

.png)
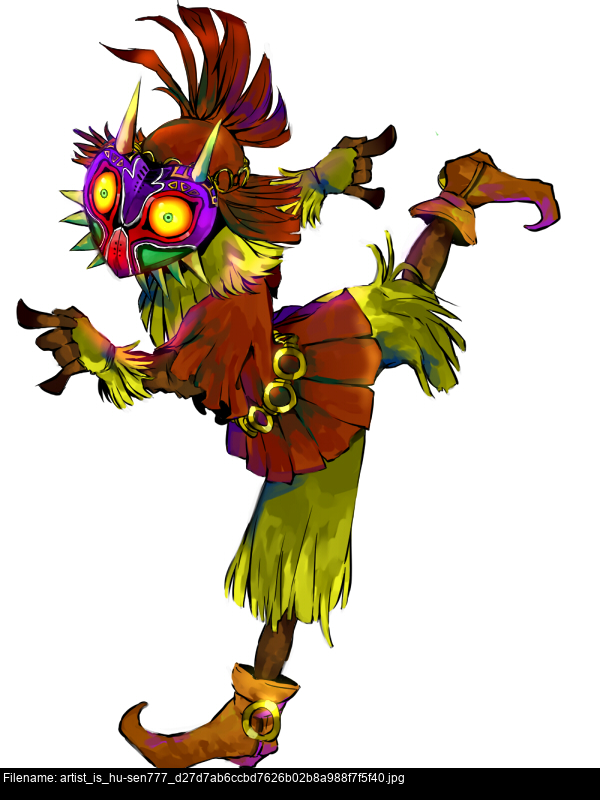
It's reference time, Freddie!
Like the tunic, the shorts are a single plain bold colour. Most folks draw it as a very slightly pale bright grass green.
They extend just a little longer than the knee when he's standing up, showing the lower leg.
The material could be, well, anything. Cotton? Straw even? It depends on how the artist draws it.
The lower quarter or fifth of the shorts is ragged, but not dirty. The raggedness is mostly straight up the leg rather than across, which is why it looks straw-like.
So, what's the plan?
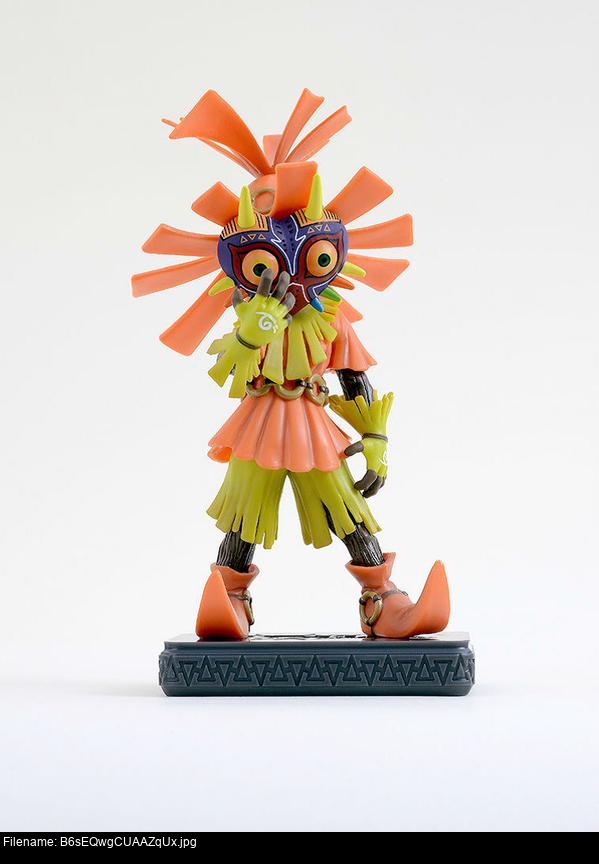

I'm following the simple bright colours of the Skull Kid collectible figure, so any kind of shorts will do really! There's no tricks here.
We can't see what the waistband of the shorts is like. Make it up! Do you want a belt? Elastic? String? *Nothing?* I'd advise against the nothing!
Like the tunic, my shorts were made out of the cheapest polyester material I could find. The colour was right, and the material looked hardwearing, so off we go.
And, like the tunic, I couldn't find any pattern that didn't cost a million pounds and look like time machine schematics, so I found a tutorial for making simple shorts online.
http://mellysews.com/2014/05/draft-mens-shorts-pattern.html
http://web.archive.org/*/http://mellysews.com/2014/05/draft-mens-shorts-pattern.html
Seems simple enough, right? :) Follow the instructions, and you're golden.
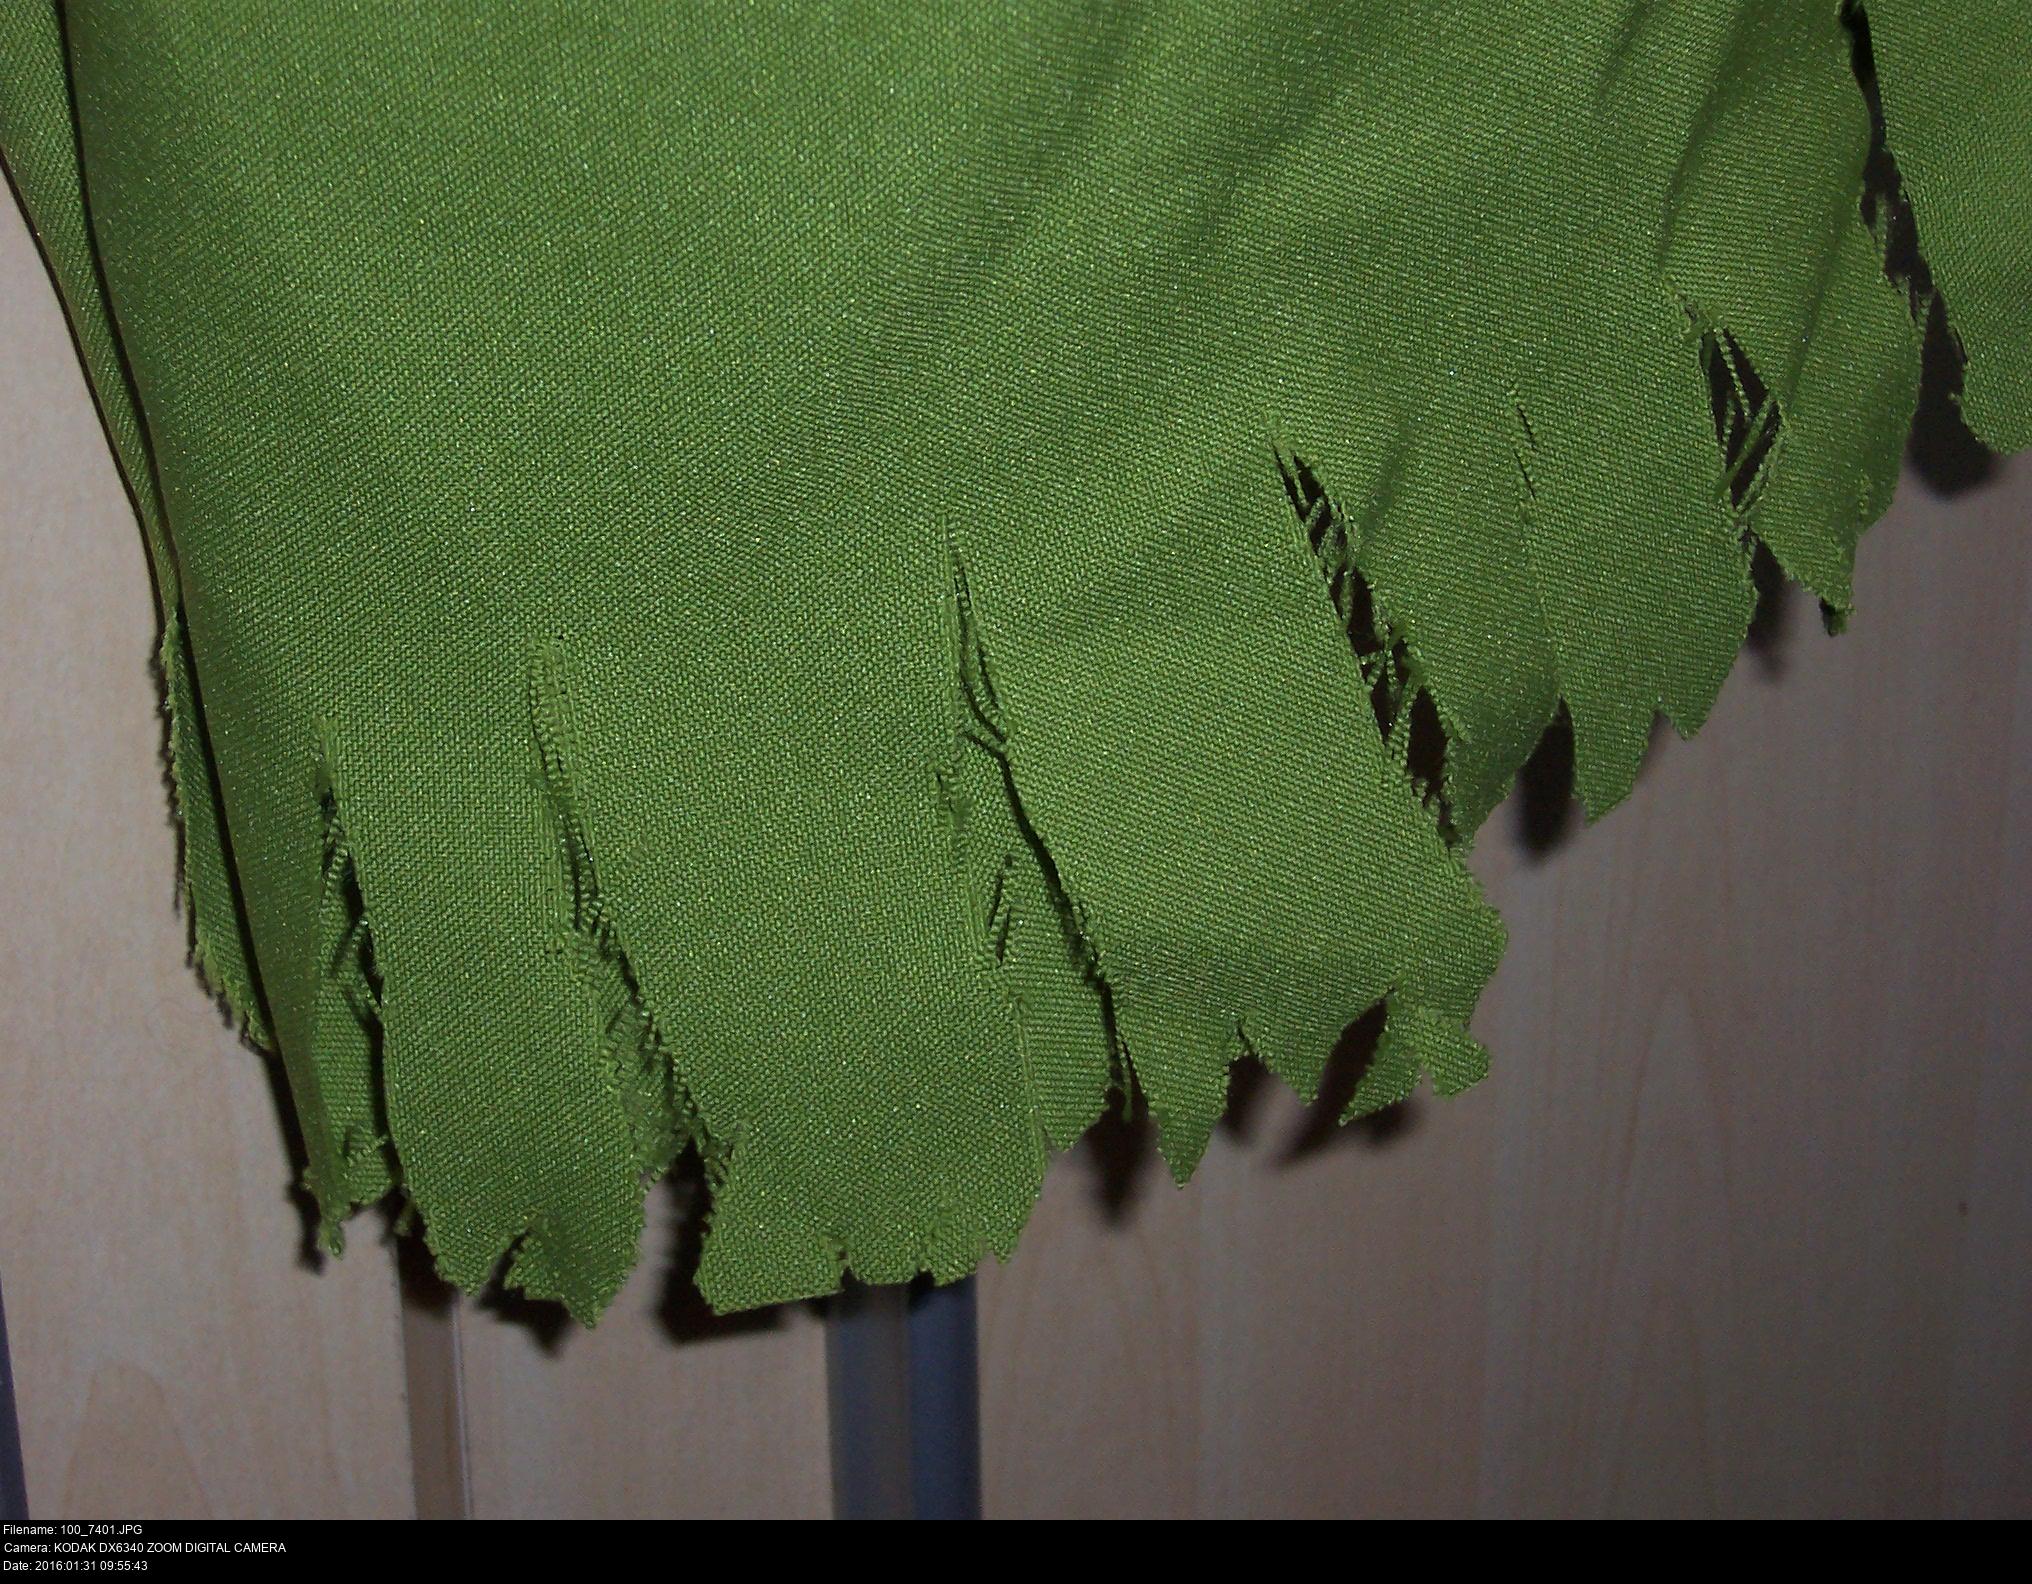
The long edges of the legs were left unhemmed so I could add raggedness later.
For Skull Kid, I added a couple of inches to the measurements all over. As a result, I had some very long, very baggy shorts that I could take in as I needed. And take in I did! They were absolutely huge! Don't adjust them until you have the rest of the costume to compare against.
In these pictures, I'd tucked up the waist of the tunic and pinned it. You've got to keep testing everything as you make it. Only when you've got all the pieces together can you get everything working together.


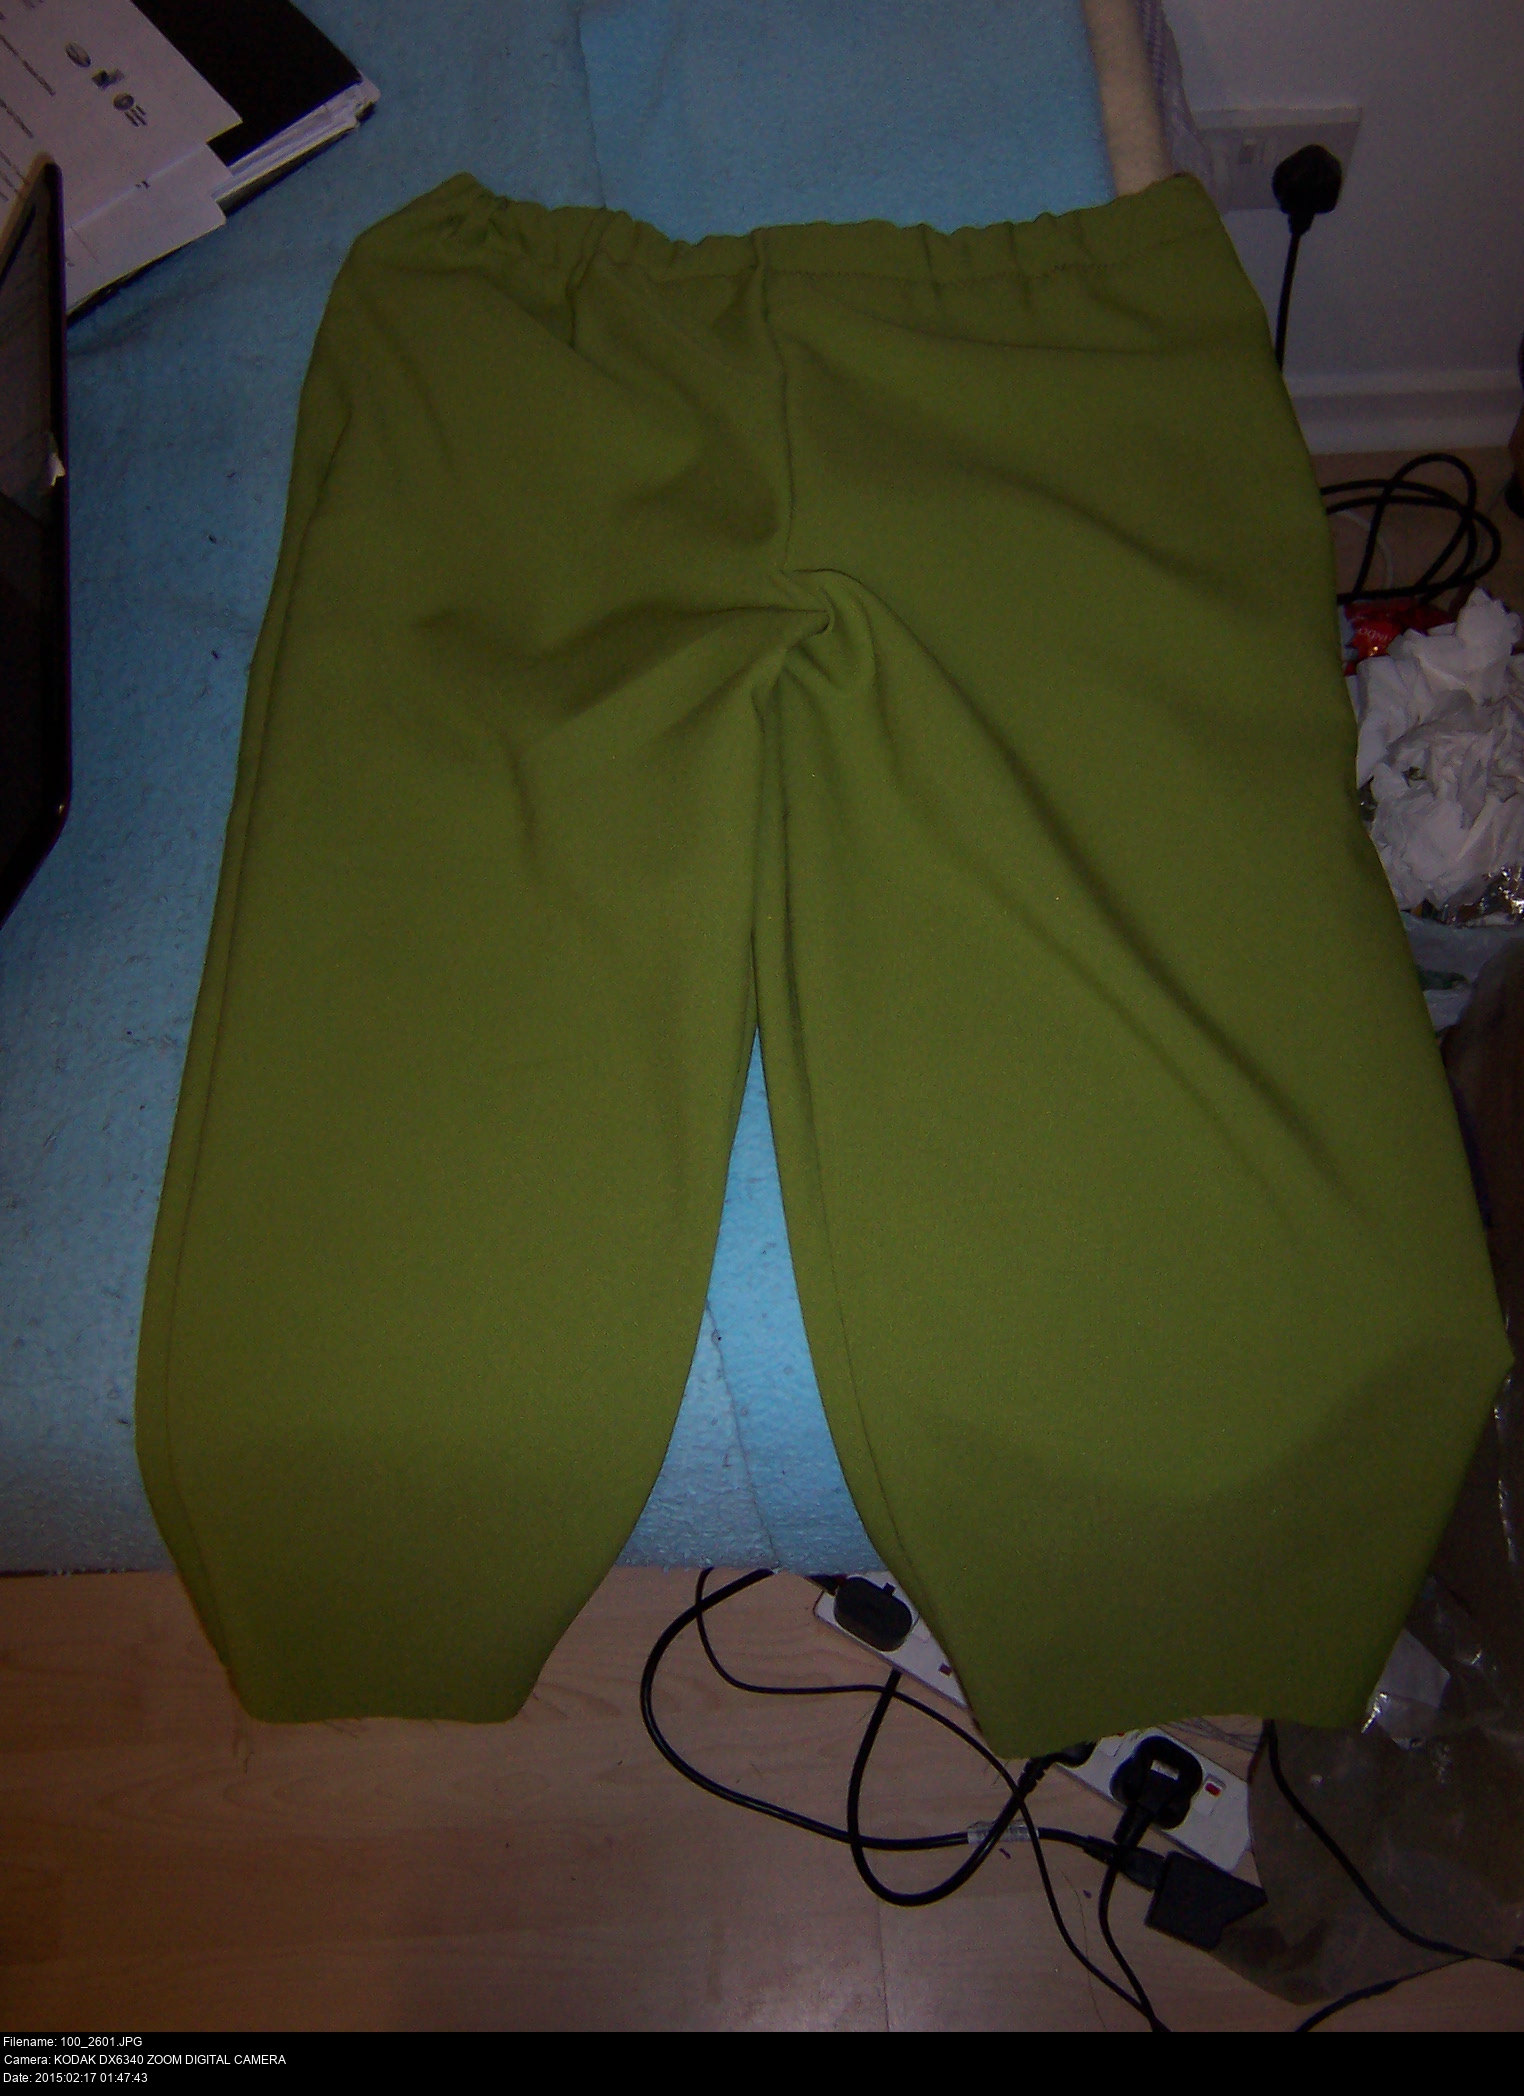


After making the basic shorts, I needed to do something about the waistband. Since this would be the first time making something that covers the lower half of my body, I wanted to be reasonably confident that my pants wouldn't fall down in the middle of a crowded con!
To insert elastic:
I folded down the waist of the shorts by an inch and a half.
Sewed it all the way around except for a large gap.
Threaded the elastic strip through the gap.
Sewed the ends of the strip into a solid band.
Then sewed the gap shut.
Now the shorts are nice and snug! As a bonus, the elastic tugging makes the fabric ripple as it goes down the leg, giving it a more detailed appearance.
To get the raggedness similar to how it appears in the illustrations, I followed some advice online (that I can't find now) about making fabric distressed in a cartoony way:
First, press your fabric so it's nice and flat to work with, otherwise you won't get anywhere fast.
Next, very gently cut shallow mountainous shapes inwards from the edge of the fabric.
Then grab the fabric in your fist and rub it against your other palm, like a mortar and pestle. You'll rub all the neatness out of the cuts you've just made and draw out a few loose threads.
After that, you can cut vertical lines upwards to make these ragged edges into strips. Rough 'em up again if you like.
And that's it!
If you'd like to alter your apparent body shape with illusion, consider making them deliberately bigger or smaller, altering where the crotch lies and so on.
Unfortunately, since these costume shorts were made to be simple. You can put in pockets if you like, but be aware that pockets will change the look.

First try of cut up shorts, notice the rest of the costume is all out of whack, I haven't cut up the gloves or the tabard yet and the tunic sleeves are a little too long.

Written by Matt Carr! mrdictionary.net nonsense.
Questions? E-mail 'em to me, skullkid@mrdictionary.net!
Twitter @SkullKidUK - Facebook facebook.com/mask.smith.cosplay