

Previously, on Skull Kid's Cosplay Stuff:
You've got a mask that's two feet across by one and a half feet tall. The outside edge of the mask is lined with horns made of easily deformable foam and coated in chippable plaster. You've left it on tables and workbenches for weeks on end, and now it's sitting in the middle of your bedroom and you're praying nightly that nothing slips off a shelf and shatters the whole thing.
Now what? How the hell are you going to store or carry this? It's a nightmare.
Get a large piece of 6mm MDF and let's get truly manly. We're going to do some CARPENTRY!
But not until we've taken some measurements first and planned everything out. What exactly are we going to make here?
Imagine a large, flat hinged box, like a toy chest. The mask is going to lie in a foam-lined cavity in the centre of the box, and the floor and ceiling of the box will also be padded with foam. The interior dimensions of the box should be big enough to hold the mask with enough added border so that the mask is safely insulated from any potential collision with the edges. I'm going to add three inches in each direction, and one inch to the top and bottom surfaces.
This is a super large piece of MDF that cost just over ten pounds from B&Q. They helpfully cut it in-store into panels that were small enough to fit into the large laser cutter at DoES Liverpool. Don't forget you'll need measurements of your tools, equipment and transportation: you'll want to know that these panels fit into the laser cutter, and that the panels you're buying can make enough pieces for your box!


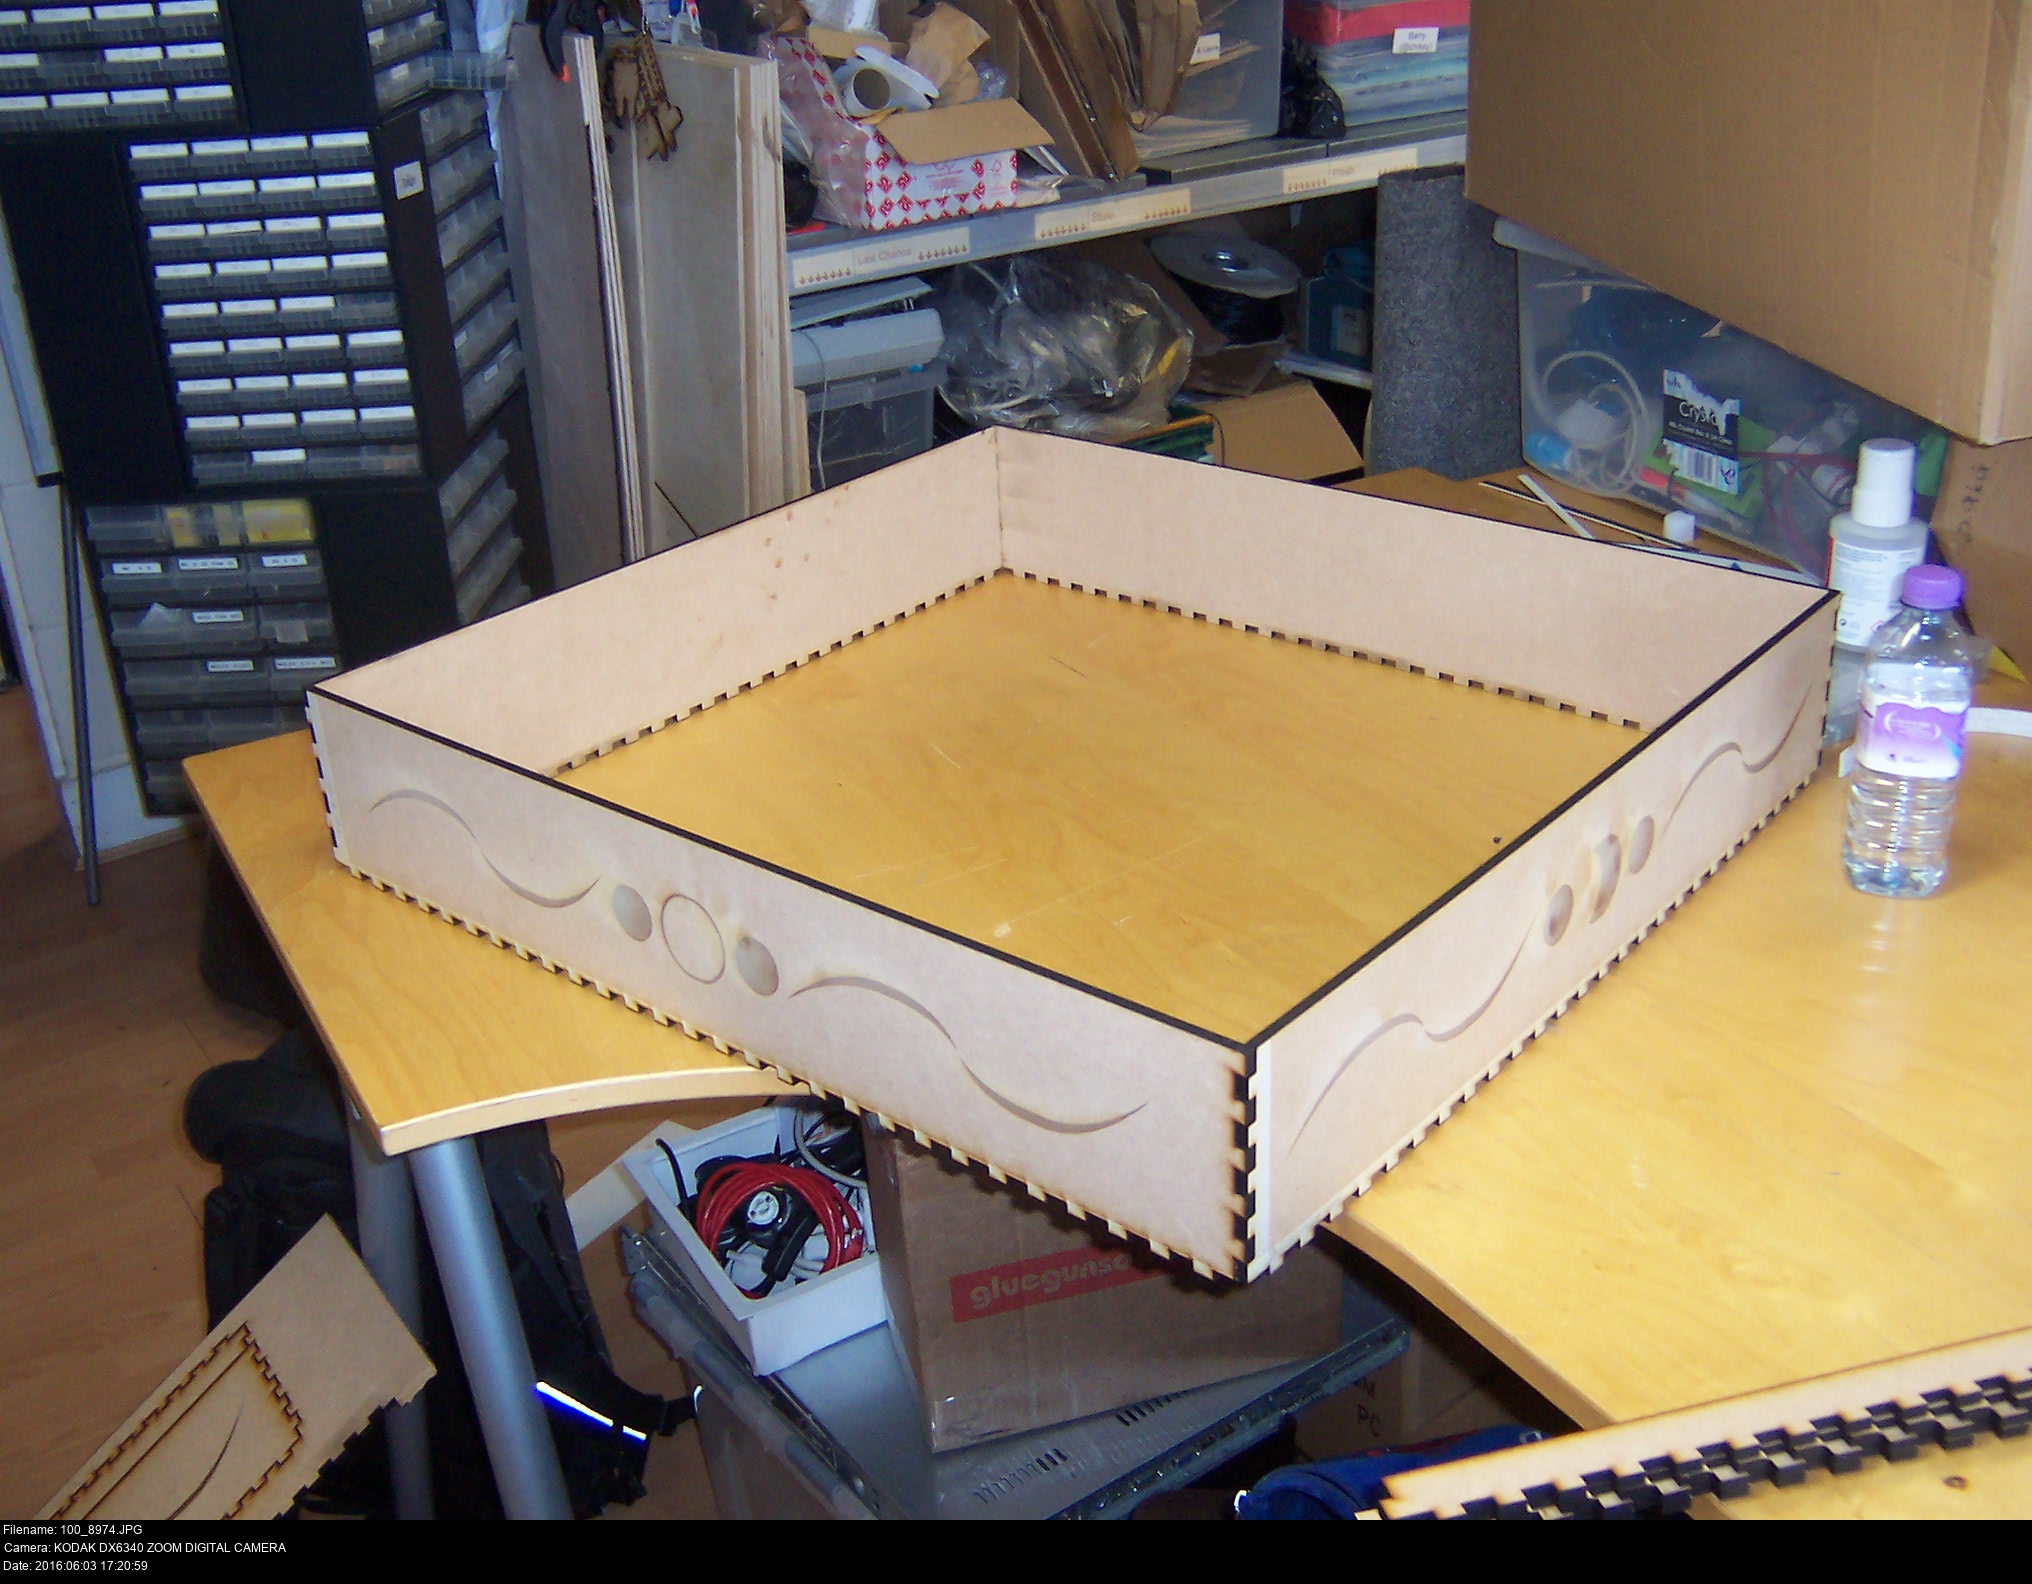


You've got some squares. How do you make these into a box?
I run an online service for creating laser-cutting designs for custom boxes of all shapes at http://casemaker.mrdictionary.net/ . All I had to do was input the dimensions of (the inside of) the box and it generated a set of cutting designs to create the box. It's used for creating solid boxes, so I added some lines along the side faces to separate the box into 'top' and 'bottom' pieces.
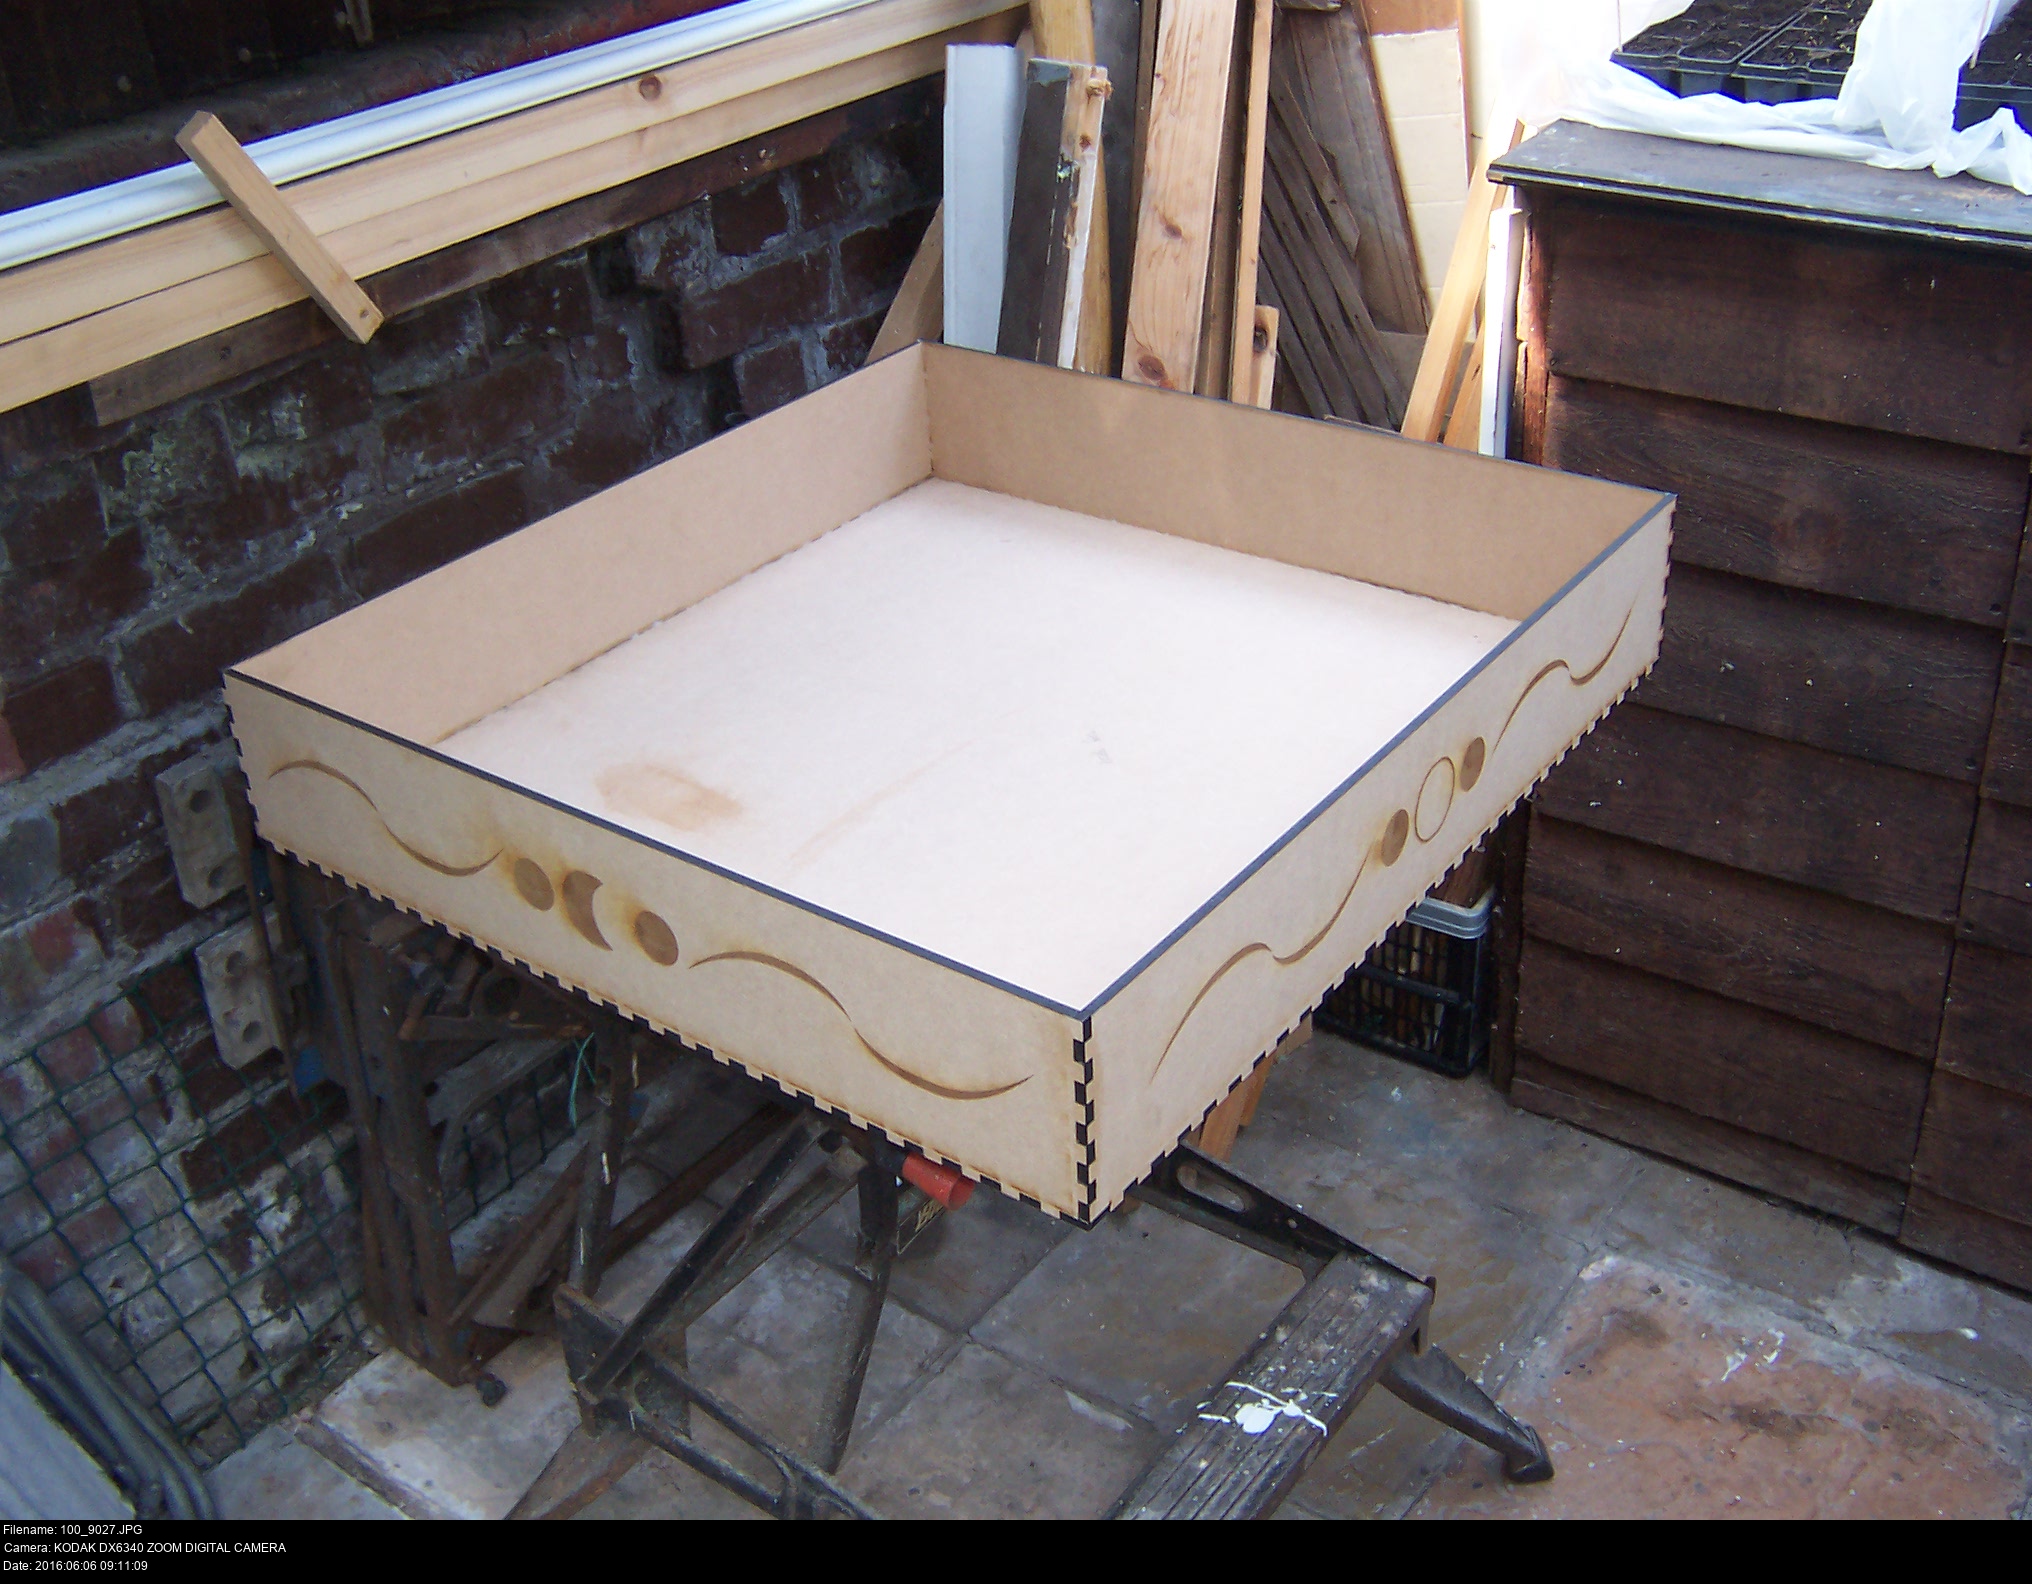
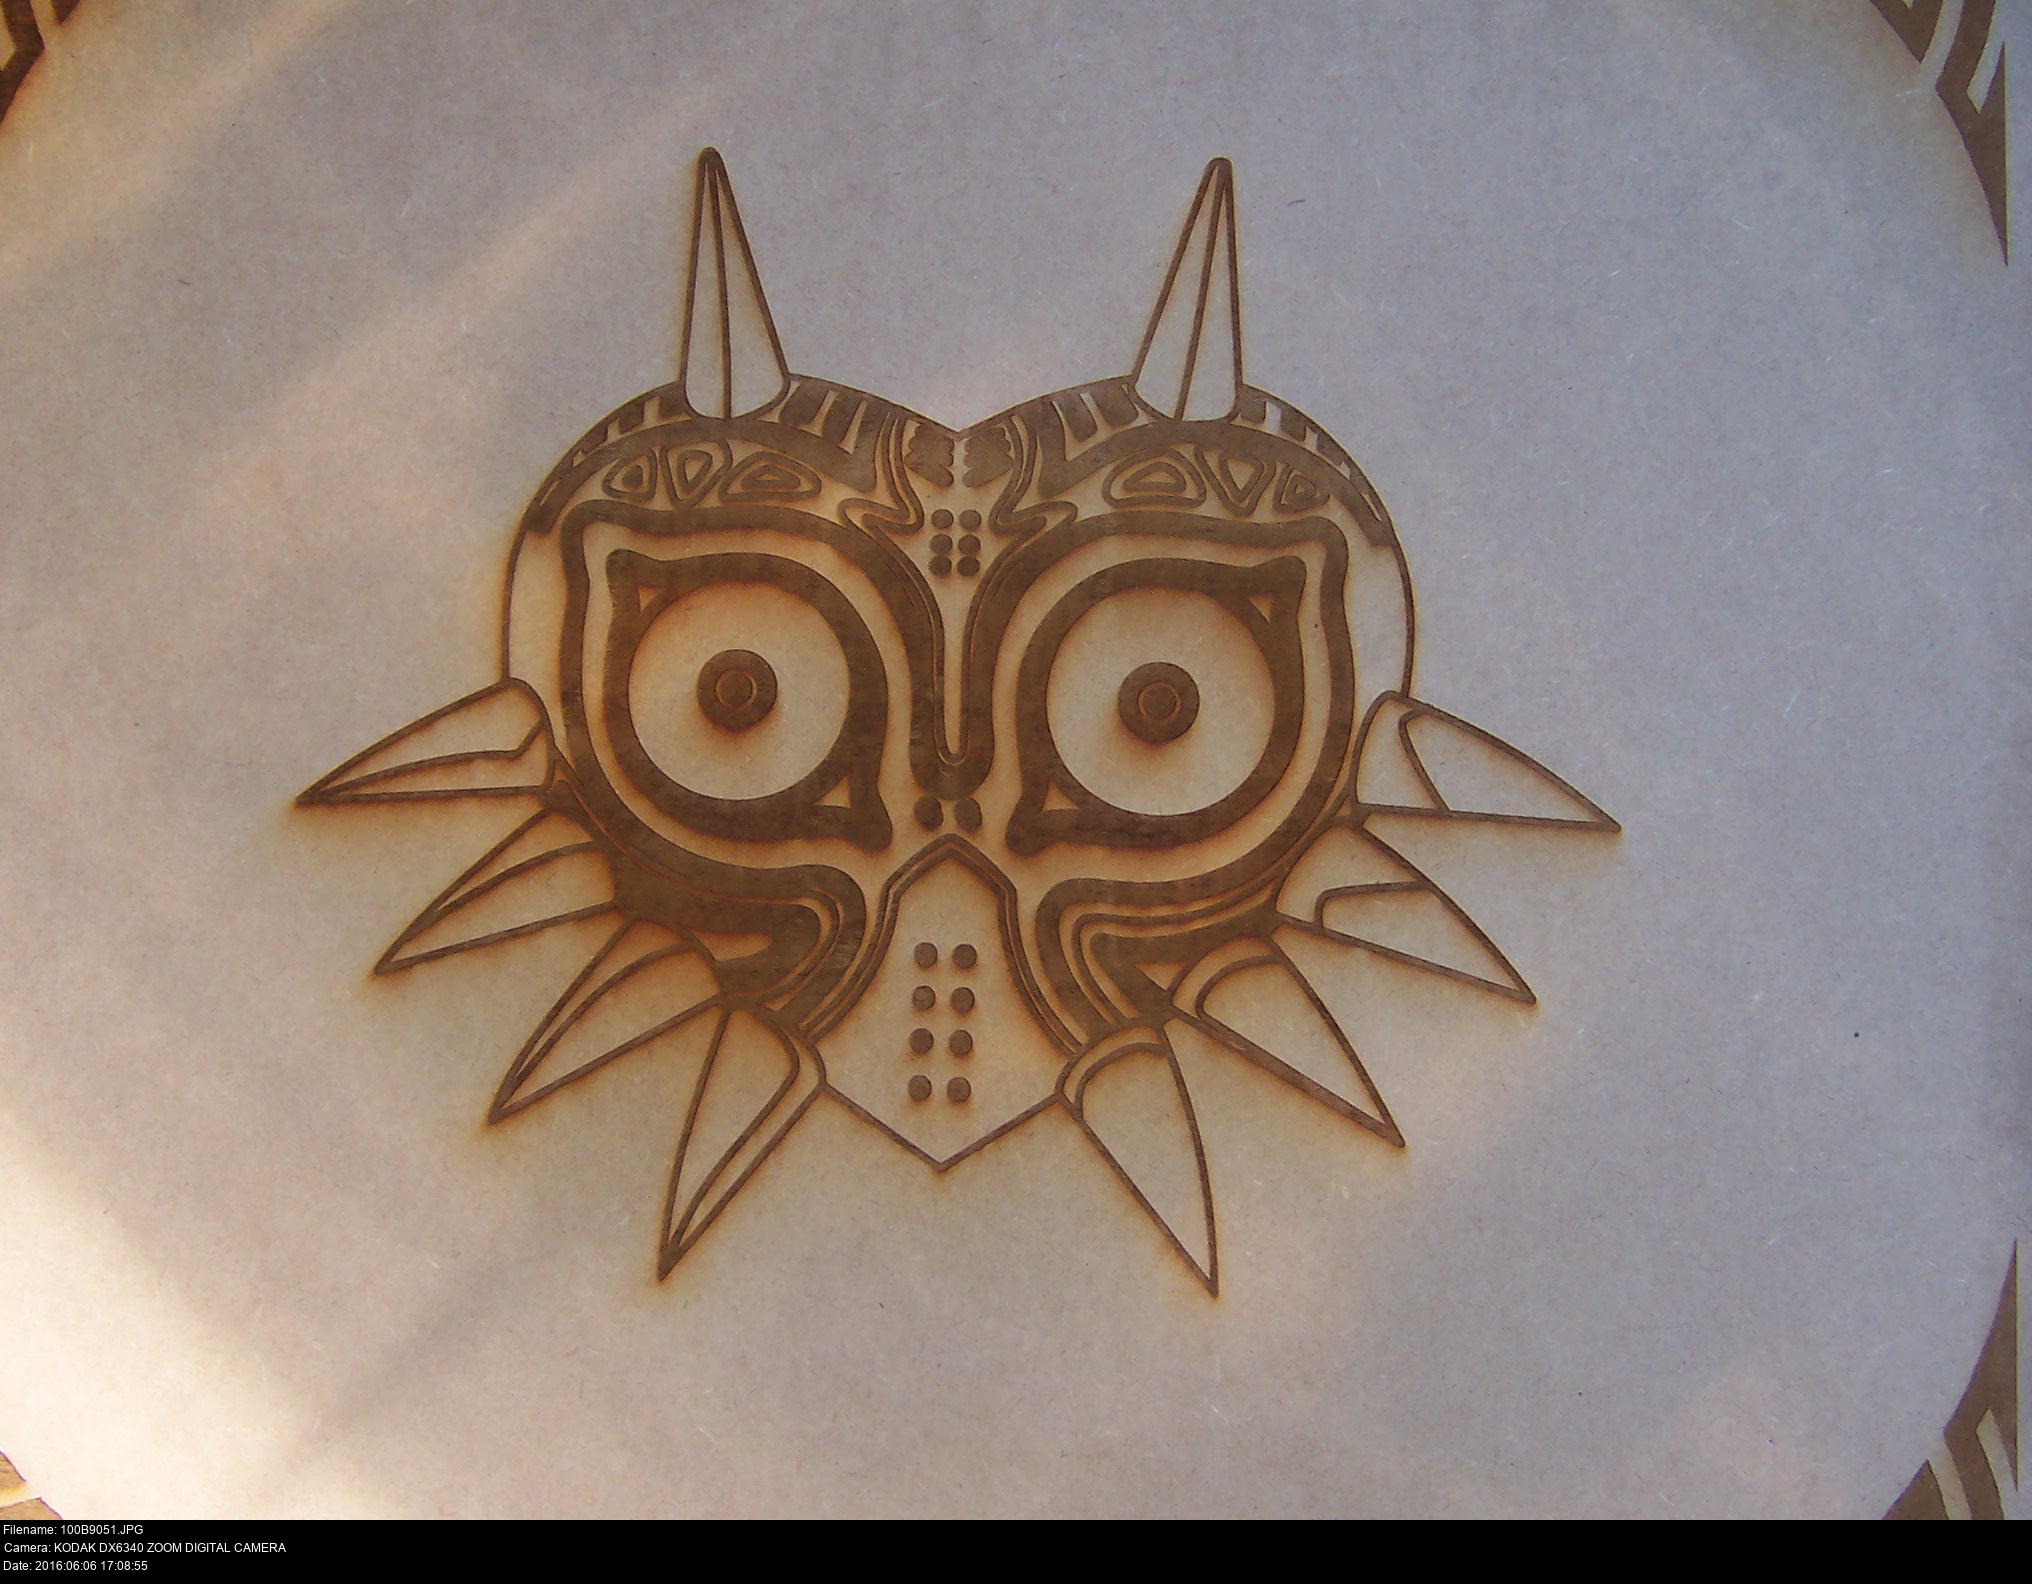
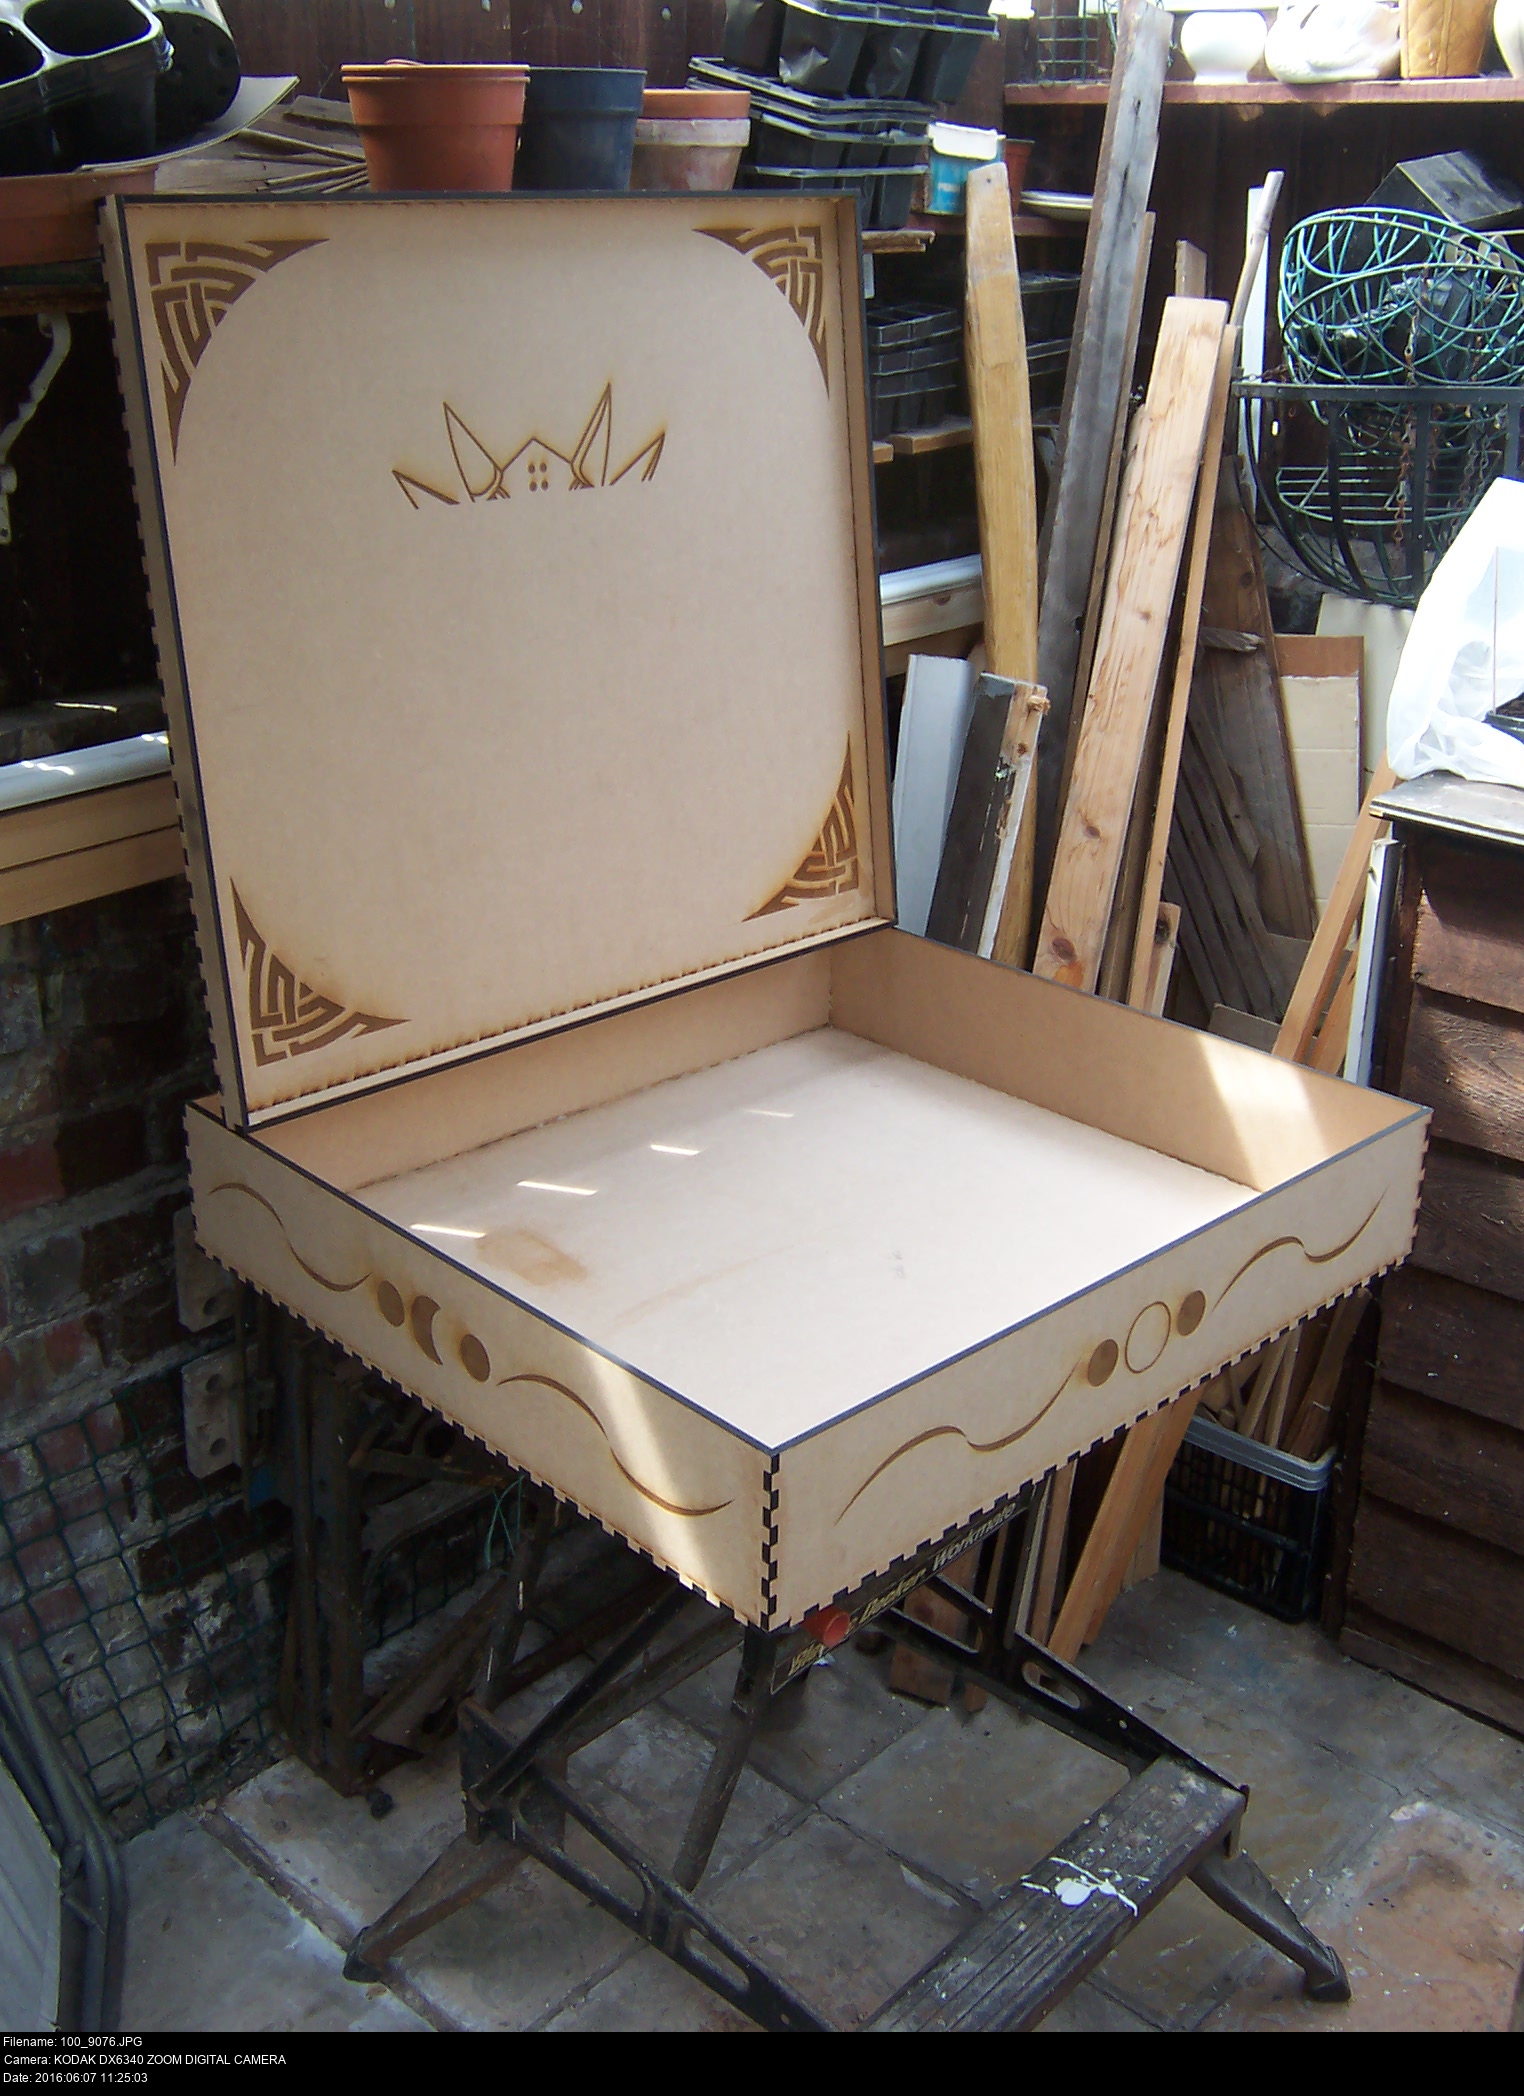
I've got a custom designed laser-etched top face based on the vector image of the Mask (remember, from the modroc Majora's Mask page!), and the sides are etched with a 'four phases of the moon' motif. Yeah, I used a generic decorative corner embellishment on the top too. I don't care if it's not thematically sound! It's not like it's an in-universe artifact. It's a box to take all the dings so the mask doesn't have to.
Master the available tools and you'll be able to make fine boxes like this!


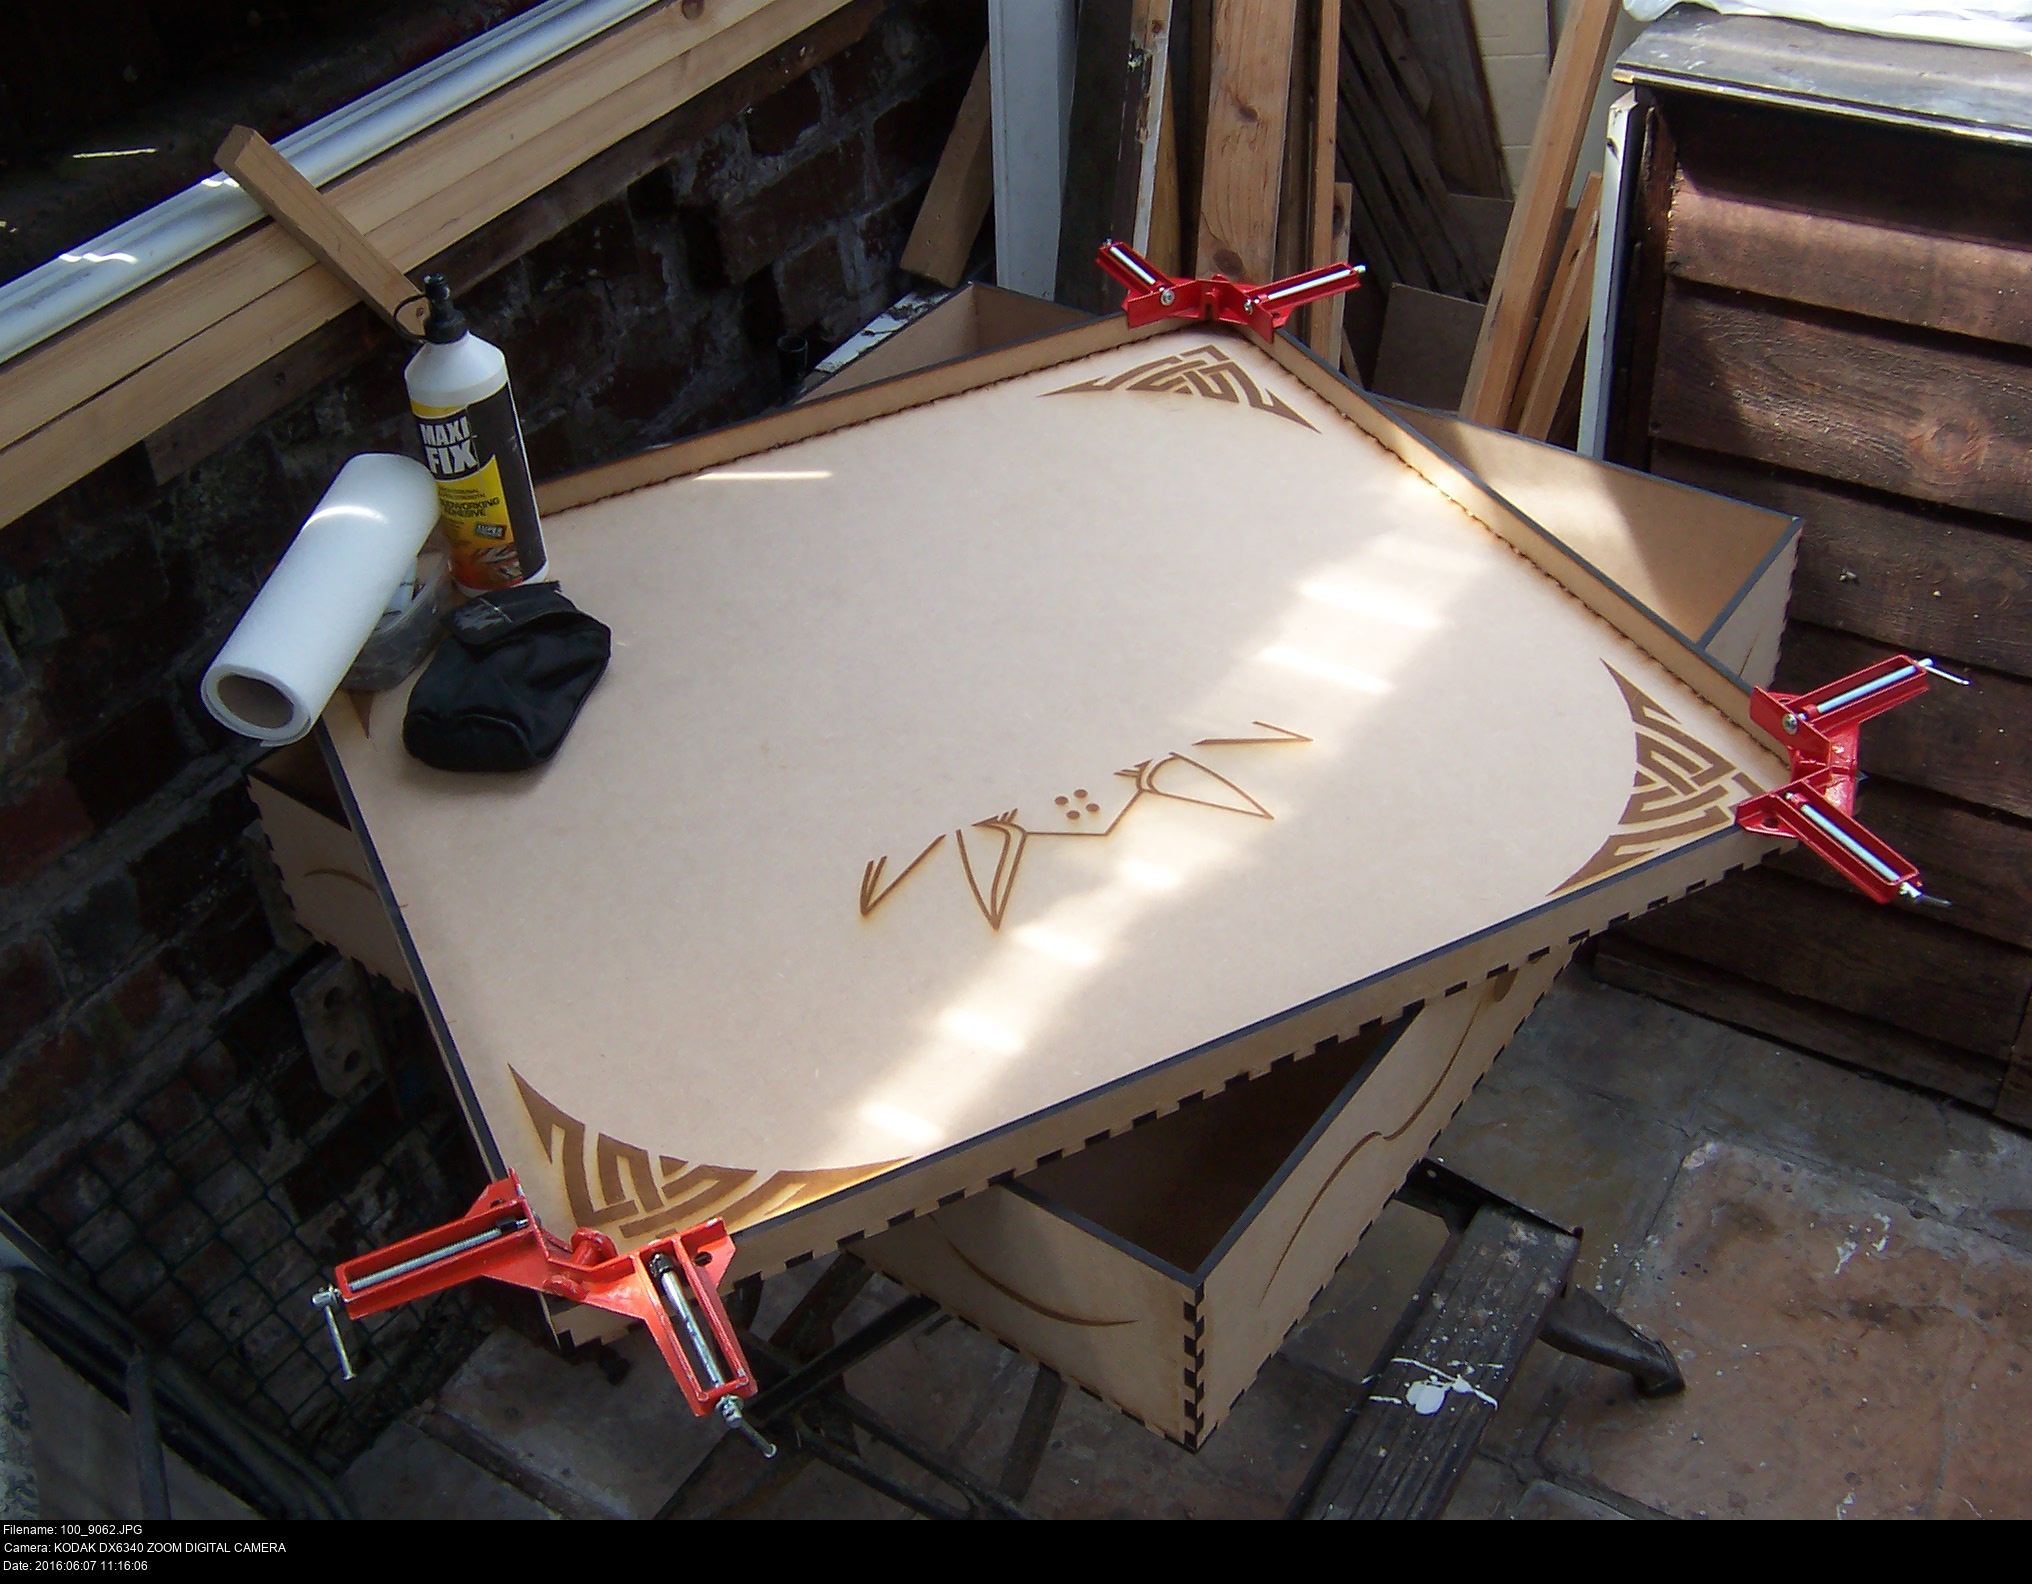


Gluing all the faces together slowly, using right-angled clamps and giving it plenty of time. Buy the good glue. I'm using Gorilla Glue brand wood glue, but any wood glue will be fine.
The alternating coloured notches along the edges are there because the laser cutter blackens the edges of the panels as it burns through the material. If you'd like a smoother appearance, the most direct method is to prime and paint the box to create a finish of your choice. If you want a sleeker finish, you can tell the Case Maker that your material has a greater thickness than it really does. All this will affect is the length of the teeth in the joints of your box. If these teeth extend beyond the surfaces of the box, then you can sand them away after the box has been glued (this will be a hassle without power tools due to the size of the box!) and you'll get a flush, un-burned finish. This is what I did for the Ocelot Arcade System below. You could also apply a paint finished after constructing a box with sanded-flush teeth to get a smoother final surface.
When it's assembled to the point where you've got two half-boxes, give it all a good couple of coats of standard clear varnish to strengthen it up a little and protect the engraving. Go slow, let them dry. Follow the instructions.
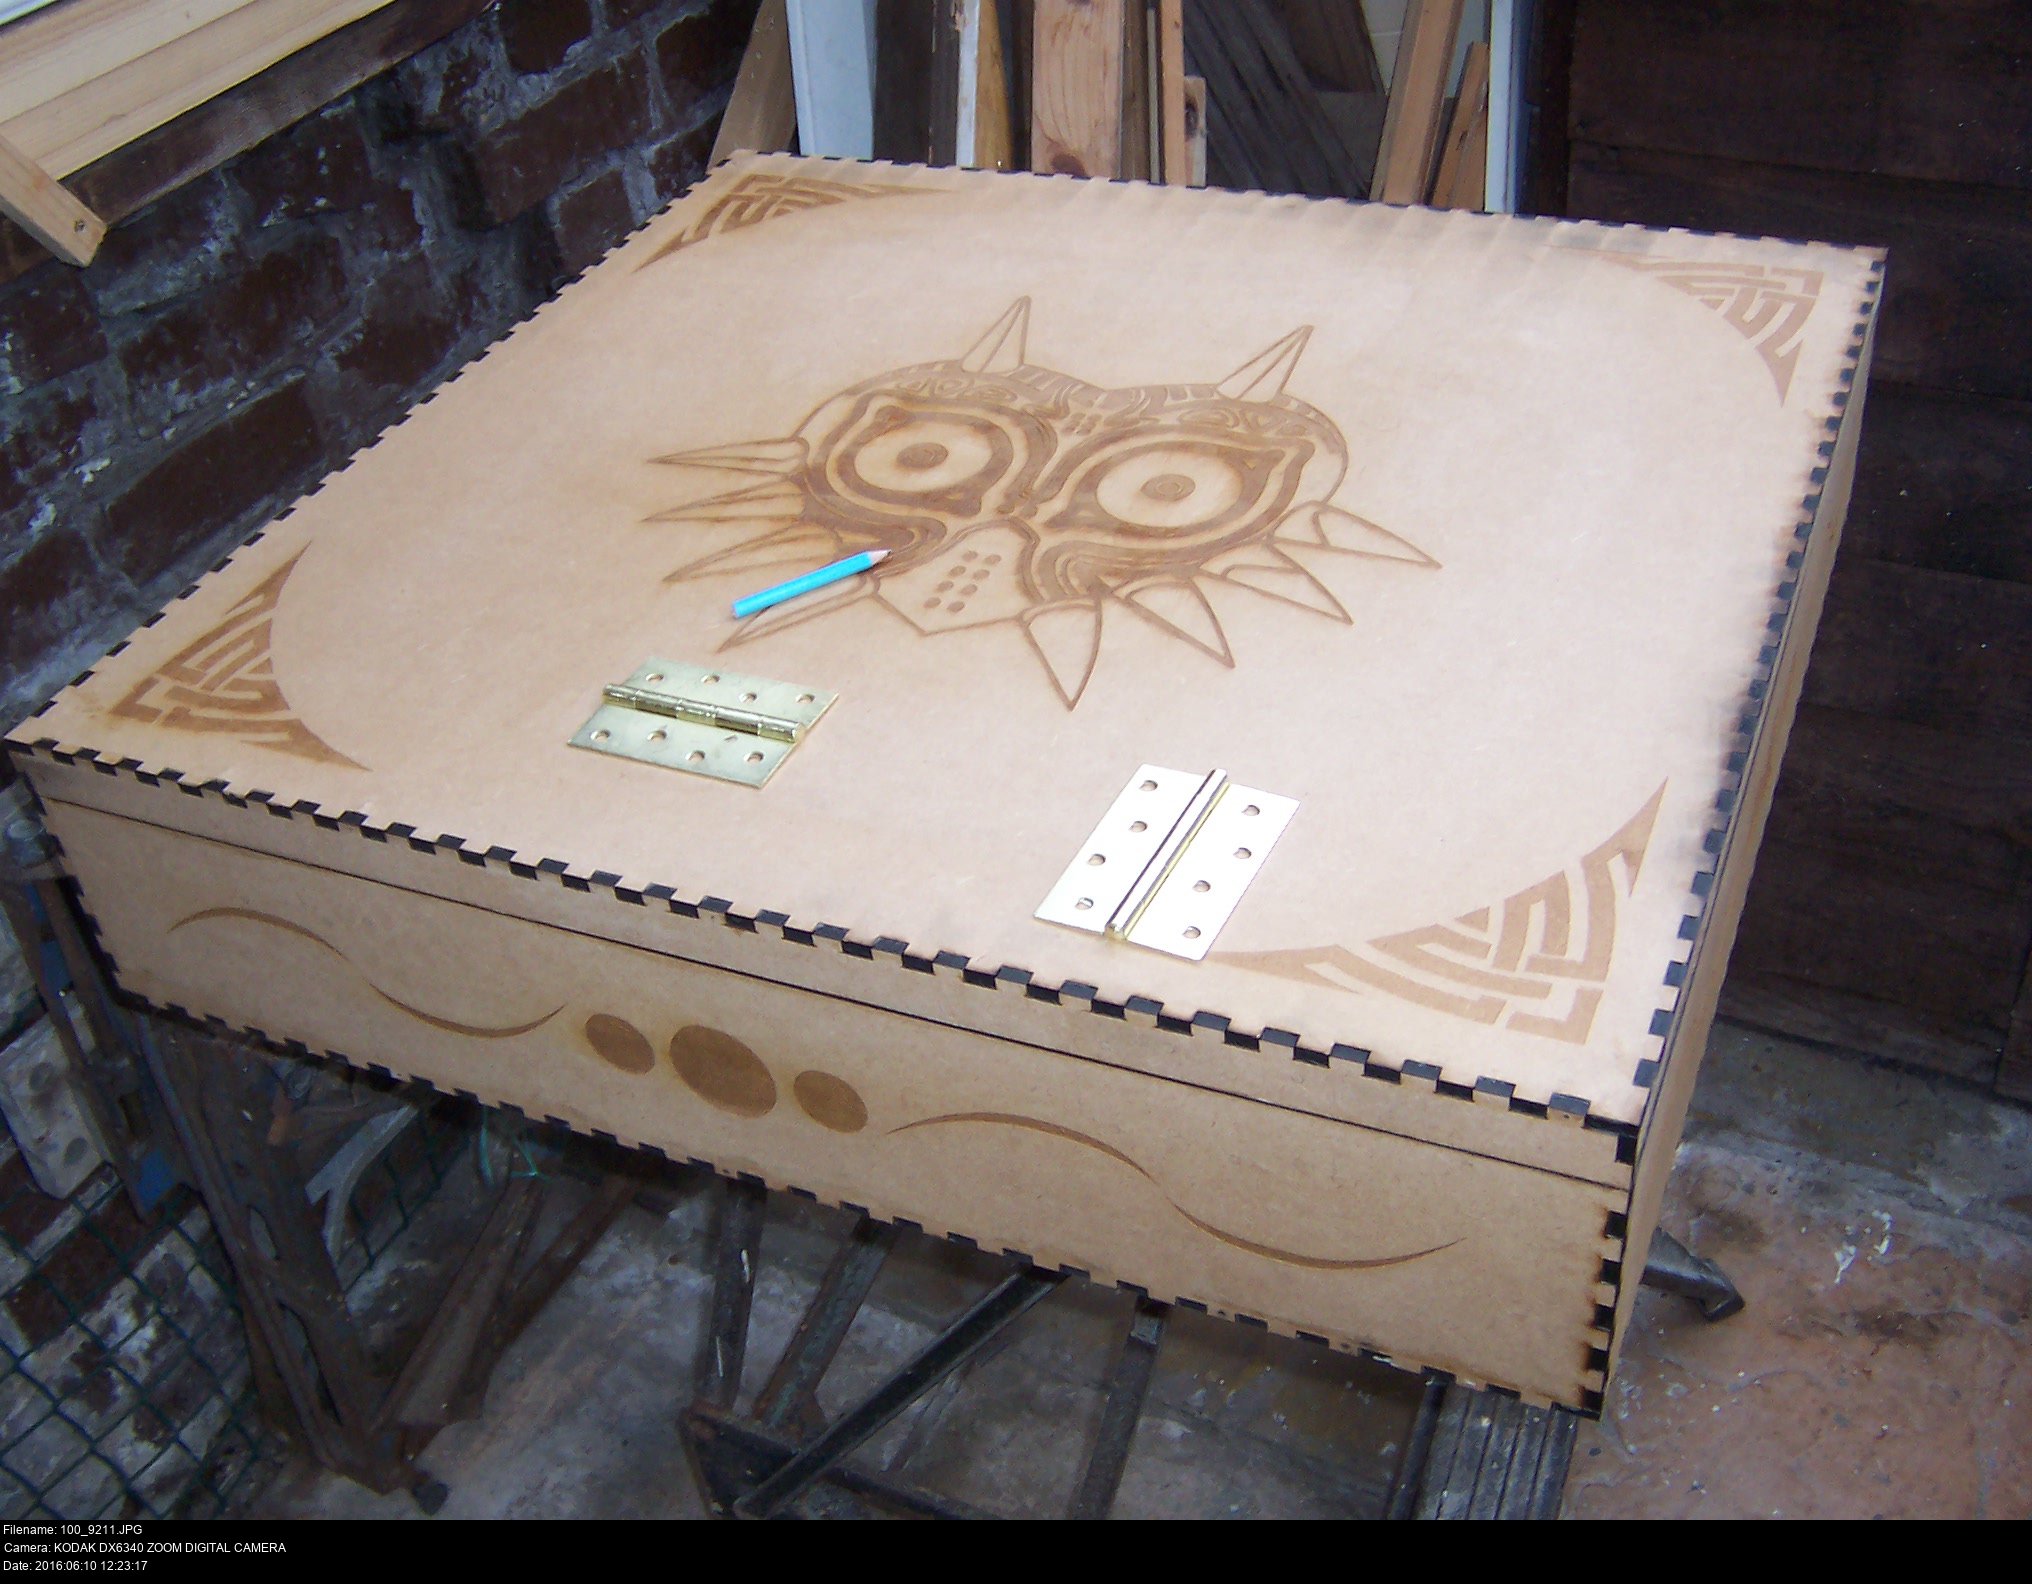


Now to add some hinges. These are just standard, chunky door hinges from Wilkinson's. The front catches were really expensive in B&Q so I bought a set of ten cheaper from Screwfix. The door handles were ordered online I think. Make sure you have lots of these wonderful 'machine screws' (nuts and bolts!) available. Measure everything, use your head, and your pencil and your ruler.
When fitting hinges, visualise the motion of the parts. Don't put them too close to the sides of the box otherwise the centre of the box will deform and bow. Don't put them too close together in the centre since they'll be really weak and the top of the box will shear about. Fit them symmetrically.
Place the hinges onto the wood and trace out the holes and outline of the hinge. Tap a pilot notch with a panel pin and hammer. Use progressively larger drill bits to expand the hole. Keep comparing your holes against the hinge.


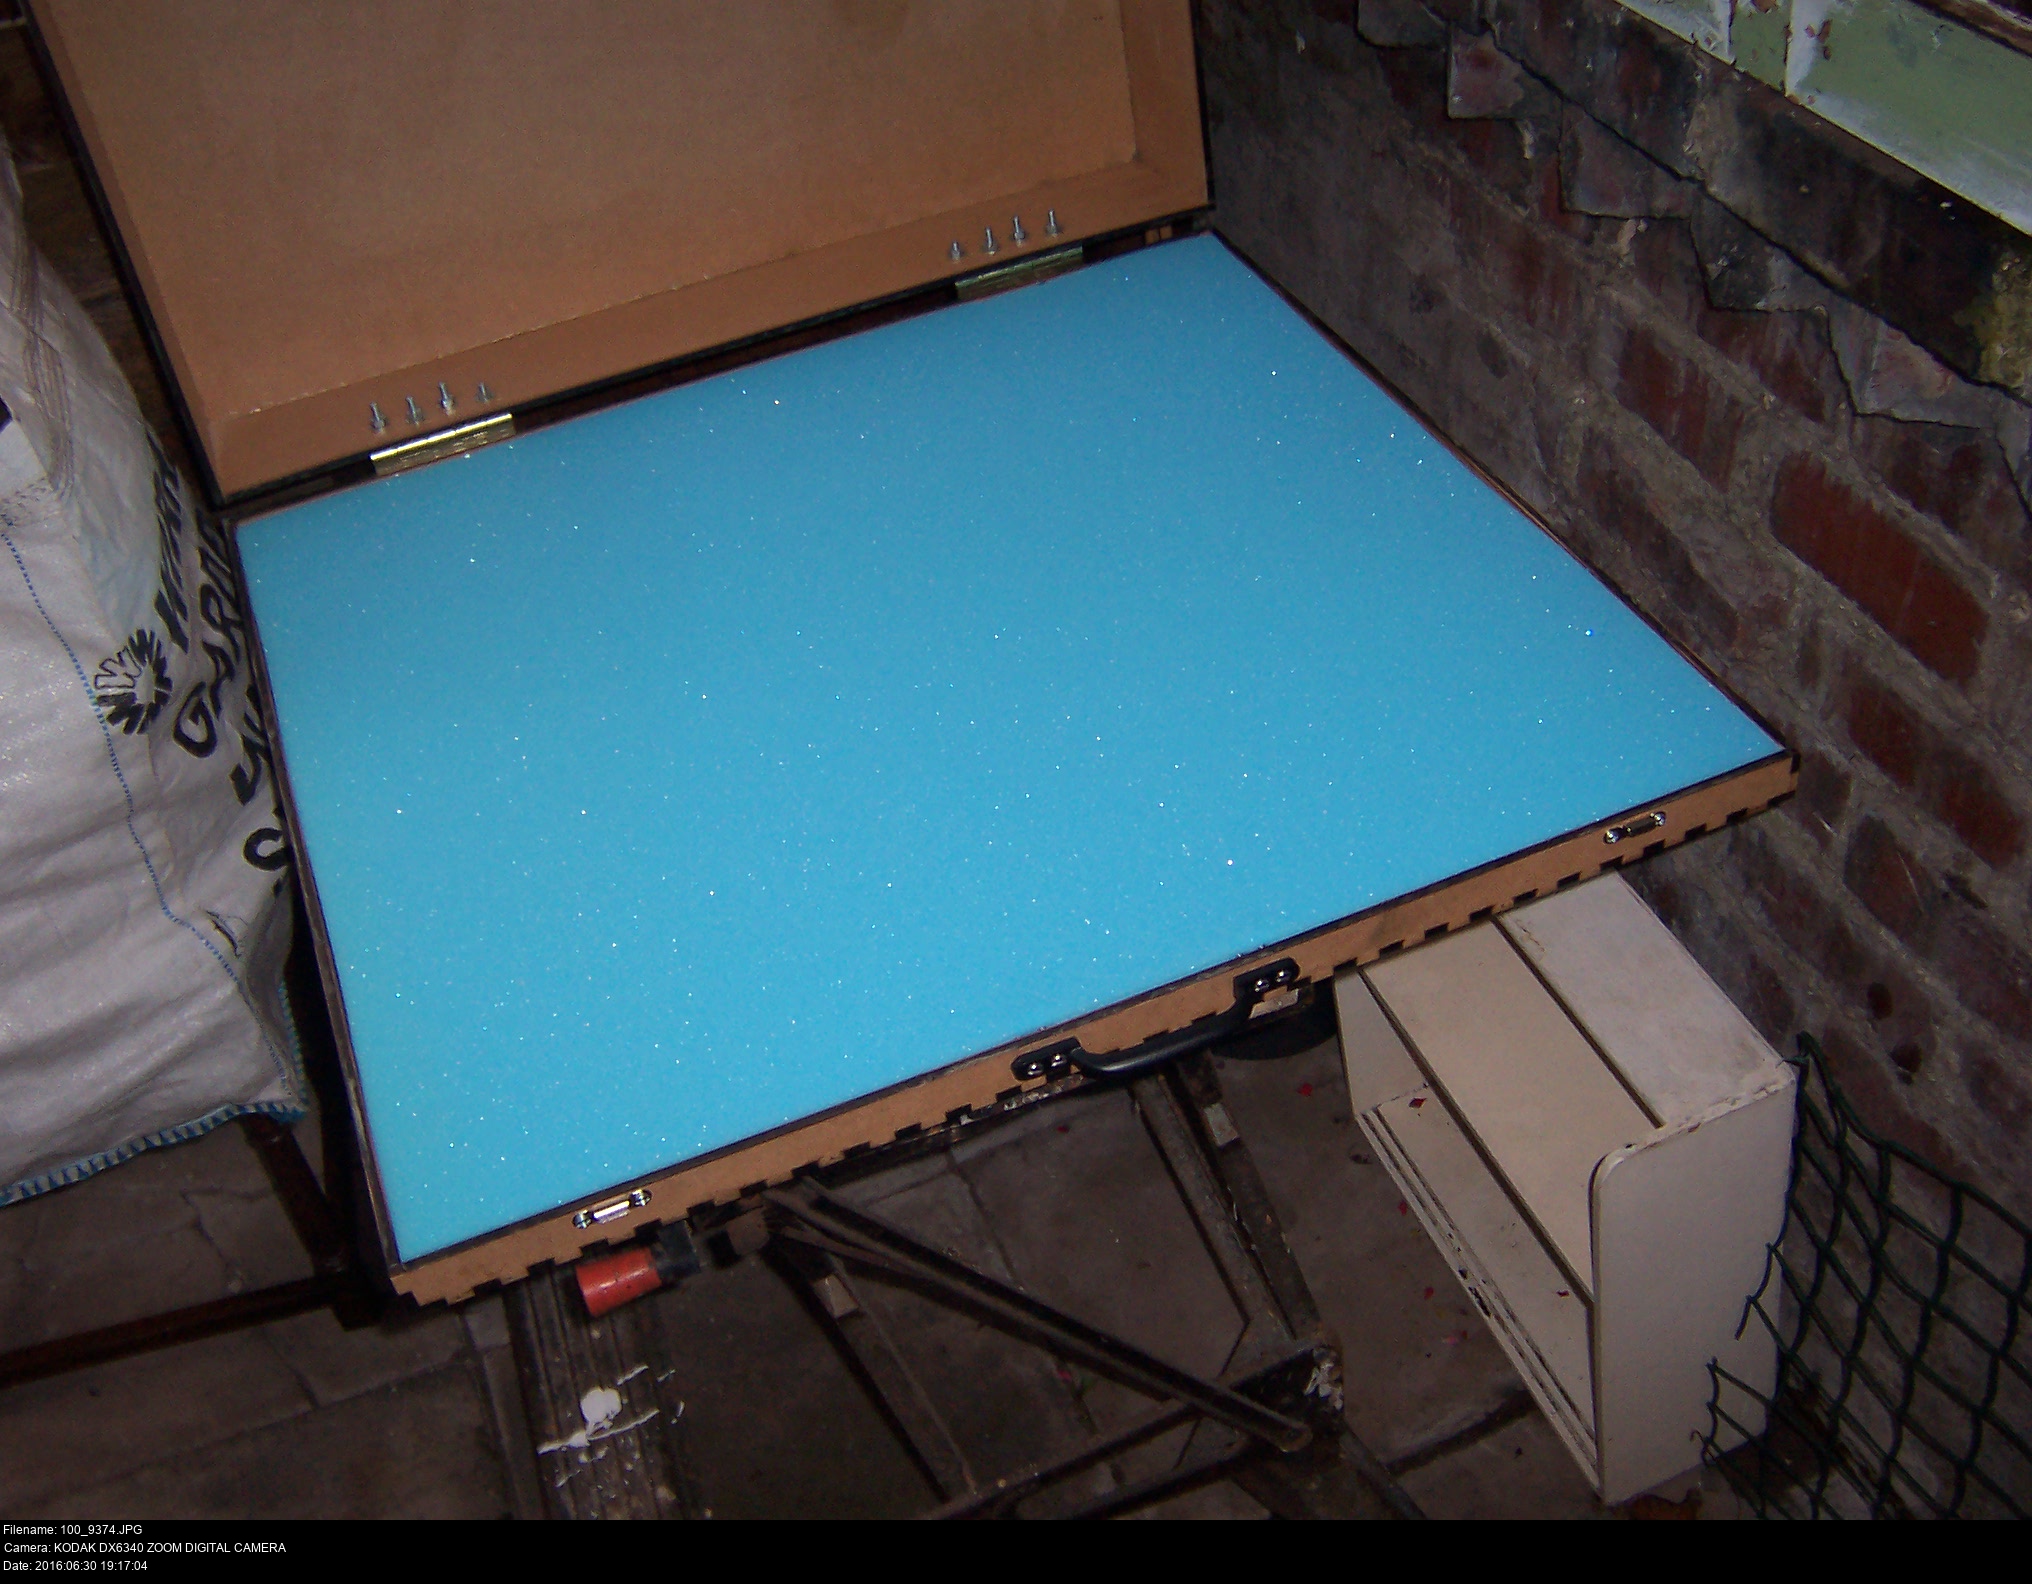

My box is designed so that there's a 1 inch layer of foam at the top of the box, 4 inches depth of foam where the mask lies, and 1 inch of foam within the lid.
I got this upholstery foam cut to the exact size at Coleman's in Birkenhead Market. I'm using more shoe glue to glue a 1 inch sheet of it into the top and bottom of the box. I'm not gluing the entire surface, just the corners, just in case I need to cut it out again.
I didn't want to use upholstery foam to hold the mask though since it's a little too coarse for that. I needed a denser, preferably softer foam. Something that wouldn't crumble up.


This foam is a 4 inch thick block of 'soft density' foam from AnyFoam.co.uk . Nice and soft, and hopefully not going to crumble into dust.
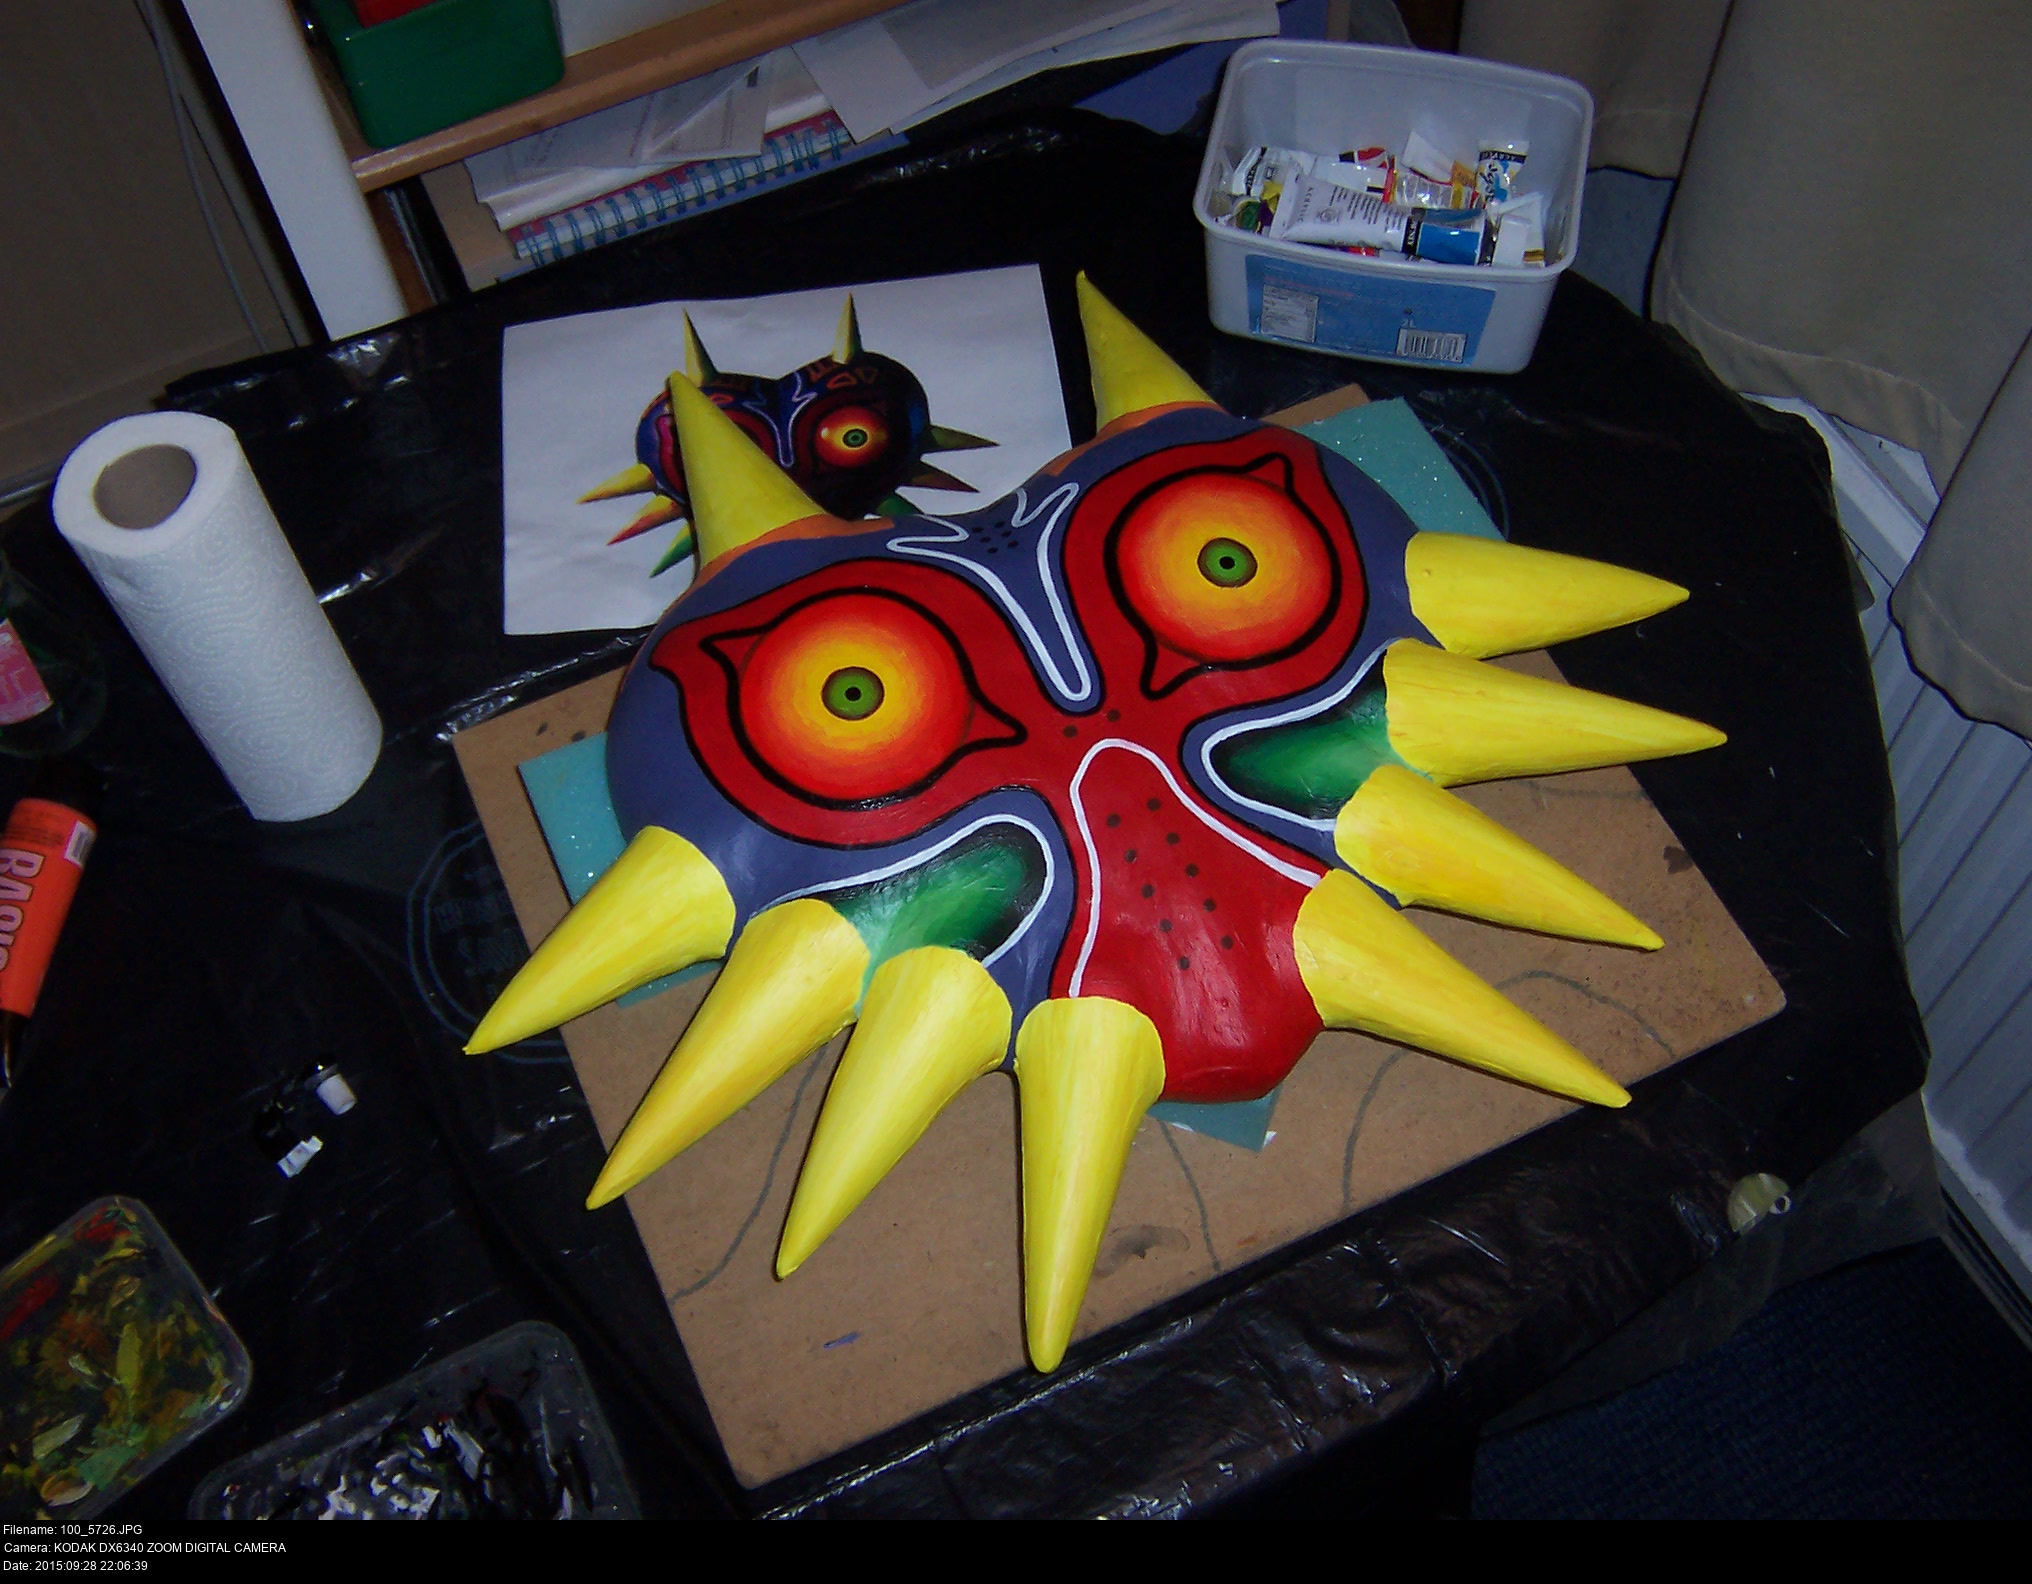
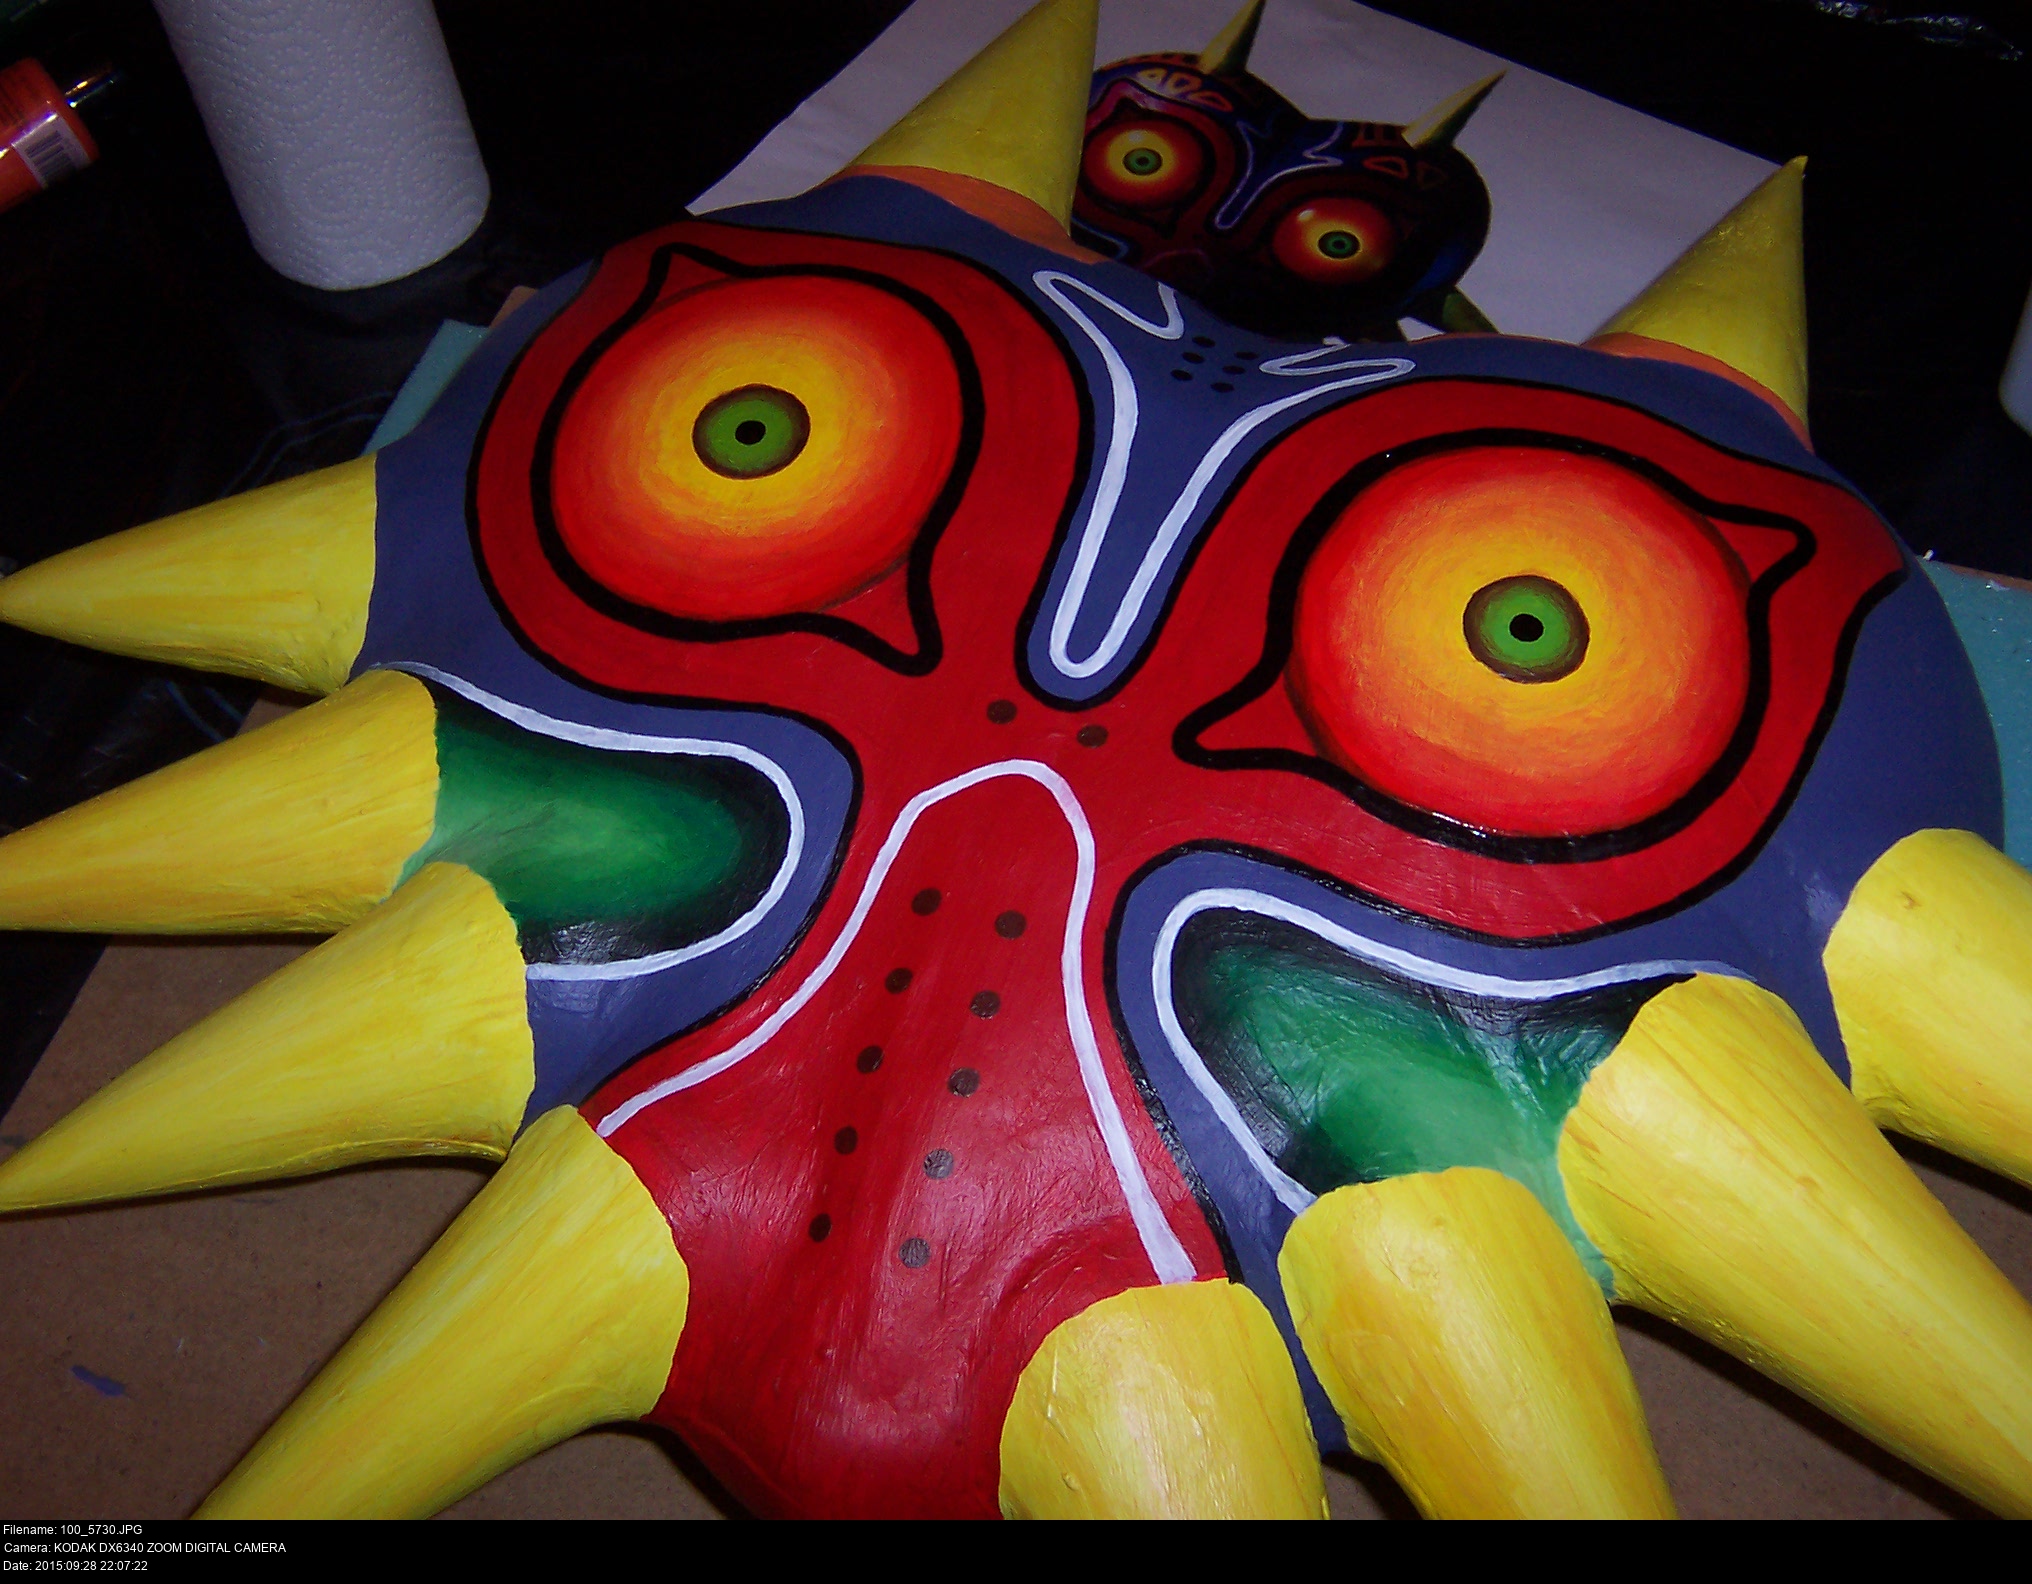
I put the mask onto a large piece of paper and traced around it with a pencil, then moved the mask to a -safe place- and copied it onto the soft foam with permanent marker. I used an ordinary food knife to cut out the shape as carefully as I could. I'm giving myself a 6 out of 10 for that job. I've even ended up with a Majora's Mask-shaped foam cushion I can use for... something!
Now I've got a big block of foam that can lie inside the box and hold the mask snug!
Keep track of which way around your tracing is going and how many times you've flipped the paper. Otherwise you'll end up with your pen marking showing on the outside of the foam like mine! At least it's serving to show that I didn't cut all the way up to the line: I cut slightly within the outline of the mask so that the smaller cavity will hold the mask snugly instead of letting it wobble about.
When the box is closed, the top and bottom layers of foam hold everything steady and the white foam secures the mask itself.
I haven't glued this soft white foam layer into the box; I'm going to let it lie loose. Think about it, and look at how the mask is lying inside the box. There's no way to get the mask out now! My knack is to gently push on the face of the mask while pulling the white foam upwards and out. That way the mask stays still and I can remove the white foam. Then I can take out the mask safely.

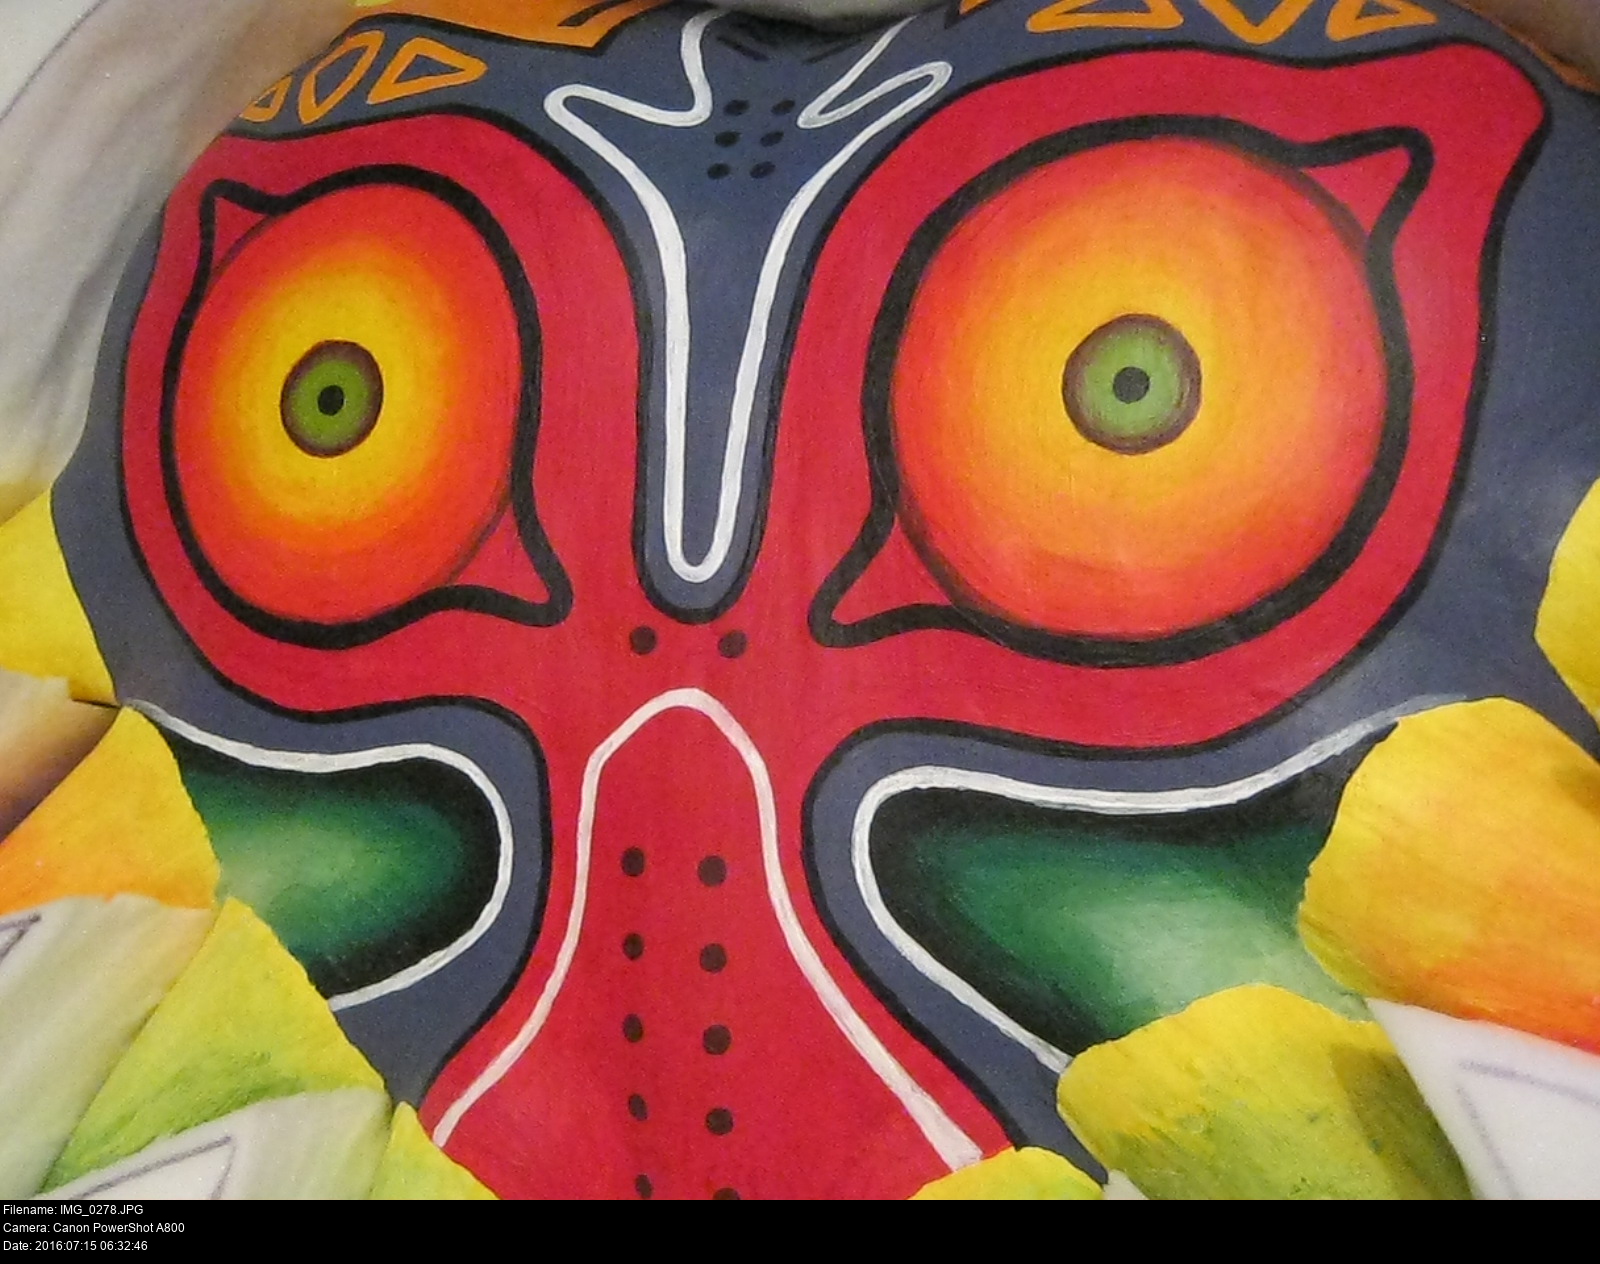


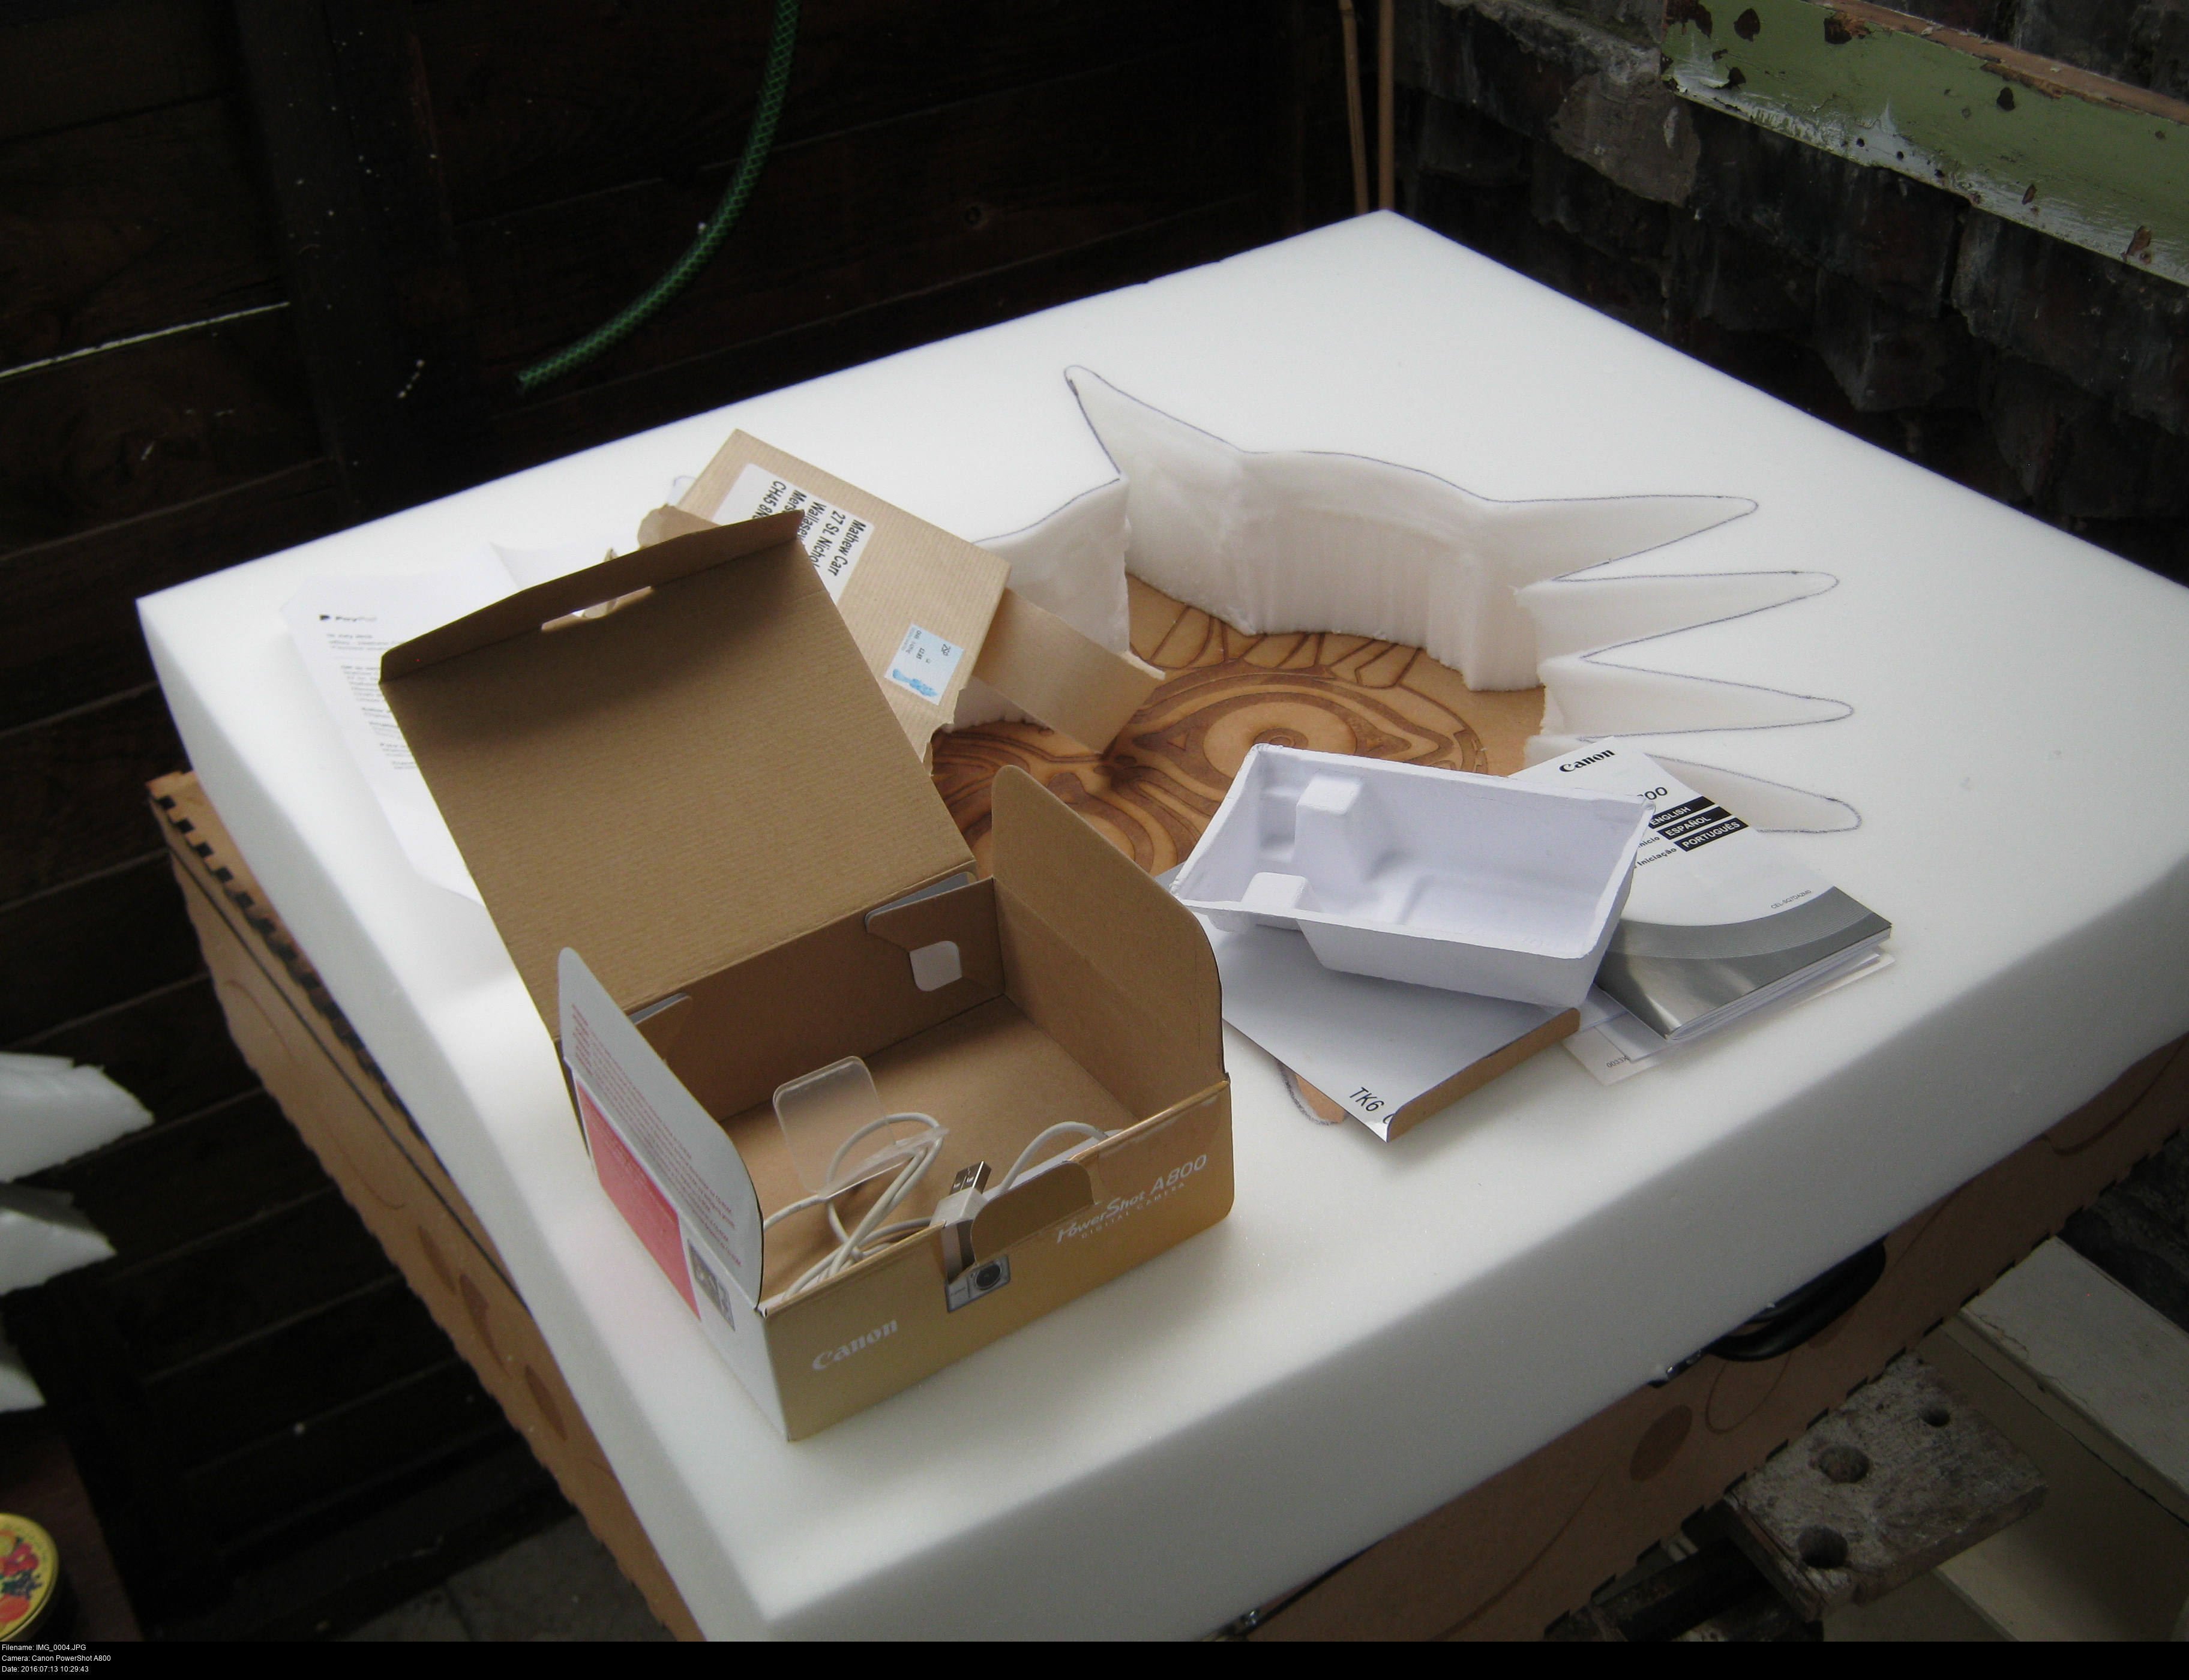
Here's some gratuitous detail shows of the mask since I got a new camera on the week I finished the box!
Now you've got a great big ridiculous heavy box, but at least your mask will be safe! Don't be overly precious with it, every ding the box takes is one the mask doesn't.
You'll need a trolley to carry this thing, but that's alright. You've come this far, don't skimp.
.JPG)
But, sometimes fate just likes to kick you in the nuts a little. Playfully.
This is Eccles station, closest station to EventCity where Play Expo Manchester 2016 was held. No stairs anywhere at the station. I had to do a bit of farmer-fox-chicken-grain puzzling to heave my boxes up to street level, making sure to never let either of them out of my sight.


Now that you've made the box, you ought to take care of it. It'll take knocks and scrapes. When I load up the box onto my mum's old shopping trolley frame, the exposed metal bars gouge out large horizontal stripes on the back surface of the box. Whenever I come back from a con, I take the (empty) box out to the shed, sand it down smooth, and re-varnish it nicely. Varnish protects against minor scraping damage, but mostly water damage. If it gets in too much, it'll warp and go soft and strange. A properly varnished box will be a big relief if you have to travel to or from your hotel in the rain.
Written by Matt Carr! mrdictionary.net nonsense.
Questions? E-mail 'em to me, skullkid@mrdictionary.net!
Twitter @SkullKidUK - Facebook facebook.com/mask.smith.cosplay