
Welcome back to Skull Kid's Cosplay Stuff. I'm Skull Kid and today* we're going to re-make Majora's Mask!
*(well, not all in one day because that would be rushing, and rushing, like swooping, is bad)
Remember the XPS foam which I used for the horns on my original Majora's Mask? Remember how I said it was cheat mode for cosplay?
Why not make the whole mask out of it? It'll be durable, light, gluable... -wearable- perhaps. Wouldn't that be fancy?
Here's the plan:
Make the main mask body out of XPS foam.
Make the horns out of XPS foam. Yes, after making over thirty horns for the previous mask and swearing I'd never do it again, I'm doing it again.
Attach the horns to the main body of the mask.
Surface the XPS foam so it has a smooth paintable surface.
Paint the mask.
Varnish the mask.
Sew and attach a strap.
It's a good plan, but it's rough. There's a lot of invisible questions in here.
How am I going to surface the mask?
How am I going to put eyeholes in it? I need to position them and cut them out. And how am I going to disguise them?
How am I going to attach the strap?
Is there a -faster- way to make the horns?!?
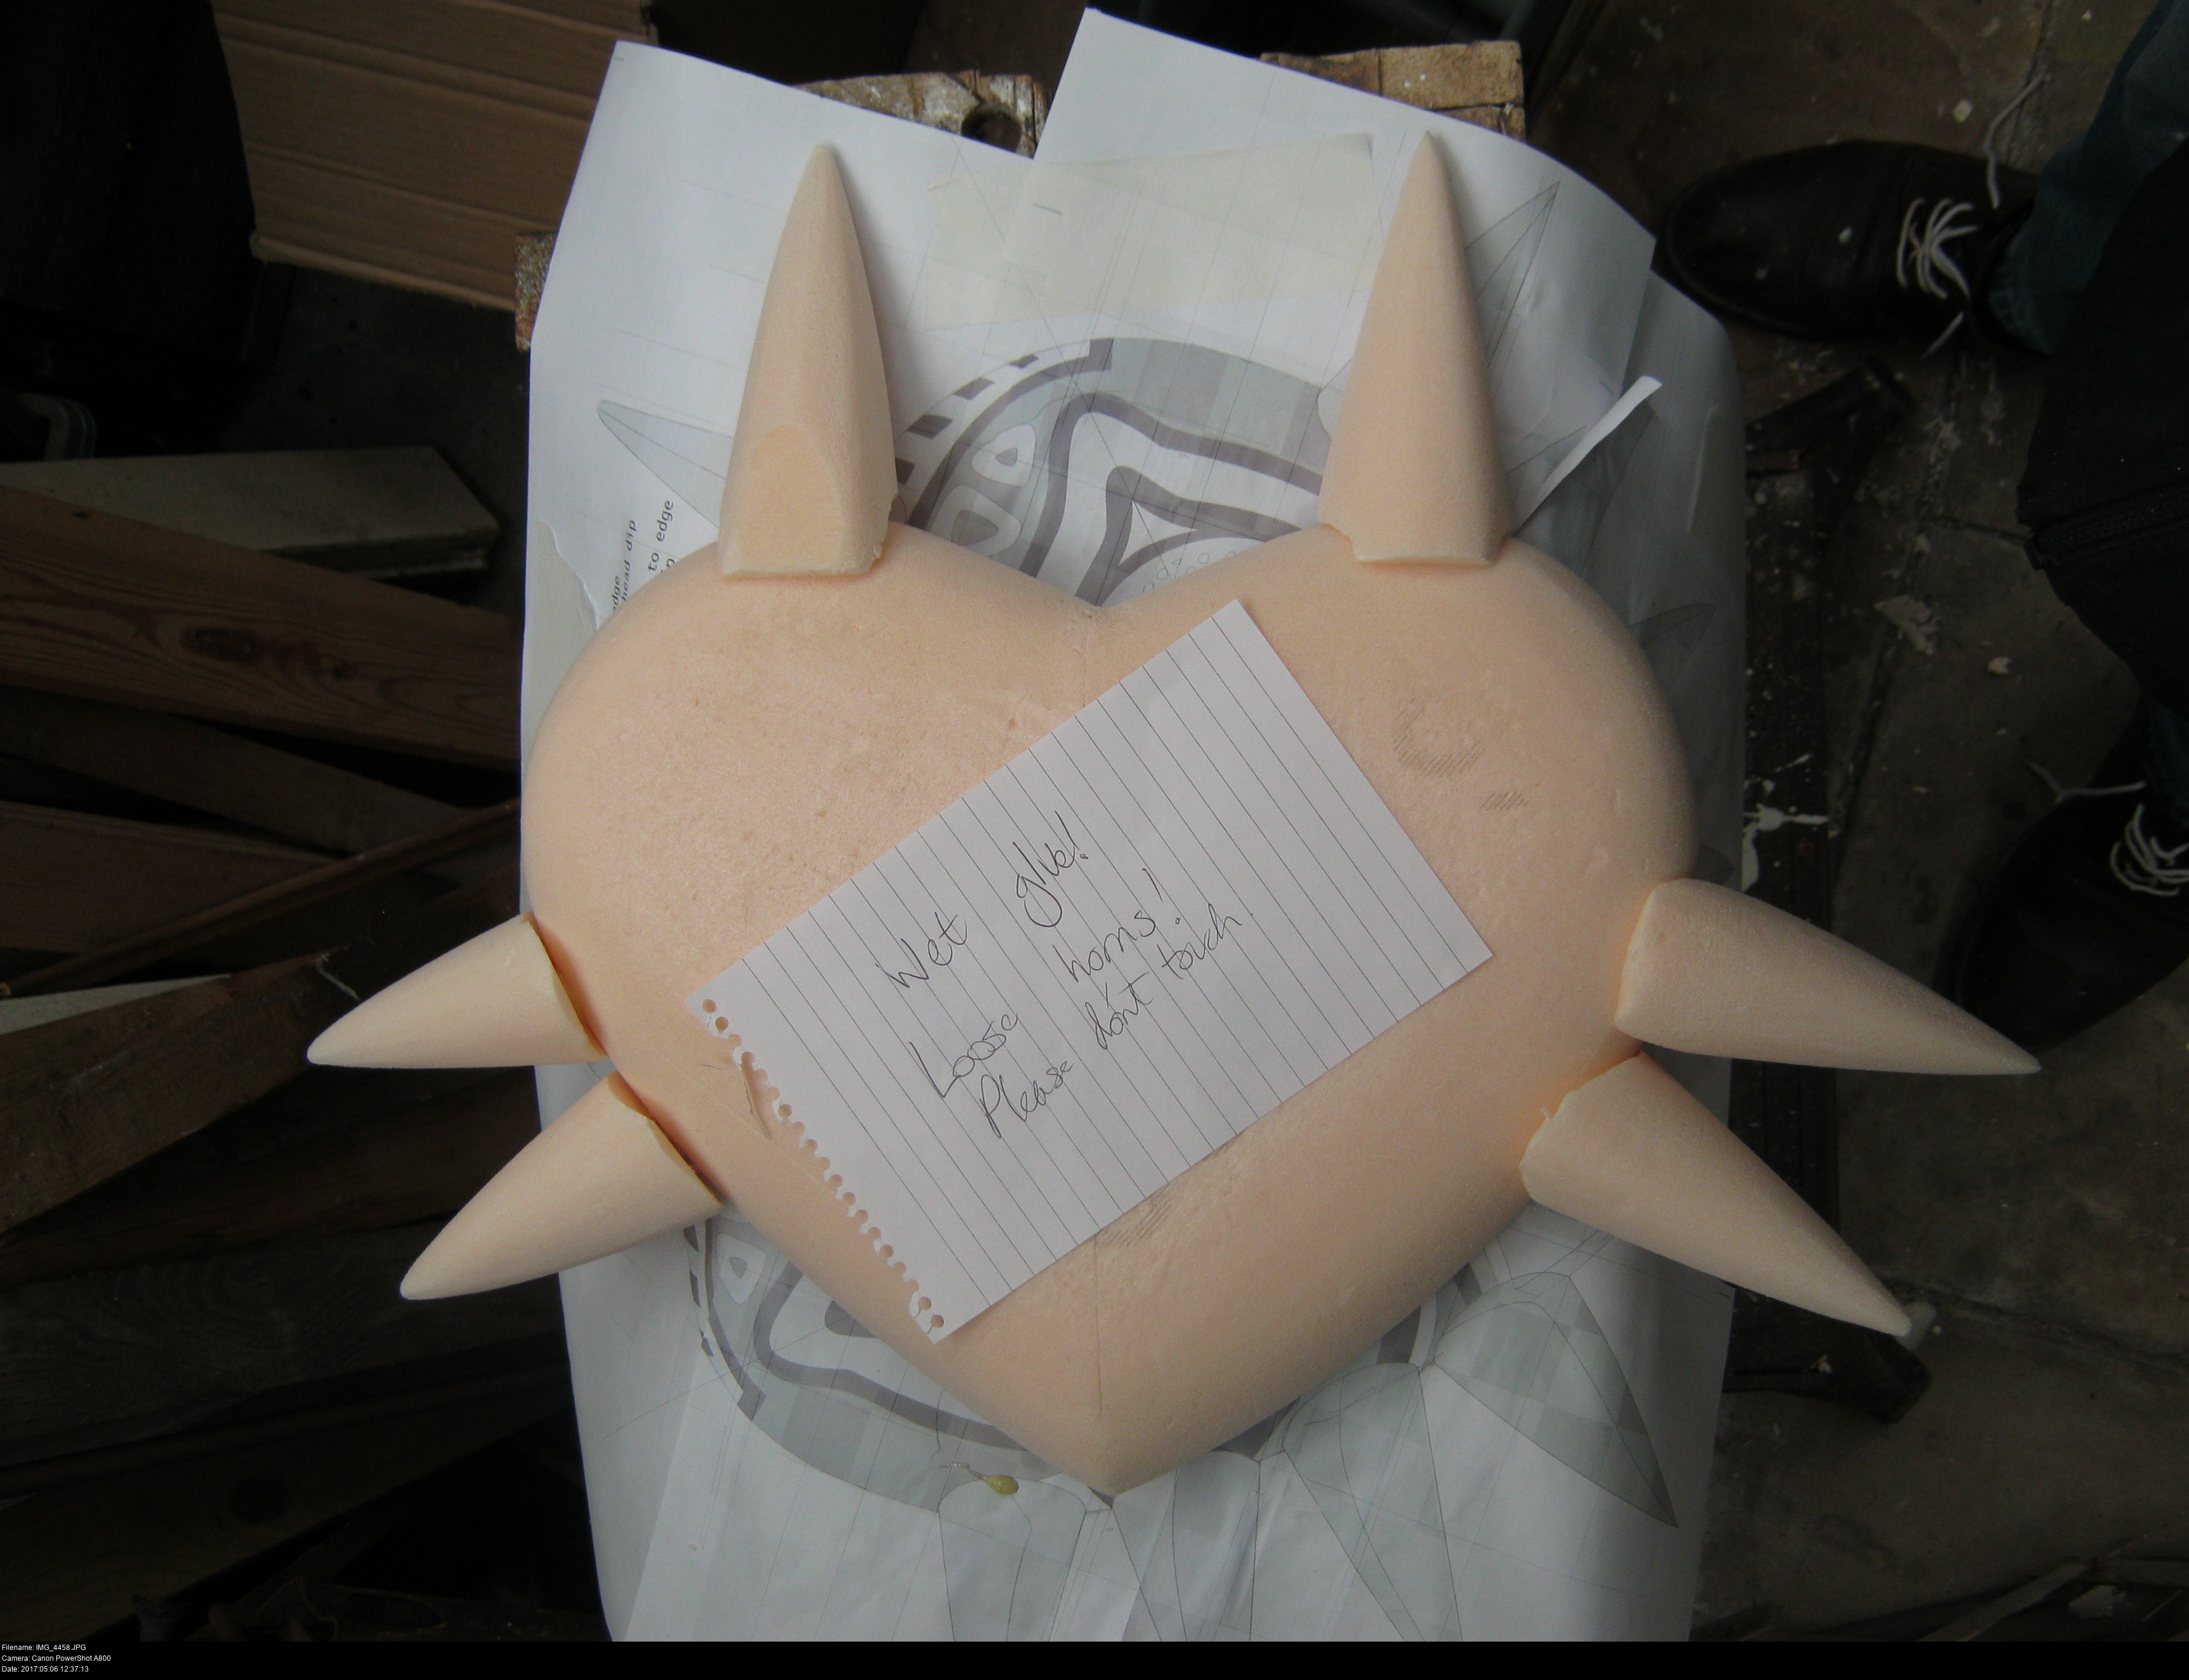
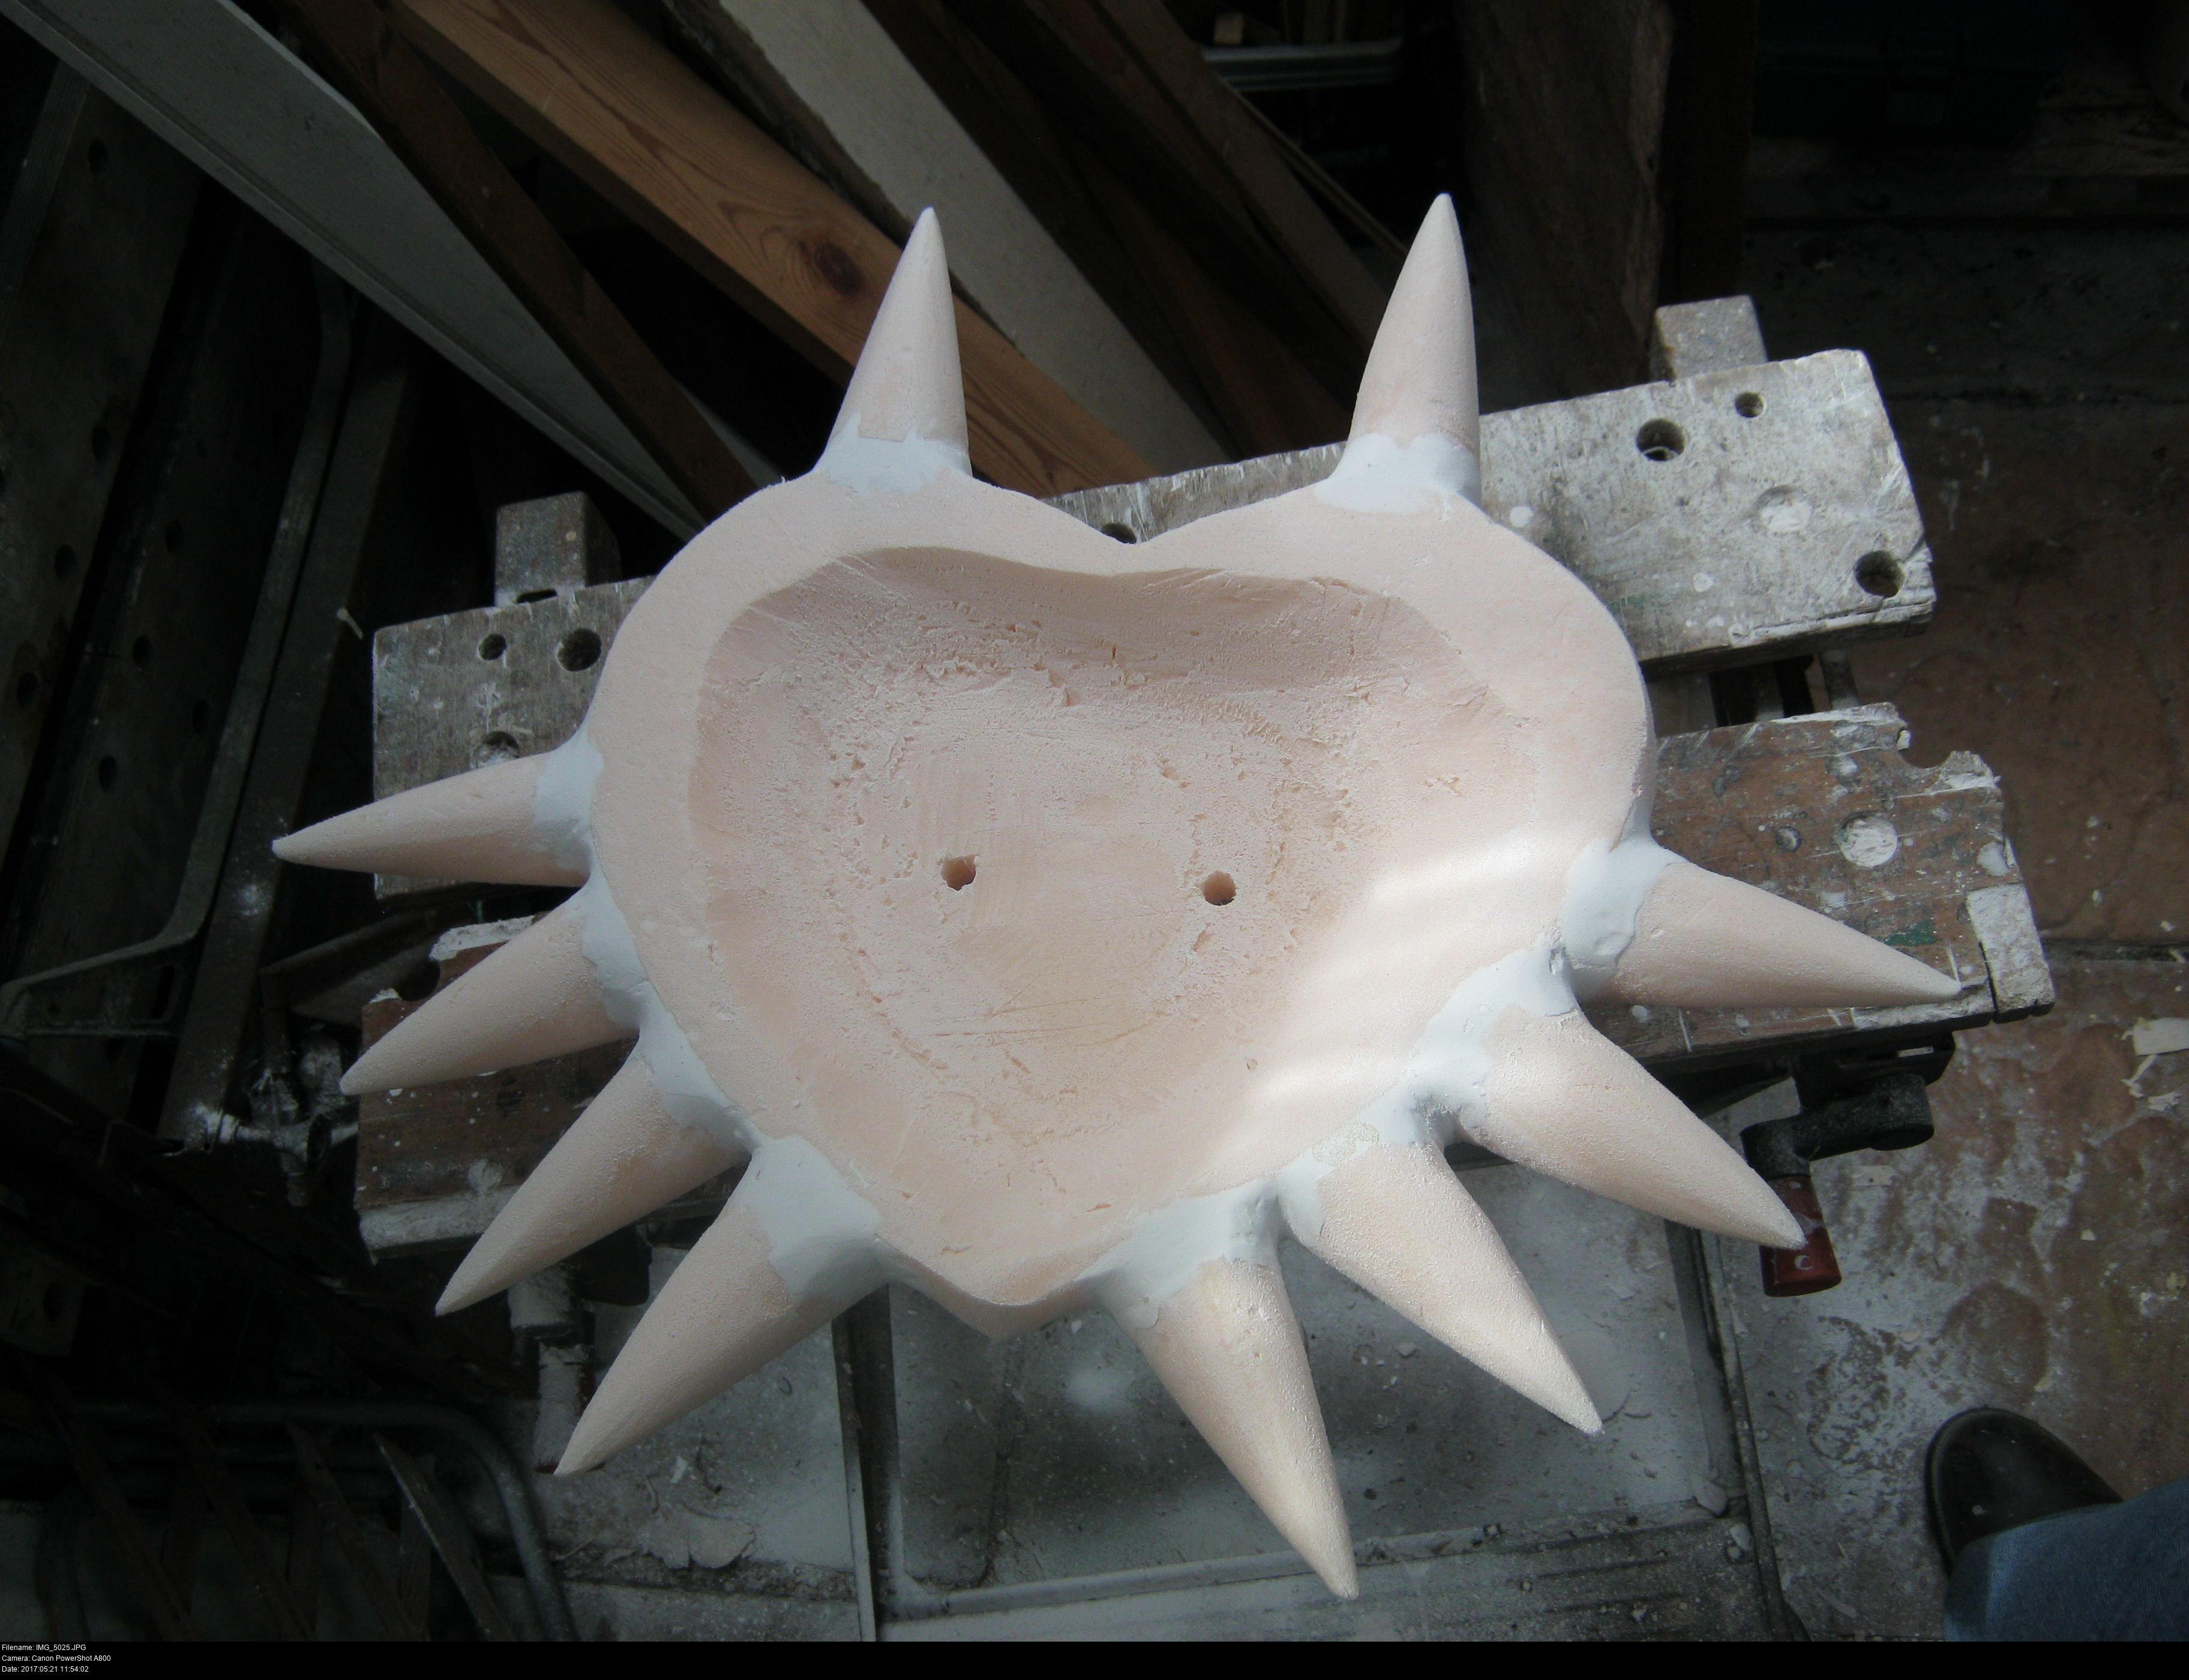
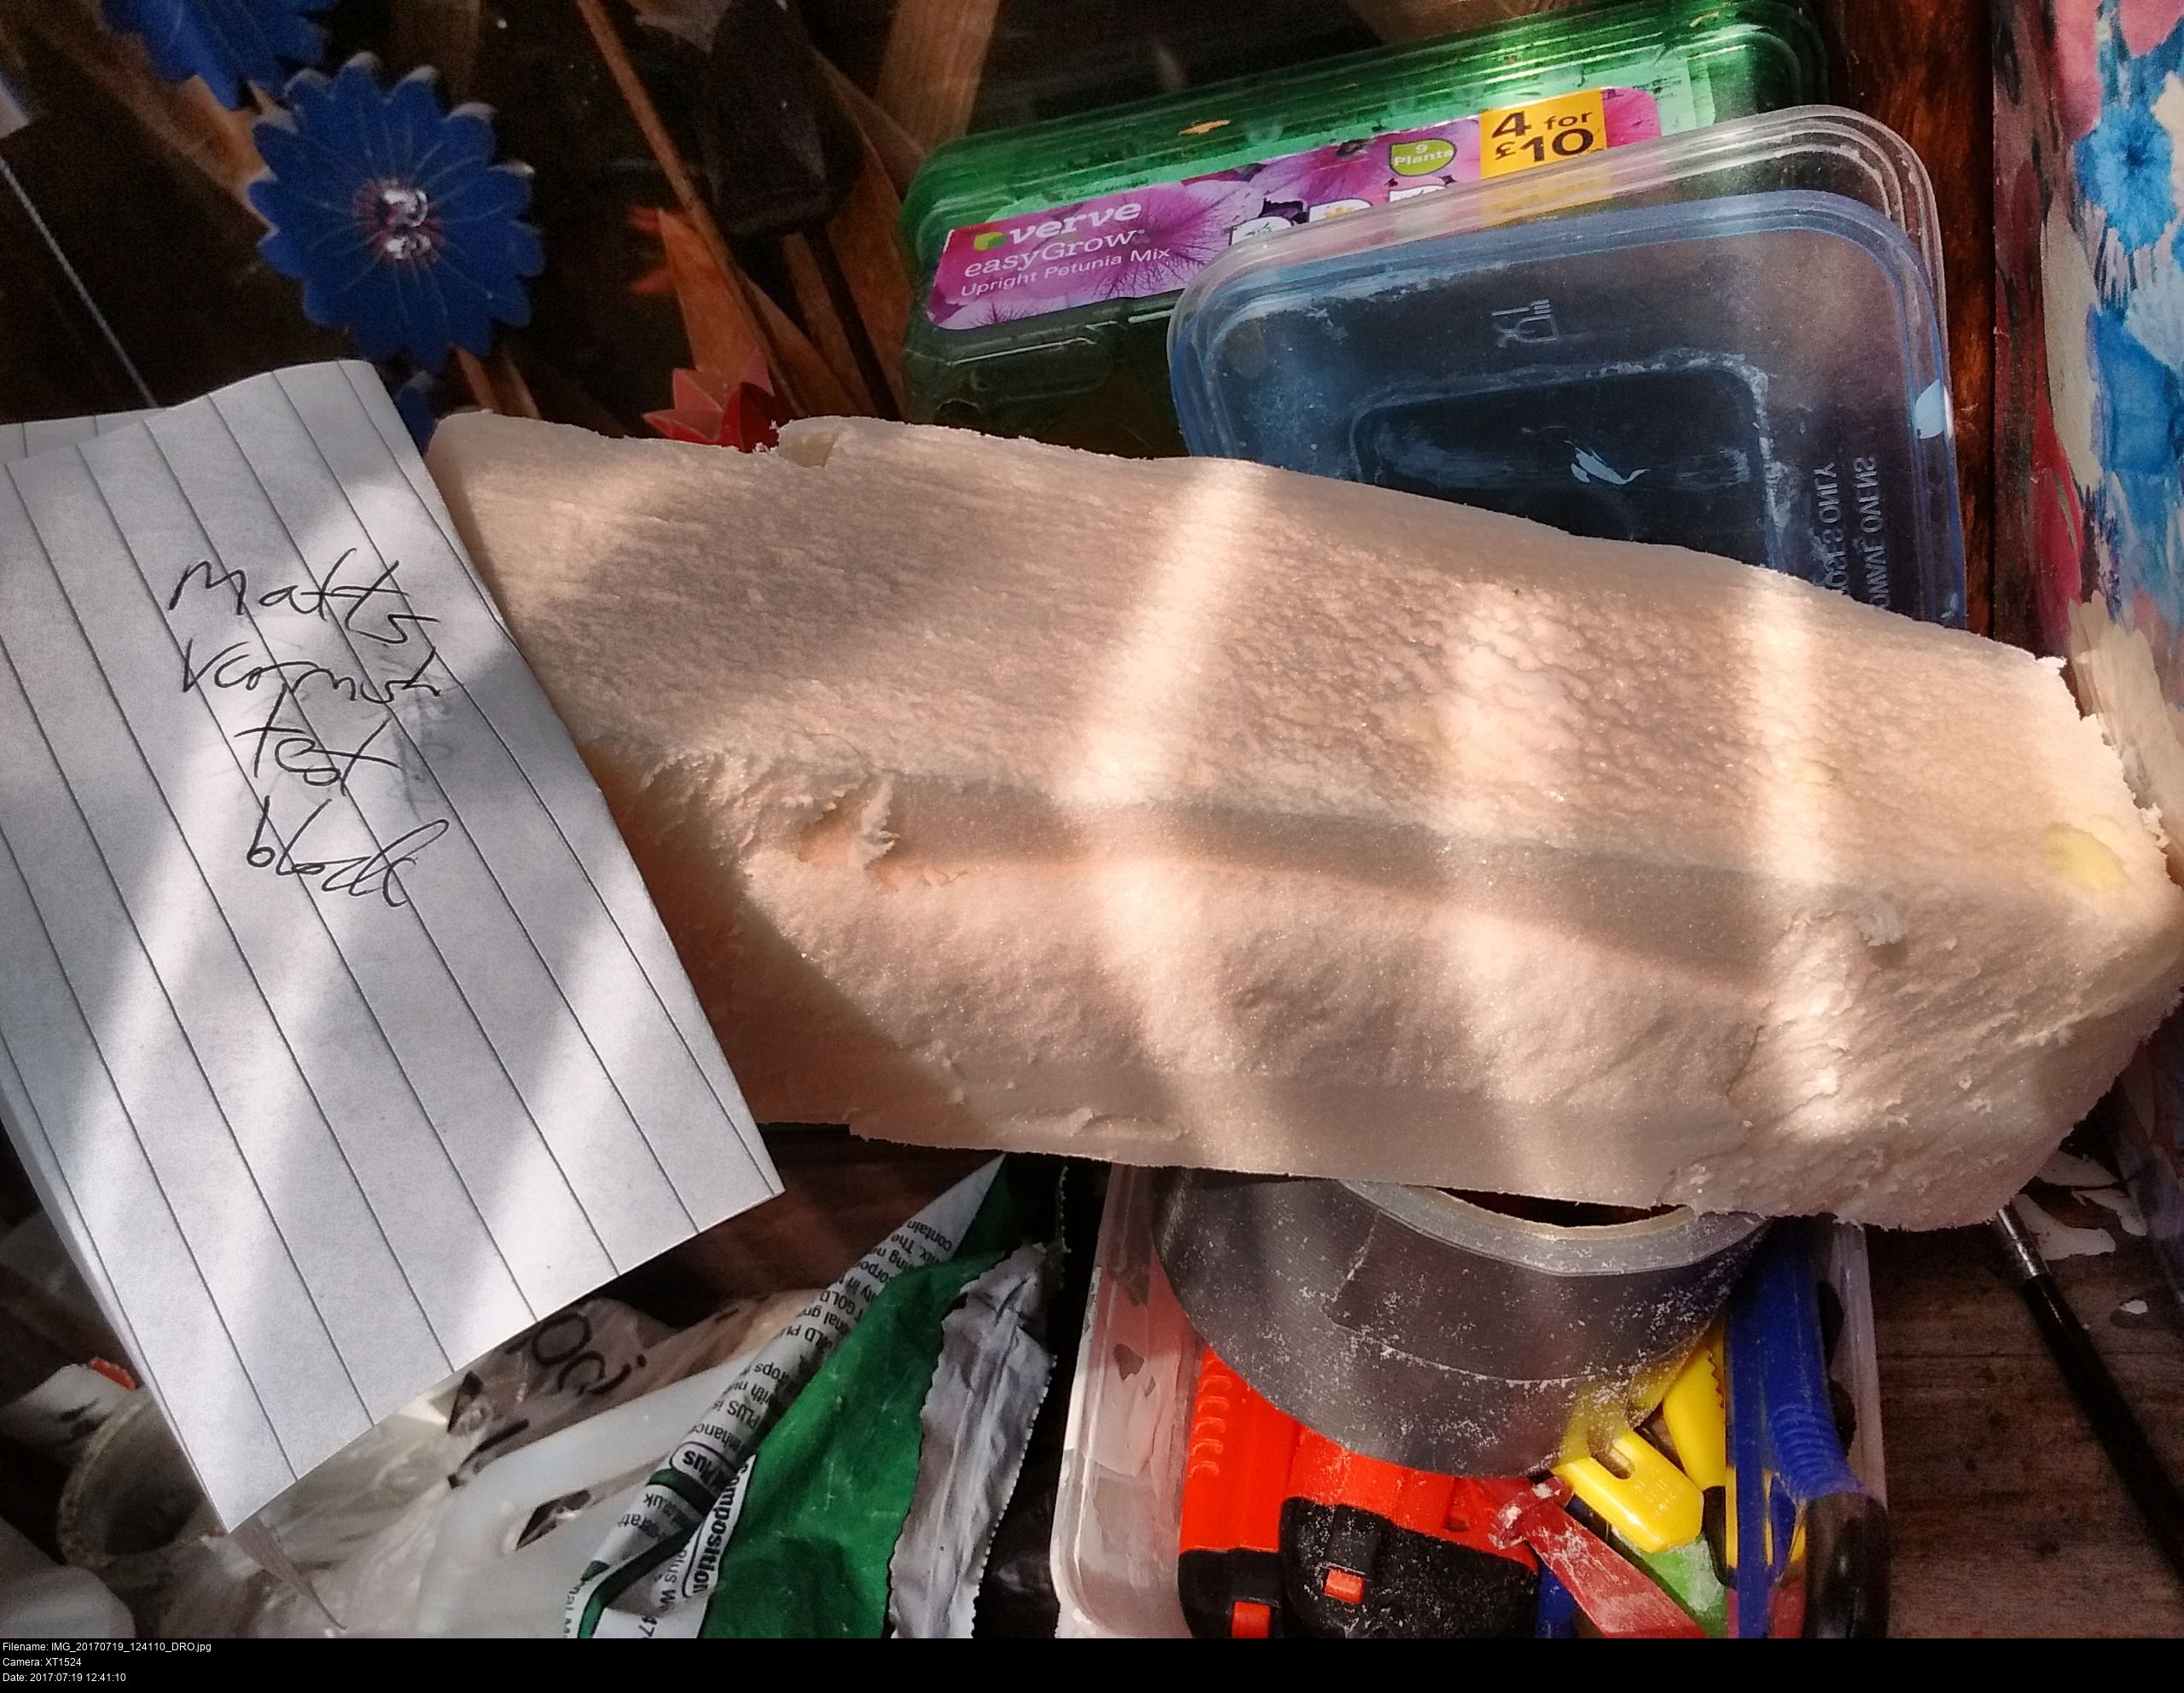
Back in 2015 when I made the original modroc Majora's Mask, I started working on its foam counterpart using the leftover foam. I had a lot! You can get a door-sized piece for very cheap!


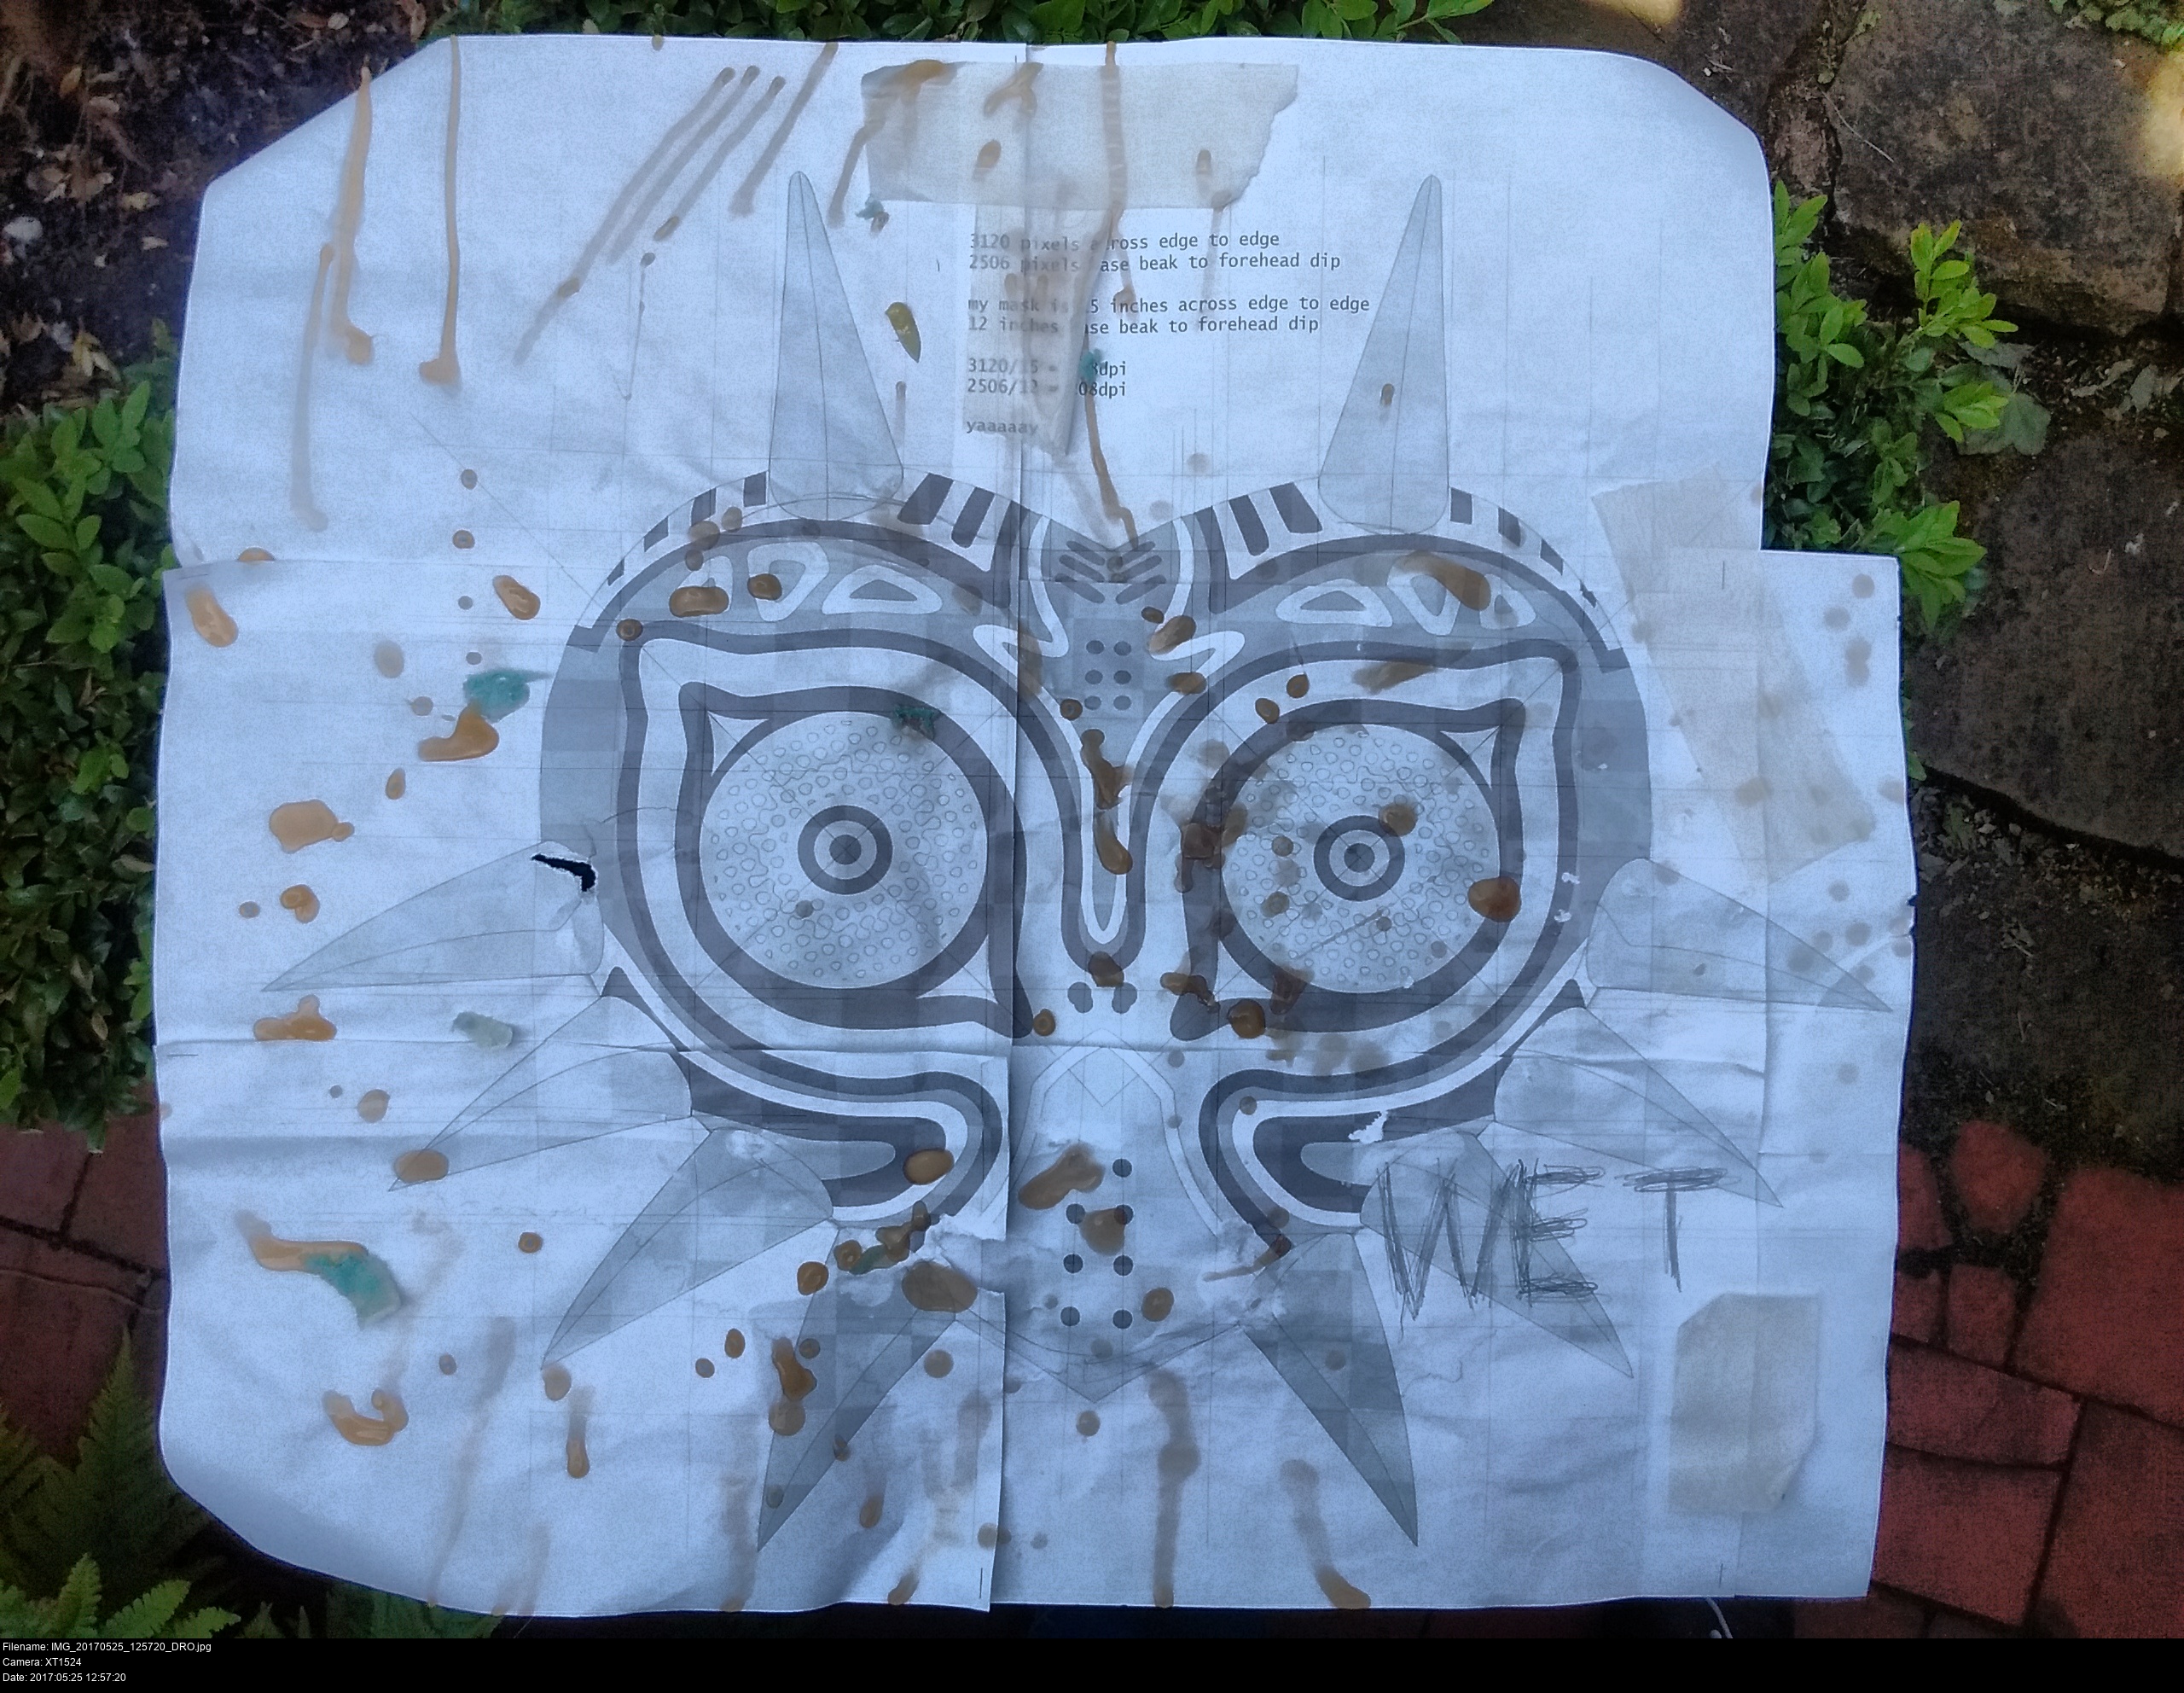
Step one, get the original template out and draw the heart. You did keep the original template, right? ^_^
Then use the hacksaw to cut out the rough shape. Don't try to cut directly onto your line, you'll miss and it'll go horribly. Cut first outside the lines and then sand inwards.
The best tool here is a long, thin, very sharp knife. If you have a disposable knife with an extendable blade, extend it to its full length and use the entire edge. I hadn't figured this out at the time, so you're welcome.


I've sanded it down to the line so it's a nice neat prism.


Once you've done that, allow nineteen months to pass while the foam lies in the new shed, neither abandoned nor forgotten, while your original mask goes on fun adventures up and down the country.
And when you've done that, don't forget to sand the contours in. The beak is looking chunkier than it ought to, but I've definitely got the start of the ridge here.

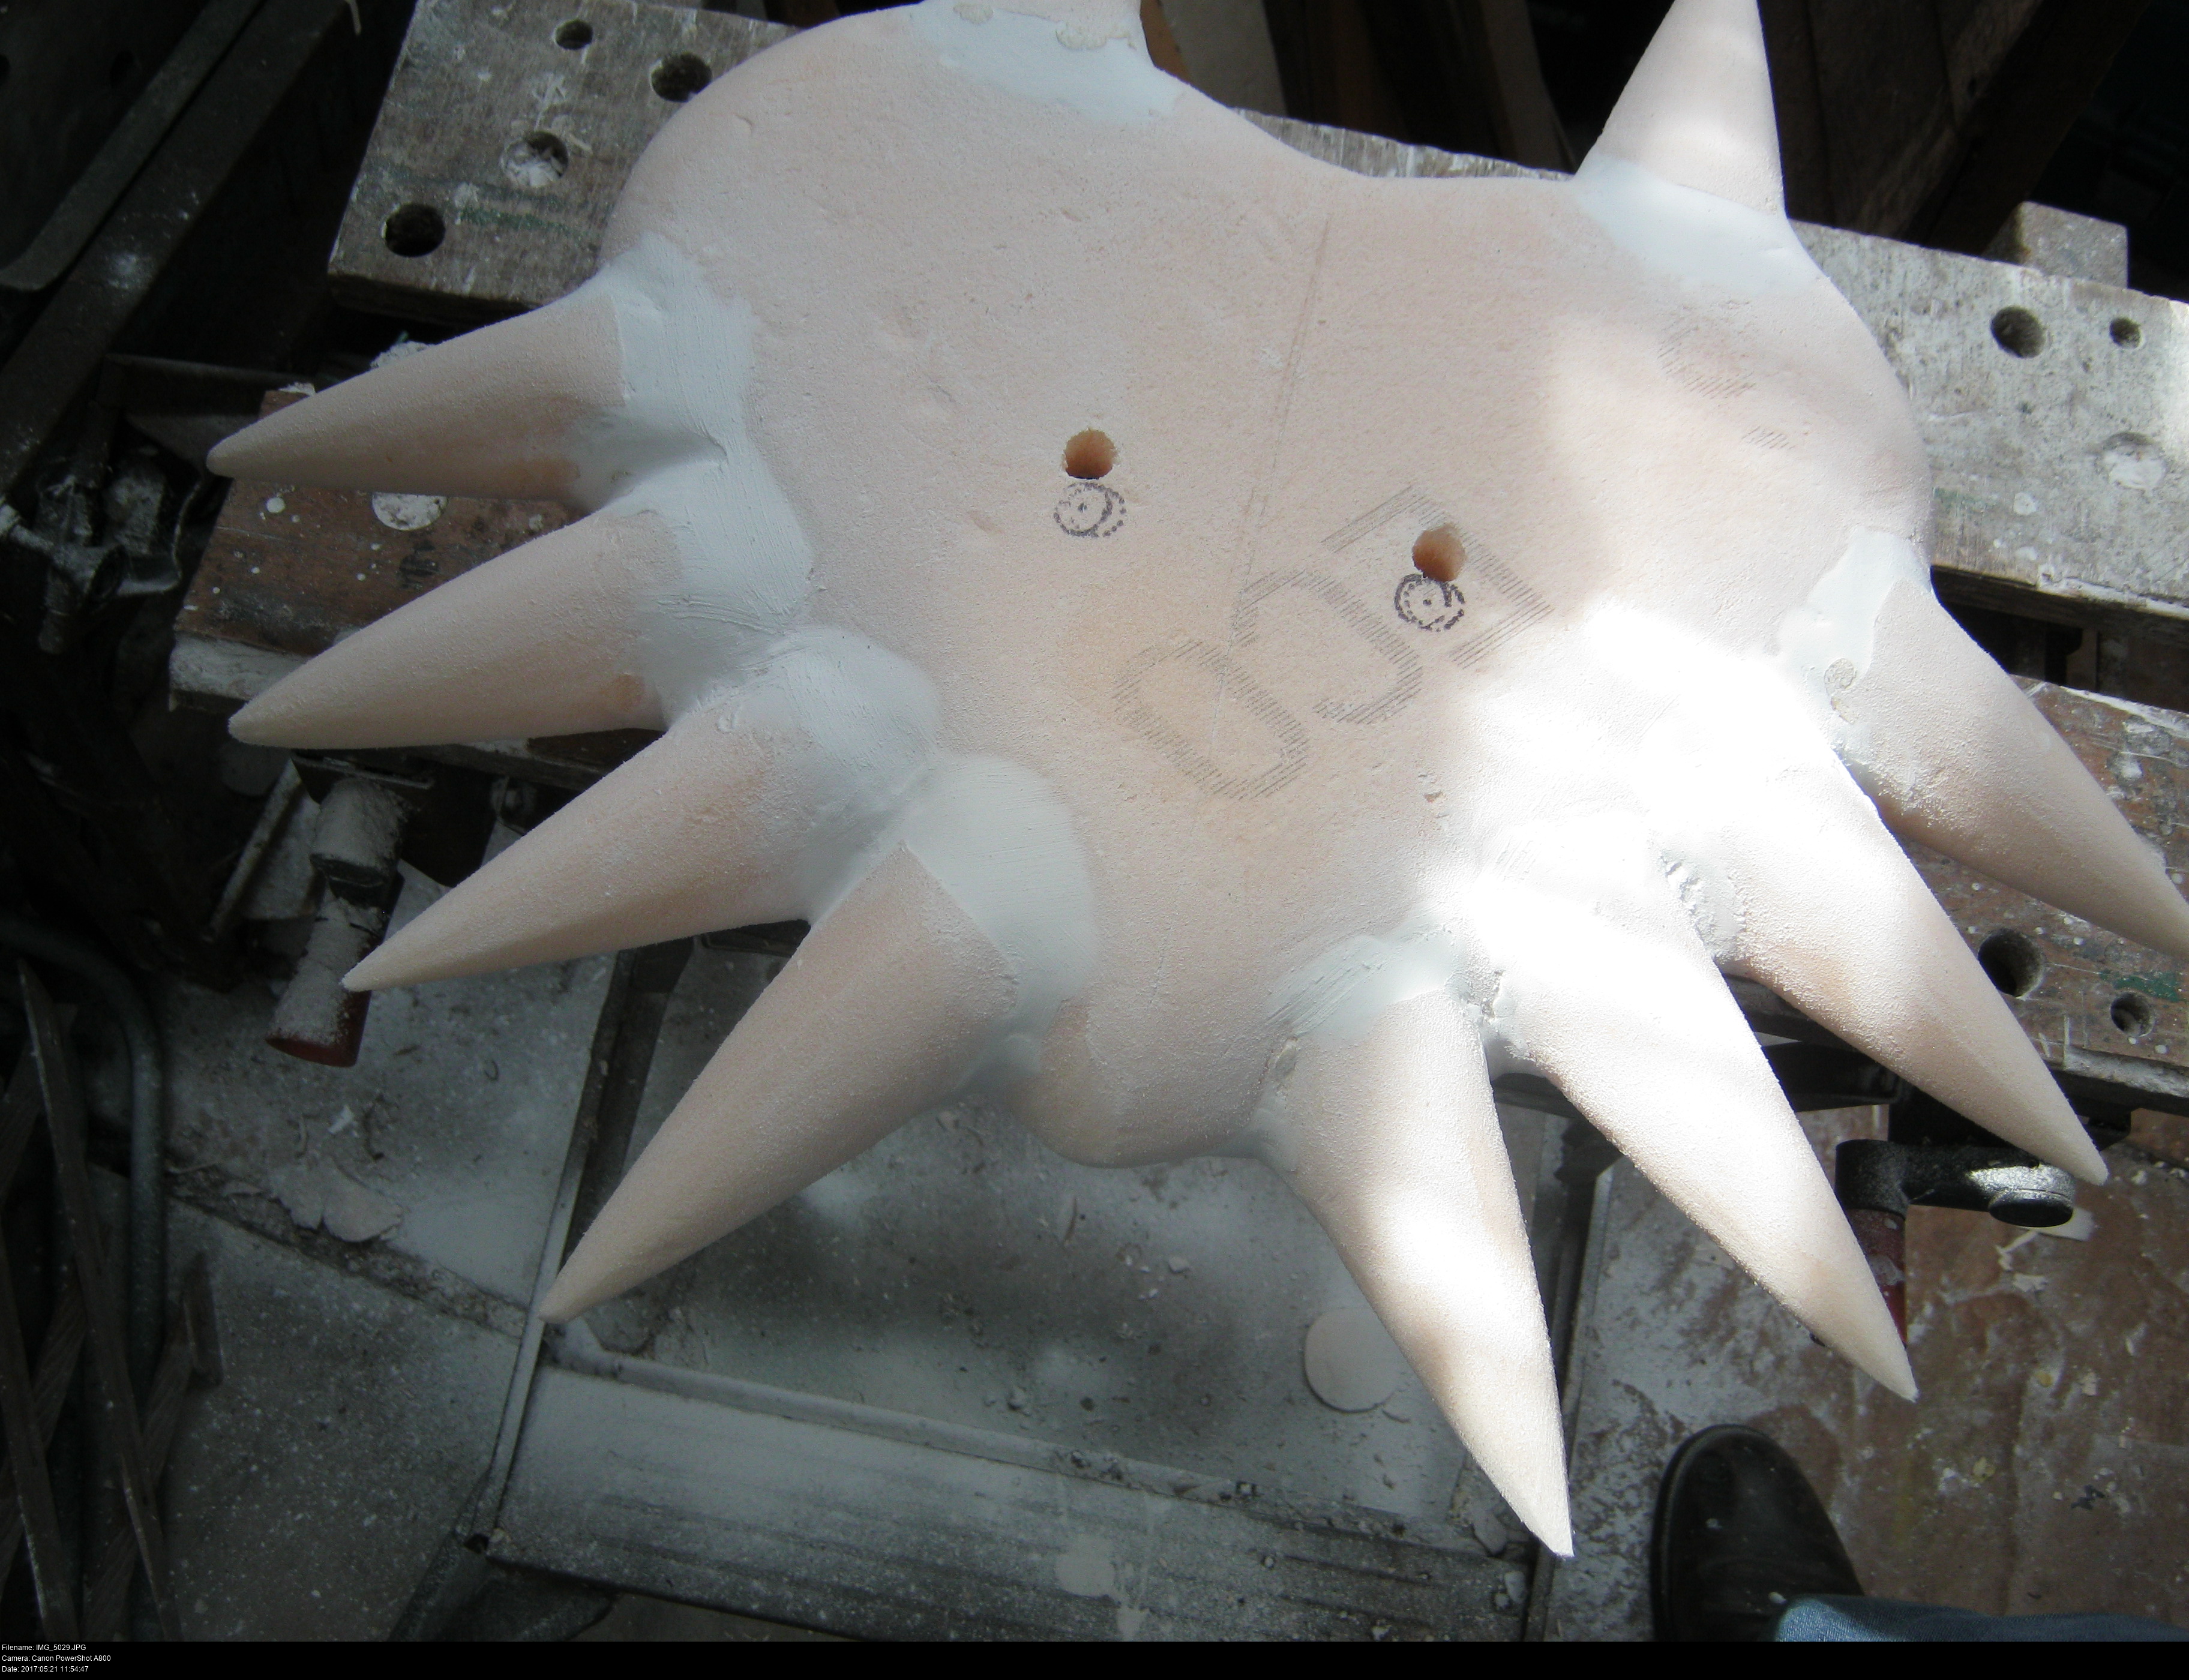
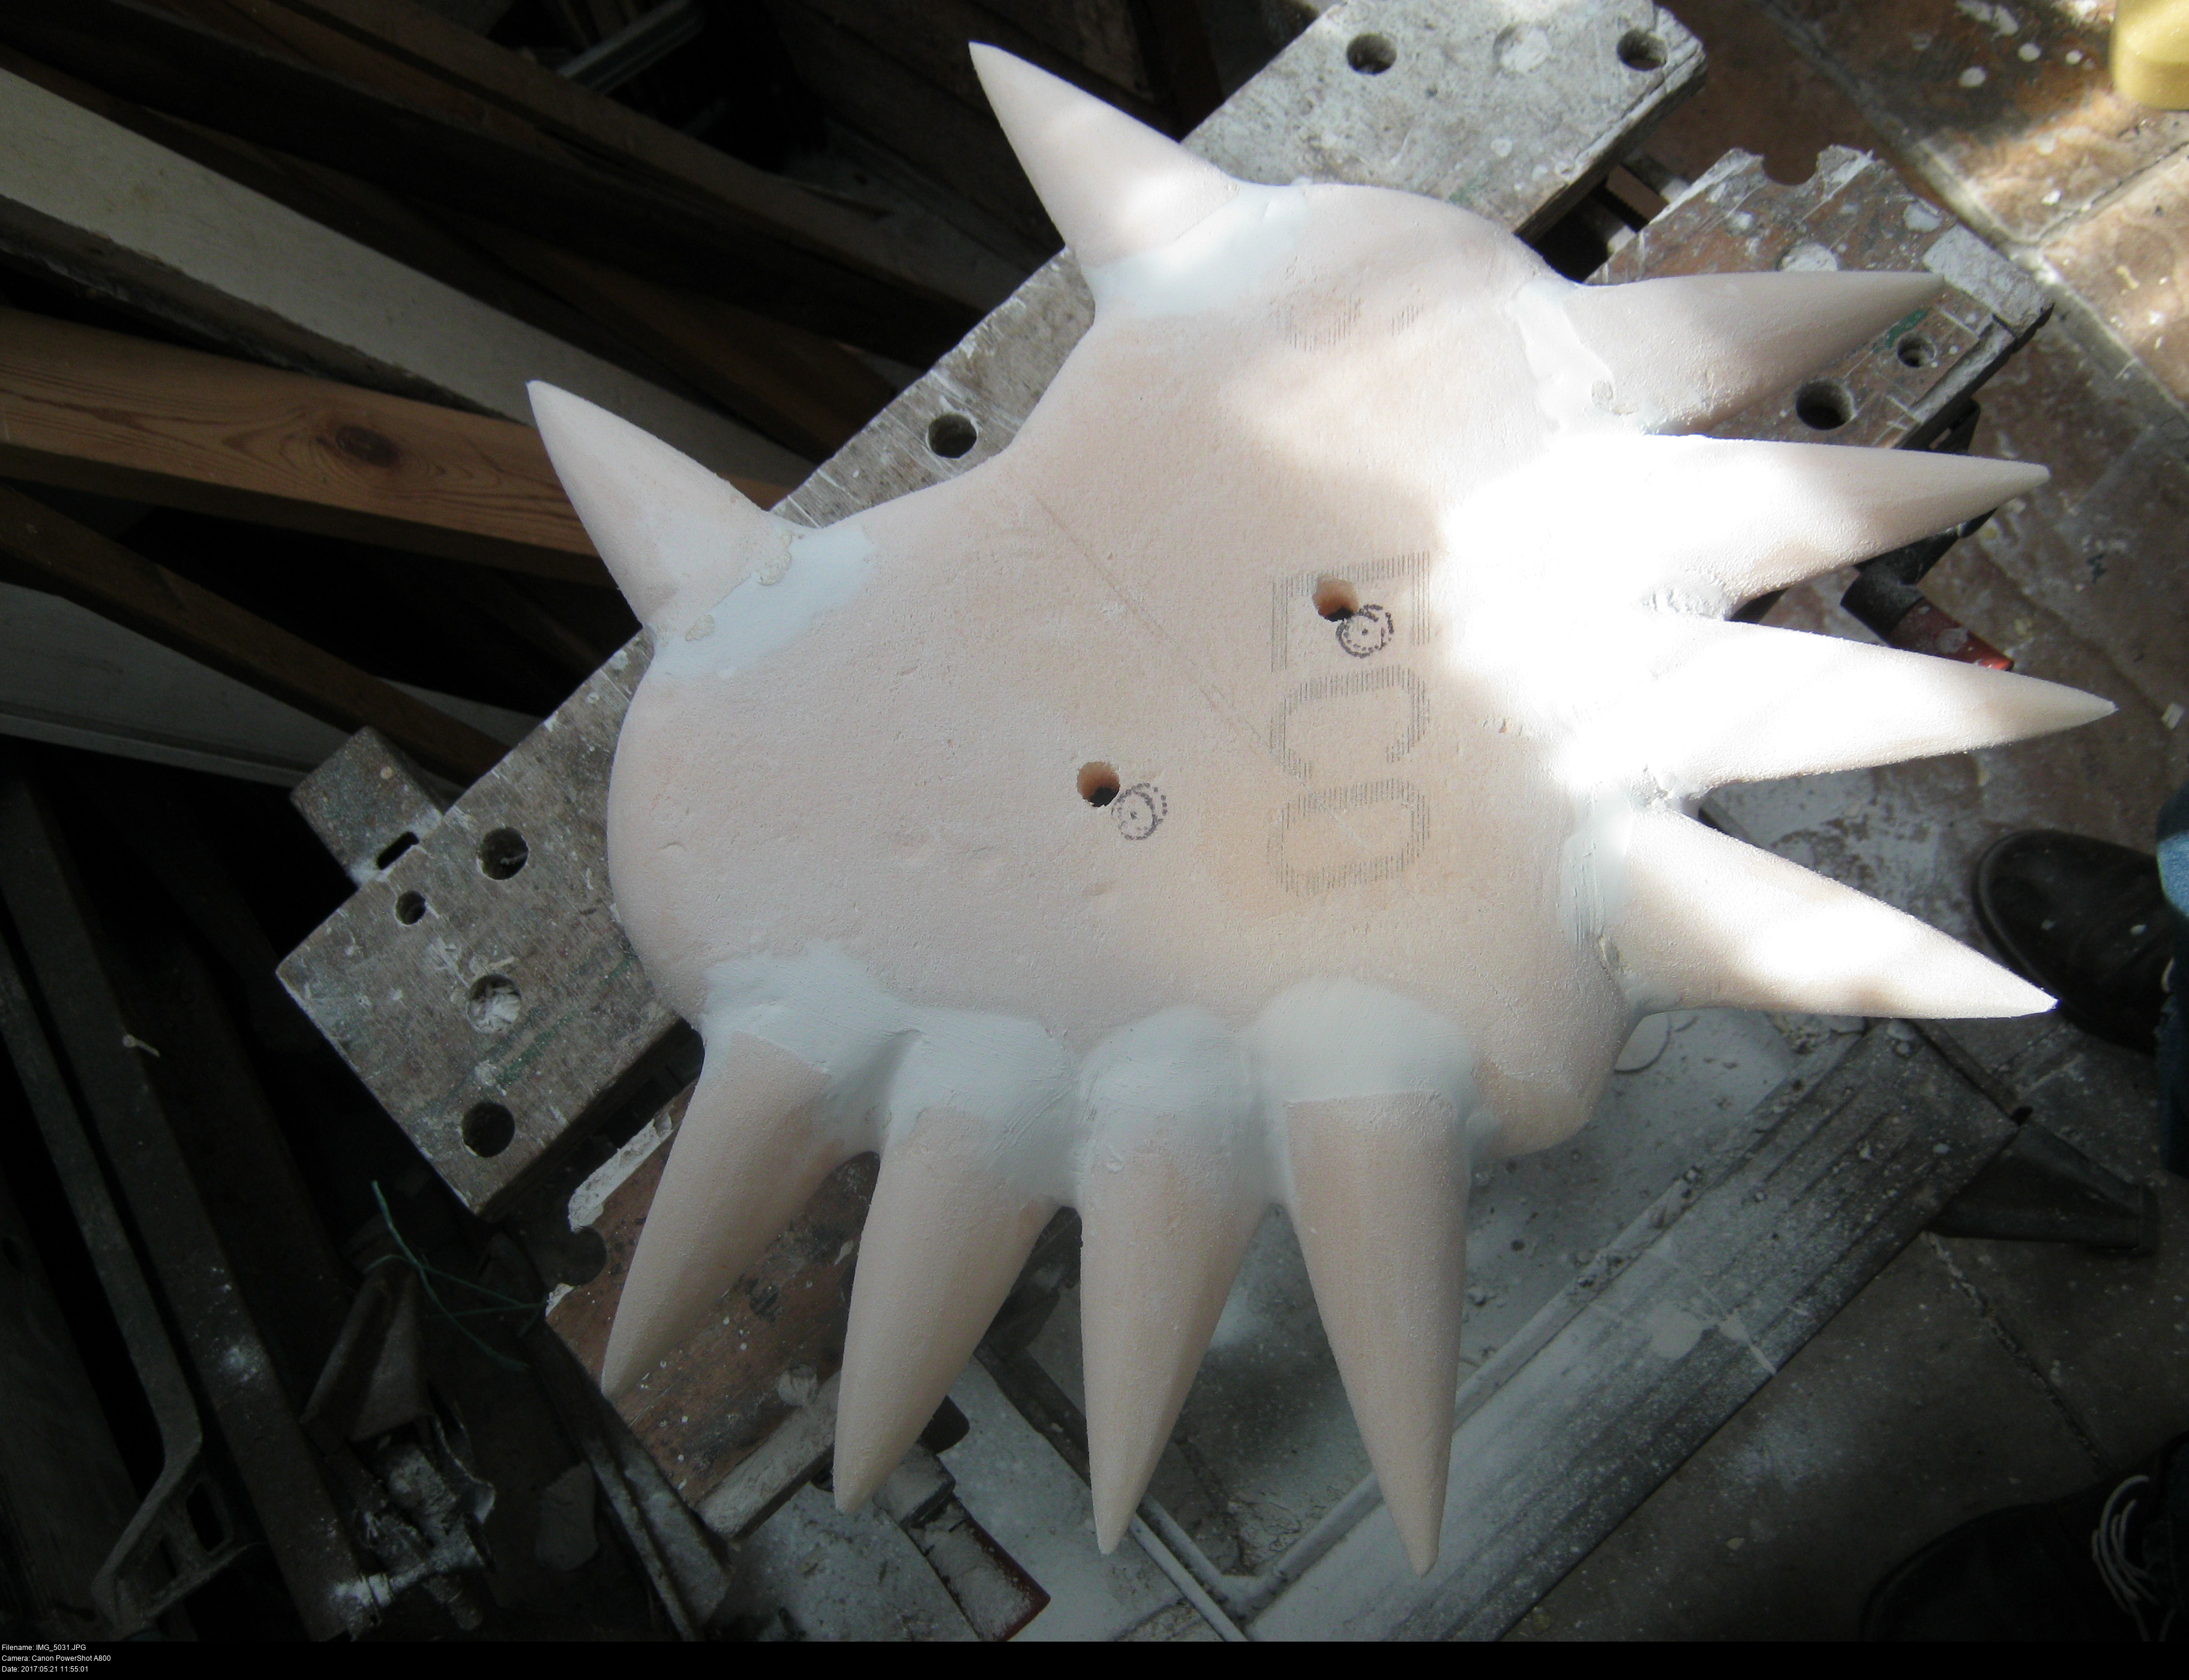
Yes, it's time for the horns again. It's wonderful. I love it.


My hands hate me and the floor of the shed is an absolute state, but I do it all in the name of art!
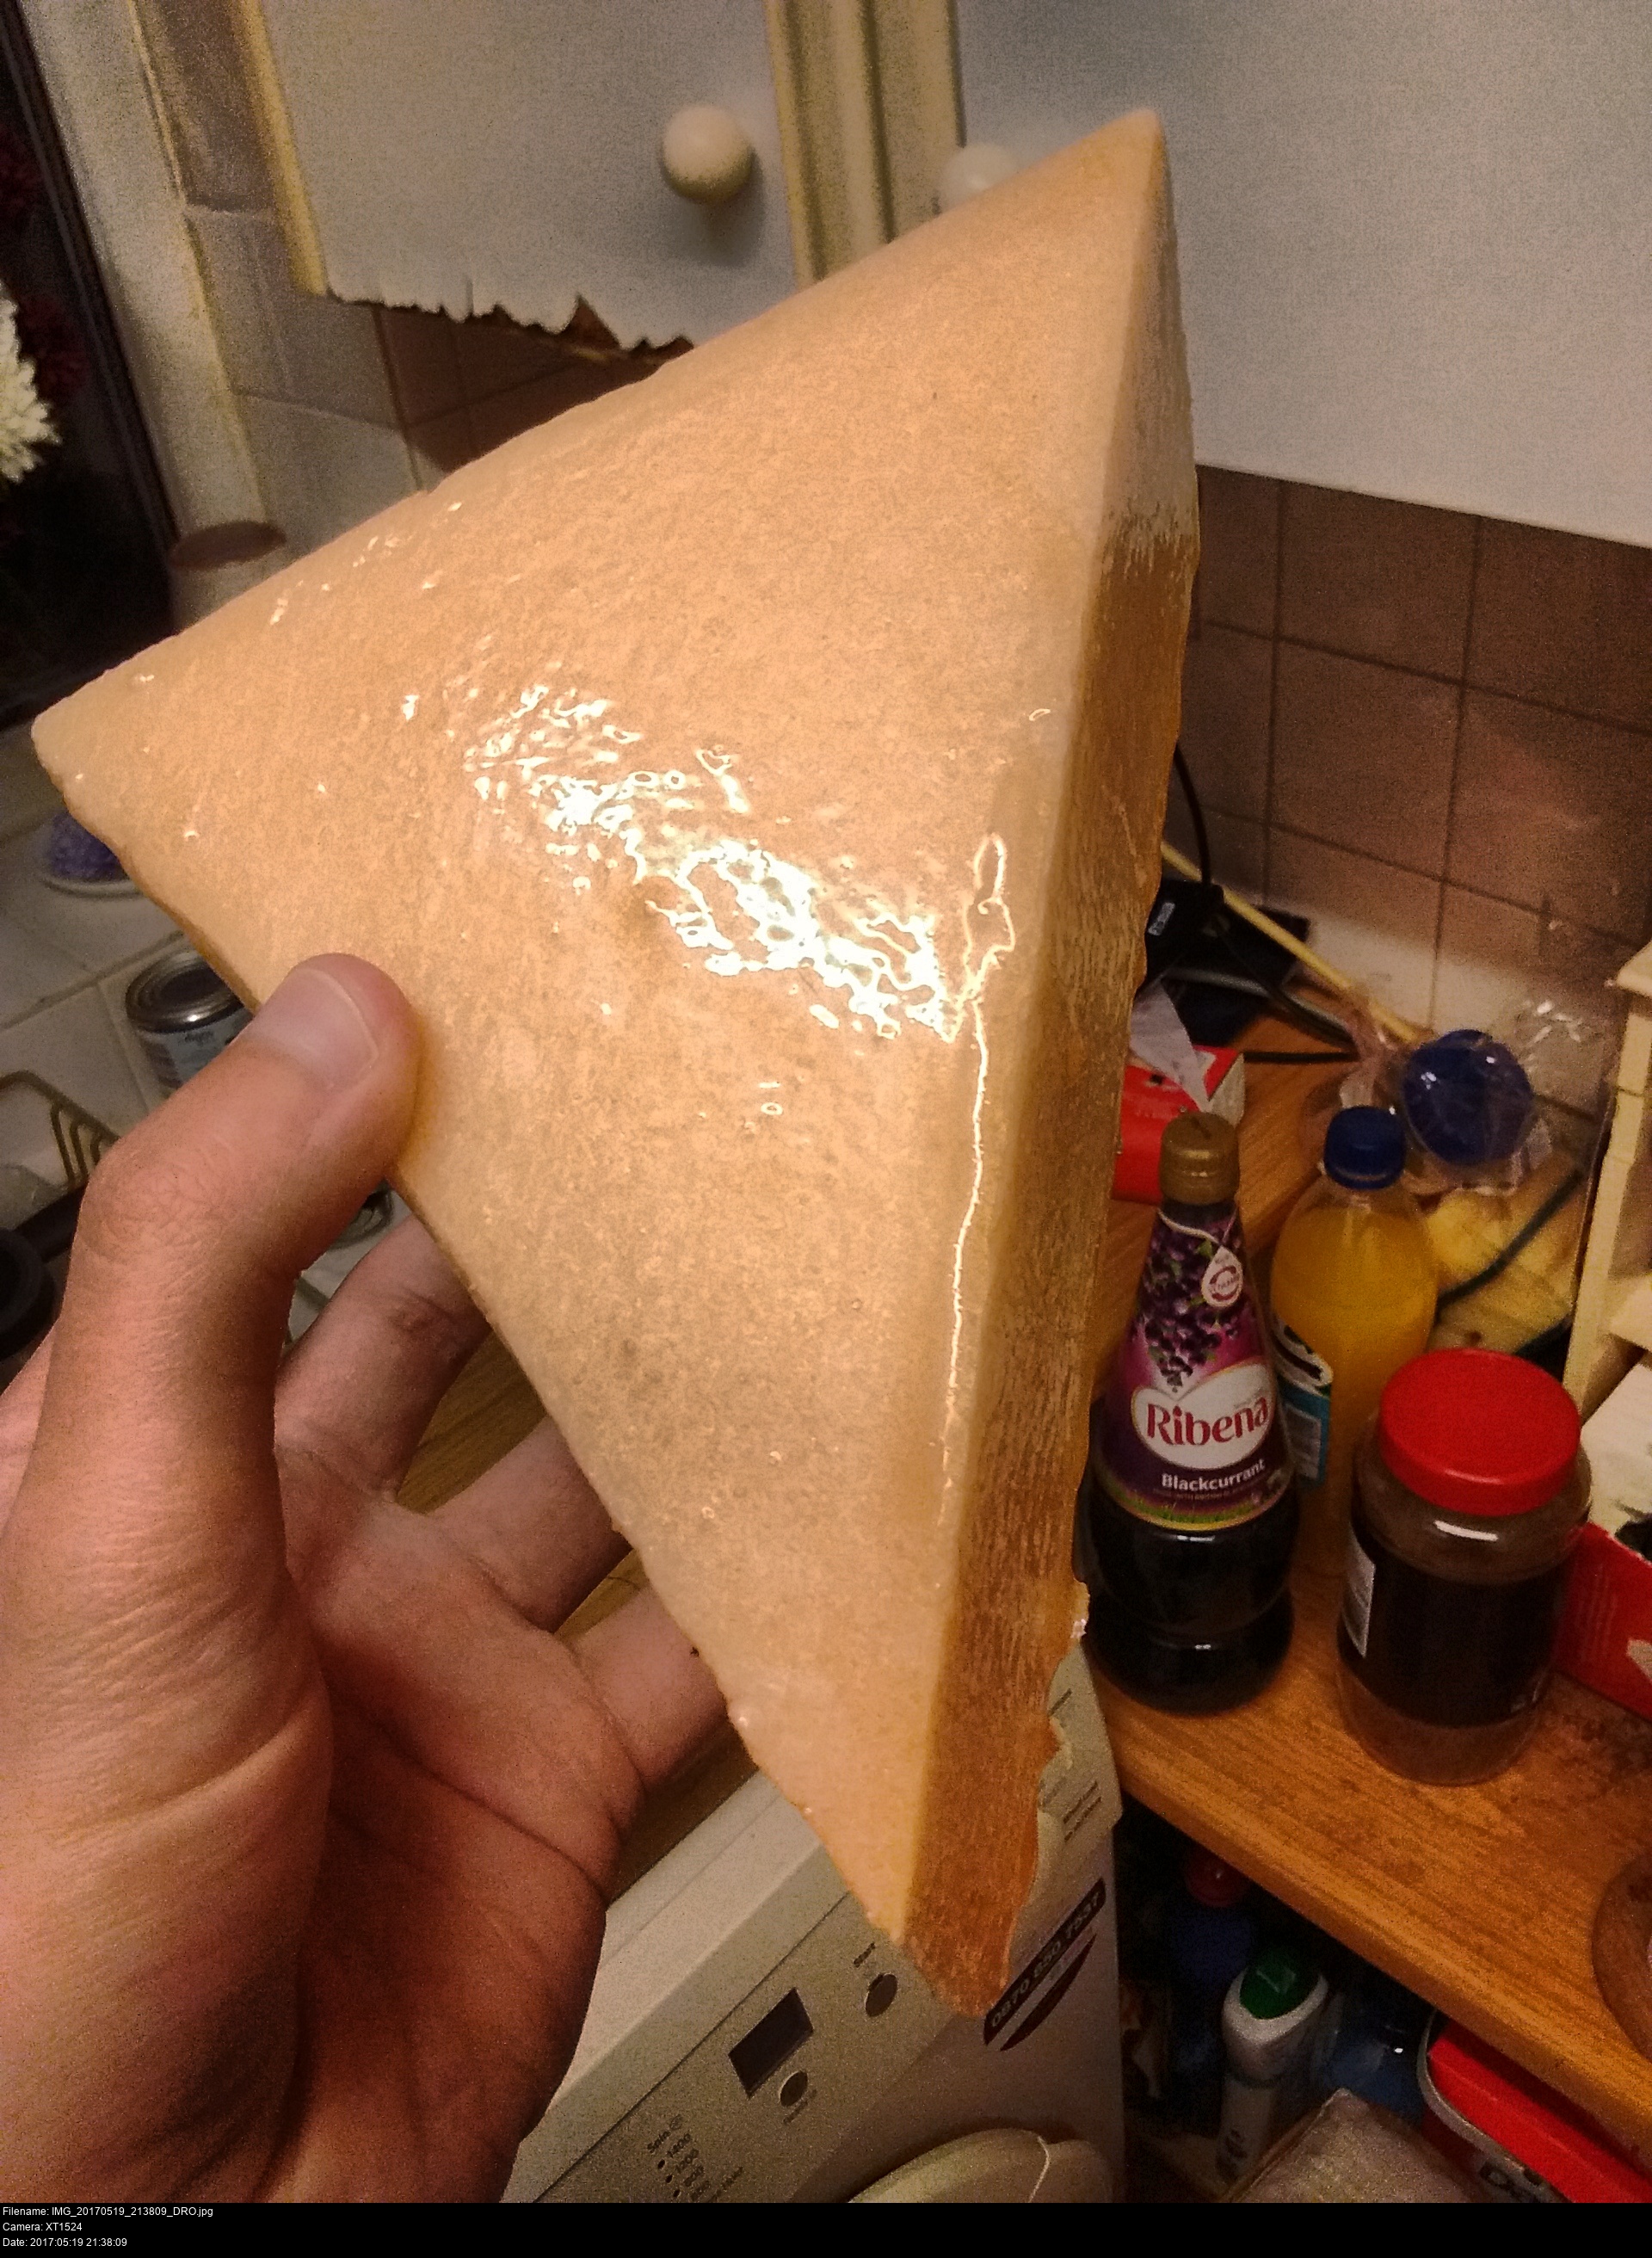
There's no trick to this, just cutting foam into cuboids, cutting the cuboids into rough larger-than-needed pyramids, then sanding them into the final shape. Wrap a piece of sandpaper (have a lot of grades and spare sheets available) around a spare cuboid to make a handy sanding tool.
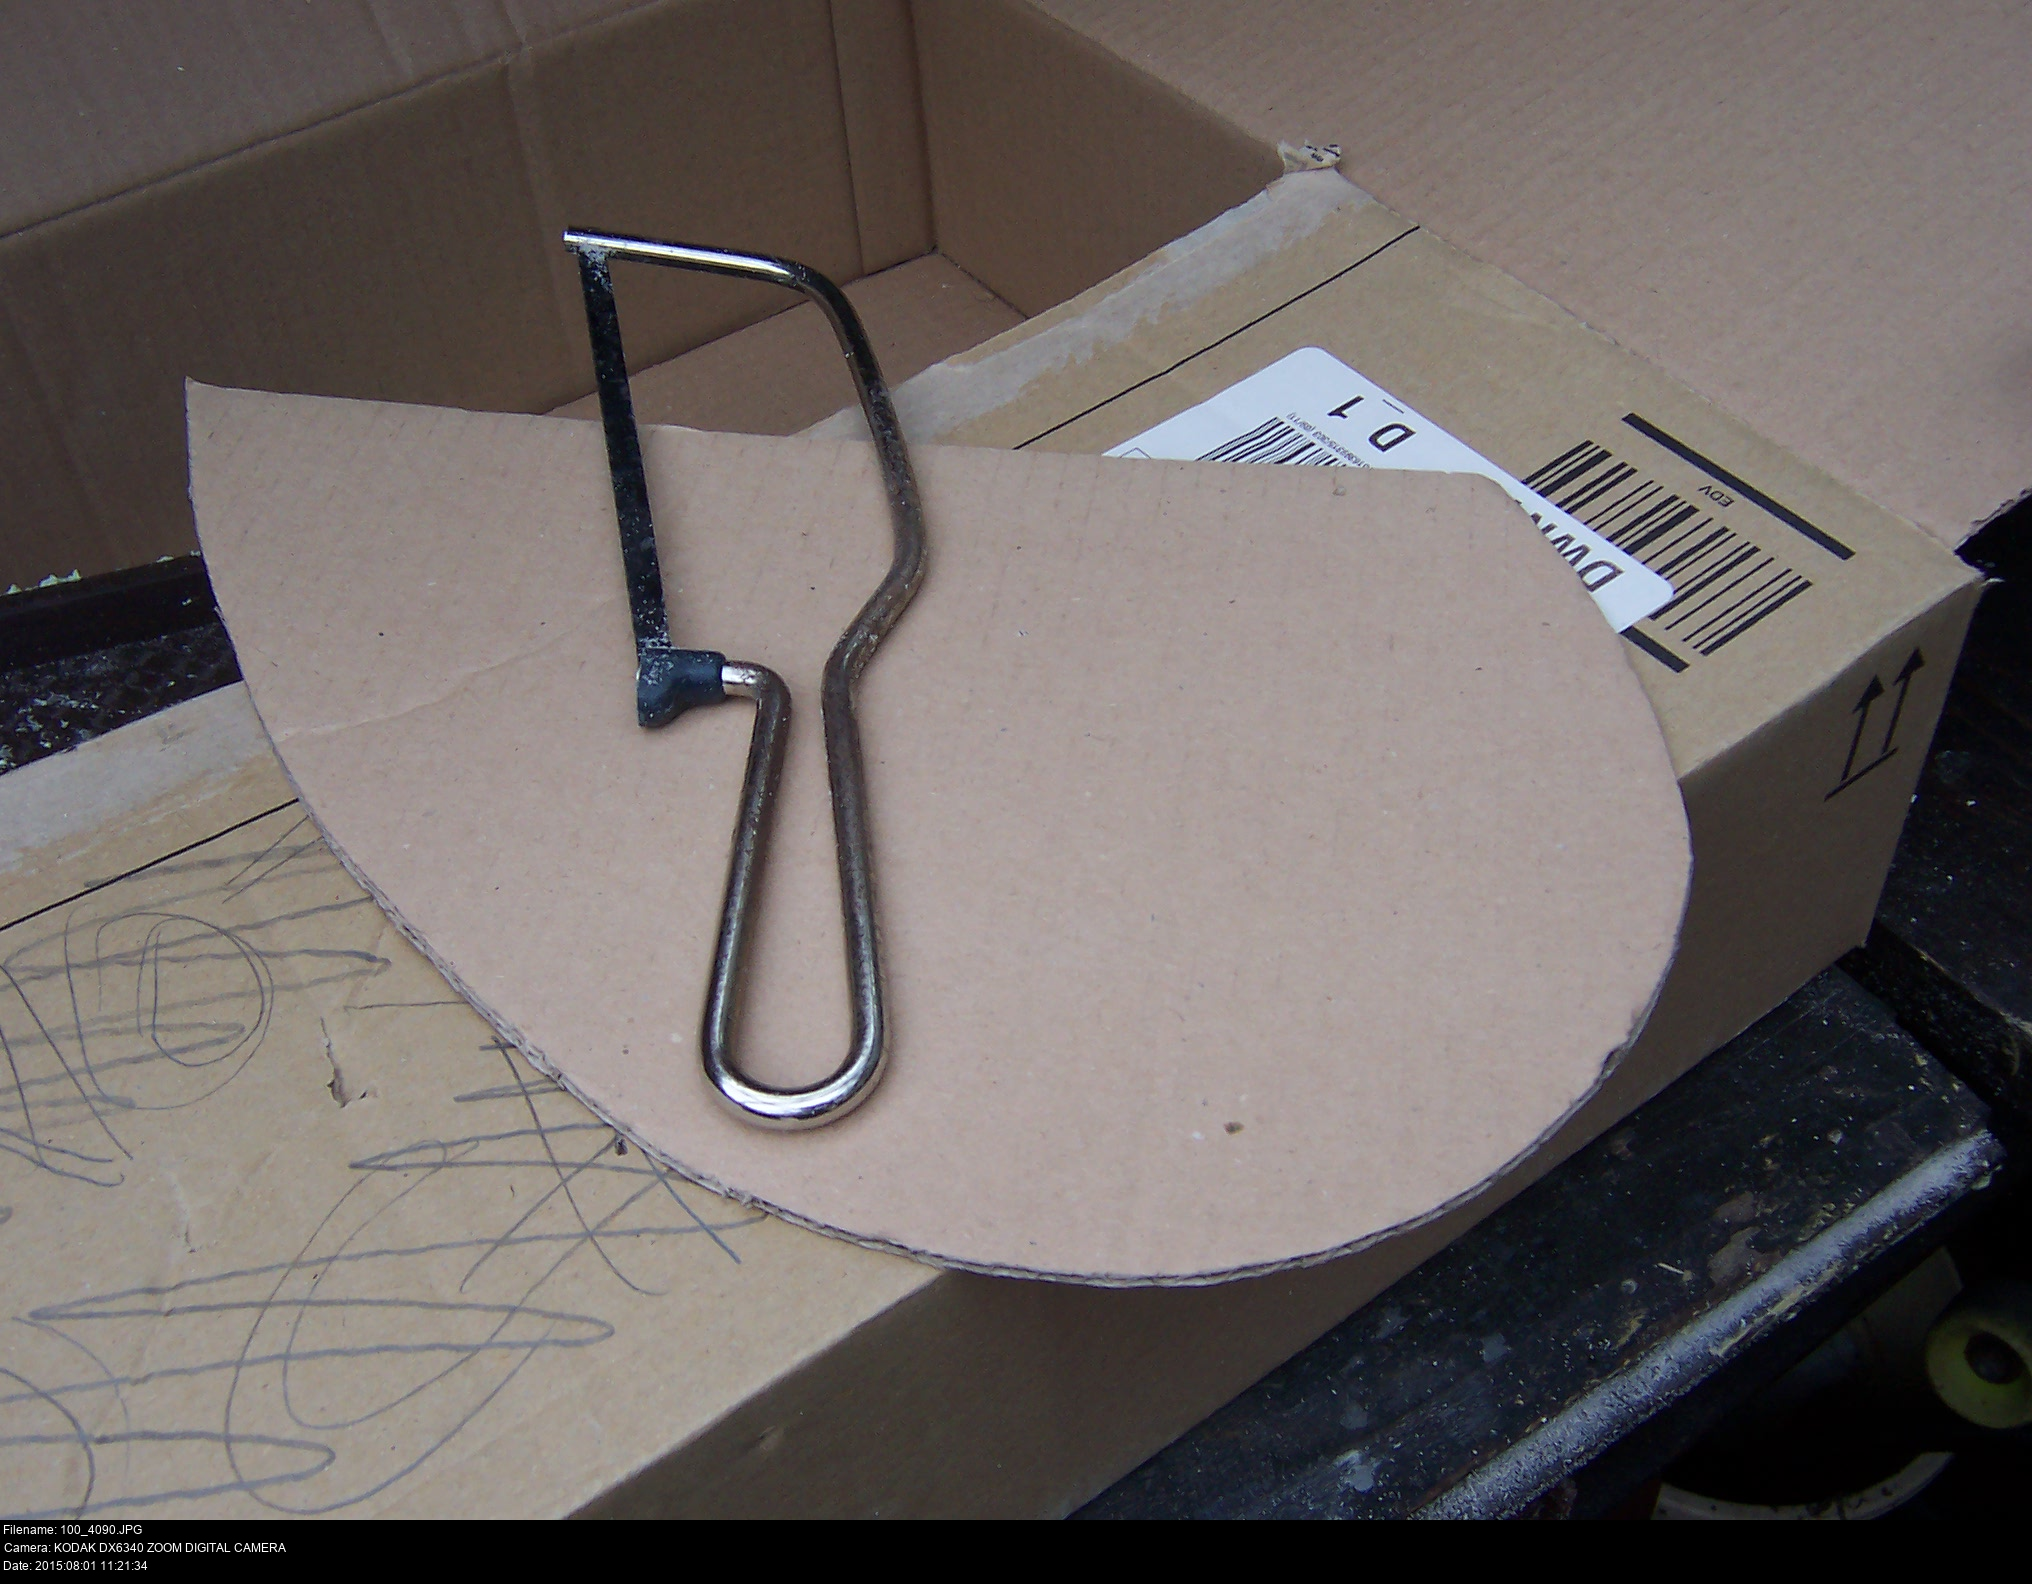
Next step is figuring out where the eyes can go. You'll first need to find out the appropriate distance between the holes.
Make yourself an eye measuring gizmo out of card. It'll look like this.

The idea is that you hold the card up in front of your face like a mask and look through the holes. Cover up some of the holes to find a pair that you're comfortable looking through. Now you can measure the distance to find out how far apart the eyeholes in your mask should be. You might need a few attempts if you end up looking directly at a boundary between holes. When you're done, you should have comfortable view through the card. In my case the distance was 7 centimetres.
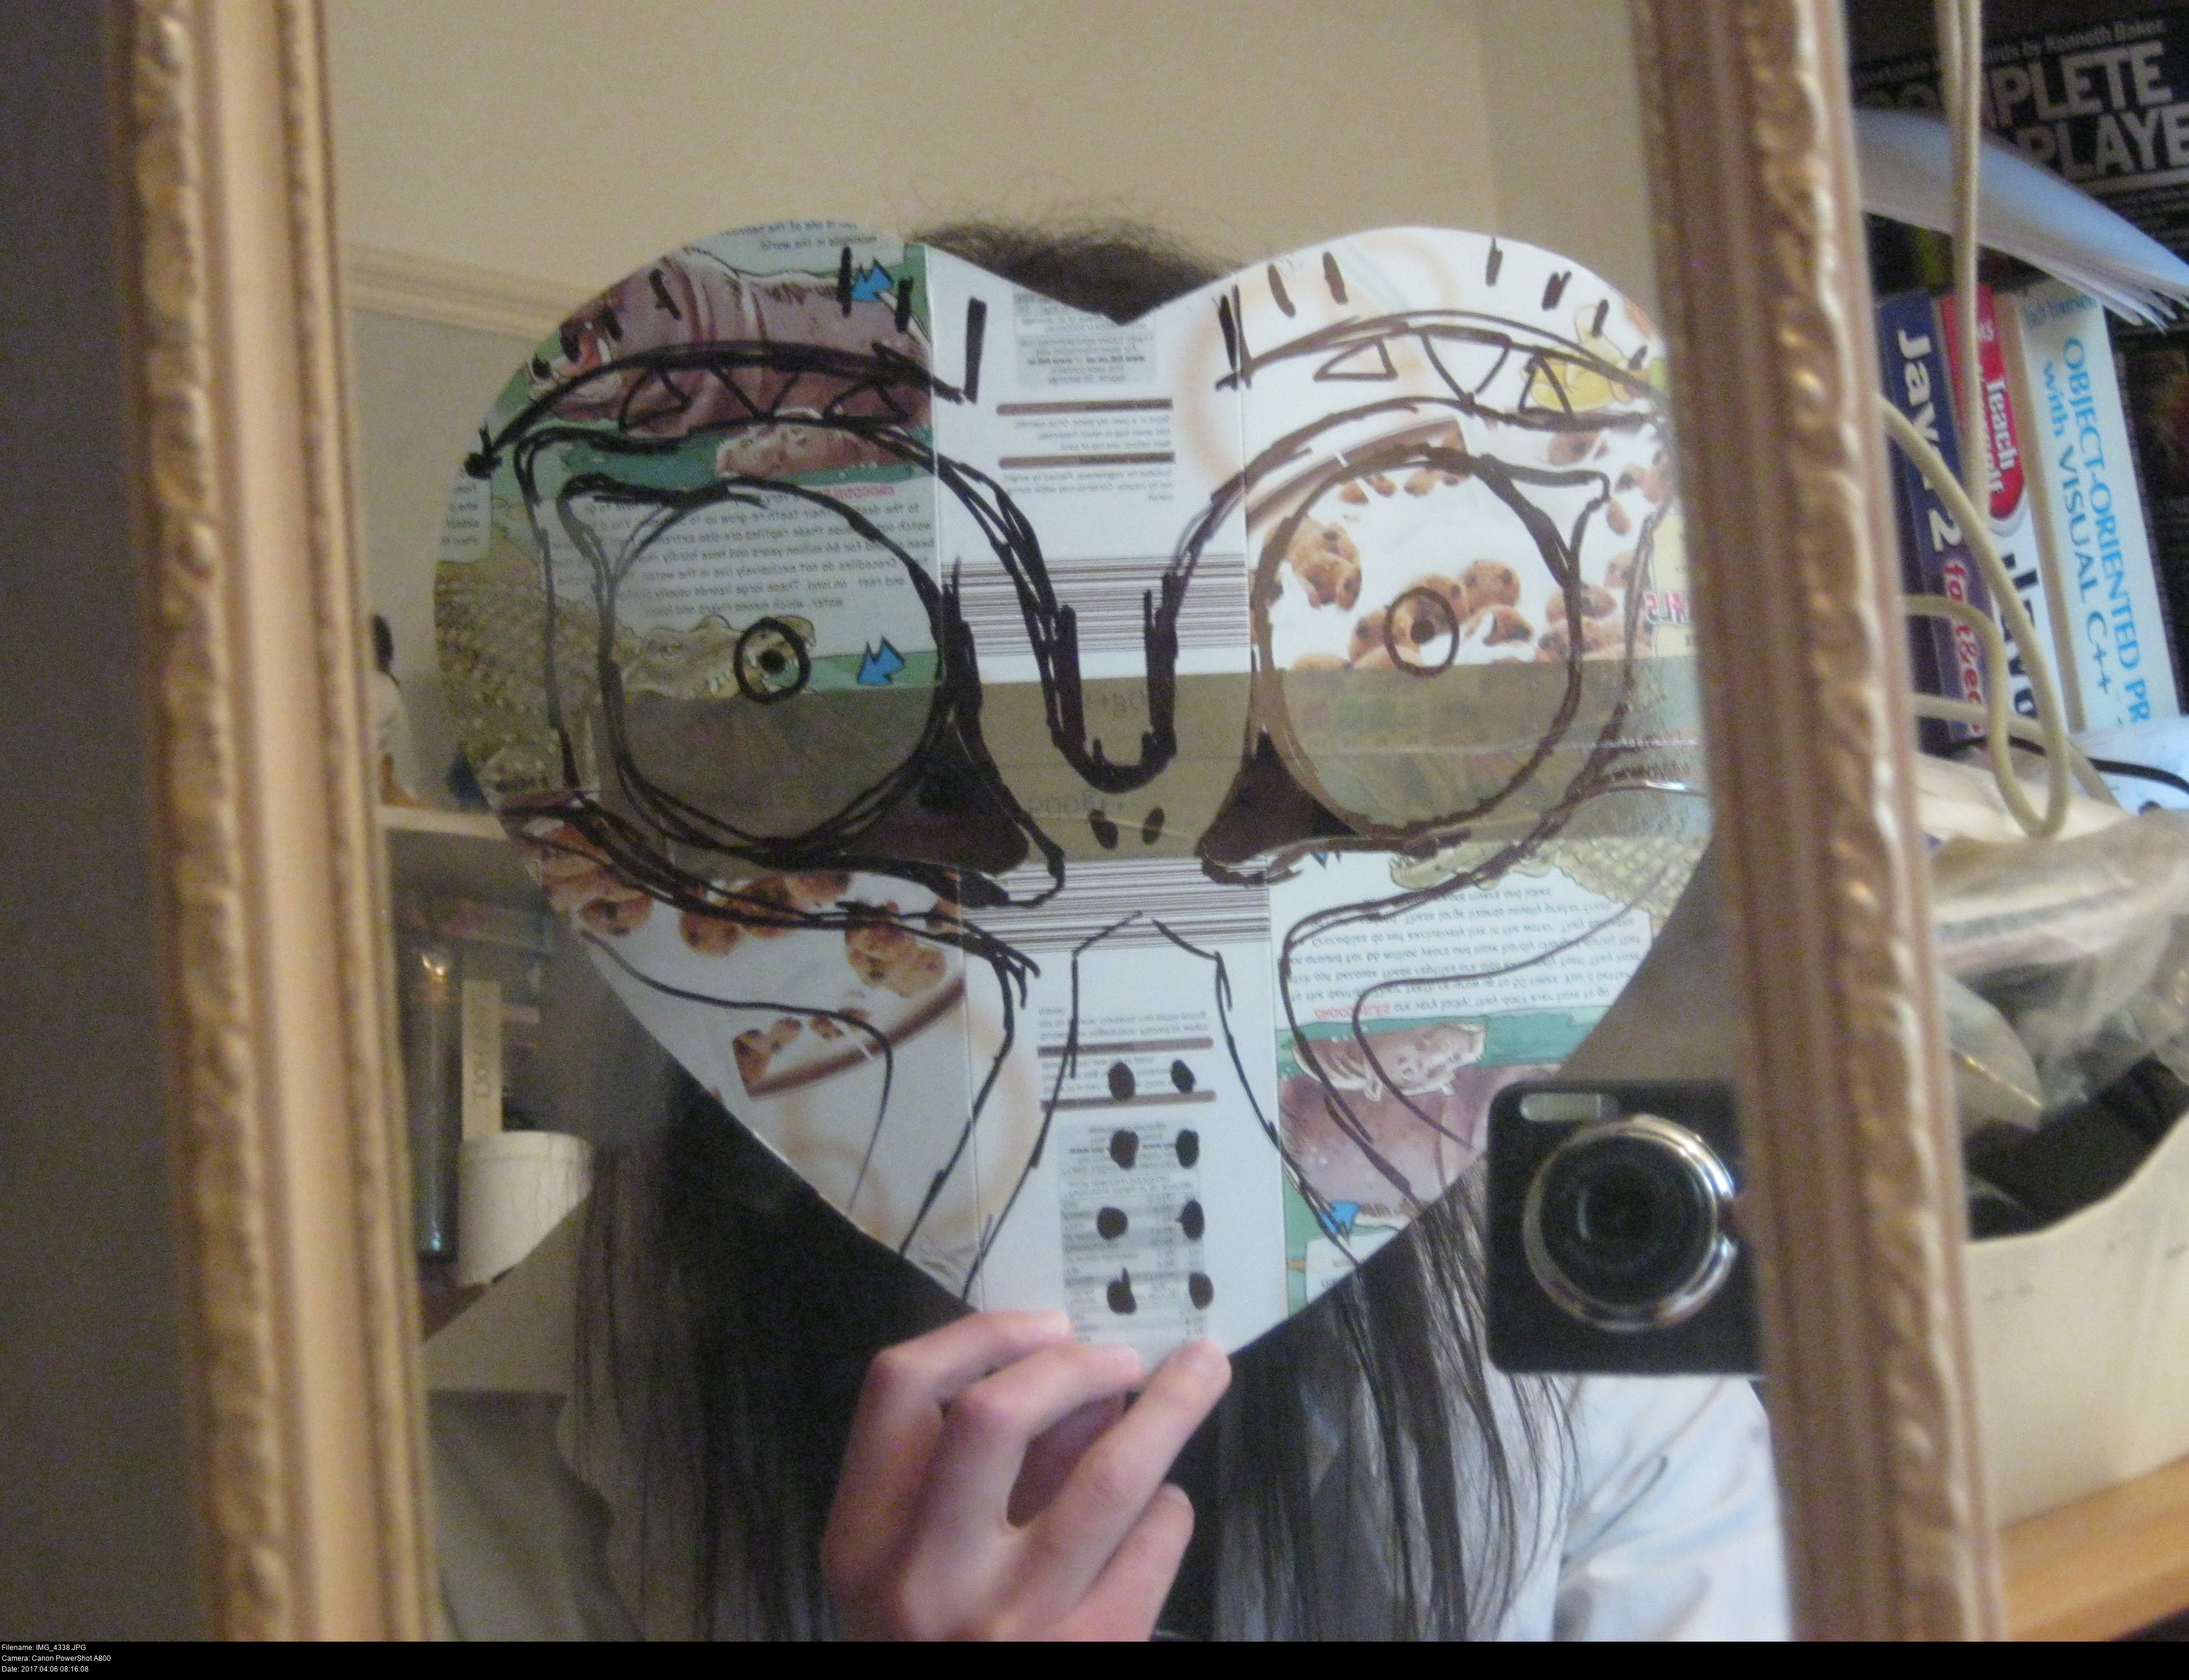
Now you can start making card prototypes of the mask to experiment with the correct vertical placement of the holes. Use tape or elastic or anything you can find to make prototypes of the mask that you're comfortable wearing and seeing through.


Ta-dah!
Isn't it awfully convenient how the 'tear duct' areas of Majora's Mask match up almost exactly to where the wearer's eyes could go? I'm not complaining! (I got that idea from somebody else though.)
Don't forget that you've got to put a strap somewhere on this thing. If the strap overlaps where your eyes are, you'll have to put holes in the strap, as well as do something to stop loose elastic threads going in your eye. I'm going to try to put the strap just above the eyes so its tight around my forehead. That means that the mask will be vulnerable to being lifted up and off my head, and if the interior of the mask is shaped badly or the elastic is too tight, the tension might make it slip off.
When you've planned all you can, you need to do some work!
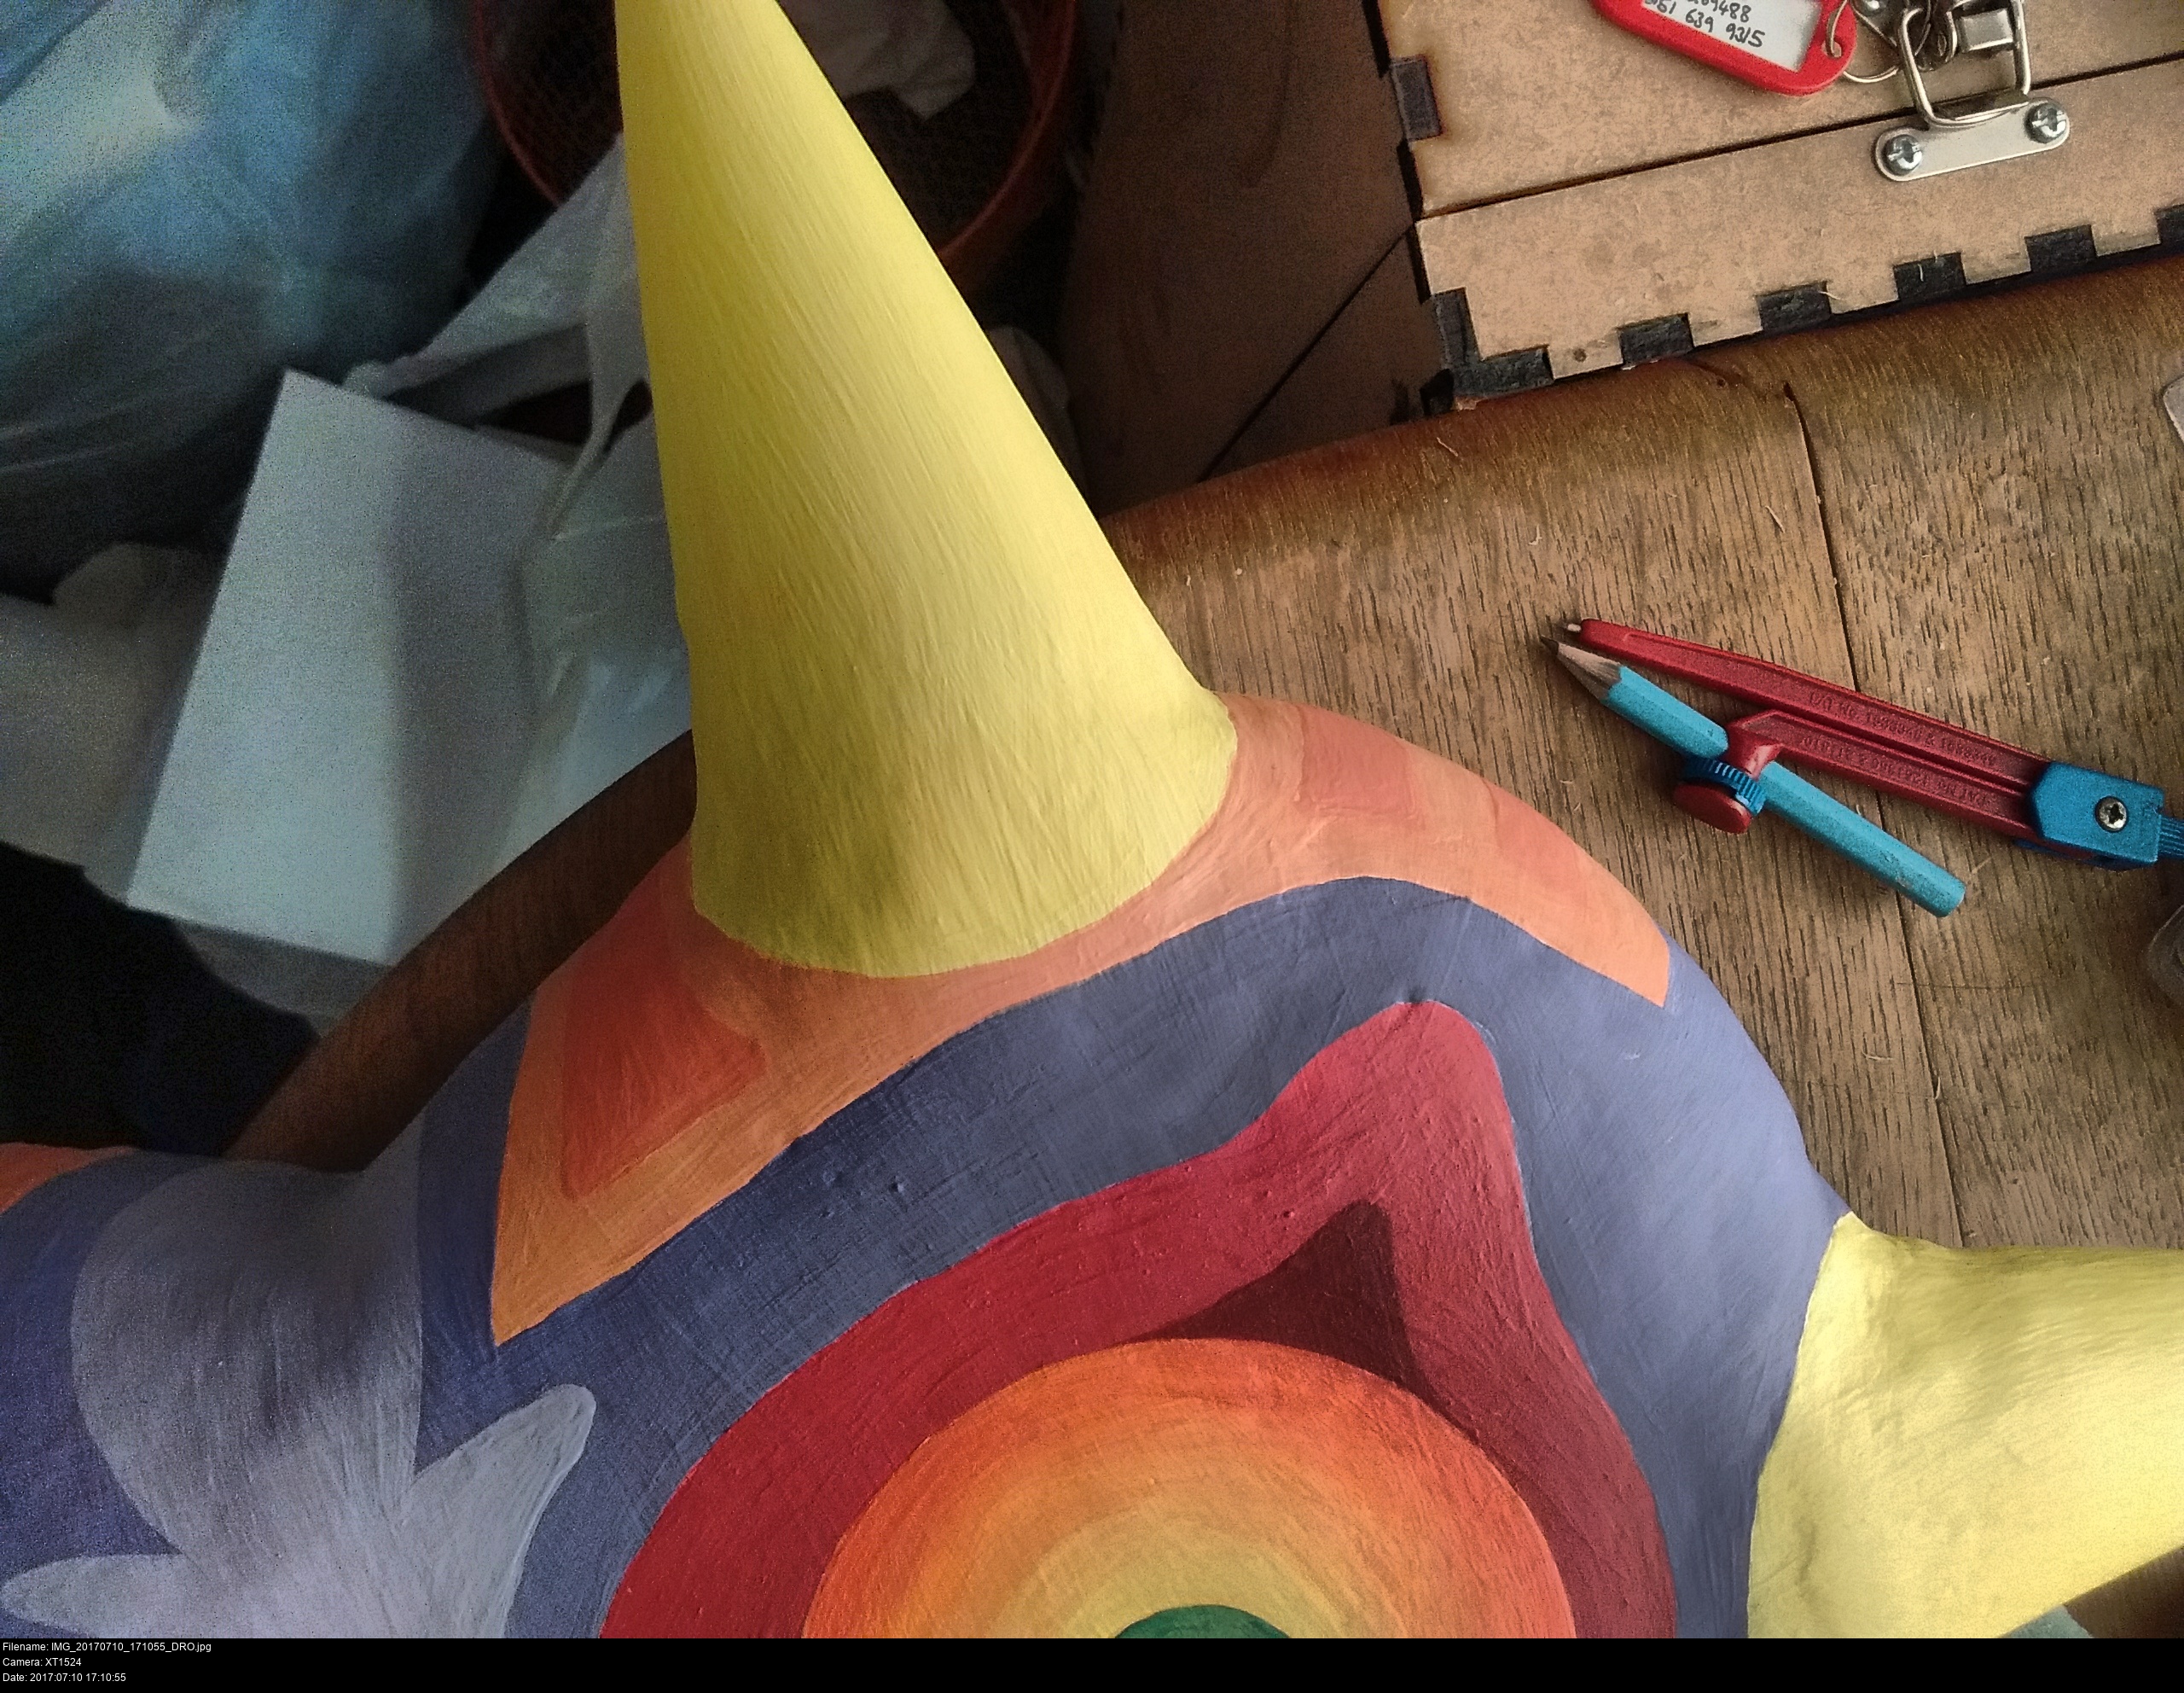
I've decided that I'm going to attach the horns to the mask before I do any surface sealing on the body piece. (I haven't yet figured out how I'm going to do that, to tell the truth.)
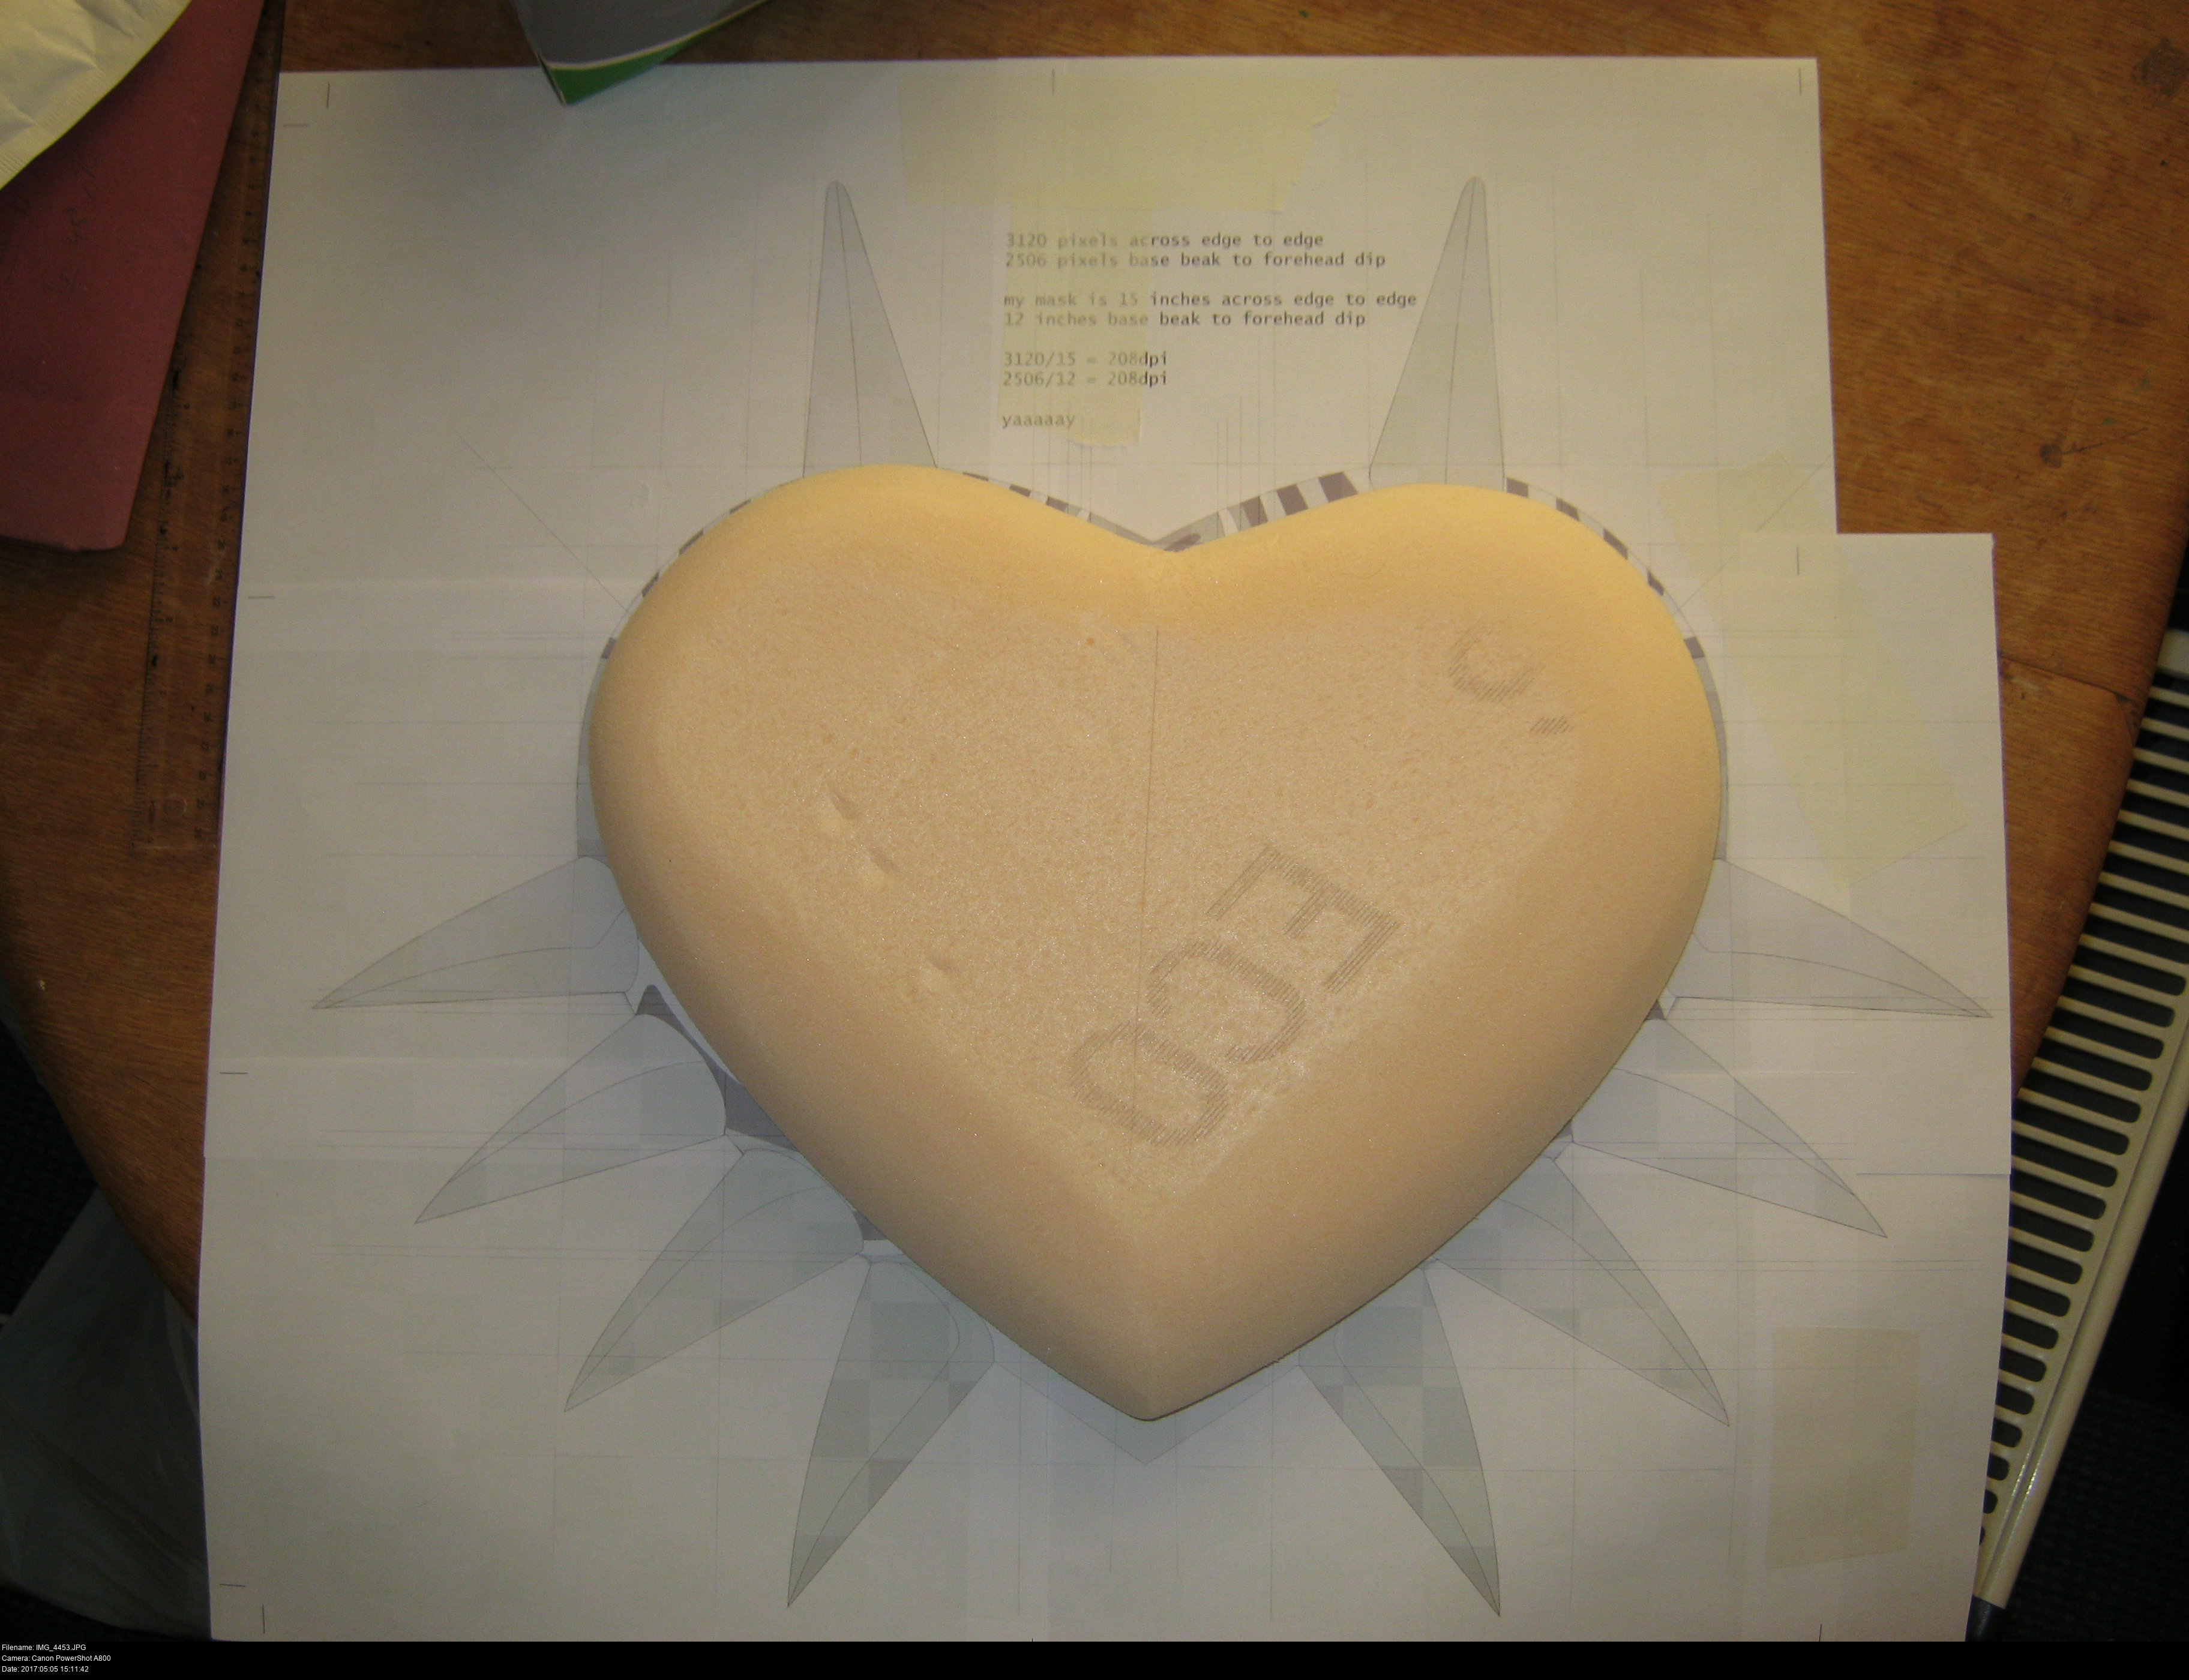
Here's another rasterbated print out of the mask design with the foam mask on top. The size is alright so far, at least. Perhaps it's a little small. There's not a lot you can do to make it bigger, save for lots of surfacing work, so you should be happy with the results of each stage before you move on.

While all that excitement is happening, let's do some experimentation with primers. Here's an offcut block of XPS foam. I'm going to spray some generic all-purpose primer onto the block and see what effect it has.
Oh, it melts it completely, just like Evostik Contact Adhesive and high-strength spray adhesive do. The moral: -you cannot use any spray product on XPS foam-. No primers, no paints, no varnishes. Don't even try it, it won't work.
Notice the small wooden sticks in the background of the first picture. They're very important!


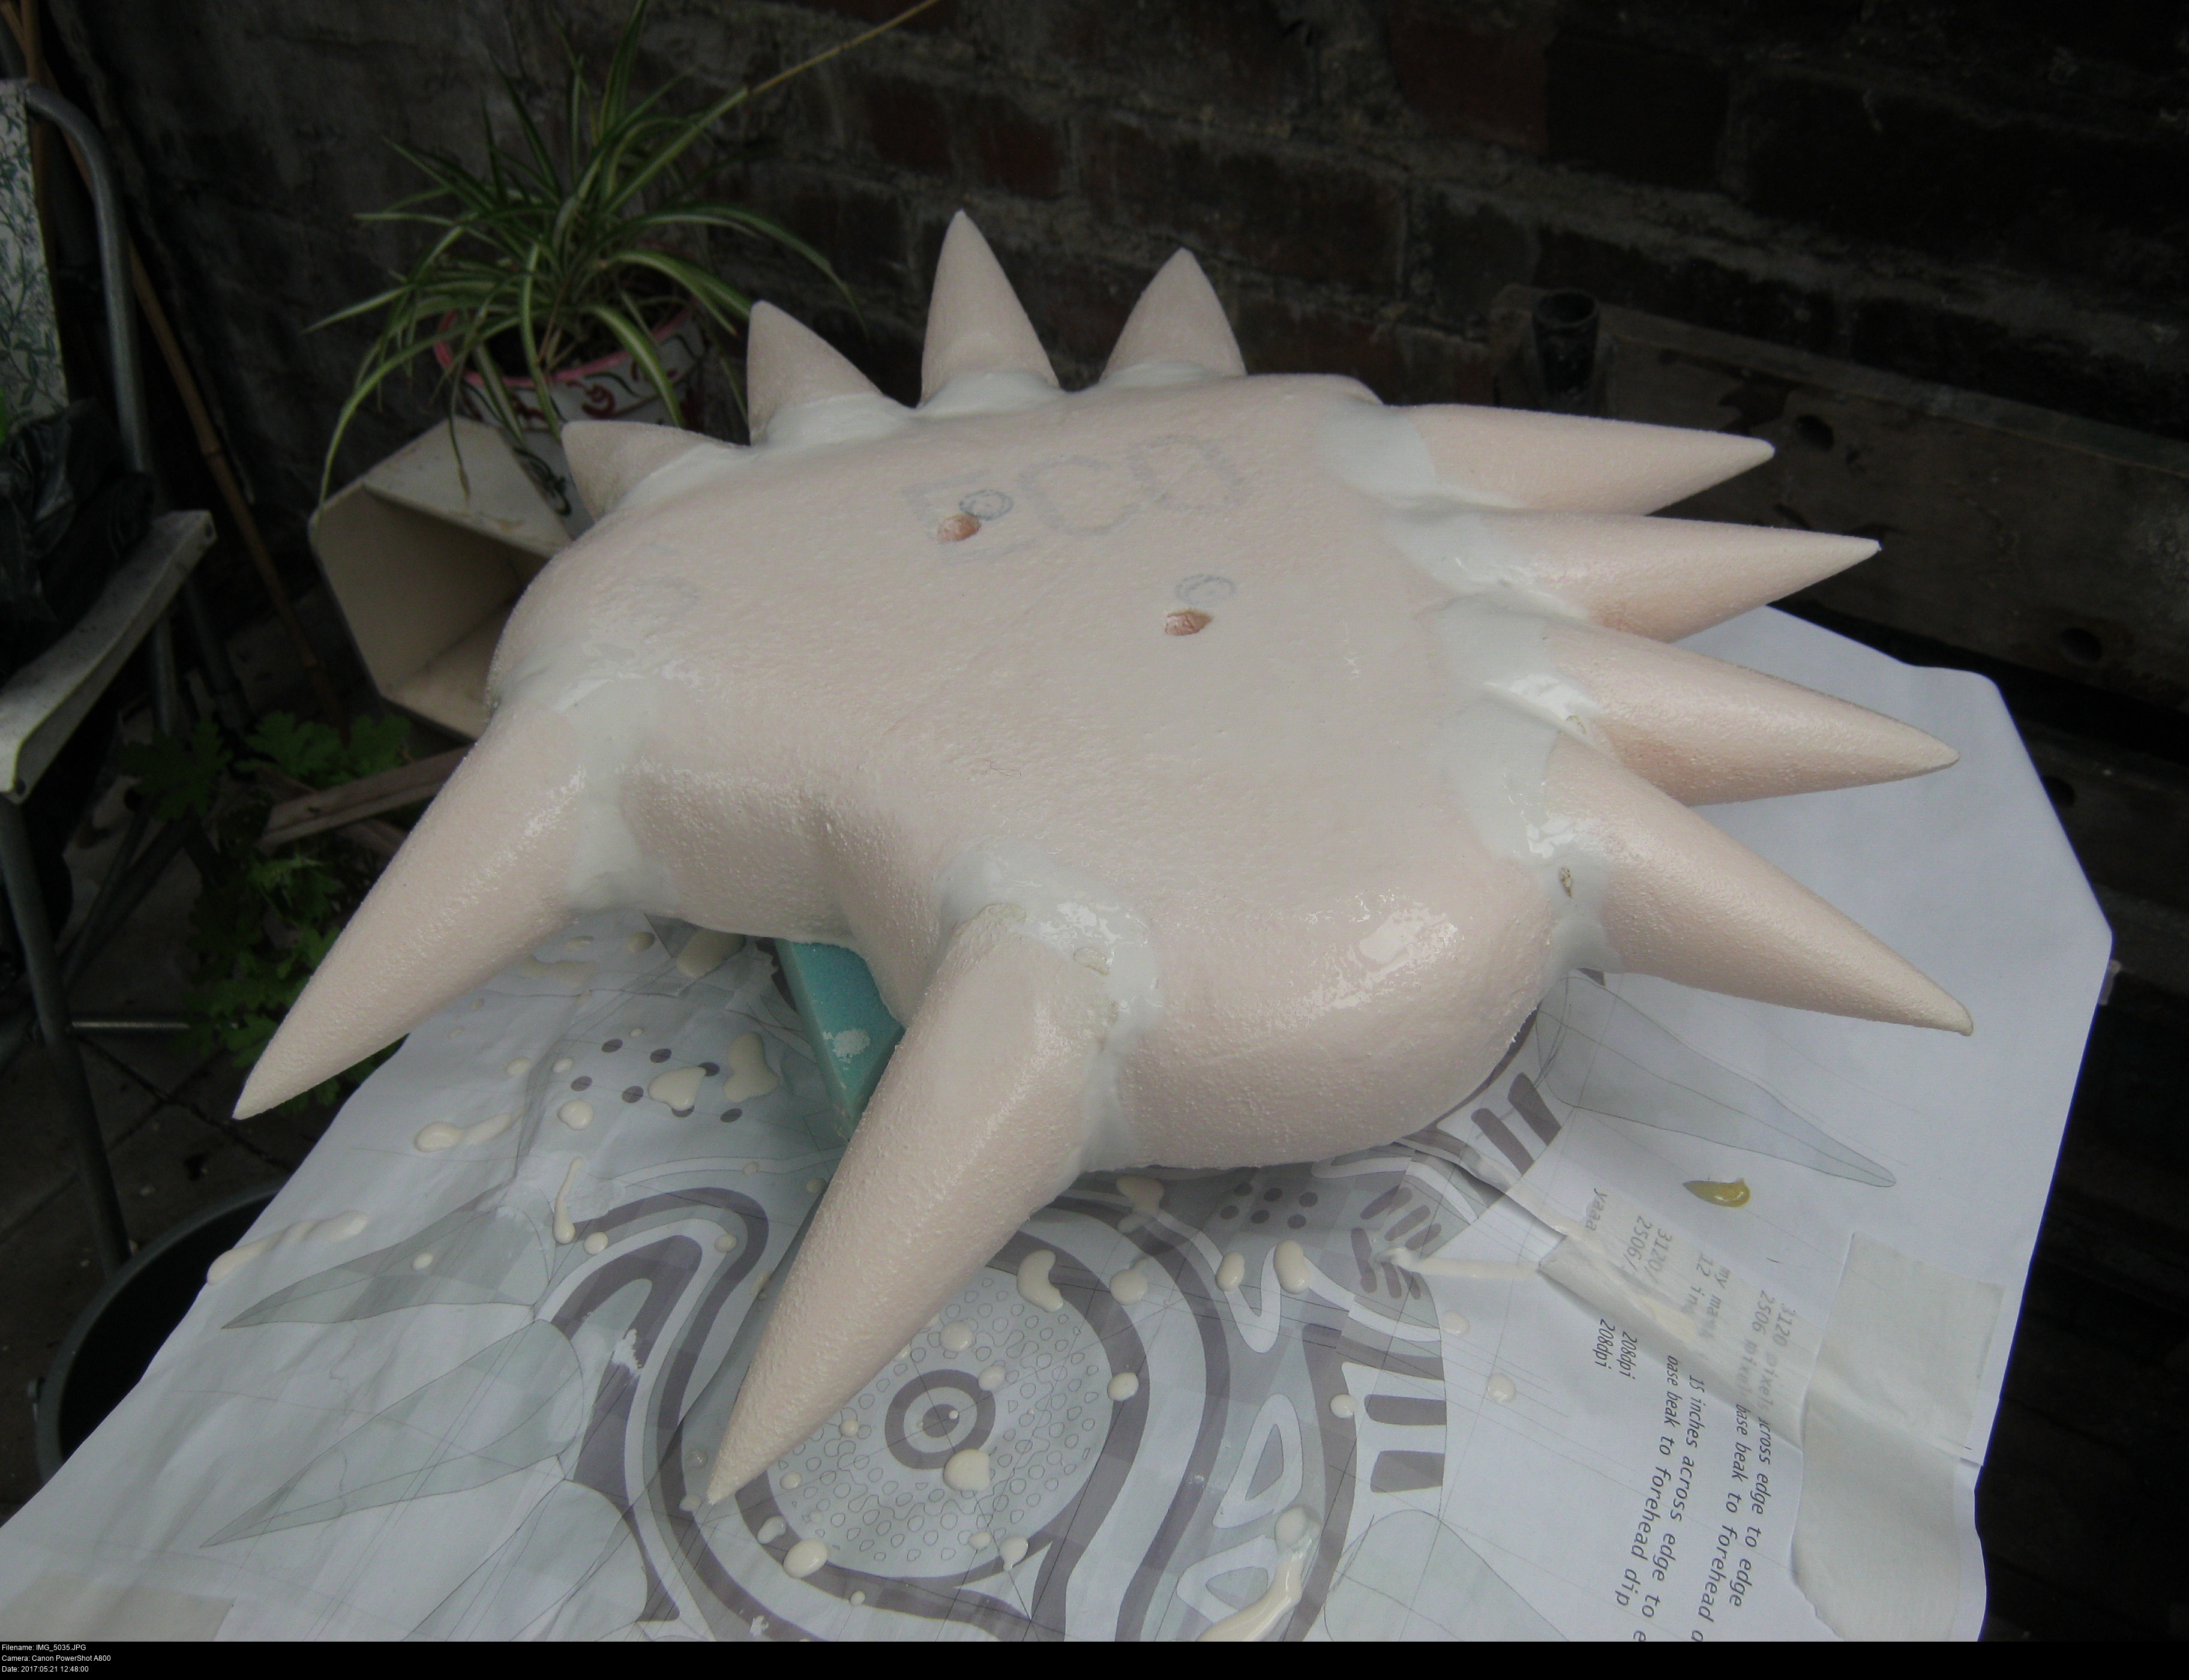
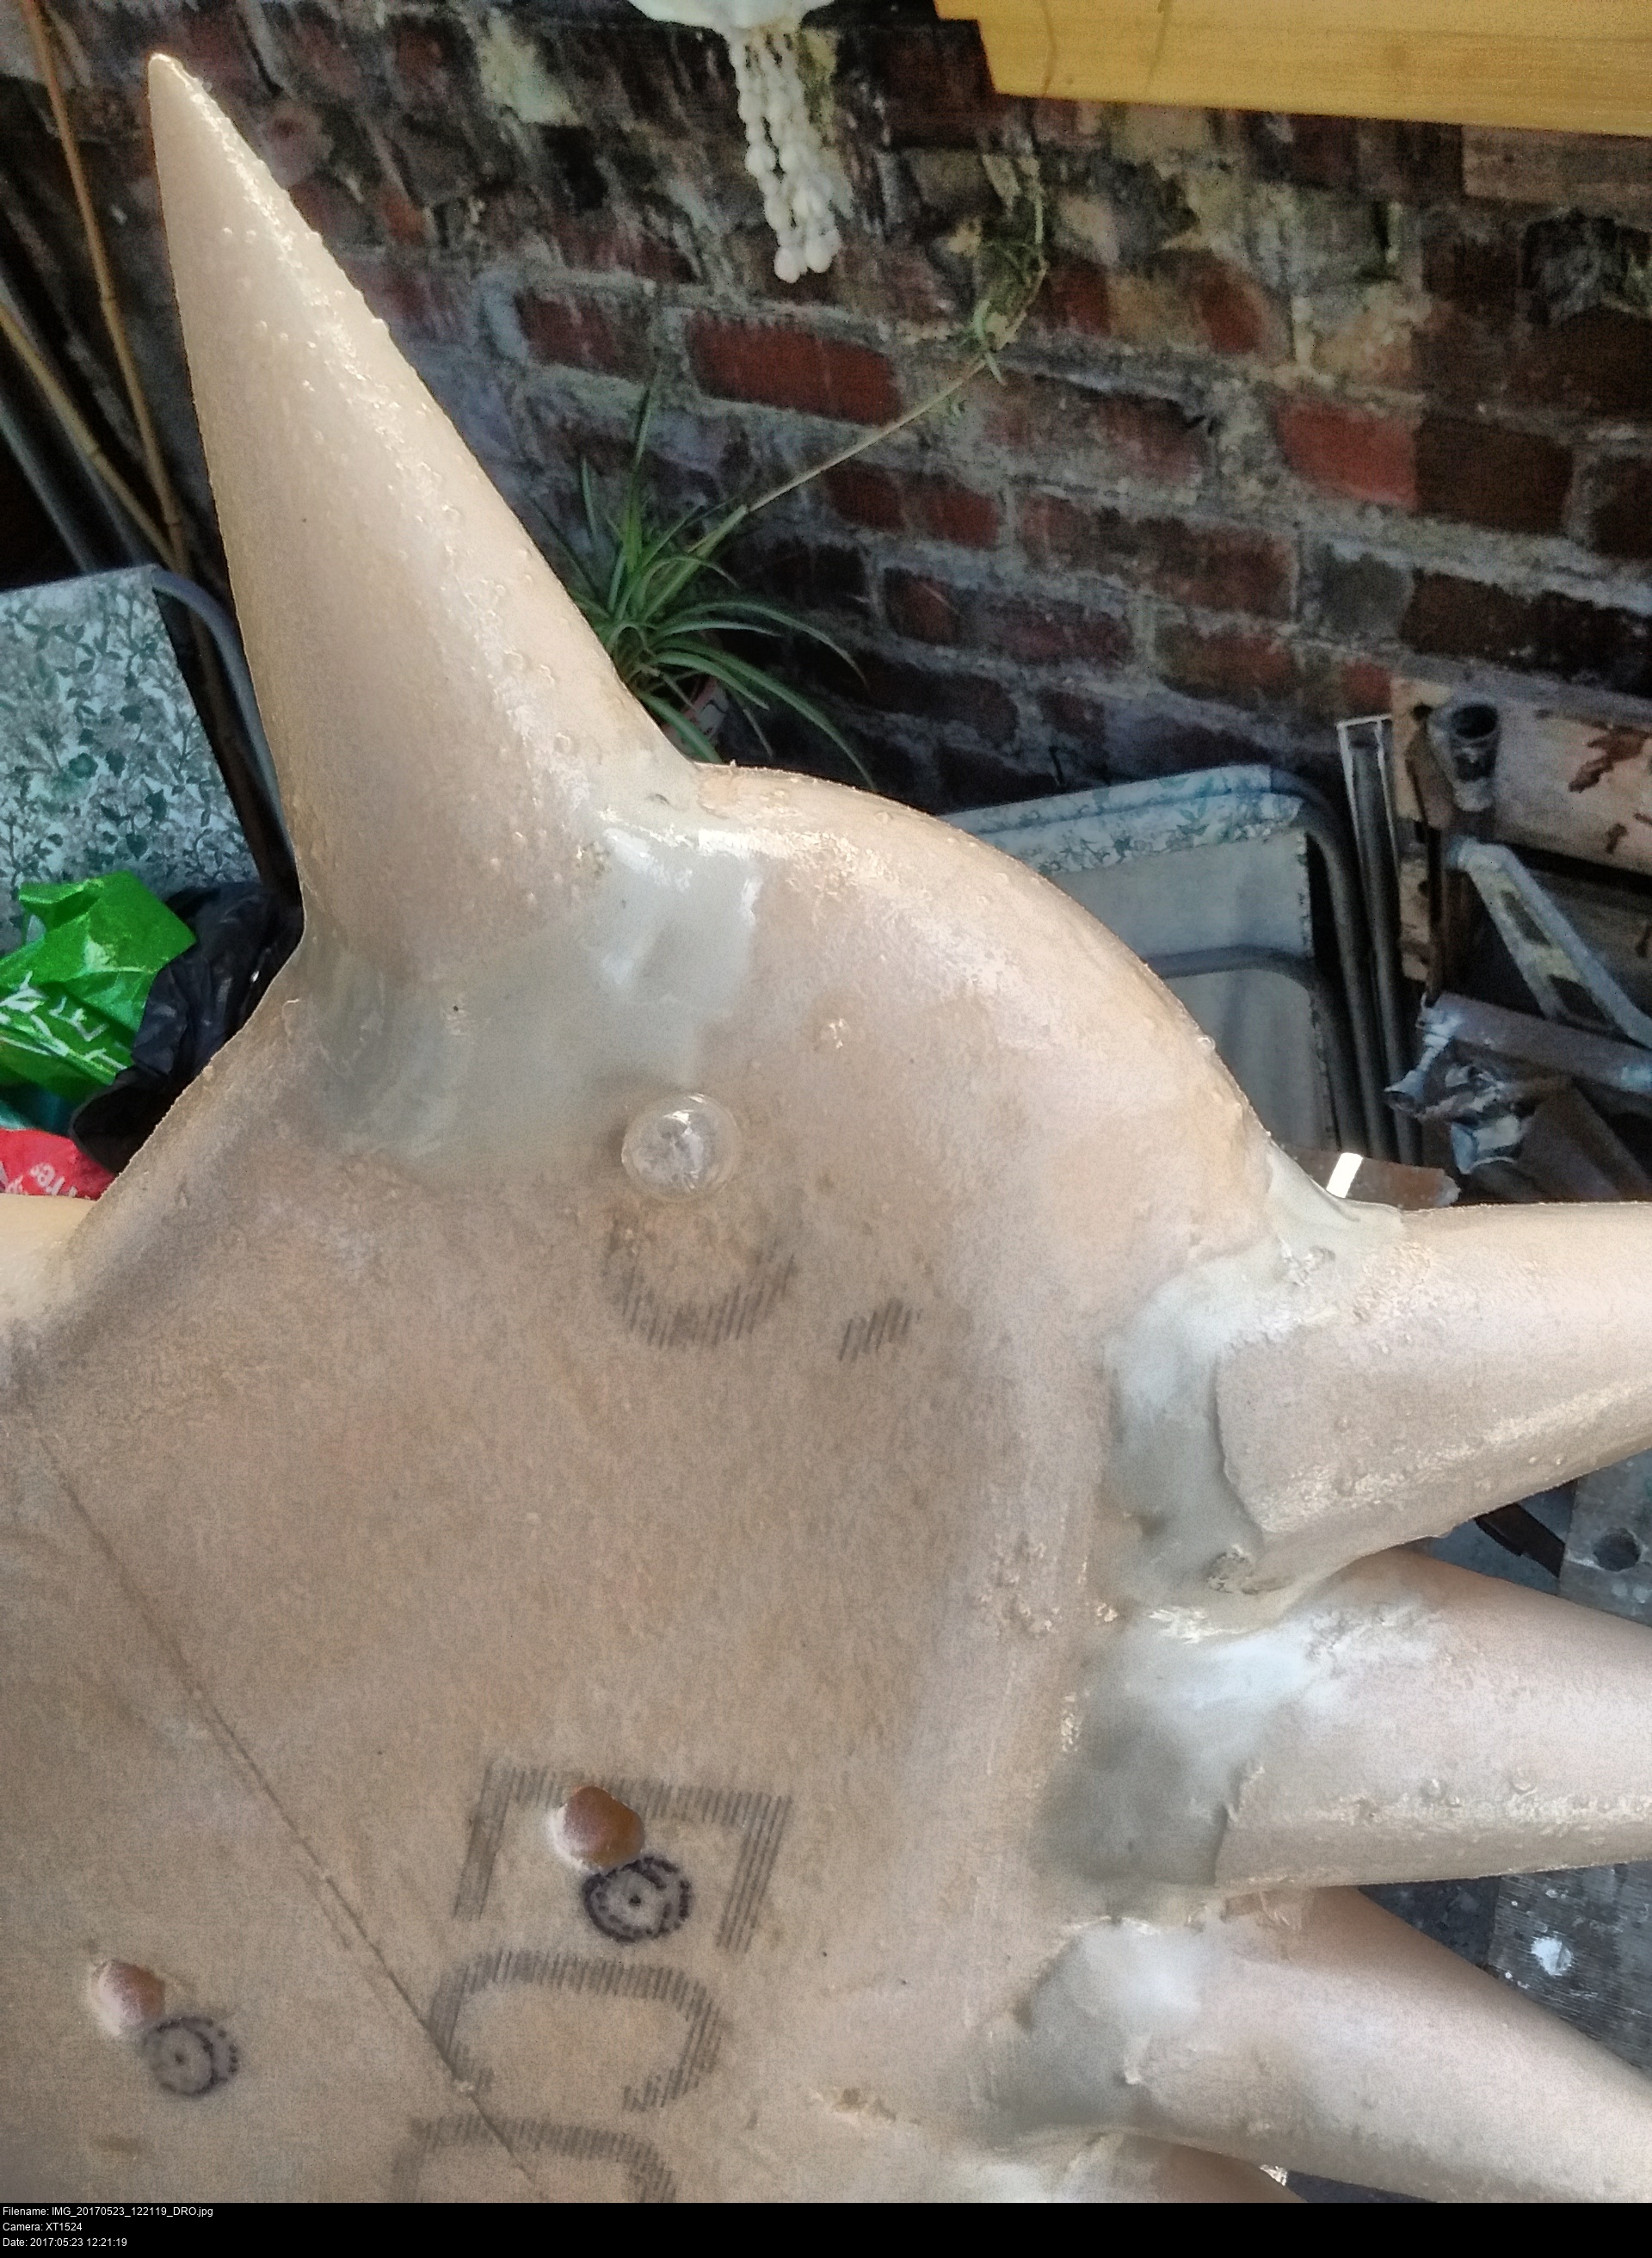
I'm gluing the horns onto the mask now, using the printed design as a guide. If you read my other page, you'll know that Gorilla Glue doesn't just expand when it activates, it -expands-. You -need- to secure it. For this mask, I've used thin wooden skewers chopped to a small size (three inches) to hold the horns in place during the gluing. They're pushed firmly into the base of the horns, then forced into the mask body. At this point they can be rotated and adjusted any number of times before the glue is applied.
Once again the mask isn't entirely accurate to the original material since the horns are straight cones instead of curved cones, but trying to consistently sand a smooth curved horn from a cone is really difficult, and the visual difference is minimal.

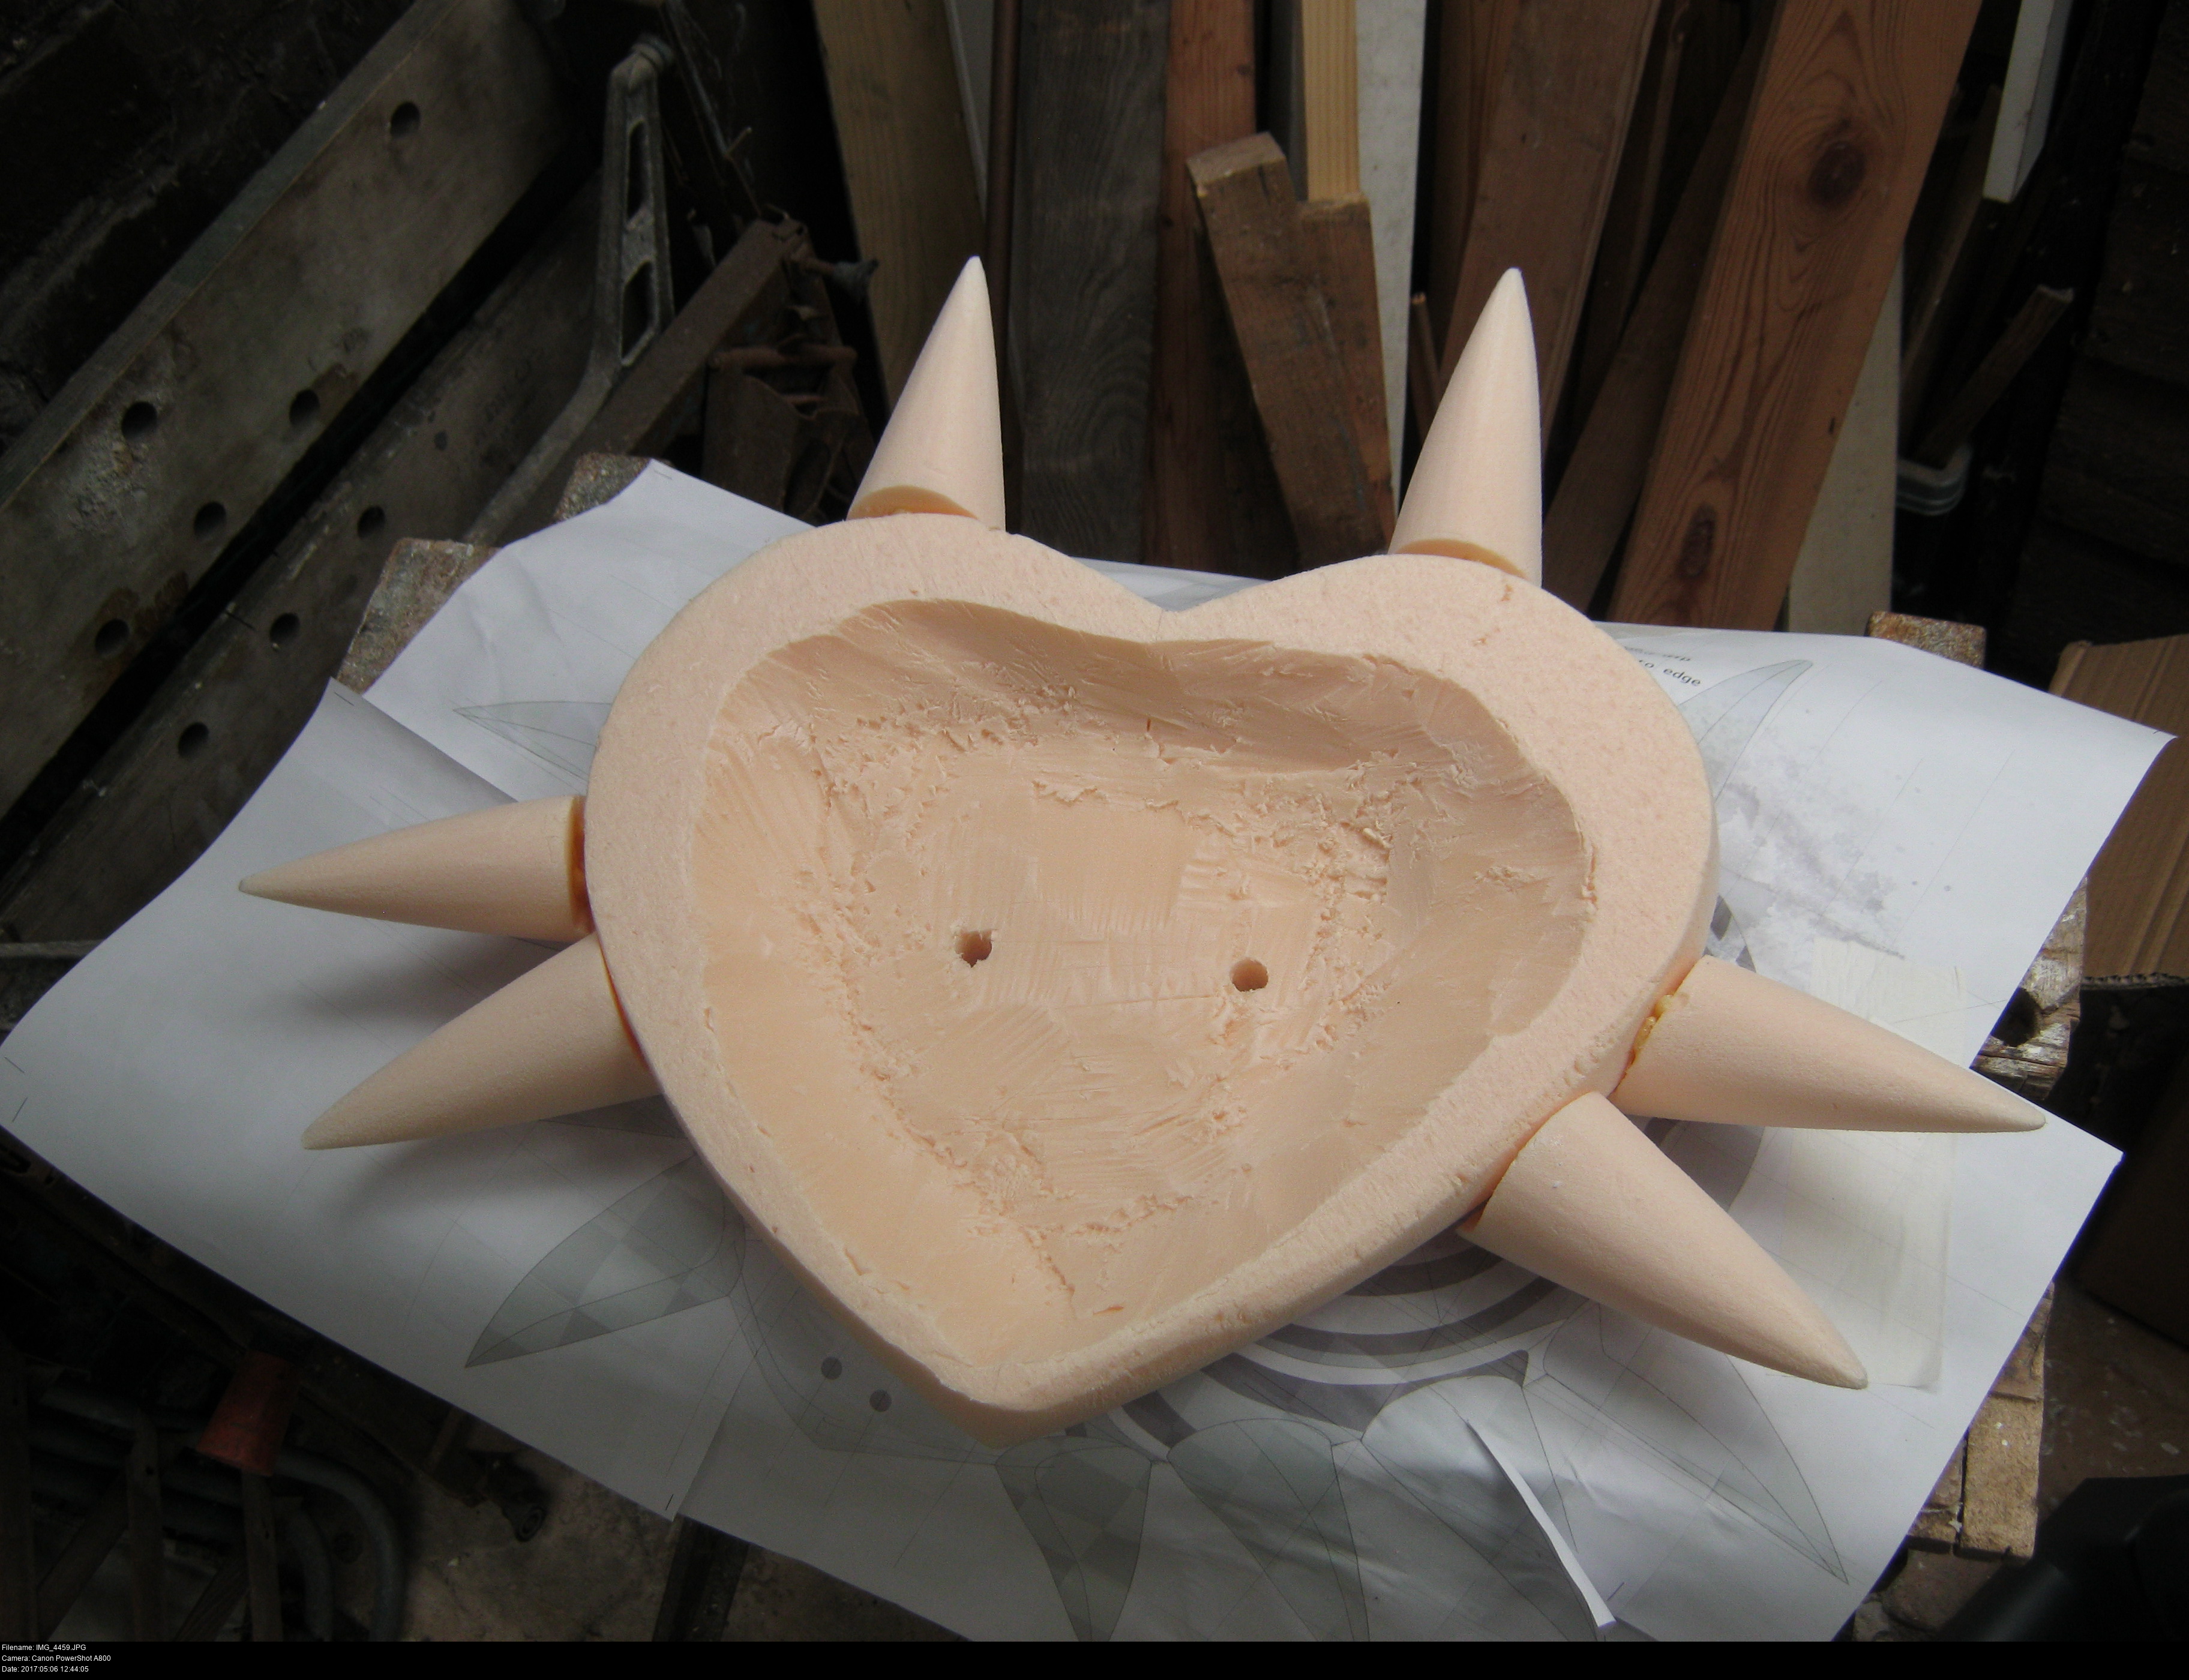
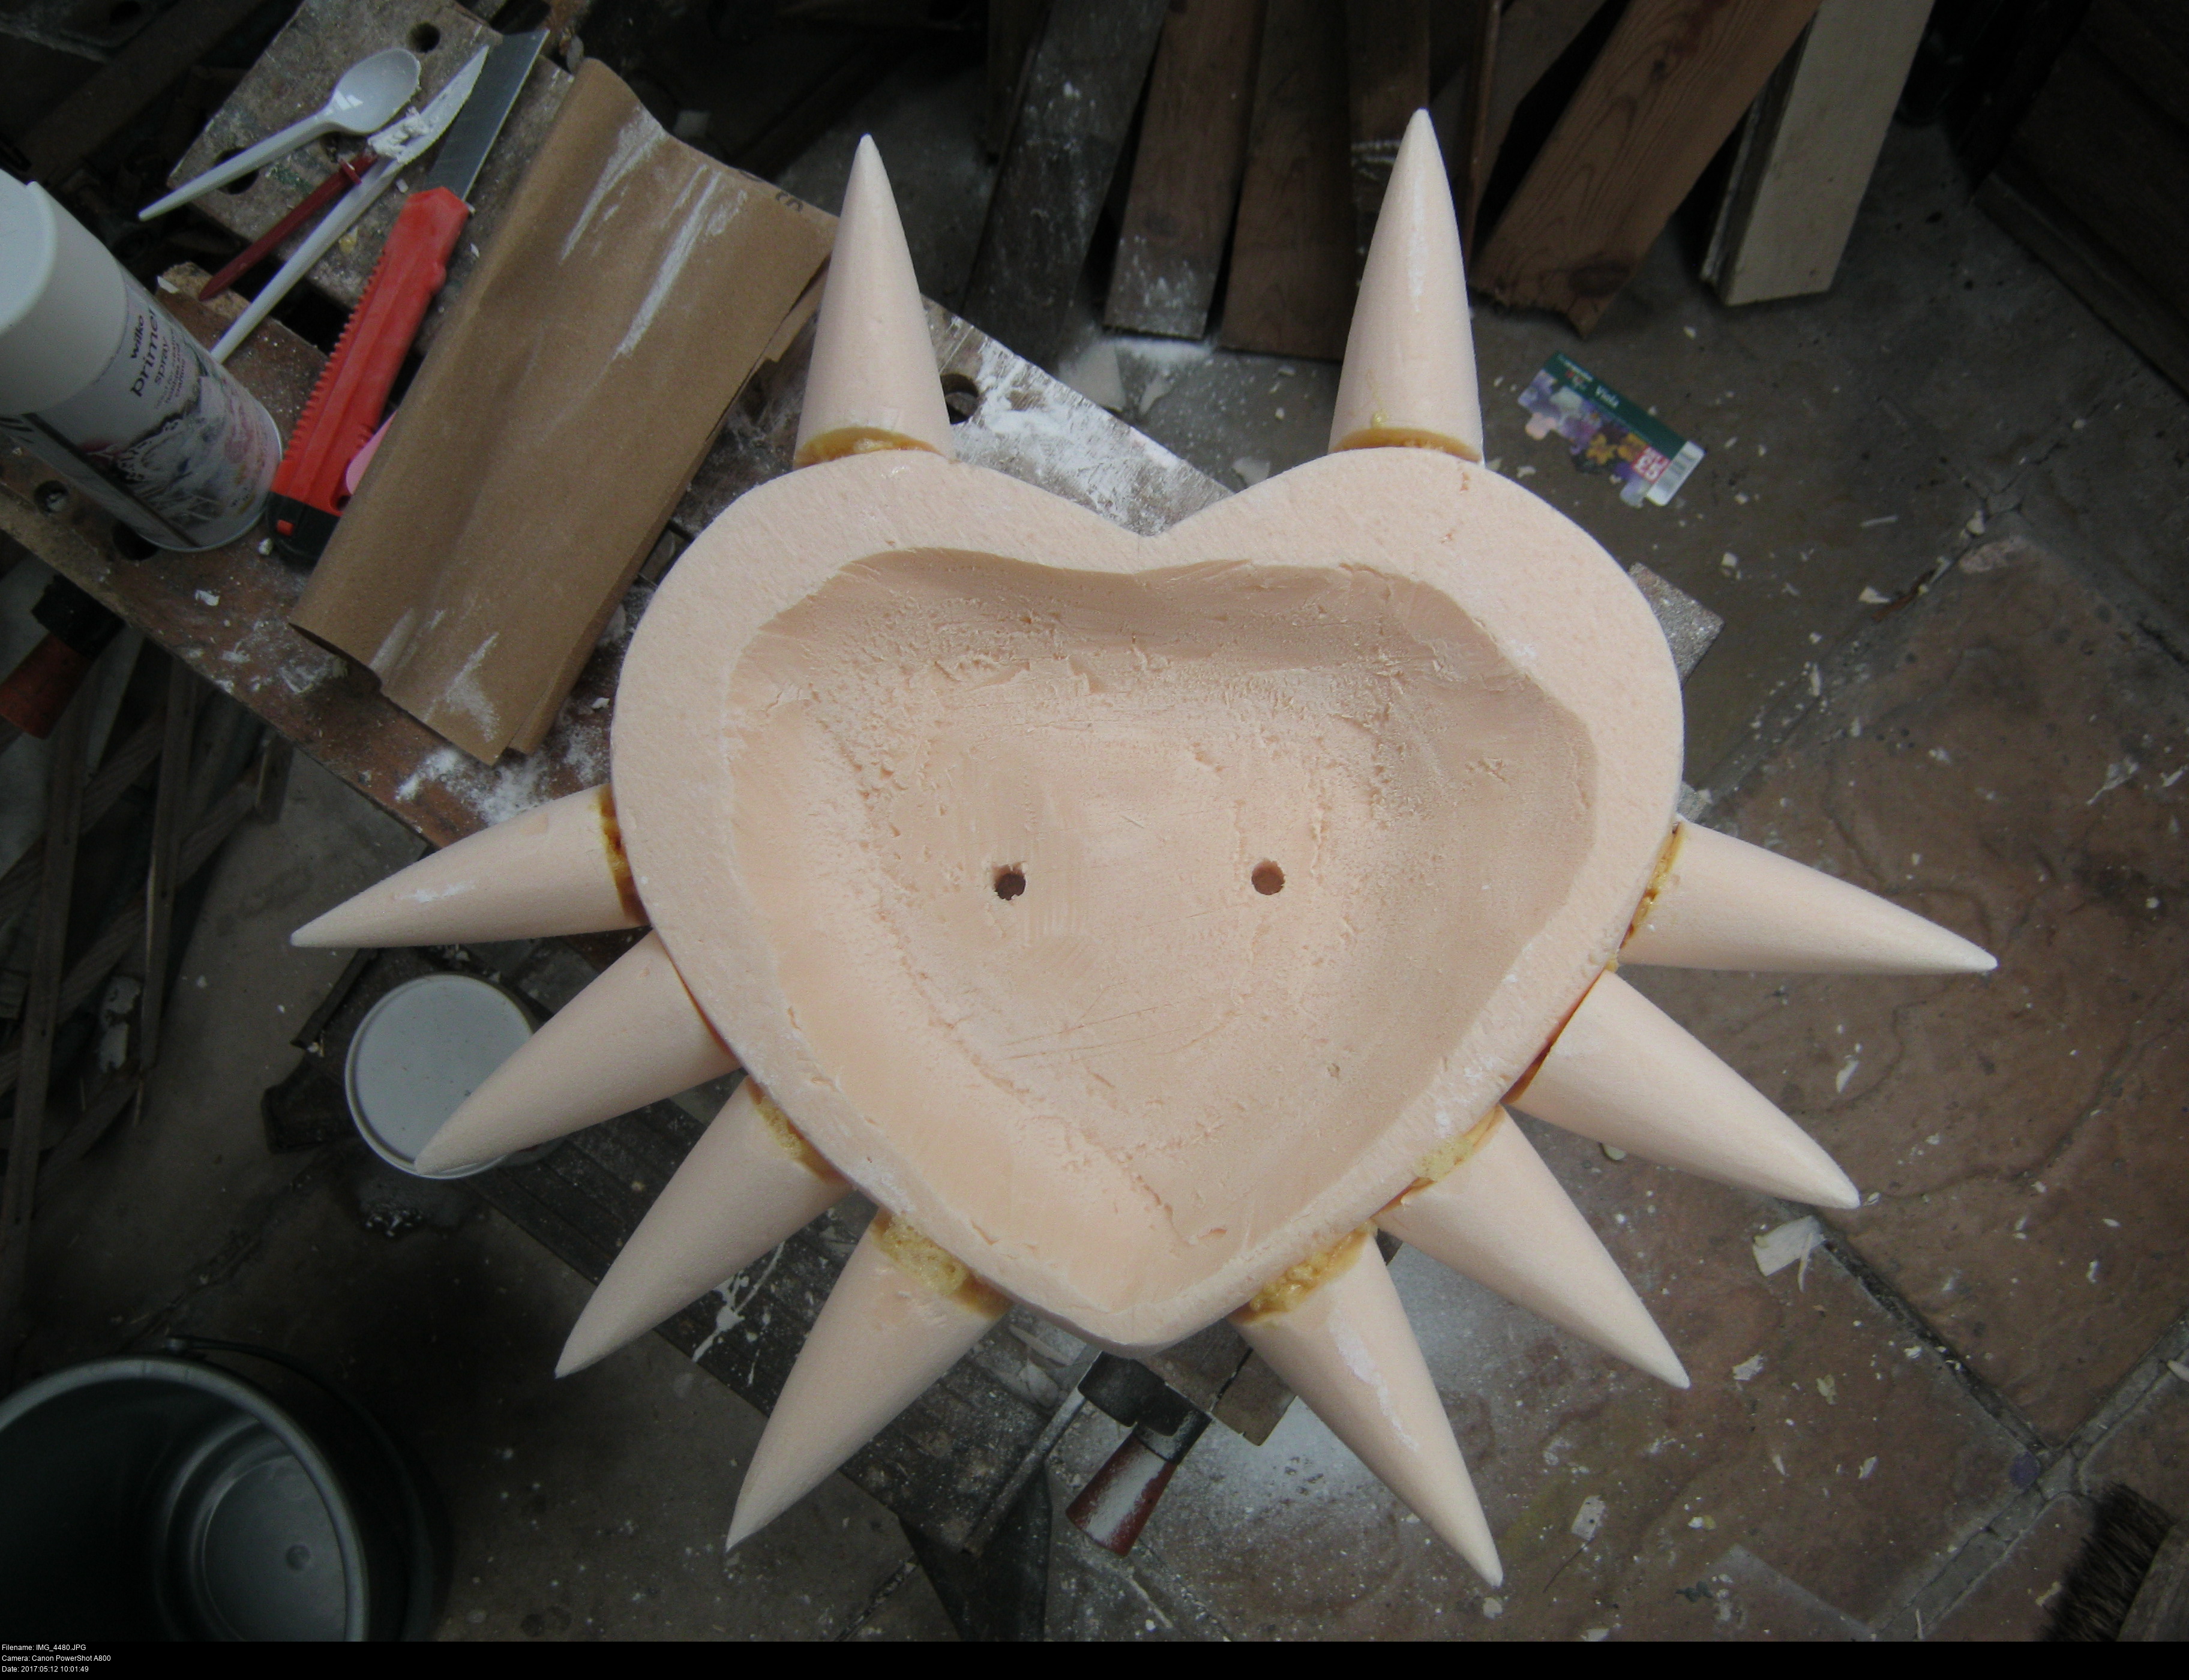
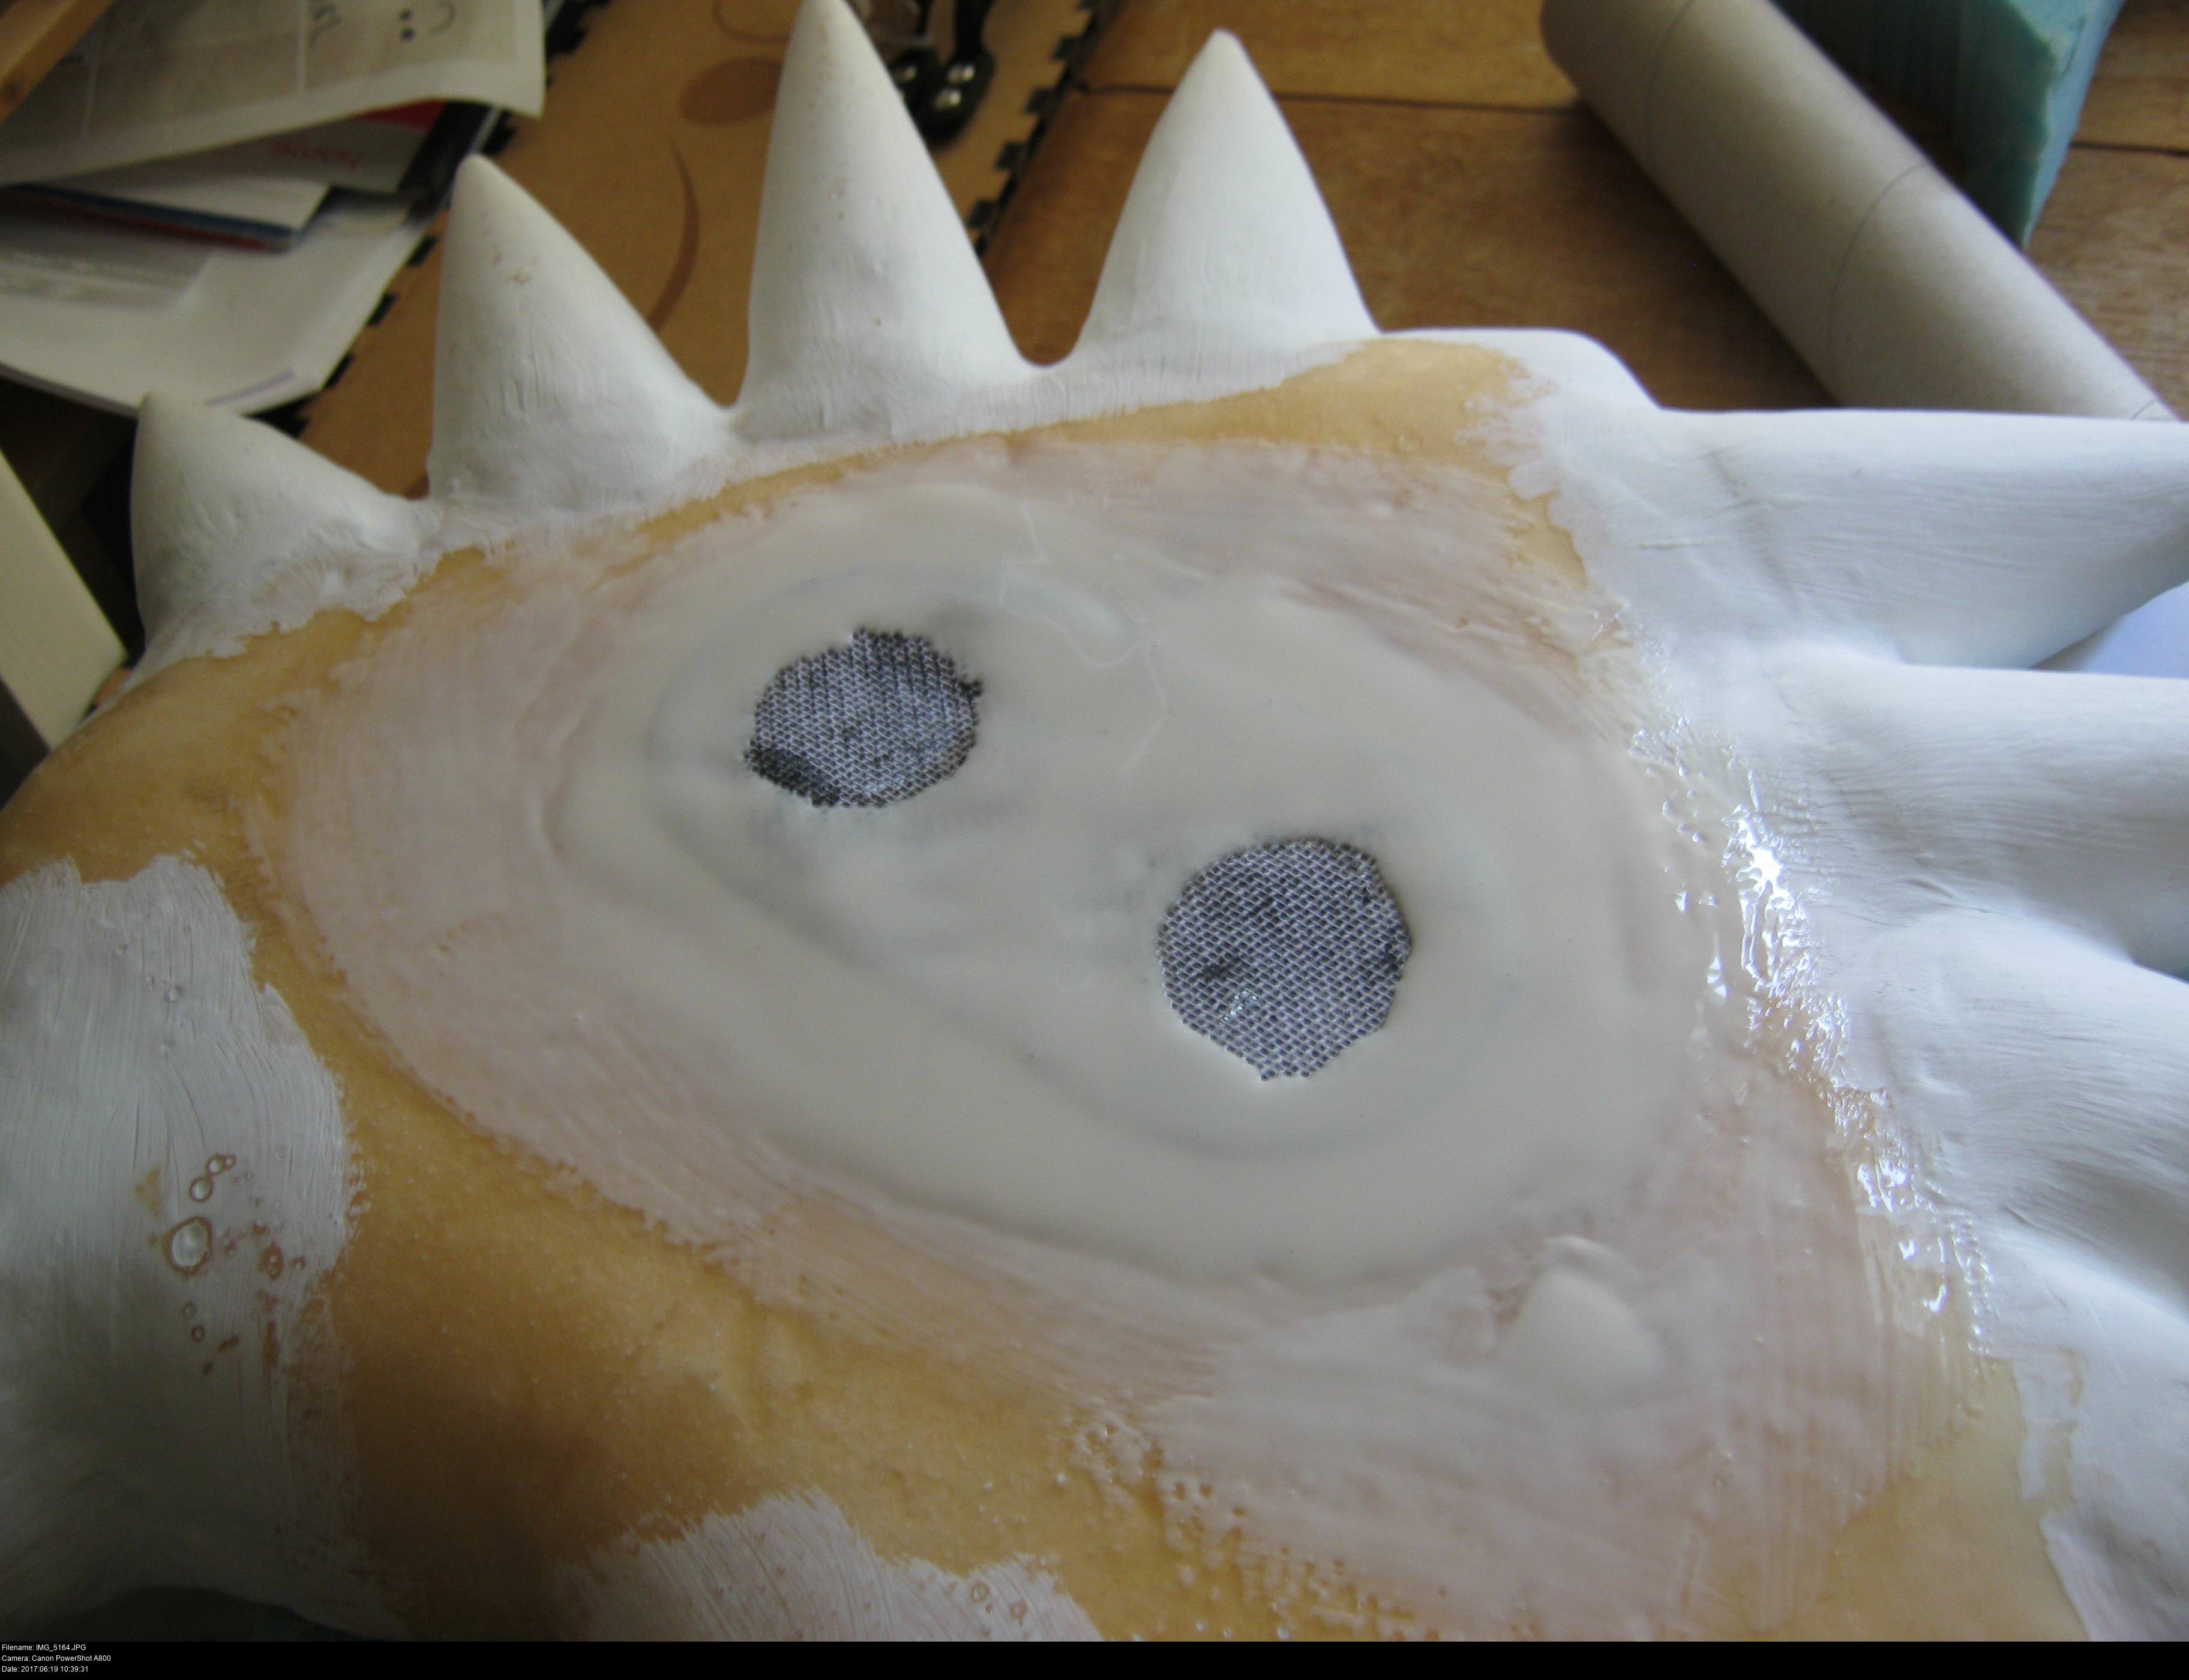
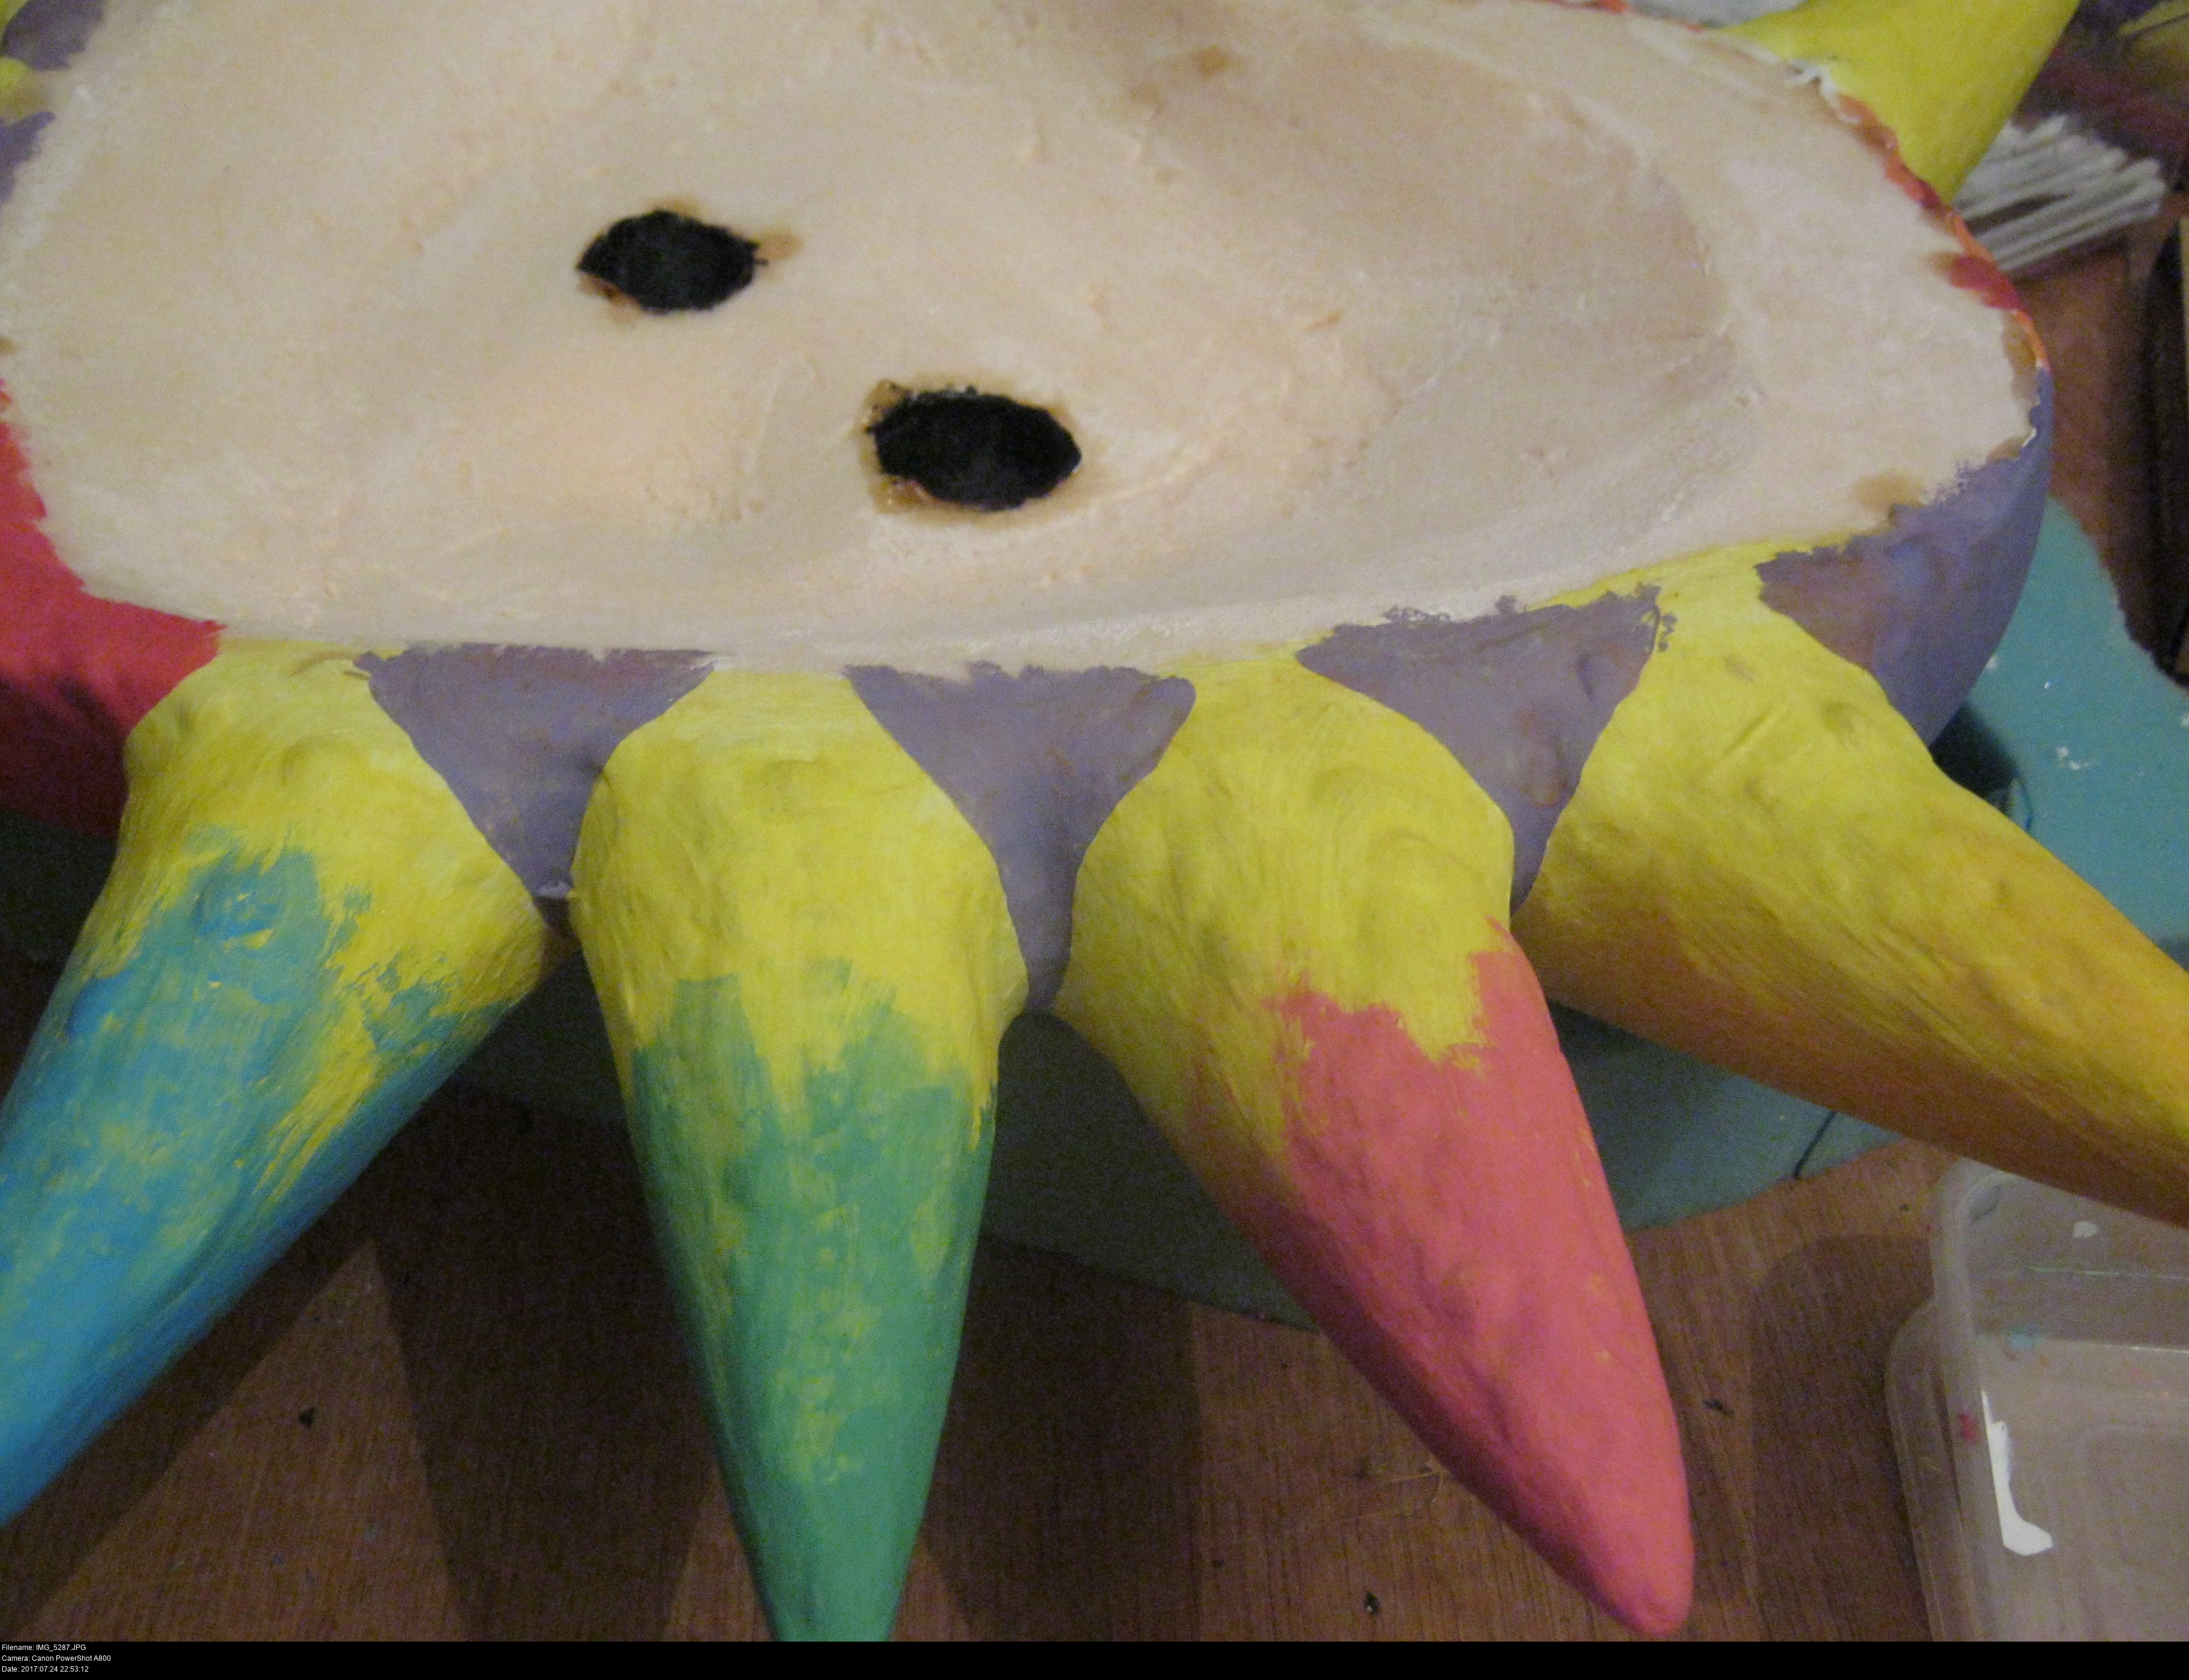
Before I started applying any horns, I made preliminary eyeholes in the mask based on the card cutout, and carved out a large cavity in the back so the mask is more comfortable to wear. Later, I'll carve out more of a defined nose-hole so the mask doesn't squash my nose flat when I wear it. If you do this, be careful not to cut through to the other side of the mask from applying too much force or overestimating how much material you have remaining. If you do make a hole and you don't want to start the mask all over again, a central hole isn't a complete disaster (read on to the section about buckram to see why).
Carving out concave sections from a flat piece of material isn't at all easy. I started by scoring an interior shape diagonally into the mask into a depth of about half an inch, then scoring against this score in the opposite direction to cut a little gully. Then I went nuts and just hacked at the foam haphazardly, trying desperately to eke out little chunks of material until I had roughly the right volume removed (making sure not to cut too much...).
When I had a horrible jagged mess inside the mask, I wrapped sandpaper around a small tin and sanded my disaster until it was smooth. When there was enough of a smooth cavity in the mask, I could neaten it up by making angled thin onion layer slices with the knife. Compare the interior of the mask to the edges to see what I mean.


When you're gluing curved surfaces together, it's very difficult to tell how large the cavity is and it's very difficult to predict how much the glue is going to expand. If you apply too little glue, it won't expand to reach both surfaces and there'll be no bond. If you apply too much the glue will certainly ooze out in all directions, possibly pushing the horn out of position. It's best to underestimate a little and hope that there's enough of a bond created that the horn is fixed in the correct orientation for you to complete the bond in a second application.
Don't be tempted to glue all the horns at the same if you're not confident that you can secure them all without knocking the horns out of alignment with your hands.
That said, you should at least test the fit of all the horns together in the mask before gluing any so you can make sure they all fit!

And here's me looking through it. The holes are rather small, so peripheral visibility isn't great, but it does work! Why are they so small? There's a good reason for this, which I'll explain in a moment.
Make as many applications of glue as you need until all the horns are firmly attached. Be careful if you're not familiar with XPS, it's easy to shatter the foam if you try to bend or twist it. Take it slow.


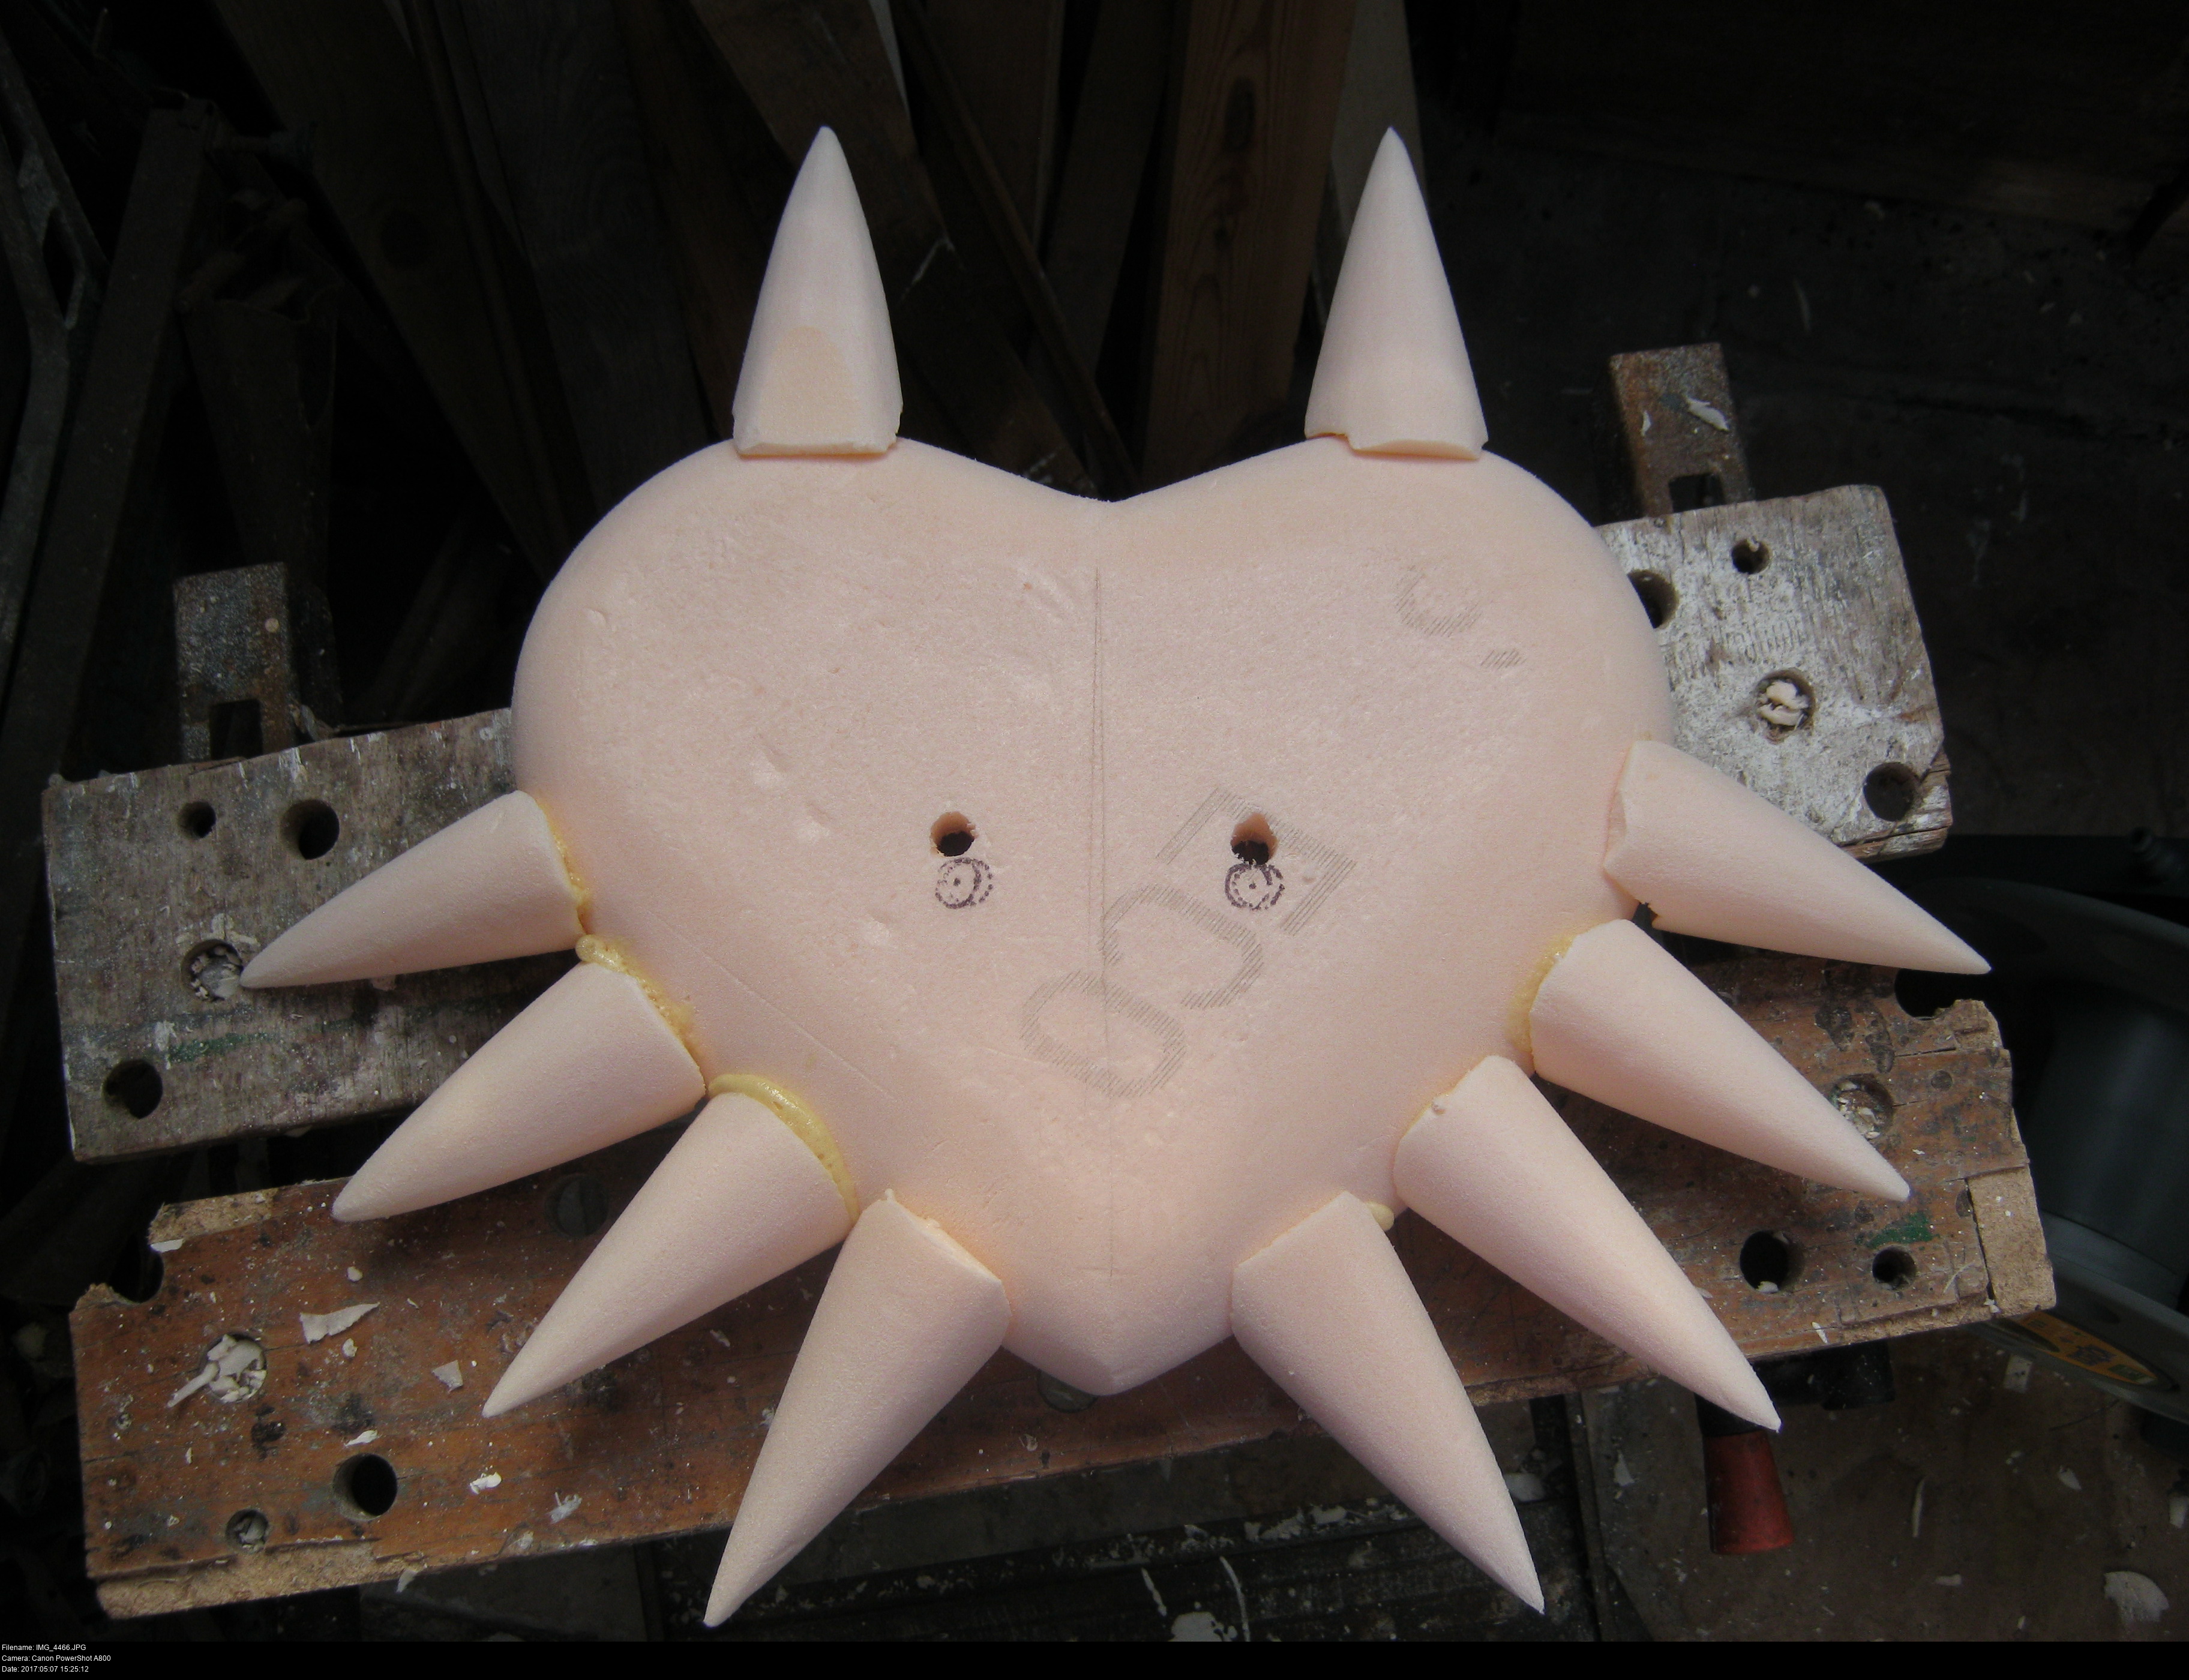
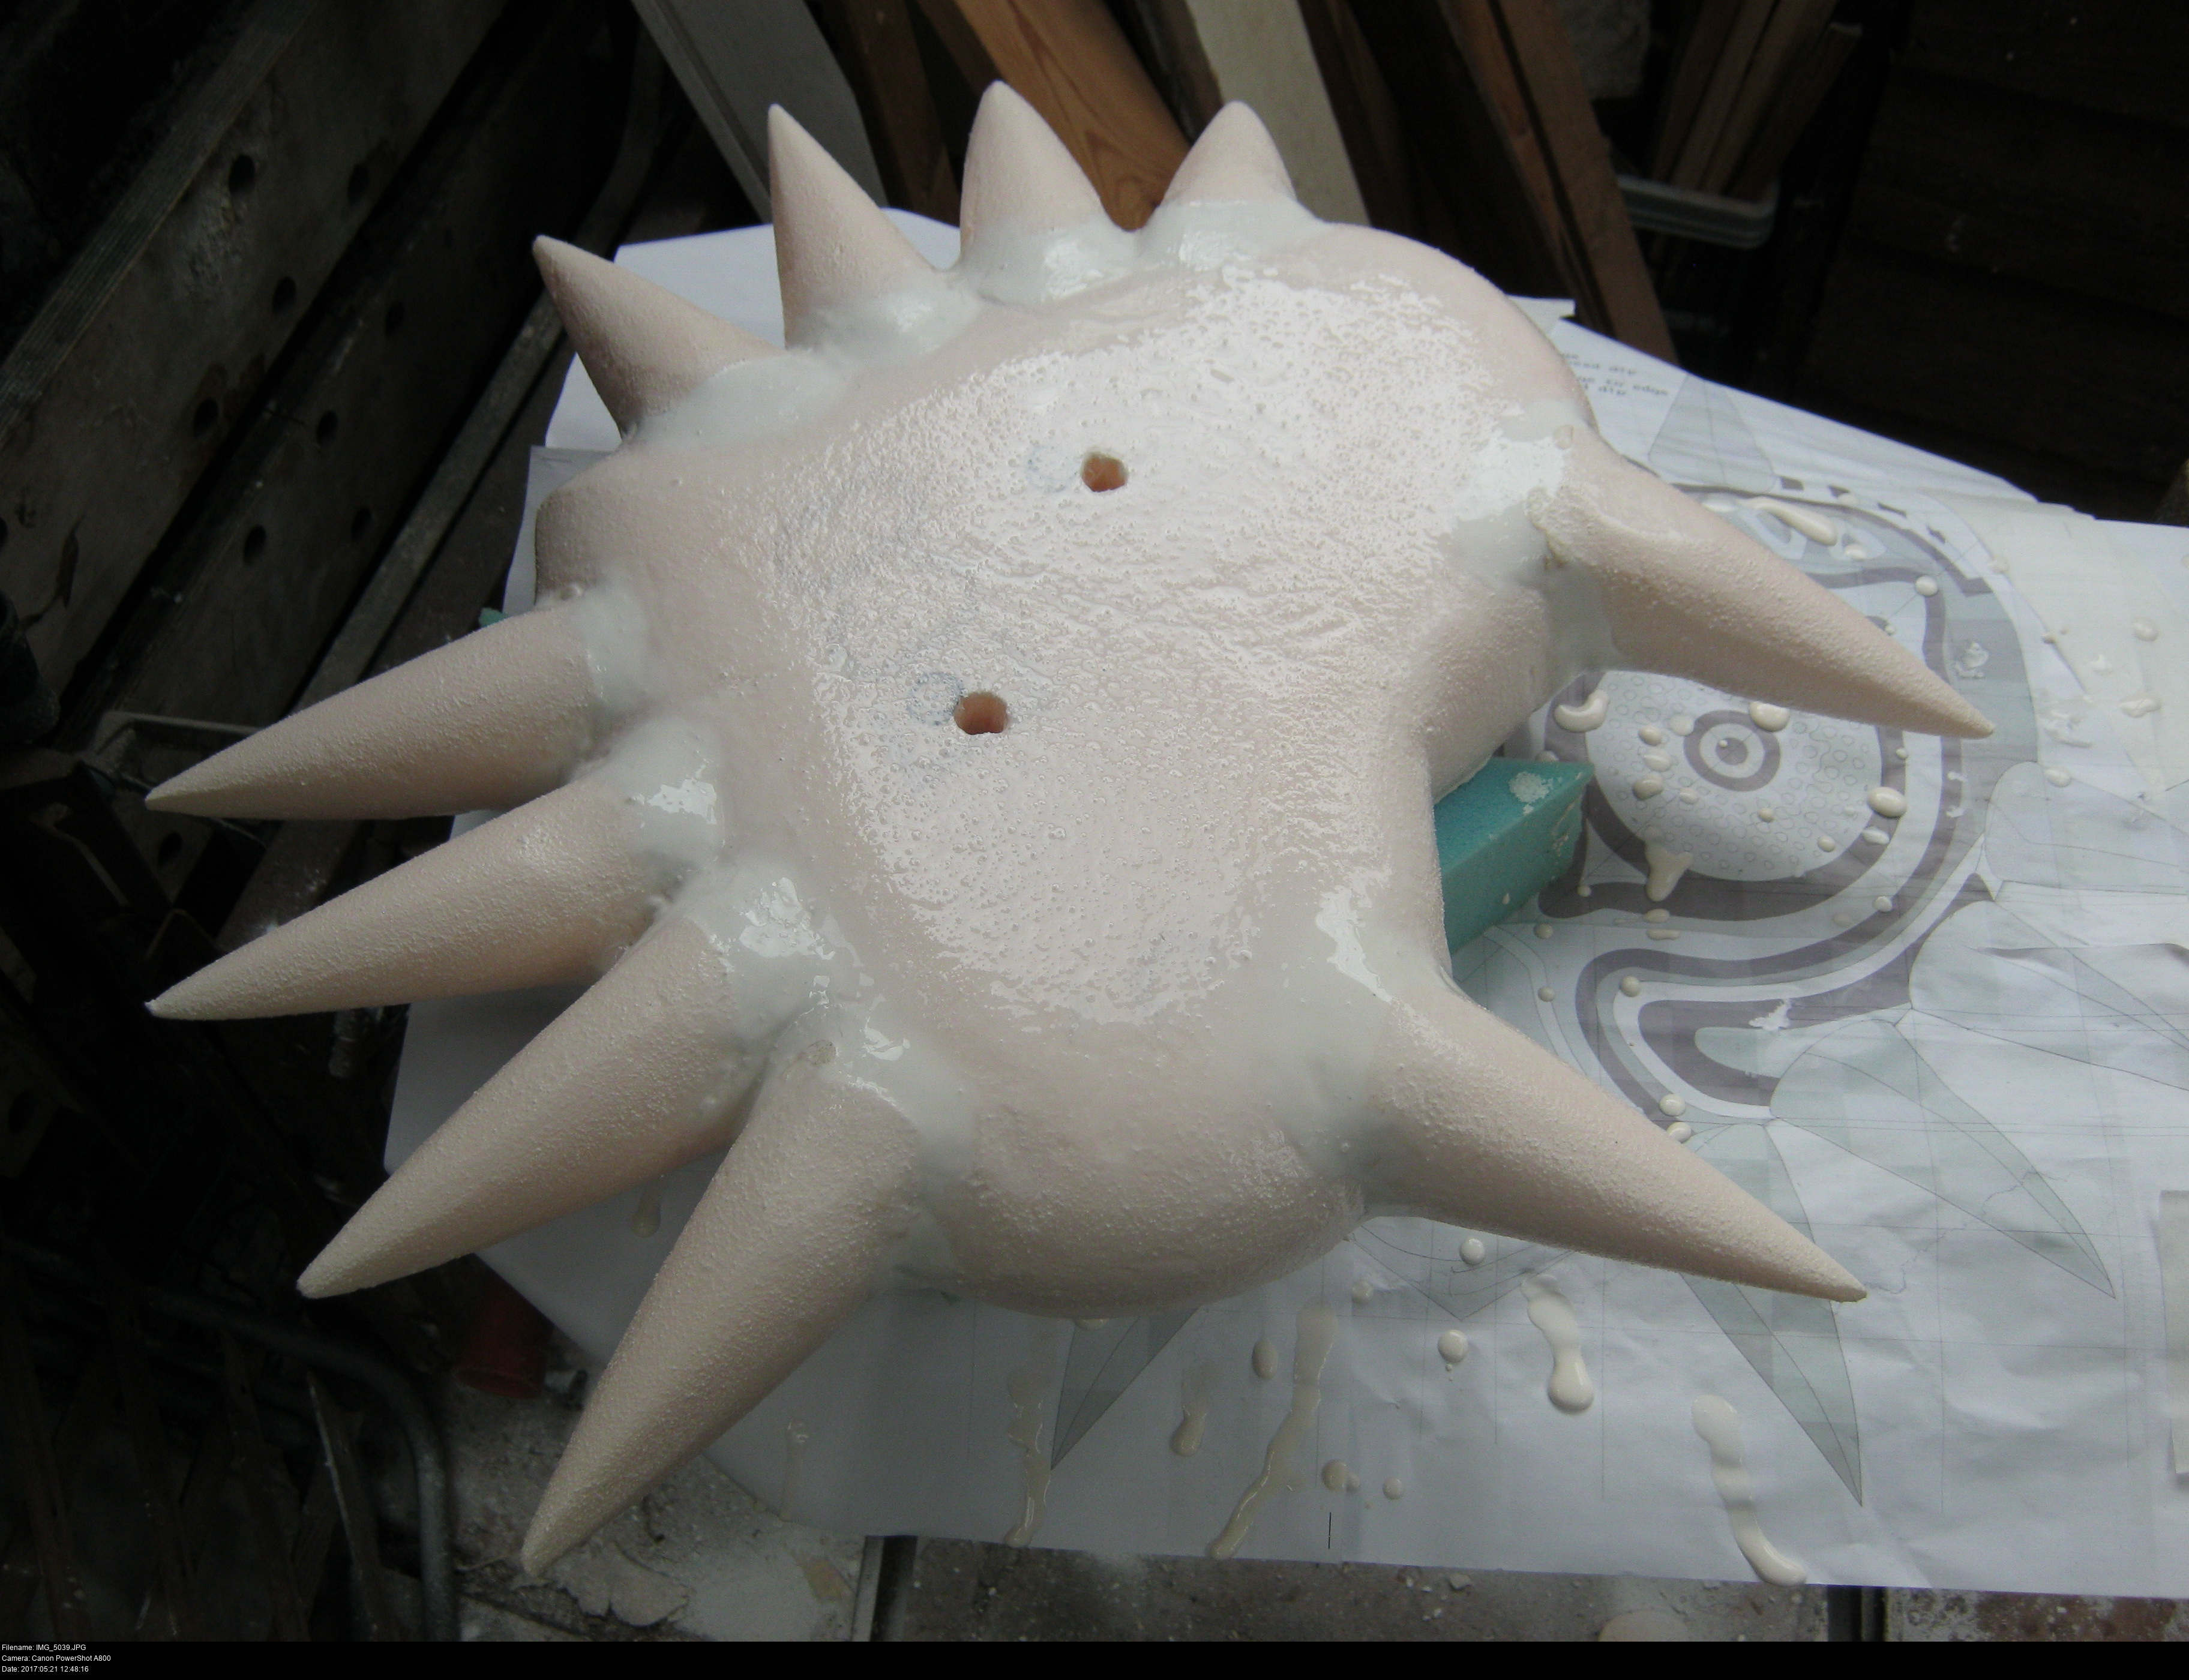
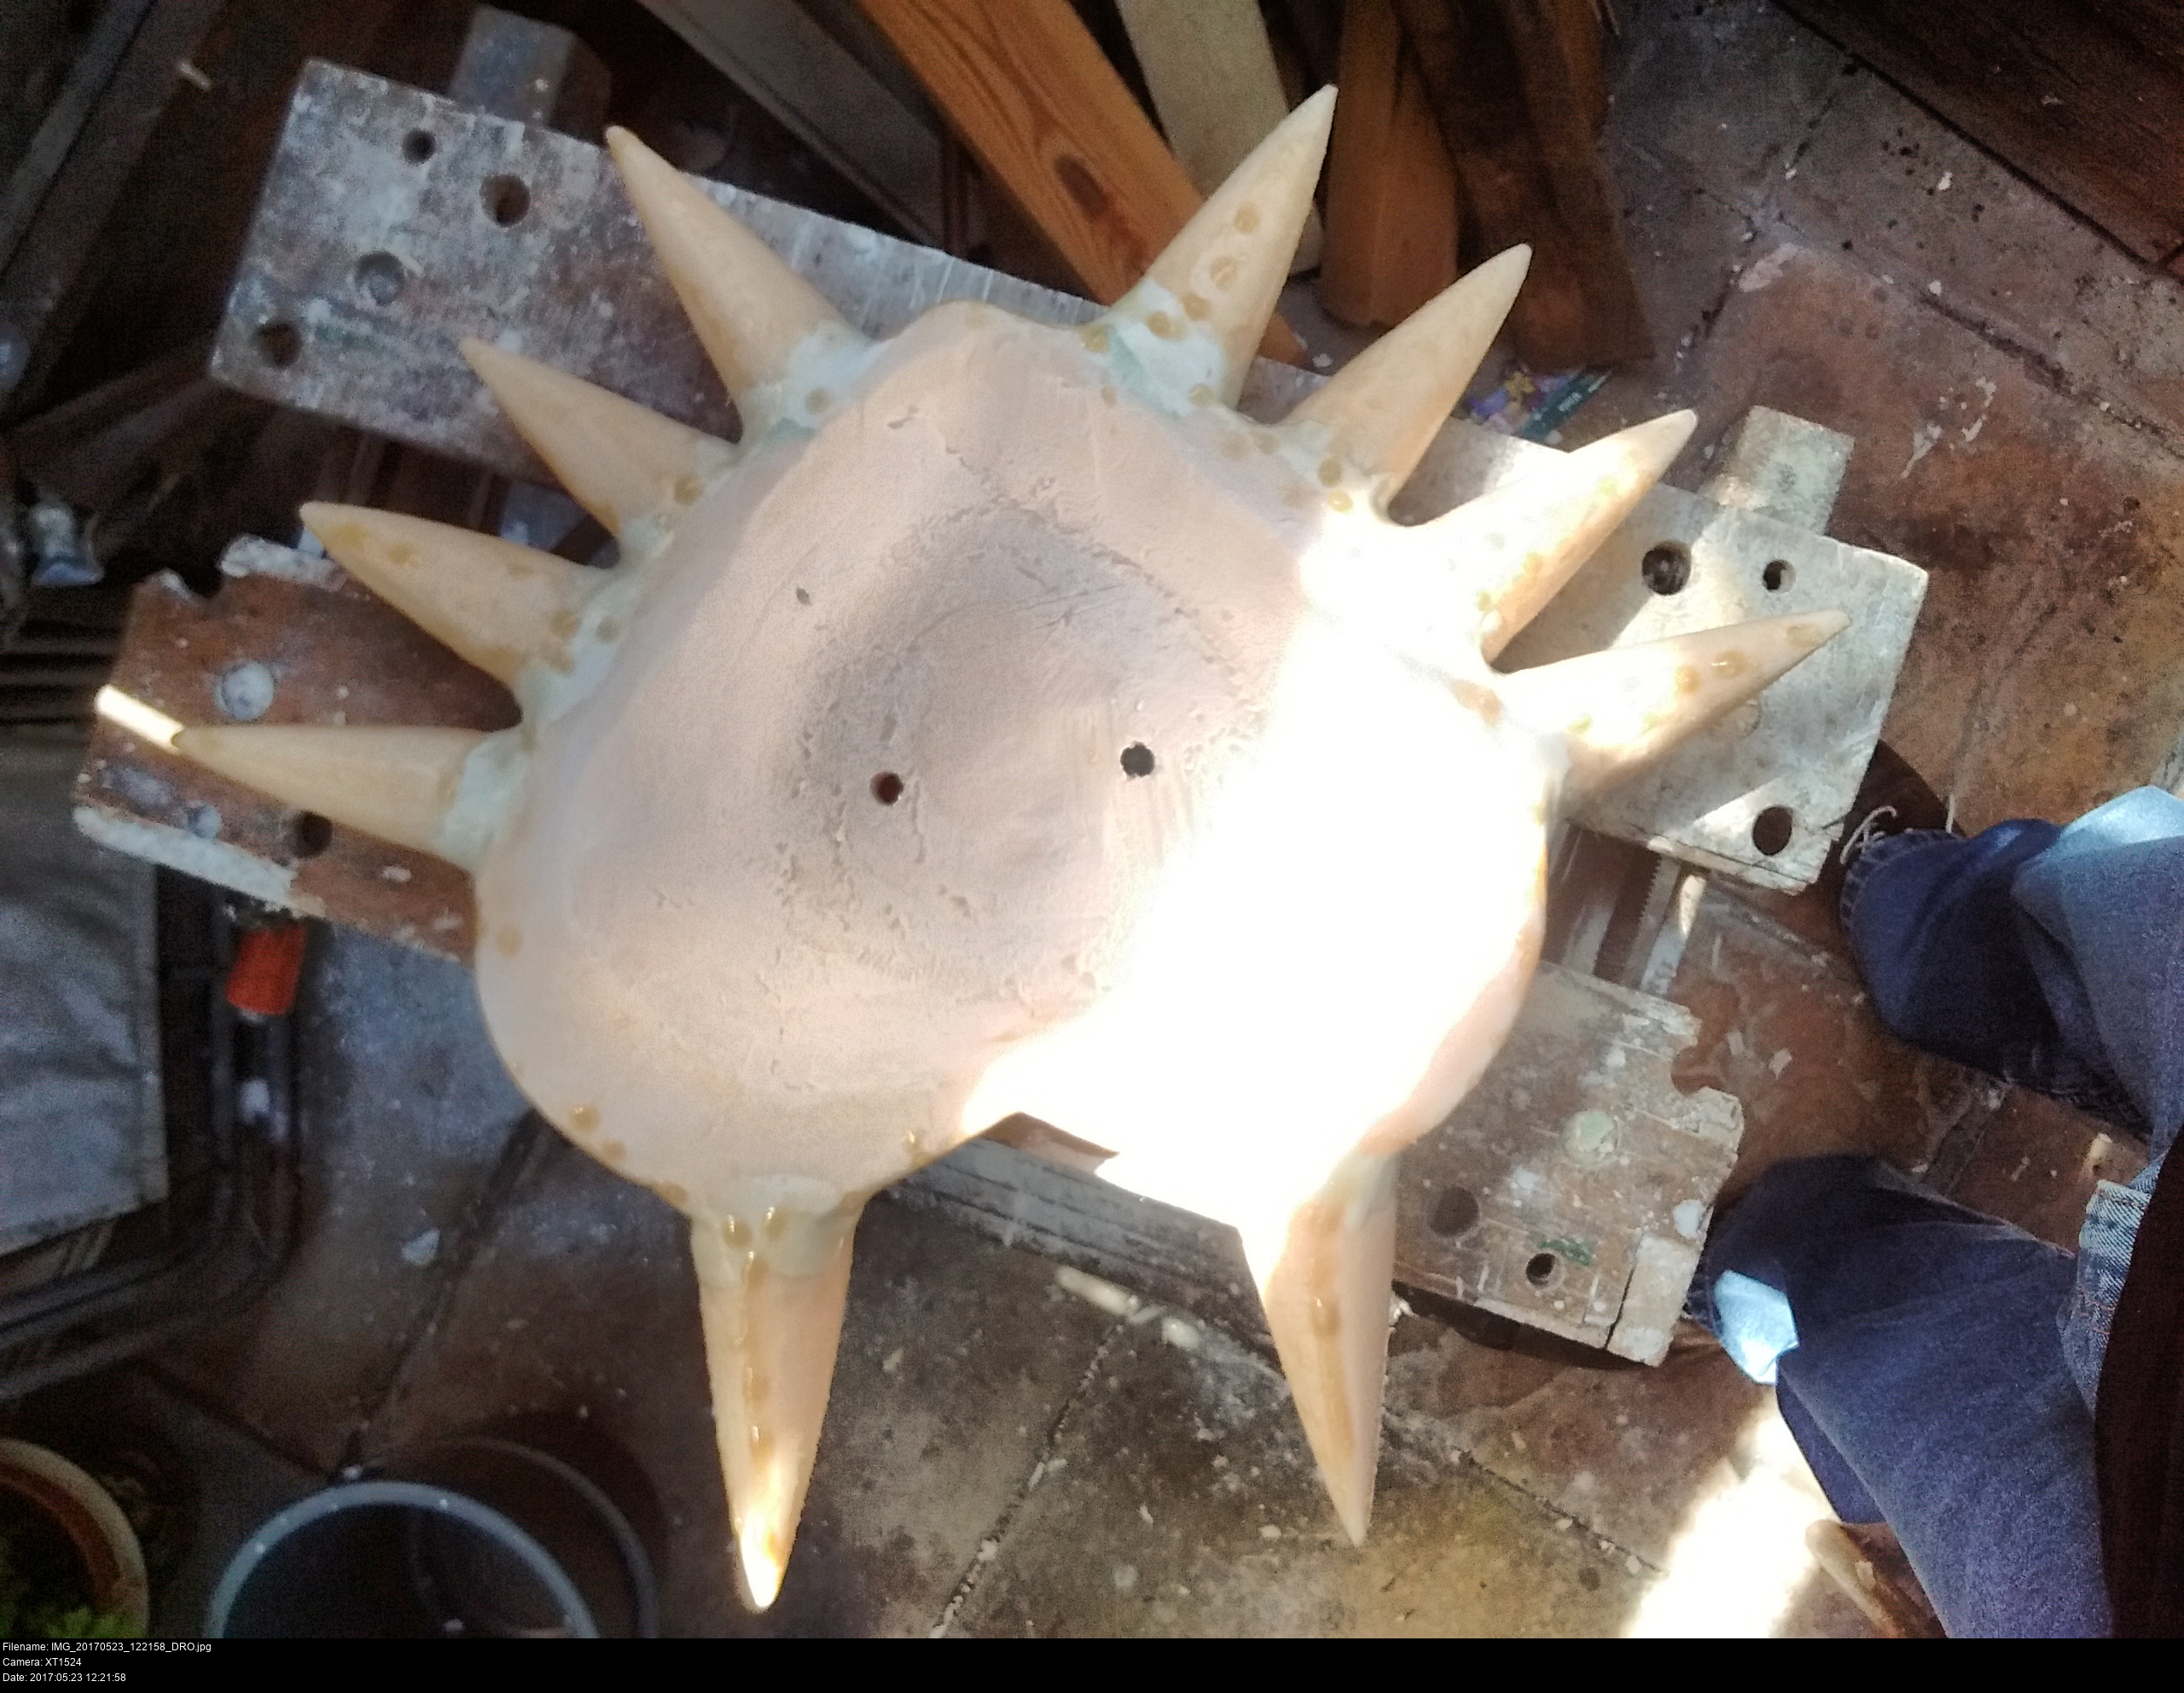
When all the horns are attached firmly and everything is dried, it's time to apply the ubiquitous filler. This is cheap household all-purpose filler from Wilkinson once again.
For working with filler, you should get:
Disposable cheap plastic cutlery, spatulas and anything else to work with the material.
Some water, either a small cup or a sprayer.
Disposable plastic work surfaces or trays, lids, etc.
Disposable gloves!
Out of the tub, it's very chunky and not entirely sticky. I was a little worried it wouldn't adhere to... well, anything. To prepare the filler for work, scoop out a blob onto a disposable plastic tray lid, spray some water on it and mash into it with a tool until its a soft paste. Push it into the gaps and try to smooth it flat with a spatula.
Don't spend much time getting the shapes right; err towards over-filling rather than perfect shapes. As you work with the tool, the filler will harden subtly and it'll start to tear out of the gaps. That's how you know you've done it too much. If it's overflowing out of the gaps a little, that's good.
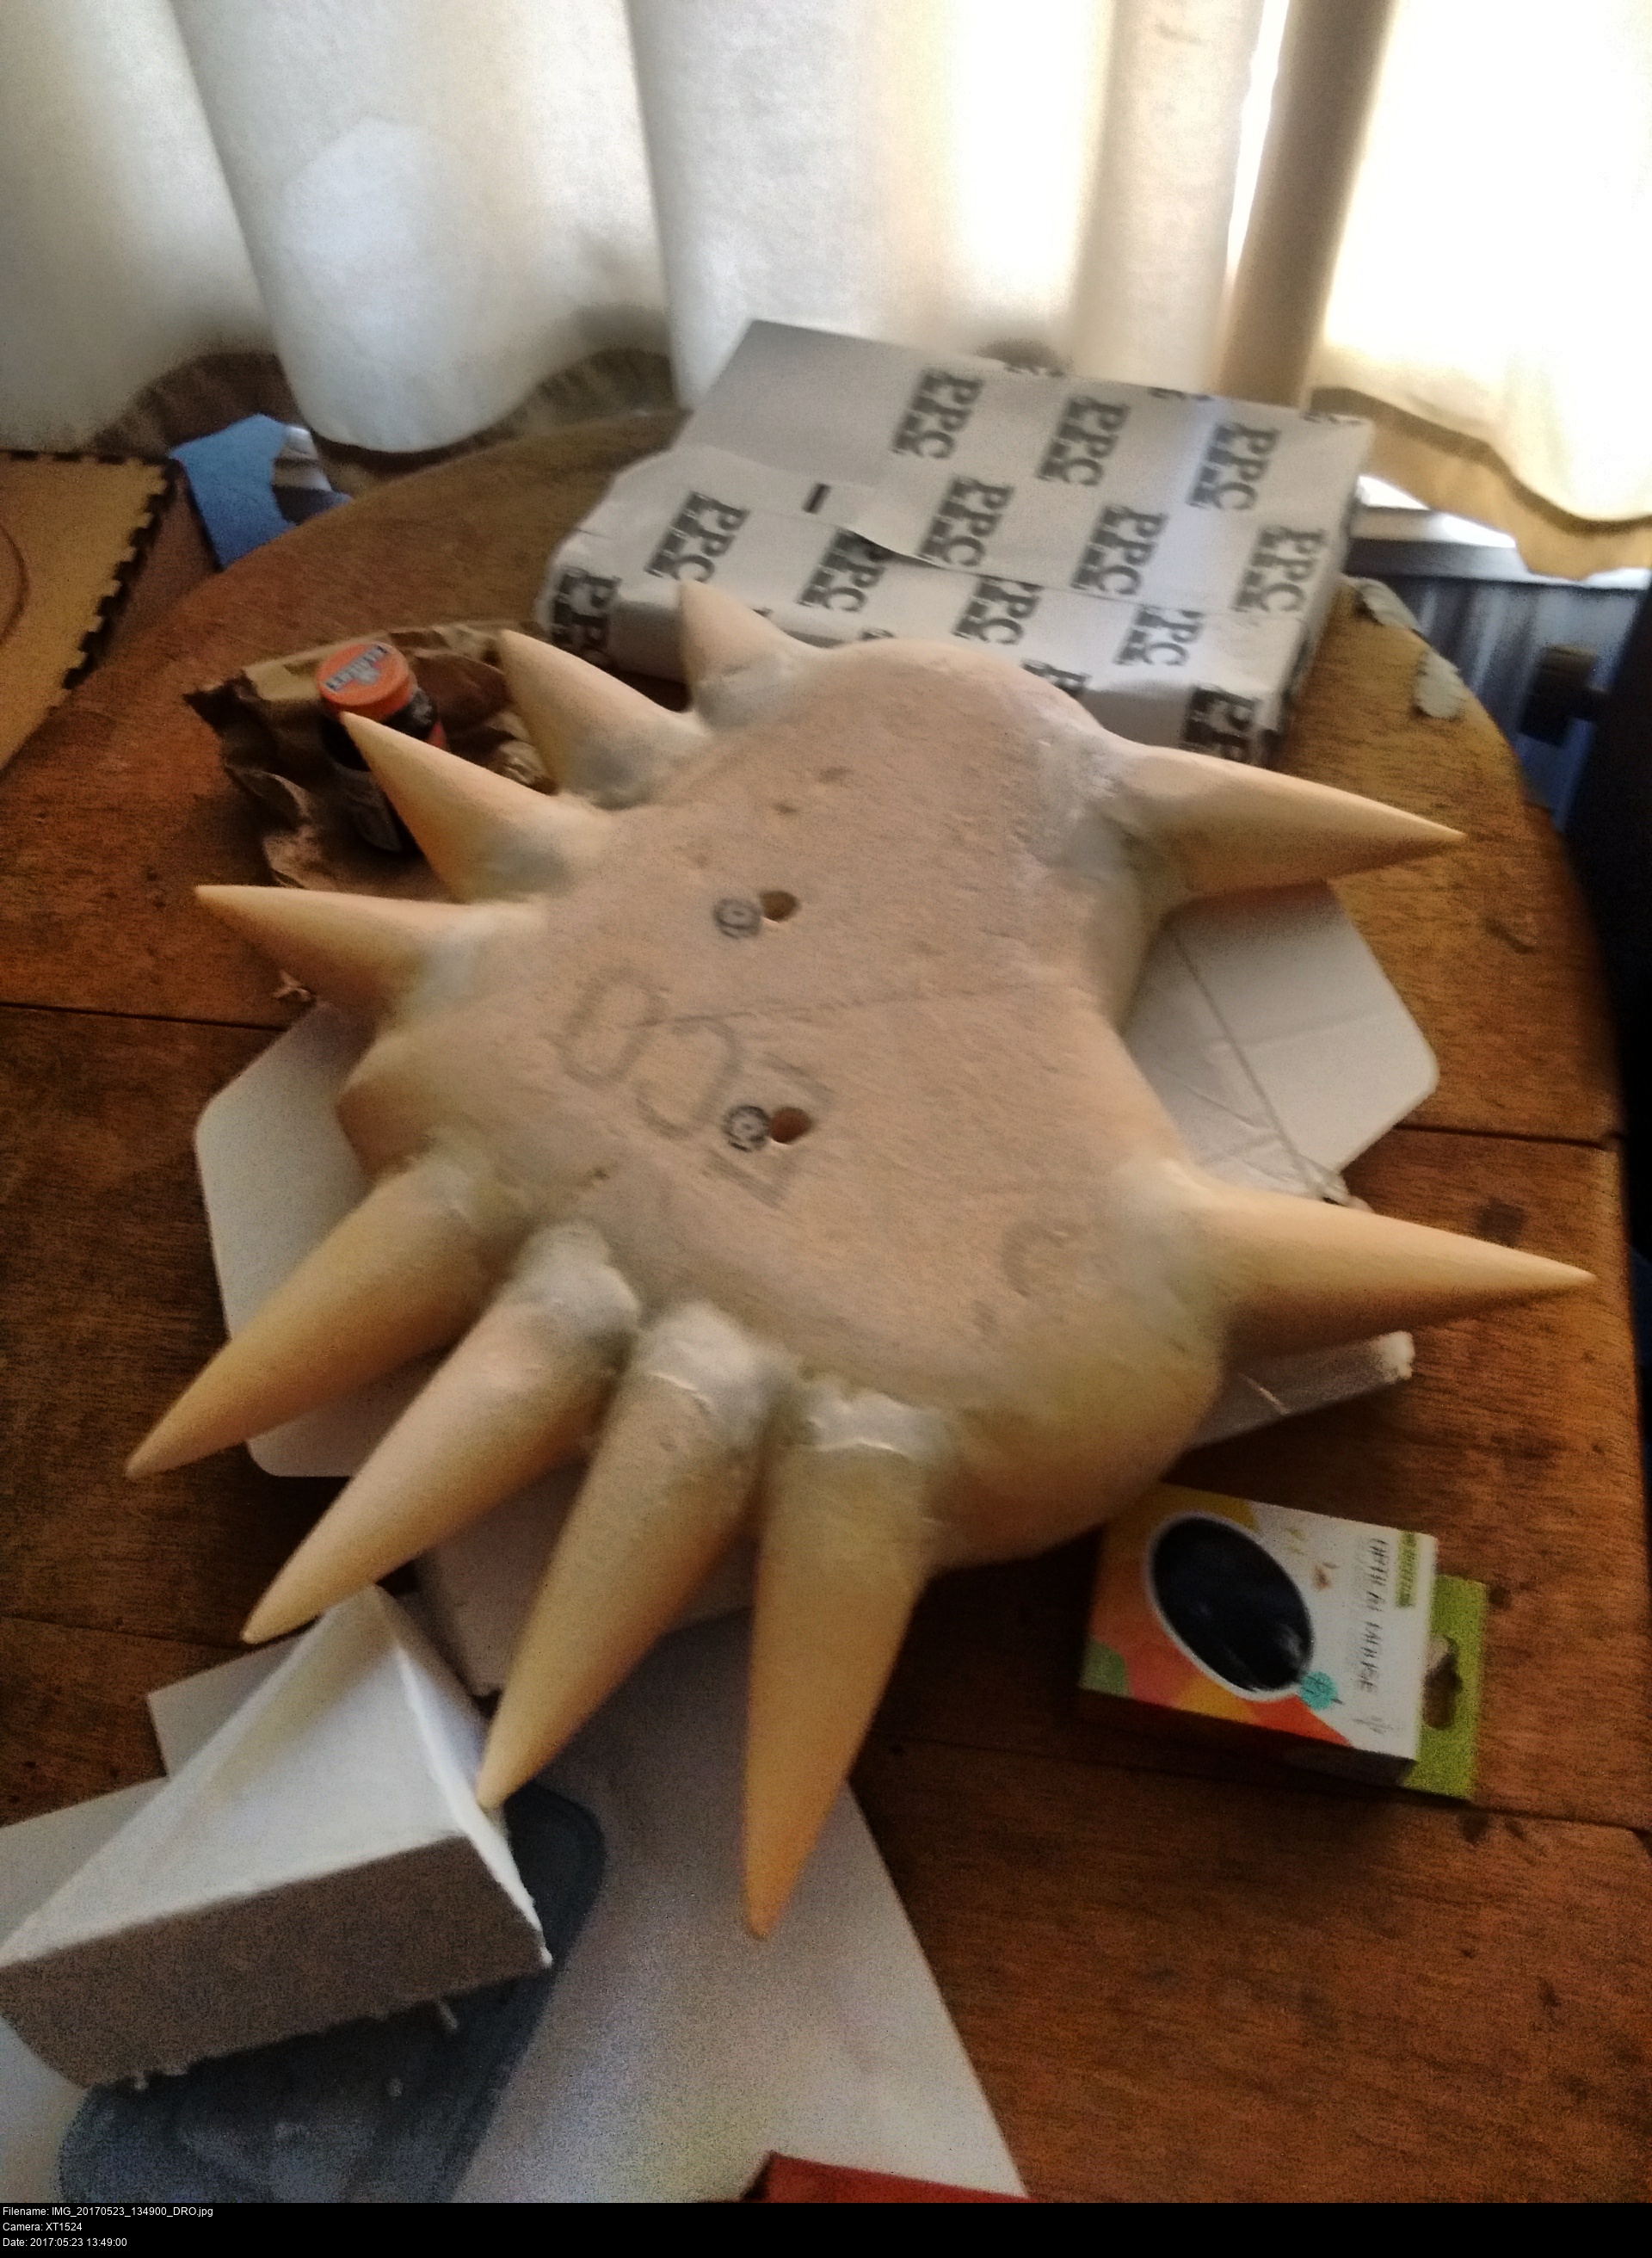
When it's dried and hardened, you can sand it down to the correct shape. You'll also be sanding a little of the horns so it becomes one seamless surface (if you want that effect, that is). The true Majora's Mask has the horns very distinct from the mask body, with the surfaces of the body and horns meeting at right angles. My modroc mask doesn't do that (though I did intend for it to) so I disguised the join with the paintwork.
Alright, it's looking the absolute business if I do say so myself!


We interrupt this epic Majora's Mask sanding adventure for an intermission about surfacing!
So, you've got your wonderful prop base form made out of some sturdy, easily-shaped, lightweight material and it's all looking super fine. Now you want to do something to do it to make it paintable, as well as preferably protect it from all the various kinds of damage.
You can't paint XPS foam directly, at least not nicely. The surface doesn't take it, and the finish looks awful. You'd have to give it tons of coats for it to work. That's a lot of gesso and it won't be very strong.
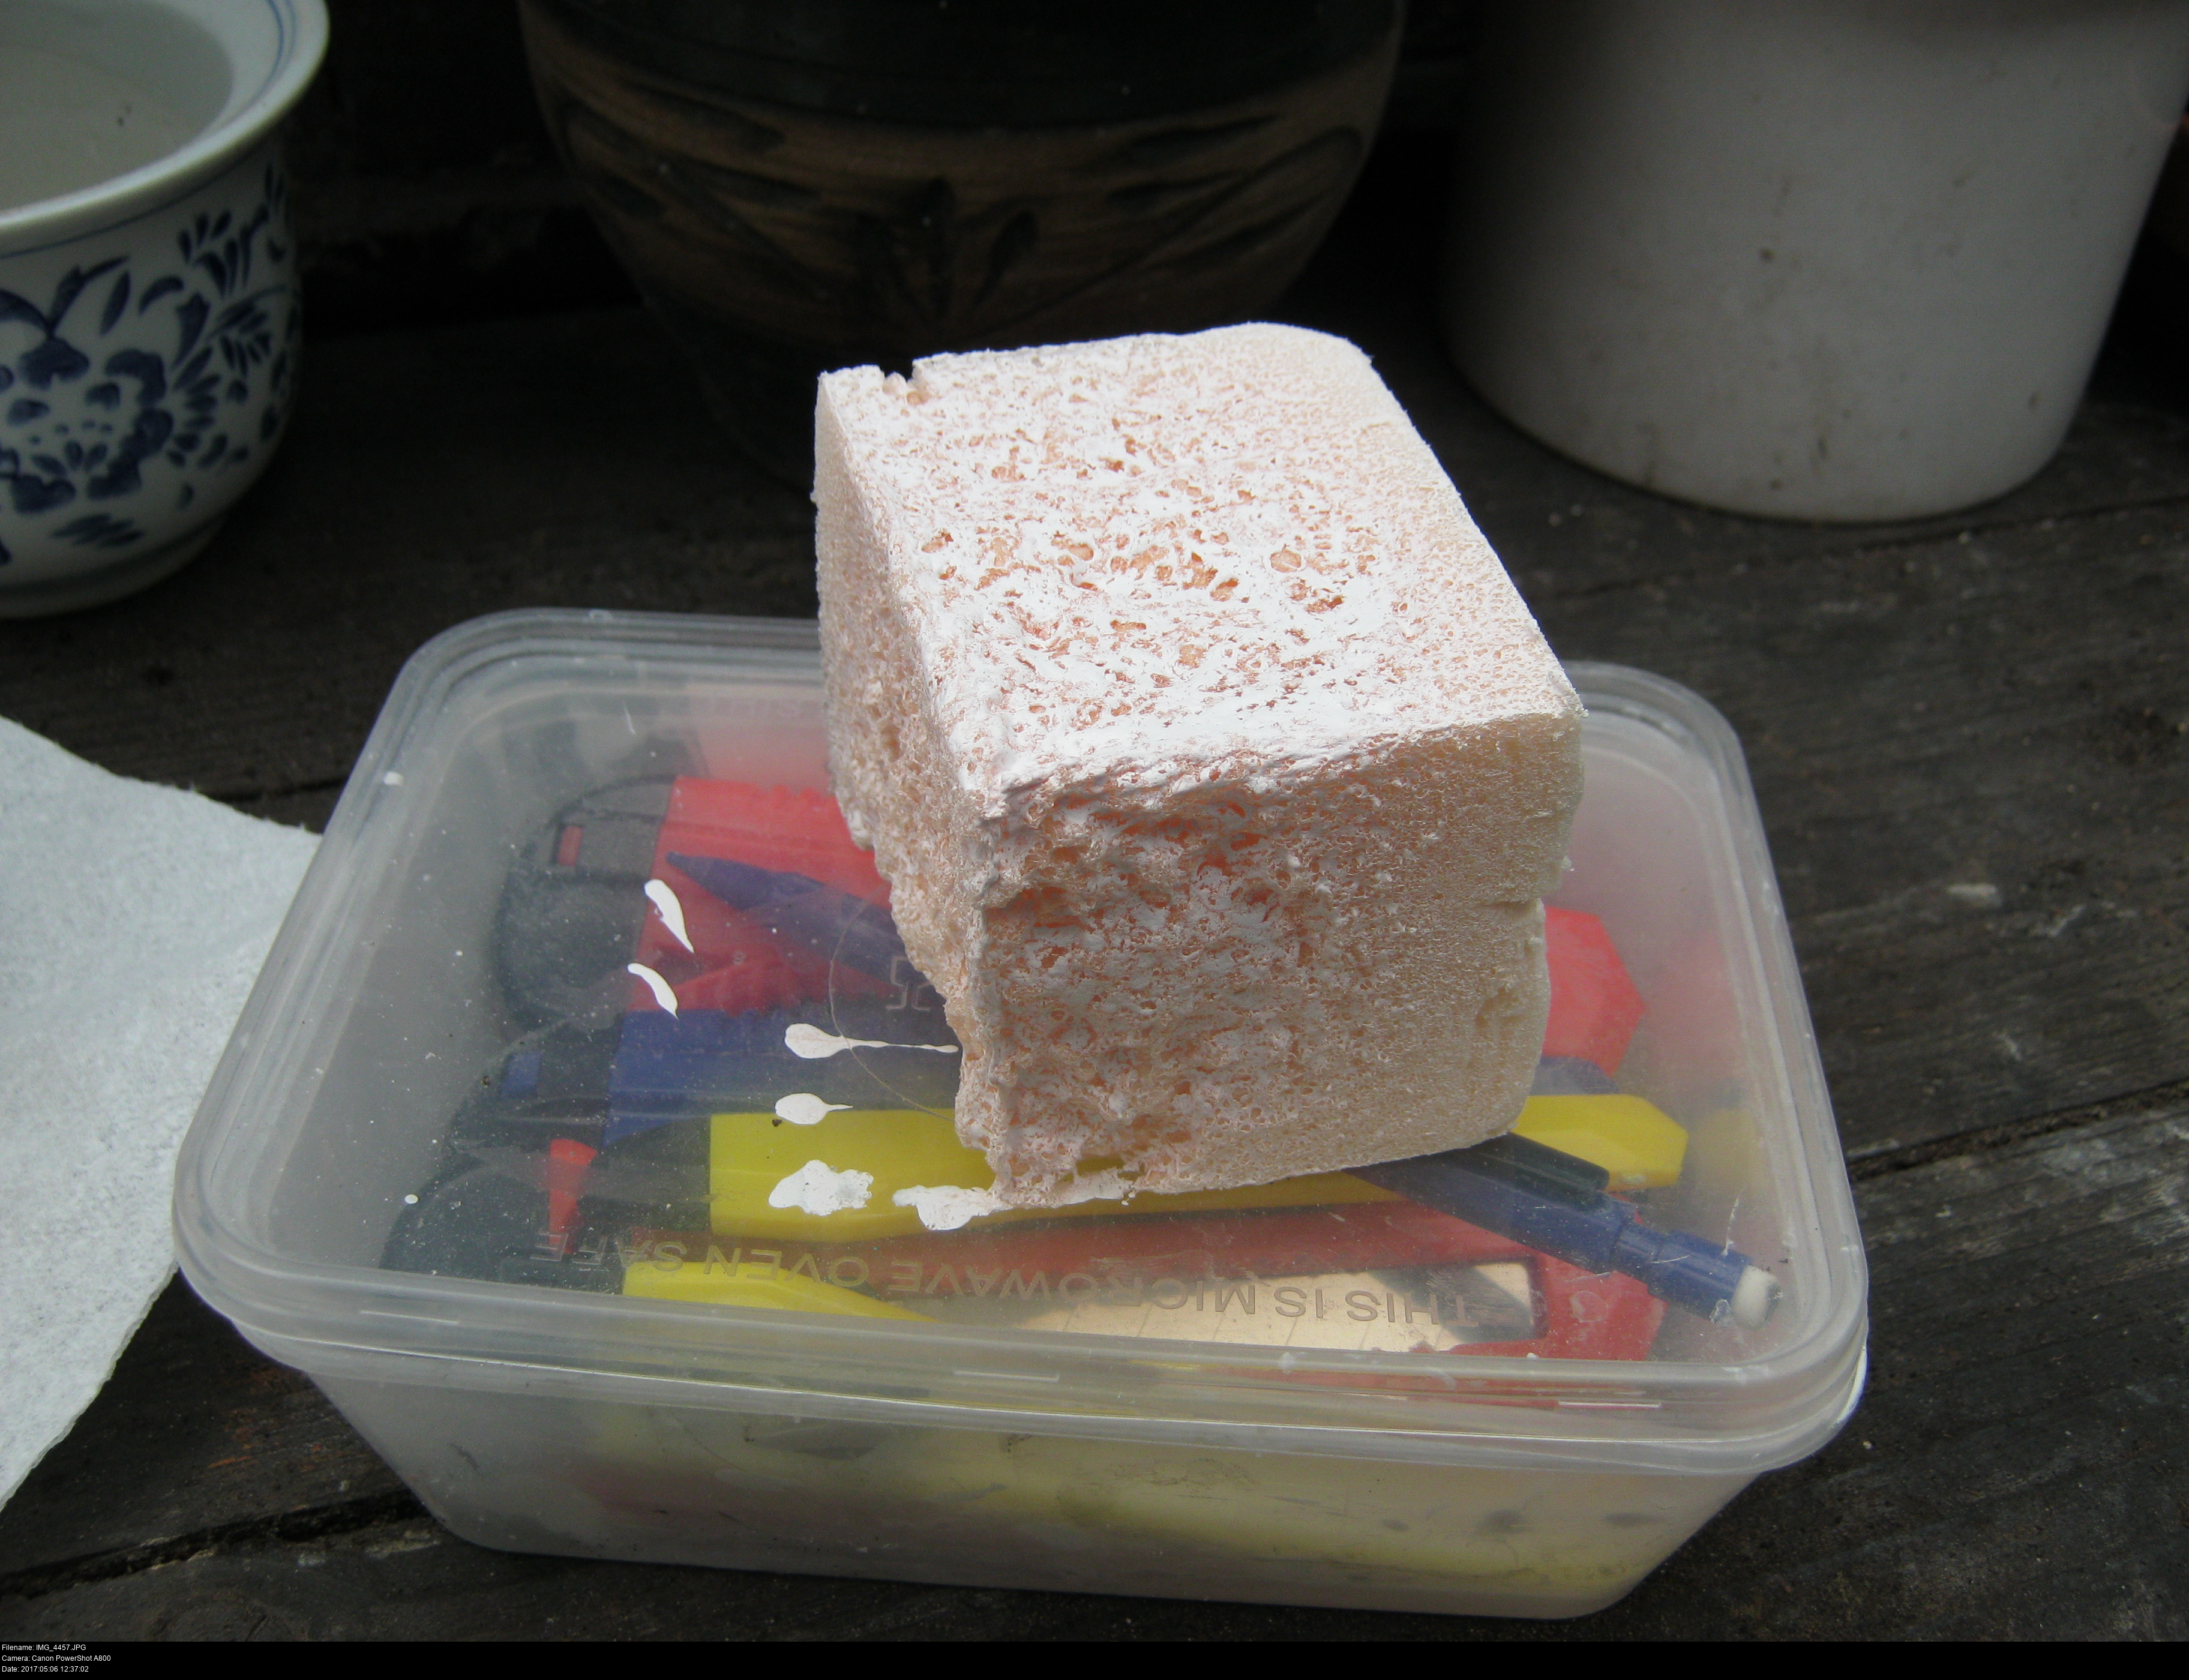
When you ask people how to surface or seal various kinds of foam, you'll get a lot of answers, but the three that get brought up the most are Plastidip, wood glue and PVA glue. I've not used Plastidip before, but it looks expensive as heck. It's my understanding that wood glue and PVA glue are essentially the same (for the most part) just differing in their concentration. So let's give it a shot! I've got a whole load of Gorilla Glue branded wood glue, and a whocking great cheesy-looking block just aching to be sealed up.
I'm going to apply the glue neat, a thin layer, and leave it to dry. I suspected it might not dry too well, glue-on-plastic, but it turned out lovely. Not quite ready for priming yet, it's still too thin.


I'm going to give it two more coats. Make sure to prop it up and cover your work surface. The GG has a tendency to run about on the surface, filling in gaps and smoothing itself out nicely. It also means that it oozes down the edges and forms lumps on the underside of the shape. Be aware!

Three full-on coats of GG later and I have myself a piece of -gleaming- cheese!
You can really tell how thick the glue has become. It's got a slightly plasticky-tacky feeling surface, very smooth even on the rough cut sides of the cheese.


Time to prime! I'm going to give it some gesso. Three coats again.
I'm calling this XPS foam, Gorilla Glue brand wood glue, and gesso sequence a success!
You know, if I'd thought ahead I'd have maybe made something more useful like an ocarina instead of a big triangular block of foam cheese. The cheese was a good test though, lots of different textures to try out the sealant on. If I'd went straight to the prop-making, I could've been left with a manky ocarina instead of an informative cheese.


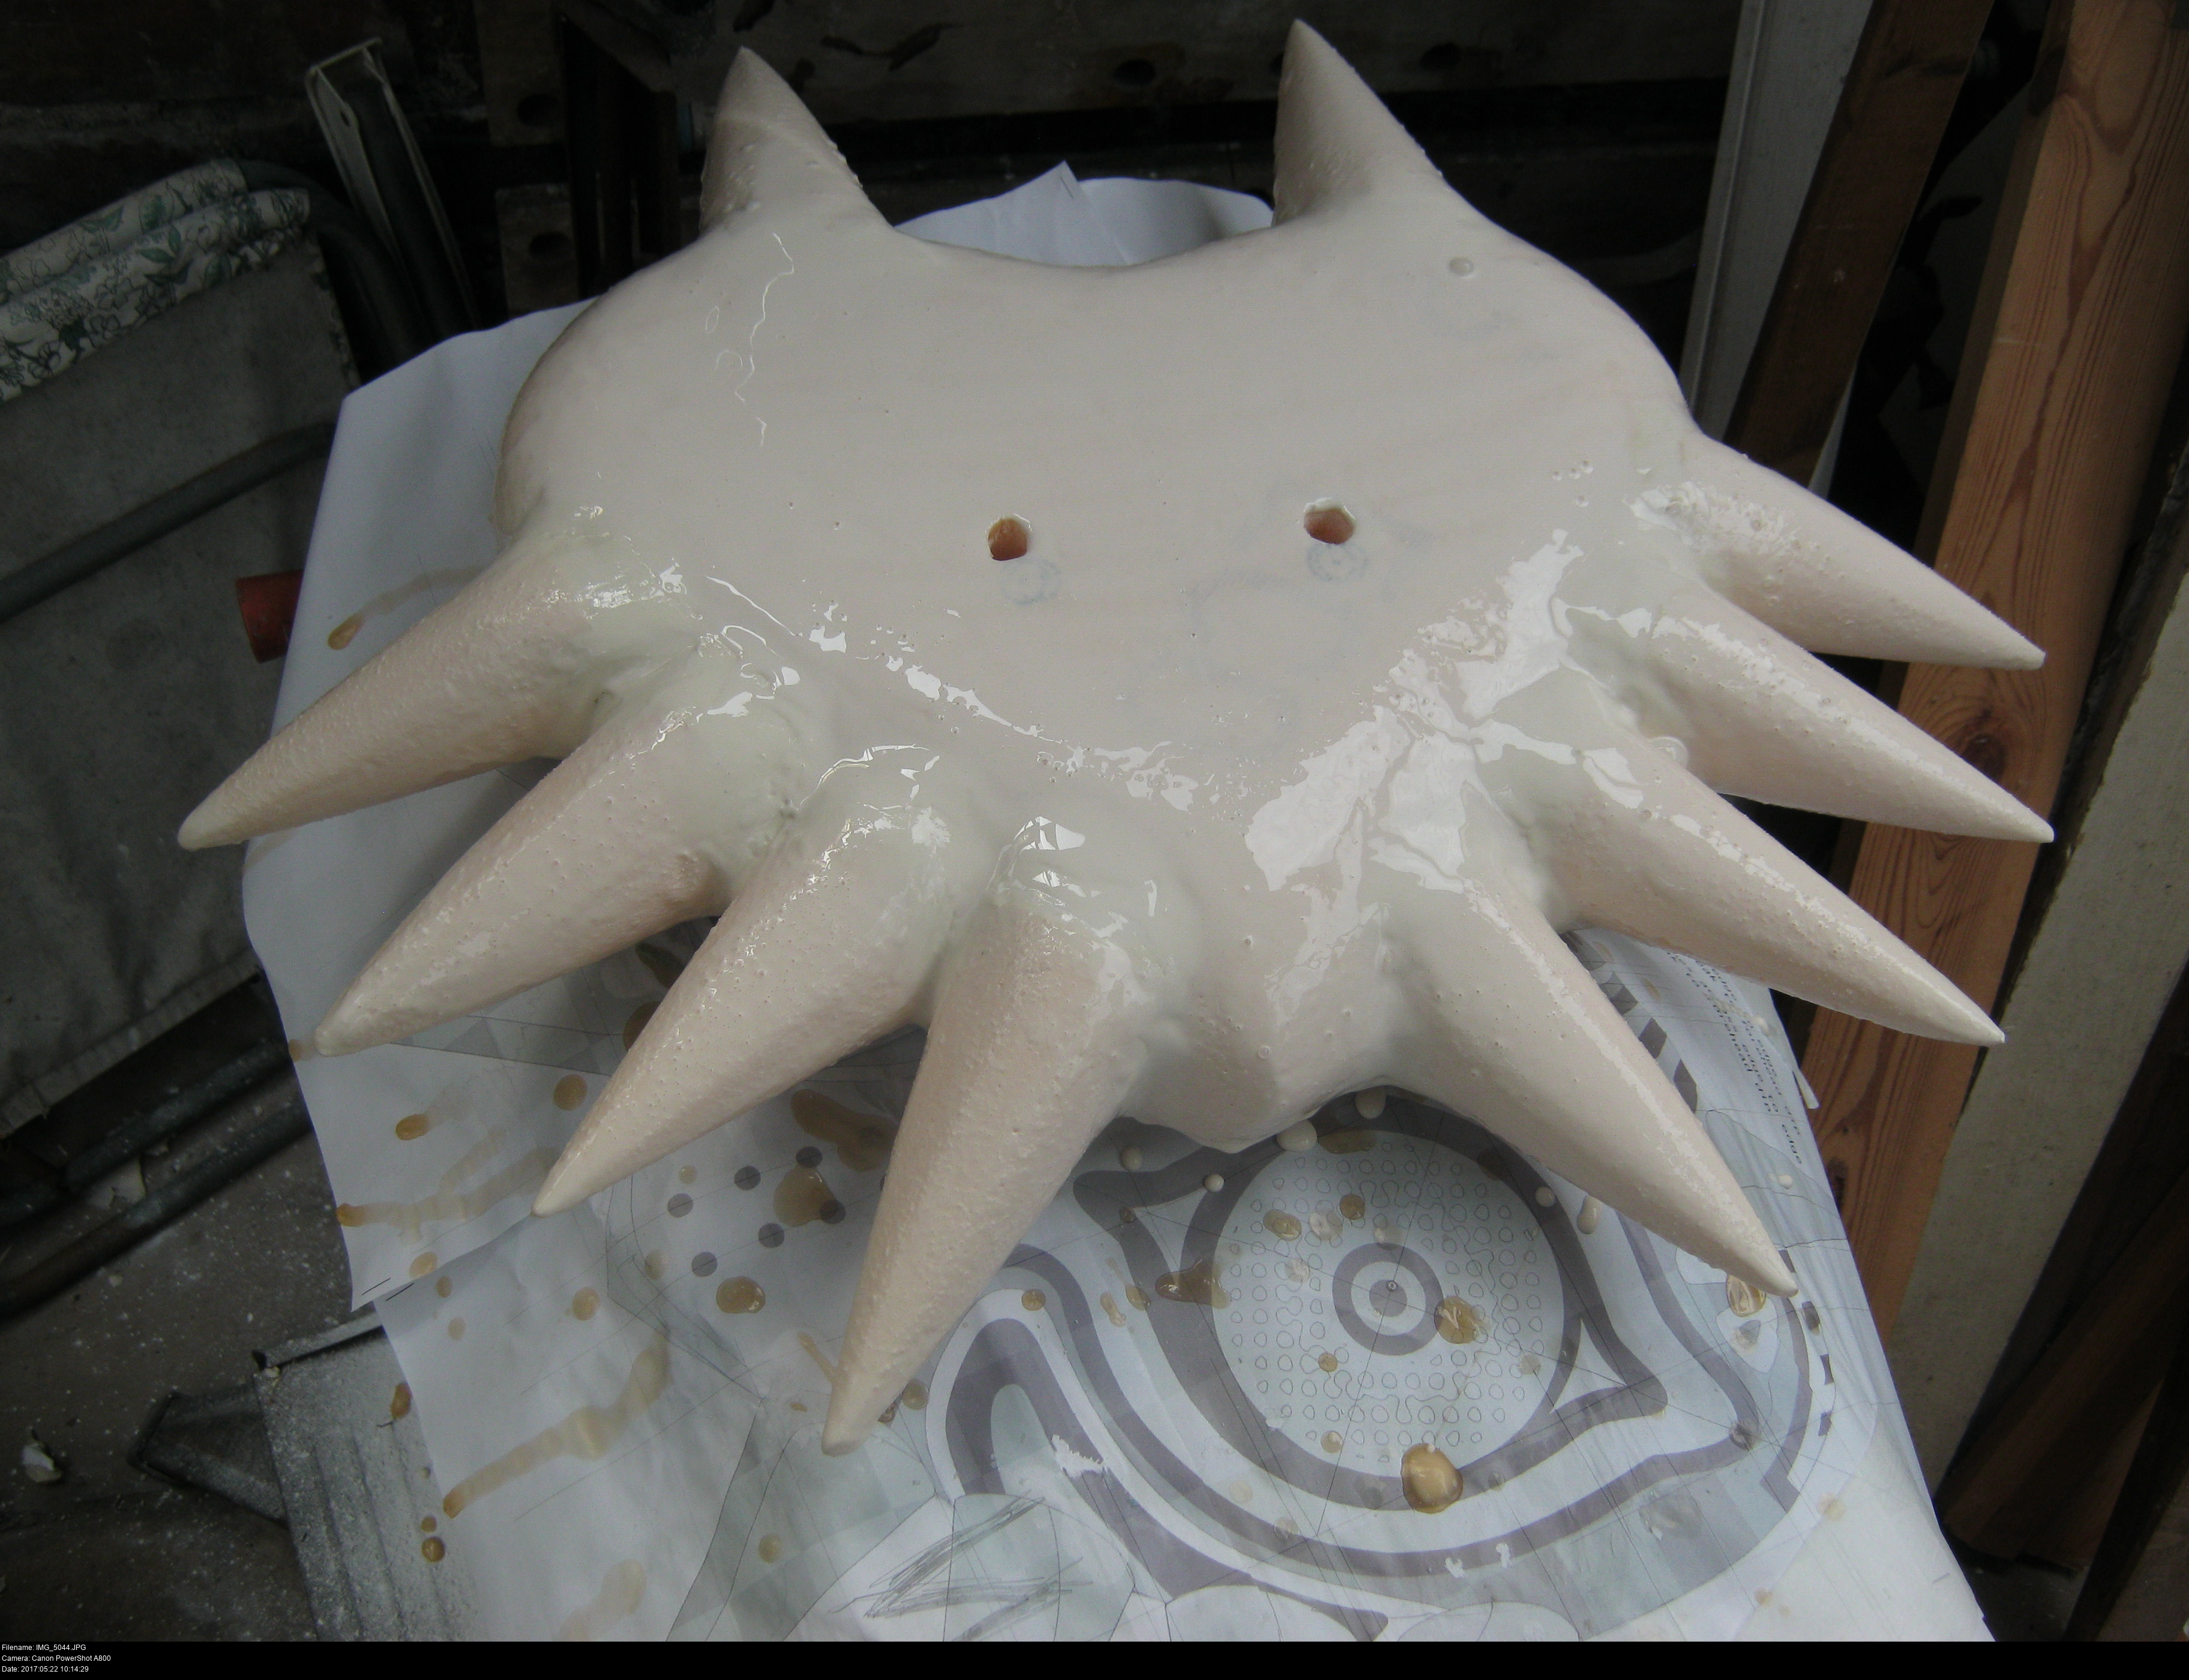
The test is complete, the mask is filled and sanded as much as I care to, so let's surface this guy! I've bought myself another bottle of this glue because I suspect I'm going to be using a lot of it.
Thin coats, undiluted. A dilute coat might make sense if this was a porous surface that I wanted to have impregnated with the sealant. These materials aren't absorbent, so I'm not doing that here. I'm using a wide, cheap, soft brush, making slow strokes over the surface. As I applied the glue, clusters of small bubbles started rising to the surface. Zoom in on the pictures and you'll be able to see them all. These are due to the air pockets within the structure of the foam that I hadn't considered. As the glue runs into the foam, air is forced back upwards, forming bubbles. Oops. Ah well. That's what this sealant stage is supposed to eliminate.


The glue is running down the sides of the mask and horns and gathering on the underside. I could reduce this by using less glue maybe, but since this glue is very thick, I'd end up with an edge -somewhere- on the model at the edge of the glue. If I intentionally allow all the glue to flow around to the underside of the mask, any blobs will naturally fall onto the reverse of the mask, out of view.


Yeah! More coats, let's get this thing all creamy. Don't forget to let it dry first and give it more time than indicated on the bottle just in case glue-on-plastic doesn't dry nicely.


Third coat of sealant has dried. It's time to take this thing back in the house before somebody wrecks it.
I'm getting some seriously large air bubbles now. I can deal with some of them with the brush at the coating stage, but the rest are just going to have to be sanded away once dried: the bubbles become solid crusts as the glue hardens. I can sand and recoat as many times as I need to. The surface is only gonna get smoother!
You might have noticed in this last set of images that some of the lower horns are a little crooked. From above the mask looks perfect, but from the side some of them are raised and some aren't. It's a lot more noticeable in real life if you're the one making the mask. But to everybody else the fact that you're Skull Kid is a lot more impressive than some slightly wonky horns.
I think there's something mightily satisfying about something that's been heavily used. Here's a mask printout that's been used to catch drips and it's totally mangled.

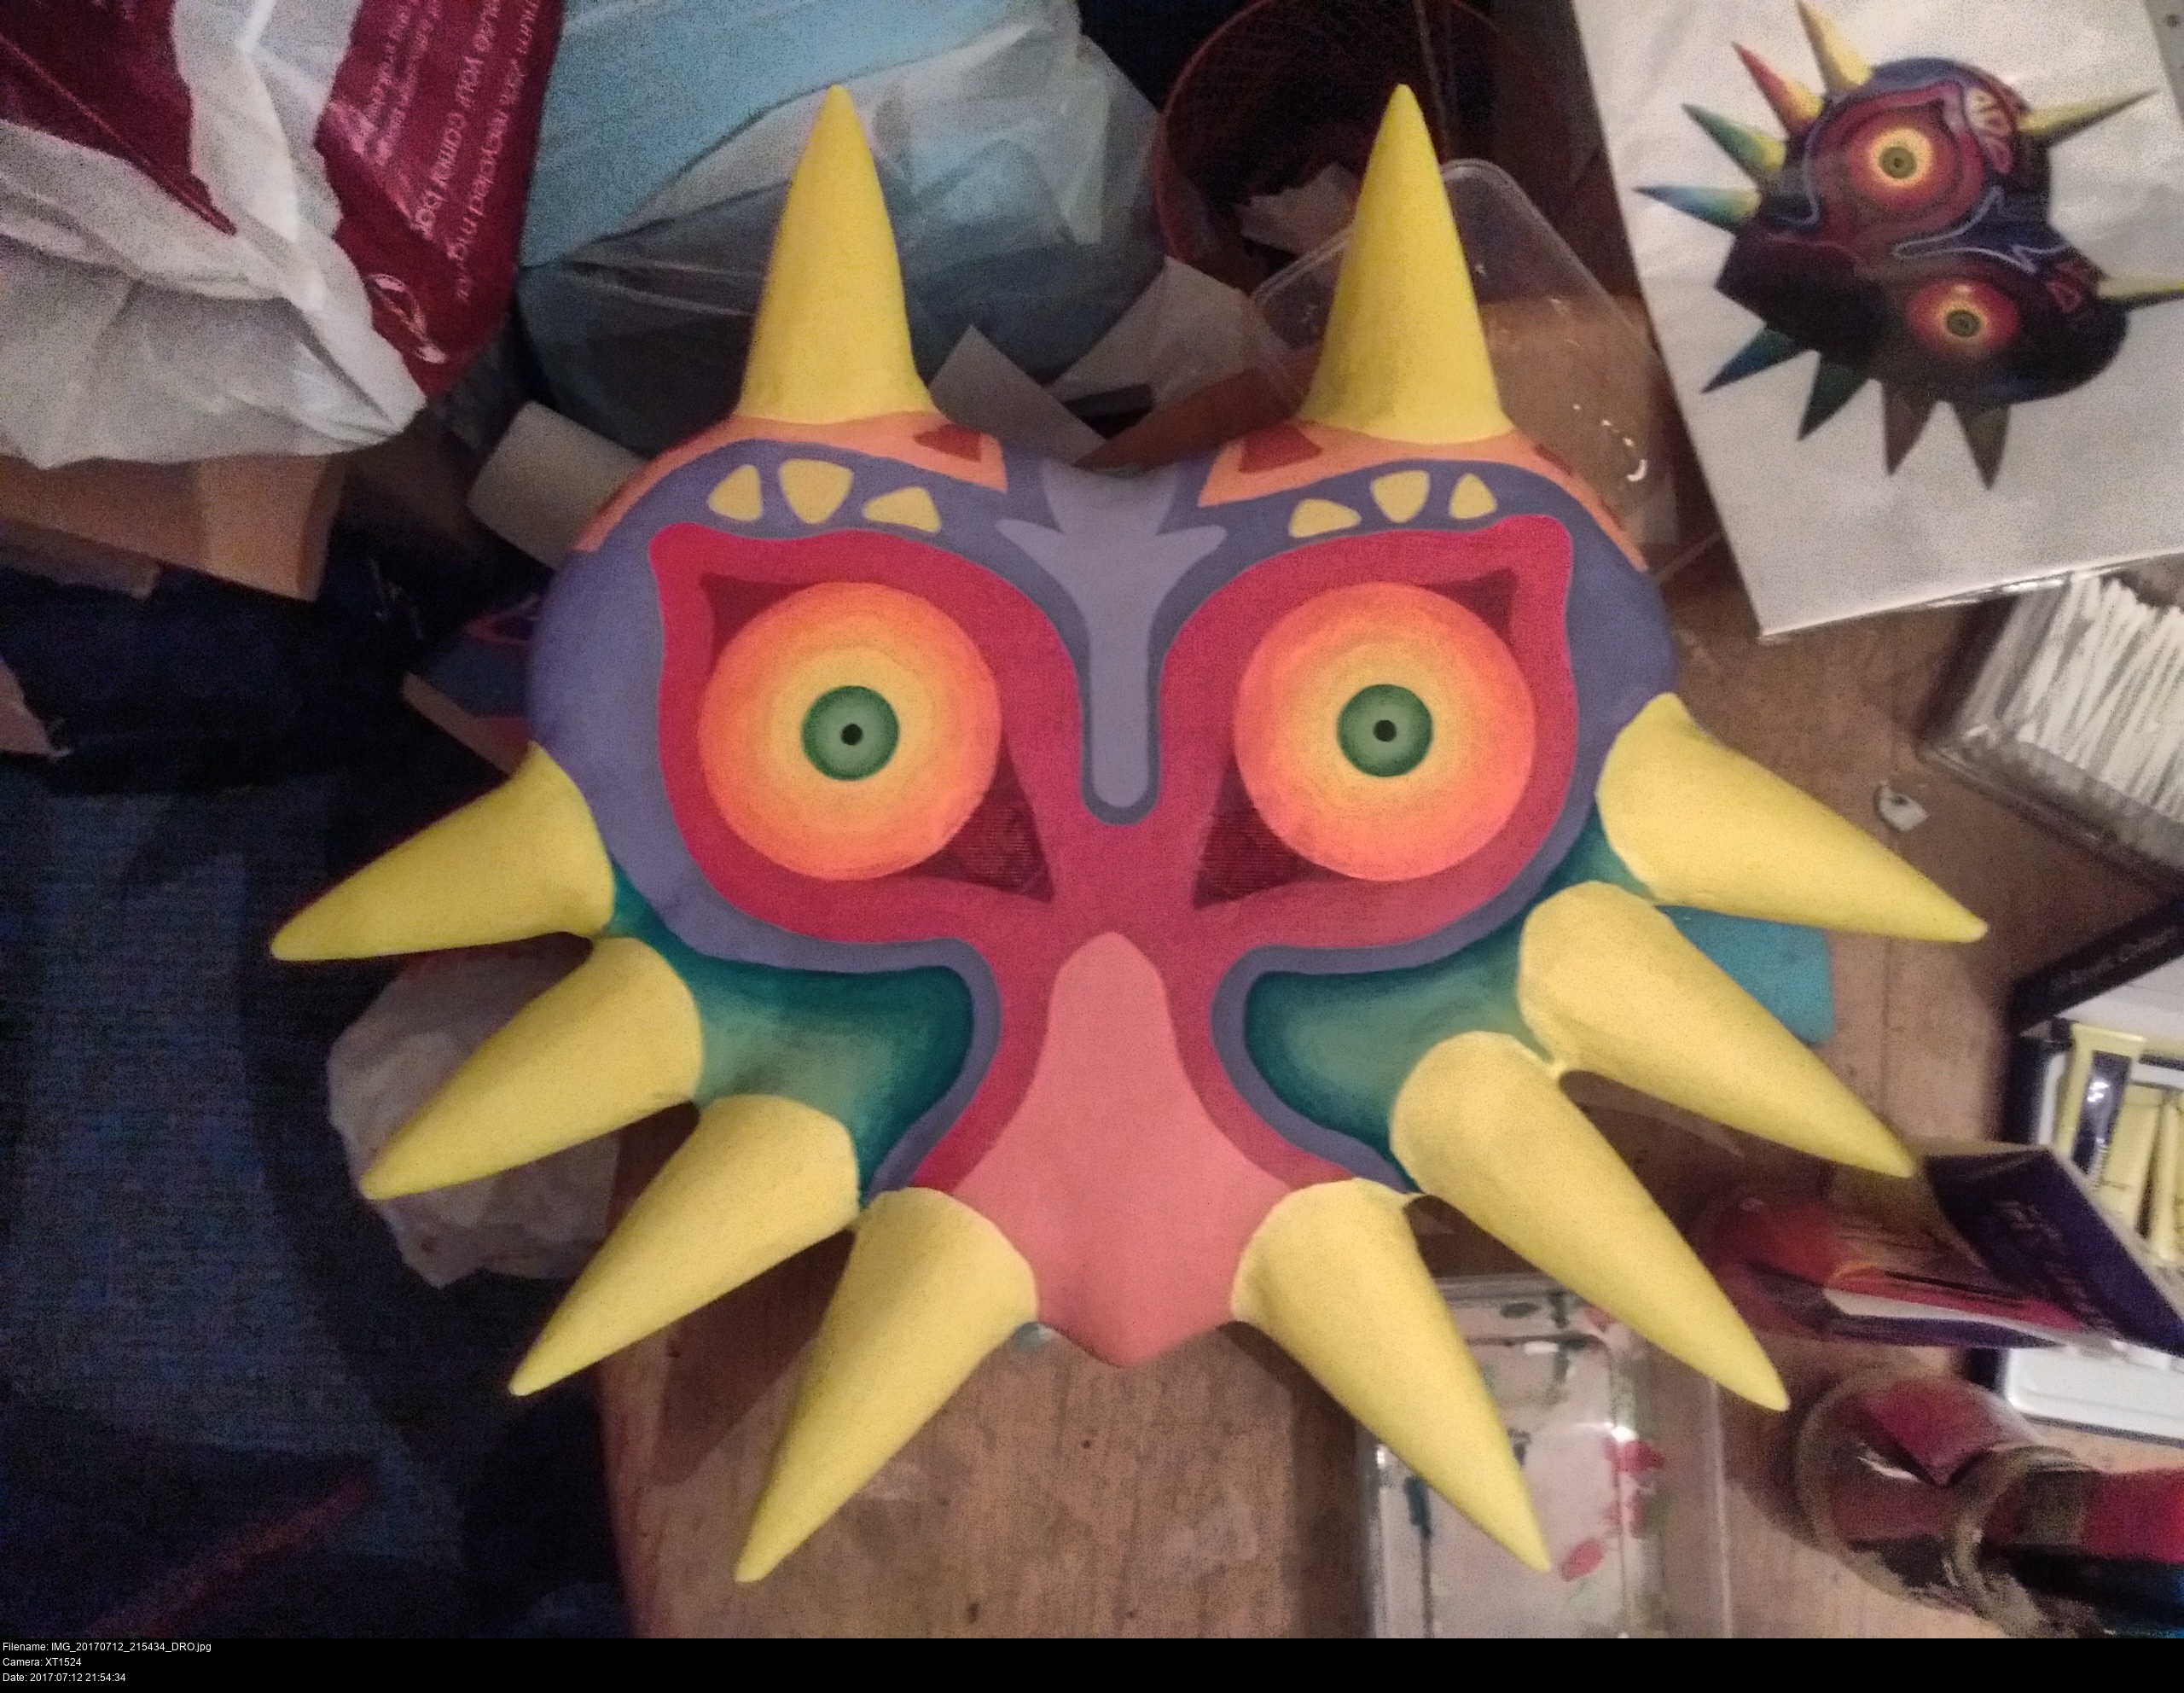
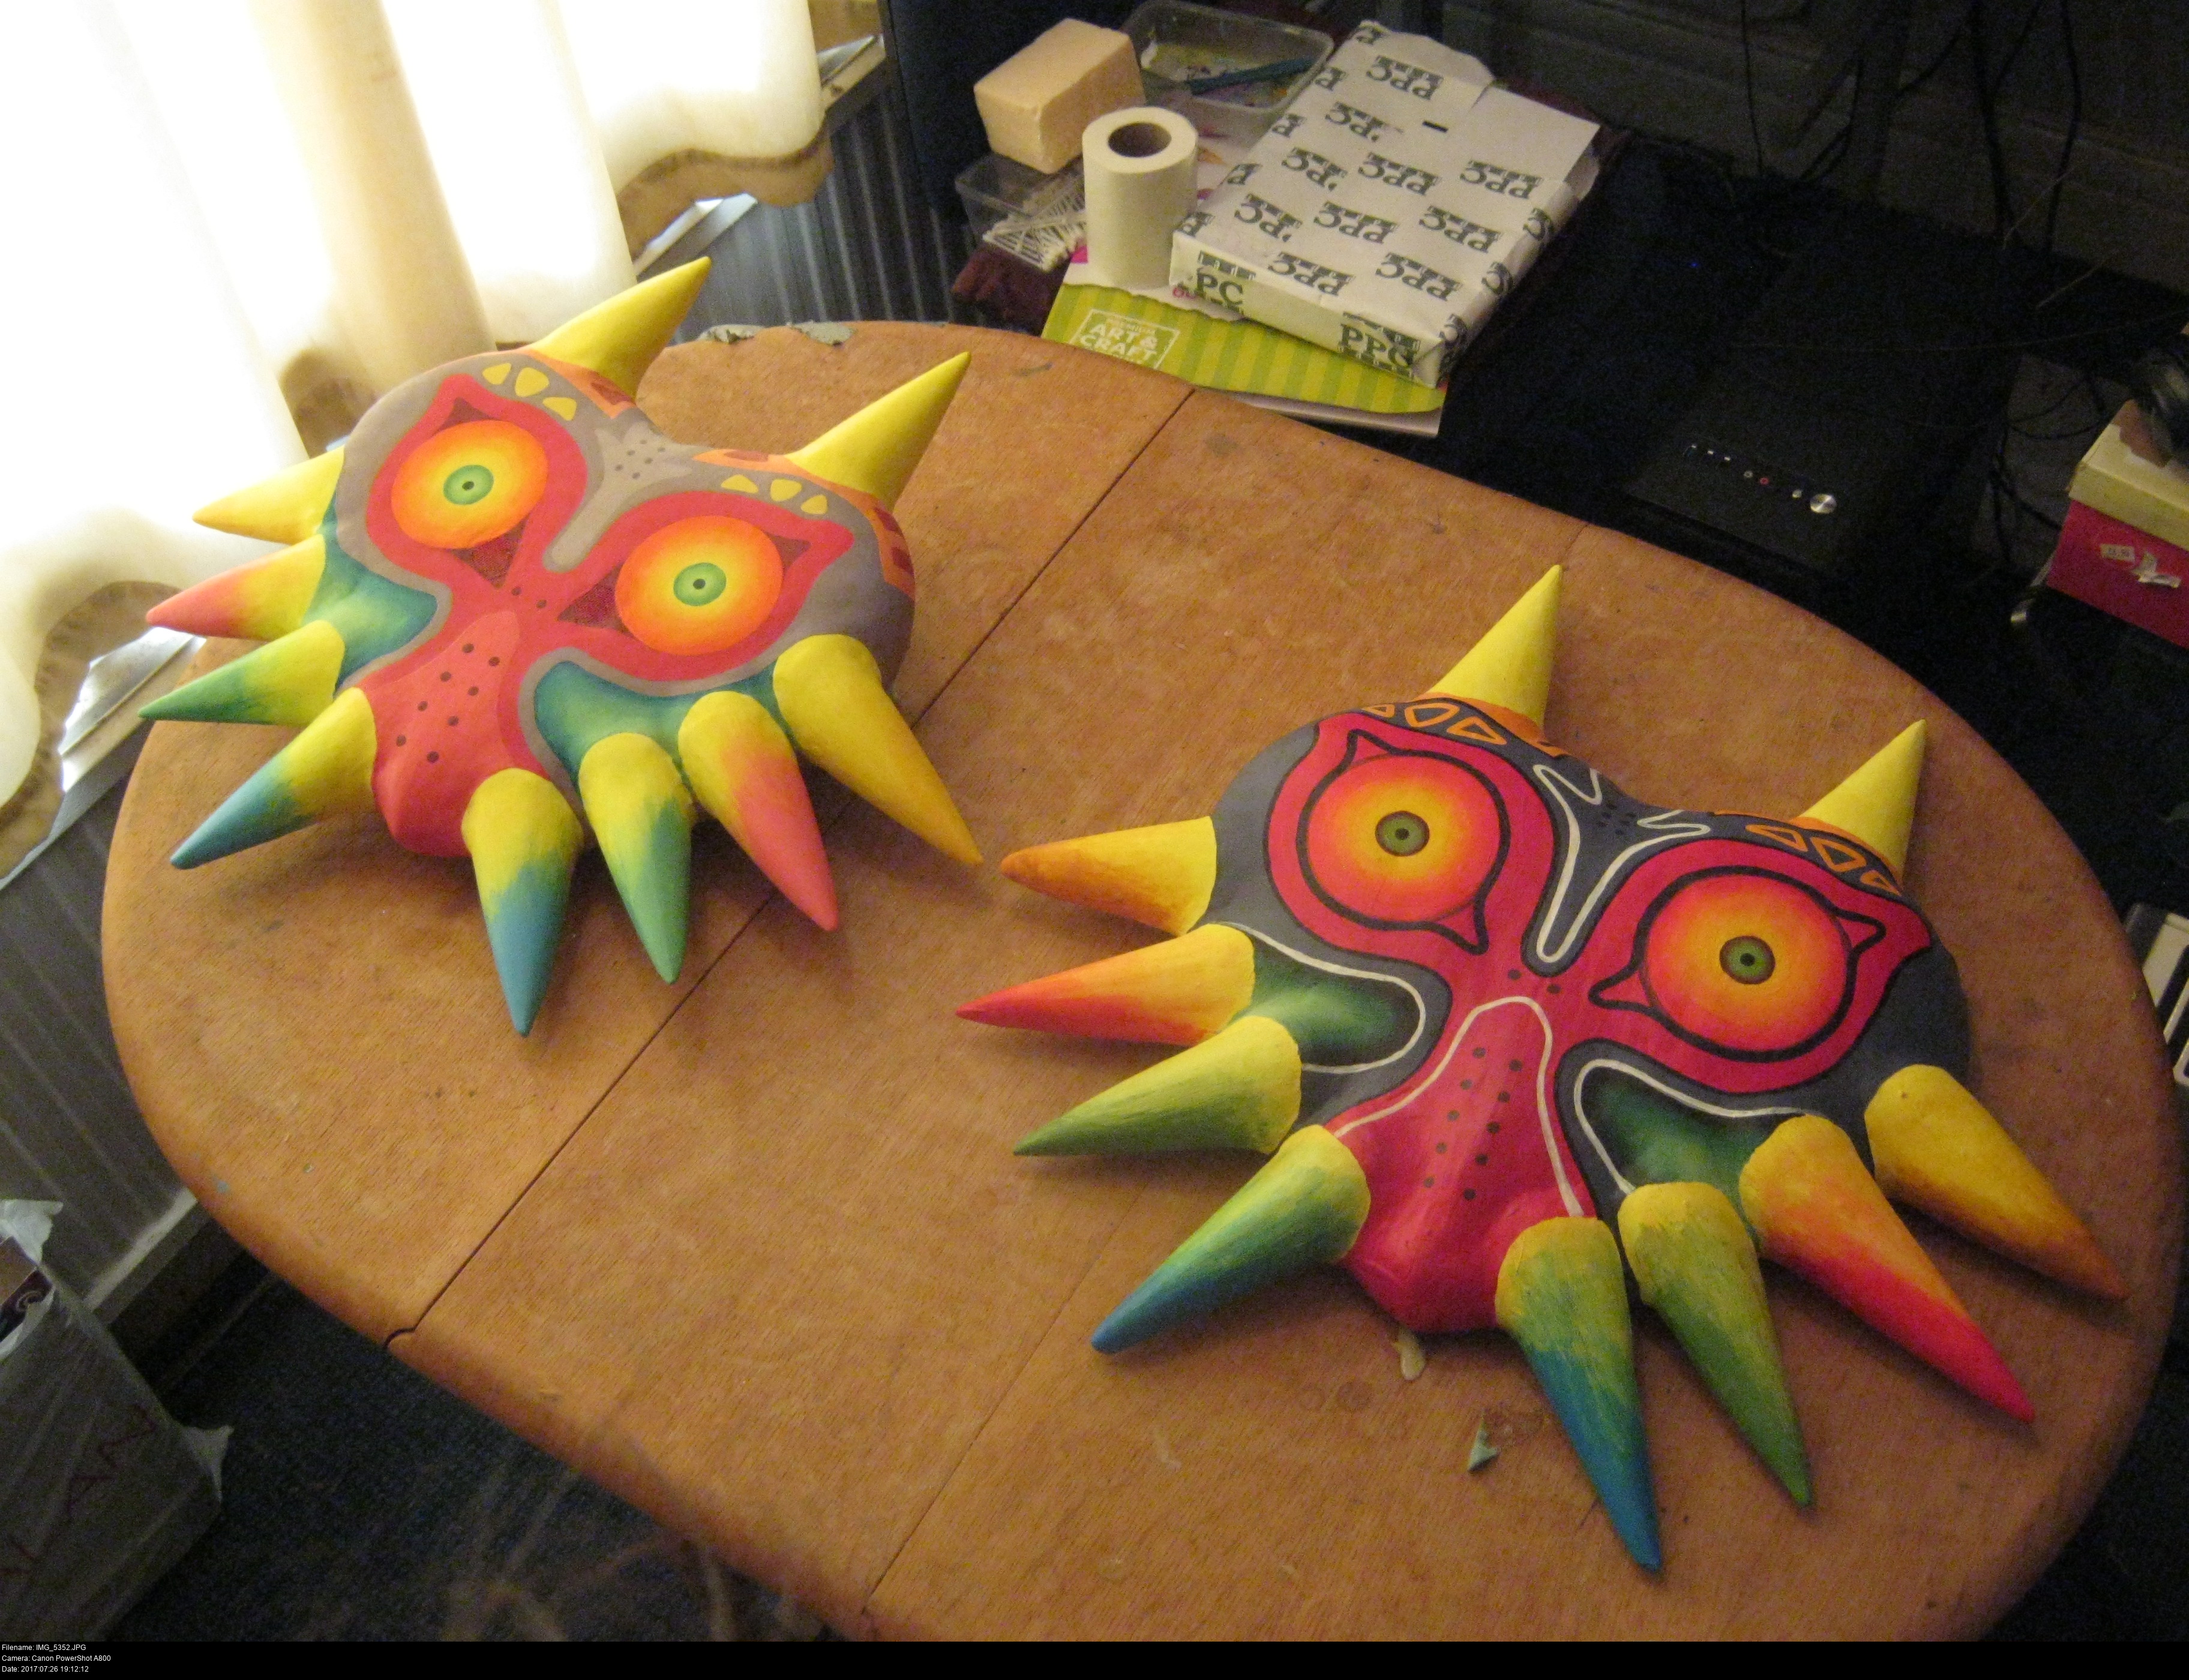
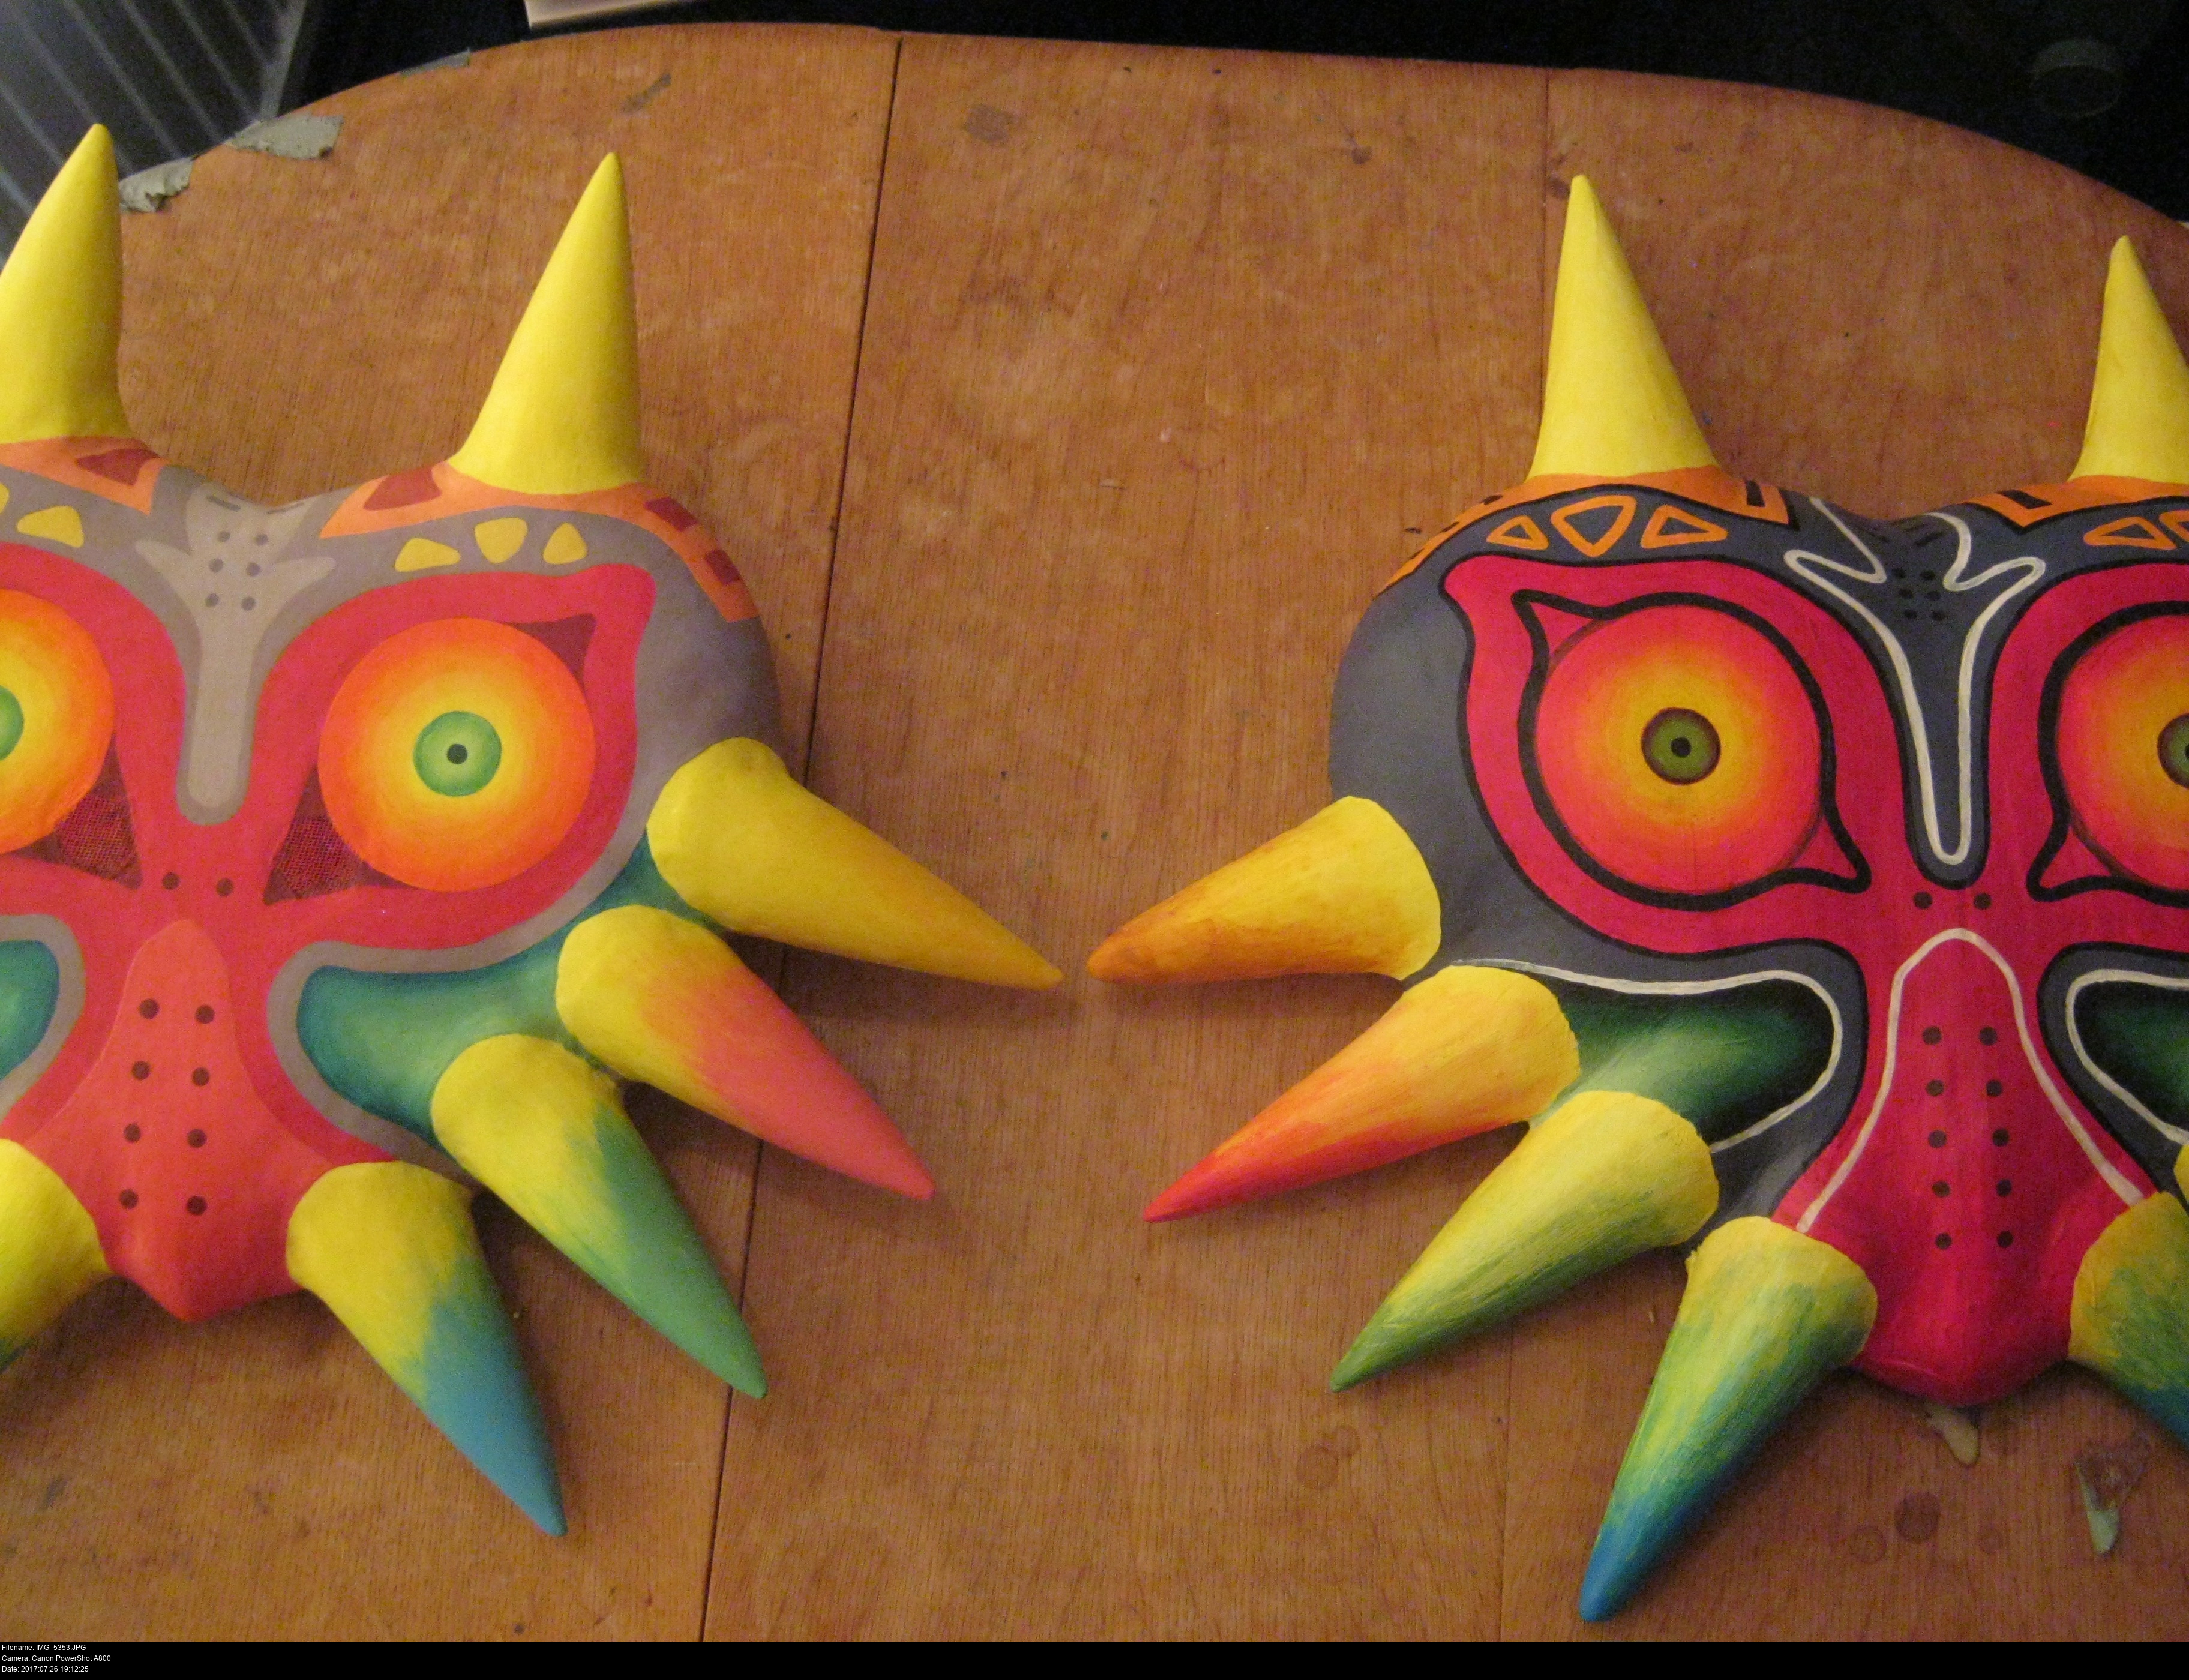
And here's my new mask beside its older brother!
It's slightly smaller - the modroc mask was built in many layers over a form traced from the outline, the XPS foam mask was cut away and sanded down from a block traced from the outline. As long as it obscures my face, I'm good.
There appears to be some dints in the foam mask, but they're all filled up with glue at this point. If you were to run your finger across the surface of the mask, it would feel smooth.


Some final finishing touches: sanding away the remants of the large bubbles and giving those areas some more coats of glue. My room is smelling very strange at this point. Doing much work with this glue inside the house is inadvisable; especially not your bedroom!
I've enlarged the eyeholes now. Just a little longer and I'll explain it all, I swear!


First thing to do, let's see how the primer takes to these lovely horns. I can't do anything about the centre of the mask until I'm completely happy with the surface and I've got my eyeholes ready.
Let the gesso dry. Then sand it down. These faded patches where the glue is showing through are due to lumps in the glue. Keep gessoing and sanding until the coat is even and smooth as you like.
Alright! Here we go!
You've got a large mask that you'd like to be able to see through, but you also want to somehow have the illusion that the mask is opaque to the outside viewer, or at least have the eyeholes not as an immediately obvious feature.
You know what other kind of costume item has eyes like that?

Say "Hi!" to Hotshot the Overlynx, my first furry character cosplay! He's from an obscure Norwegian MS-DOS game called Interpose released in 1996.


His eyes are made of 'plastic-card': stiff, shiny white sheet of plastic you can buy from model shops (for train set buildings and so on), and buckram interfacing which is a stiff, sparse fabric used for shirt collars and sleeves. The plastic card forms the sclera and iris part of the eye, and the buckram is the pupil.
(There's many arrangements of plastic and buckram used in furry heads: sometimes the entire flat surface of the eye is painted buckram with a plastic border, but Hotshot's eye style doesn't allow for that. His massive cat pupils and huge amounts of iris work well for my method though!)
If you hold buckram up to your eye, you can see through it quite well. When I wear Hotshot's head, I'm really looking through his eyes!
Your eyes can focus on the distant objects and your combined binocular vision helps to fill in all the missing areas. (Apologies to the cyclops in the house.)
If you paint the interior-facing side of the buckram black...


You get no distracting reflections and bounces from the material itself, creating an image comprised entirely of incoming useful parallel light. That's a good thing!

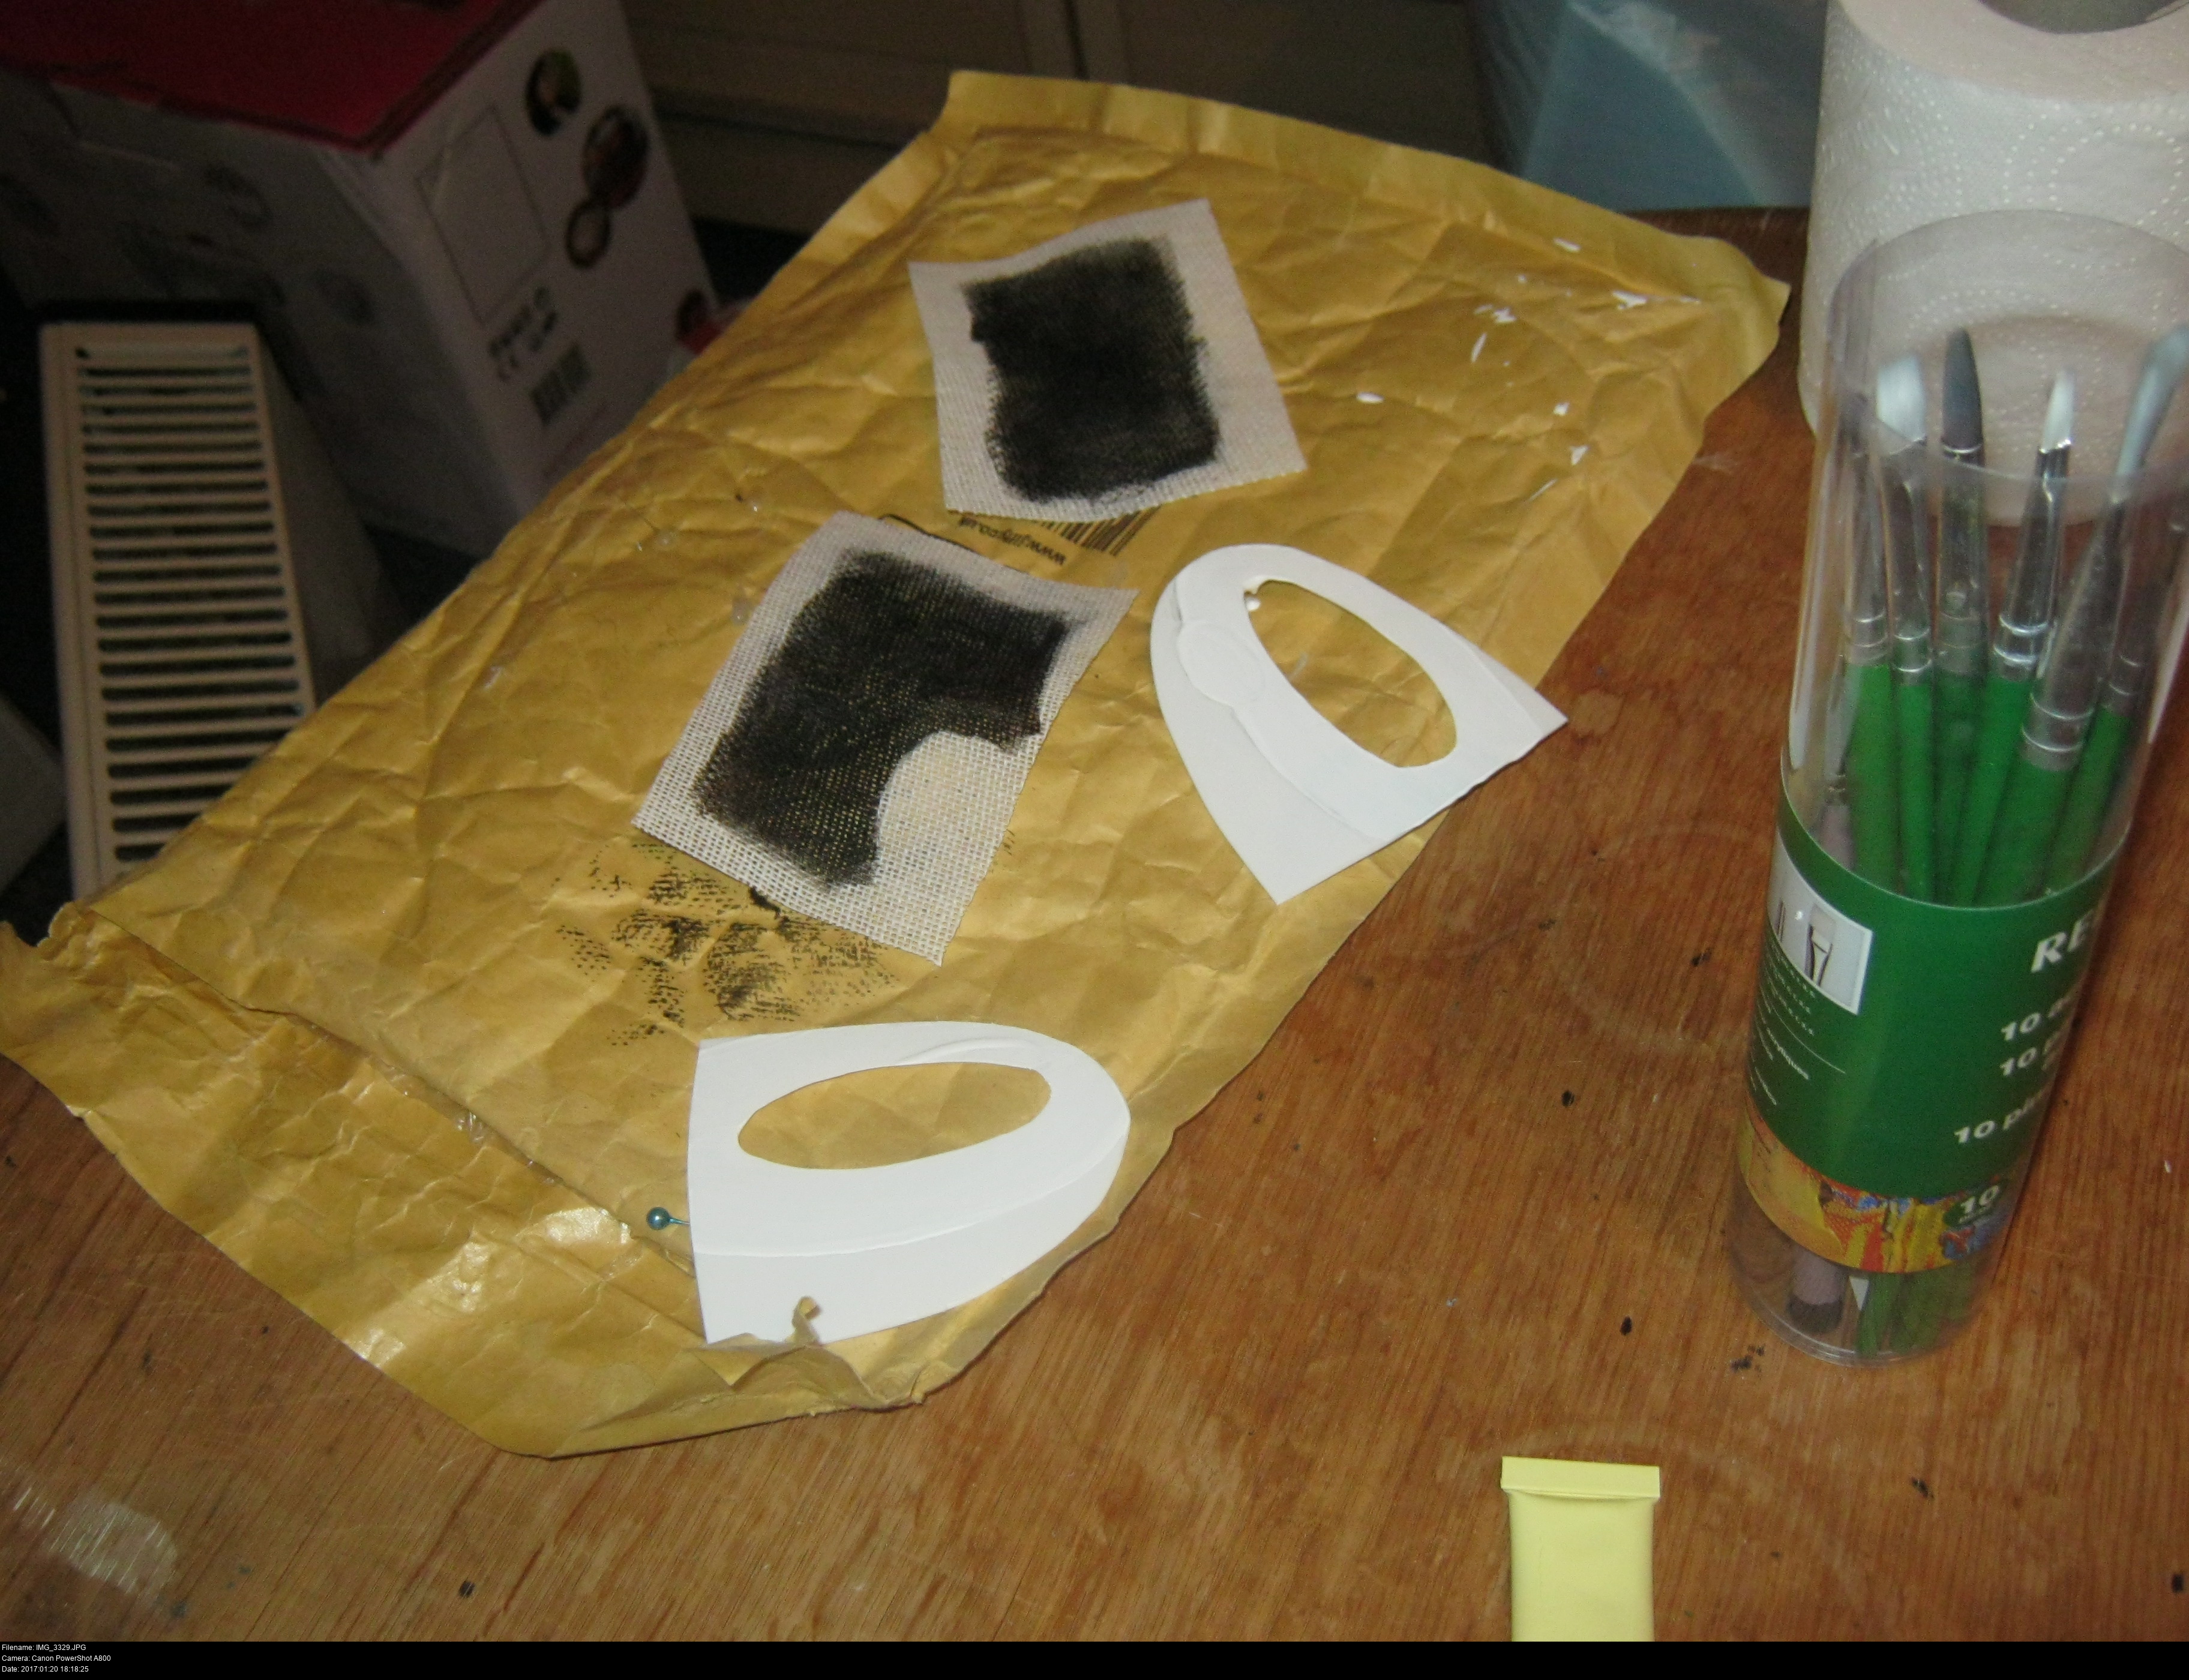
Alright, so buckram. A big face-mask shaped piece of buckram with the inward-facing side painted black.
Painting buckram black is easy but has a couple of caveats that you need to be aware of:
Buckram is stiff stuff and it'll probably have a slightly creased or twisted texture by the time you've cut it and got it ready to paint. As you paint it, it'll become even more warped from the drying paint. Consider flattening it between some heavy surfaces for a day or so when the paint is completely dry.
If you paint the buckram with paint instead of darkening it with a wide-tipped permanent marker, you'll end up with films of paint blocking the holes in the buckram. The way to fix this is to individually pierce each film as it appears with a thin steel sewing pin. Watering down the paint tends to make more films appear, so I try to use the paint neat and sparingly. Keep holding up the buckram to the light to check for films. You can pierce them after the paint is dried but it's more difficult.


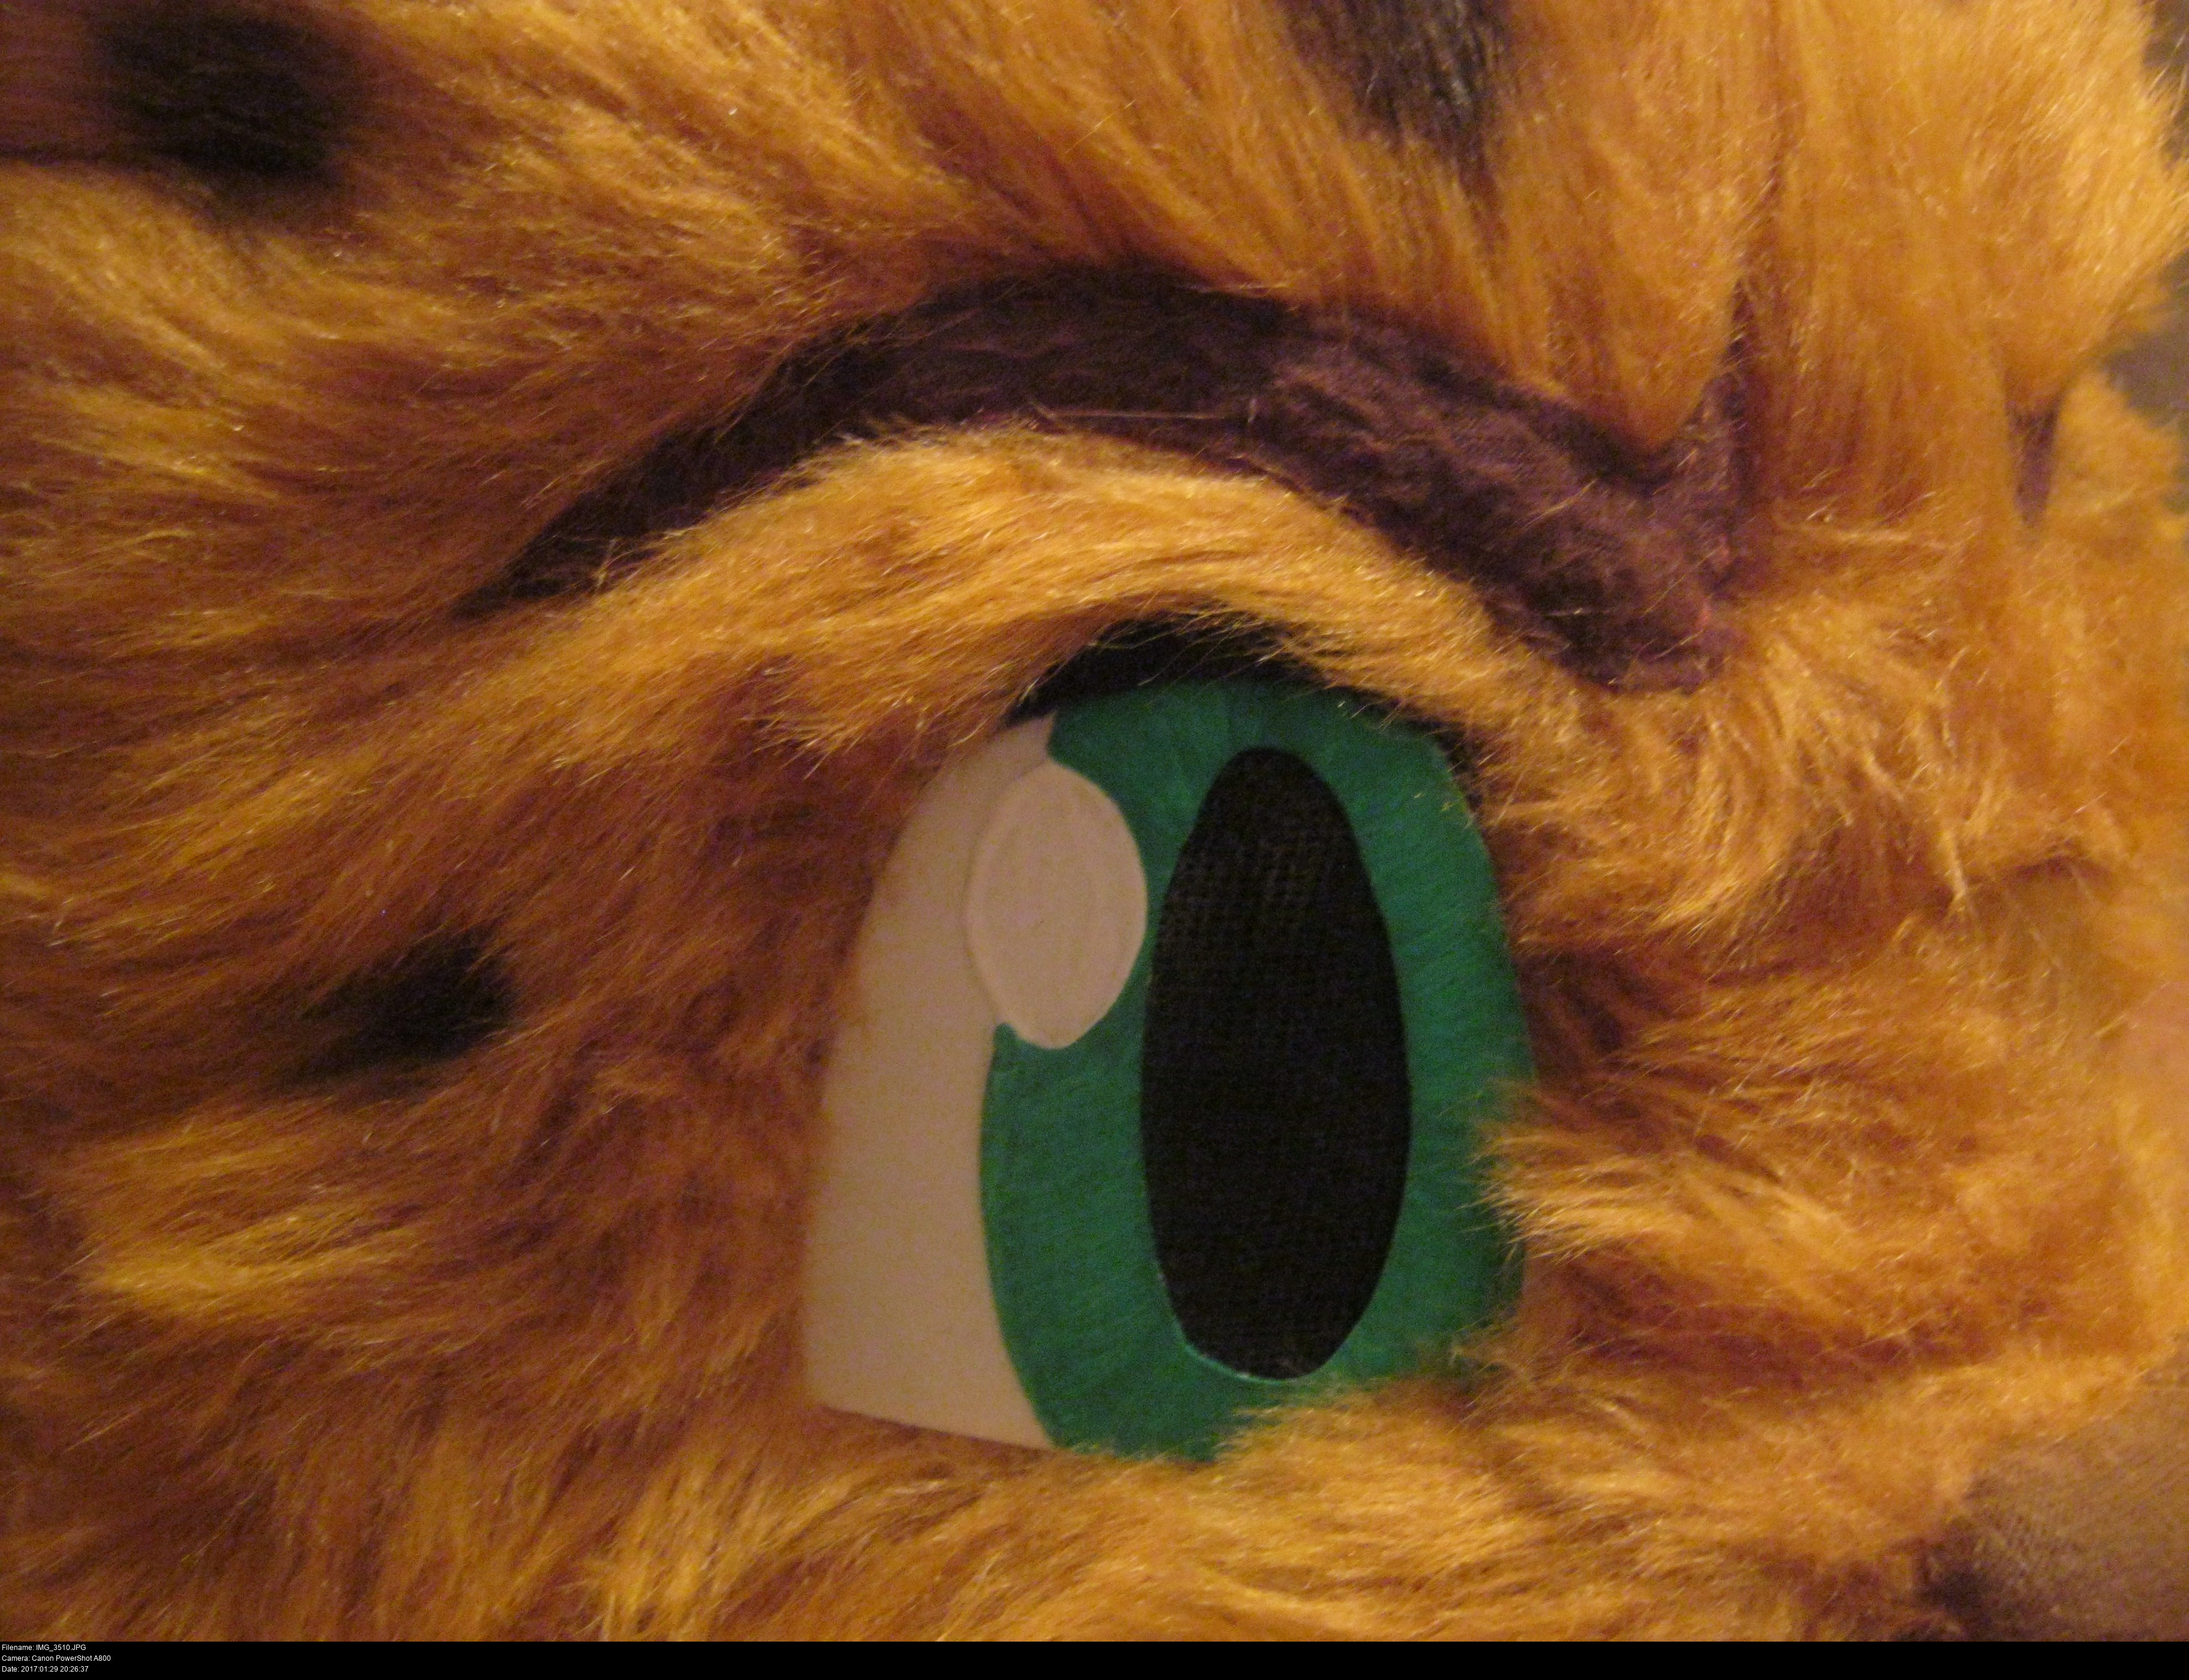
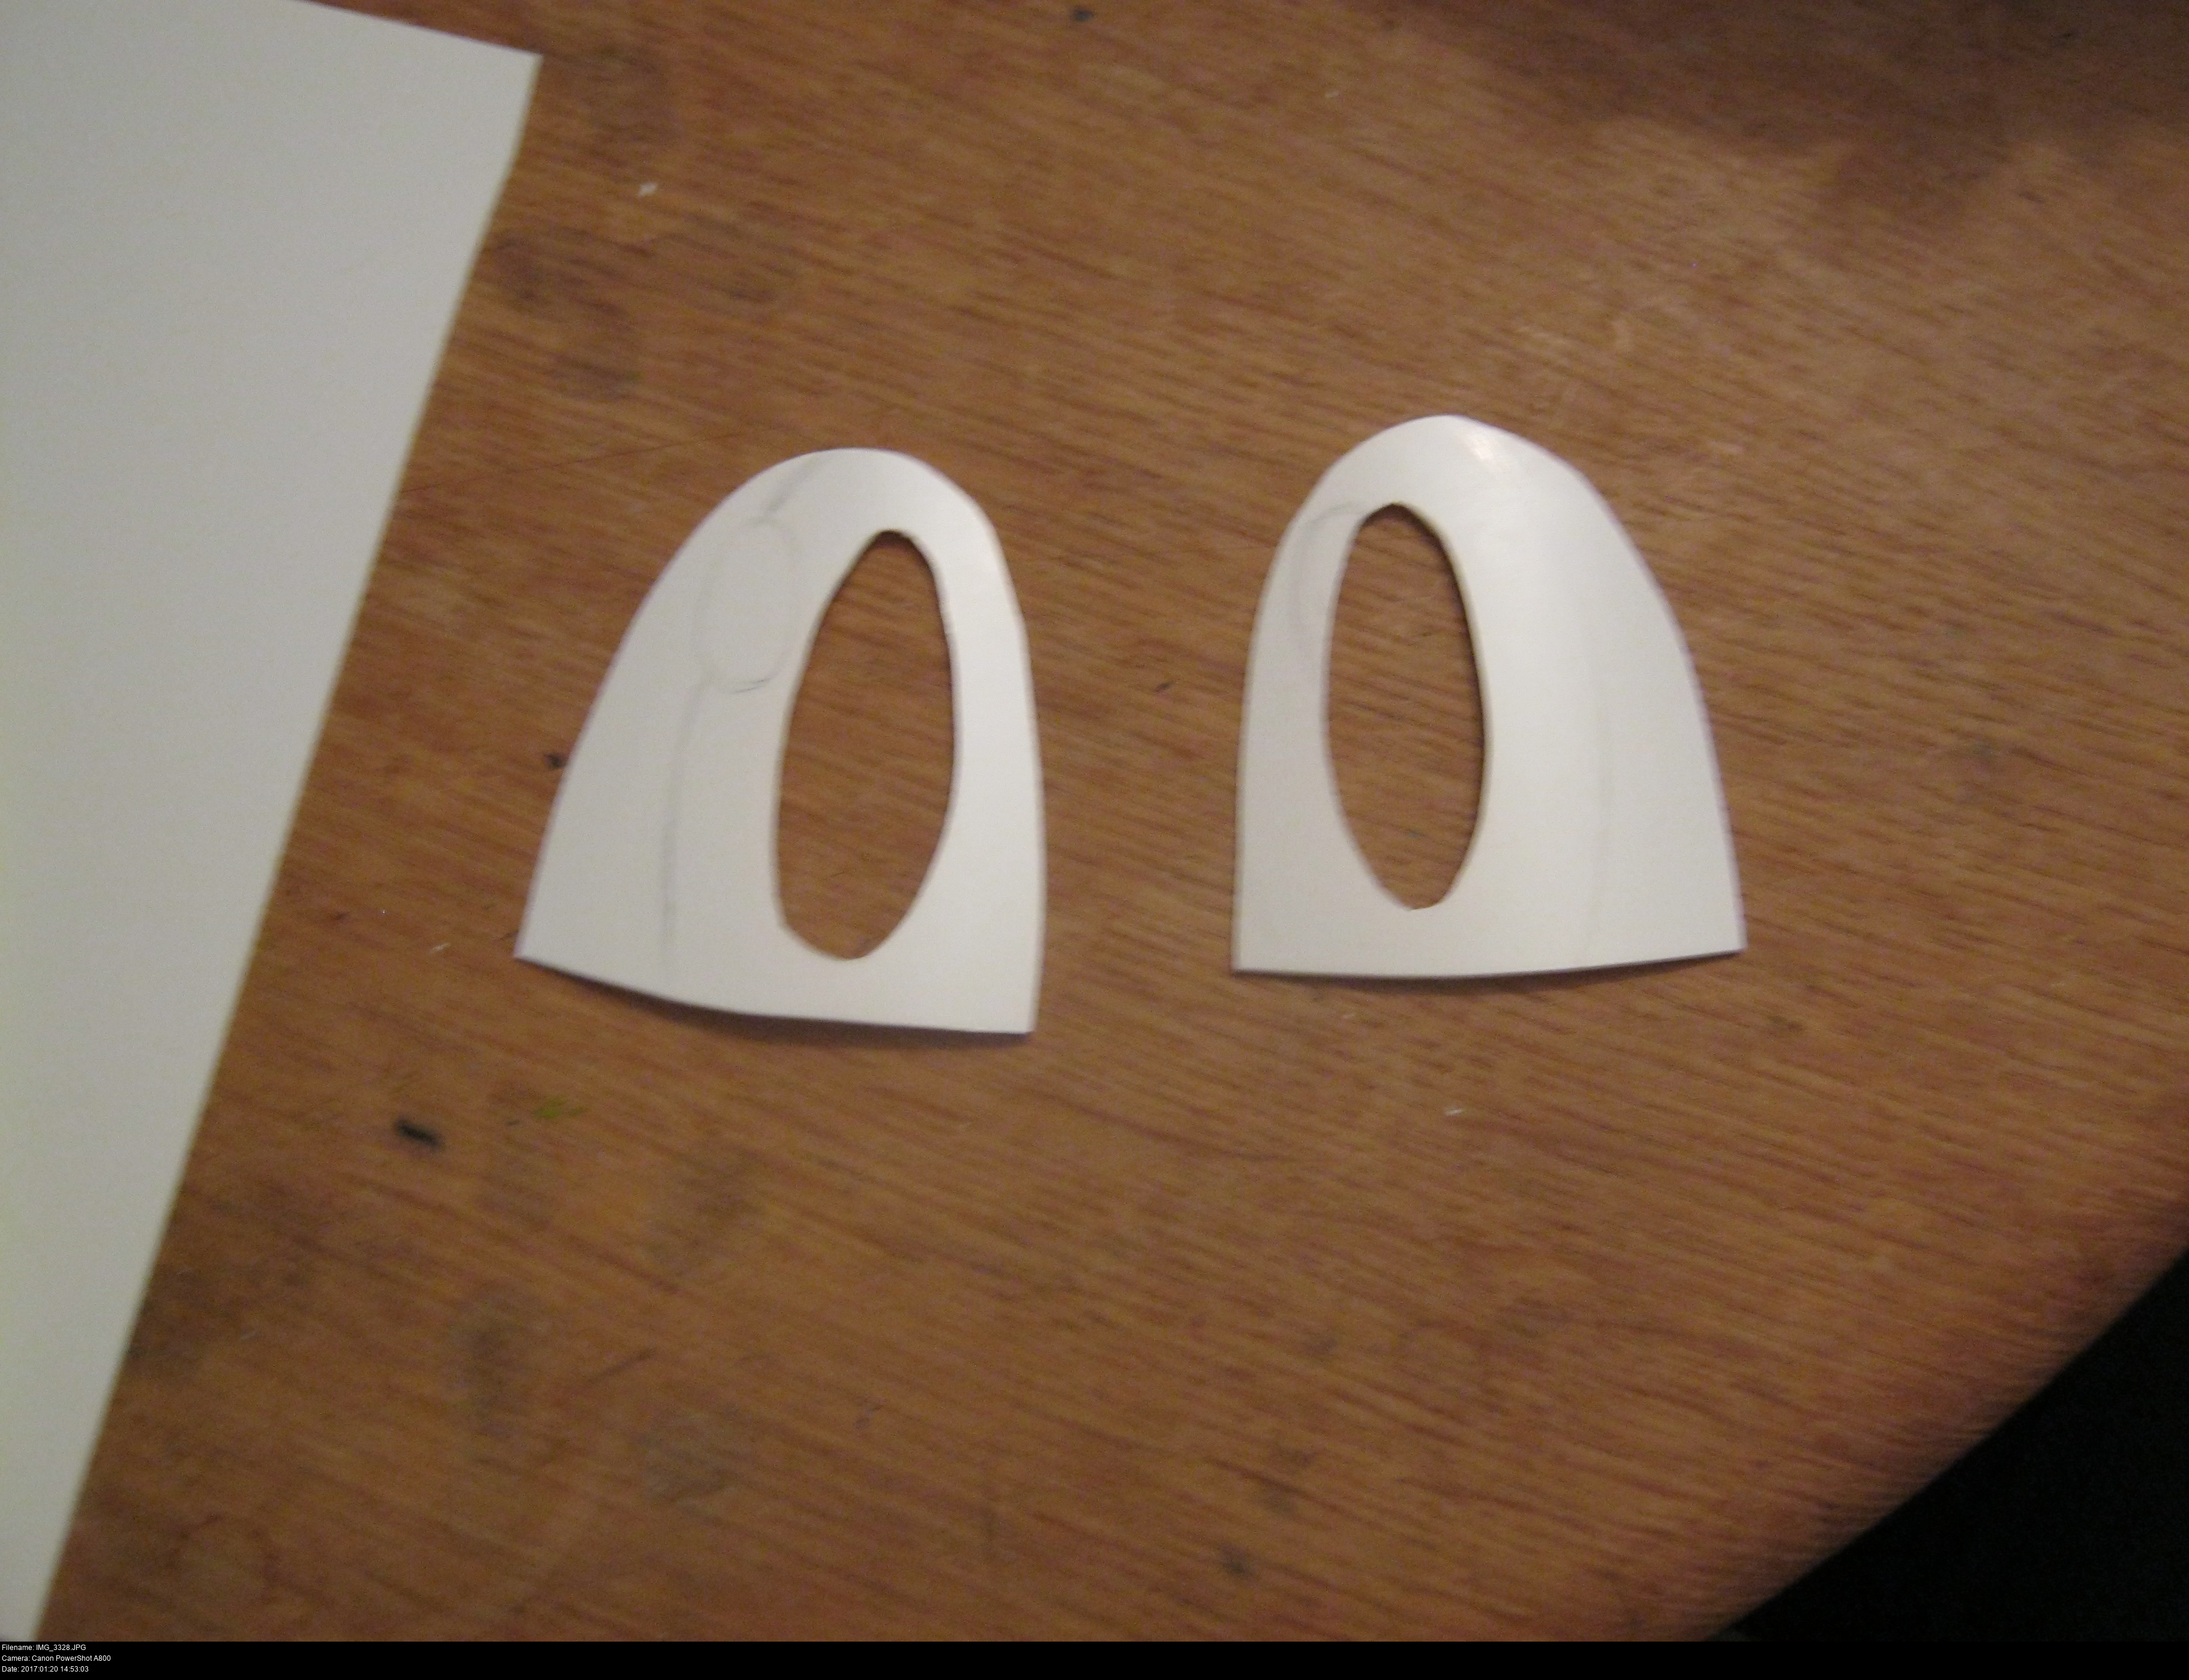
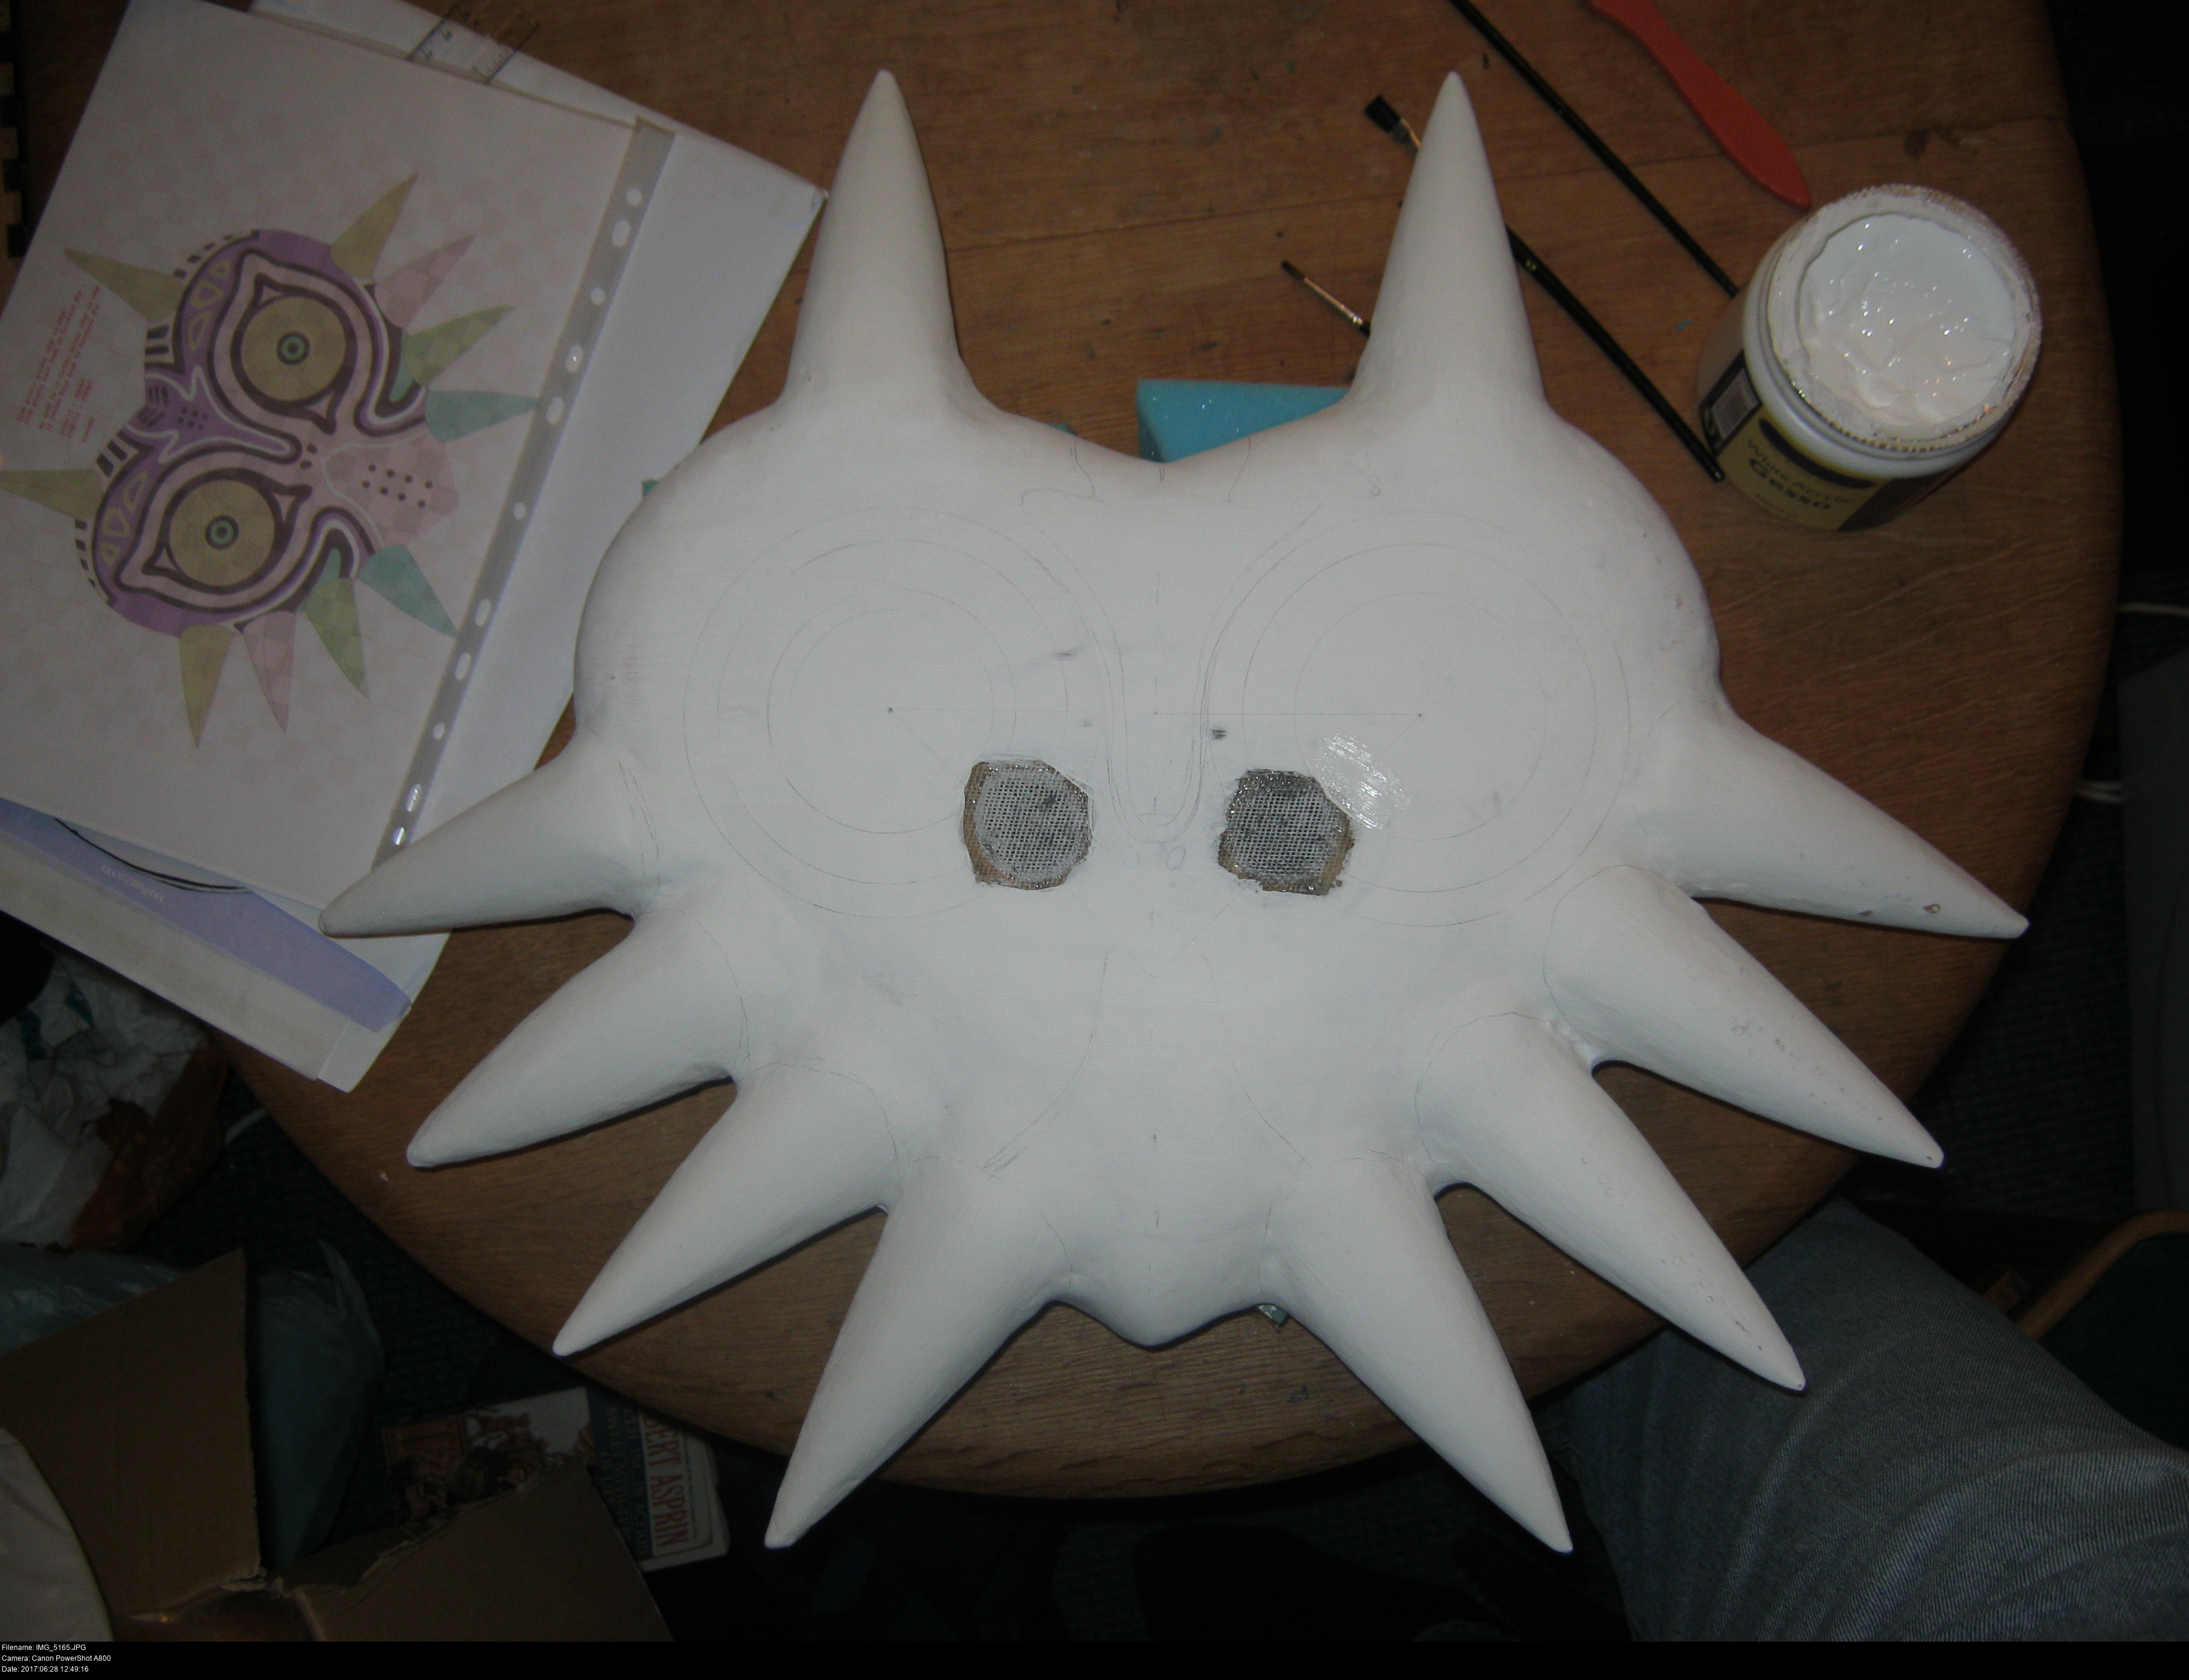
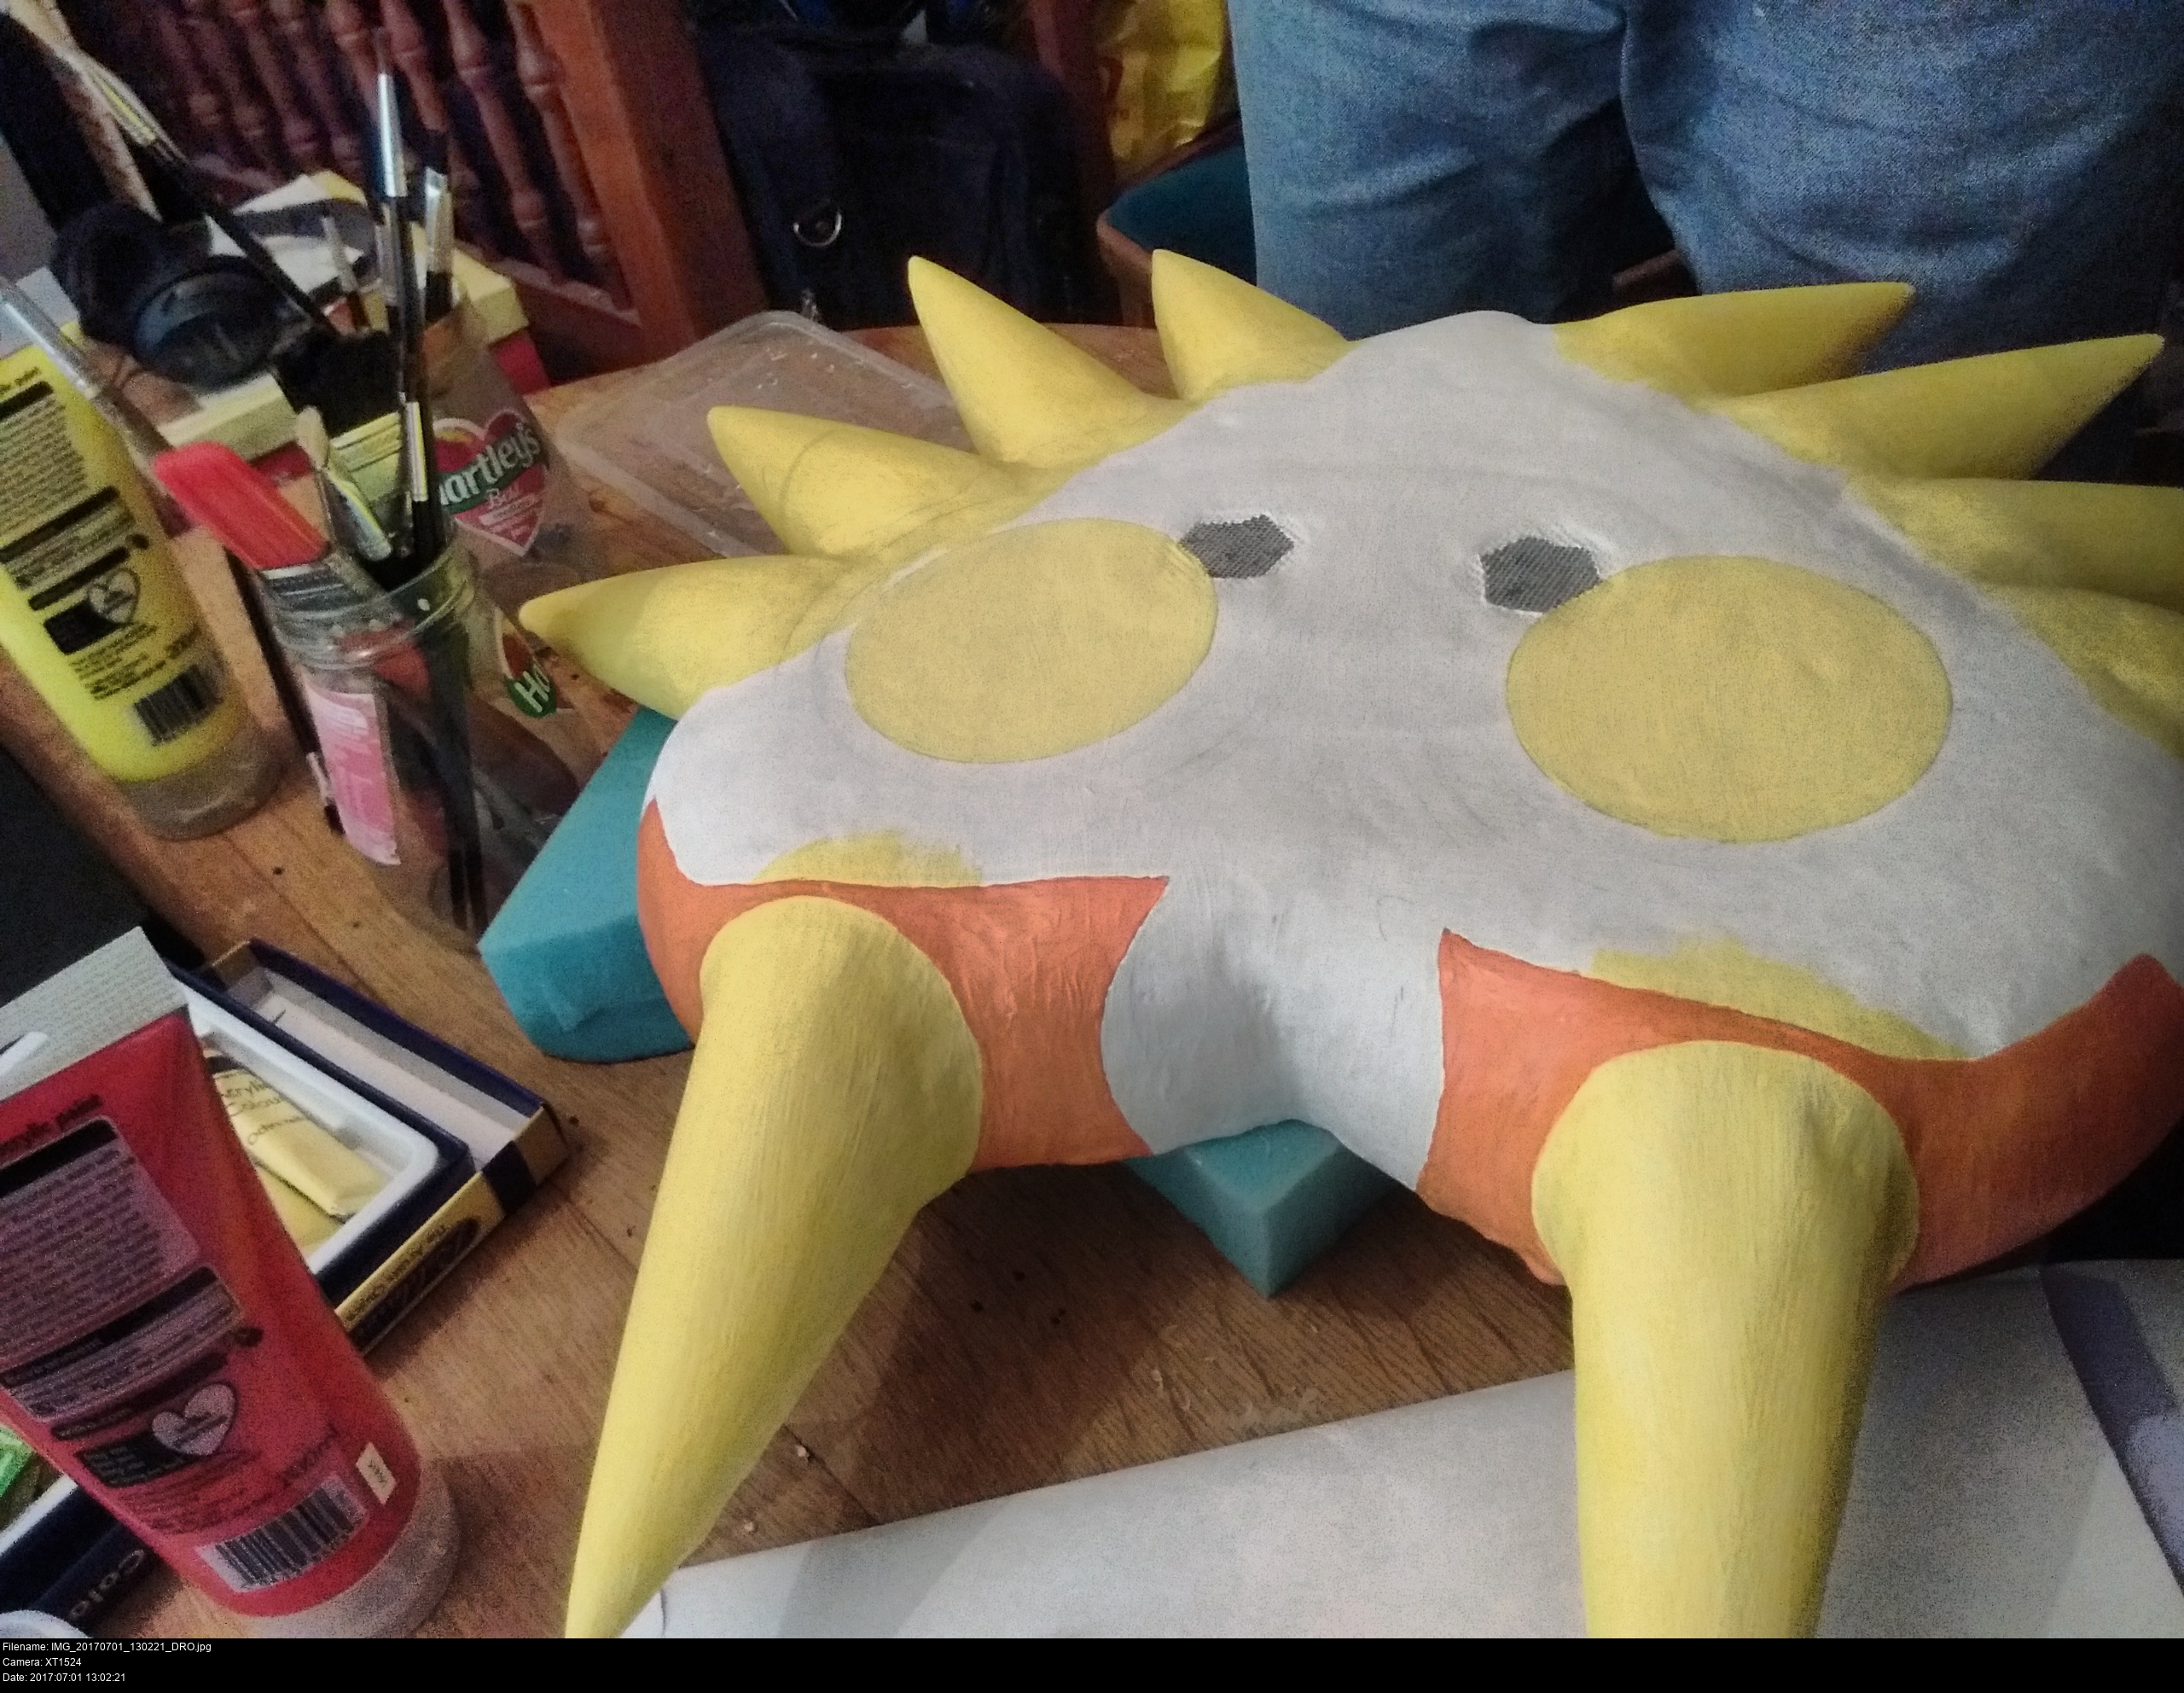
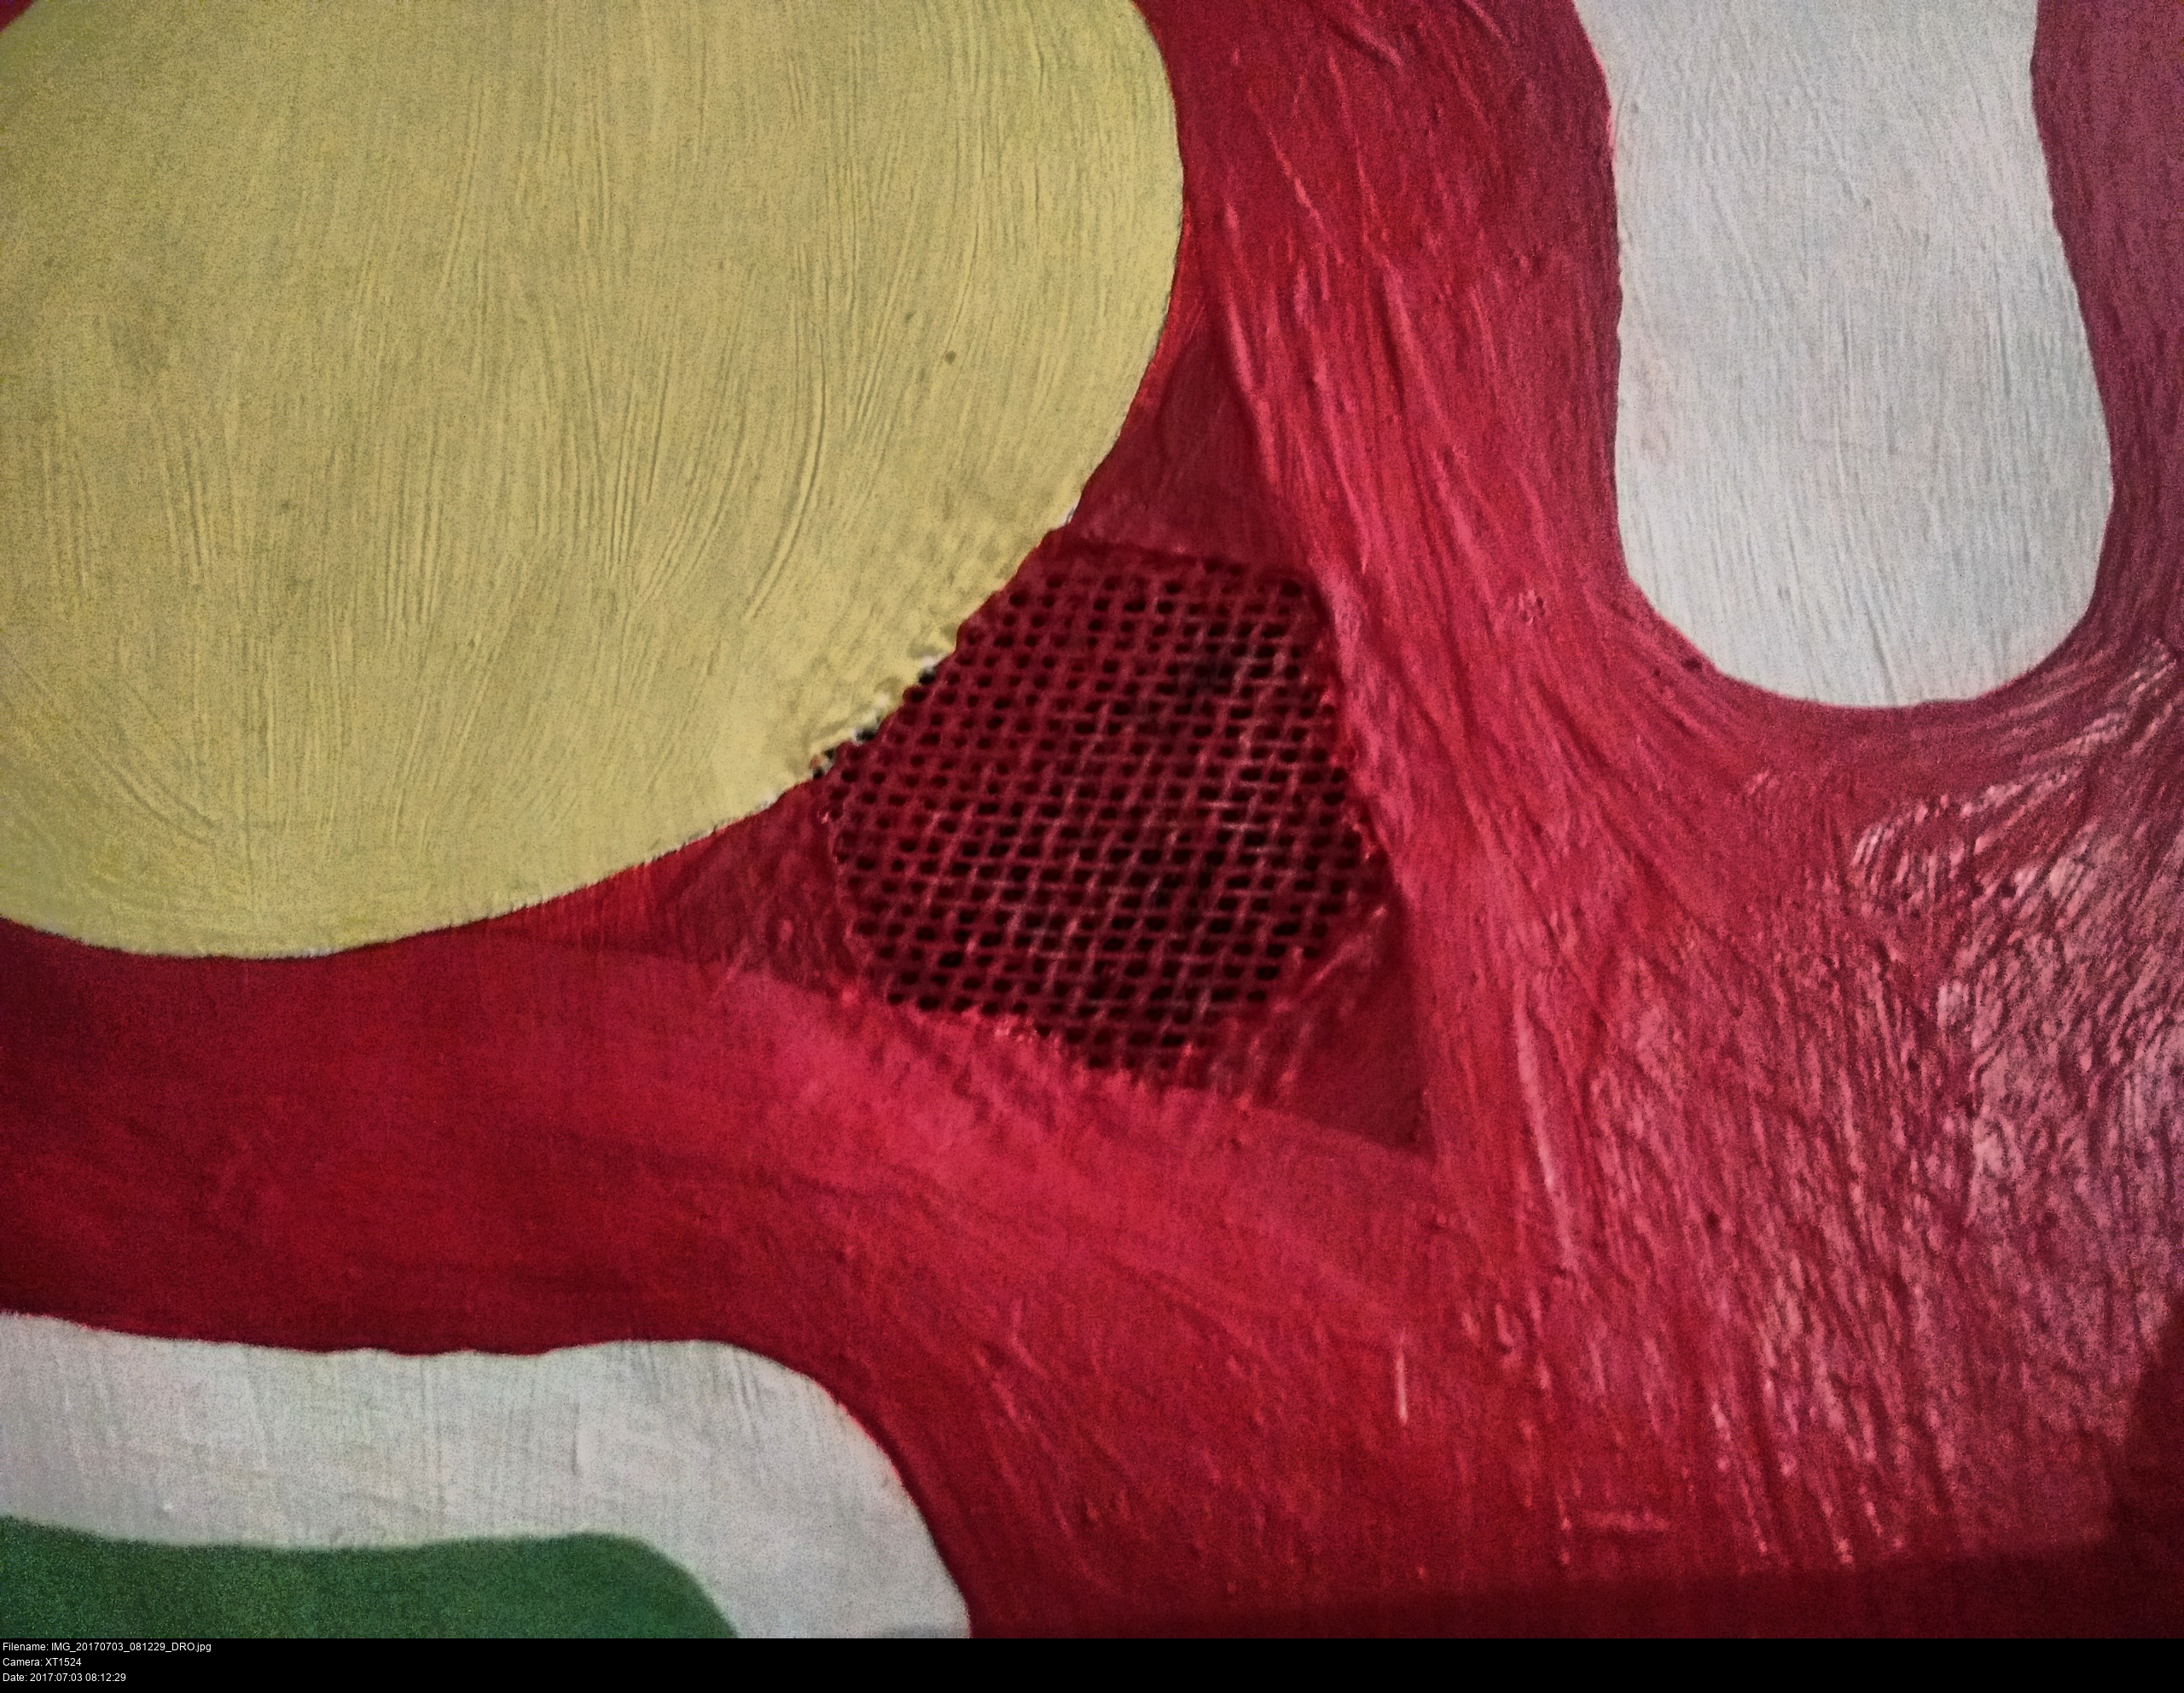
In preparation for the buckram, I've enlarged the eyeholes using a series of drill bits and sandpaper wrapped around various tools. I've also sealed their interior with glue, primed and painted them black for the same reason as the buckram. When you do this, use the original holes as a guide, and constantly, -constantly-, check to make sure everything is symmetrical. It's not the end of the world if it isn't, since you'll see how I shaped the eyeholes in a few pictures time, but having poor eye placement will throw off your measurements and planning later on. Get it right here first.
Now how am I going to apply this to the mask without it looking like a big crinkly piece of fabric that's just been glued onto the smooth surface of the mask?
Well, I'm just going to do exactly that.


Lay the buckram out flat on the mask and apply the glue beneath and on top. Press down on the buckram so the glue oozes through all the holes, but don't clamp it. Let the glue hold it in place. Don't paint over the eyeholes! Keep the glue to the outer regions of the buckram, but have a generous margin of glue.
When it's dried...

BINGO!
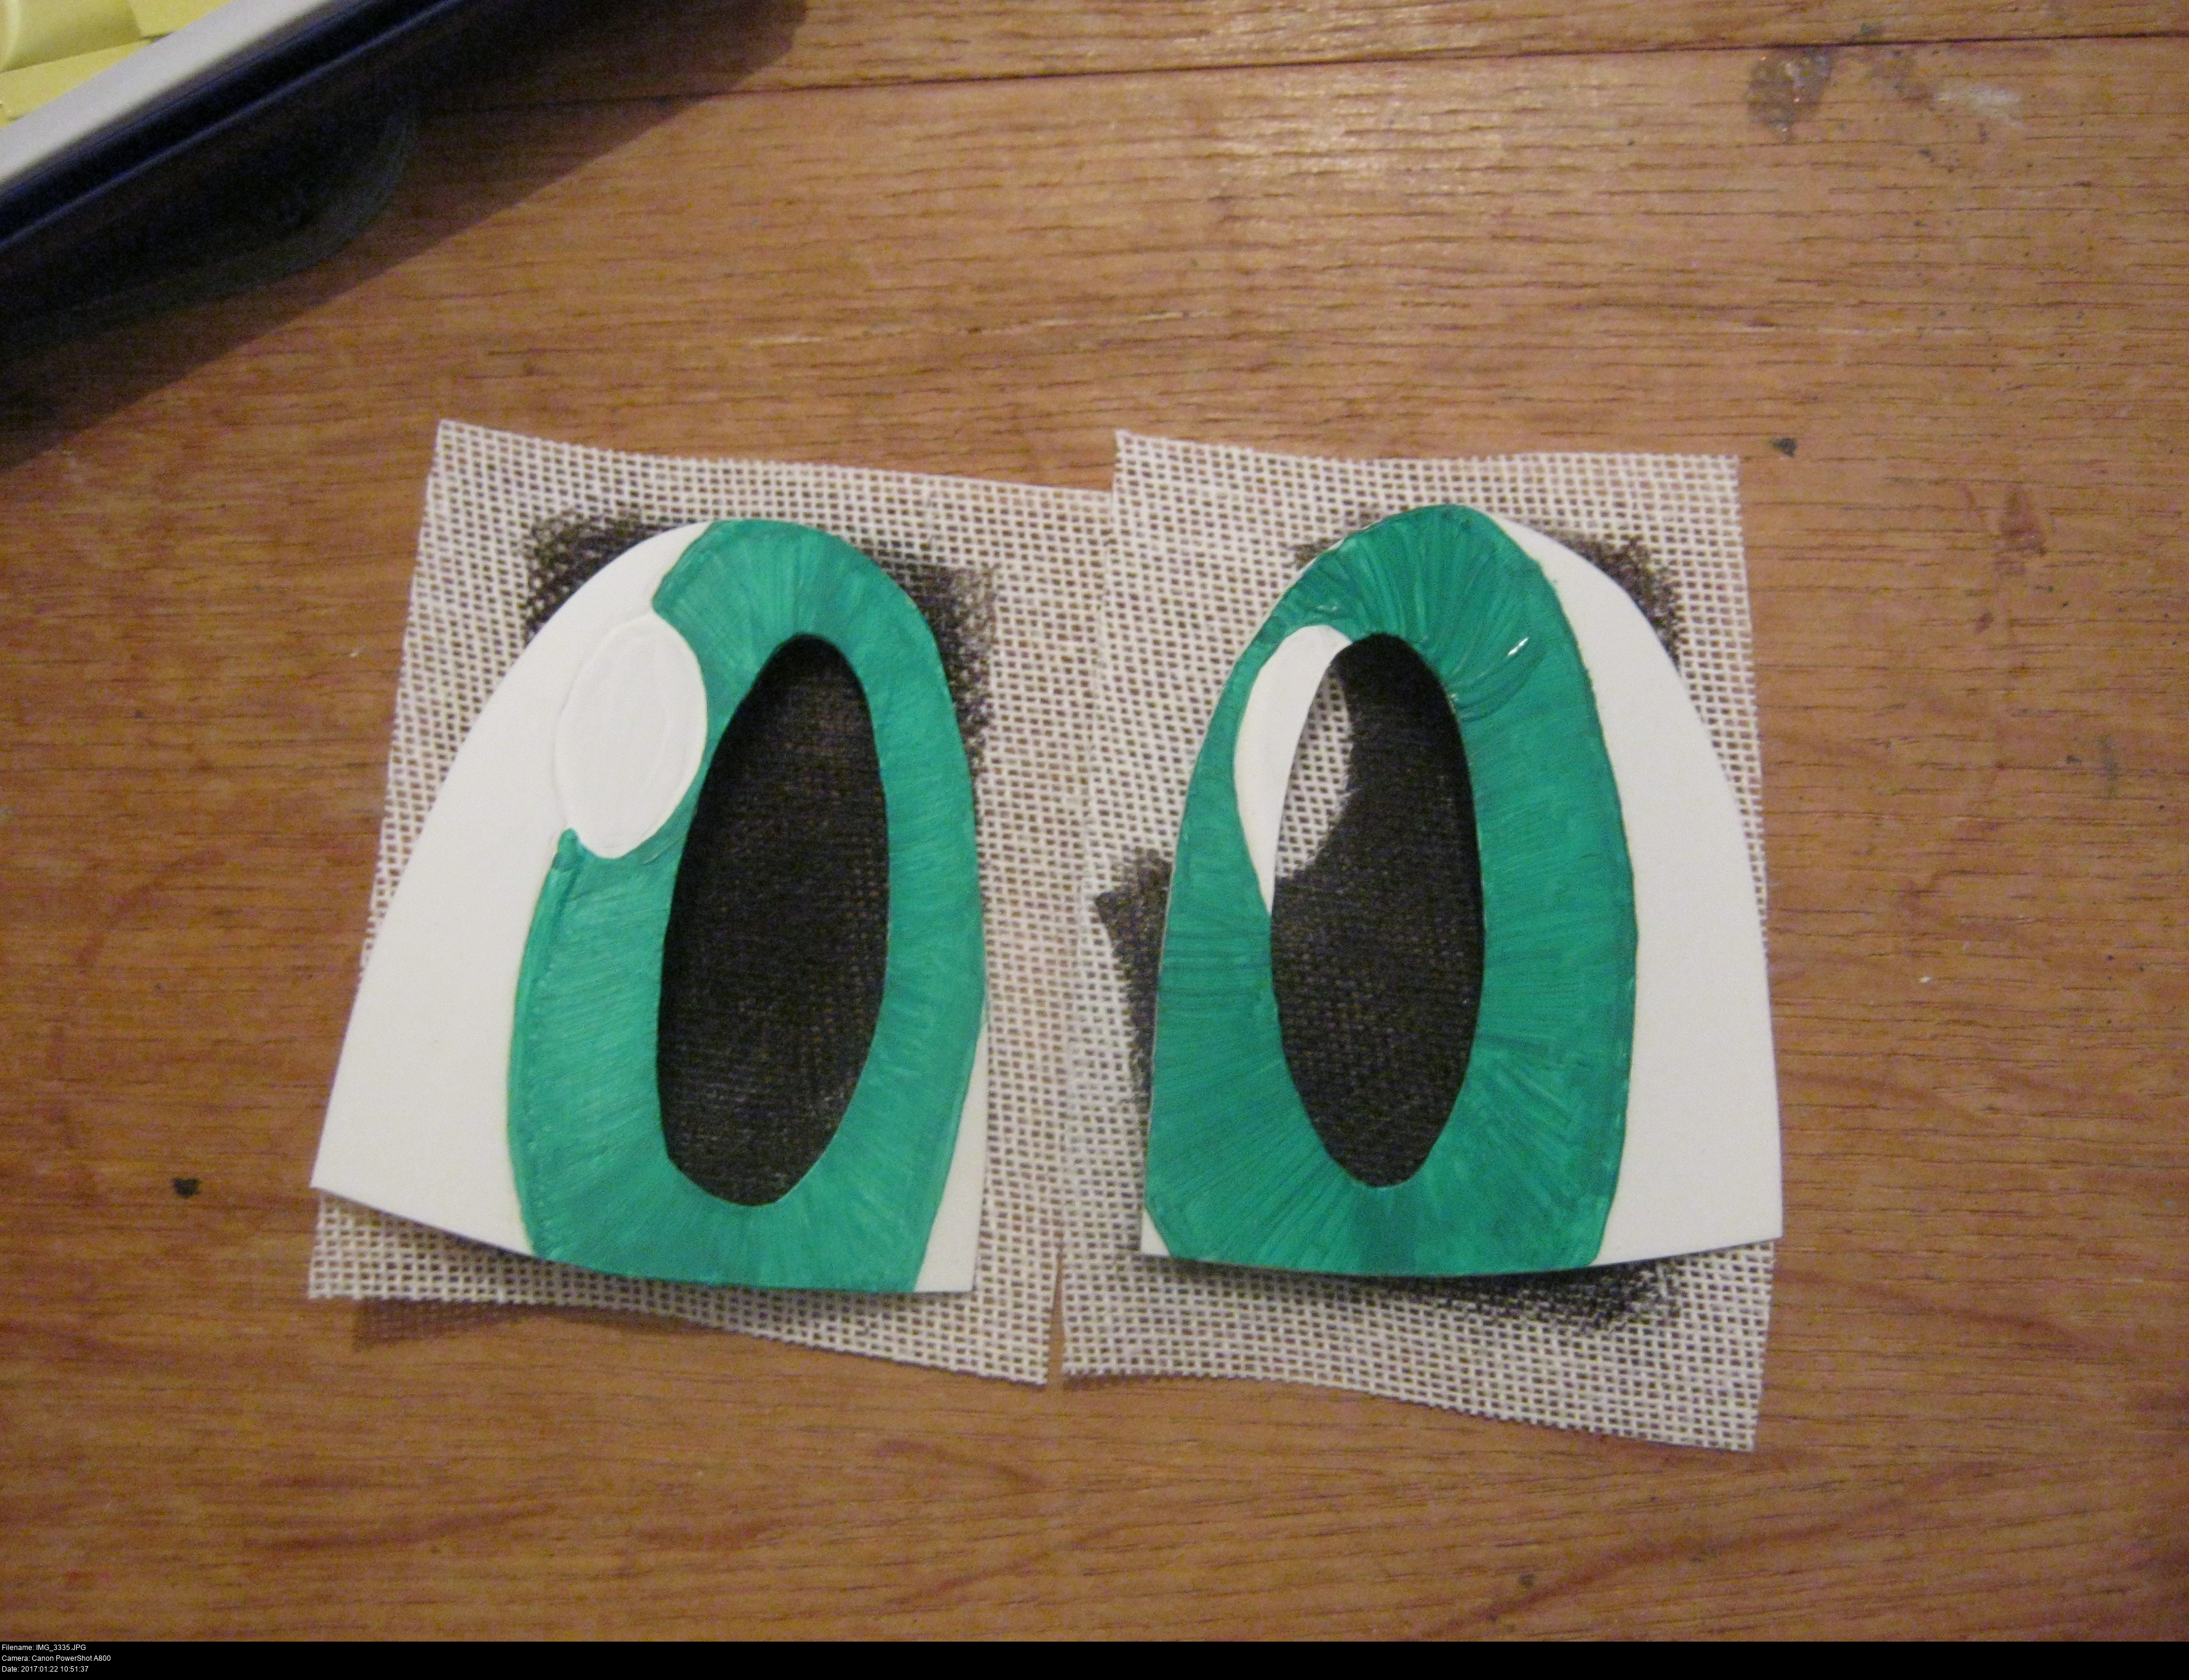
The buckram is very securely glued and sealed flush against the glue-surface of the mask body, just as planned!
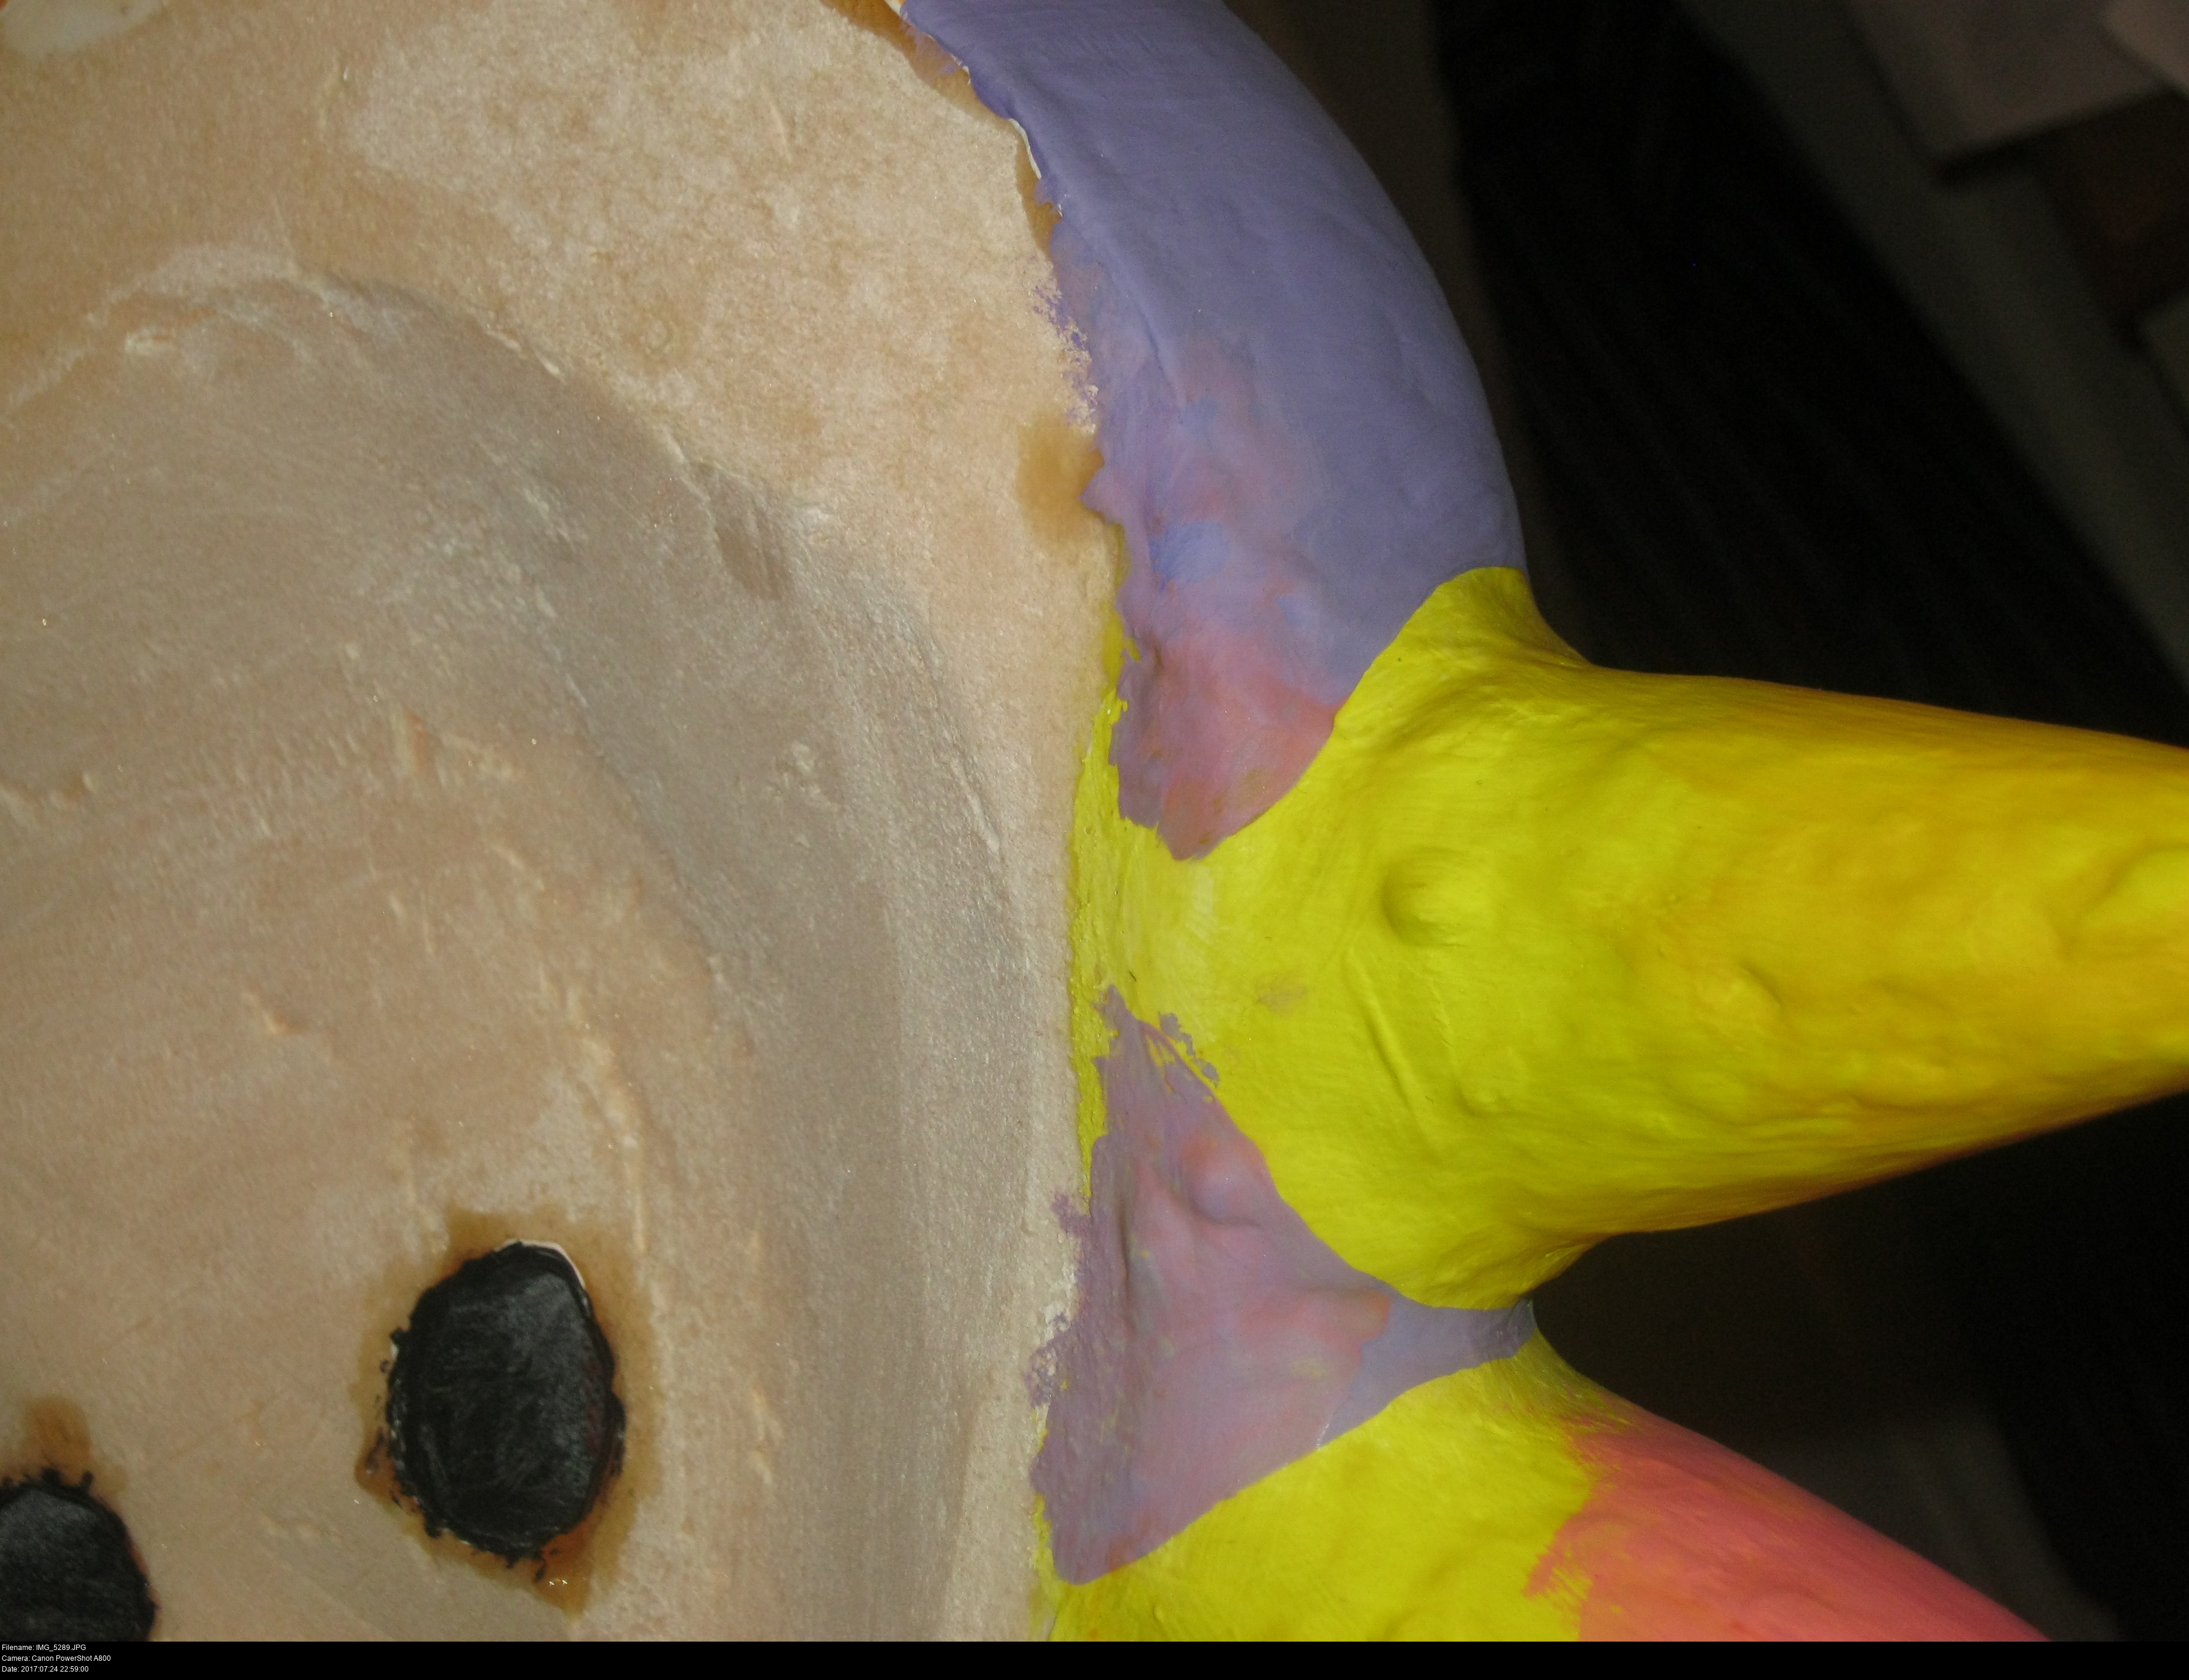
There's two visible ridges in the glue now, one where the buckram ends, and another where the new layer of glue ends. It's tempting to sand these, but this new layer of glue isn't thick enough yet. I need a few more coats of glue laid over this first. Each new layer of glue will reduce the visibility of the ridges and provide more substance to sand into. Don't worry about messing up the glossy finish of the dried glue if you sand it down. In fact, scuffing the glue will probably help the gesso adhere later on (this is sometimes called 'keying' the surface), but make sure to thoroughly brush away all the dust if you do.
It's important to reiterate that these pictures are all over the course of weeks, not hours. Don't rush this. Let everything dry fully before adding layers or sanding.
When I've applied enough layers, all the structural work is done. Since I tested gesso on glue-sealed XPS already, it's full steam ahead. It's time to prime the mask!


I'm not certain I used enough layers of glue to disguise the buckram oval, but I am certain the paint is going to hide this.
At this point I had a realisation: it doesn't really matter what shape the physical eyeholes are in the mask body. After gluing the buckram to the mask, I'm going to prime the glue surface with gesso to provide a blank surface to paint onto. Since the gesso is thick, I can paint over the exposed buckram to shape the 'hole area' freely. This means I could have had a large horizontal slot in the centre of the mask and covered it with the buckram and precisedly controlled the shape of the eyeholes using the gesso.
I wouldn't recommend cutting a giant hole and covering it with buckram though, since the eyeholes will help you position things on the mask and the more foam that's present, the stronger the mask will be.
Those faded patches in the horns are still here for now, it's going to take a light sanding and several gessoings to make them vanish. But vanish they will...


Beautiful!
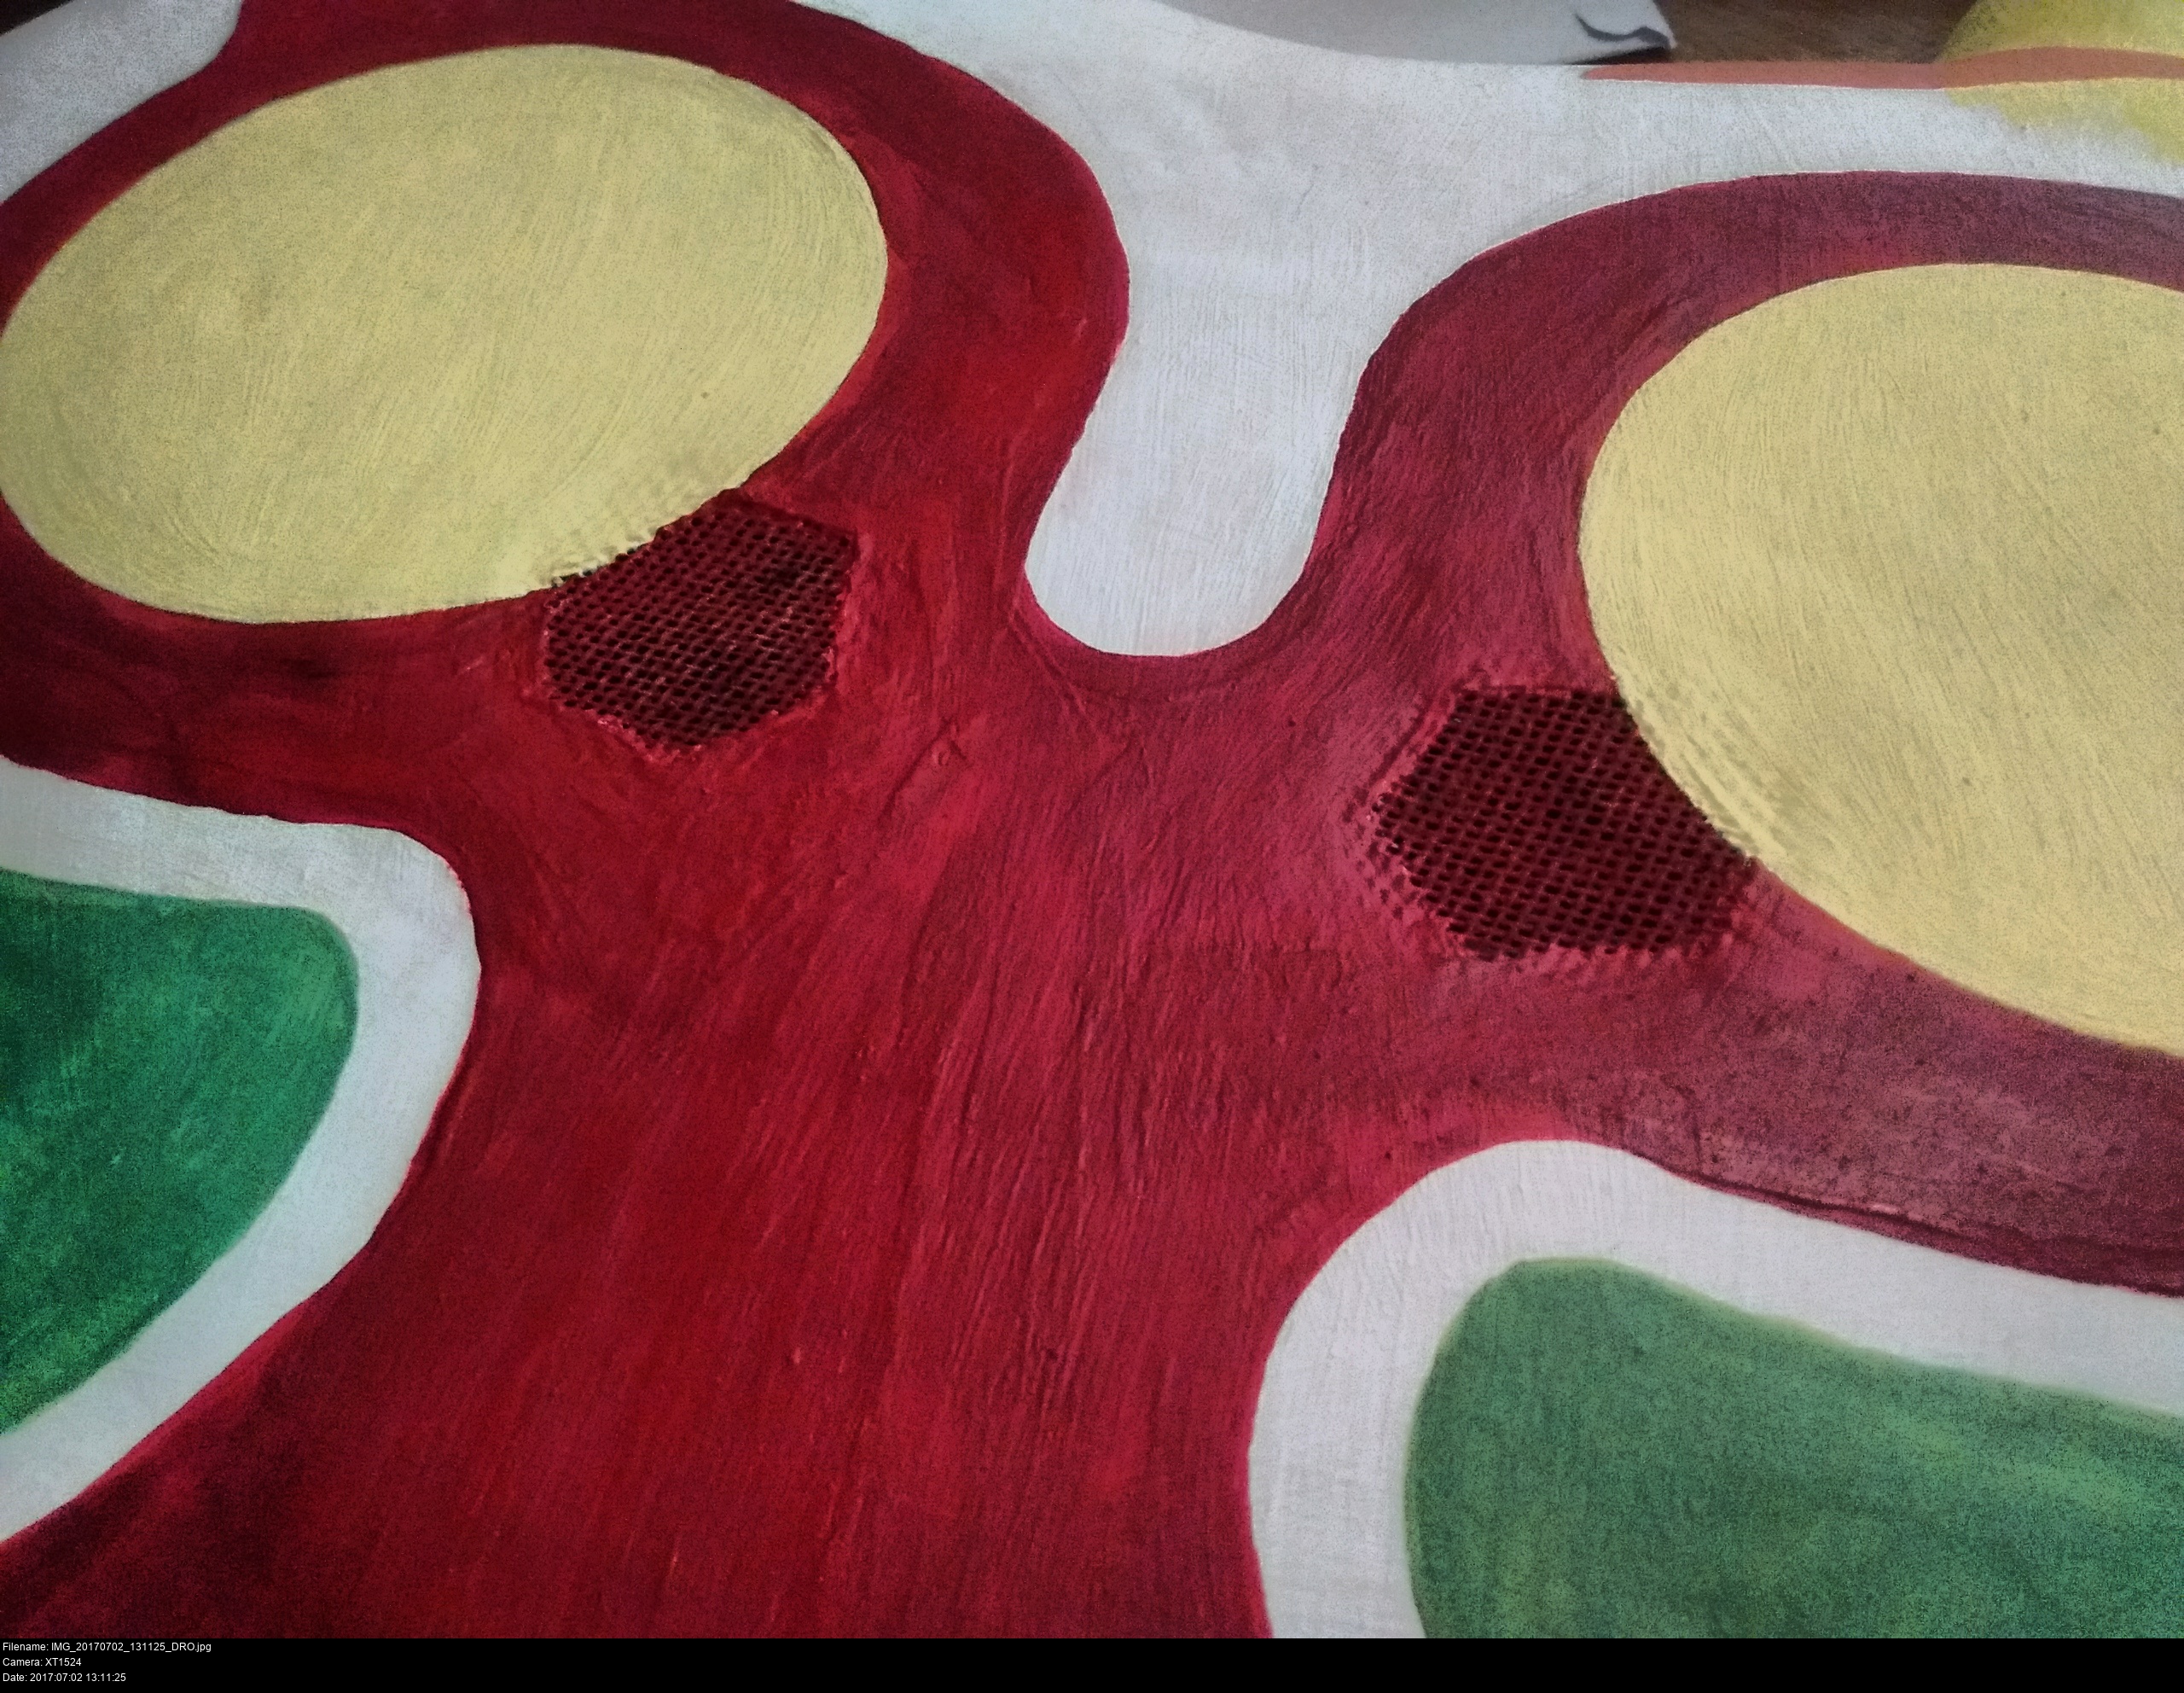
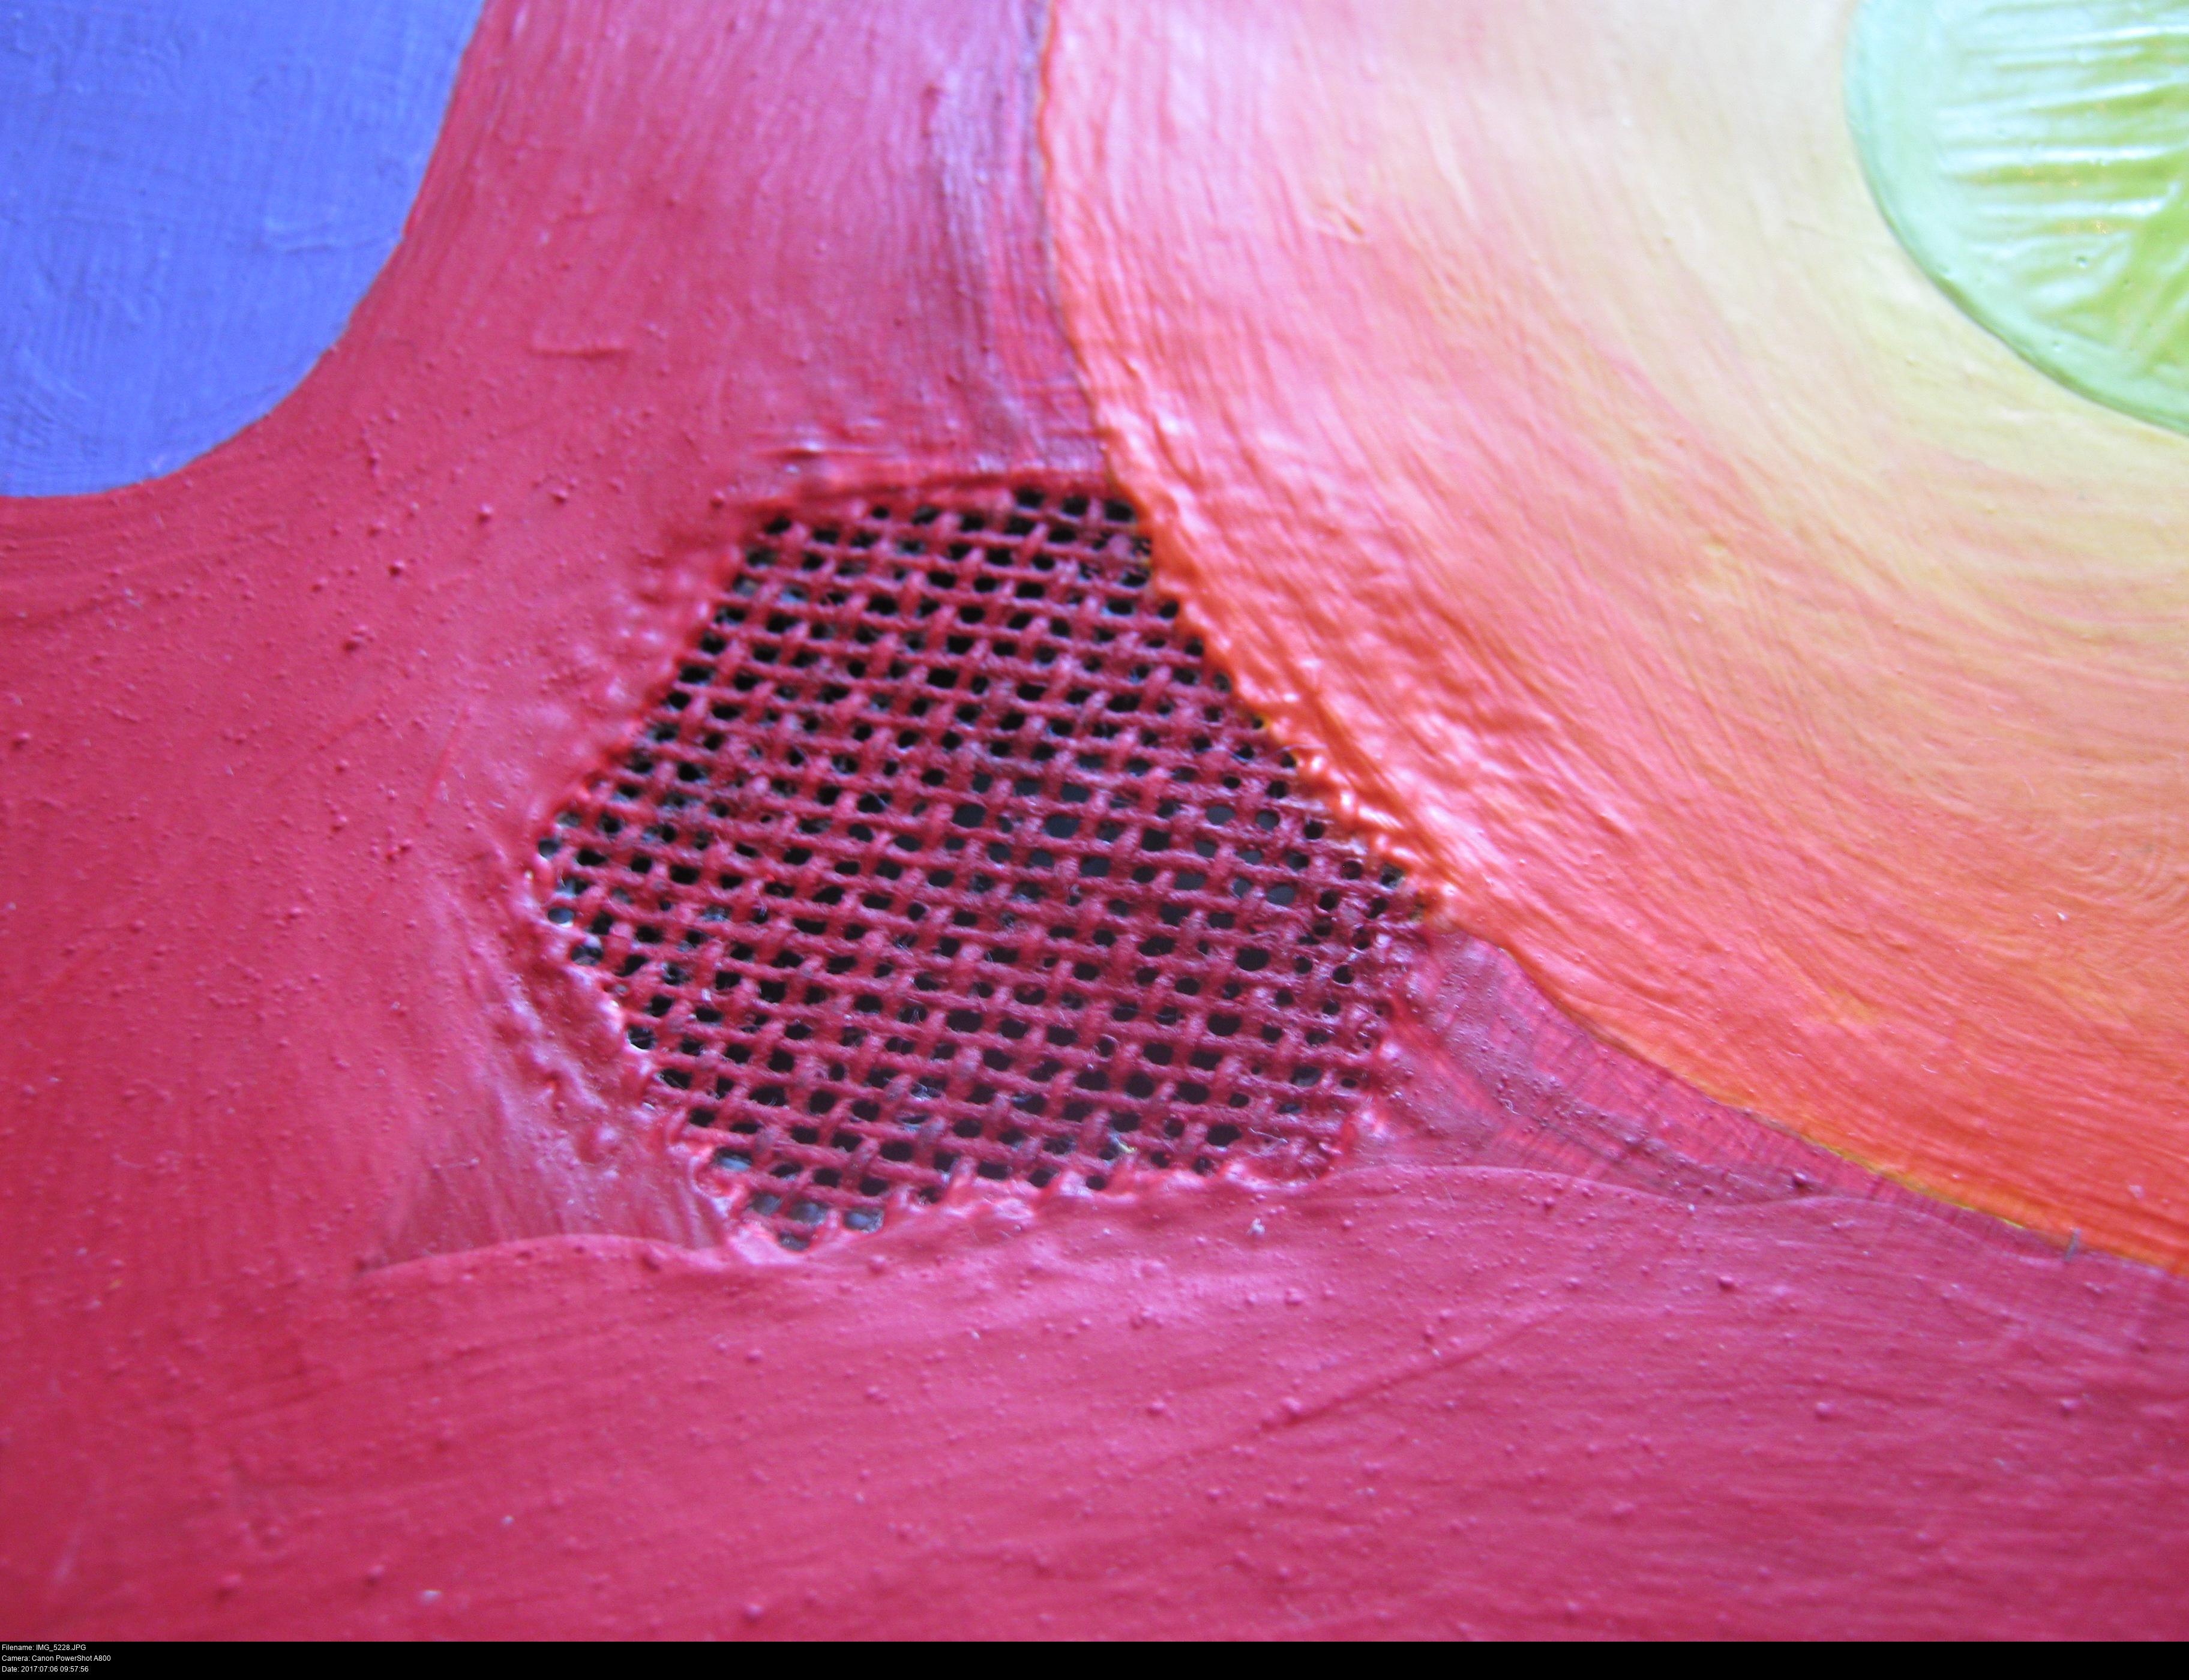
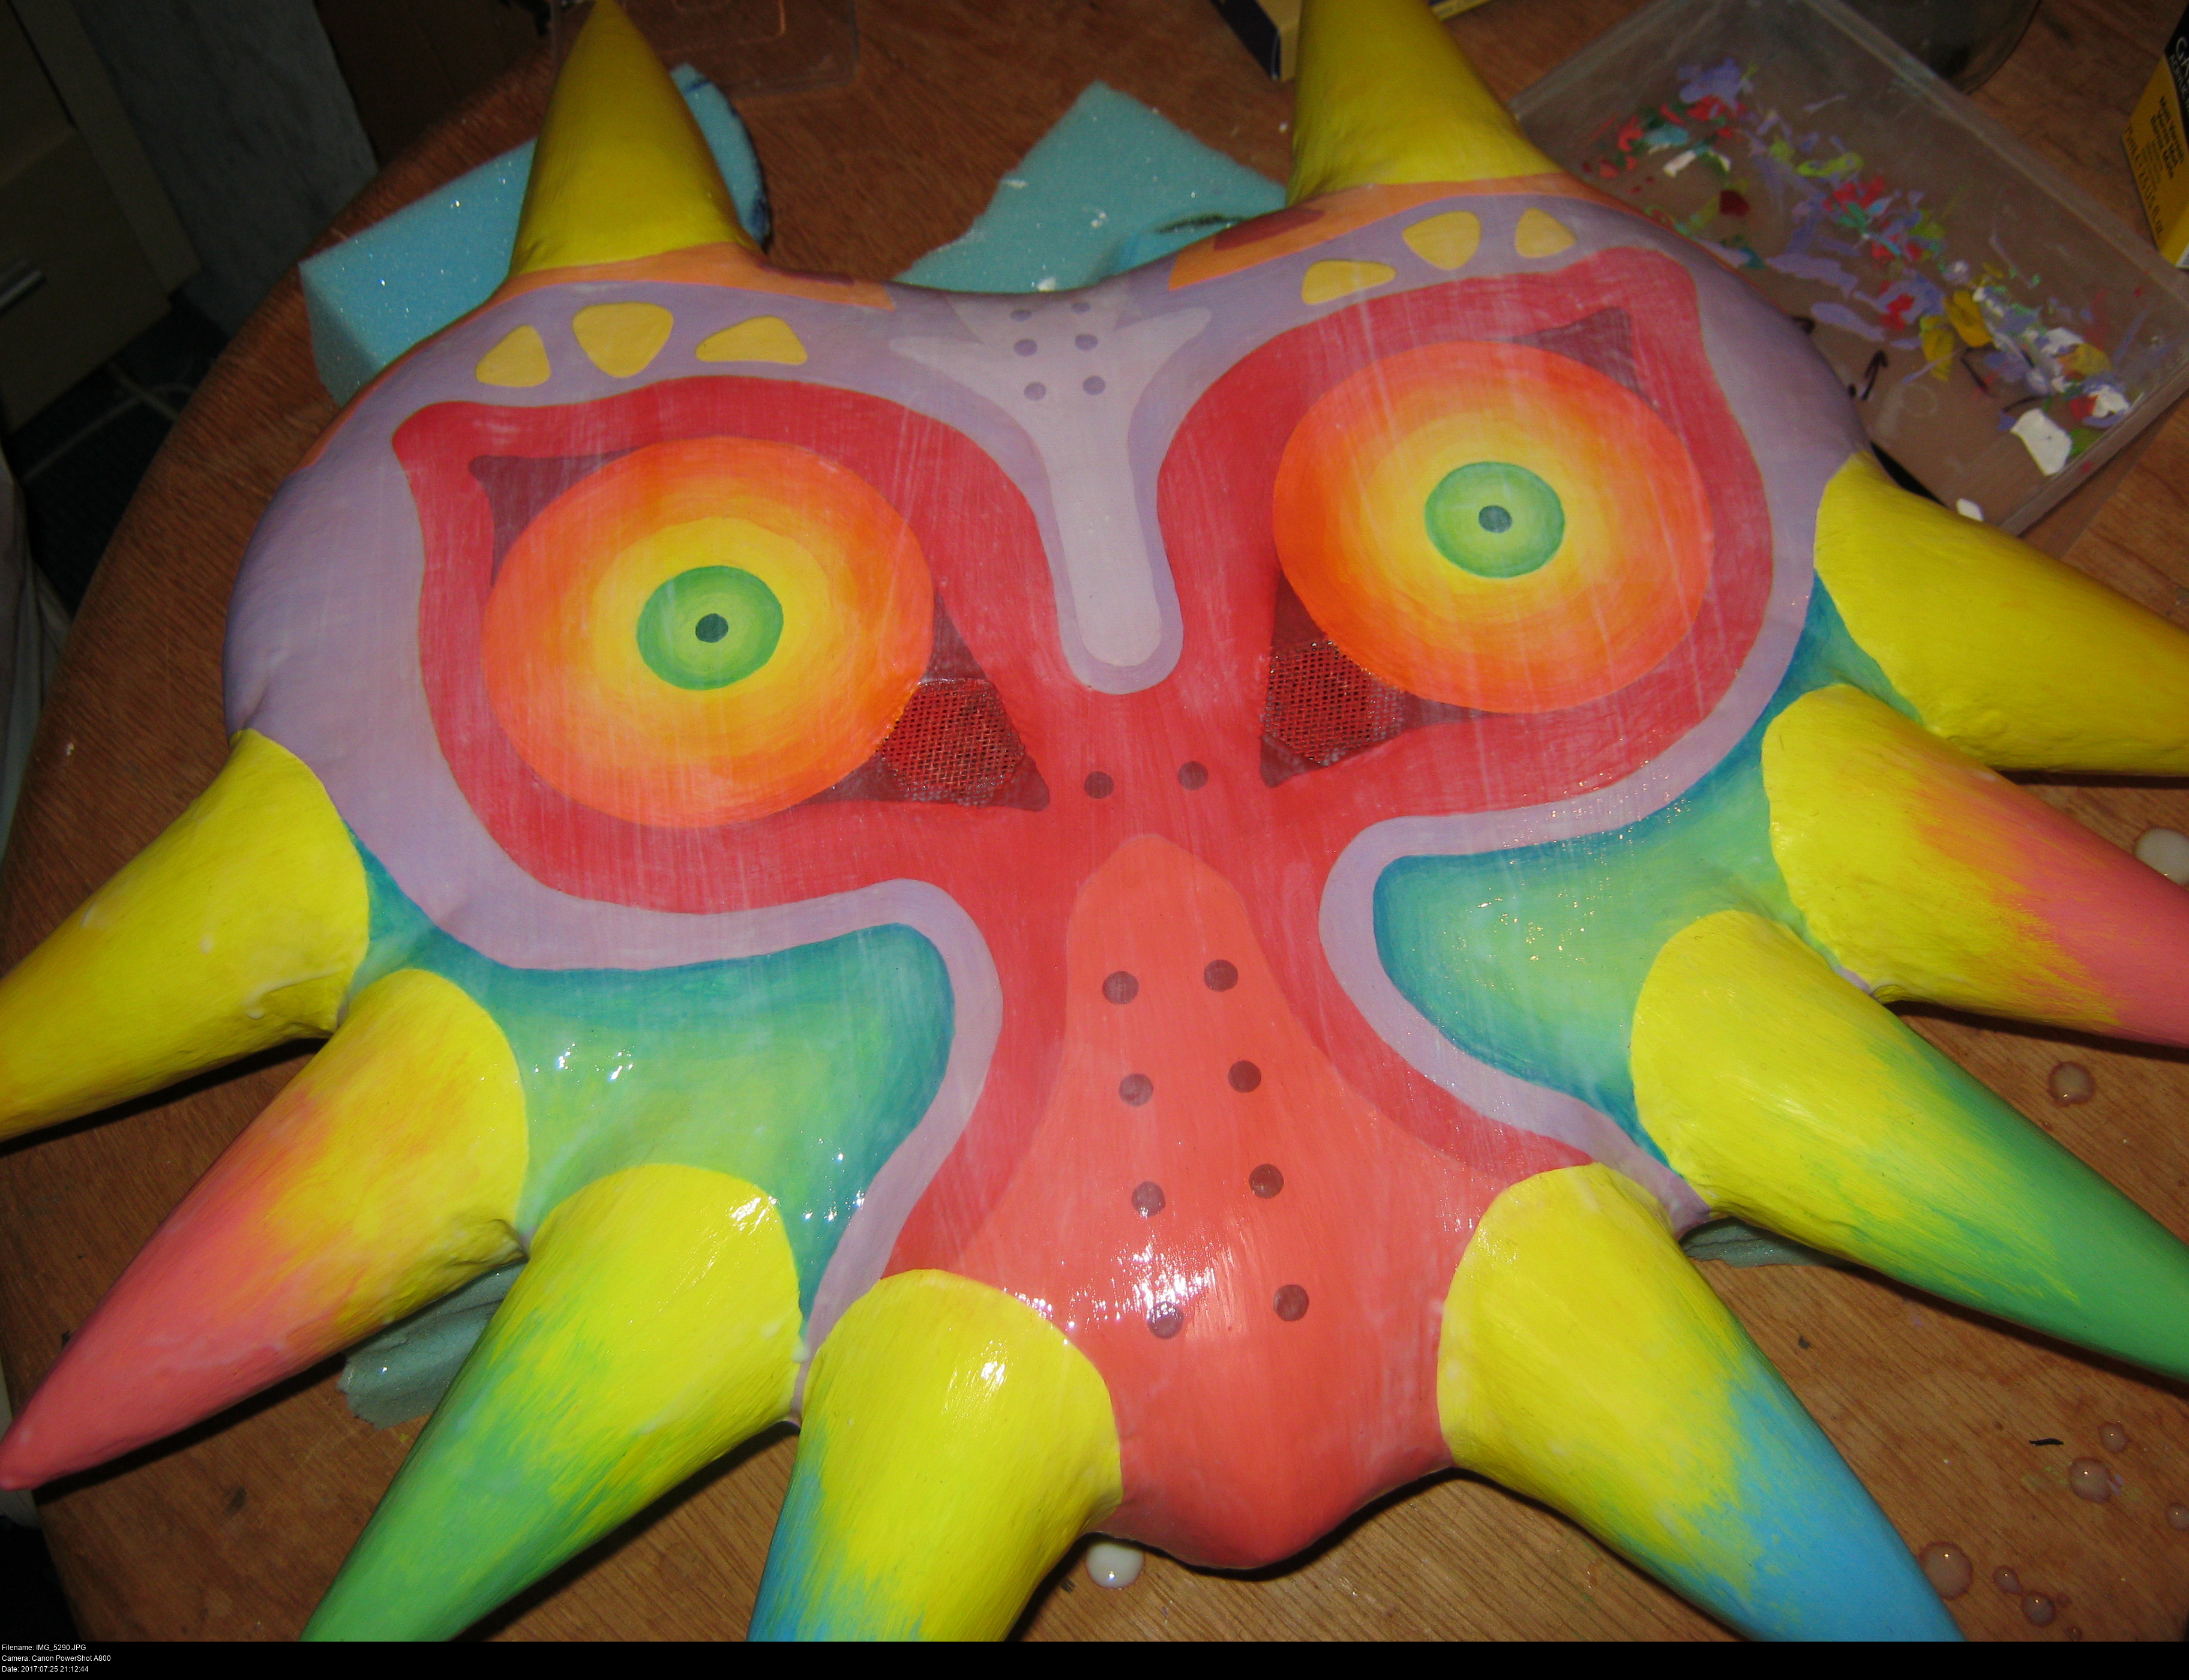
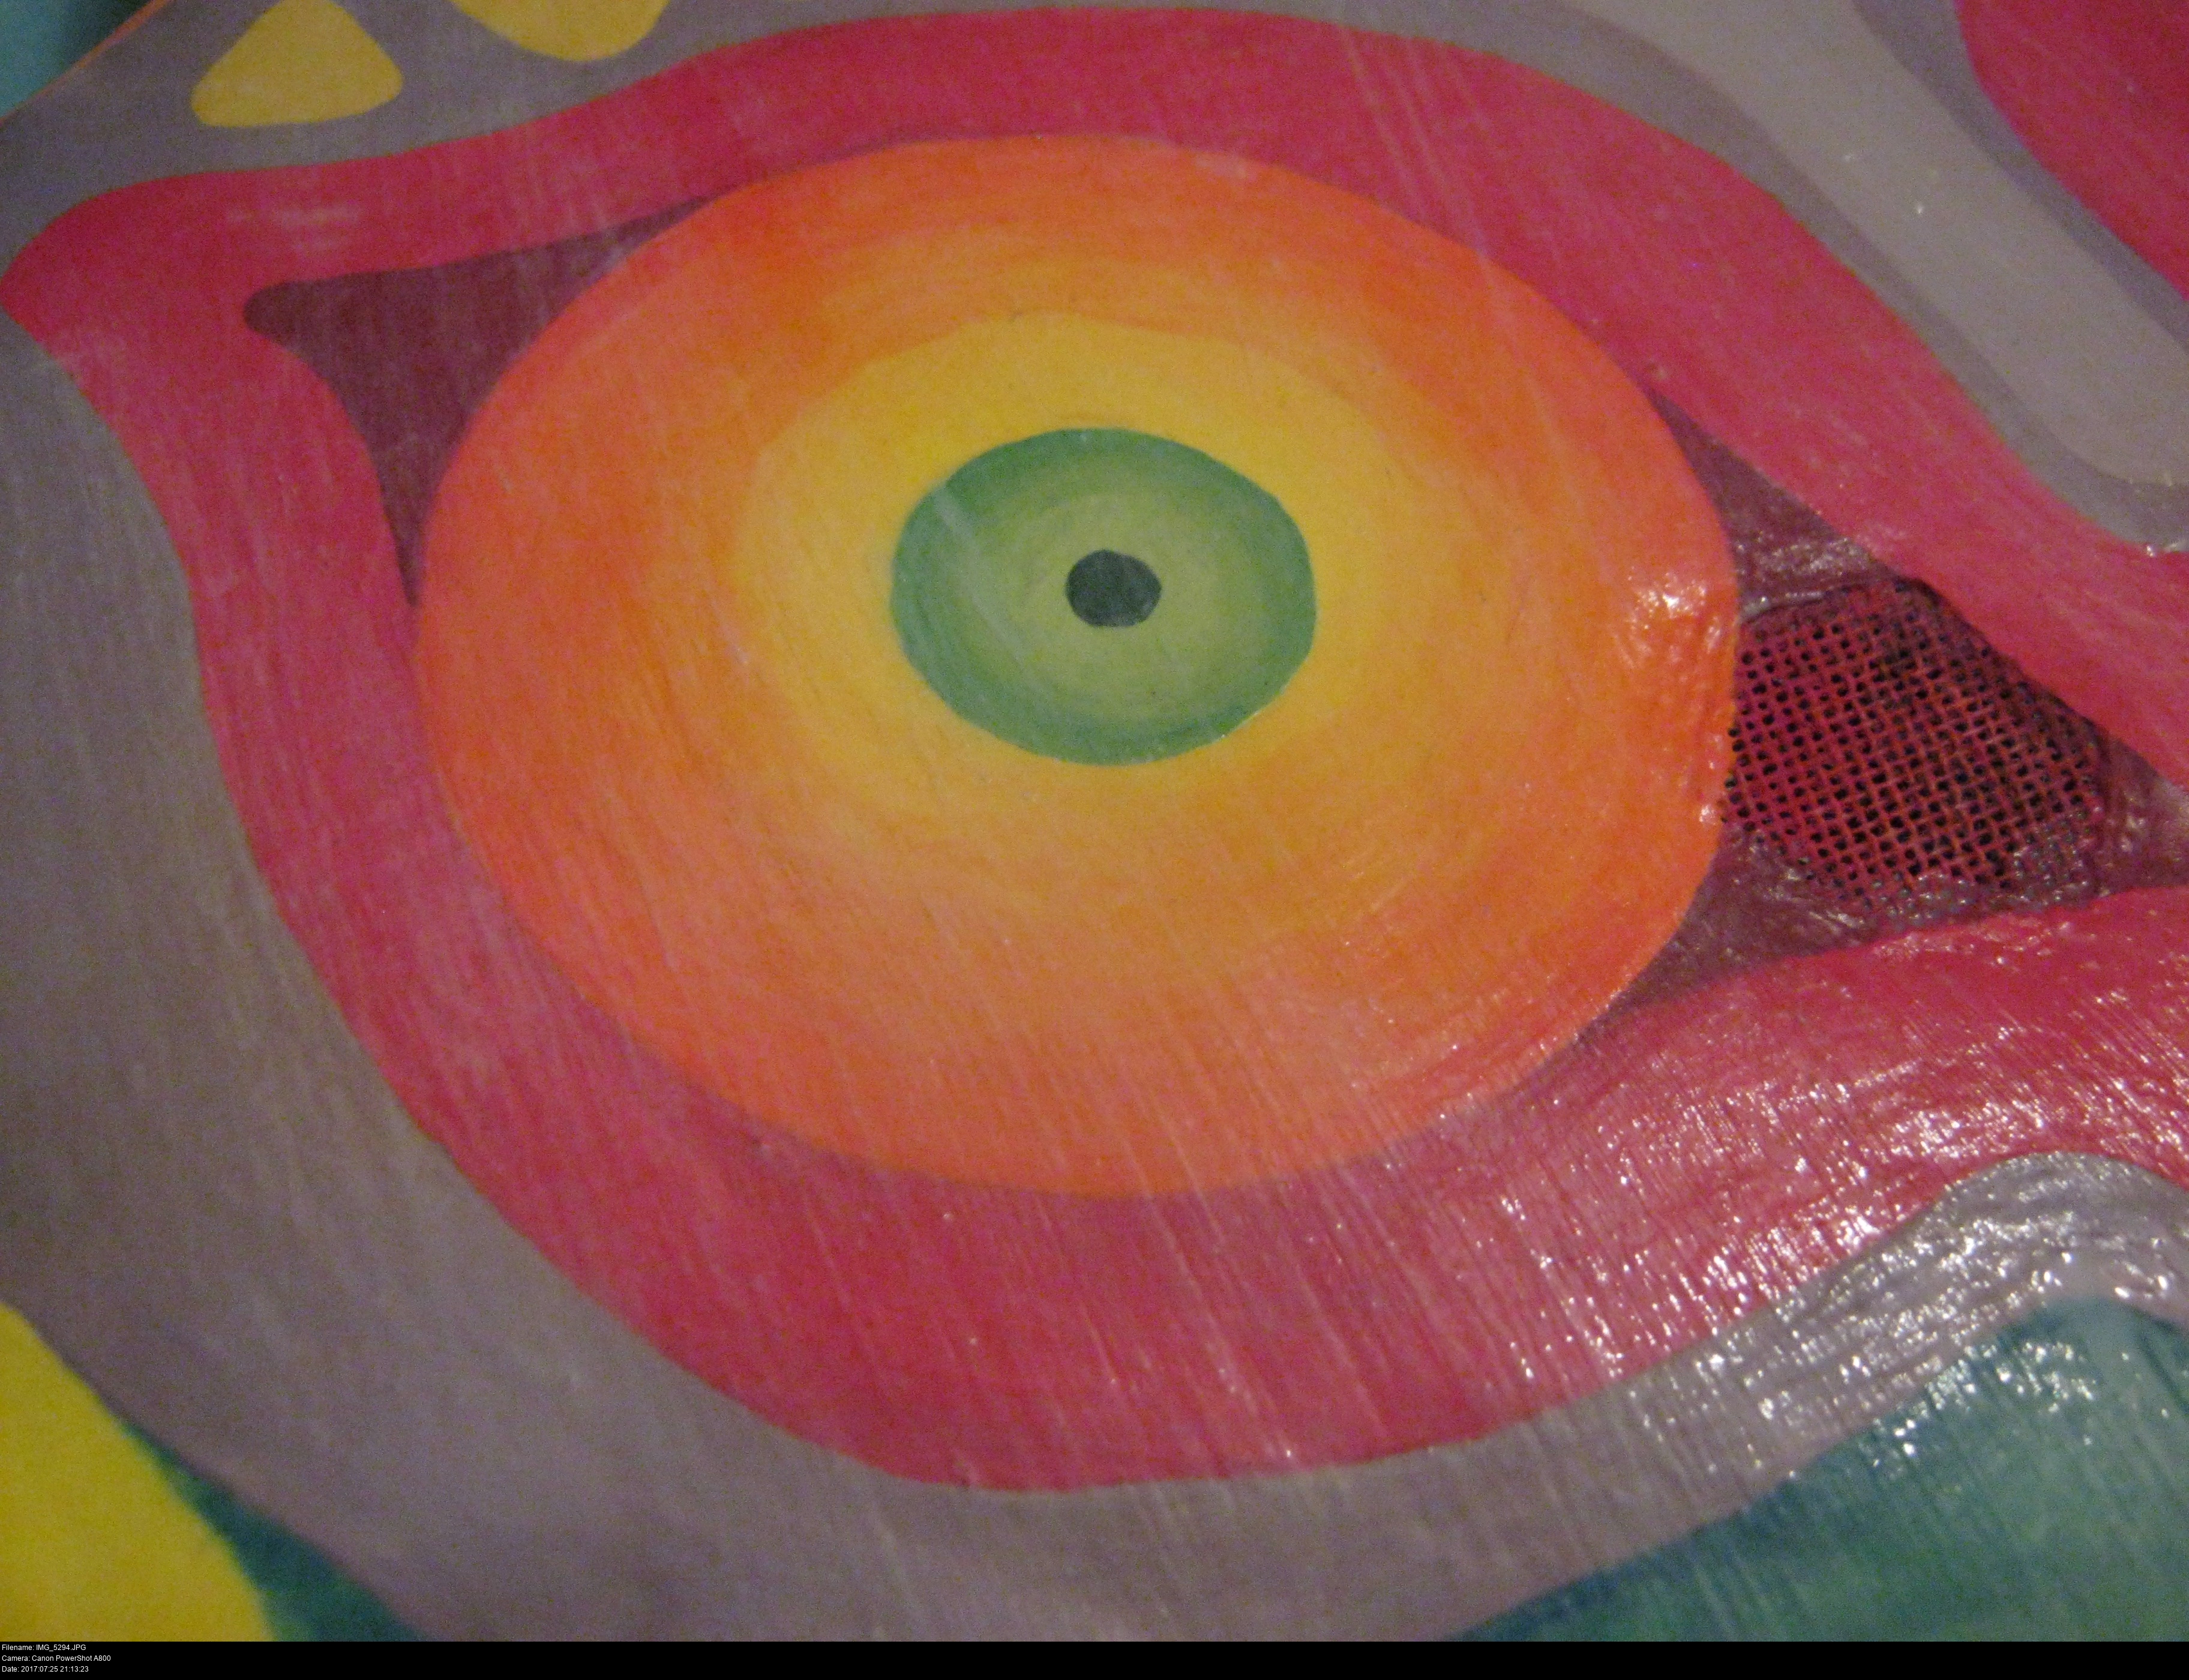
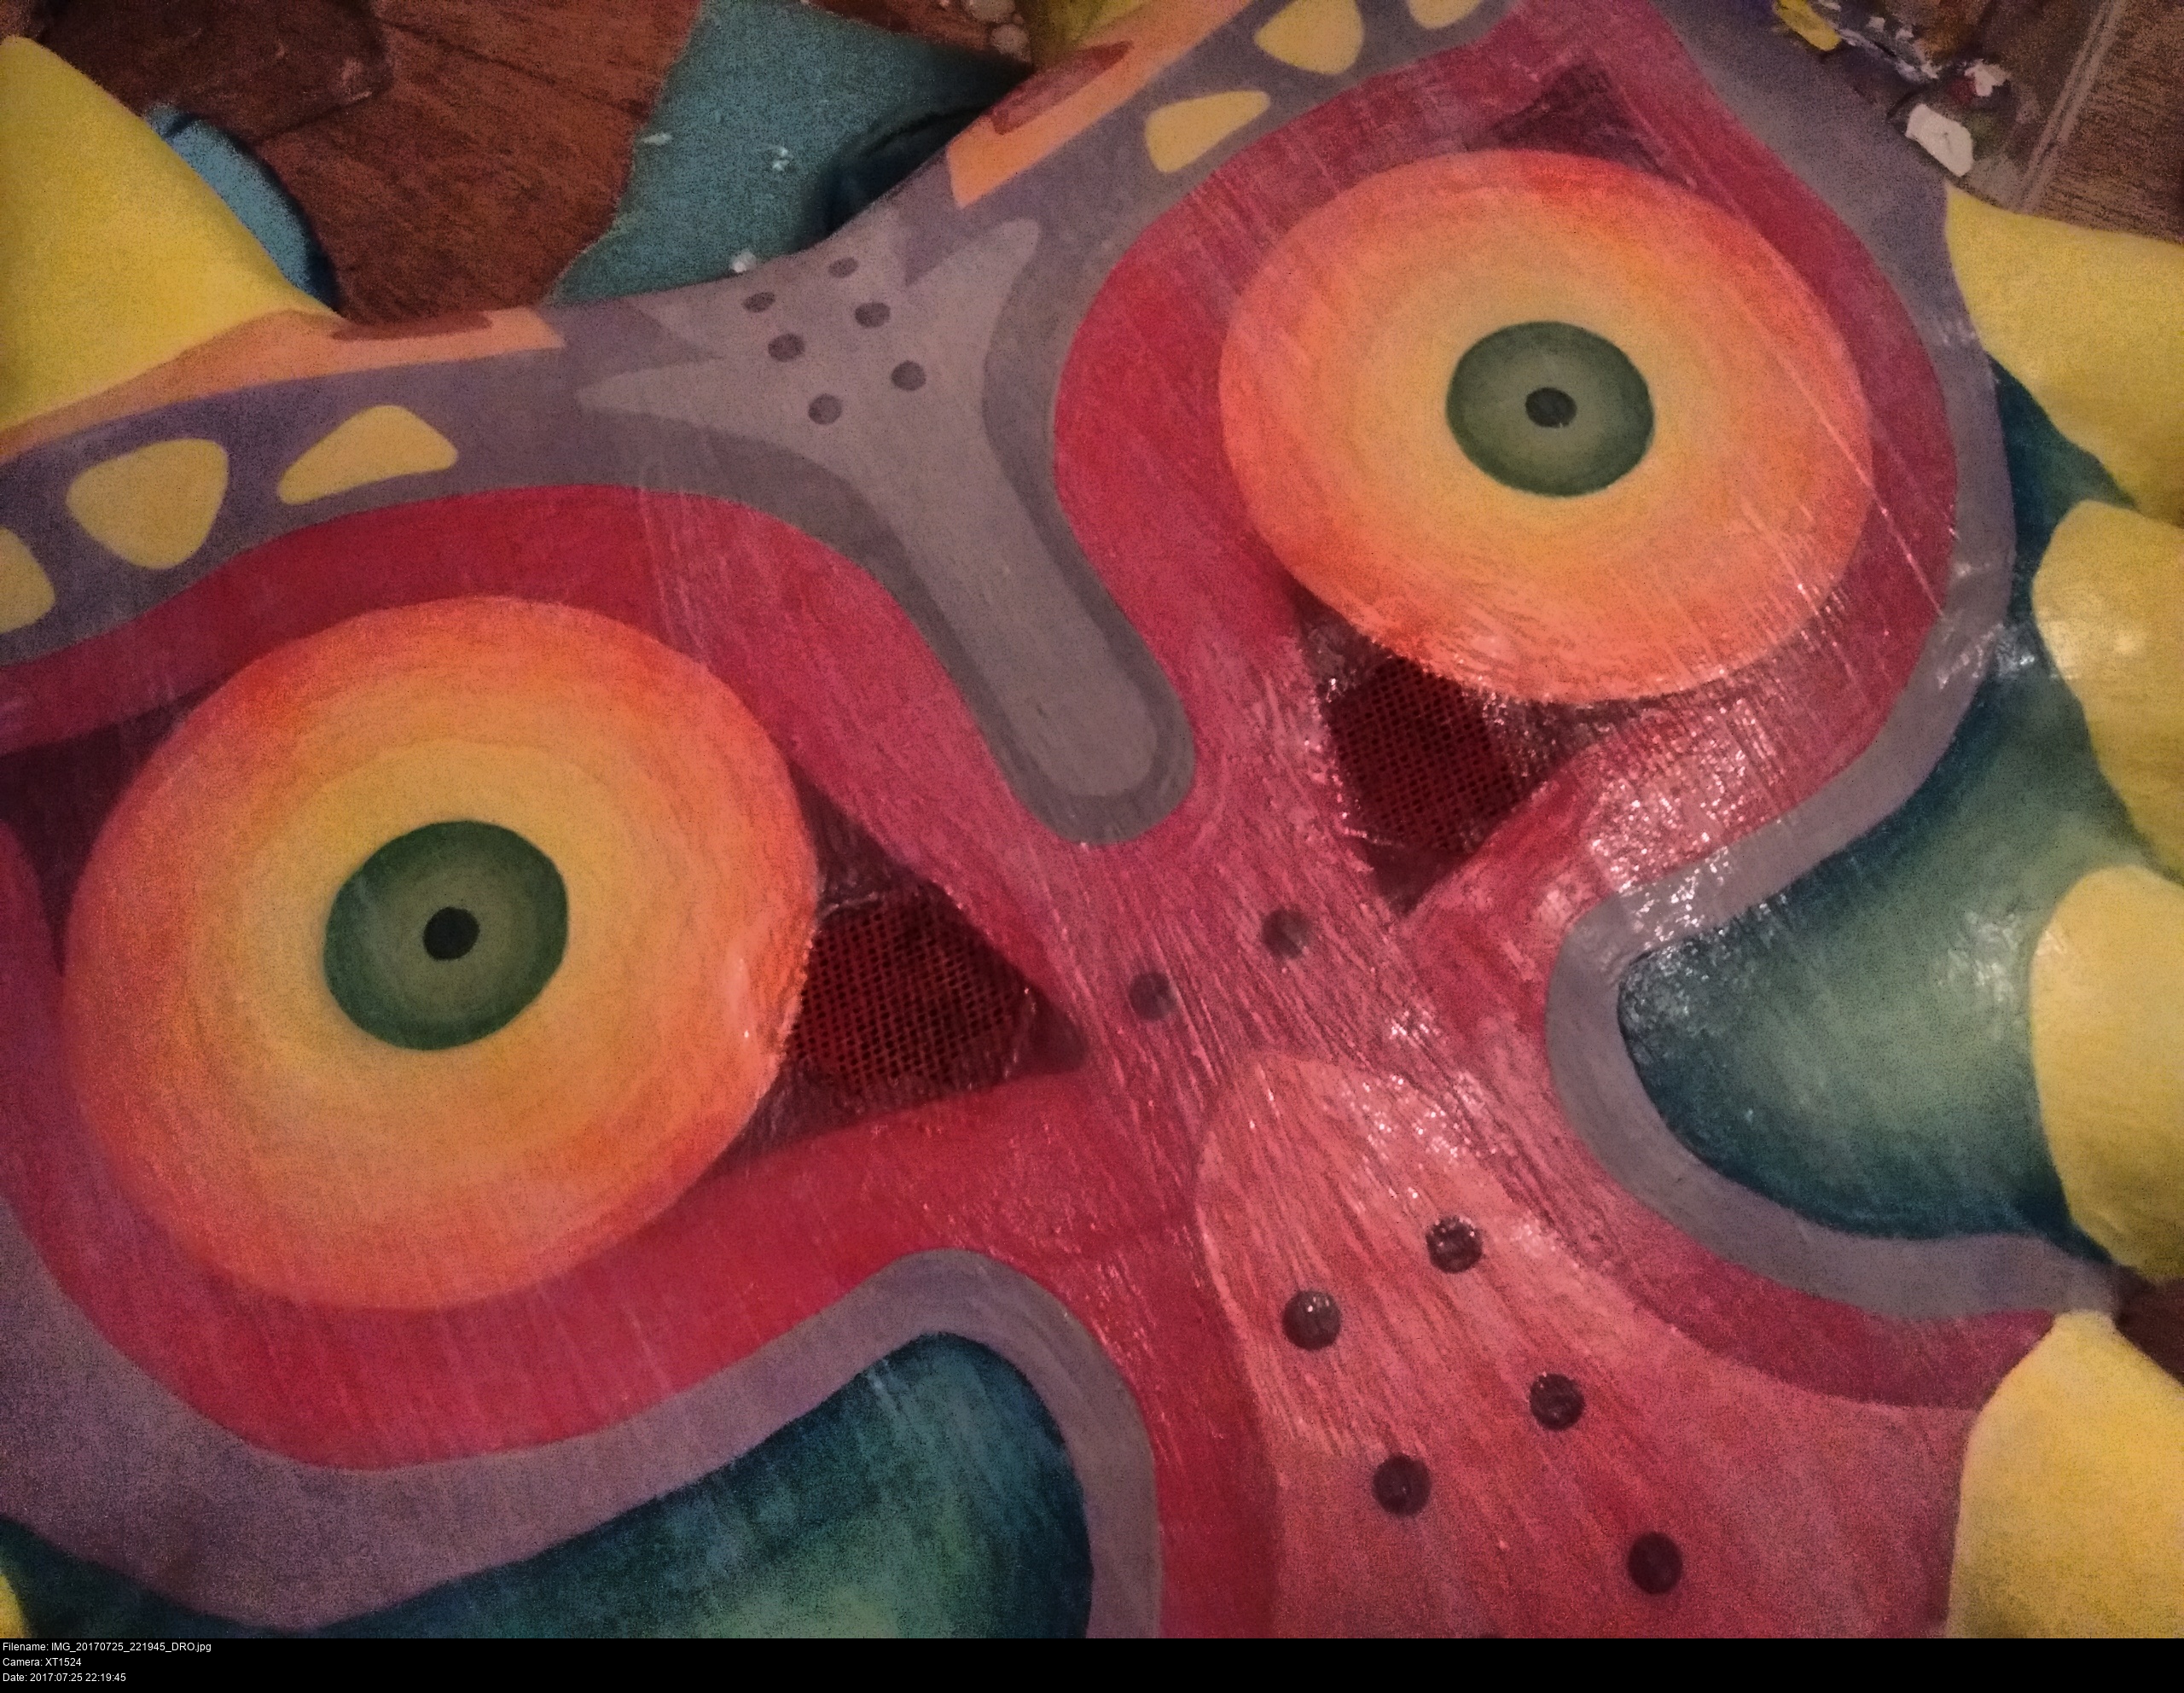
You can see now how the buckram is completely integrated into the mask. It's like a single unbroken primed surface that happens to miraculously have patches of buckram embedded within it. In the last picture, you can see how I've reshaped the remaining buckram with gesso to expose just the 'tear duct' area on the interior of the mask's eyes. That hexagonal area is a solid dark red on the mask design. If I paint the buckram there a light red, it'll appear darker when the mask is photographed!


Notice the shape I've used for the eyeholes: it's bounded by the large circle of the eye and the sloping curve of the tear duct as it goes towards the centre of the mask.
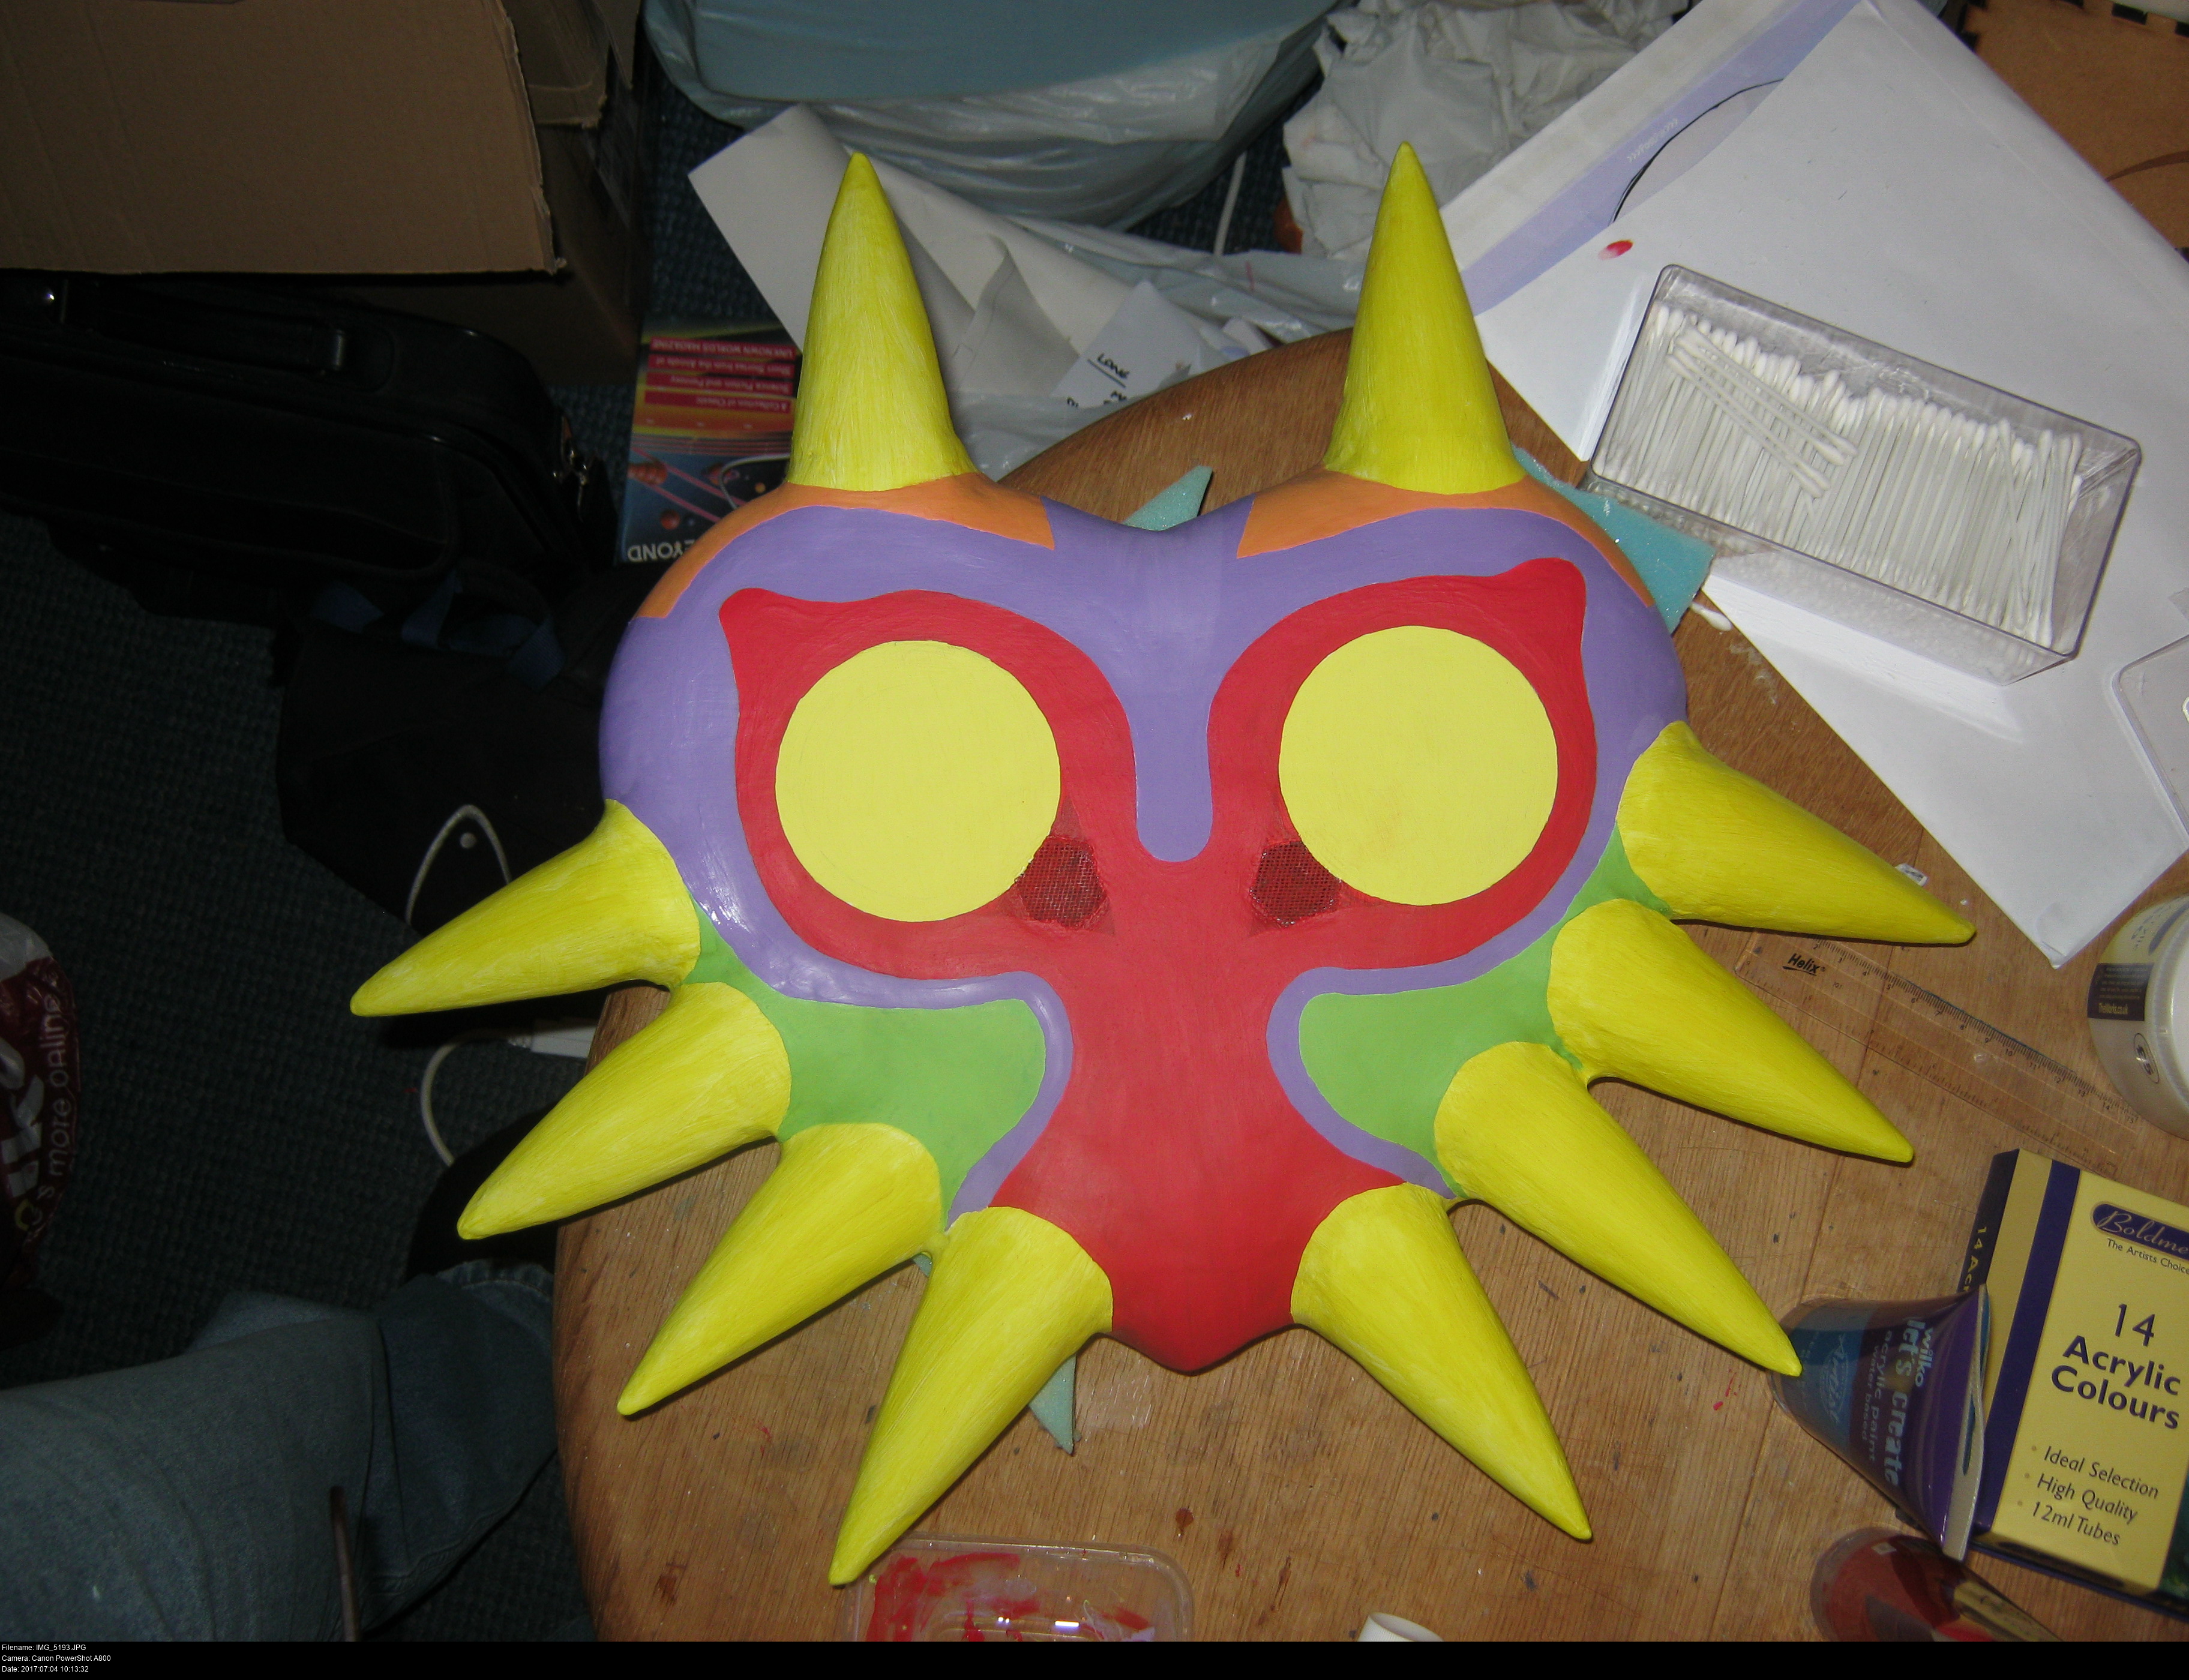
It's time to start copying the design onto the mask. Draw very very very lightly, or be prepared for your marks to show through the paint! Paint isn't opaque, it's like a tinted film. Erase your marks before you paint if you have to and be sure to brush away all the eraser lint too.
I'm a technical, geometrical kind of guy. Rulers and compasses are the order of the day to get this thing looking nice and neat. -HOWEVER!- since this thing was hand carved and sanded and has had some hand carved and sanded horns glued all over it, it's no longer symmetrical, if it ever was. That means any attempt to get the eyes equally spaced from the vertical centre of the mask at the same time as them being equally spaced from the sides of the mask is going to fail. You'll just have to use your intuition and your imagination. Take pictures and colour them in on the computer if you need to.
Check my other mask page for a really cool, more in-depth guide on how to paint!
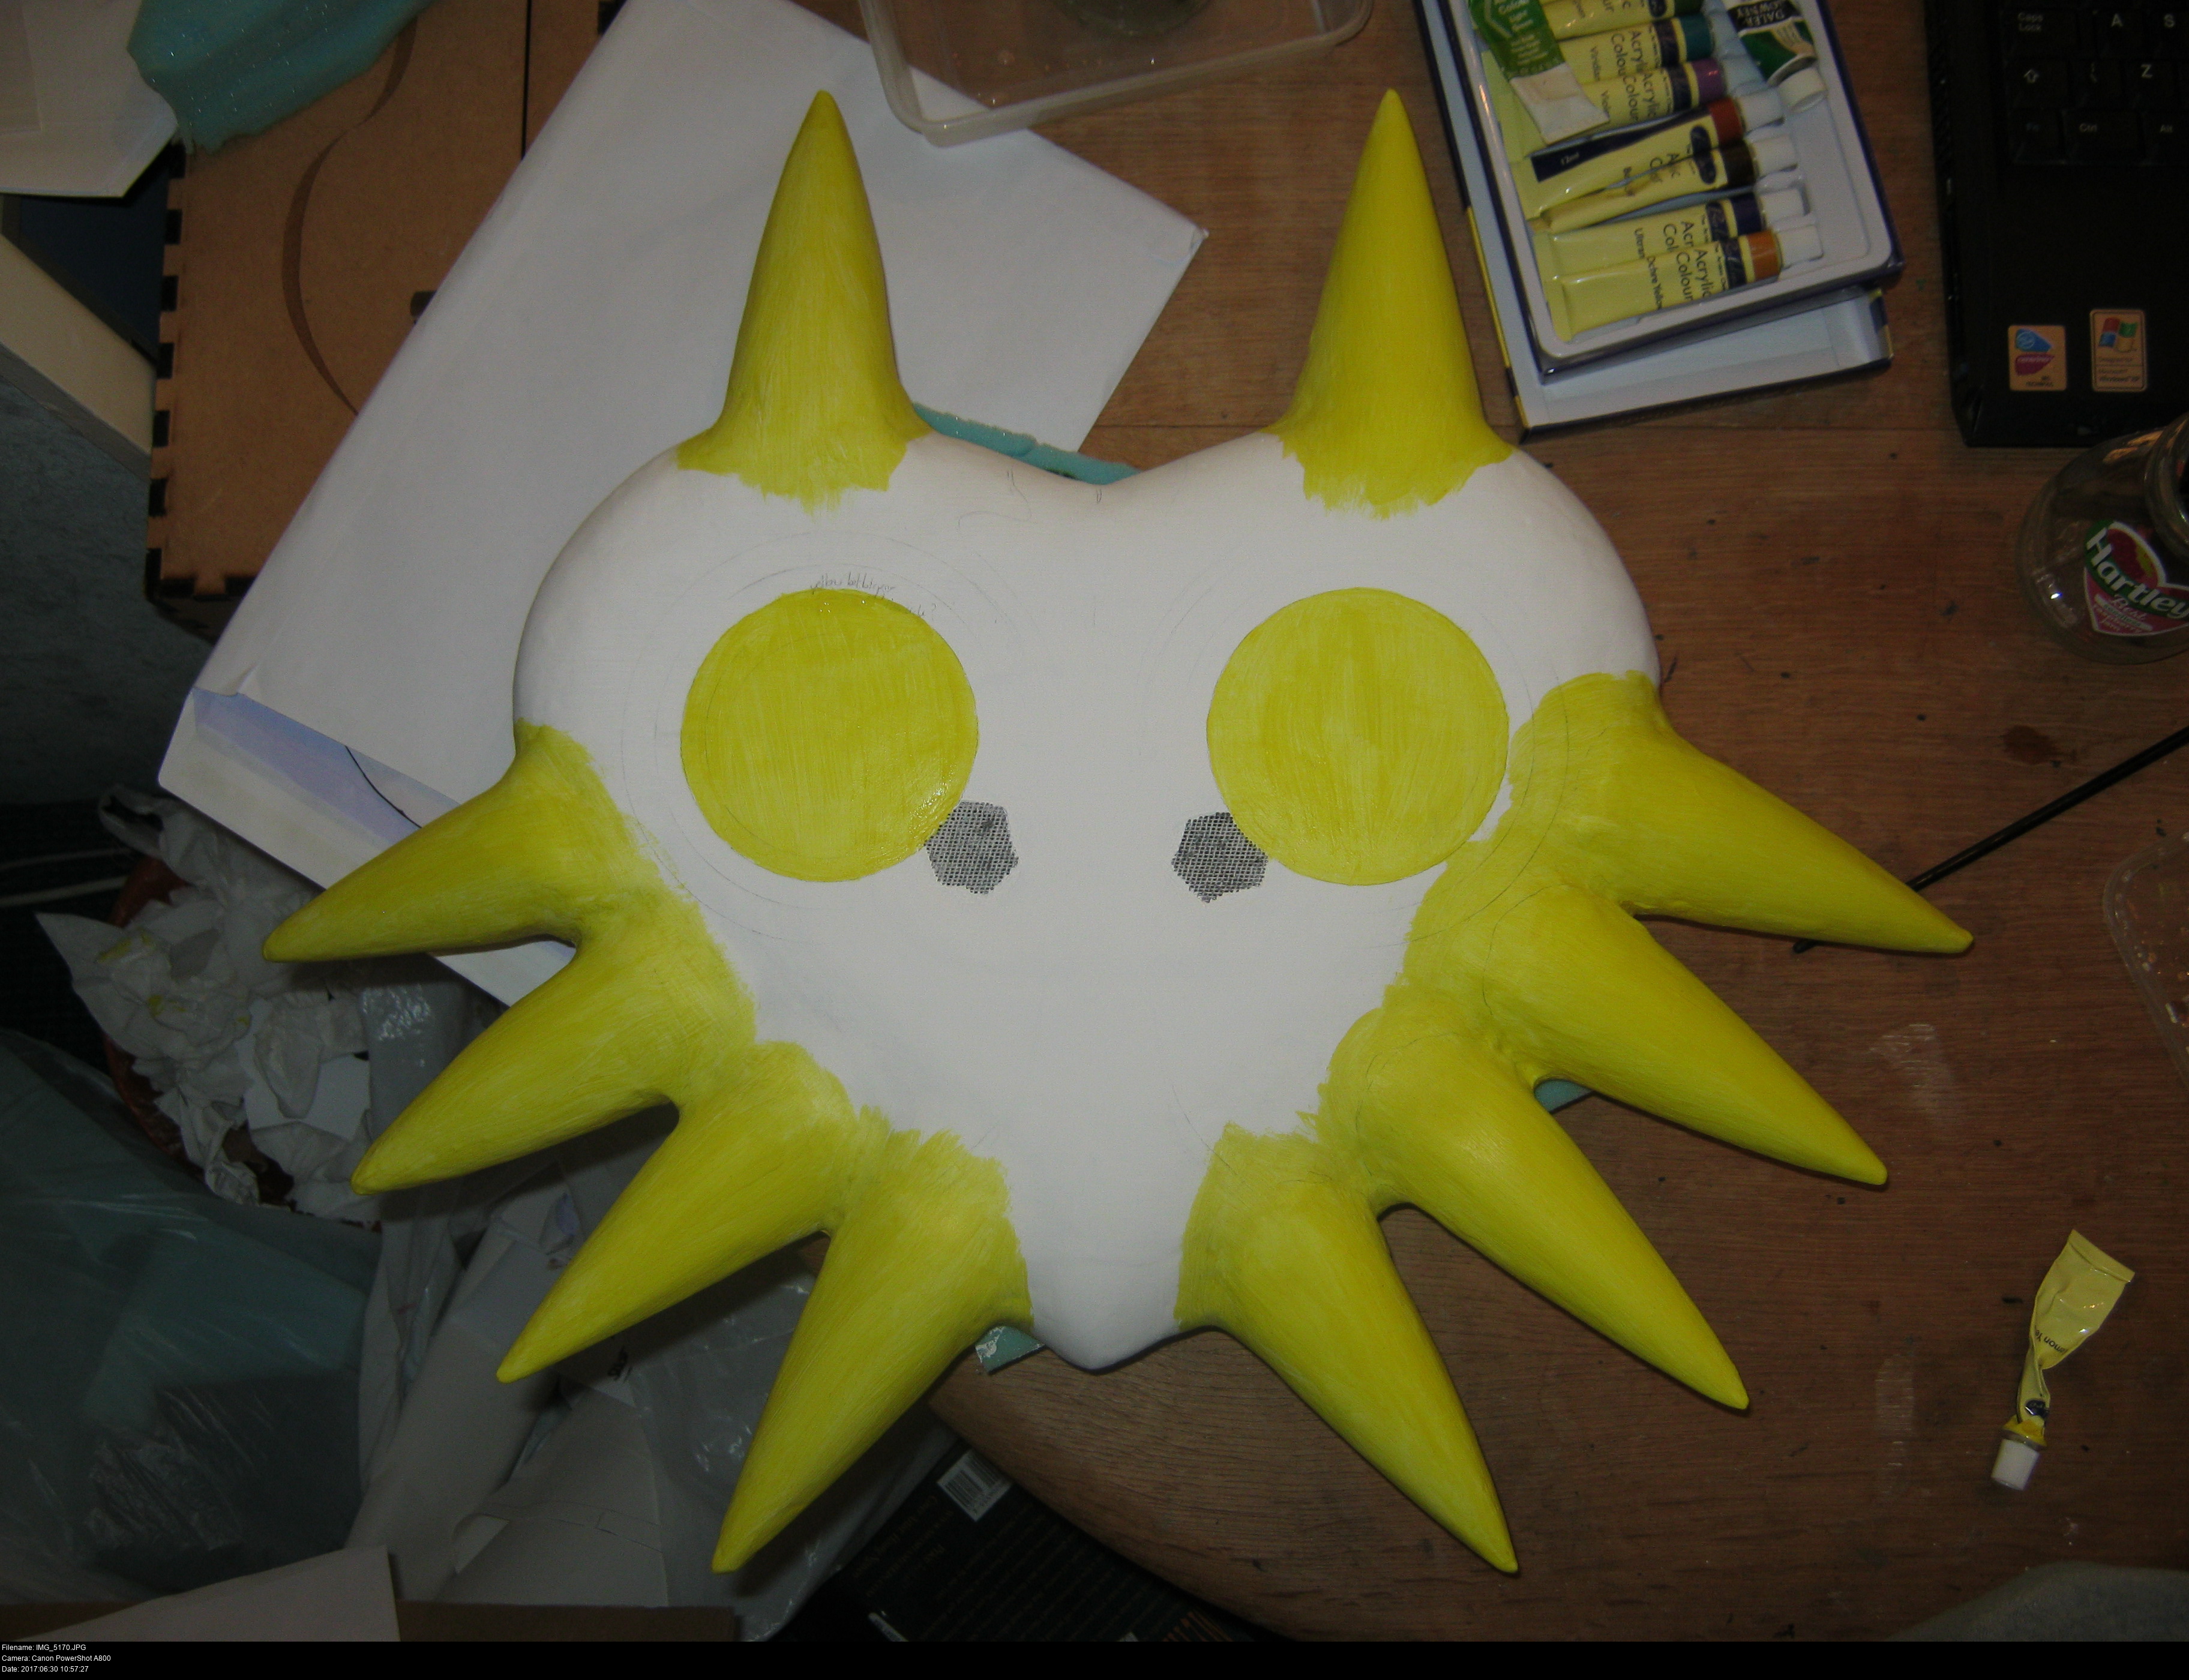
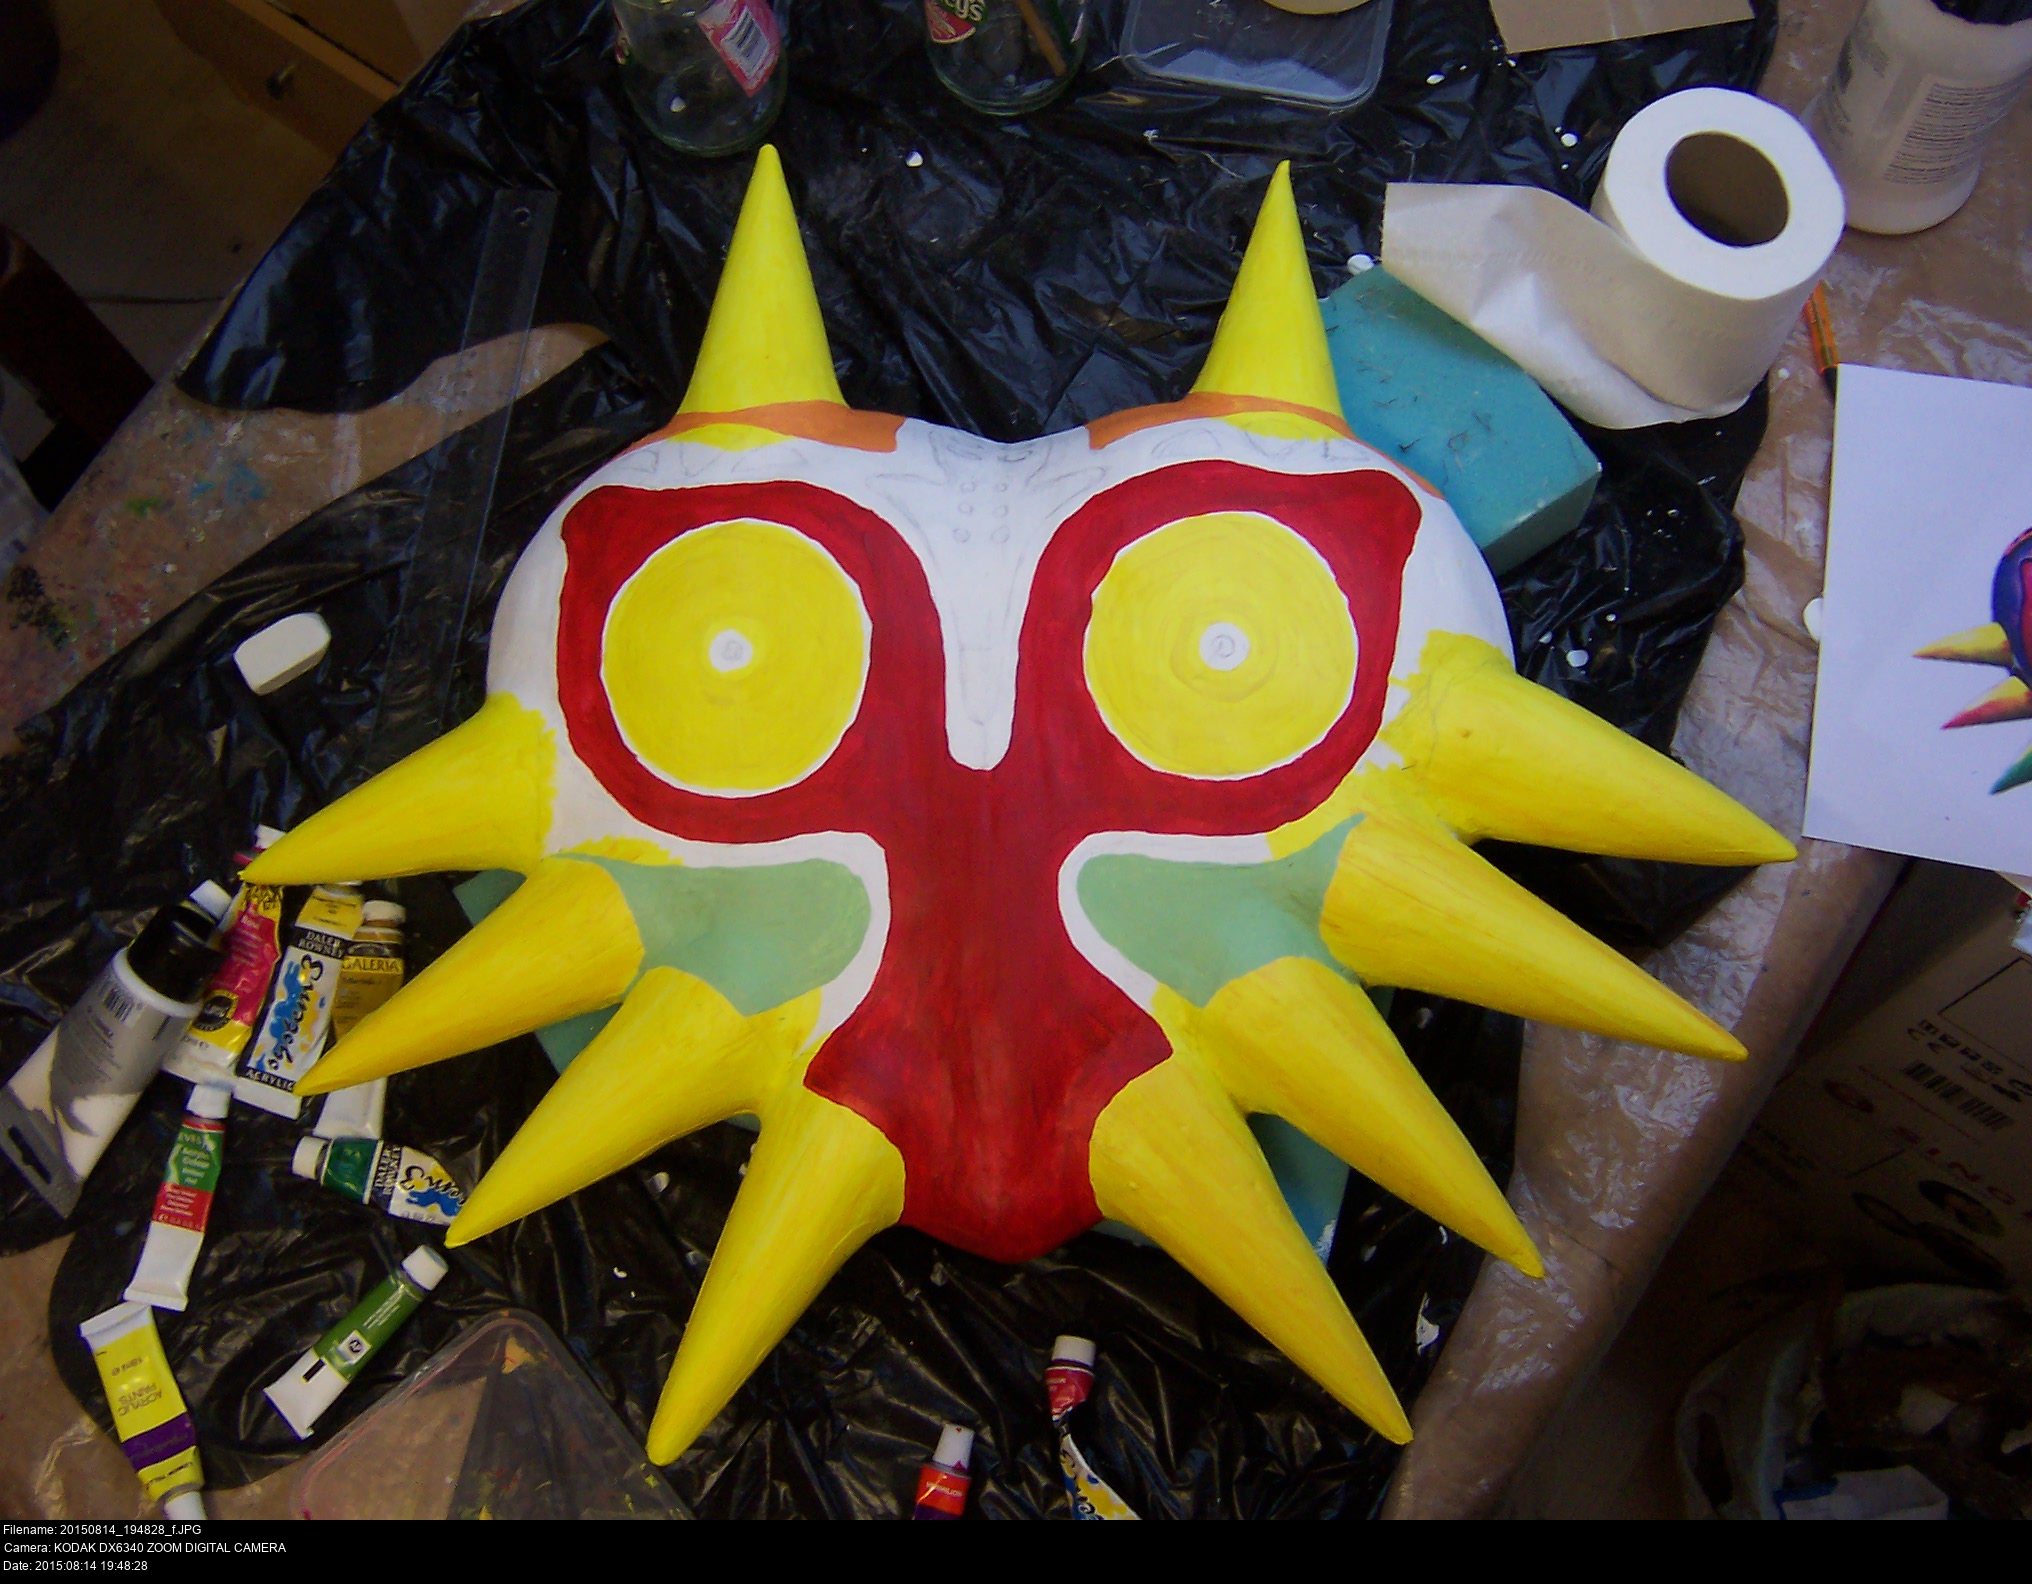
Start with the lightest colours:


I seriously underestimated how much paint this is going to take!
It's off to Wilkinson's to buy some of their acrylic paint - blue, red and yellow.
Notice how the yellow is showing through my markings a ton. To make your paint more opaque, you can mix in some gesso if you want. In fact, I do this to almost all of my colours since I like my paint being opaque and having a chunky thick texture. Also the paint I have here (this is Boldmere acrylic paint from The Works) darkens noticeably when it dries, so I need to lighten everything anyway.


Slow and steady. One area at a time. Use a mixture of brushes to suit your needs. Thick, thin, soft, hard. It's imperative that you not only practise painting, but also know how to recover from mistakes. Use wet wipes, clean brushes, cotton swabs! When you're happy with an area, STOP. Let it set. Then move onto the next area tomorrow.
It's a good idea to get yourself a set of make-up brushes. Go to a pound shop and get a set or two. That way you'll have a whole selection of intricate brushes of various shapes to work with. You can never have too many tools. (Or if you do, you can always put them aside I s'pose.)
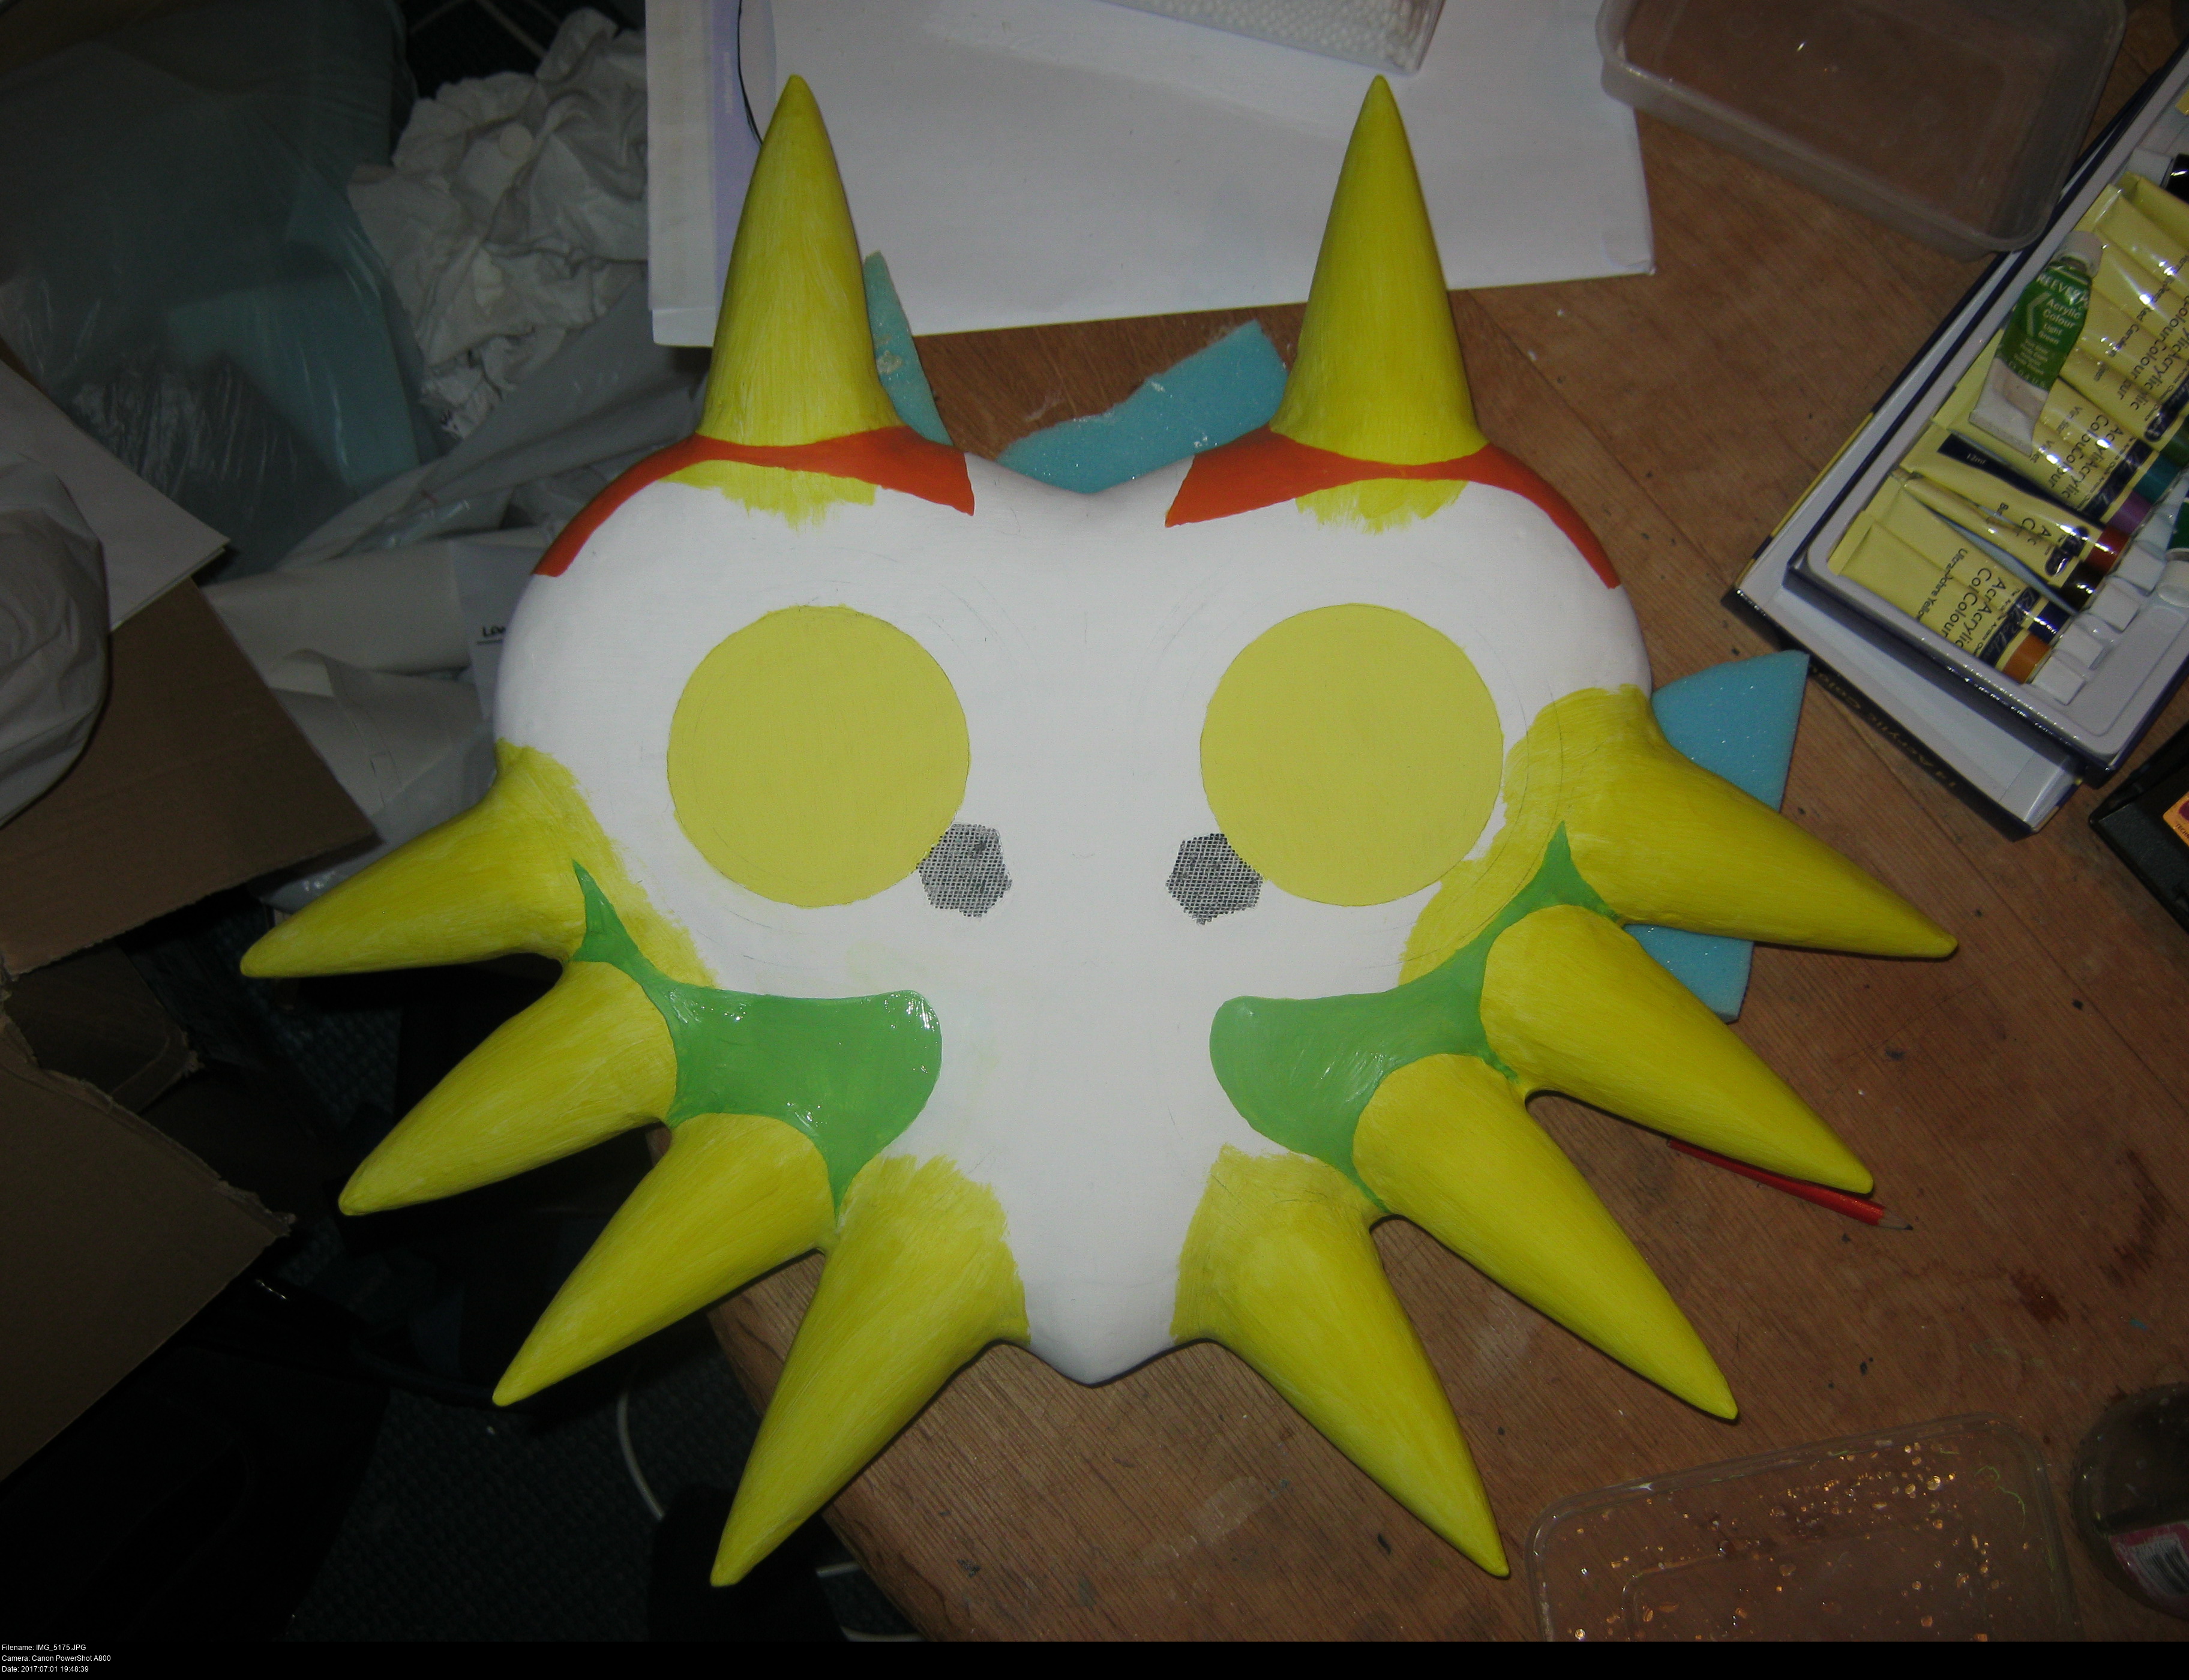
It's not straightforward to visualise the shape of these green cheek areas. I want them to look similar, ideally symmetrical but preferring aesthetically pleasing to completely accurate. The area on the right looks too short, but the area on the left doesn't yet reach the central beak shape so that side needs to be longer too... It's a puzzle.
And, in a real genius move, I did the cheeks separately before and after having my dinner so the paint dried and I had to re-mix it. Don't do that. Do all of one area of solid colour at once, regardless of how long it takes.
These top orange rectangles look like a nice colour at this point, but they ended up drying a lot darker. It took over an hour for me to do these properly.
Notice how the mask is vastly changing colour when I switch from my compact camera to my phone, and as the natural light changes. The only way to ensure that all the colours of your work are accurate is to view it in direct sunlight often. Don't rely on images, intuition or, heaven forbid, guesswork.


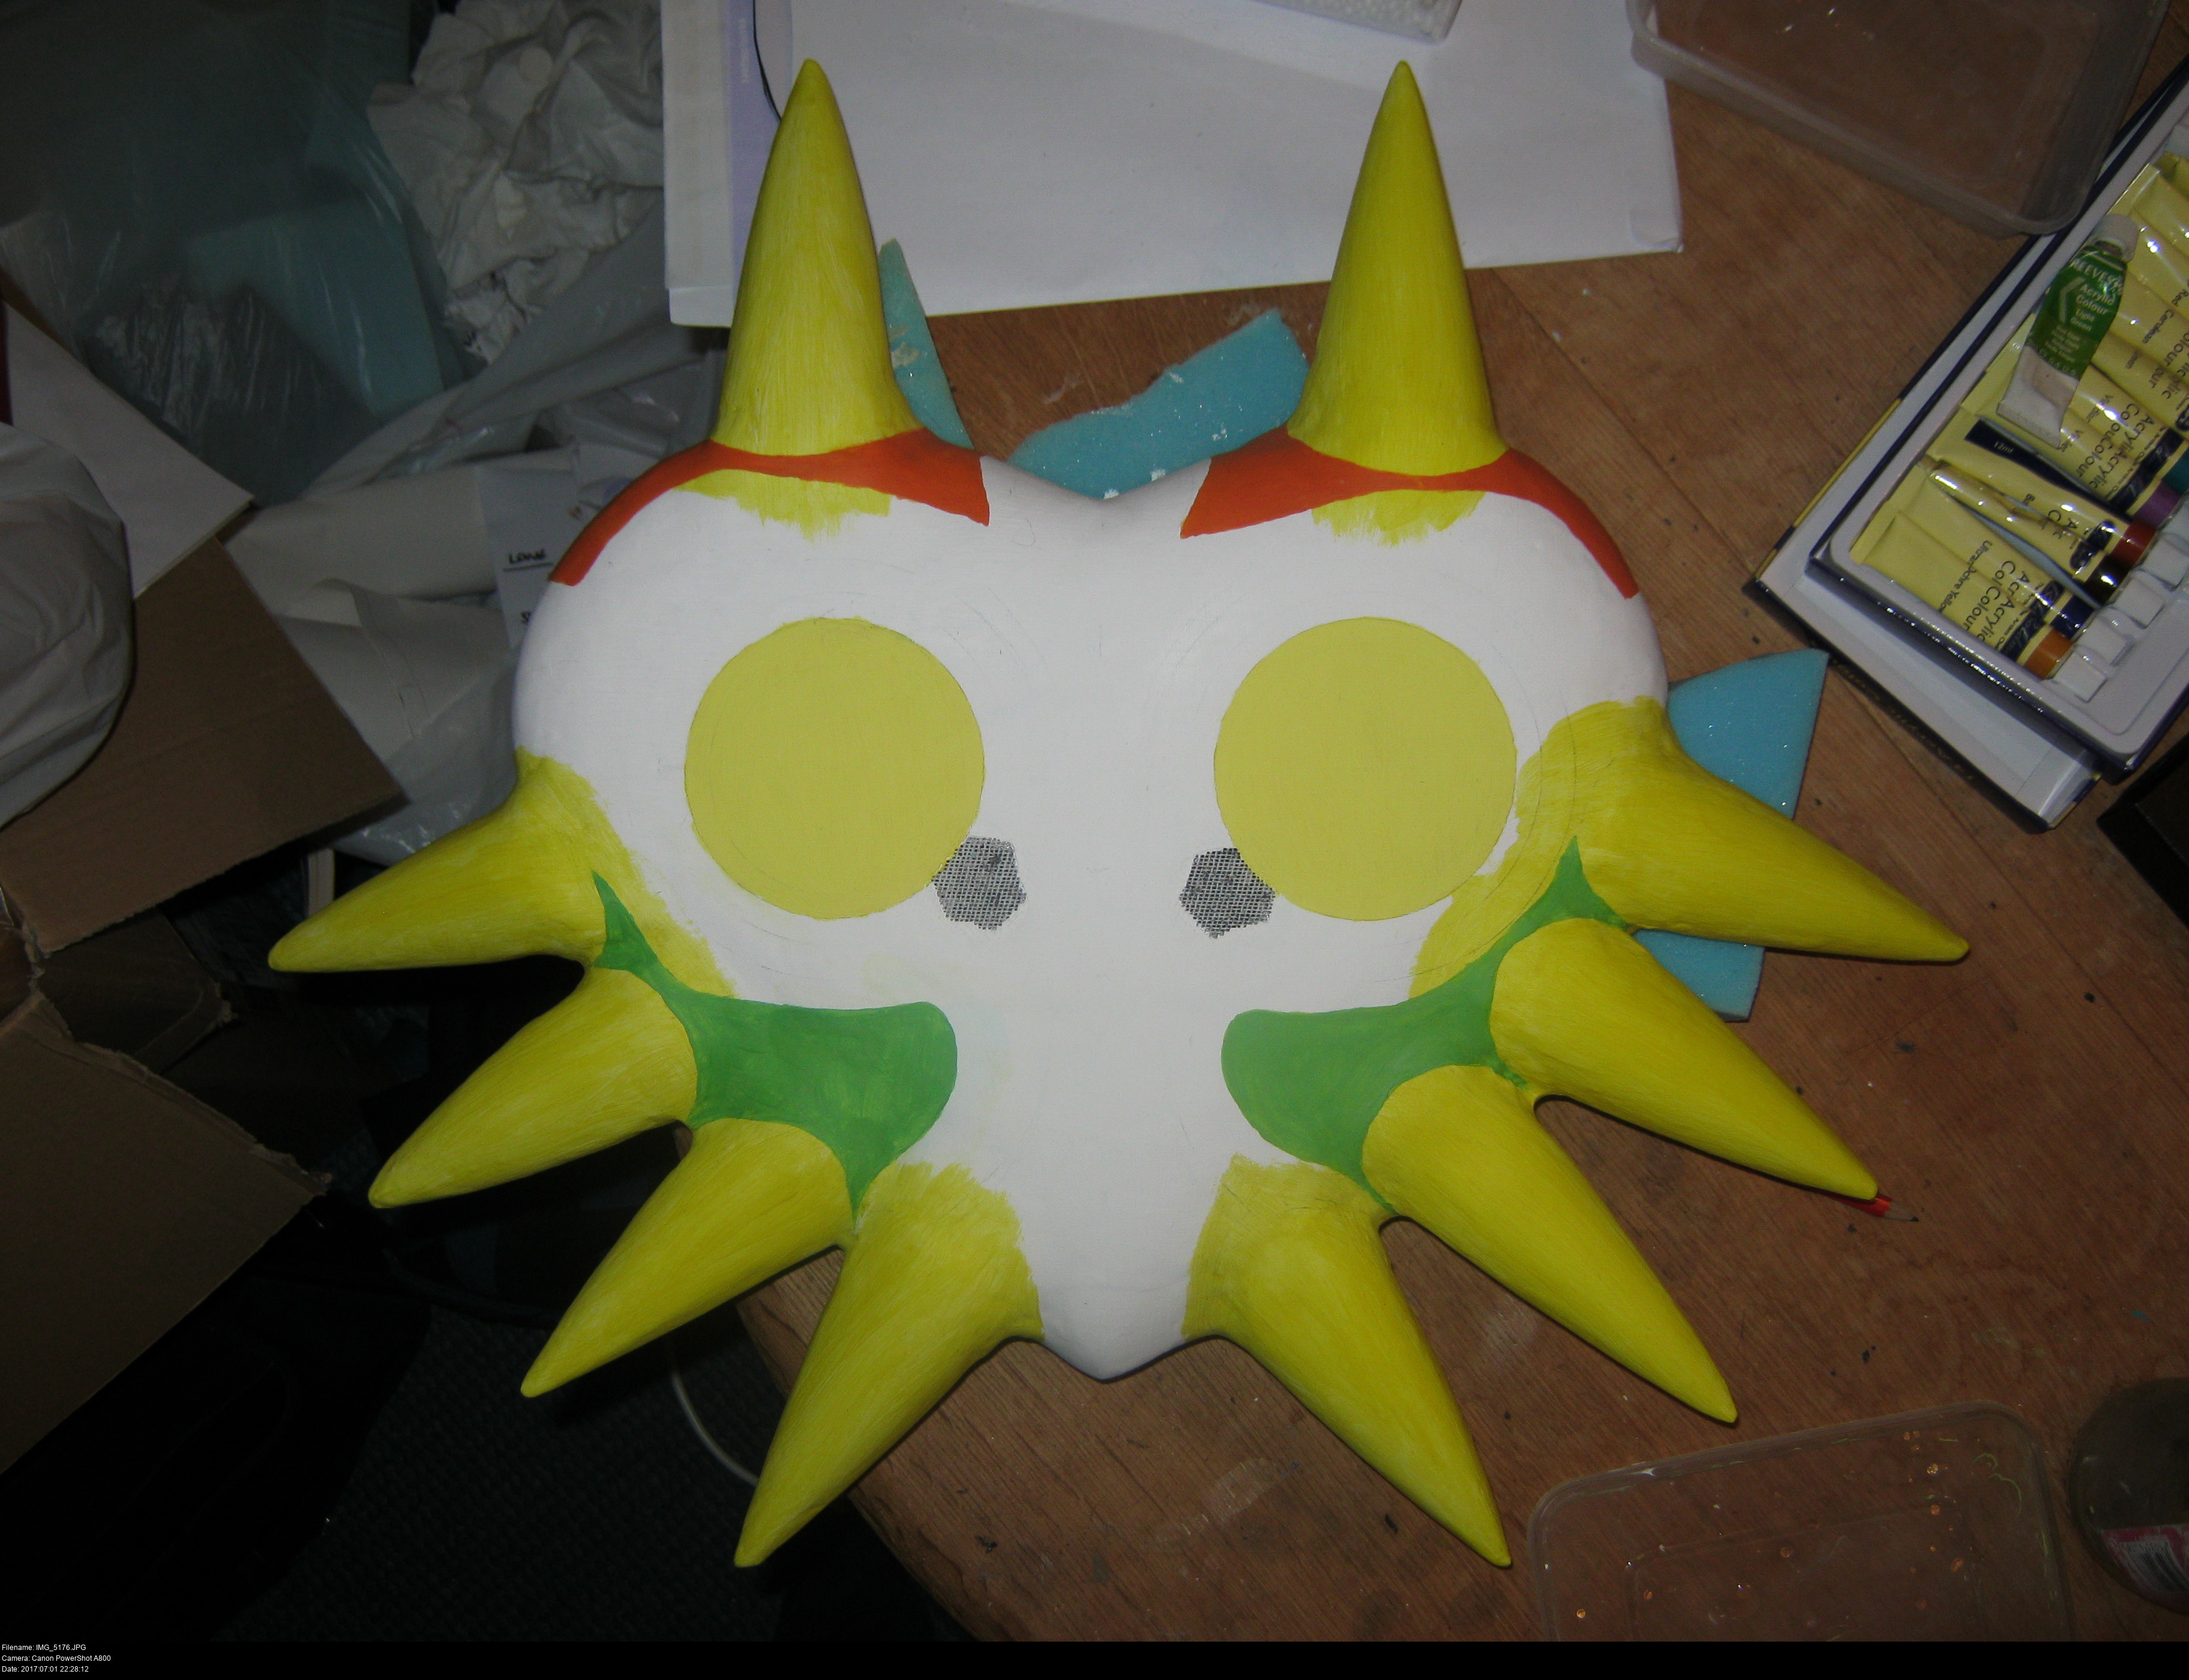
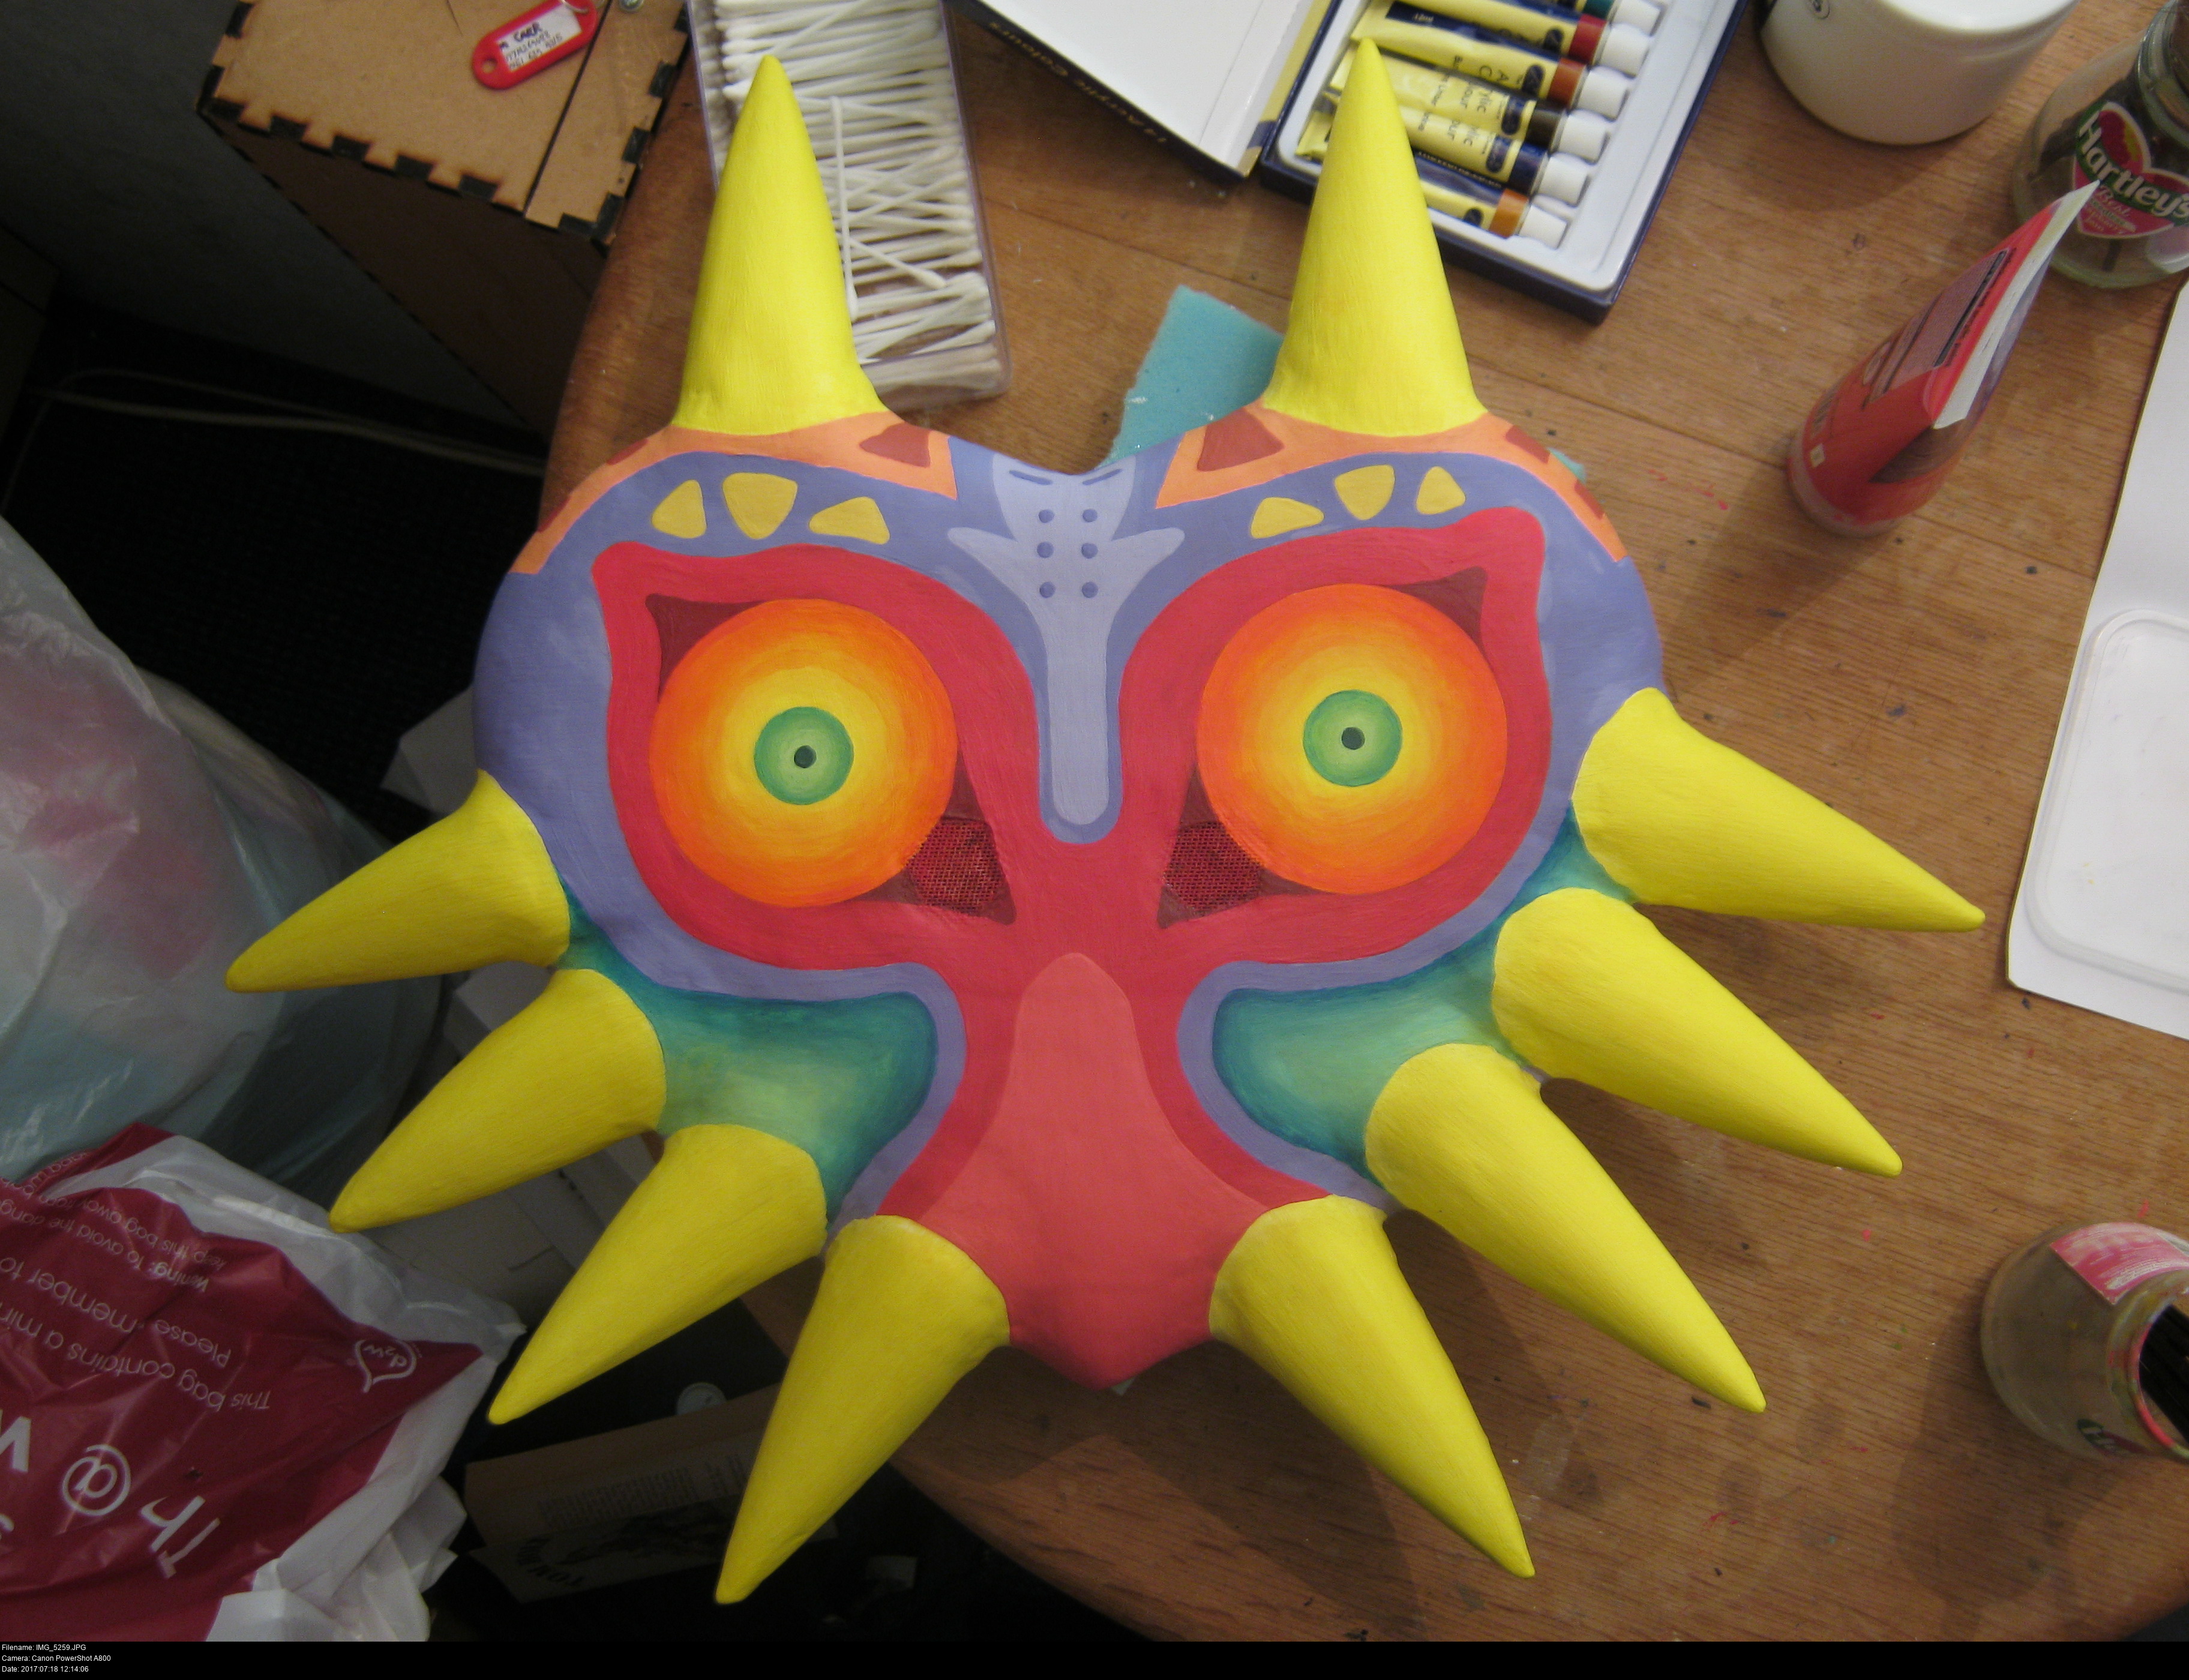
How long did it take to paint this red area? Way too long! I'm not satisfied with the shape of the upper corners of the eyes, I might redo all of the red area later. Redoing the orange top parts was definitely the right move. In fact, I'm thinking the lighter I make everything, the nicer the mask will look.


The red area seems to be going darker and darker every time I look back at the mask. I repainted the green cheeks completely in the last picture, erring on the side of lightness. These paints really do dry a heck of a lot darker than they appear when wet.
Every time I worry about not having the skill, patience or steady enough hands to work on the mask, I look back at the original modroc mask. That mask turned out wonderfully, but look how stodgy my original lines were! I was all over the place!

Here I am repainting the red. I wouldn't be surprised if that tomato red on the right side ends up drying like the scarlet on the left.

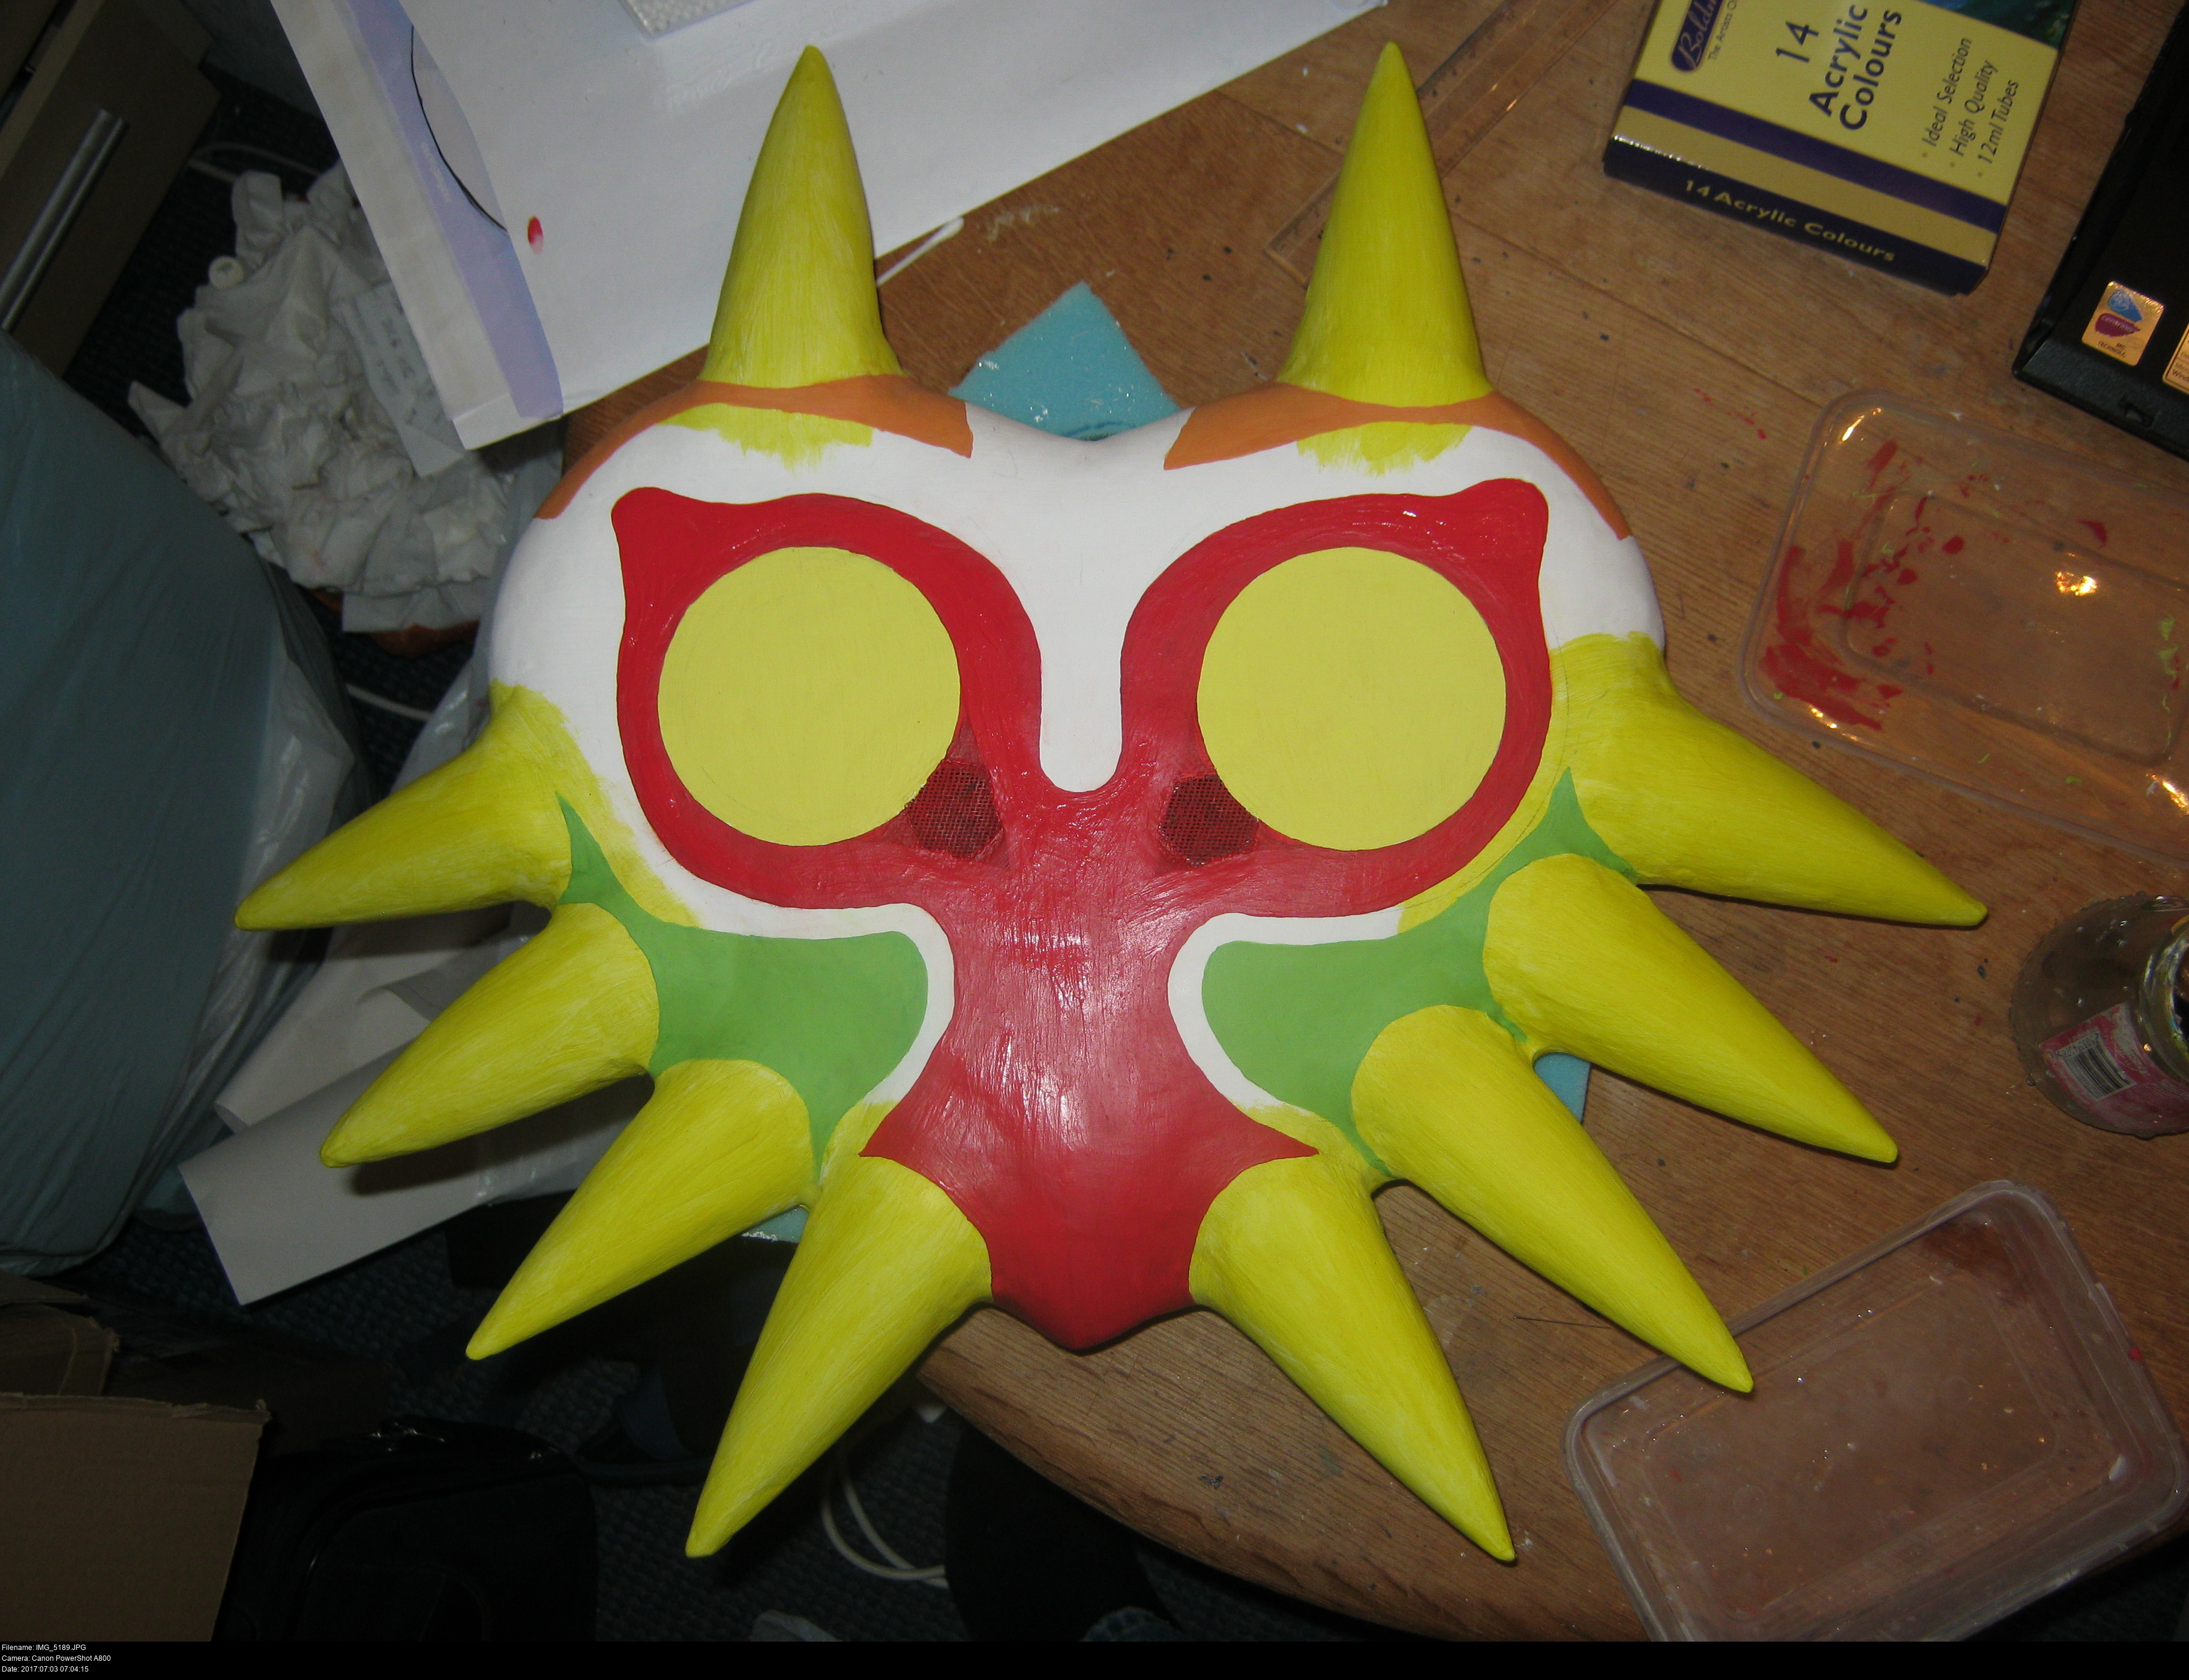


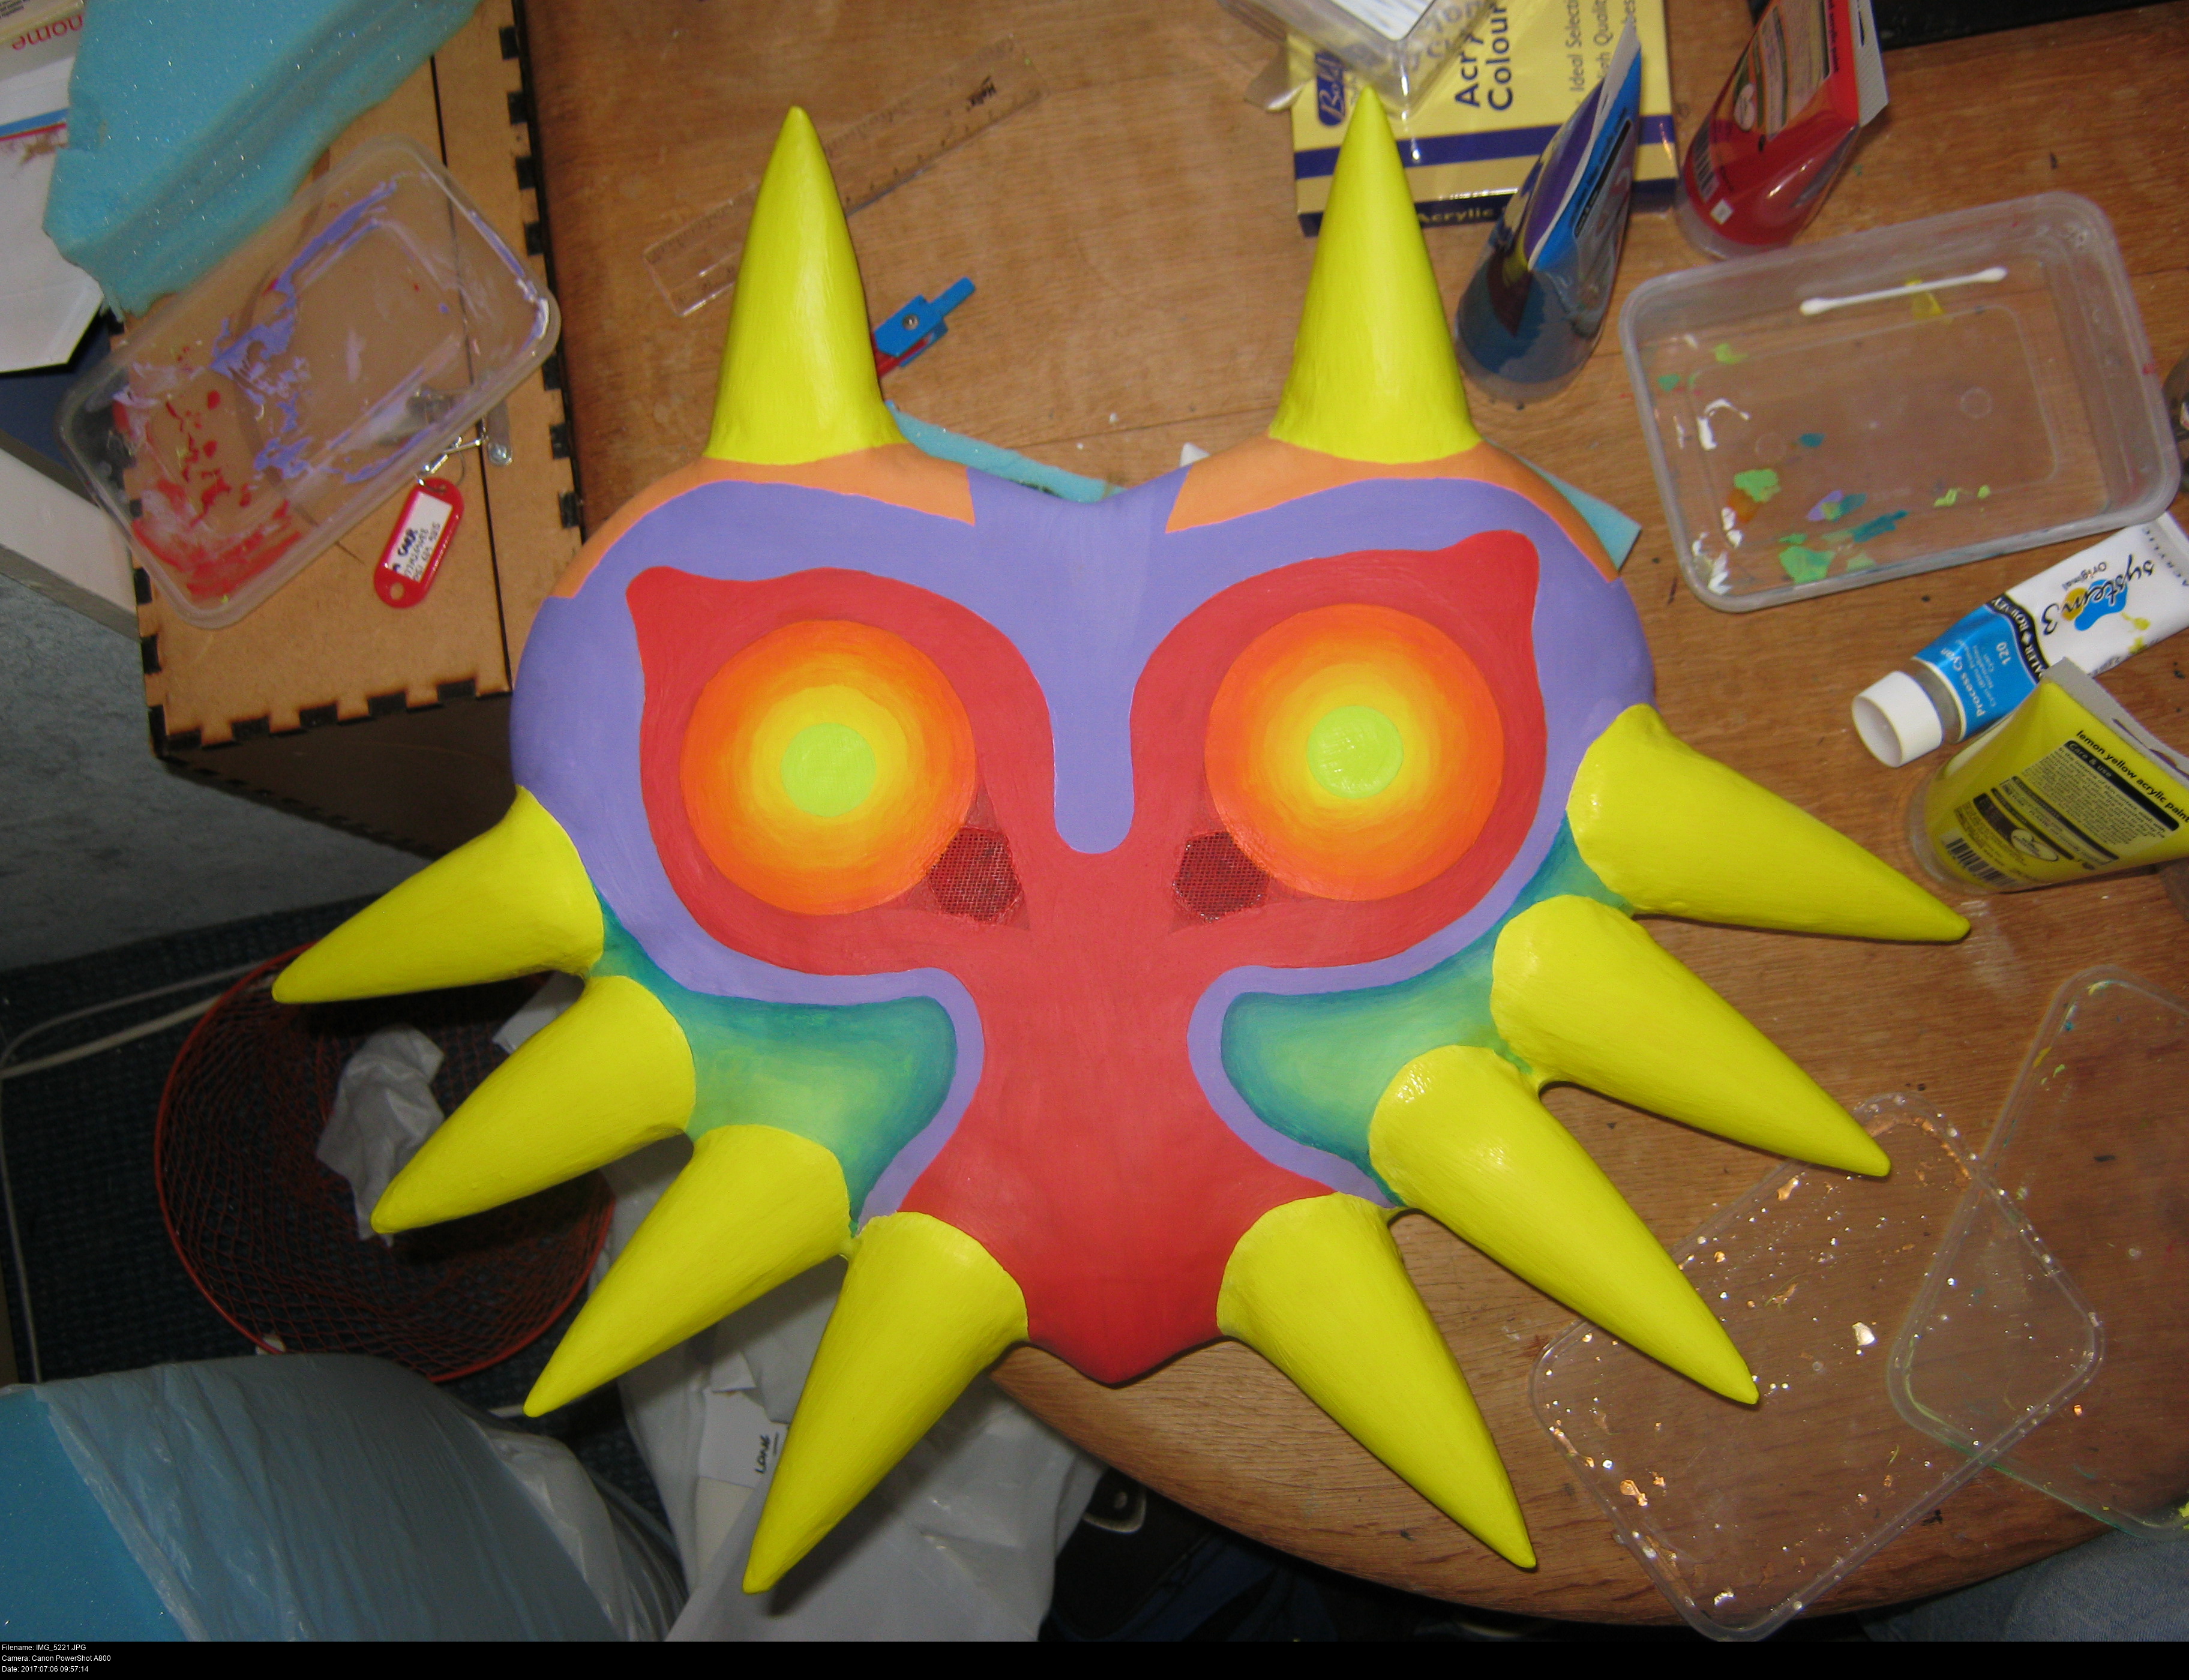
The red area is done and dry and the reshaped corners of the eyes are looking a lot better. With the lighter colours in place, you can see how the buckram appears to become a seemingly seamless opaque surface at anything but a deliberate, steady focus.

As I add more and more colours, I'm starting to get a more definitive image in my head about how I want the mask to look.
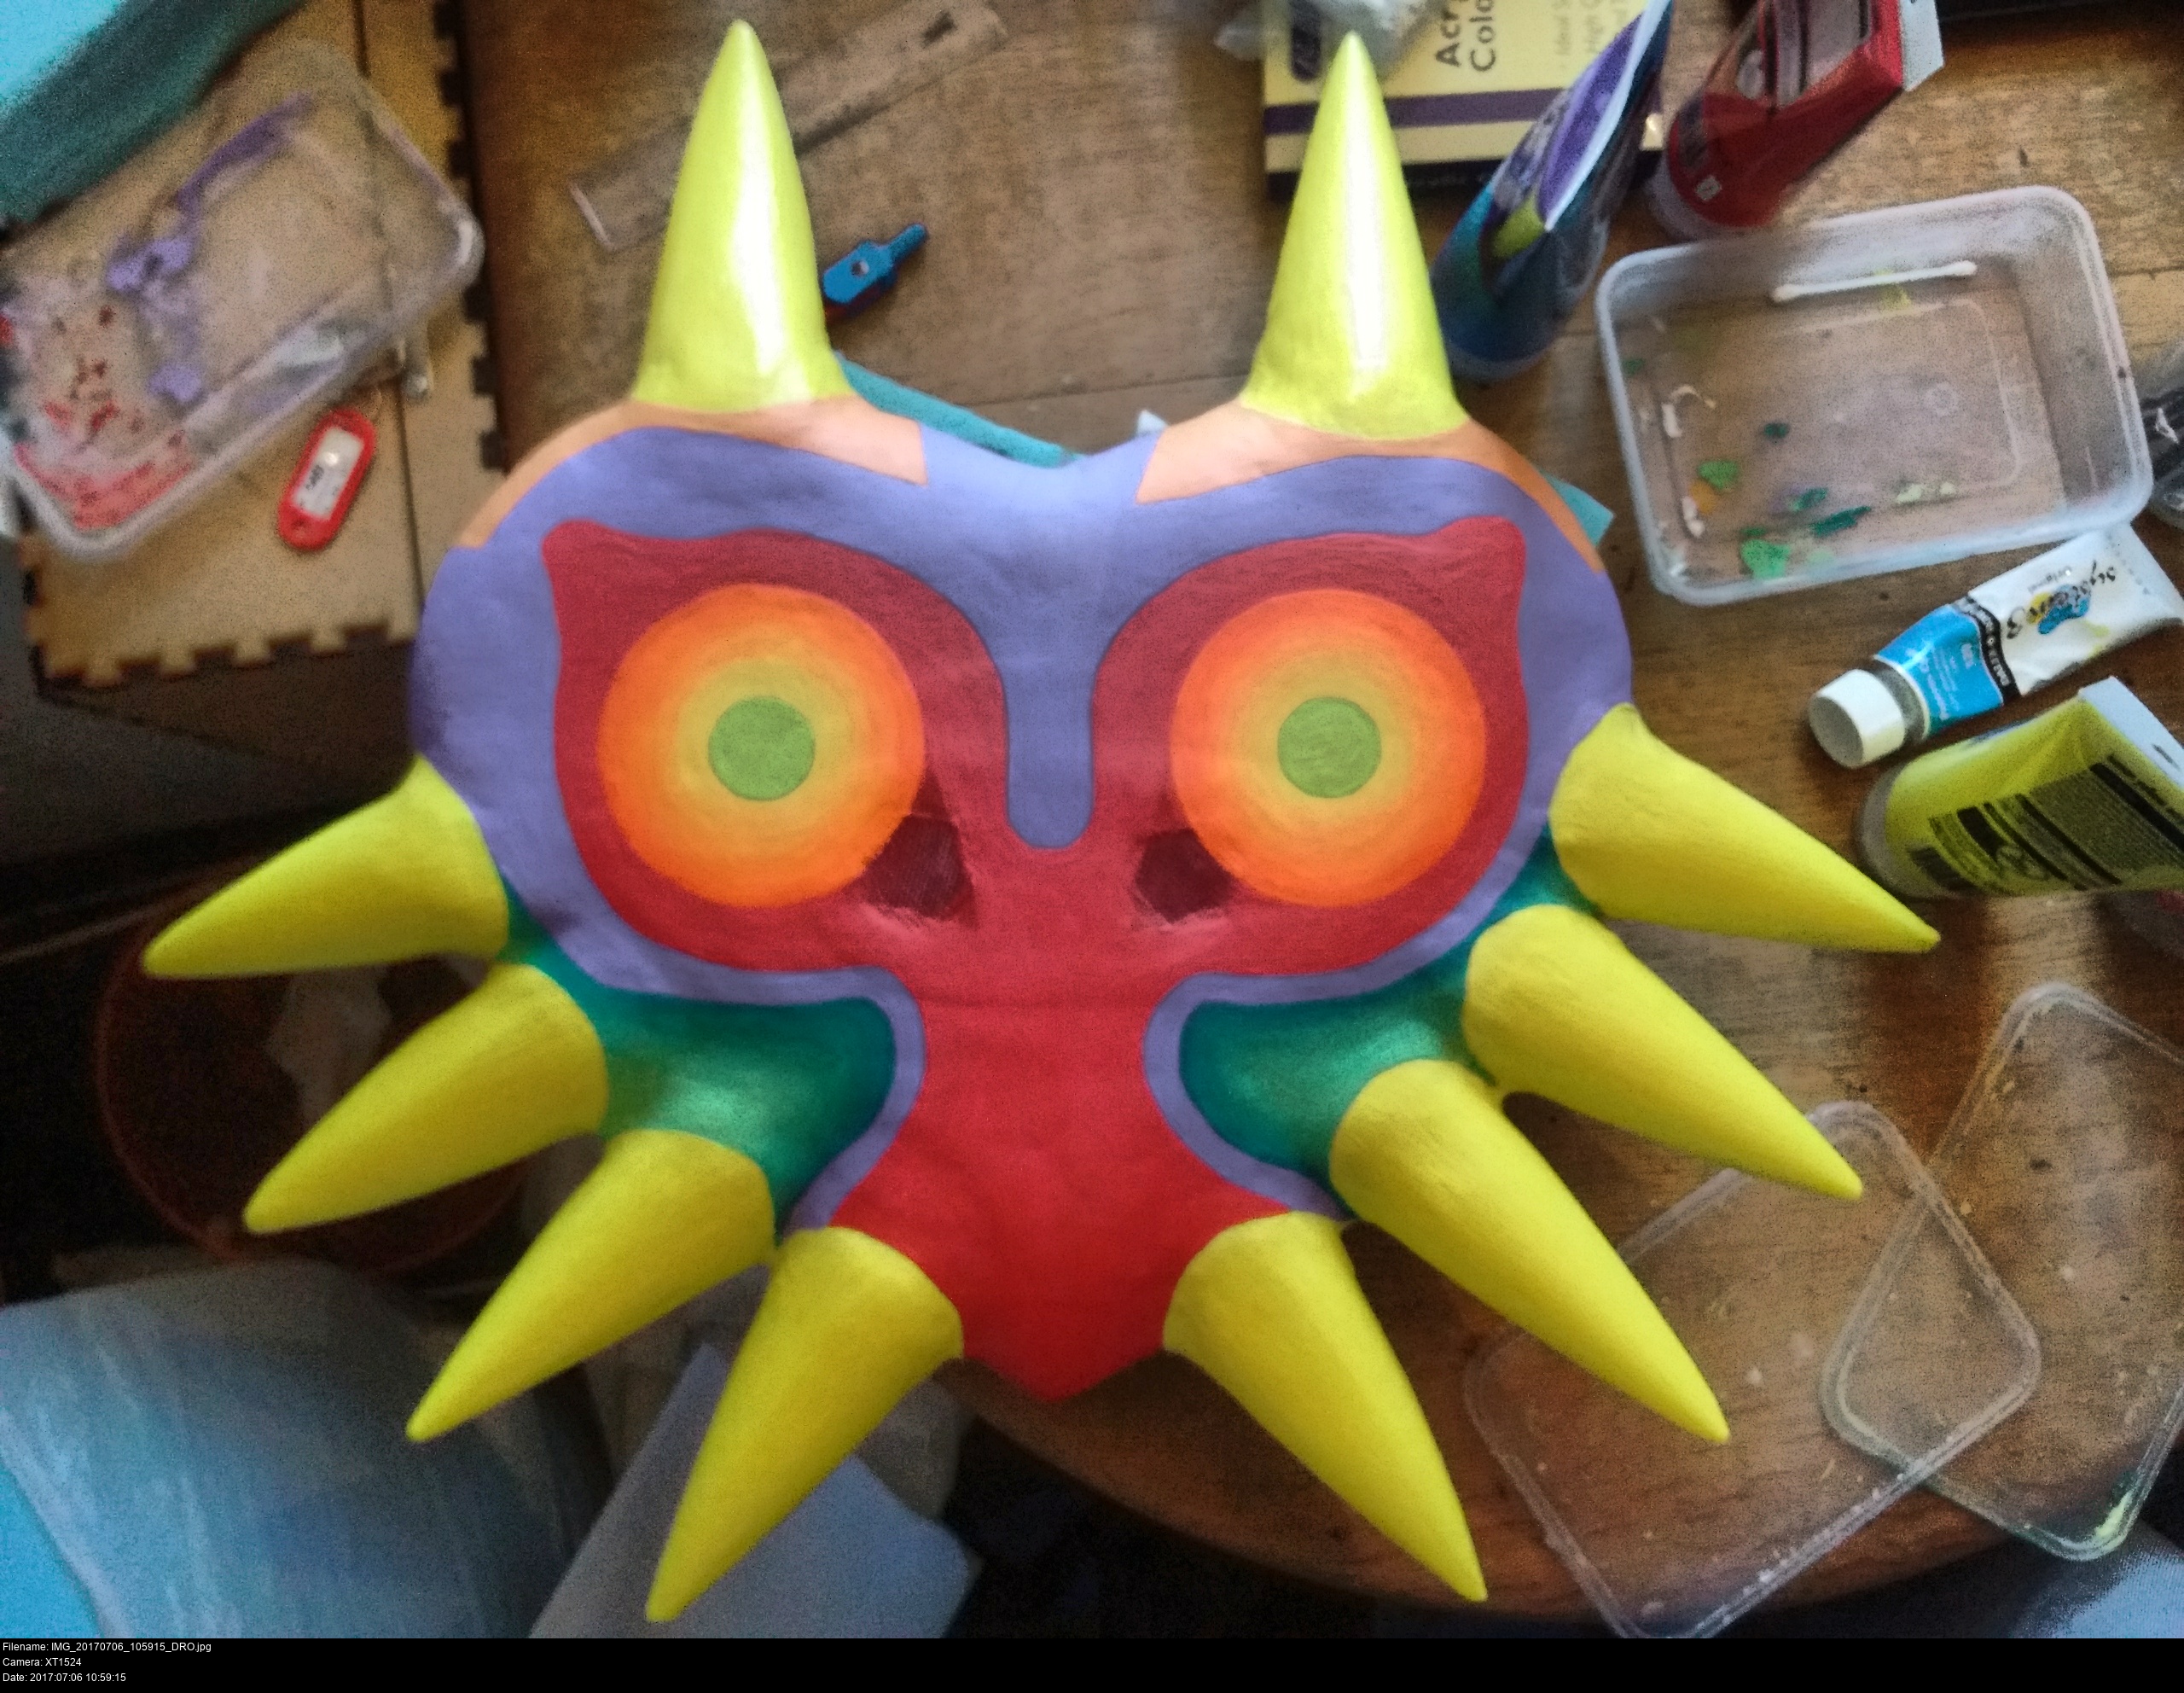
I'm not going to make this mask accurate like my original modroc mask, or realistic at all. I'm going to use pastel colours all round to match the cheapo bright polyester outfit I've made: I'm all-in on collectible plastic figurine Skull Kid! I'm not going to add any of the dark or light lines around the eyes or cheeks and hopefully end up with a happy and bright Skull Kid to celebrate my new mask.


.jpg)
It's time for the main event: the purple layer! Except this time going for a lovely lavender/mauve colour. Take a guess at how long it took me to paint all of this.
Two hours. It took quite a few How Did This Get Made podcasts to get through that.
The worst part was by the end my paint was drying out... what little there was left of it! I hadn't mixed anywhere near enough. And that means trying to reproduce colours of paint, matching your new colour with what's already in the palette, even though it's partially dried...
Yeah.
And here's a little known bonus fact about paint: red and blue don't make purple. They just don't. You might think they do, but they don't.
When you go into an art shop, do you notice how many different kinds of solid primary reds and blues there are? Some of the reds are 'blueish' reds and some are 'yellowish'.. same for the blues. If you mix together a green-ish blue with a red, the green and red cancel out and you get brown! Or -grey-.
https://www.youtube.com/watch?v=IUc31f0A7CQ
I had a couple of goes with the red and the blue primaries I bought from Wilkinson and all I could make was dark grey and slatey blue.
In the end, I just used the 'violet' from the cheap set of Works paints and mixed it lighter with gesso!
If you need secondary colours to paint with, buy them ready mixed or suffer.


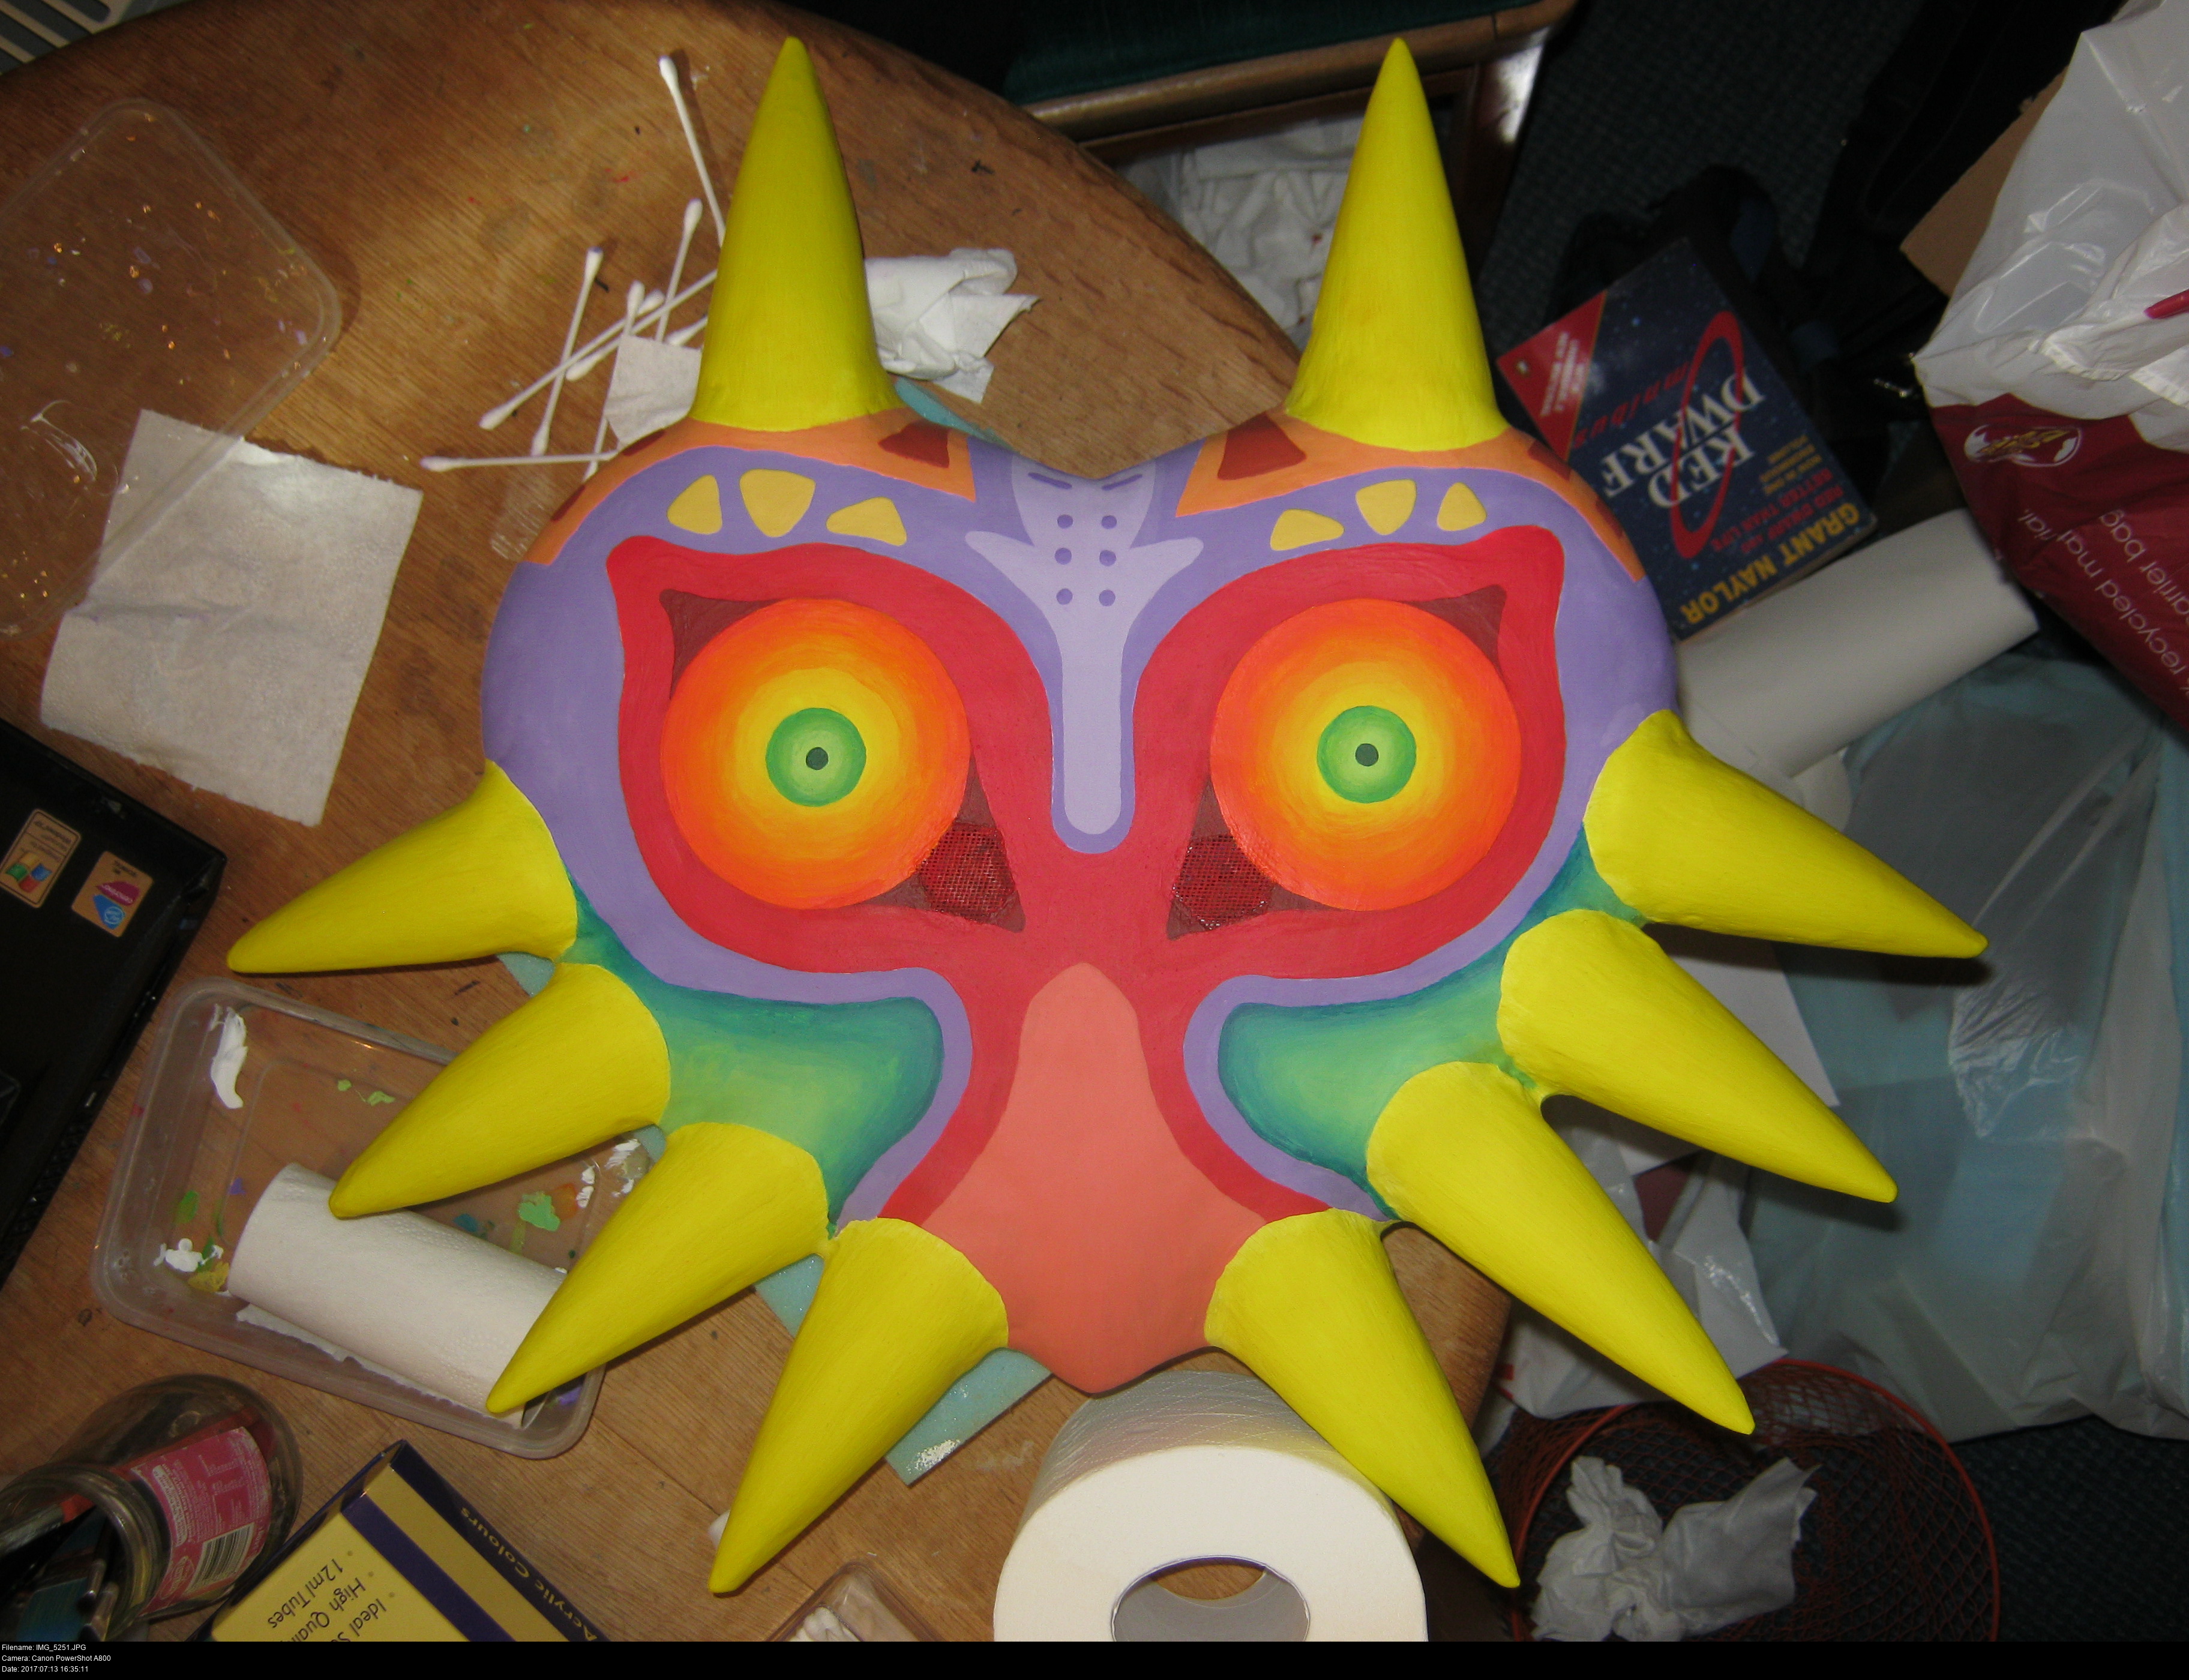
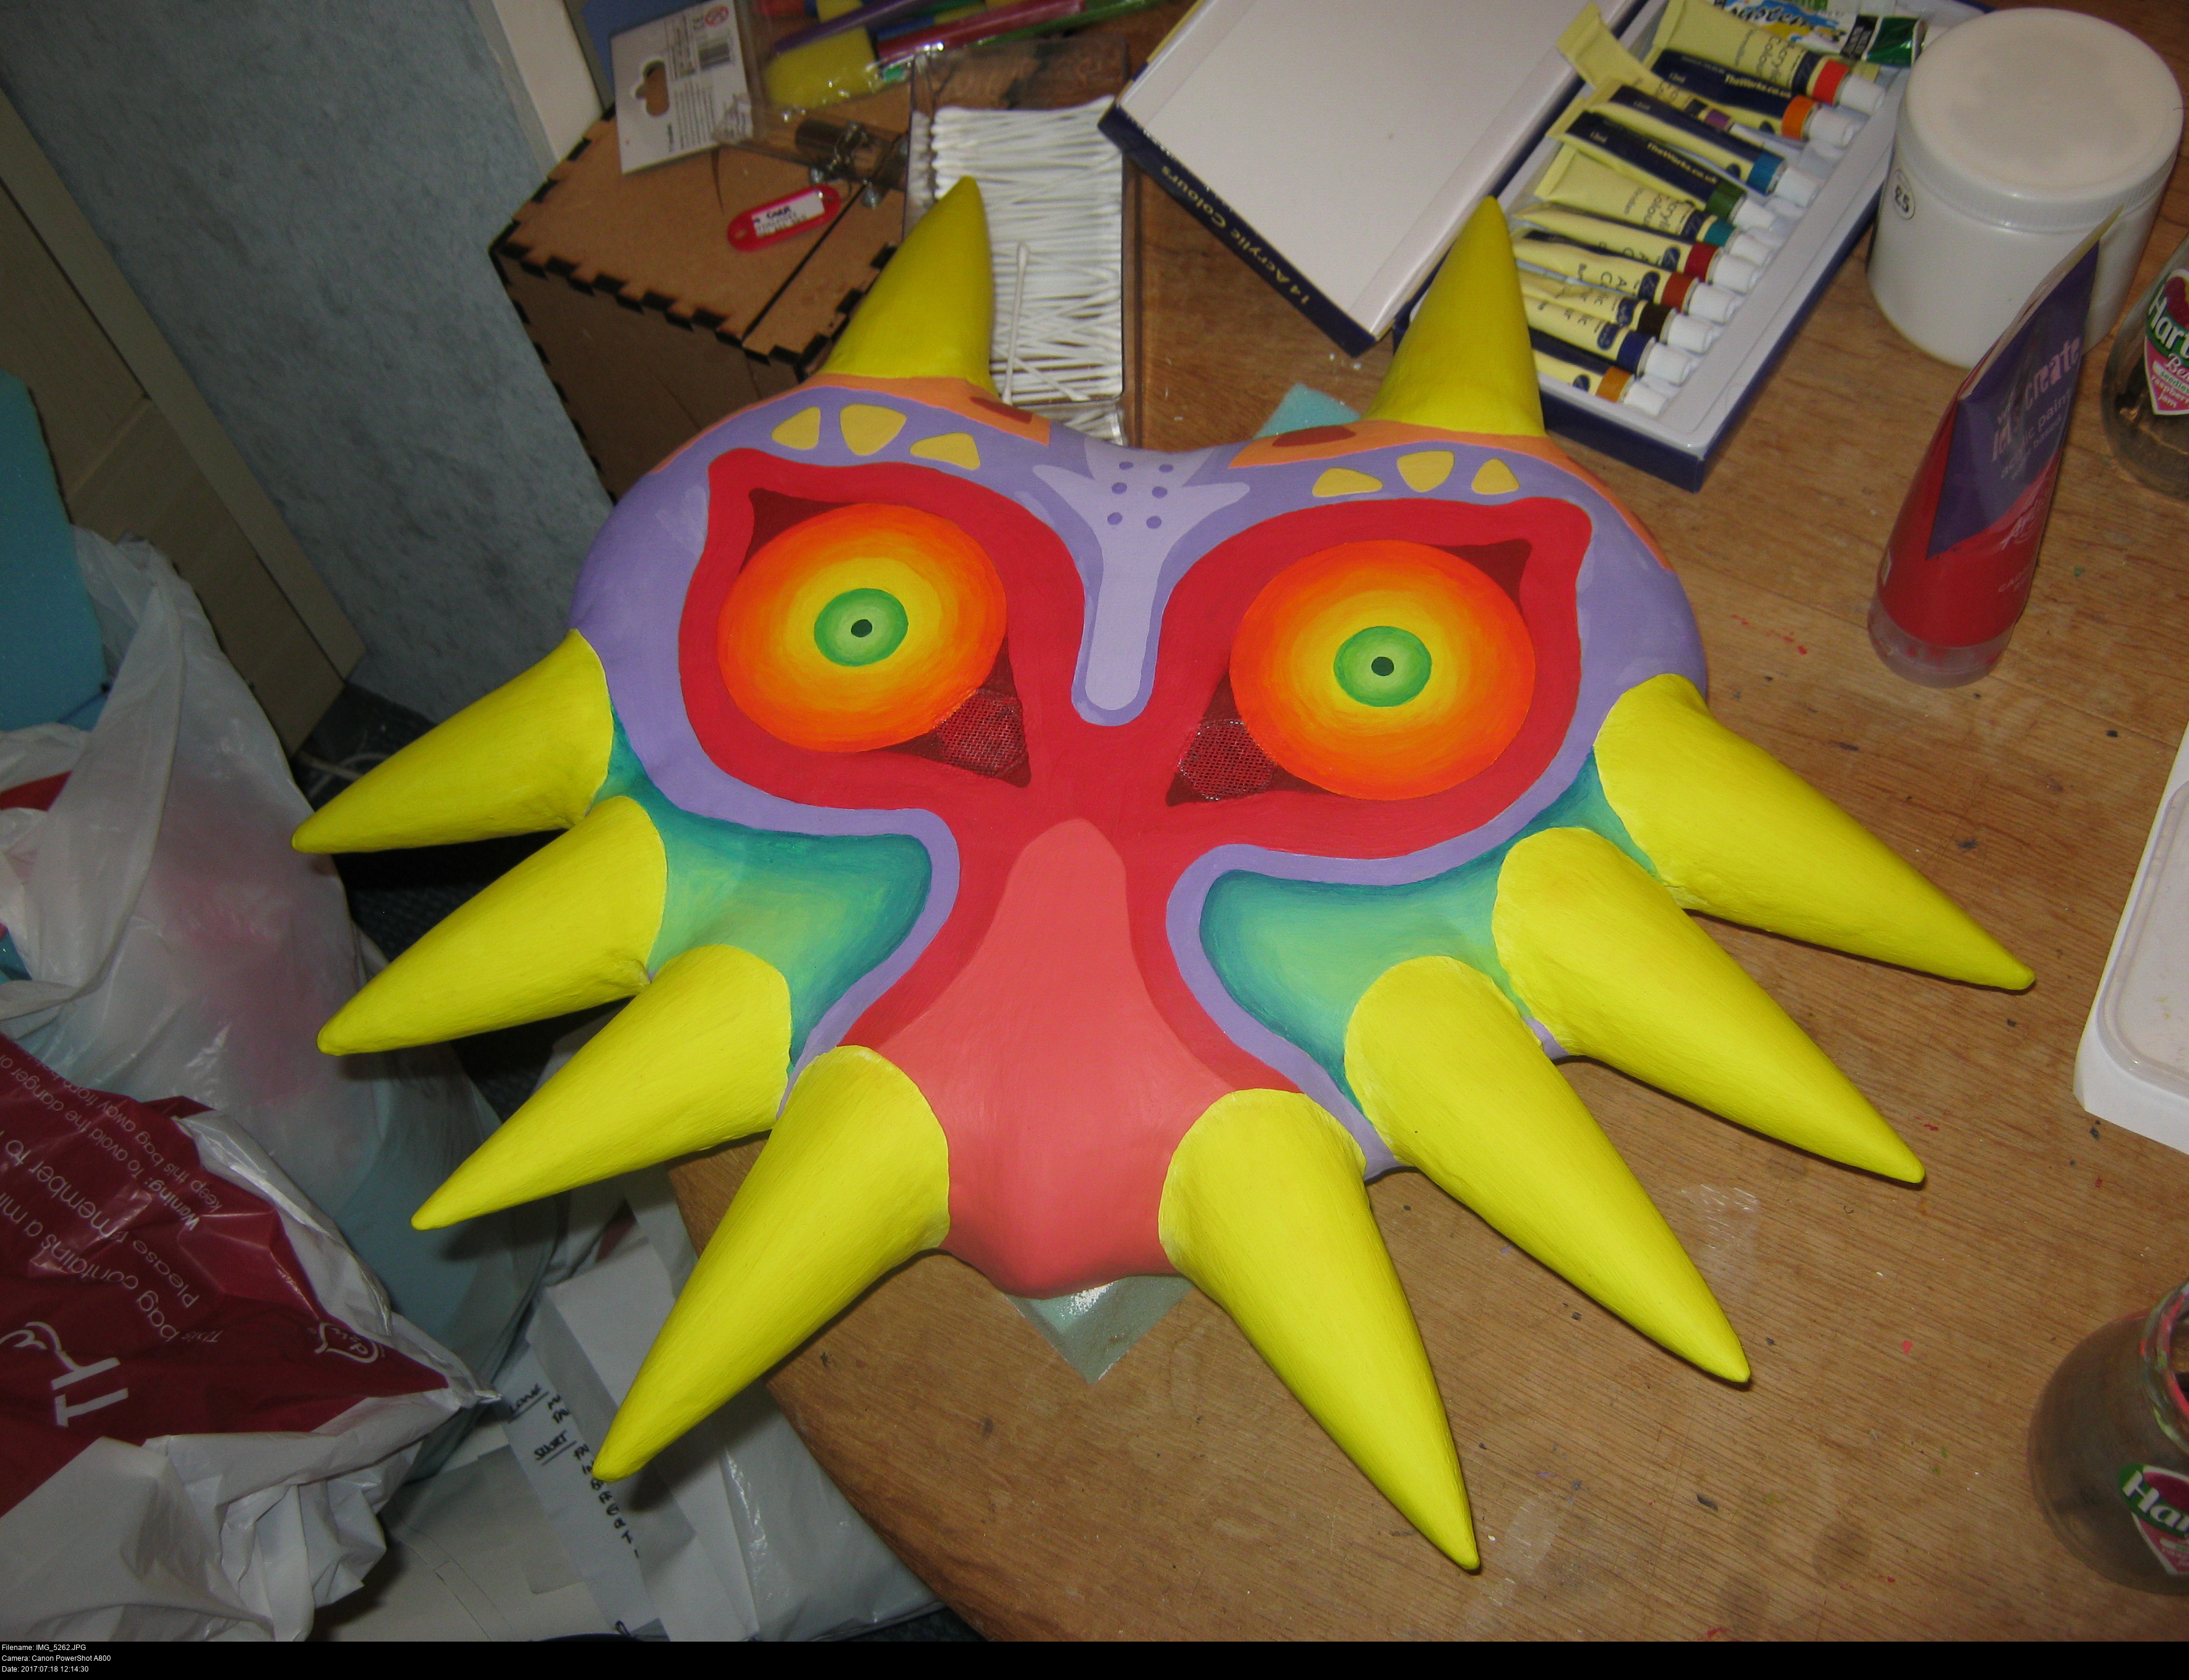
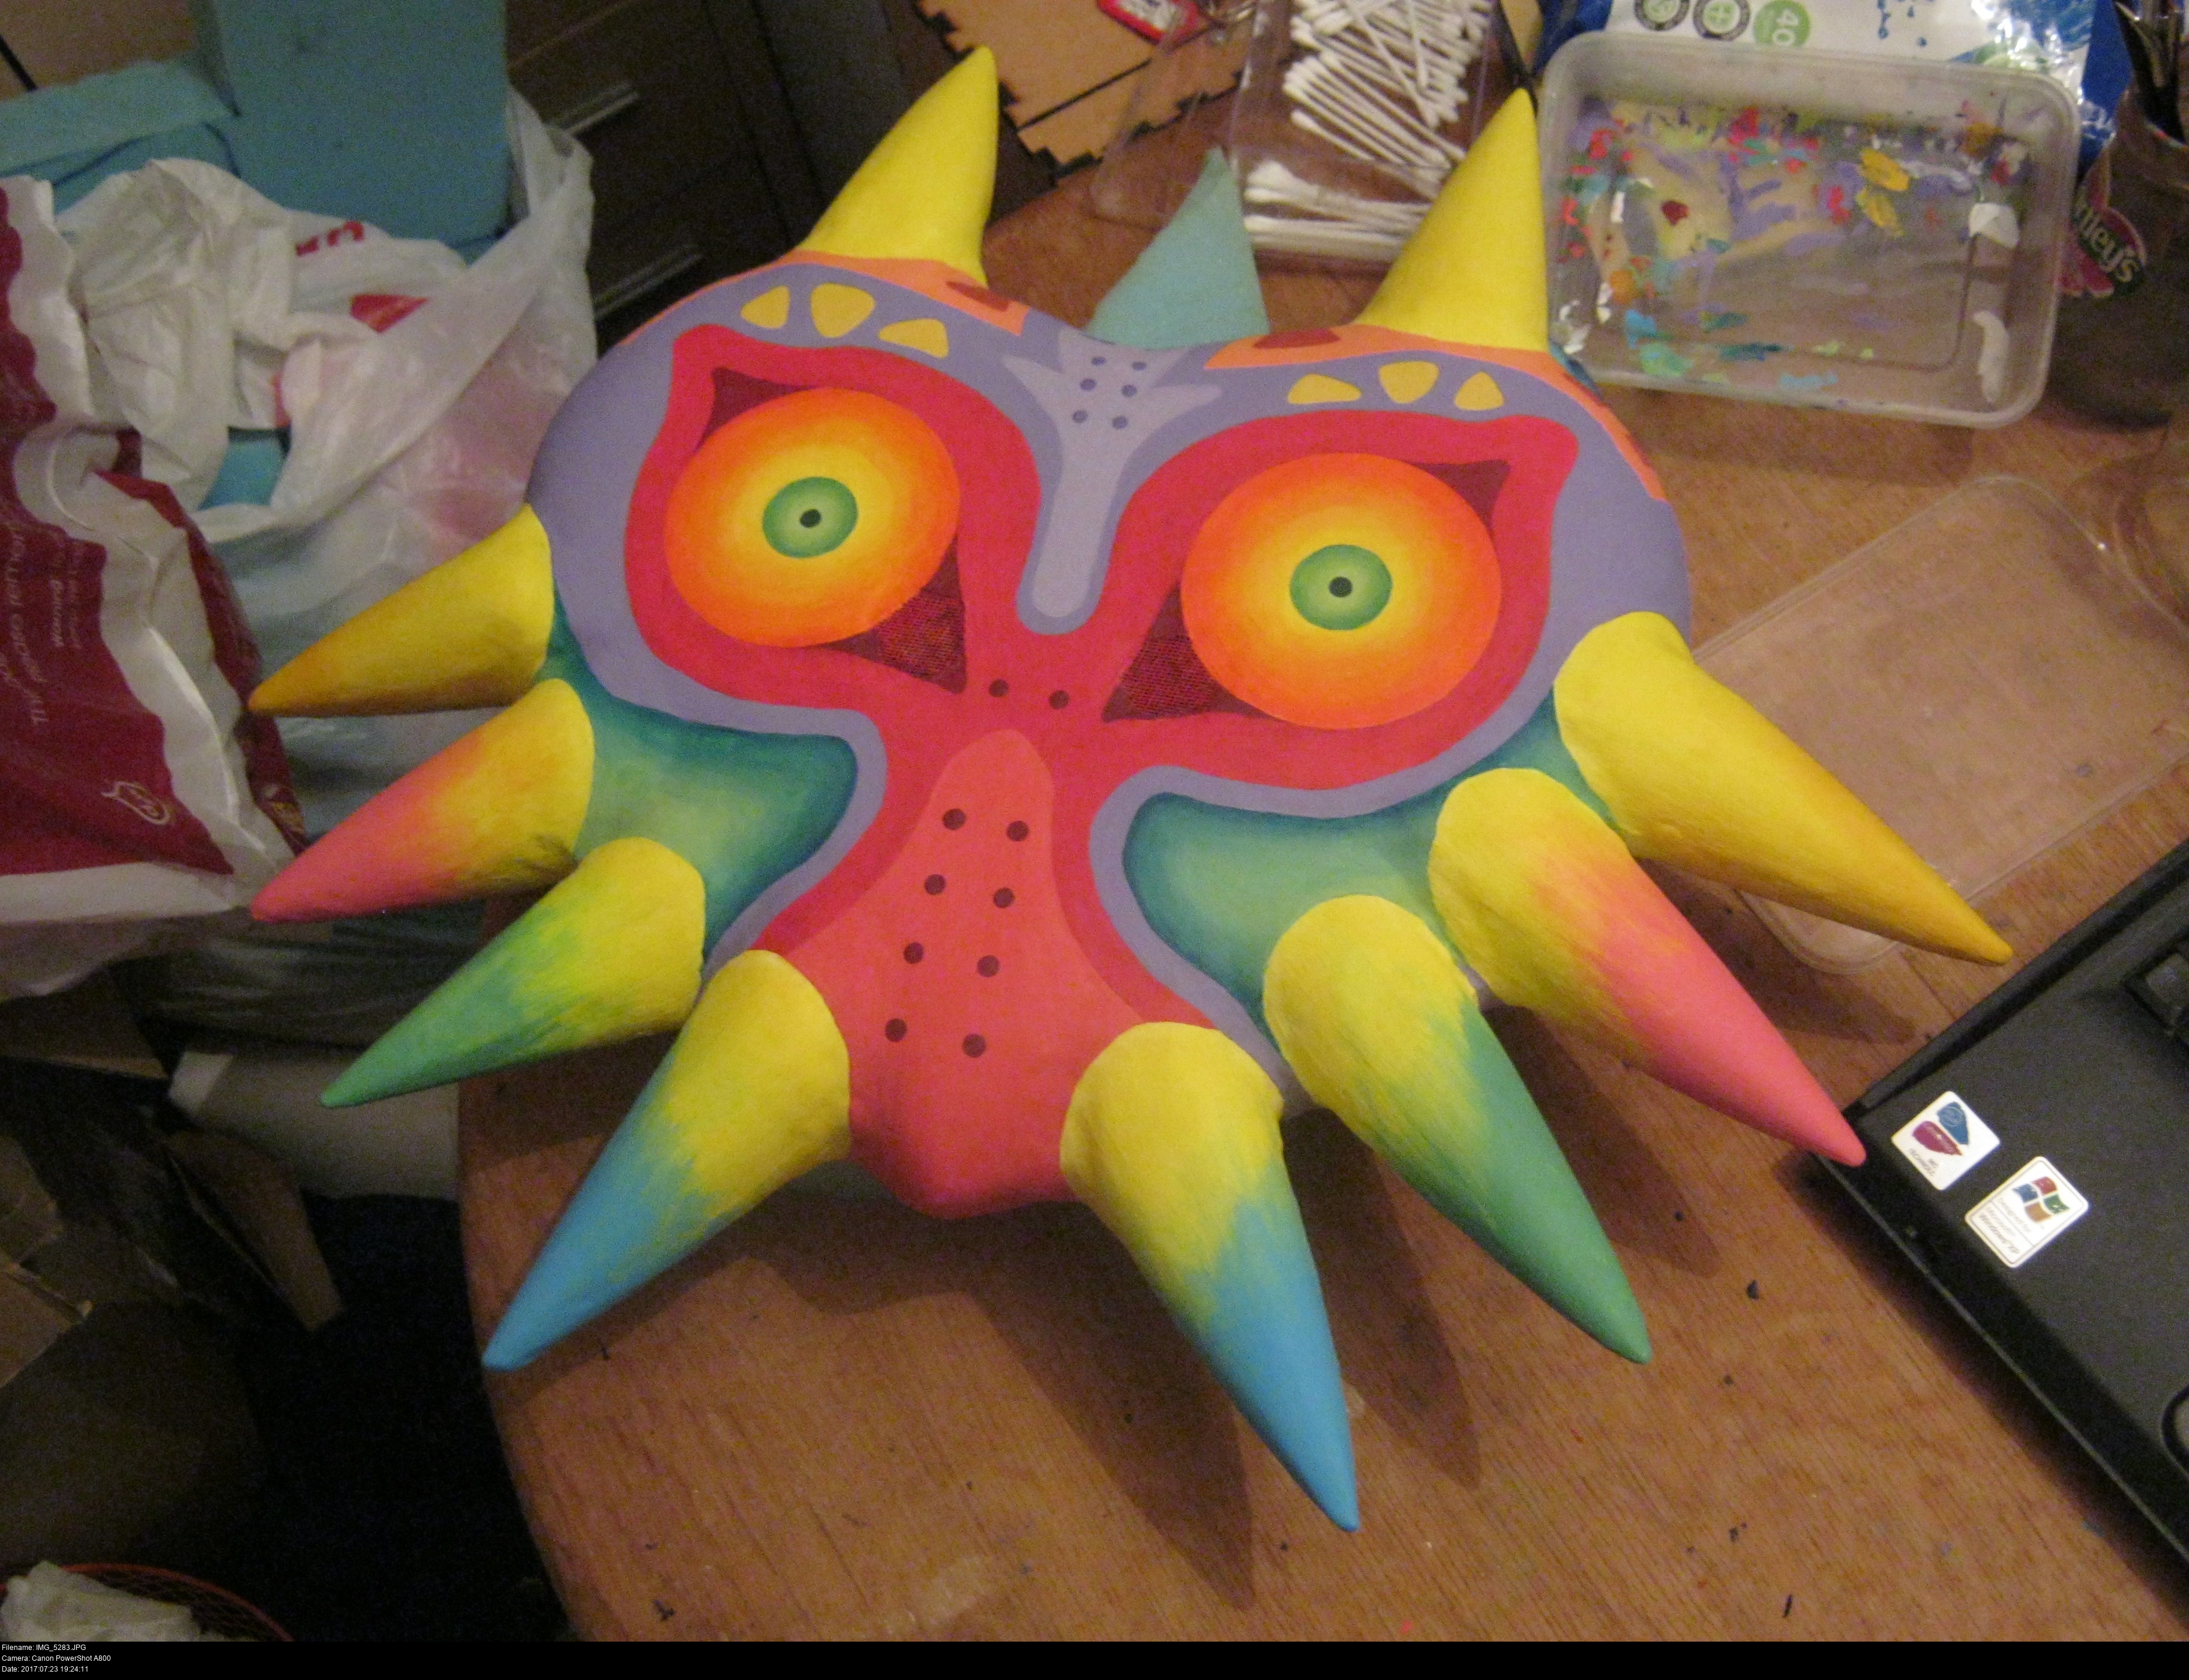
Oh yeah!! The mask is -on- now. I don't mean I'm wearing it, that'd be a terrible idea before I've varnished it! But it's looking damned tasty!
It's really hard to tell where the buckram is now, right?
I don't think I've fully got the hang of painting gradients. I've mixed up all the shades I want to use on the palette, and I'm switching back and forth between painting solid colours, applying water, moving things around with a dry brush, and cycling through all the brushes I have. I don't have any deliberate, reliable skill for this. All I can do is keep shifting things around until they look right.
Eventually, there comes a point where it looks good enough and you have to leave it. If you can, leave it looking too bright, and fix it with a second coat to add more faint gradient details another day.
Trying to do any of this without strong natural light is impossible.


After the eyes comes the cheeks. I wanted to make a smooth gradient from the pale, vomit green to a nice aquamarine colour. This took a lot of work, especially trying to get both sides looking consistent. Mixing a lot of paint and keeping it moist on the palette is essential. Having nice, new, thin brushes helps a lot.
Notice how the border of the cheeks isn't a very dark colour at all: it's quite a light blue, but it looks darker against the indigo. Visualise all the colours you want to use before using them.


If you're curious about how much light the mask lets in now that the front is painted red and the back is painted black, here's what it looks like held up to natural light. When you're wearing it, the buckram might as well not even be there!


Now I've got to make a decision.
This is the point where I have to decide whether I'm going to paint on the dark lines, make them faint, or just have the colours running into one another. The eyebrow triangles could be left as outlines like the original design, or I could fill them in. I could fill in the beak as well, turning the fine details of the mask into variations of colour instead of solid outlines. I could try both types!
I wasn't sure, so I mocked up some designs on the computer and asked a bunch of folks online what they thought. And then I completely ignored their advice and went with the design I was going to do all along: pastel colours and no outlines.
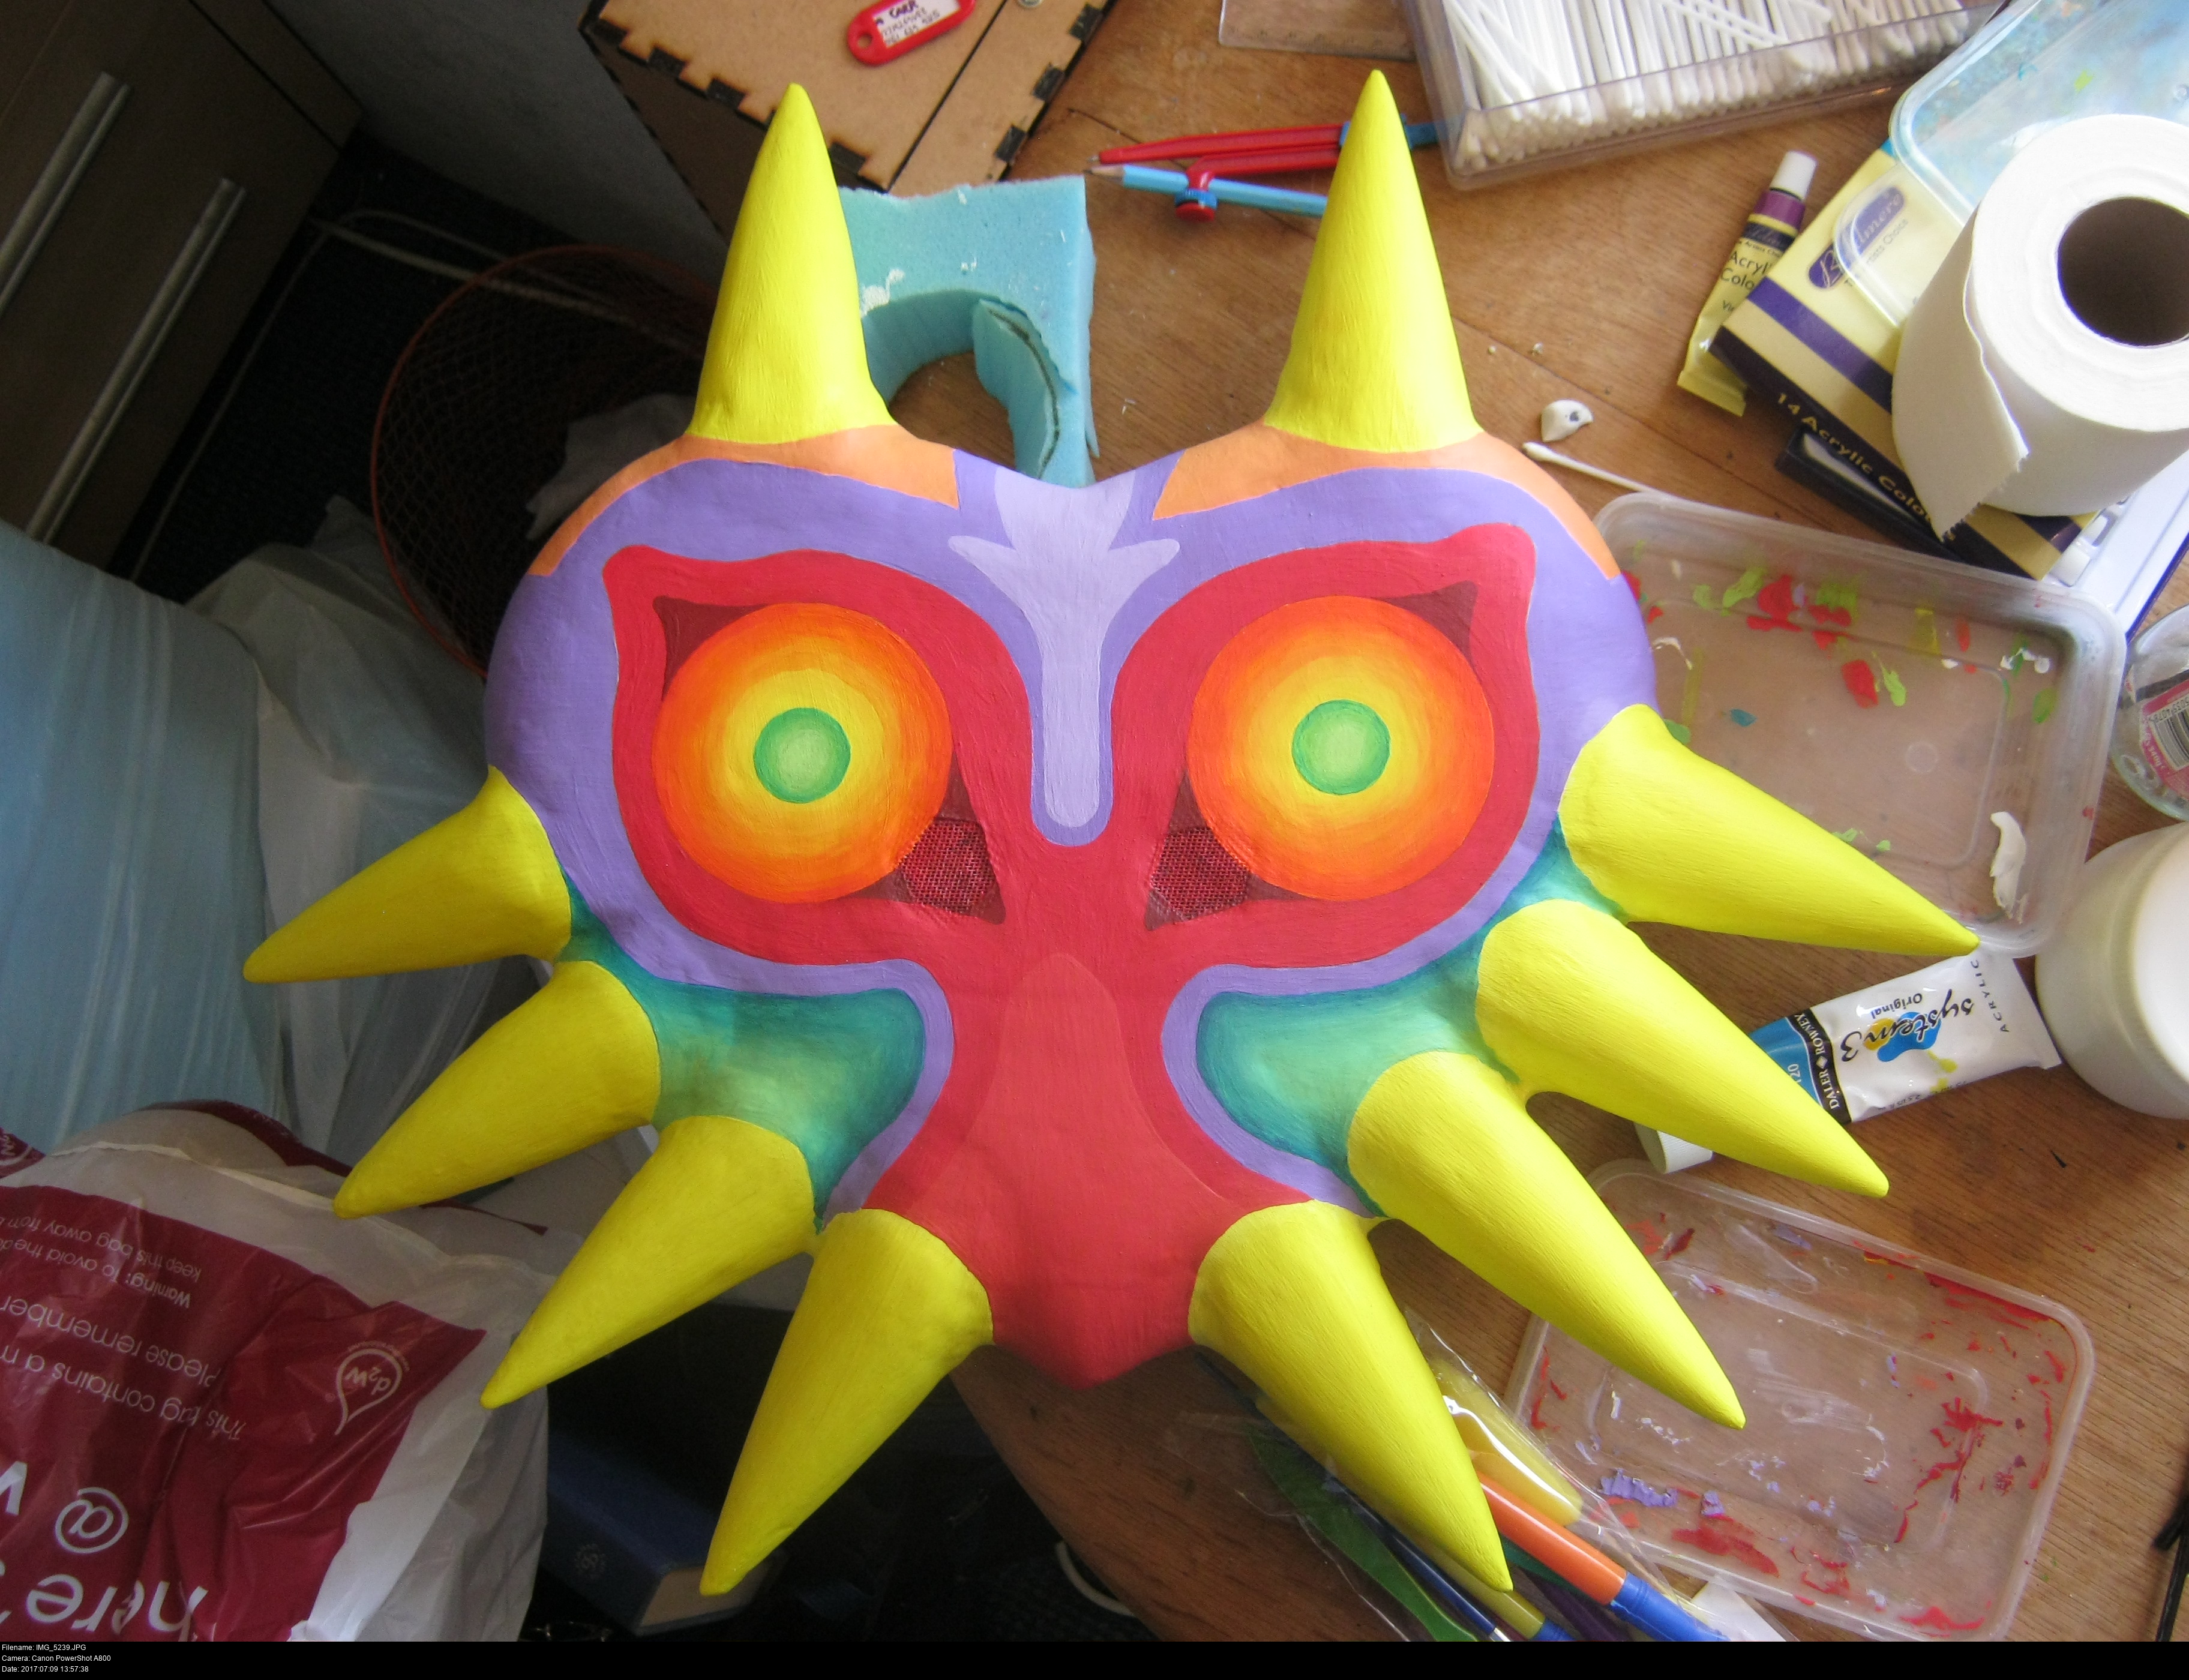
With my decision made, I can start on the highlighted regions for the forehead arrow and the beak and finalising the darkened areas in the upper and lower corners of the eyes, remembering that the semi-transparent buckram will darken whatever colour you apply to it. The forehead shape is maybe the most intricate part of the mask, and getting the sharp concave edges neat was a big hassle. At least I think I've got the colour right this time.
The gradient for the pupils is next. The difficulty here is ensuring perfectly neat circular lines. Keep those cotton buds handy and don't be afraid to wipe away an entire circle if you're not happy. If you do, be gentle and don't wipe away the yellow eye gradient. There shouldn't be too much danger of that if you've left that to fully set first.

The beak shape is going to be a highlighted region instead of an outlined one, so let's lighten that up too.
No... no, that's too damned dark.

That's... kind of better? It's still too orangey perhaps. The phone camera isn't showing the true colour.
Let's leave that for now and do something else.


I had a go at doing the stripes on top of the mask. Somehow, this colour turned out way brighter than I anticipated too.

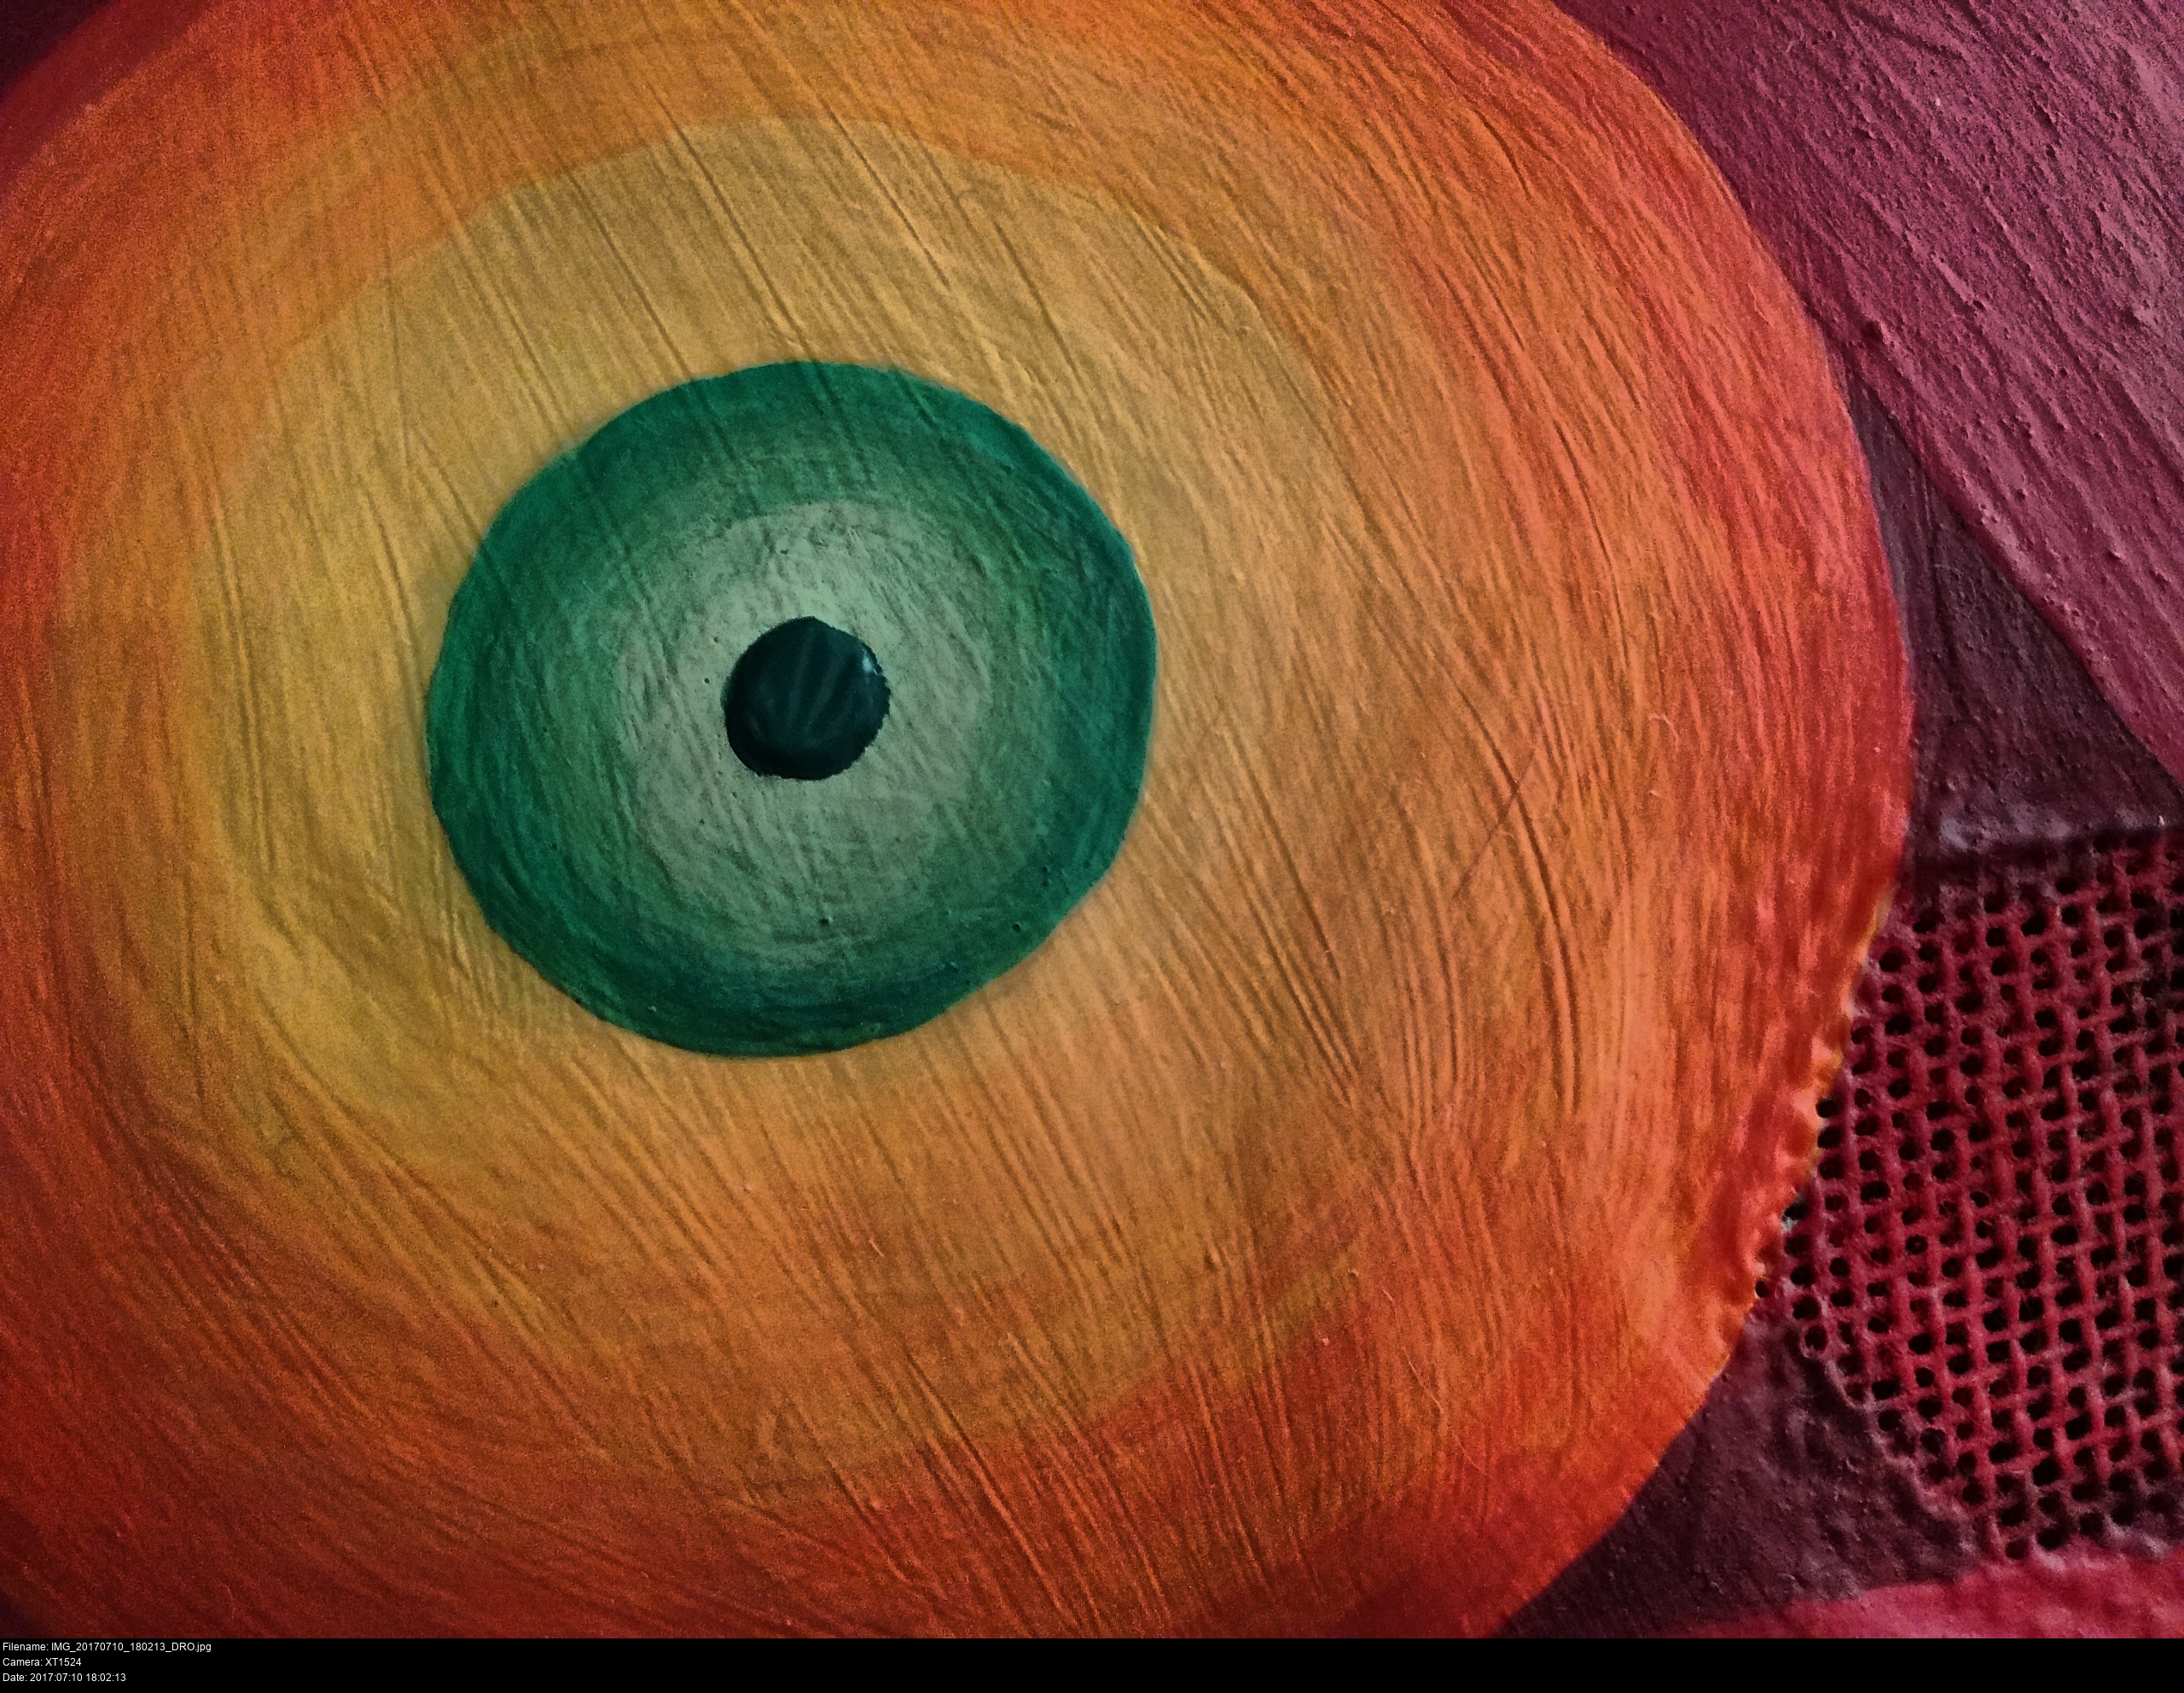


How do you paint perfectly circular tiny pupils?
Very, very carefully. And on the third attempt.
Notice they're also not black but a medium green. There's going to be no white and no black on this mask!


The forehead triangles are filled in on my new version of the mask. Small brushes once again! On the modroc mask, I had to first paint on the details in pure gesso and then colour them in the next day. This time I'm using heavily gessoed-up yellow paint directly onto the mask.

This second attempt at the stripes is looking a lot nicer. I went with a single solid stripe on the interior and two stripes at the sides to simplify the mask. One side's stripe is thicker than the other, but the collection of shapes all at once makes it un-noticeable!


Forehead dots!
These are done in a purple that's almost identical to the main body of the mask. Getting them symmetrical despite the asymetrical mask is a skill... (I've said that a few times, but it's a persistent concern.)

This guy is looking marvellous now!
Maybe that beak needs to more of a red and less of an orange though?

Guh... nope. That's ruined it again. Now I need to paint it AGAIN to make it lighter!
I can't do the beak dots until I've got this colour how I want it. I have to give it a day to dry (the paint is pretty thick...) and try again.


I think I've got the beak the right colour now. A lighter red, a strong vivid fire-engine red. If I try for a fourth (fifth?) time it'll just go worse so I'll accept this.
I noticed there were some areas where the colours didn't quite meet up as a result of me being a little too cautious with the fine brushes. I tried to touch up some distracting exposed white areas between the purple and the red, but the result was a disaster. Now there's visible splodges of mismatched purple all over the body of the mask. This isn't good. Fixable, but not good.
Can't do anything about it right now.


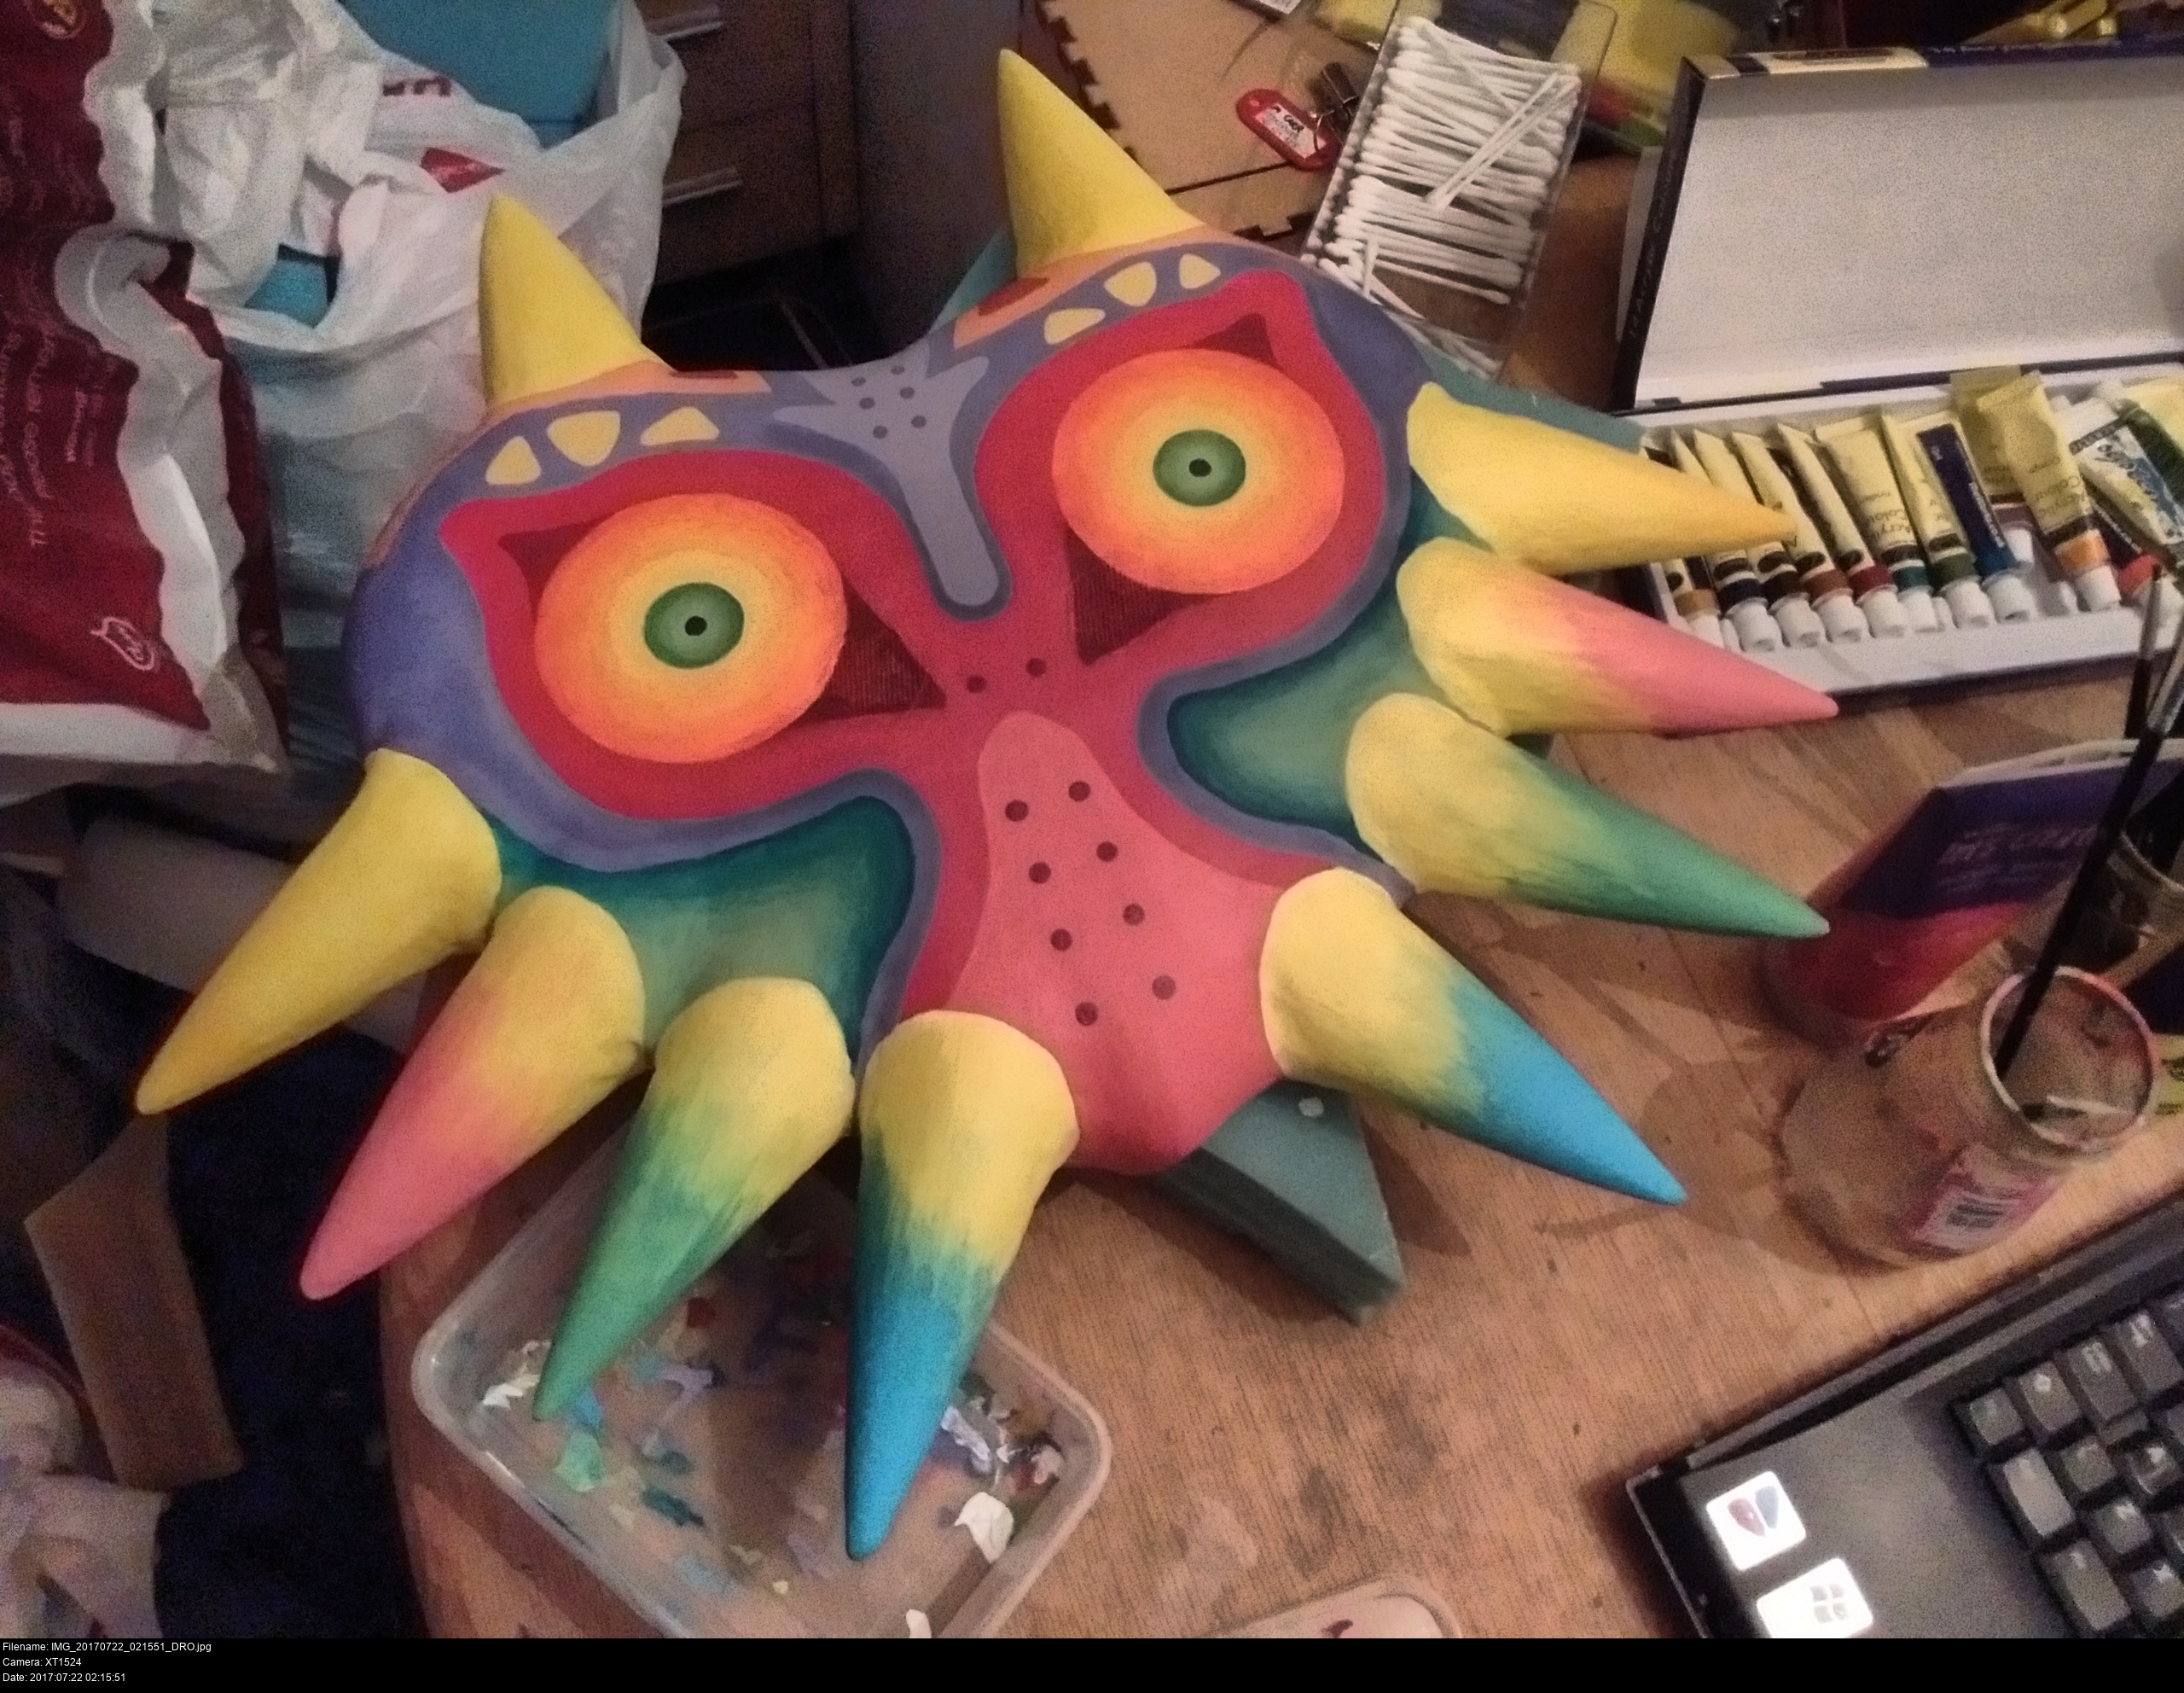


While I'm thinking about the purple area, I can make a start on the horns.
Nice super bright horns this time. On the modroc mask, I tried to make the paint look sketchy and rough, like it was done with harsh bristles and dry paint. This time I'm trying to make the paint fade more smoothly from tip to body. Having soft brushes, wet wipes, and a lot of patience helps.
It's not entirely clear, but I did paint the uppermost horns in a very light mustard colour. It shows up in some pictures.
I spent a lot of effort trying to get the paint to be stronger on the uppermost half of the horns, rather than having the horns being perfectly conically gradiented. It's how they're coloured in the original artwork and also gives the illusion of a slight curve.


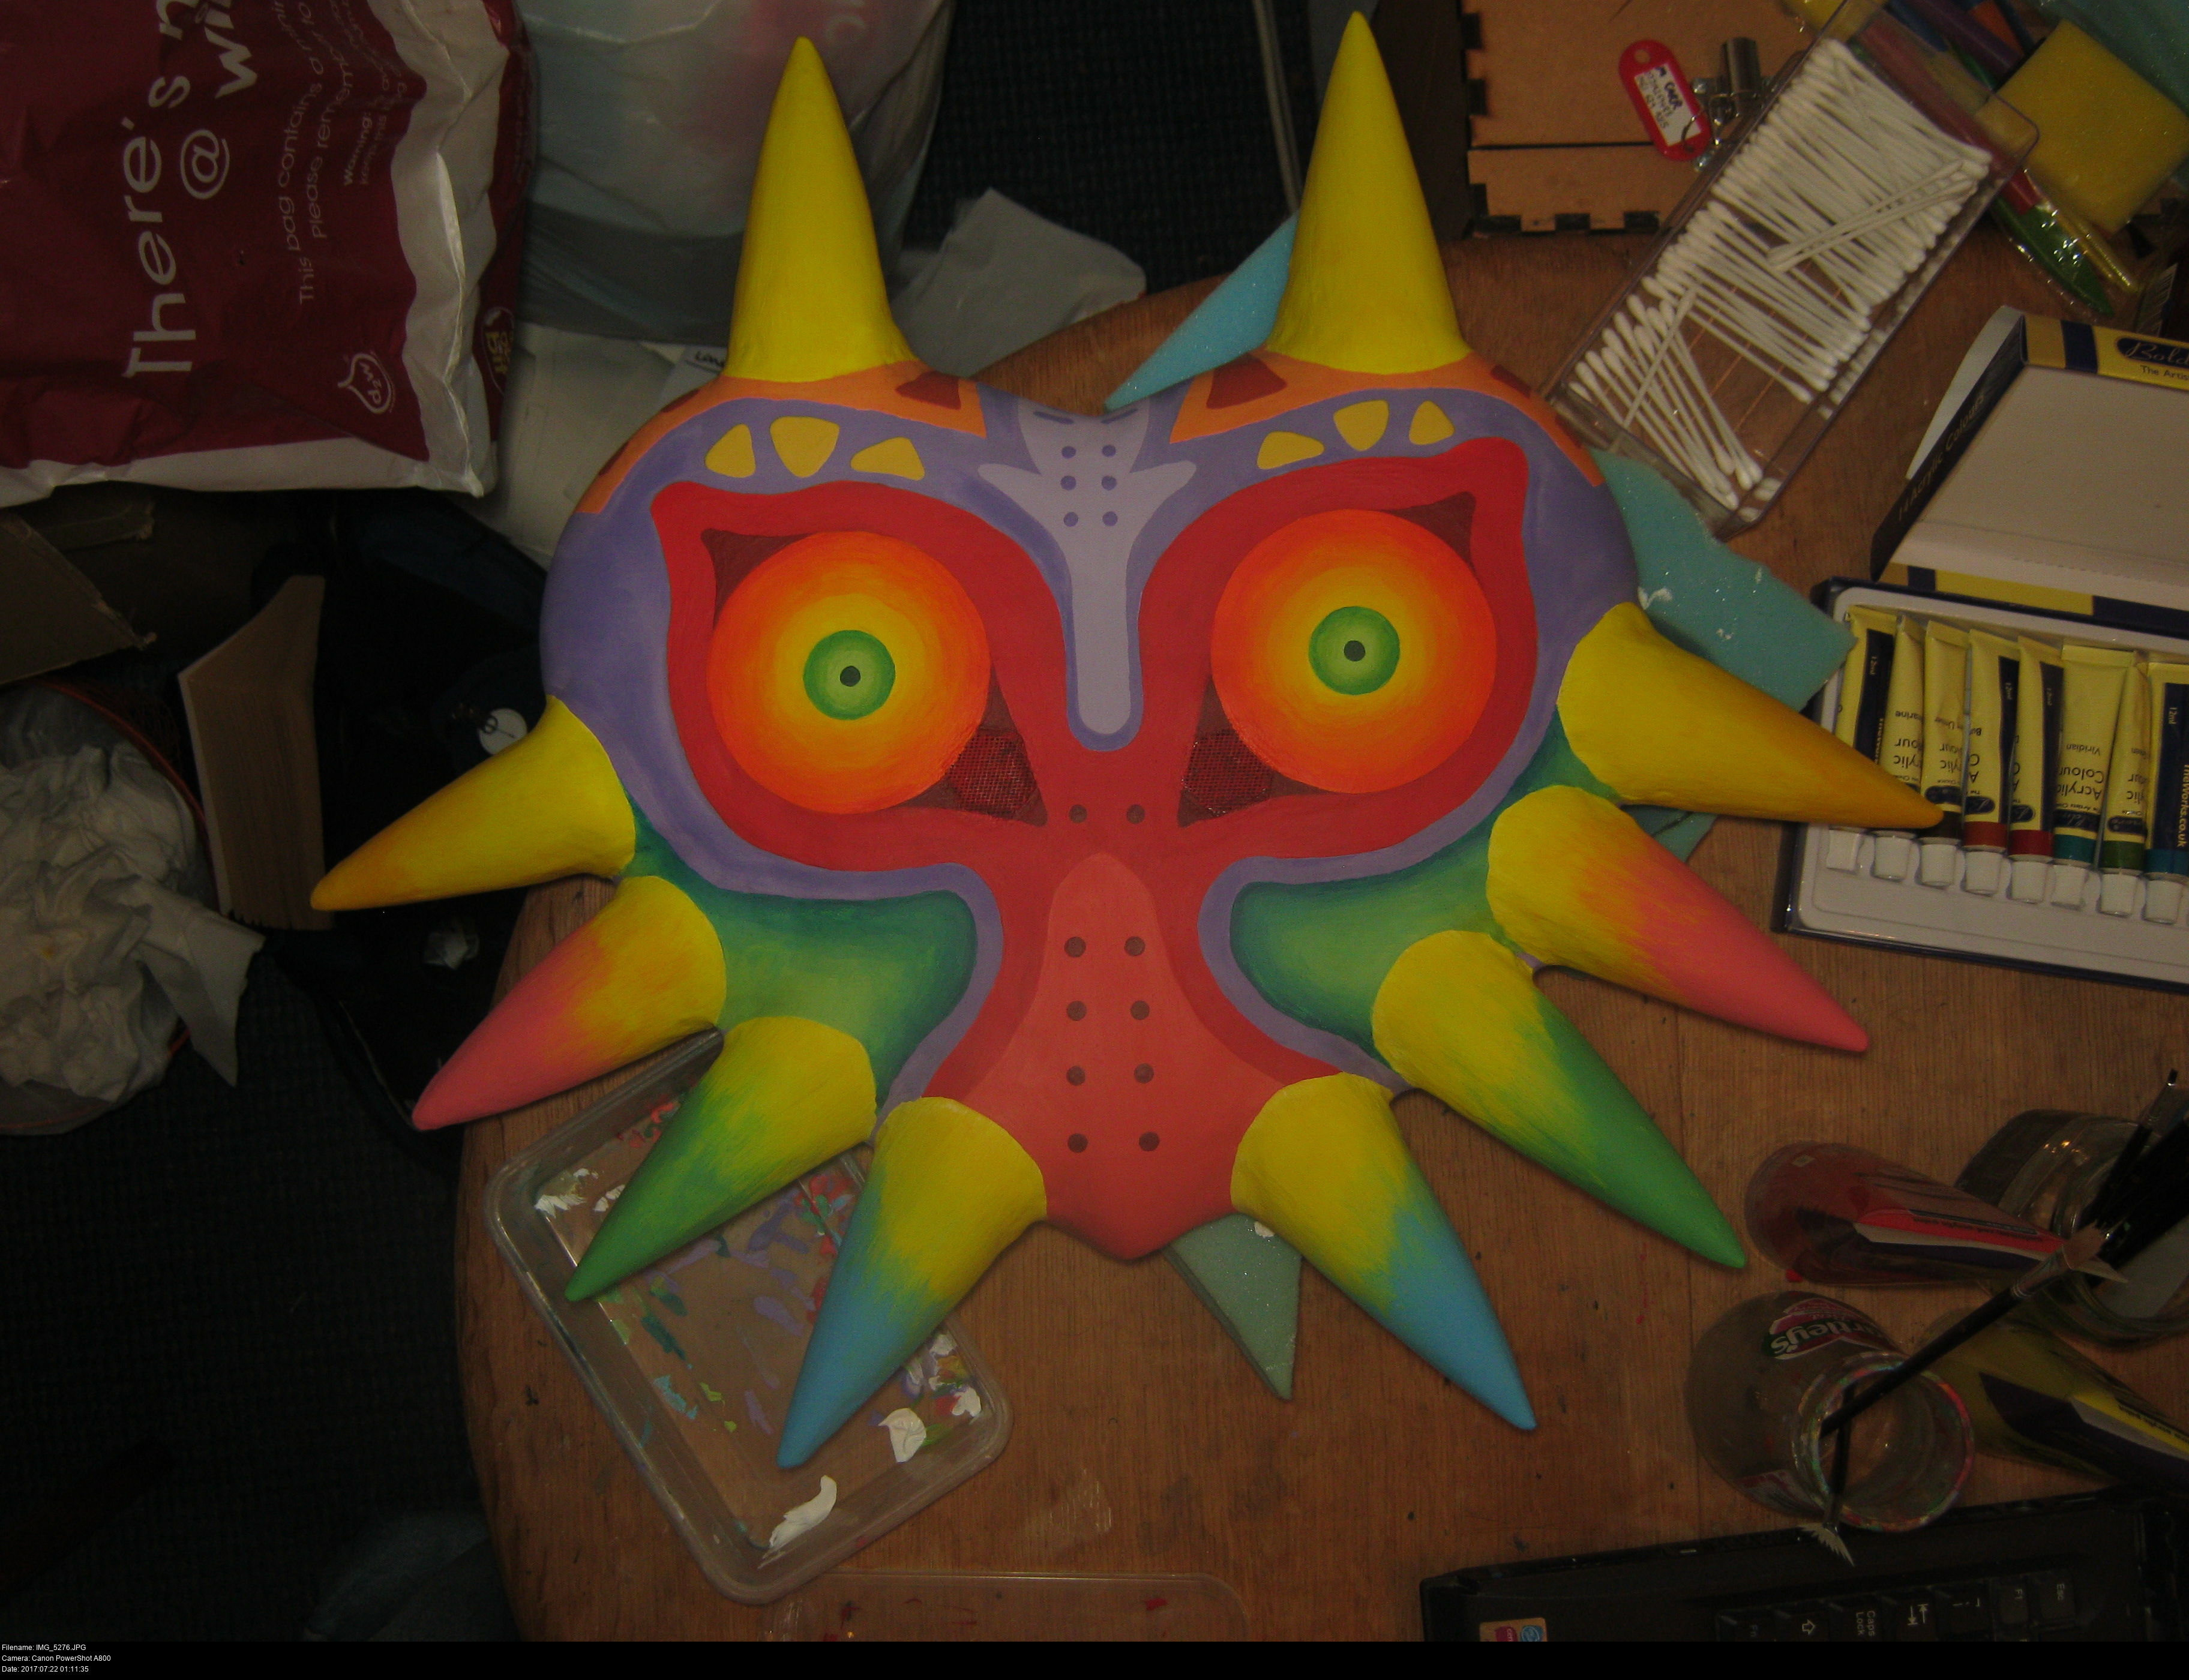
Look just how atrocious the purple layer has become now! This looks like water damage, but it's actually a result of me trying to disguise the splotchy blobs of purple rework with a smooth stroke in an attempt to match the purple.
Never try to match paint. You can't. You can't. Don't.
The only way to make a large area all have the exact same colour is to paint it all with the same colour mixed in the same large palette all at once.


And that's exactly what I did. A super large palette, all the violet paint I had left, a whole load of gesso, and a laptop full of back-to-back podcasts about classic films like The Wraith and The Phantom.
I had to paint around all the details on the mask: the contours of the cheeks and the red area, the edges of the horns, the purple arrowhead on the forehead and those blasted yellow triangles. Sure I could've painted the yellow triangles again, but I got them exactly how I liked them the first time. So I had to go in with the tiniest brush and very gently repaint all the purple between them.
When you're working with large areas, prepare way too much paint (and that means you need to HAVE a lot of paint to hand - a mistake I almost made), and ensure that the colour is completely consistent throughout the palette. Since the area was large, it began to dry in the original areas as I moved onto new ones which meant its colour was changing. Don't be fooled! Trust in the fact that it was all the same colour in the palette and continue onwards and it'll all dry the same colour.
I almost ran out of paint, by the end it was drying in the palette and becoming crumbly. This meant that the paint was lying thicker on the mask, so you can see texture of the purple paint becoming more ridged and textured from right to left, especially around the yellow triangles. It doesn't look at all bad though! I like it!
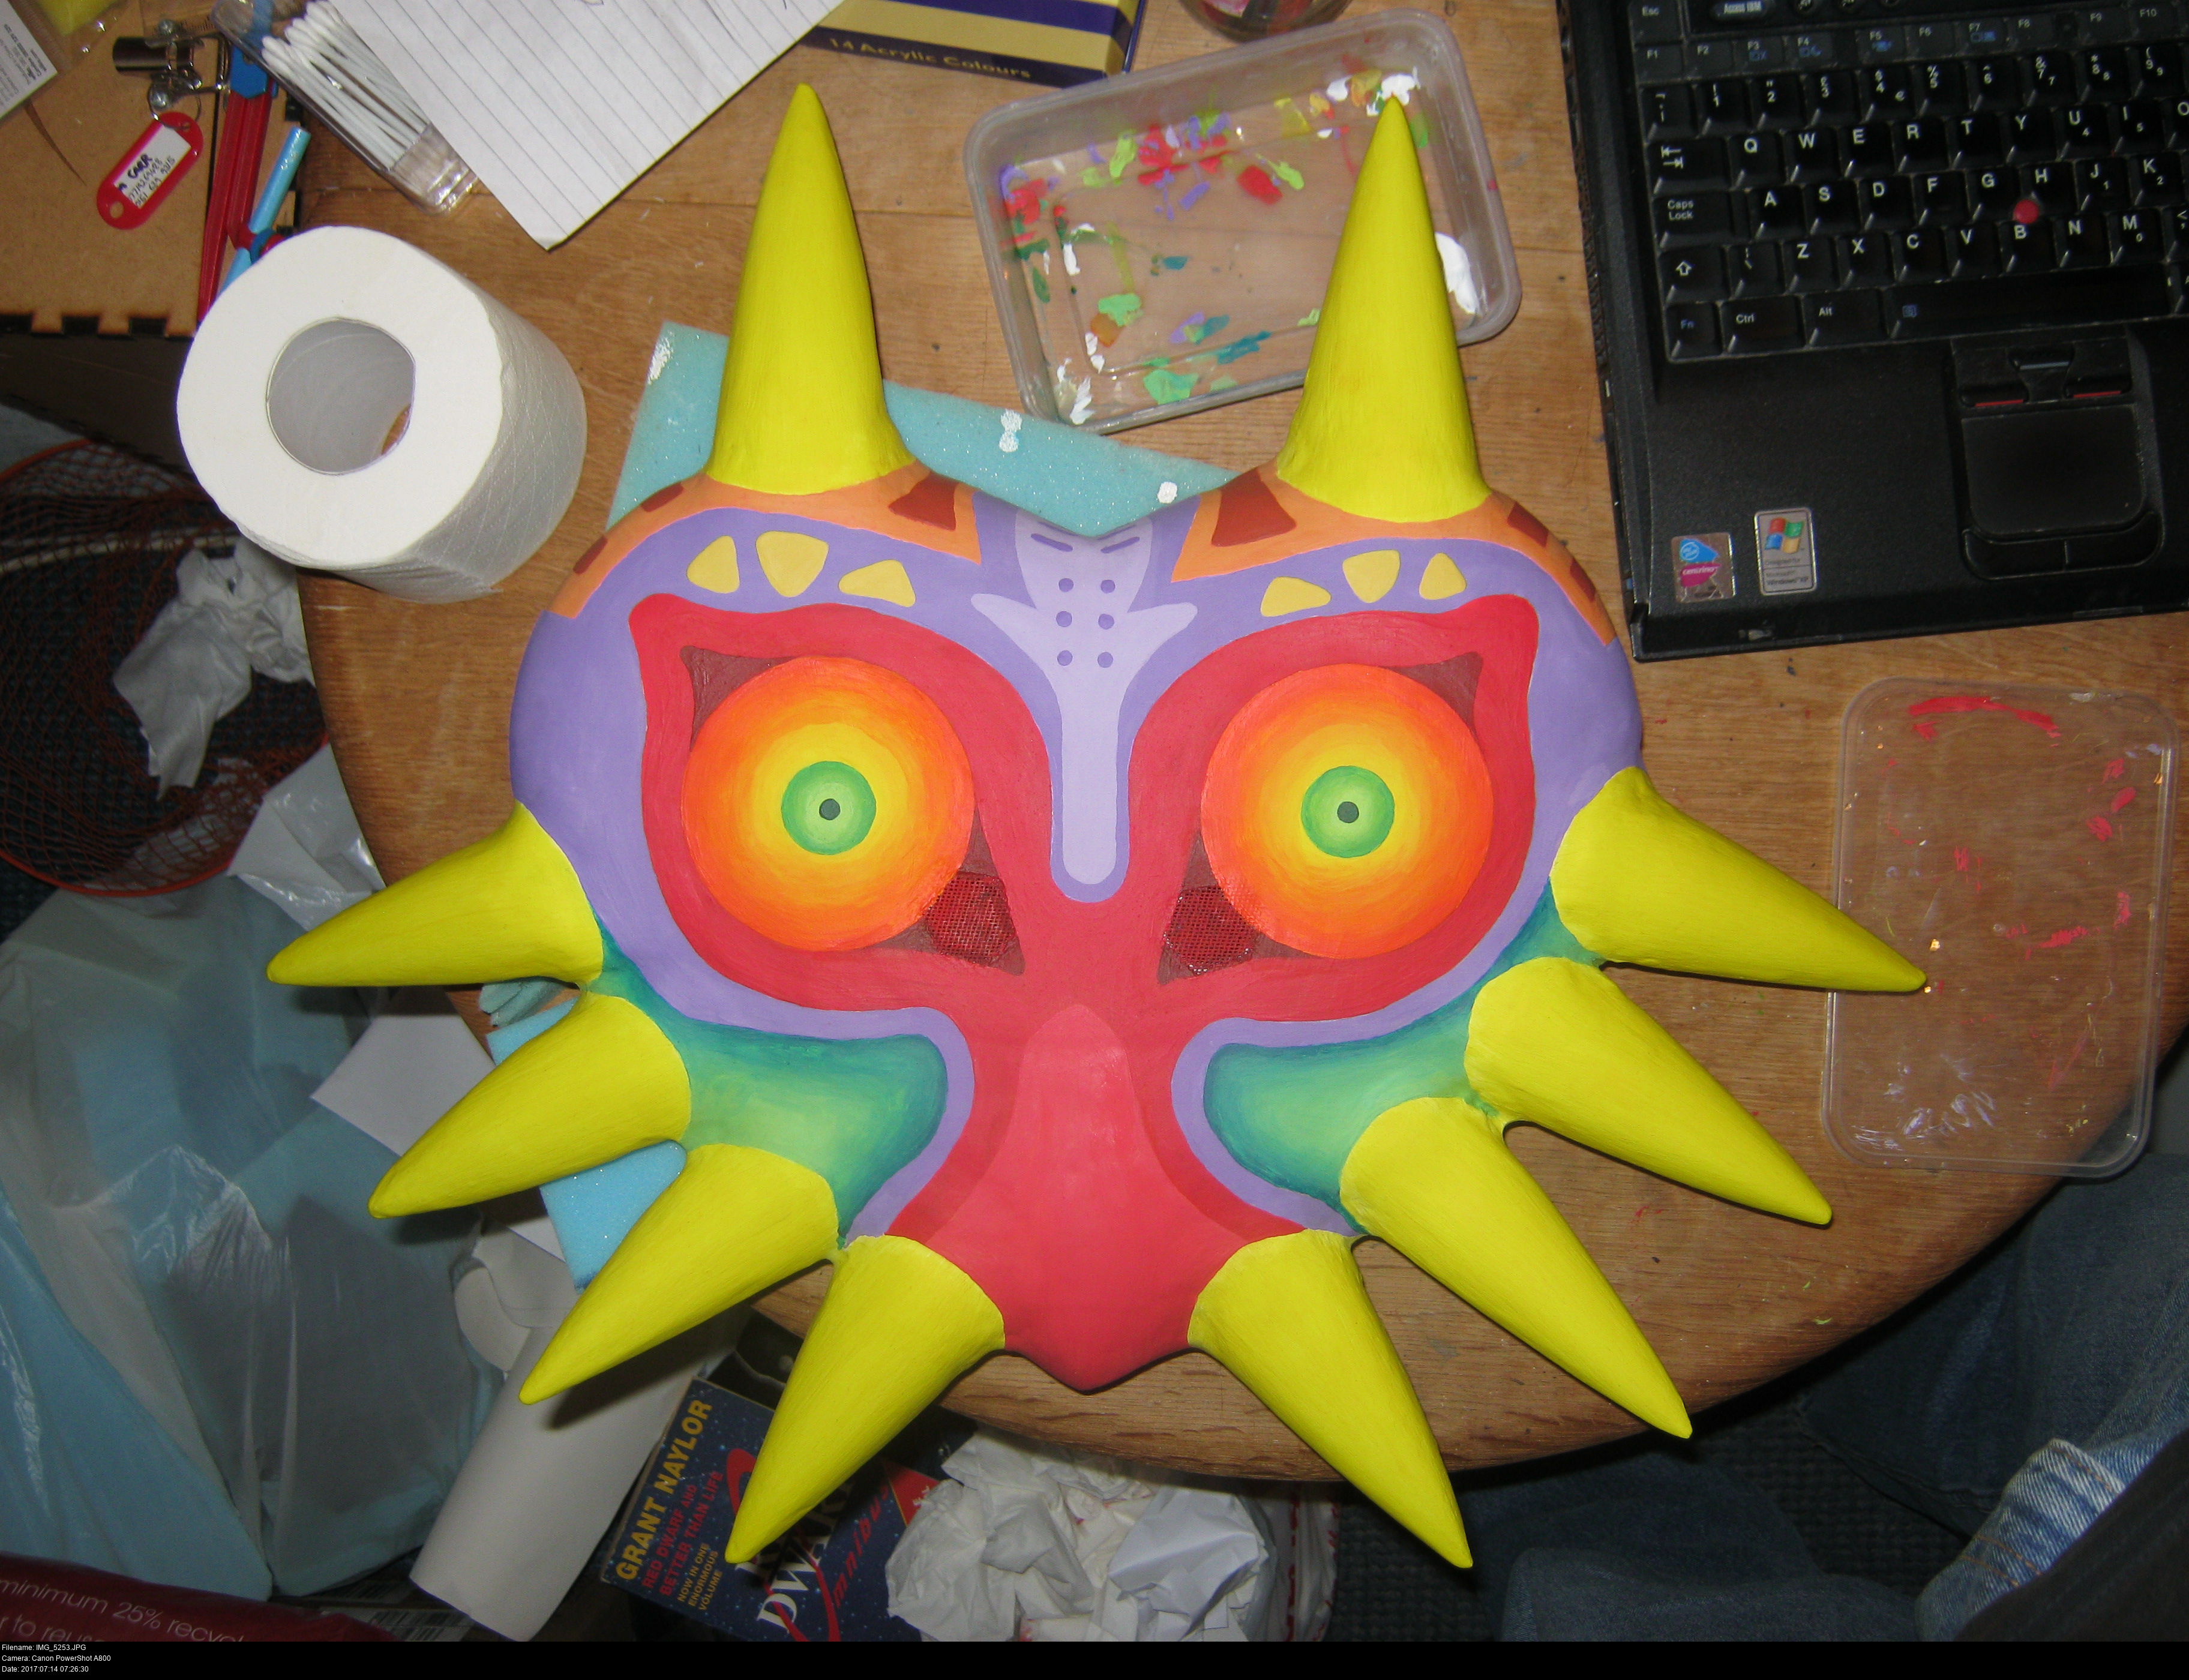
Wait... It's done! Completely done!
Now I have to varnish it... this is the most nerve-wracking part of the entire thing. I could pick the wrong varnish and end up melting the entire damned thing!

A little while ago, I went to a model shop in New Brighton (well -the- model shop, really) and bought myself some spray acrylic varnish. Not the same as the stuff I used on the modroc mask, but very similar.
What does it do to XPS foam?


The spray annihilates it. Remember to test. Preferably far, far away from your precious work. I did this out in the shed.
The moral, again: -you cannot use any spray product on XPS foam-. No primers, no paints, no varnishes. Don't even try it, it won't work.
So, that idea was a complete bust, so I went to the proper art shop in Liverpool and decided to get myself some top-of-the-range Galeria Acrylic Mediums Matt Varnish.
What could pawshibly go wroaaannggg...


AAAAAAAAAAAAAAAAAAAAAAAAAAAAAAAAAAAAAAAA
IT'S MELTING THE MASK TOO OH MY GOD WHAT THE HELL.

You see this? YOU SEE THIS? This on the left?
I am surpremely thankful I had the sense to try just a small smear of the varnish on the reverse of the mask, where I'd painted it purple but it wouldn't be visible if there was any damage.
I'm all out of options now. The spray varnish completely obliterates the foam, the paint-on varnish completely obliterates the paint! And the convention is in a few days!!
All I have is the Wilkinson Quick Dry Varnish... it worked for Hotshot's laser pistol. While I was testing the Galeria varnish on the back of the mask, I tried some of the Wilkinson stuff against the purple paint that had dried in my palettes. It doesn't seem to eat the purple, or any of the other colours I've used. Doesn't eat the XPS foam. Seems safe.
I have to use it.
Well, that's not true. I could wear the mask without any varnish. But regardless of how expensive your paint might be, it's going to rub off all over the place just from touching it. Varnishing is a Good Idea.
Hmm... should I use it neat though? I want thin coats. But I also don't want to run any water across this mask. I'm going to mix up a little jar of 50/50 varnish to water and hope for the best.


Here's some valedictory pictures just in case the mask is warped into a horrific corrupted mush by the tinned varnish...
We barely knew you, Majora's Mask Version Two.


Well, nothing's gone seriously wrong yet. I suspected that either the cheapo Wilkinson paint or the cheapo The Works violet paint would be picked up by the moist brush and smeared around a little... from the looks of these pictures it seems like the purple might've moved around a bit.
Ugh. I tried my best.
But then... a miracle happened. That subtle mauve colouring was just a side-effect of all the colours of the mask shining through the film of wet varnish.
It dried perfectly clear. The colours were all fine.
And if one coat of varnish dries fine, that's GAME! That means all the colours are secure! That means I can apply another coat of varnish, and another, in complete confidence that nothing can go wrong! YESSSSS!
(I'm not varnishing over the buckram, btw. Let's treat those areas very delicately!)


YES
YES YES YES!
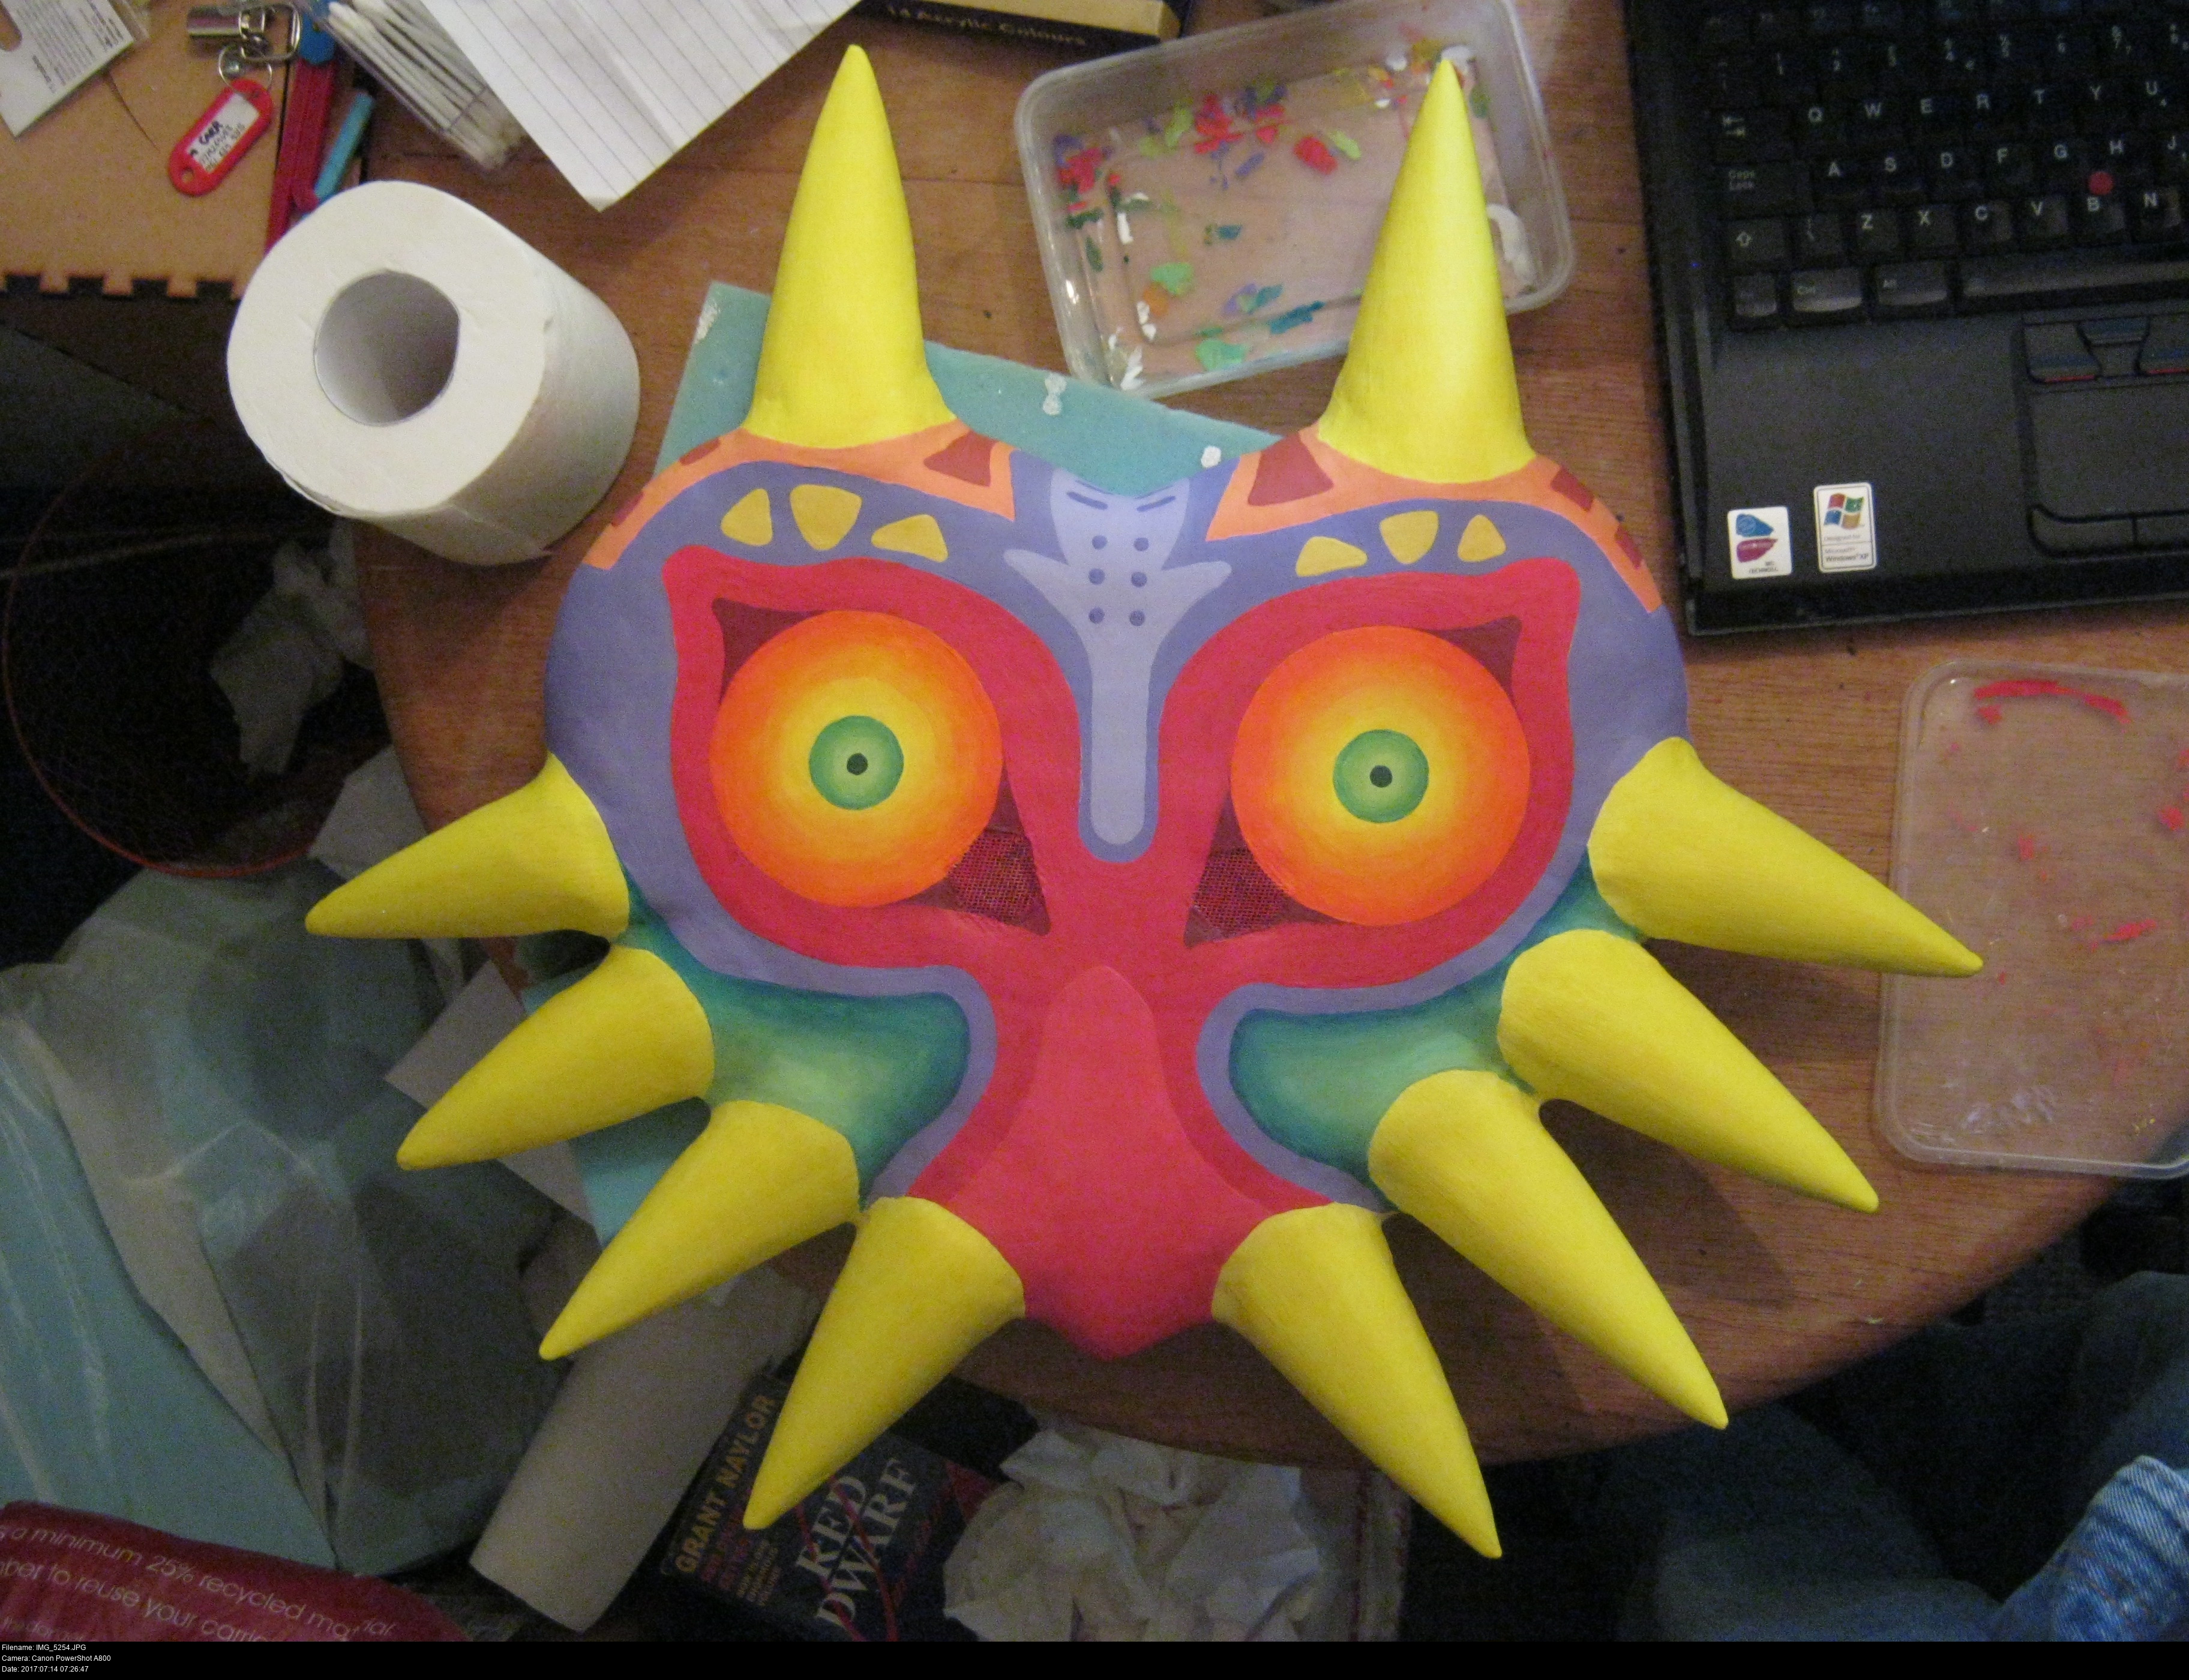
Everything is perfect! The varnish is set, the colours are gleaming!
This calls for some VICTORIOUS MUSIC!
https://www.youtube.com/watch?v=tP8BJ-tkB6U


Finally, let's make and glue on the strap. It's identical to the one from the previous mask: a long strip of two inch wide elastic with complementary velcro ends sewn on. The centre section will be glued into the back of the mask with the two ends free. Check the other mask page for images of that.
The only difference this time is that I'm being neater with my glue. Assuming that the Gorilla Glue is going to expand like mad as a fact, I'm using masking tape to confine the adhesive to only the area I want. Weirdly enough, this might be the first time I've ever used masking tape to actually mask off an area. I'm taking extra care to ensure that there's no way the glue will seep into the eyeholes. If it goes in there, it won't be particularly easy to get out, but I can do it. I'd be worried about damaging the face of the mask though. I'm being very careful to rest the finished face of the mask on a thick soft surface throughout all of this.


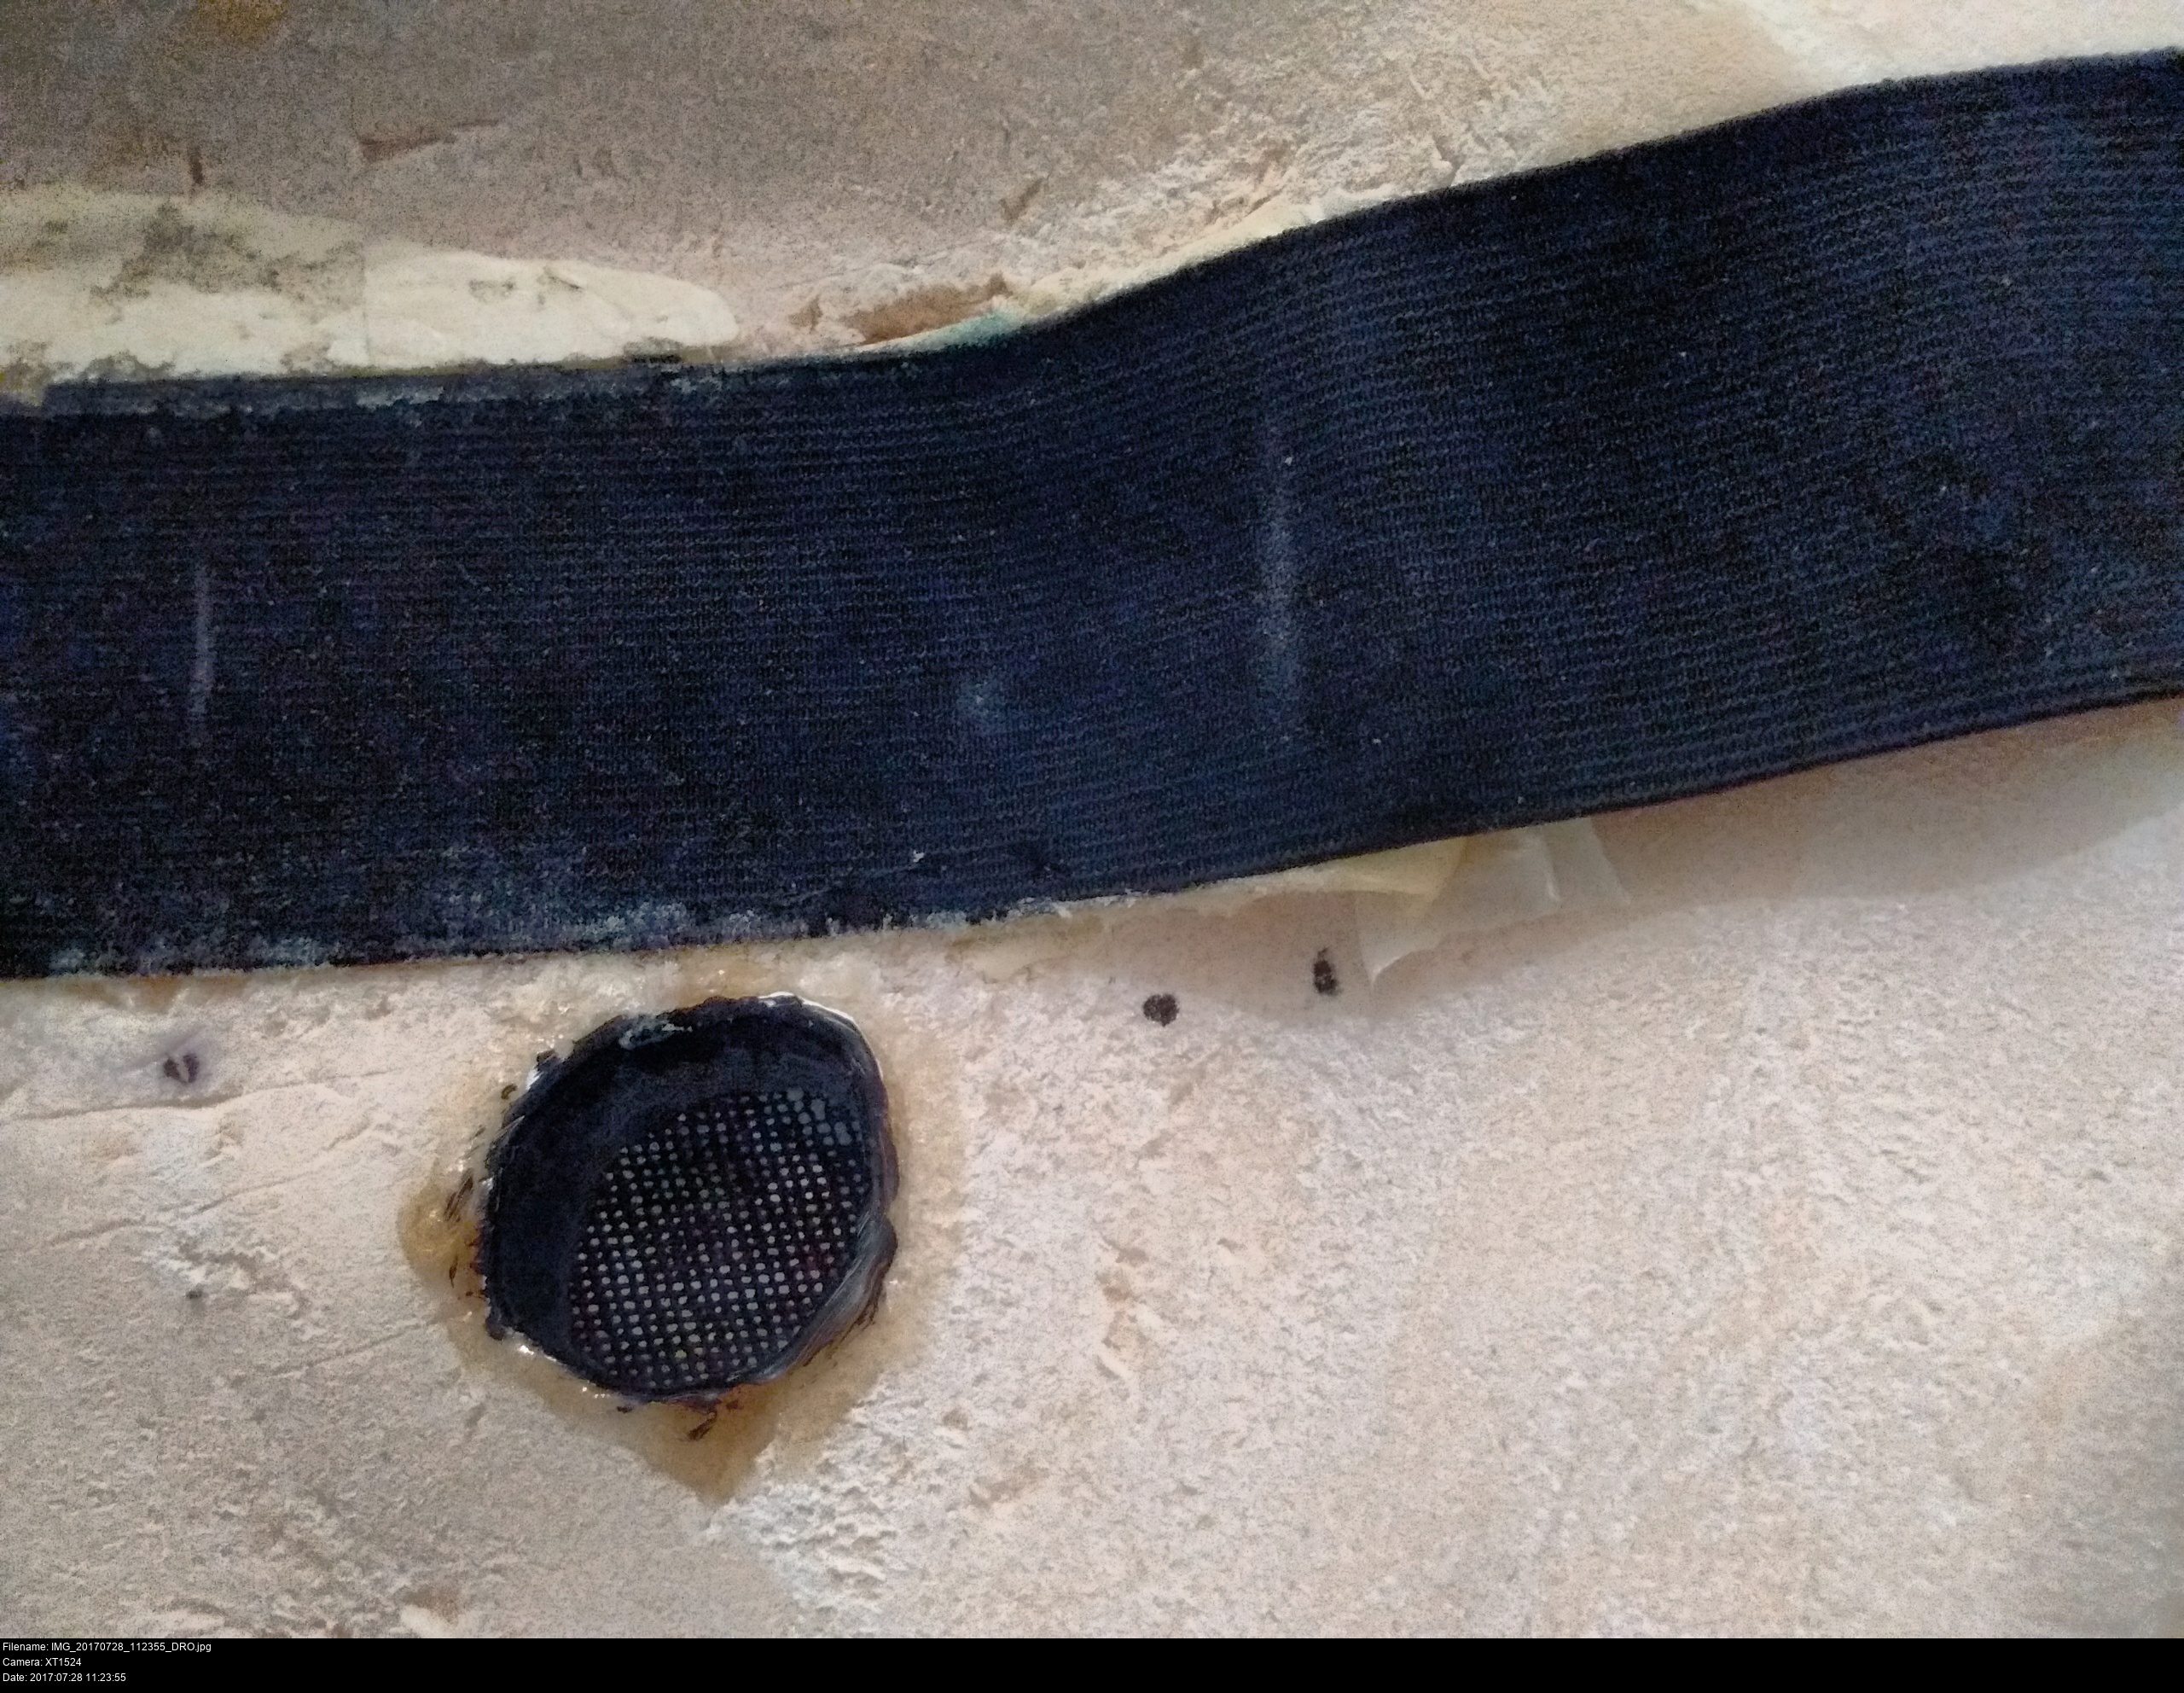
When the glue has dried (Check out how much it's expanded! I used way too much glue...), the masking tape allows me to use my favourite extending blade and neatly trim away the glue foam to the rectangular area I'd laid out. Some of the masking tape is still trapped inside, but I don't honestly care.
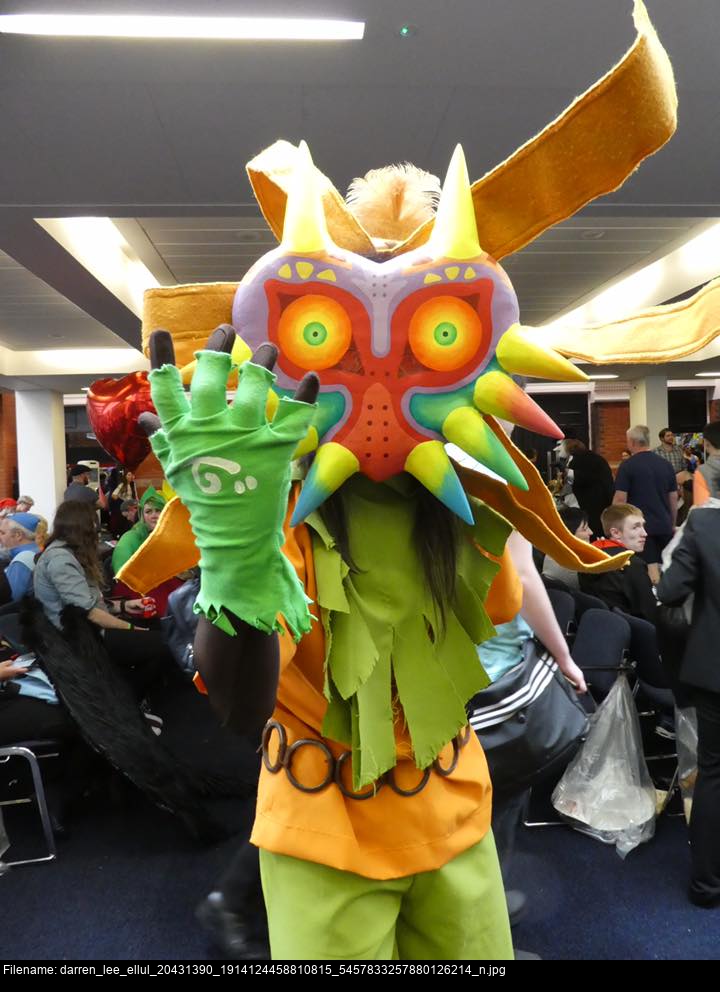


And now I have my very own feather-light mask!
But where will I put it...?
I transported it to and from MCM Comic Con Manchester 2017 in the same box as the old mask, using the same foam insert since they're almost identical in shape. But now that I'm back home, I've got two masks and one box.
Written by Matt Carr! mrdictionary.net nonsense.
Questions? E-mail 'em to me, skullkid@mrdictionary.net!
Twitter @SkullKidUK - Facebook facebook.com/mask.smith.cosplay