
Hello again! I'm Skull Kid, and for some reason, I've got a jonesing for making another mask.
But what kind of mask should it be? Well it might be something you don't expect, unless you found this page from the front page of my cosplay site, in which case the surprise might not be as surprising.
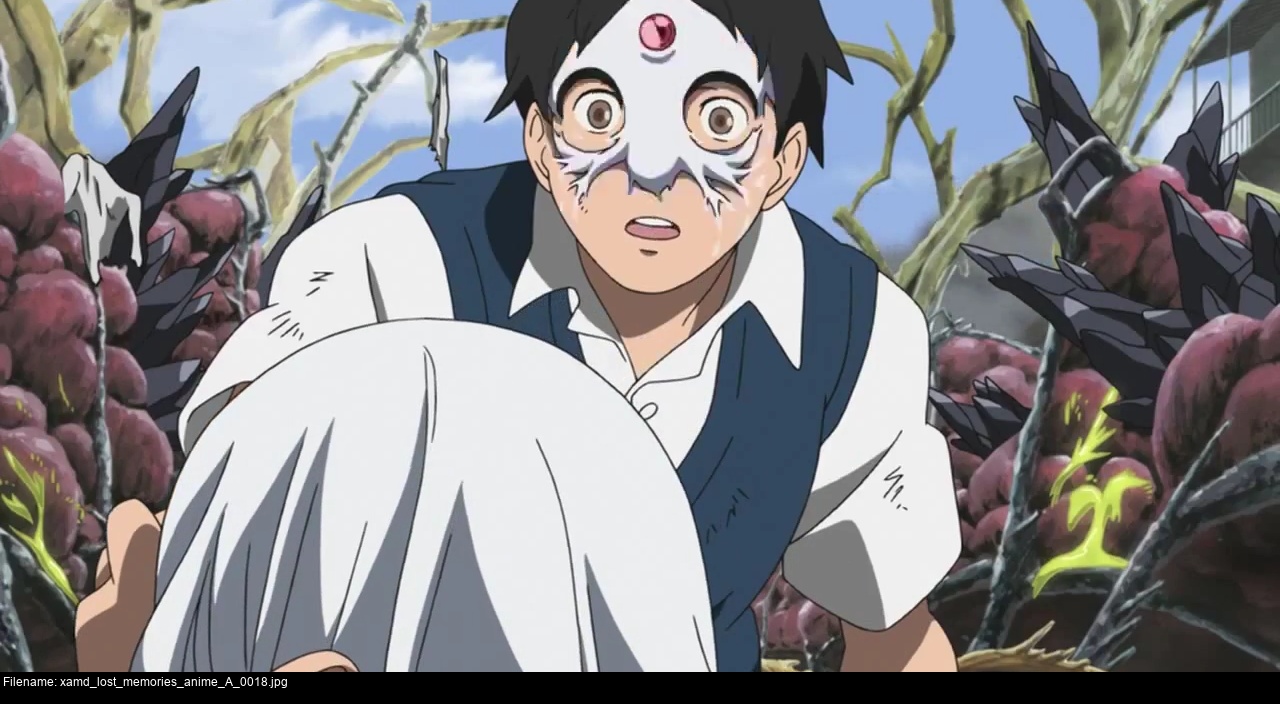
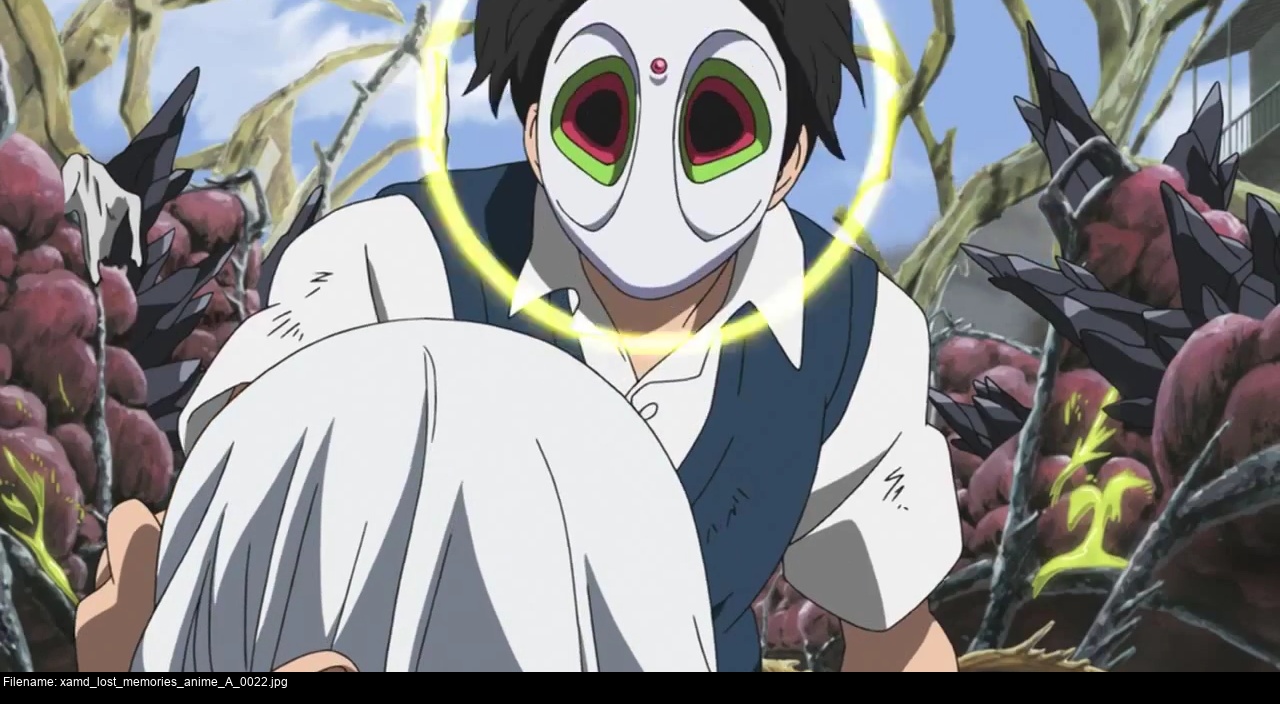
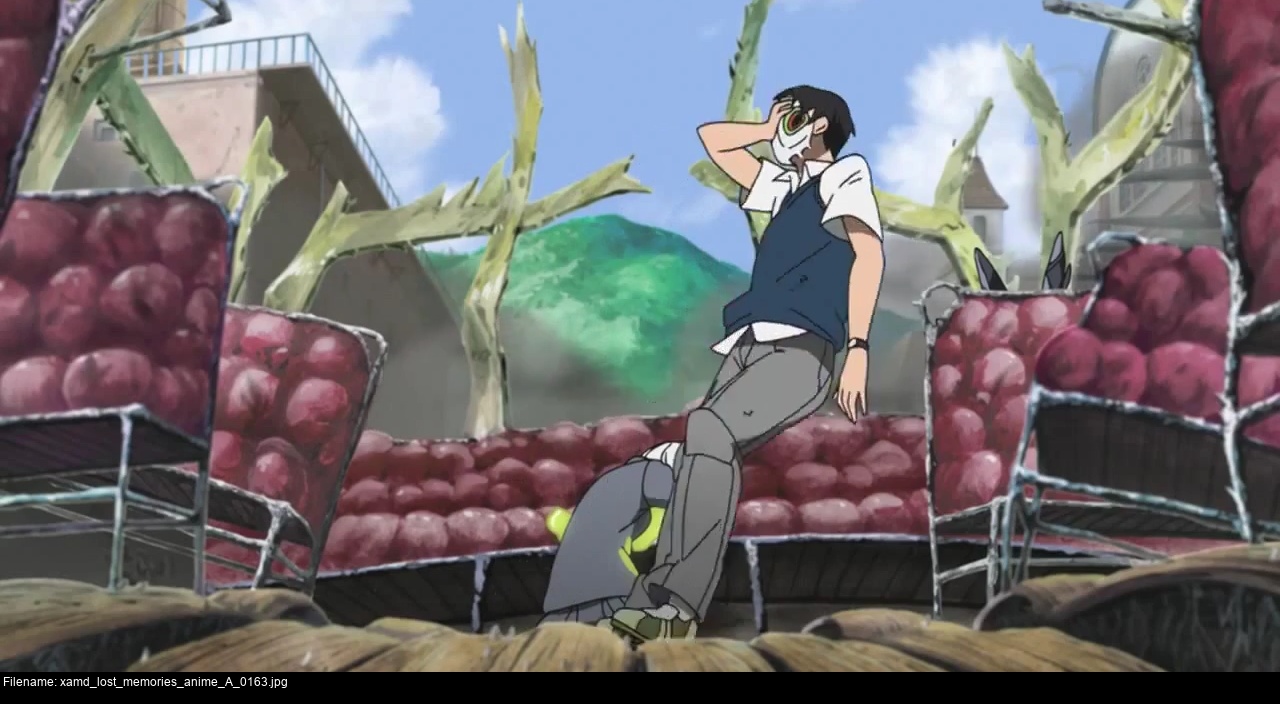
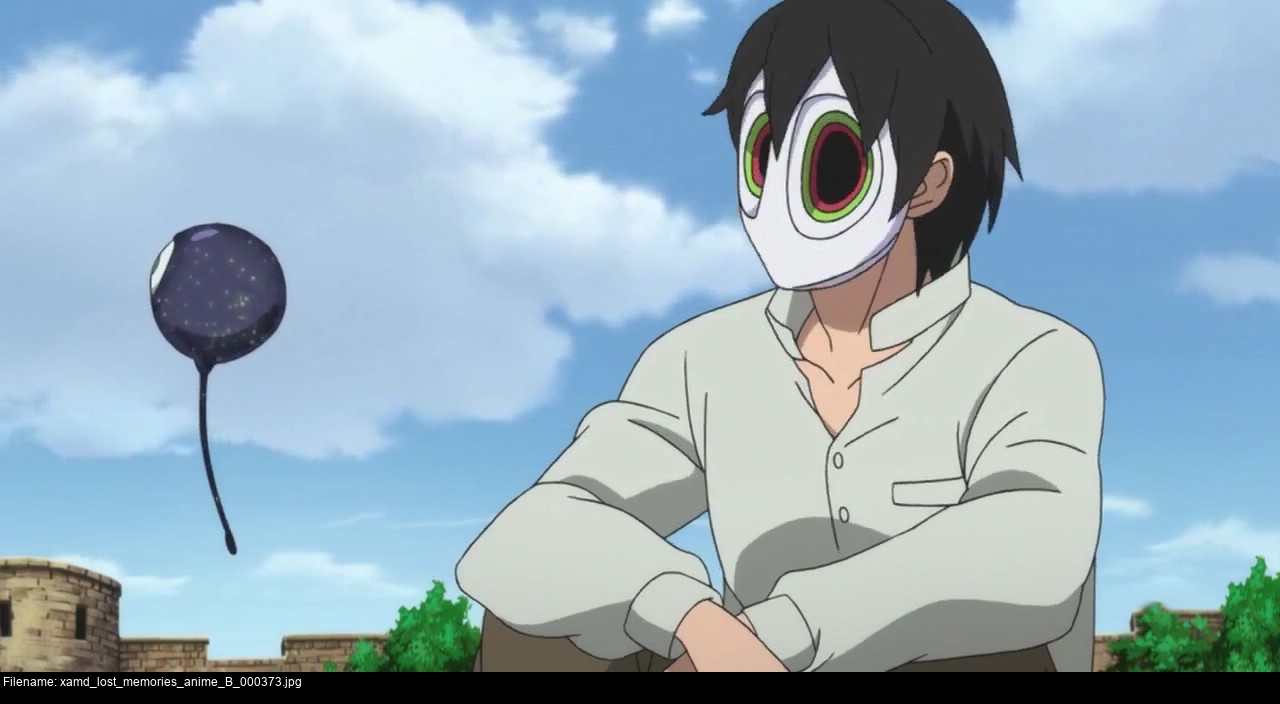
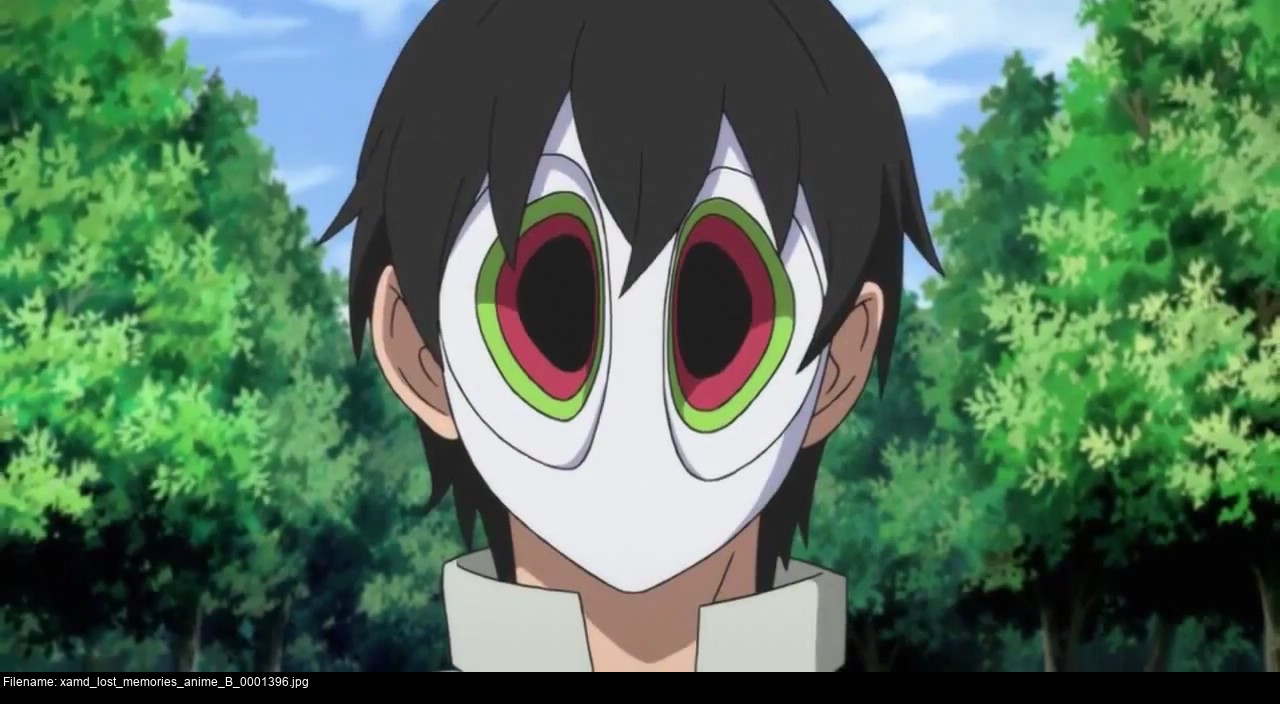
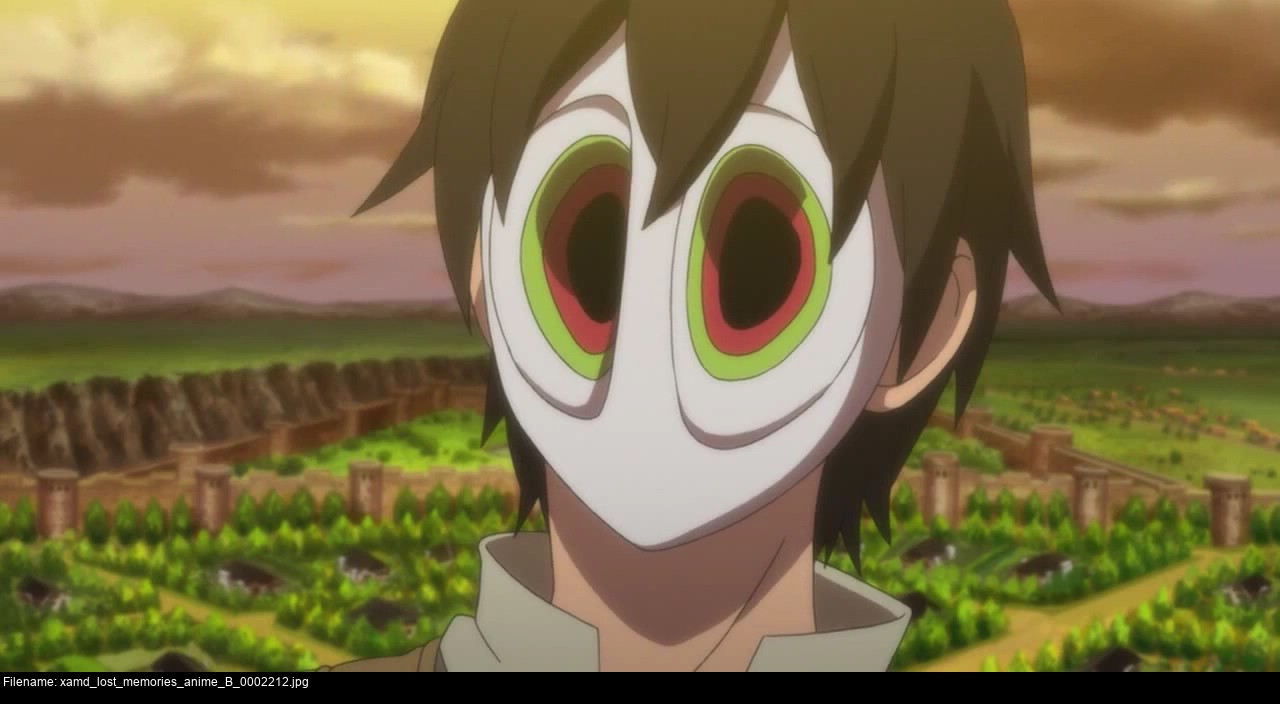
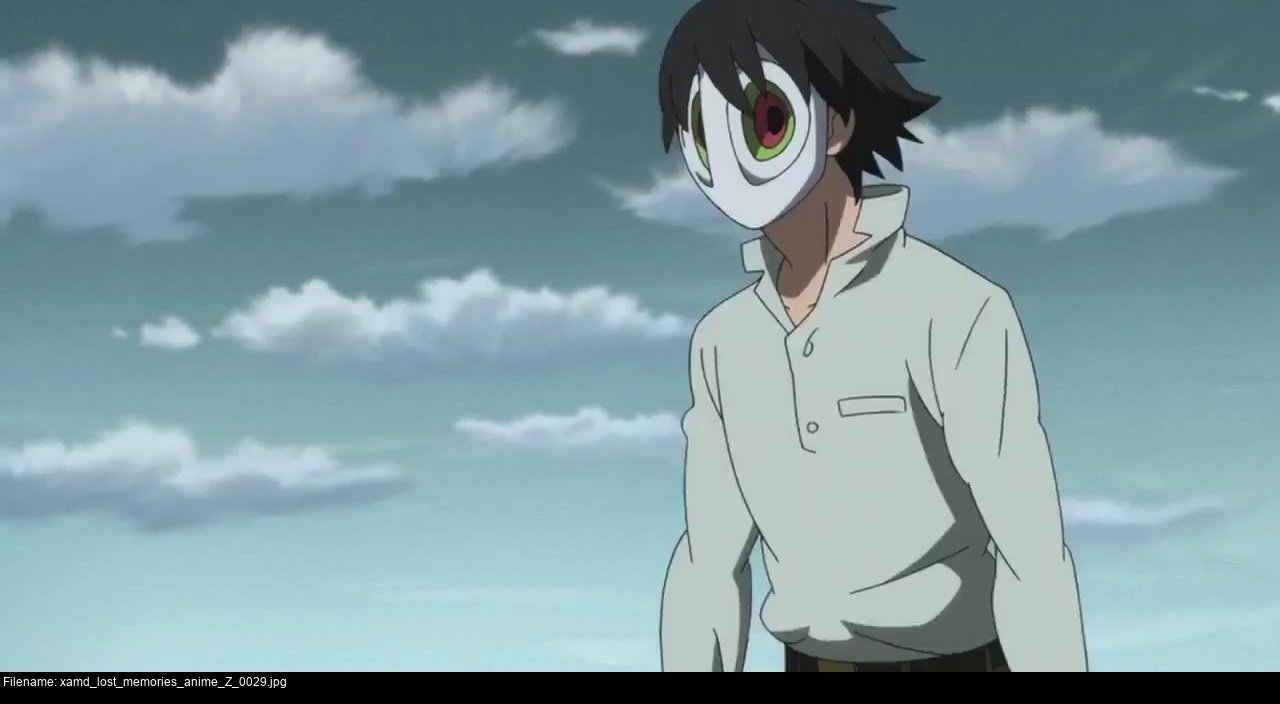
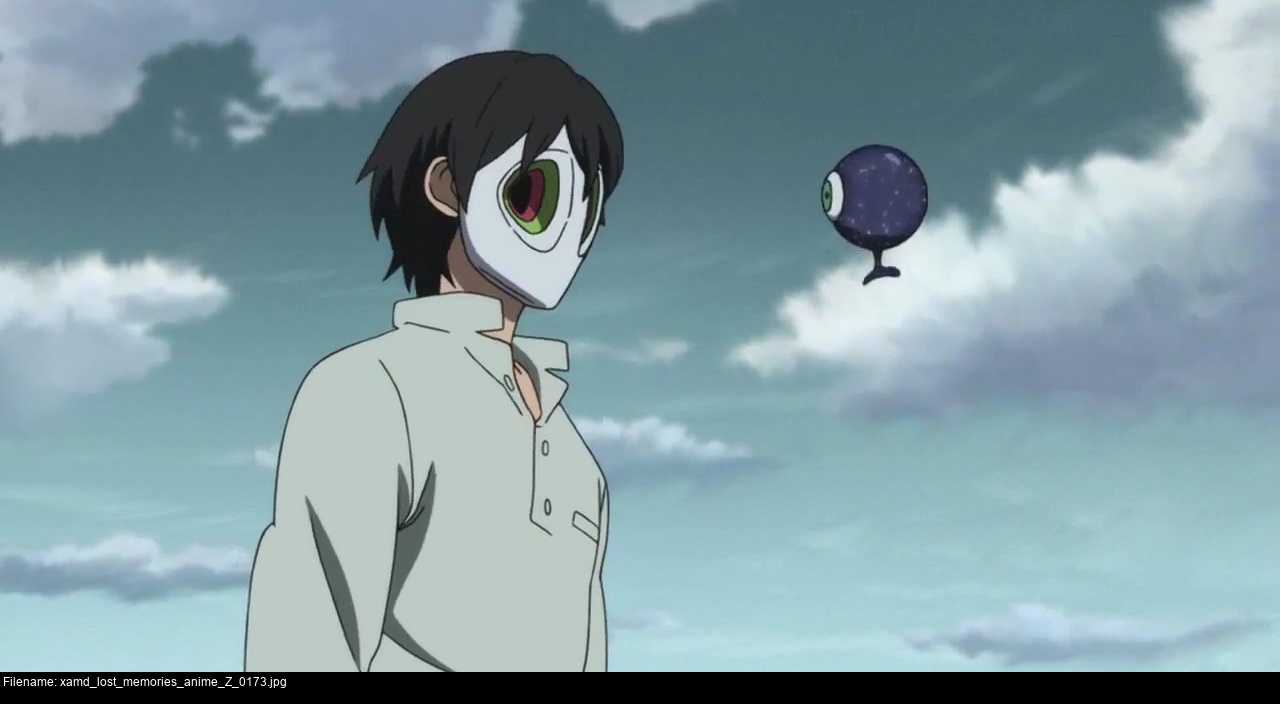
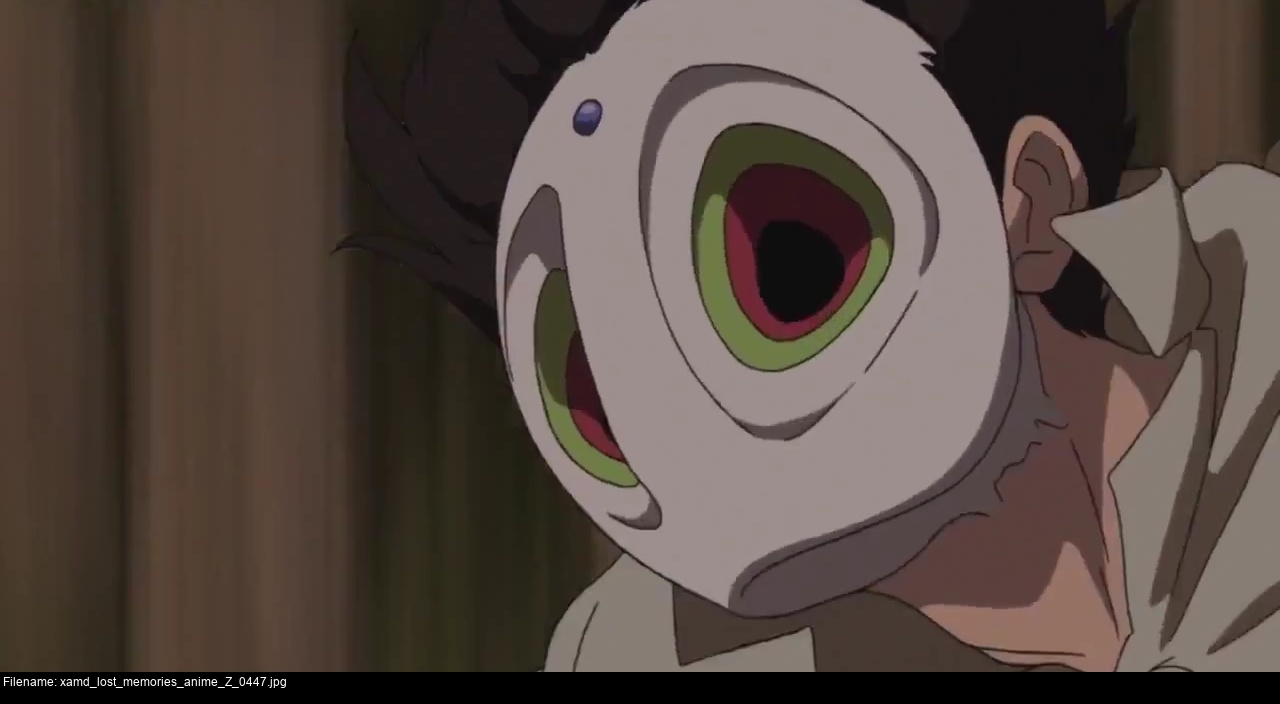
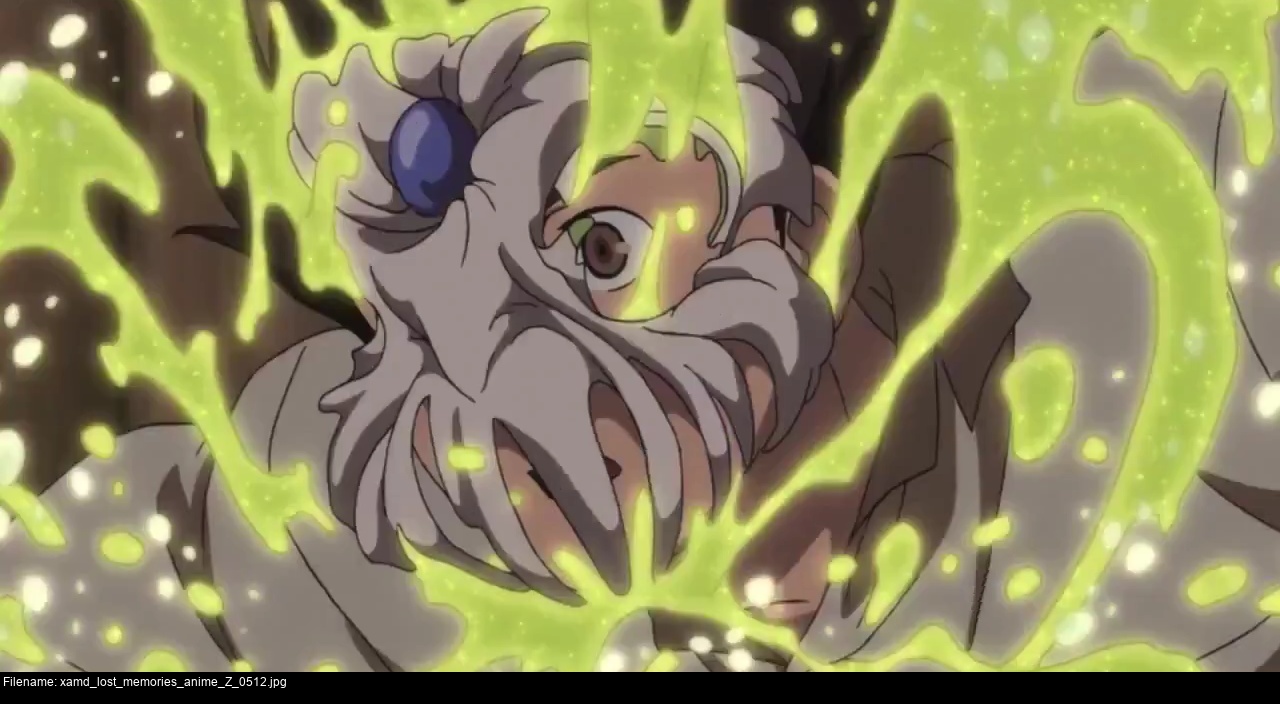
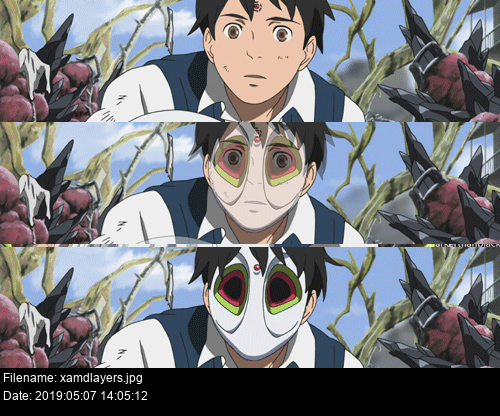
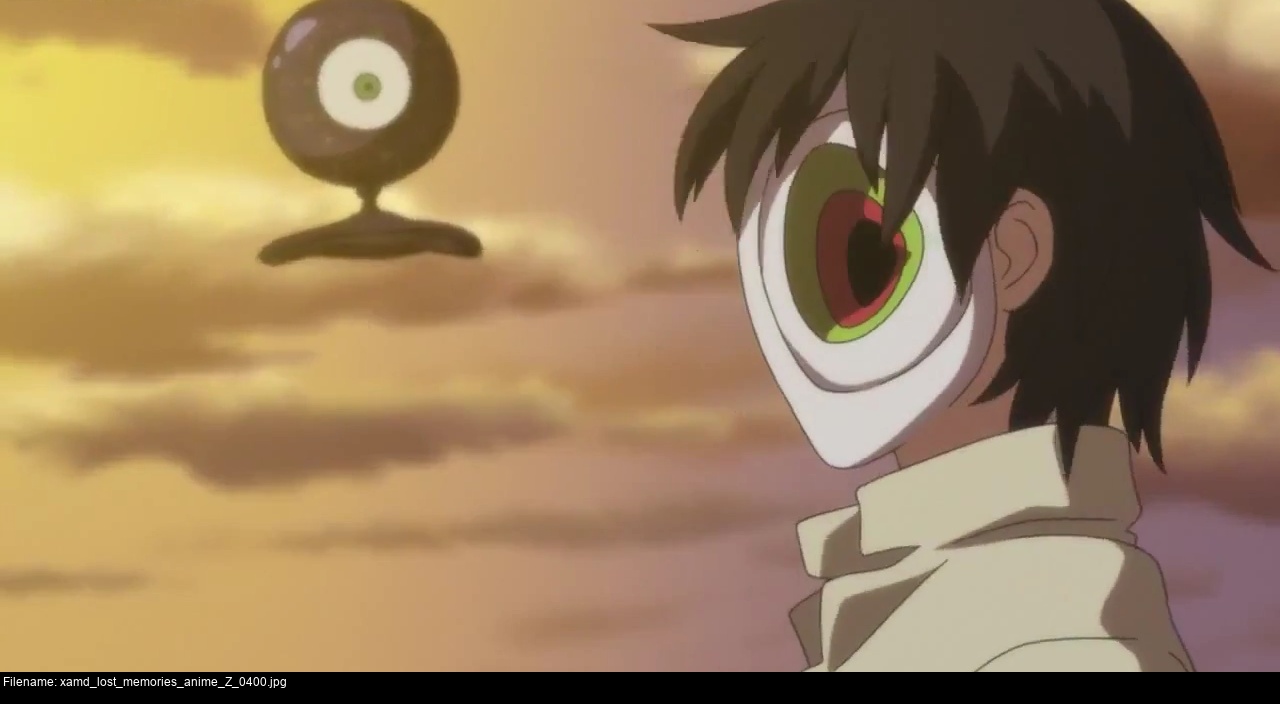
Say hello to Akiyuki Takehara! He's a got a little bit of a mask problem.

I can't say I fully understand the world of Xam'd (since I've never watched it...) but the gist of it is that during a nasty civil war scenario in a mock-early-20th-century-European country, suddenly there's aliens. Akiyuki gets a bit of one stuck in his arm, and the only cure for that is a Smartie in the forehead. Side effects include nifty white glossy unremoveable masks!
It happens, you know?

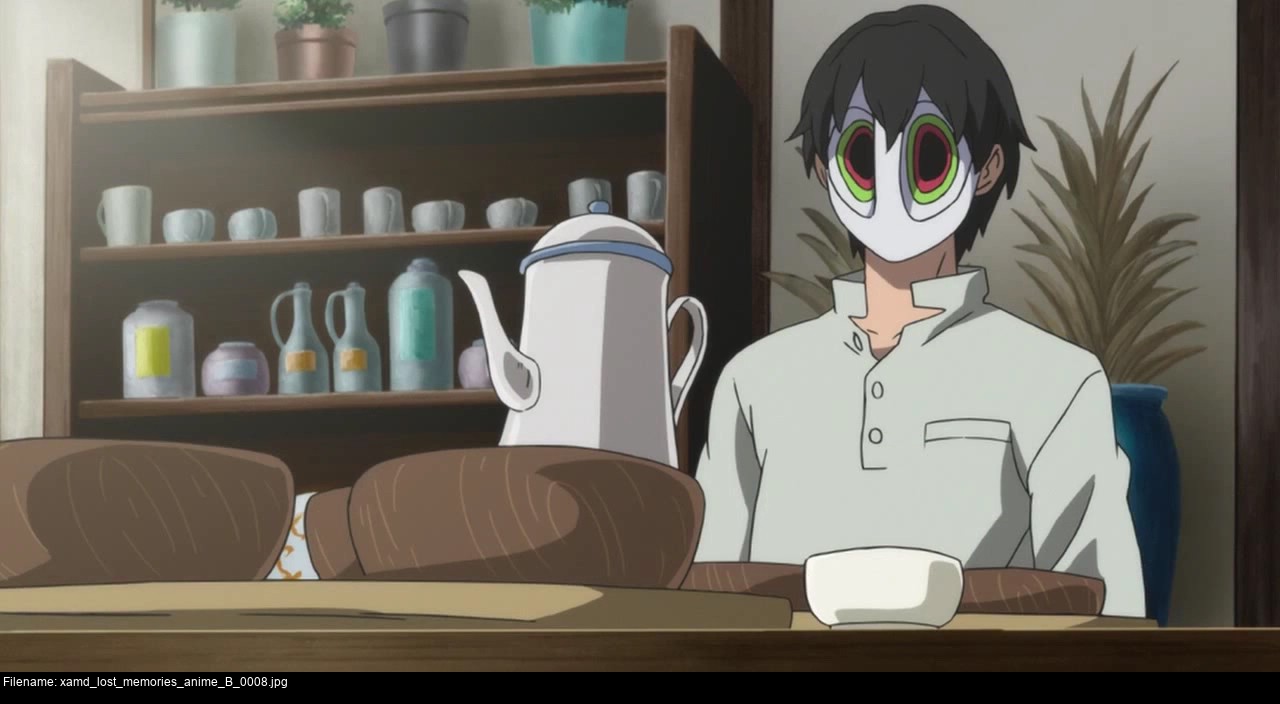

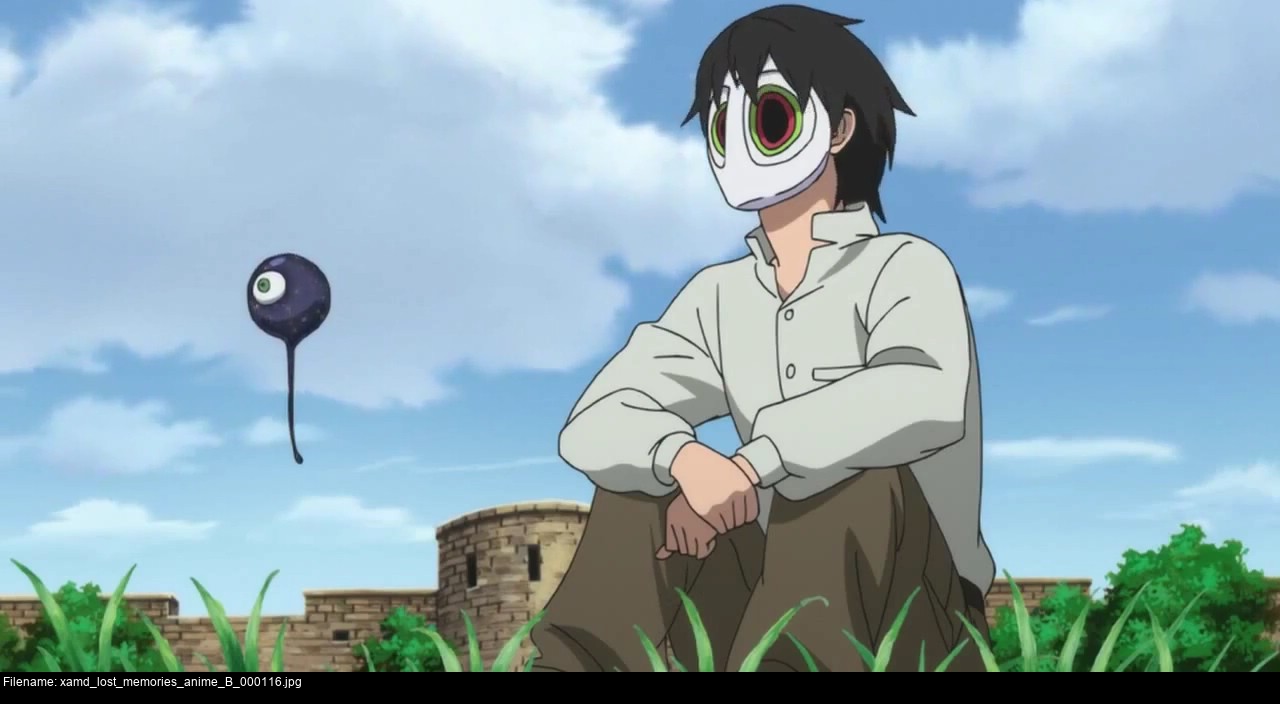


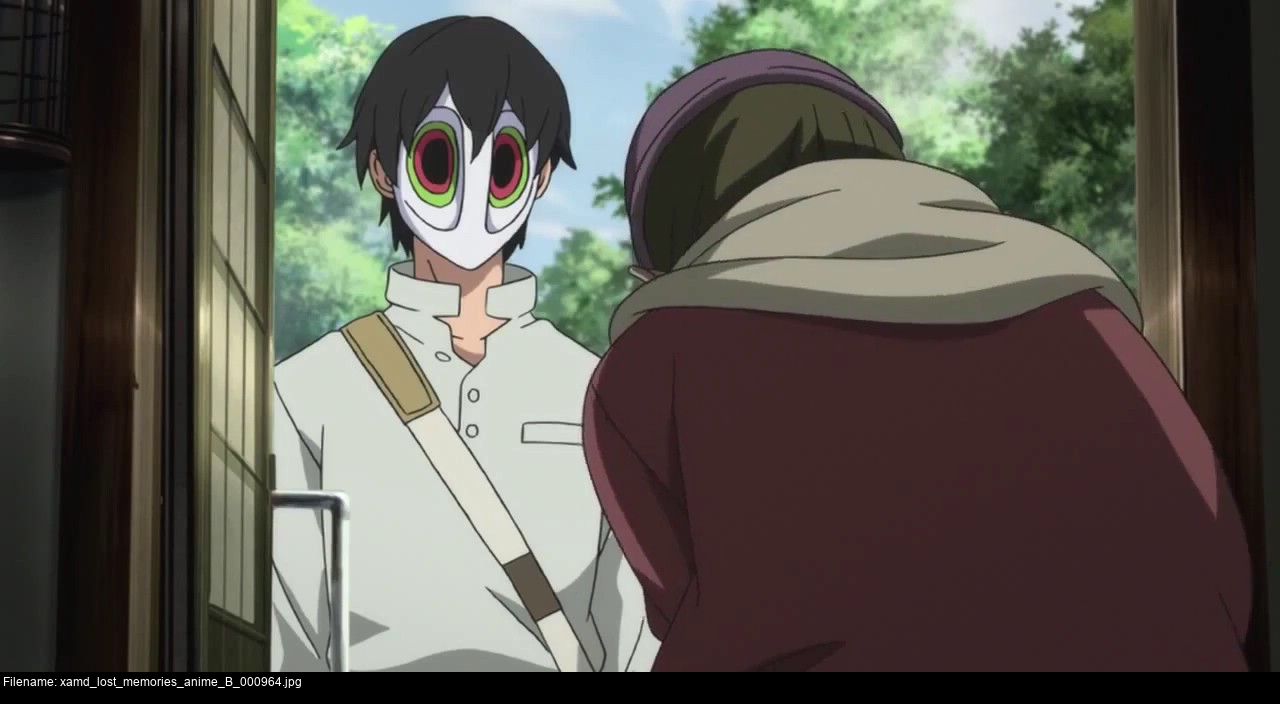
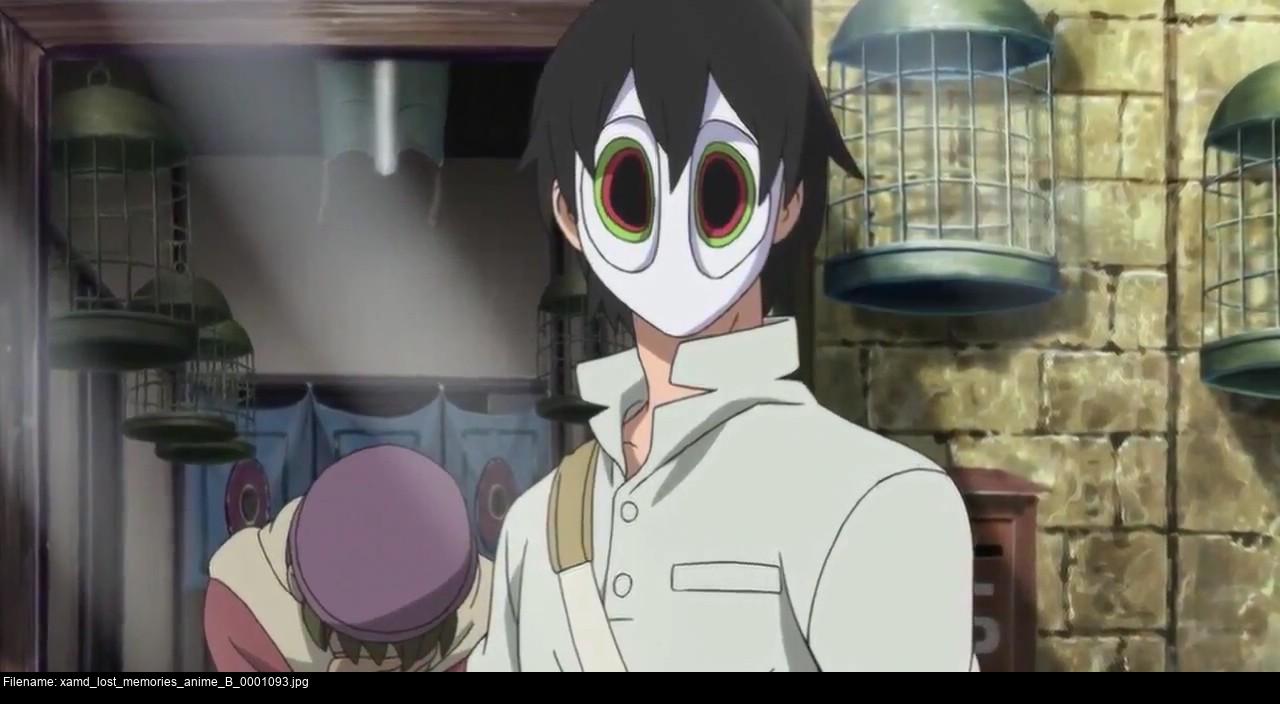
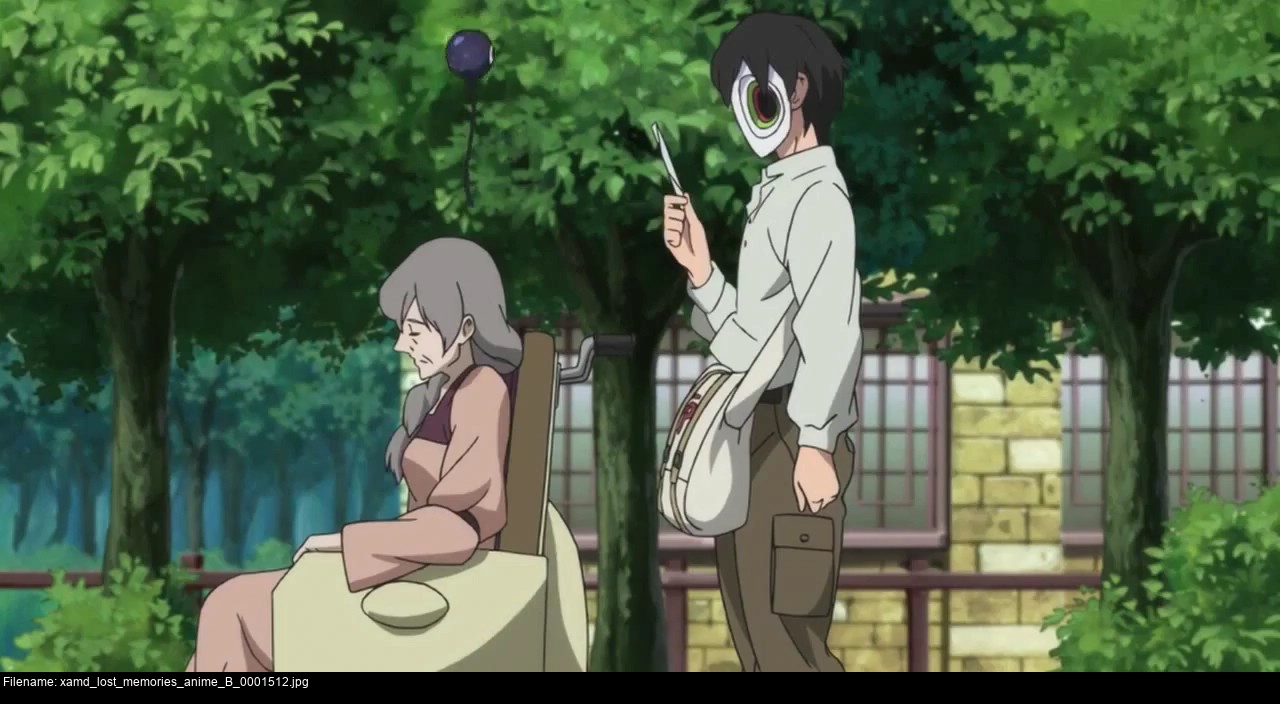
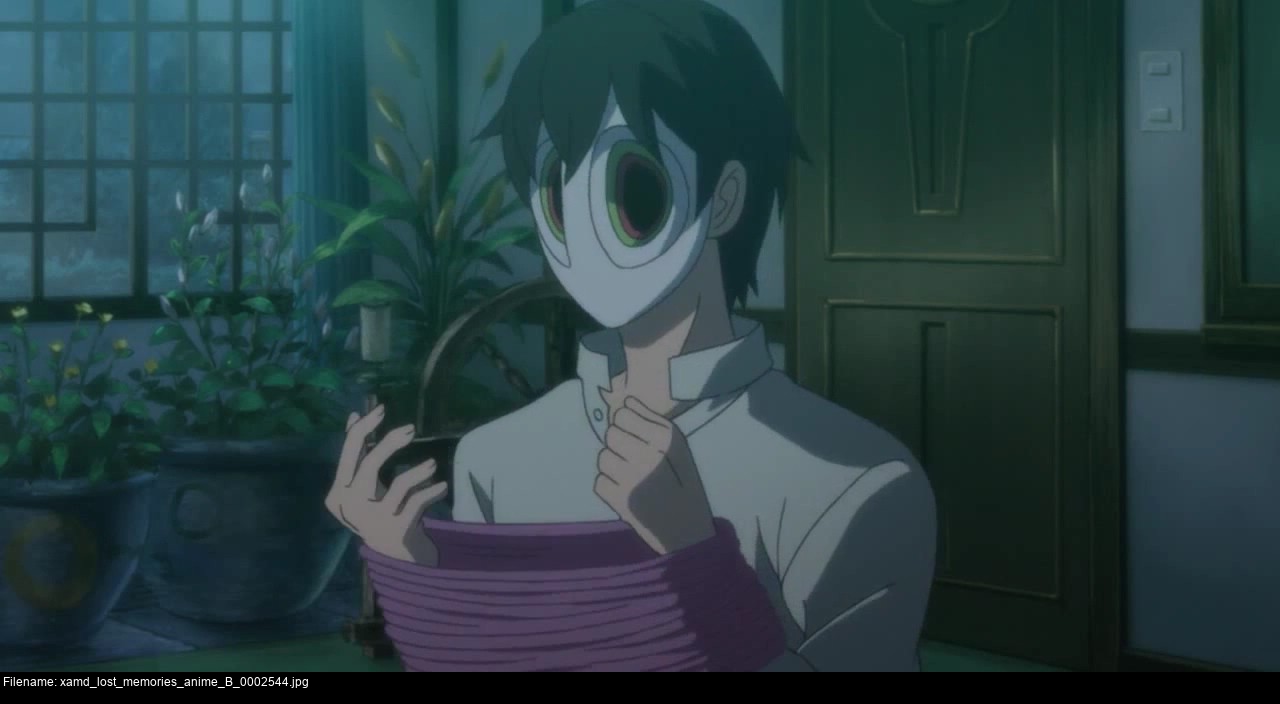
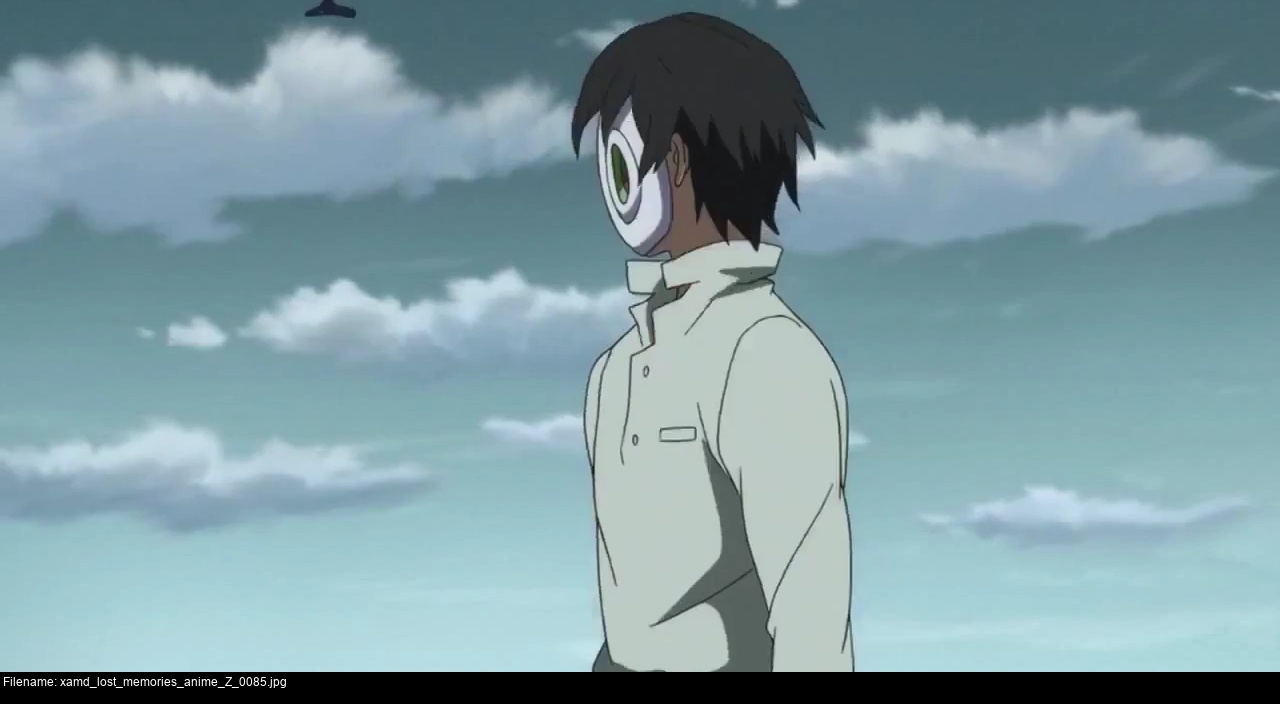
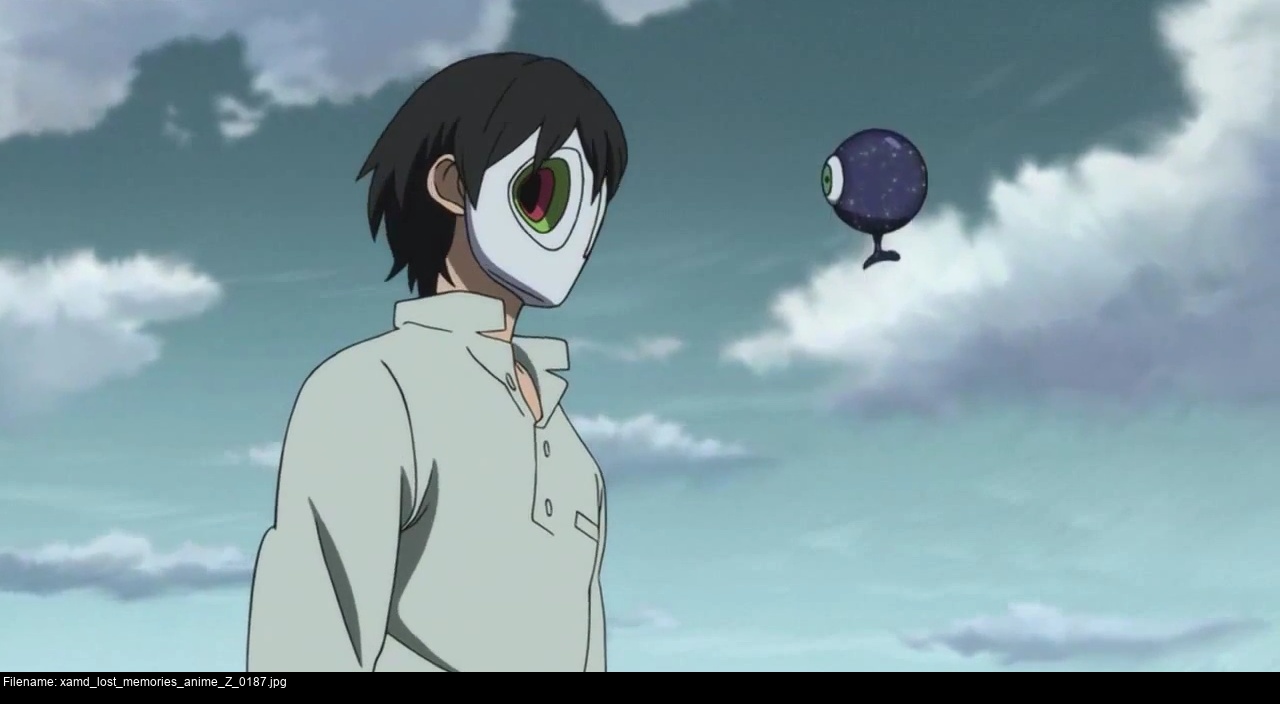
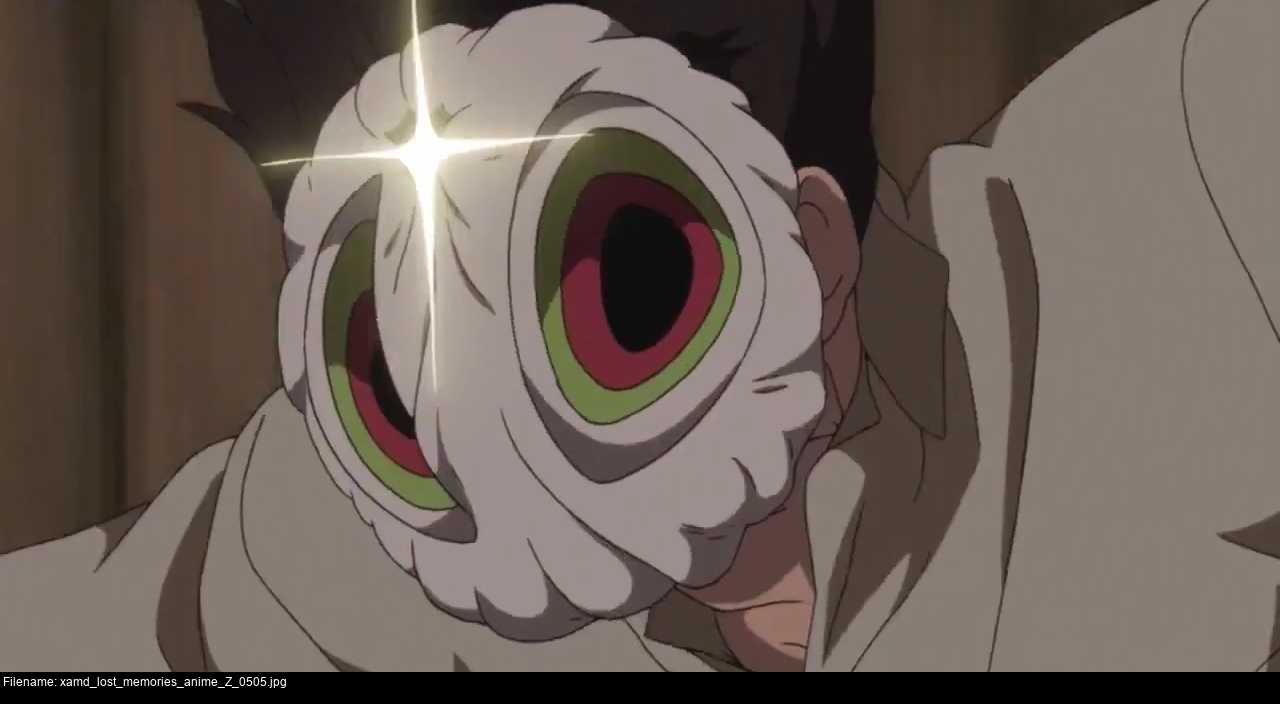
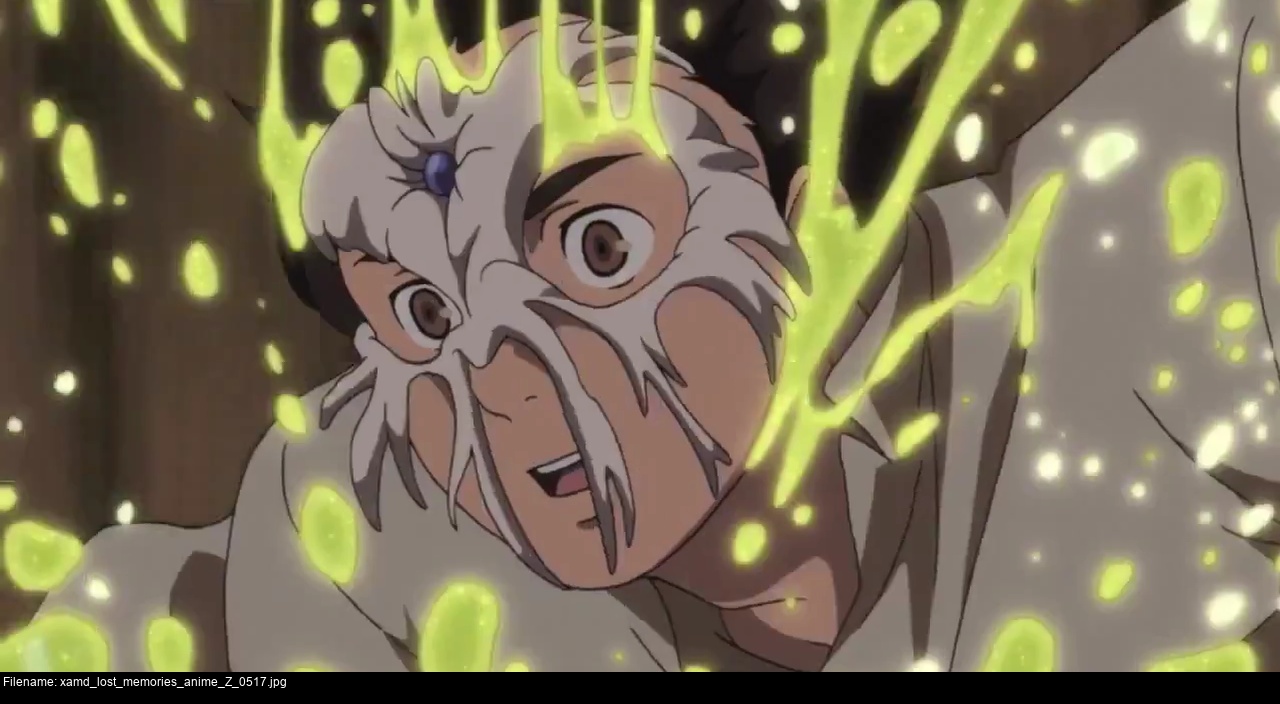
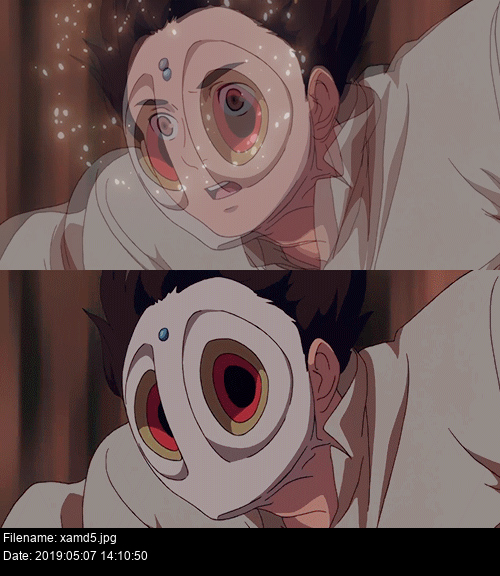
Later on, Akiyuki finds himself stuck in his mask for other reasons and spends almost four full episodes of his own monster-transformy action show... wandering about delivering letters in a town. This is why Xam'd is pretty low on my list of things to watch. But at least his mask looks nice and cool!


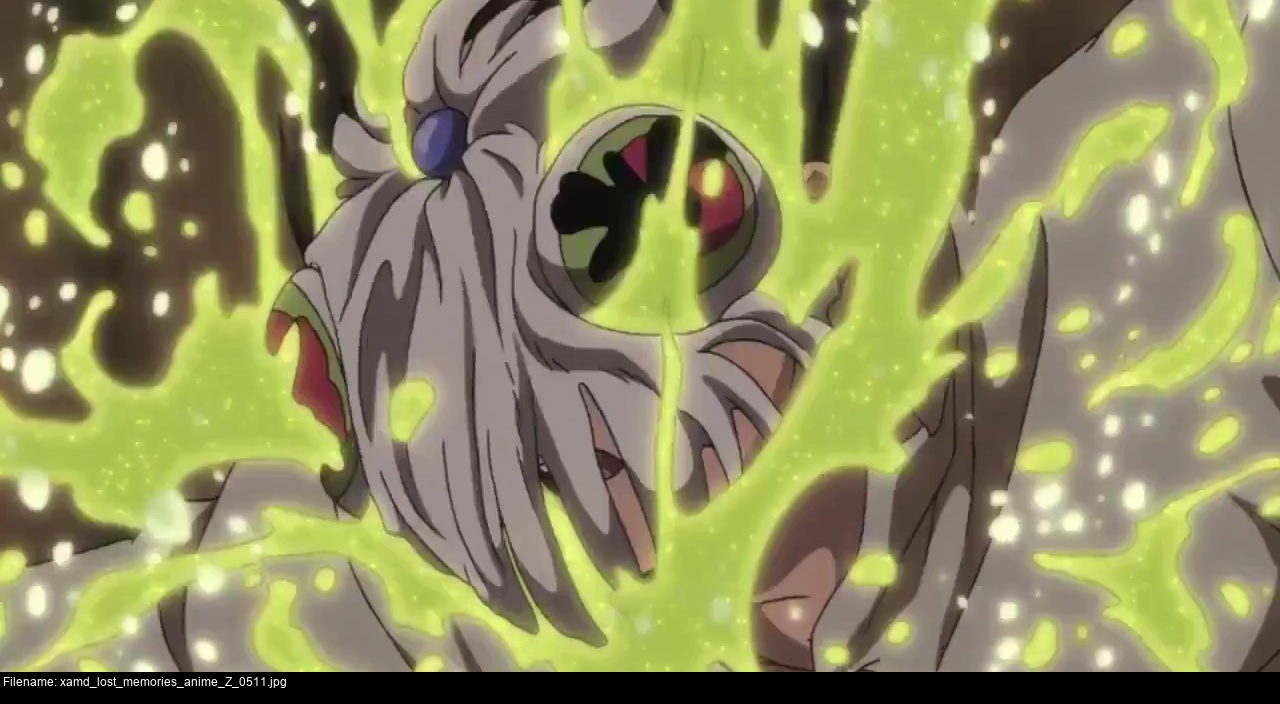

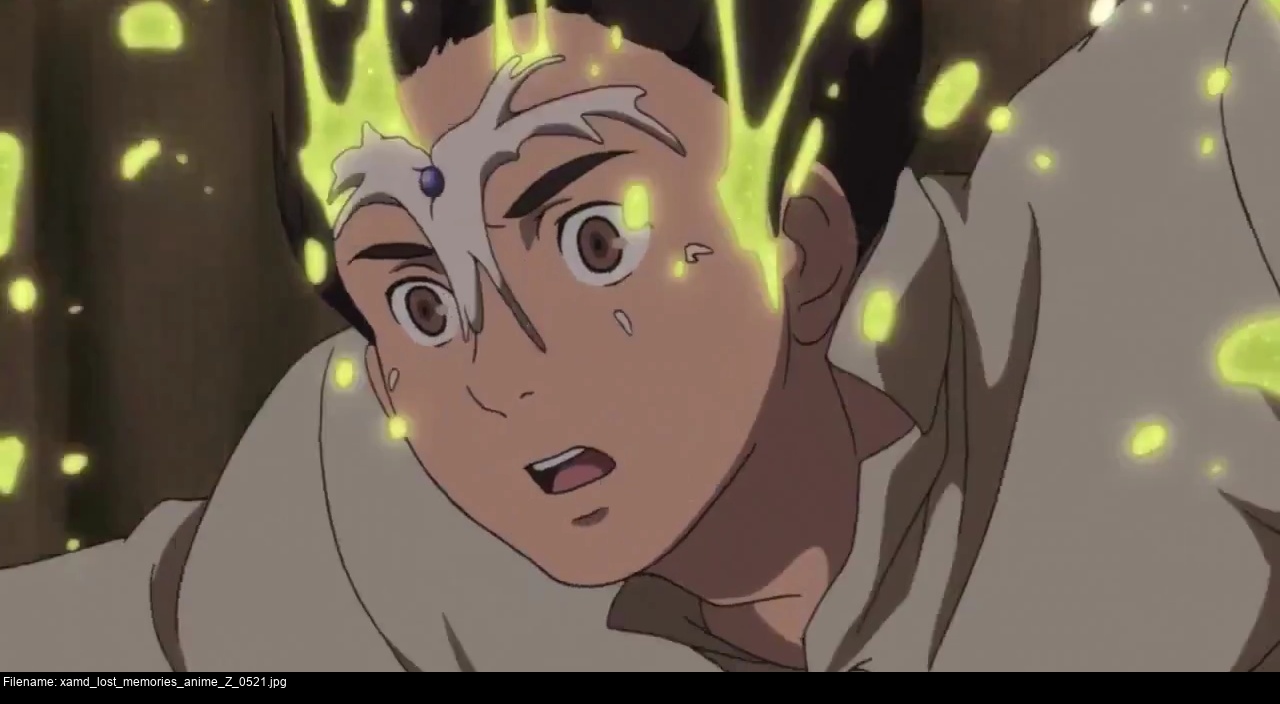

And then it disappears and it's never seen again because it's not relevant to the show. Bah.
Why so many high-resolution pictures, me?
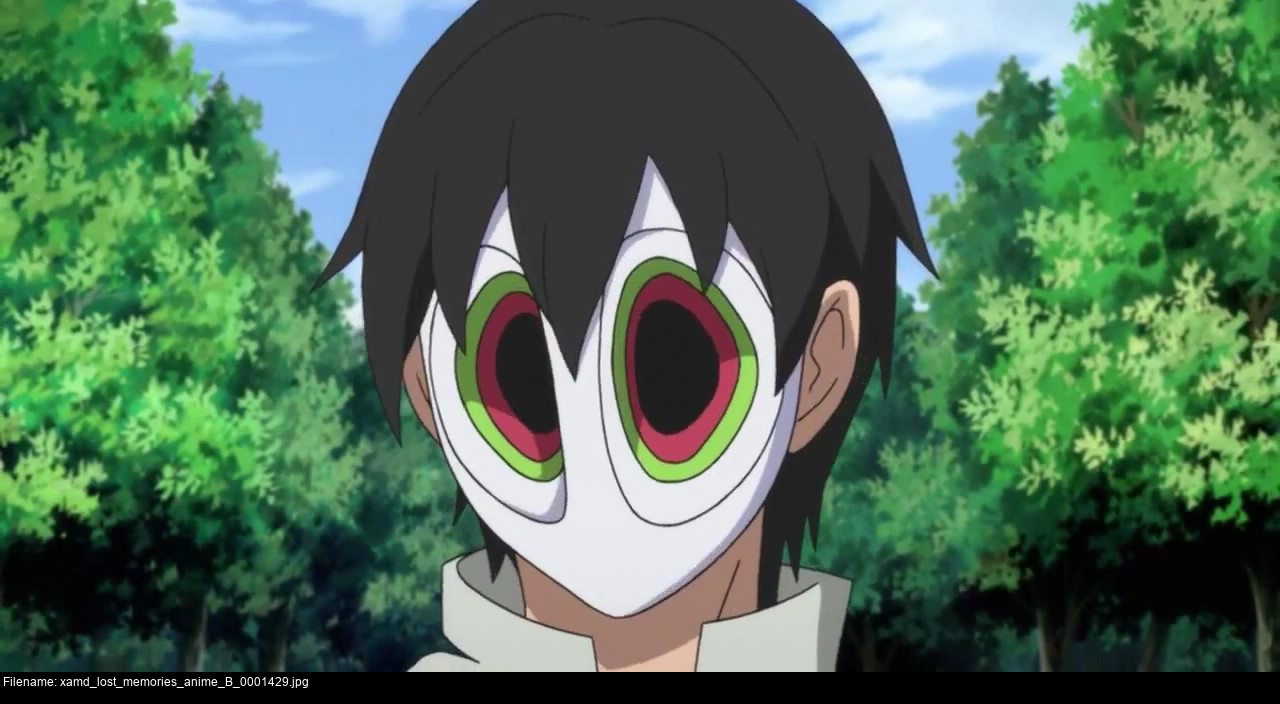
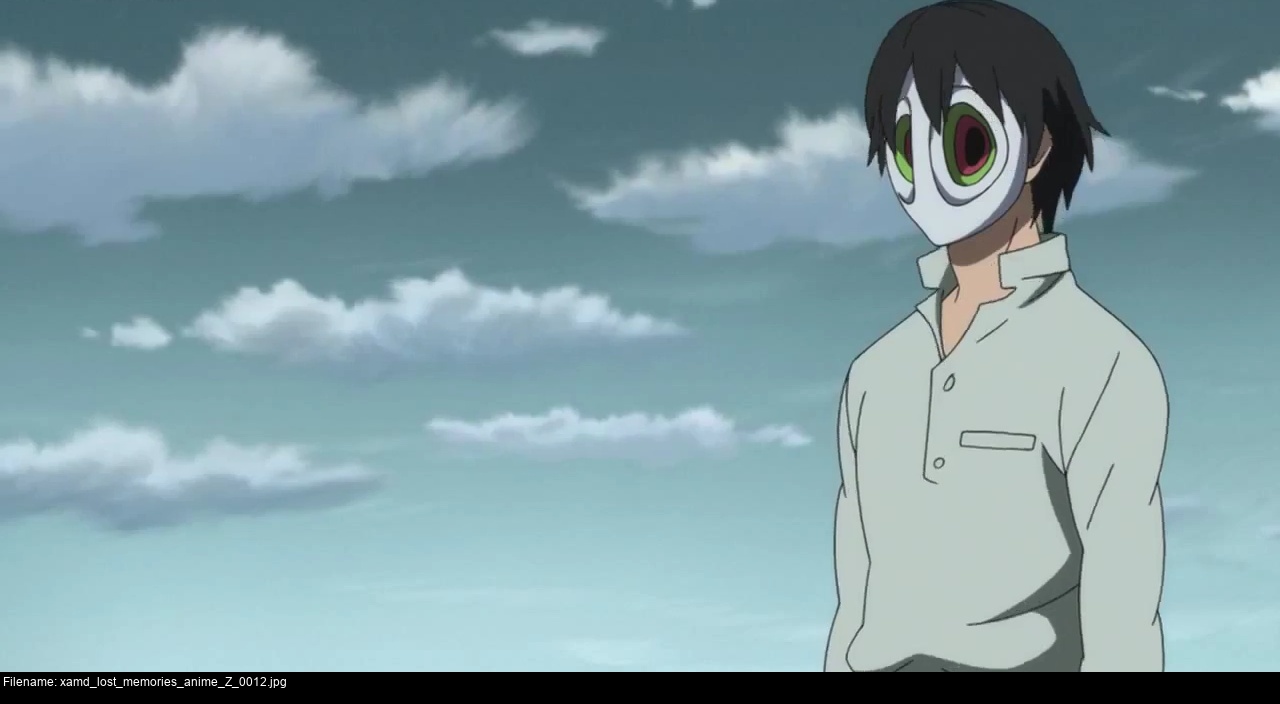
With any kind of transformy stuff, it's useful to have a lot of high-resolution pictures of the process because the middle stages show you how closely it ought to fit to the body or face. Also, I got real sick of not being able to find any decent pictures of this mask, so here's every angle of every shot of every scene once and for all.
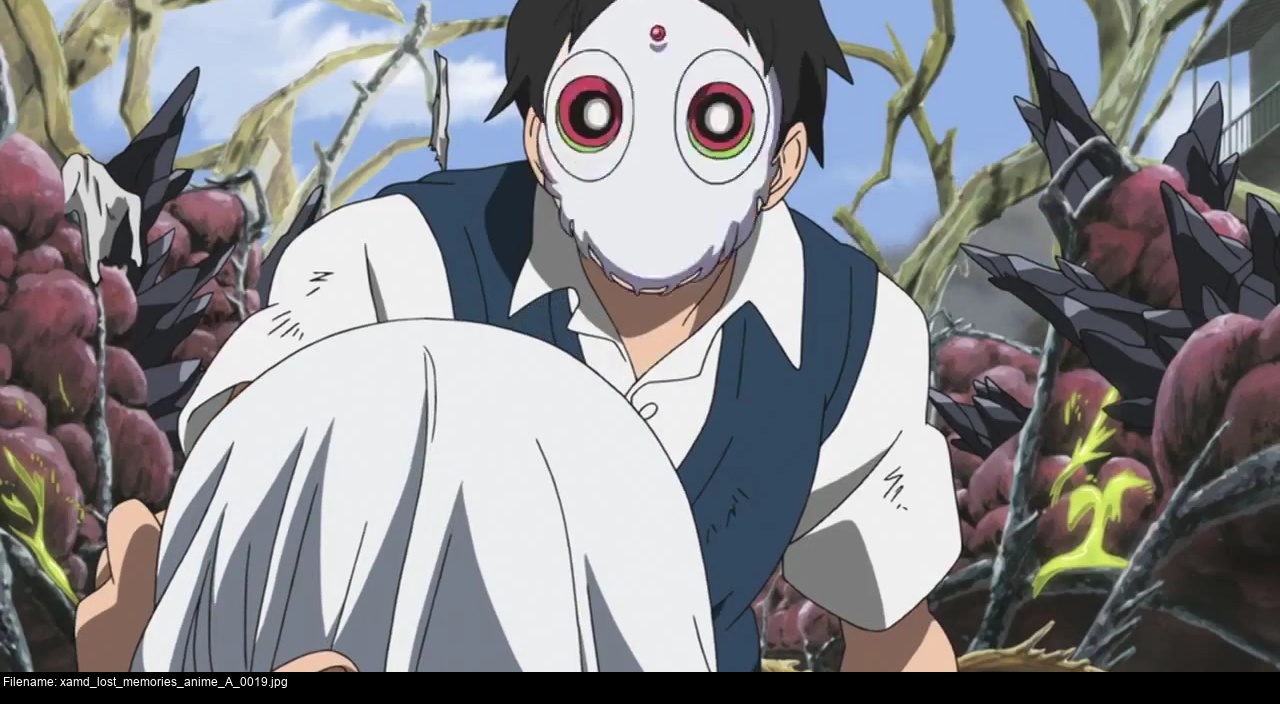
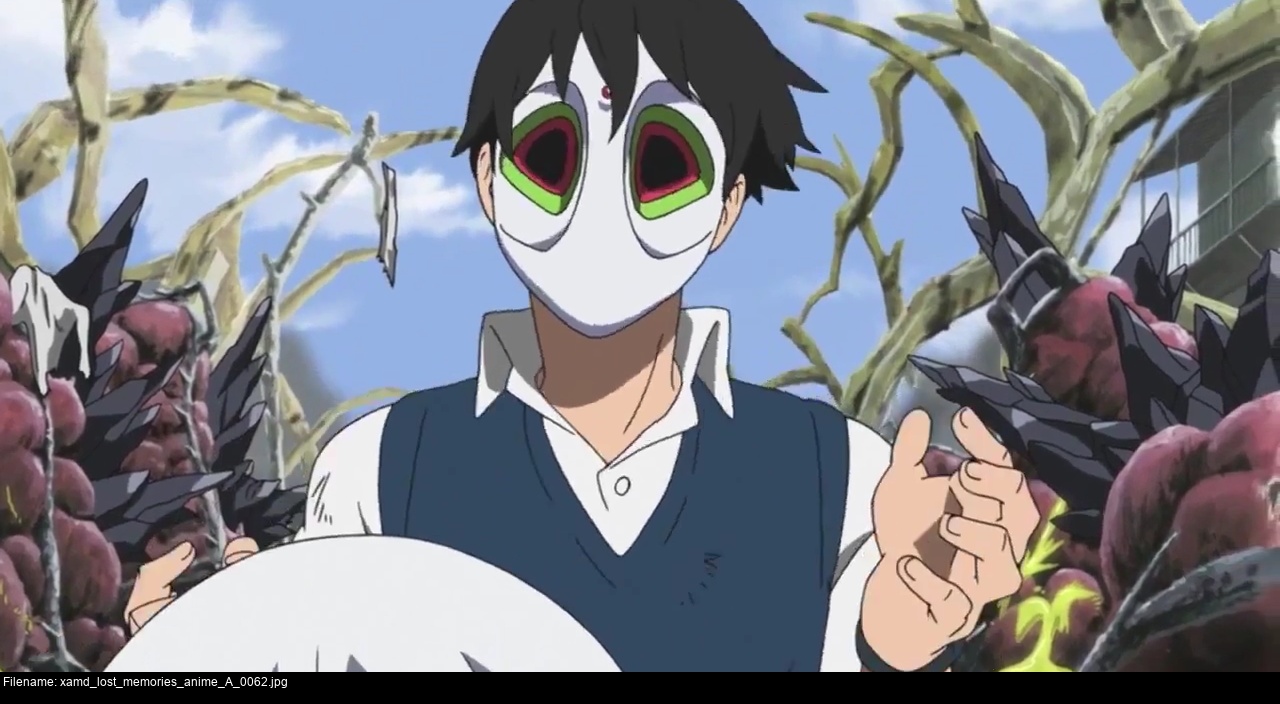
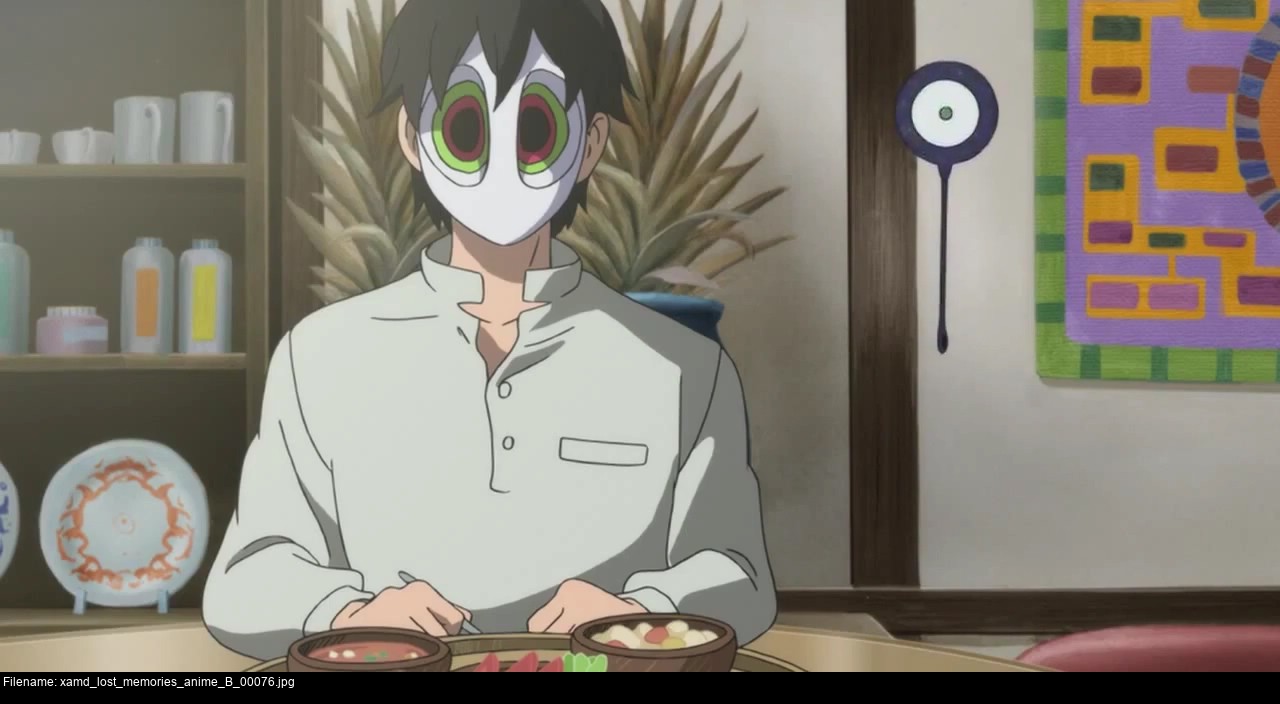
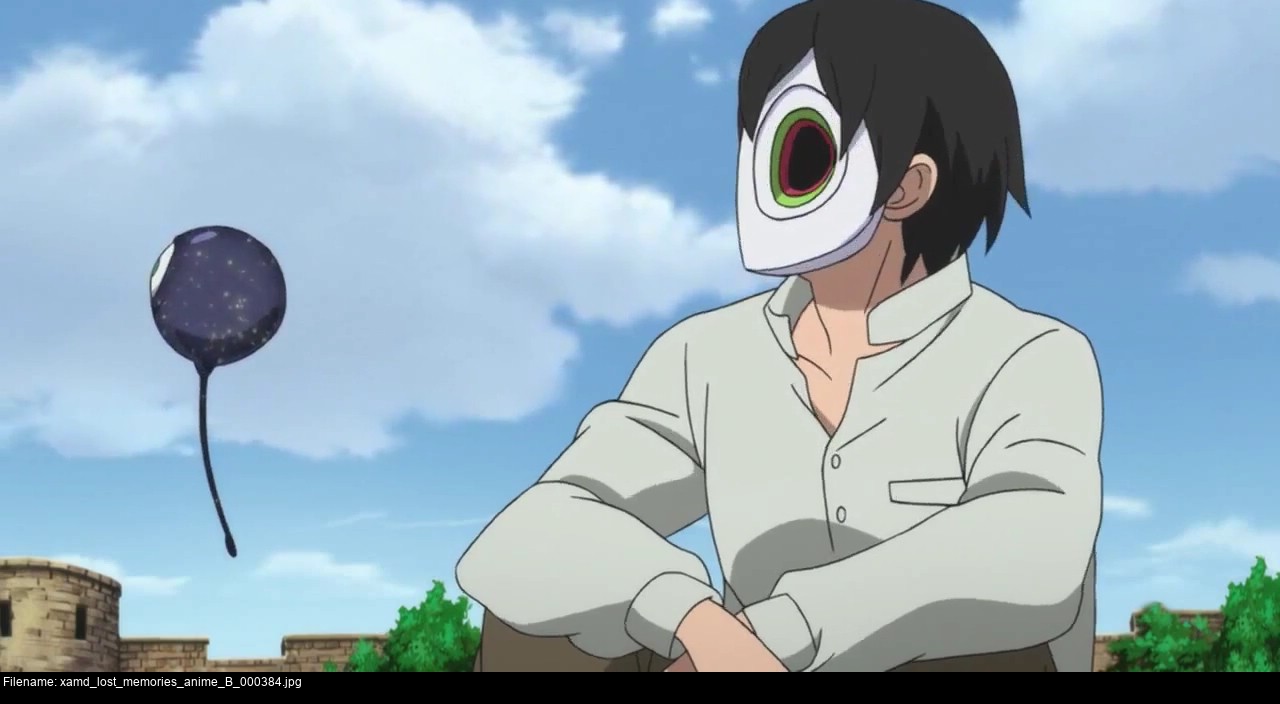
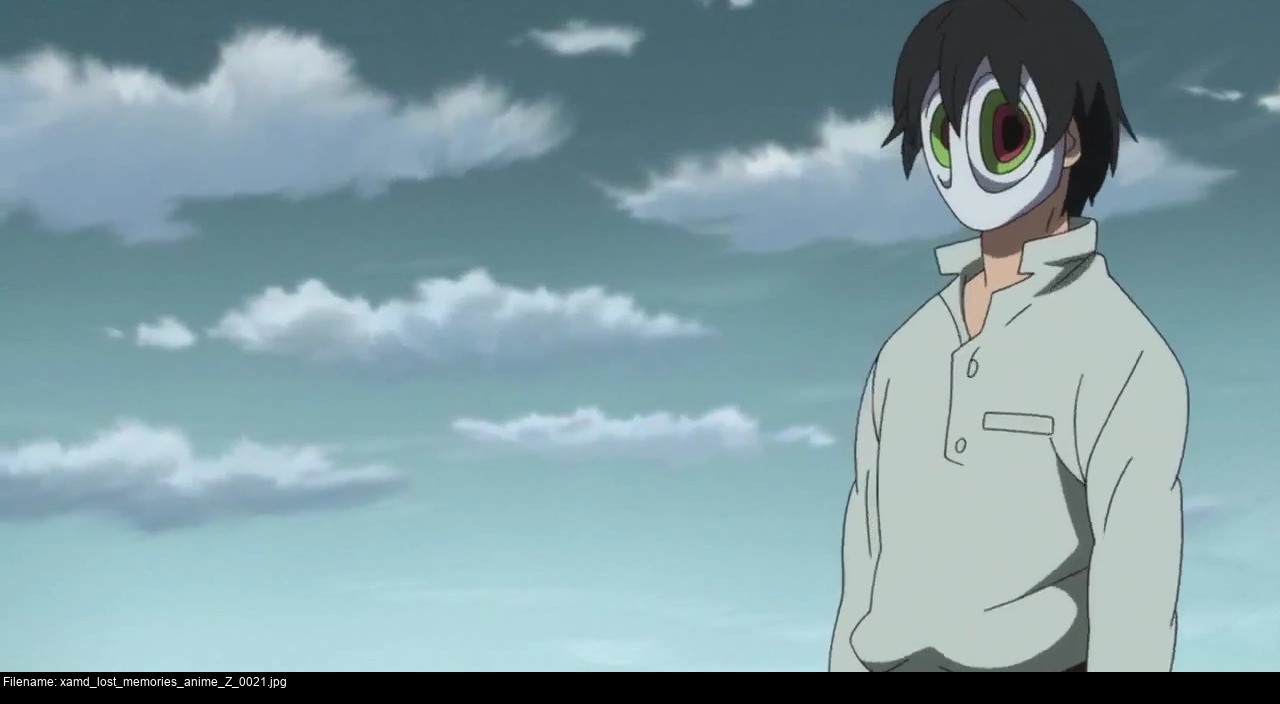
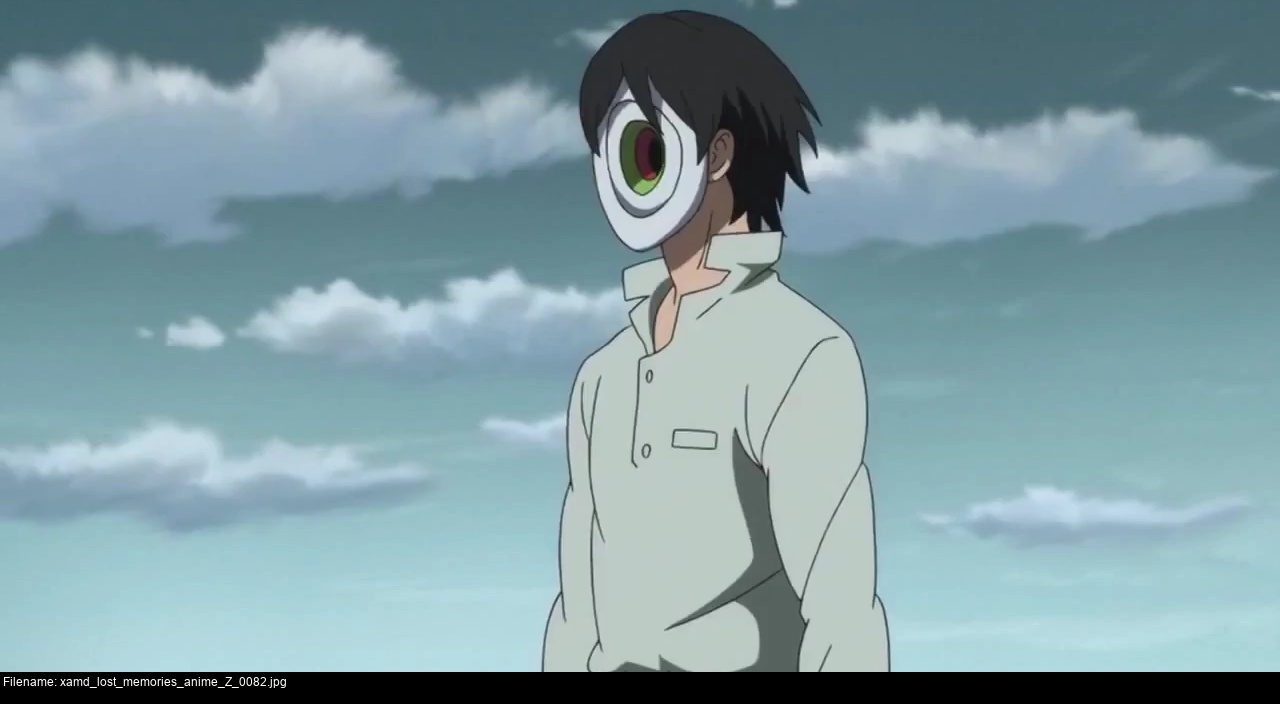
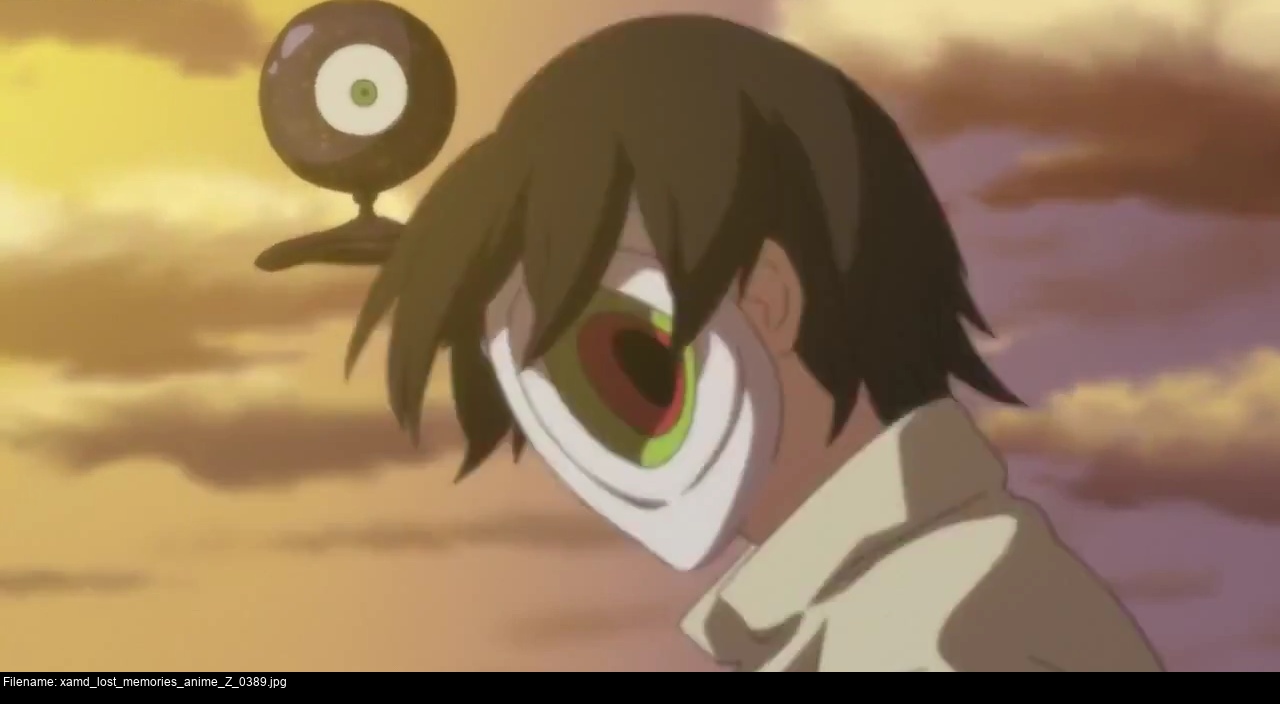
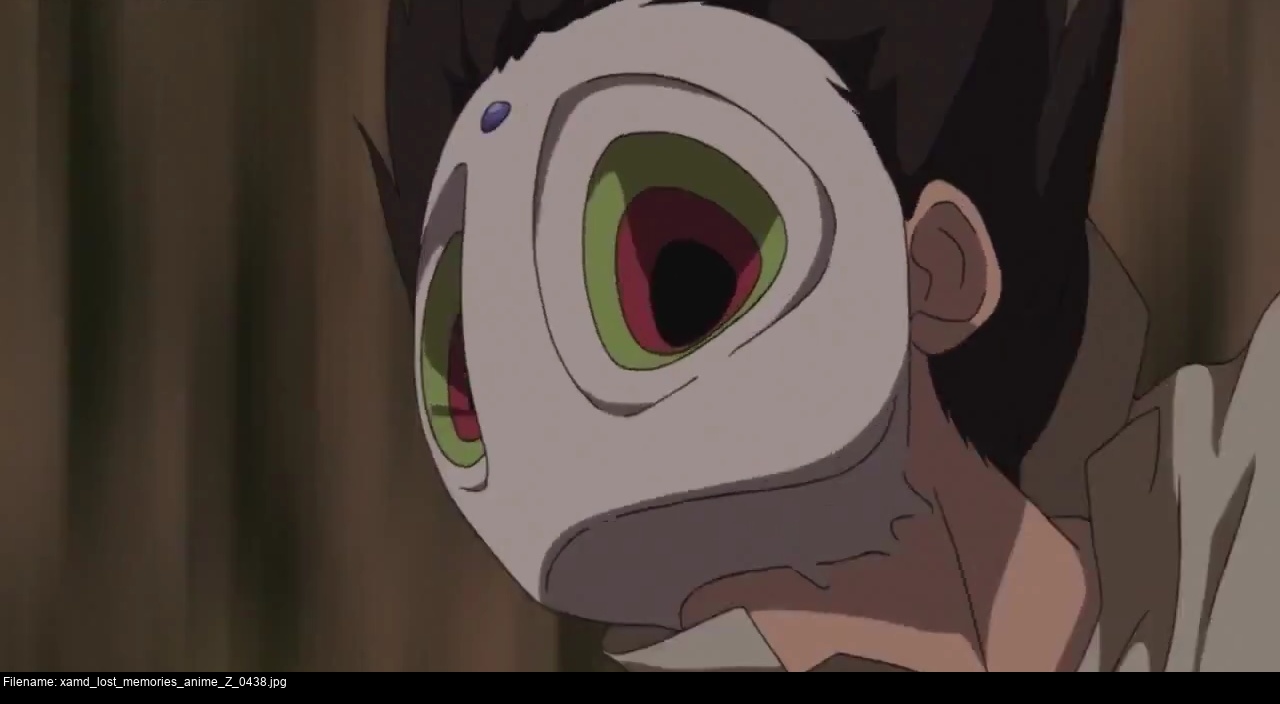
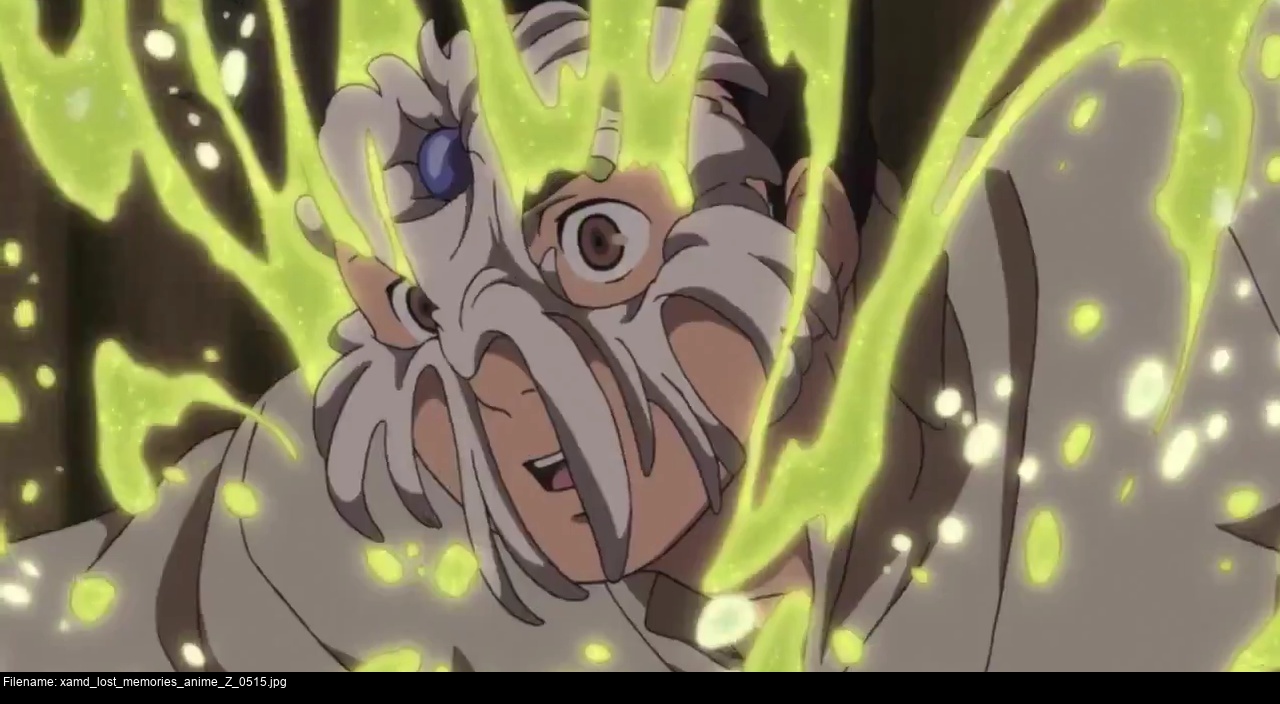
Take a good look at all the different angles. A character can look very different depending on show, artist, scene and surroundings. In a low-budget, filler scene, details will be lost or simplified. In this case, Akiyuki's mask's eyes are sometimes drawn as ovals, whereas in the close-ups we can see the eye is almost triangular in shape, with three main straight edges: the vertical inner edge, the diagonal lower edge and the diagonal upper outer edge. These give the outer eye corner a distinct pointed shape. Also bear in mind that although (I assume) the mask is supposed to be a static, unchanging object, artistic license could have it presented in slightly compressed, enlarged or exaggerated proportions to portray the wearer's emotion.
The mask is alternately drawn as having bulging veins on the underside of its jaw running smoothly towards Akiyuki's neck, and having no veins. Either way the rim of the mask meets Akiyuki's face very, very closely, wrapping around his jaw and cheeks and forehead tightly. In the first scene where the mask appears, Akiyuki is gagged by the solid mask and can only mumble.
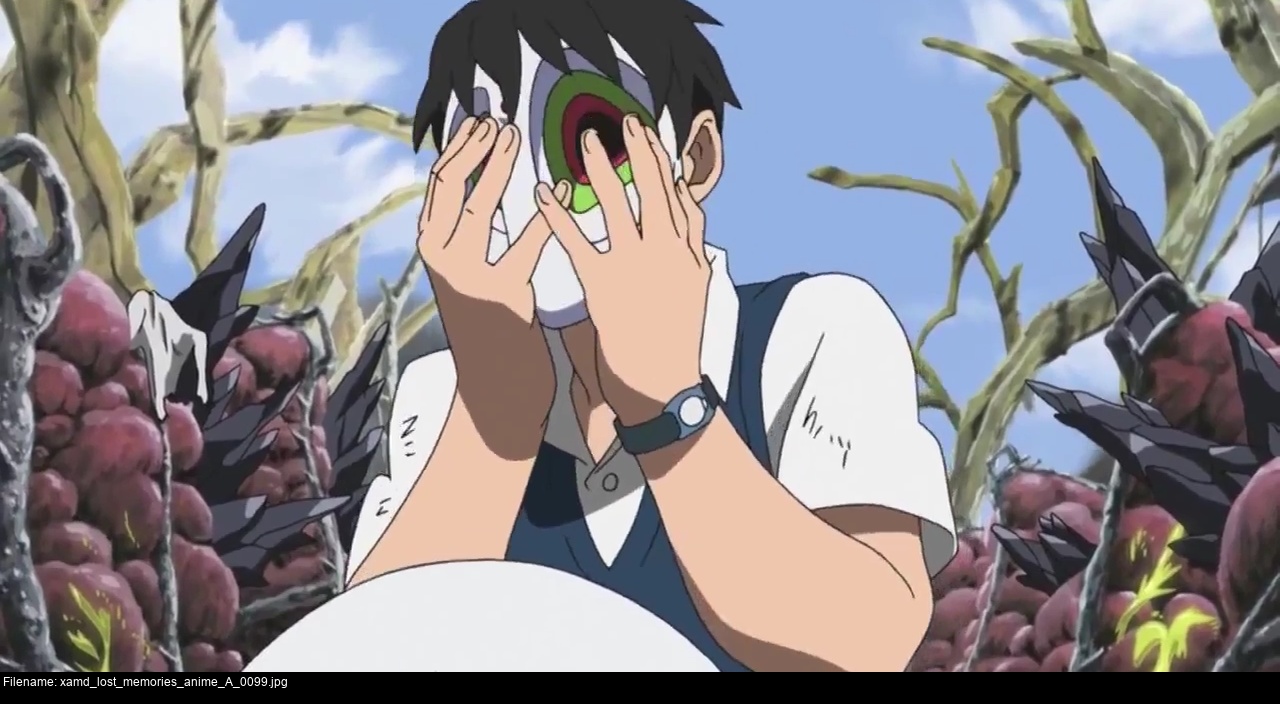
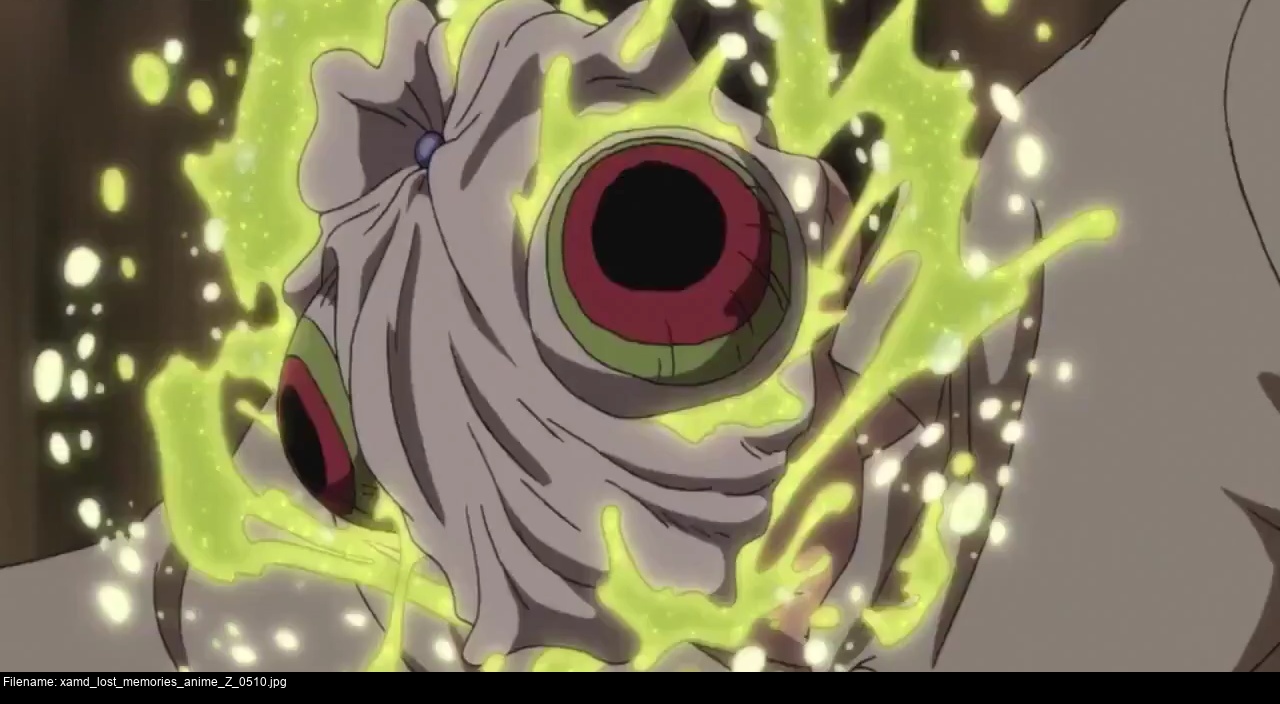
The mask has a strange organic nature, the texture could be smooth or rubbery, hard or soft. It could even be somewhat foamy or fleshy - Akiyuki's complete monster form looks to be made of the same stuff and that's super supple and mobile.
The mask itself doesn't appear to have a glossy texture like polished glass or plastic; it's smooth and clean but it isn't shown with a shiny rim or face at any point.
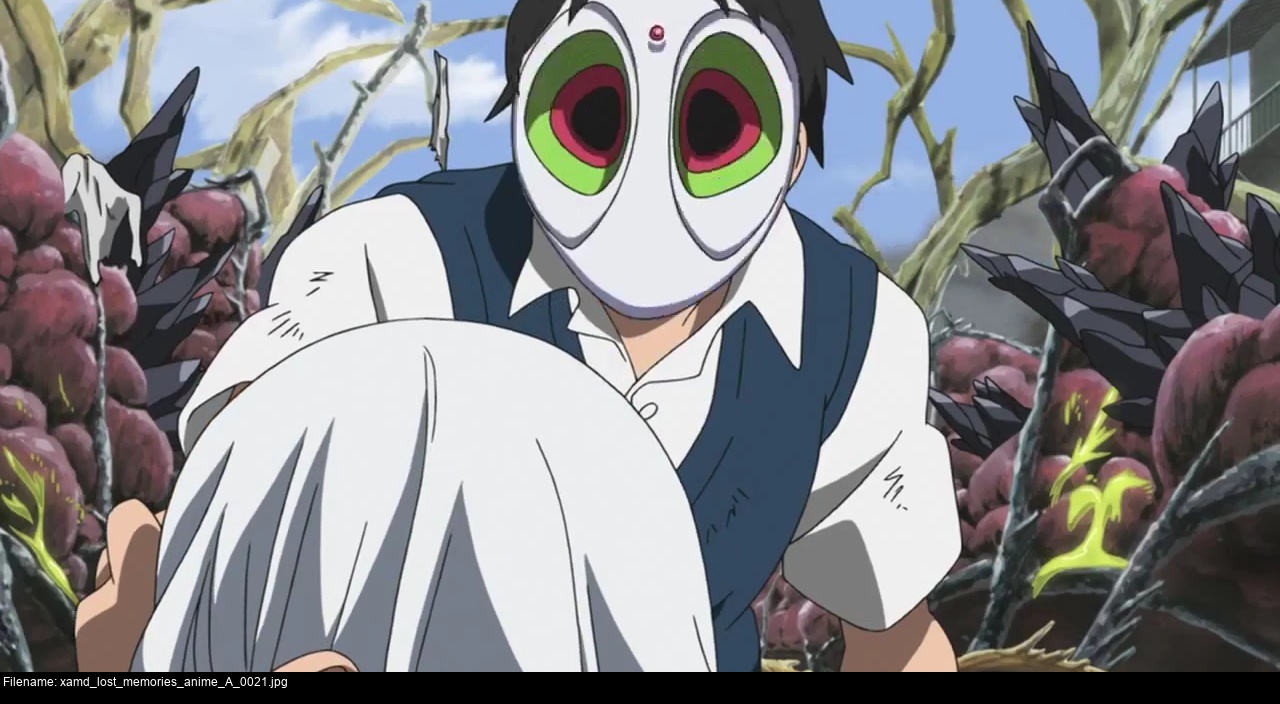
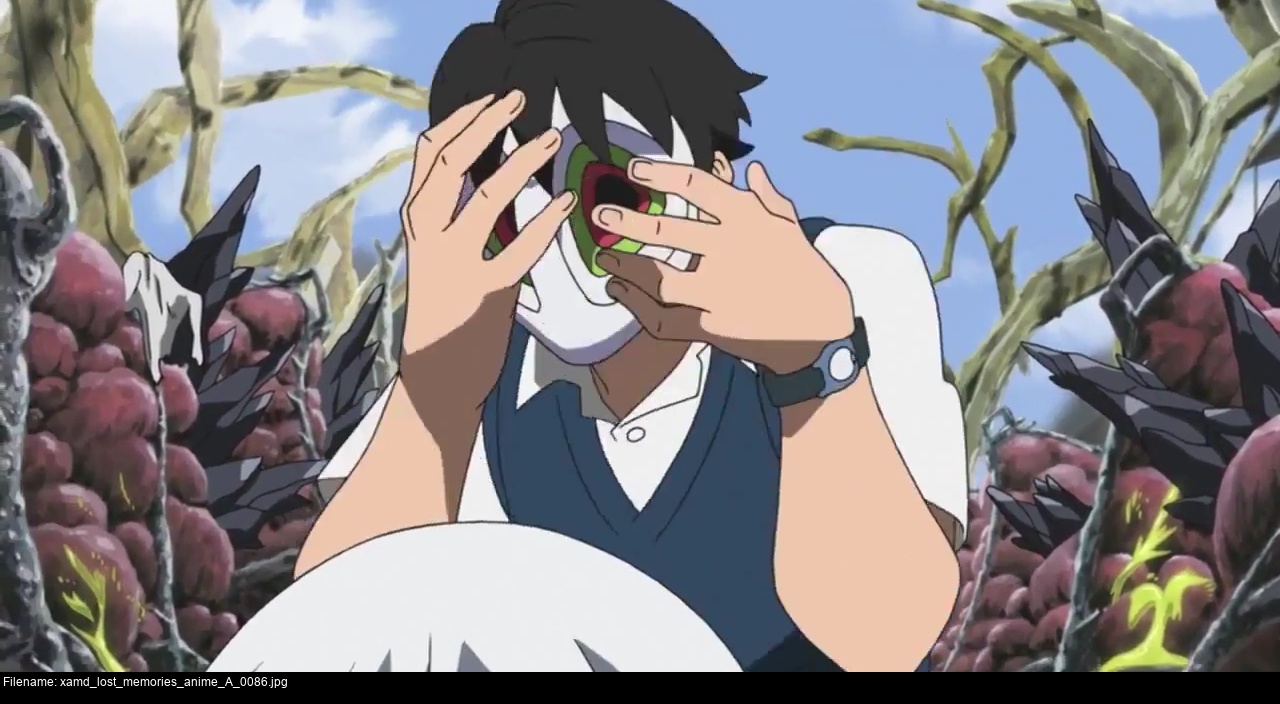
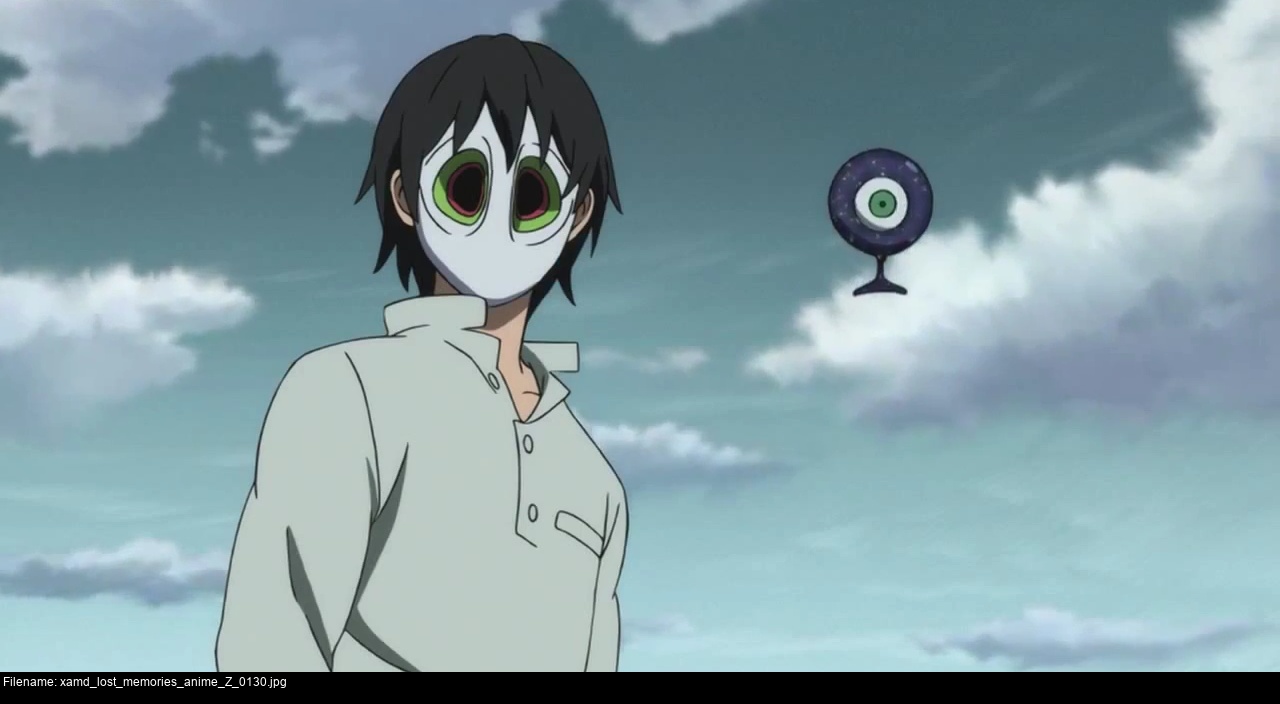
The concave eye cavities have distinct edges to them: they're always drawn very clearly.
The blue gem in the forehead is often covered by Akiyuki's hair, but I think it's always supposed to be there.
The mask's eye cavities seem to be very deep, ending in complete blackness.
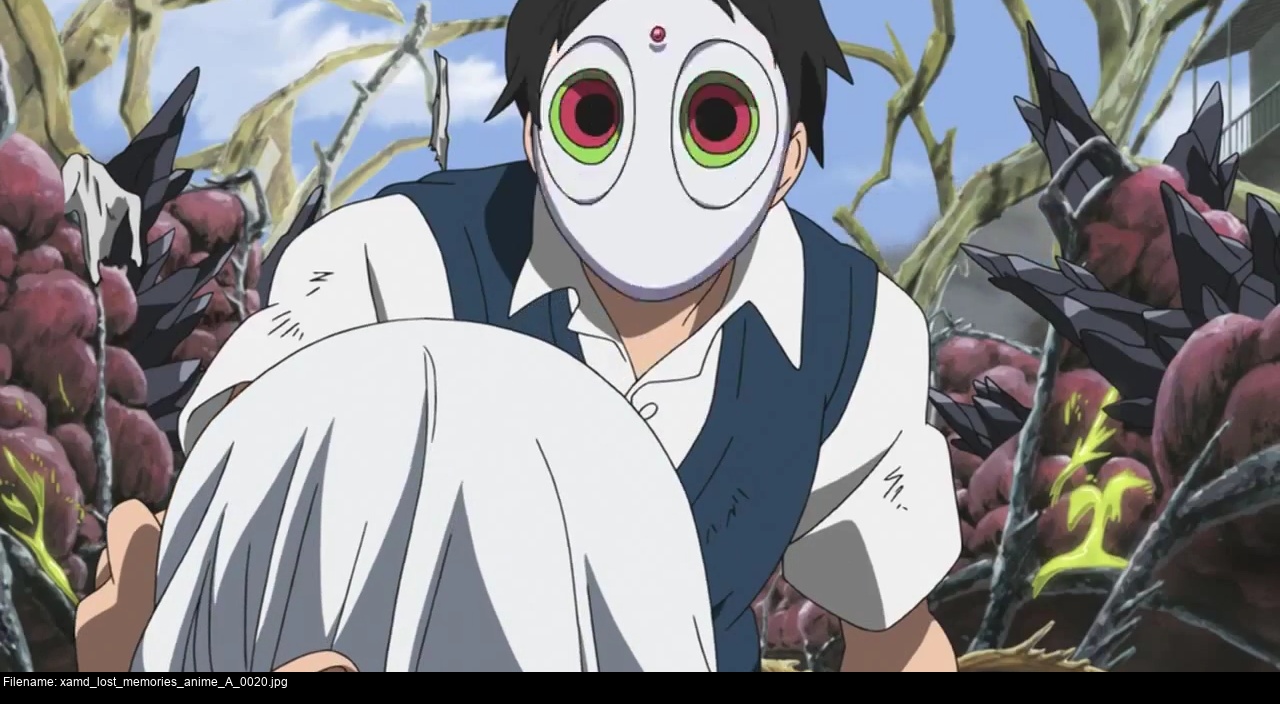
Eye cavities ignored, the shape of the mask is a very simple inverted teardrop shape, with a hemispherical top, flattened cheeks creating a distinct bladed beak and a pointed chin.
Together this indicates a solid but somewhat flexible mass that's very tightly fitted to the face and built up thickly around it. Unfortunately, when designing any prop or especially a mask, you have to bear in mind the constrains of reality: if you had some kind of Ben 10-ish bug monster thing going on, and the alien version has a very human-like body but their eyes or other features would lie in places that would require you to have a great big hole in your head somewhere, you're going to have to work around that.
It's important to be certain about which sources you're going to trust and to what extent you're going to trust them.
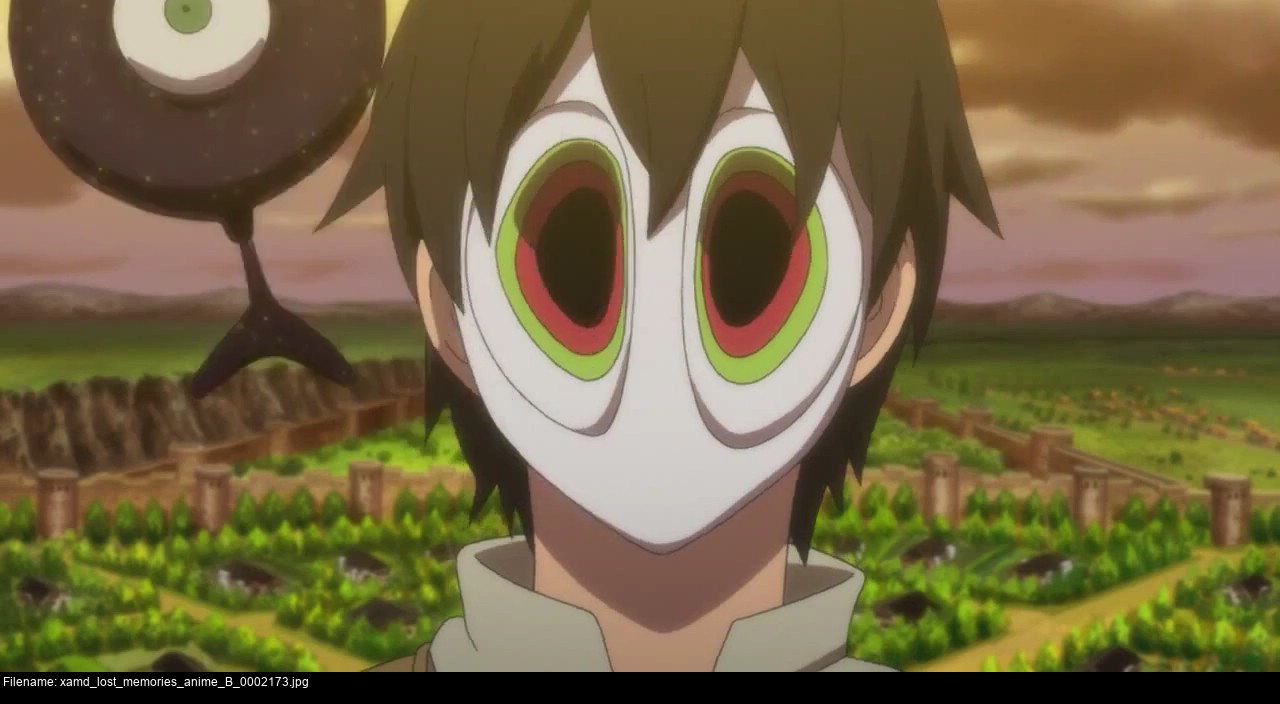
You can just pick your favourite episode if you want to, but if you want to comprehensively grasp the shape of something, especially if it's not a common object, you ought to find all the pictures you possibly can! Luckily for me, in these slow-paced scenes of Akiyuki sitting down or walking about, he spends a lot of his time in bright sunshine indicating the true colours of his mask. If I only used the pictures at sunset as a reference, the mask would appear to be amber with different coloured eye cavity rings.
I had a very strict time limit for making this mask: I started on 7th May and it had to be wearable by the morning of the 17th. That's ten mornings and evenings. This is an absurdly short amount of time to make anything, regardless of how simple it appears. I'm going to use the same method I used to make the second Majora's Mask: XPS pink insulation foam. Pretty much everything I do here will be identical to how I did it then. Even so, that is a heck of a lot of stages. Consider this:
Make the main mask body out of XPS foam.
Carve the teardrop shape.
Sand it into the correct overall shape with the hemispherical top, beak and chin.
Excavate the concave eye regions. (How??)
Hollow the eyeholes themselves.
Surface the XPS foam so it has a smooth paintable surface.
Lots of Gorilla Glue Wood Glue Glue.
Lots of sanding.
Prime the mask.
Sand the primed surface of the mask.
Paint the mask.
Cover the interior of the eyeholes with buckram interfacing similar to how I did it for the Overlynx furry head and the foam Majora's Mask to black out the mask eyes while keeping them see-through.
Varnish the mask.
Sew and attach a strap.
Extra bonus round: How am I going to store and transport this?
It's a lot to think about, and you really ought not to begin unless there's a decent chance that you can finish in time, or you'll end up miserable and maskless. Do it right!
You cannot, -can not-, make something to wear without planning and measuring first.
We've already got our references, let's have a little closer look though:
Since it is a mask and I intend to wear it on my face, covering my face, I need to be aware of the full dimensions of my face, all the curves and volume:
The width of my face, from one ear directly to the other.
The height of my face, from the top of my scalp, to where I want the top edge of the mask to lie, to the bottom of my chin.
The height of my eyebrows, eyes, nose, mouth, chin.
The distance between my eyes at rest. (During the making of my foam Majora's Mask, this was 7cm, and it's the same now.)
To determine all of these, I used the highly scientific method of holding up a tape measure in front of the mirror, making notes on paper, and cutting out rectangles until I got a piece of paper that I was satisfied covered my face. When I had the final face-covering rectangle, I expanded it a little (it's a template, it's also rough, and the final mask is going to be a hand-produced mess that'll approach the final size from the outside).
Marking out rectangles and measurements is nice and simple and fun. When you're designing something with right angles (like a rectangle) or symmetry, it's very helpful to know your compass constructions: the perpendicular bisector, radiating lines of equal length, and so on.
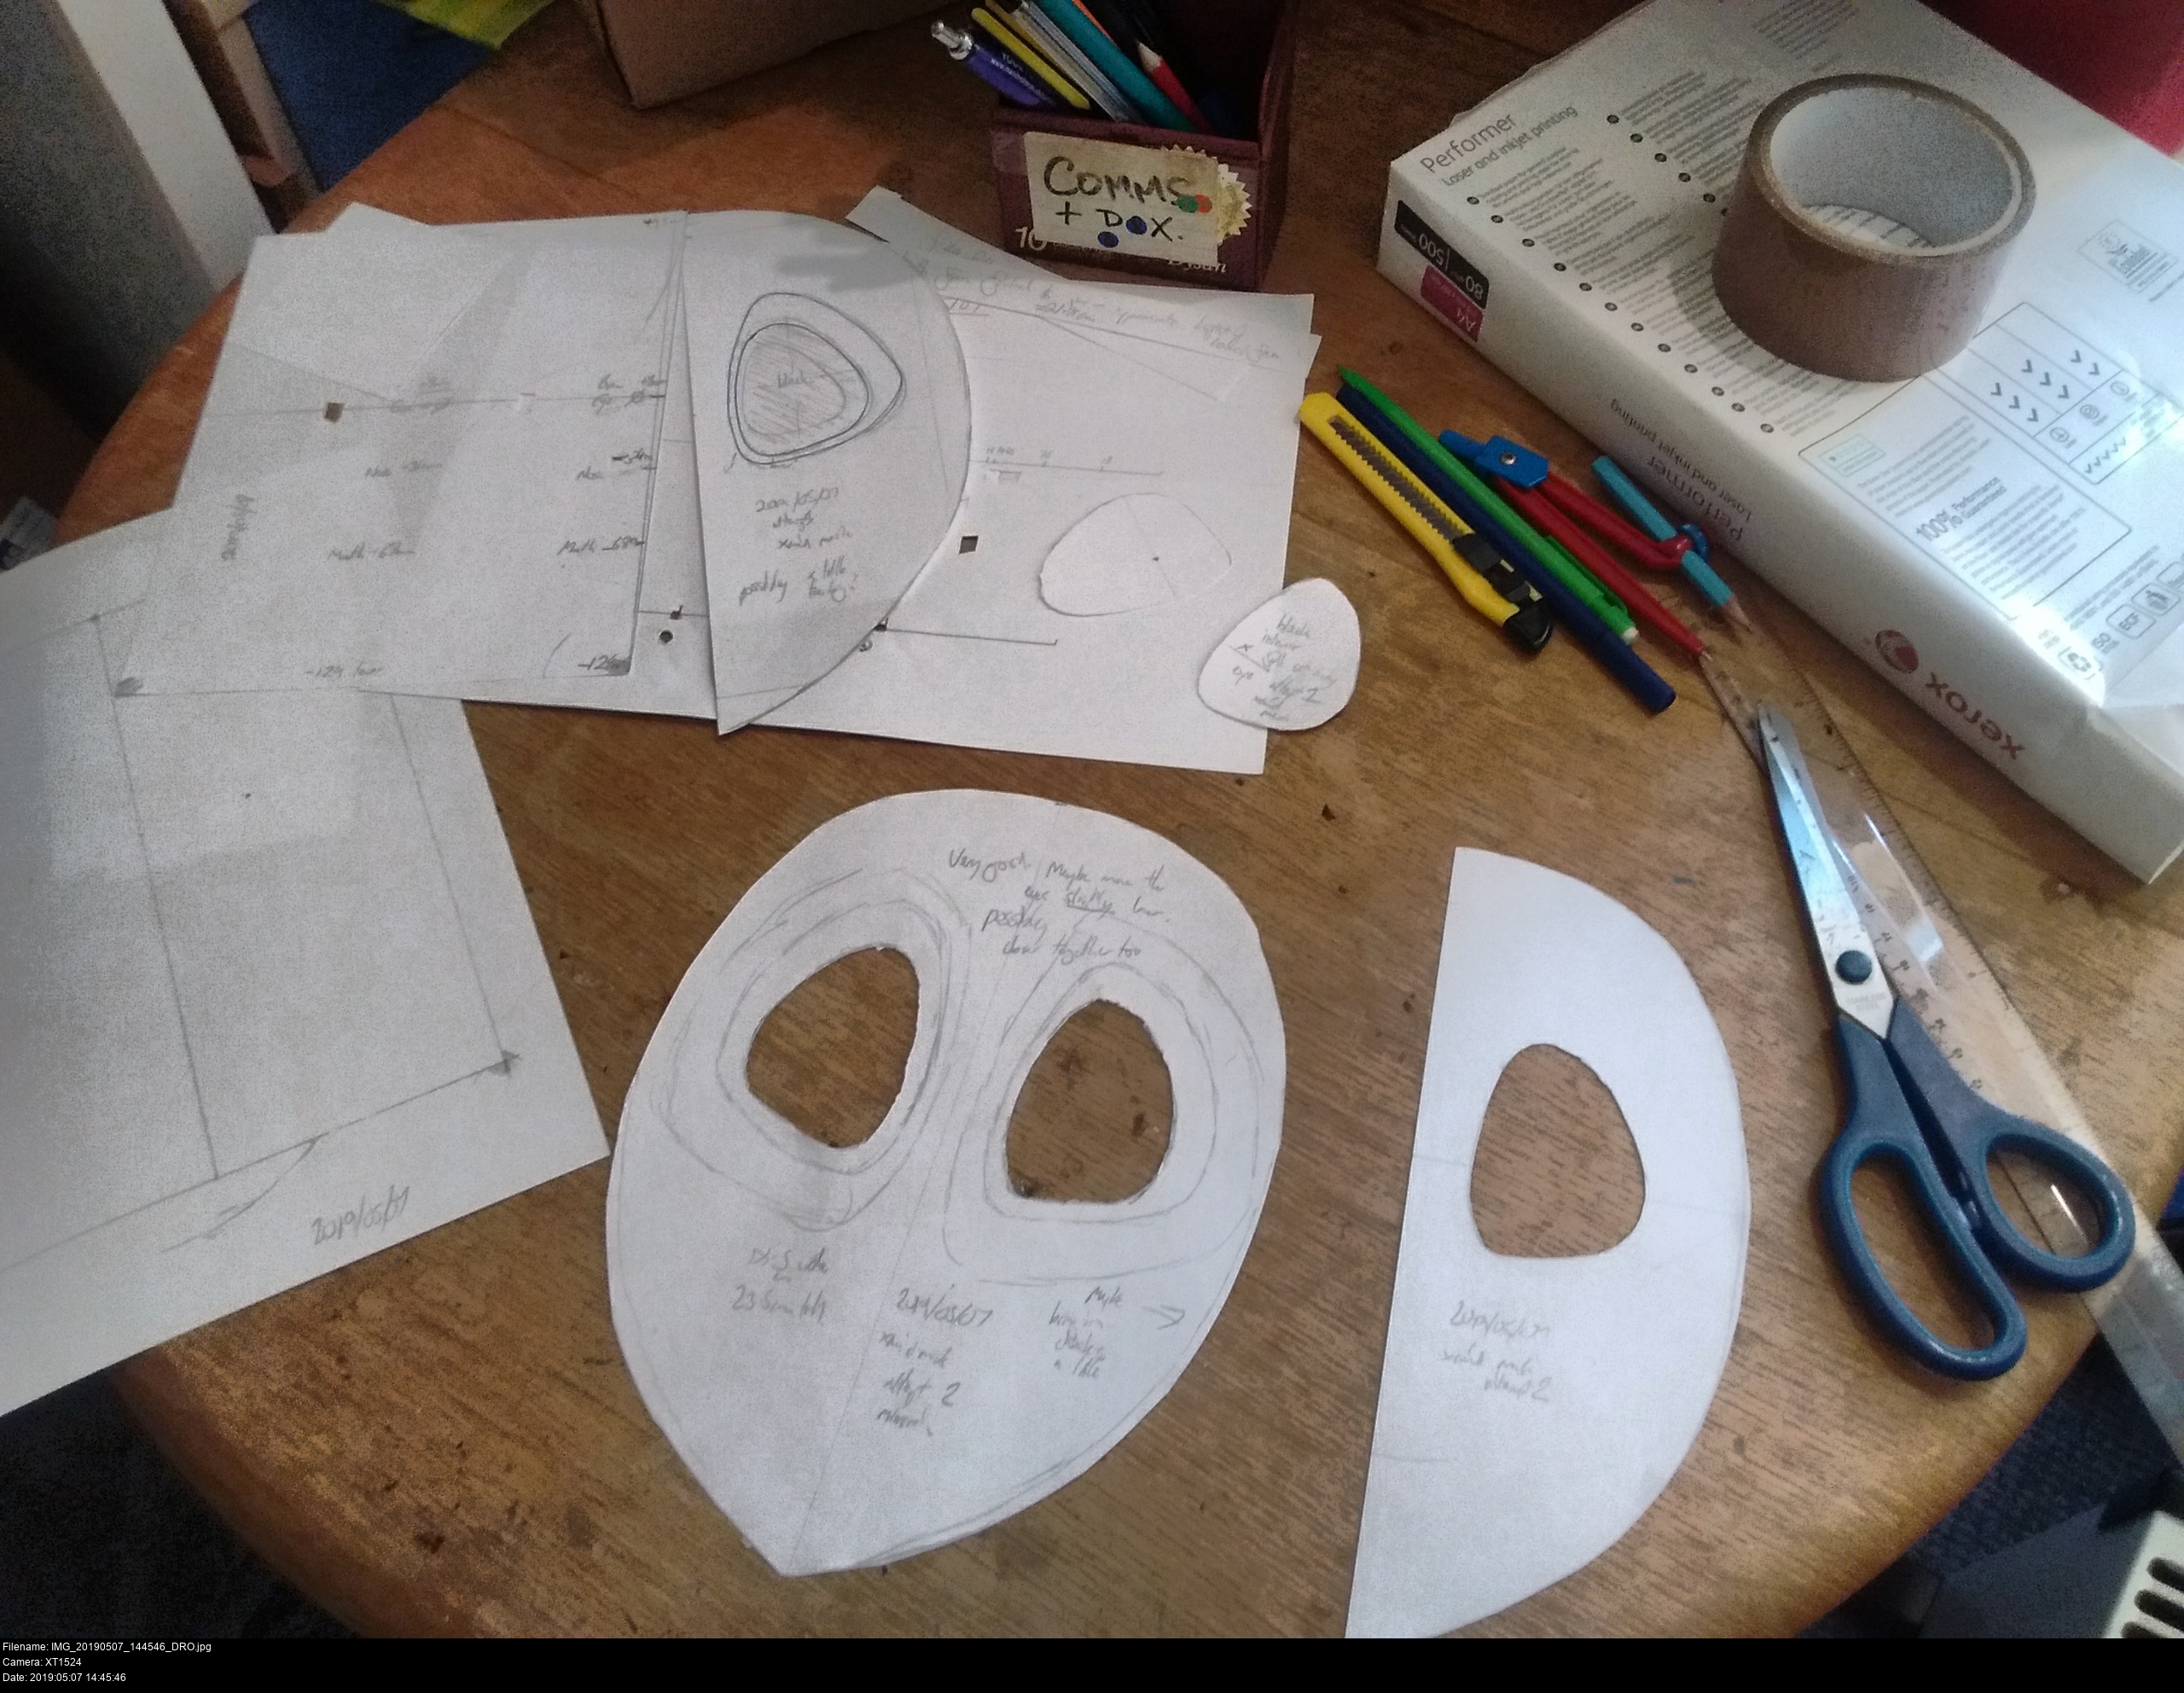
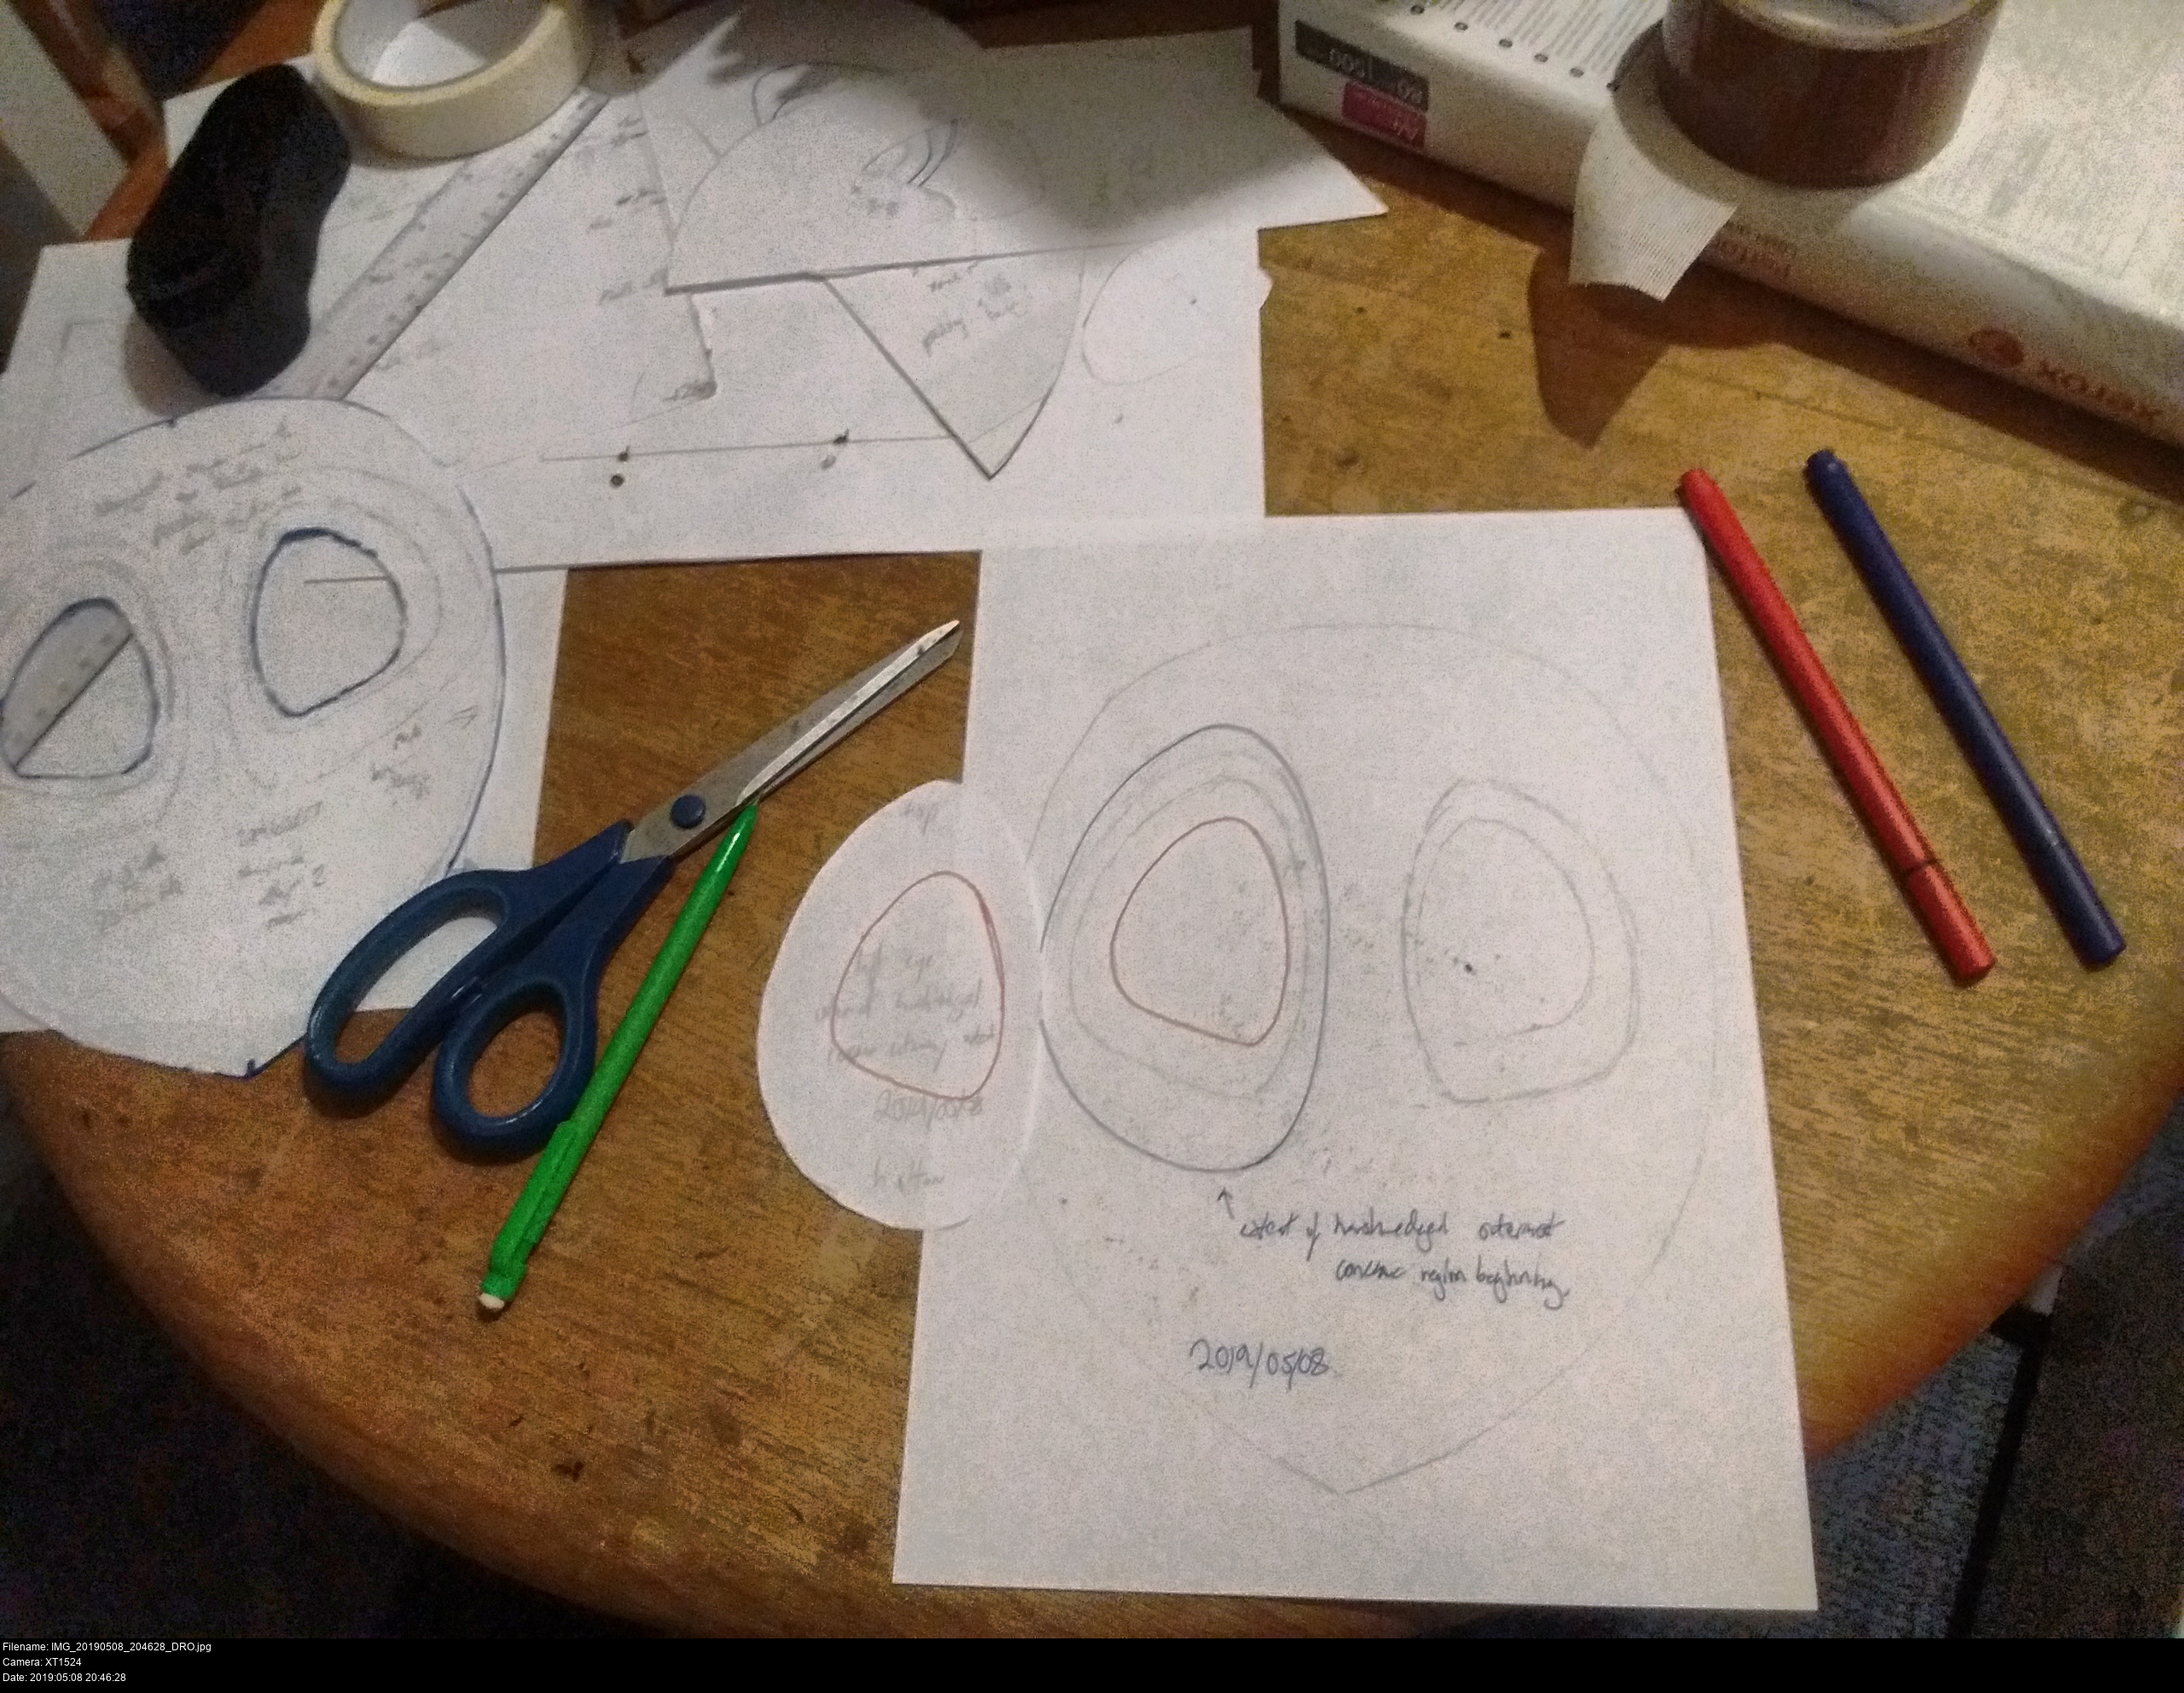
I had a few attempts at working out the shape and size of a teardrop mask that would completely obscure my face. Lots of test curves and mechanical pencil usage. I didn't use it here, but don't be shy about using squared paper if you have a firm mental image of the angles or proportions you want. It goes without saying that if you're trying to make something perfectly symmetrical, you should make a half-template and flip it instead of trying to do it completely freehand.
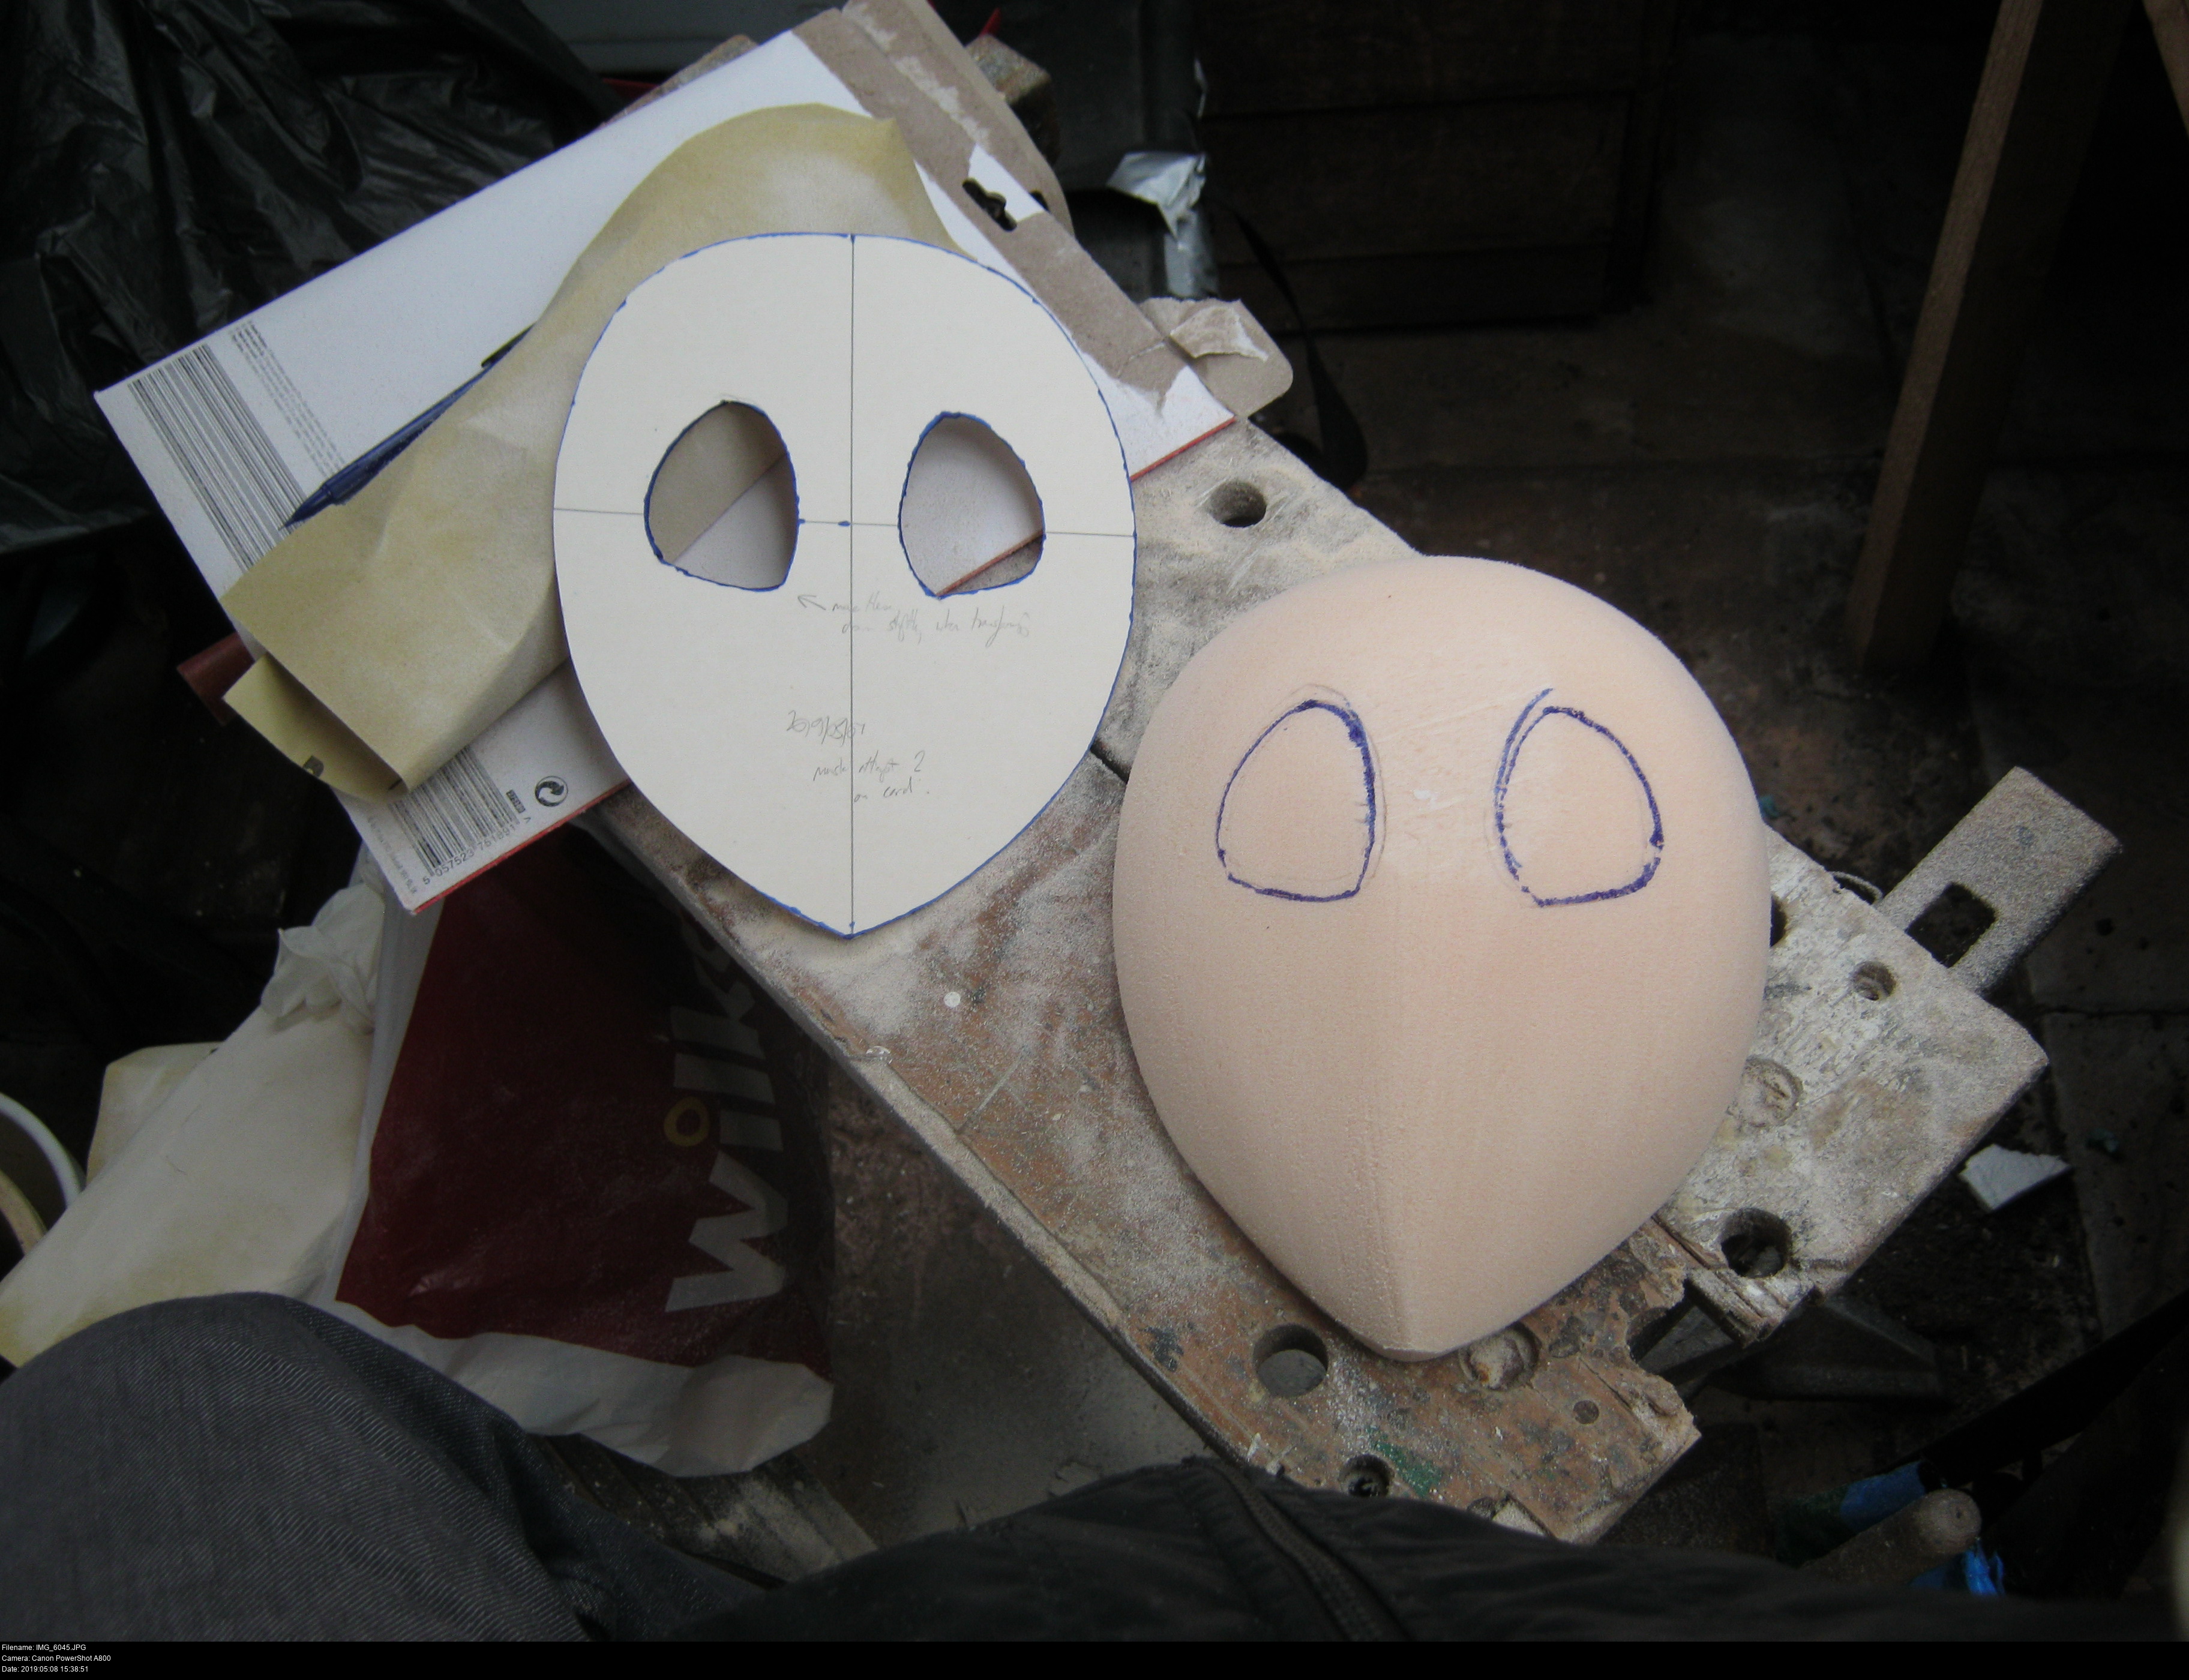
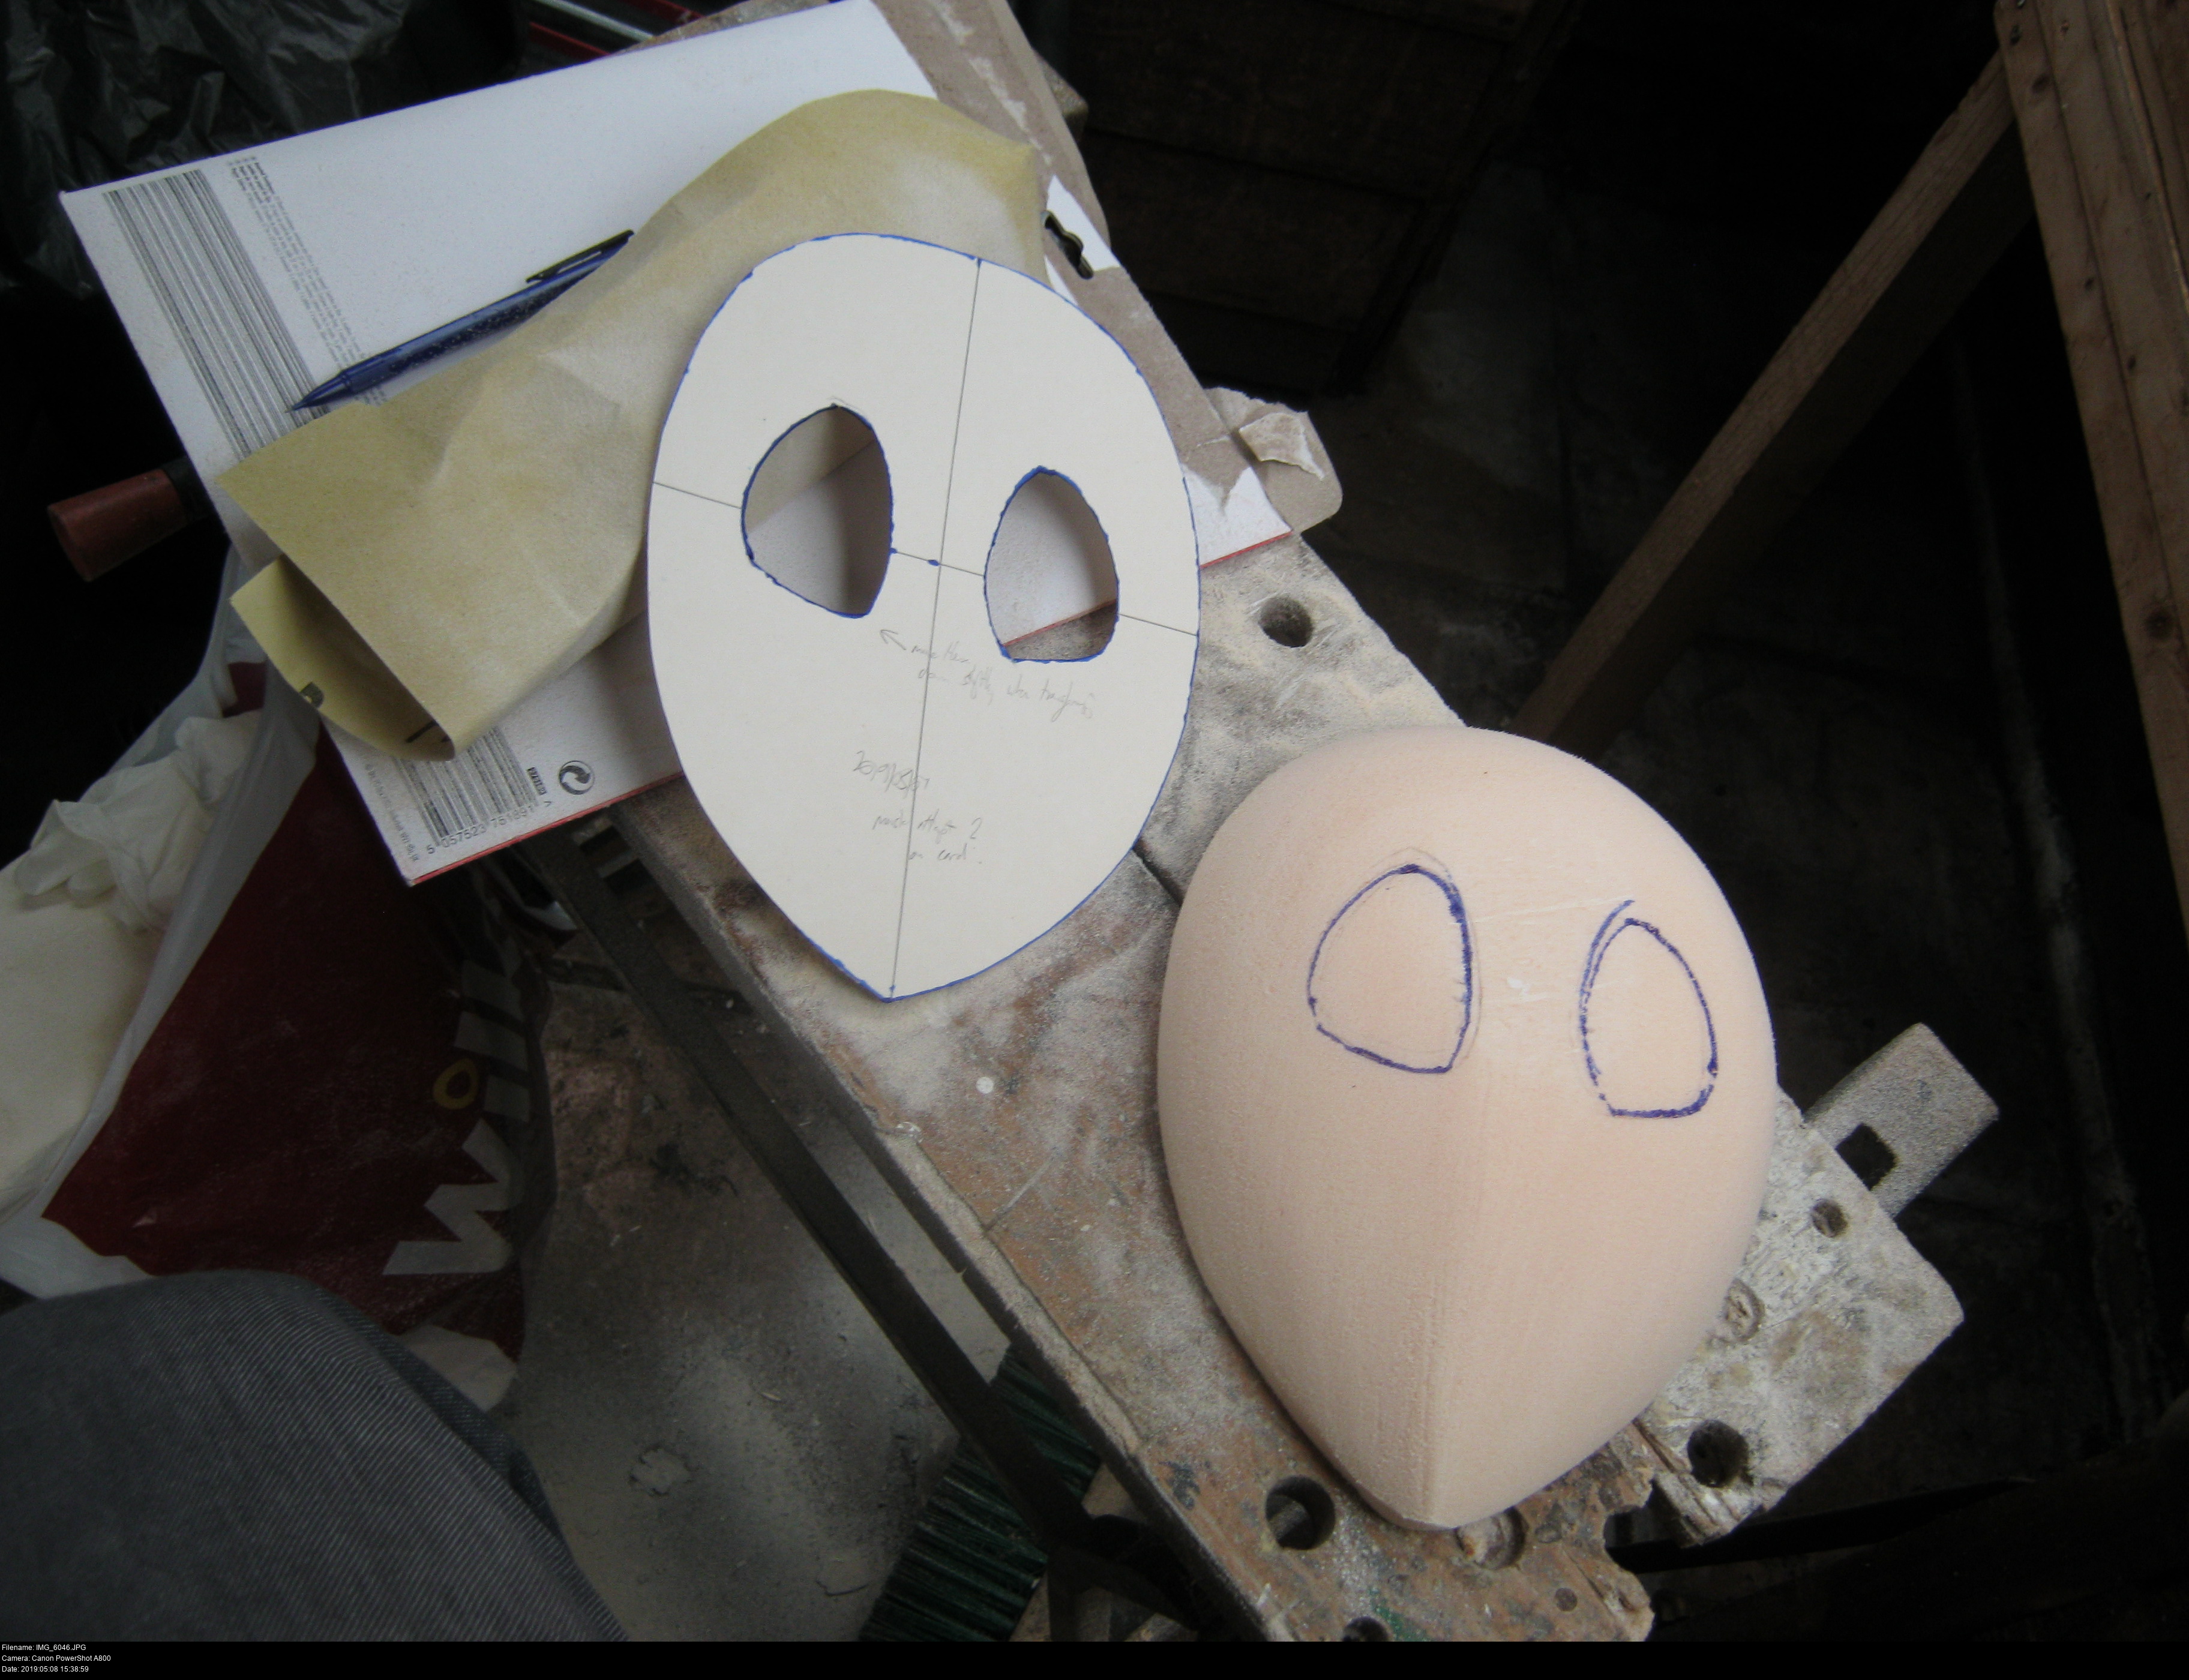
When I had a rectangle that would cover my face, I had to next make small holes for my eyes. I measured the distance between my eyes using the tool again first, just to be sure. To mark the mask's full eye locations, you first need the rectangle with small eye holes cut and test-wearable, so you've got something minimally functional to position your larger shapes around.
I had a few attempts at working out the shape and size of the mask's eyes based on the dimensions of my teardrop. It's possible to be exact here and work off one of the front-facing anime images (like I attempted with the large chequered vector image of Majora's Mask), but I wouldn't recommend it given that the mask is moulded to Akiyuki's face (so it ought to be moulded to your own), and he's not real (so you'd end up with a weird mess anyway). I think it would be best to wing it here, drawing shapes, testing them, cutting them out, holding them up. You also have to have more than a modicum of faith in your ability and the future, because a 3D object is going to look a lot different than a 2D projection on paper. You just have to wait and see.
There's lots of notes on my cut-outs here, telling me what revision I'm up to, what the piecce is supposed to be, and what changes I could or have made to it. I'll probably forget what these all mean next time I look in the Xam'd patterns envelope, but I tried!
The eye shapes are a combination of the shapes I saw in all the different images:


I made the bottom diagonal edge of the eye more or less straight, the interior edge more or less vertical and completed the shape with a large smooth arch. The final shape is a lot closer to the very first appearance of the mask where it pops onto Akiyuki's face, mostly because that was how I'd visualised the mask up to this point (I hadn't seen any clips of the later episodes yet; a rookie mistake, but unimportant!). I also considered that straight surfaces would be easier to consistently reproduce by hand. Later, the mask is drawn with the eyes almost vertically symmetrical.
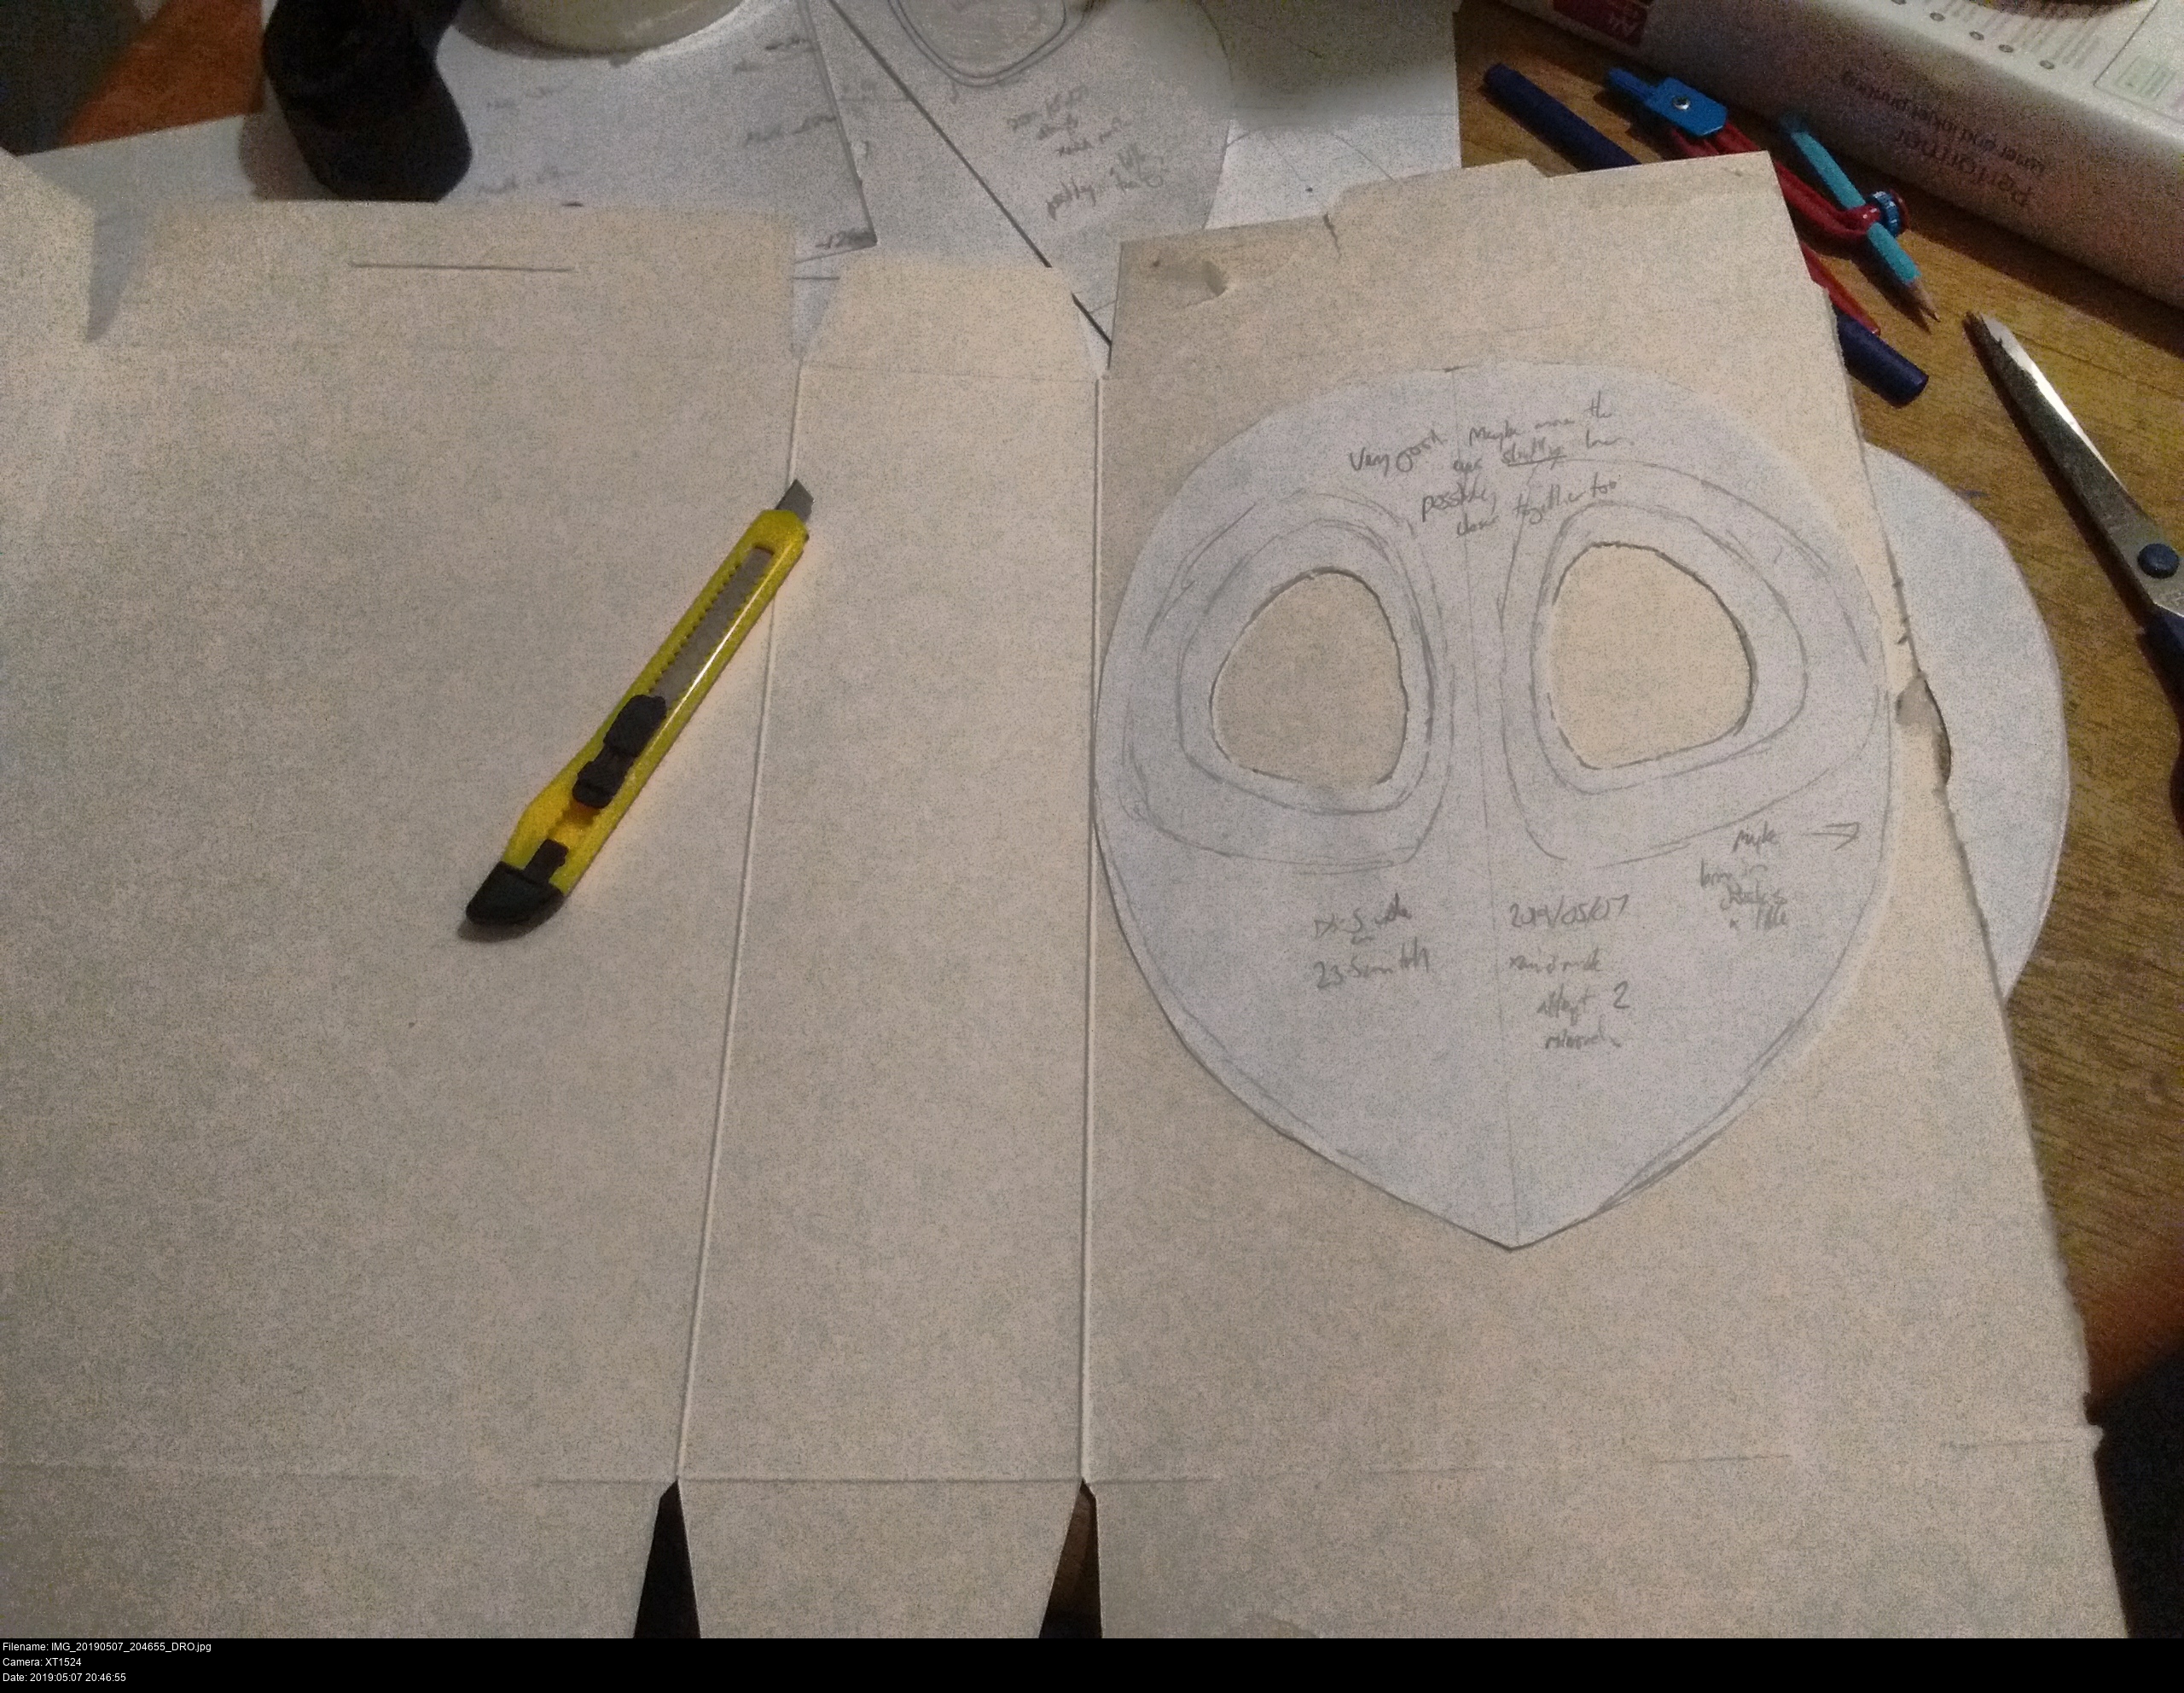
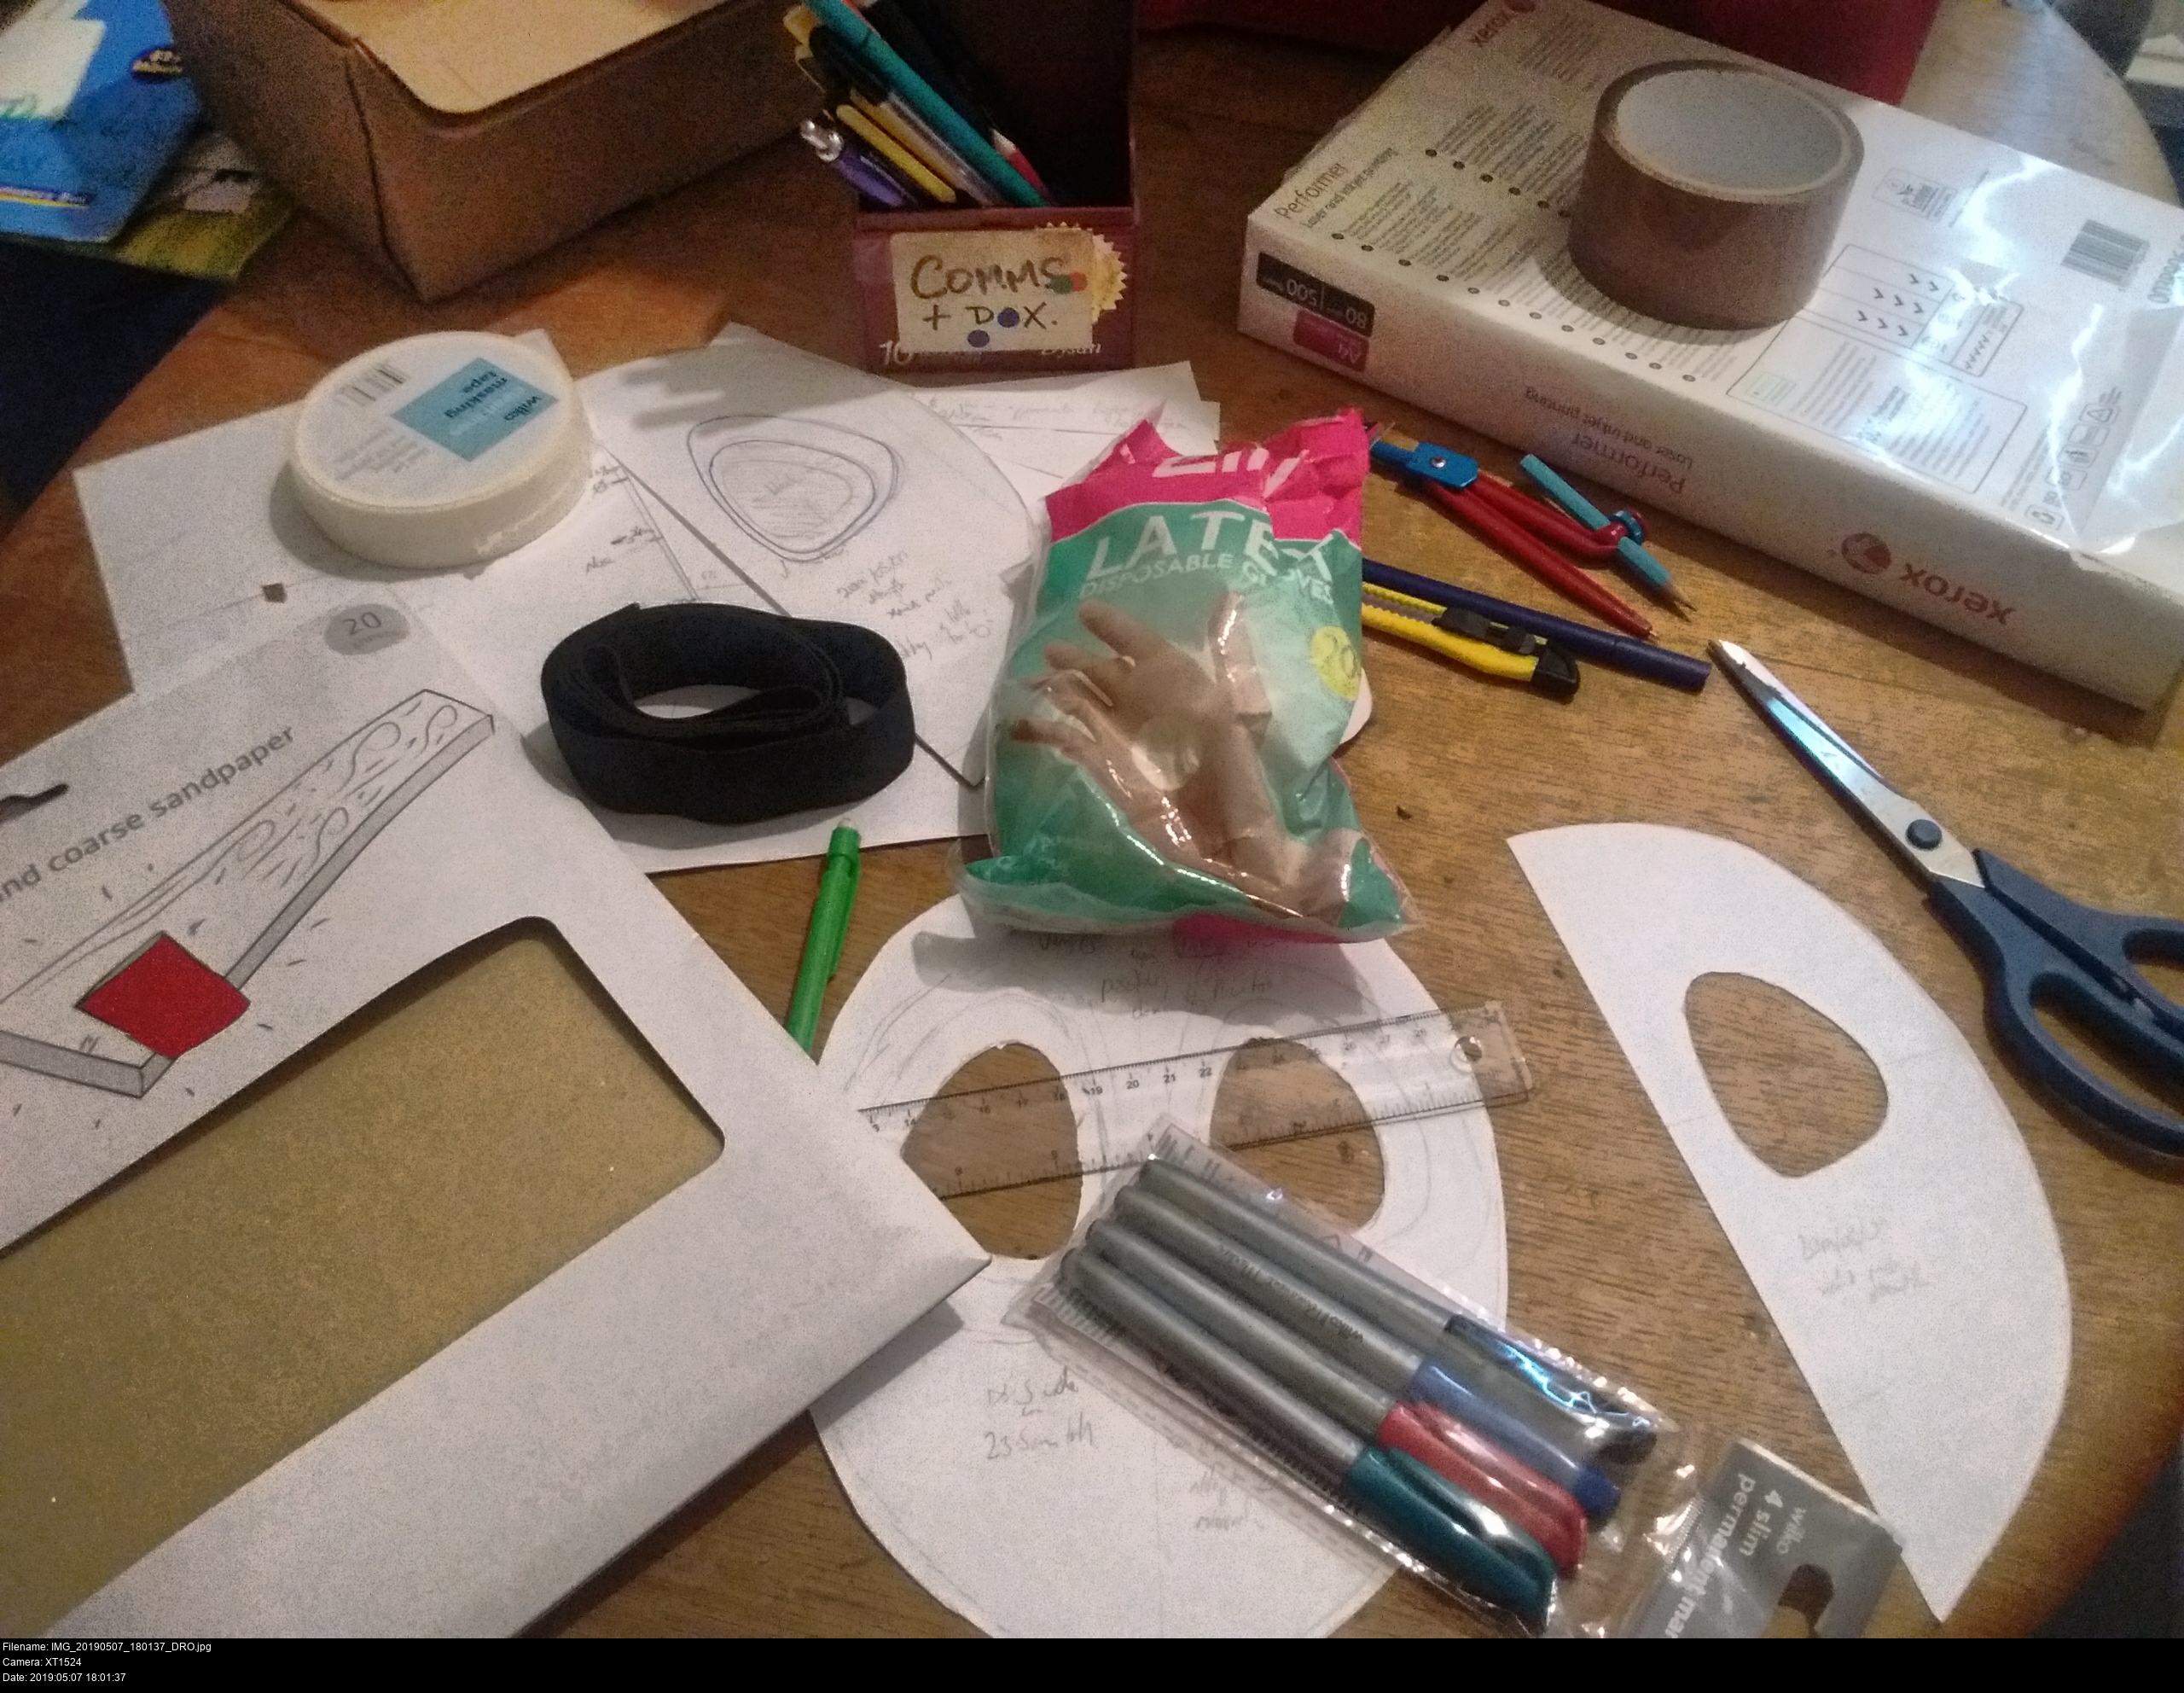
With all the designs all laid out on paper, it's time to transfer it to some cereal box card courtesy of the Cereal Cookie lynx. On this paper template, you can see I've suggested to myself that I should bring the cheeks inwards.
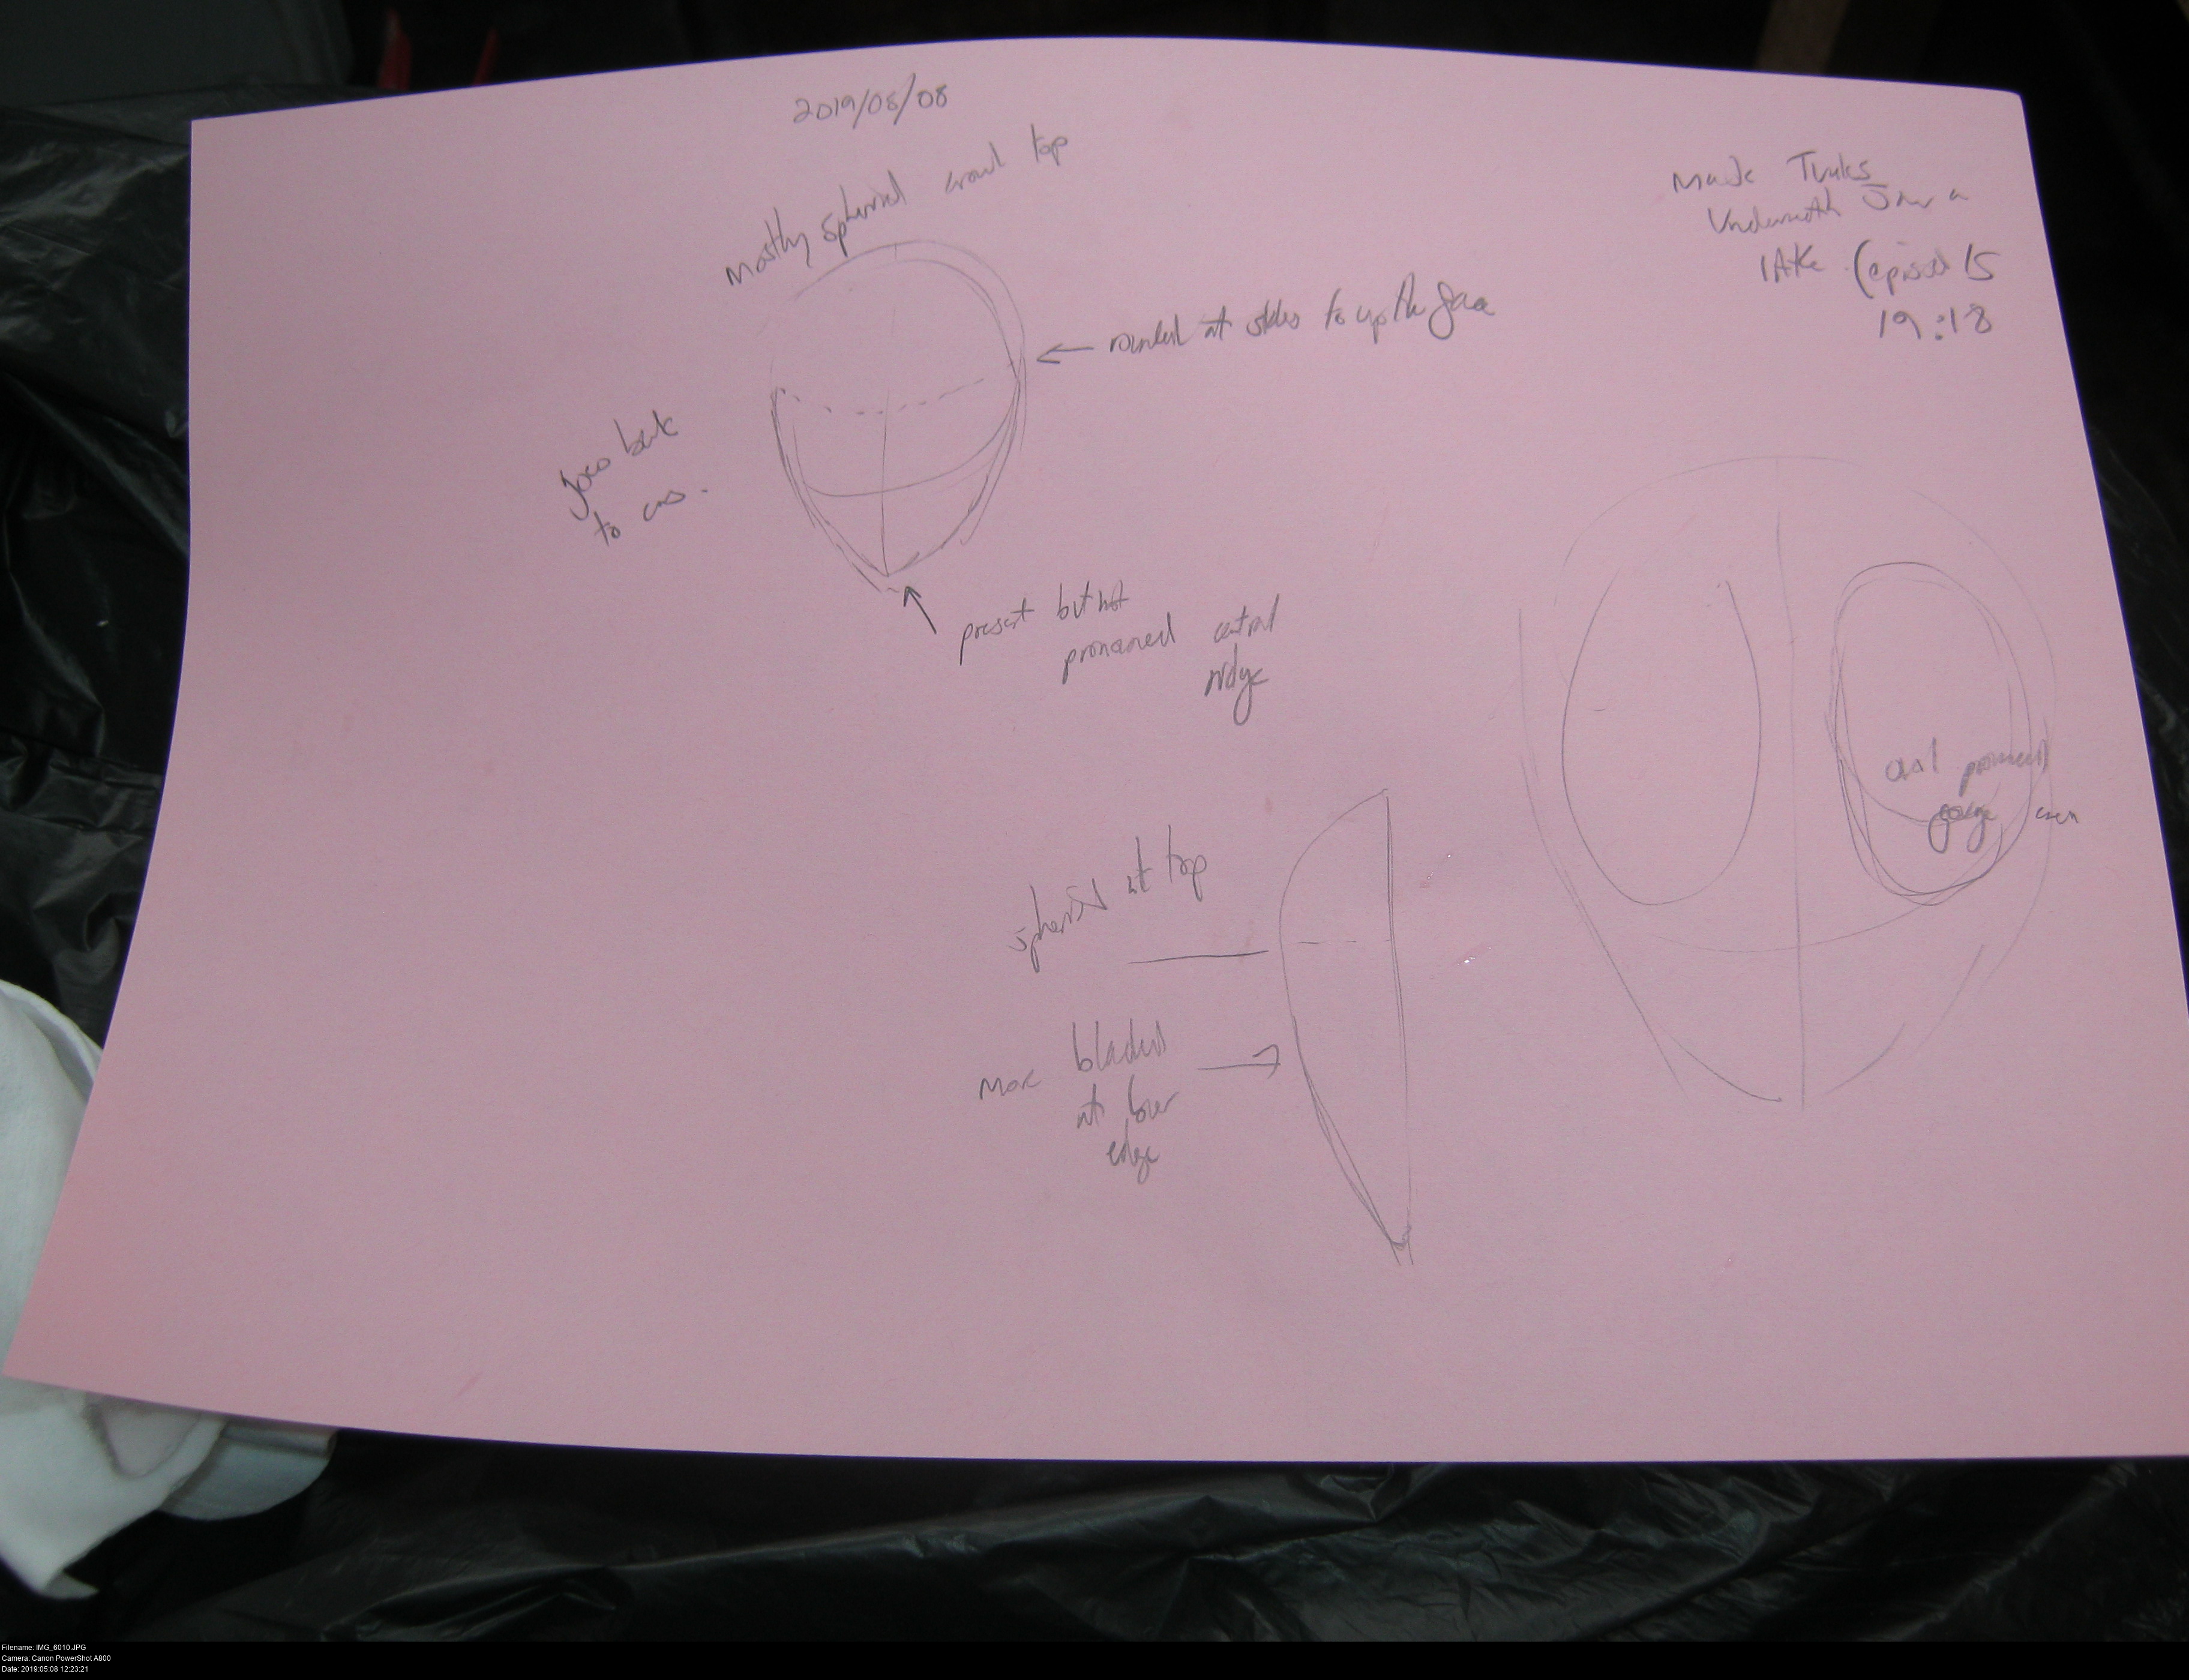
Before attempting to sculpt any shape, it's a fine idea to get a piece of paper and try to draw what you think the shape is supposed to look like. If you can't draw it, you probably can't sculpt it very well. Here's the teardrop shape with the hemispherical forehead, smooth cheeks curving down forwards like a leaf, raised sharp beak and pointed chin.
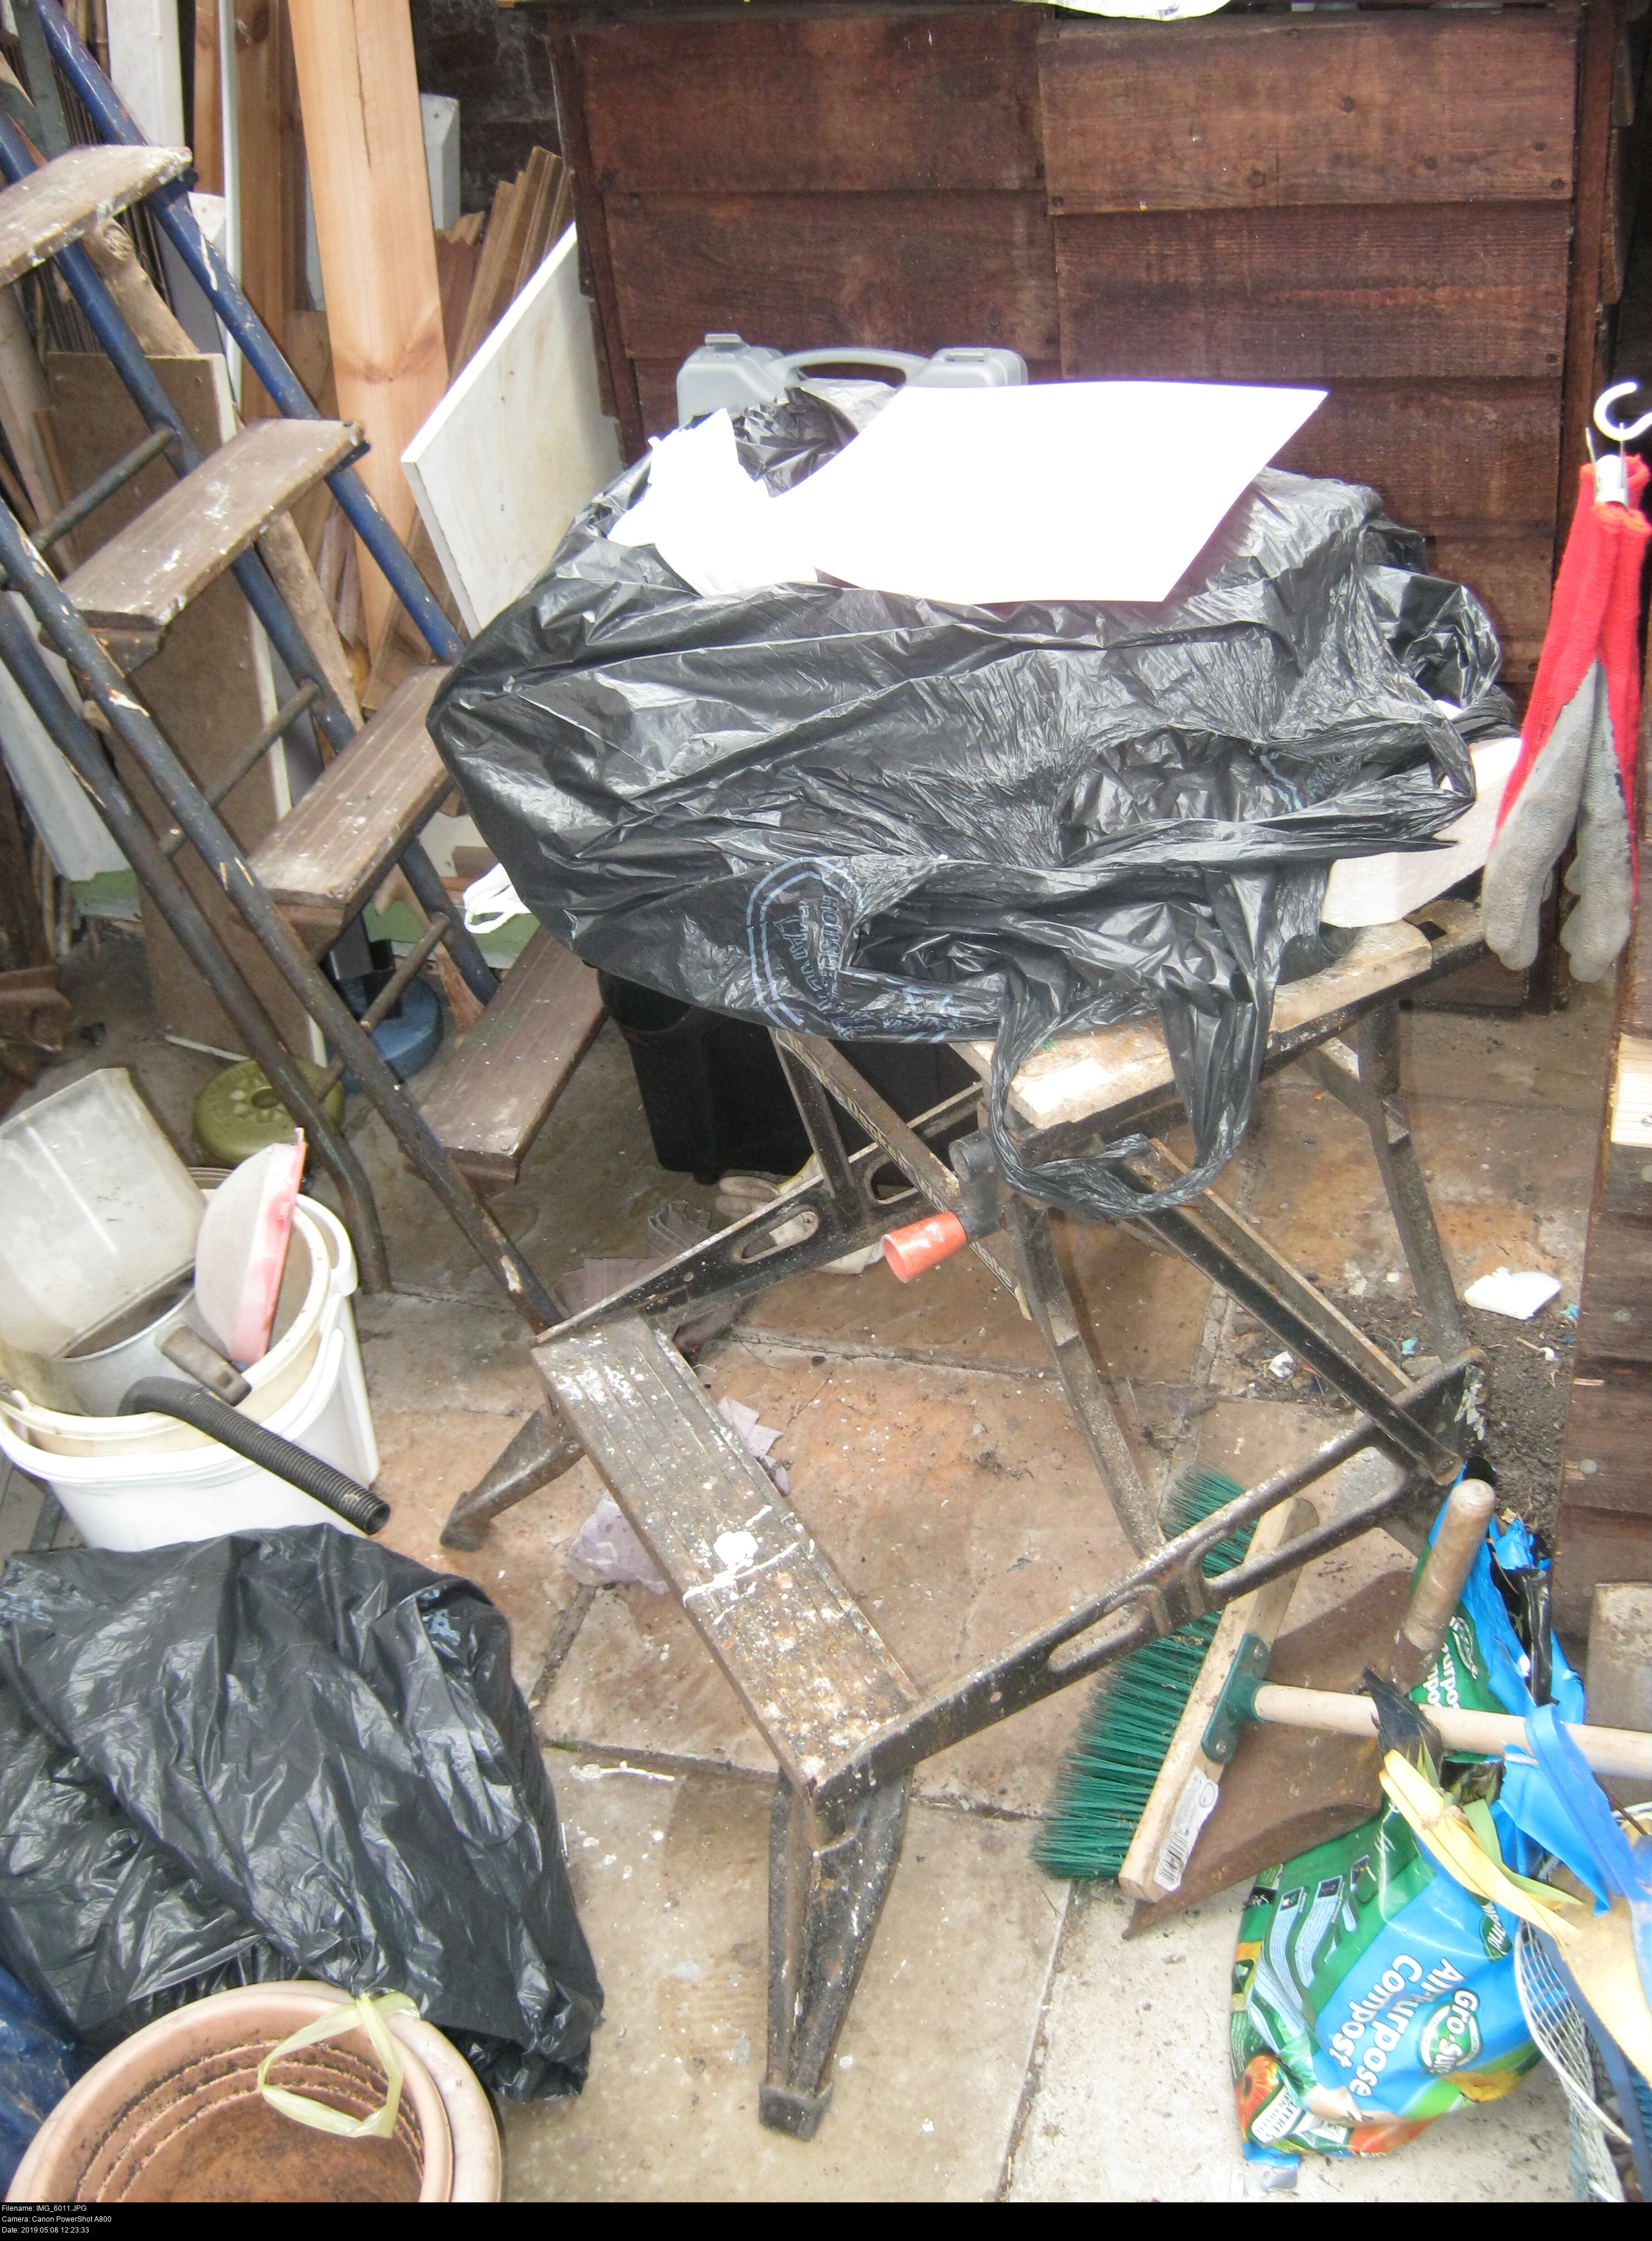
Oh, right. I hate my shed with a passion, don't I? Well I've got eight days to do this so I can either whine or I can do it. There's no pointy cones to make this time, just one single block of maskitude, so let's get to it.
You'll need a sturdy table, preferably an adjustable workbench, vices, duct tape, a permanent marker, and lots and lots of extendable disposable knives, since we're bringing out the XPS foam!
Where is my material?
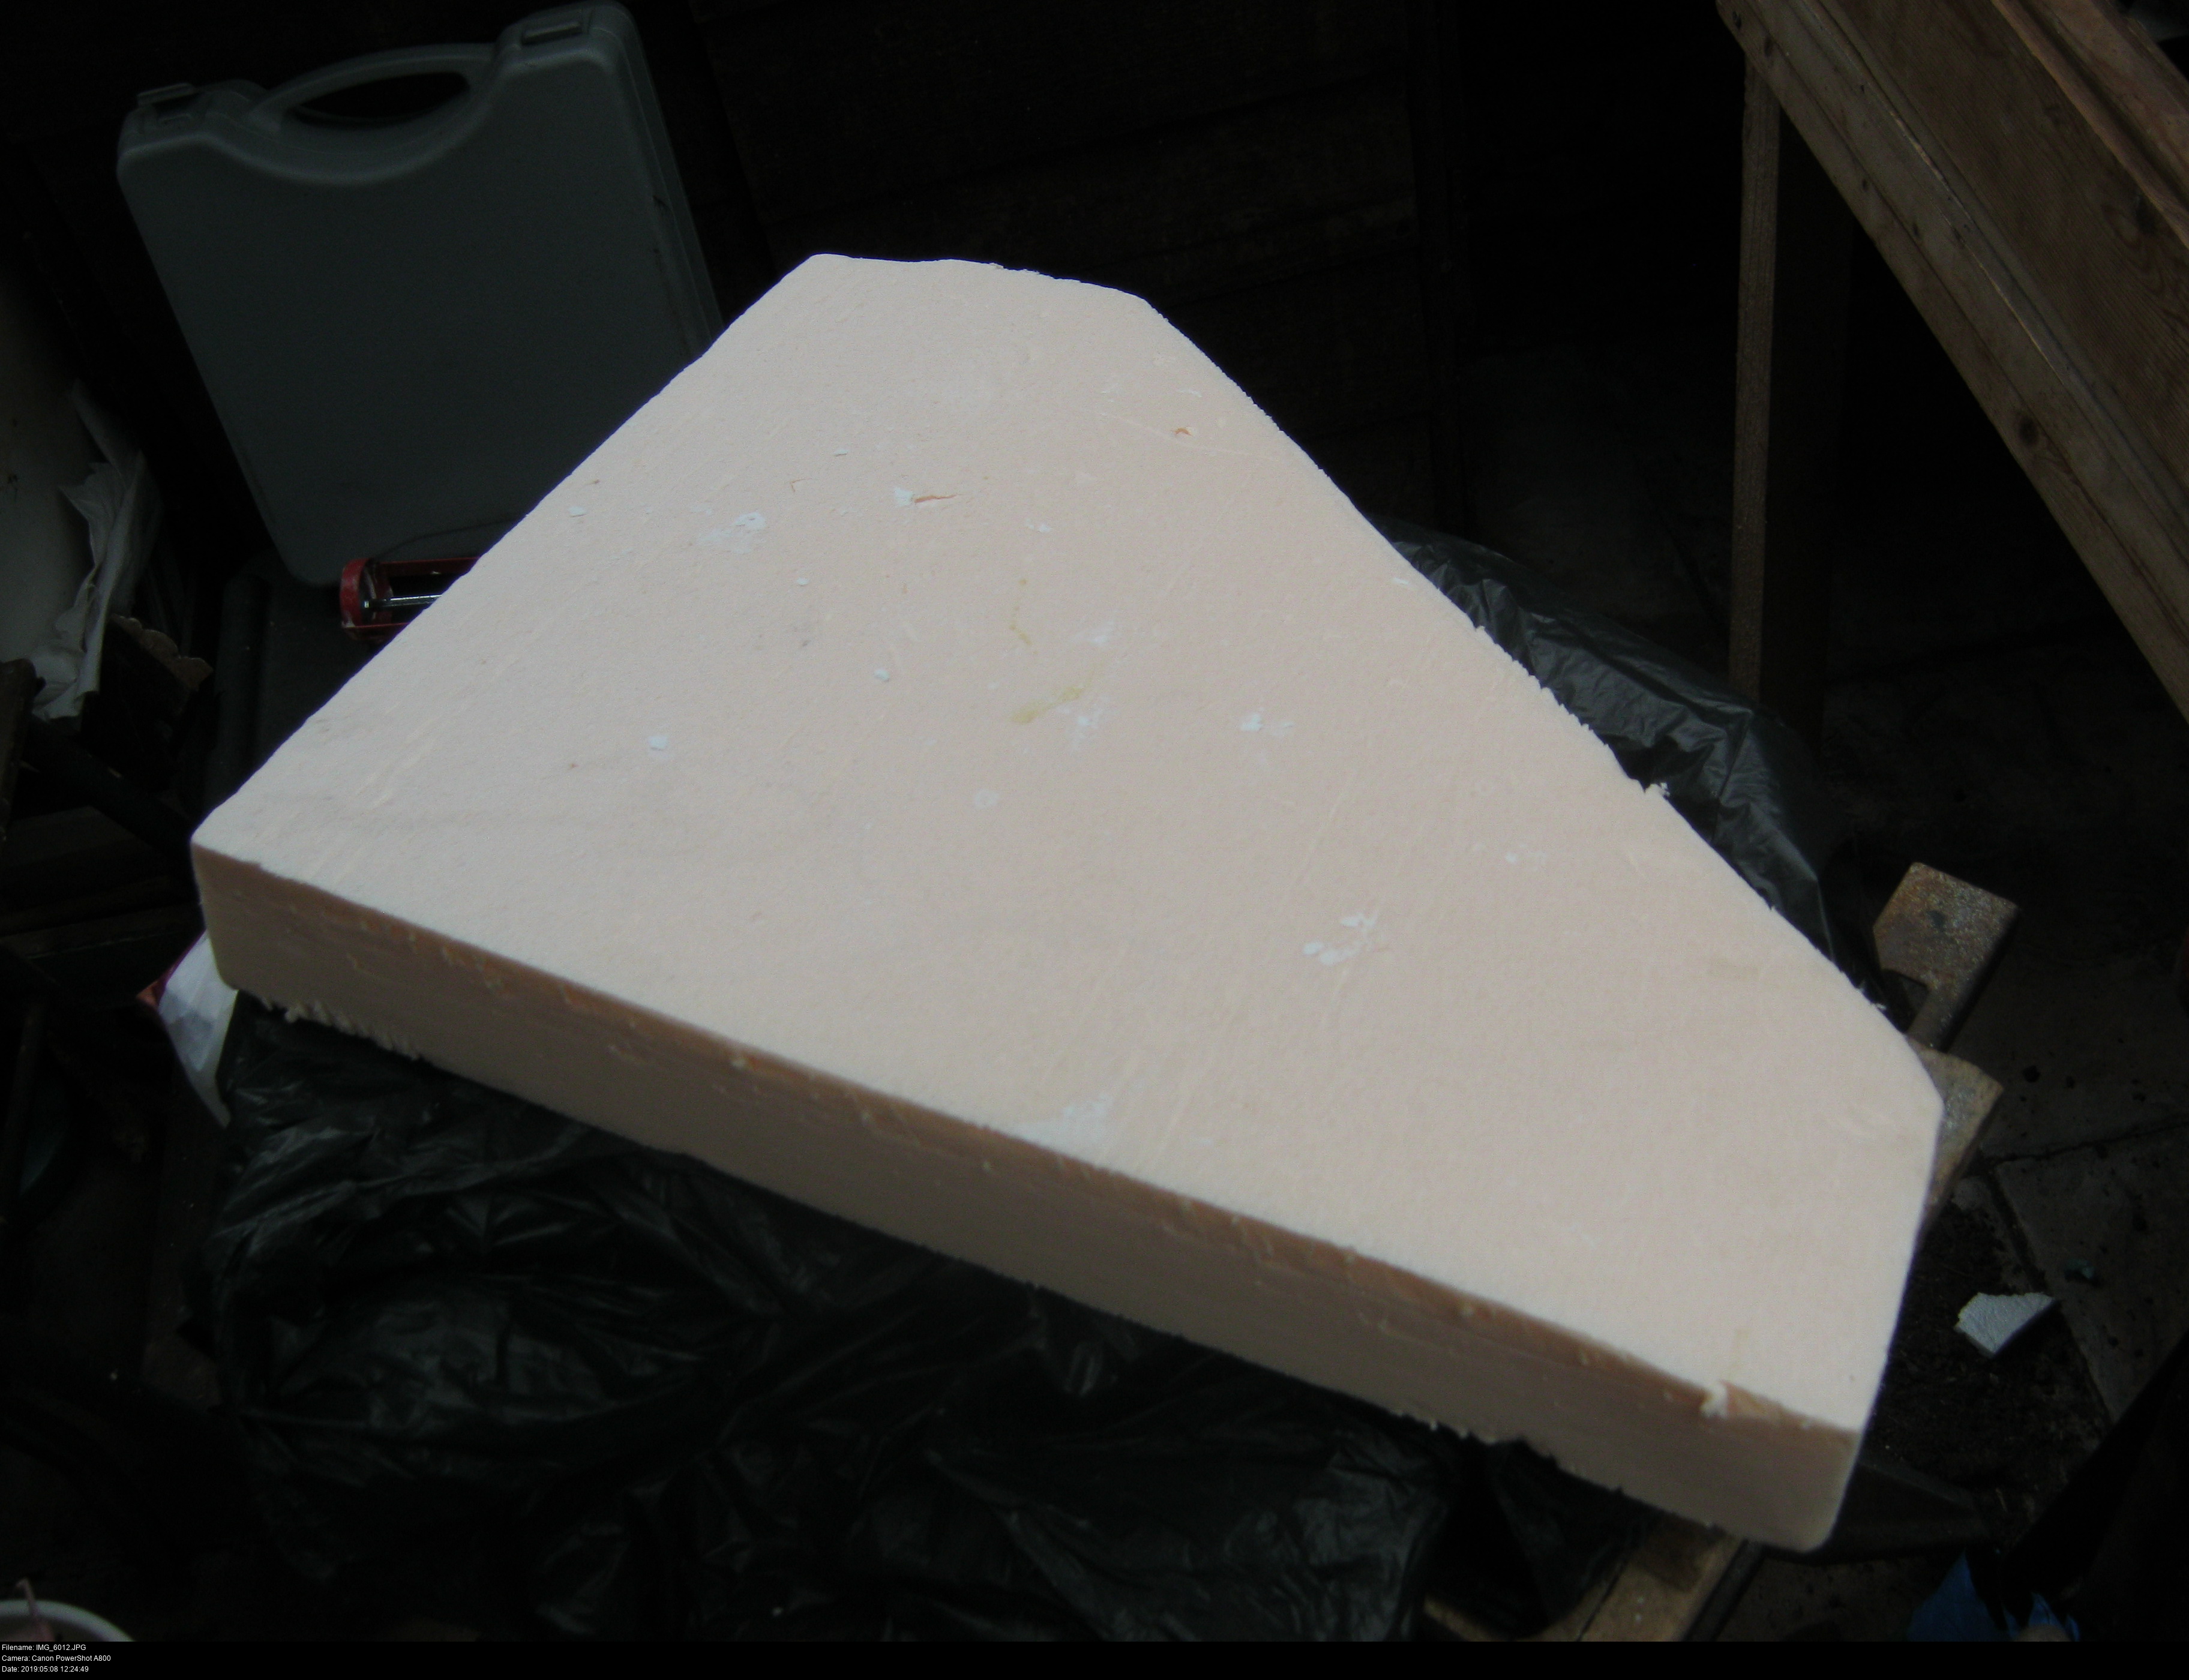

There she blows. This is the same piece of XPS that I bought near the end of making my first Majora's Mask in order to create some resilient horn cones. It's also the same piece I used to make the entire second Majora's Mask. It's lasted!
It also means that it's at least three years old, and had spent two of those in a black bag in the bike-shed. It's been used as a work surface, cutting surface, been dusted with plaster powder, and had glue dripped on it. You might question the wisdom of turning this into something that's designed to be worn against my face. And you'd be right. But it's what I have, and it's what I have -now-.
Since this place makes me feel ill (even before the sanding), and I don't want my hands to get cut up or dried out from foam dust, I'm going to be changing into a new pair of disposable gloves whenever I need to. I shouldn't even be taking my camera out here to take these pictures, but there's no other way.
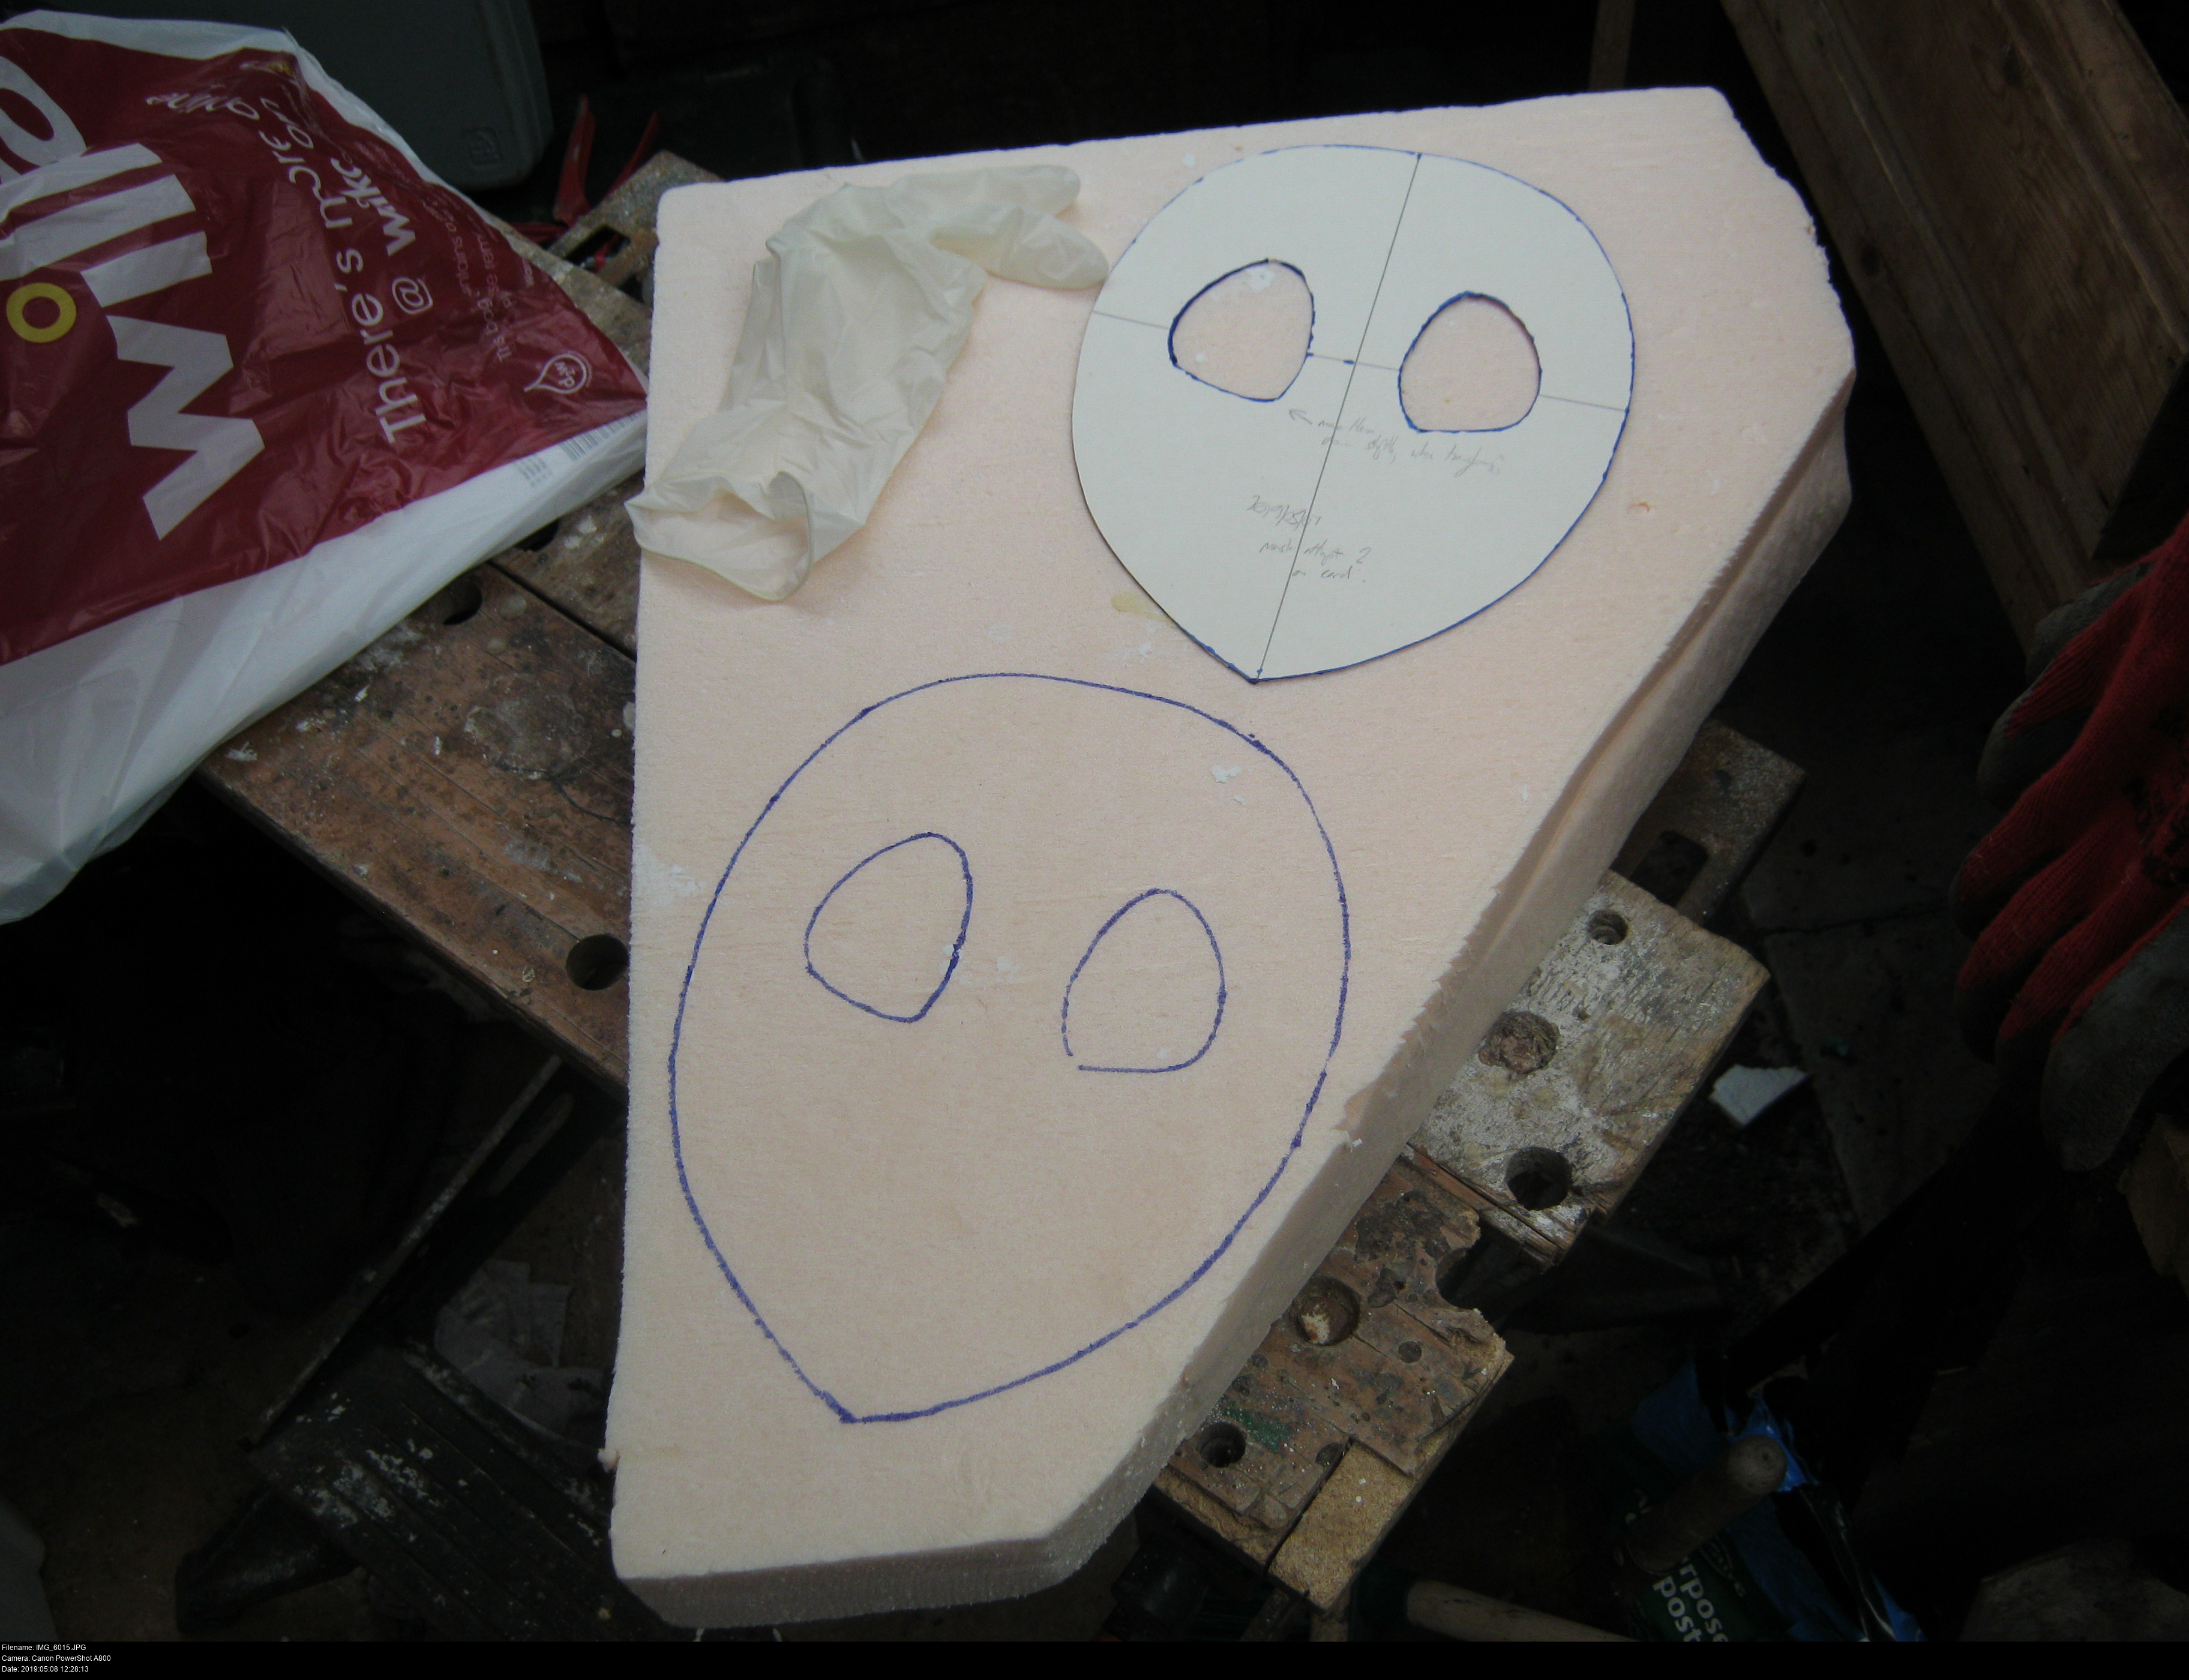
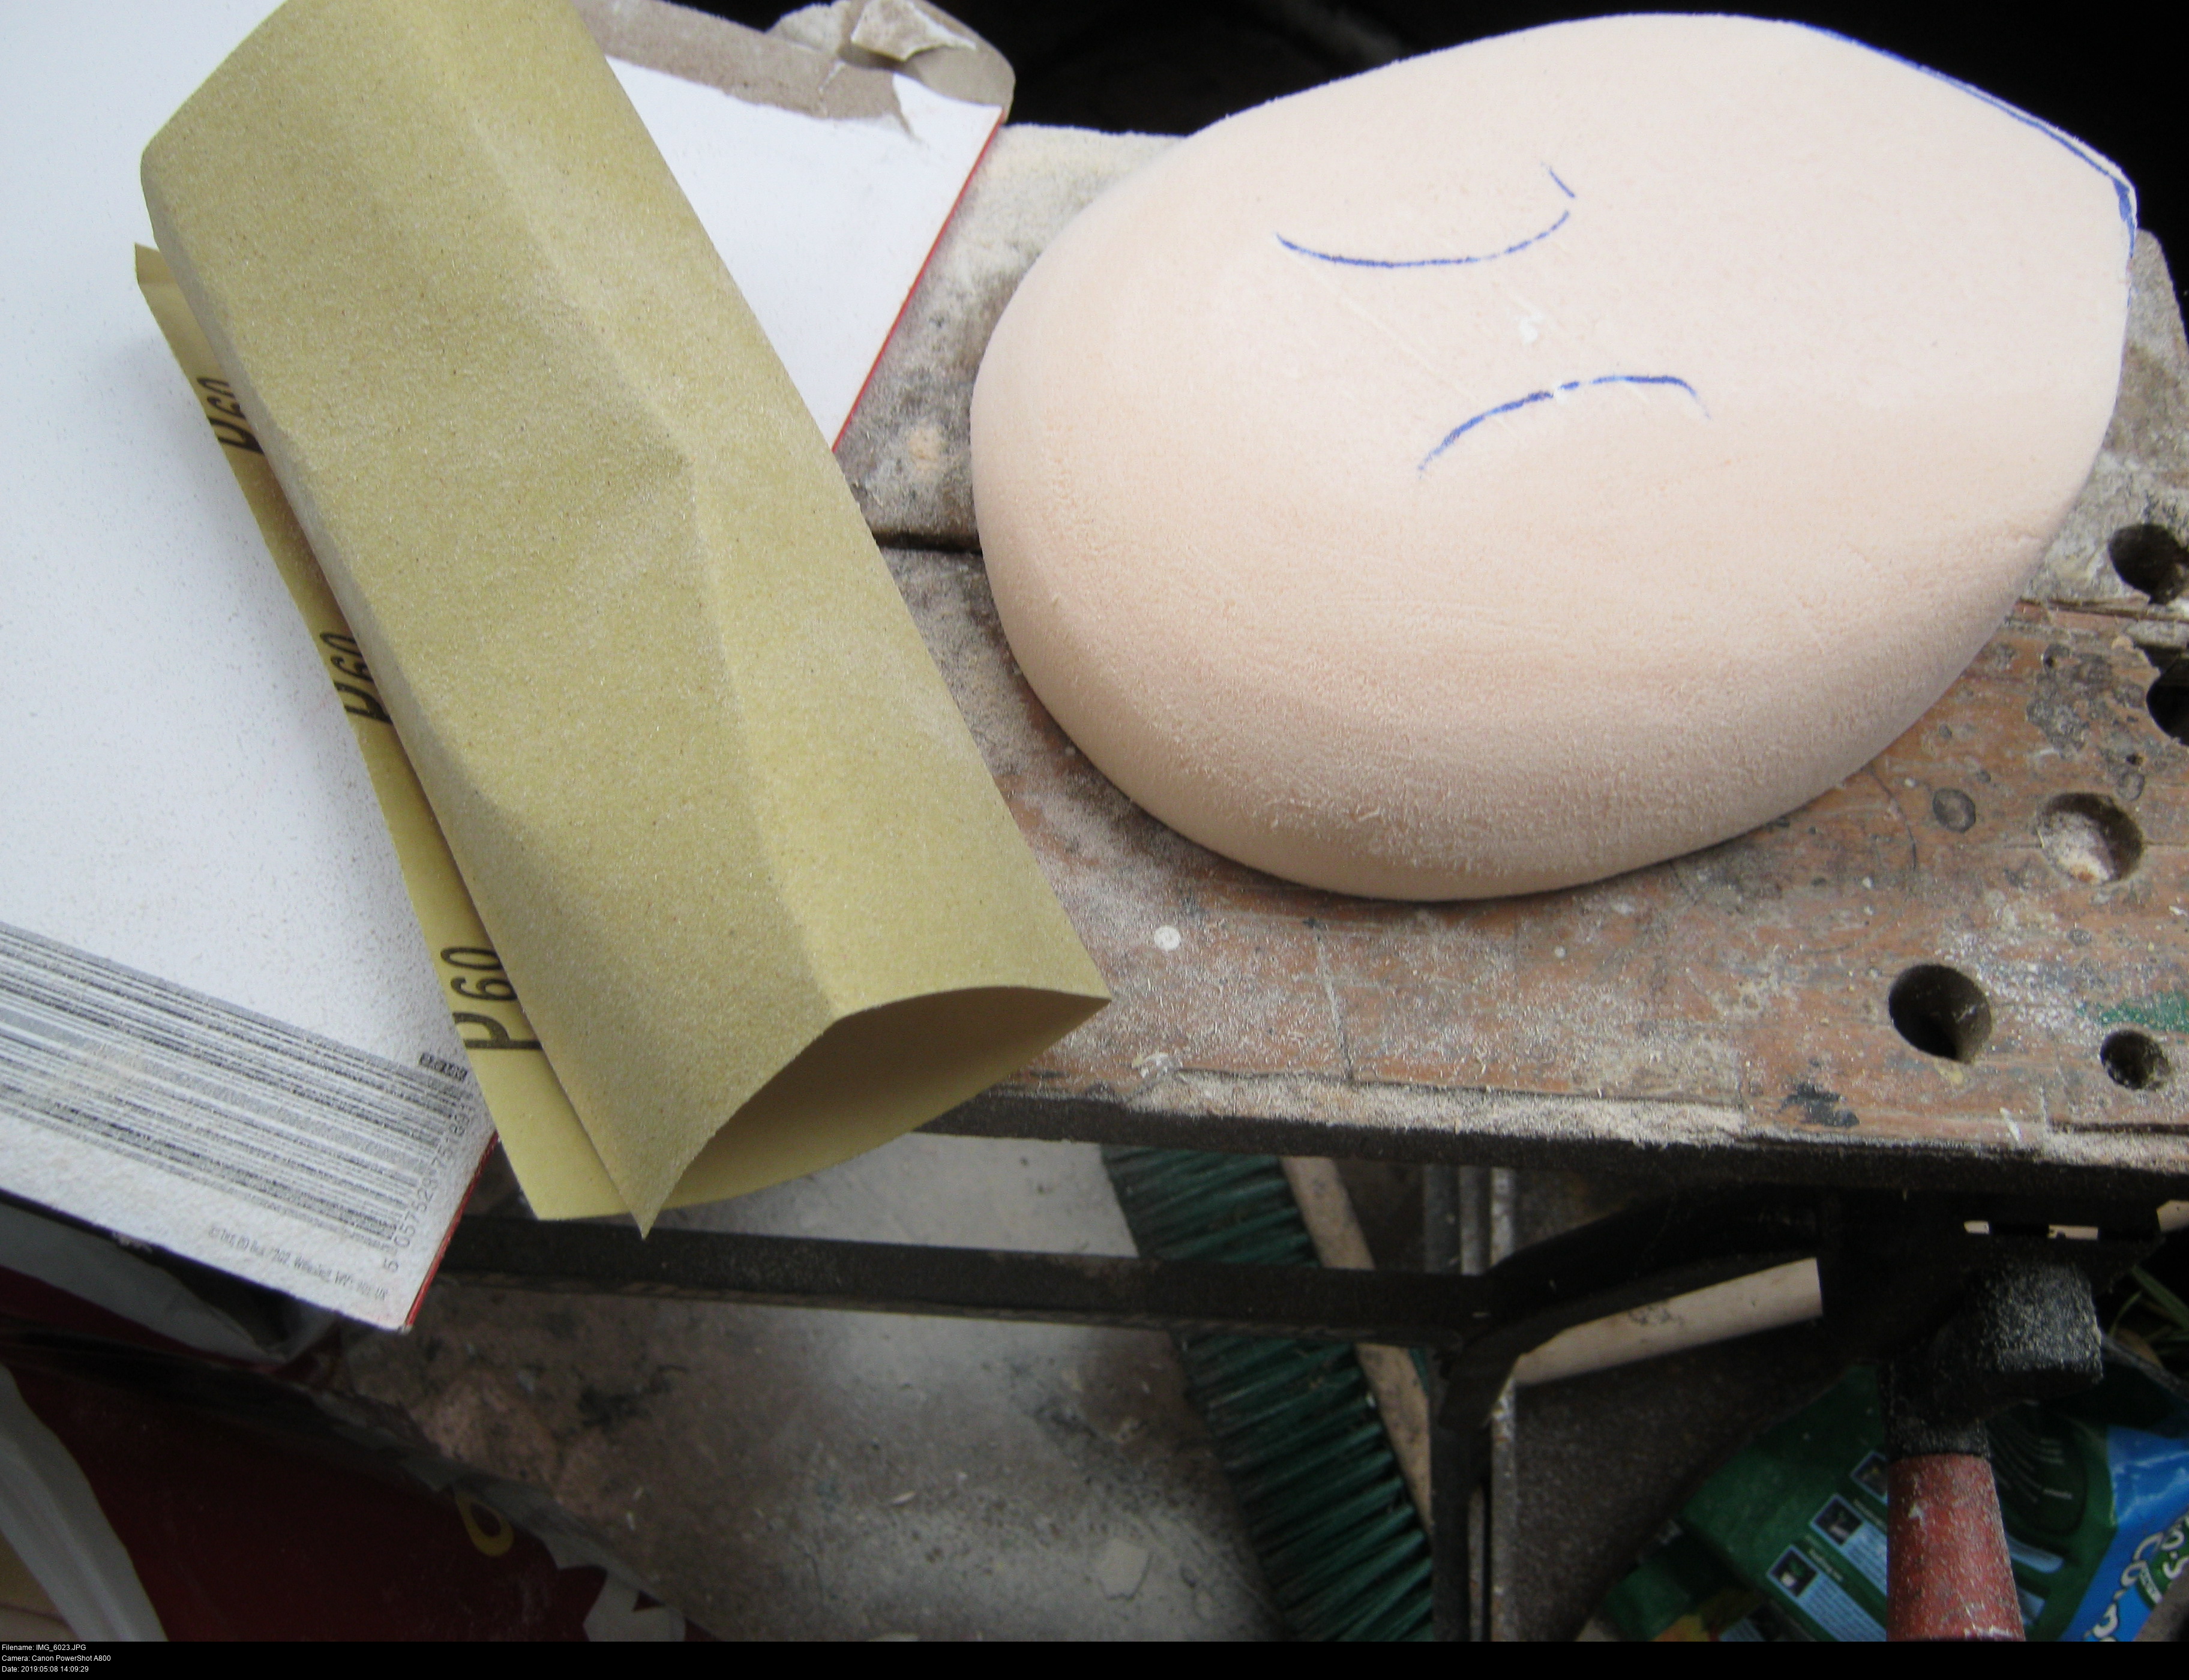
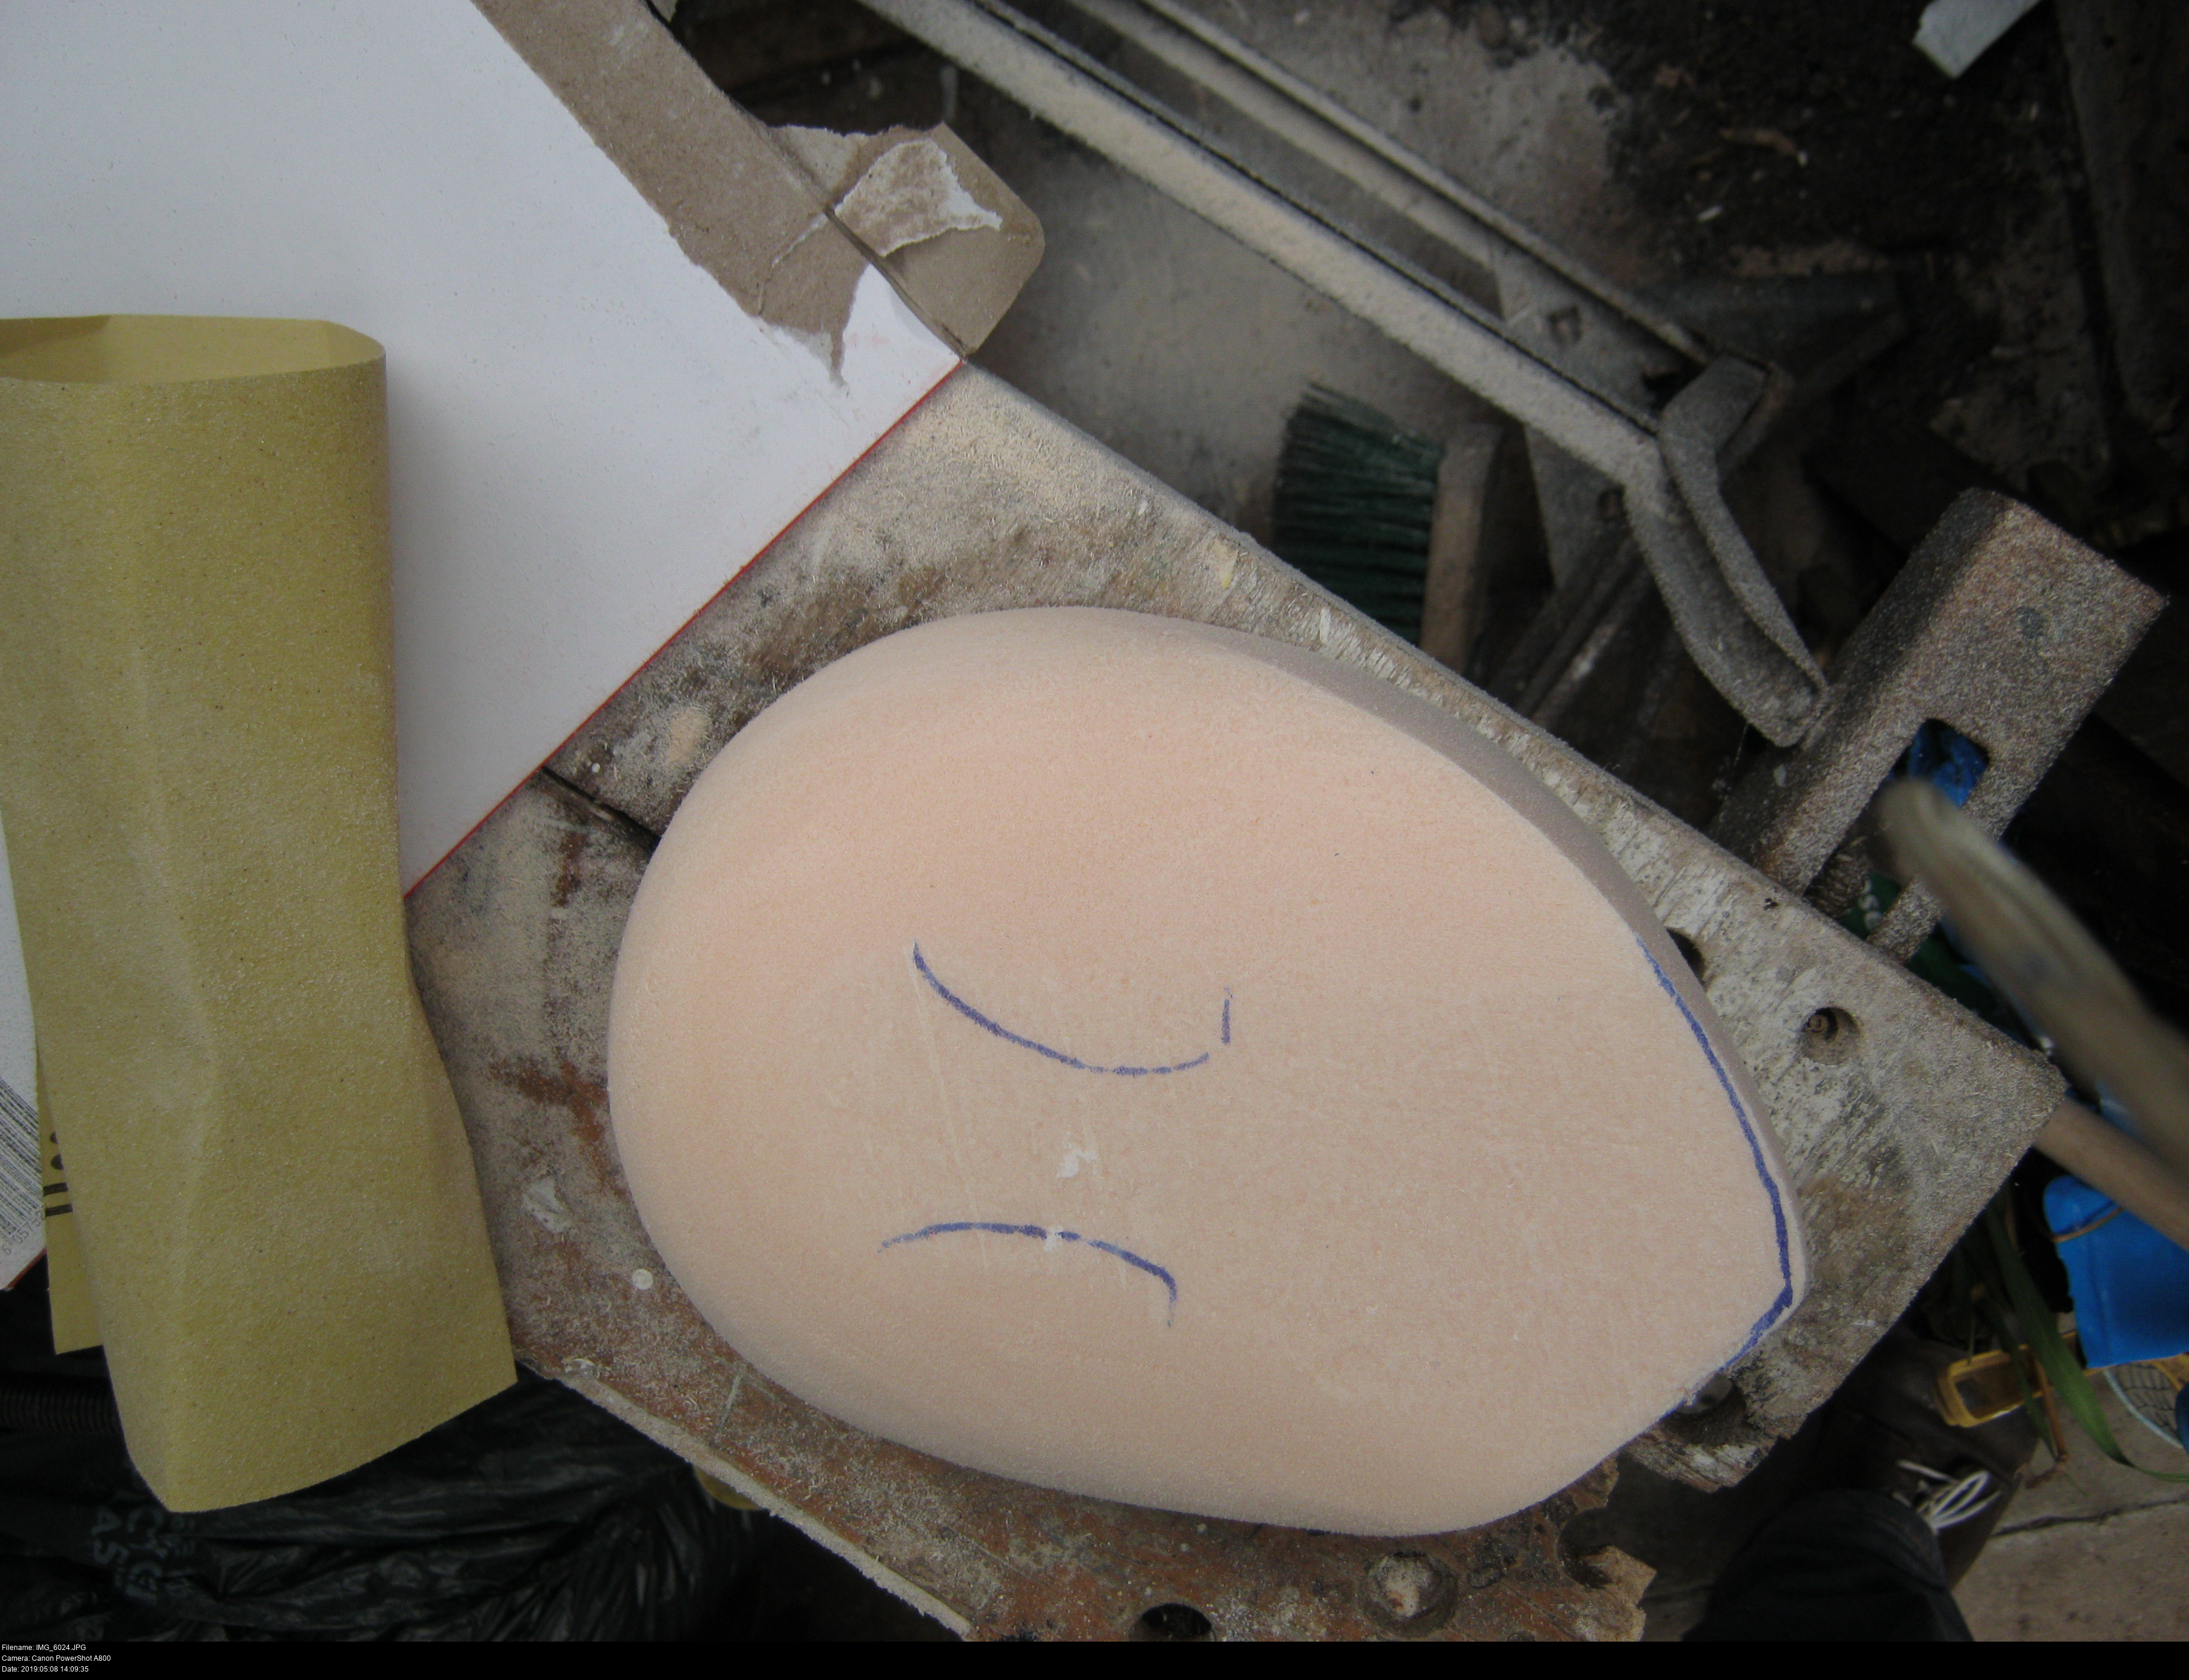
First, tape the card template to the material with masking tape (I'm actually using it to make a mask this time!) and then draw the shape. Notice that I've marked the eyes too. I'm using a narrow extendable disposable knife to cut it out, roughly.
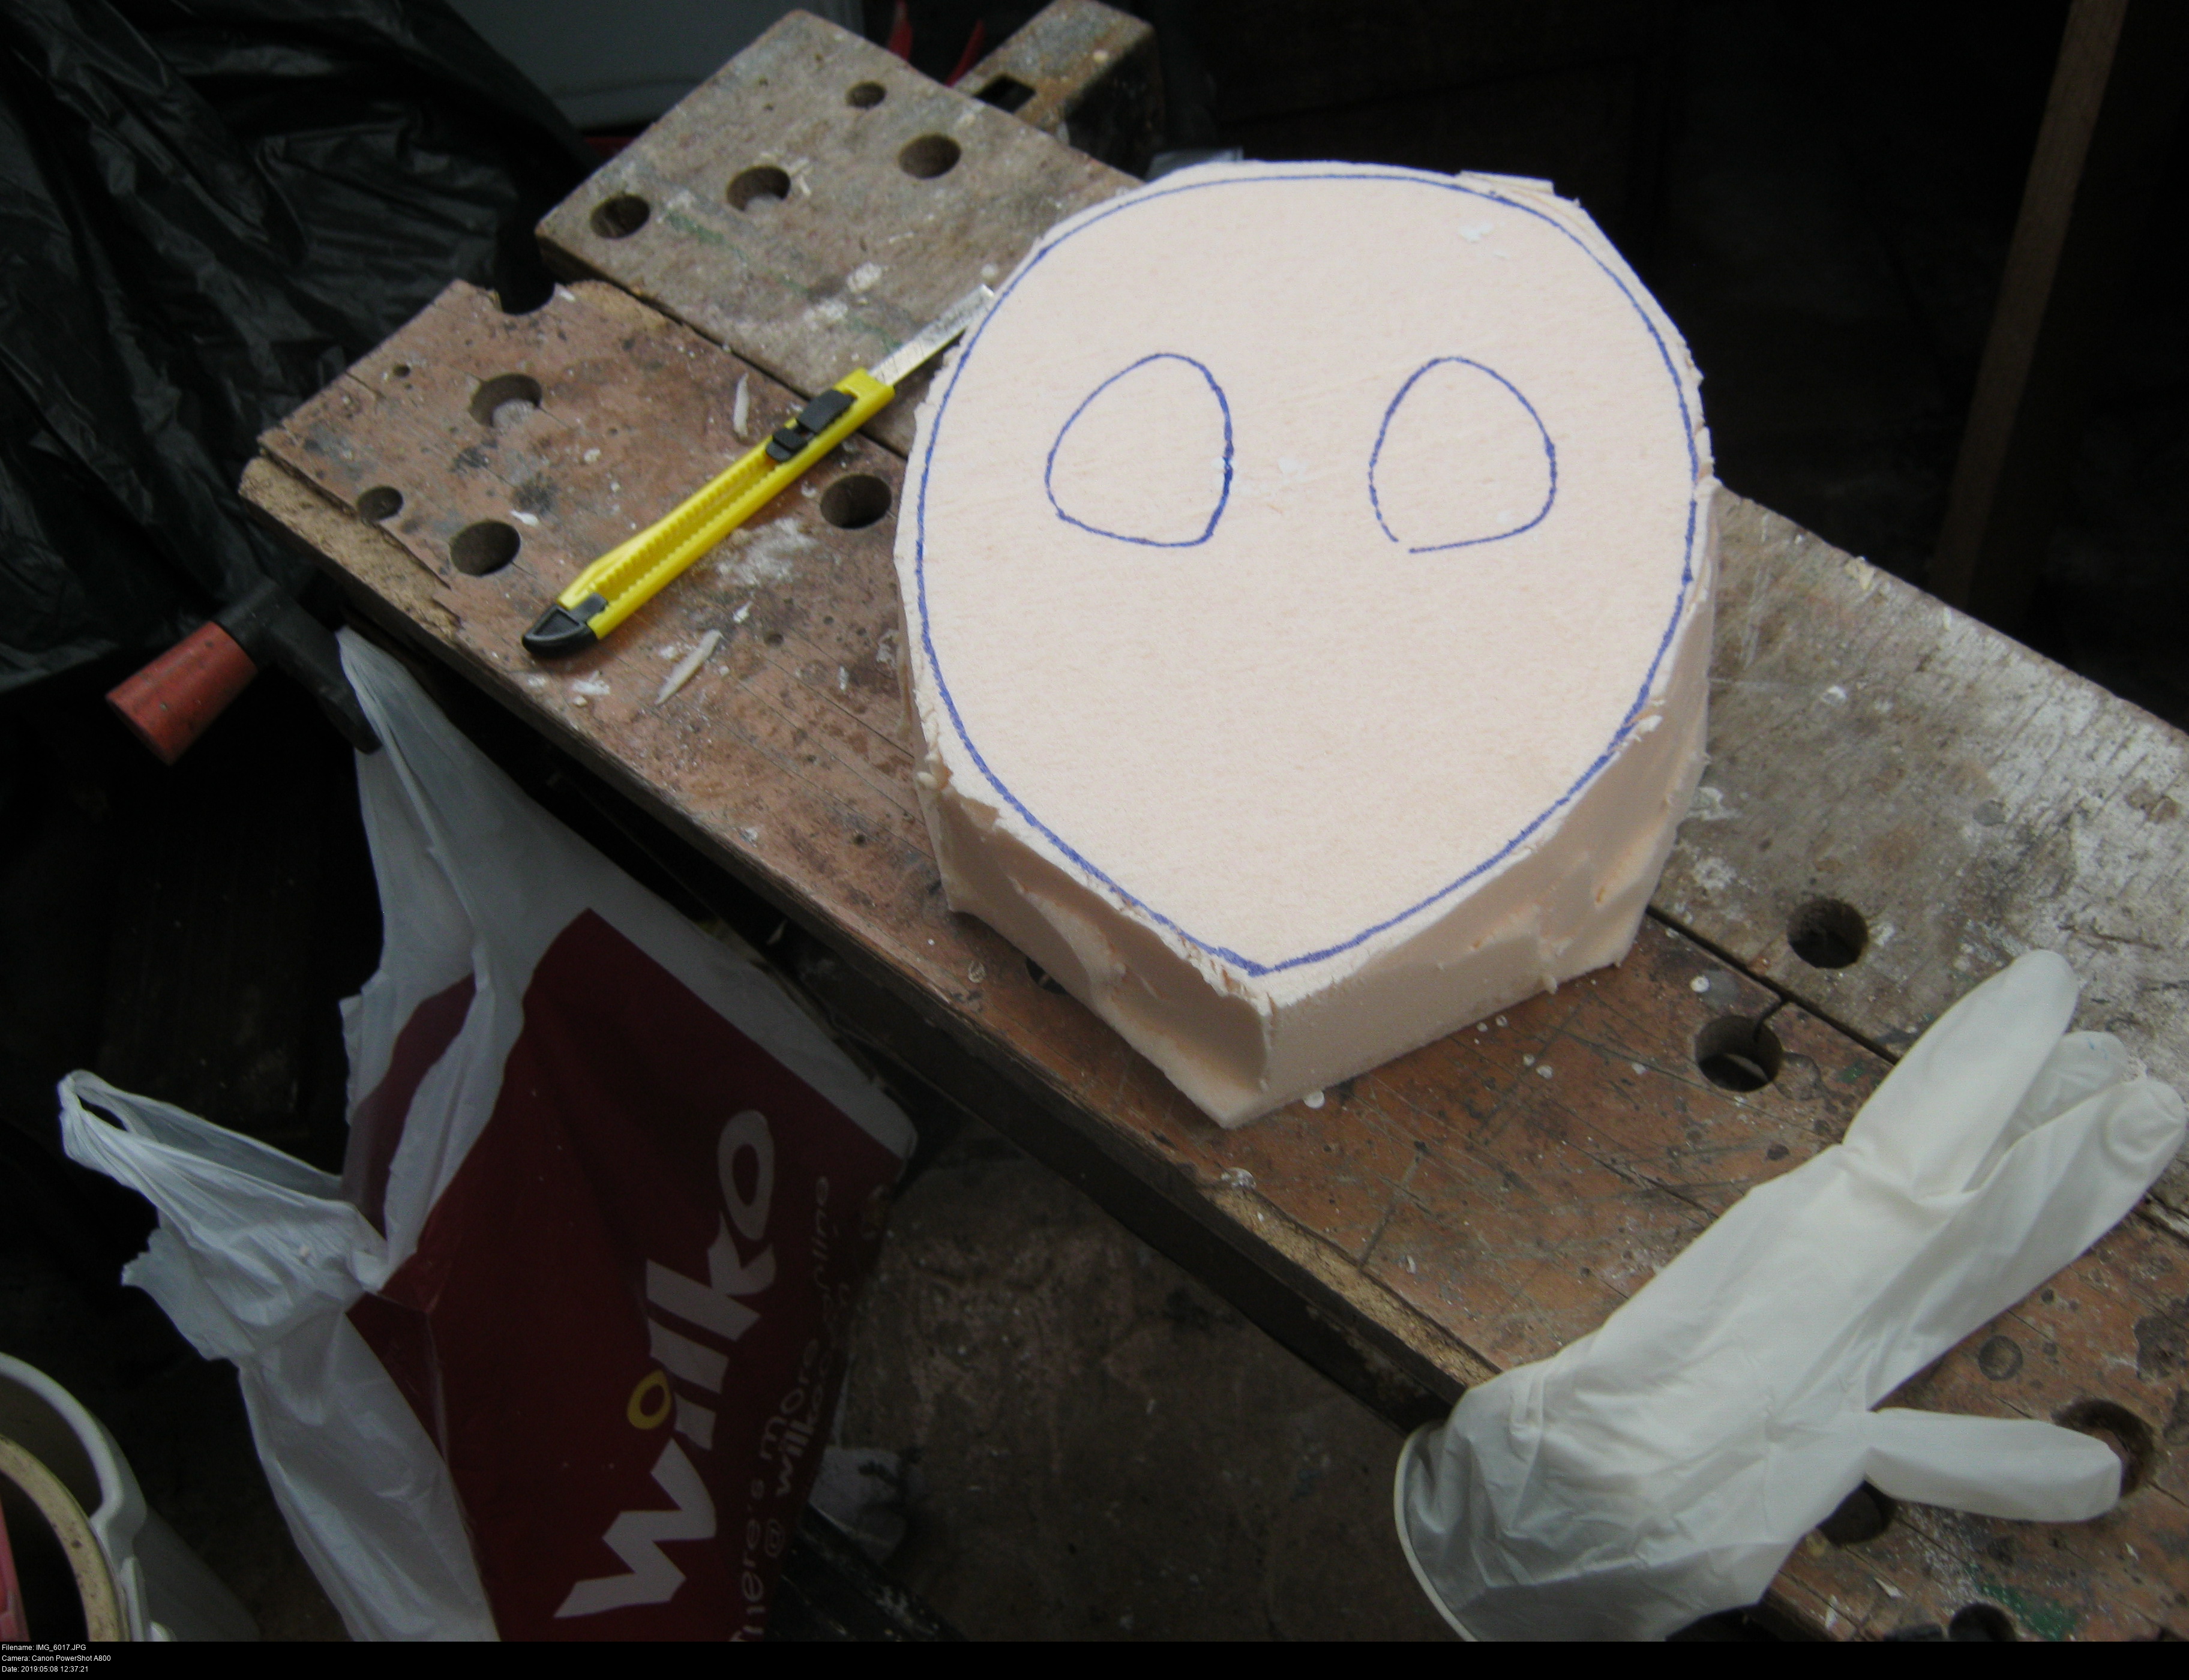
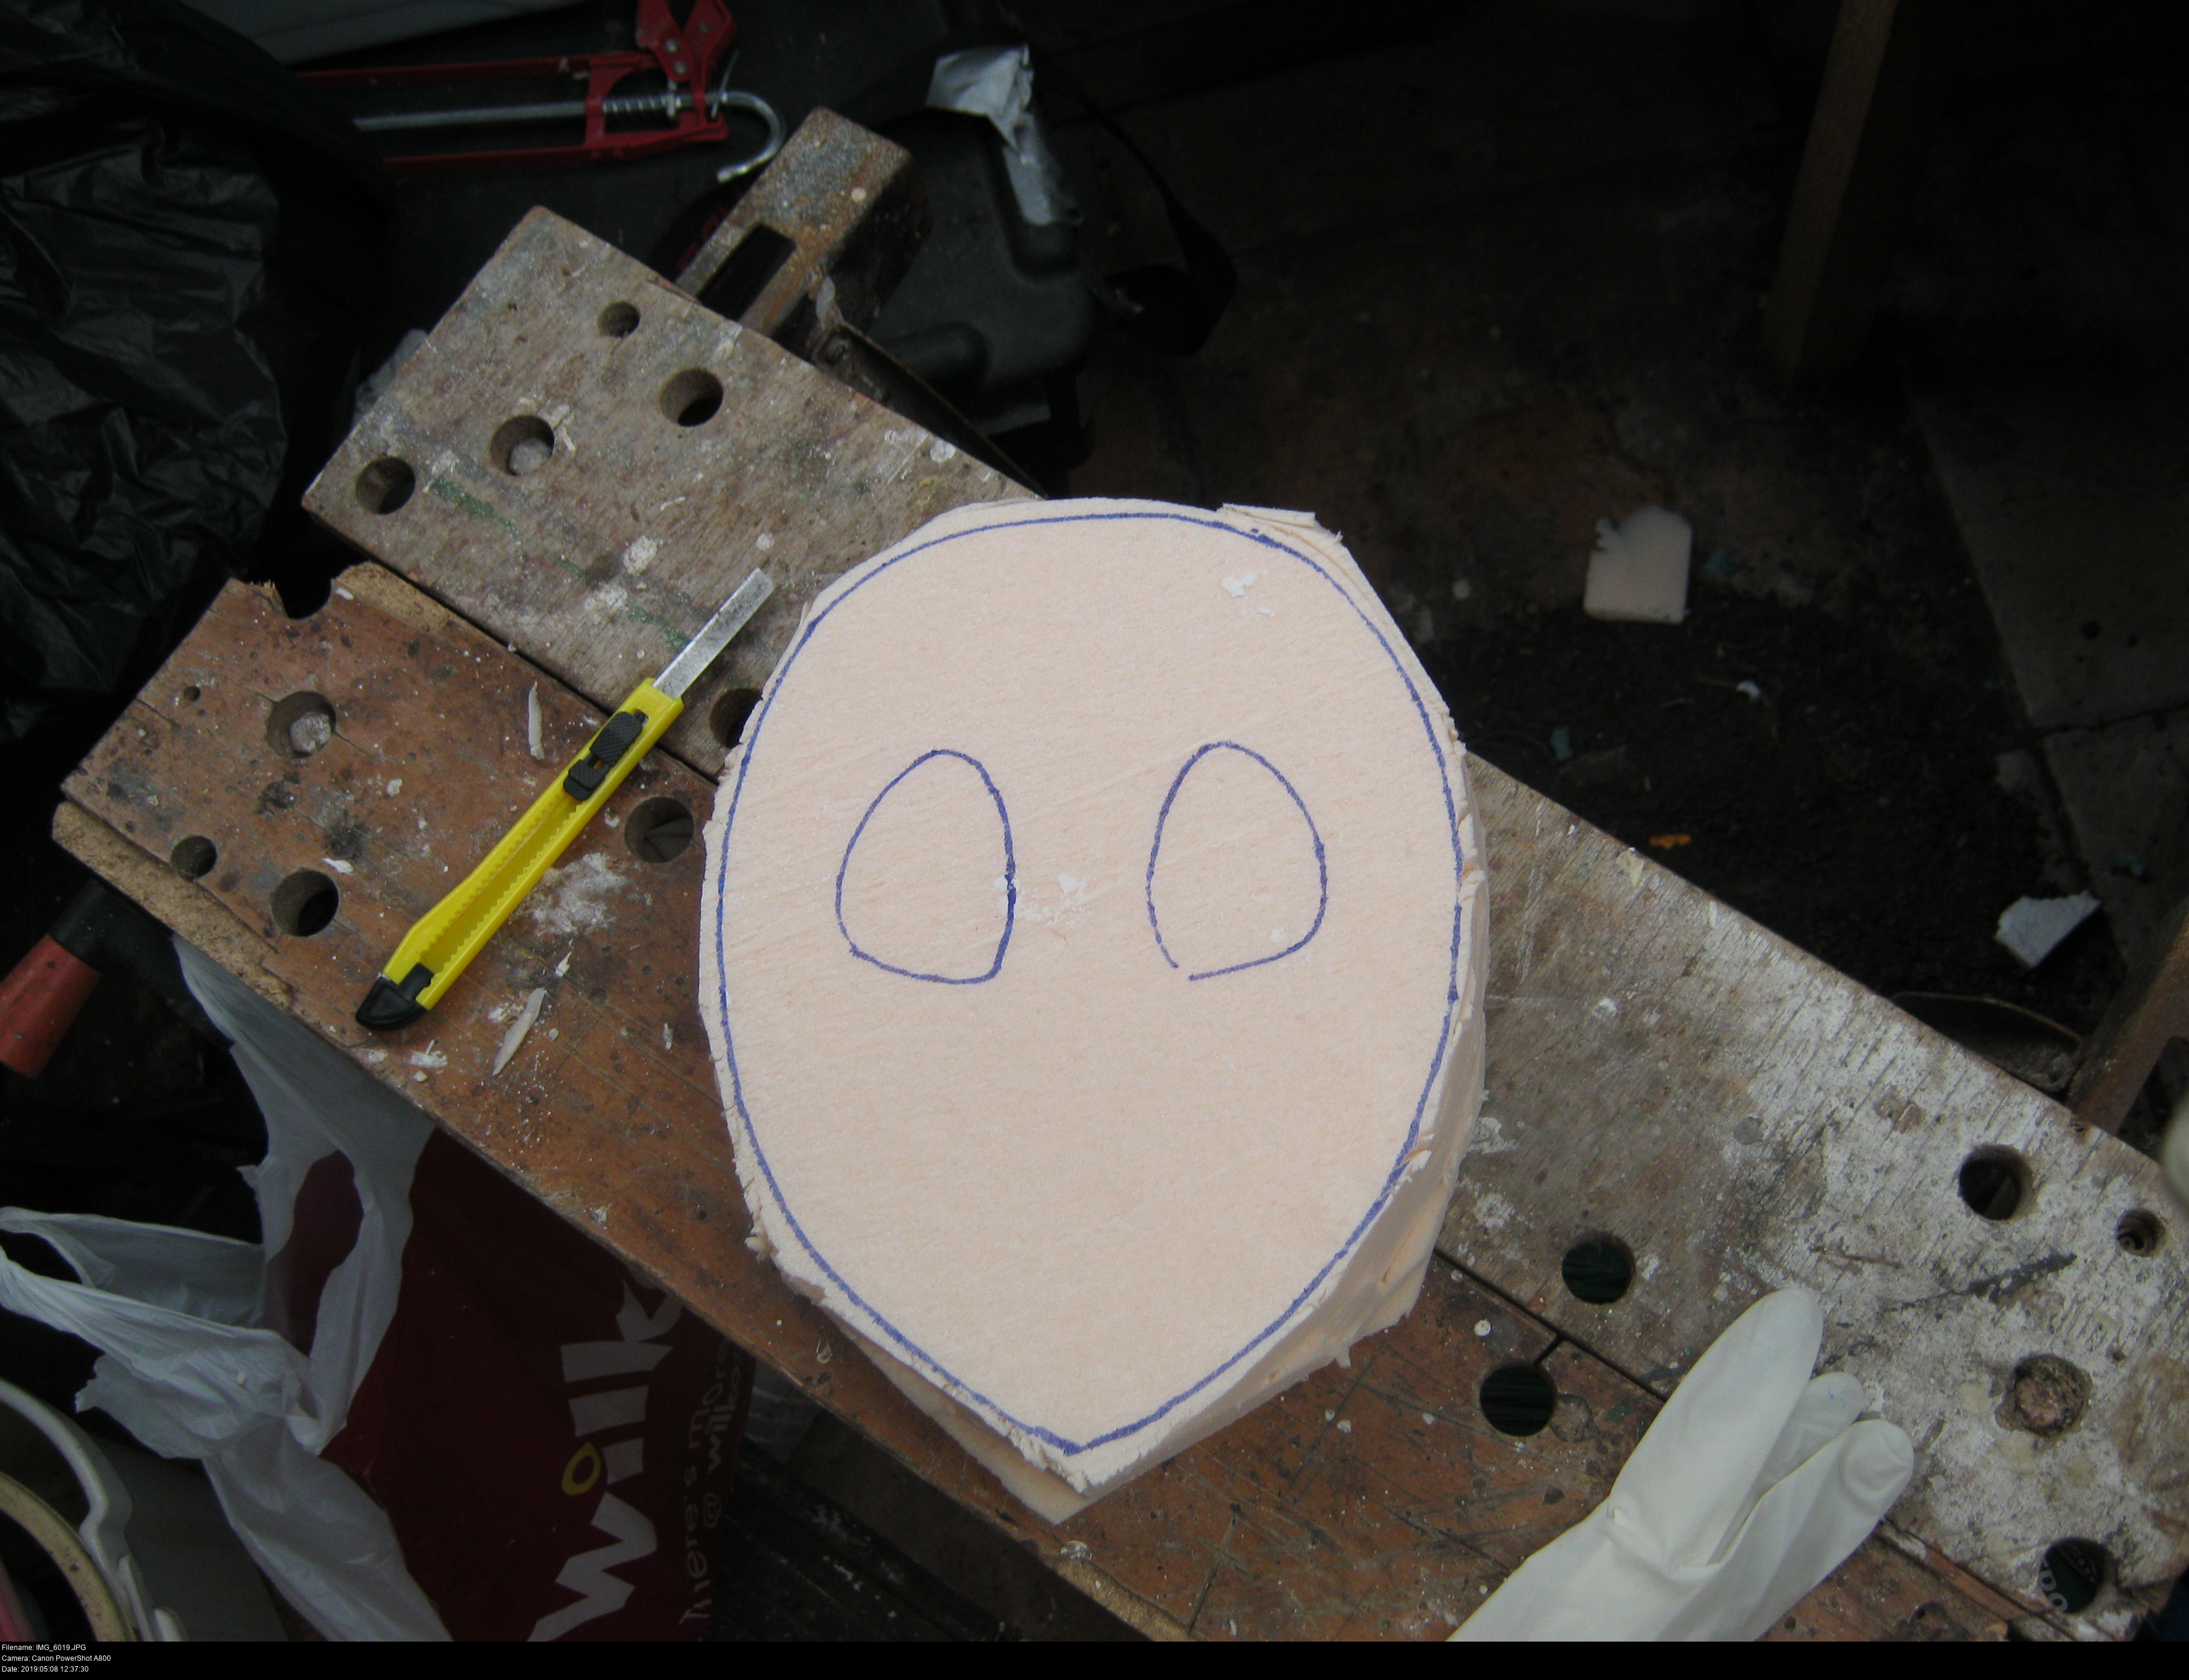
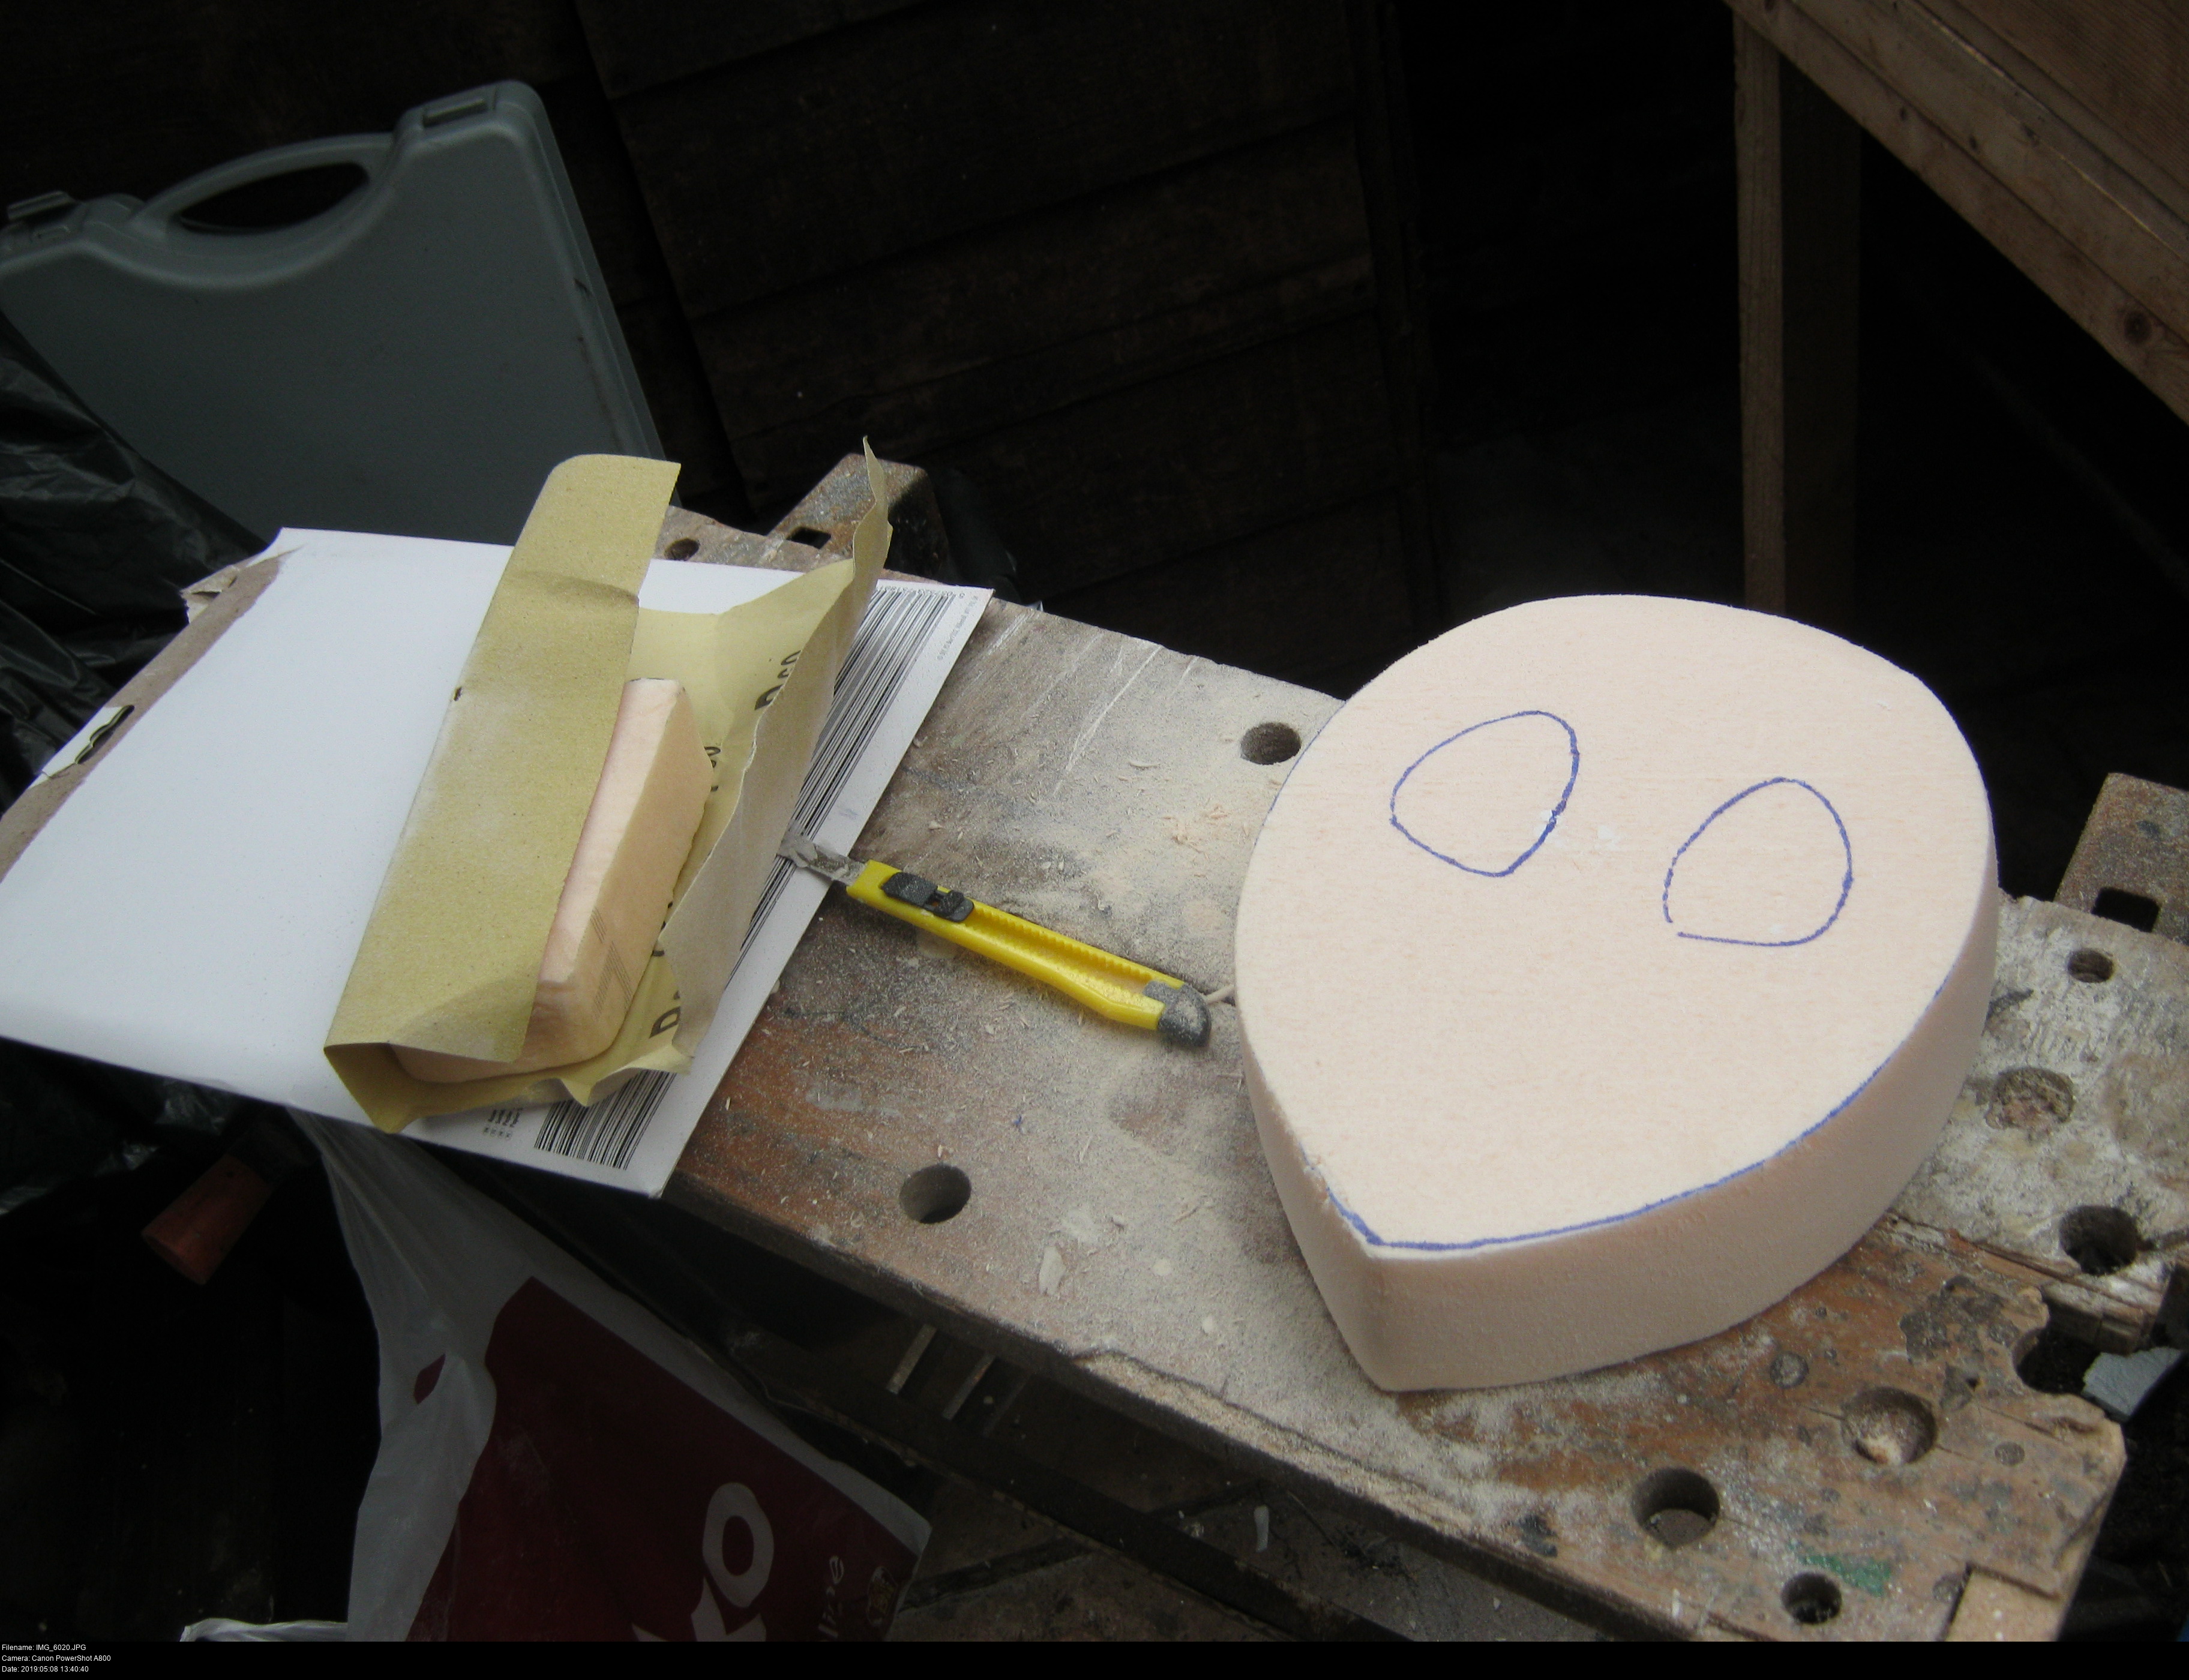
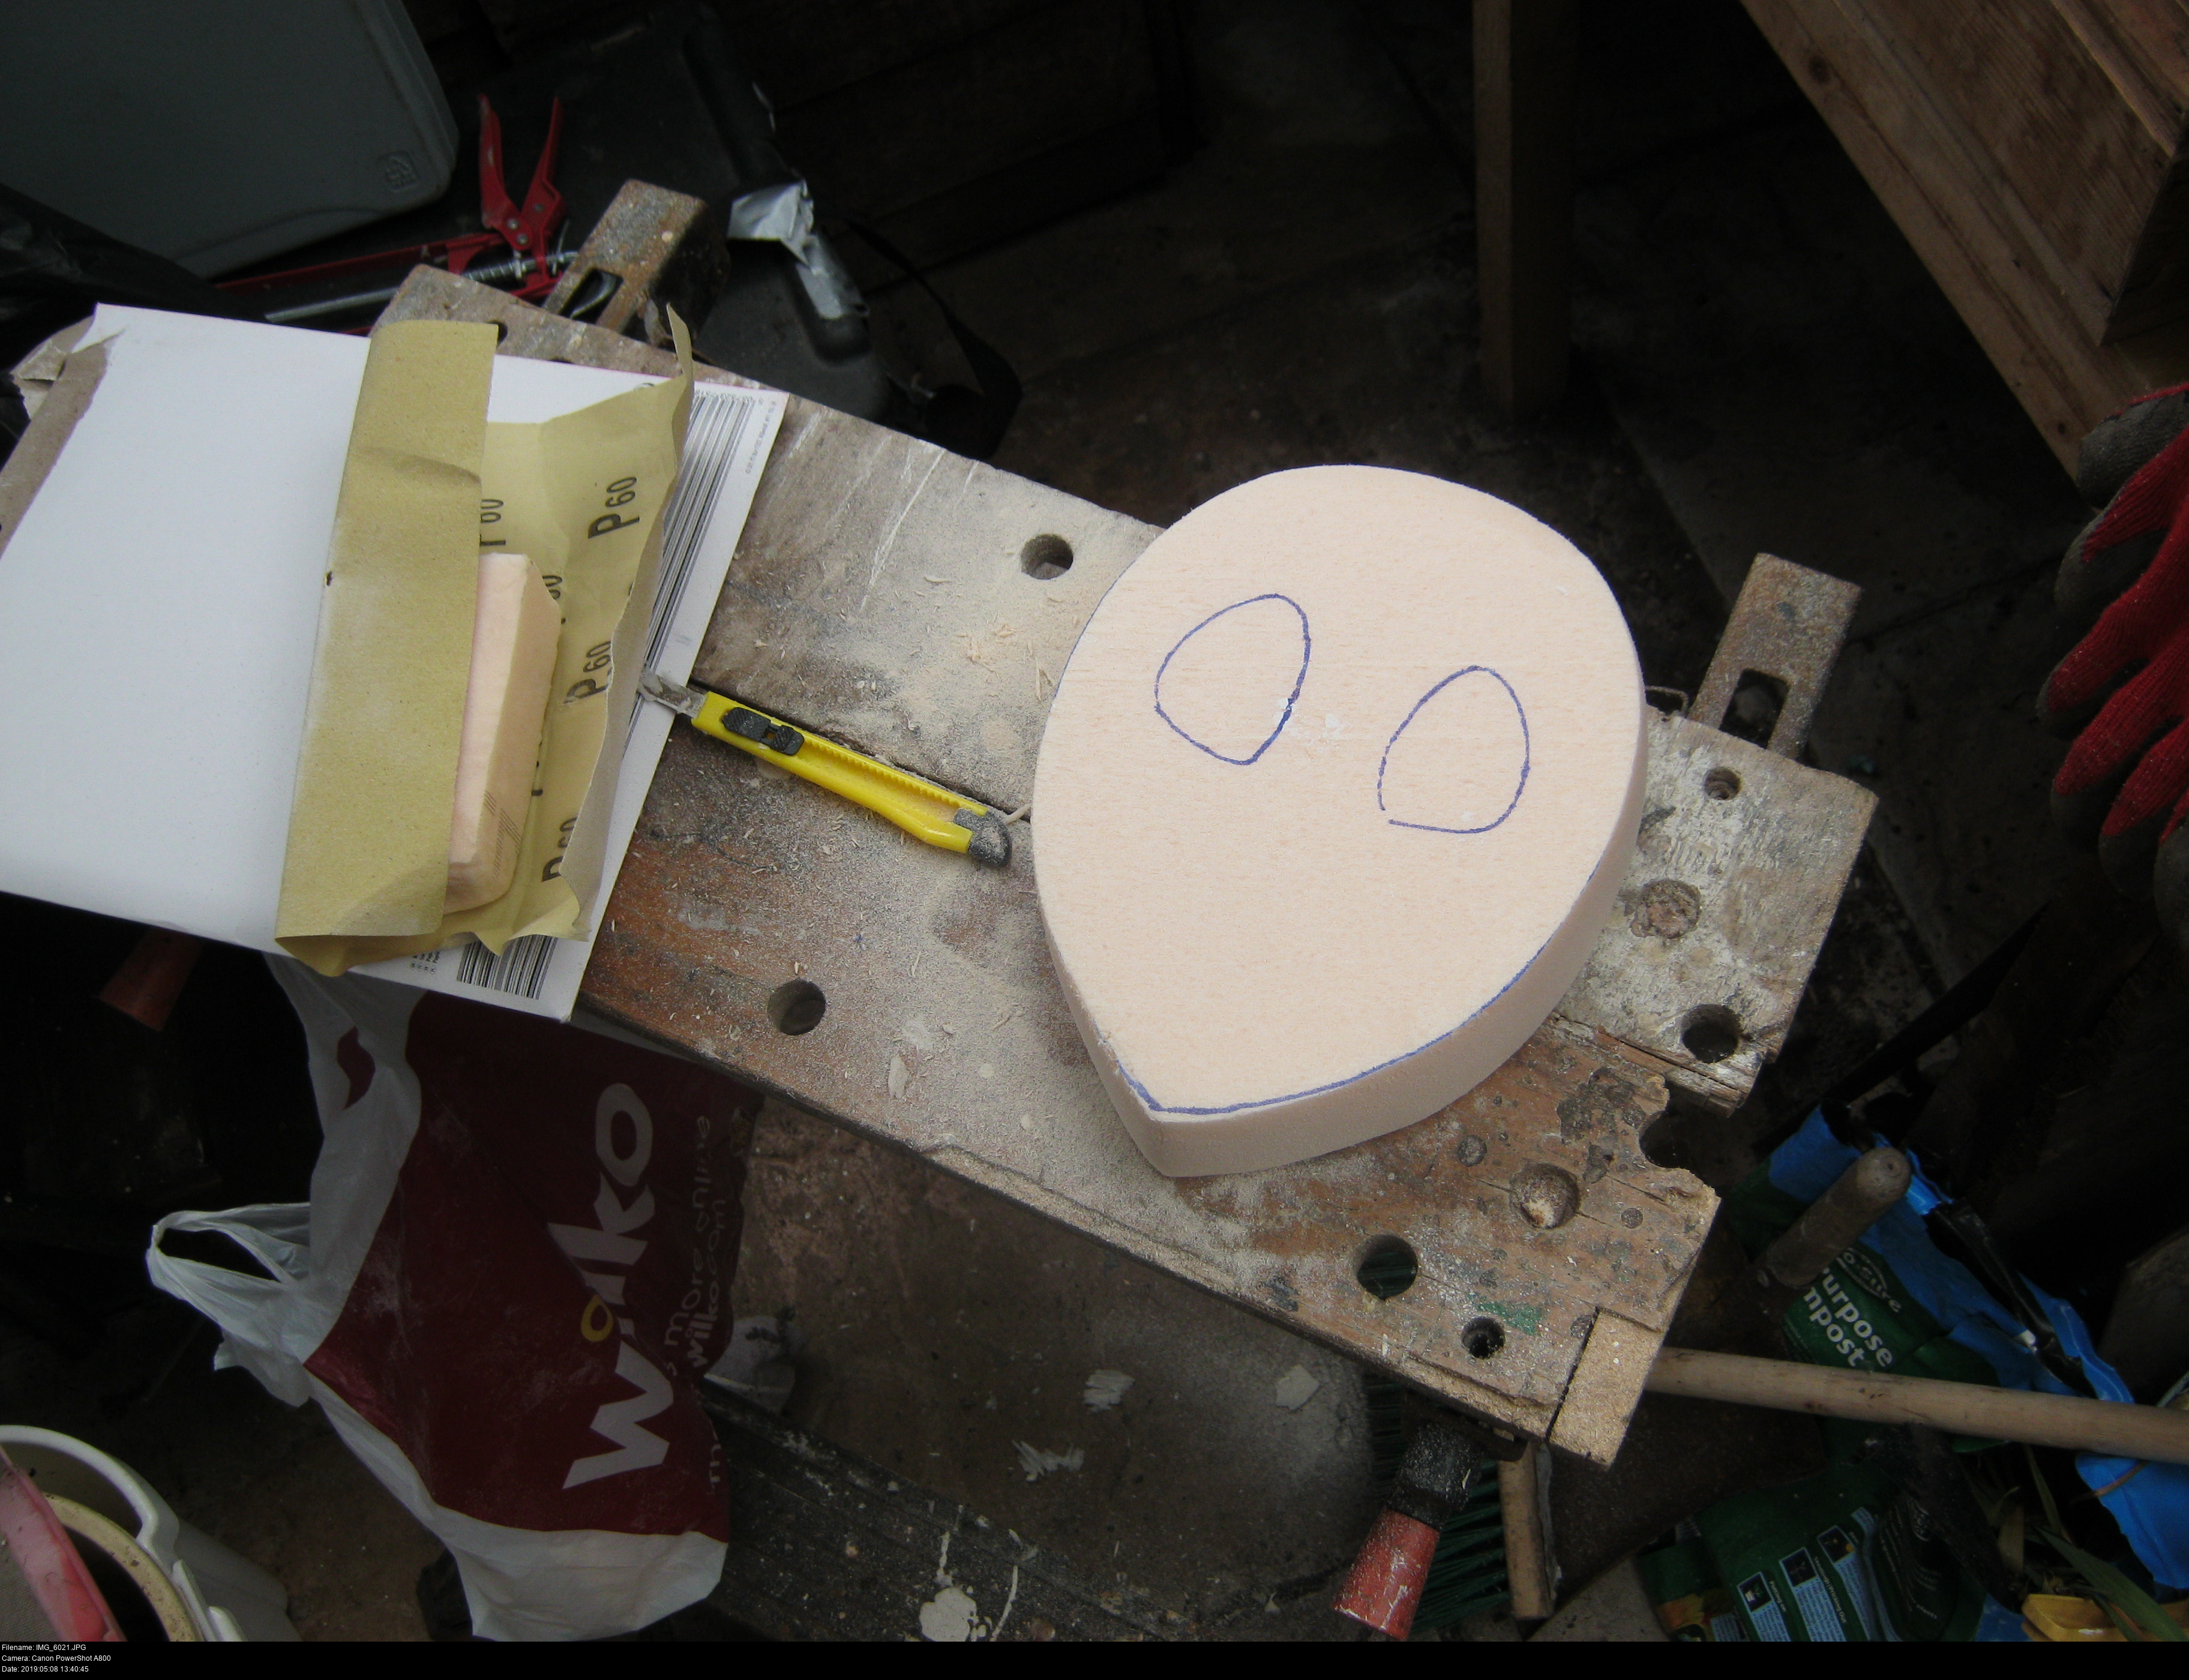
There it is, roughly cut. This material is too thick to cut all the way through with the knife unfortunately - whooshing around the outside of the shape in one go sounds nice, but it's not realistic. The best I could do is try to deeply score straight lines and then carefully but forcefully snap the material over the edge of the workbench, gradually refining the shape until I was able to get it looking like this.
In my head, the full volume of the mask fits inside a prism with a cross-section the same shape as the teardrop, which means that the next stage can be to sand this rough block into a perfect prism.
I don't possess any fancy tools for working with wood or foam whatsoever, so I can't rack you off by whipping out some $5,000 magic thing that'll make this easier that you don't have. What I have is a pink 2" x 2" x 5" block of XPS and a brand new 12-pack of Poundland sandpaper. Do whatever you must to get the prism shape, brace it against your body or the table, but if you do use the table make sure there's nothing on it first or you might end up causing damage to the block.
Alright! It's prism-tastic.
Sanding XPS foam is a pain in the butt, no mistake. It's also possibly not very healthy, so let's have a Super Serious Health Warning here.
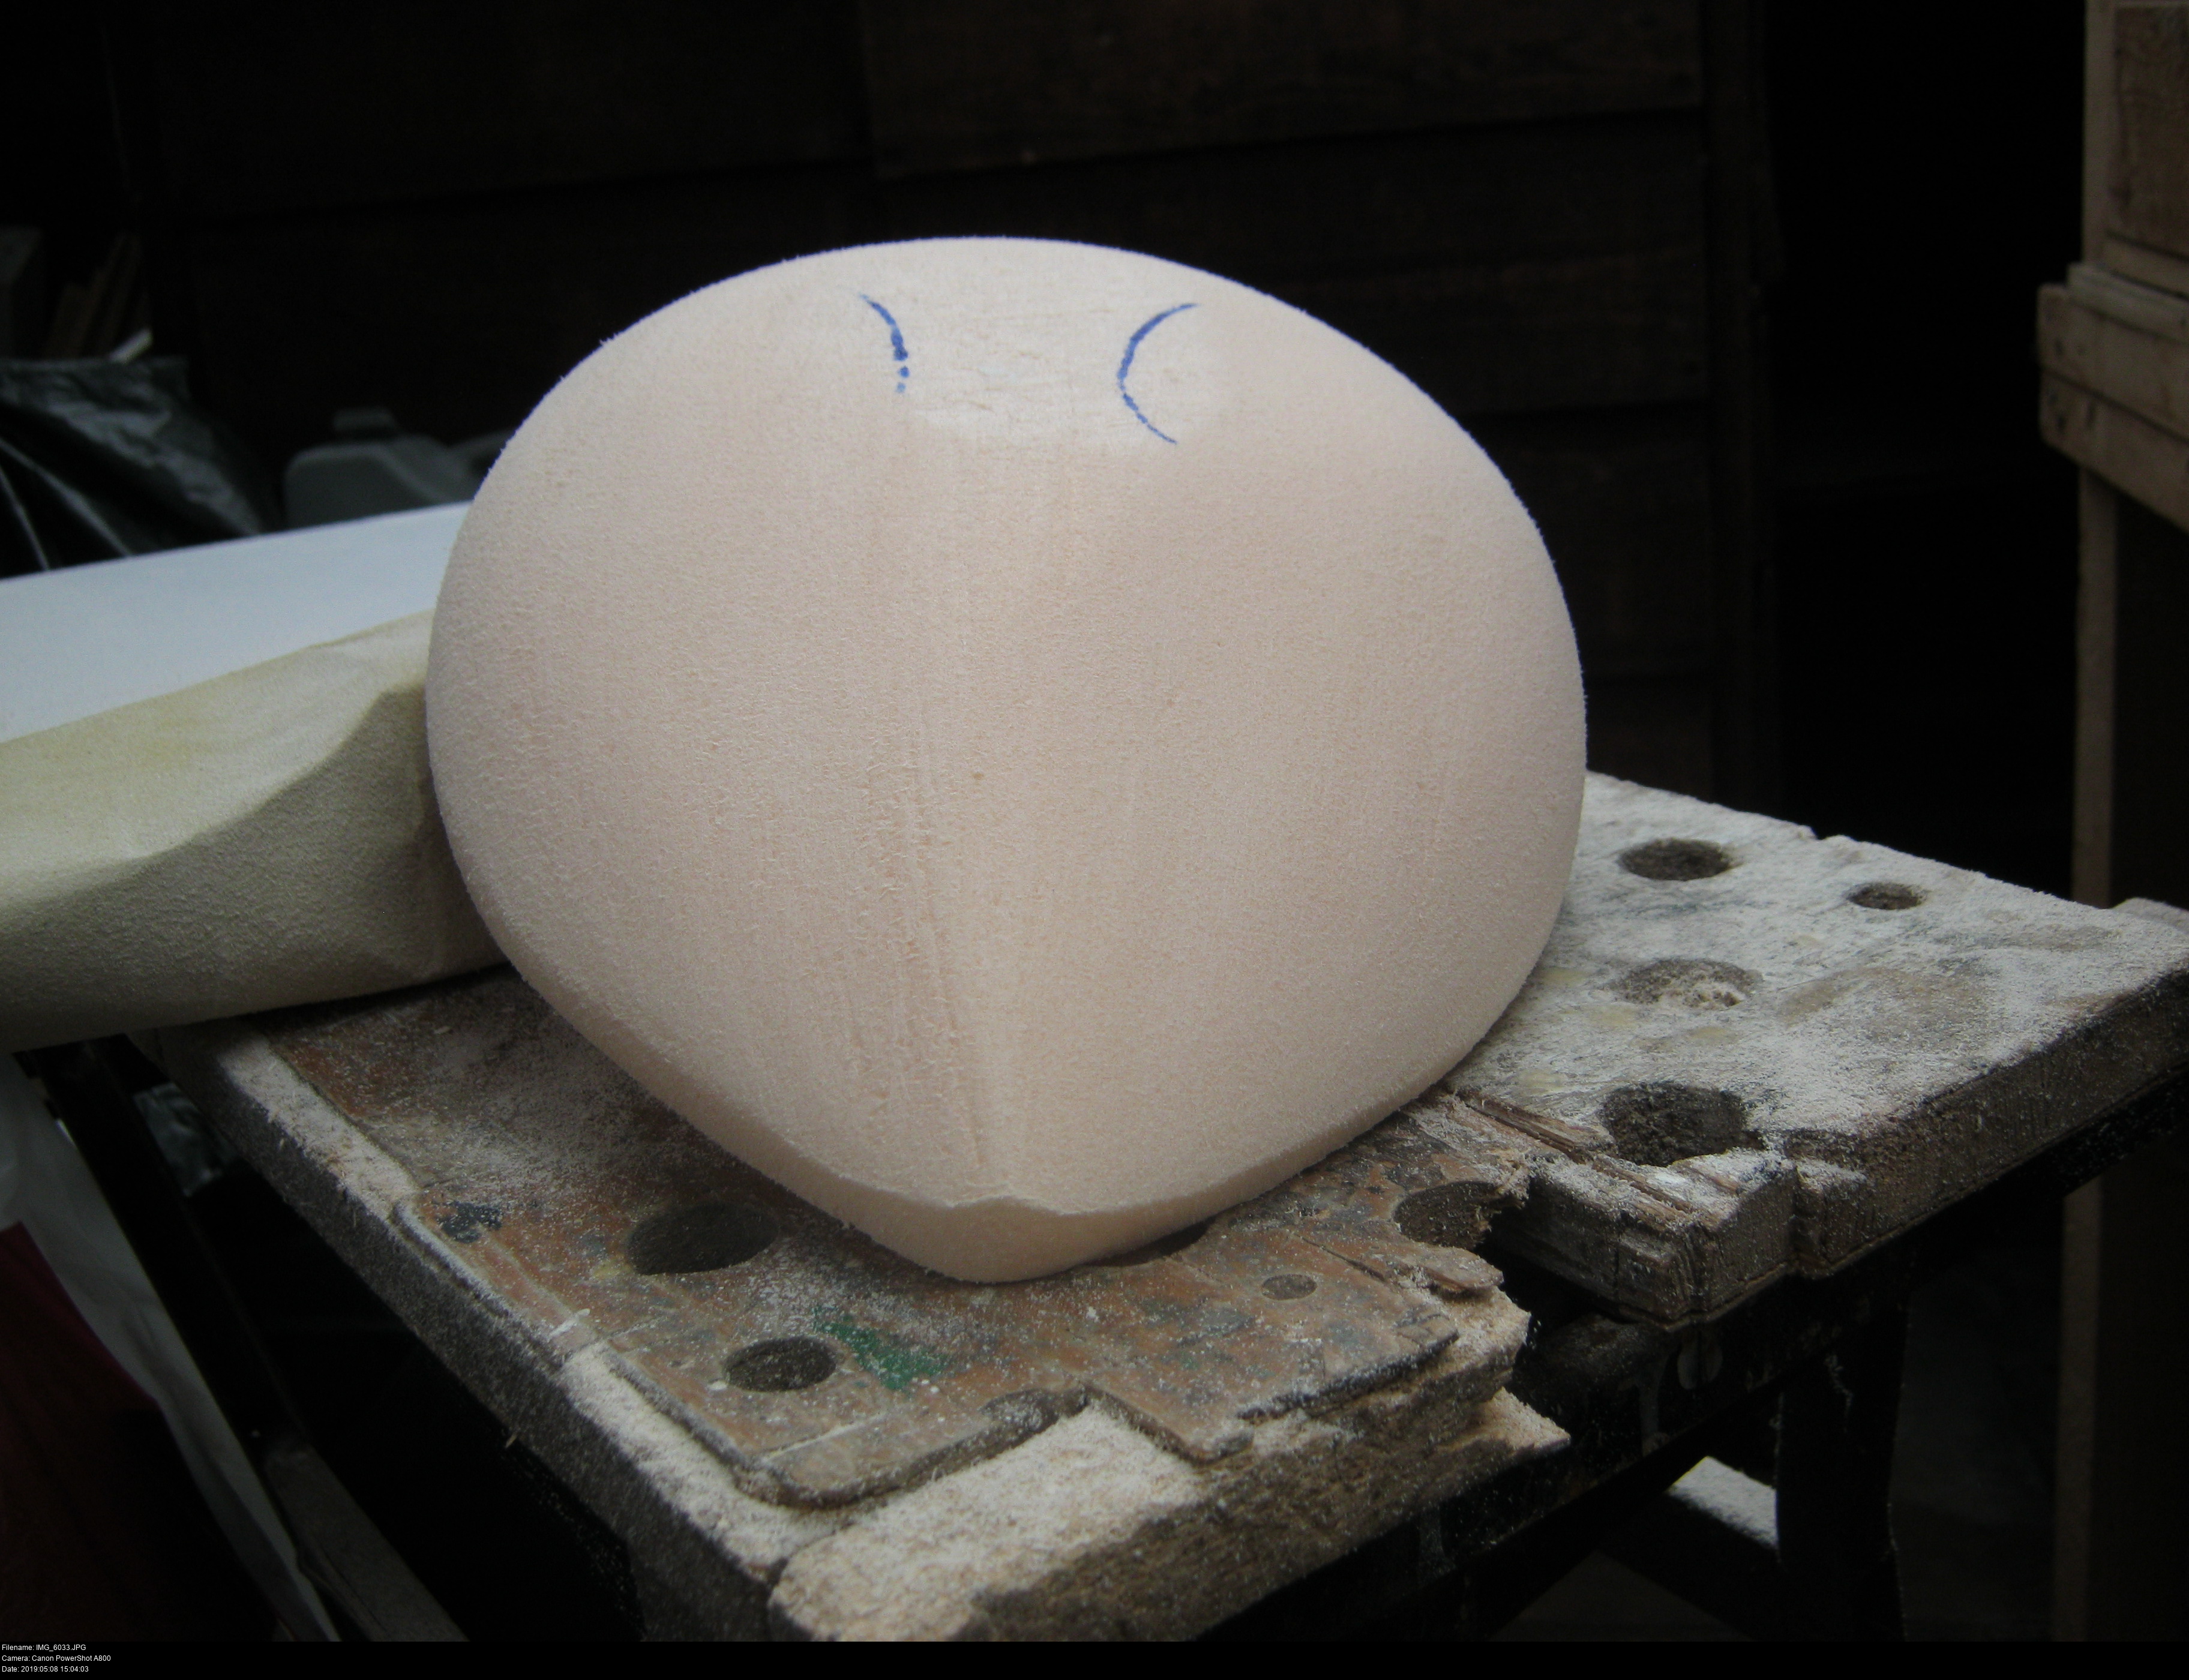
Next step, let's see if I can give the top surface into the correct contours. Once again:
The top half needs to be hemispherical.
The bottom half needs to be almost a pair flat planes from the cheeks rising diagonally upward to the centre of the mask meeting with a visible blade curving gently down from the centre of the mask to the chin.

I'm coughing myself to death just looking back over these images, ye gads.
That's the top of the mask done. Just lots of elbow grease and constant visualisation. I start sanding by working out places where I -know- something will have a certain shape. For example, I know that the topmost edge of the mask is going to be a quarter-circle curve from the flat top surface down to the top-most edge. Start by sanding or cutting off rough chunks very conservatively to make that shape, and then sand away. Similarly, the same quarter-circle curve is present on the left and right. Once you start and remove the right angle of the prism, it becomes easier to visualise and work. Just sand and sand and sand and sand.
And don't try to get this perfect, since when you move onto the rest of the shape you'll be coming back to this to make it all consistent. Best to under-sand first than over-sand.
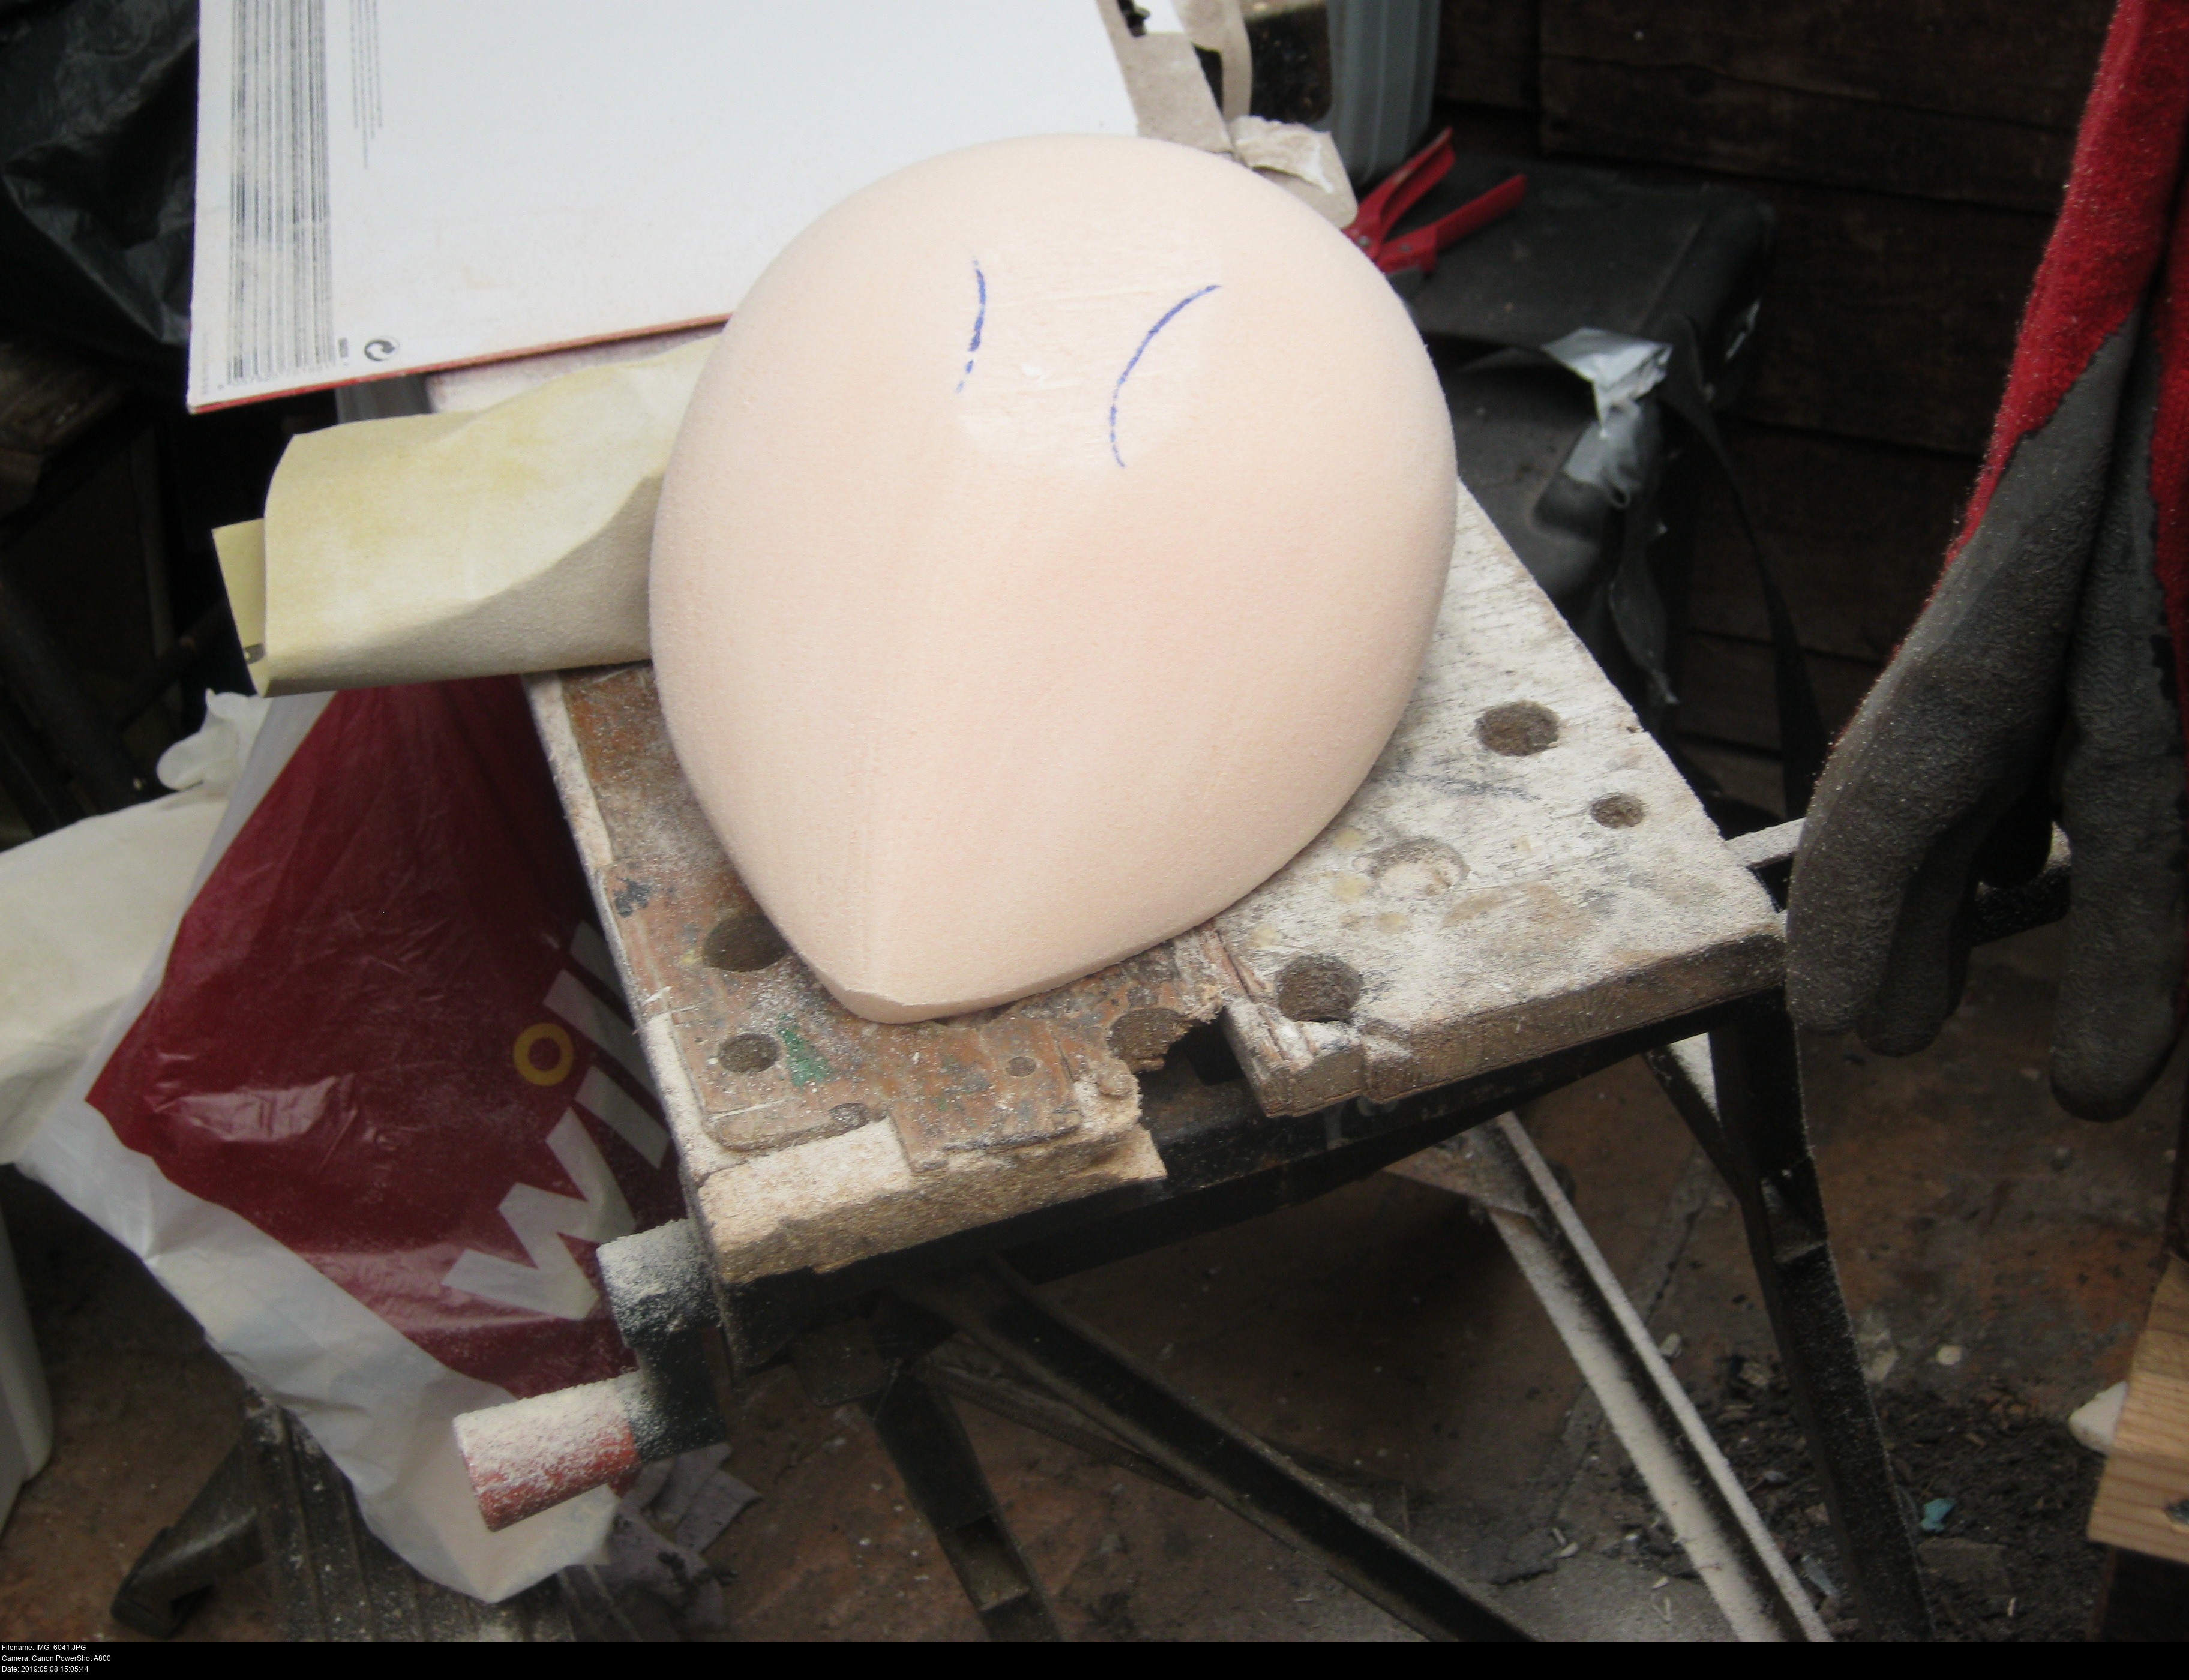
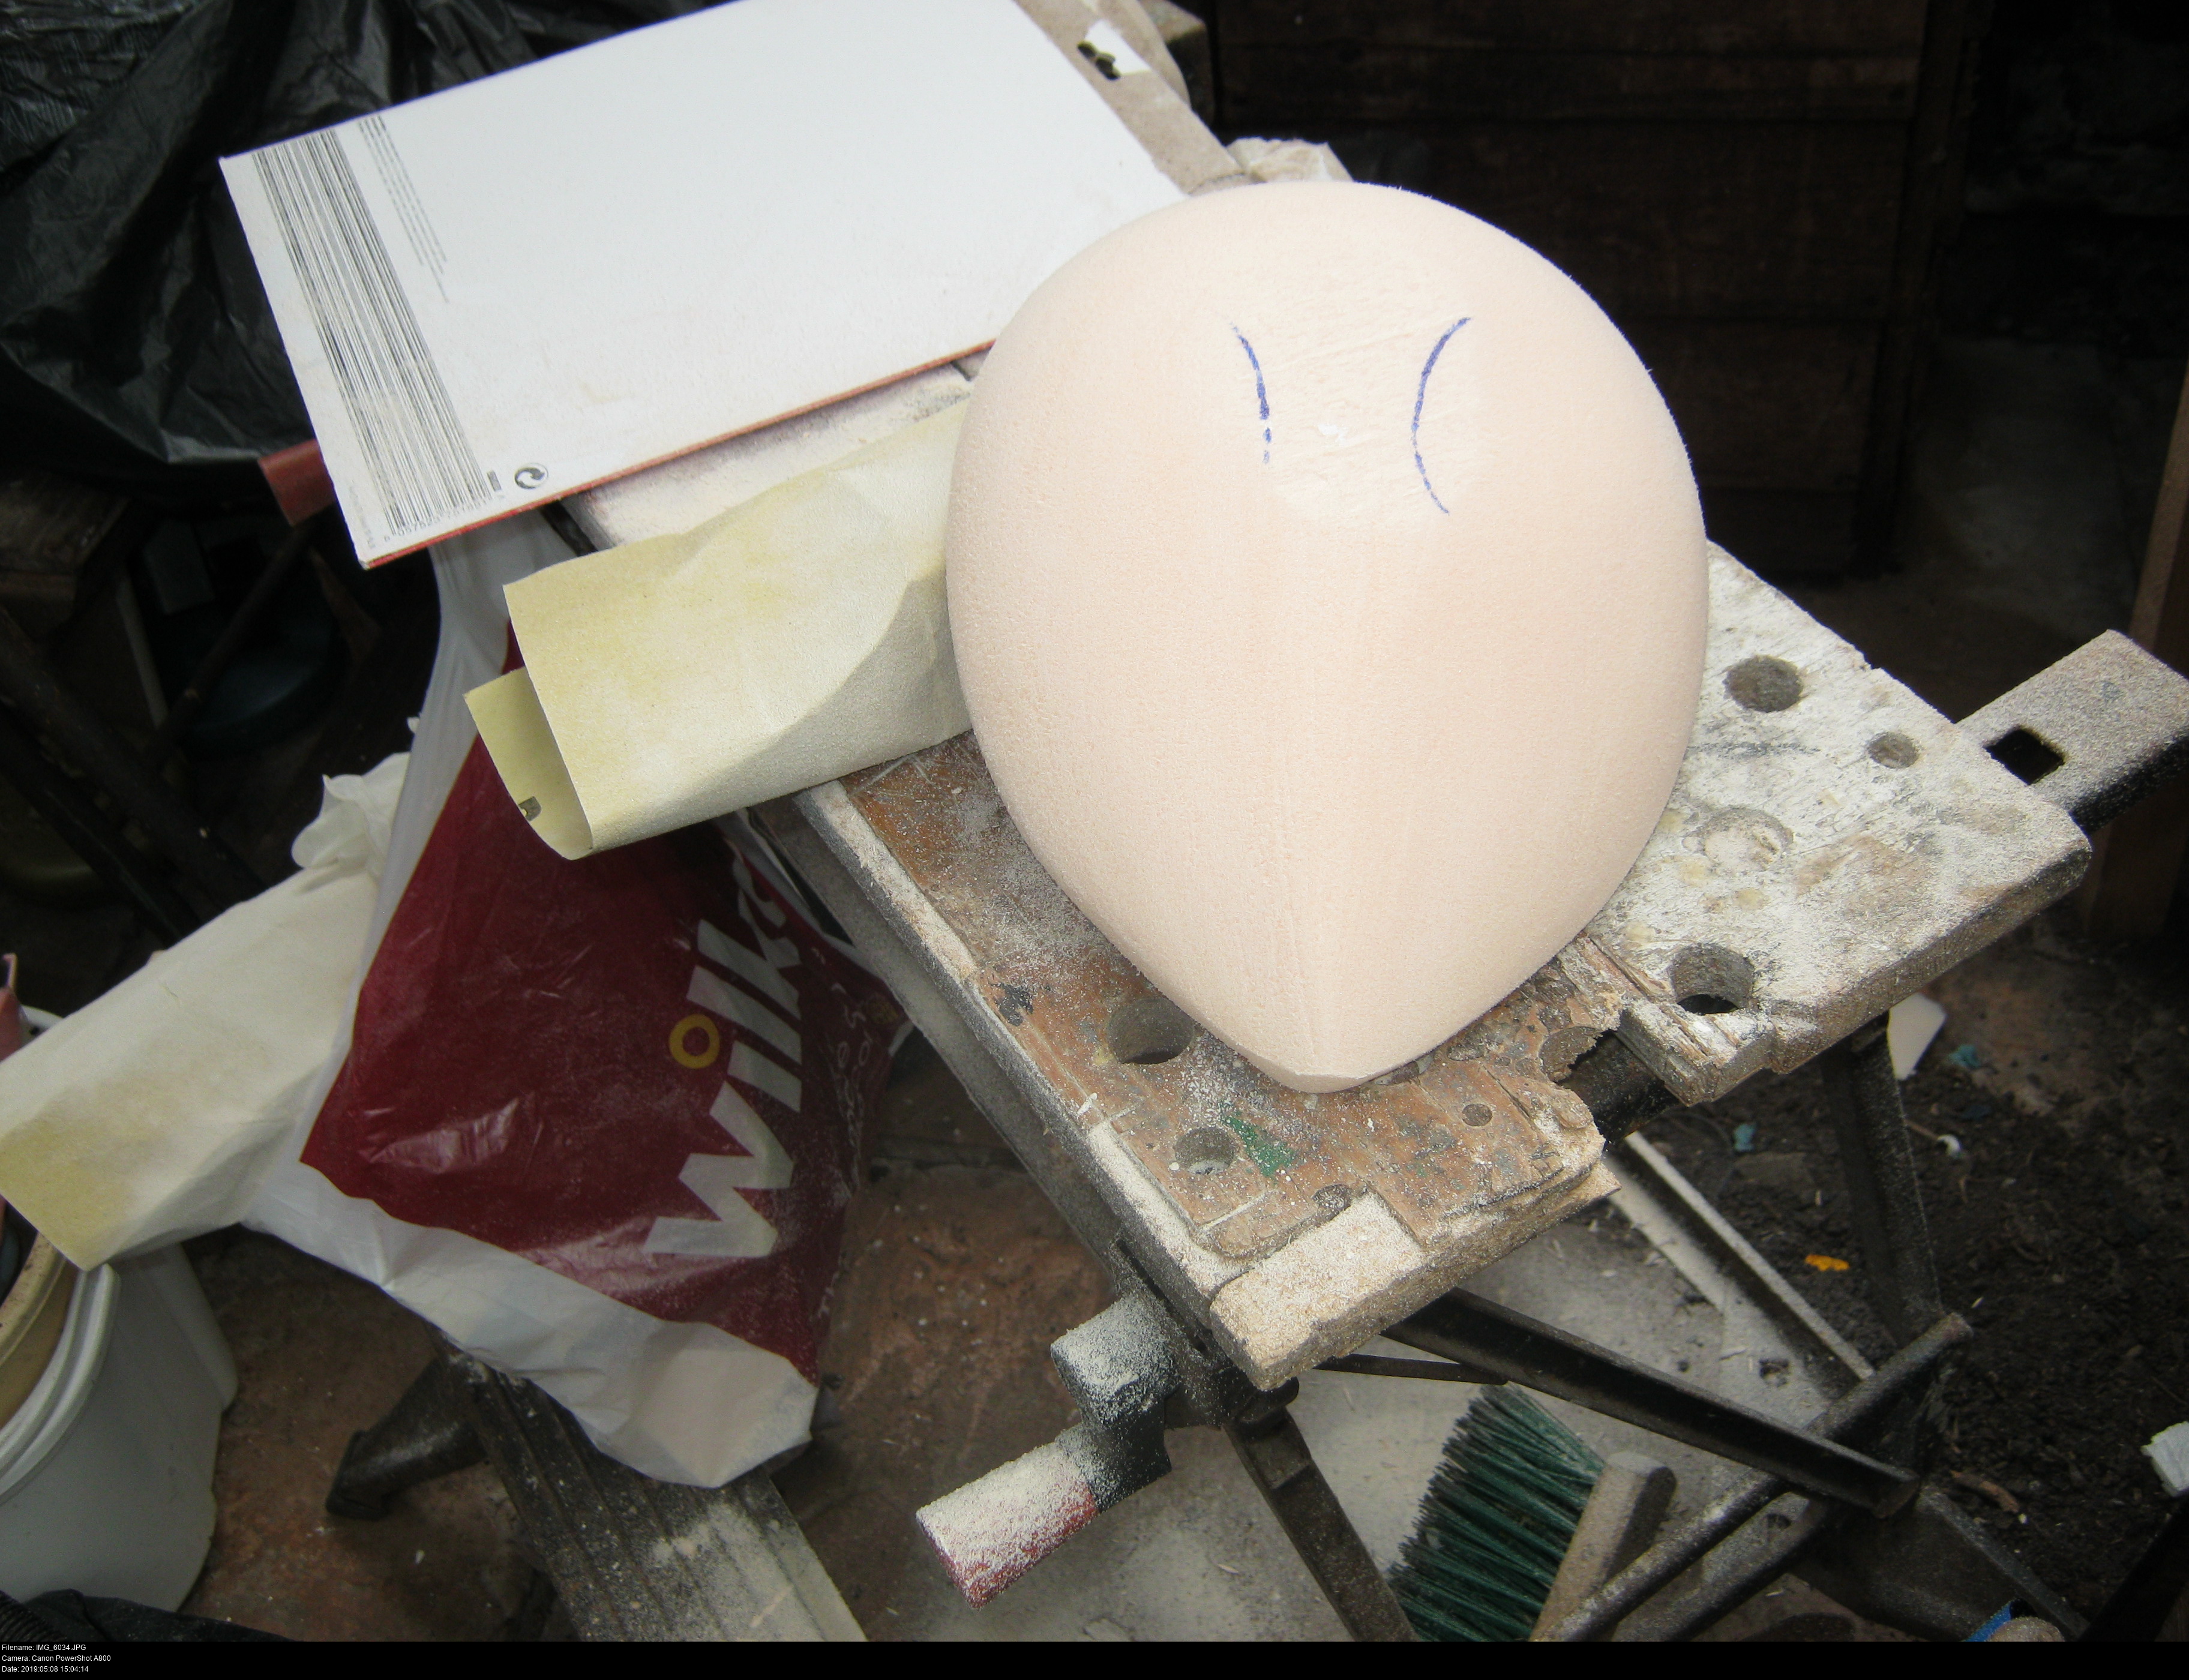


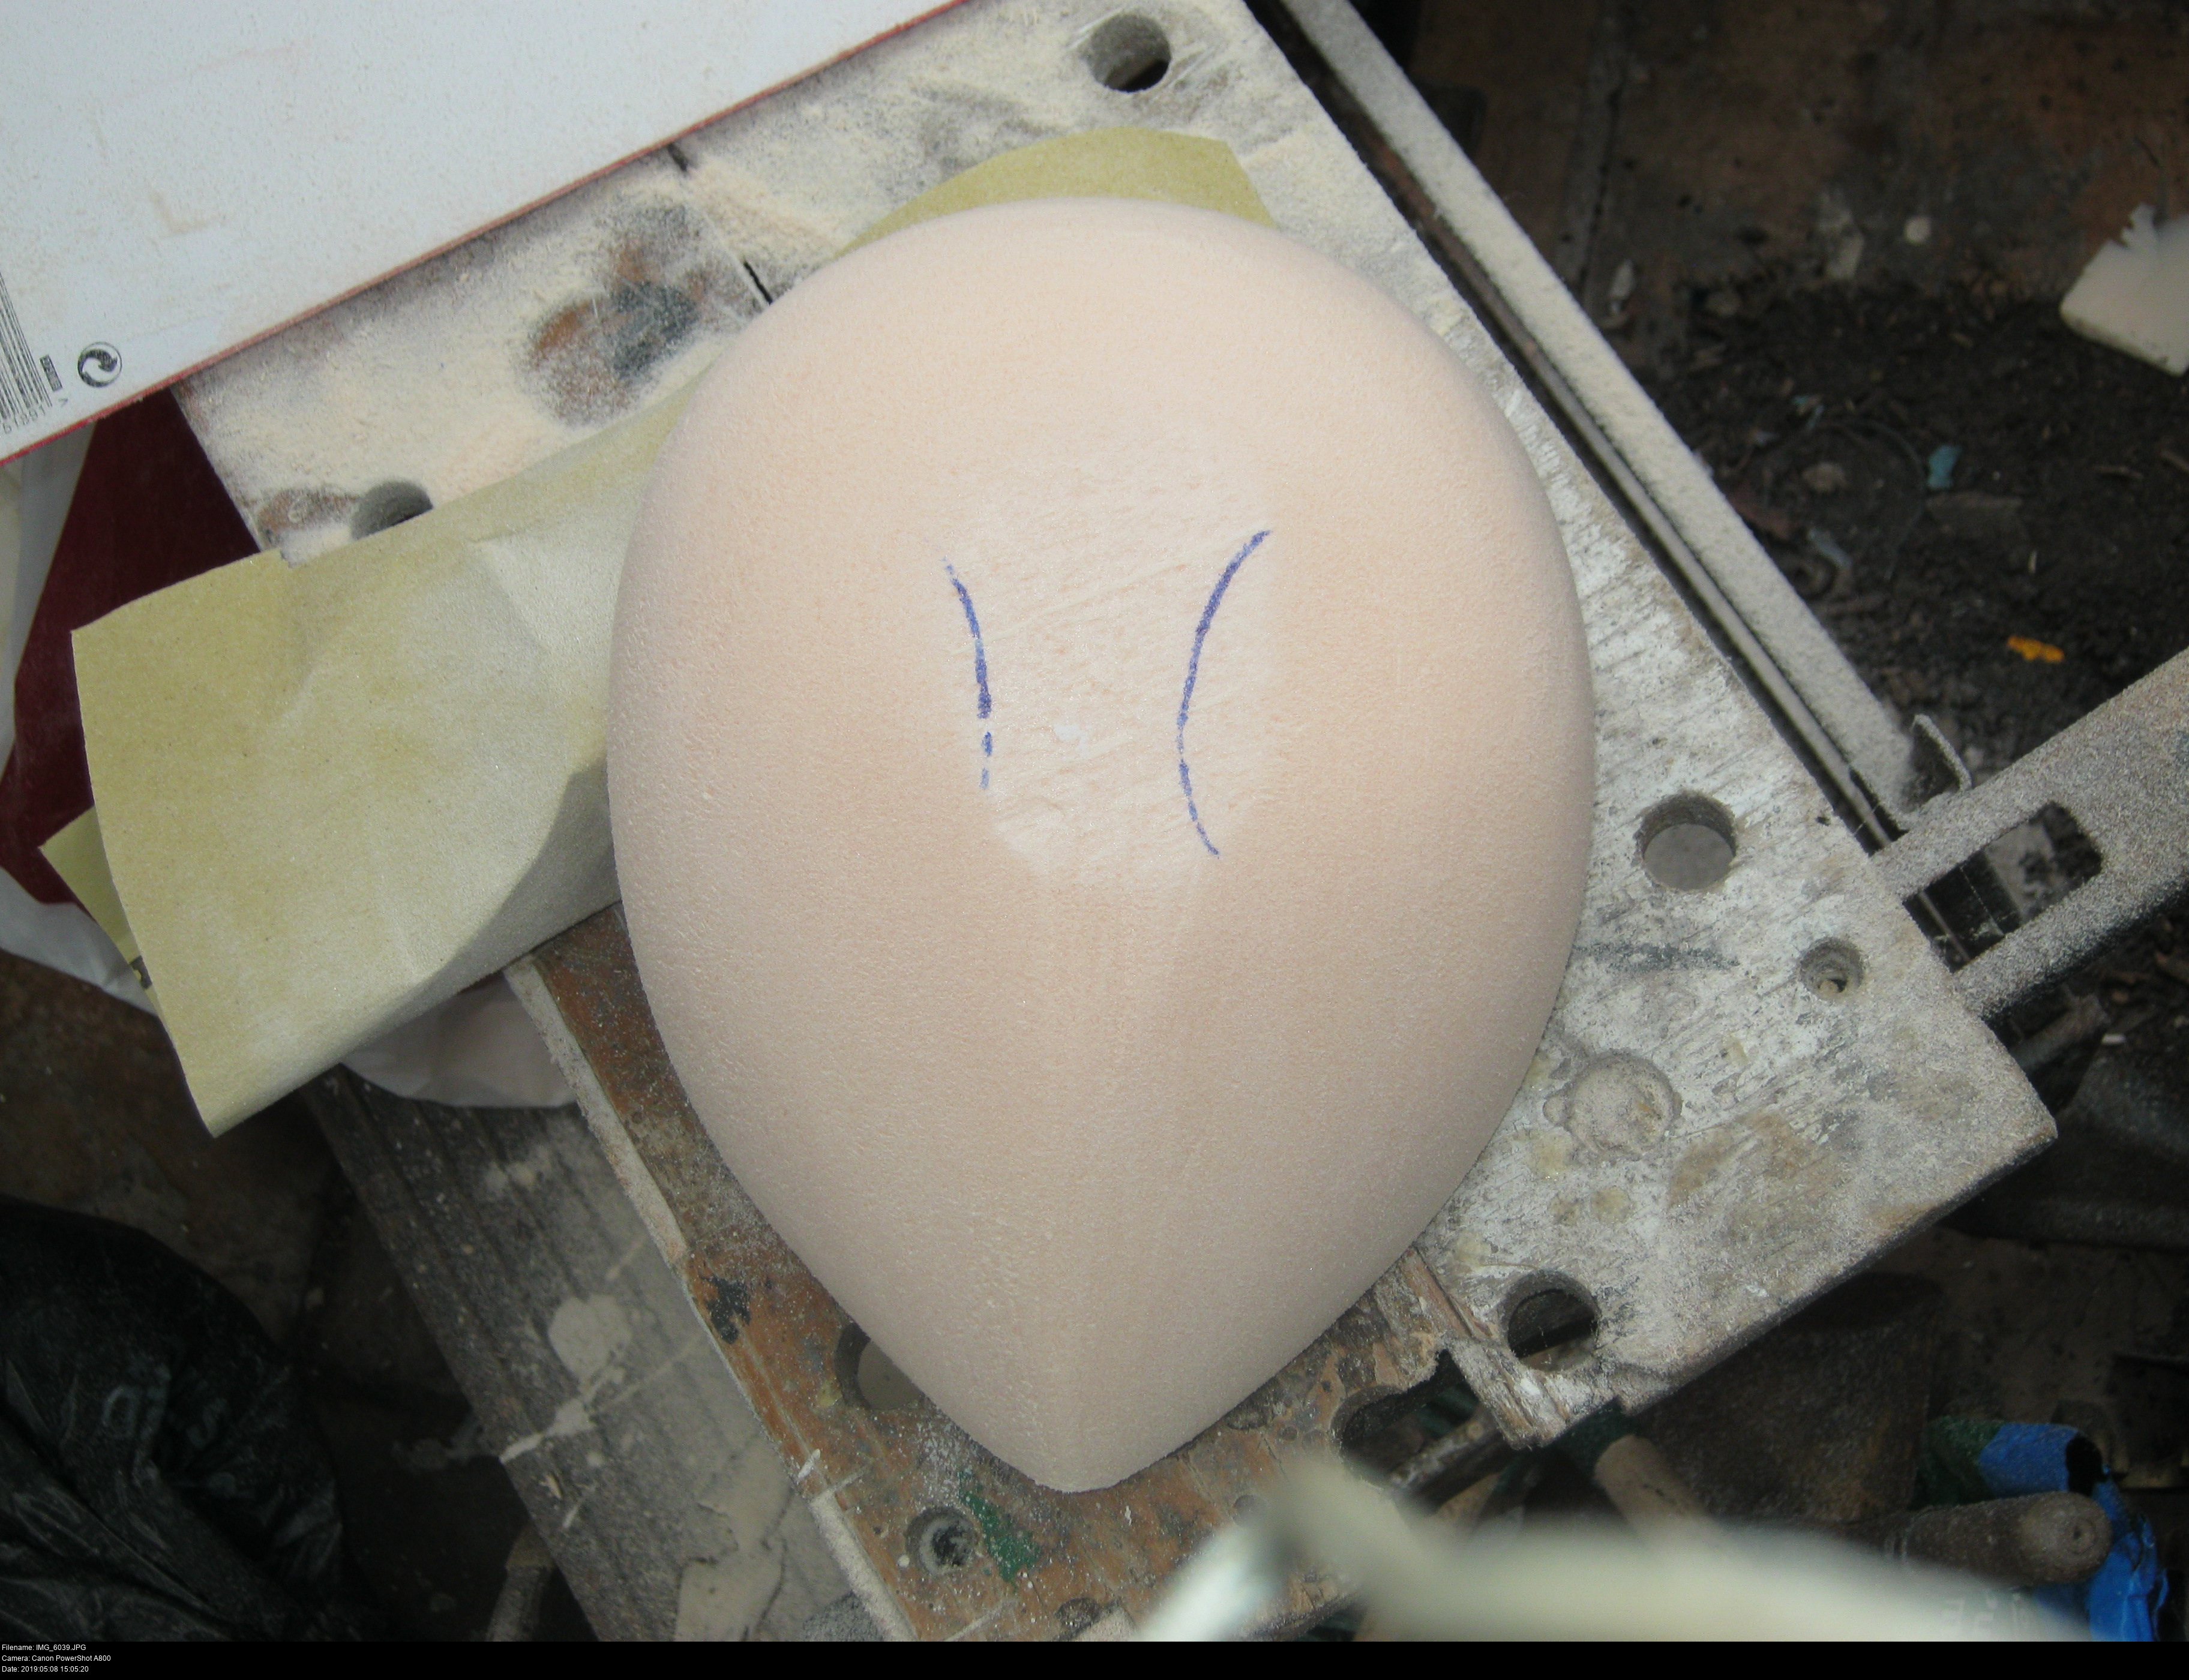


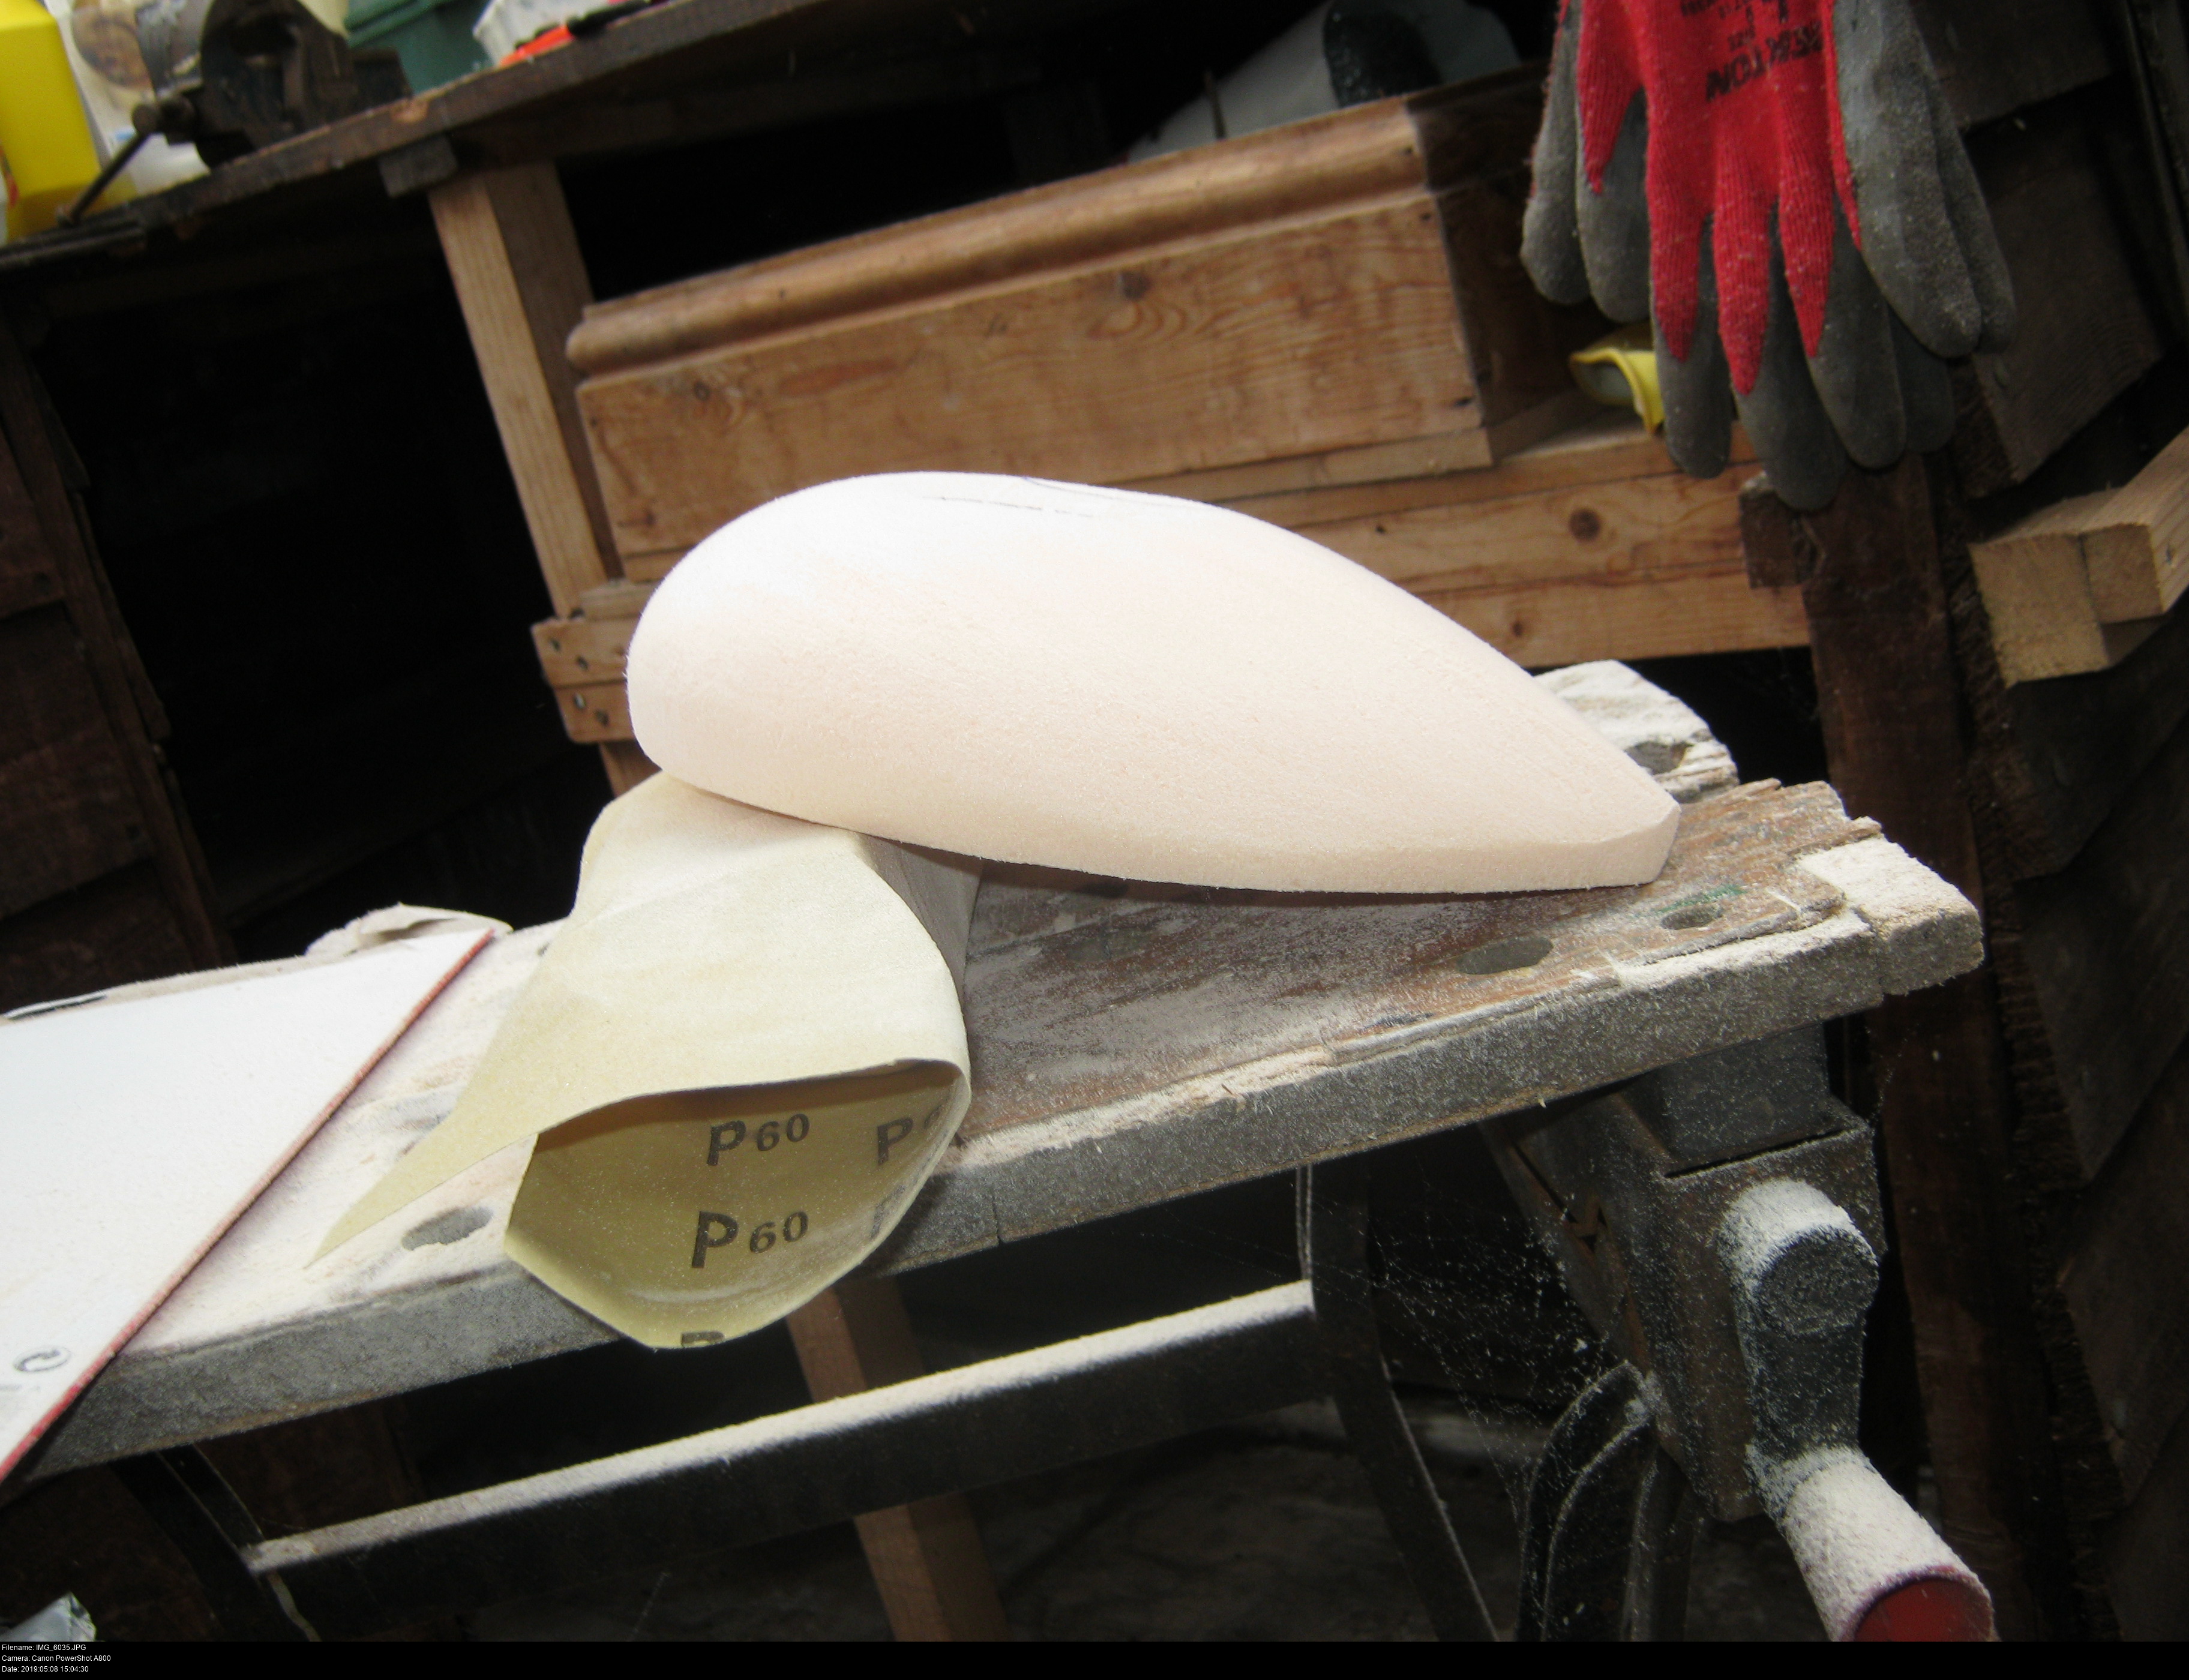
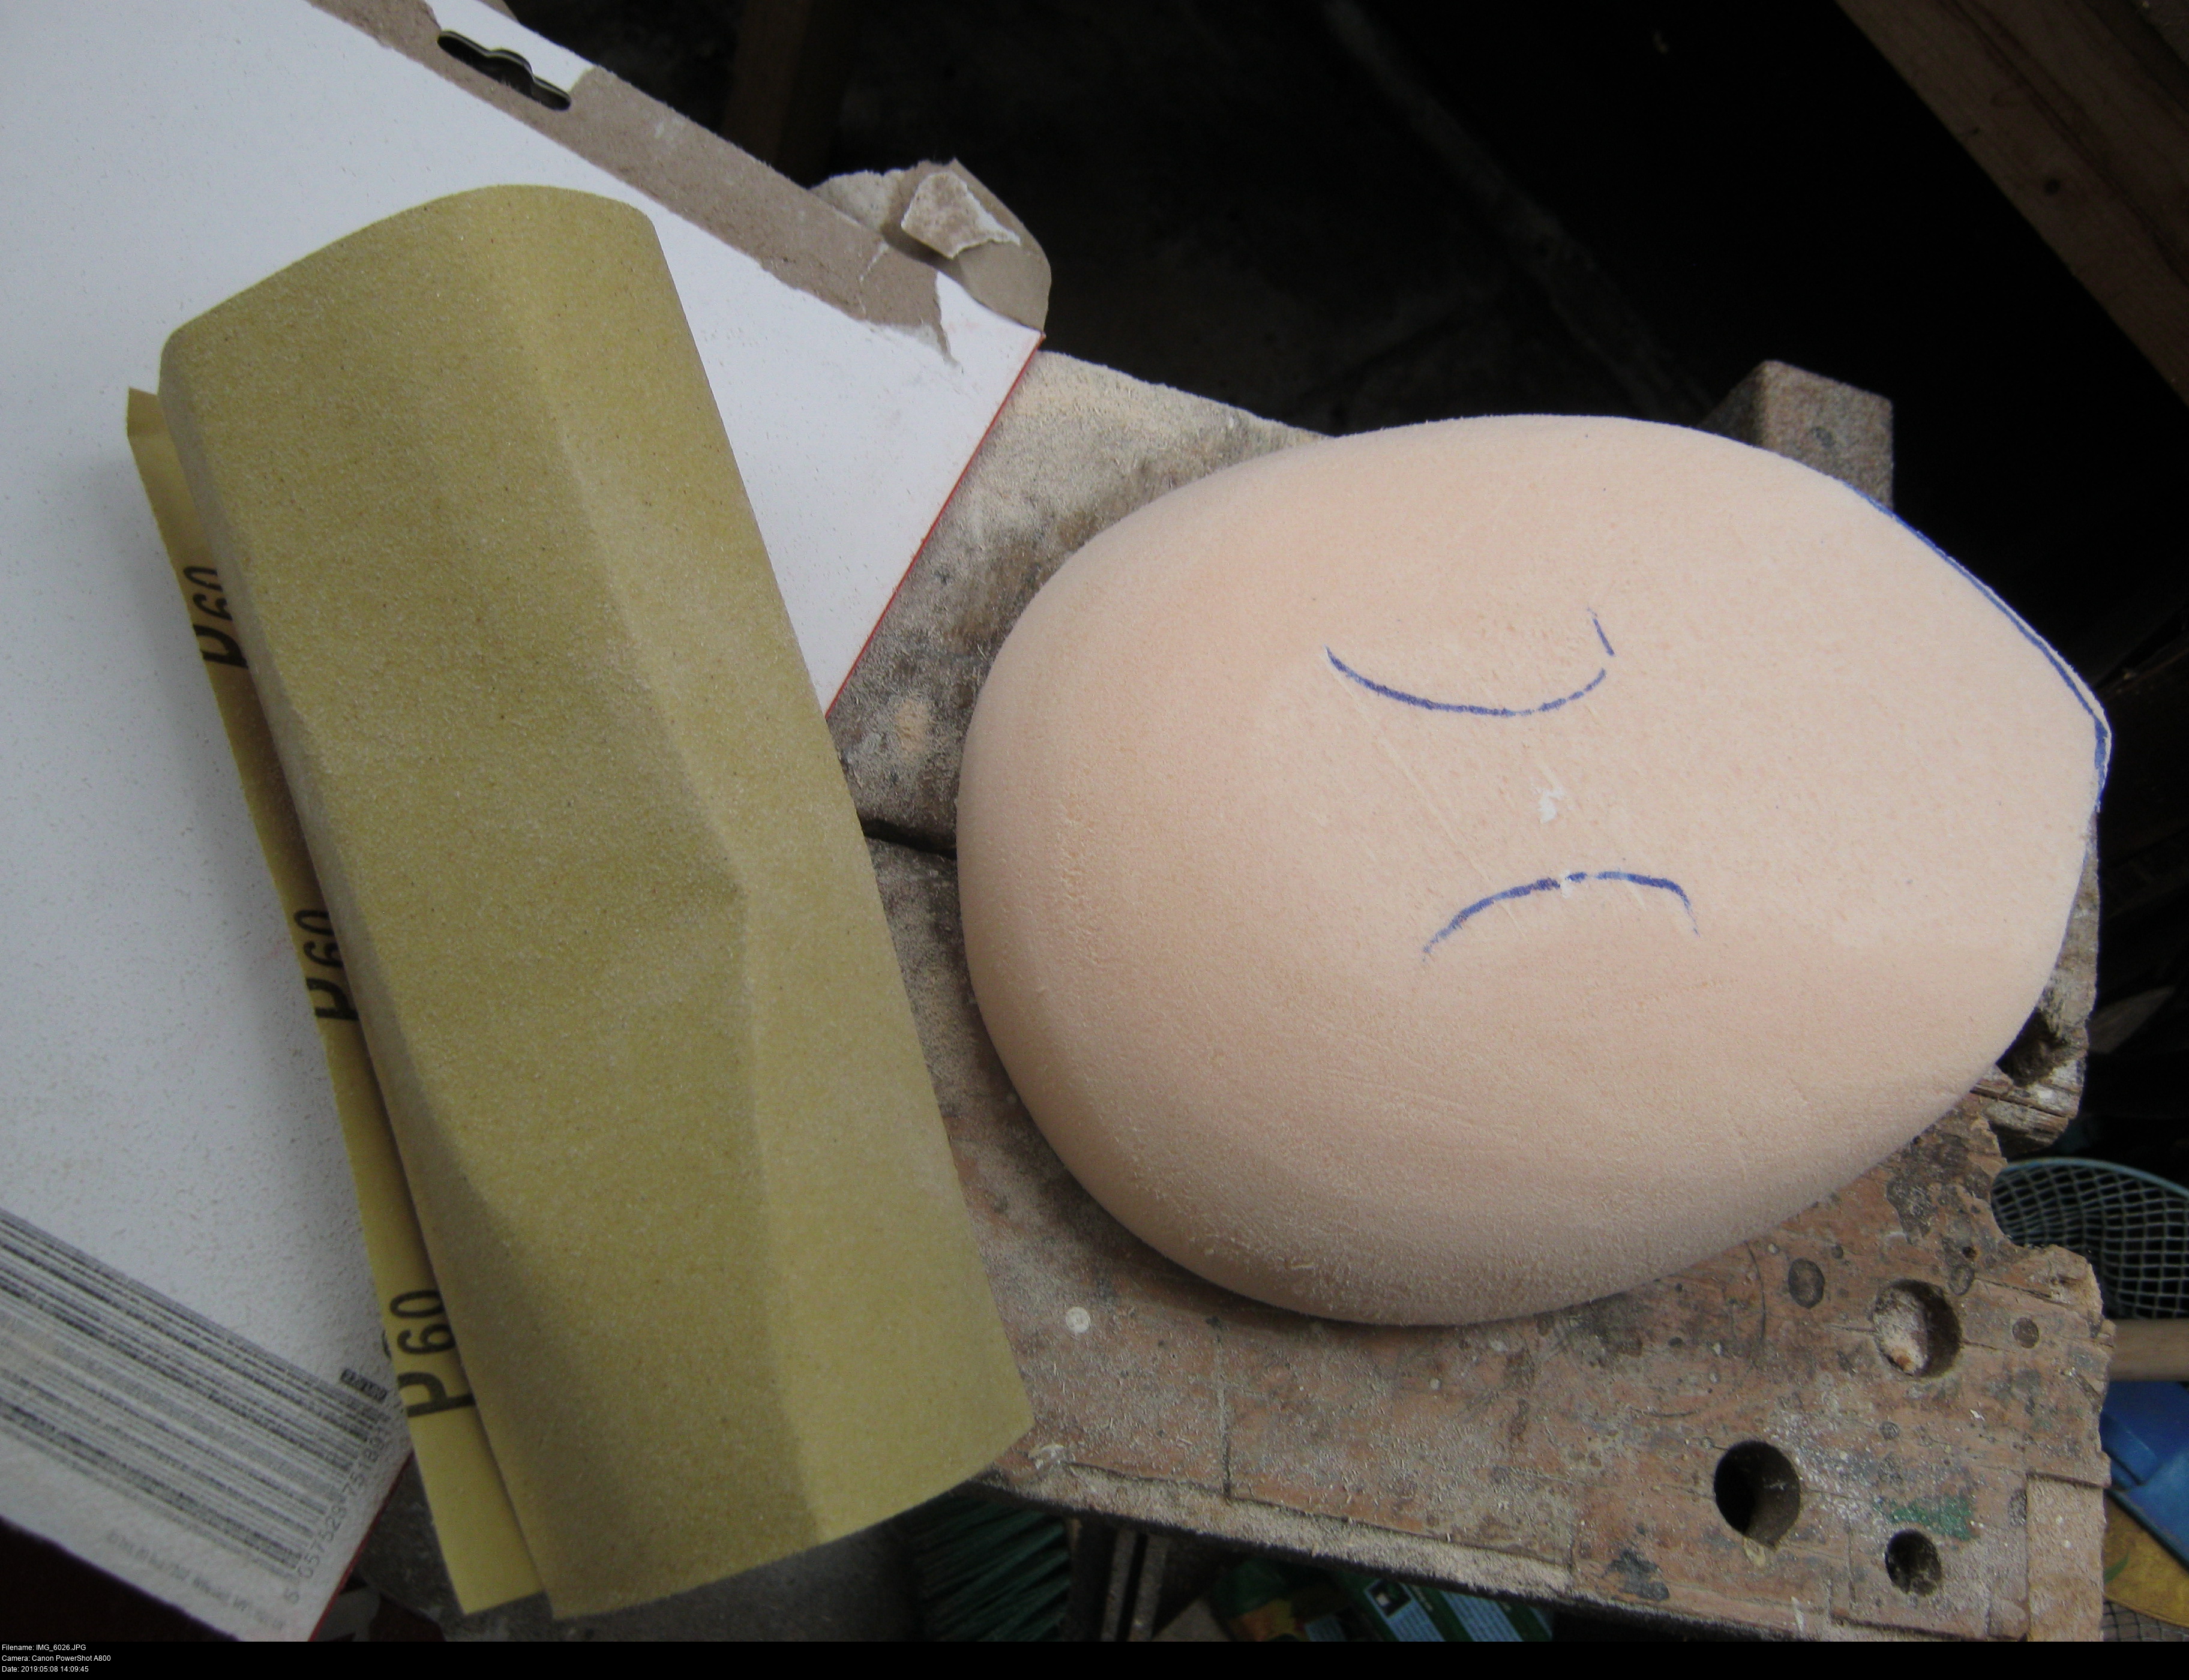
The shape is done! More or less. I think it looks rather danged good, if I do say so myself!
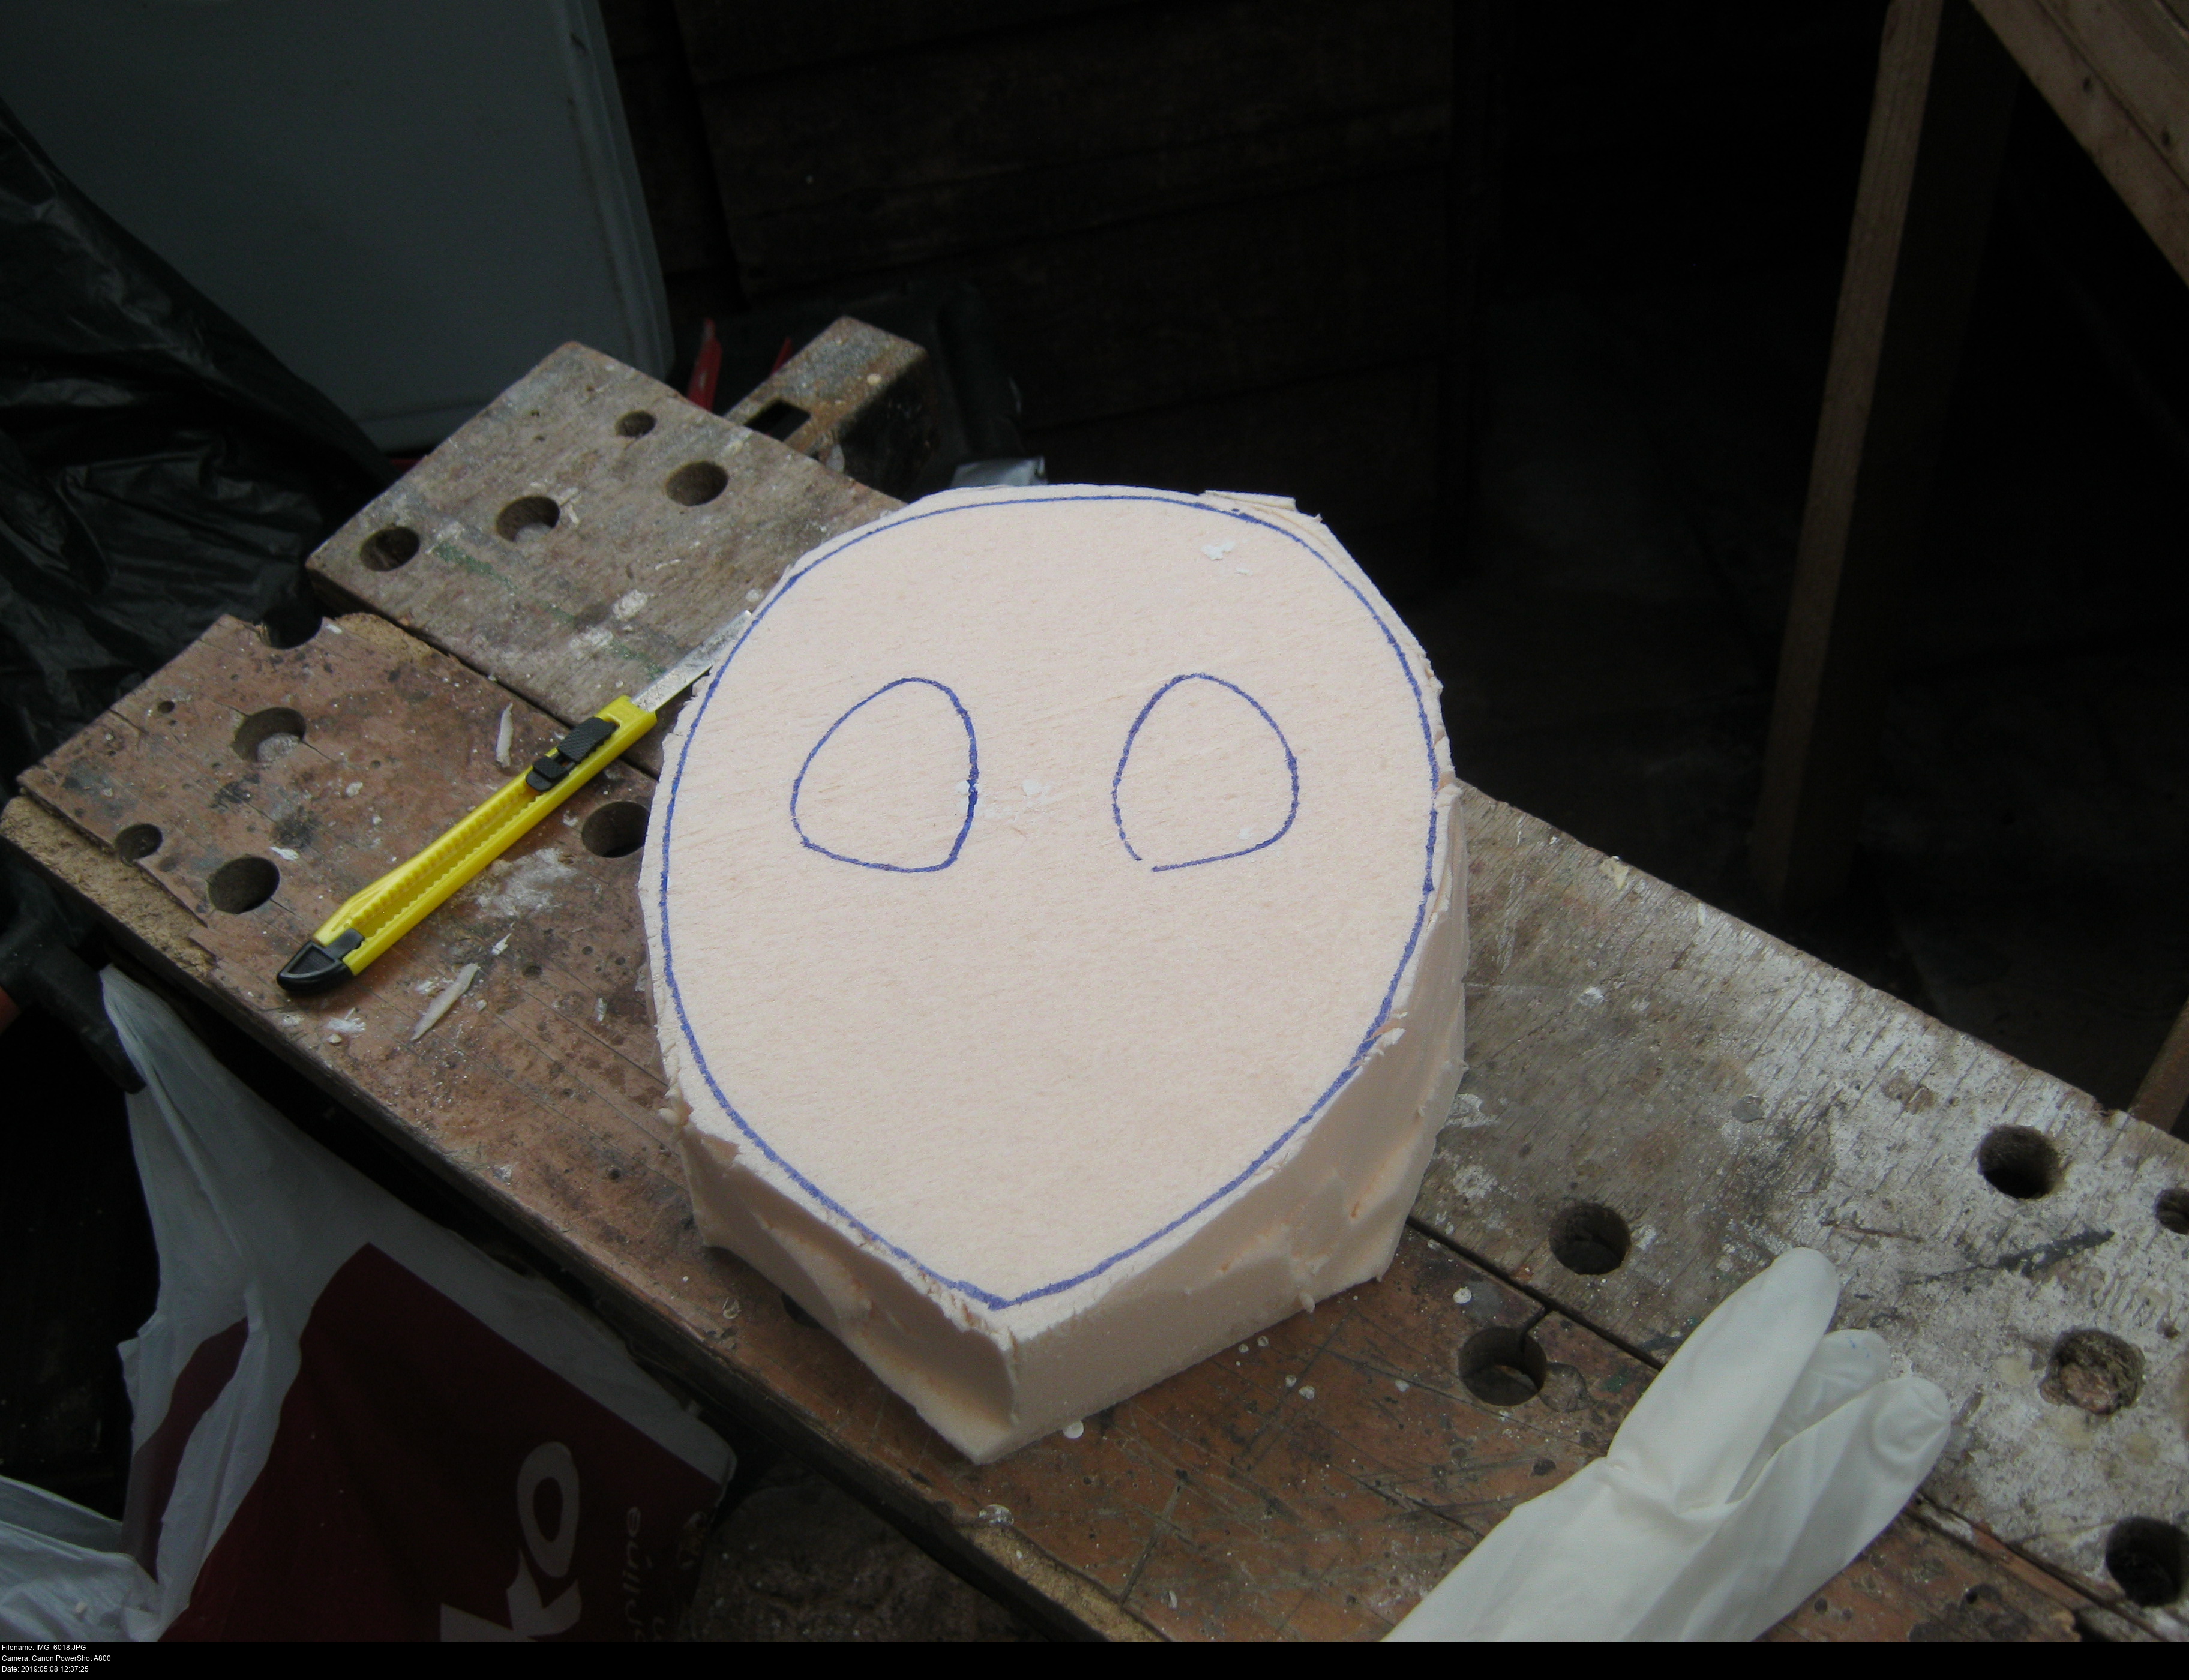
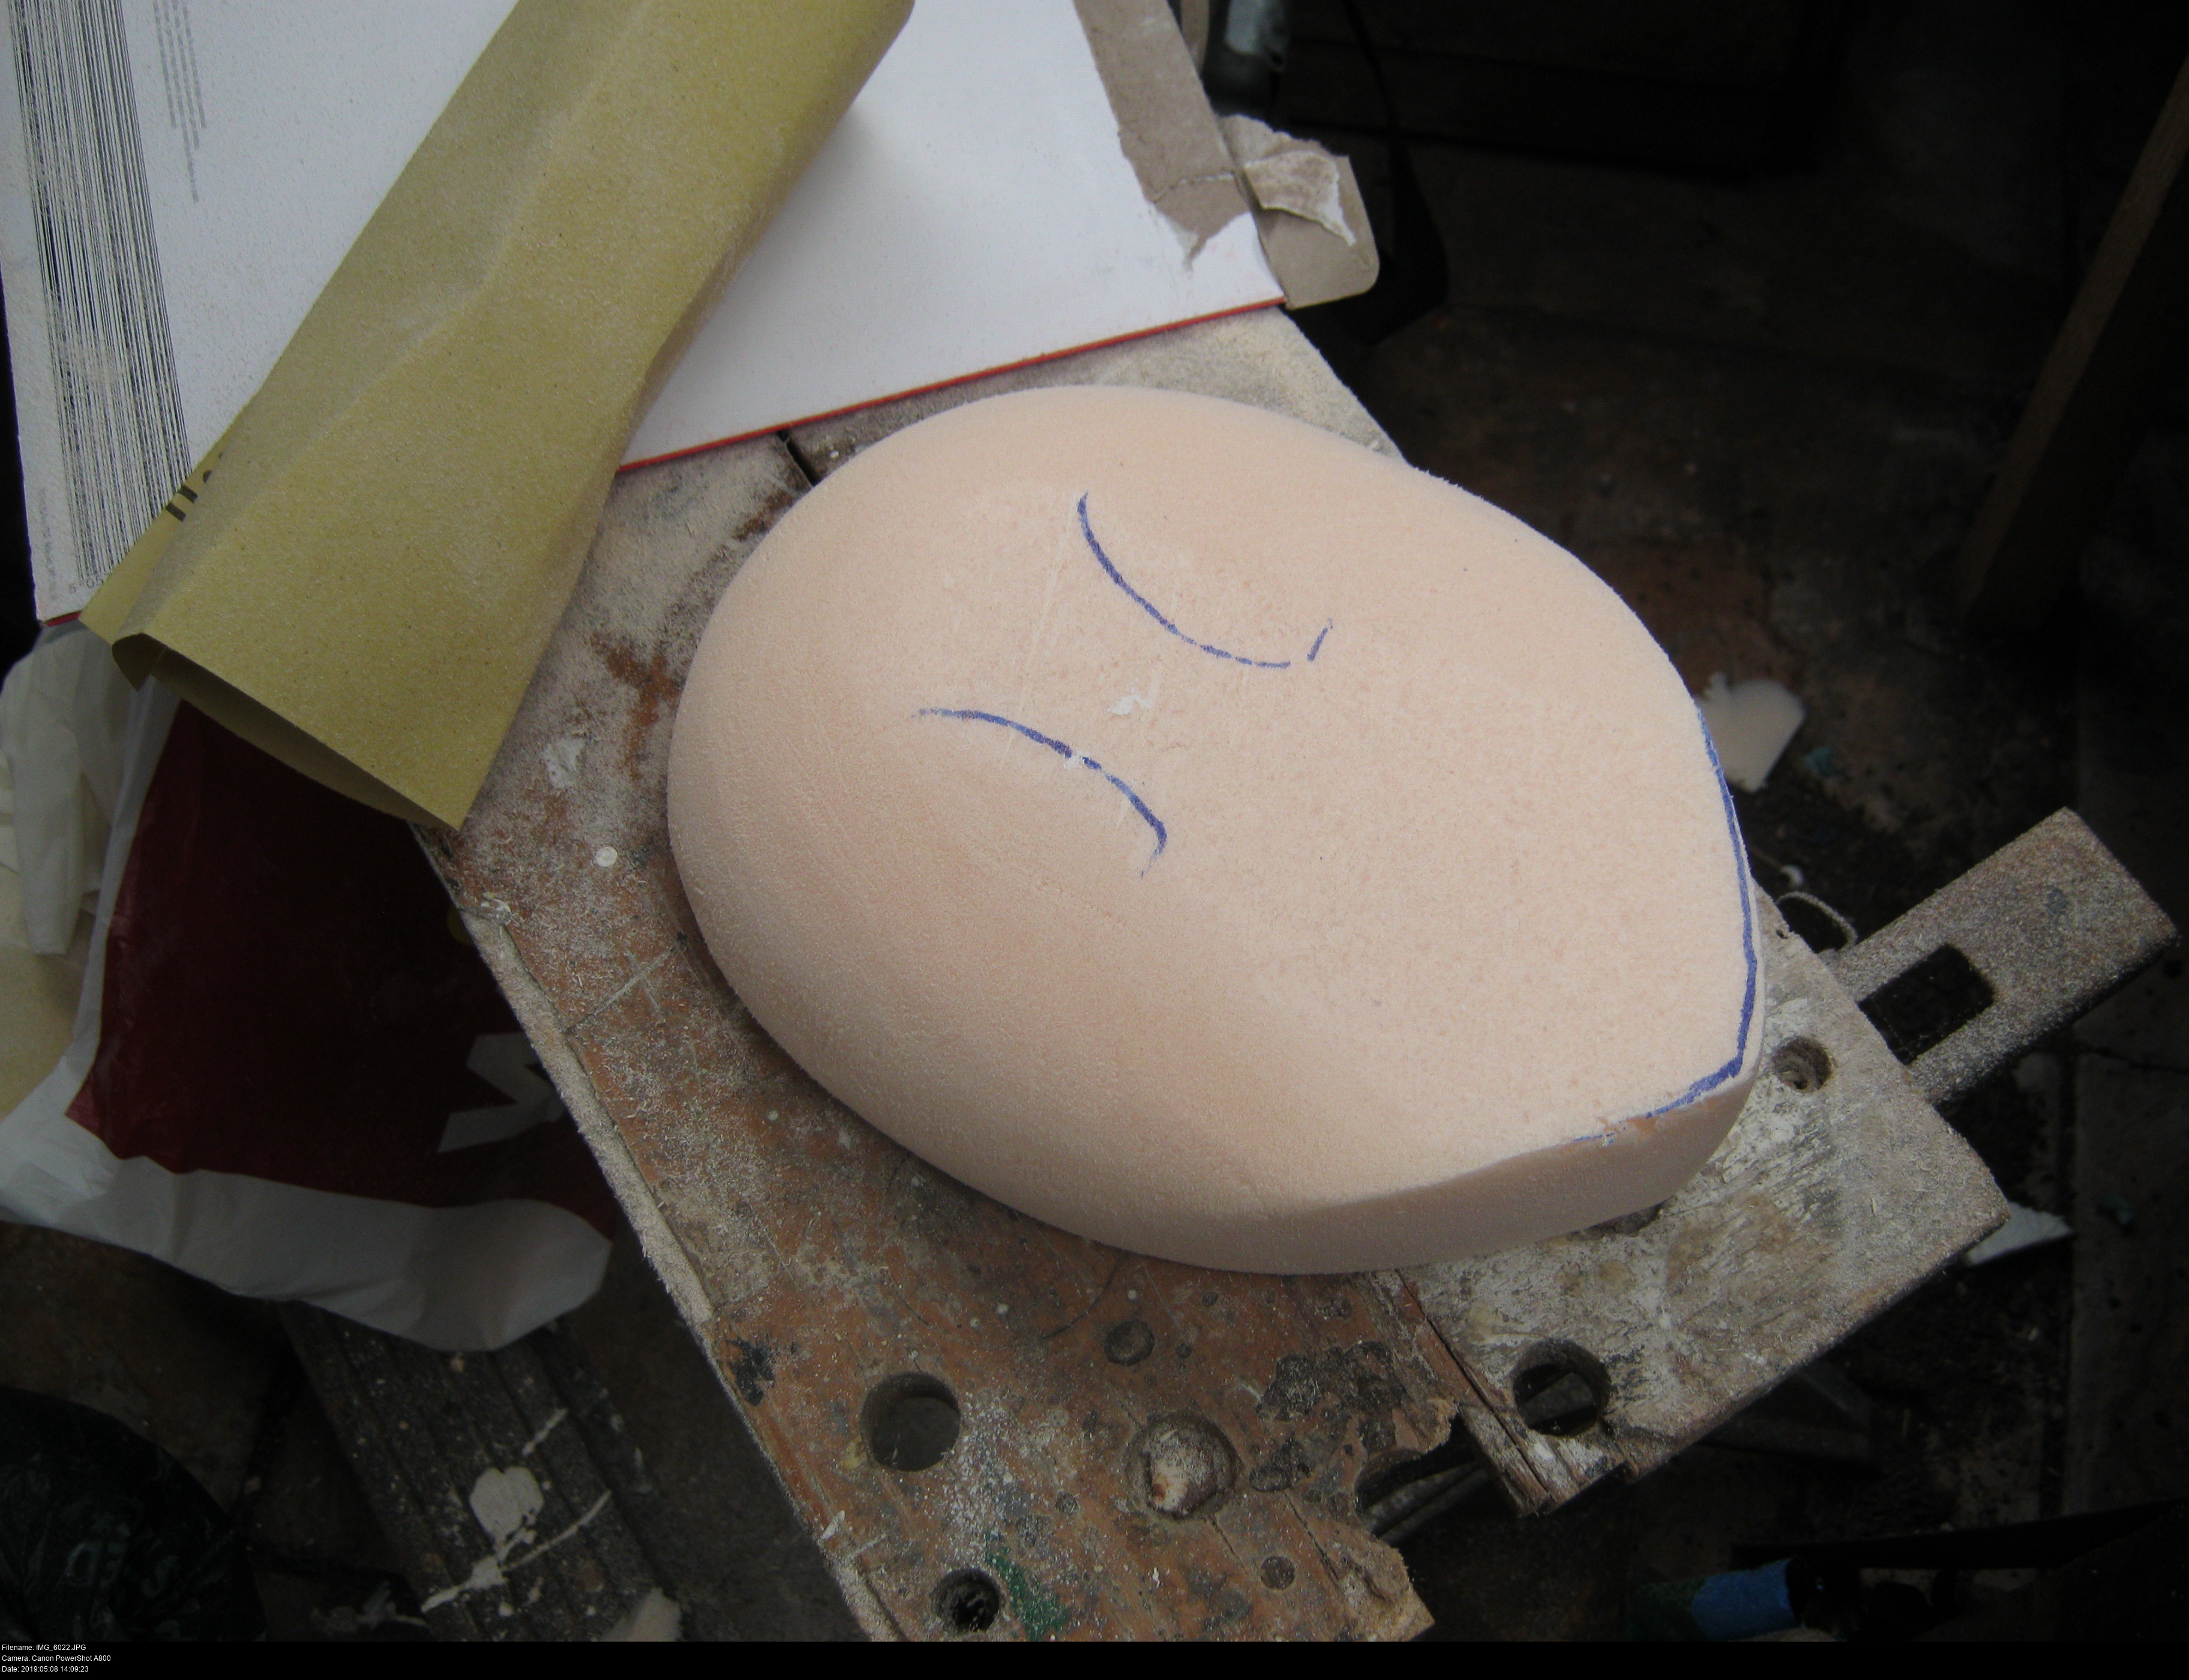
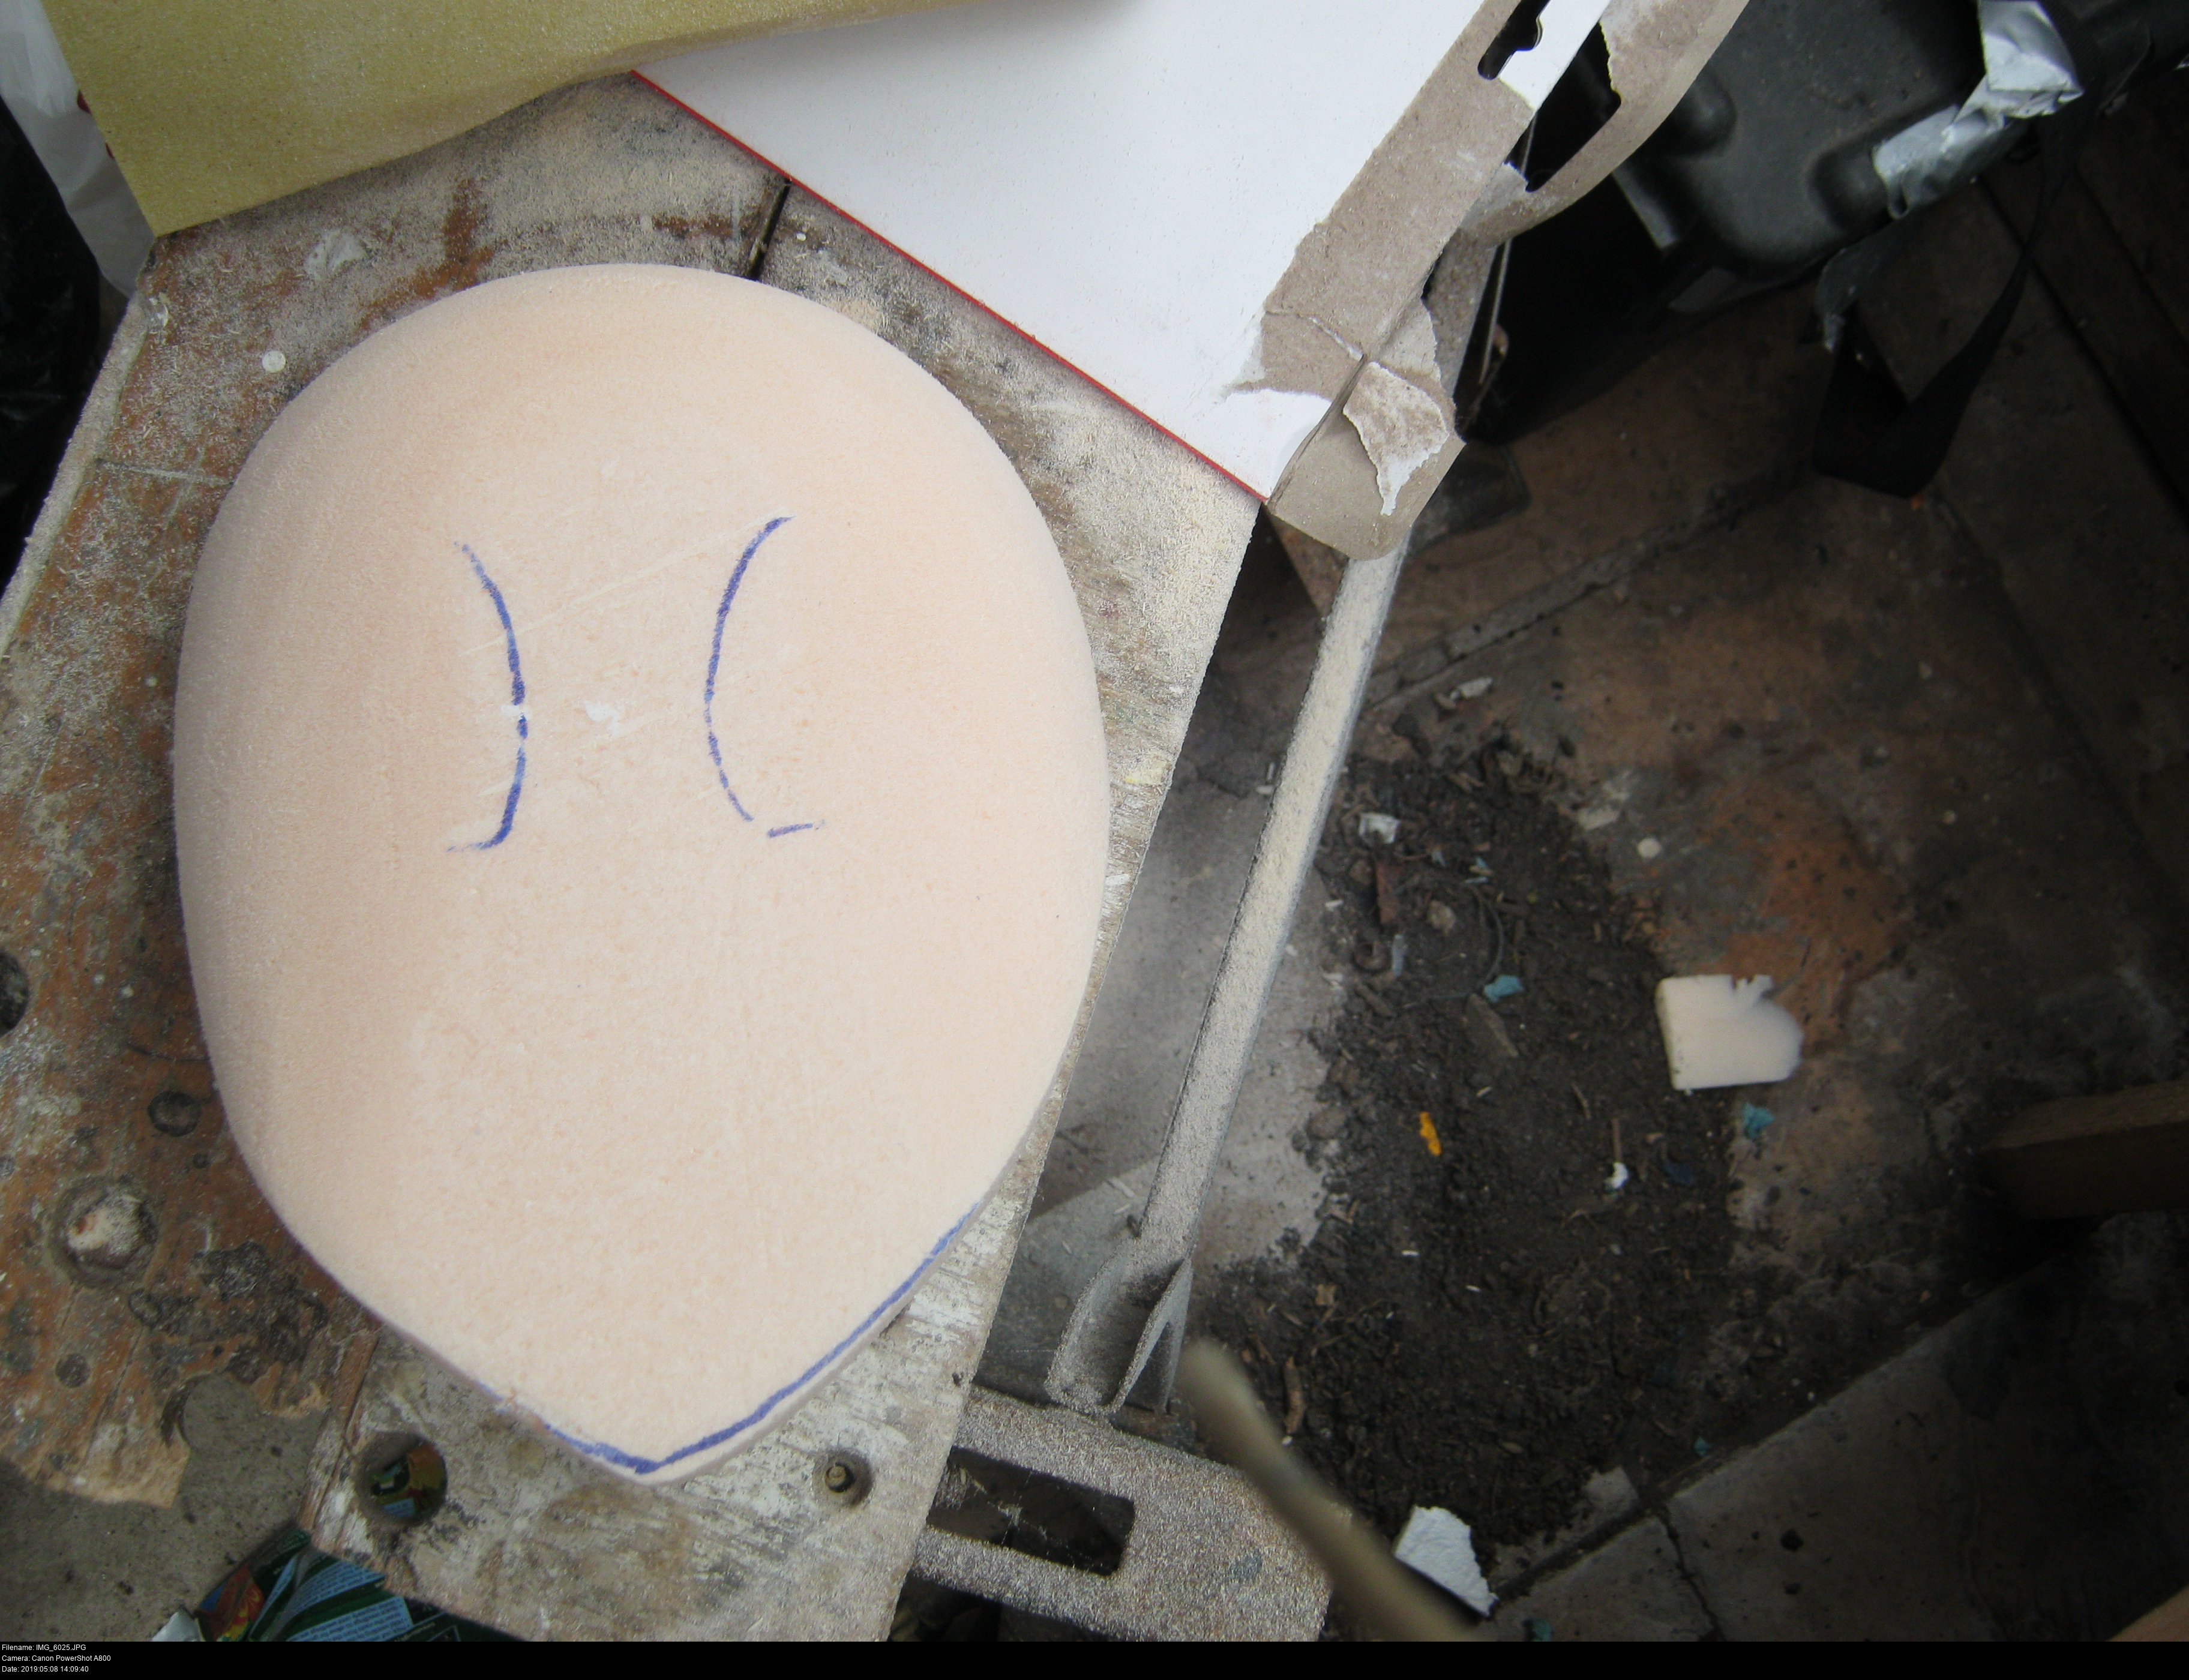
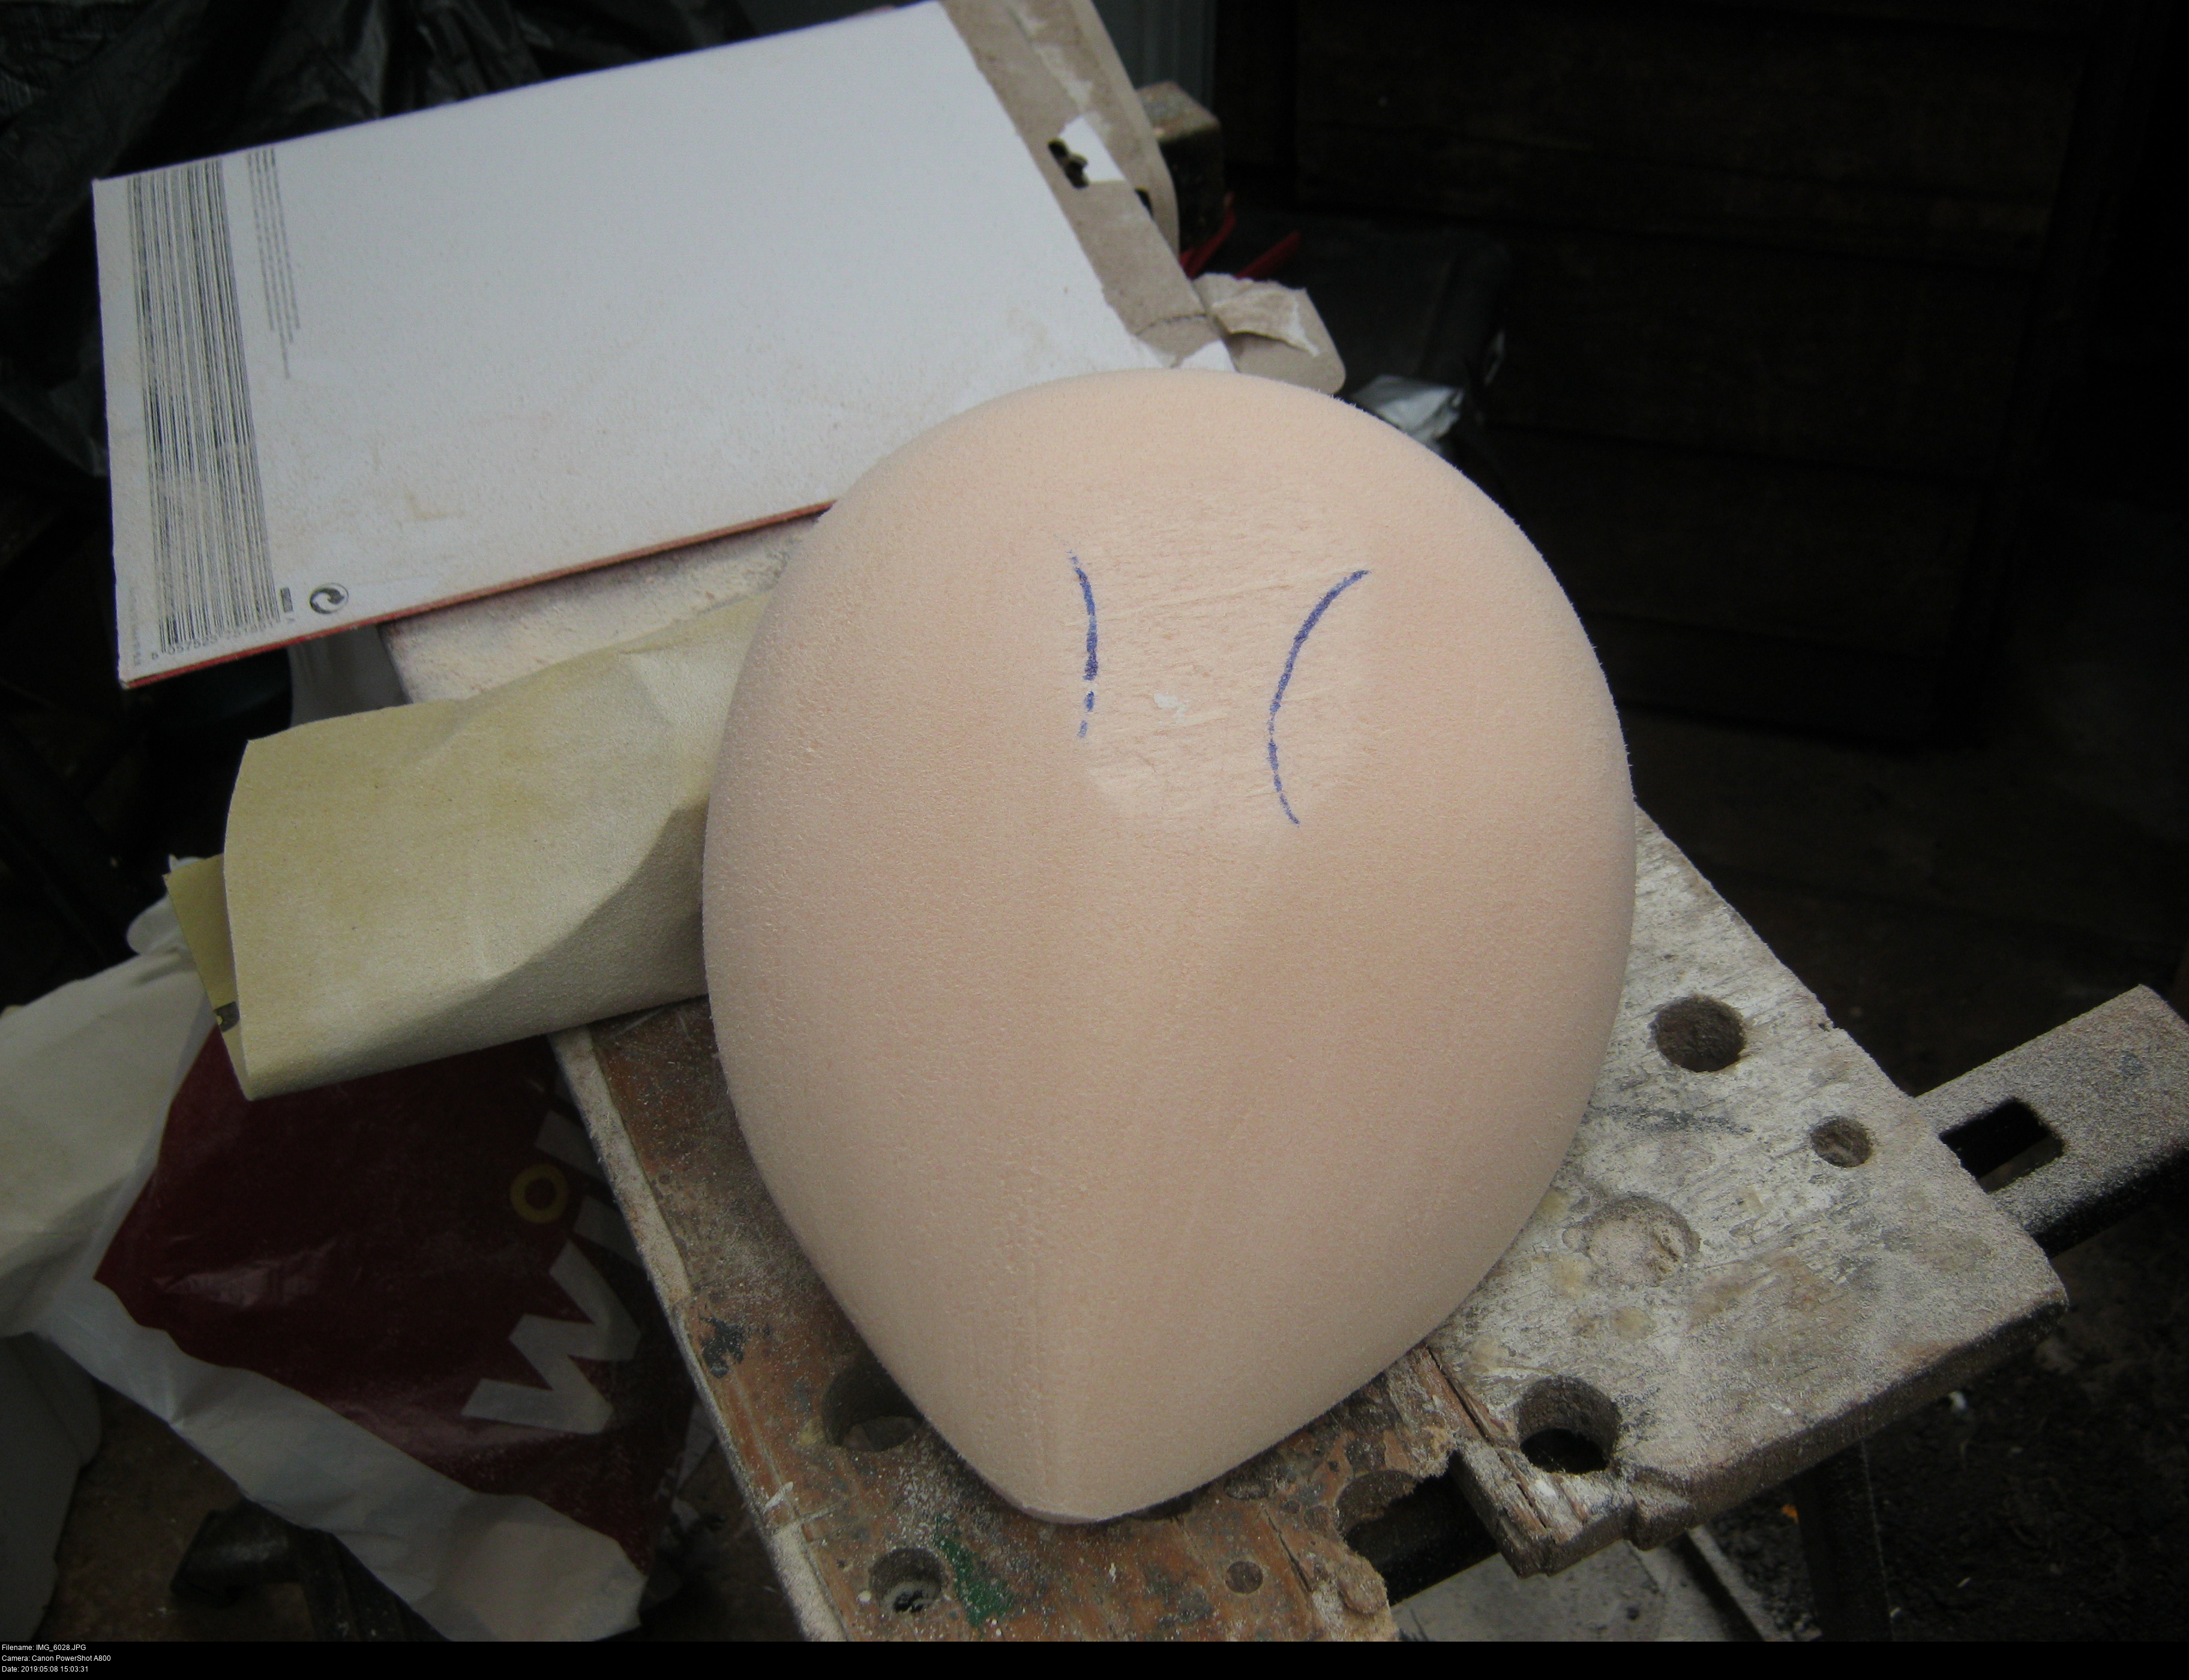
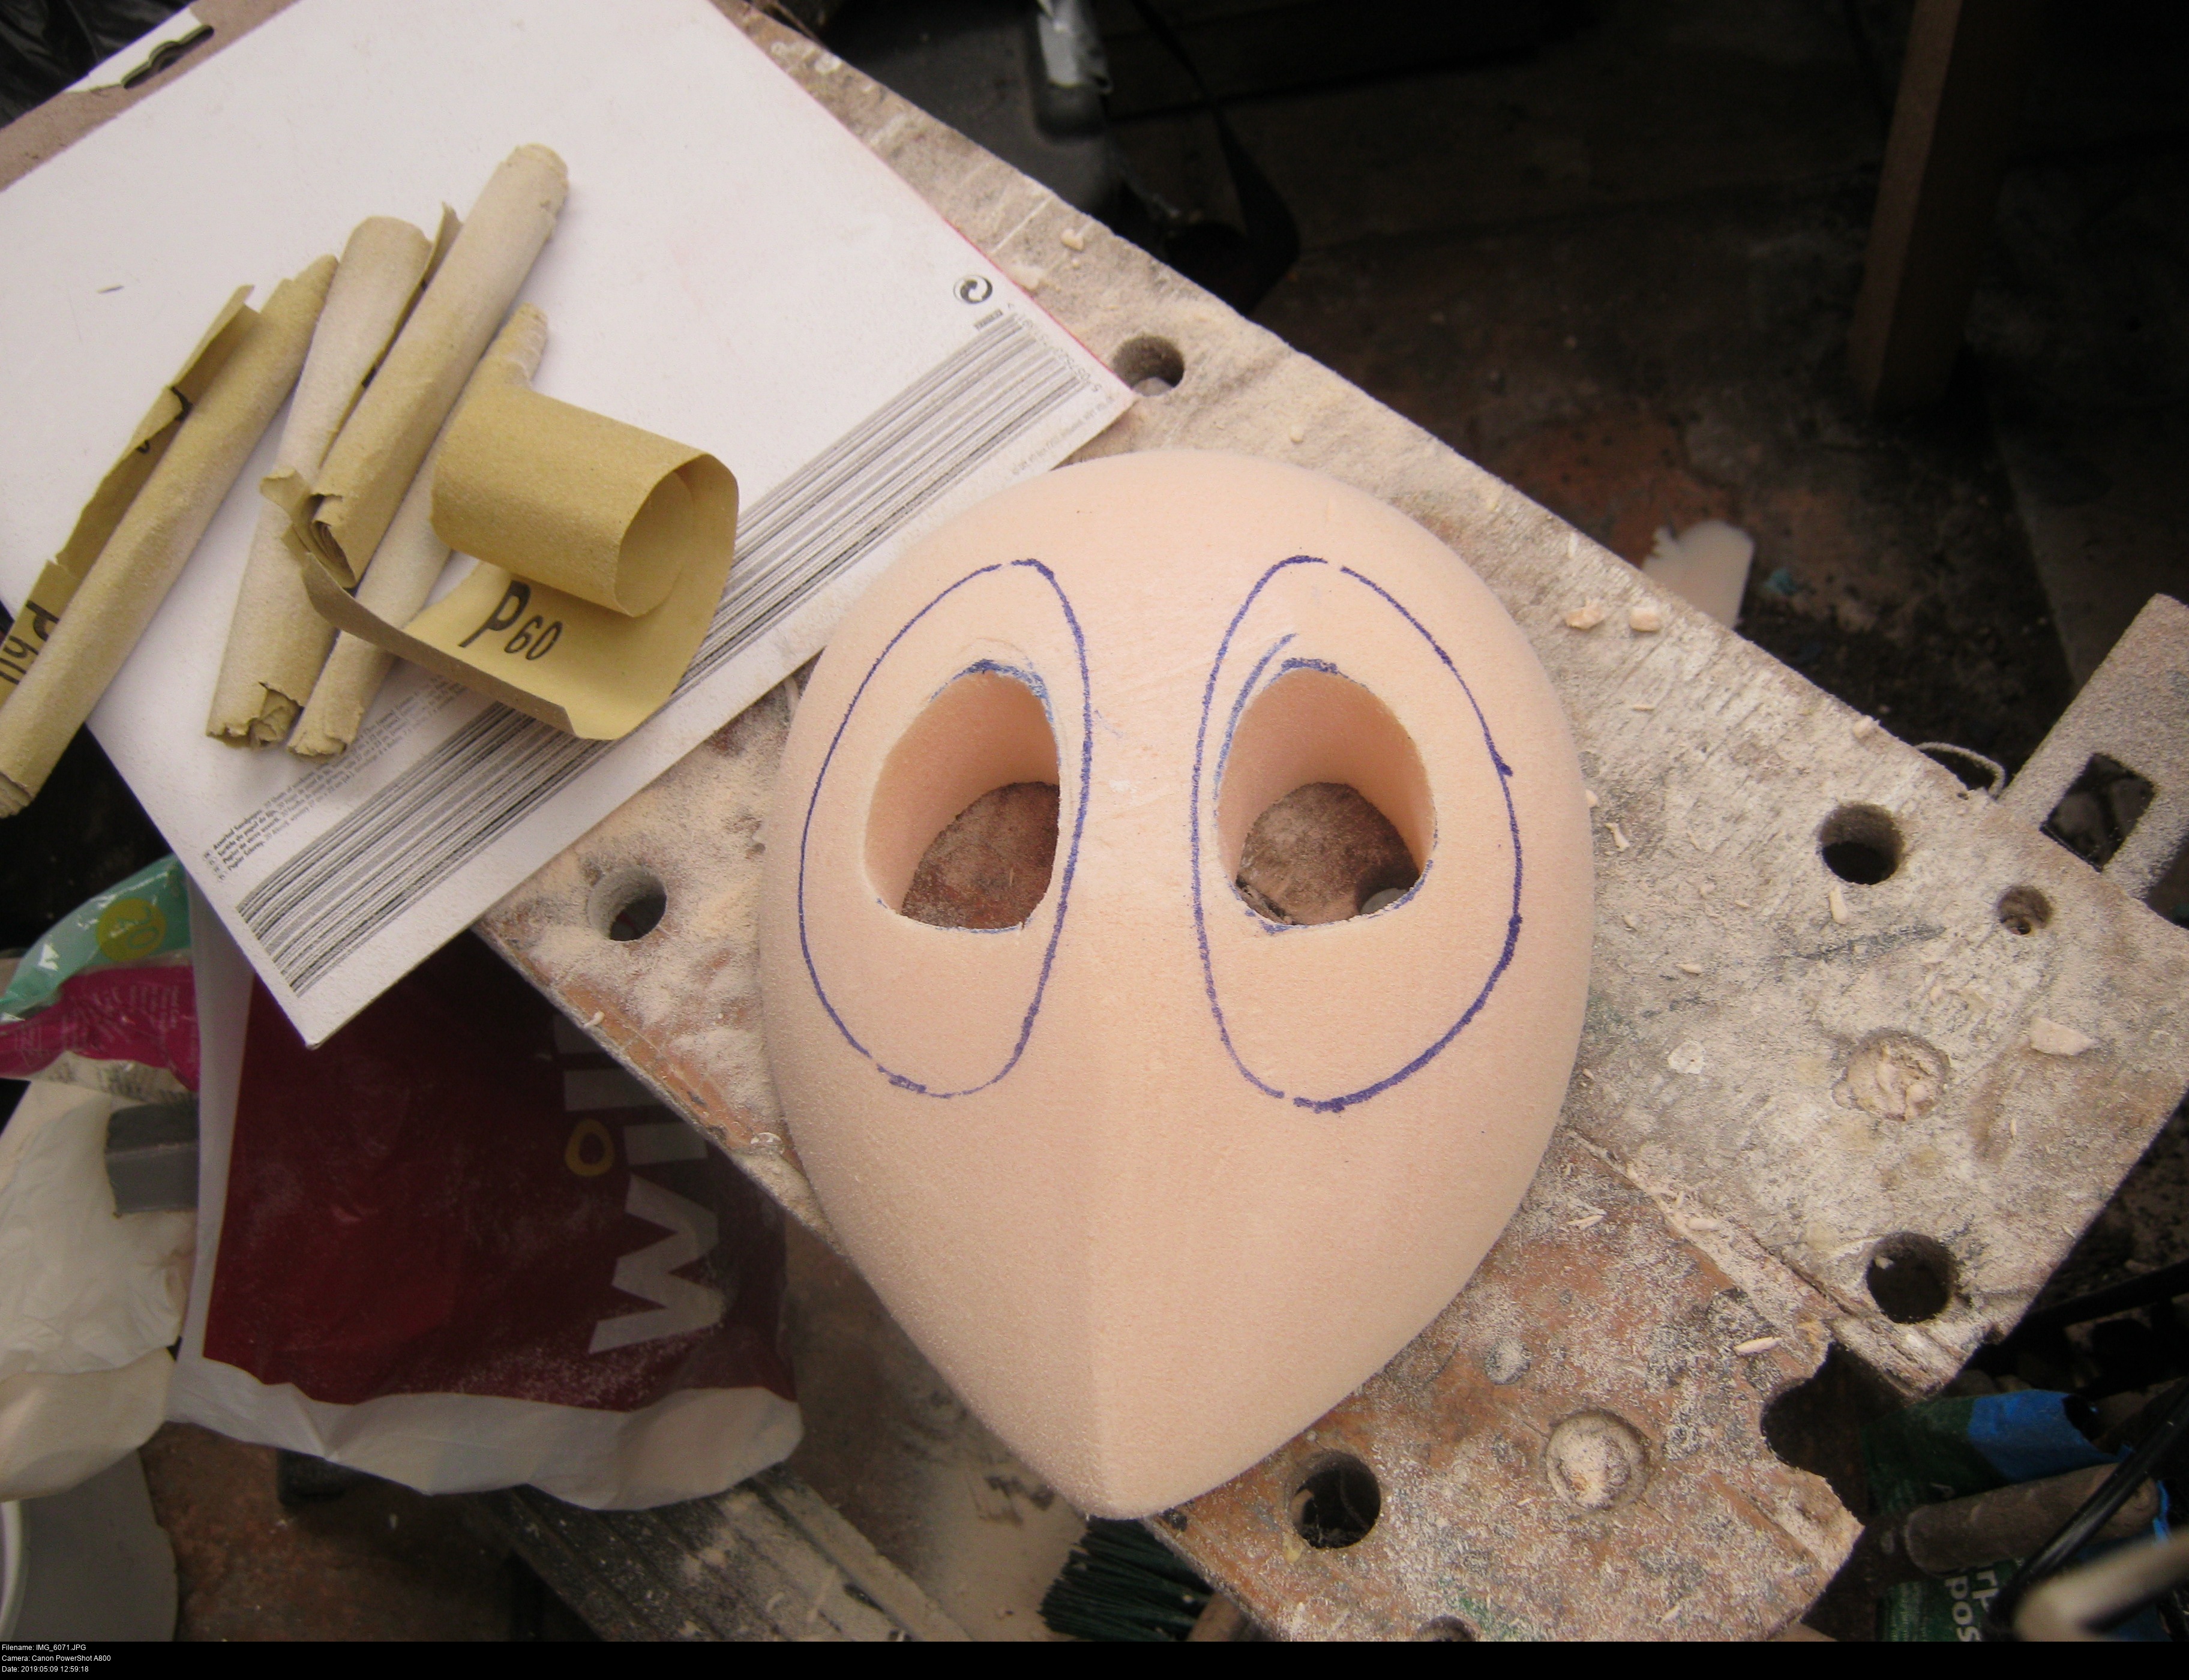
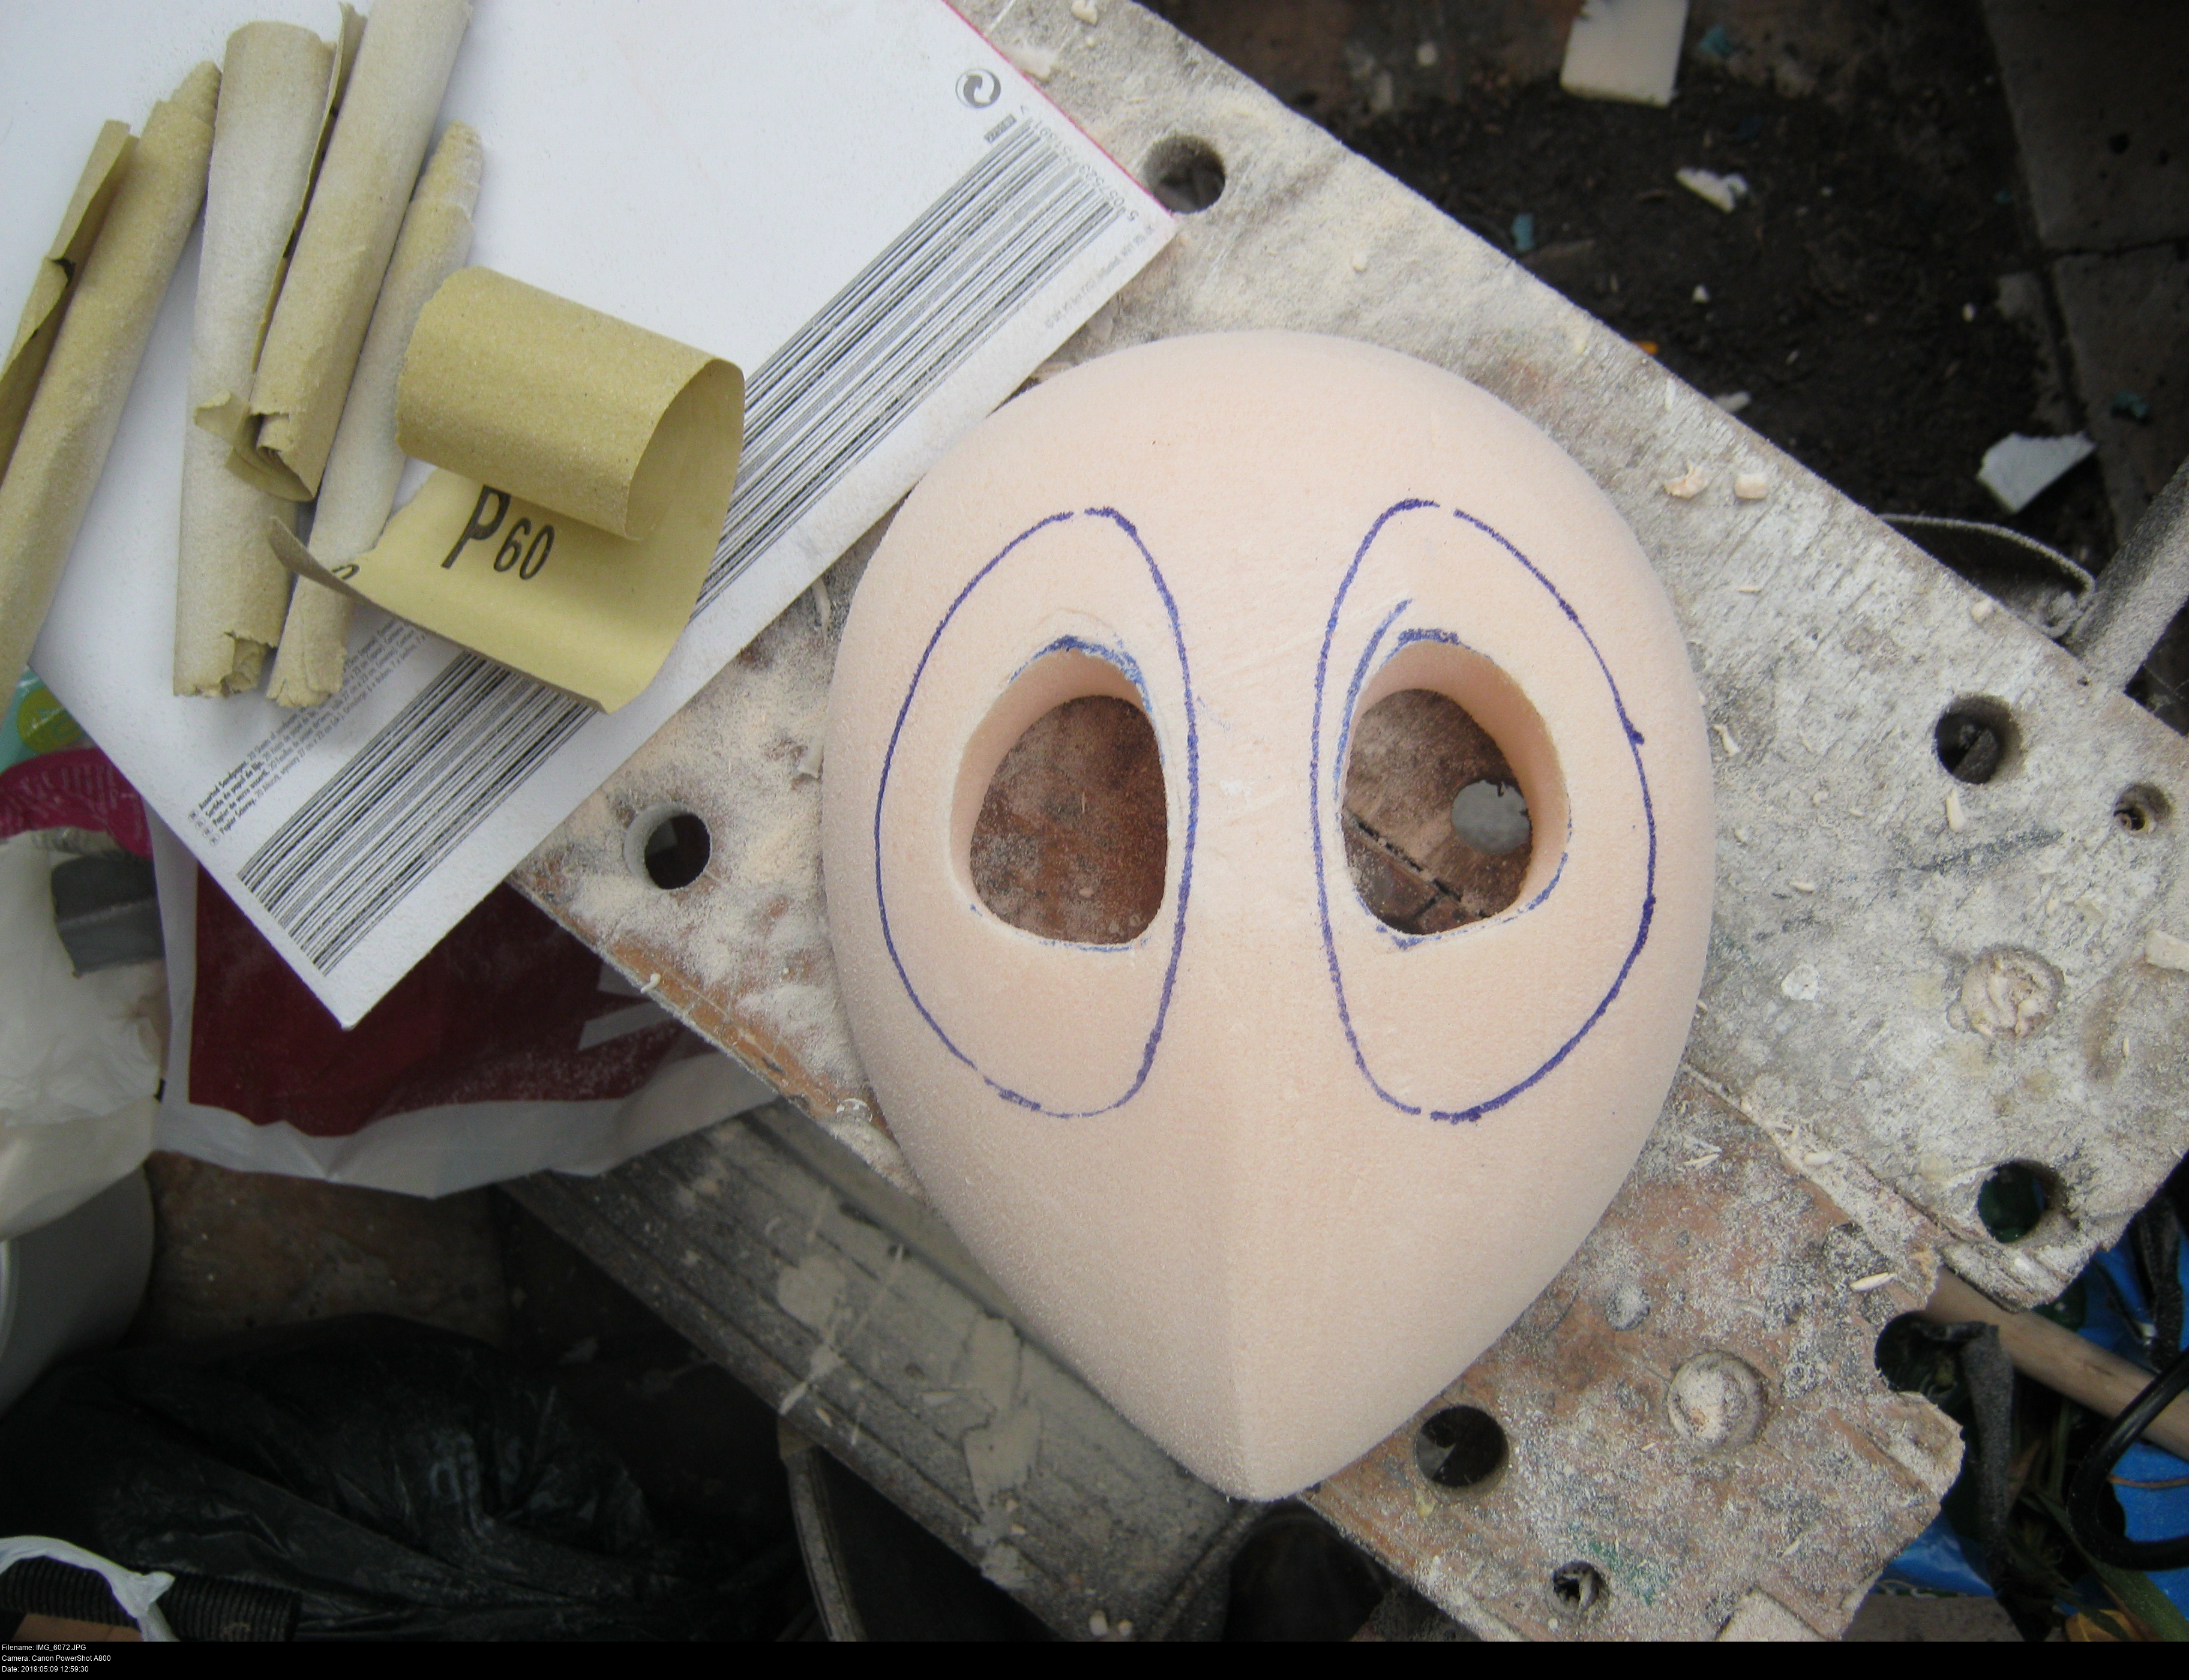
I am very thankful I'm wearing gloves, and that I have lots and lots of spare gloves. Notice that since I've sanded away some of the top surface where the eye markers were, I've not got a lot left to work with. I'm going to have to re-draw in the eye markings now otherwise I'll lose them forever. It's fine to re-mark and re-sand over and over to get the correct contour and have markings. But don't take the pen back inside when you're done, it belongs to the filthy dusty shed now.
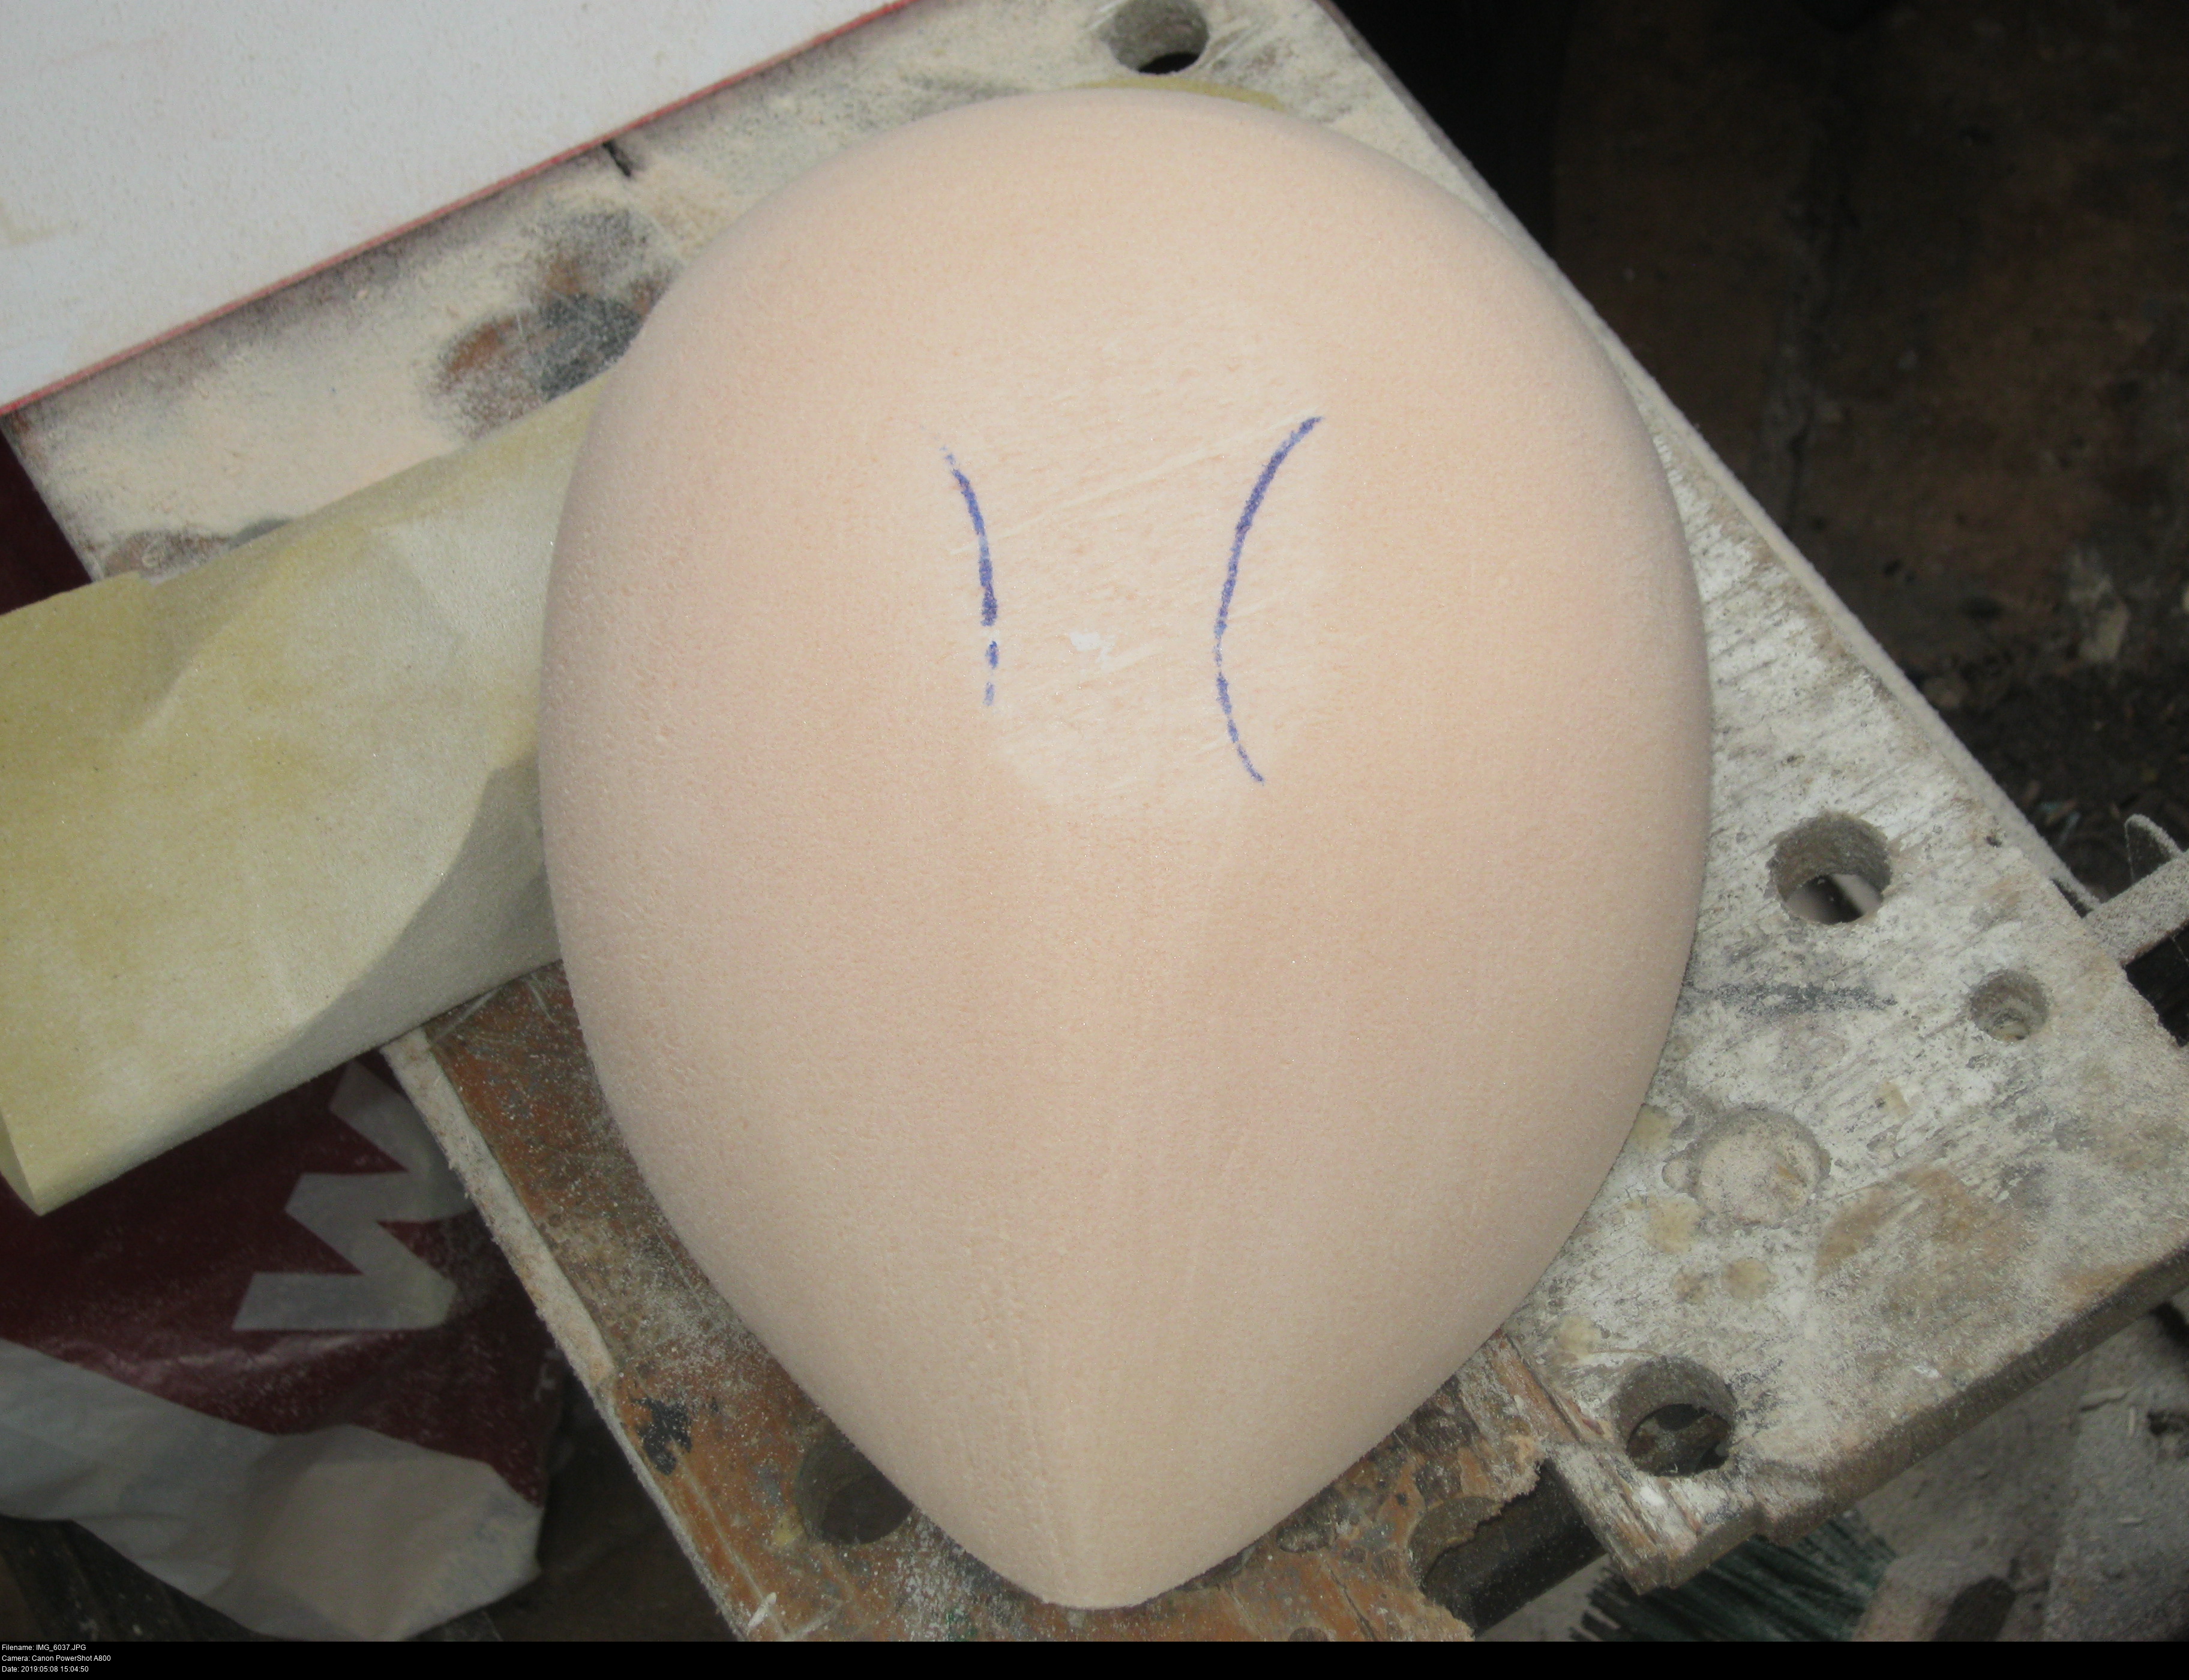
The markings are back. This is why you should always keep track of where your templates are, and keep all the central pieces that you cut out for eyes, etc.
The next step is to somehow hollow out these eyes straight through. I want perfectly straight prismatic holes: the wearer should be able to see straight forward through this mask, and the concave cavities for the eyes are formed around these holes.
What kind of amazing super technology have I got for this?
Well, even if I had something ready, I don't think it would be a good idea to use it to be honest. Anything with any power behind it is probably going to shatter this brittle foam or do something unpredictable and nasty. I should make these holes by hand.
And to do that I'm going to use:
A narrow, long screwdriver, and
A fresh piece of sandpaper rolled into a tight coil.
That's it.
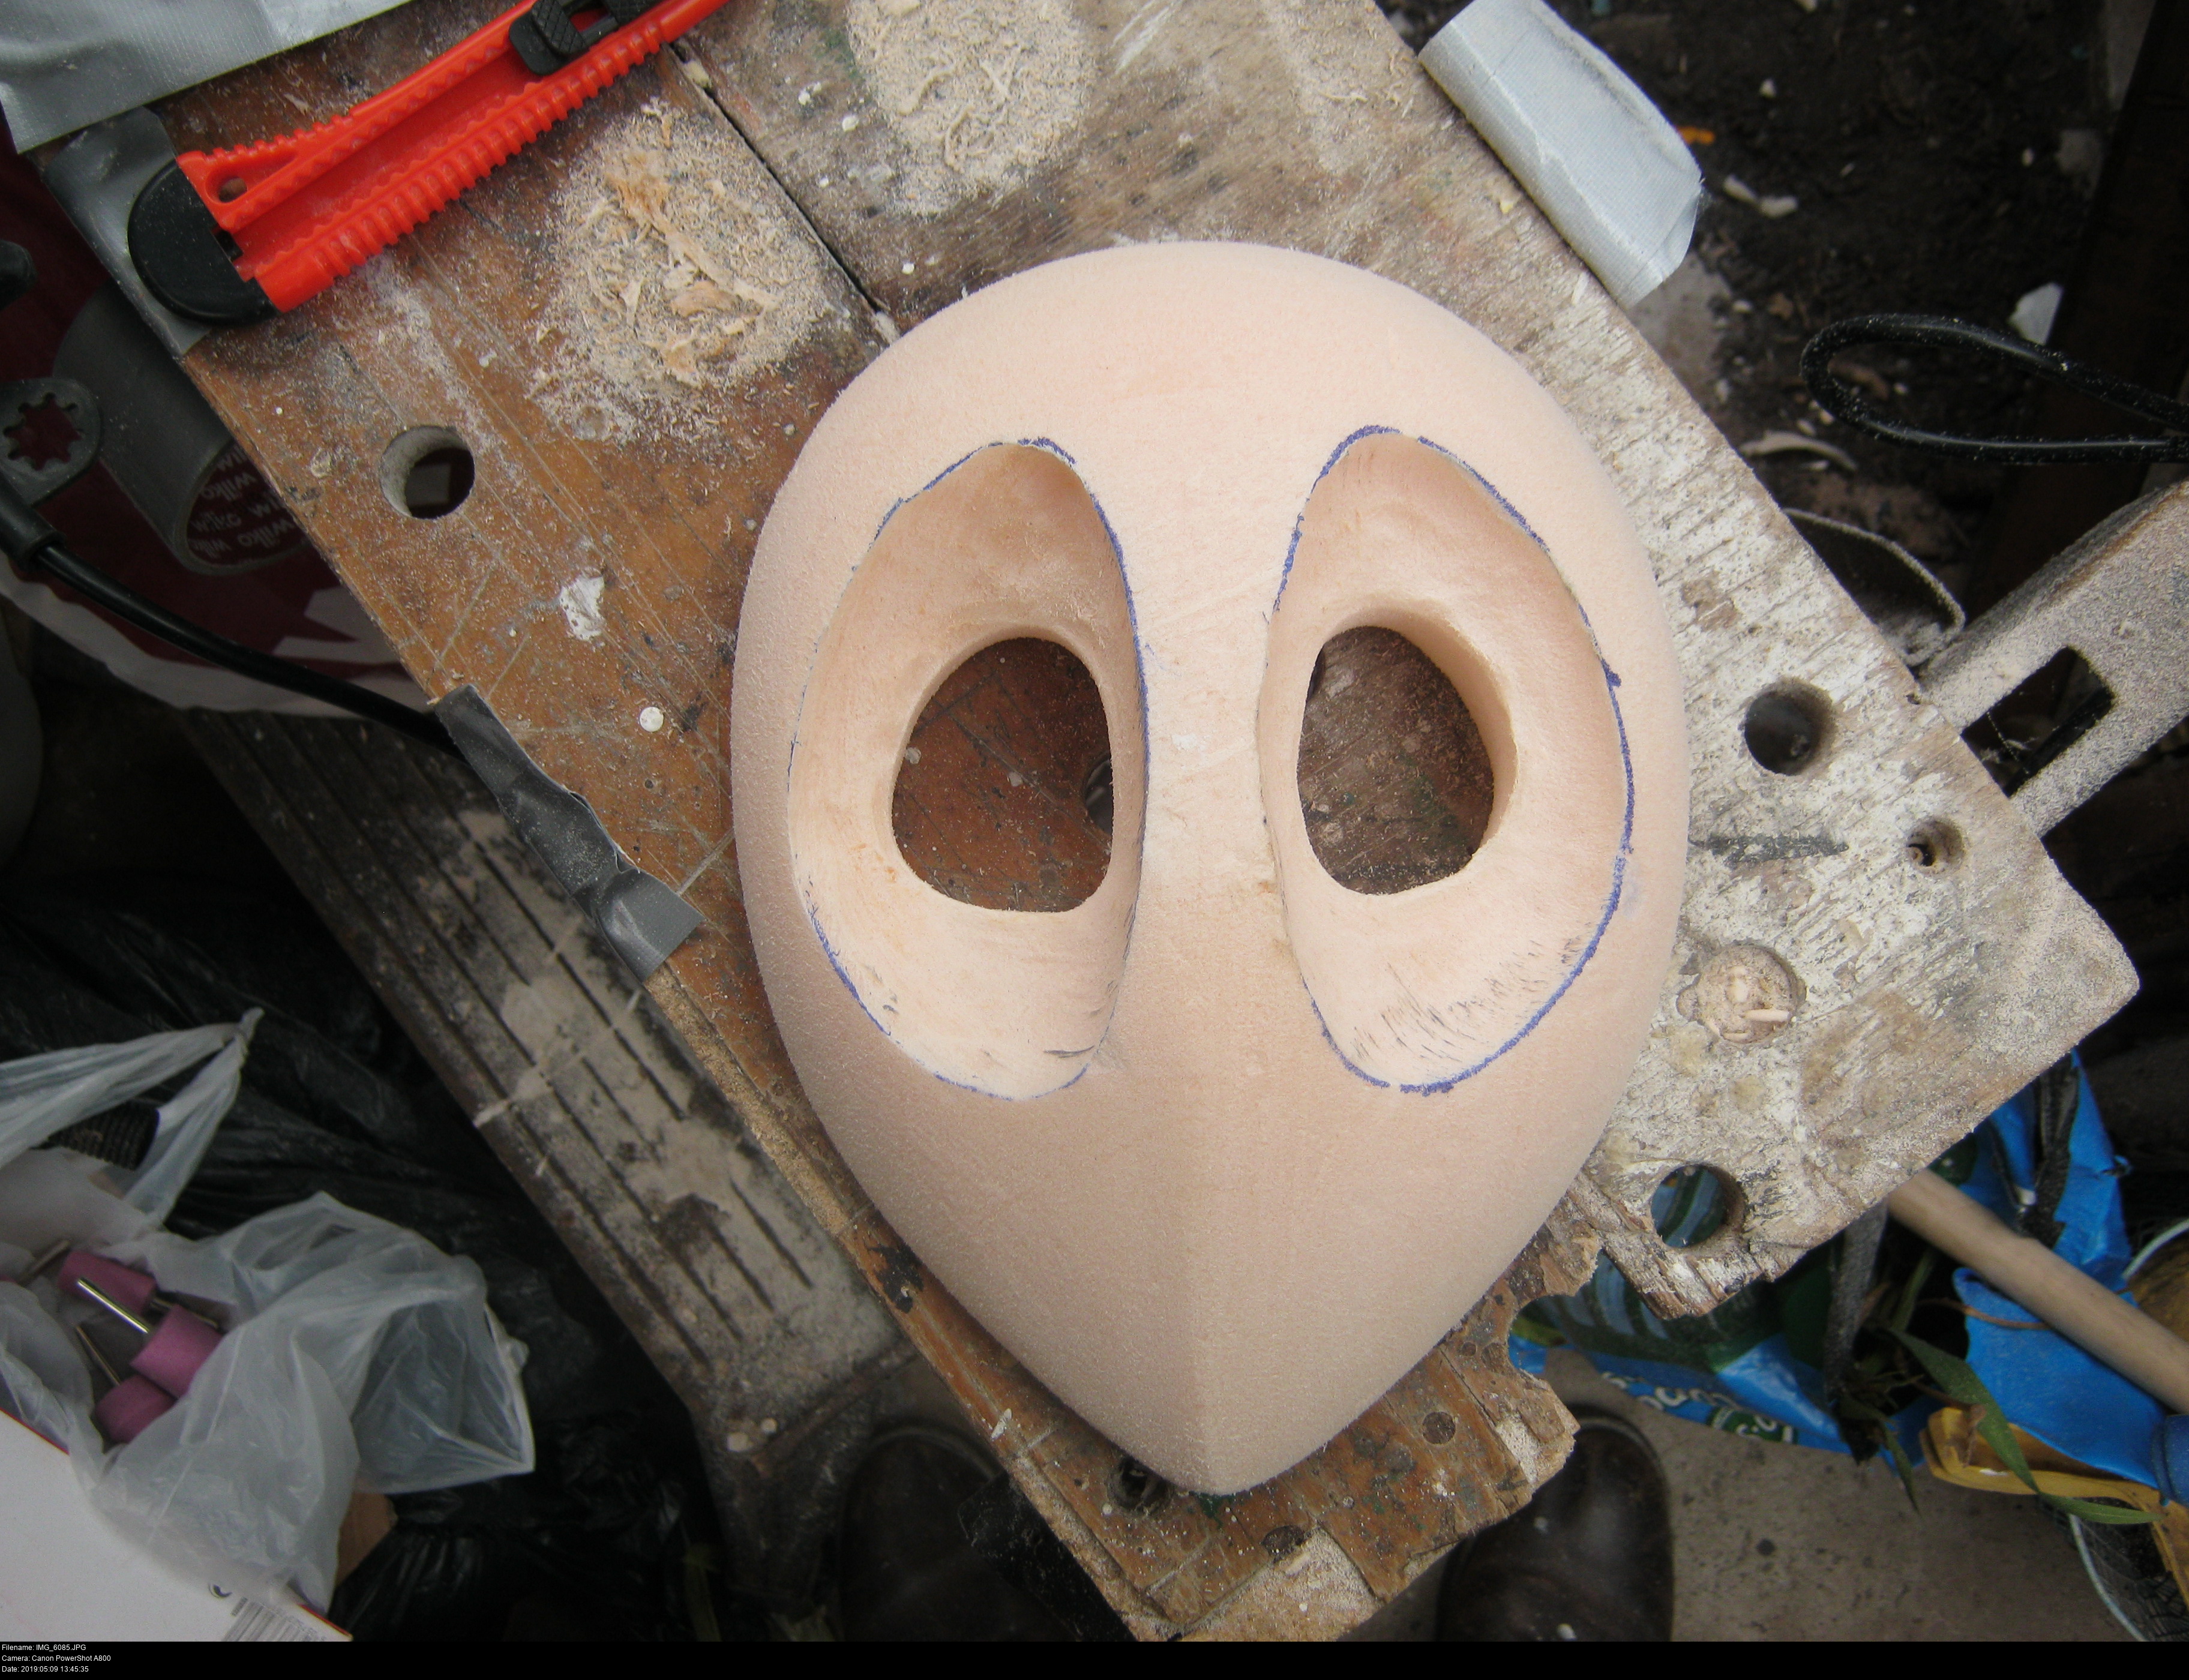
The plan is to poke the screwdriver through the foam straight through, well inside the lines, and continue around the interior to make a perforated shape I can then press out, leaving a big holey messy mess that I can then sand into the correct shape with the rolled-up sandpaper.
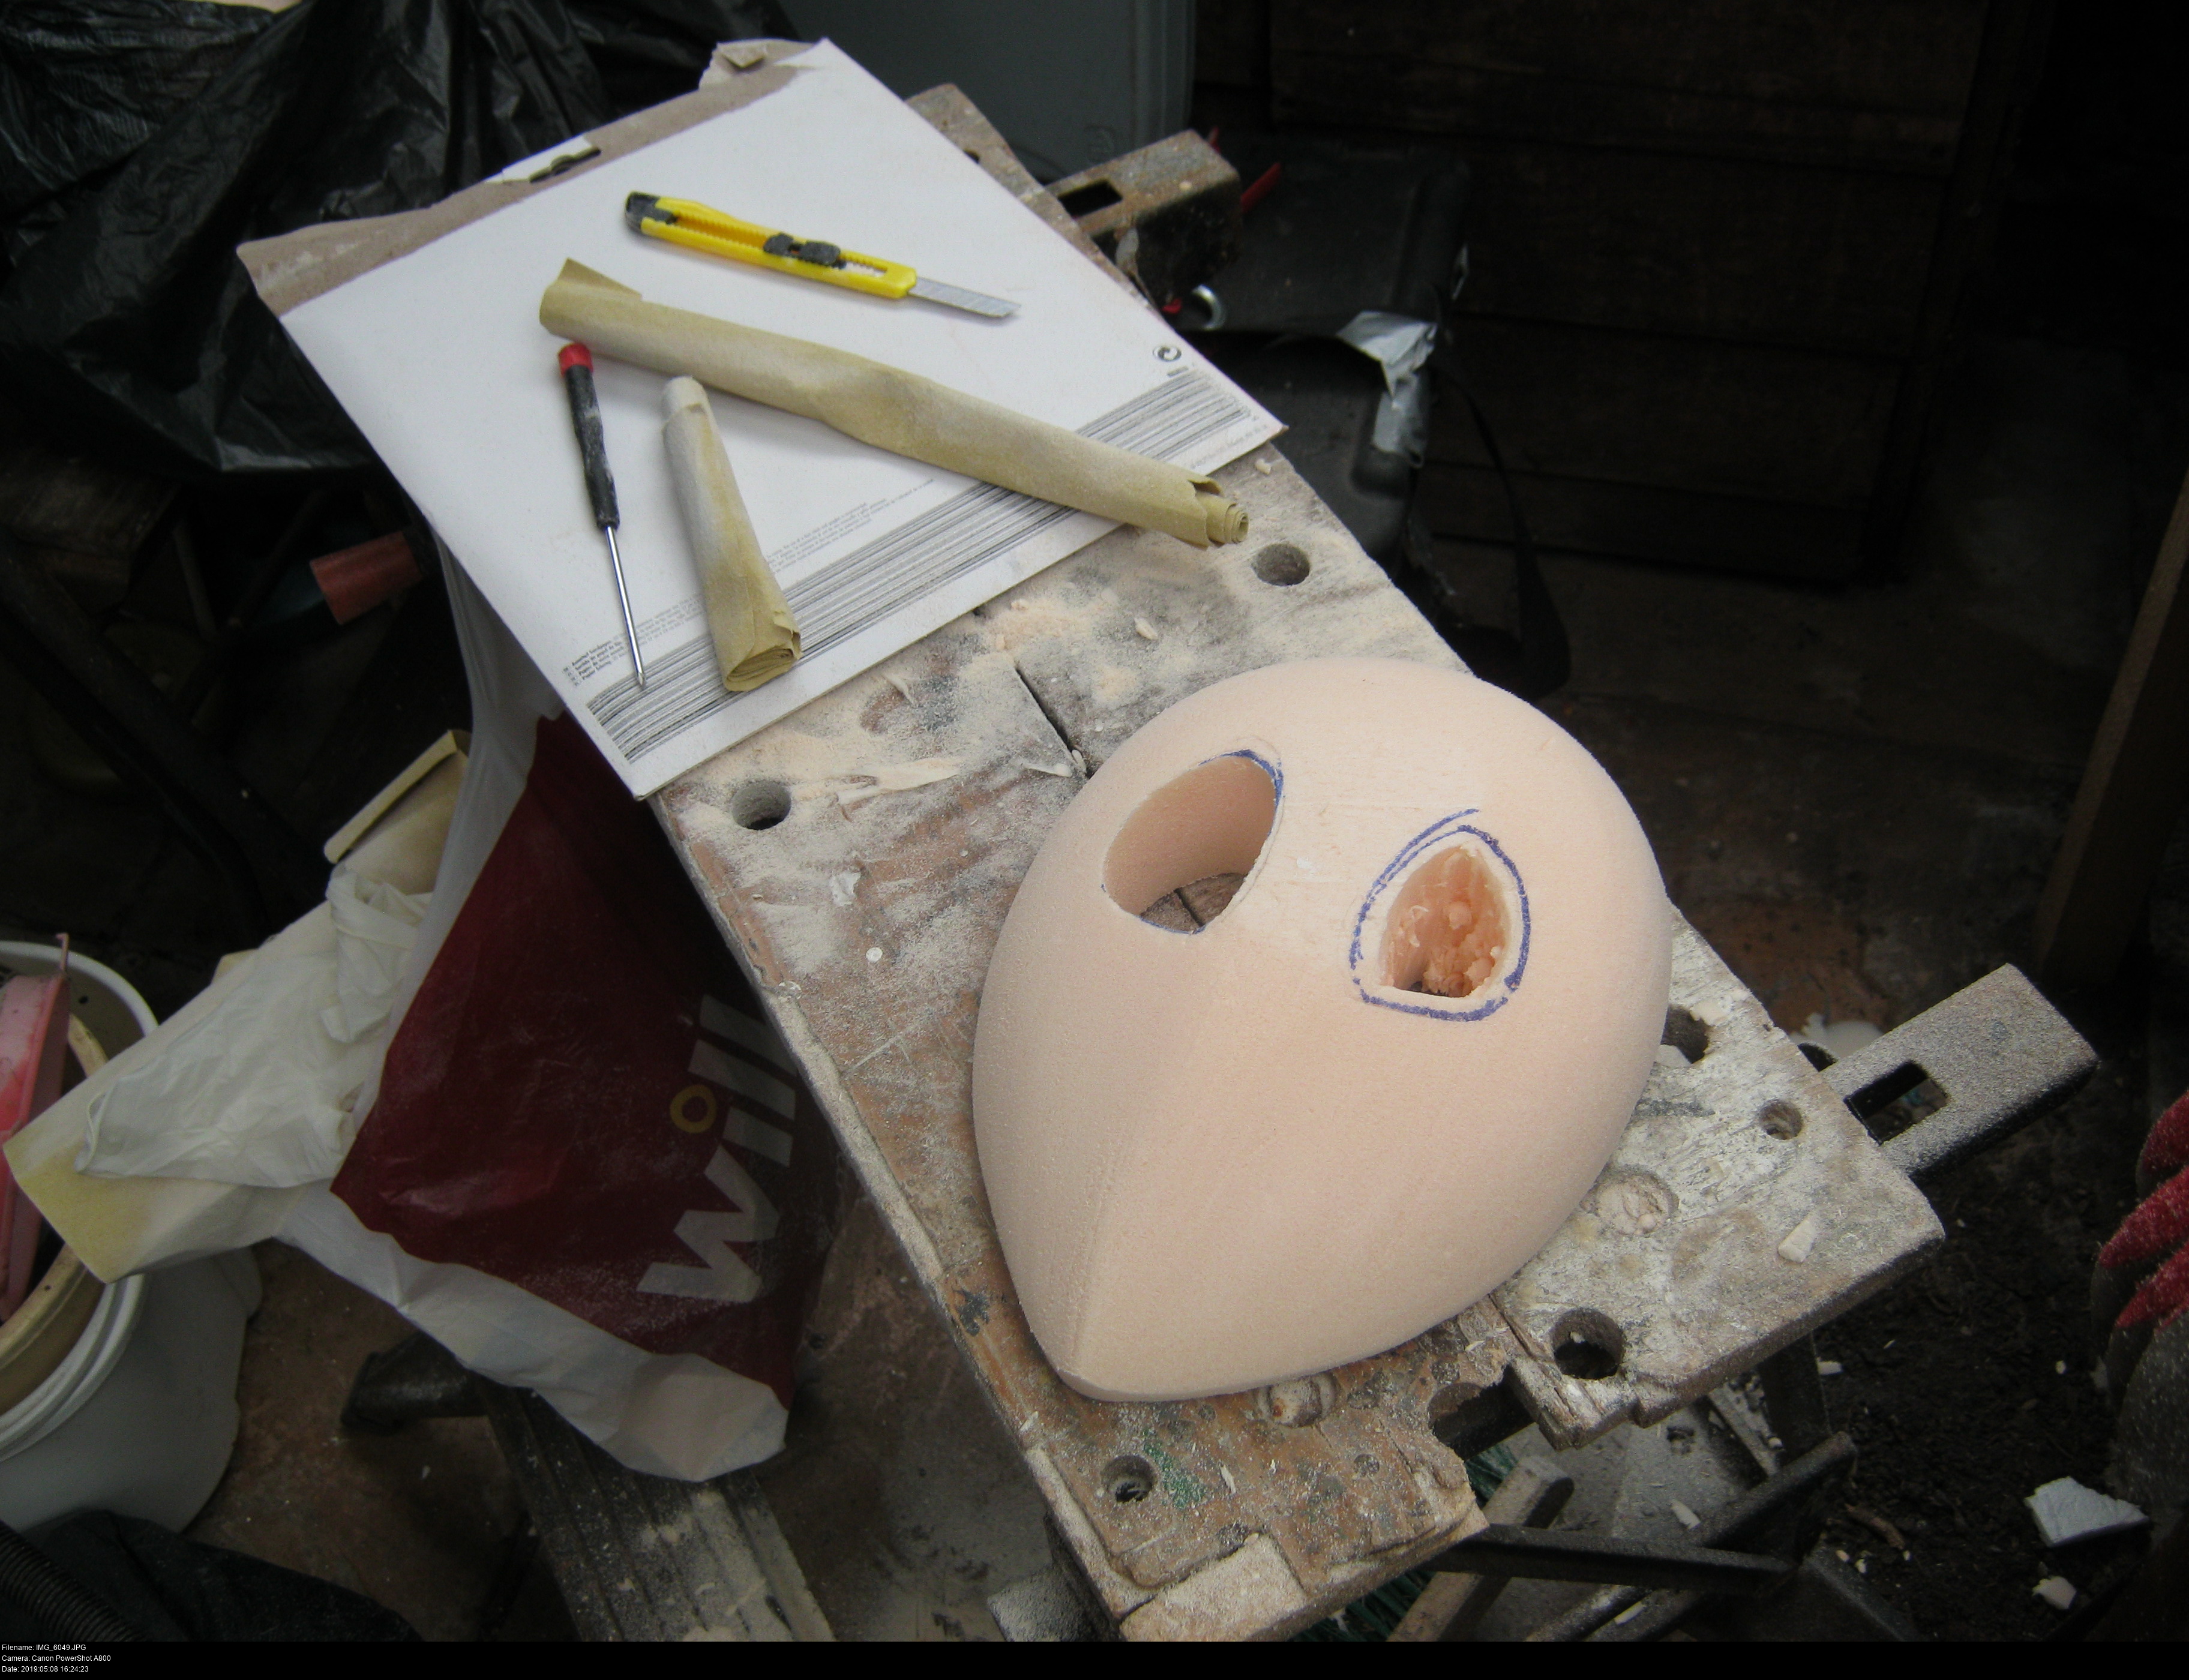


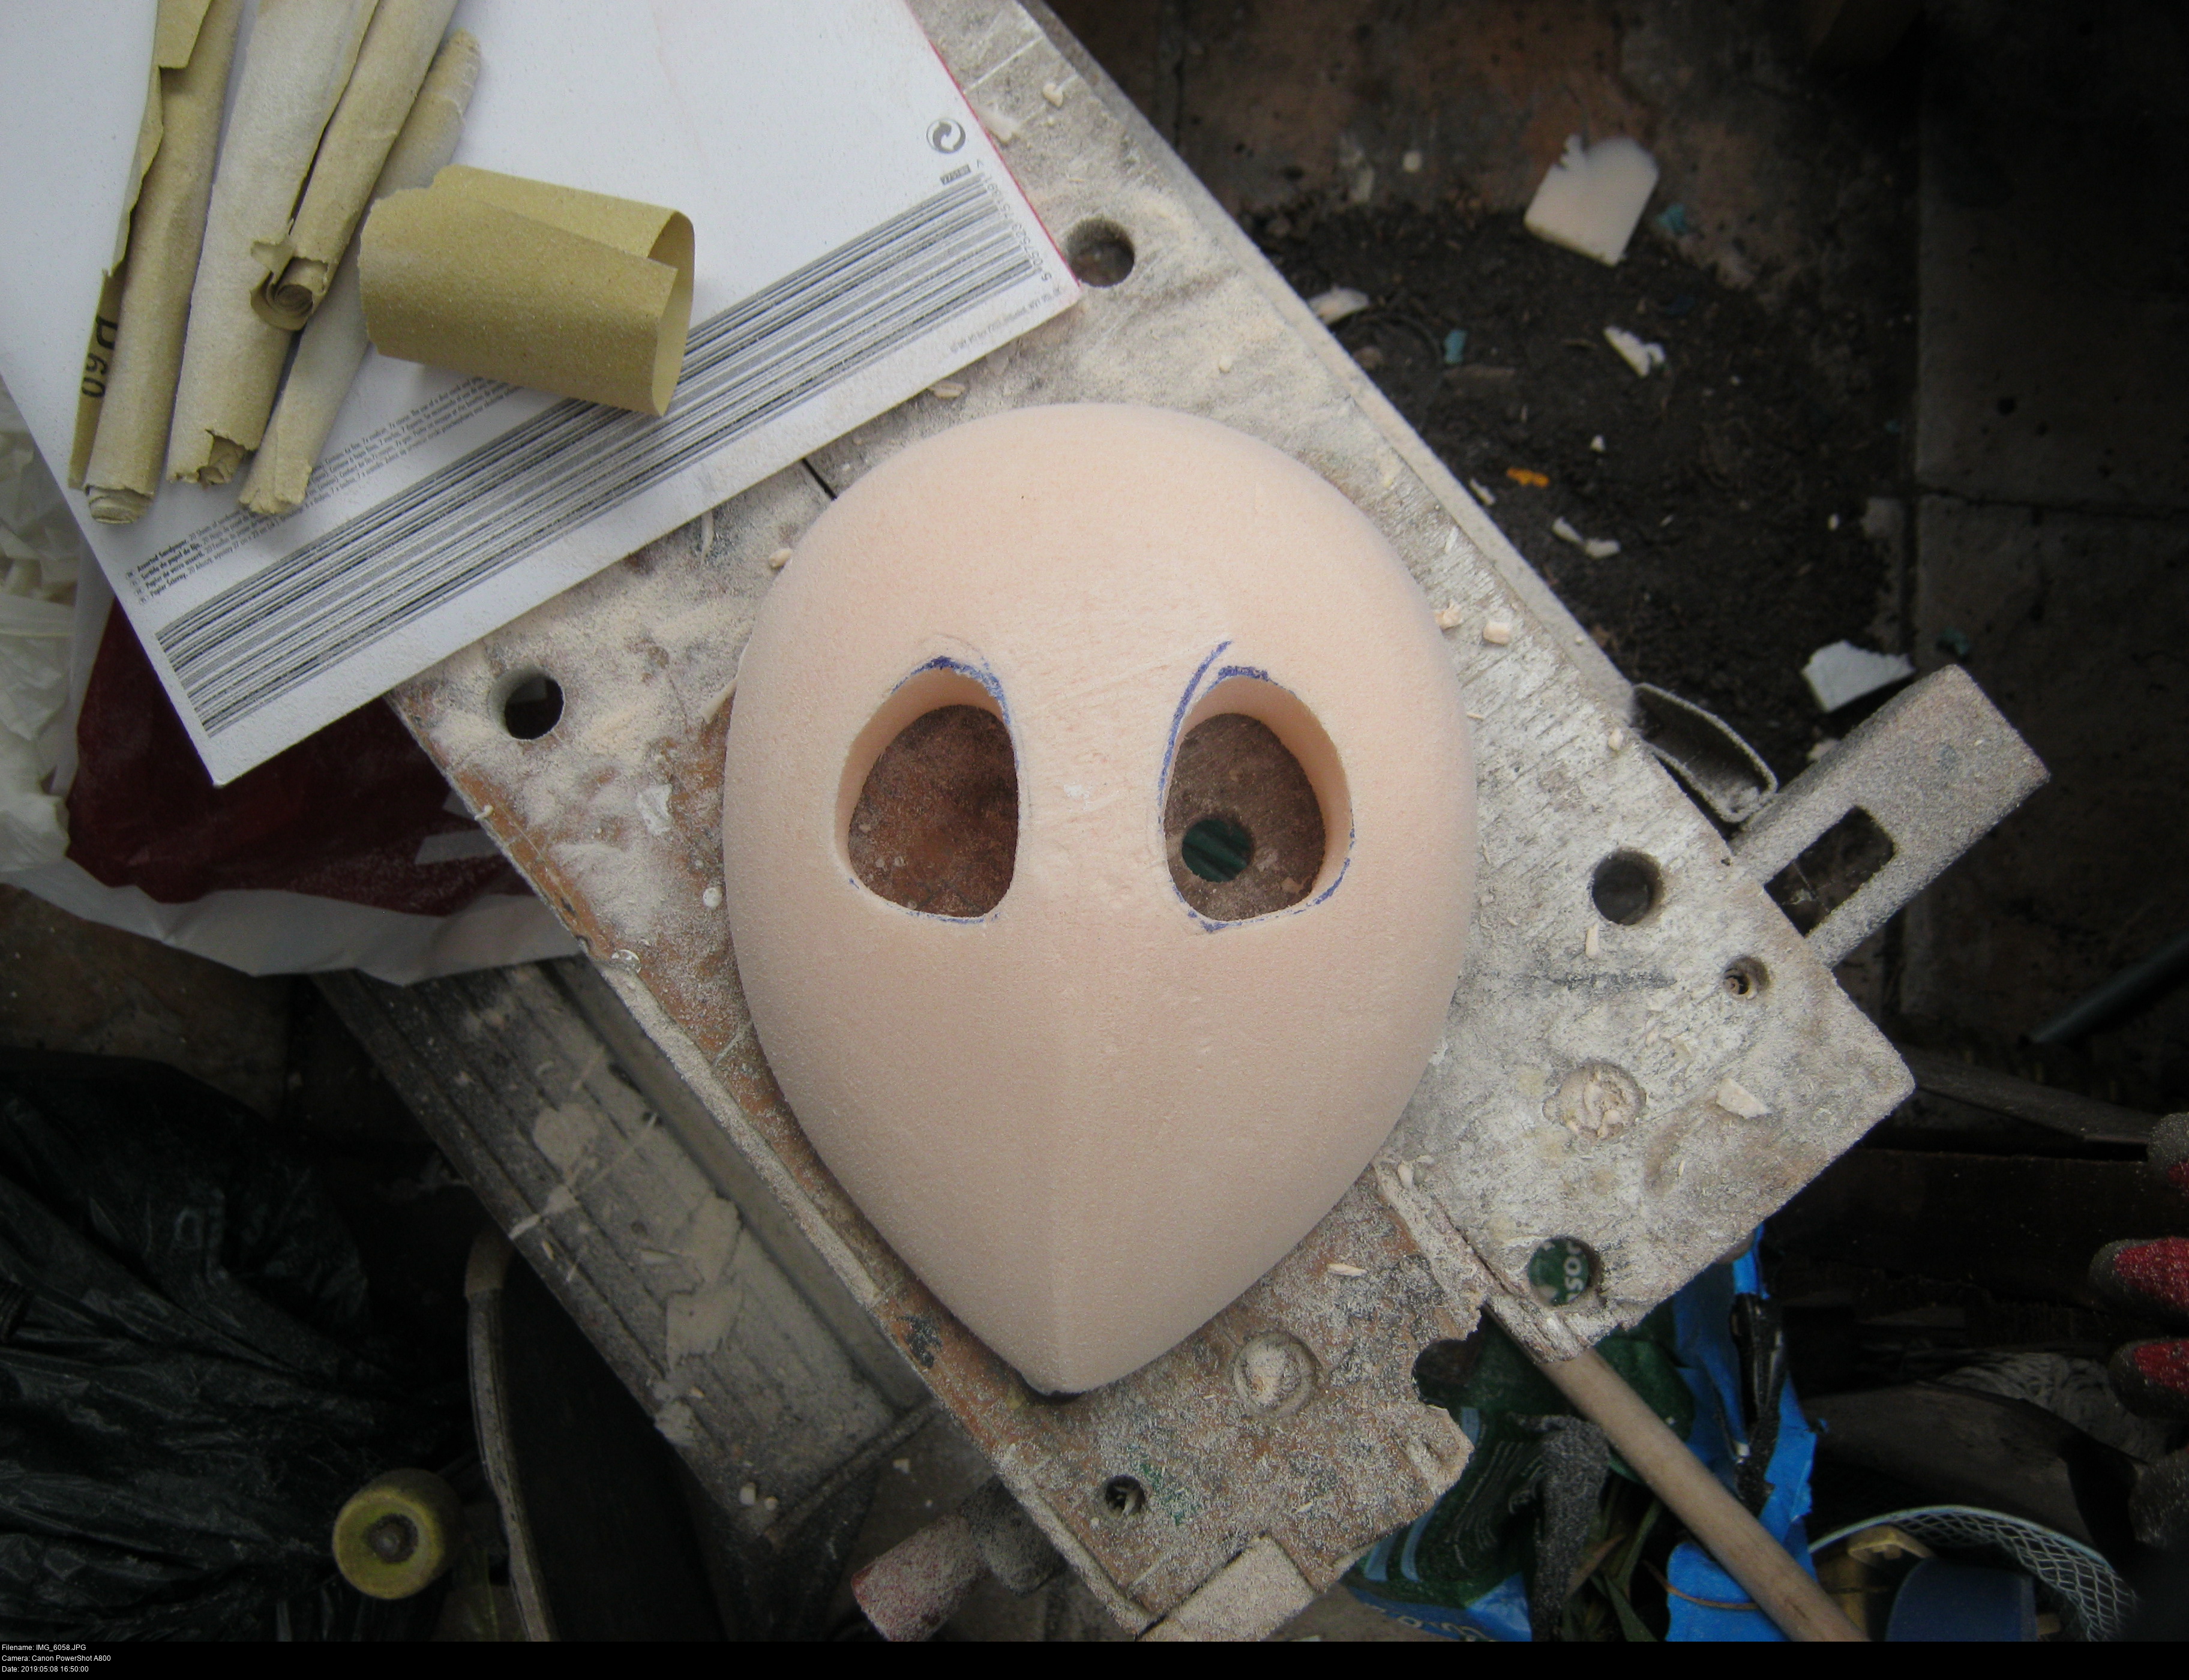
Kaboom!
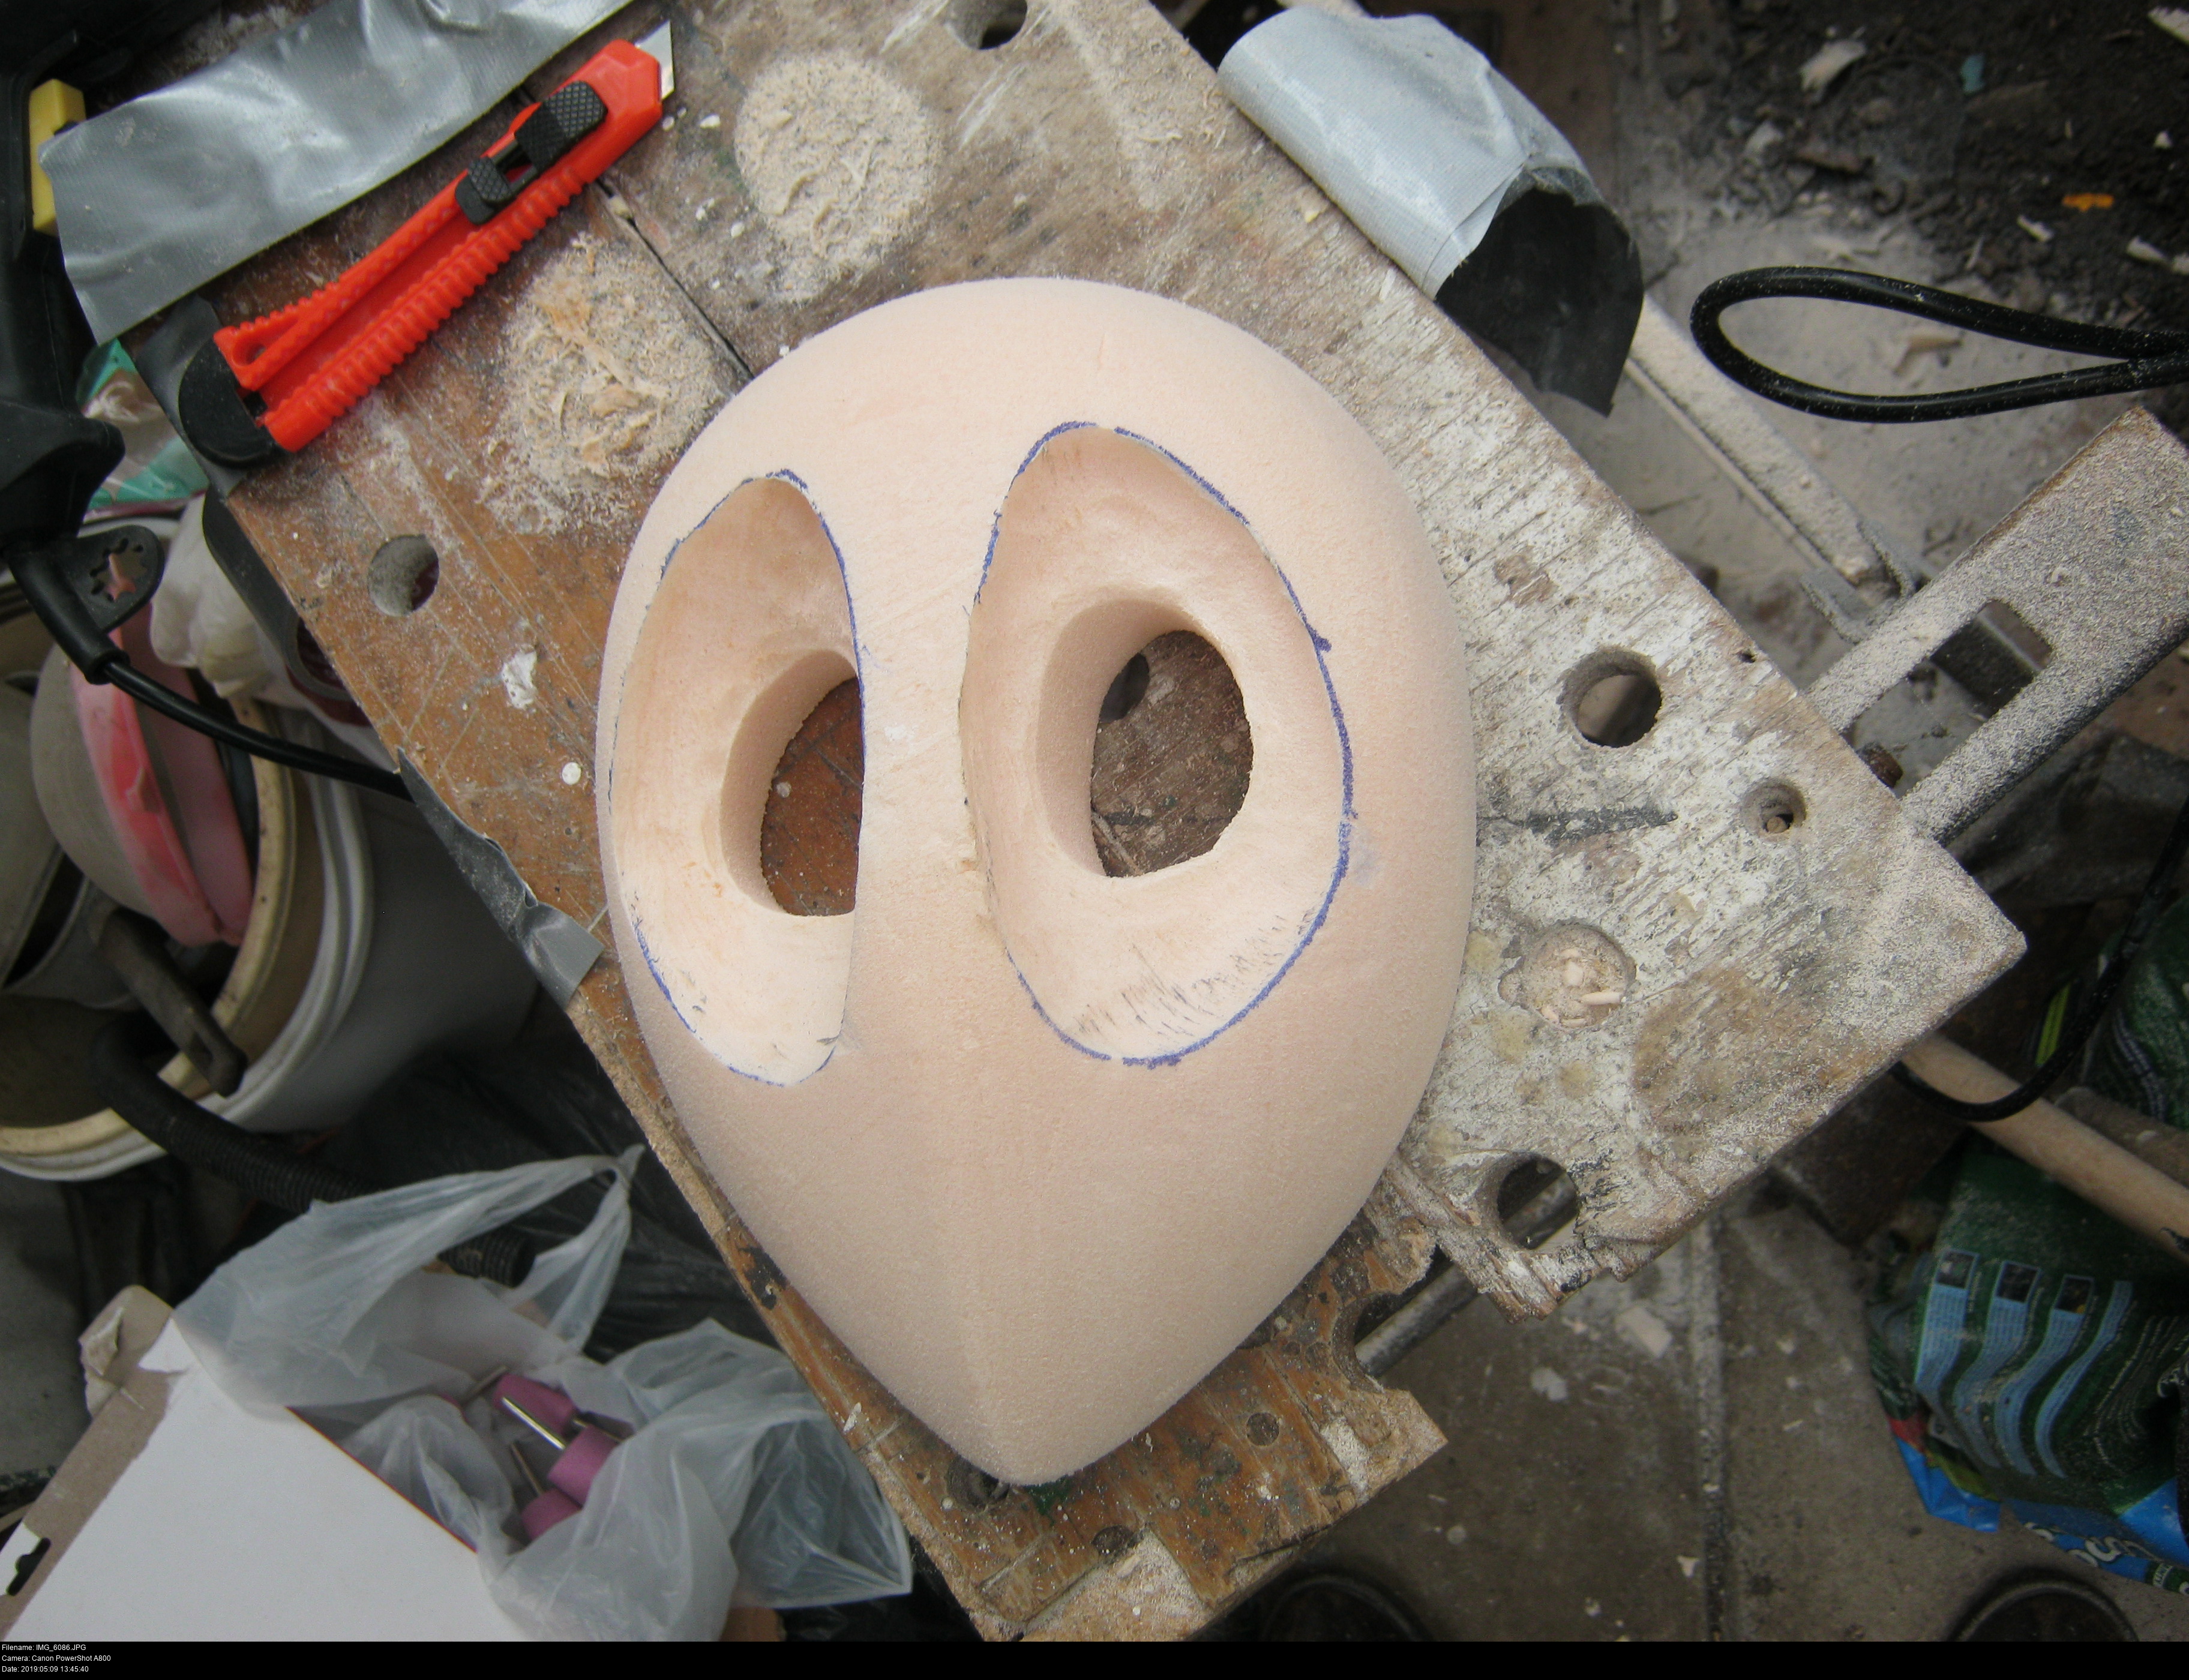
That leftmost eye is looking fabulous, considering the circumstances.
Time to repeat the process on the other side.
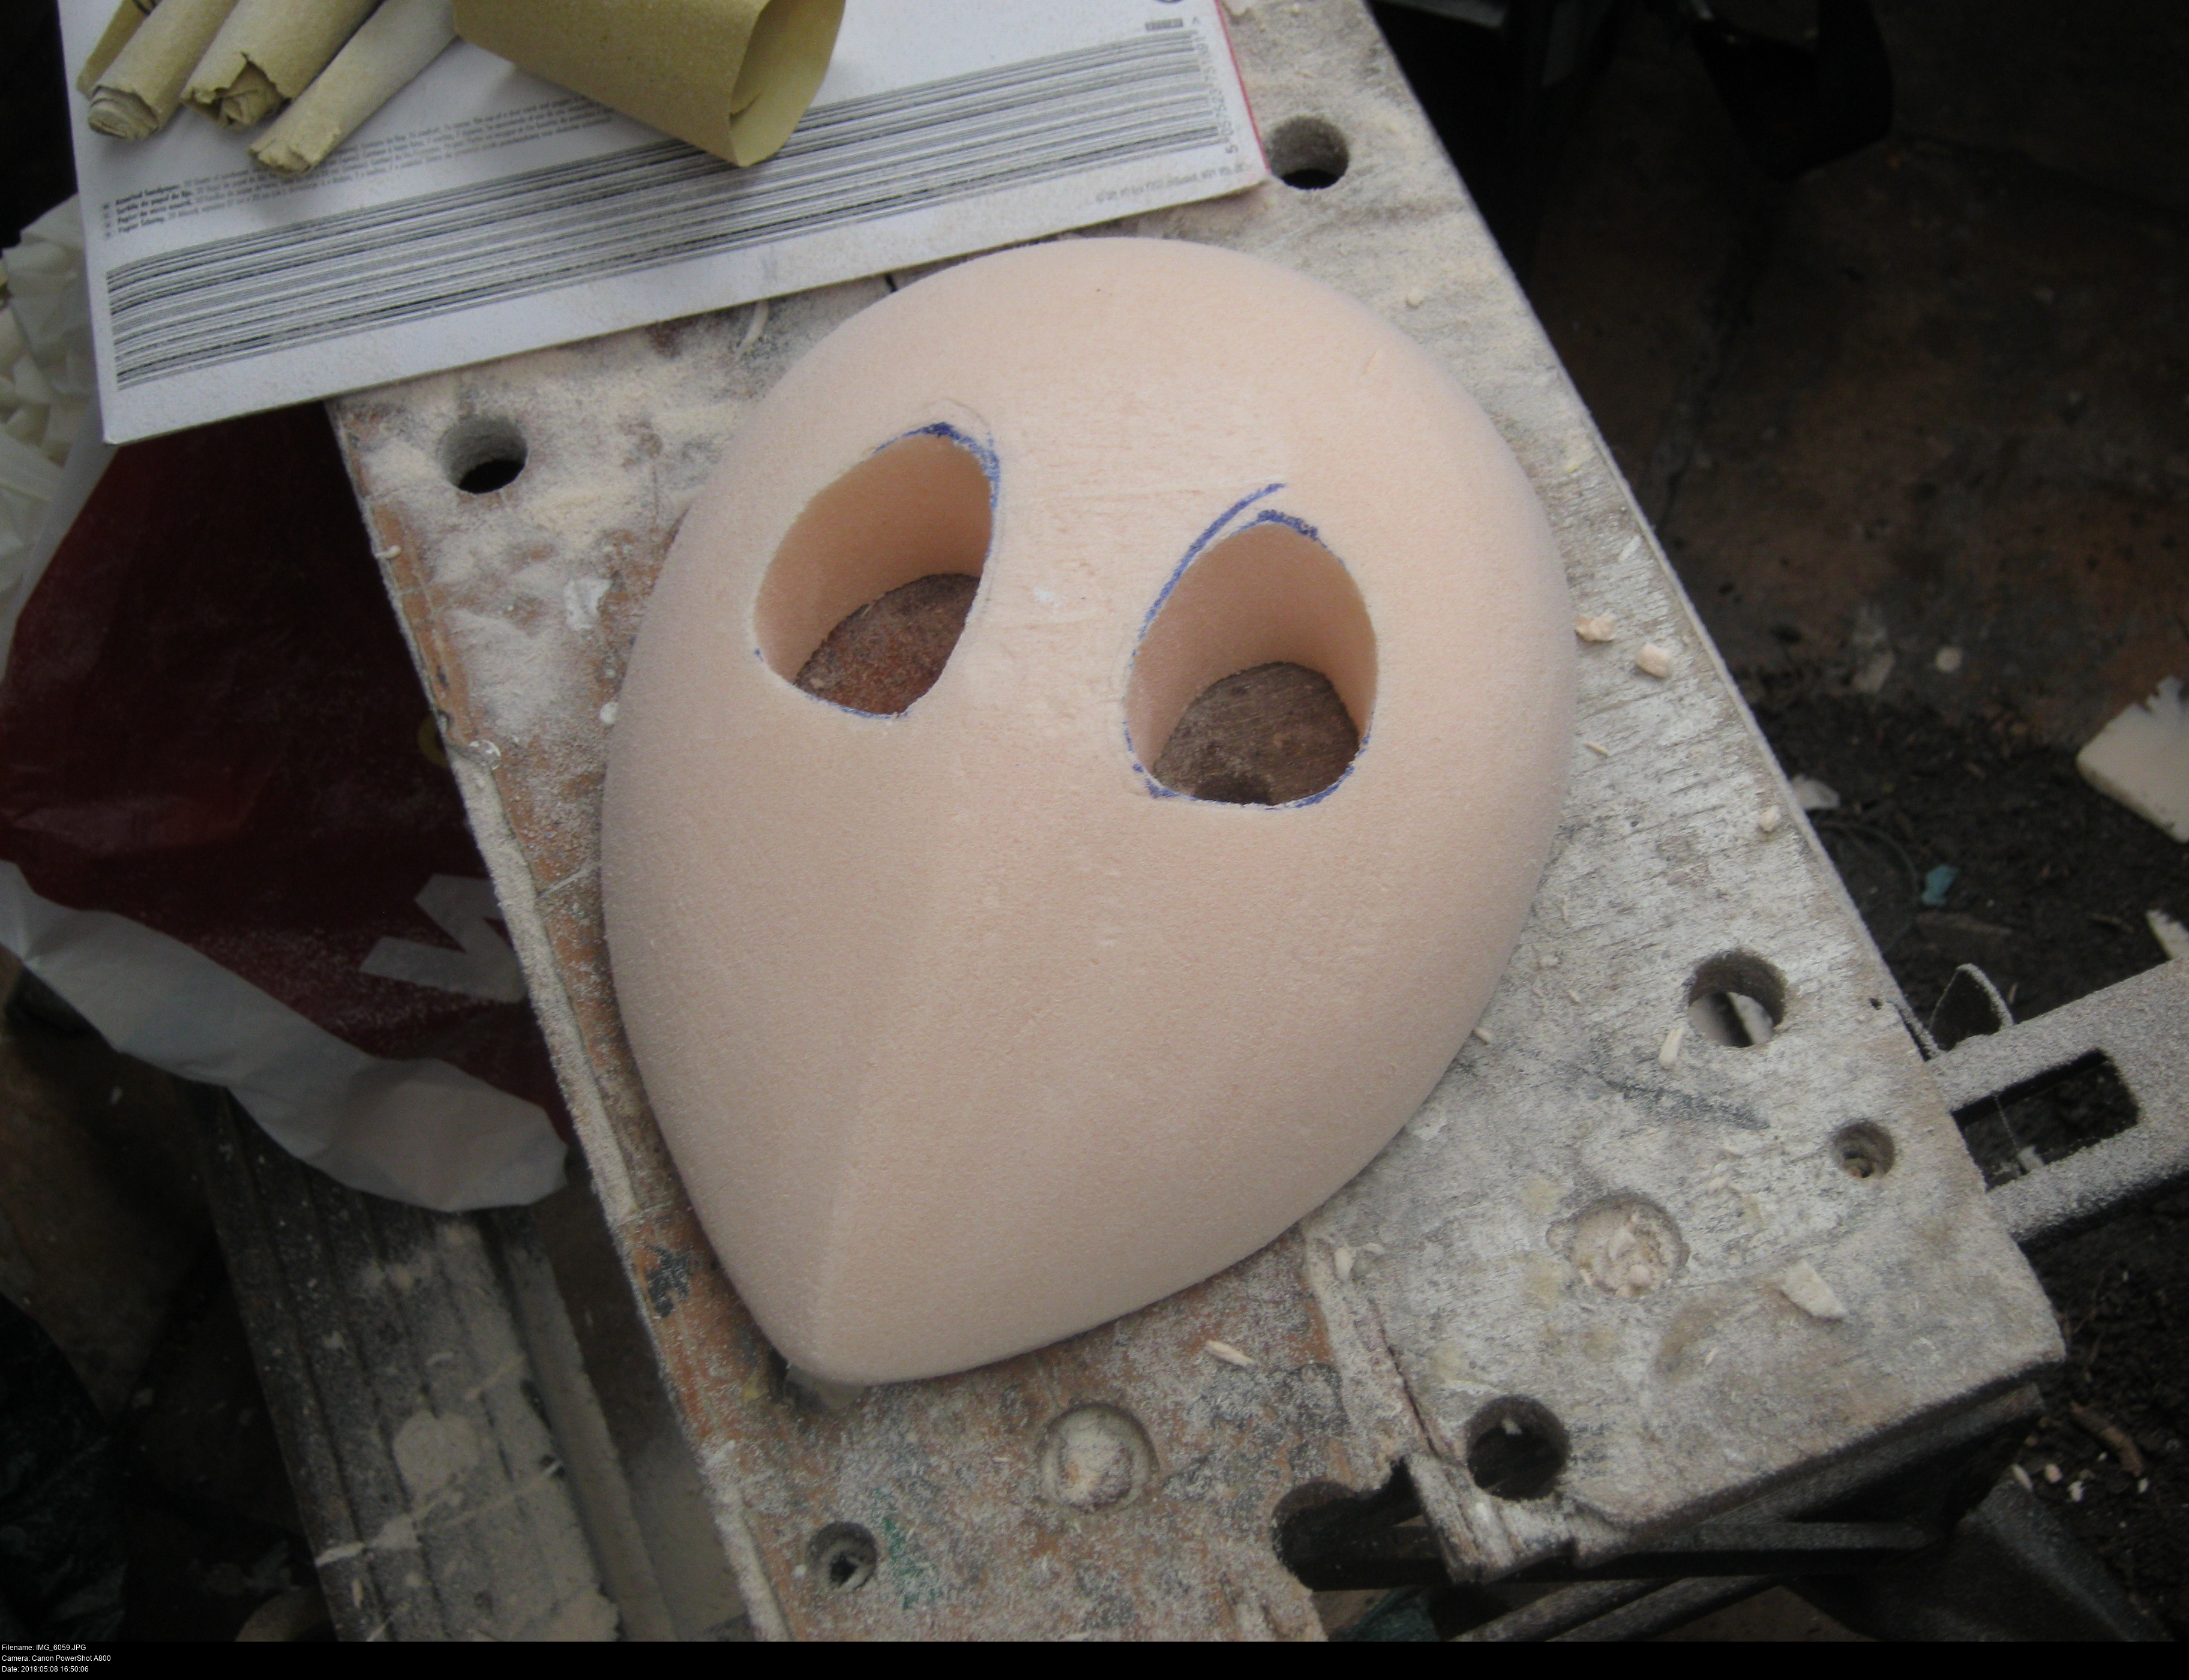


It's hard to believe that this wonderful thing was a prism just earlier today, and then a jagged cut-up mess before that, and then a misshapen, leftover block of foam in a bin bag earlier still.
What's next?
Nothing. I haven't got any decent way to cut out the convex area for the mask's colourful eyes, so I'm kinda stuck.
I really have no idea how I'm supposed to do this. I could really do with a coarse sphere of sandingness that I can rub against the interior of the eyeholes to bore them into the right shape. I asked some folks, and they said what I really ought to have accepted: I really ought to get a rotary tool for heaven's sake what am I thinking?

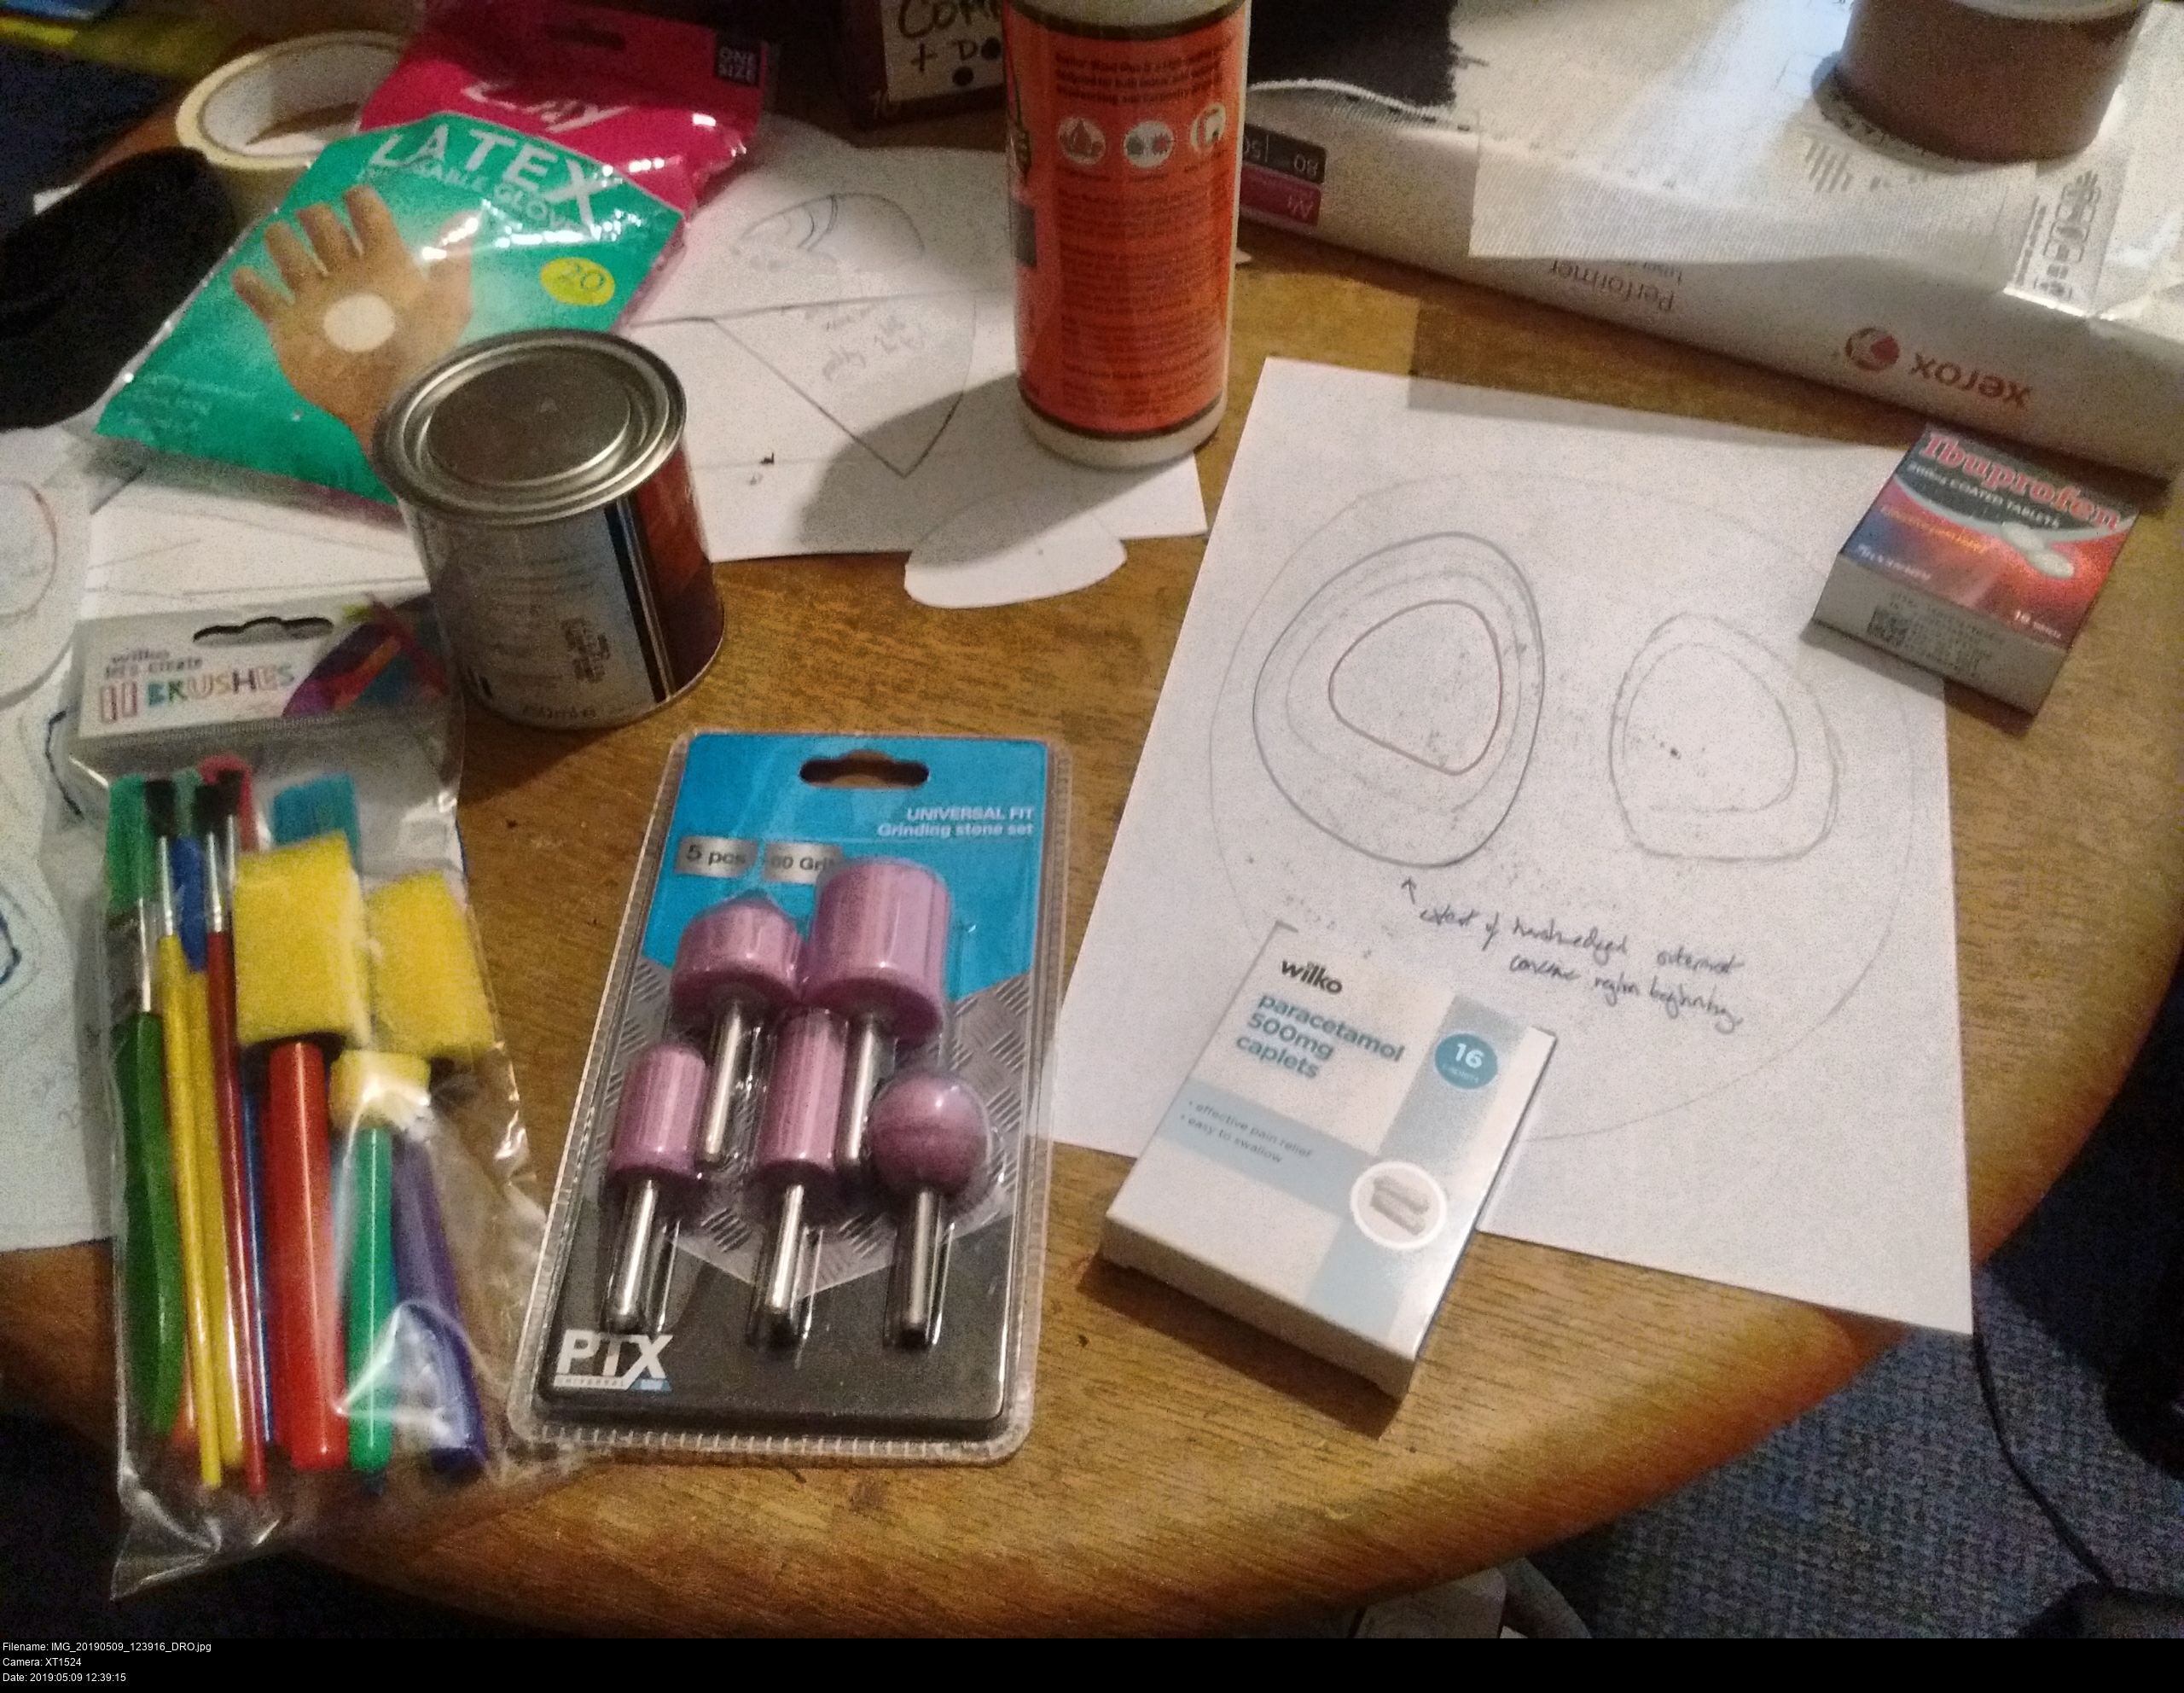
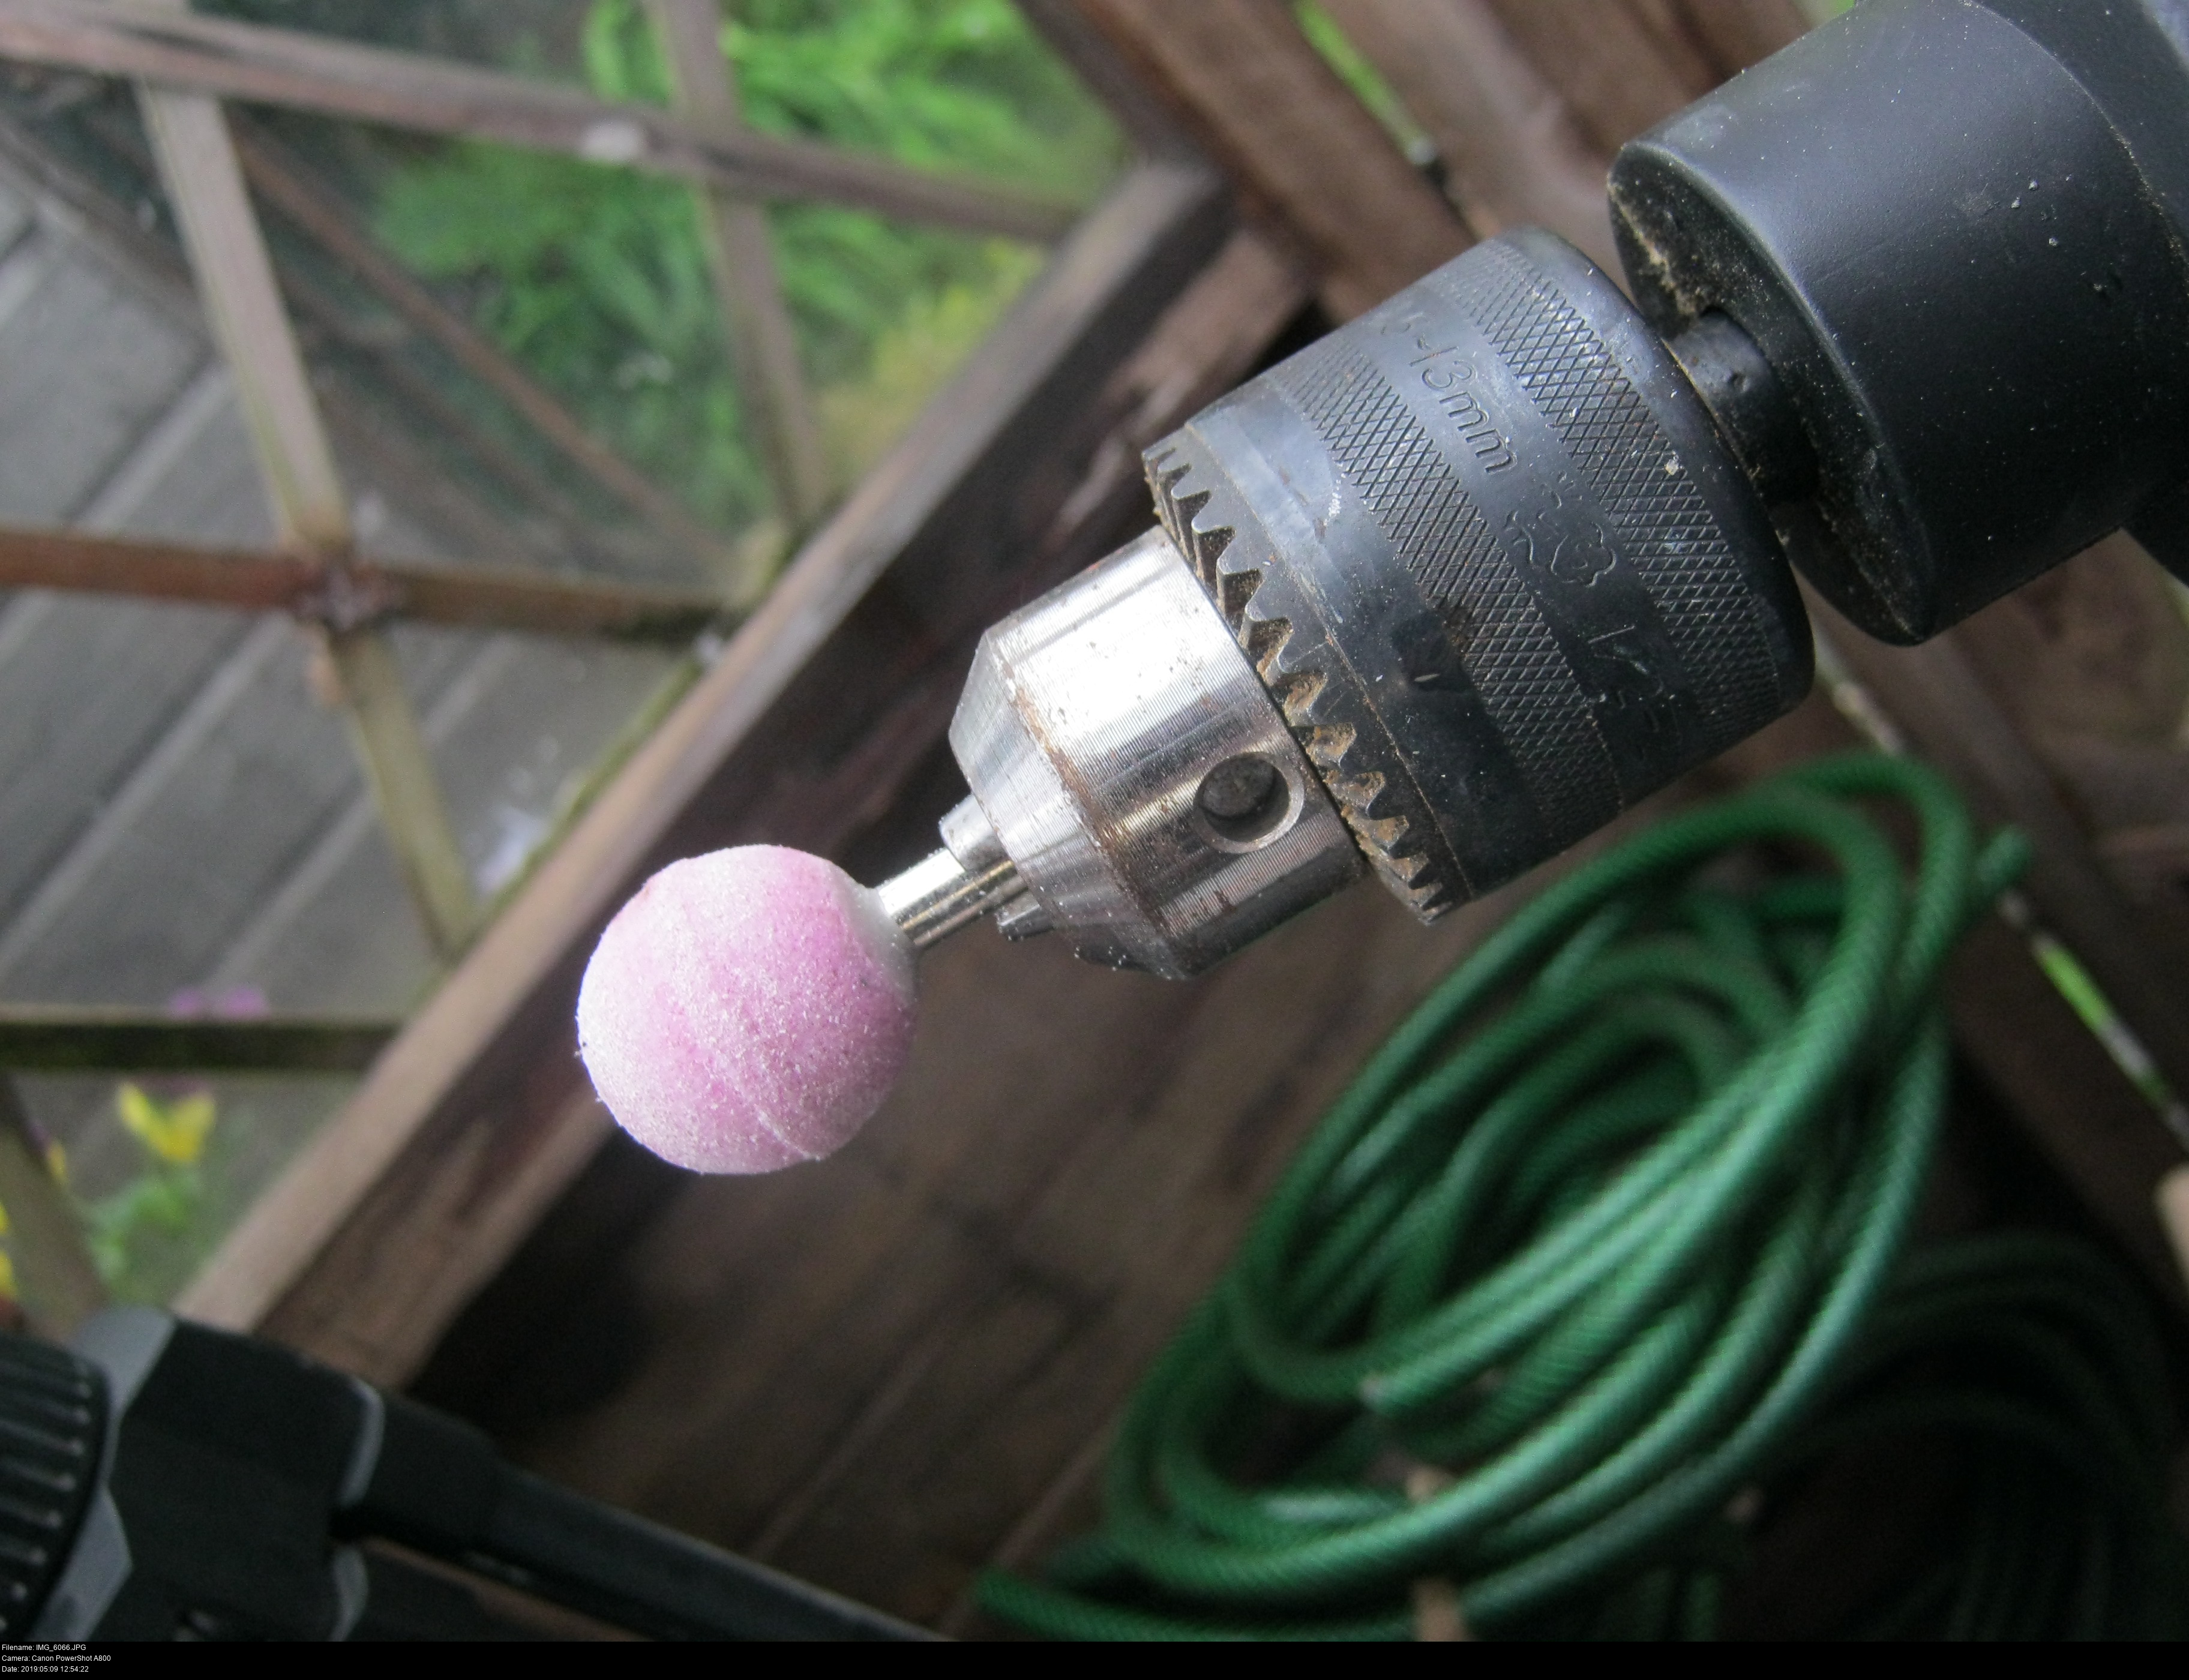
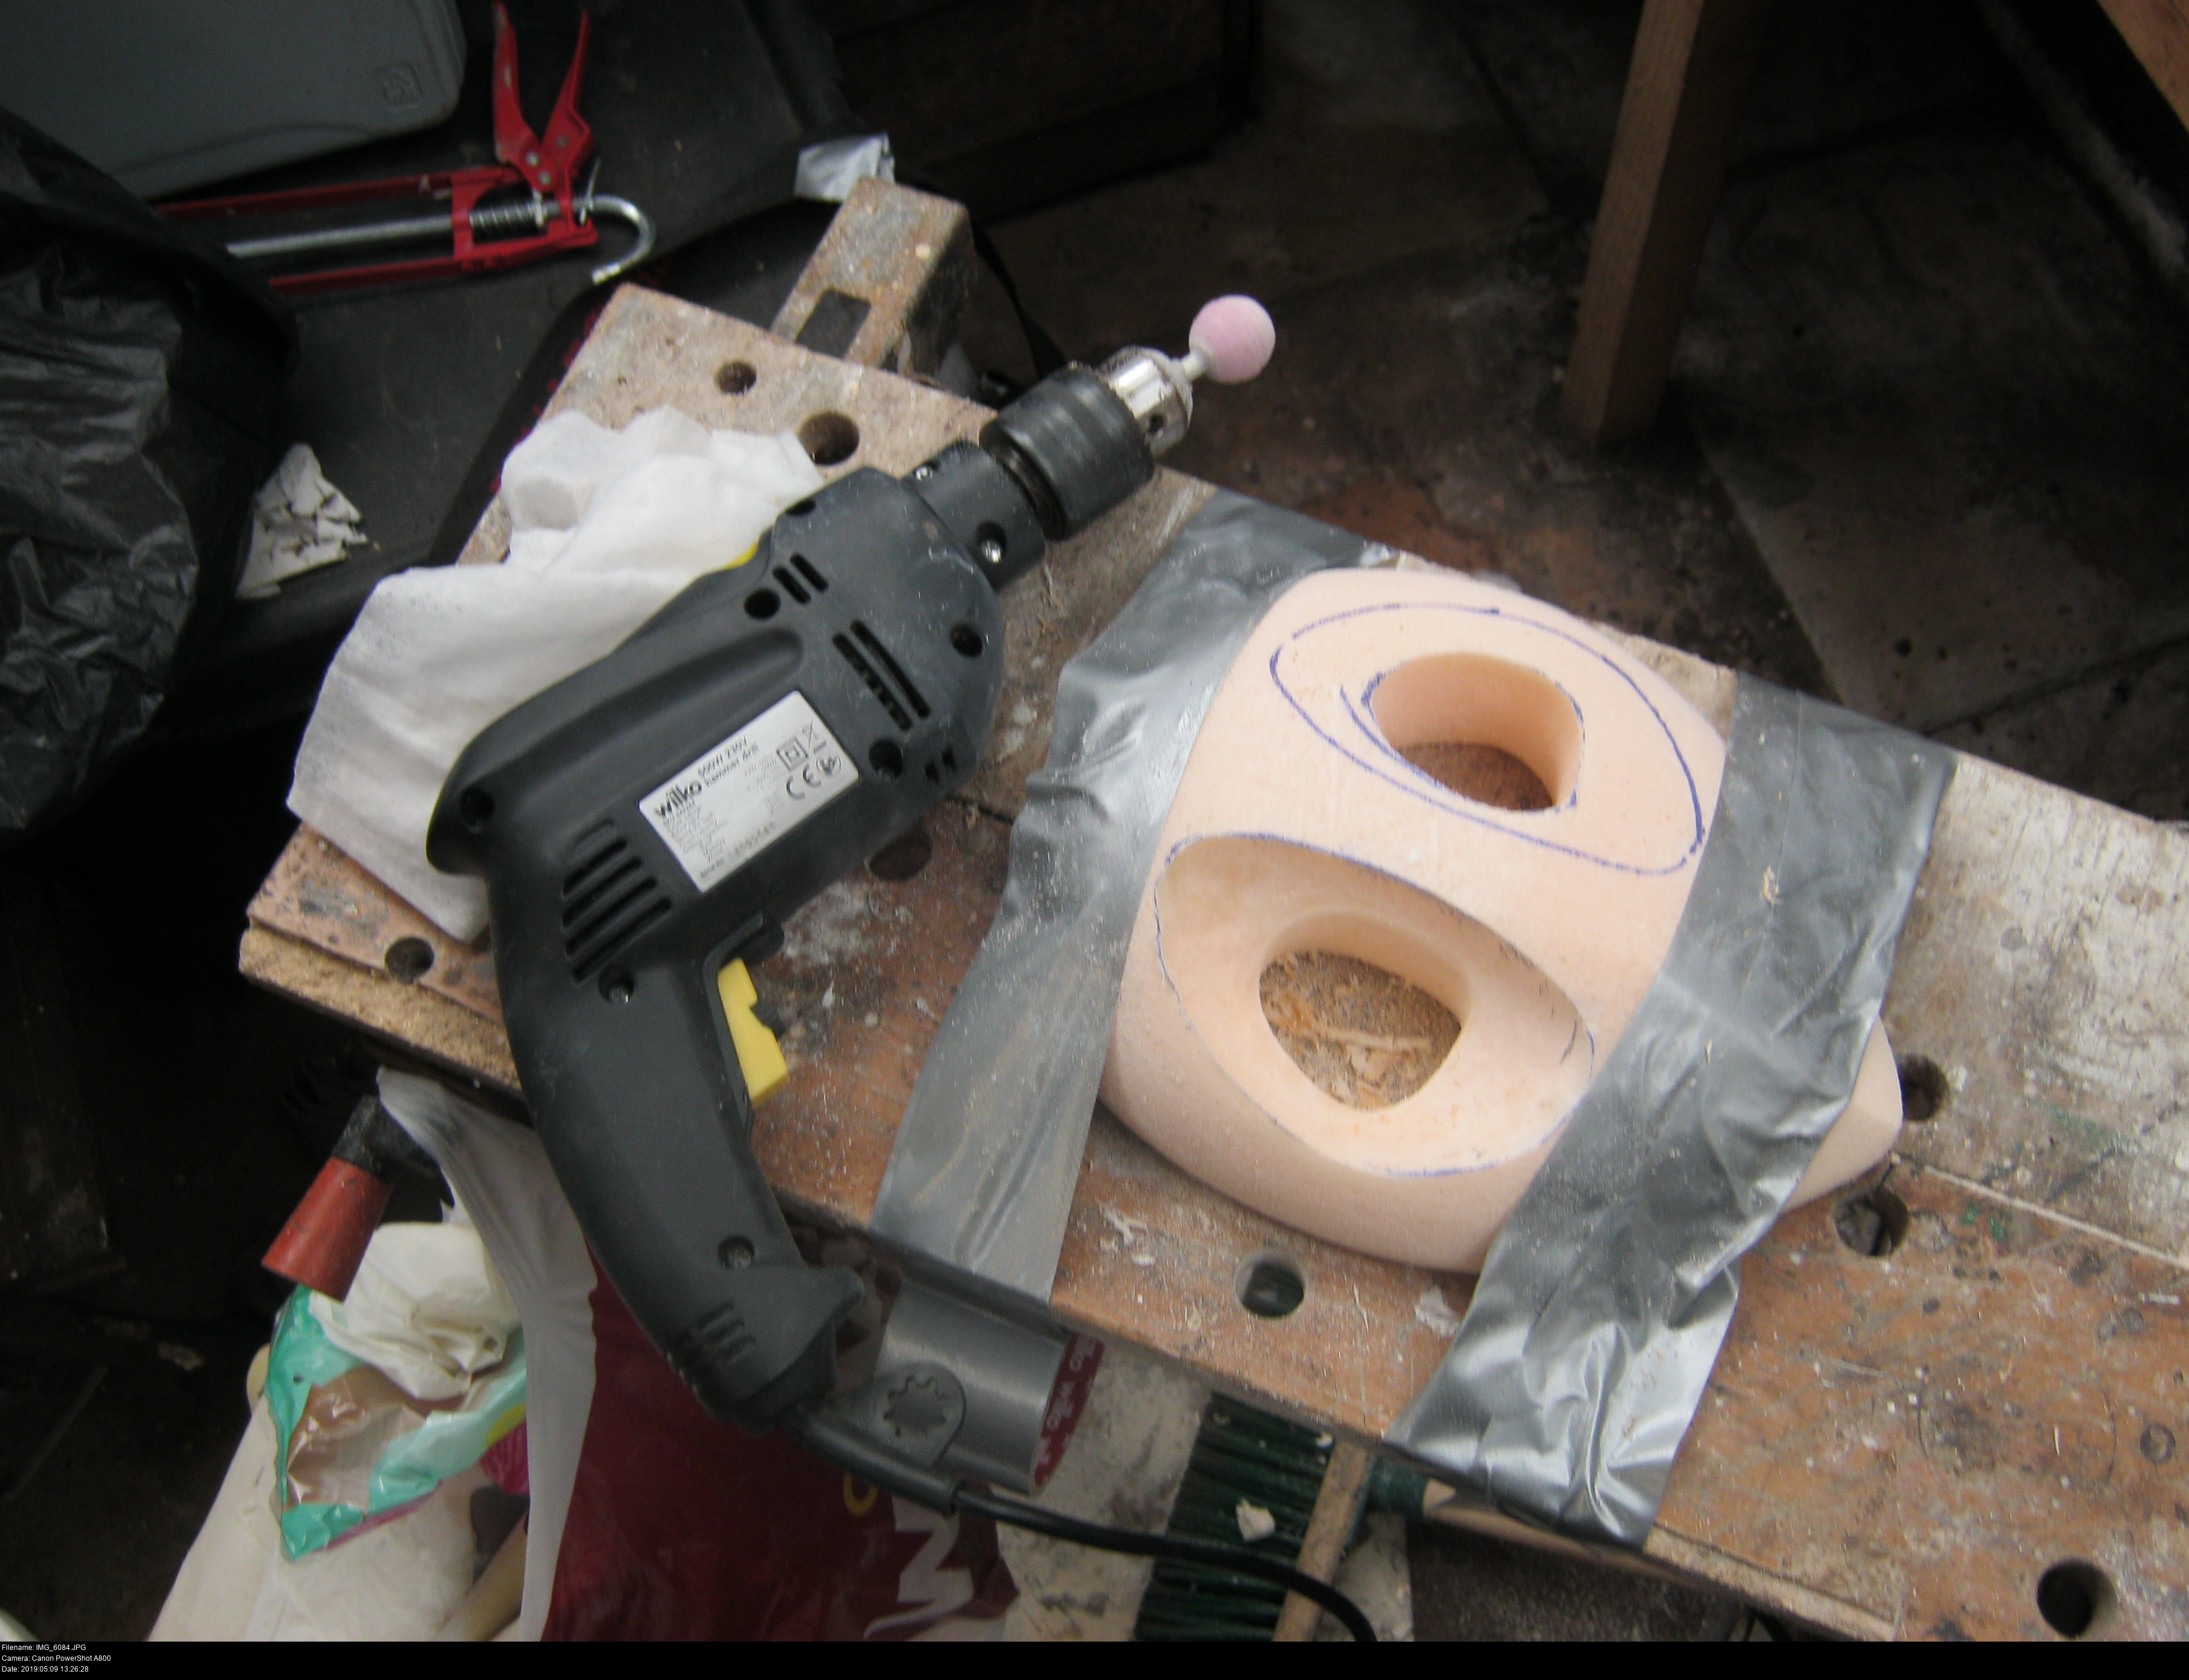
Here's what I need. Lovely rough grindstone bits for a drill.
Other important tools shown:
Disposable latex gloves. Perfect for sanding, gluing, painting, varnishing. Everything.
Wilkinson quick drying matte finish clear acrylic varnish. This is what I used to finish both the Majora's Masks that I've made. If you read my XPS foam Majora's Mask page, you can read about a little mis-adventure I've had with proper artists' varnish in the past, so I stick with normal wood varnish for my props.
Gorilla Glue brand wood glue. It's what I used on my XPS foam Majora's Mask to seal and surface the foam and it was perfect. I'm going to use it again here.
Cheap set of kids' Wilkinson brushes. The actual paintbrush brushes in this set are rubbish, really. However, you get some really nice flat, chunky, long-bristled brushes in these sets which are great for varnishing and gluing. It's worth getting a set or two for those alone.
Blank paper. And lots of it.
Masking tape.
Templates in various stages of completion.
Various painkillers. Always read the label.
I saw a rotary tool in Lidl for nice and cheap, but it didn't seem to have the bits that I would need, plus I have absolutely nowhere to put a rotary tool. And then other people might want to use it and -heck nope-.
These pink guys go on a standard household drill. I'm really liking the look of that spherical-tipped bit. I hope that these are compatible with my XPS. They're advertised as grinding bits, which I assume means they're for sharpening and shaping metal. I have no clue what kind of effect they'll have on the pink foam. I'm going to start with a low speed and see how that works.
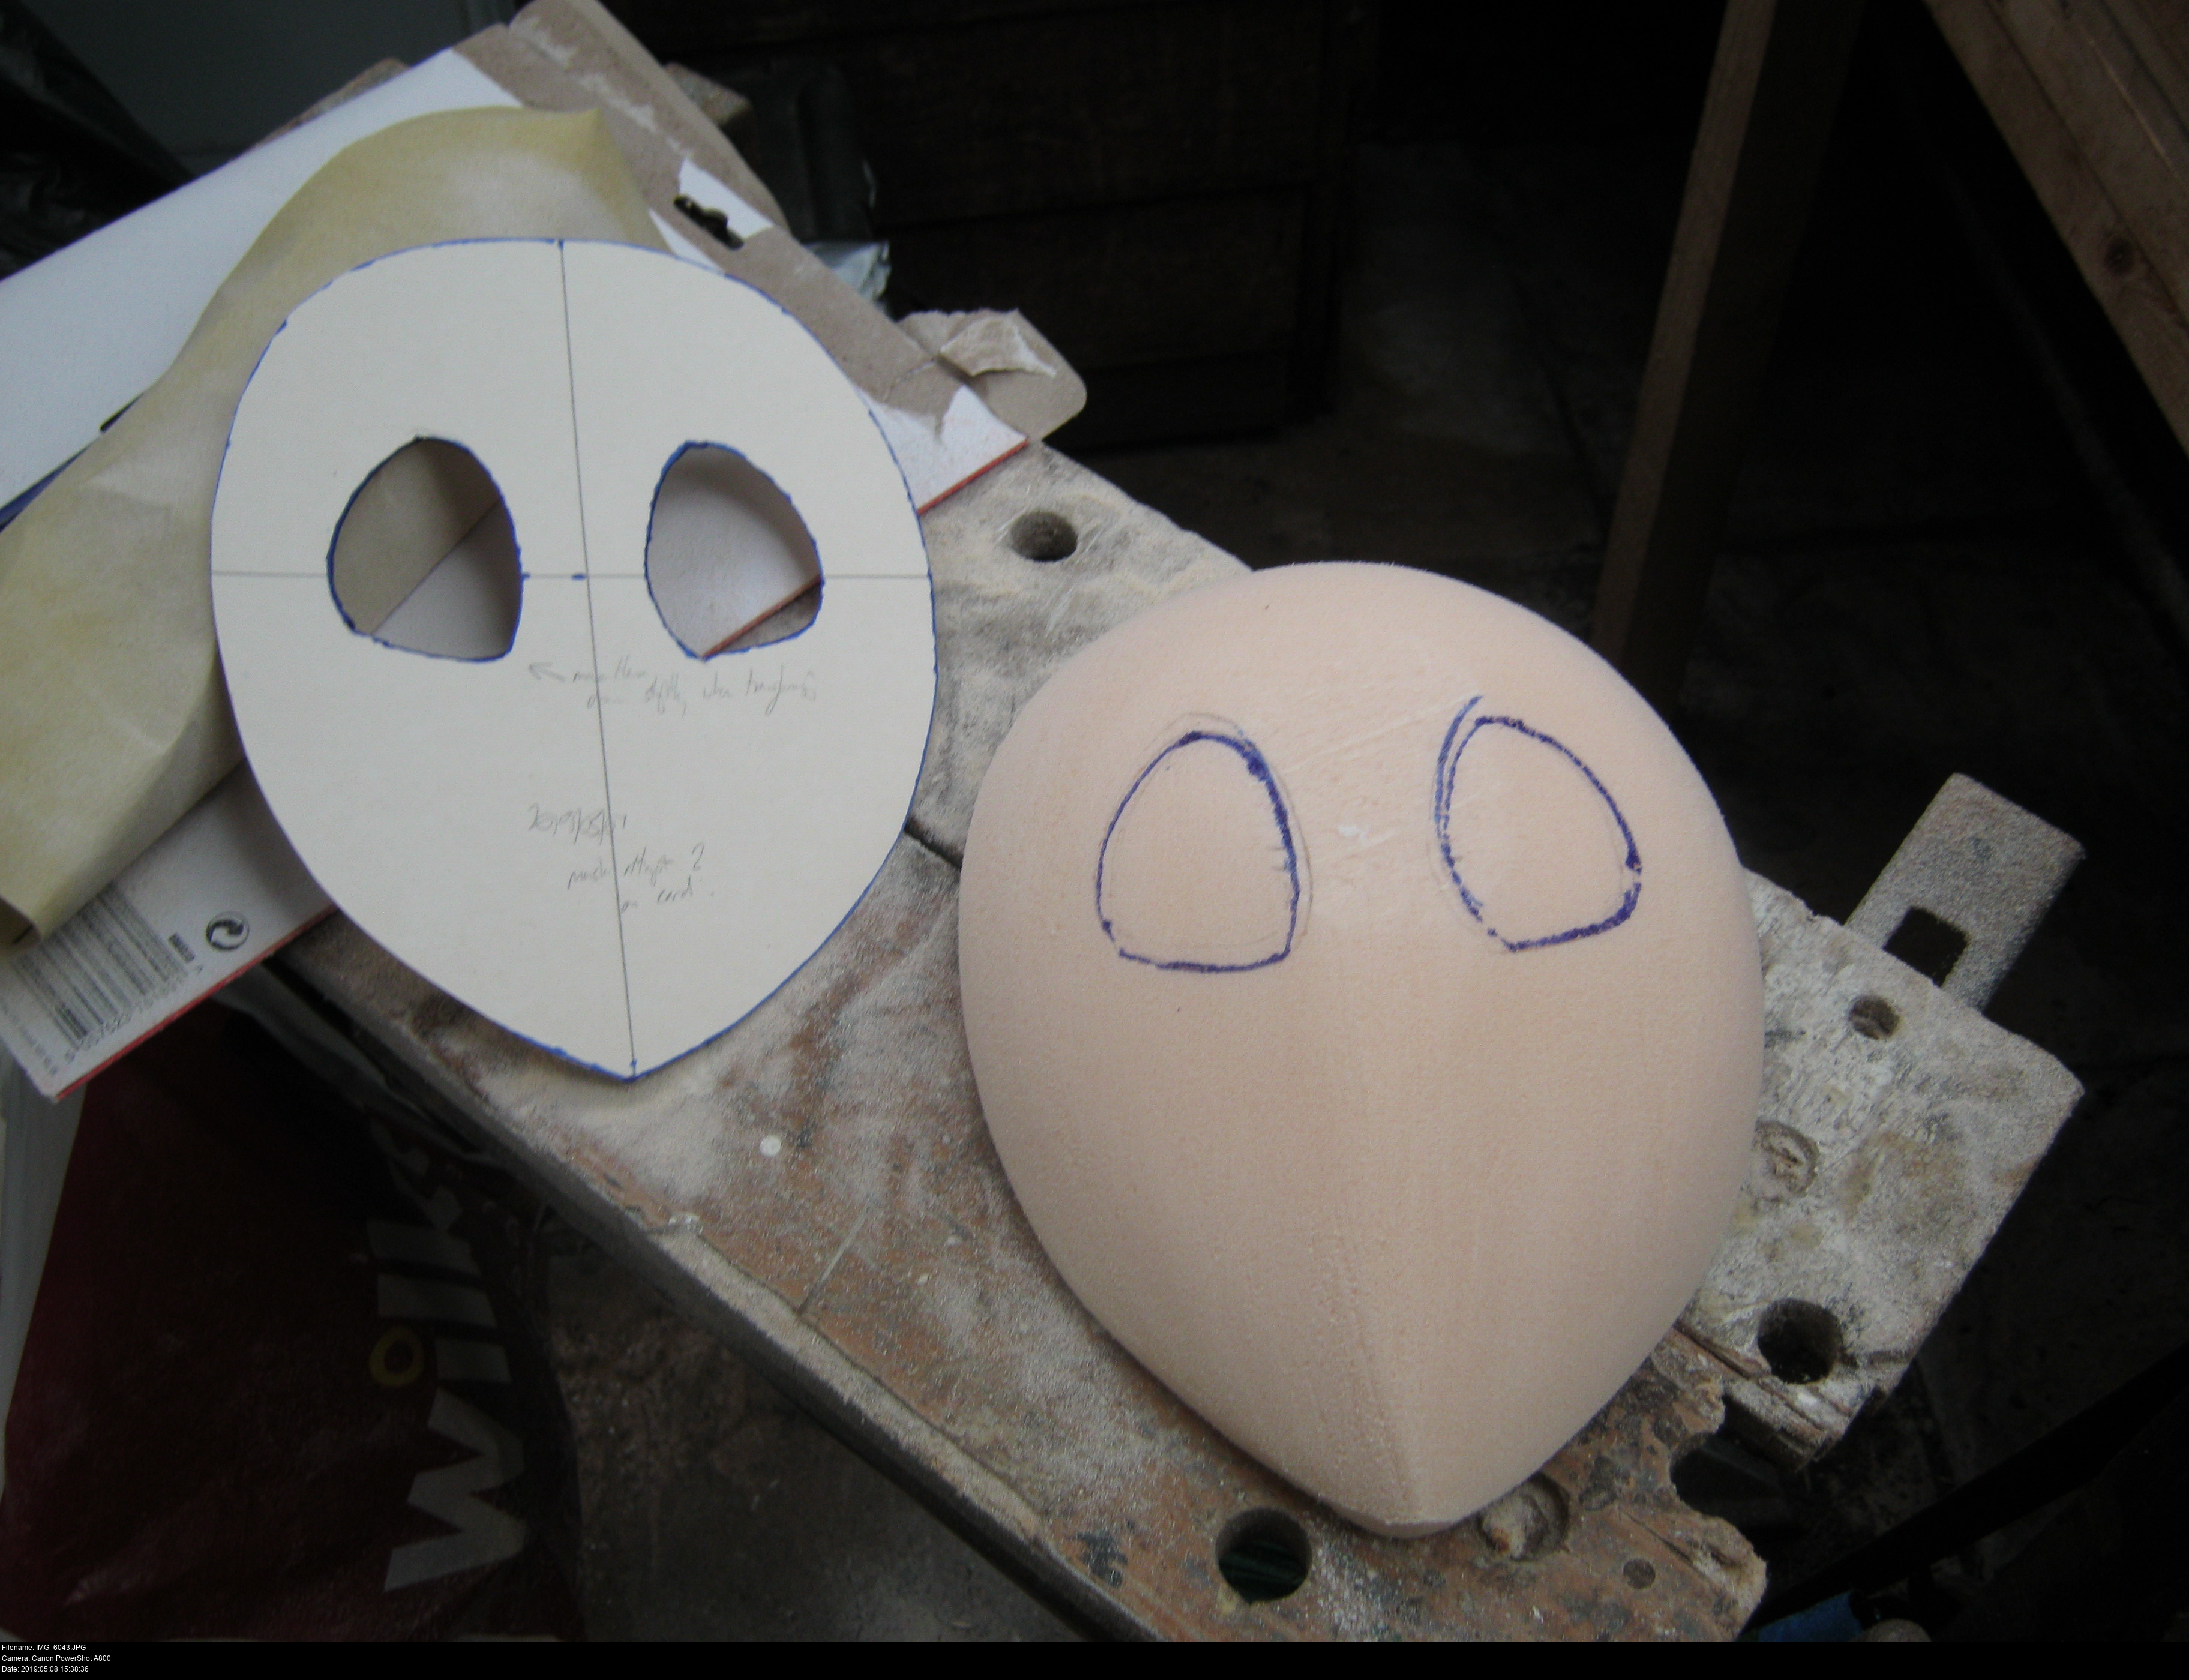
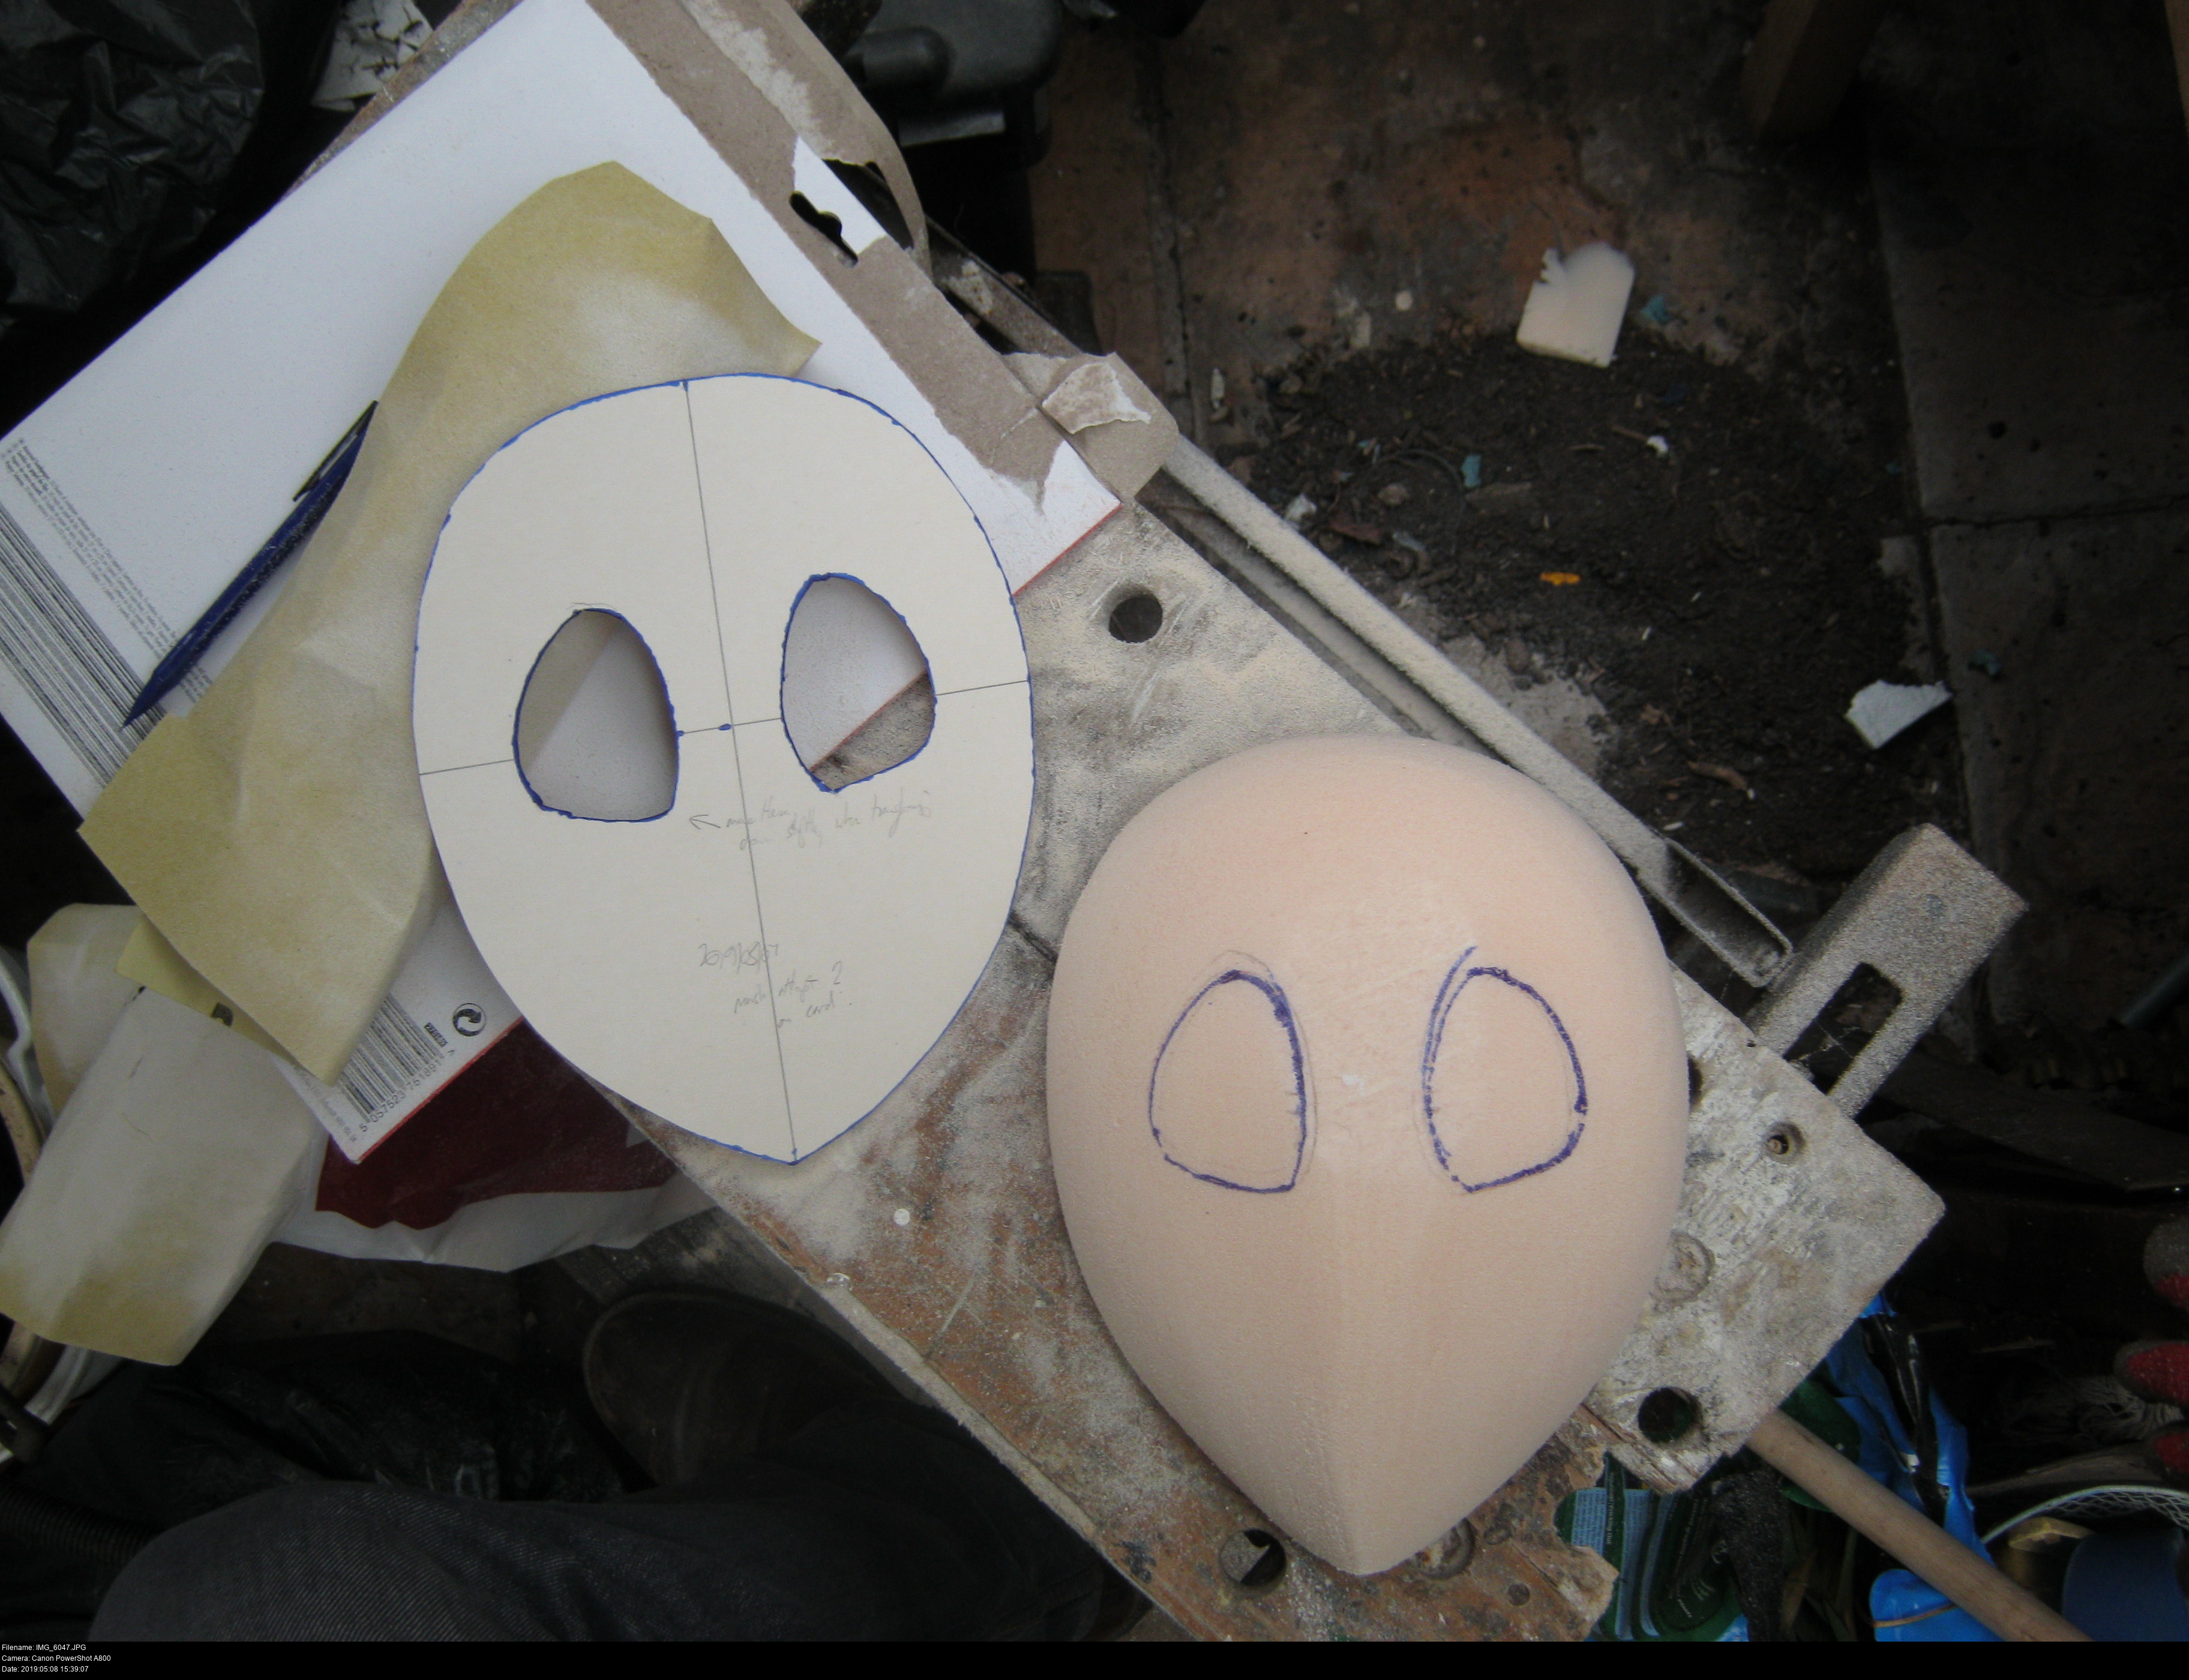
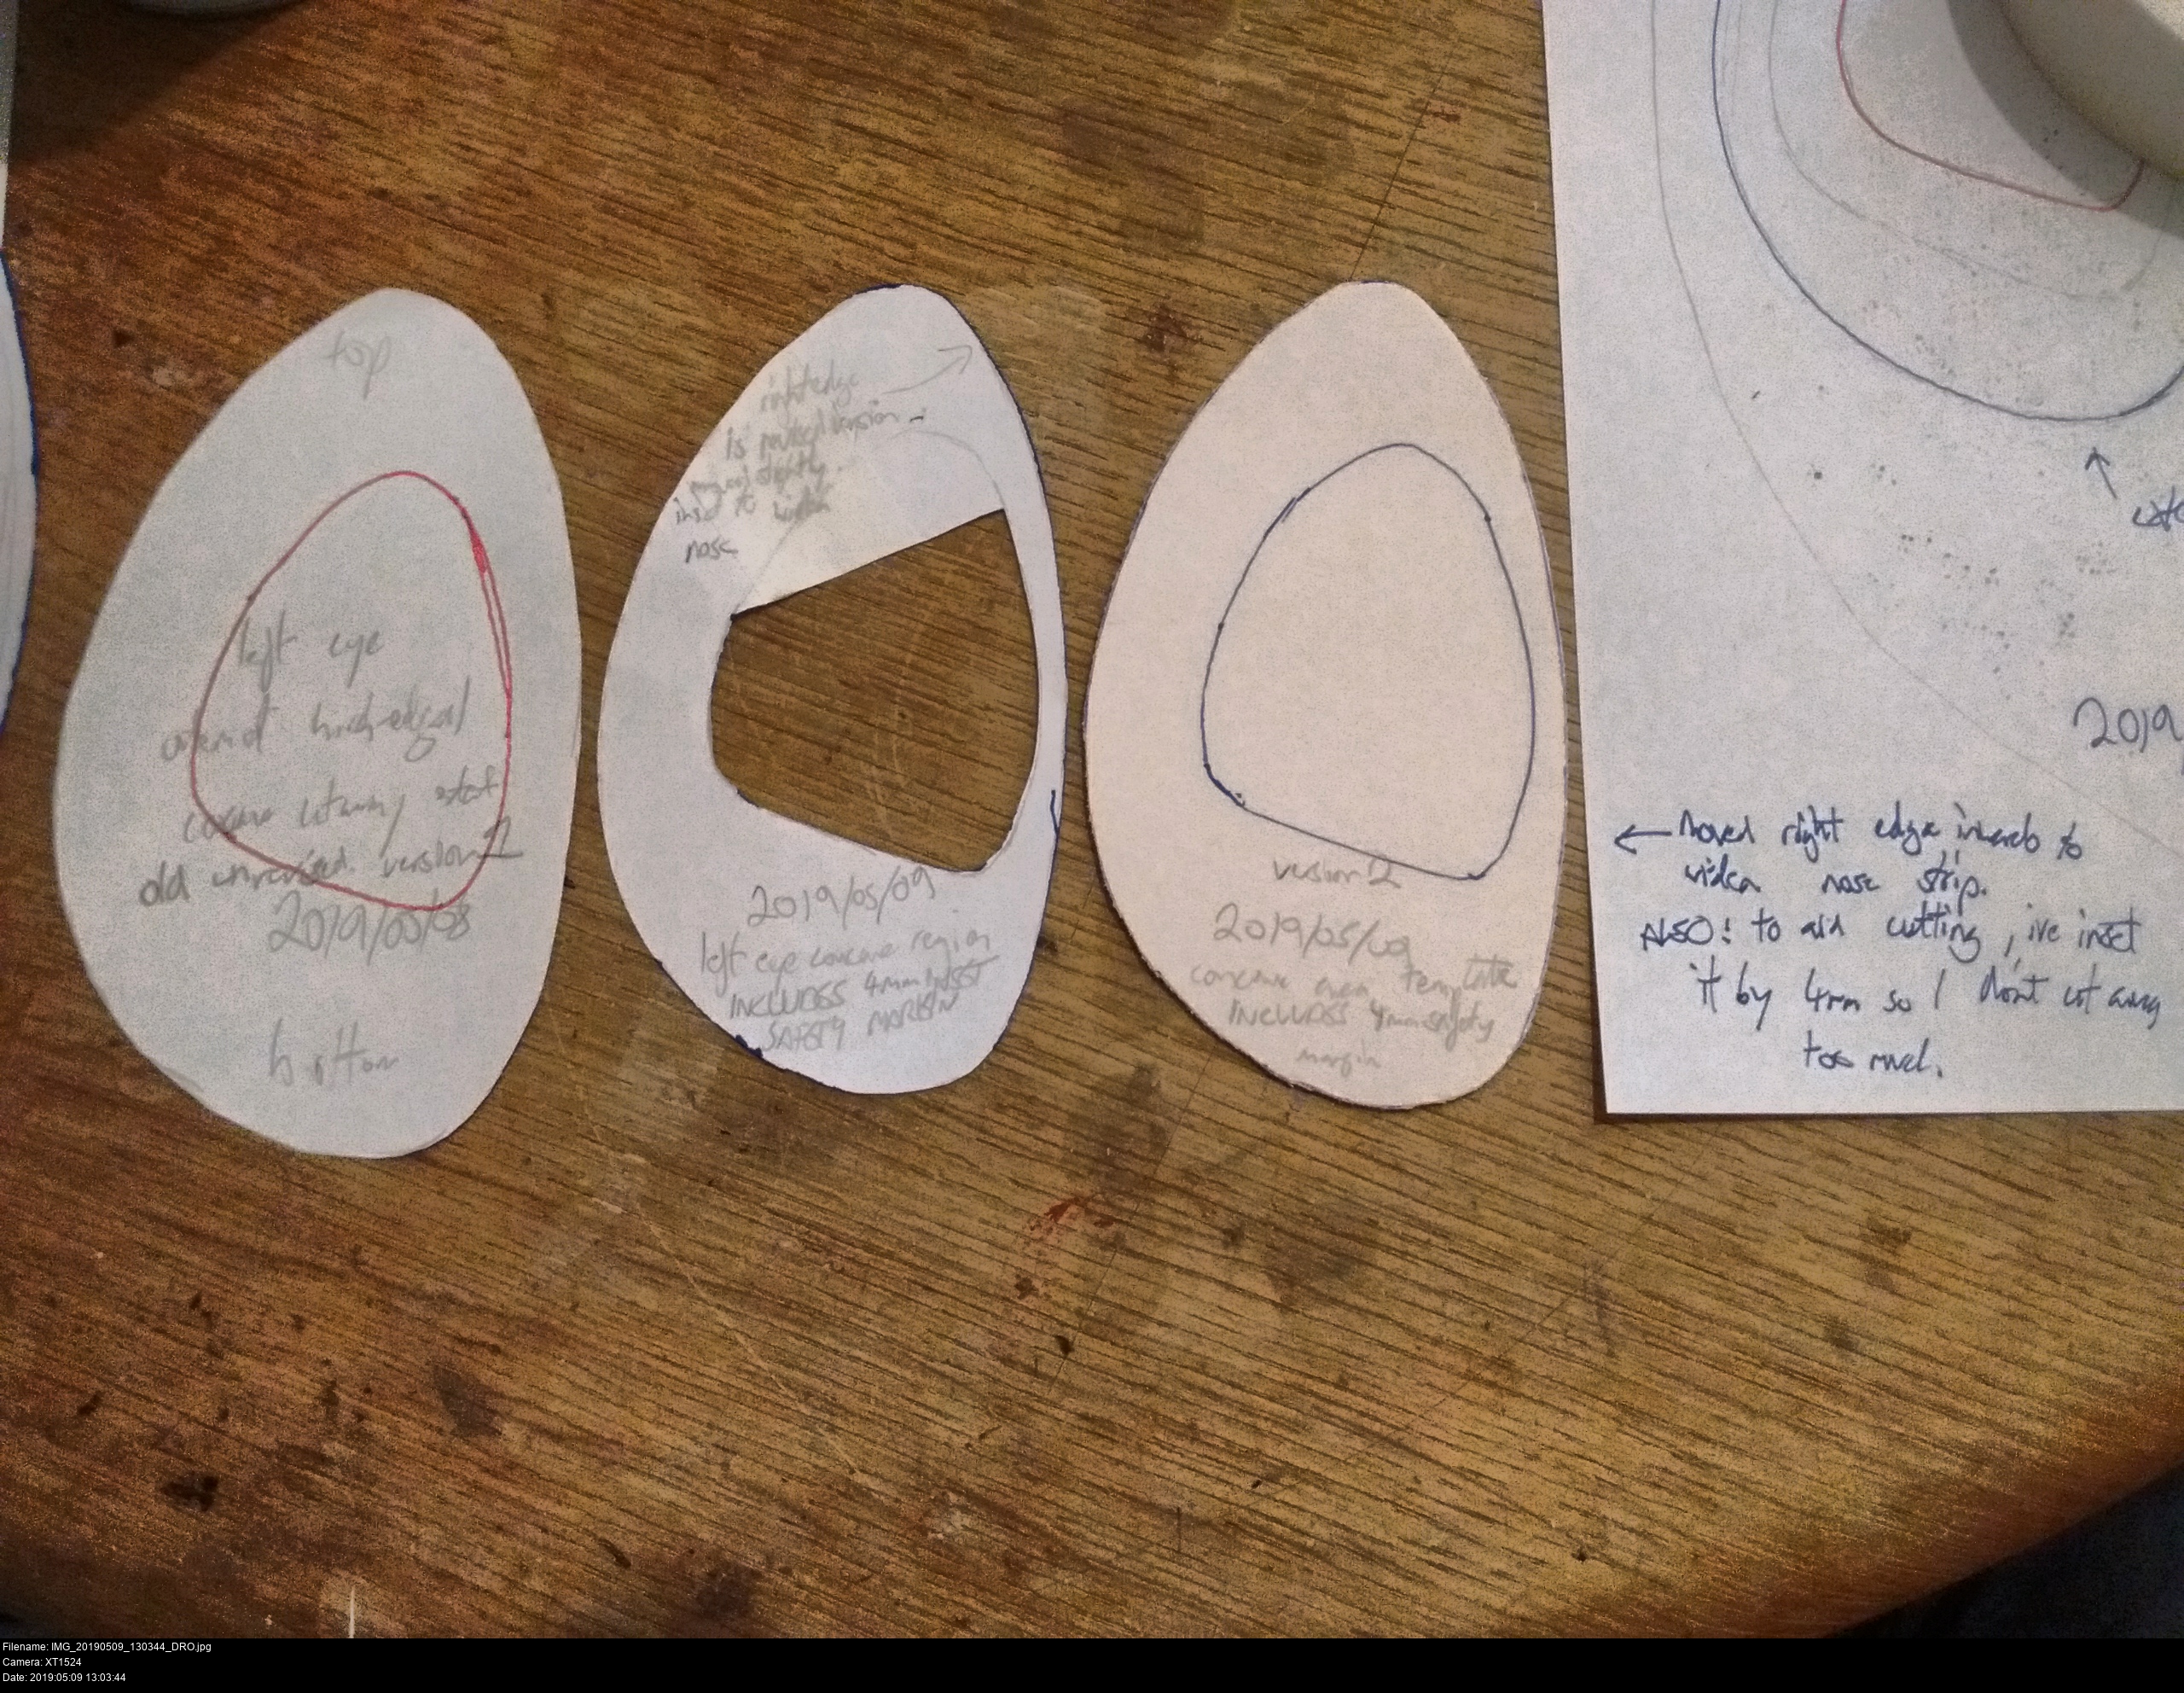
I need to make a template for the concave regions. Lots of drawing, tracing, trying, repeating. Don't forget to flip it to keep the symmetry instead of making two! When you've got a template that holds the final shape and size of the cavity you want to bore, consider making a copy that's a little recessed inwards. This has two benefits: a) if the the permanent marker outline bleeds outwards, it won't spread onto the surface that you want to keep intact and clean, and b) you'll be guided to bore conservatively so you can then expand the region towards the final, correct size in a controlled, conscious fashion.
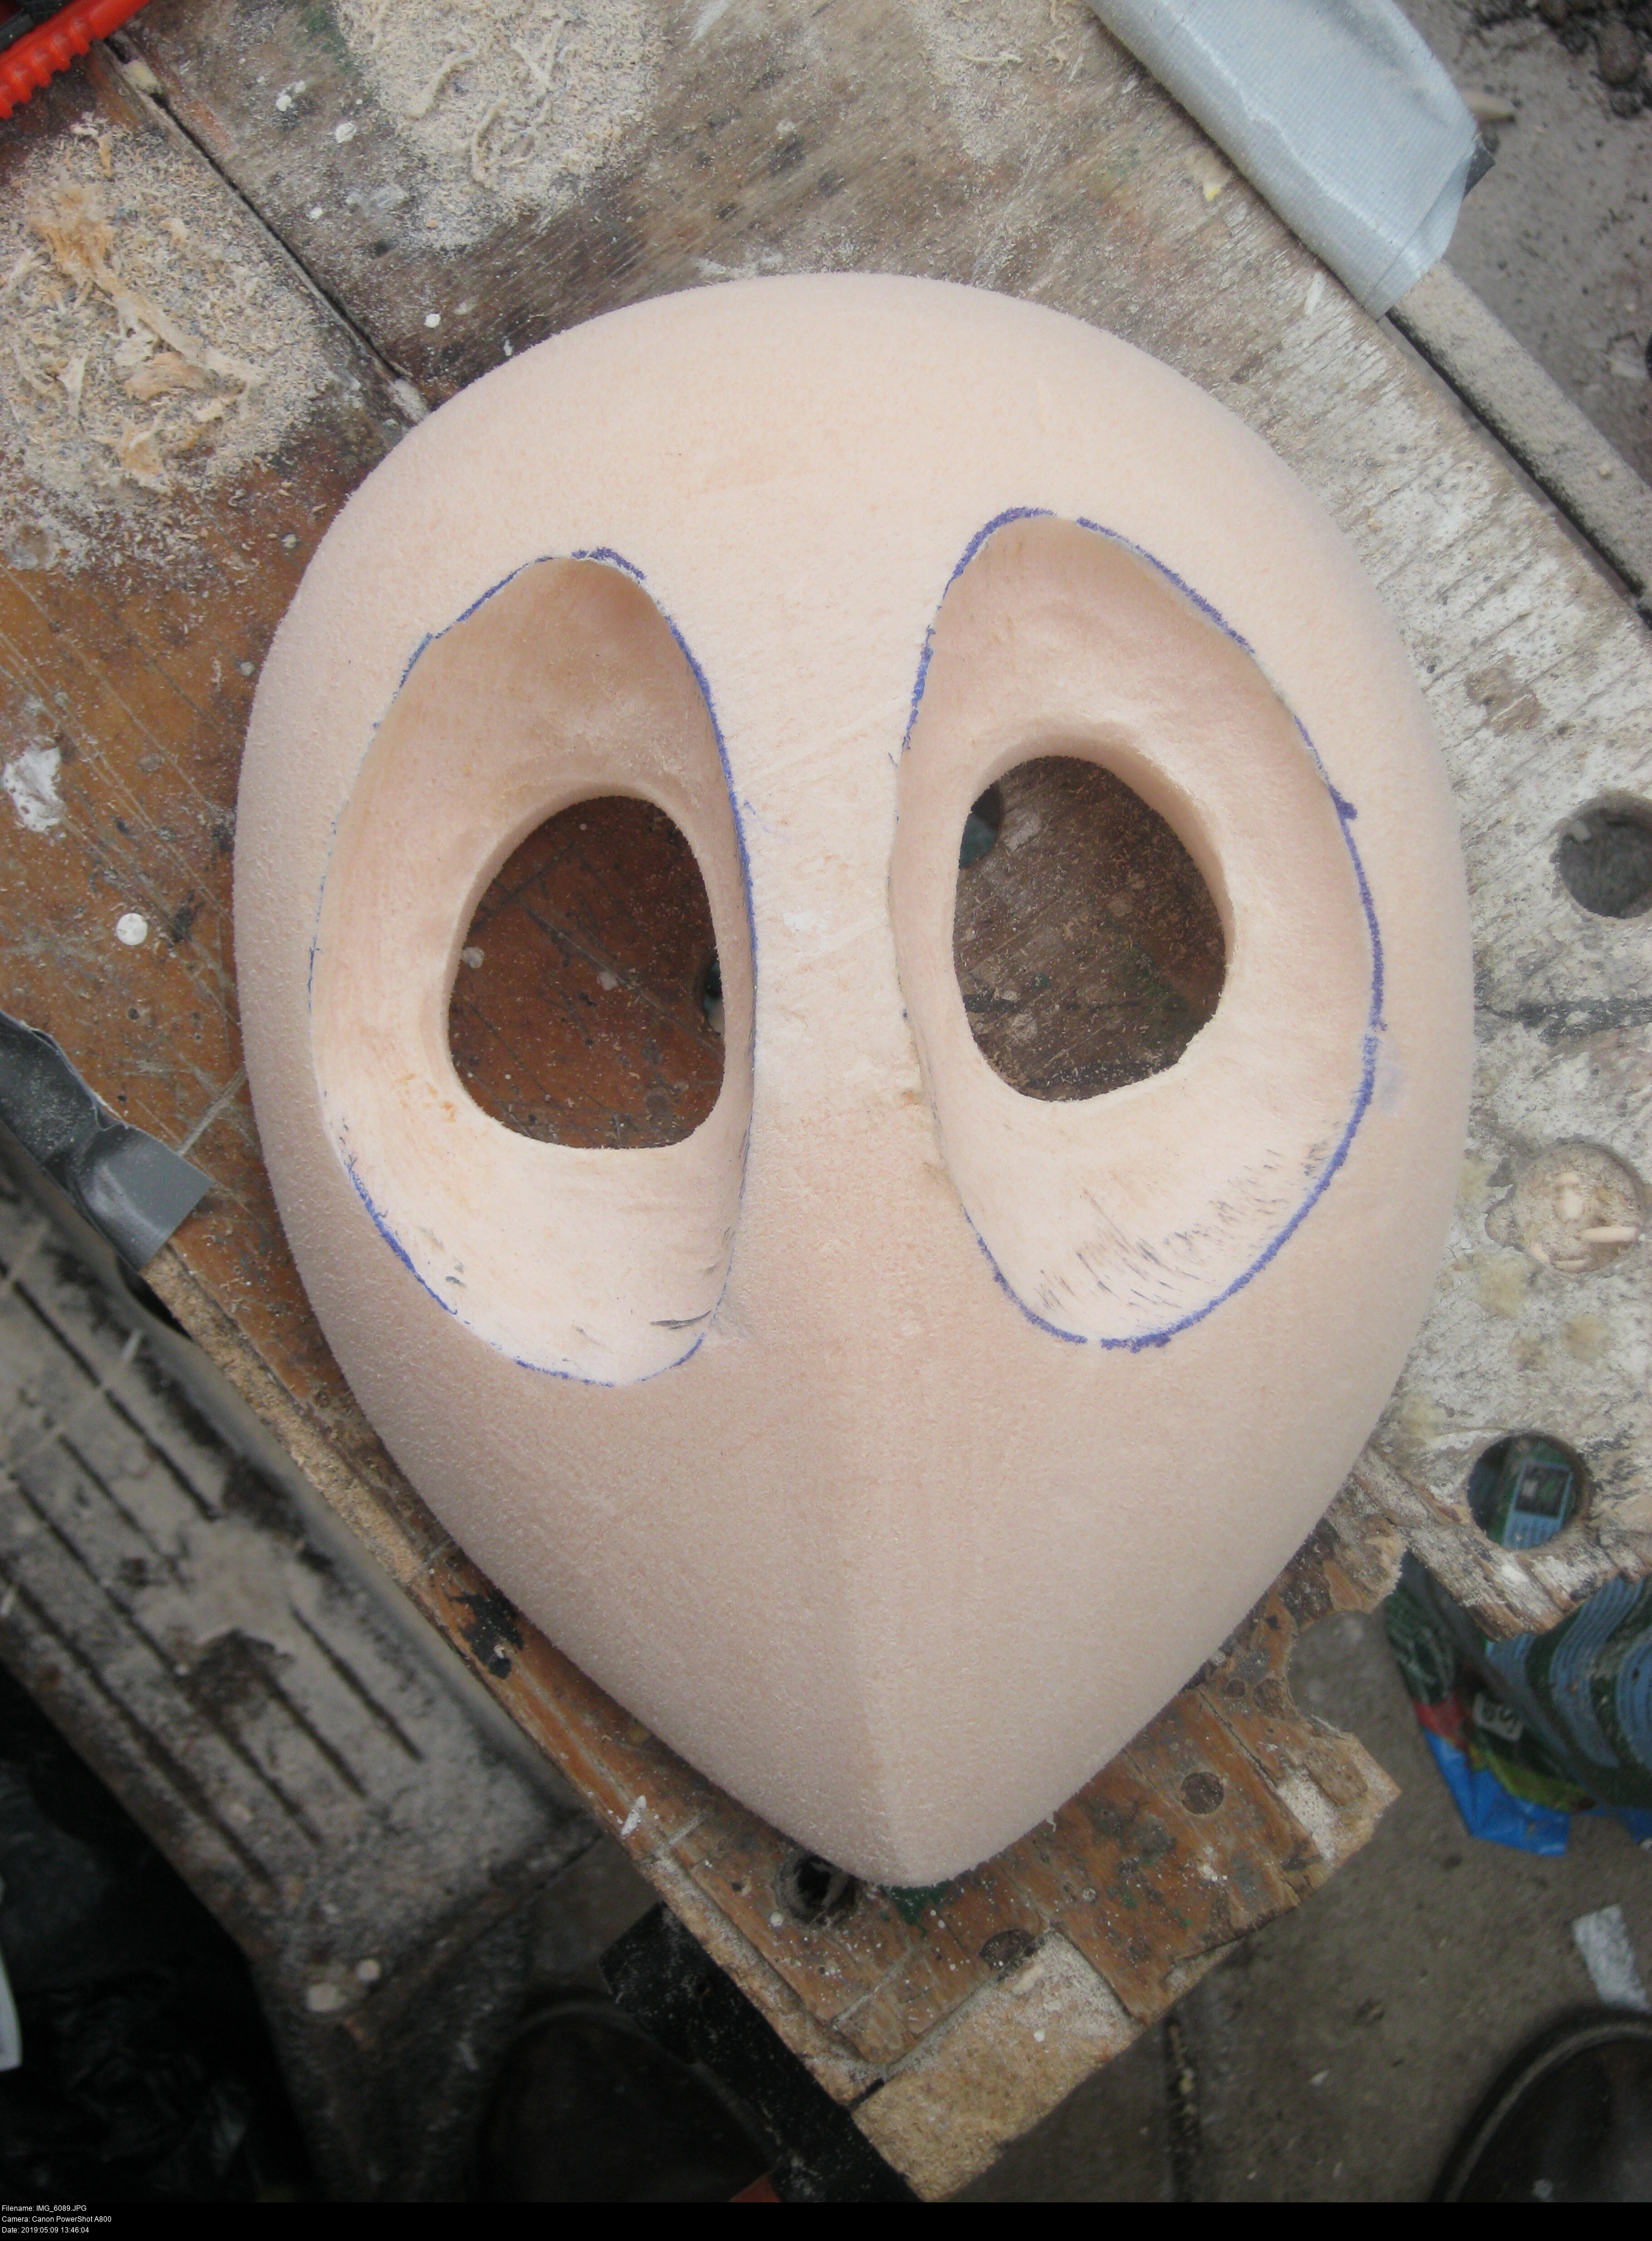
There we go. These are inset about 5mm from where they ought to be.
It's important to have a very good mental visualisation of the shape you want to create. Go back to the references, print them out real big, put them all over the place. I knew that the interior vertical edges had to be at right angles to the flat vertical stripe of the nose, and that the angle between the front-facing-most edge of the eyeholes and the concave bowl should also be a right angle. From there, the only remaining degree of freedom was the depth of the eyehole. I could have bored the eye cavities super deep into the mask, but that would prevent me from boring the interior of the mask inwards toward the front to meet the eyeholes - I'd be stuck with a completely flat-backed mask.
Also: keep comparing your markings and alterations to the mask as a whole not just any one specific feature. These eyes might look asymmetrical with respect to the central beak, but if I sand the beak a little more on one side it will look different again.
Also 2: WEAR A DUST MASK. Don't make me come get you.
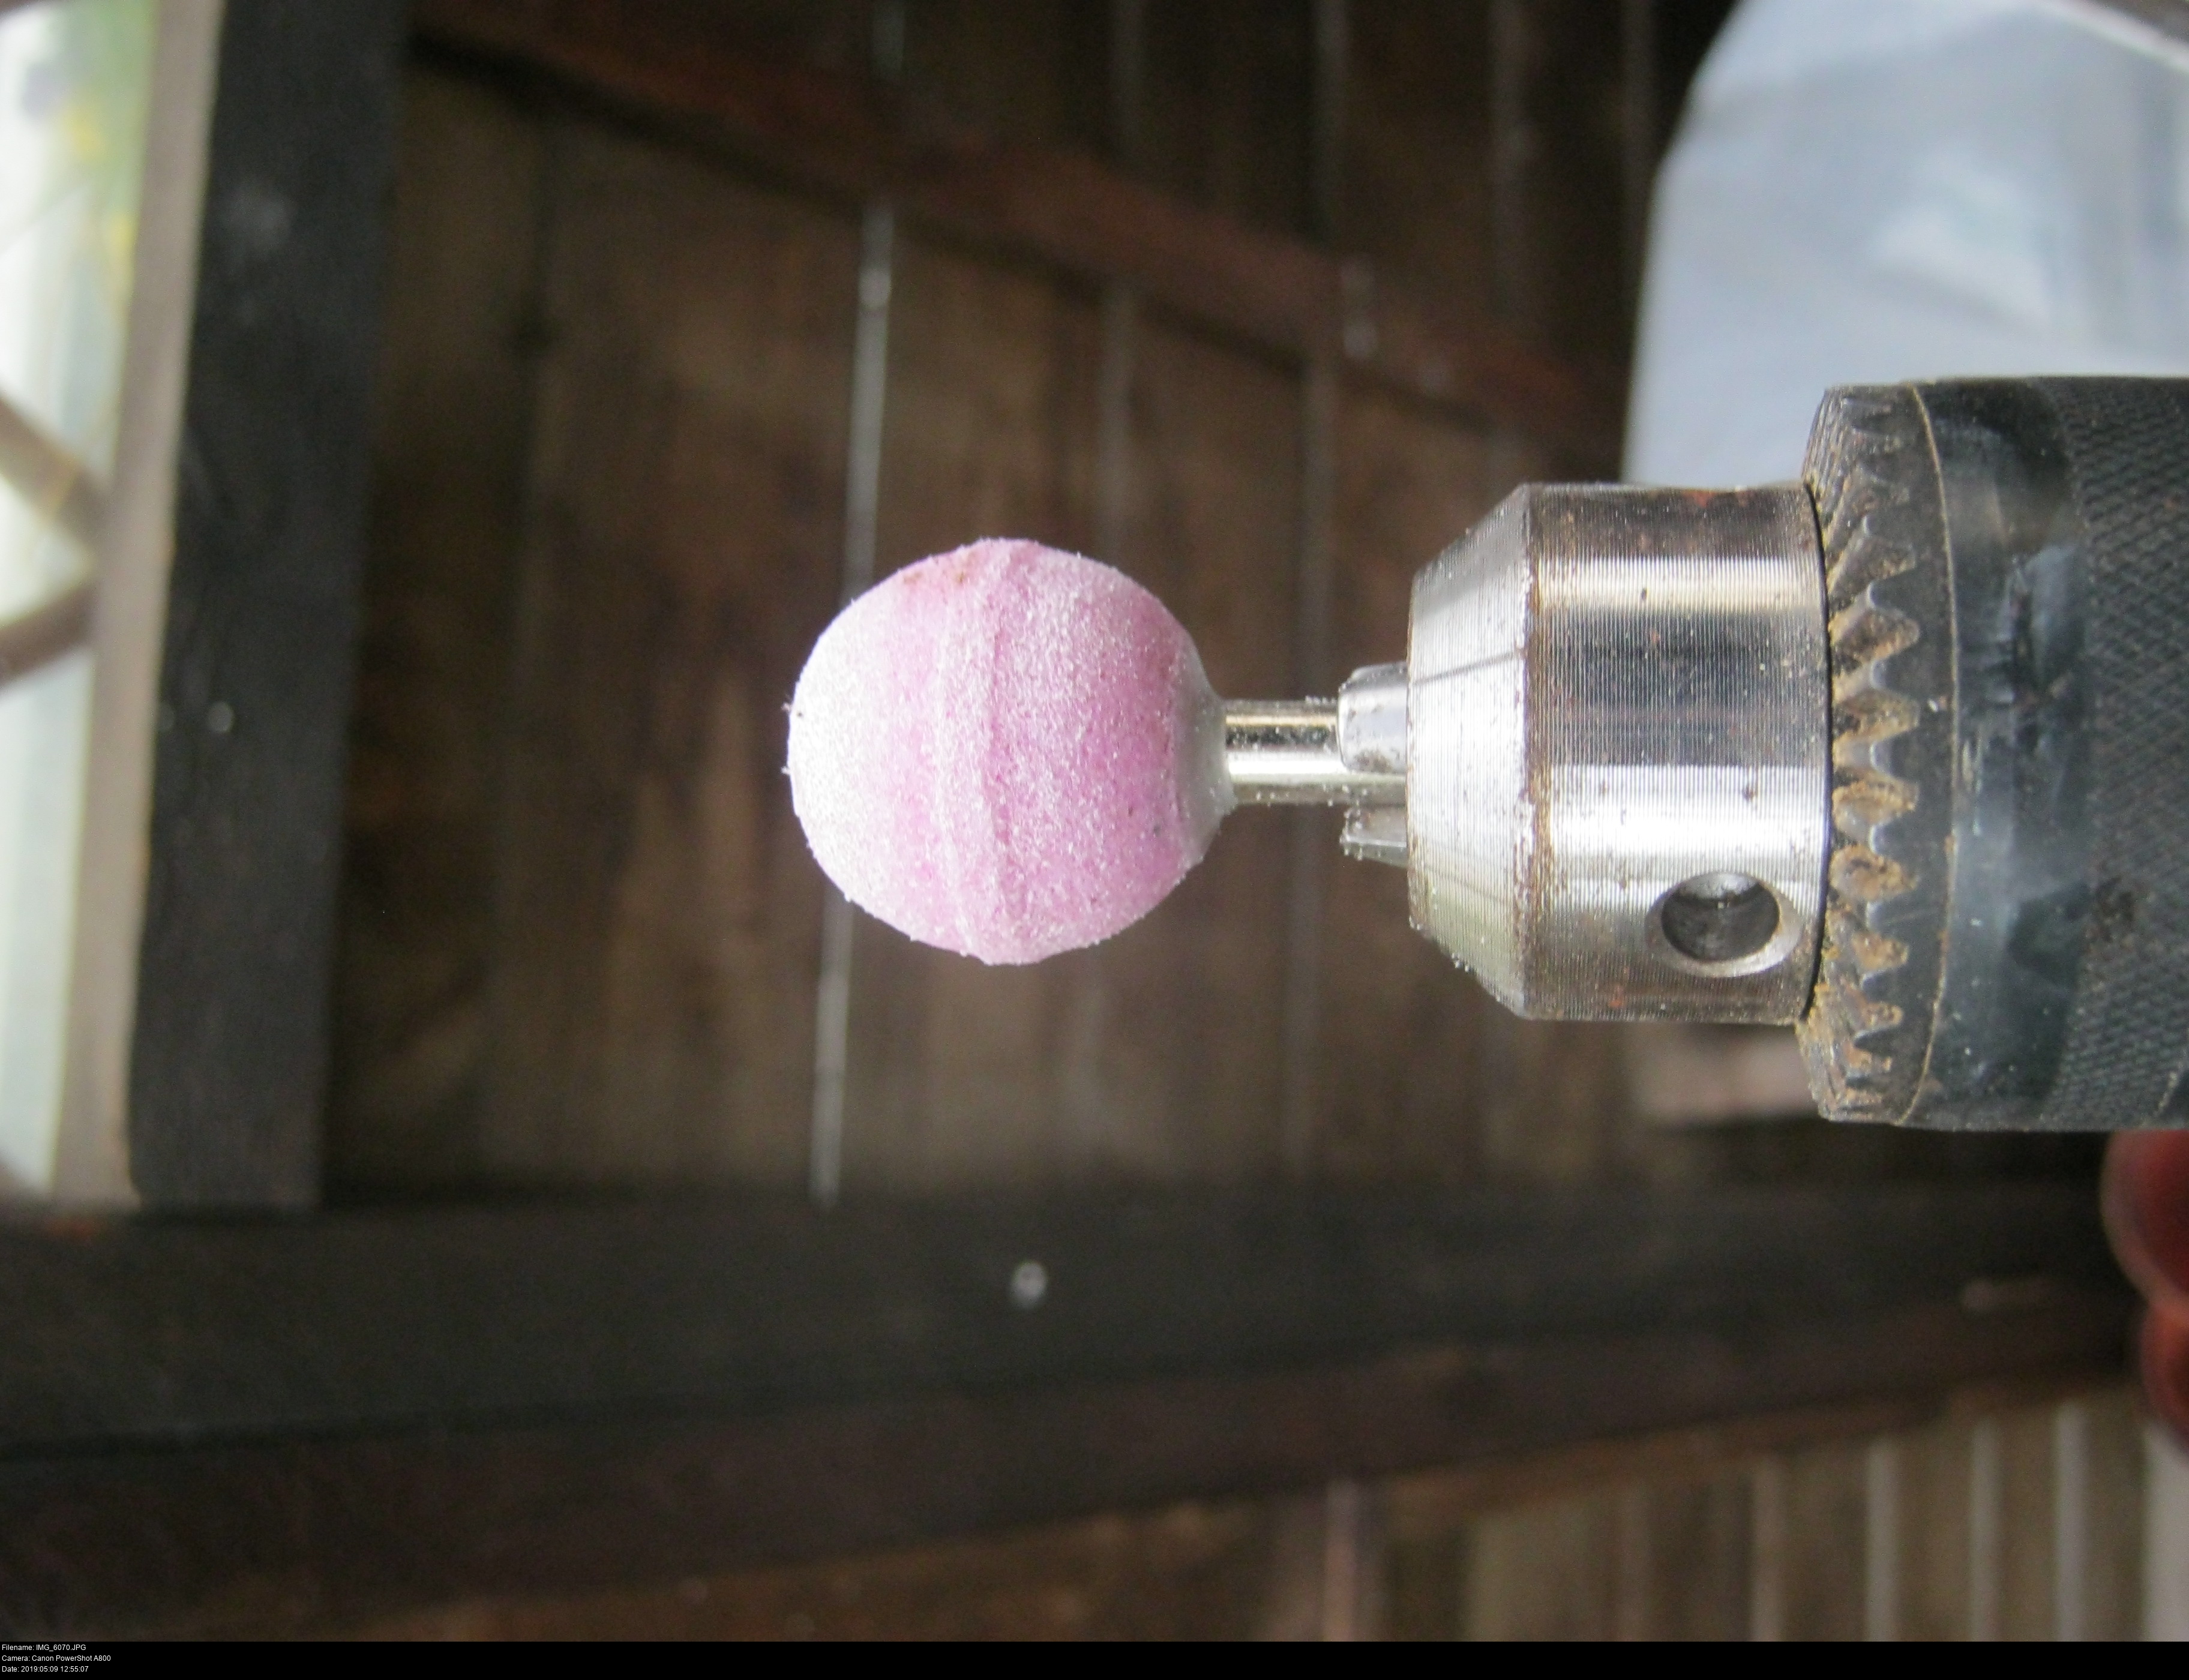
The new bit fits like a glove. One of those unremoveable gloves you have to secure in place with a heavy chuck key.
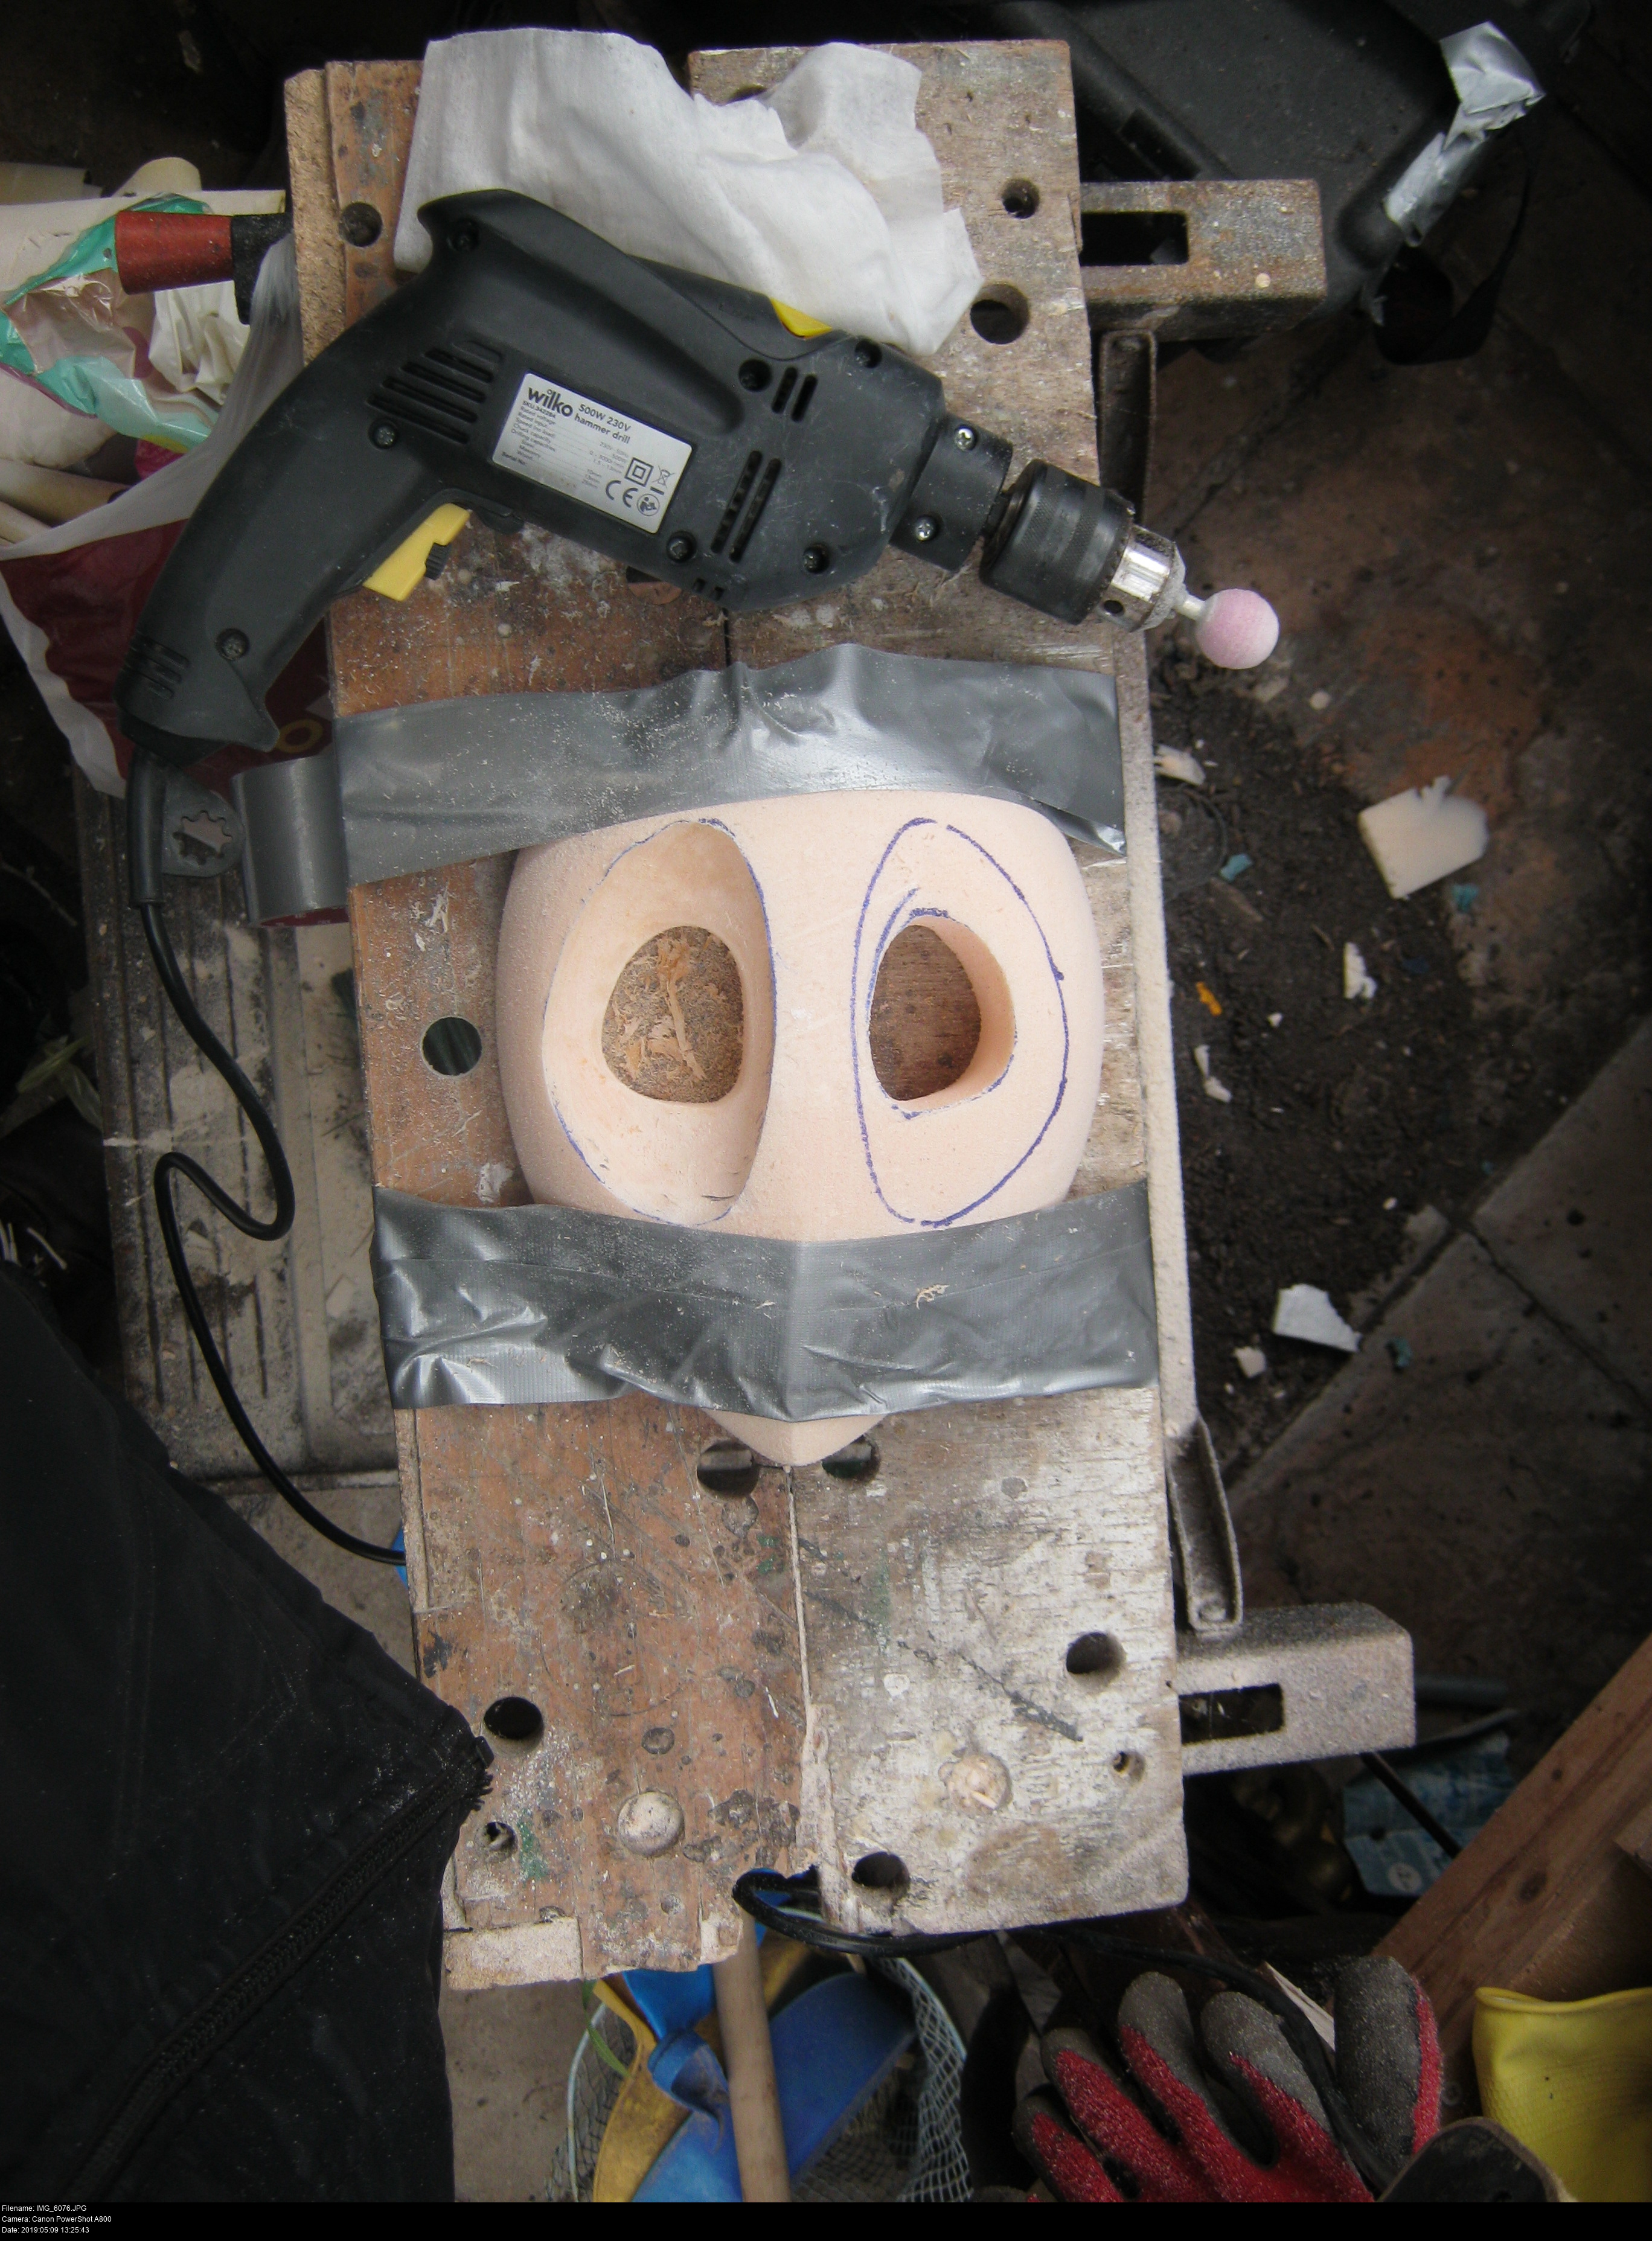
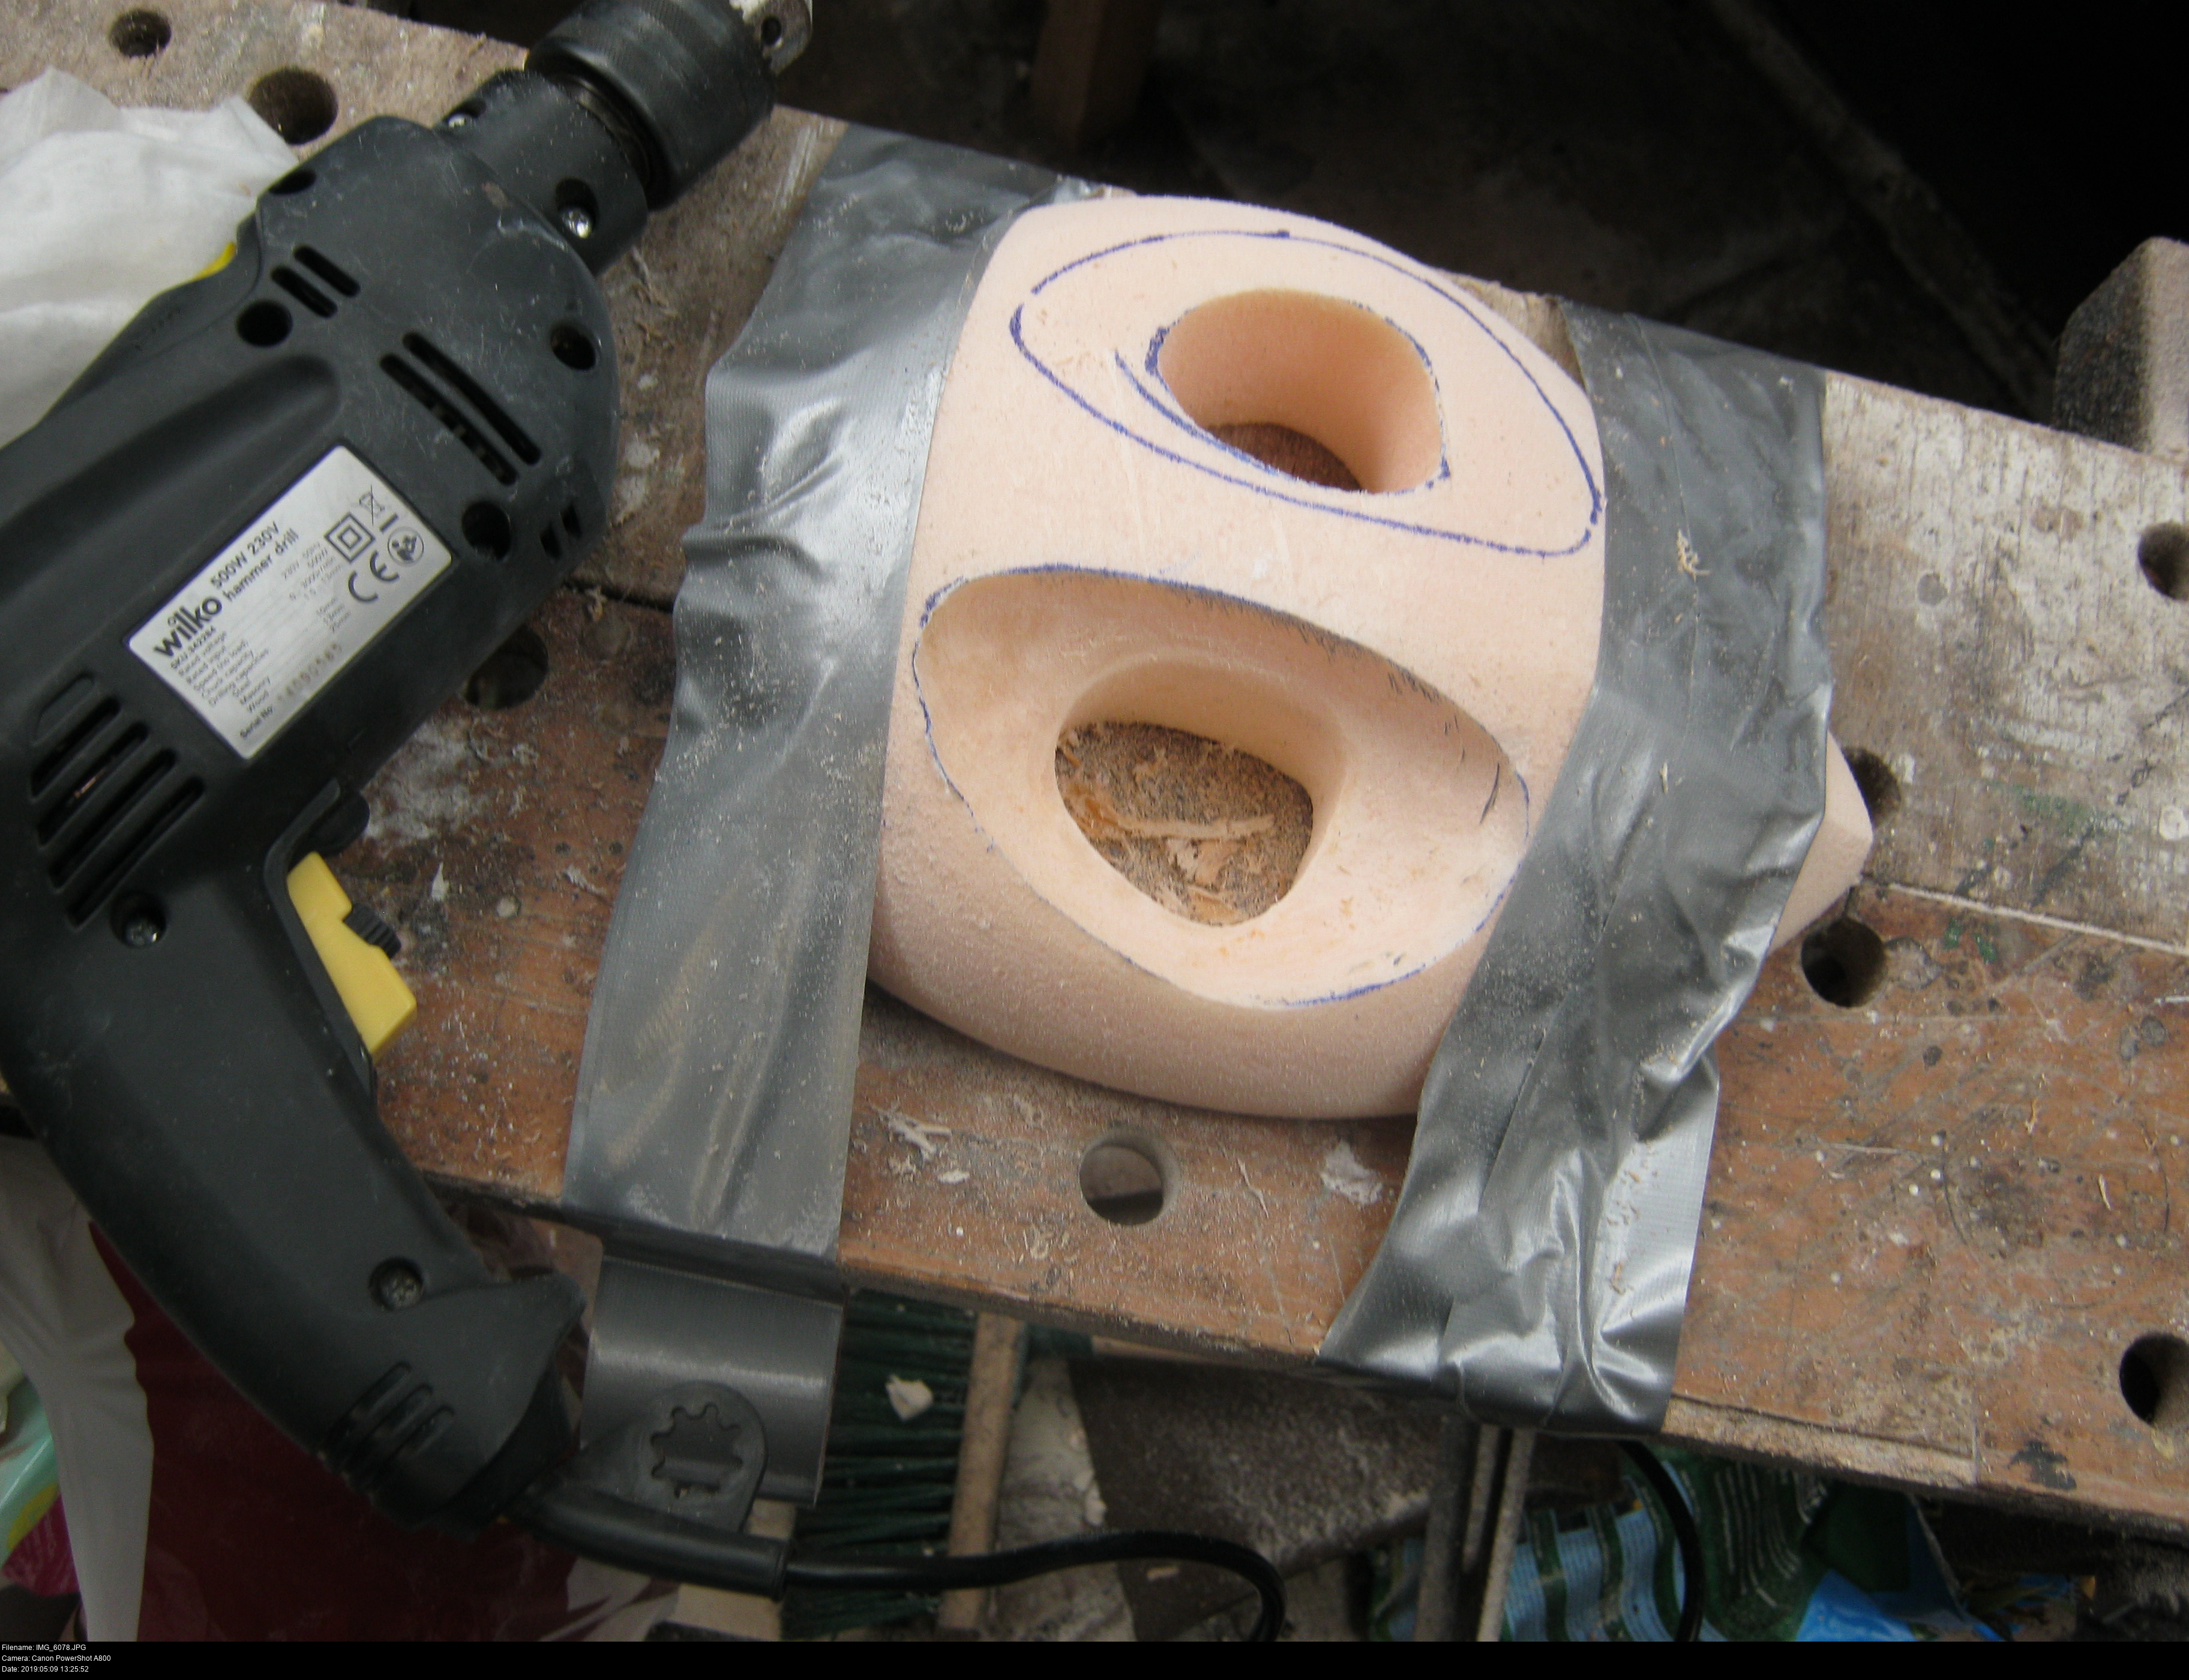
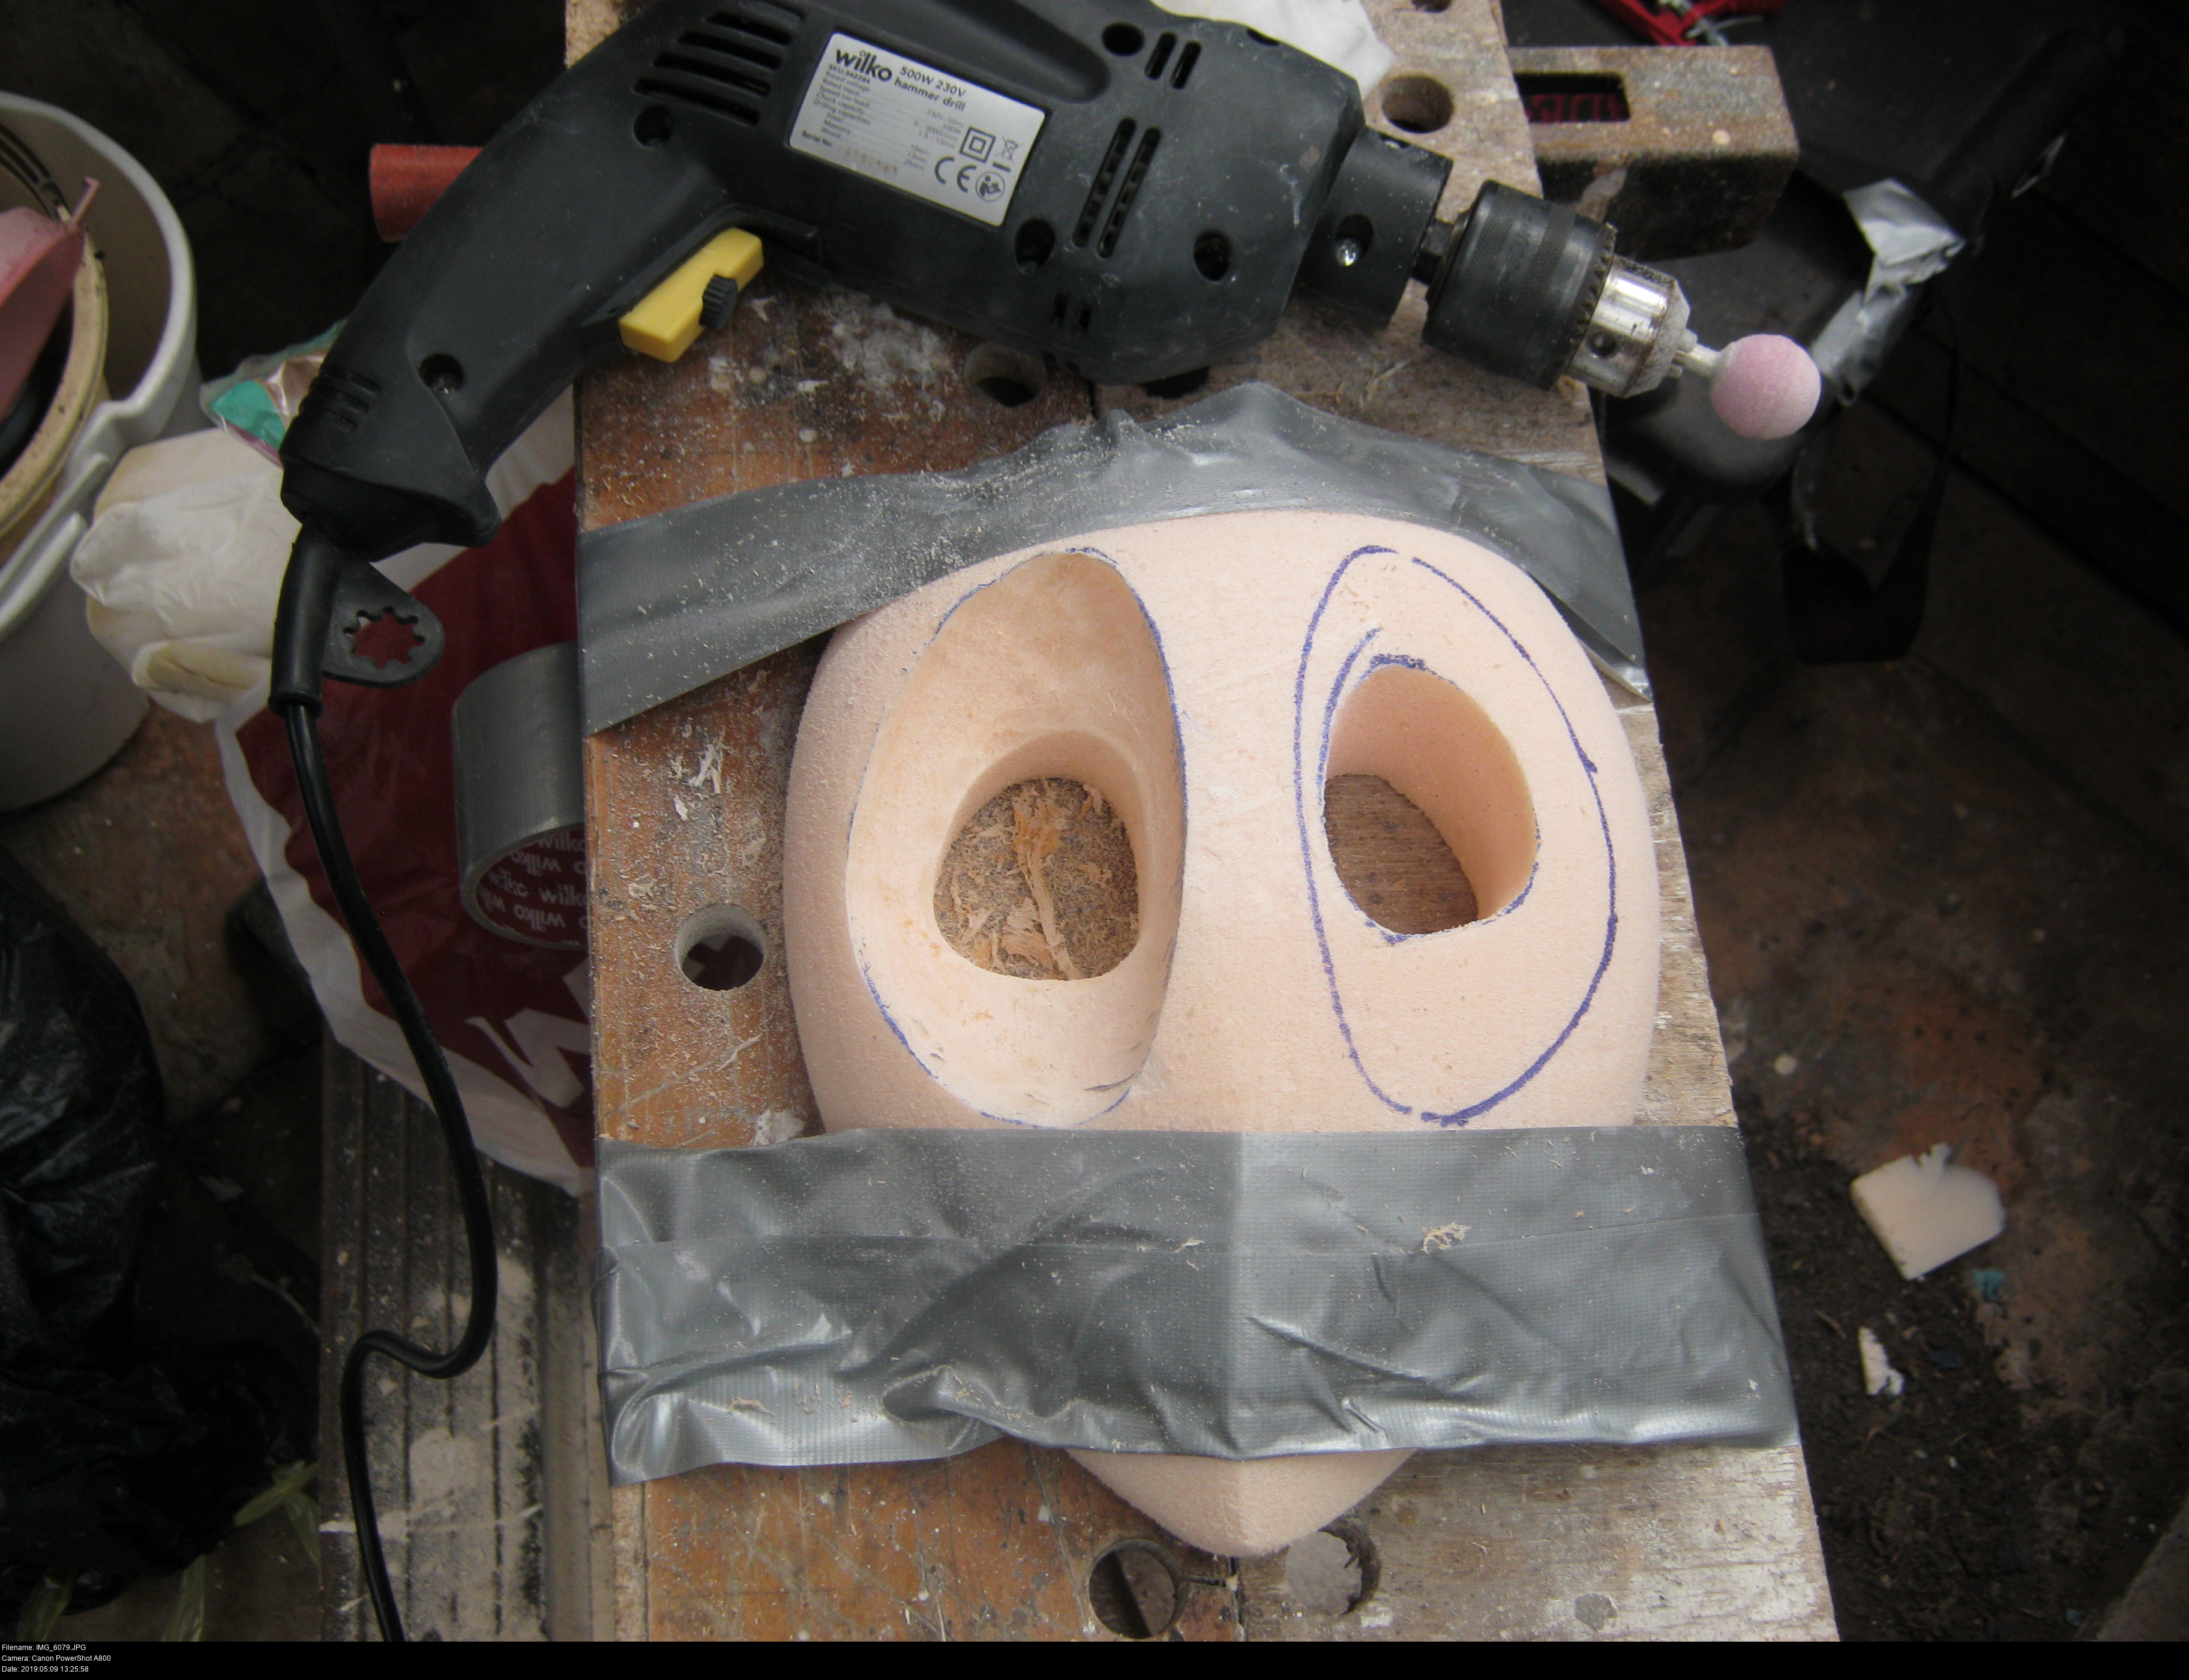
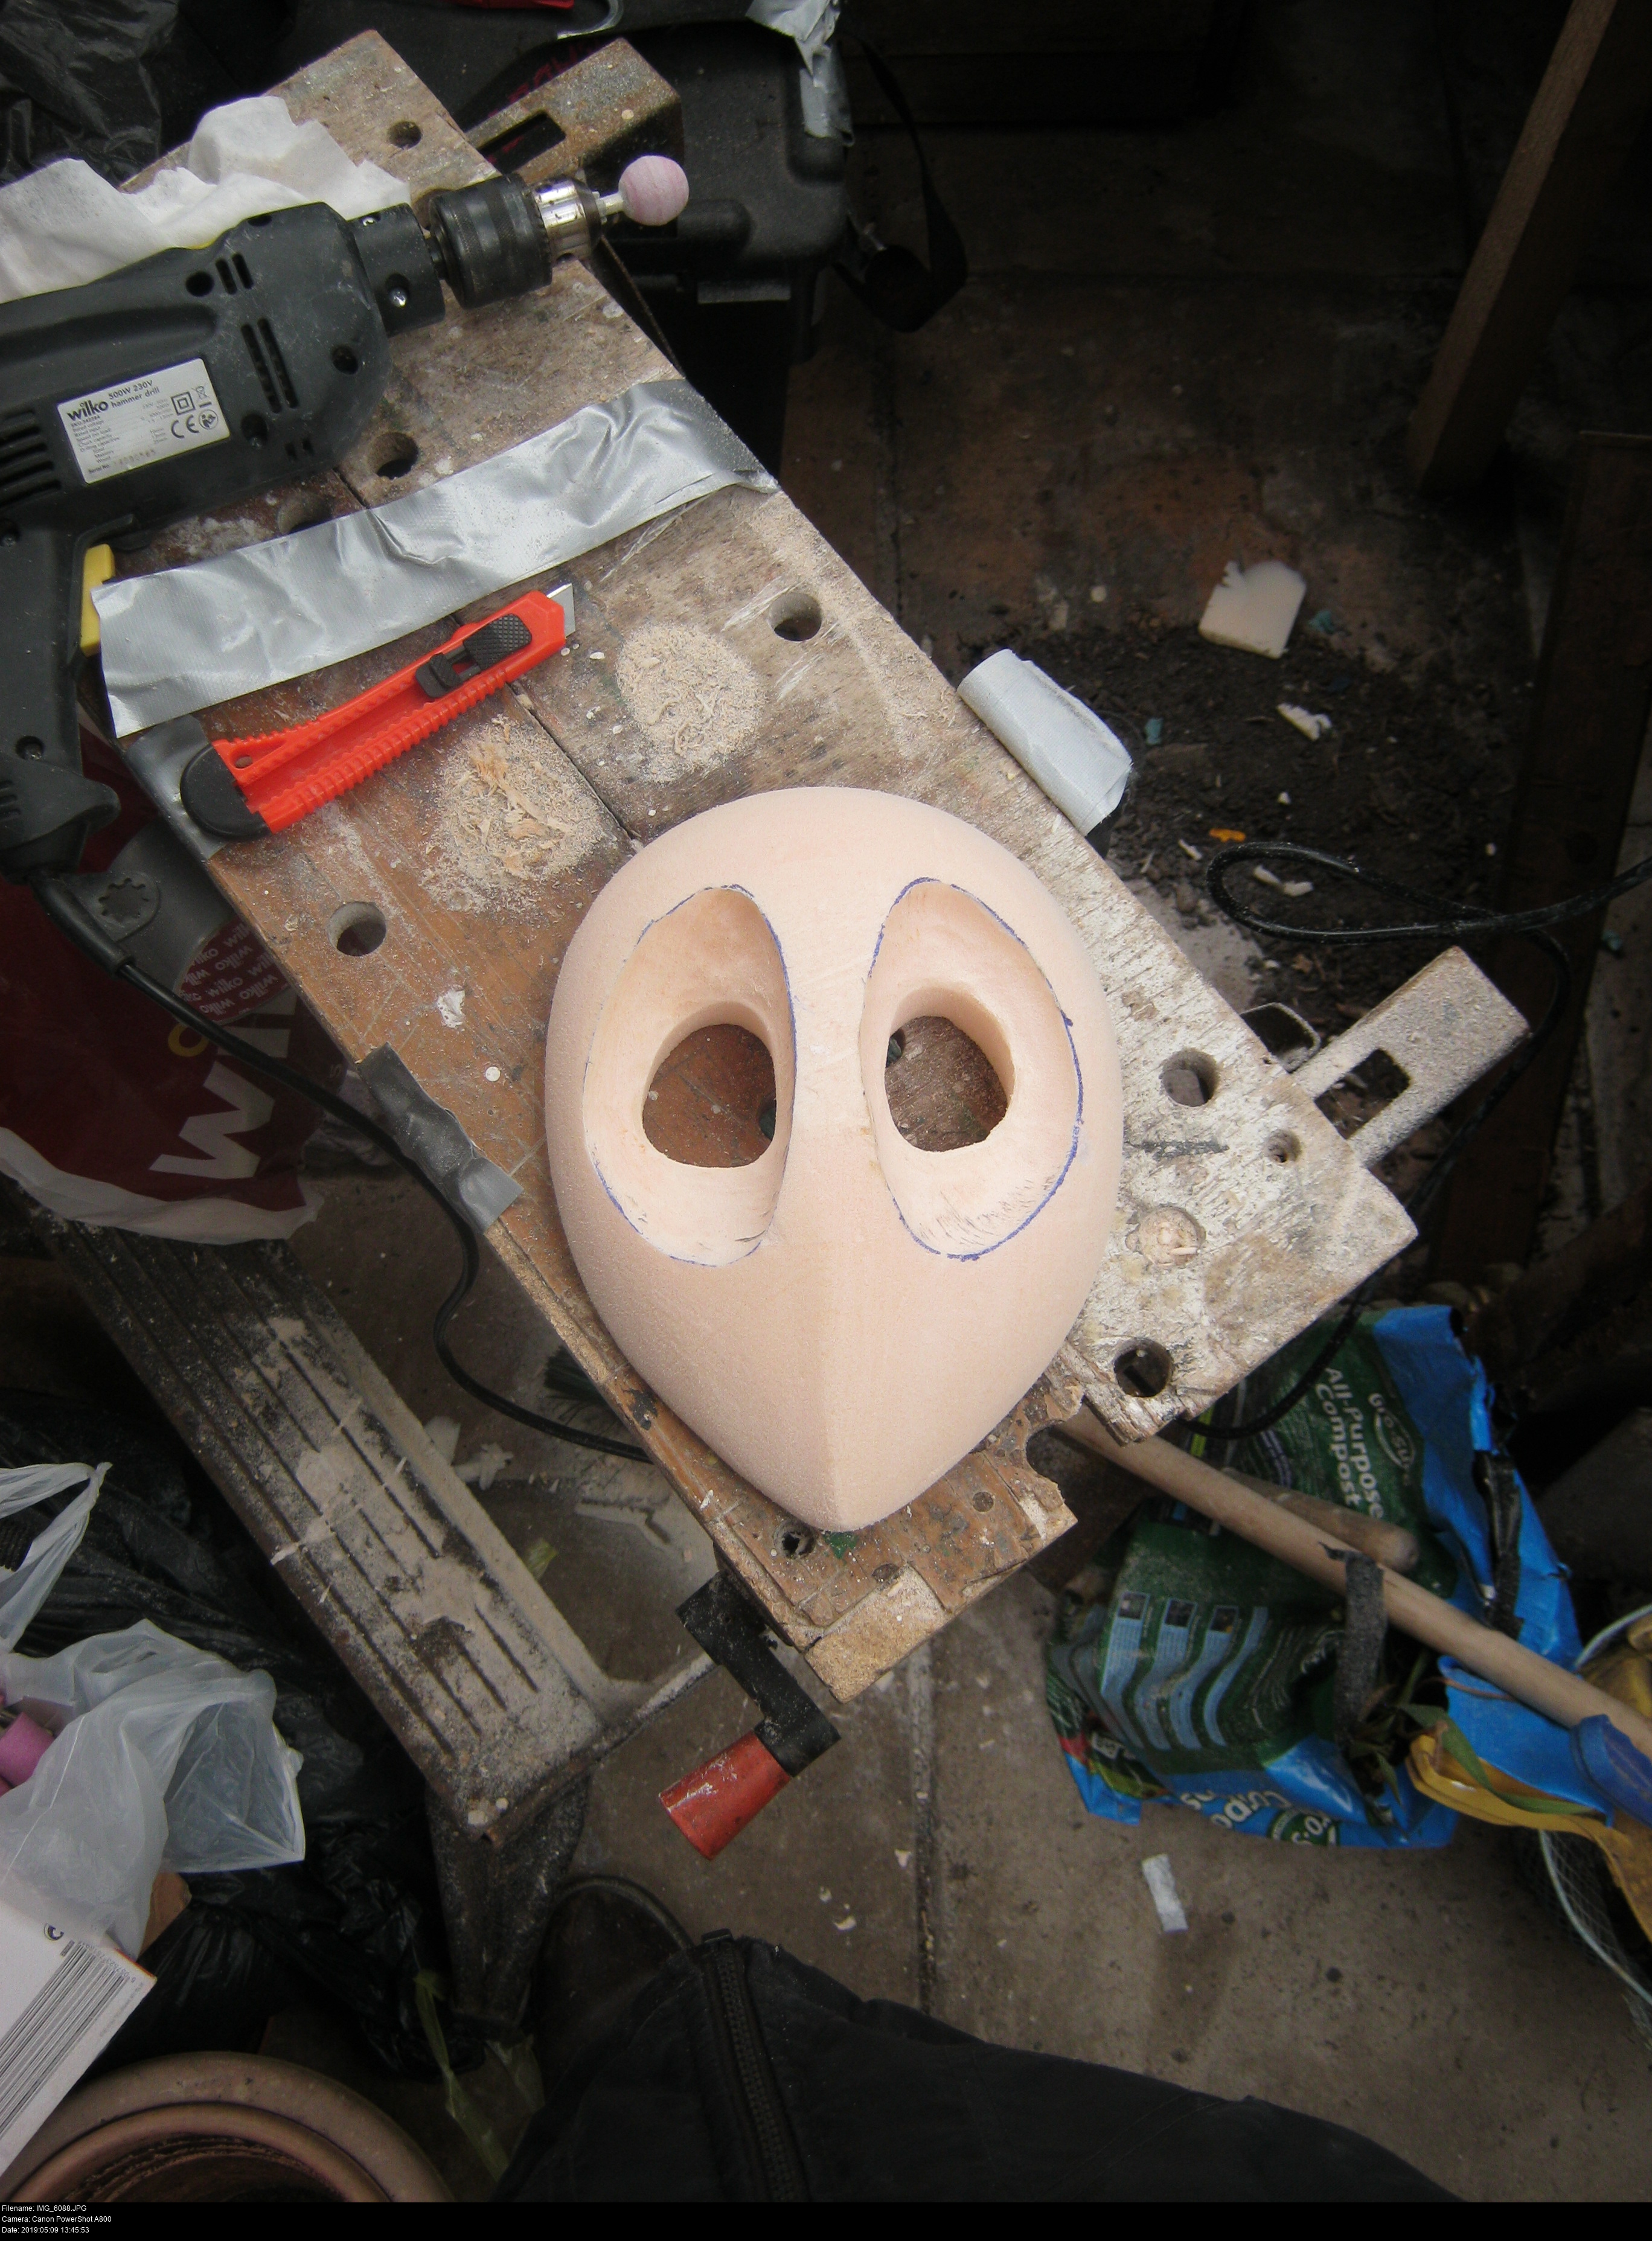
First, you've got to secure the work. The workbench I'm using has a vice built into it (it's made of two planks that can be independently shifted in and out to hold work in place), but the pink foam is so soft I think that using this would result in awful linear gouges across the surface. Instead, I used some left over duct tape and taped the mask down onto the surface like it was being held down by restraining straps. (Taking care not to tape over where I wanted to bore.)
If you don't secure the work, what'll happen is that the rotating bit will throw the work aside suddenly on contact. I saw this coming, so thankfully my wonderful mask which I intend to wear on my face didn't land in a heap of... stuff.
Second, the speed that you run the bit at doesn't really matter if the work is secured. Higher speeds will let you work faster, but you ought to be working as slow as you possibly can regardless. With the bit running slow, there's more of rough, cutty action. A faster bit grinds smoother, and even melts the foam a little as it runs. That's neither good nor bad, really.
Before setting a completely unfamiliar tool on your super cool mask, try it on some scrap material first!
Here's my experiences with the grinding bits on the pink foam:
They're damn good.
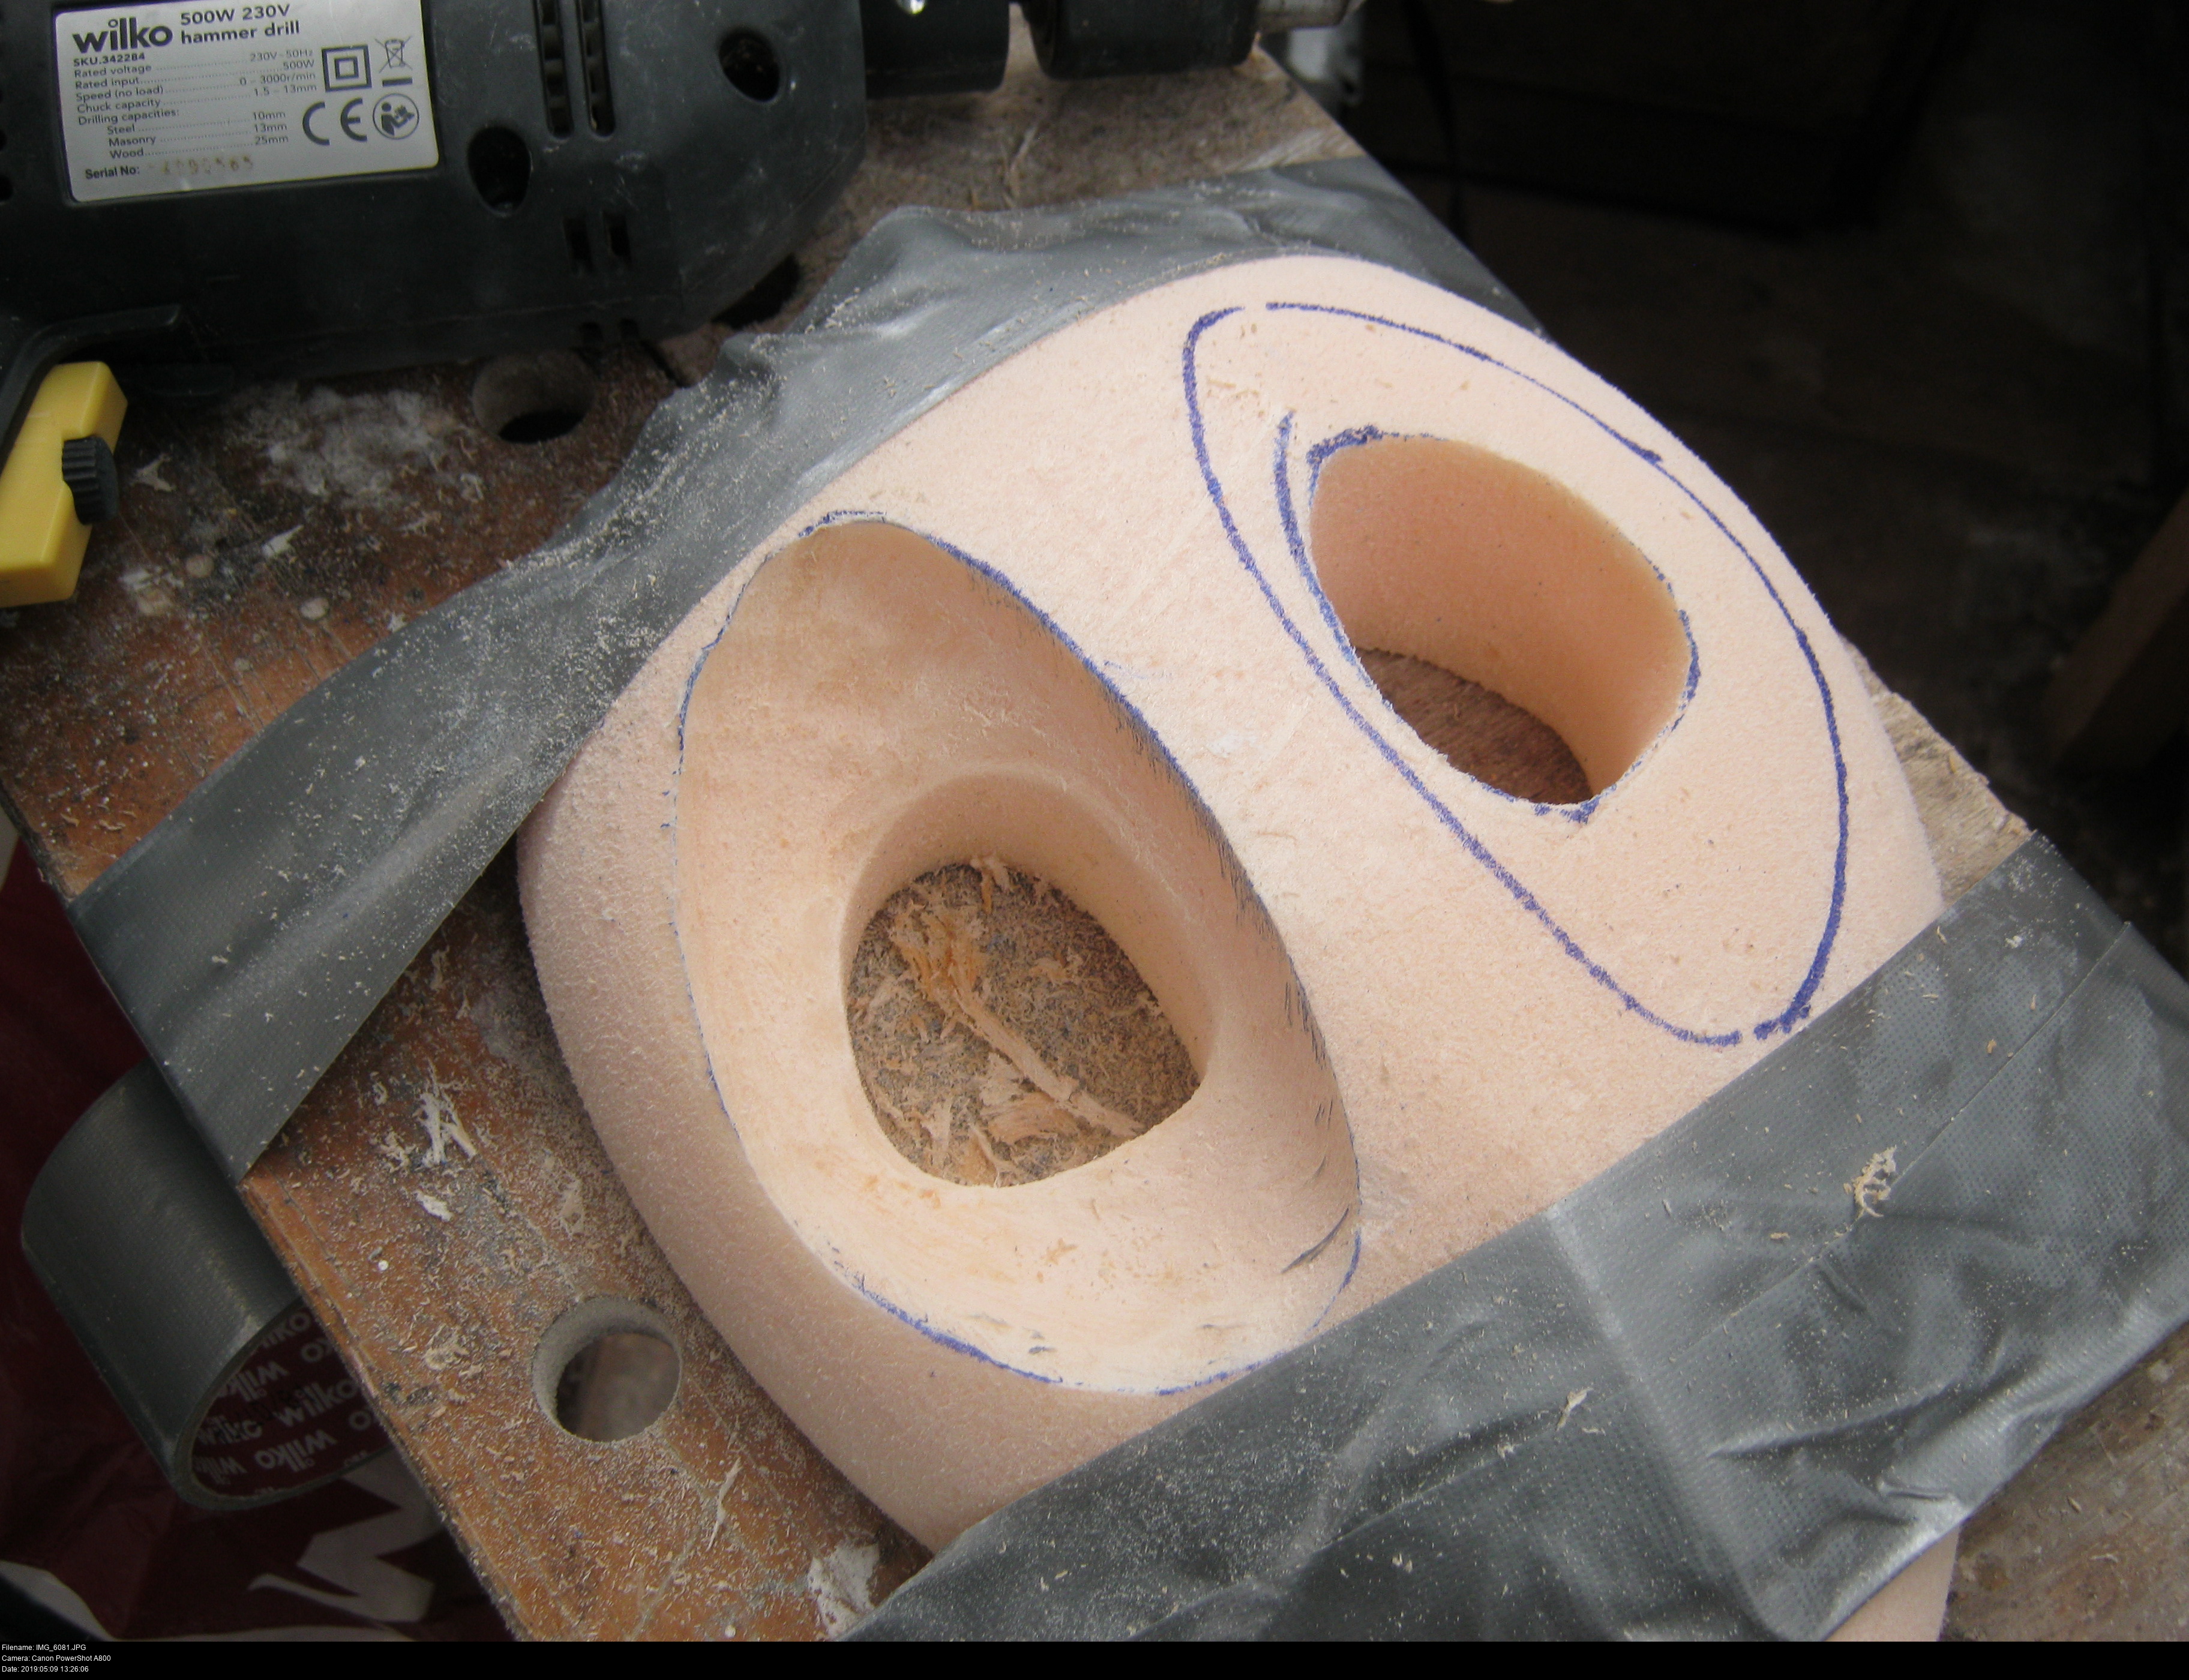
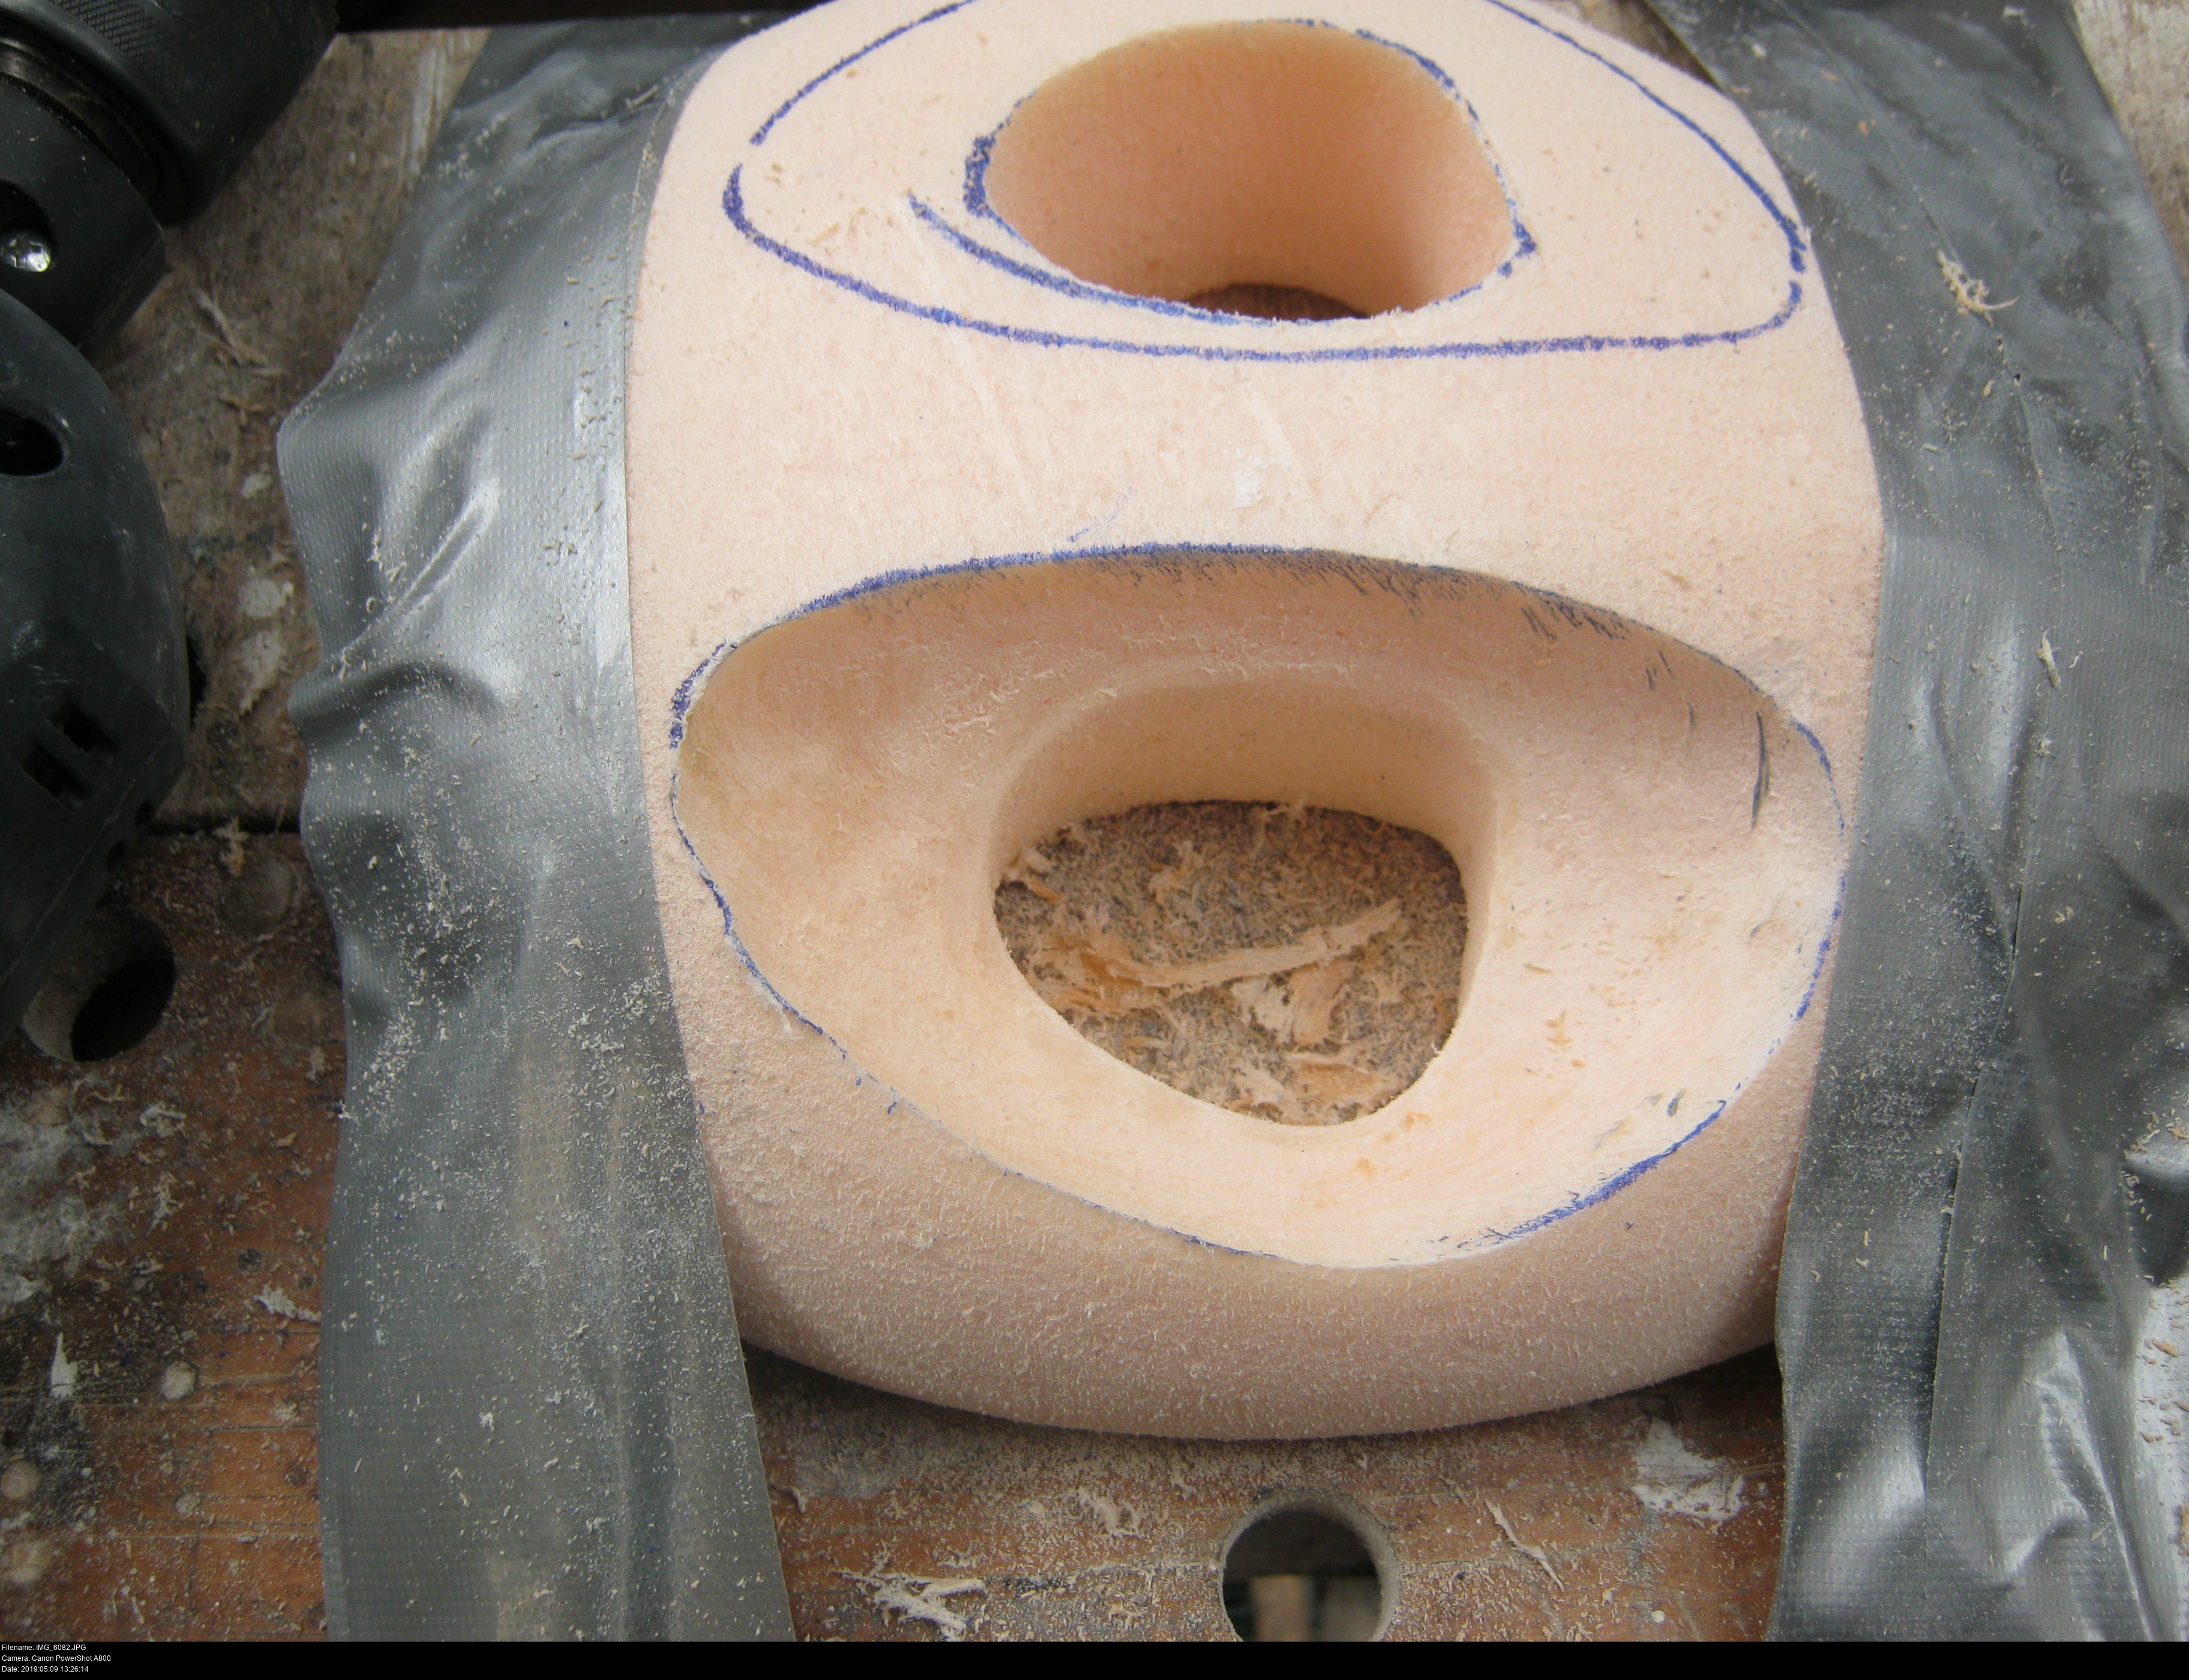
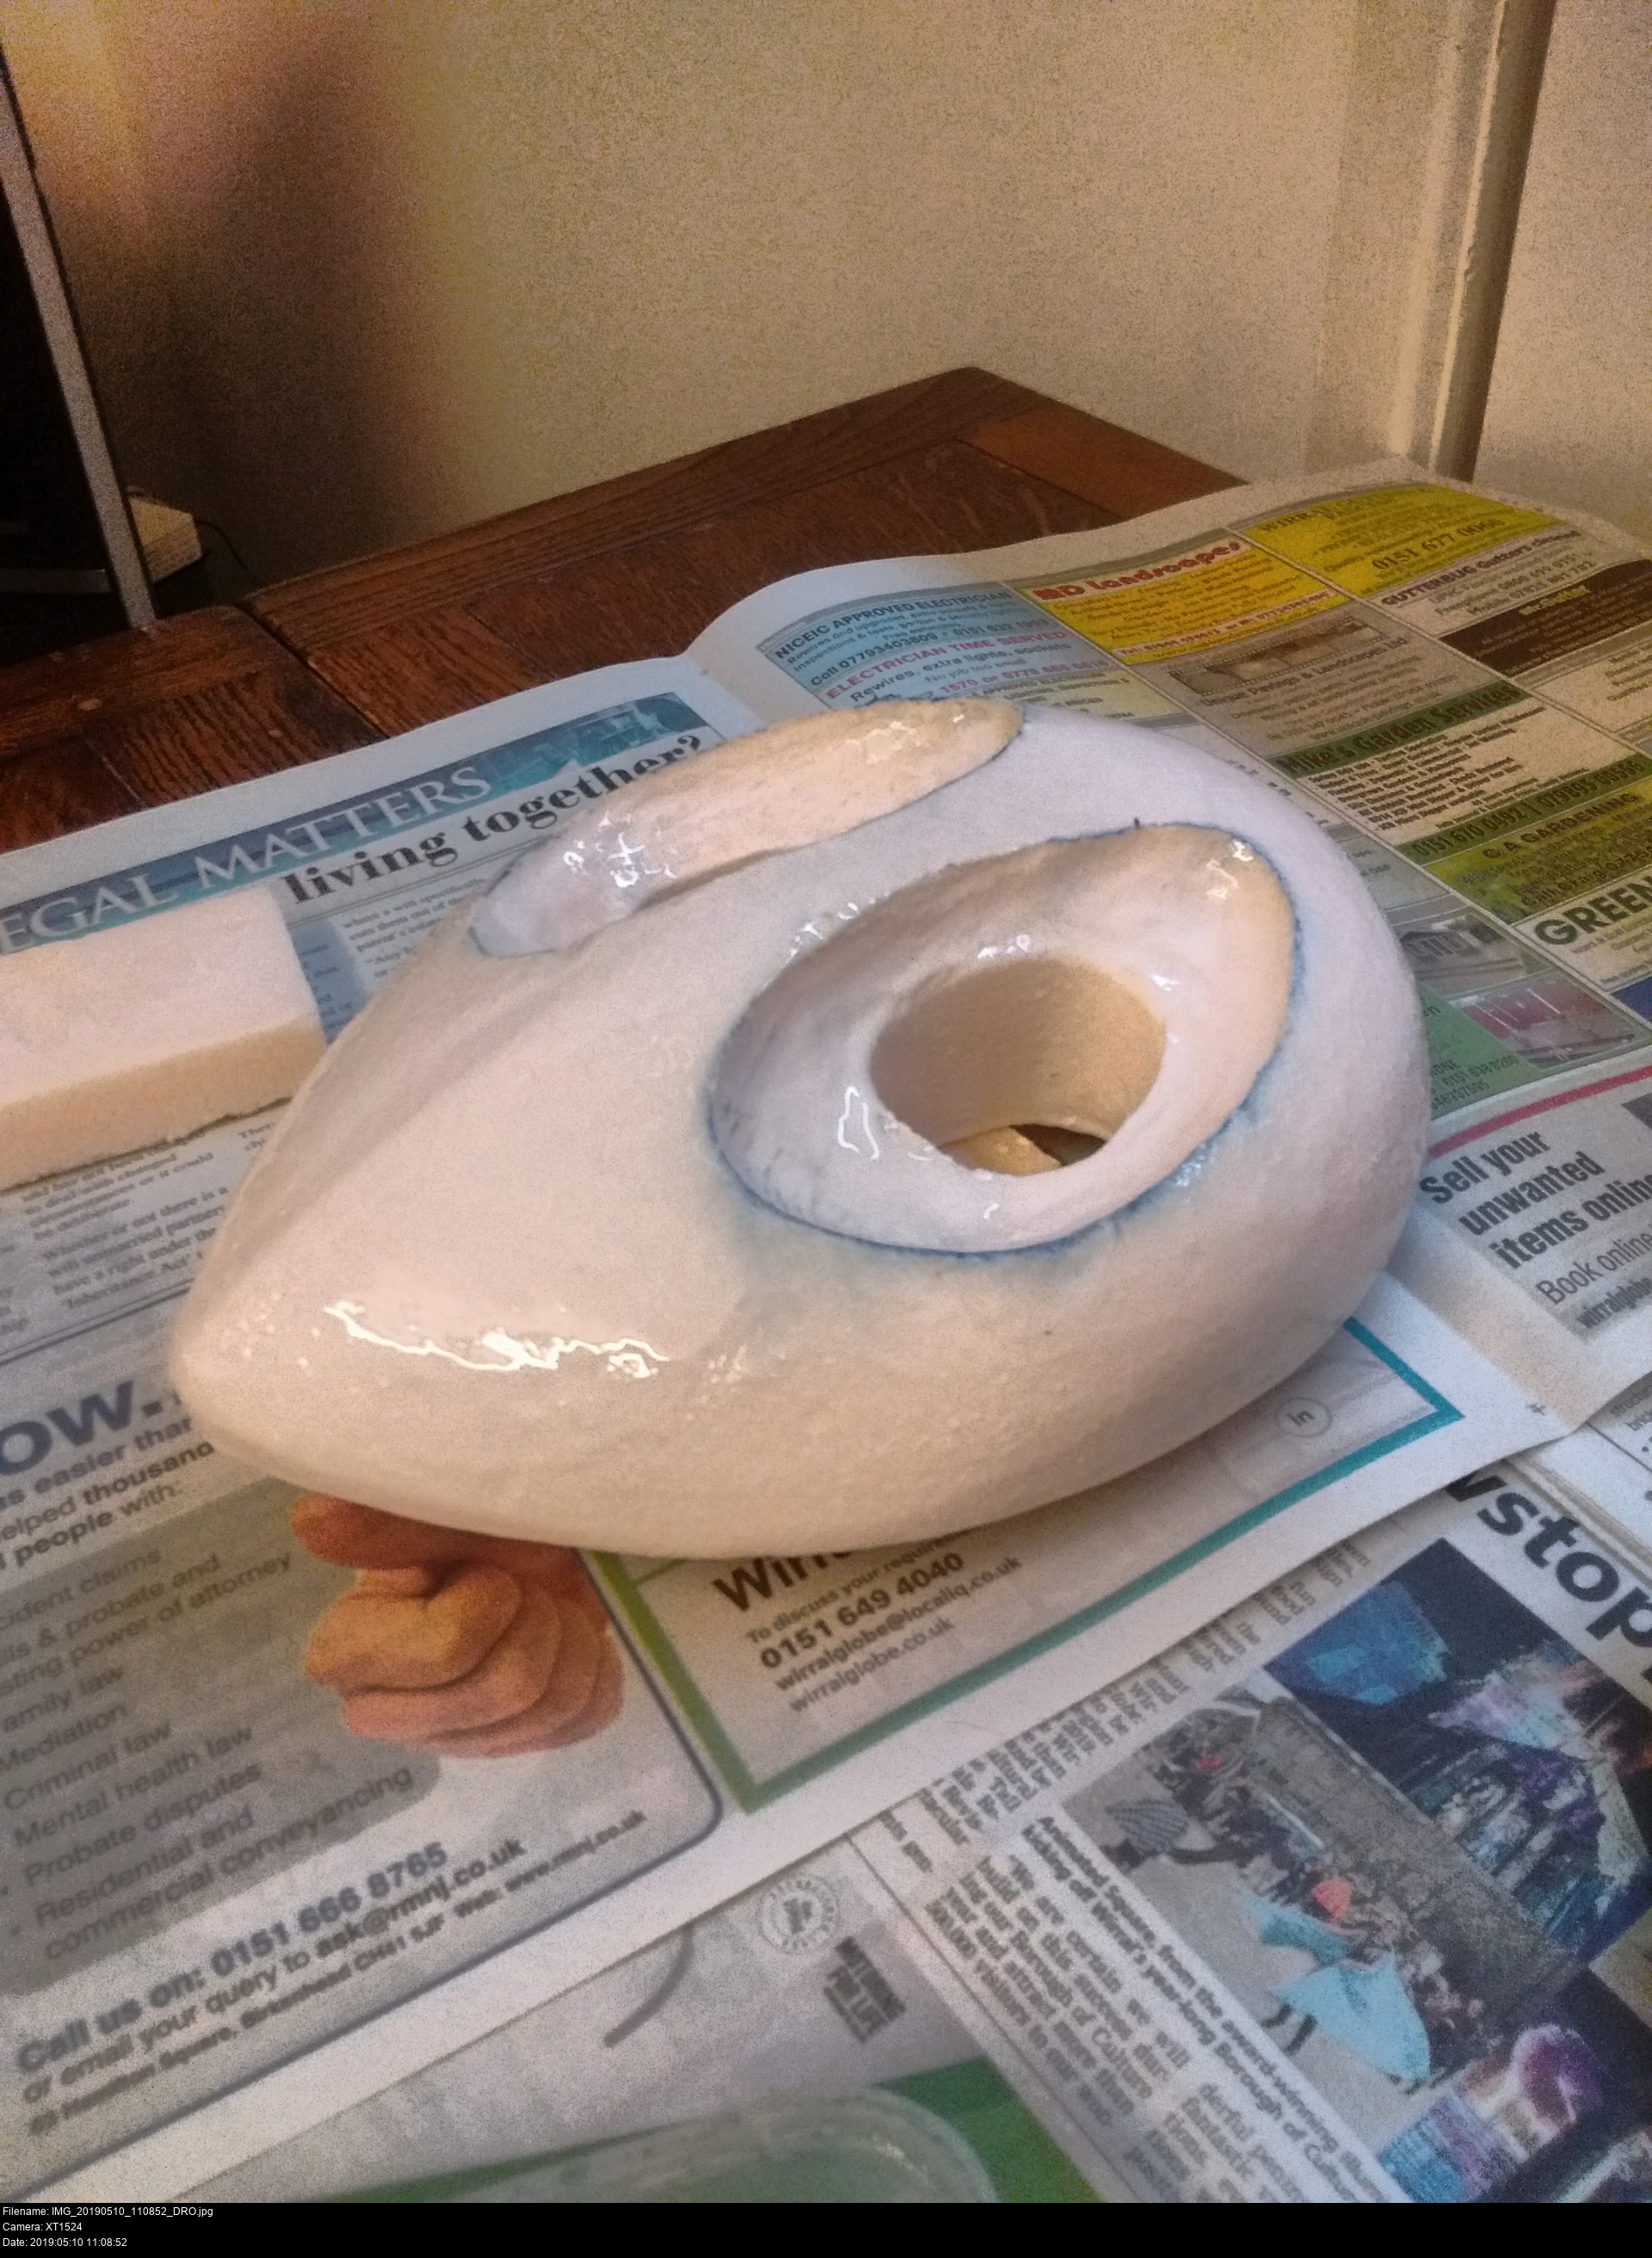
I started with the parts that I was most certain of the shape of: the interior edges of the eyes, with the sheer vertical drop into the depth of the mask, then moving down to the shallower part of the lower edge. Slowly wearing away the material.
Keep in mind the way the grind bit rotates: the very tip is the centre of rotation so you can't use it to grind. You have to contact the foam with the side of the bit for the correct effect. When the grind bit meets the foam, the bit will be pushed away from the material very quickly. You need to grip the tool very, very securely and be ready for this. I held the drill in both hands and braced it against my chest as well, carefully tilting and using my body to manipulate and move the grinding contact around around the material.
Proceed slowly, working from an edge of your choice, either making it deeper, or extending the existing depth around the edge of the cavity you've bored so far.
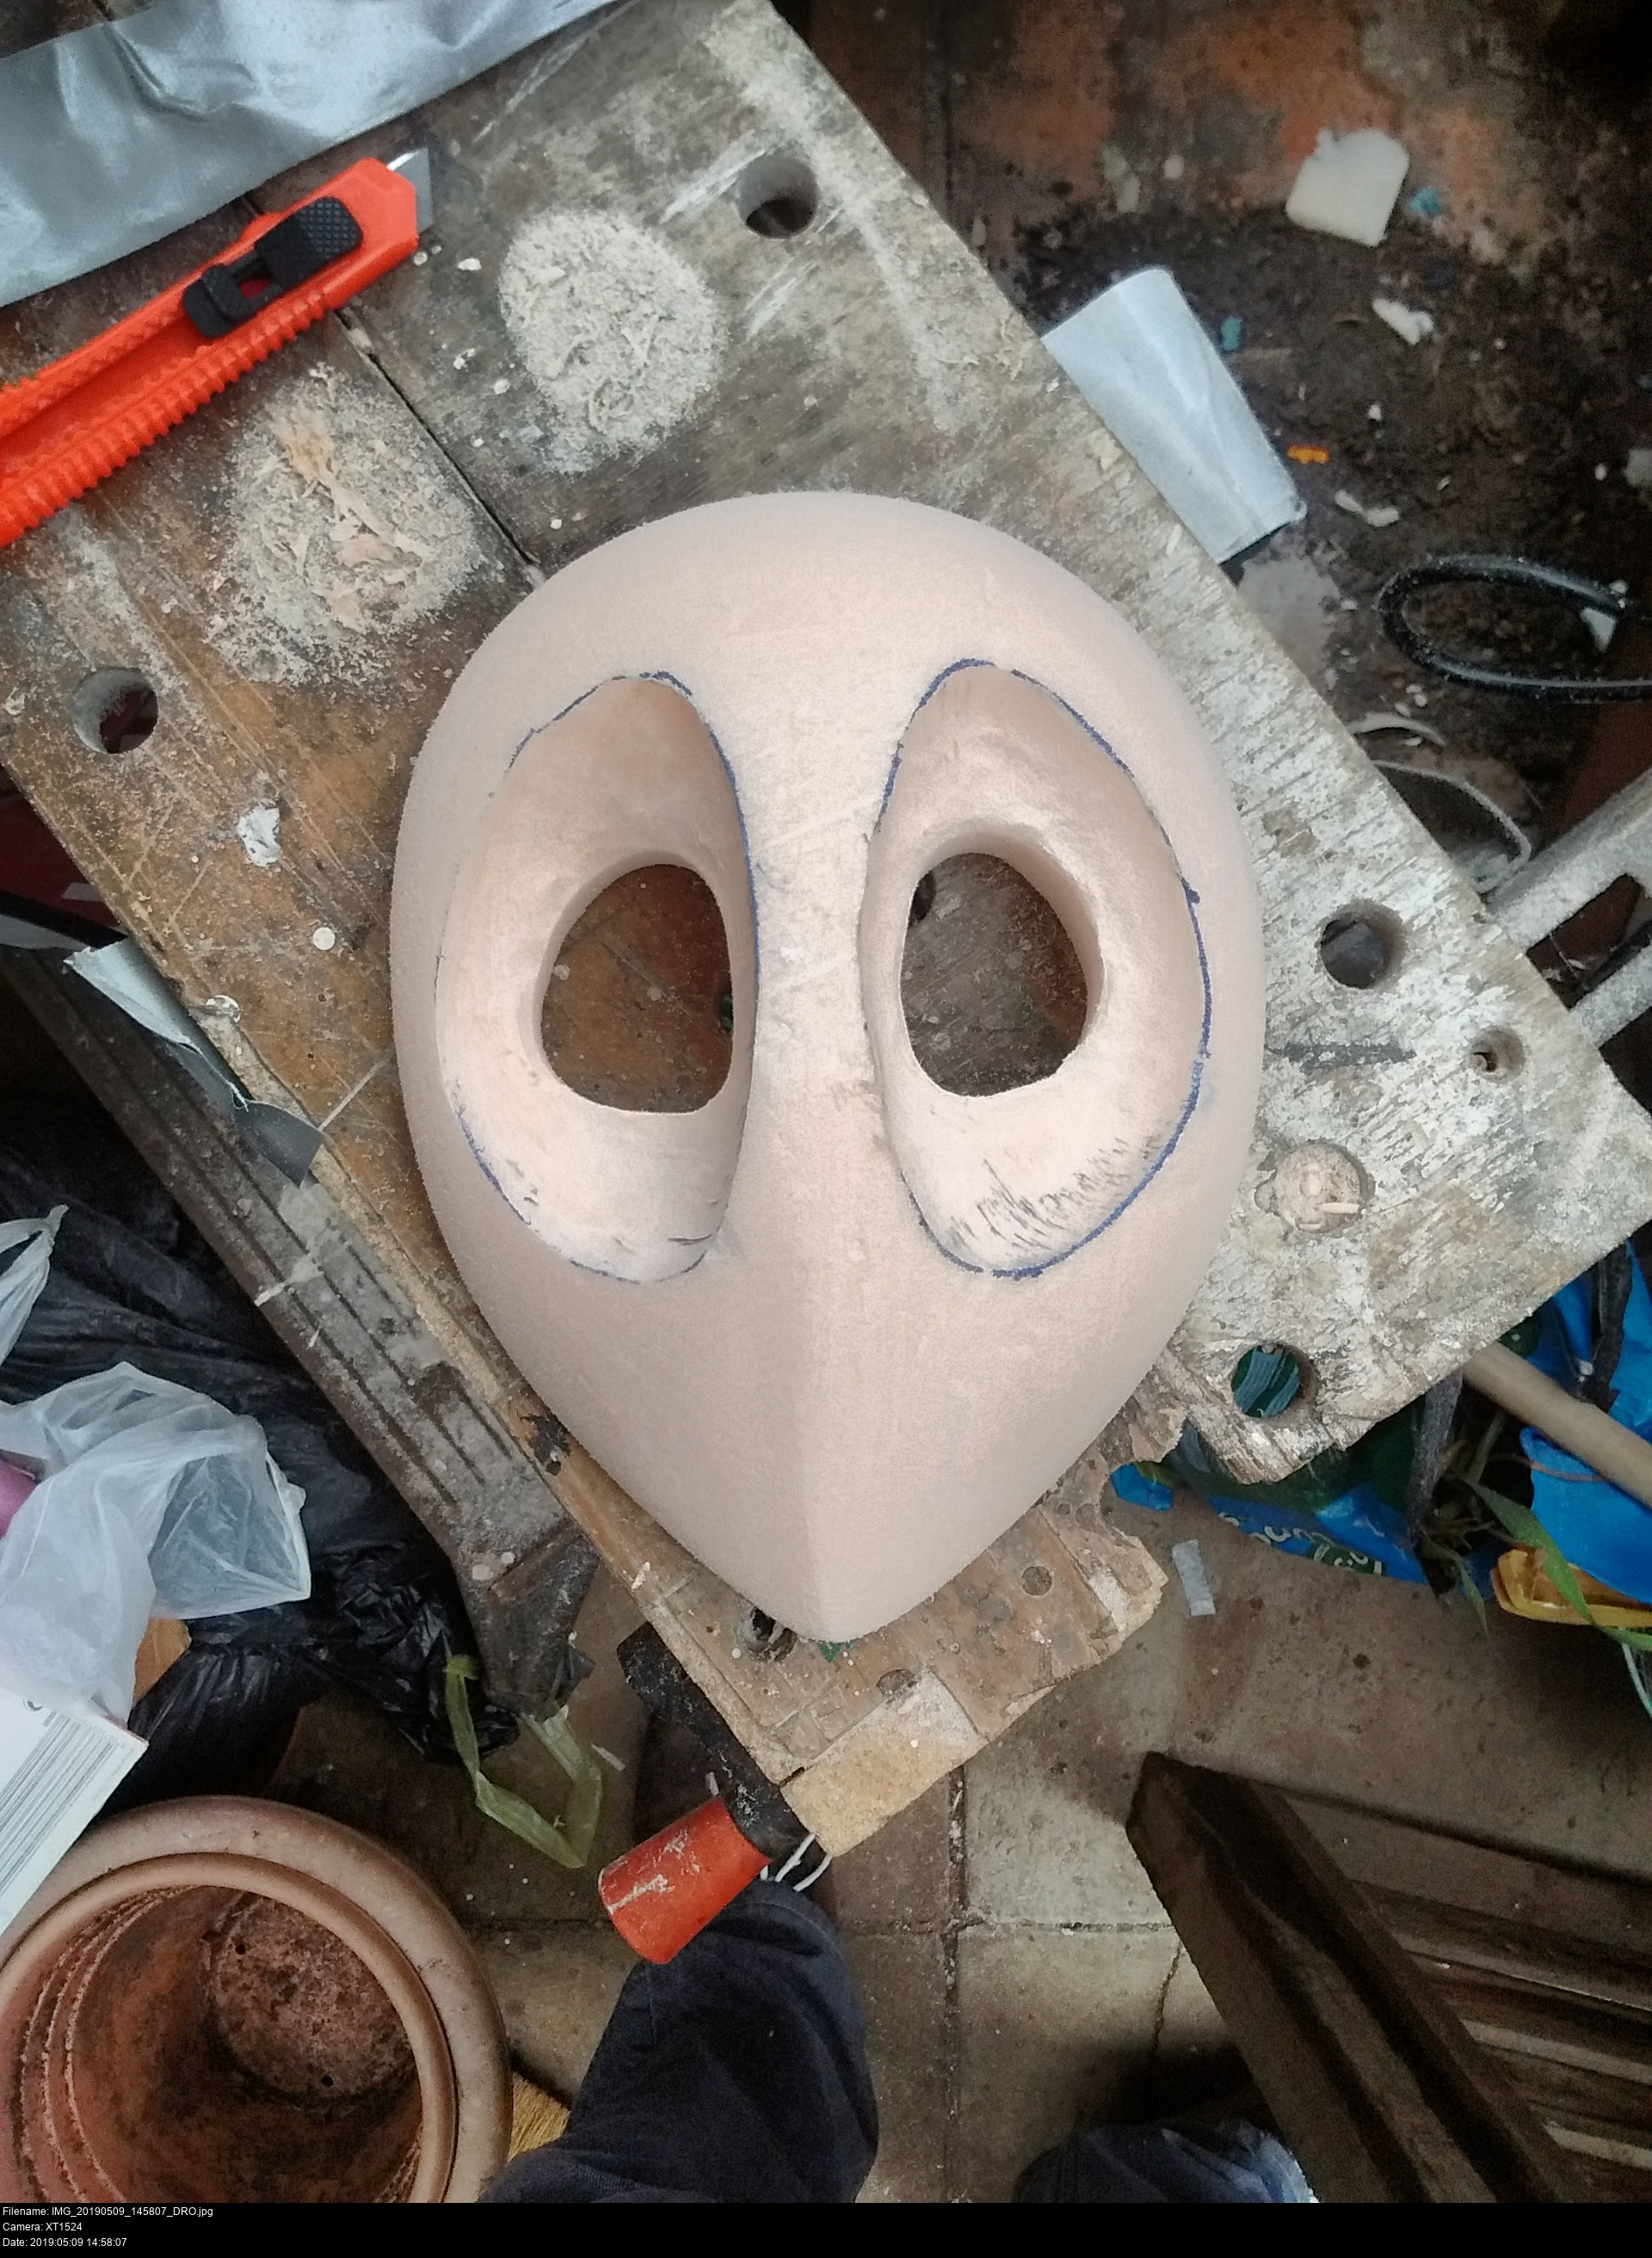
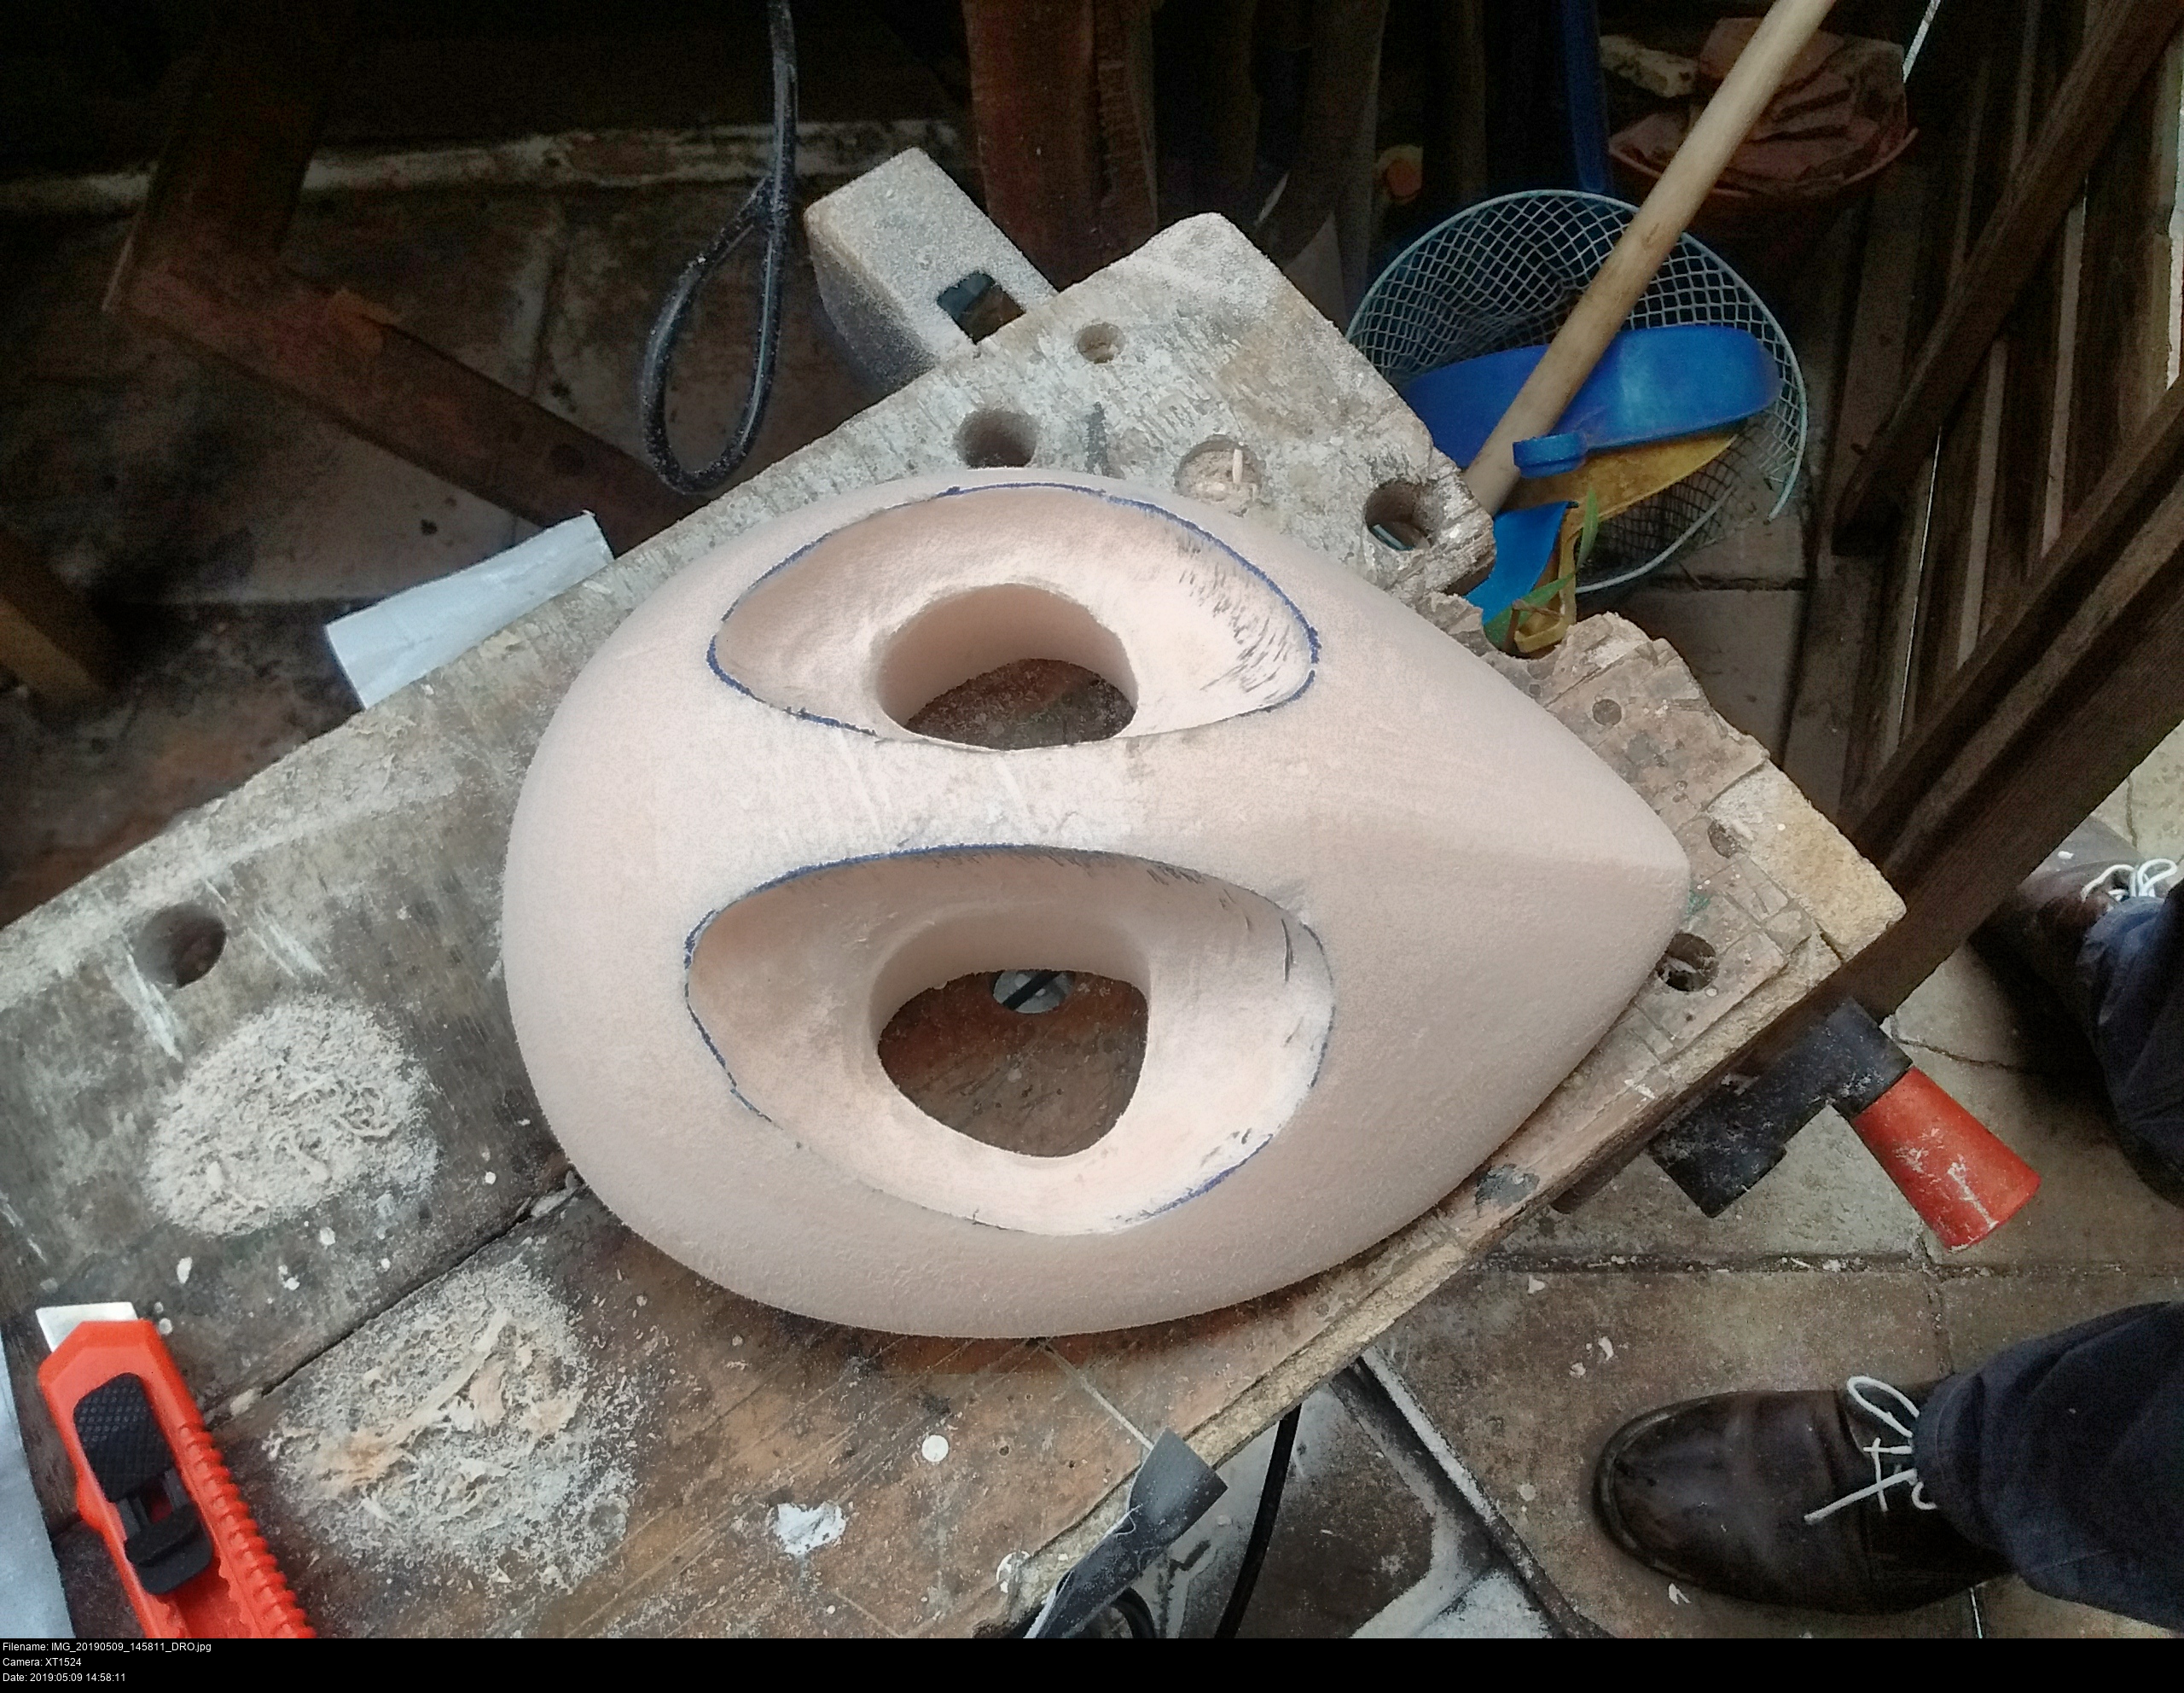
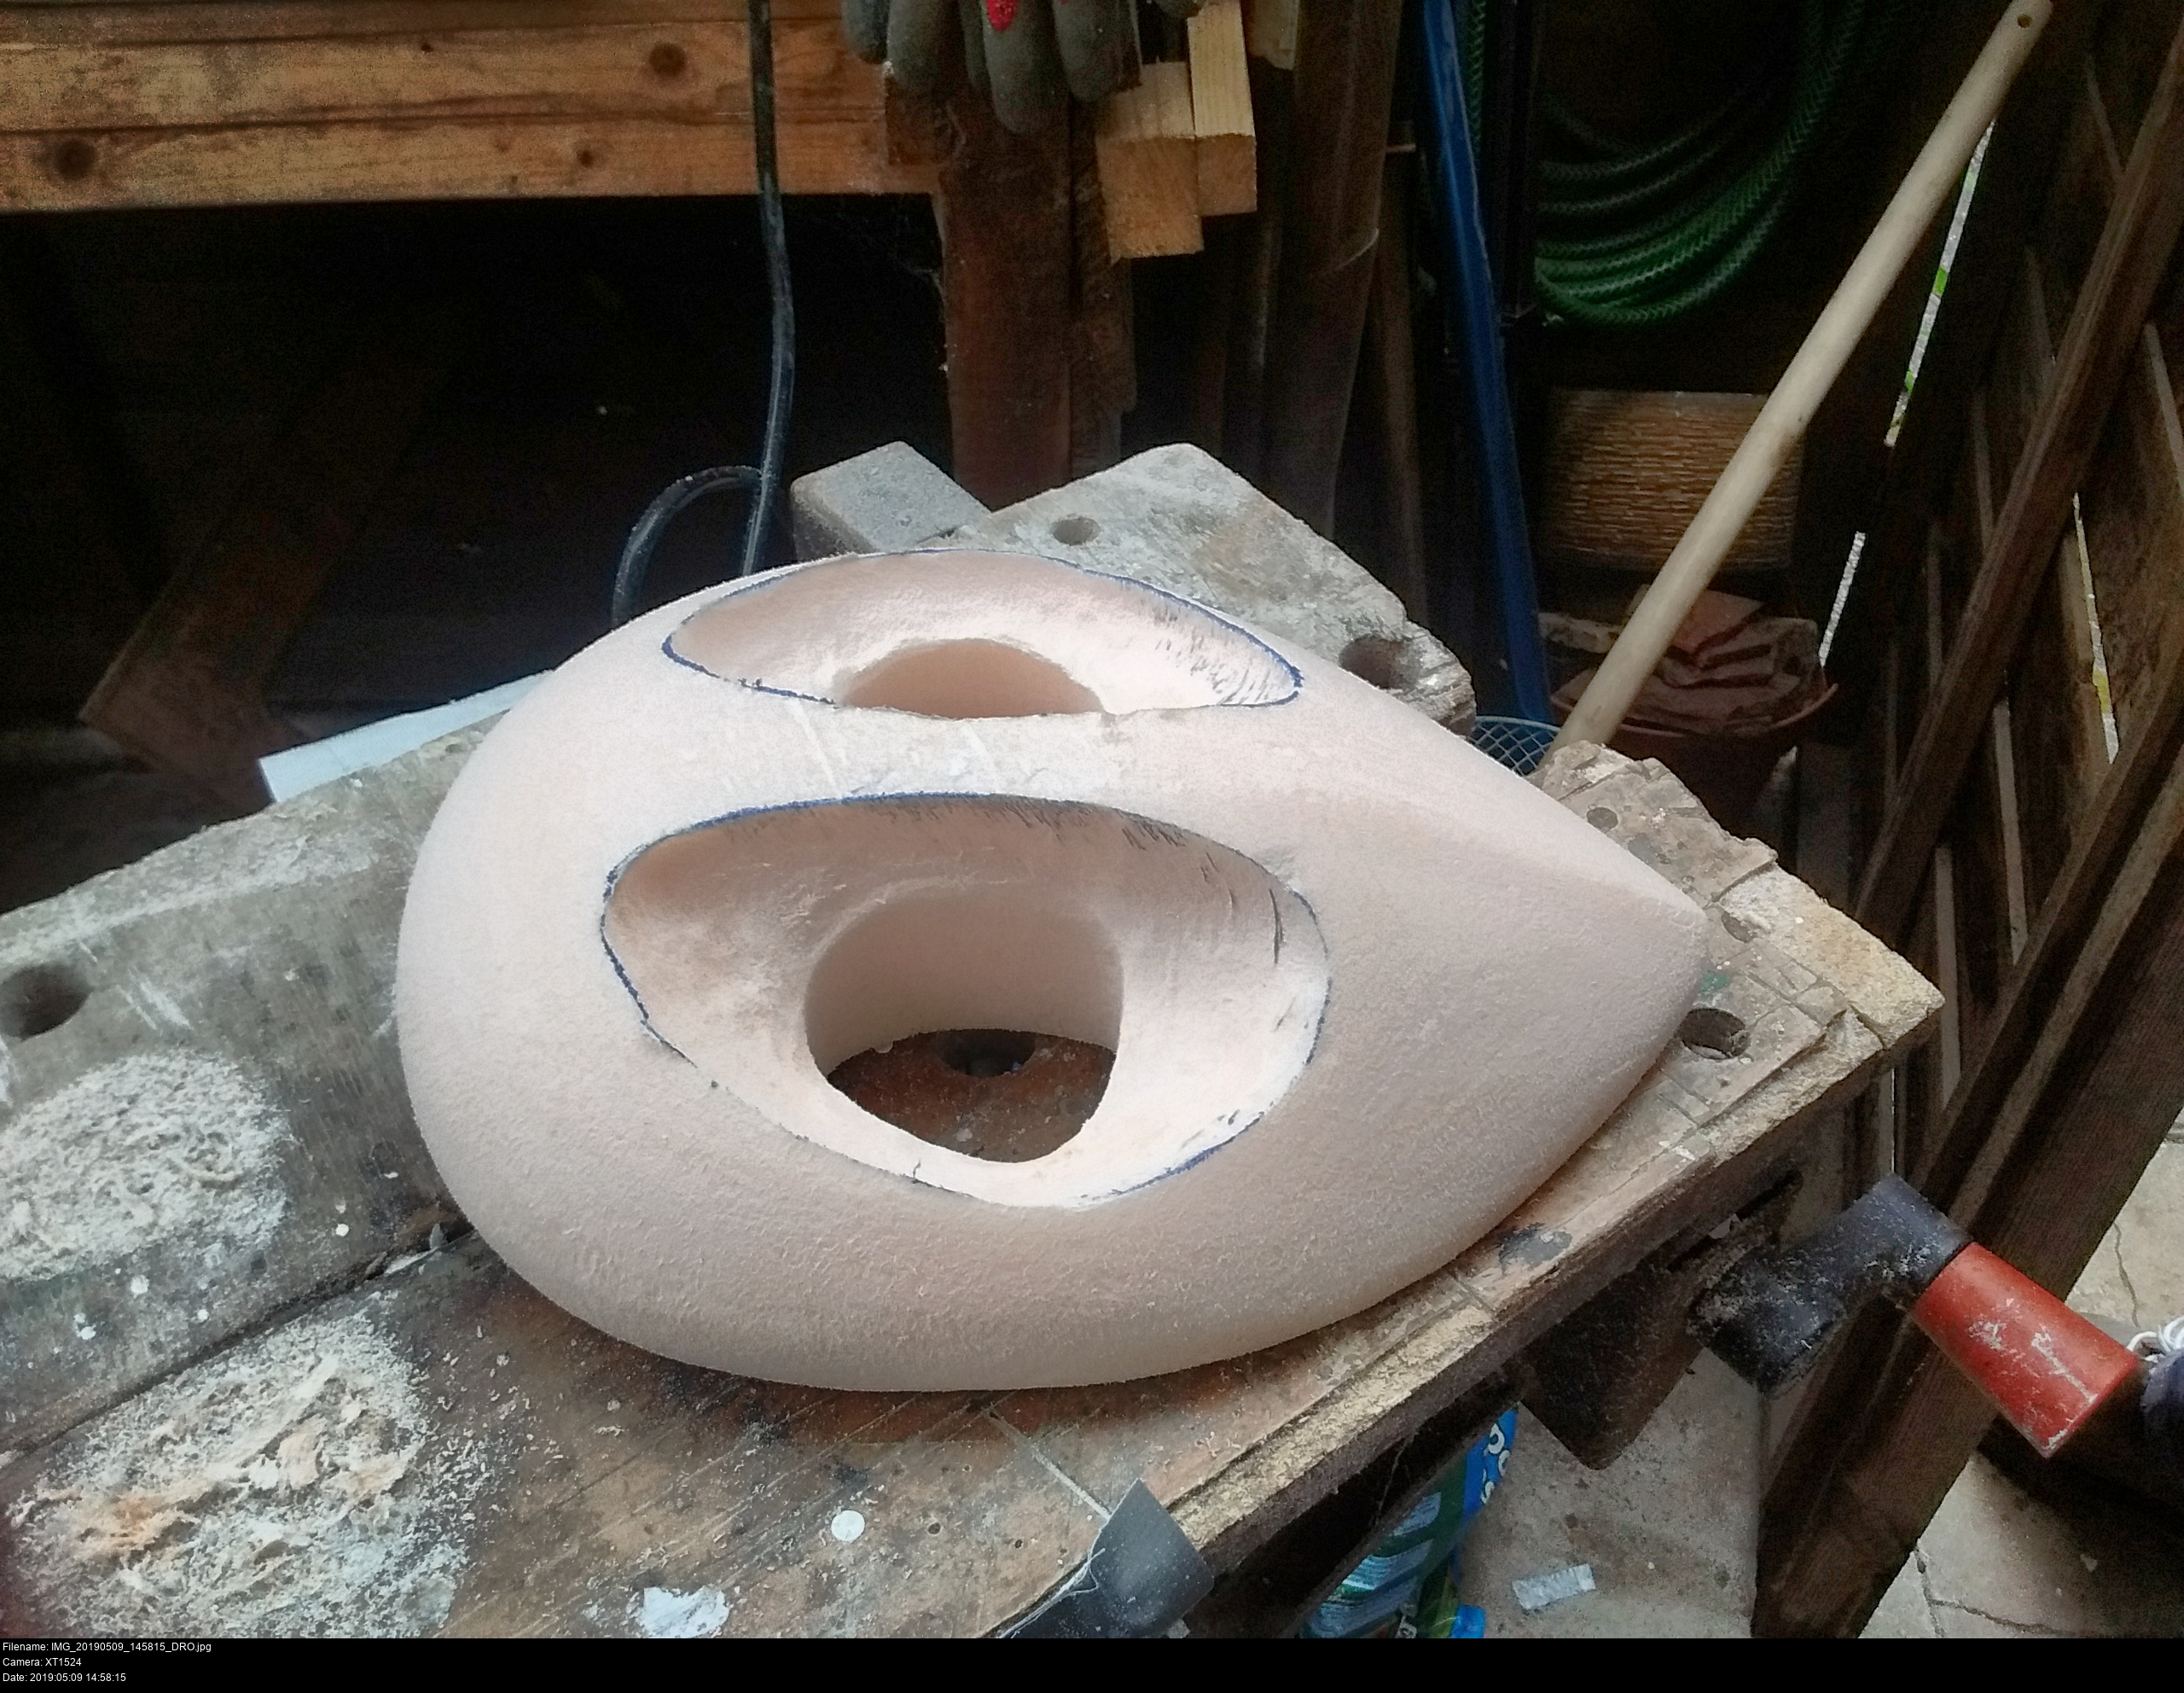
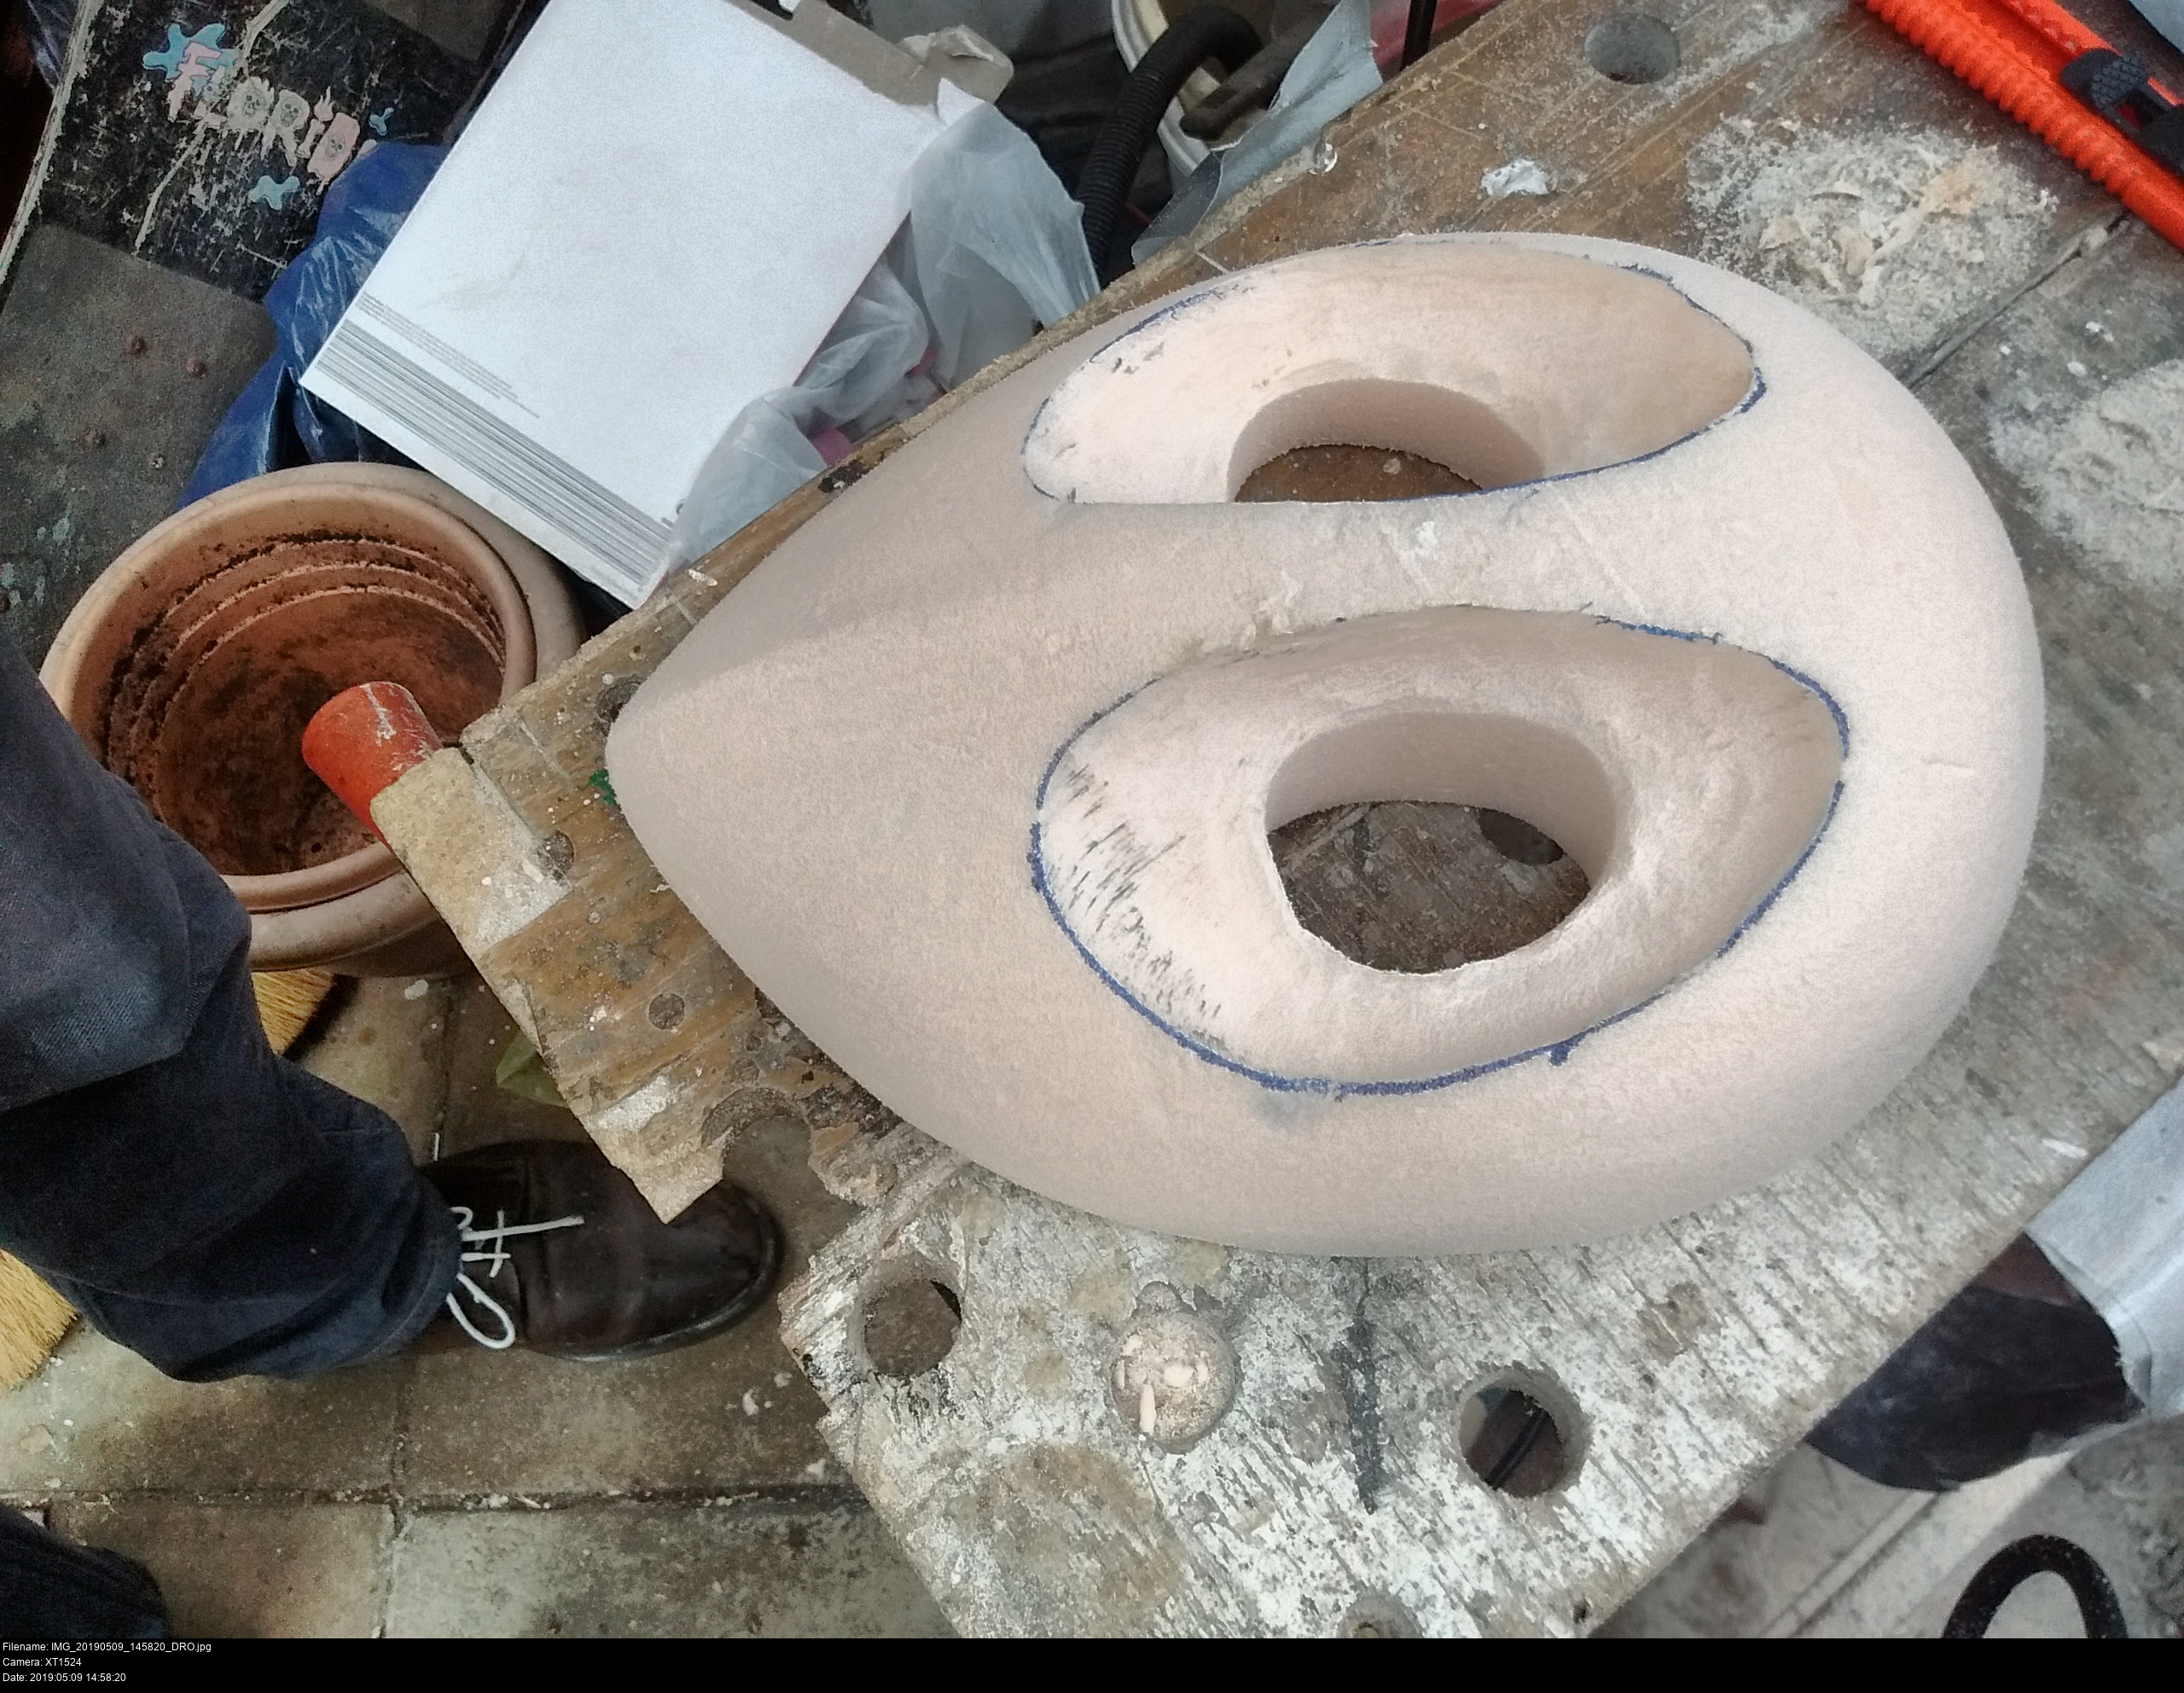
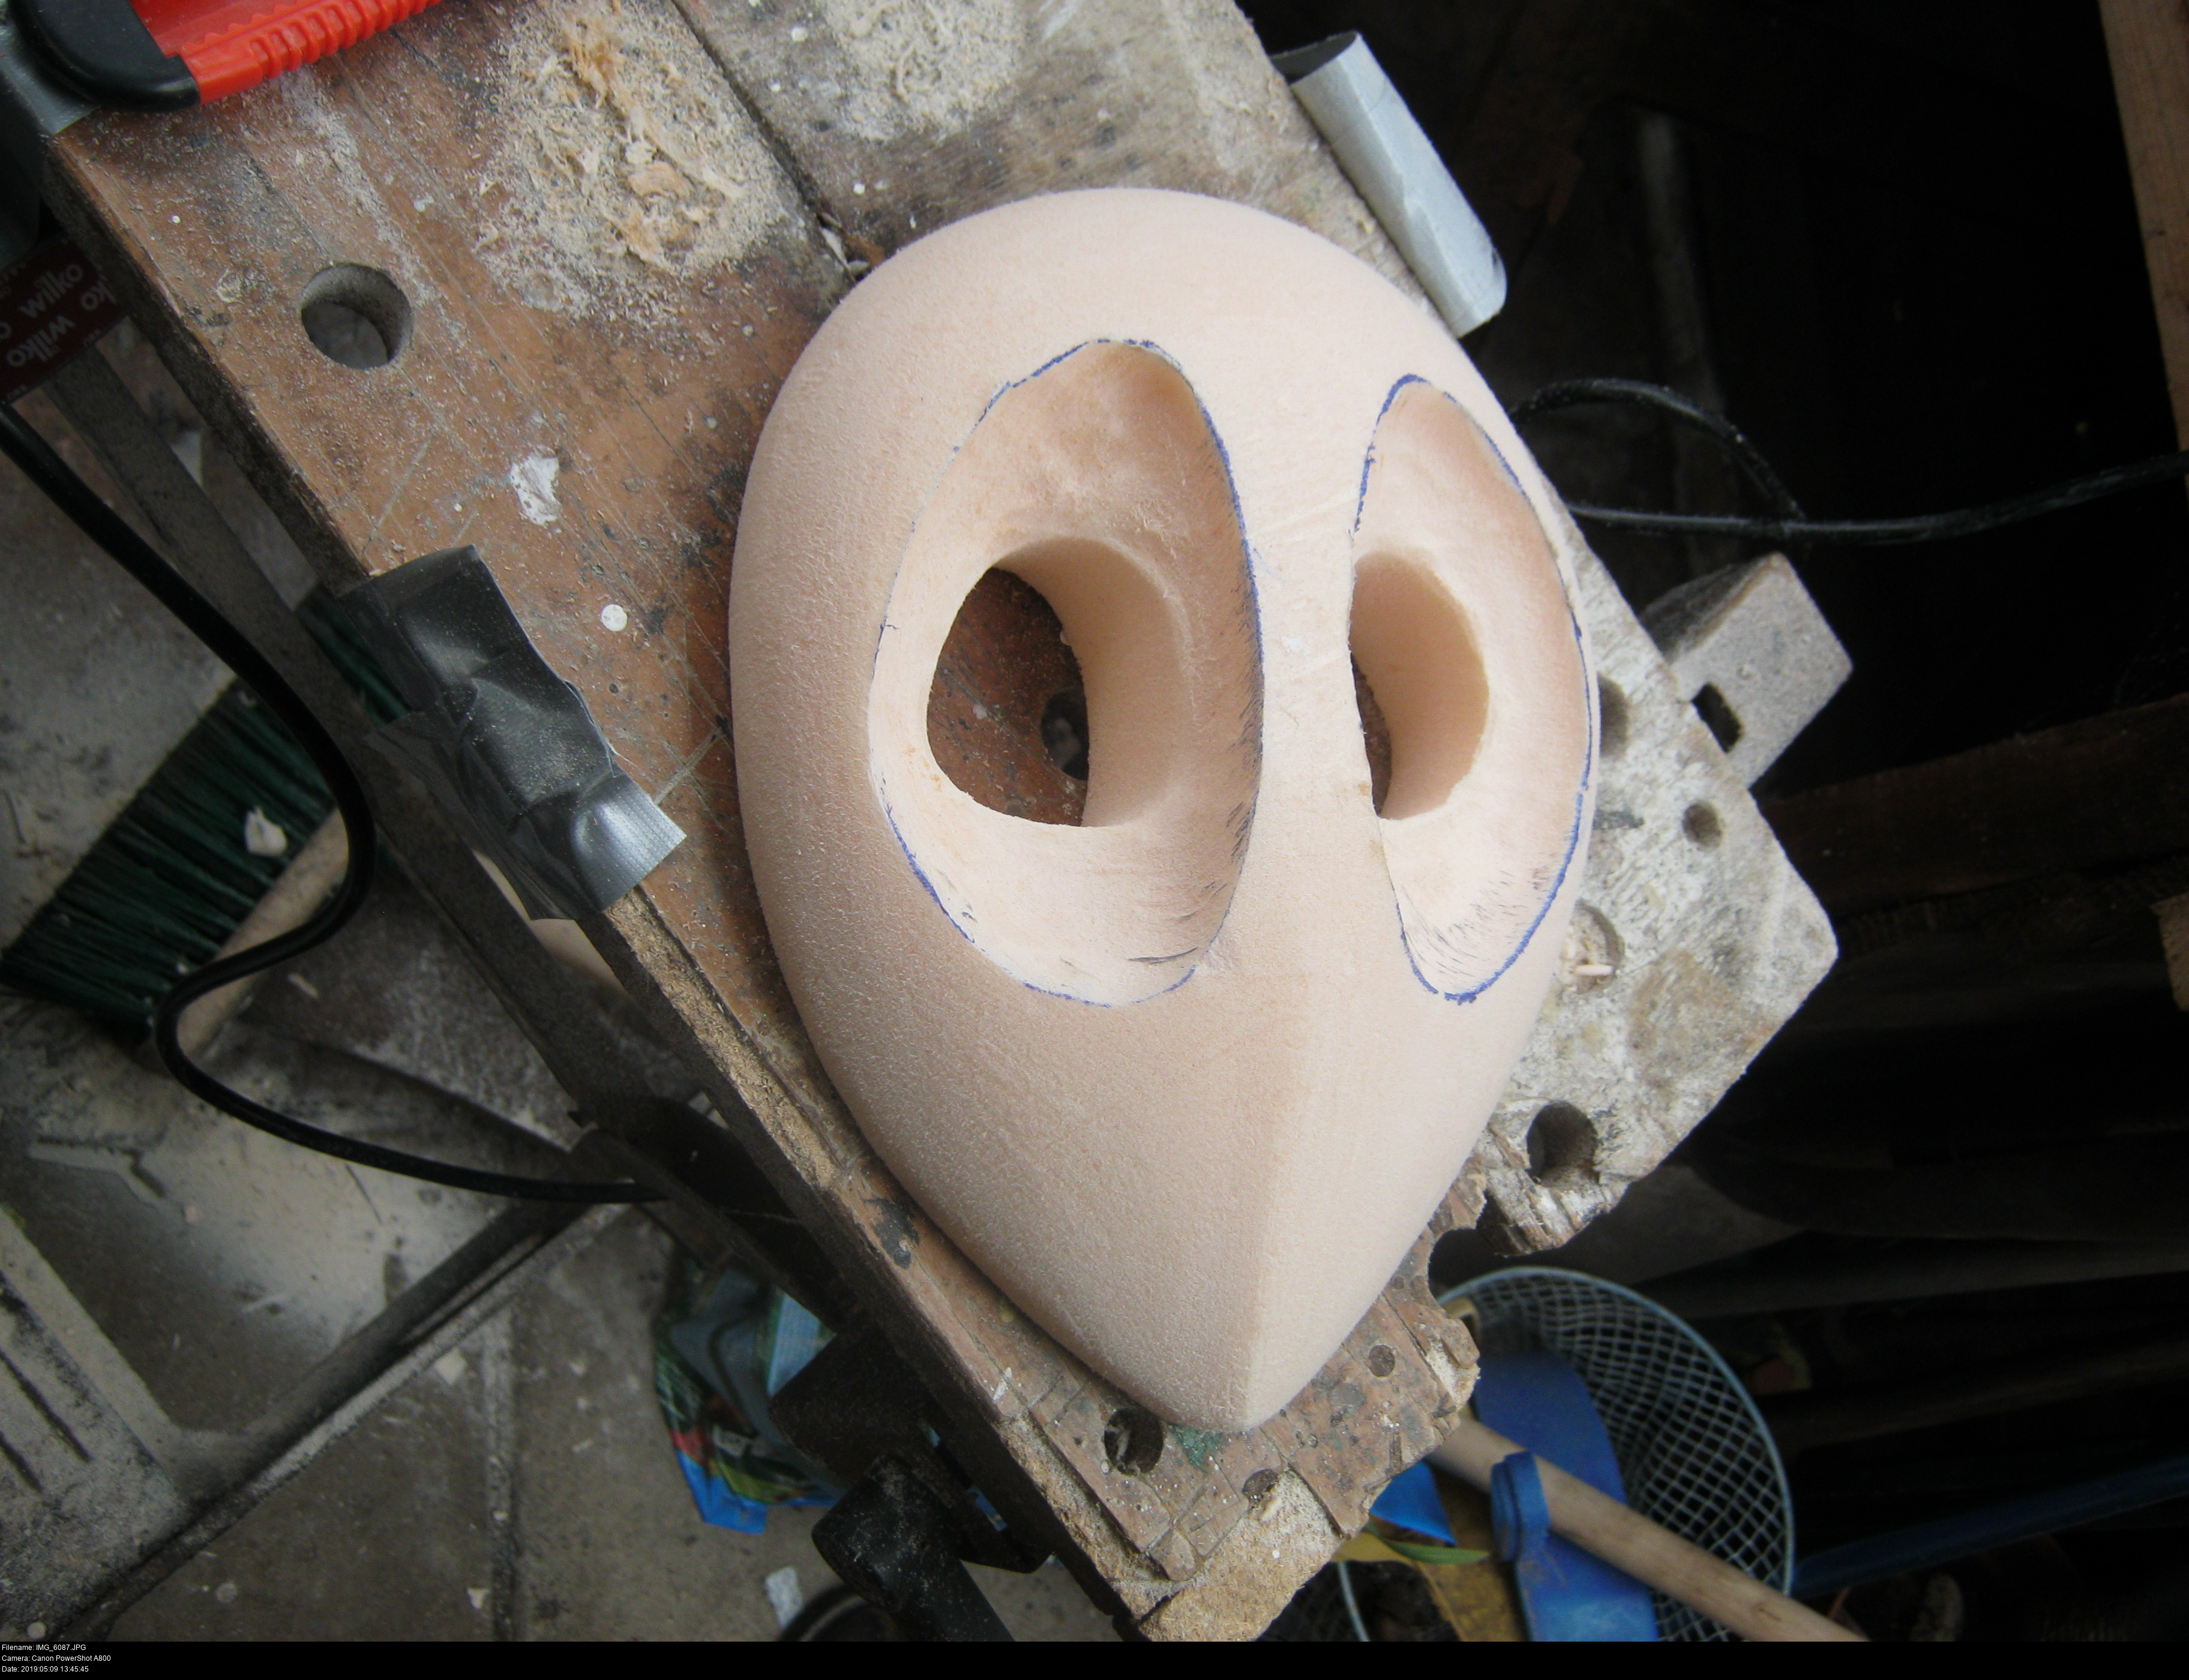
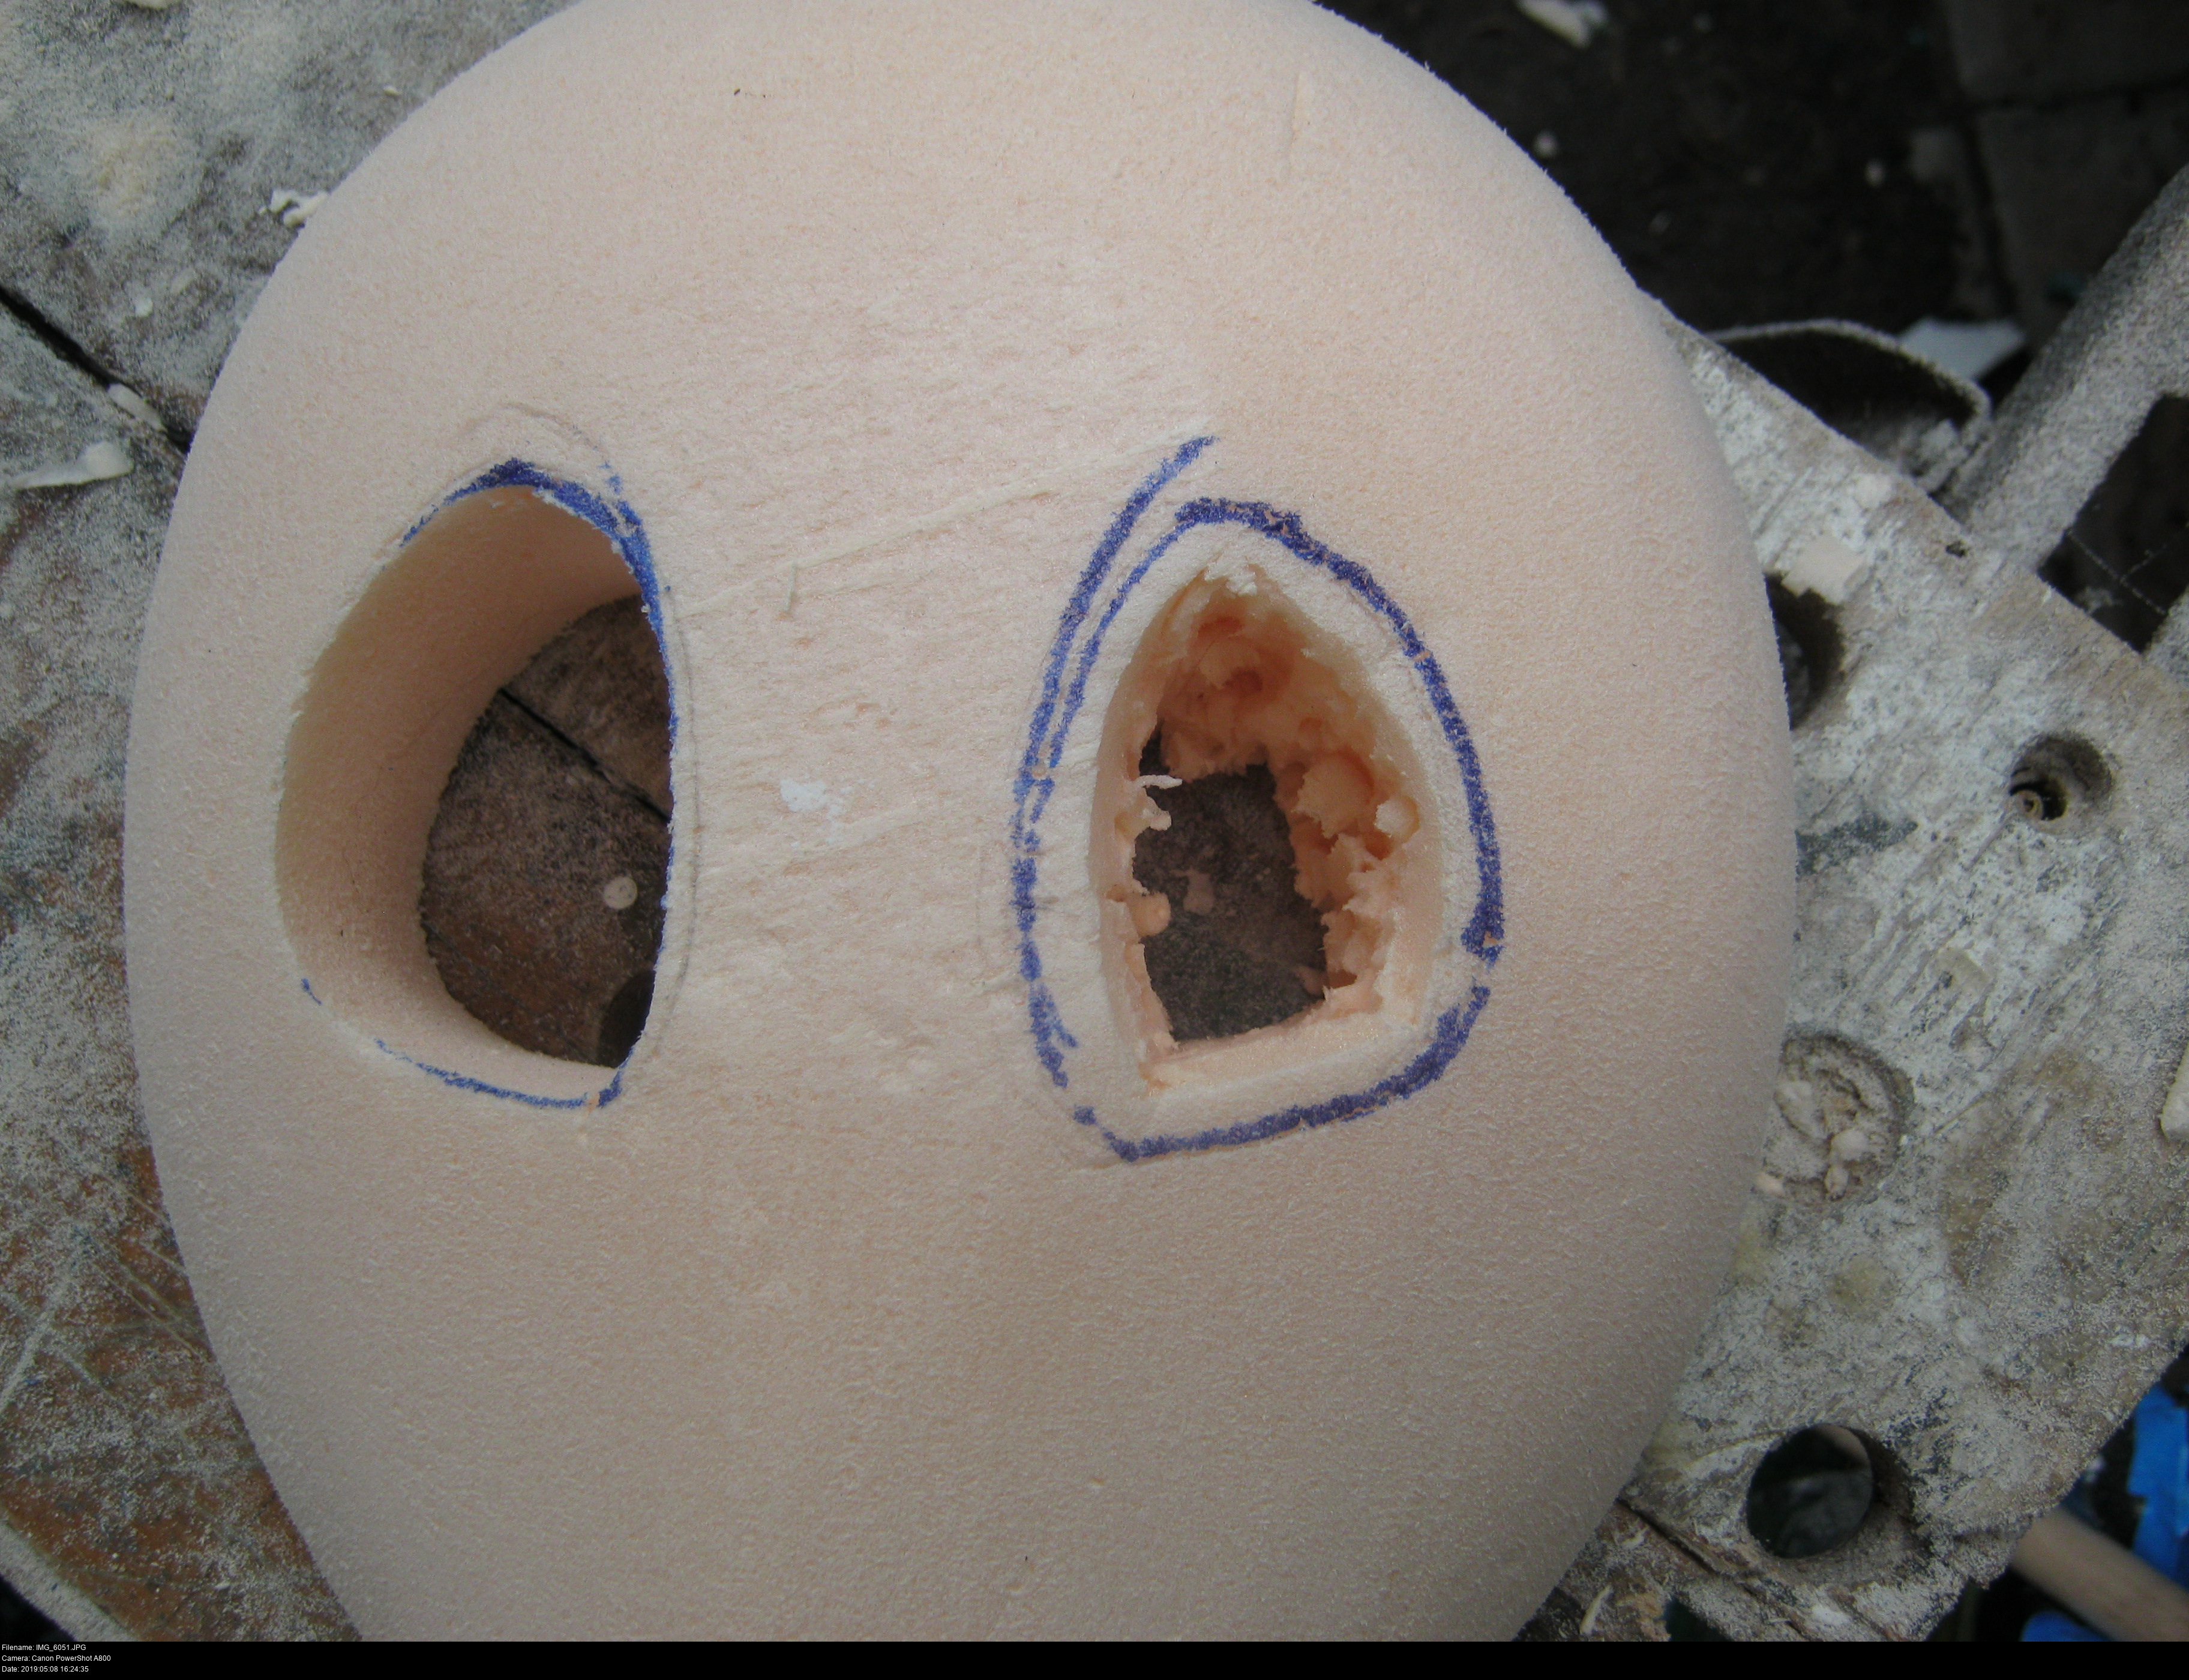
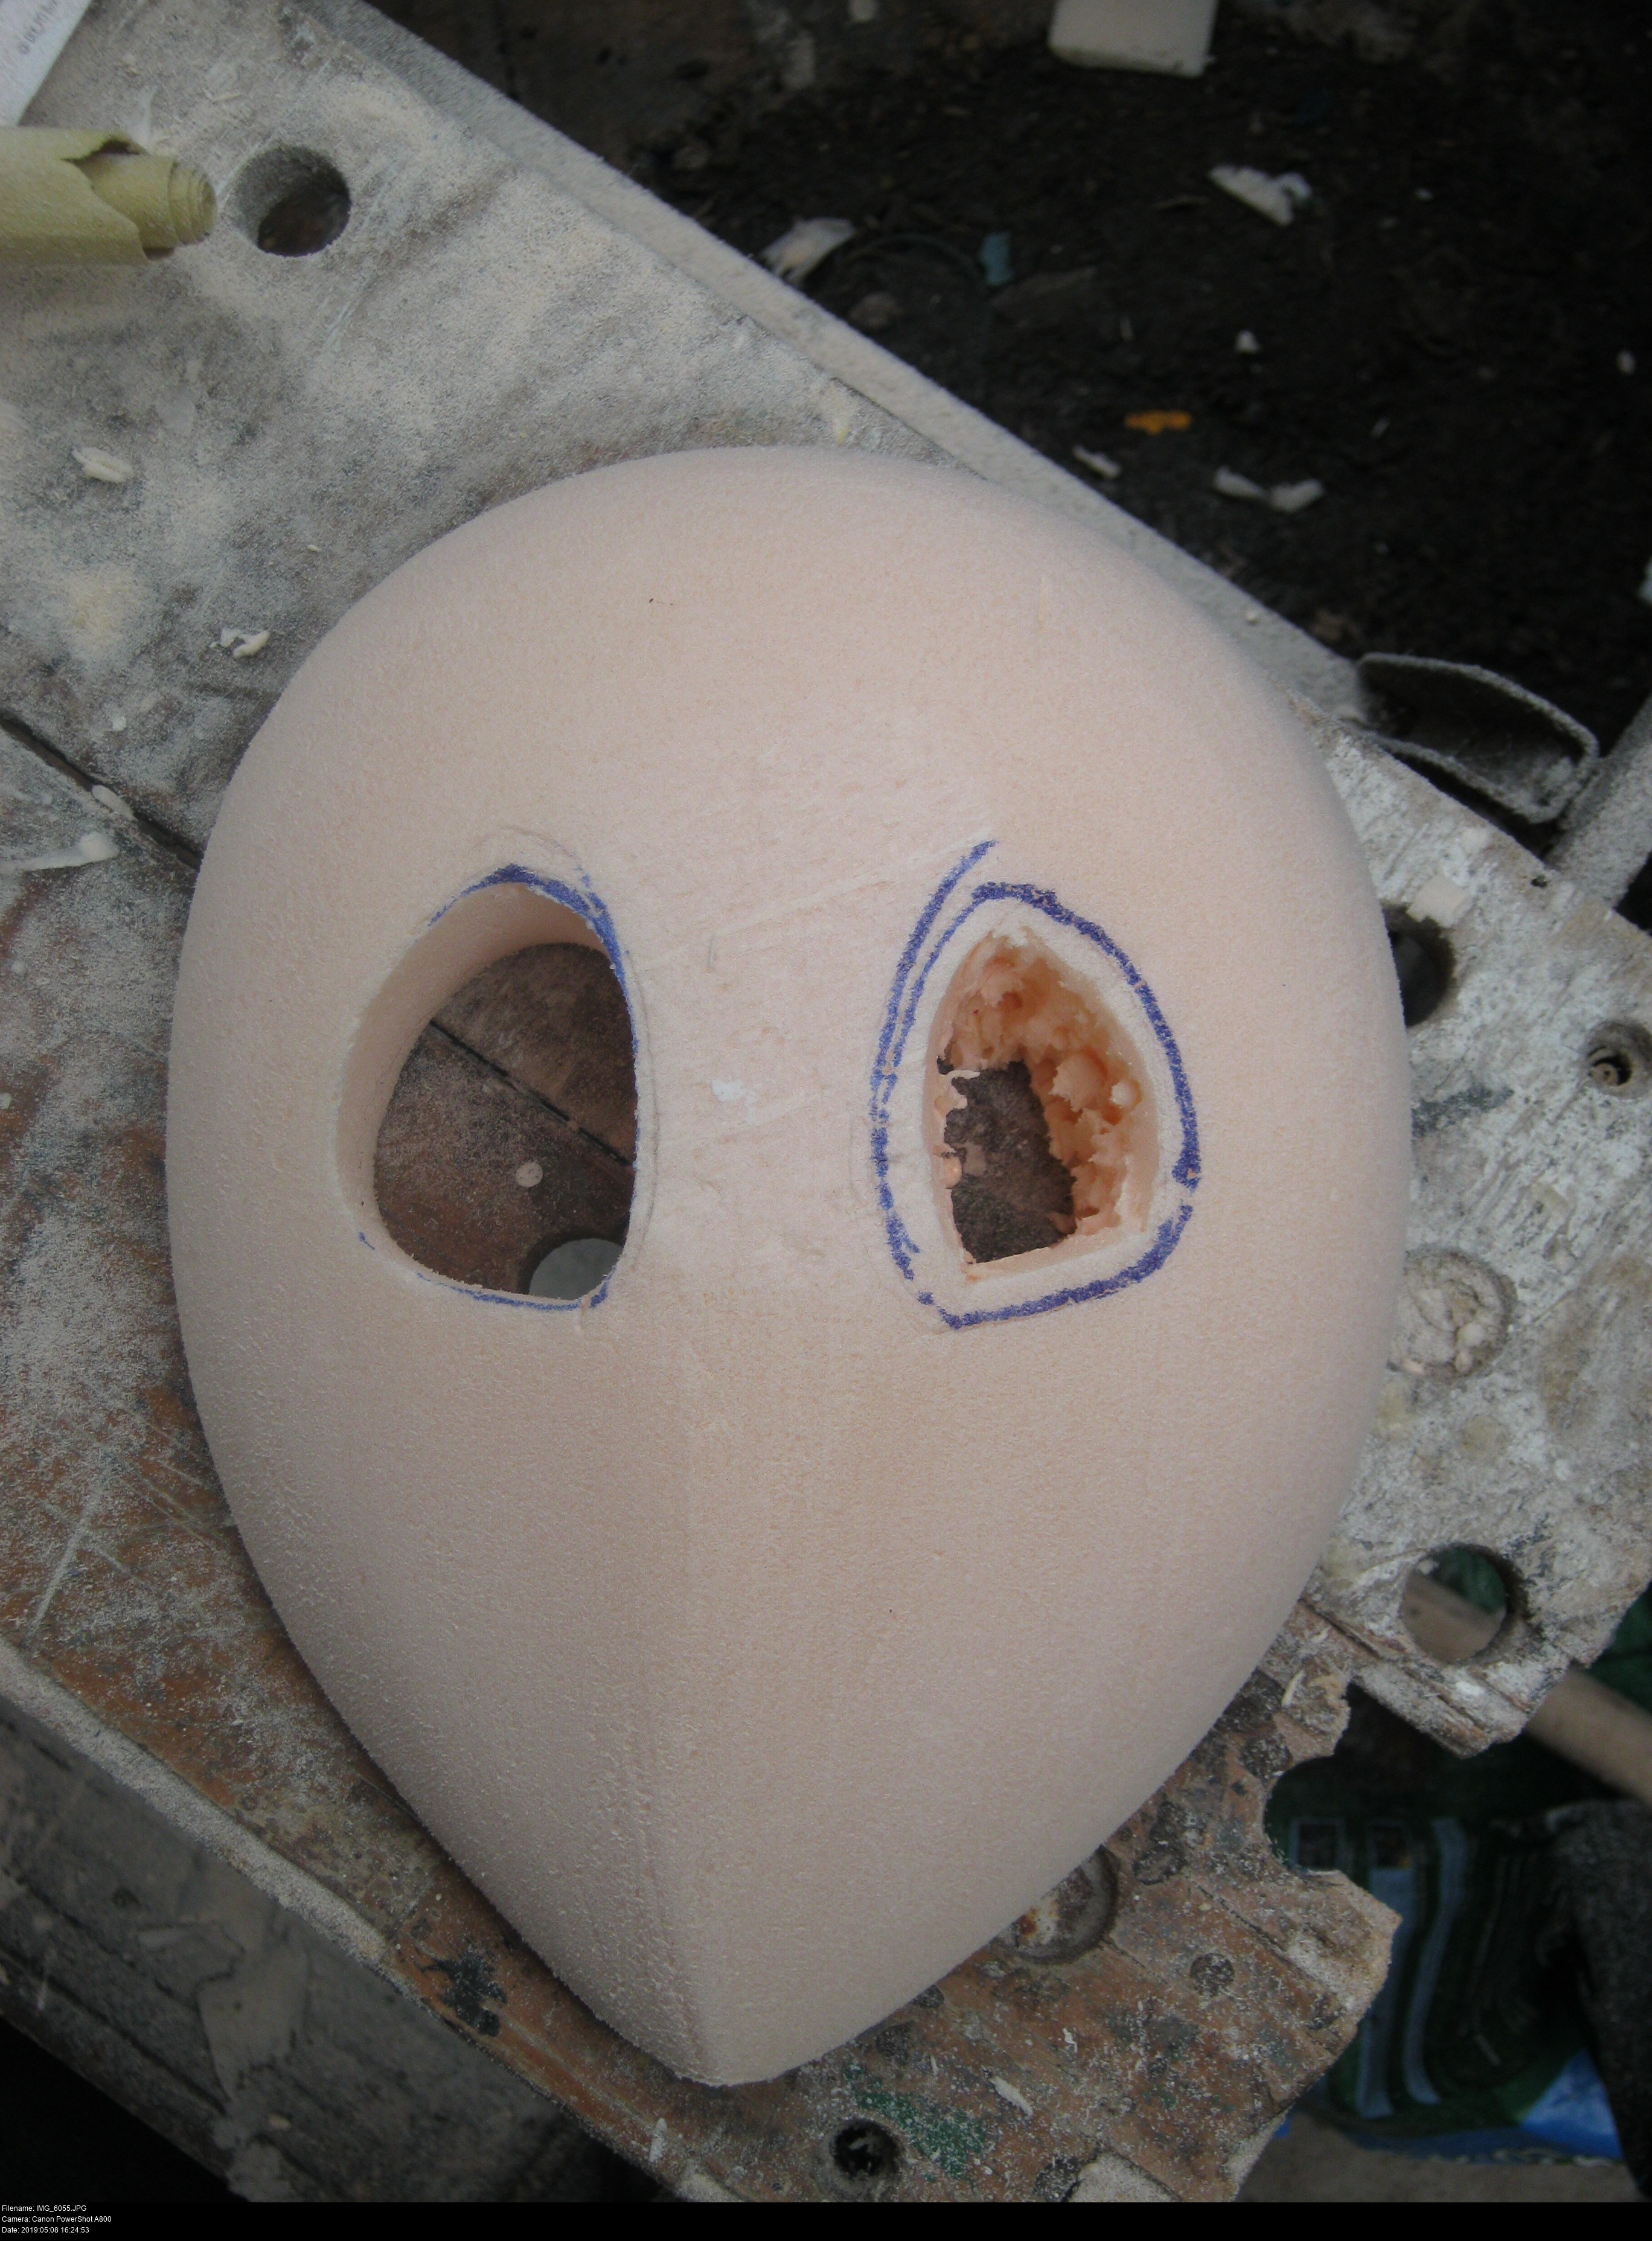
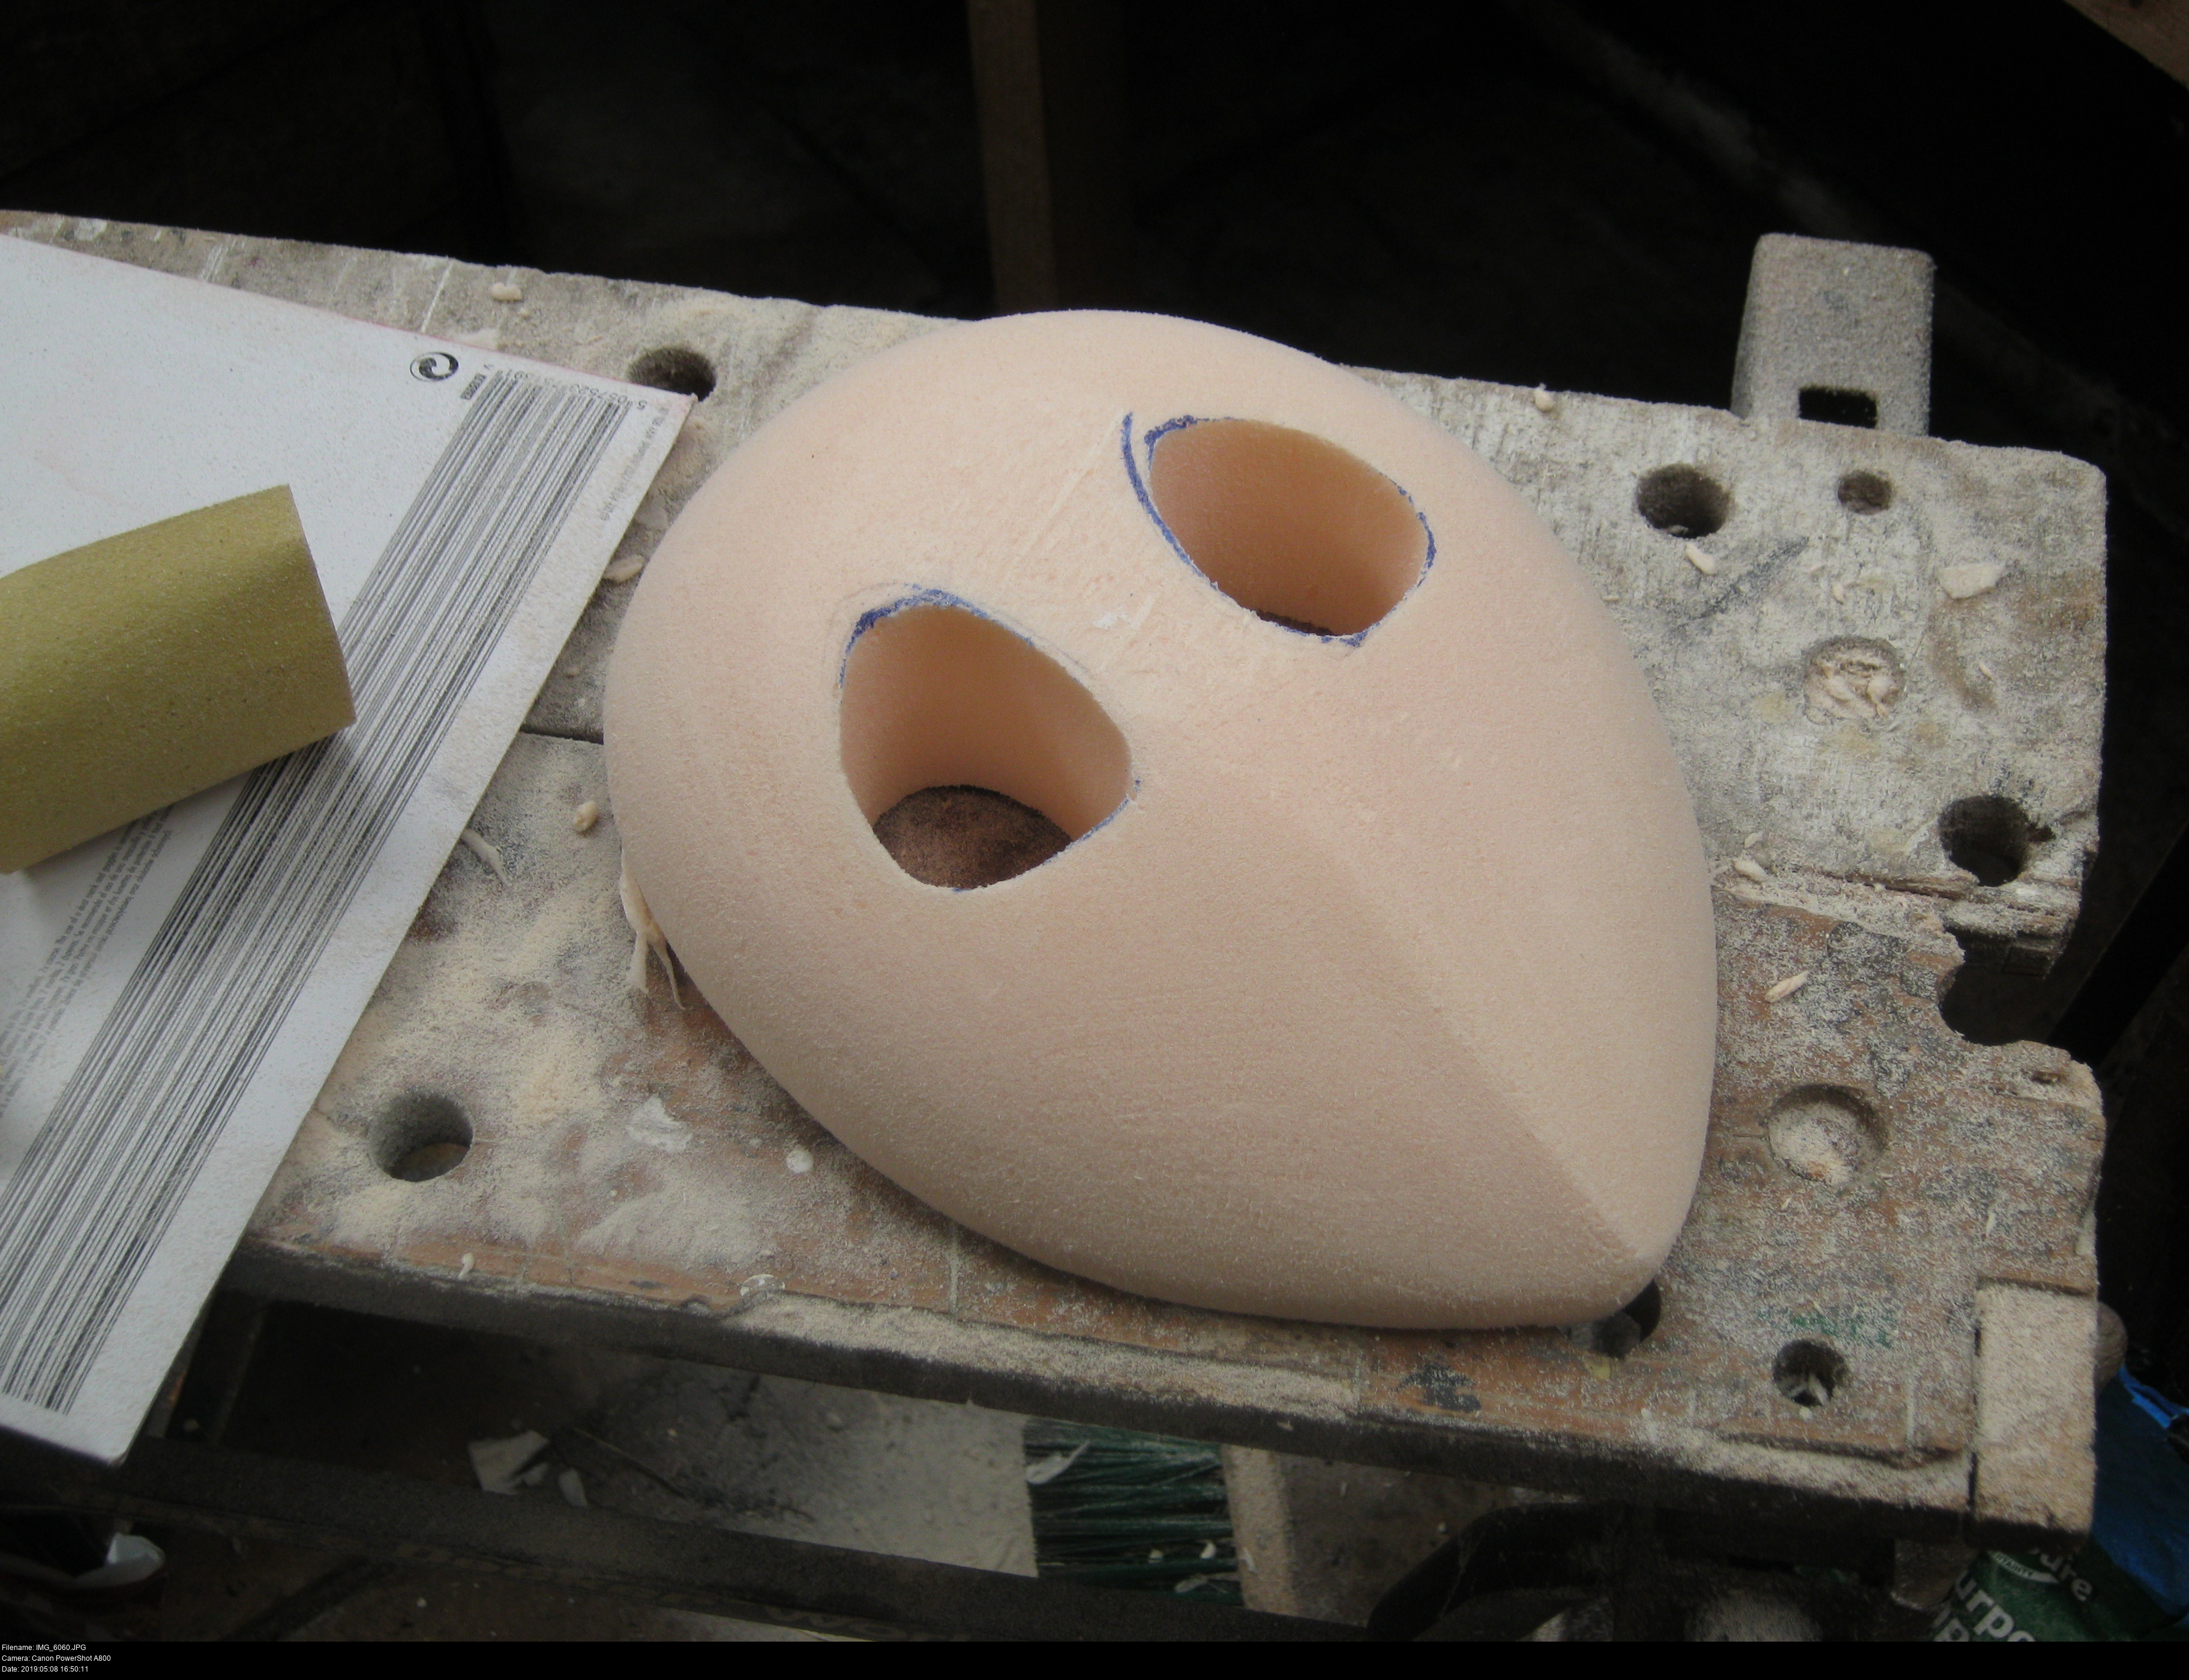
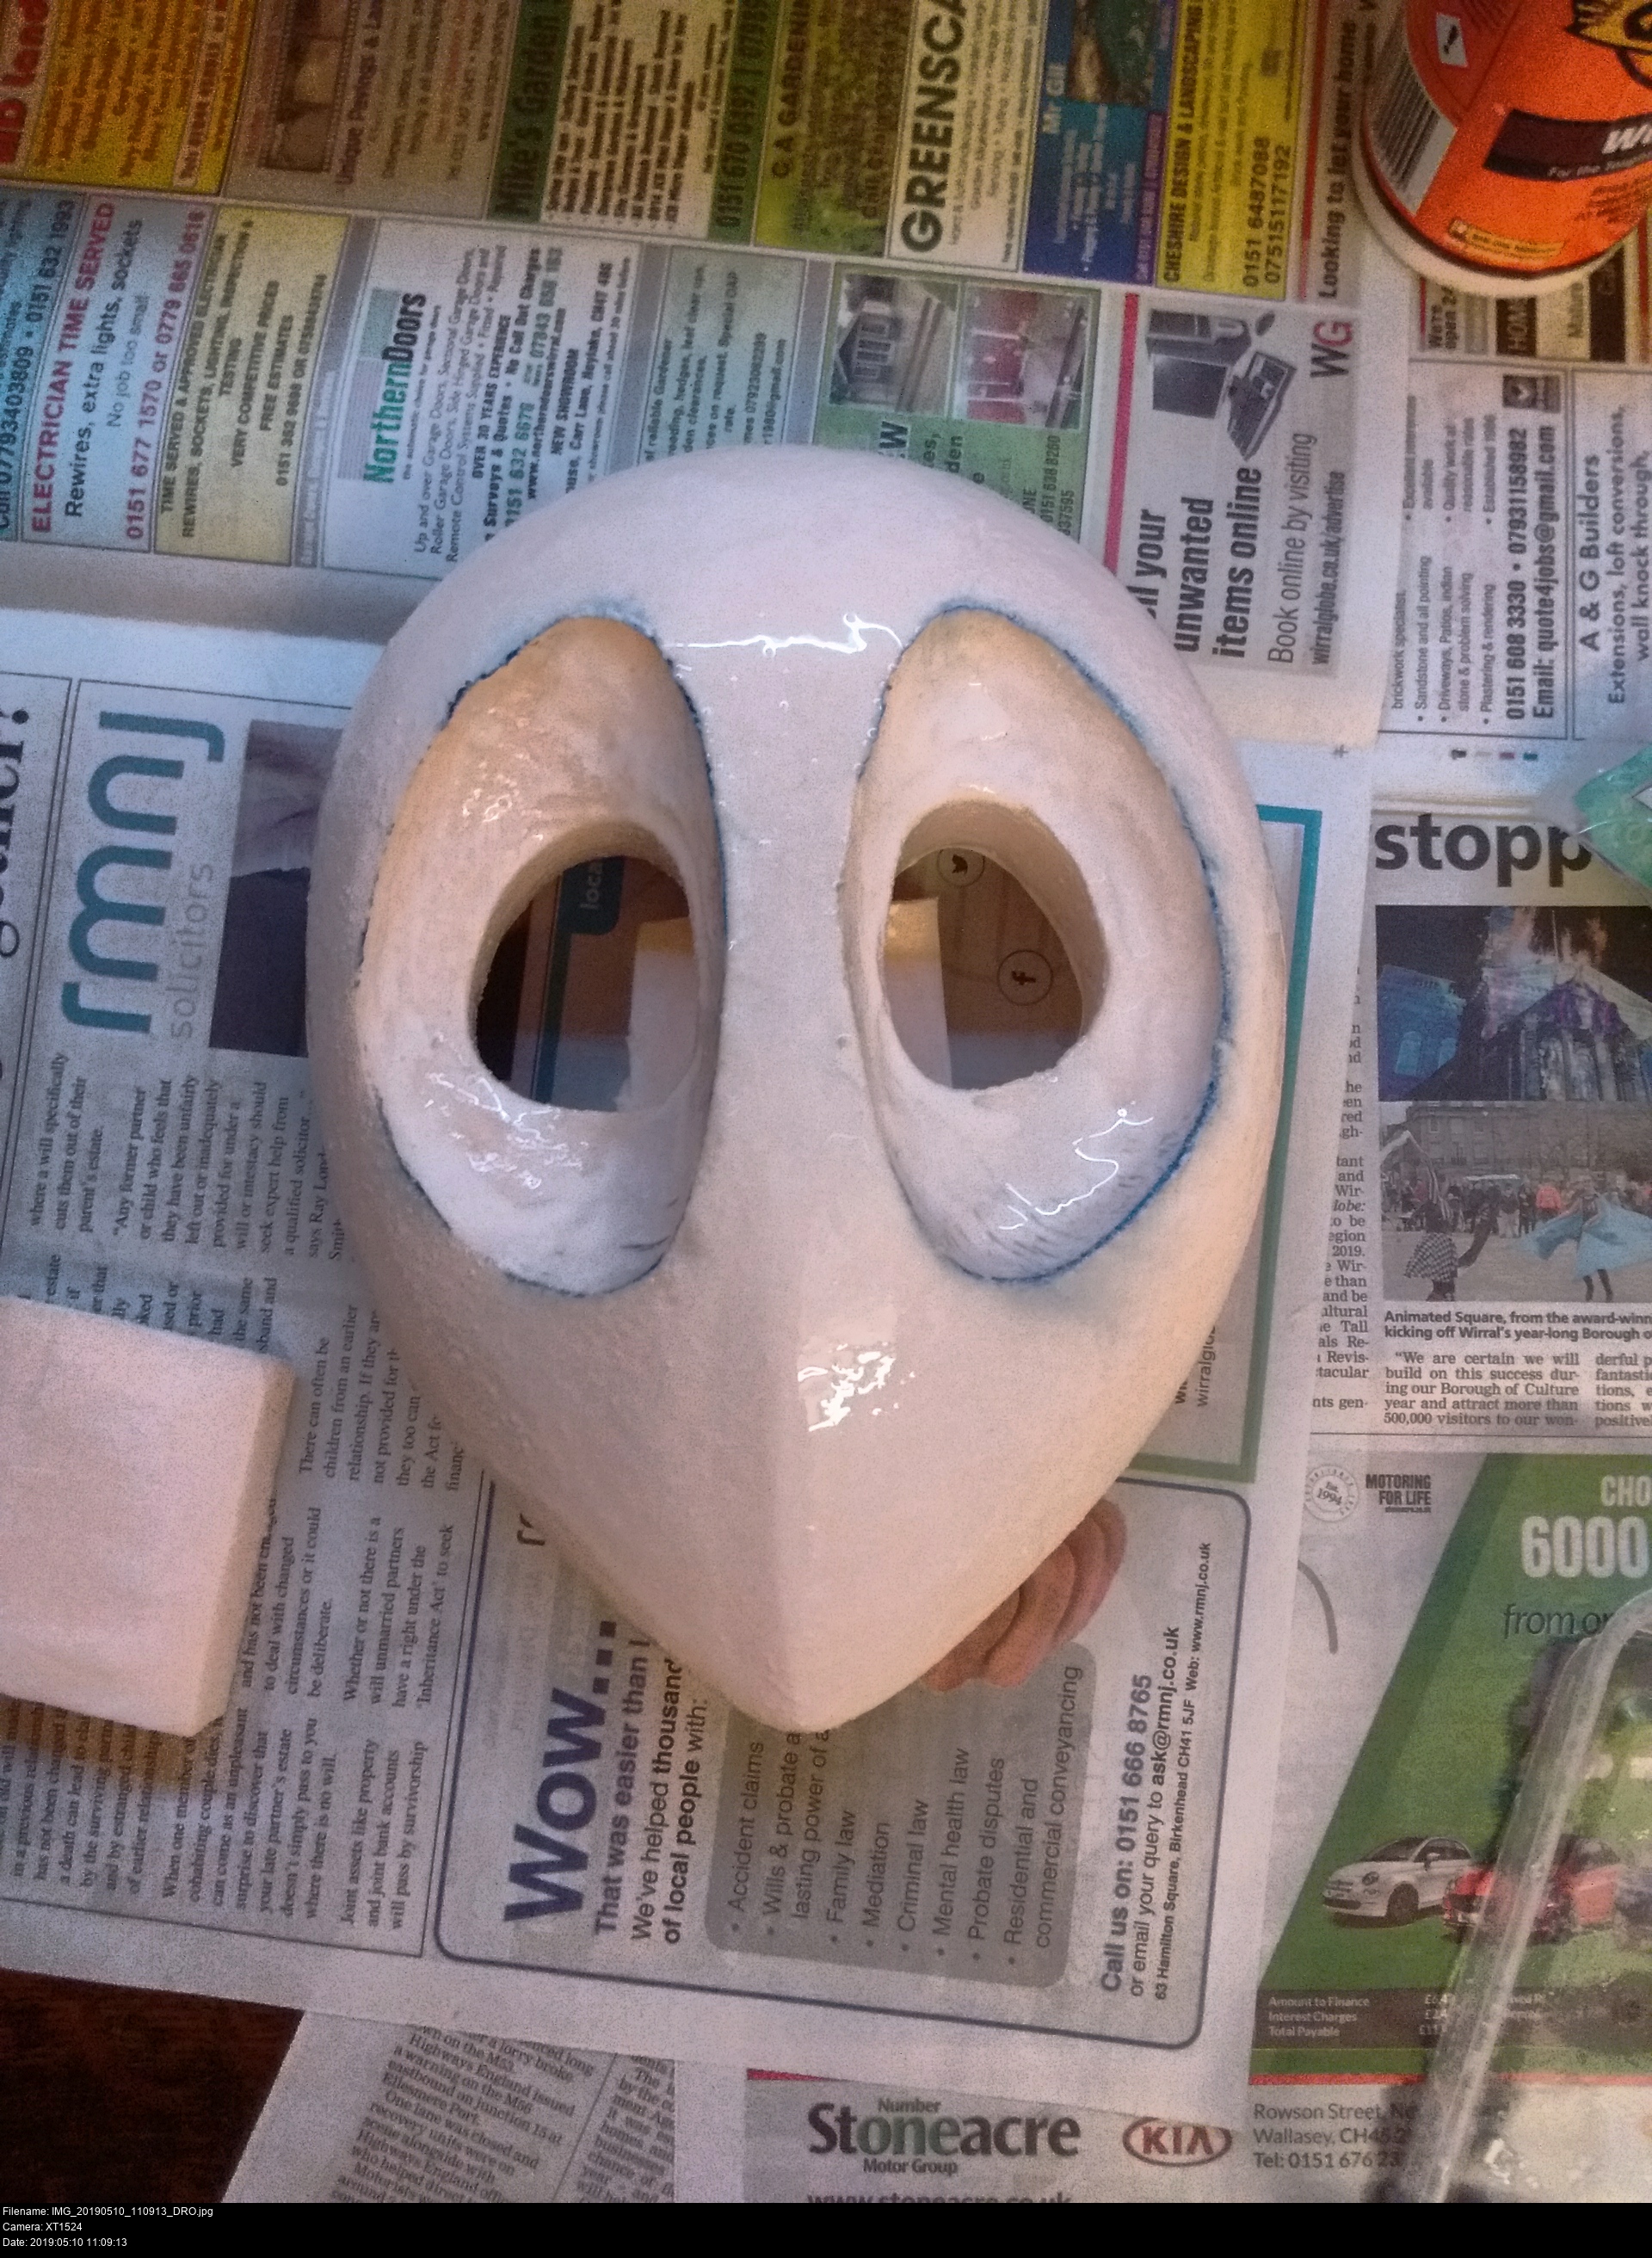
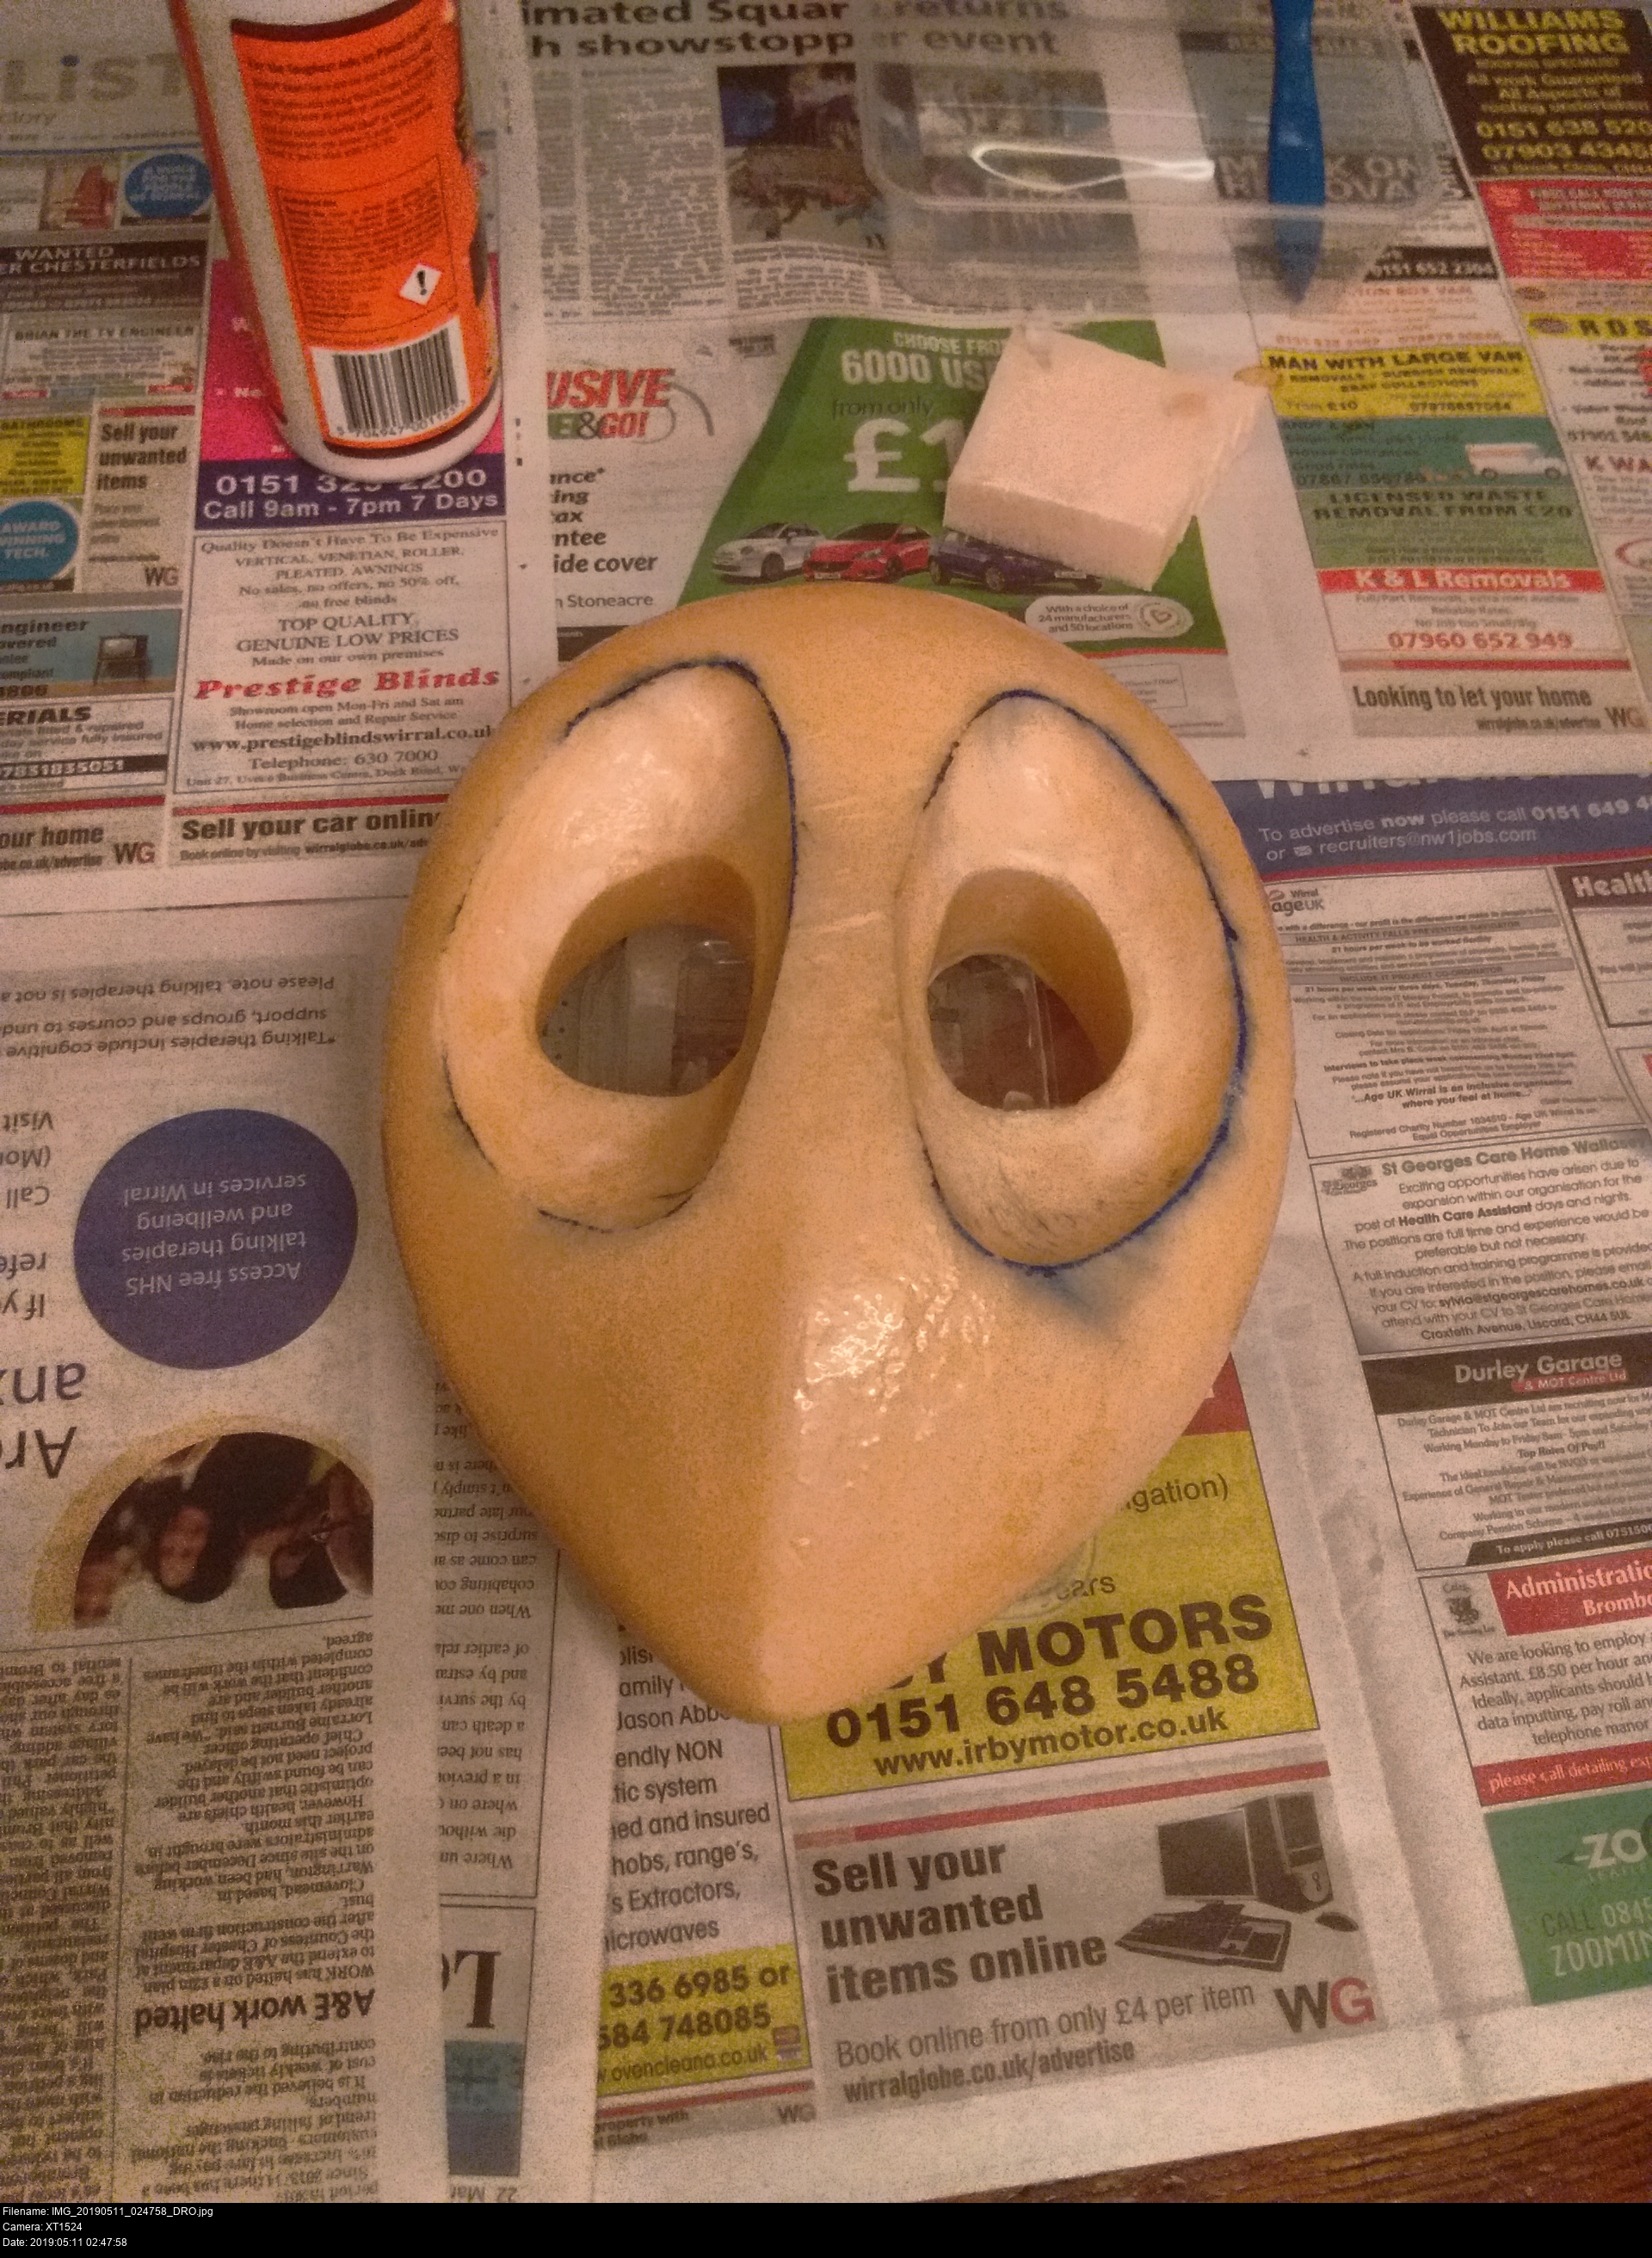
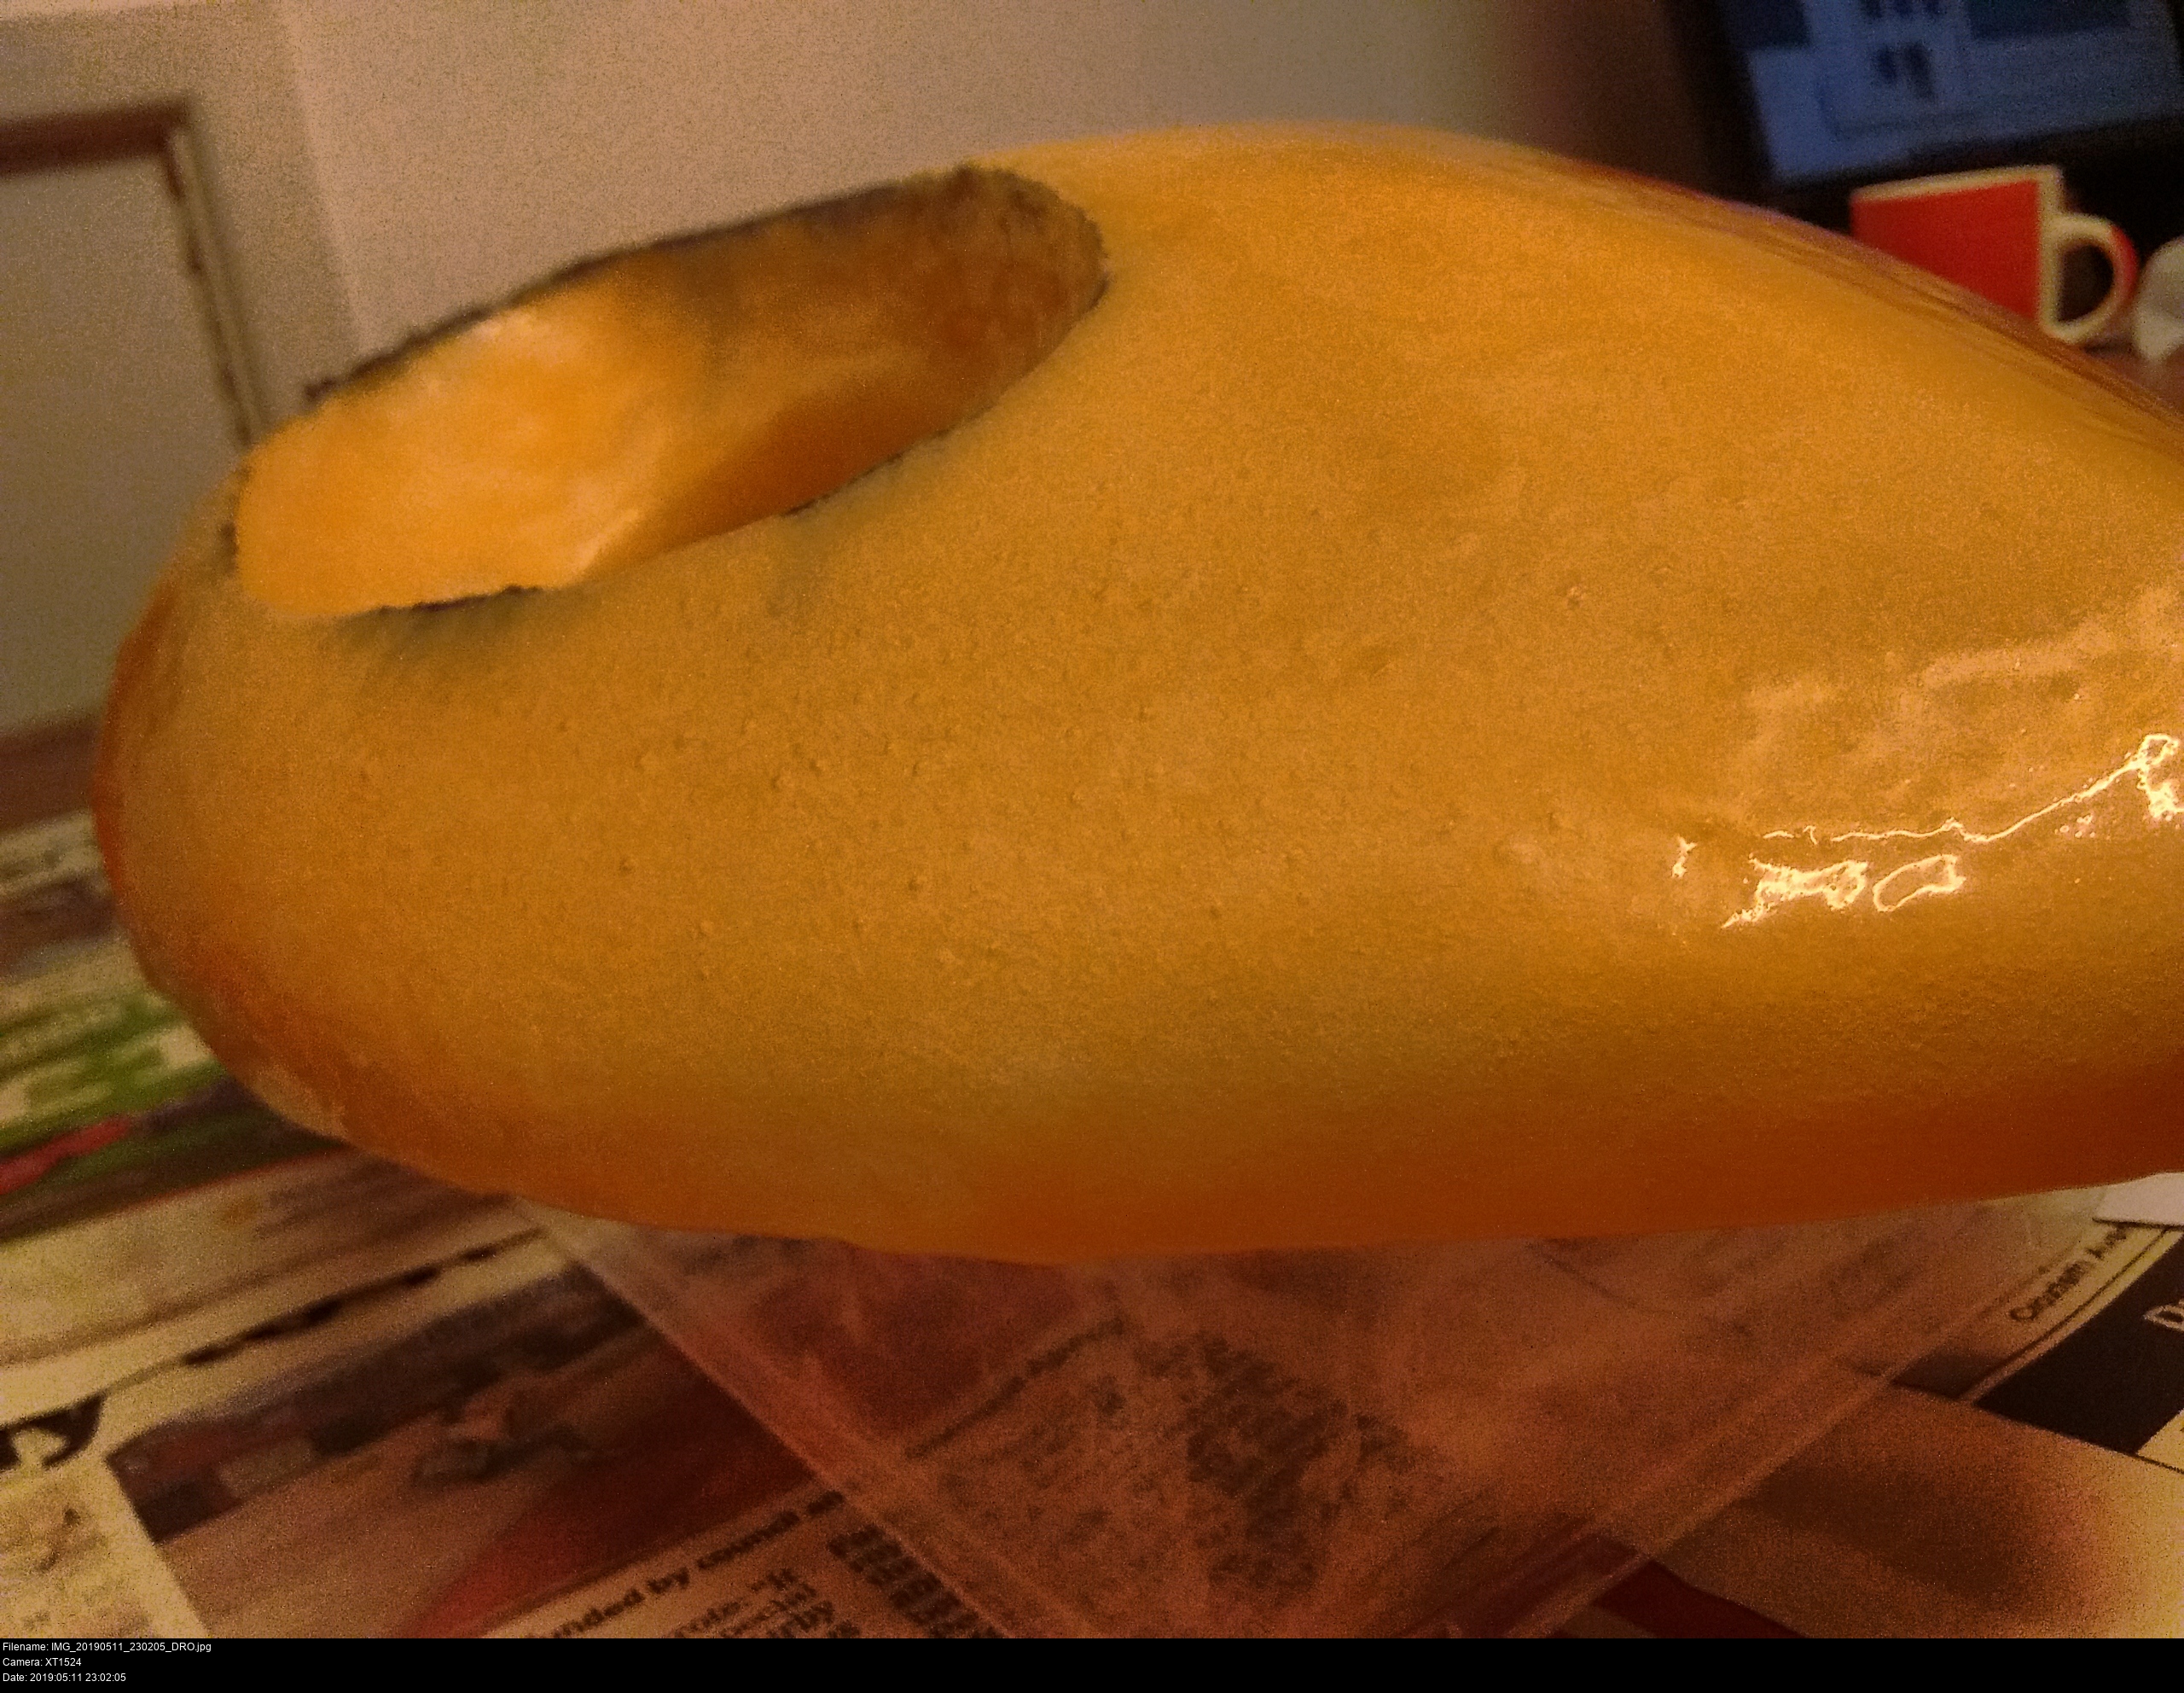
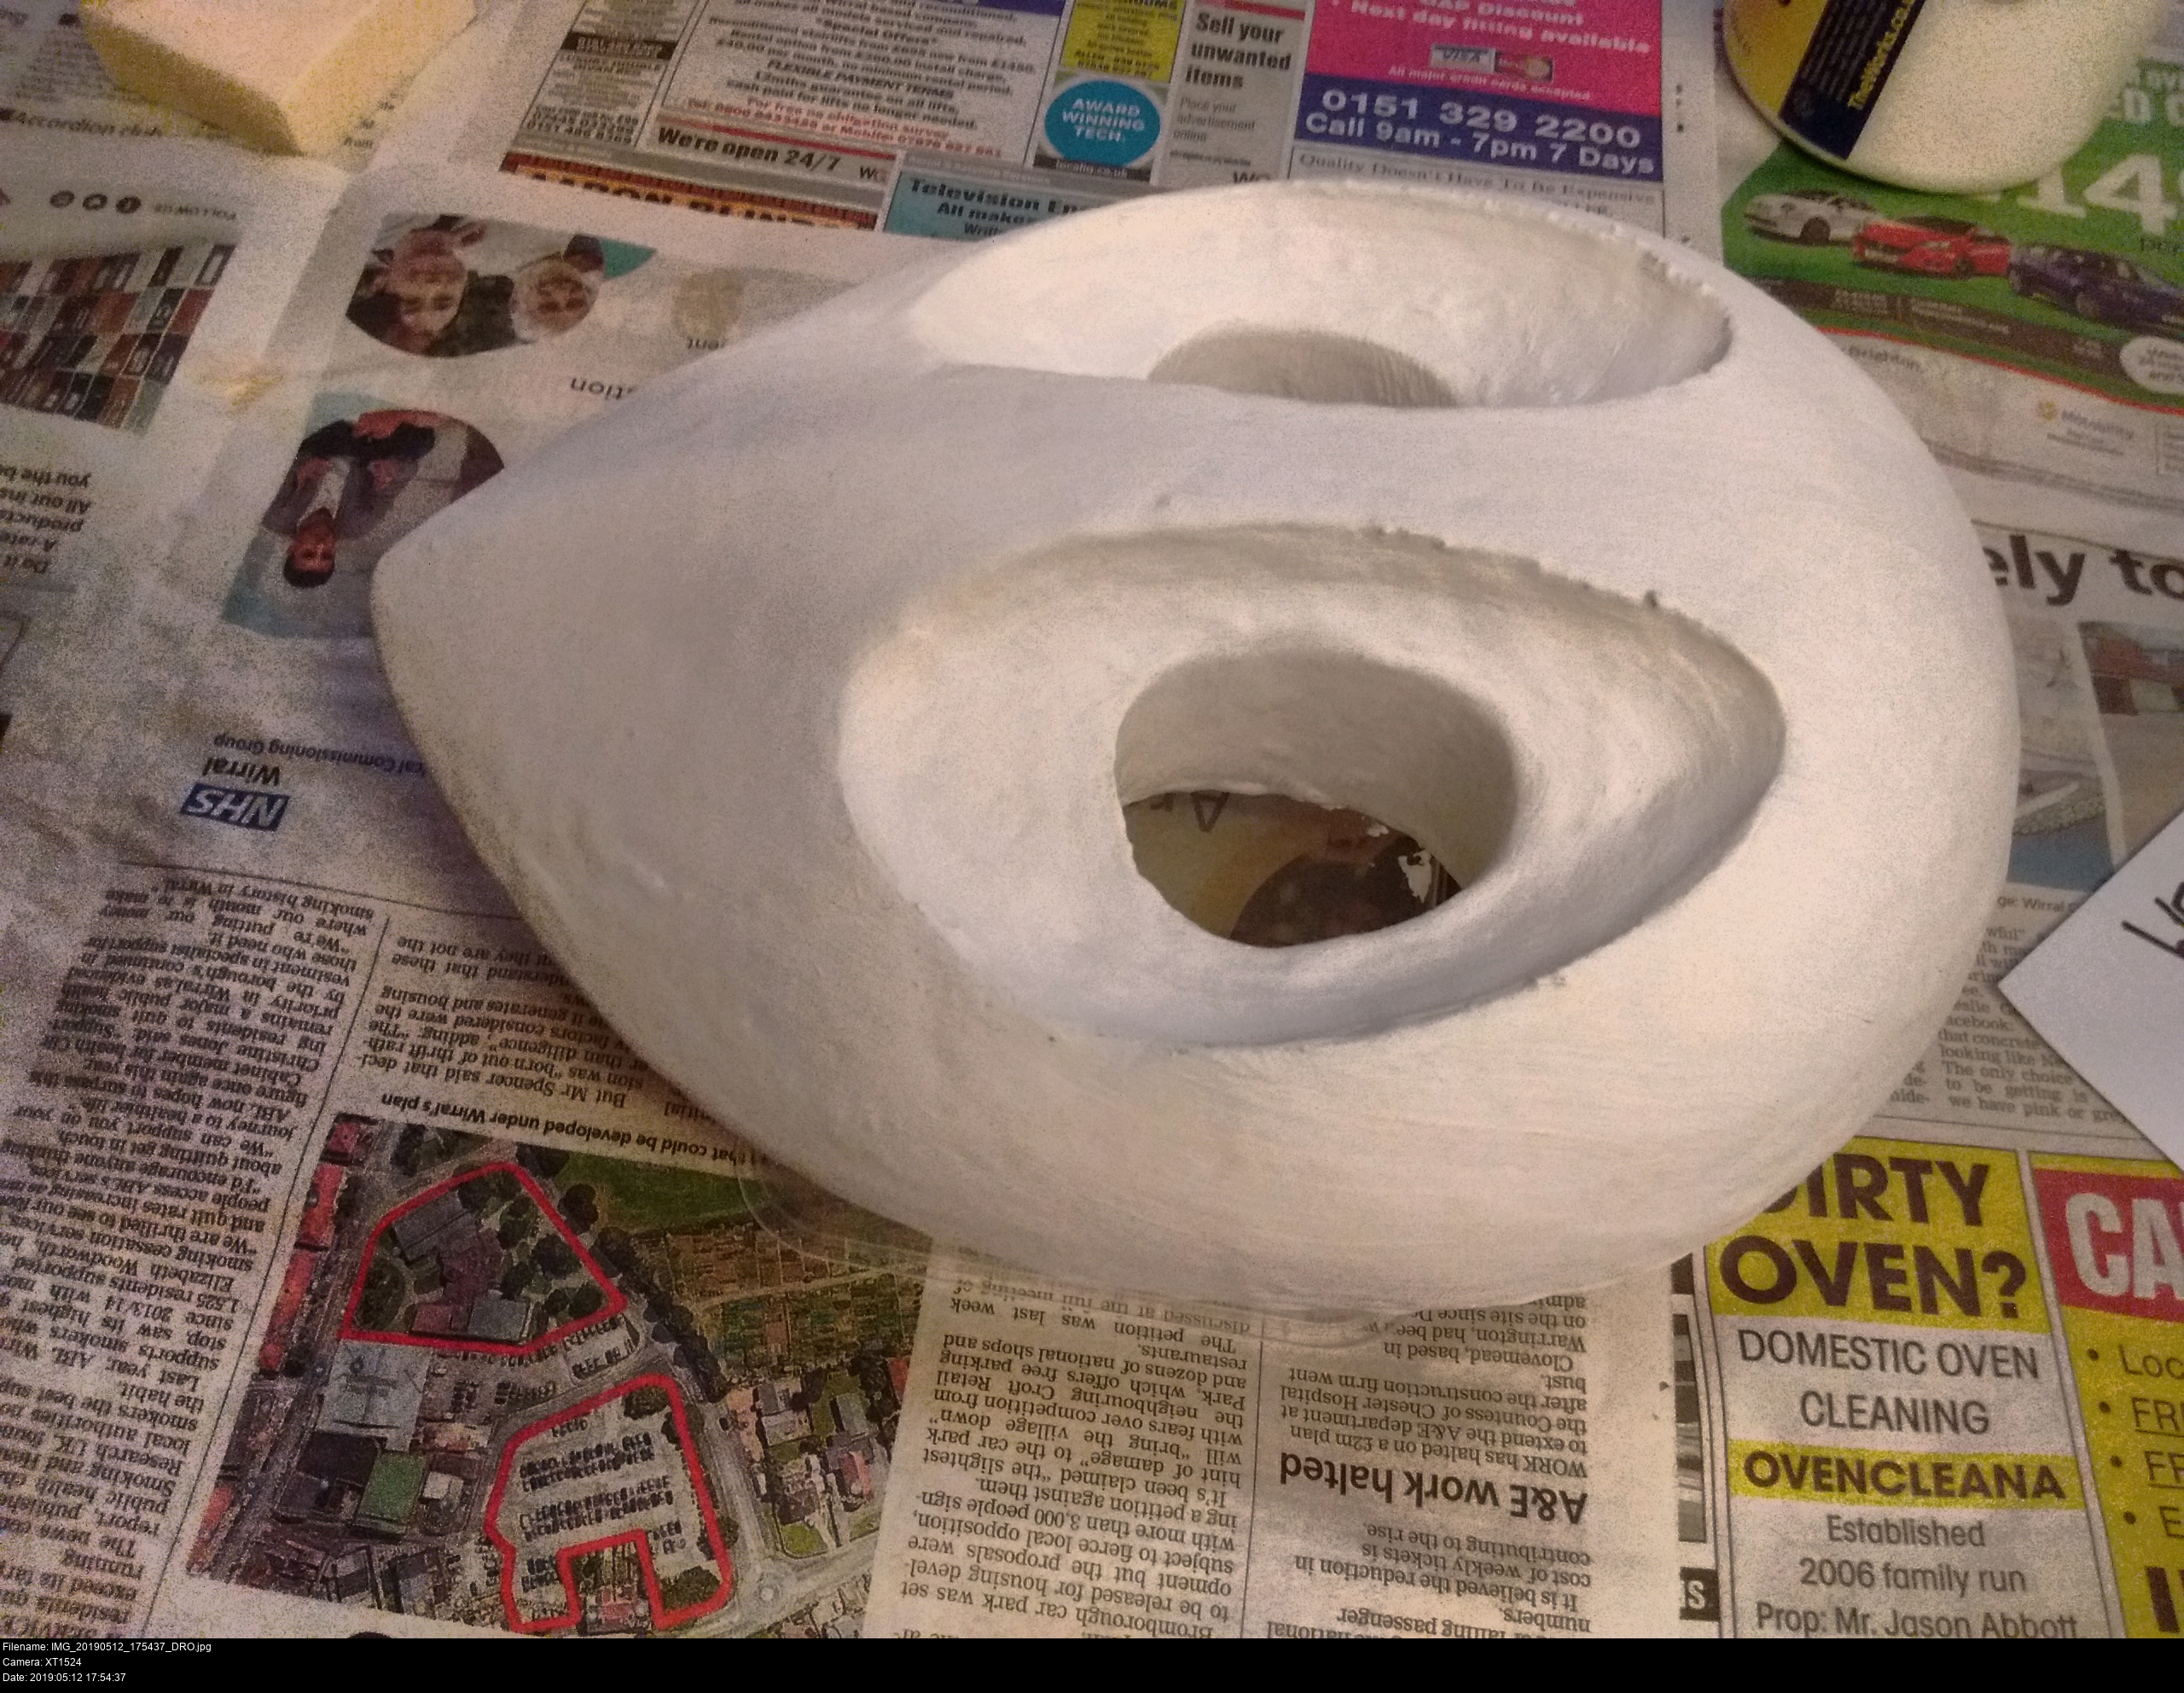
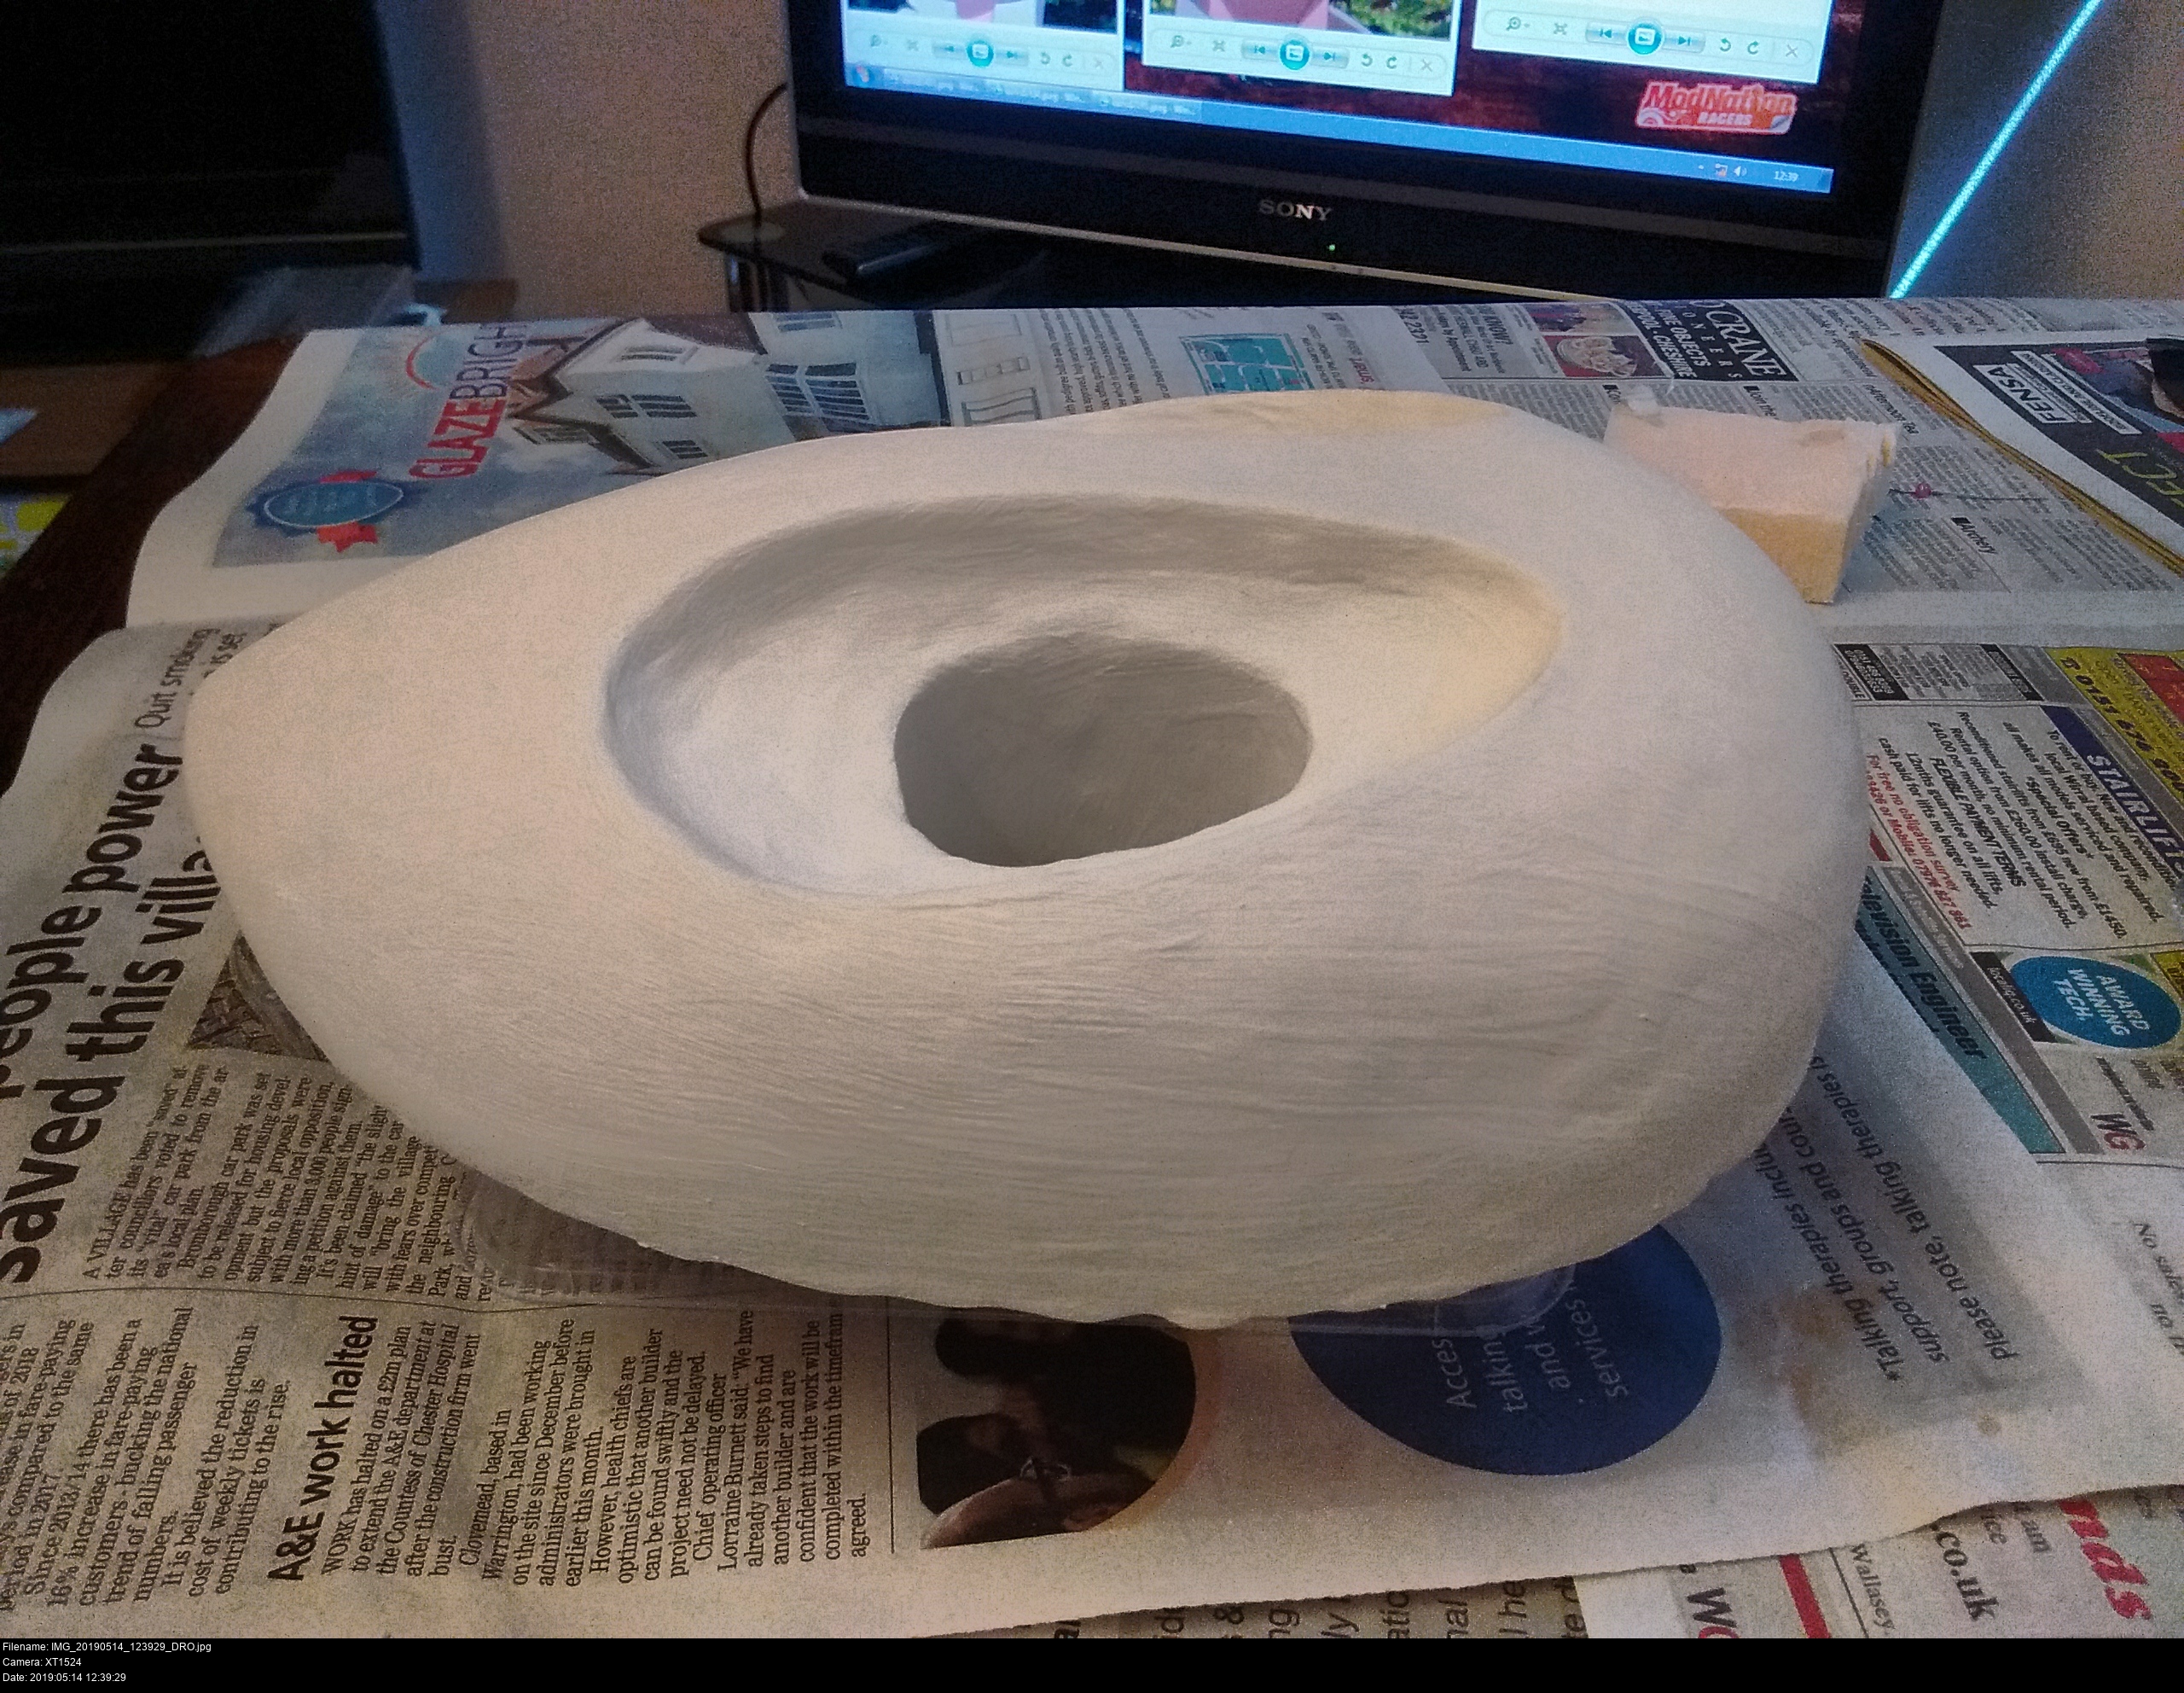
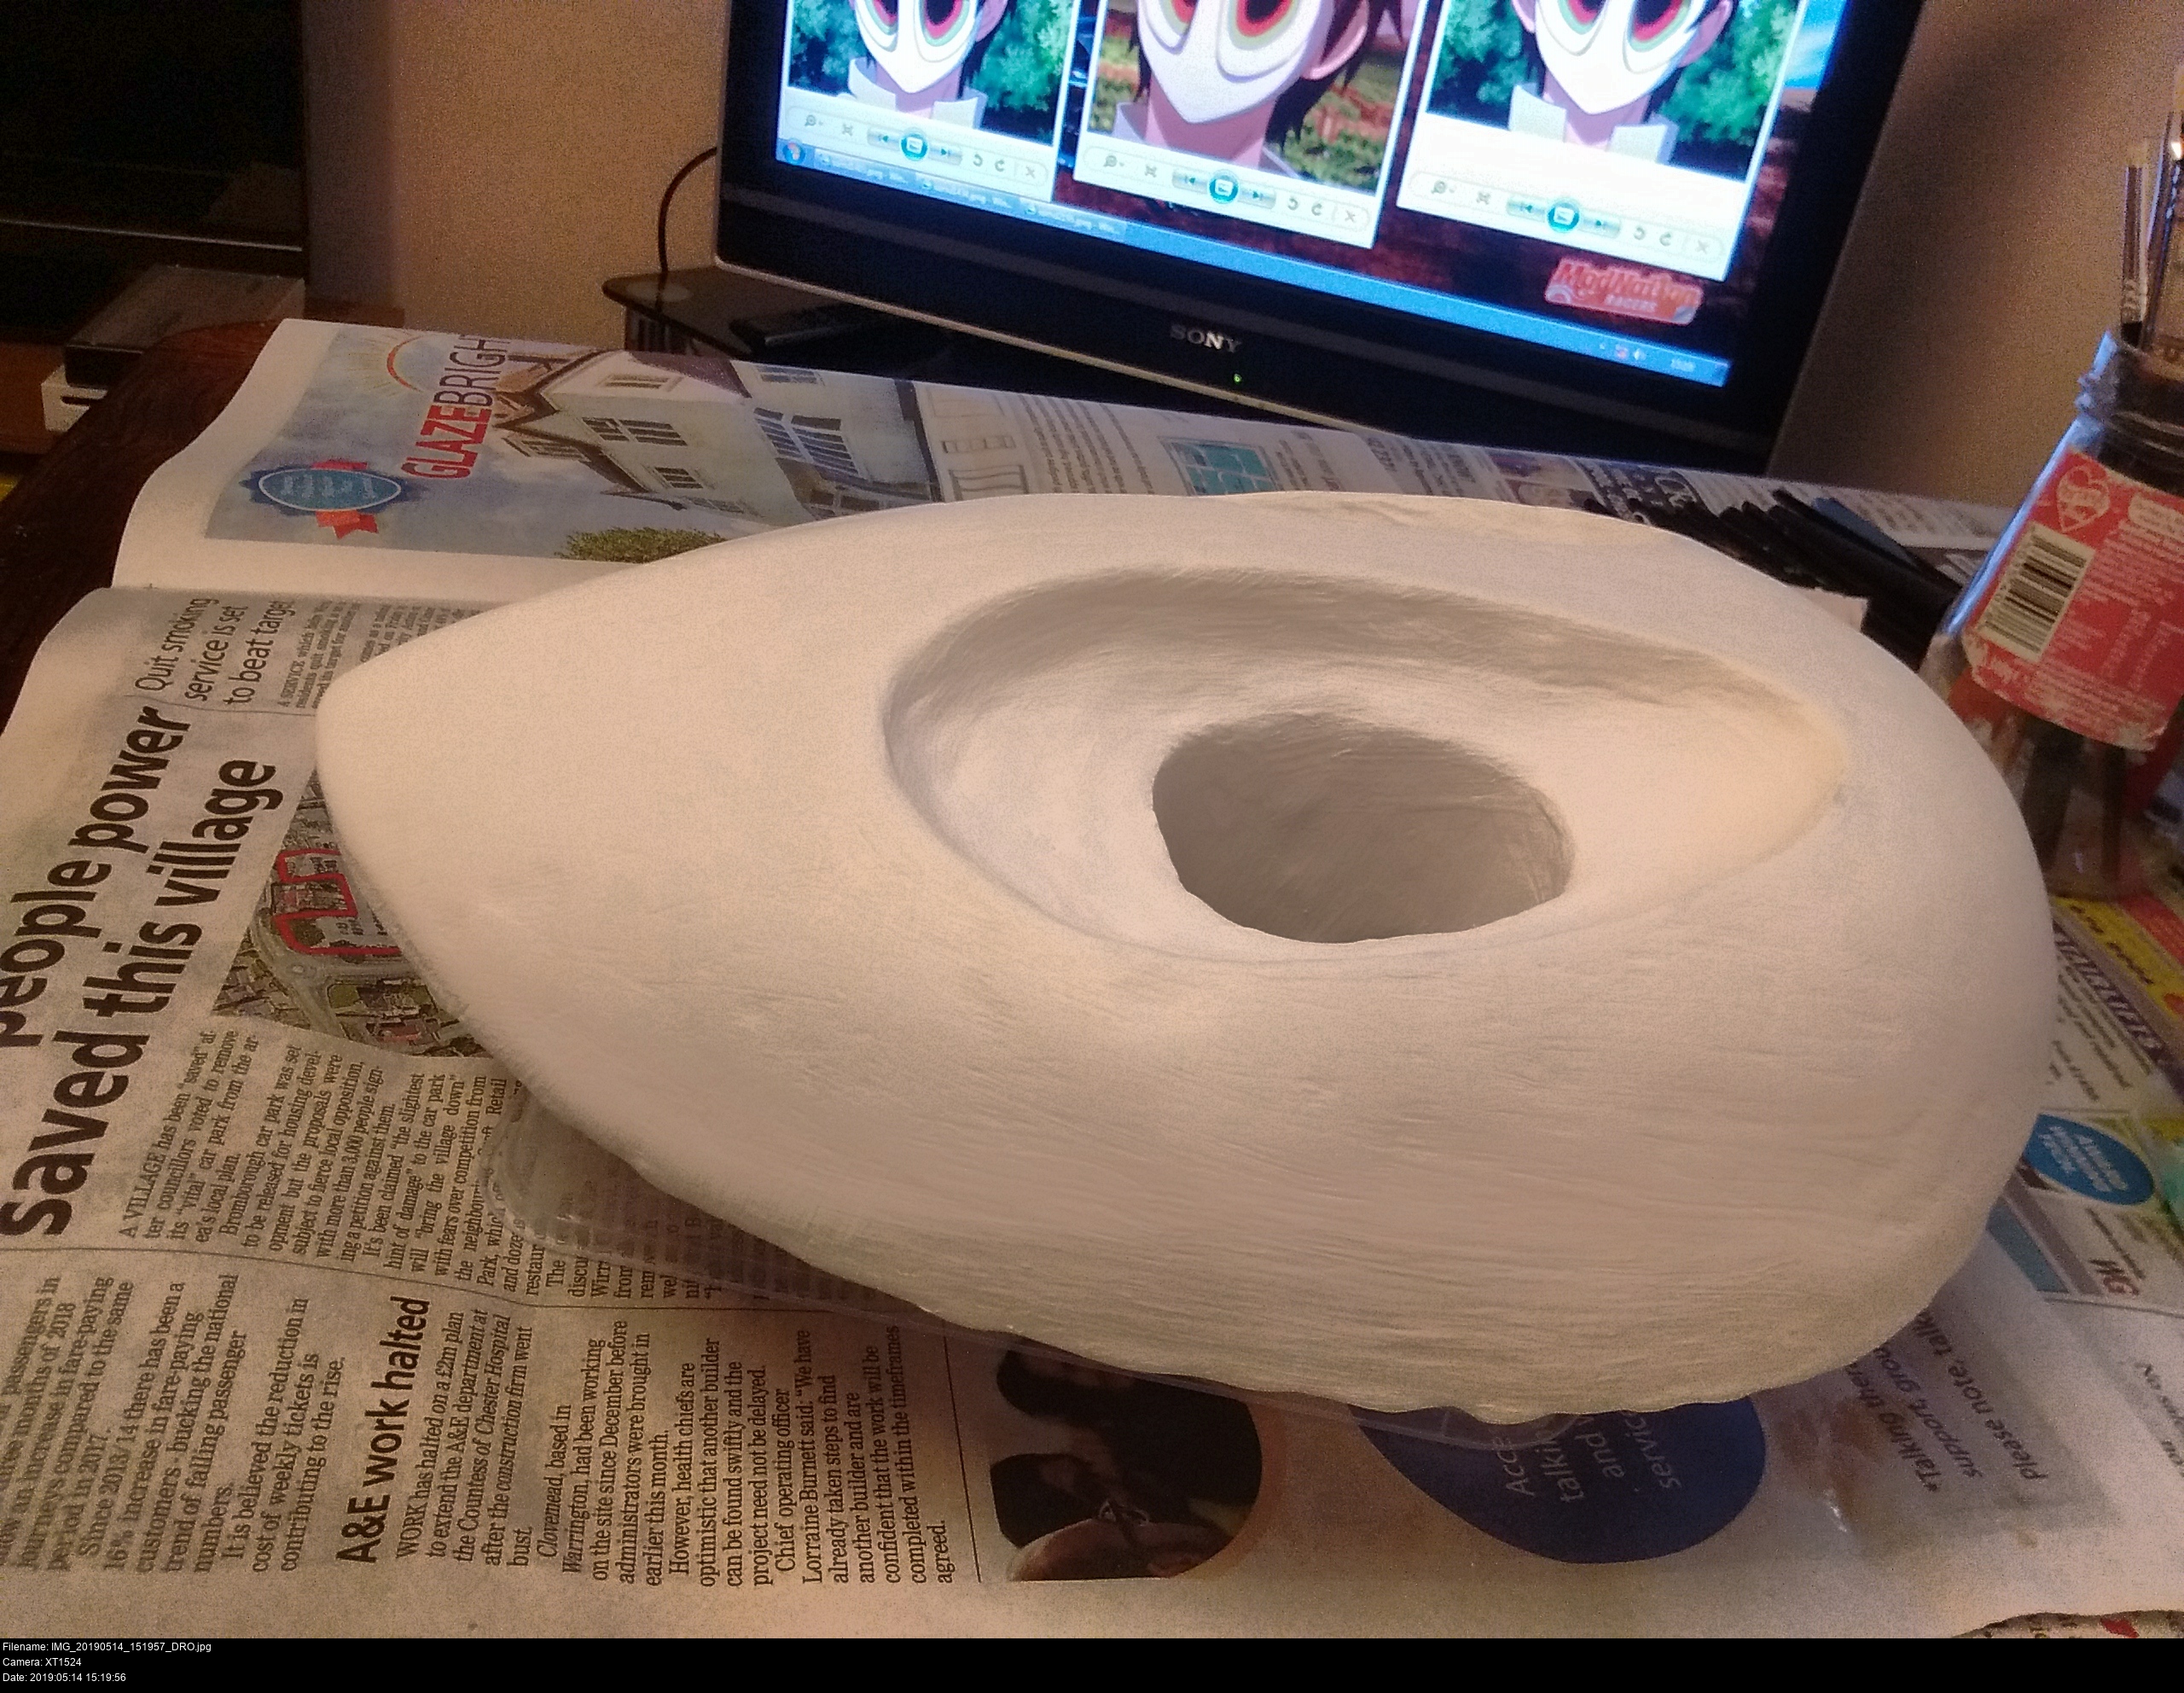
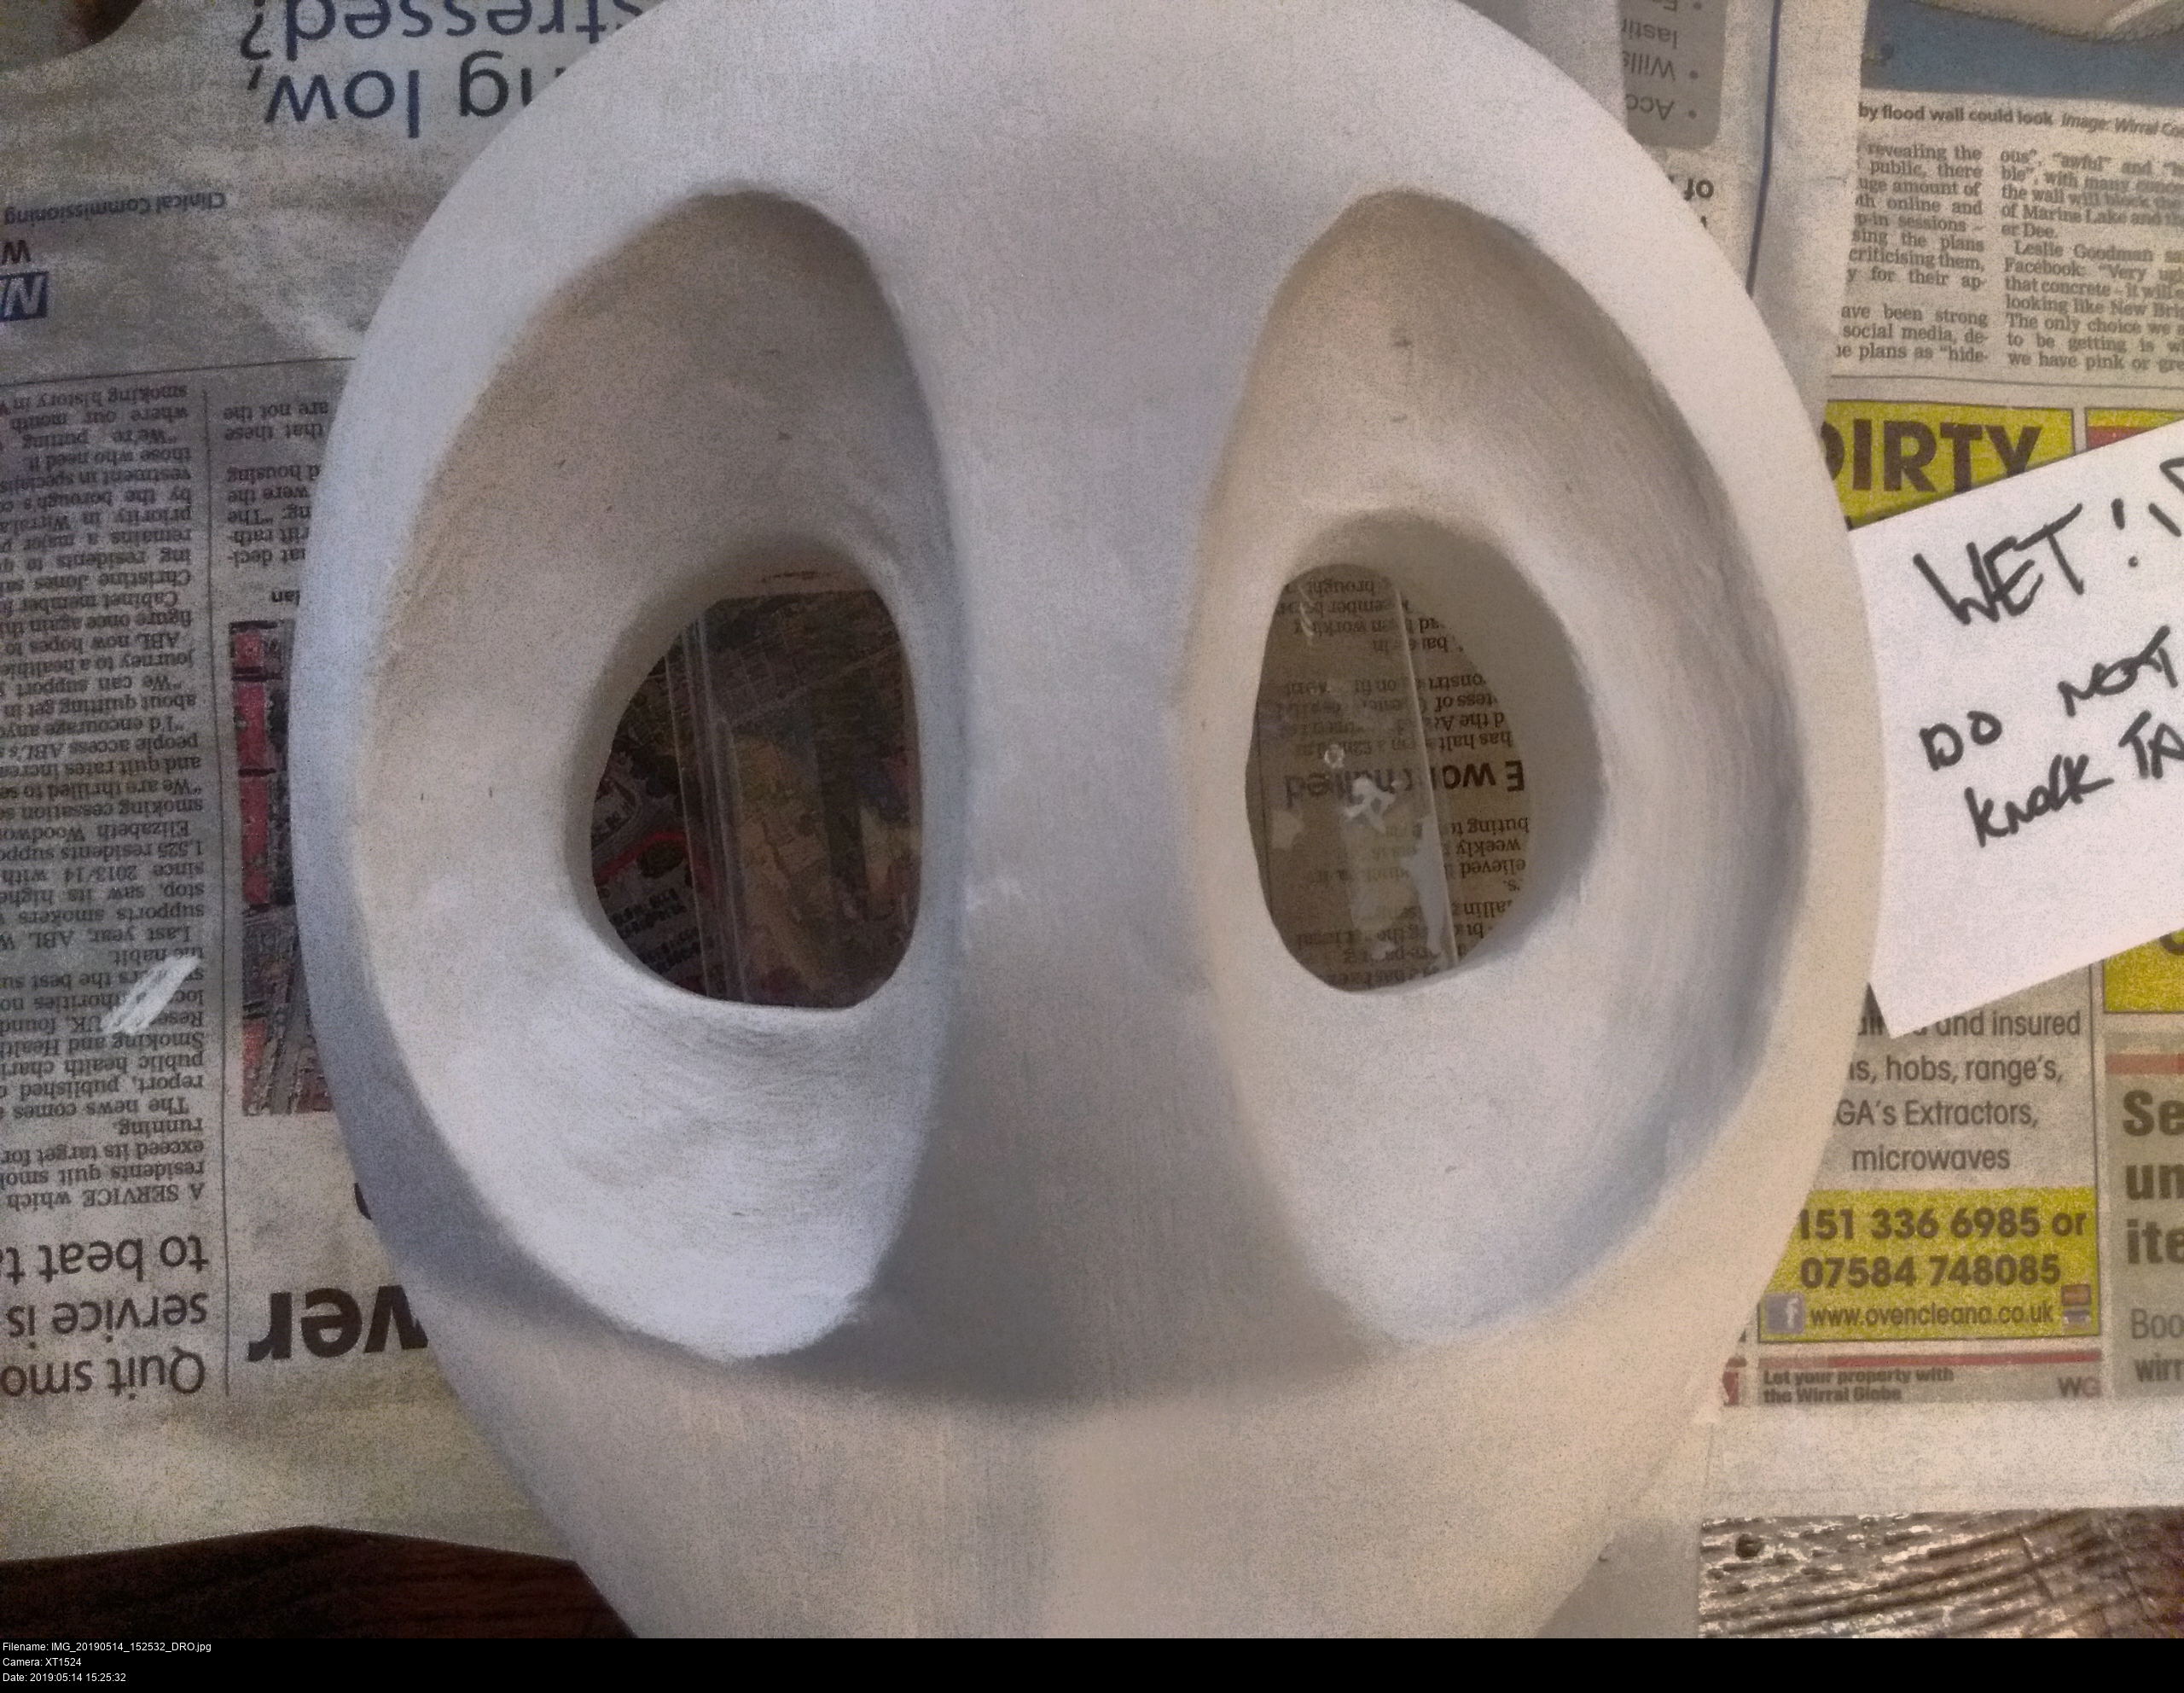
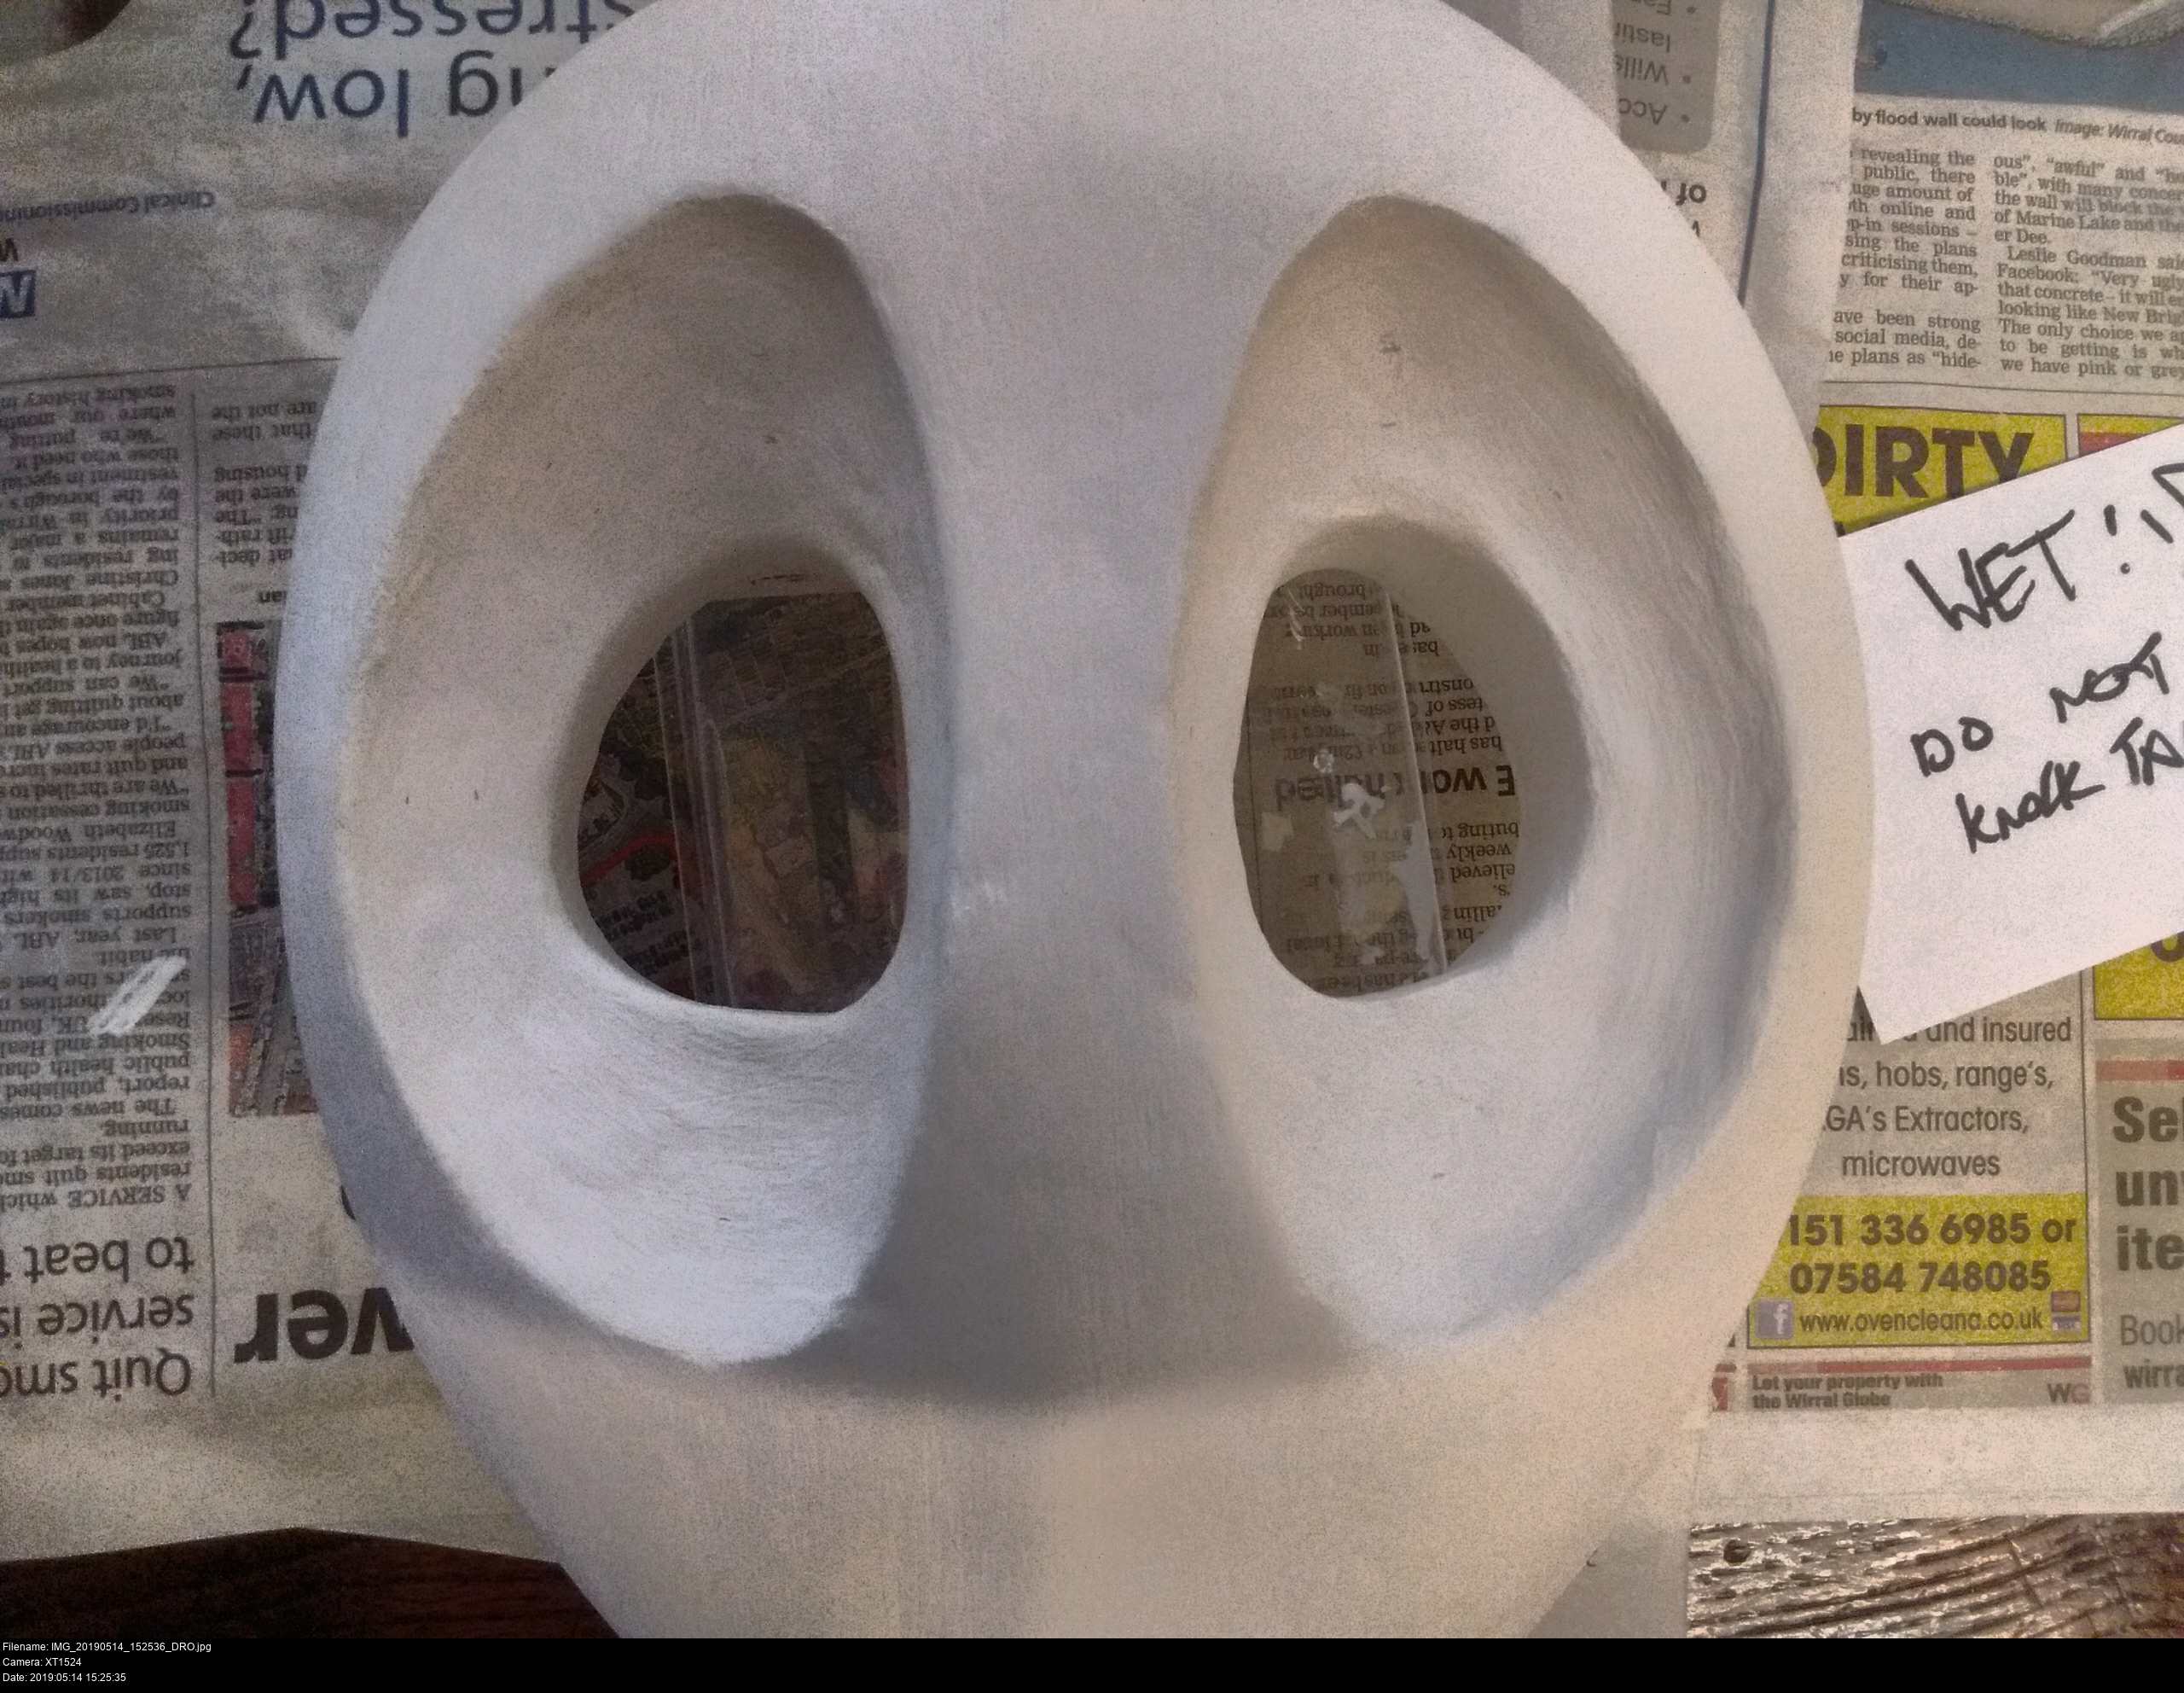
Two eyes! I'm so surprised with myself here. I managed to make them look sleek and rounded and -symmetrical-. Without breaking the rest of the mask! Astonishing! I didn't even tear the mask apart removing the duct tape.
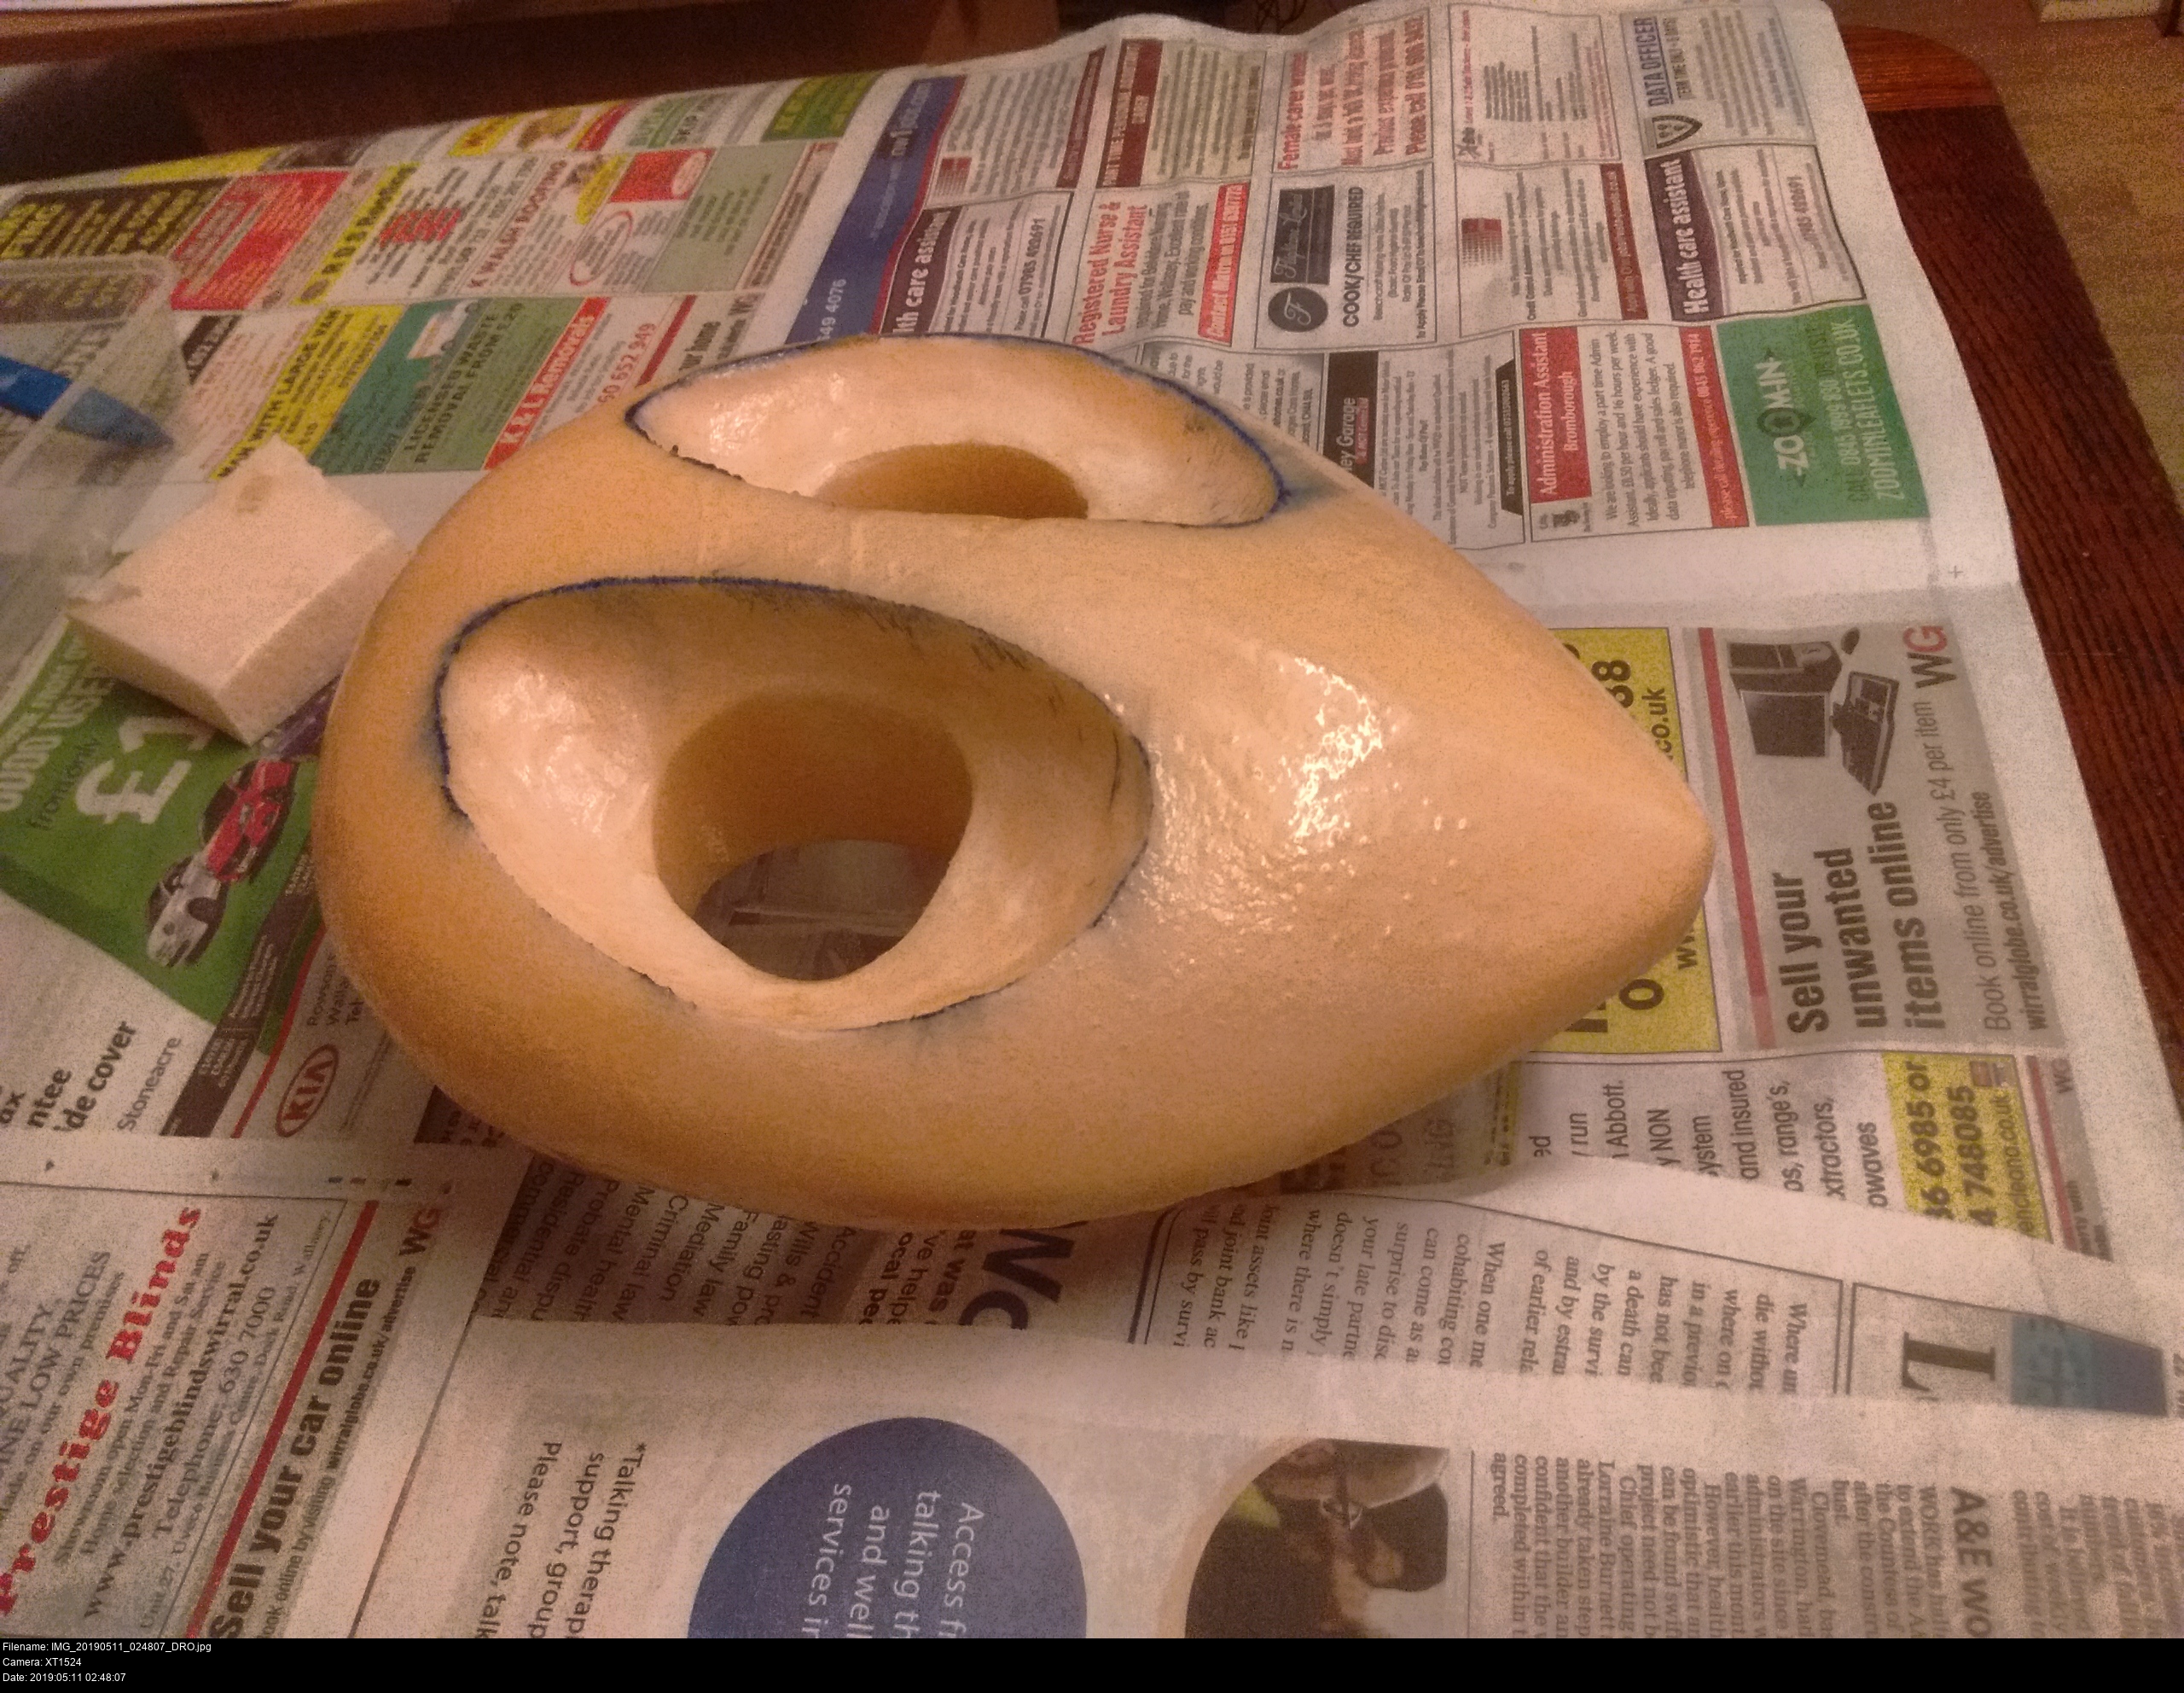
Make sure to look at the mask from every angle, workspace permitting.
It's important to keep in mind that it will look different many times over over the successive stages - surfacing, sanding, surfacing, sanding, priming, sanding, priming...
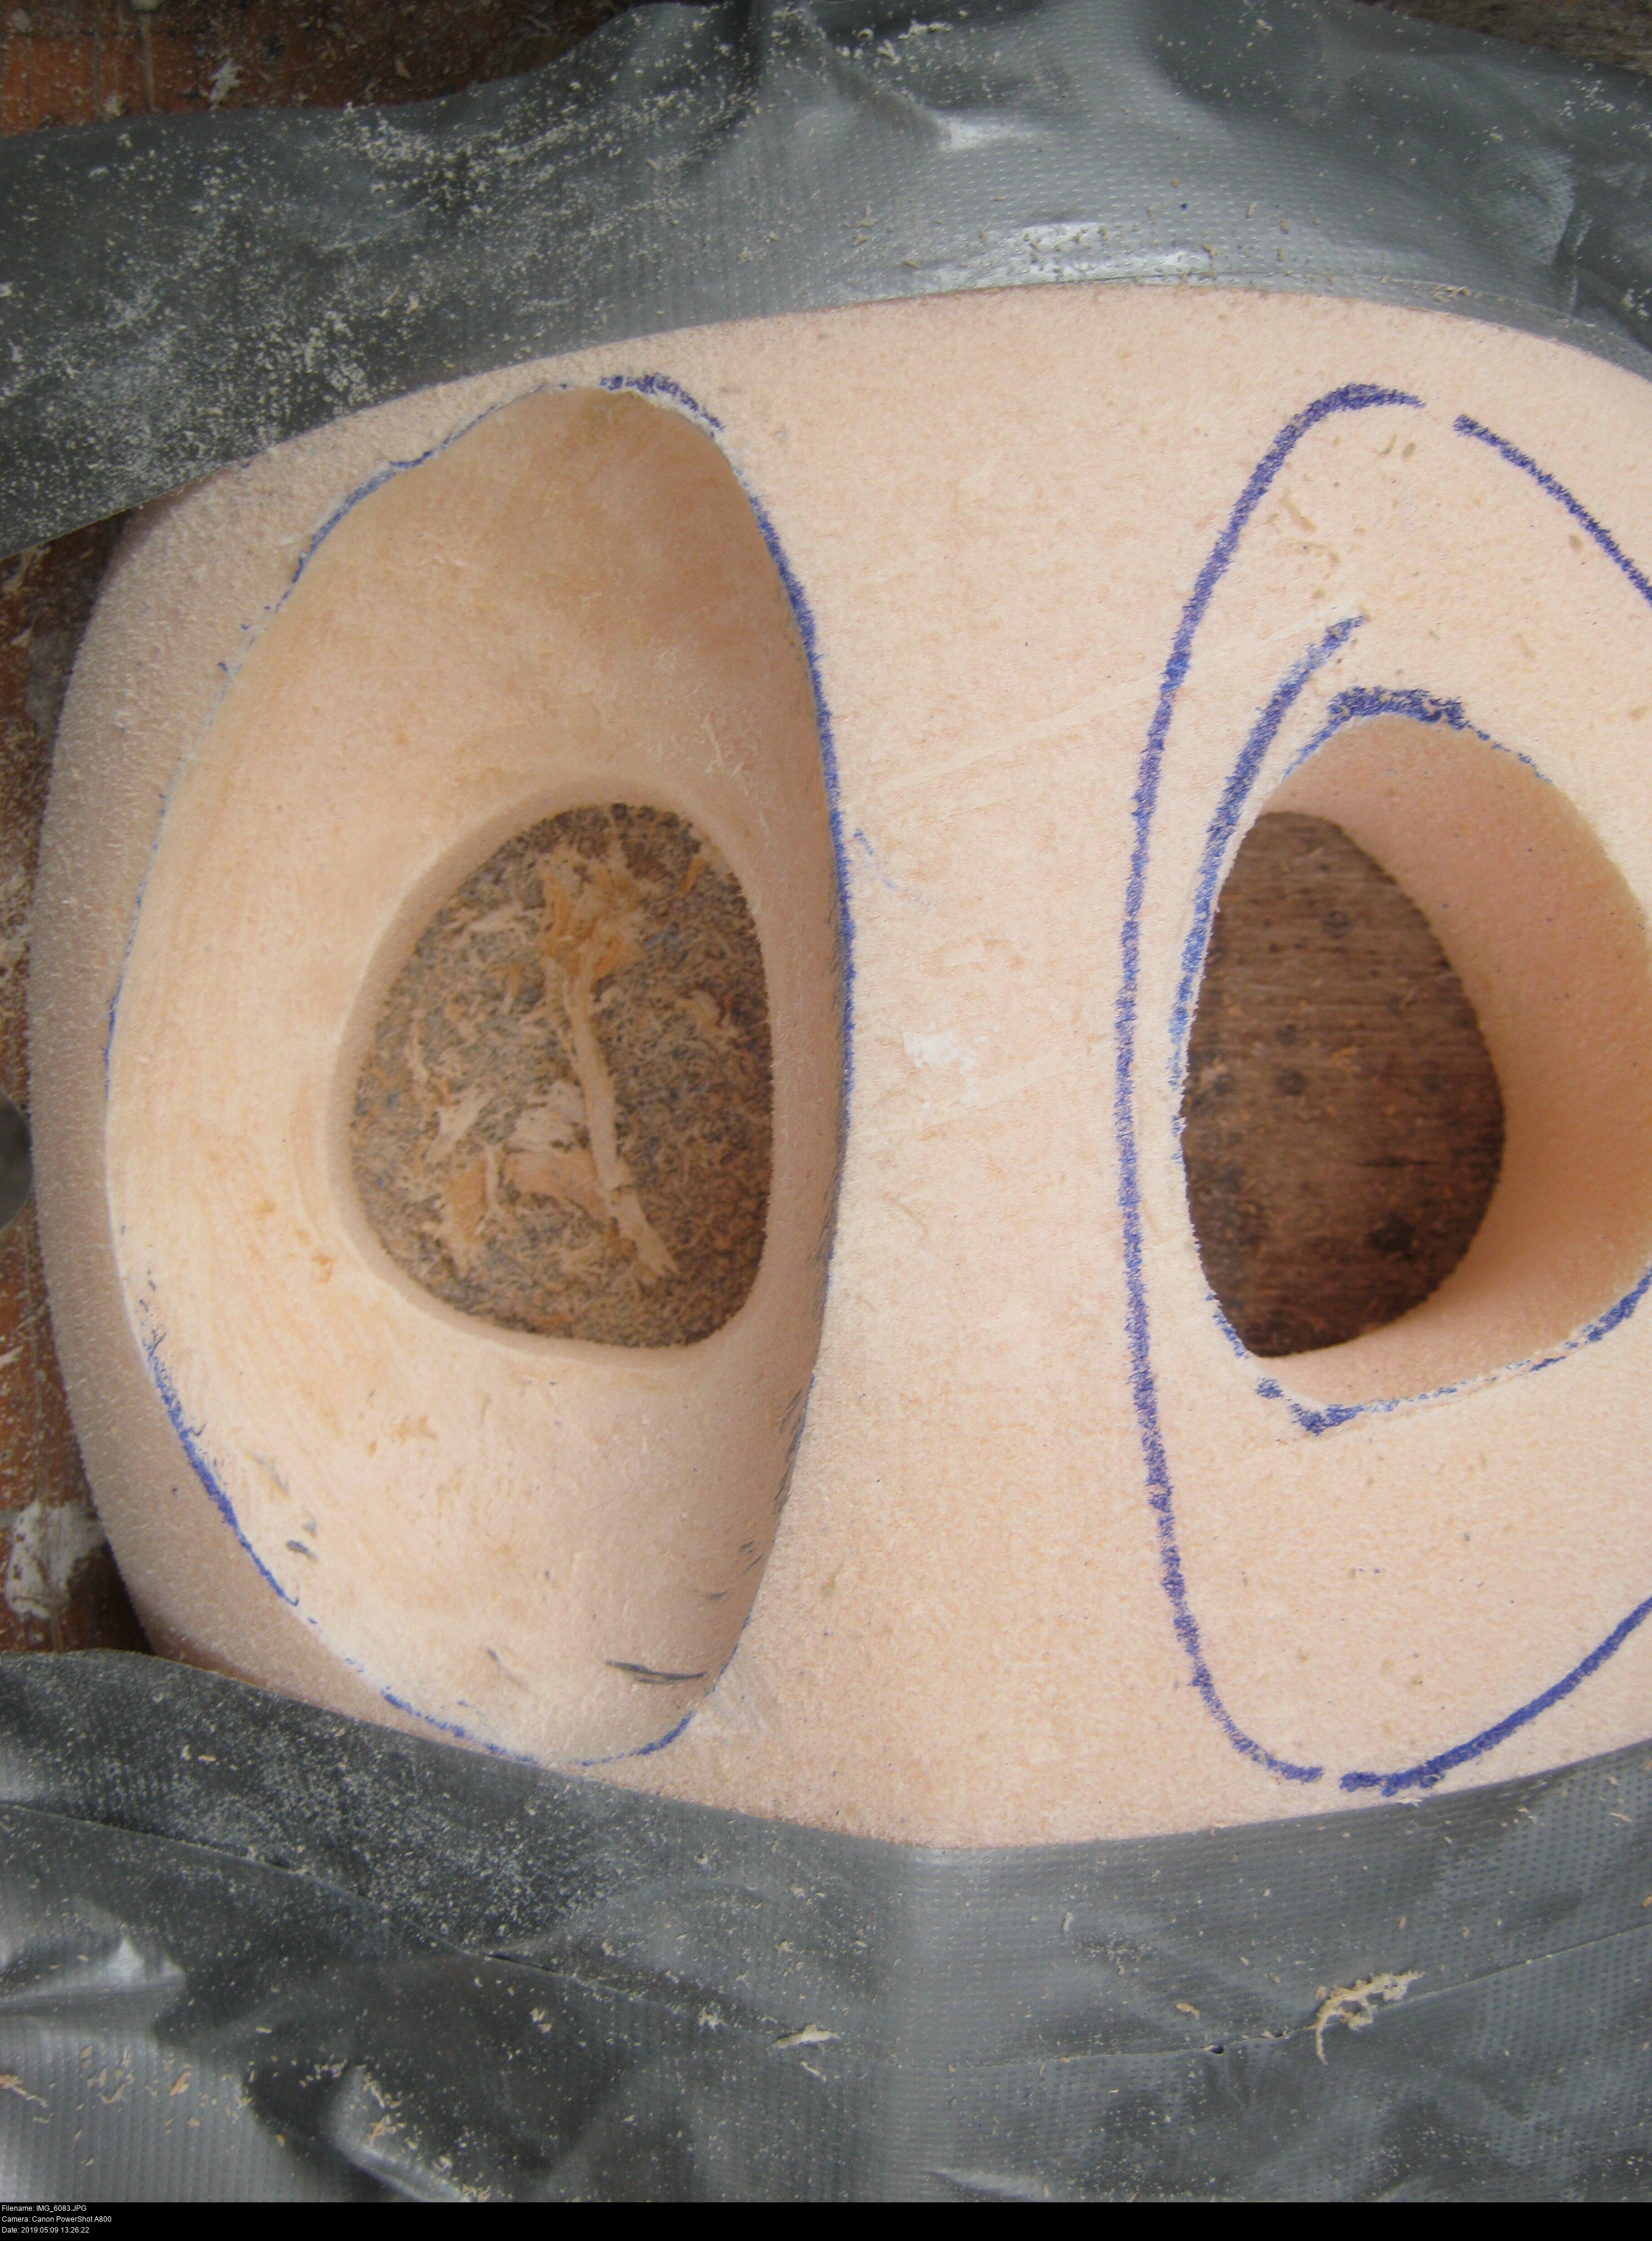
At this point I have to make a choice.
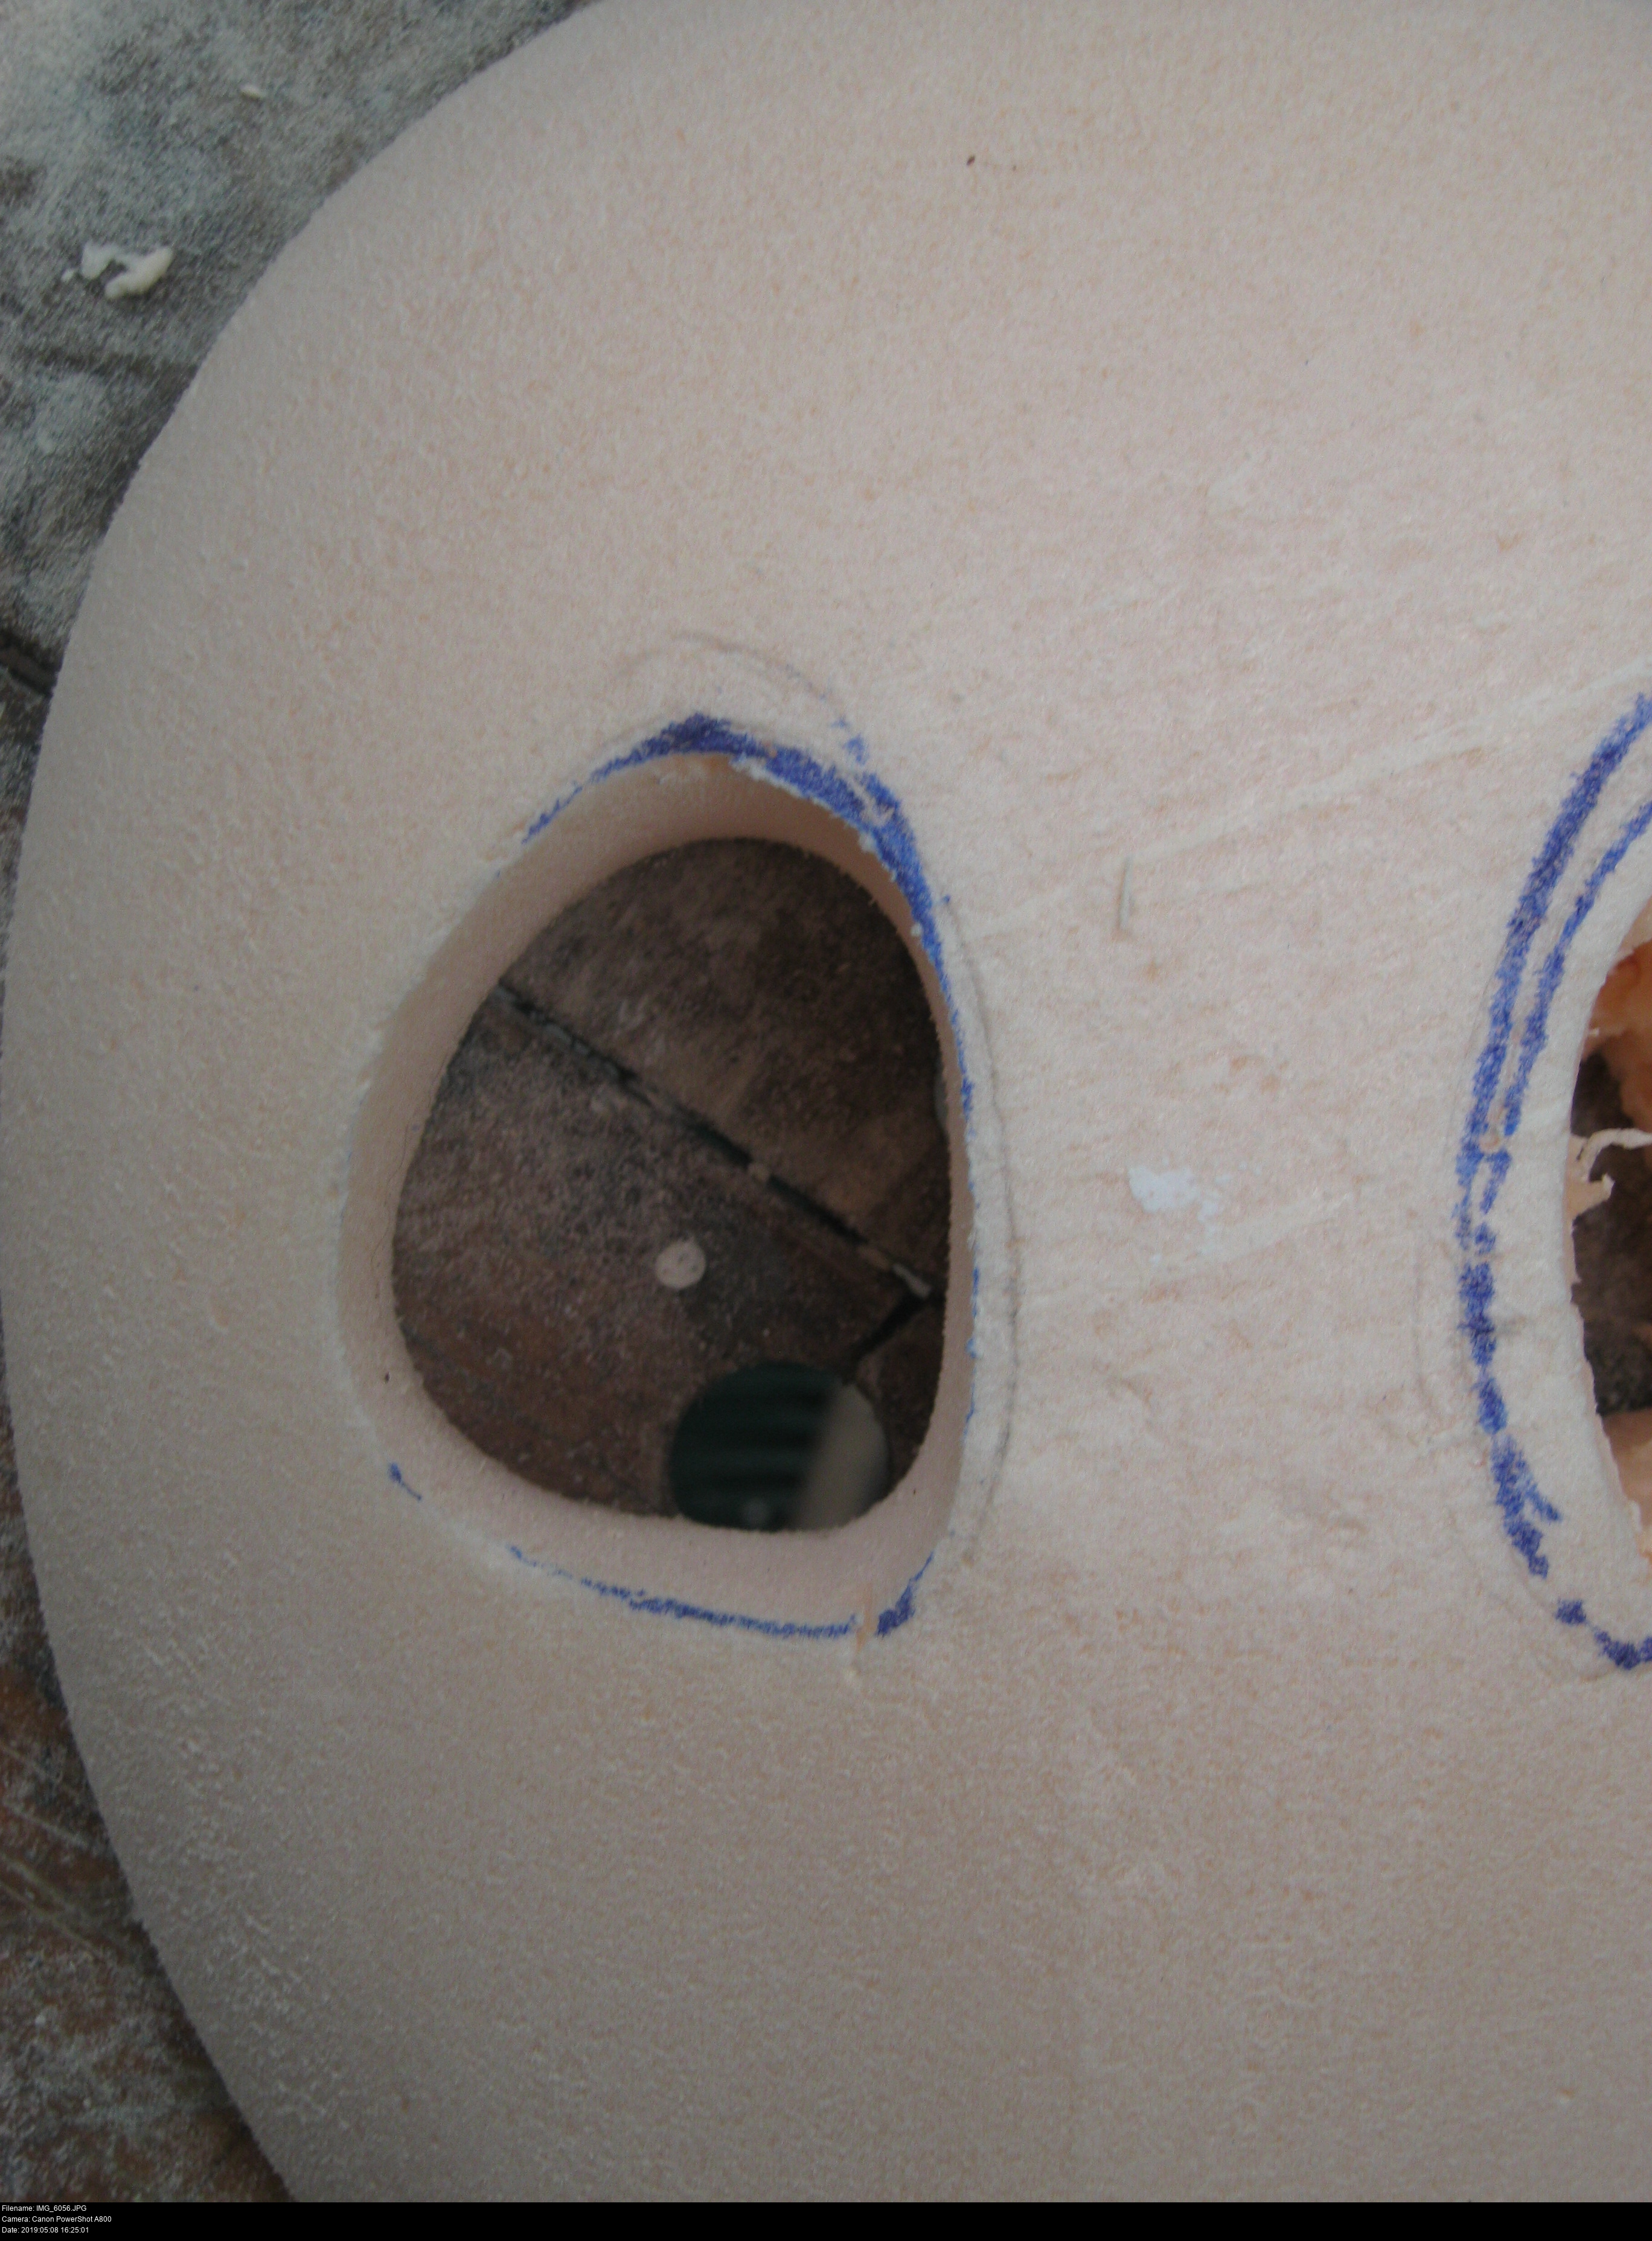
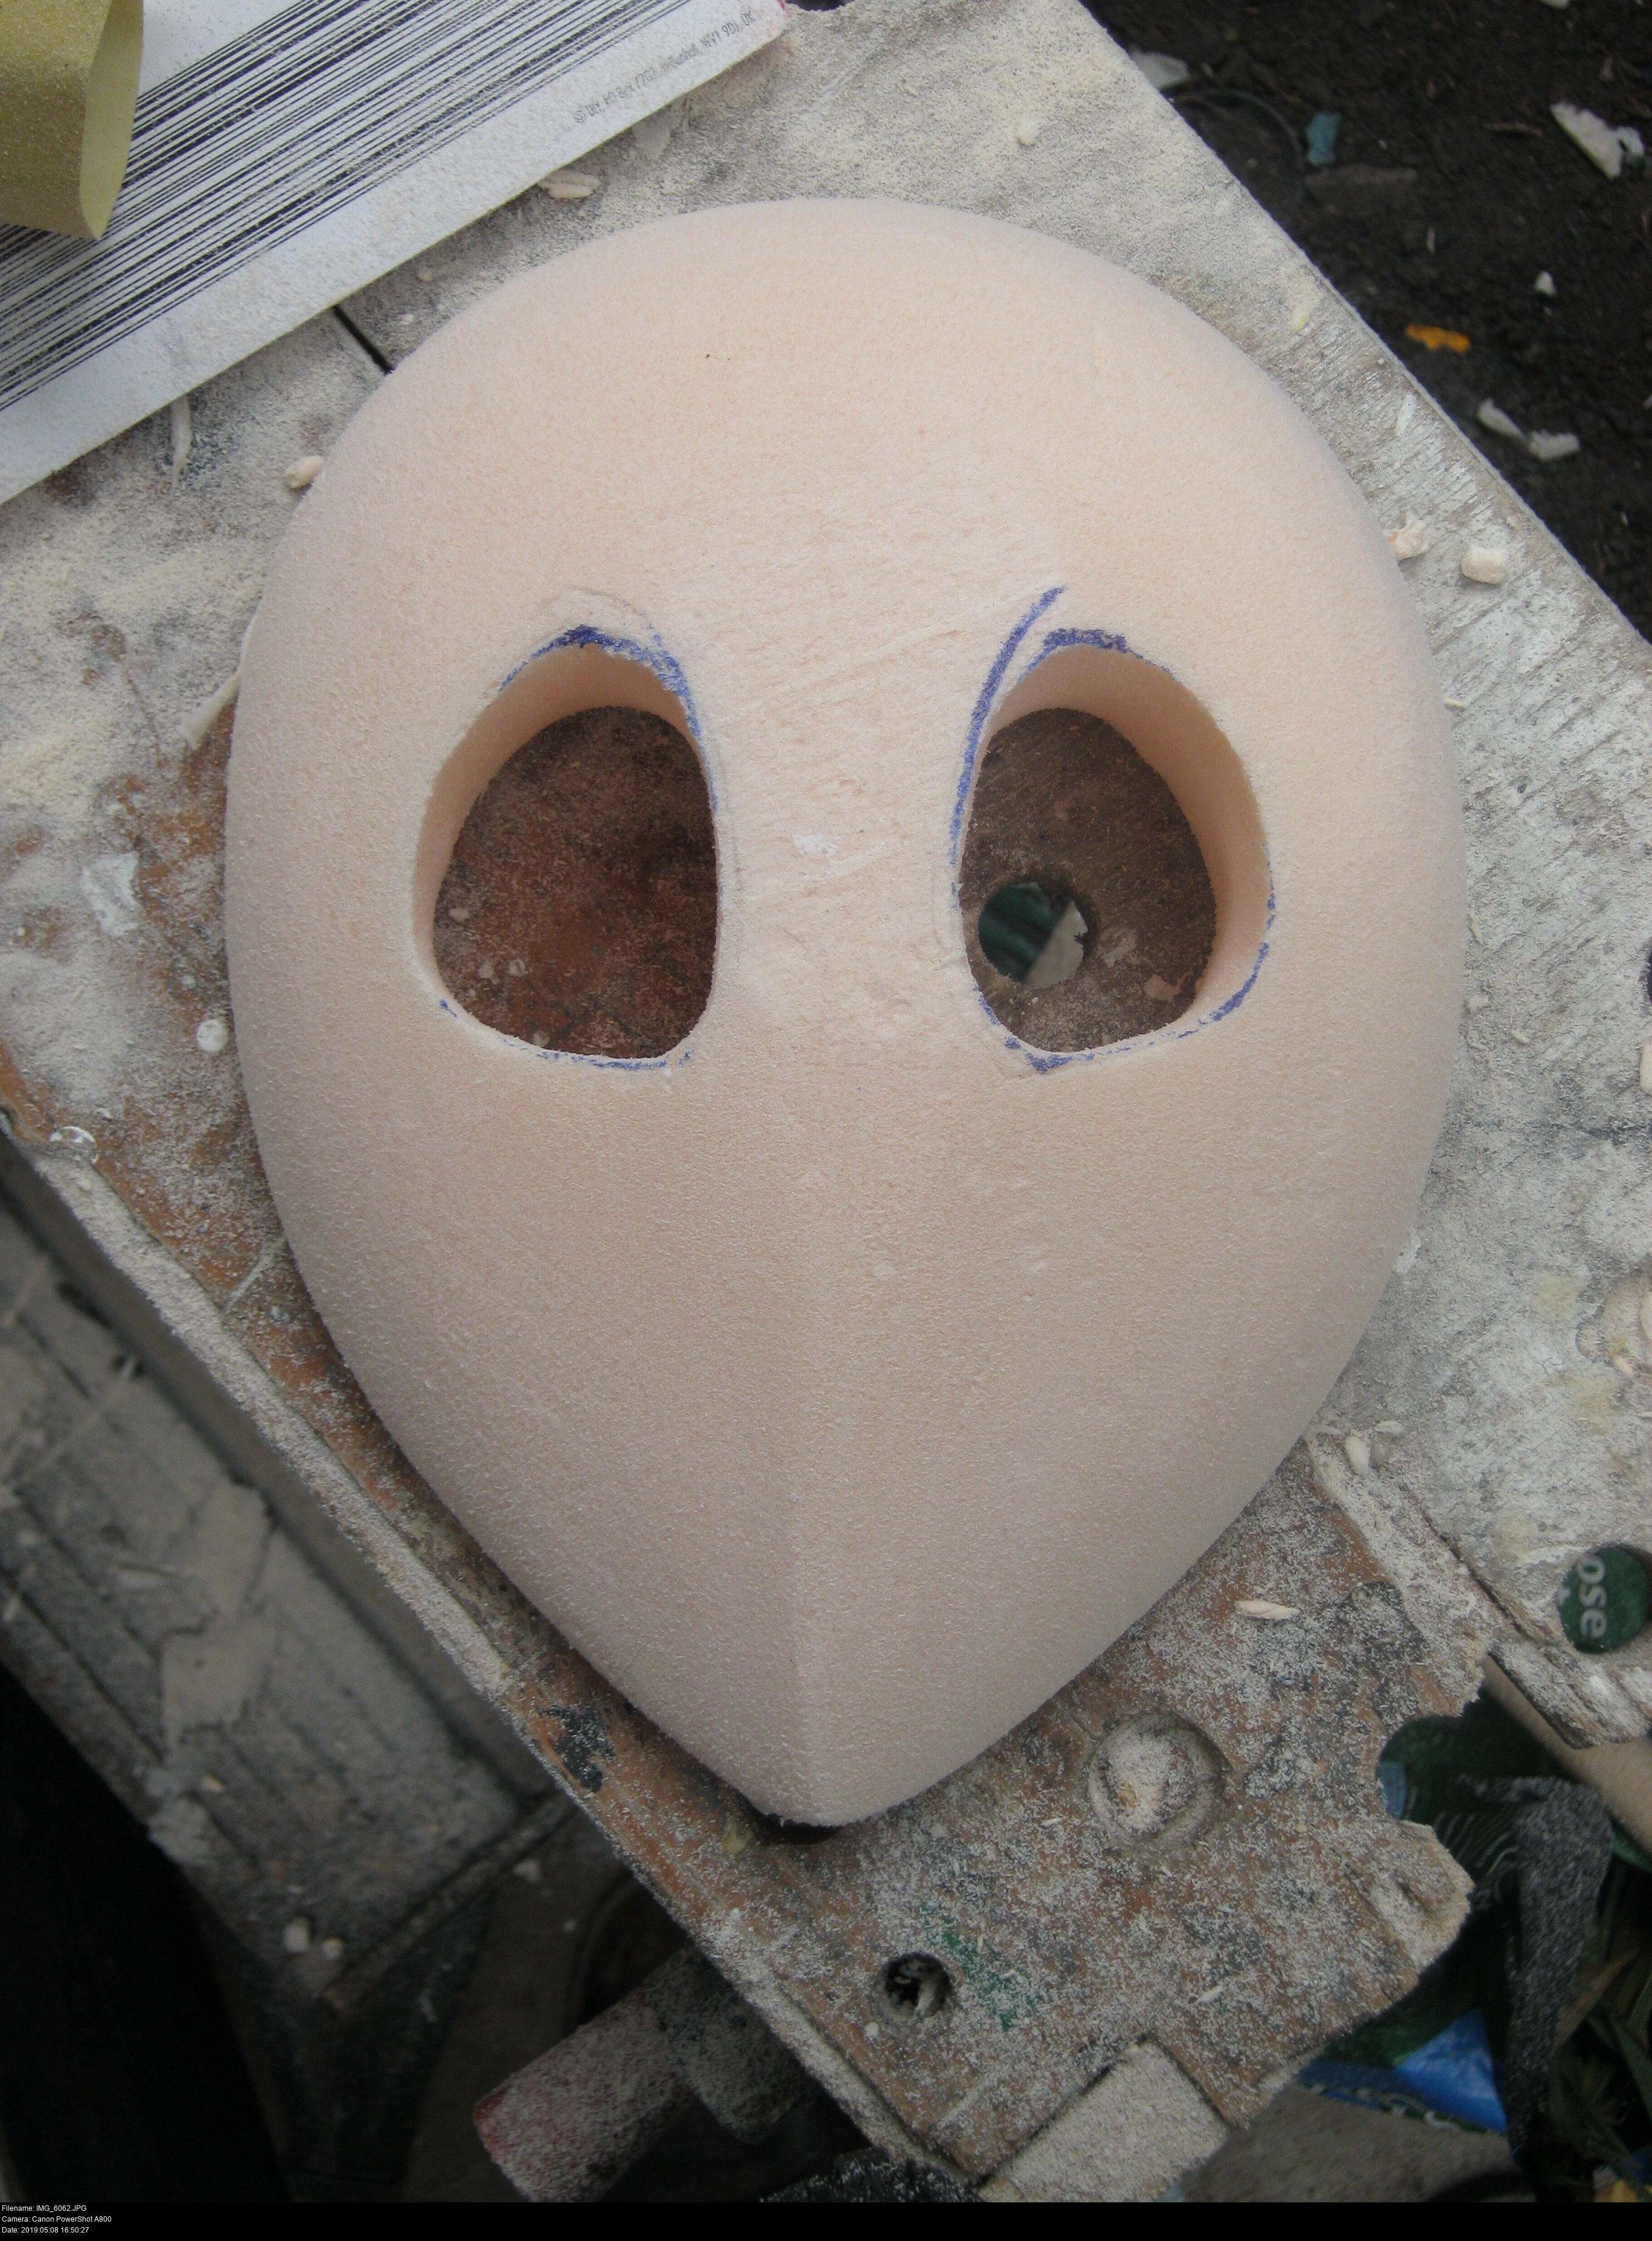
Remember a little way back when I drew the template for the concave regions I said that it would be a good idea to use a copy of them that's recessed slightly? That's what I did. So these perfectly formed cavities are -smaller- than what I originally intended. My choices are:
Keep them as they are because they're even, consistent, symmetrical and nice.
Attempt to expand then outwards to the size I originally intended.
I'm going to choose the first option because it's easier and safer and faster. What I've got is a lot better than screwing things up now. Perhaps the lesson here is that designing conservatively is great, but sometimes things just work out fine first time and trying to correct from 'safe' to 'perfect' is a step too far: it's okay to not be overly consevative if you're experienced. Given that I'd never used a rotary sanding bit before, I'm definitely justified in my method.
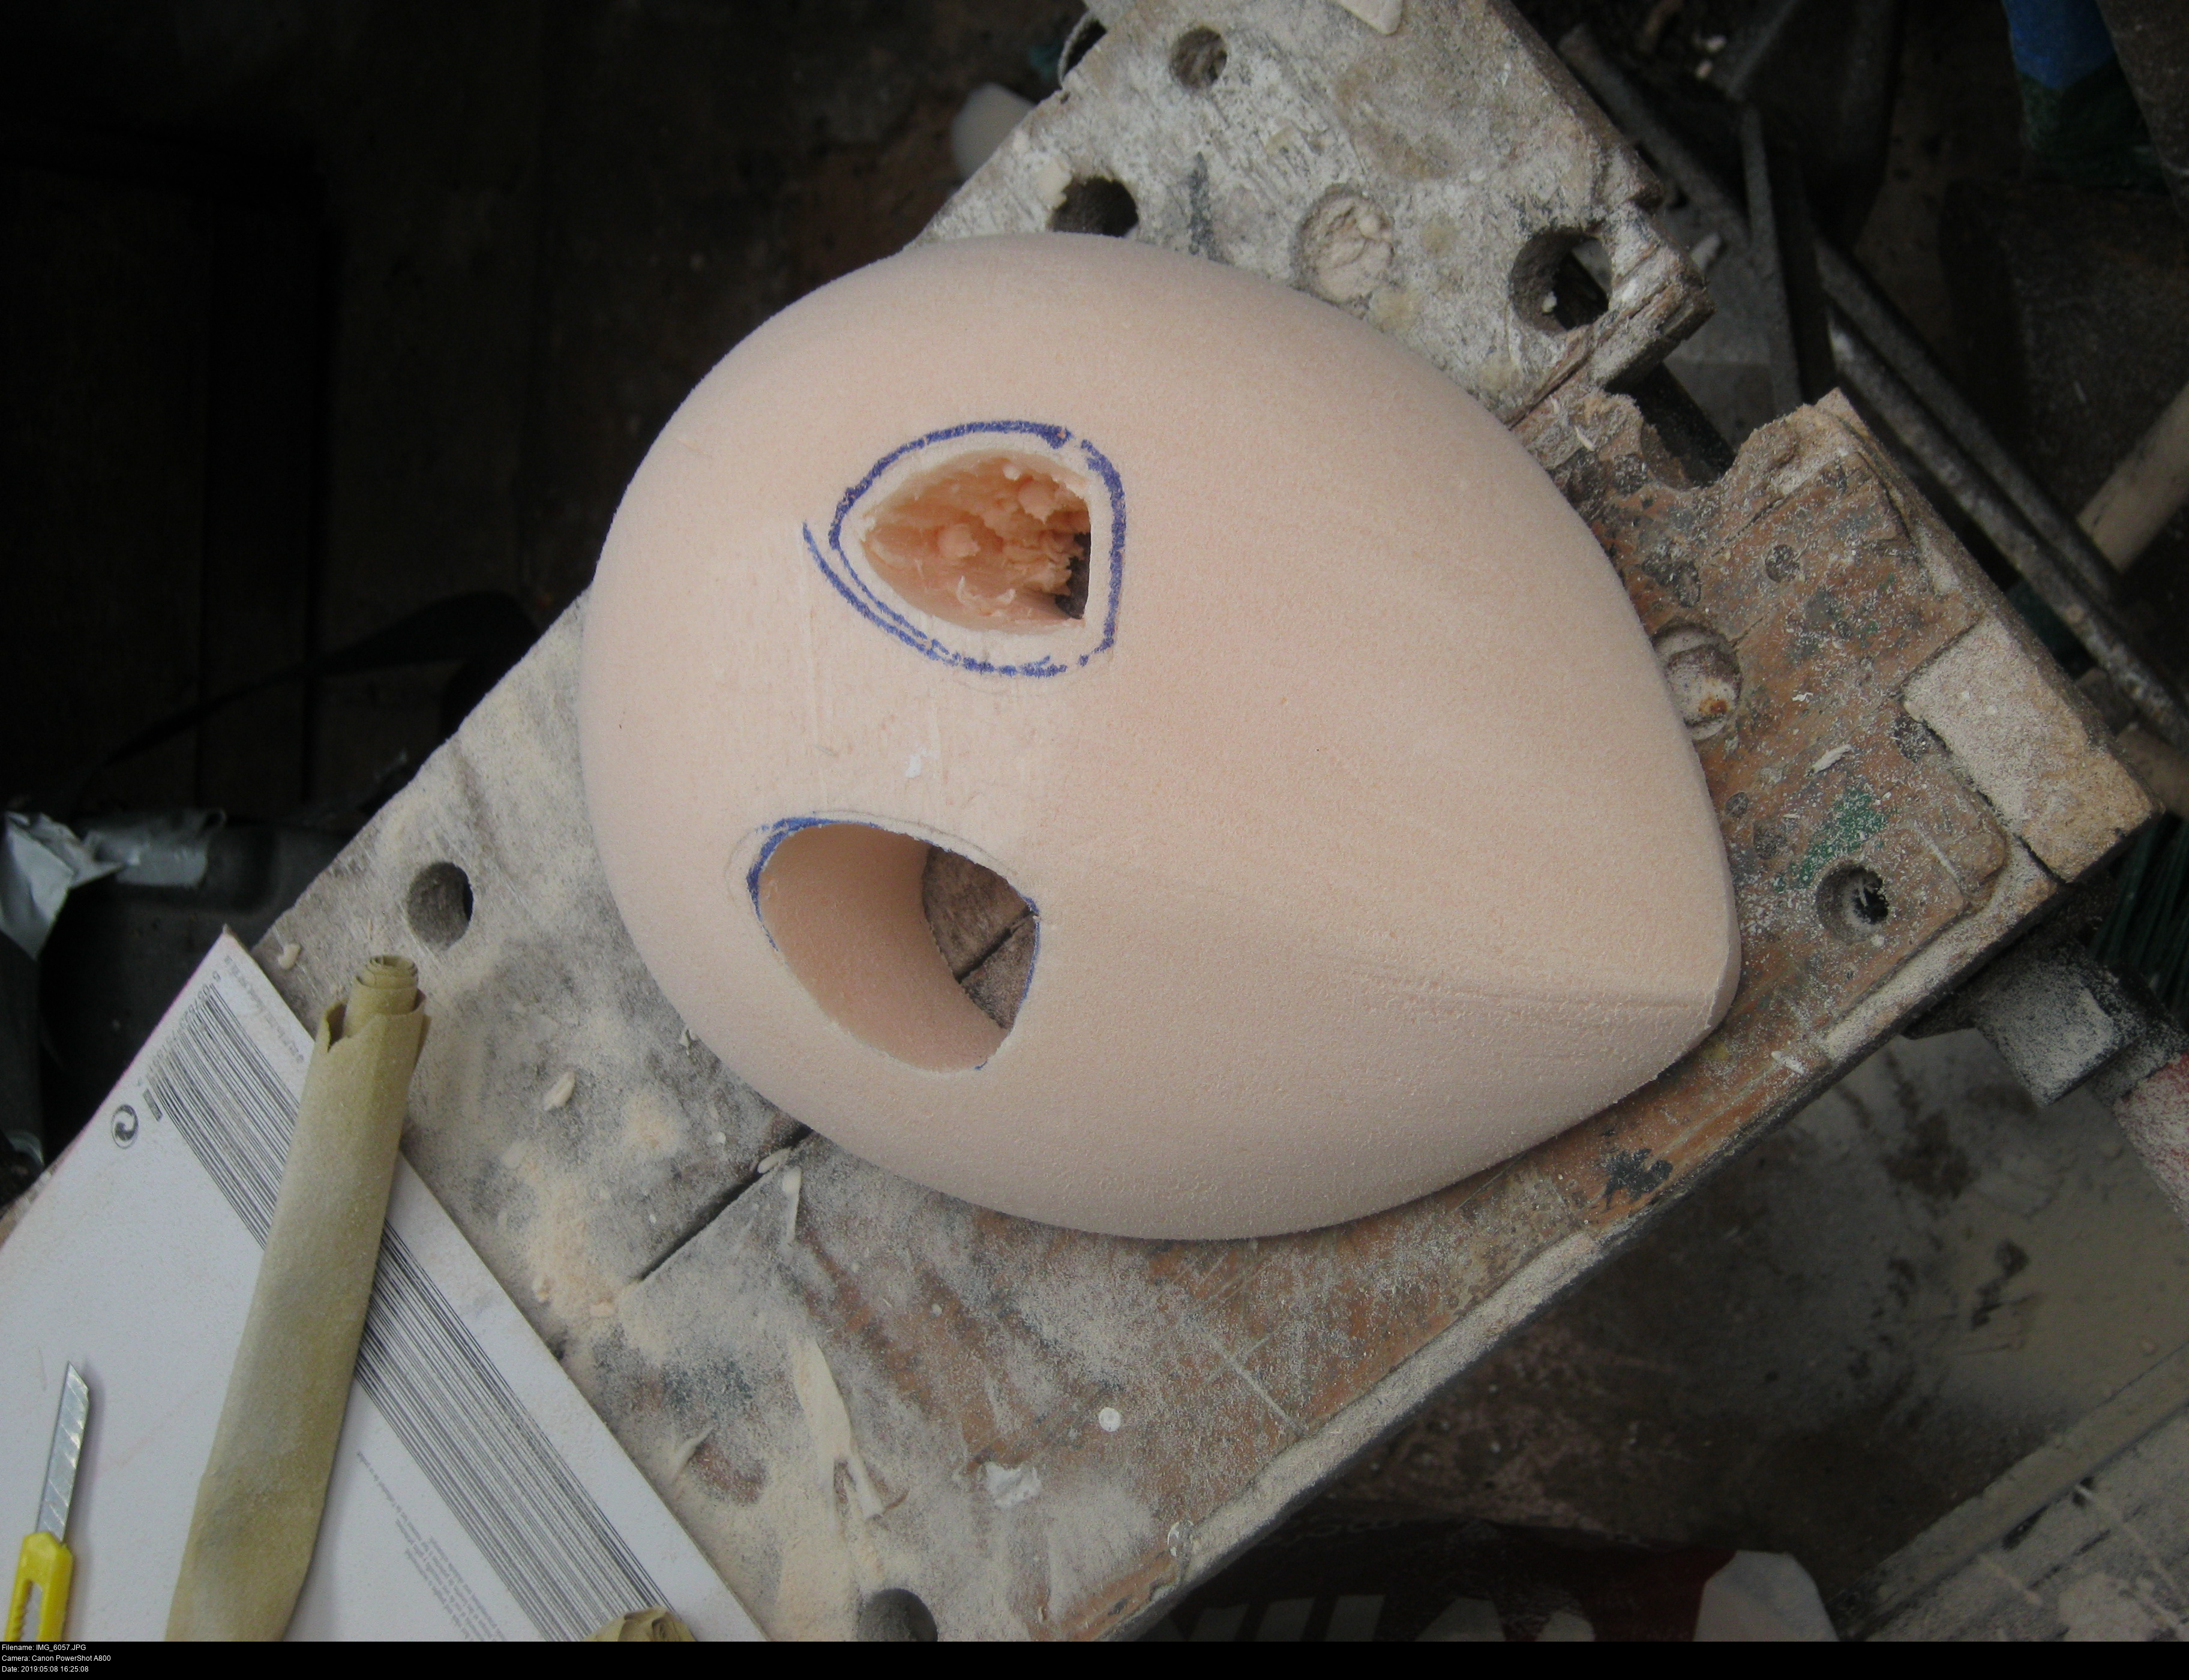
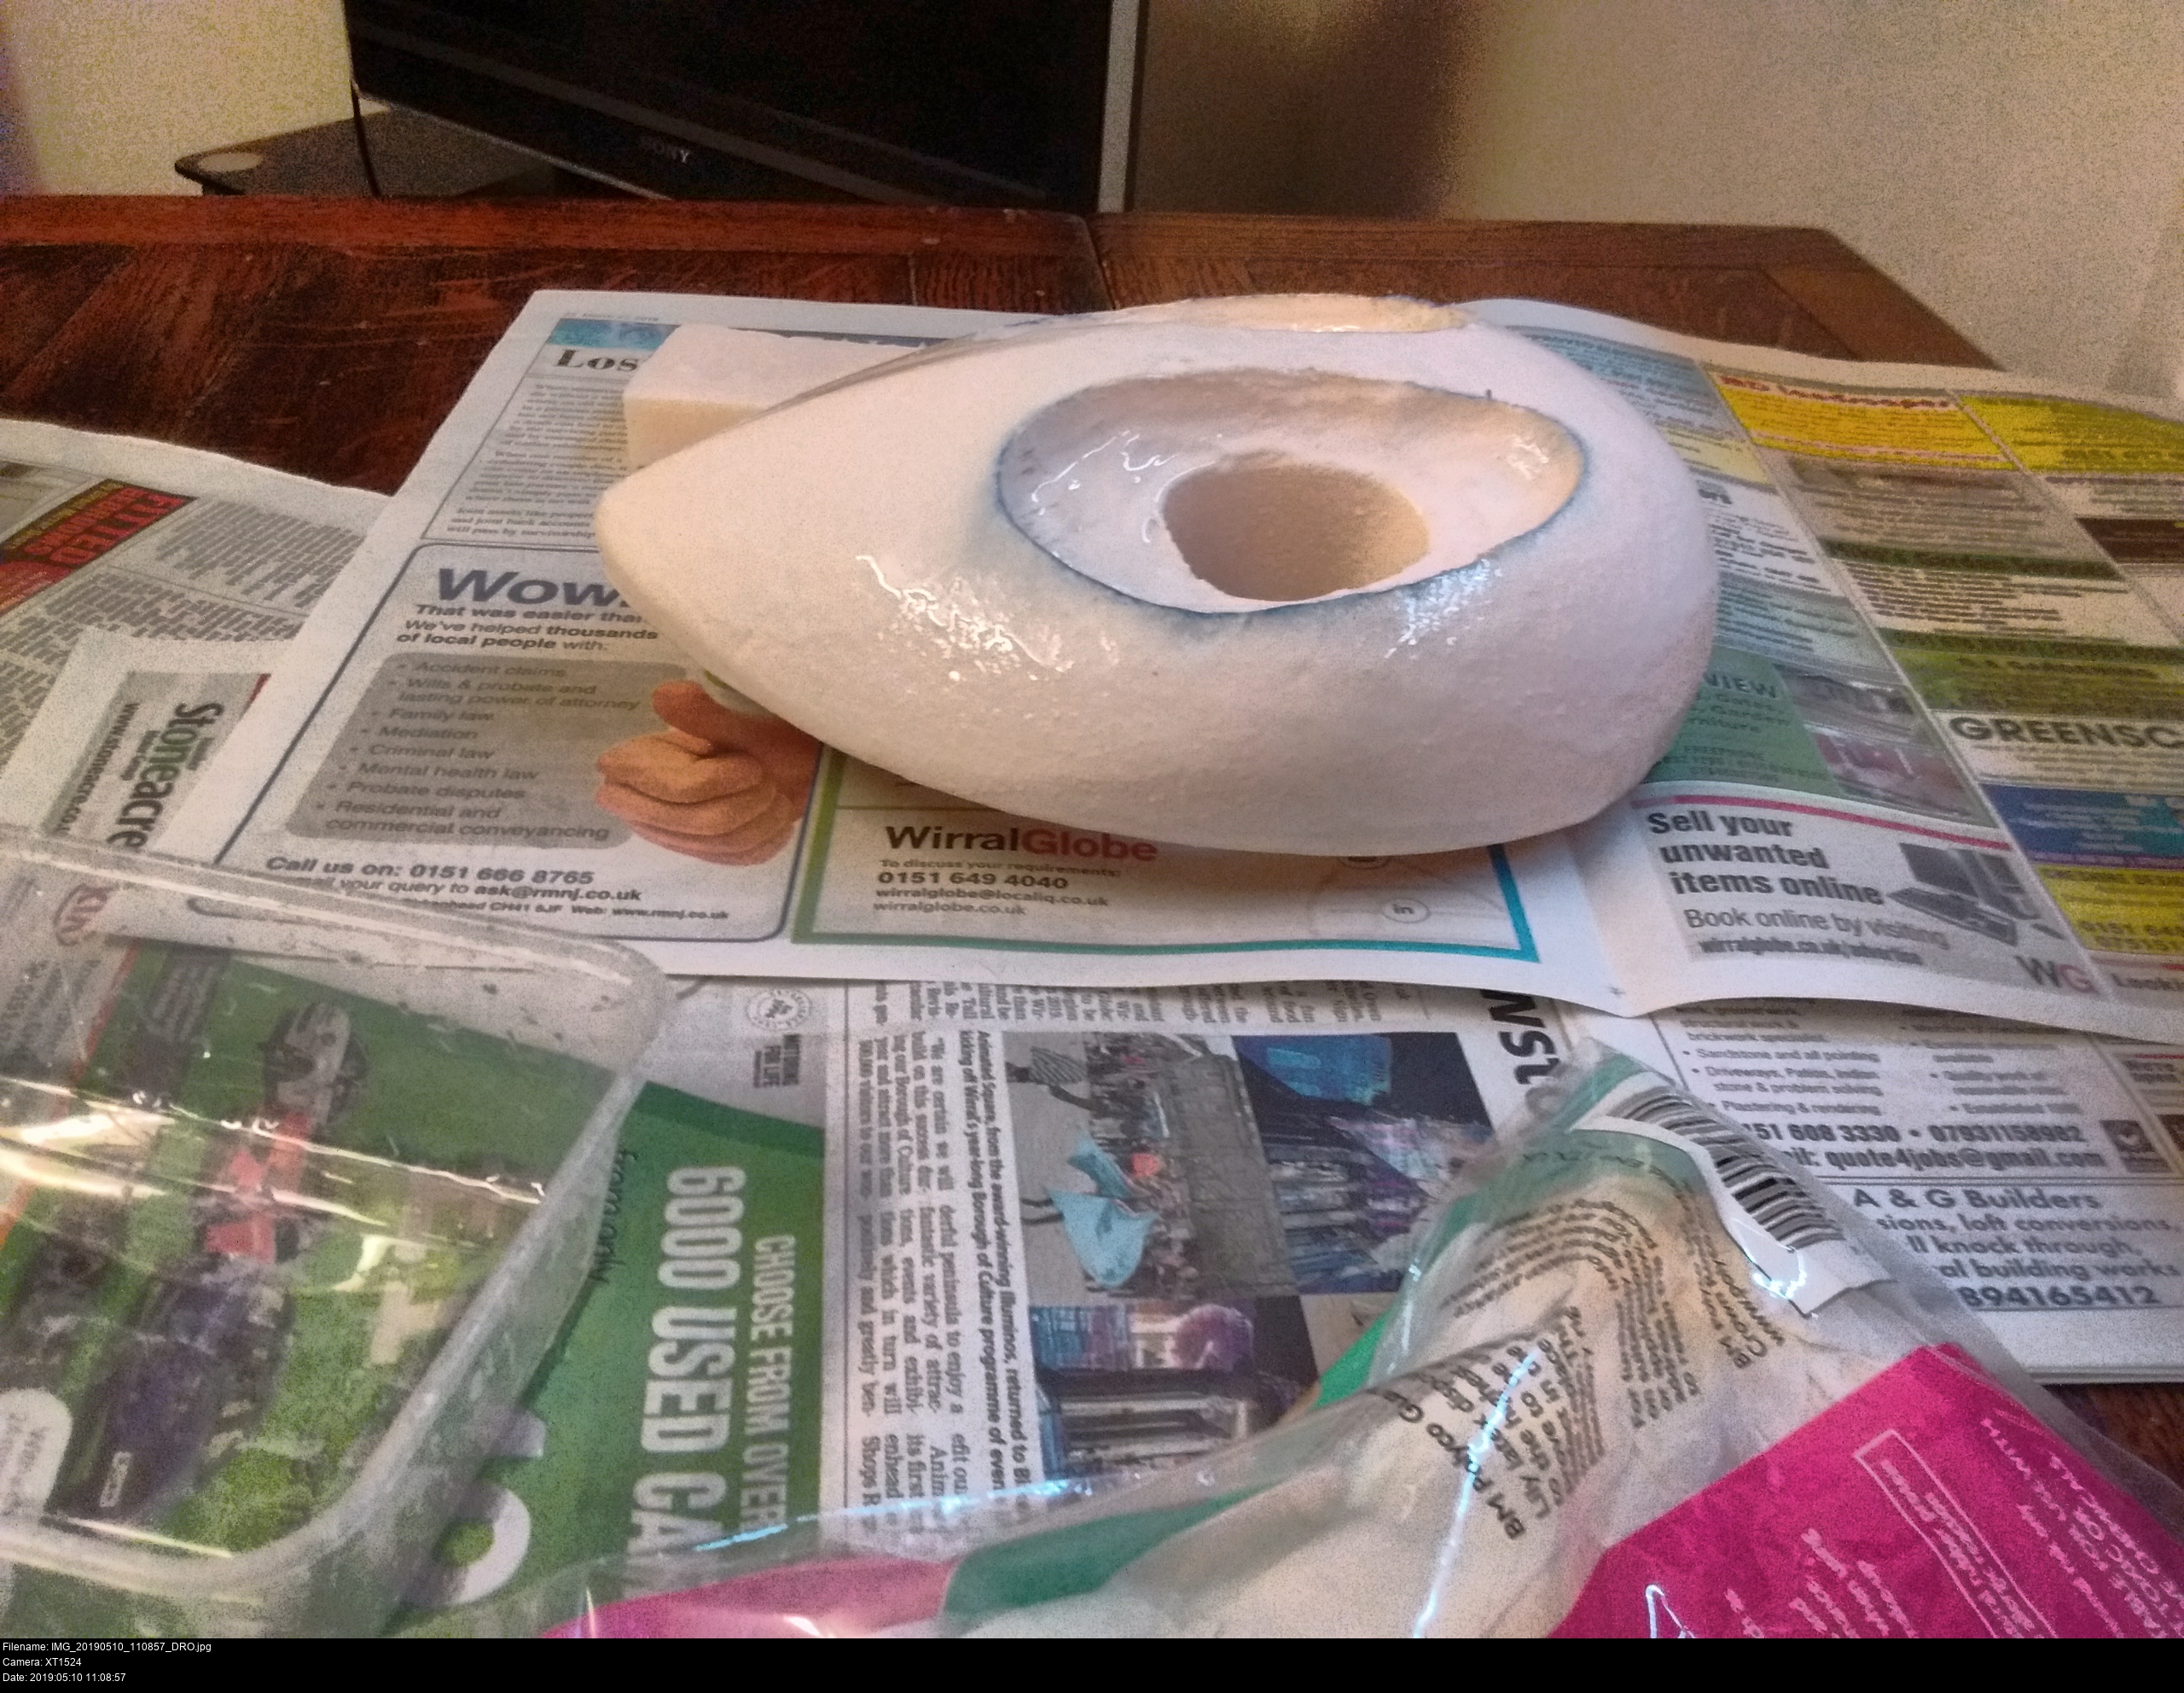
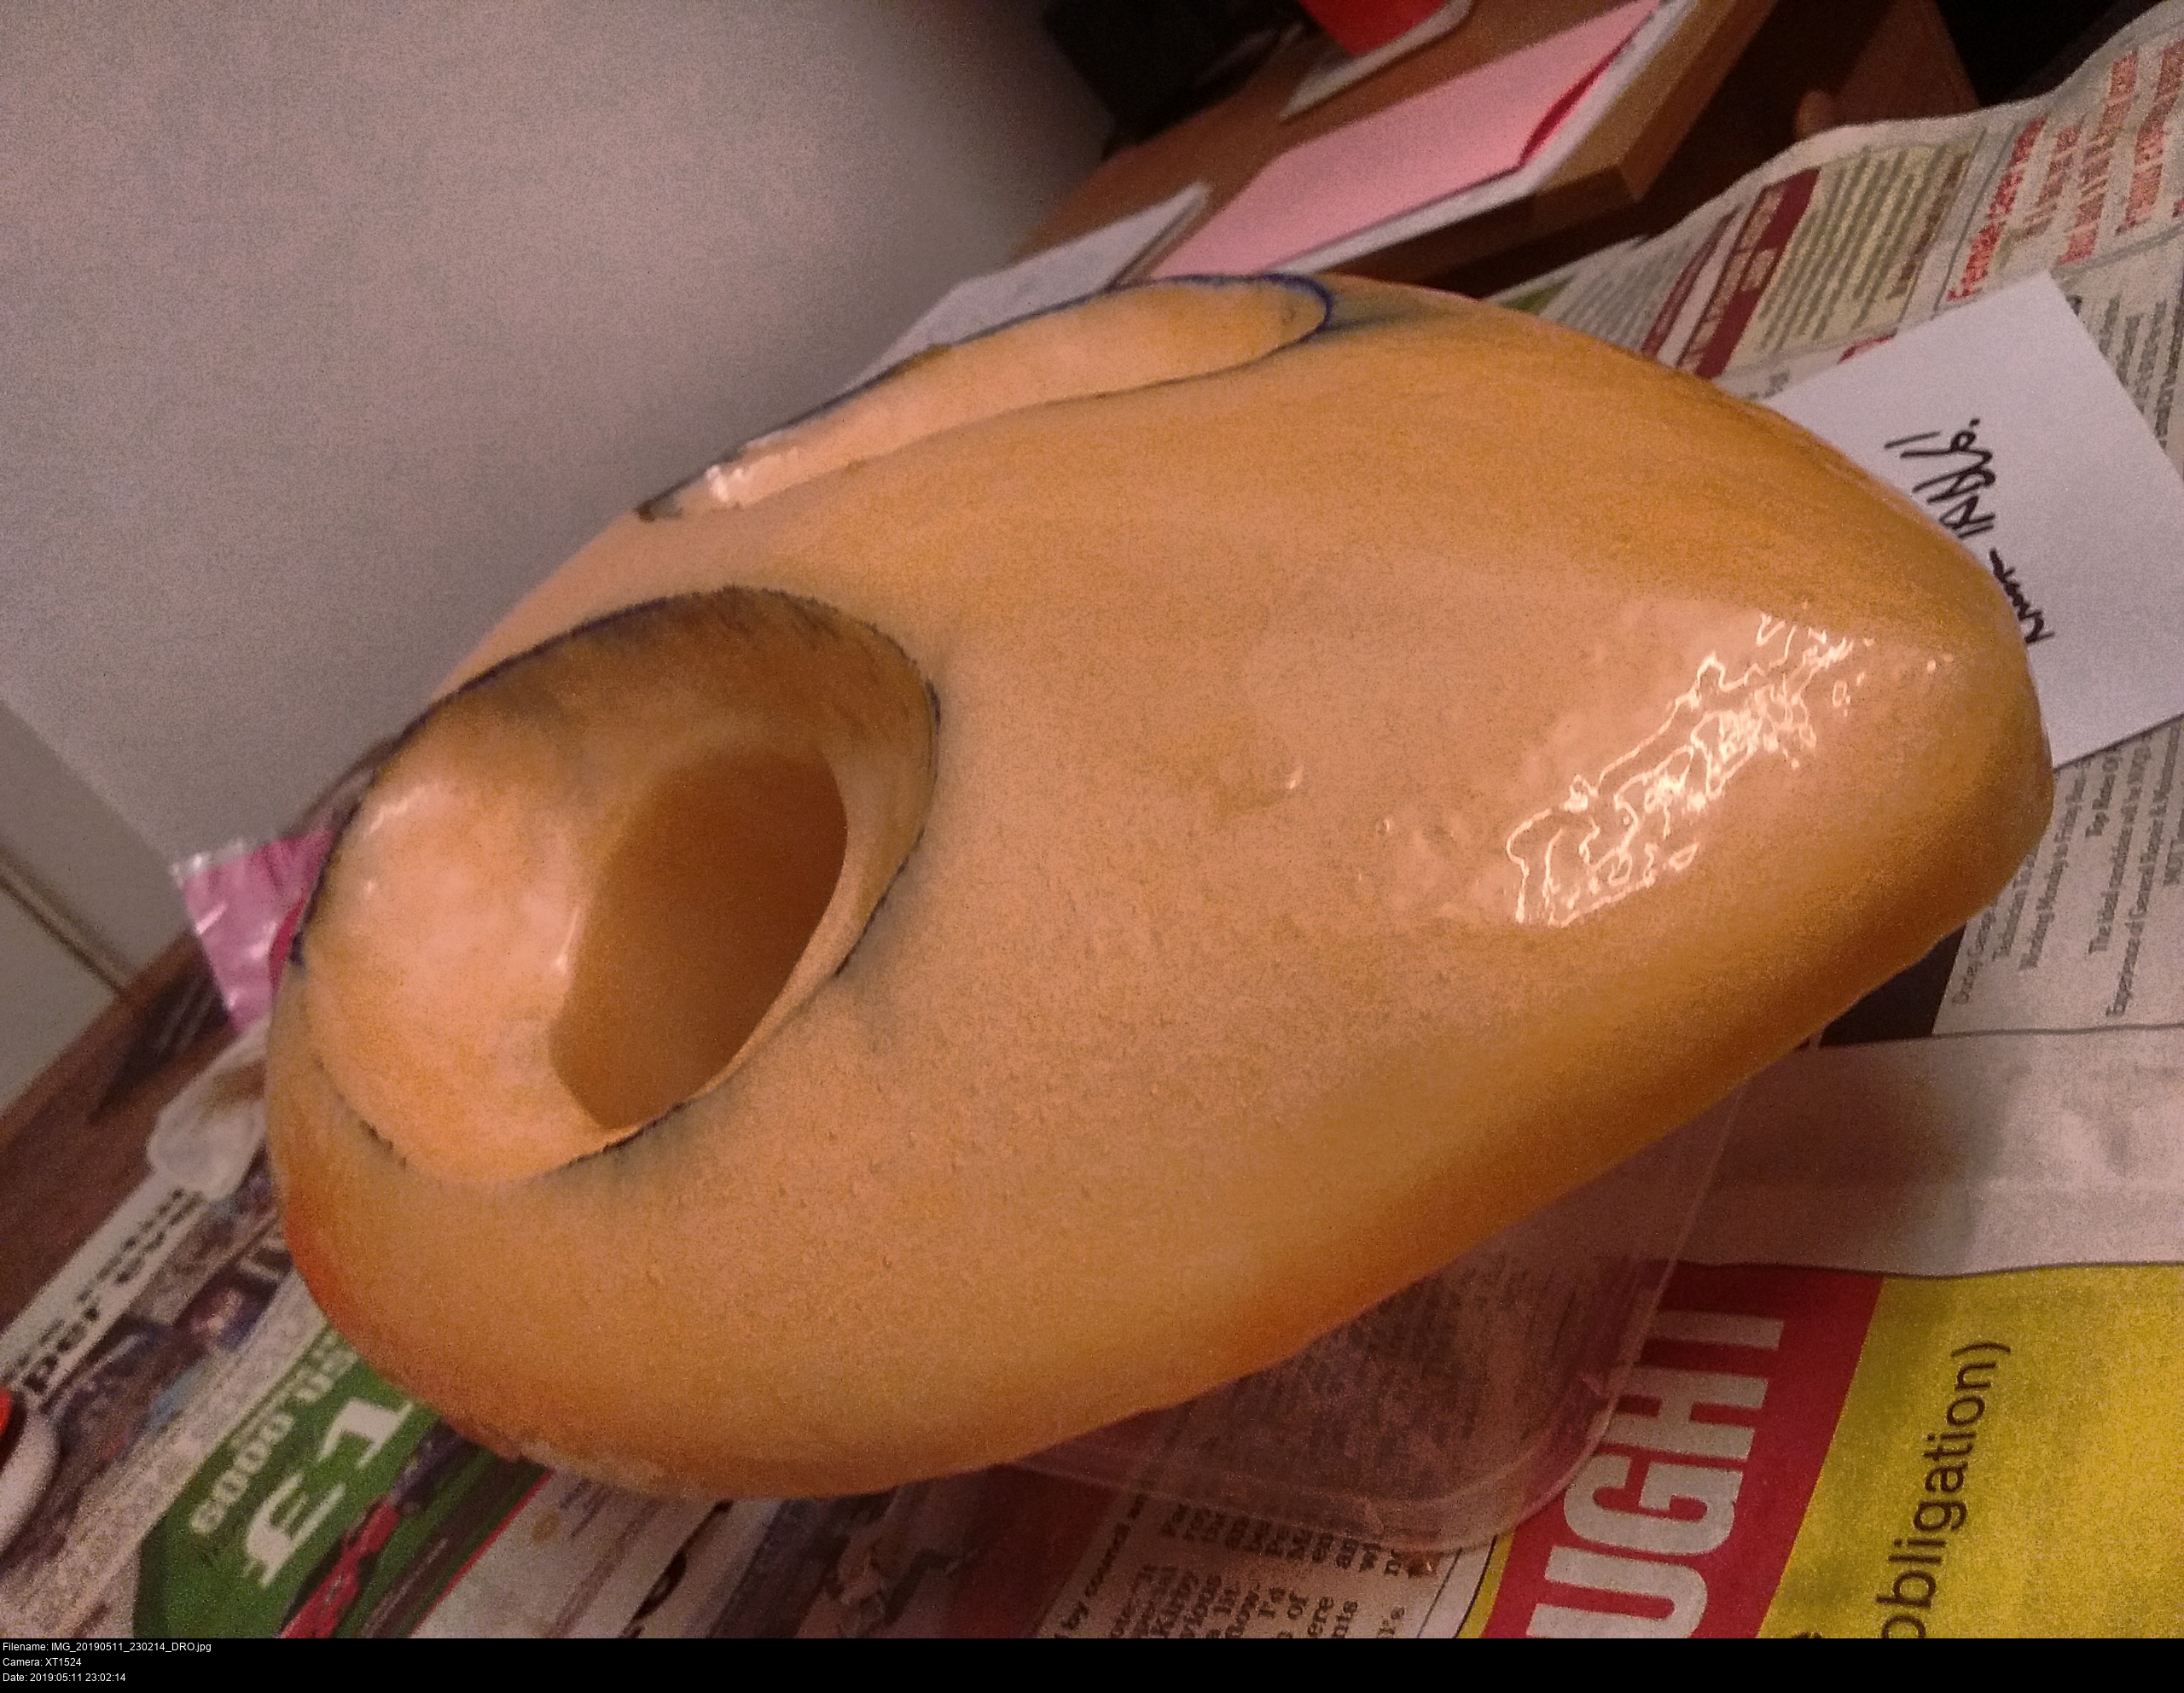
At this point, I also took some time to rotary tool out a nose cavity in the rear of the mask. If I decide to keep the inside of this thing totally flat, I want to still be able to wear it at least a little without my schnozz getting blonked.
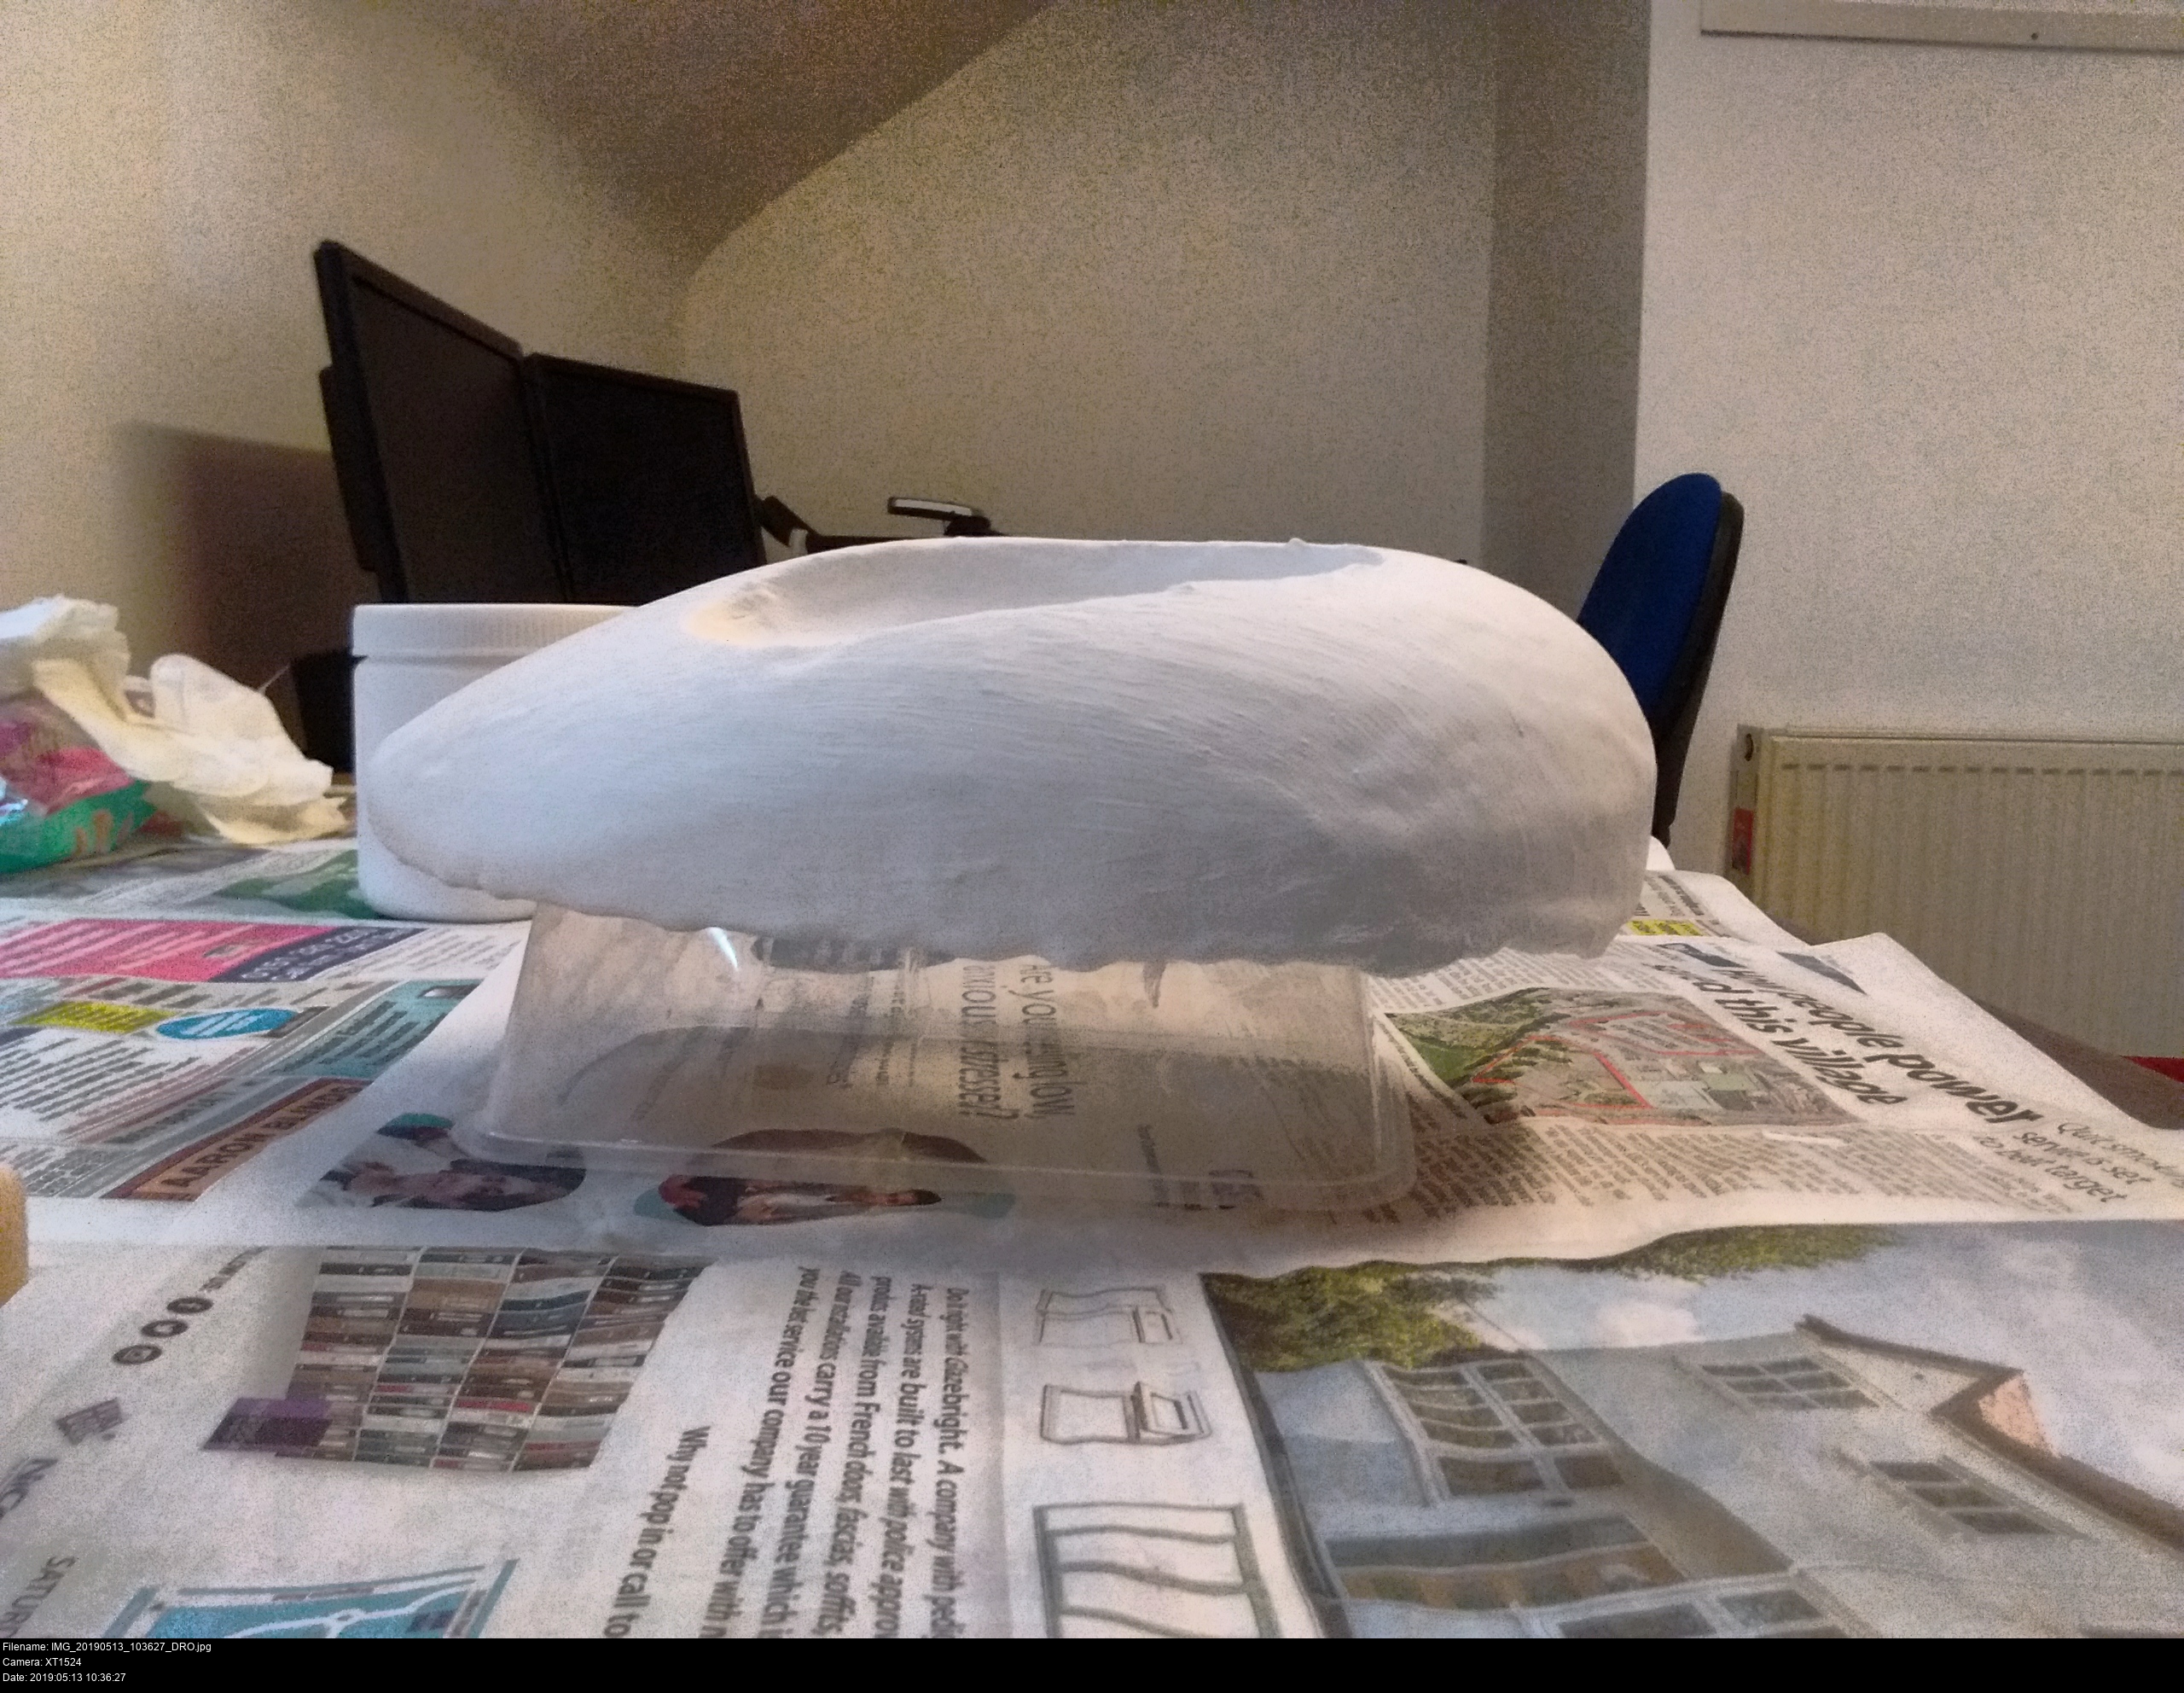
It's time! Time to take this thing out of the stinky shed and give it a delicate wipe and move it to somewhere a little nicer.
Stuff it's useful to have:
Newspaper.
Shallow disposable plastic resealable food trays.
Flat, long-bristled brushes.
Water.
Disposable gloves.
Gorilla Glue brand wood glue.
Scrap flat clean foam or blocks.
A lot of space: a large flat, clean table with lots of space surrounding it is best.
But before I move the mask, I'm going to put a lot of newspaper onto my nice drop-leaf craft table. Nobody likes glue, gesso or paint splats on their nice clean table where costumes are to be made. Wear gloves, don't touch a wet mask, and make sure to prepare some blocks of wood or foam to raise up the mask from the surface of the table.
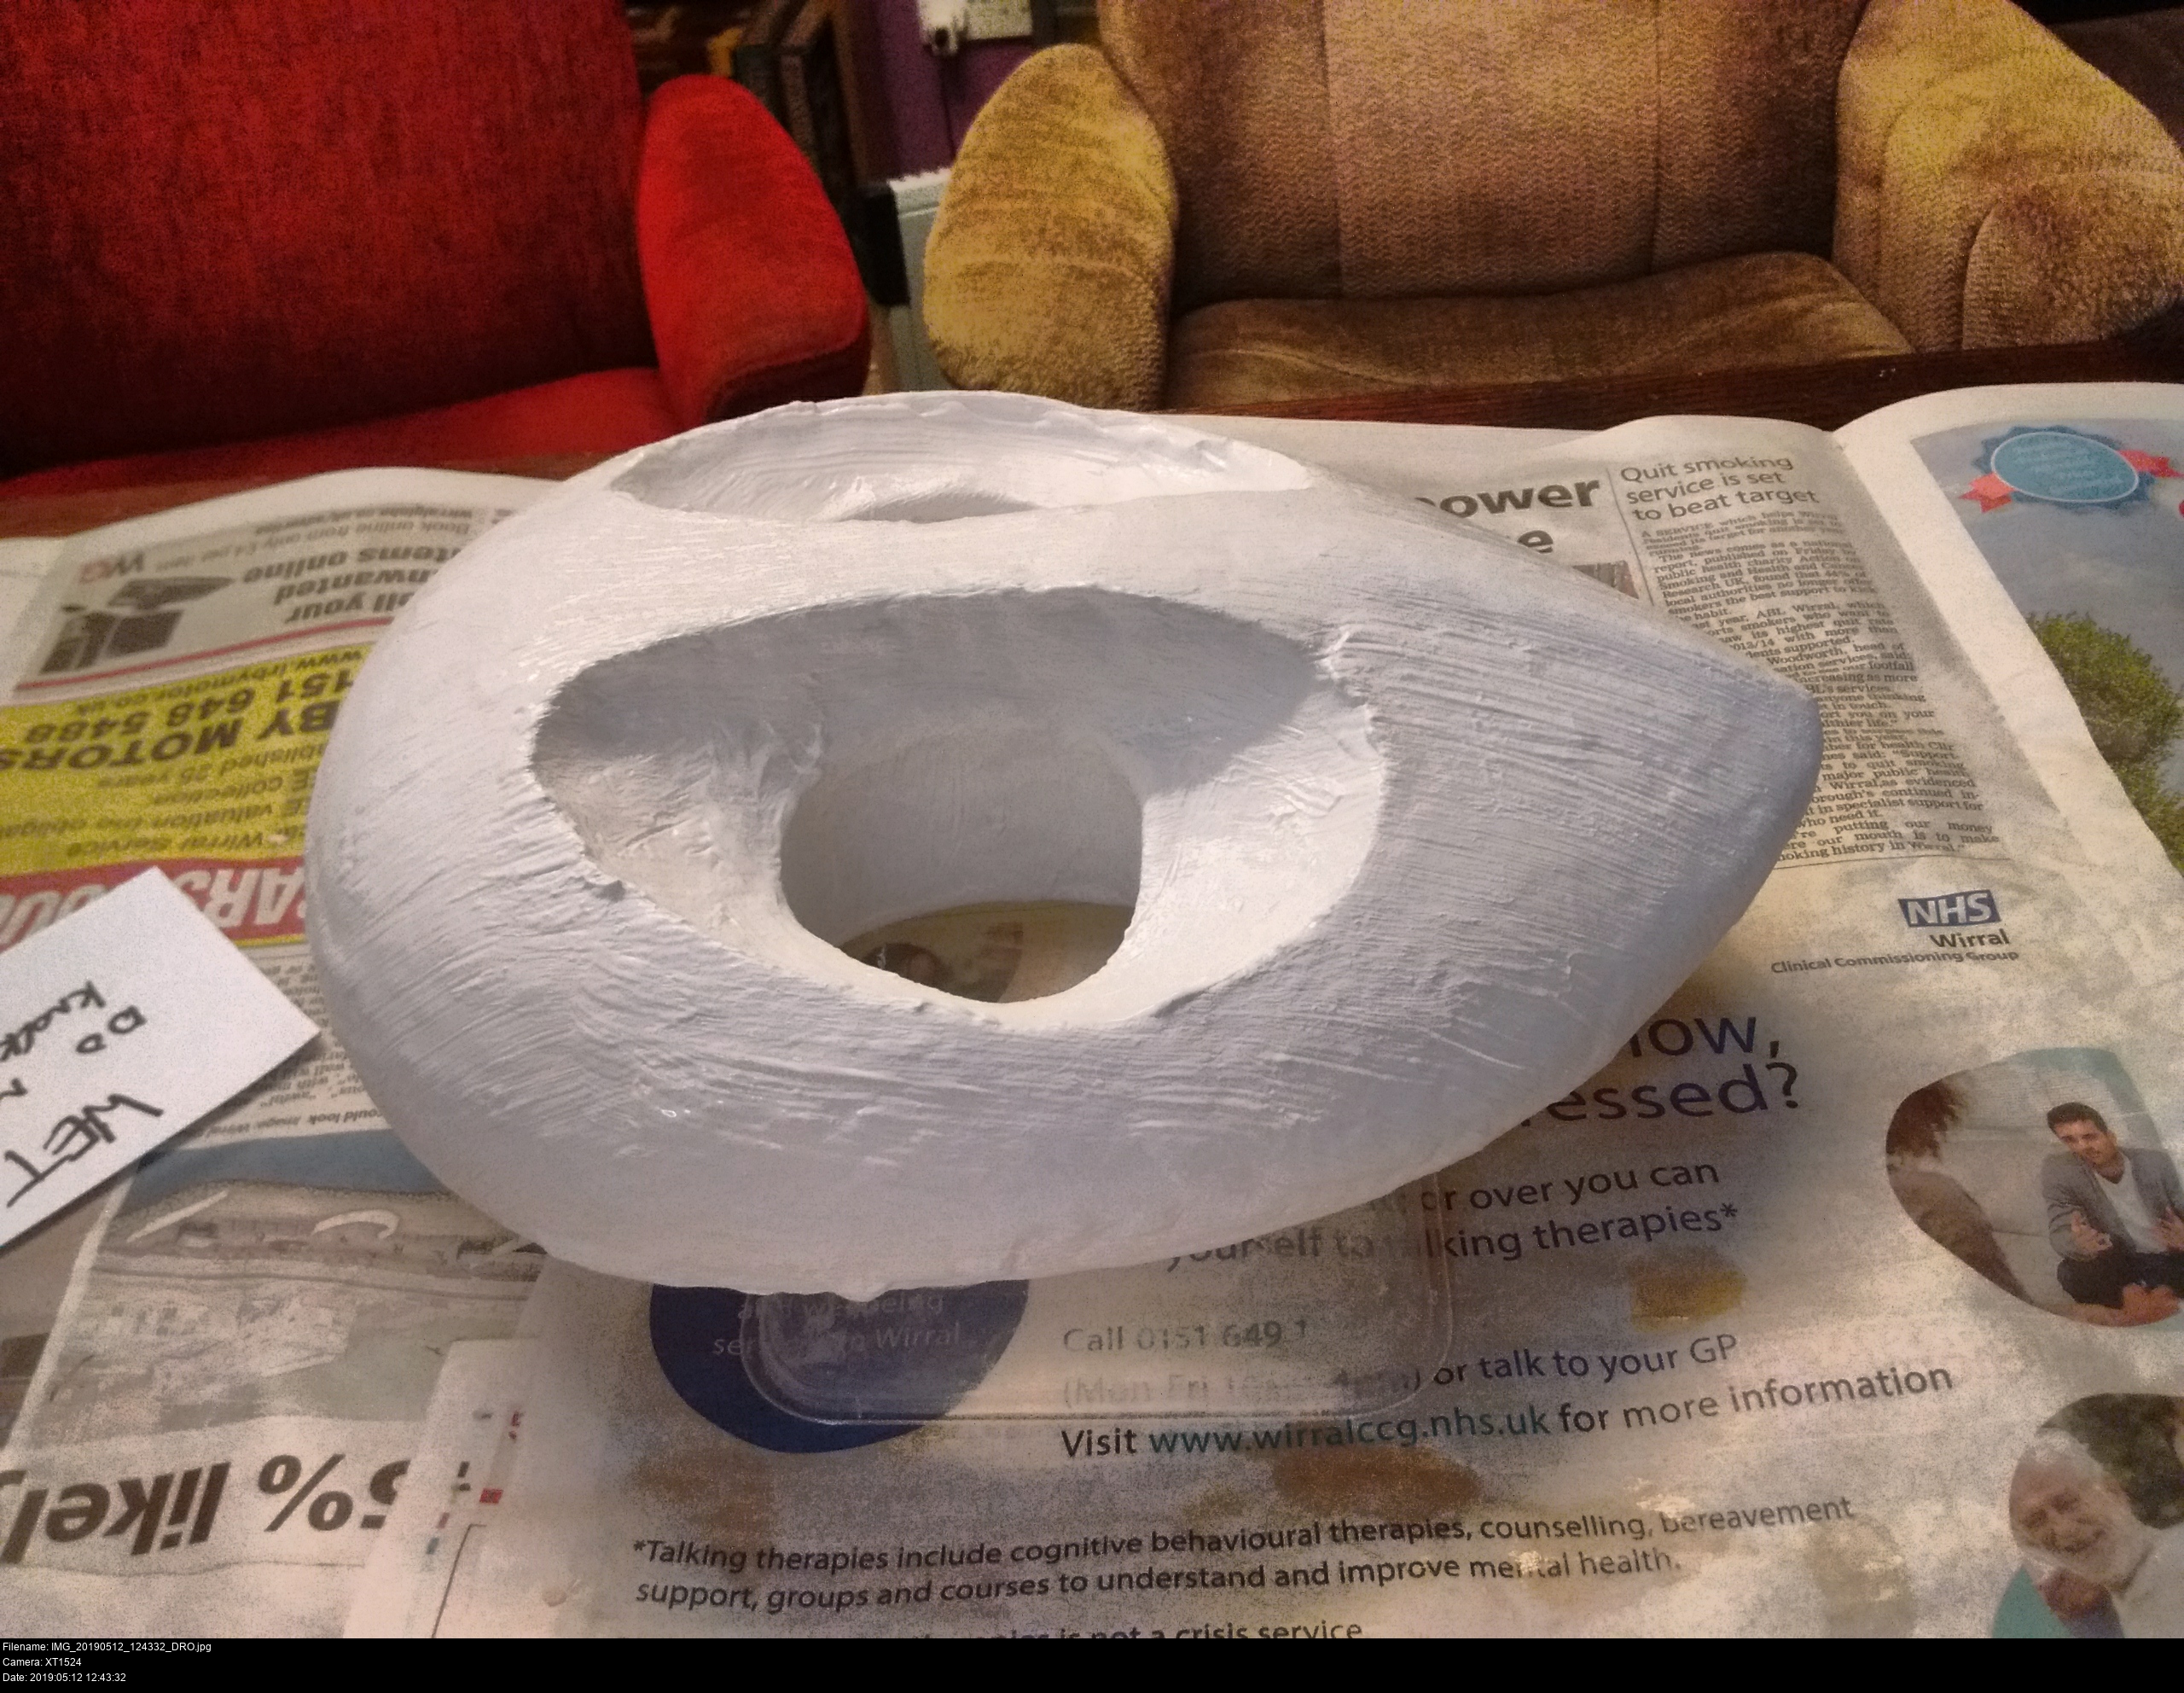
I'm using the Gorilla Glue brand wood glue, since I'm familiar with it. I use it neat: pour it out into a tray and use a flat, wide brush to apply a thin even coat over the upper surface of the mask, and the interior of the eyeholes.
If you apply too much glue, it will drip over the edge and form small lumpy stalactites, which is no good at all. Of course, that happened to me all over the place with Majora's Mask and it's happening here too. Oh well.
It's hard to express just how goopy and messy and shiny this mask has become now. As soon as you apply any glue, try to touch the mask as little as possible. I held it in one hand with my fingers through one eyehole holding it like a palette as I did the first side, then I had to carefully place it in its drying position and complete the coat.
The glue settles on top, seeps in a little, and smoothes itself out after it's applied.
Wash your brushes and tray thoroughly and look after them. Look on the label of your glue to see how long it takes to be touch dry (then don't ever actually touch it) and how long it takes to fully cure (and then double it because it probably wasn't meant to be used like this).
GG wood glue has a 30 minute grip time and a 24 hour cure time. I'm going to see how hard it becomes after twelve hours. I can get four coats done in forty-eight hours that way. That's the opposite of what I said above, but whatcha gonna do?

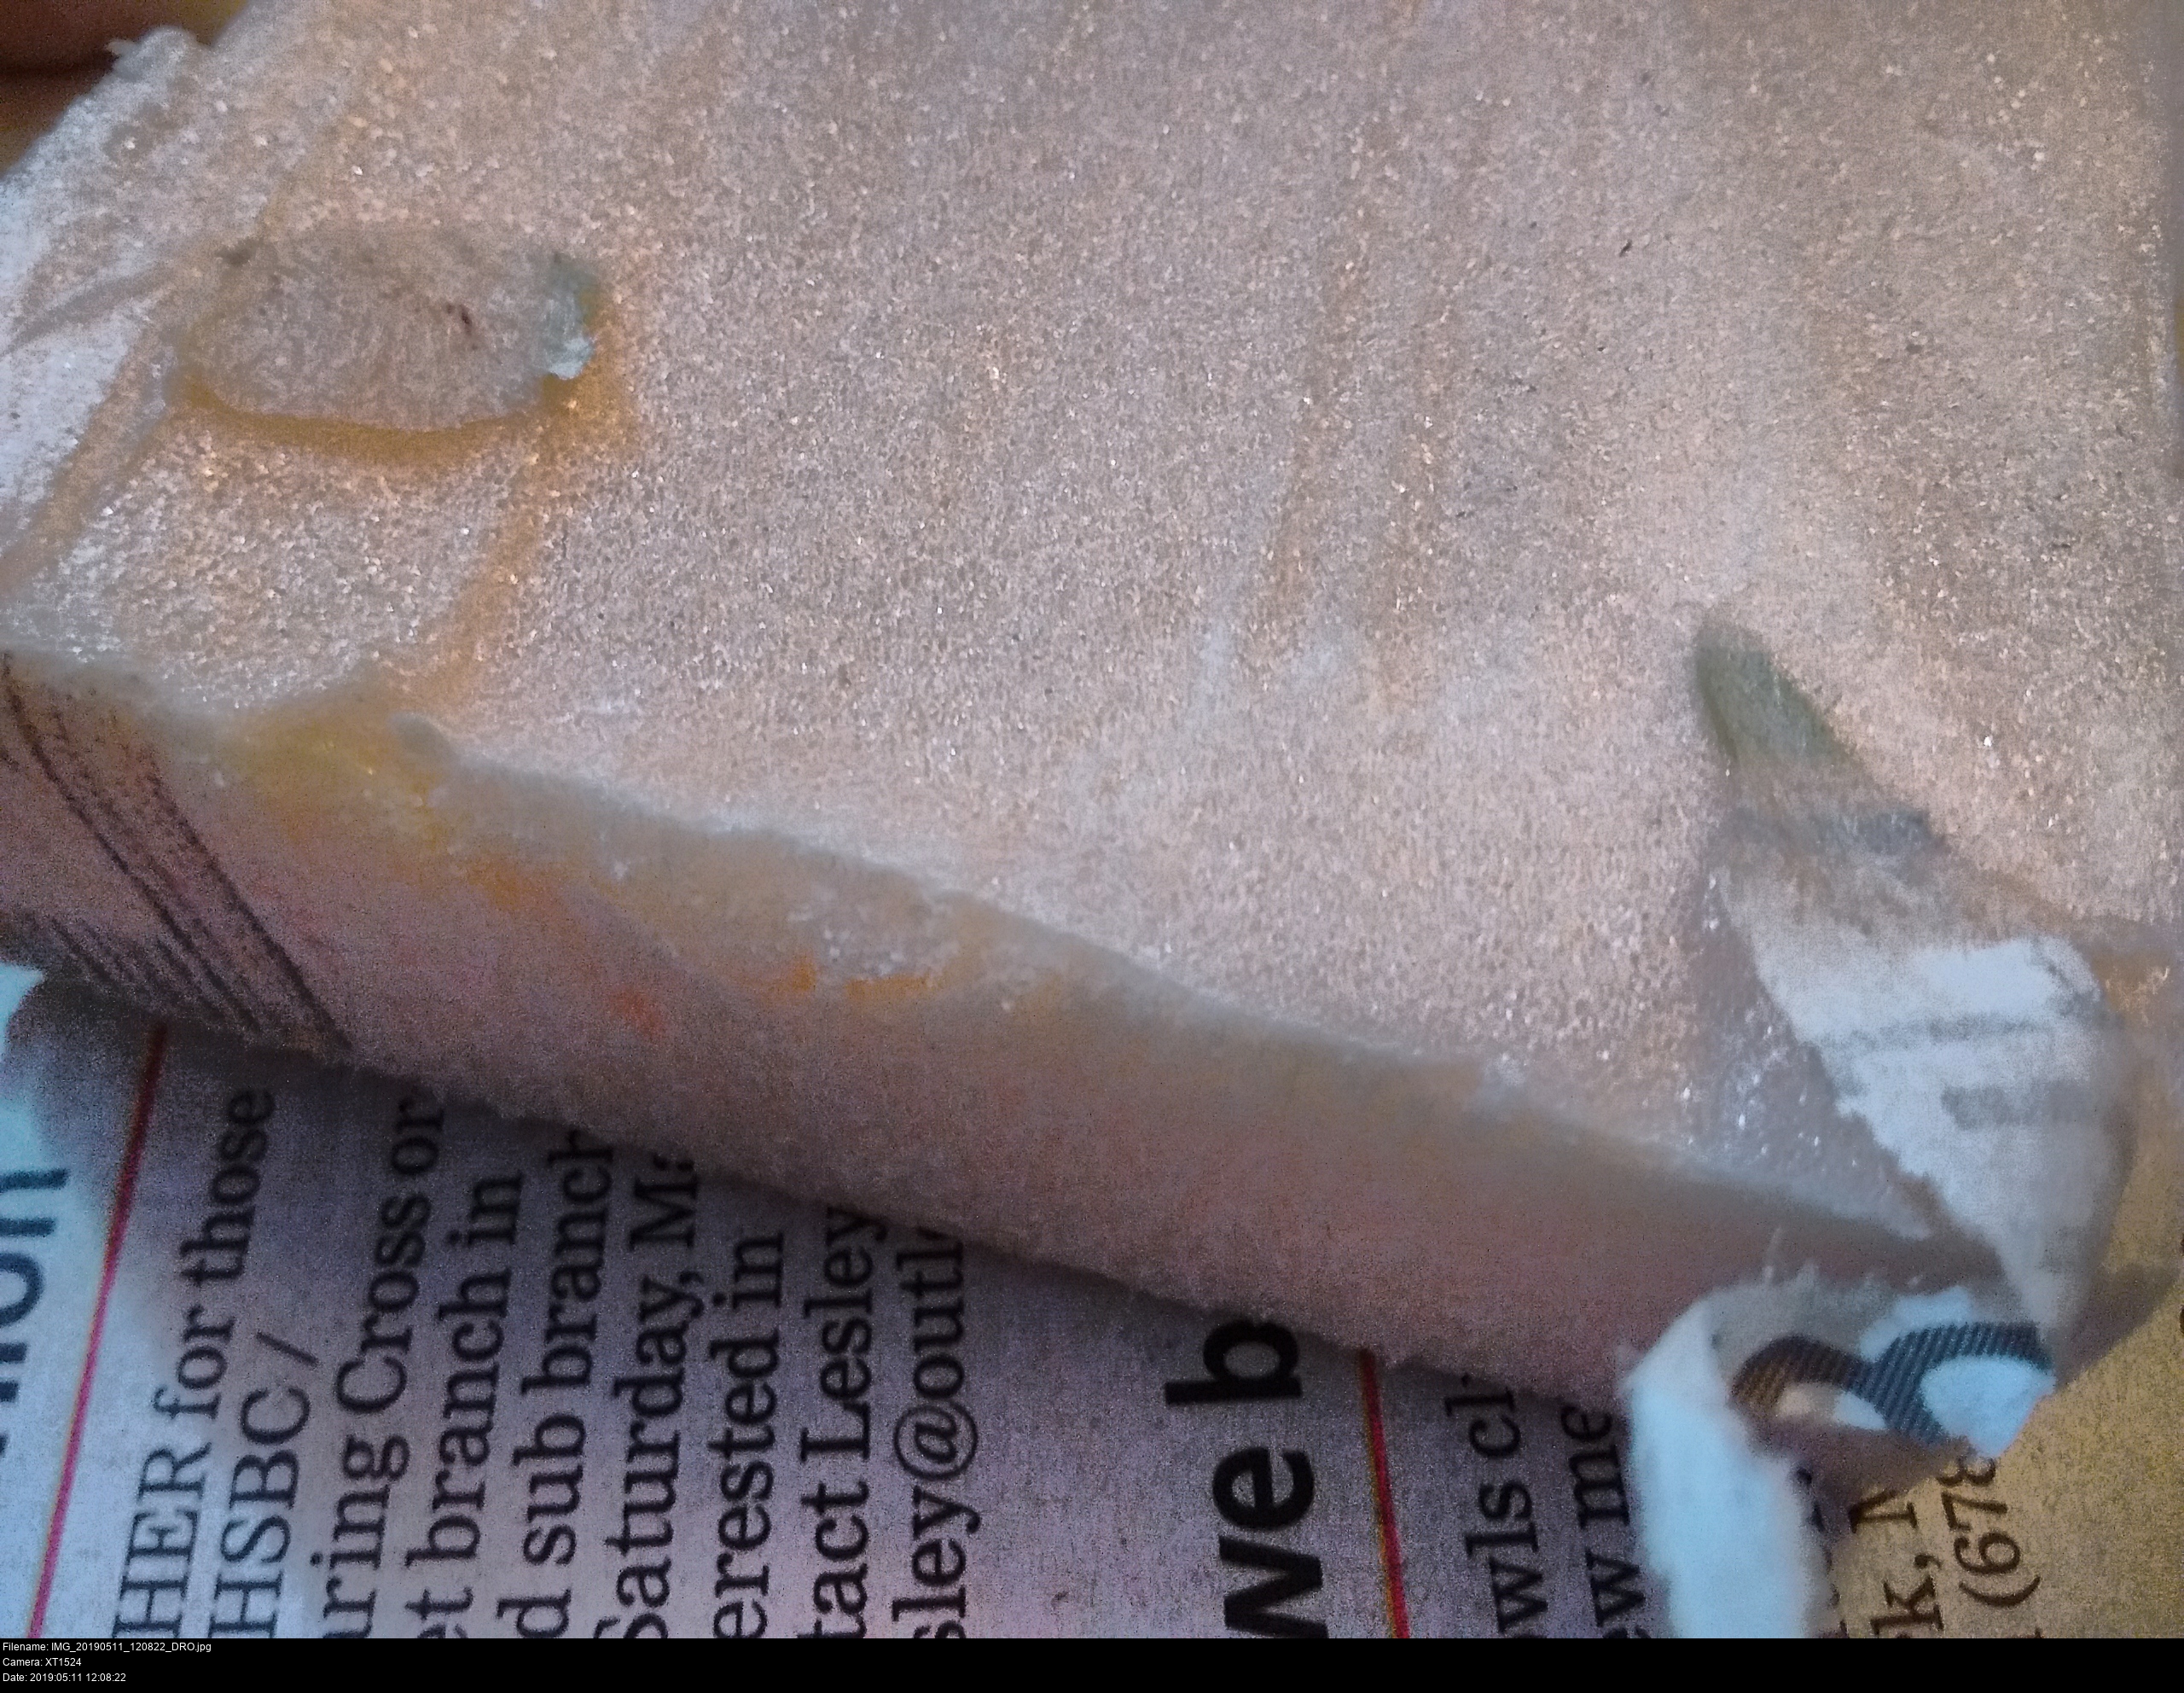
An unfortunate fact of the GG wood glue technique is that when the glue settles over the foam for the first time, it will trap air in the small cavities of the foam. These pockets of air will change shape as they're compressed, pushing the glue above them aside, forming solid bubbles that will either pop or form a shallow lumpy crust. You have to sand off these bubbles before applying the second coat. Do this -outside-. -Wear- -a- -mask-.
I'm going to do four layers of glue in total, twelve hours apart. (look this up) As a smooth, complete layer develops, the need for sanding is reduced and the surface becomes thicker and smoother.
When GG wood glue dries, it solidifies into a tough, very slightly tacky plastic layer which can be cut or sanded, or, more importantly, primed. GG wood glue isn't colourless, it has a slightly caramel tint to it, which becomes more and more obvious as additional layers are applied.
It looks like it's dissolved some of the permanent marker as well, turning the marked rings into a huge smeary mess. Unimportant! It's all going to be obliterated with gesso later. And if the gesso doesn't cover it, I'm just gonna stand and scratch my head, because it's got -one job-, you know?
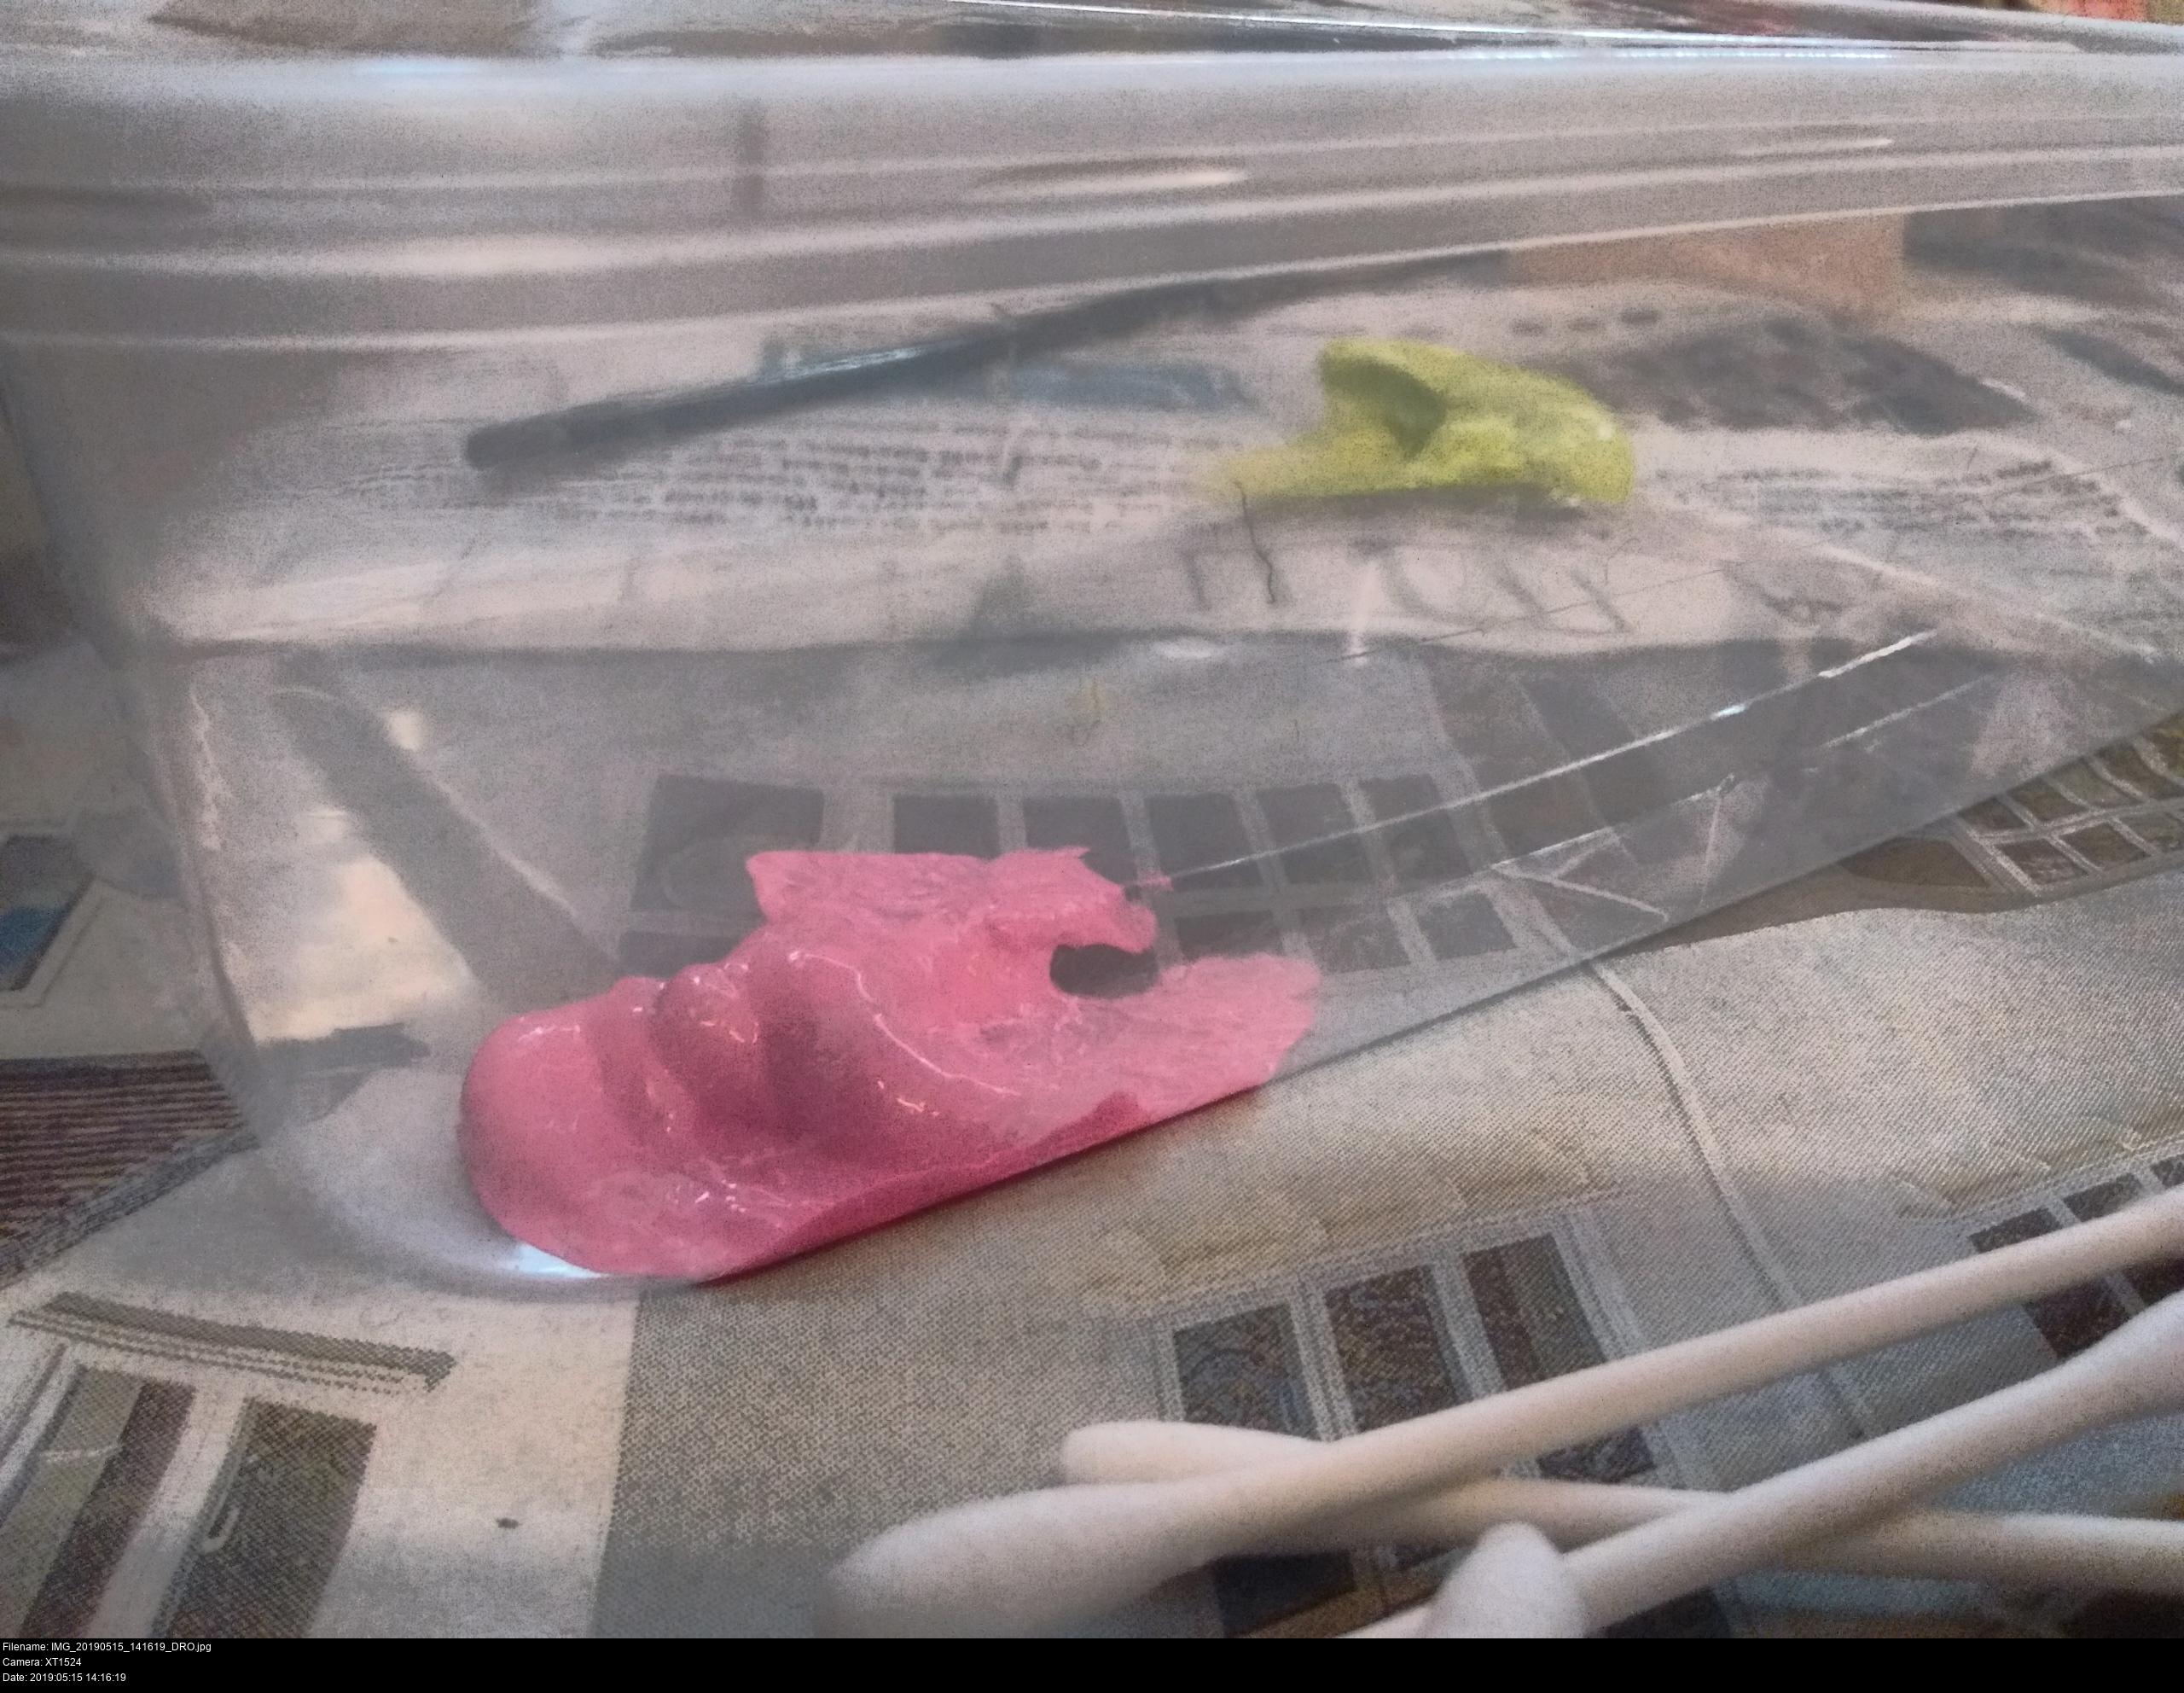
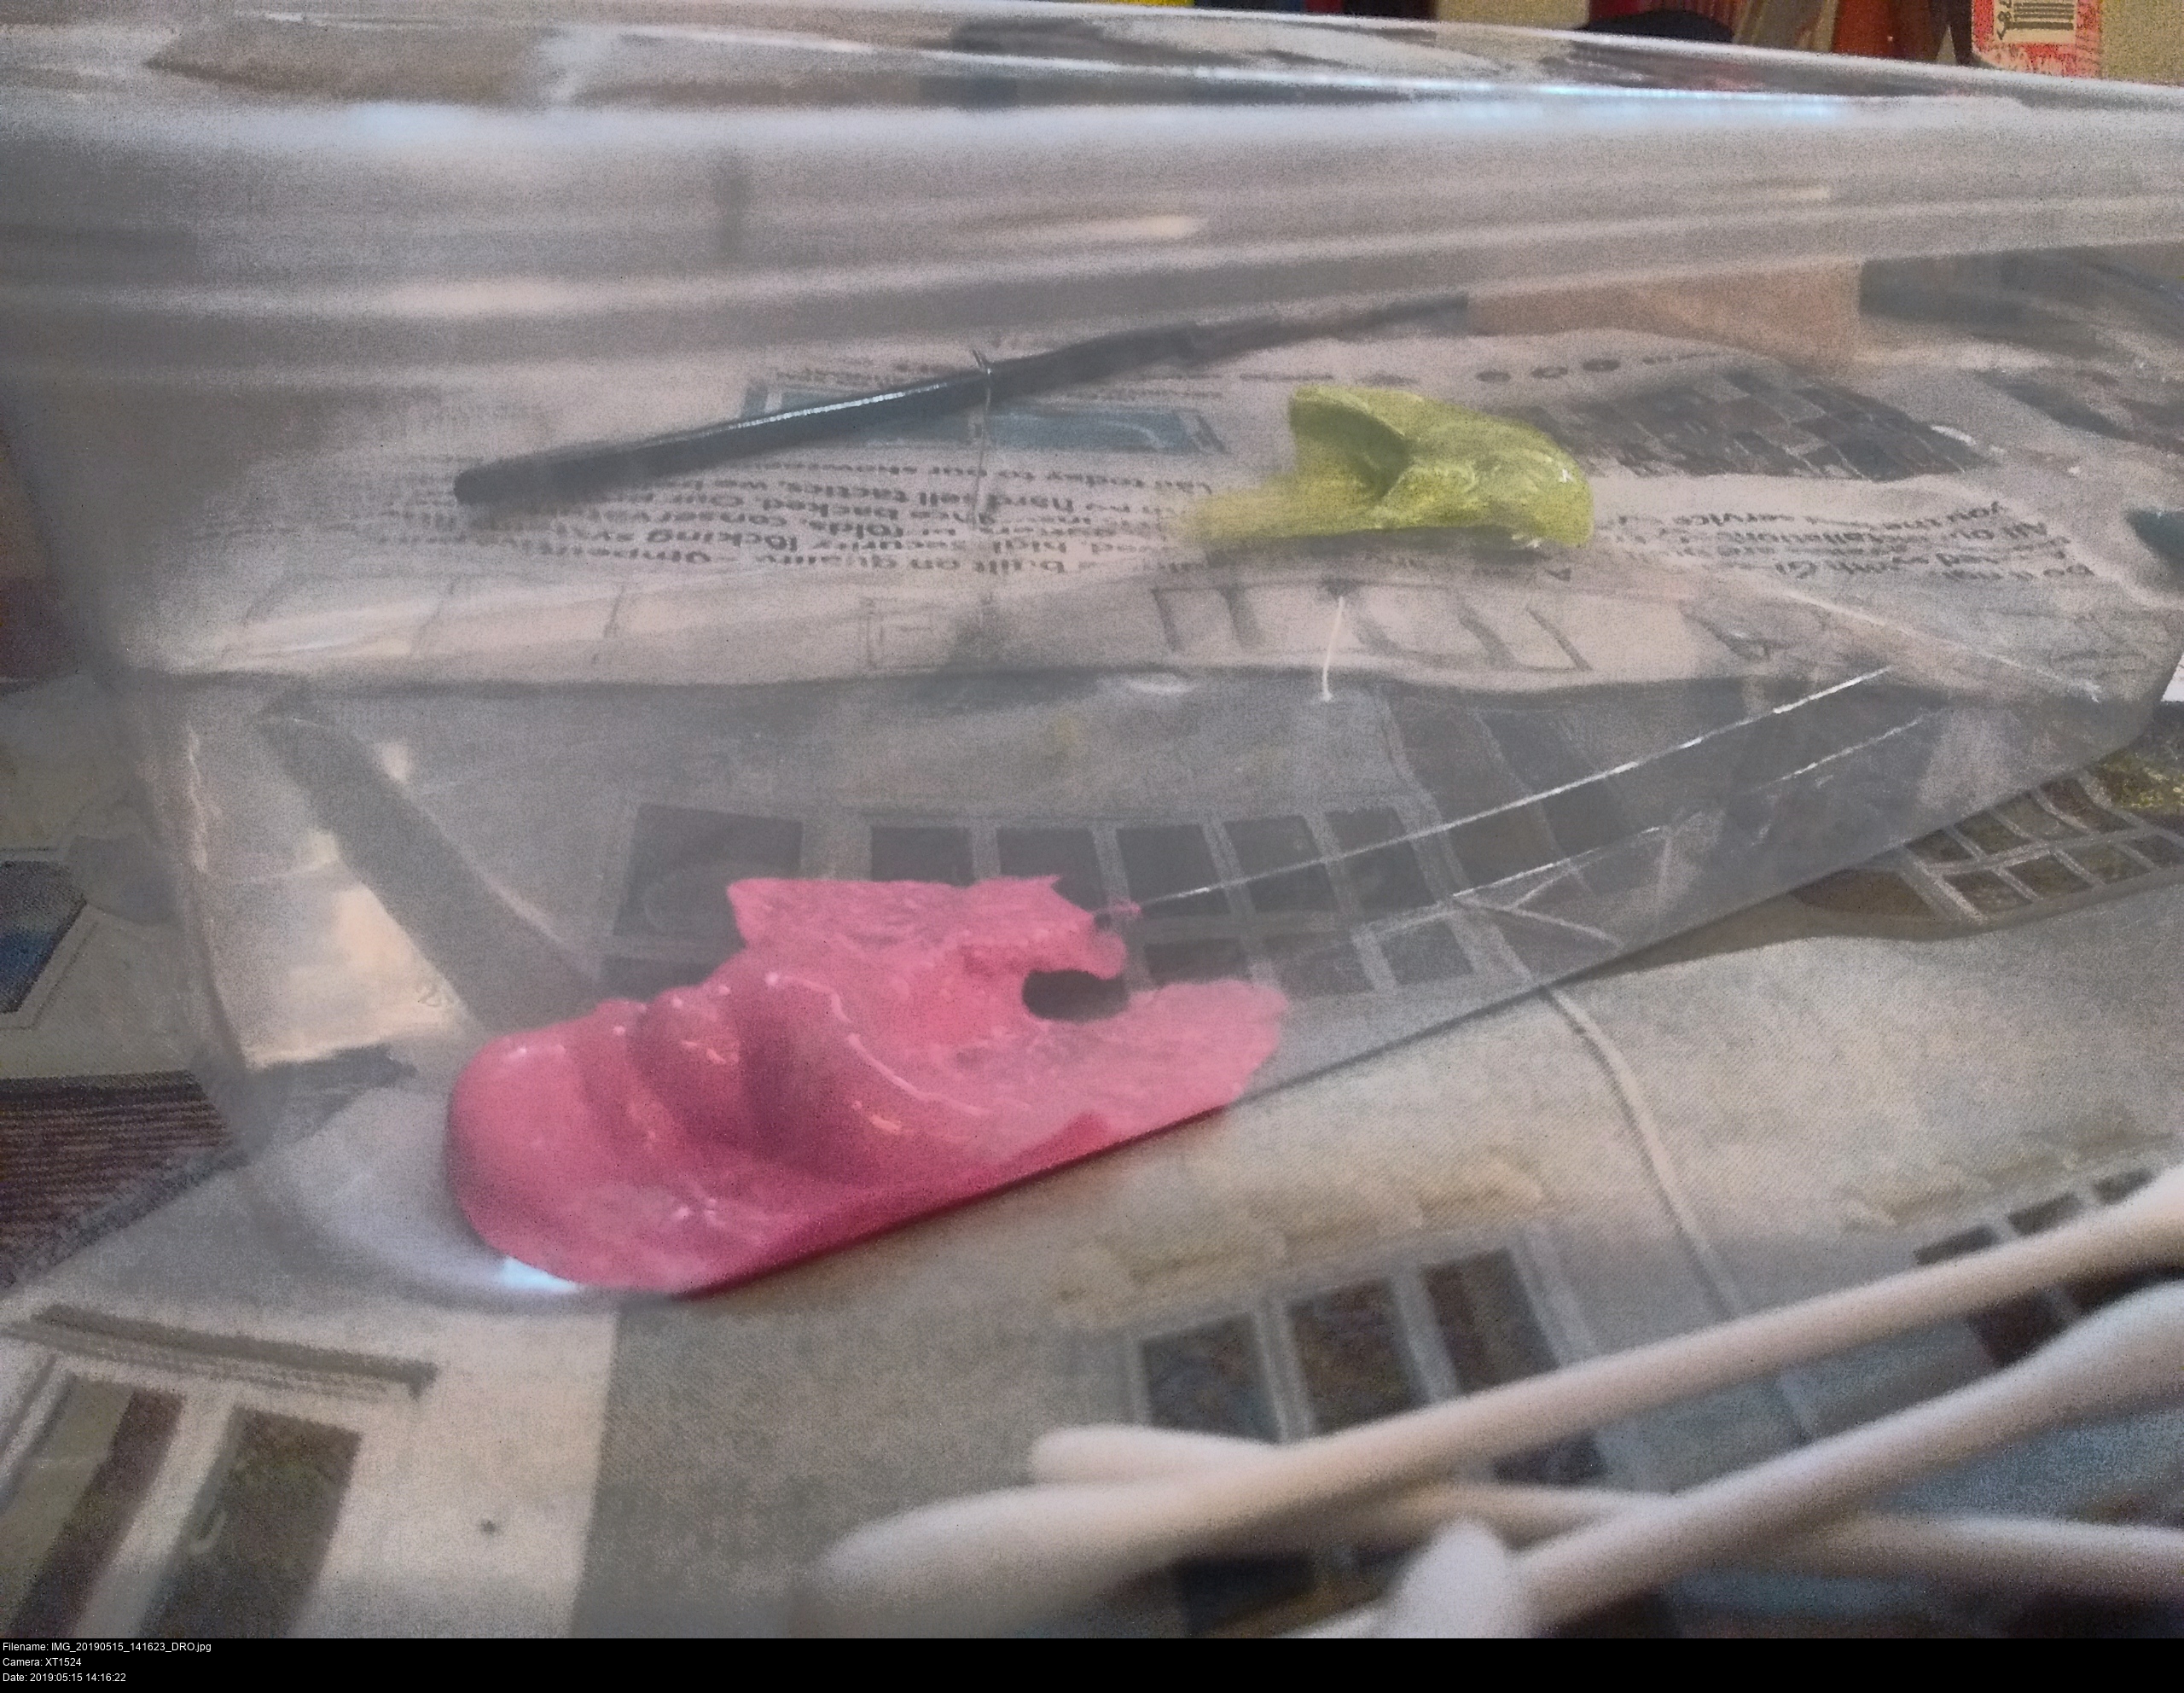
While that's drying some more, I'm going to try this:
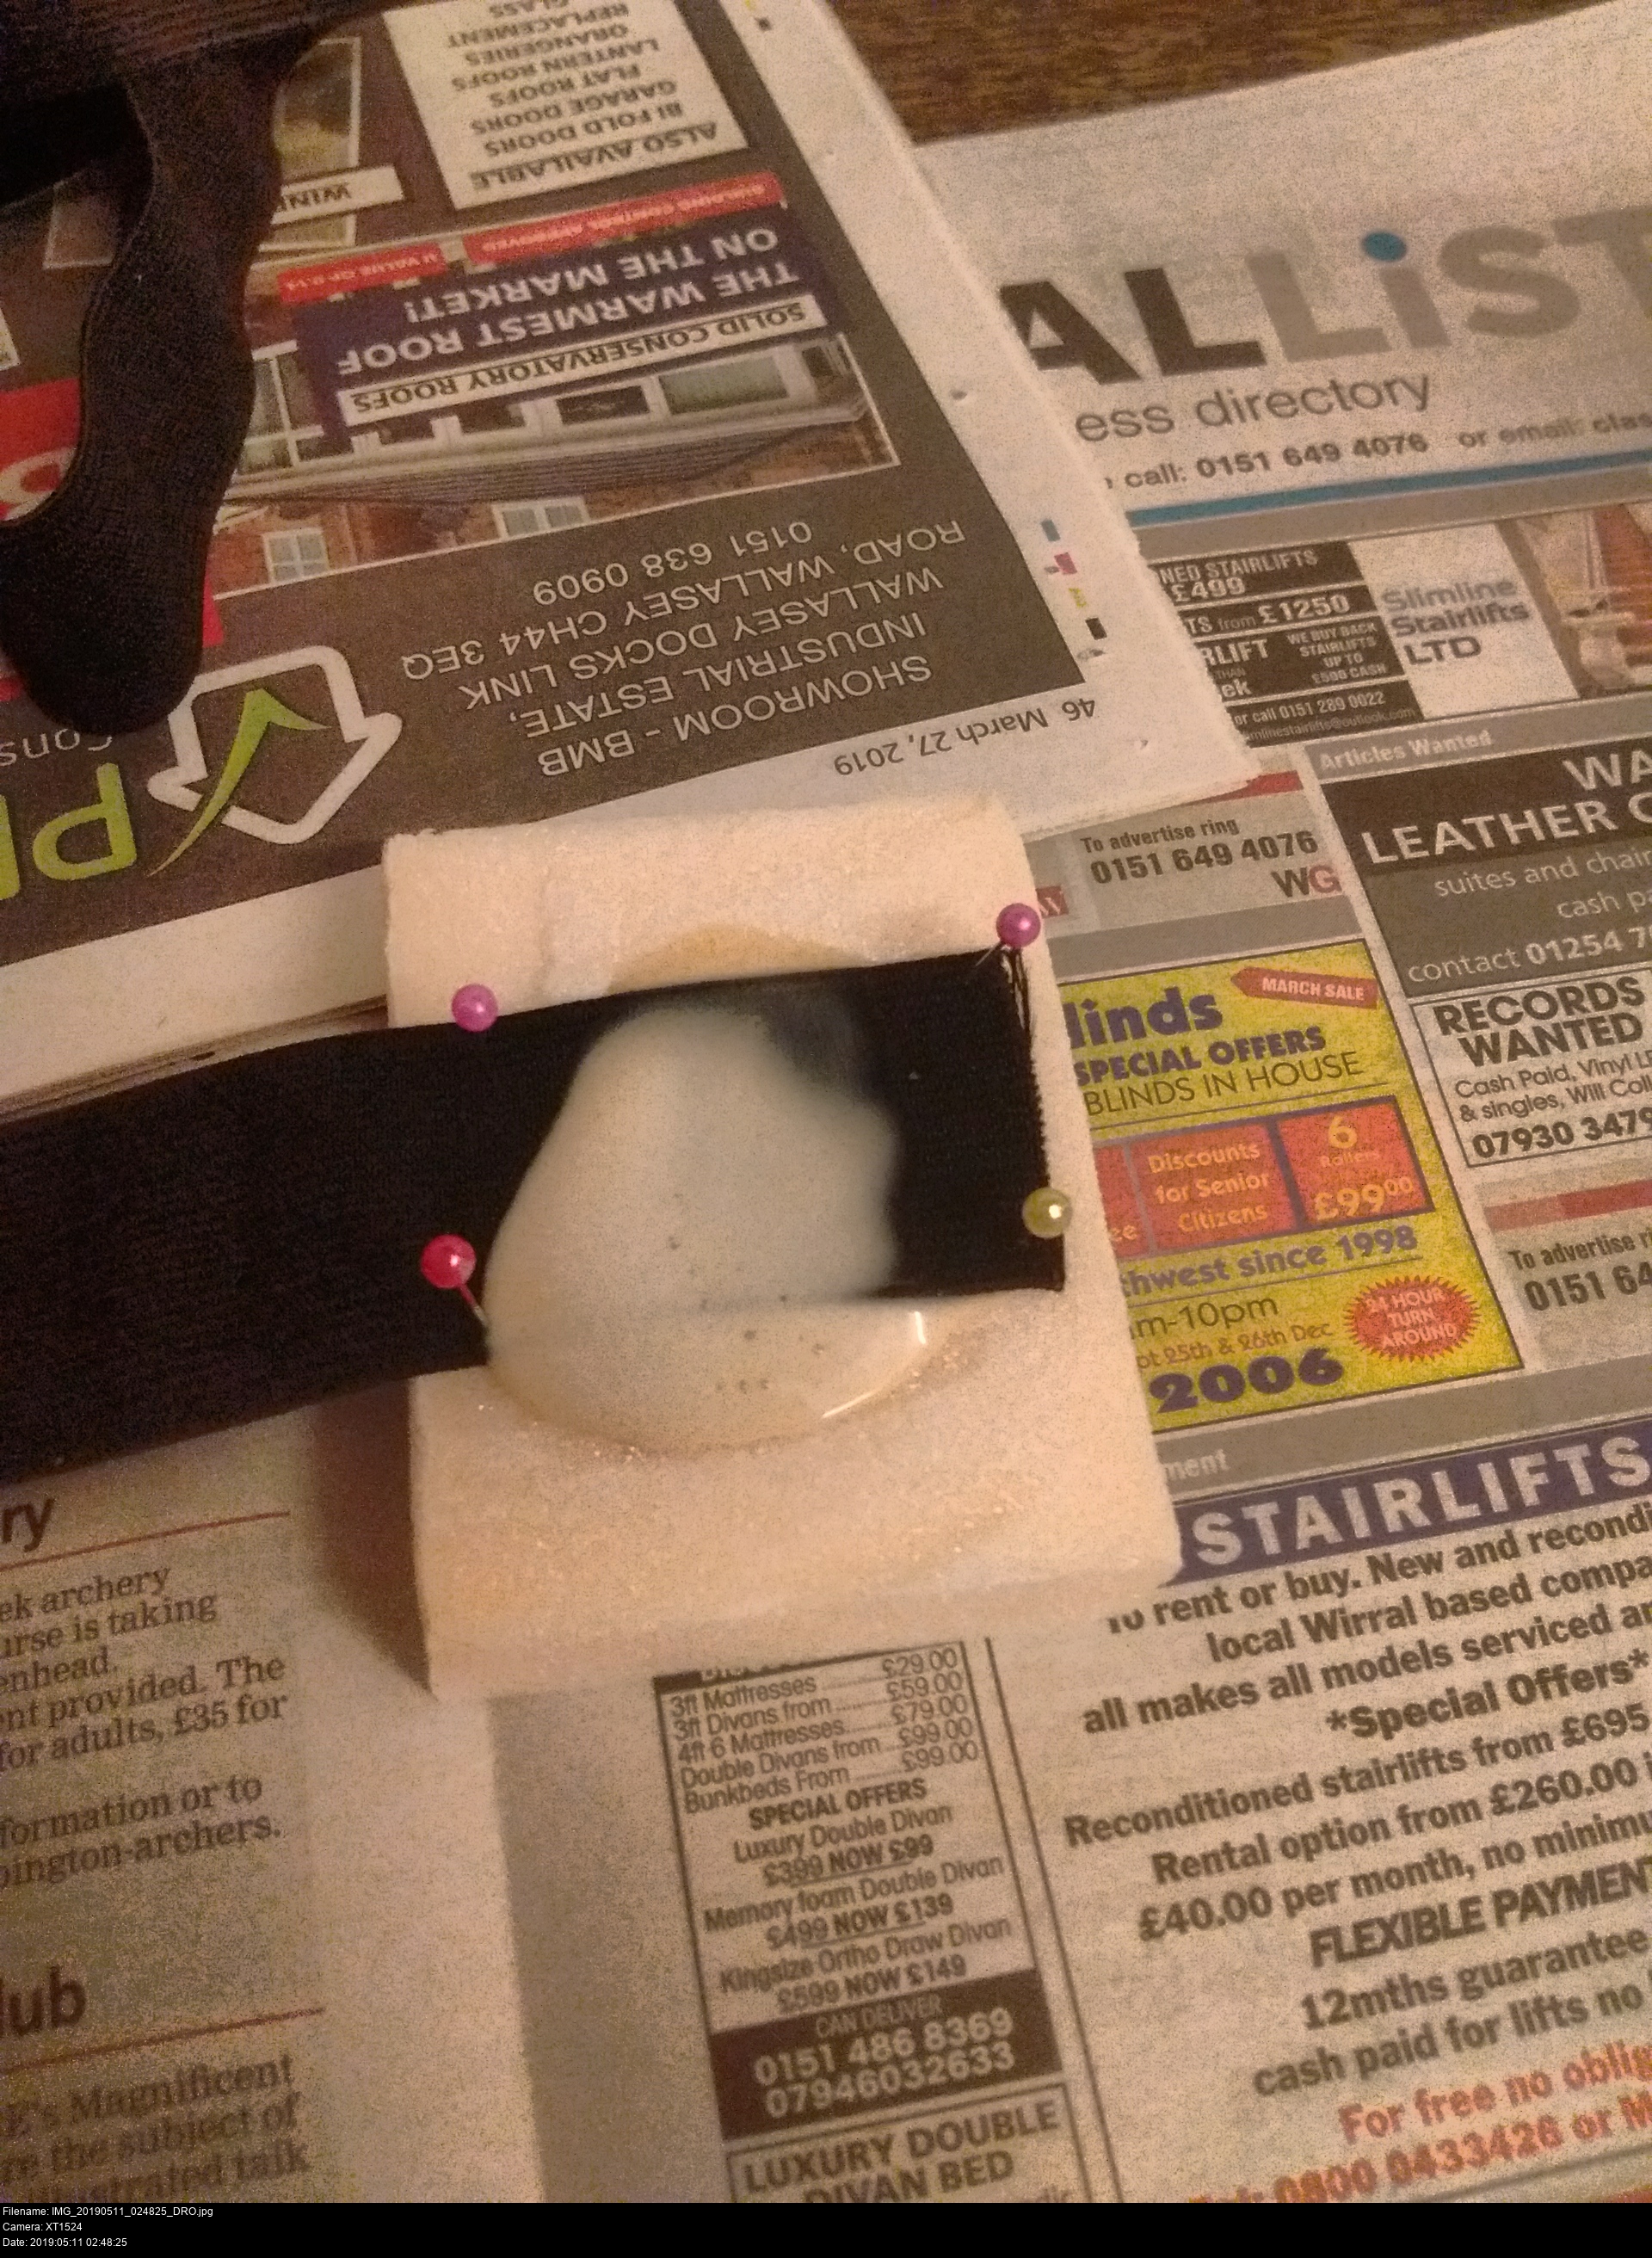
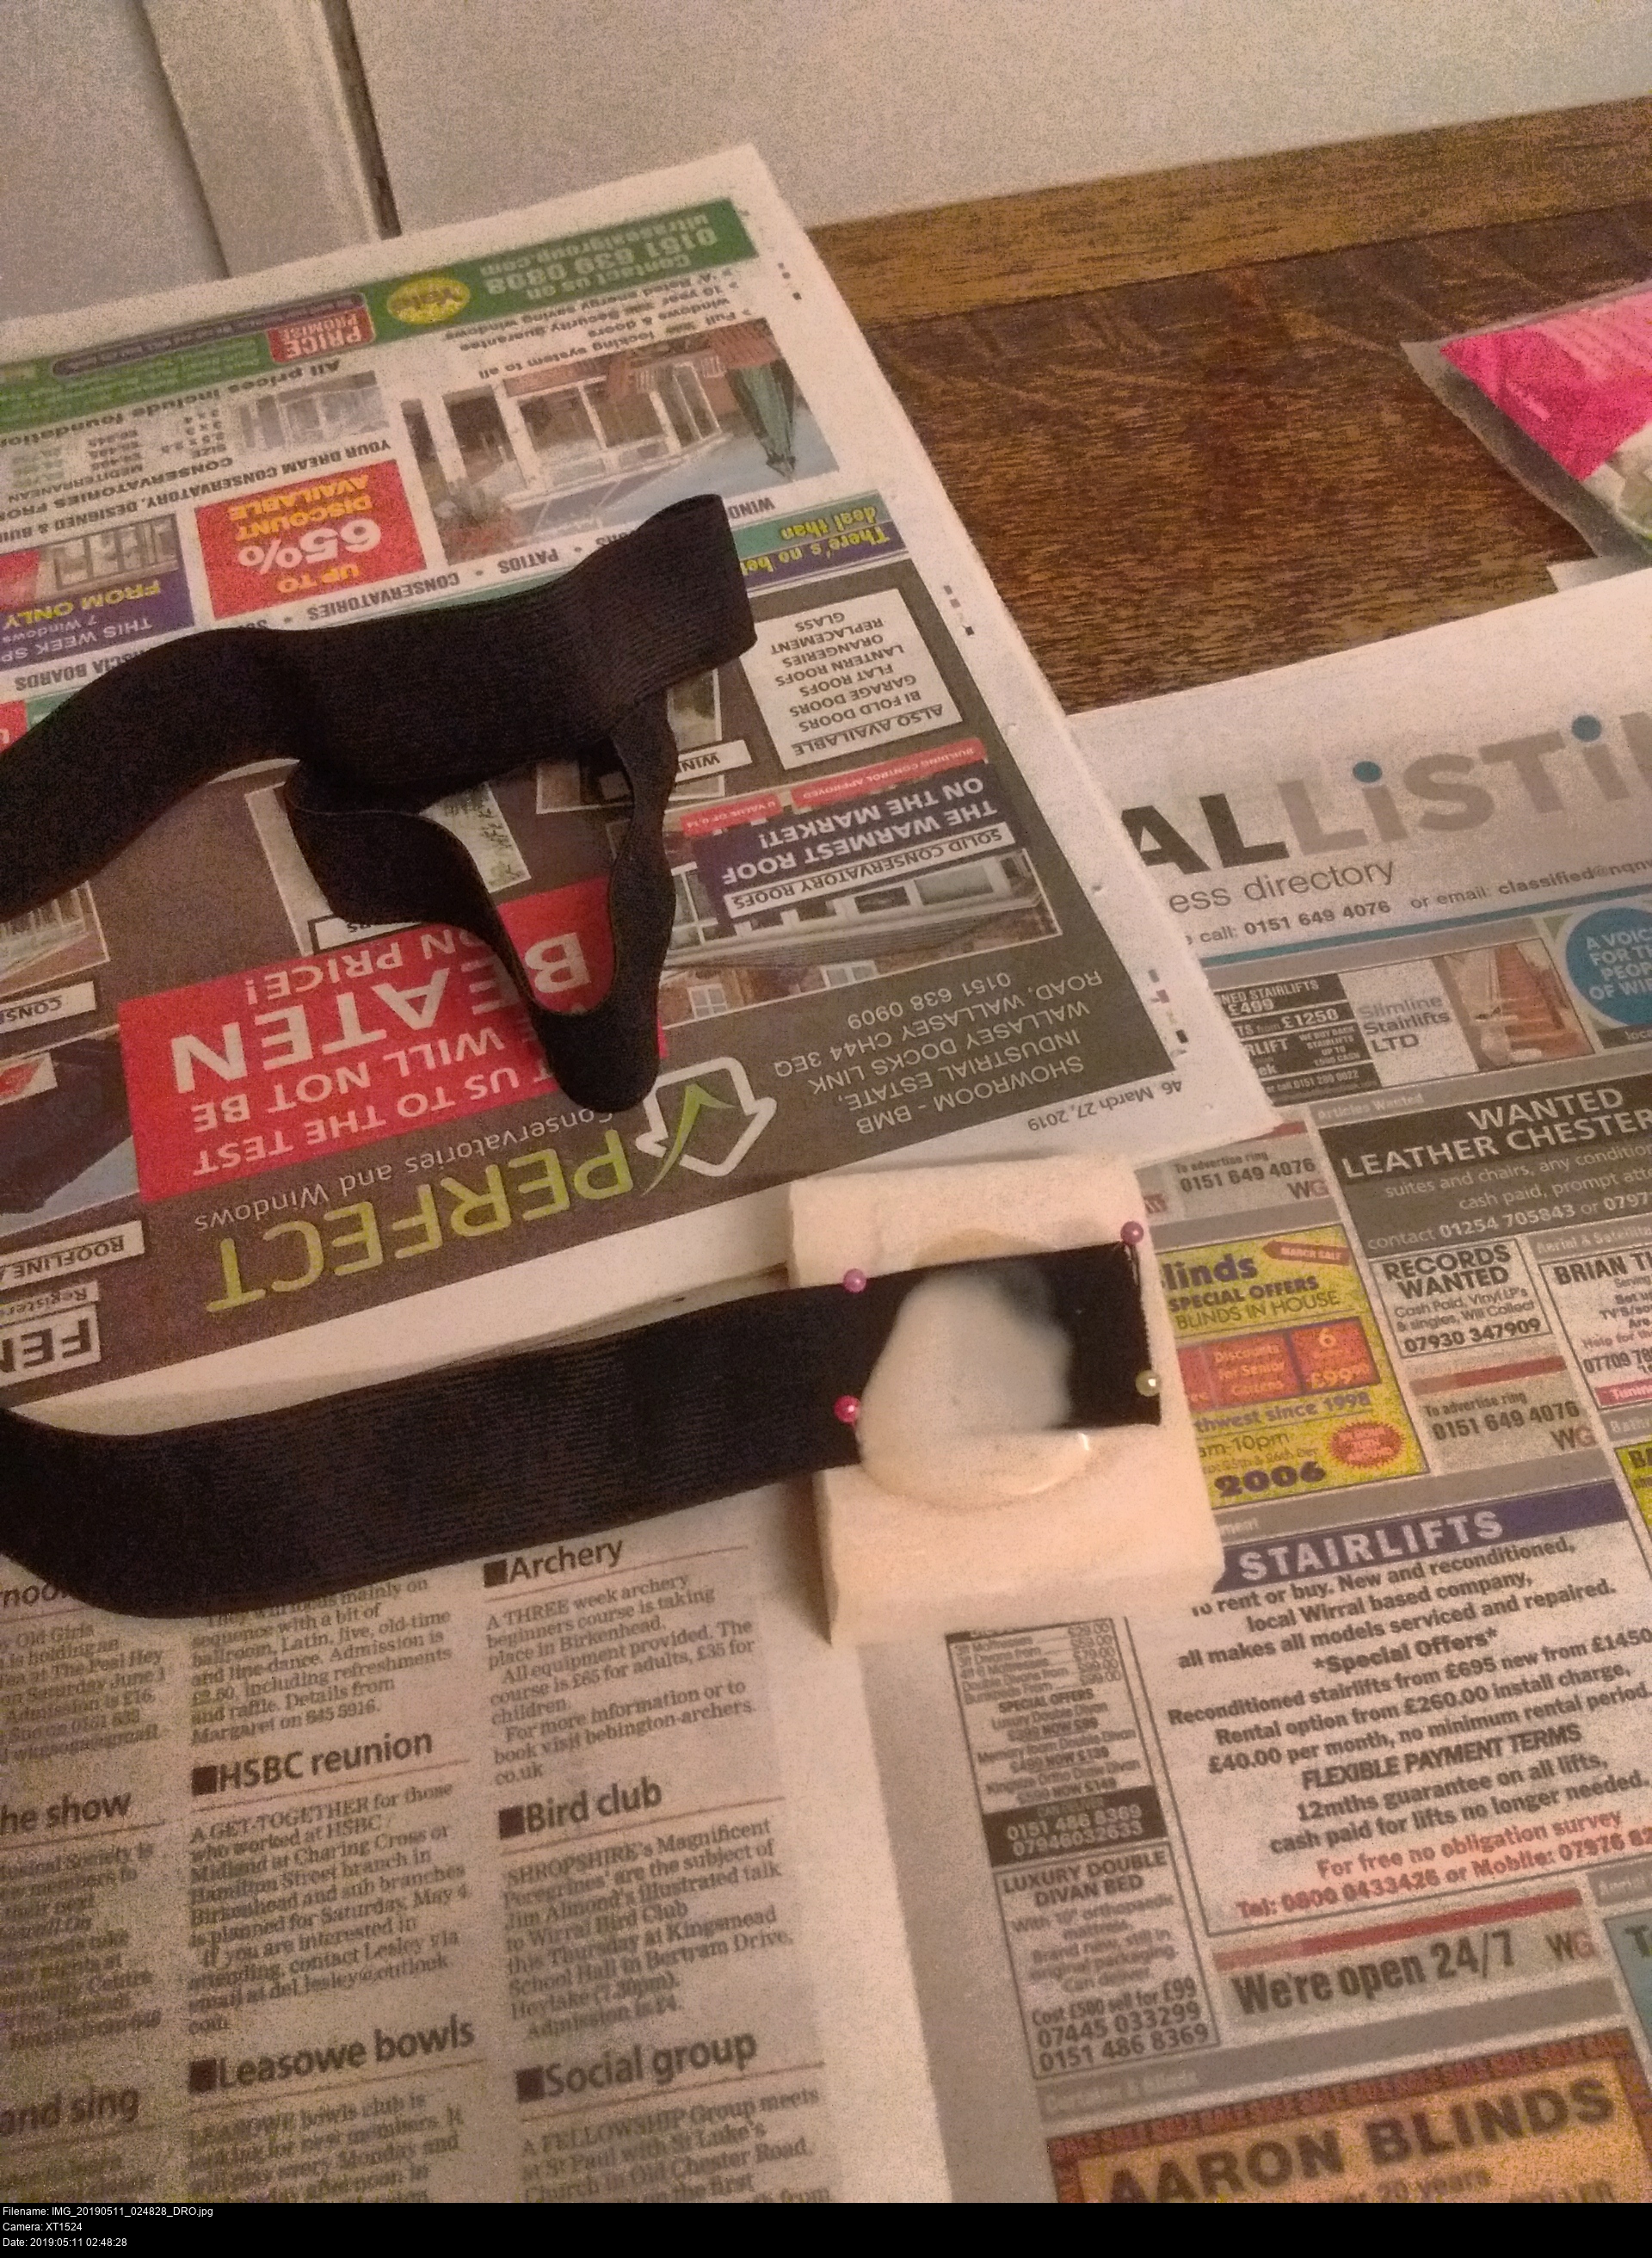
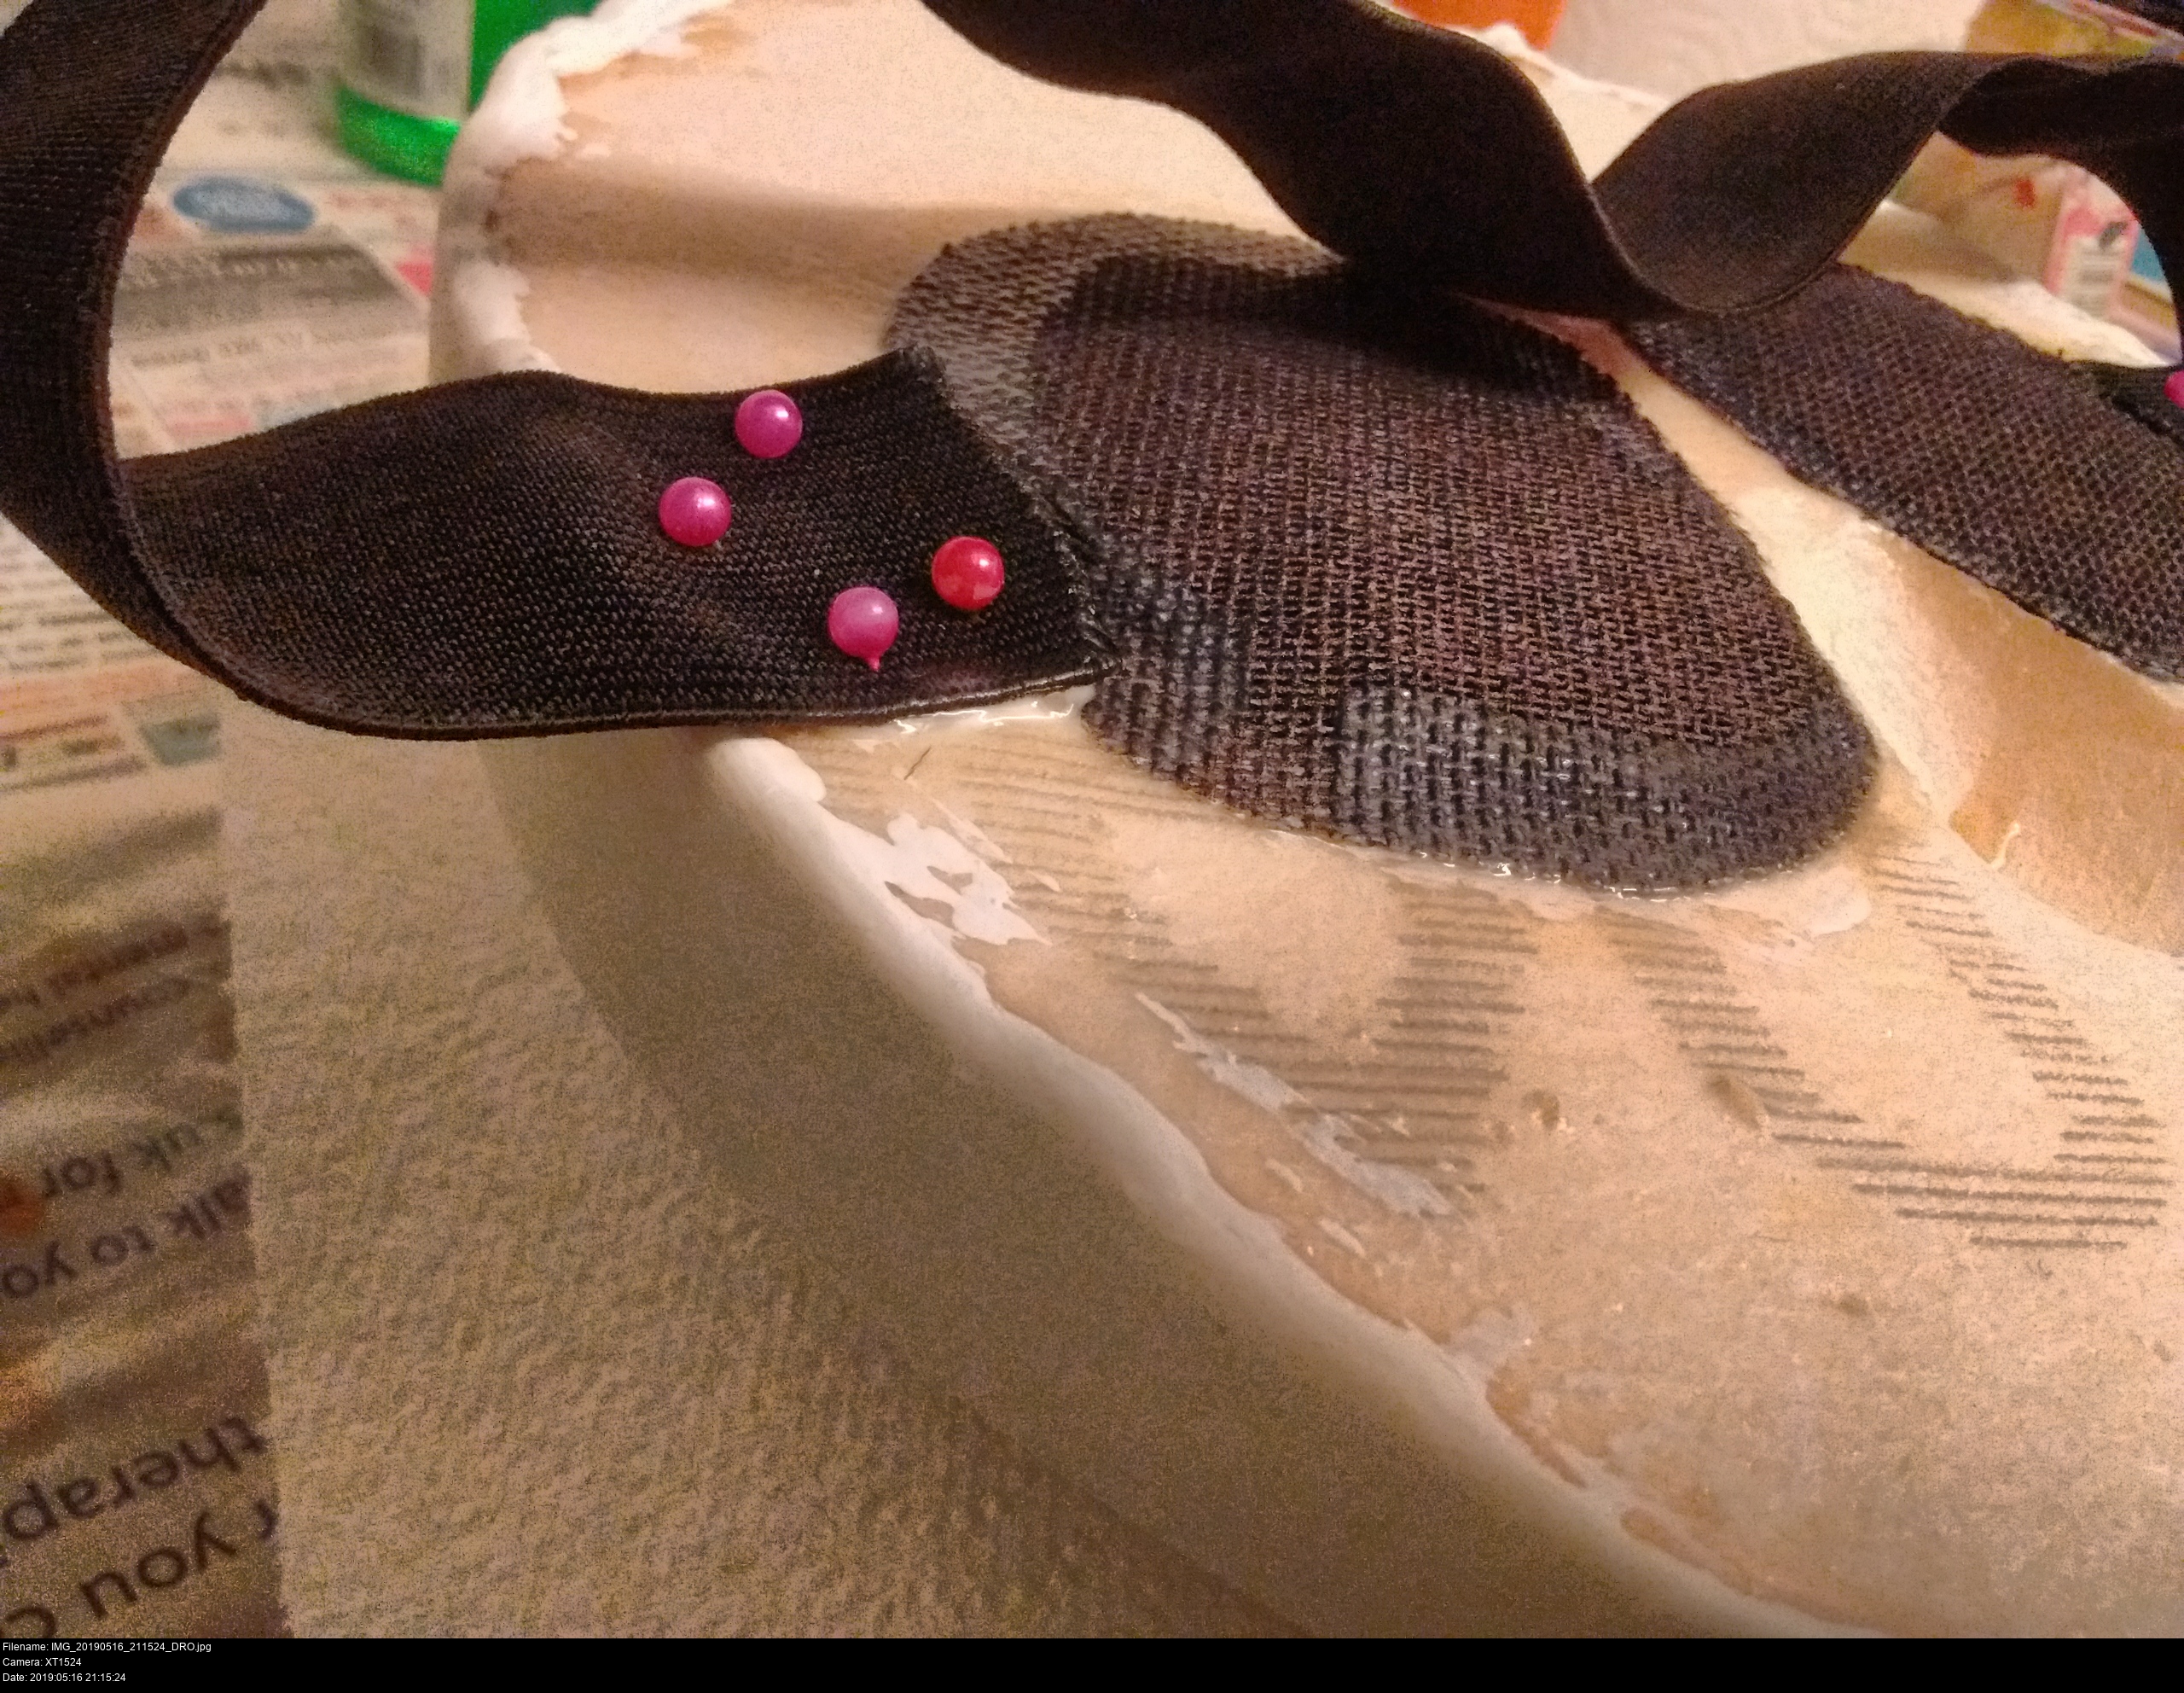
I've spread a puddle of GG wood blue on a scrap block of XPS, then laid a strip of 3/4 inch wide normal black elastic on it, pressing it down firmly into the goop, and fastening it in place with some sewing berry pins.
This is how I intend to attach the strap to this mask when the form is complete. I haven't tried regular GG wood glue on elastic before, but I'm confident this will all solidify into one big bronze plasticky lump of permanence, in time. Gotta test. The alternative is the expanding regular Gorilla Glue, and that stuff turns into a huge pizza crust mess unless you're phenomenally lucky. This might be more controllable if it works - it'll certainly be easier to work with and around than cutting huge foamy blocks out at the end.
The mask's glue layer is looking unpleasantly blotchy at the moment. You just have to have faith that it'll look right when all the layers are applied. Applying thinner layers can stop this from happening. Remember that when the glue is solid, it can be sanded and shaped once again, but if you do so and make any major changes, you'll have to resurface it again at least once.
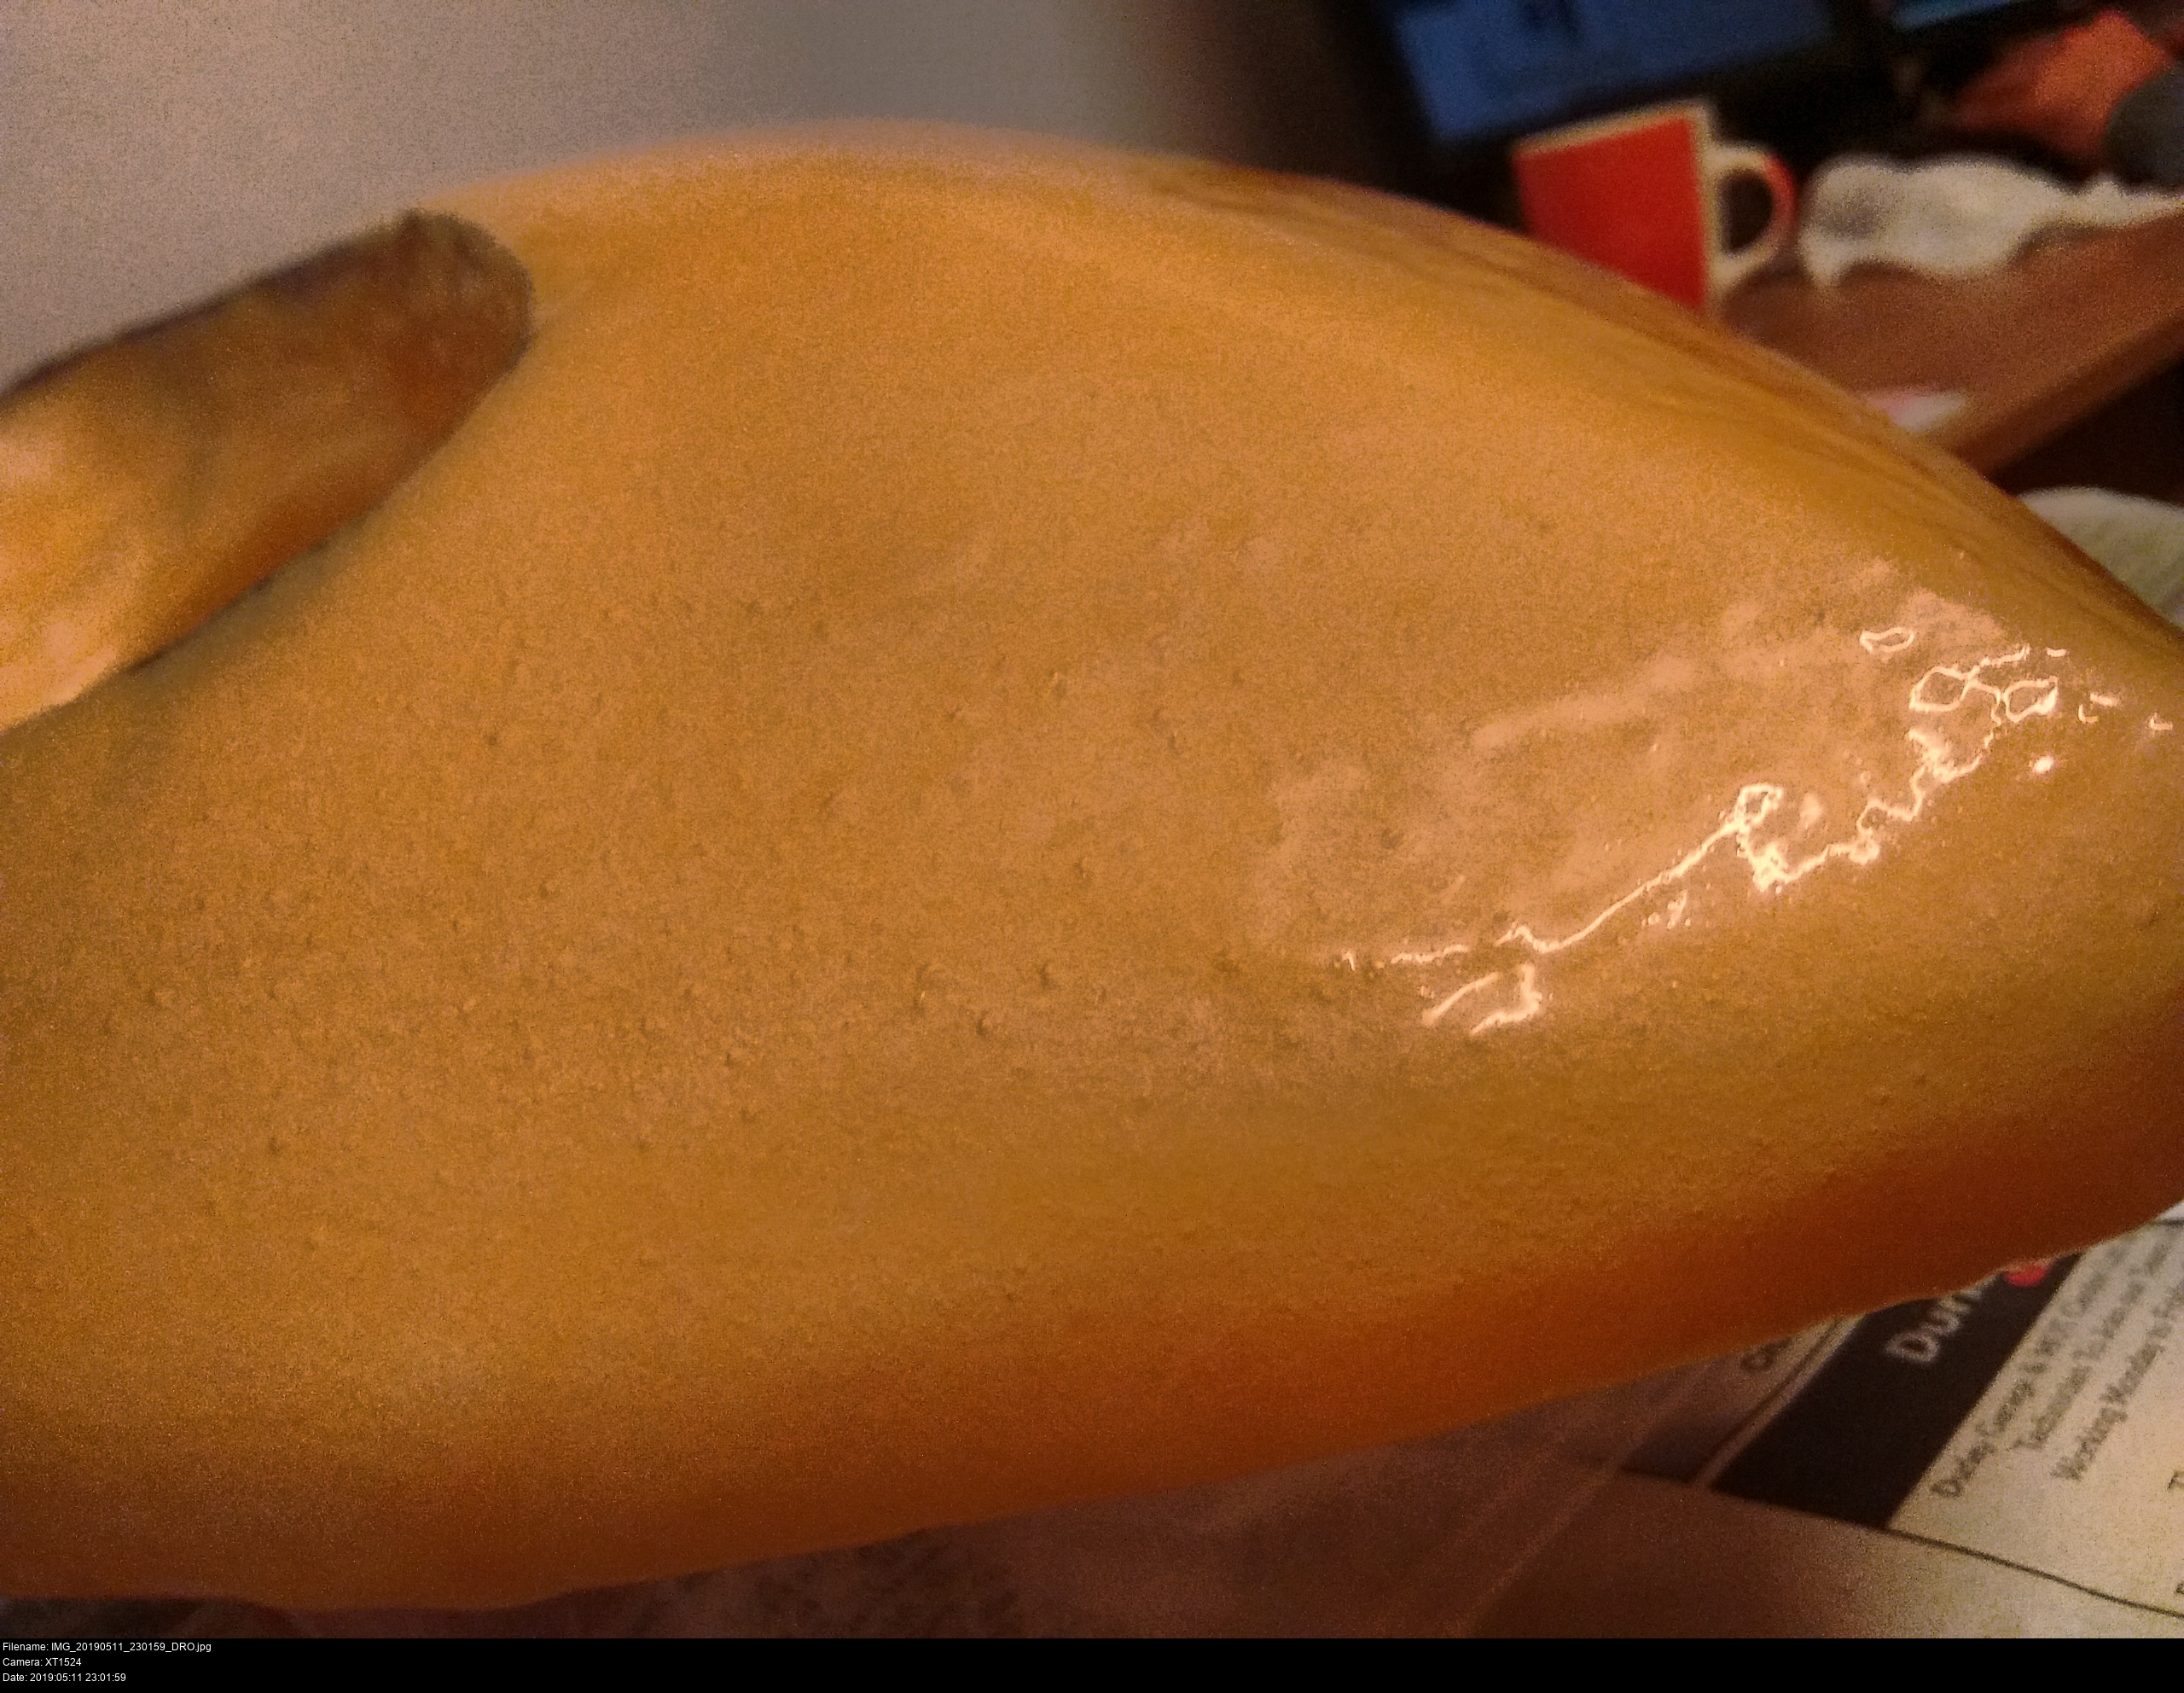
If you're wondering why all this mess is necessary, take a look at this:
The texture of unsurfaced XPS foam is like stale bread: a brittle, rough foam. You can't paint it, you certainly shouldn't eat it, and there's a chance of it flaking to bits from contact.
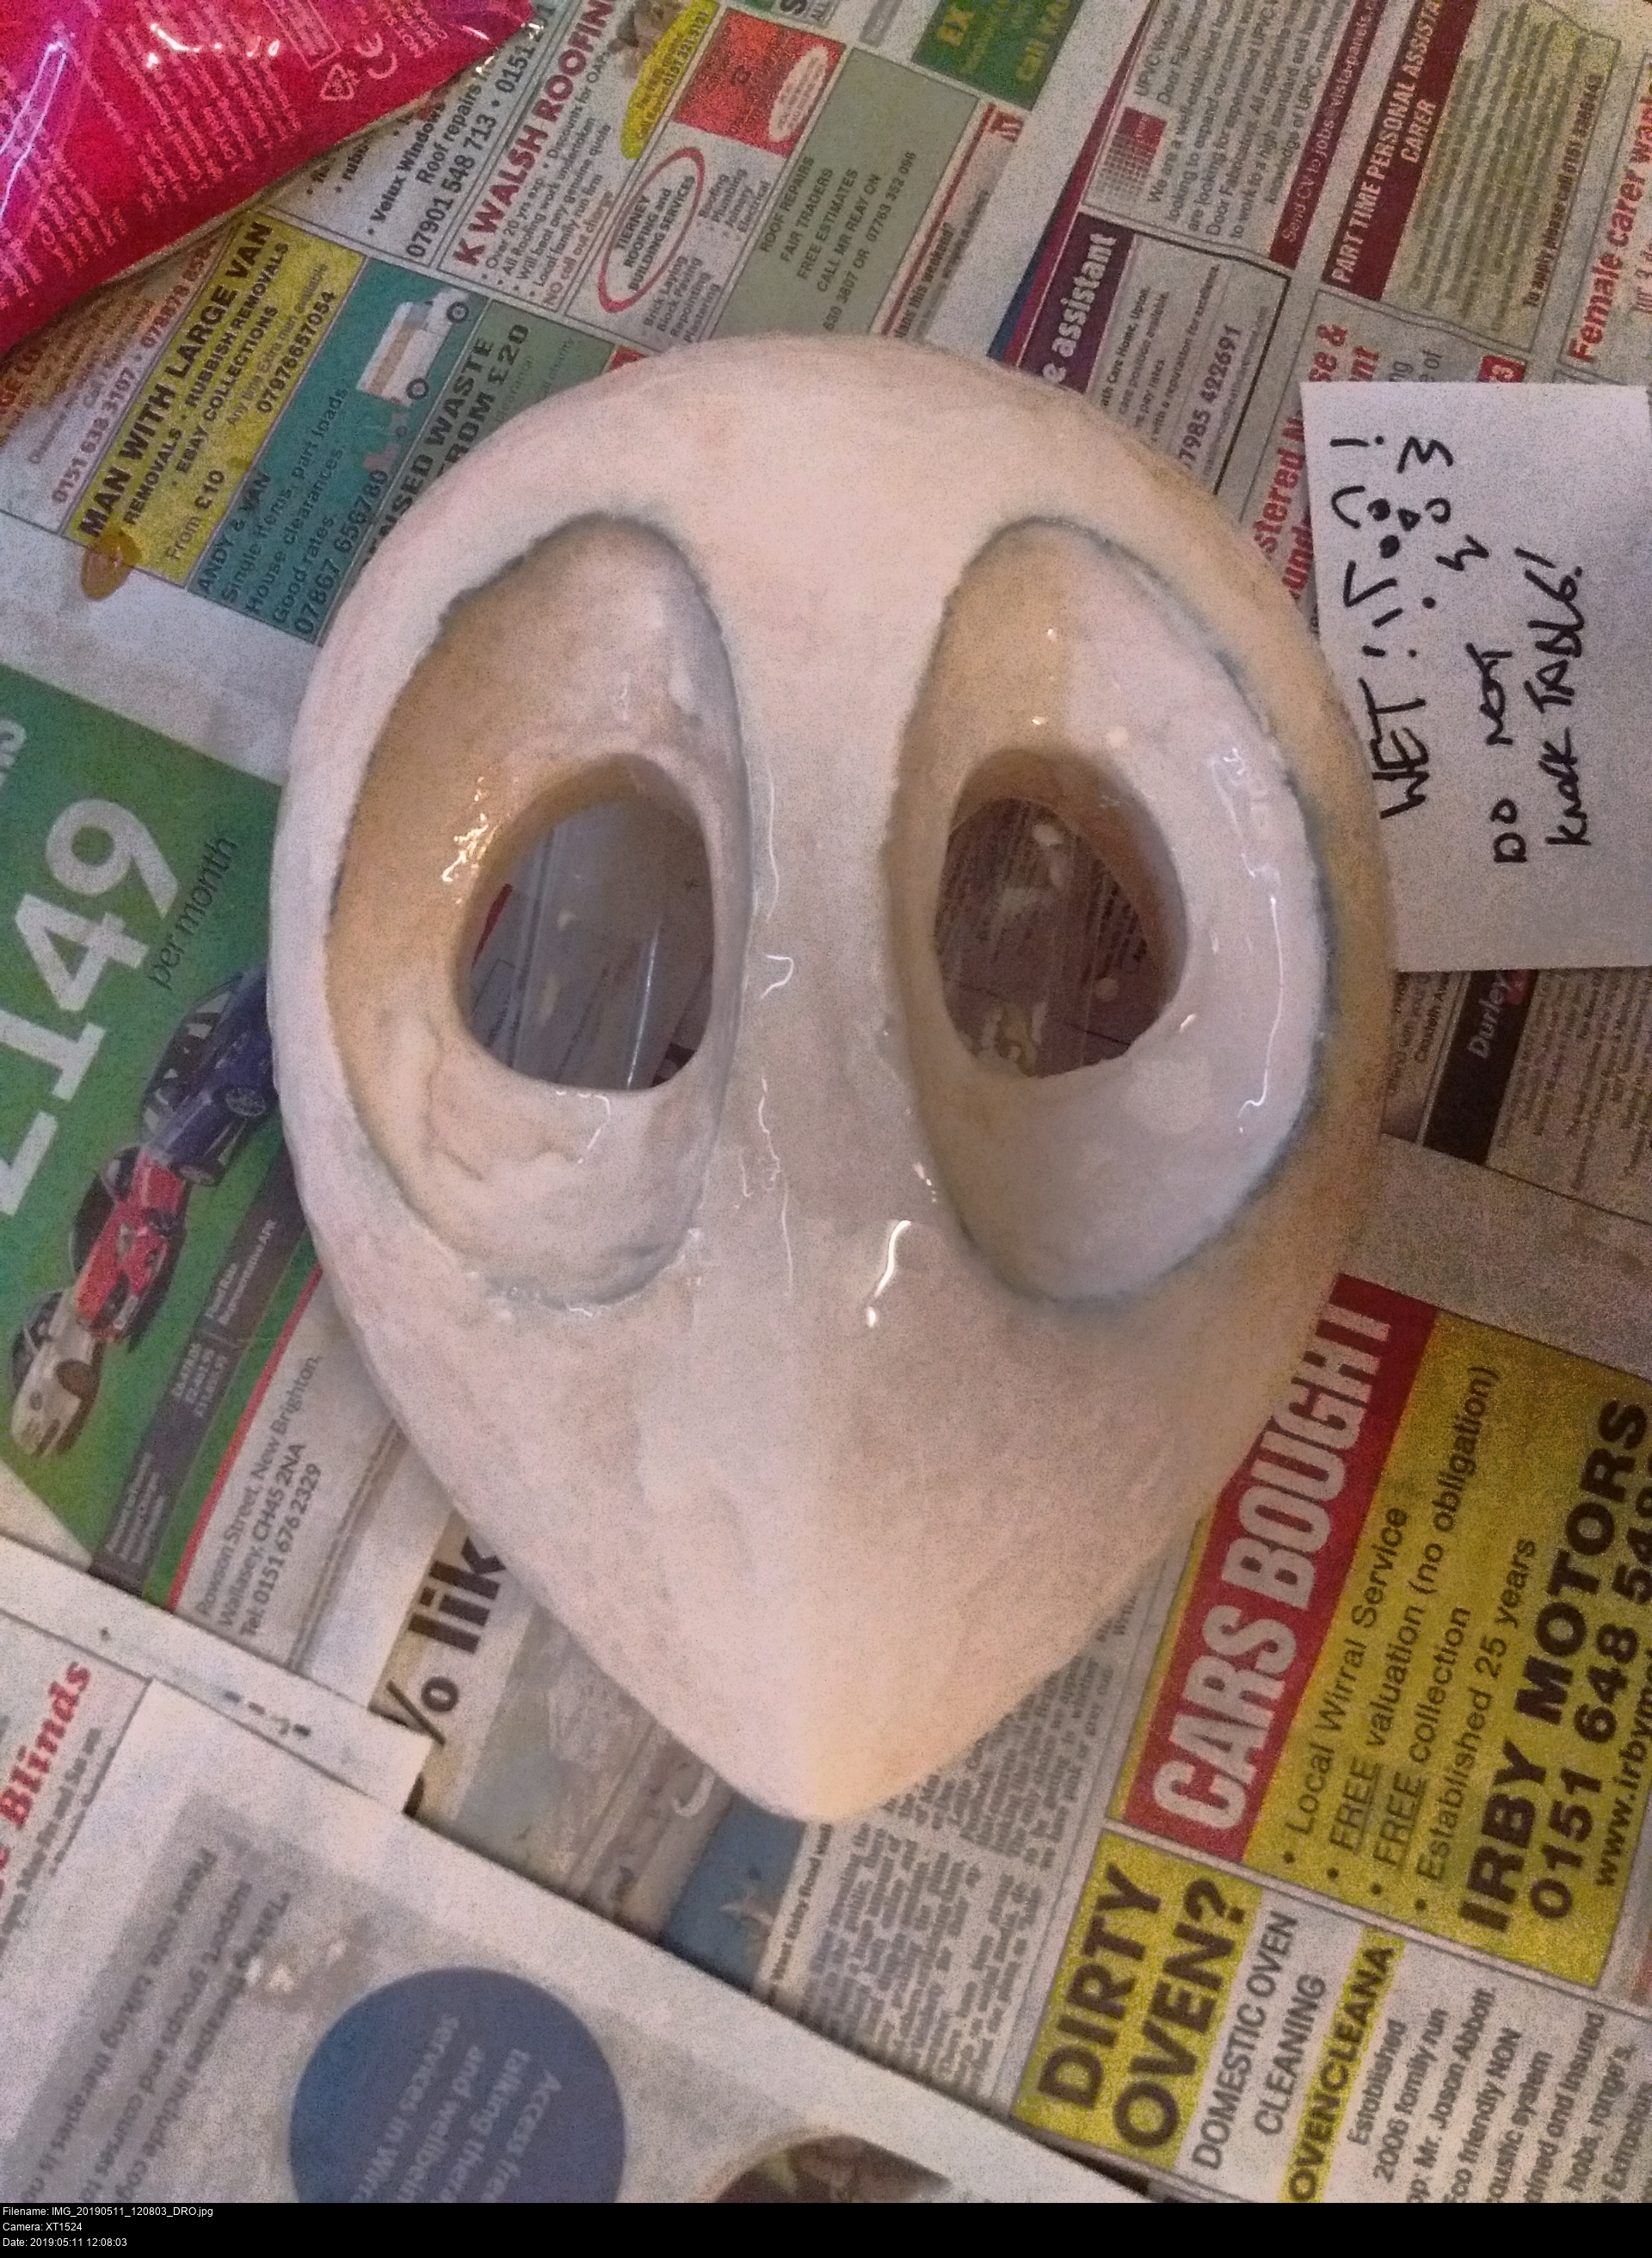
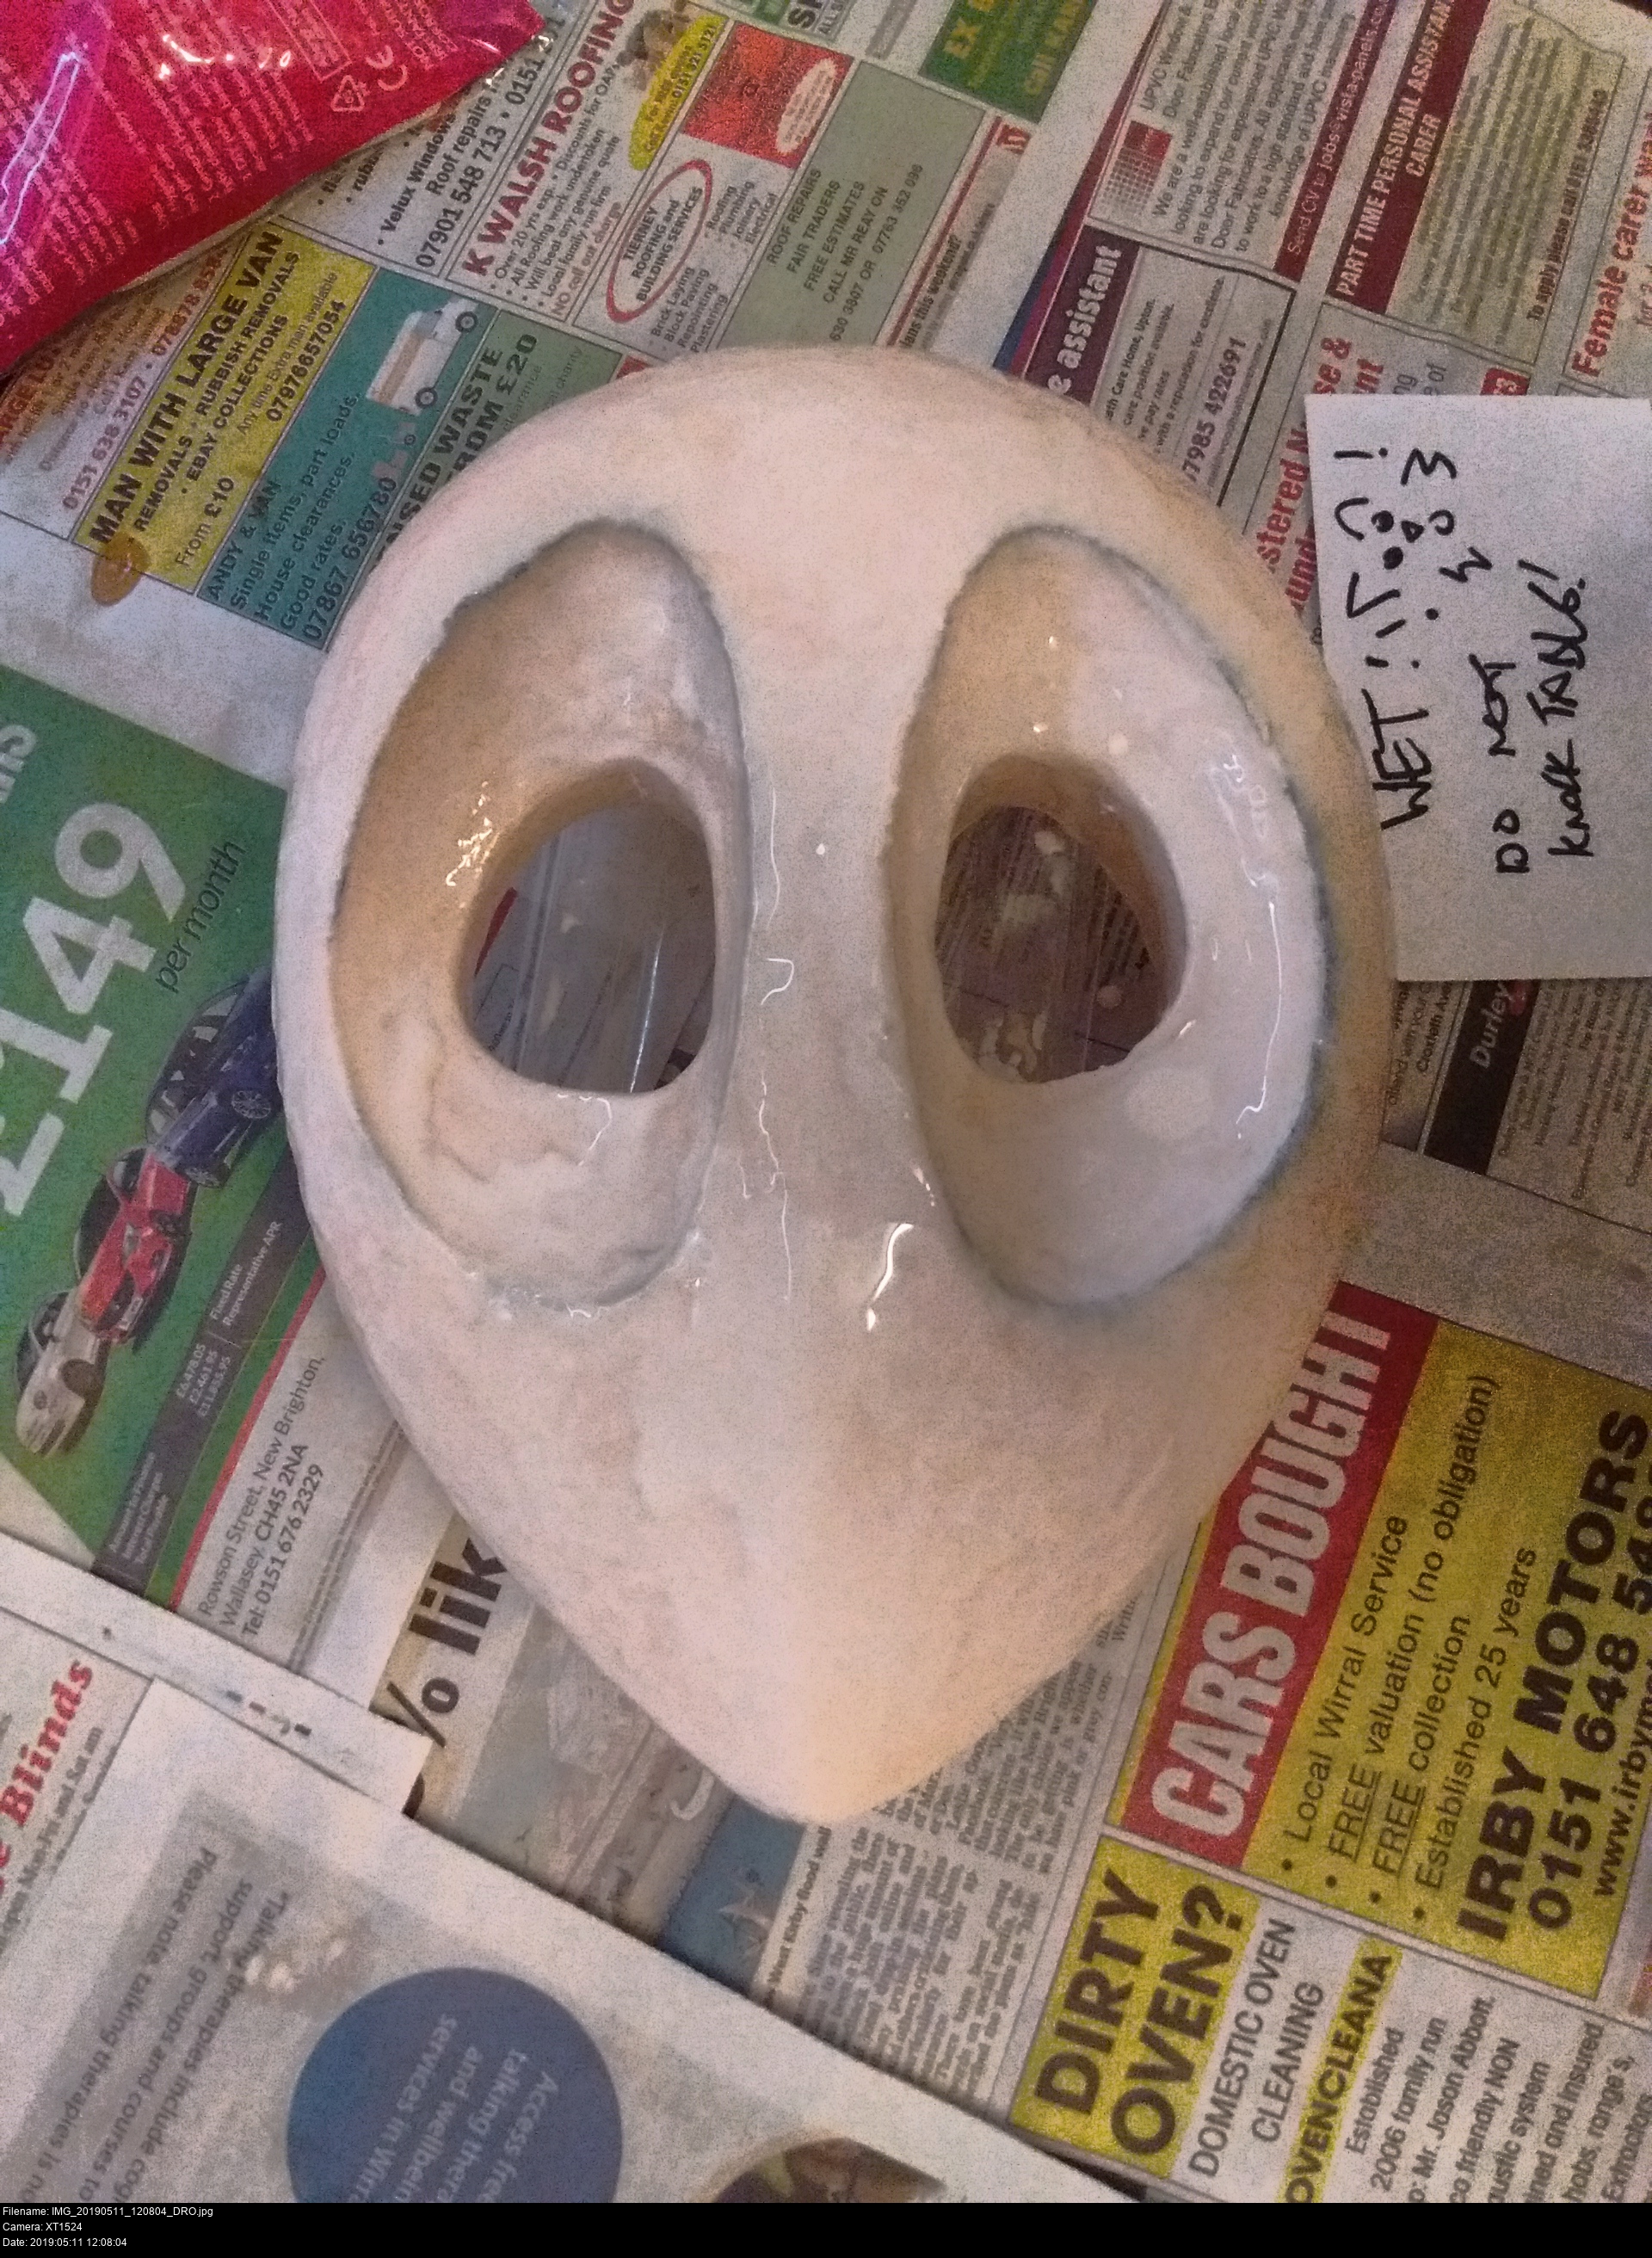
The mask is dry once again, a solid crust of glue is now firmly in place, with some minor lumps around the edge. You can see some of the bubbles that have developed and been trapped between the layers. I've applied four coats.
When sanding, use the normal technique: start with the coarsest grades and work towards the finer grades. The glue doesn't have to be perfectly smooth to move onto the next stage - but the surface does have to be clean, dry and complete.
My primer of choice is white arylic gesso from The Works, because it's not failed me so far. It's very similar to white paint, except its mission is to obliterate the colour of whatever you apply it to, and provide a papery or chalky surface for painting or drawing on. The cured gesso surface can itself be sanded or shaped to the level of finish you need.
I'm covering the entire top surface of the mask and the interior of the eyeholes. I'm going to apply four coats of it in total, and I'm using the same type of flat wide brush as I used to apply the glue.
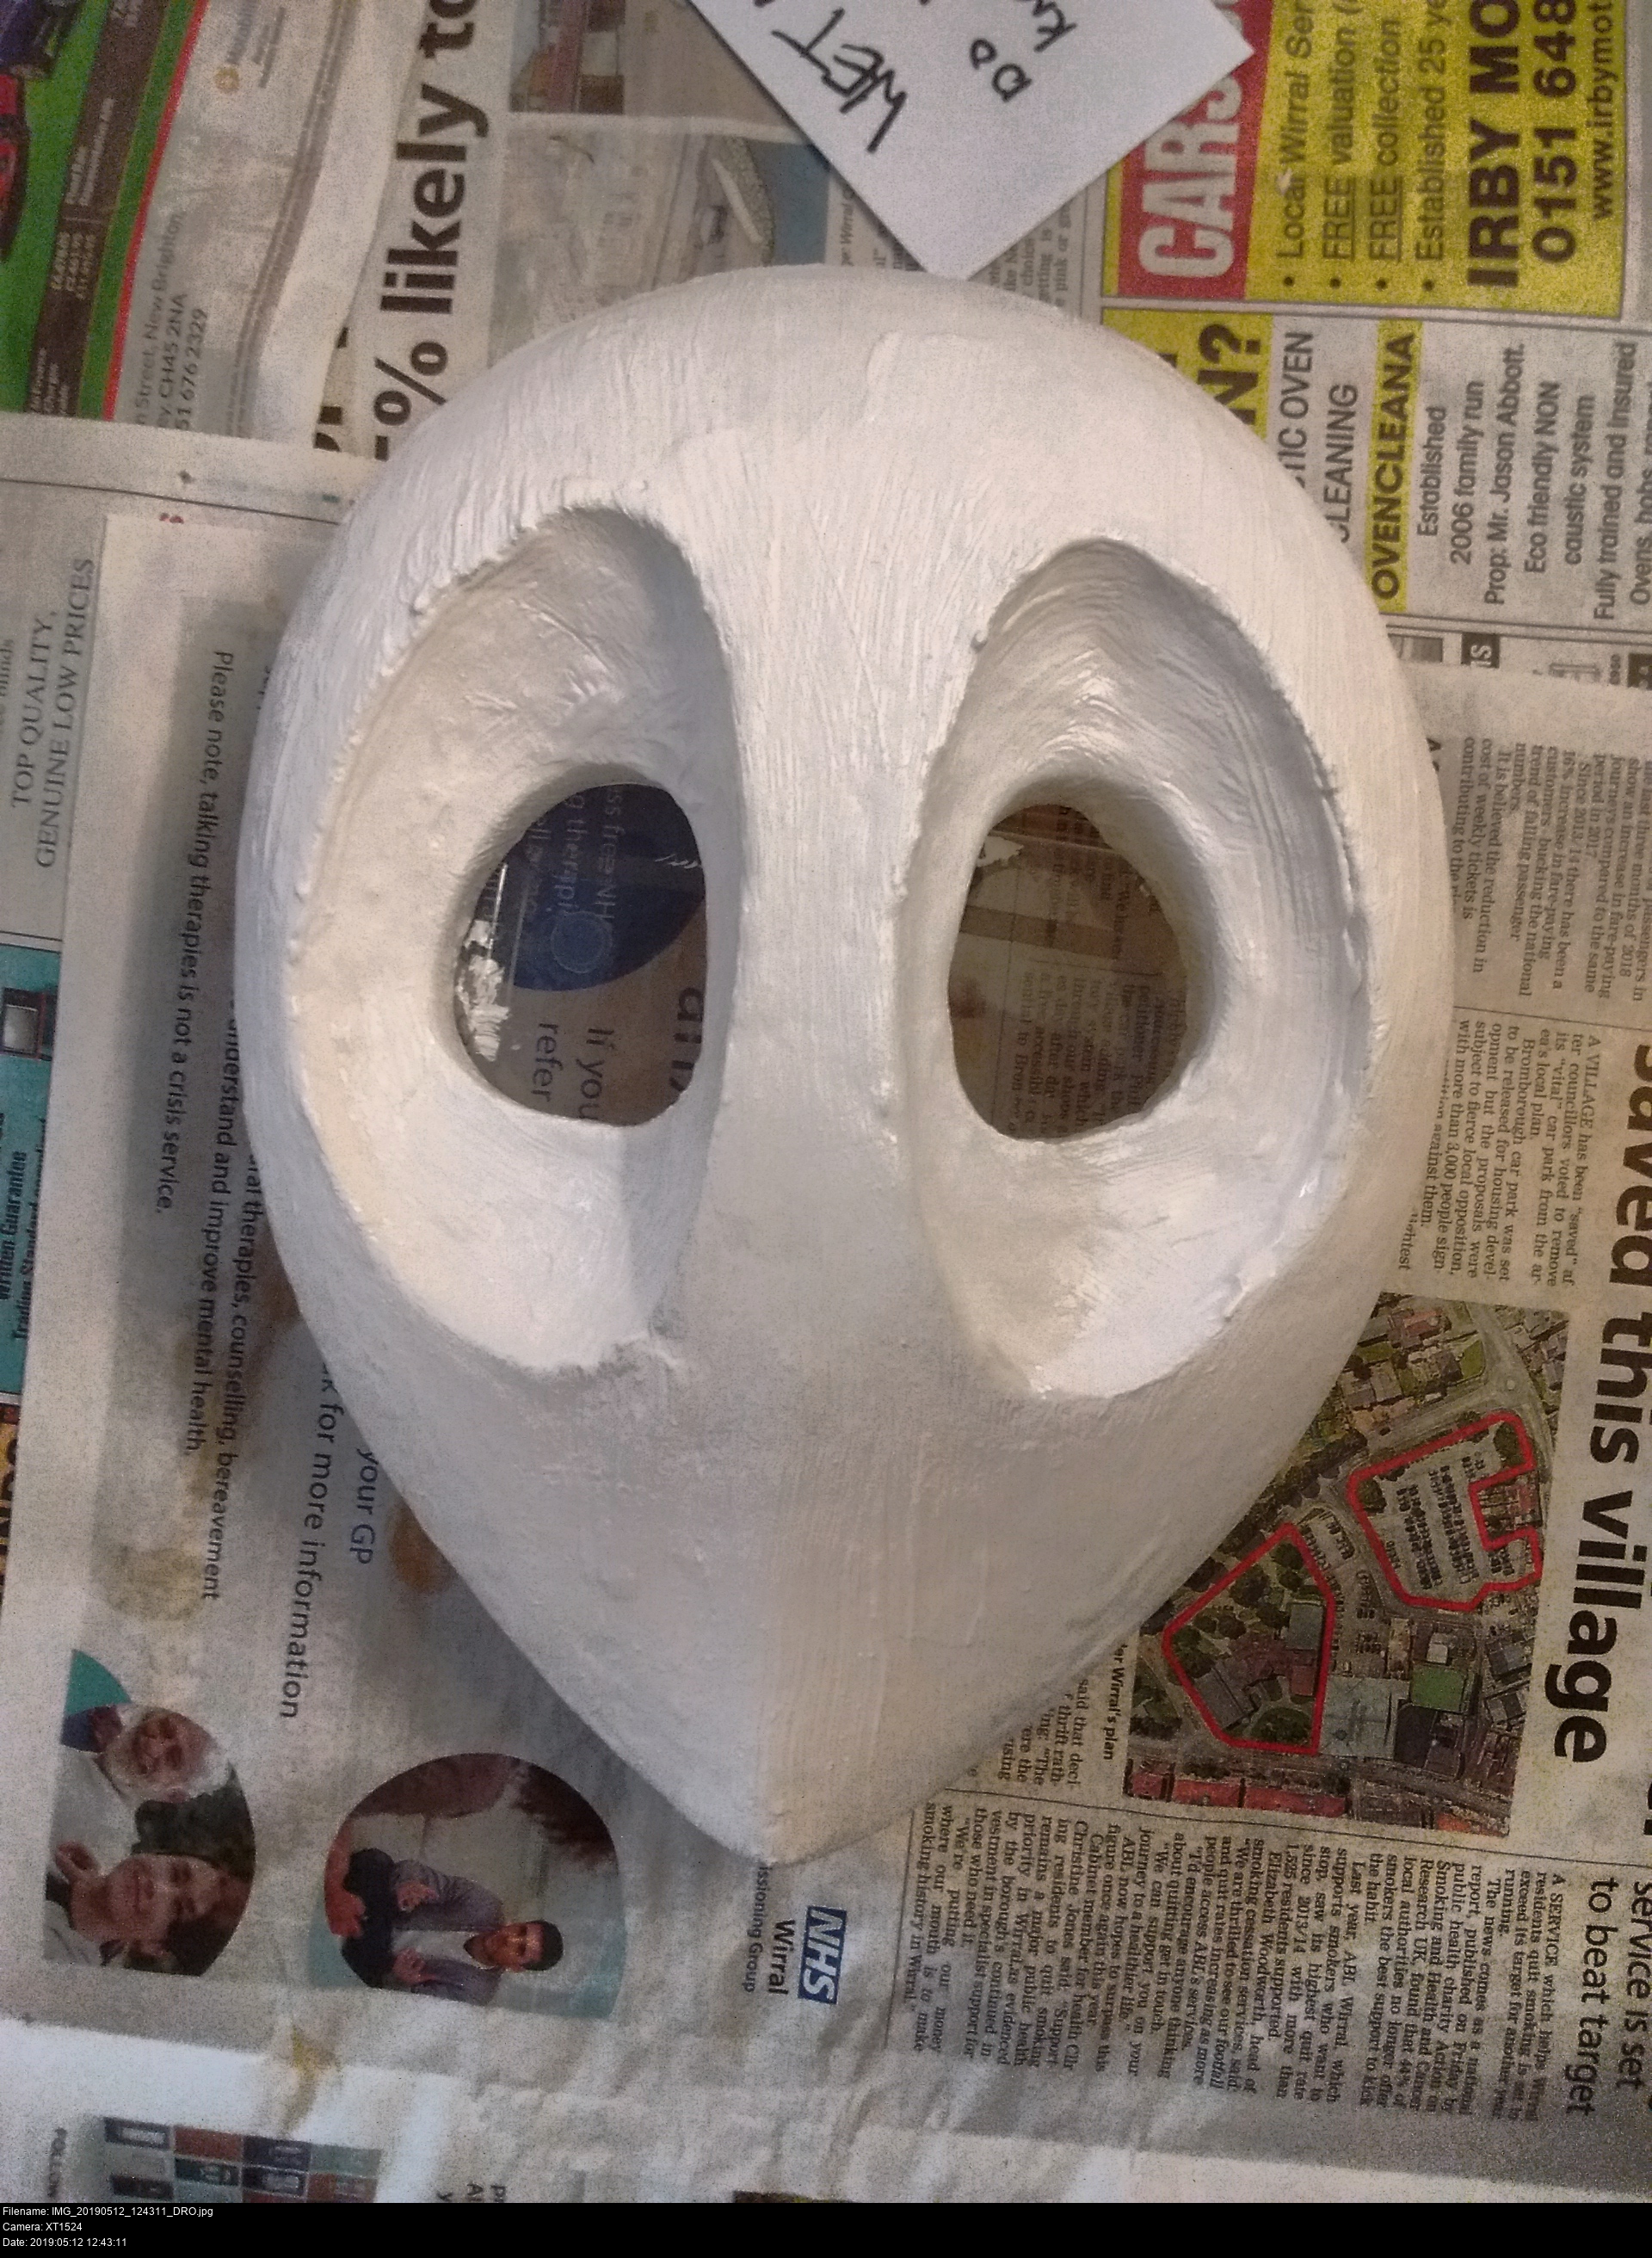

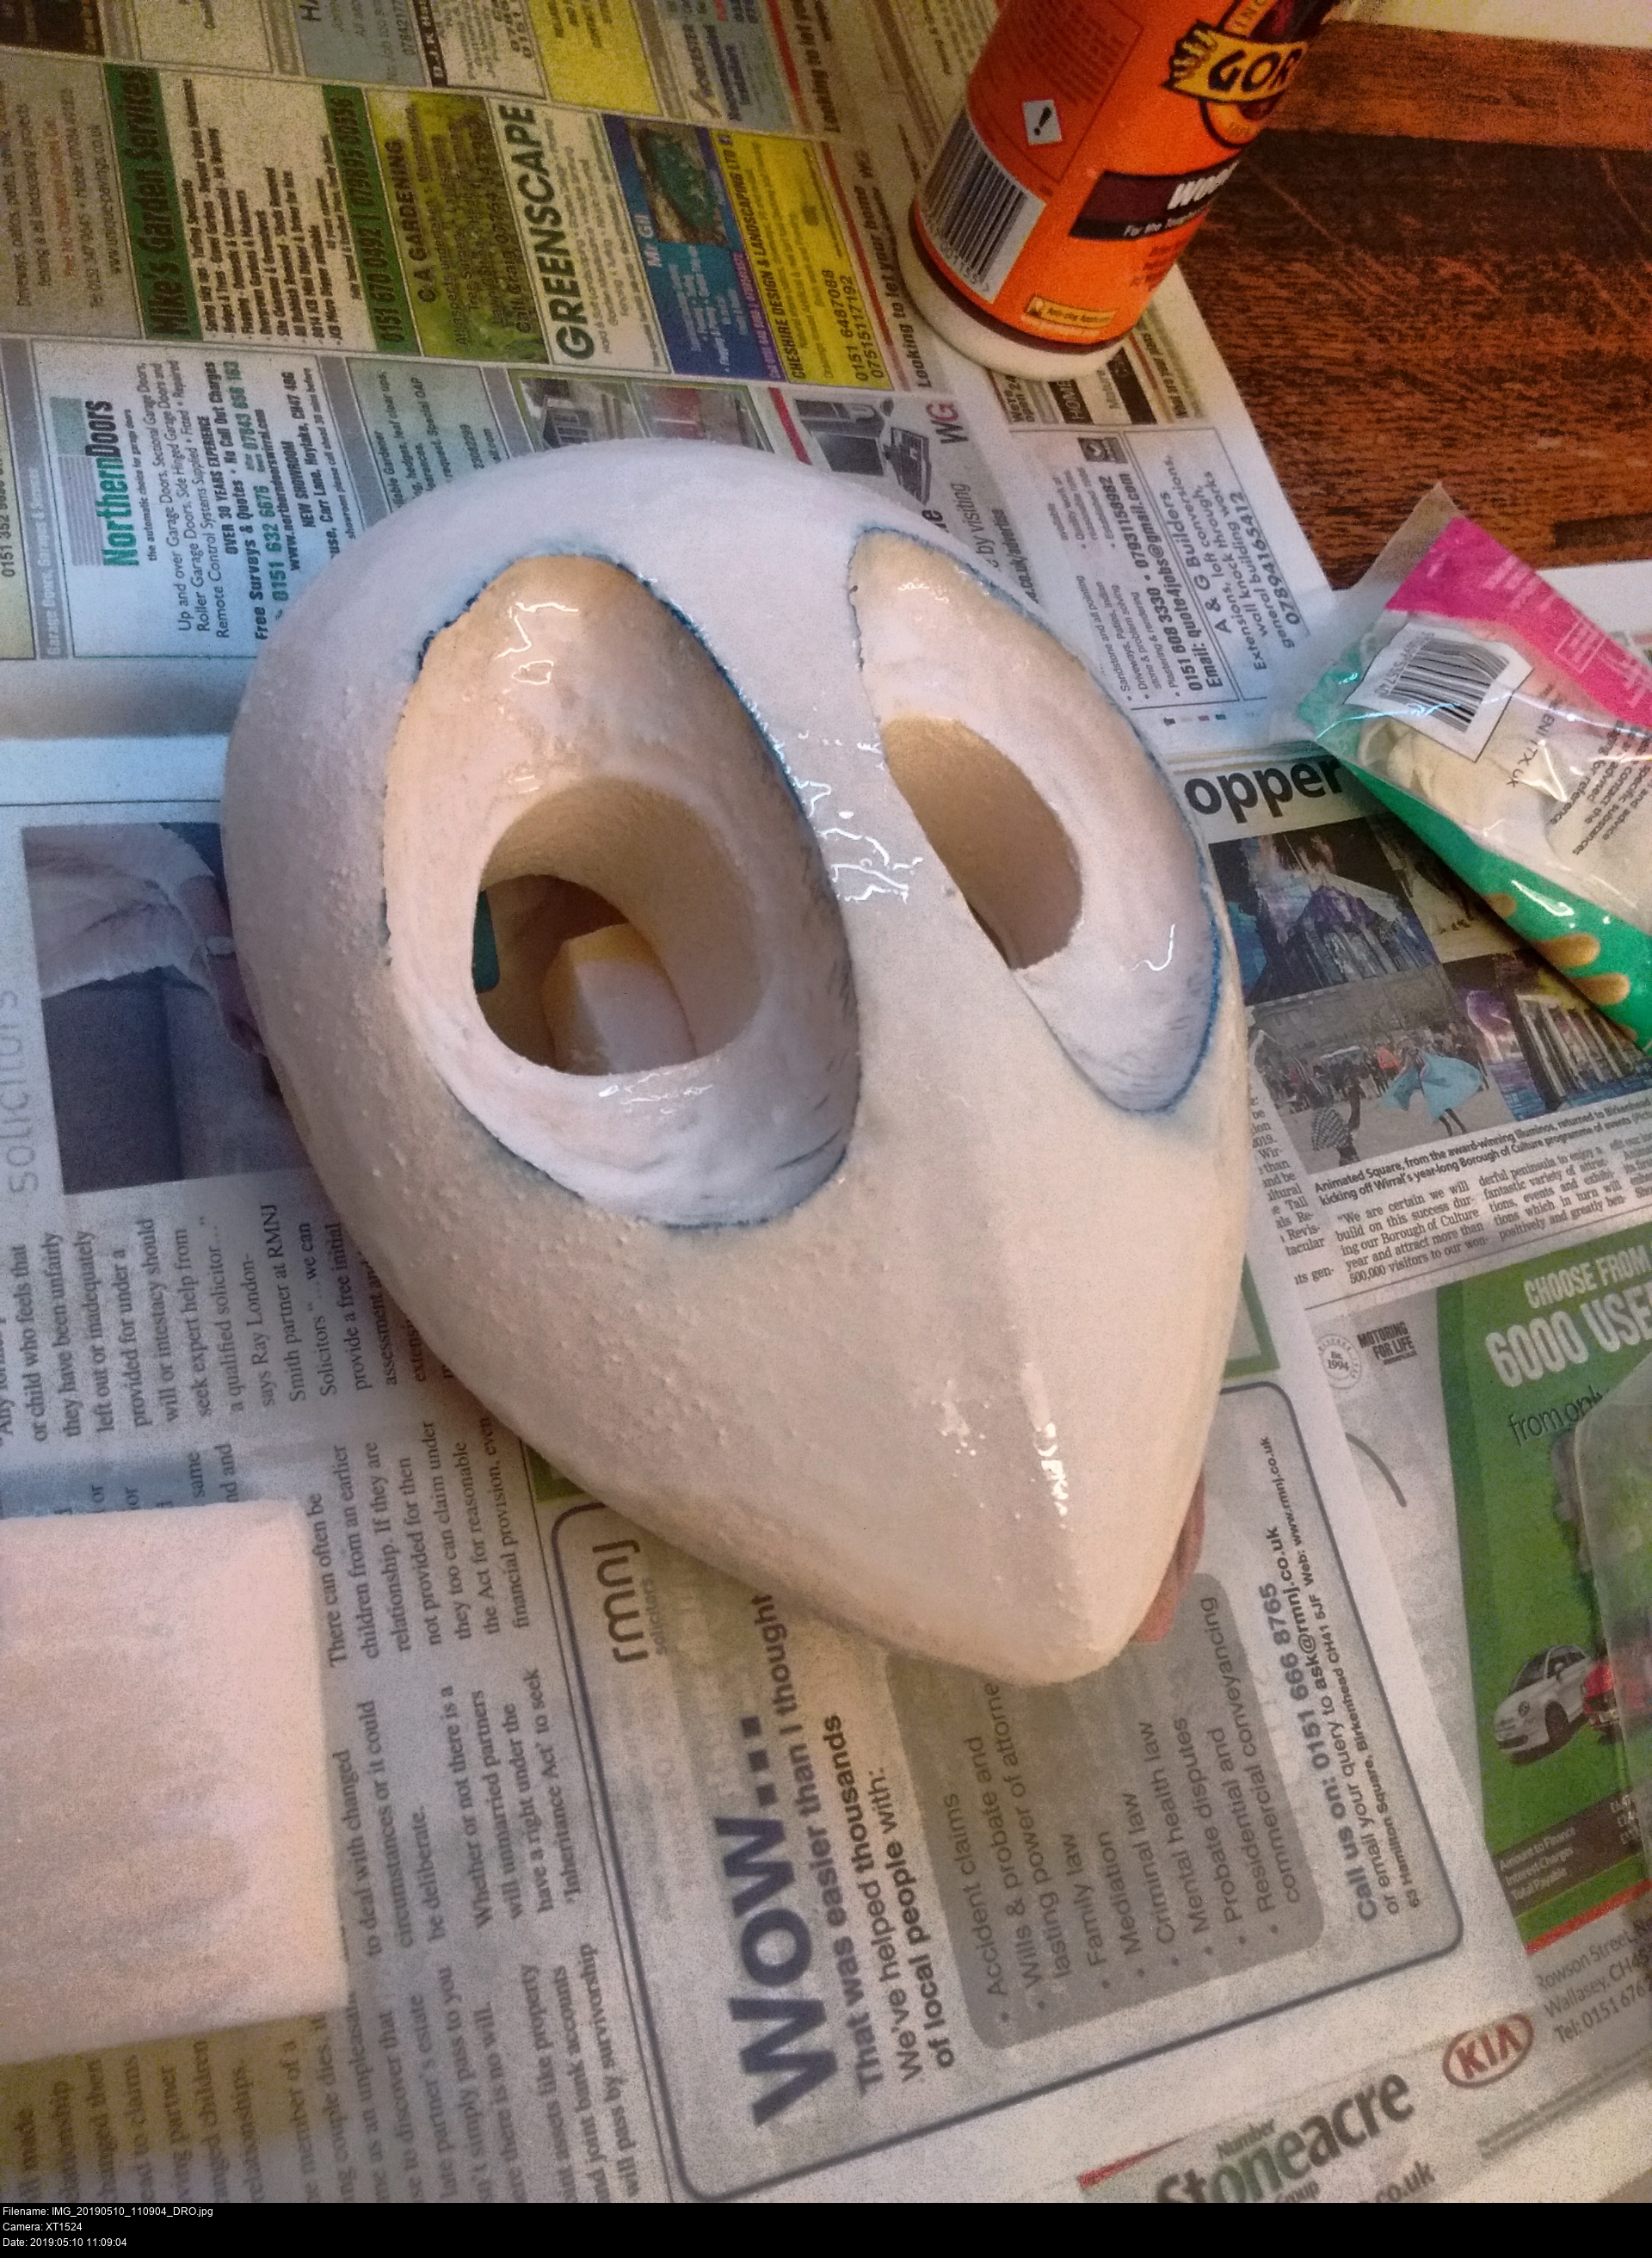
Here's how the mask looks after the first coat. These vertical streaks are very reminiscent of the vertical streaks of plaster I ended up with on my first attempt at making Majora's Mask using modroc. All of the imperfections in the glue and the XPS itself are showing up very clearly now in this flat whiteness. It's all part of the plan.

Another layer of primer in place. I'm trying to apply the brushstrokes methodically, vertically over the surface of the mask. Not for any deliberate reason other than neatness.


As the primer builds up, all the amber glossiness of the GG wood glue and the marker smudges have been annihilated. It's looking pretty good, lumps aside.
It's time to take this to the shed and give it a good going over.
You should be very gentle when sanding the primer. It has a chalky texture, and it's somewhat soft also like chalk. Start with a fine grade and work up to super-fines. I'm going to ignore my advice and be a little harsher though: I intend to go right through the gesso and take off a millimetre or two of the solidified GG wood glue as well. I'm going to rely on the built up gesso layers to fill in the imperfections that have survived up to the glue layer. Once I'm done, I can prime it one last time with the refined structural-primed surface, sand that, then it'll be super smooth and imperfection-free and paintable.
Sand carefully, anyway. And wipe that mess with slightly damp kitchen roll or clean cloth to remove the dust before taking that anywhere near indoors.

Here we go! I have given this guy a serious going over, wearing the primer right down to the glue to remove the lumps and imperfections. I didn't use the bit for this, just lightly rolled up sandpaper. Those dark marks are where I've sanded away right down to and through the GG layer to eliminate lumps in the mask surface and in side the eyehole cavities.
Now I have to re-prime over it again...
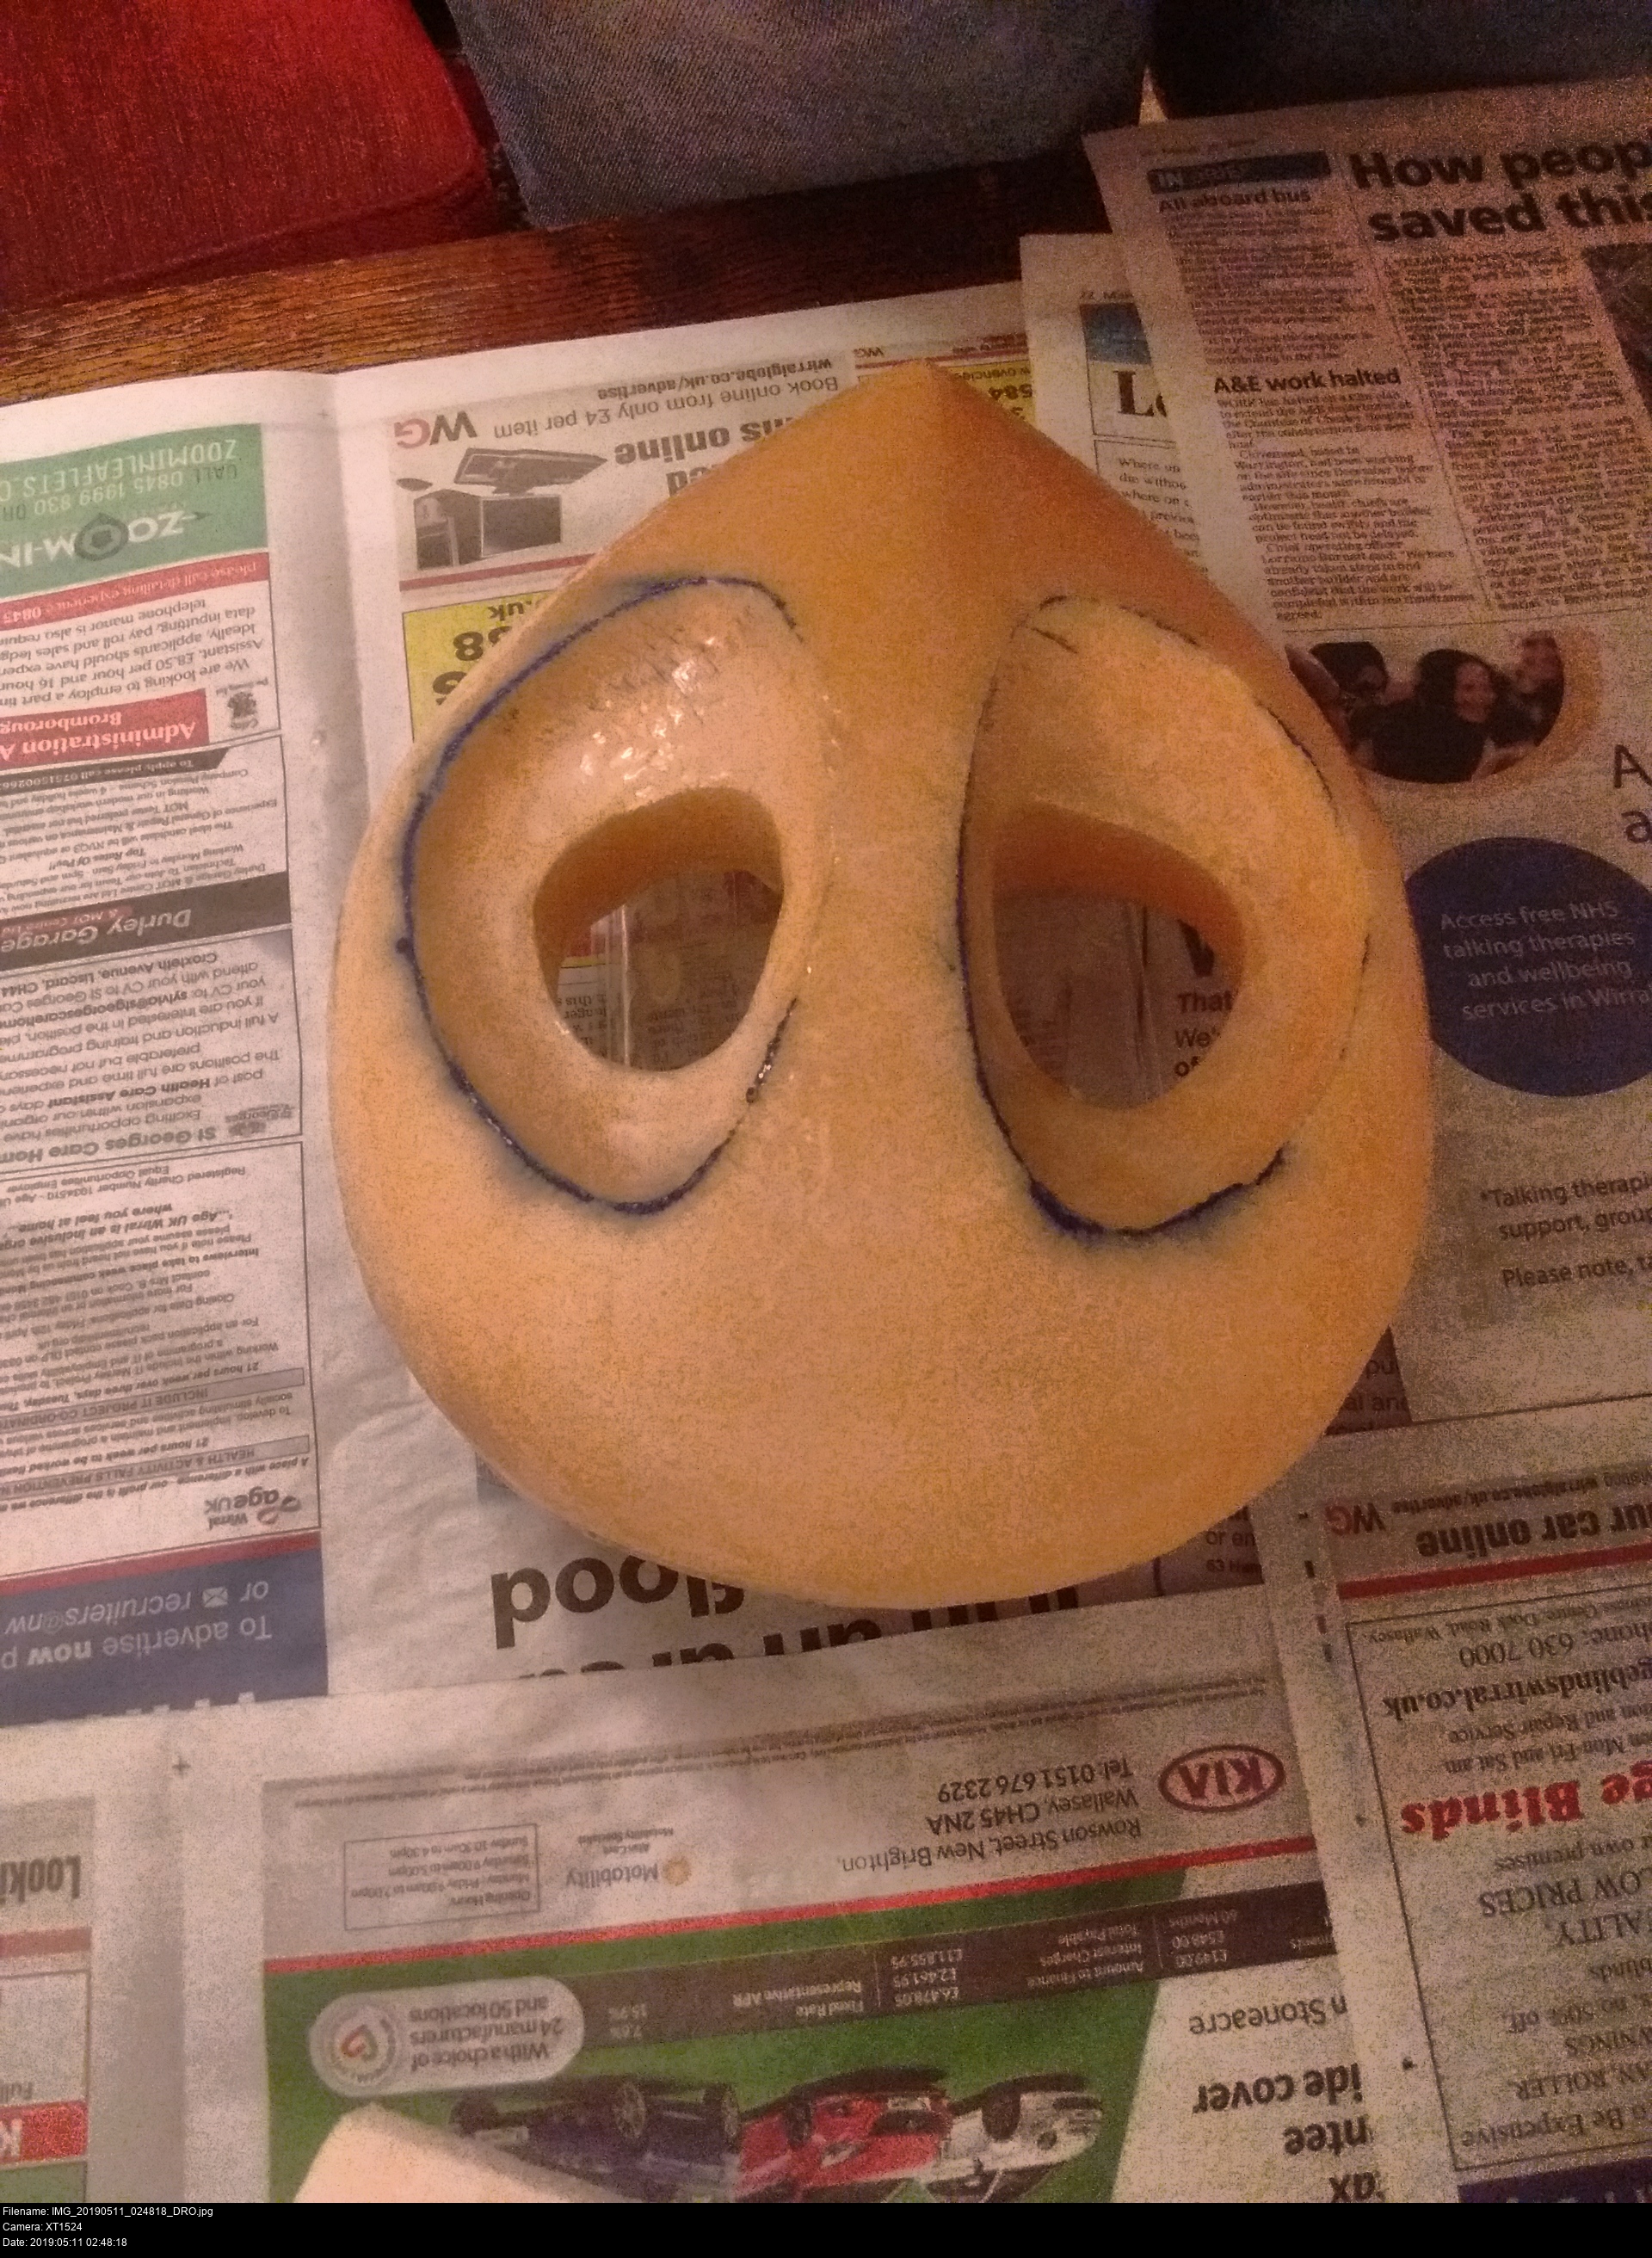
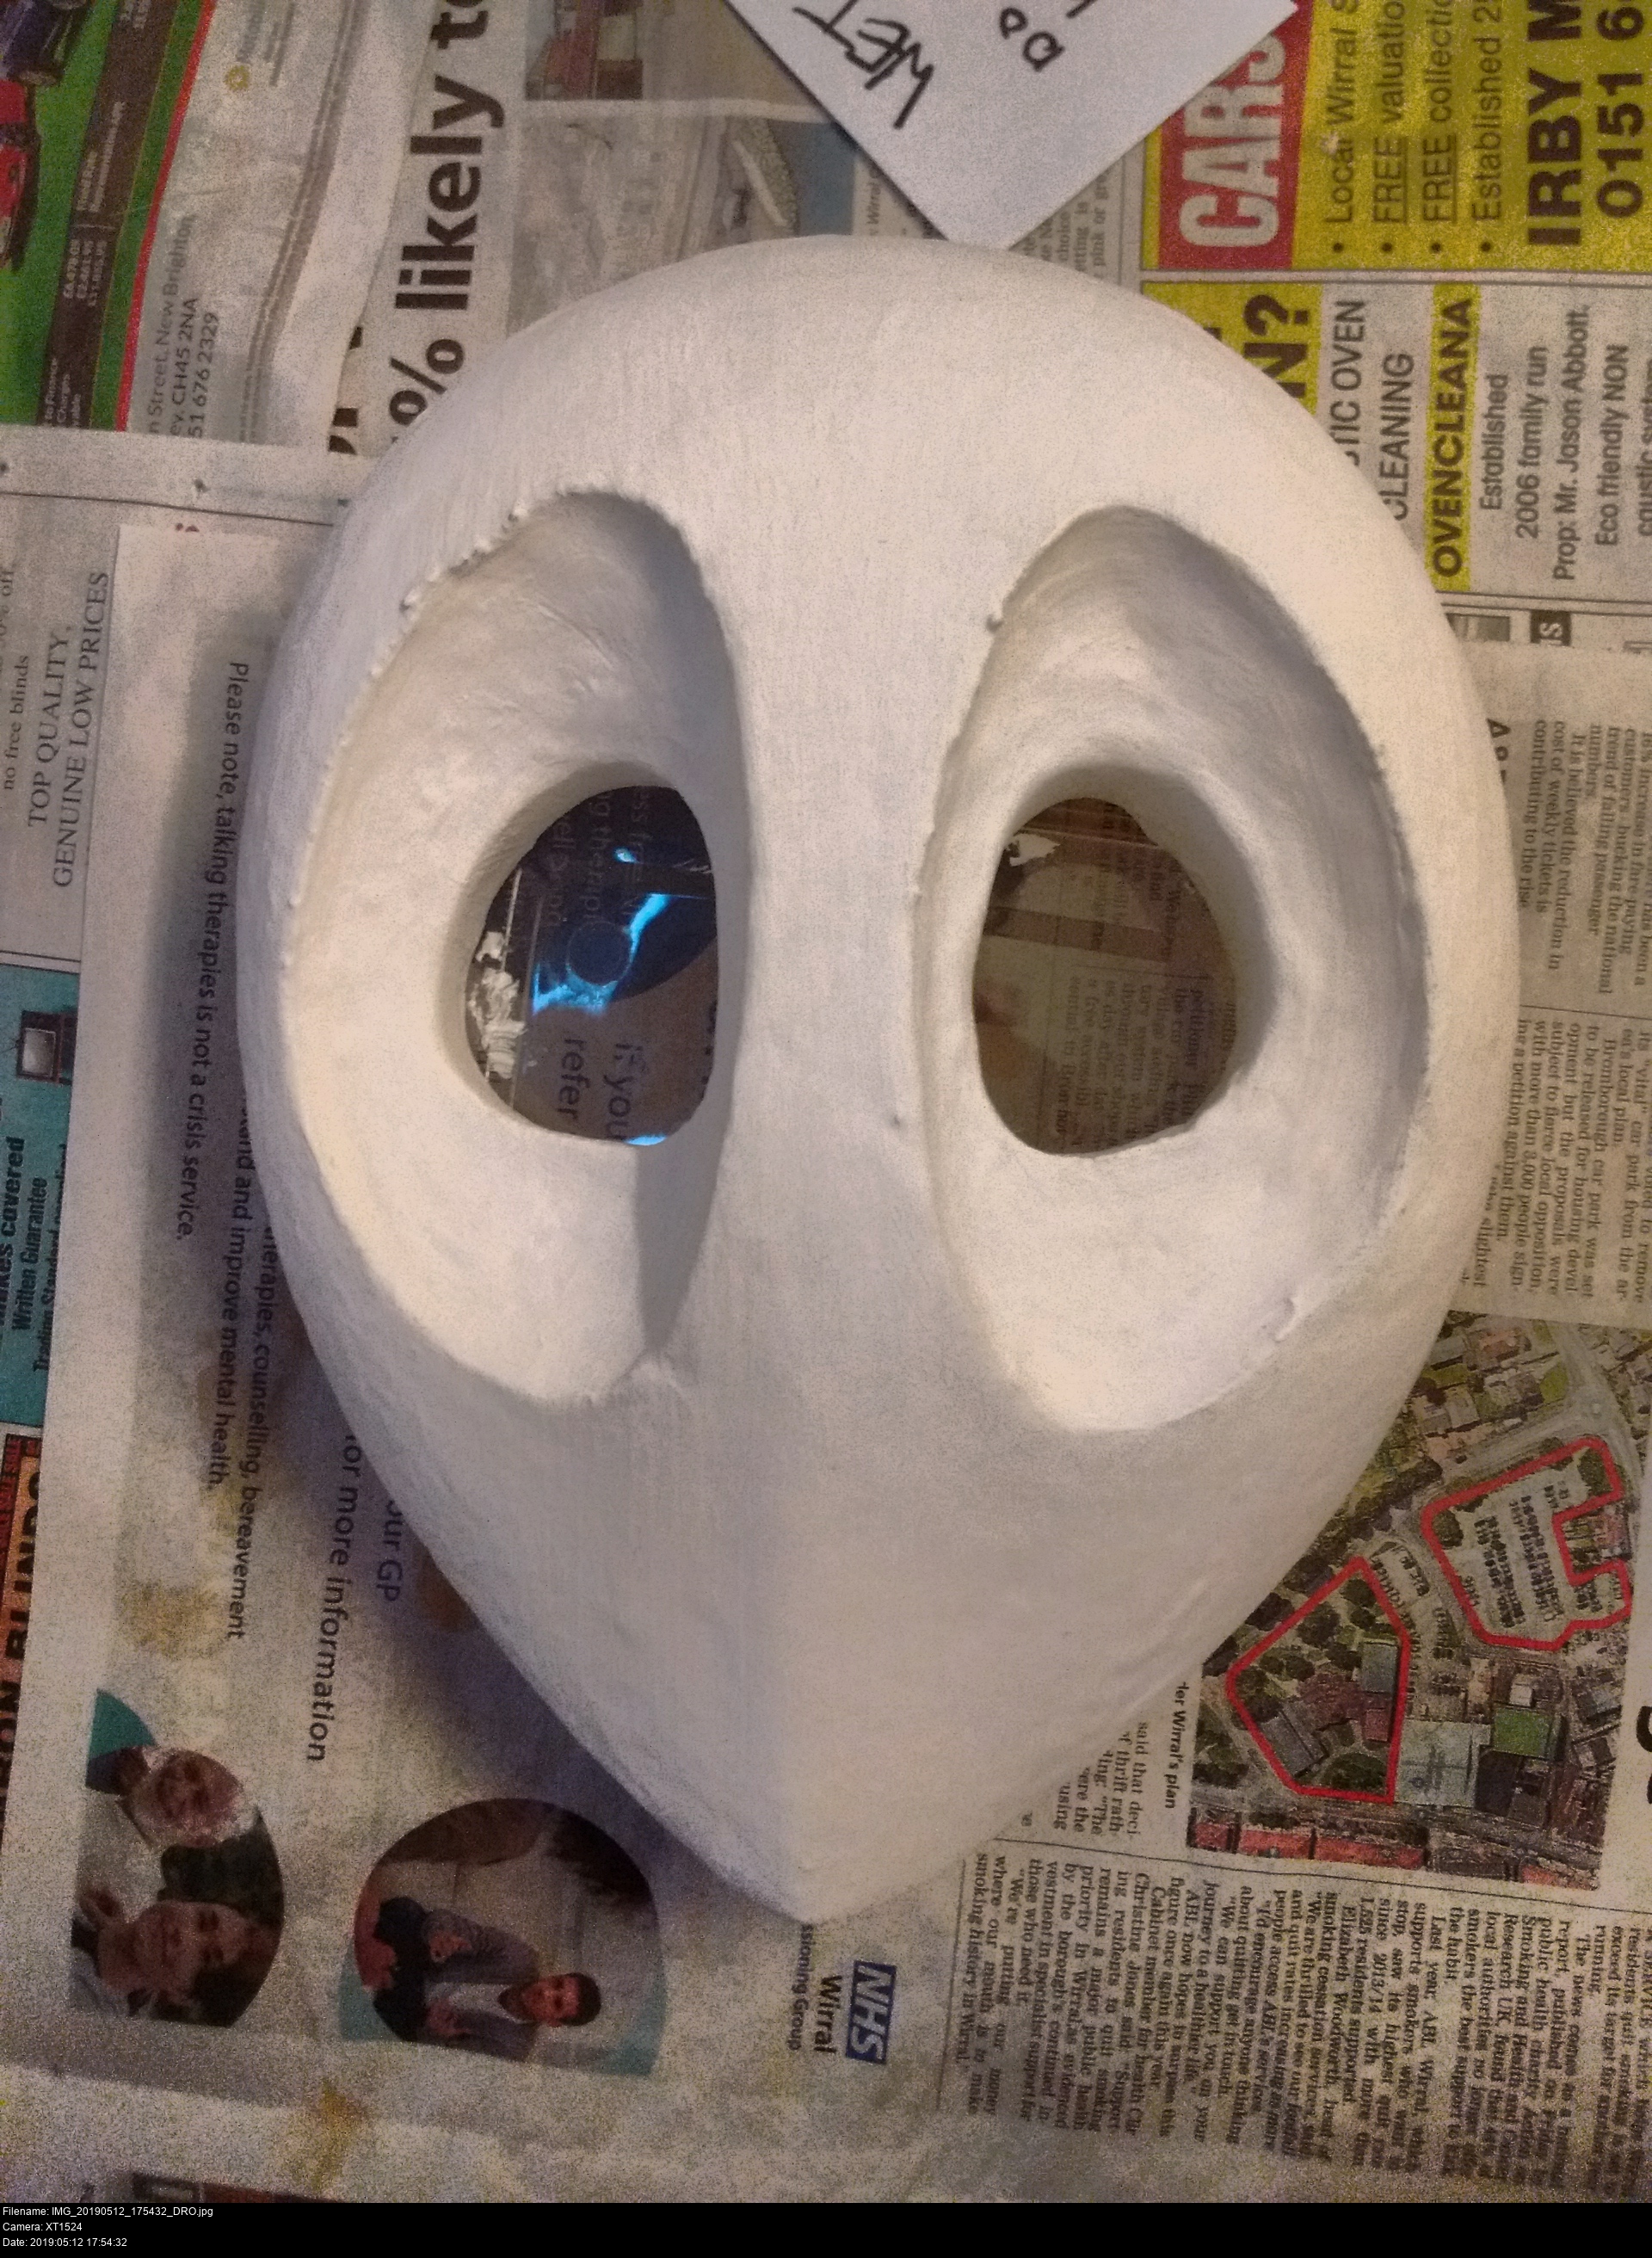
Primed once again. I could paint it at this stage, but I don't want this ridged surface. Akiyuki's mask is supposed to be magically rubbery smooth and all.
Gentle sanding (outside) for me, then some strong kitchen towels or a microfiber cloth to finally buff it to a lovely smoothness. If you use cloths, don't re-use them amongst different roles because that's gross.
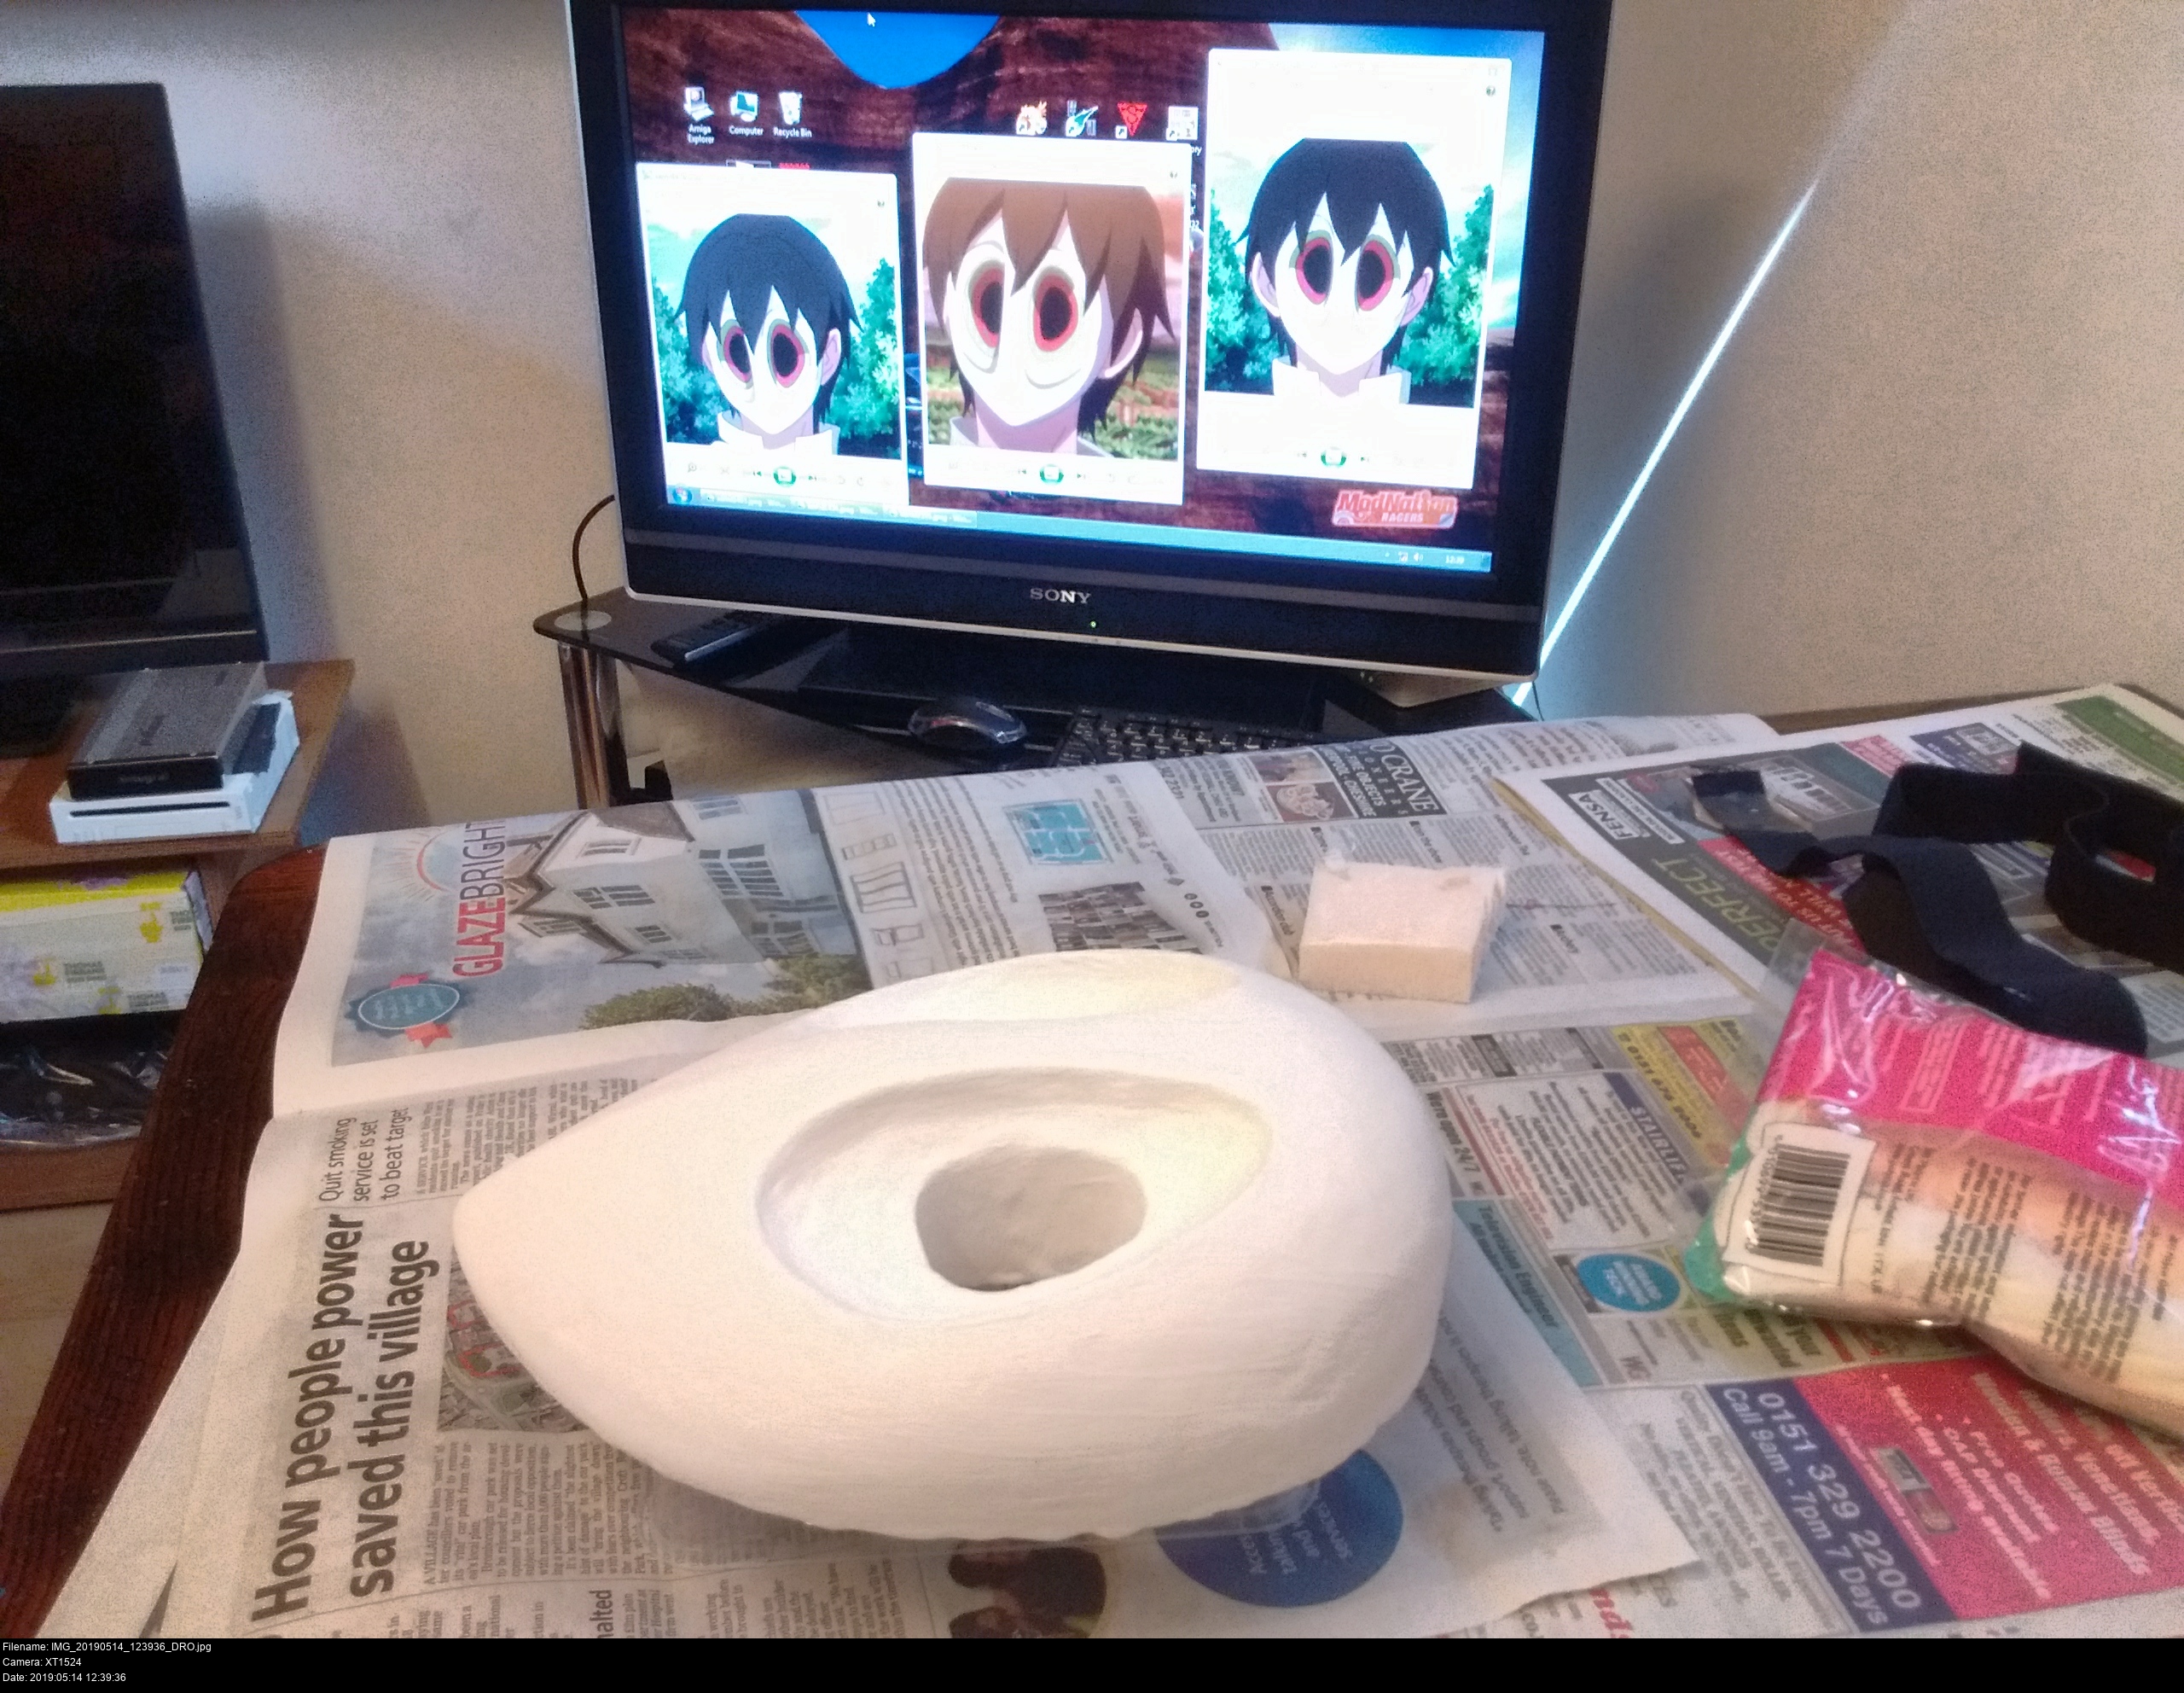
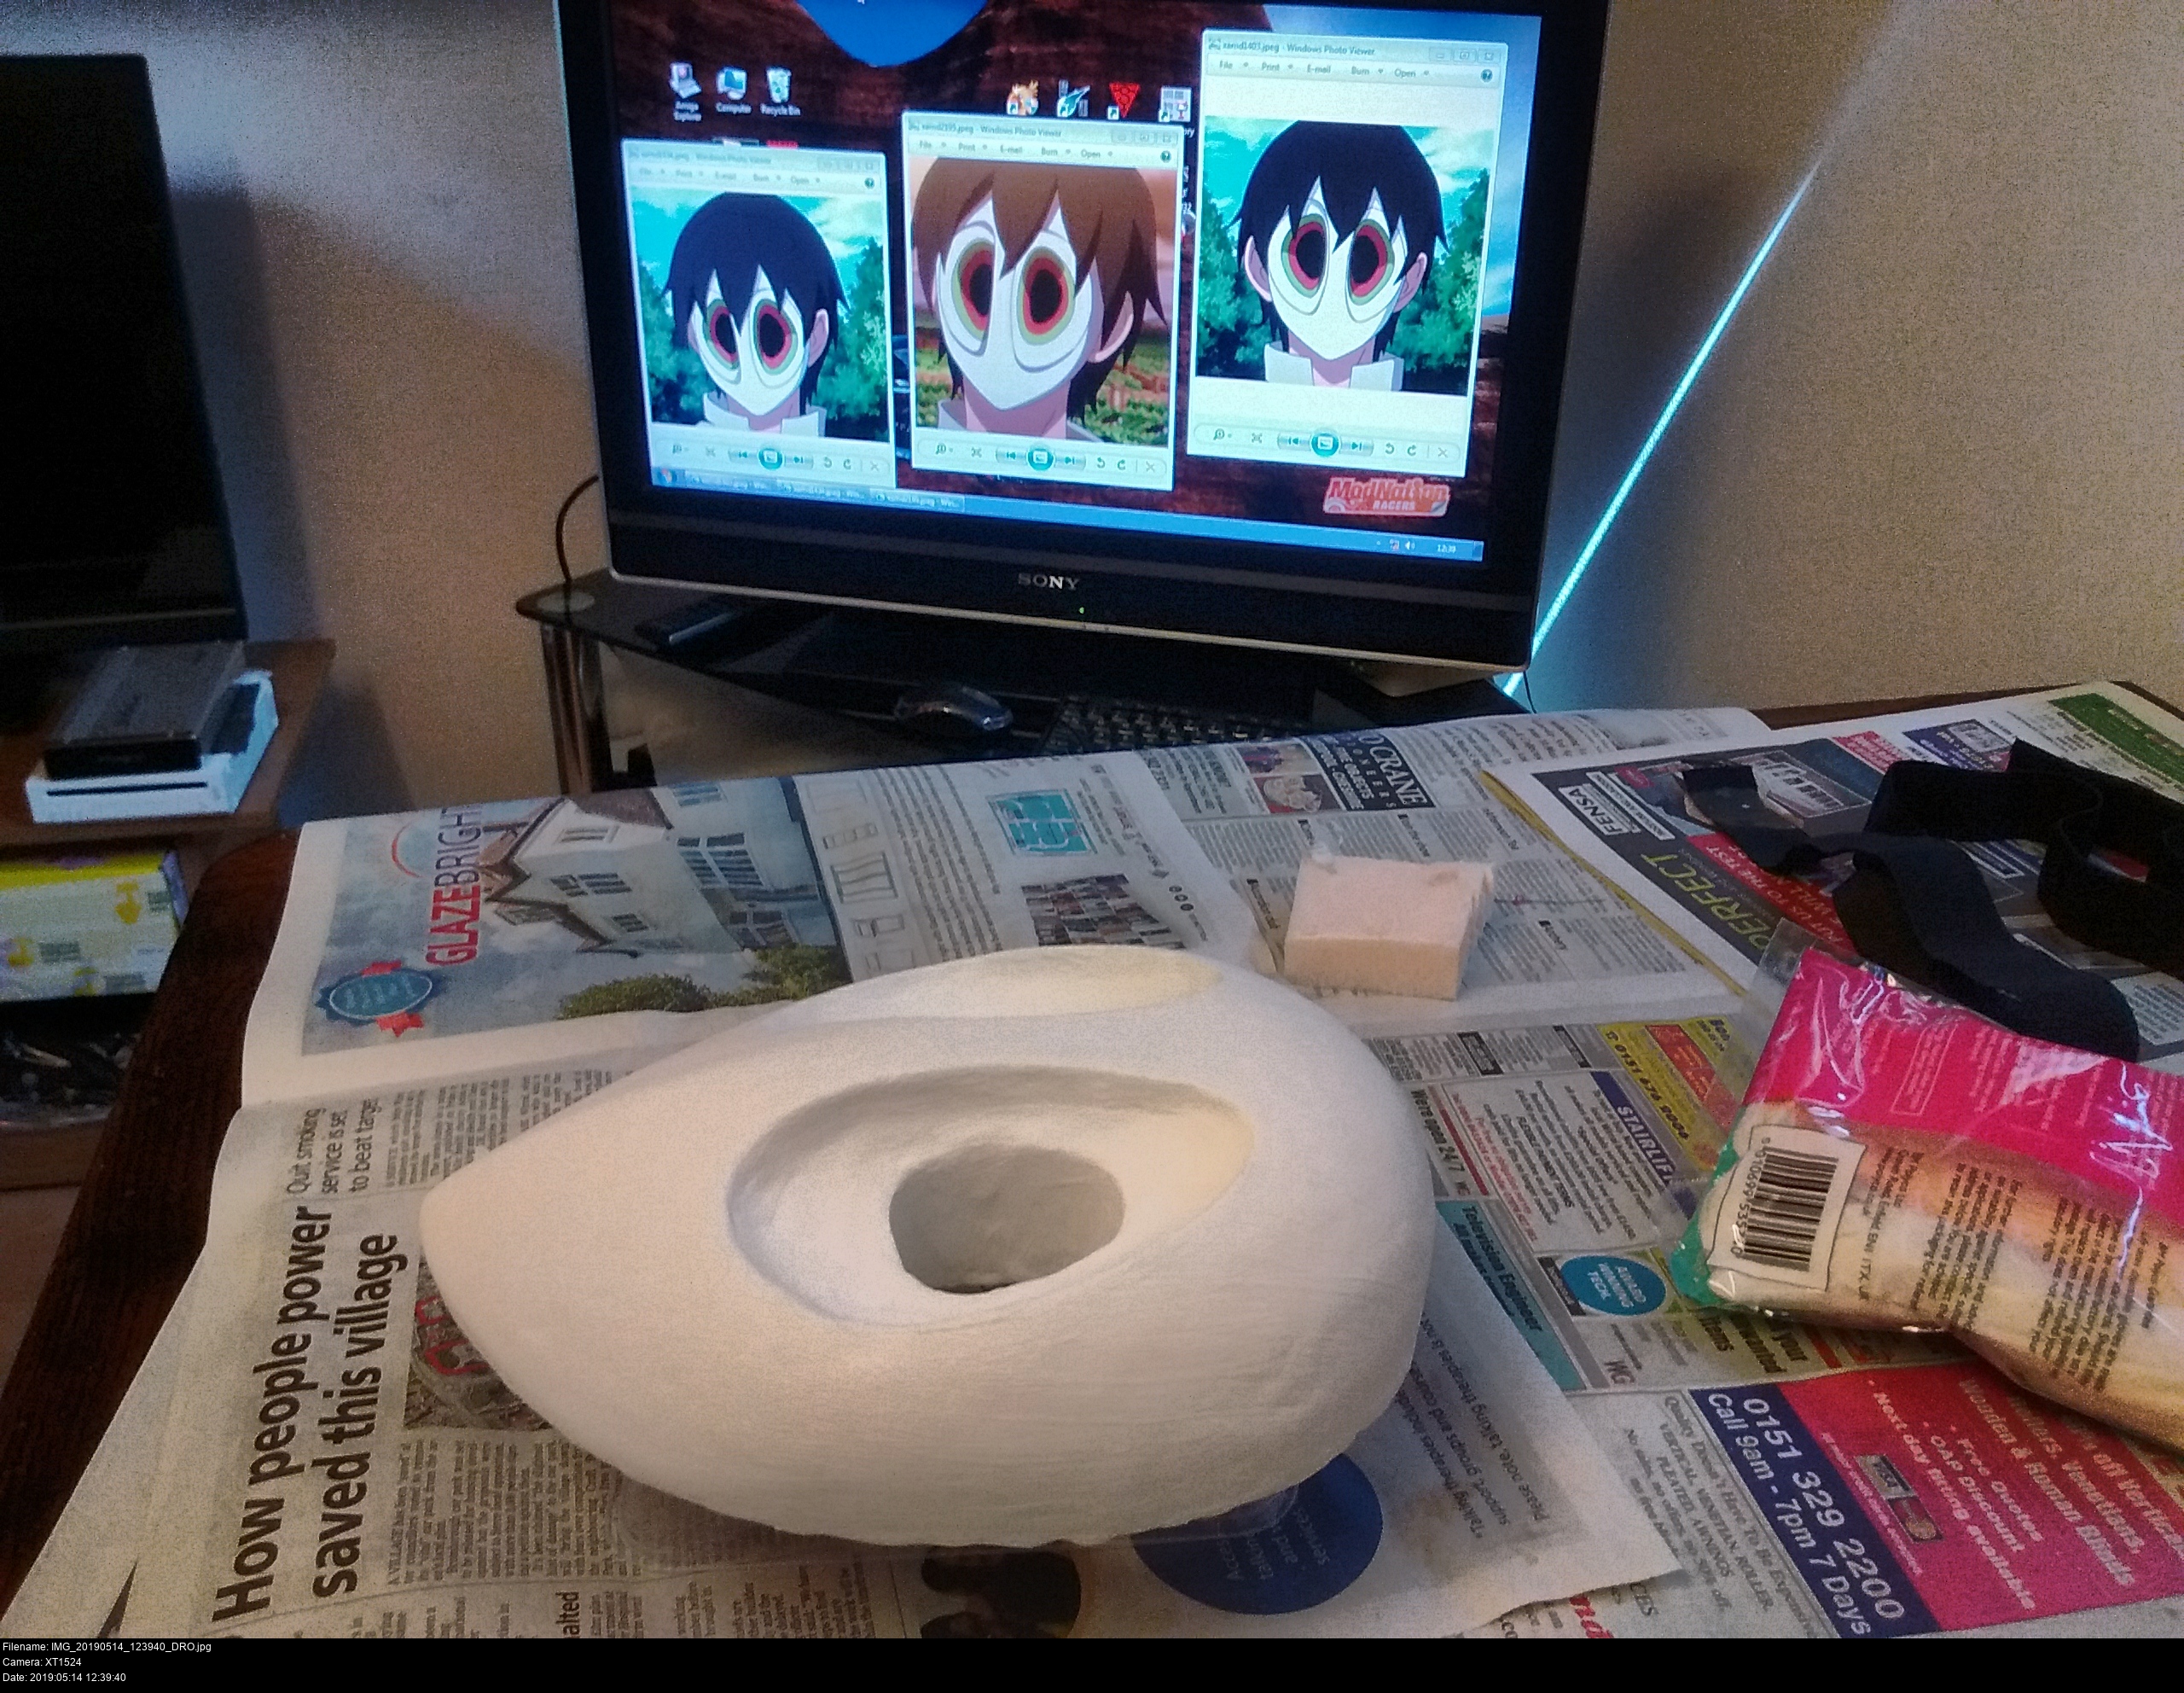
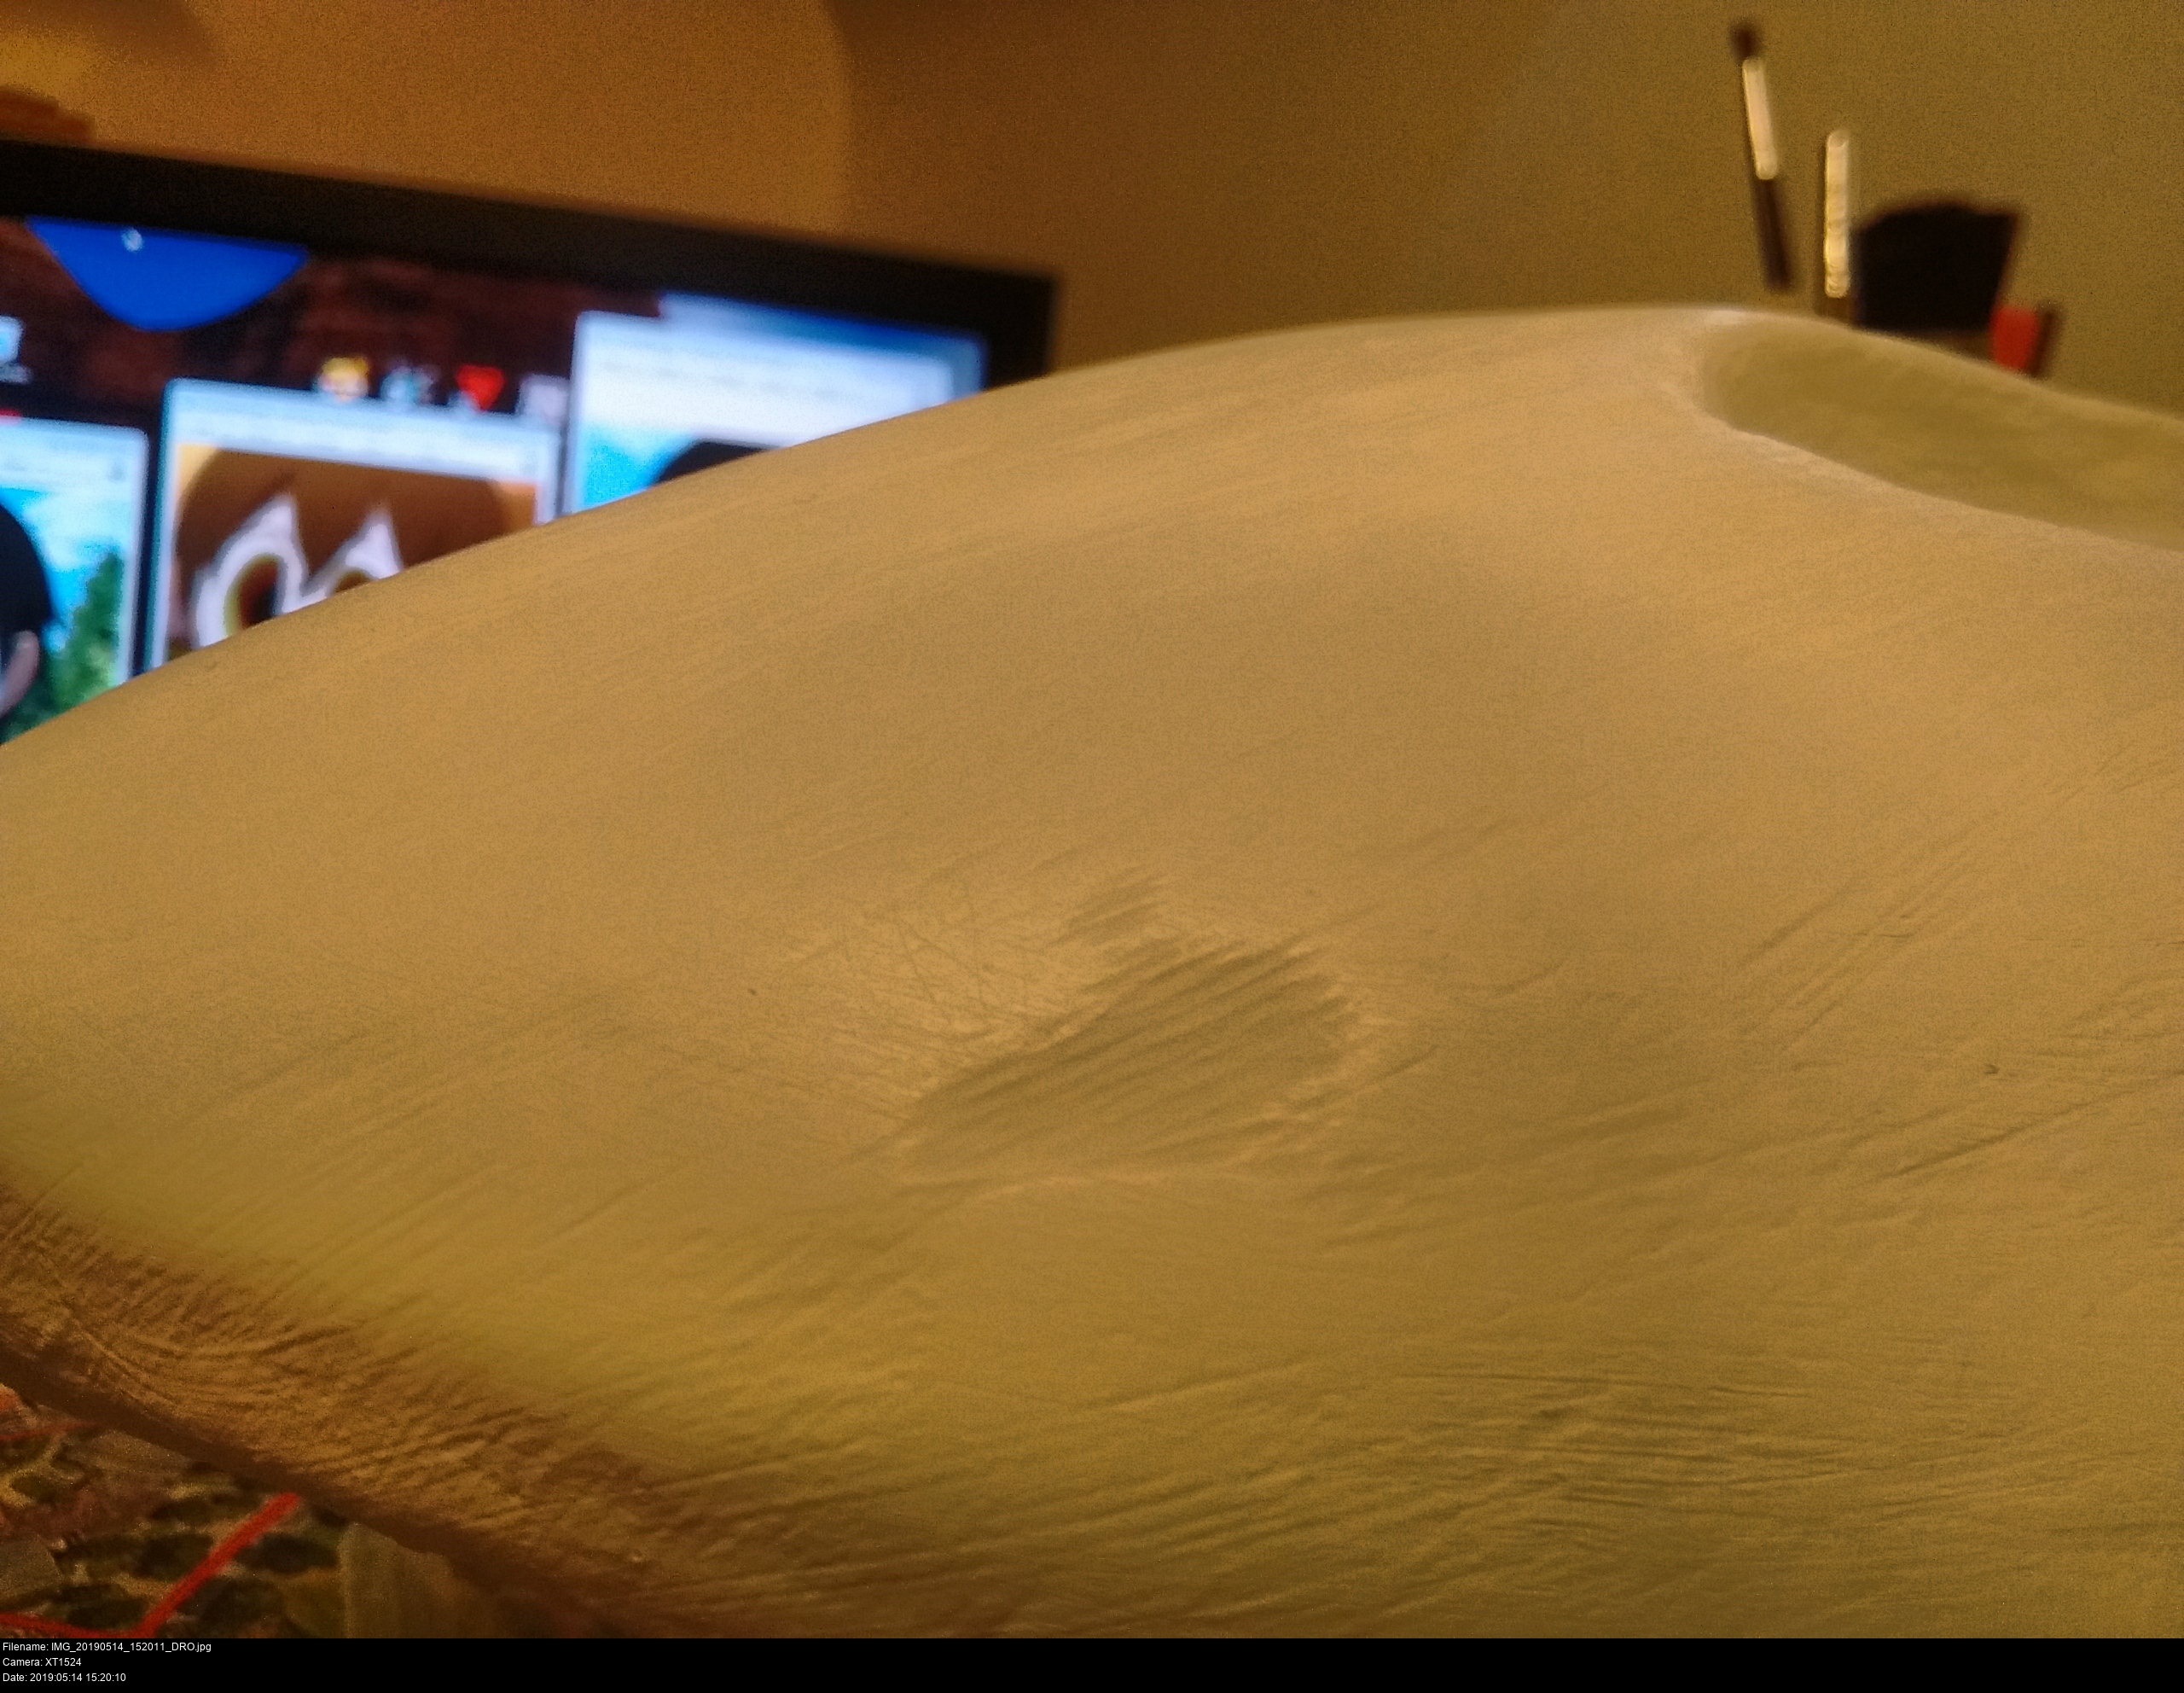
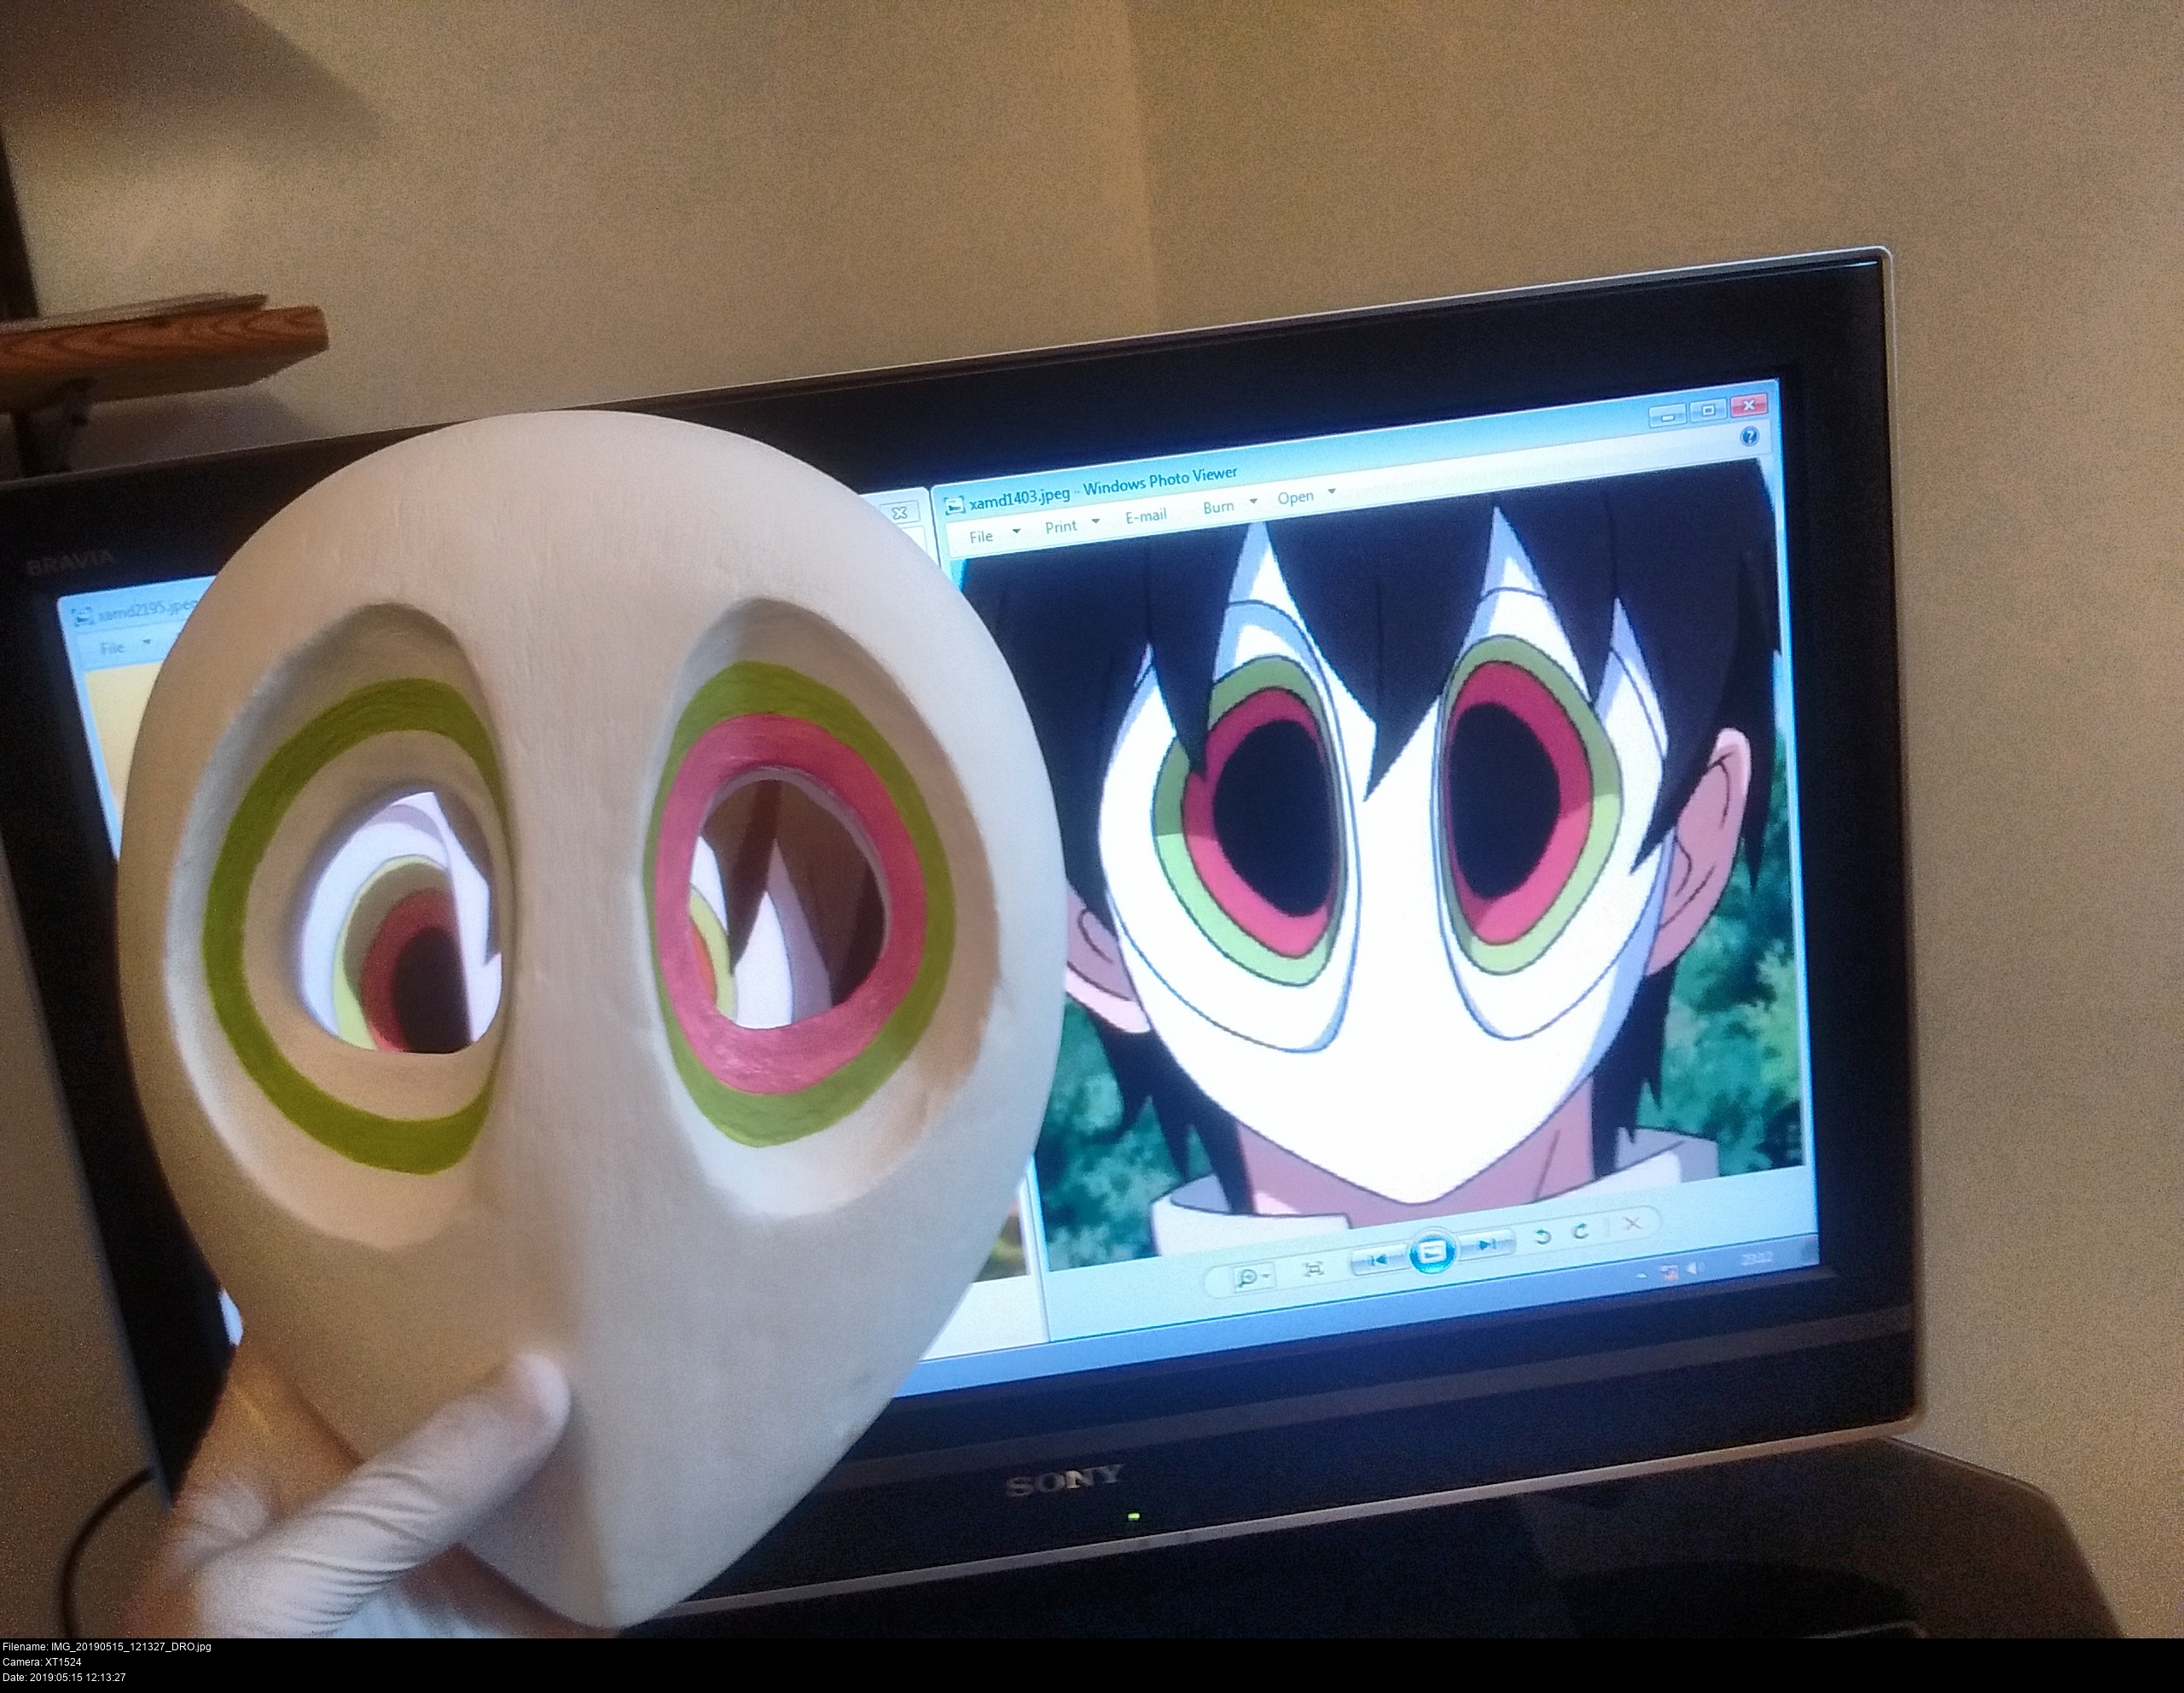
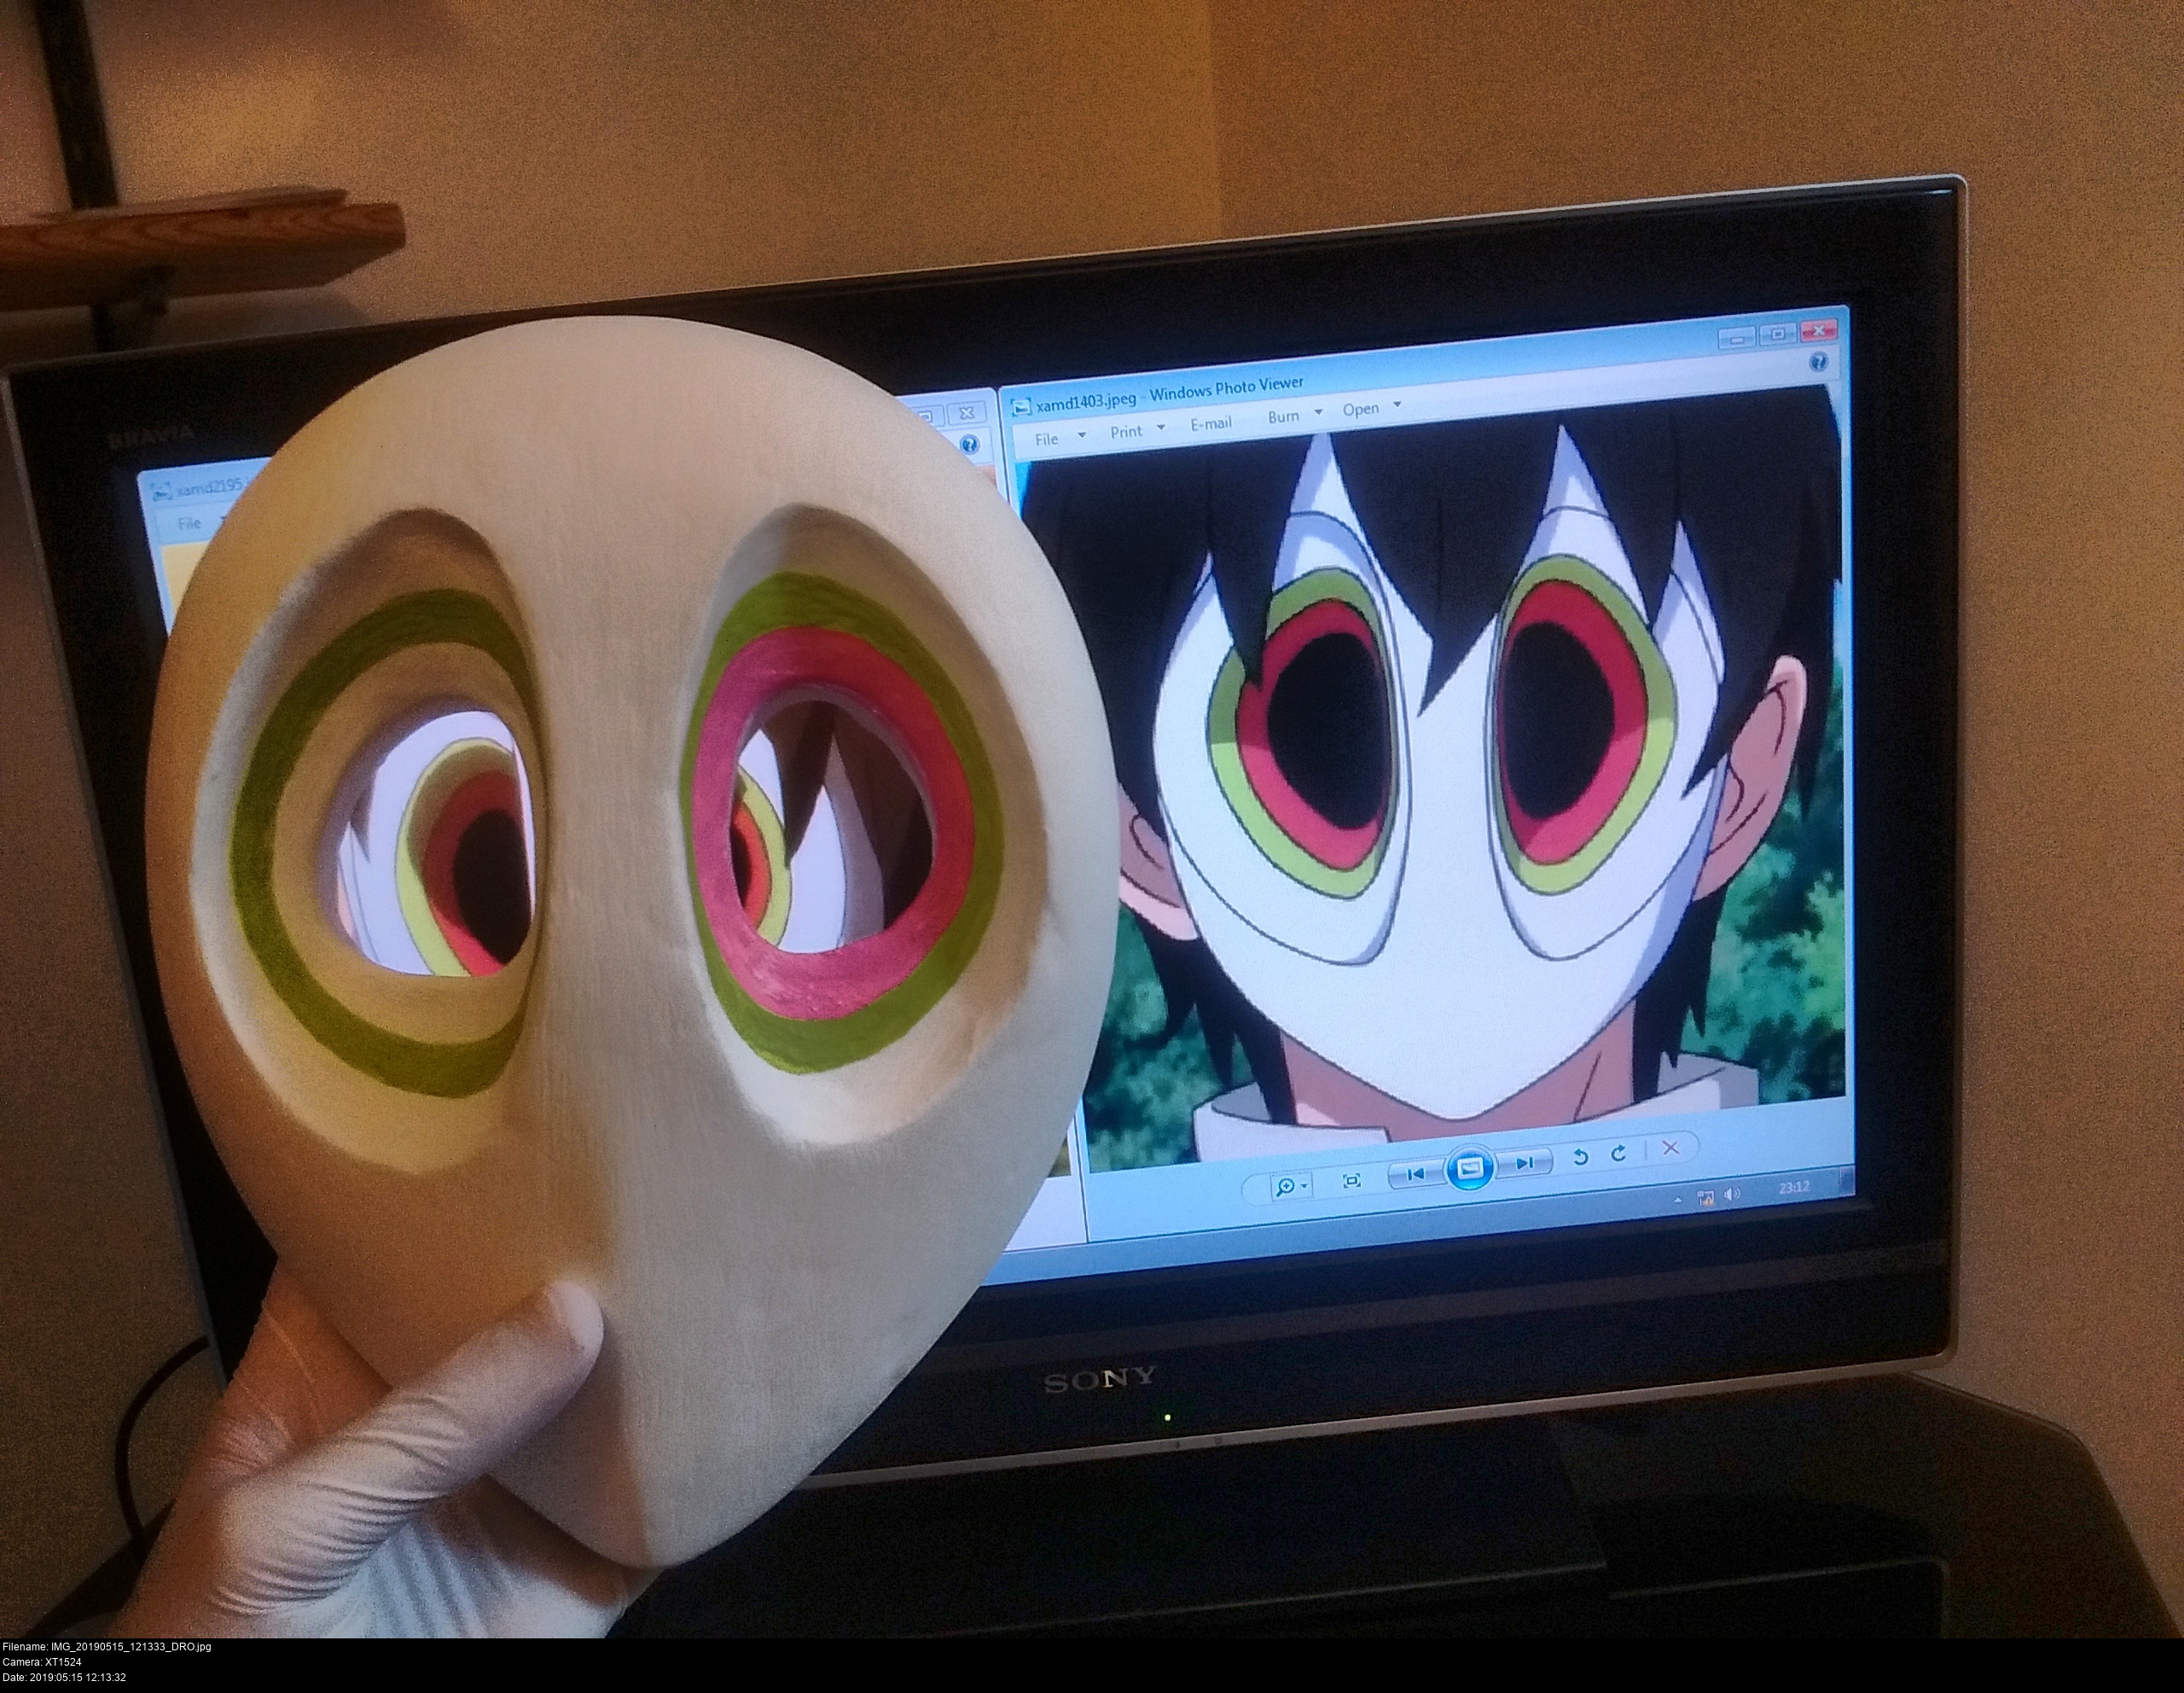
I've set up my TV as a monitor as well to show some reference pictures of the mask for the painting I'll be doing shortly. Having a giant, self-illuminated image of multiple references of the work is a very good plan.
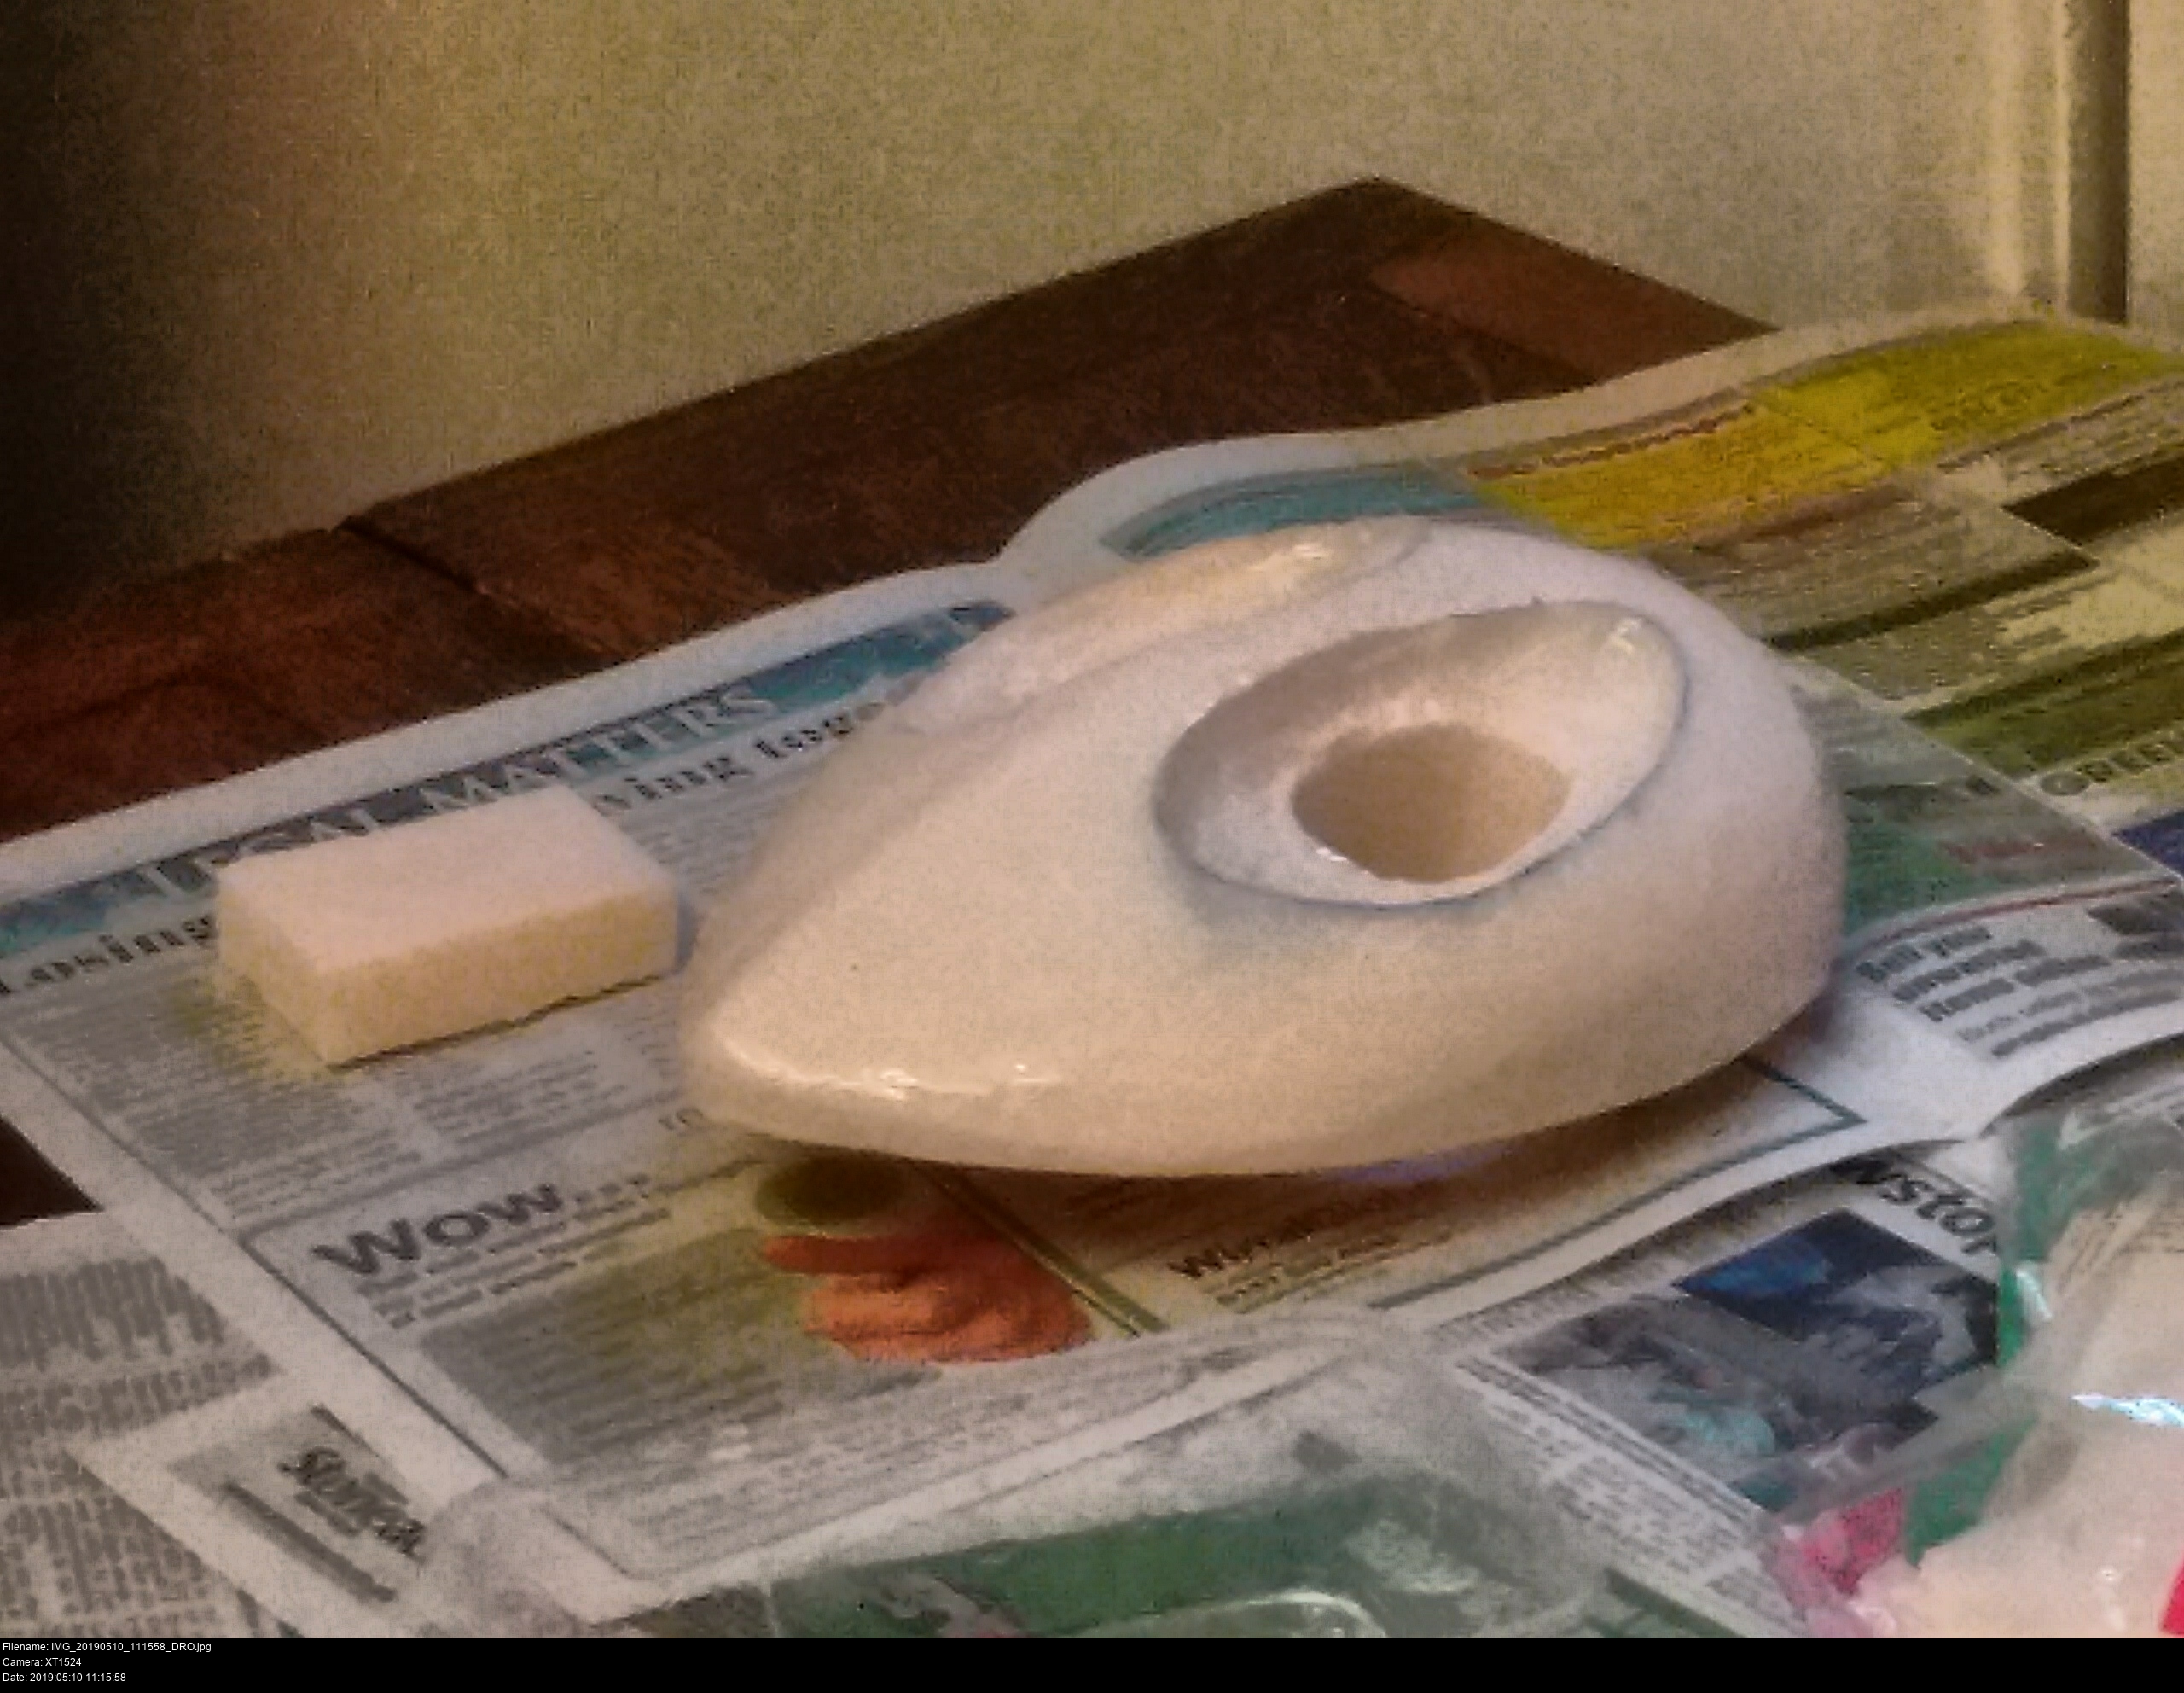
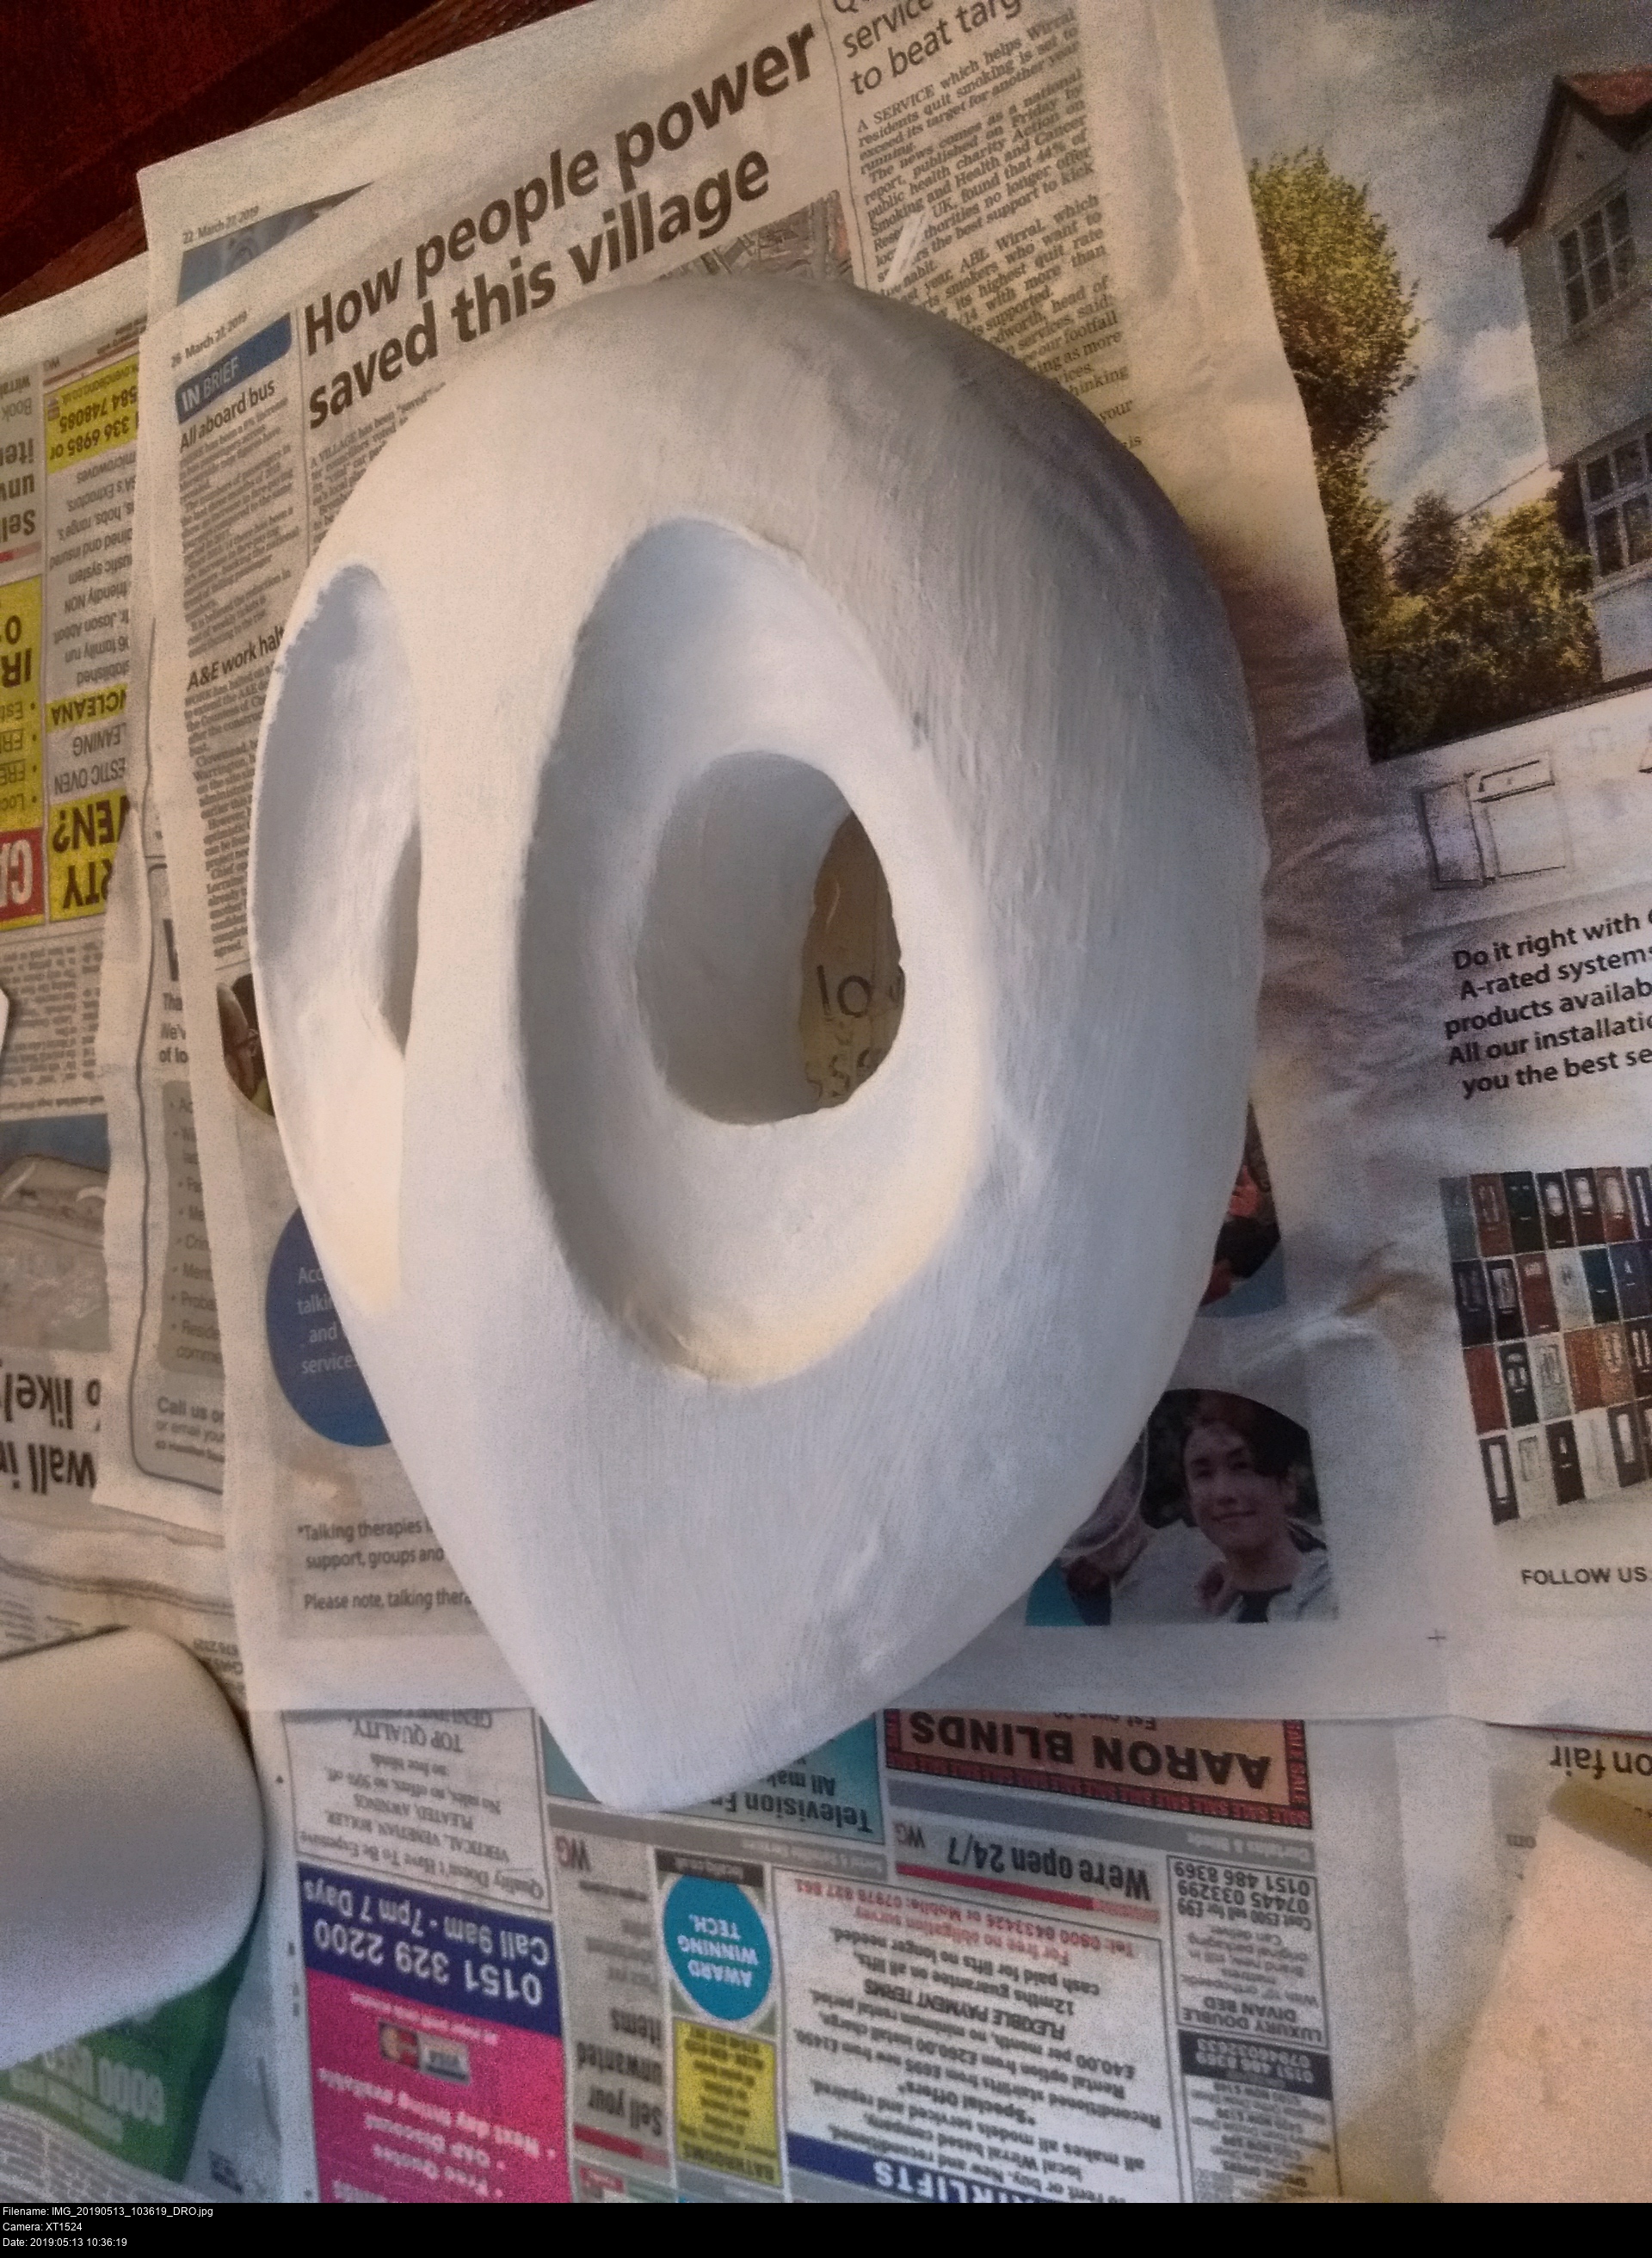
If you scroll all the way back up to the top of the page and check the reference pictures for the side view of Akiyuki's mask, you'll see that the side contour of my mask's eye cavities don't match up with his at all. My bowls are way too shallow - his reach around the sides of the mask a lot more and you can see the rings of colour clearly from a side view. Can't win 'em all.
Here the mask again with a little bit of attention applied. There's no protruding ridges, but there are some recessed ones.

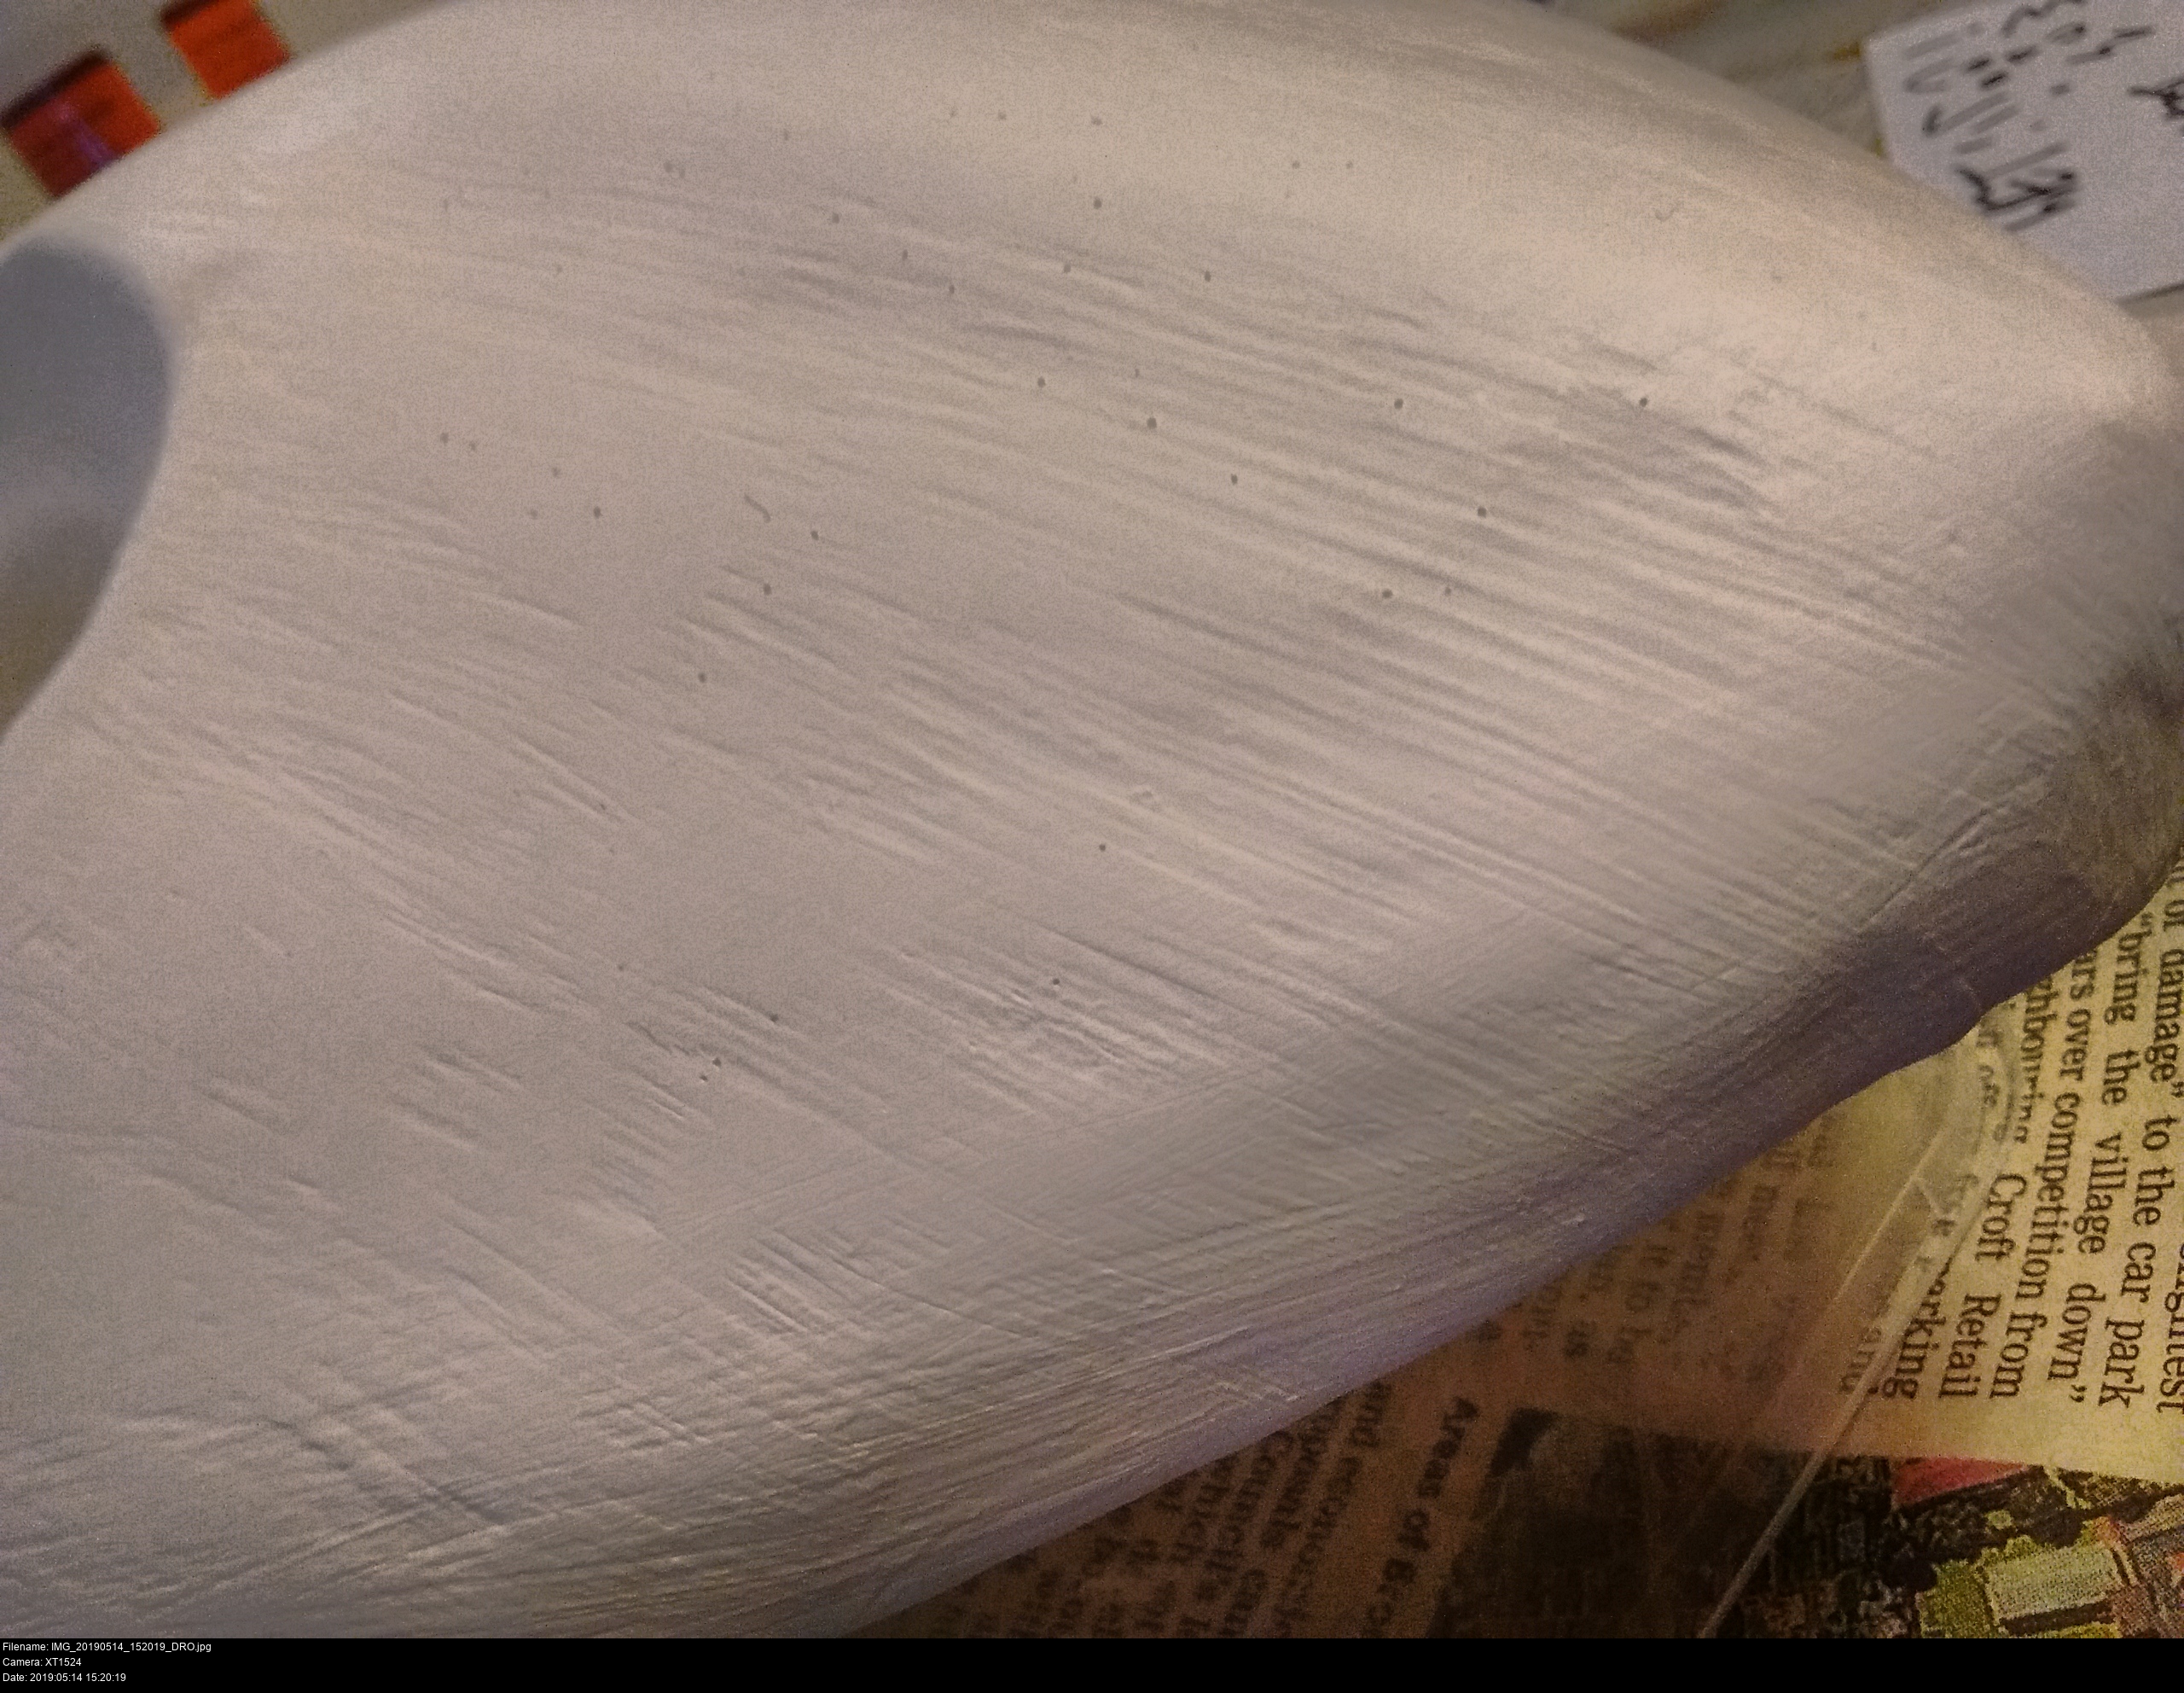
There's nothing like the feel of a well-prepared rubbery smooth textured surface!
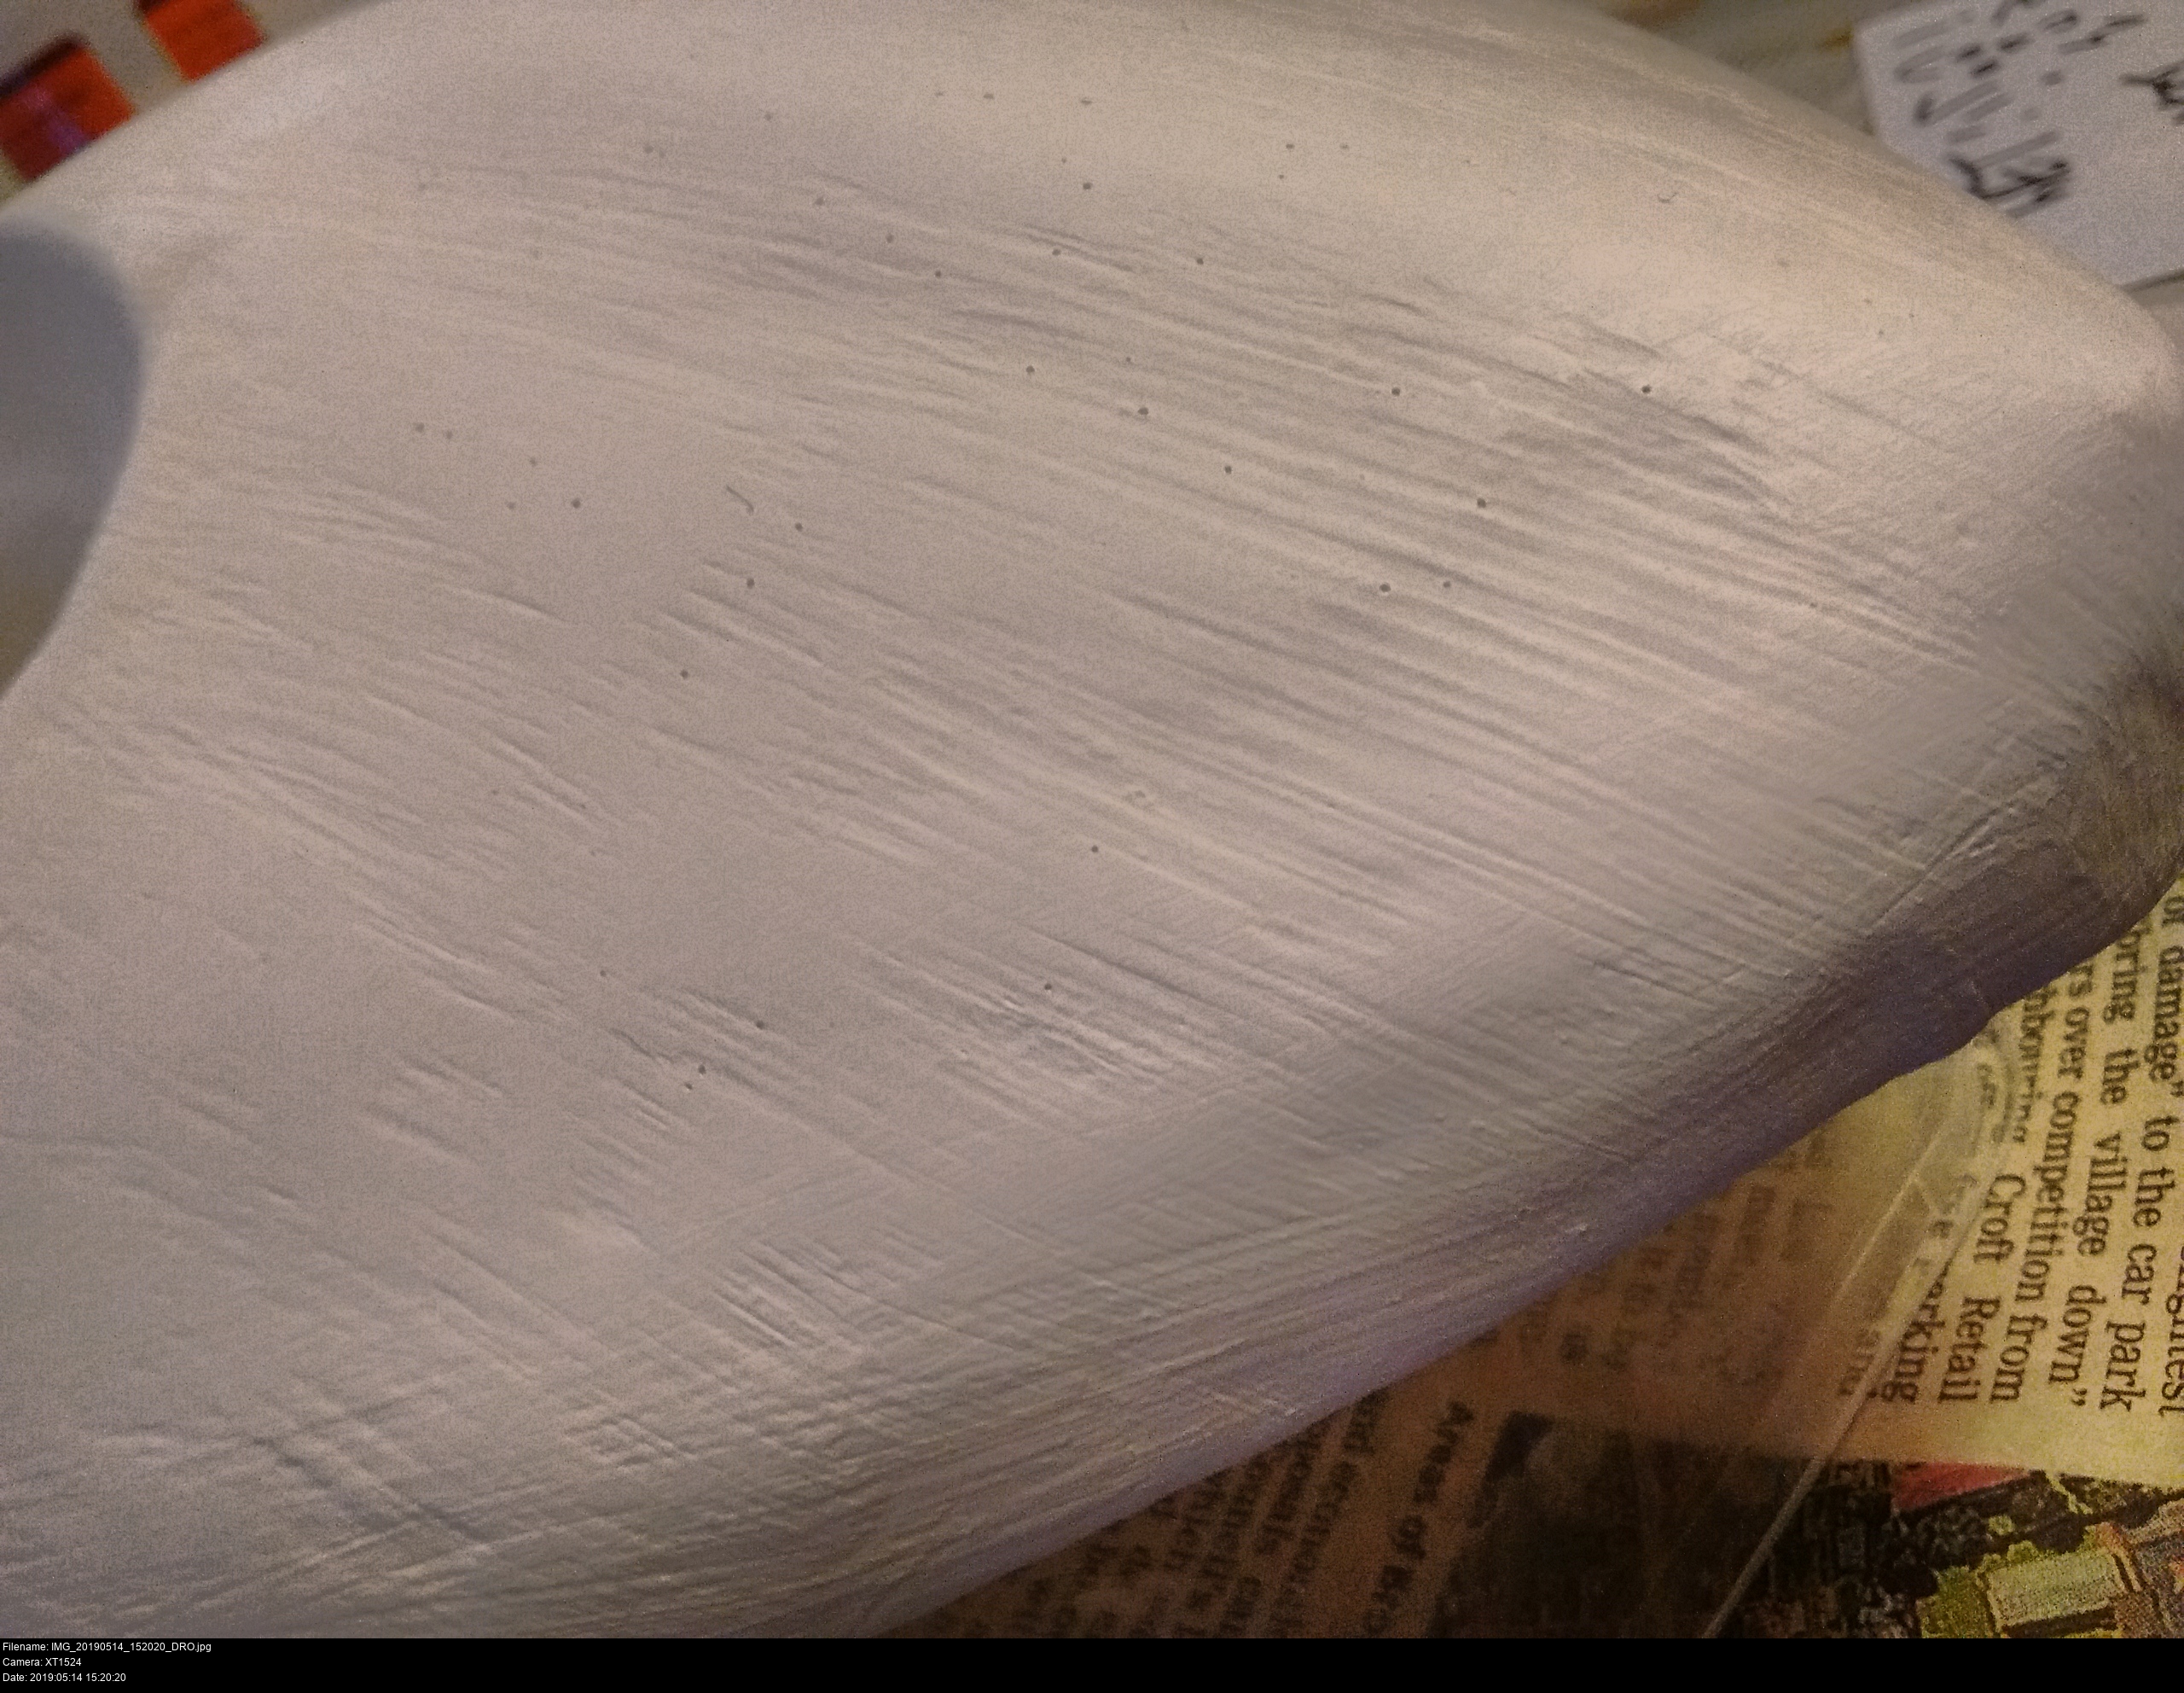
Some of the deeper imperfections in the structure of the mask are now a bit more obvious. This was a small recess caused by a moment of carelessness with a tool when working on the eye cavities. Since I've buffed the rest of the mask, sections like this won't appear as buffy. But if I wanted it to be super glossy, I'd be relying on the varnish for that, not the primer.
I think that's as good as I'm going to get it.
It would be possible to get the cavity edges to be super sharp by using the rotary tool, but what would be the point? It would wear away quickly, and applying the primer on top would blunt them slightly again. That's a level of detail that's simply not important here. My phone's camera is being very unkind to the mask's ugly details. Those black marks are most likely just dust. In sunlight, at the right distance, this is going to look fab.
I think it's time to paint.

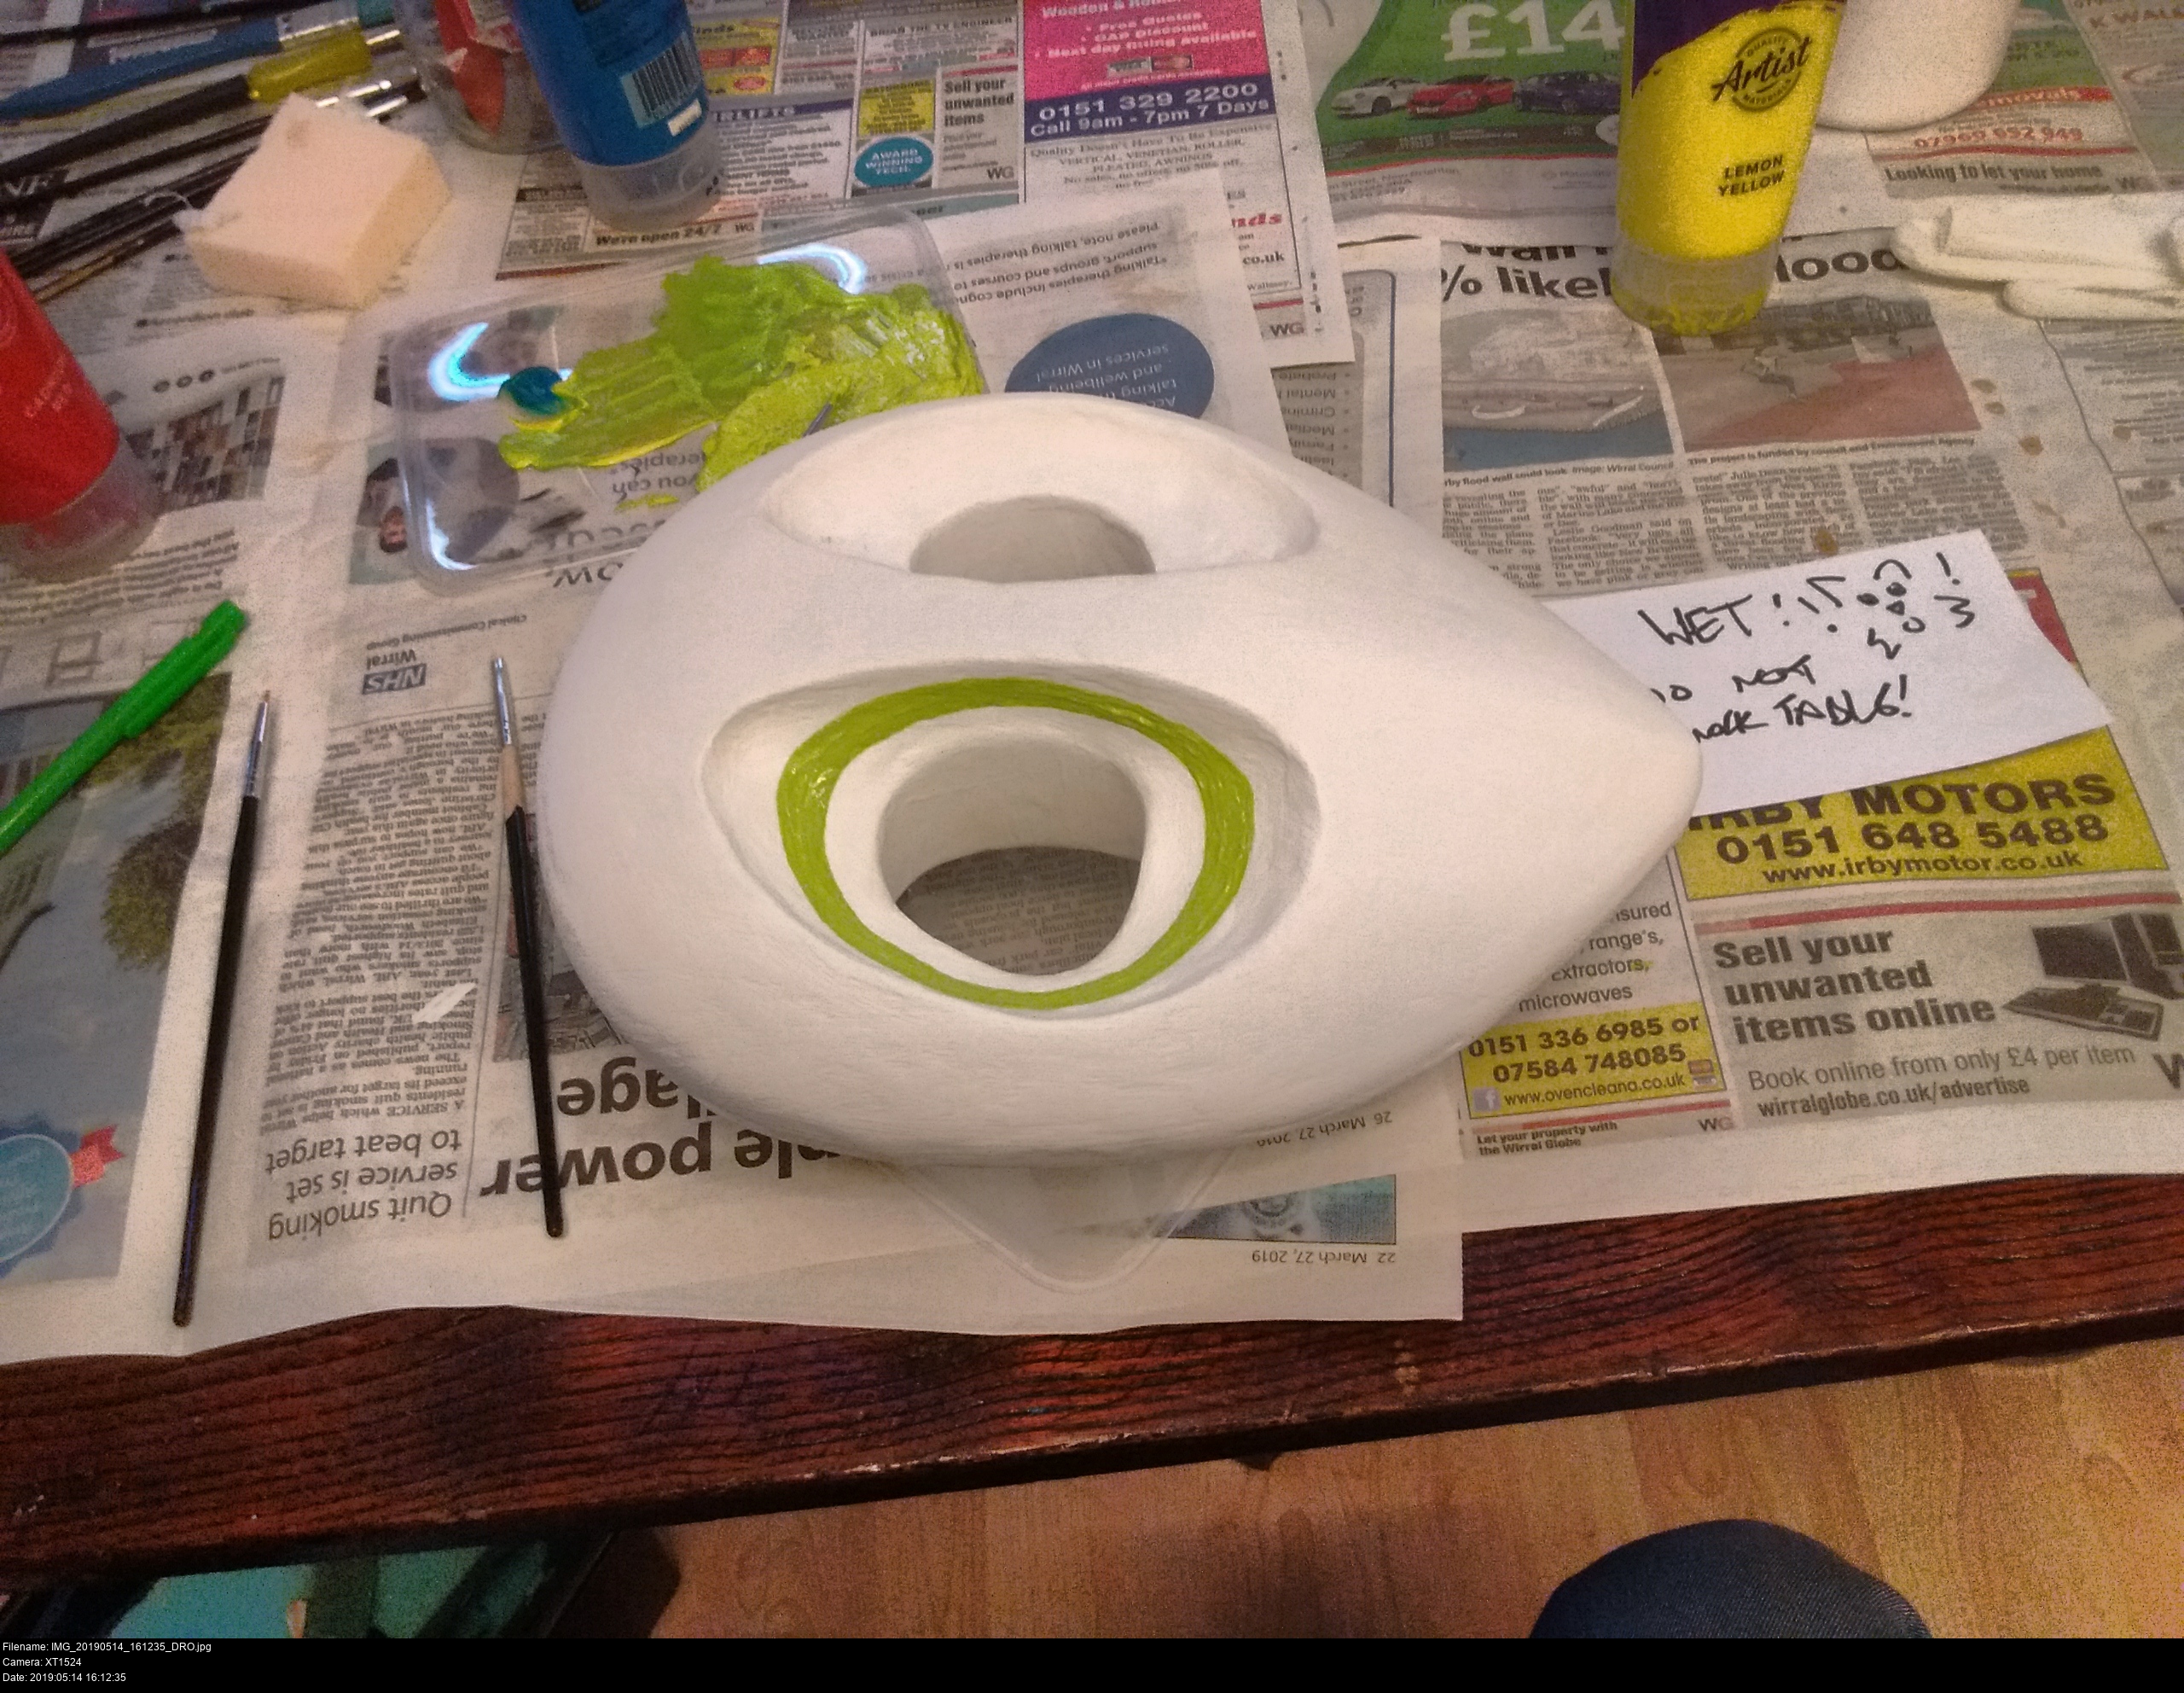
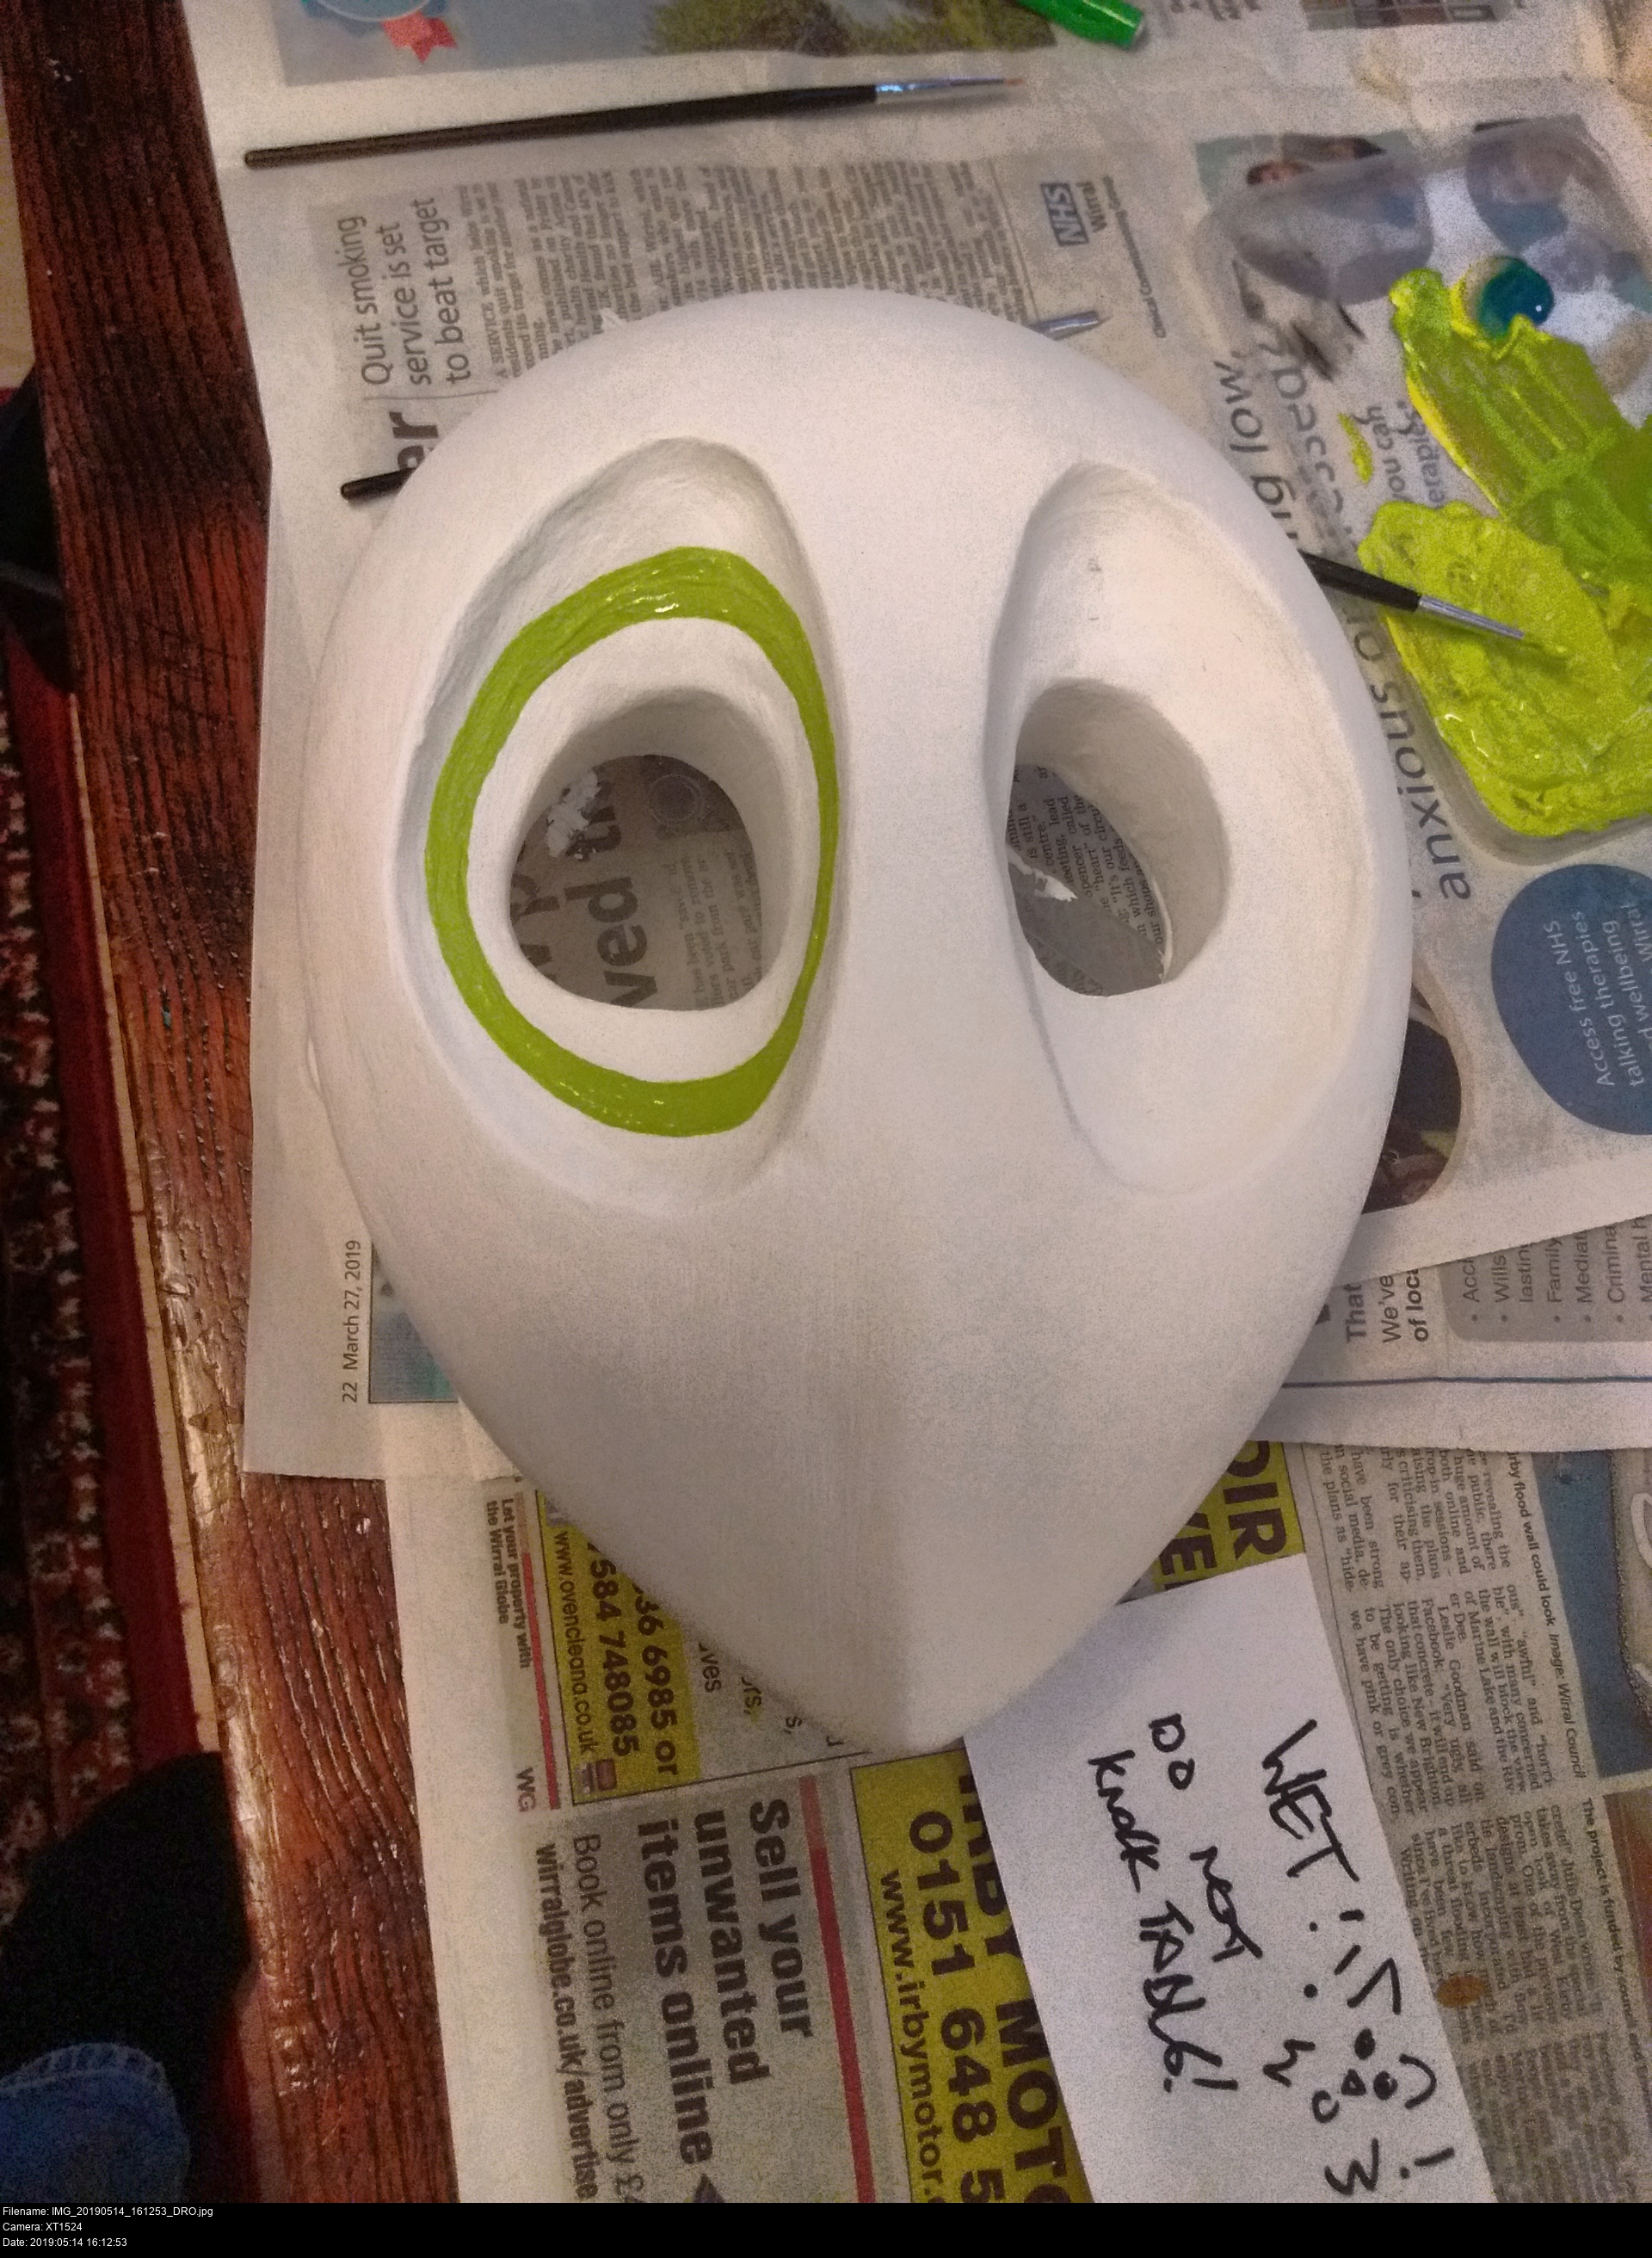

Step one, the green!
Why did I pick the green? Because it's the lightest of the two colours, and that's how you're supposed to paint stuff, right? I don't know whether it was super smart to start with the colour that forms a ring that's completely unbounded on both its interior and exterior, but it'll just be a test of my skill and patience is all.
I'm using a mixture of the blue and yellow primary colours from Wilkinson with a bit of gesso for solidity; I'm aiming for a very citrussy natural lime green here.
My trick to painting a prop to any level of detail is to work slowly and have a vast collection of useless tiny makeup brushes of all varying types to switch between depending on which one feels like playing nice today with the state of the paint I have, and have just as many different methods of rectifying mistakes: cotton buds, antibacterial wipes, very slightly moist brushes, tissues, anything goes, because if my hands shake I -don't- want a mistake to dry.
Start at a place you know where there's supposed to paint and then work outwards being as safe as you can. I did make very small mechanical pencil markings at the cardinal maximums of both eyes to try to keep things consistent, but that might not have been the best idea since they're difficult to erase cleanly at the best of times, and there's definitely no way to erase them if I paint over them, and frustratingly acrylic paint (all the acrylic paint I've ever used at least) is ridiculously translucent.
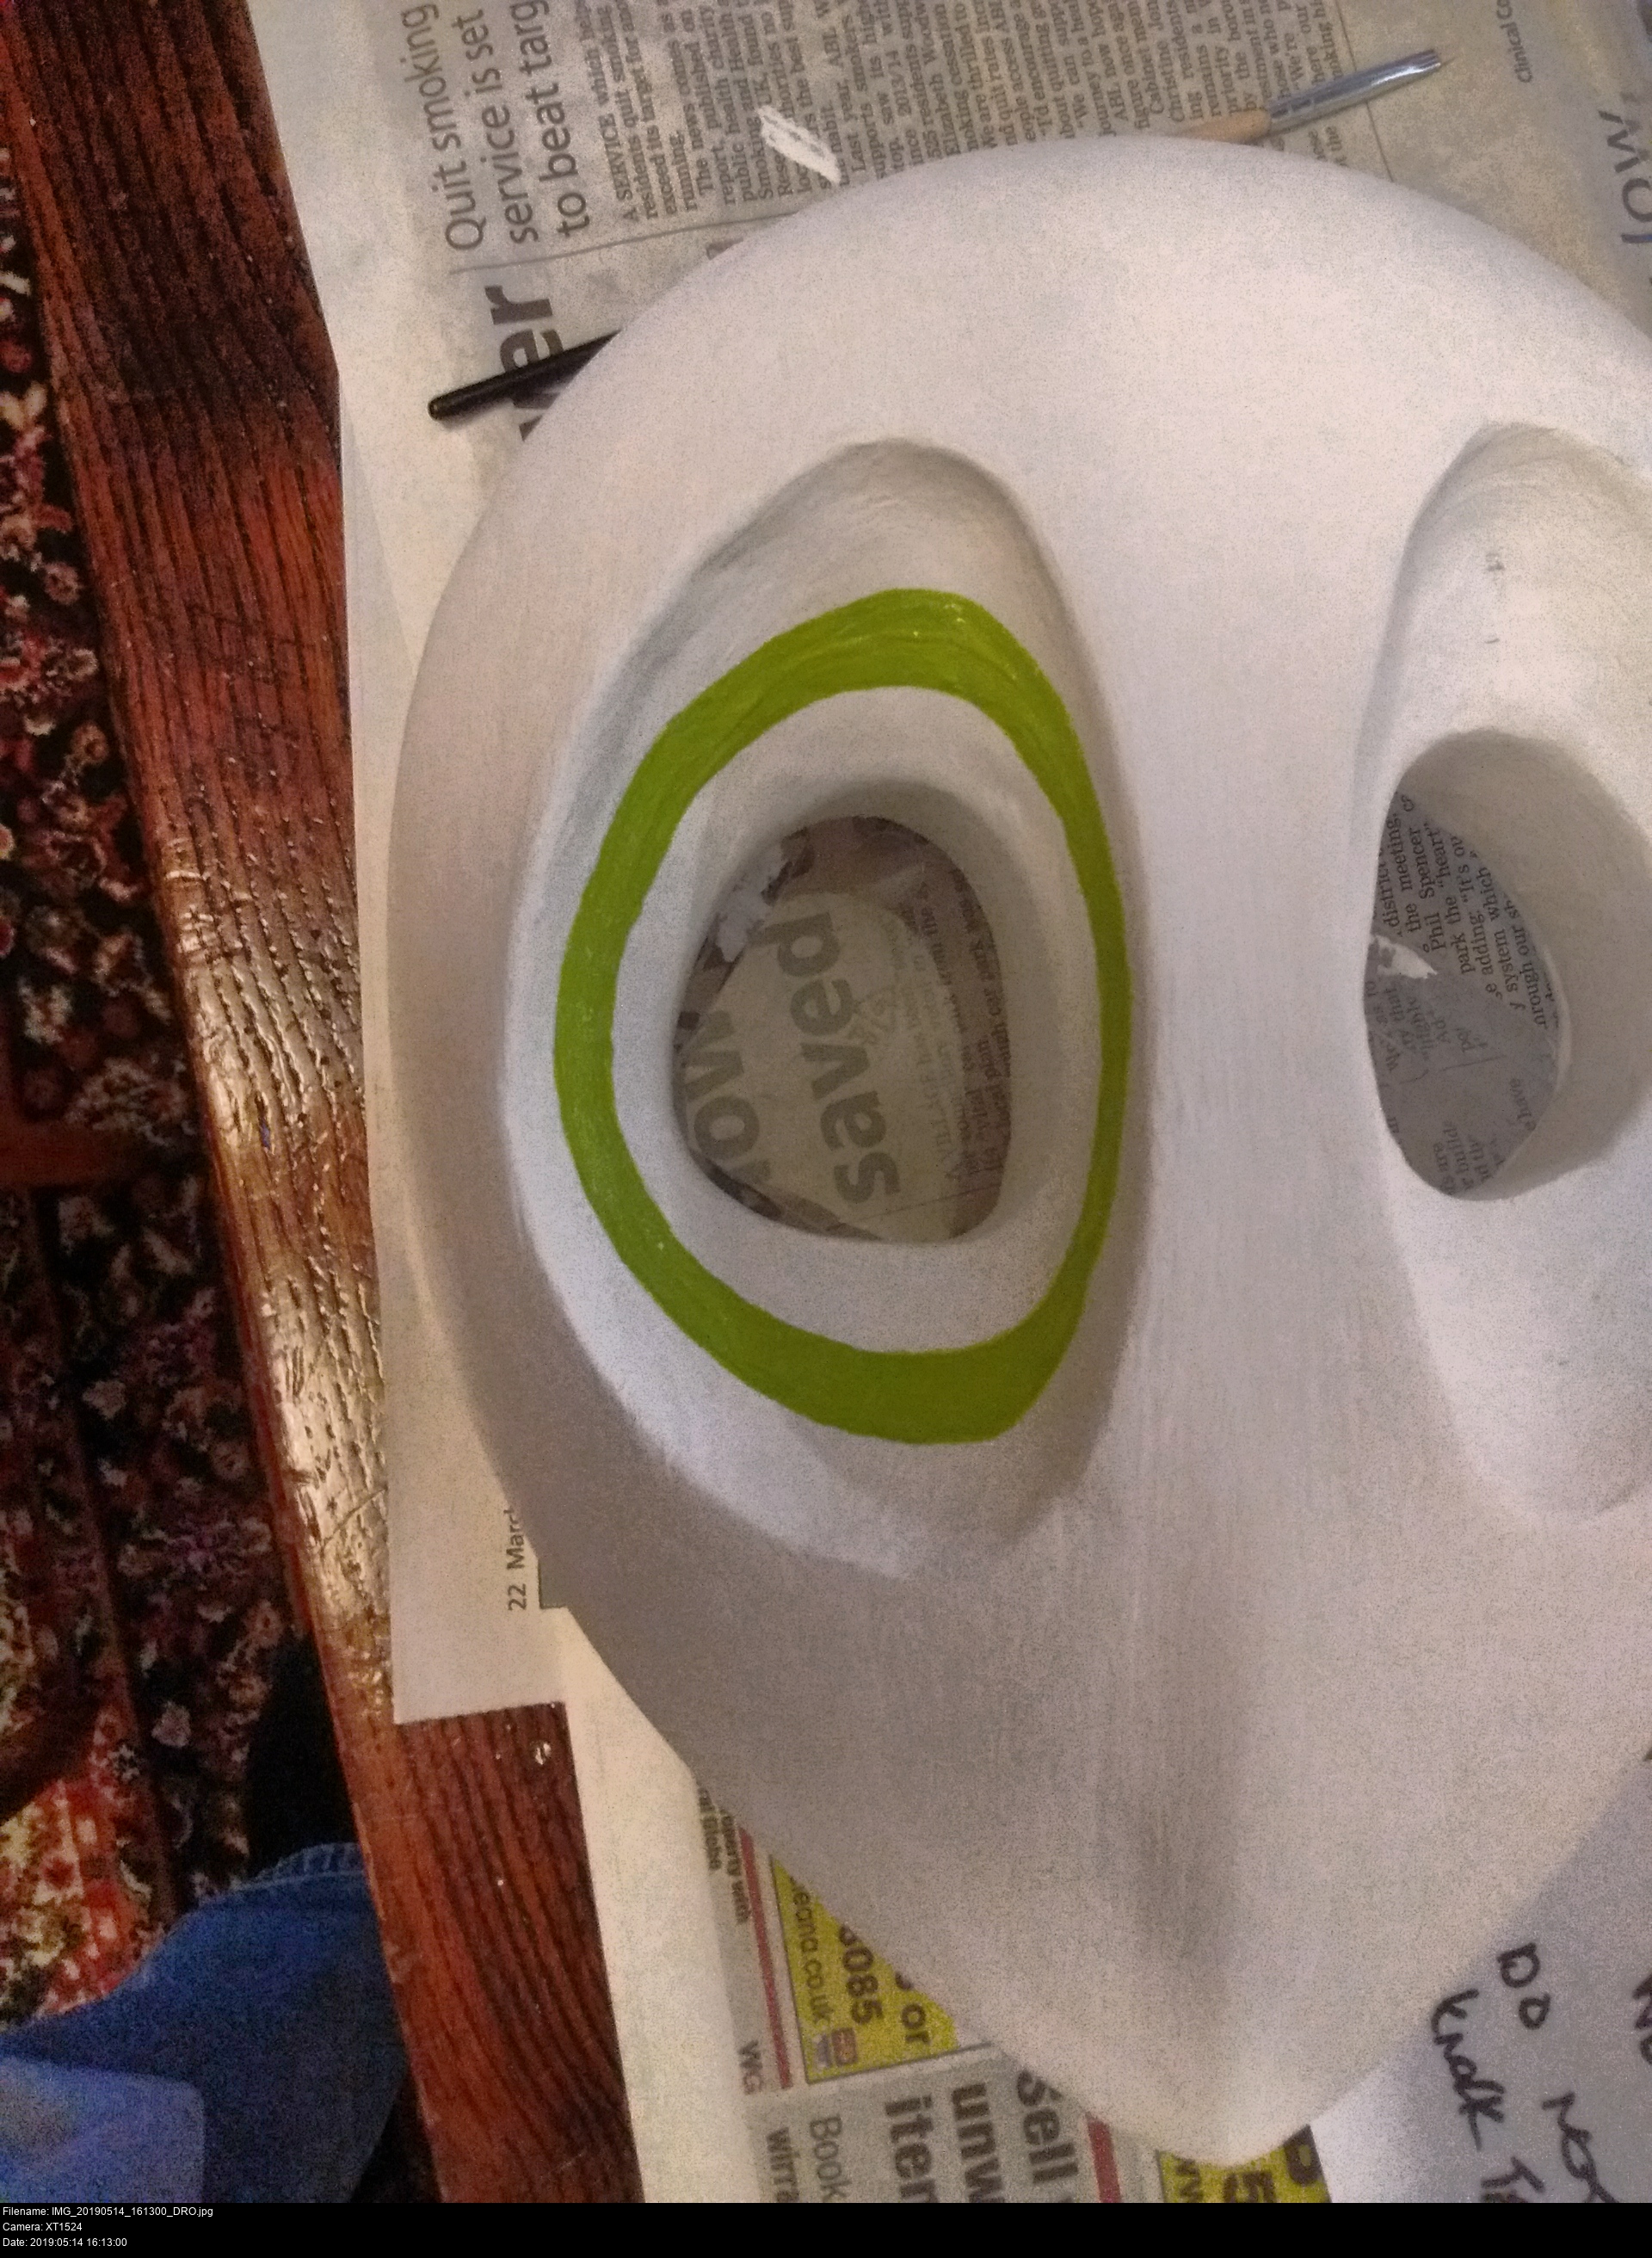
I'm going to let this dry a little and do a second coat. This paint has so little substance to it that the edges of my rings look streaky and faded. Yet somehow it's gathering up into thick, textured lanes of material too. I'm not too worried about those, they'll dry consistent.
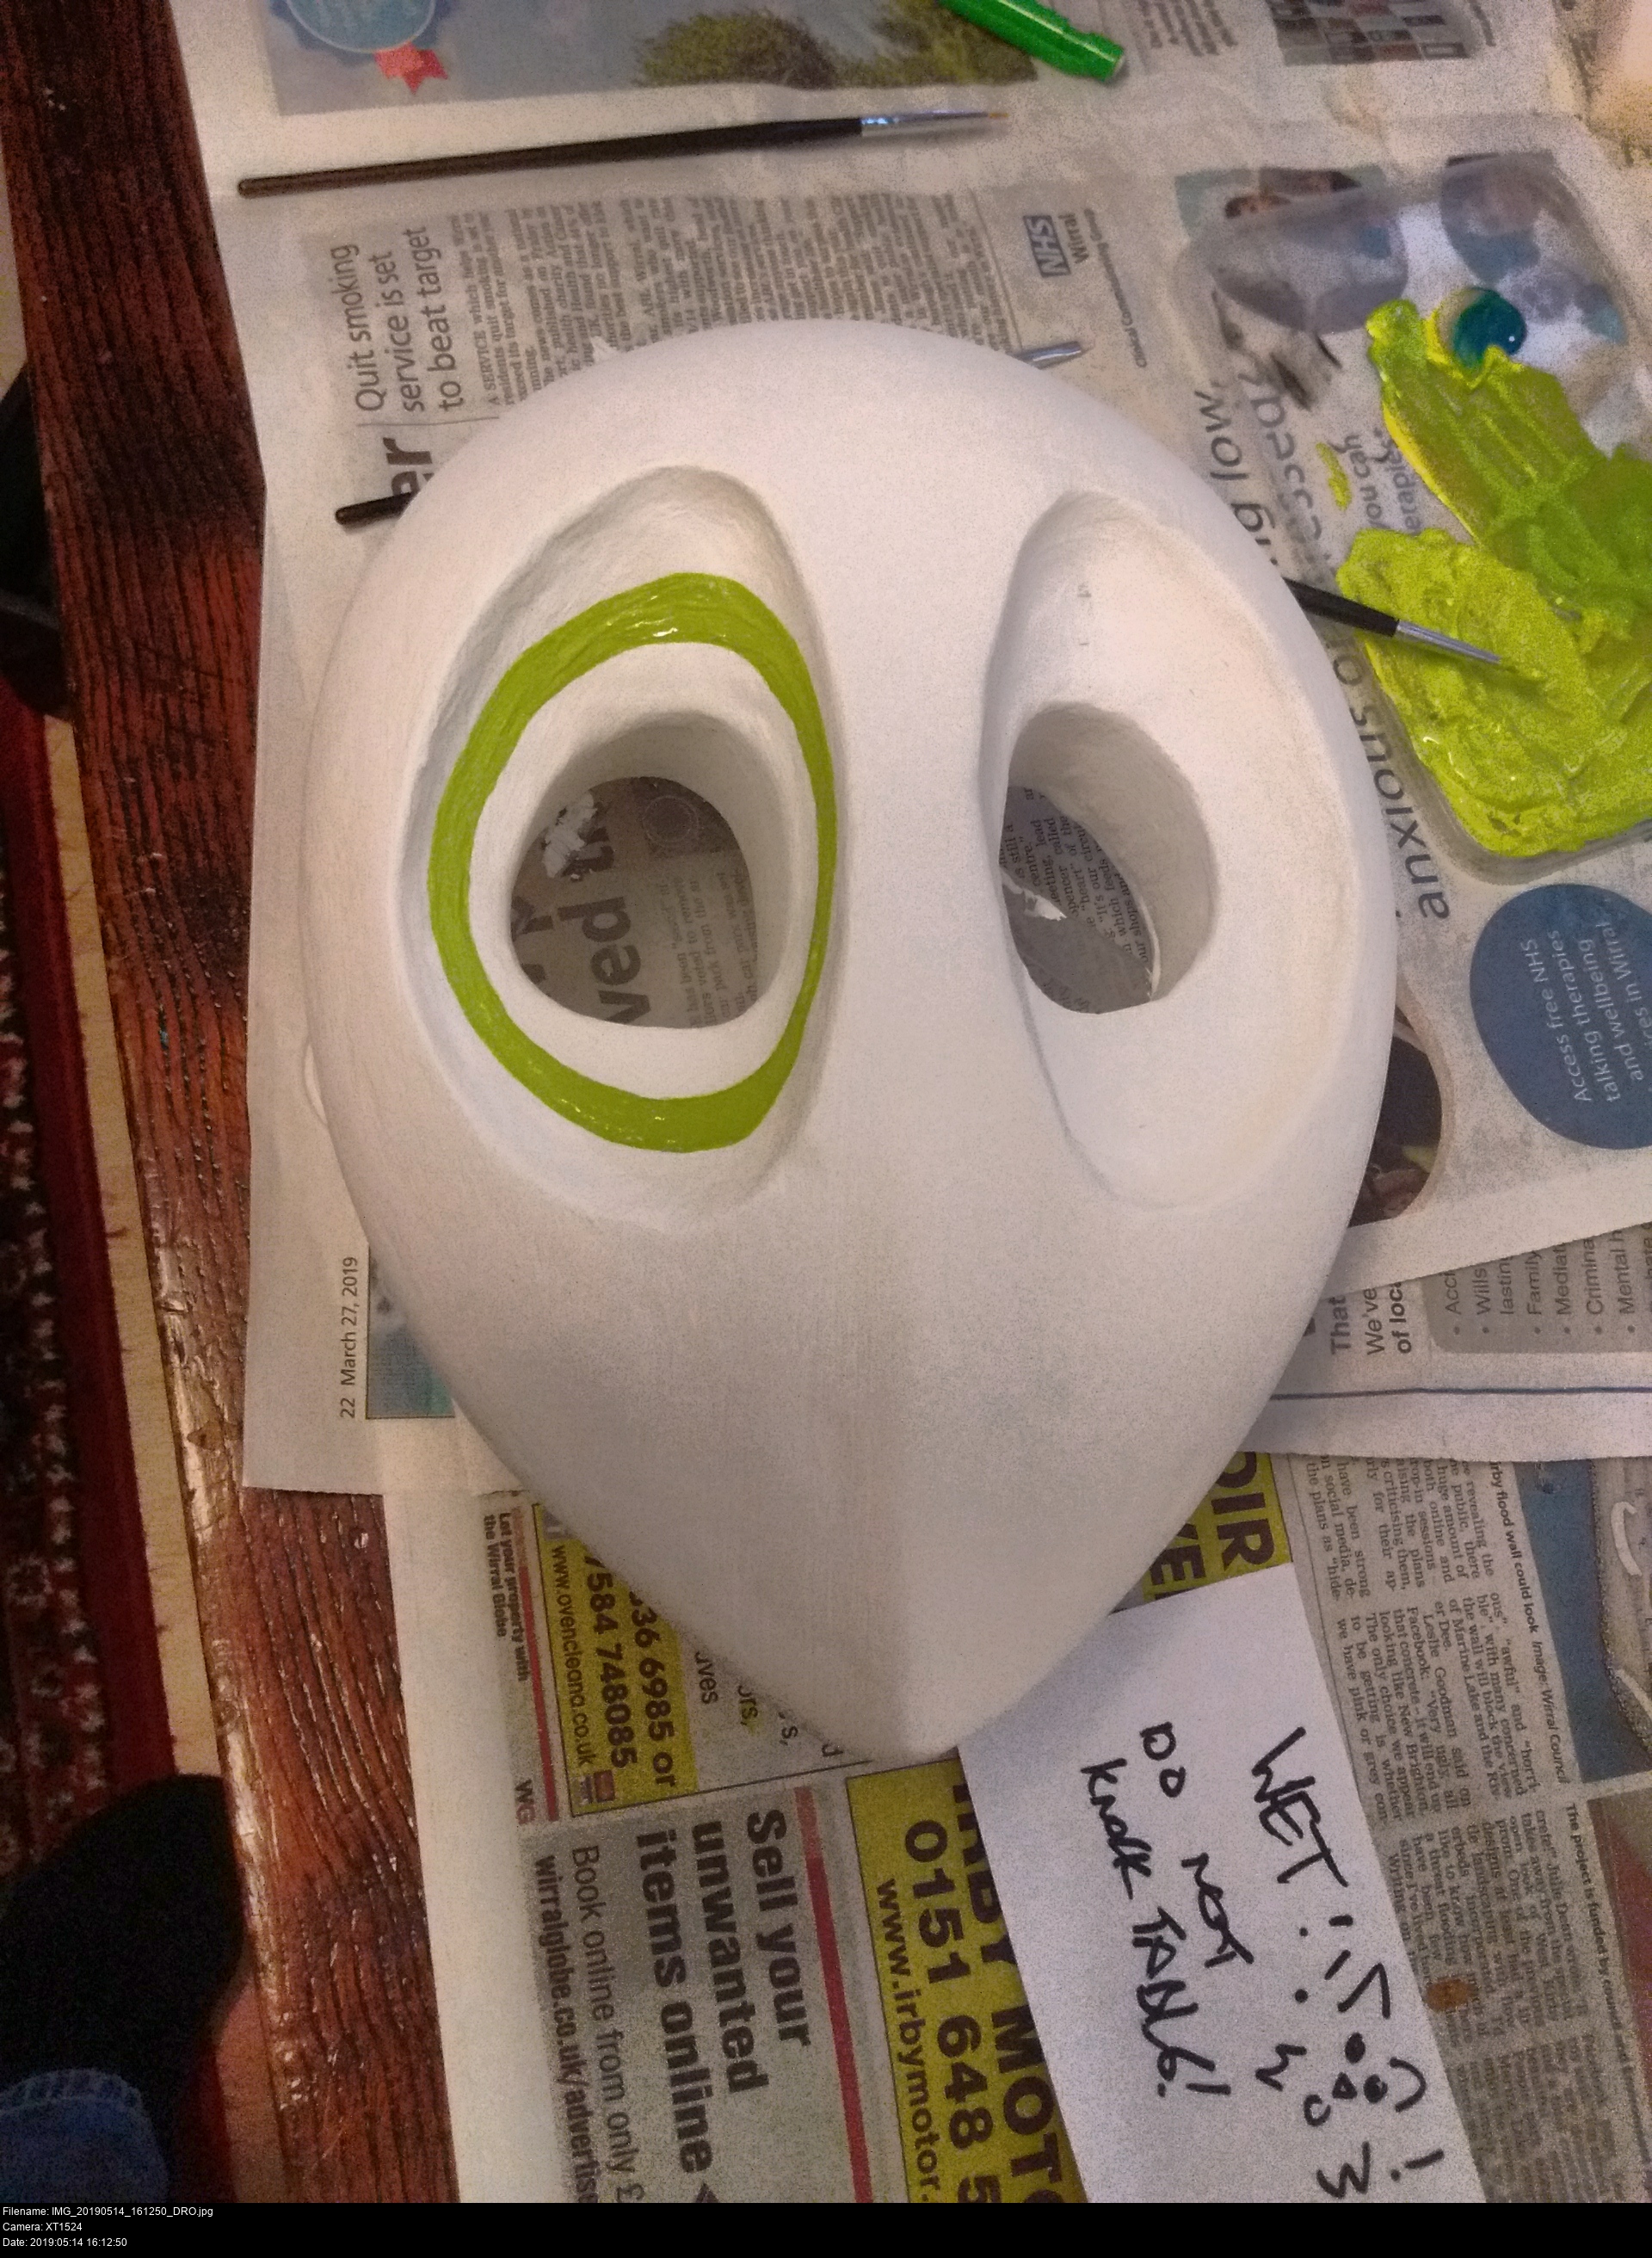
Time for the rightmost eye.
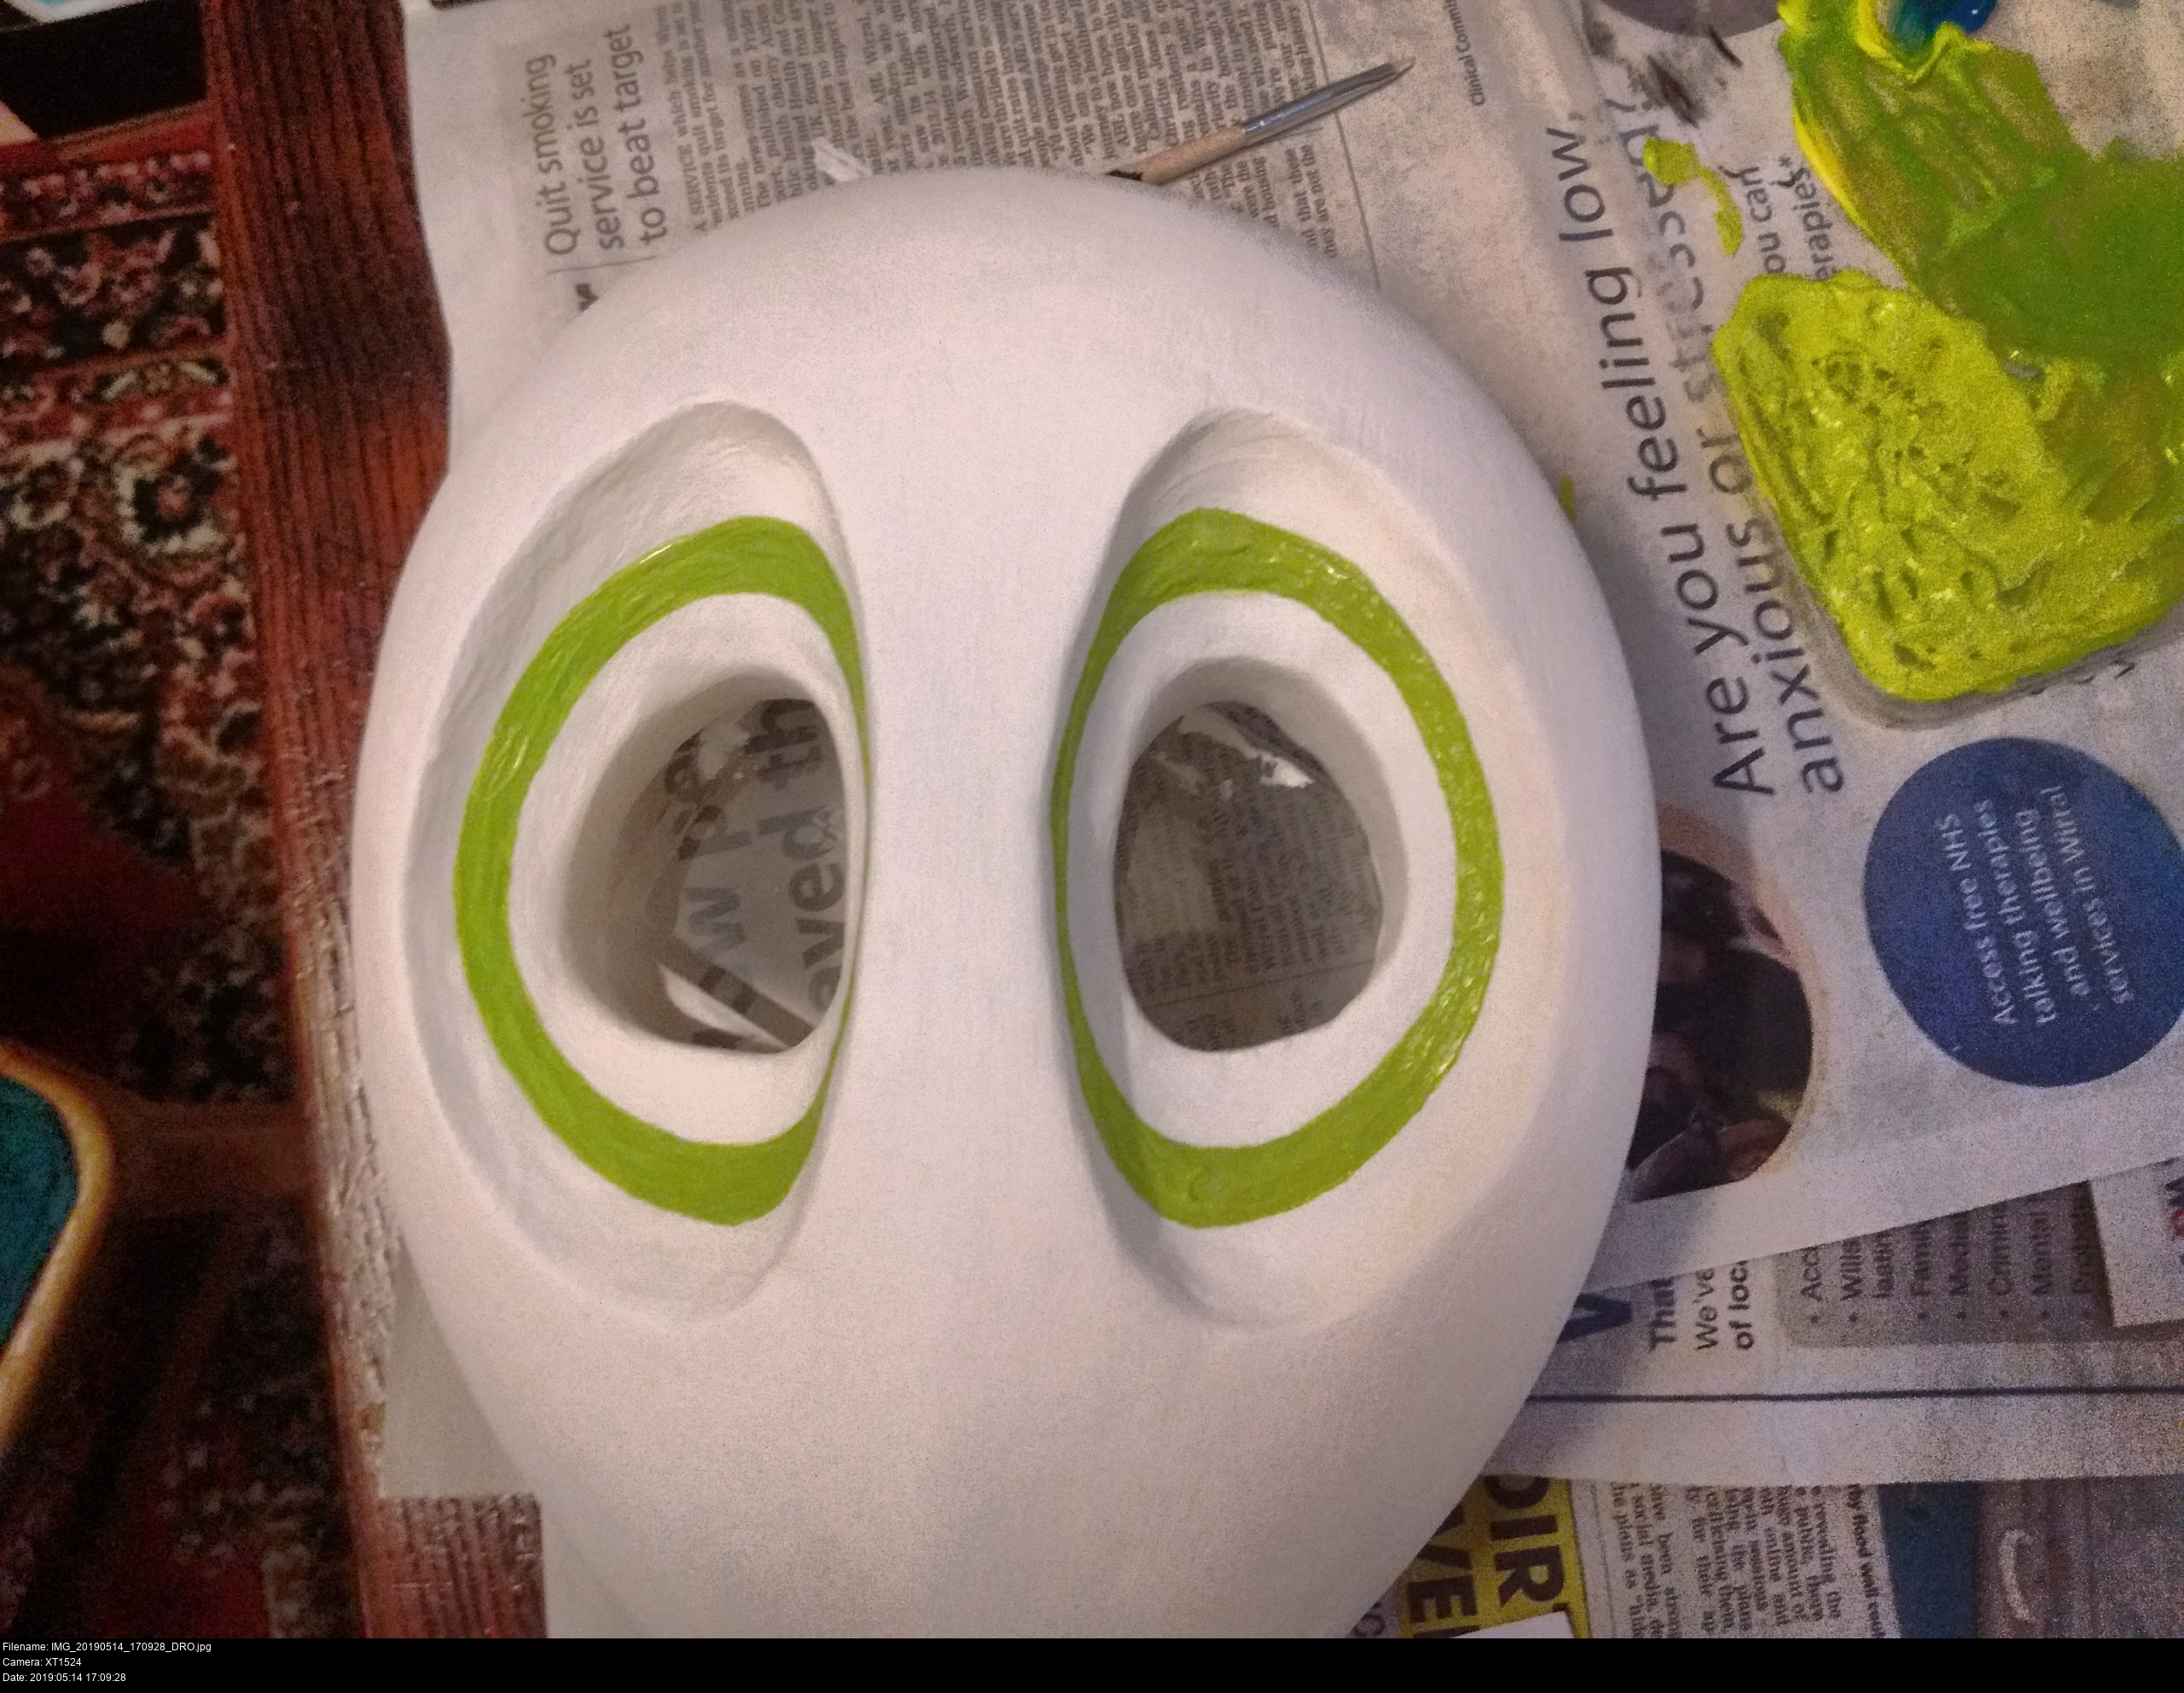

How did I get the rightmost eye to be so wonderfully symmetrical with the left? I... don't... know. I worked very slowly, starting in safe places, expanding the painted area in directions and curves that were obvious to me to be correct, and then closing one eye and comparing the two rings quickly to see if they matched.
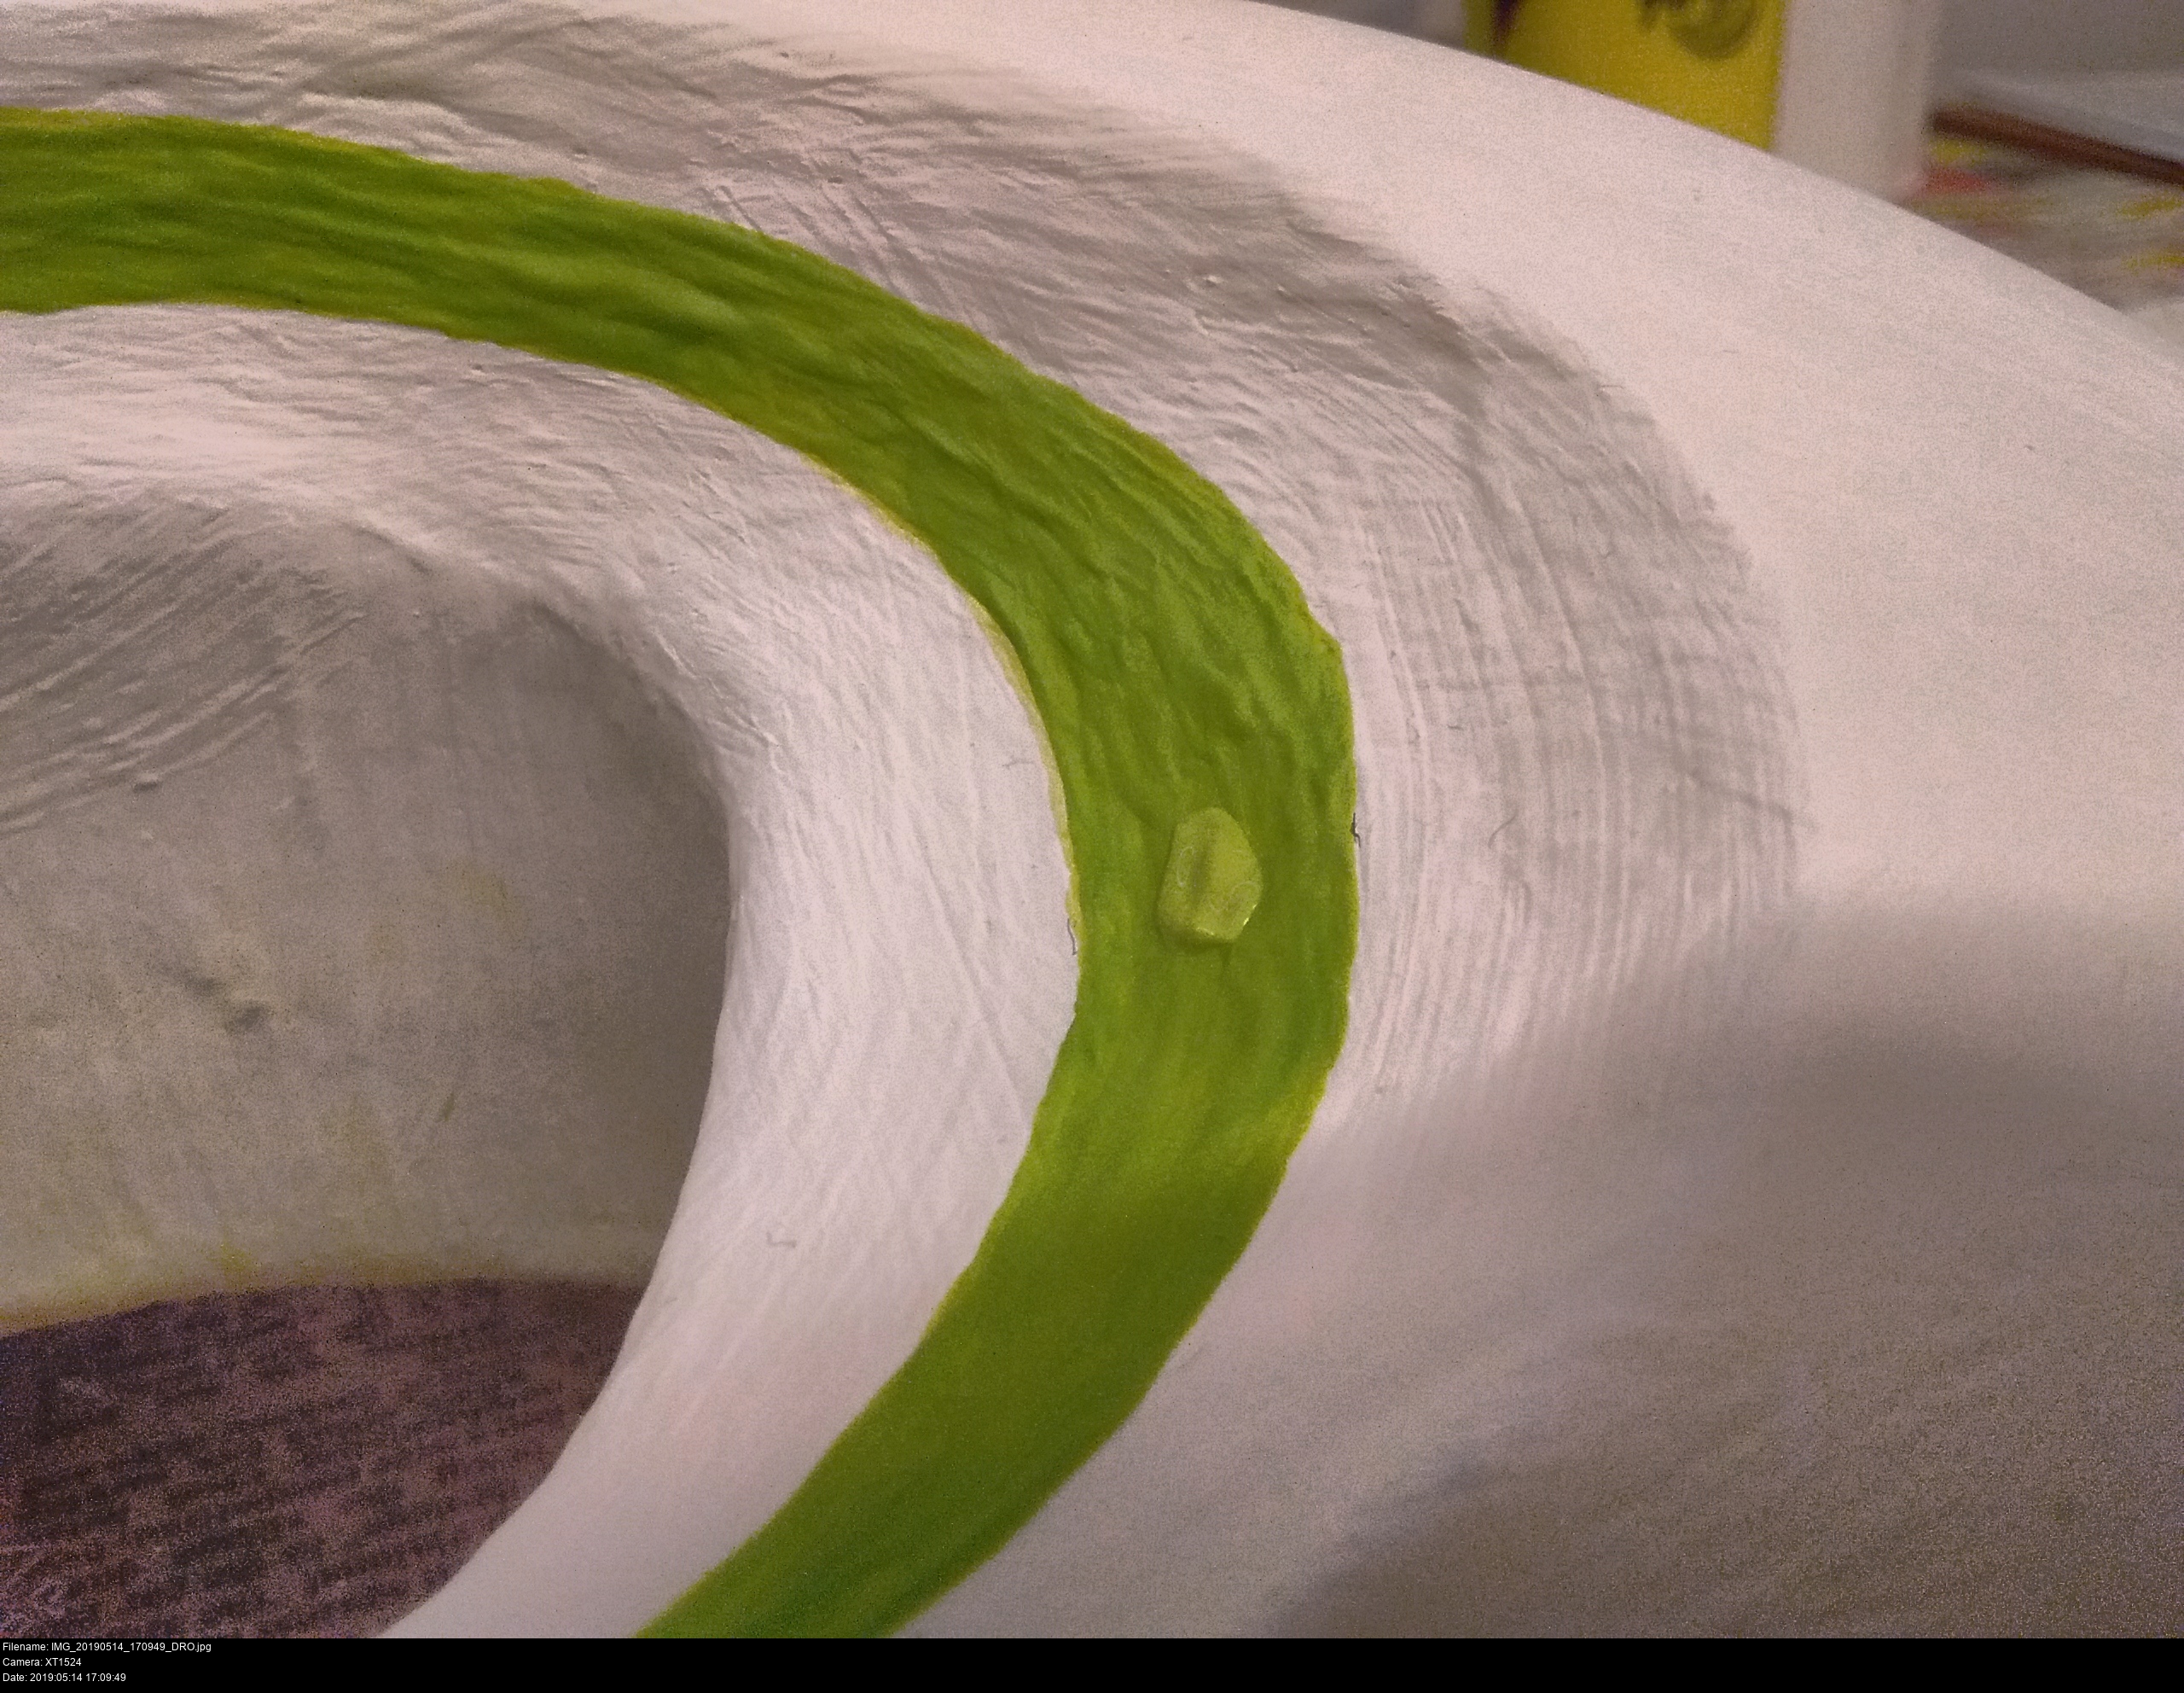
By the way, here's a example of how much darker paint dries. The little blob is fresh, the rest is dry. Attempting to recreate this colour later tonight or tomorrow to apply a second coat is simply not going to happen. I'm going to scoop this up (mixing way too much paint in advance is great, don't be stingy) and seal it into one of my disposable food trays. Hope this works! I don't have much confidence that it'll last long, but I can at least try.

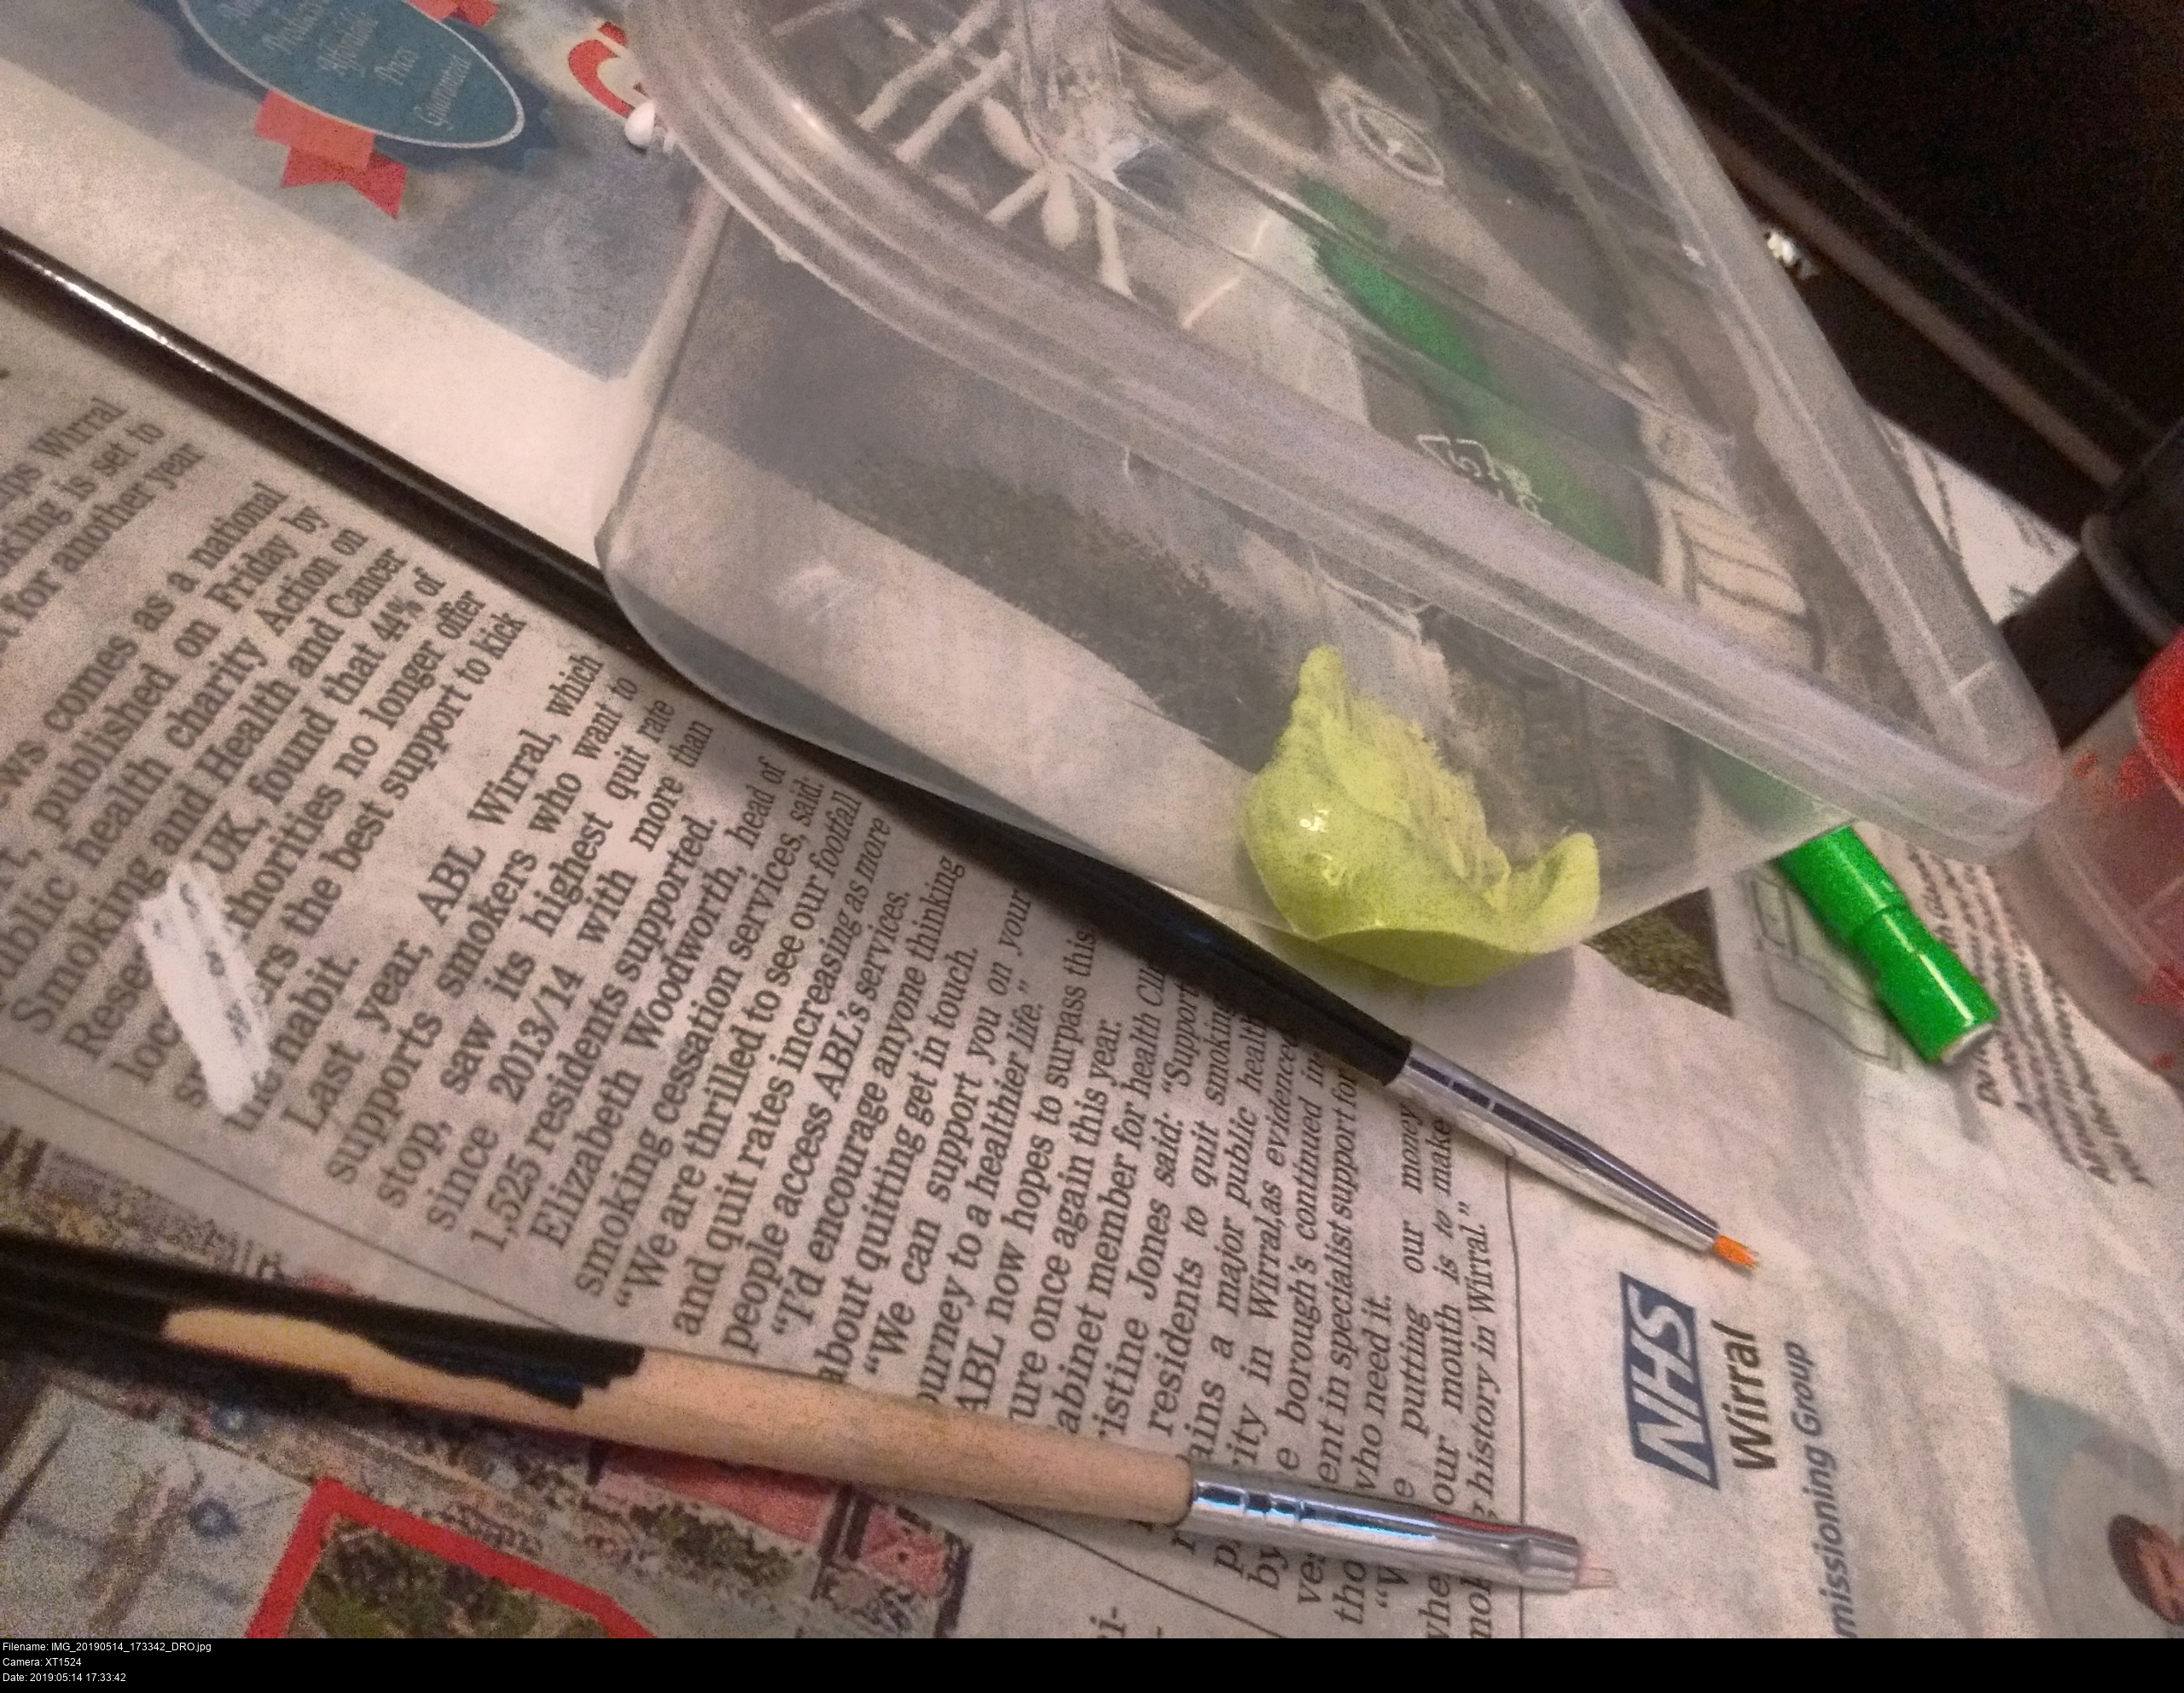
This is all that remains of the last person to cross me.


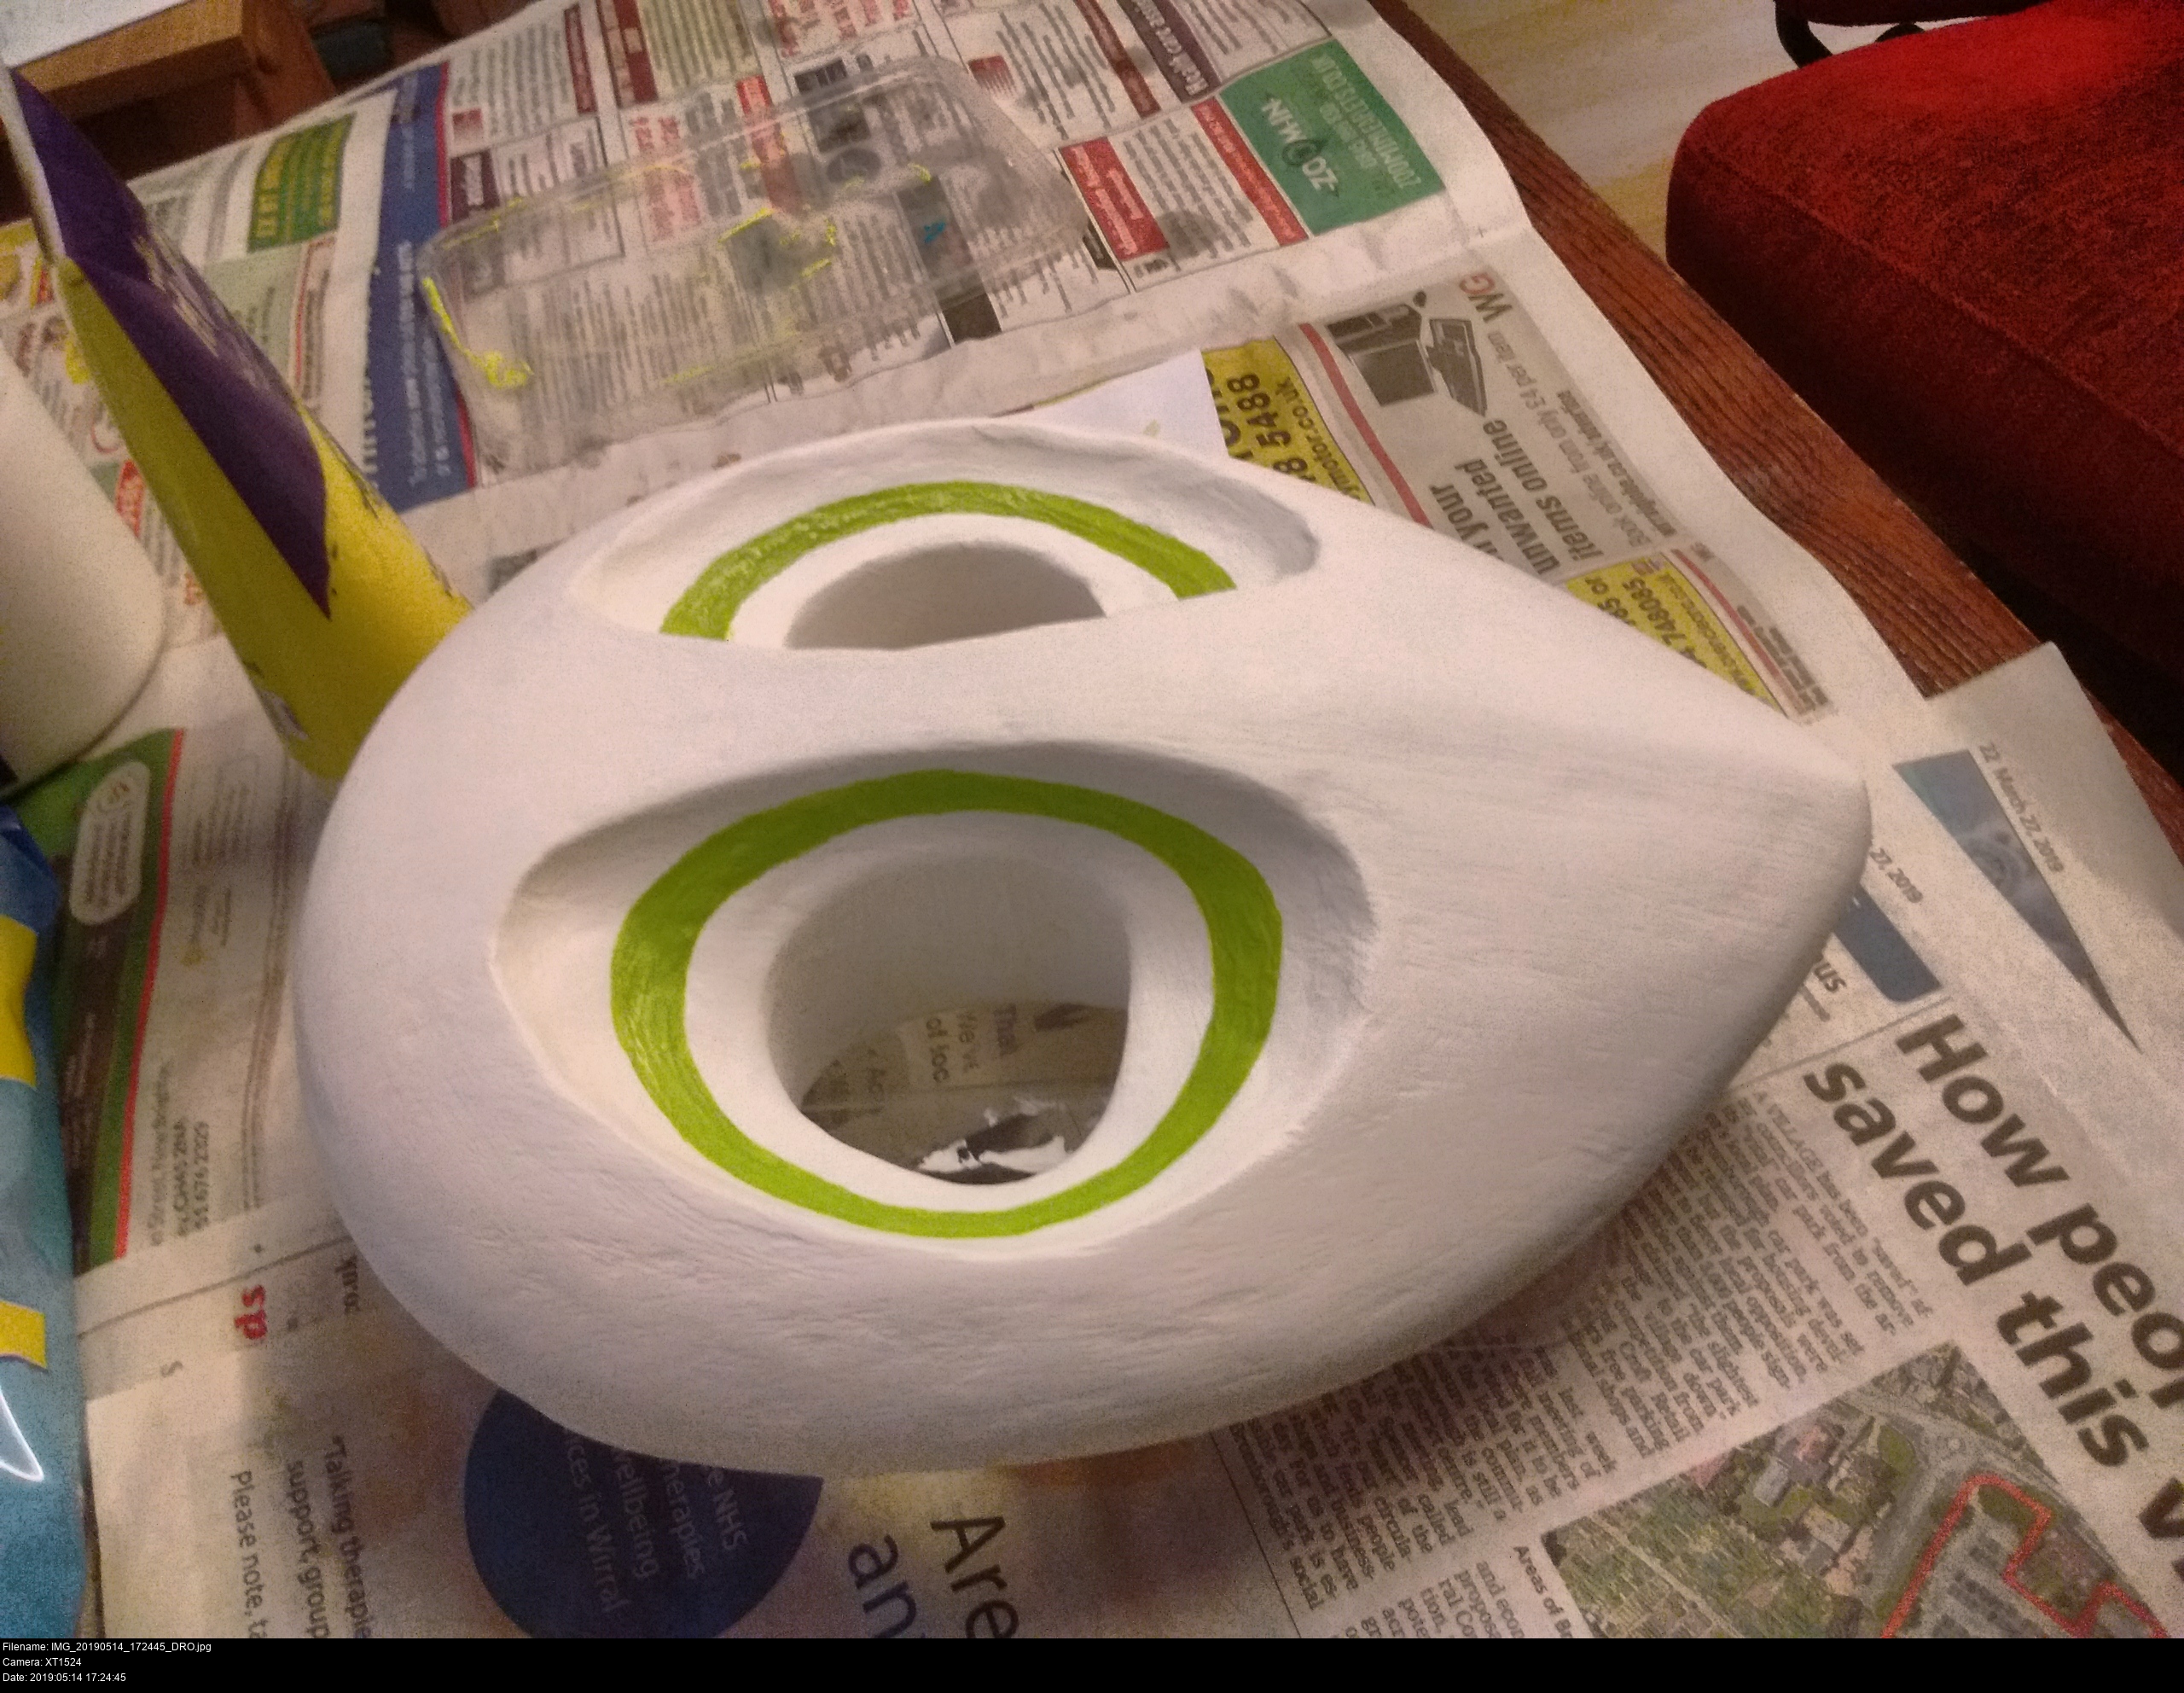
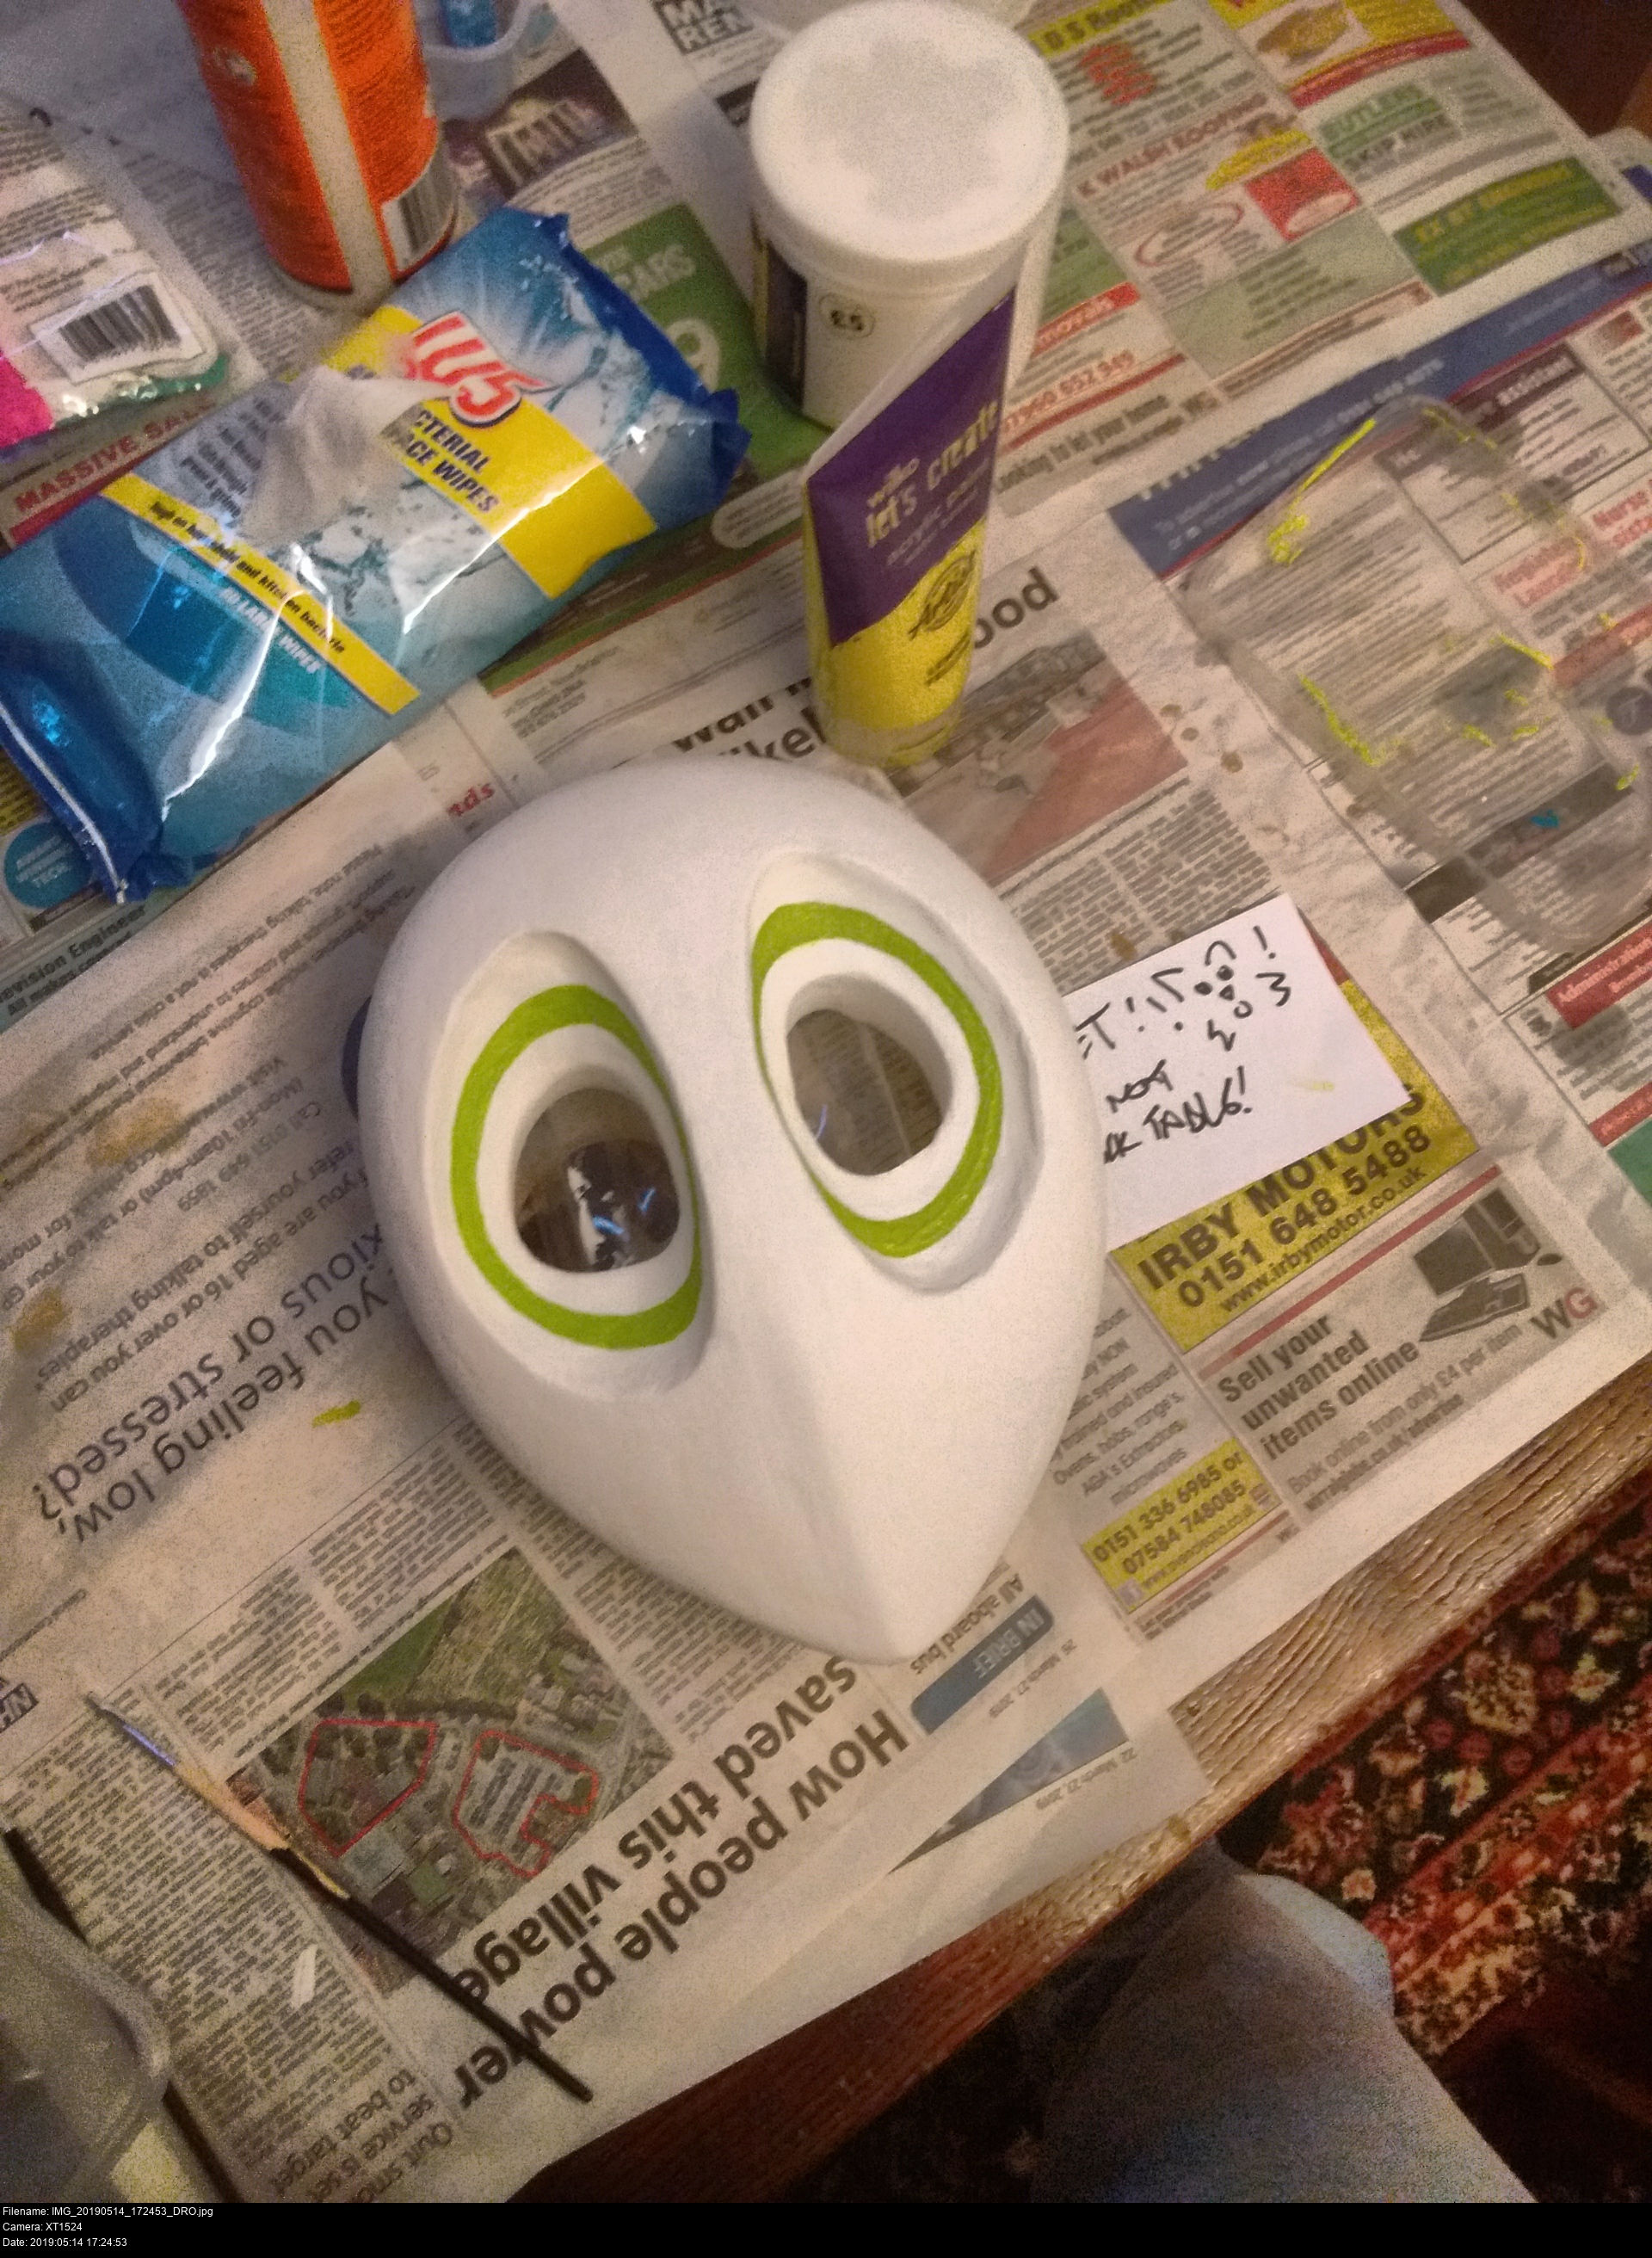
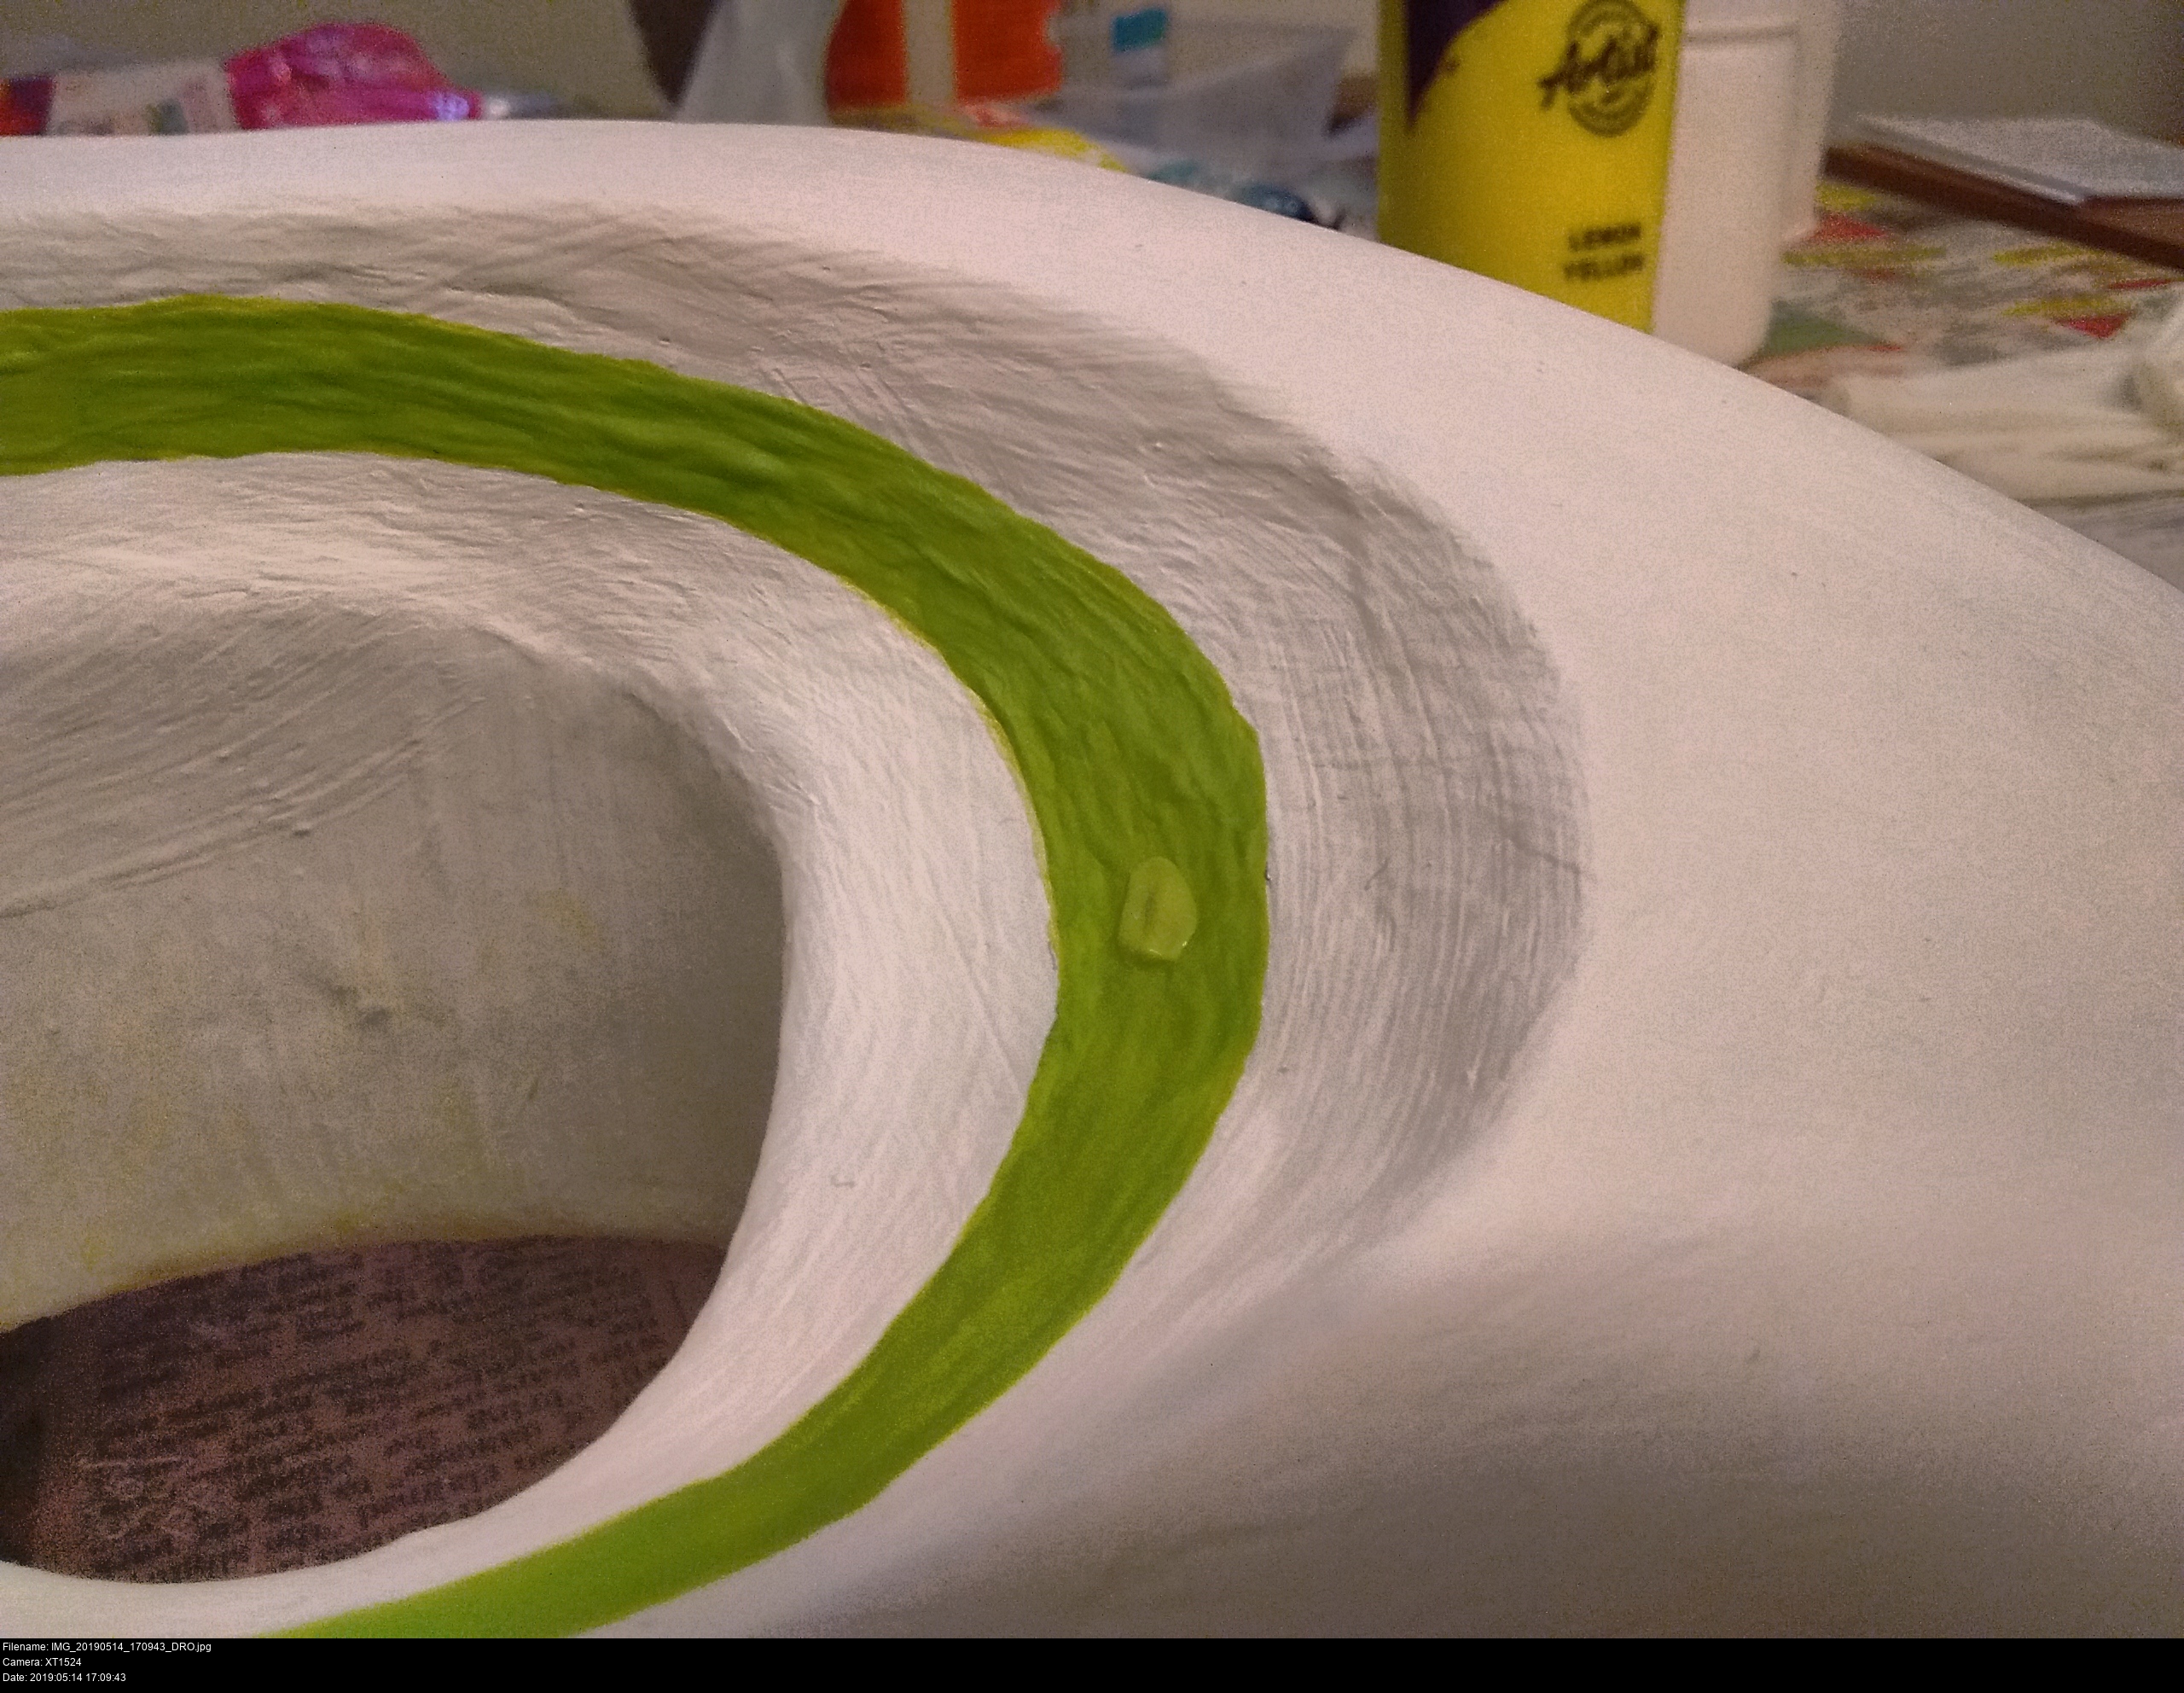
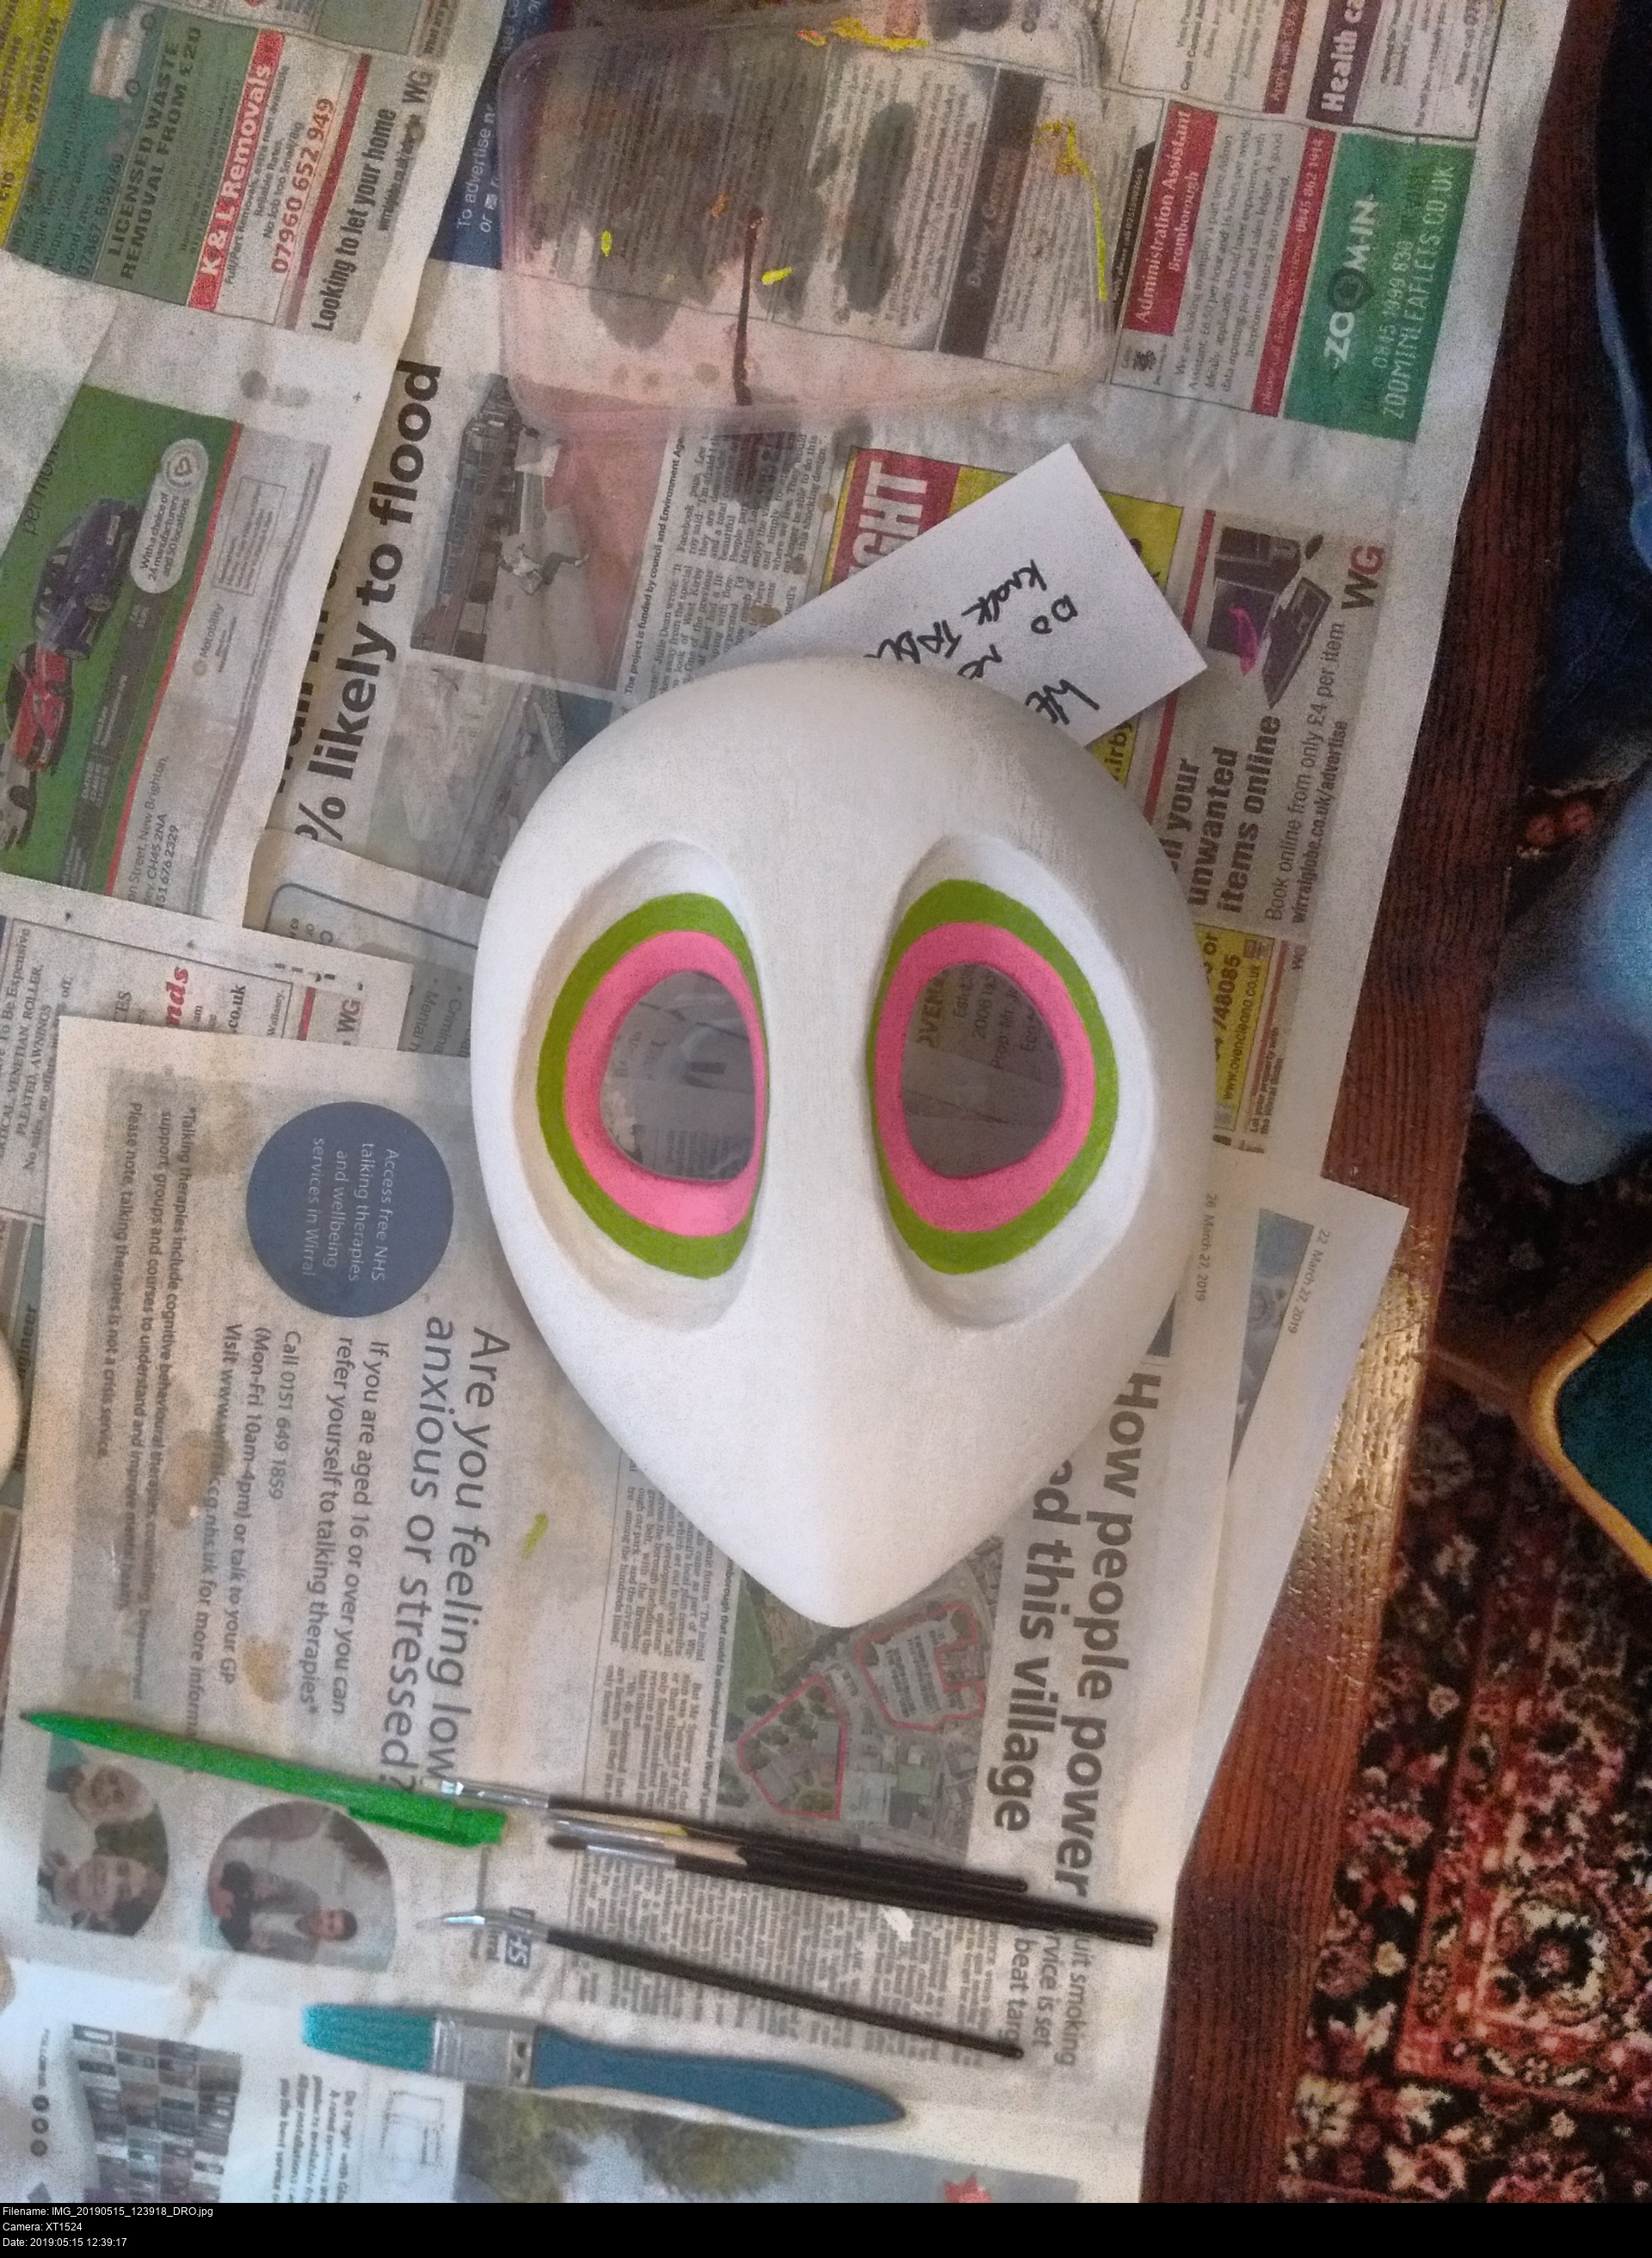
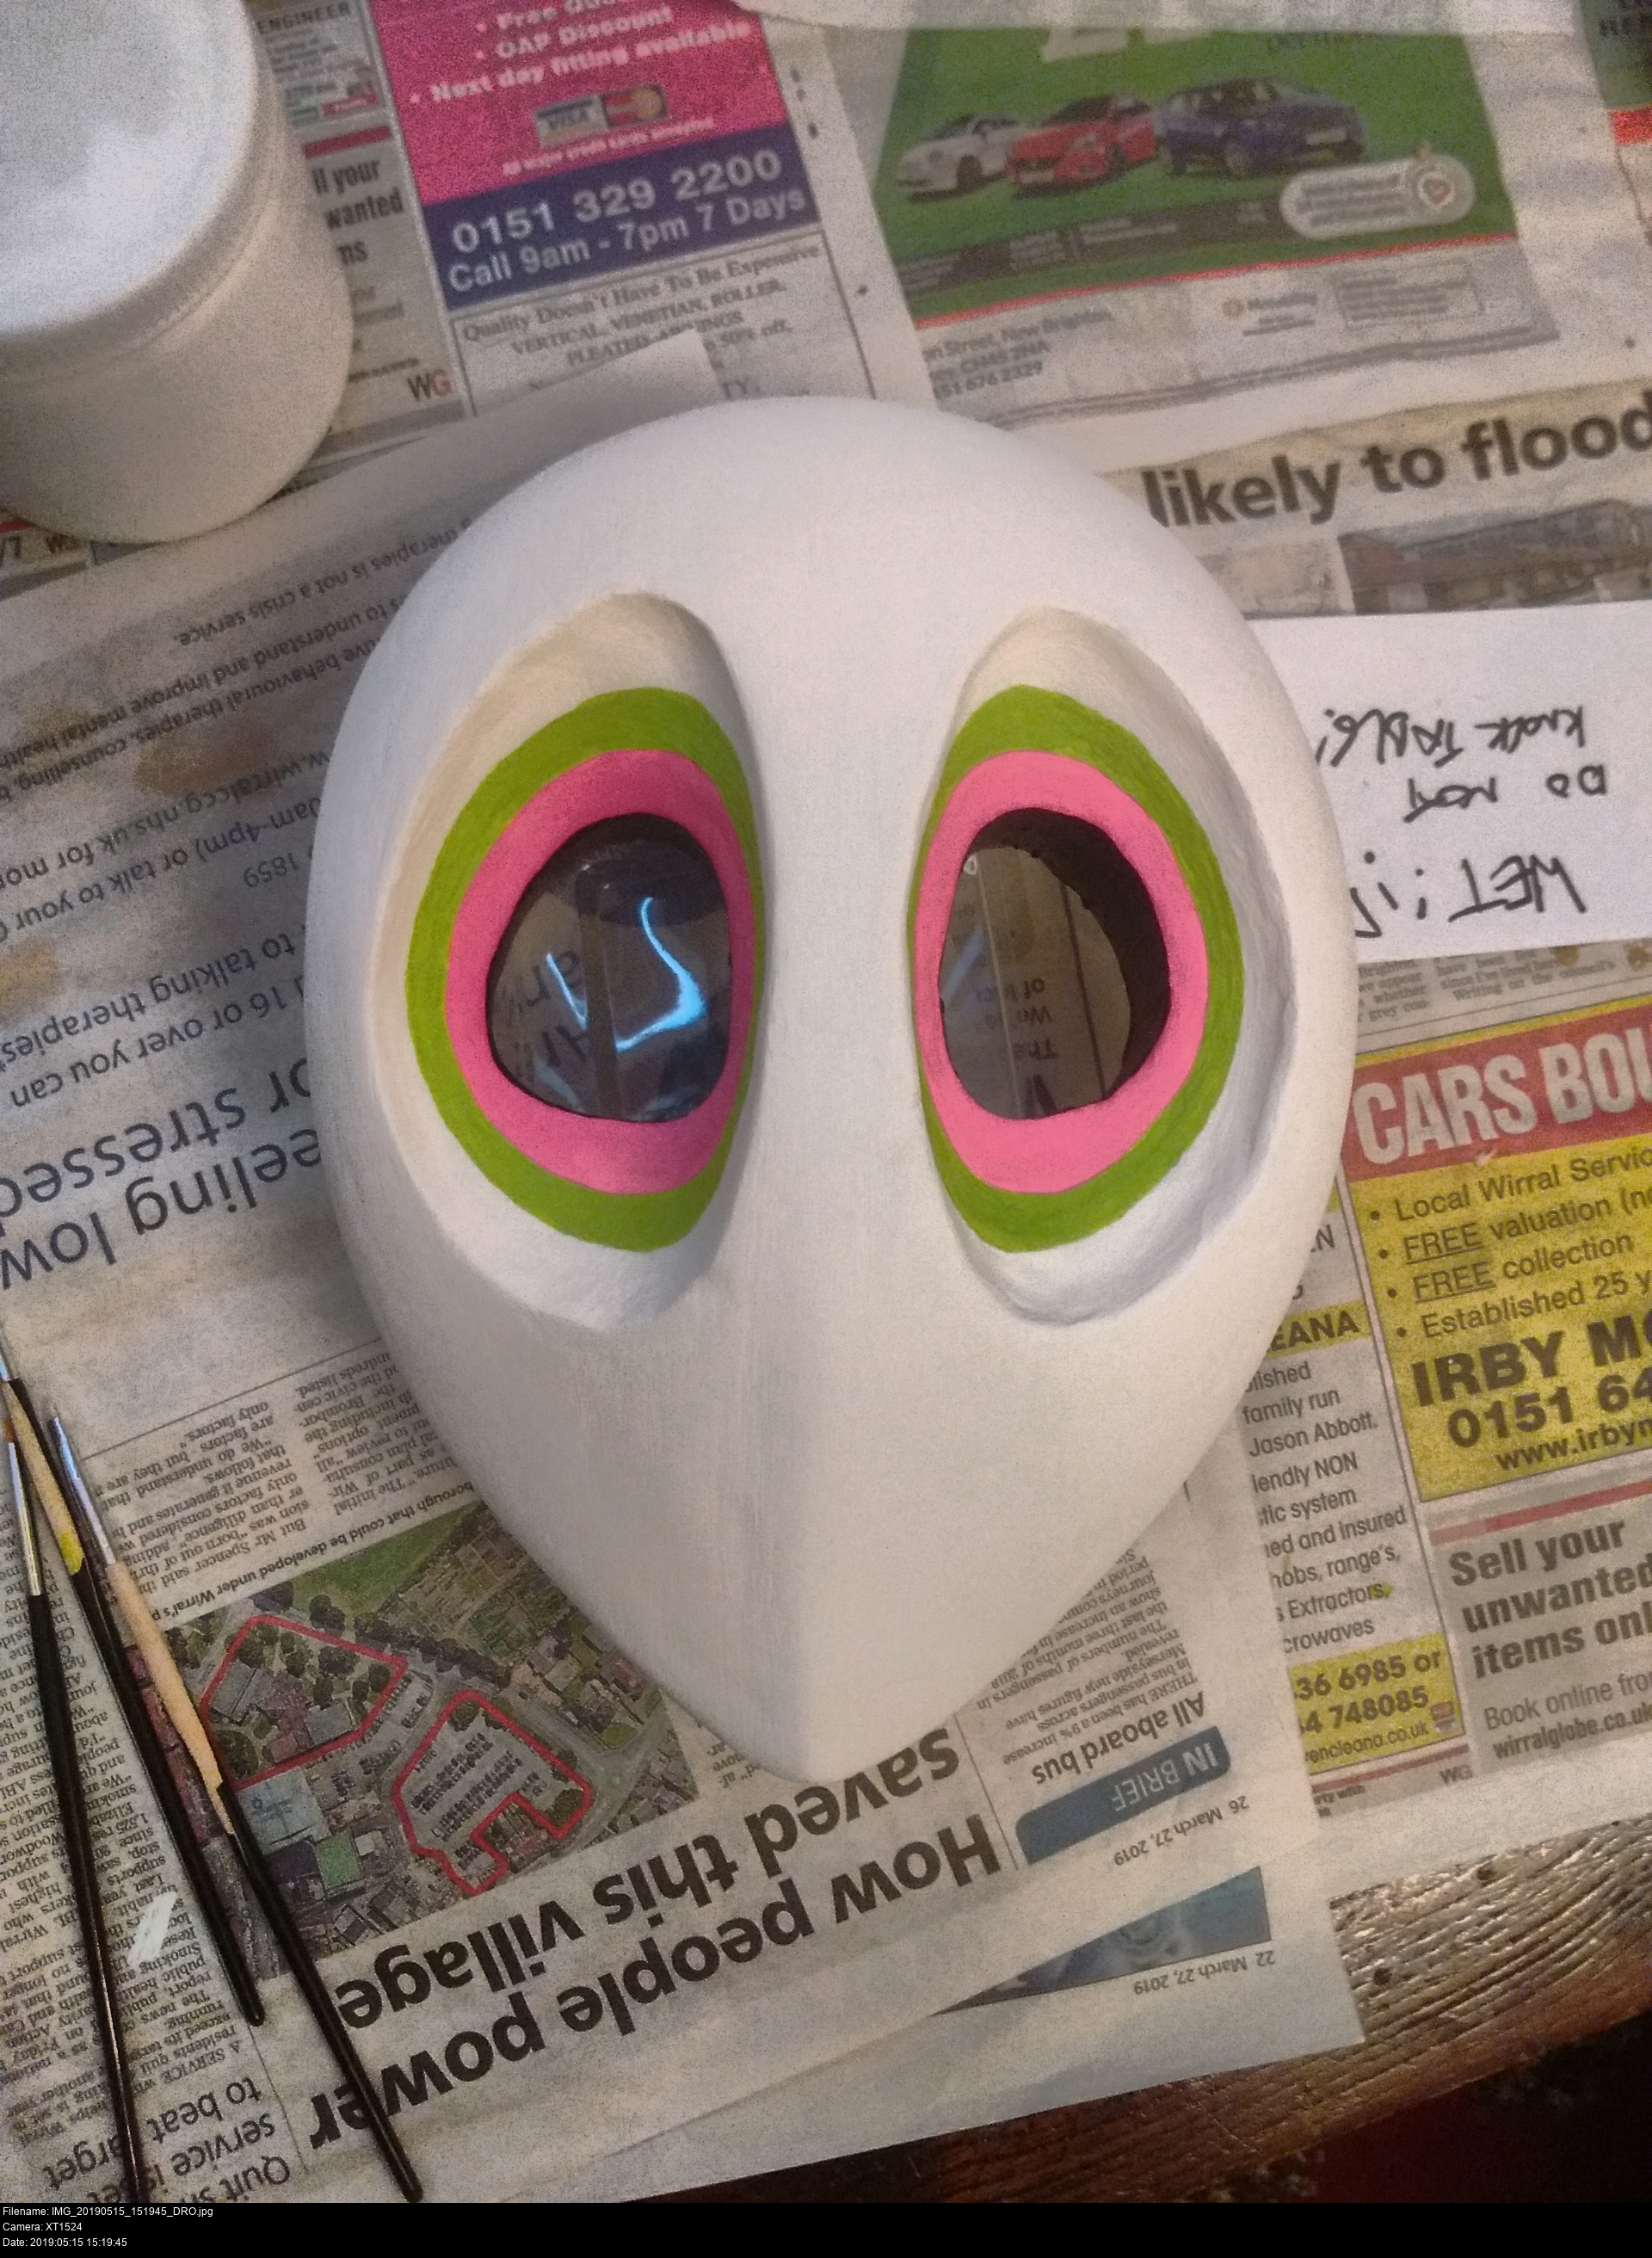
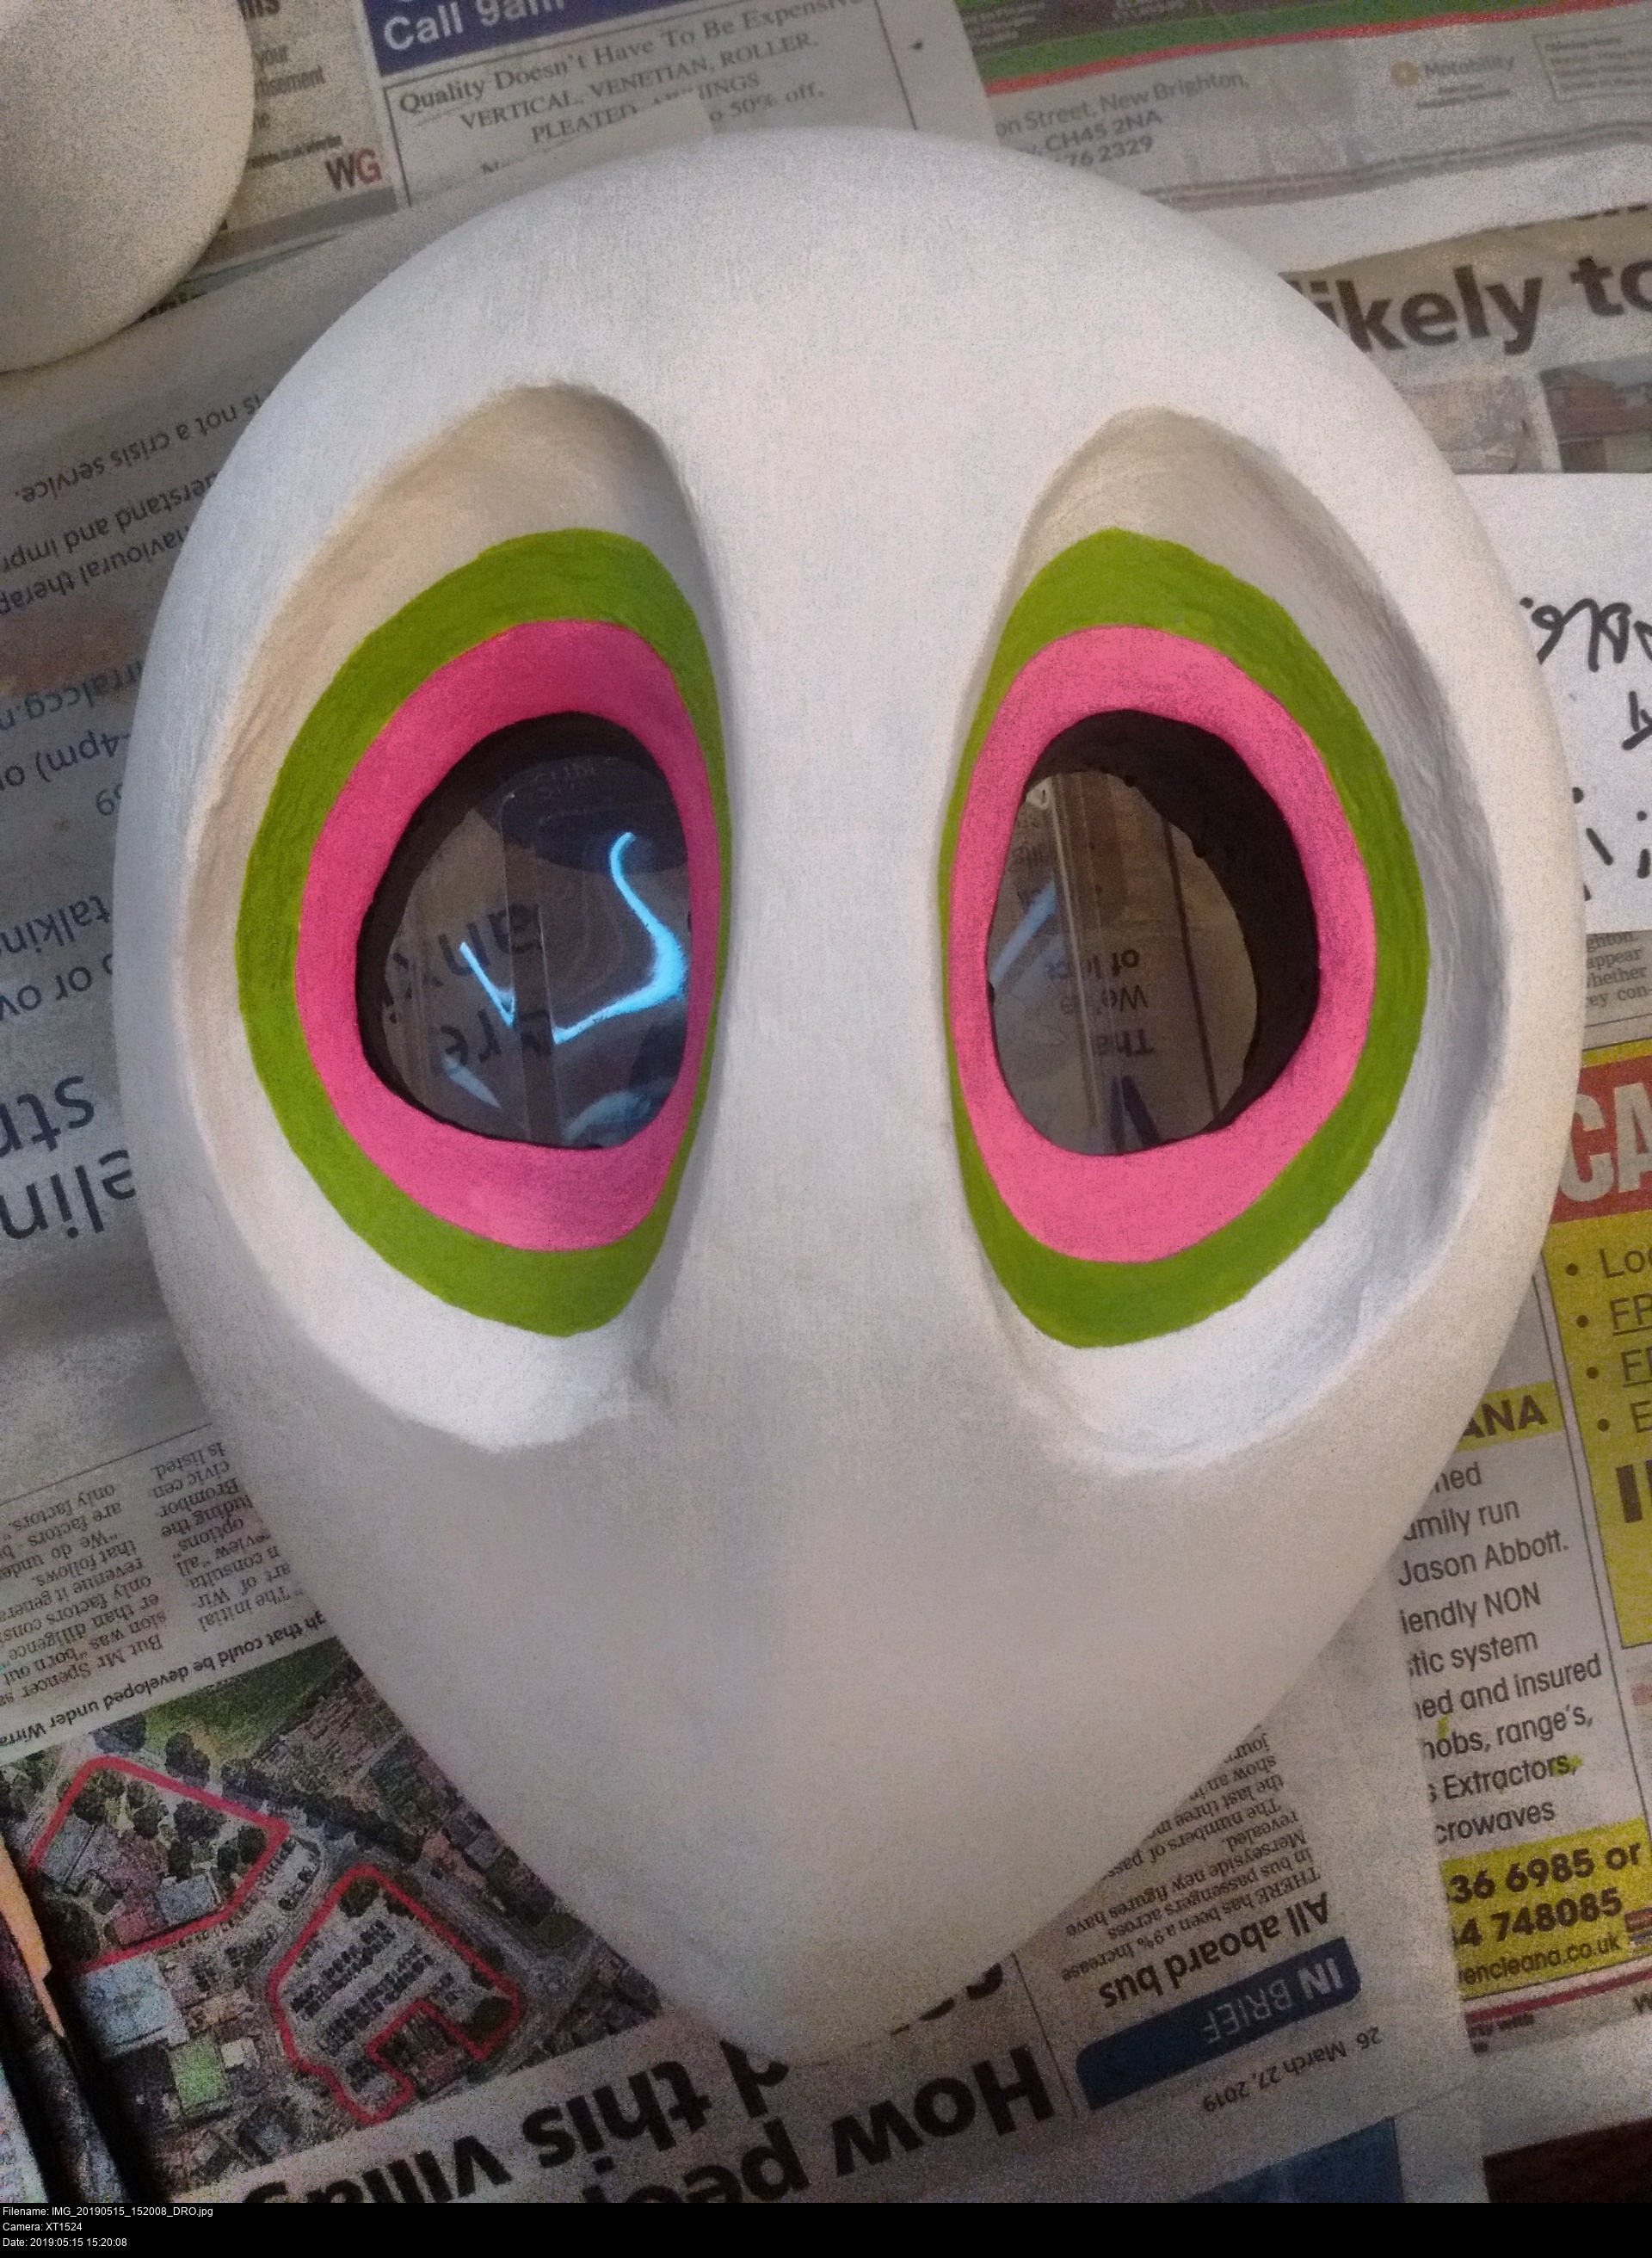
There we go, the green section is finished for now.
Next up, (at least when the green has completely dried! One colour at a time!) synthesizing the fuschia shades on the inside!
The interior ring of the mask's eyes are a very vibrant dark-ish raspberry colour. Like a wine colour, perhaps. It definitely isn't fire engine primary red.

If you've read my Majora's Mask pages, you'll know that I have a hell of a time trying to make purple, or any shade between red and blue. (Foolishly, I assumed you could mix red and blue paint. Boy, was I wrong.)
Having used up all the tiny purple I had ages ago, I needed to make a series of rational plans, and backup plans, for getting some more: local art shops that would be open tomorrow, my old pal Mr. The Works and its reasonable acrylic products, other places. I was rapidly running out of time and couldn't afford to waste a day without the colour. By this point it was almost 11pm, so obviously the correct course of action would be to walk to the 24-hour Tesco that's just over a mile away through some scrubland in near complete darkness and try to track down a simple mixed colour acyrlic paint gift set with a purple in it.
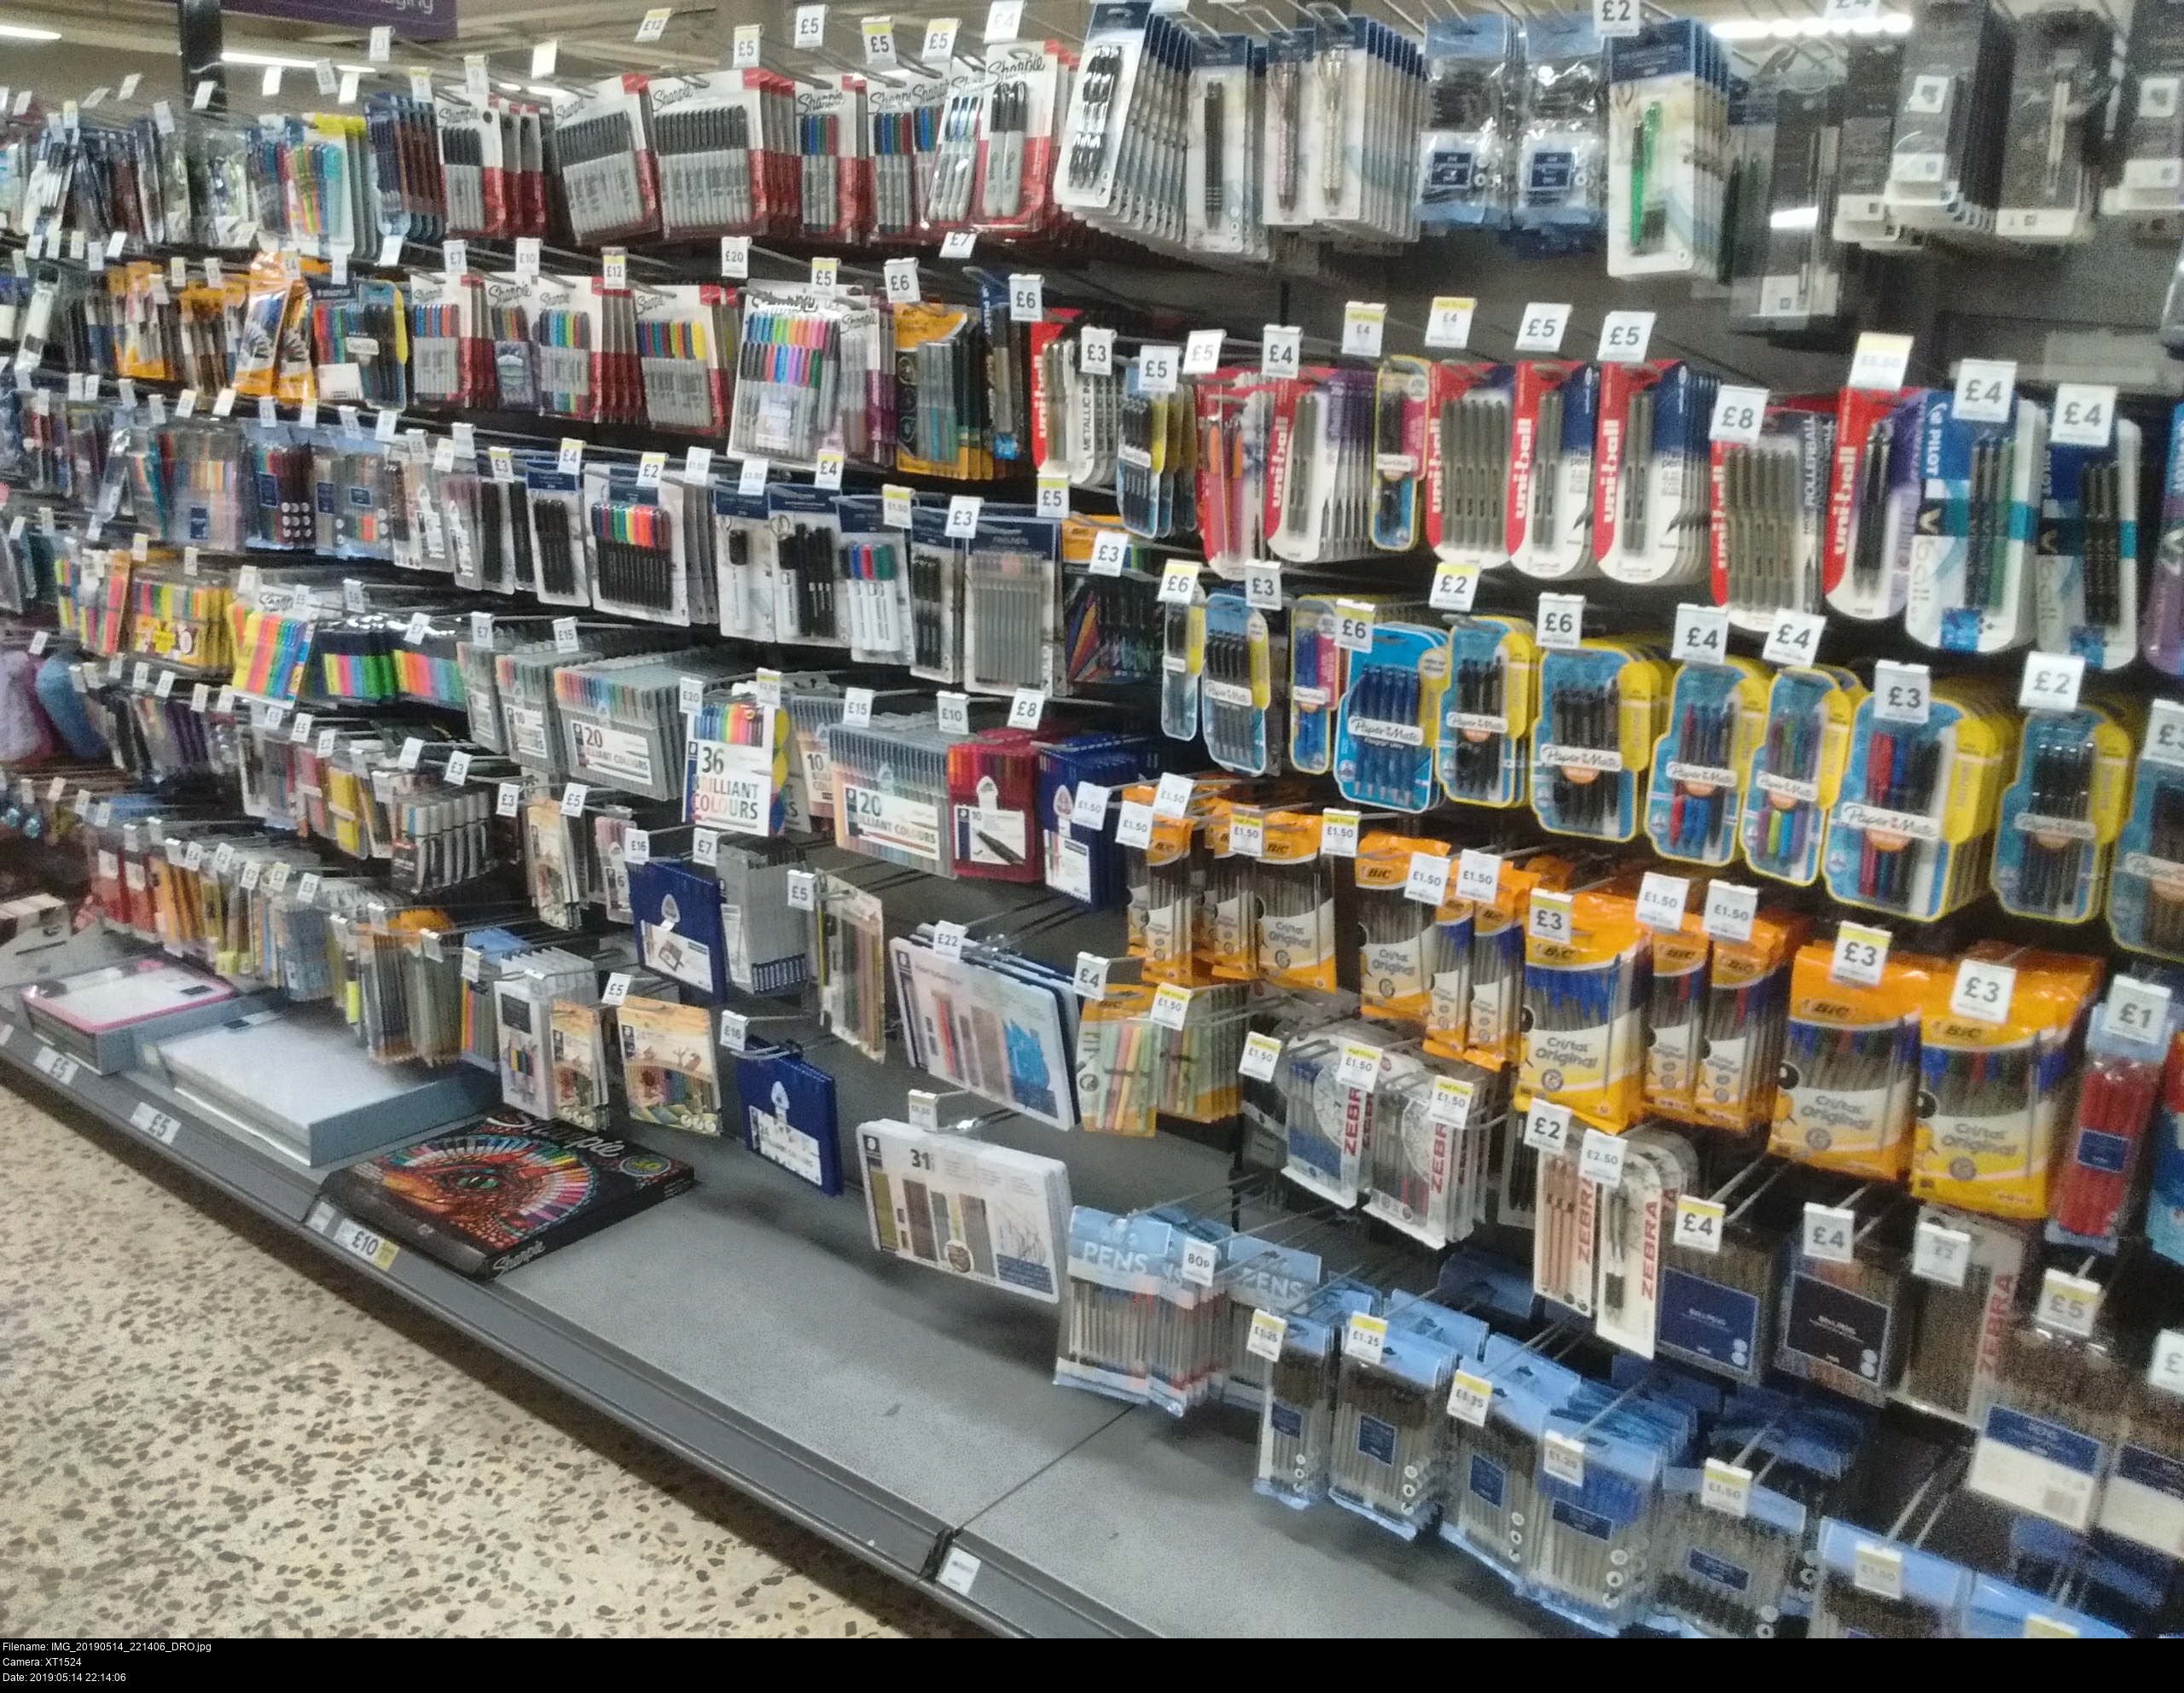
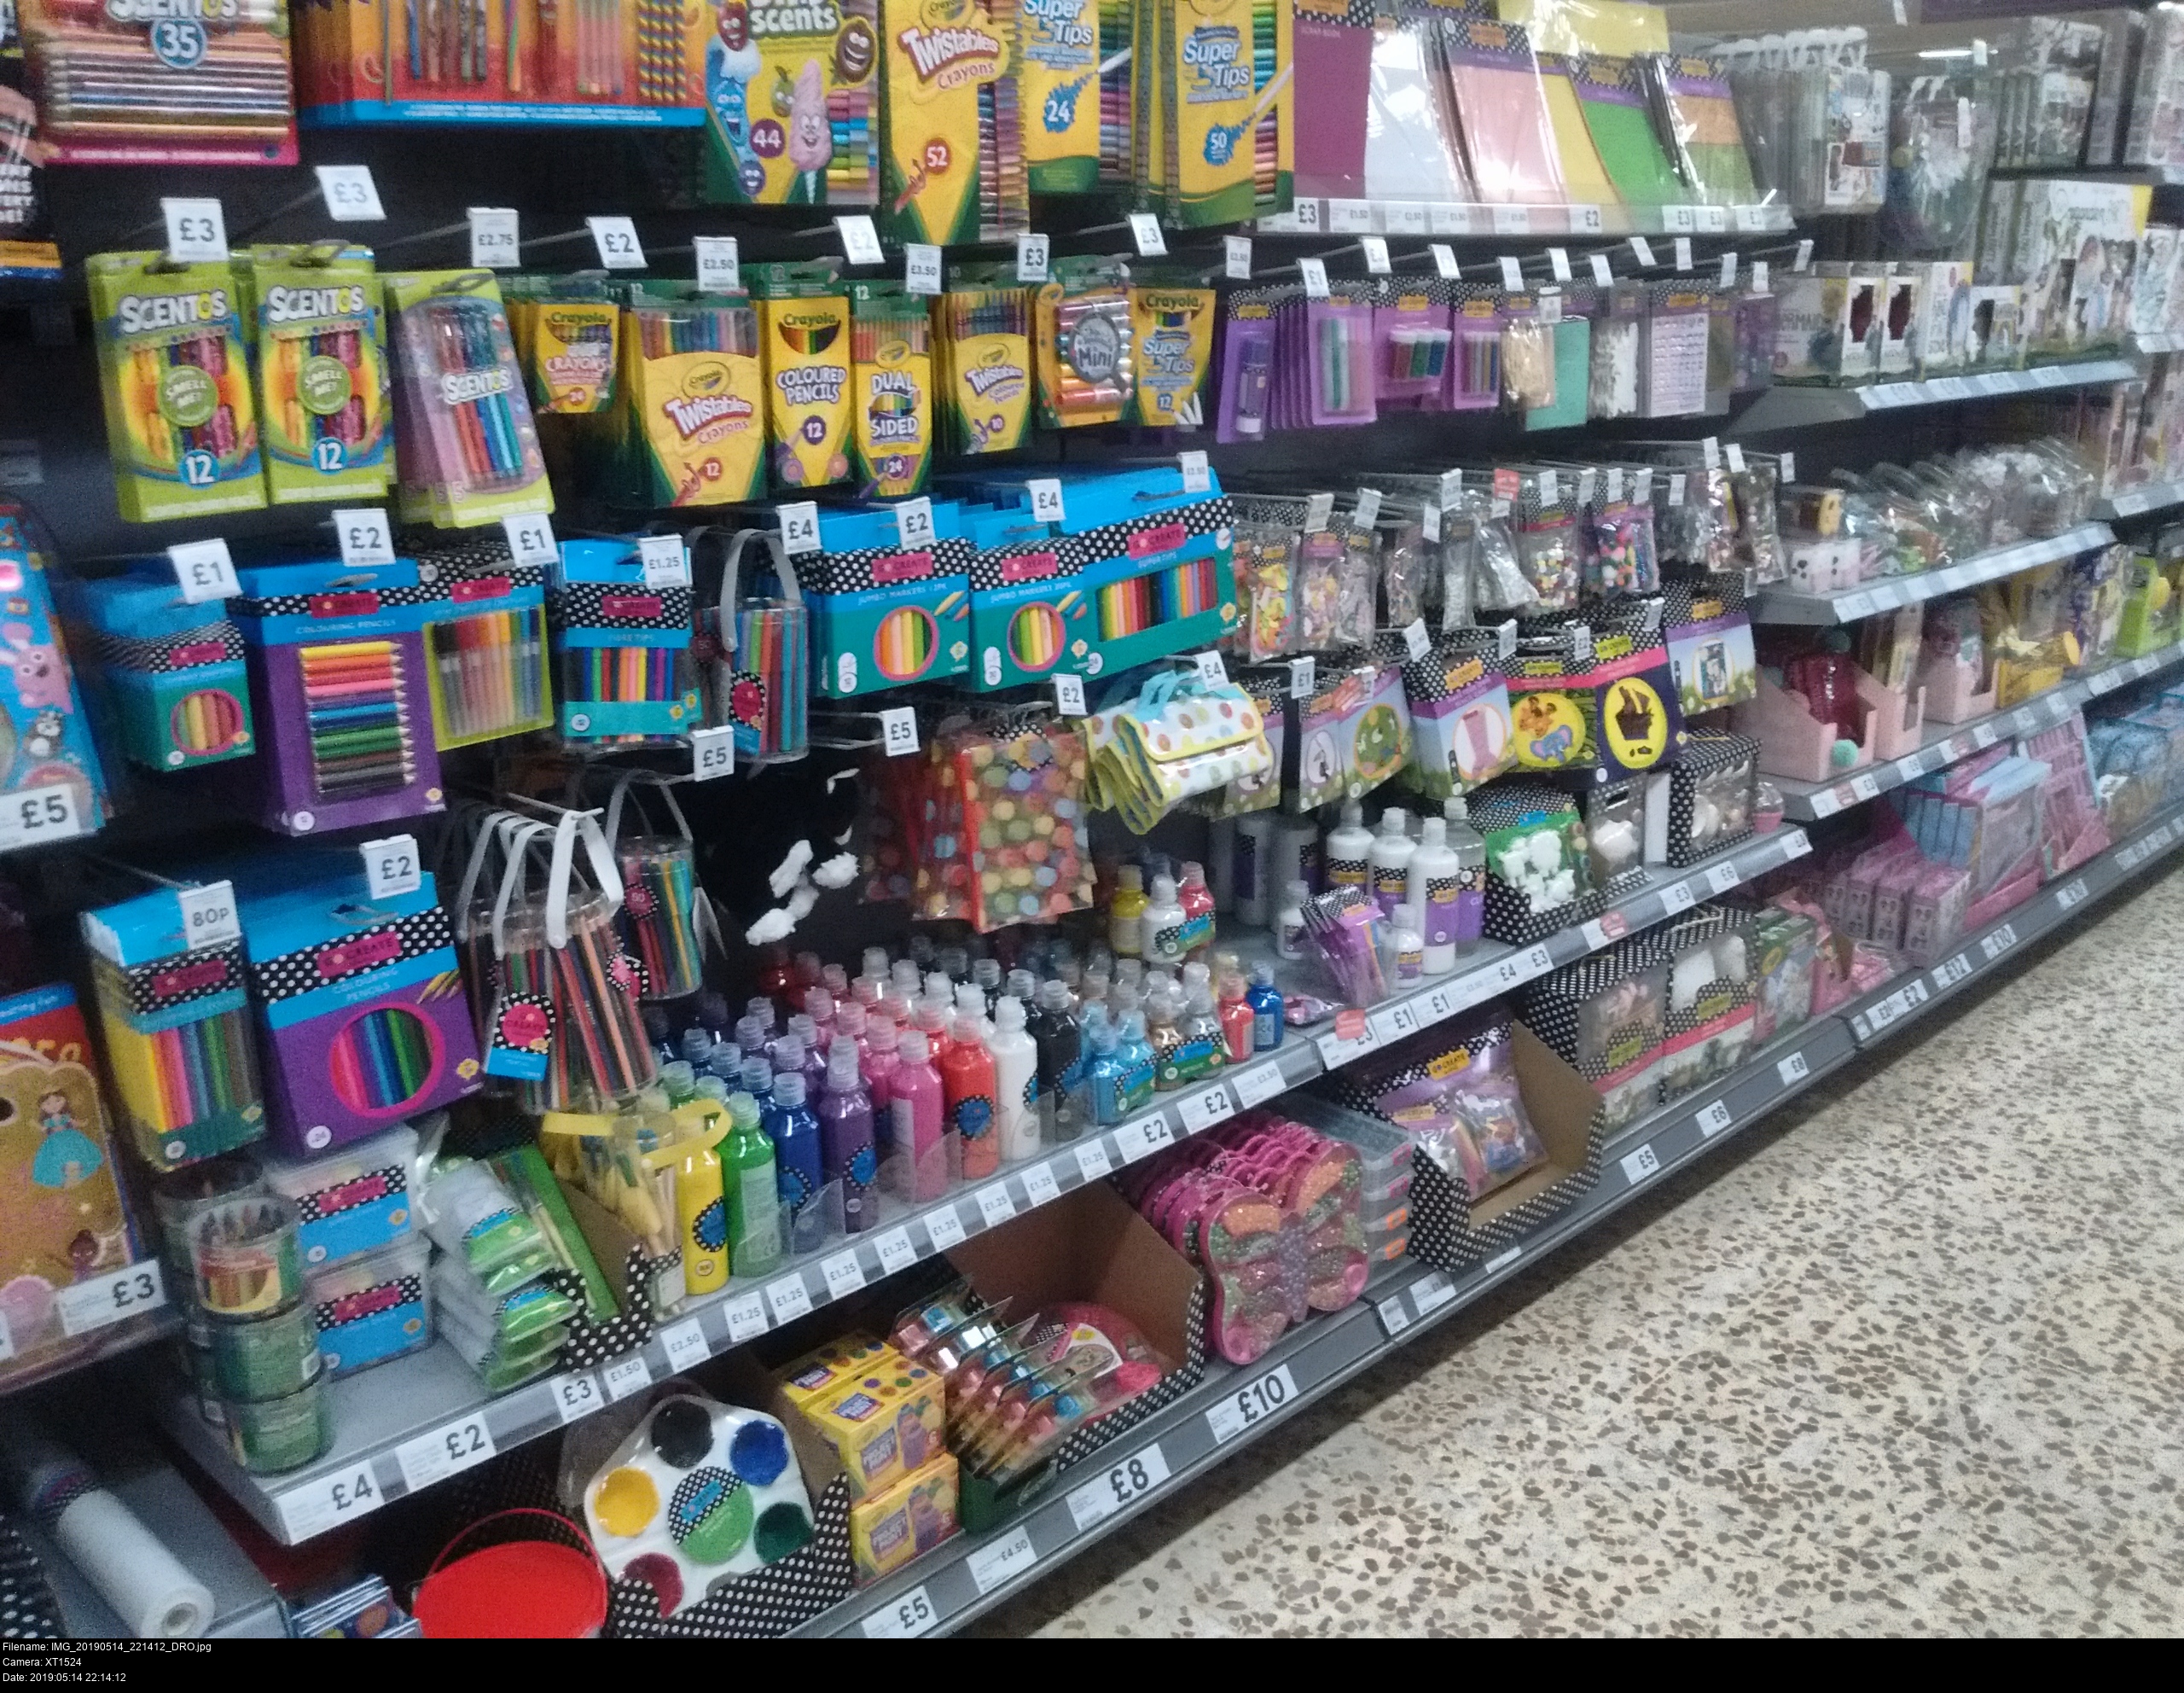
No acrylic paint anywhere to be seen. Nowhere in the entire shop. Not in the stationery, the gifts, or the kids' crafts stuff.
Sure there's a bunch of kids' paints down there in the lower centre of the second image, but I'm sure they're washable poster paints. (Of the kind that would wash away when you tried to coat them with a water-based varnish, like what happened with Hotshot the Overlynx's black pistol.)
At least the walk back was nice. It was a bright, full moon, and I could see my surroundings and my shadow clearly from just the moonlight.
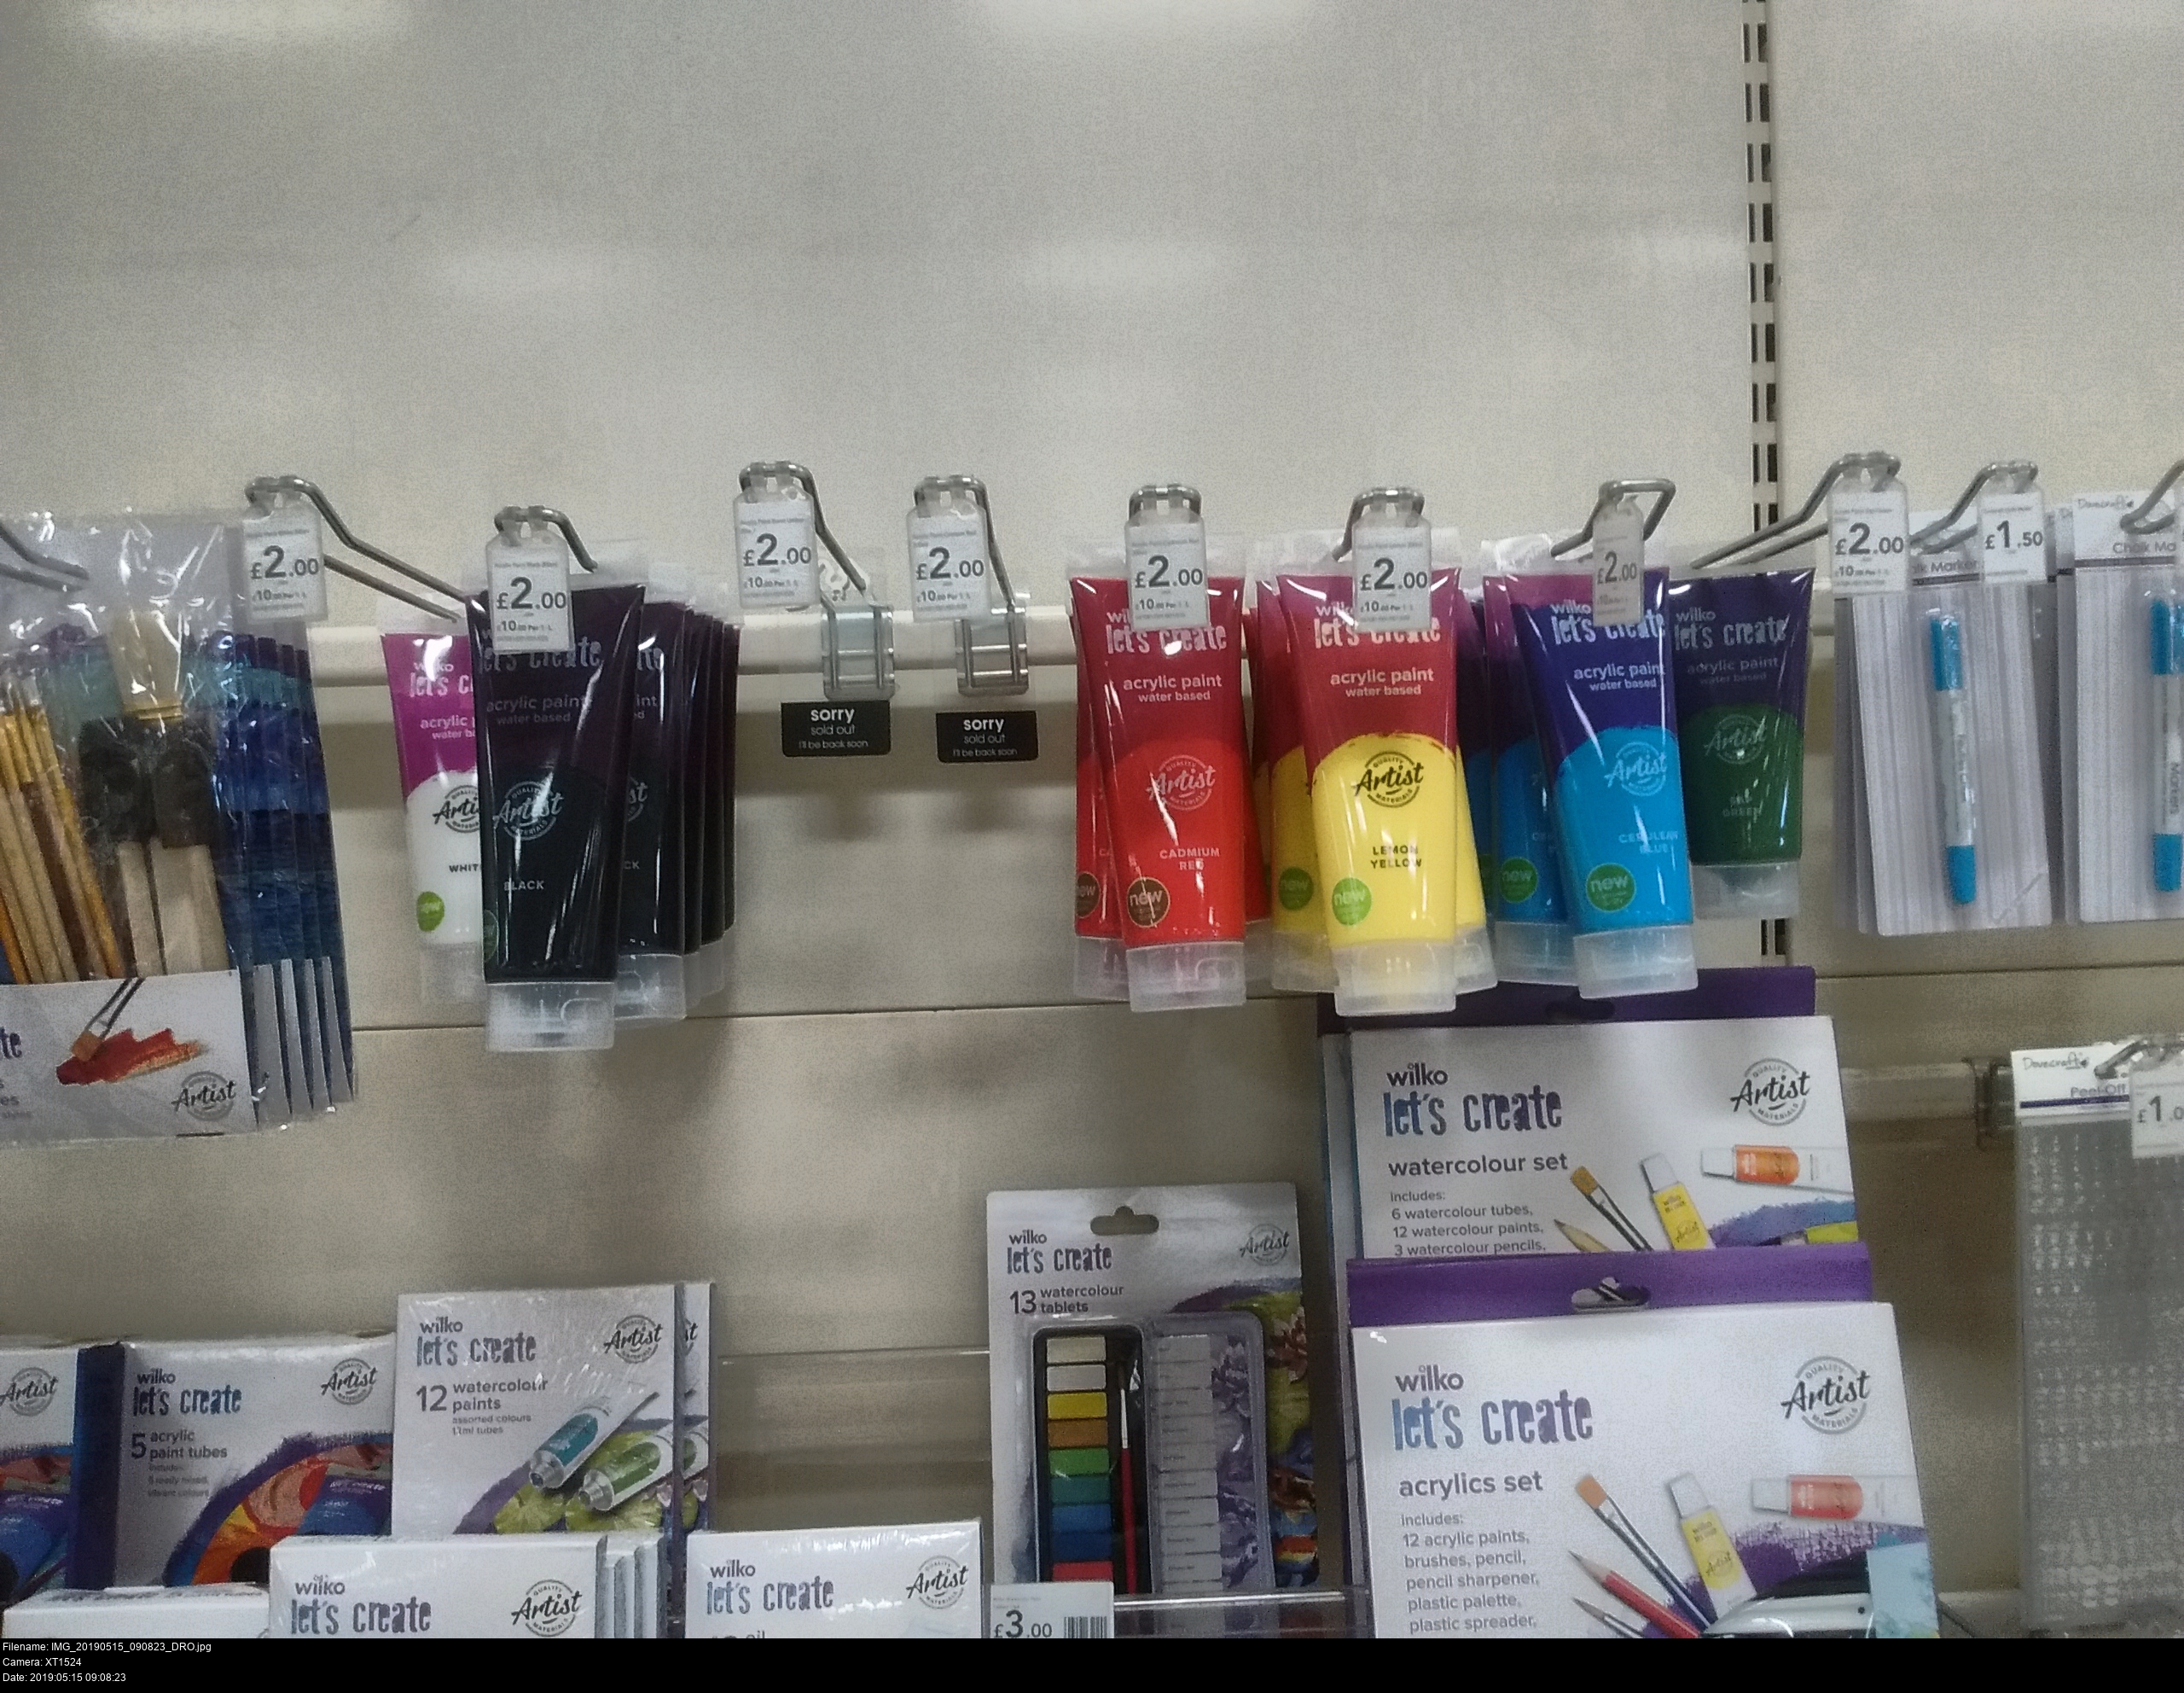
These are the primary shades in Wilkinson that I've used so far for Majora's Mask and this Xam'd mask. Every colour but the colour I need. * super thumbs up *

My second choice, Home Bargains, has this! It'll do. I'm sure I can turn it into the colour I need. I think my phone camera has accurately captured the colour of the tube there: it's a pretty deep dark fuschia. If I use this neat on the mask, it'll dry darker still and become a very deep raspberry scarlet. Too dark. But the hue of it is very close to what I'm seeing on the image and my mental model of the RGB values.
Right, no time for messing about. Hoof it back home!
Home Bargains is a discount shop in the UK, their stuff is pretty good, more or less. Good enough that if you were to see a similar thing priced higher, there'd be some mental quizzical eyebrow wriggling going on. Their black is what I used on Hotshot's gun. (I later found that The Works (which is much further from me) has a surprisingly large variety of secondary shades of acrylic in generous bottles for £1 each. I'd definitely give their purples a go at some point.)
Regardless of whether or not the paint is high-quality, the tube is certainly up to the task. I was pricking and poking the foil cap over and over trying to get at the stuff.
Can ya guess what happened? Can ya? Can ya really?
SPLURT.
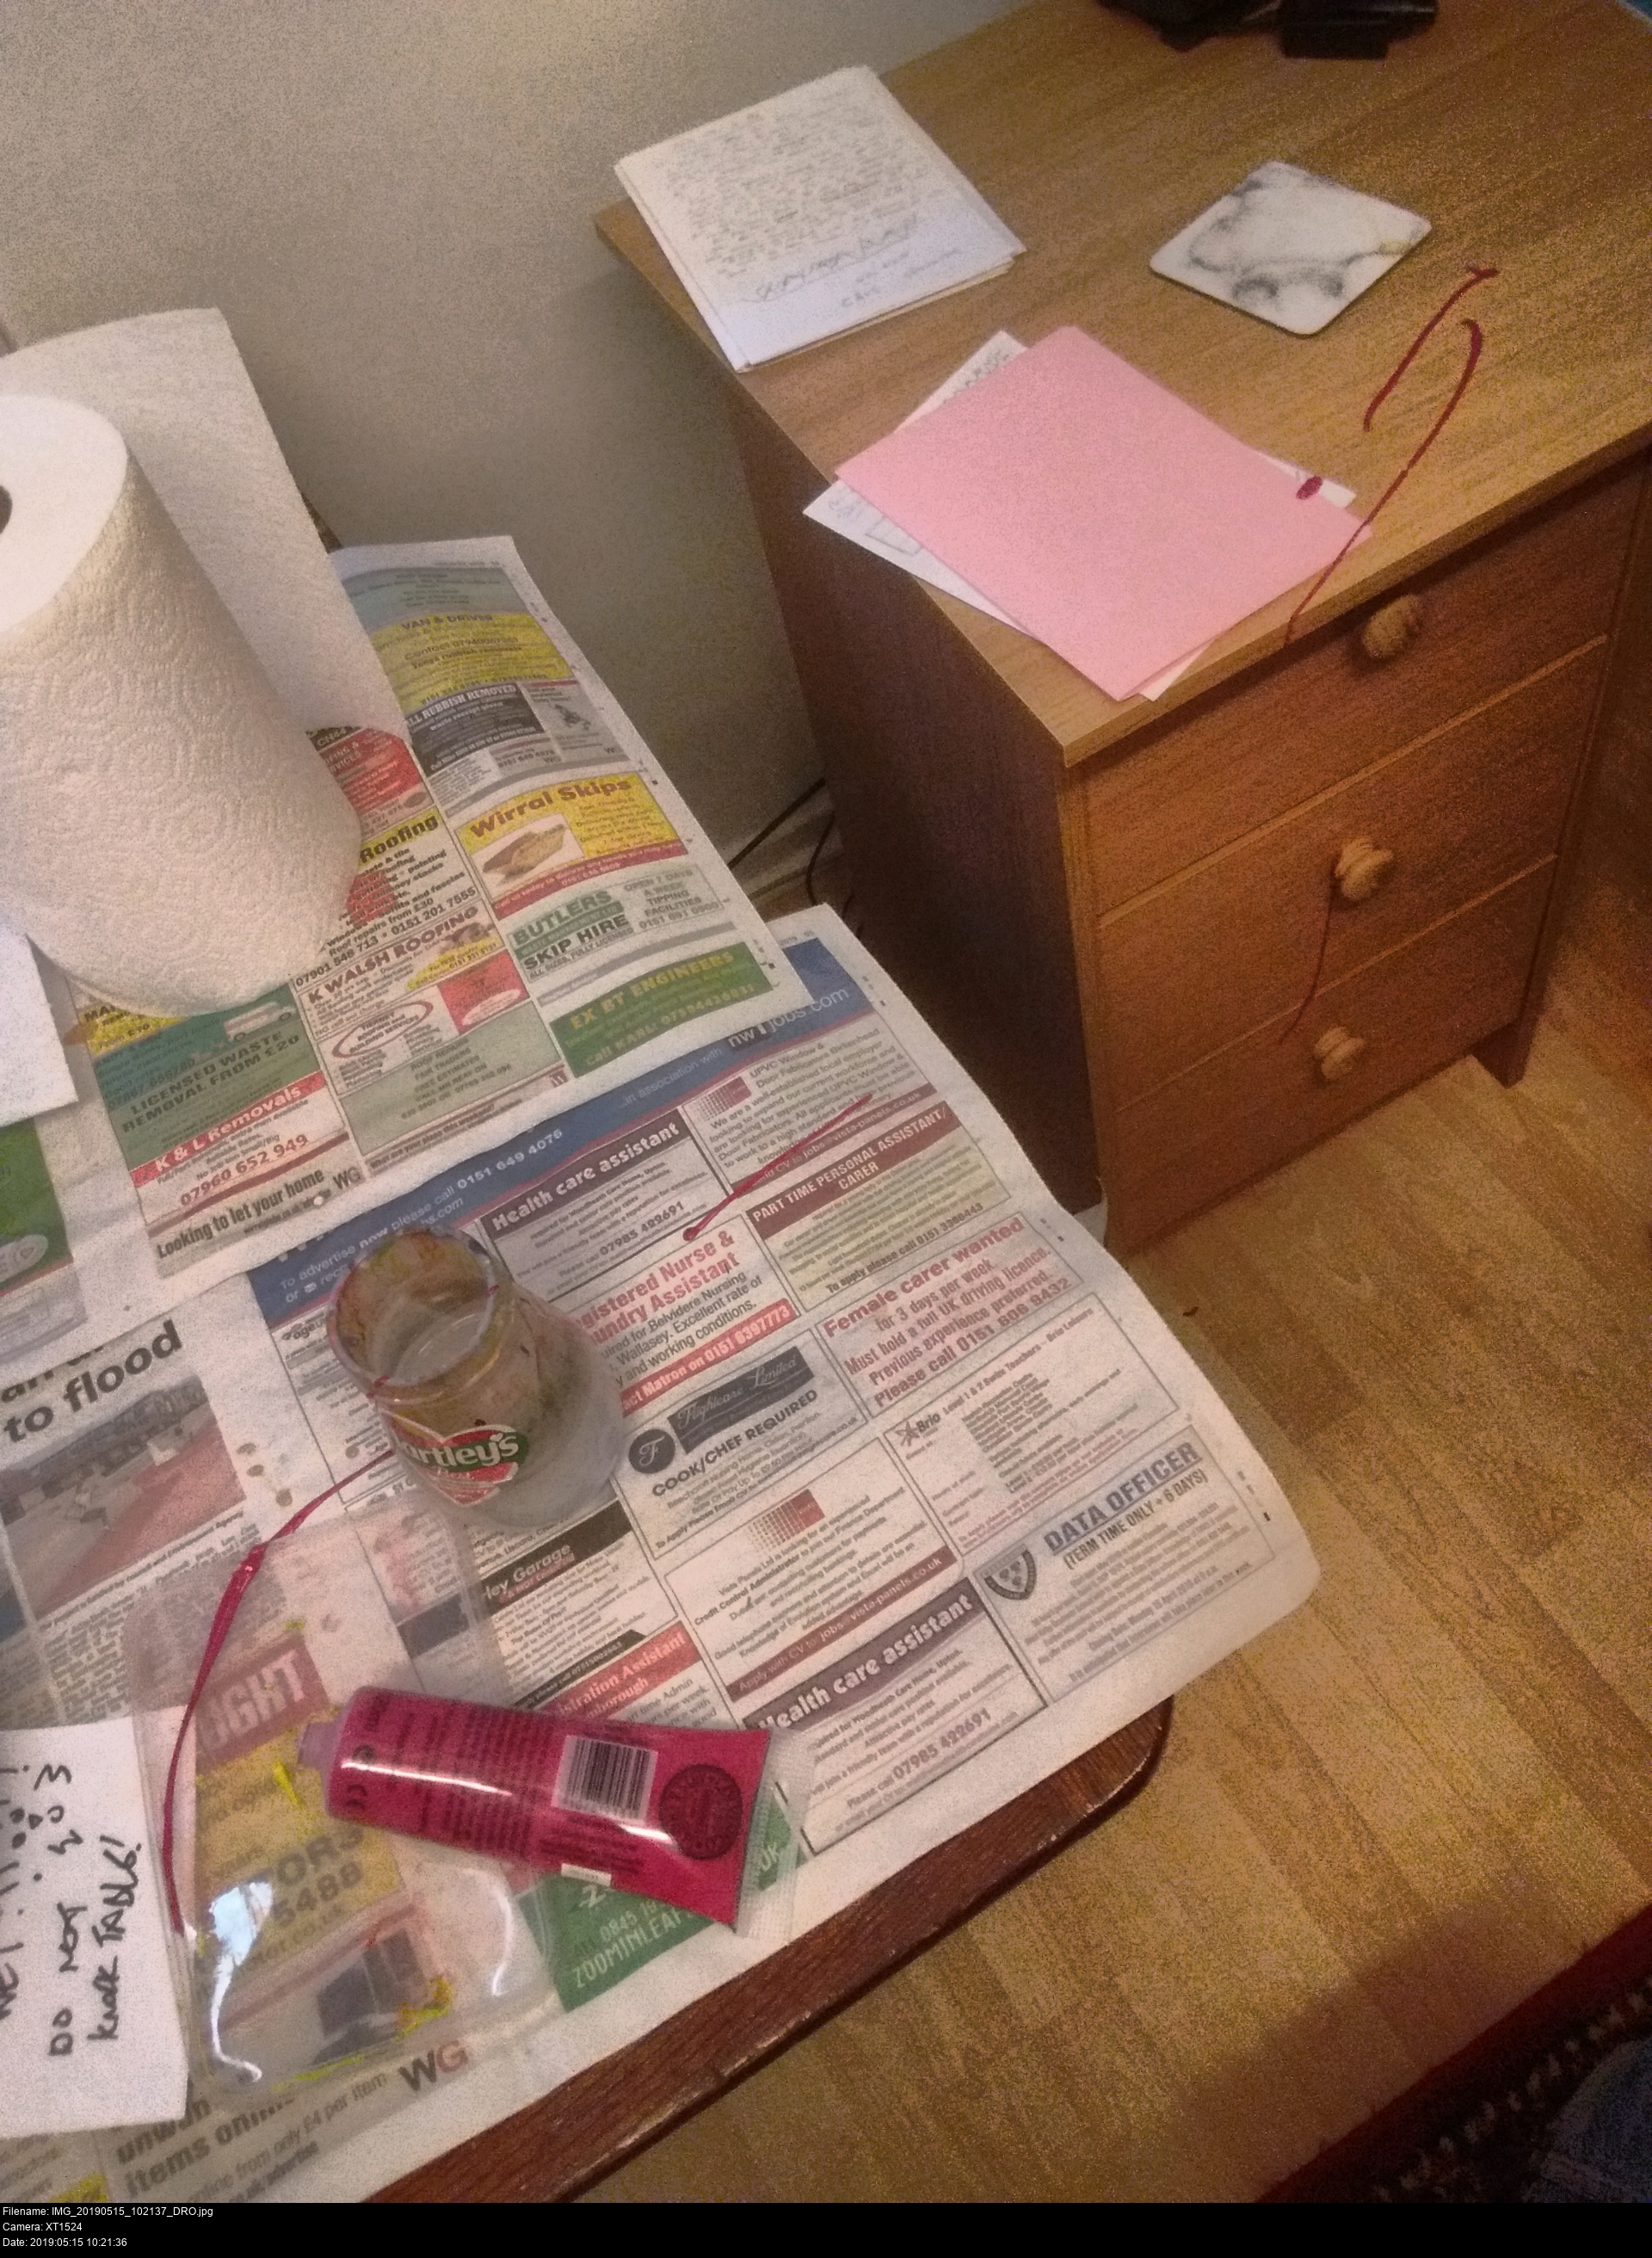
I sprang into action, taking the correct, most-super-appropriate response to a crisis: taking a picture of it for the internet.
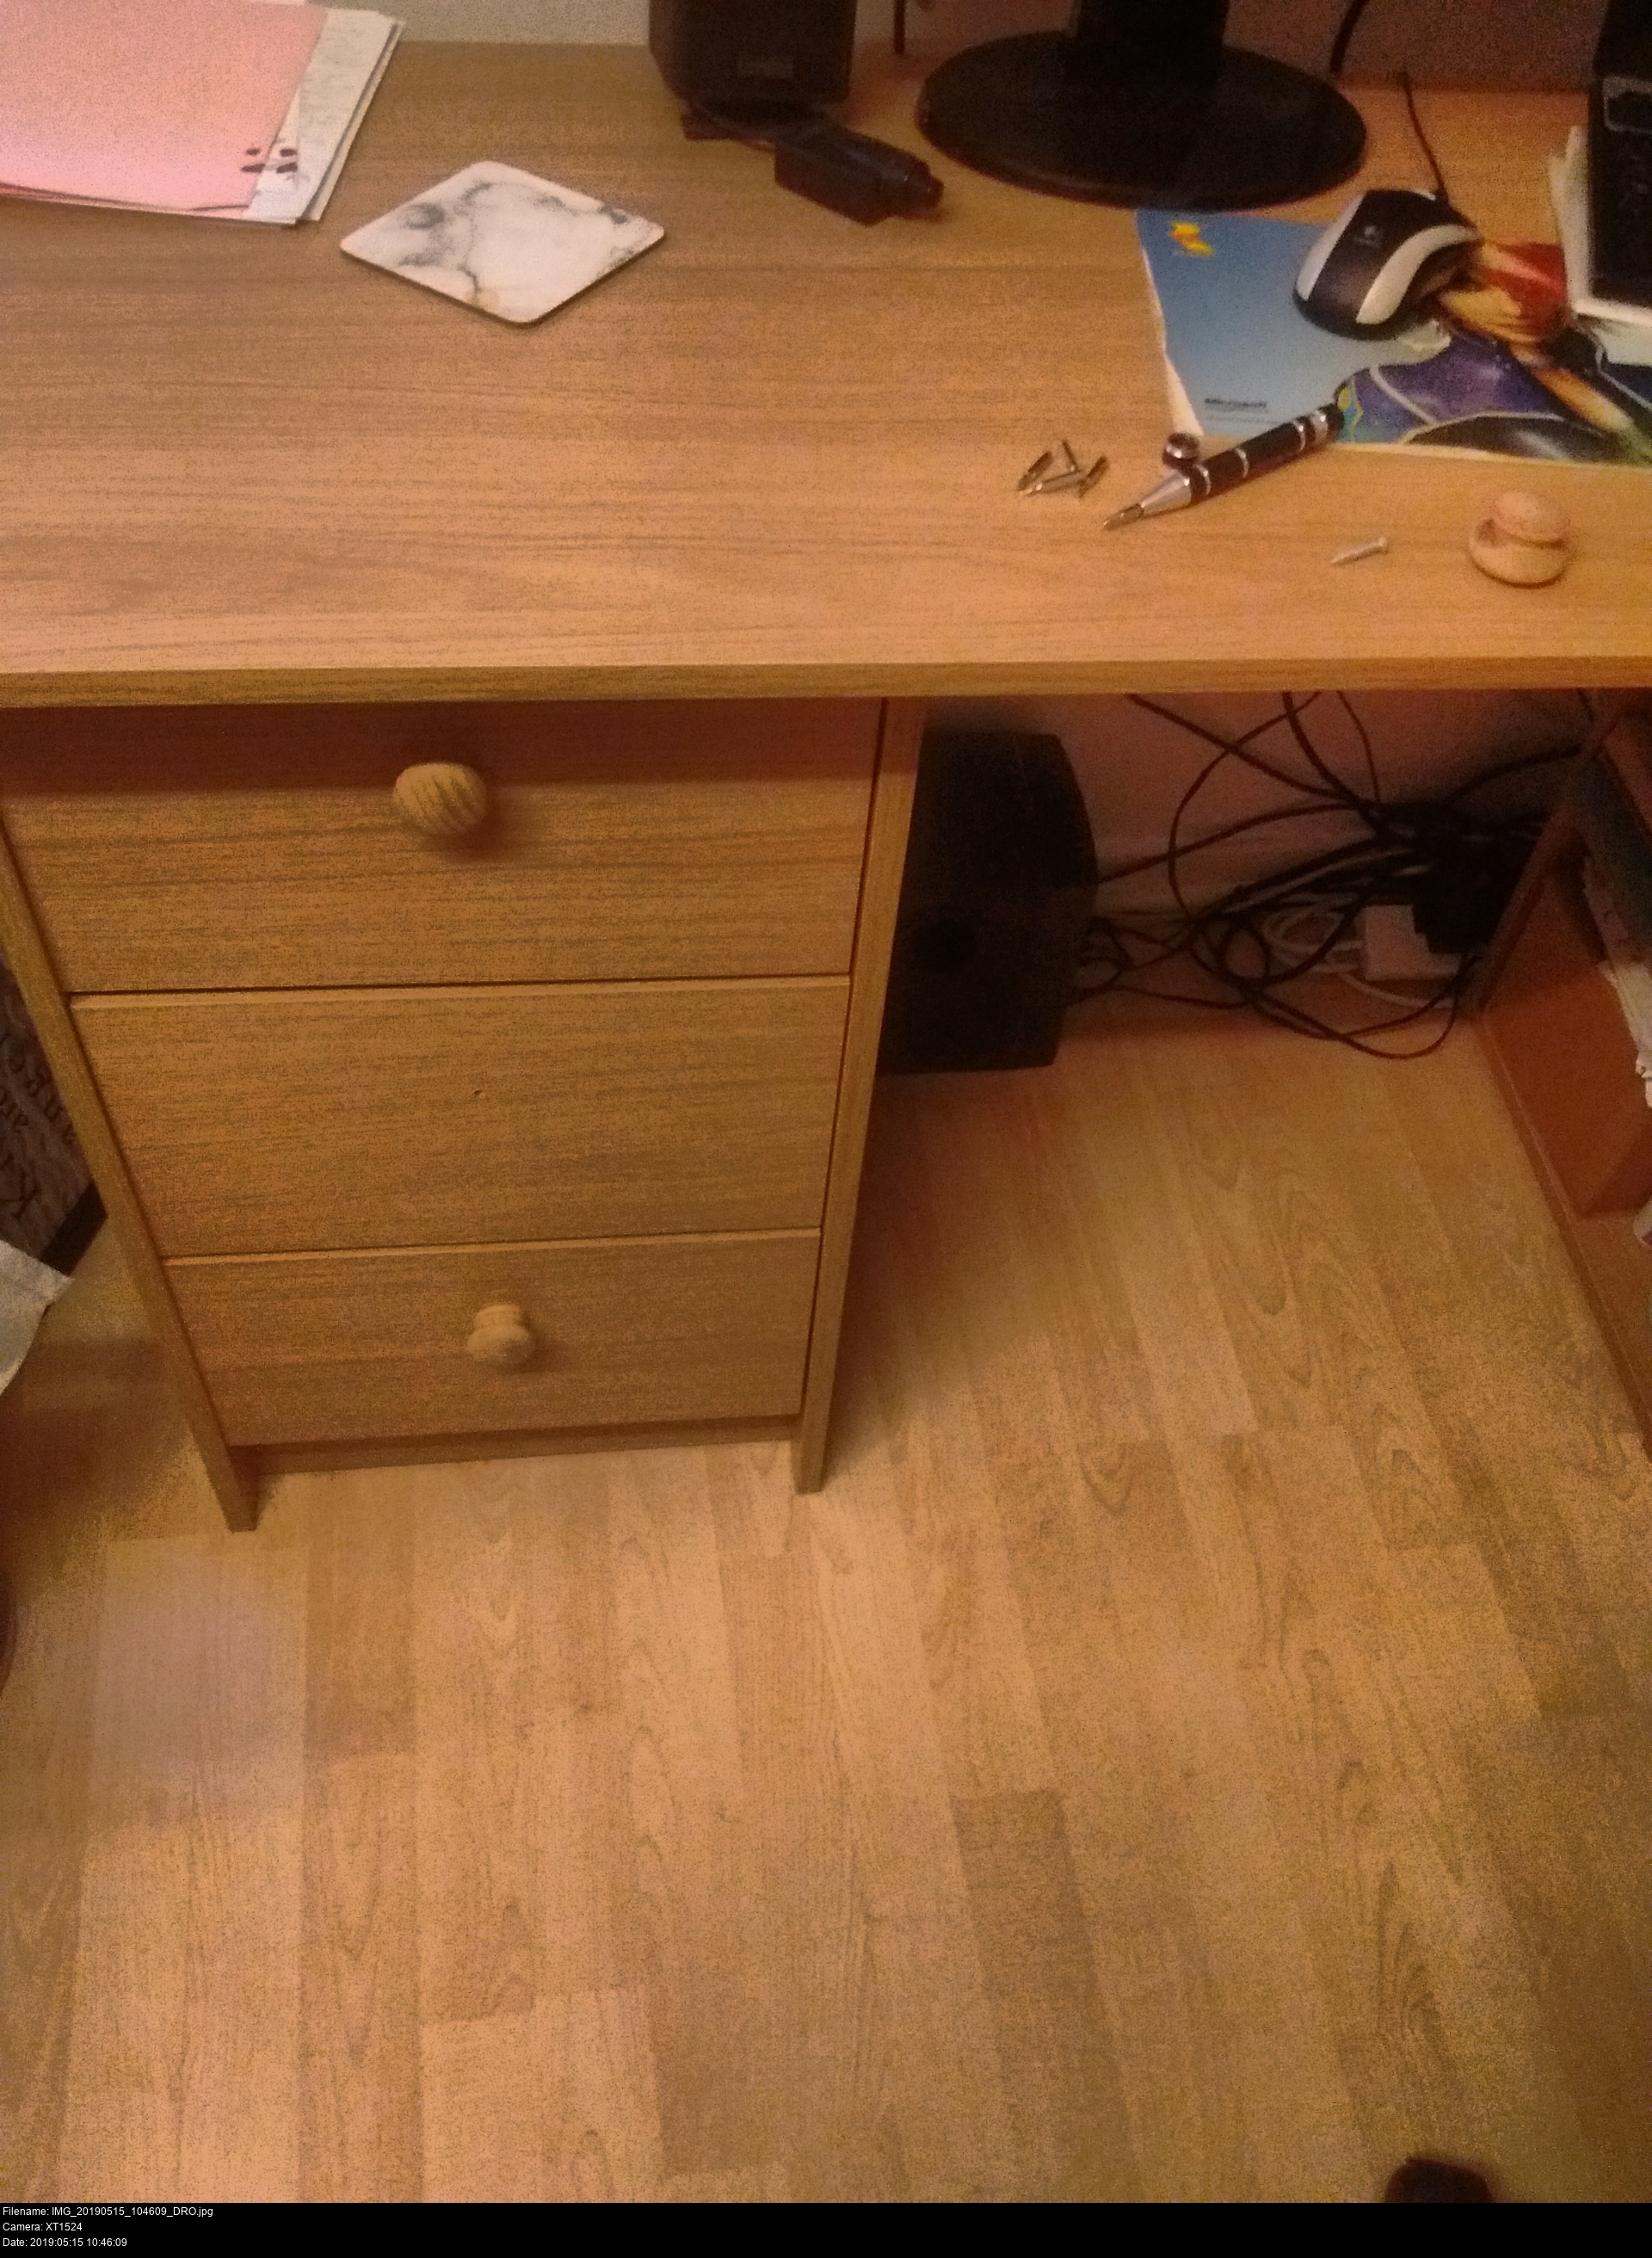
Oh, by the way, that's not my desk. That belongs to someone else and it was brand new. Eek.
Seriously though, I cleaned that mess up pronto. I was already wearing a pair of my famous disposable gloves in anticipation of something like this, and I have a large shoebox full of washing-up liquid, sponges, brushes and other cleaners for cleaning consoles and games on stand-by, so this was merely a tedious thirty minute distraction.
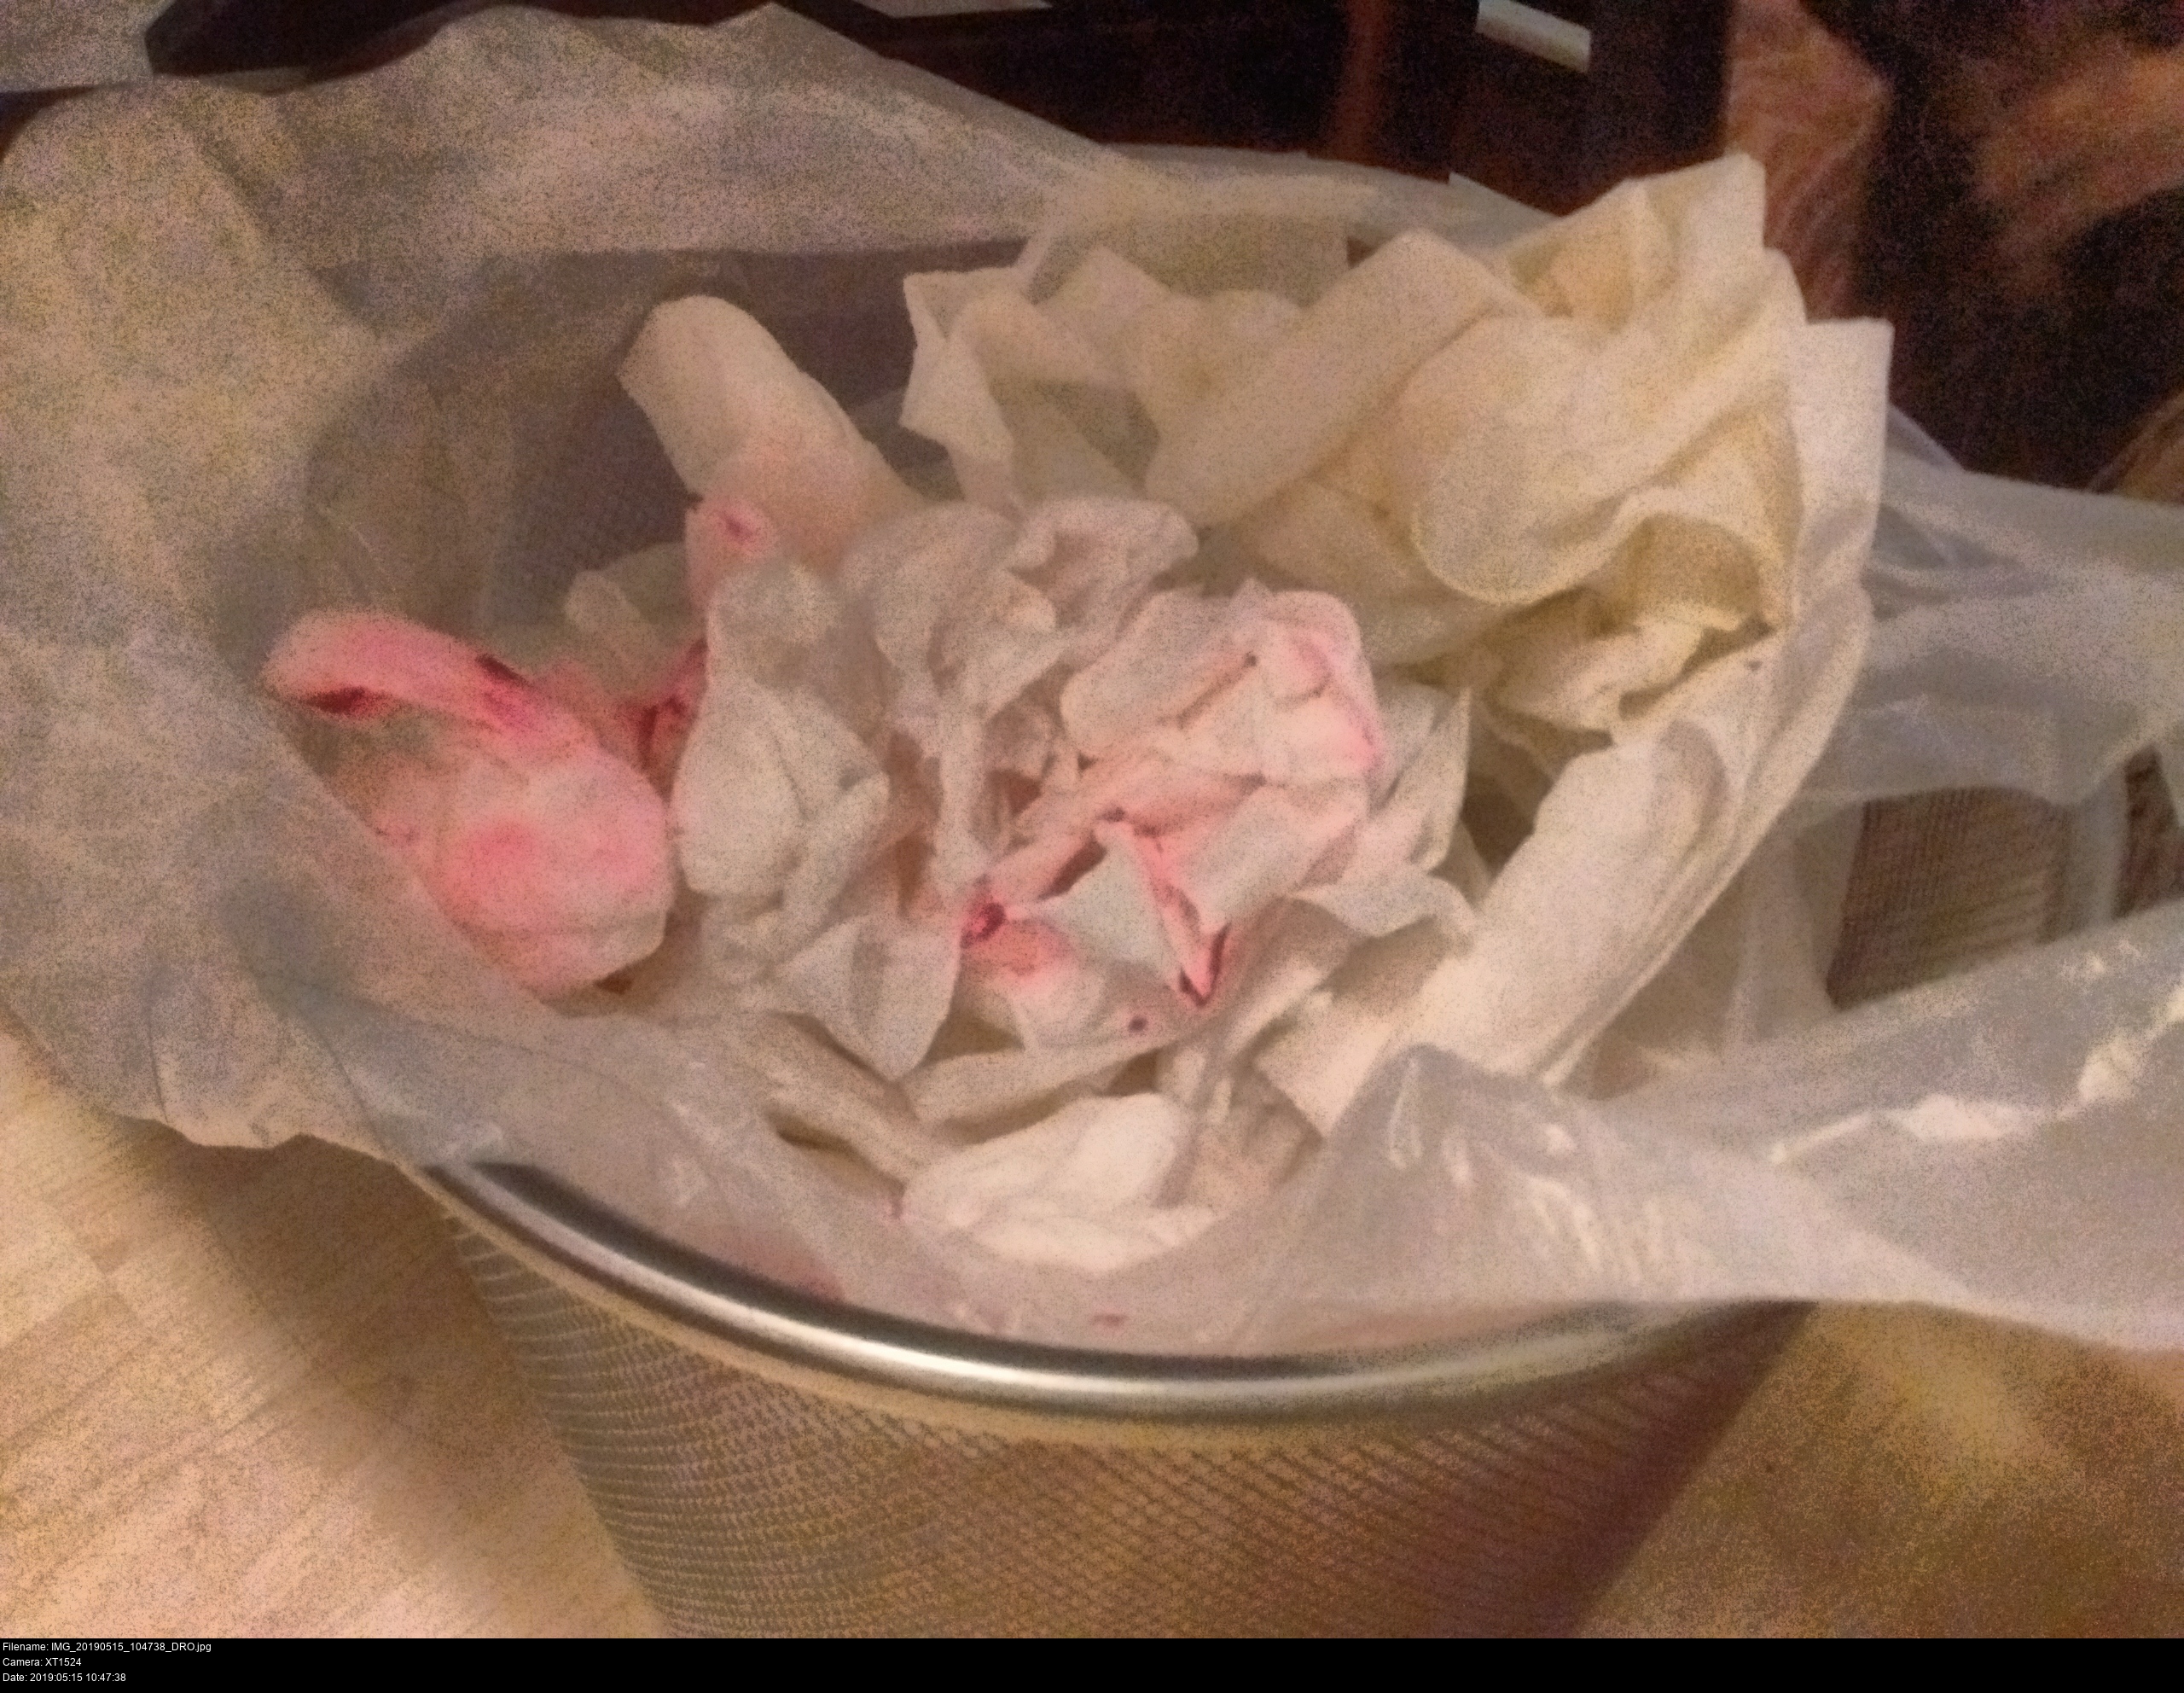
Have a gander at these antibacterial wipes. They're bright, bubblegum pink!
Meanwhile, some of the paint dried on some papers that were lying on the desk, and there it had become a very deep raspberry as I suspected. This Rose paint has a huge huge range... I need to be careful.
I'm going to mix some of this with some gesso (gesso goes with everything, basically) to make a brighter, more vivid fuschia and hope it dries darker.
Ka-bingo! This is 90% of the way there, I reckon! This has yet to dry so I don't know where it'll land. Of course taking a picture of a TV screen isn't going to show the colours perfectly, but...
Moving on to the other side!

Blimey that's vibrant. Hmm...

I like it!
Another wobbly splat to add to my collection.
This probably isn't too far from what the first forms of life on Earth looked like.
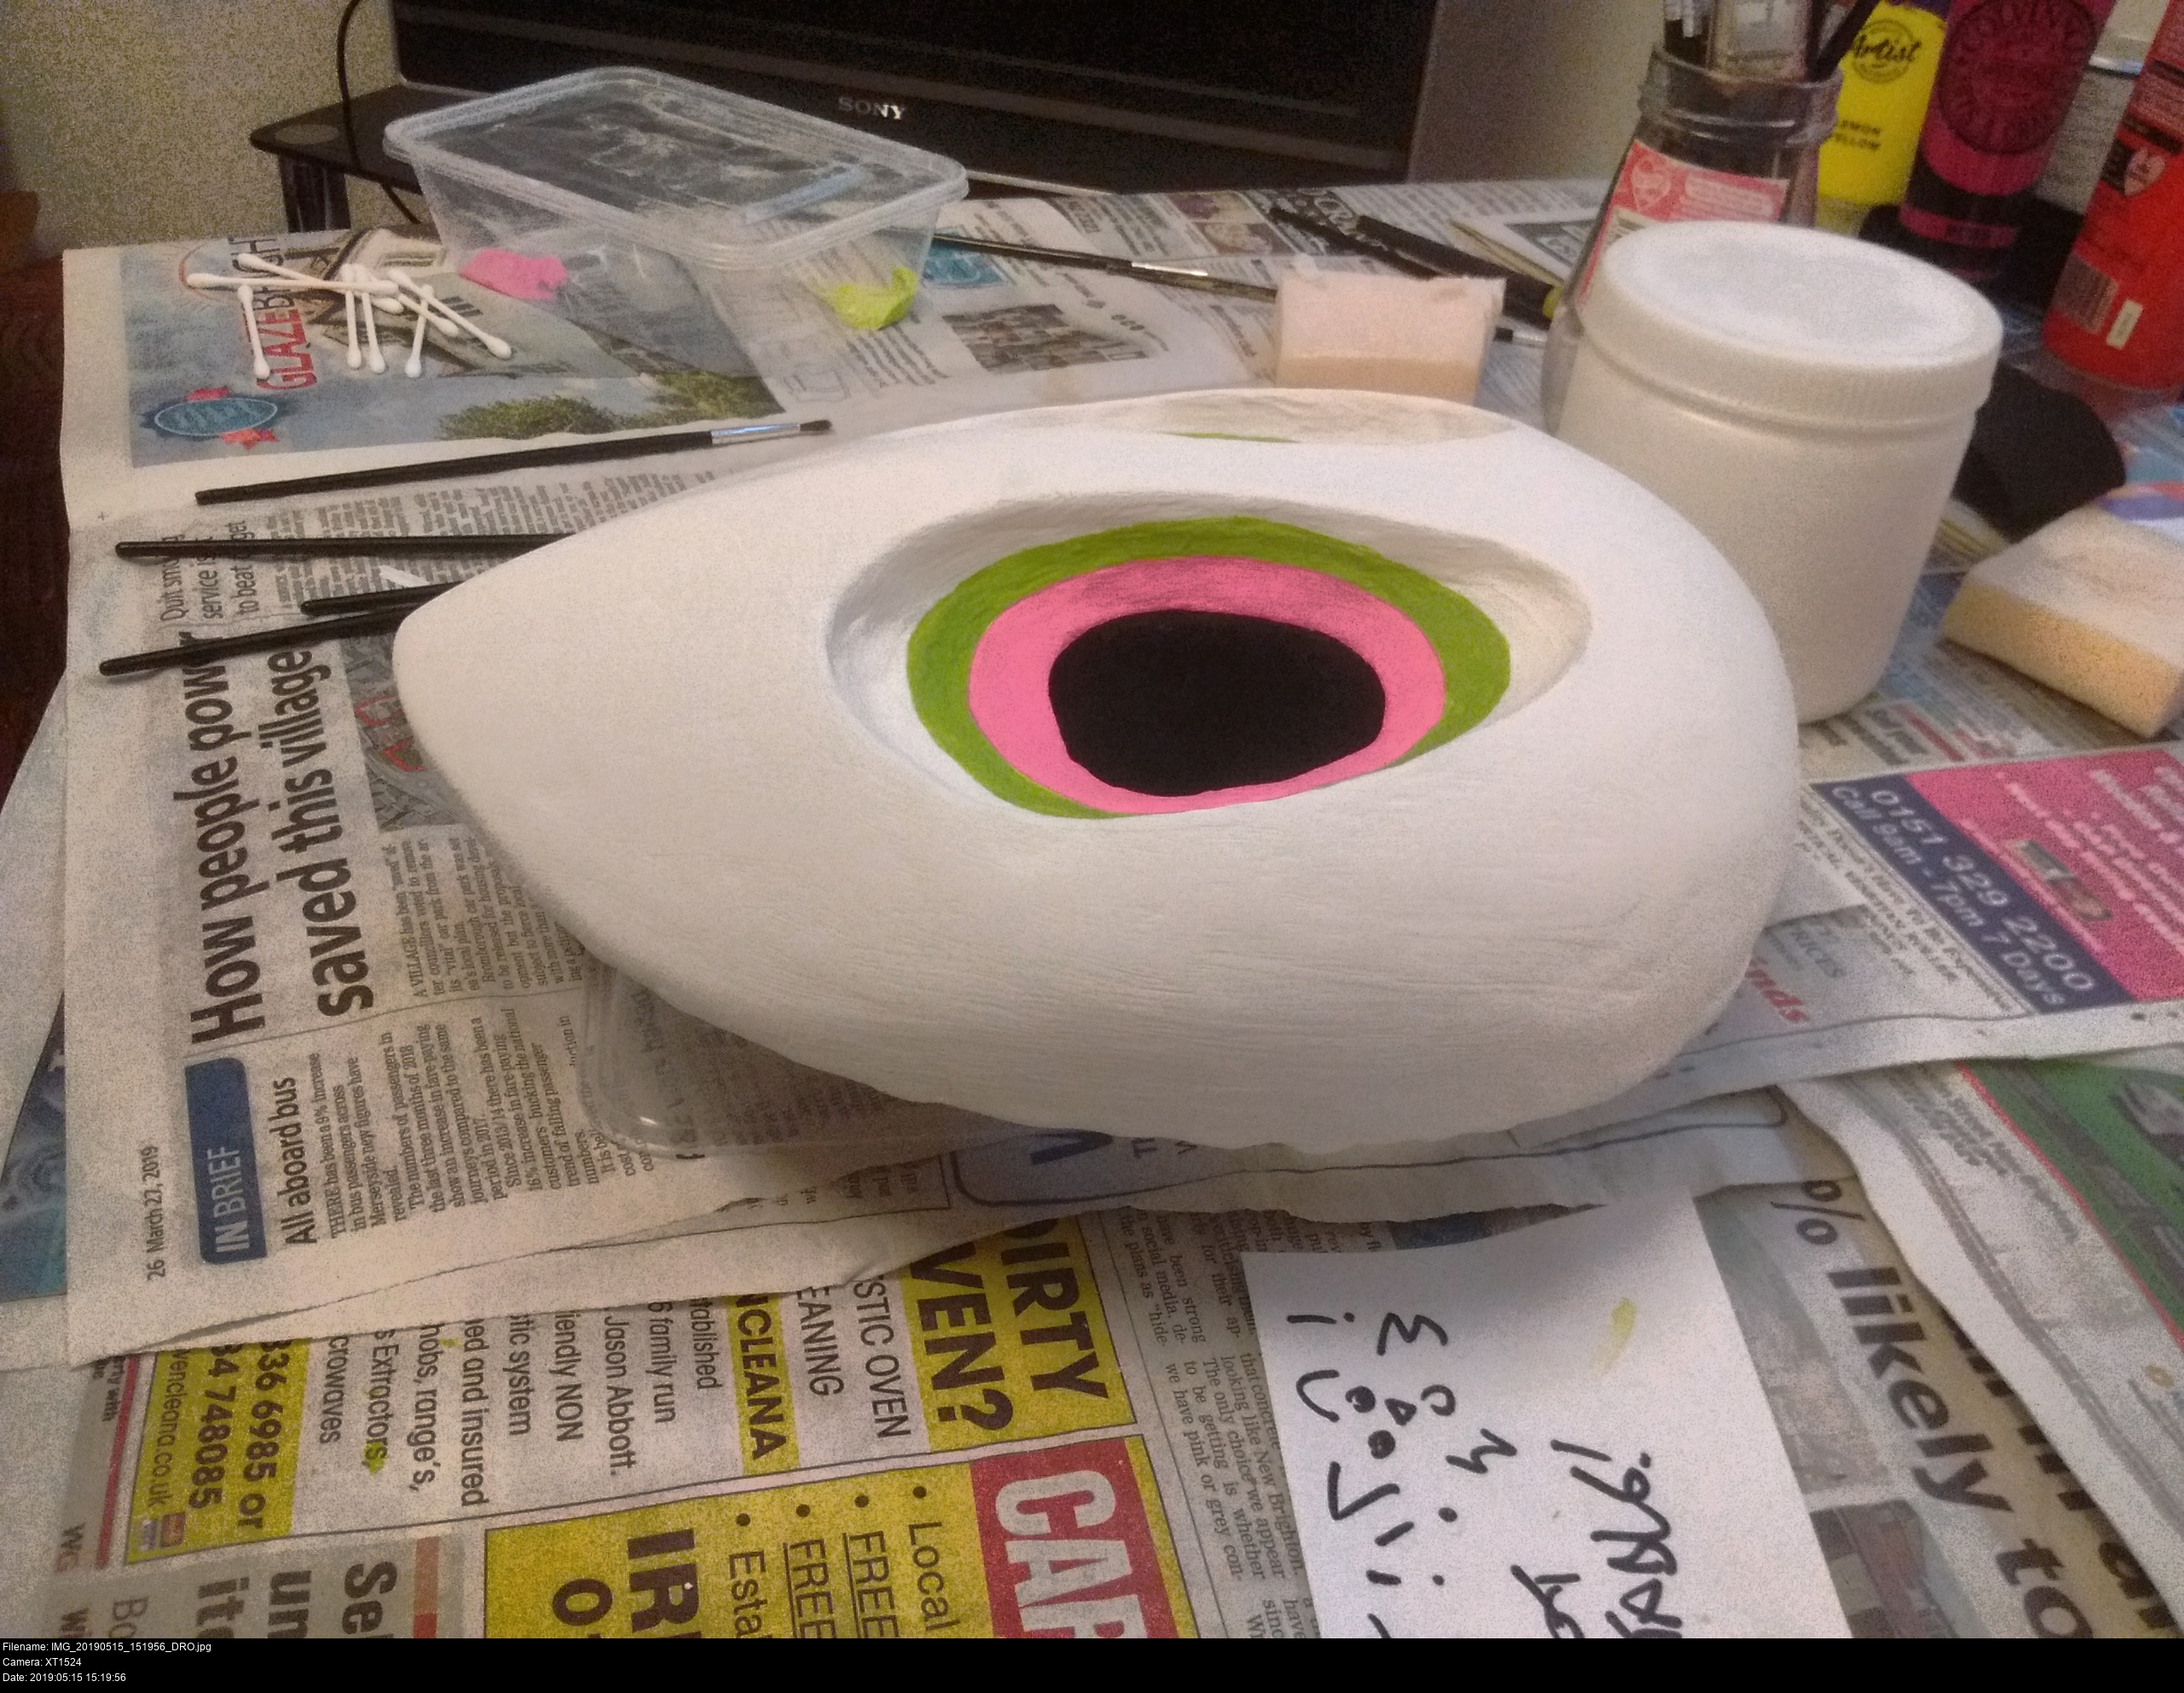
I haven't got much time left. The pinks are dry. Time to paint the interior of the eyeholes black. Simple enough. Still wearing gloves and going super slow and holding the mask very carefully. It would be very easy to end up with a big black thumbprint on this somewhere from carelessness.

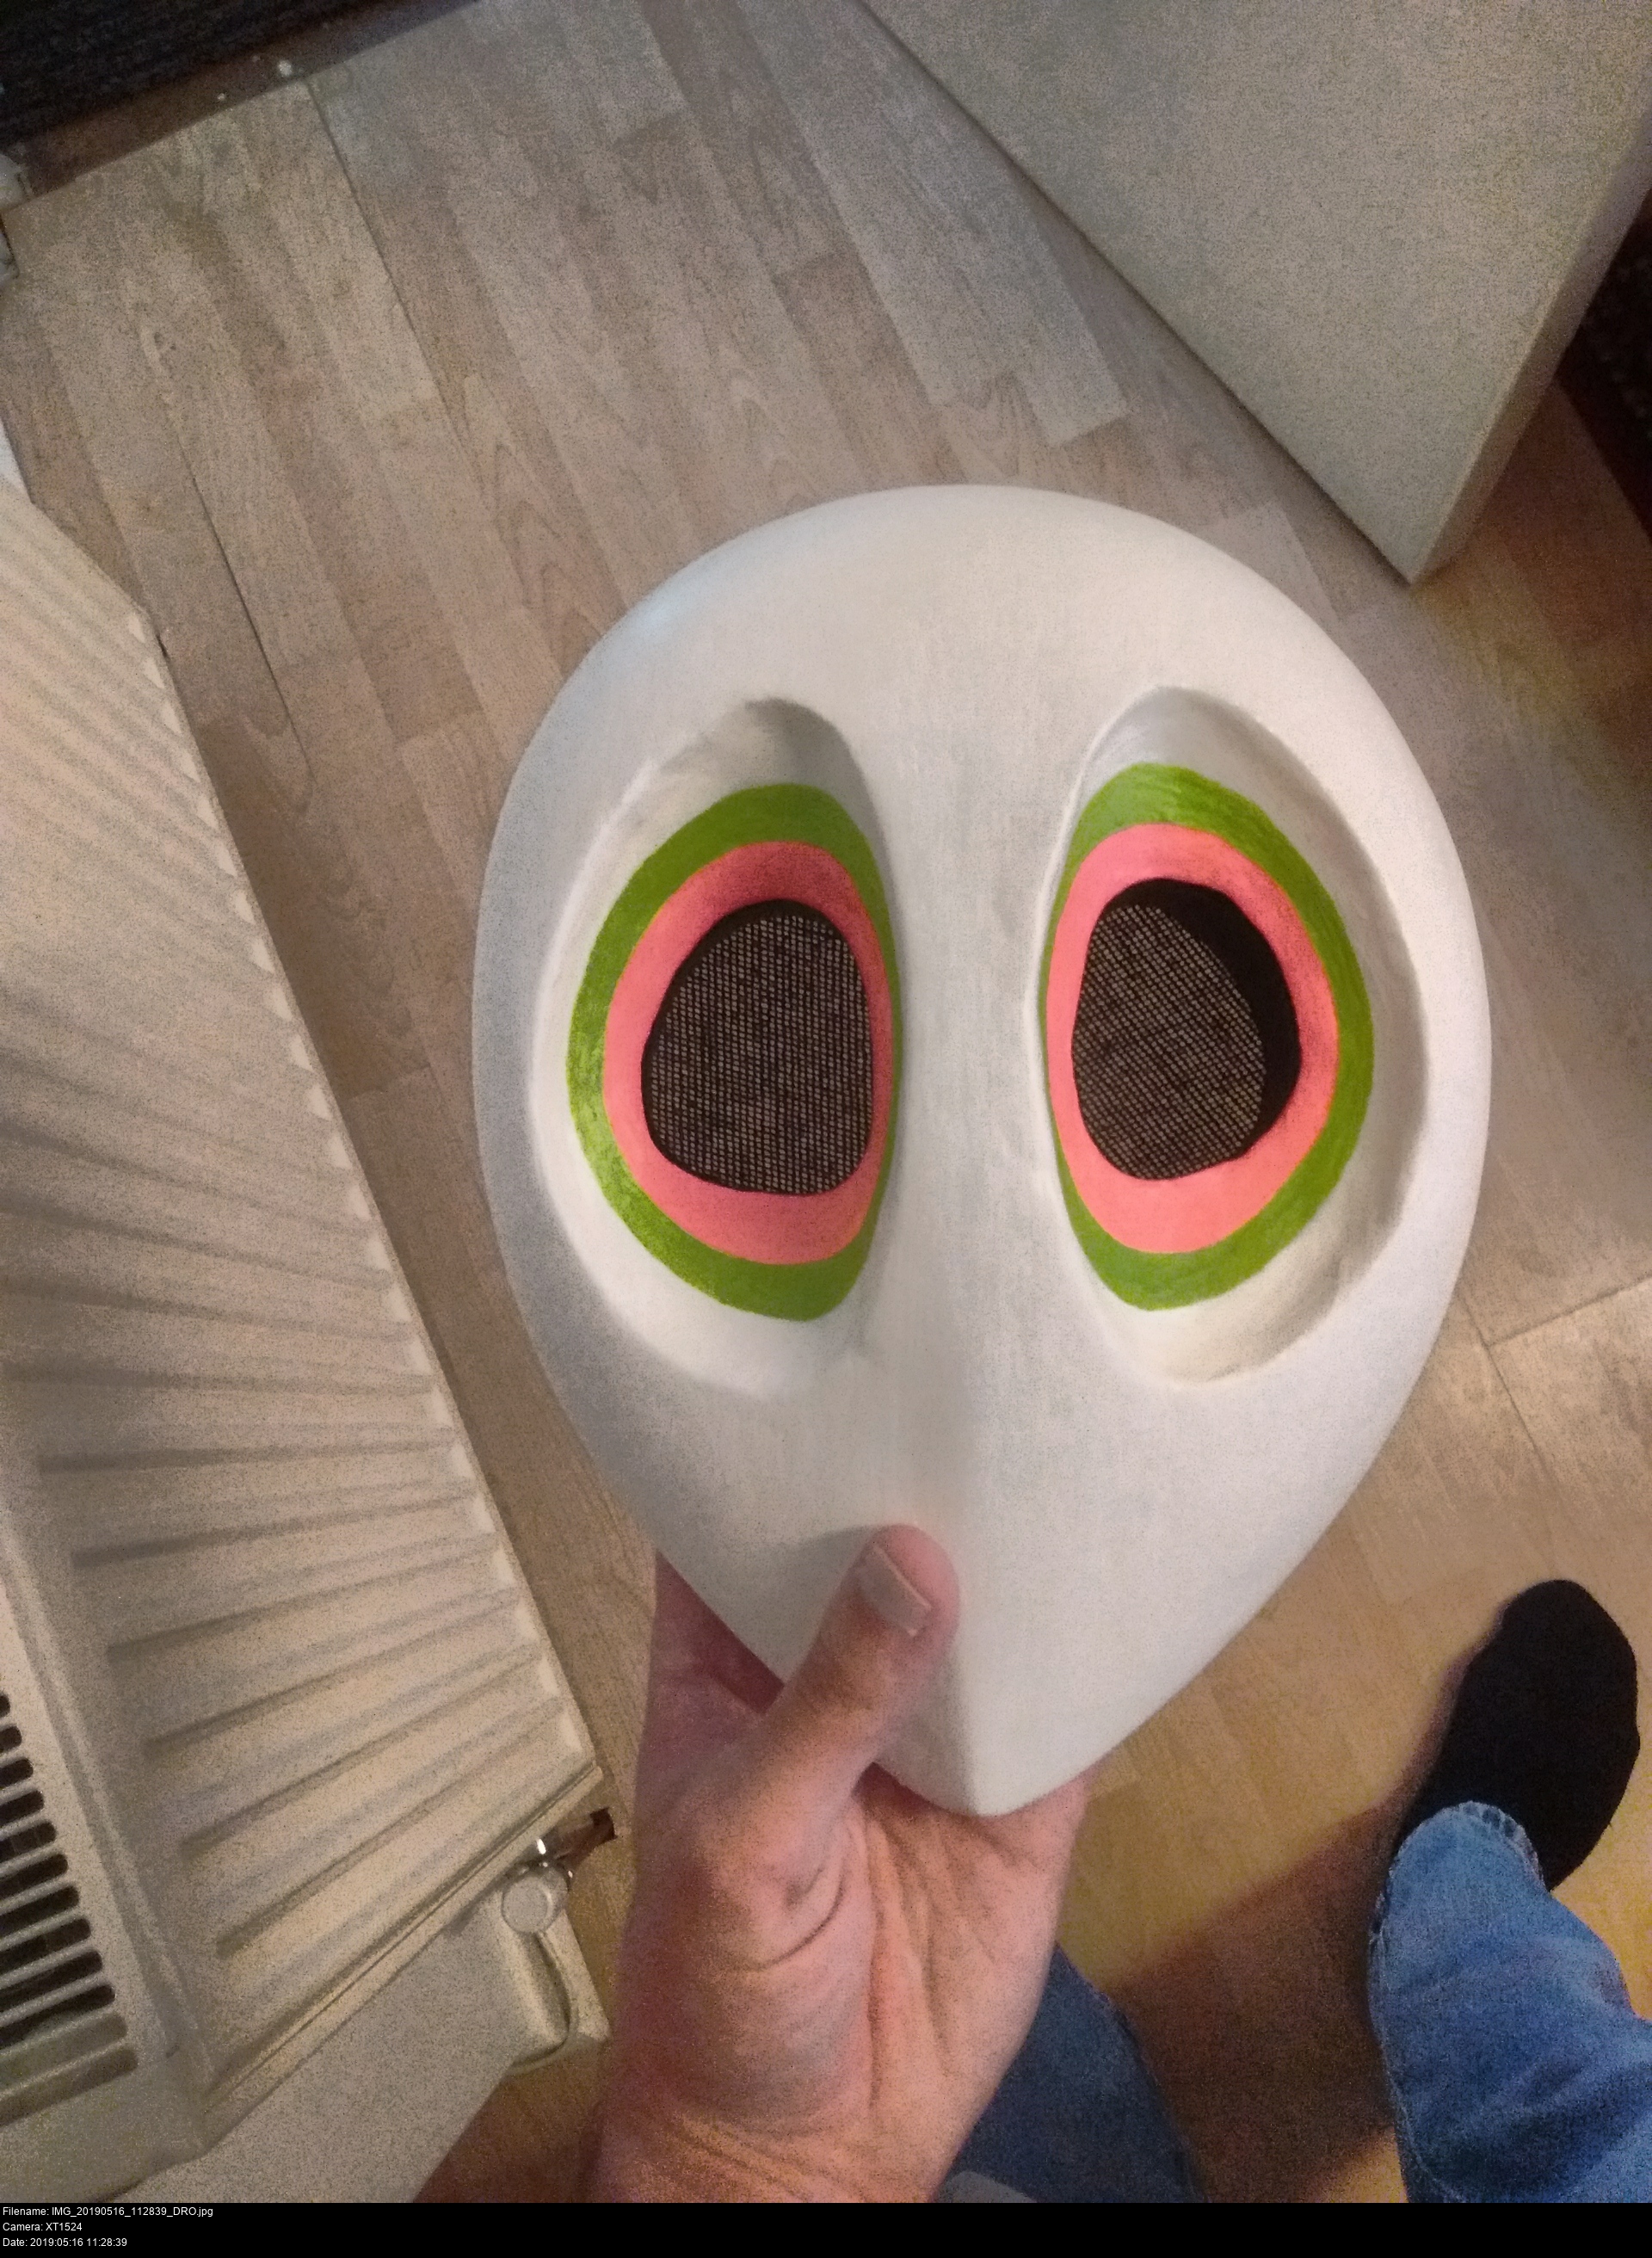
Whaaat... did the purple dry -lighter-? It even looks a little bit orange. Um. Okay. Something to think about.
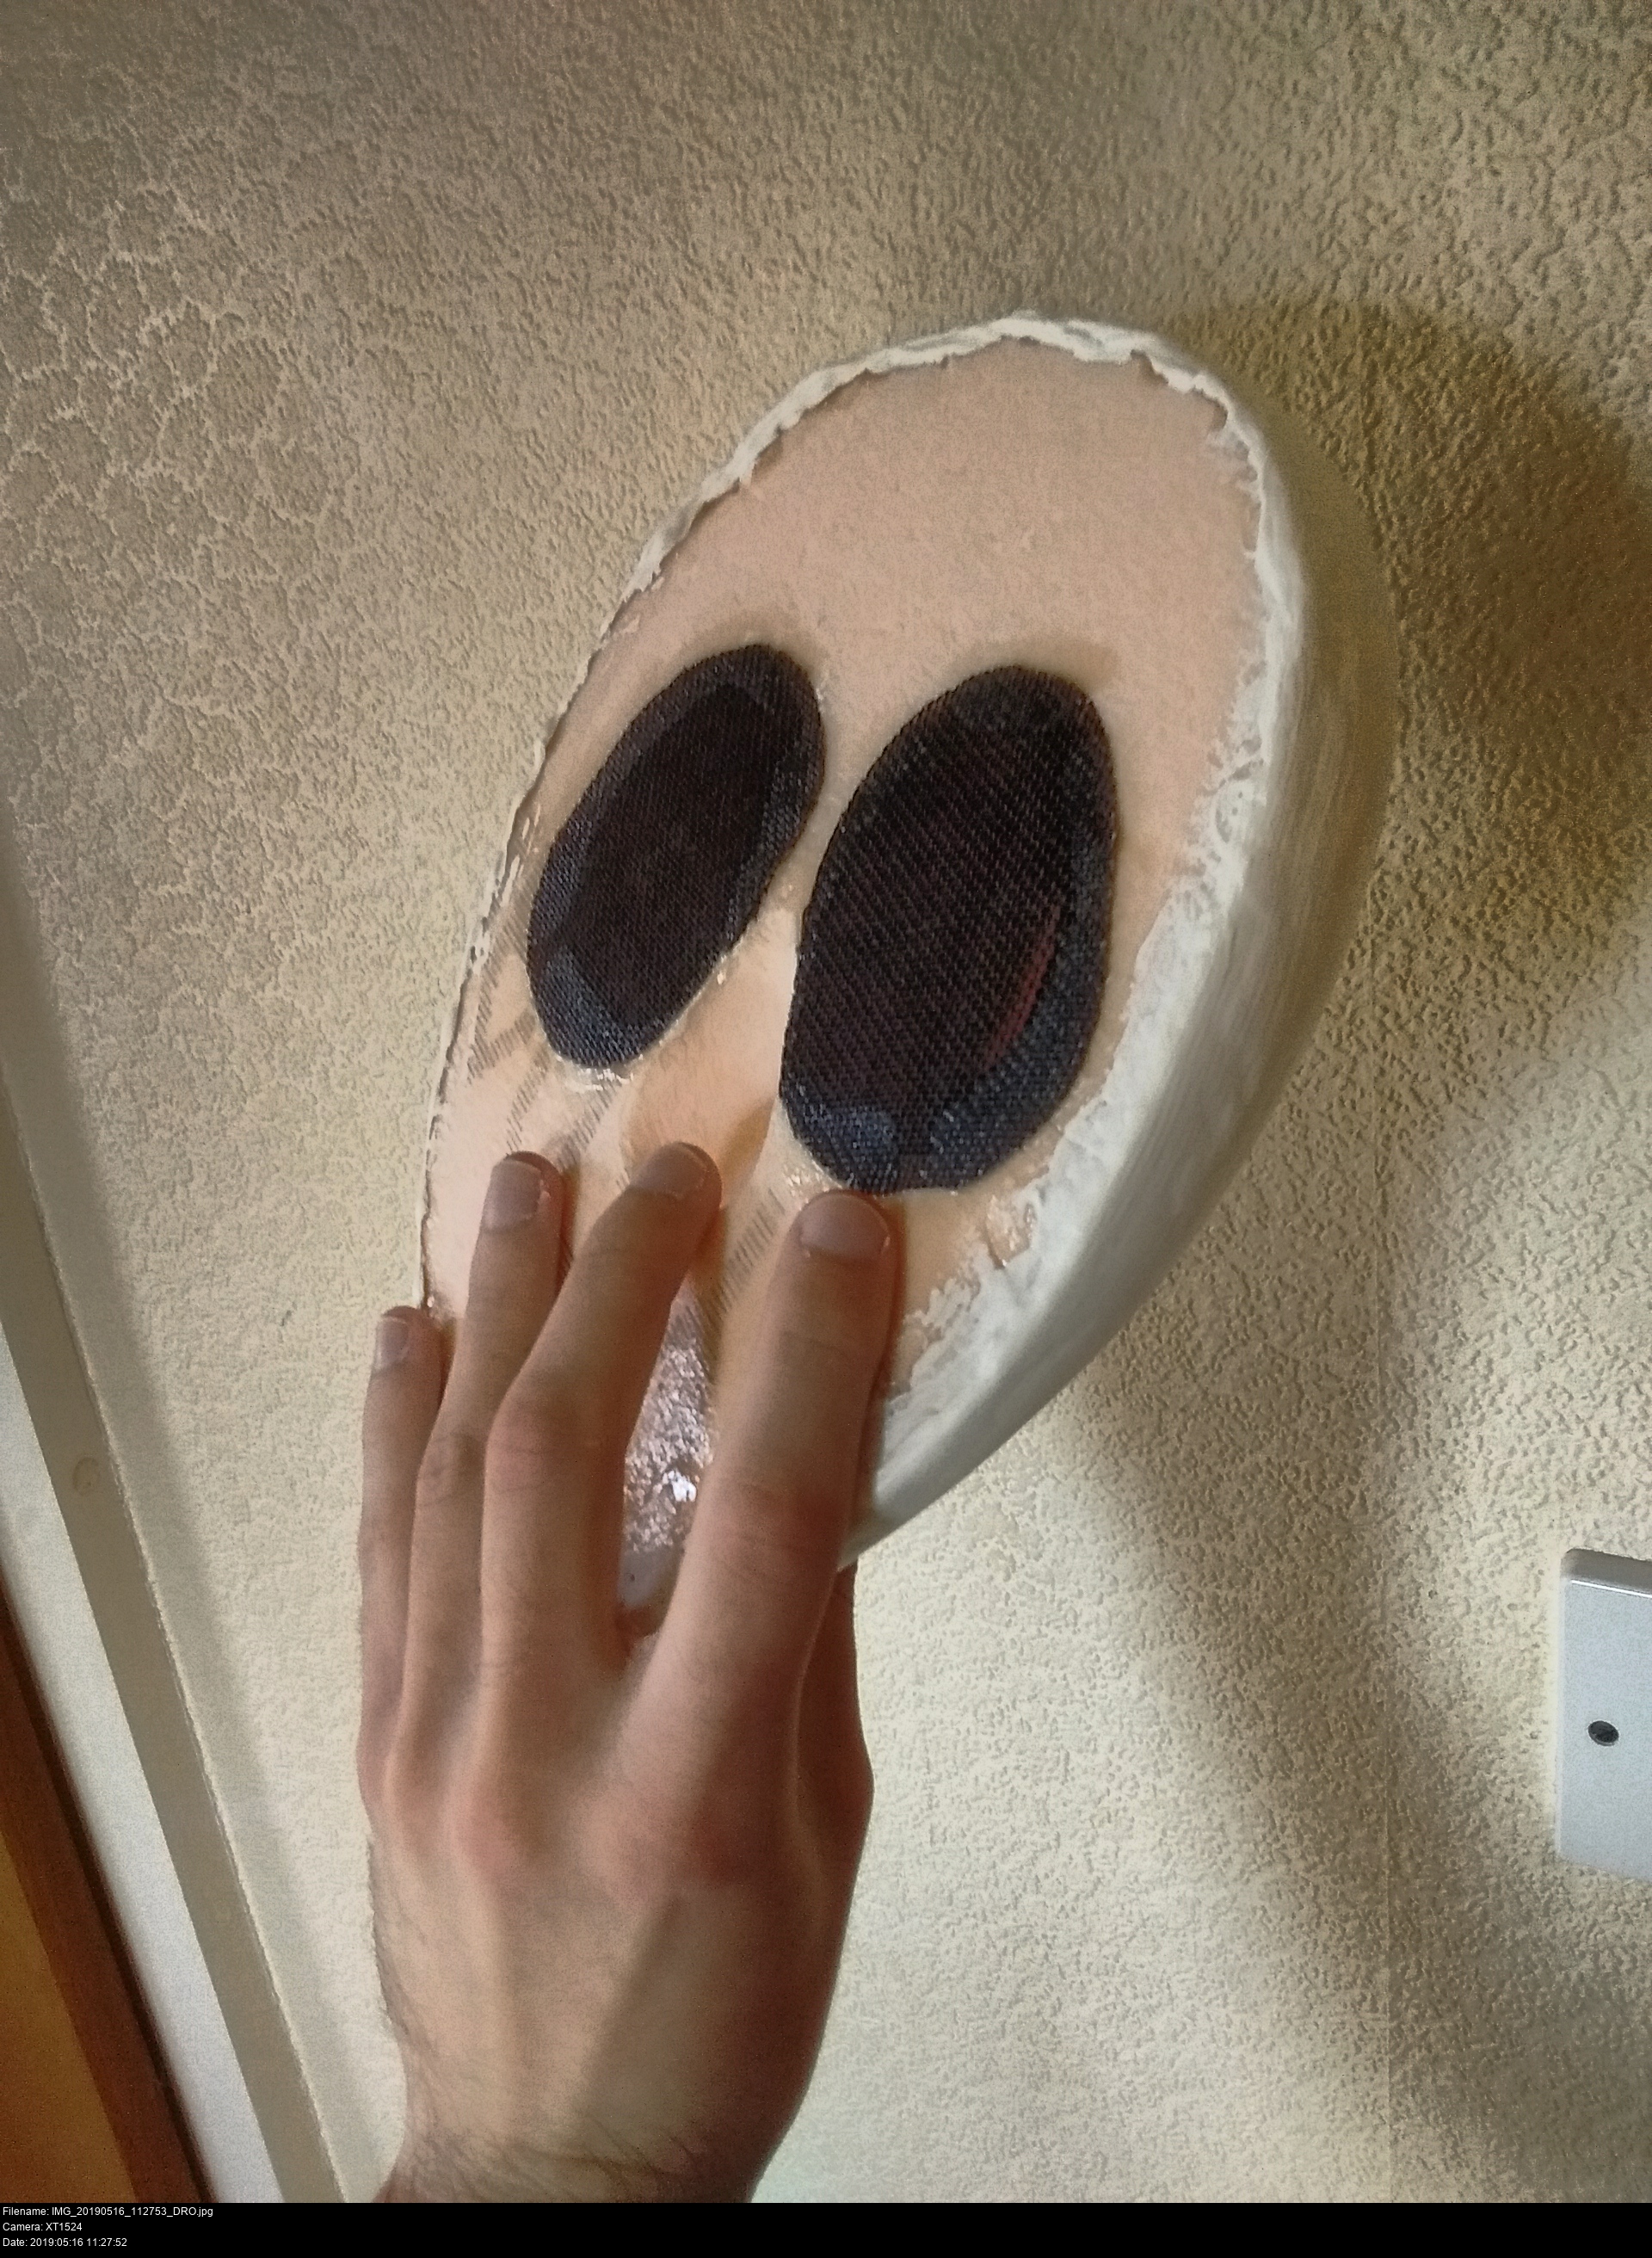
At least the black eyeholes look right.
Super good.
I have to choose whether or not to have the mask outlines on now. This is the same choice I had on the XPS Majora's Mask. Last time I decided against doing it in the name of making the mask unique (and also saving me a lot of time and effort). This time, I asked somebody and they suggested leaving off the outlines since they might be present in the anime appearances because of the style of the art rather than indicating that there ought to be solid dark lines between the regions. Since that was straightforward, I went with it.
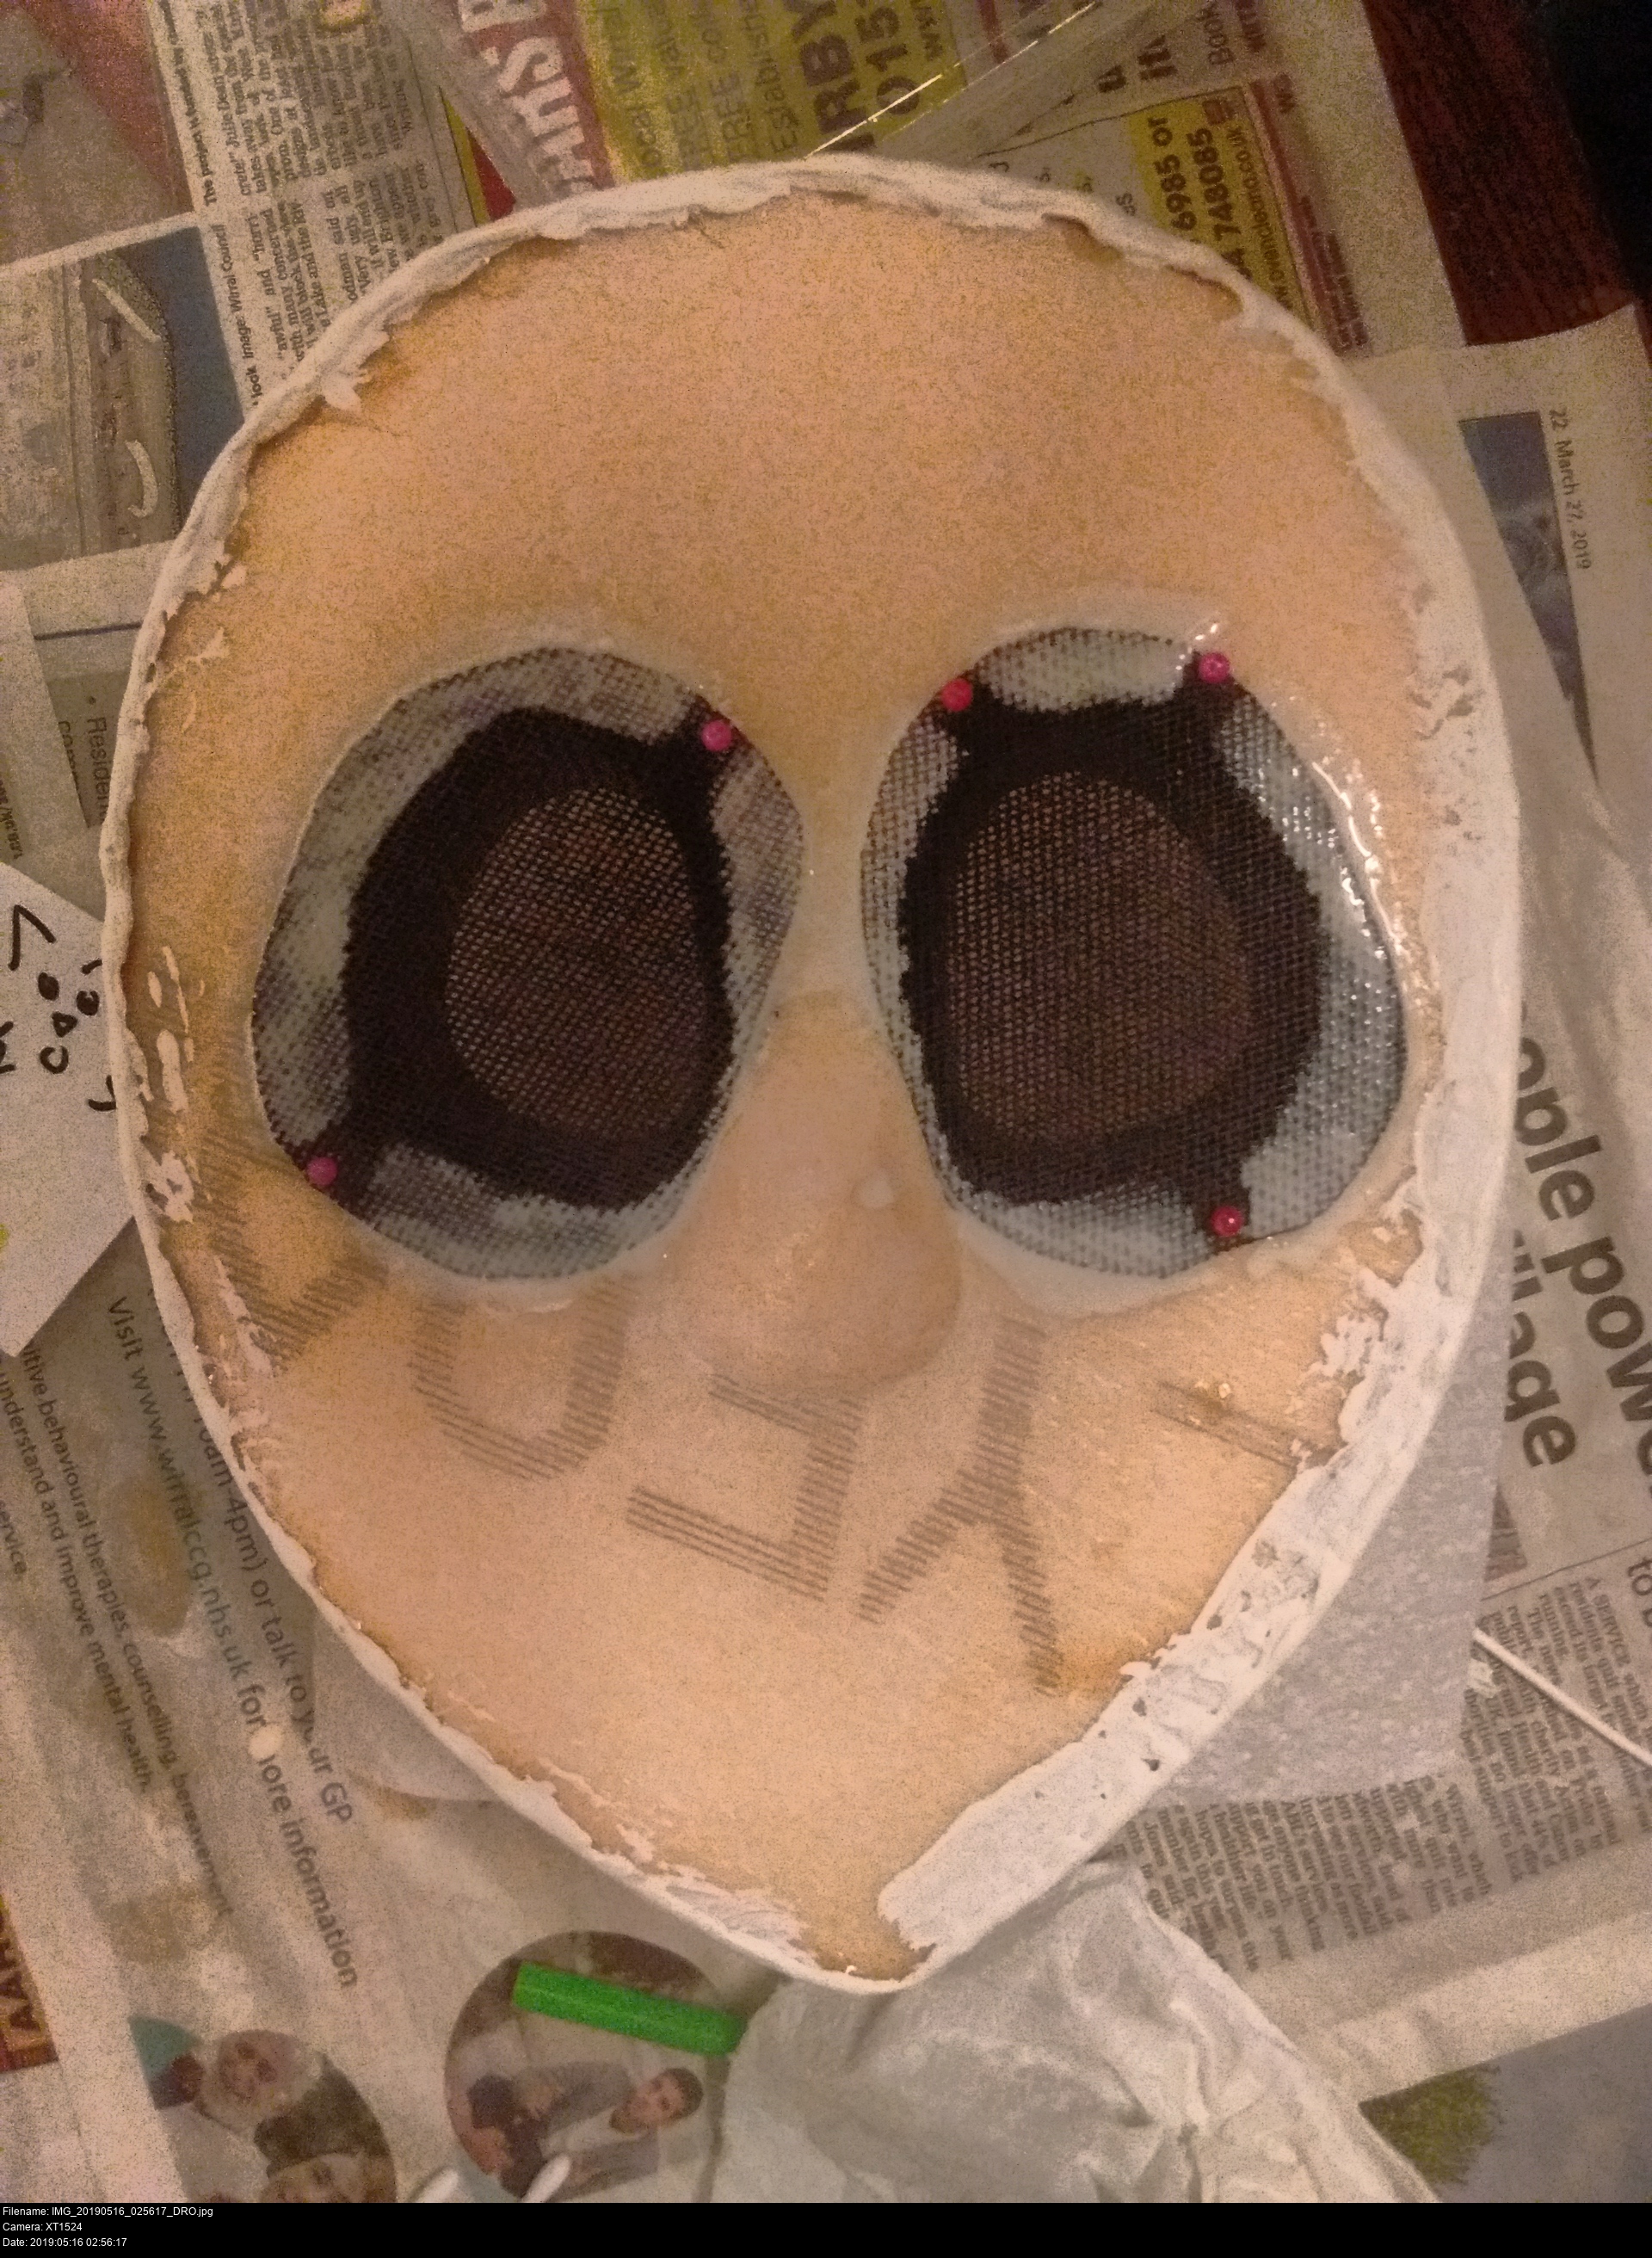
I'm going to glue the eyehole mesh on now. I could have done this at any point, but I chose to do it after I'd done as much painting as possible since being able to use the holes to hold the mask was really useful.

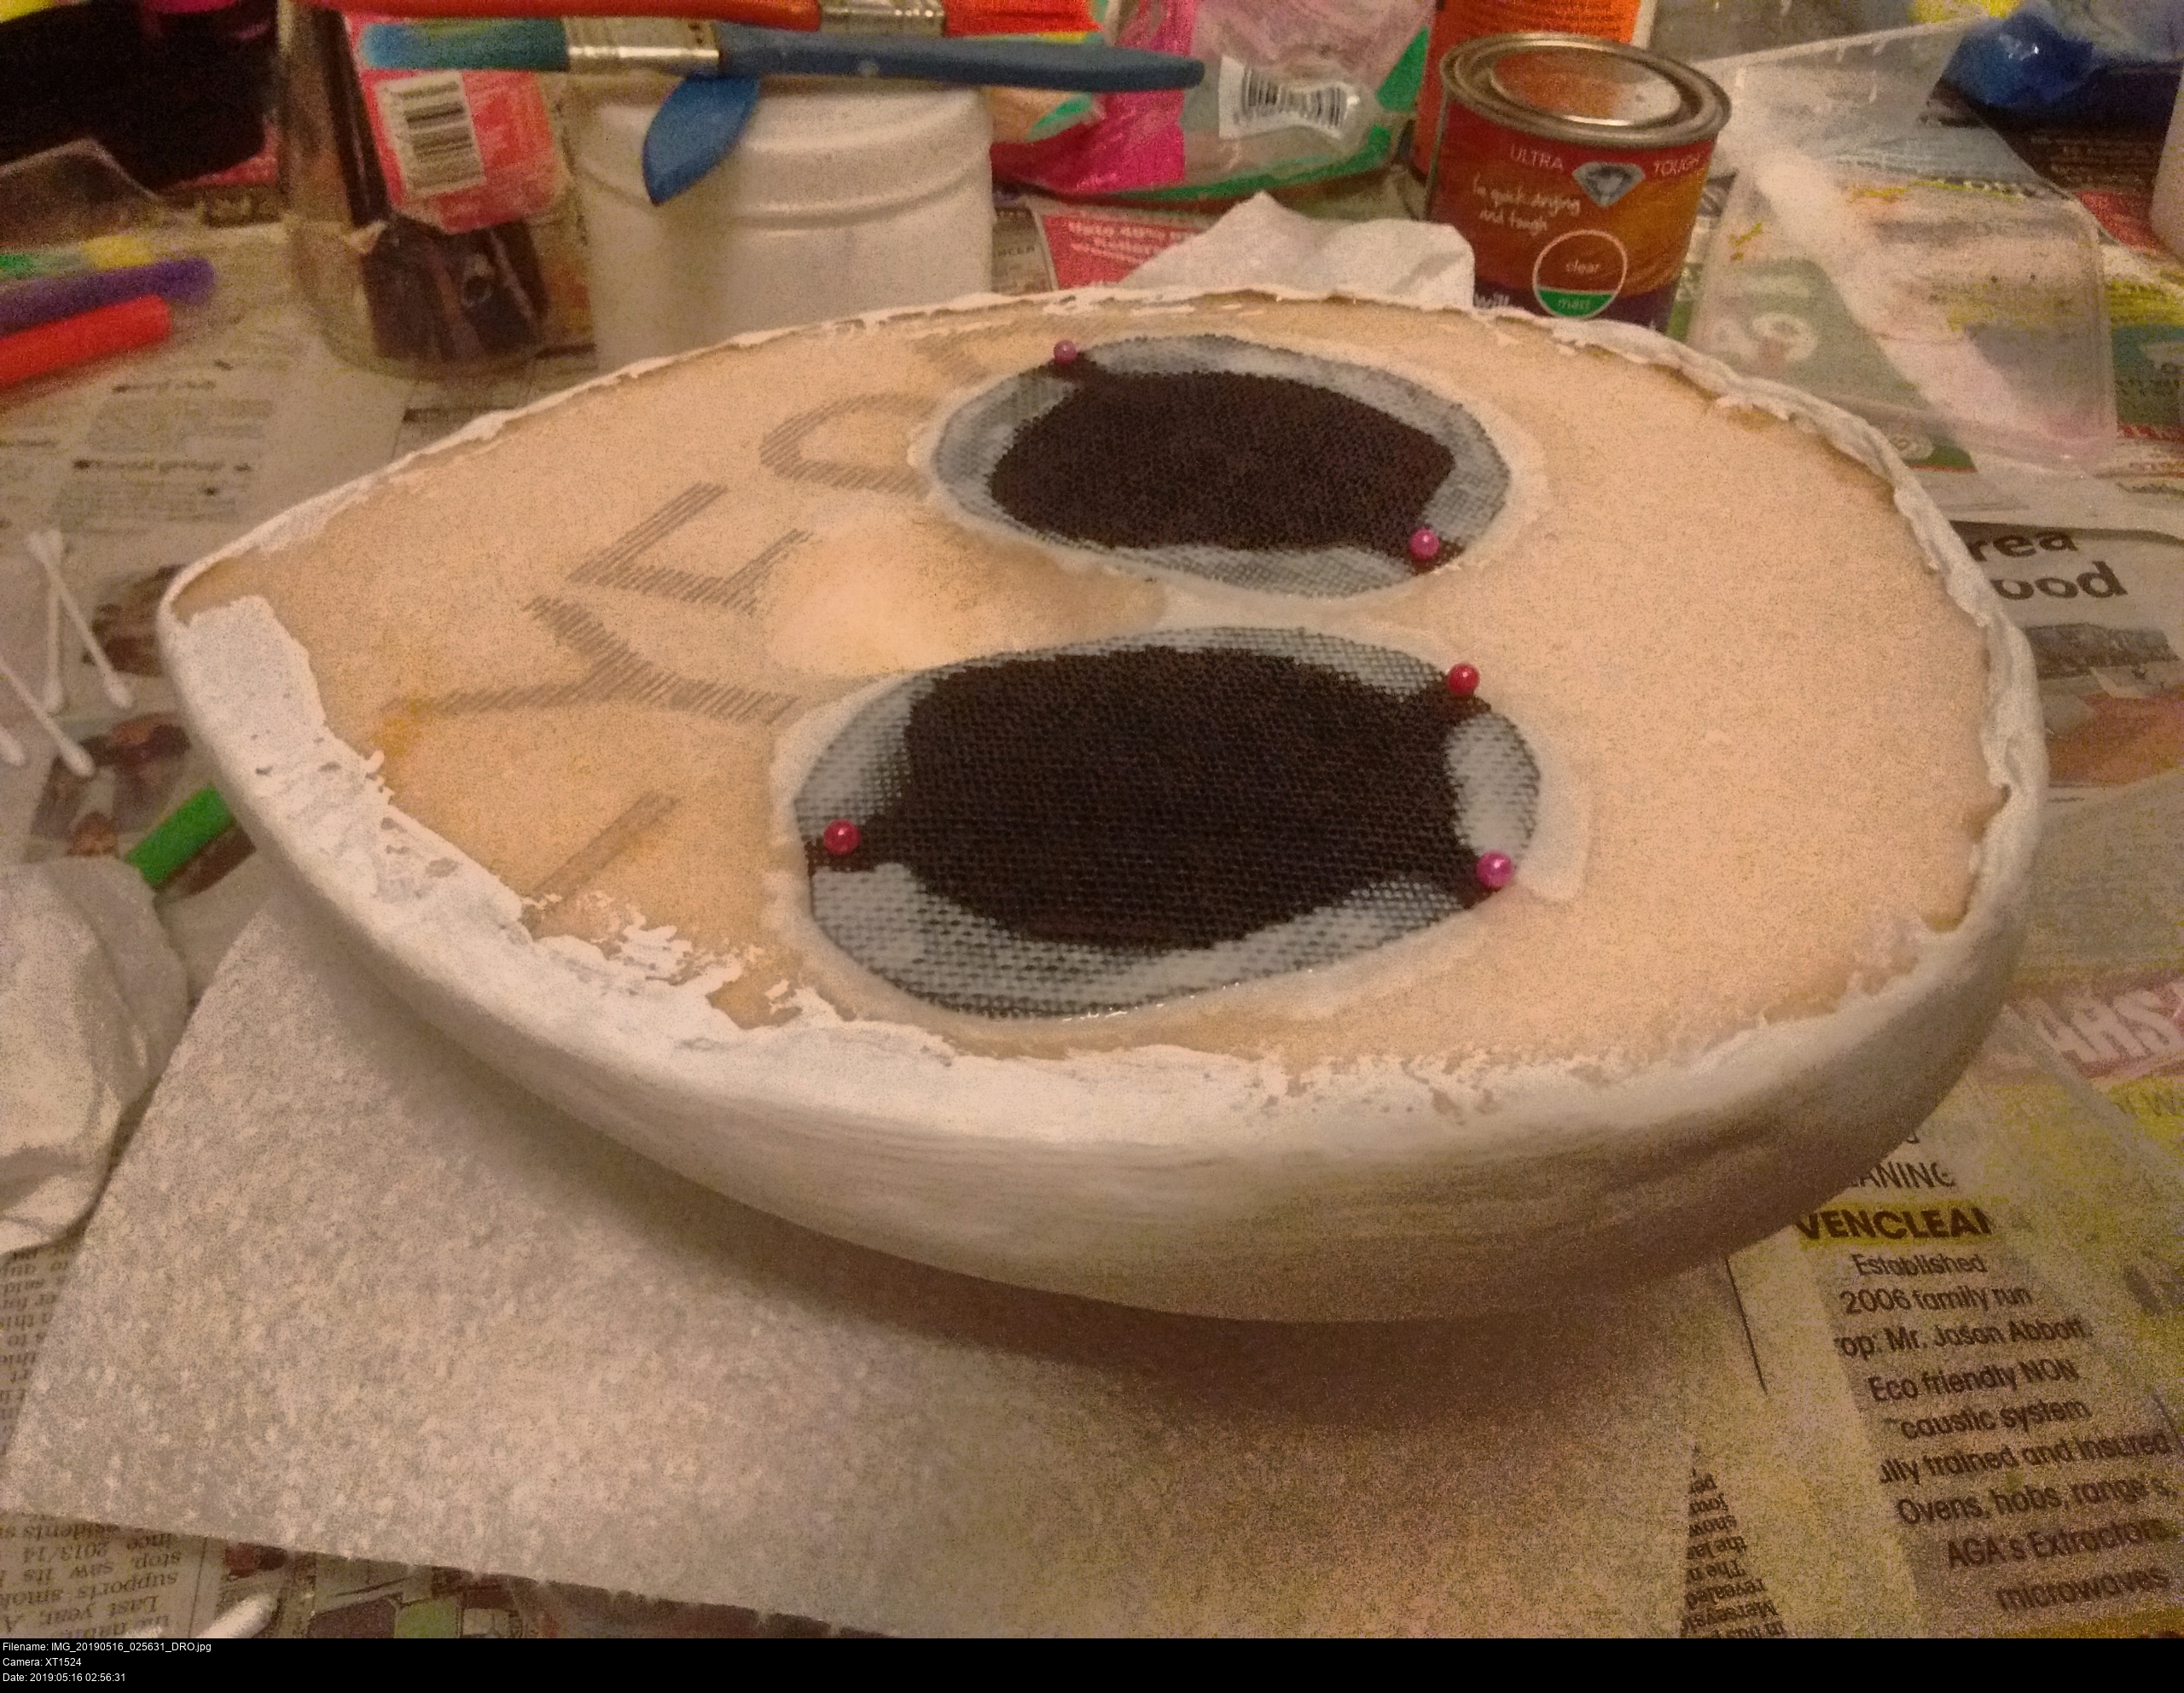
This is non-adhesive, sparse formed buckram interfacing from Abakhan Fabrics in Liverpool. I tried to get some from Calico Laine but they didn't know what it was, and then they offered me some iron-on substitute which would've been a real mess. I'm glad I had some left over from the Majora's Mask and Hotshot masks!
Previously I would use acrylic paint to blacken the white interfacing (both side) prior to gluing, but this time I had a little brainwave and used a thick permanent marker instead. It took a while to colour it in fully, and more than one coat, but not having to deal with paint blocking the holes was worth it. Cut out a large enough rectangle of interface to work with and then colour it in generously. Cut out the shapes you need for your own mask -last-! Don't try to cut out the ovals and then colour it in, it won't work and you'll get ink everywhere.
I'm gluing these mesh pieces in just as you see: pressing the mesh pieces down onto the XPS, then applying WW wood glue around the edge, pressing it gently into the puddle with my fingers to maximize contact between the surfaces, being very careful not to let any glue seep into the eyeholes themselves. I'm using sewing berry pins to hold the mesh pieces in place. It's not devastating if any did seep in, since the glue is mostly transparent, and it's upon black so it'd be mostly invisible. When this glue dries, the pale glue here on the back will be transparent too.
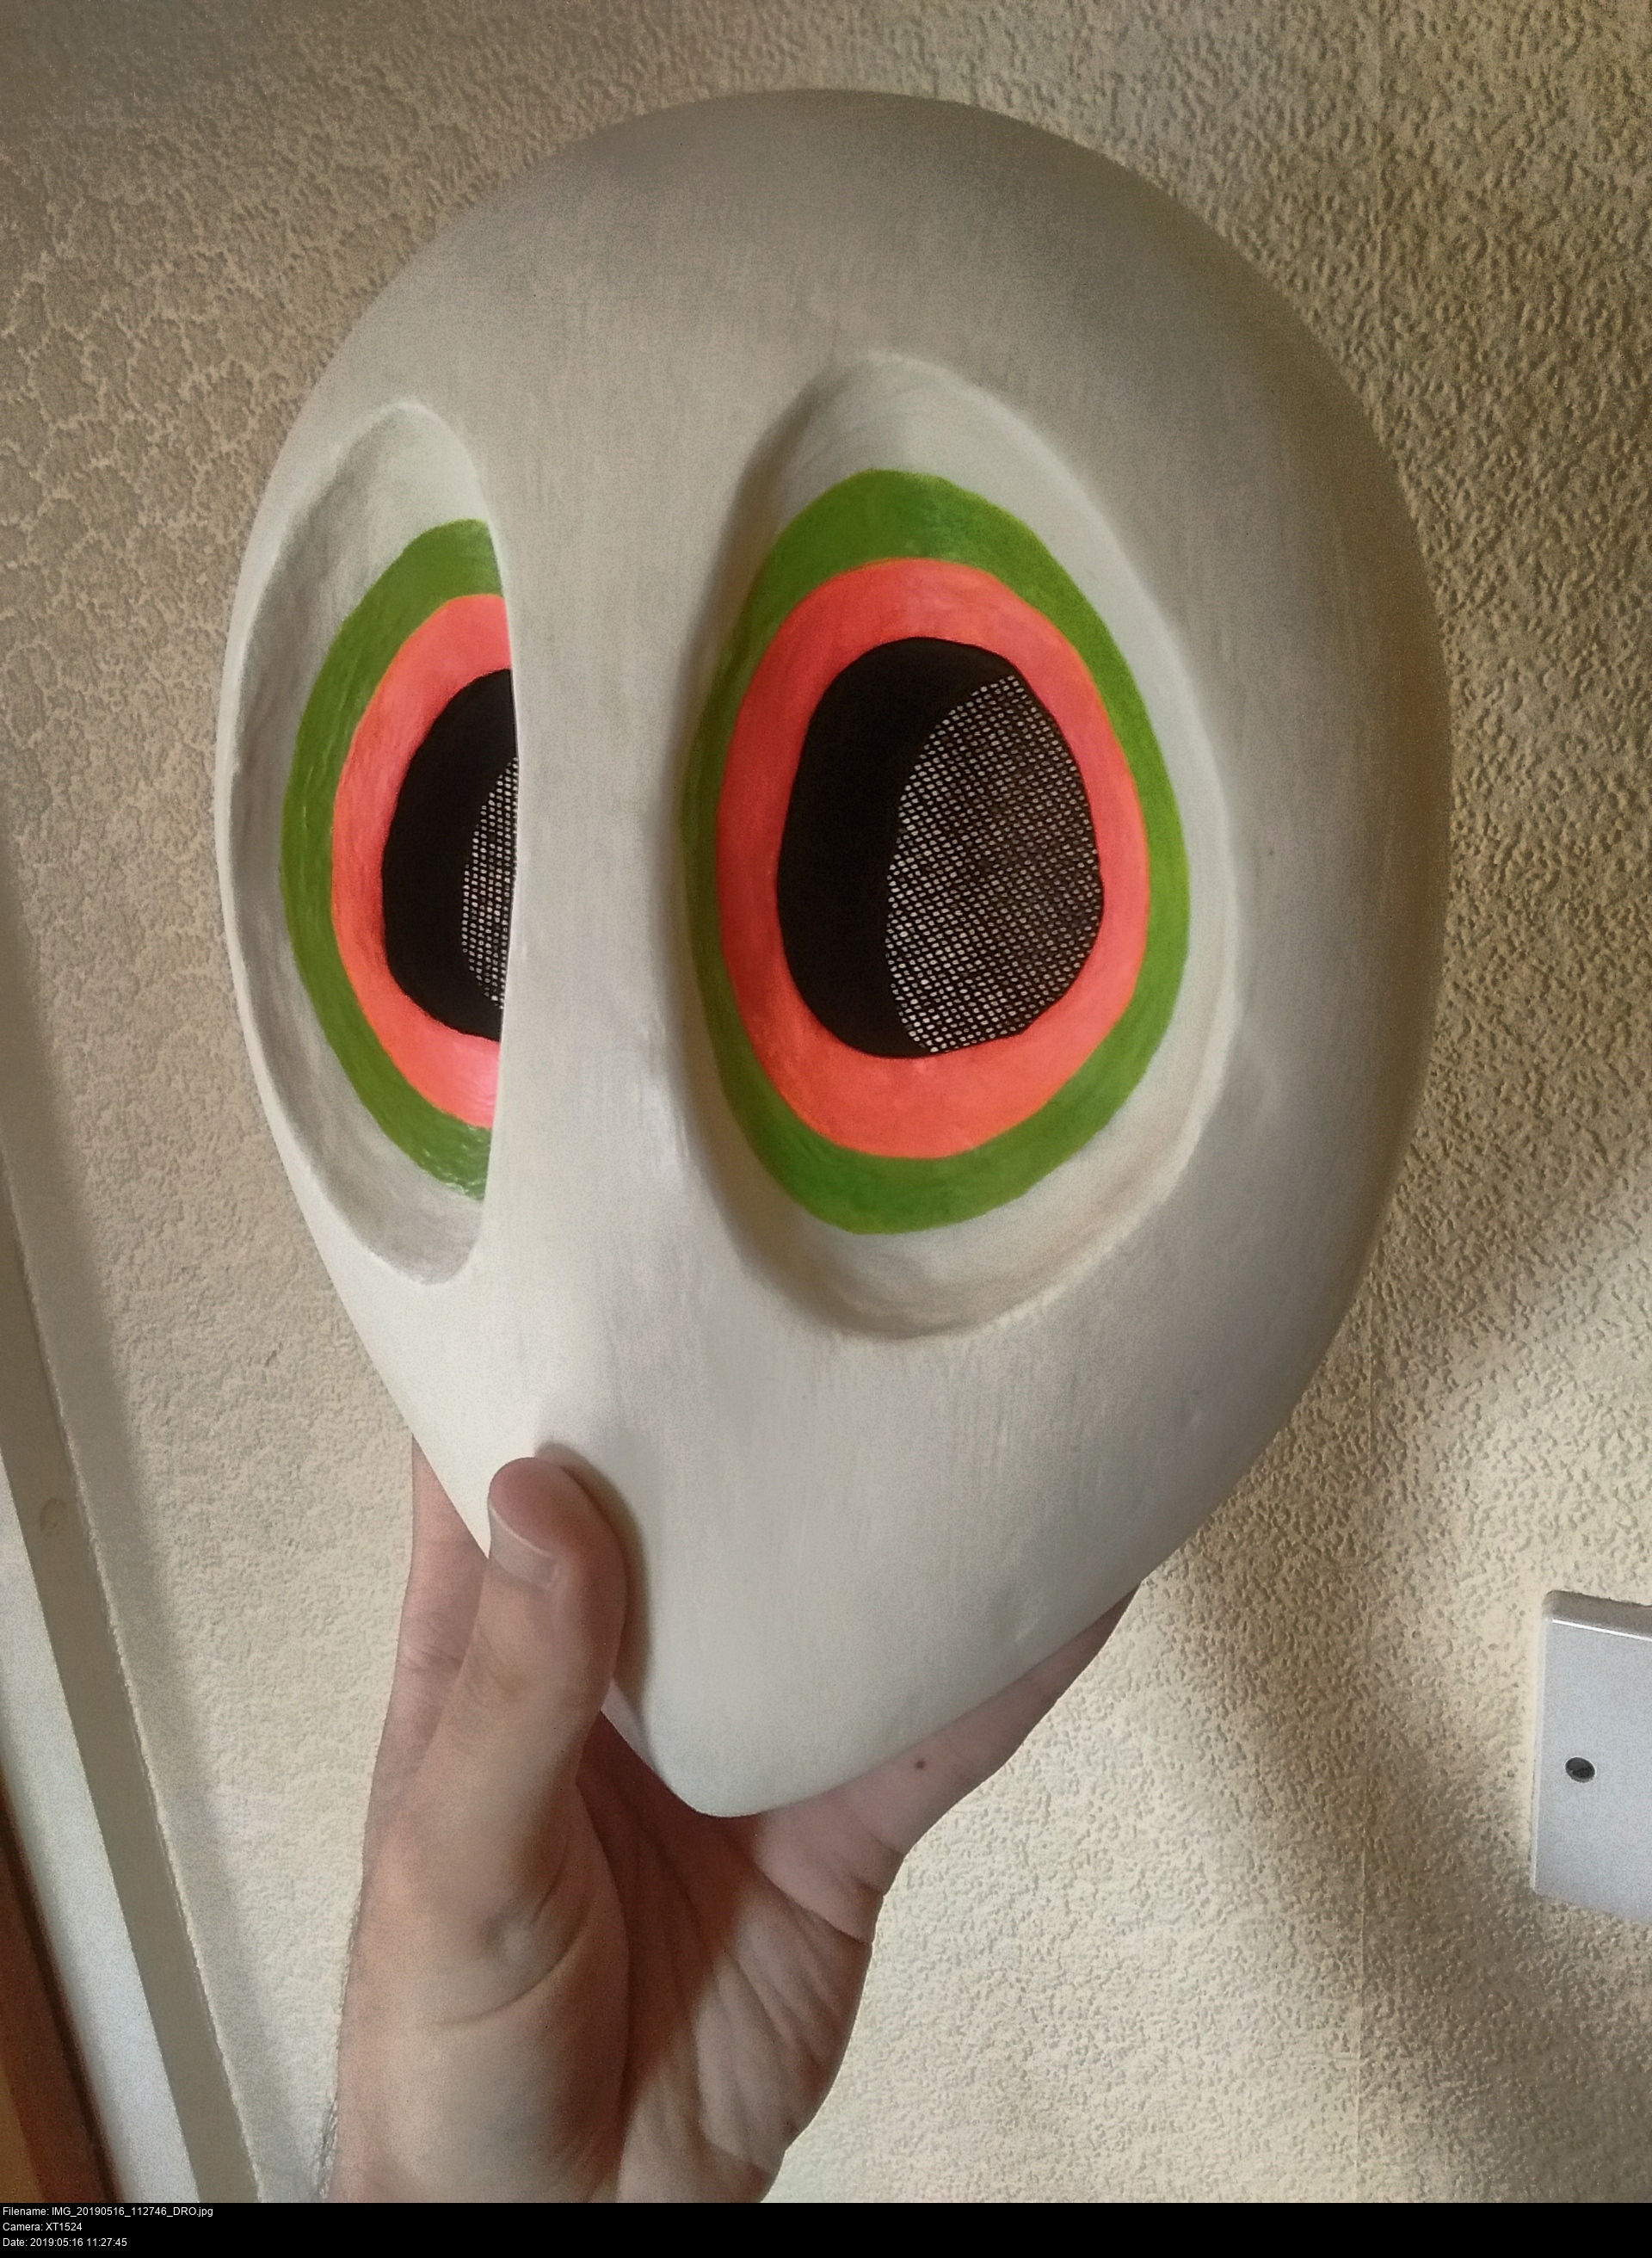
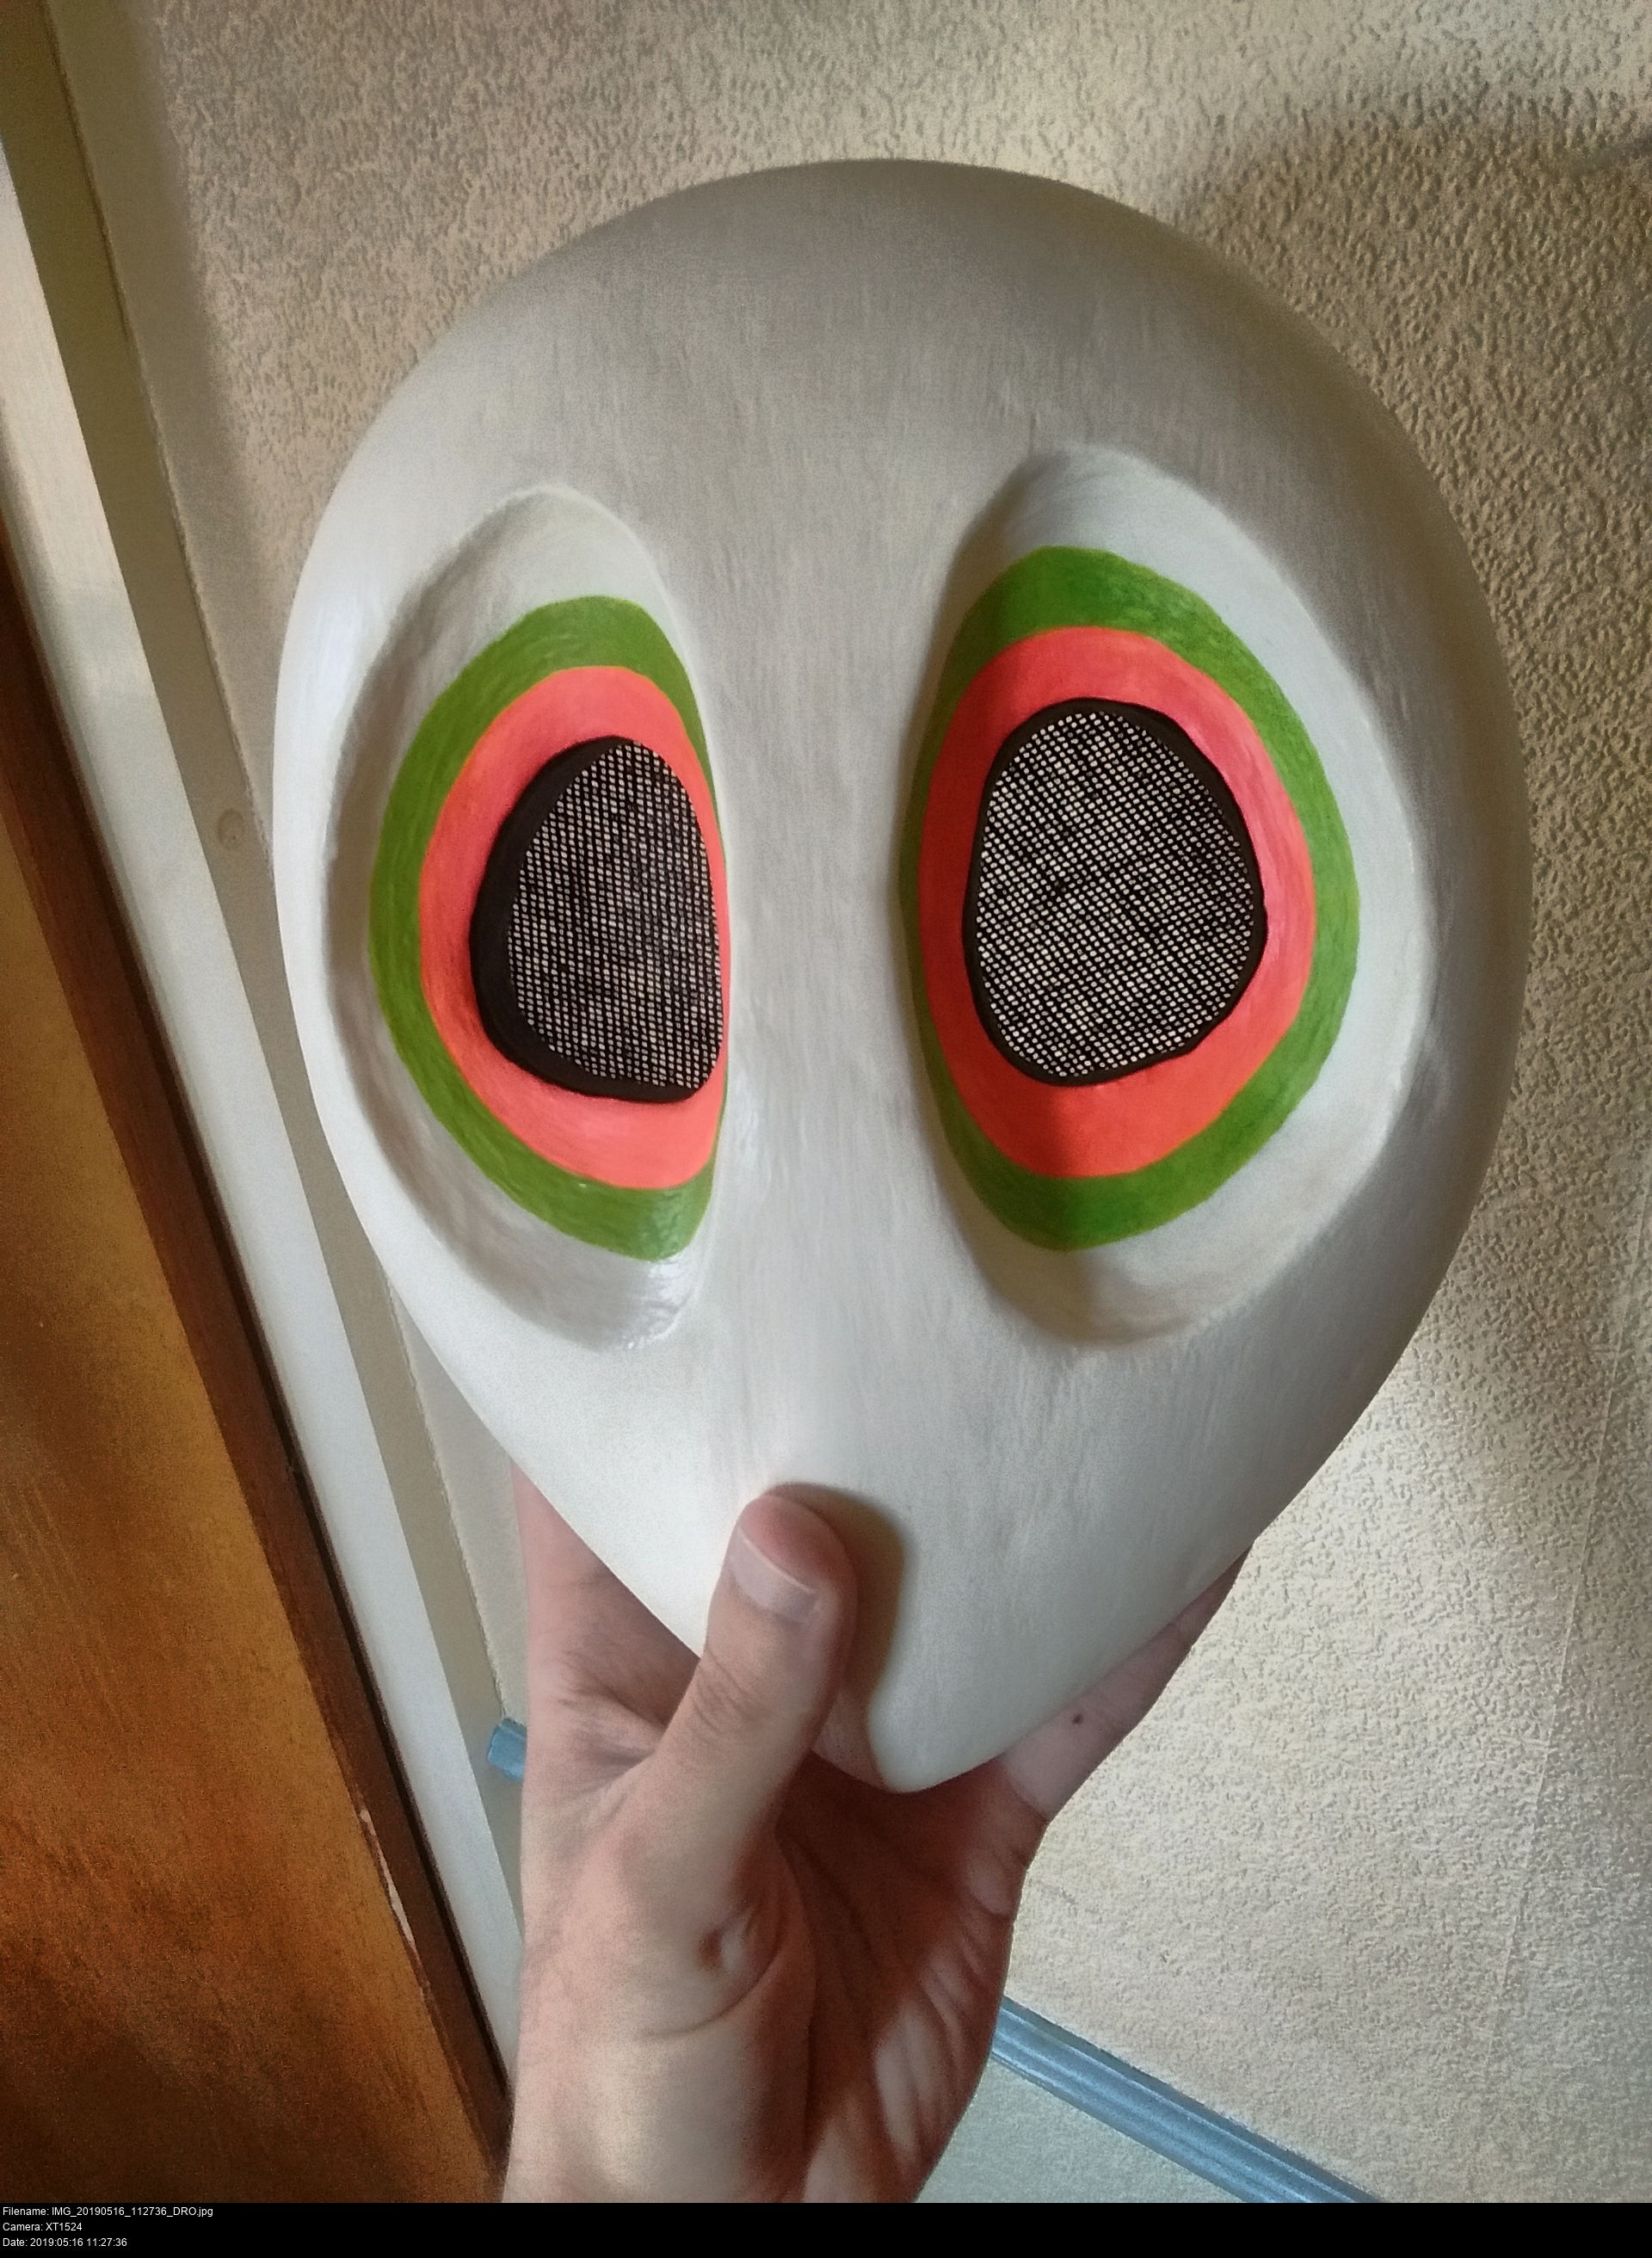
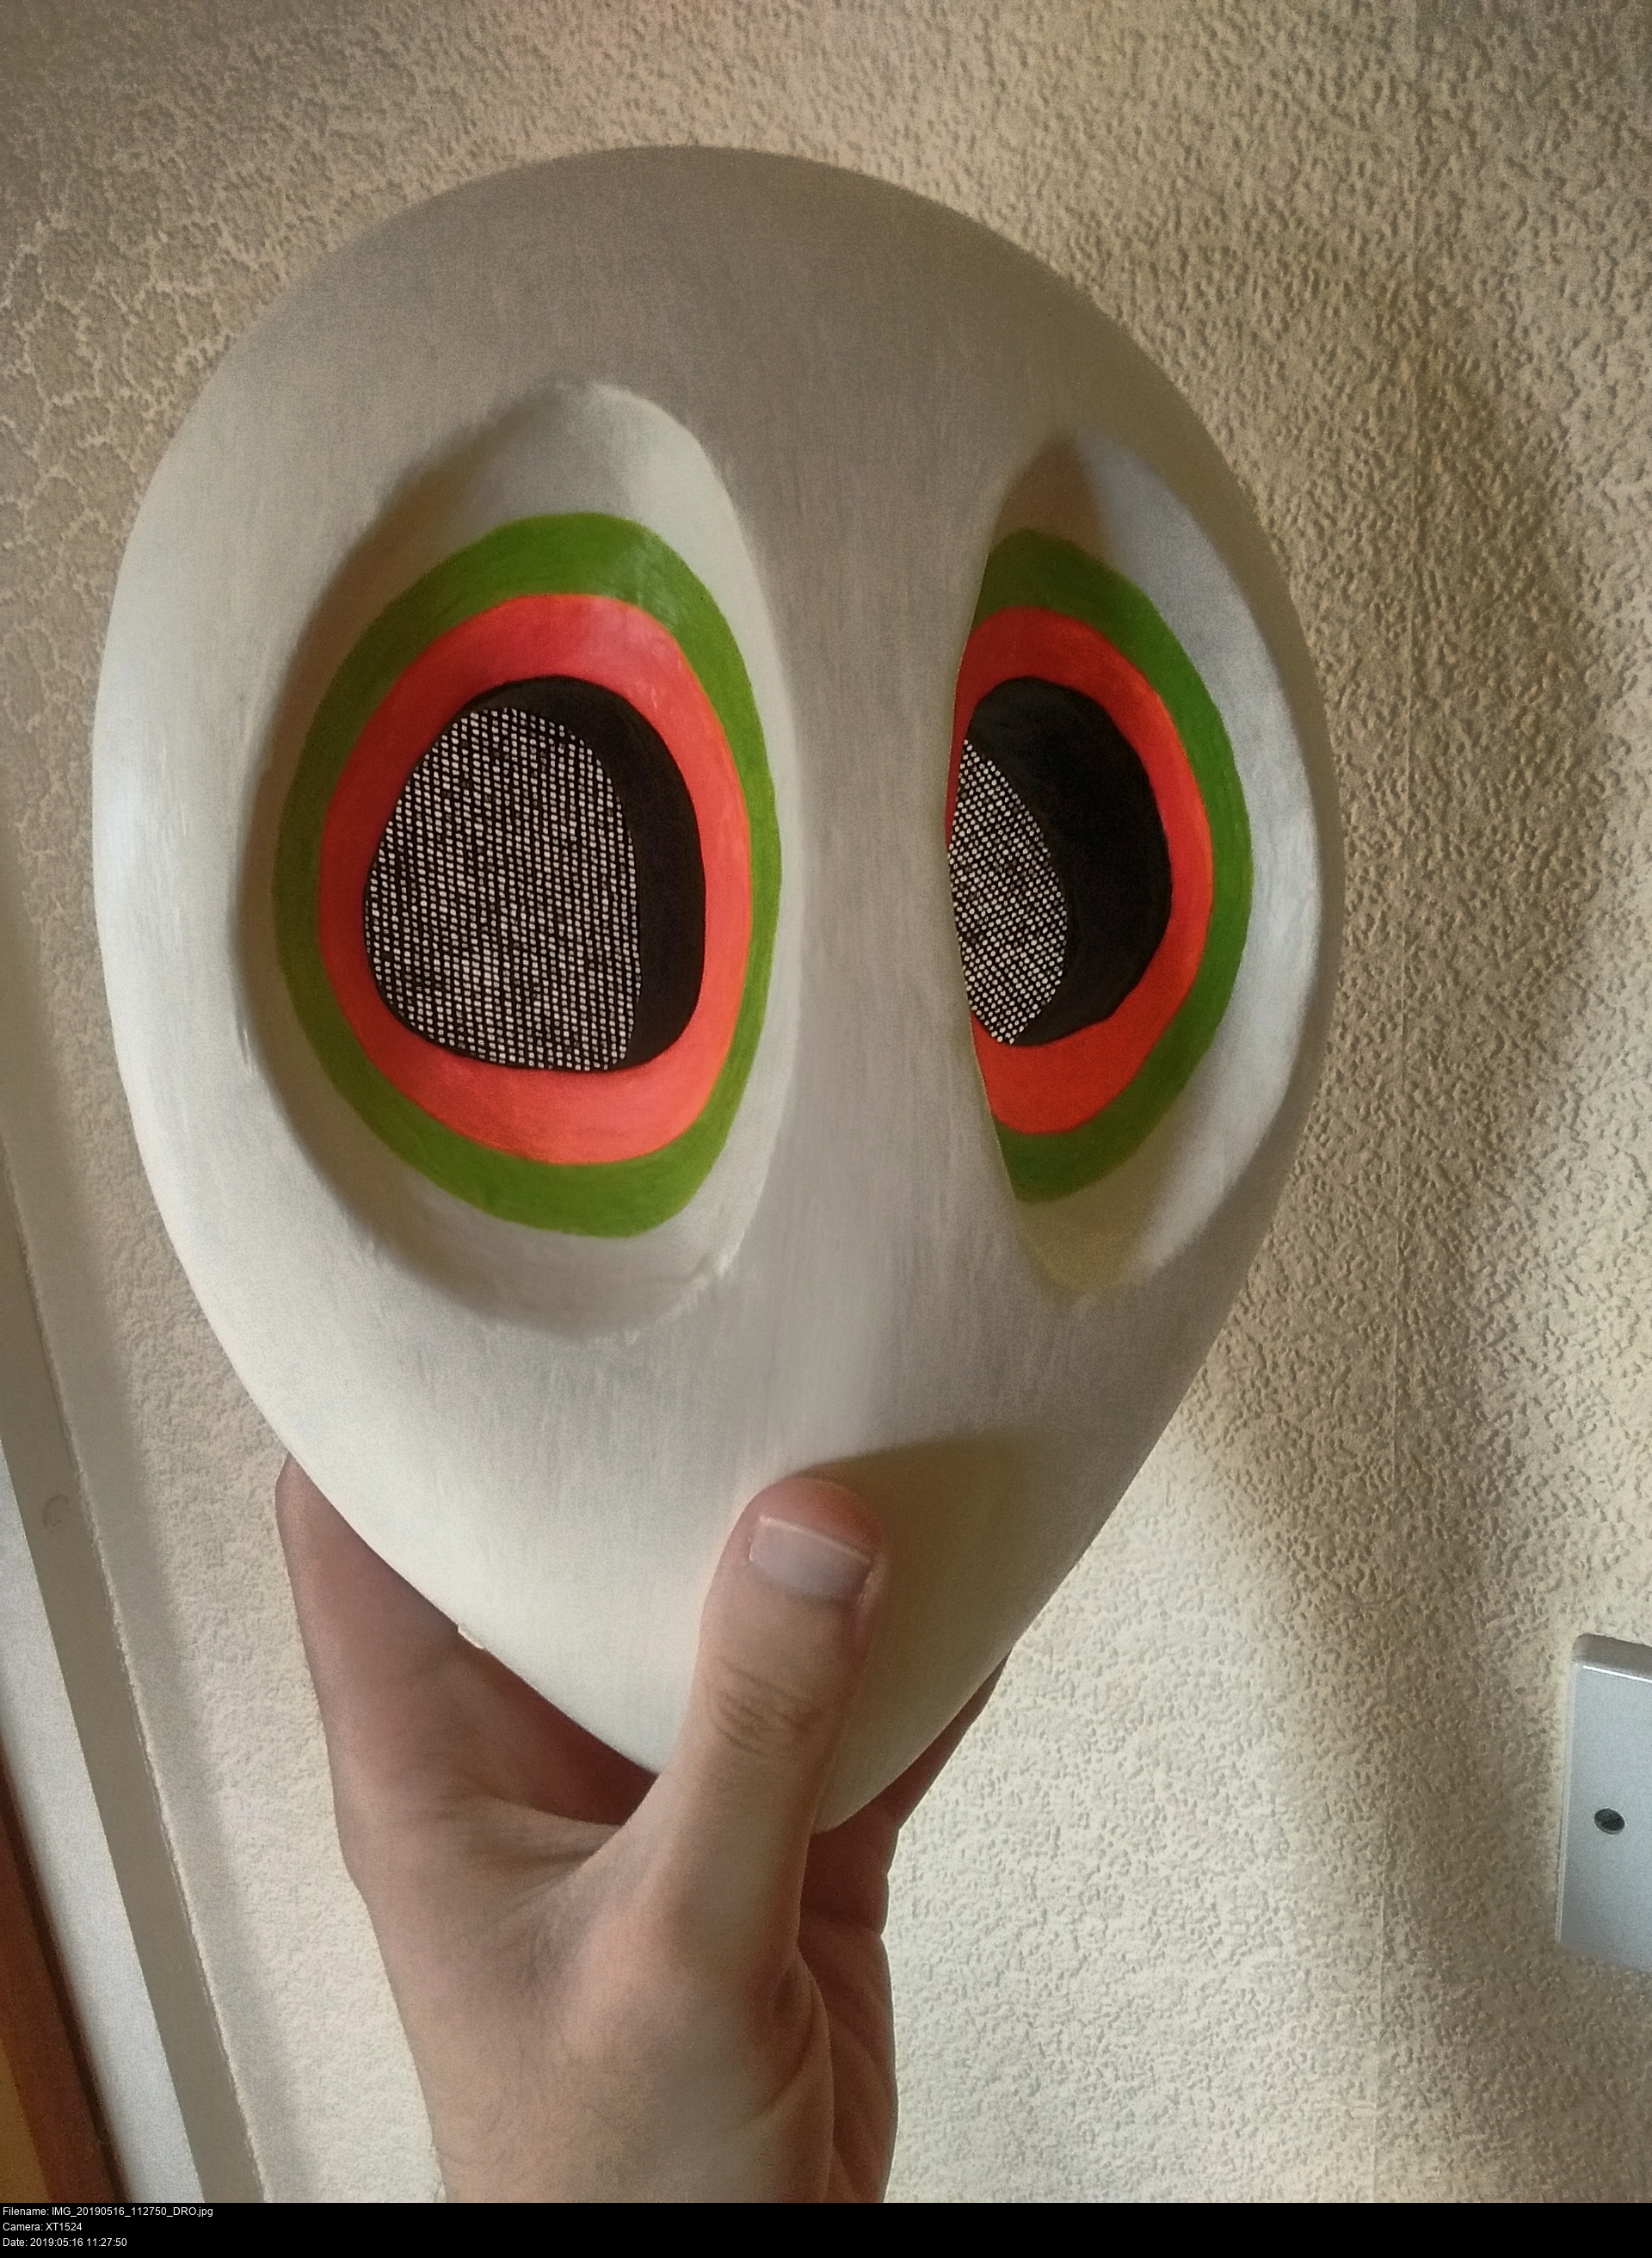
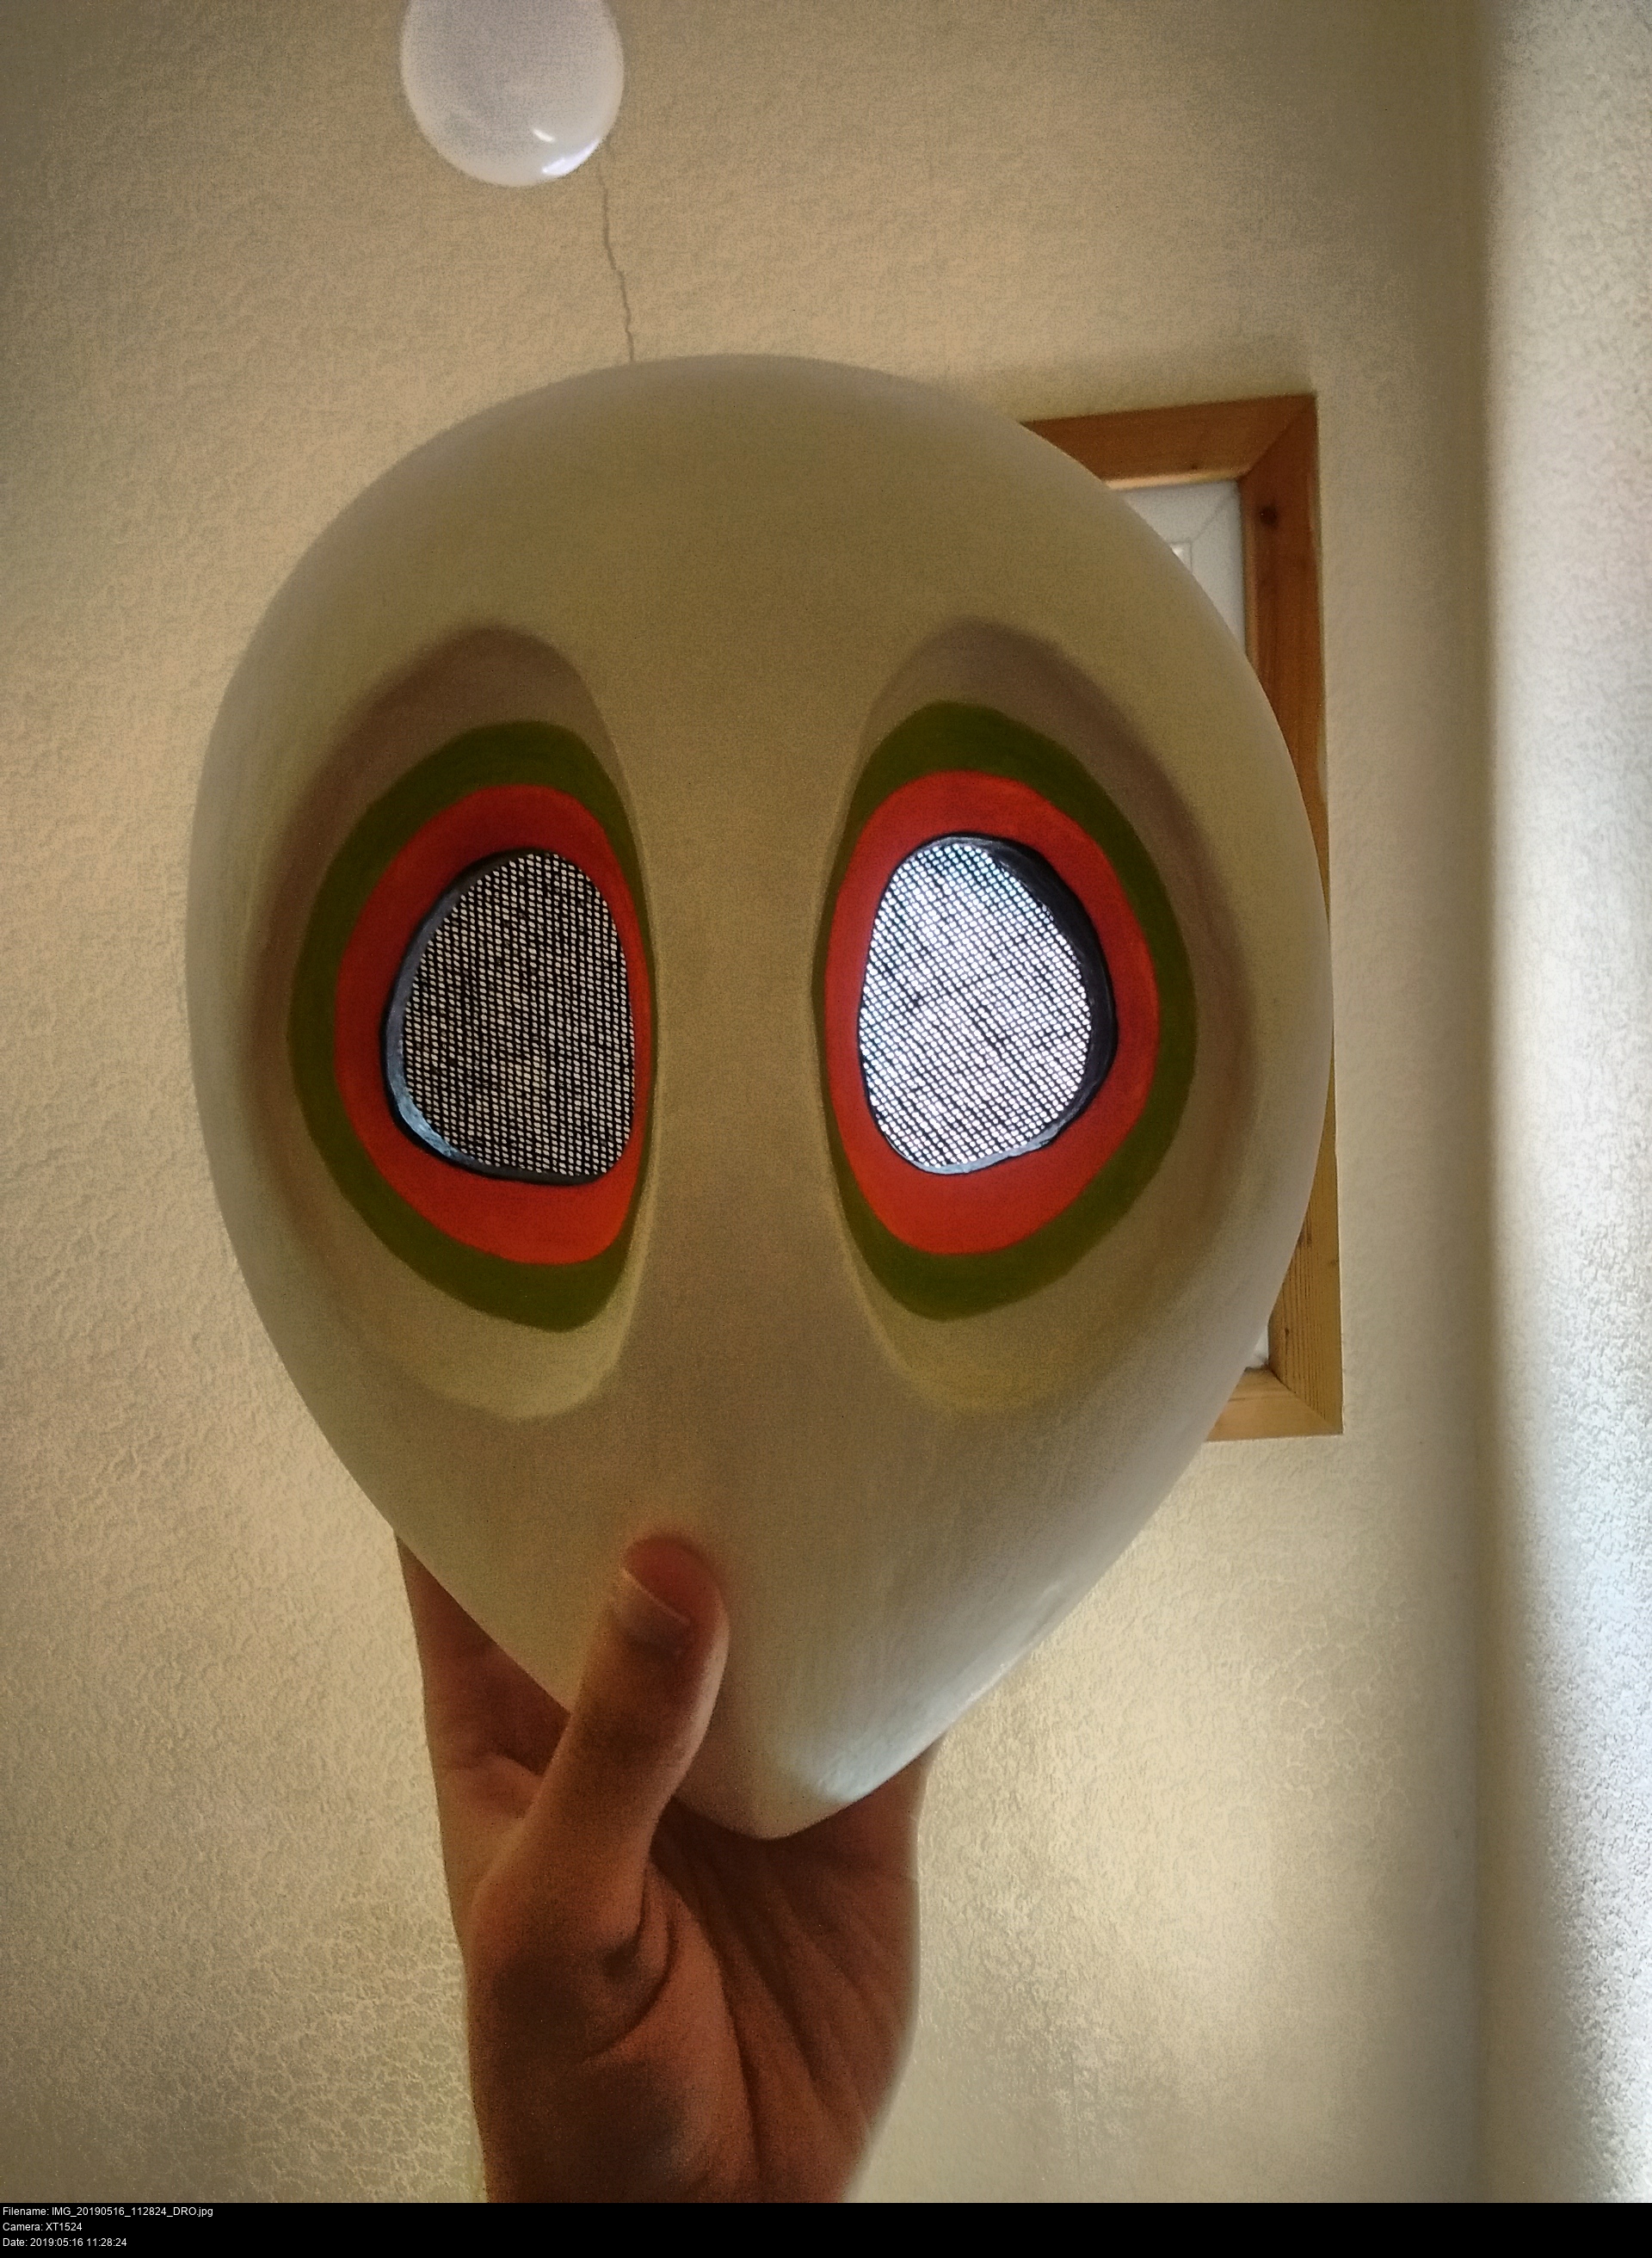
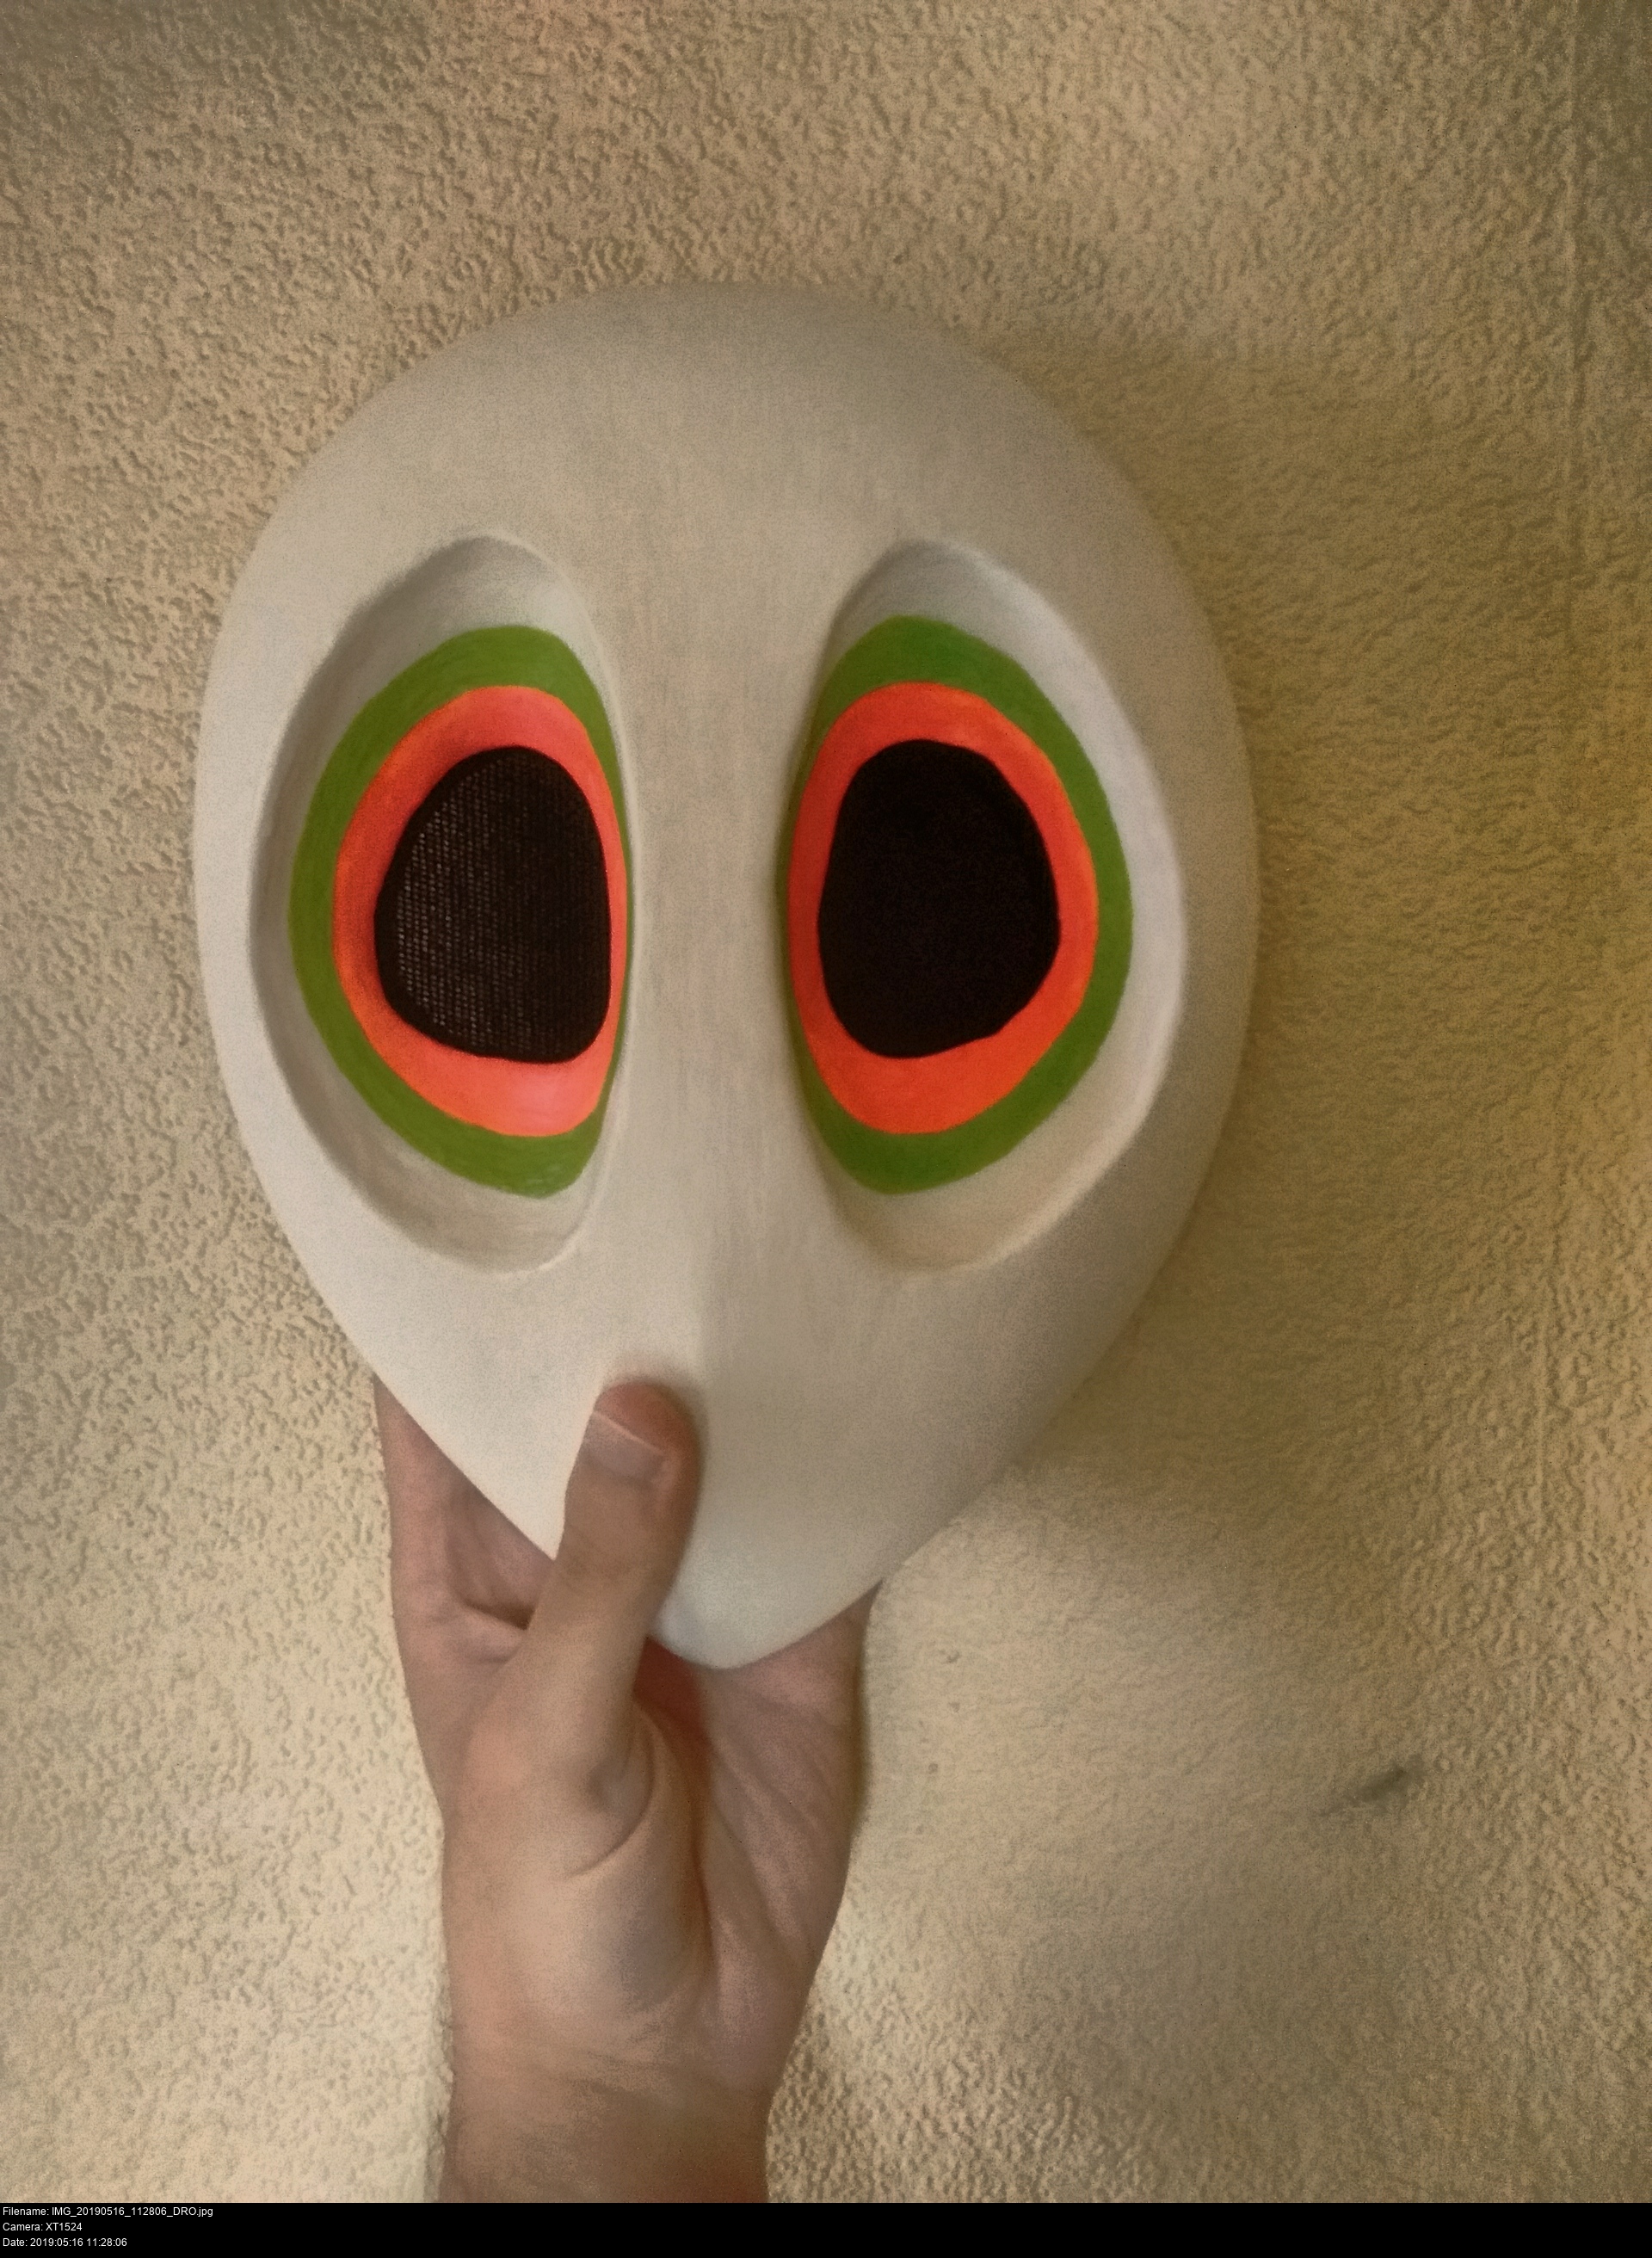

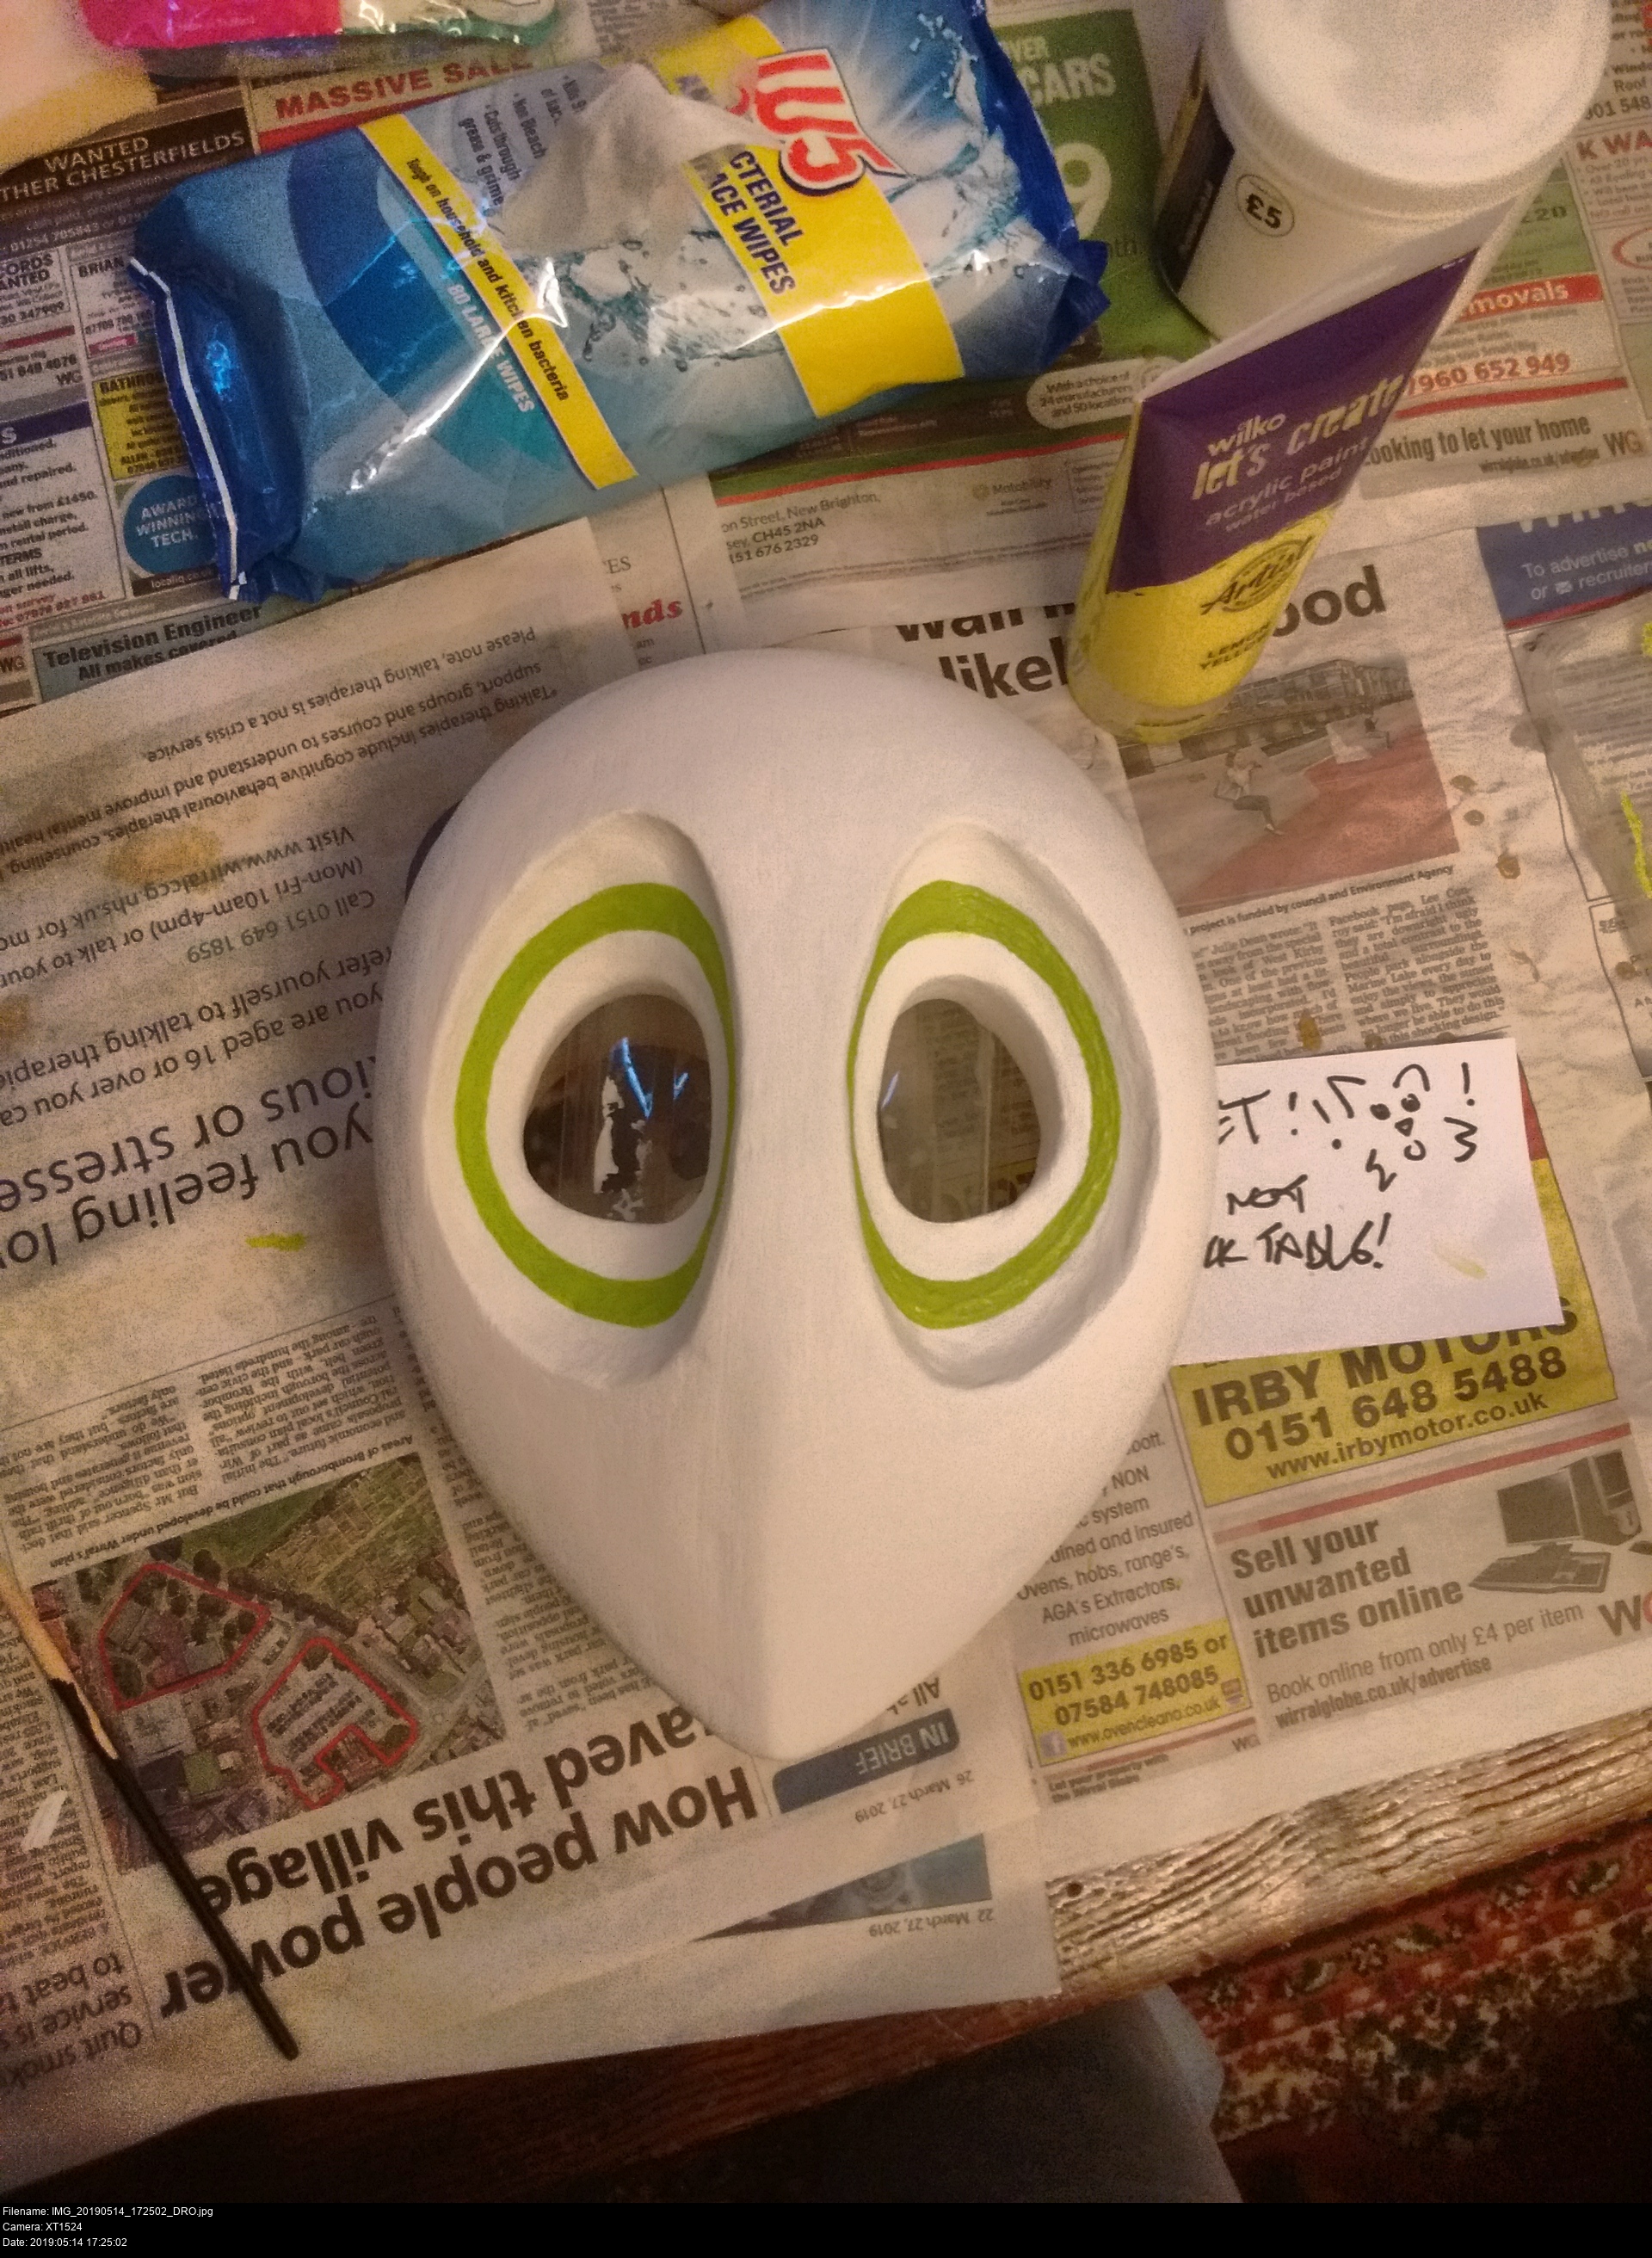
The mask is done! Four coats of quick drying interior household varnish applied and dried! And not a moment too soon. The mesh is on, it's see-throughable and everything is intact and lovely.
Ok, alright, that is indisbutably -orange-. That isn't purple or pink or raspberry. In real life, to my eyes, that colour is supremely fluorescent (like the wipes in the bin from earlier). On my monitor even, the colour is somehow burning intense. I wonder if that's a trick of human vision due to it being beside green? Also notice how the colours change in different lighting conditions.
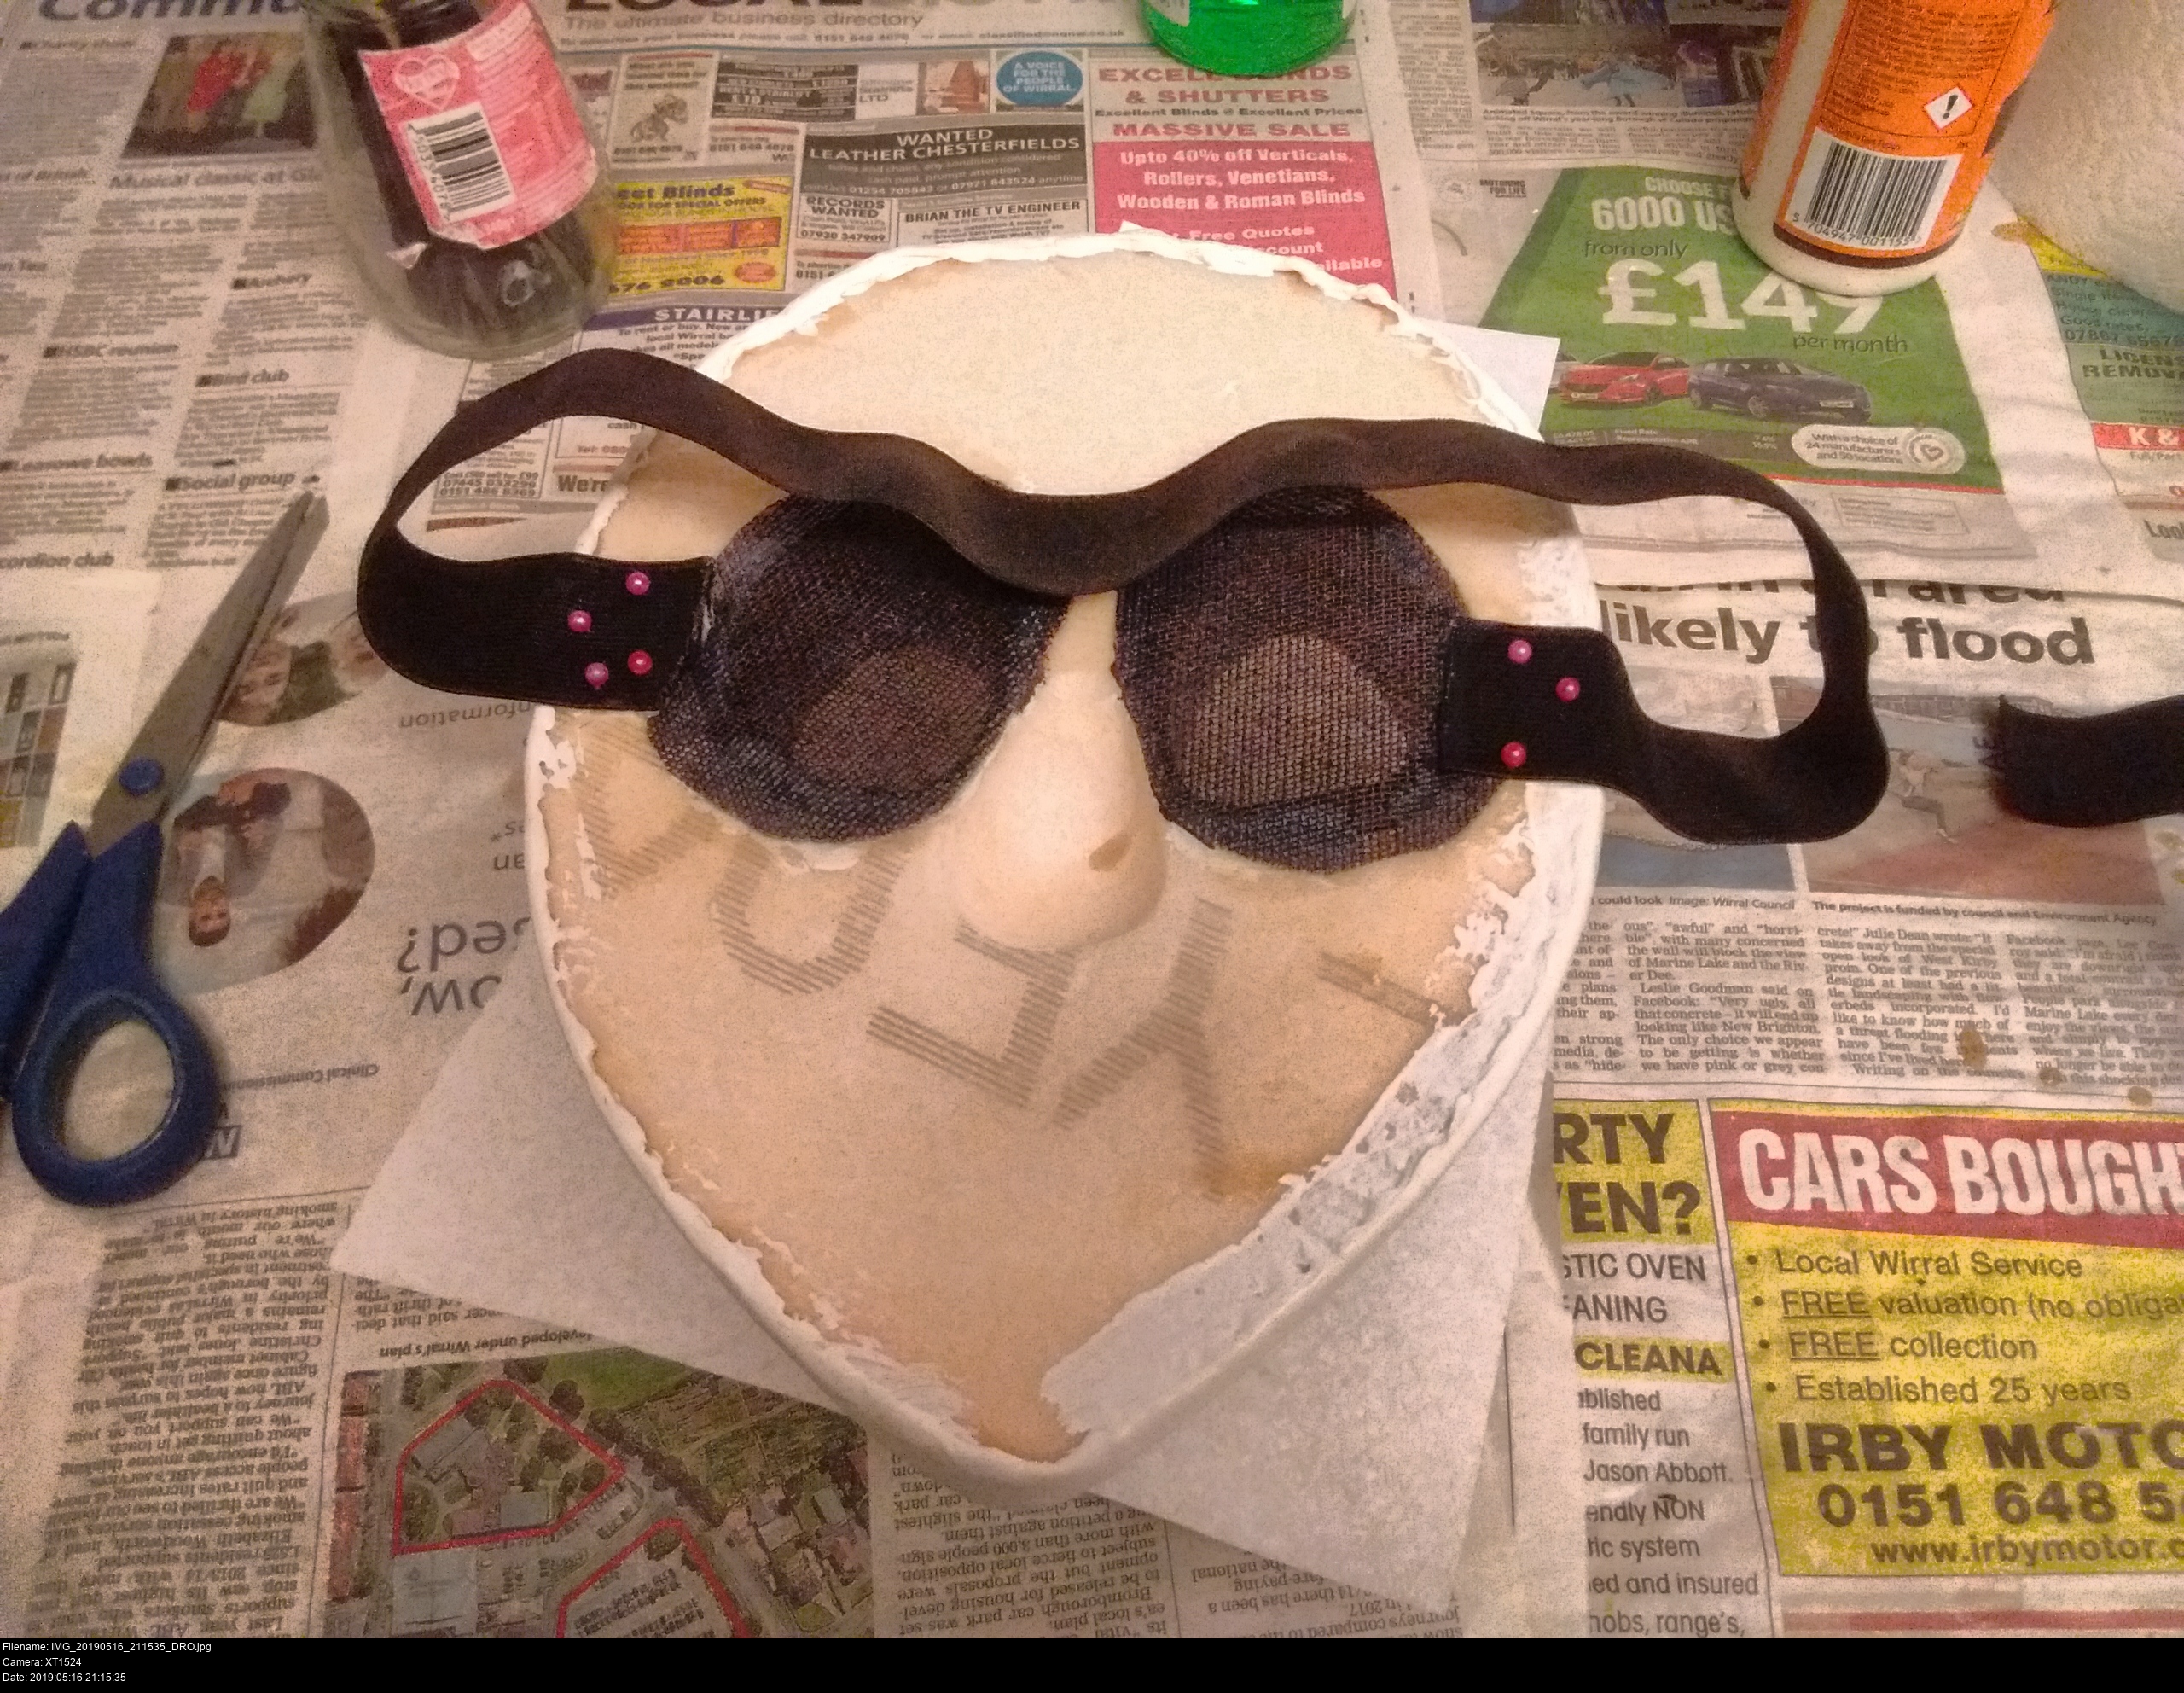
The final step: the strap. This was surprisingly painless. Very similar to the mesh eyeholes, GG wood glue and berry pins and hope. It took a lot of attempts to come up with a strap length that would be comfortable. When this is dry the mask will be completely done.
The elephant in the room is here the flat back of the mask, so let's talk about that for a moment.
This mask had to be made, painted and completely dried and wearable in nine days. It wasn't for a convention or a contest or anything, just some fun. And I wanted to make another mask!
Boring out the entire interior of the mask would've been a tricky task without calipers. I'd have to gauge how deep the mask was at every point and work to thin the bulk of it without breaking through the surface. When I held the XPS block, it was fairly obvious that it wasn't thick enough to encompass my head the way Akiyuki's magic mask does anyway, so I didn't waste much time thinking about it. It isn't very great to wear, but it's alright. It doesn't have the forehead Smartie. I just plain forgot! I suppose I just like the flat whiteness too.
What I'm interested in is how I could make a mask that -did- conform to the head. A friend of mine is whispering all kinds of secrets about moulds and silicone and so on, and I'd totally love to know where that leads.
Written by Matt Carr! mrdictionary.net nonsense.
Questions? E-mail 'em to me, skullkid@mrdictionary.net!
Twitter @SkullKidUK - Facebook facebook.com/mask.smith.cosplay