


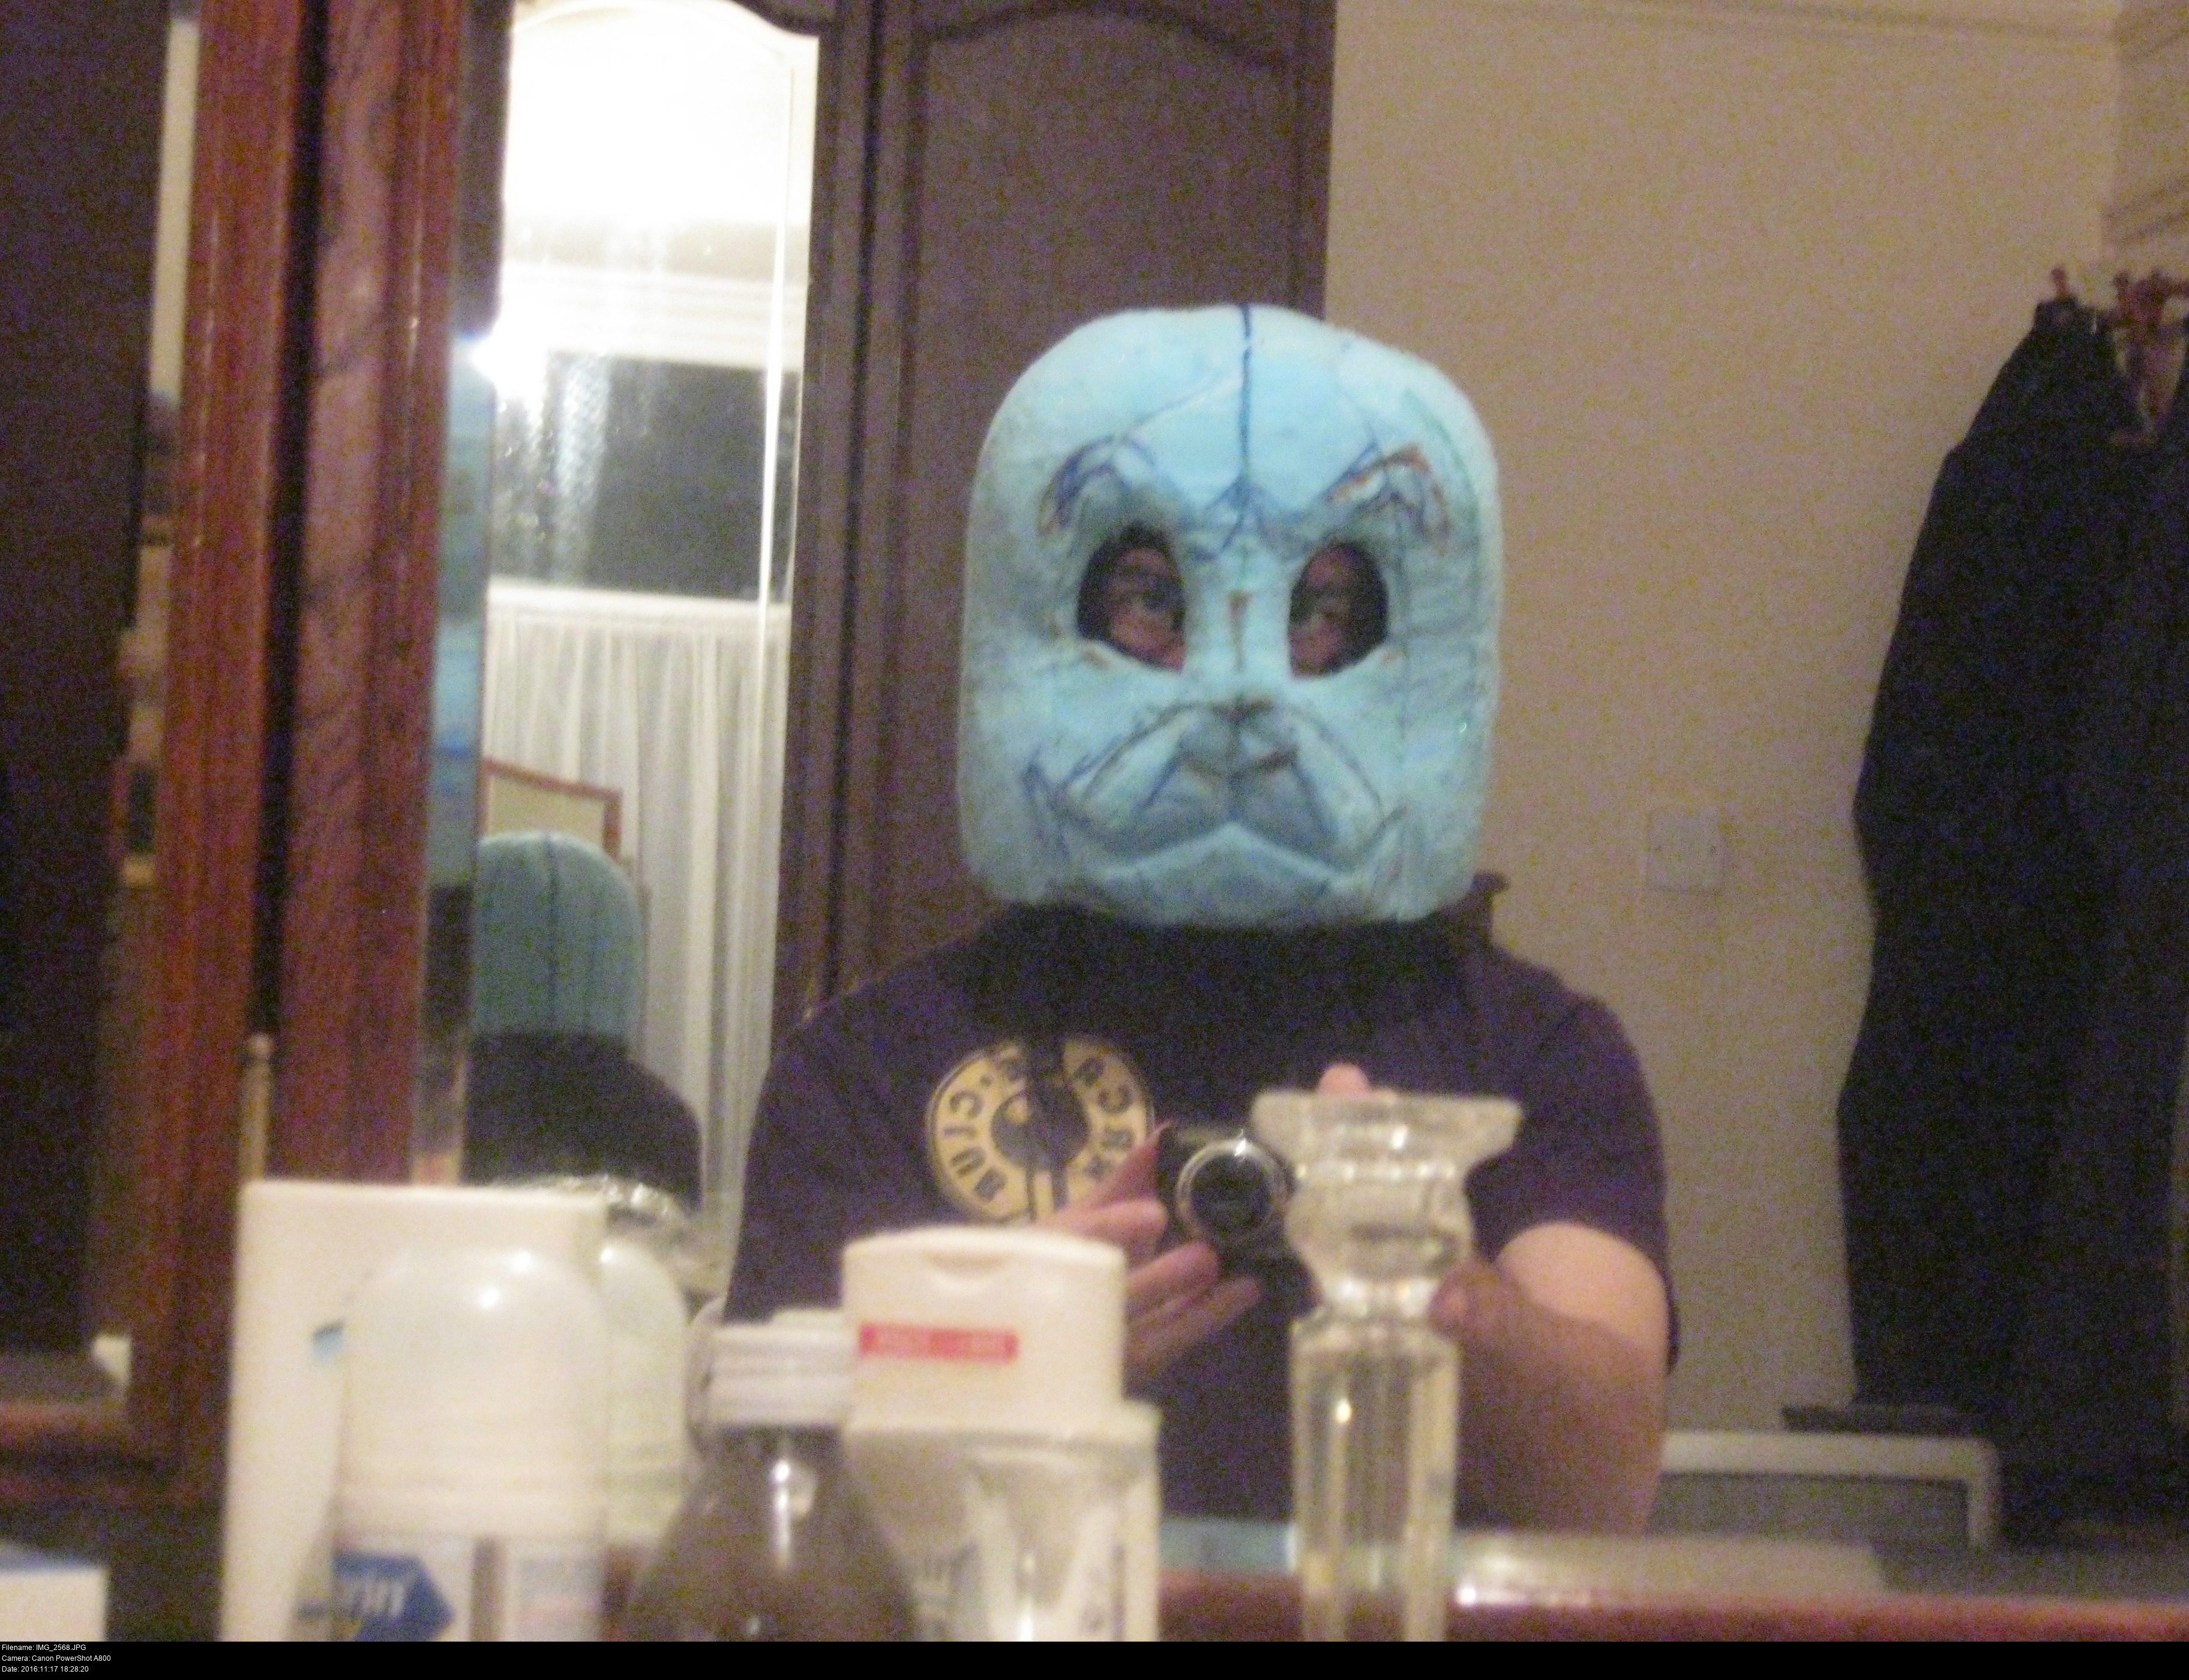
Hey there! Say hello to a character that I've named Hotshot.

He's not my fursona, nor did really I invent him at all. He's got a history all of his own. Wanna hear about it?
Let me tell you a story...

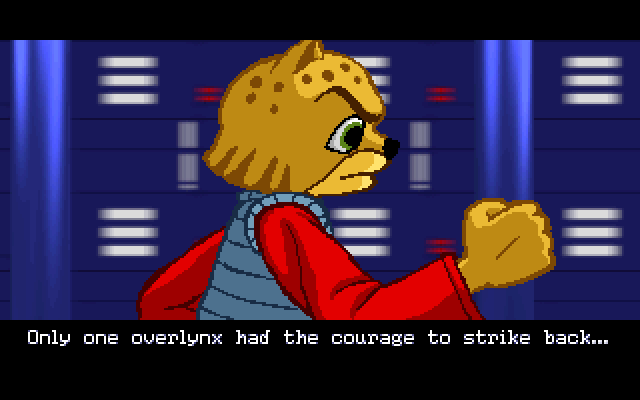
Once upon a time in the early nineties, there was a Norwegian demo-scene group called Twilight Zone who made animations and graphical effects for MS-DOS.

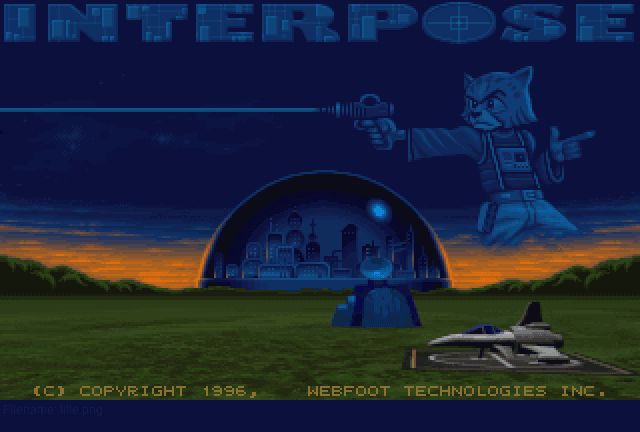
Then, in 1996, Twilight Zone Software released their first game called Interpose which I played as a nine year old kid after finding it on a PC coverdisk together with a bunch of other shareware games like 'Amulets and Armor', 'Breakfree' and 'Get Lost!'.

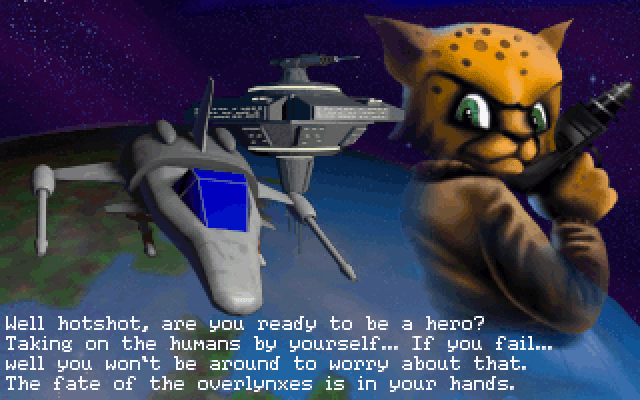
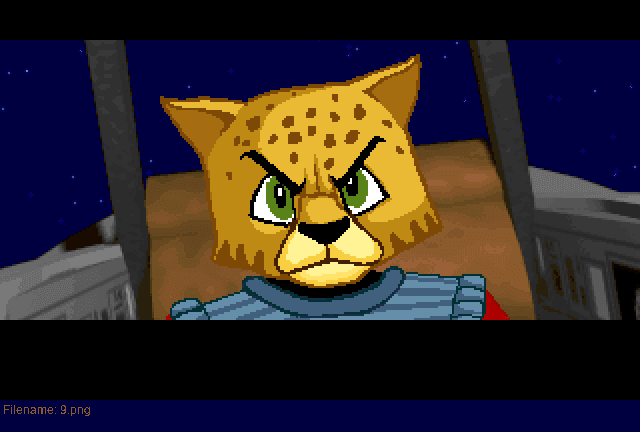
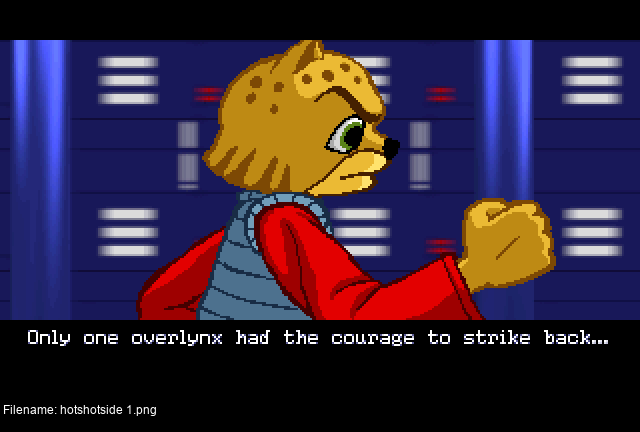
In Interpose, you play as a heroic unnamed 'overlynx' pilot from a time before even the dinosaurs.

An overlynx from the age of the ancient civilisation of Atlantis!
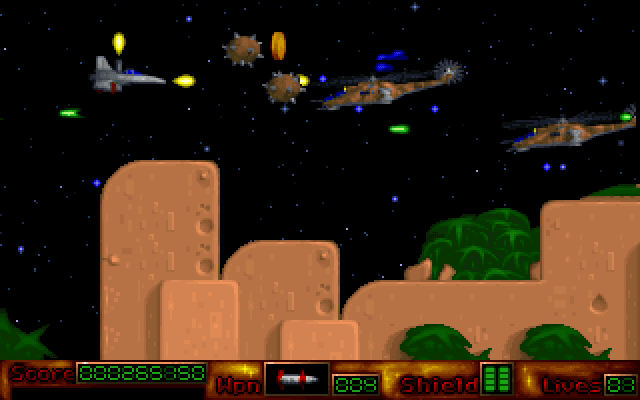
His mission is to fly from left to right across the screen and shoot rendered spaceships...
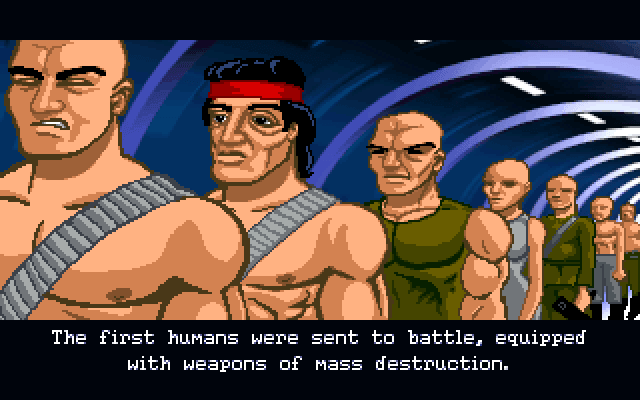
in order to defend prehistoric Earth from an alien army of bio-engineered creatures known as 'humans'.
The game features mind-blowing animated sequences, a bevvy of special weapons and many, many music modules, as well as a title CD track with -lyrics-.

And if that doesn't sound like the coolest thing ever, you probably have never been a nine year old computer nerd.
Three people, a programmer, an artist and a musician, got together and worked their arses off to make their game a reality. People all around the world learned of it, and this unusual cartoon adventure world would became an indelible part of my childhood. How do you even react to that?
Though to be honest I thought his big ol' staring eyes were kind of scary at the time. But you've got to face your fears, right?
As far as I know, this poor fellow doesn't even have a name. You name him when you start a new game, so he's you! Even the image URLs on the old tzsoft.no website are called things like 'lynxturs.gif'.
If the poor guy never got an official name, why do I keep calling him Hotshot?
Because the first thing the game does after starting a New Game is to call you a 'hotshot'. :)
Alright!
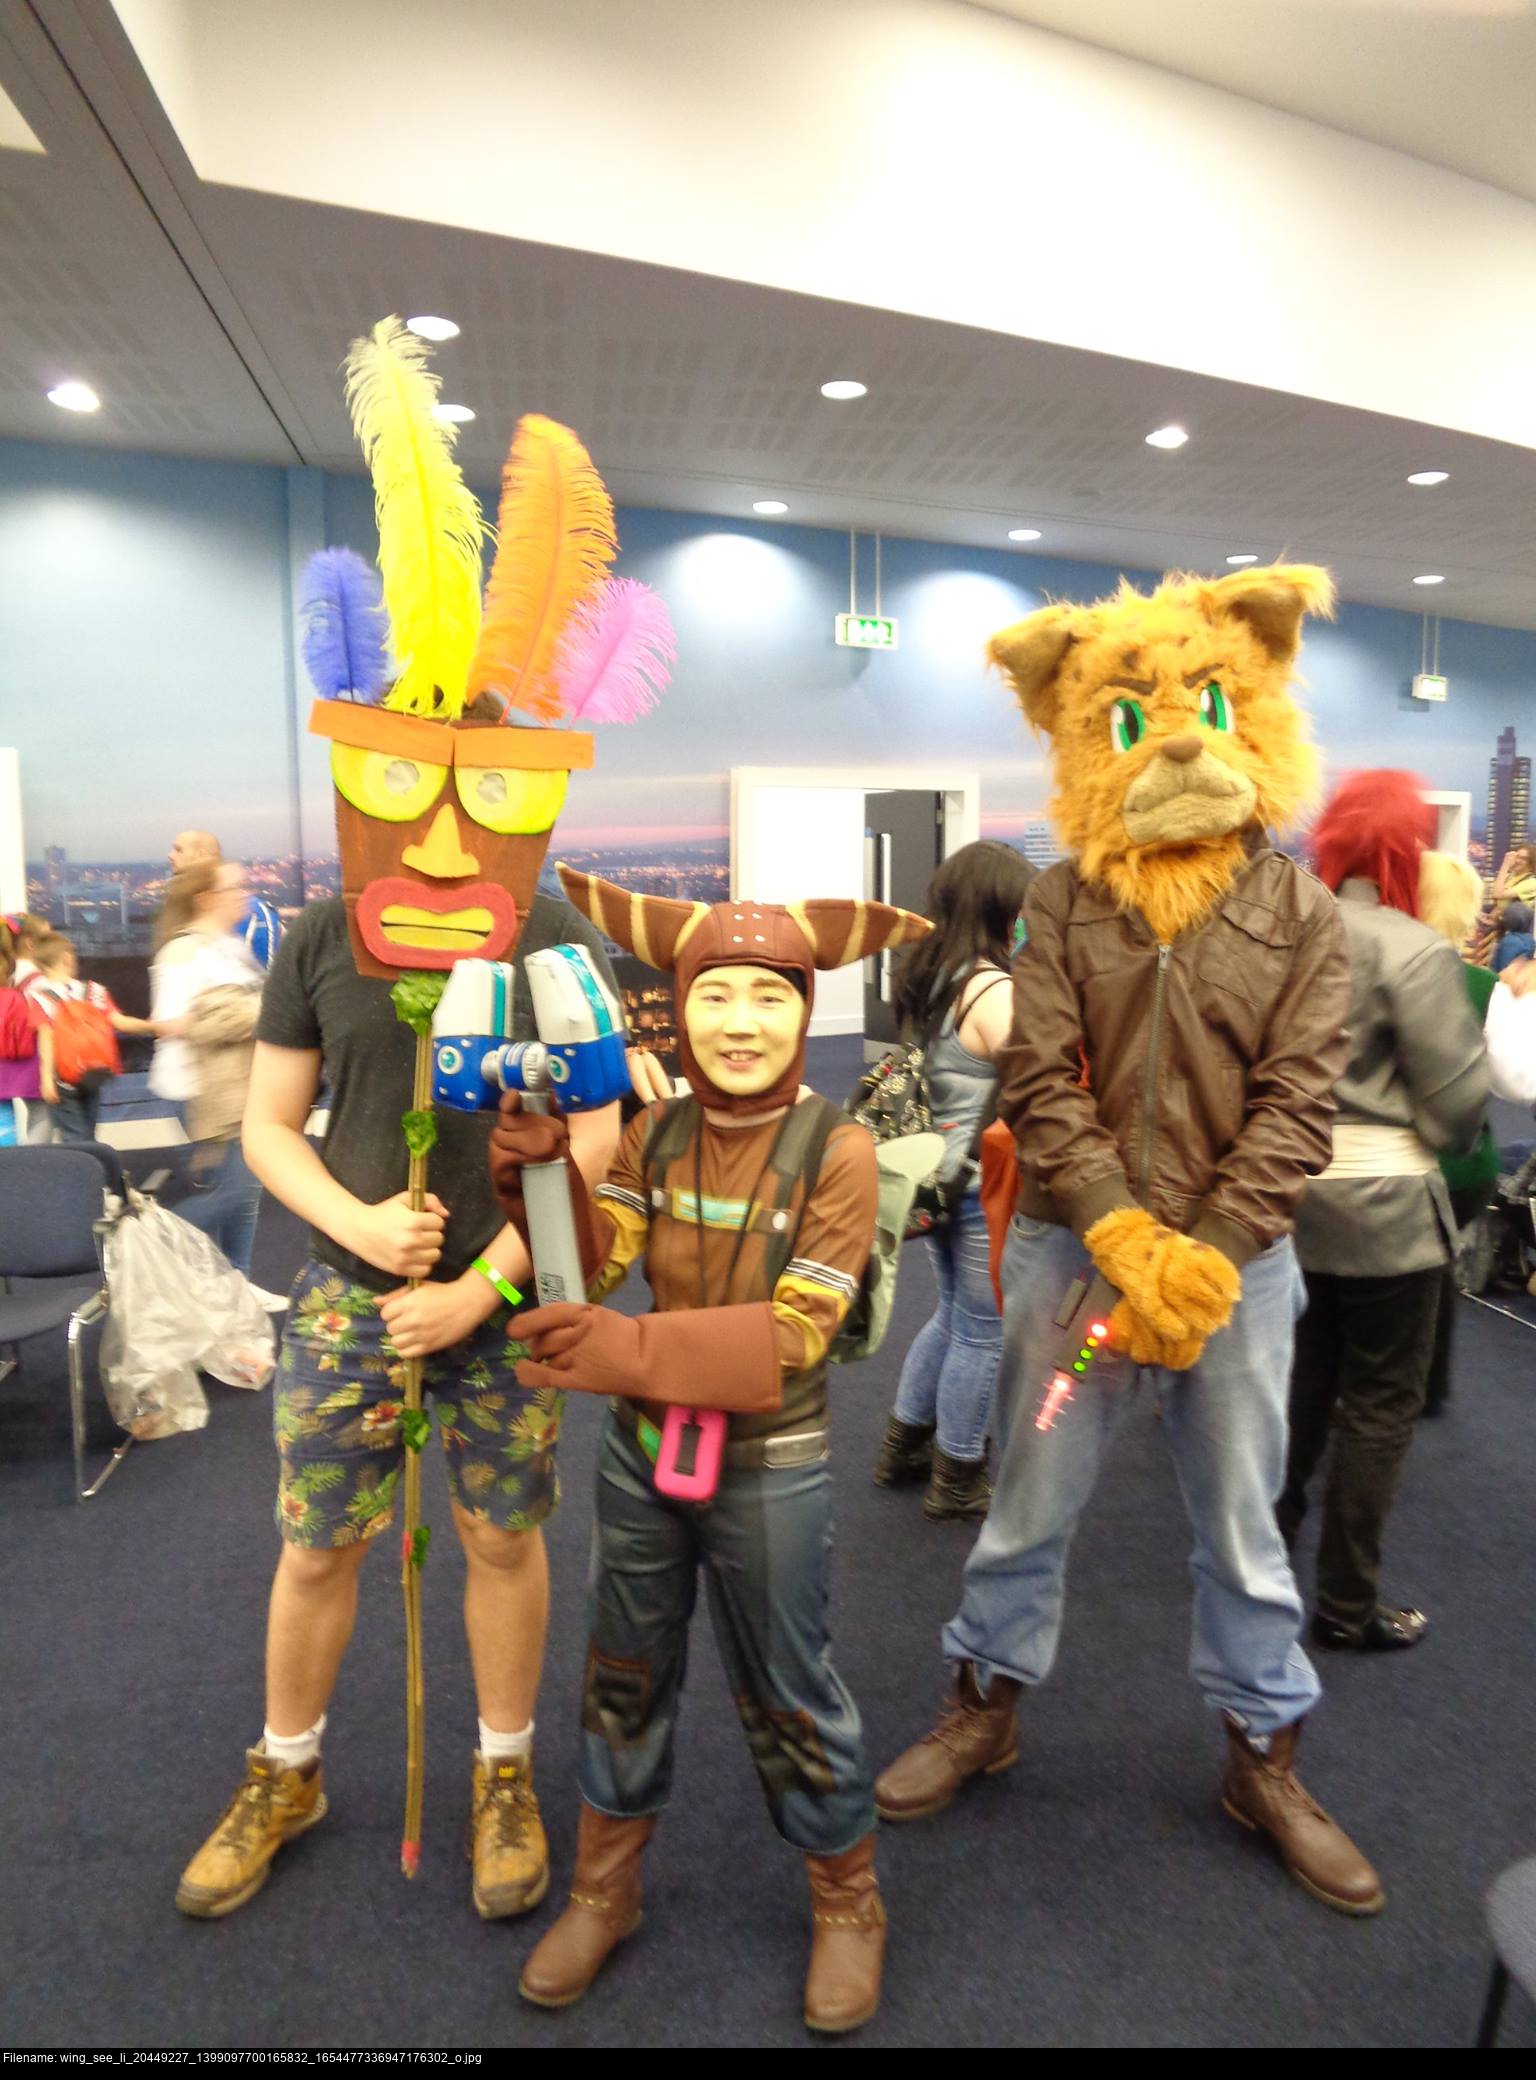
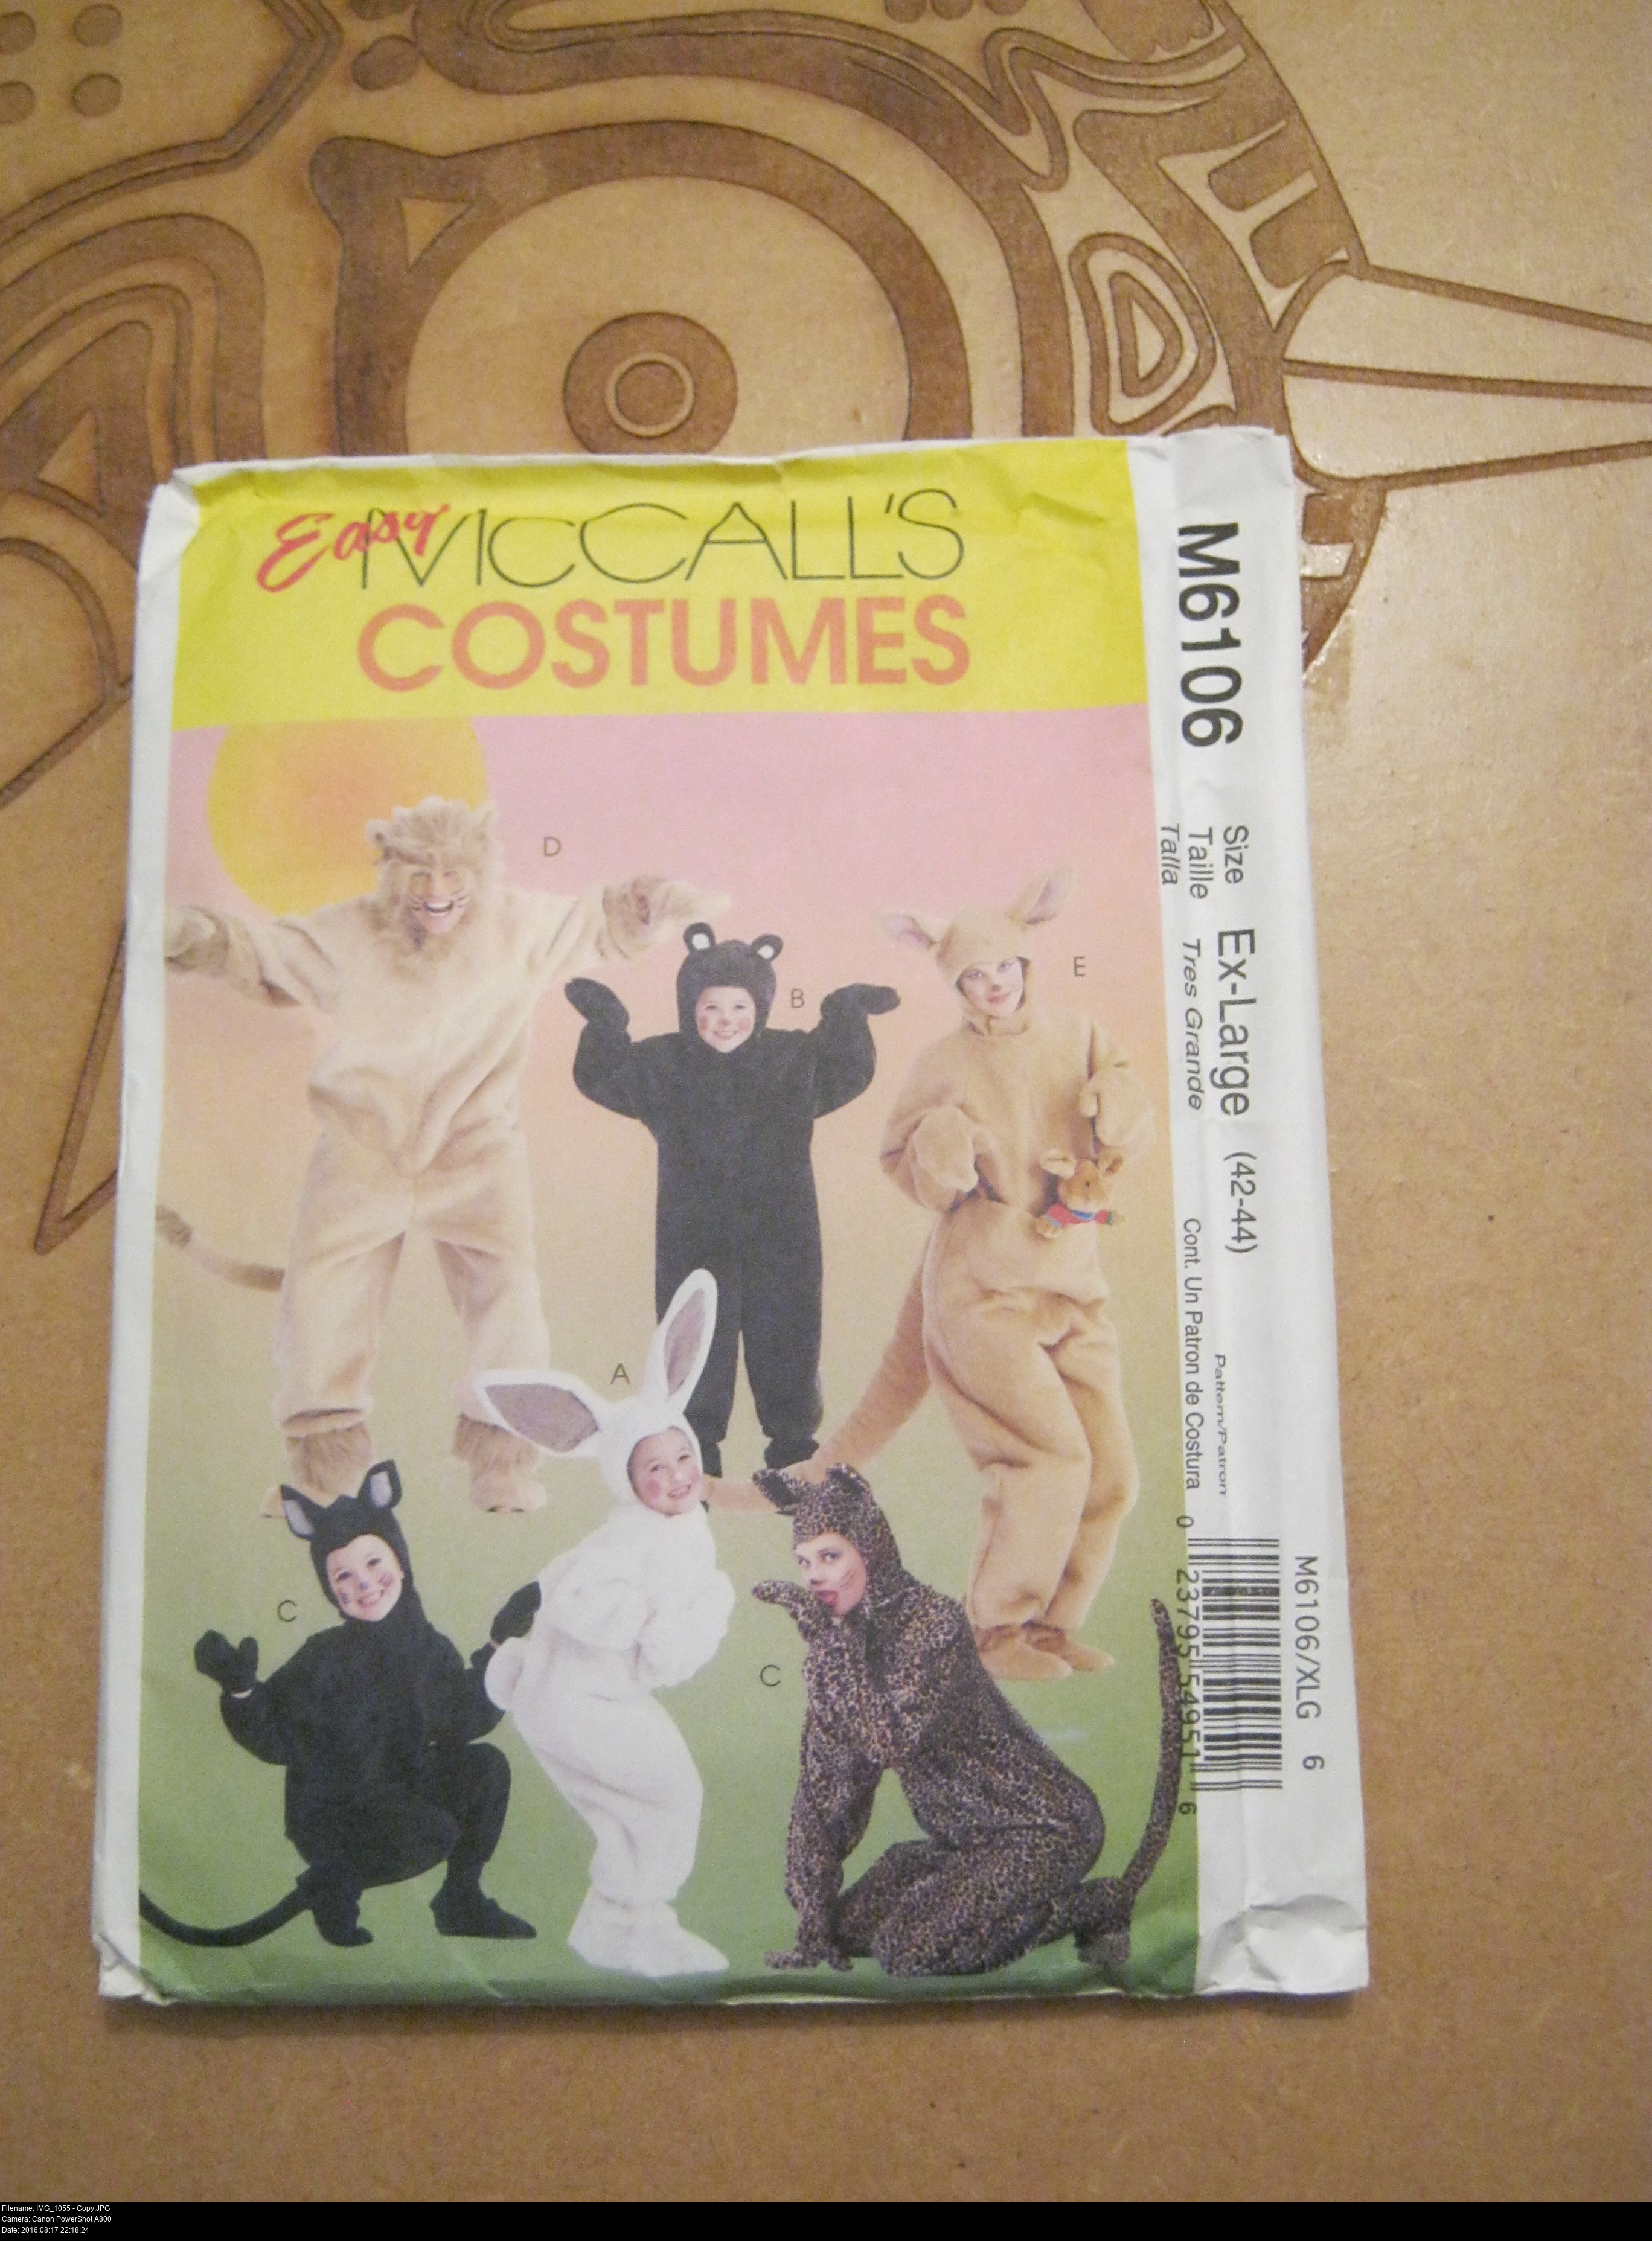
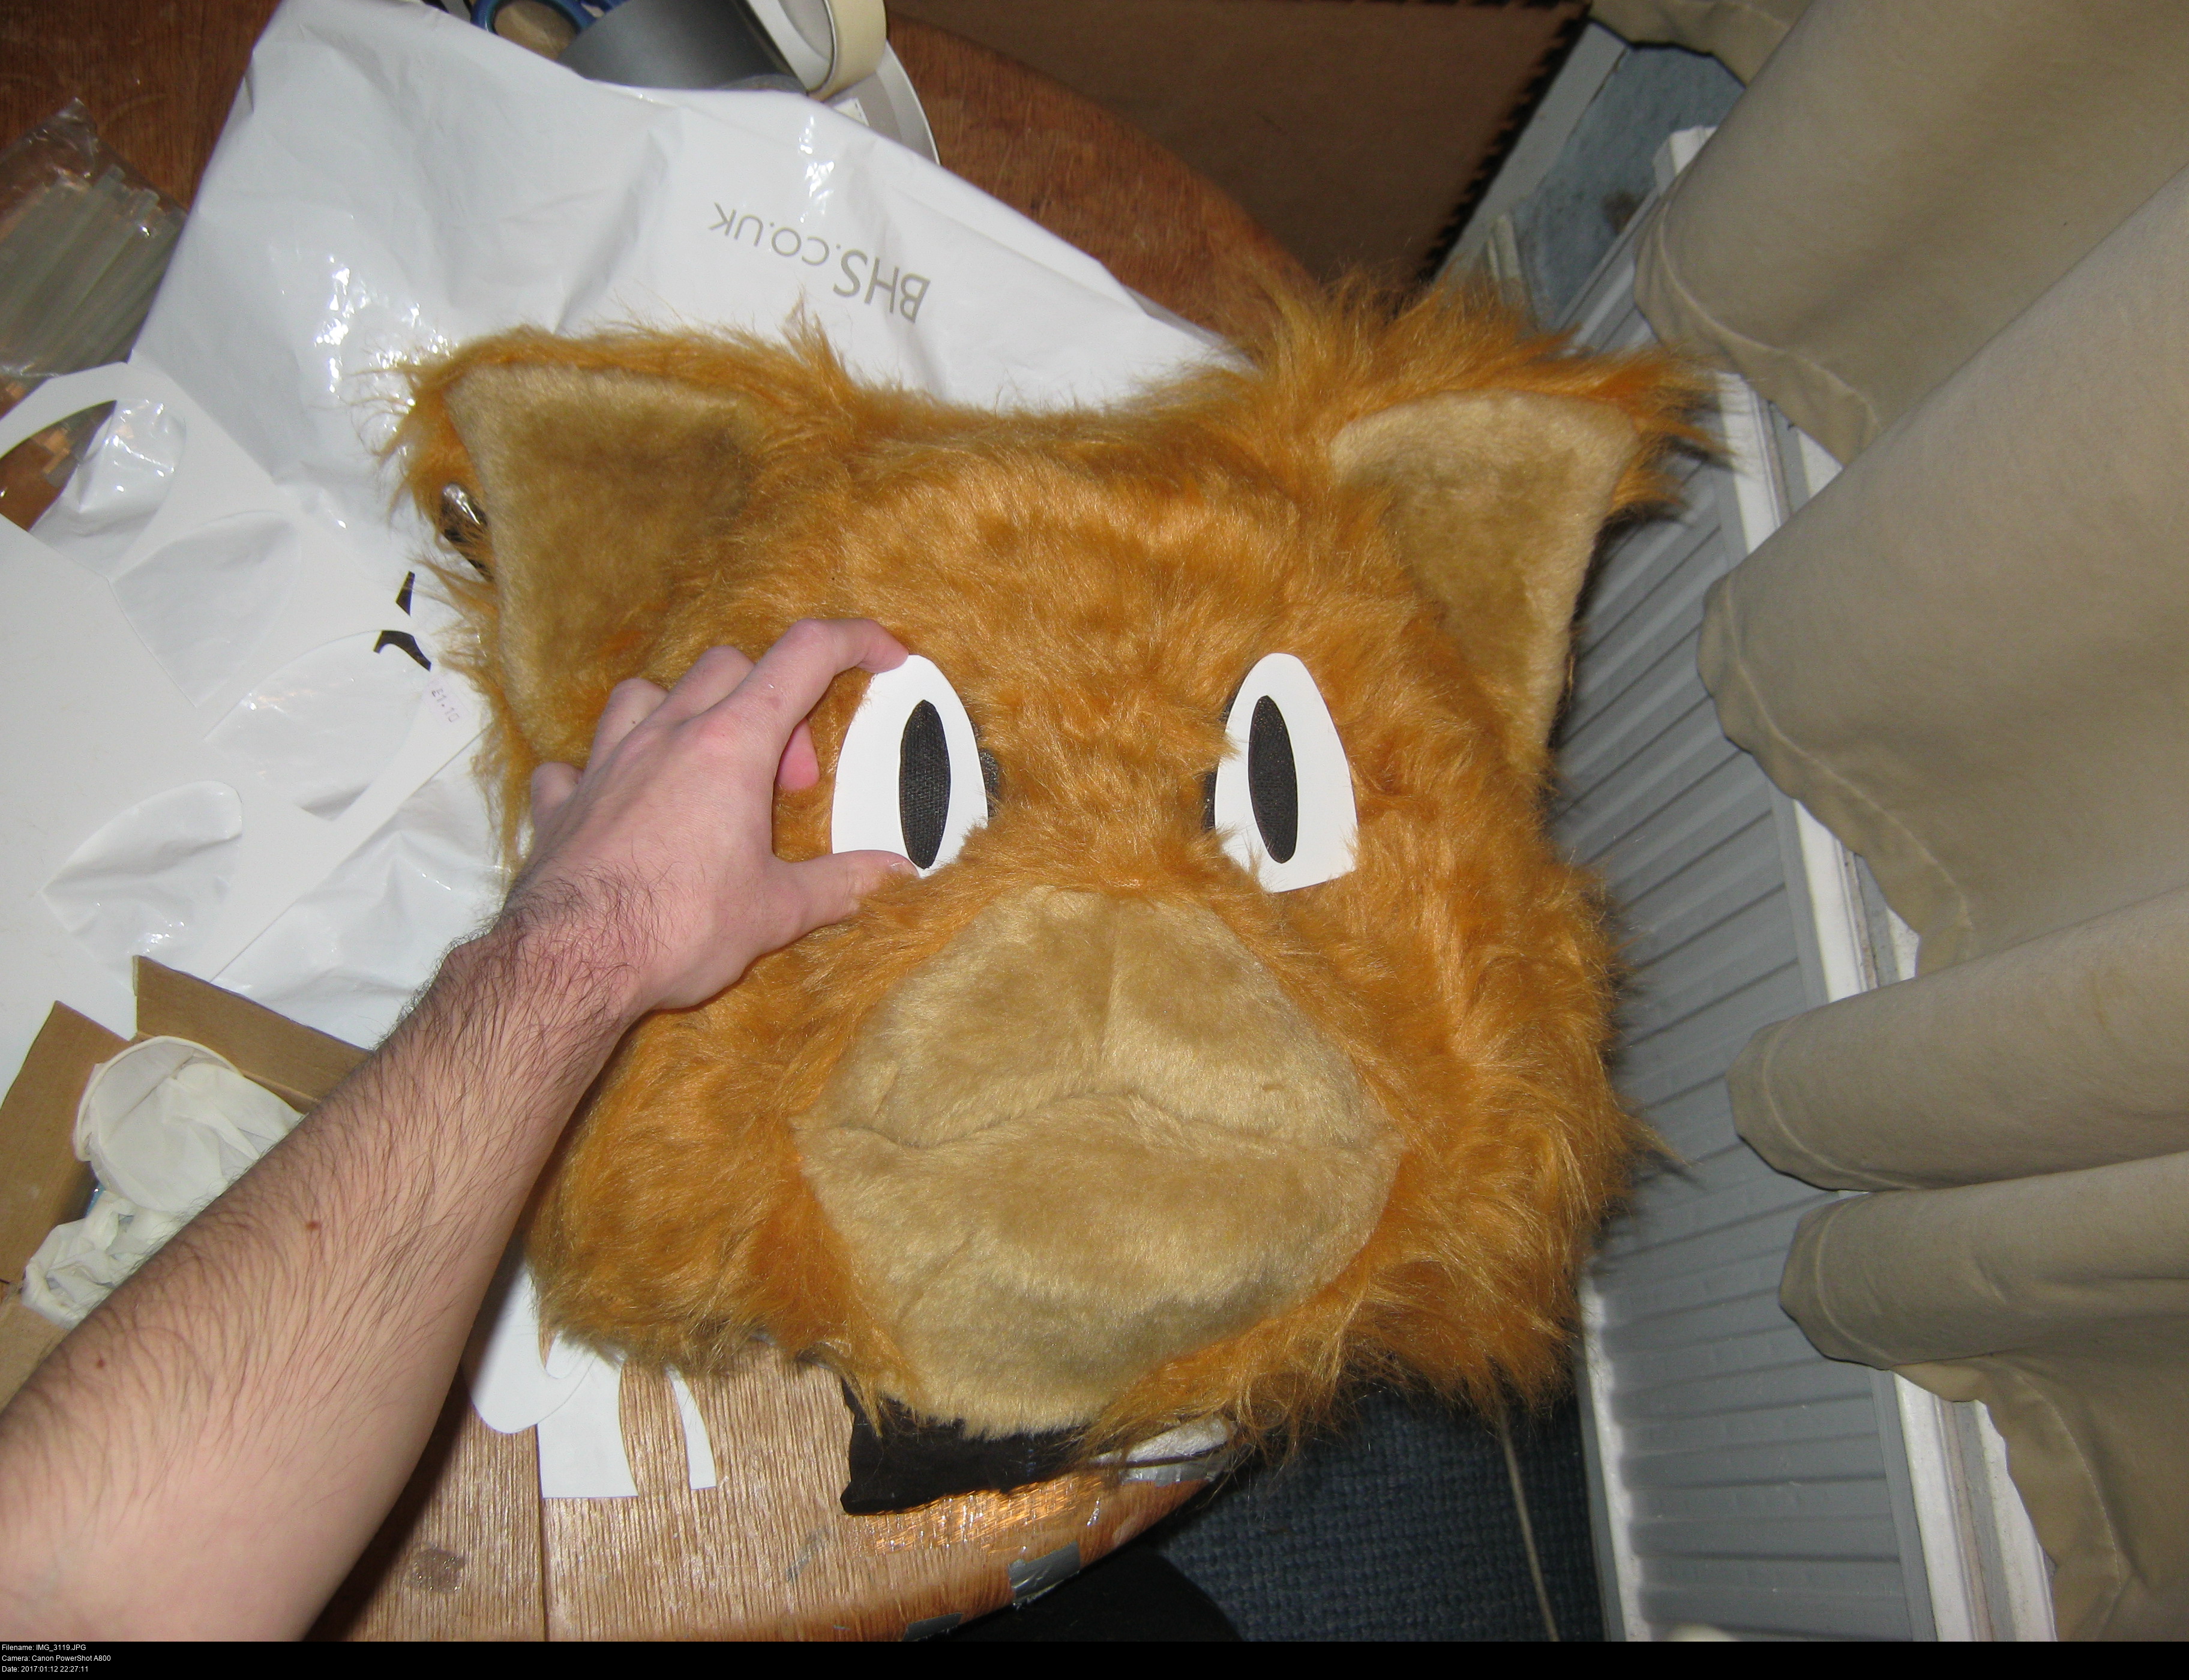
For my birthday in 2016, my sister bought me a sewing pattern for an animal costume onesie. It had a choice of bunny, bear, cat, lion or kangaroo.
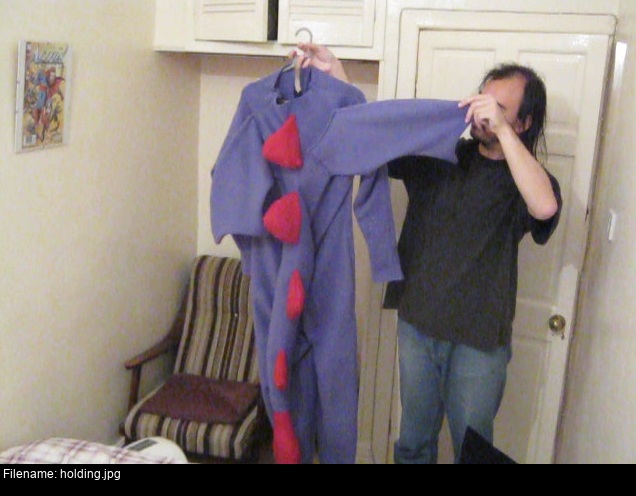
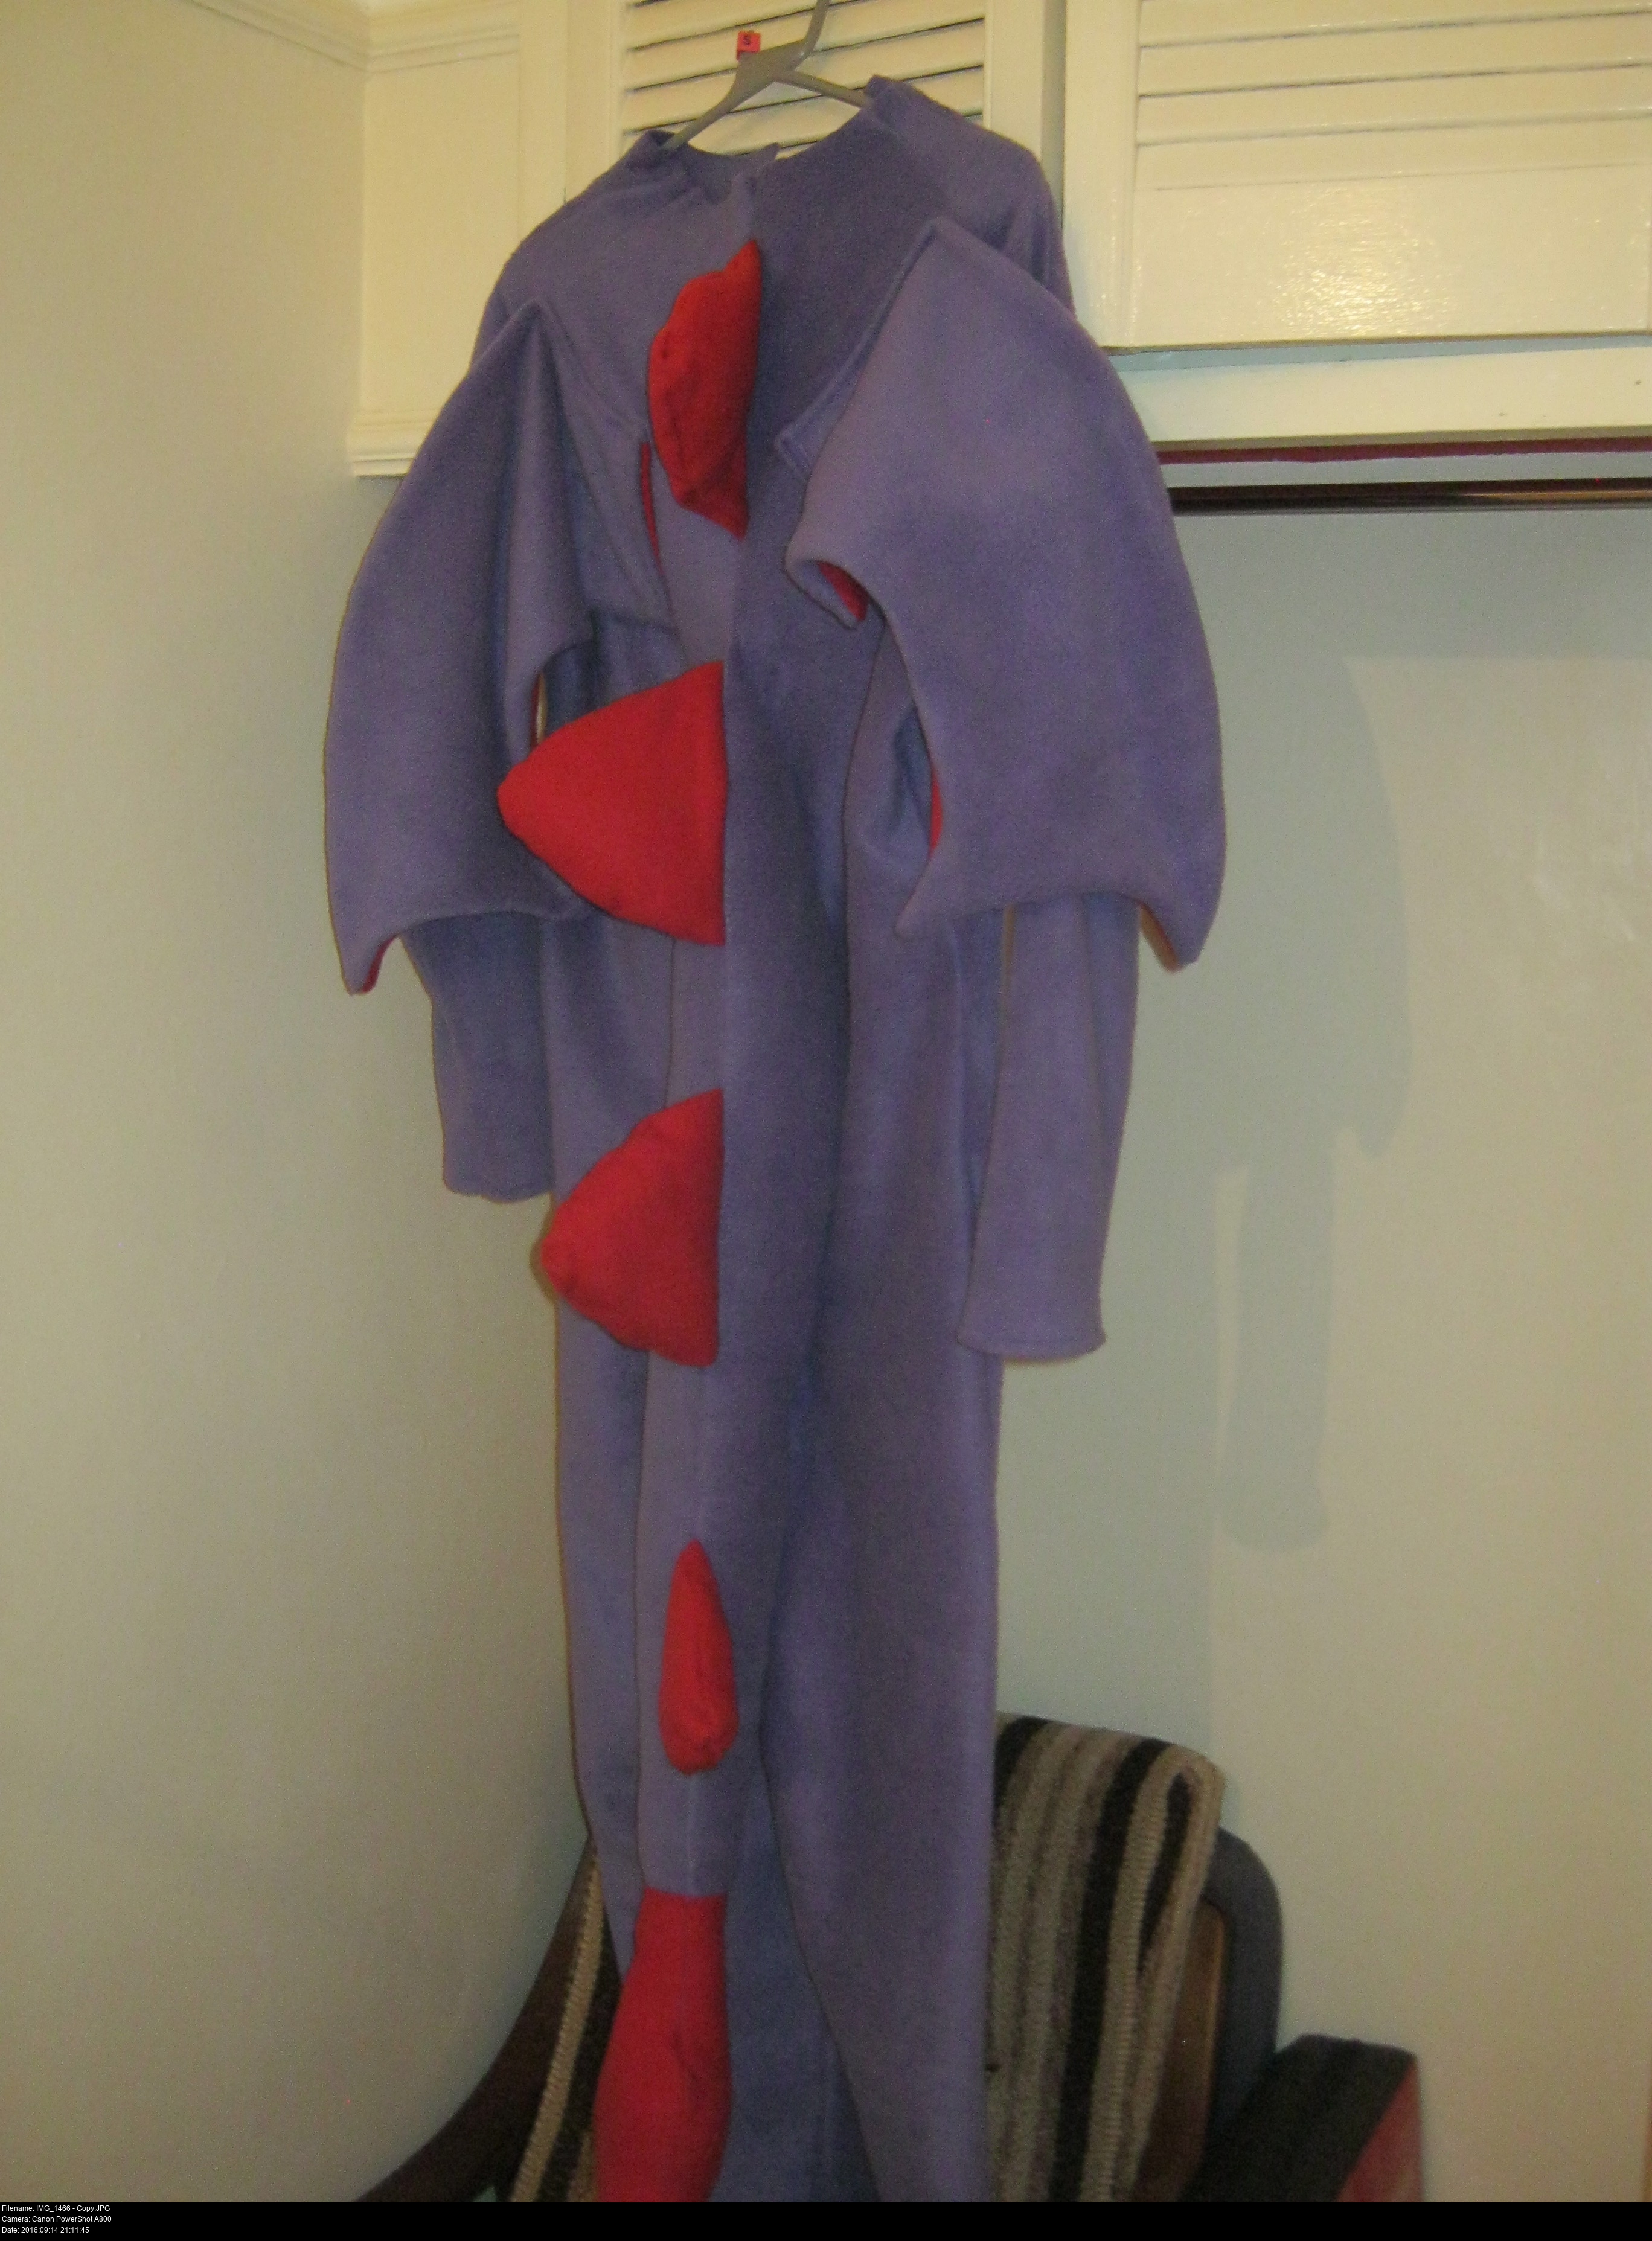
So naturally I made a dragon.
I'm getting to that!
And then I got to wondering if I could make a fursuit head for the dragon. It'd be weird having a furry head on a fleece onesie, but I've seen weirder things.
It was a sterling plan...


A sterling plan only hindered by a complete lack of ability to draw a dragon's head.
So why not make a head of a creature that I really like? I really like cats. I can make up my own cat character.
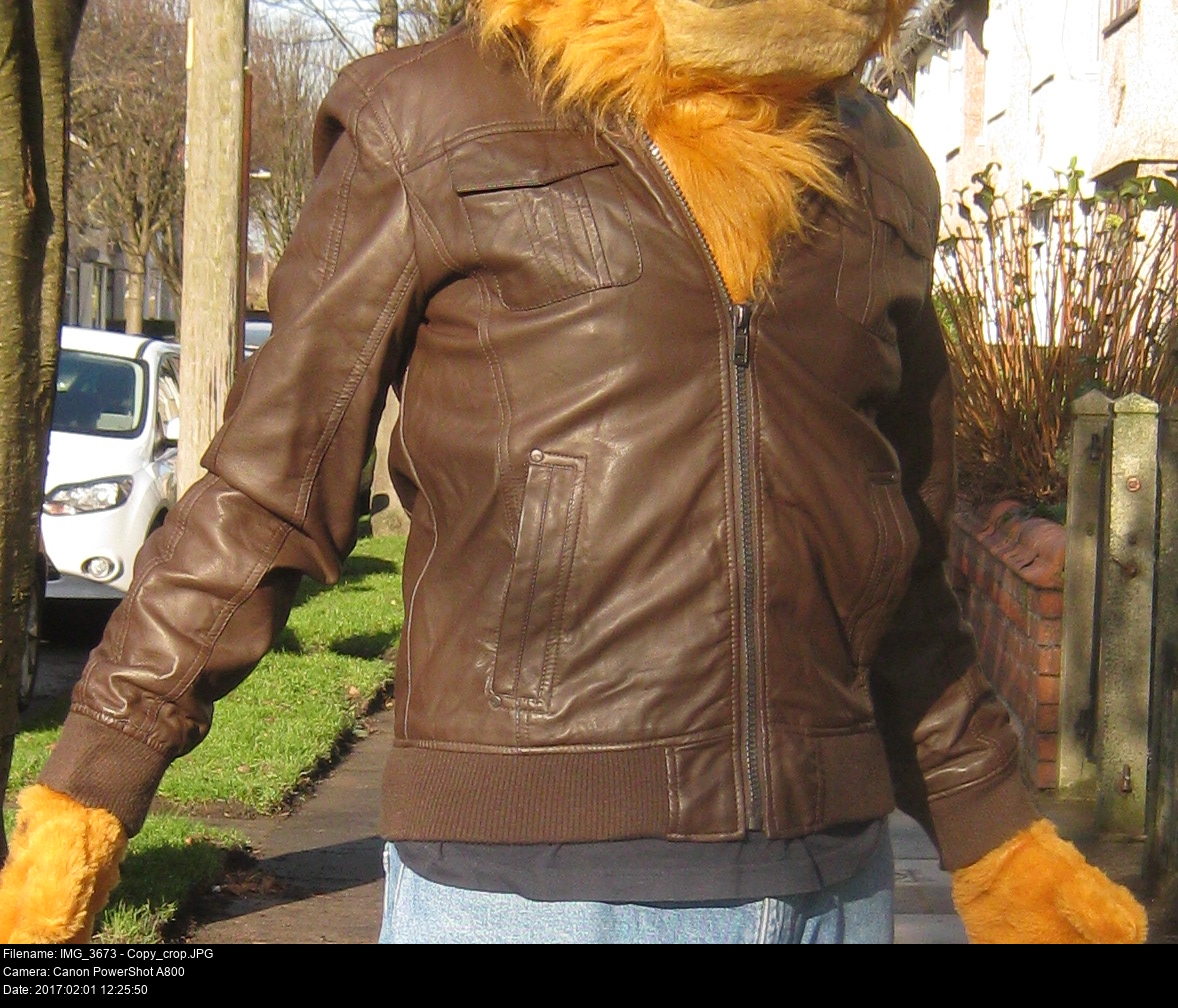
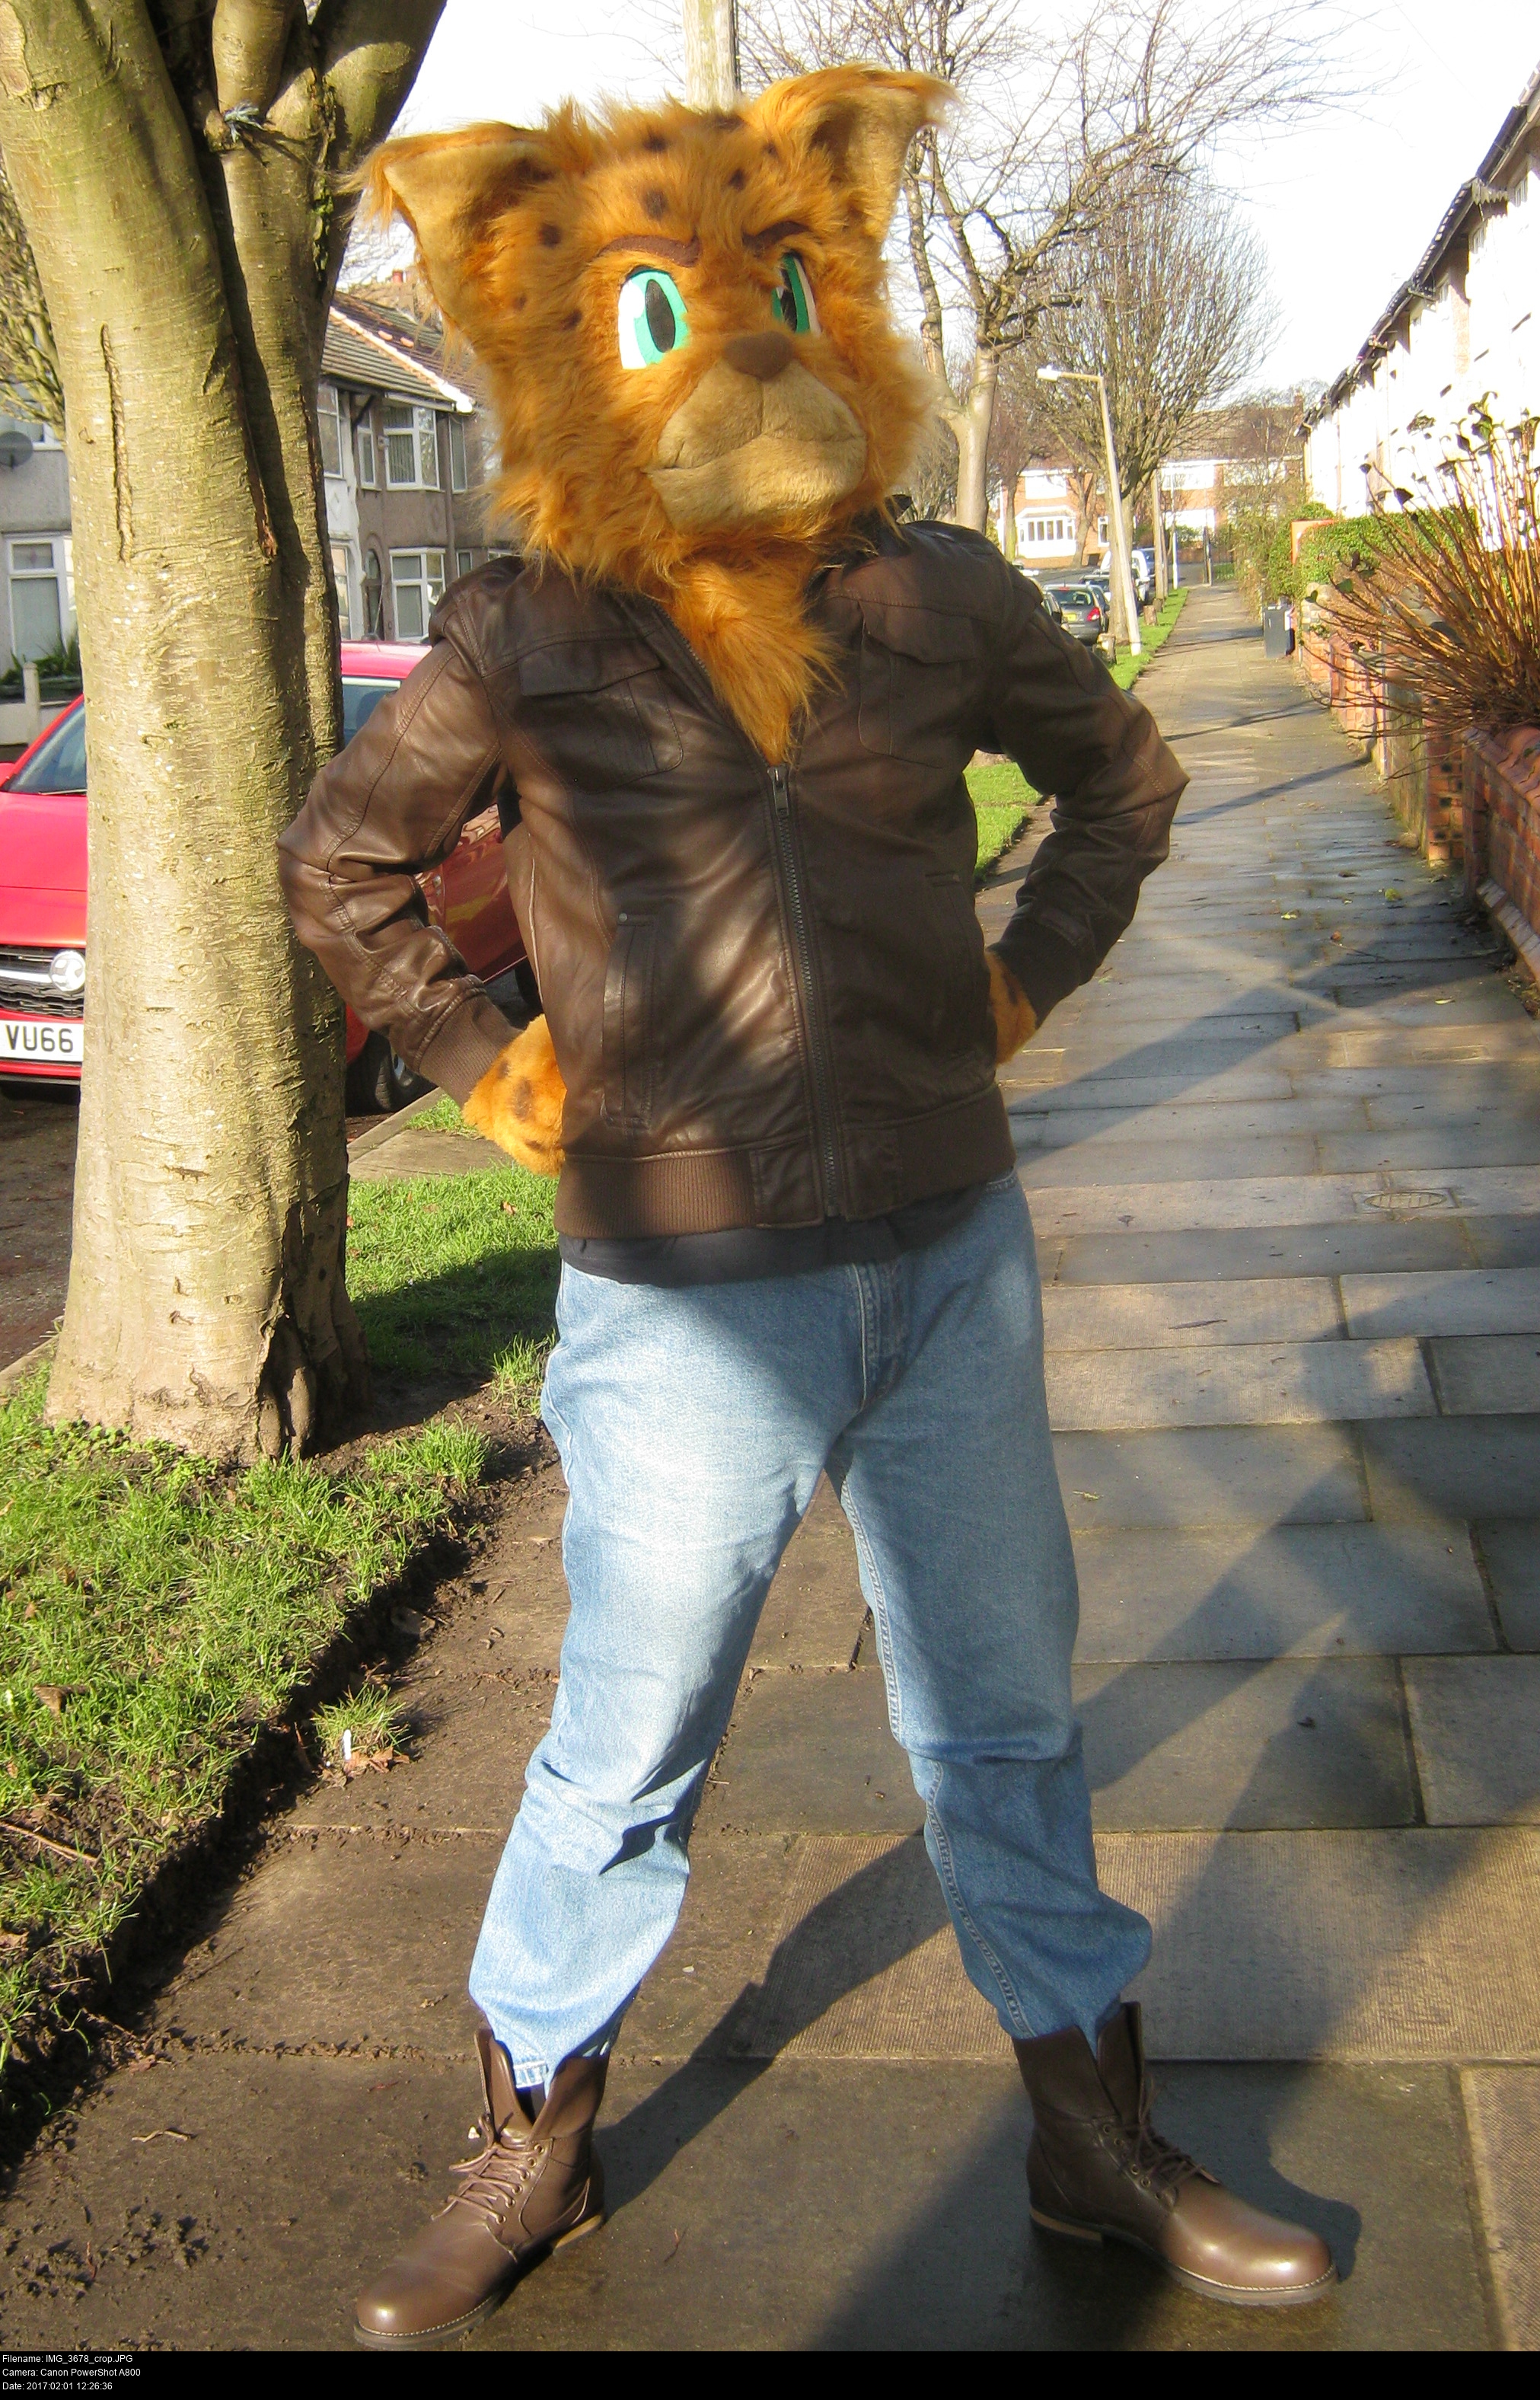
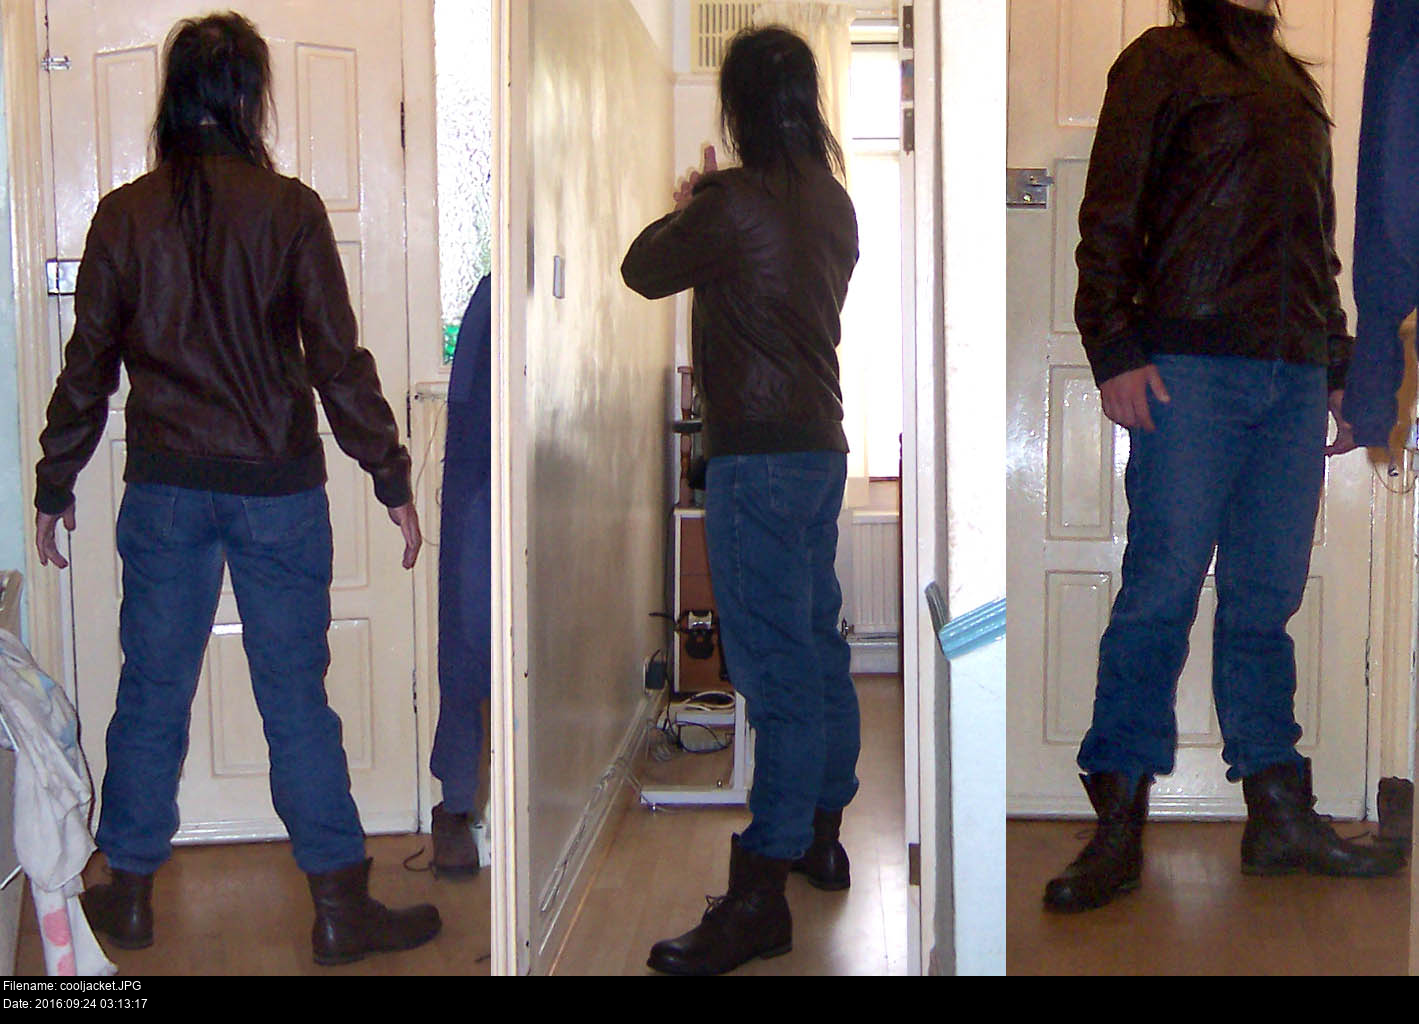
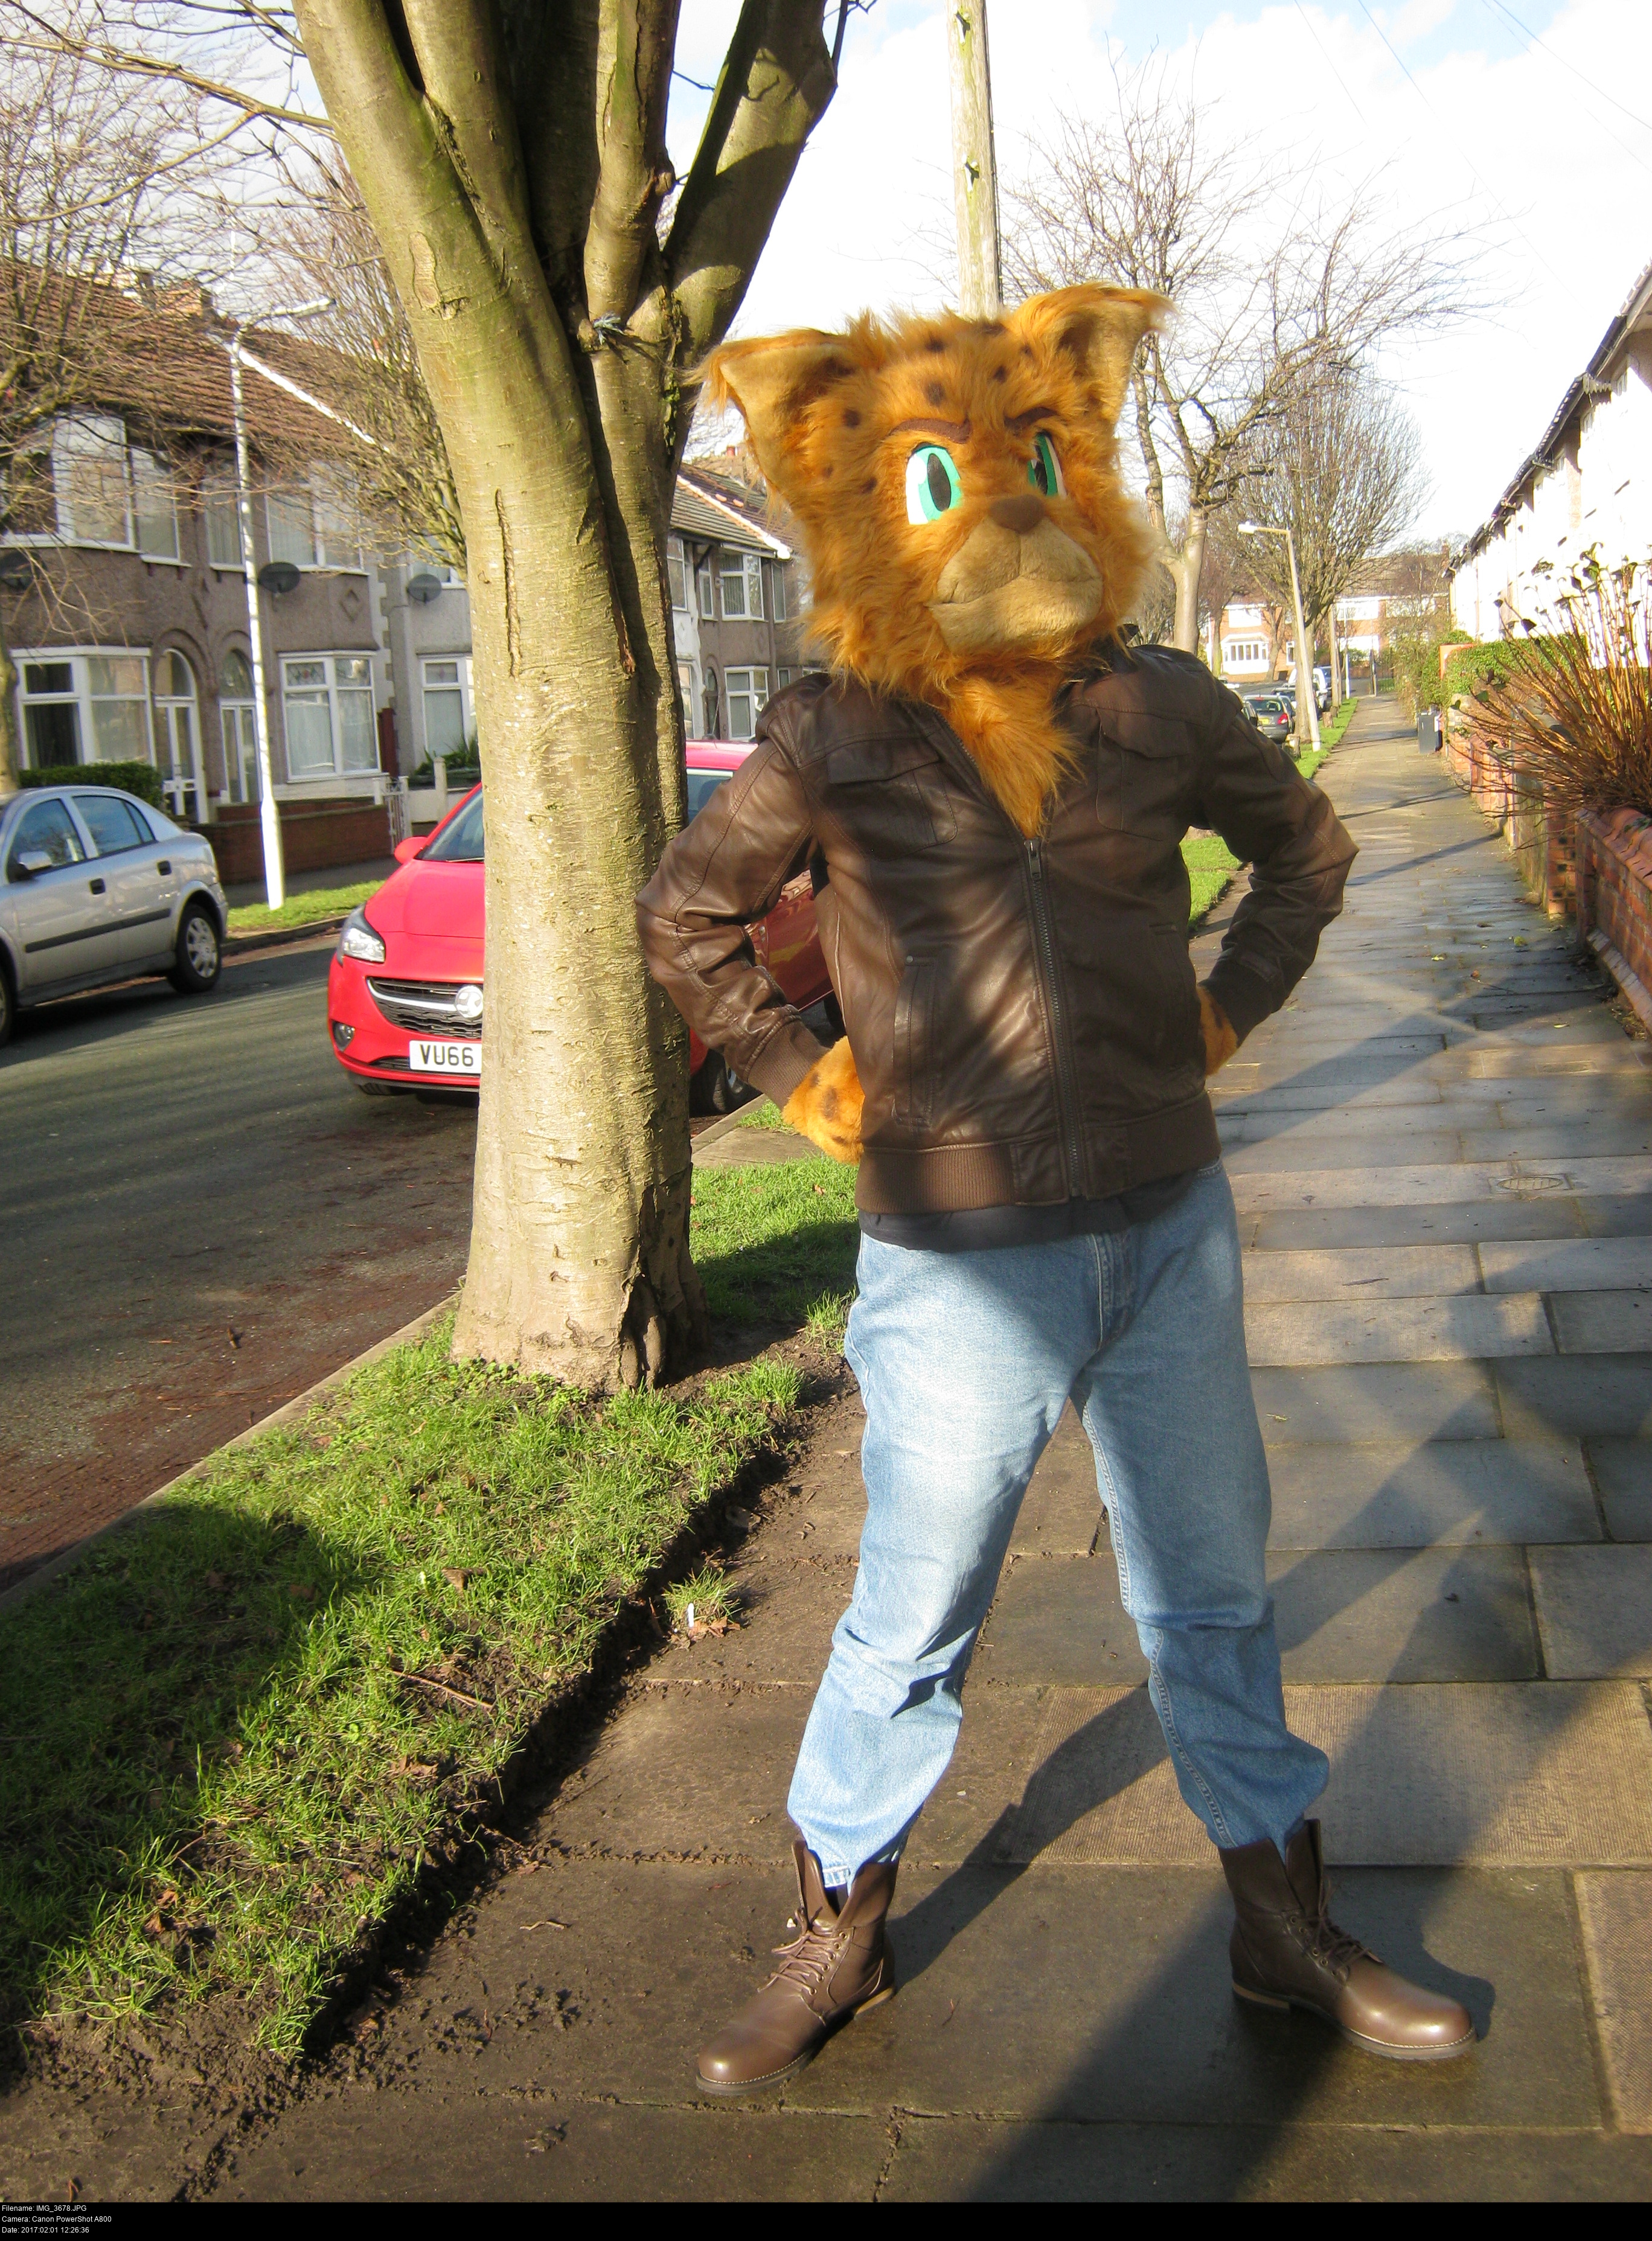
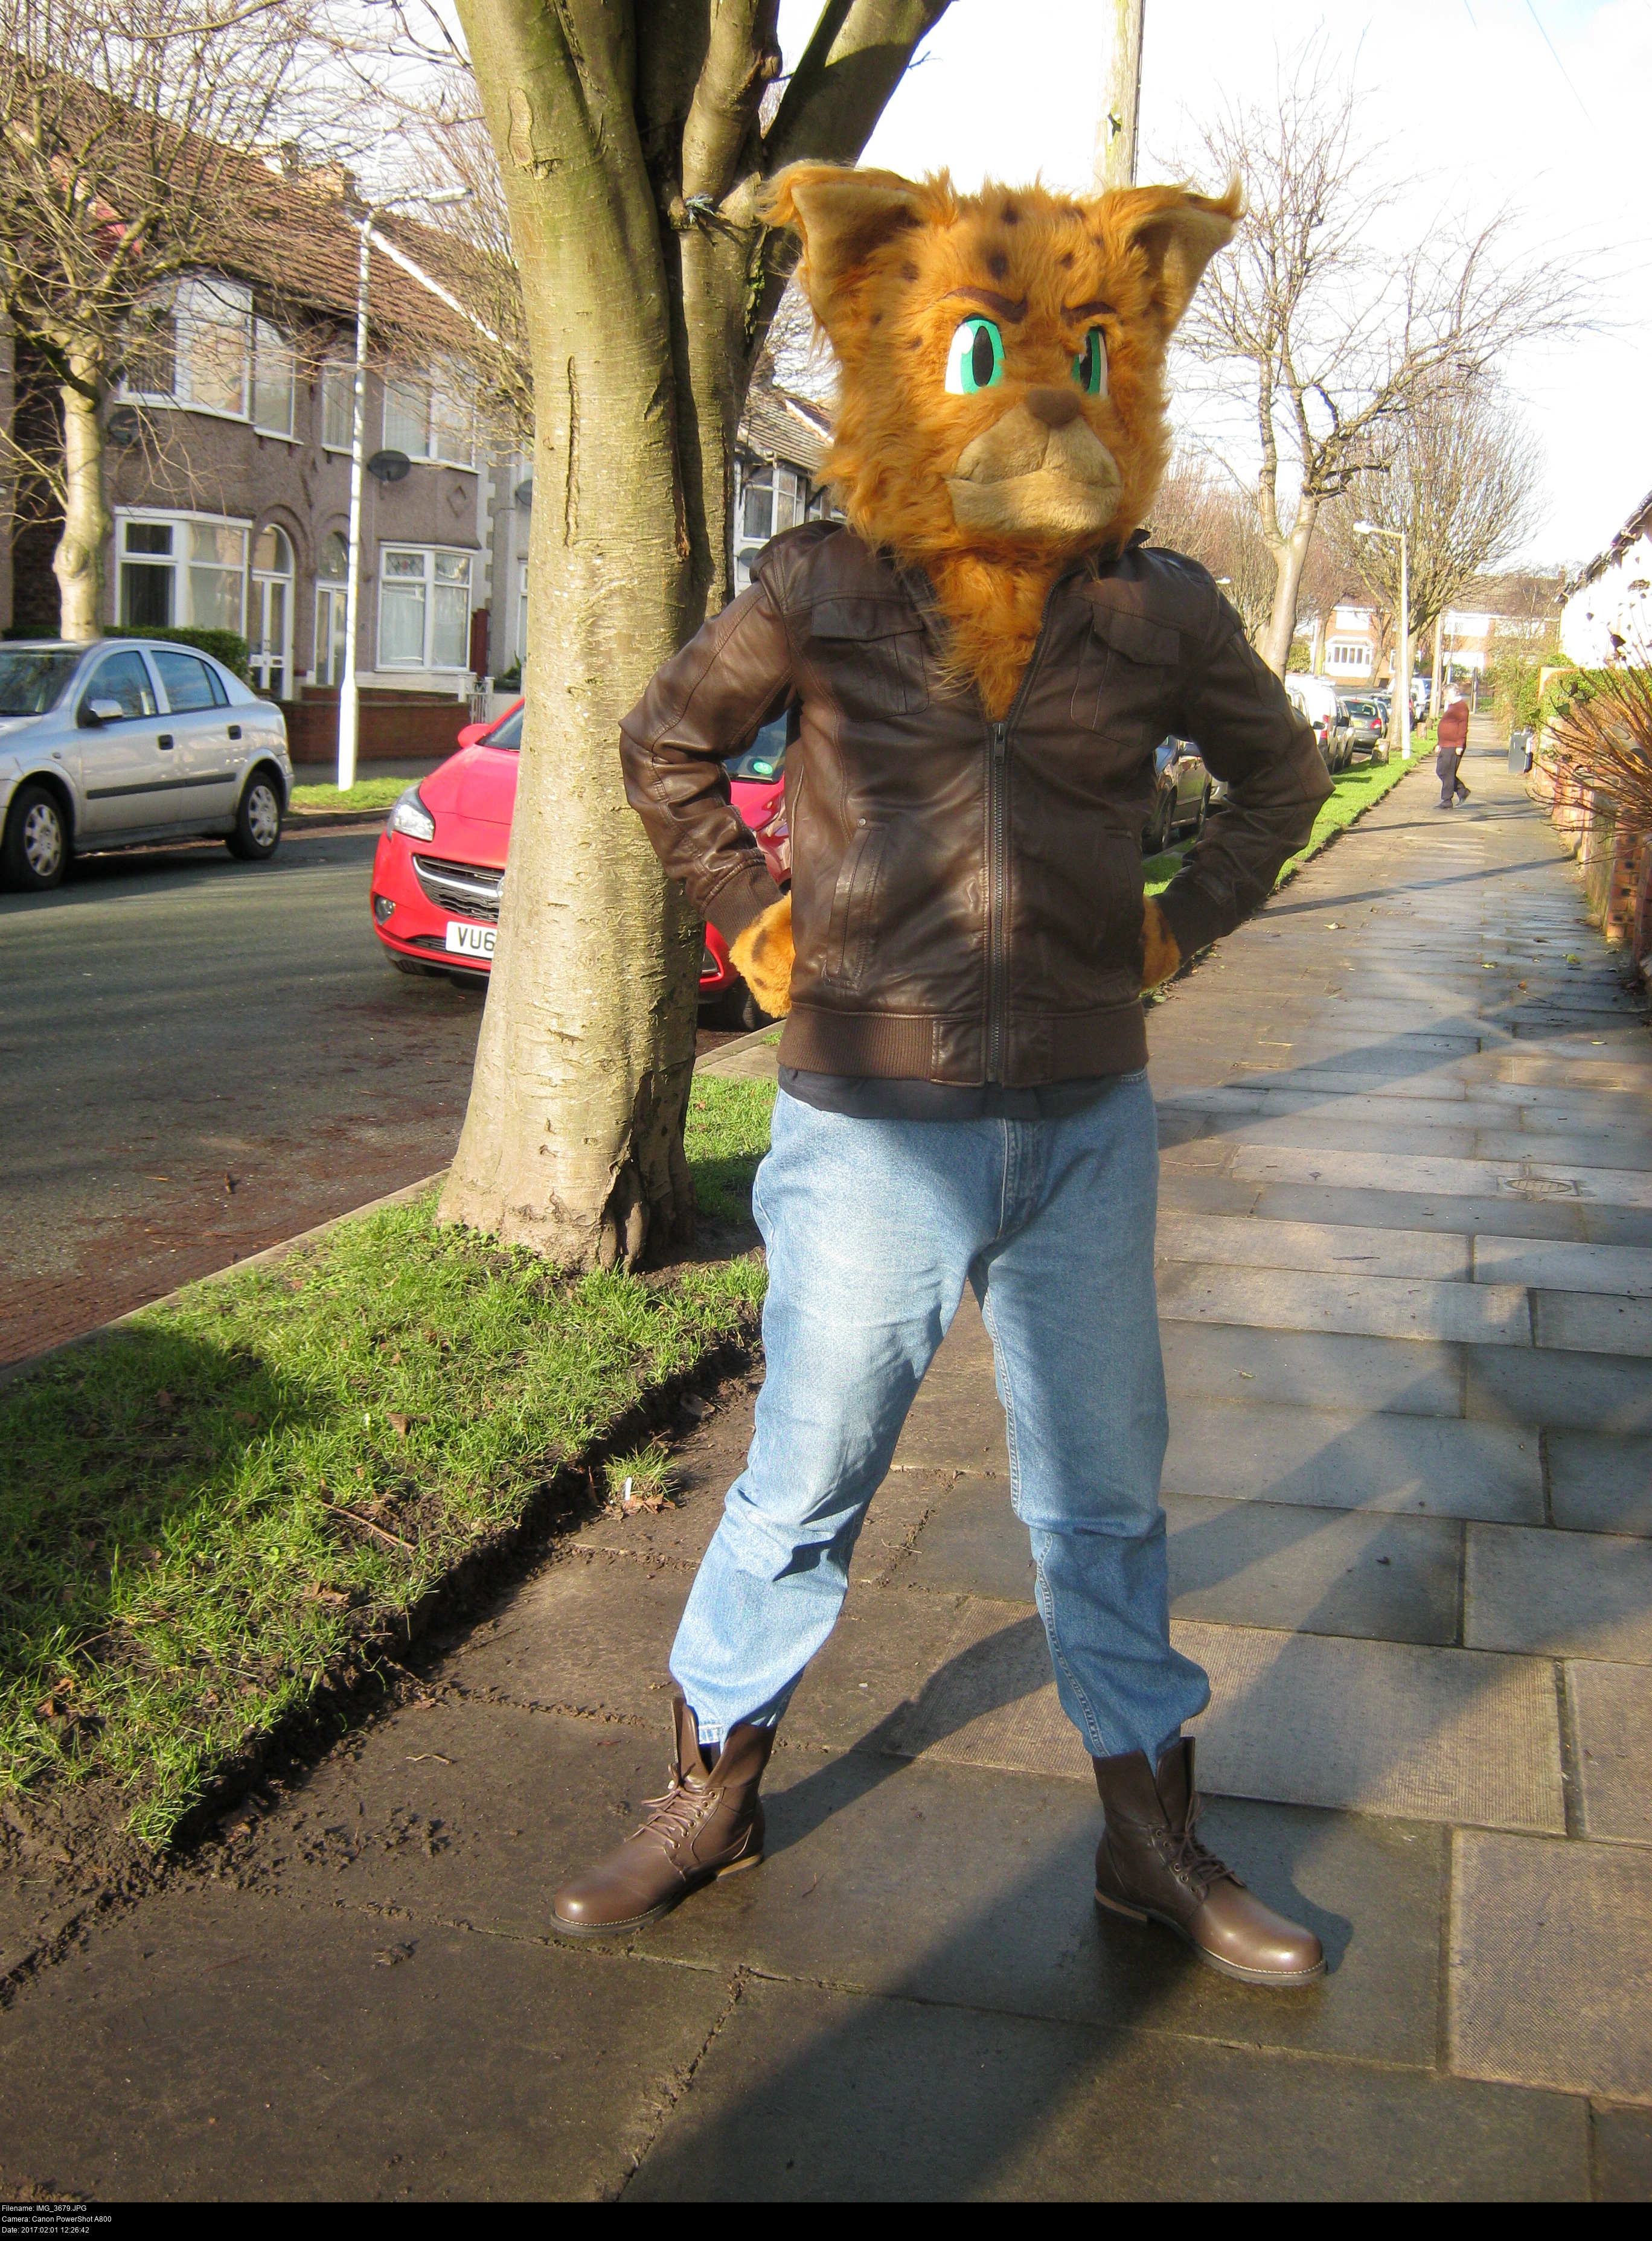
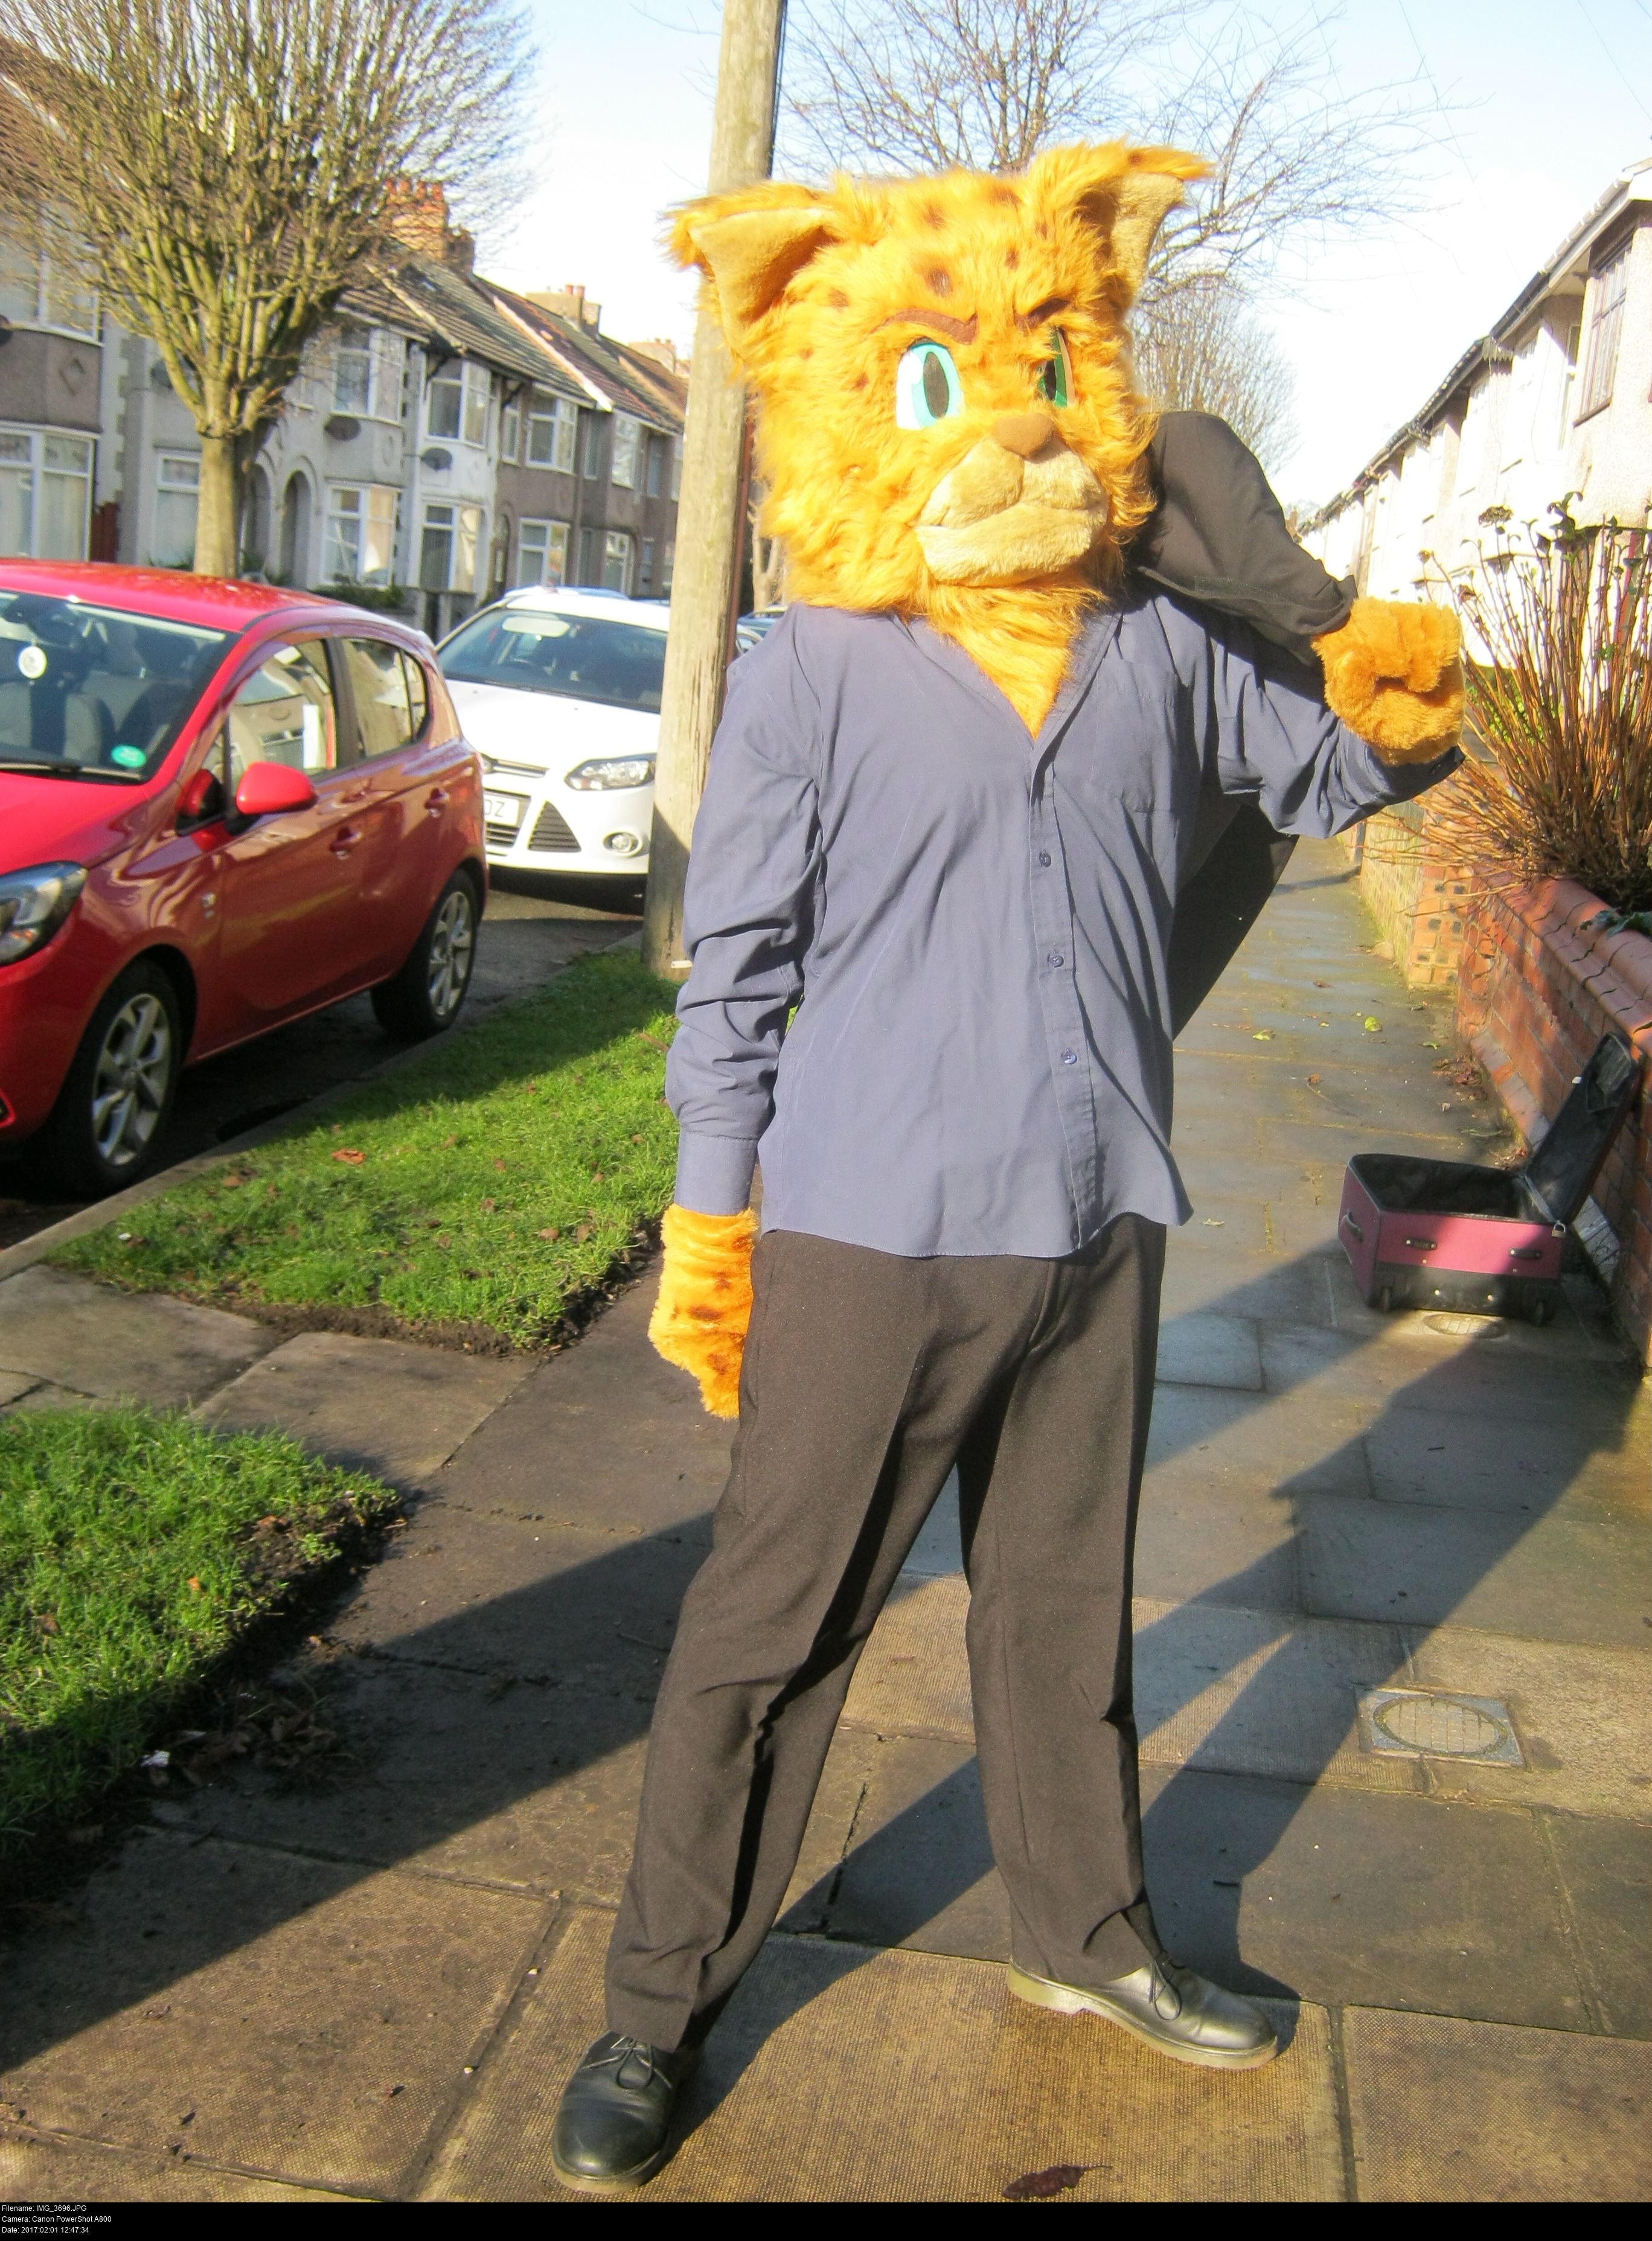
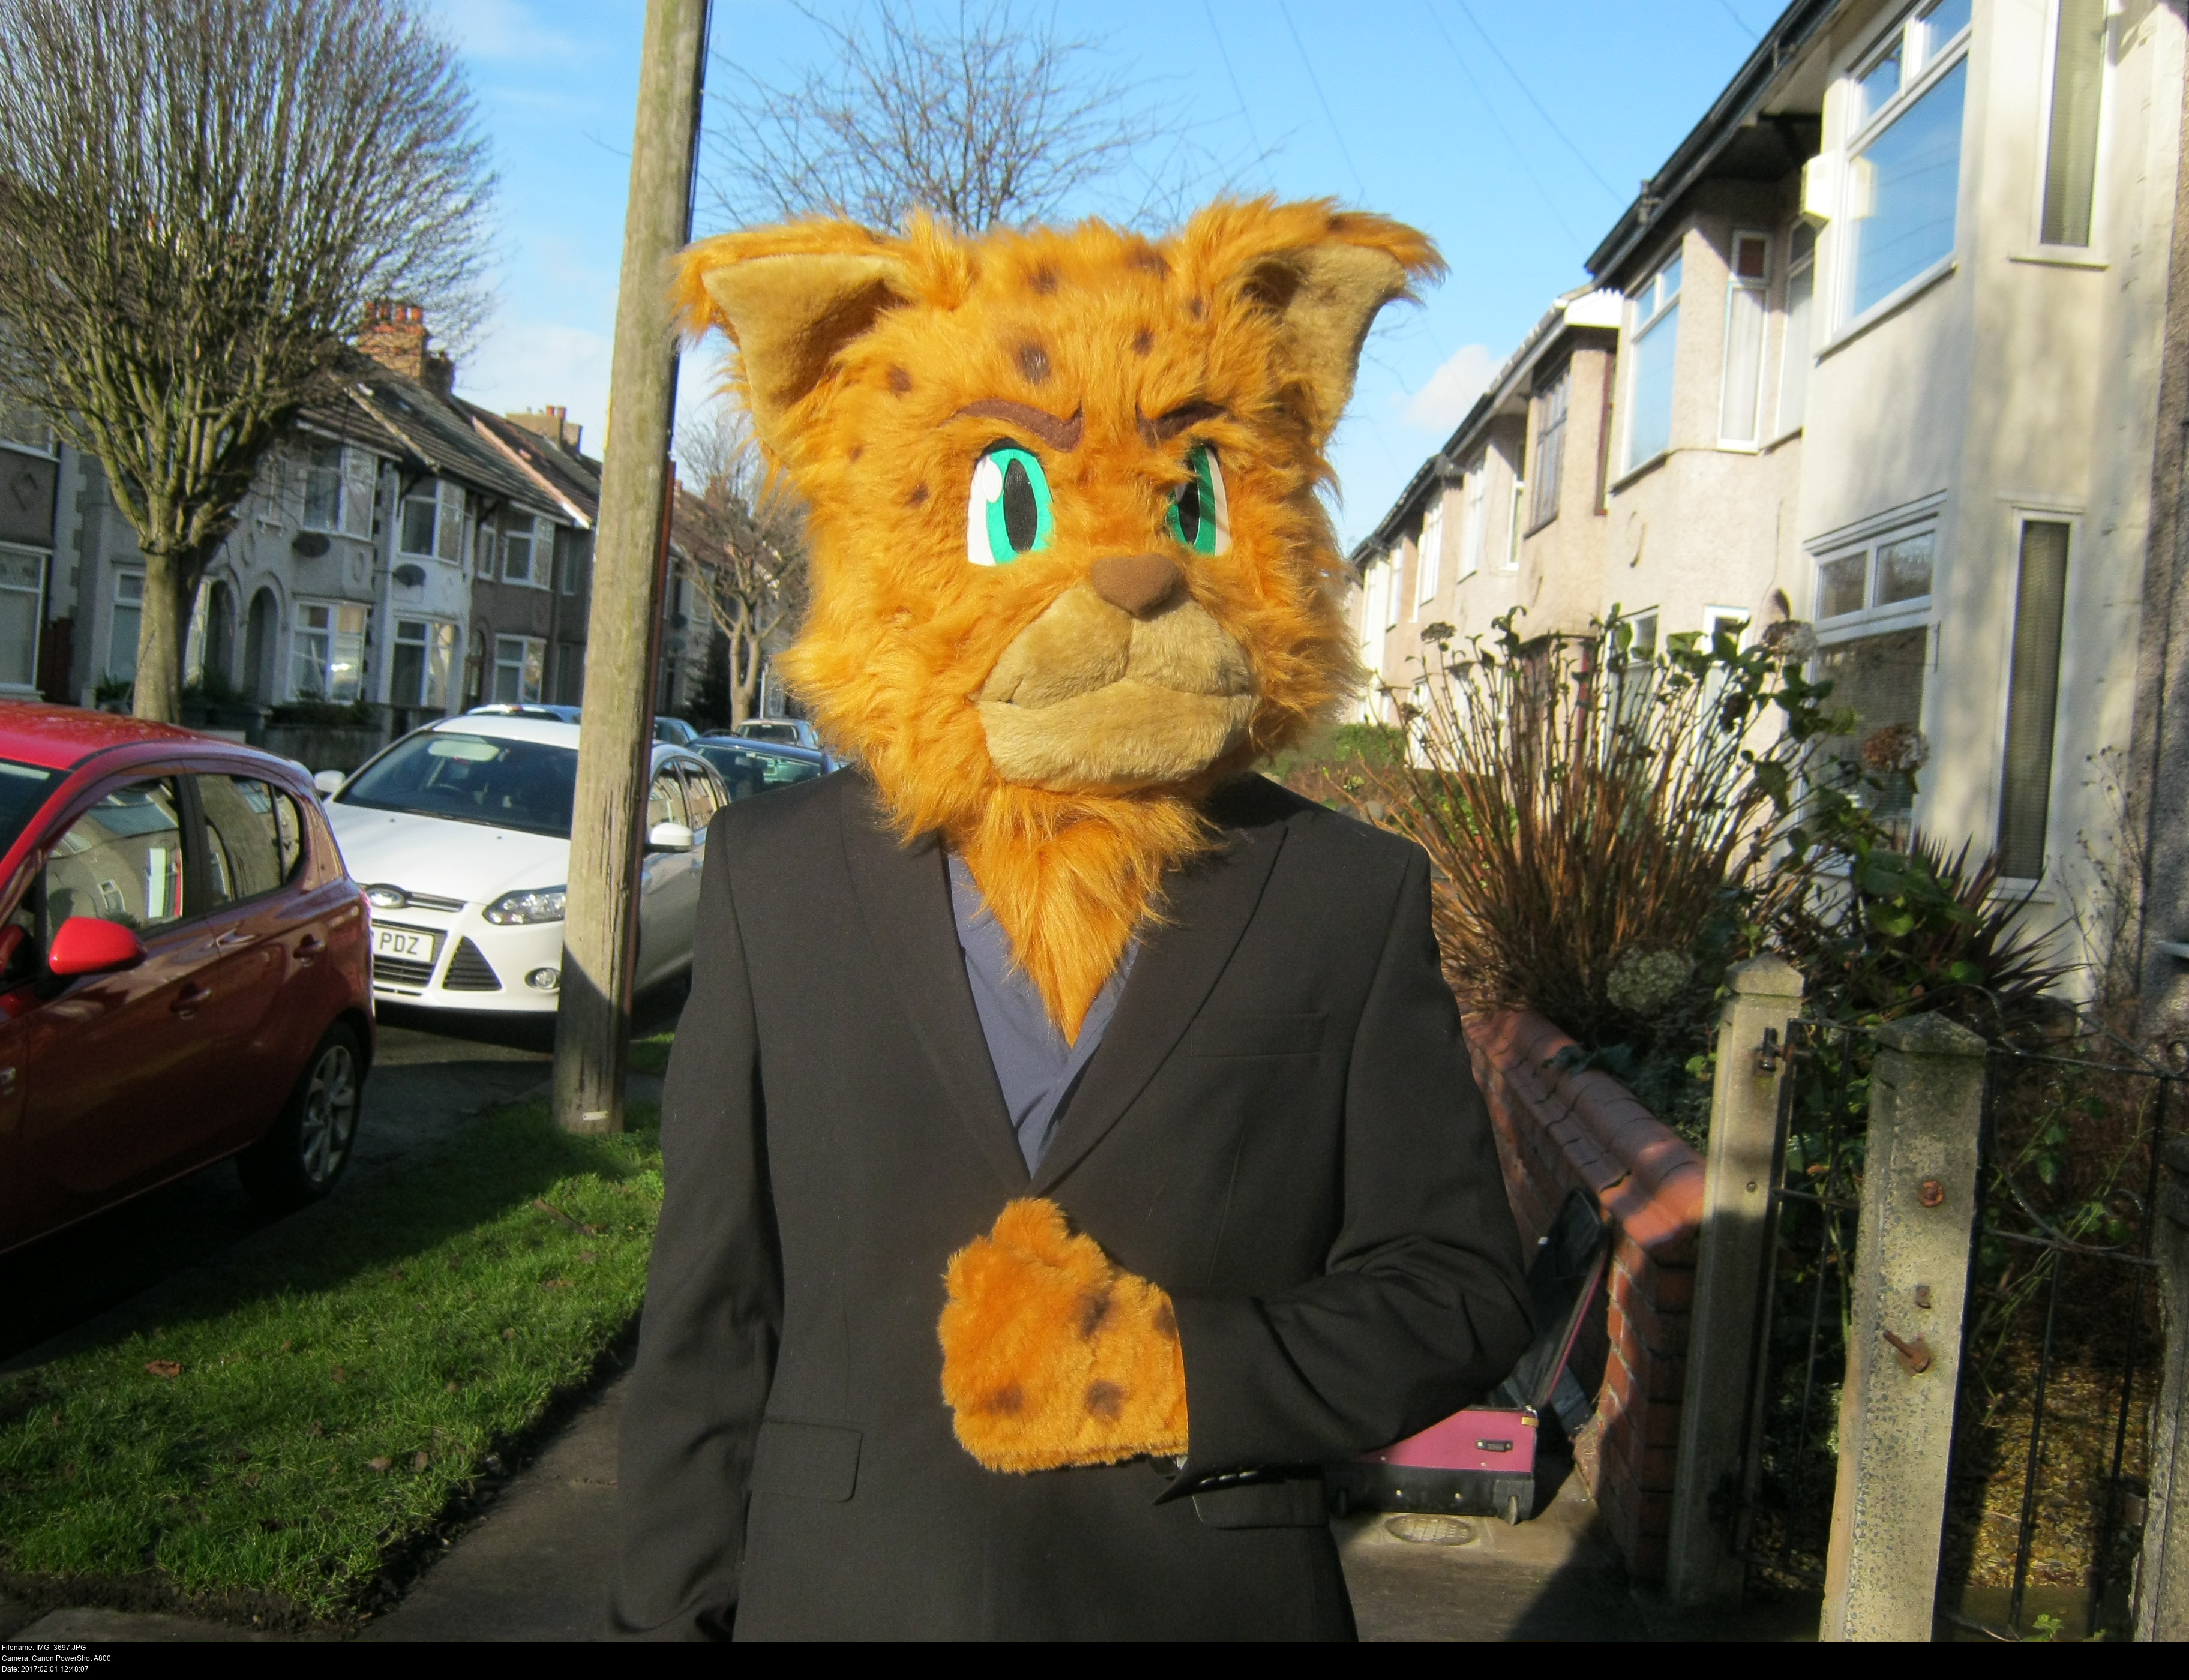
Or I can find -this wonderful jacket- in a charity shop for £8. It fits, it looks awesome.
It's an F&F pleather jacket (yes, that means it's from TESCO!) and I've never seen one like it anywhere else. Primark briefly sold a similar style in early 2017 but they've long since disappeared from the racks. It's got a ribbed collar, waist and cuffs. It looks almost exactly like Hotshot's jacket in every possible way.
The only time you see Hotshot's feet is in a brief scene where he runs to the ship and you see him as a tiny mass of pixels from above. I'm going to assume he's dressed like a pilot, 'cause he's a pilot. :)
So, hypothetically, if I were to cosplay as this overlynx, I'd just need to find myself a pair of tall, brown combat boots that look nice with the jacket.
I'm terrible at finding shoes. I'm a size 10 fit with incredibly wide feet. My feet are basically diamond shaped. Whenever I go out shopping for shoes I always come back disappointed. I'm furiously jealous of anybody who can walk into a shop and just pick a pair of shoes that they like because 'they look nice' rather than because they're the only ones in the entire shop that fit their feet.
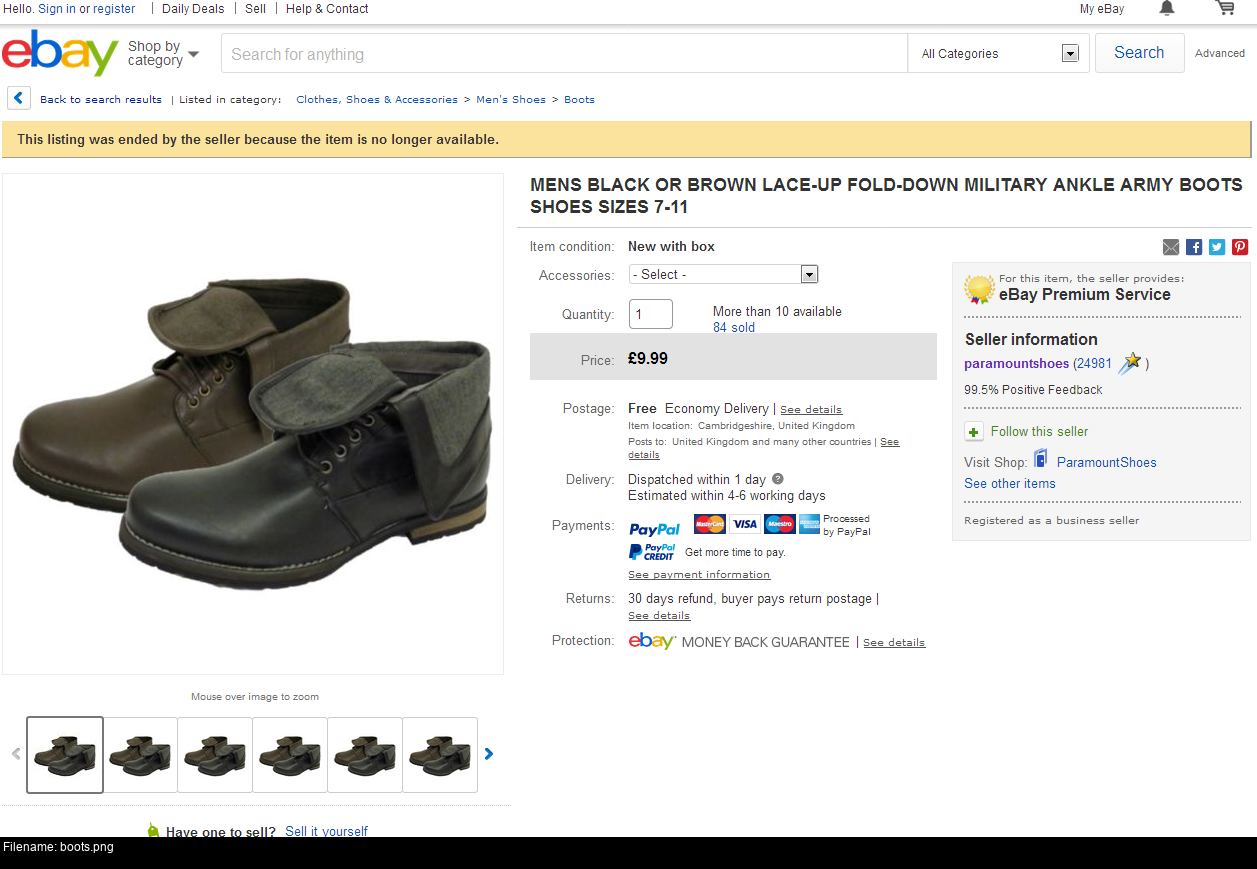
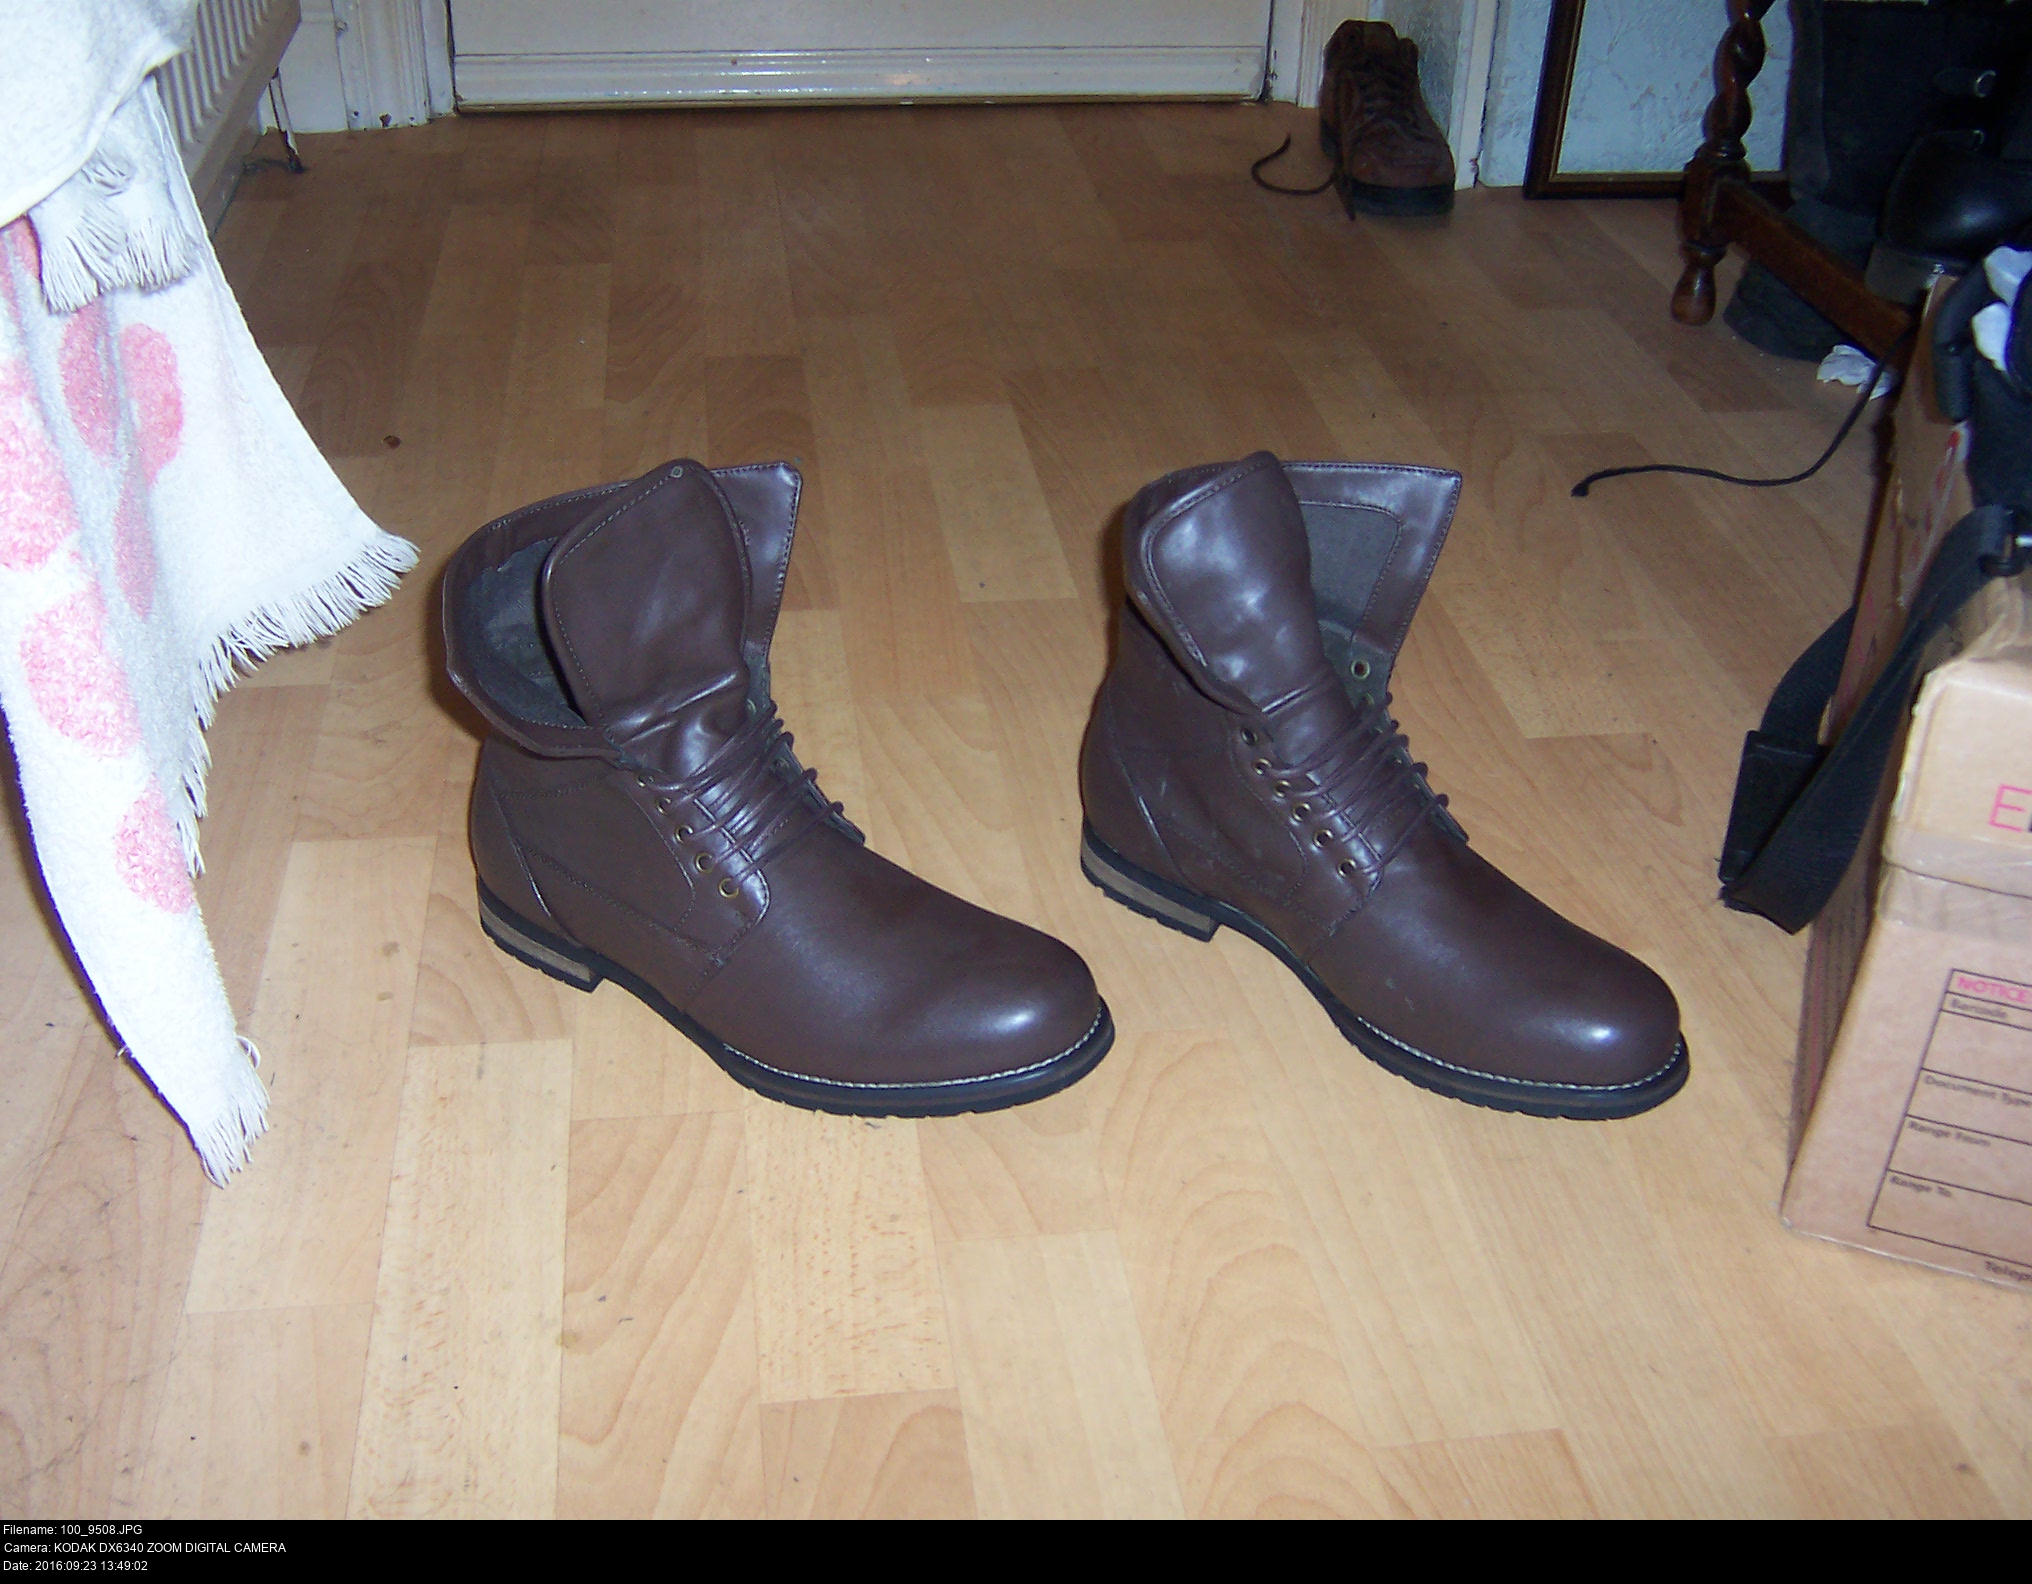
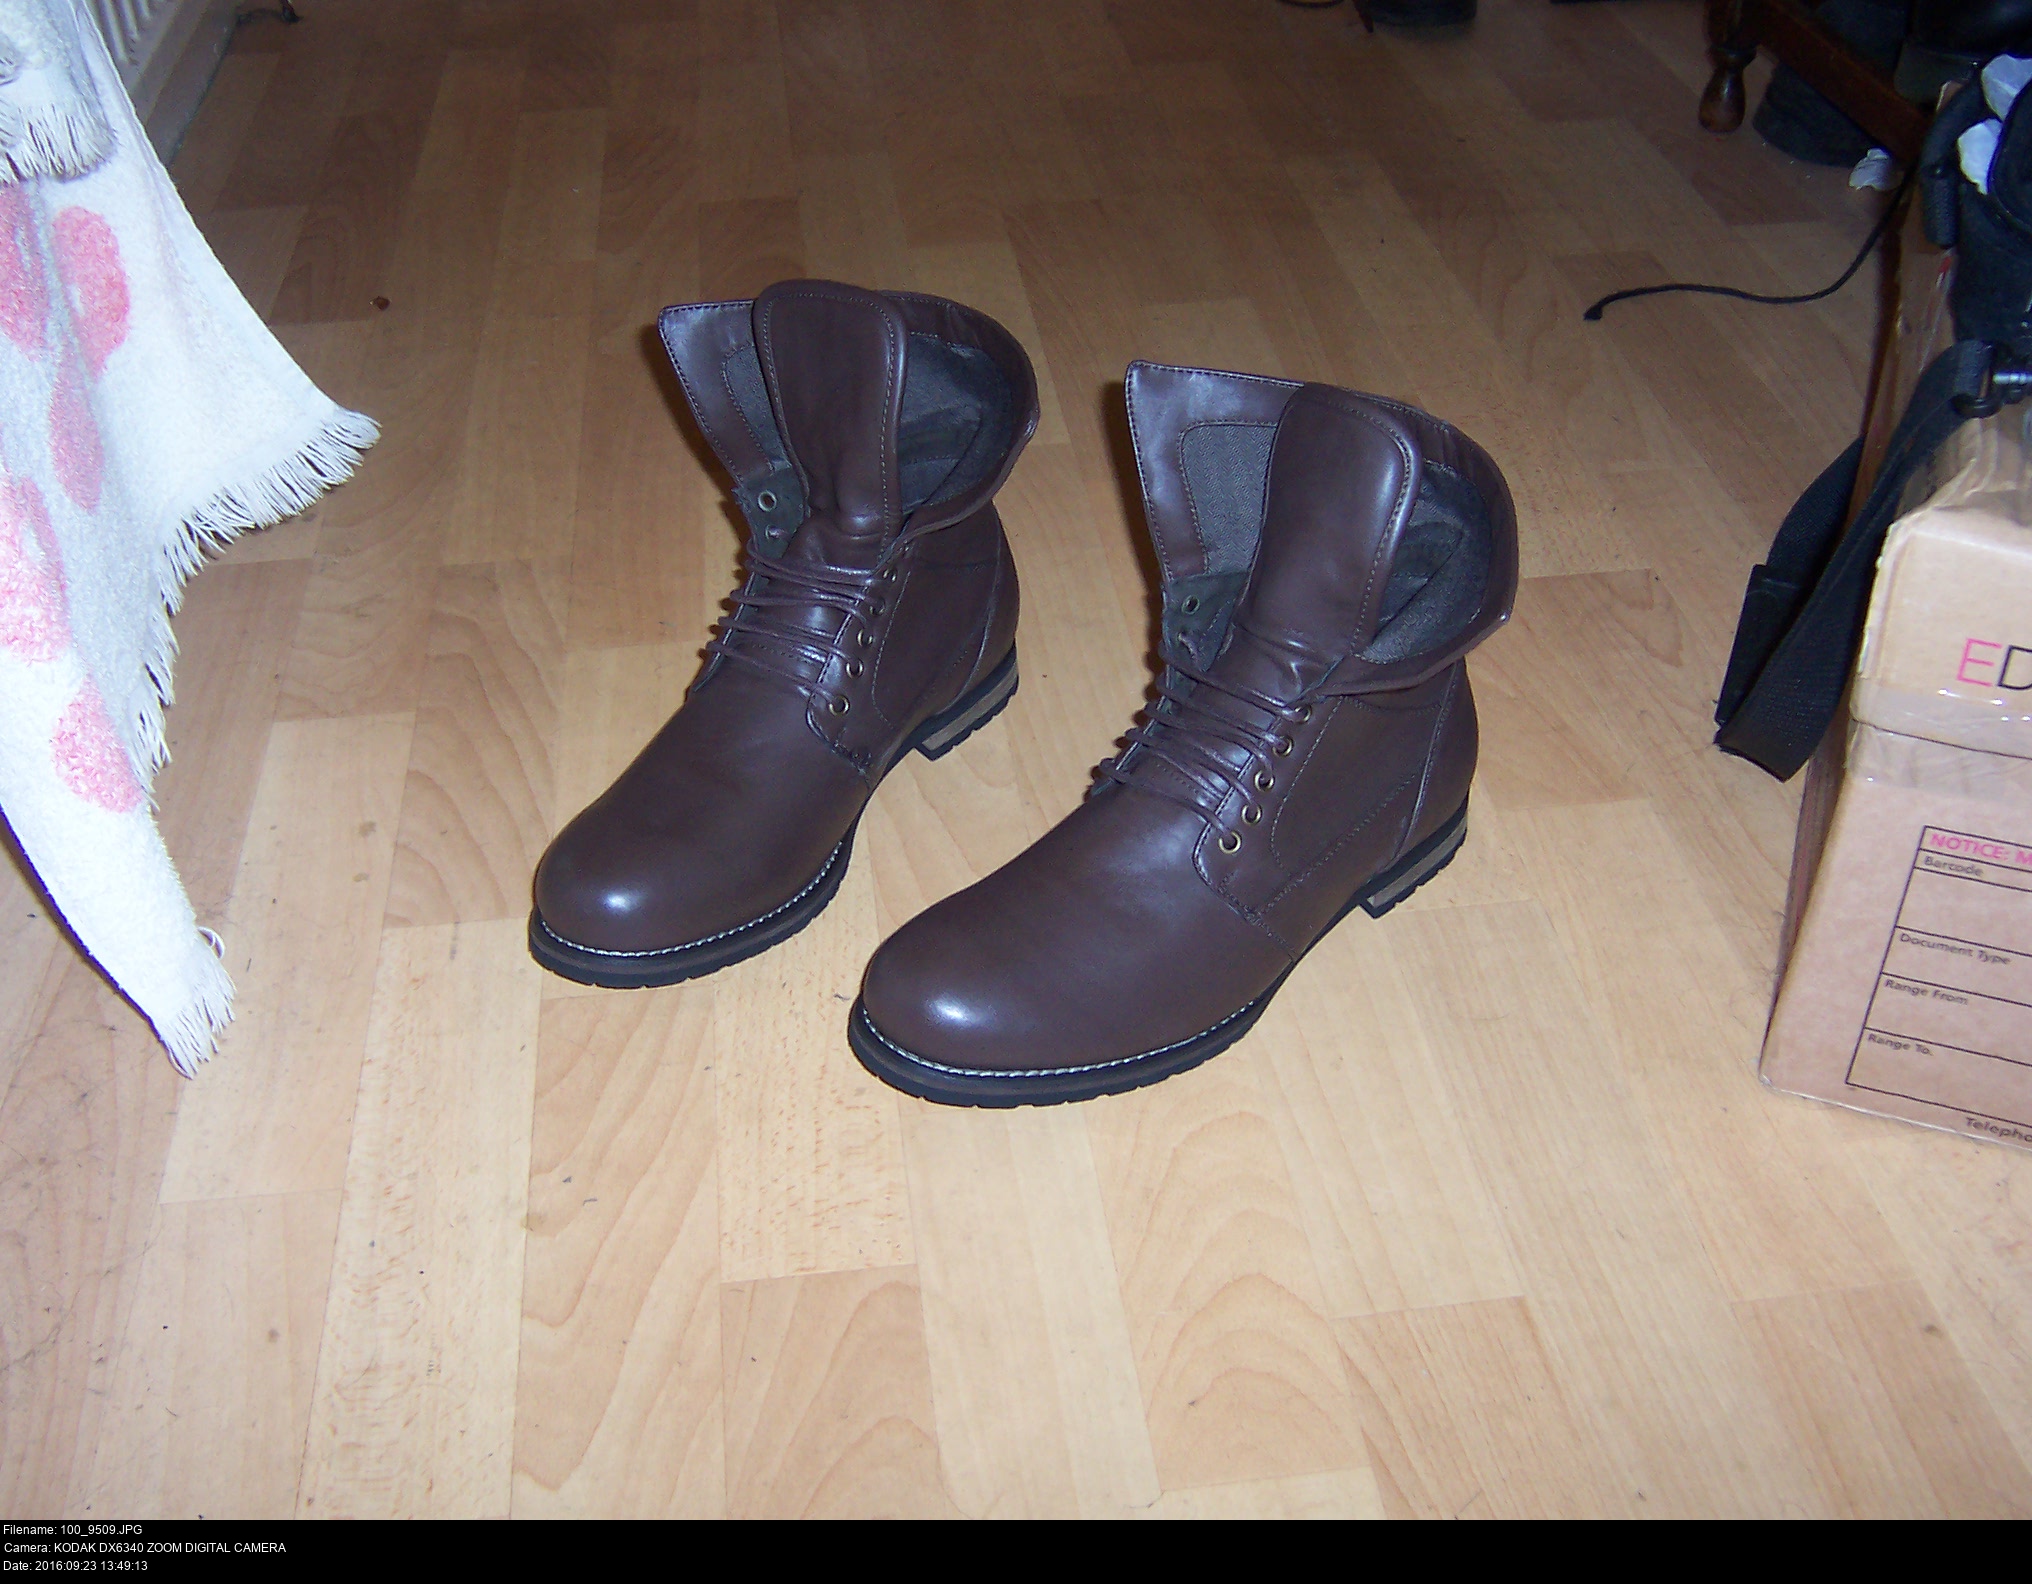
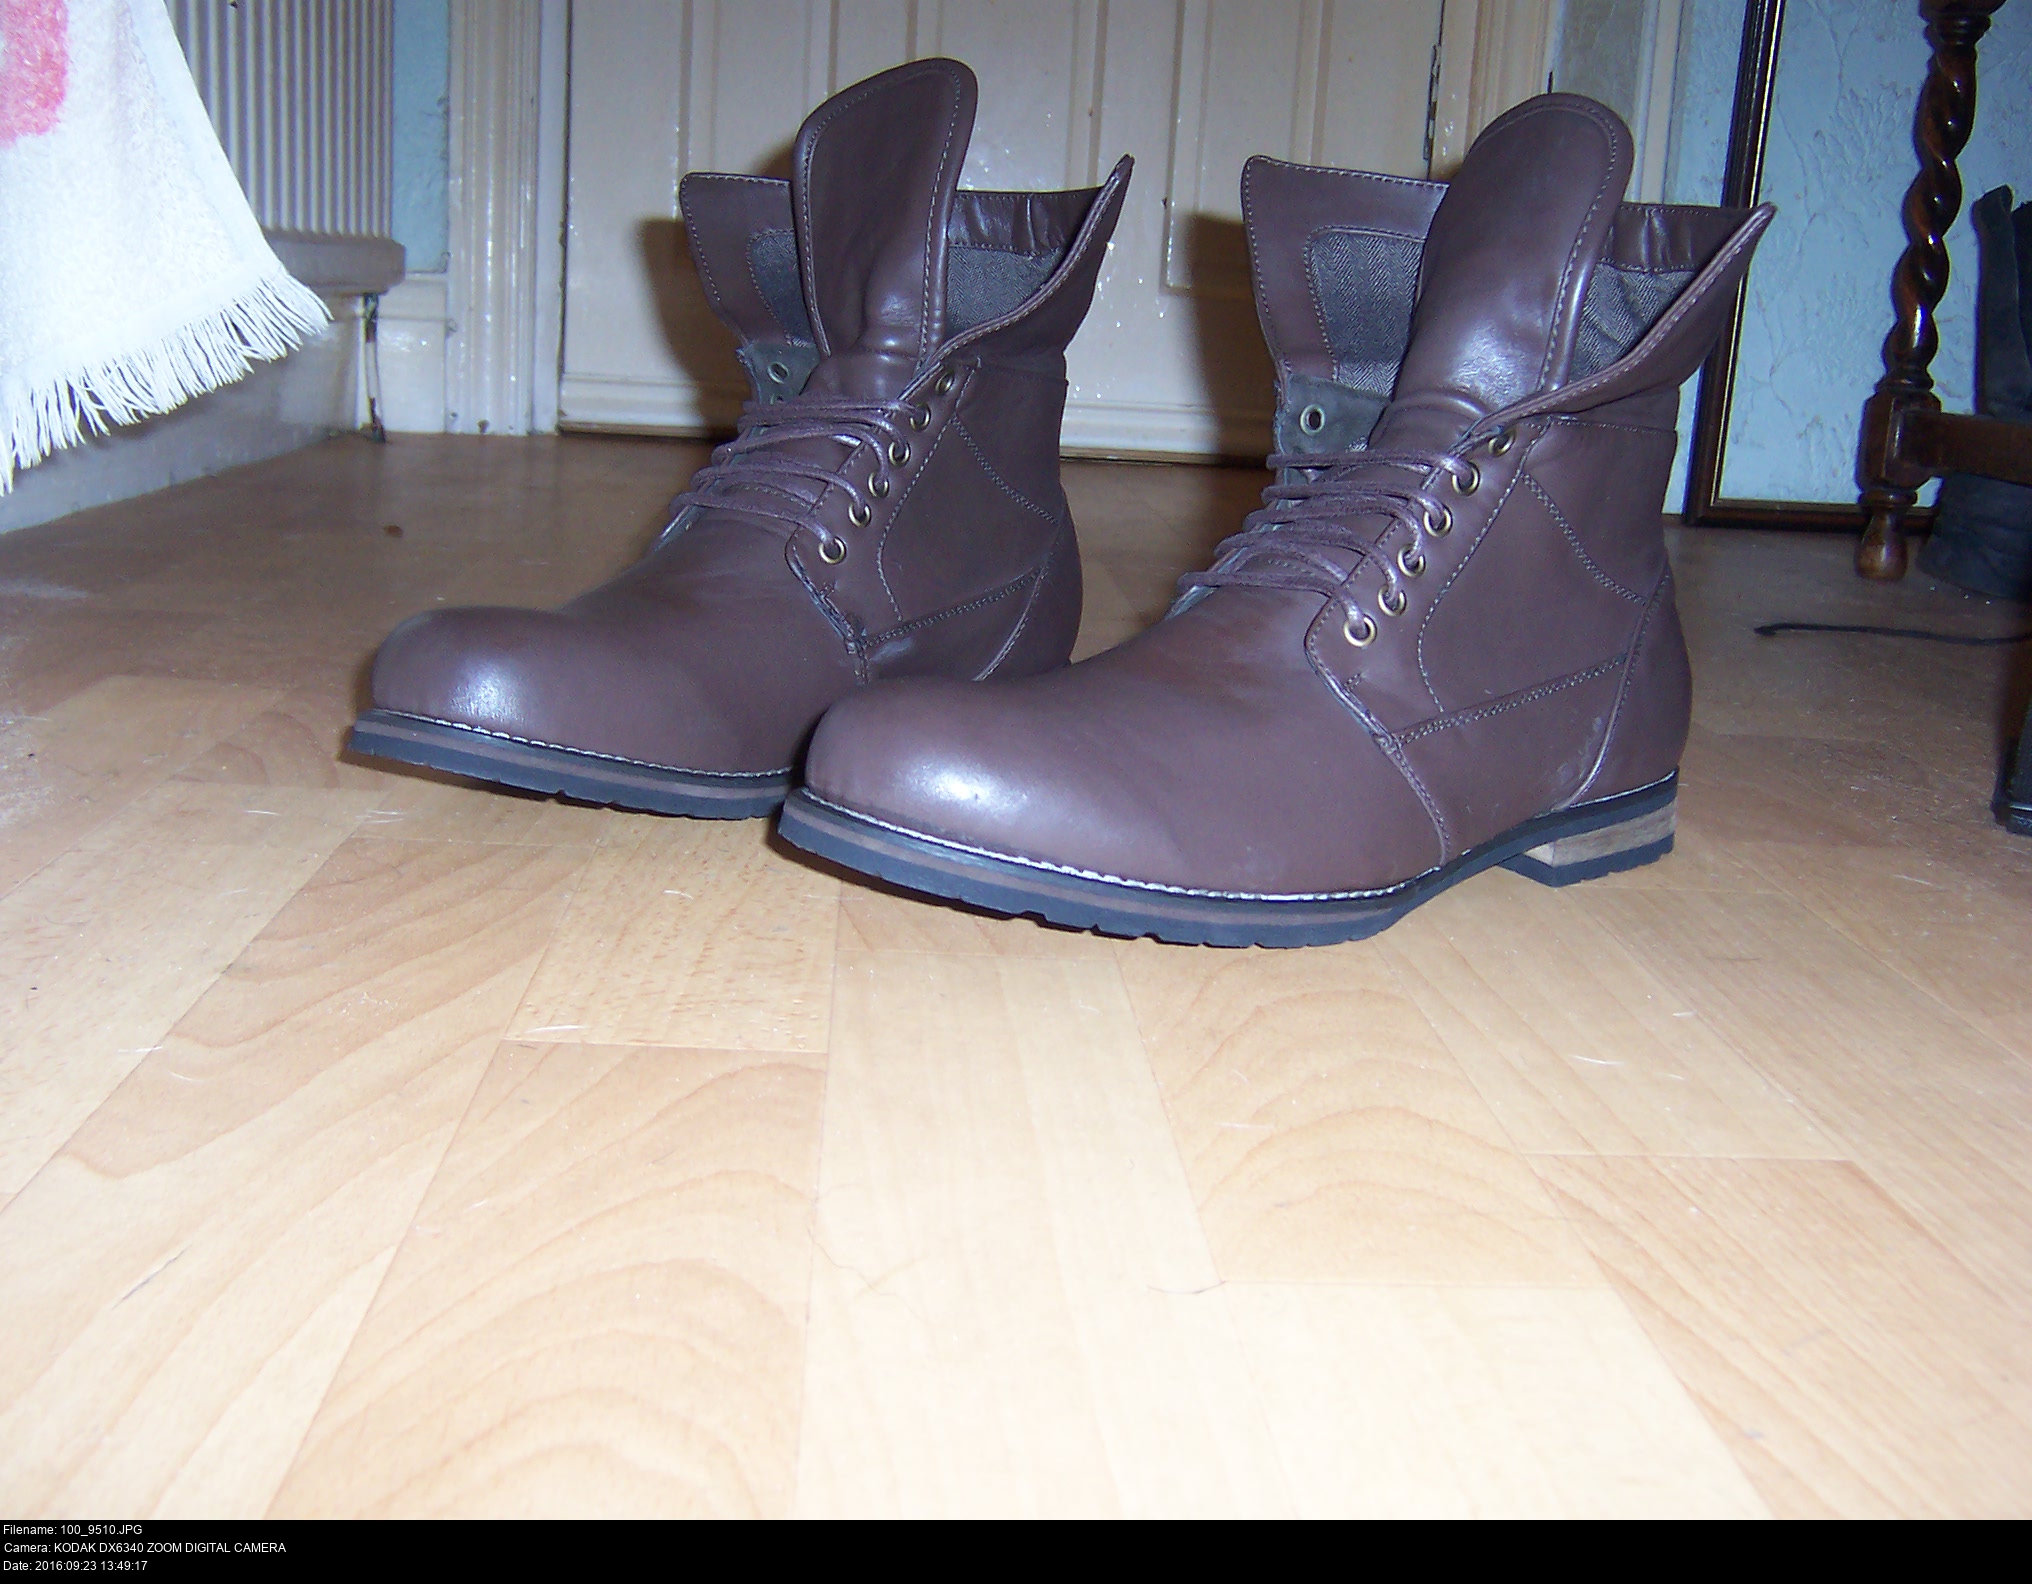
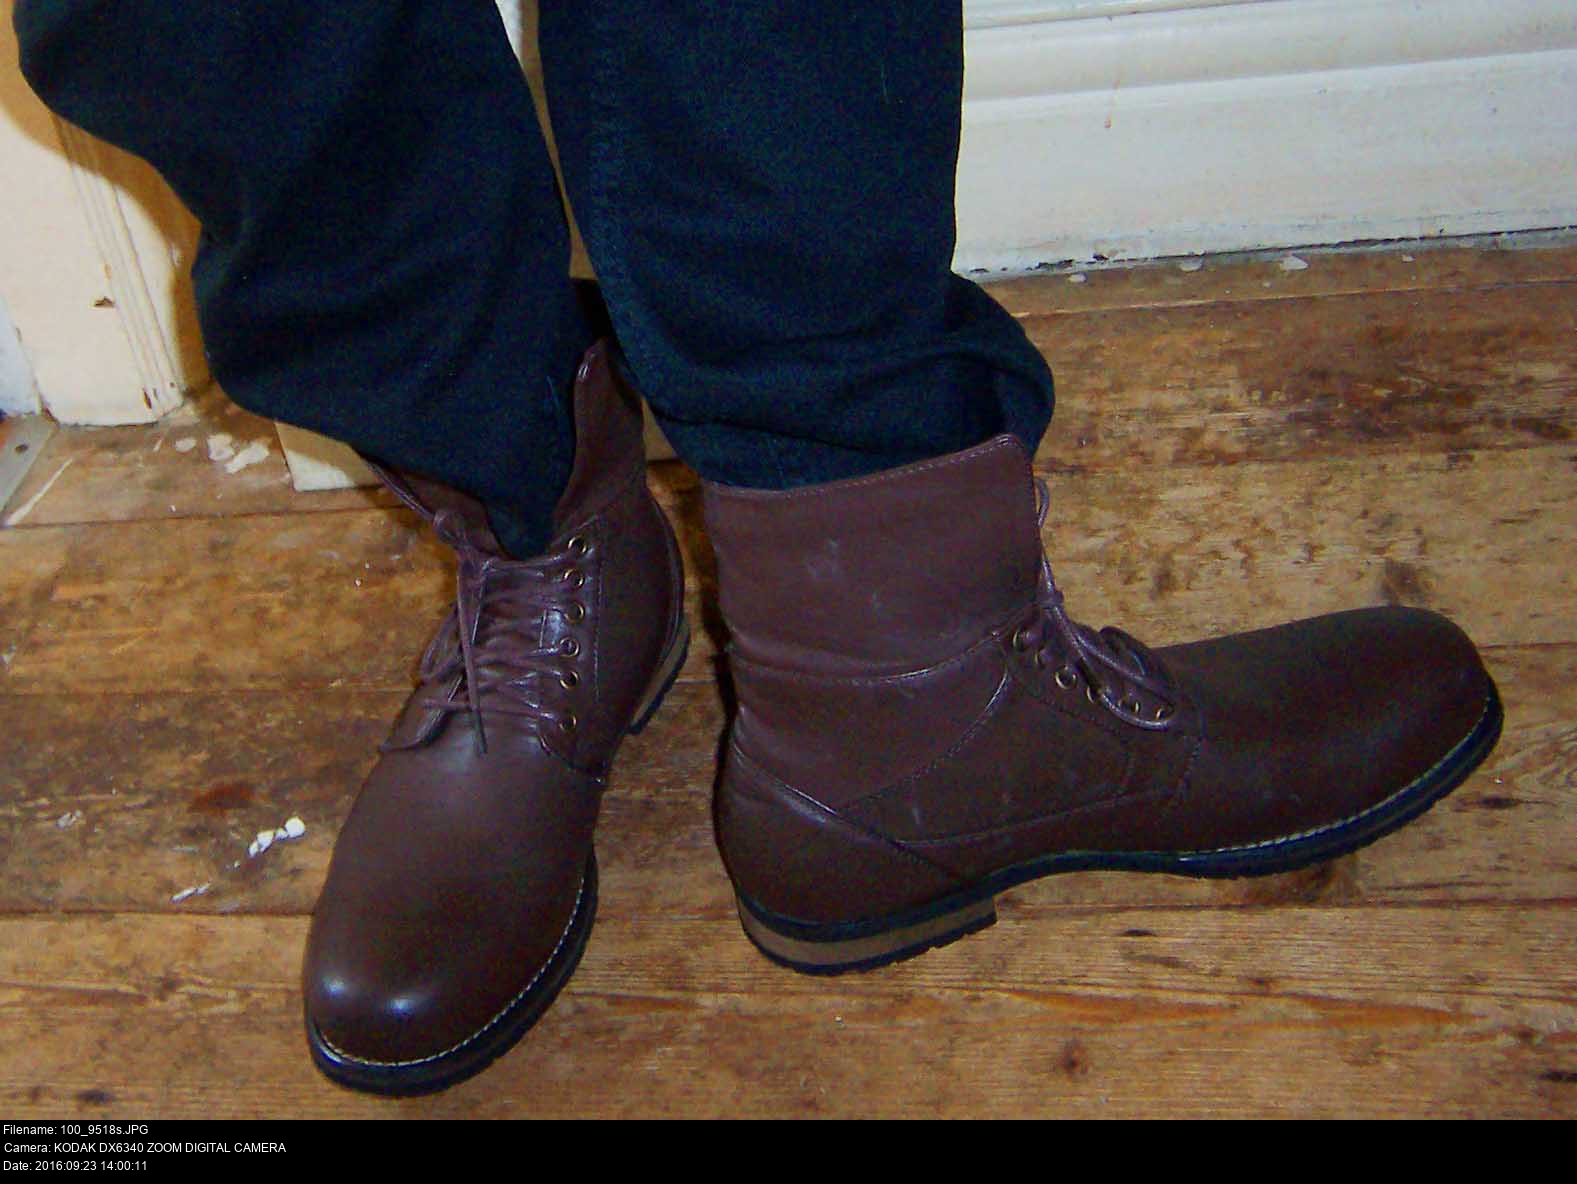
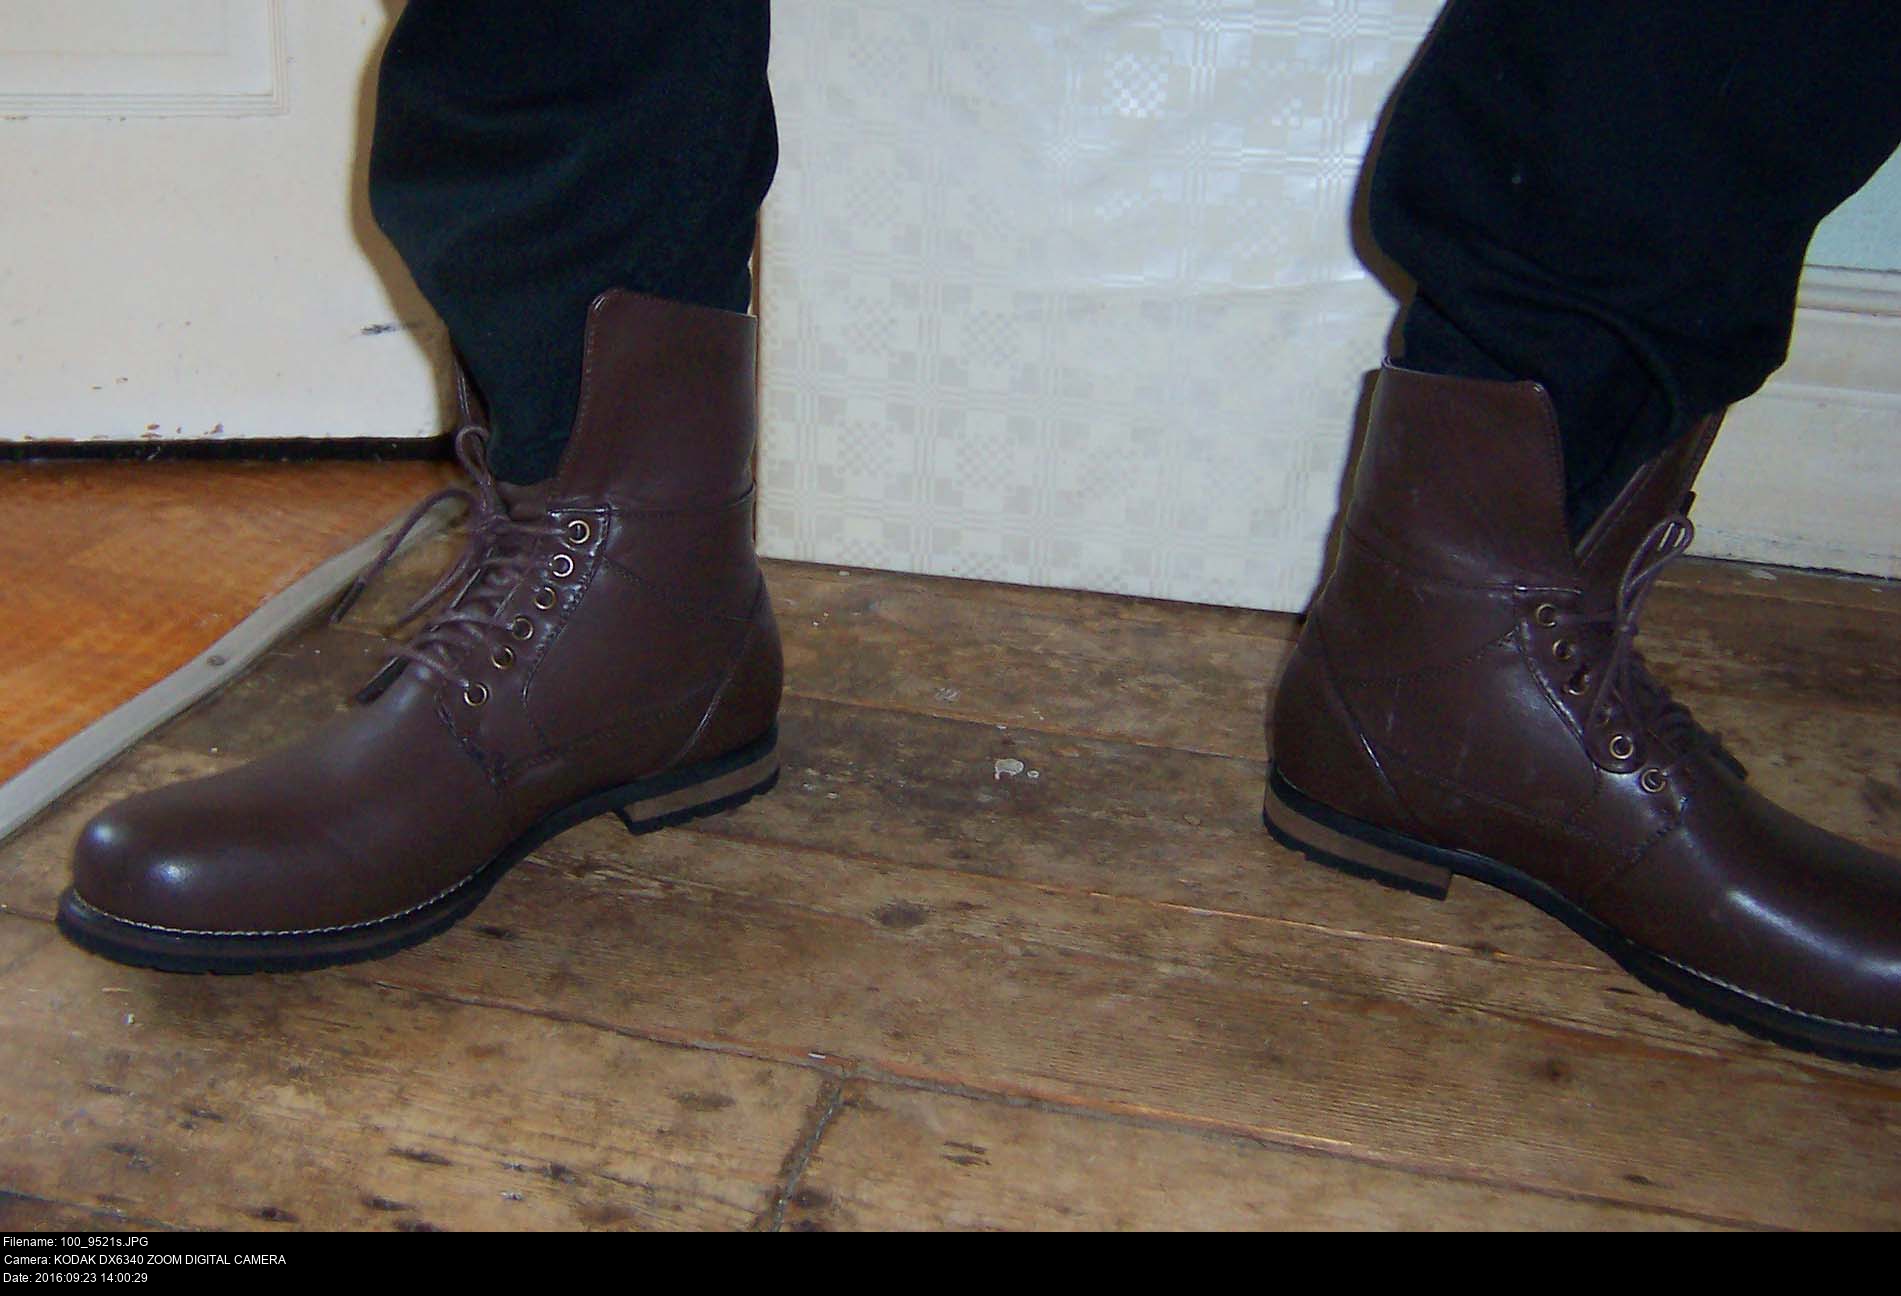

So can anyone explain to me how a random pair of boots bought from the internet as a throw of the dice manages to fit my feet perfectly, without me even having tried them on once or knowing what manufacturer made them? (It was New Look old stock, incidentally.)
The true answer to the question 'Why did you cosplay as an furry lynx from an obscure shareware PC game demo from 1996?' is:
I adore cats and lynxes are the best, even though Hotshot doesn't look very lynxy.
I've been meaning to make a fursuit for absolutely years. I attended a furry meet up in January 2016 due to weird circumstances and met a super friendly guy who became my inspiration.
I adore game demos. No smoke and mirrors: here's a little bit of what you could get if you spend money. But if you don't like it, you still get to keep this bit forever and show your friends at school weeks, months or years from now.
I adore games with distinct graphical styles written by small groups of people that develop a mystique in my mind due to them not being surrounded by horrific marketing arse-ness.
Nobody's really heard of Interpose but me, so I'll definitely be the first one to play him! And I bet the developers would love to see their character come to life!
The title music's stuck in my head.
But mostly:
(Now that I'm writing this almost a year later, I'm kicking myself that I didn't buy three pairs of both black and brown from that eBay seller just in case. I should send them an e-mail to ask if they have any more. Though the boots are pleather too so they heat up quite a lot when you wear them for a long time.)
That's most of the work done. I'm already a generic pilot!
To become Hotshot, I must undertake The Three Trials. I need to make:
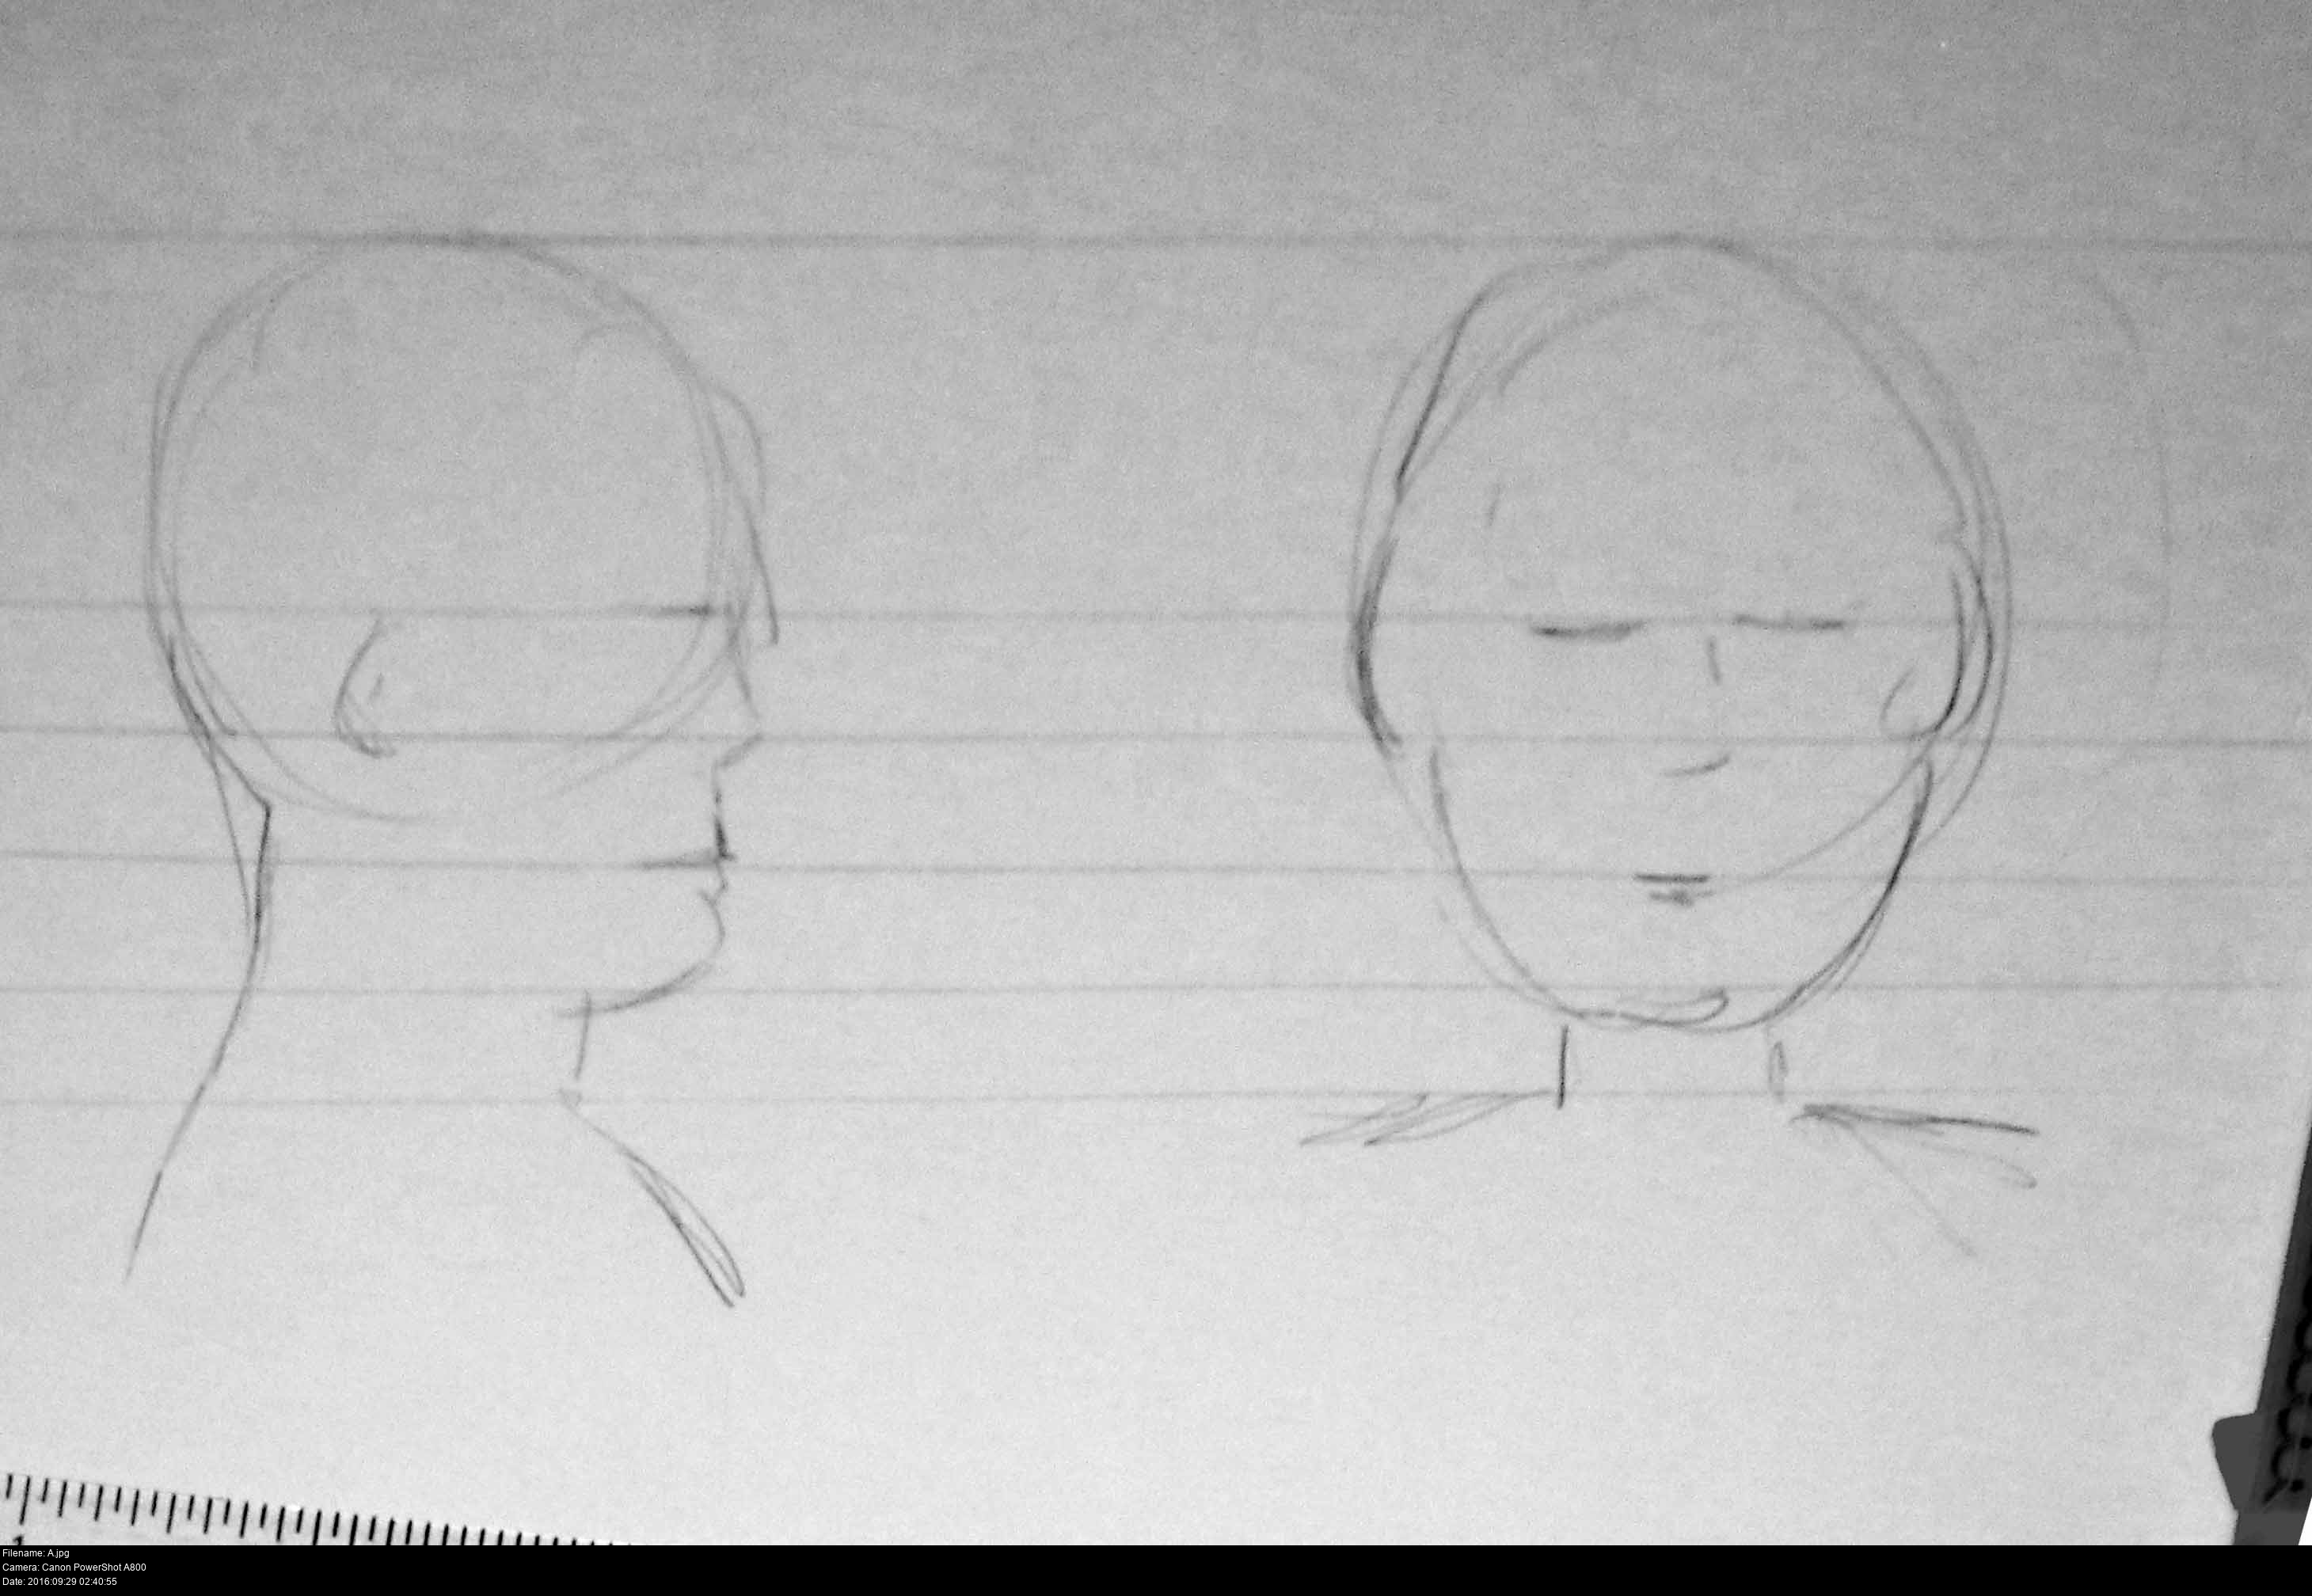
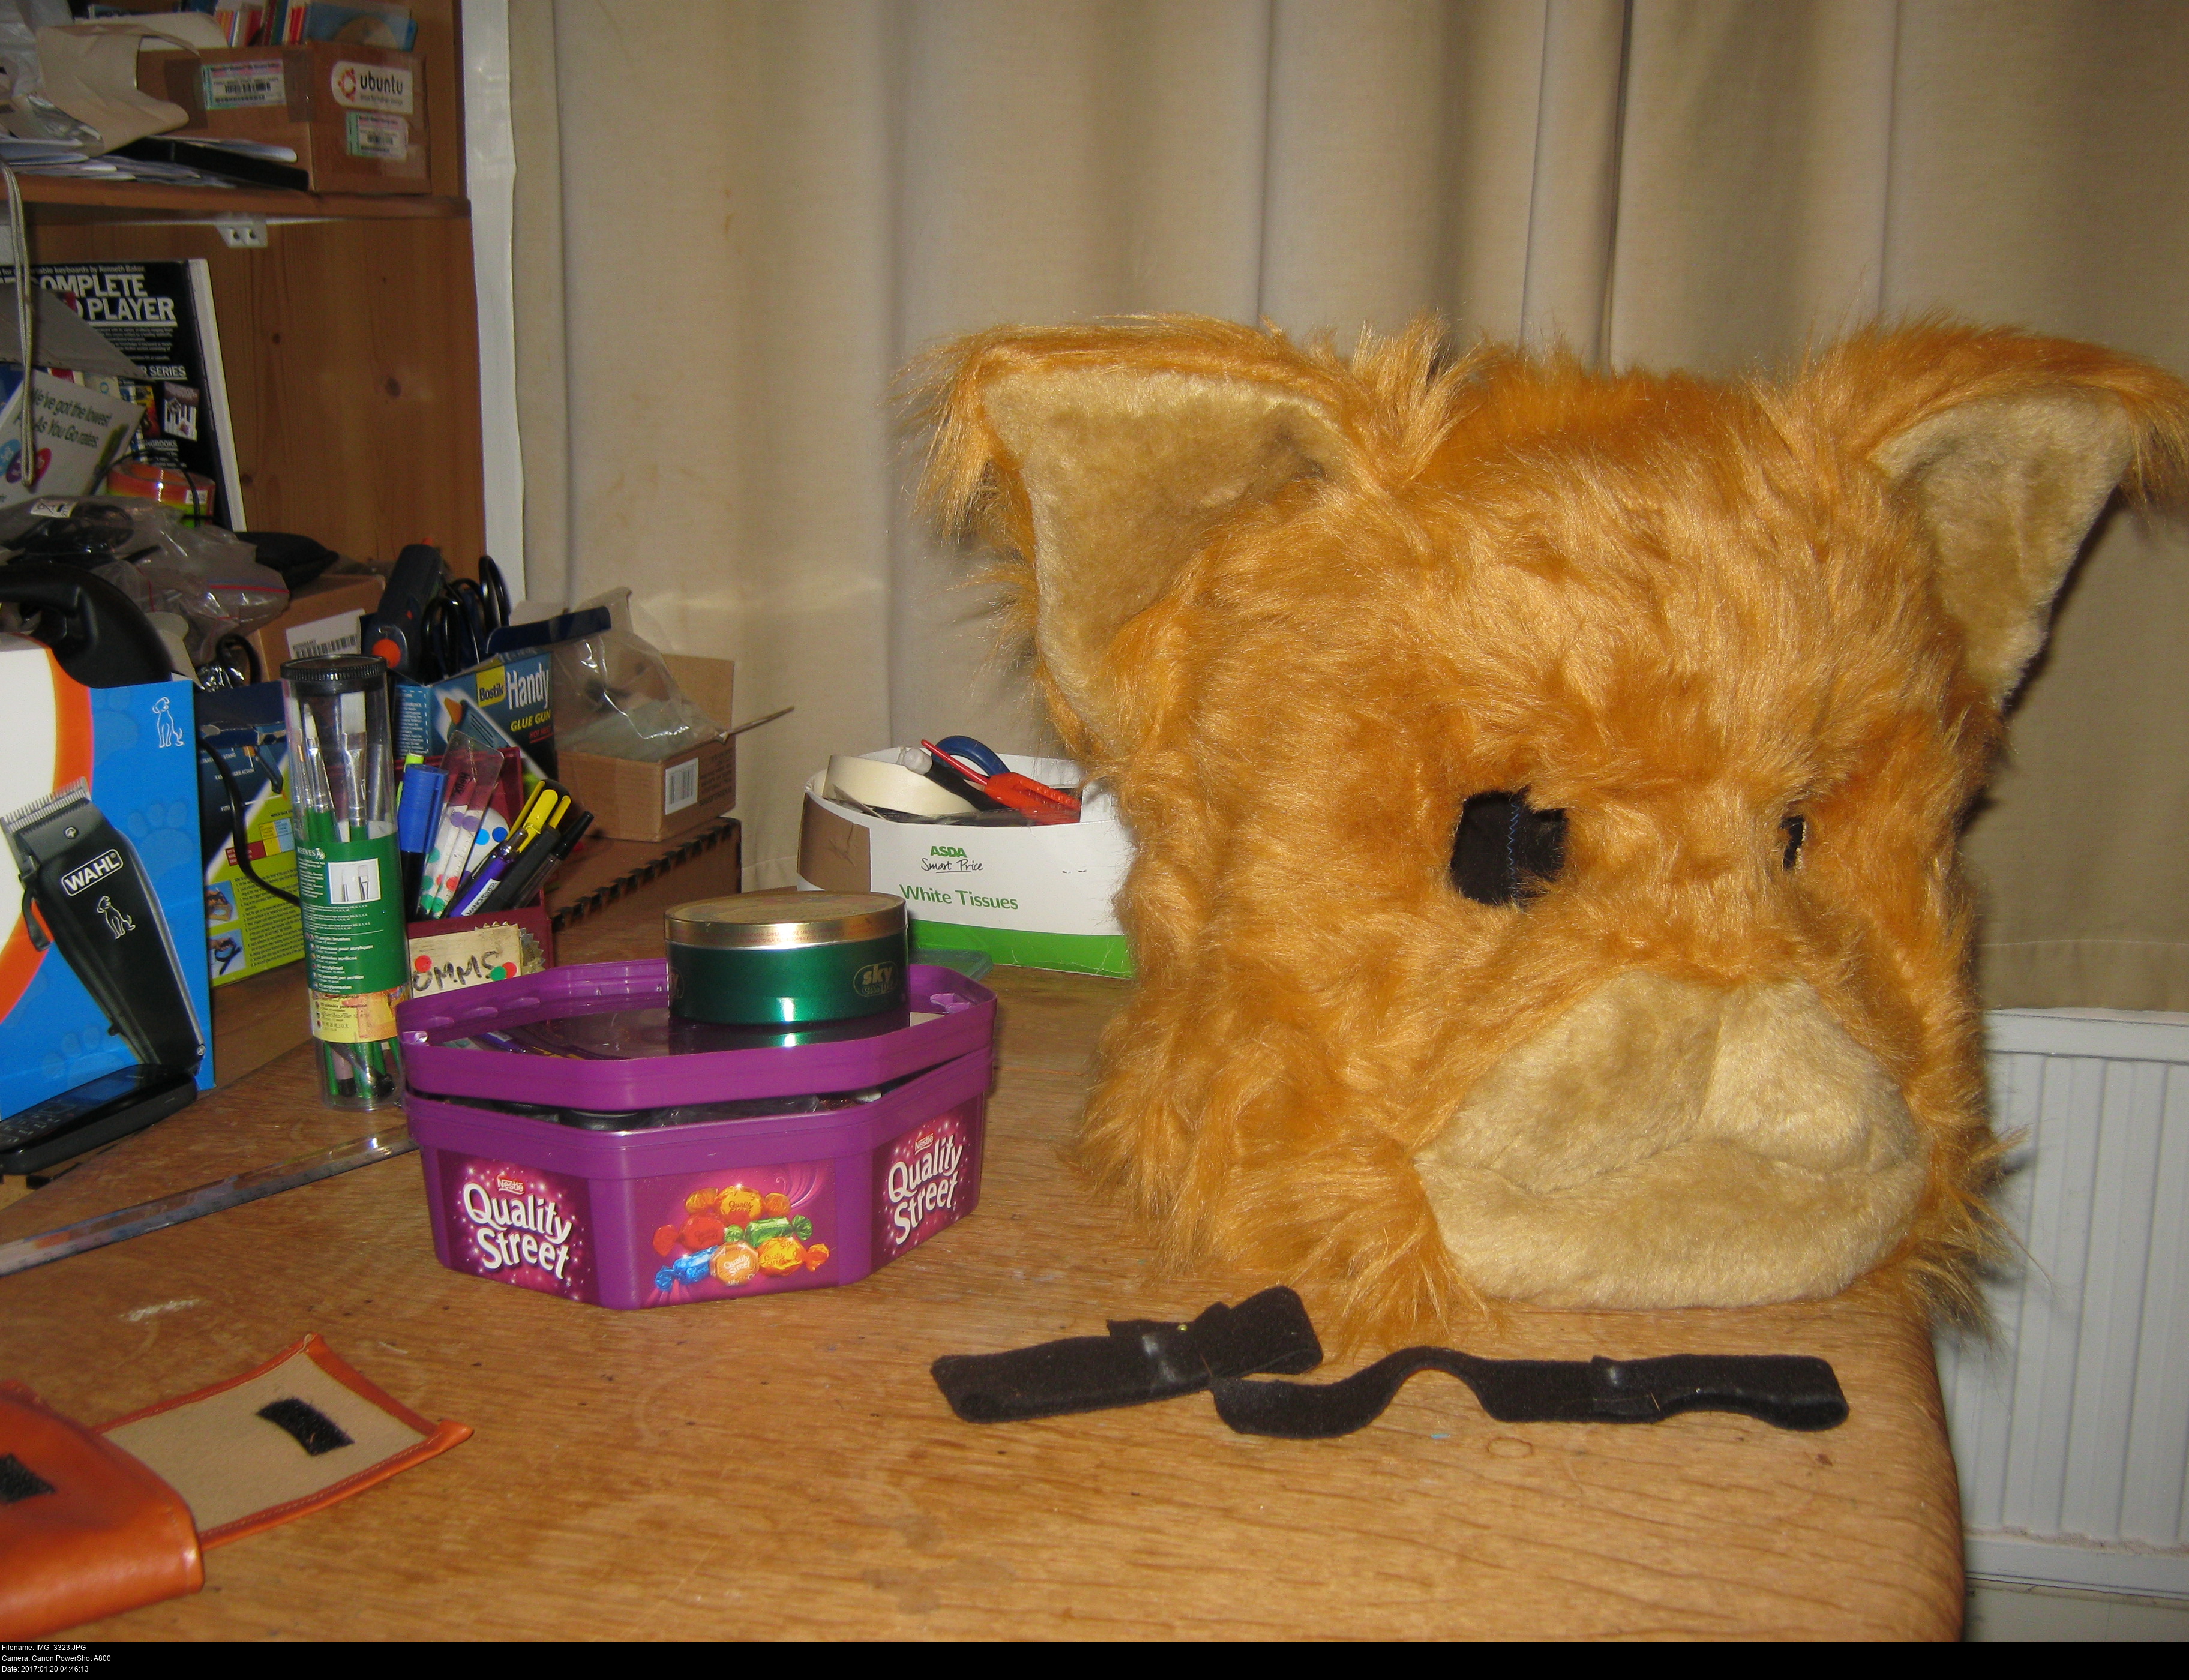
Let's get some references in here.

Wait, isn't there more??
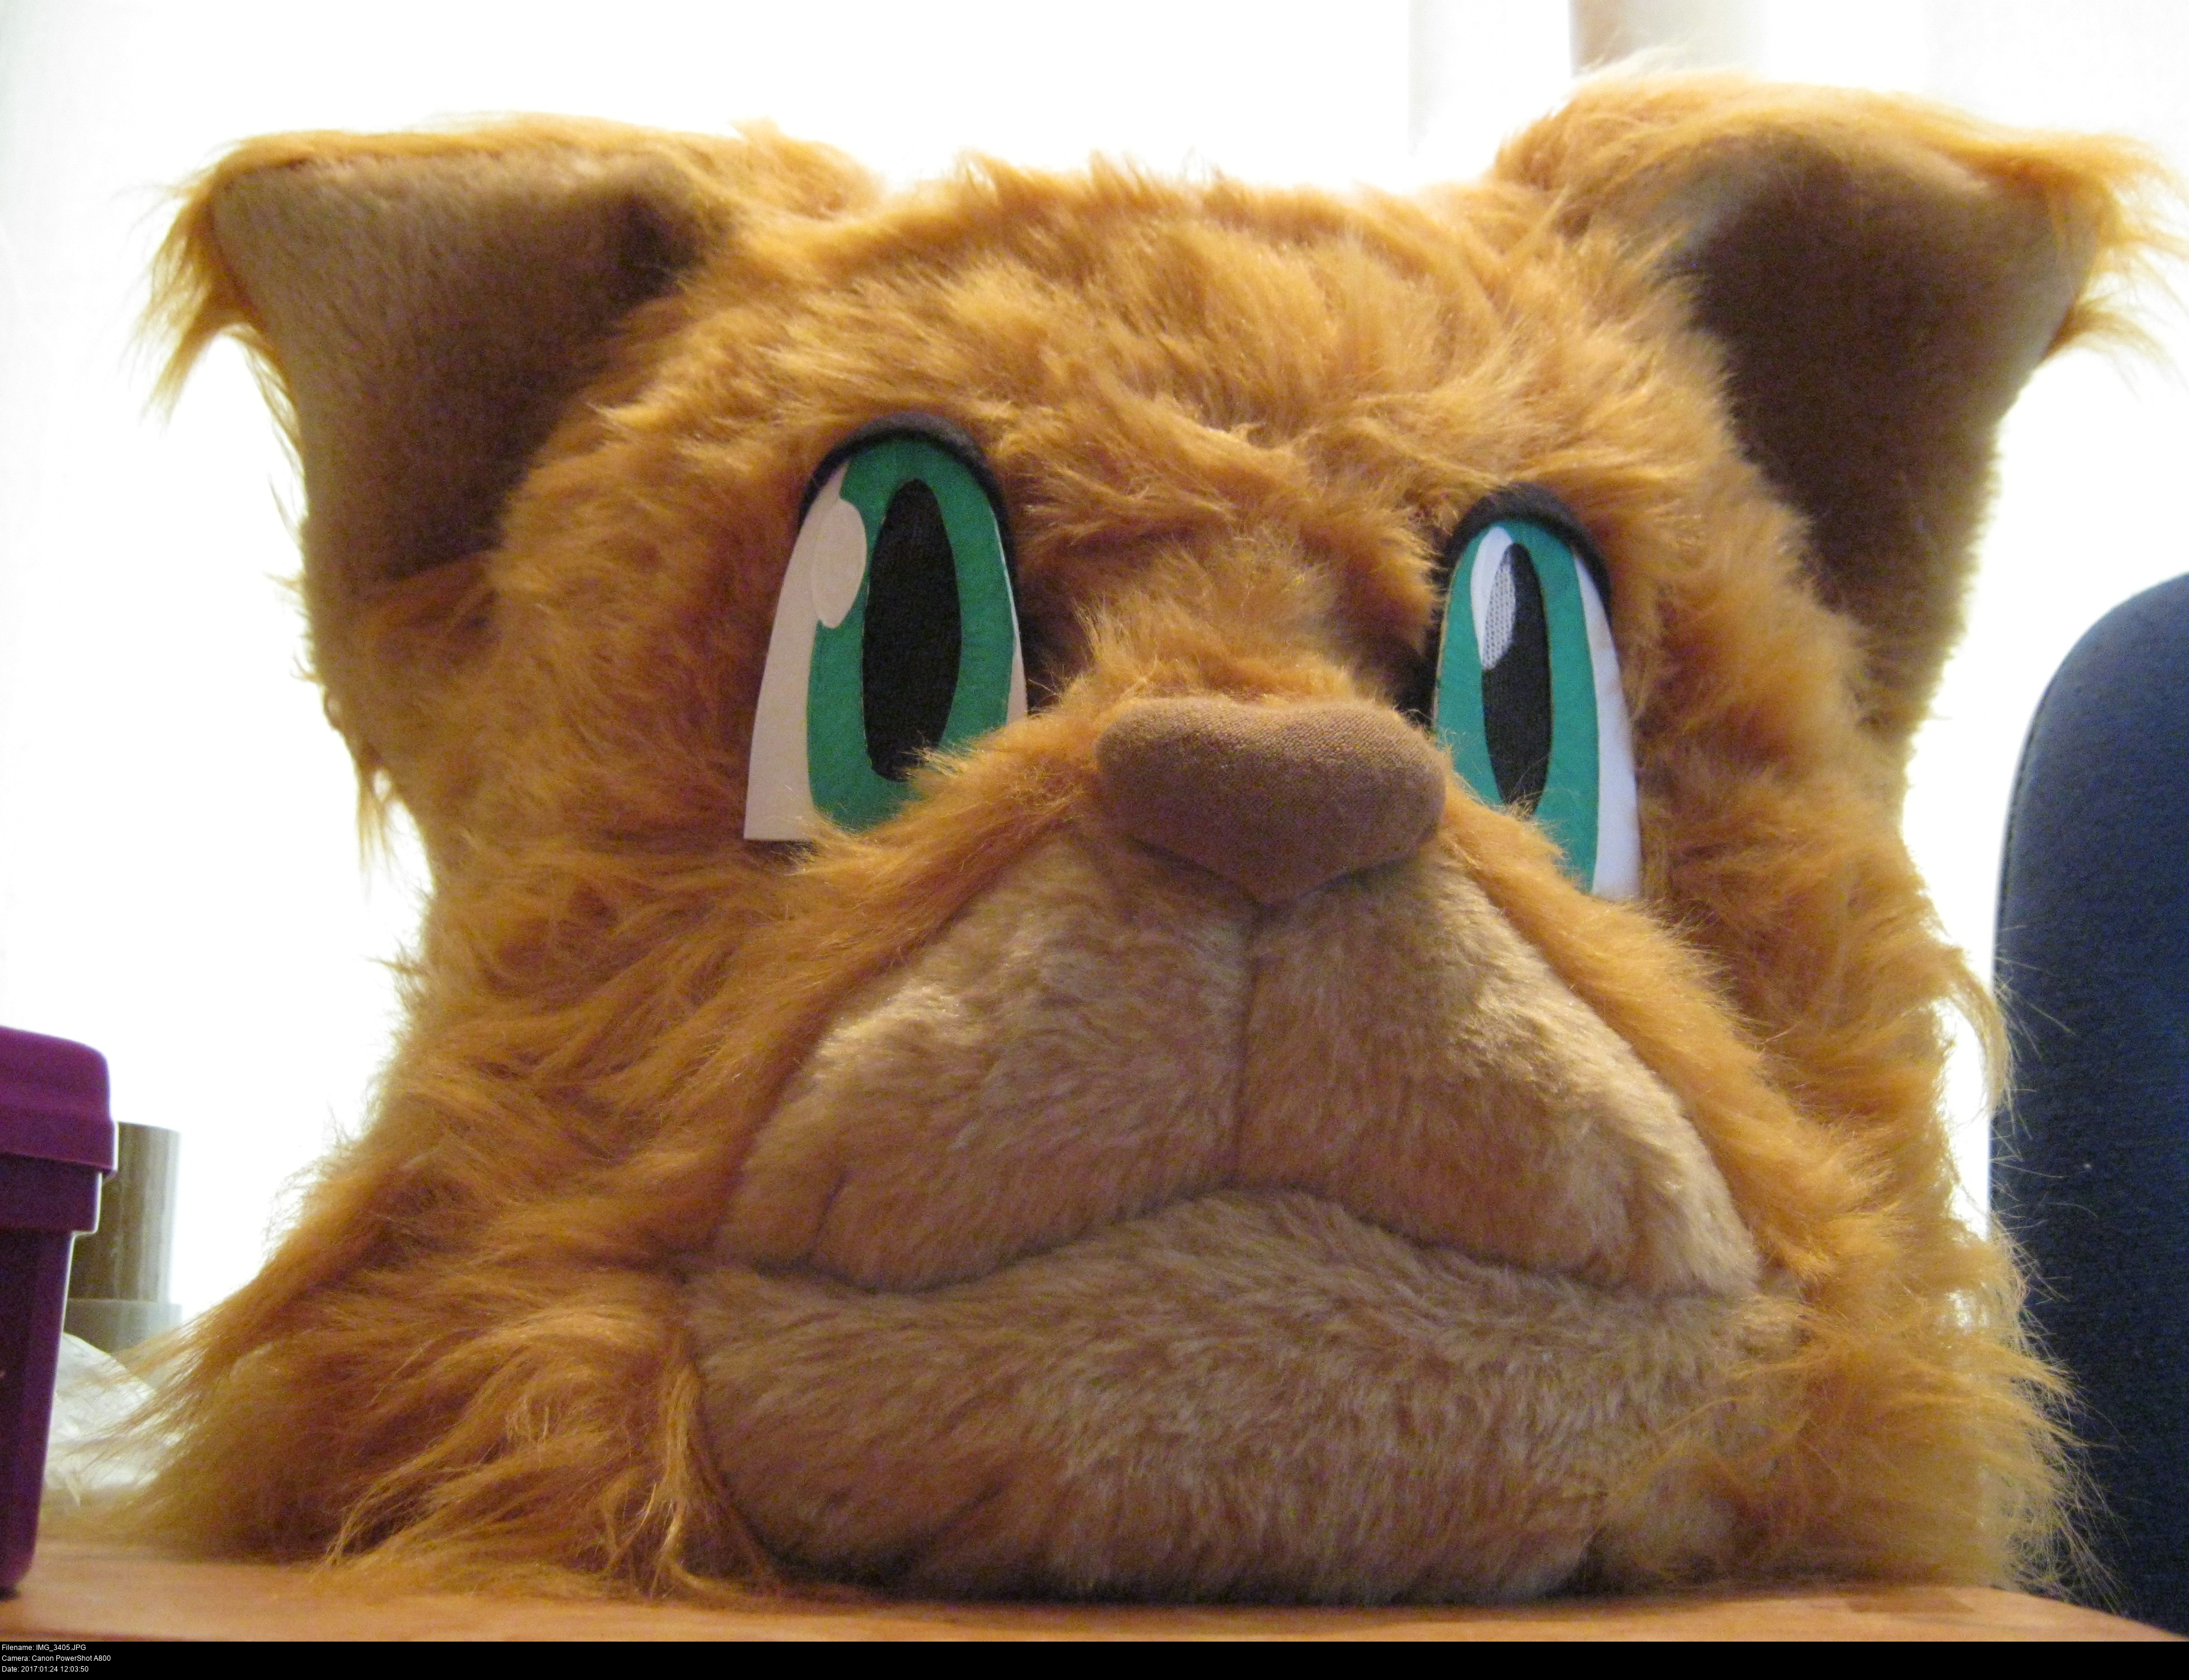
Nope. This is basically all you see of him (or any overlynx)!
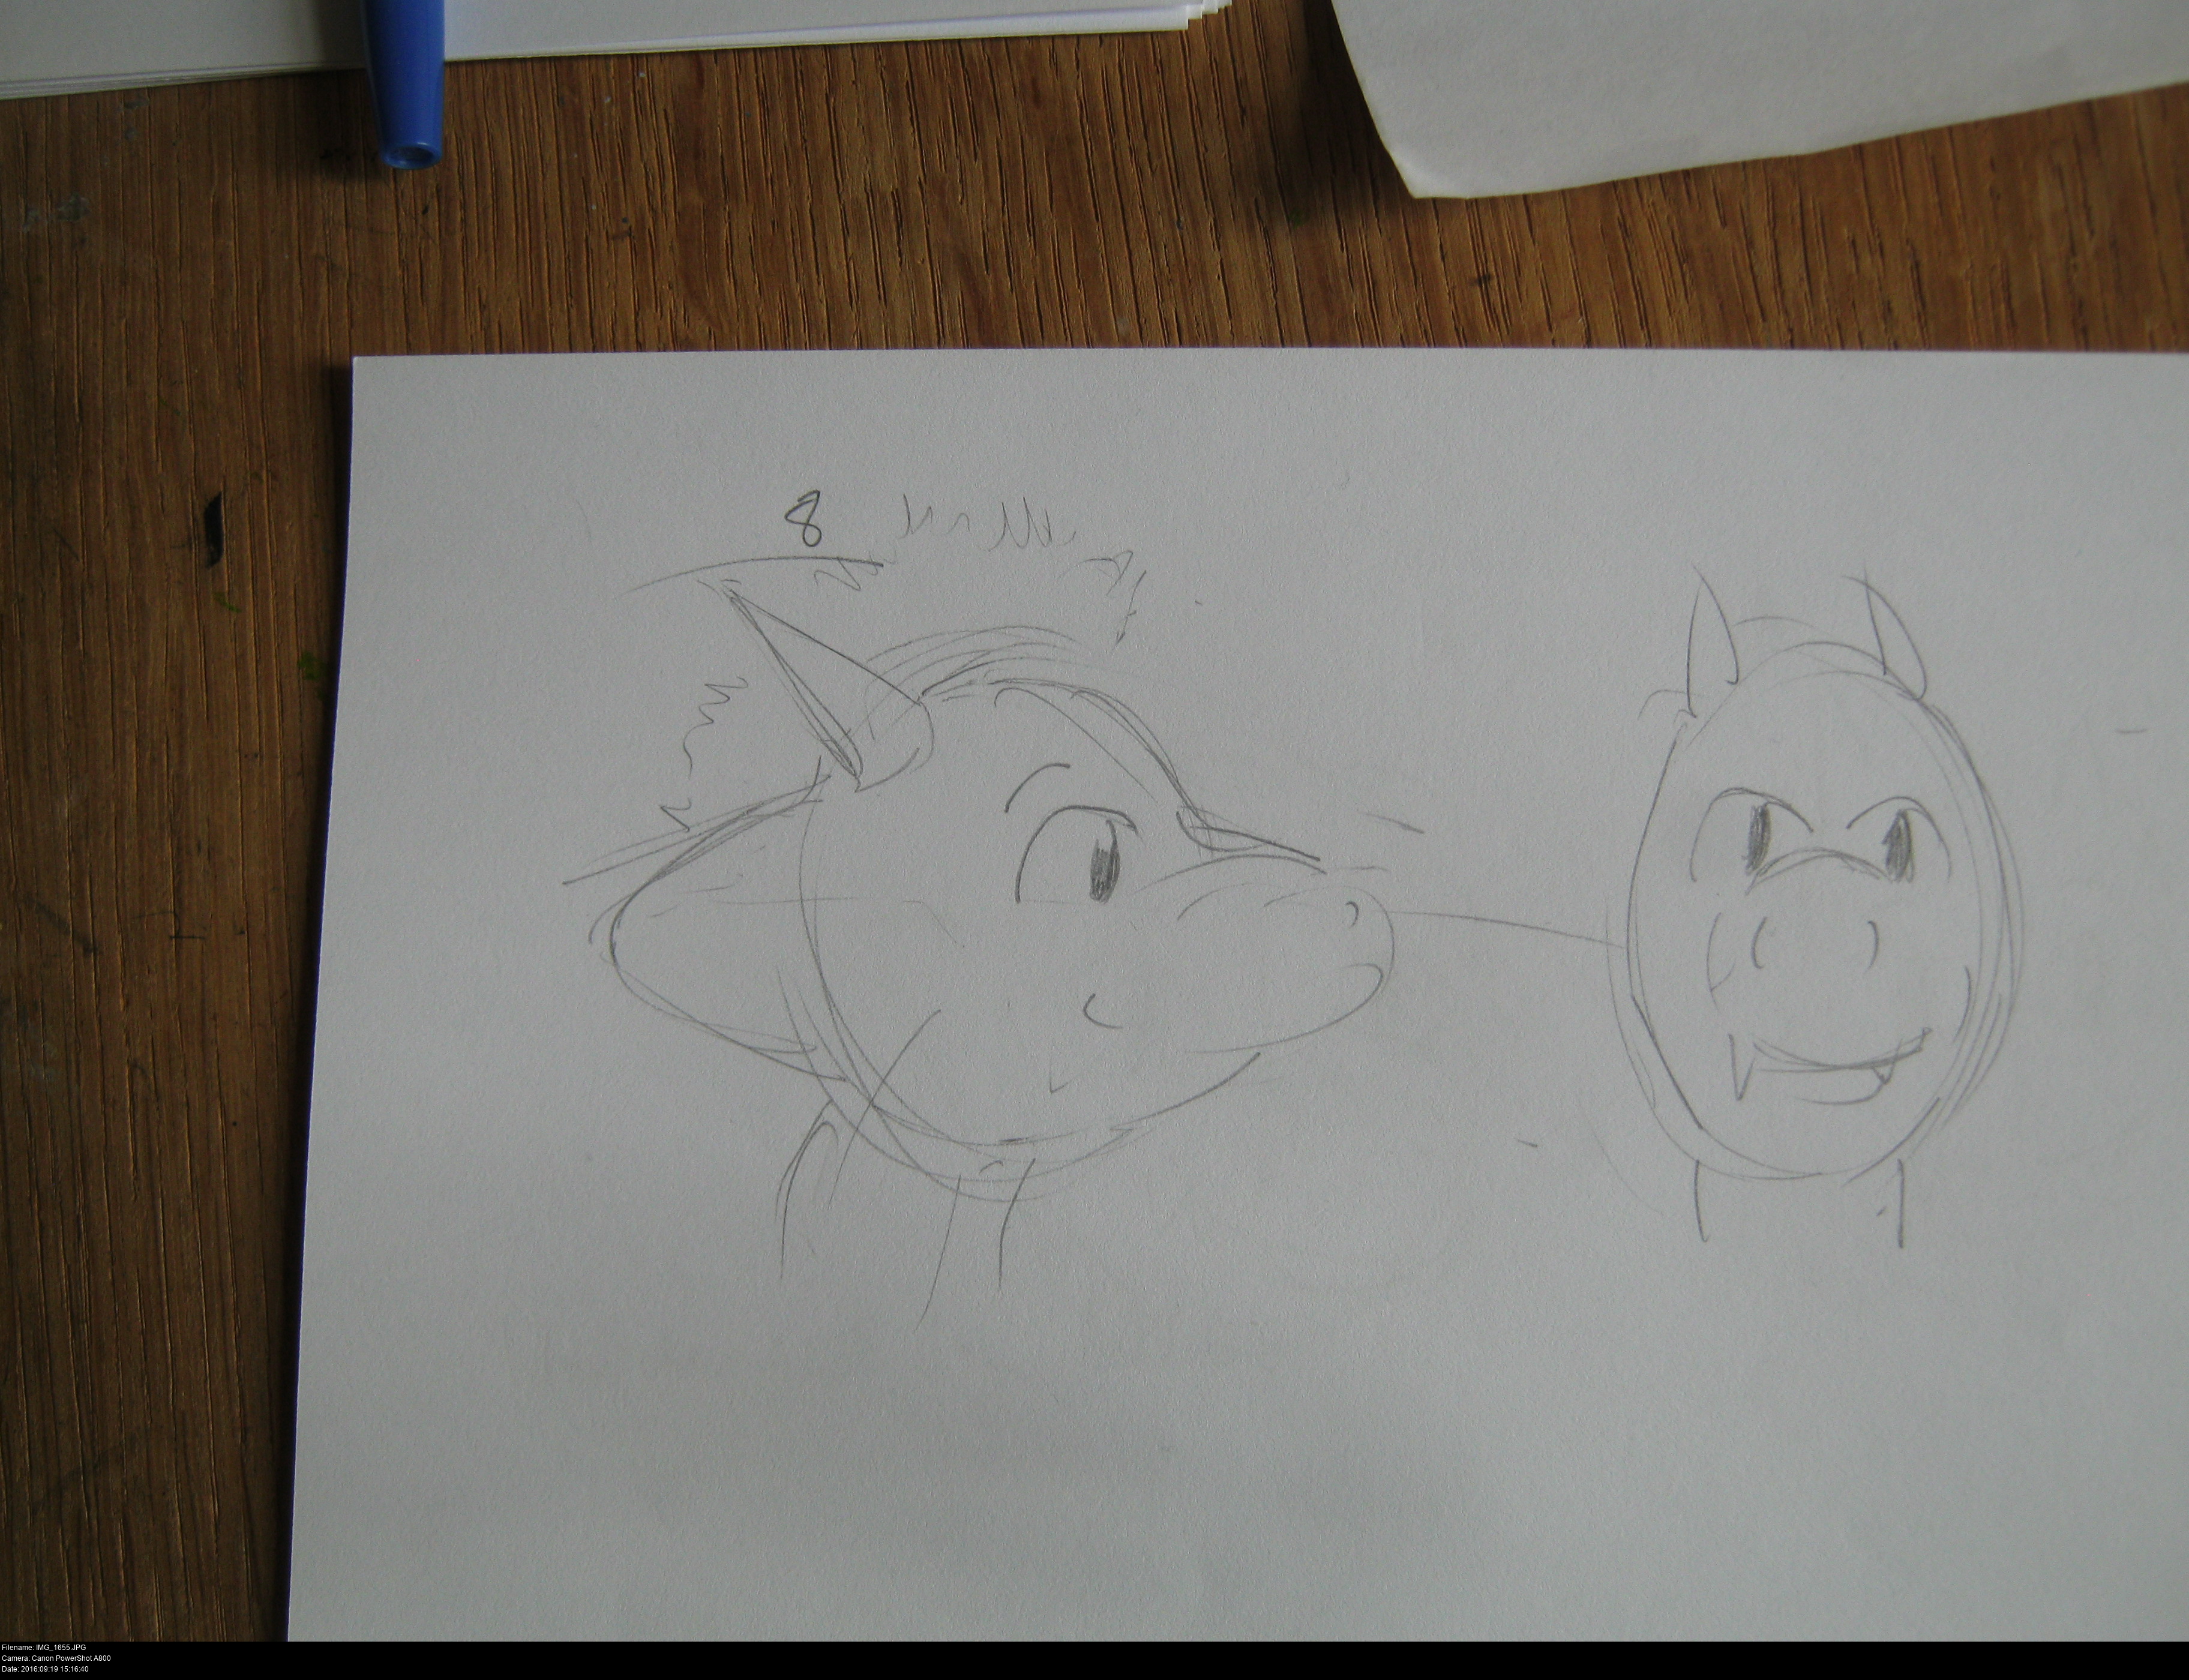
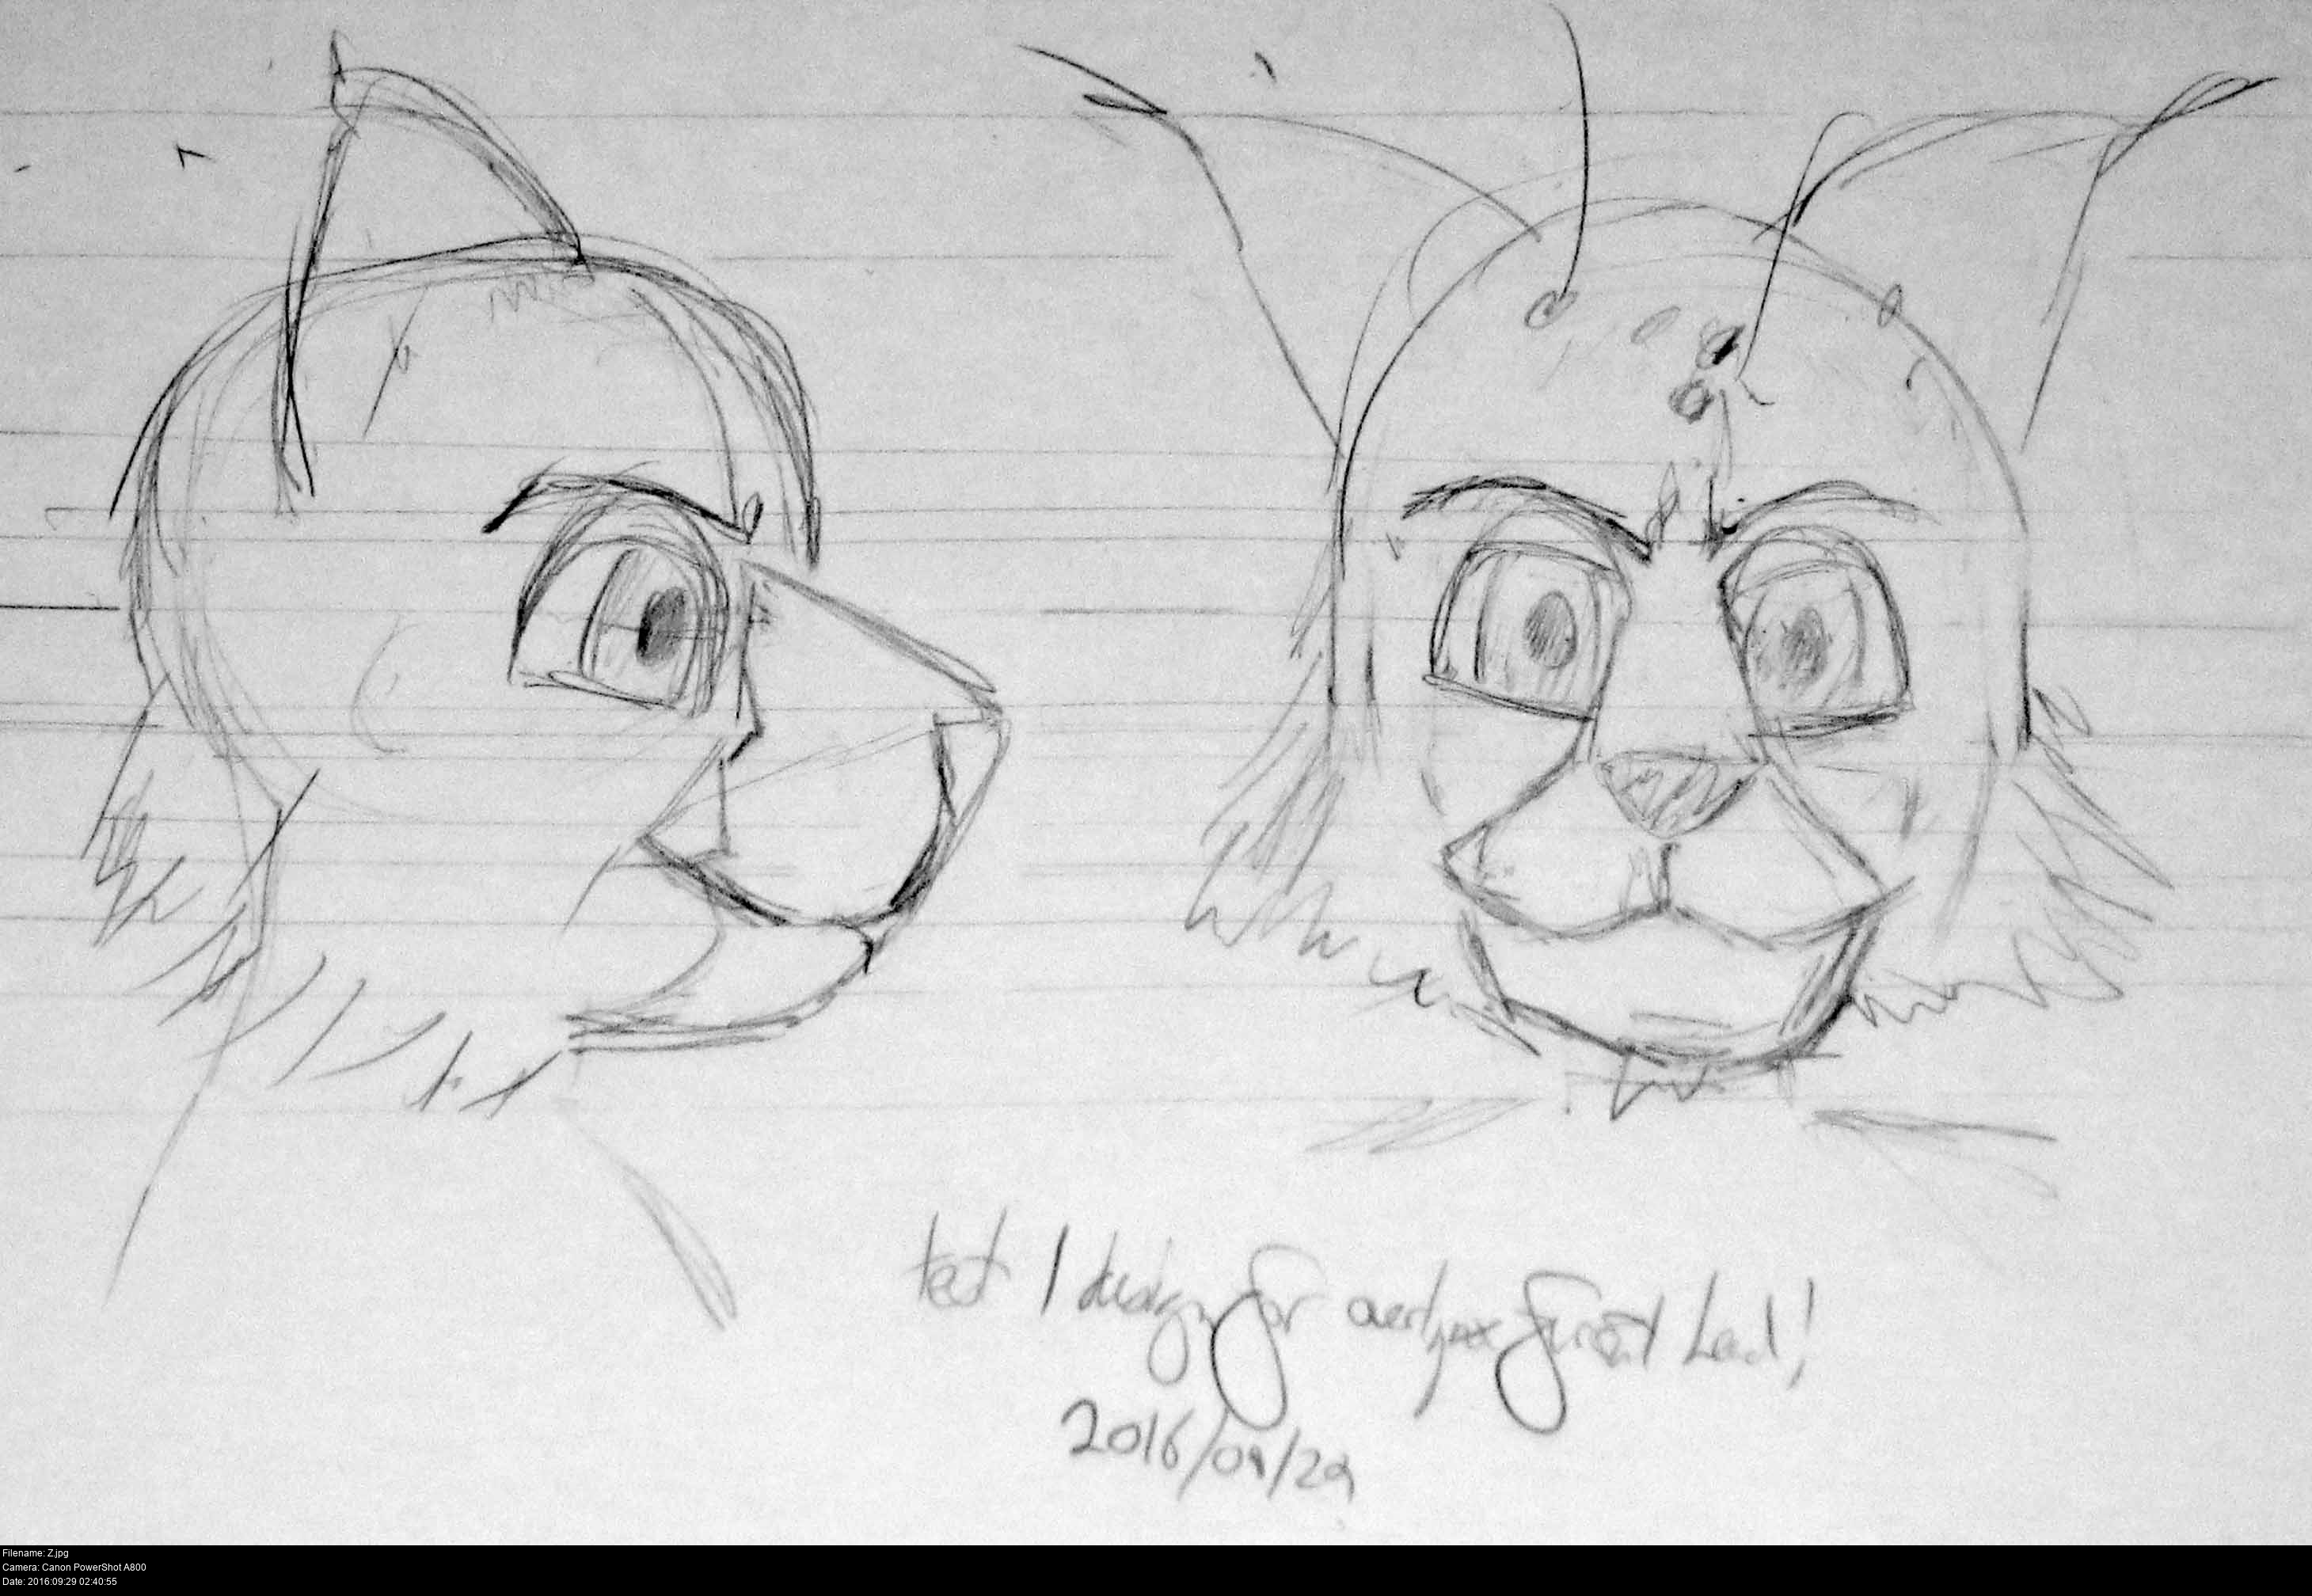
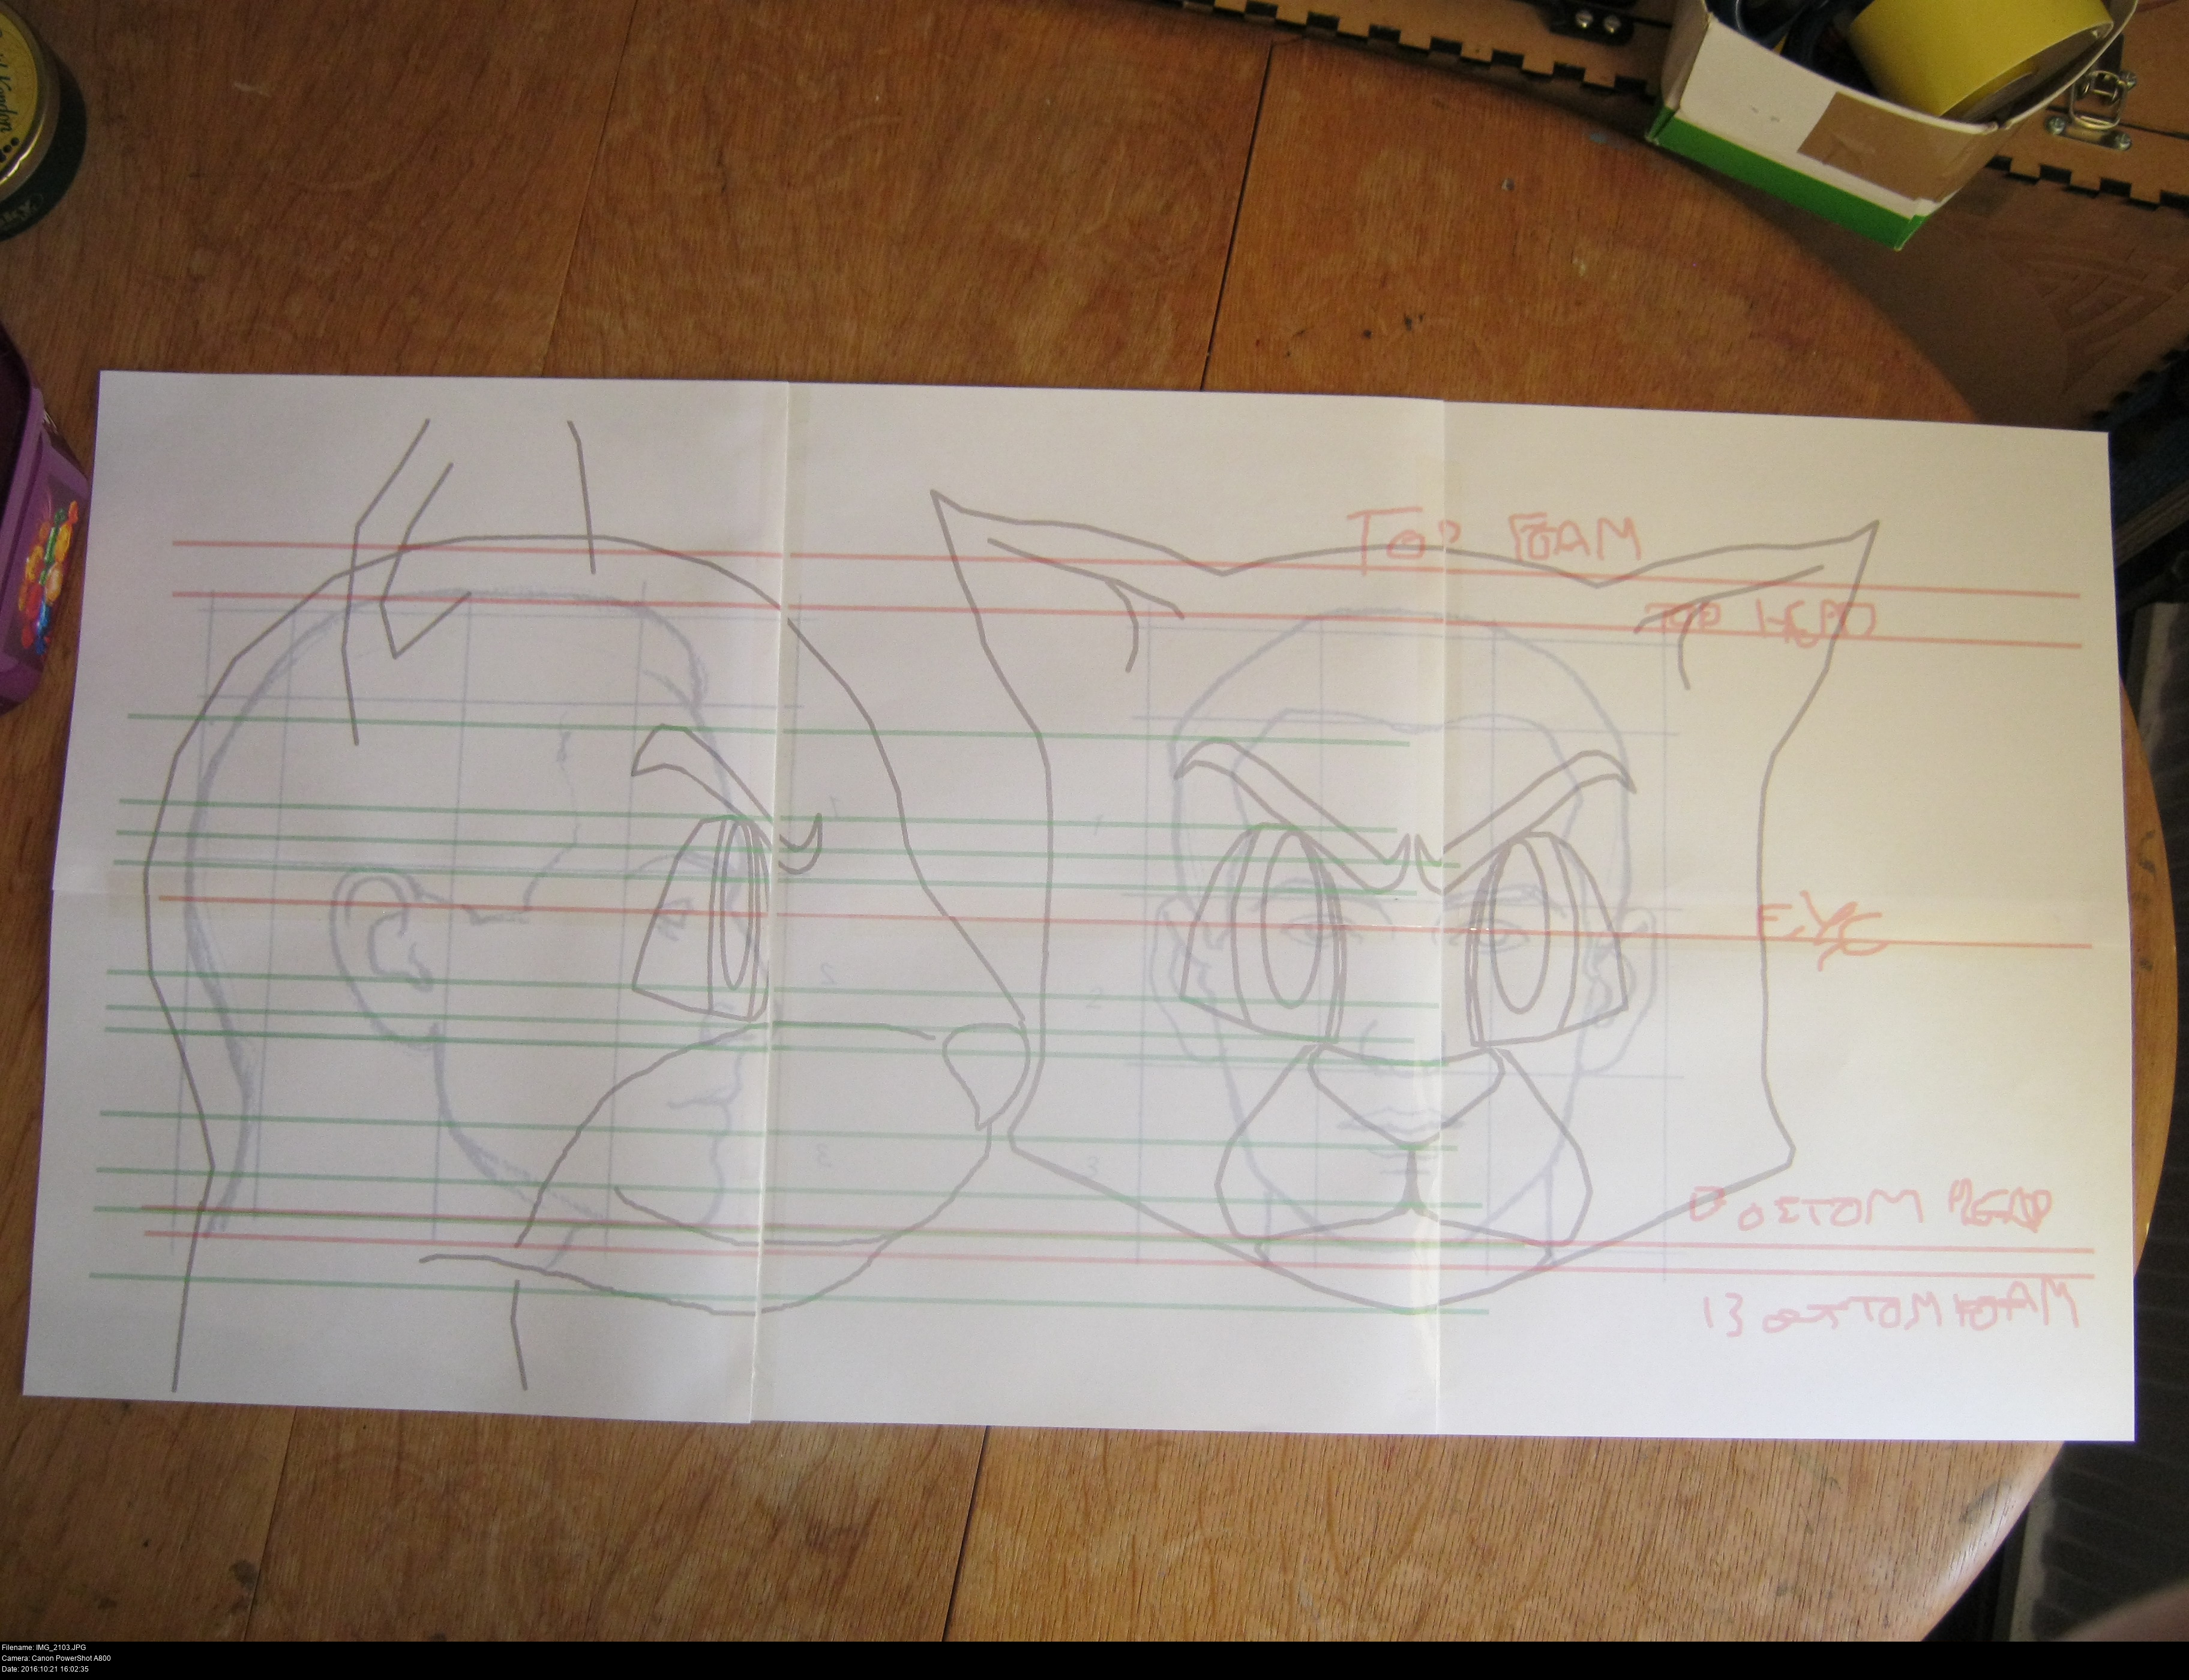
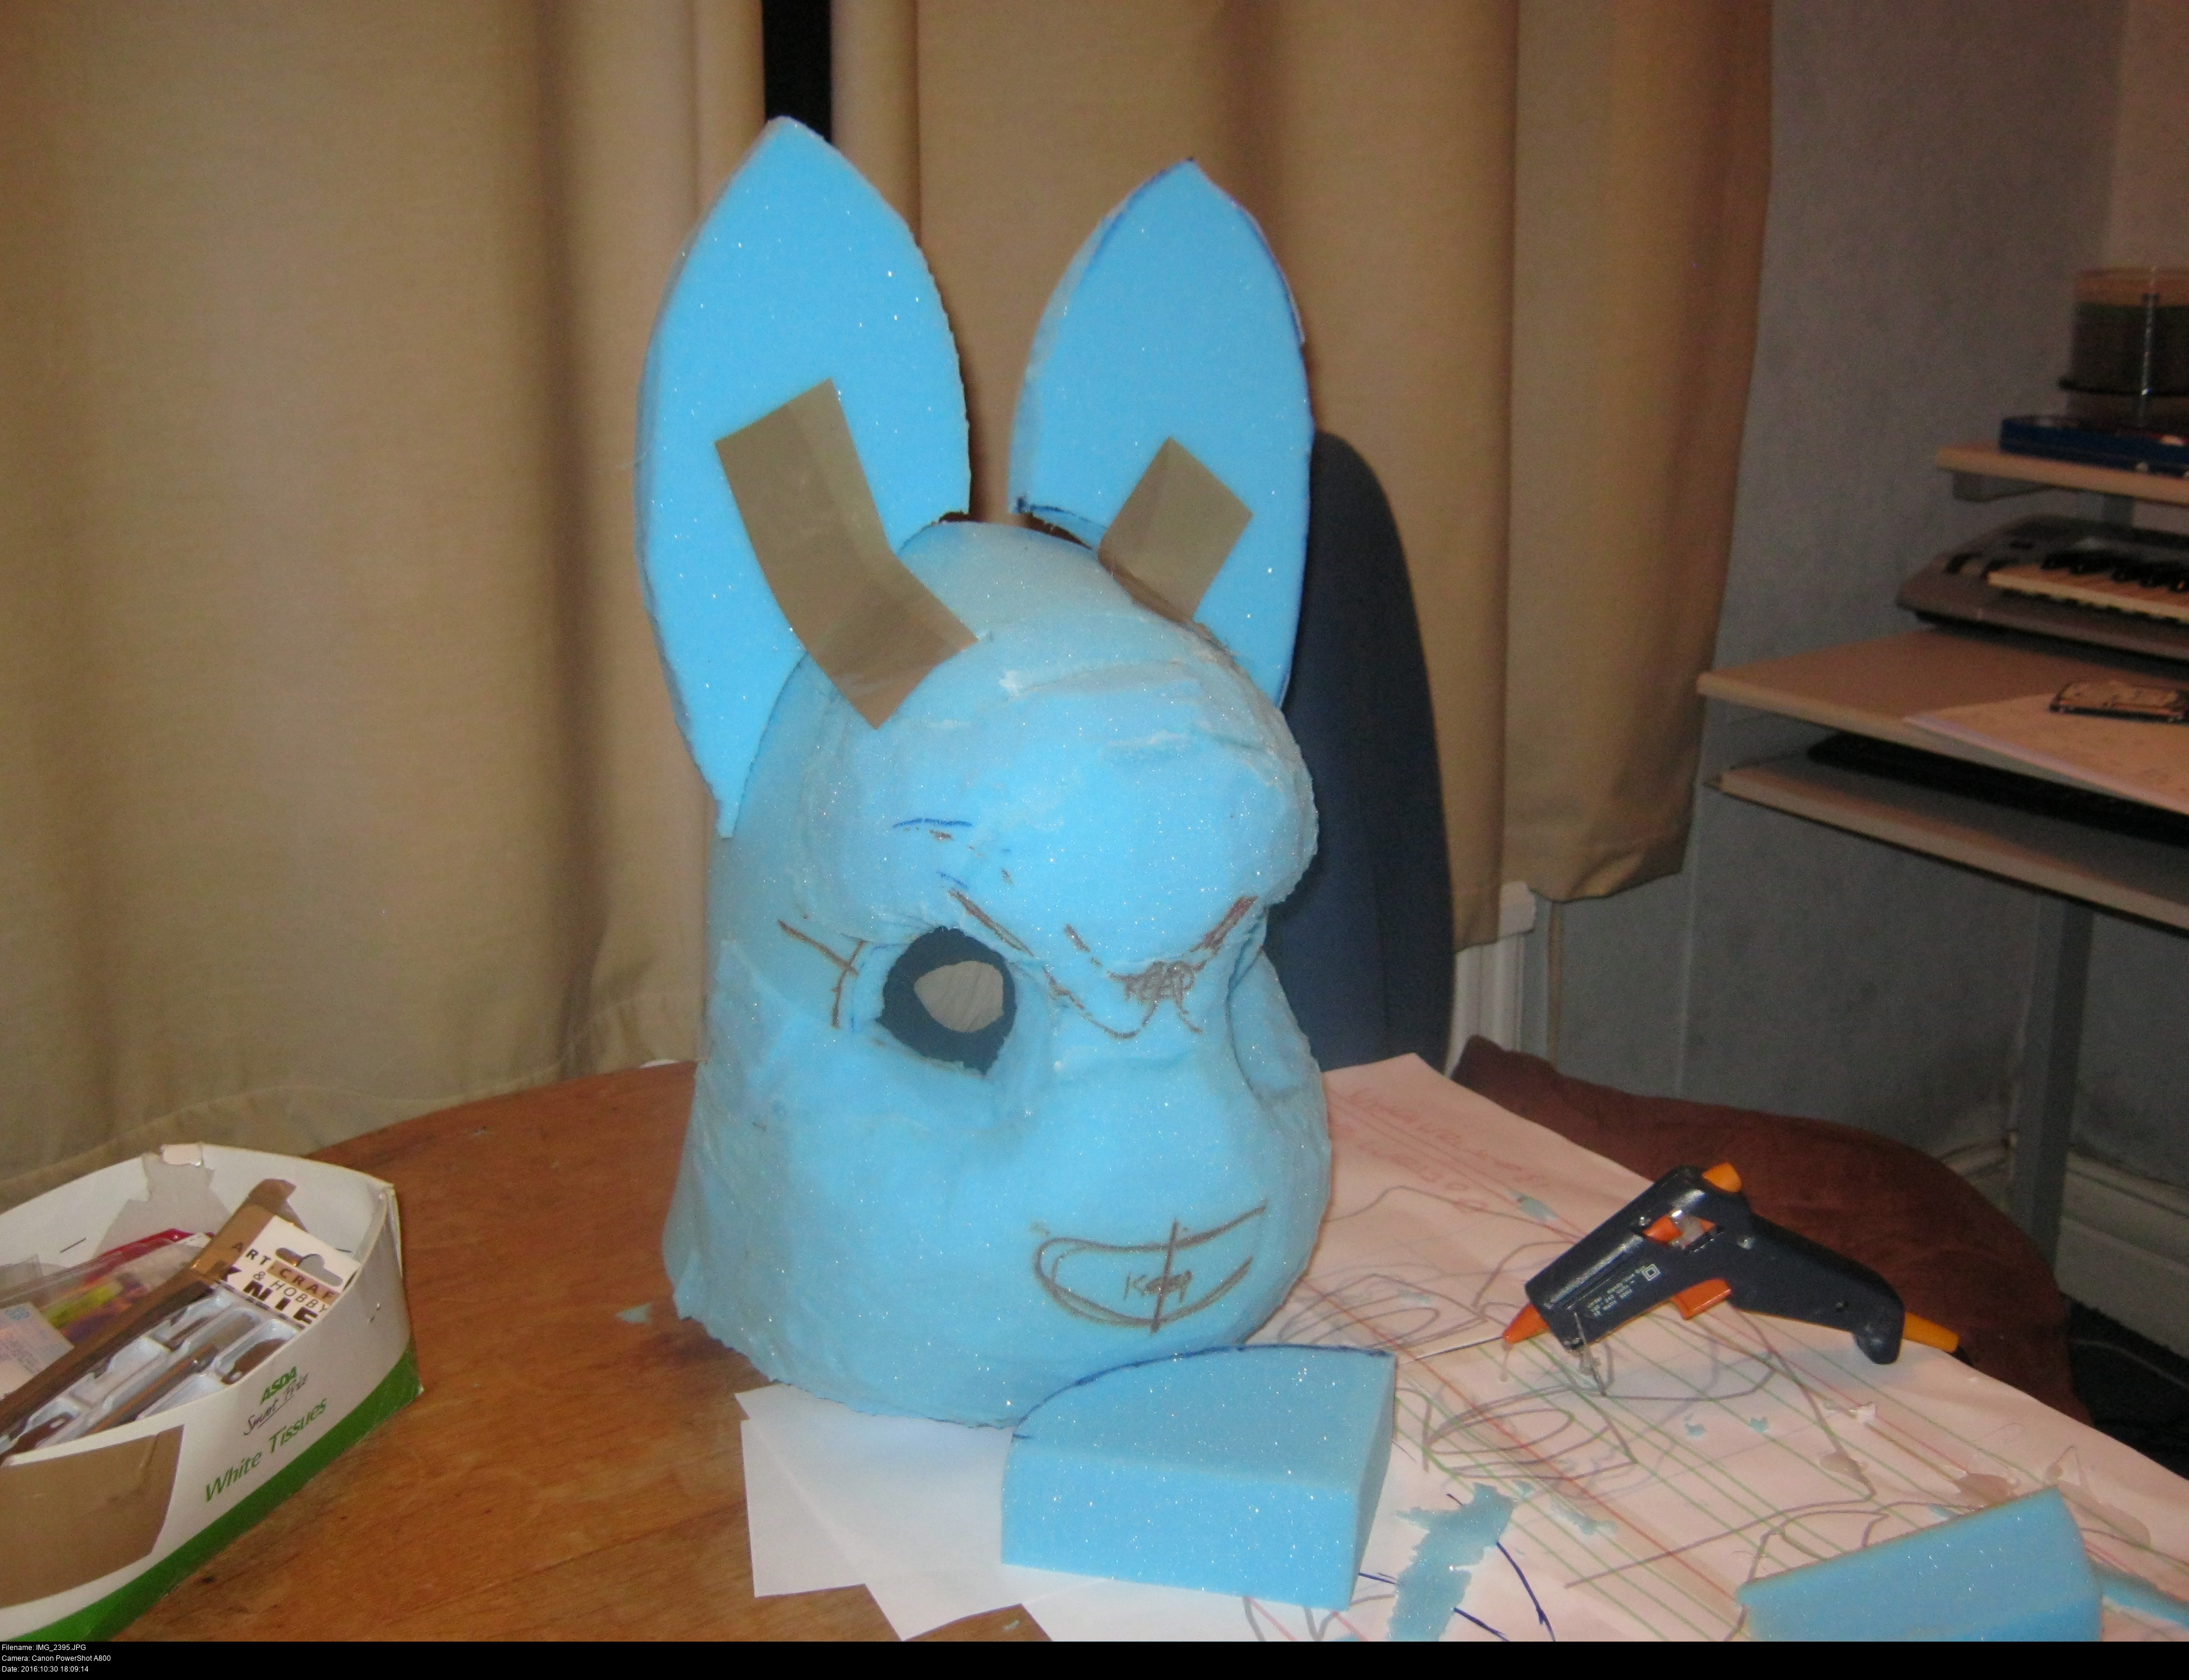
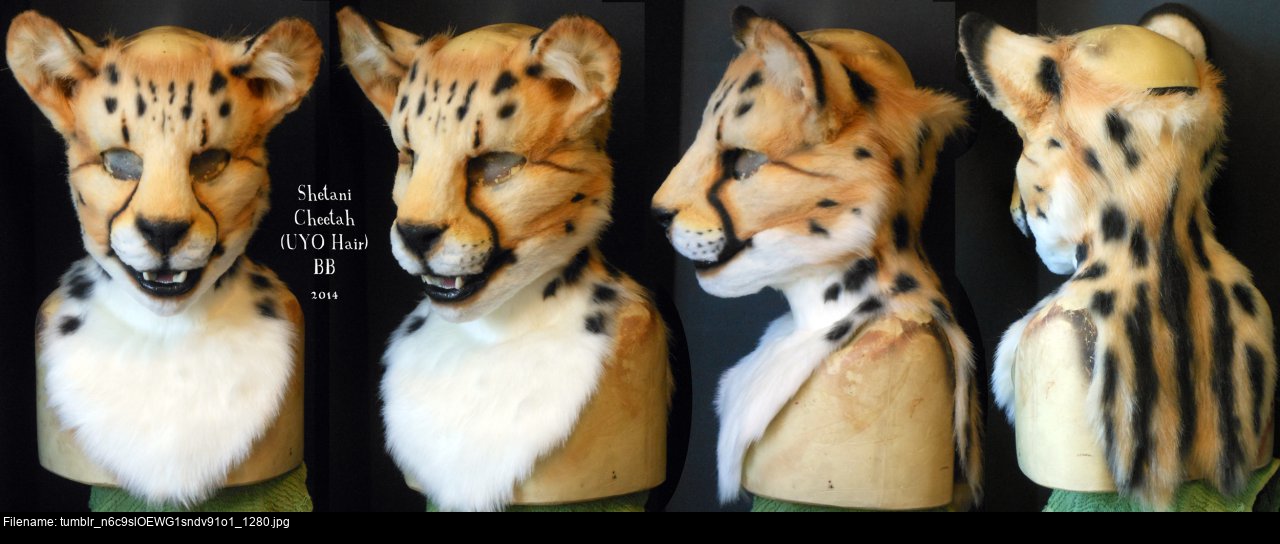
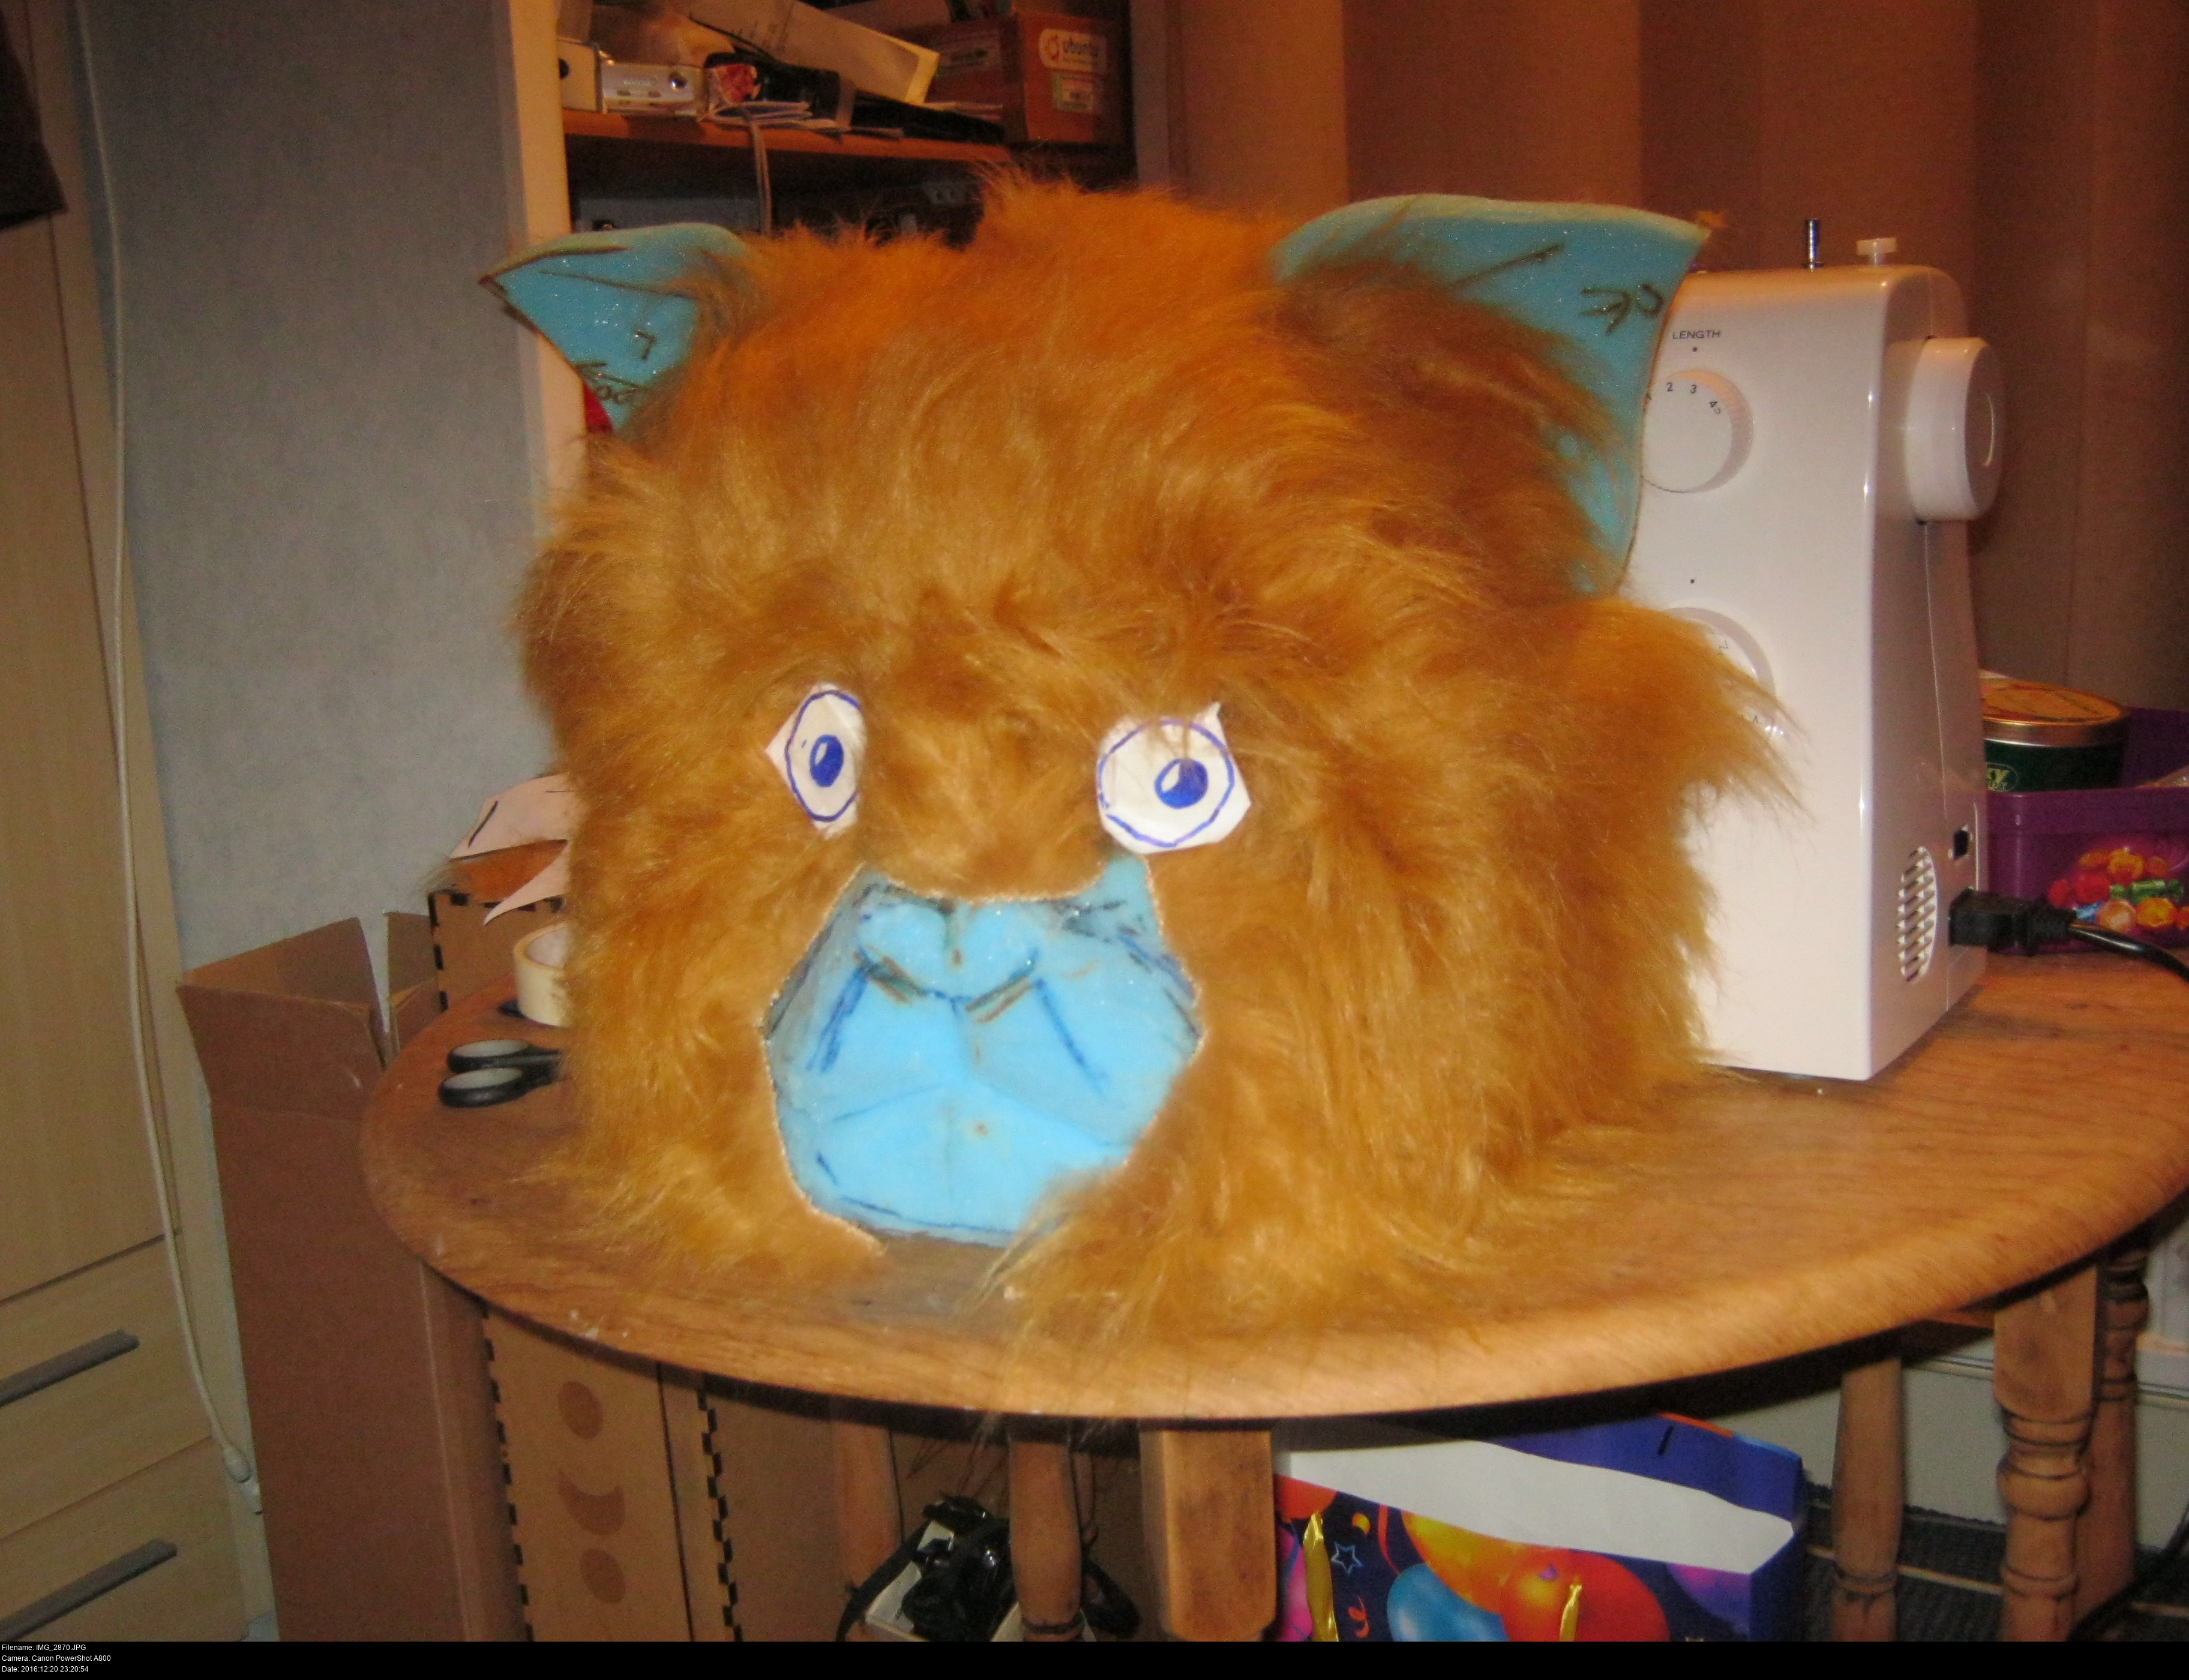
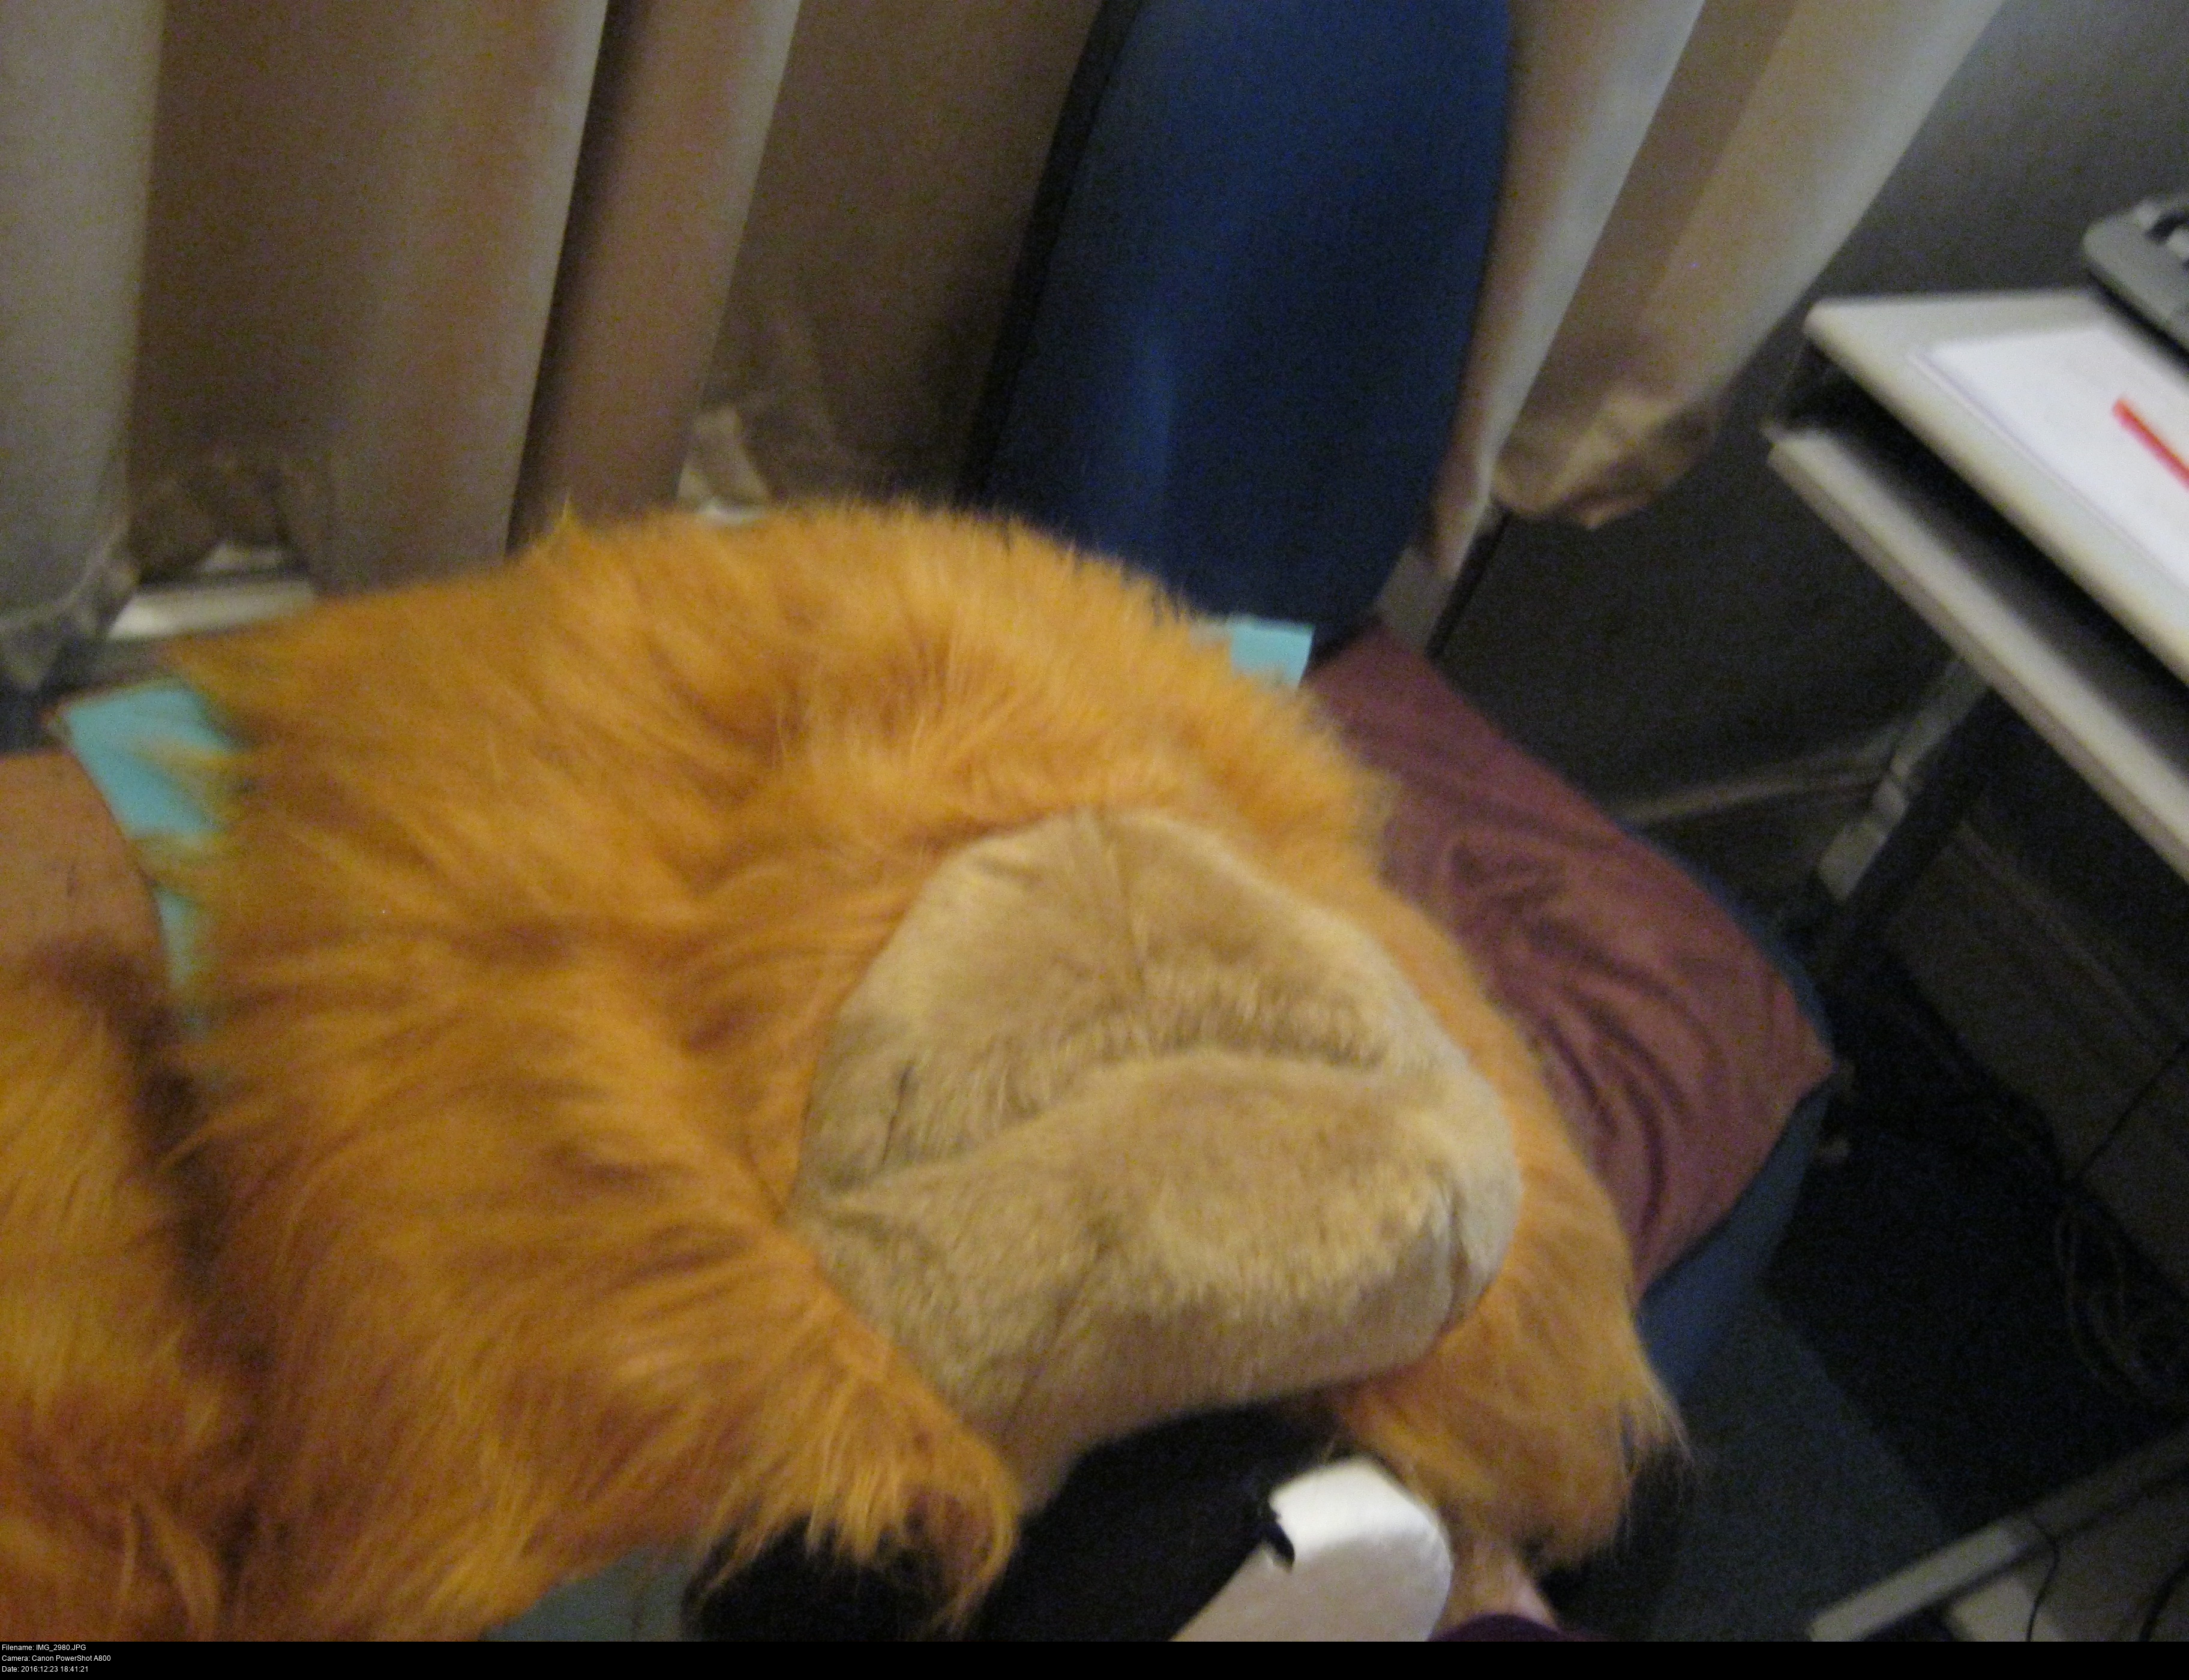
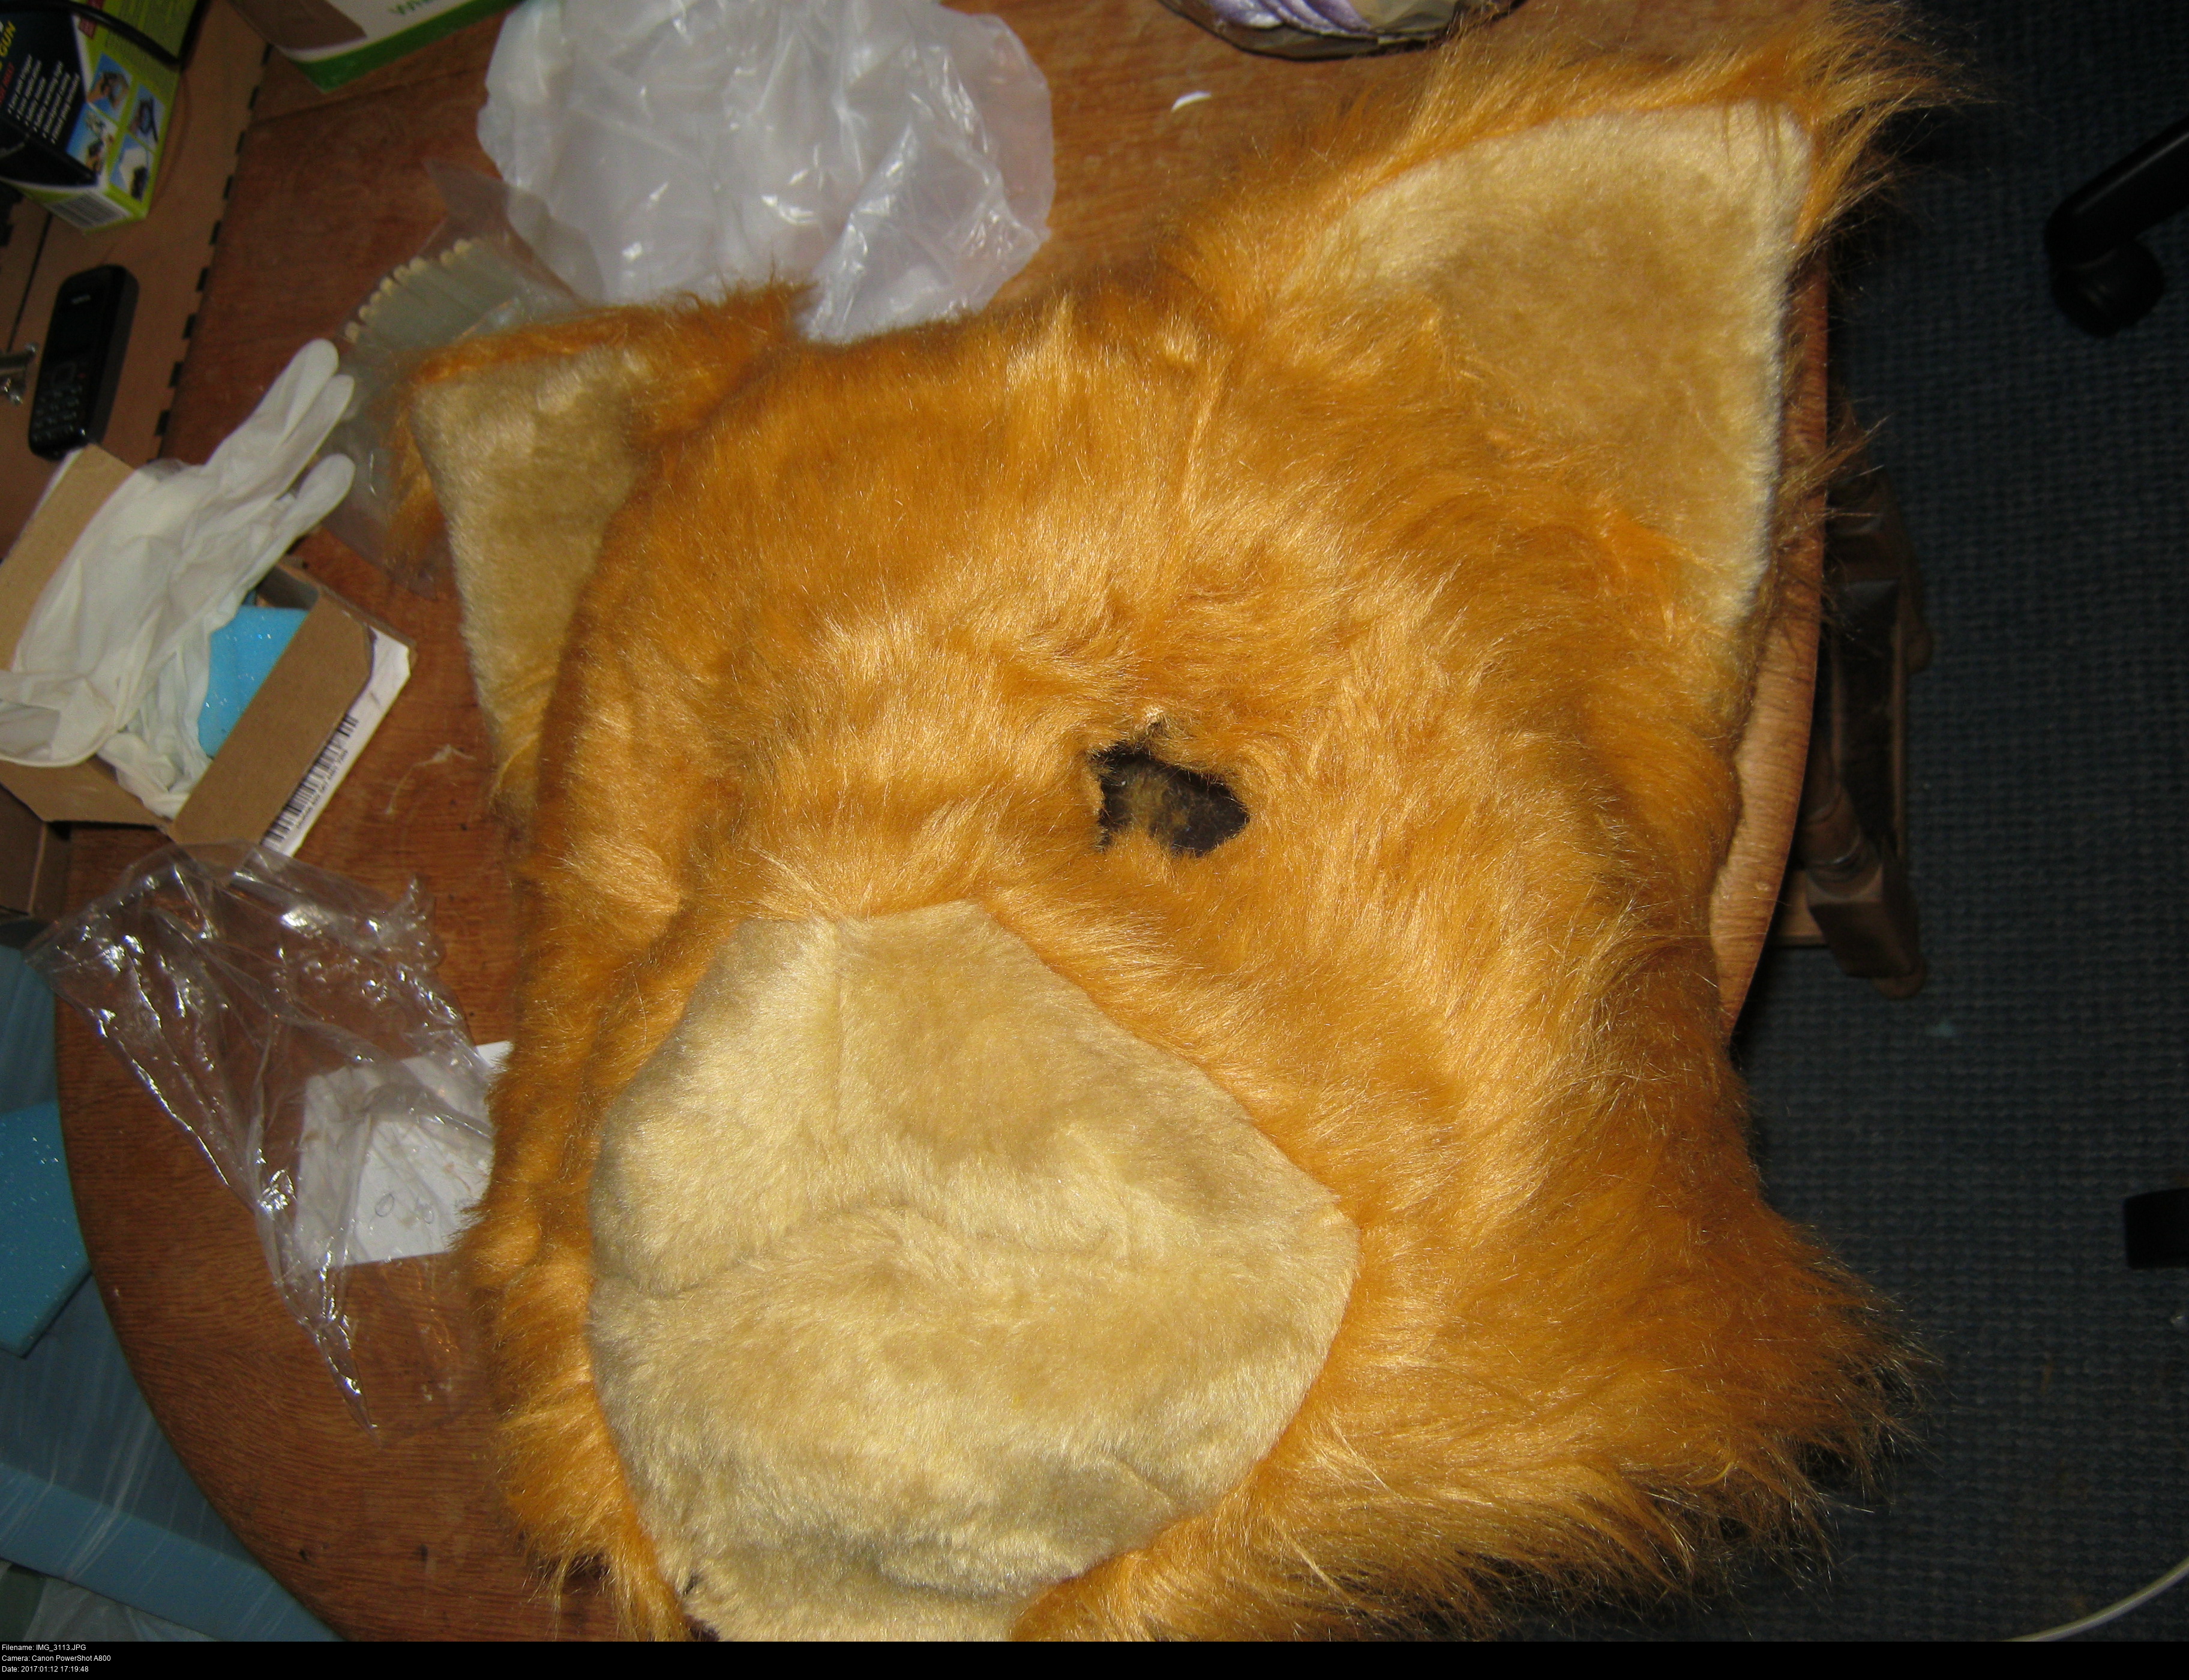
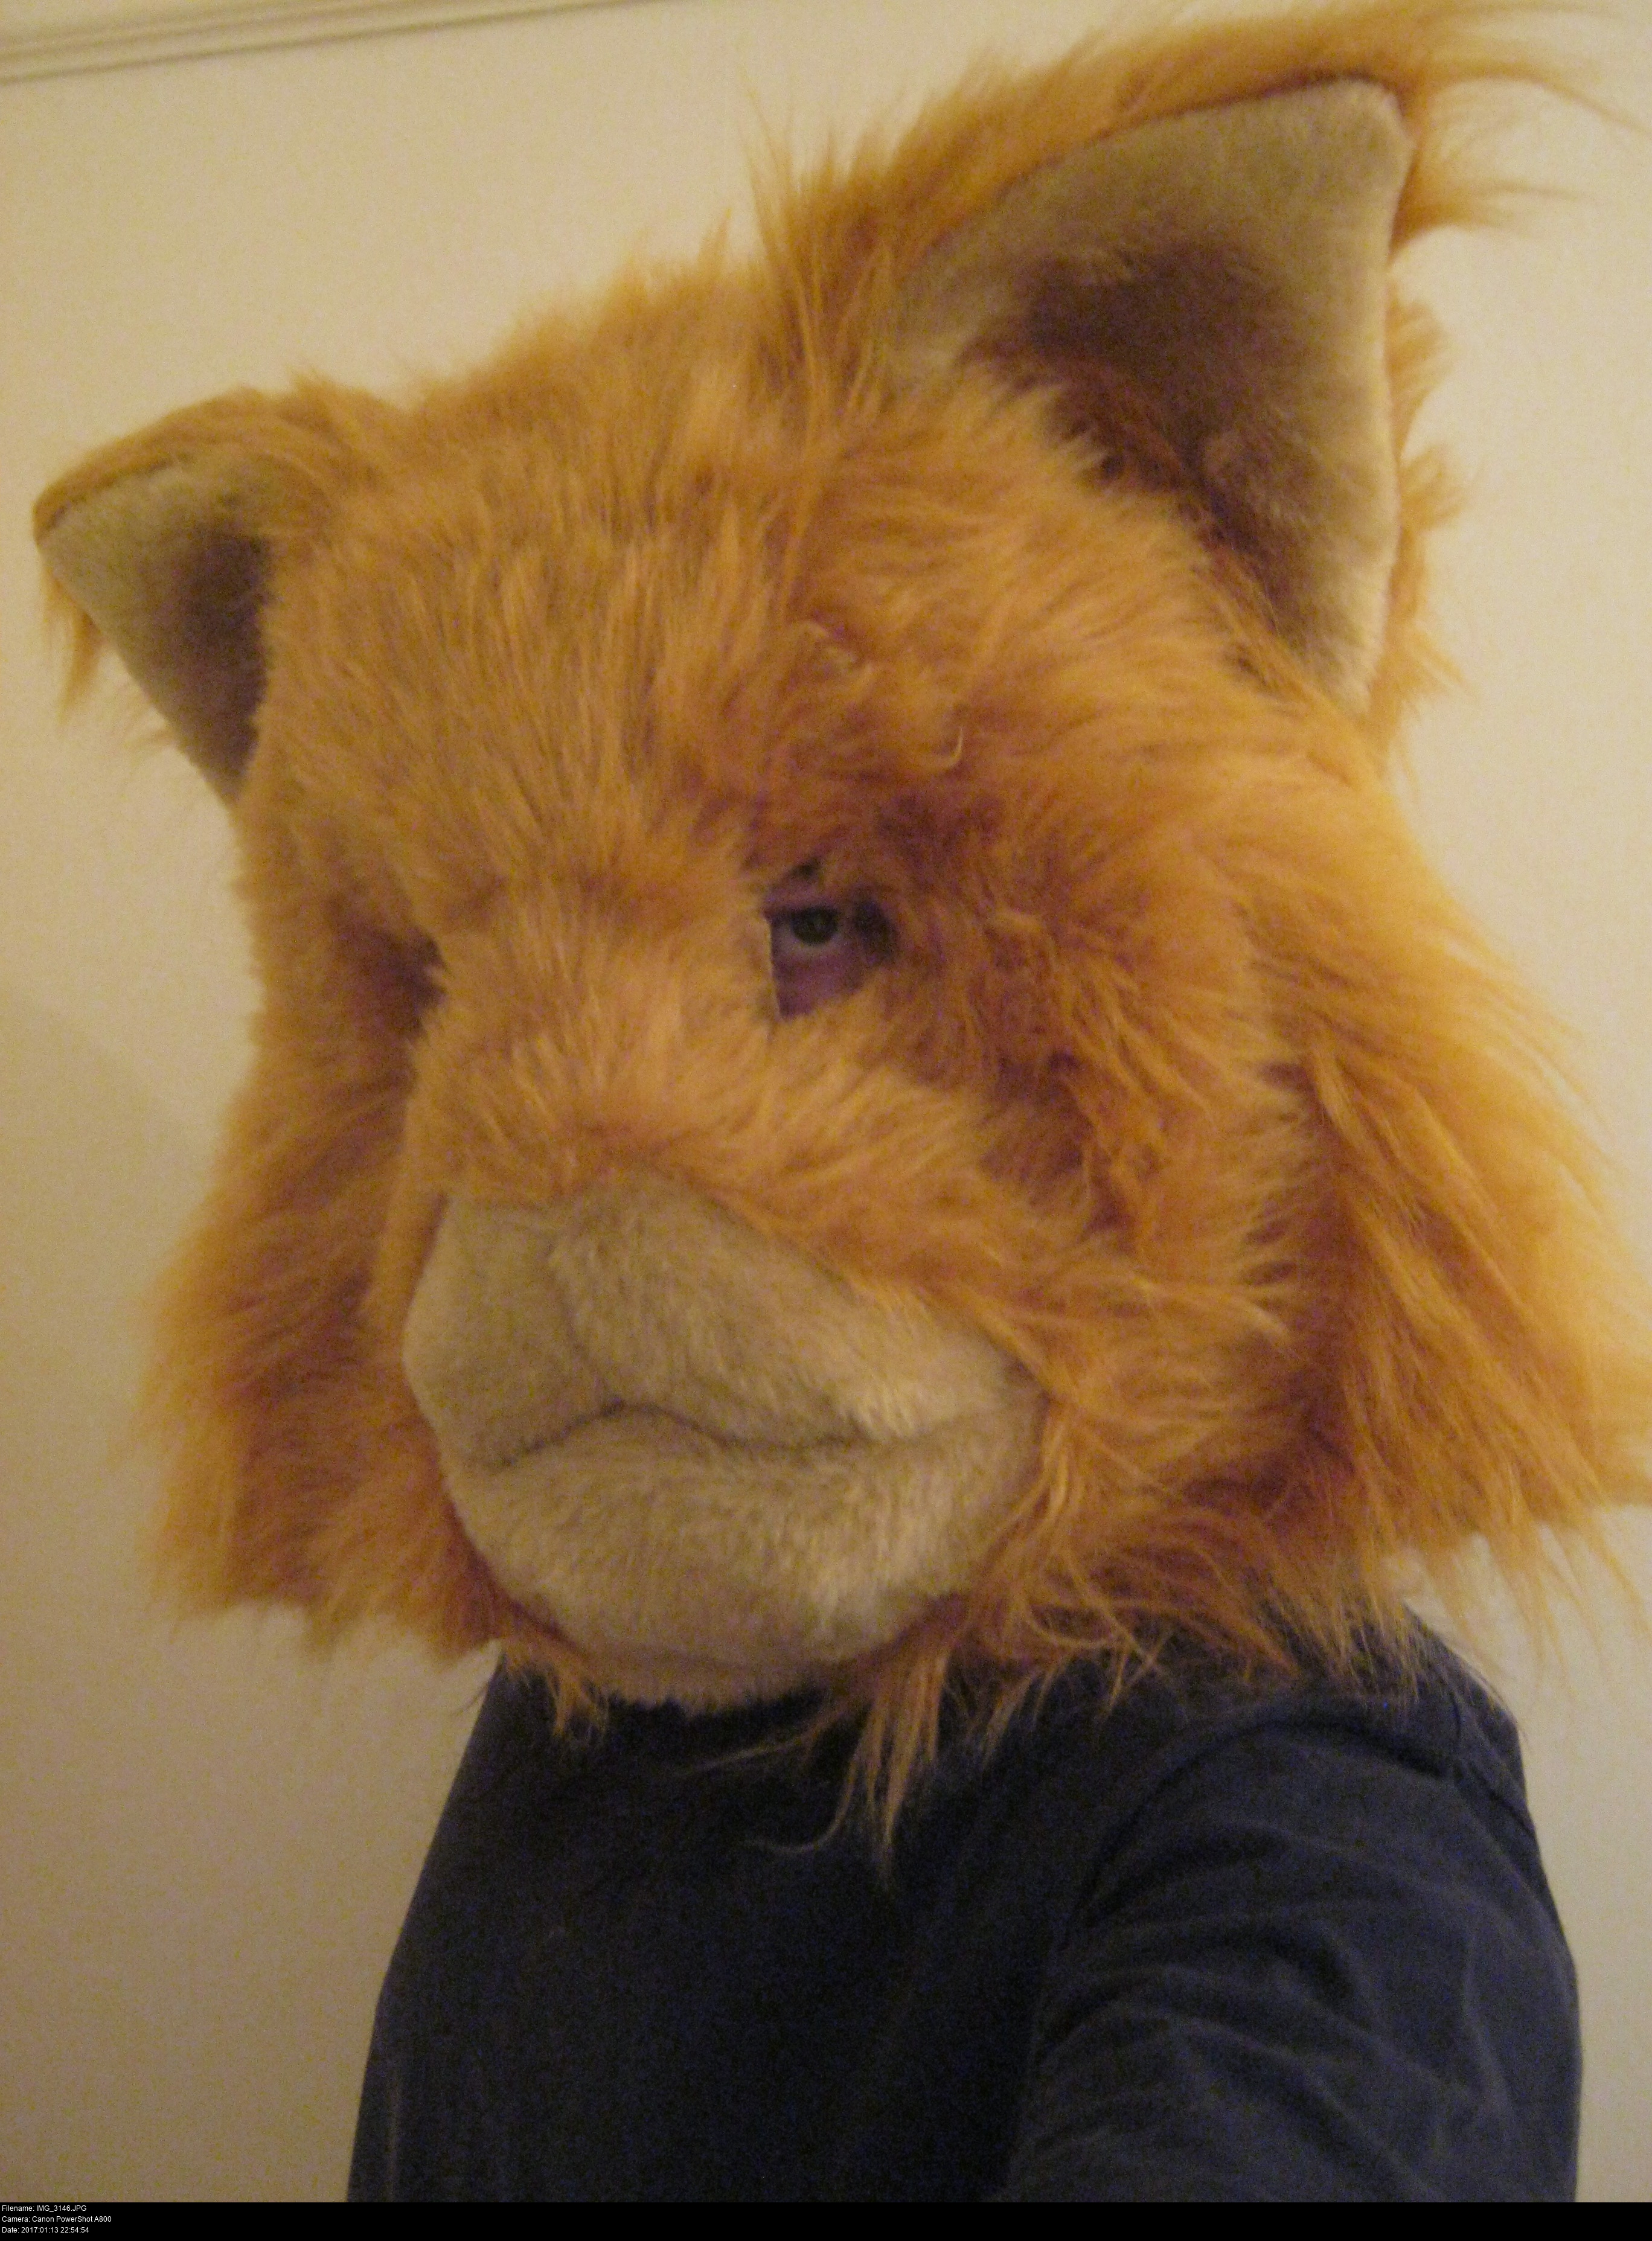
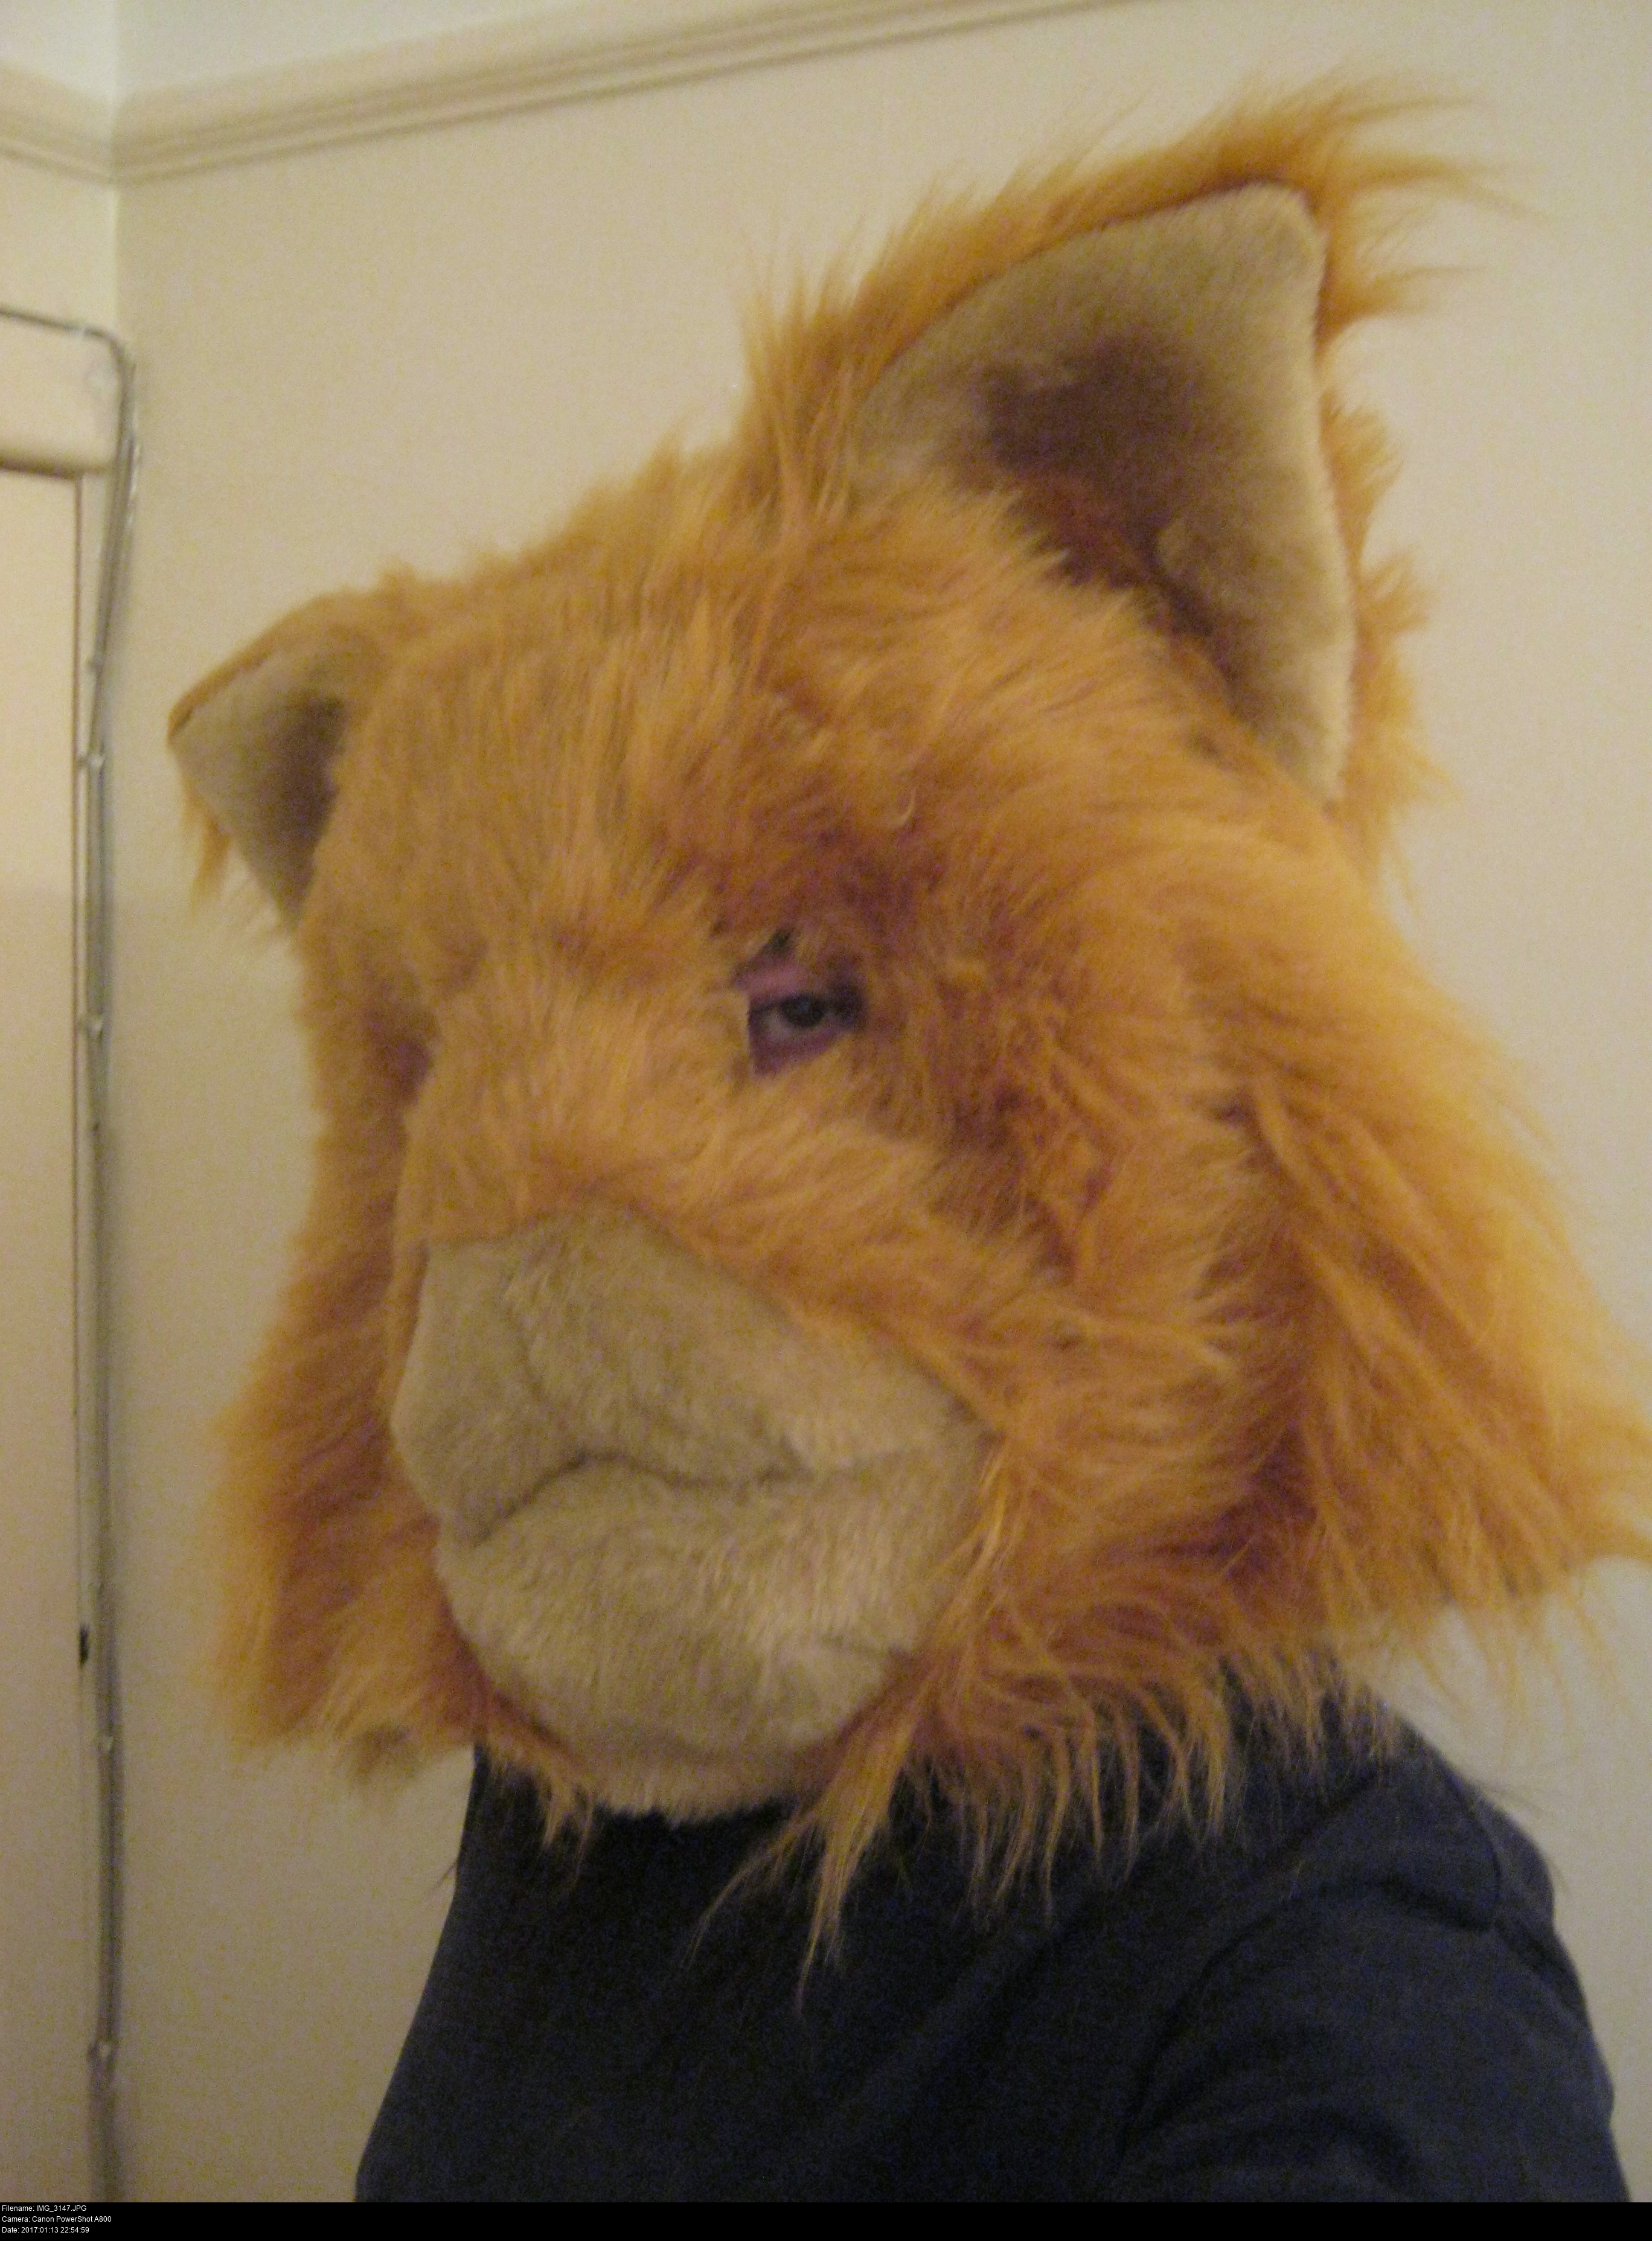
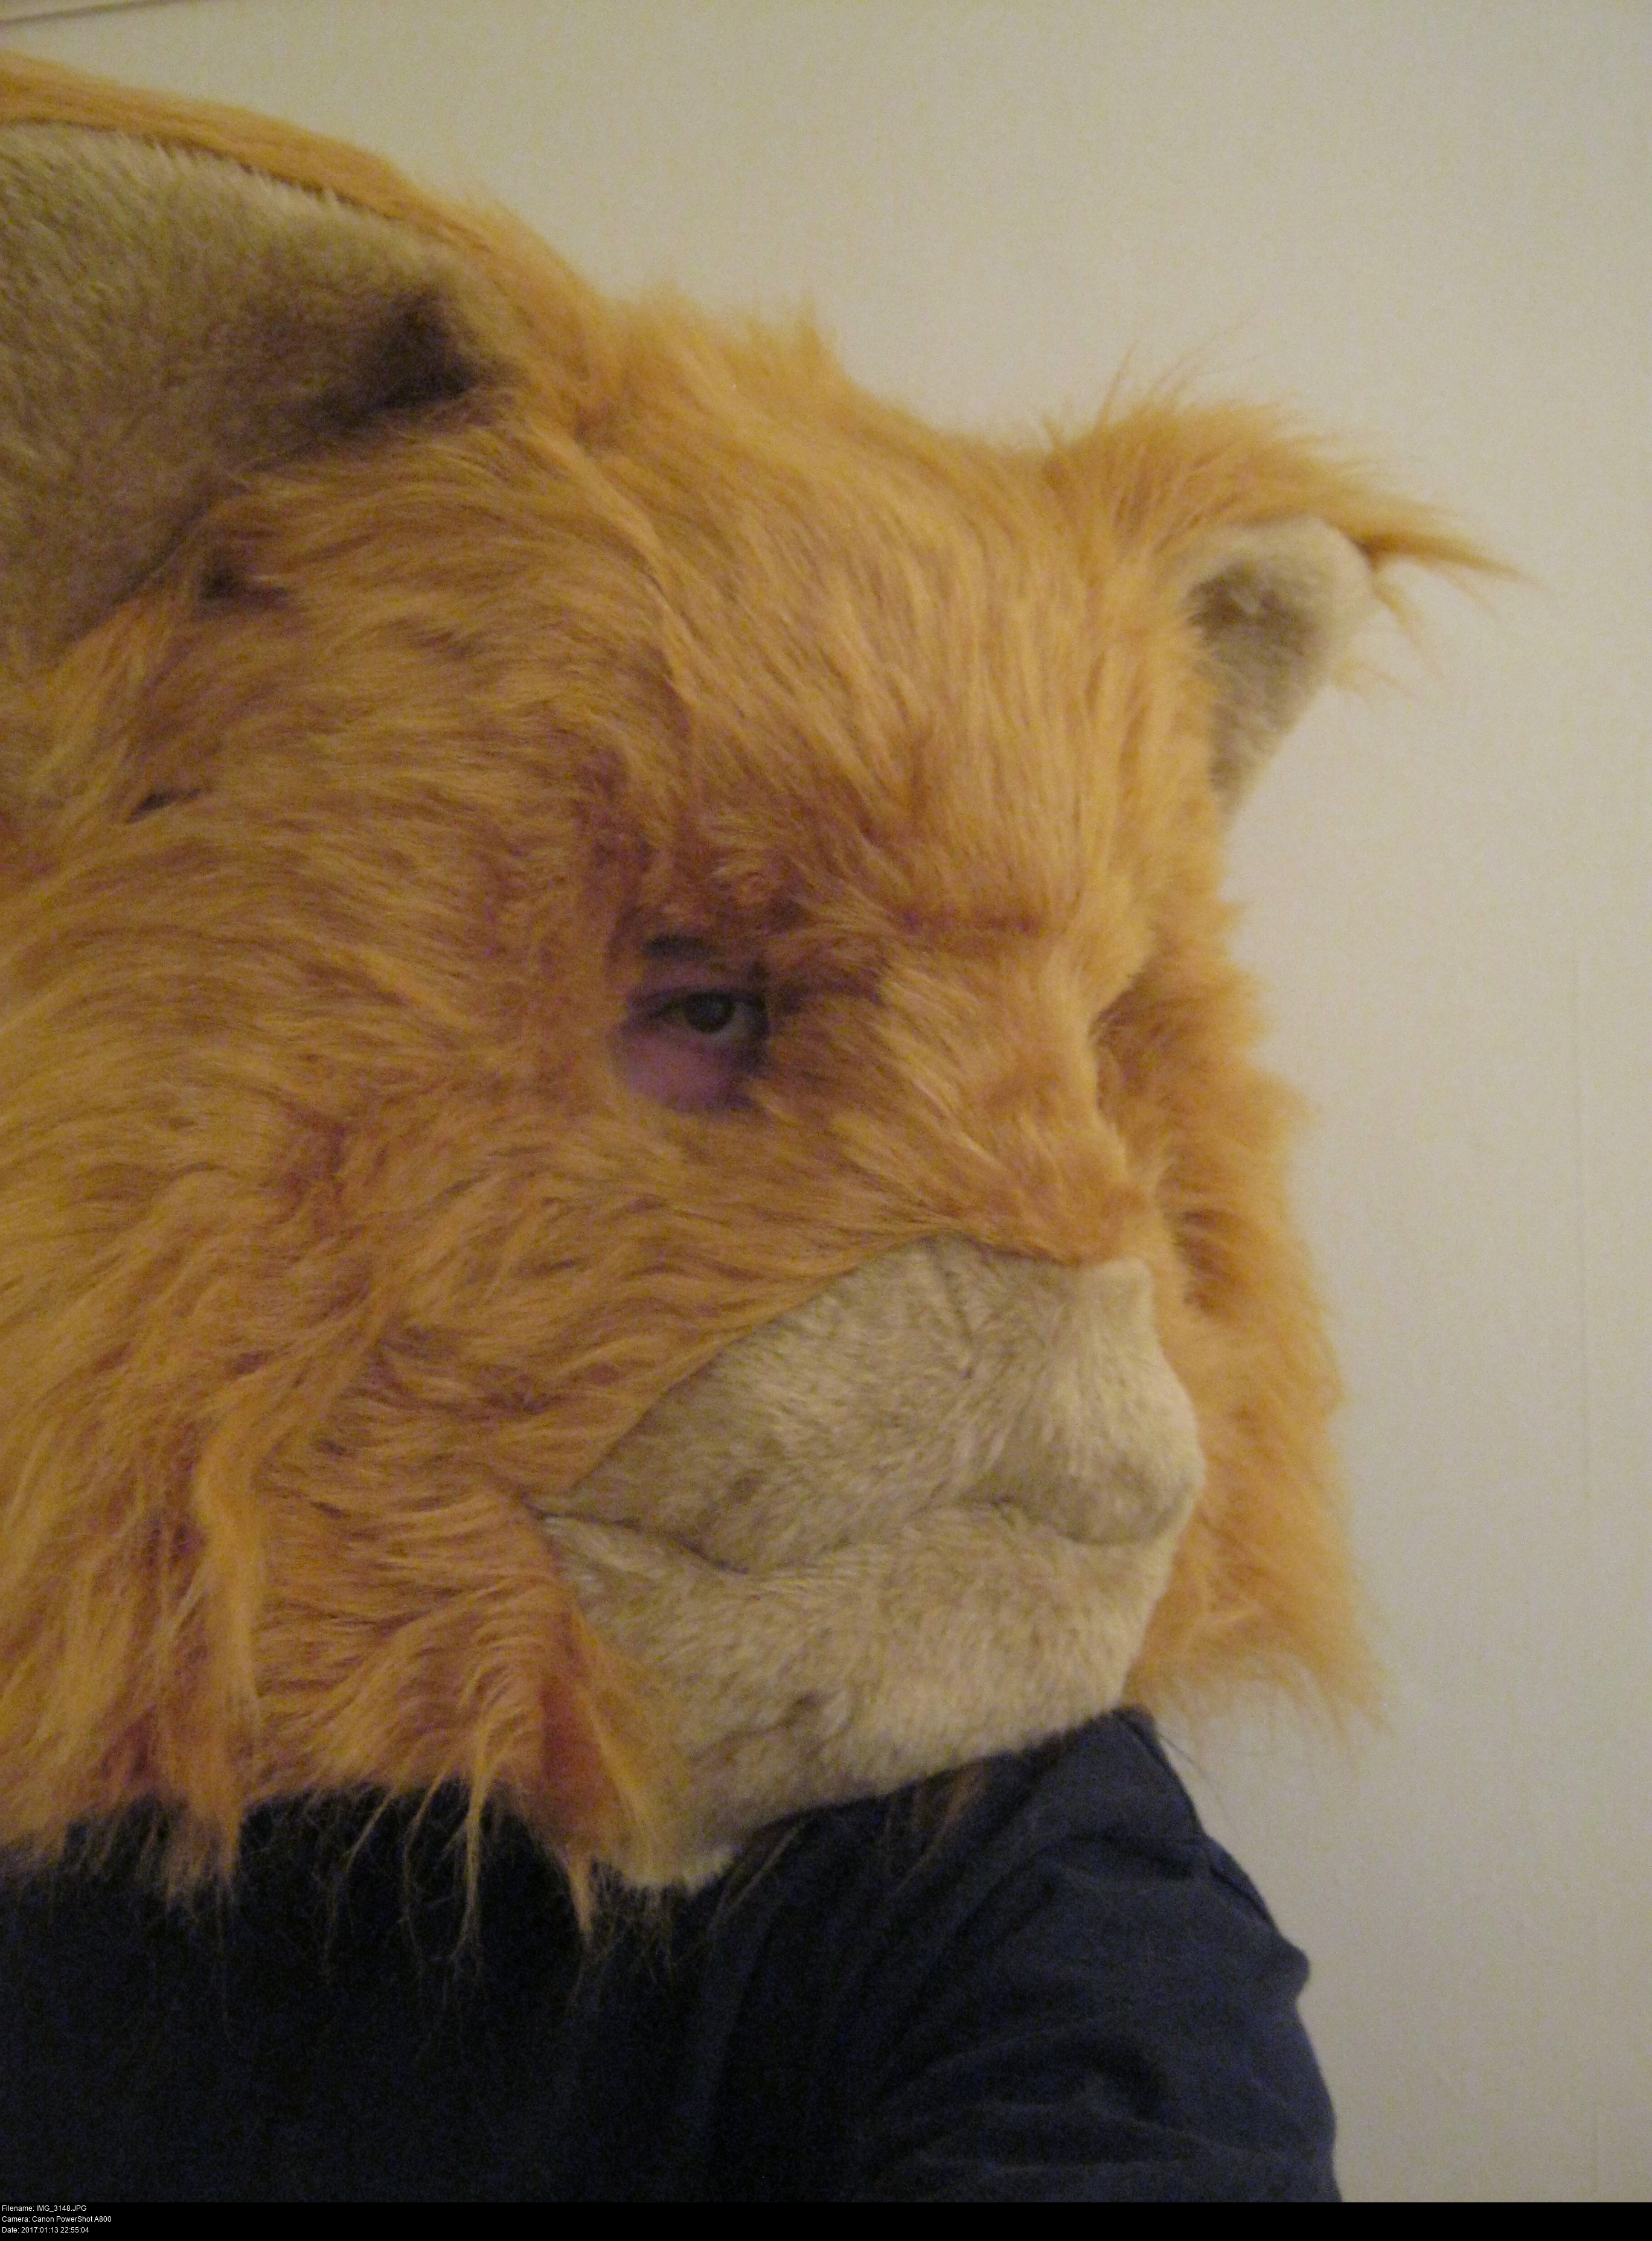
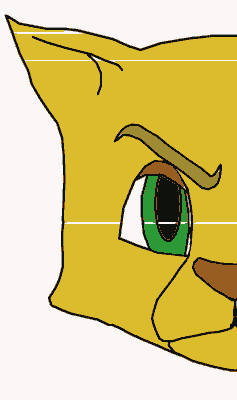
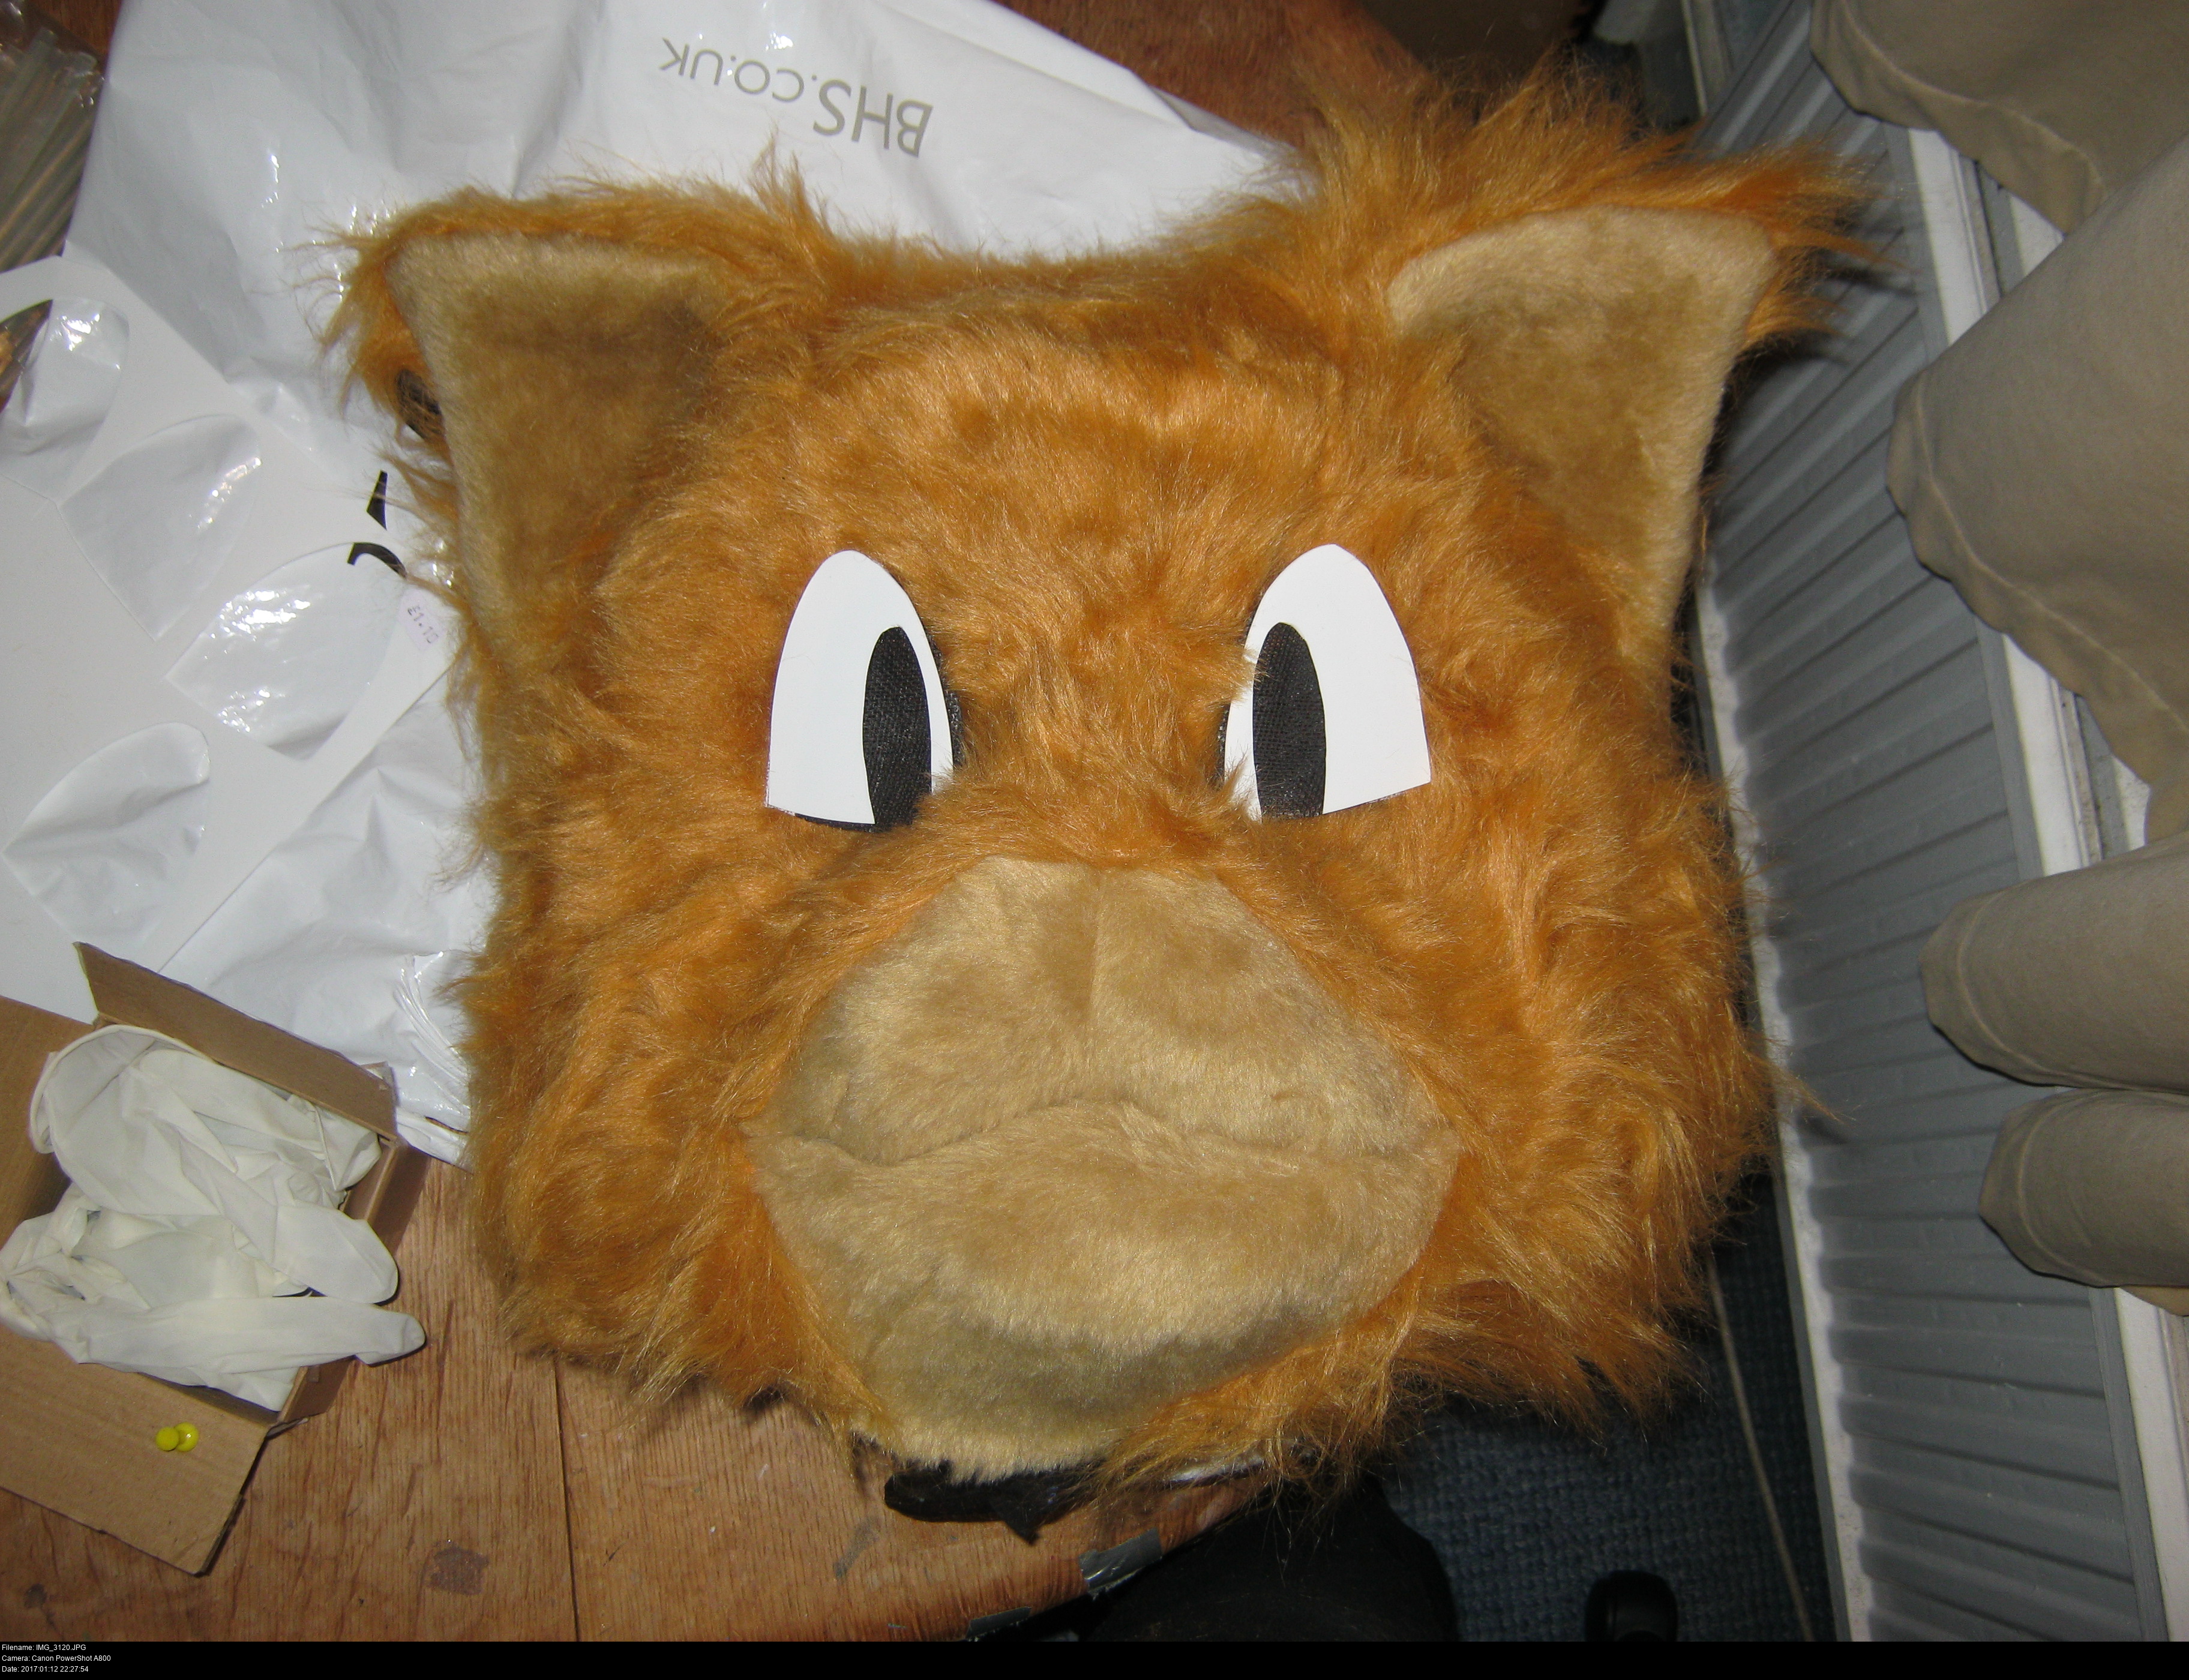
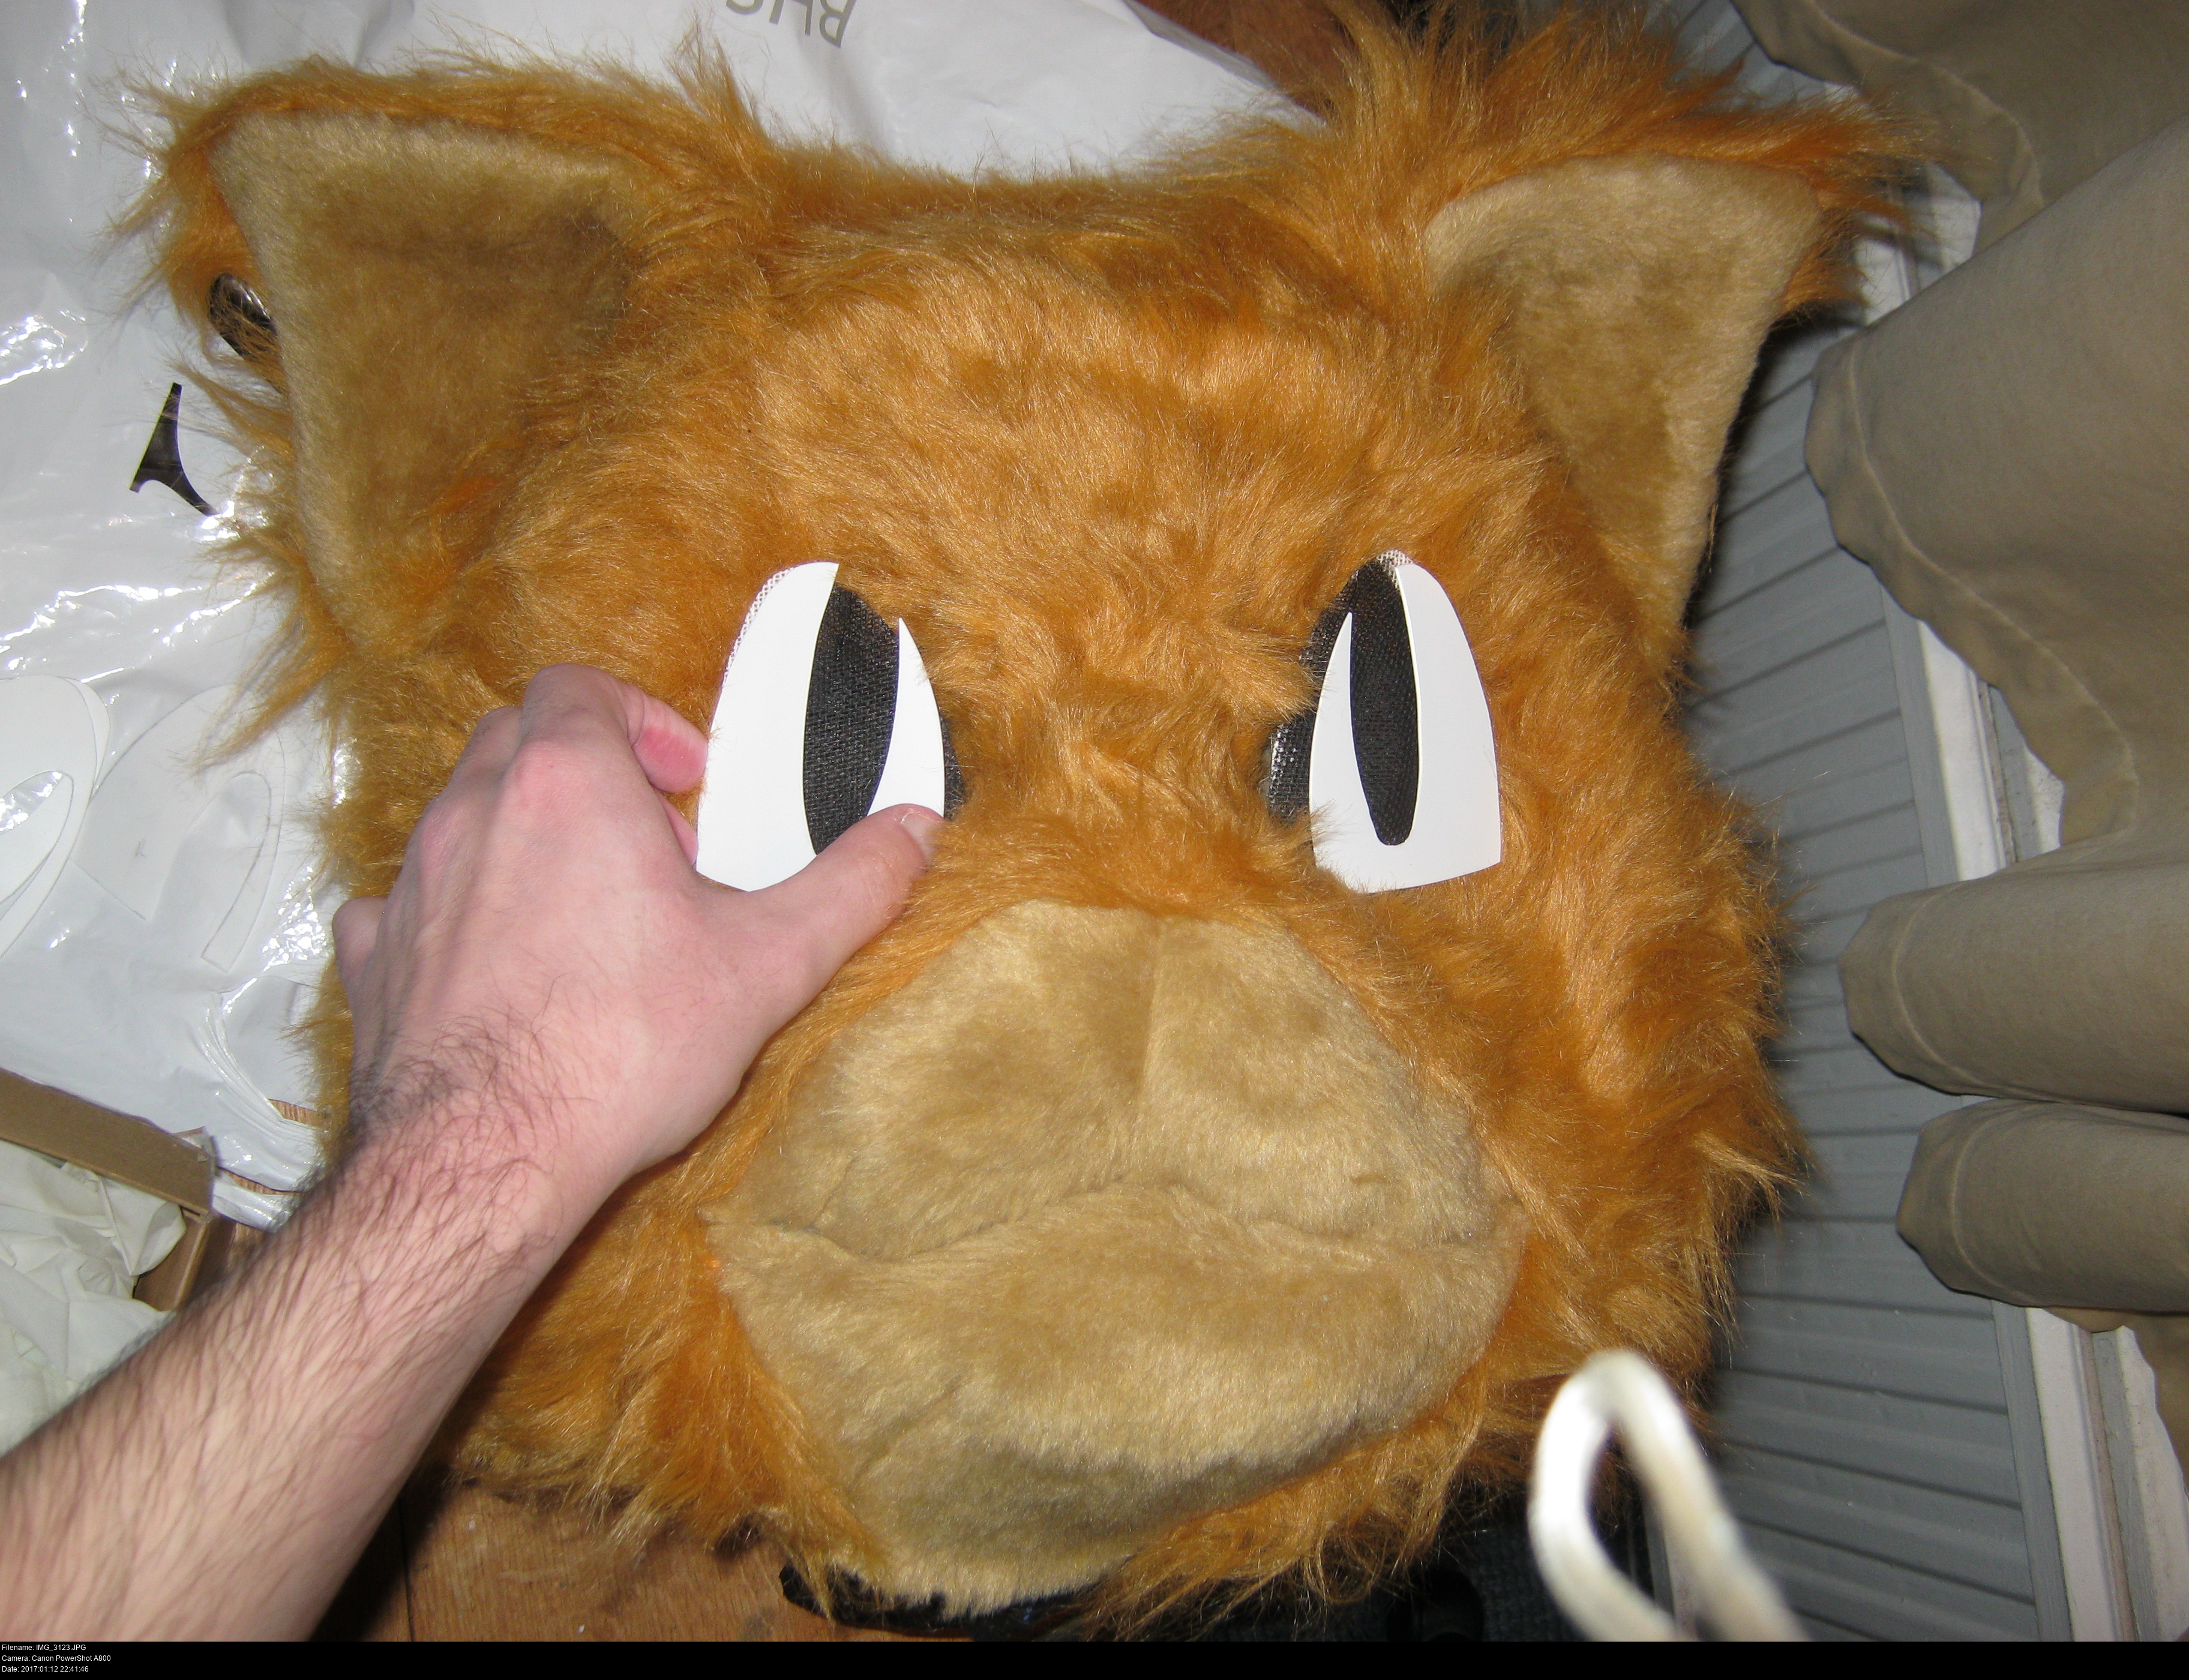
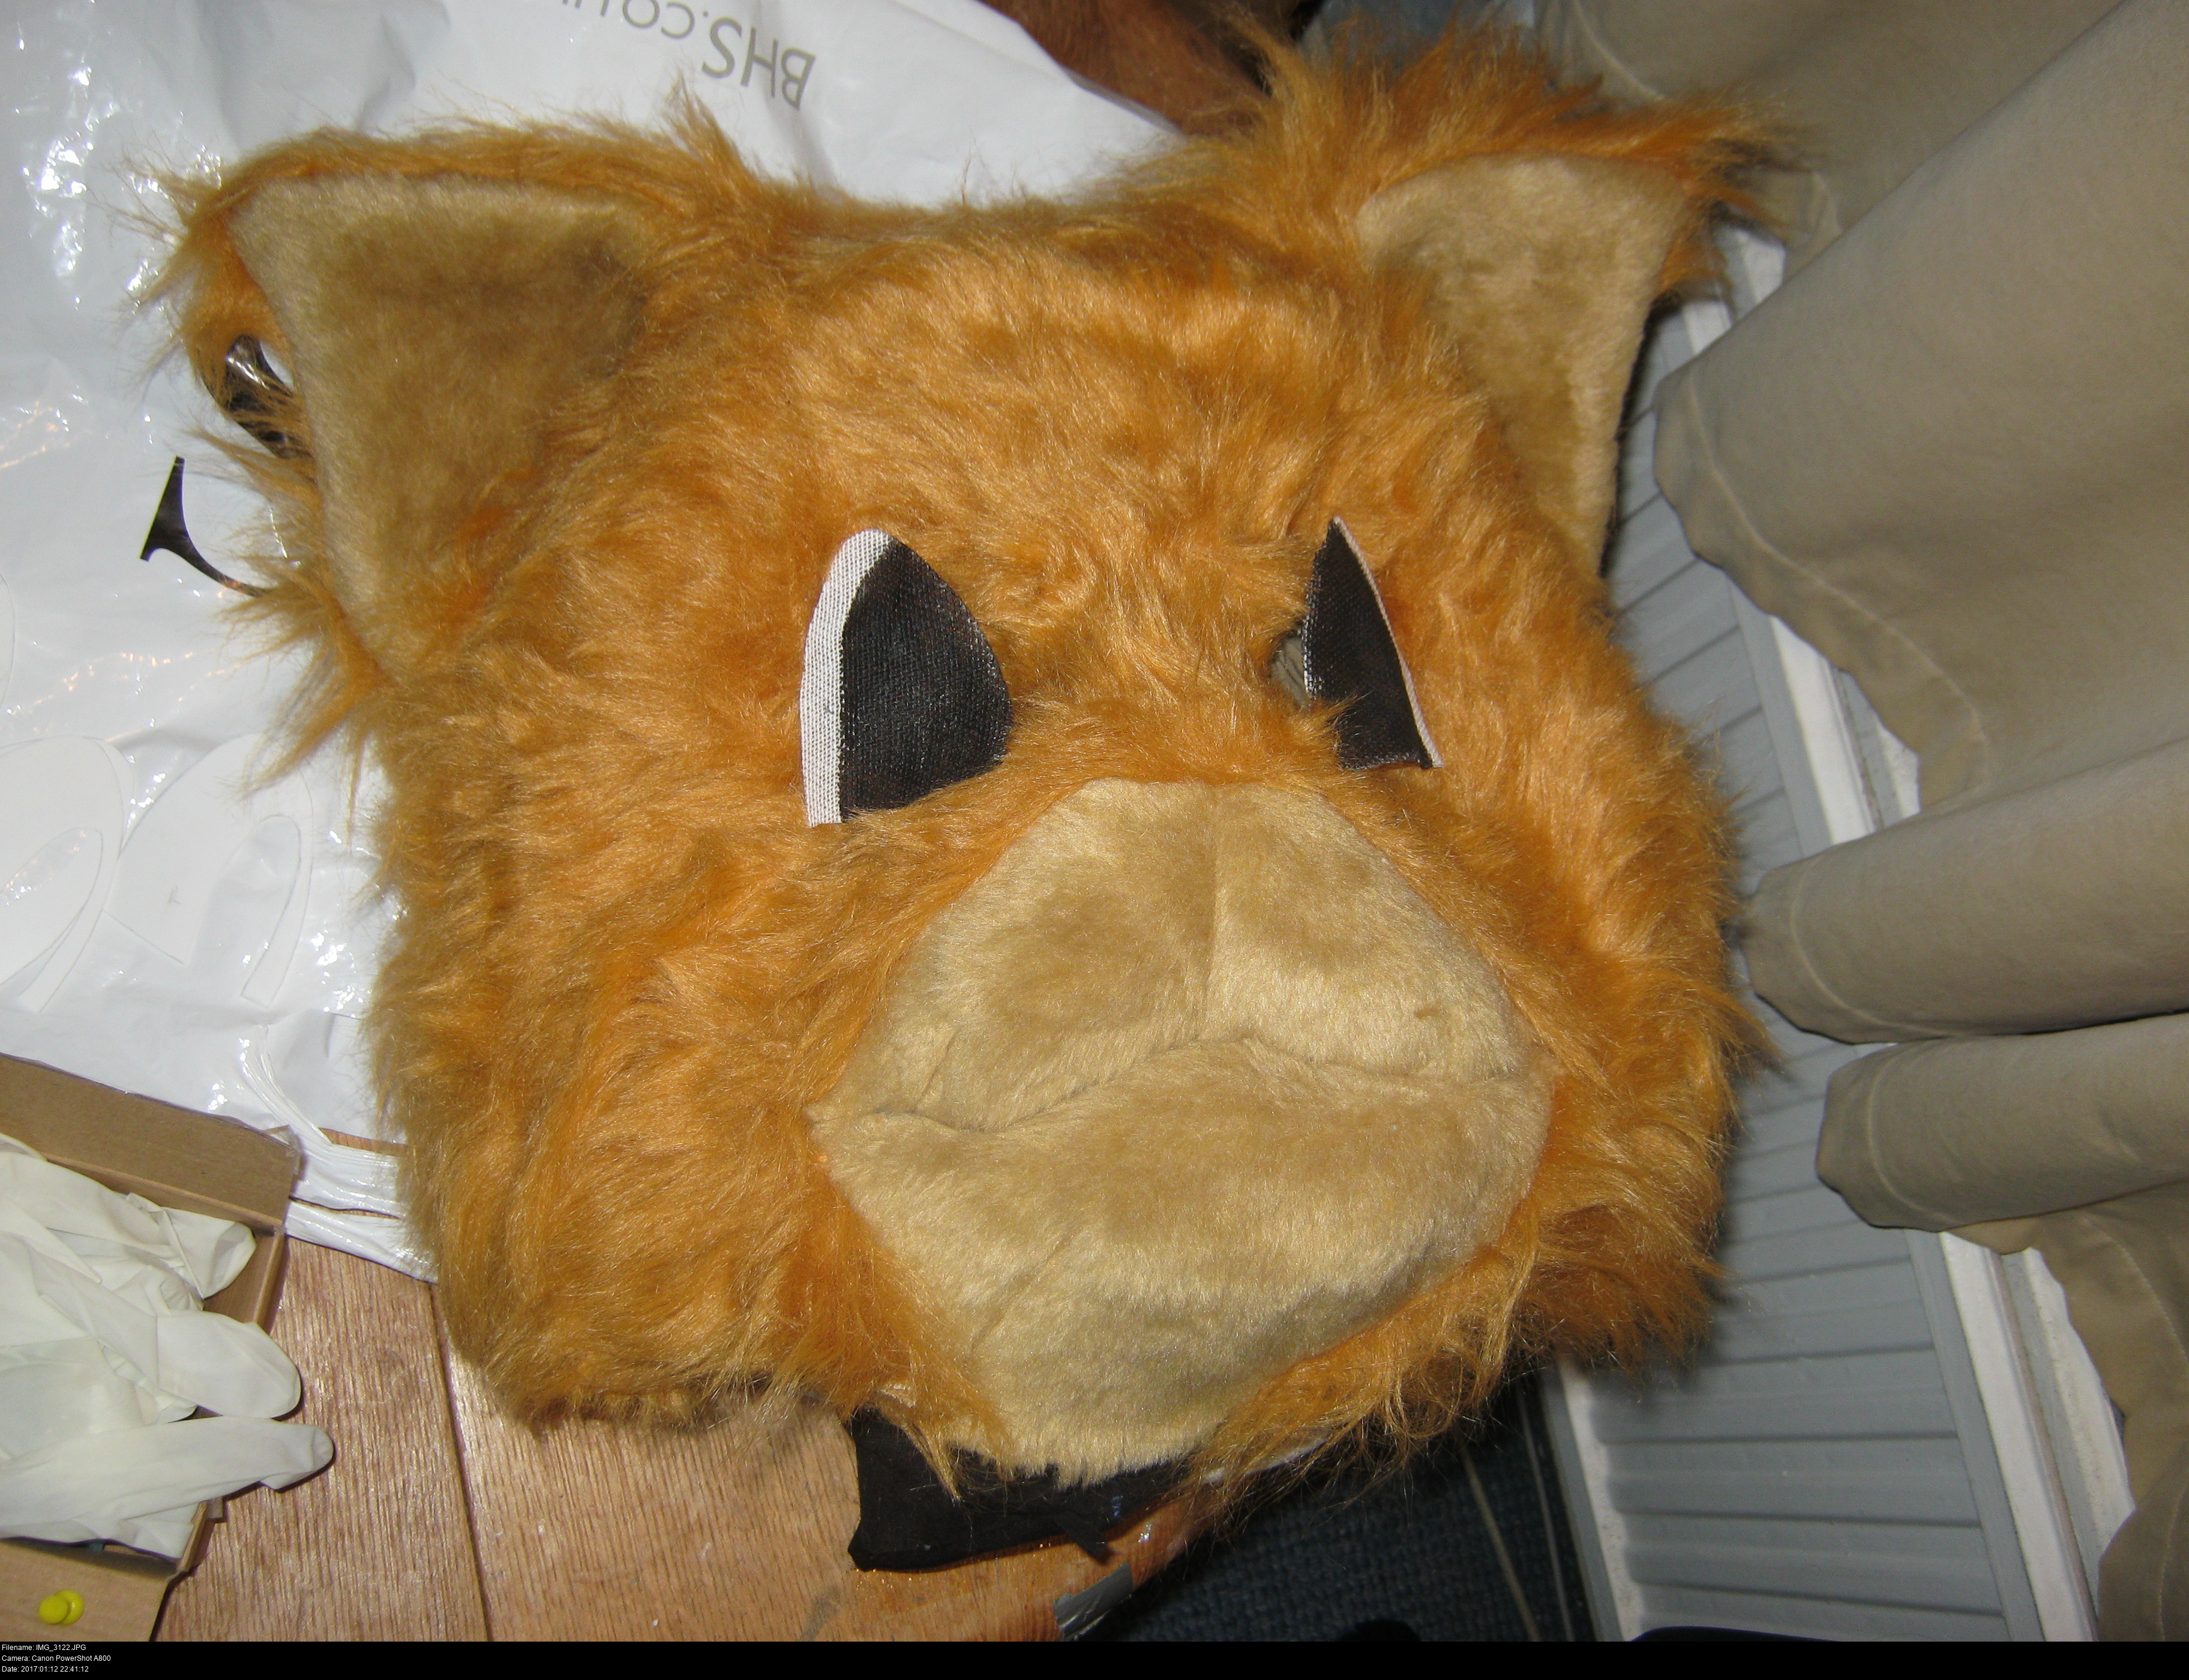
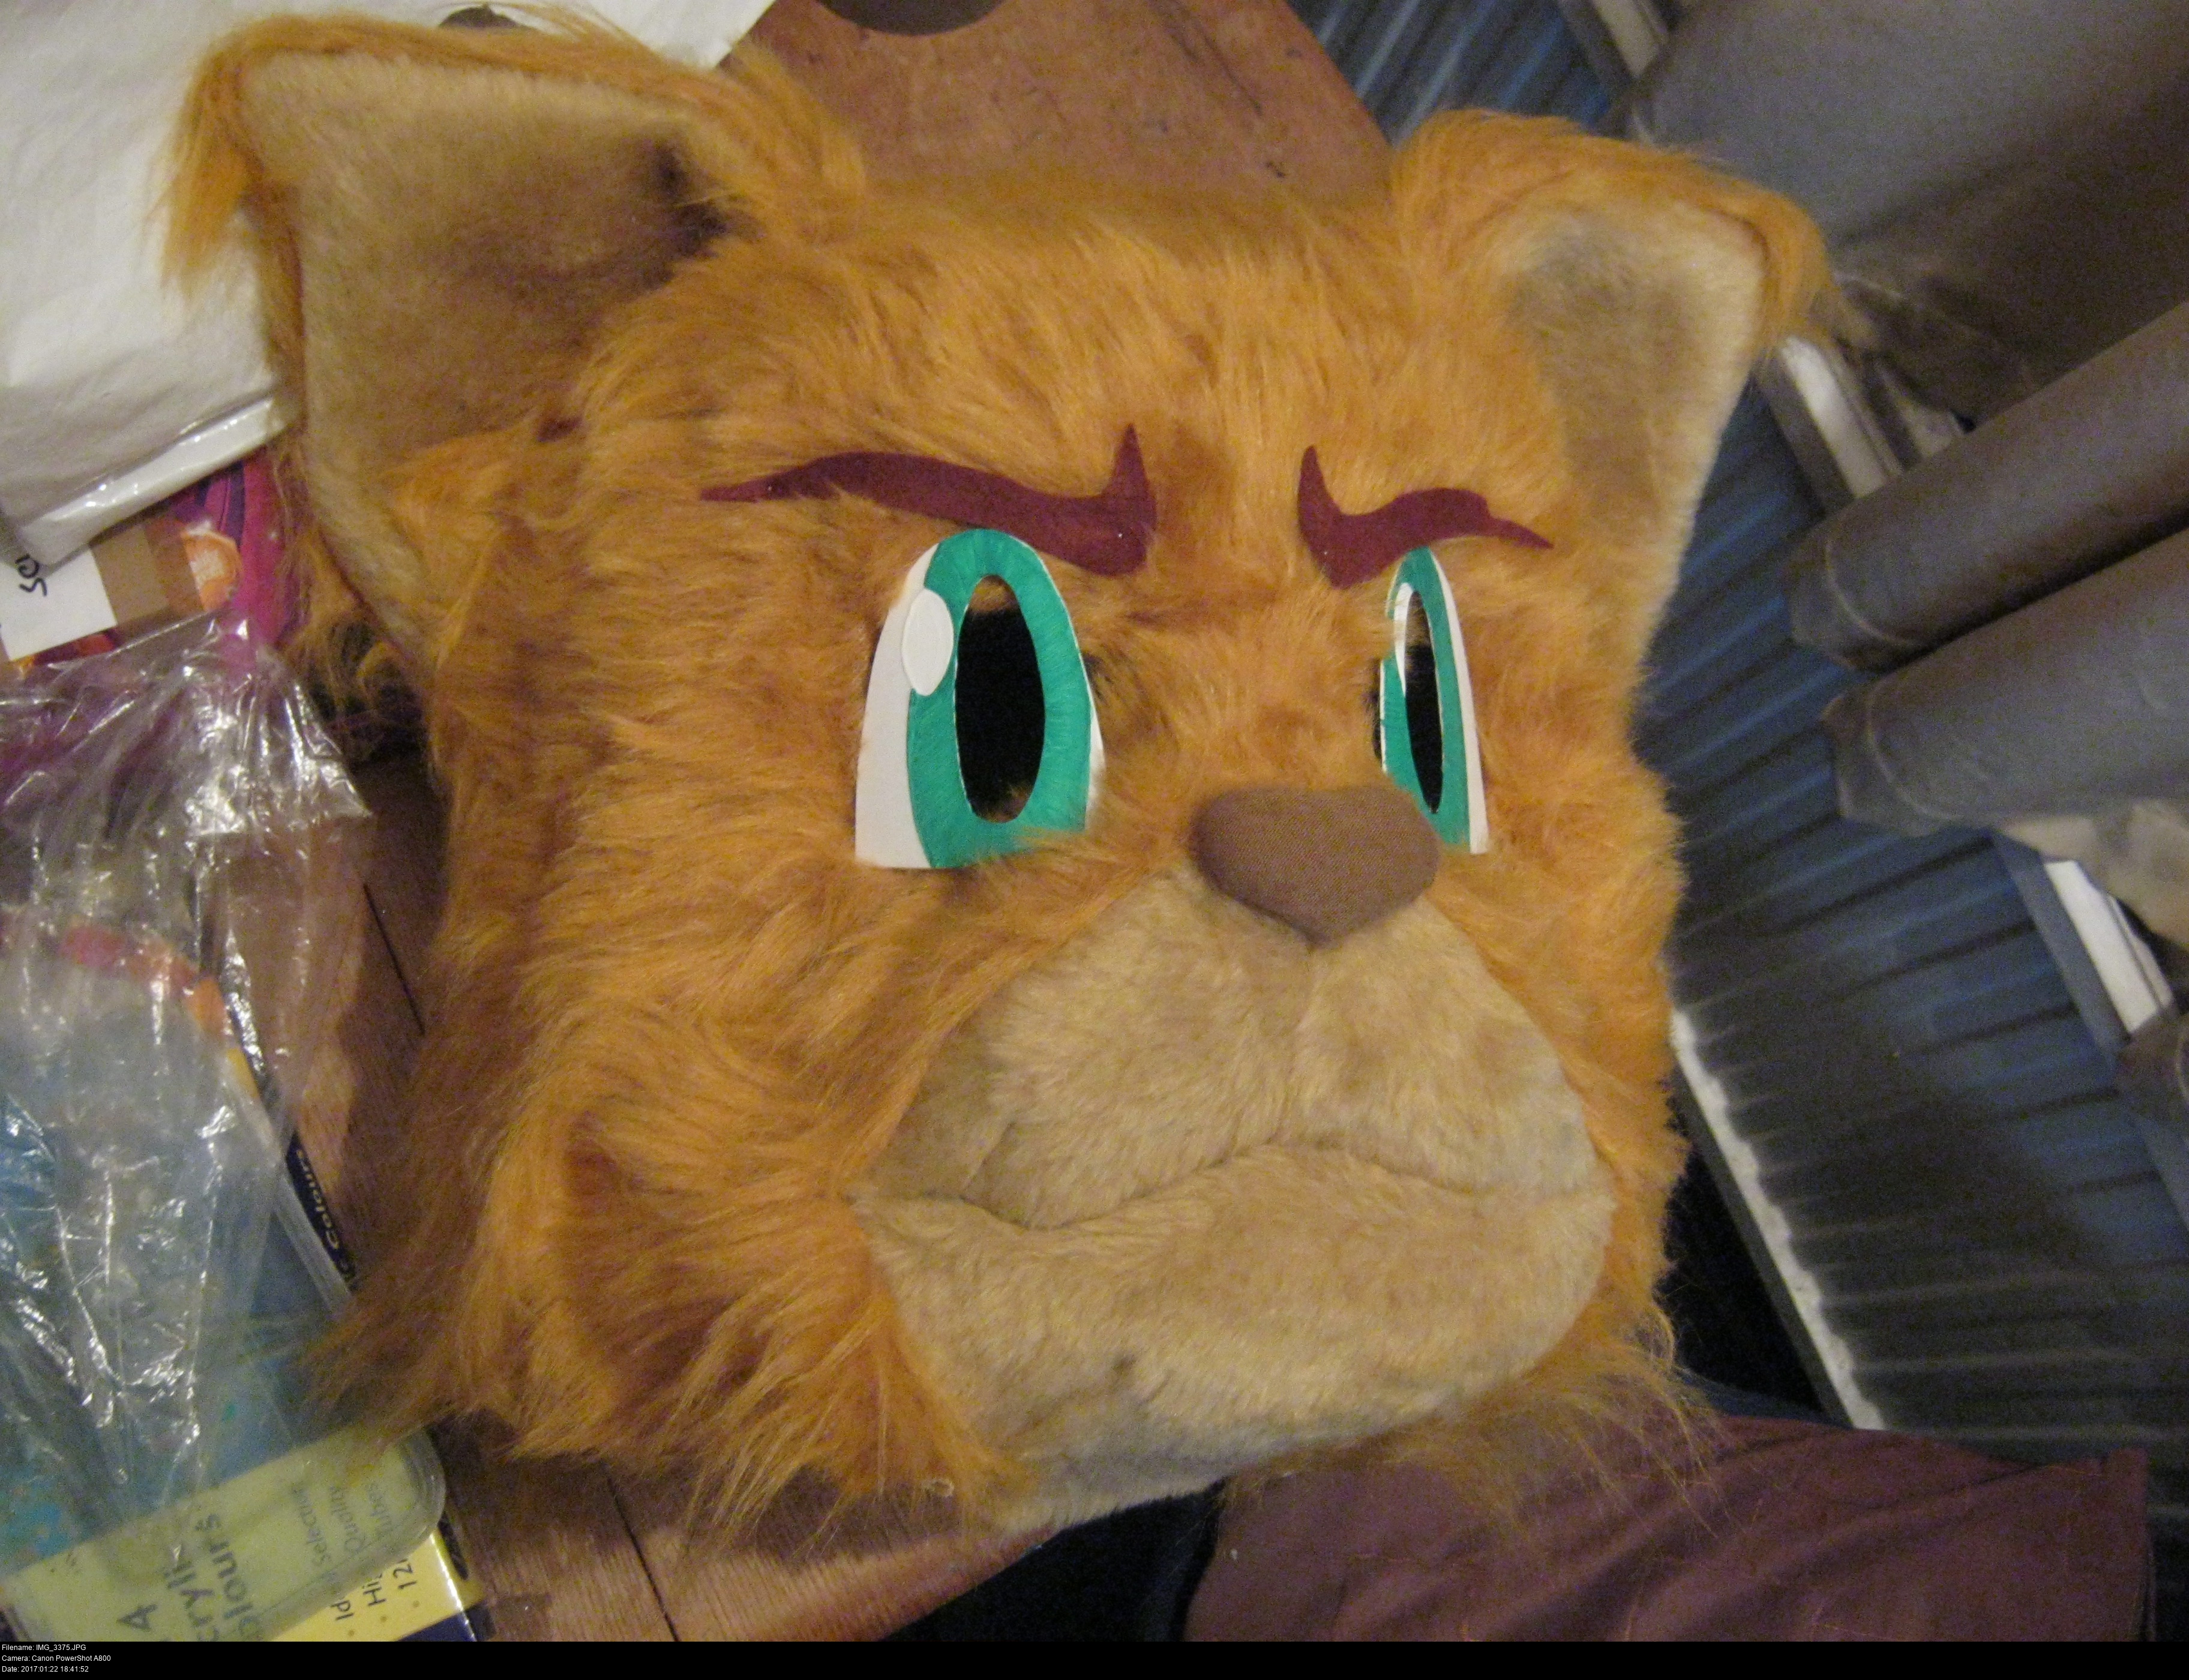
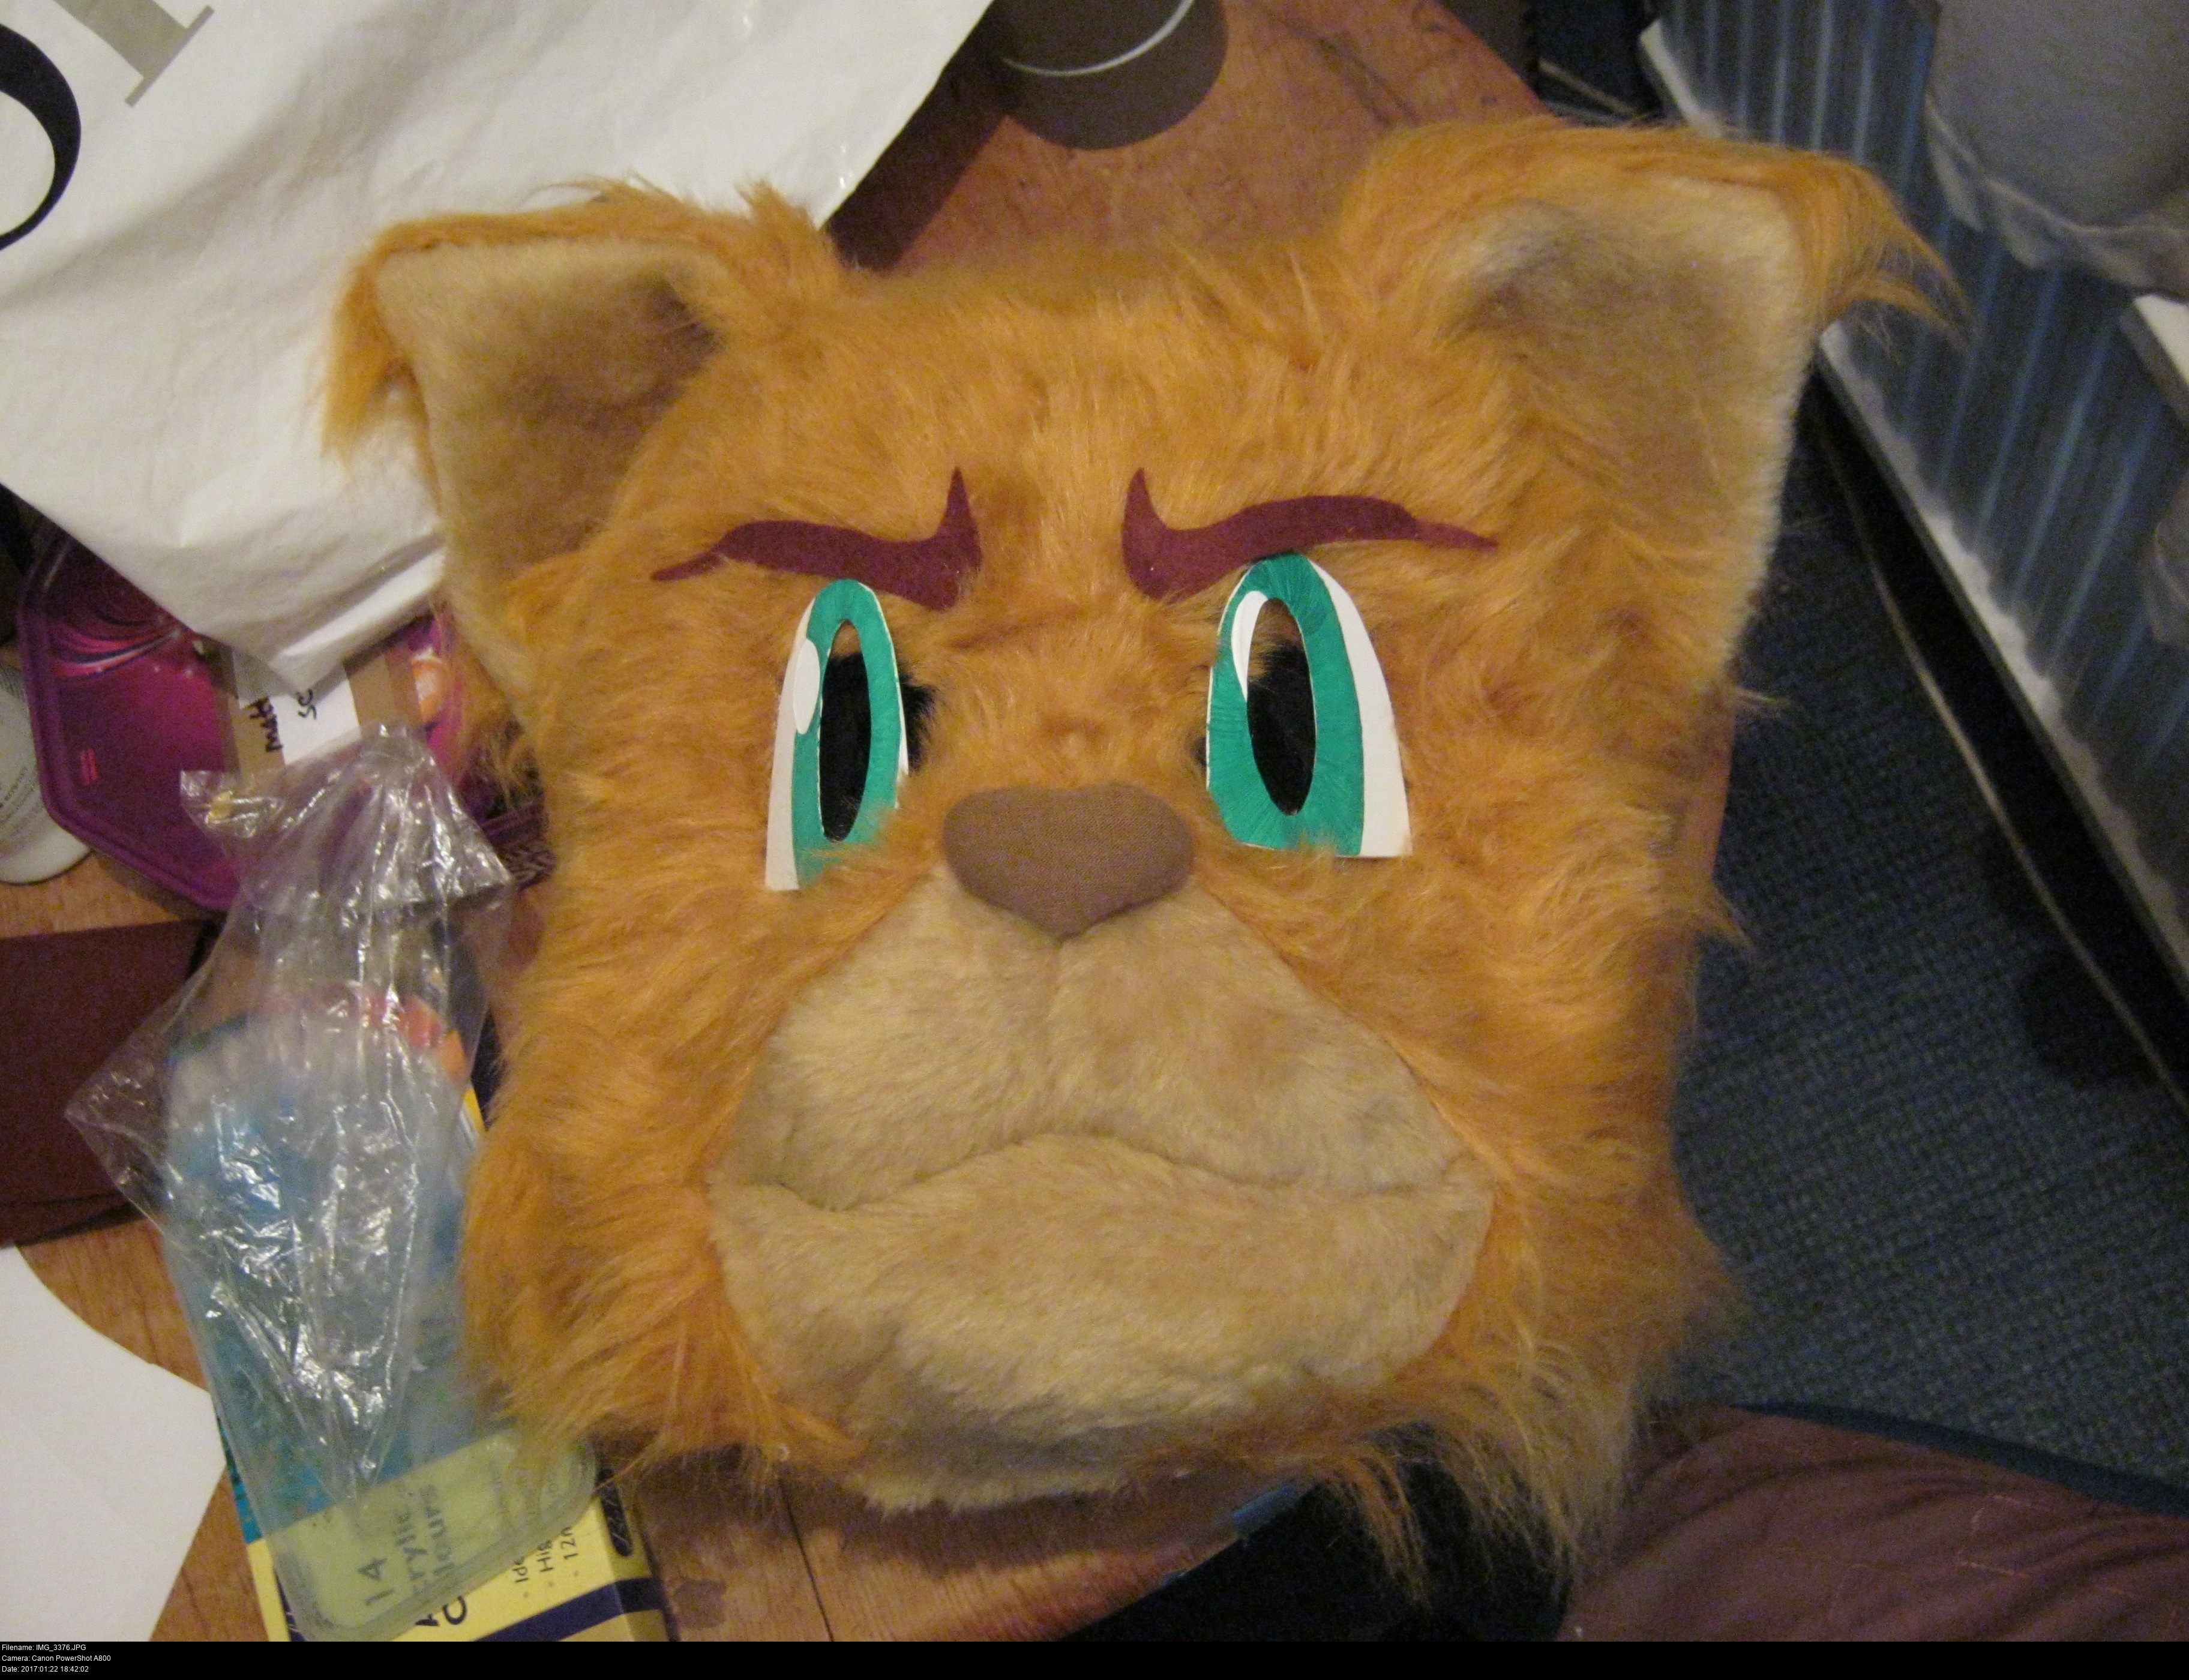
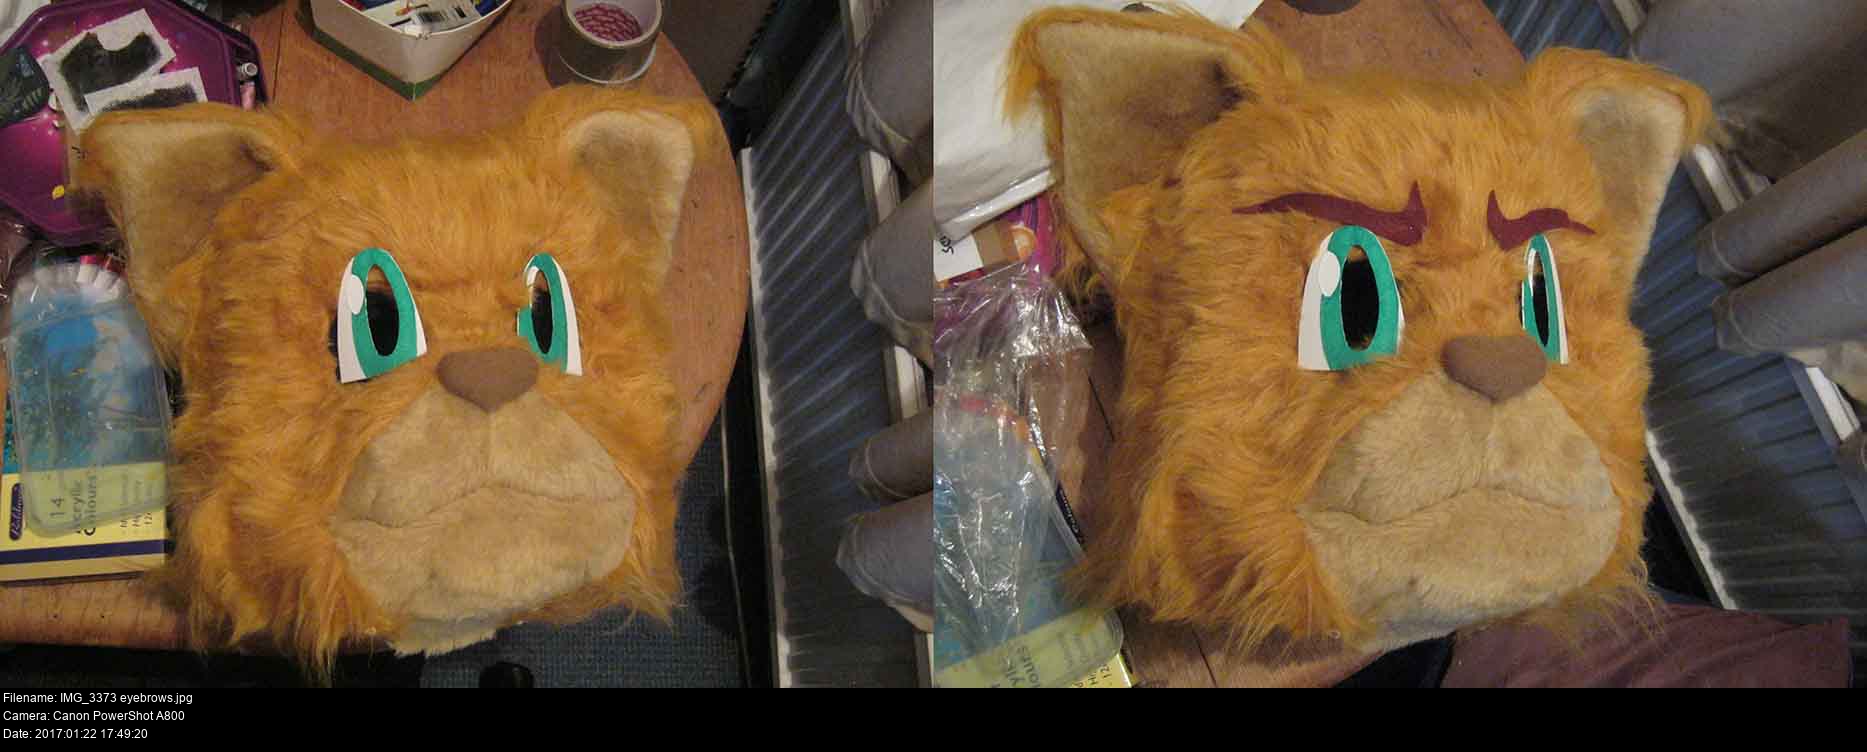
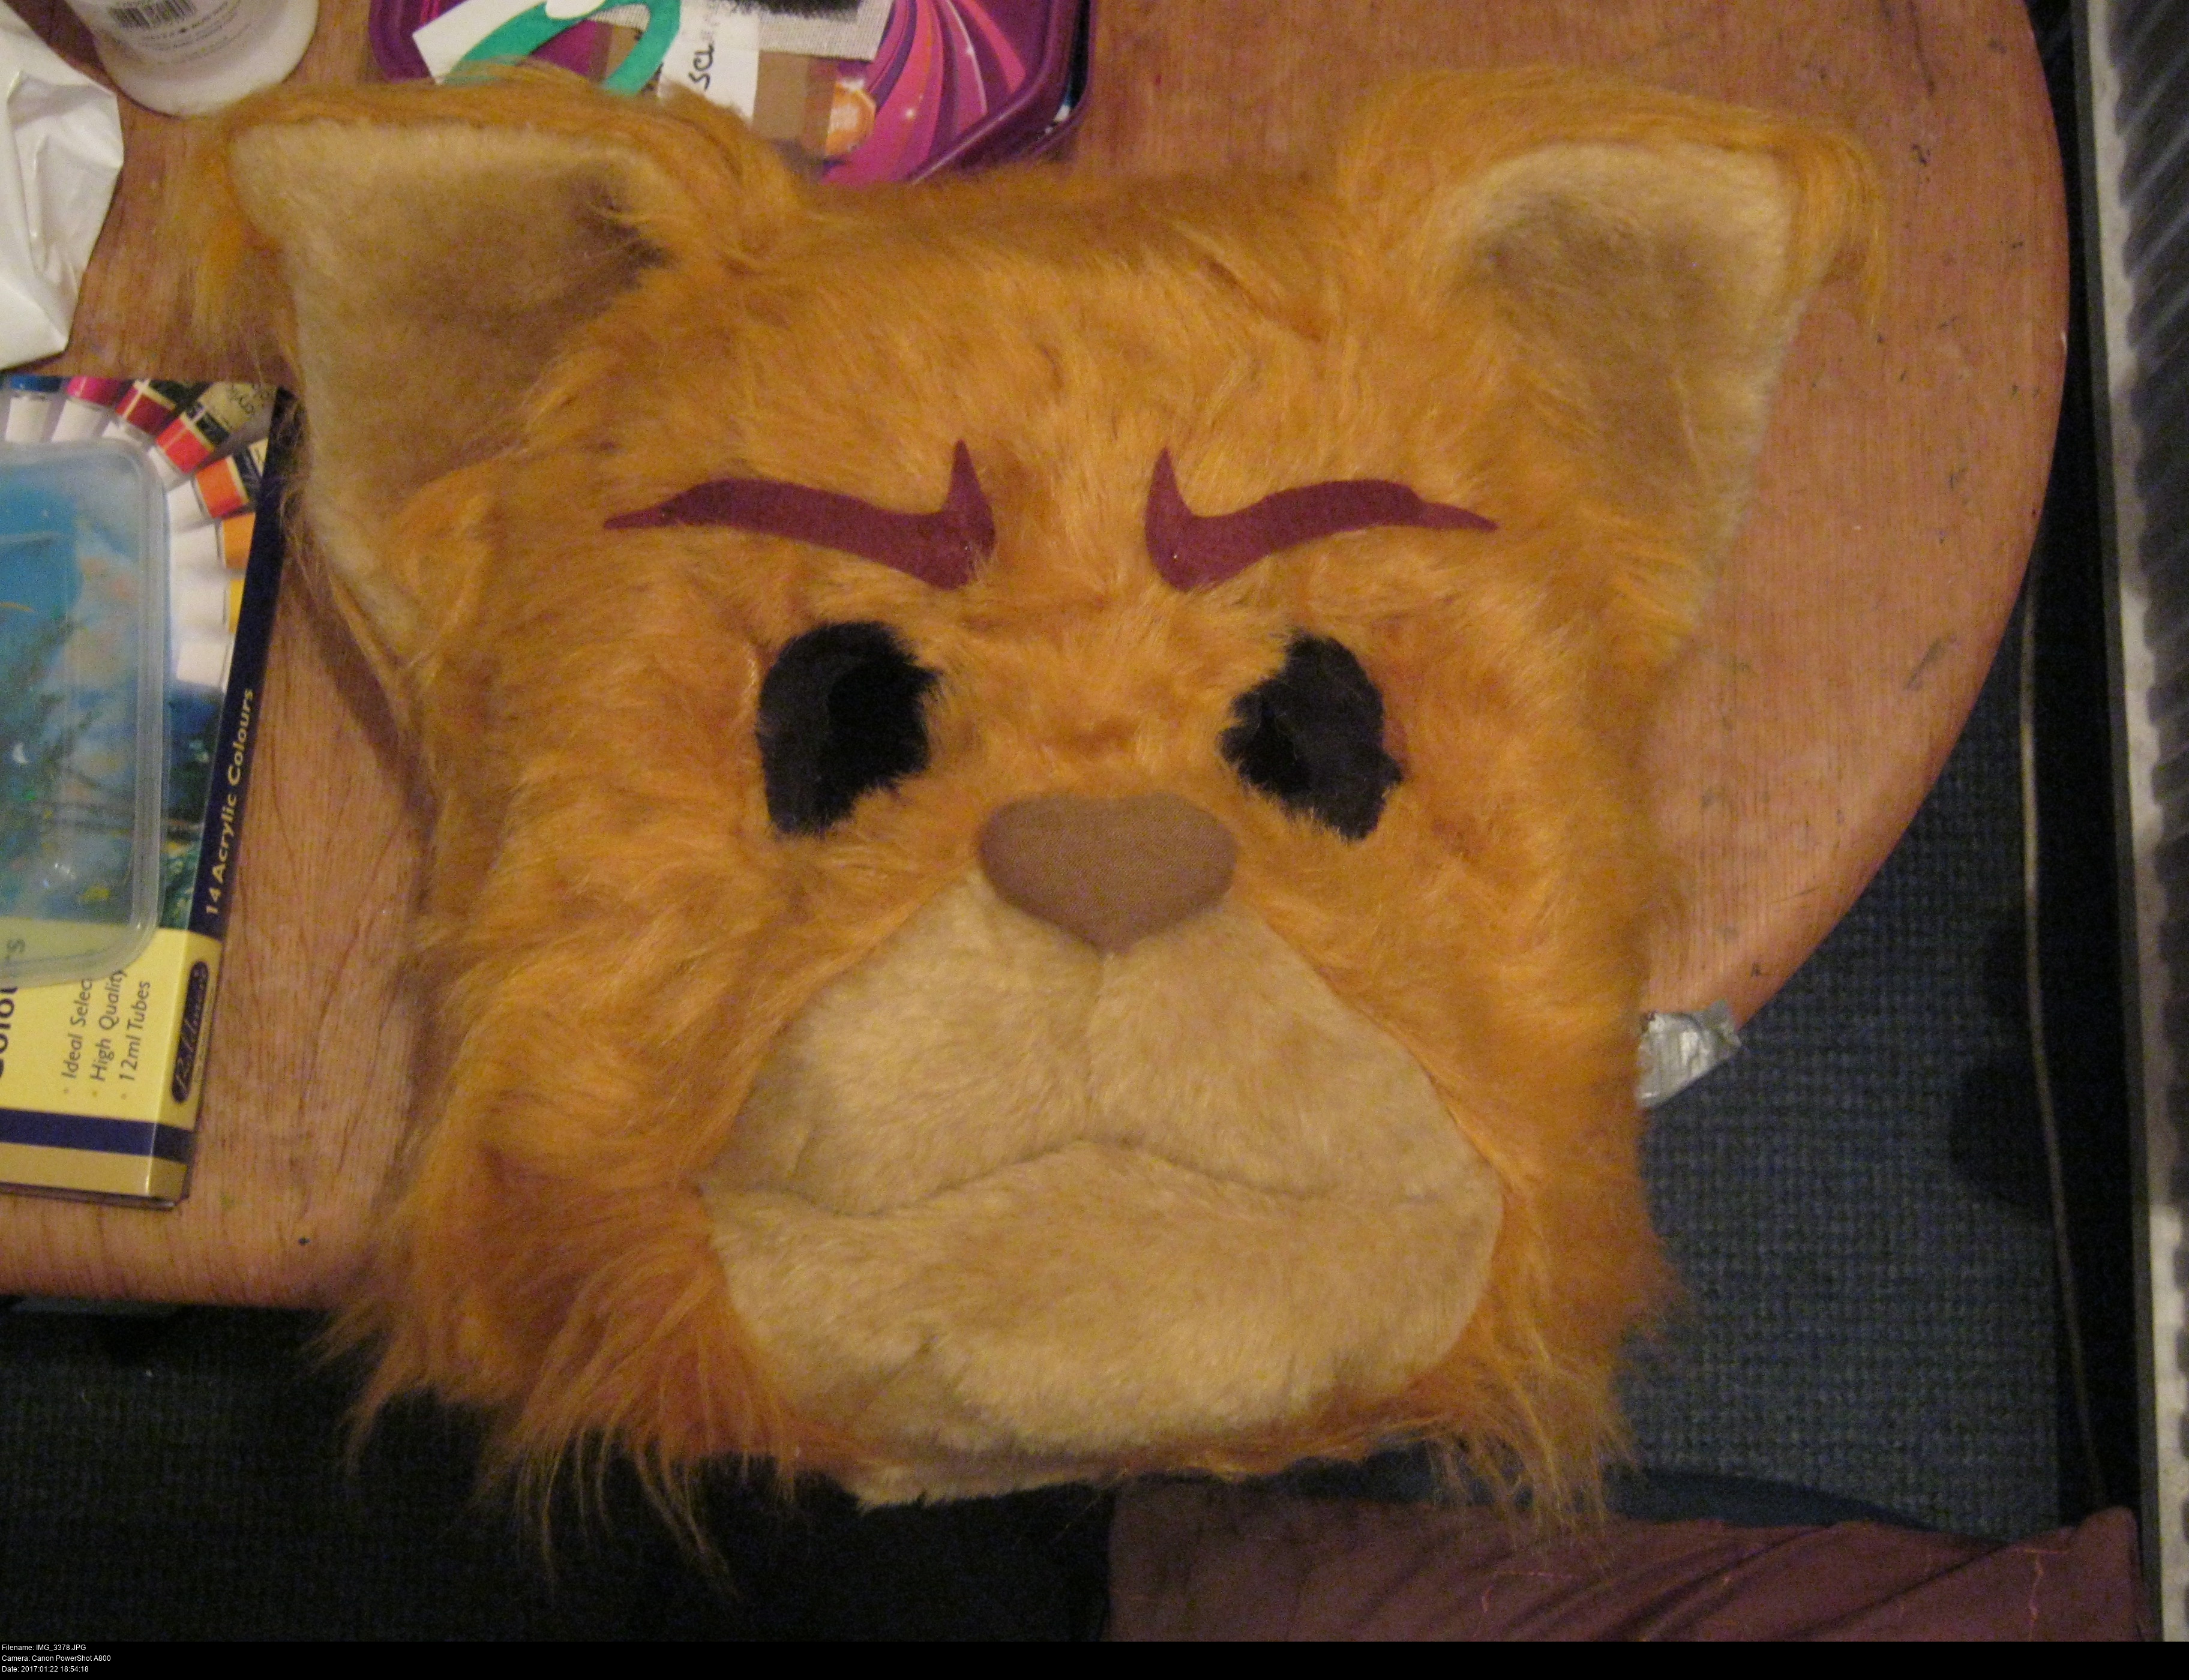
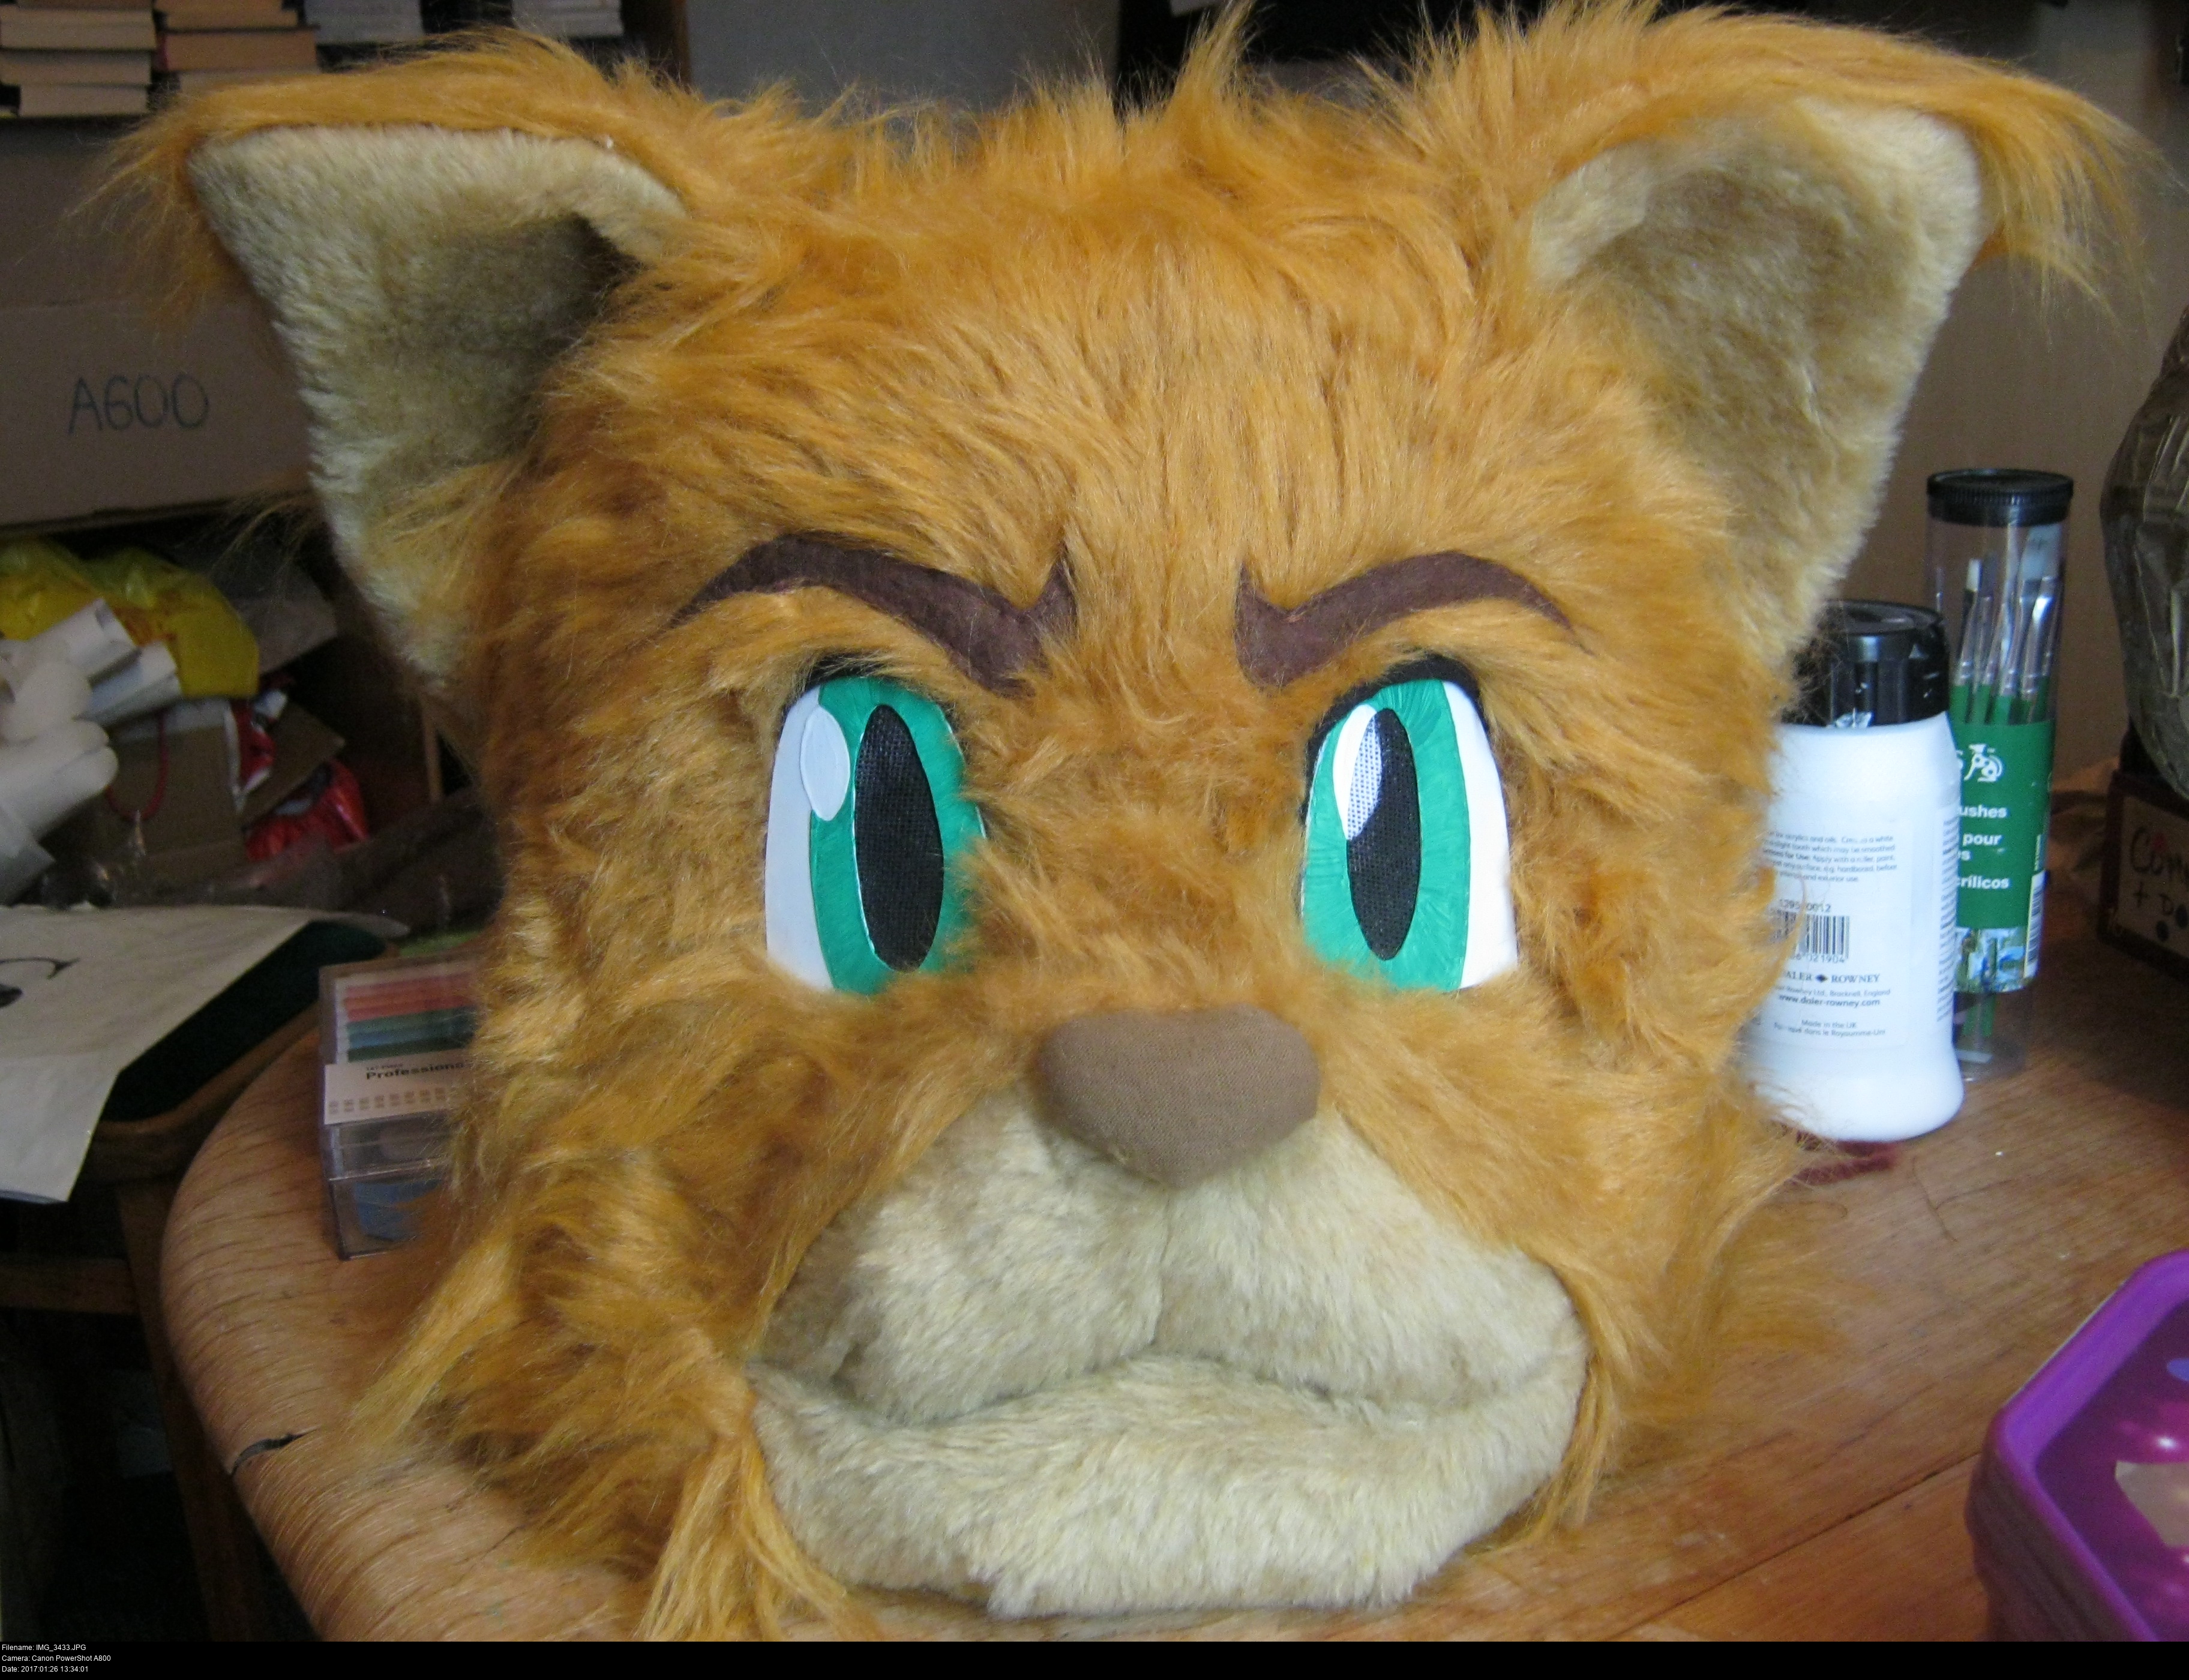
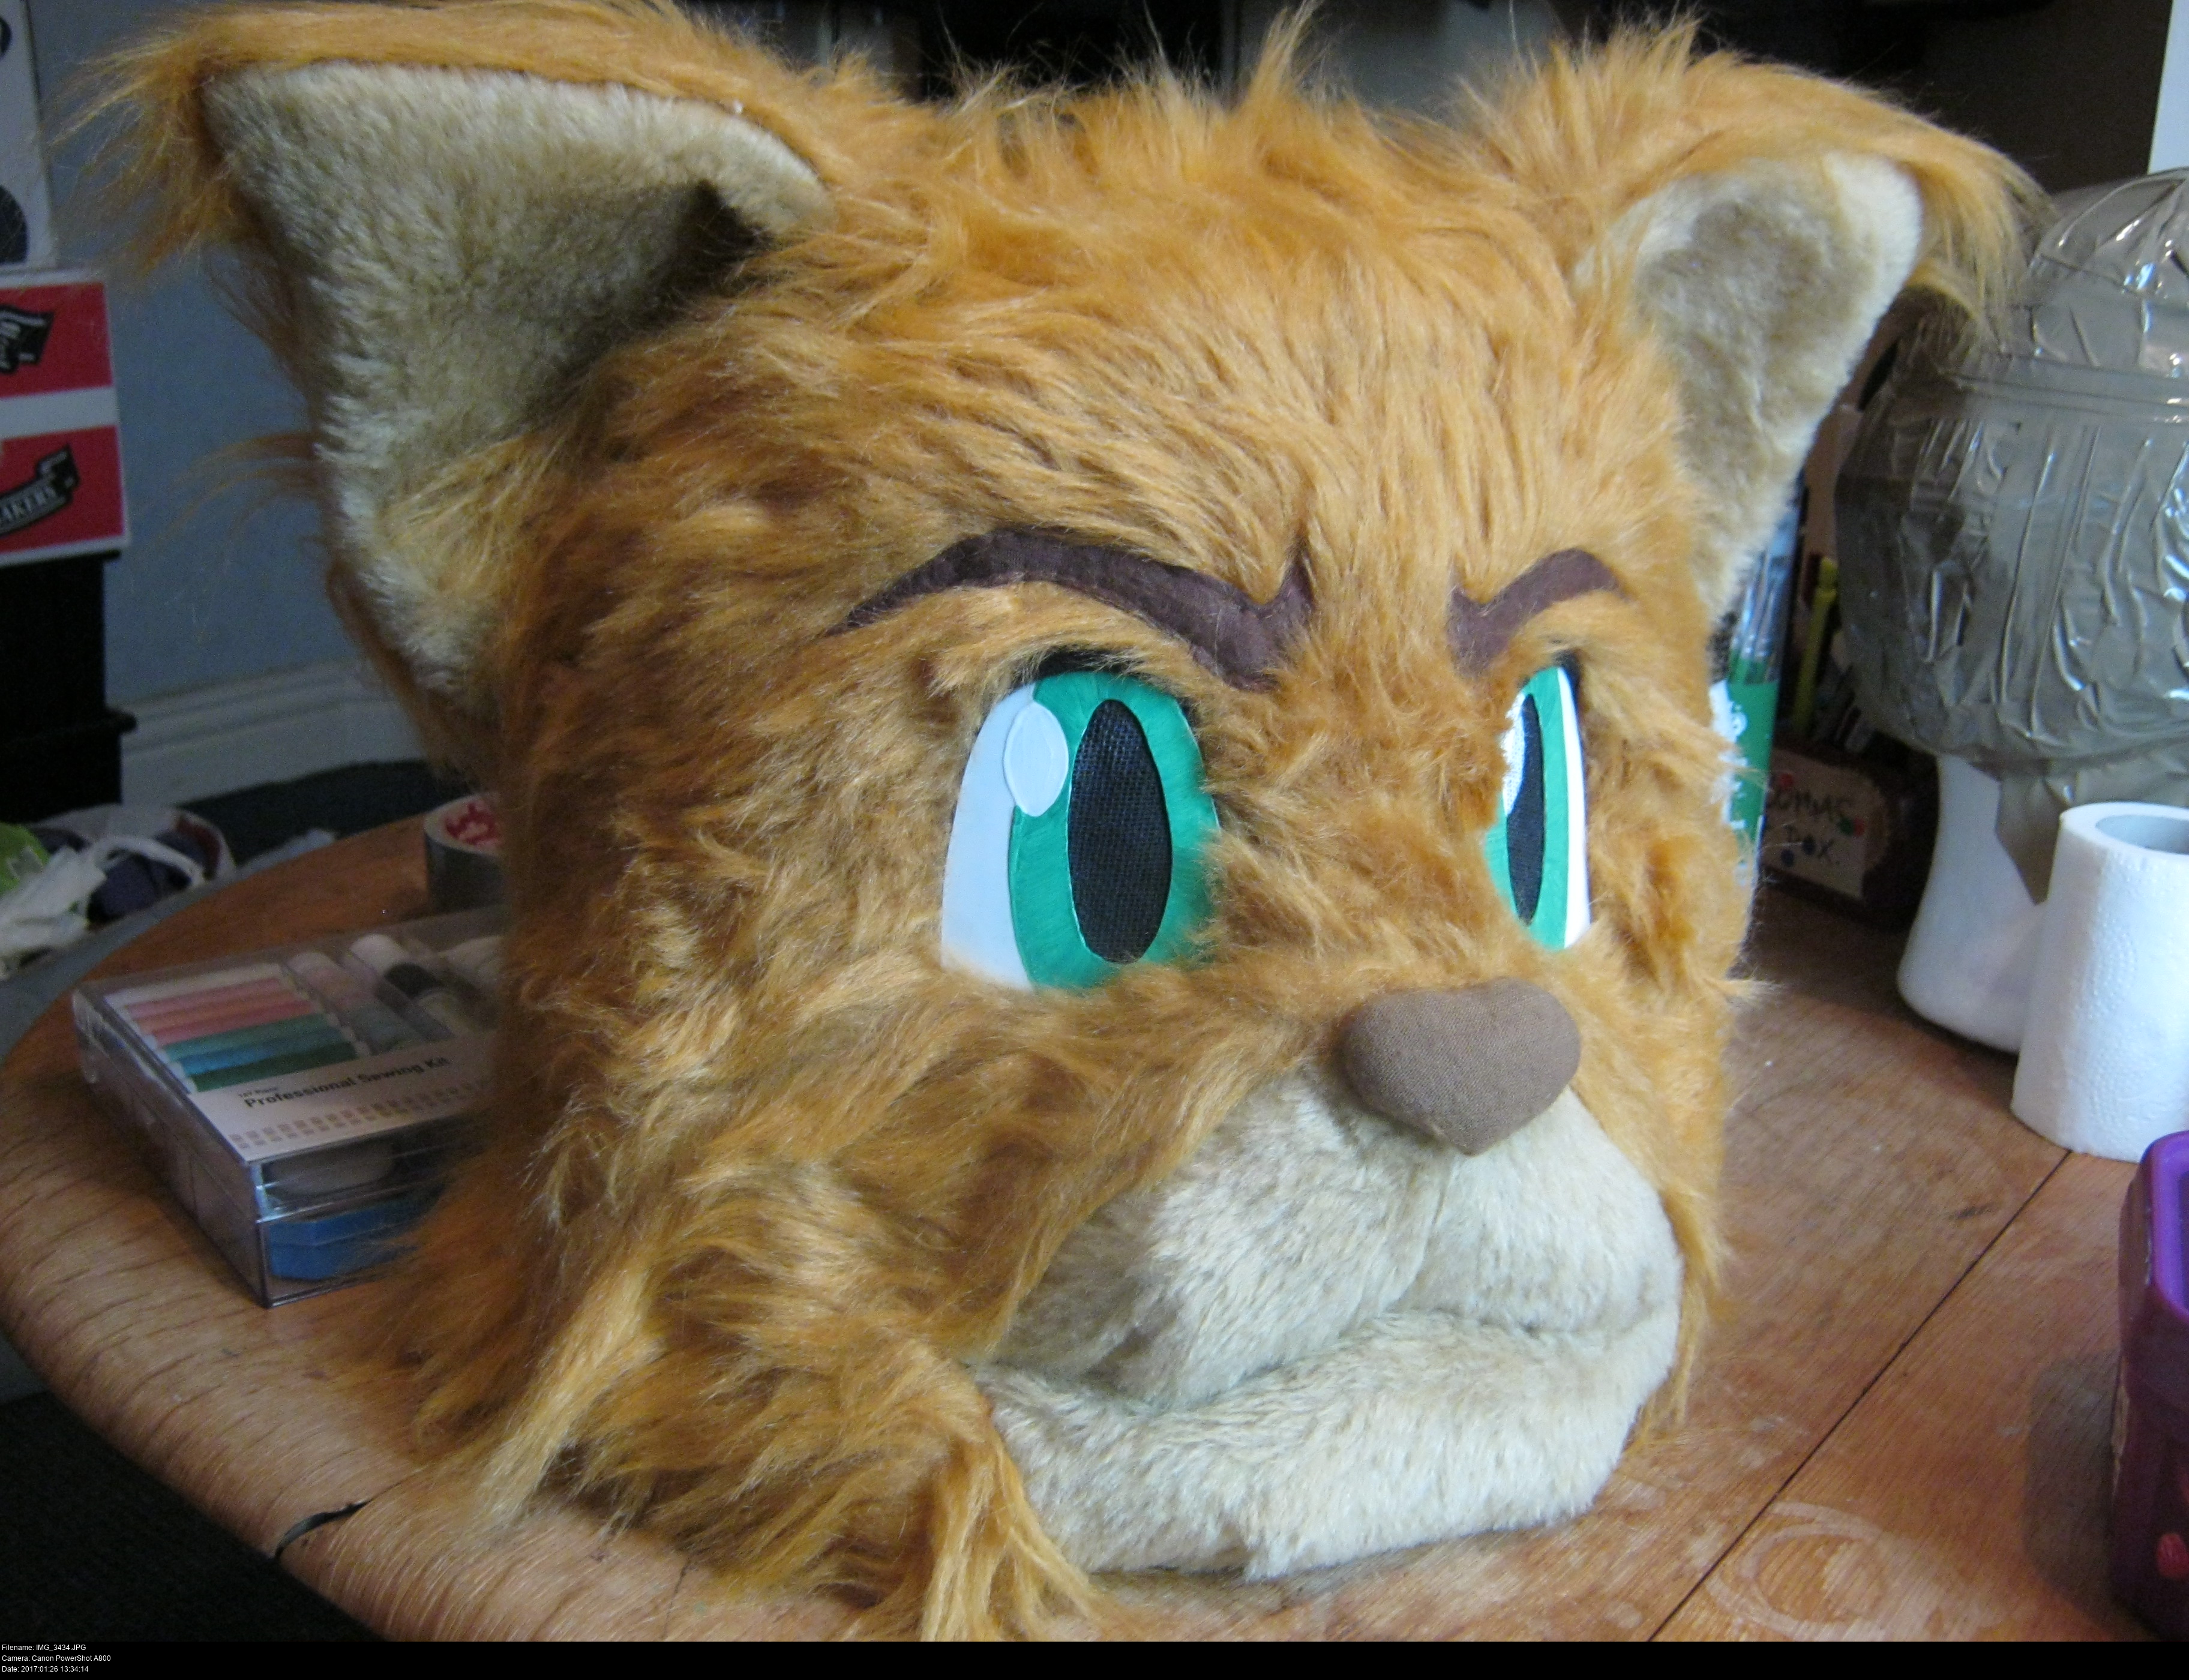
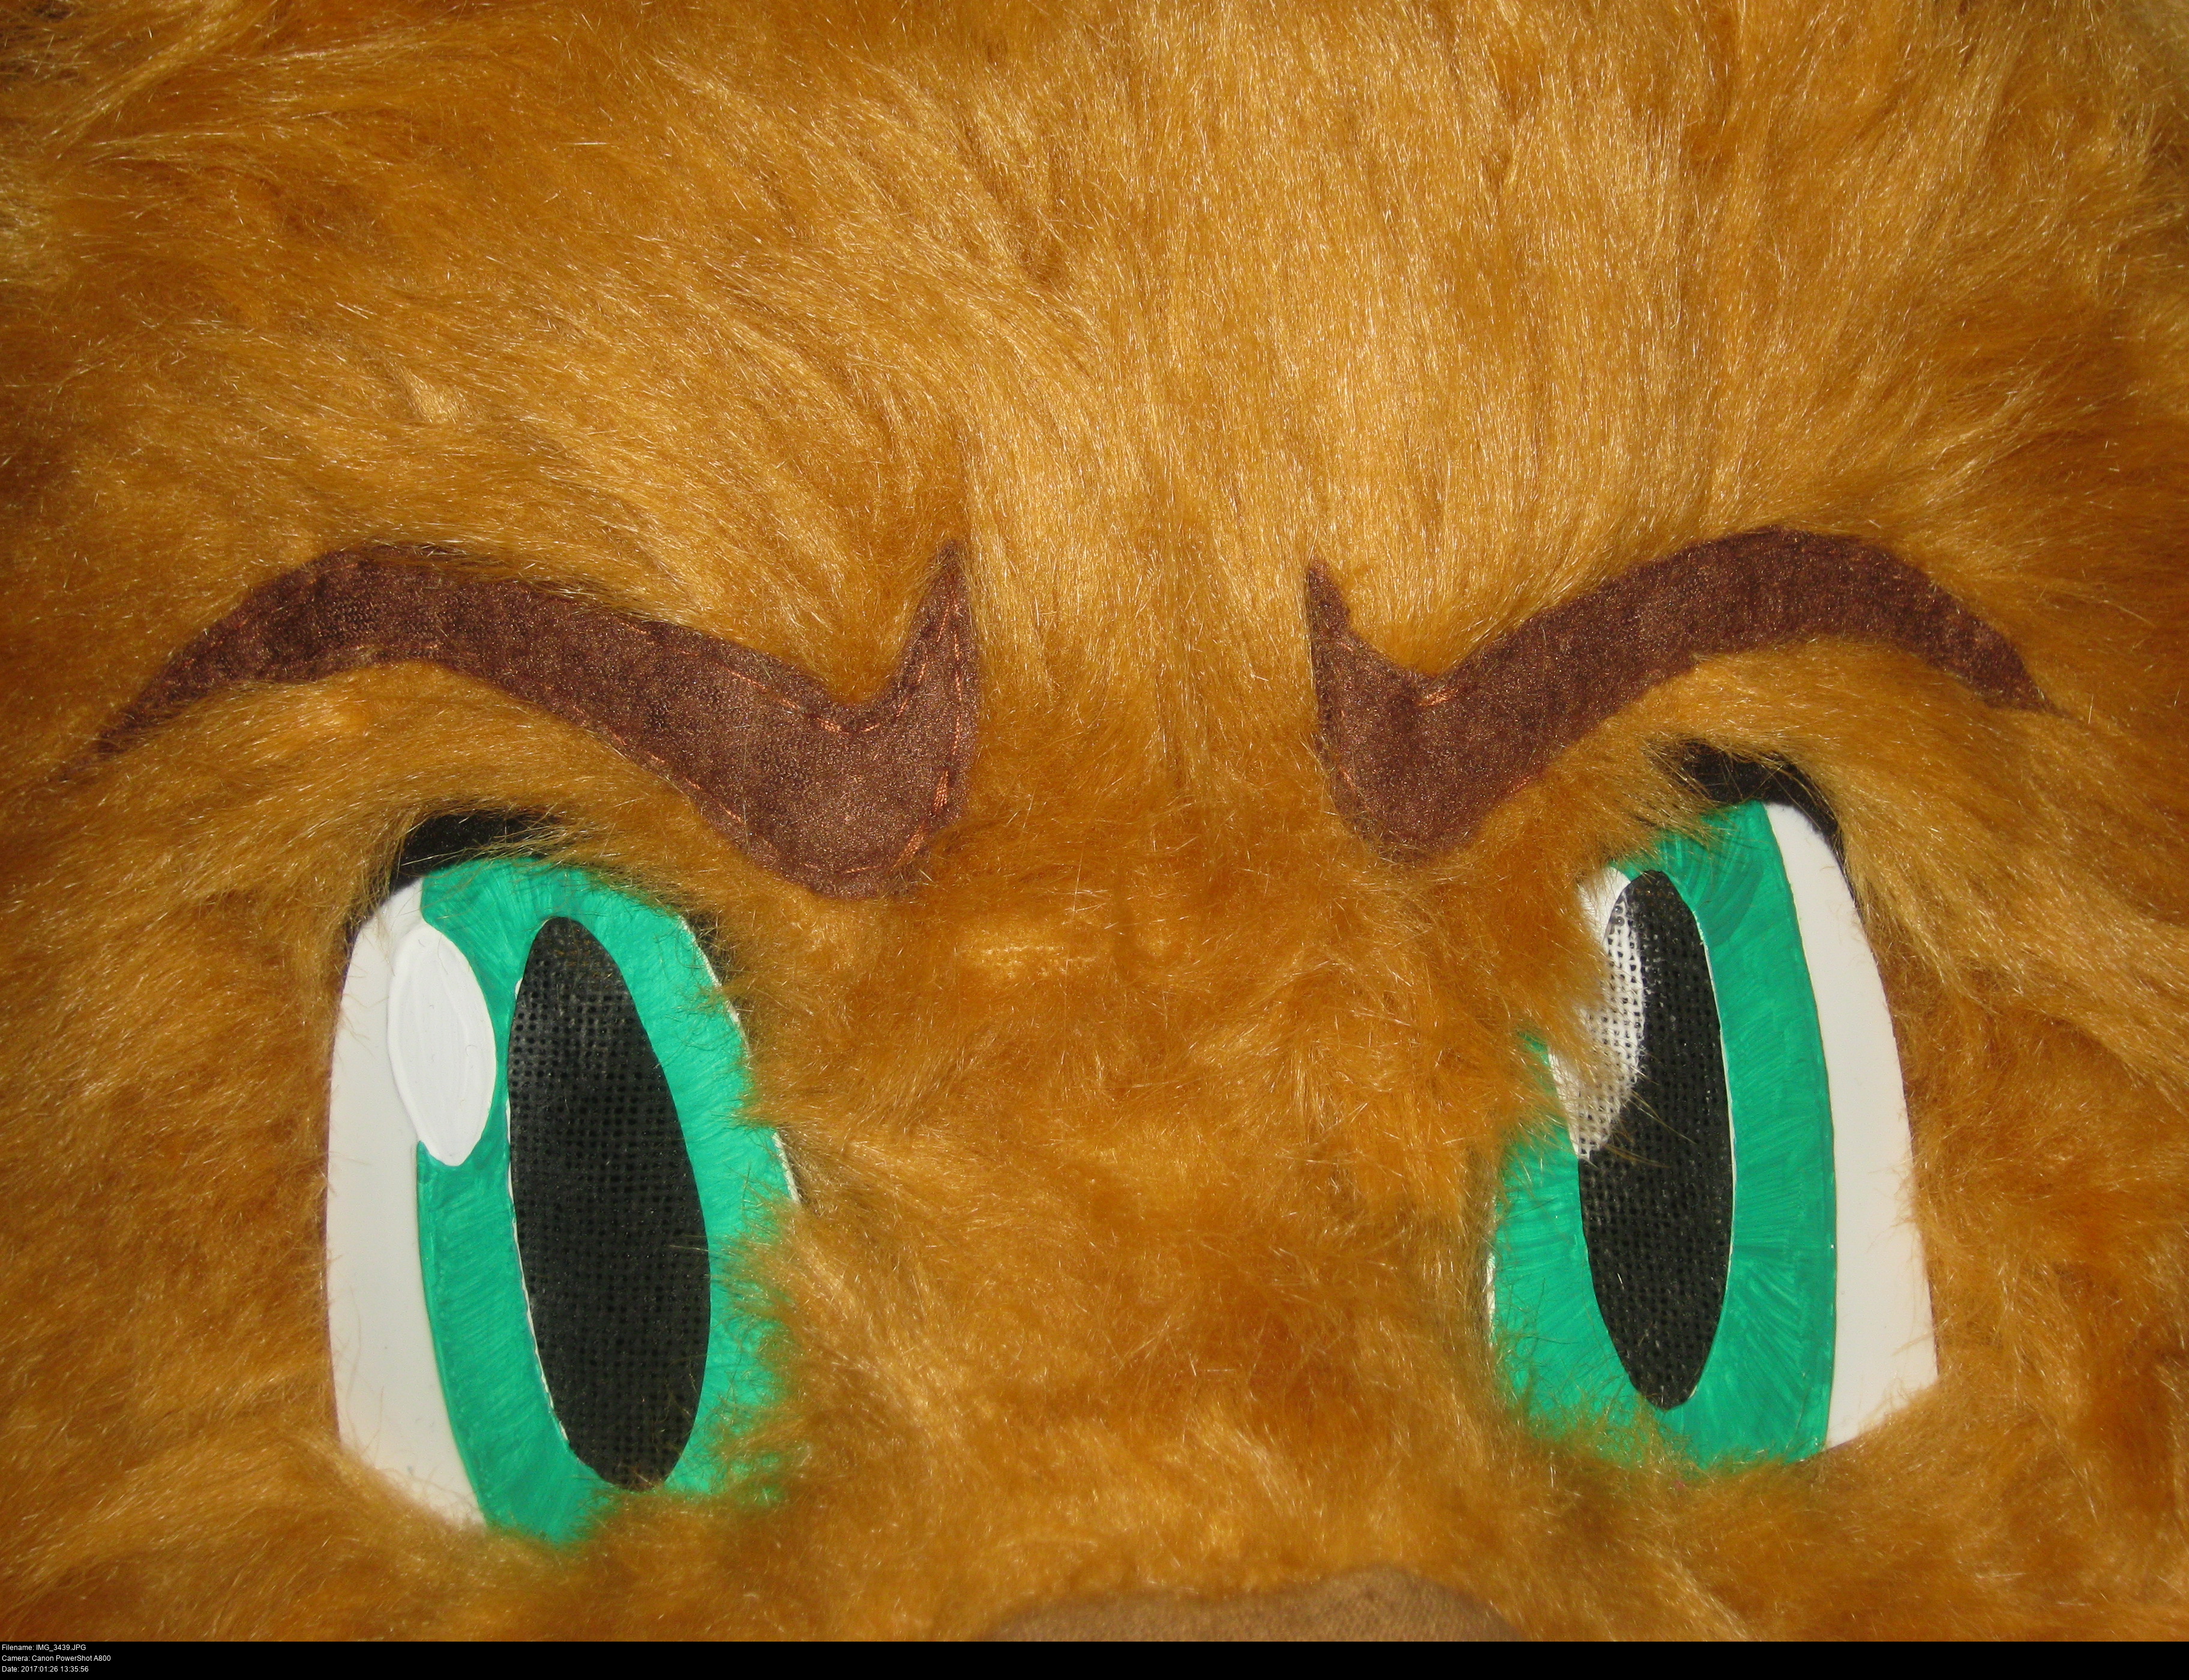
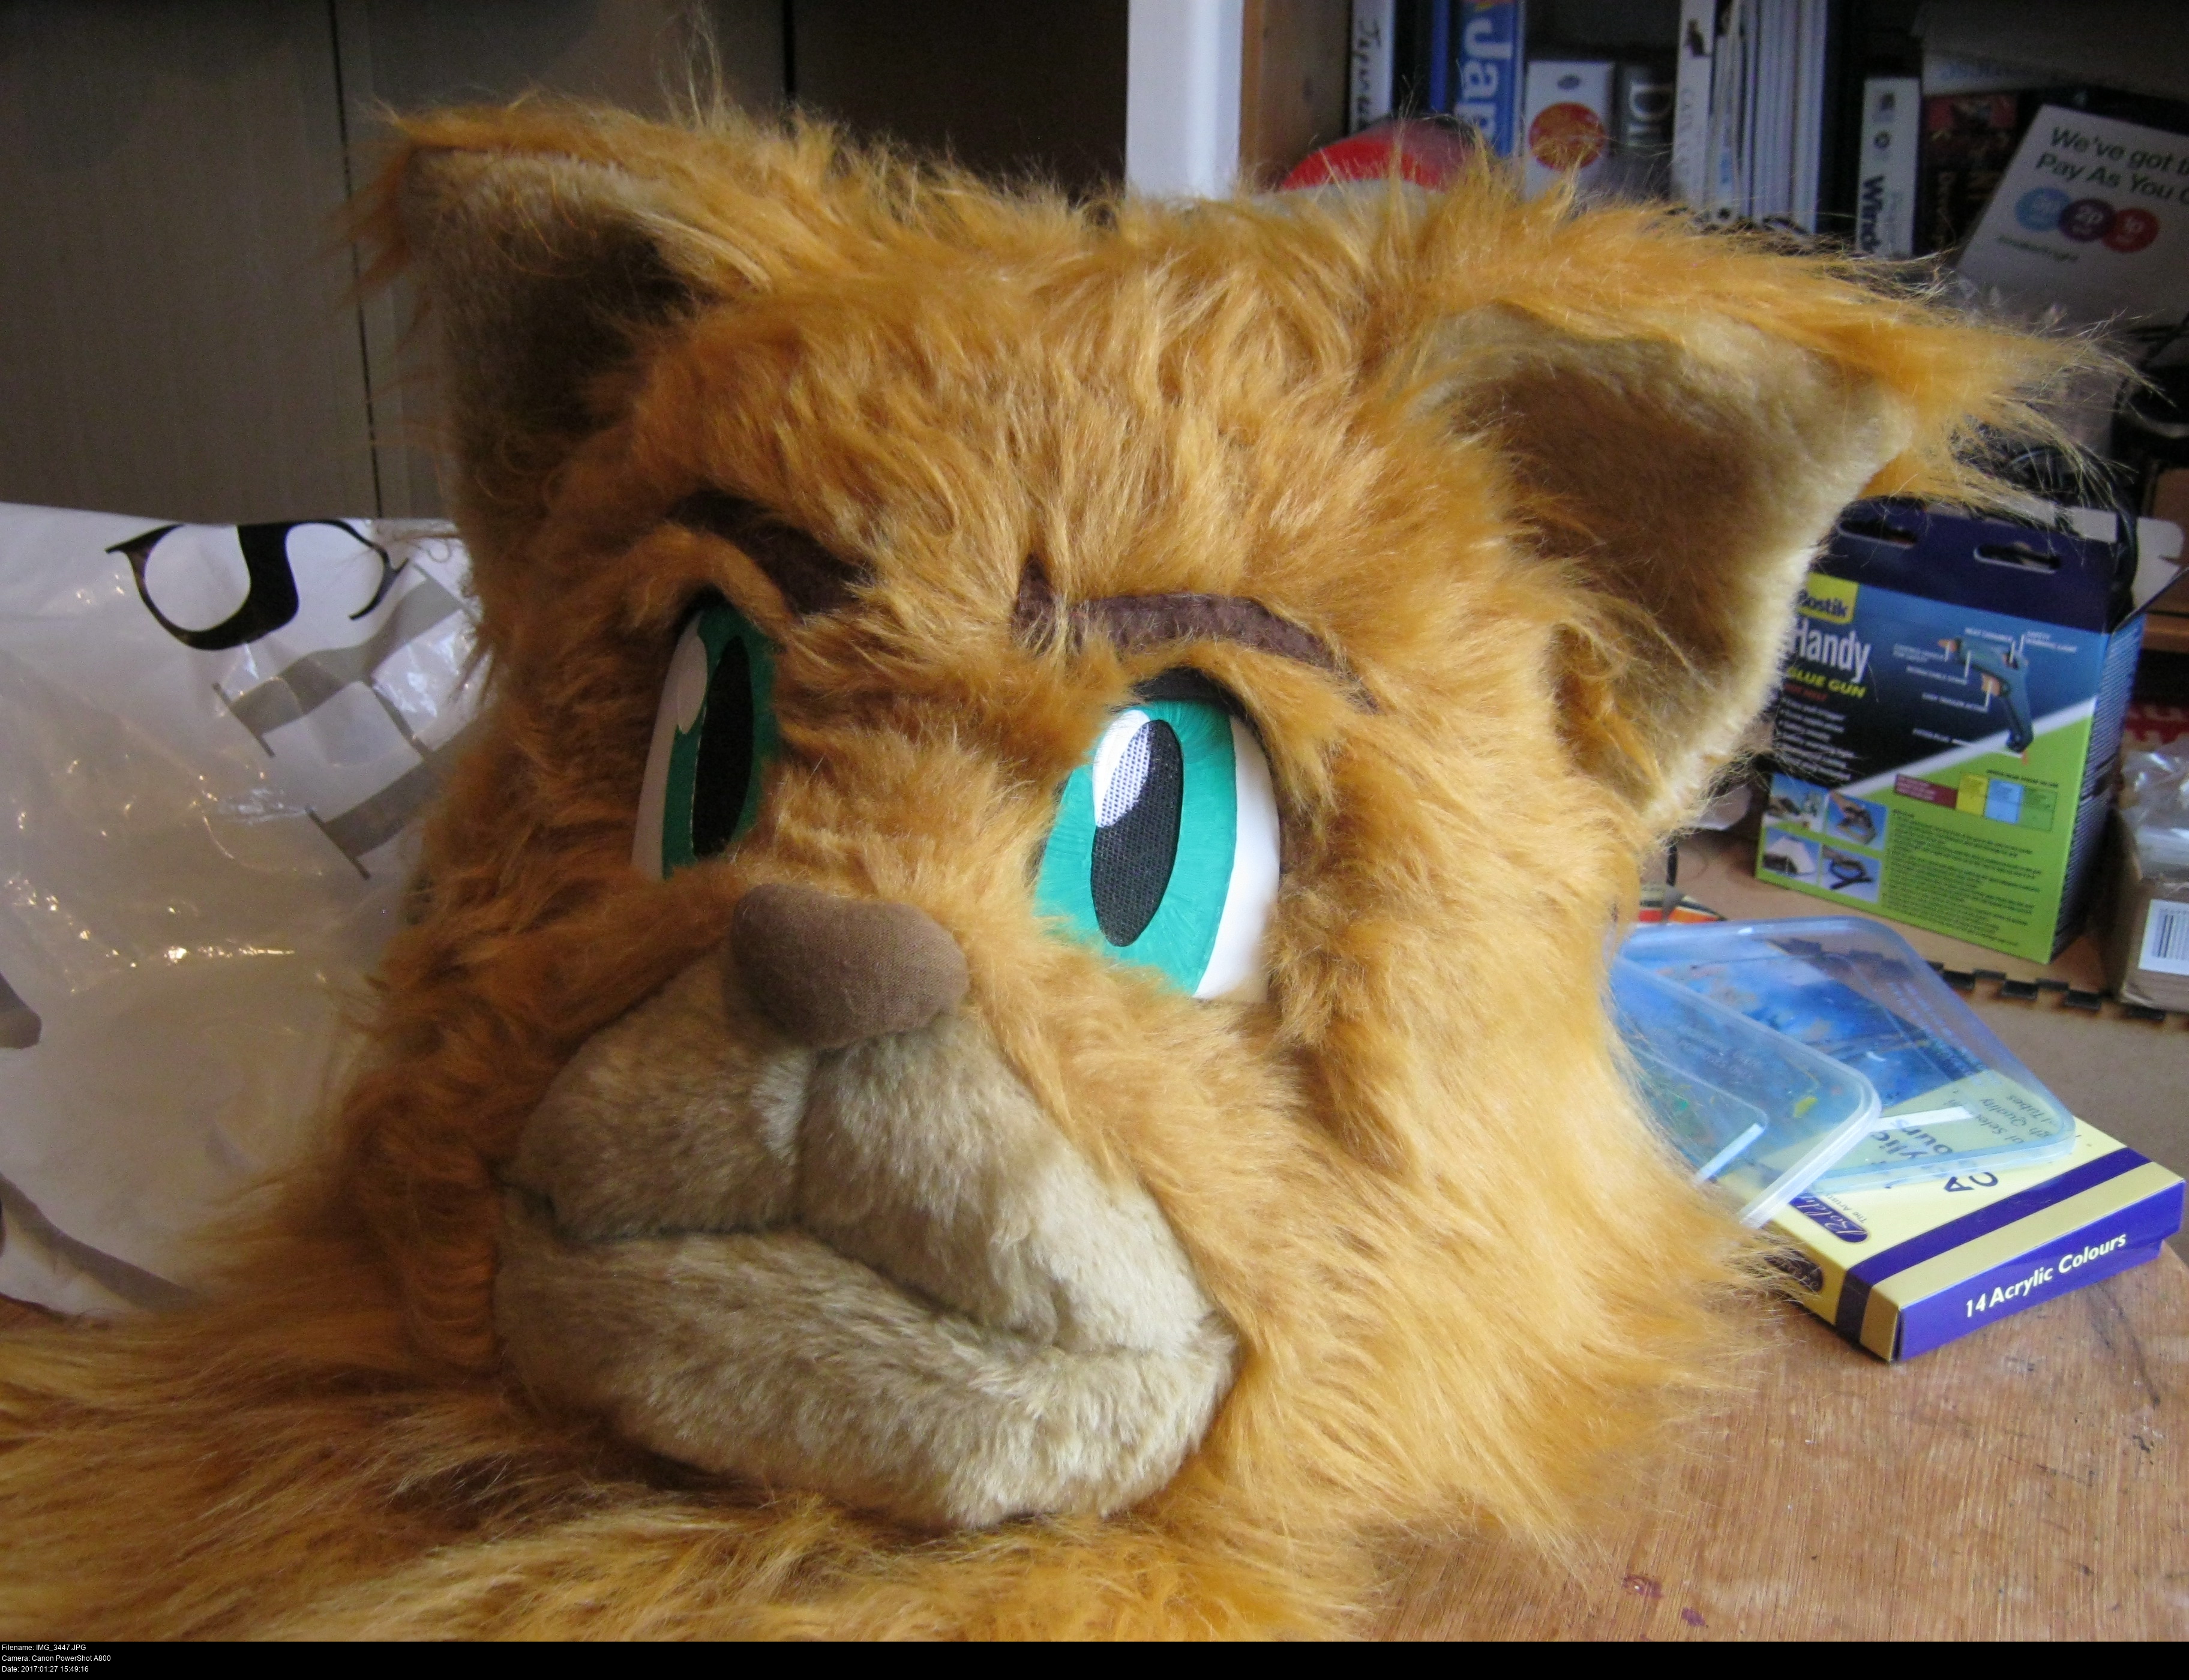
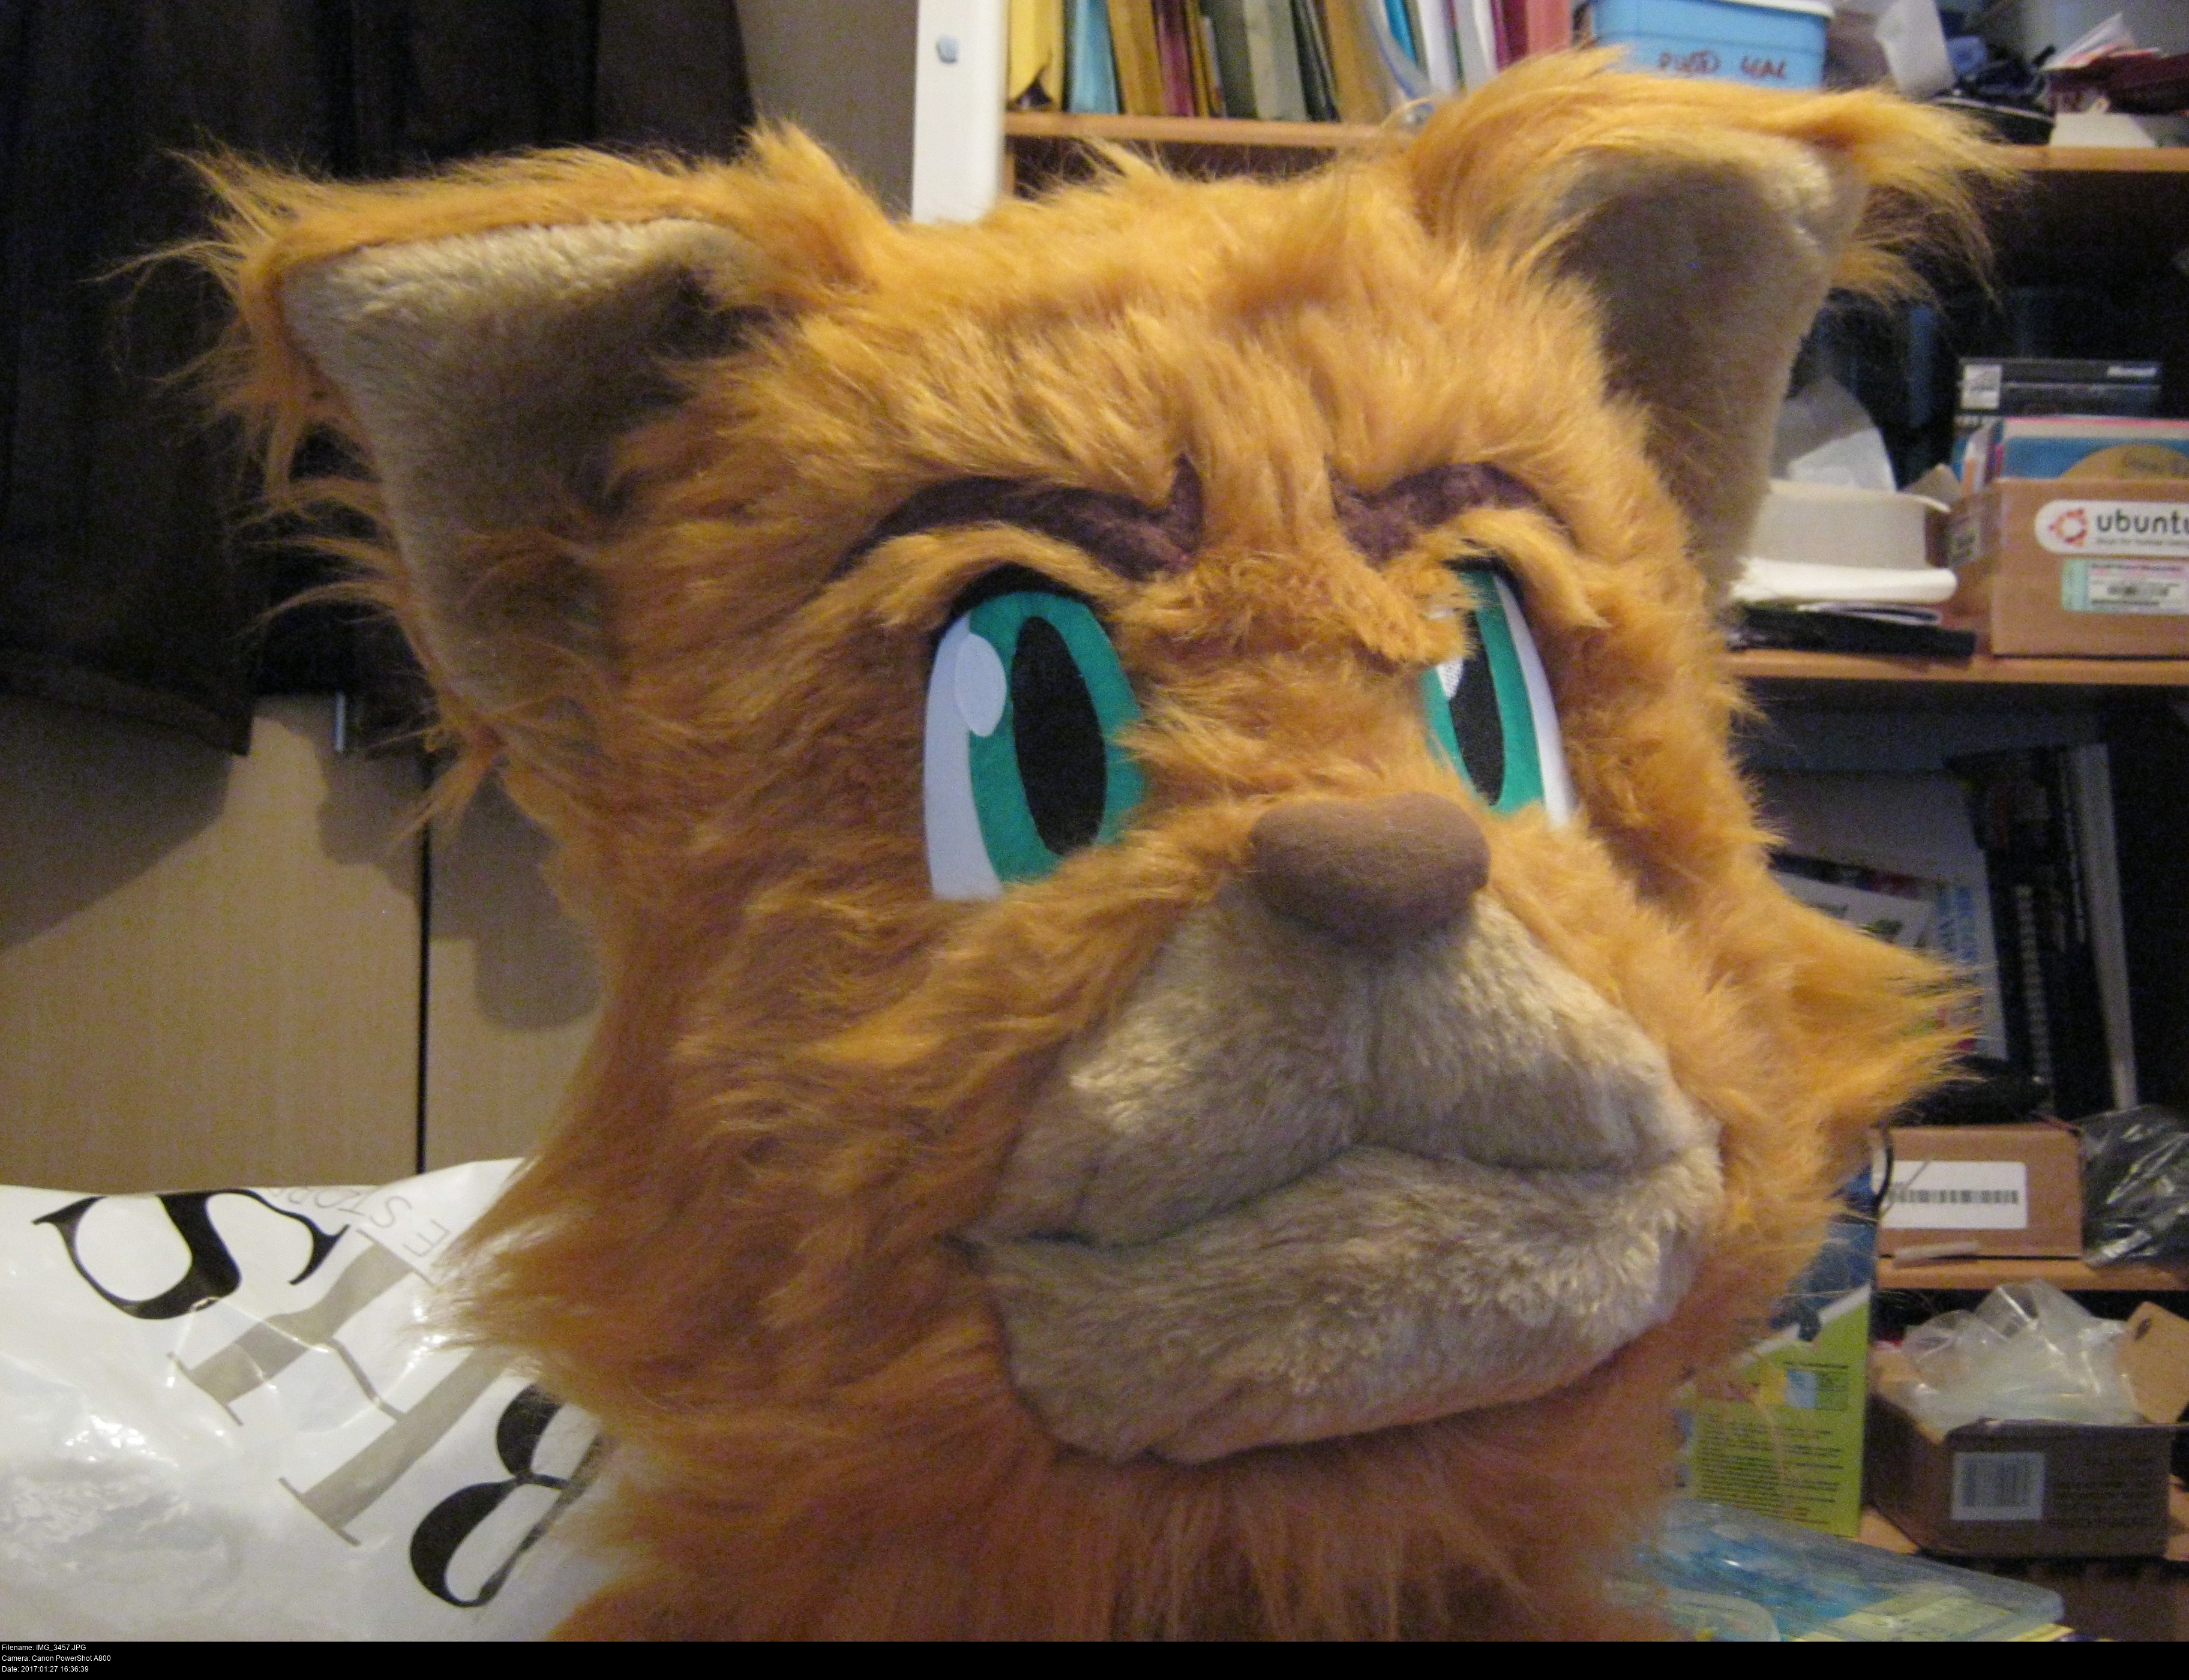
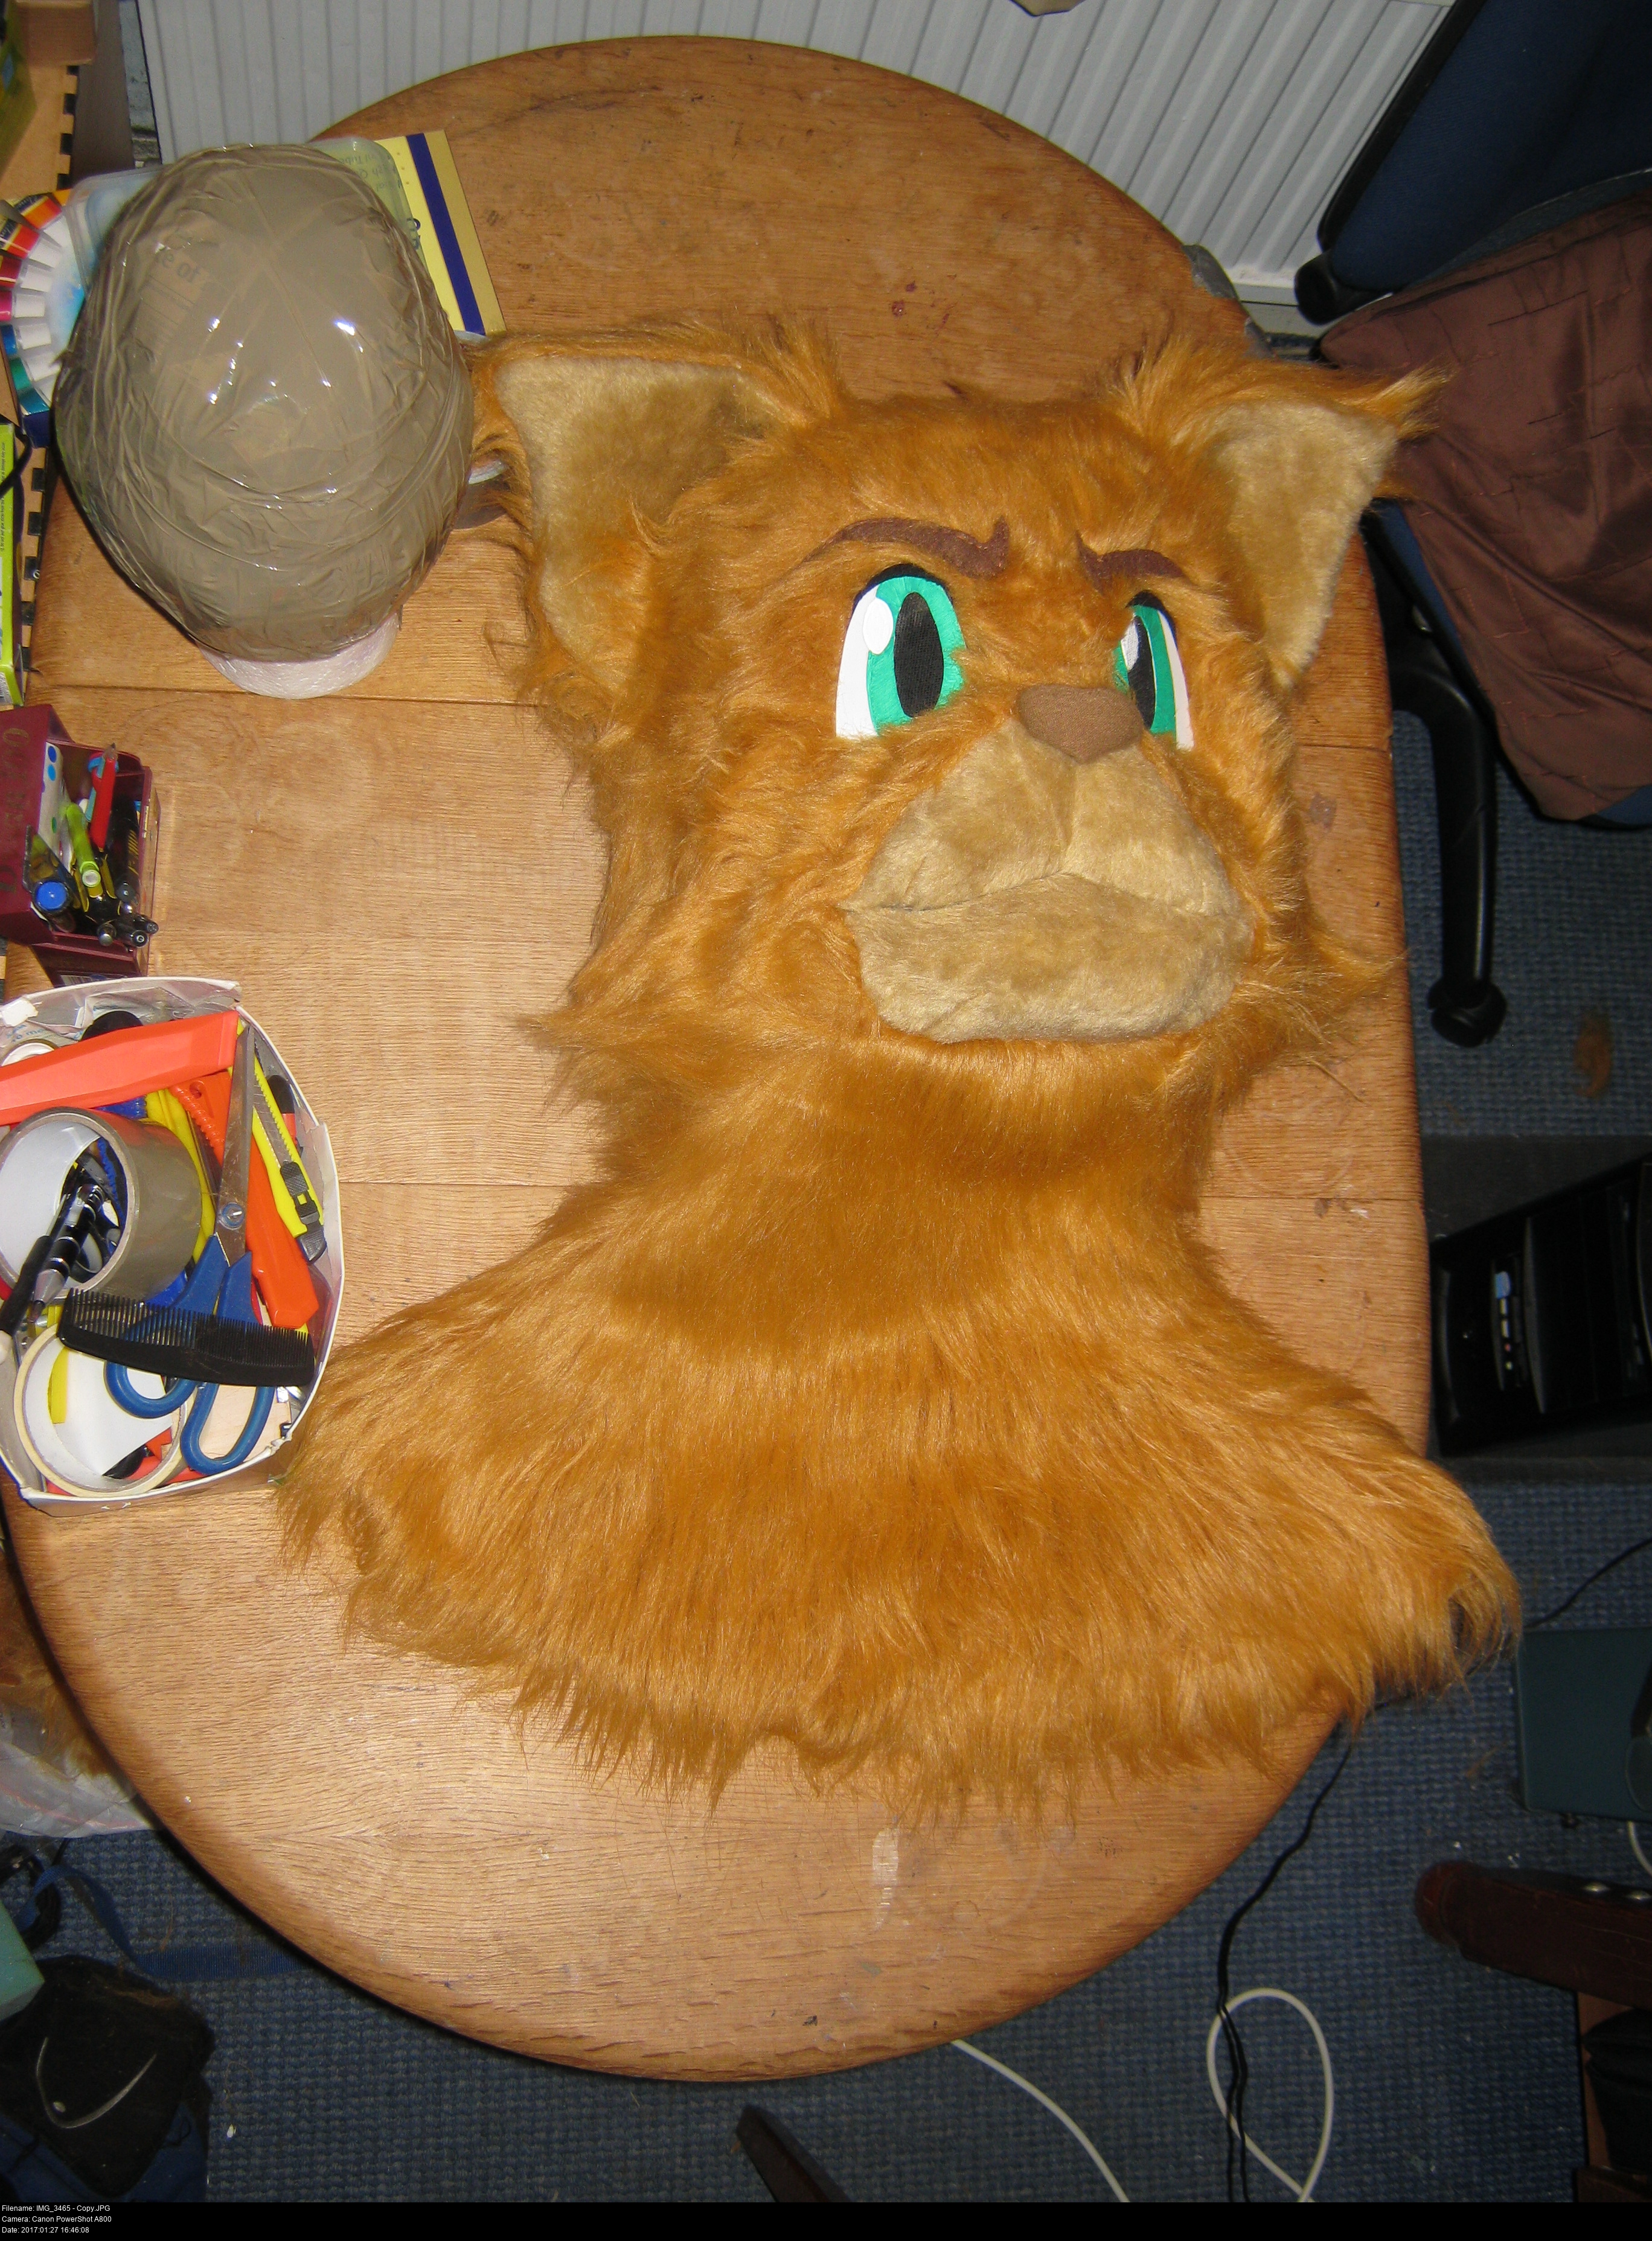
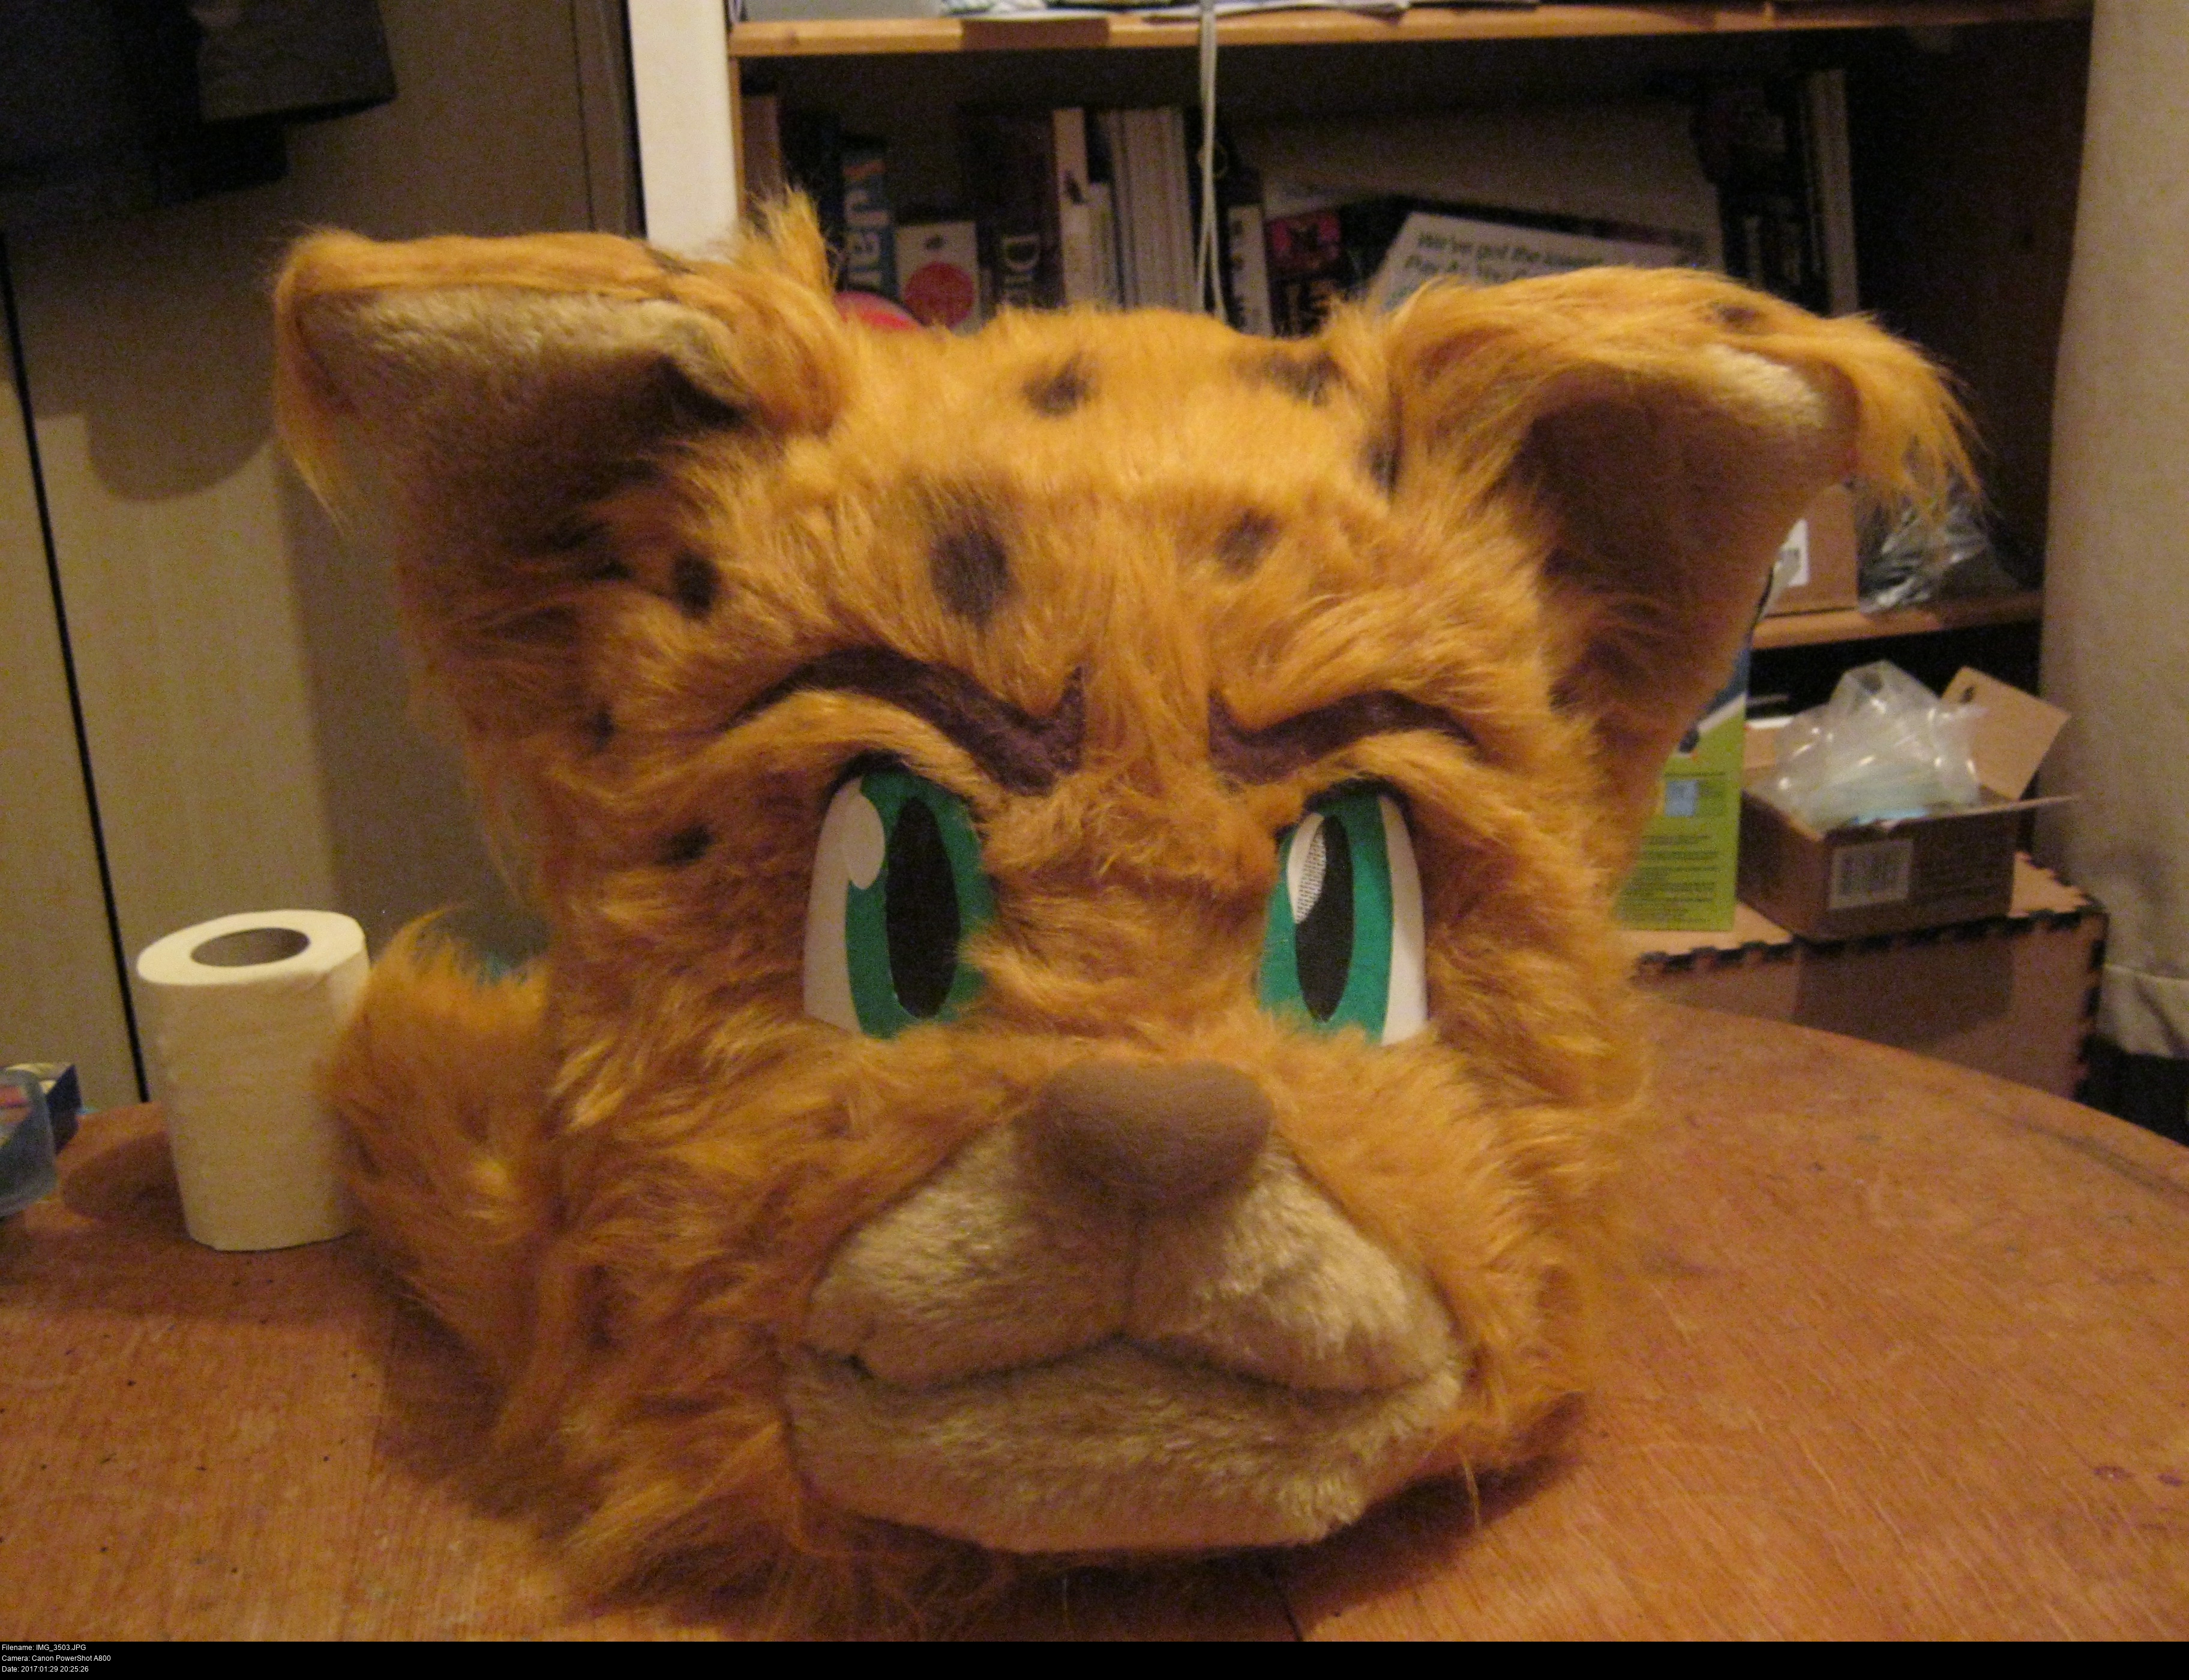
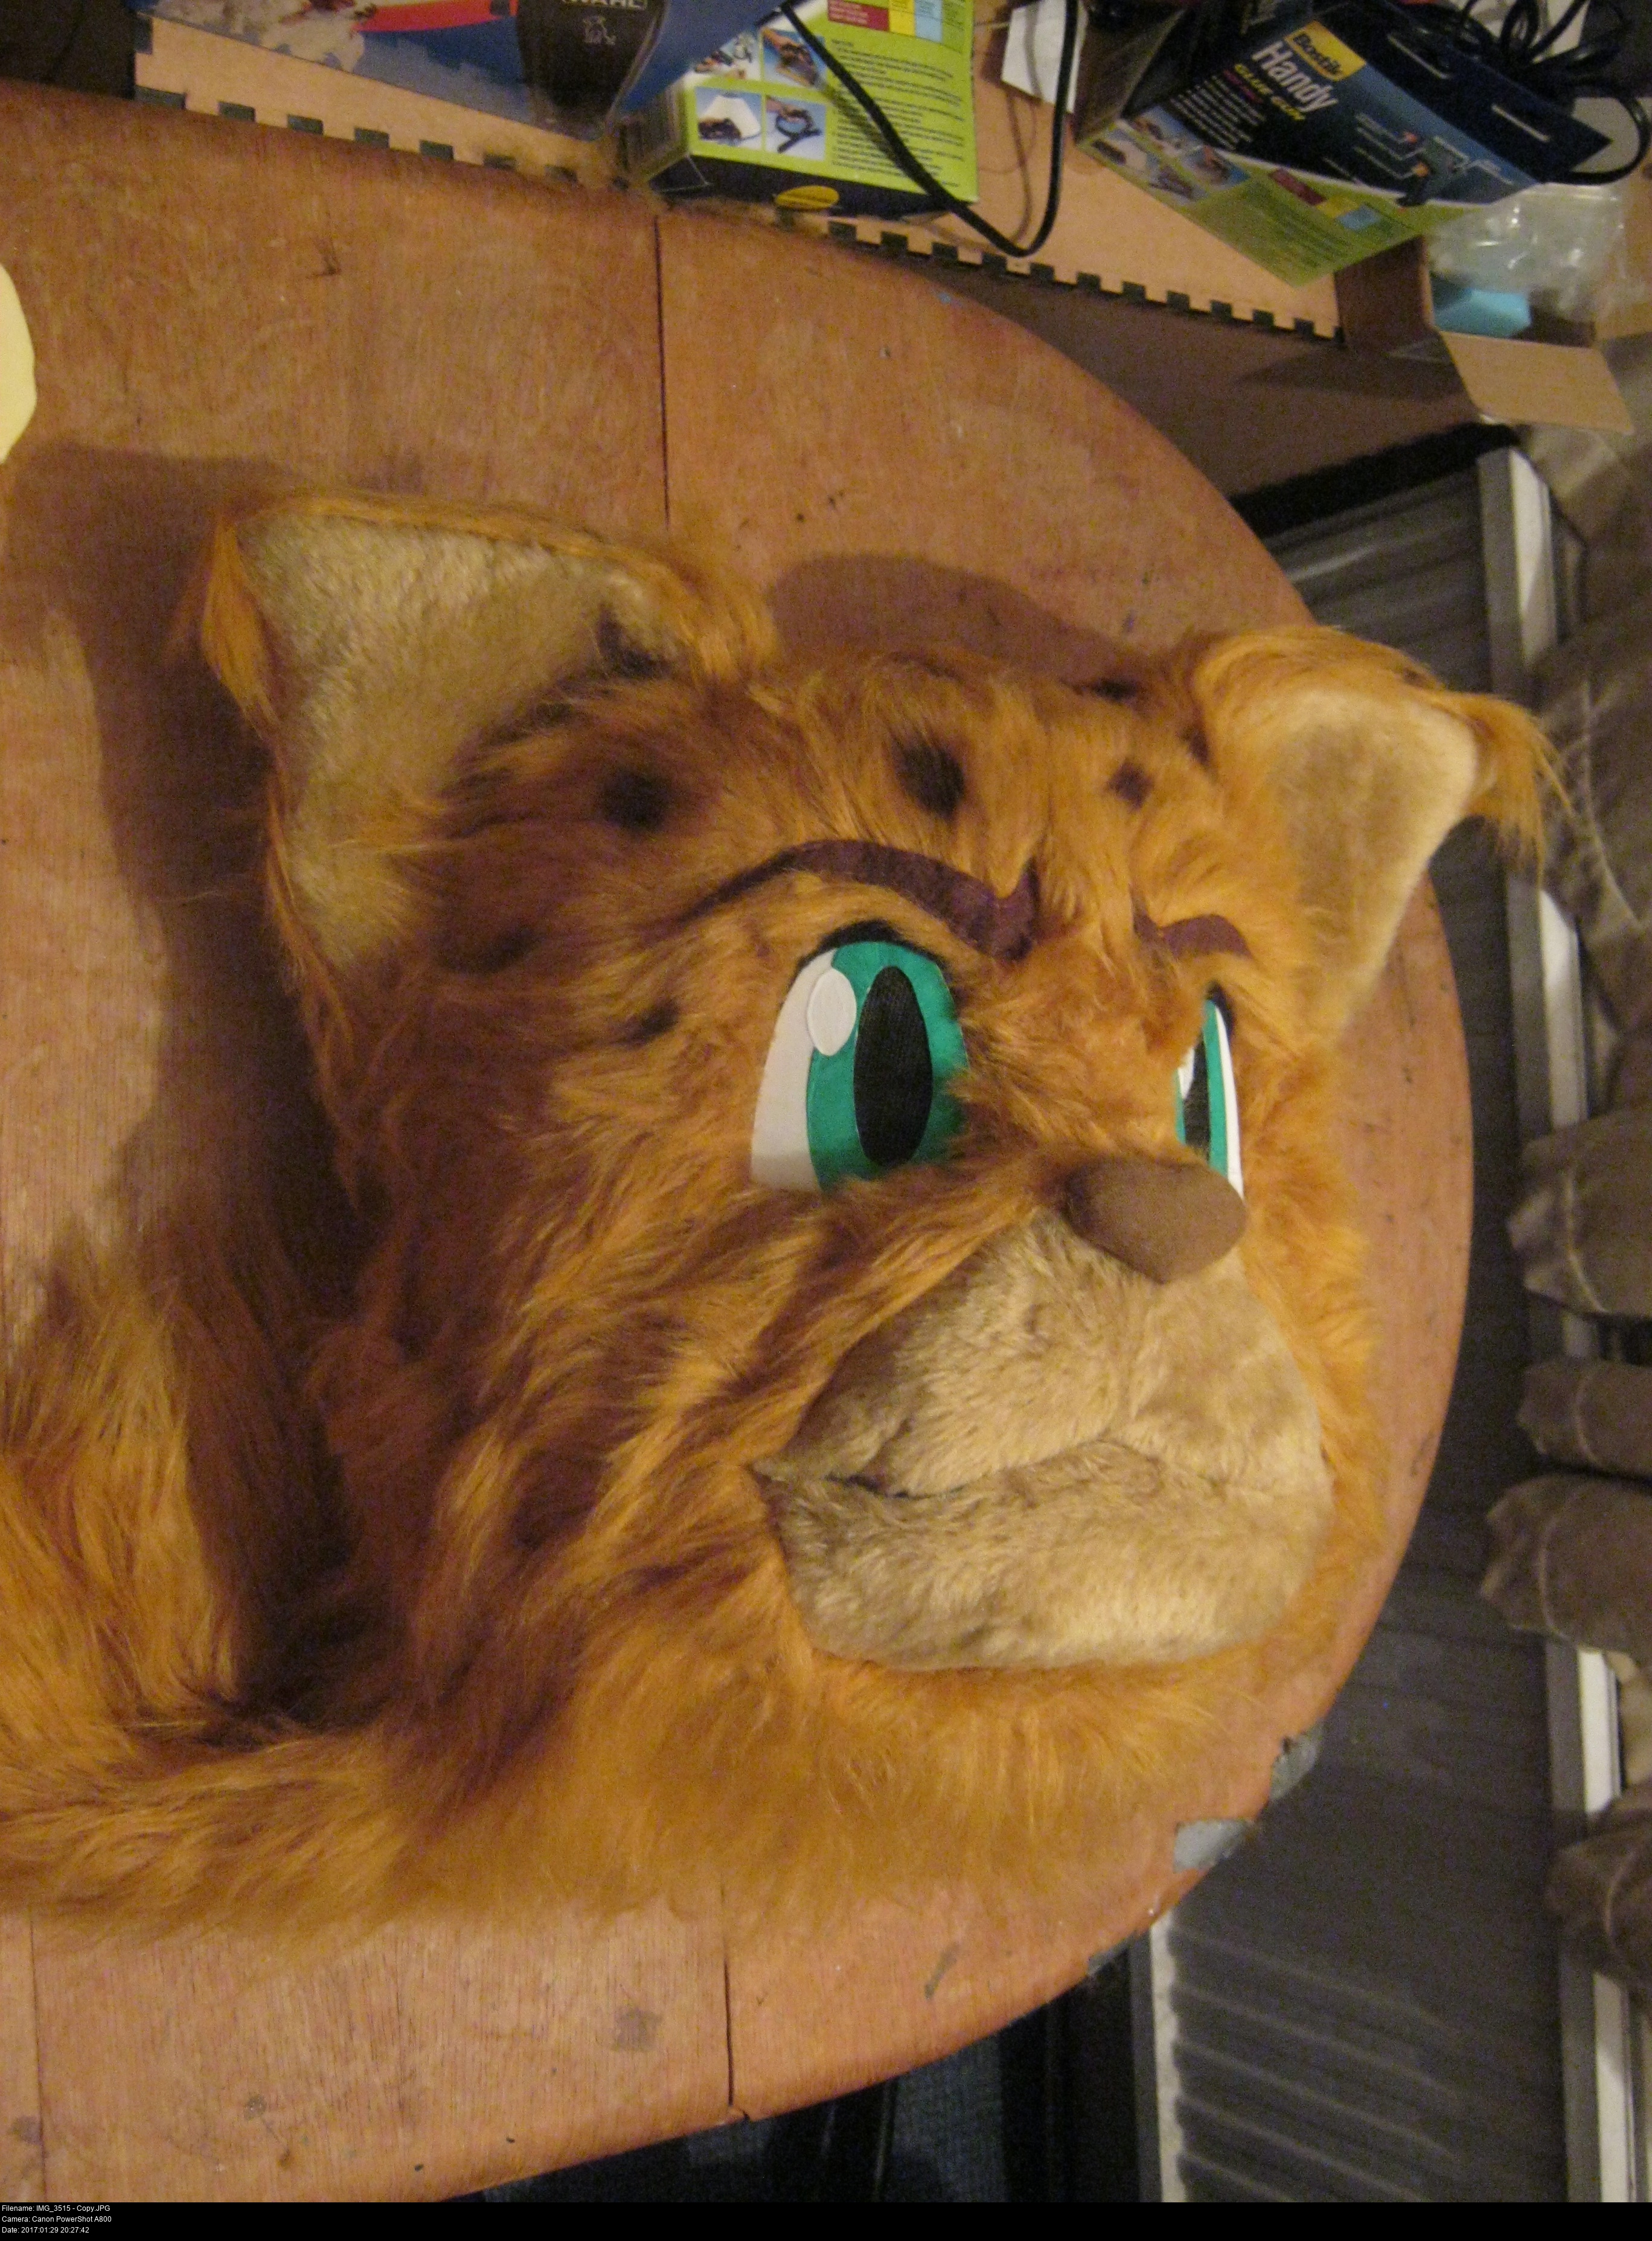
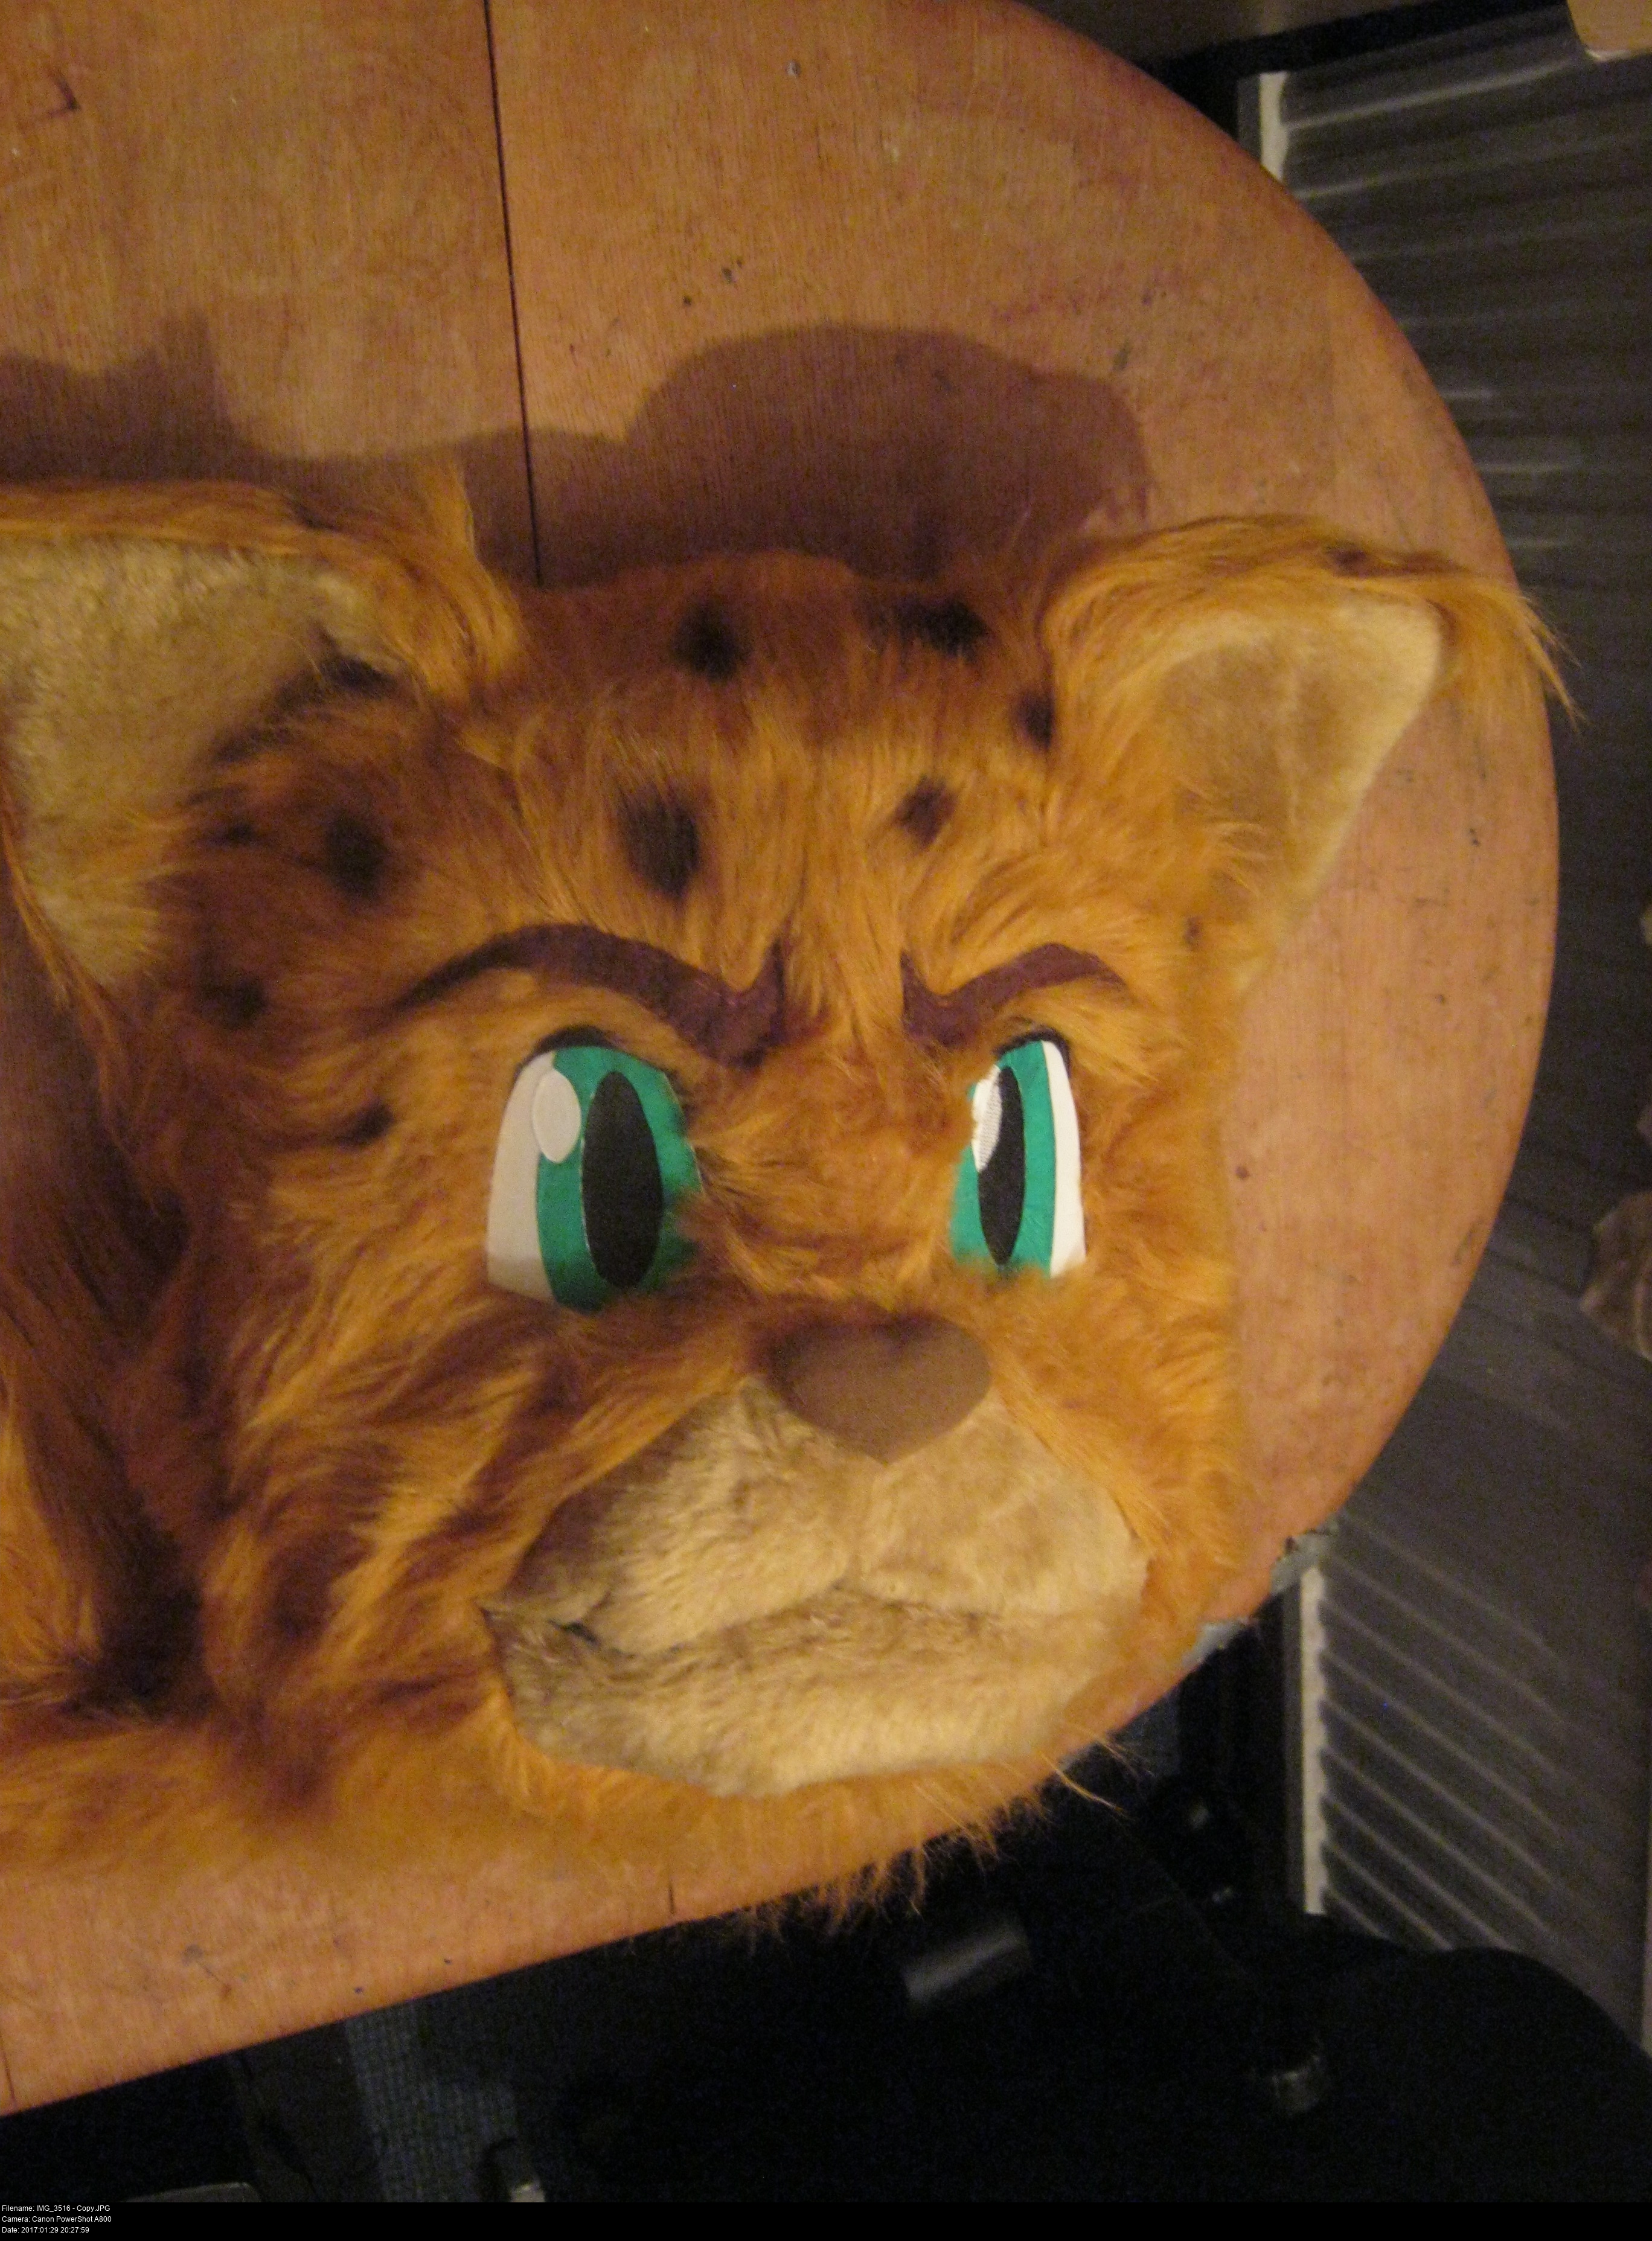
His main fur colour is mustard, with a series of spots spreading across the forehead and temples.
No clue as to fur length, looks pretty short, except at the lower sides where he's got outward and downward sweeping tufts with darker stripes.
He's got quite small, twisty looking ears with the top edge folding down over the ear slightly.
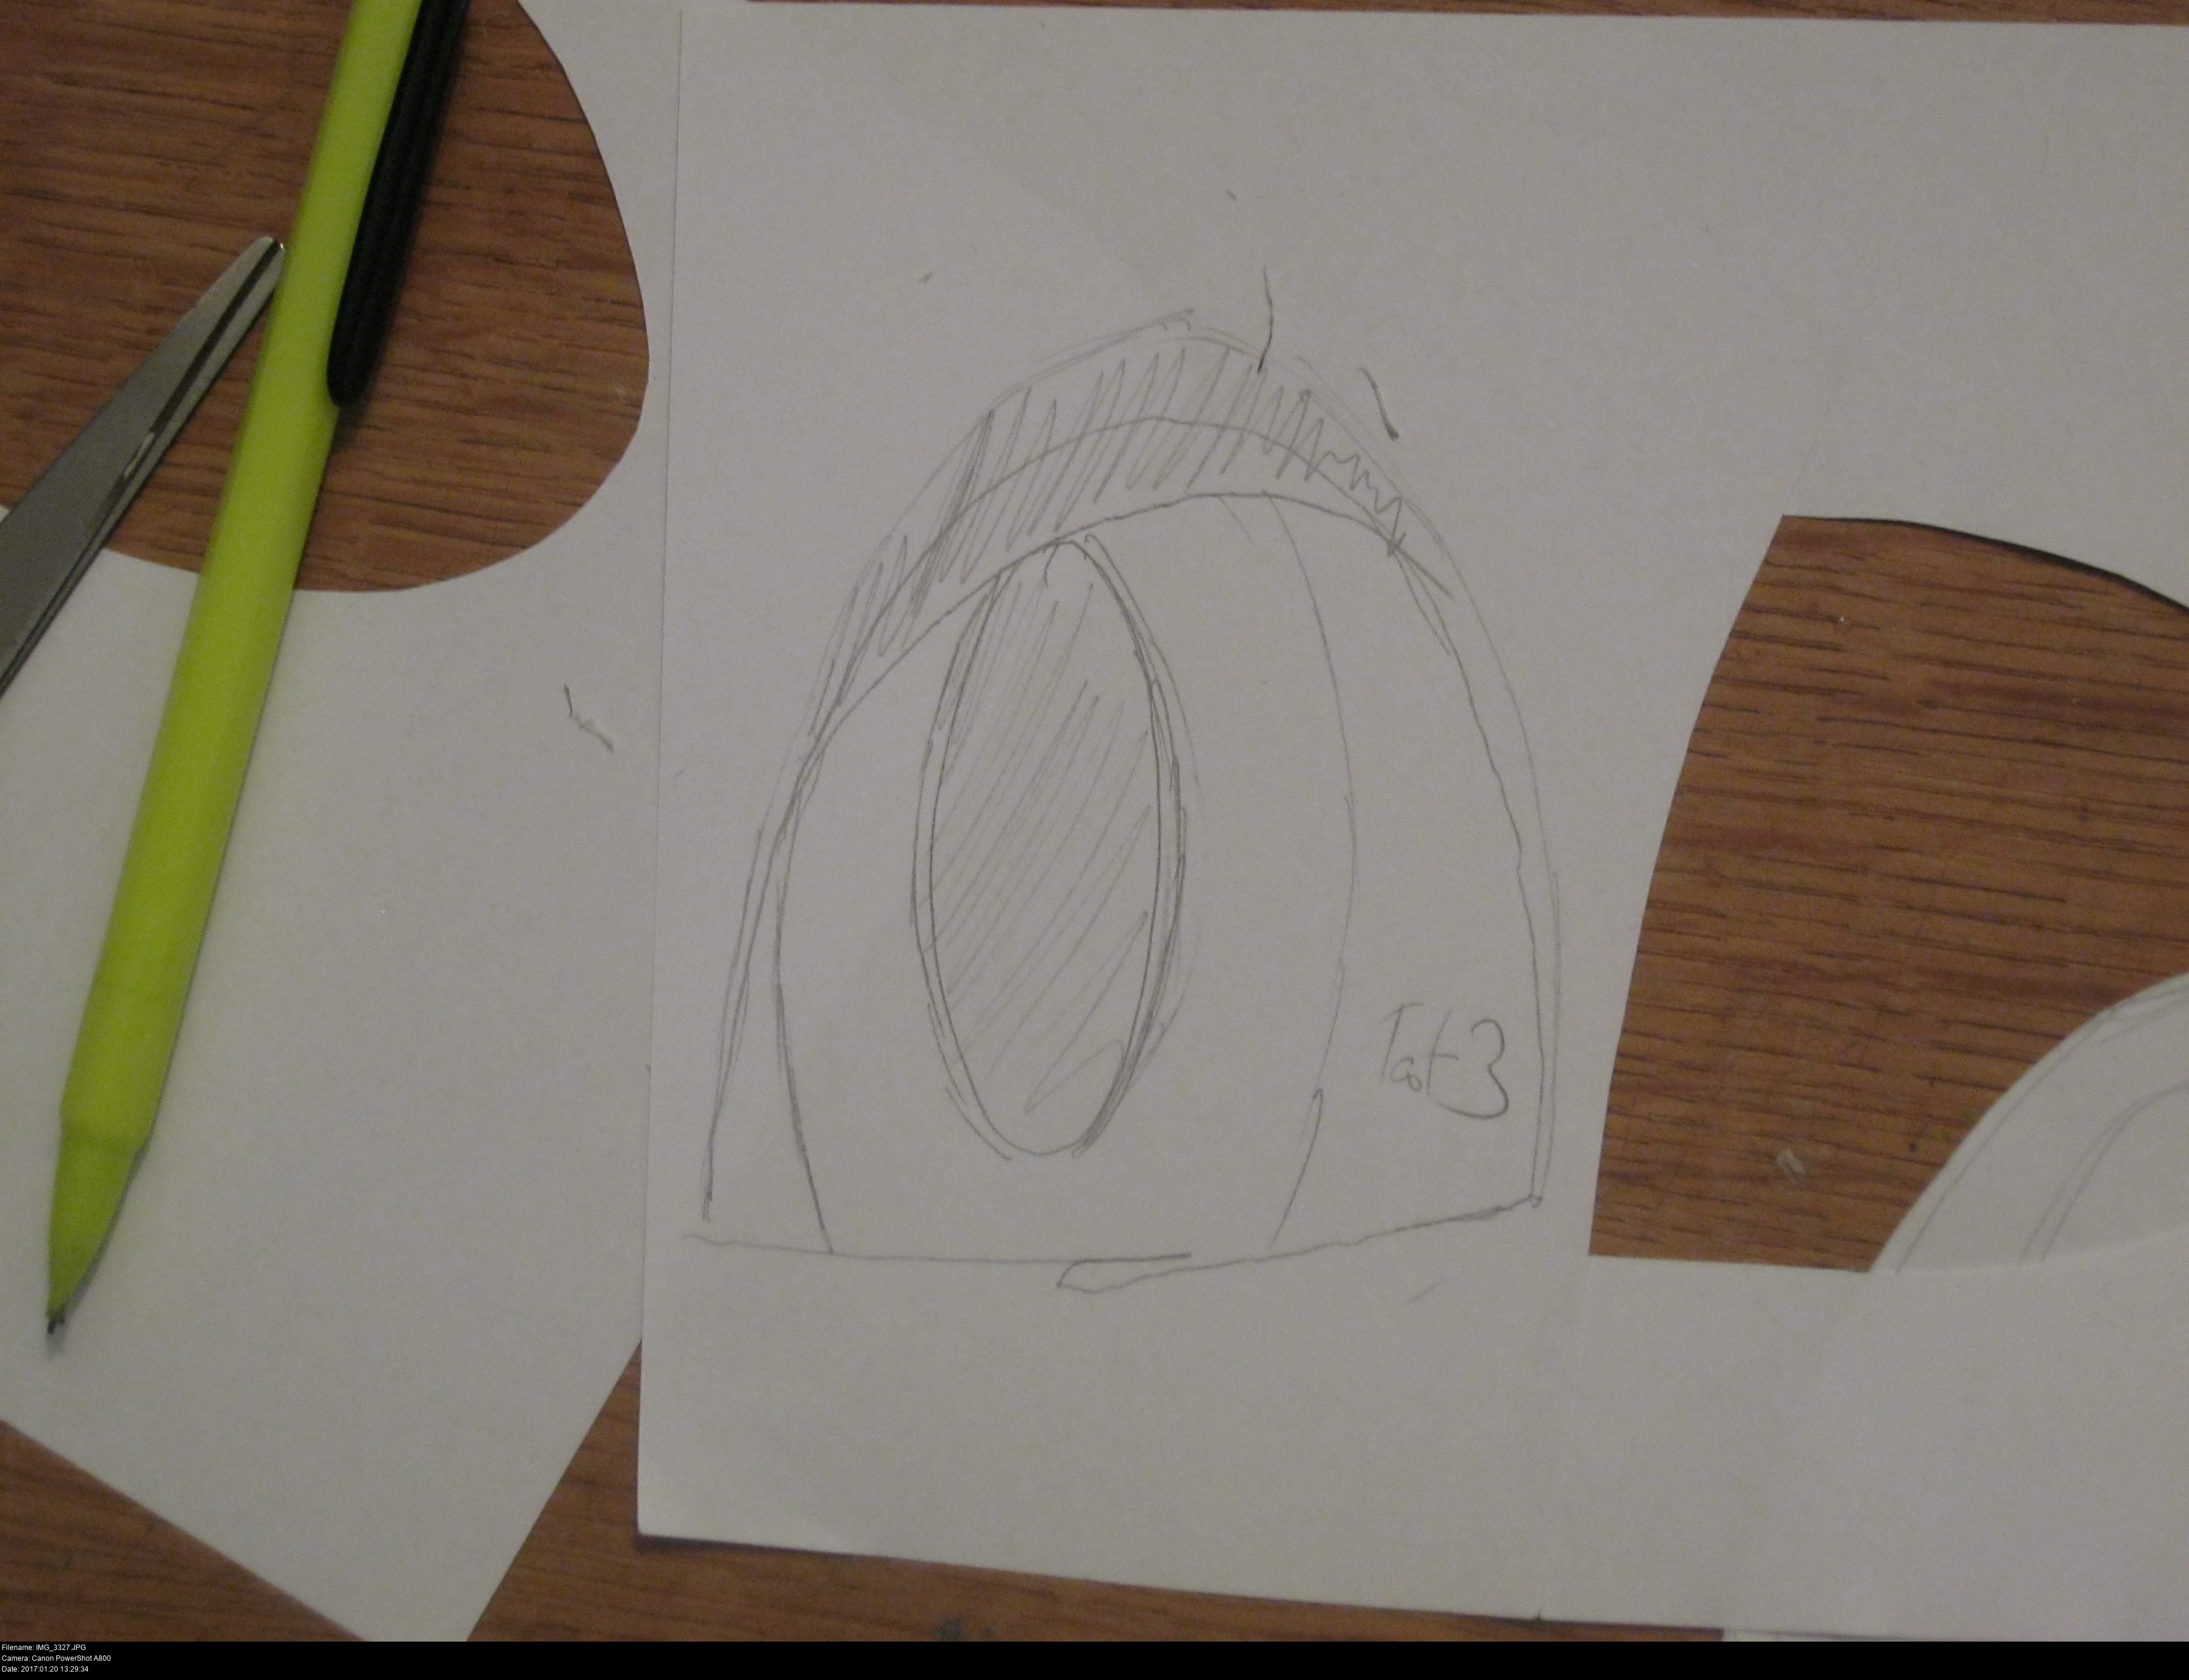
Dark green large vertical -staring- cat eyes and fierce frowny black eyebrows.
Wide very very short and flat triangular nose that slightly curves downwards in the top centre, black or dark brown.
Hexagonal short muzzle with a sort of frowny smile. Could be the same colour as the rest of his face, or it could be a lighter custardy colour. No permanently happy face with tongue and teeth here, furry fans.
His head is pretty large on his body, and wide. You could almost imagine his head being as wide and tall as his entire torso.
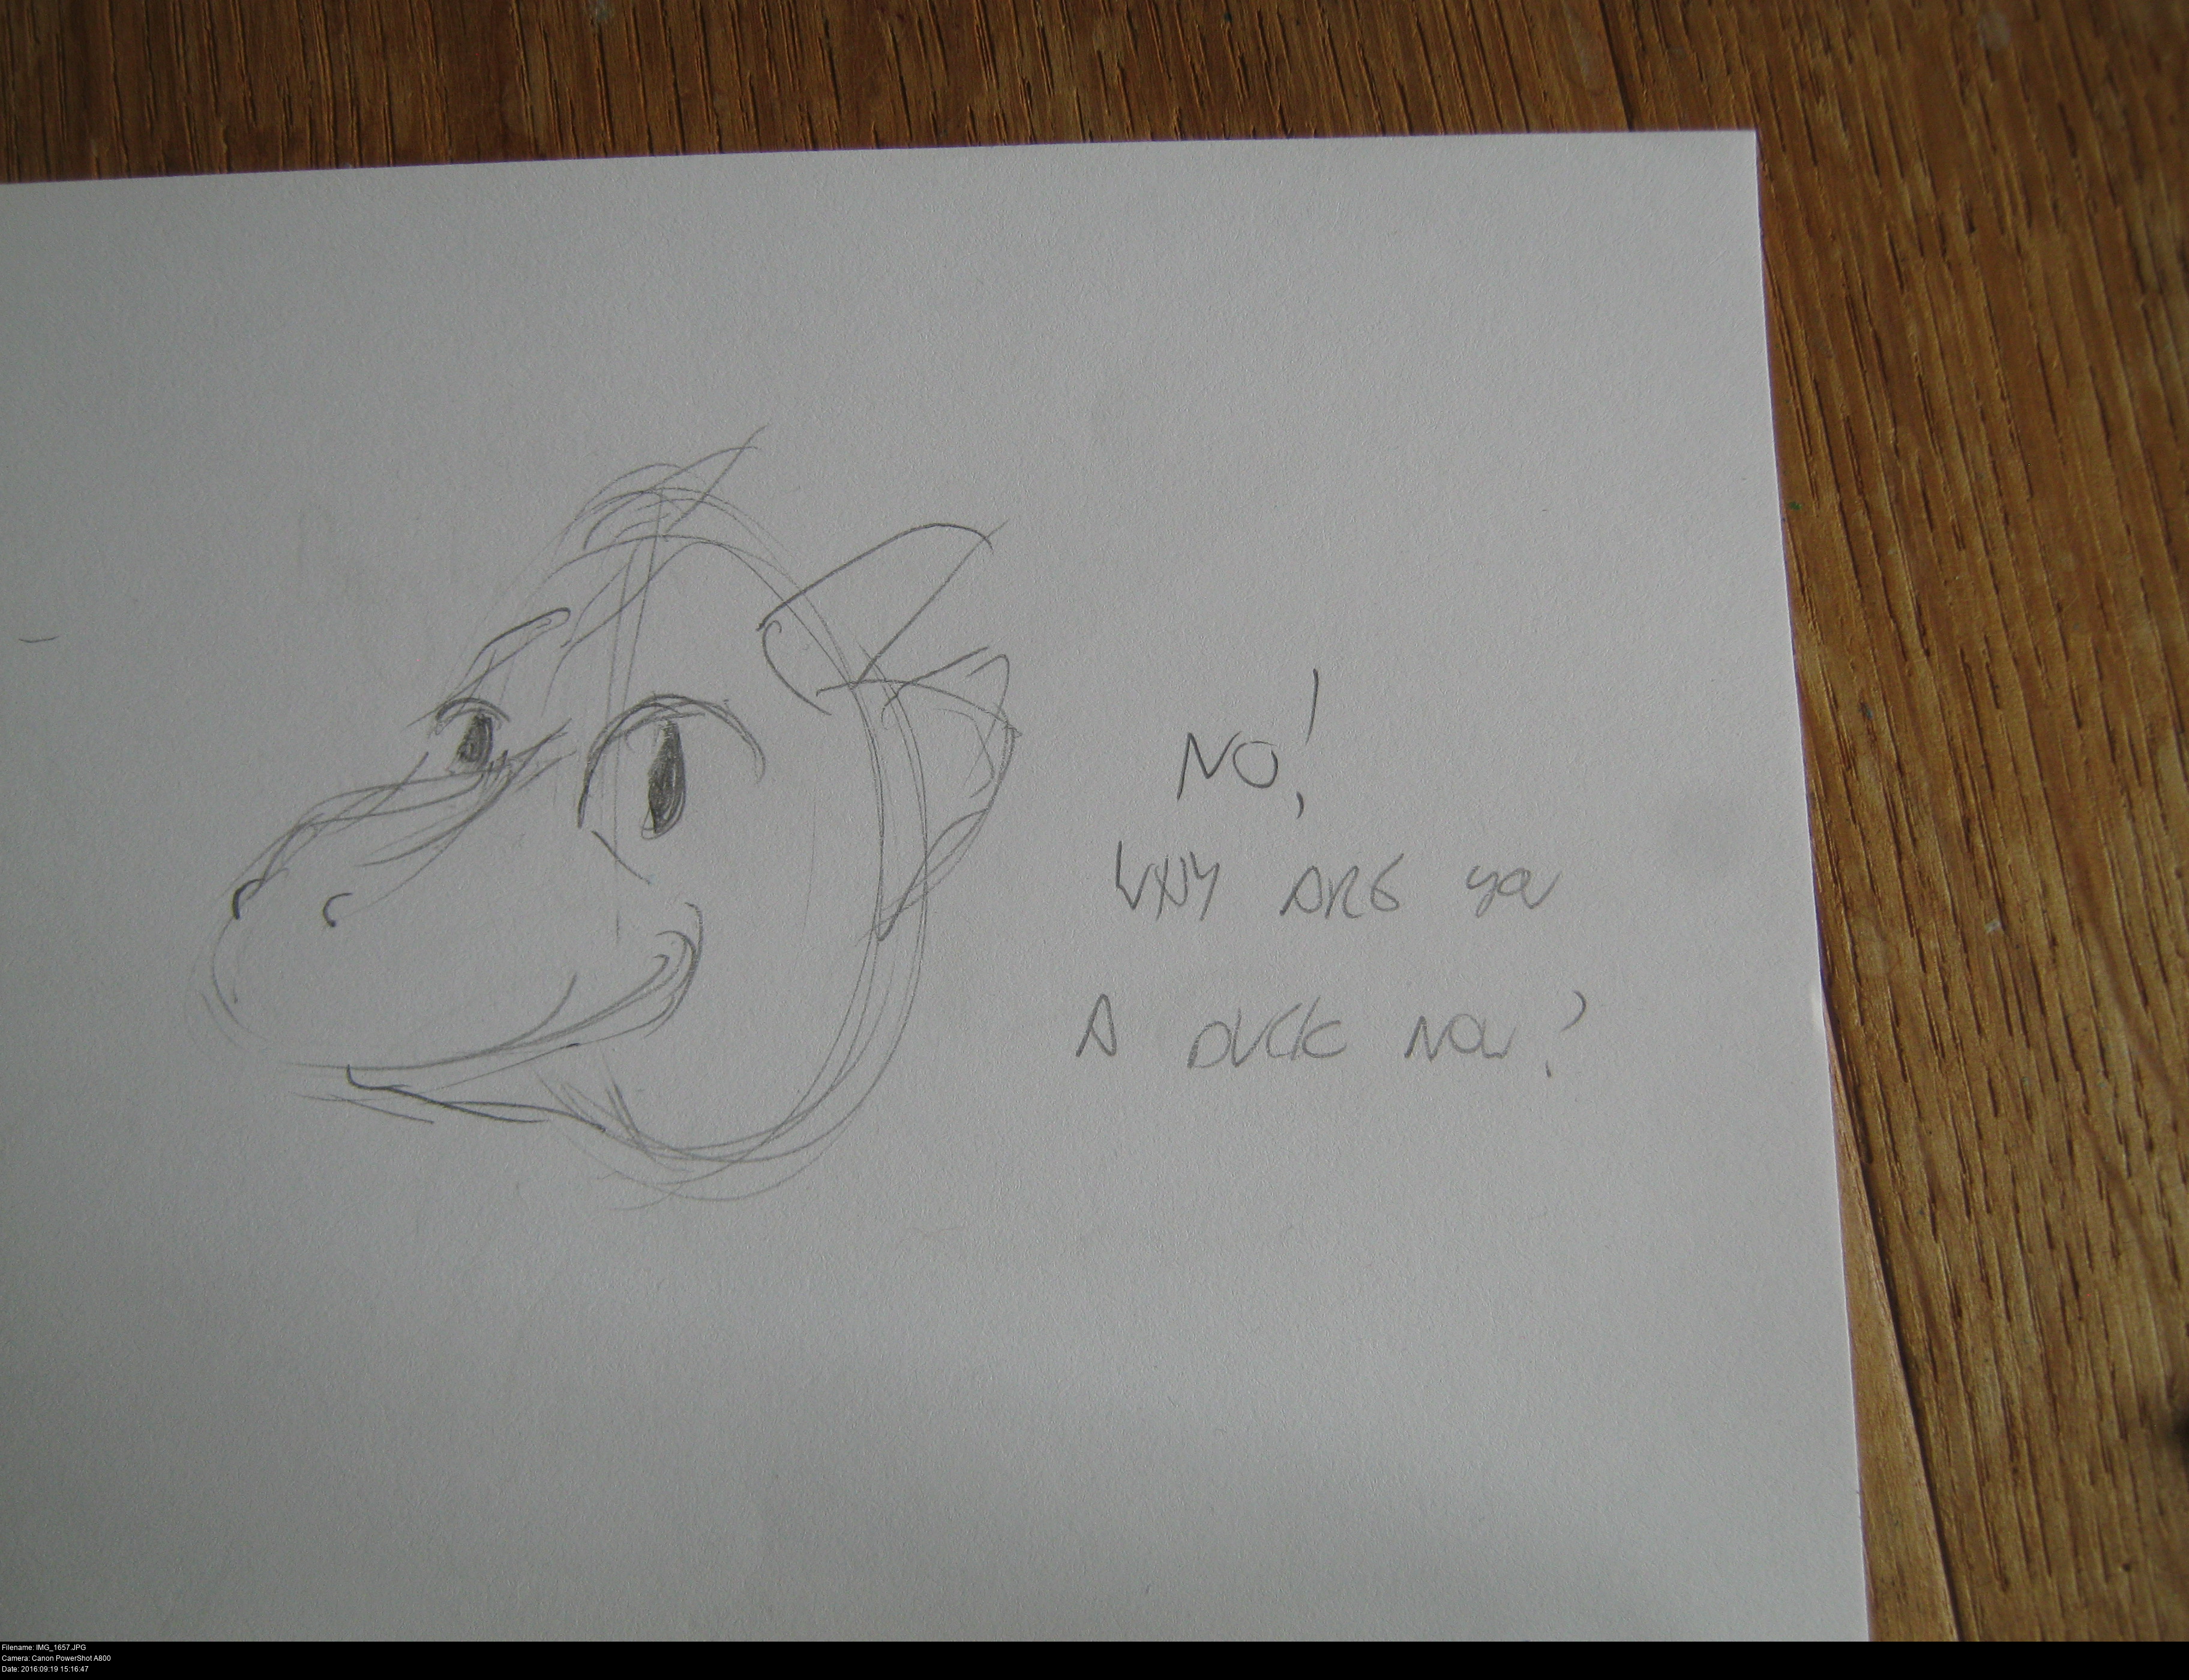
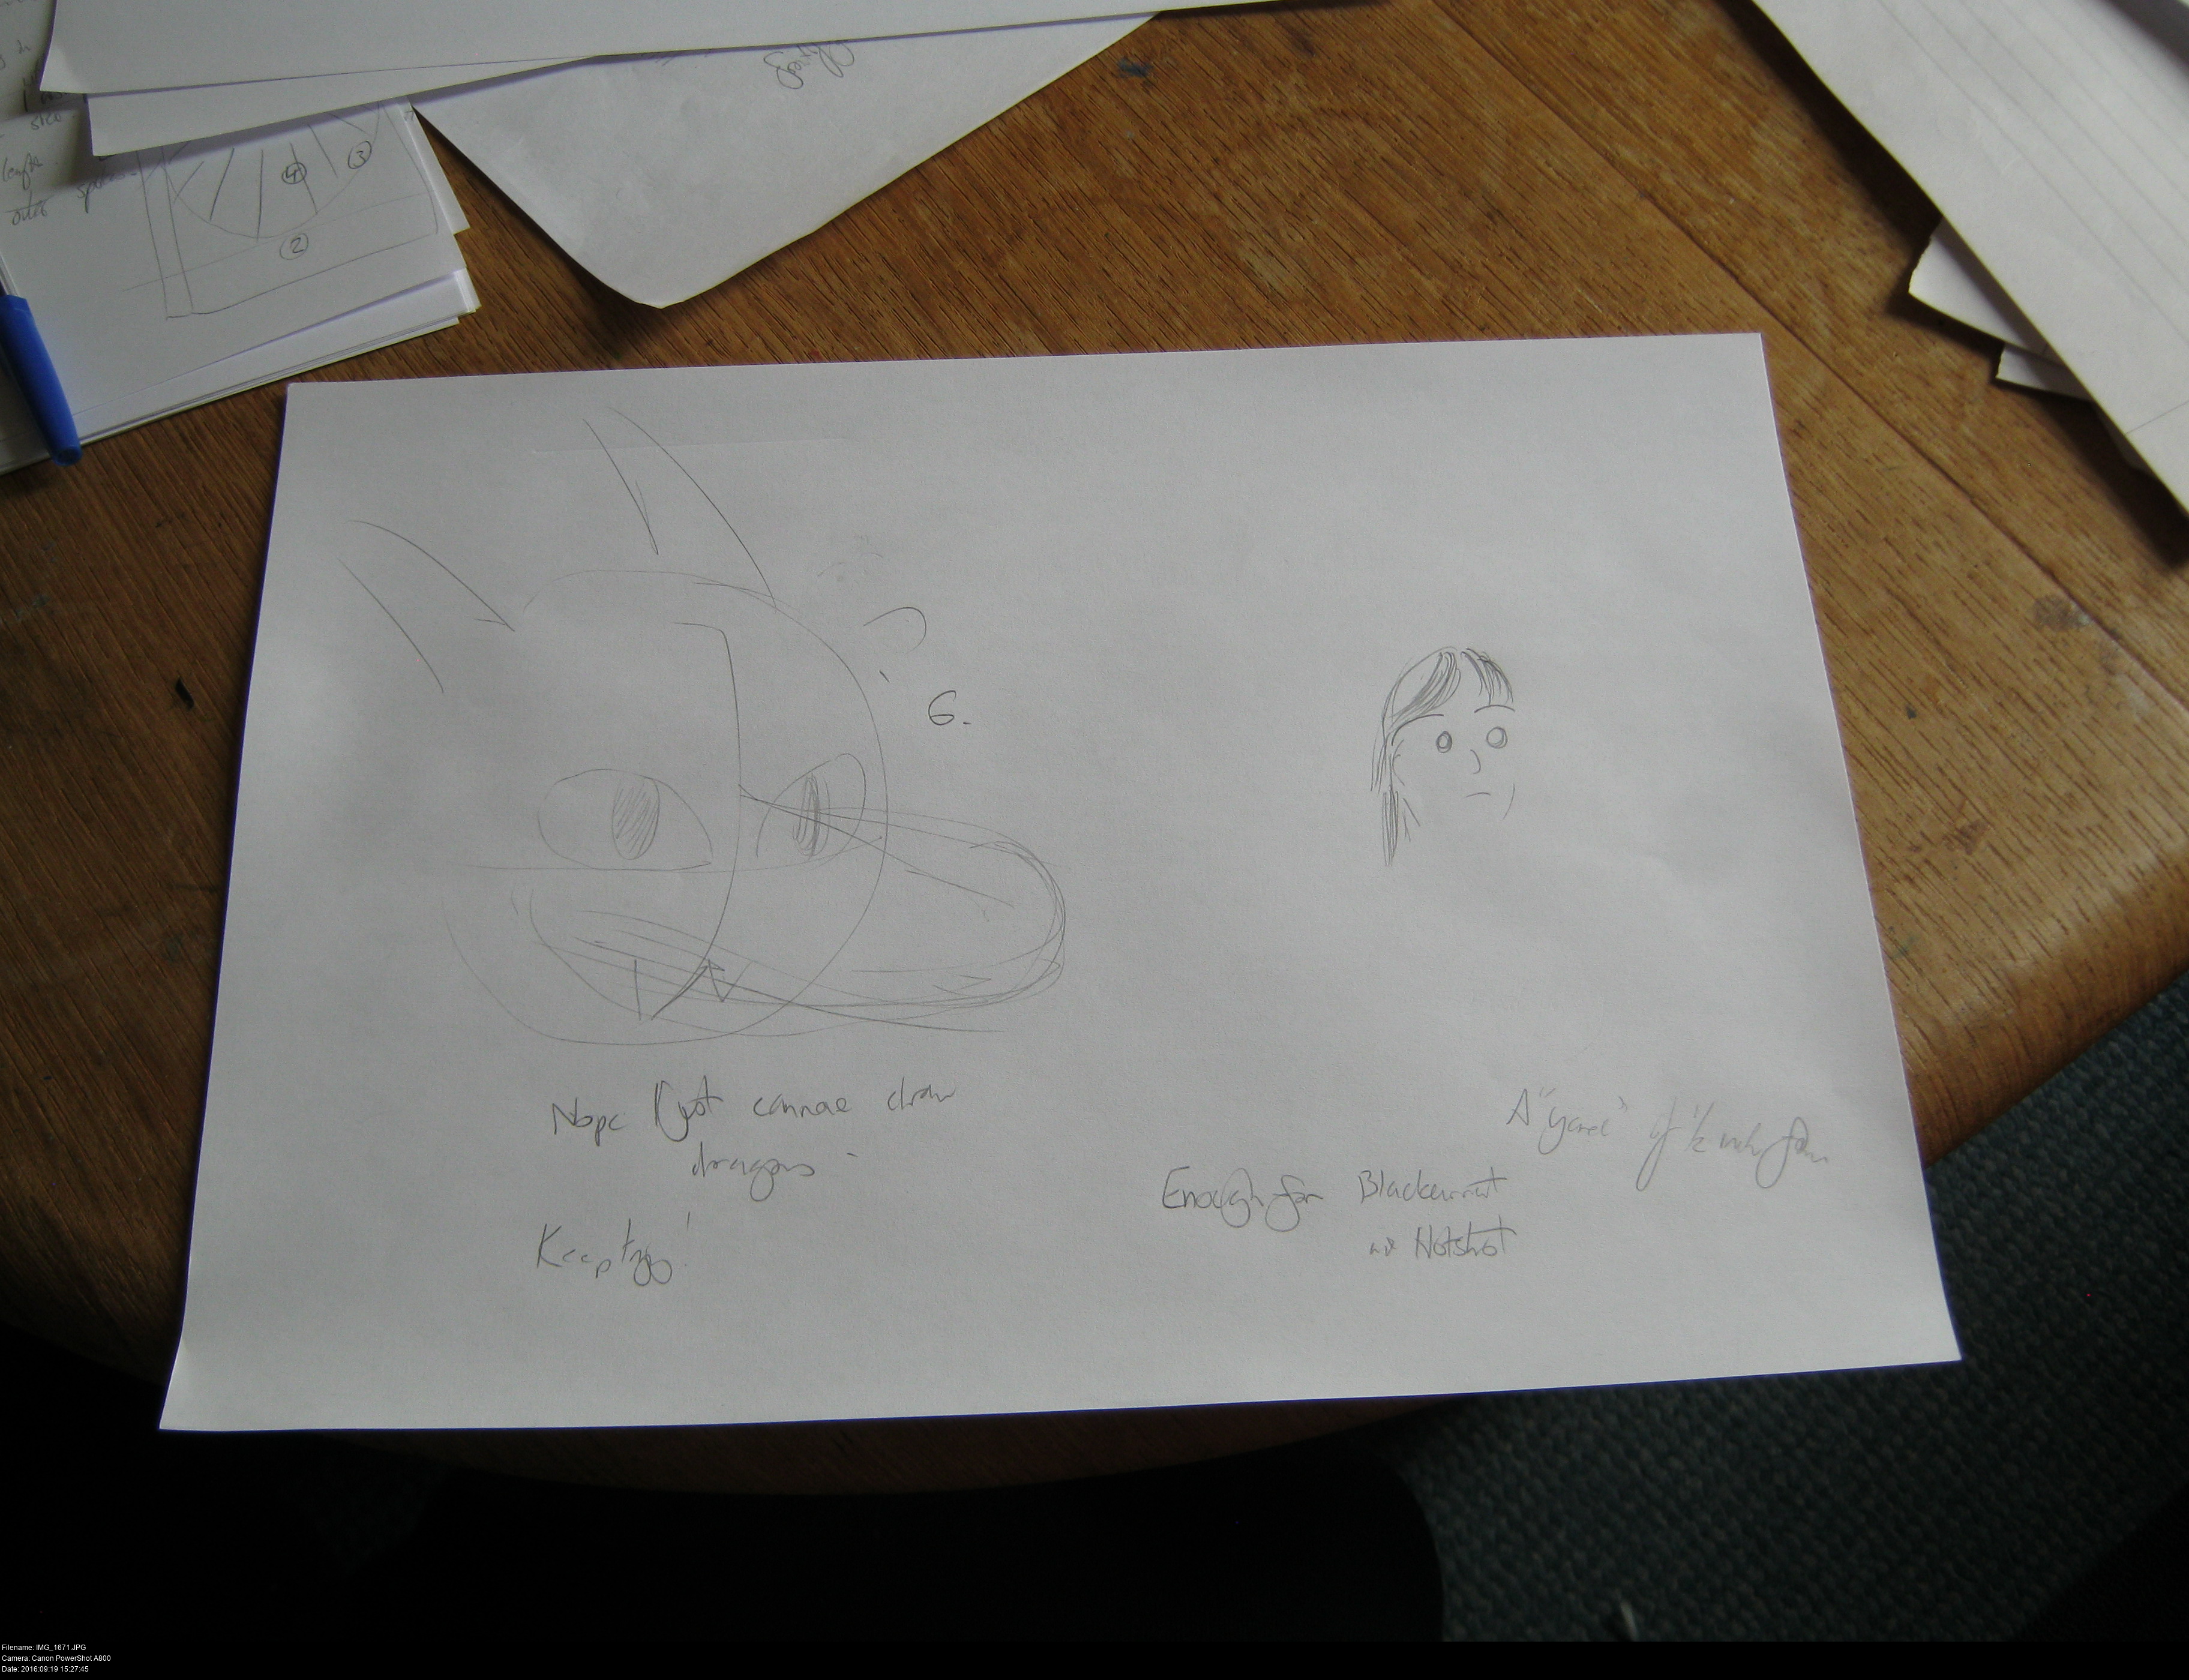
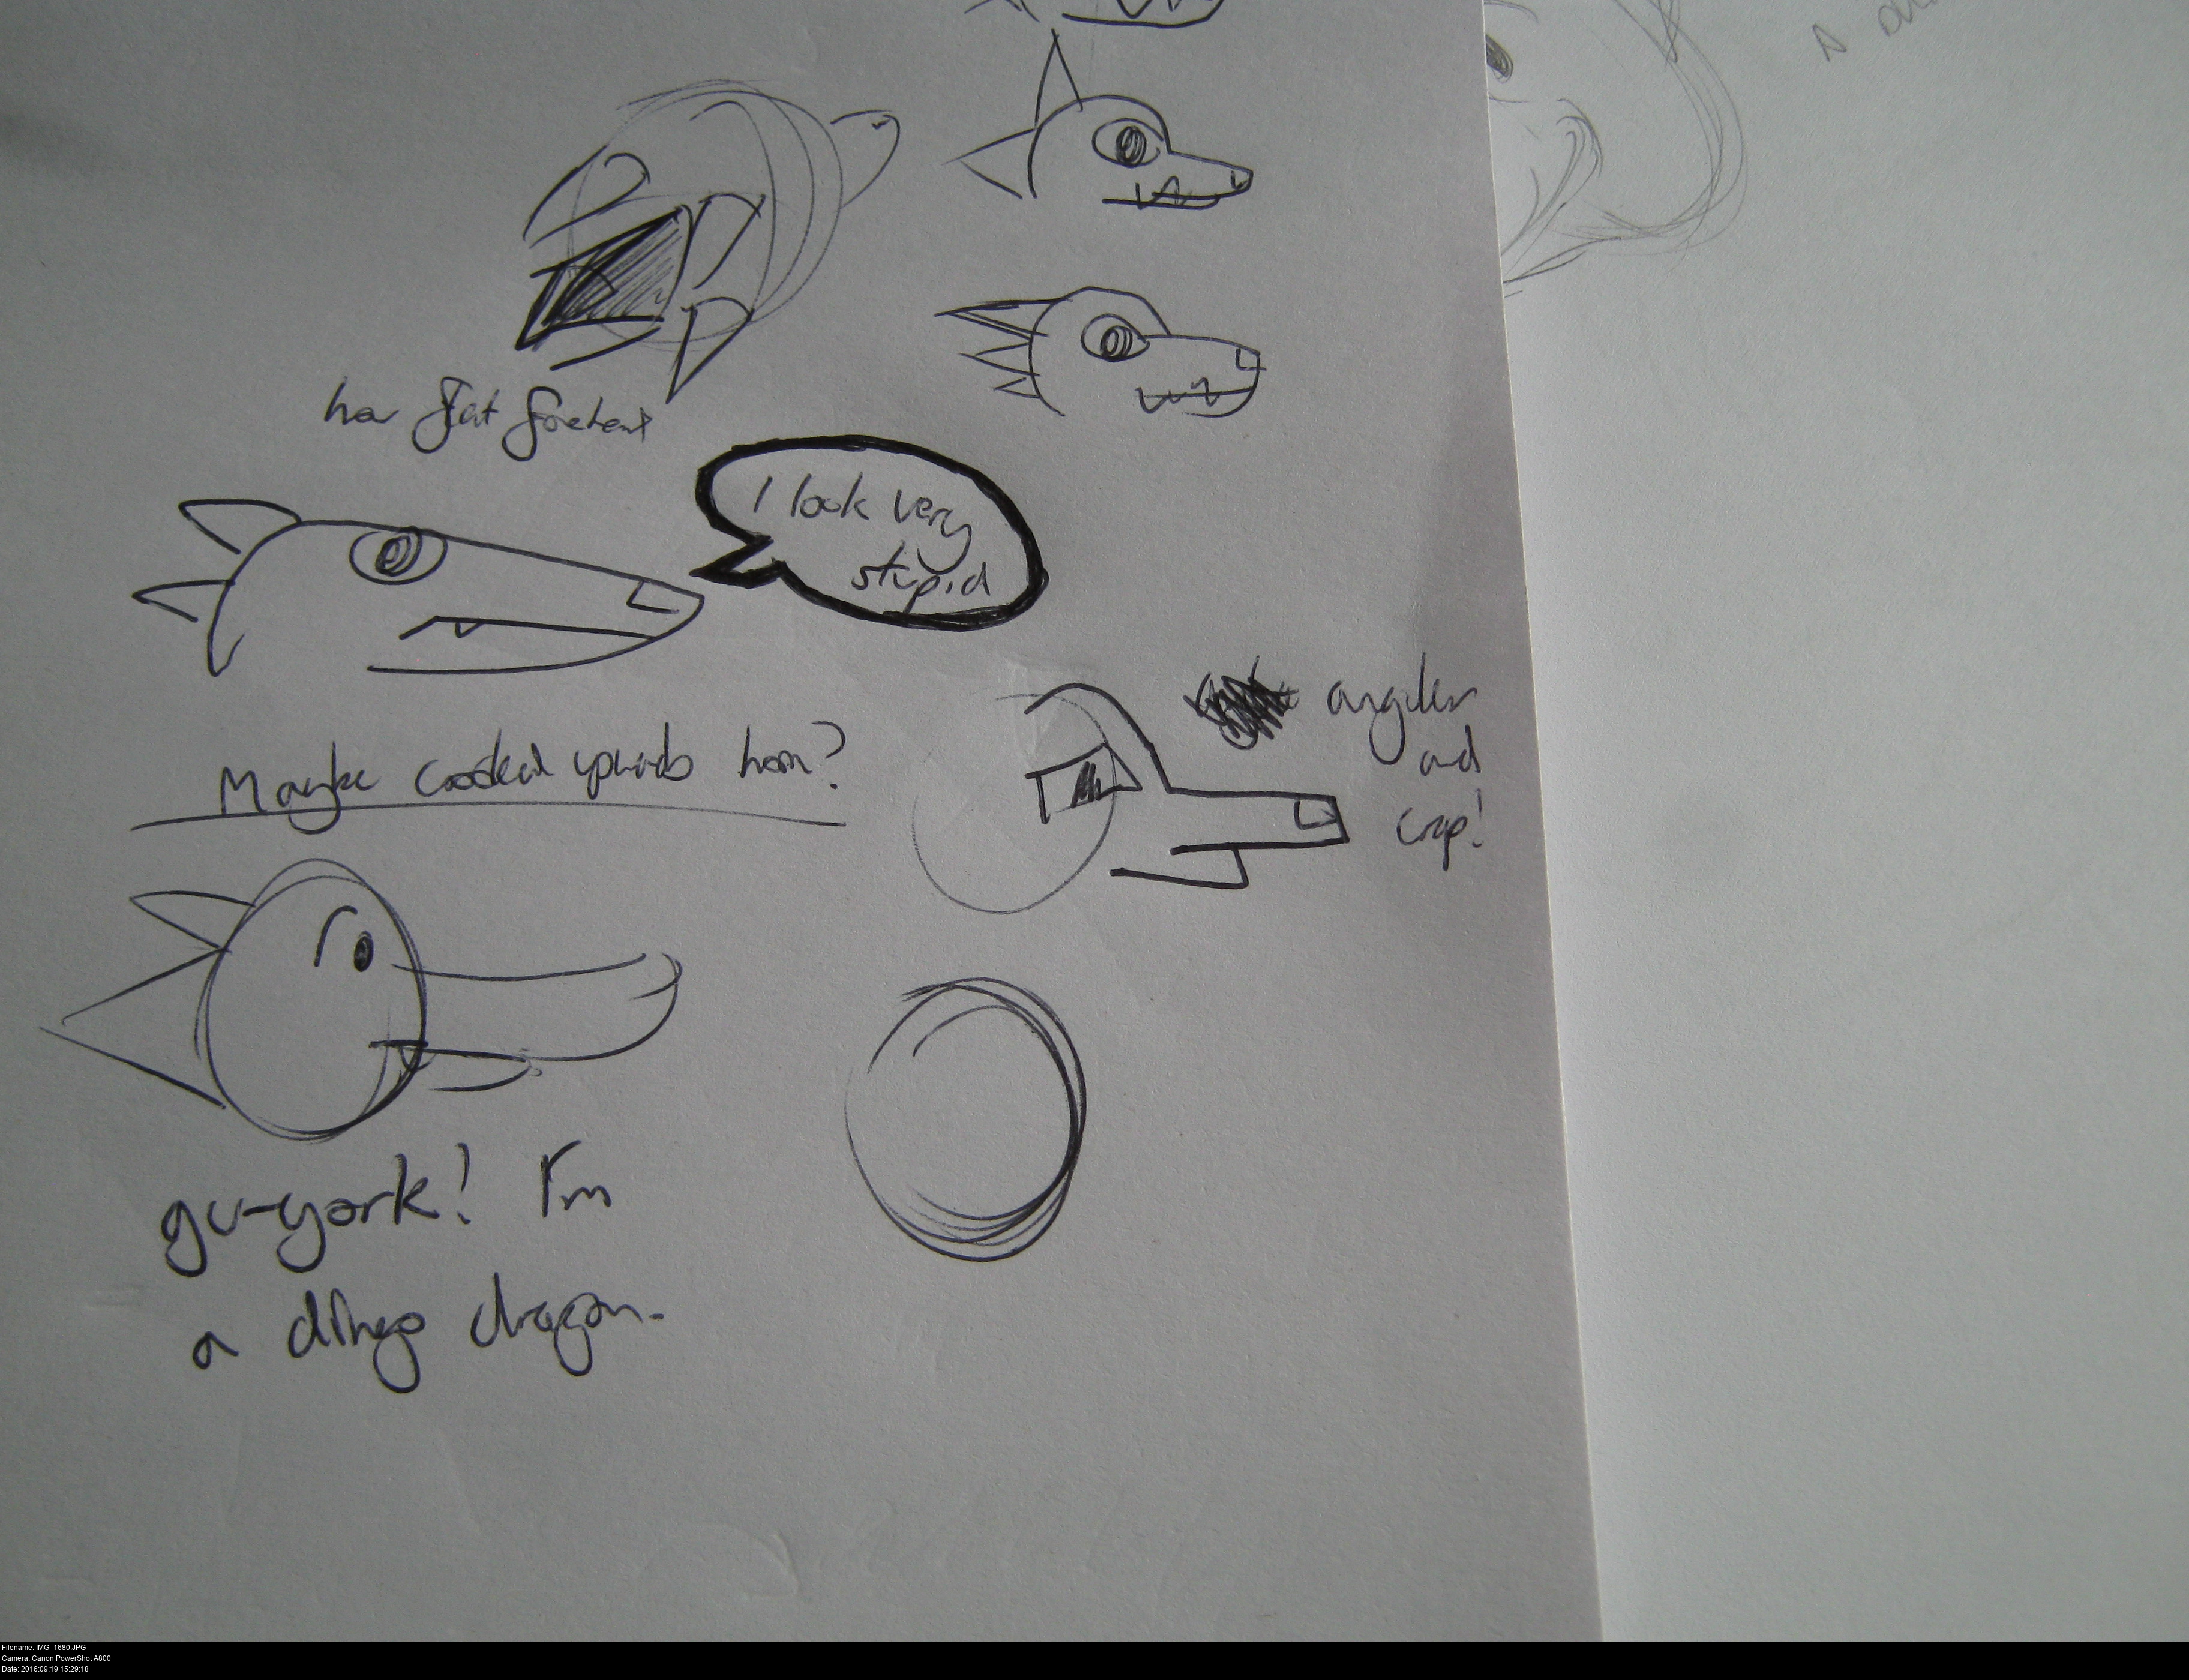
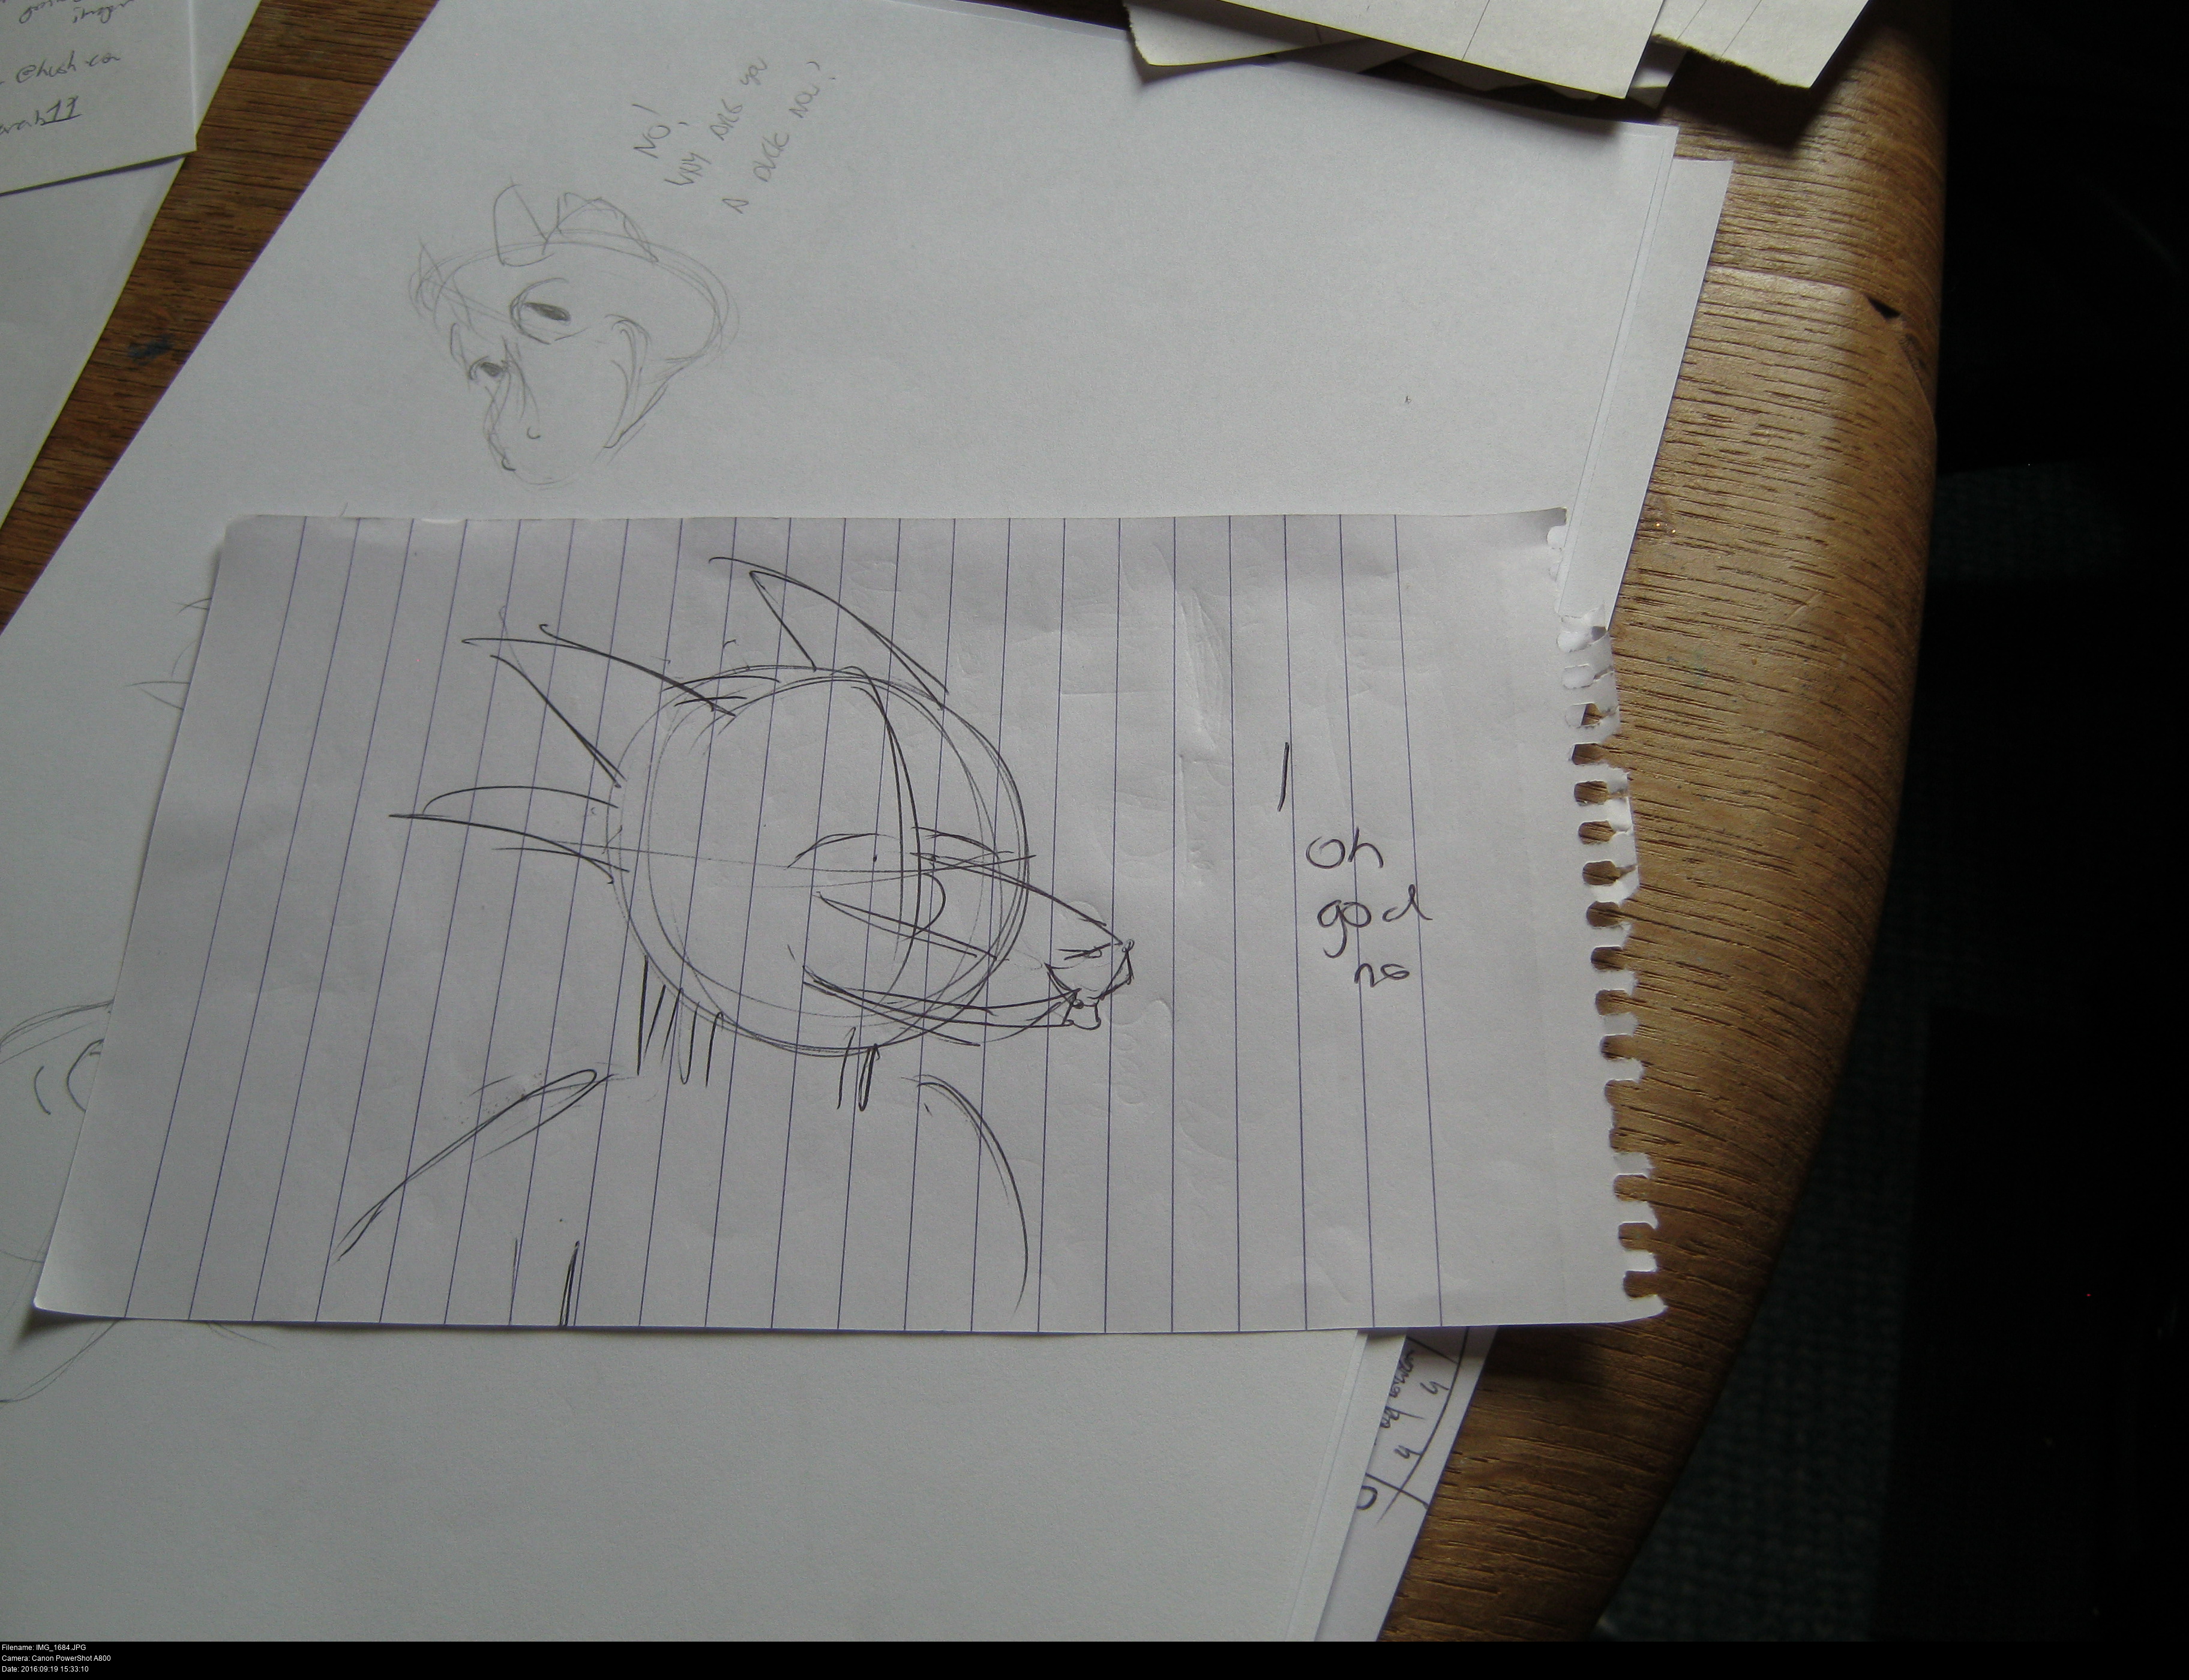
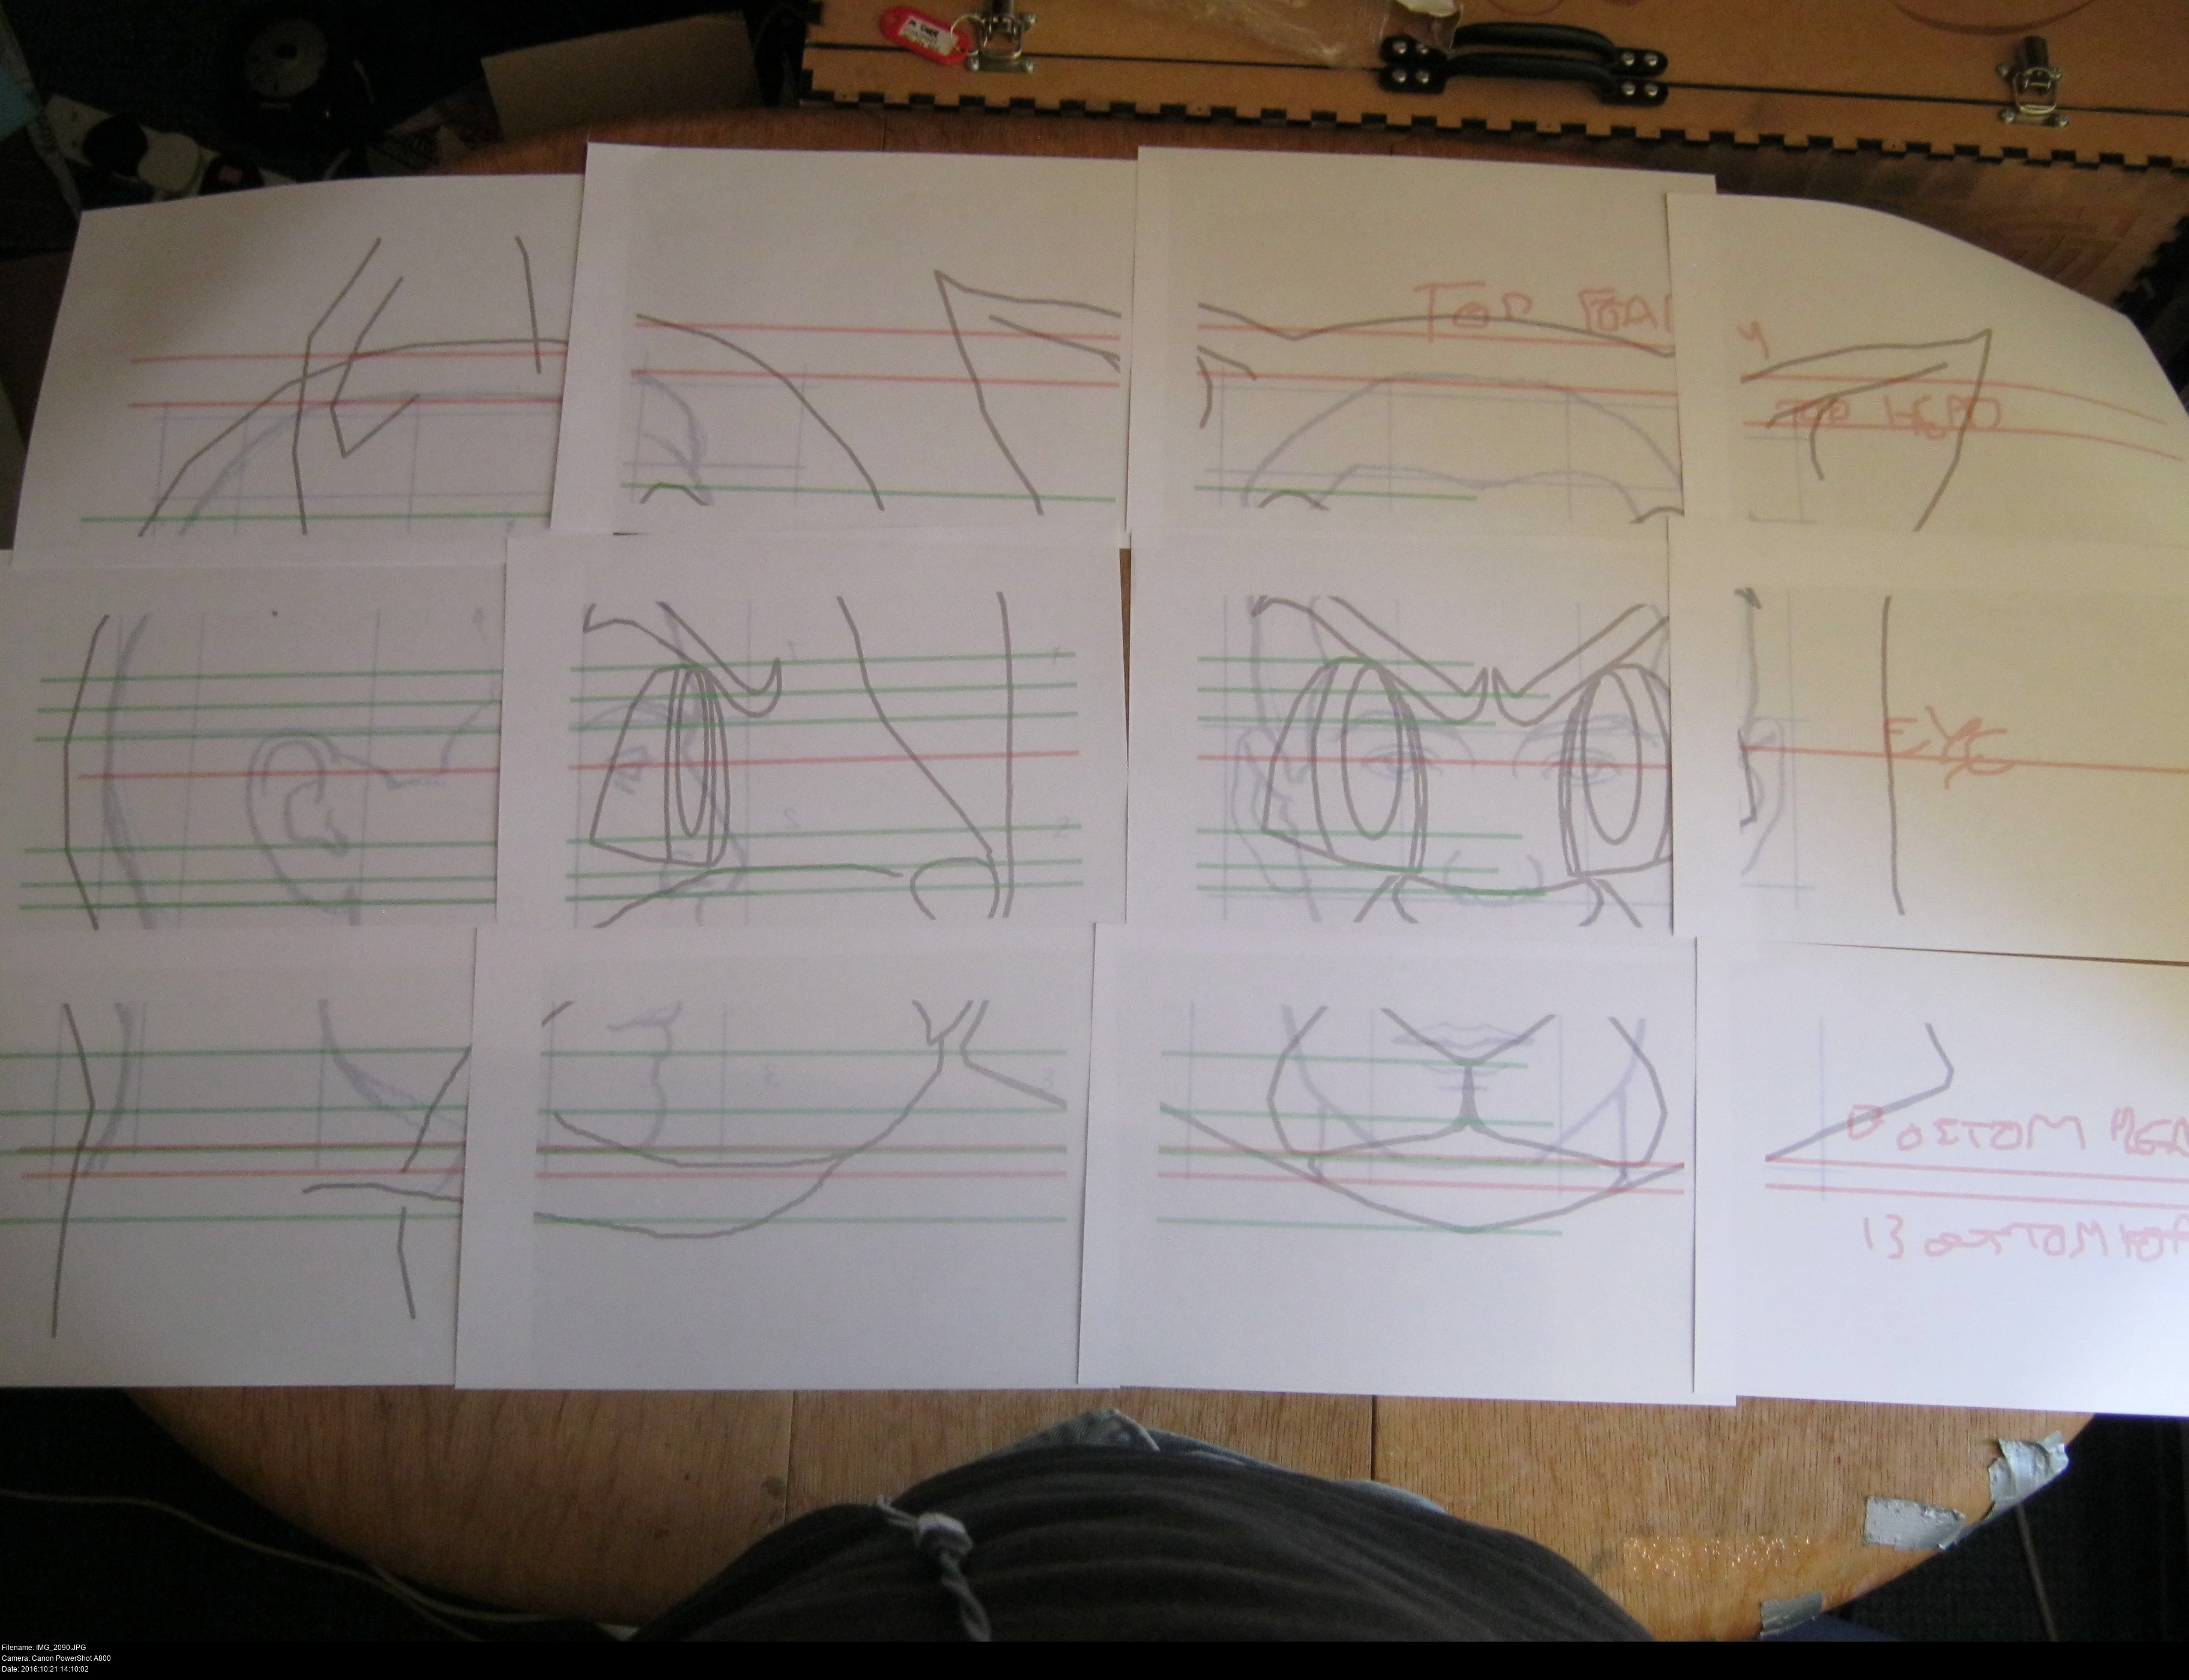
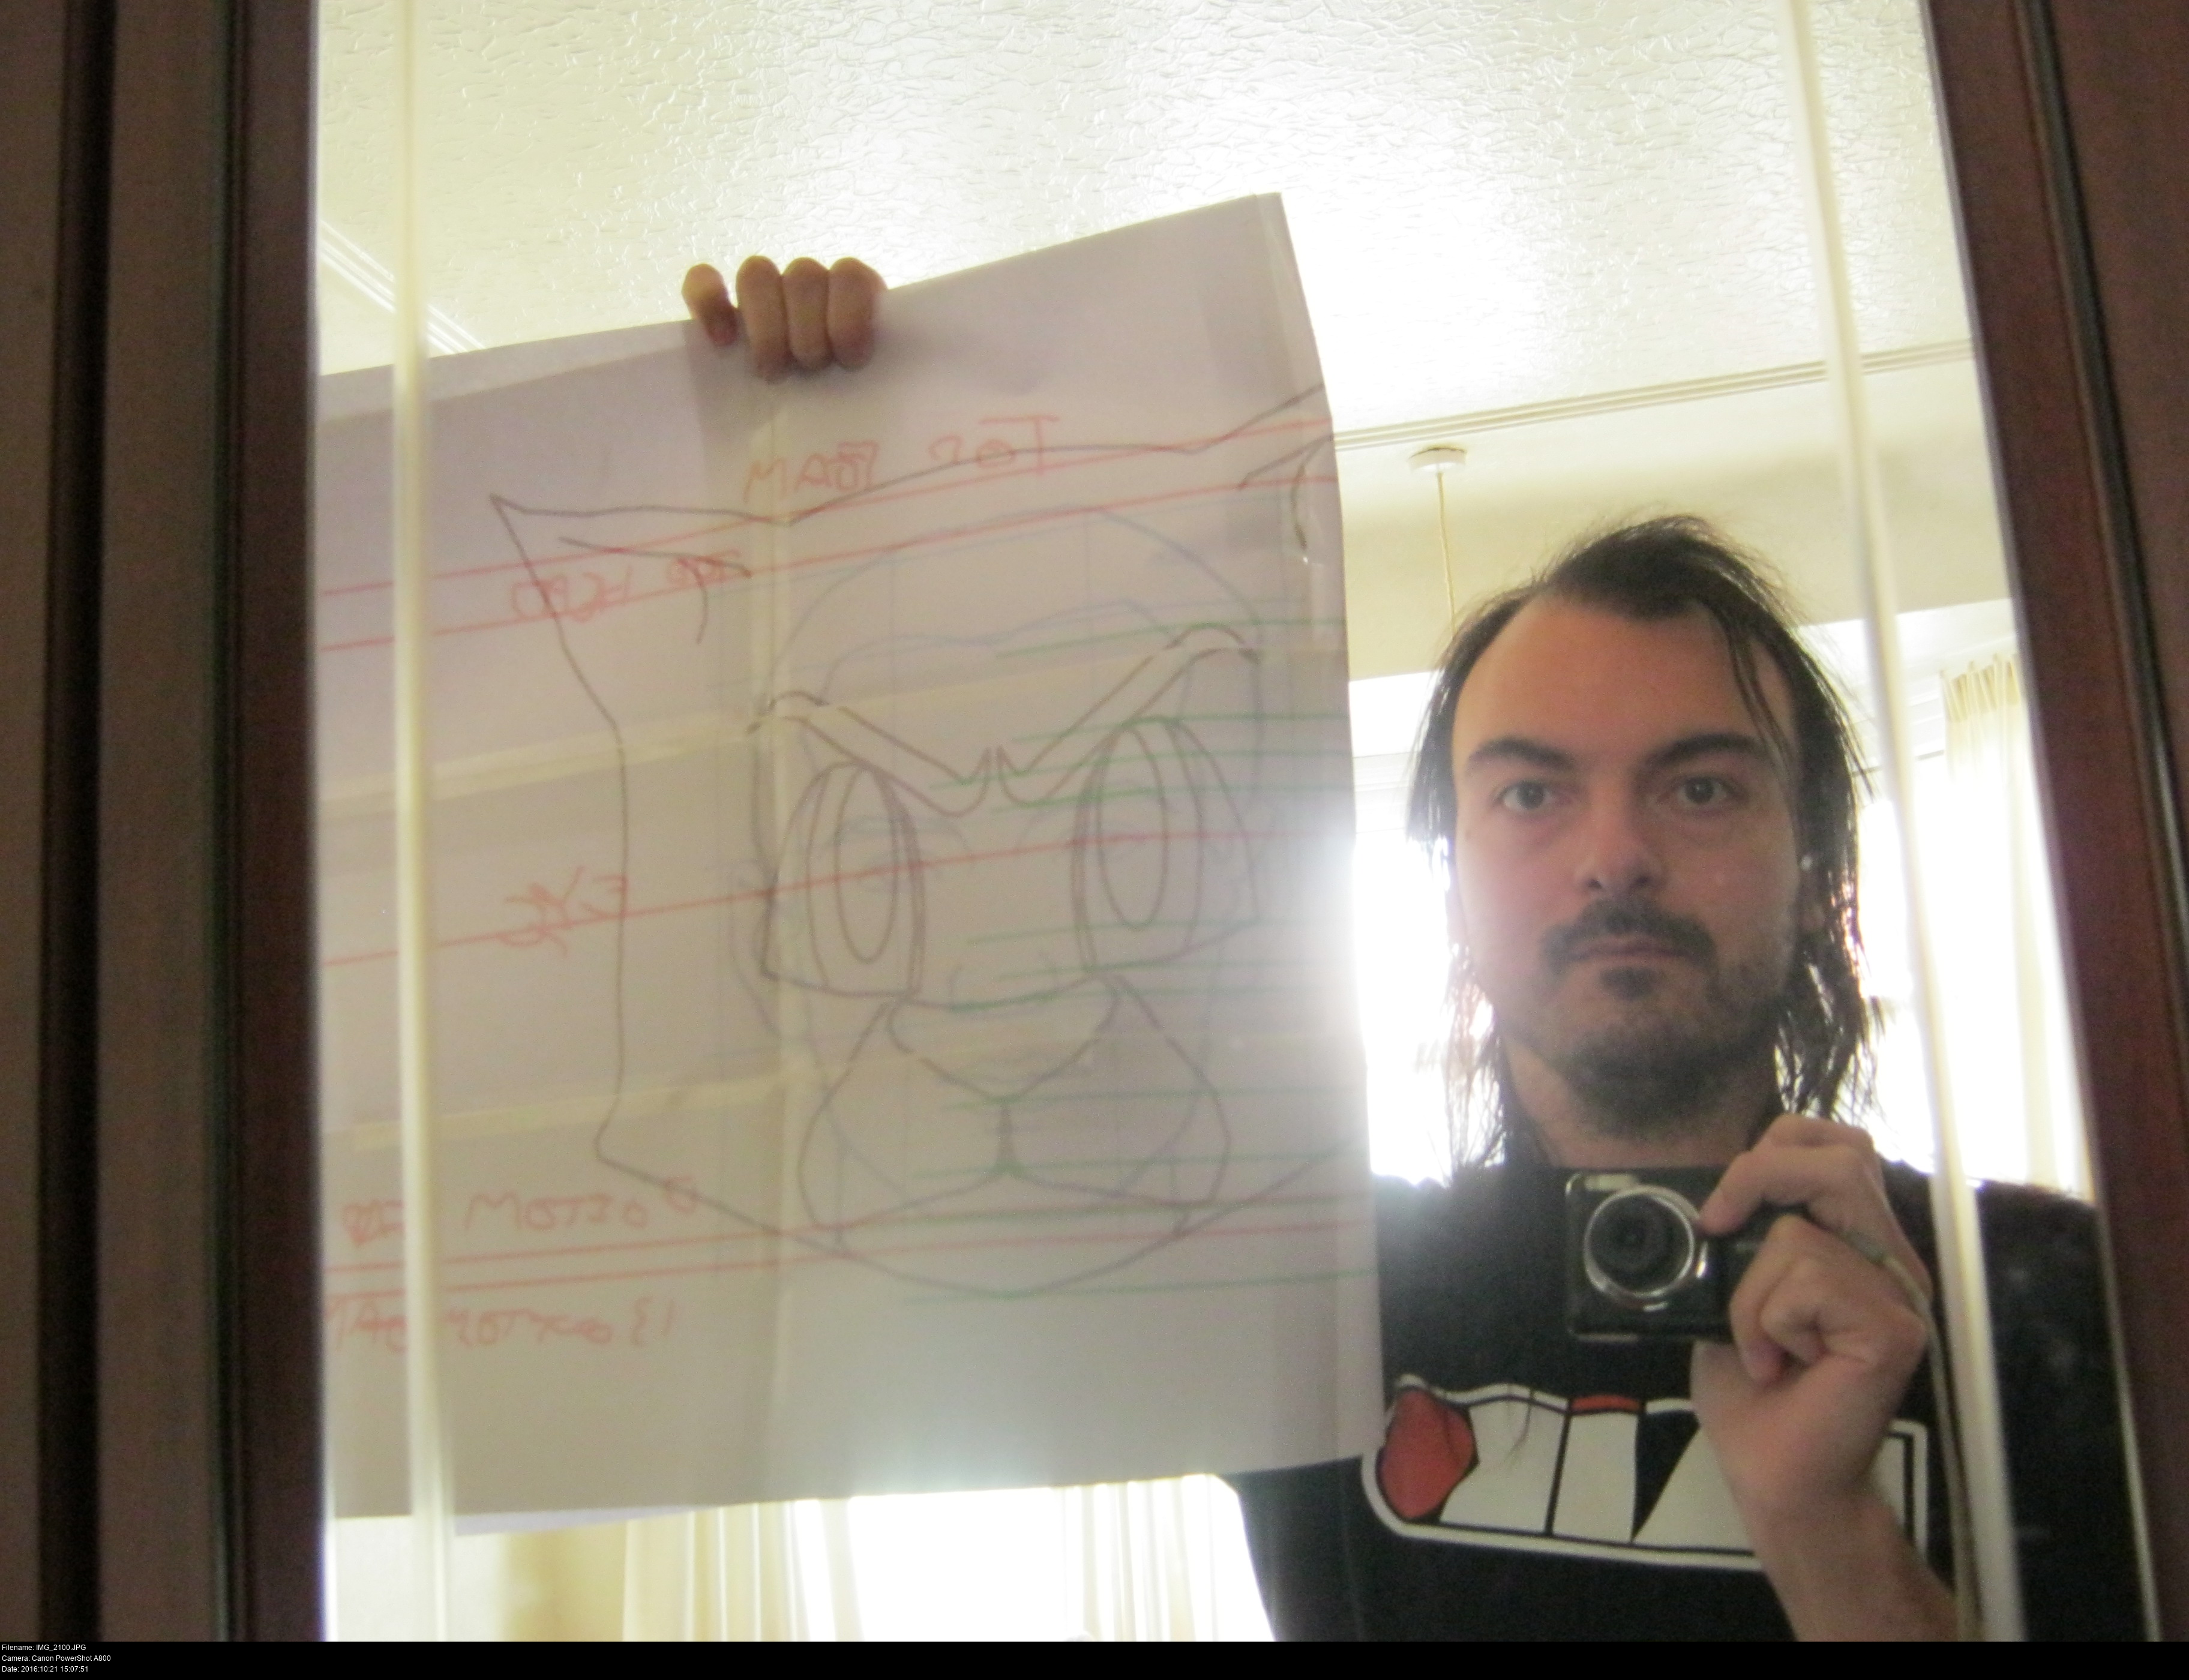
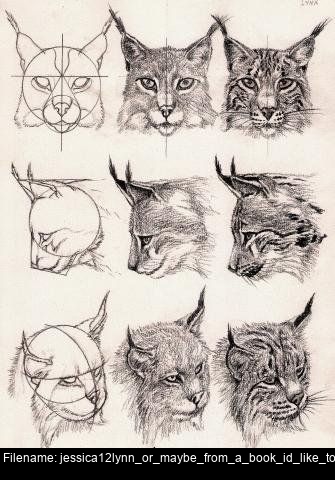
That's a start. Time to see if I can draw him. I can't make him if I can't visualise him, right?
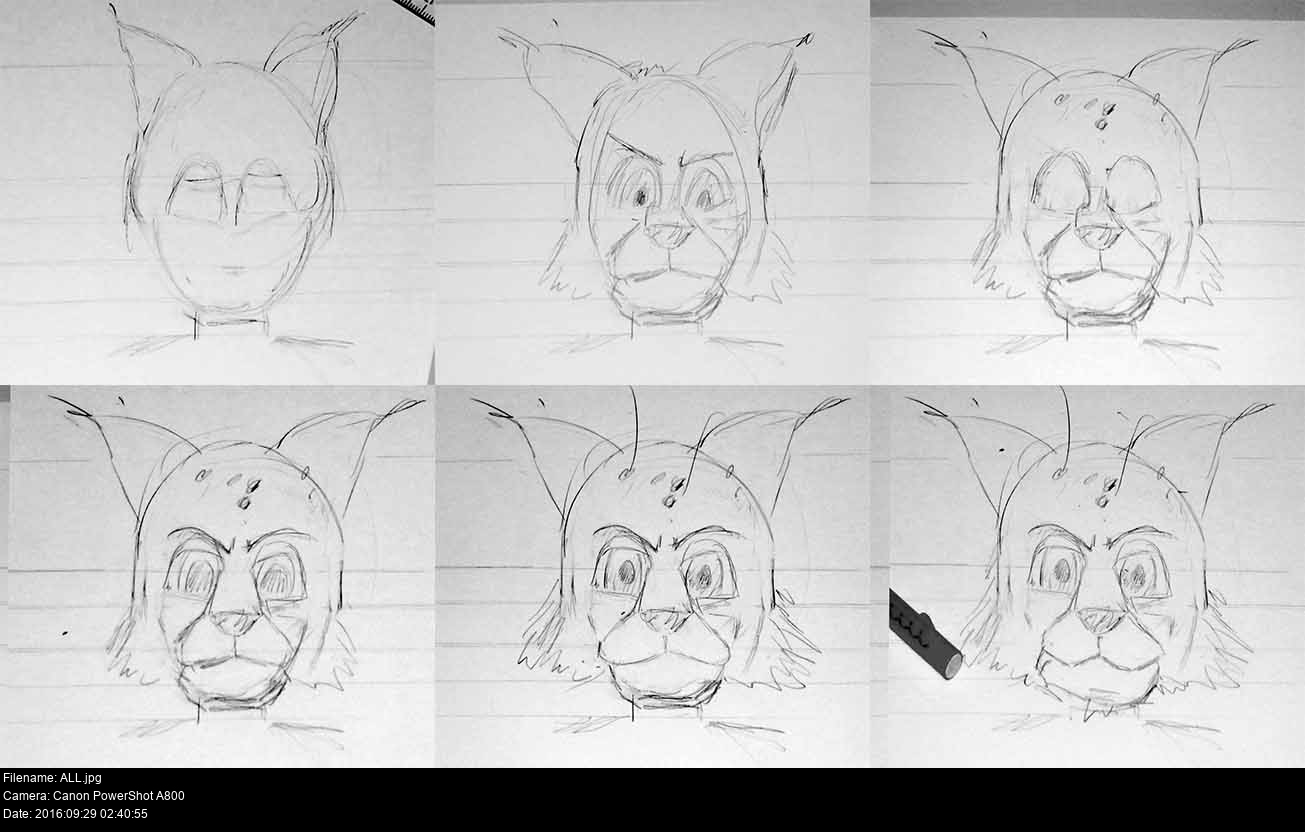
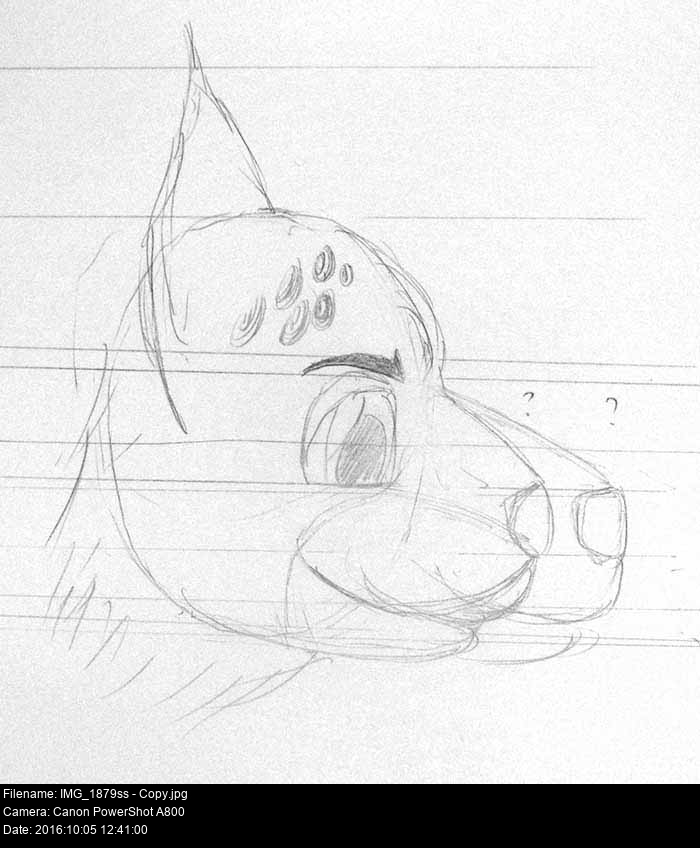
Ahh... I'm not quite hitting it. I don't know exactly what I want to do, but this isn't it.

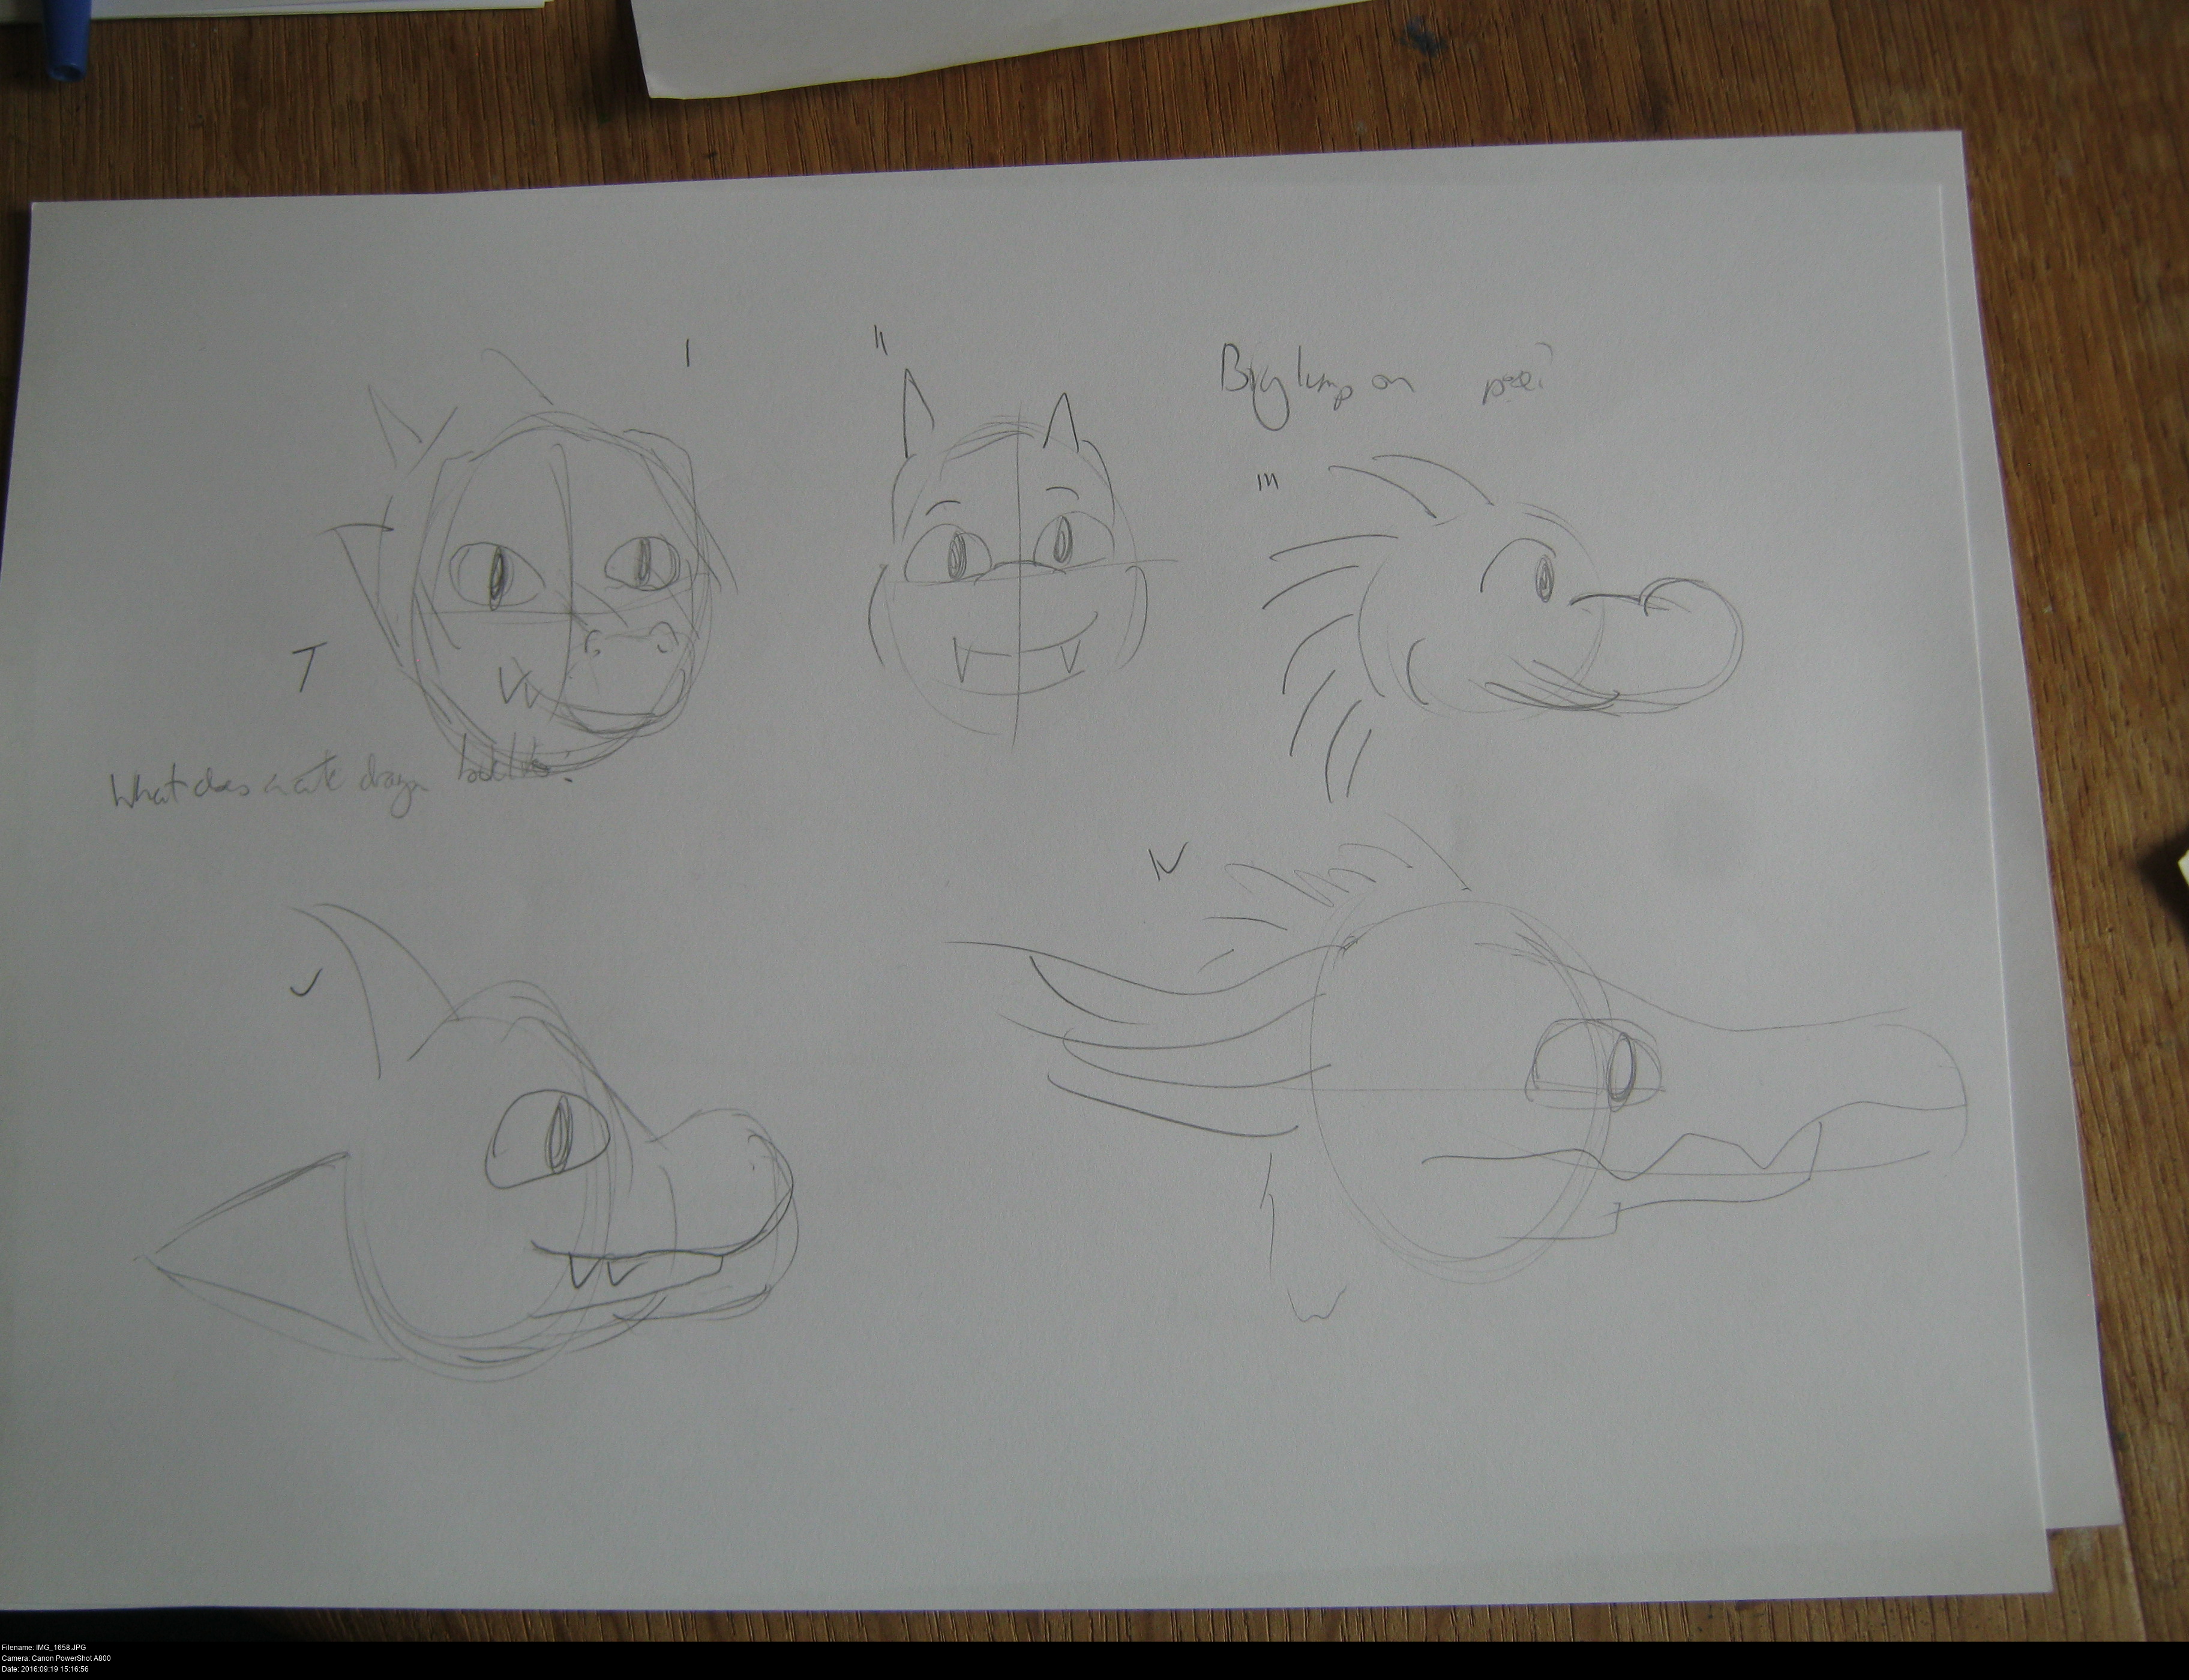
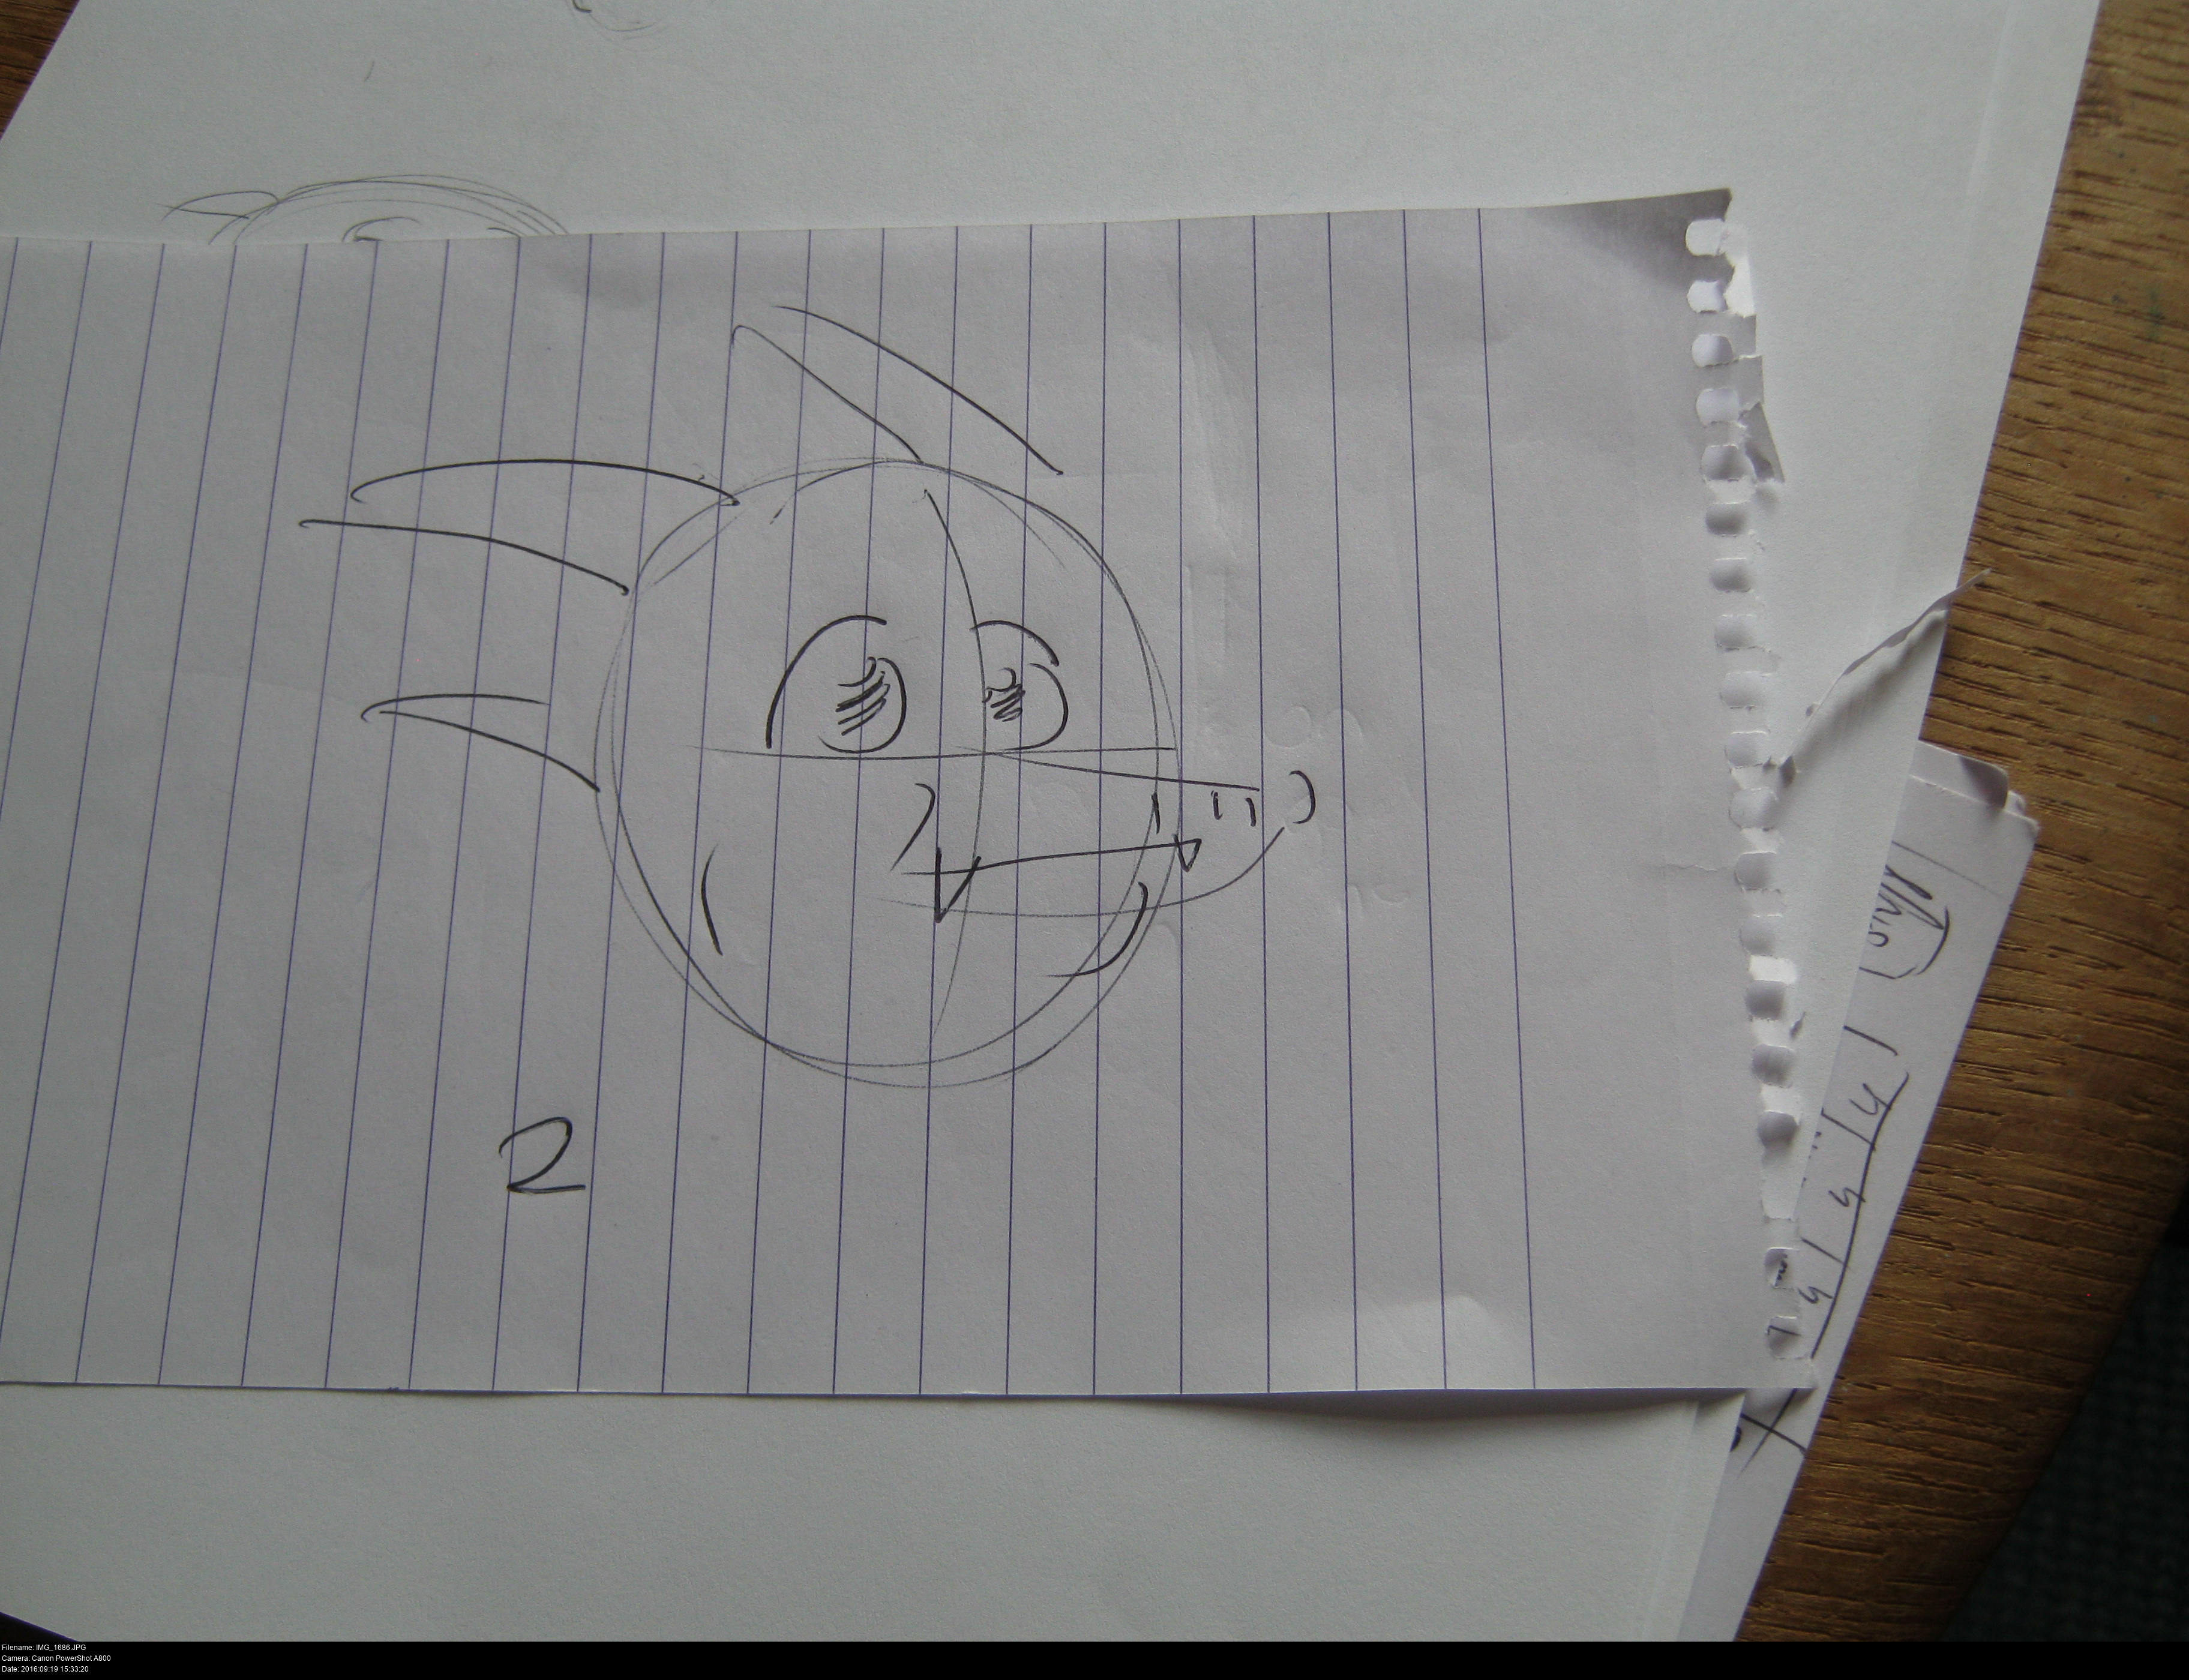
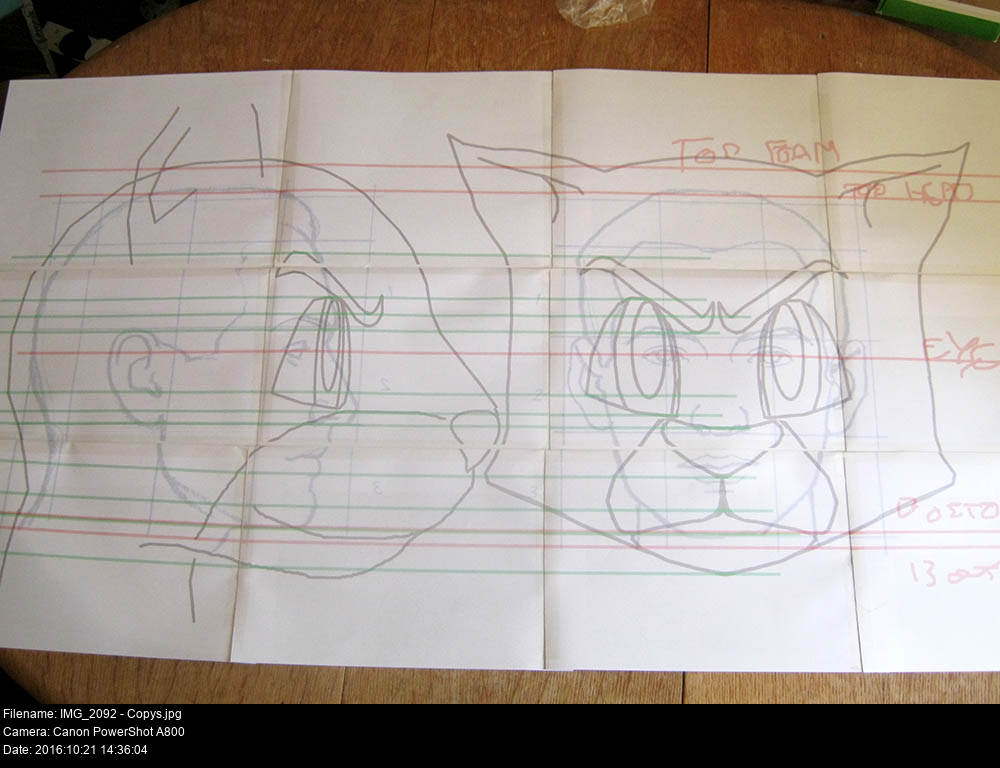
I came back to it a few days later and wrote some notes: 'Friendlier expression', 'Fewer straight lines and more curves', 'Wide round eyes', 'Blunt muzzle + cheek lower shape', 'Look at actual cute lynxies! Floppy cheek tufts!'
If I simplified him down to the basic shapes, maybe I'd have a better idea of what I wanted:

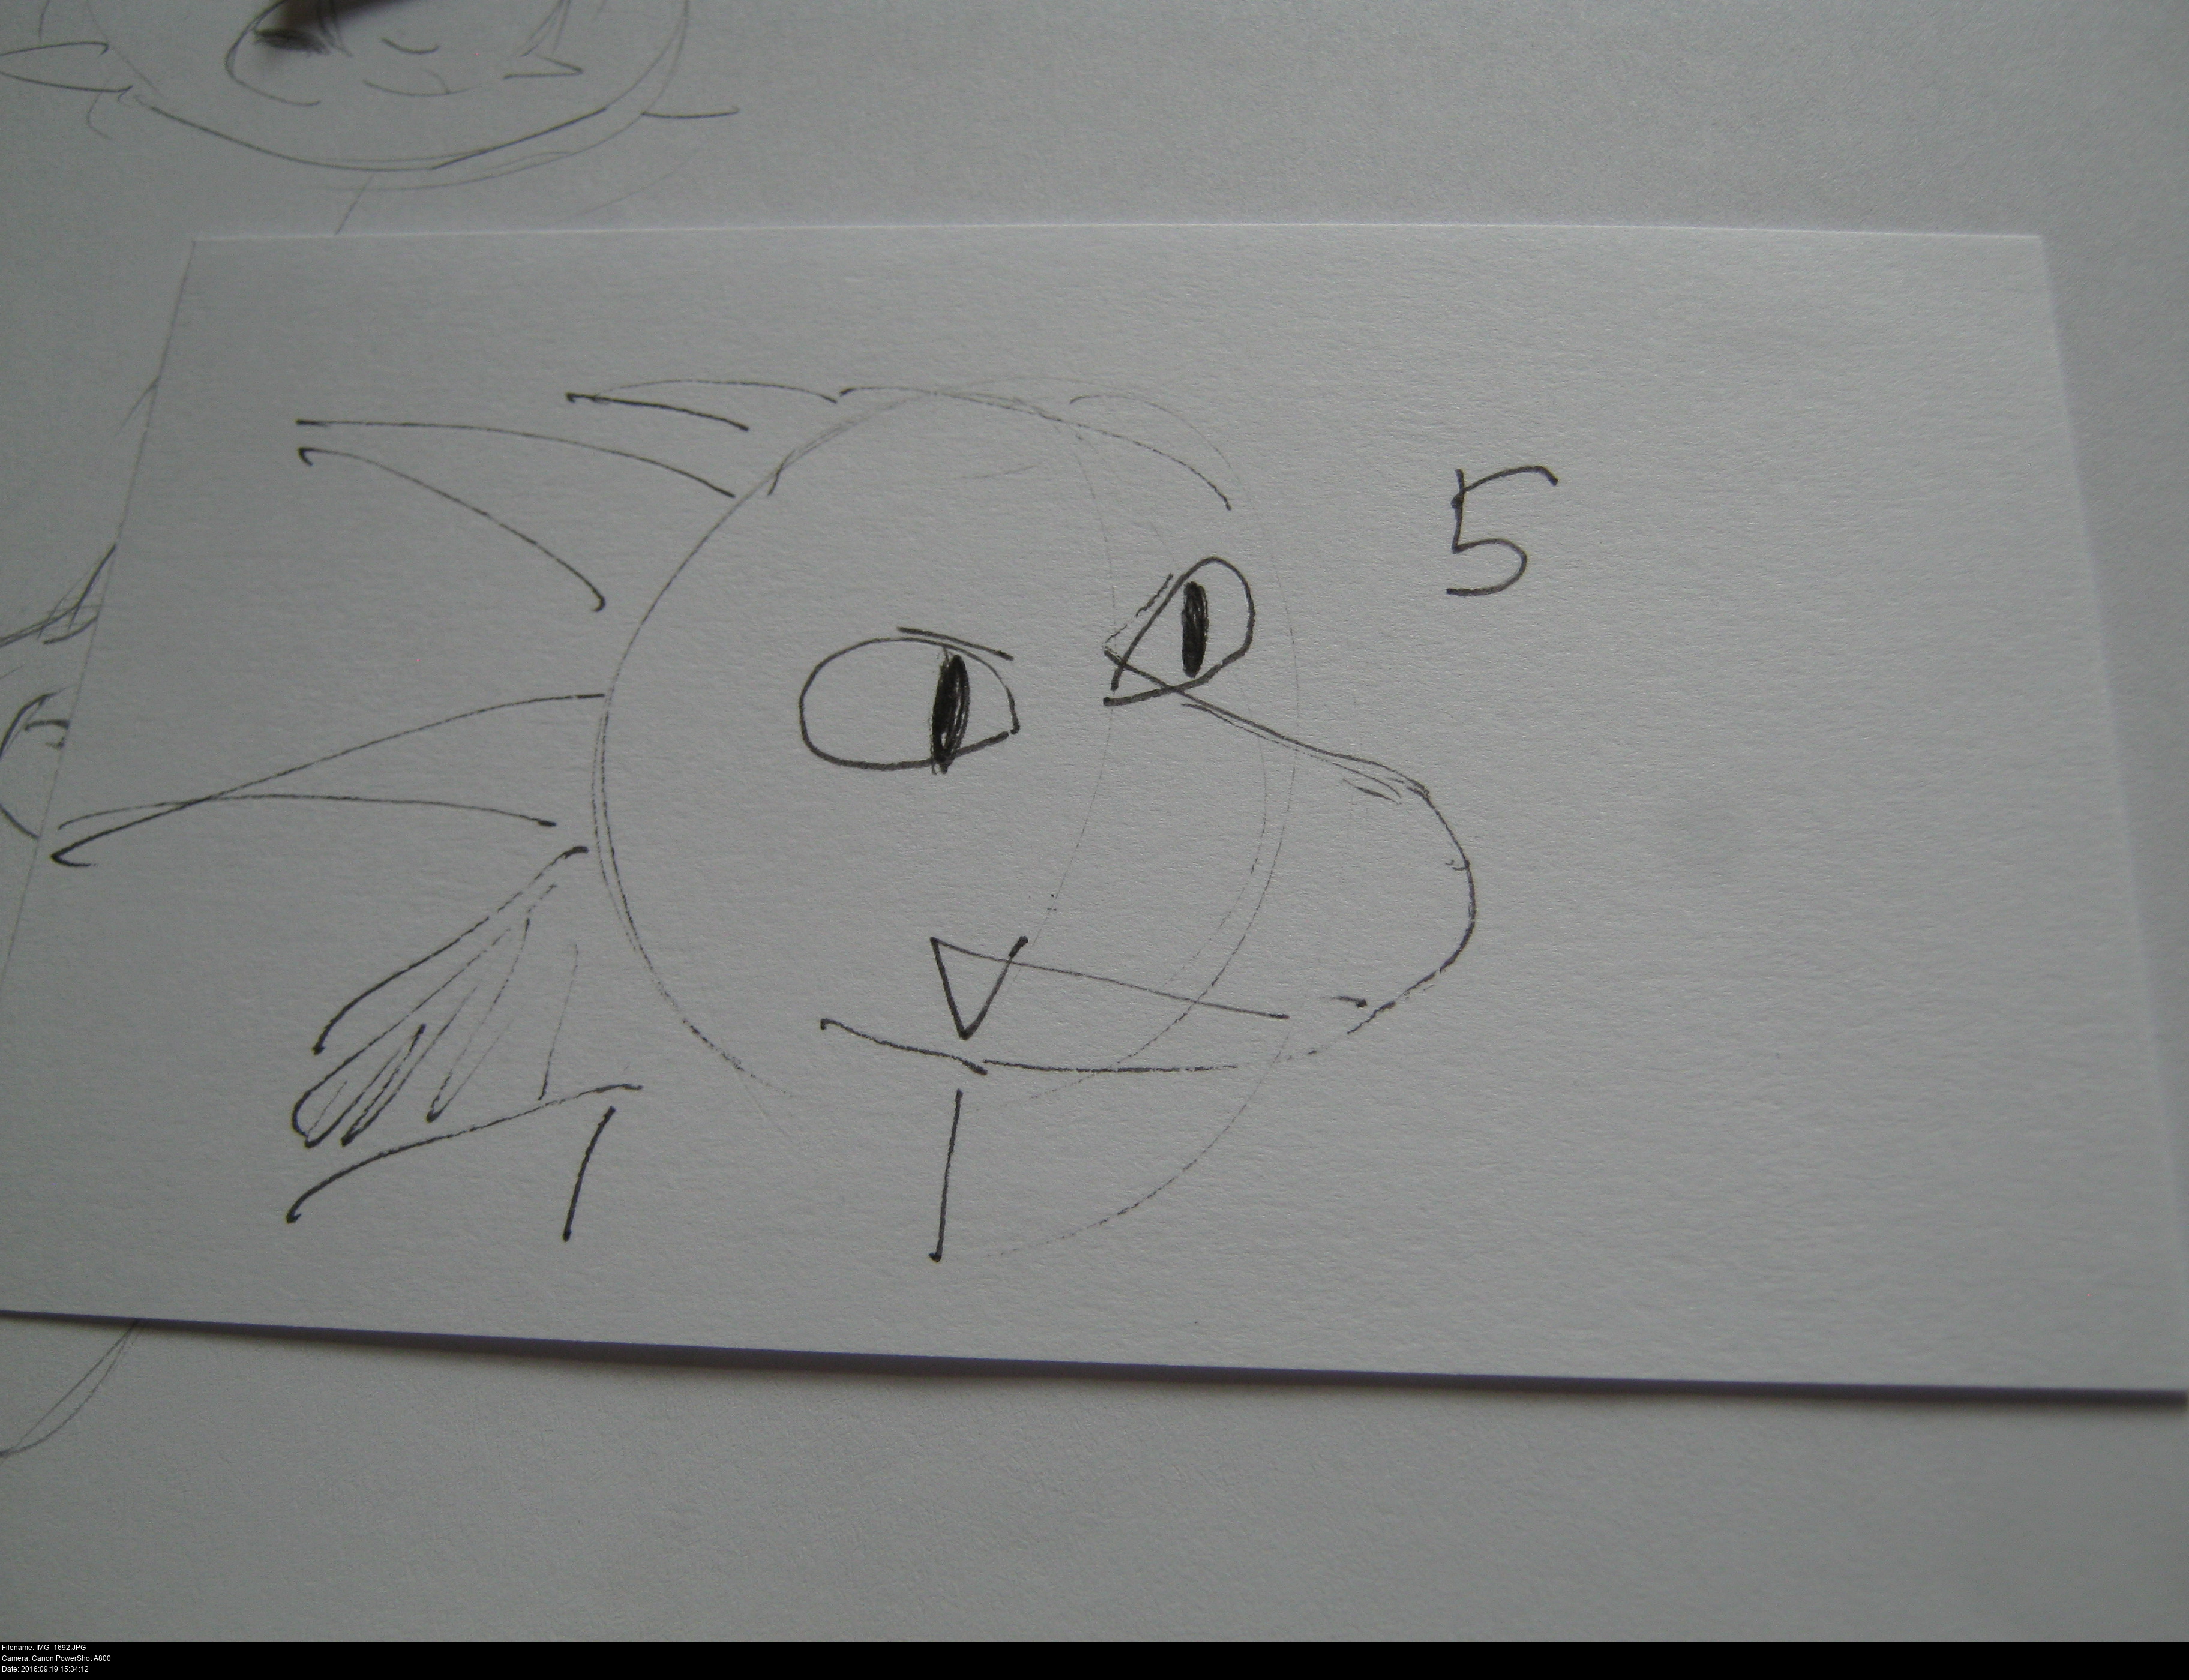
Well he's getting dopier, maybe? His ears have risen right to the top of his head, and just to show how tired I'd become, check out this very early sketch of the muzzle length. Horse cat.
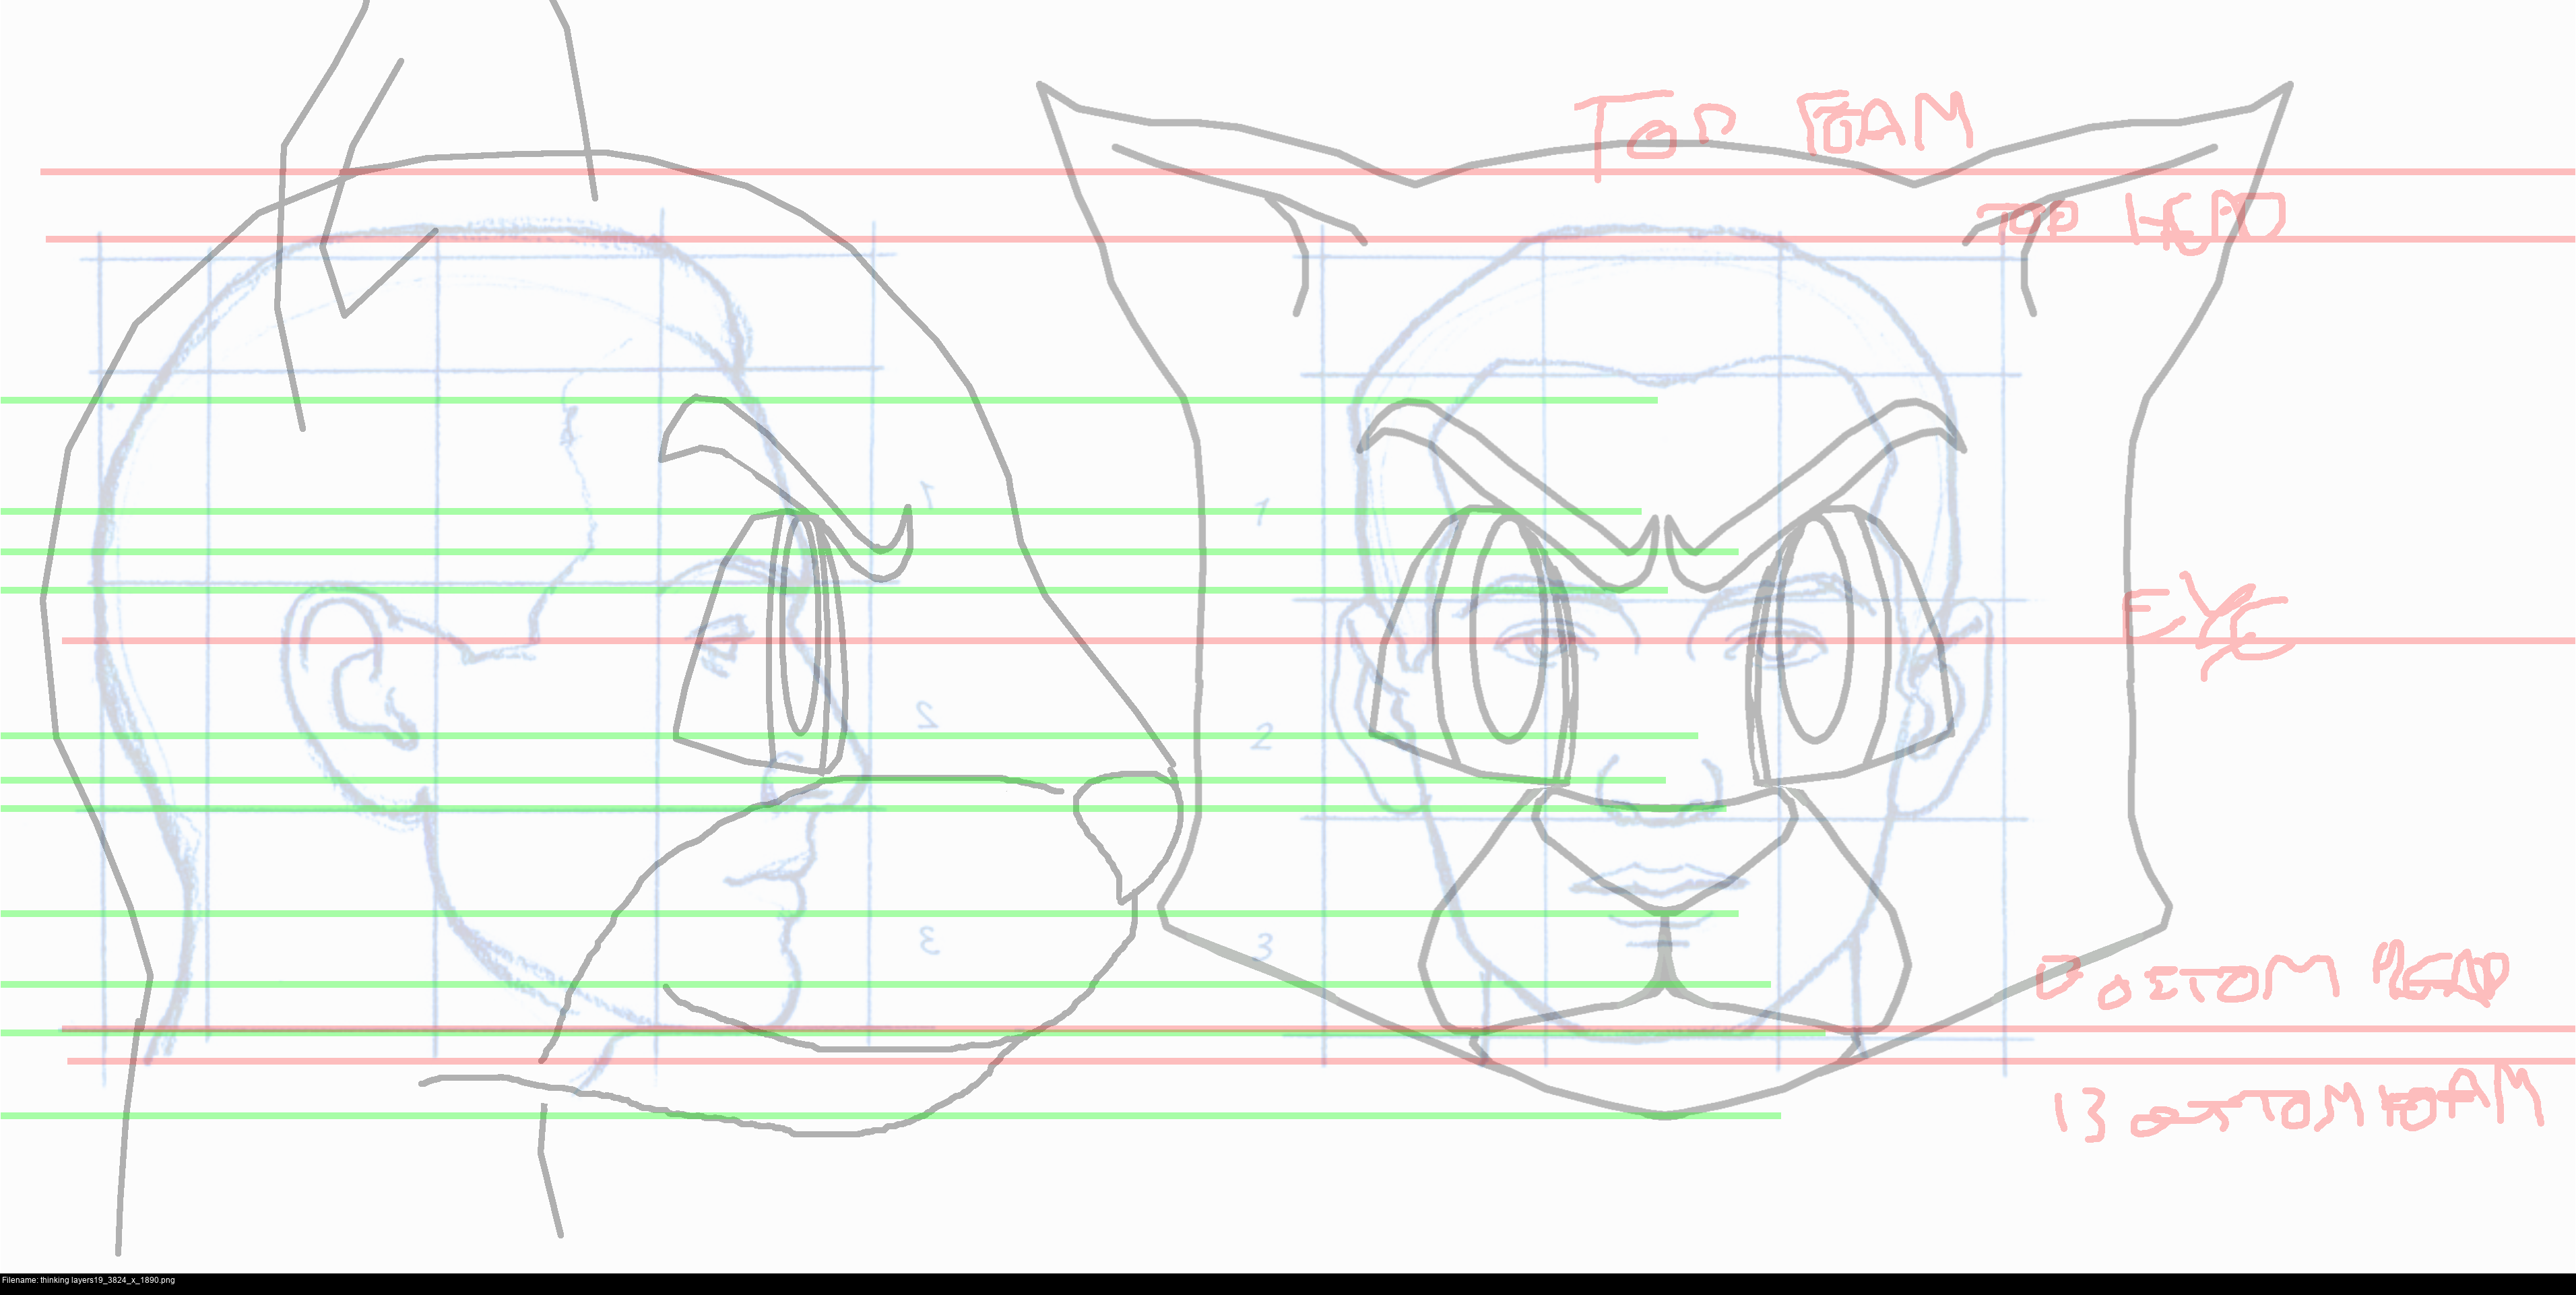
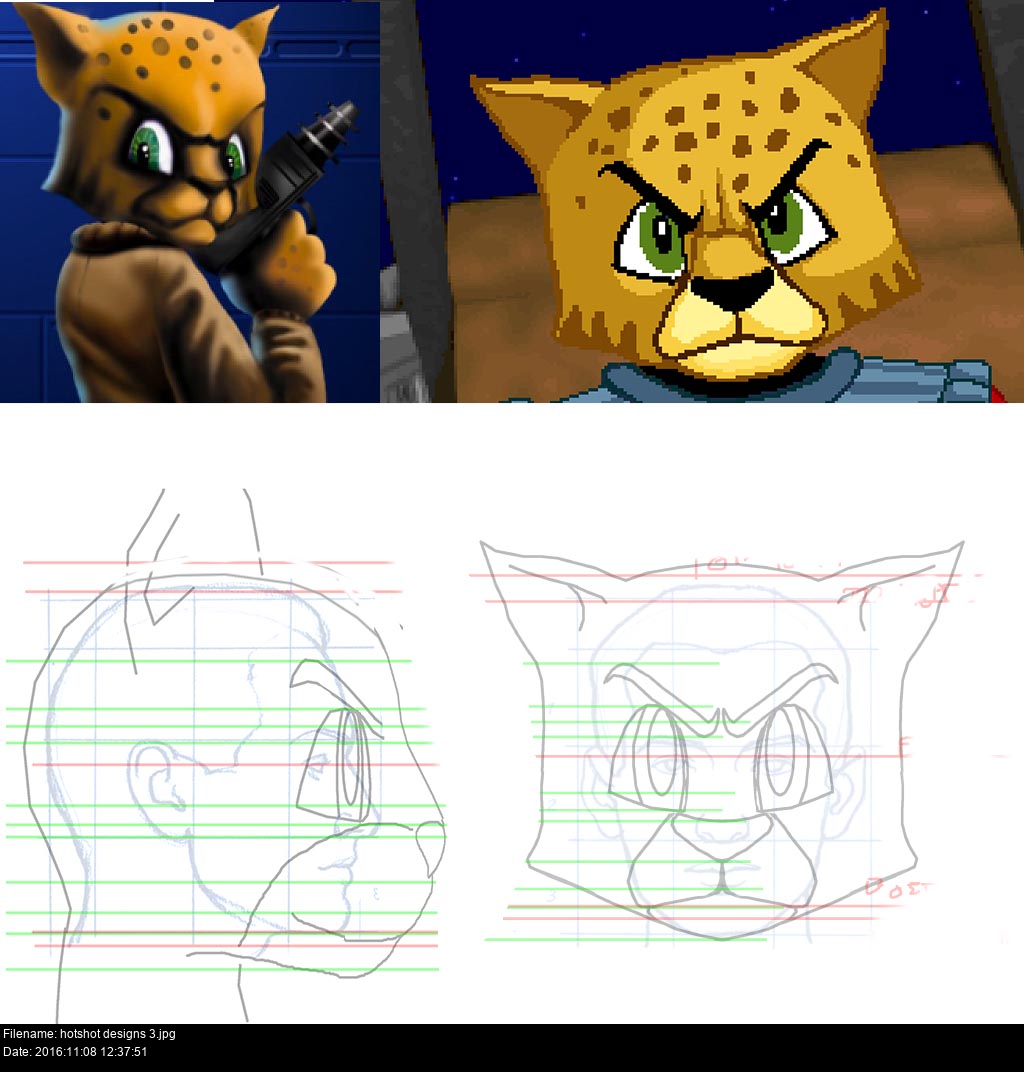

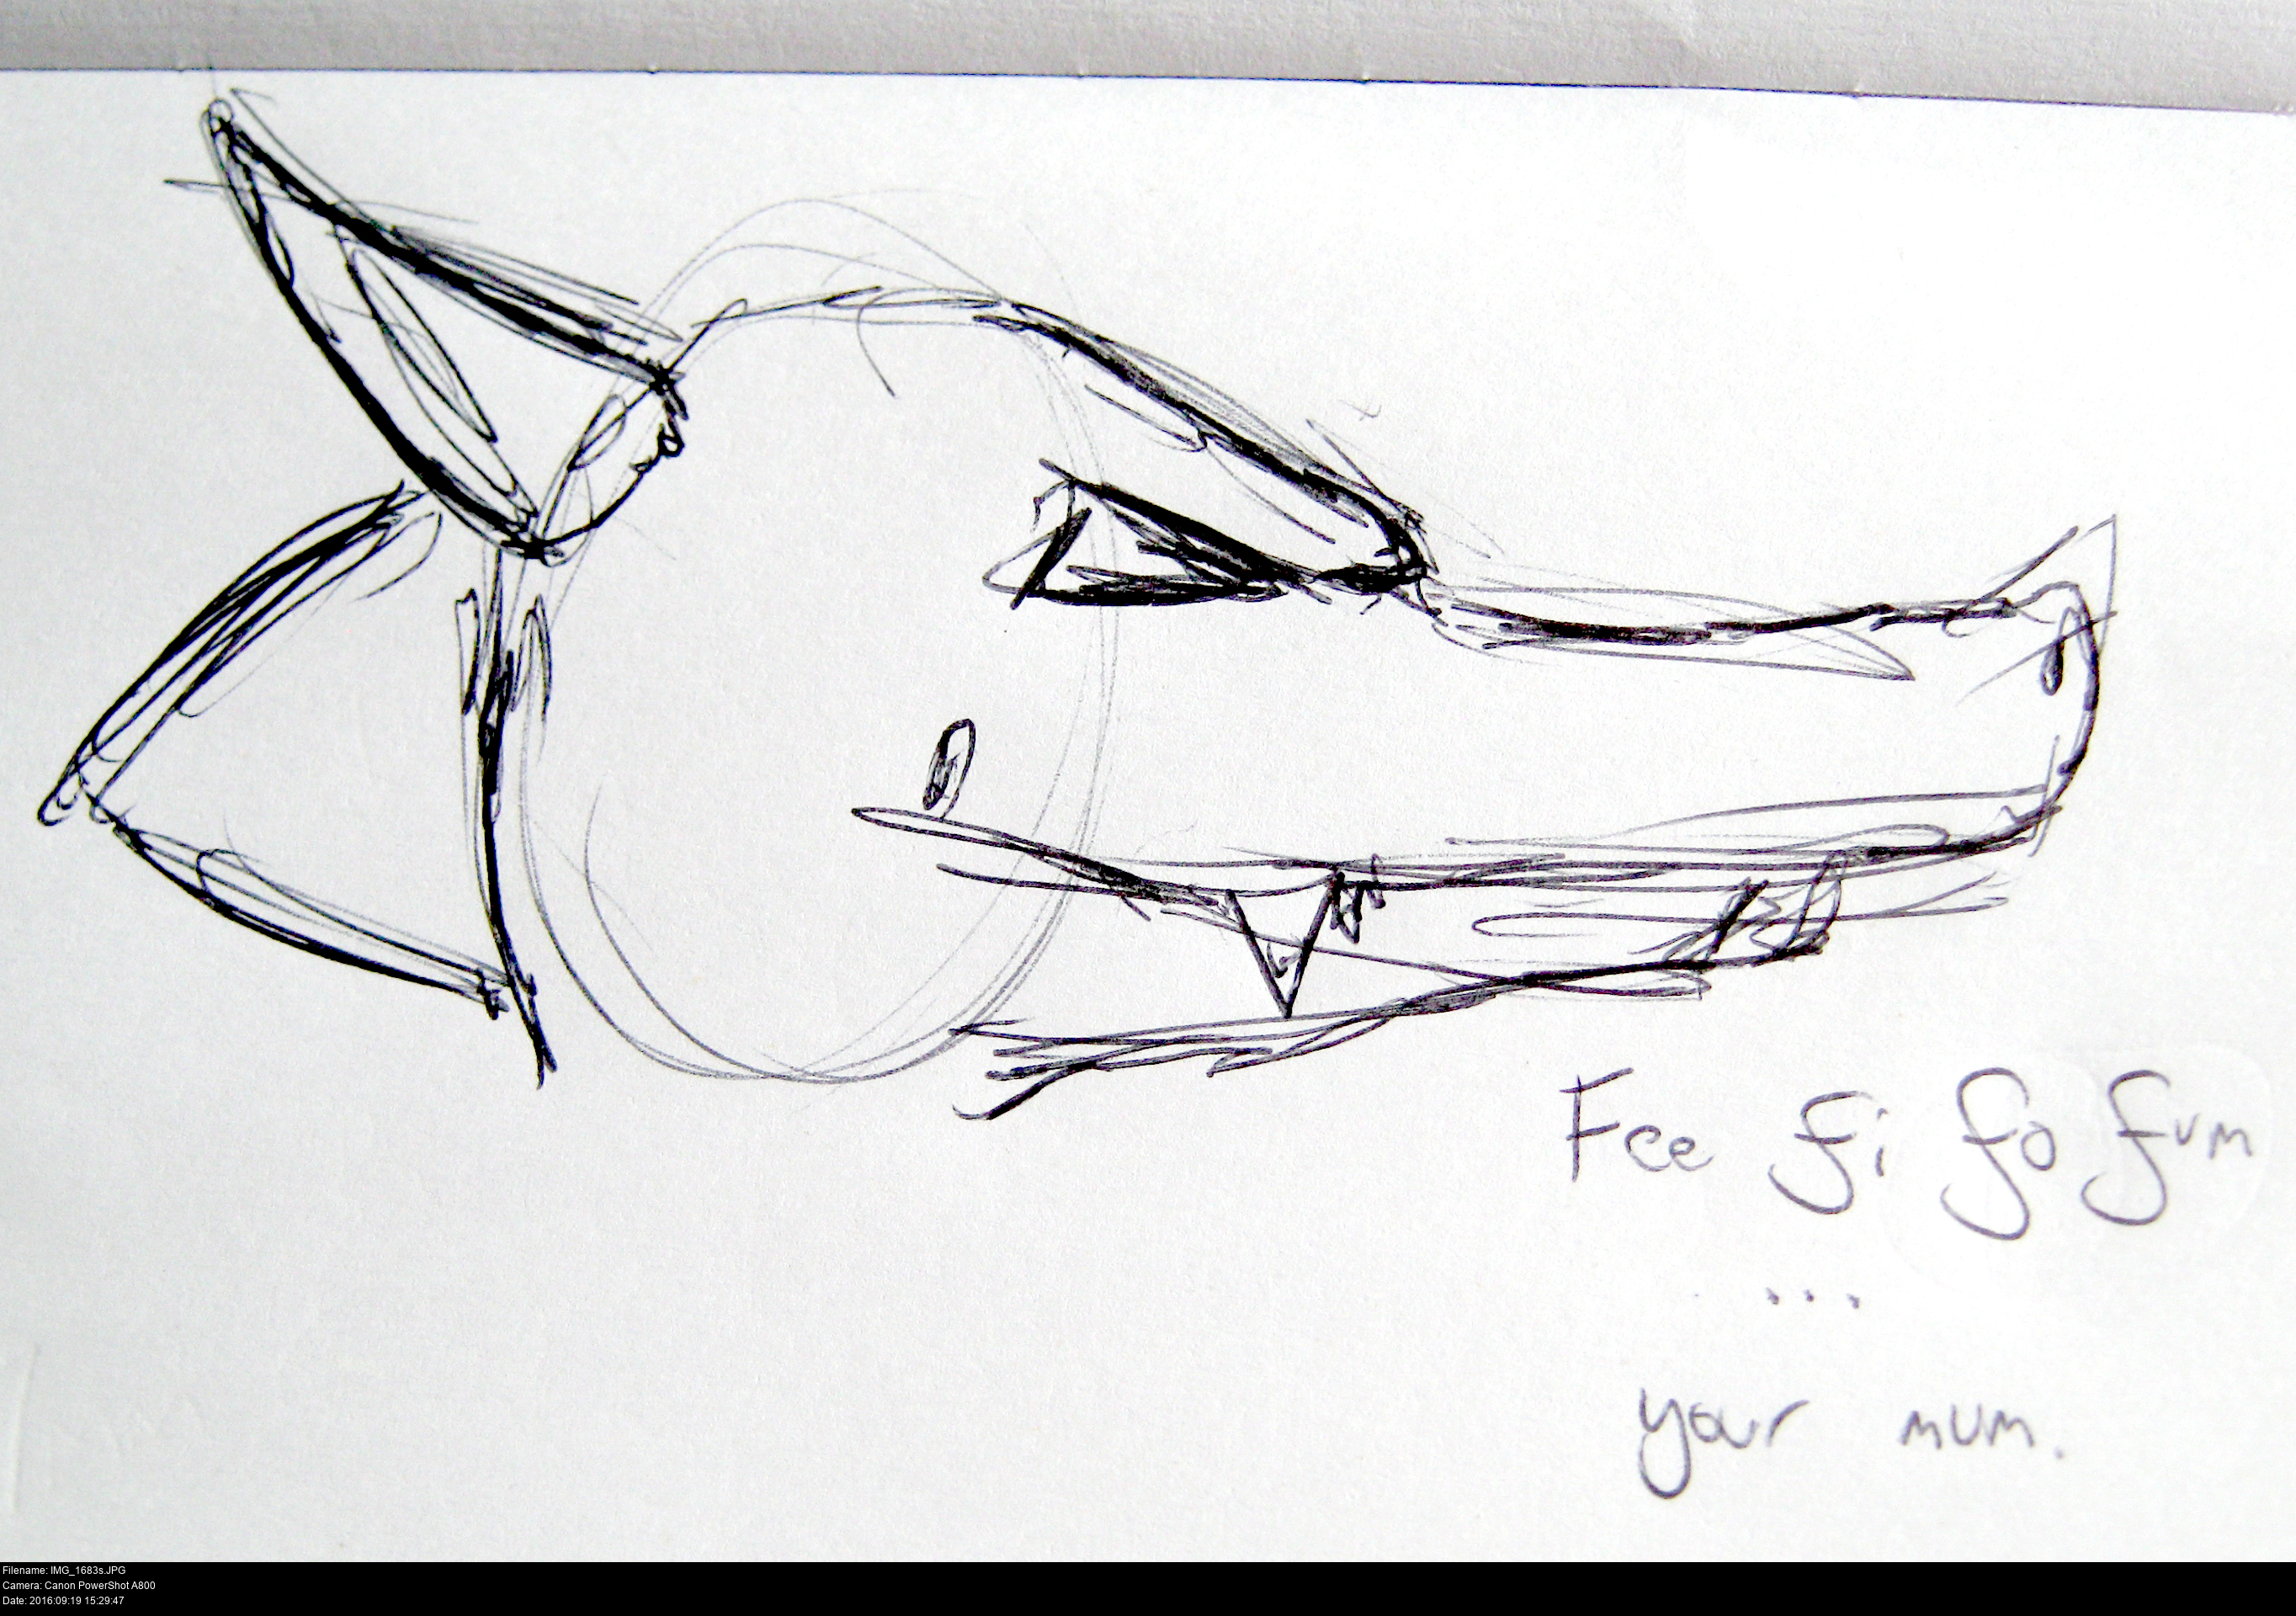
Now we're getting somewhere!
My trick here was to copy and paste the game graphics and resize and drag parts around until they fit the dimensions I wanted relative to a generic male face. I'm going to look through the pupils, unlike some heads where you look through the corners of the eyes.
I still haven't got the muzzle shape perfect yet. I'm sure when I've got the foam in front of me, it'll all make more sense.
What exactly is a fursuit head?
A fursuit head typically is a sculpted and carved base of soft foam that has been covered in fabric and fitted with details, designed so it can be worn (semi-)comfortably.
I've never made one before, so this is all new to me!
http://www.matrices.net/tutorials.htm
https://www.youtube.com/watch?v=zyEdS2BM7Gs
https://www.youtube.com/watch?v=Ia922jD20wQ
https://www.youtube.com/watch?v=D59OkhbgYN0
https://www.youtube.com/watch?v=6KcGVeozrNg
http://aminoapps.com/page/cosplay/9774823/fursuits-why-and-how
https://www.flickr.com/photos/caninehybrid/sets/72157646828183365/
http://themenageriecostumes.webs.com/fursuiting-guide
http://whitewolf.denofwolves.com/suit/specs.html
http://matrices.tumblr.com/post/51899557133/tutorial-making-a-neck-for-a-fursuit-head
https://lobitaworks.deviantart.com/art/How-to-Fur-a-Head-pt-1-423805637
https://lobitaworks.deviantart.com/art/How-to-Fur-a-Head-pt-2-423806397
https://lobitaworks.deviantart.com/art/How-to-Fur-a-Head-pt-3-423806721
https://lobitaworks.deviantart.com/art/How-to-Fur-a-Head-pt-4-423807150
https://www.youtube.com/watch?v=w6gQY-fRLP4
https://www.youtube.com/watch?v=YvmZ5D0zMWI
https://www.youtube.com/watch?v=hvf7w3ASY8M
Find every picture, every technique! -SAVE THEM ALL TO YOUR HARD DRIVE-. You never know when they'll be gone. Save, save, save!

What tools and materials do you need?
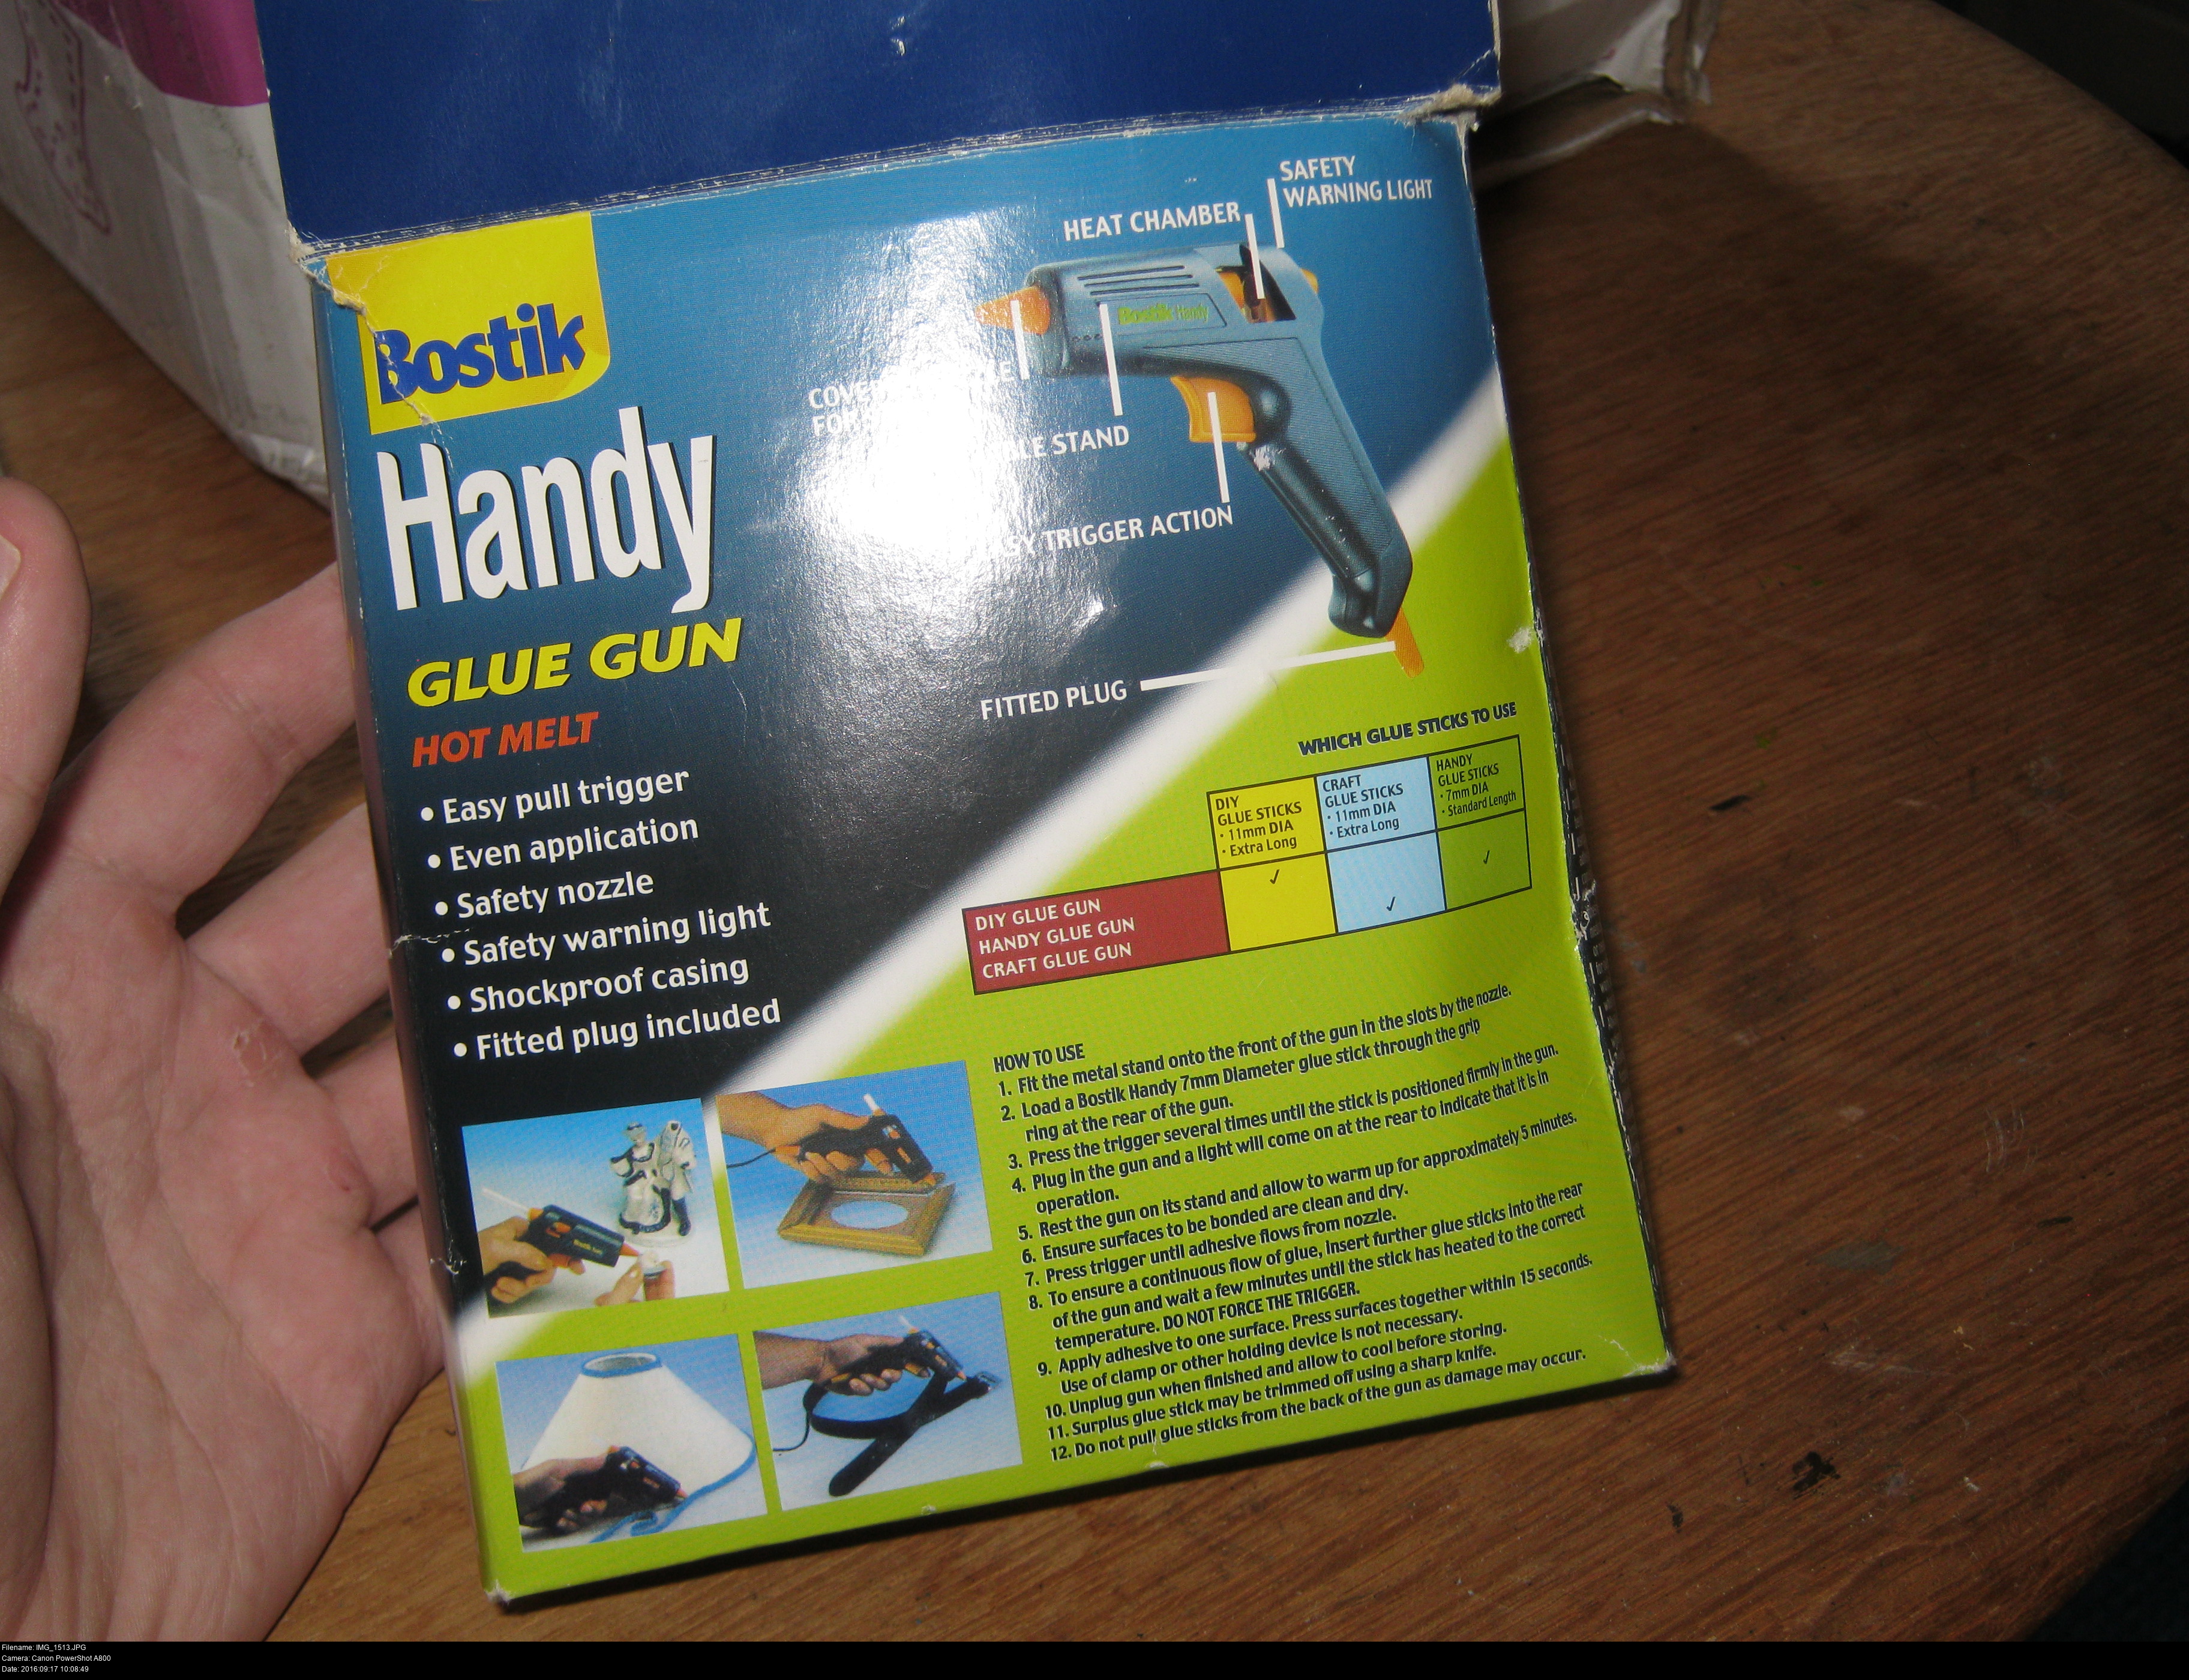
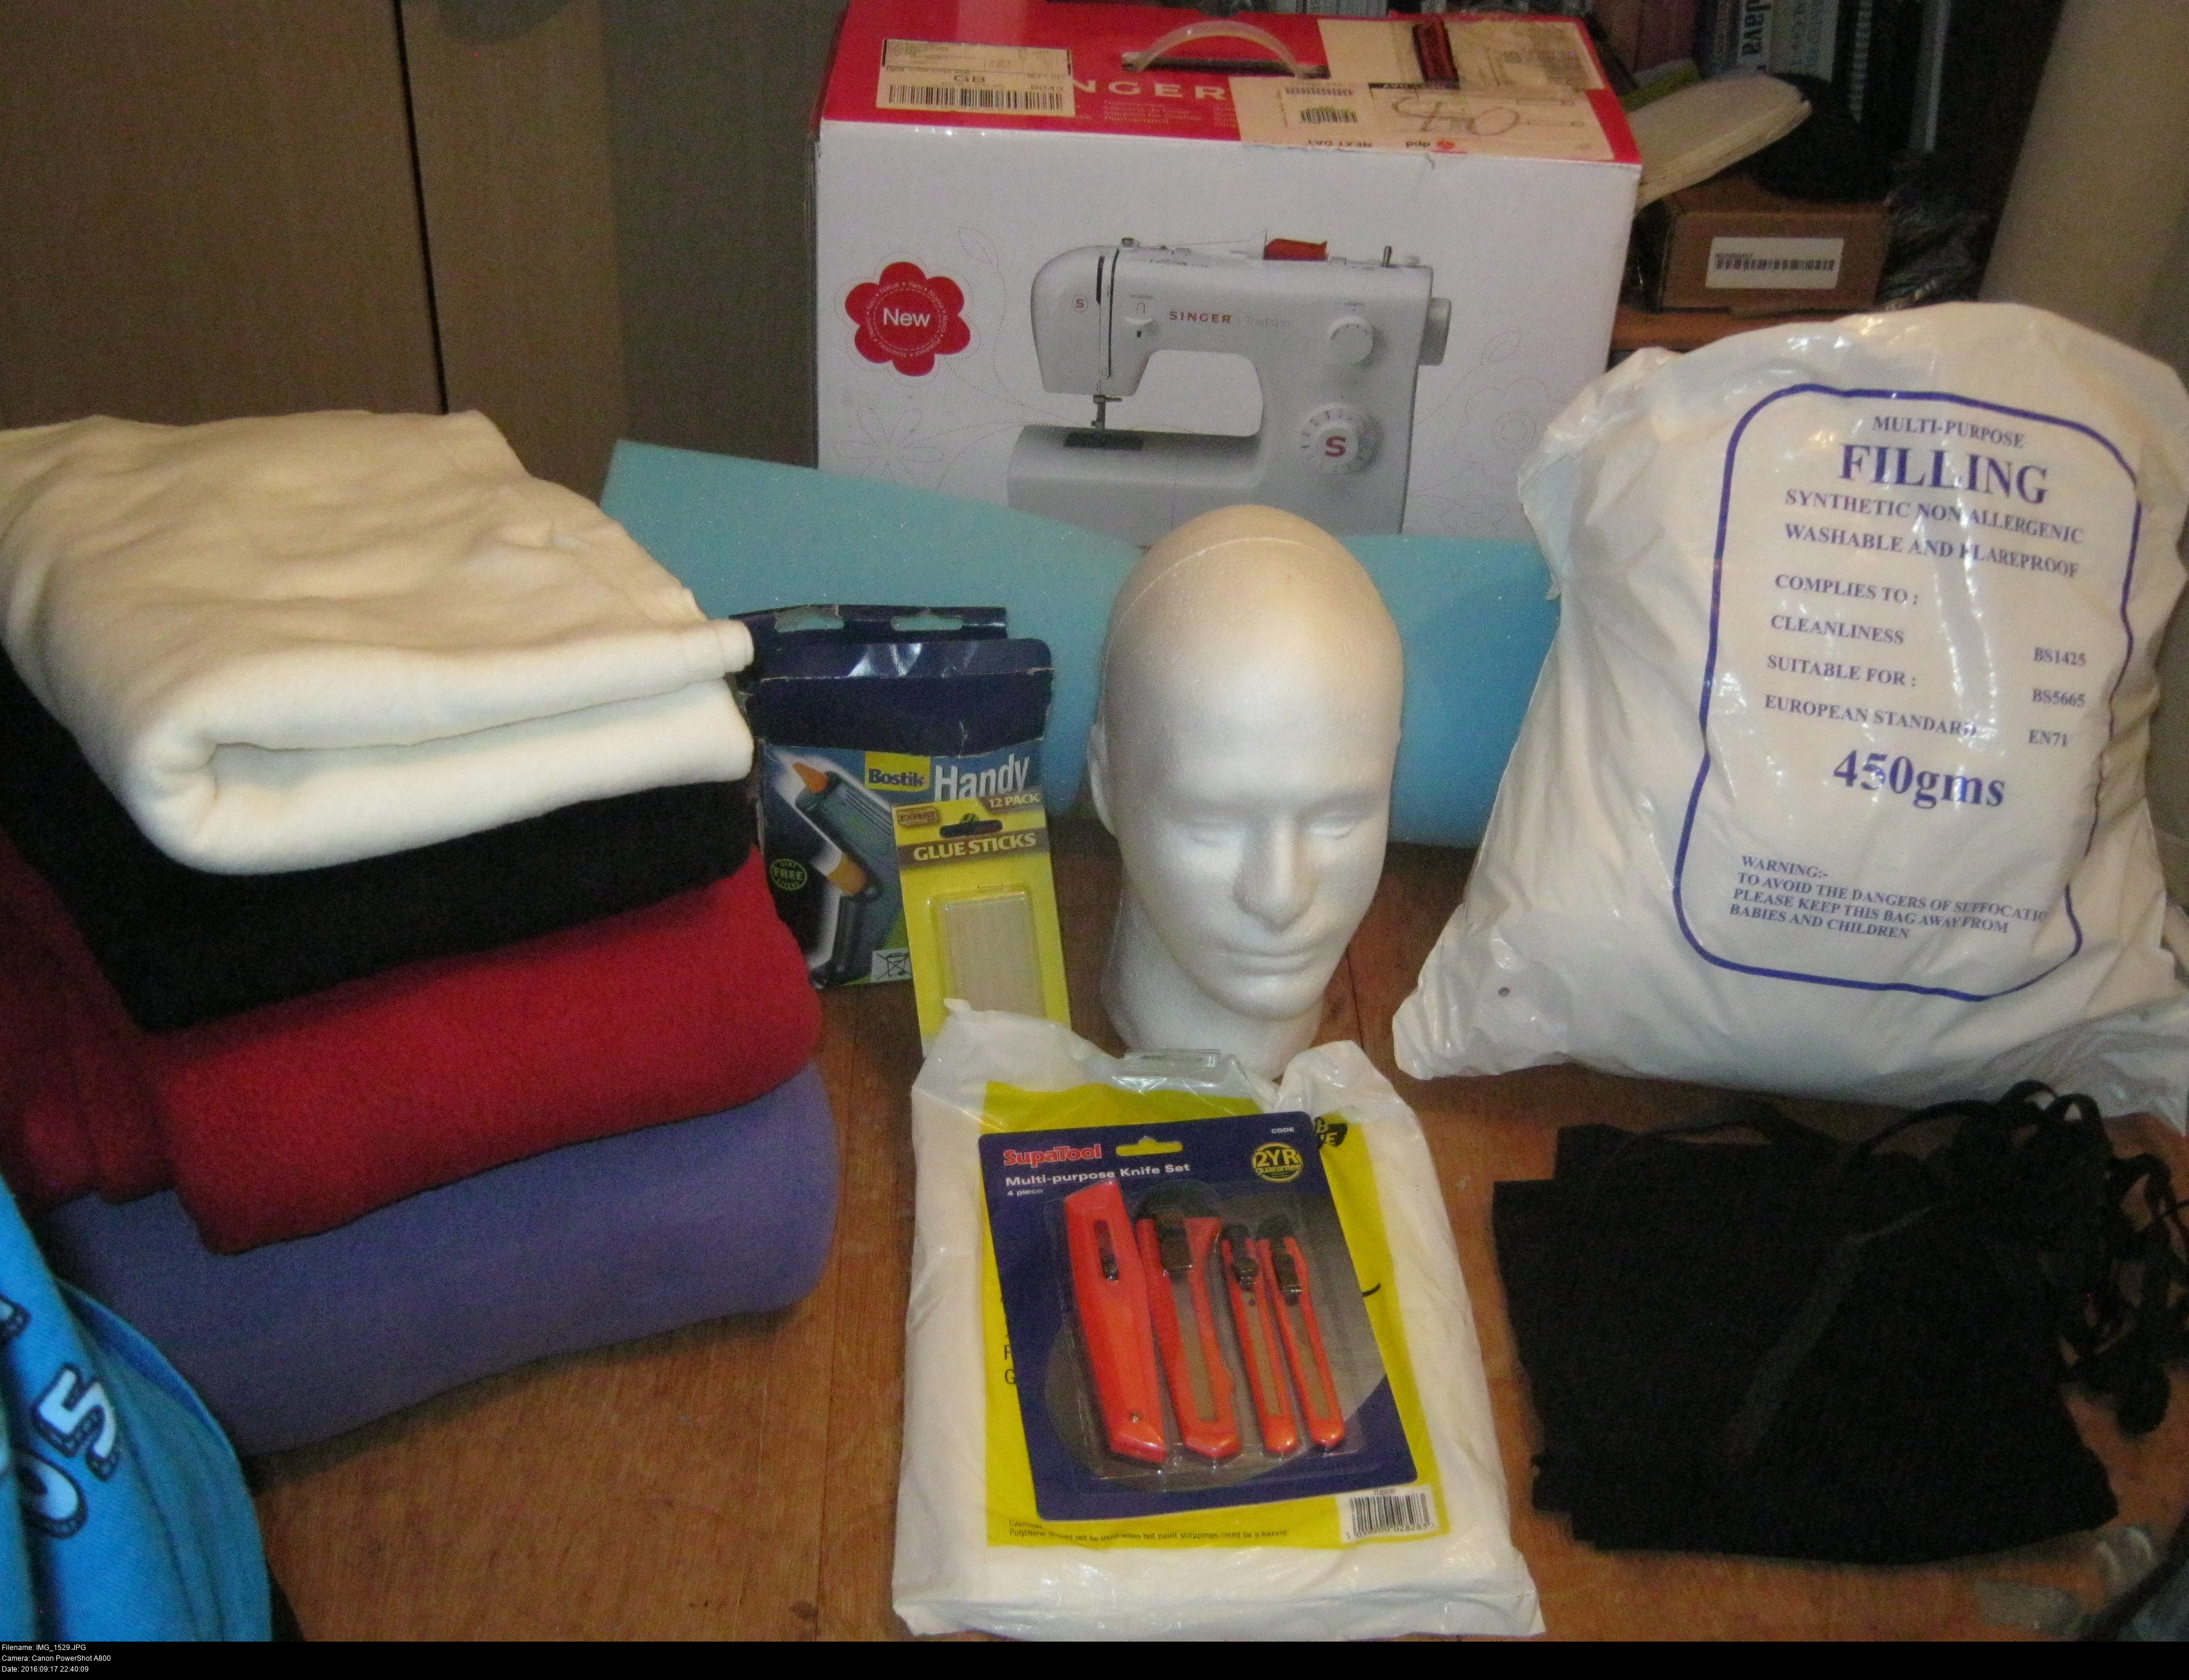
A hot melt glue gun, and lot of sticks. A LOT. I bought a box of a hundred after my first two sets of twenty got all used up. You can get a lot from Amazon, but make sure they're the correct diameter and temperature for your gun.
Disposable latex/nitrile gloves. Hot glue is hot, so you'll be very glad that you're protected.
Disposable large dust sheet or newspaper. Hot glue makes a heck of a mess. So does foam when you're cutting it up. Cover your work surface at the very least, and consider covering the floor too!
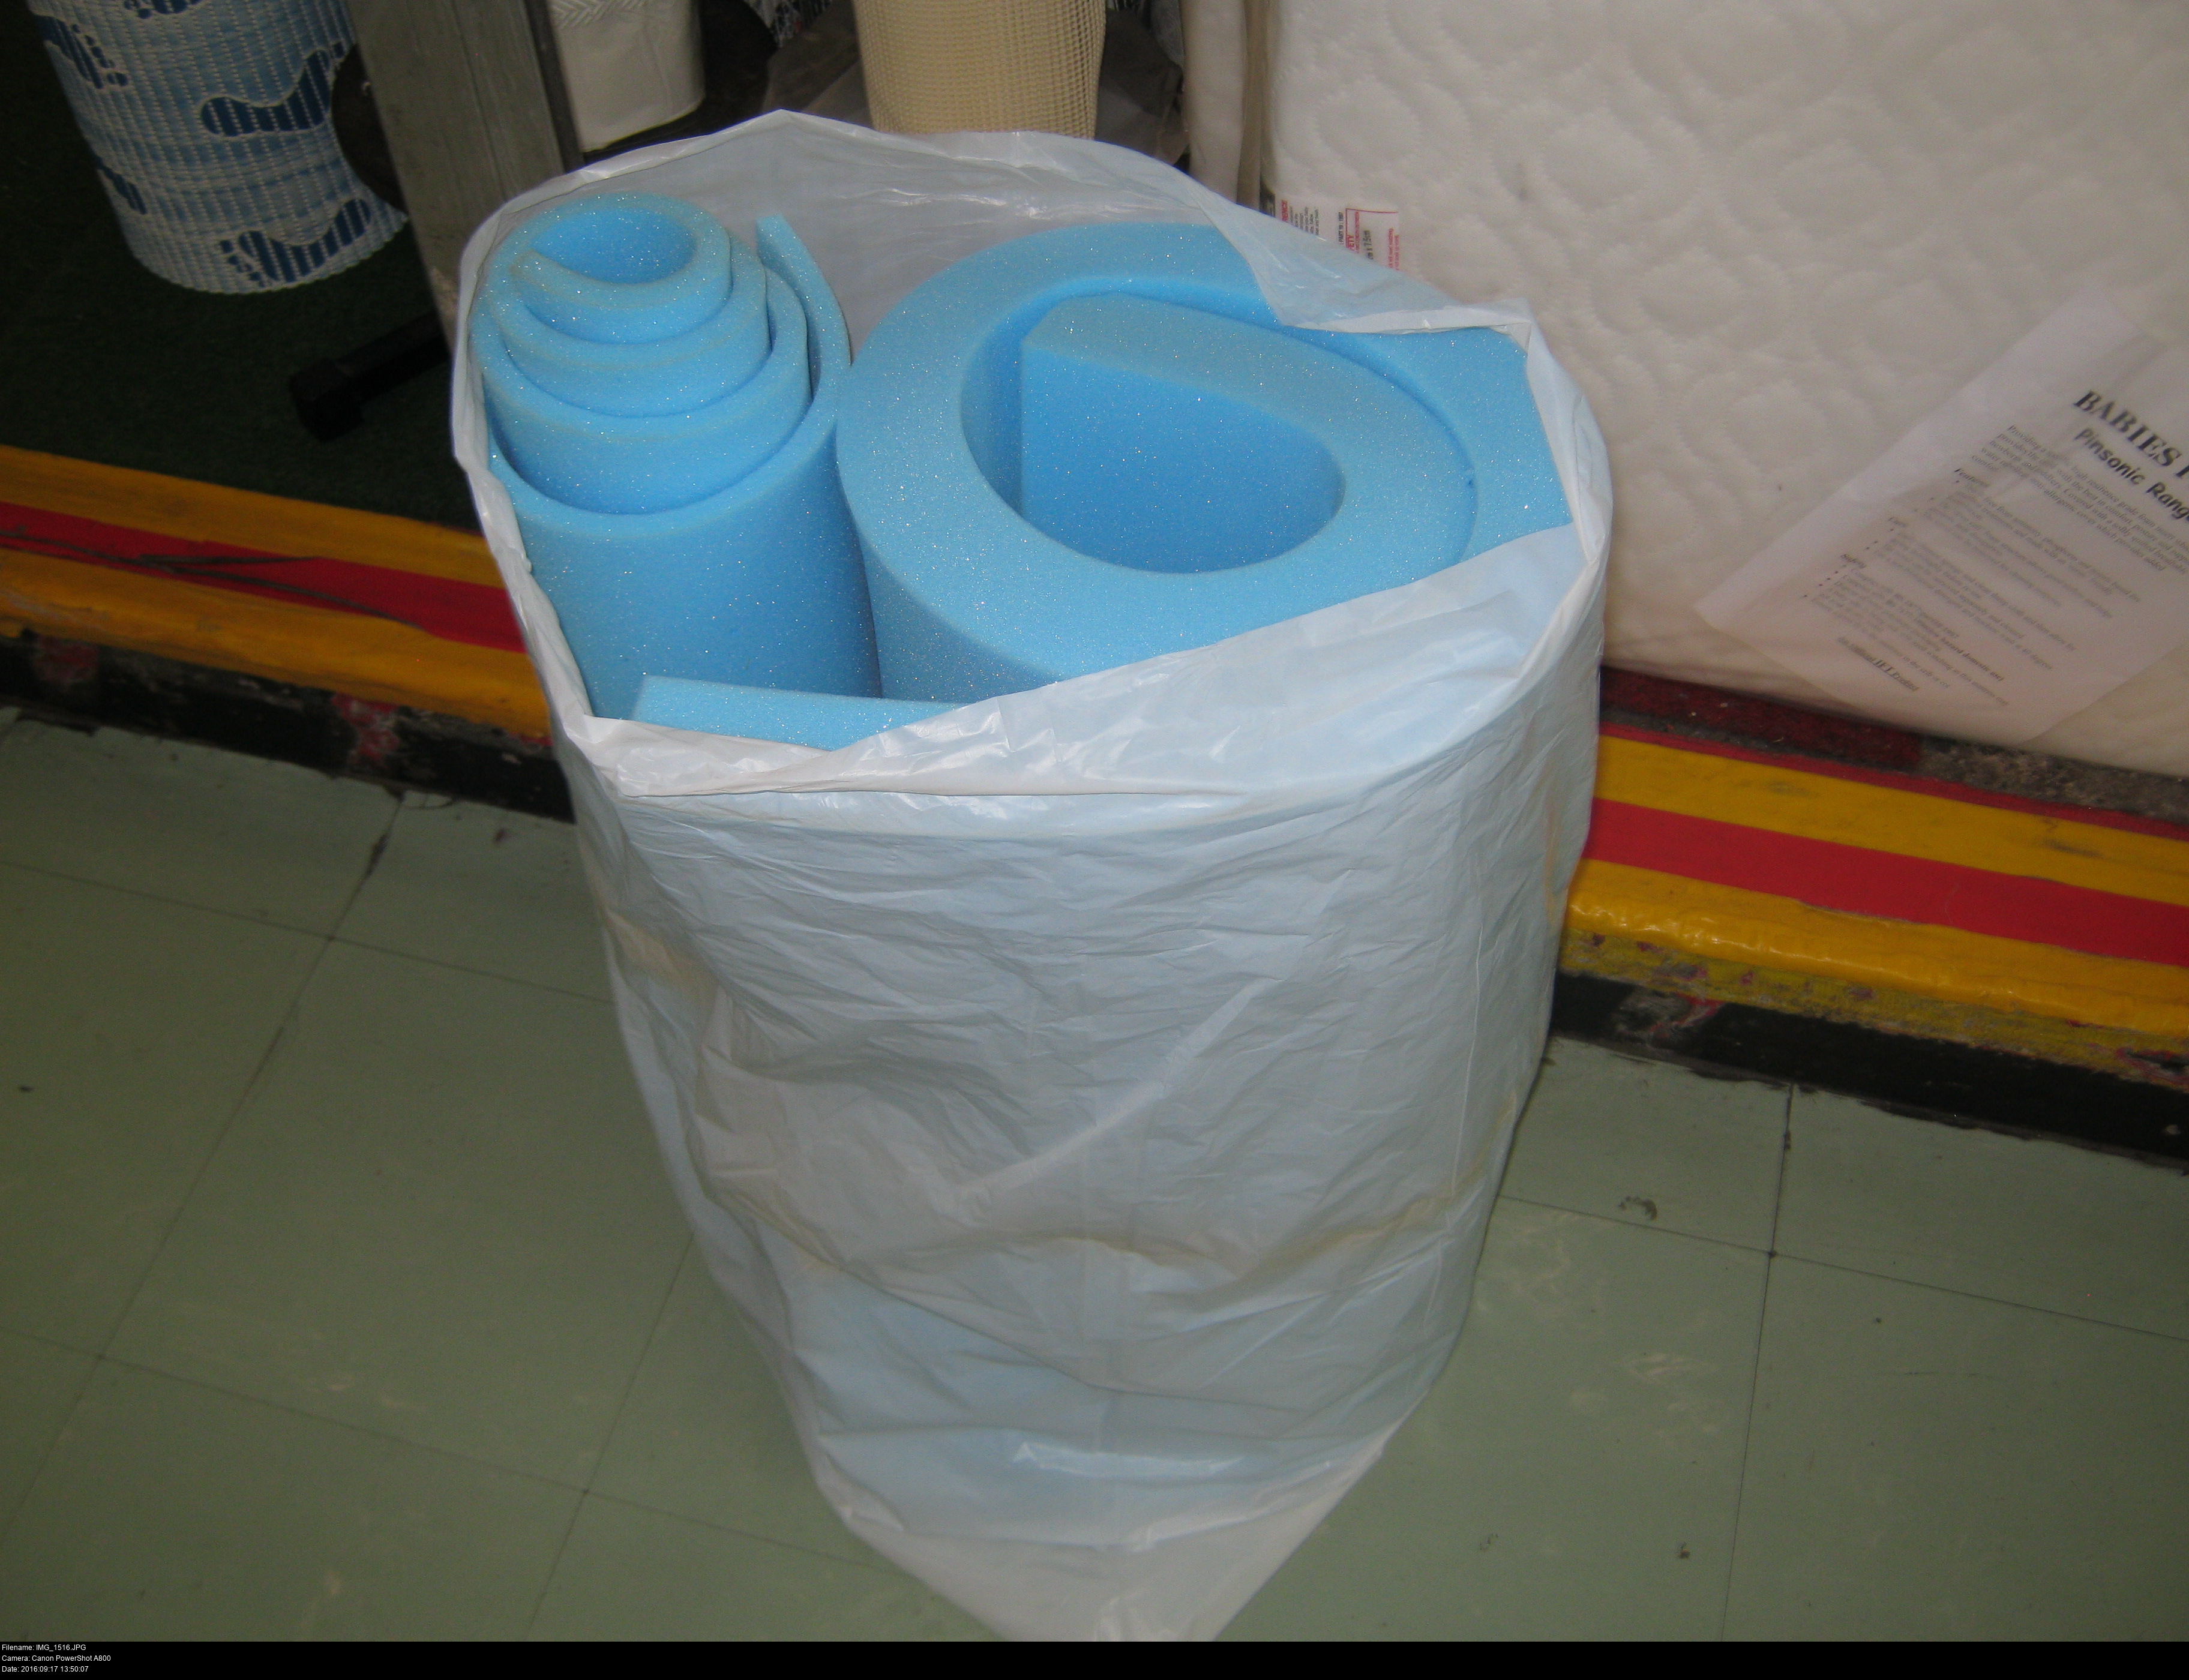
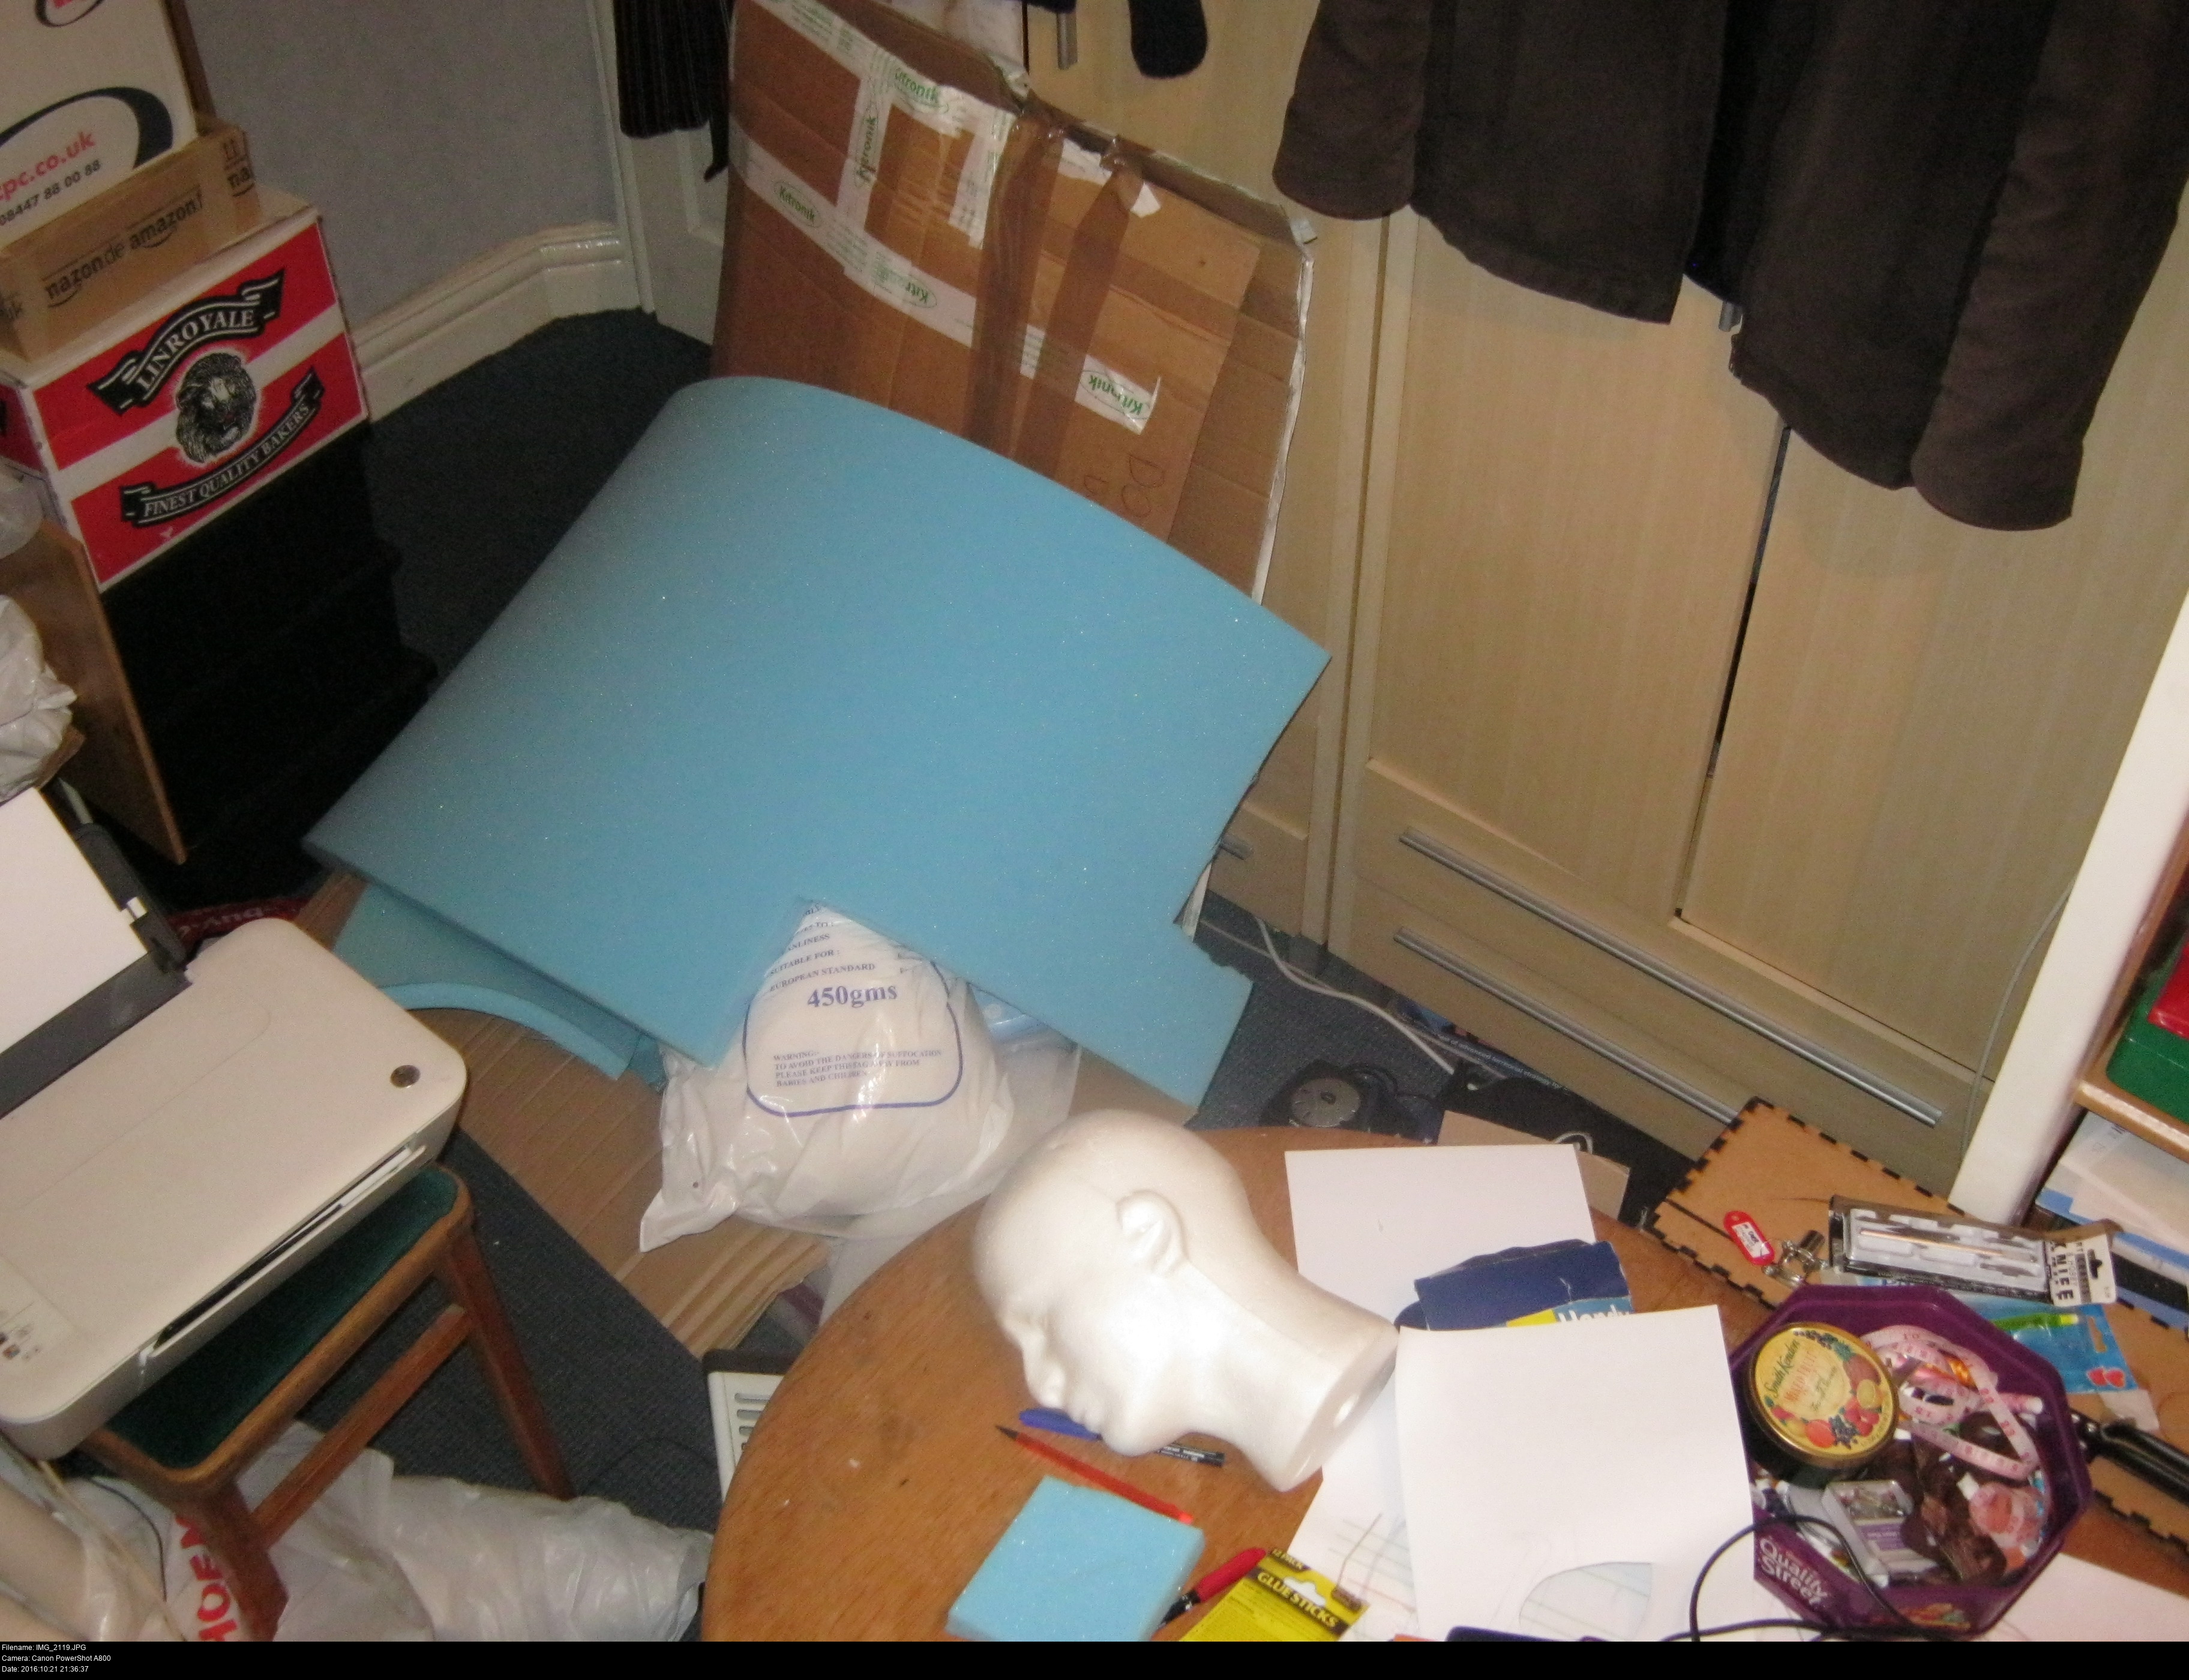
Upholstery foam. This is a stiff but spongy foam that's used for making sofas and sturdy cushions and so on. Yes, a fursuit head is literally a fancy cushion you wear. I get my foam from Coleman's in Birkenhead Market. They can cut foam to size, but I bought a pre-cut 30 inch square block in both two inch thick and half inch thick.
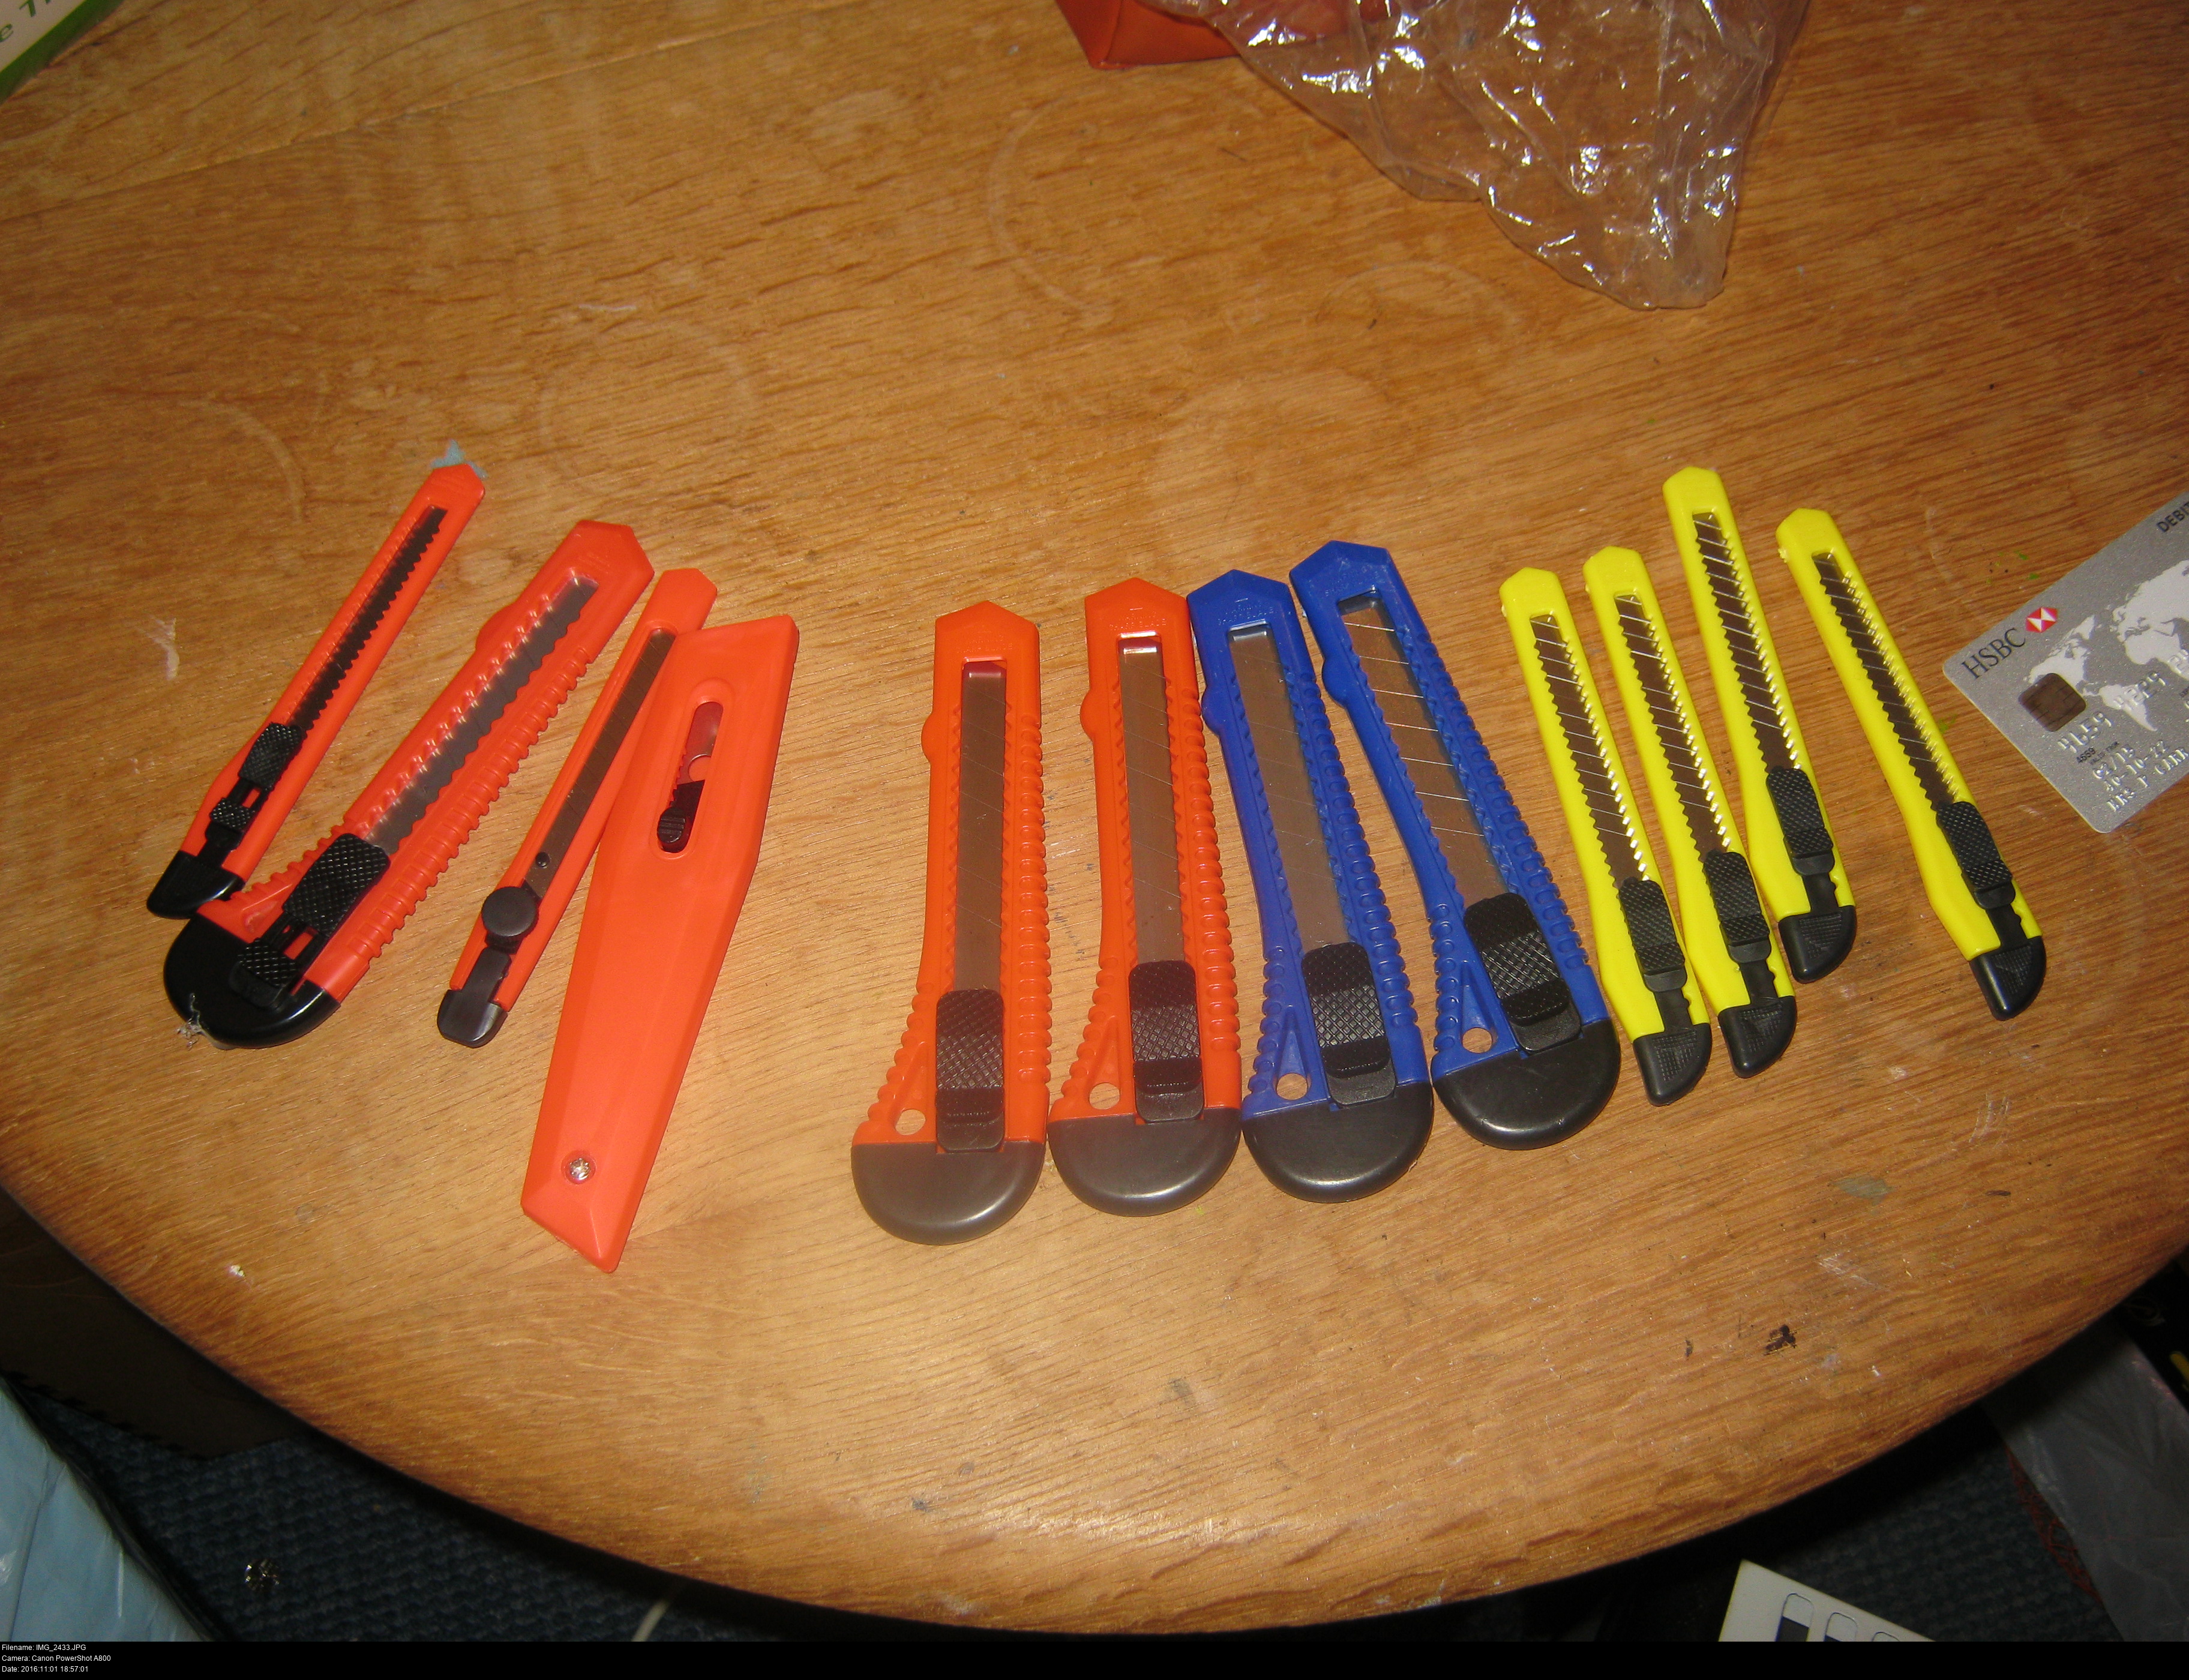
A selection of long disposable retractable knives. These fellows are the business. You need a long knife to cut through thick foam so go ahead and extend these to their full length when you're using them. Replace the blades or swap knives if you need to, but if you have a sharp blade you can do delicate work much more easily.
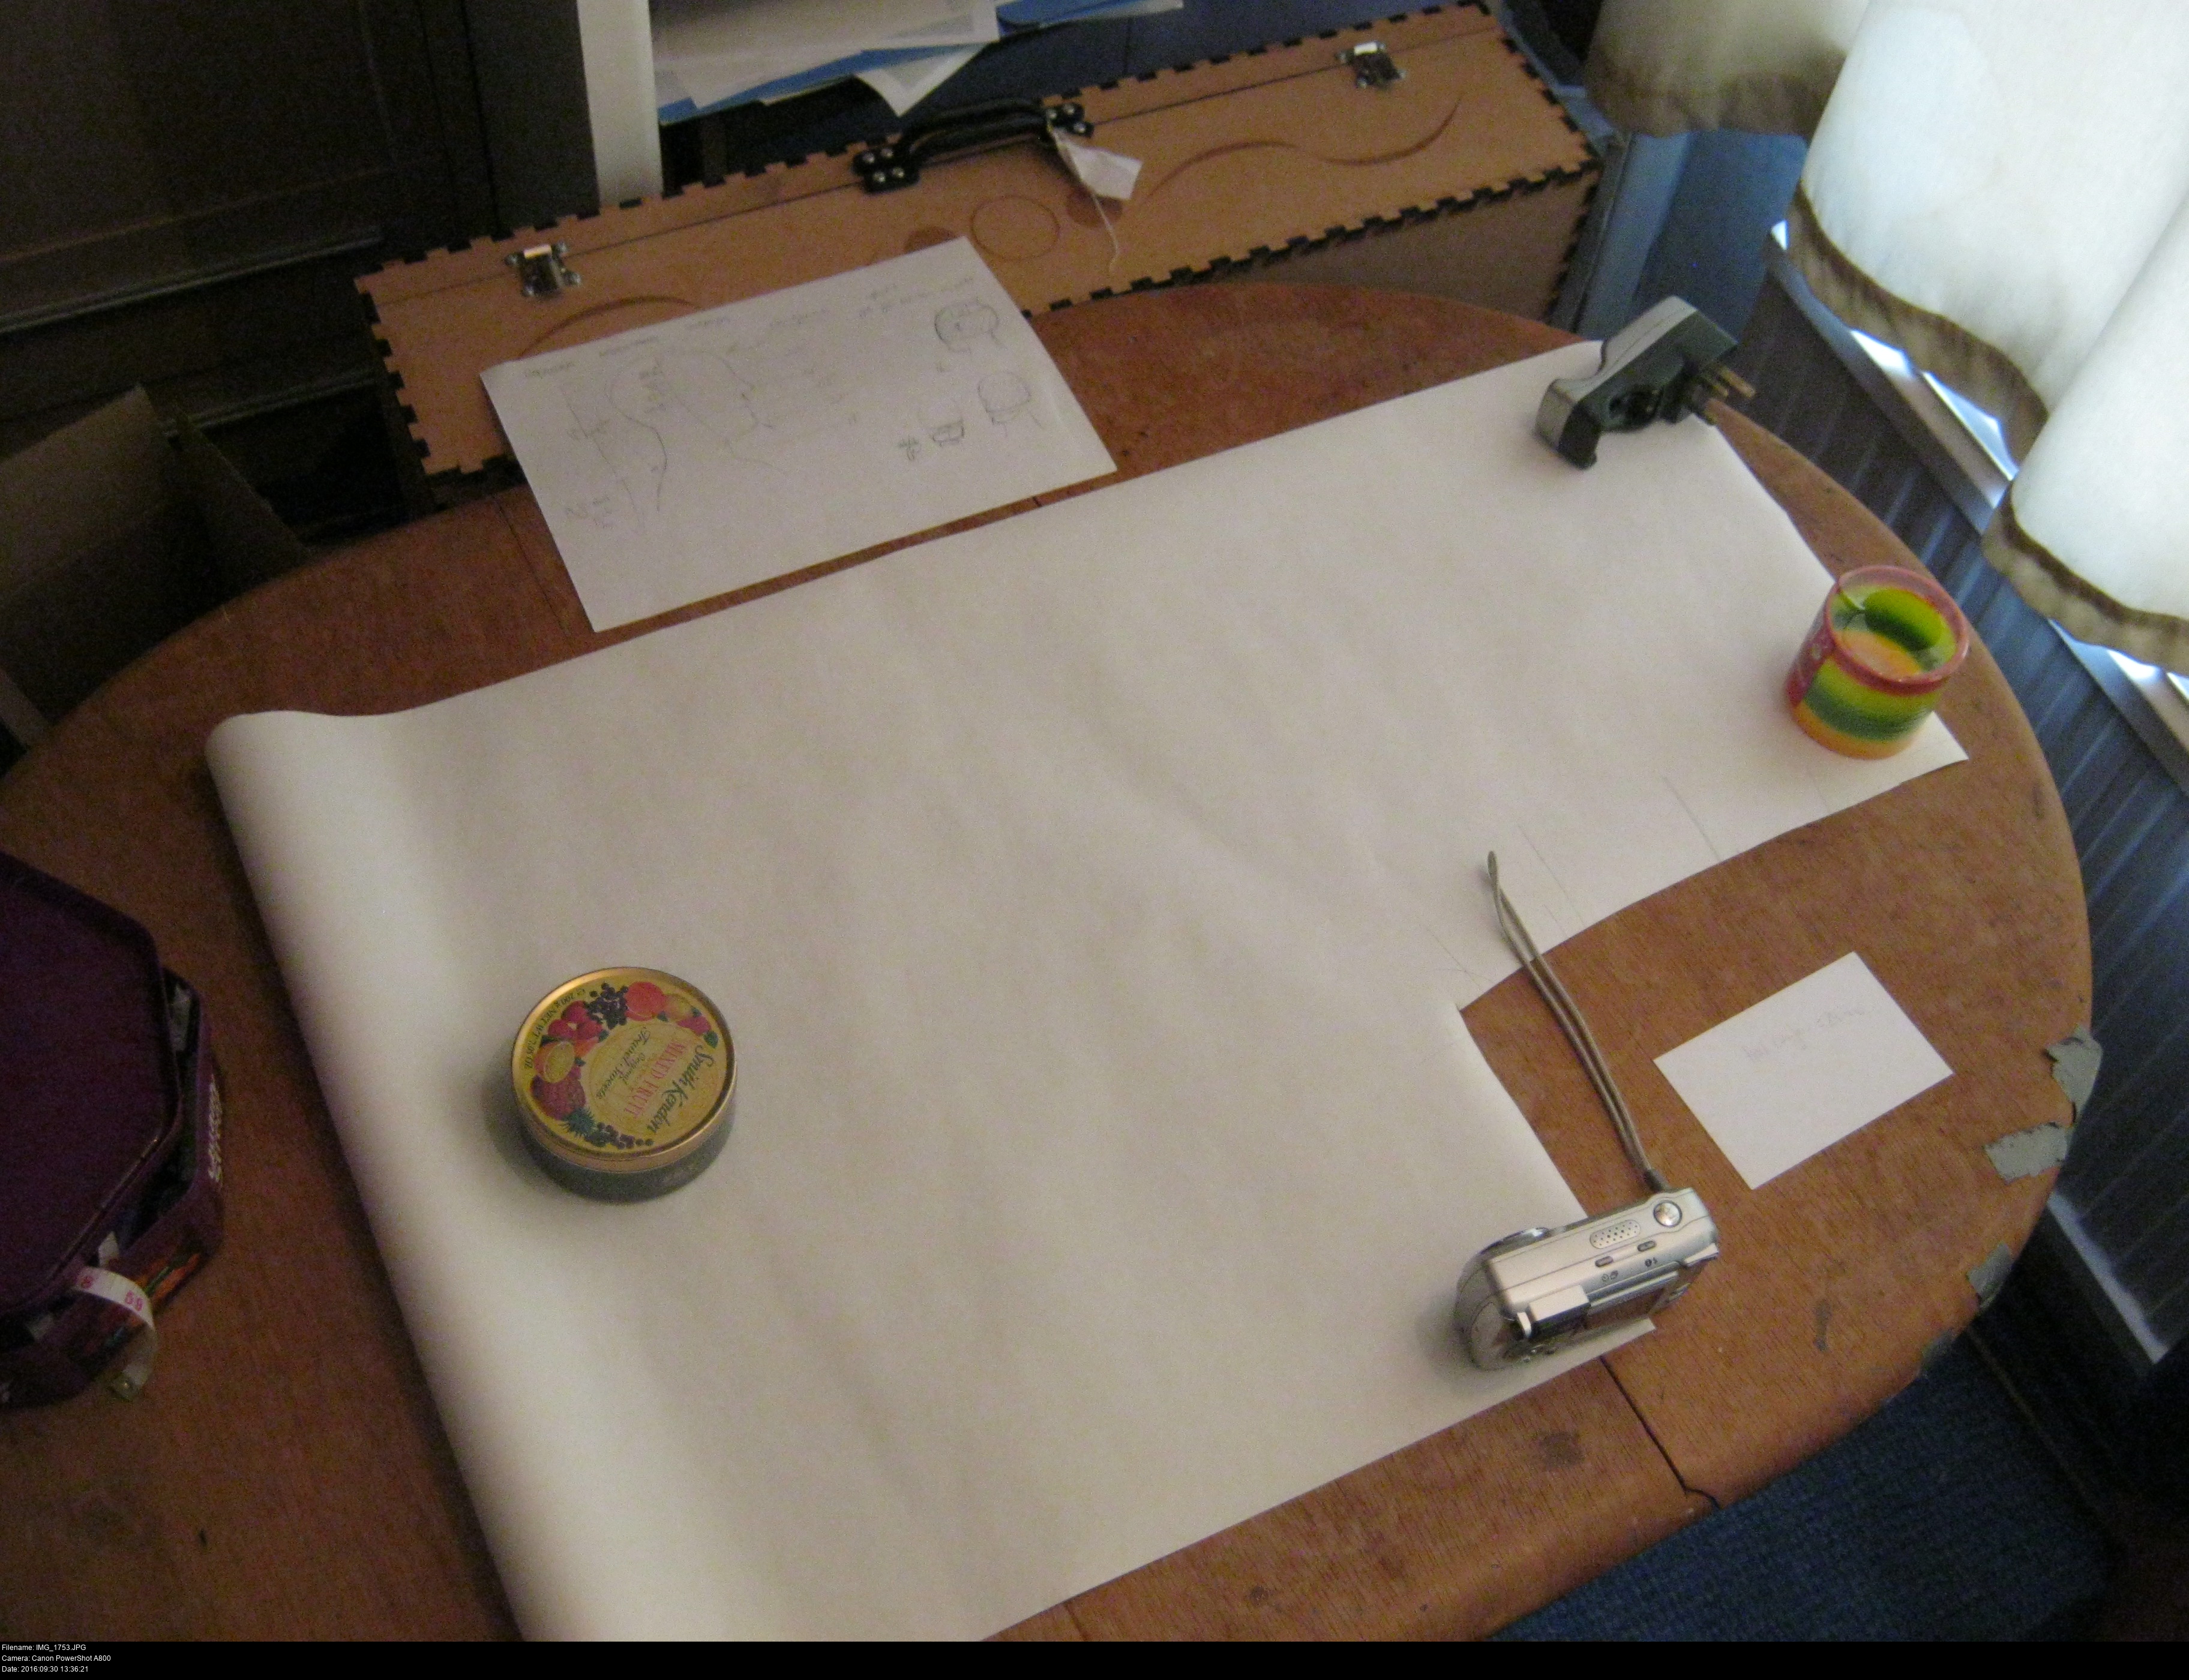
Large paper. I use wallpaper lining paper since it's cheap and available almost everywhere. You could also use baking/greaseproof/freezer paper instead - anything that's large and cheap.
Lots of pencils and rubbers.
Chalk and markers for marking foam, fur and fabric.
Polystyrene head. My guy is a cheap one from a Chinese eBay seller. http://www.ebay.co.uk/itm/252385987339 Unfortunately, it is very very small compared to my own head, so I had to pad it to the correct size by taping folded chunks of newspaper to it until it had roughly the correct shape and size. This is very important to check and verify!
Sewing machine. Possibly not my Singer Tradition, because it is a dick.
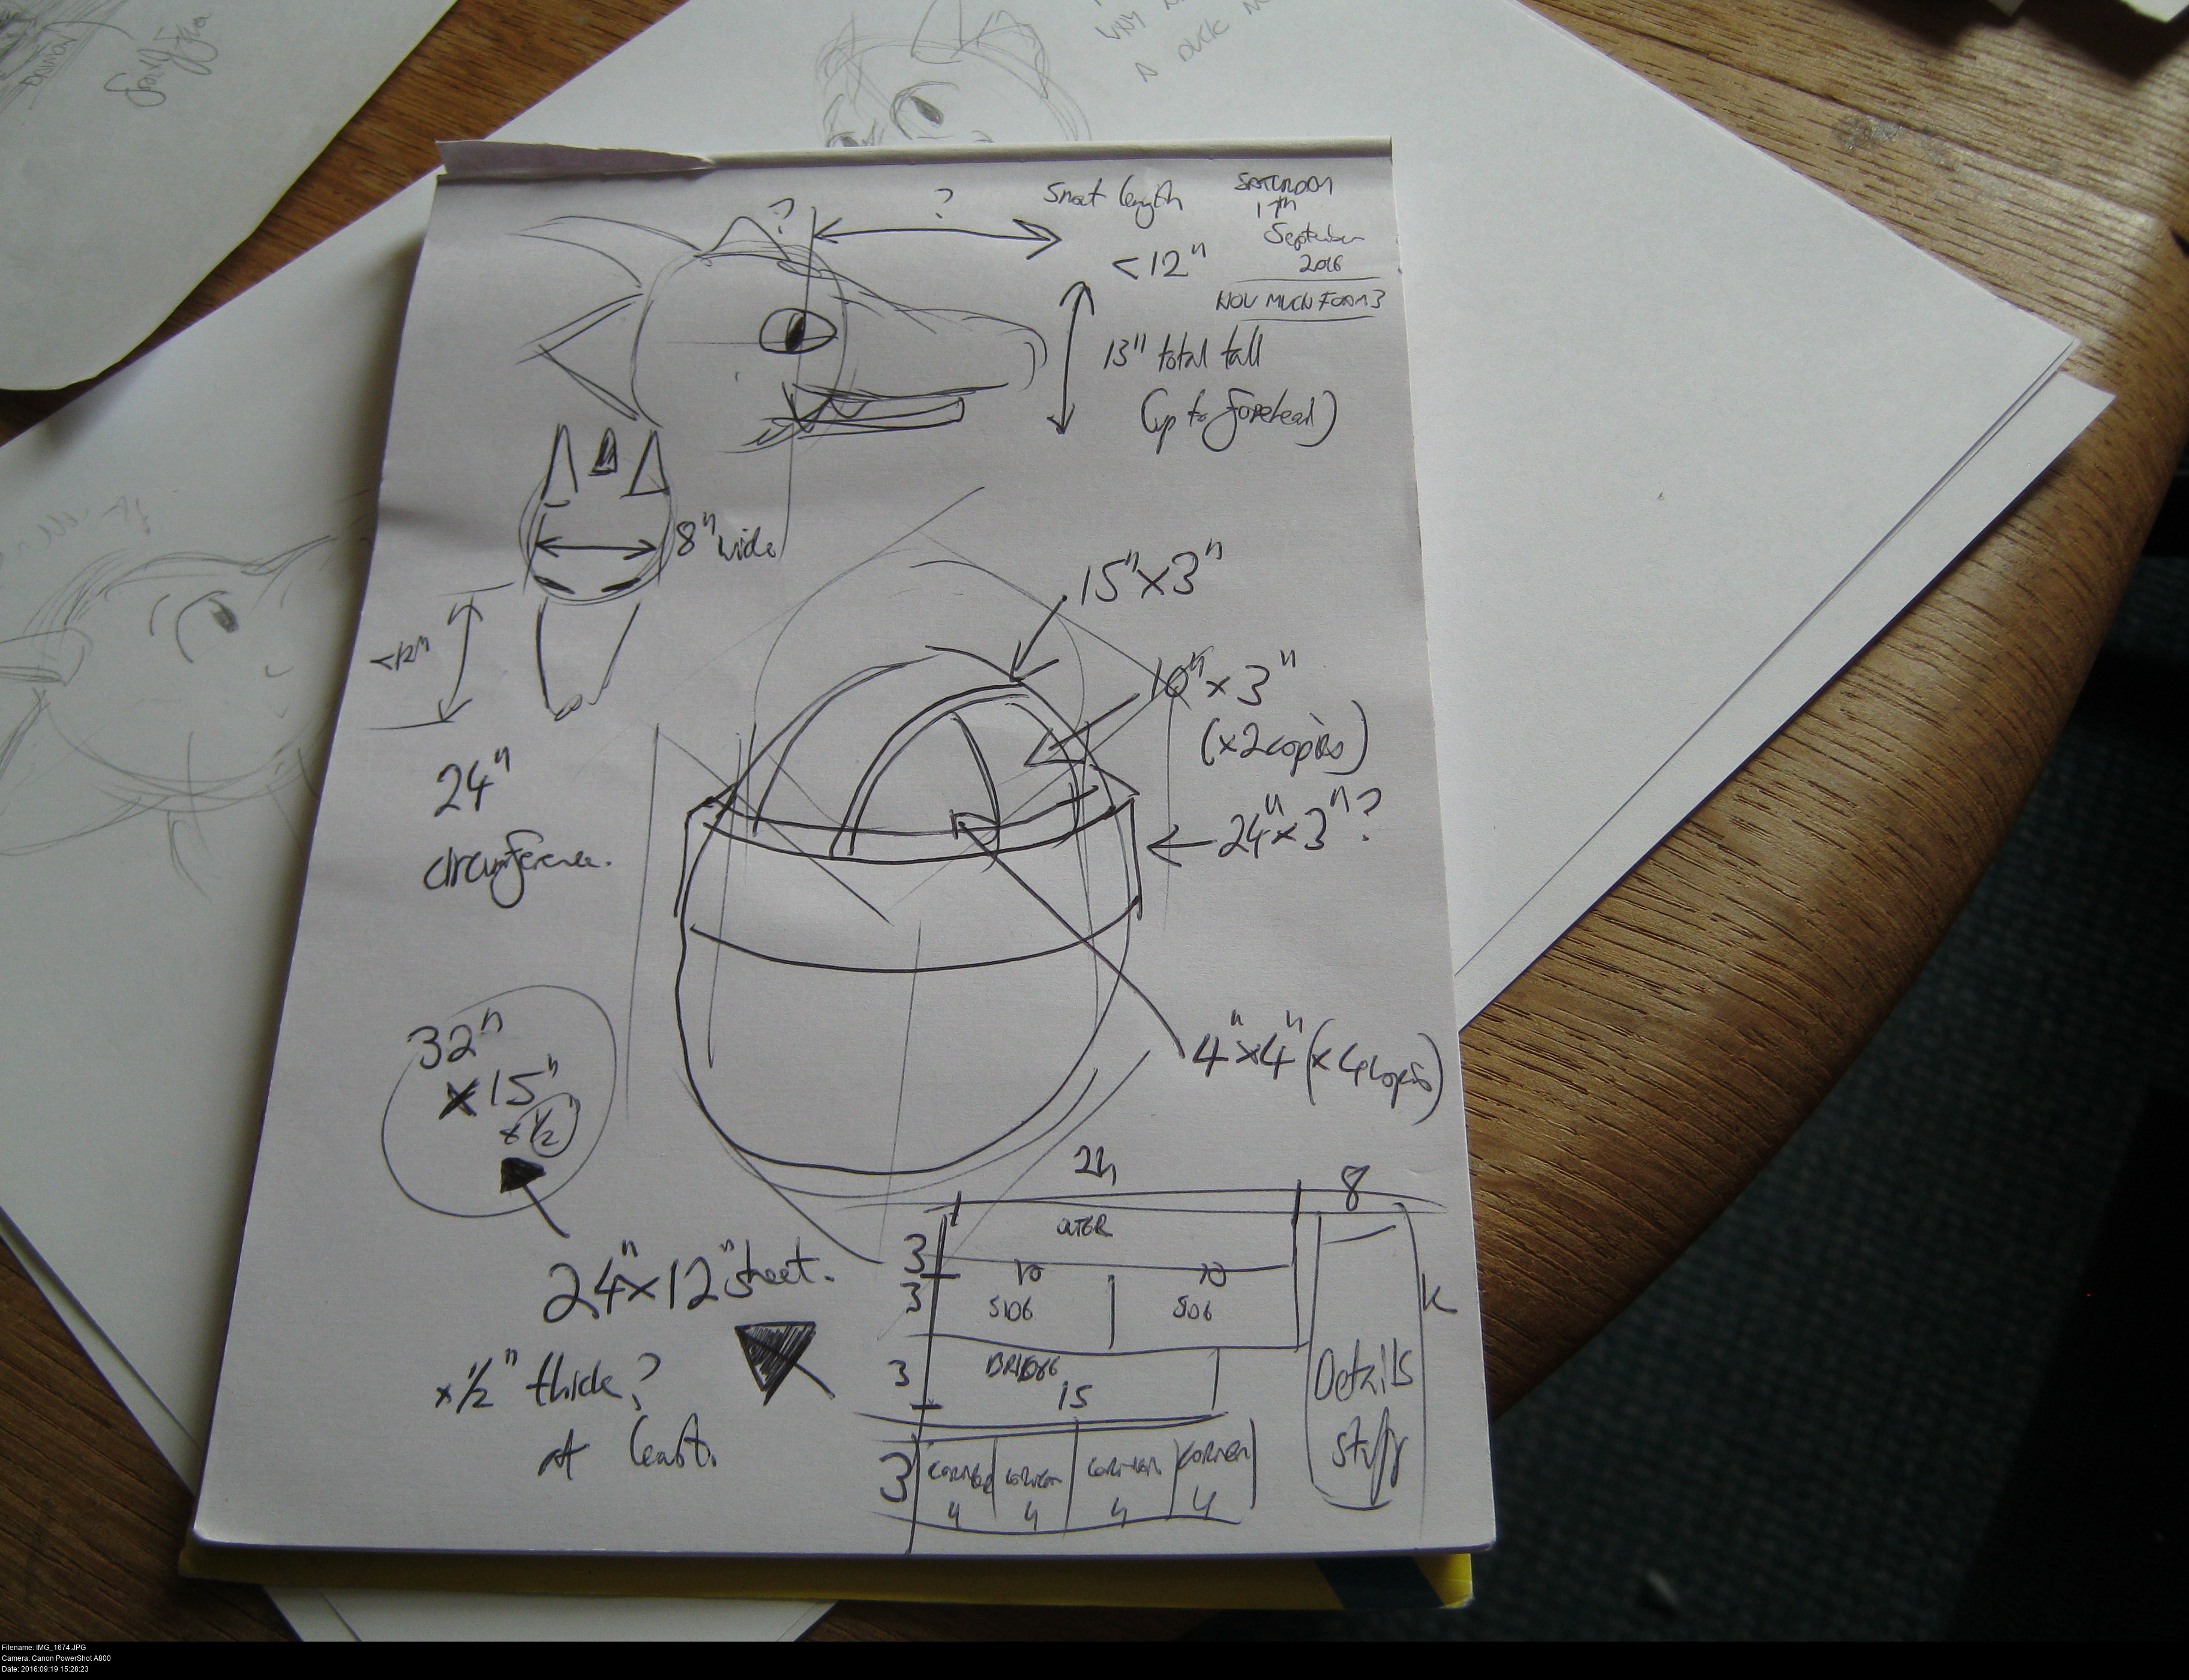
Before you can do anything, you should measure your own head. Or, better, get somebody to measure you. Make a record of everything you think might be useful:
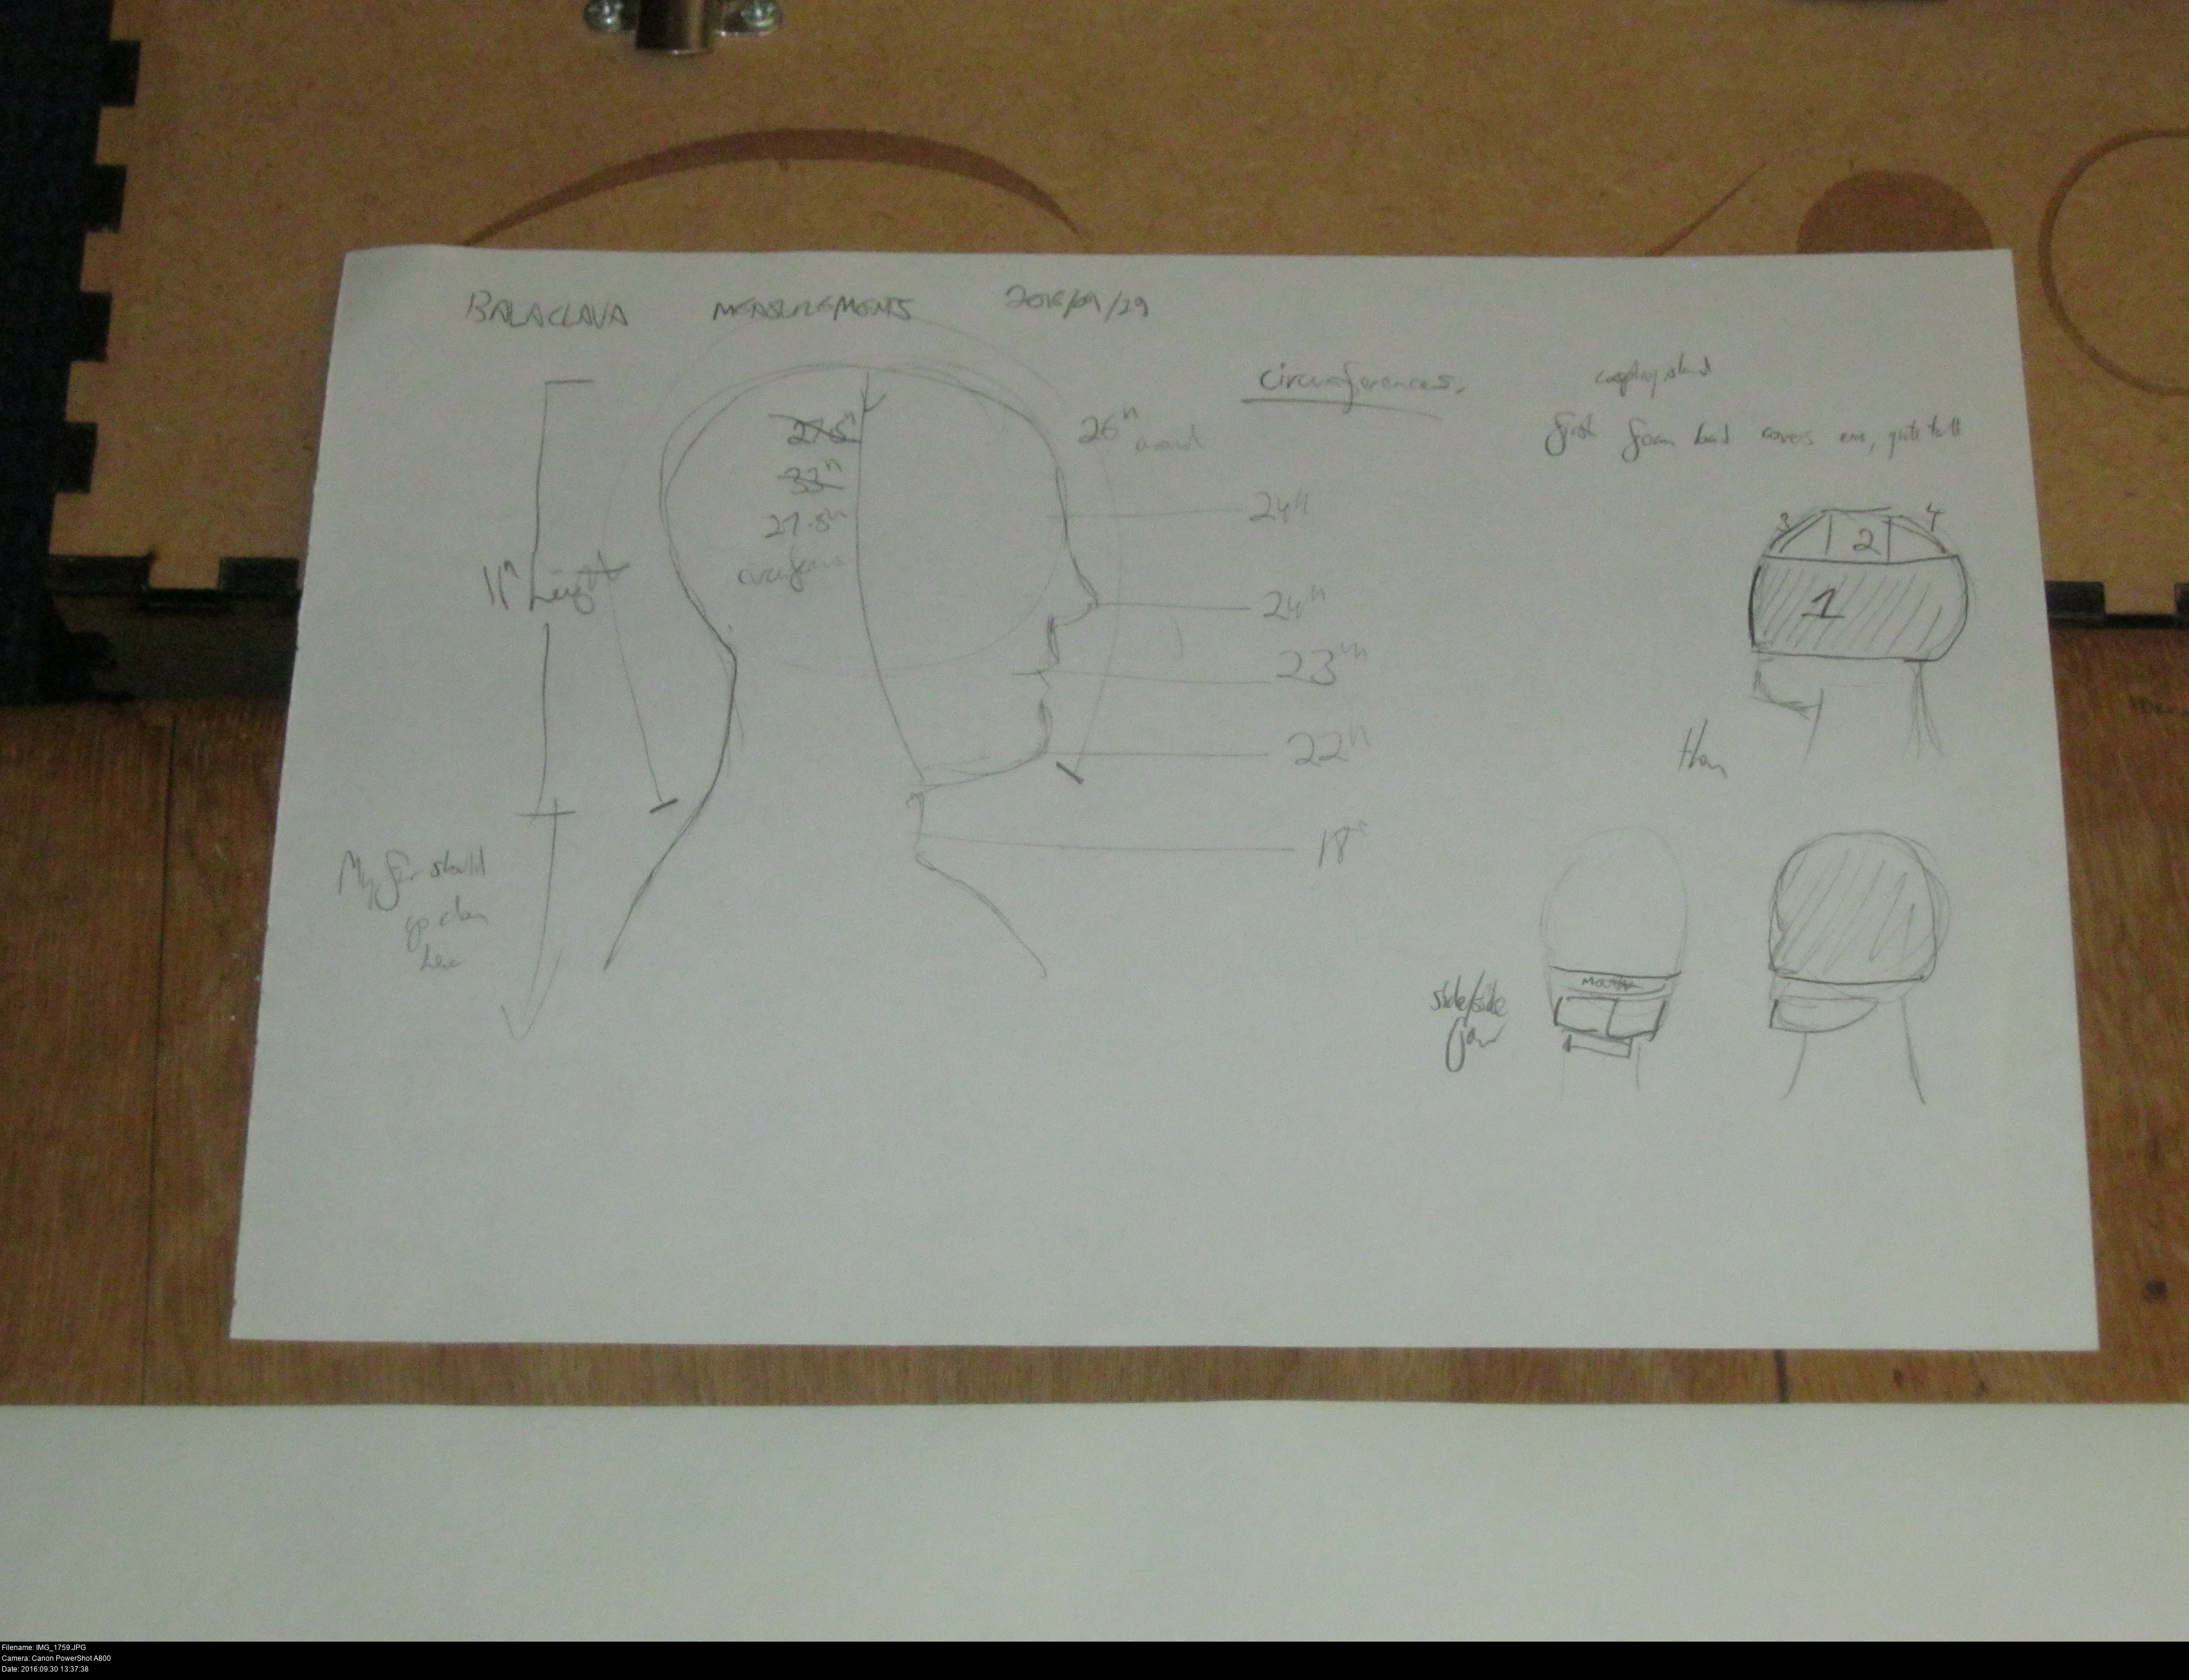
Circumference at forehead.
Circumference at nose.
Circumference at jaw.
Circumference at neck.
Distance from under chin where it meets the neck around the top of the head and down again.
Distance between various face features.
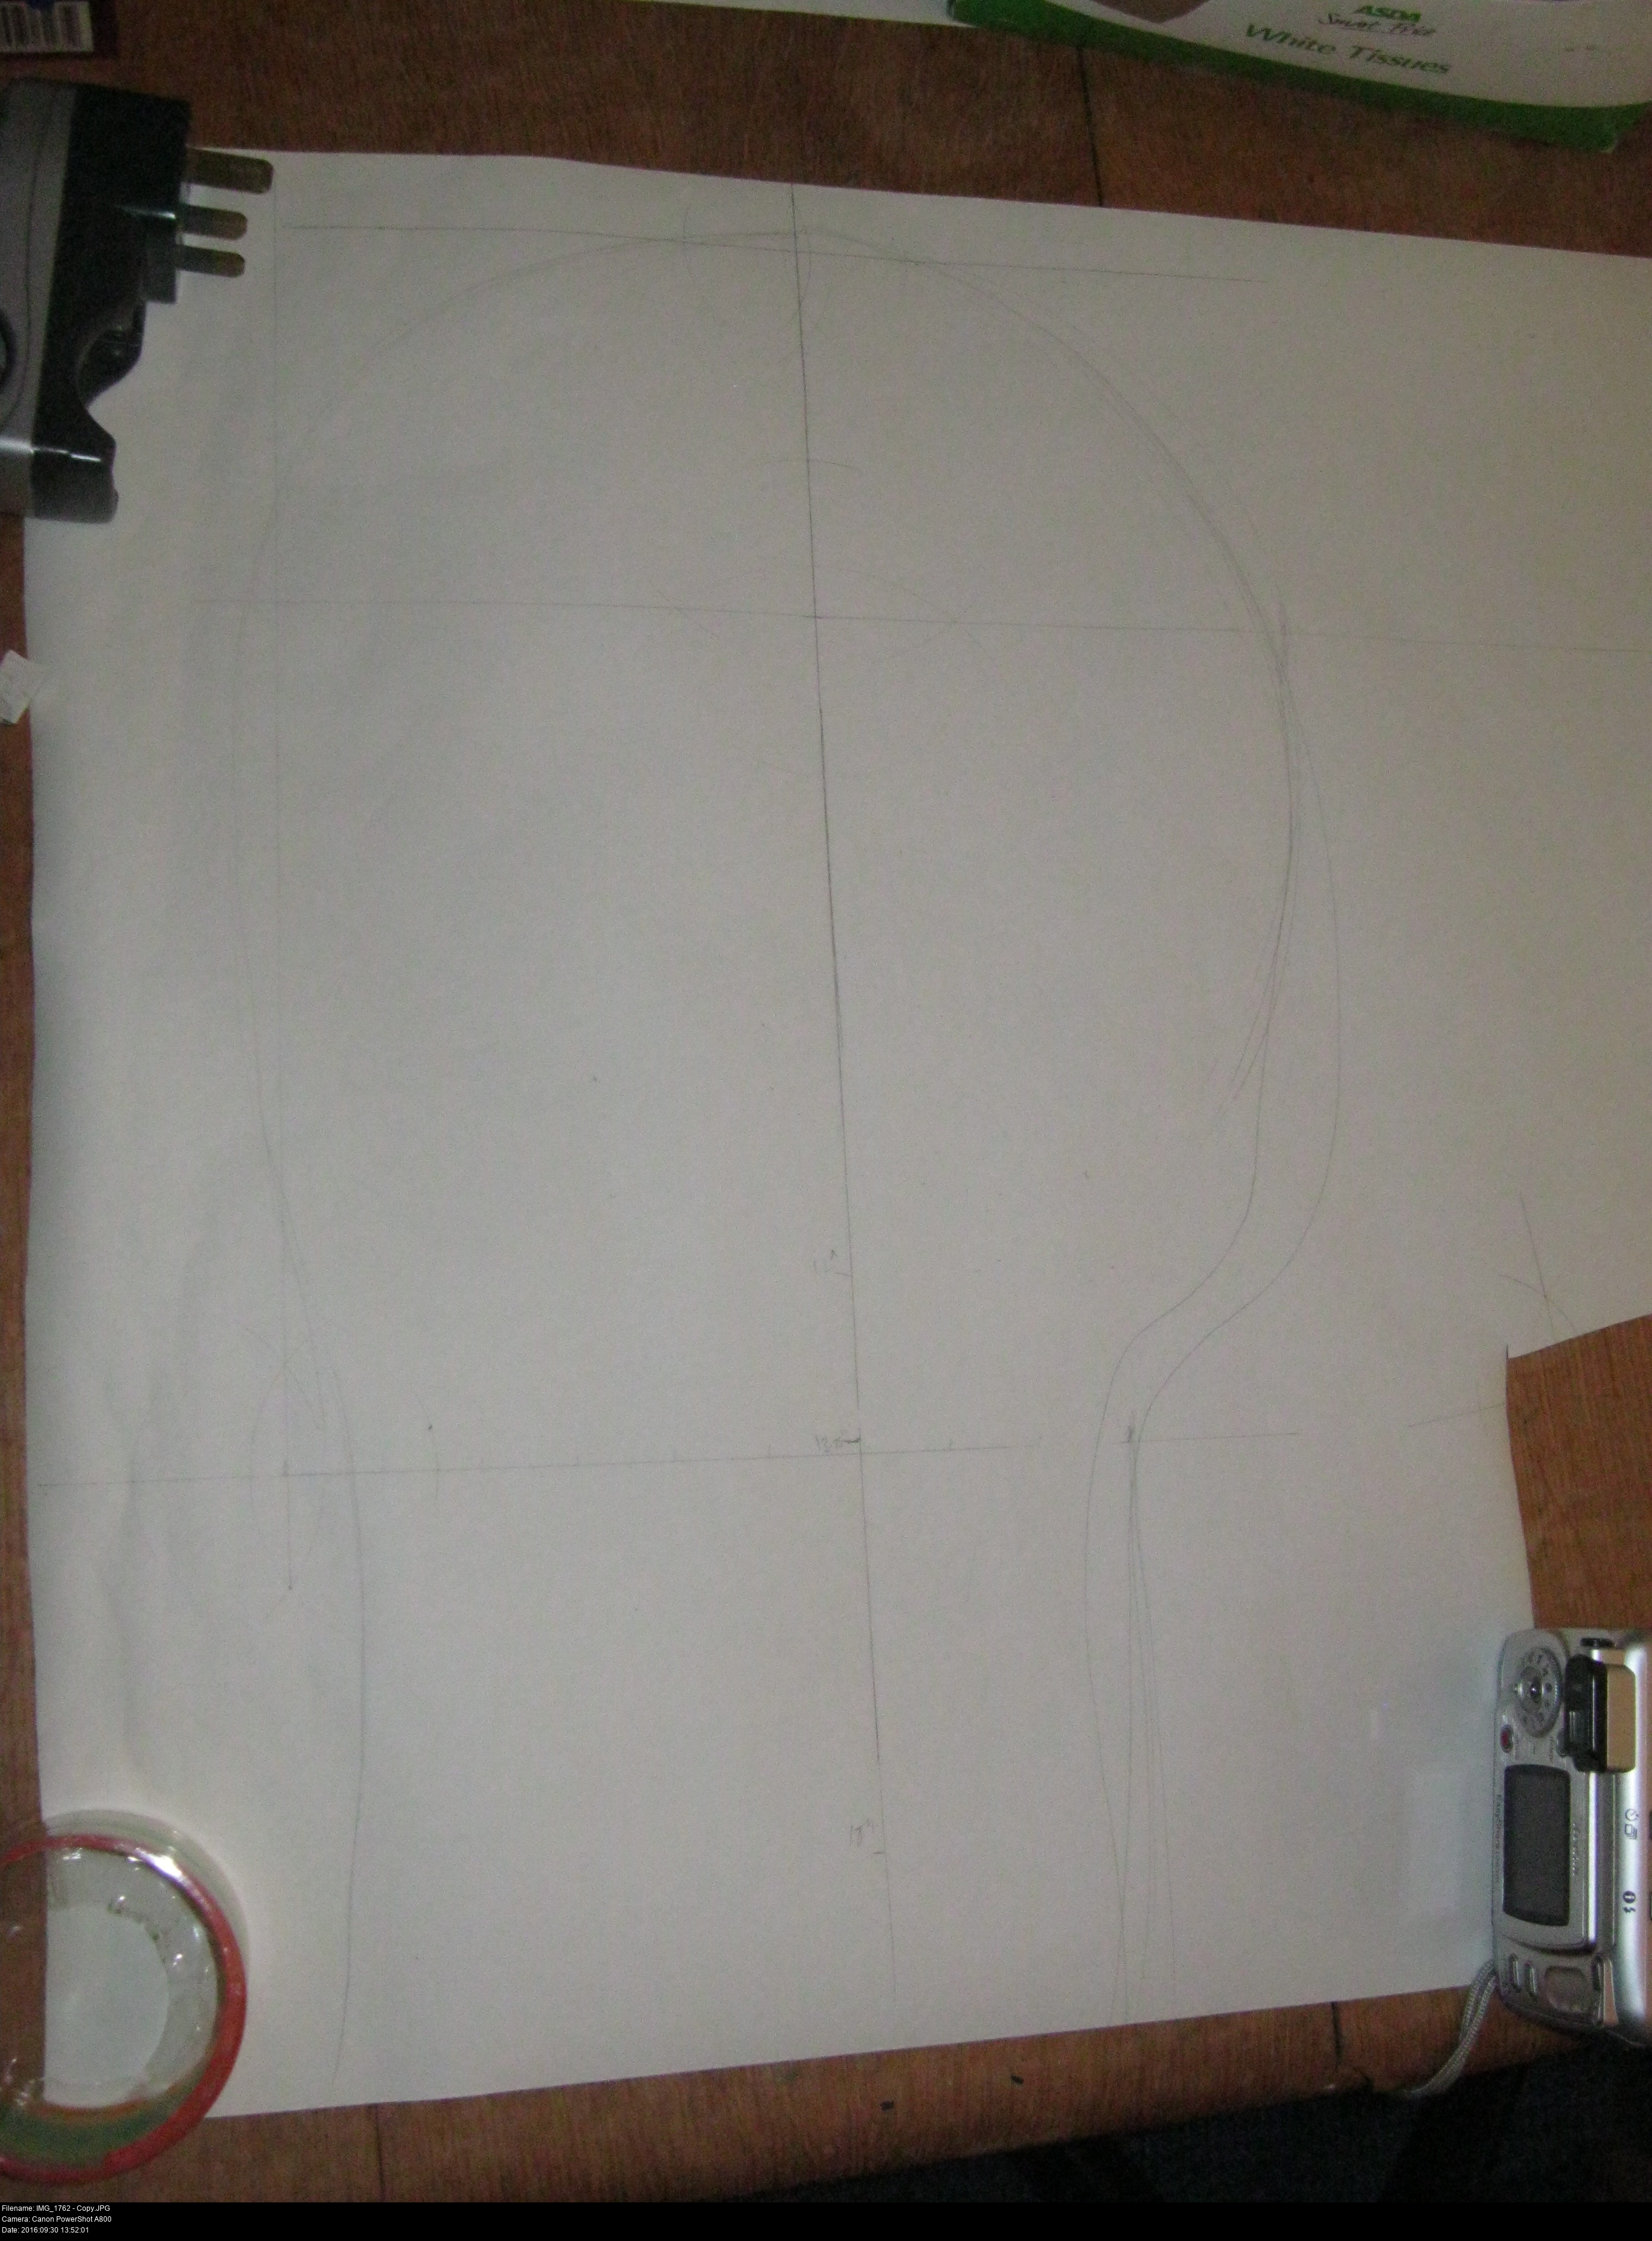
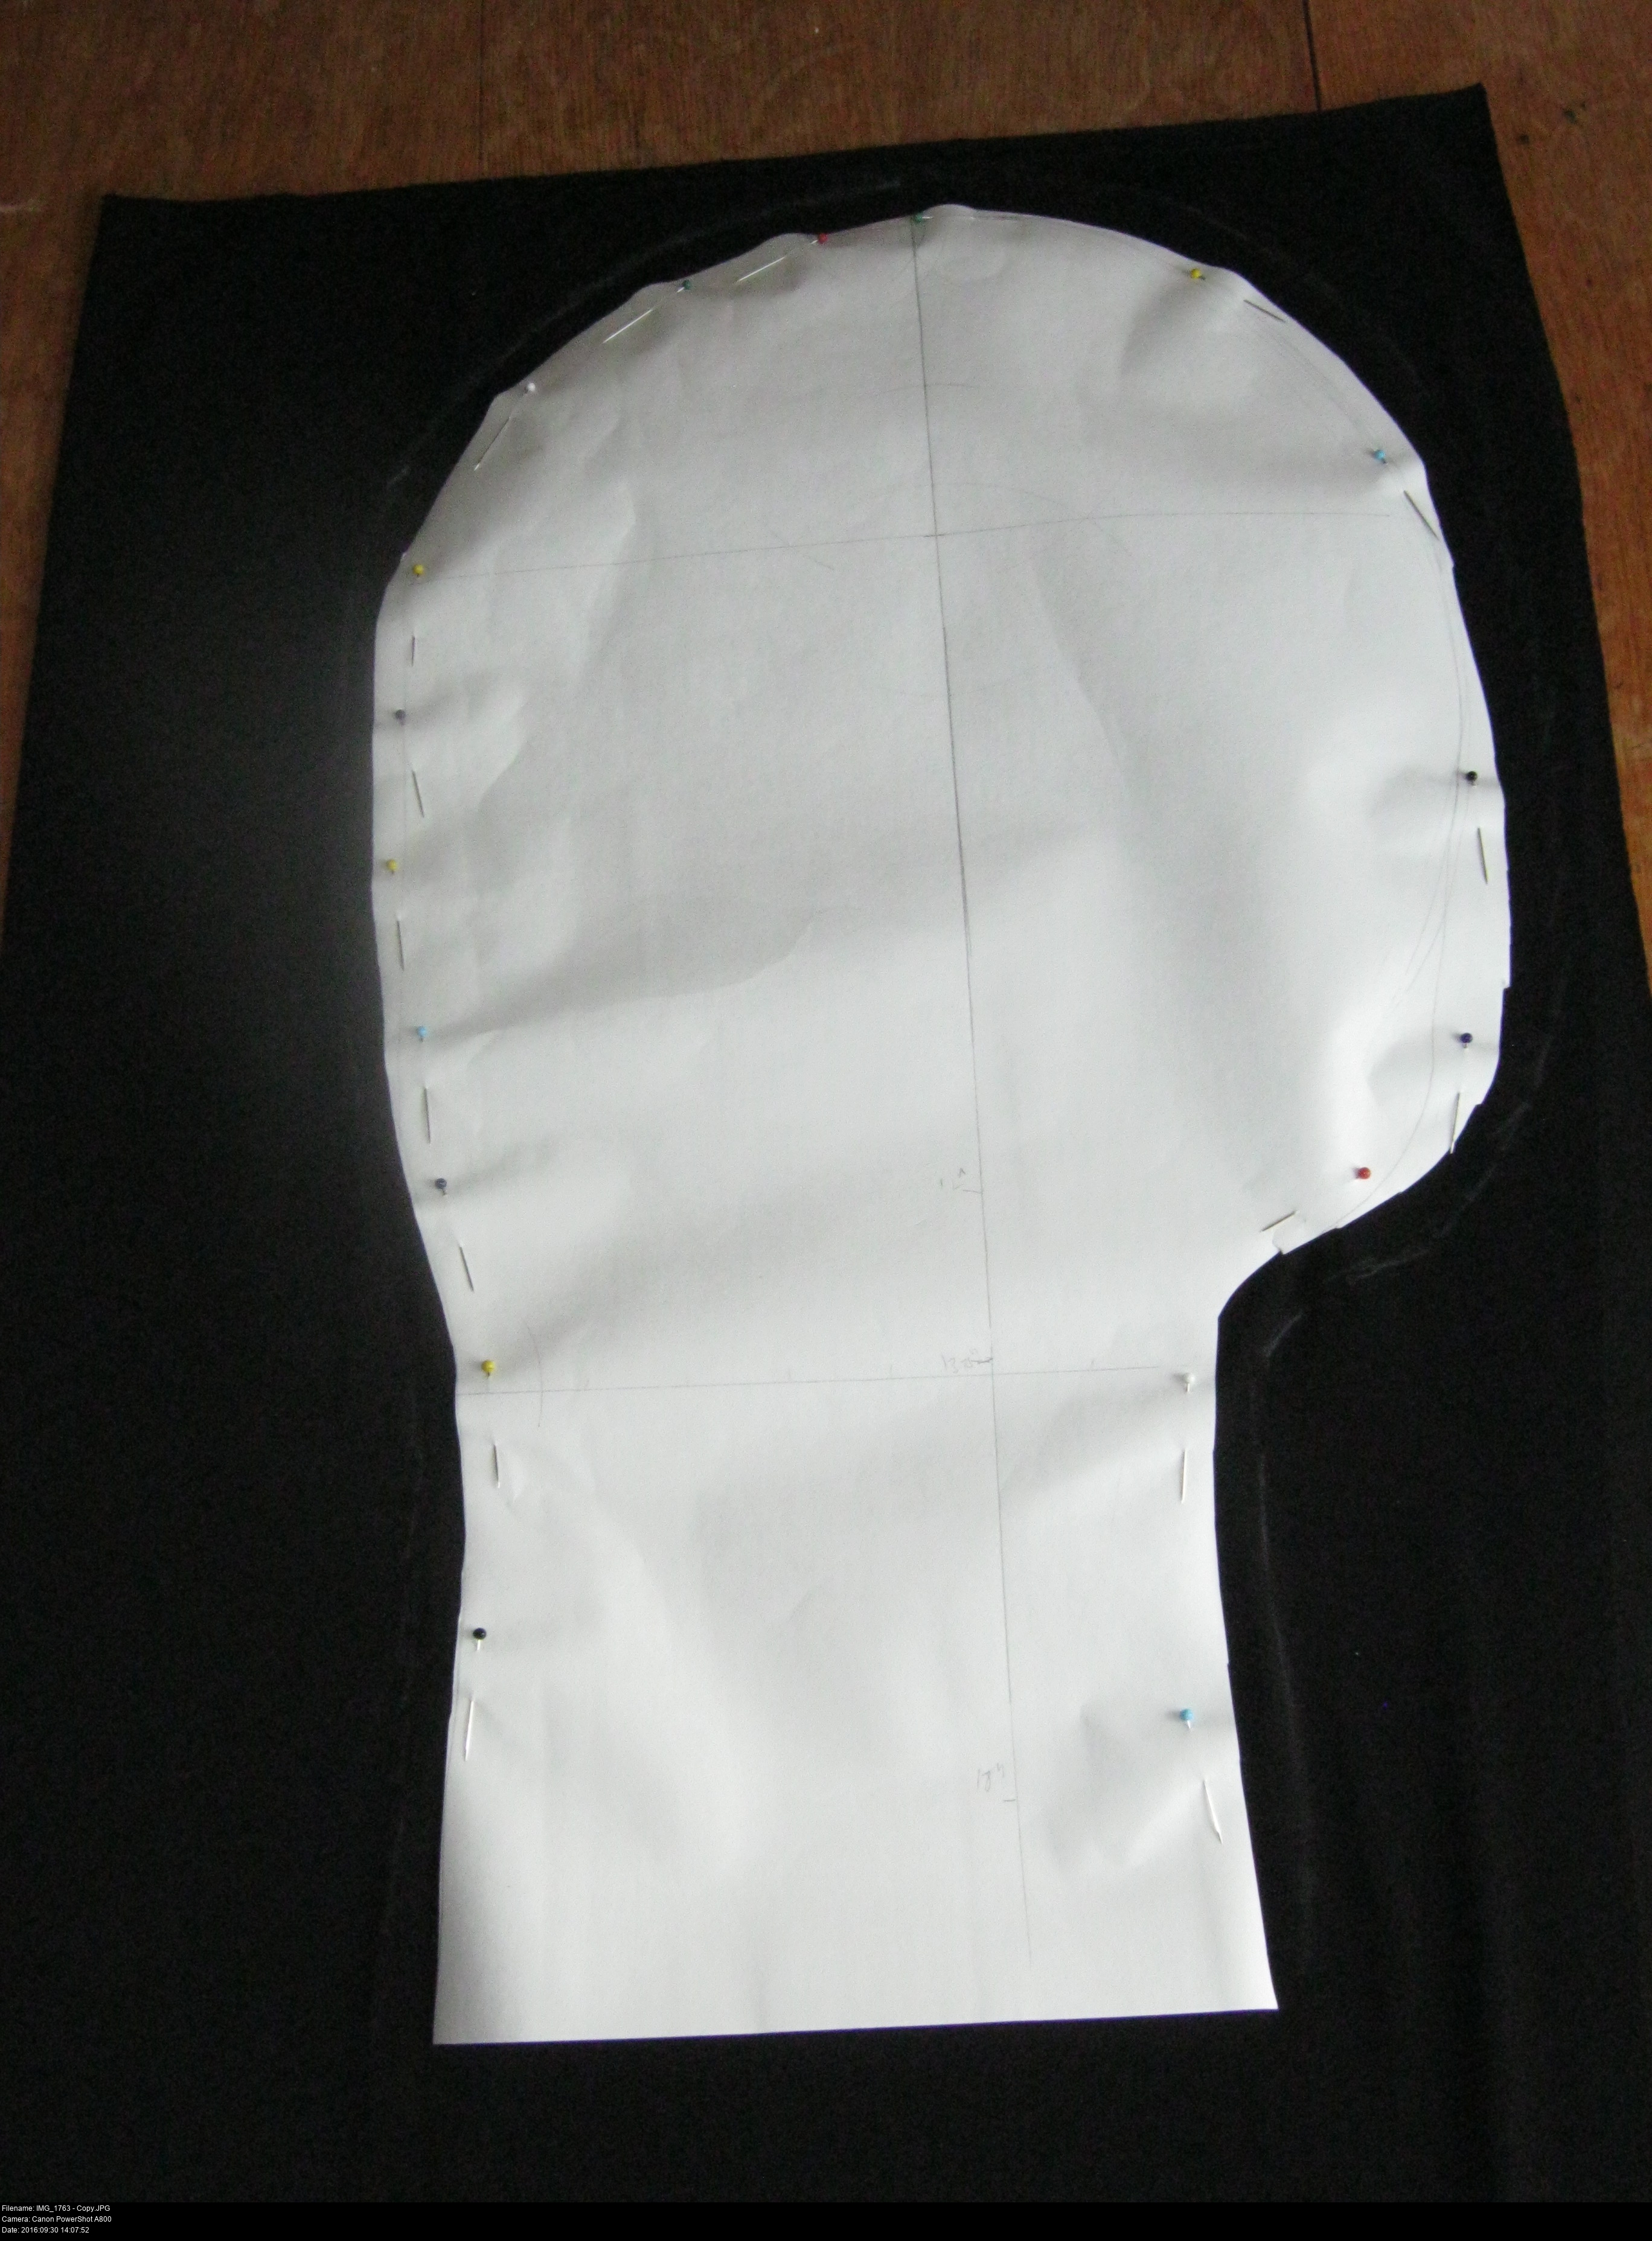
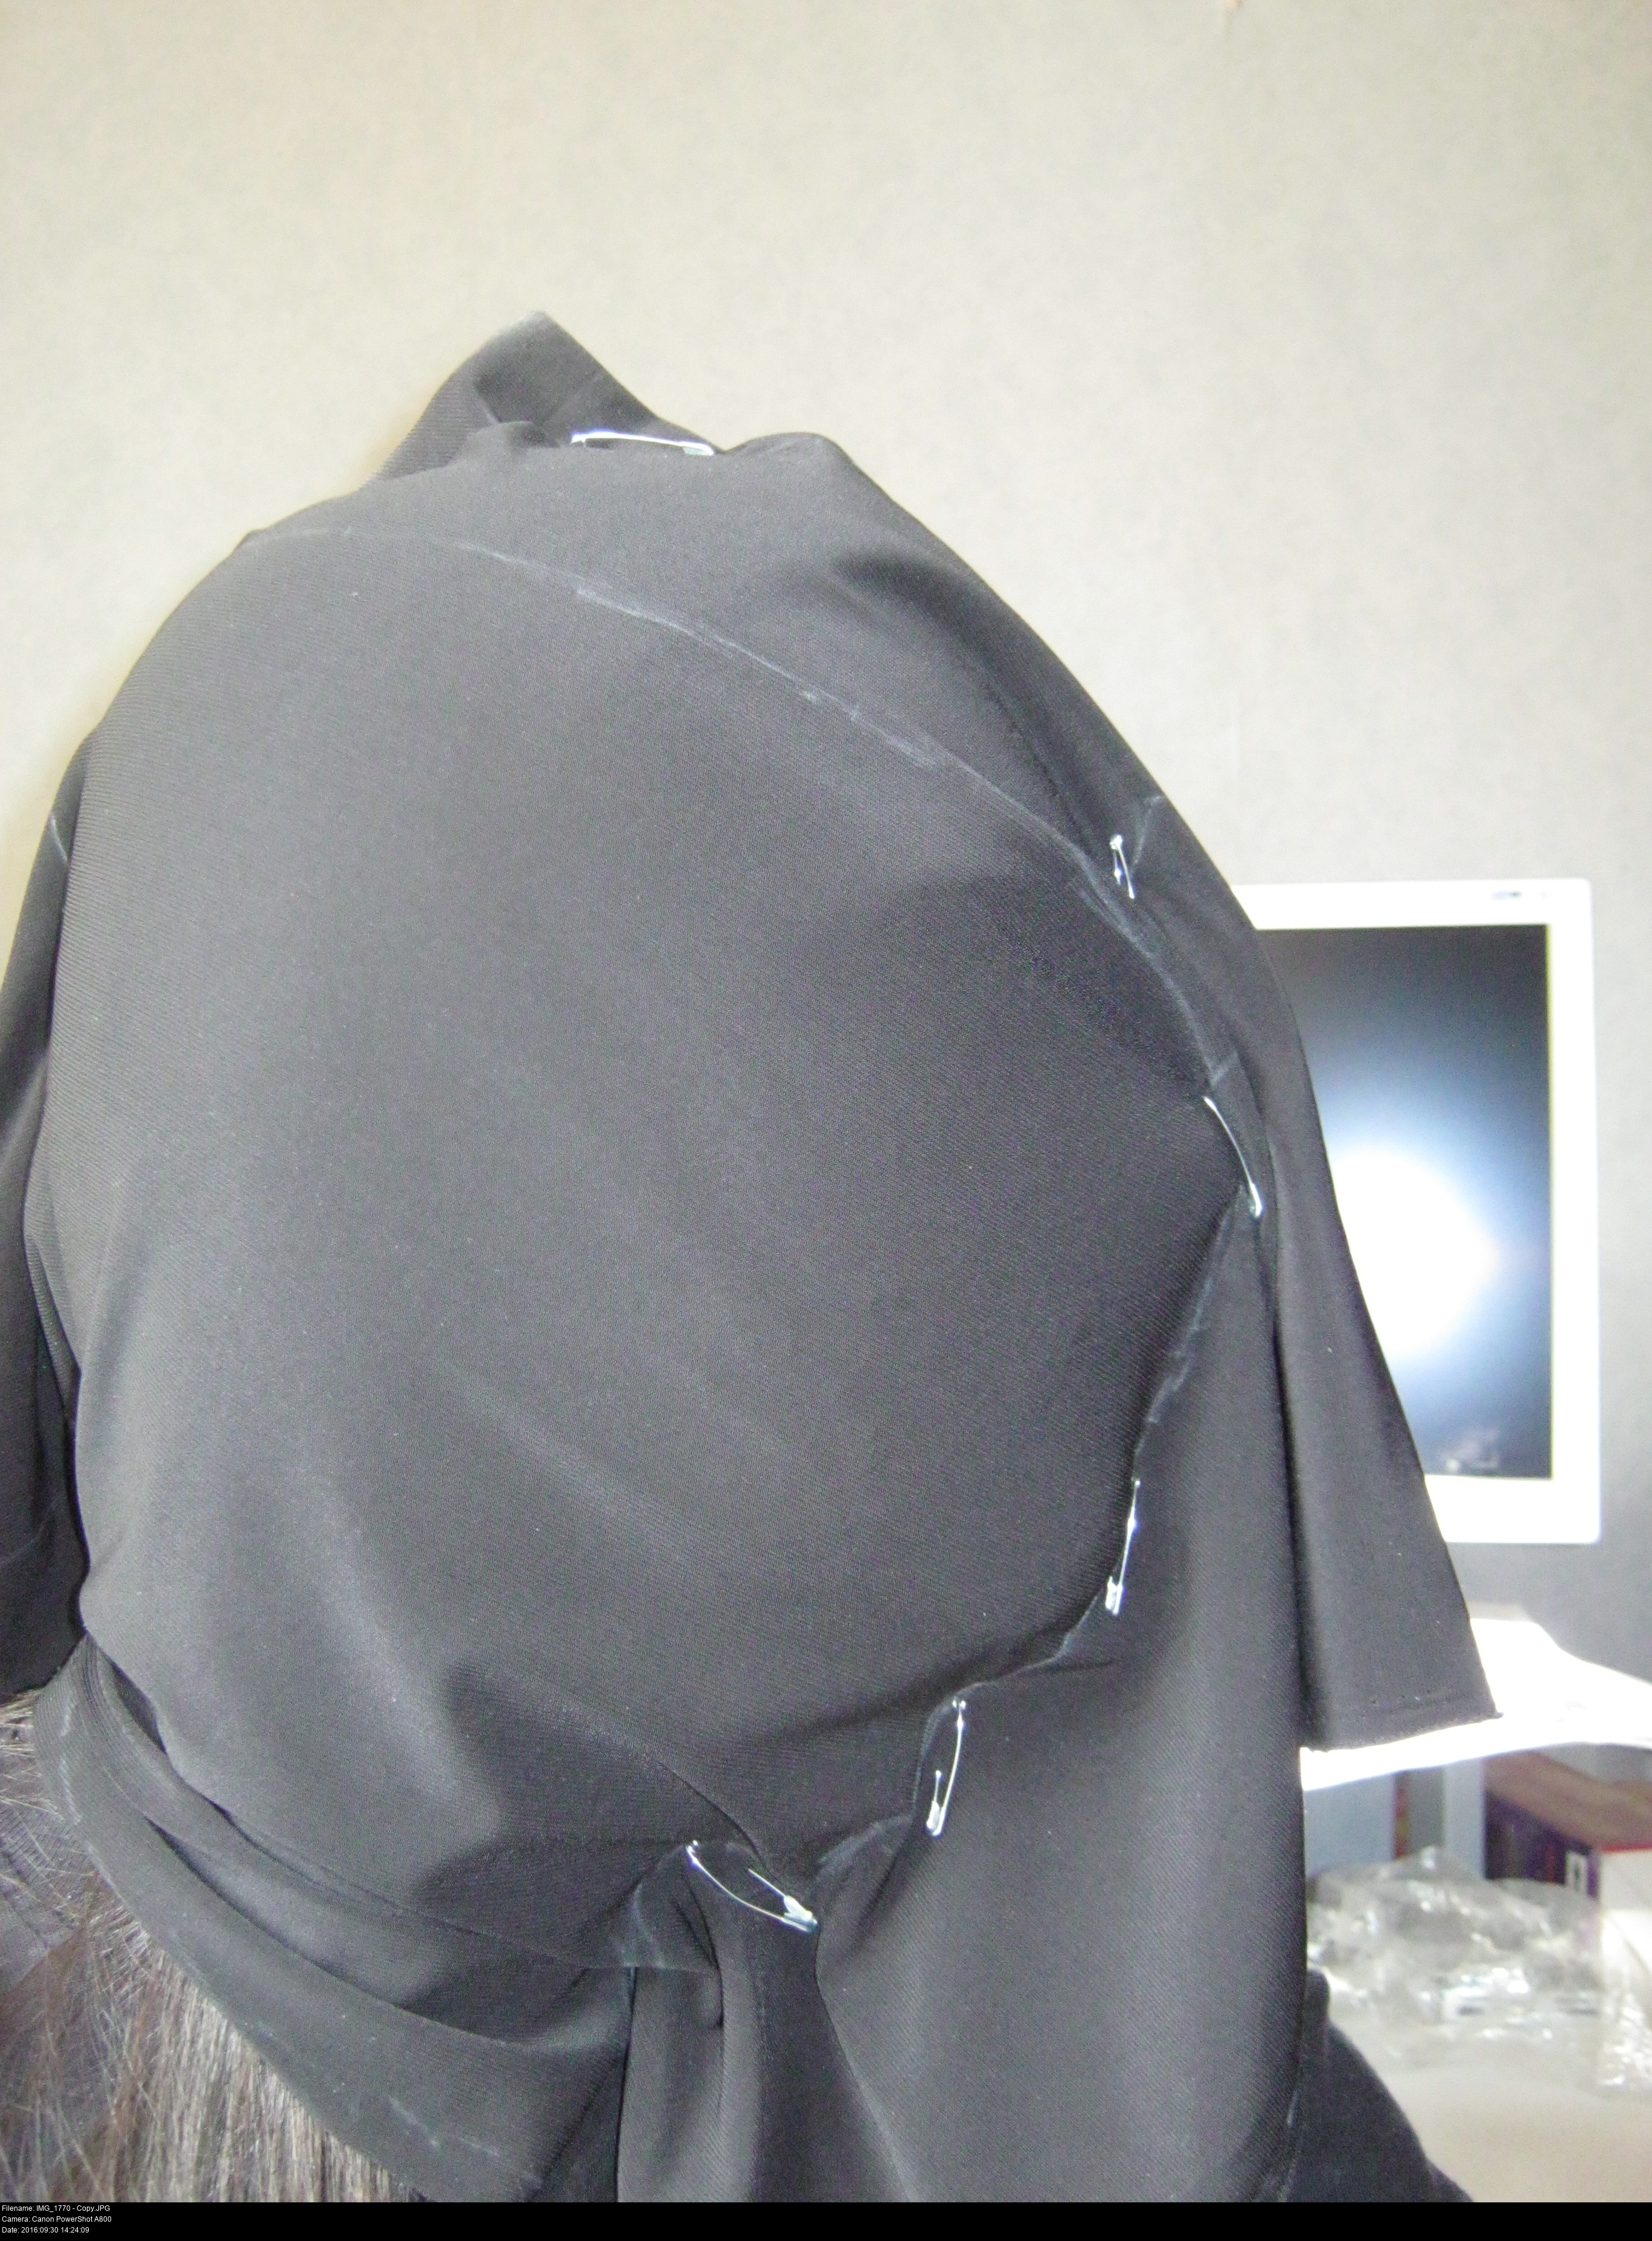
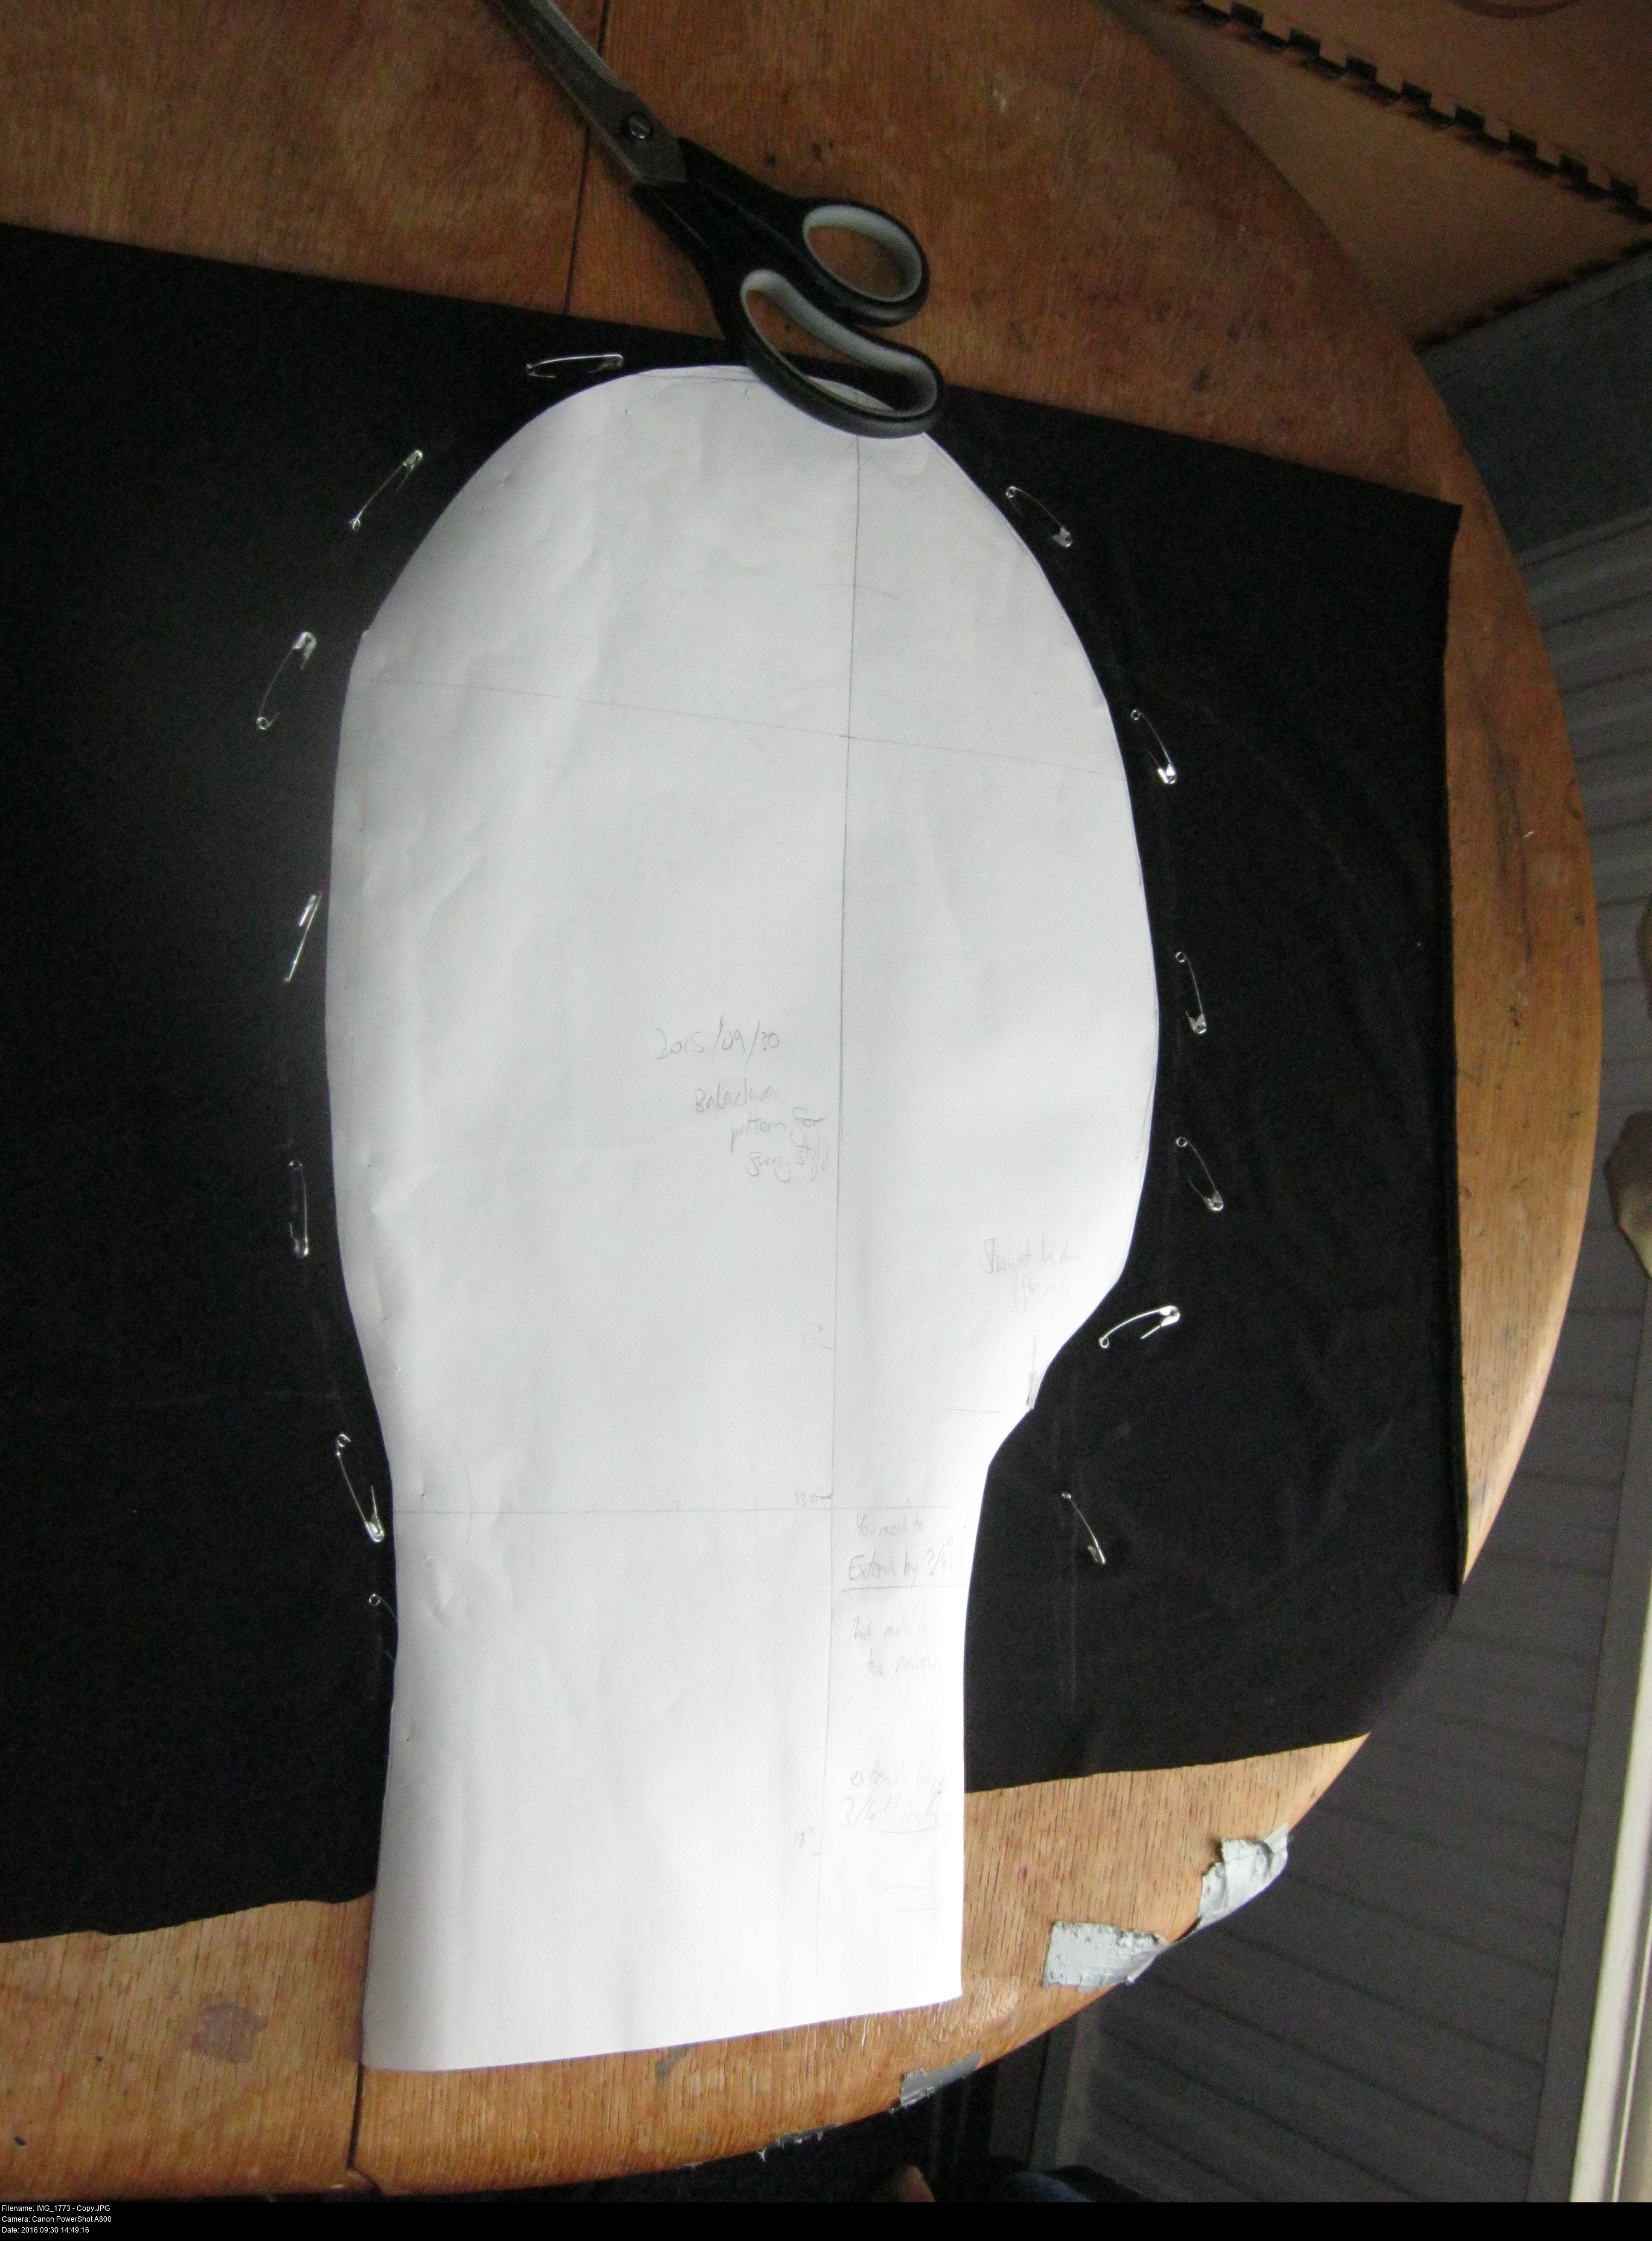
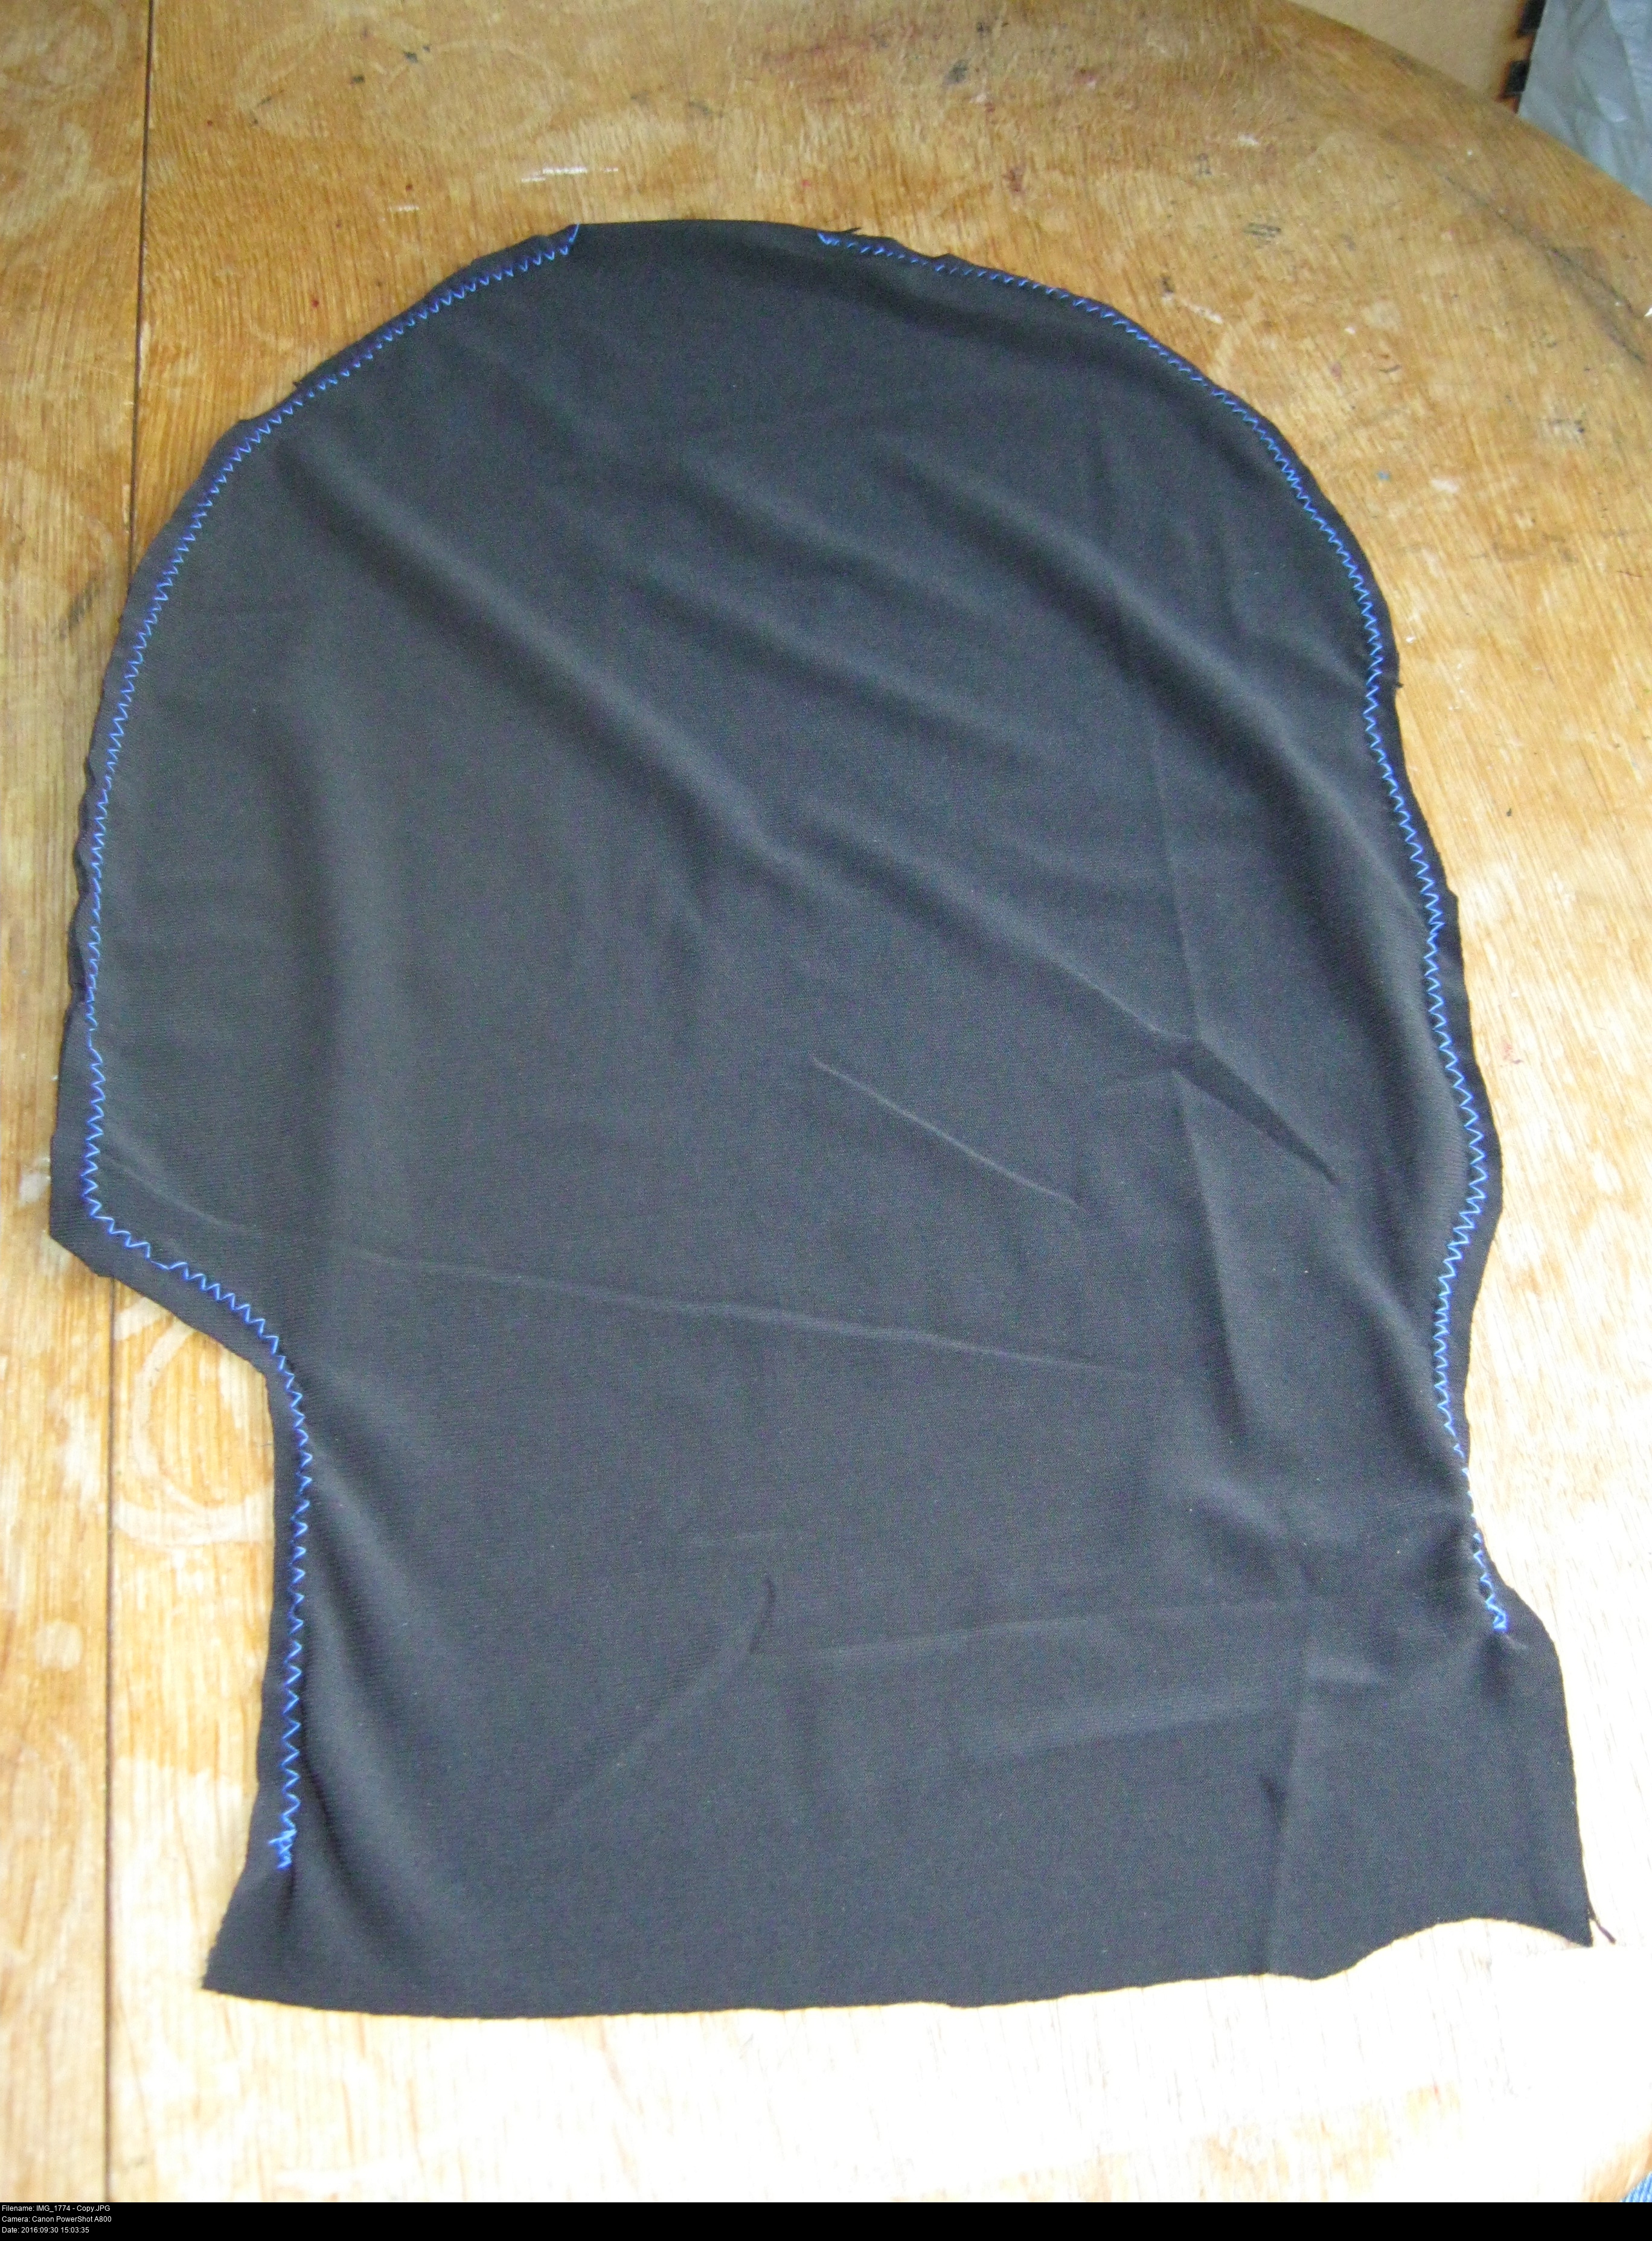

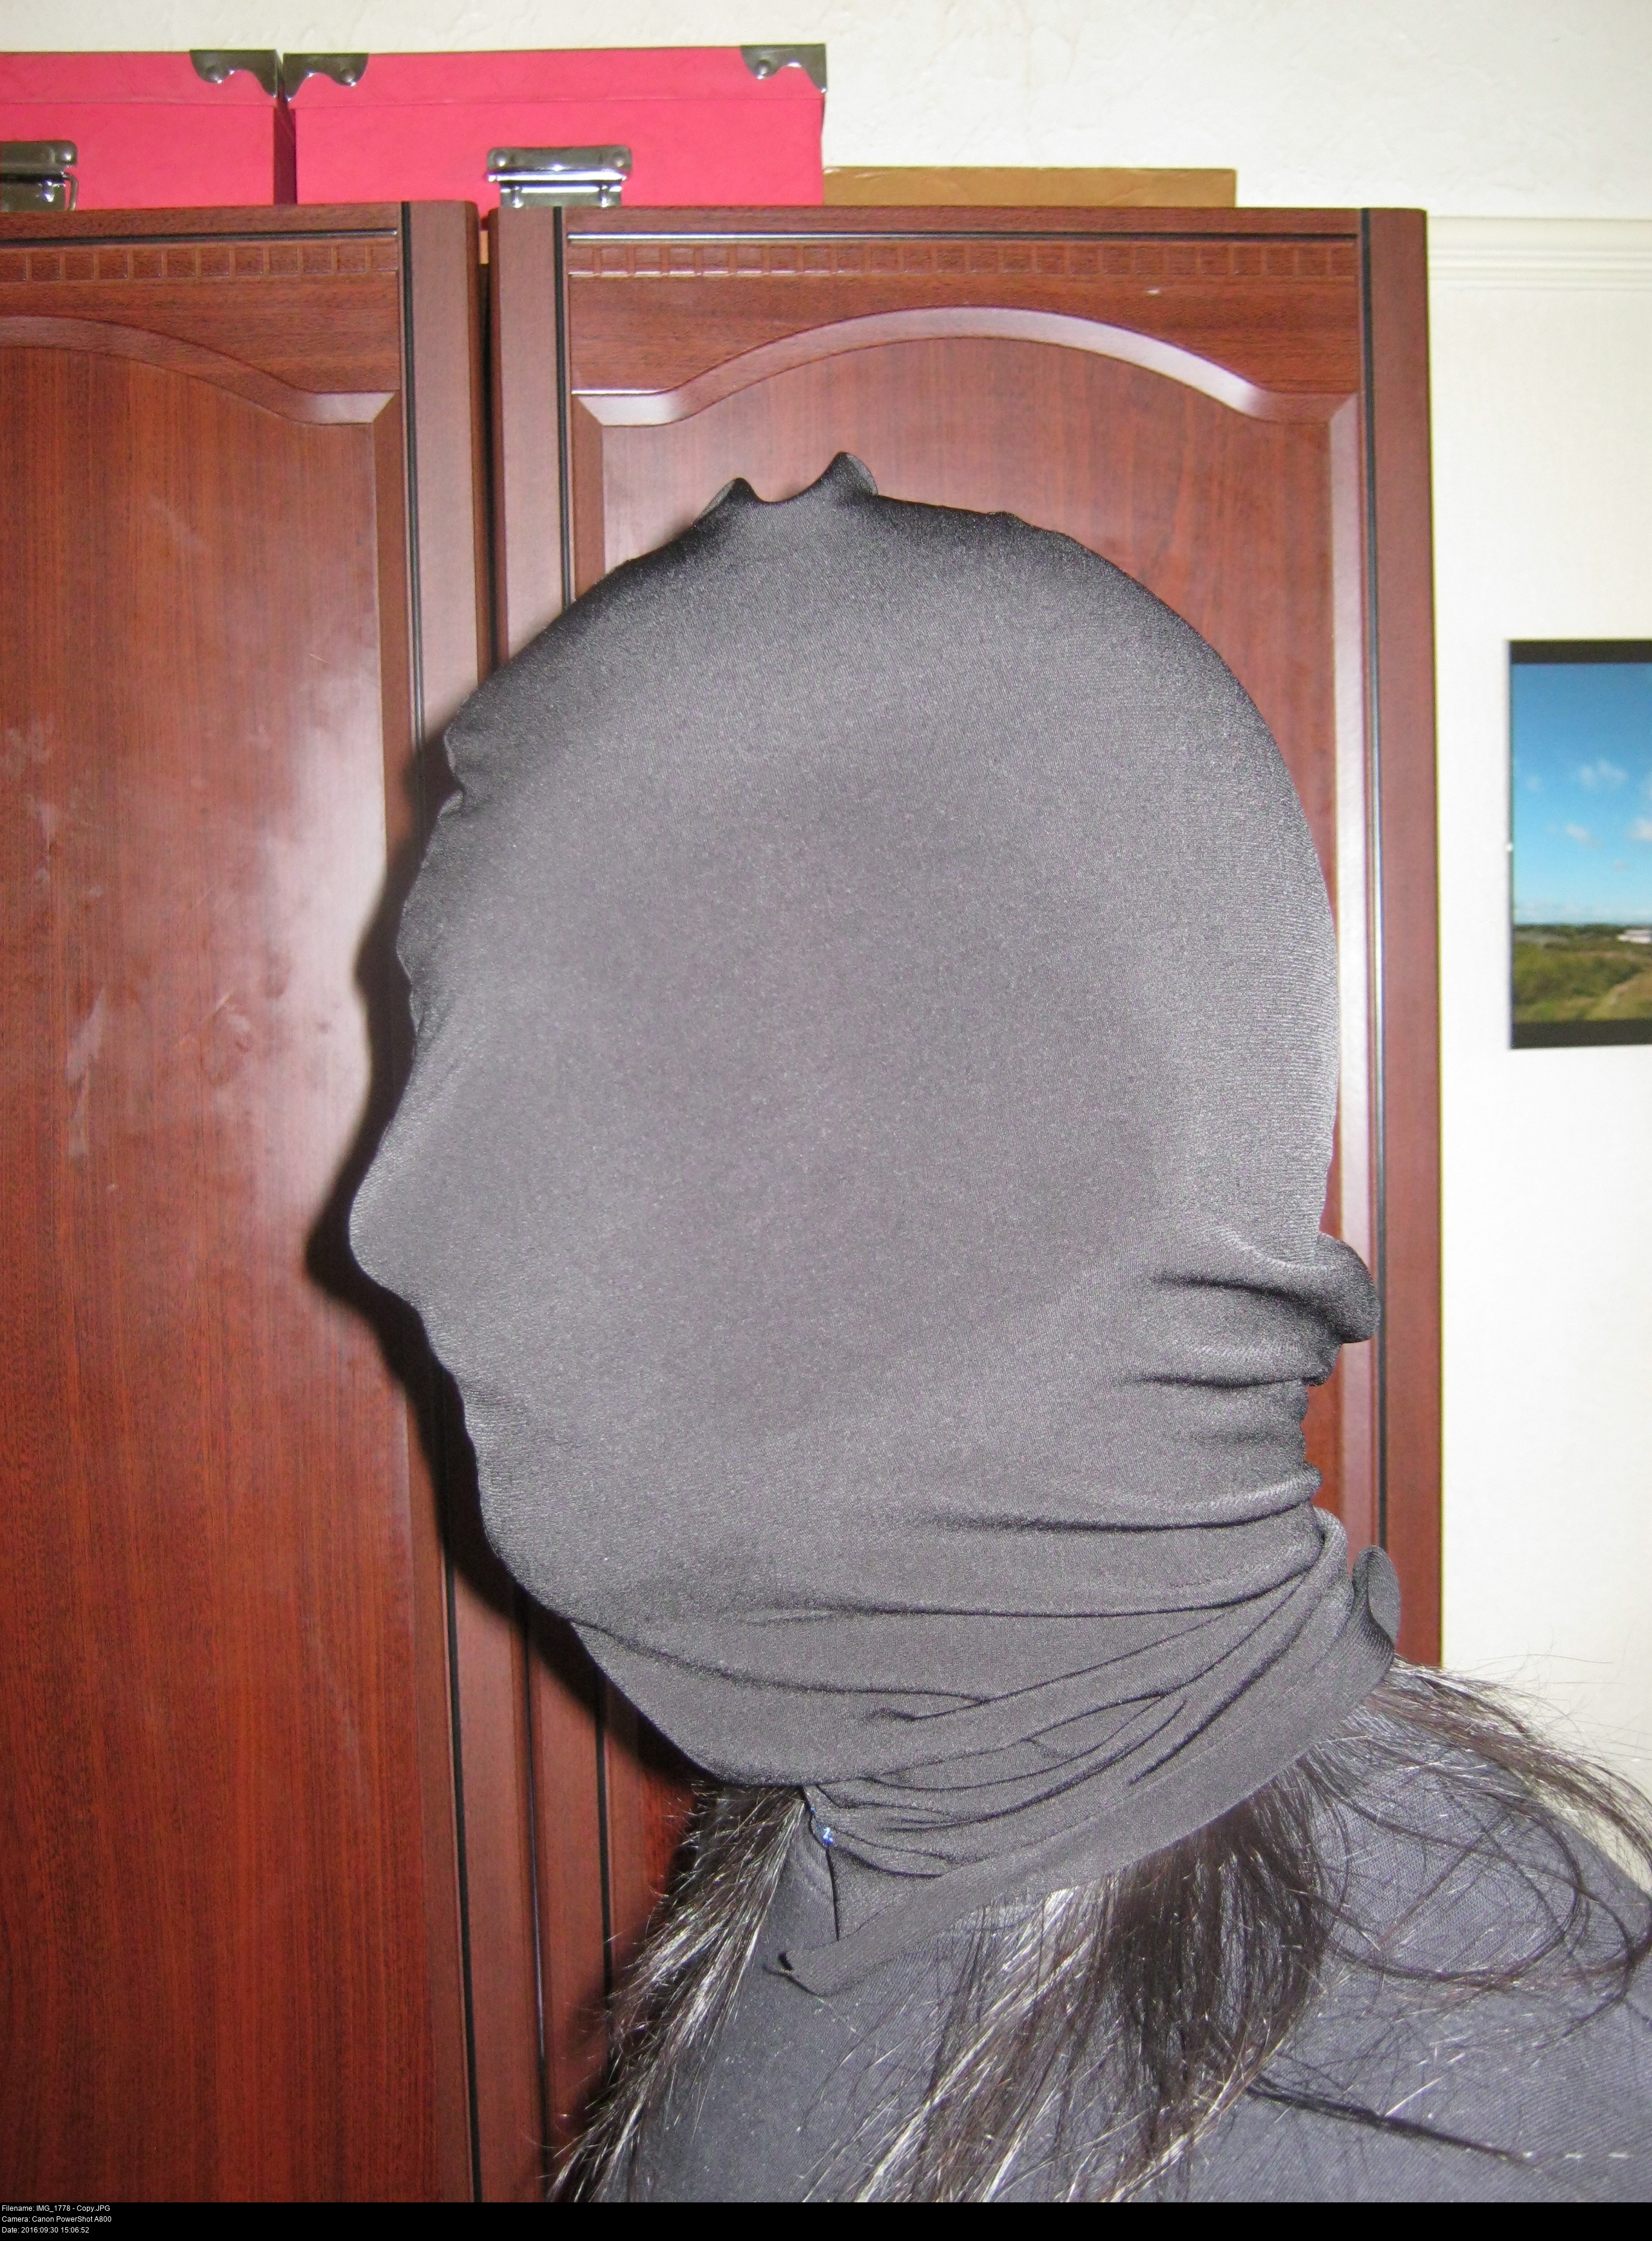
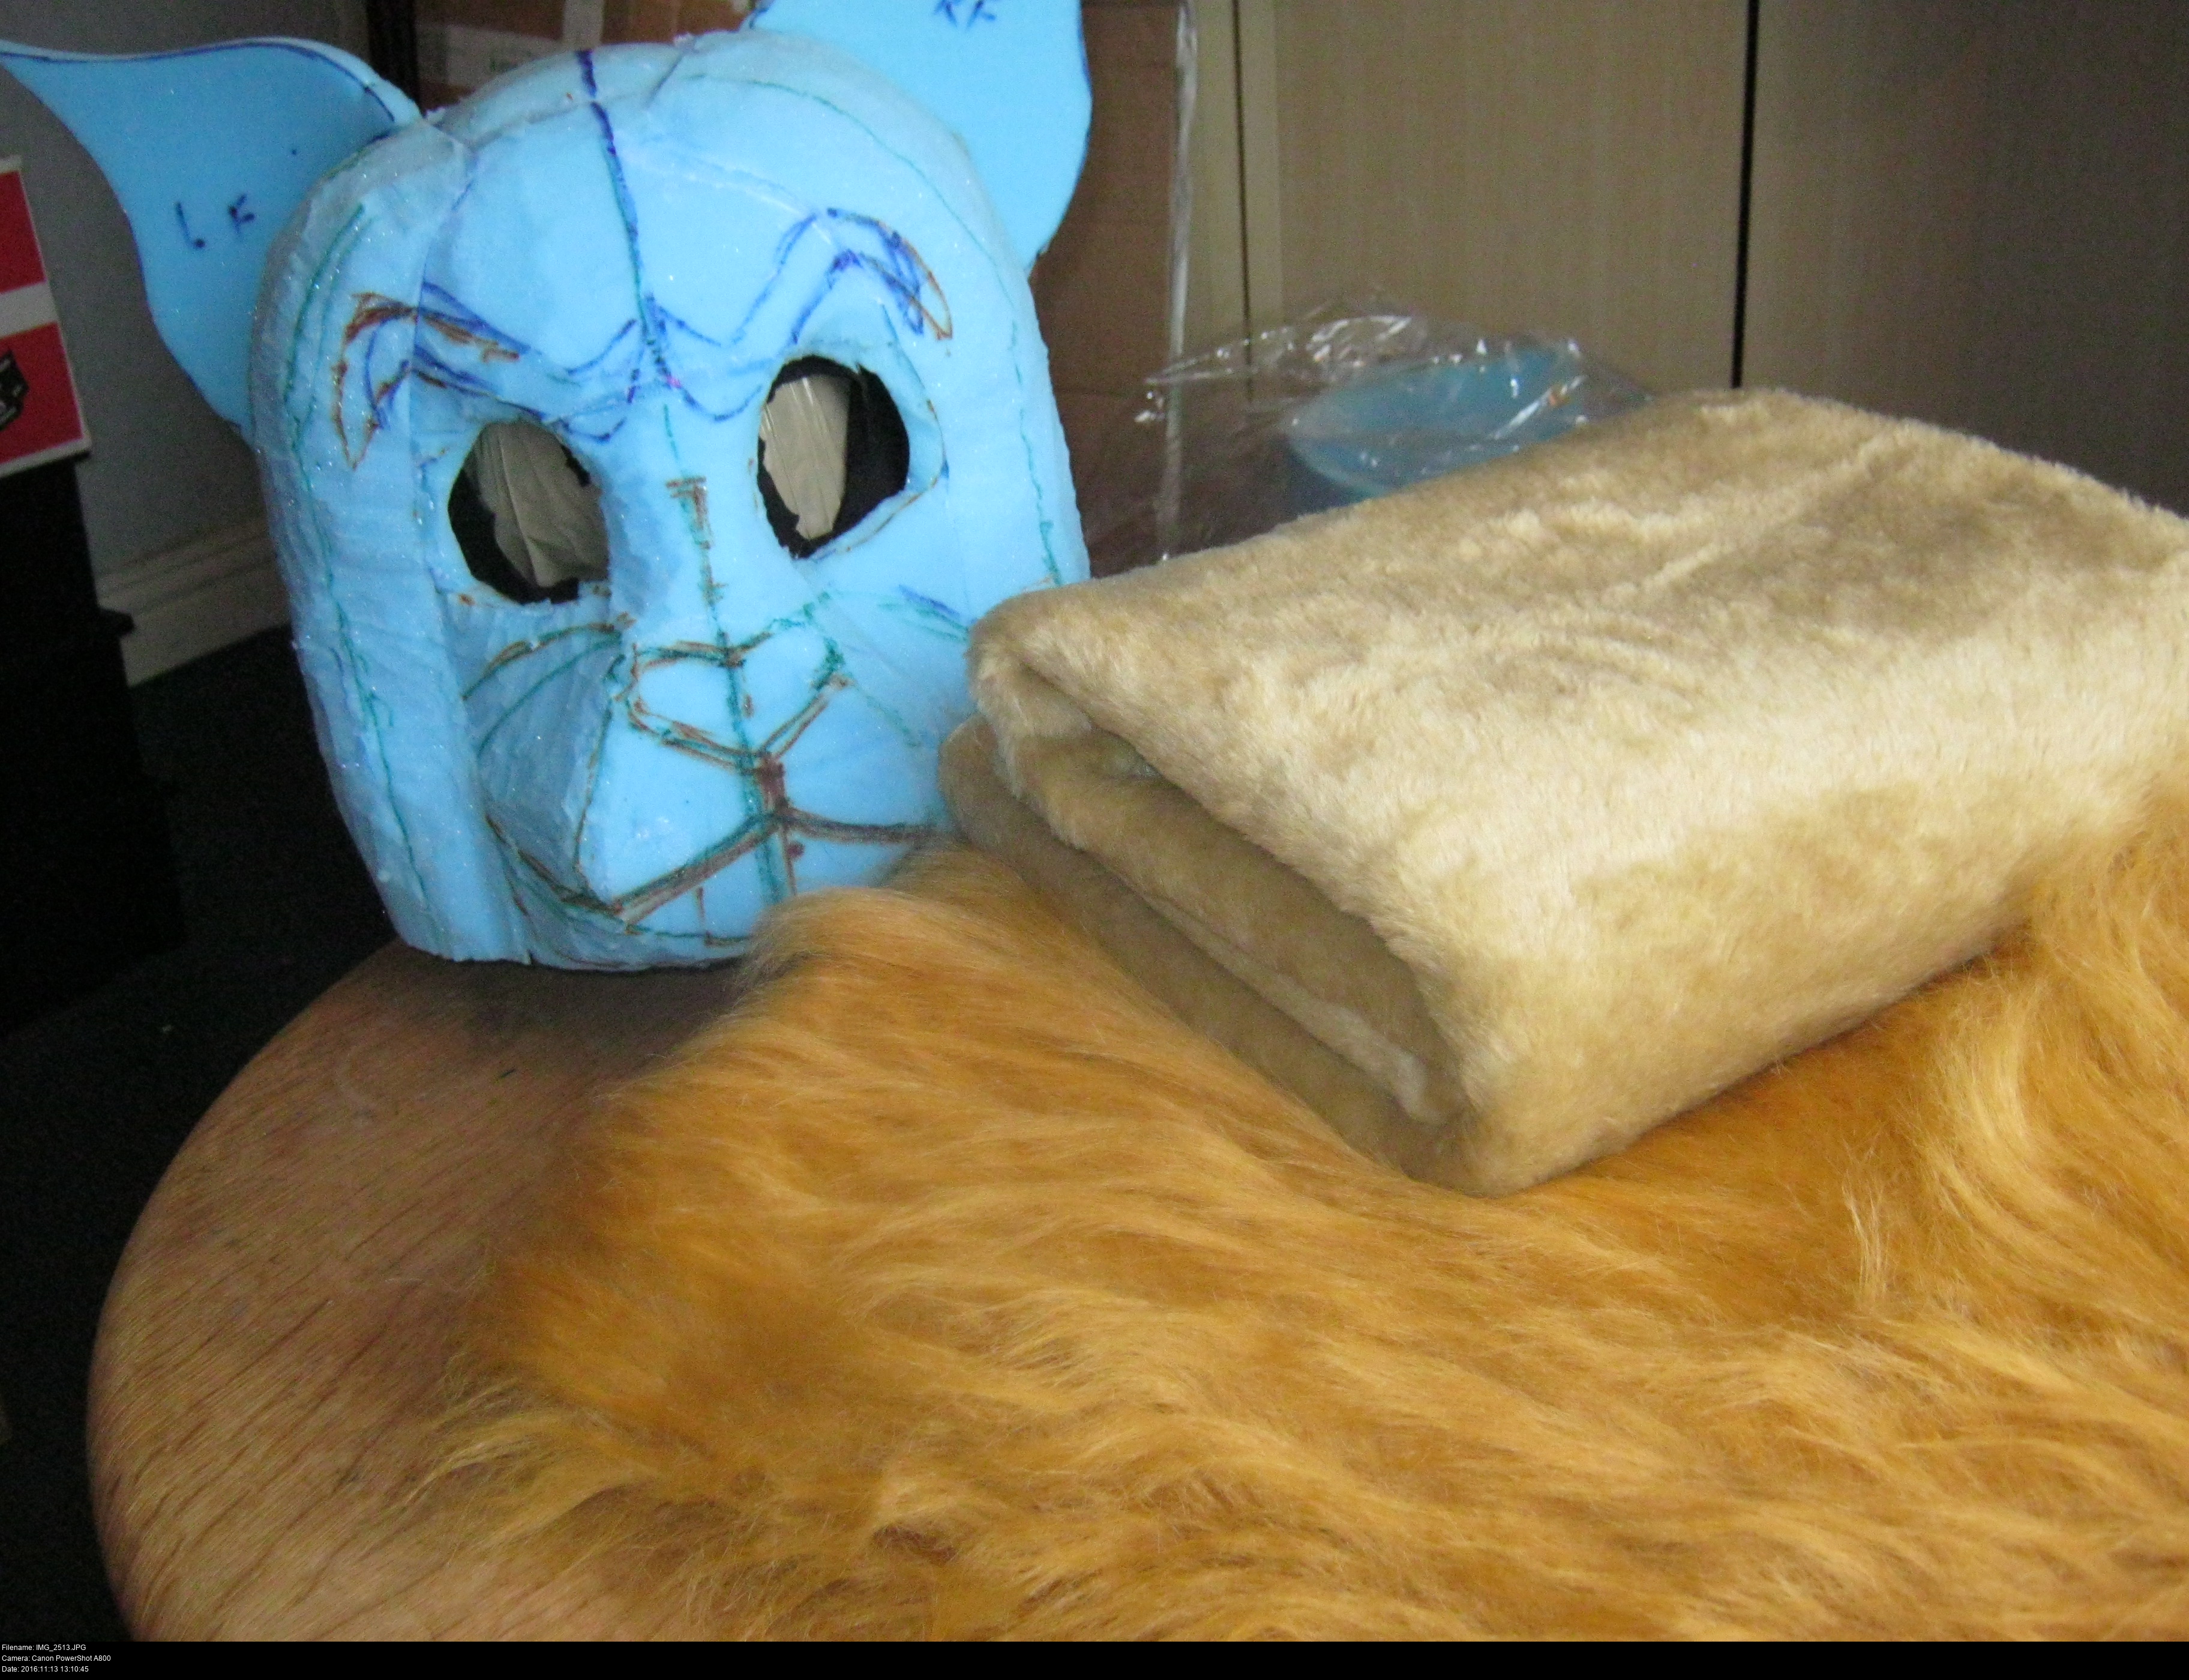
I'm going to make my fursuit head using the bucket and balaclava method. First, you make a balaclava out of spandex. This catches sweat and makes everything more comfortable and protects the foam as well as a bunch of other stuff. (Alternatively, you could wear a separate one underneath the head.)
My balaclava pattern is an improvised mess: a simple two-sided thing based on the measurements of my head. It wasn't perfect, so I had to snug up the neck (I like snug) until everything fitted comfortably.
Wearing the balaclava while there are pins still in it is highly inadvisable.


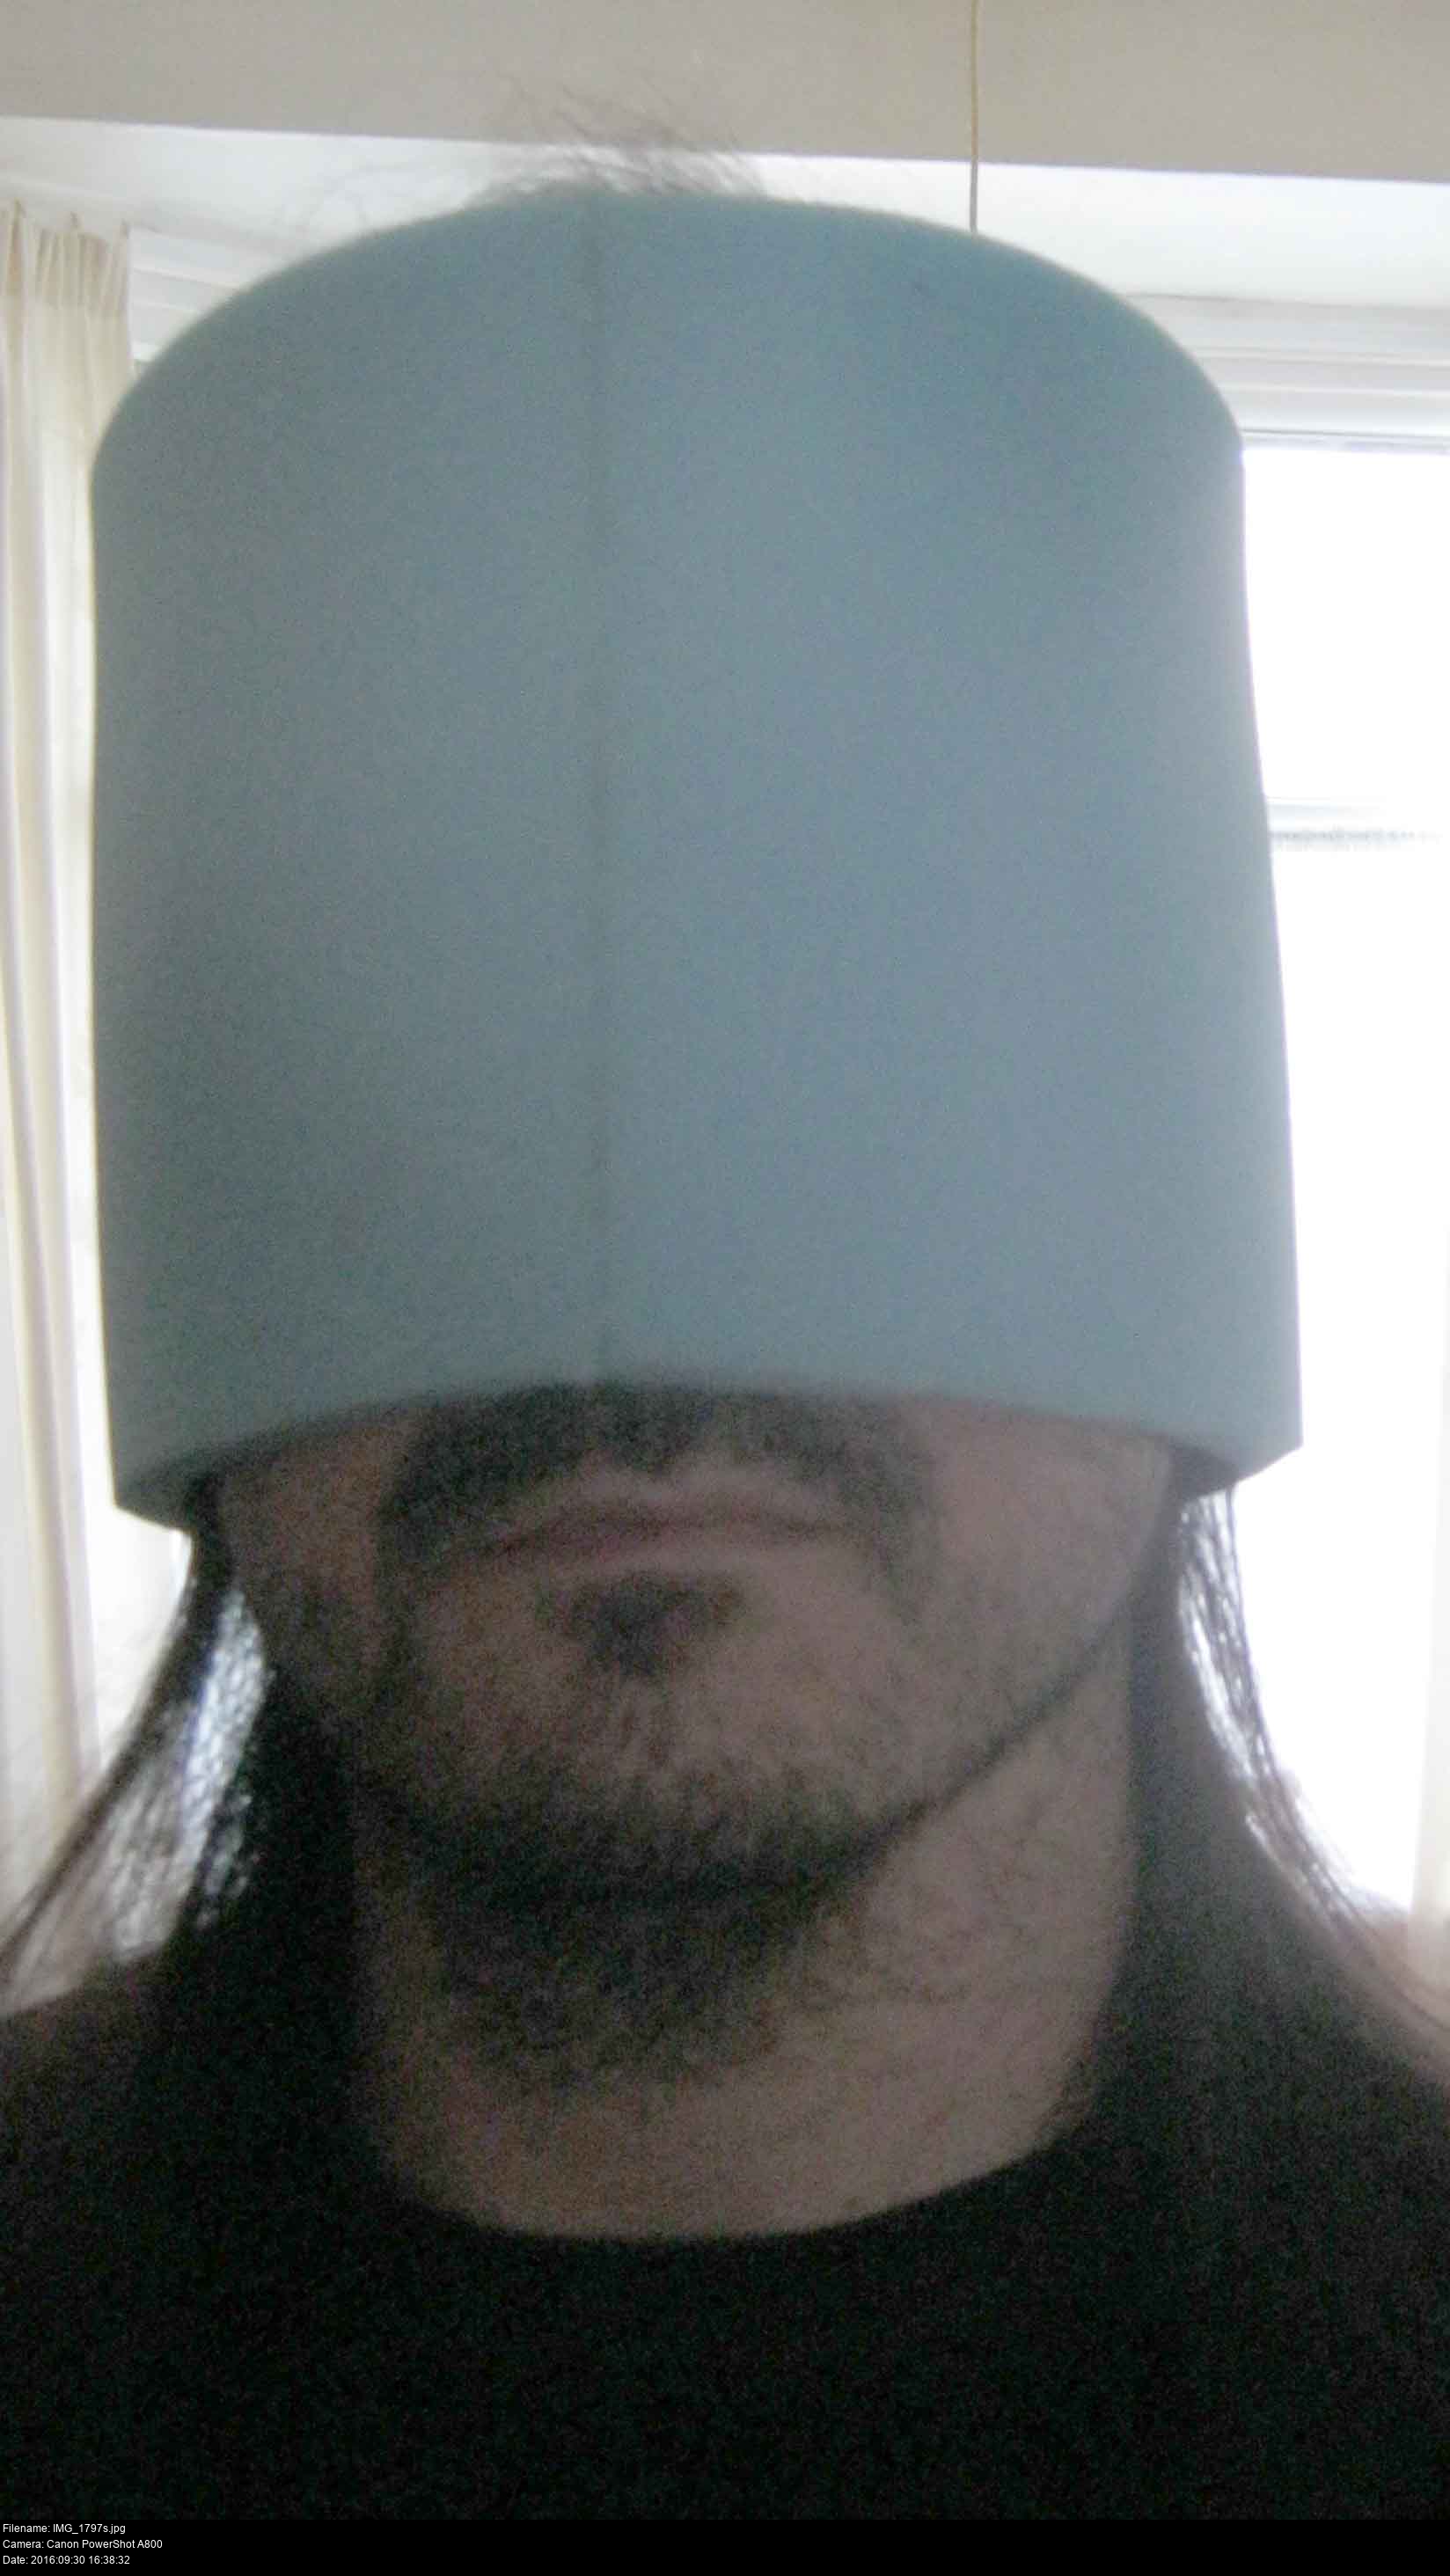
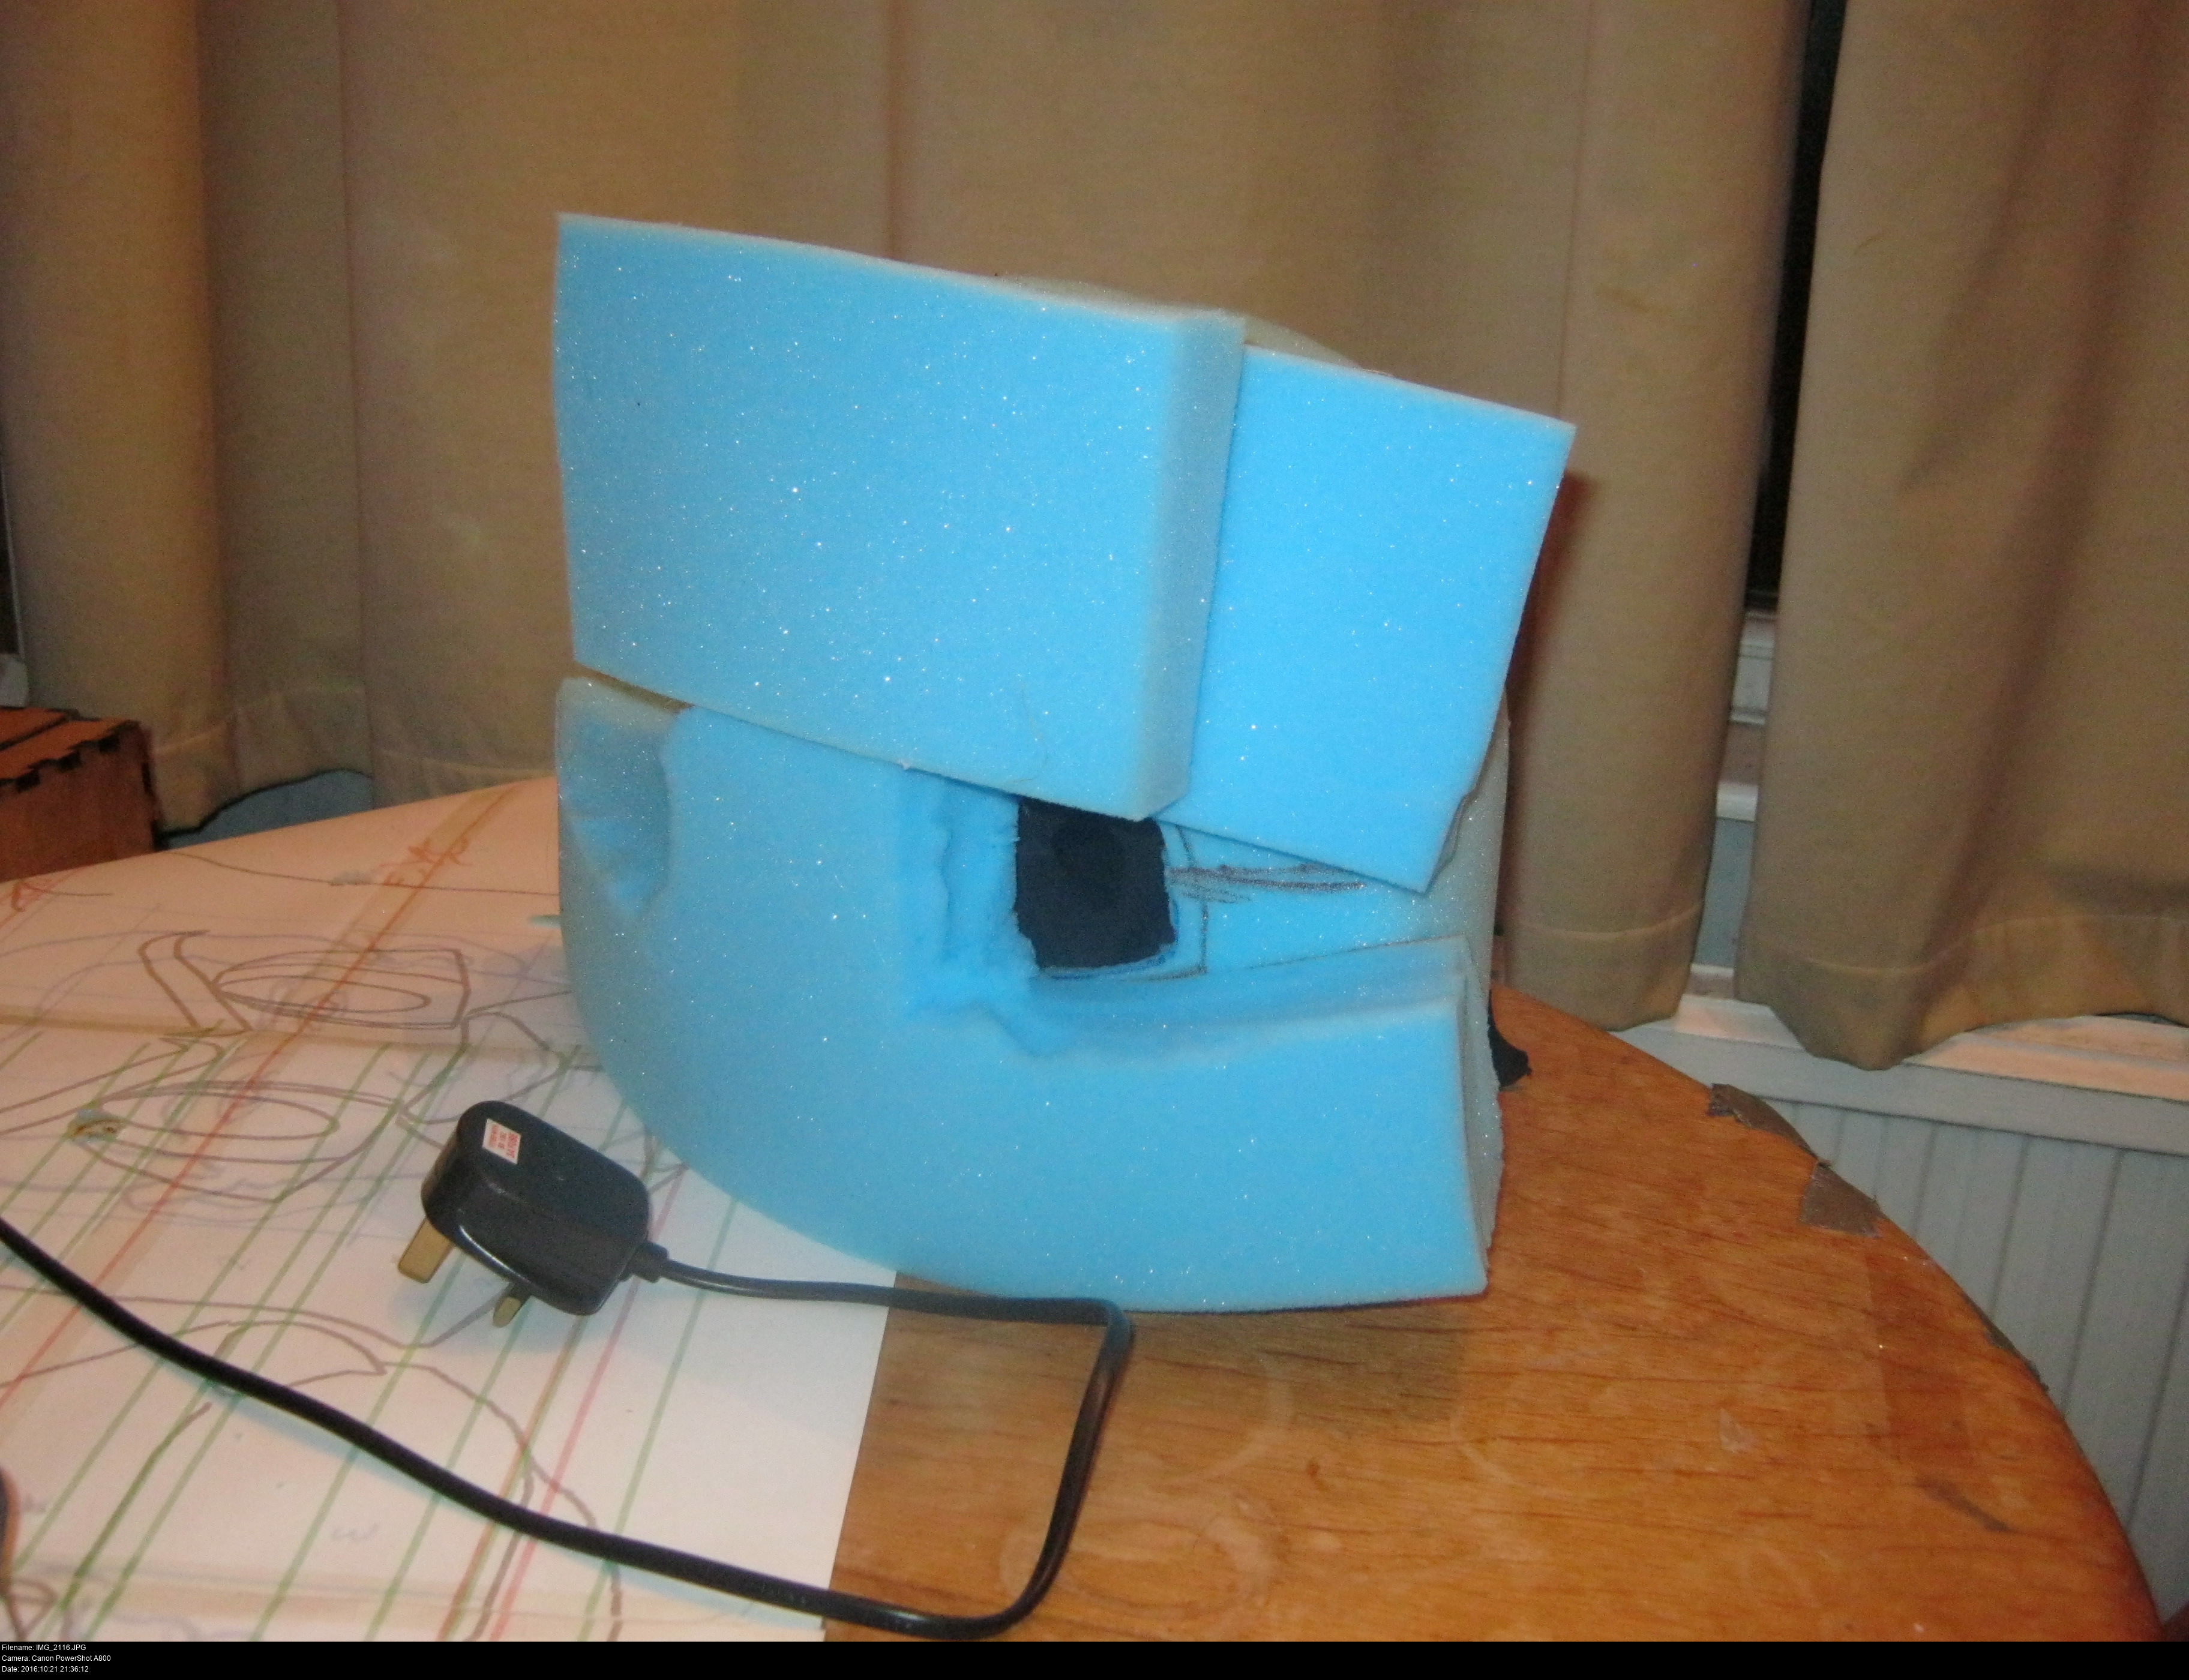
After that, you make bullet/bucket shape out of foam, big enough to be fit and be snug onto your head and then glue the two together.
The measurement around my head was 24 inches, so I'm going to make a 24 inch cylinder out of the thin foam.
It turned out to be a little tighter than I thought. If it deforms visibly when you put it on, it's too tight I think. Making it slightly bigger than necessary and then cutting it down to size might be a good move?
This is my first time using hot glue since doing my Shikamaru ninja boots years and years before. Somehow, me and hot glue have made up and we're a heck of a team now.
Here's how to use hot glue:
Make sure the surfaces are clean and dry.
Make sure your gun is fully heated before working with it. Leave it lying for at least ten minutes on the table beforehand.
Use the stand and leave it on a protected surface. The tip is constantly going to ooze glue.
Wear gloves. You'll almost certainly find the need to touch a gluey surface at some point and the portection is essential. Also, there's a chance that your cheap-ass gun will expose you to sudden heat when you don't expect it.
Be prepared for stringy bits everywhere.
Touch the glue gun tip to the edge you're gluing.
Gently squeeze the trigger inwards progressively to push the glue out.
Dab the glue gun tip on the work to try and catch the last of the glue that'll ooze out after you've released the trigger.
Apply constant pressure to the surfaces for a few minutes after applying the glue so that the bond is firm. Just because the glue isn't scalding, doesn't make the bond is good. Some people seem to be able to whoosh around their foam like a demon, applying hot glue left, right and centre. I don't know how they do it; I need to coddle every seam one by one.
Be careful and let the gun cool down properly after you've finished using it.

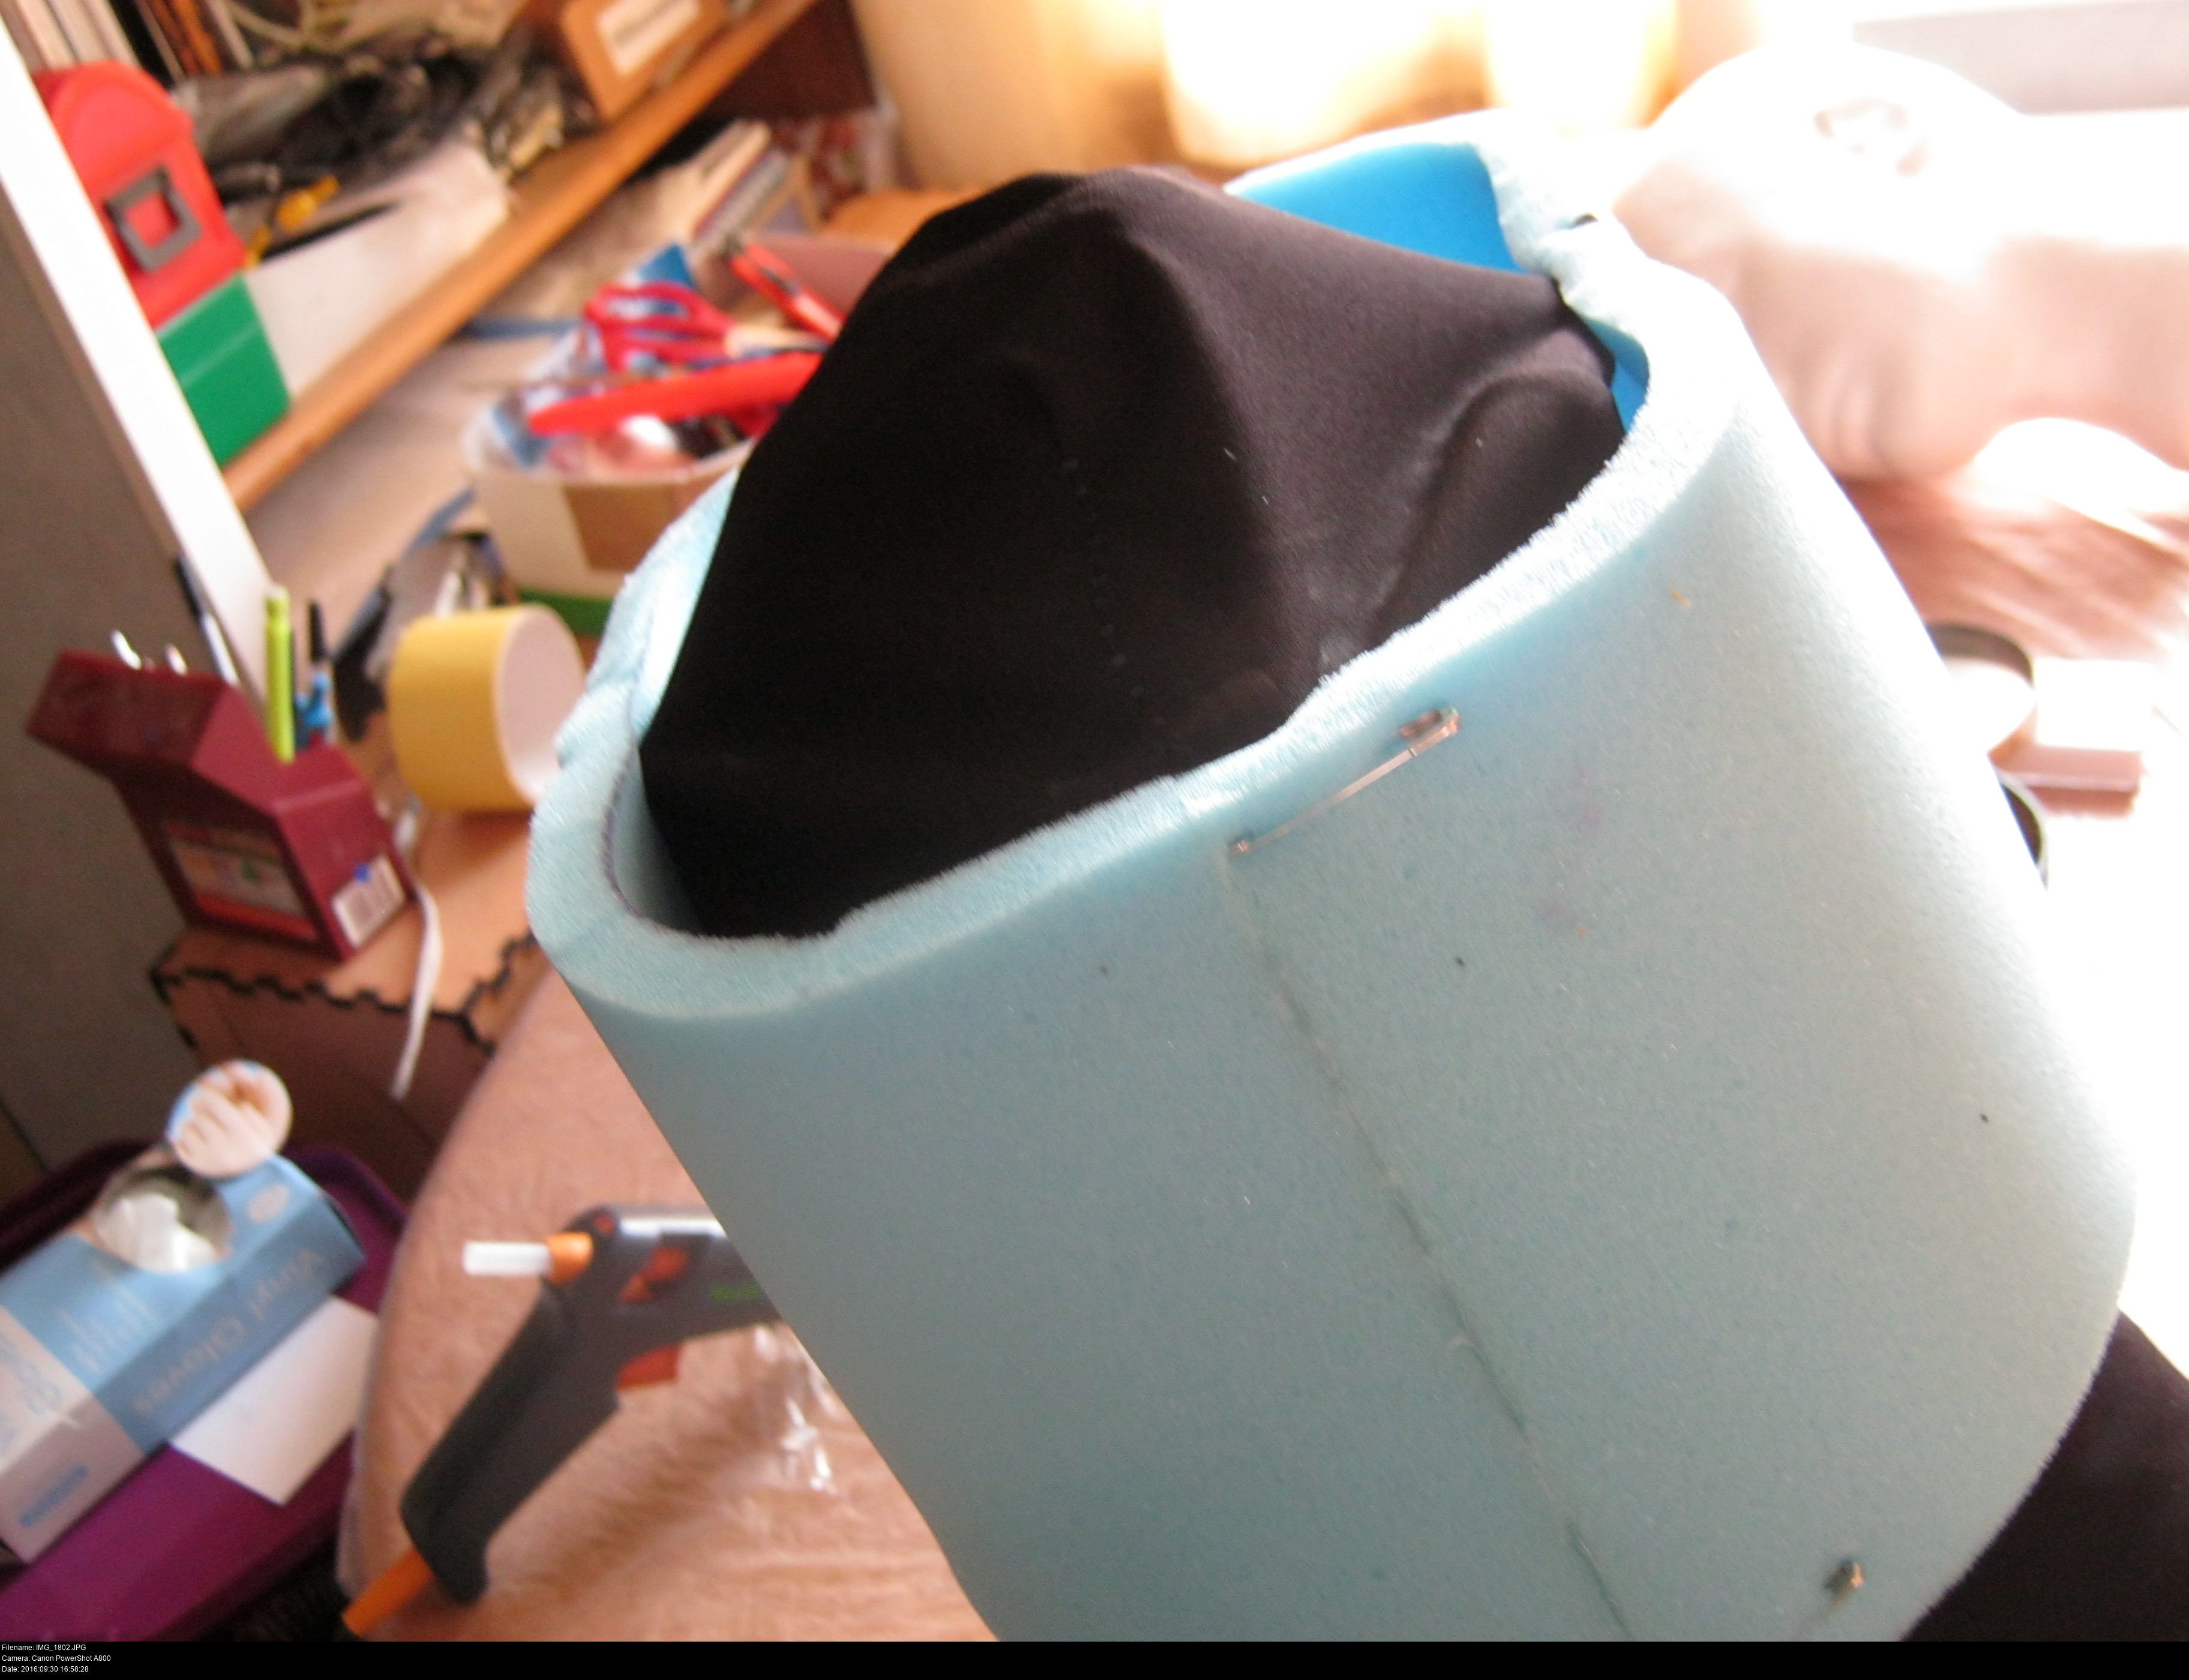
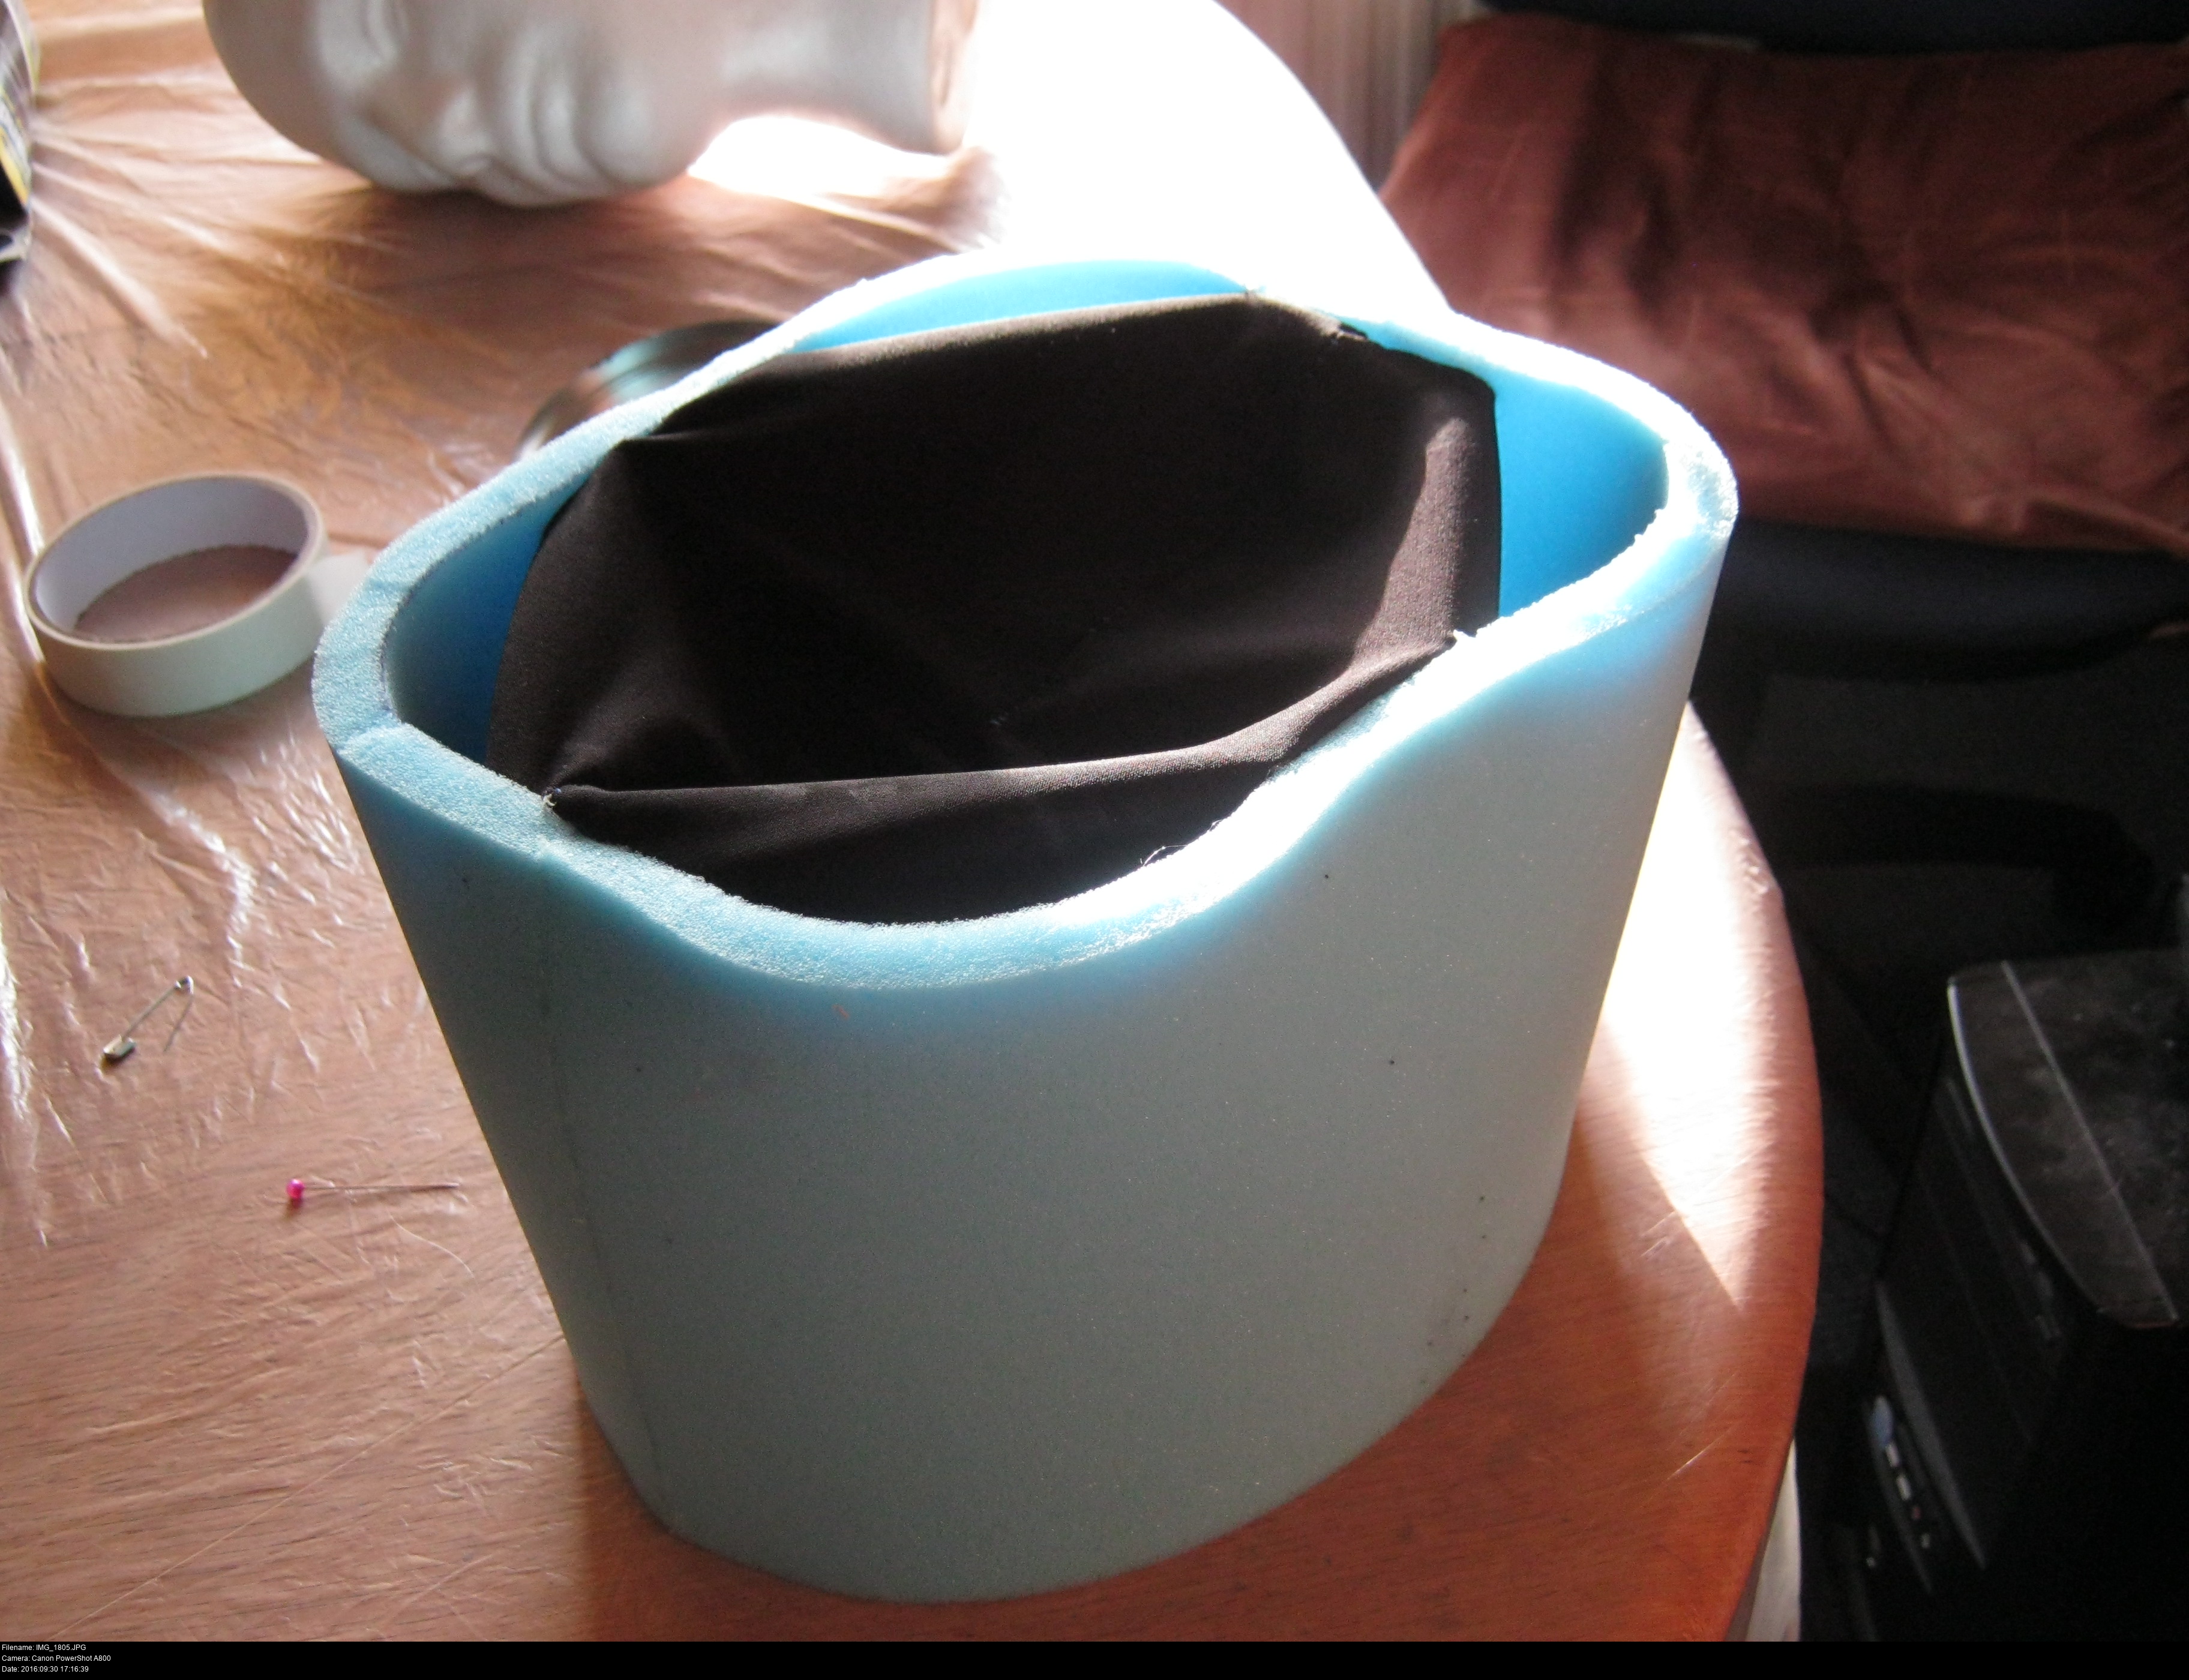

Now I can combine the cylinder with the balaclava adventure-game-style to produce a balaclava-cylinder. I had to pin the balaclava to the cylinder first before gluing otherwise I'd end up with a big raggedy mess on my hands. I glued it at four corners before gluing it all the way around at the top of the cylinder, leaving enough loose fabric for the top of my head.

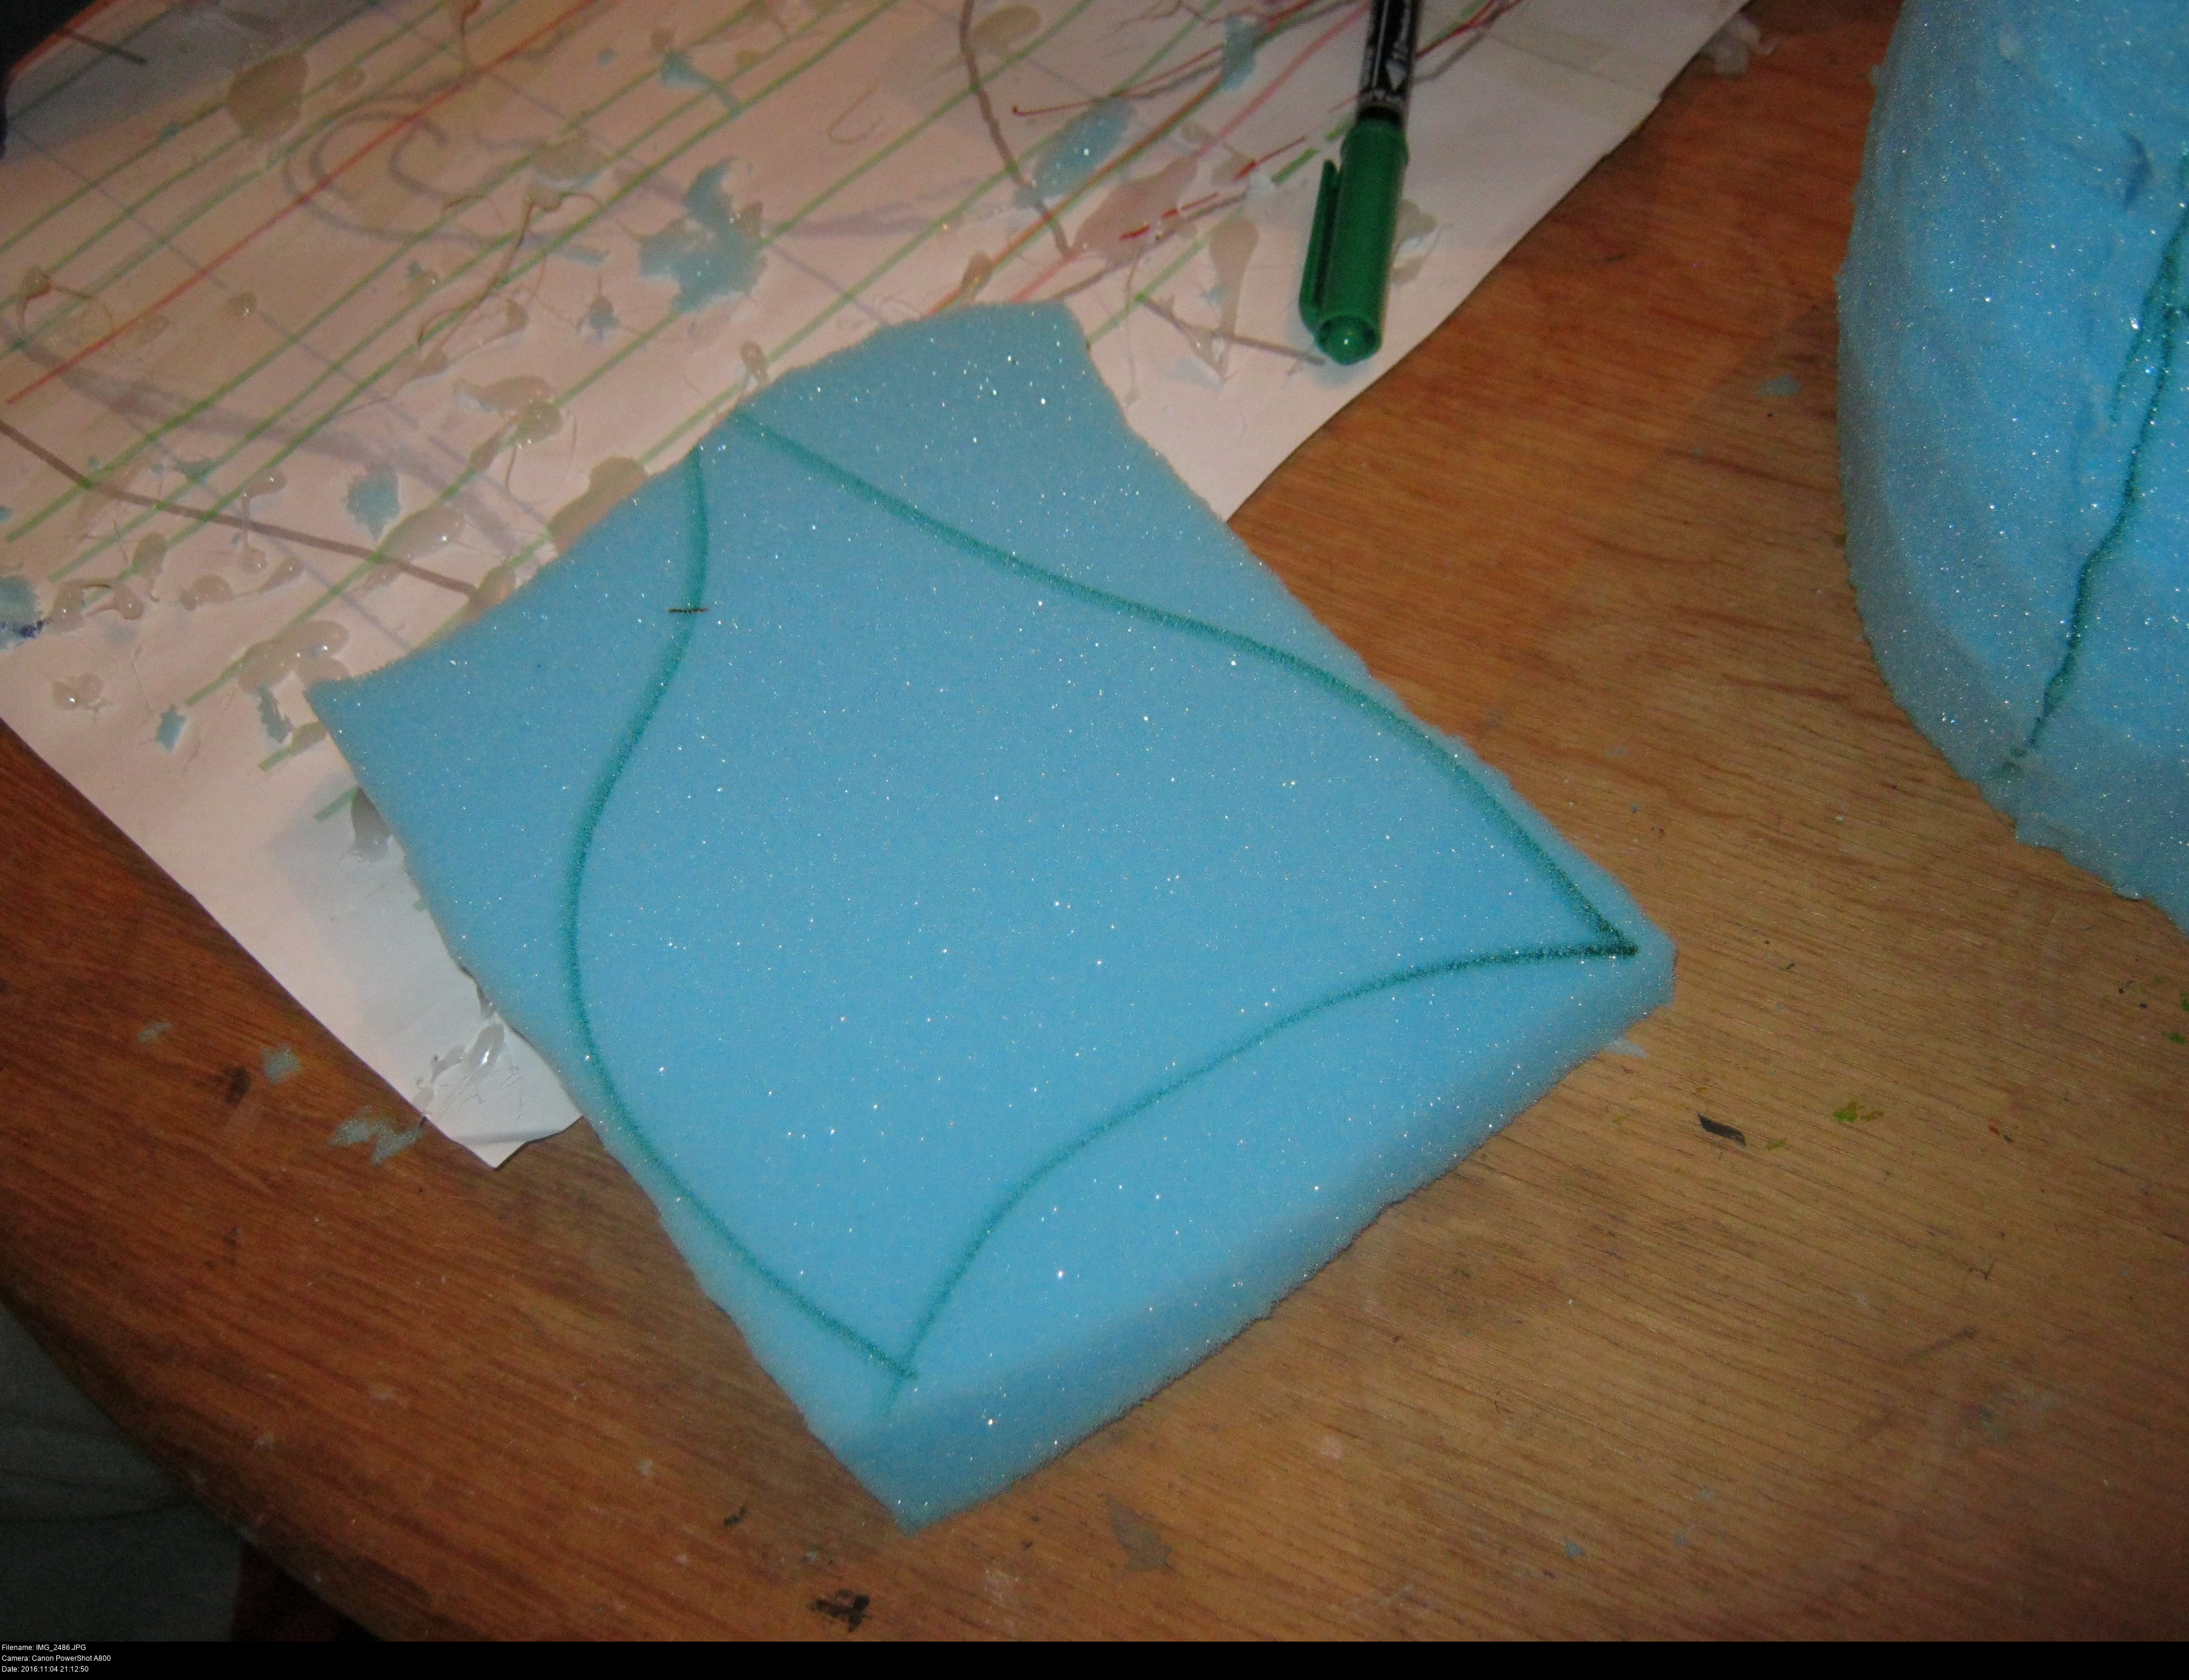
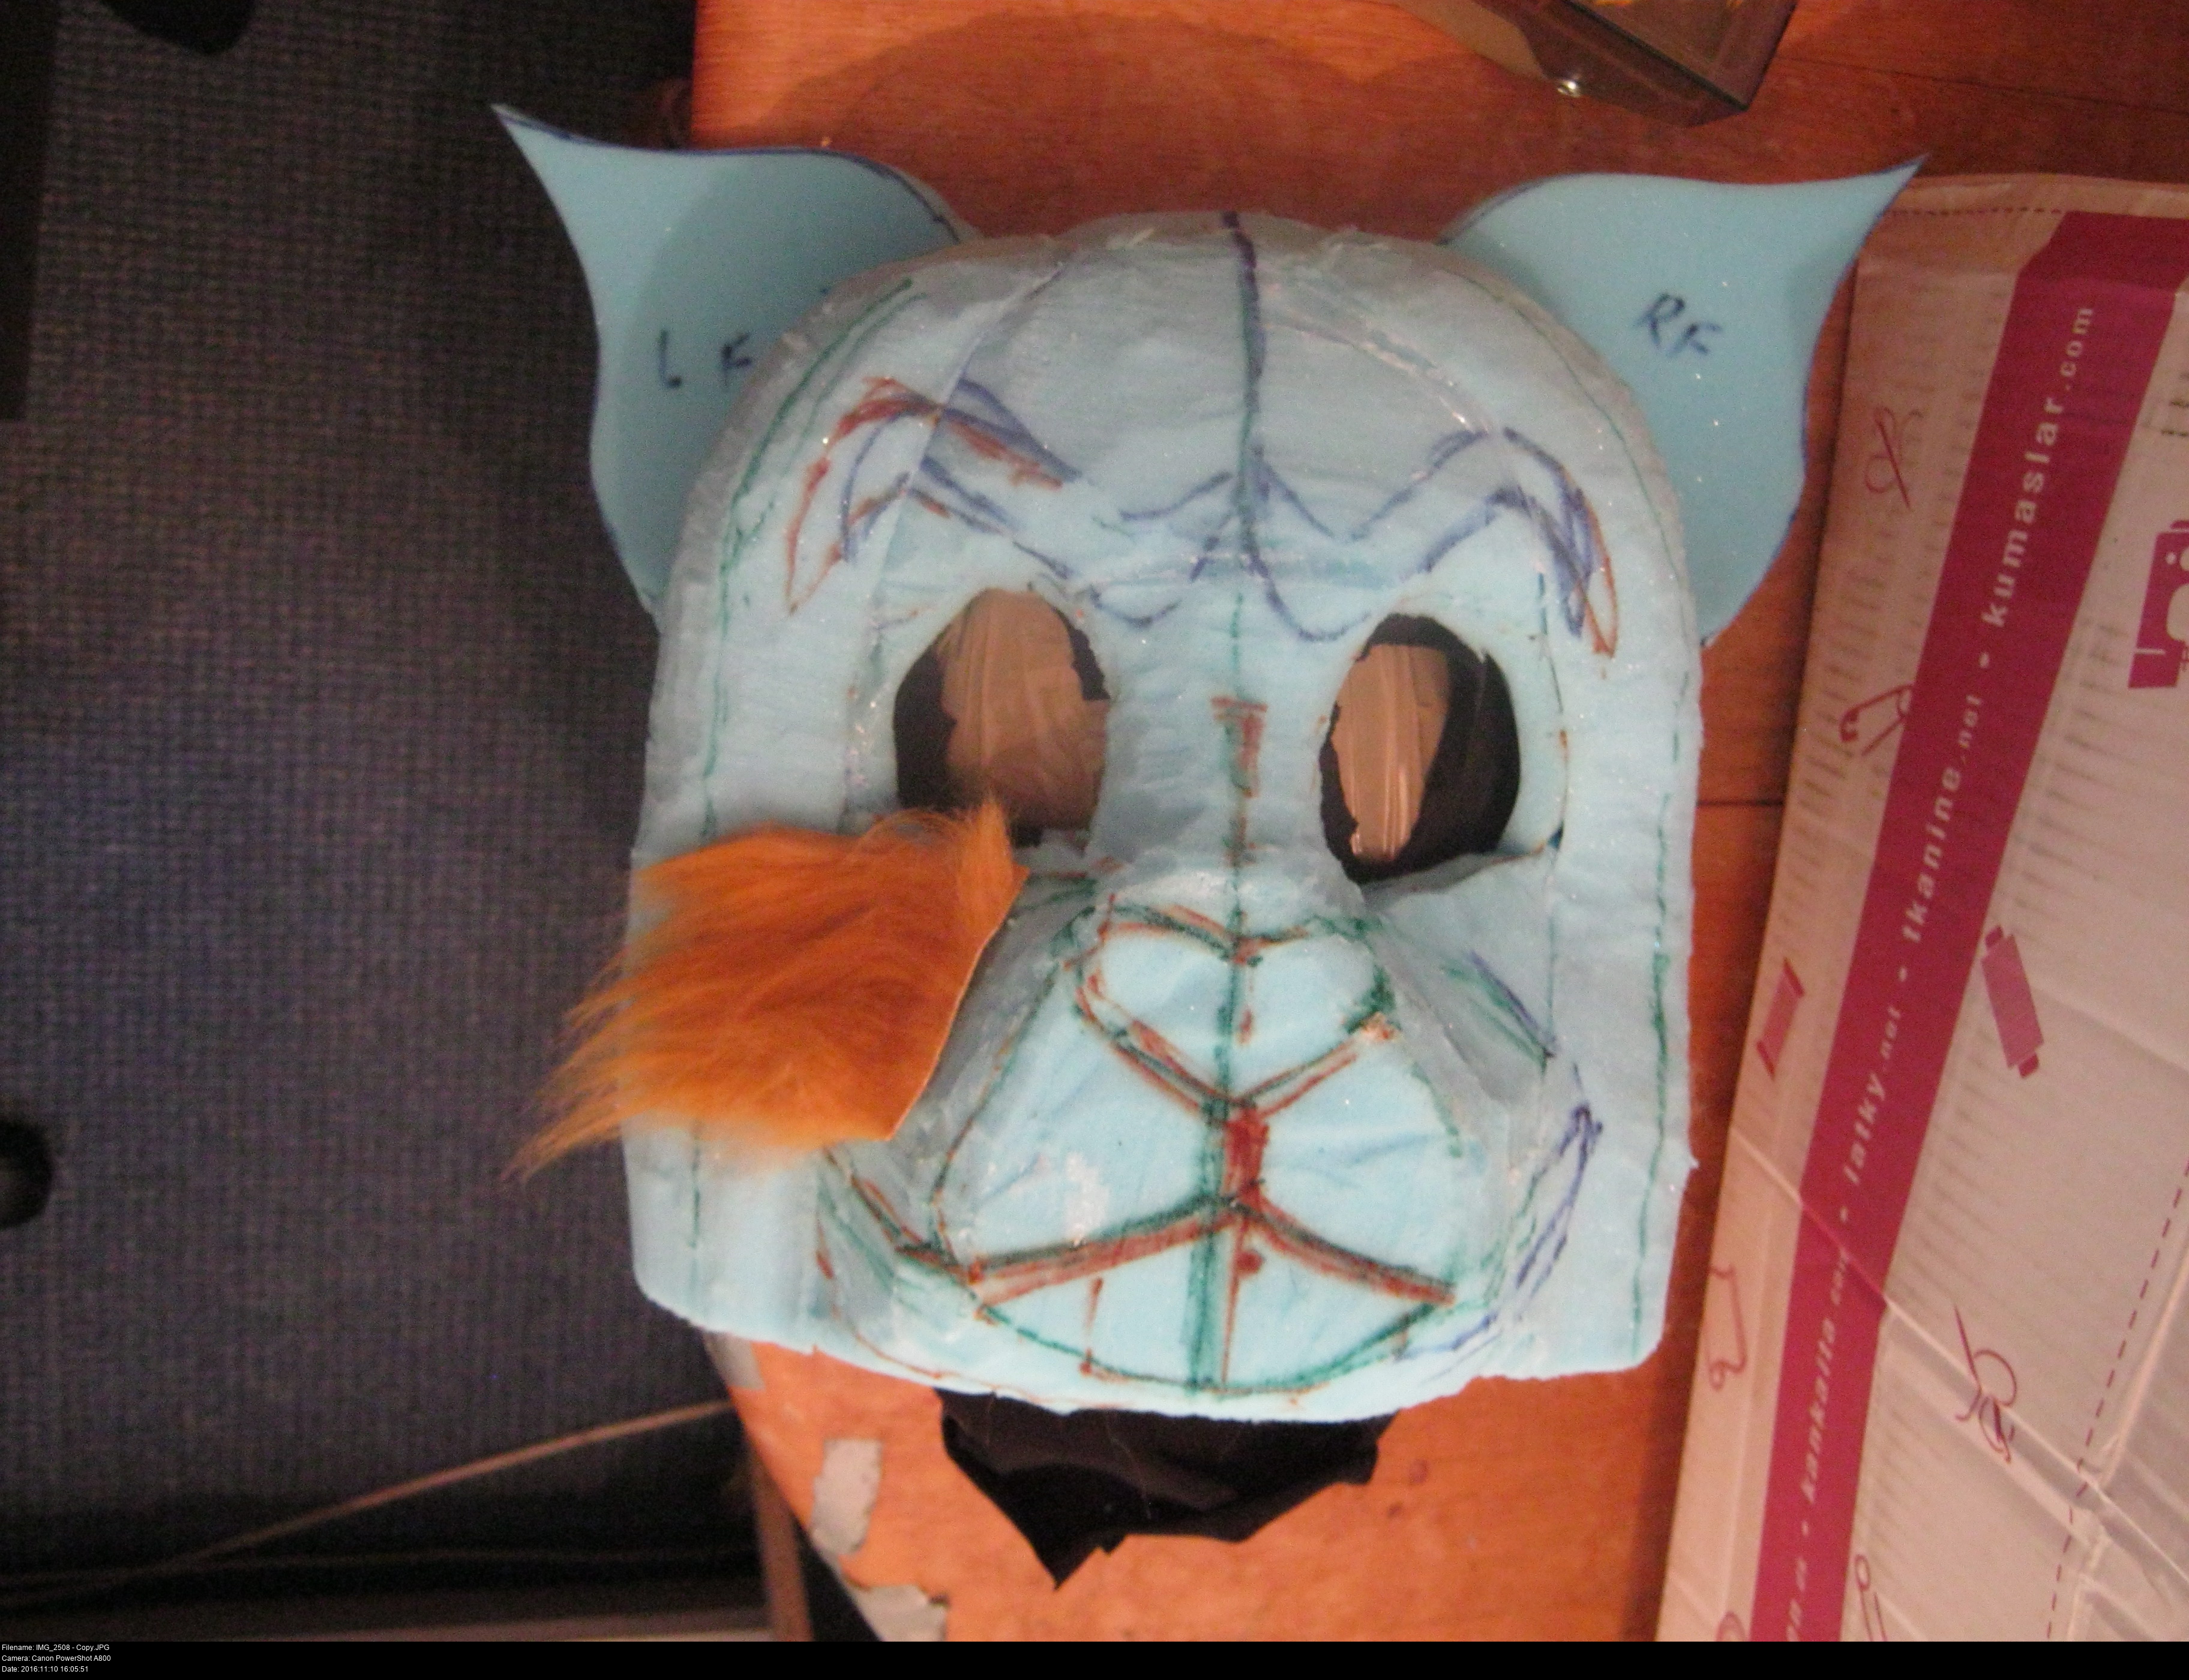
The lid to my foam cylinder is a long rectangular piece that stretches from the front to the back of the head. There's two more rectangular pieces on the sides and four triangles to fill in the four corners.
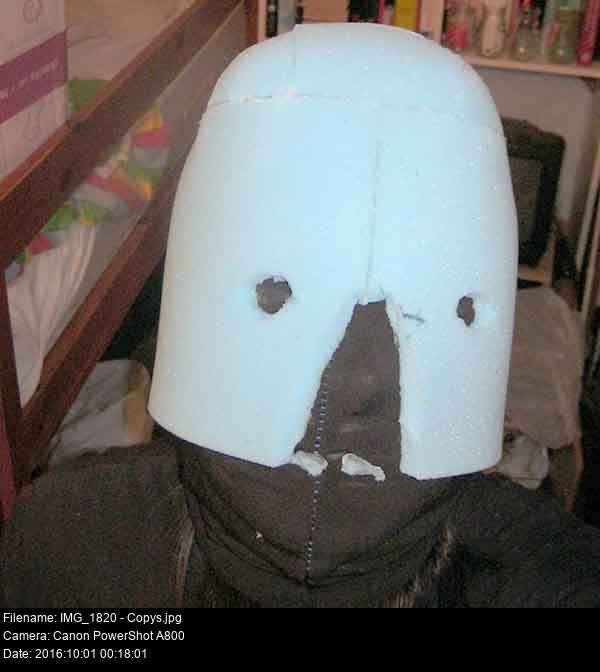
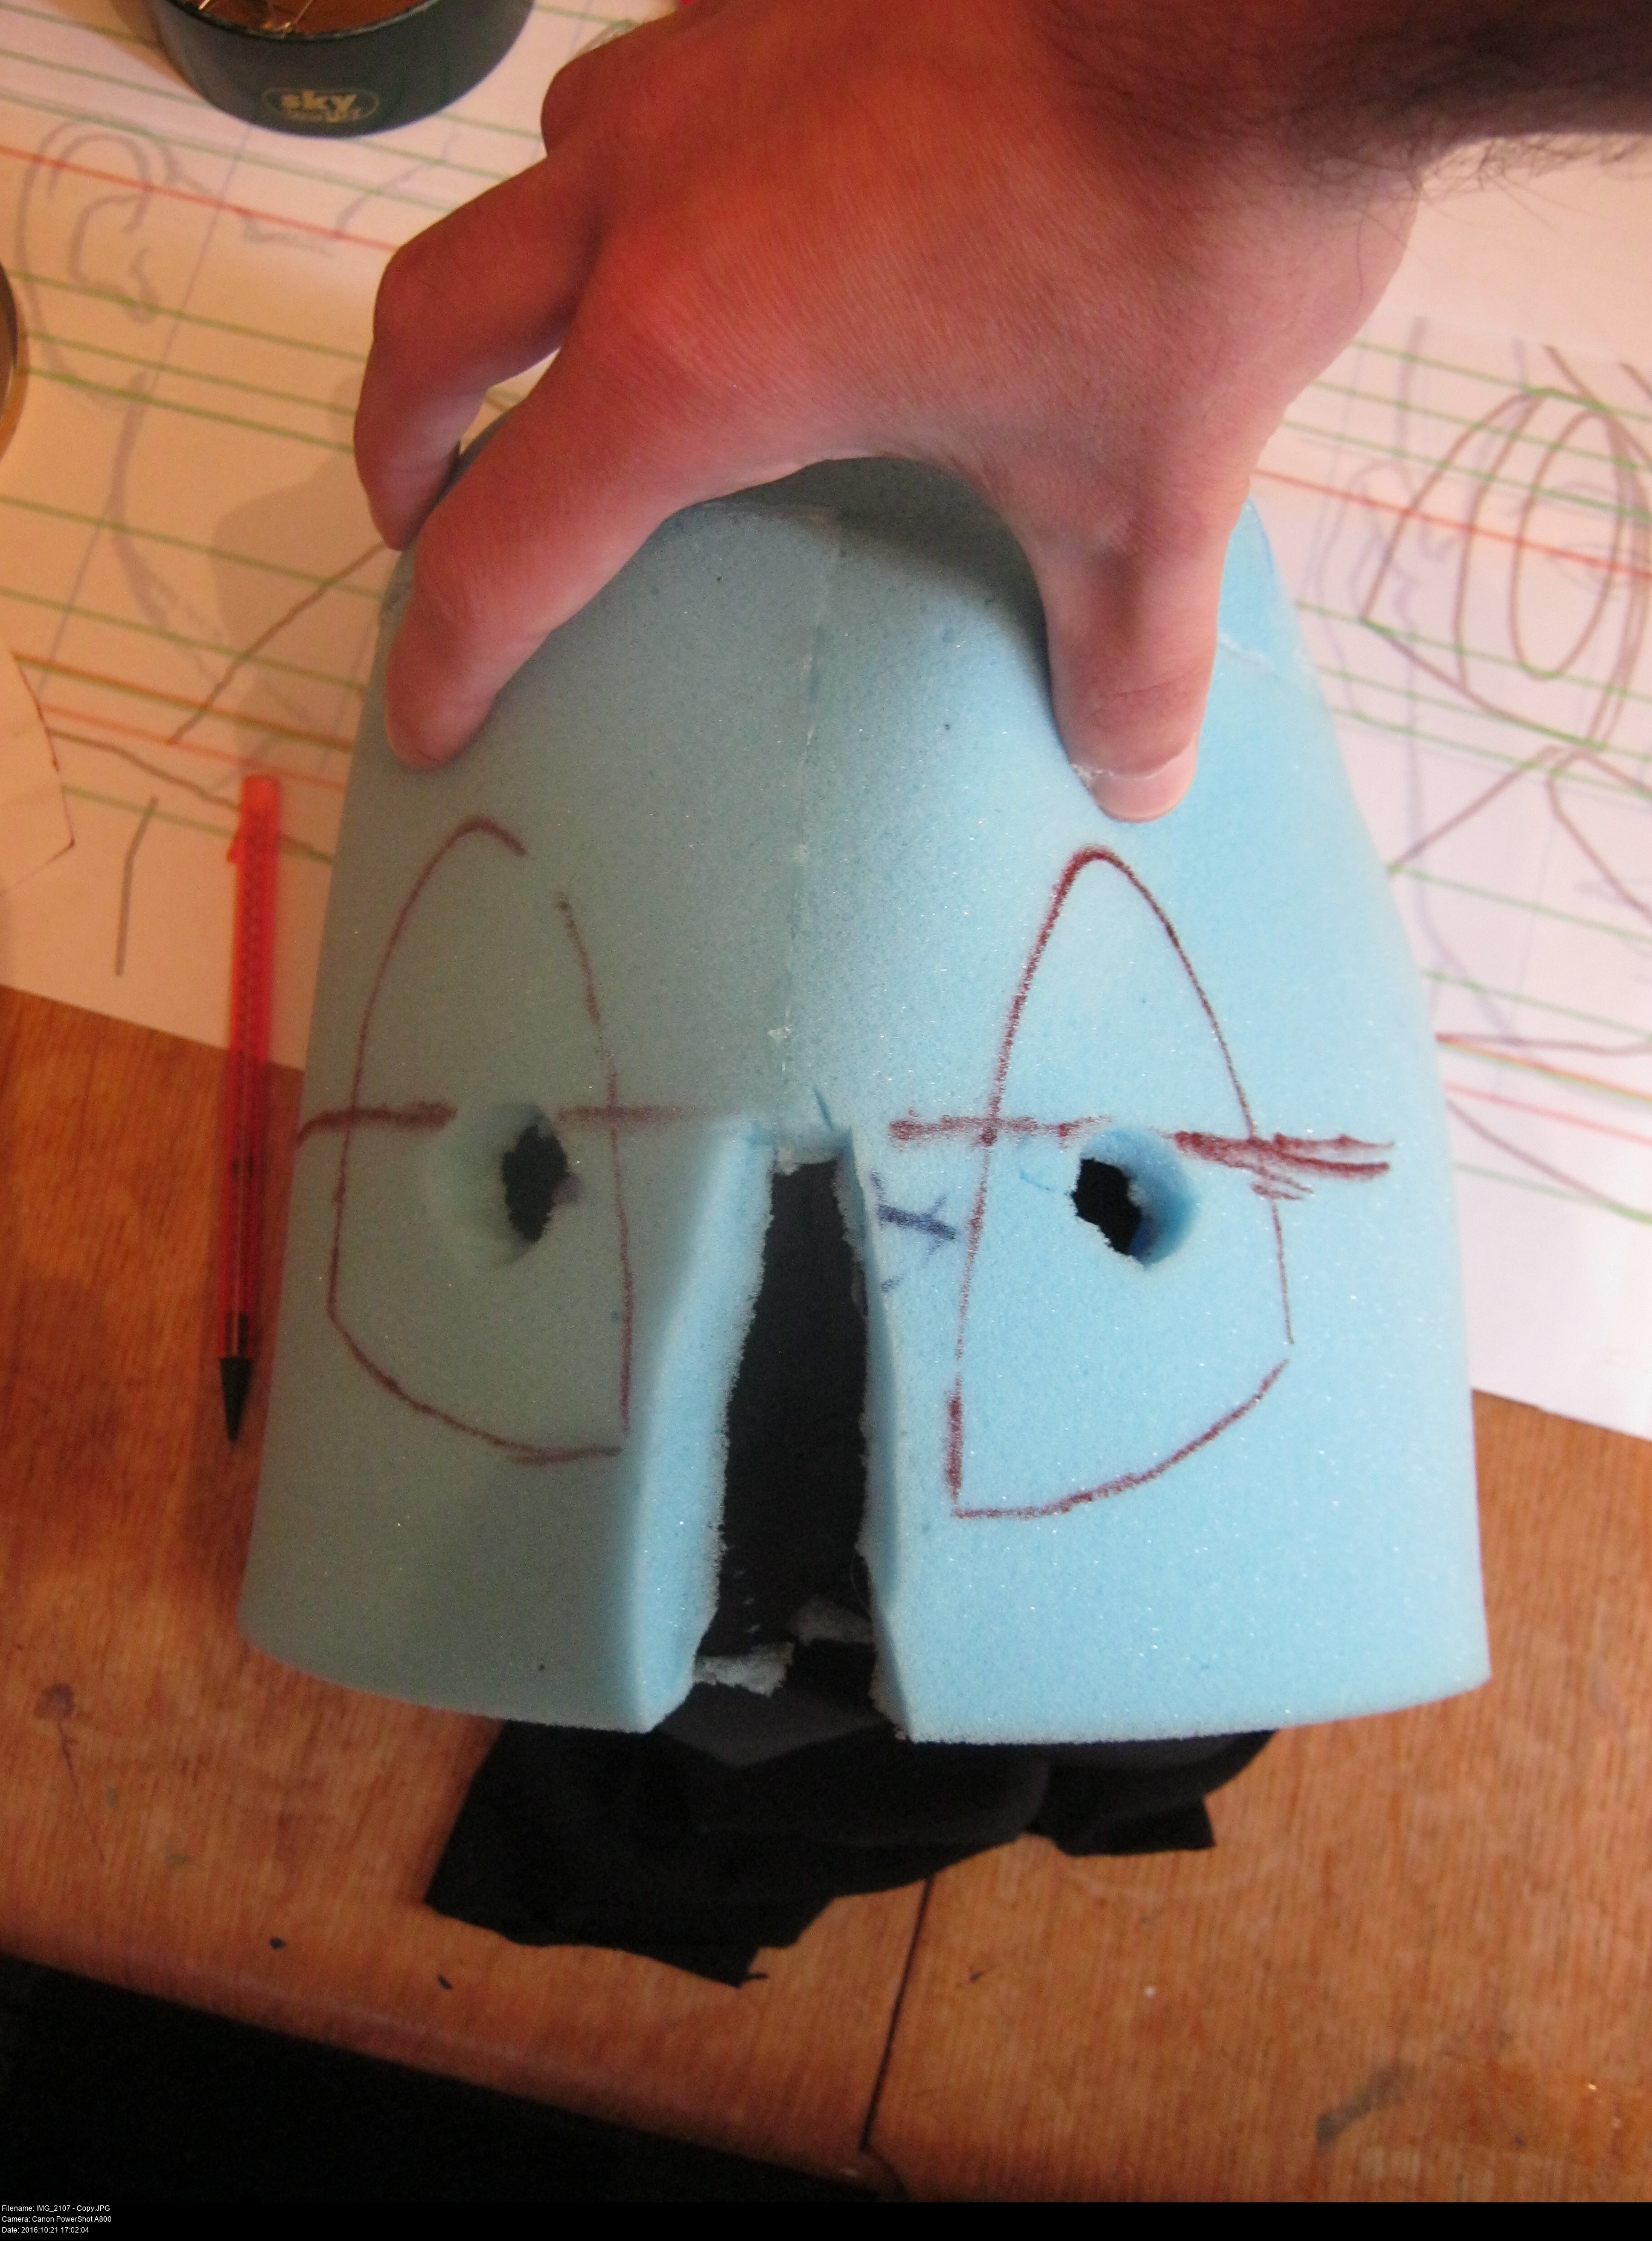
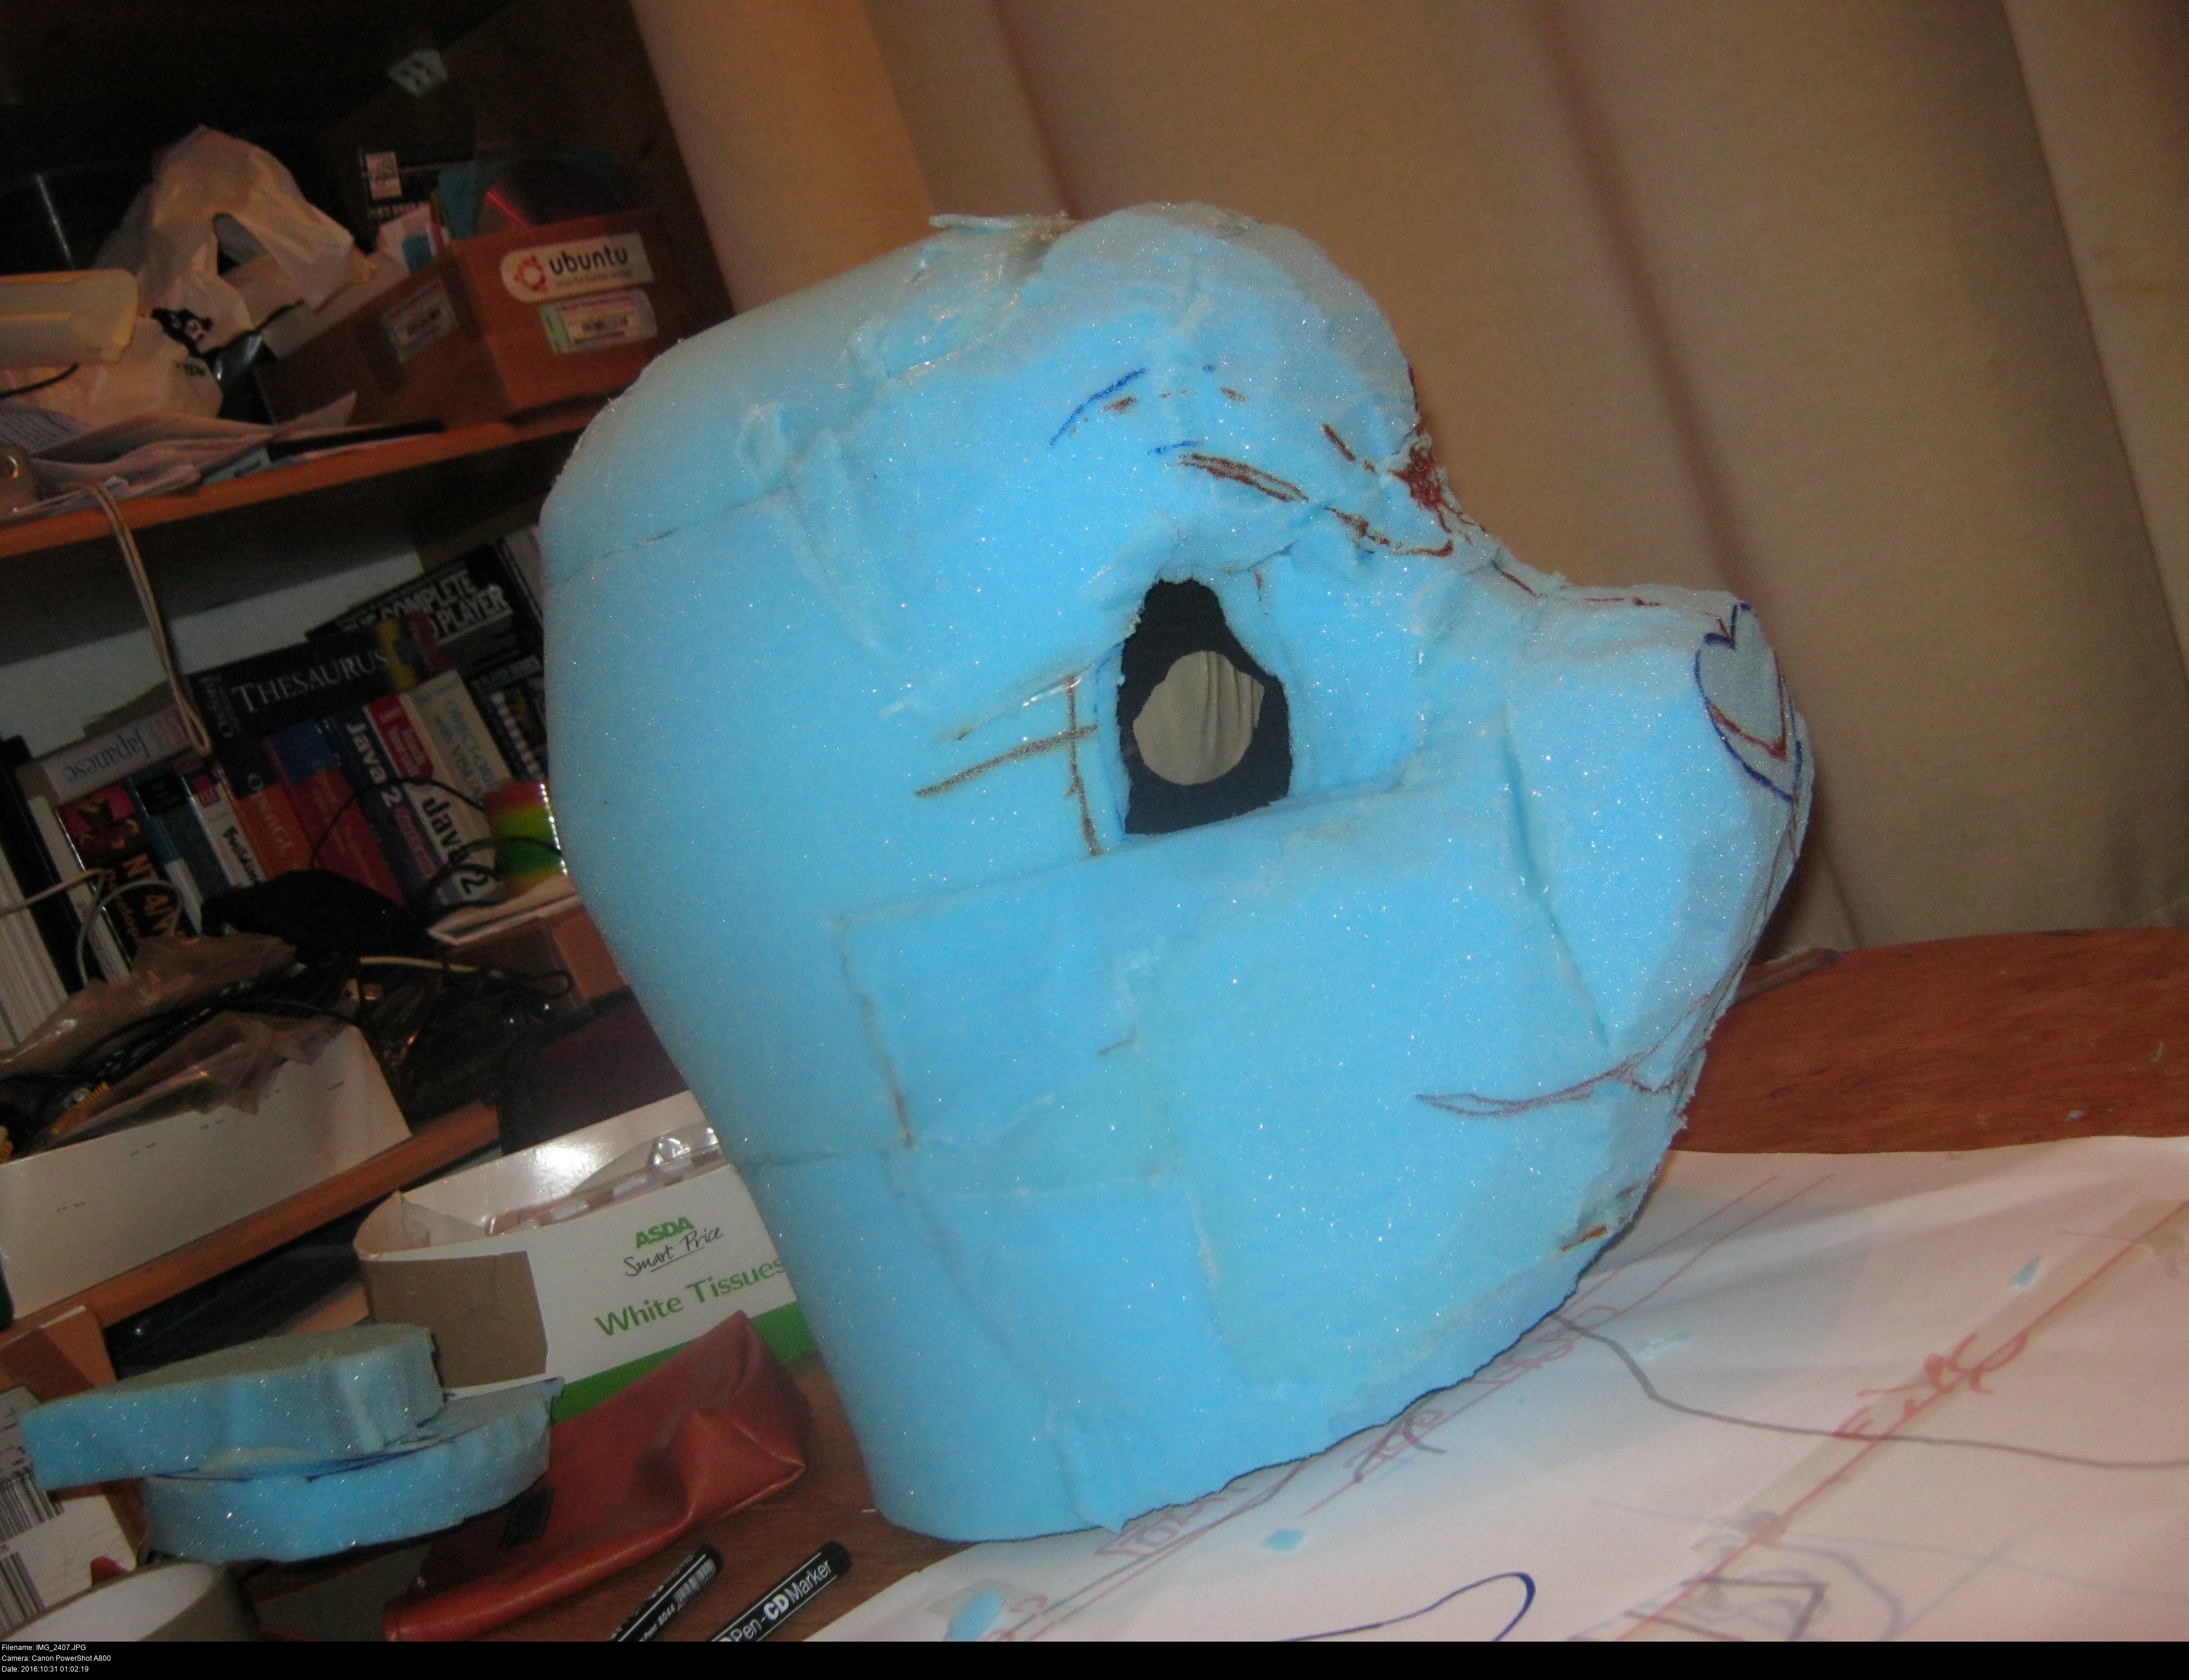
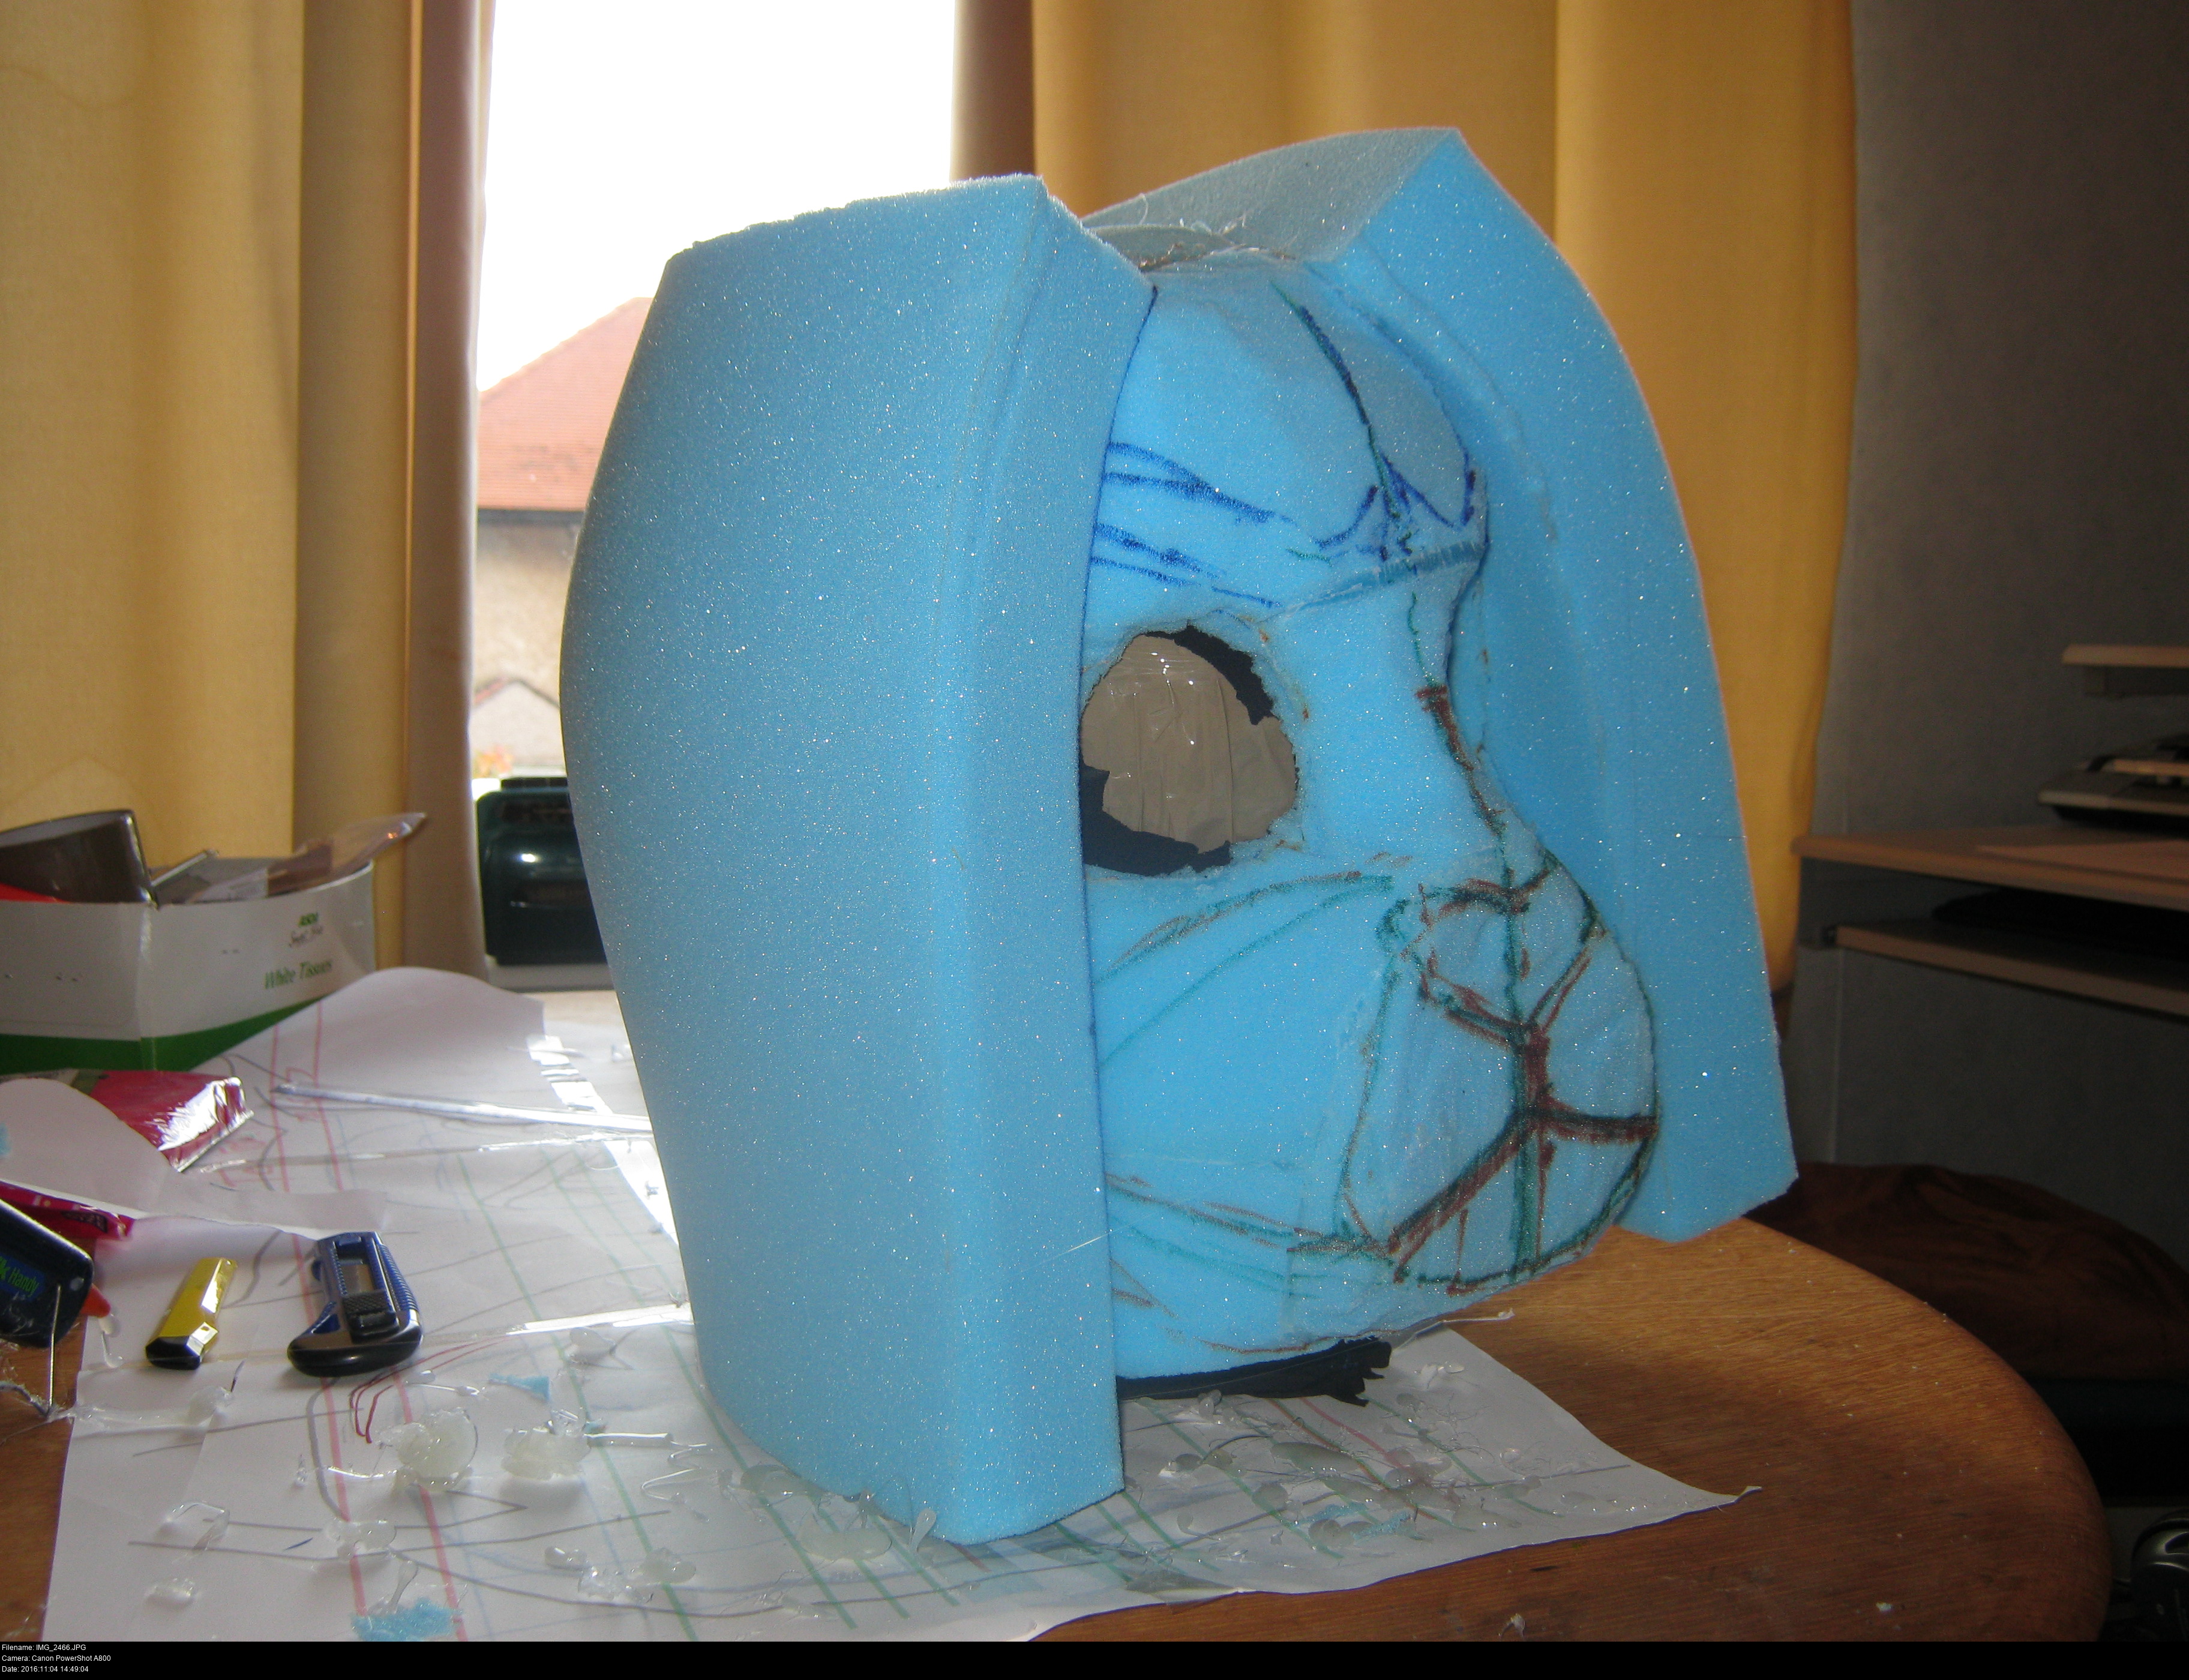
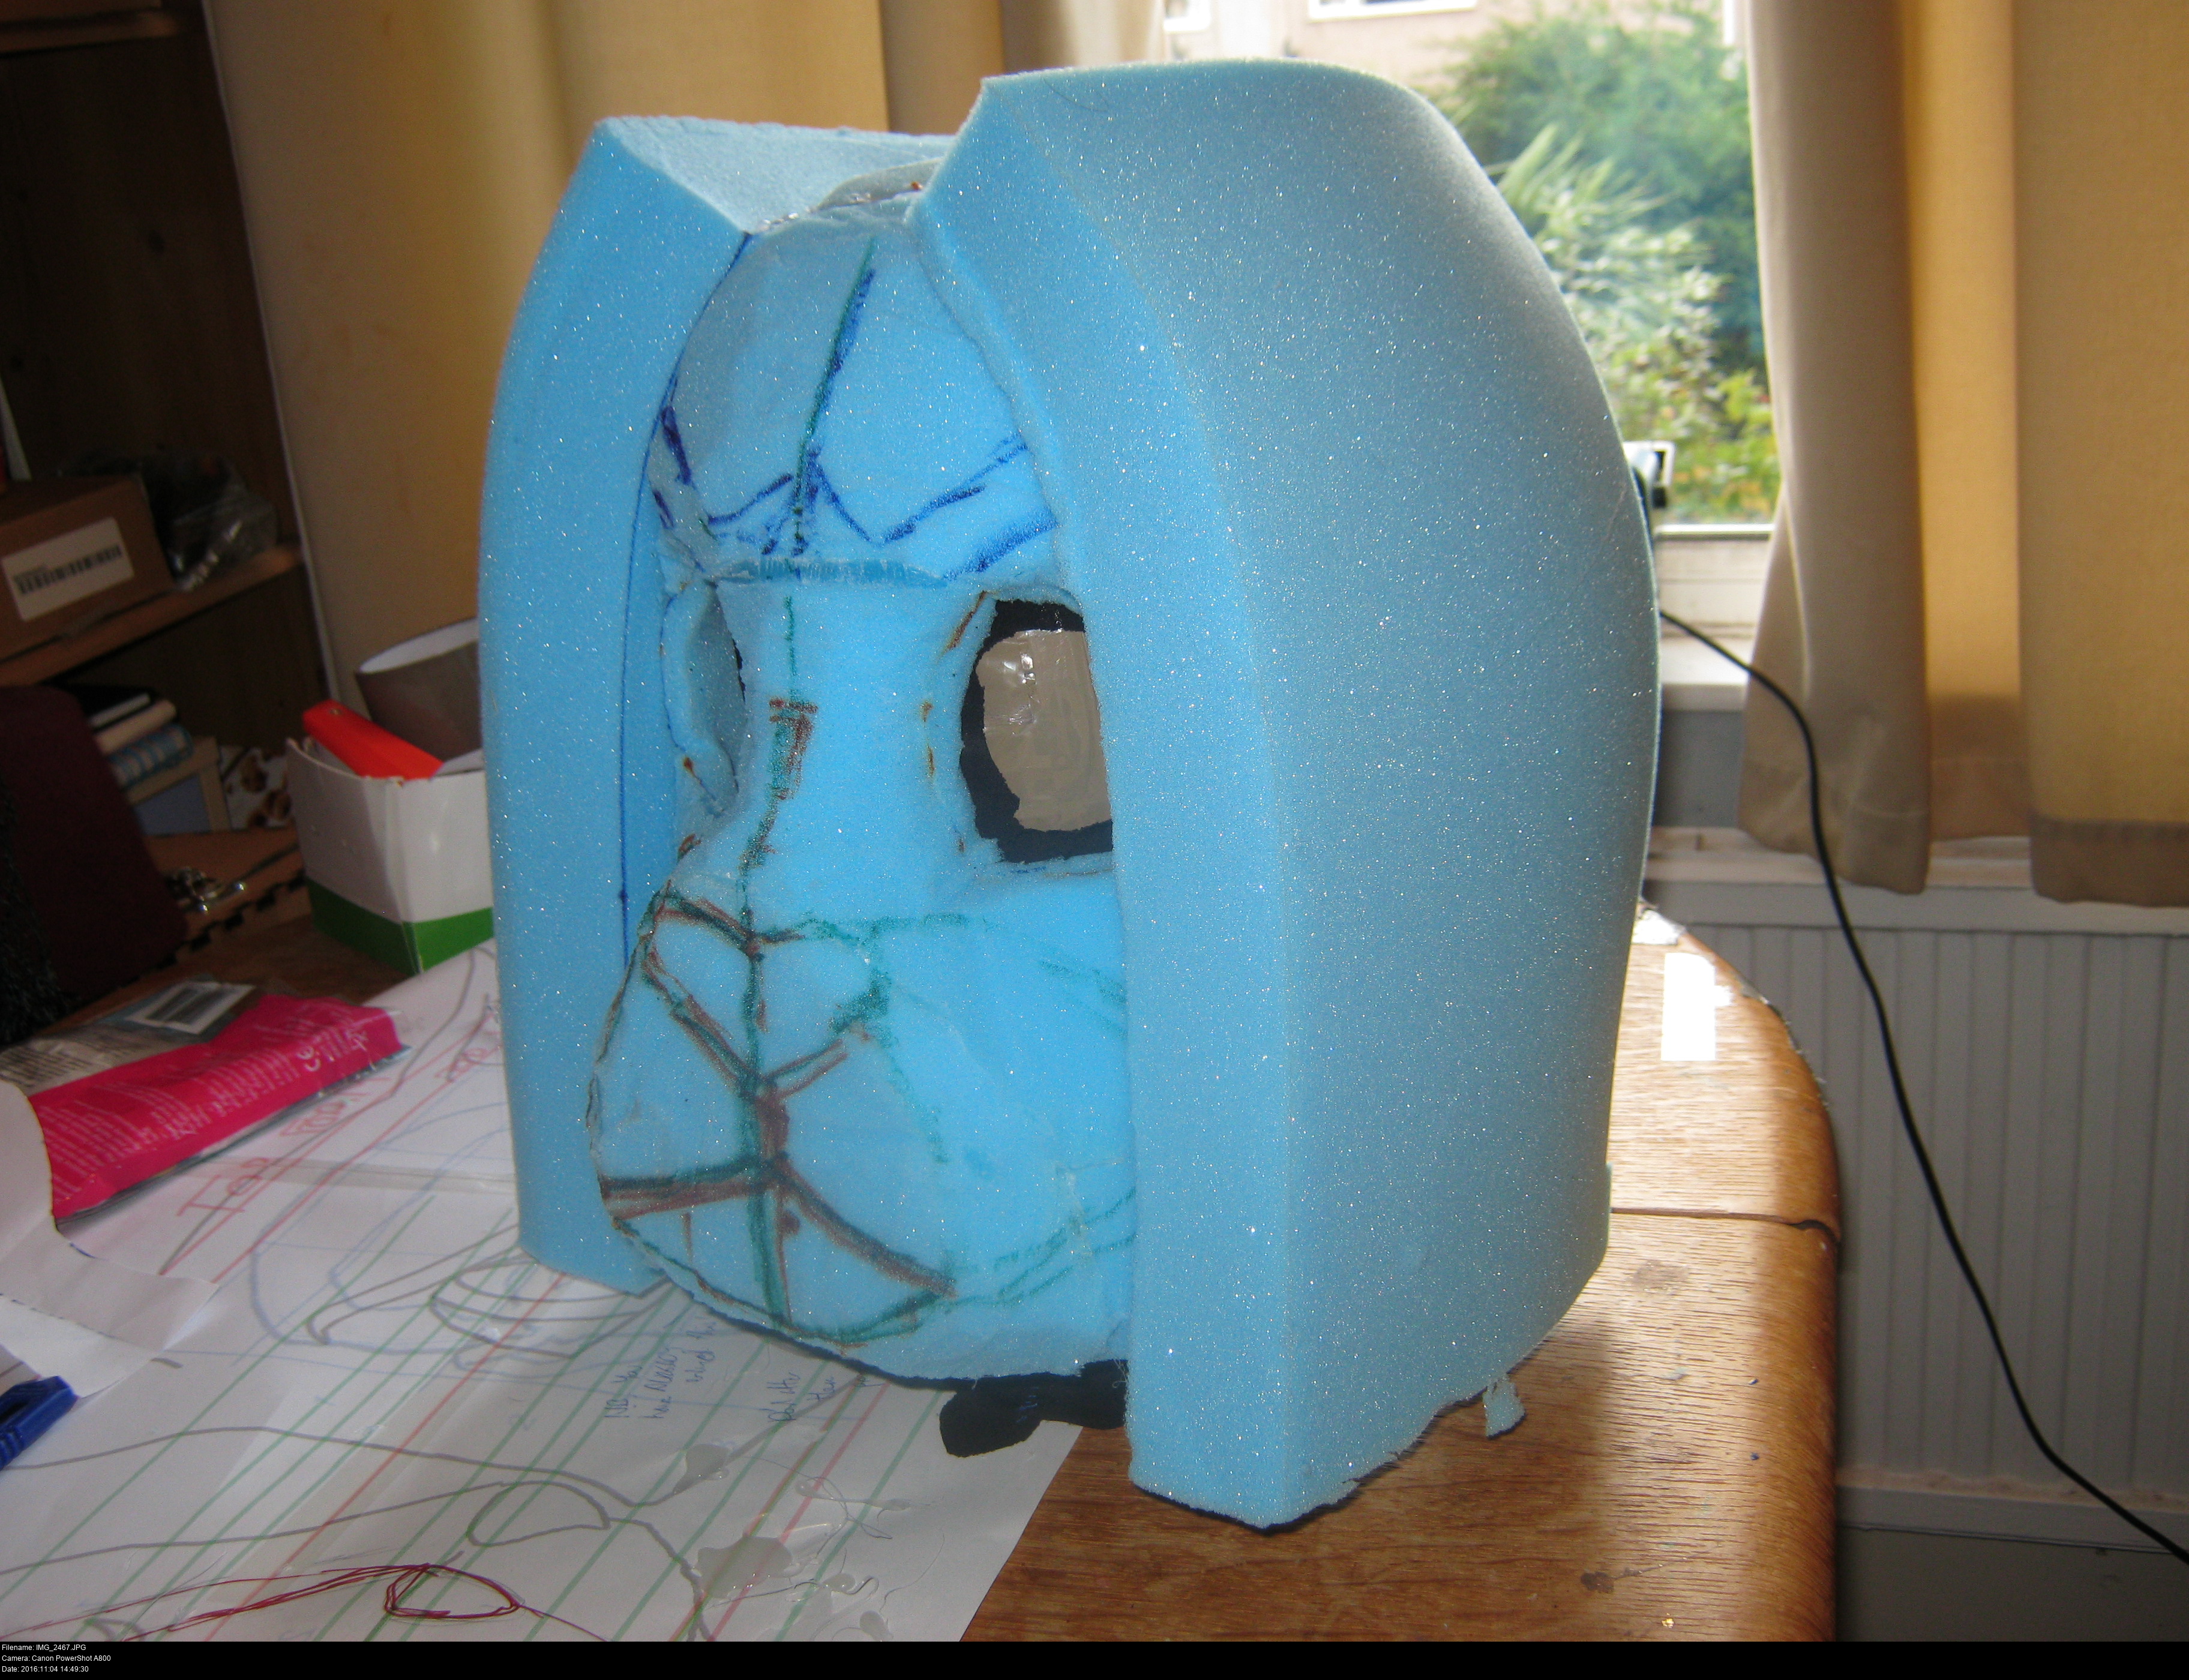
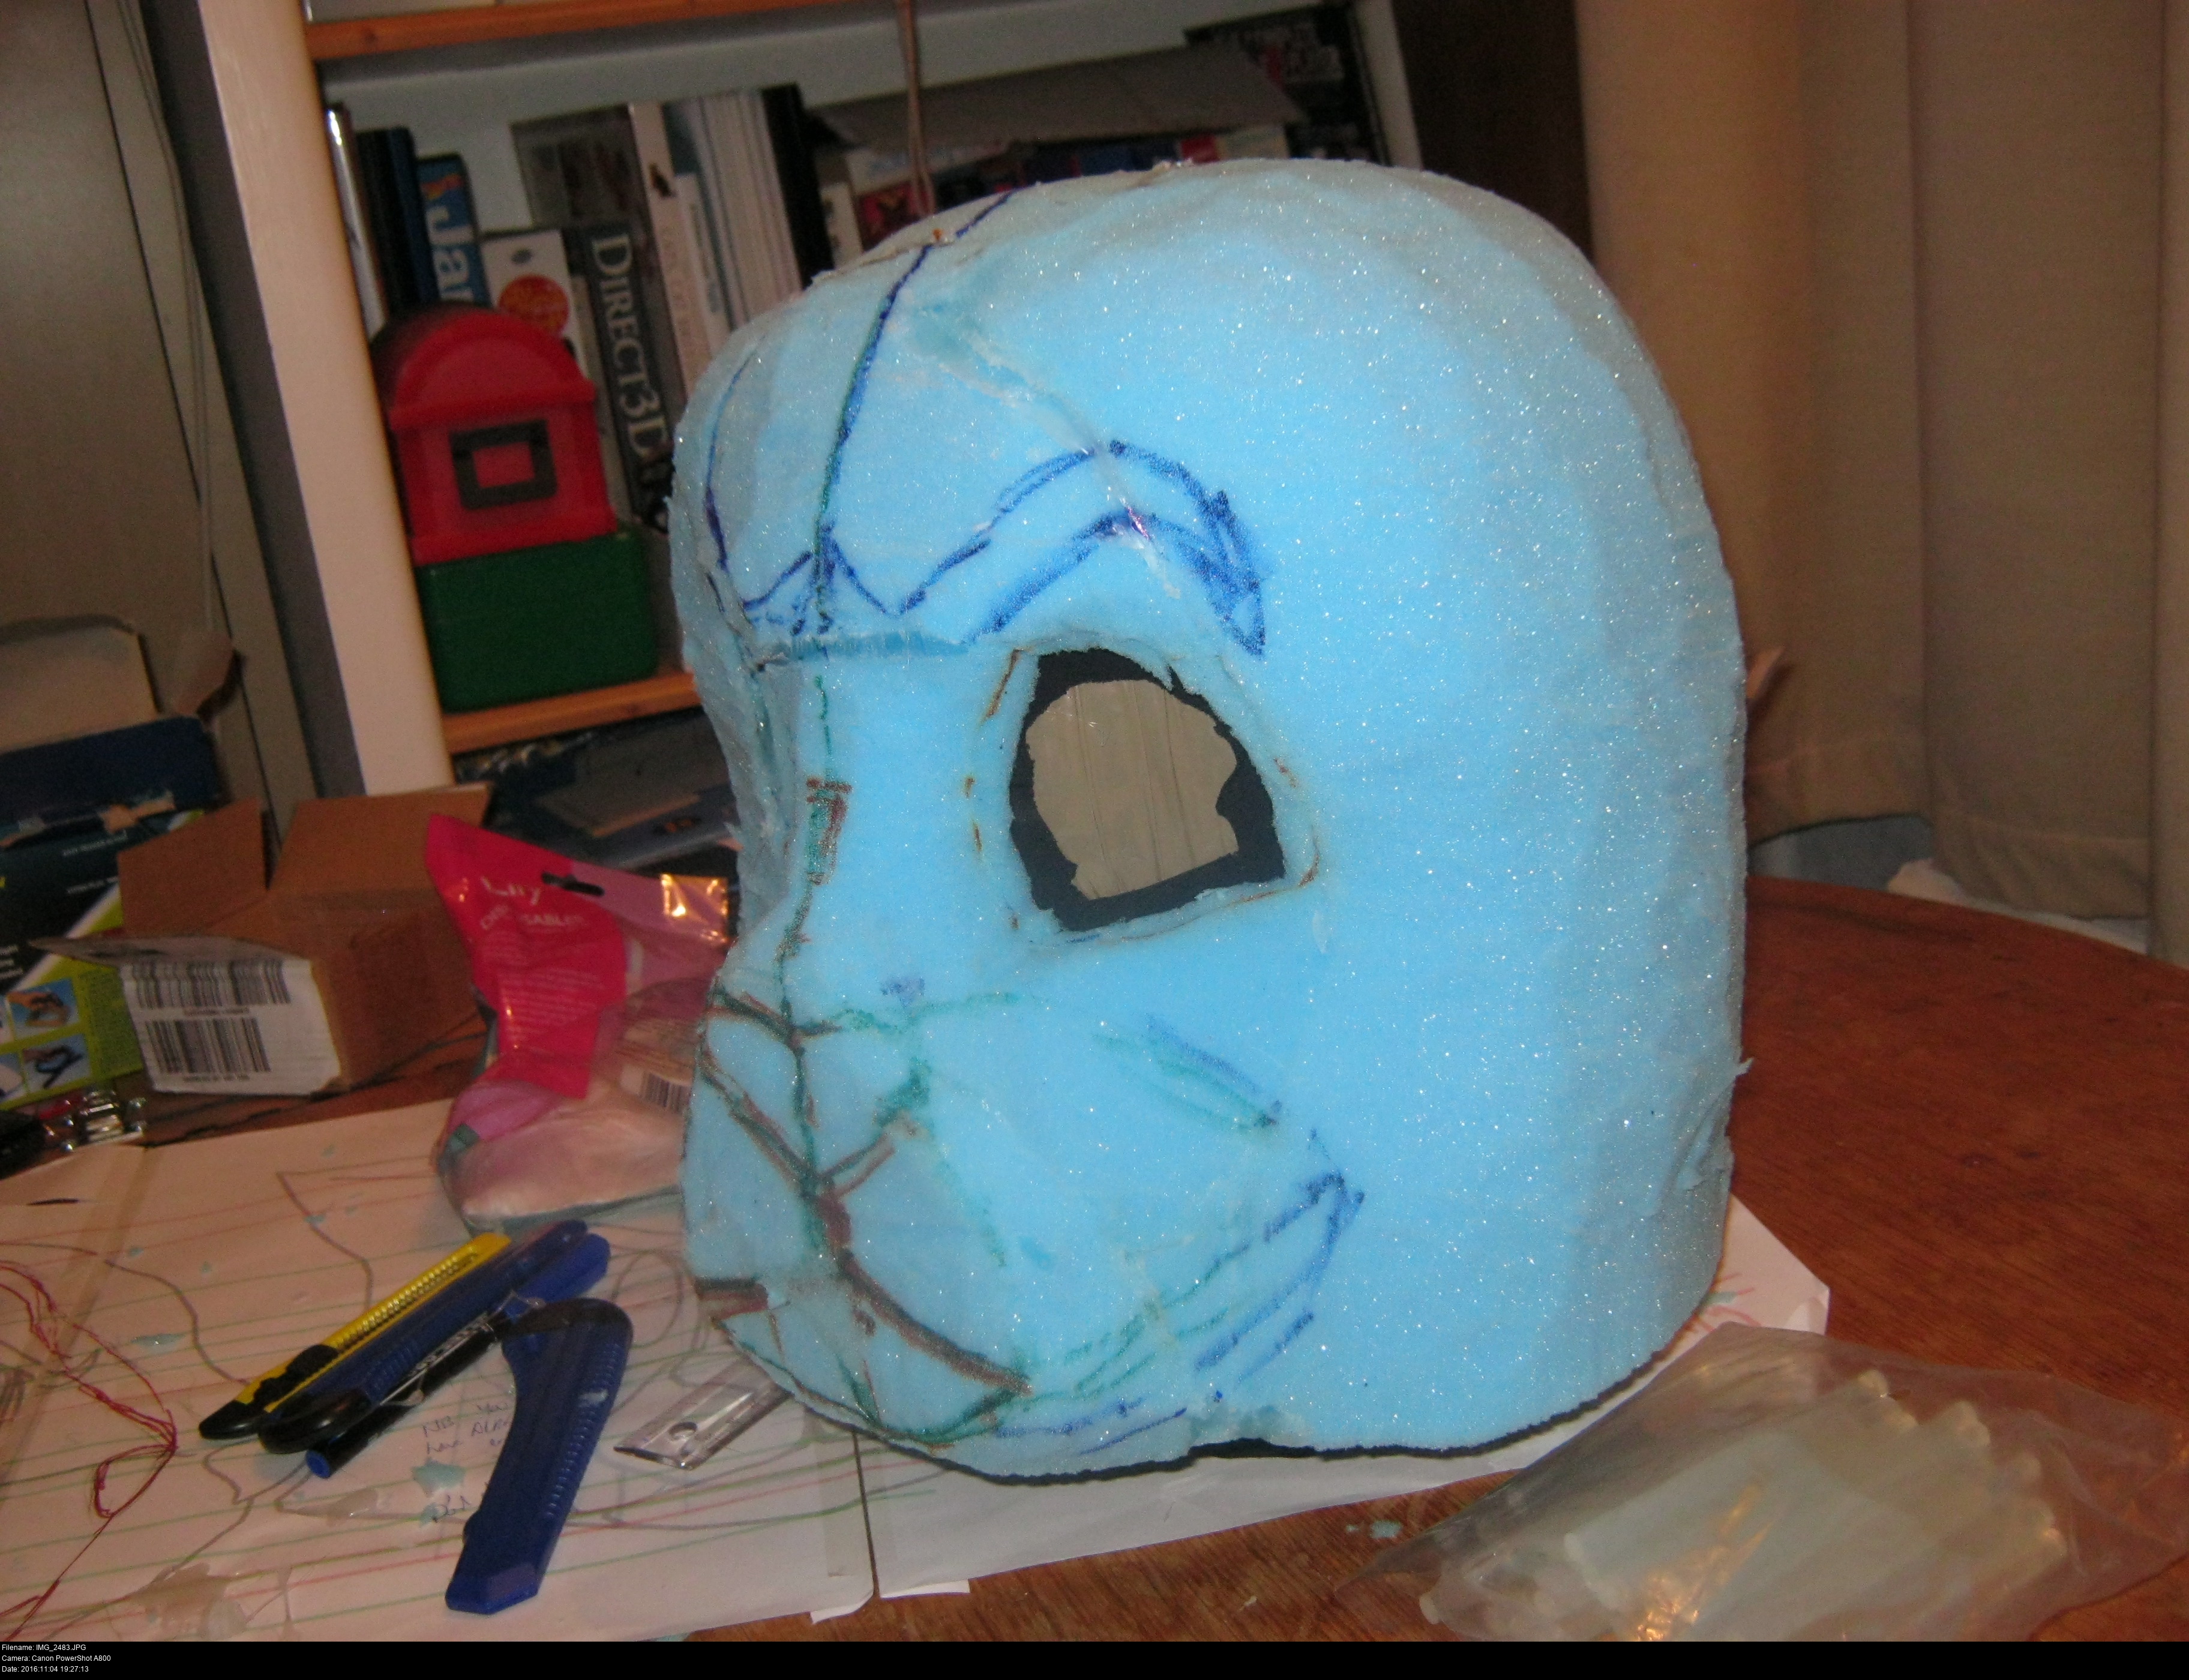
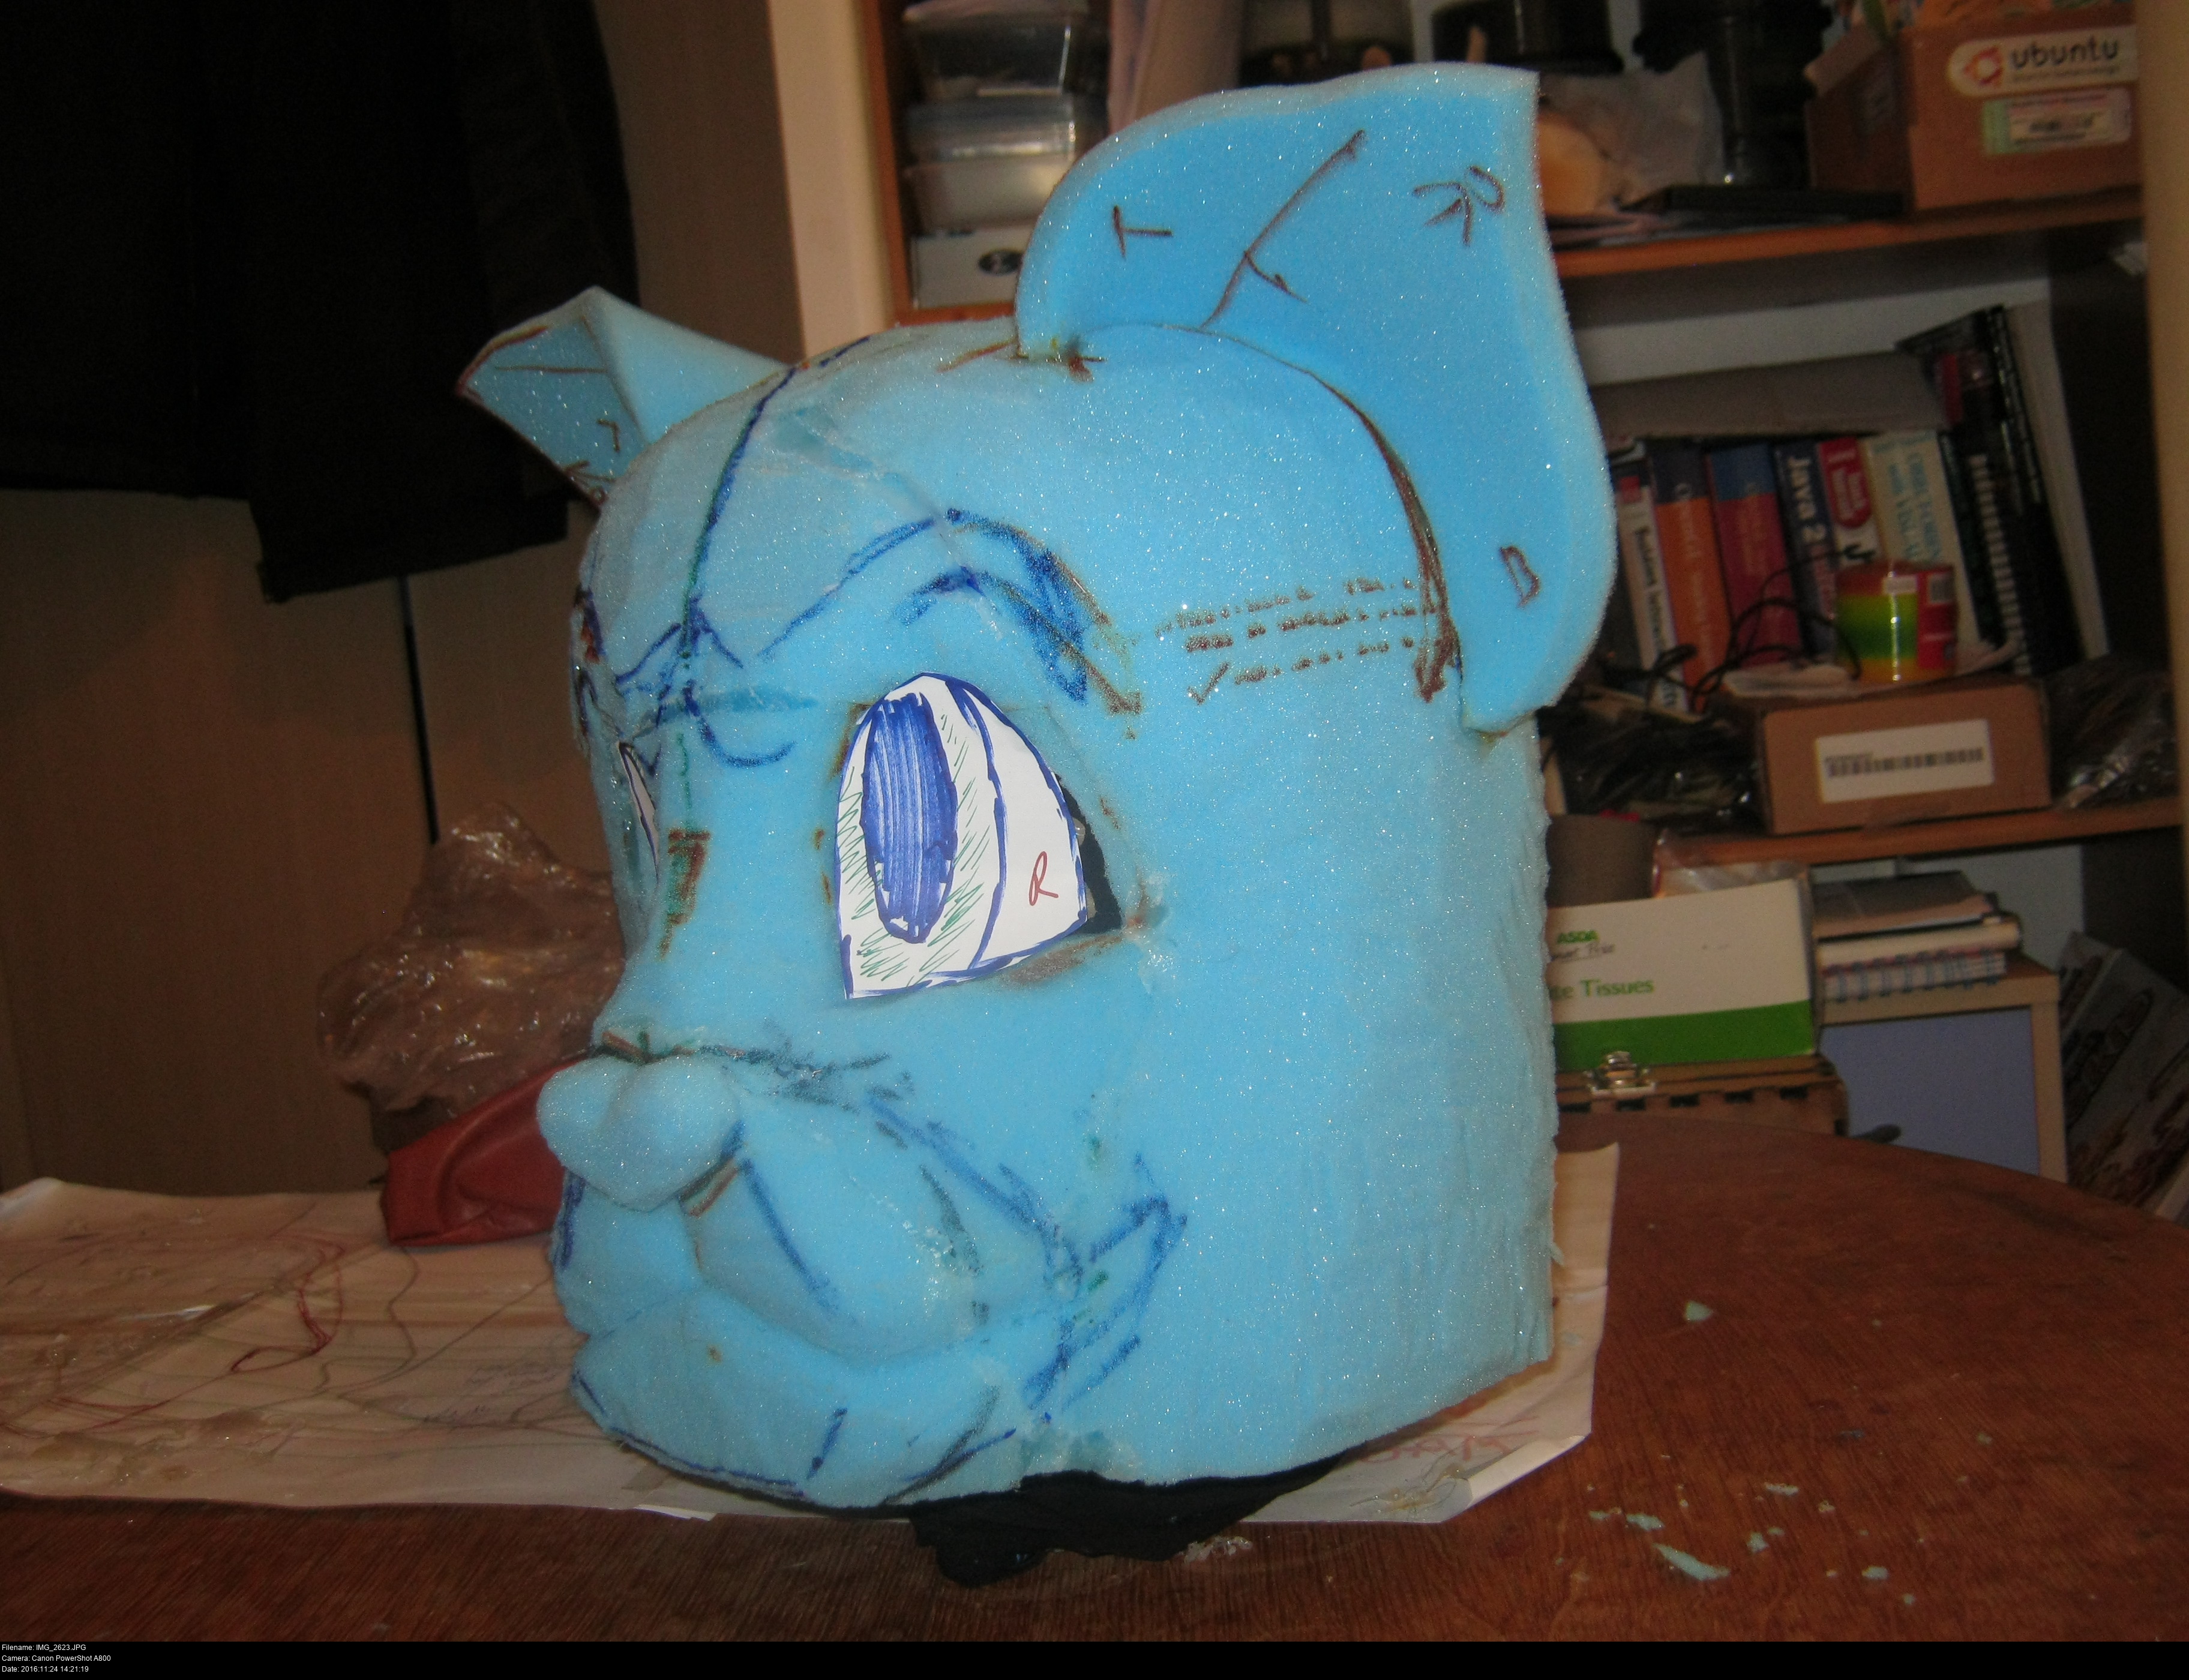
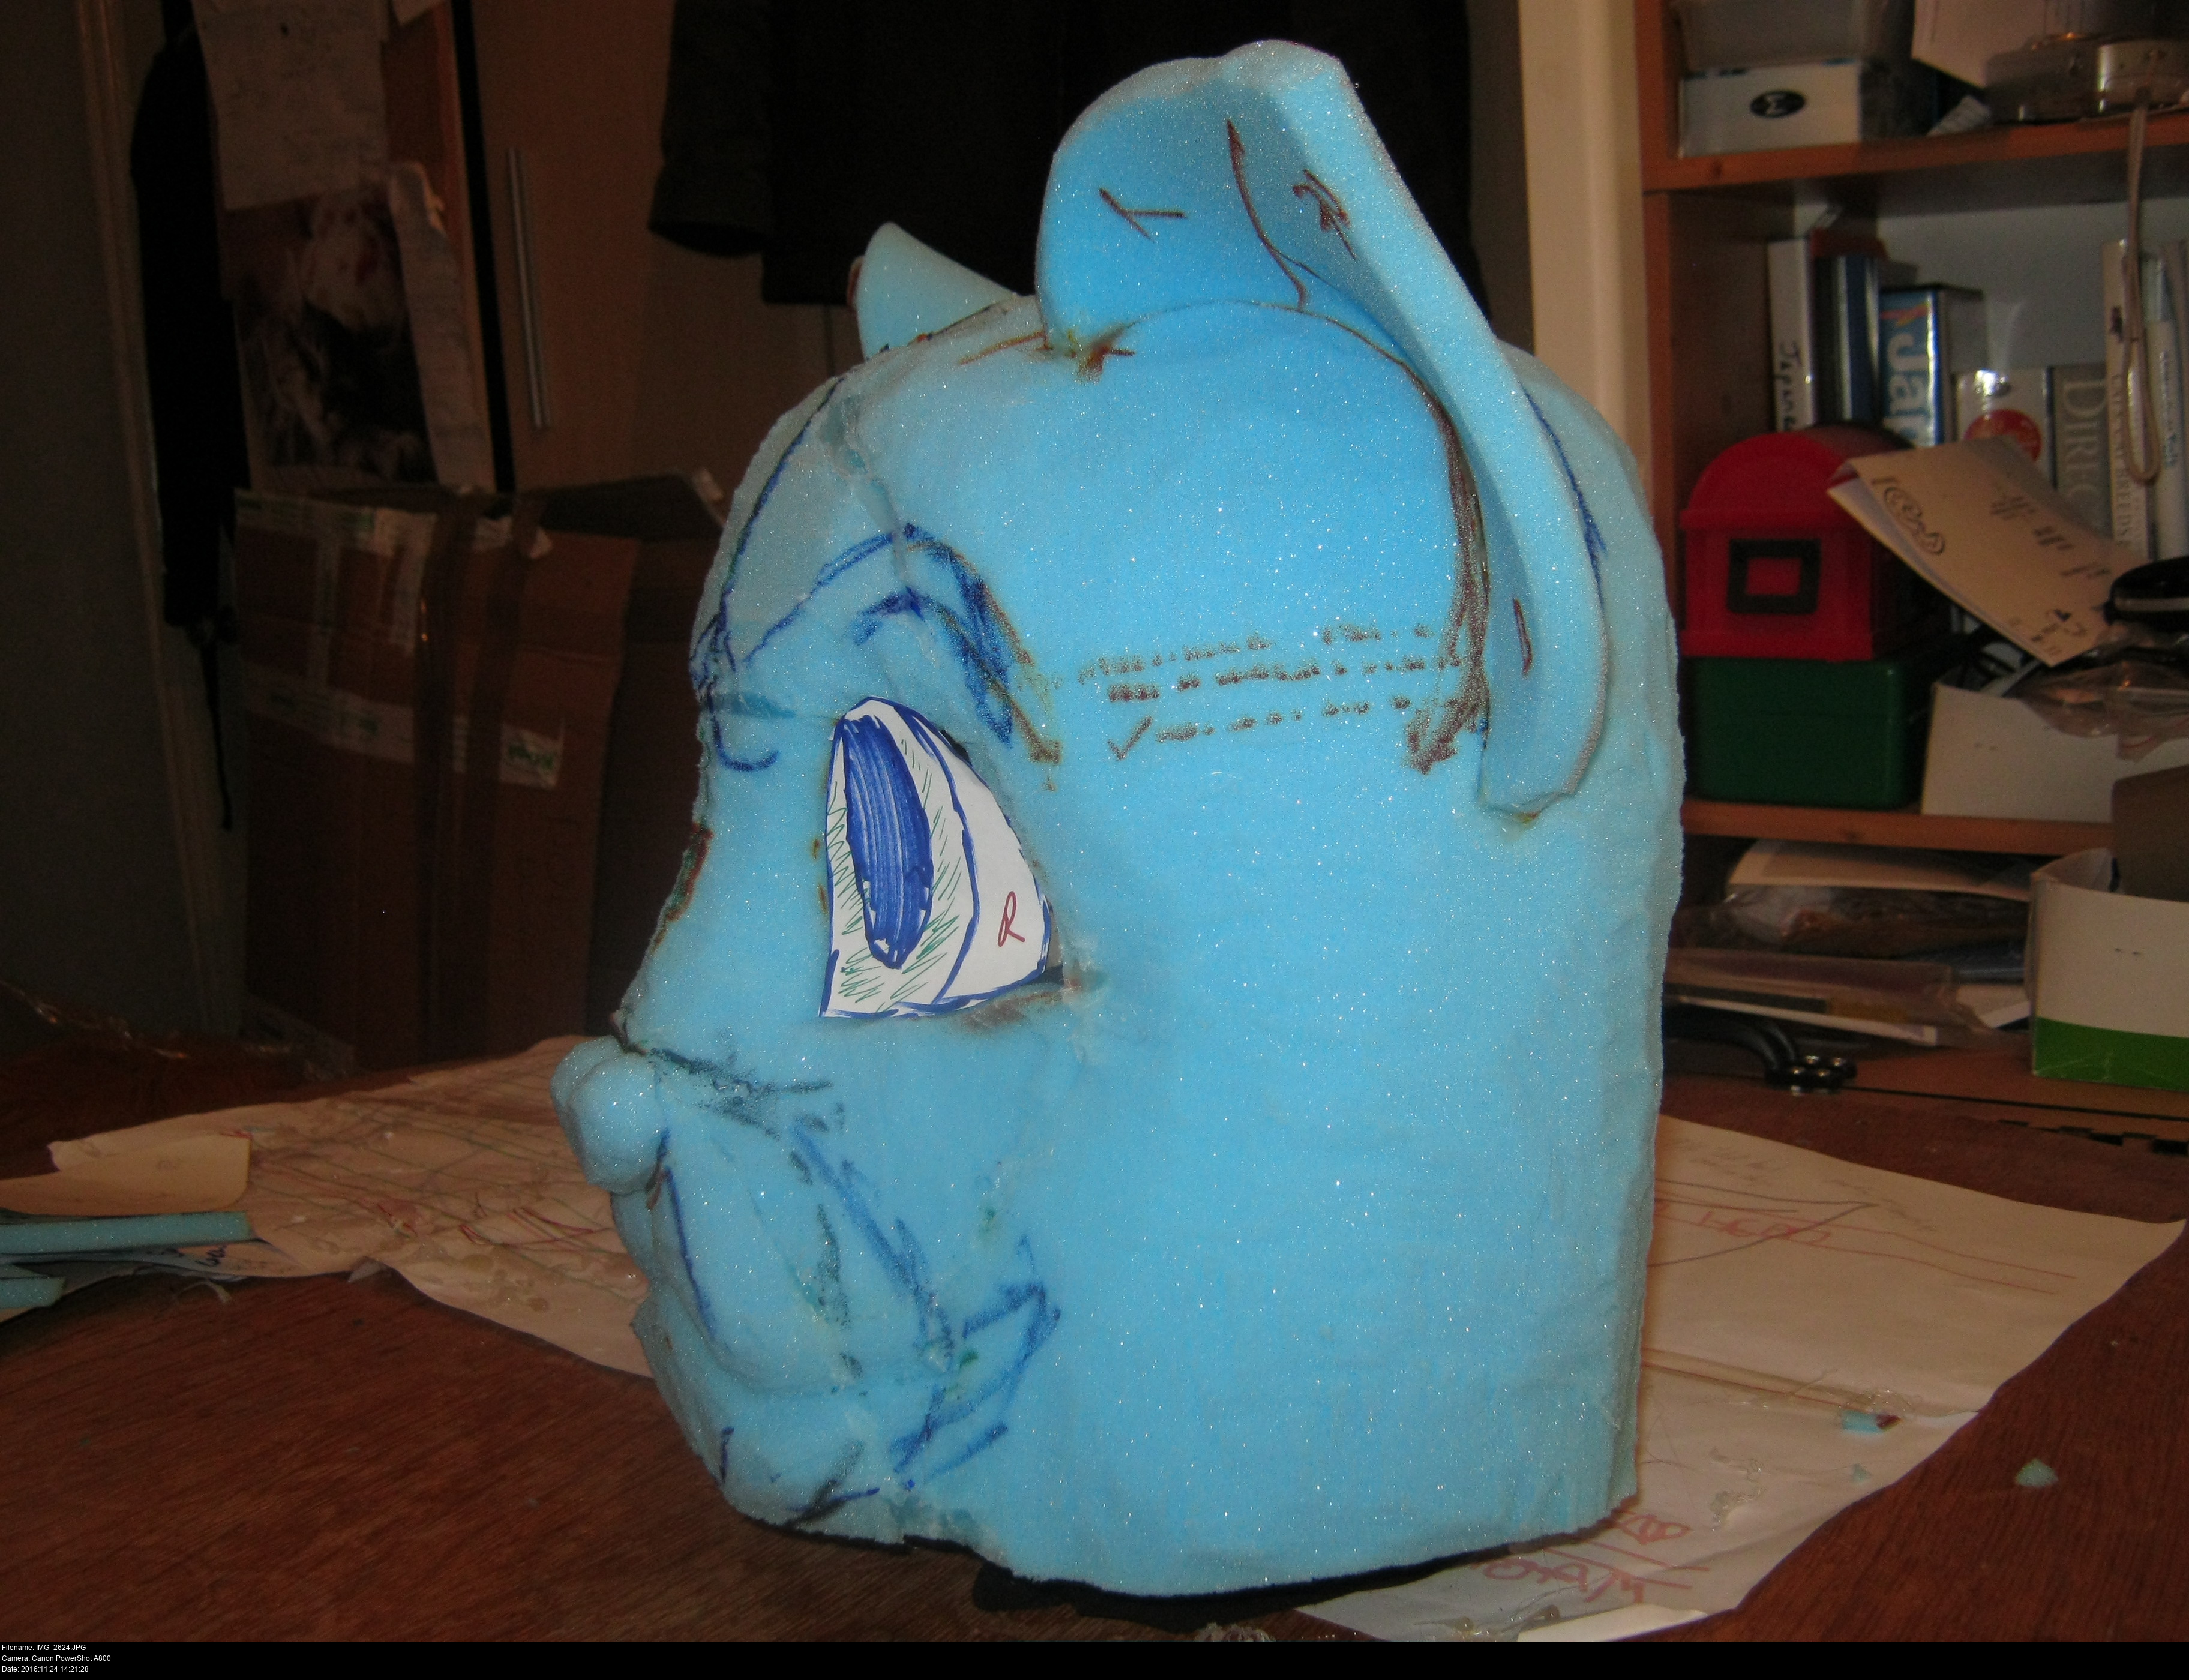
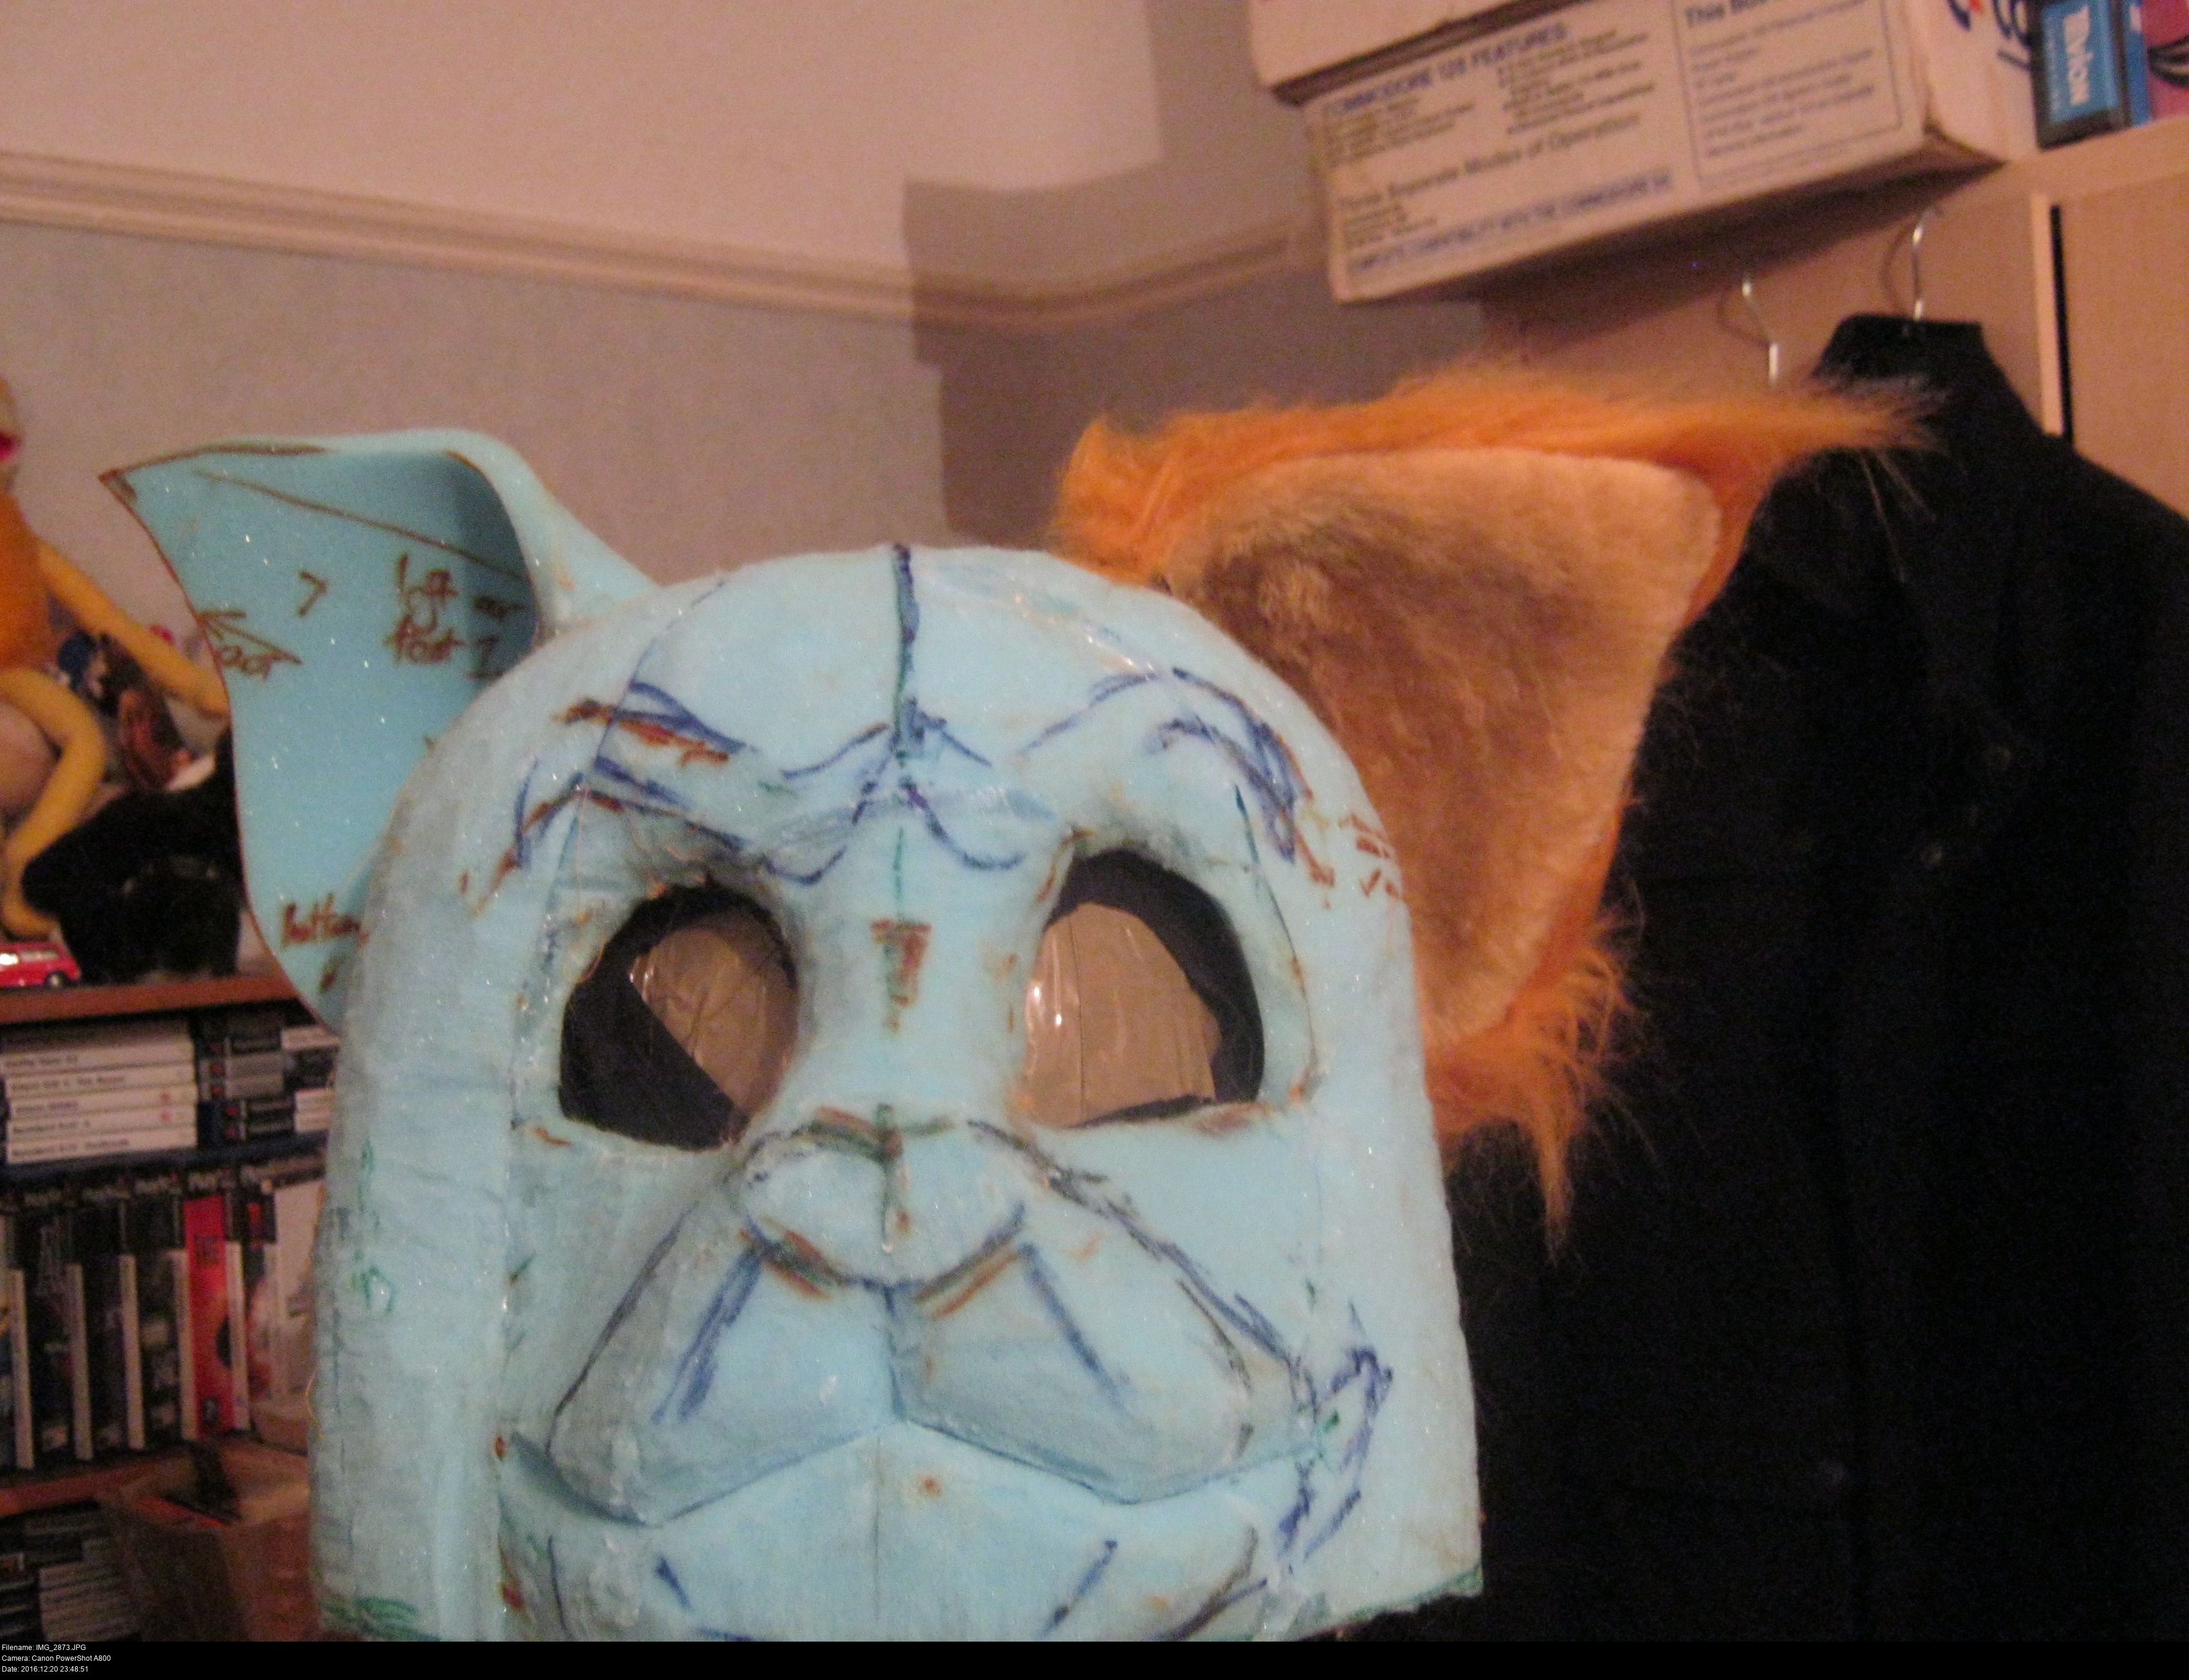
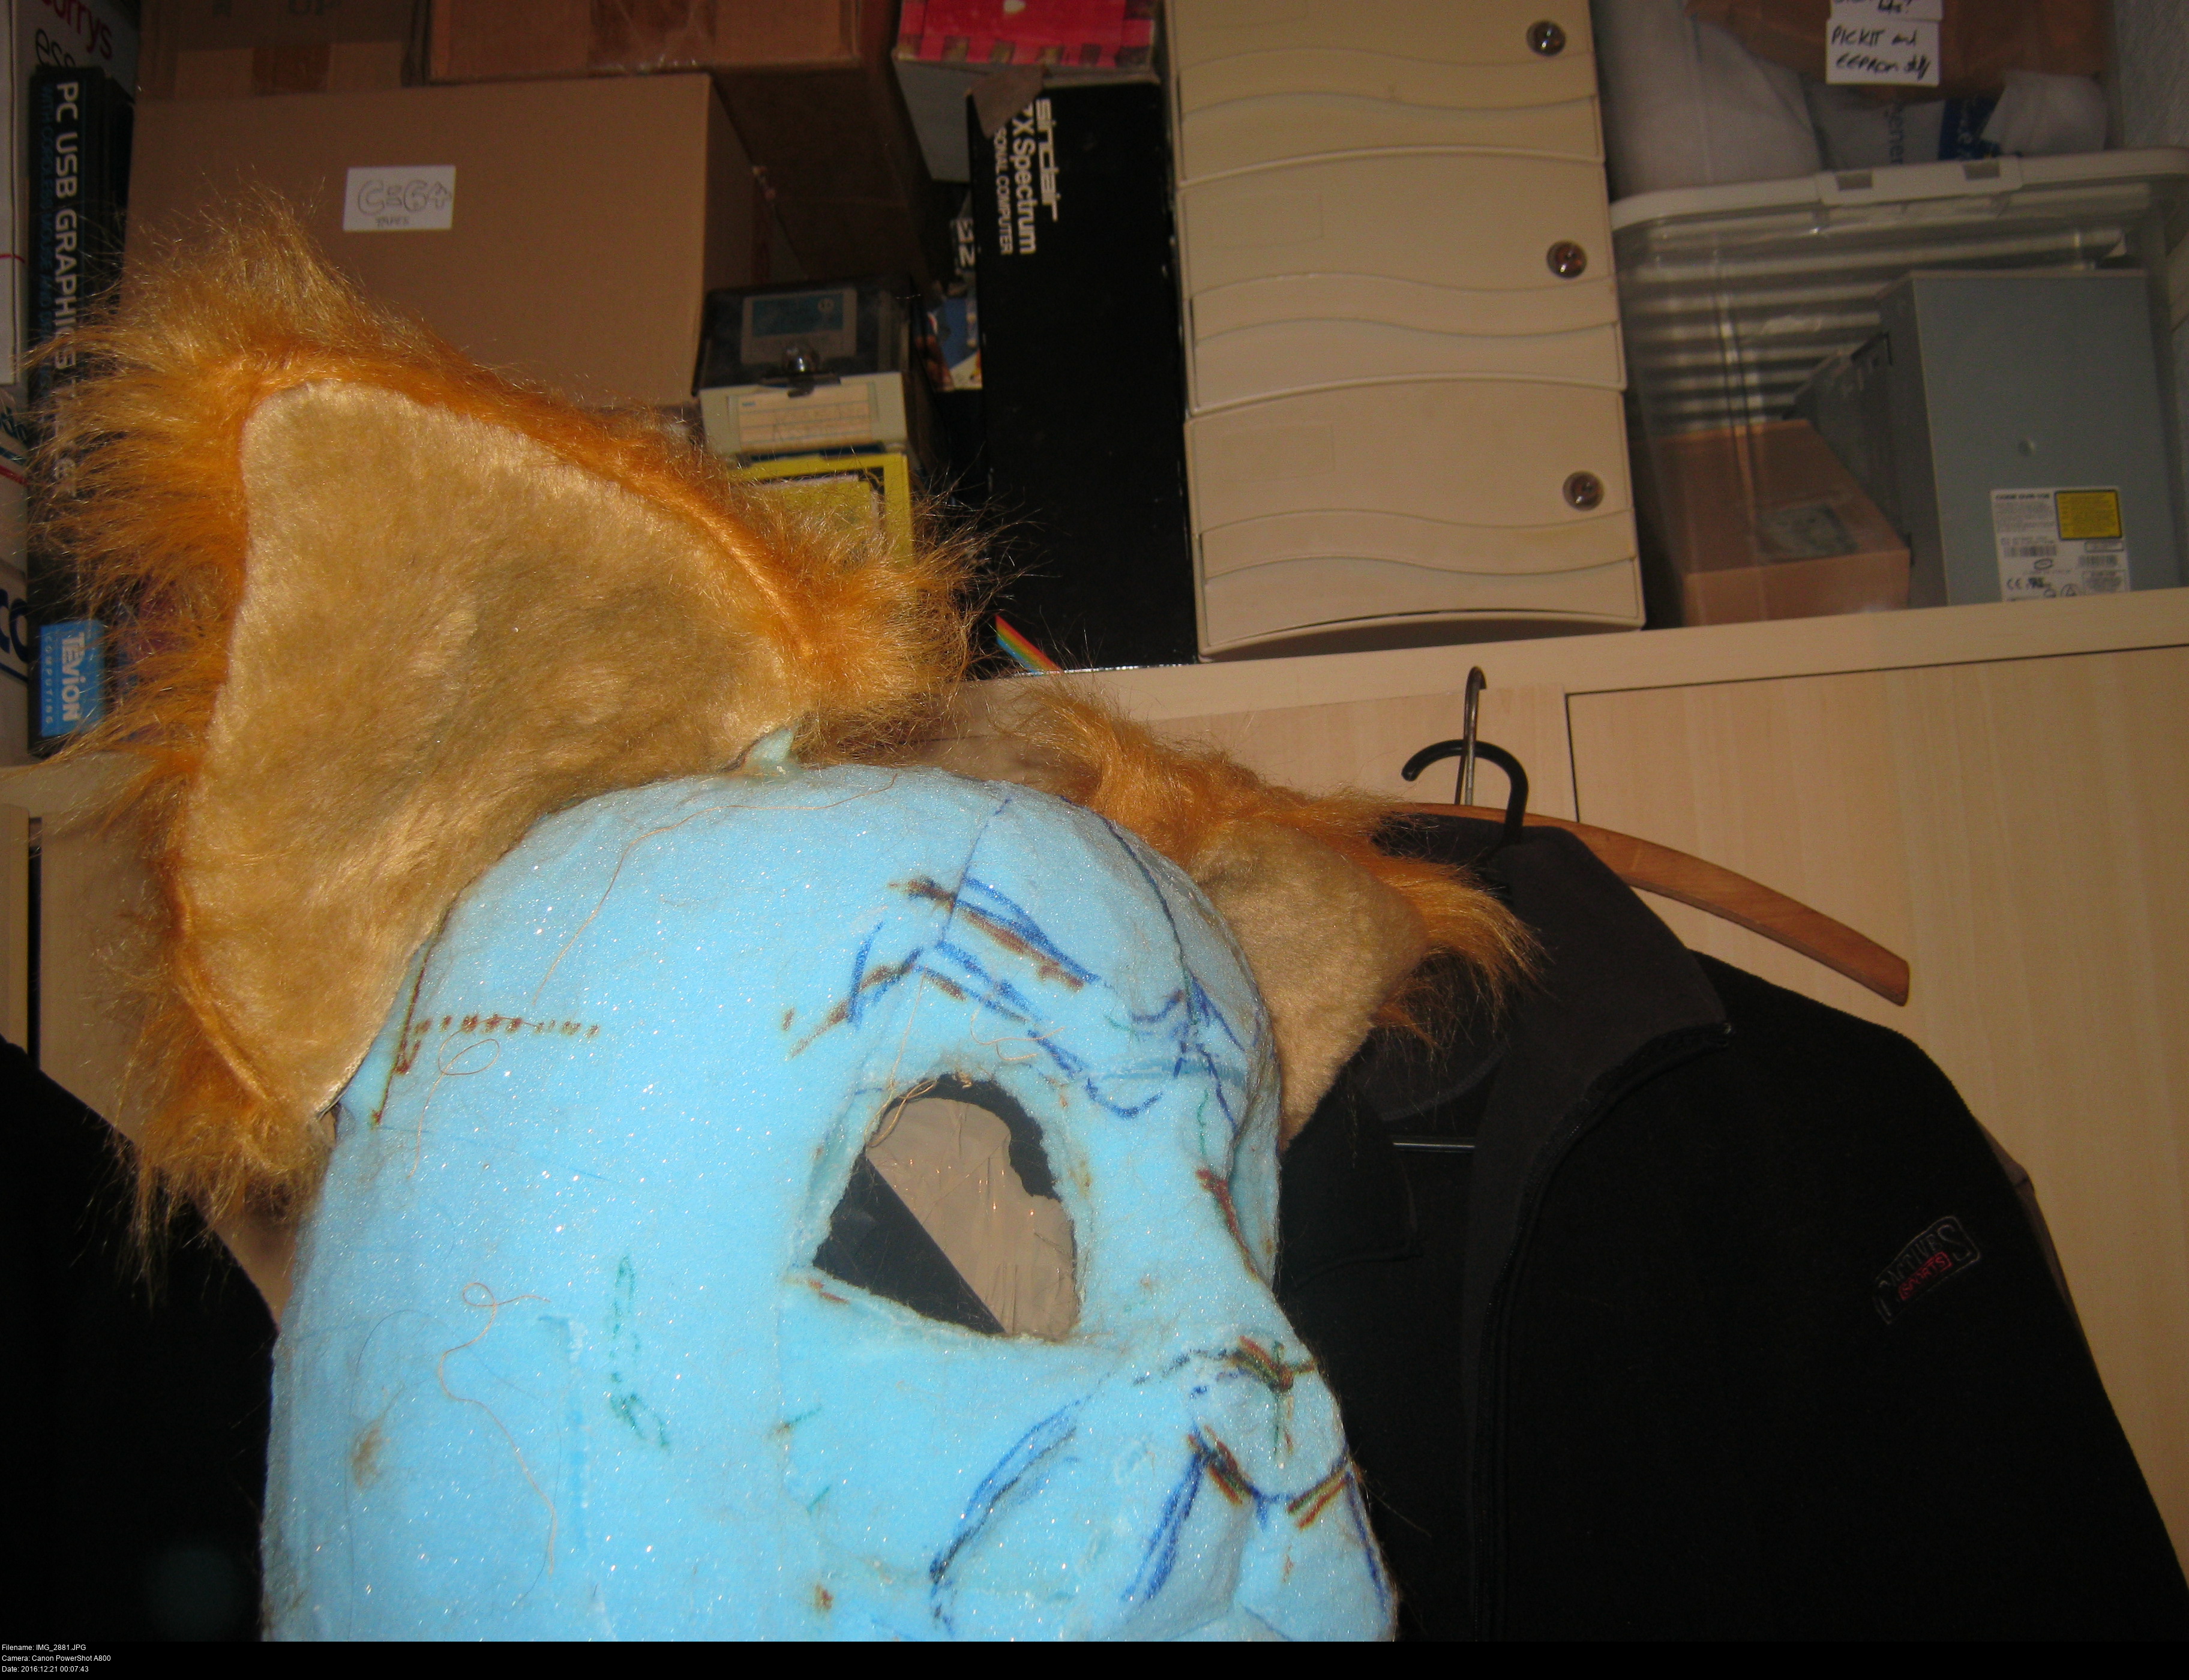
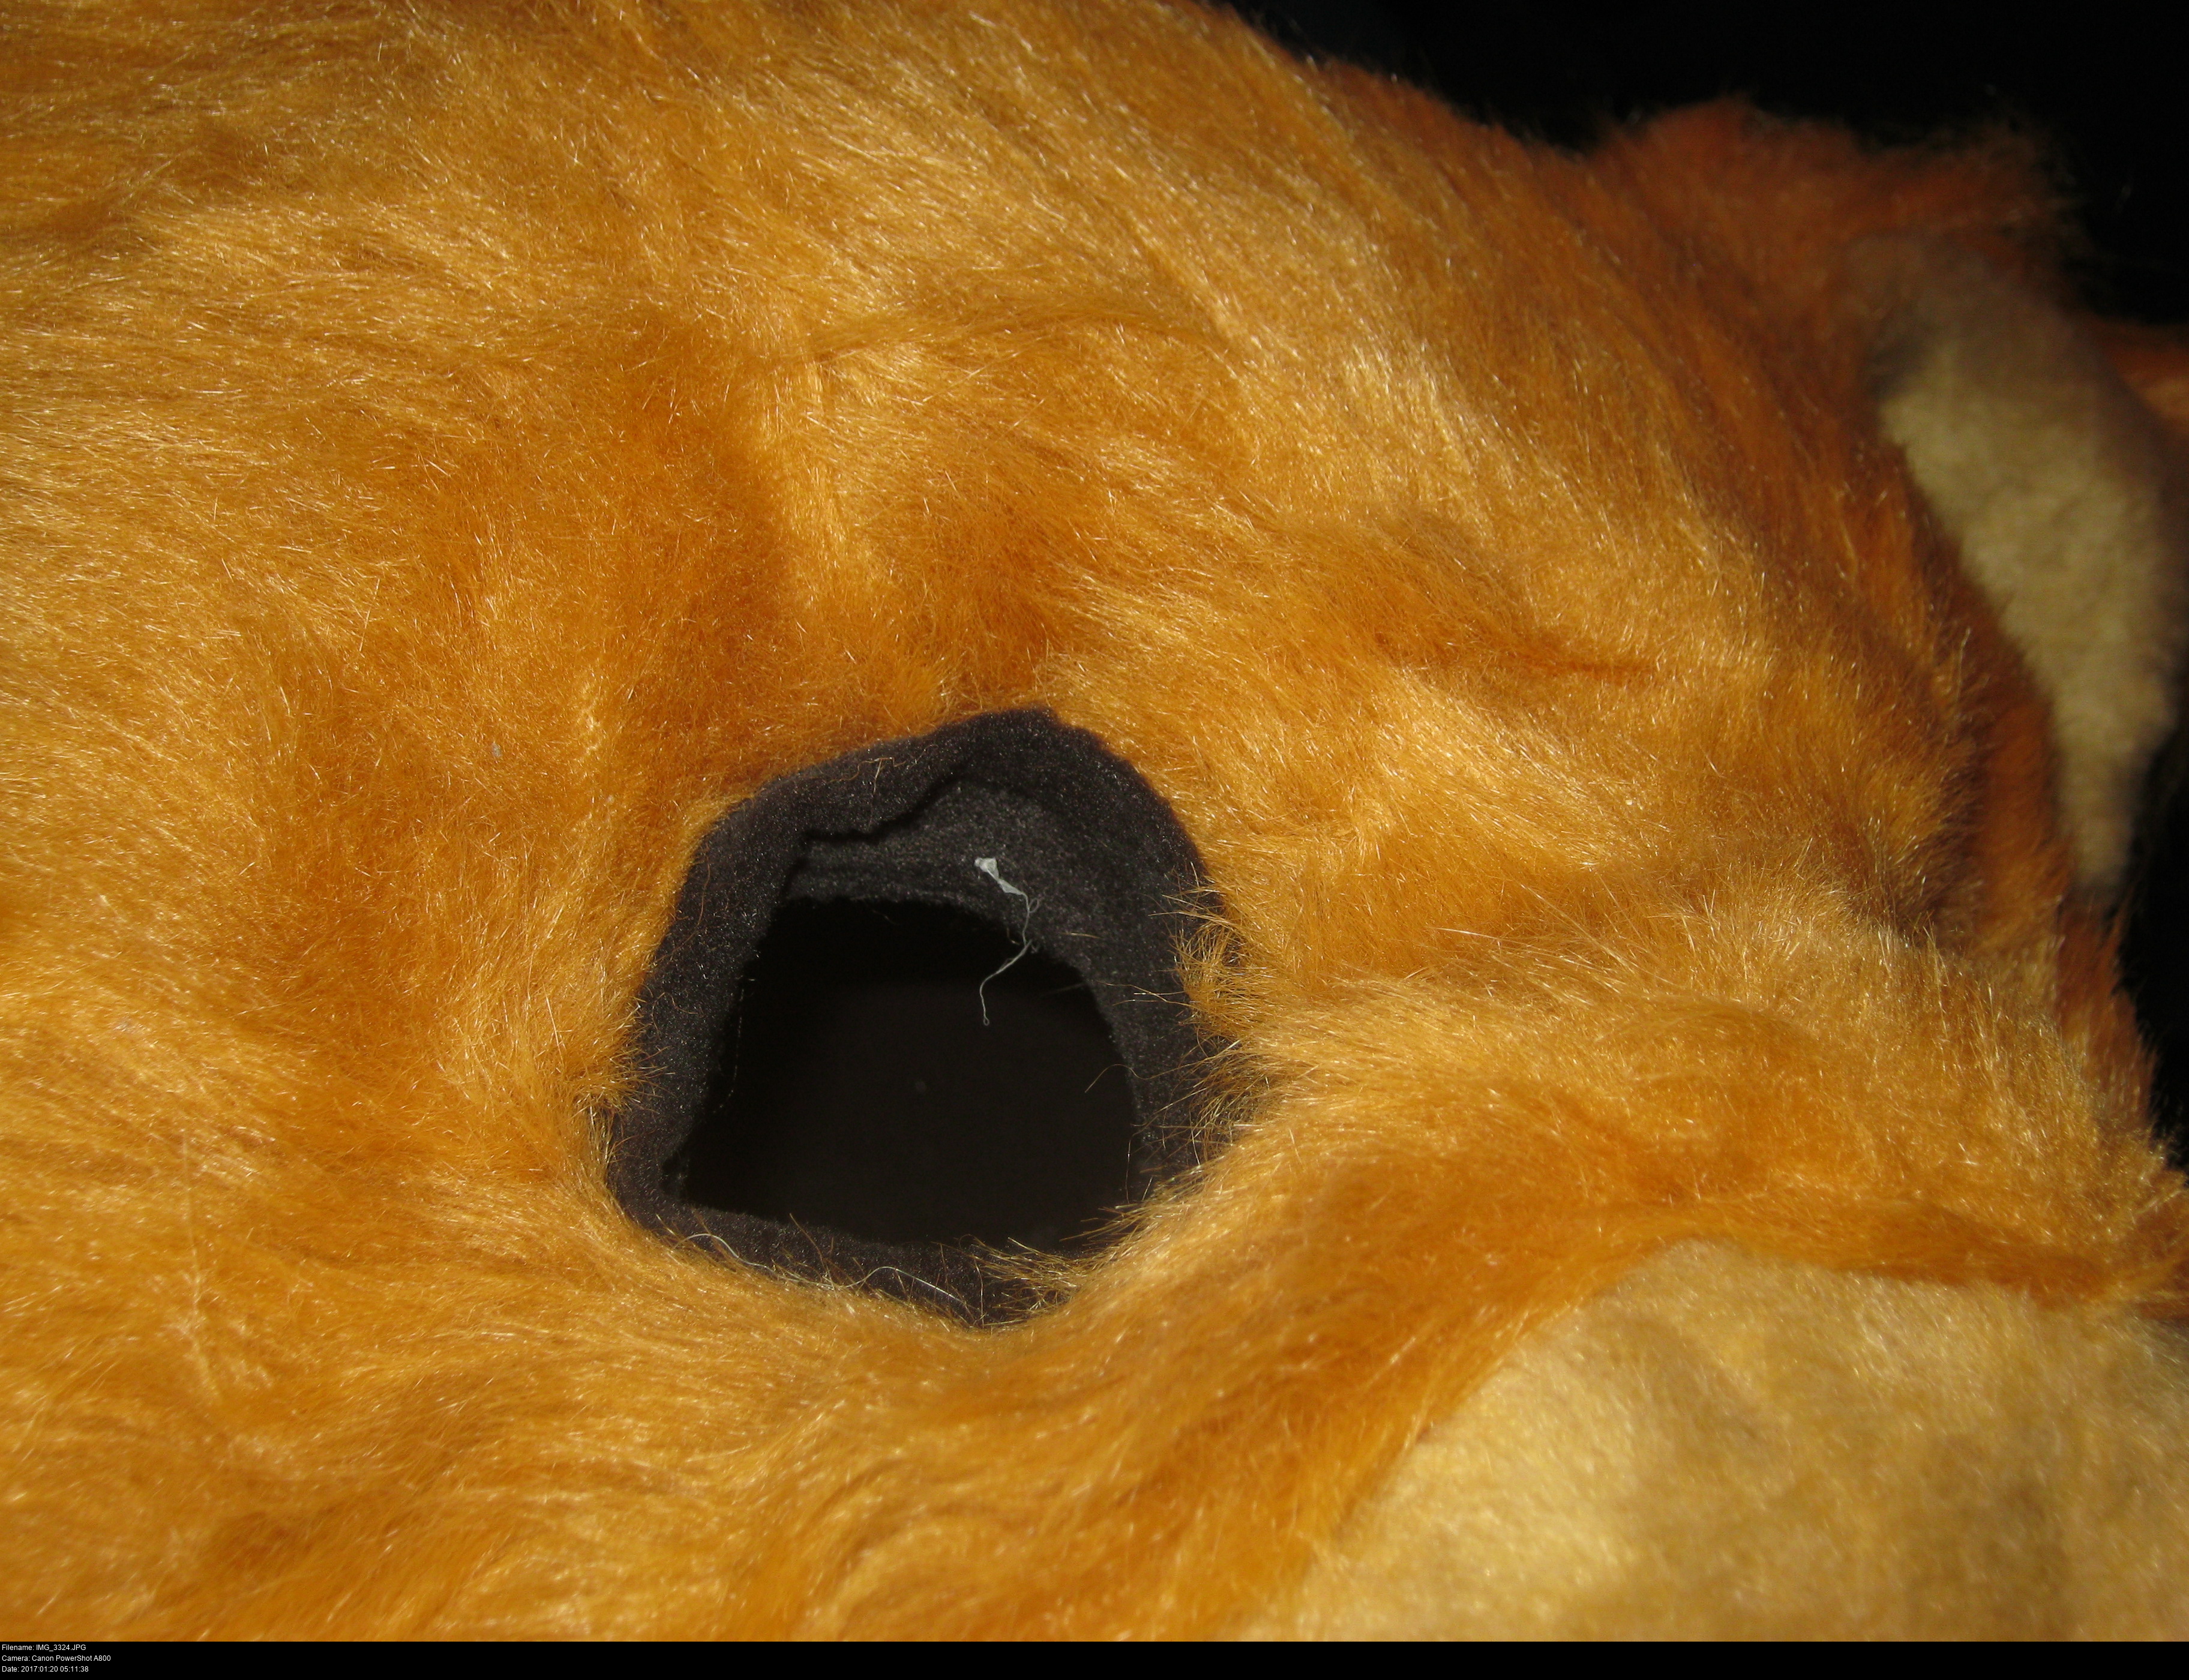
Marking out where my eye line was on the foam cylinder while I was wearing it wasn't very easy, but I did it. Now I can cut out small test eyeholes and a nose triangle and wear it properly.
I've made progress... I think? It's midnight at the end of the first day and I've somehow got a foam thing on my head.
I think in future, I'd be better served by cutting out a visor shape for my eyes and a nose and mouth section before gluing the fabric into the foam. You live and learn.
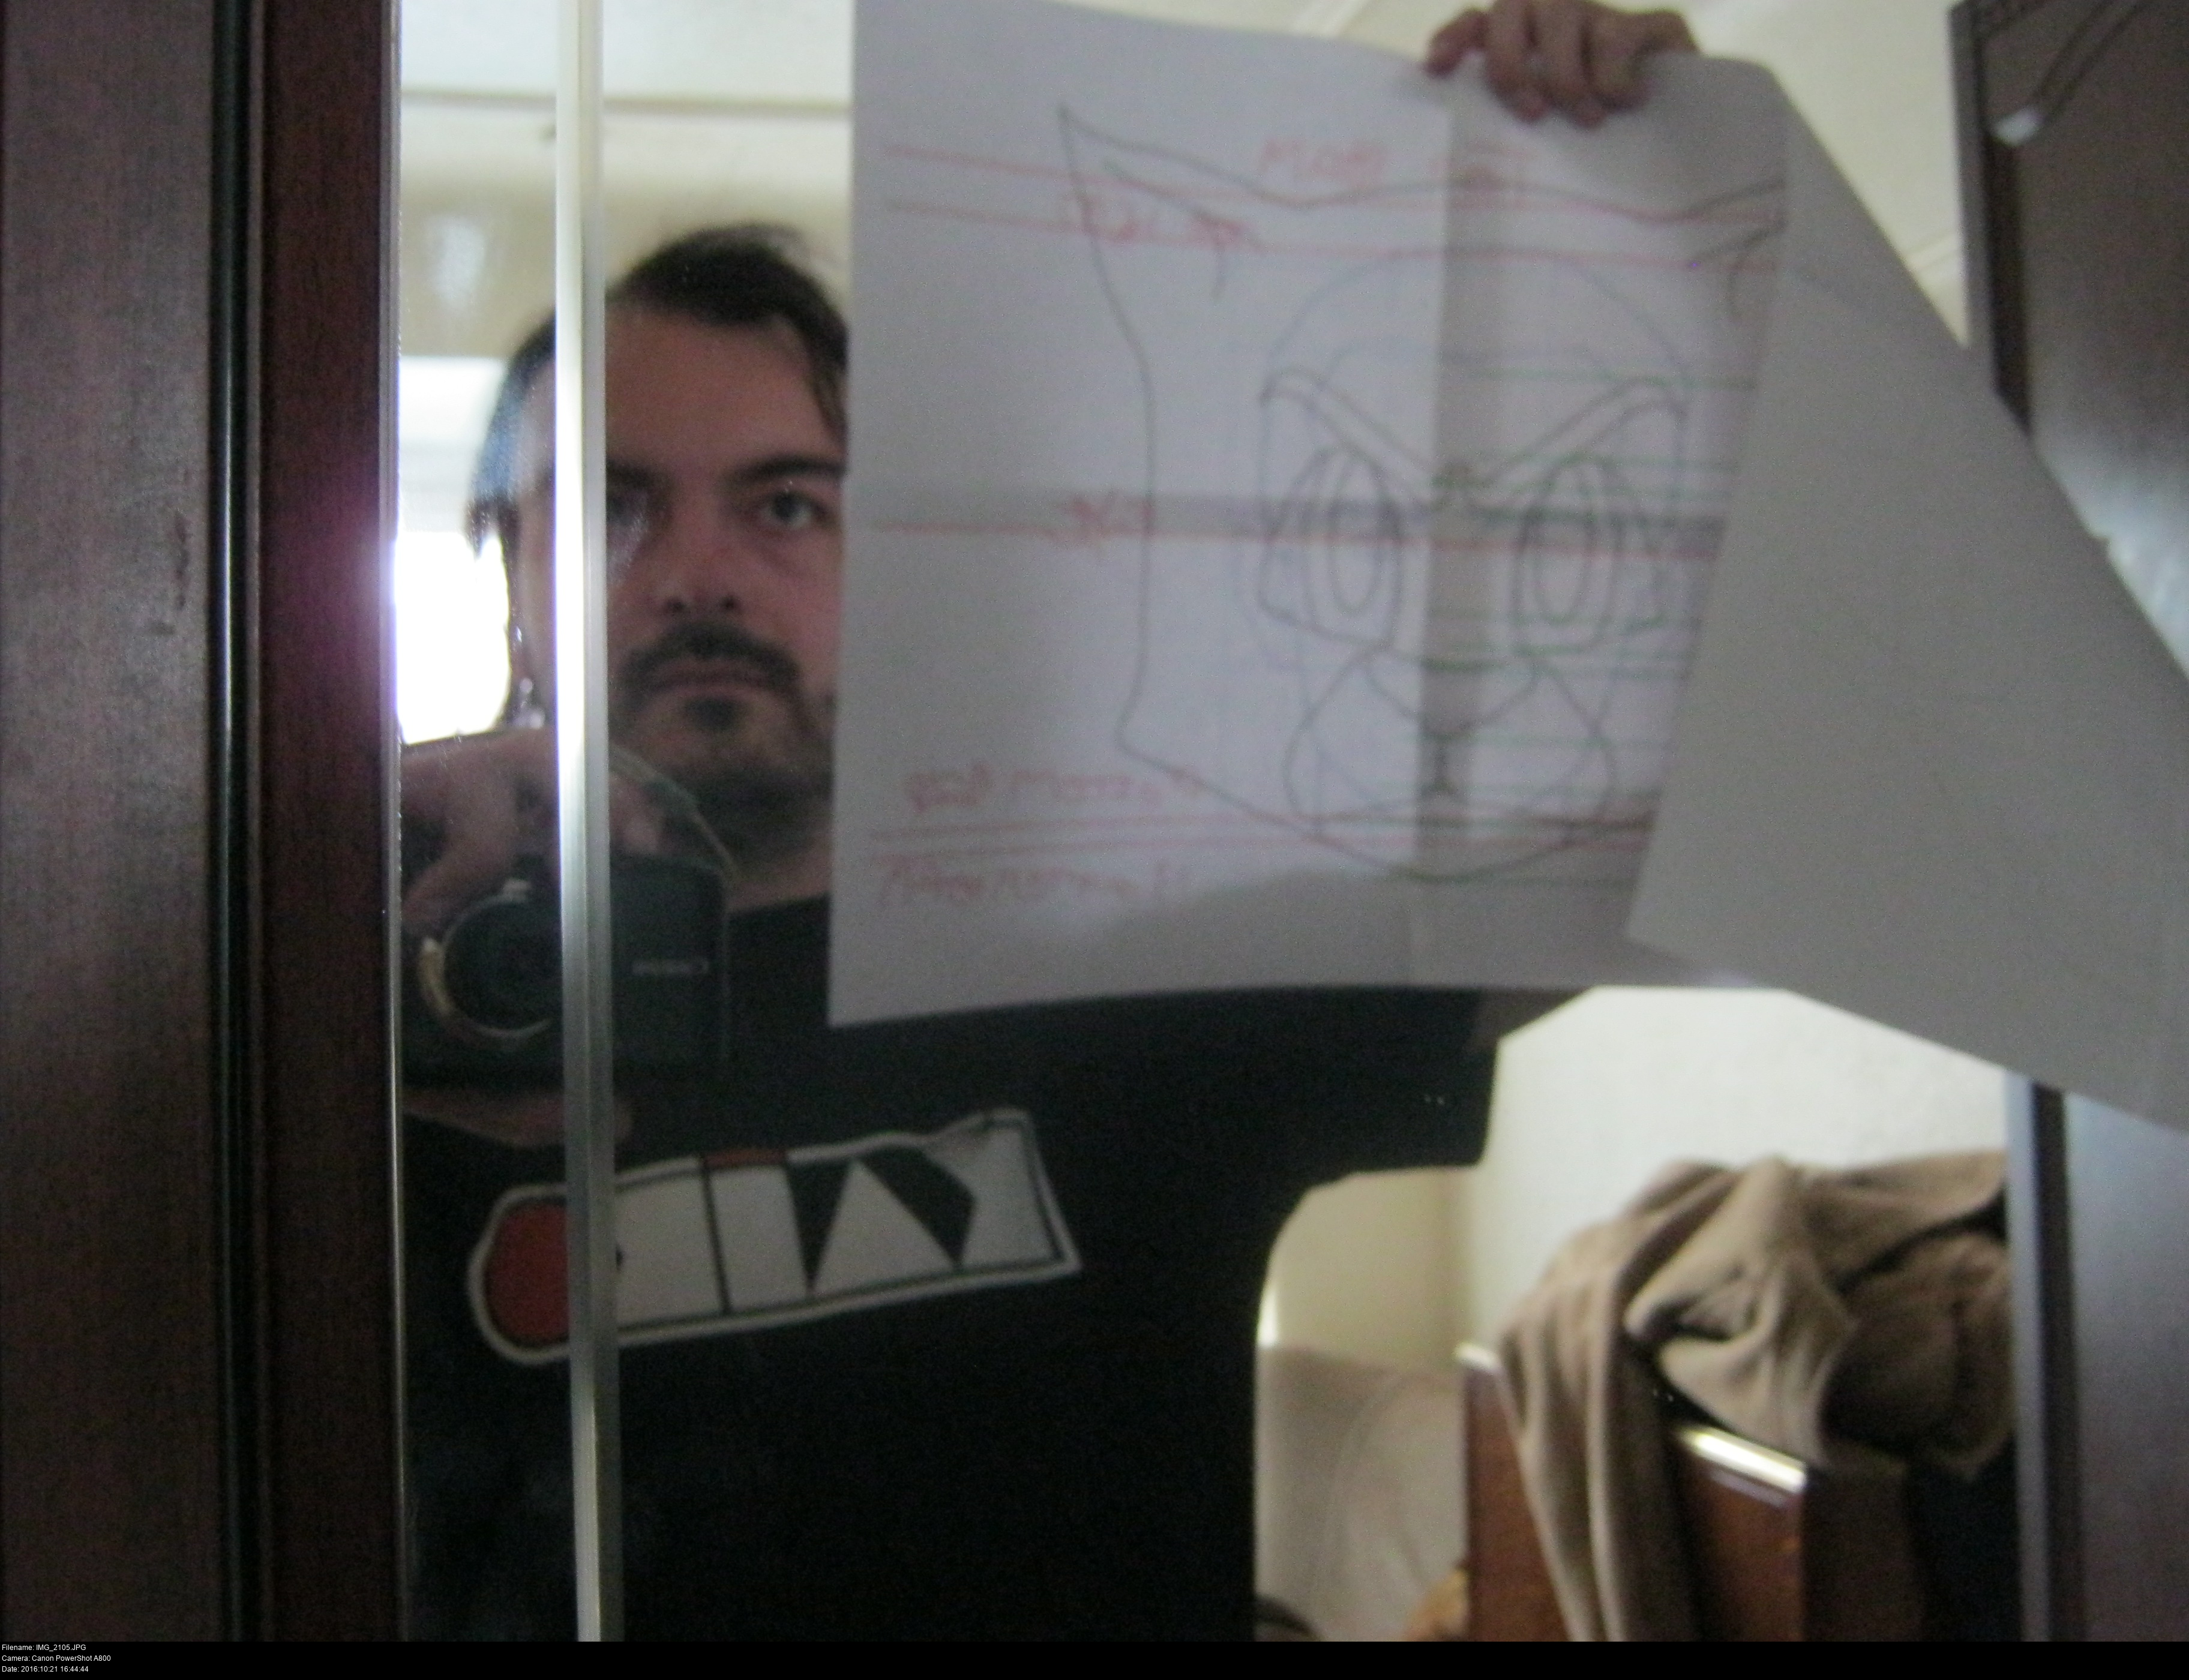
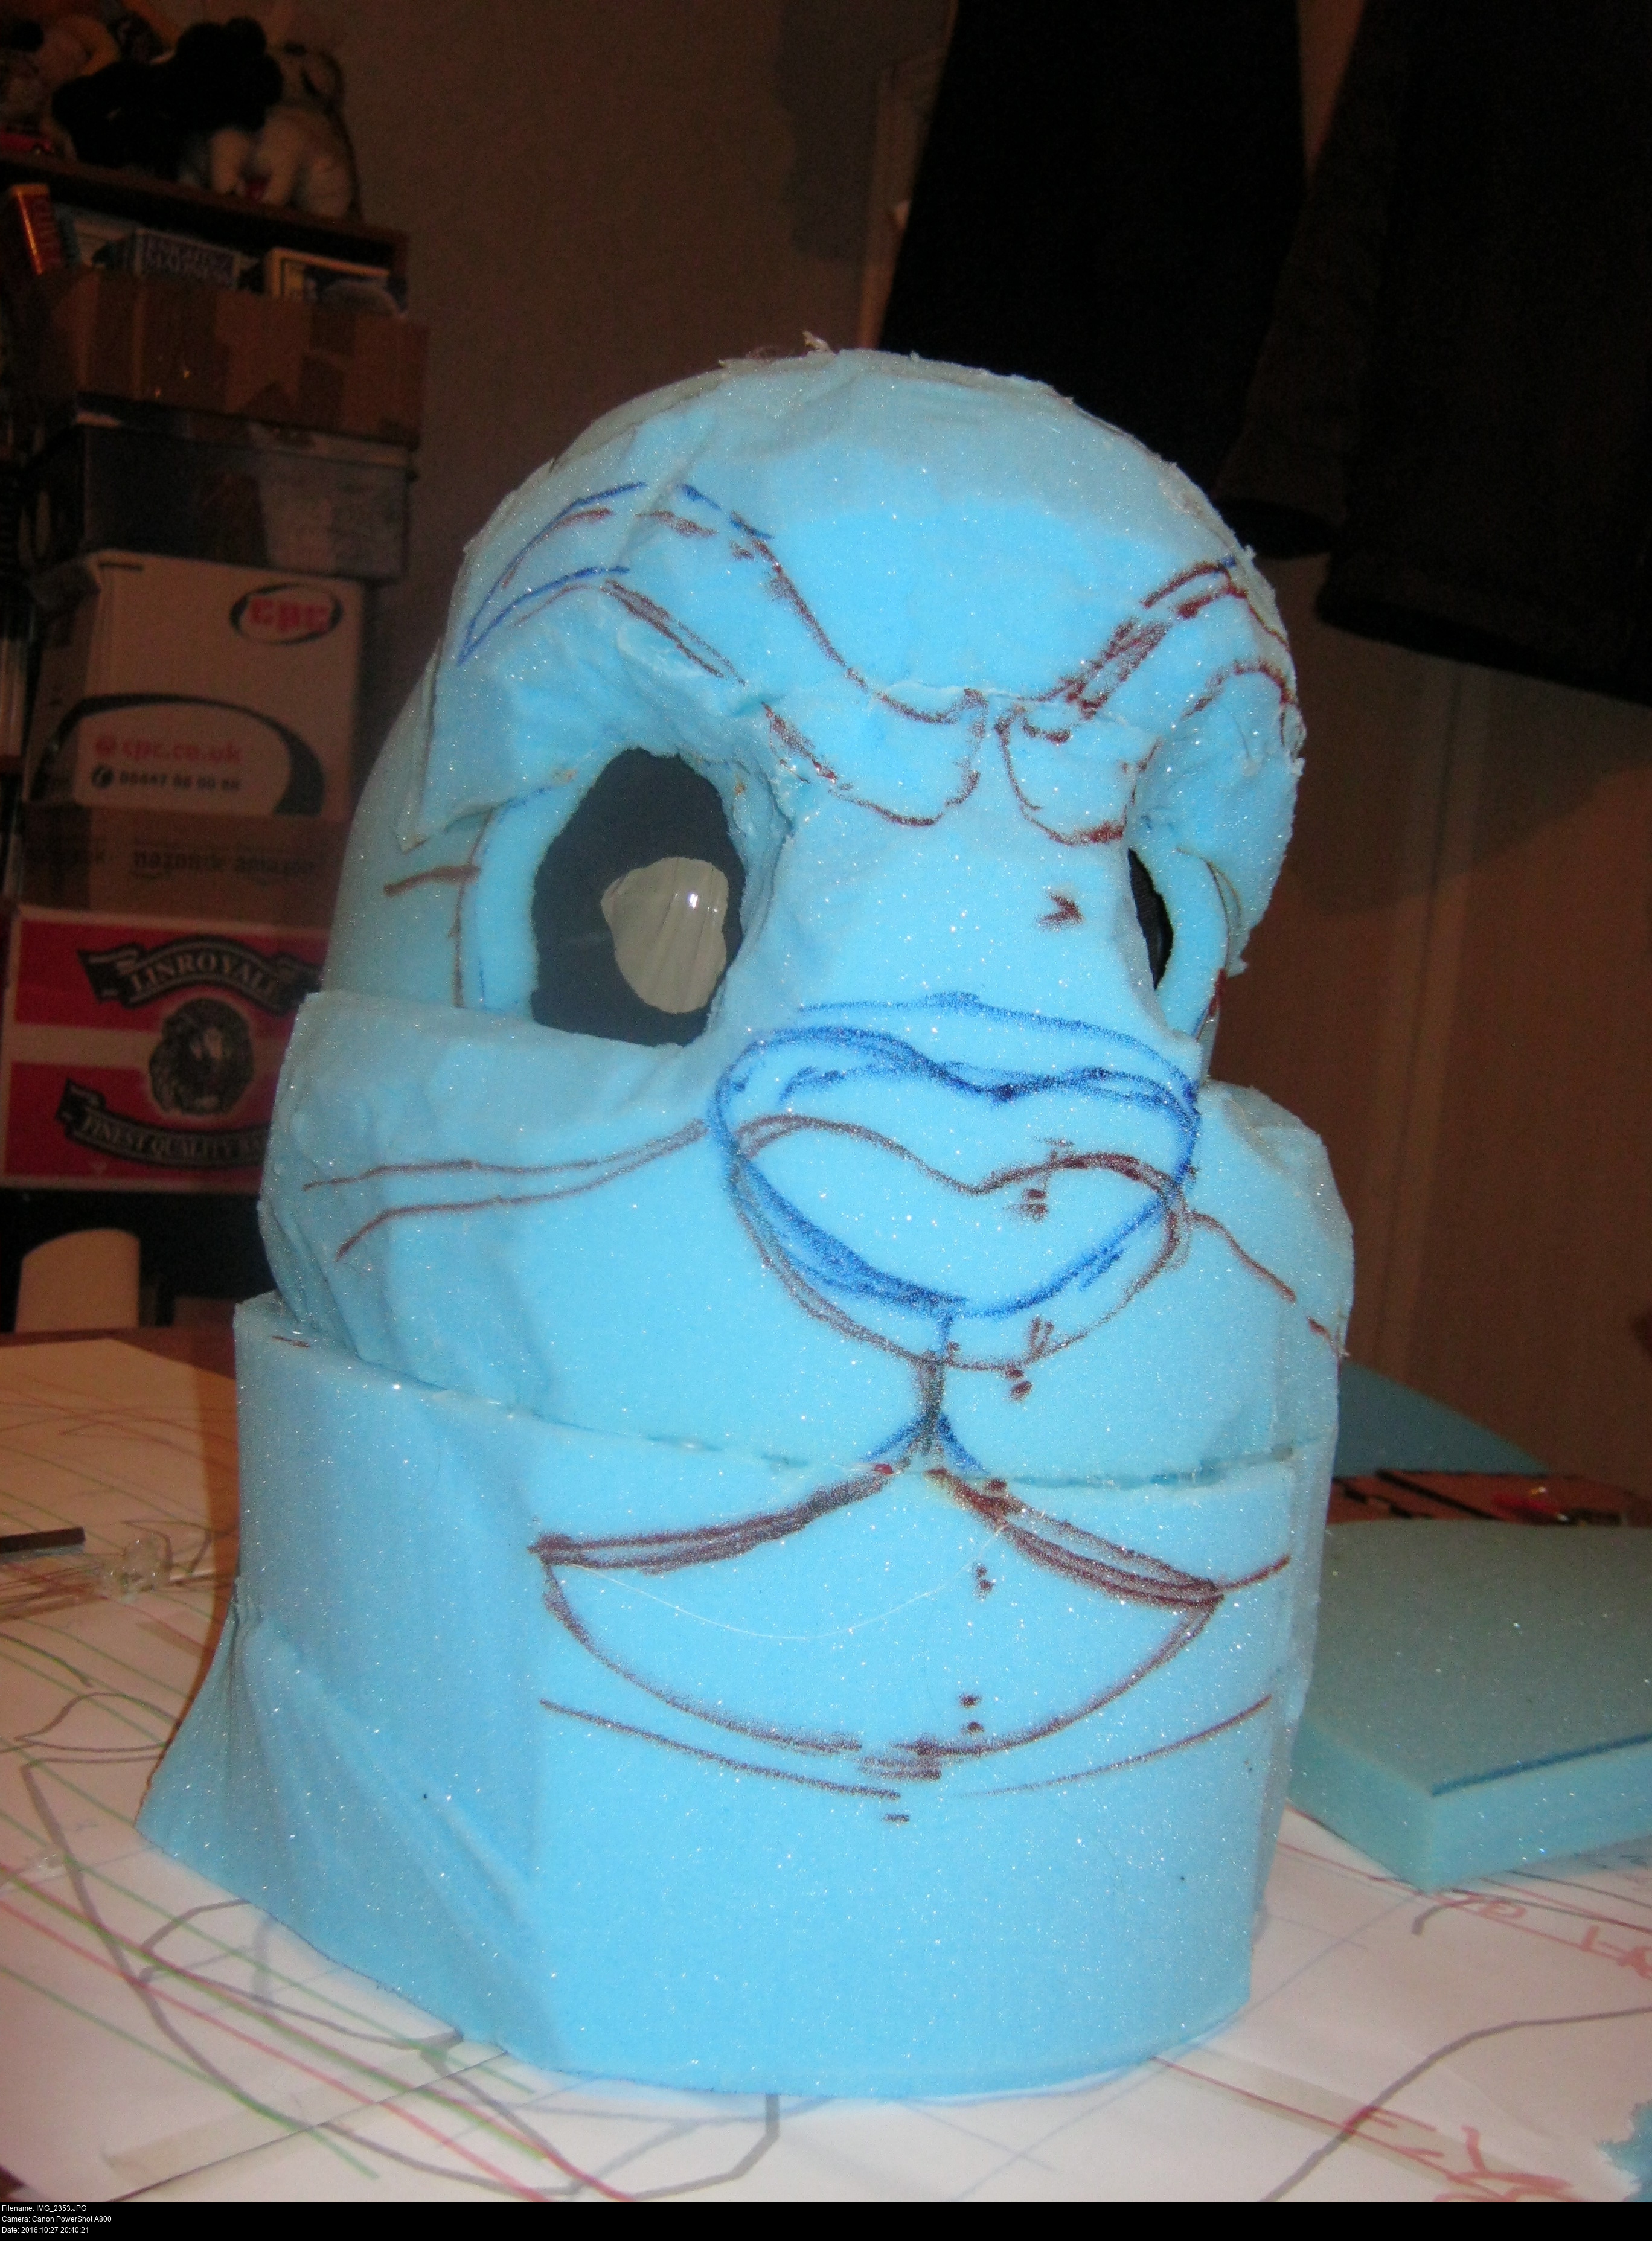
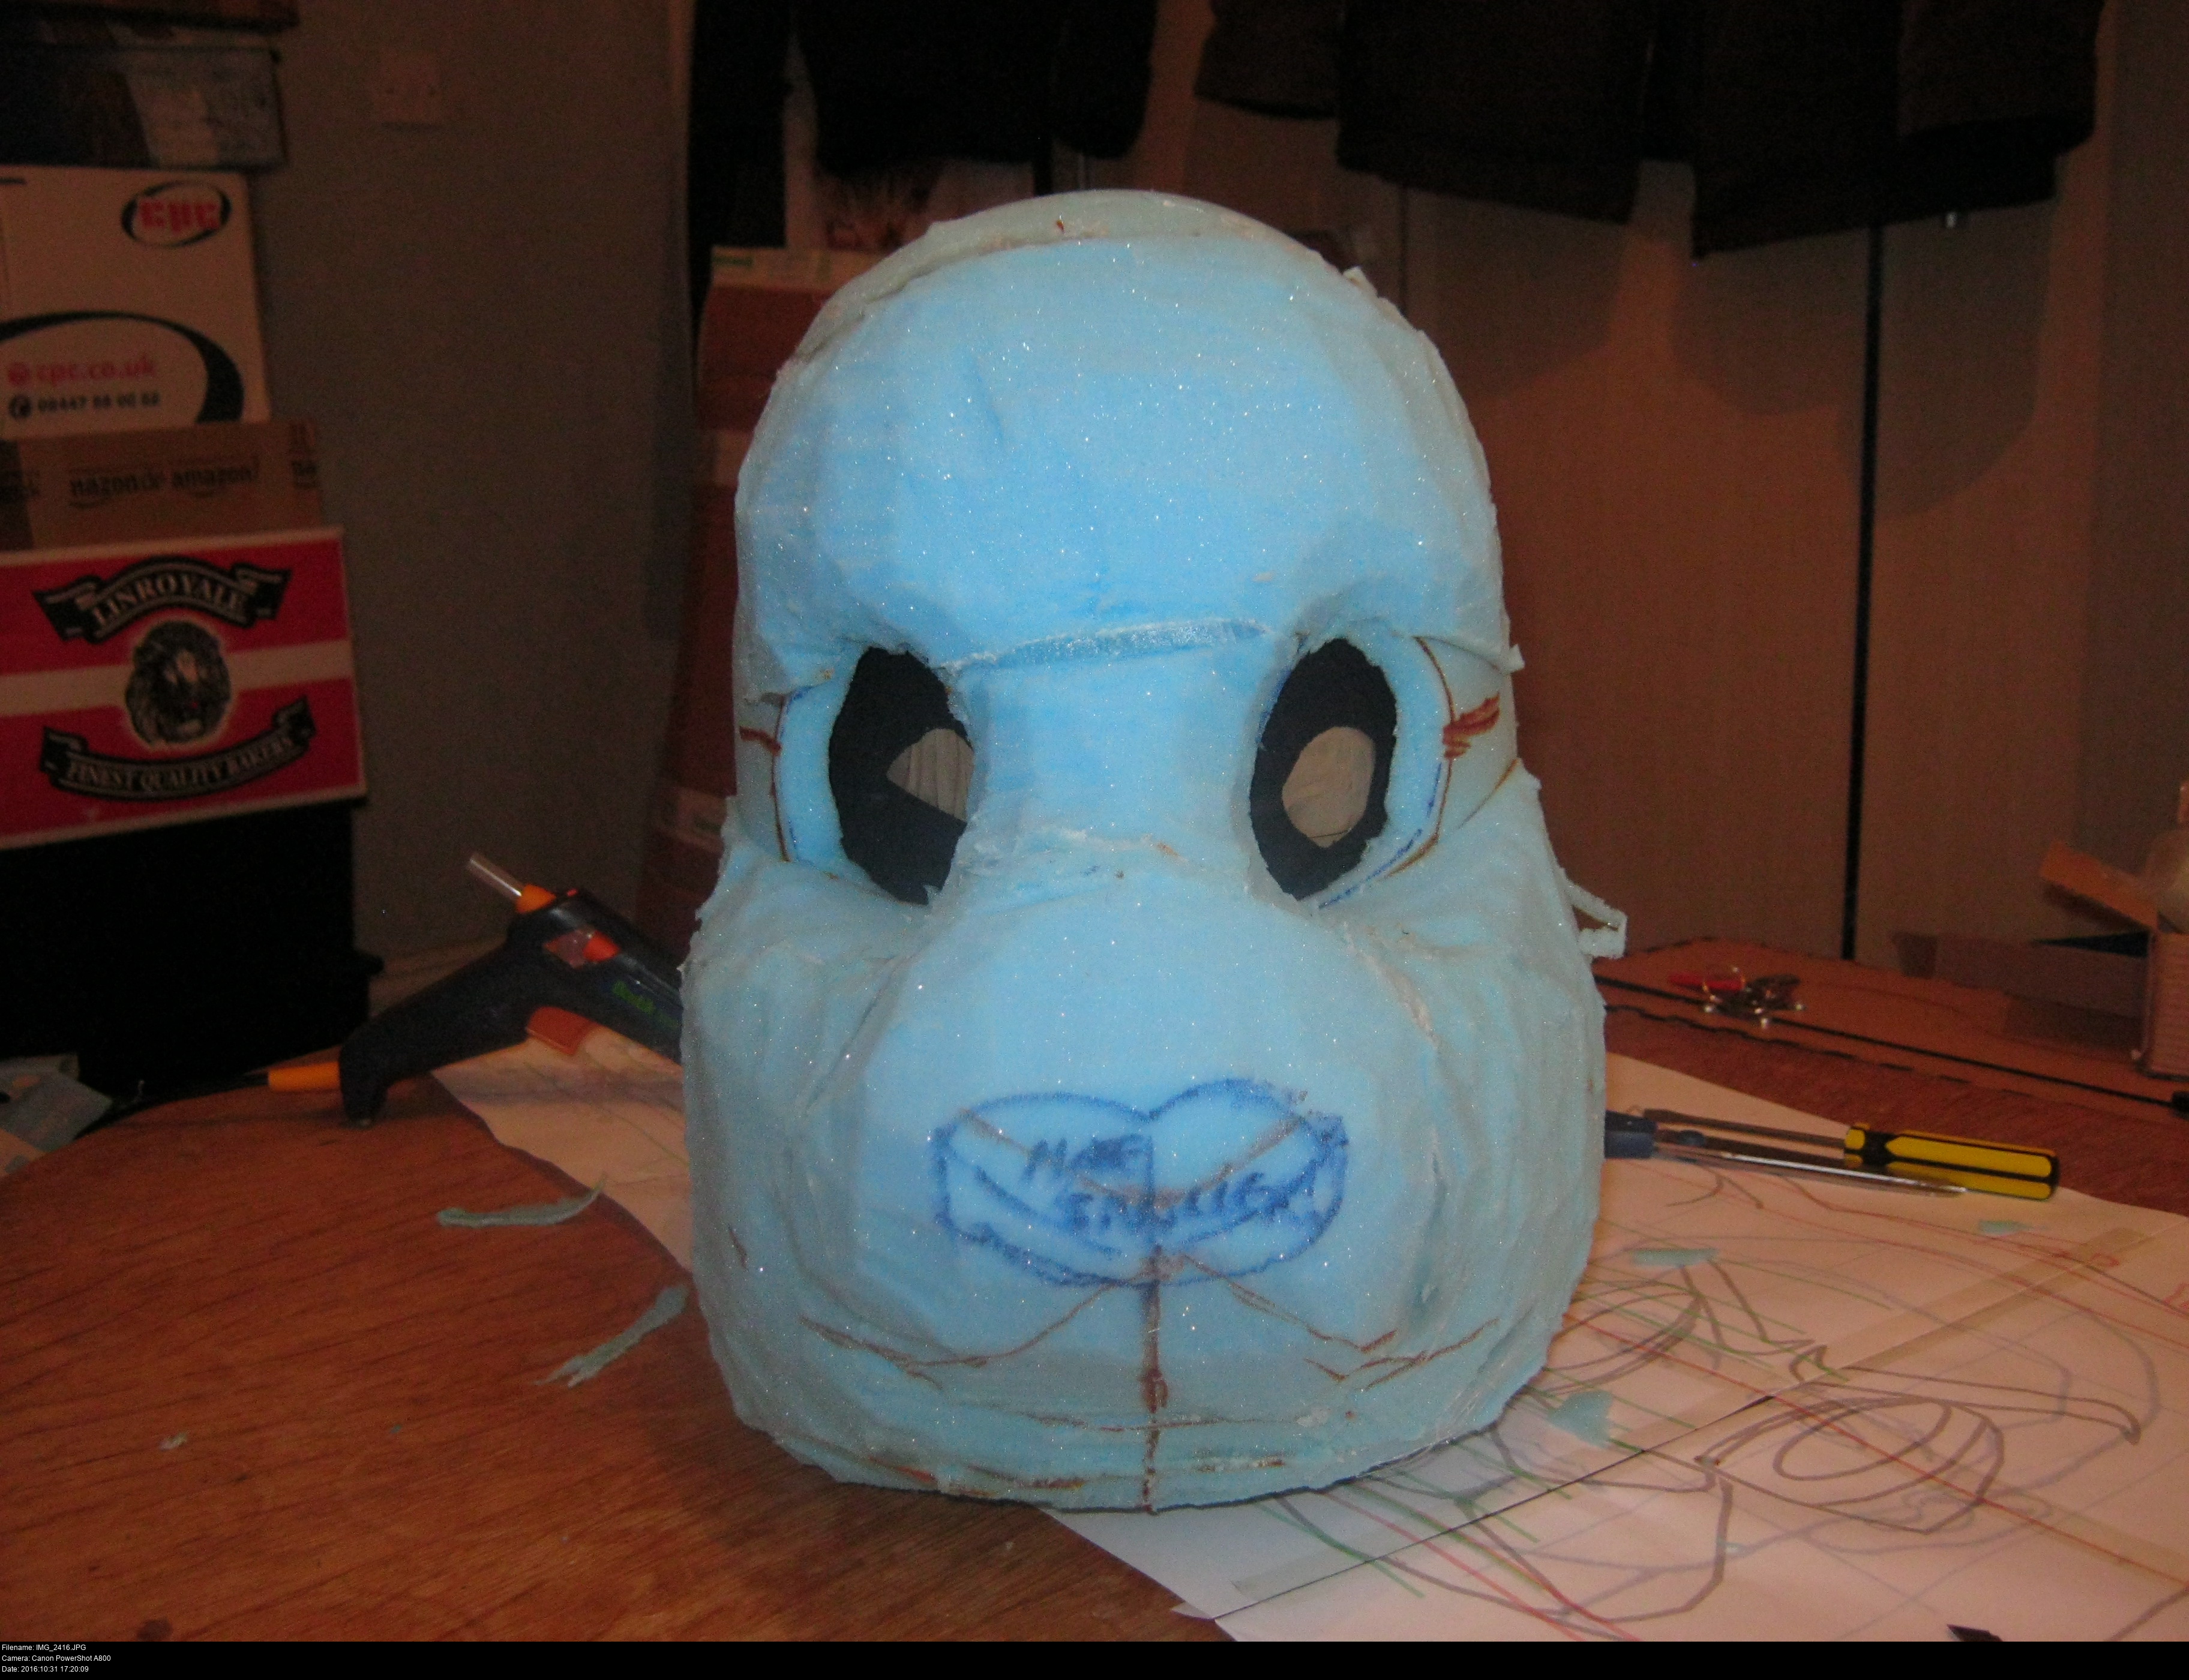
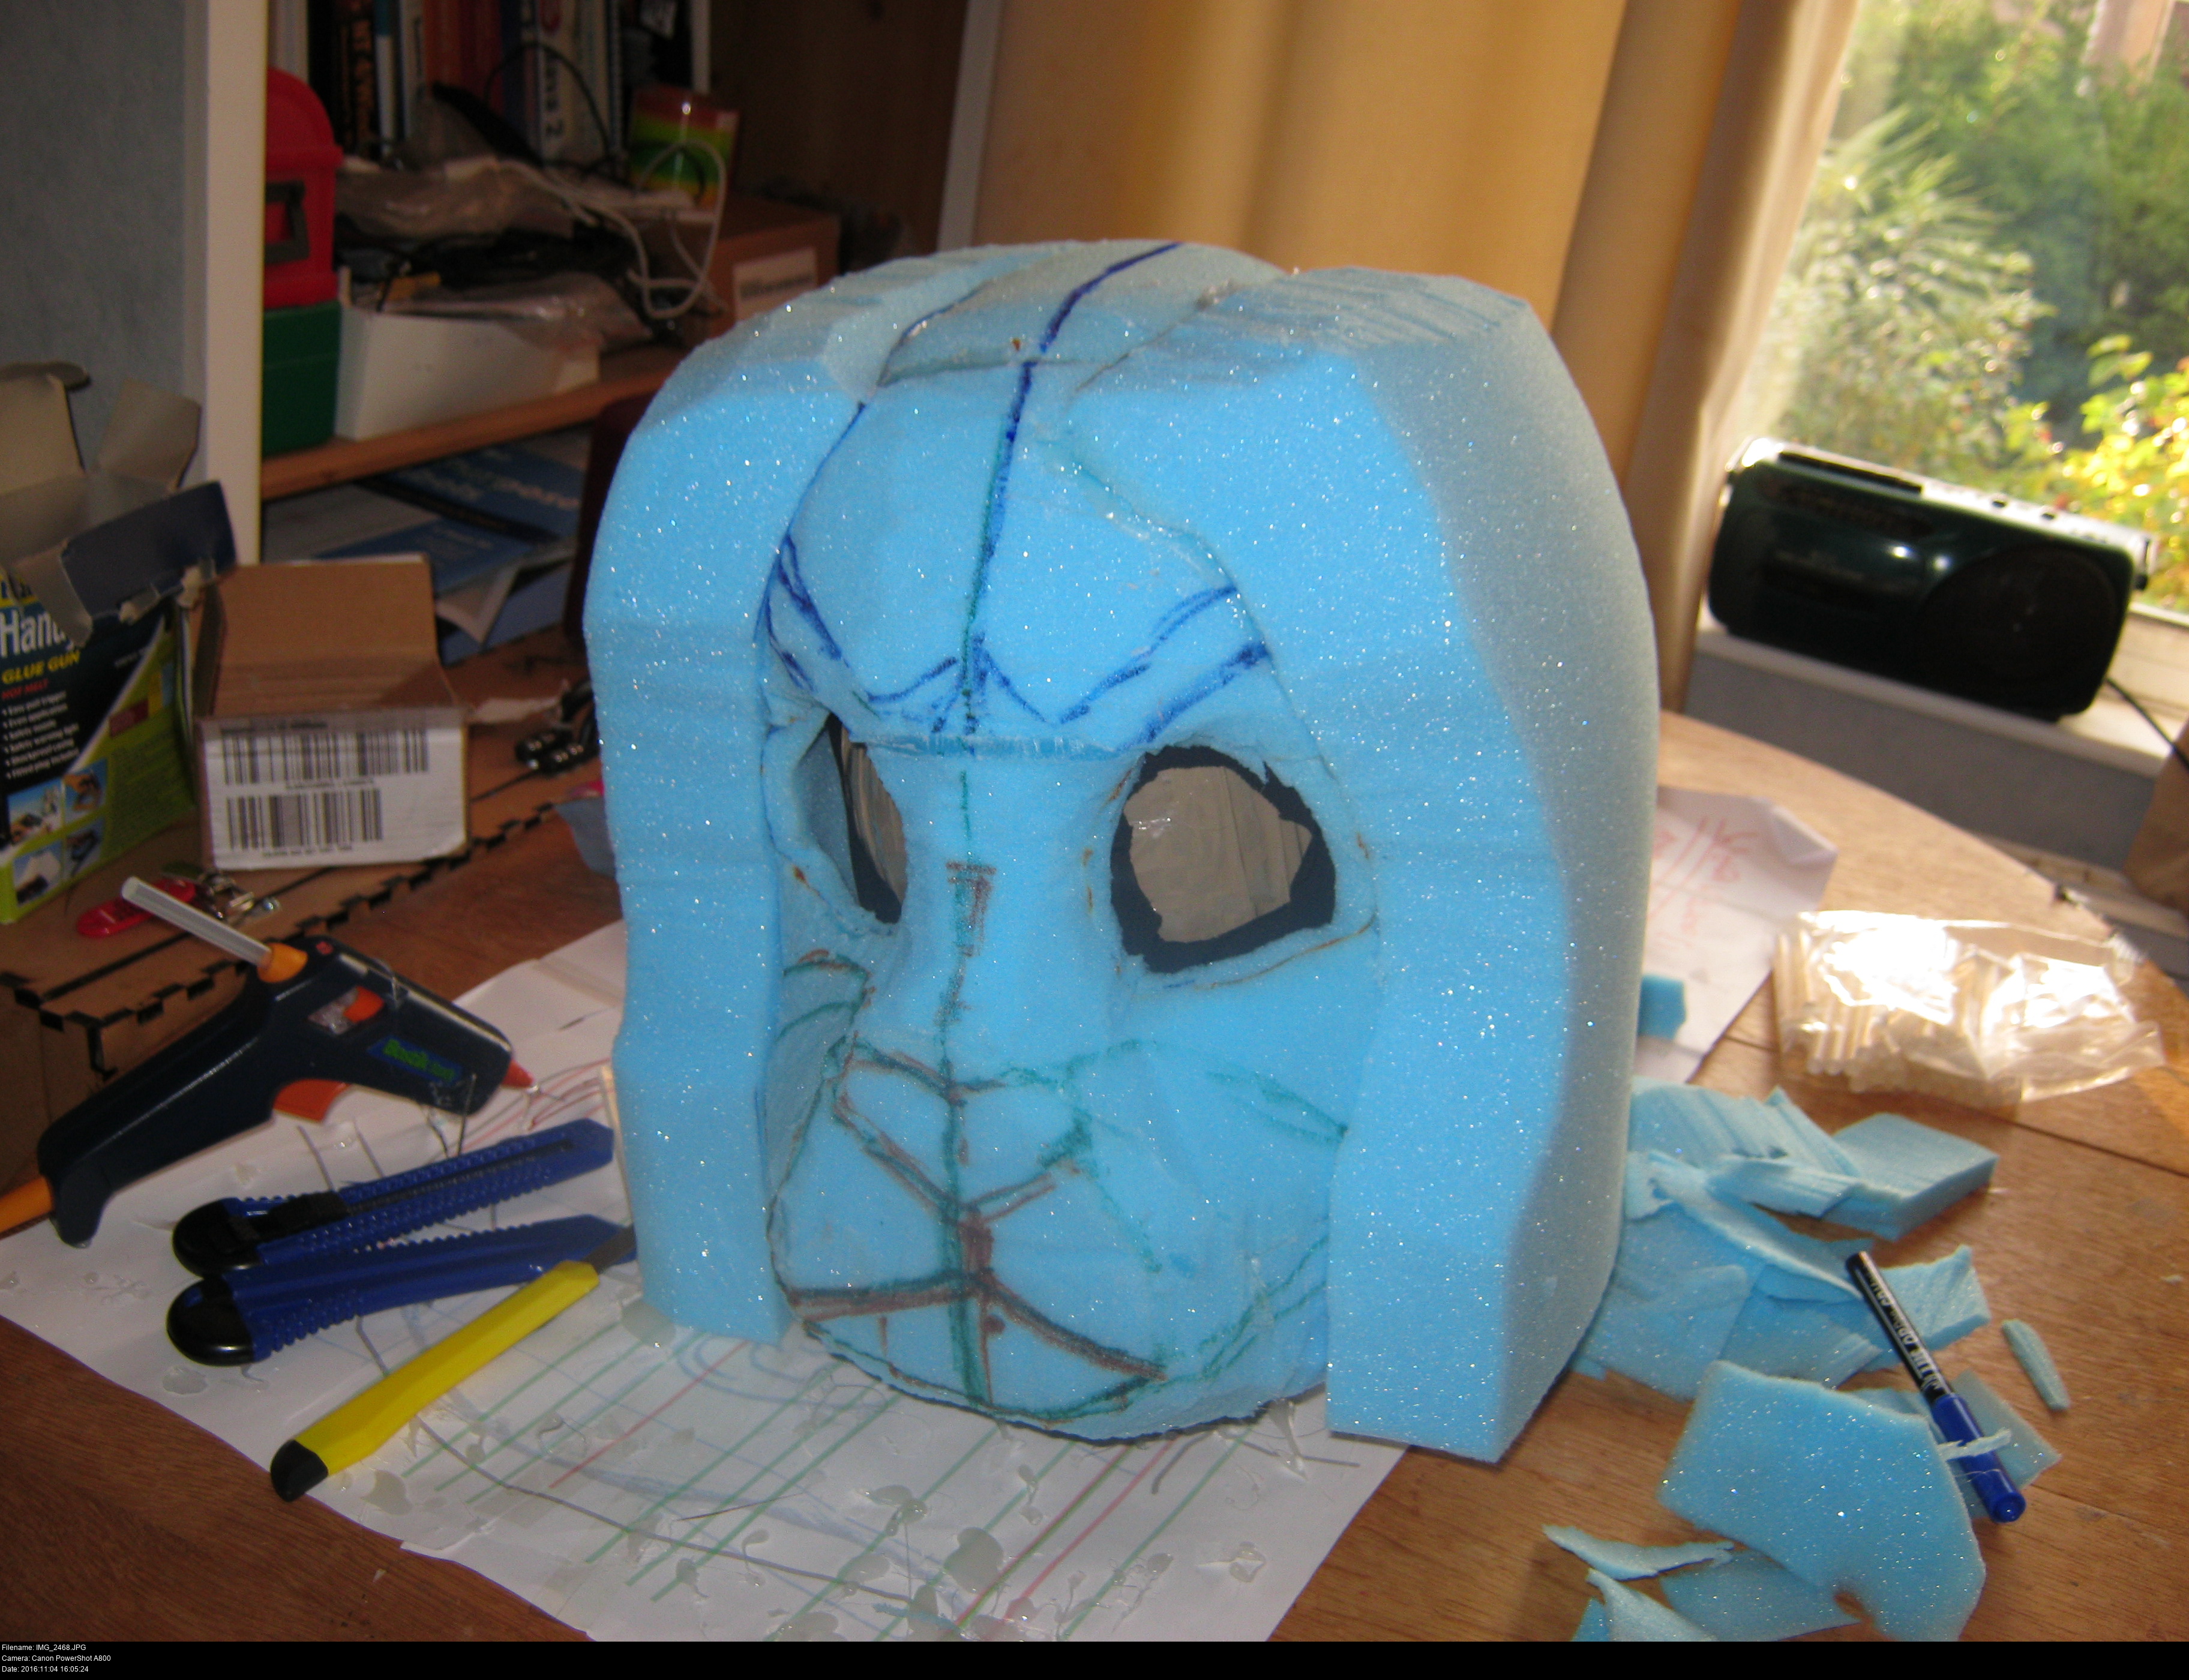
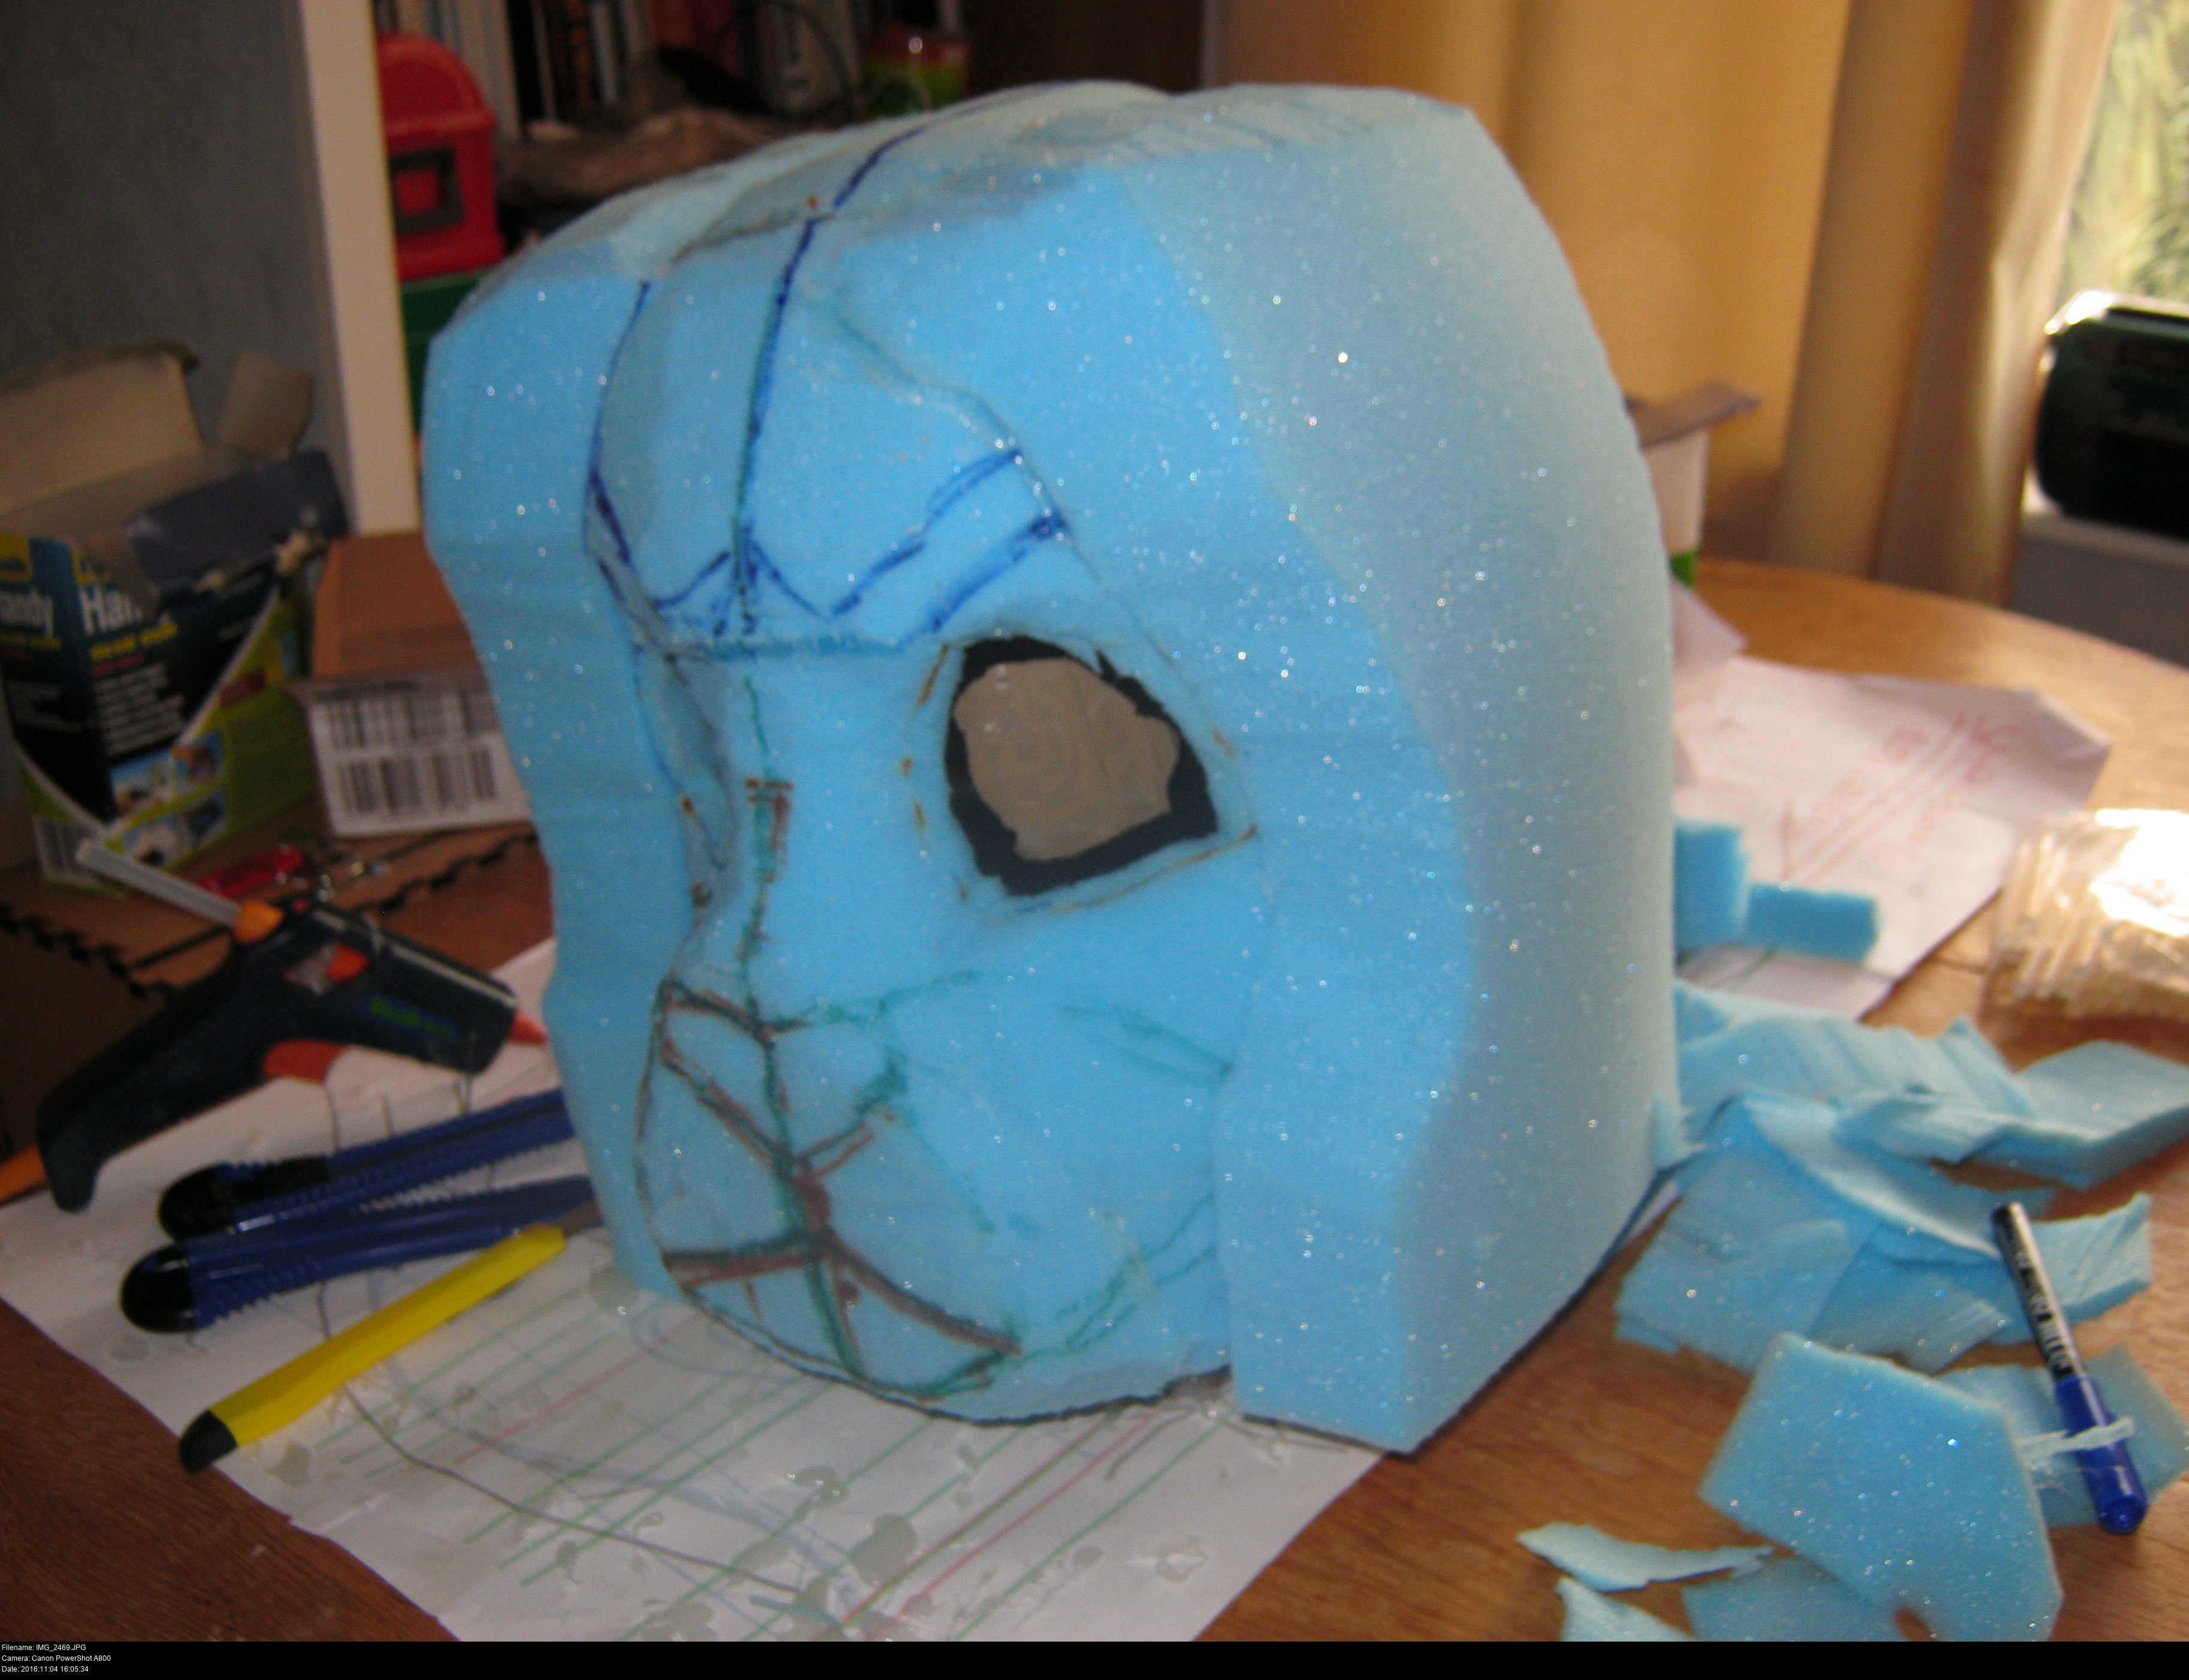
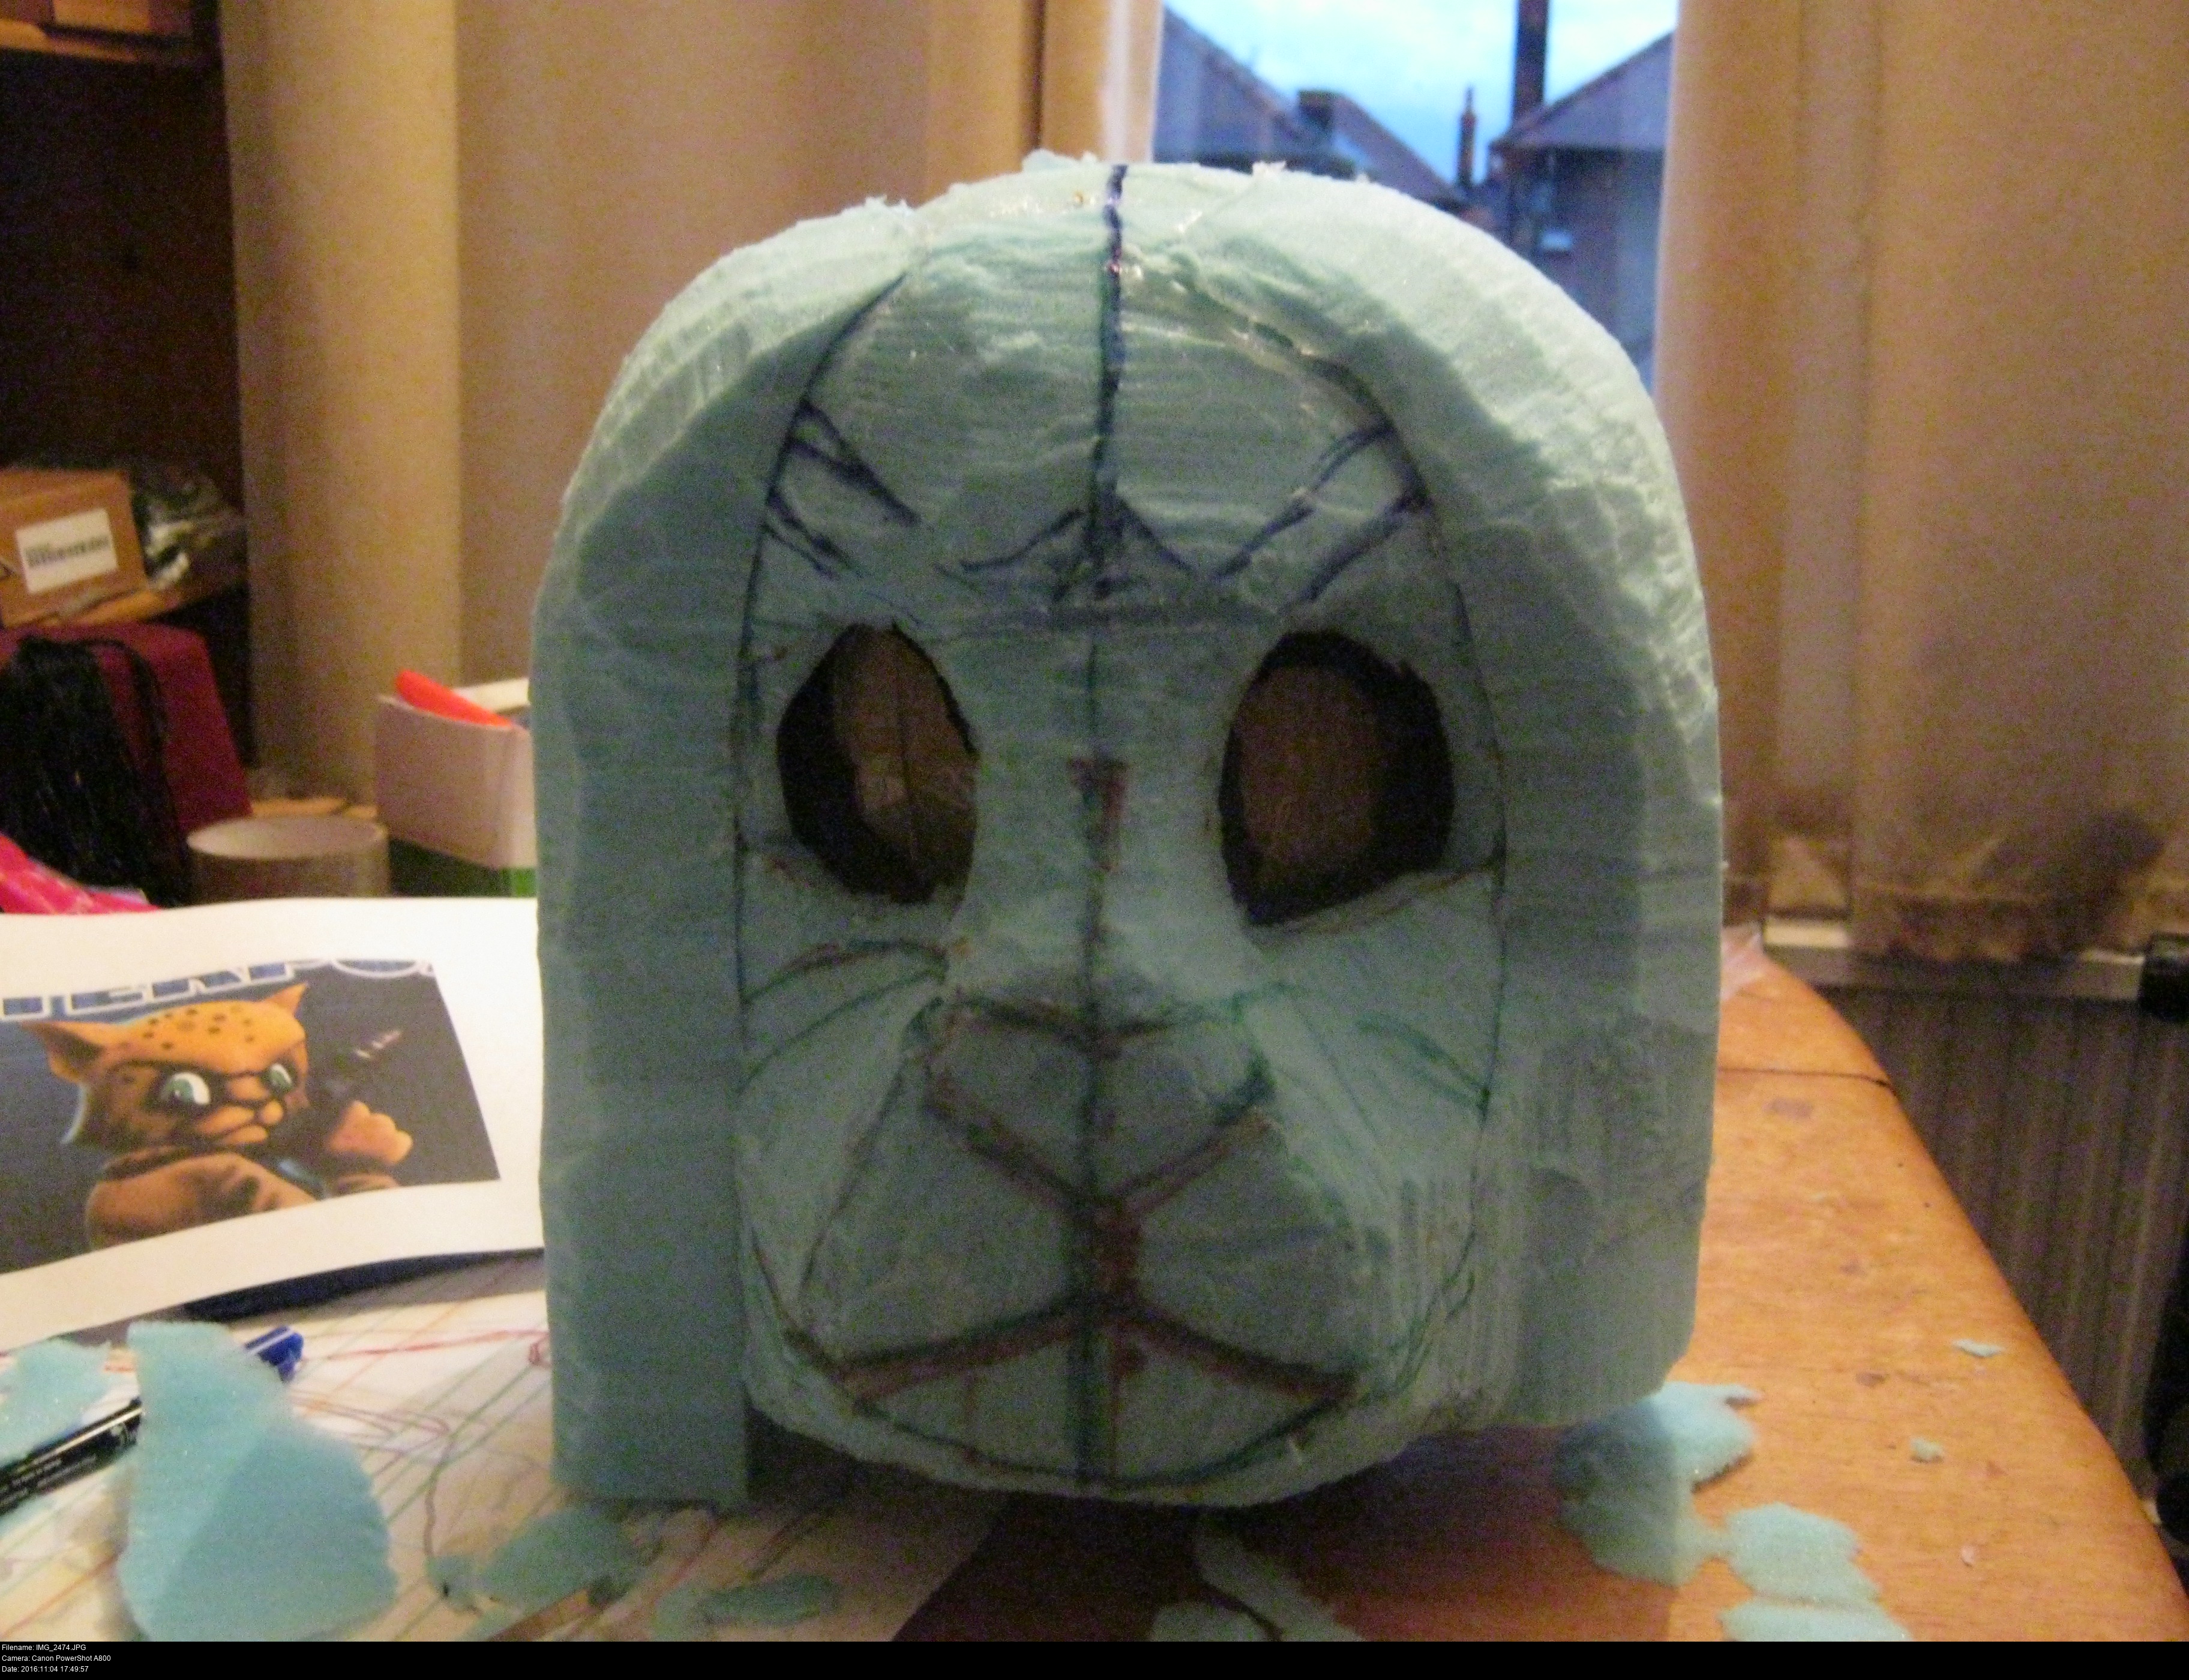
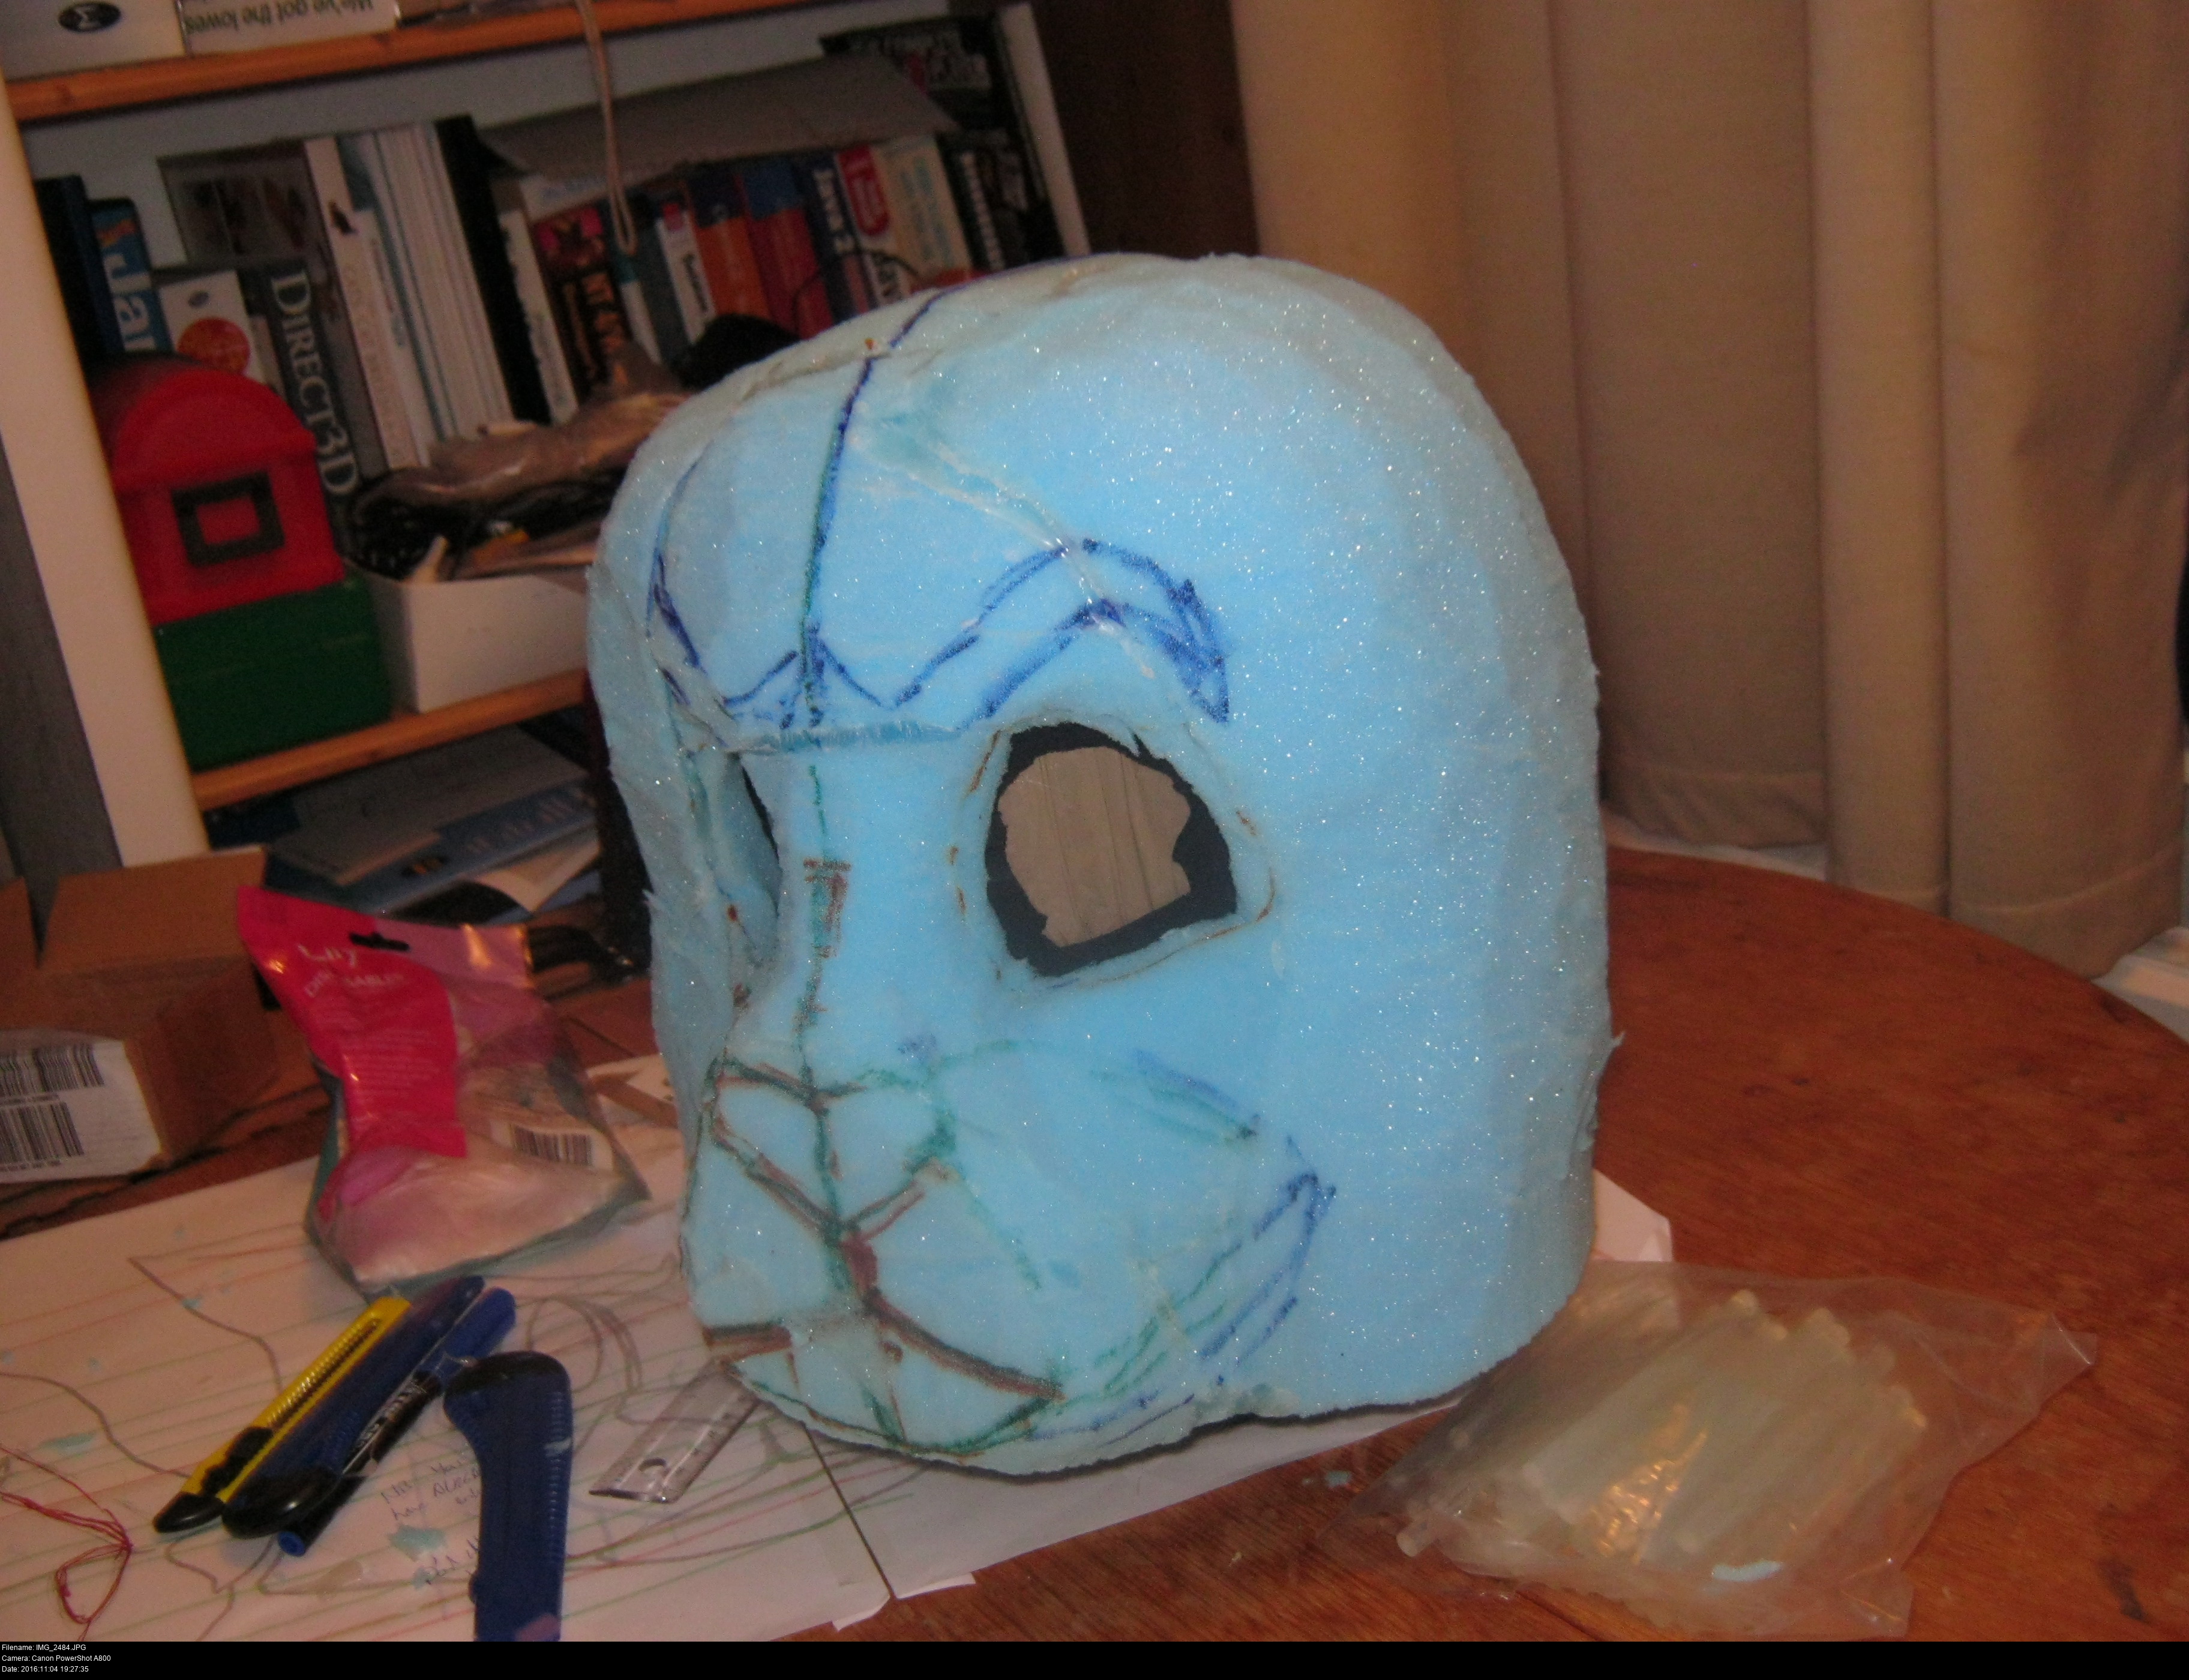
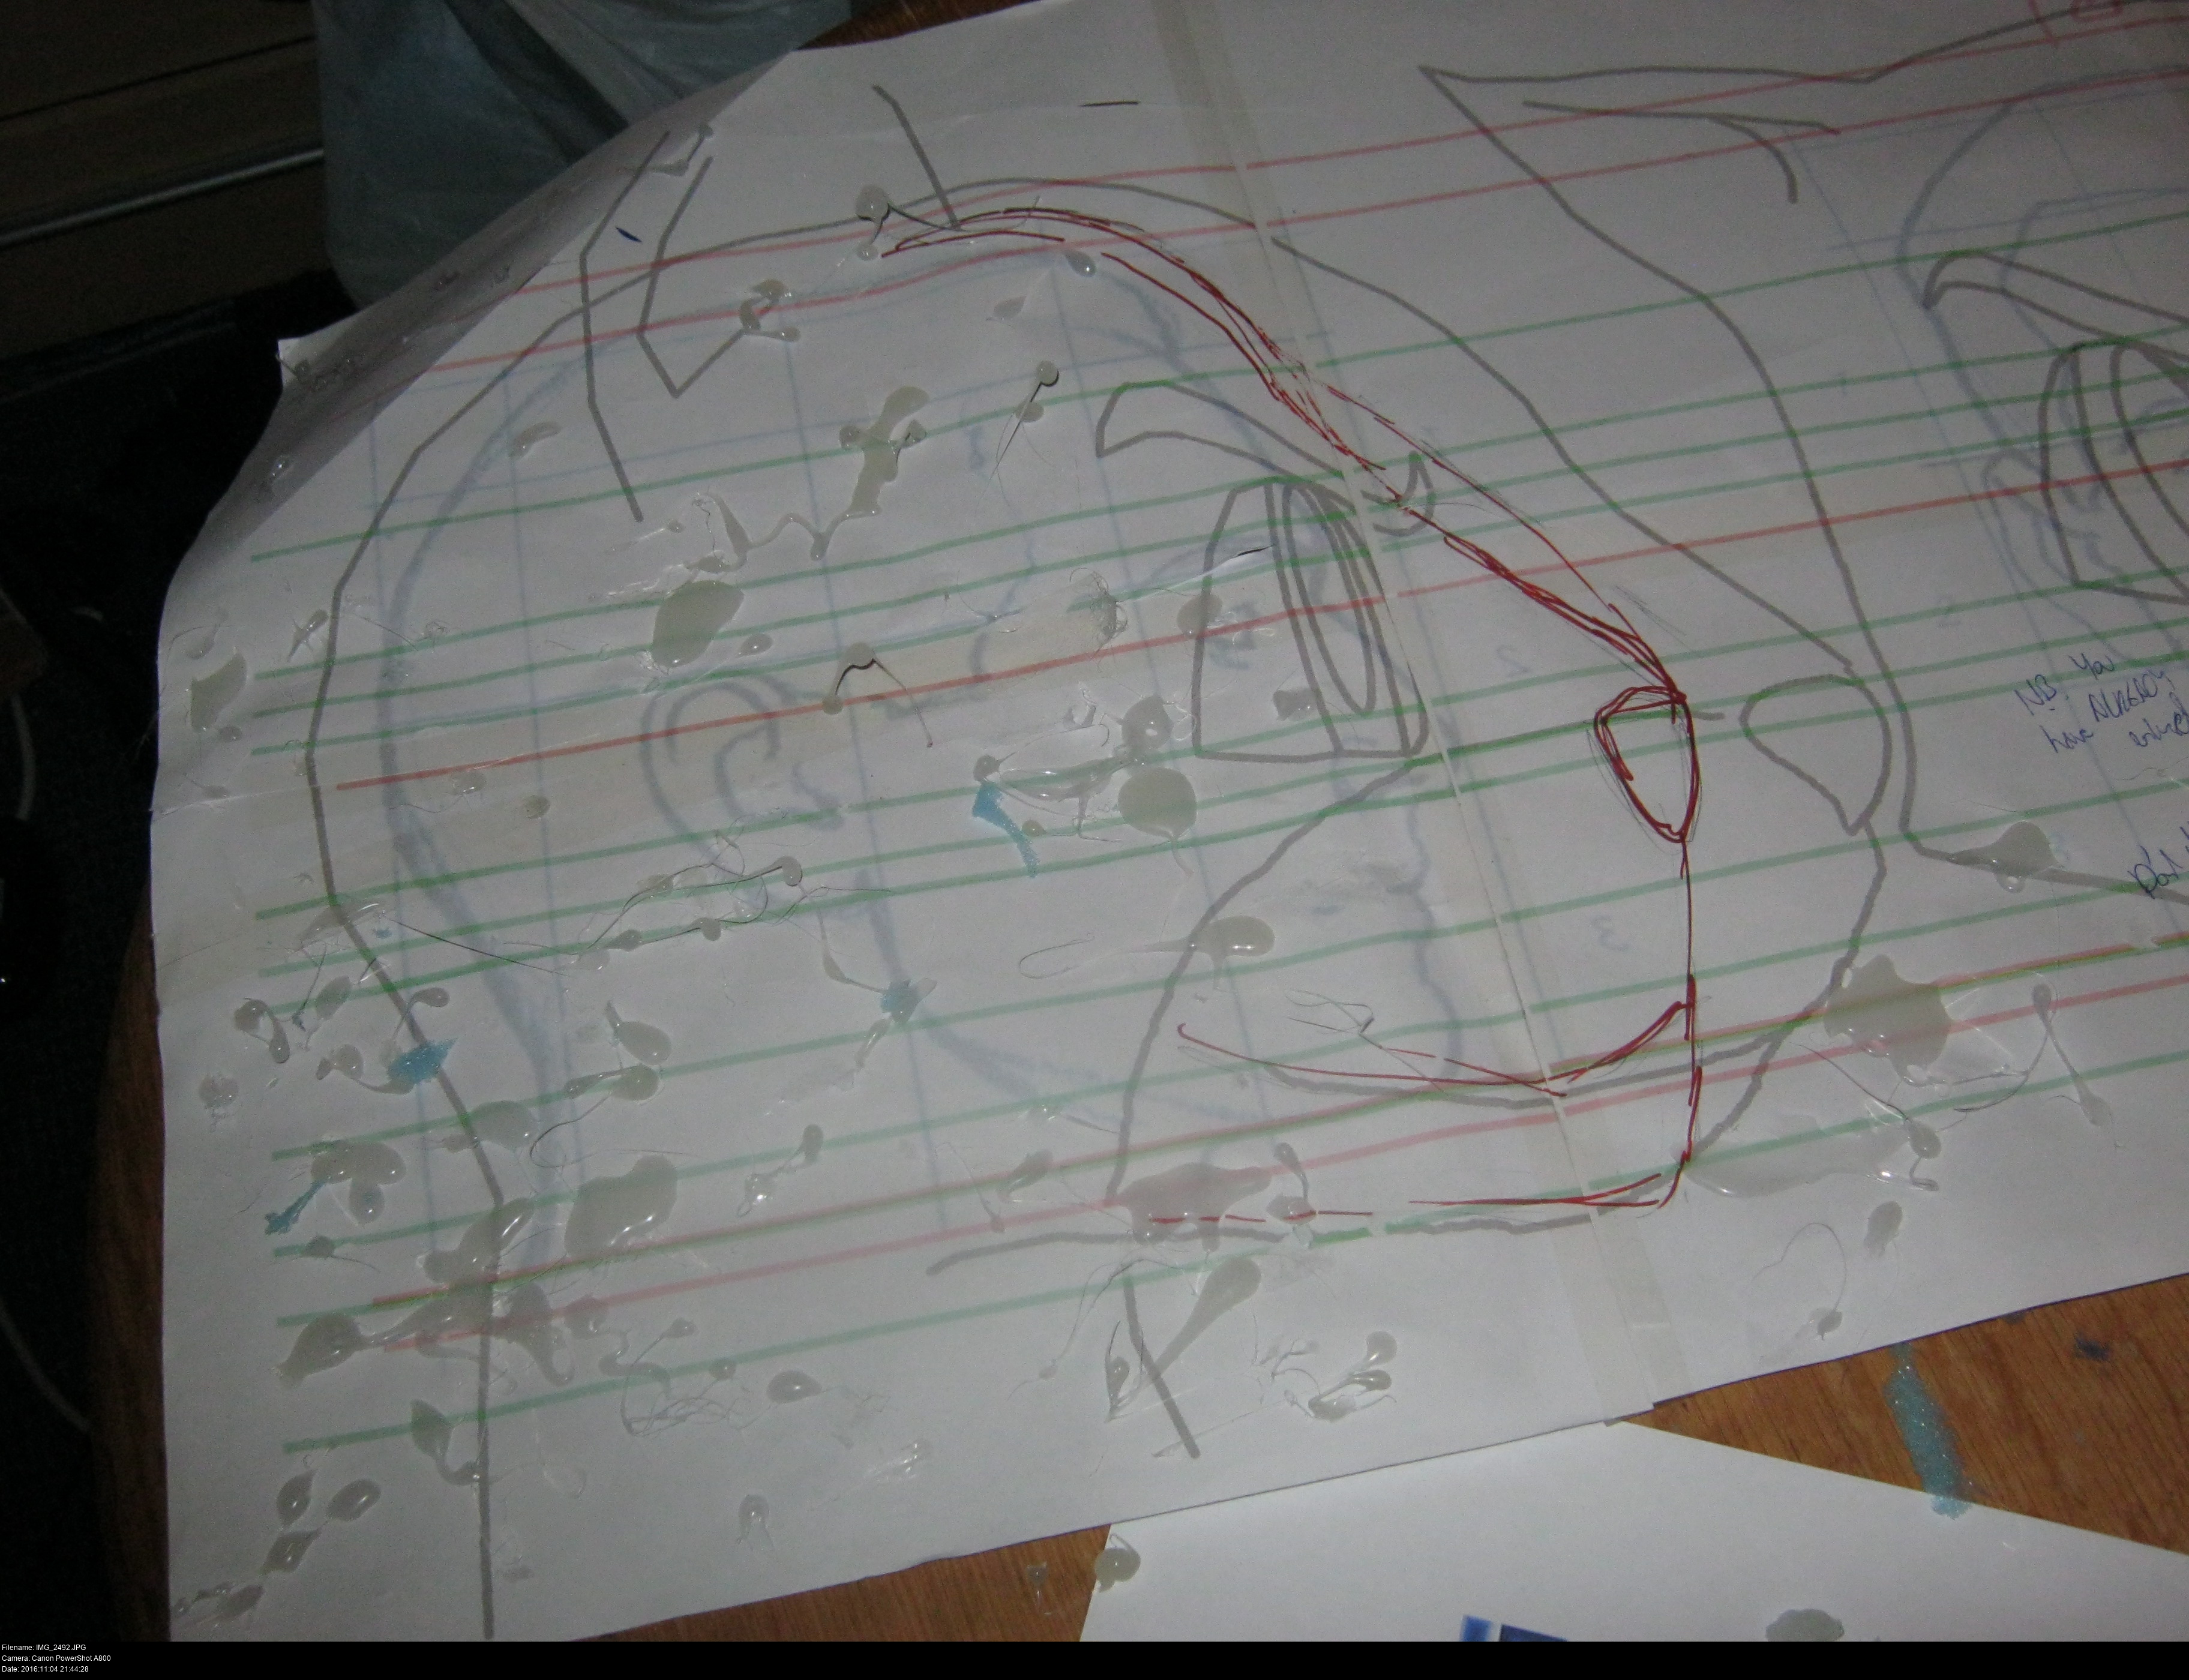
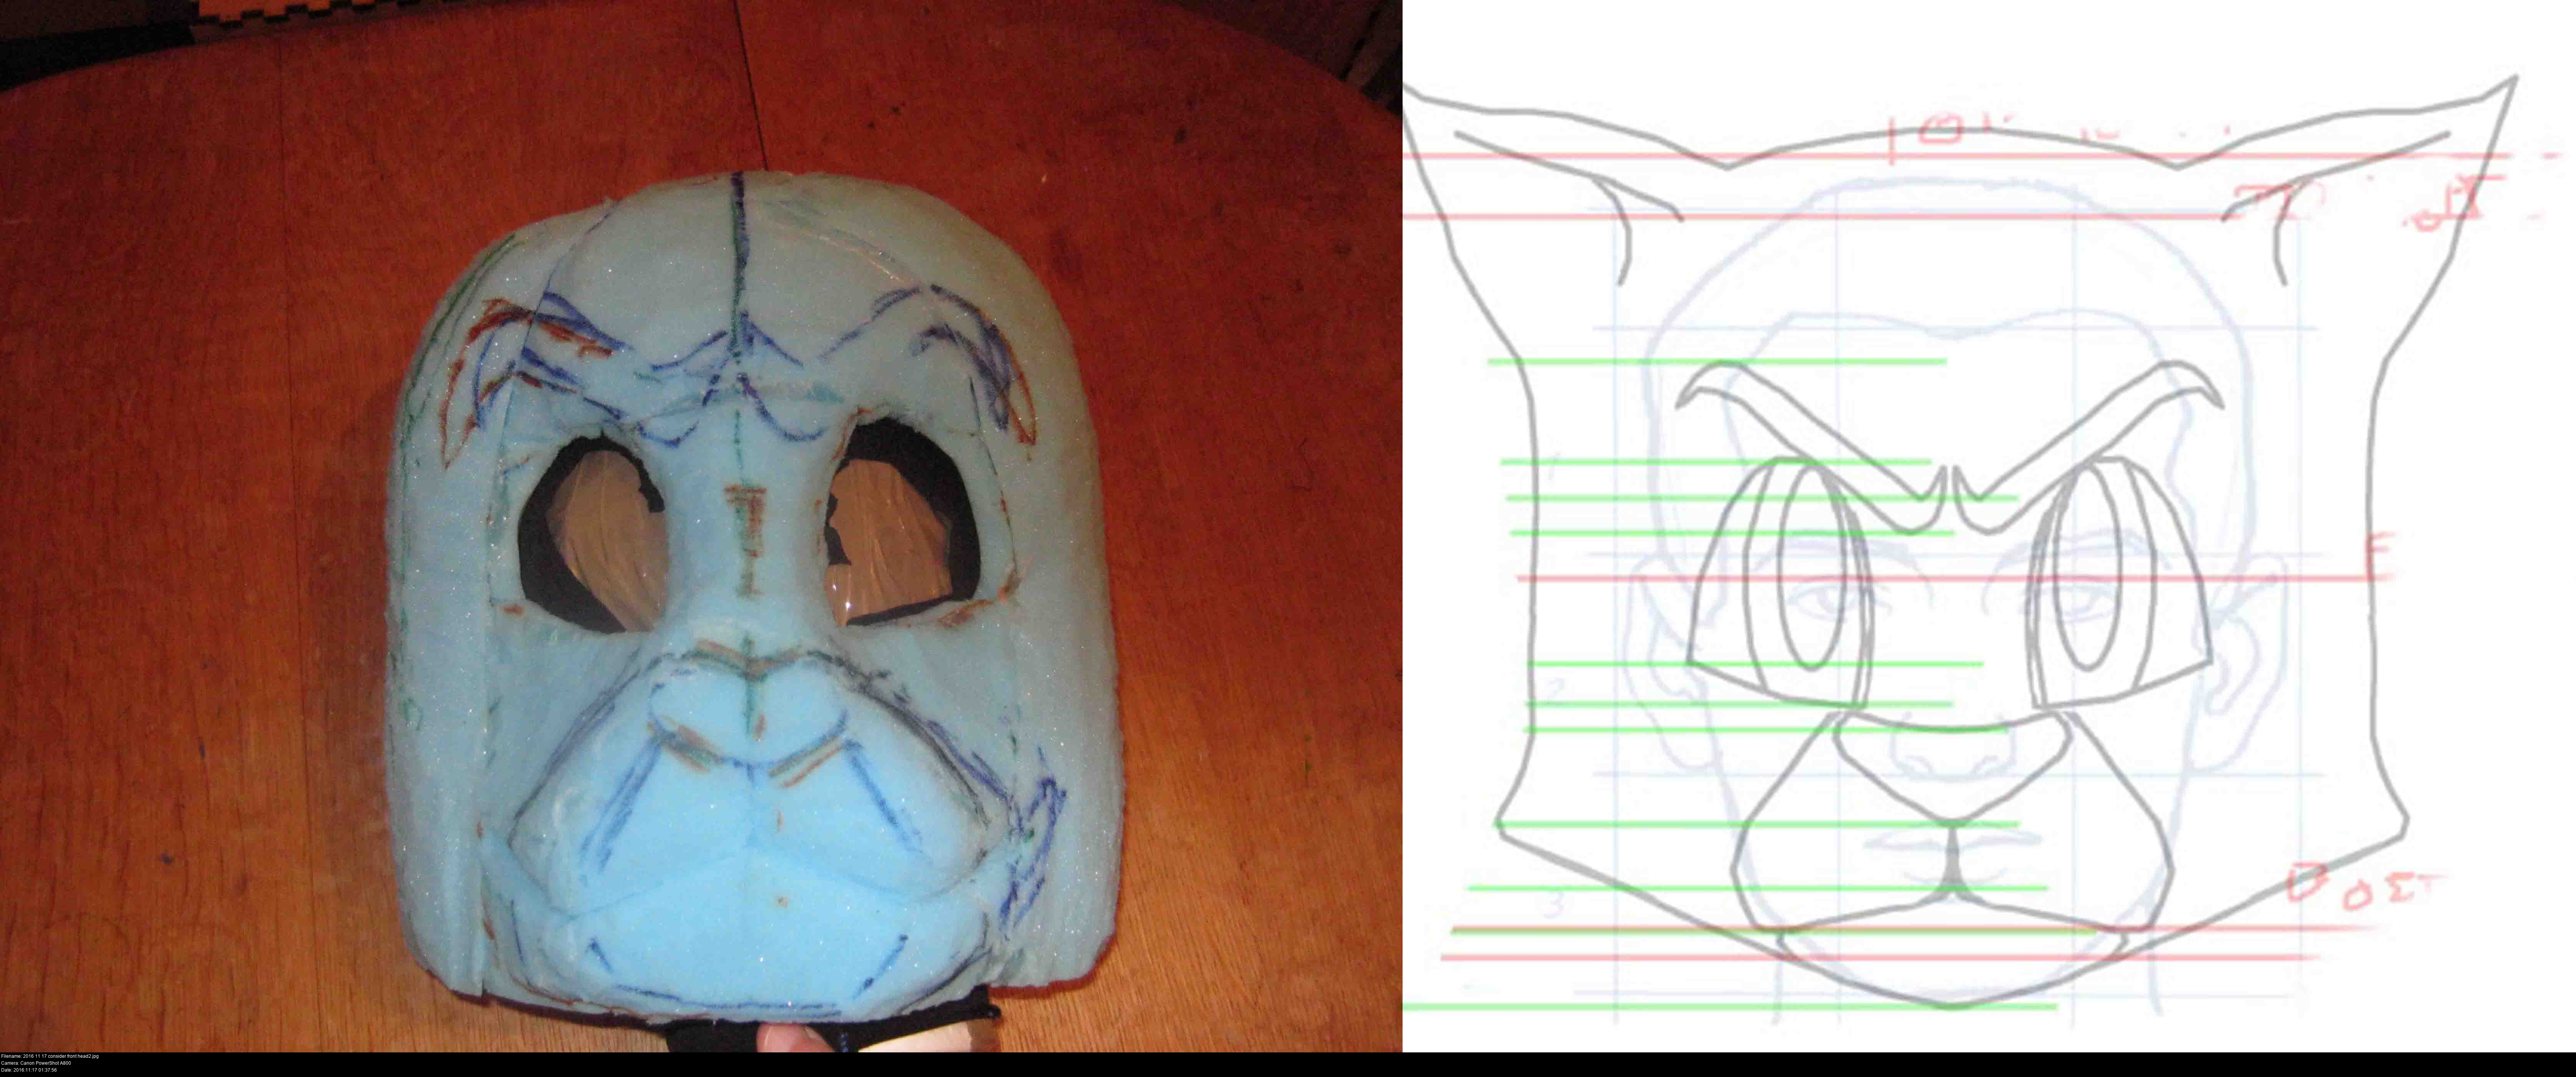
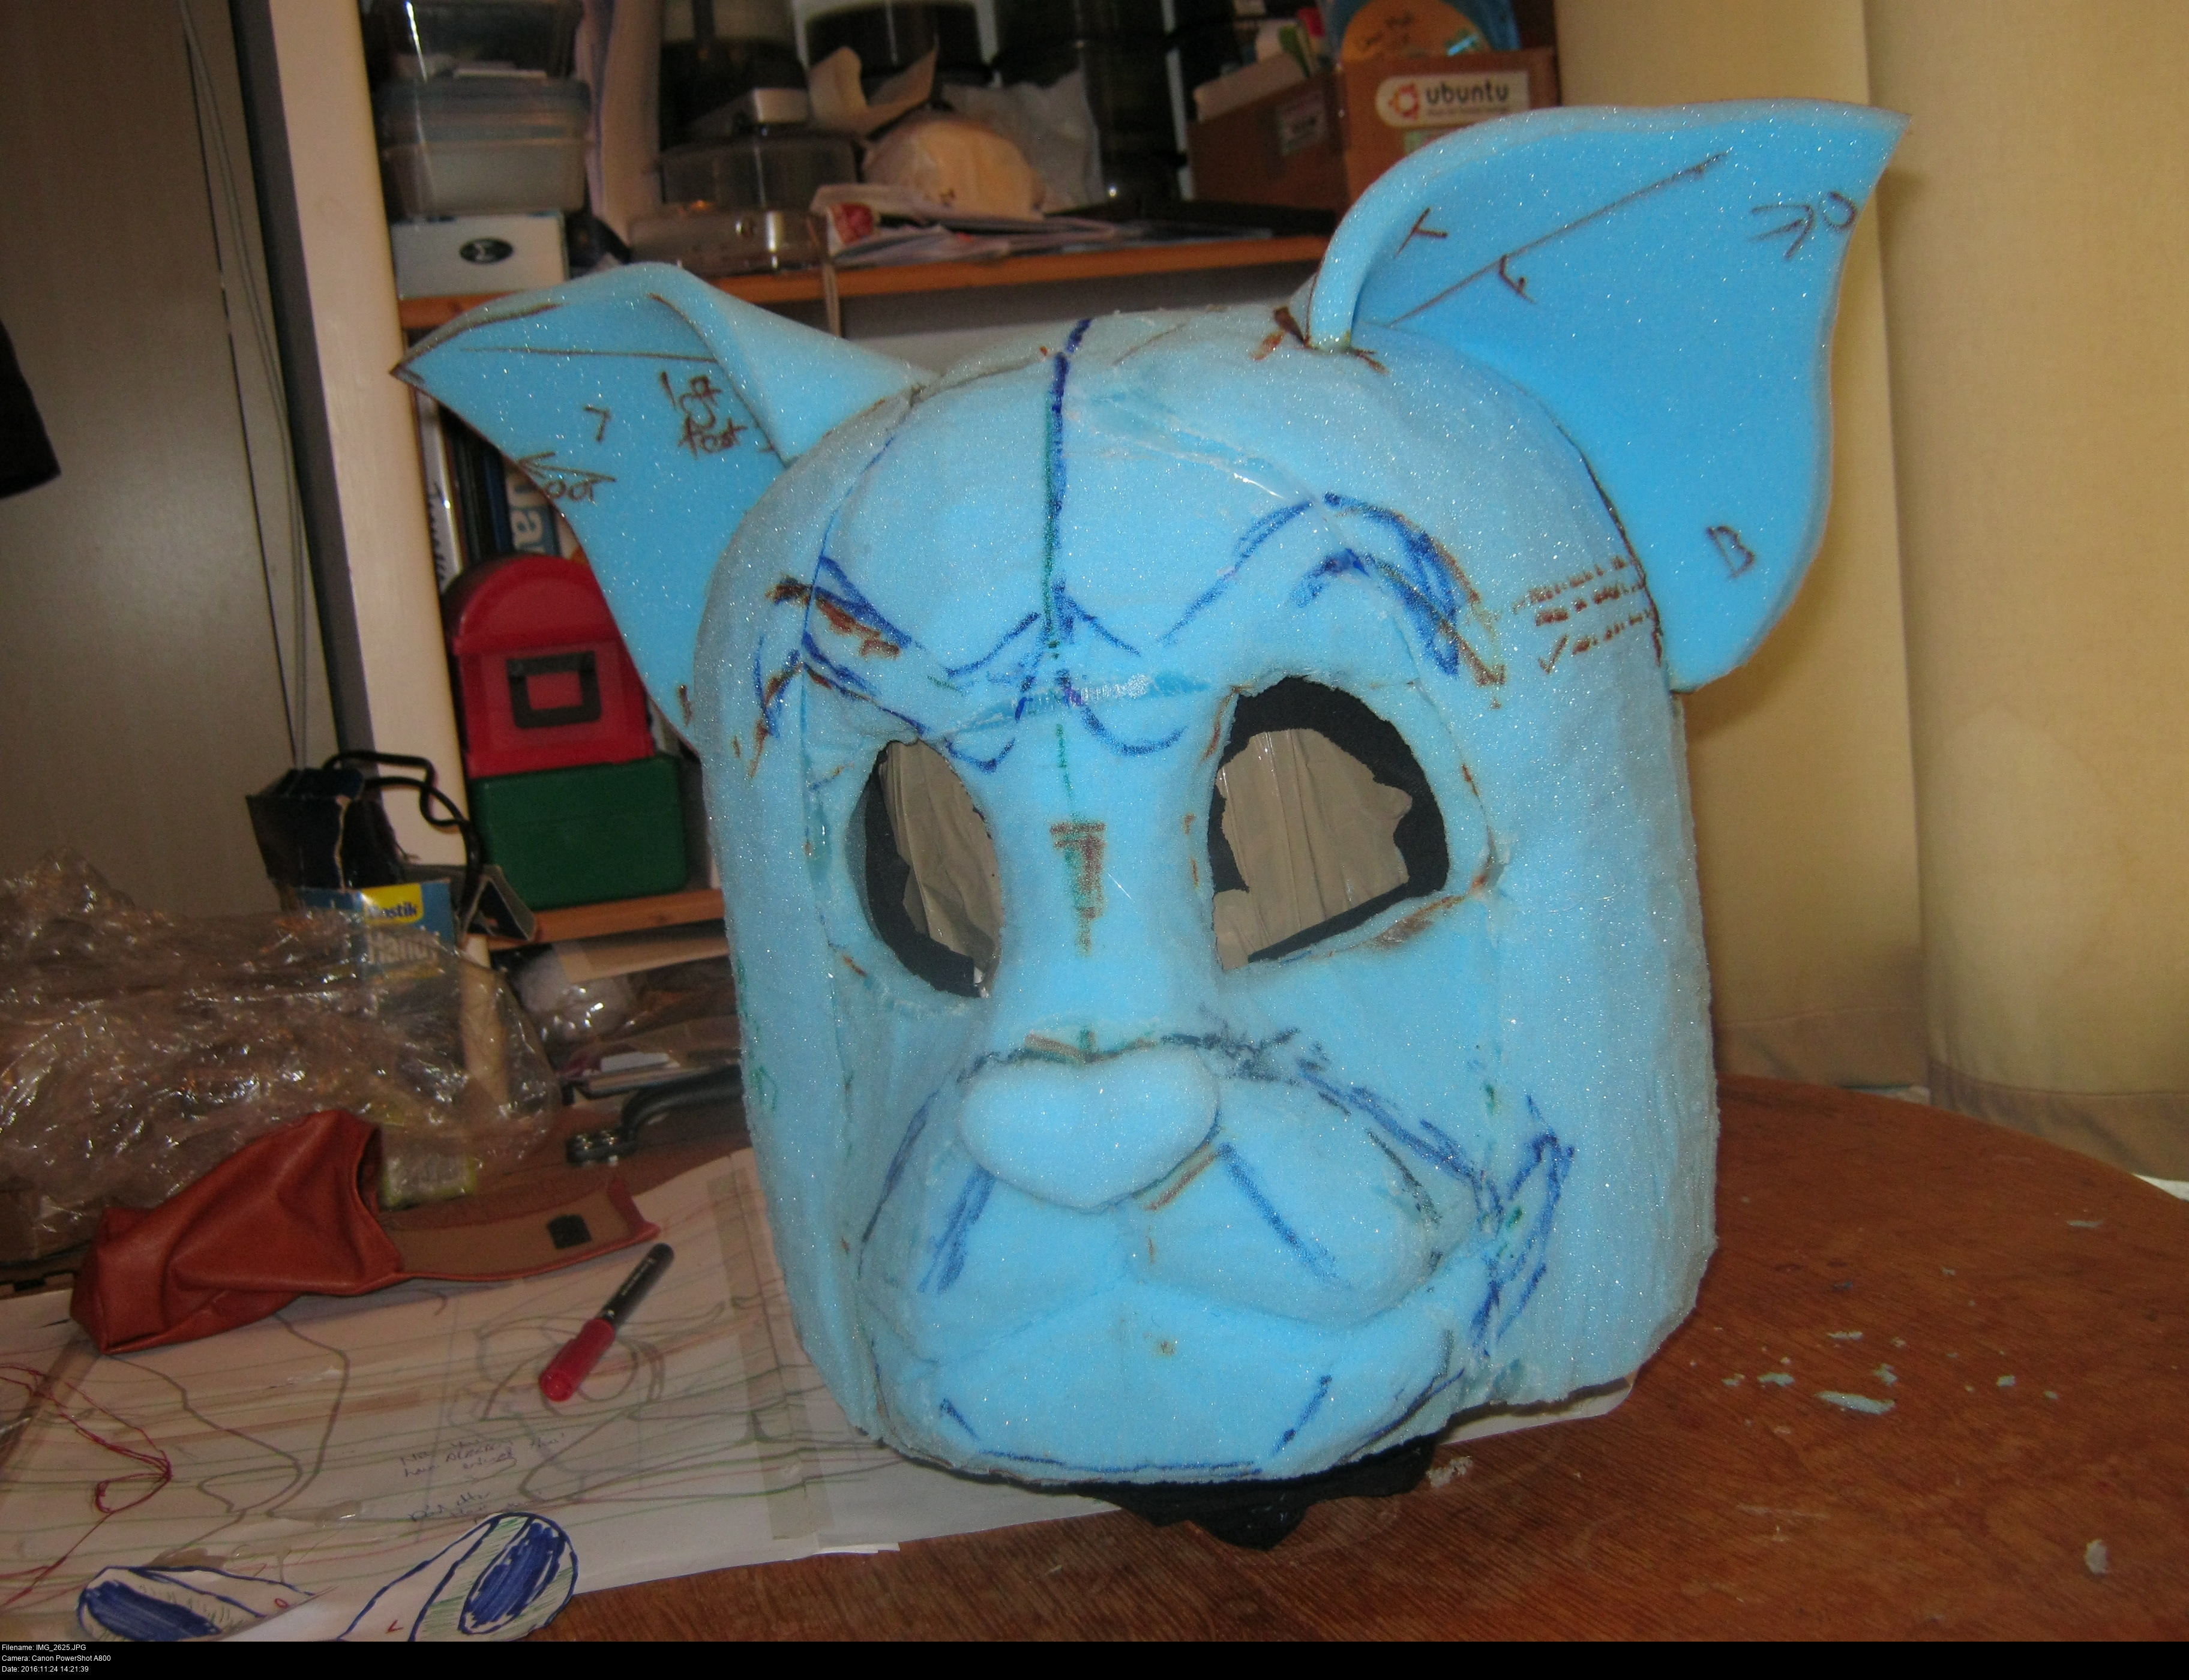
References! I've printed out my designs to life size and marked out where all my features ought to lie inside the head.
In retrospect this was too big, and it's obvious in this picture. If you keep tweeting and facebooking and blogging your progress as you go, people will be able to point this stuff out to you before you start making mistakes...
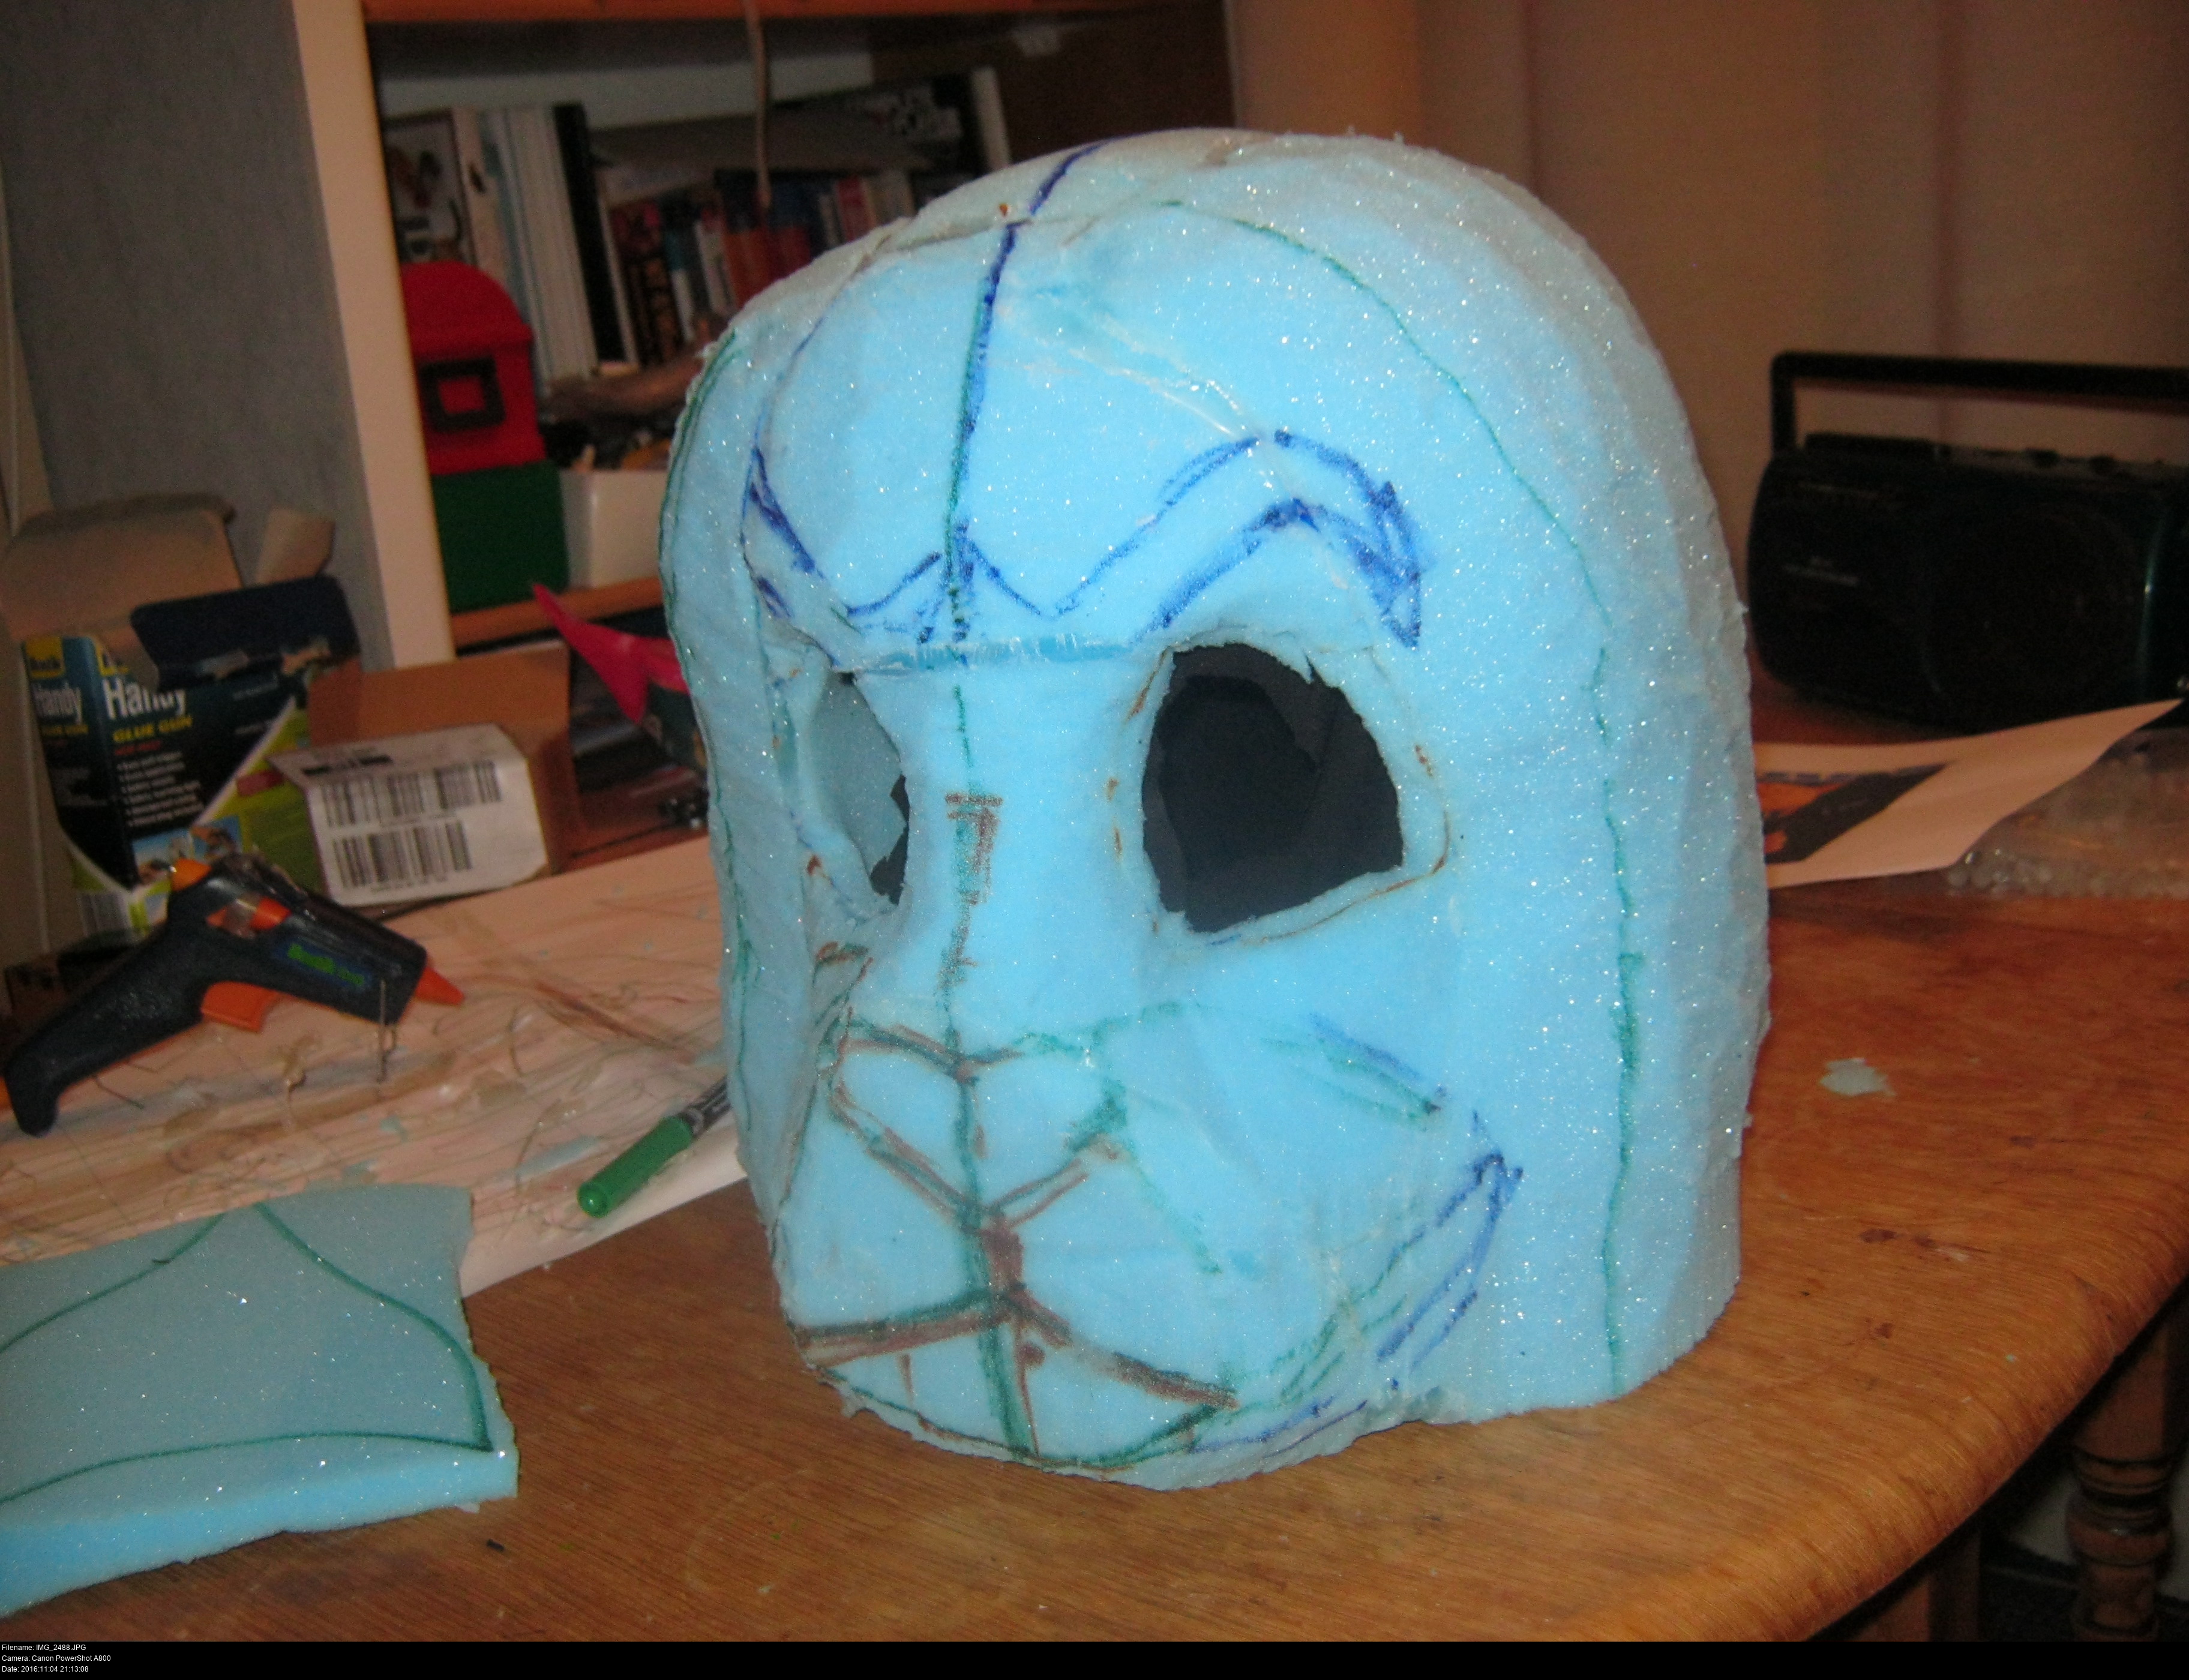
There's two ways to build a complex shape out of foam: you can either glue large blocks onto it and cut them down into a shape, or you can progressively glue on small blocks and construct the shape a layer at a time.
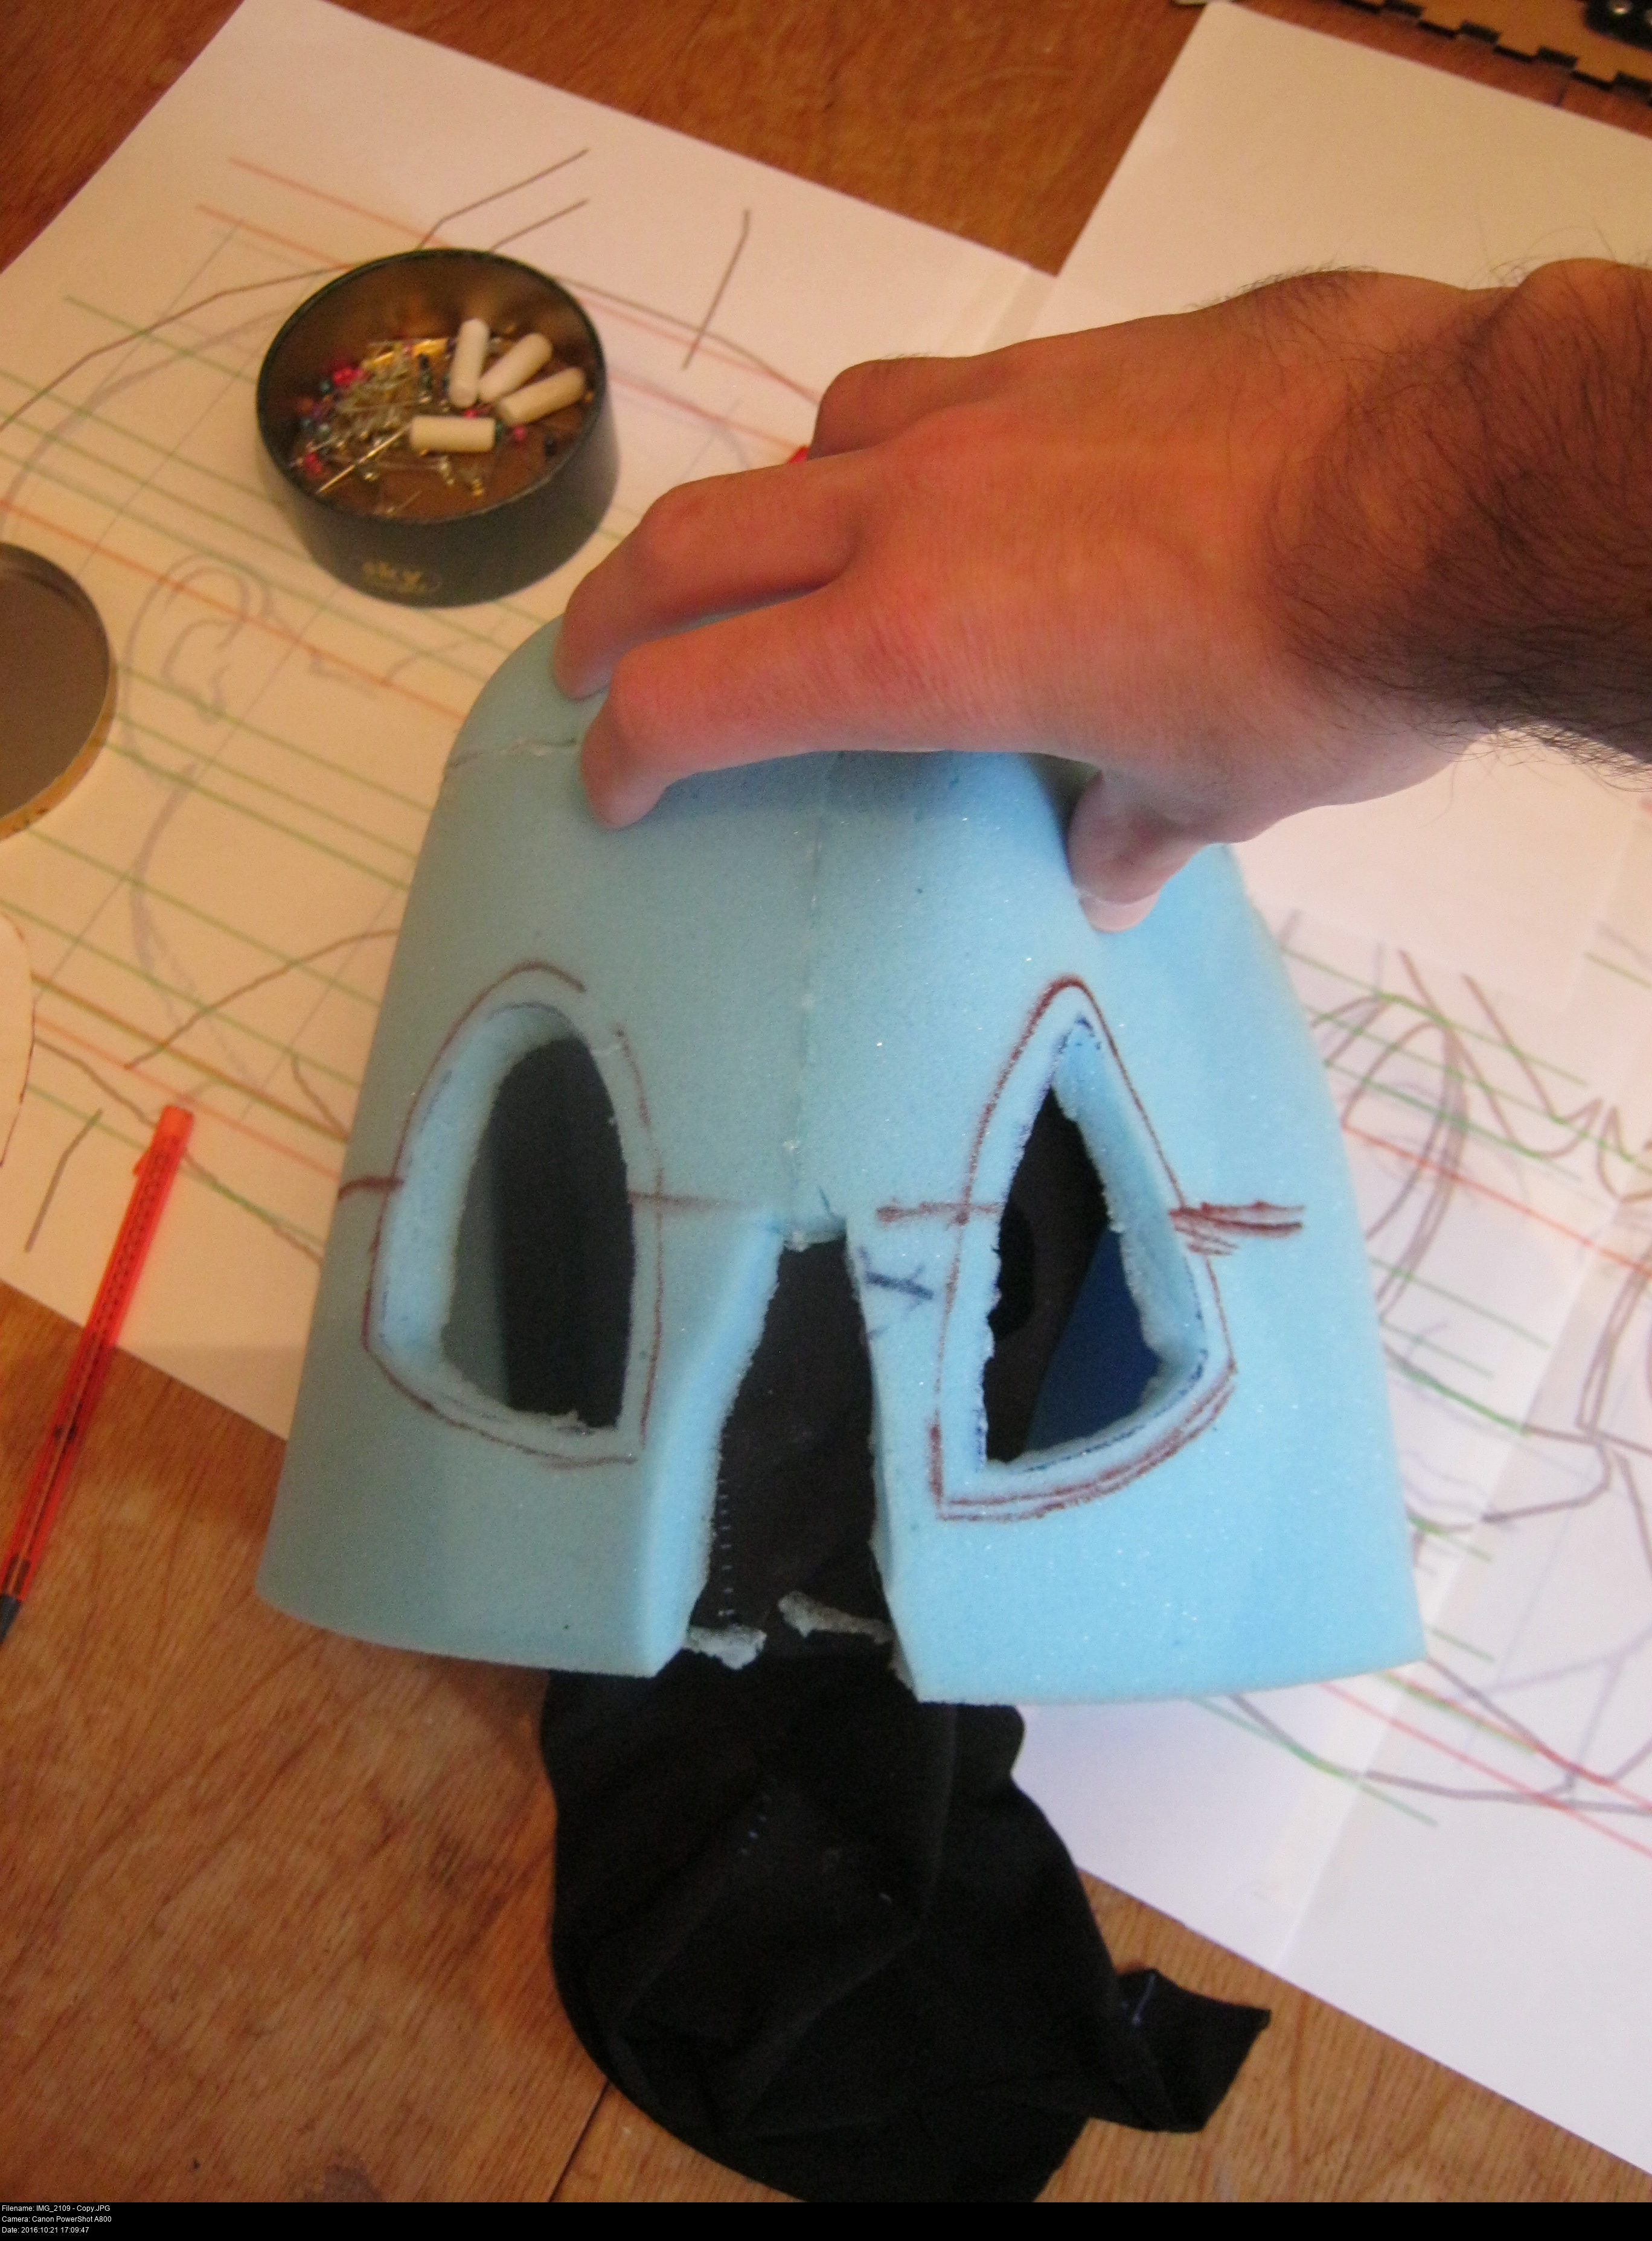
Either way, I need to enlarge these physical eyeholes a little so I know to work around them. I'm not going to cut them to the exact final size, just a little smaller. I haven't decided how I'm going to fit or make the eyes yet, it's all a mystery. If I have some big eyeholes in the foam, I can at least pretend to look like I know where I'm going with this.
The exact size doesn't matter, I suppose. They're going to be covered eventually and I could hotglue new interiors into the cavities if I needed to.
When you print things out, especially rasterbated things, make sure to that the dimensions of the print-out match what you wanted. You might need to scale things in the print settings since the printer's version of an inch might not match a real inch.
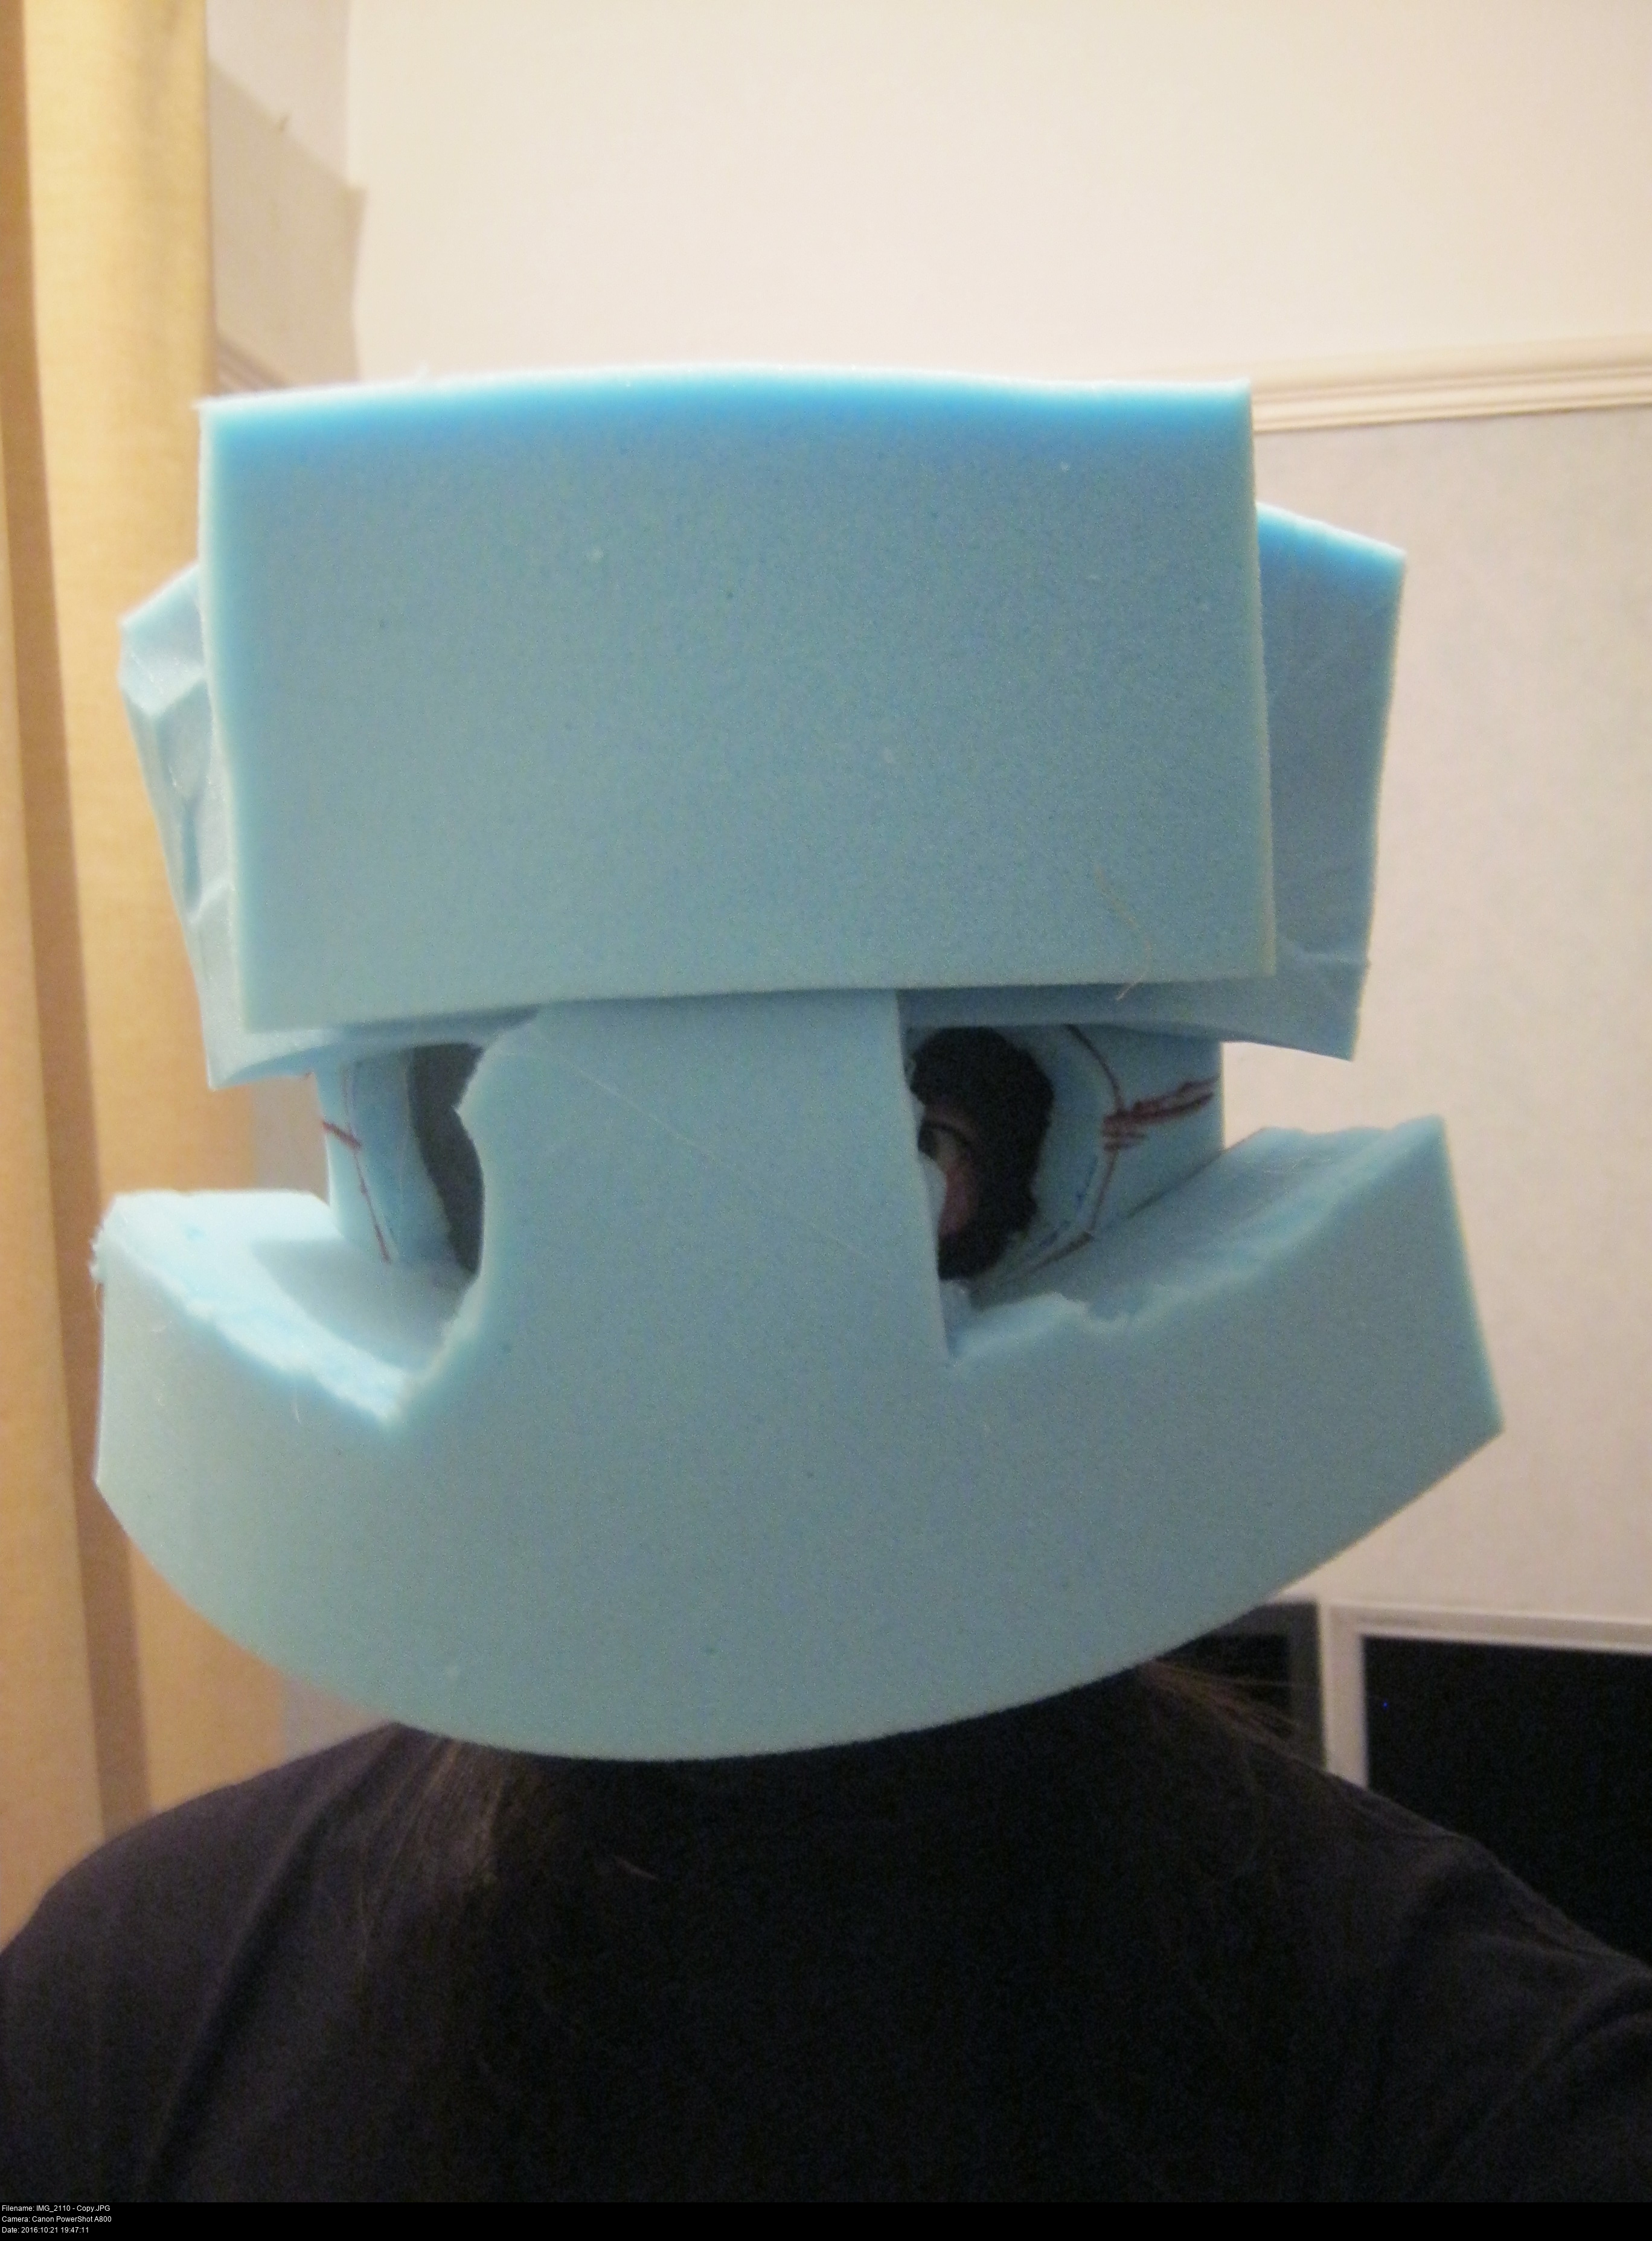
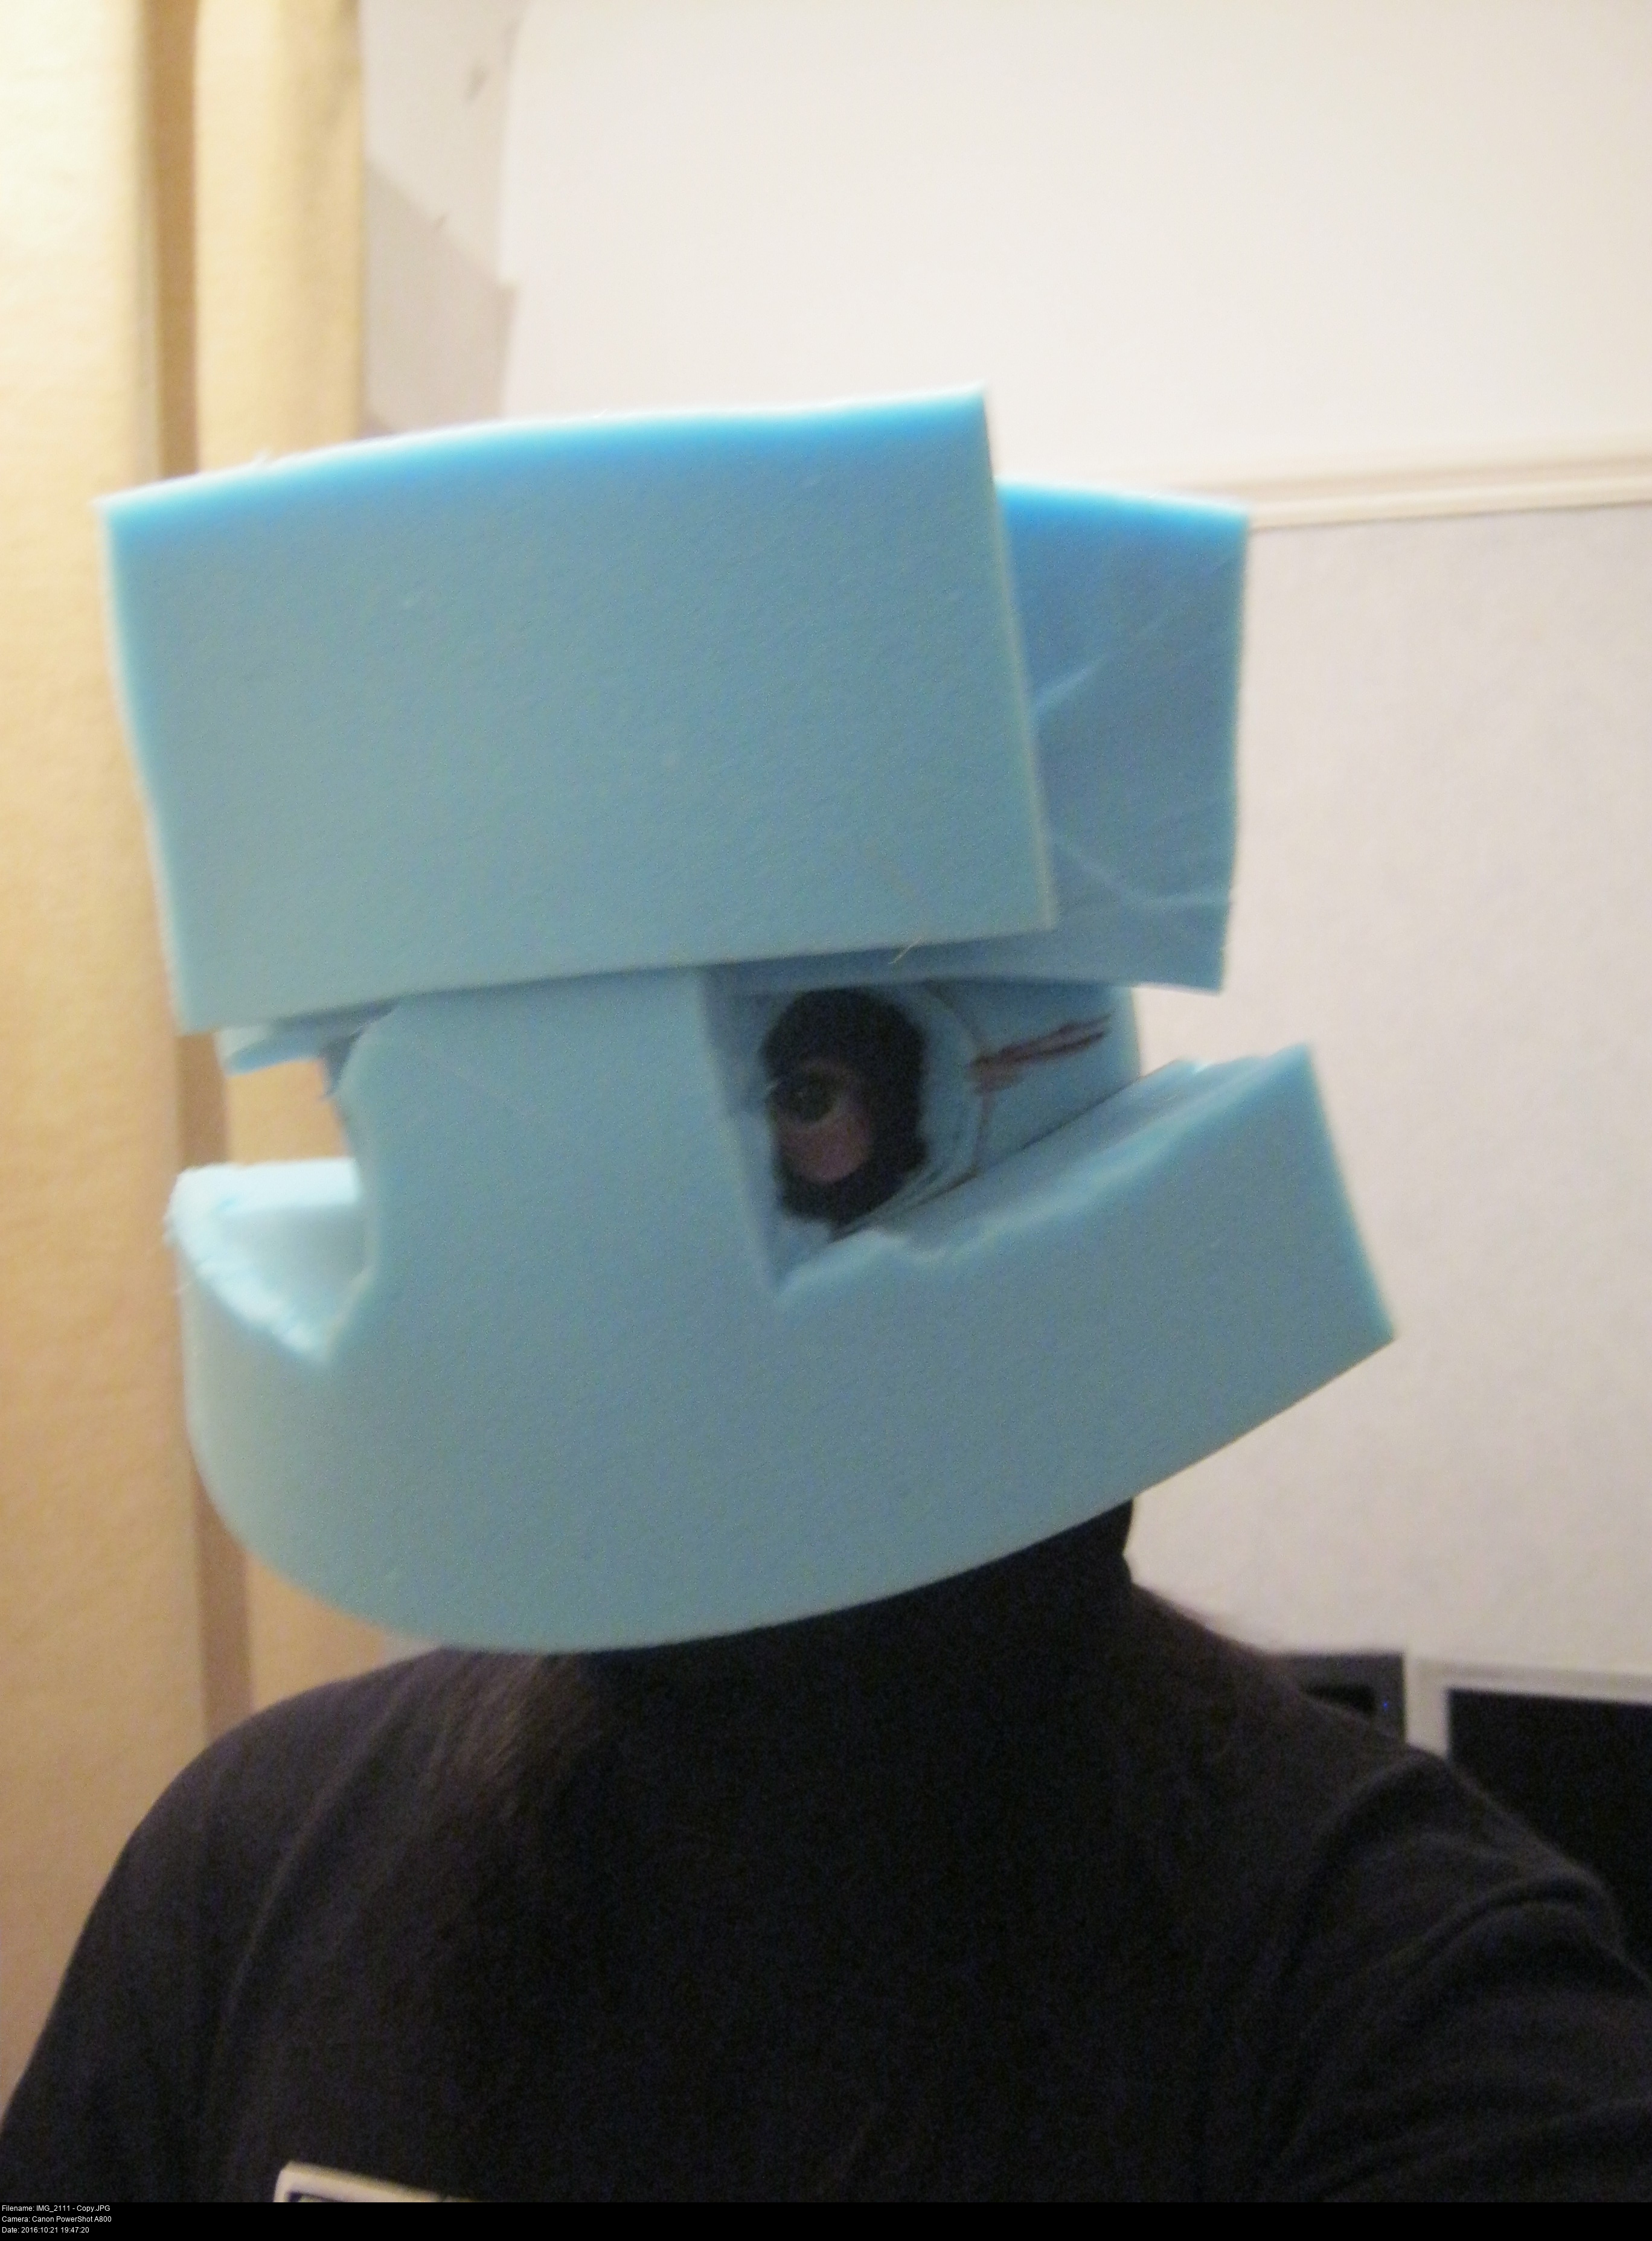

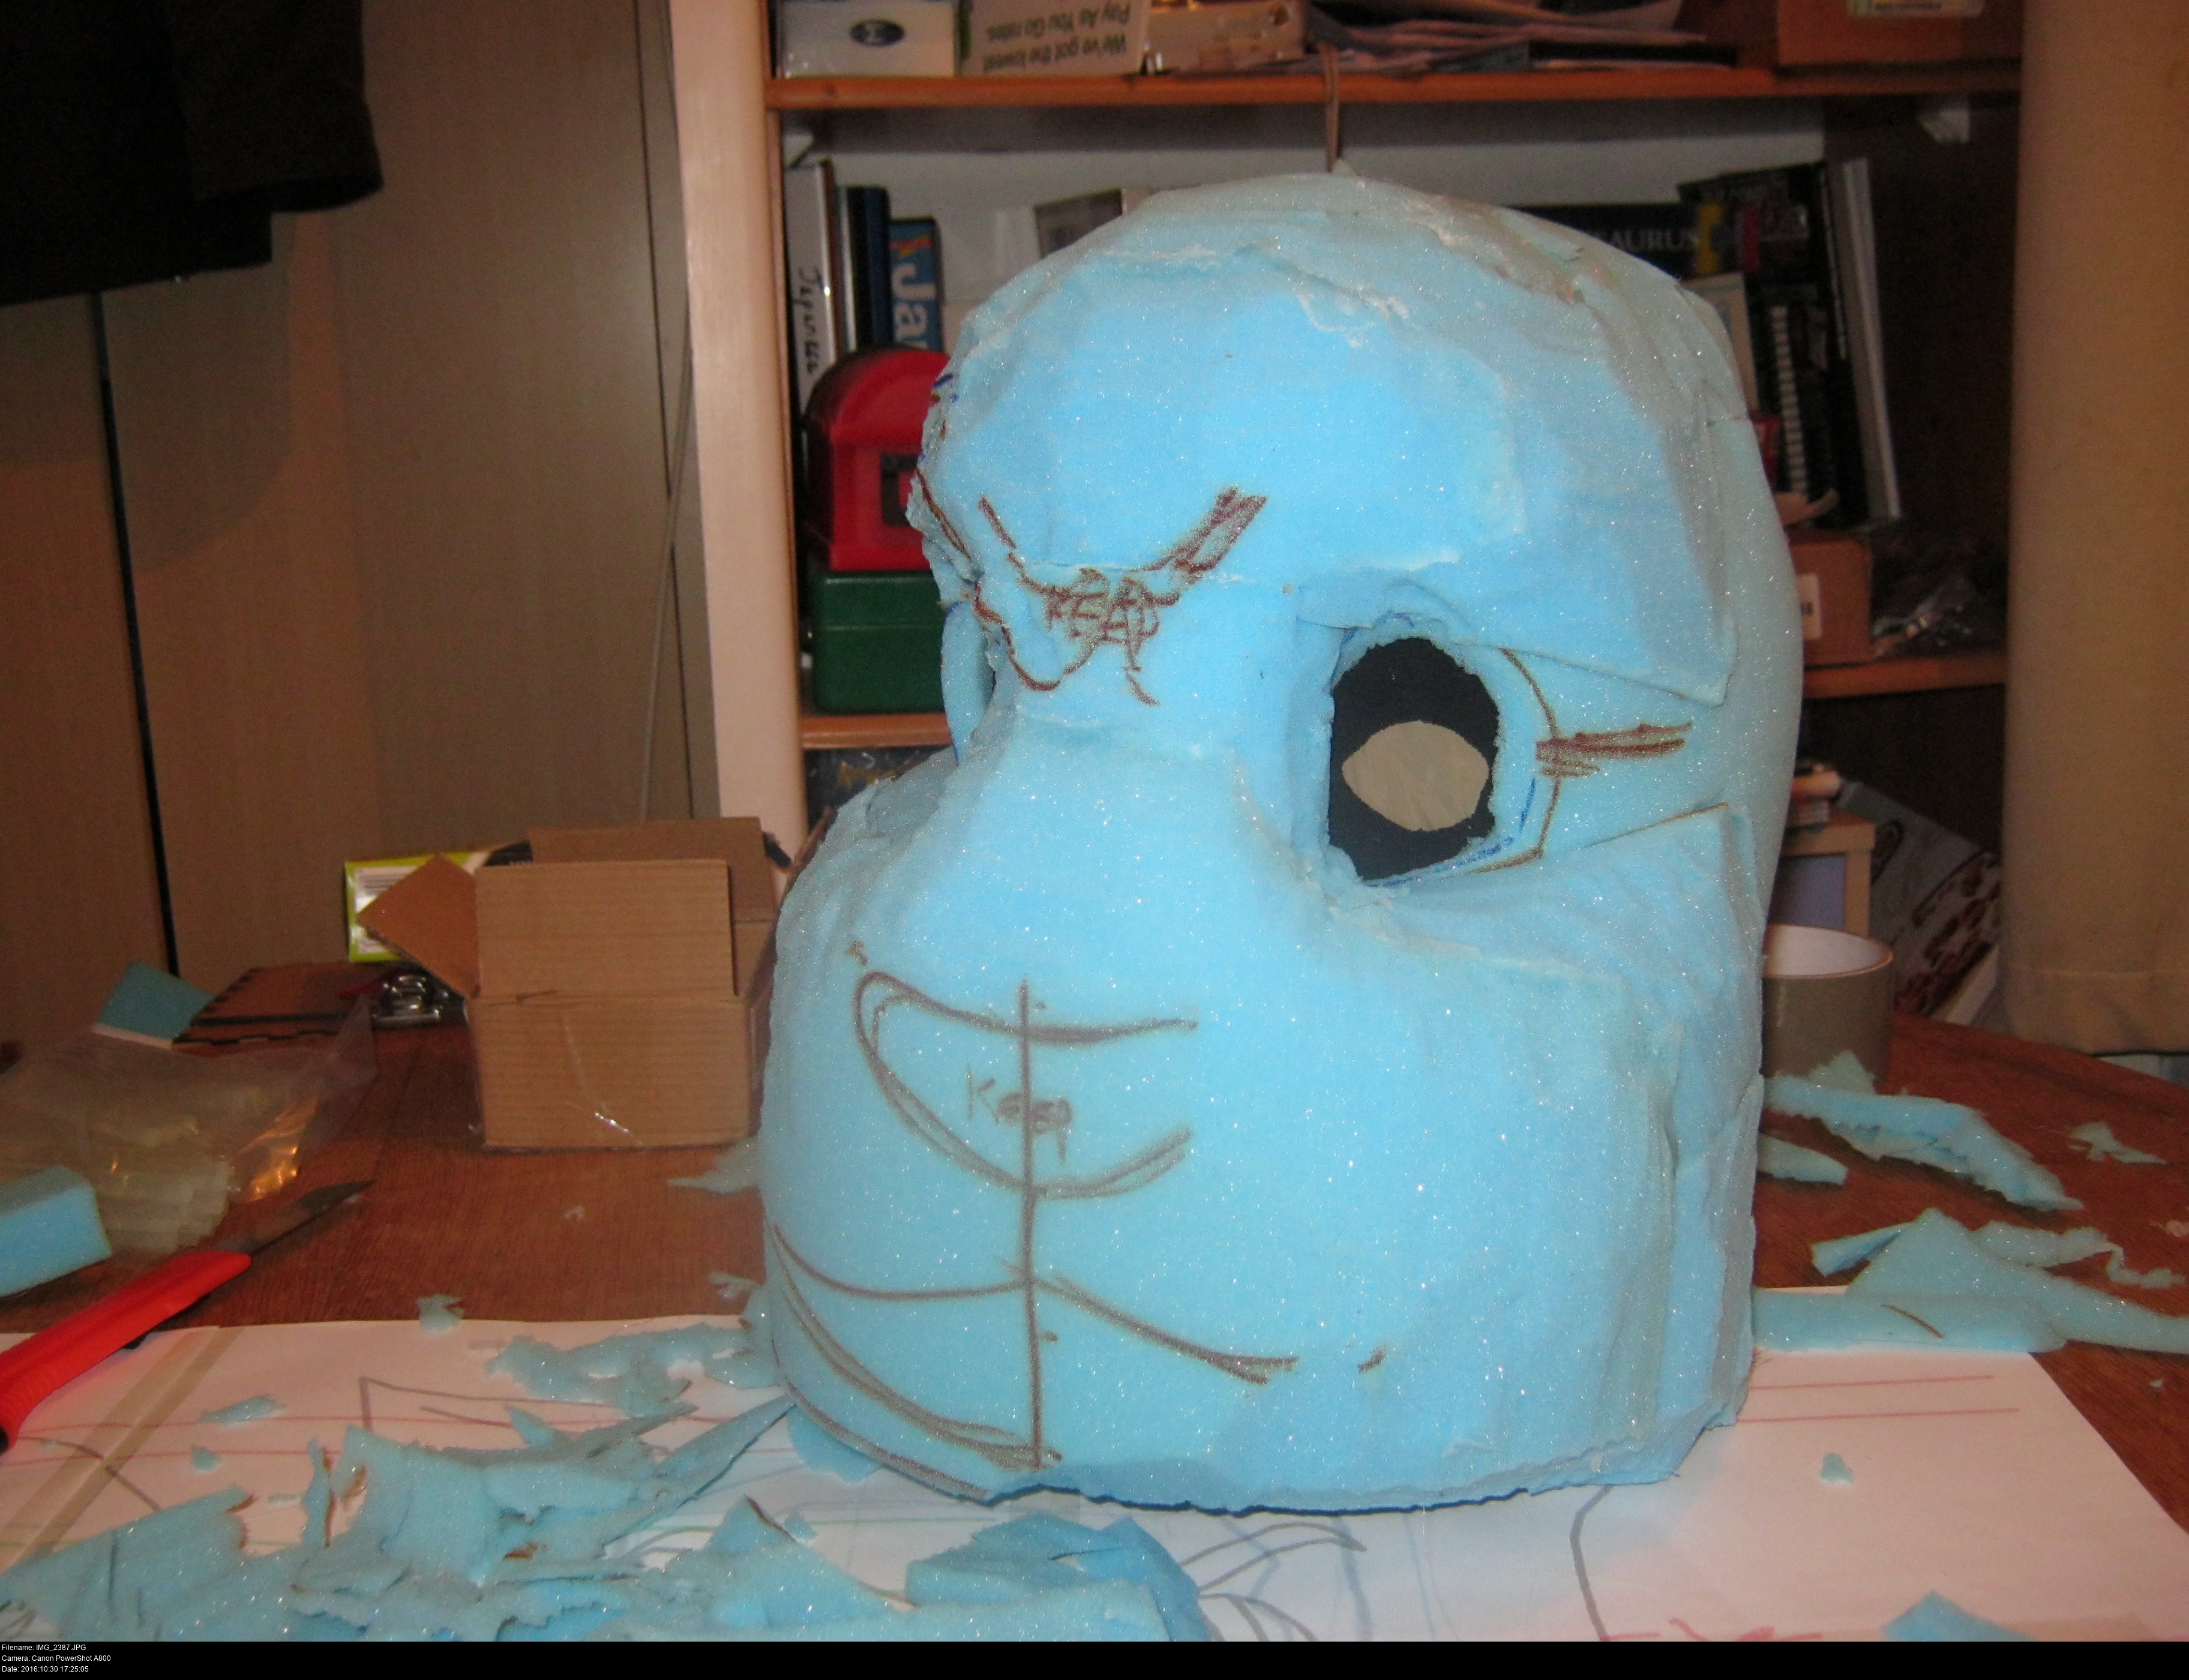
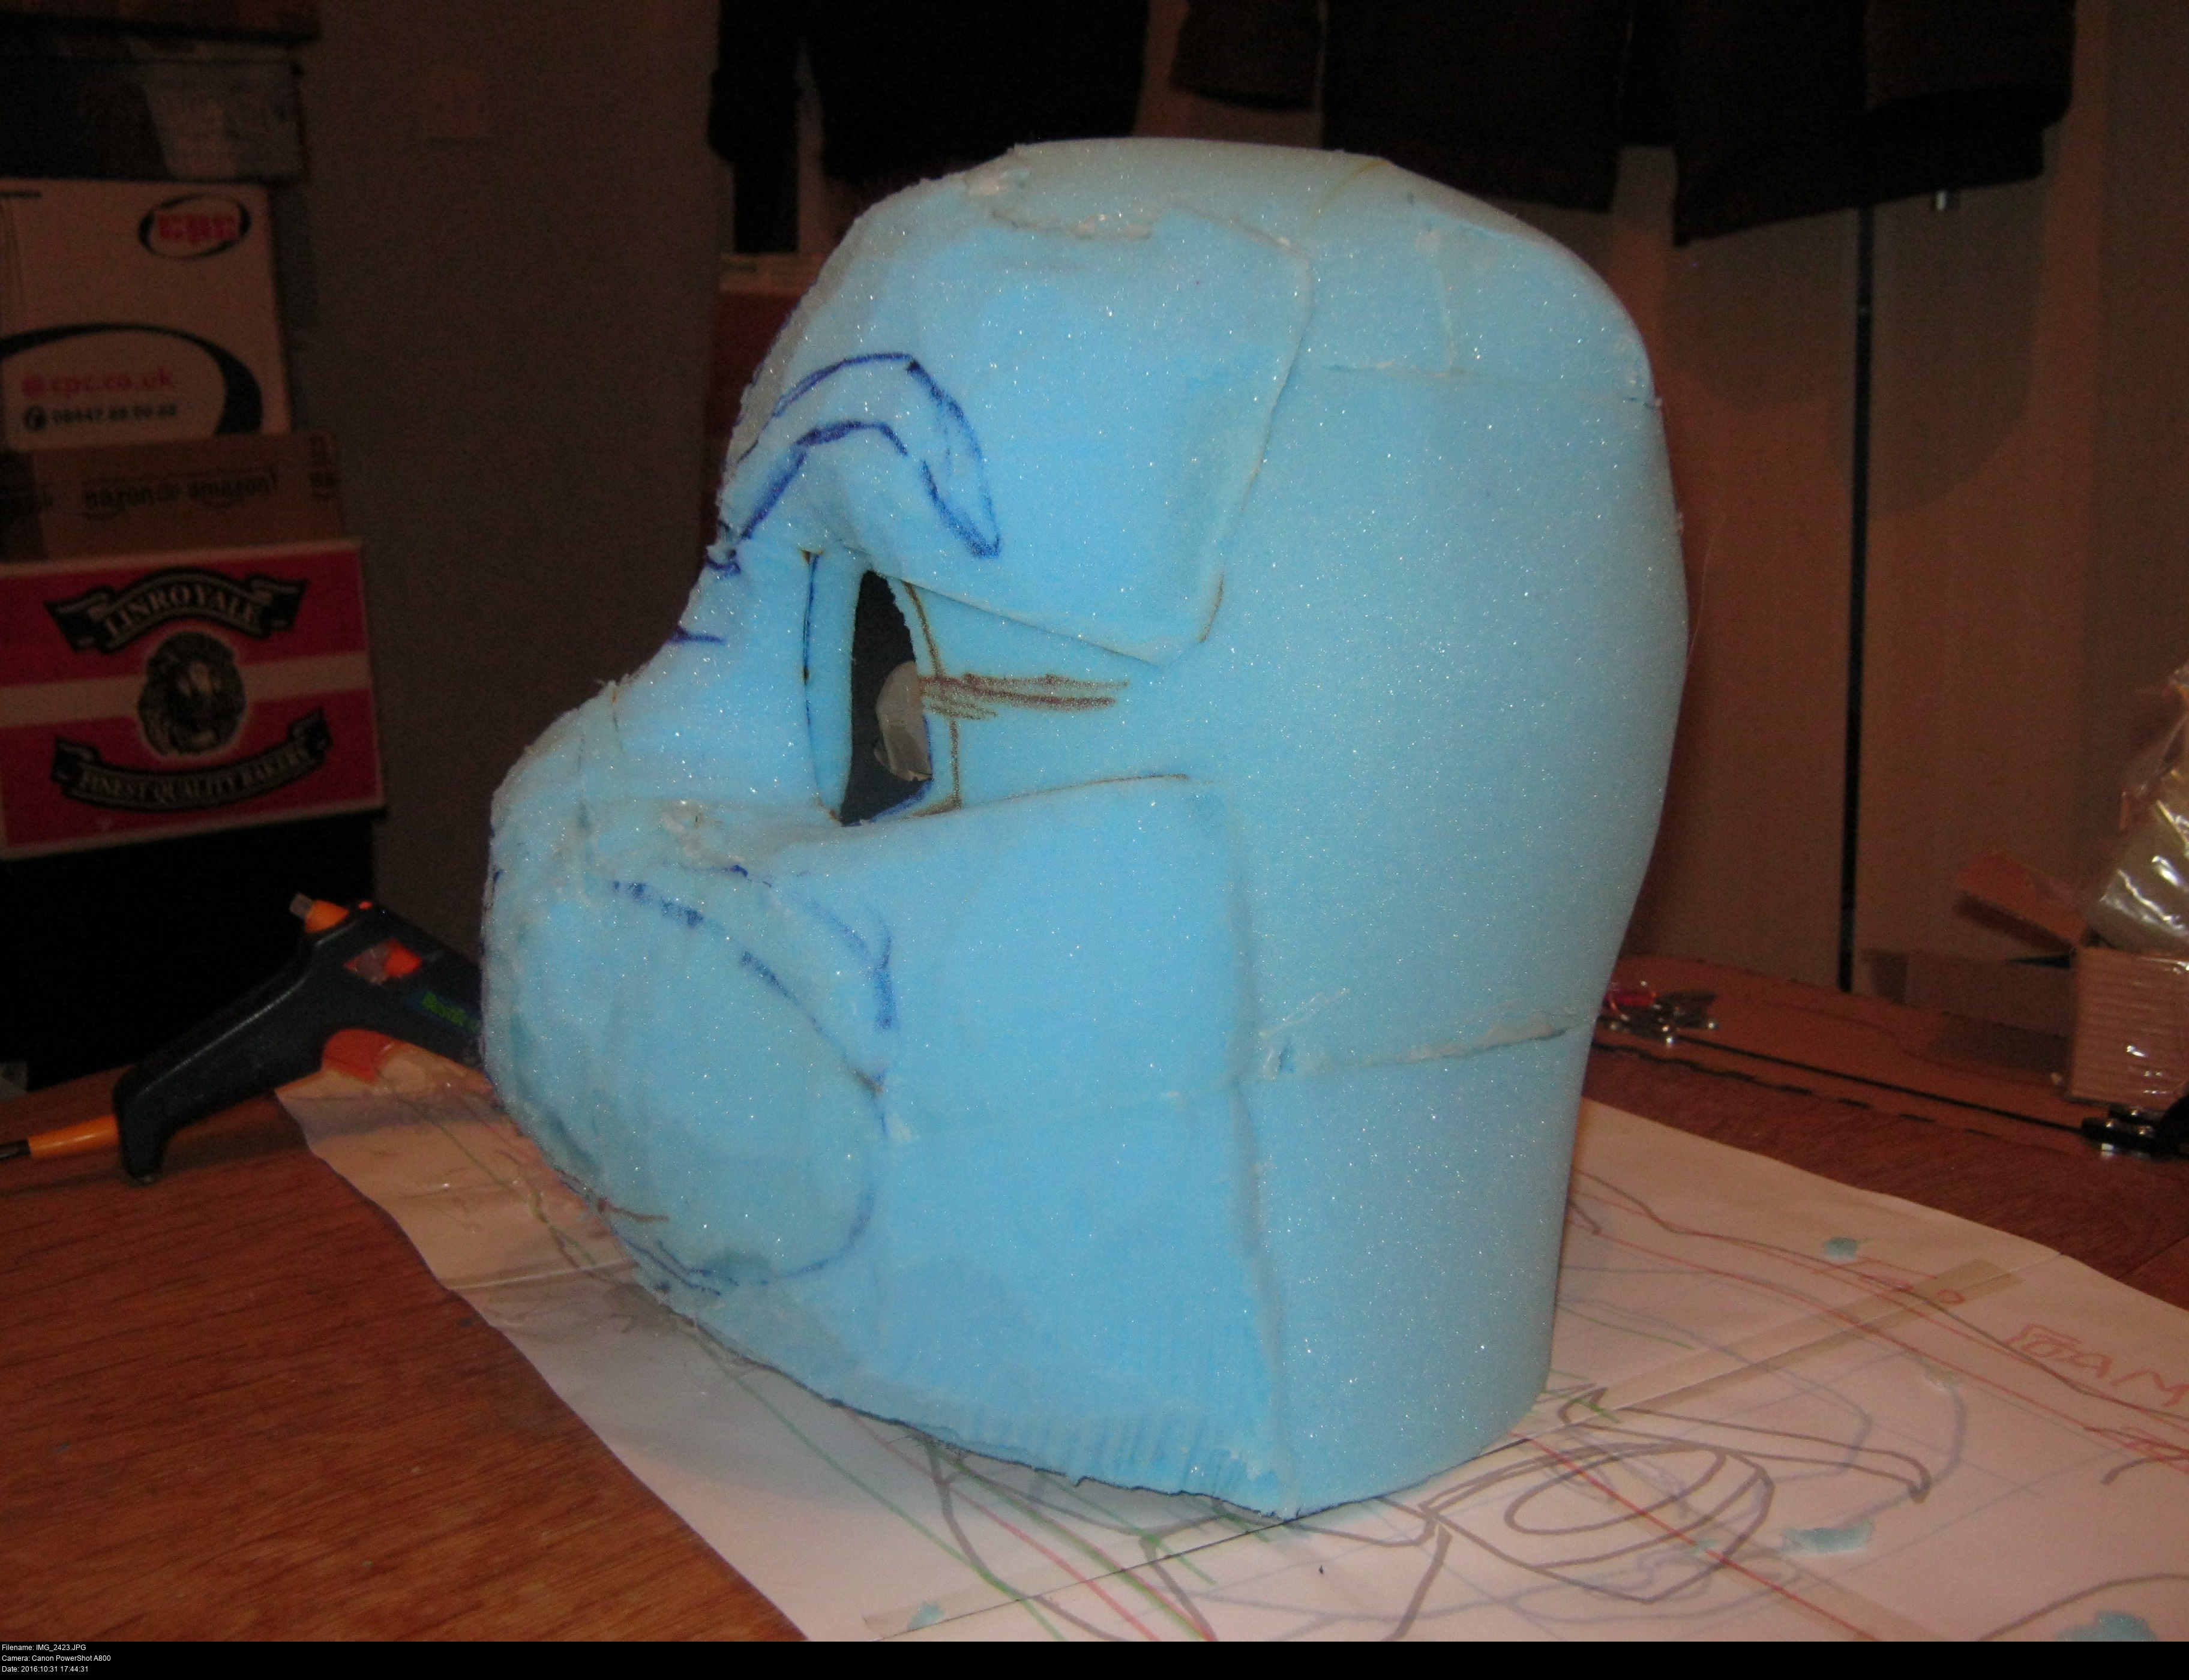
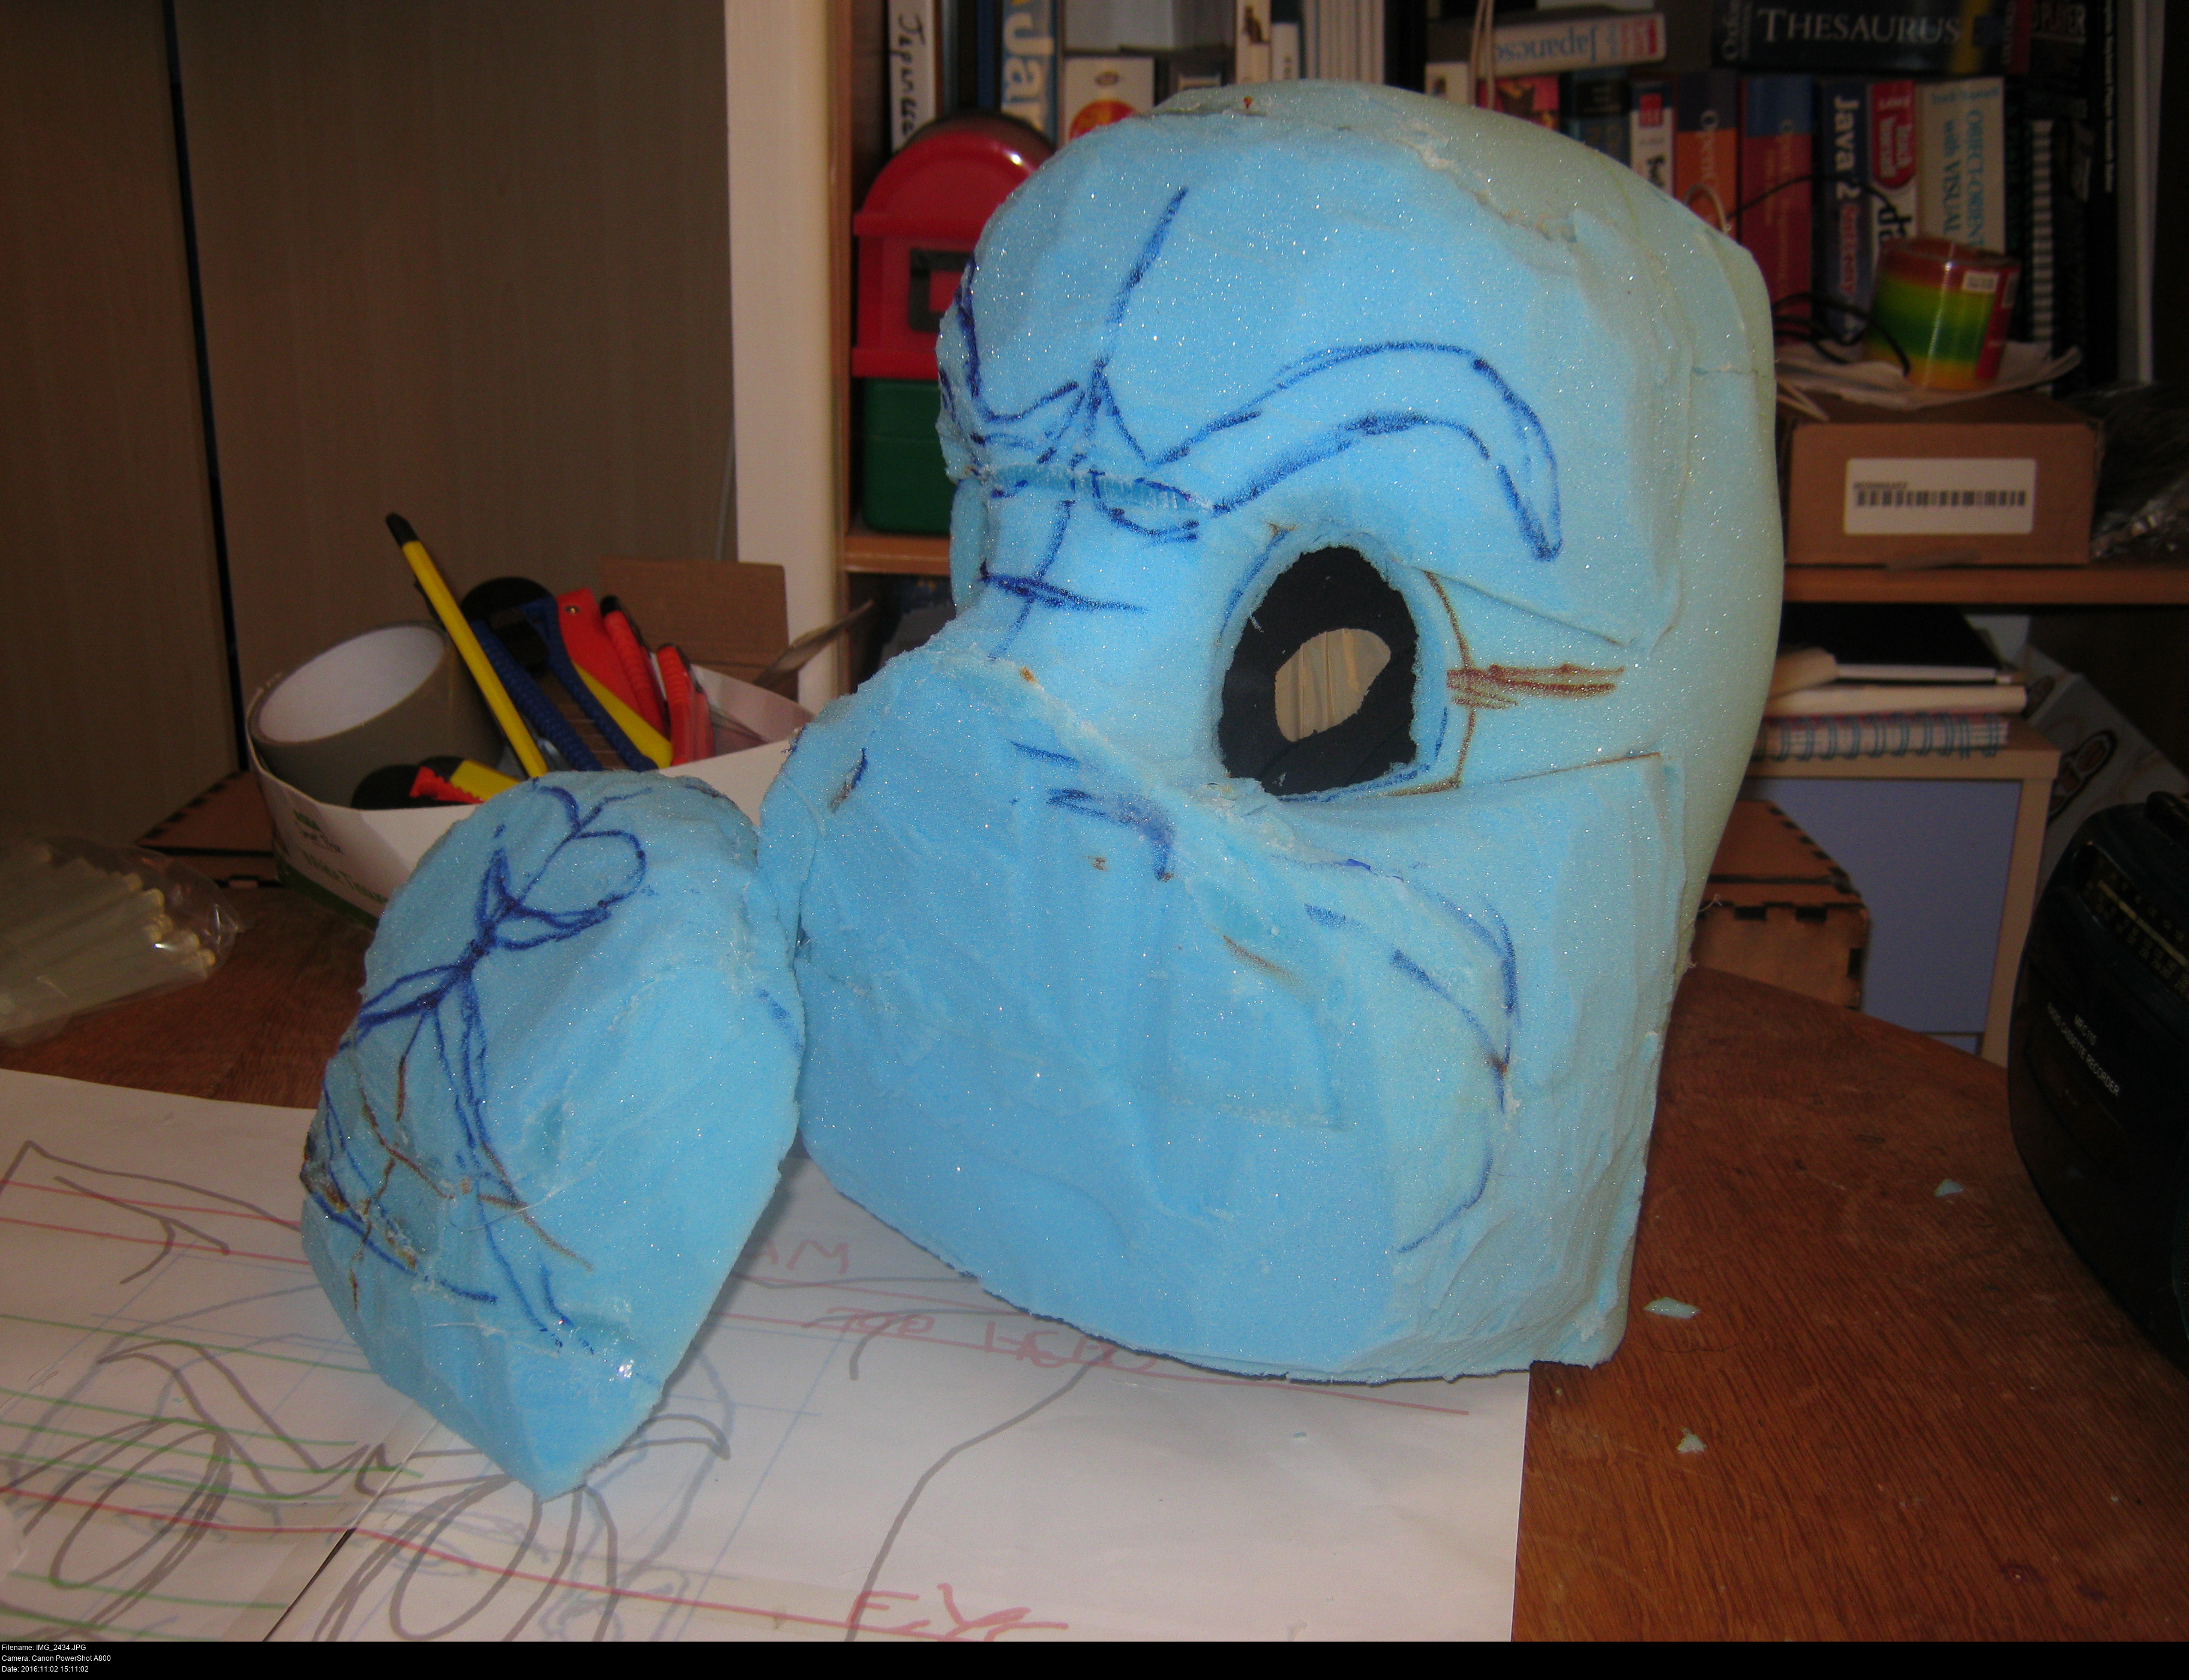
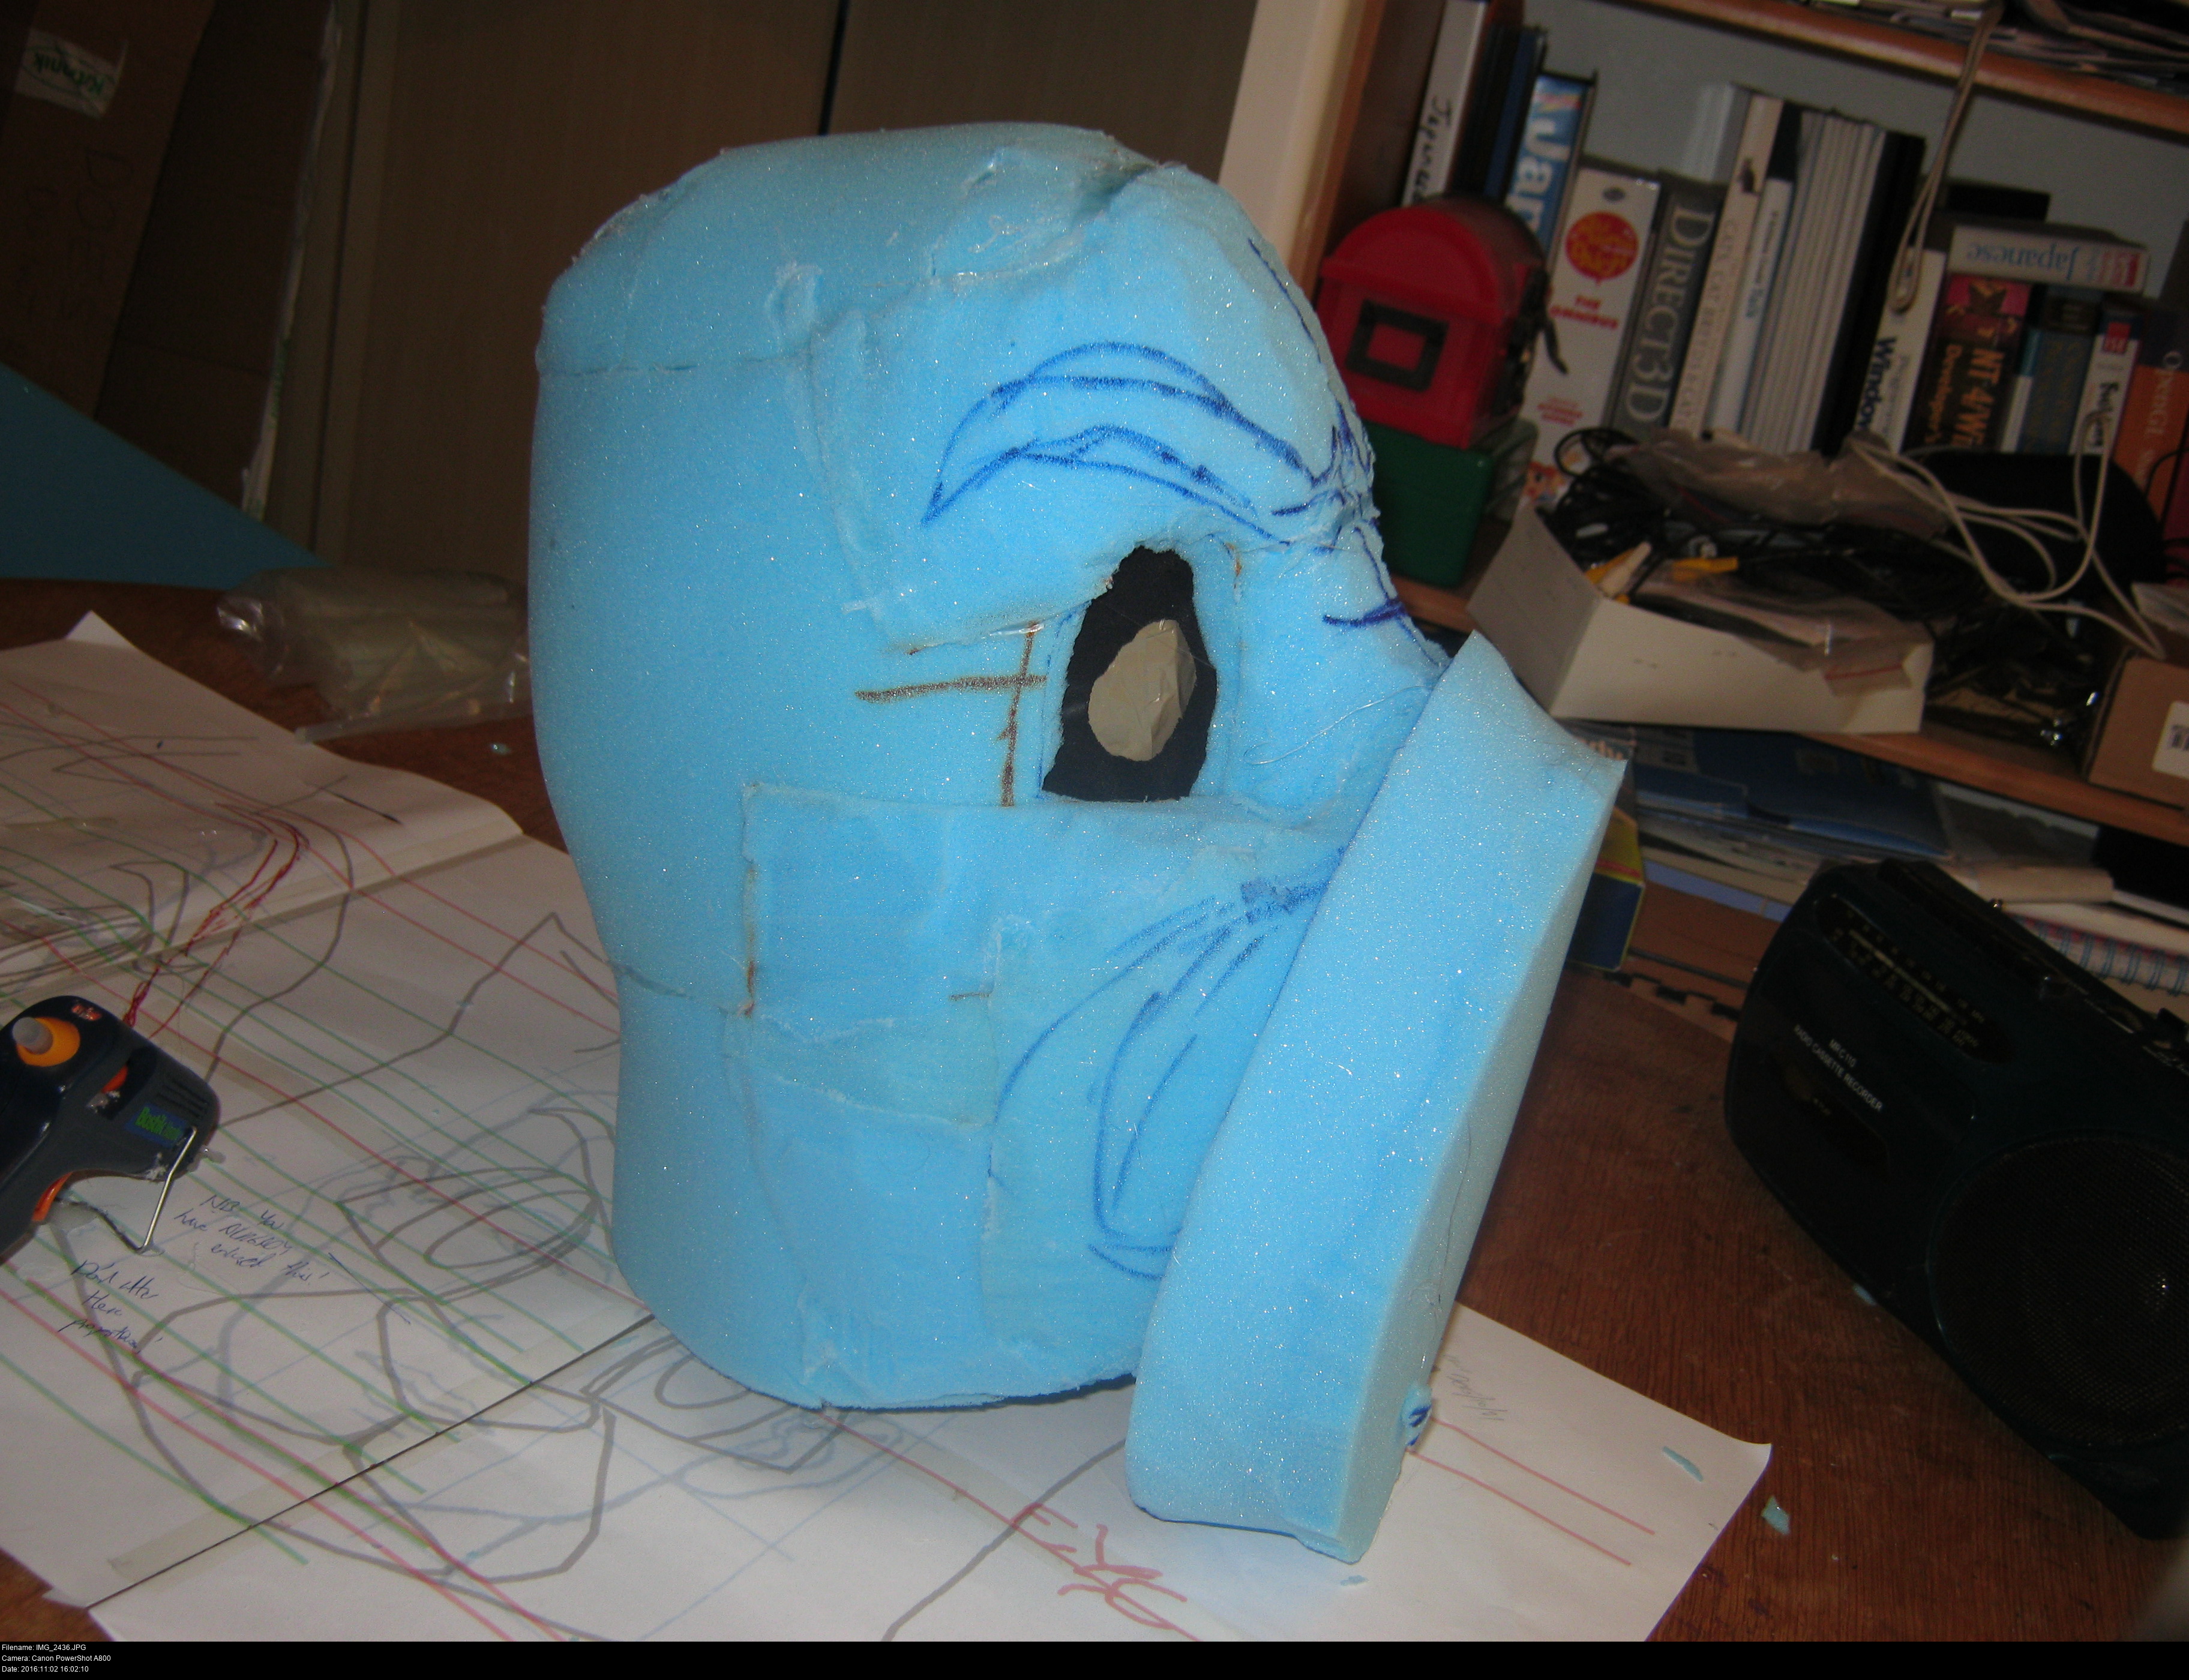
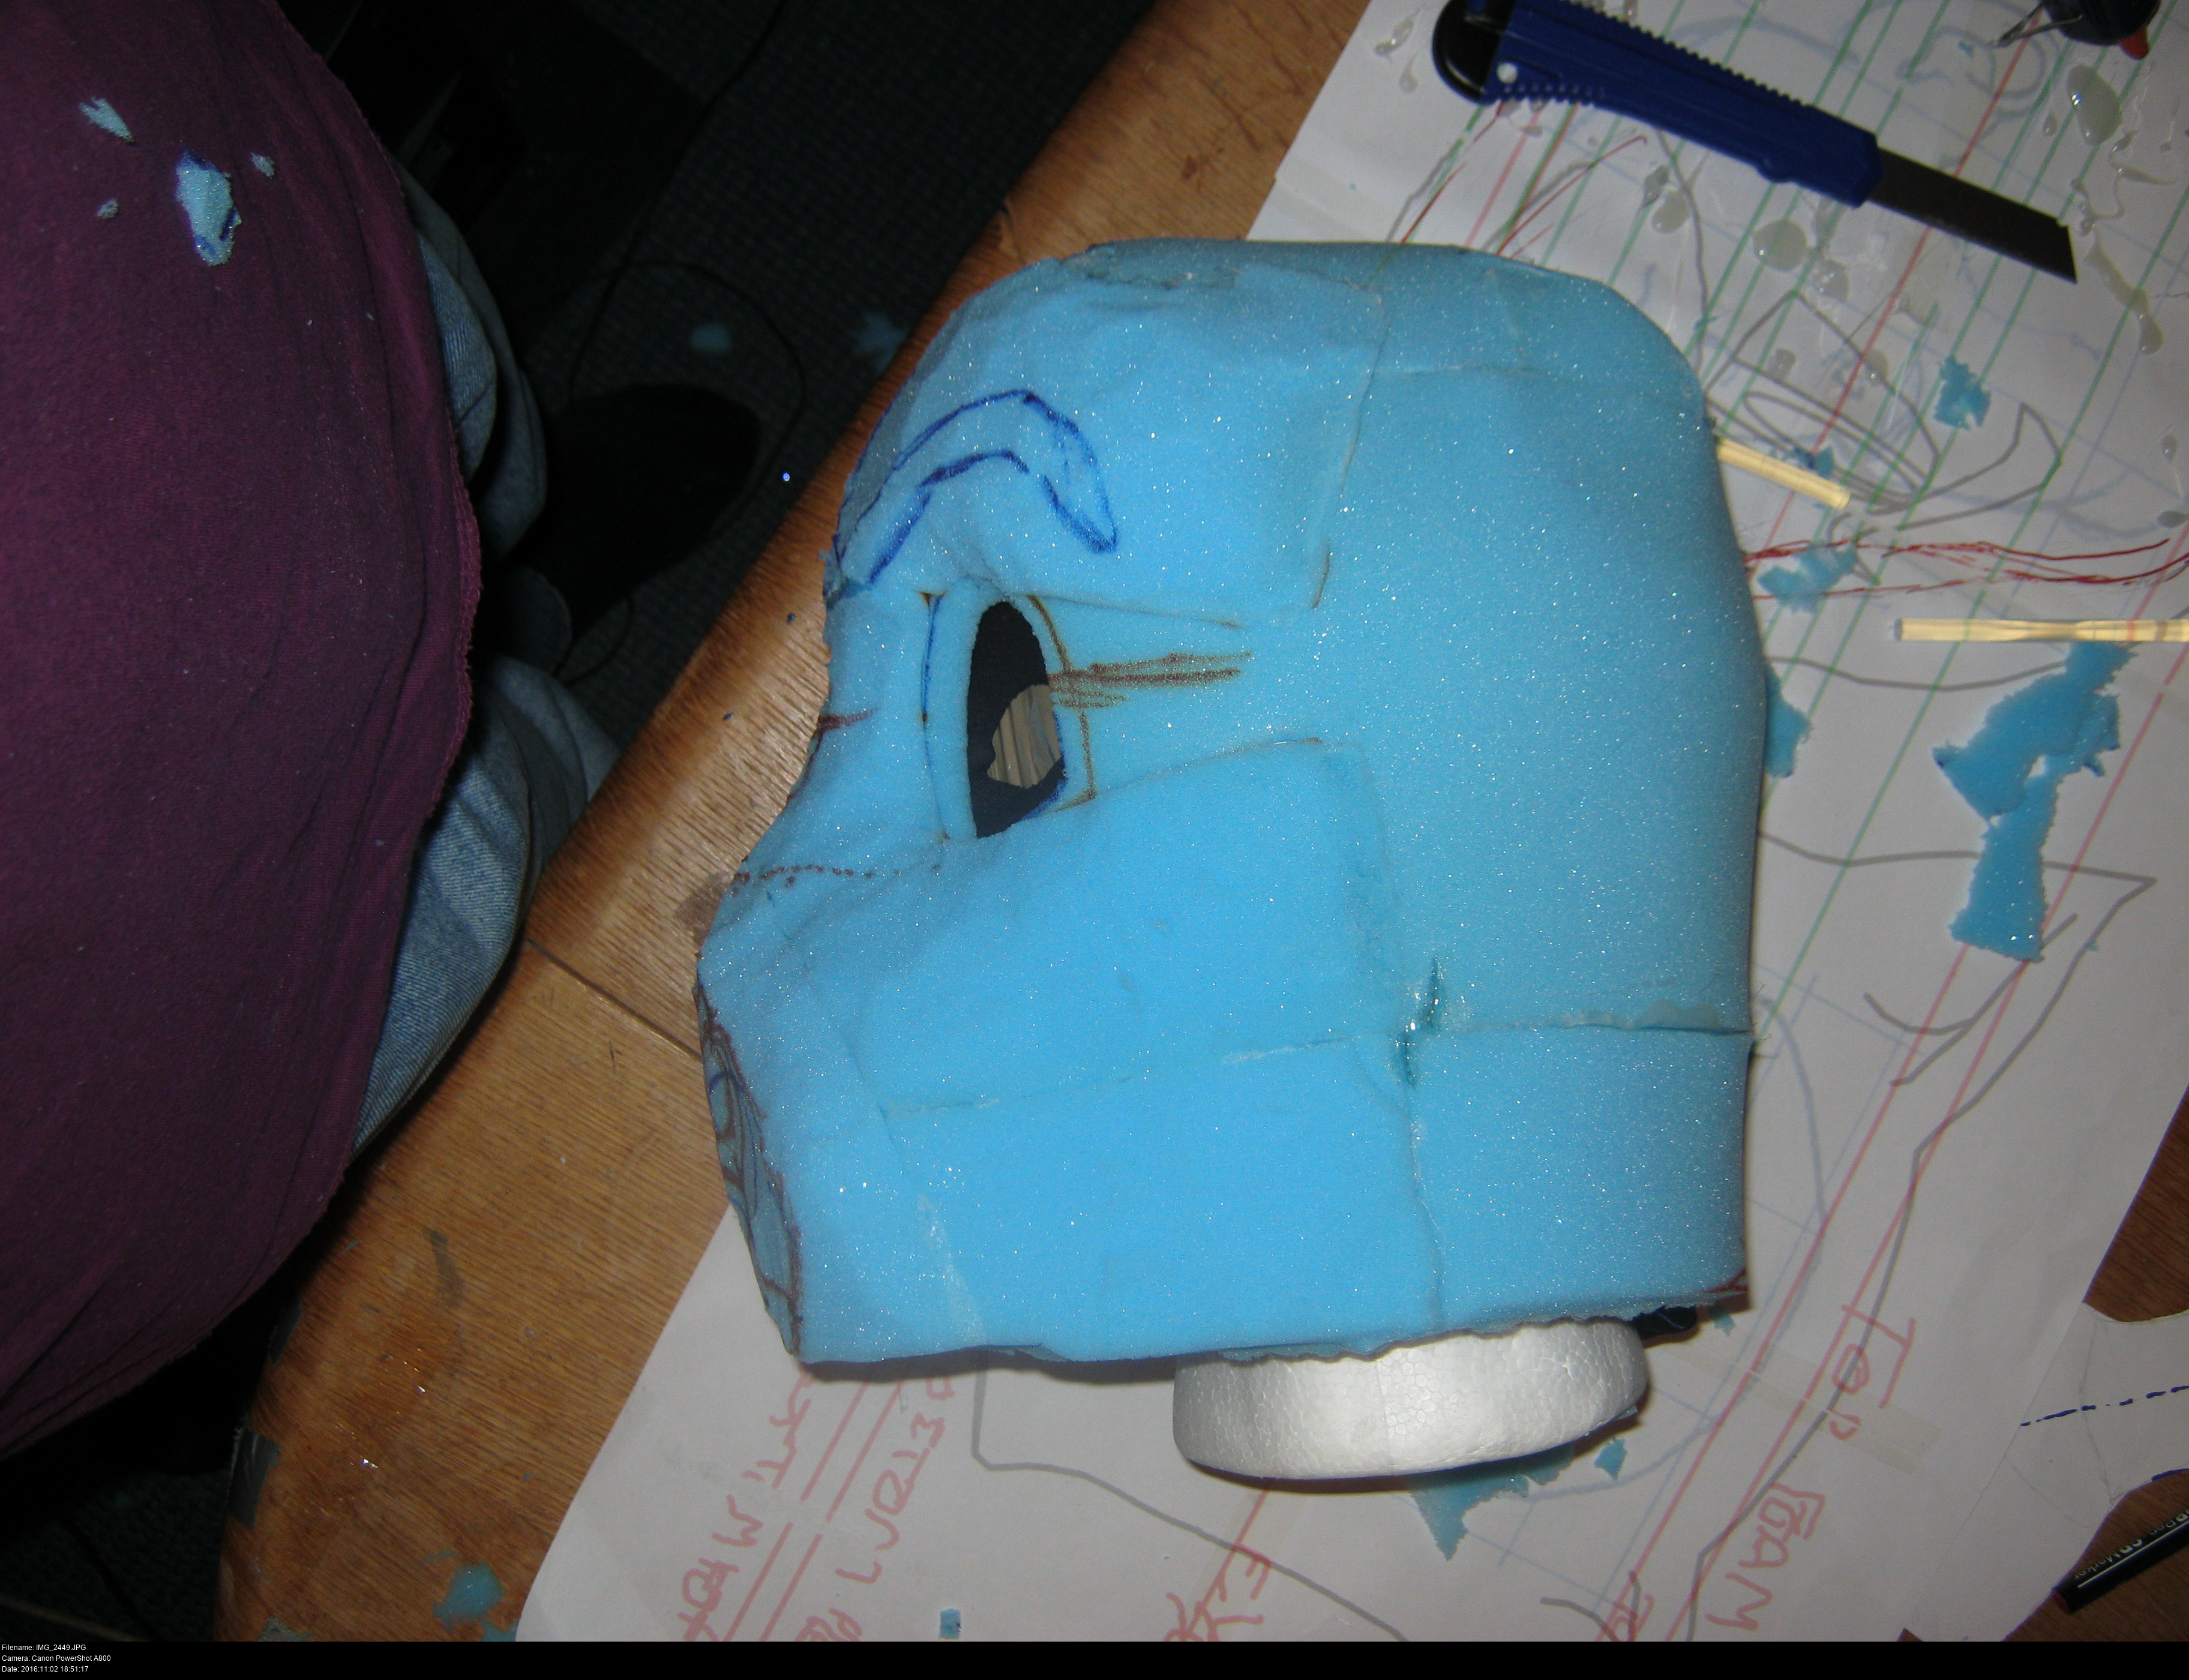
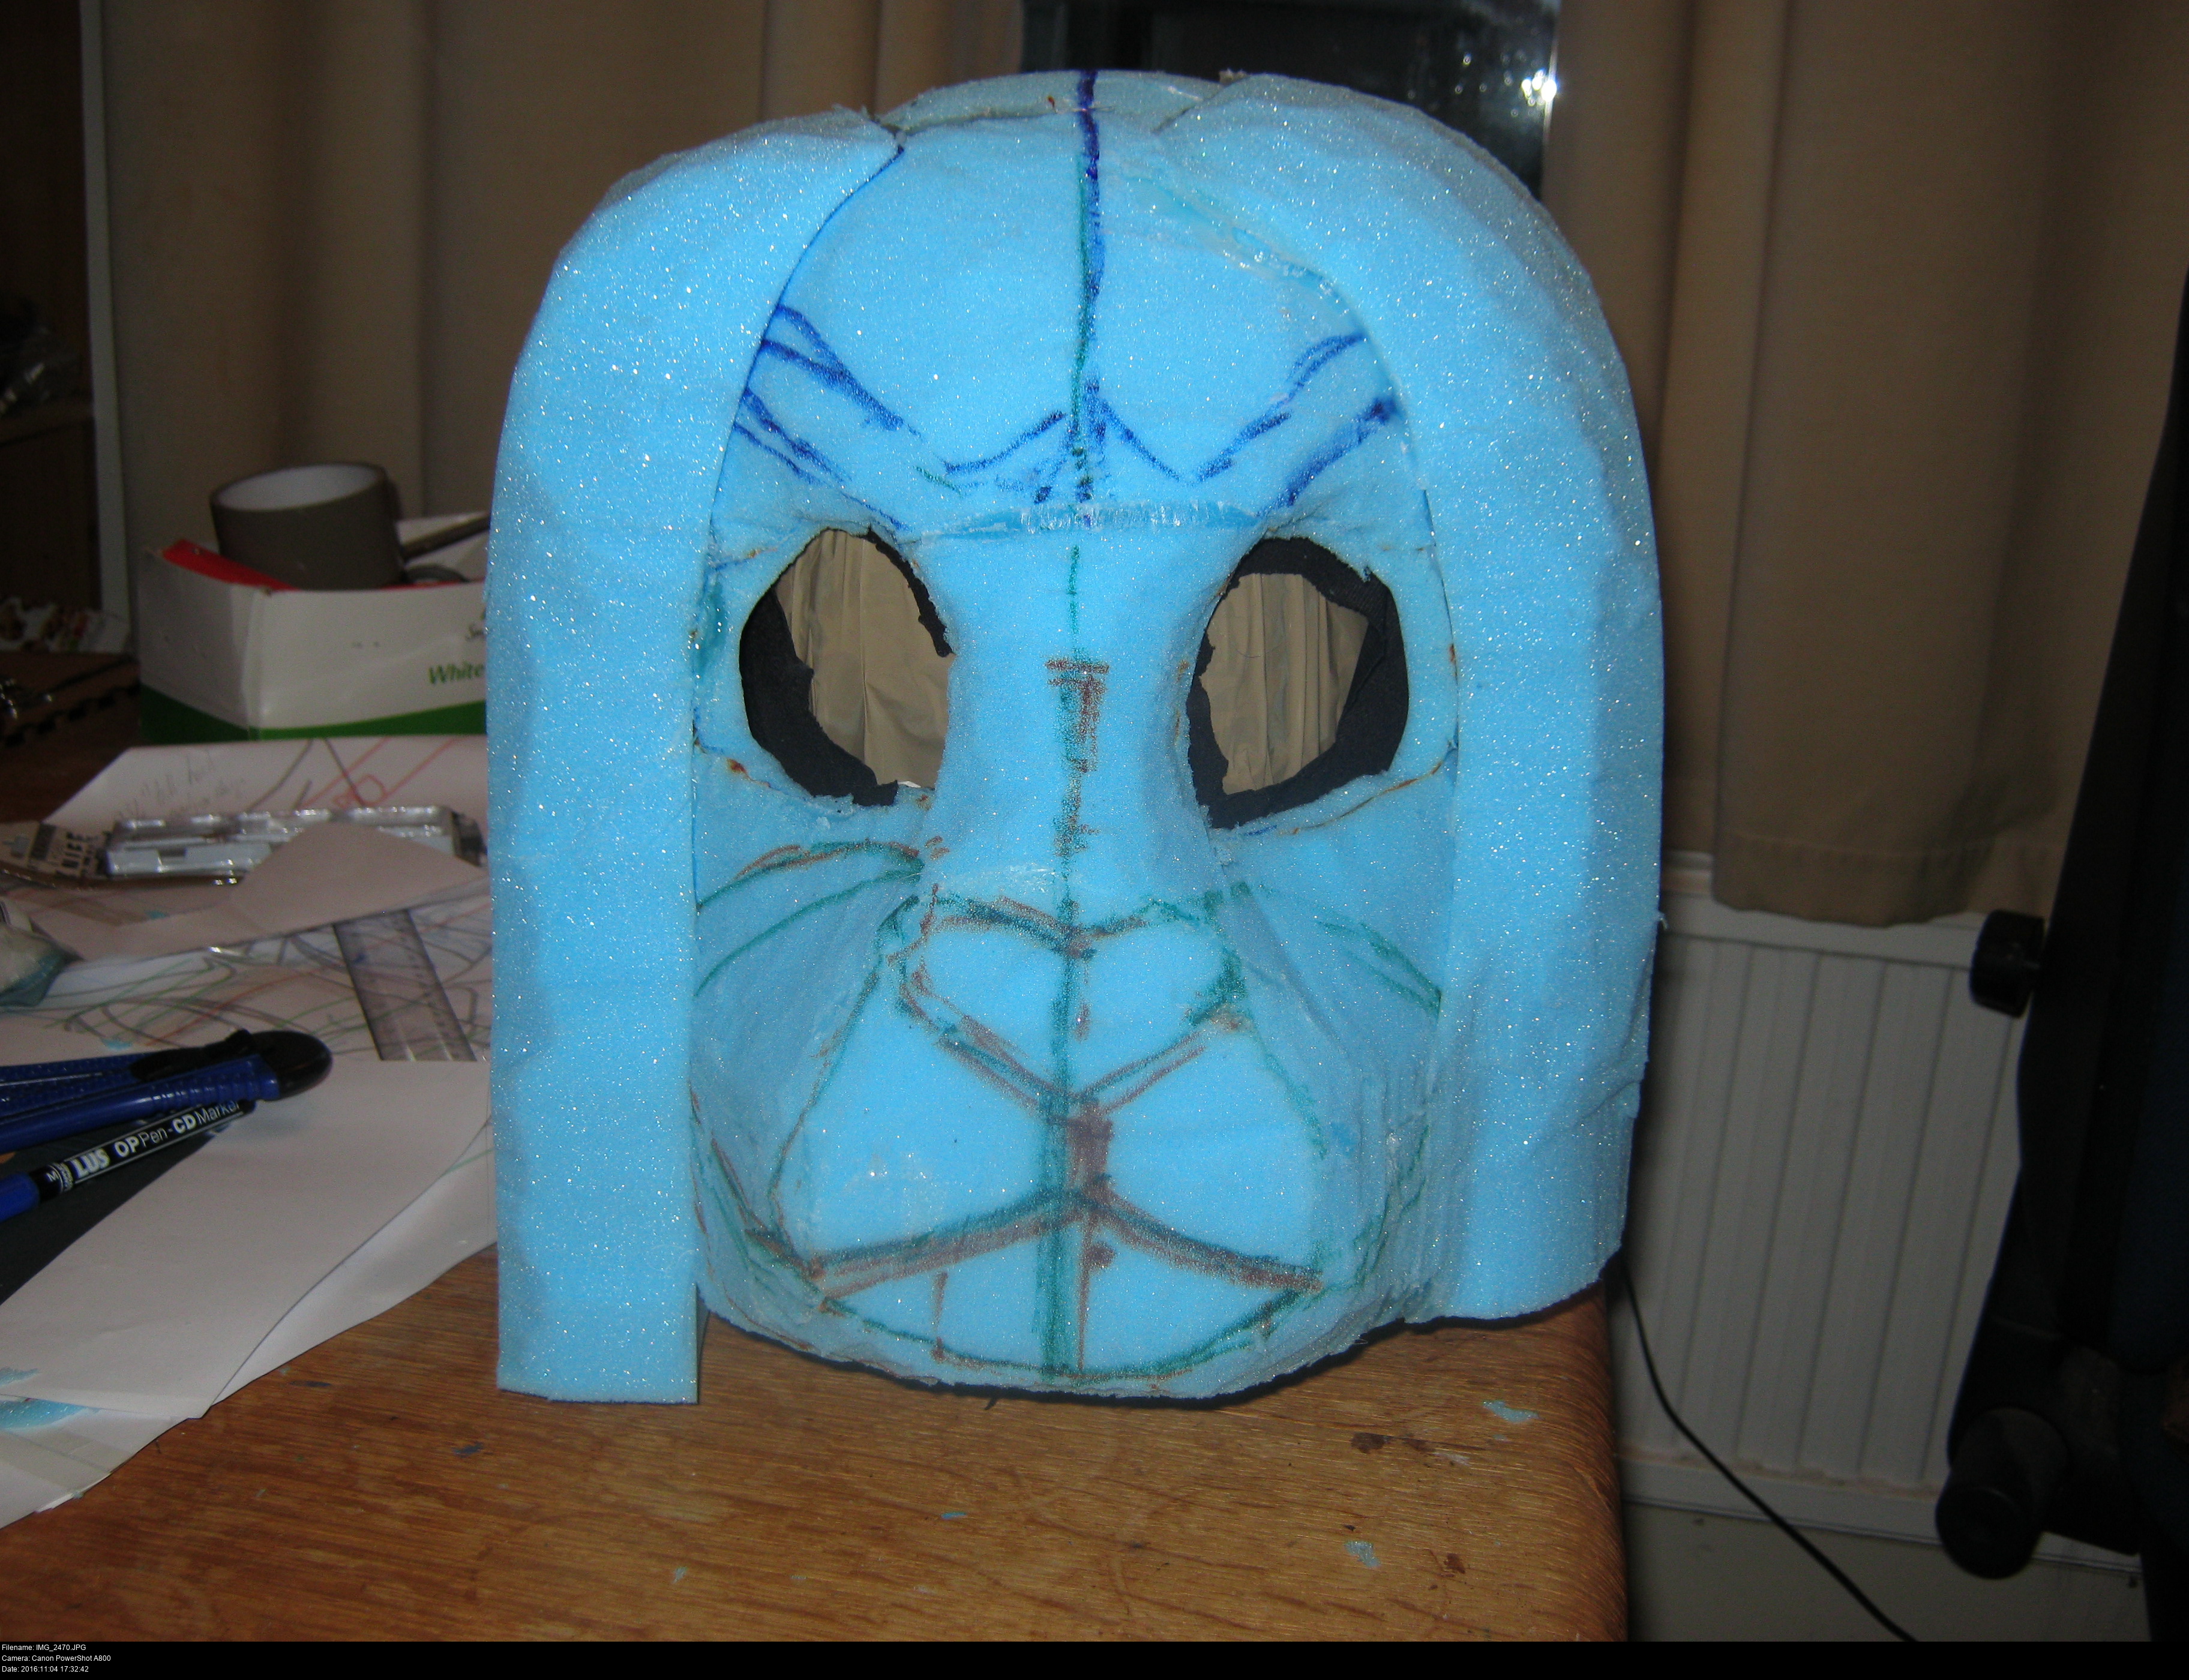
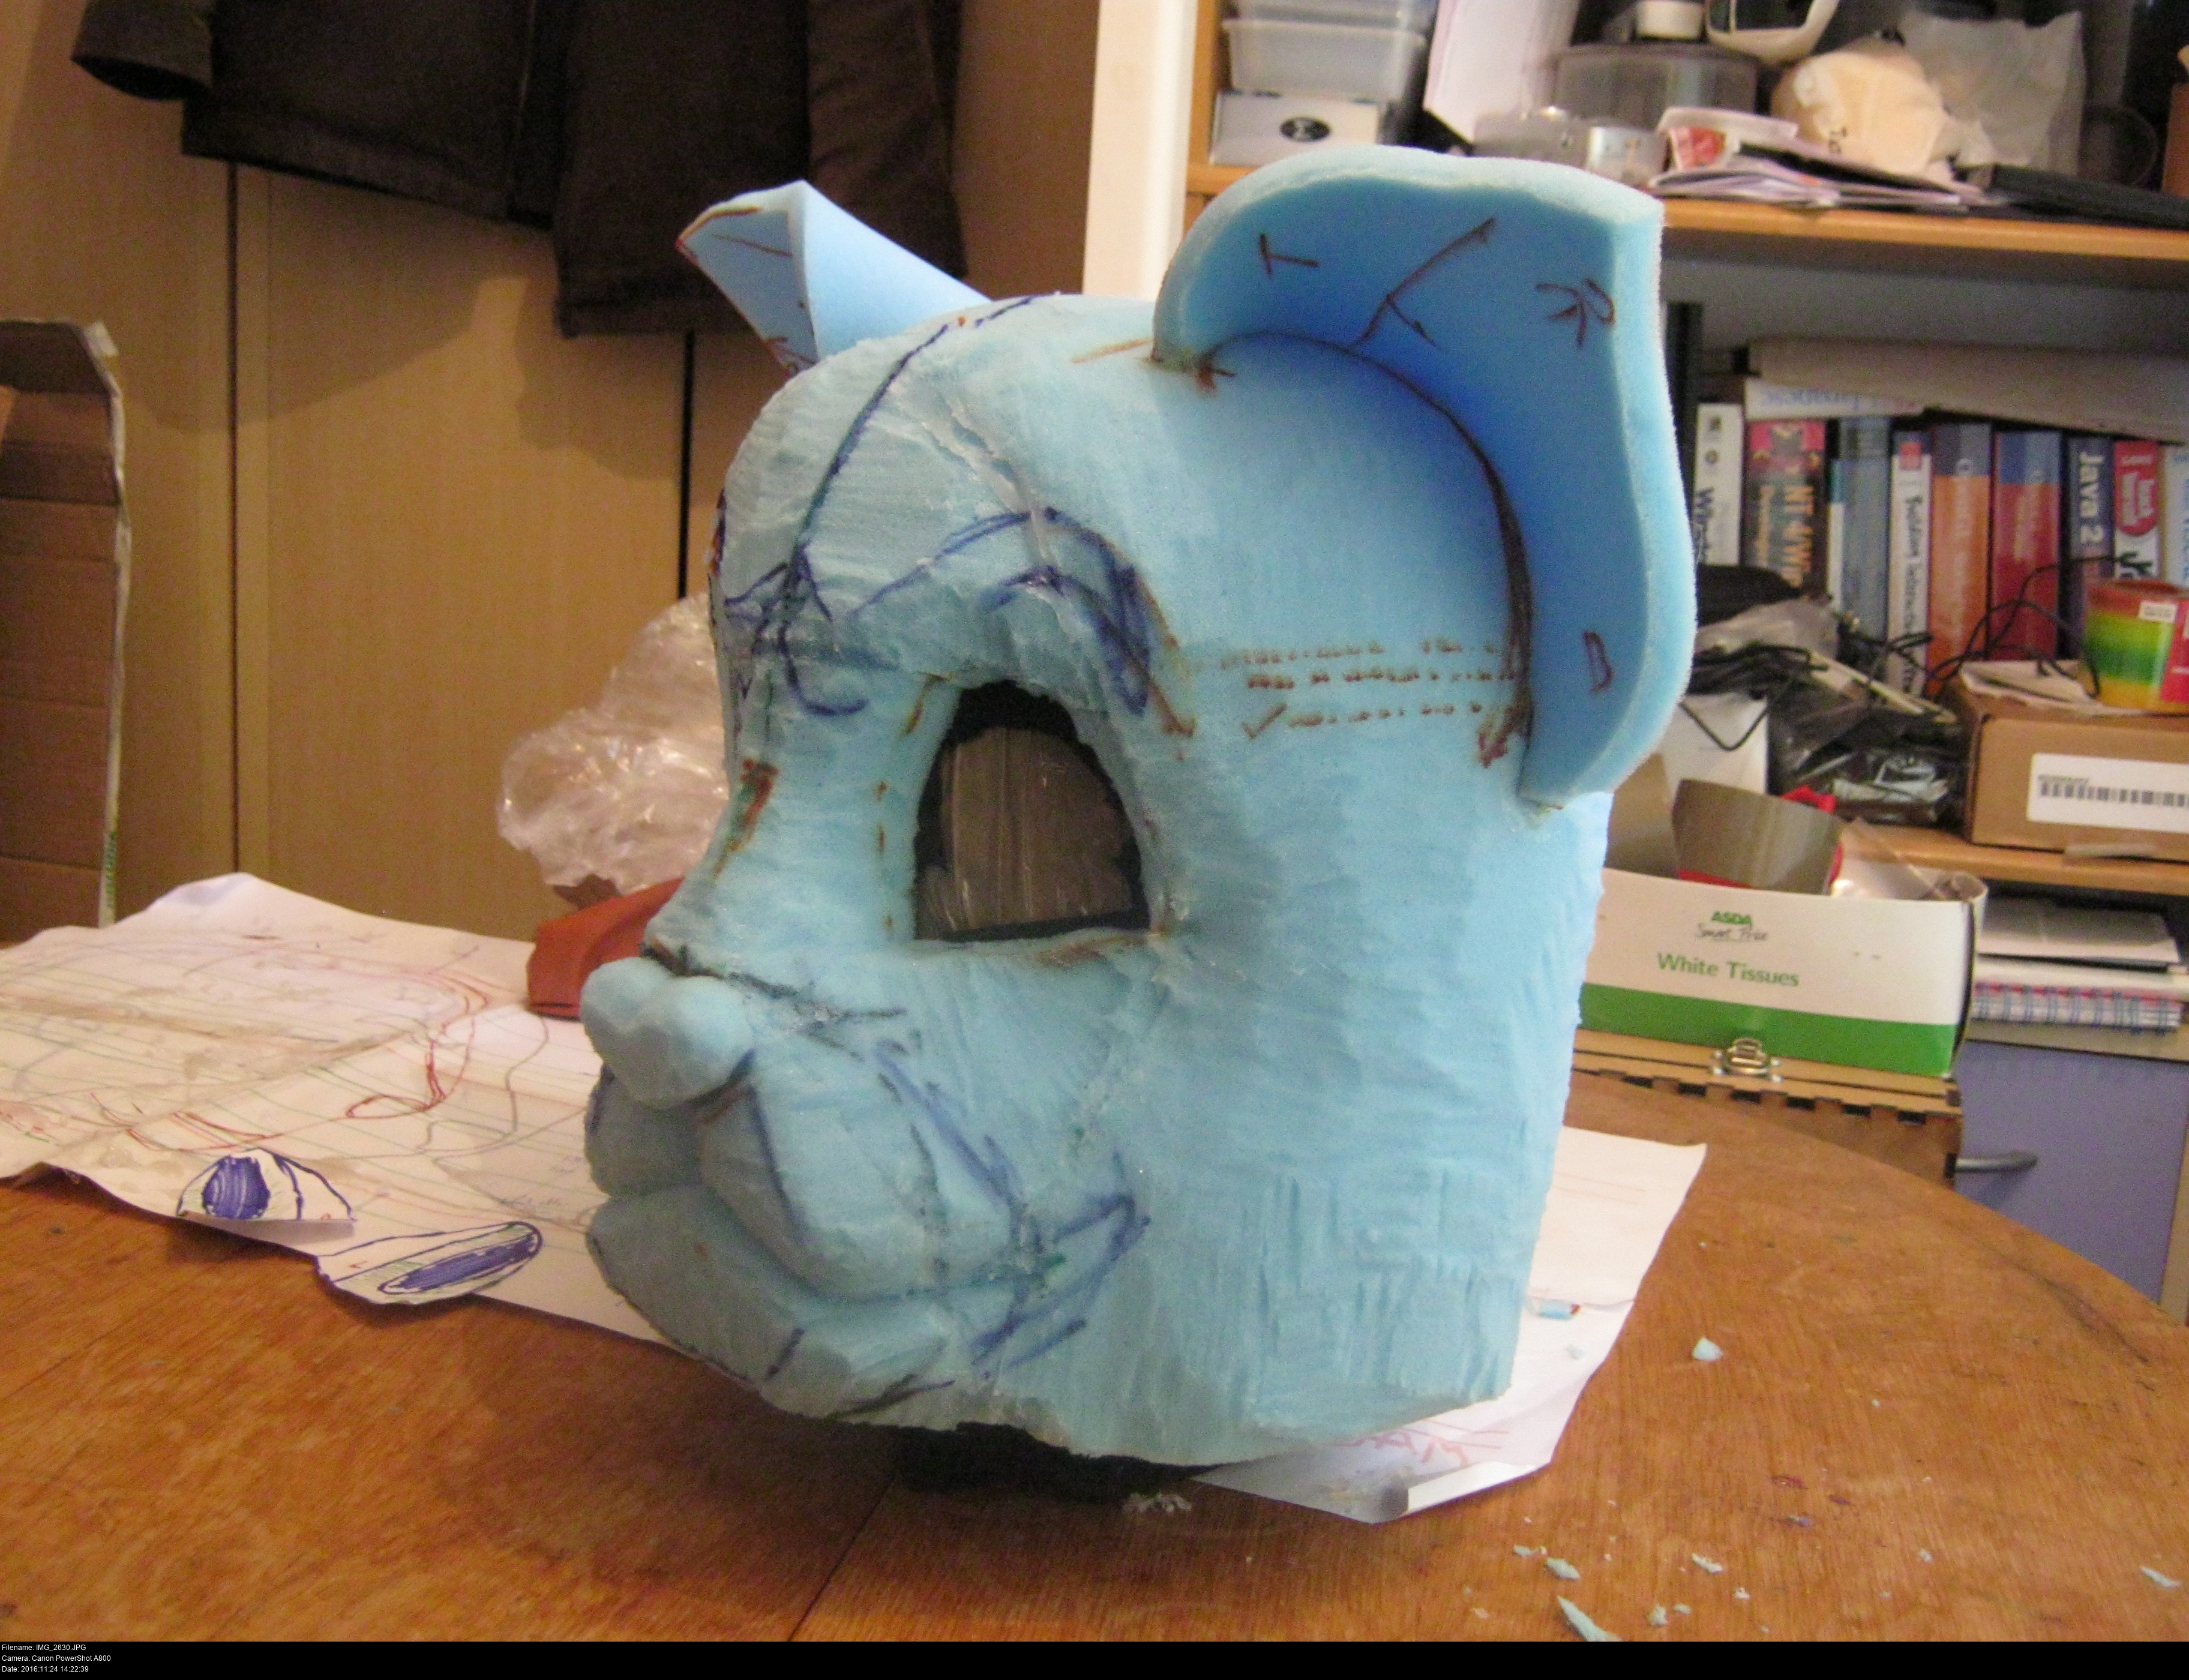
Alright, I'm diving right in here for the 'carving down to shape' technique. Blocks ahoy!
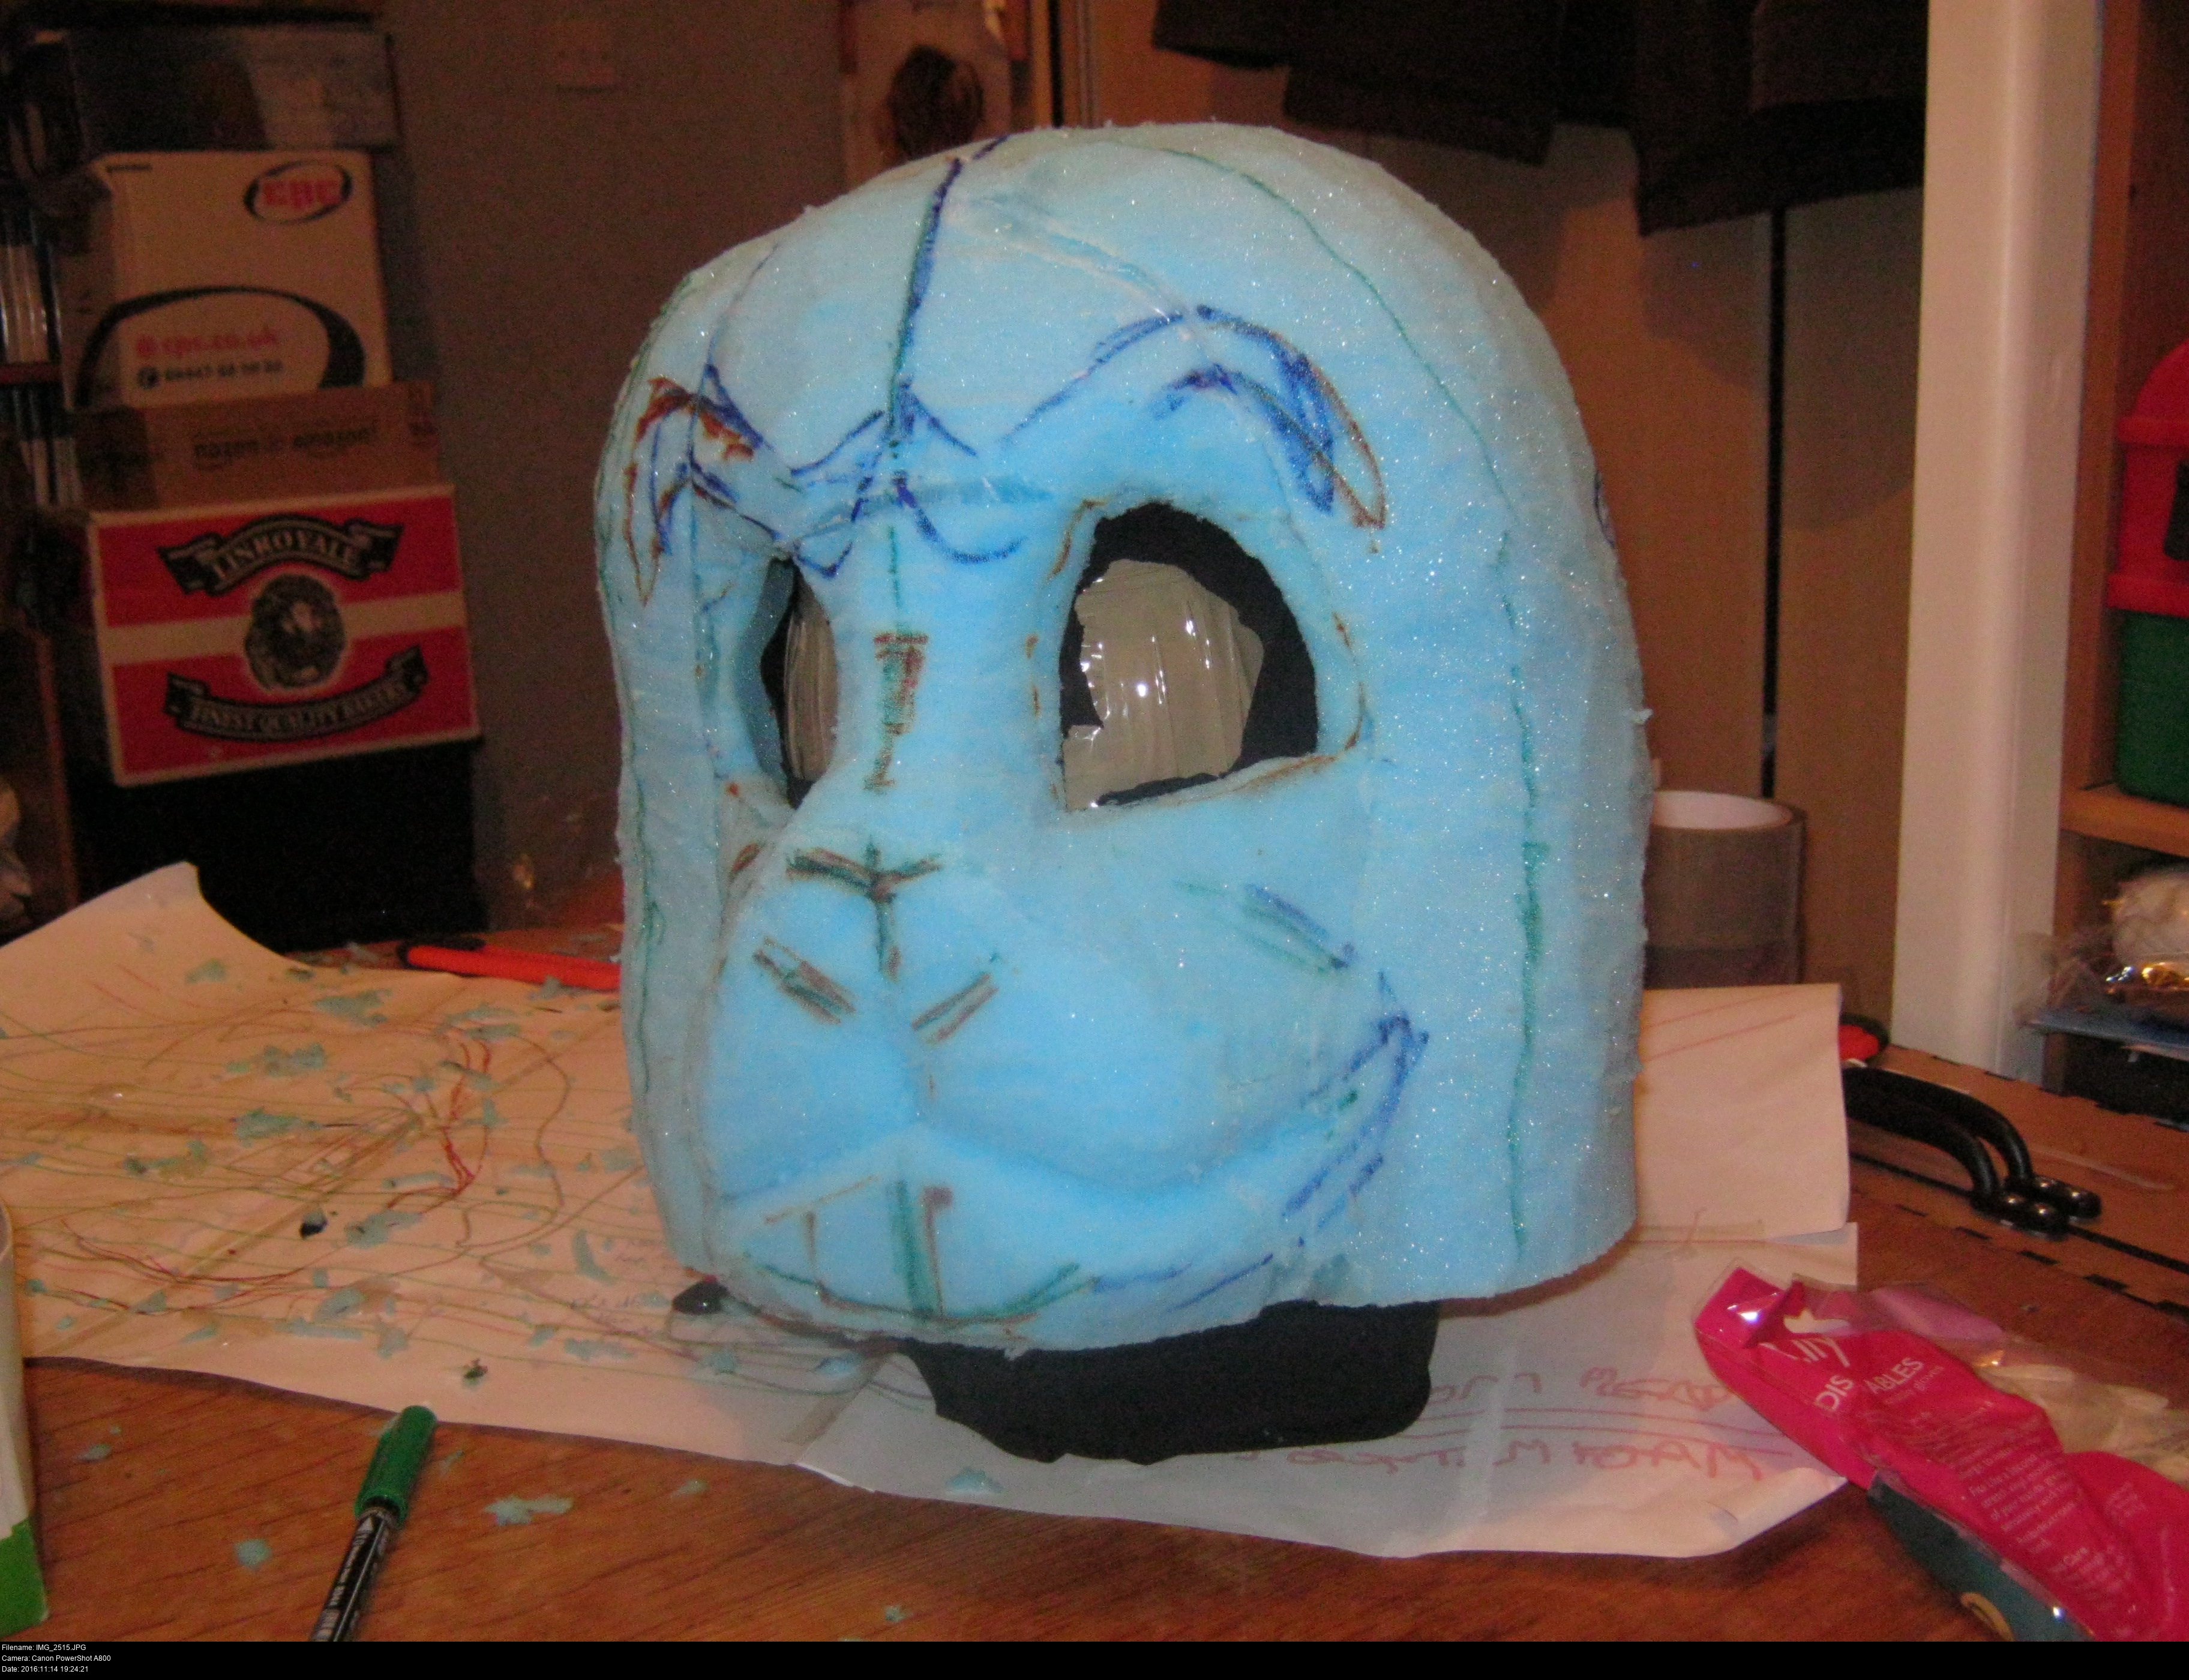
I need to reshape my forehead, I guess. And my nose. And cheeks? Just stick stuff everywhere. You have to think fourth-dimensionally, Marty.
It's foam and I can see through it. It's practically a fursuit head already!
What a danged mess. And despite my earlier advice, I haven't yet packed and padded the polystyrene head. That's going to really throw me off later.
Im going to need a bigger bin for all of this foam.


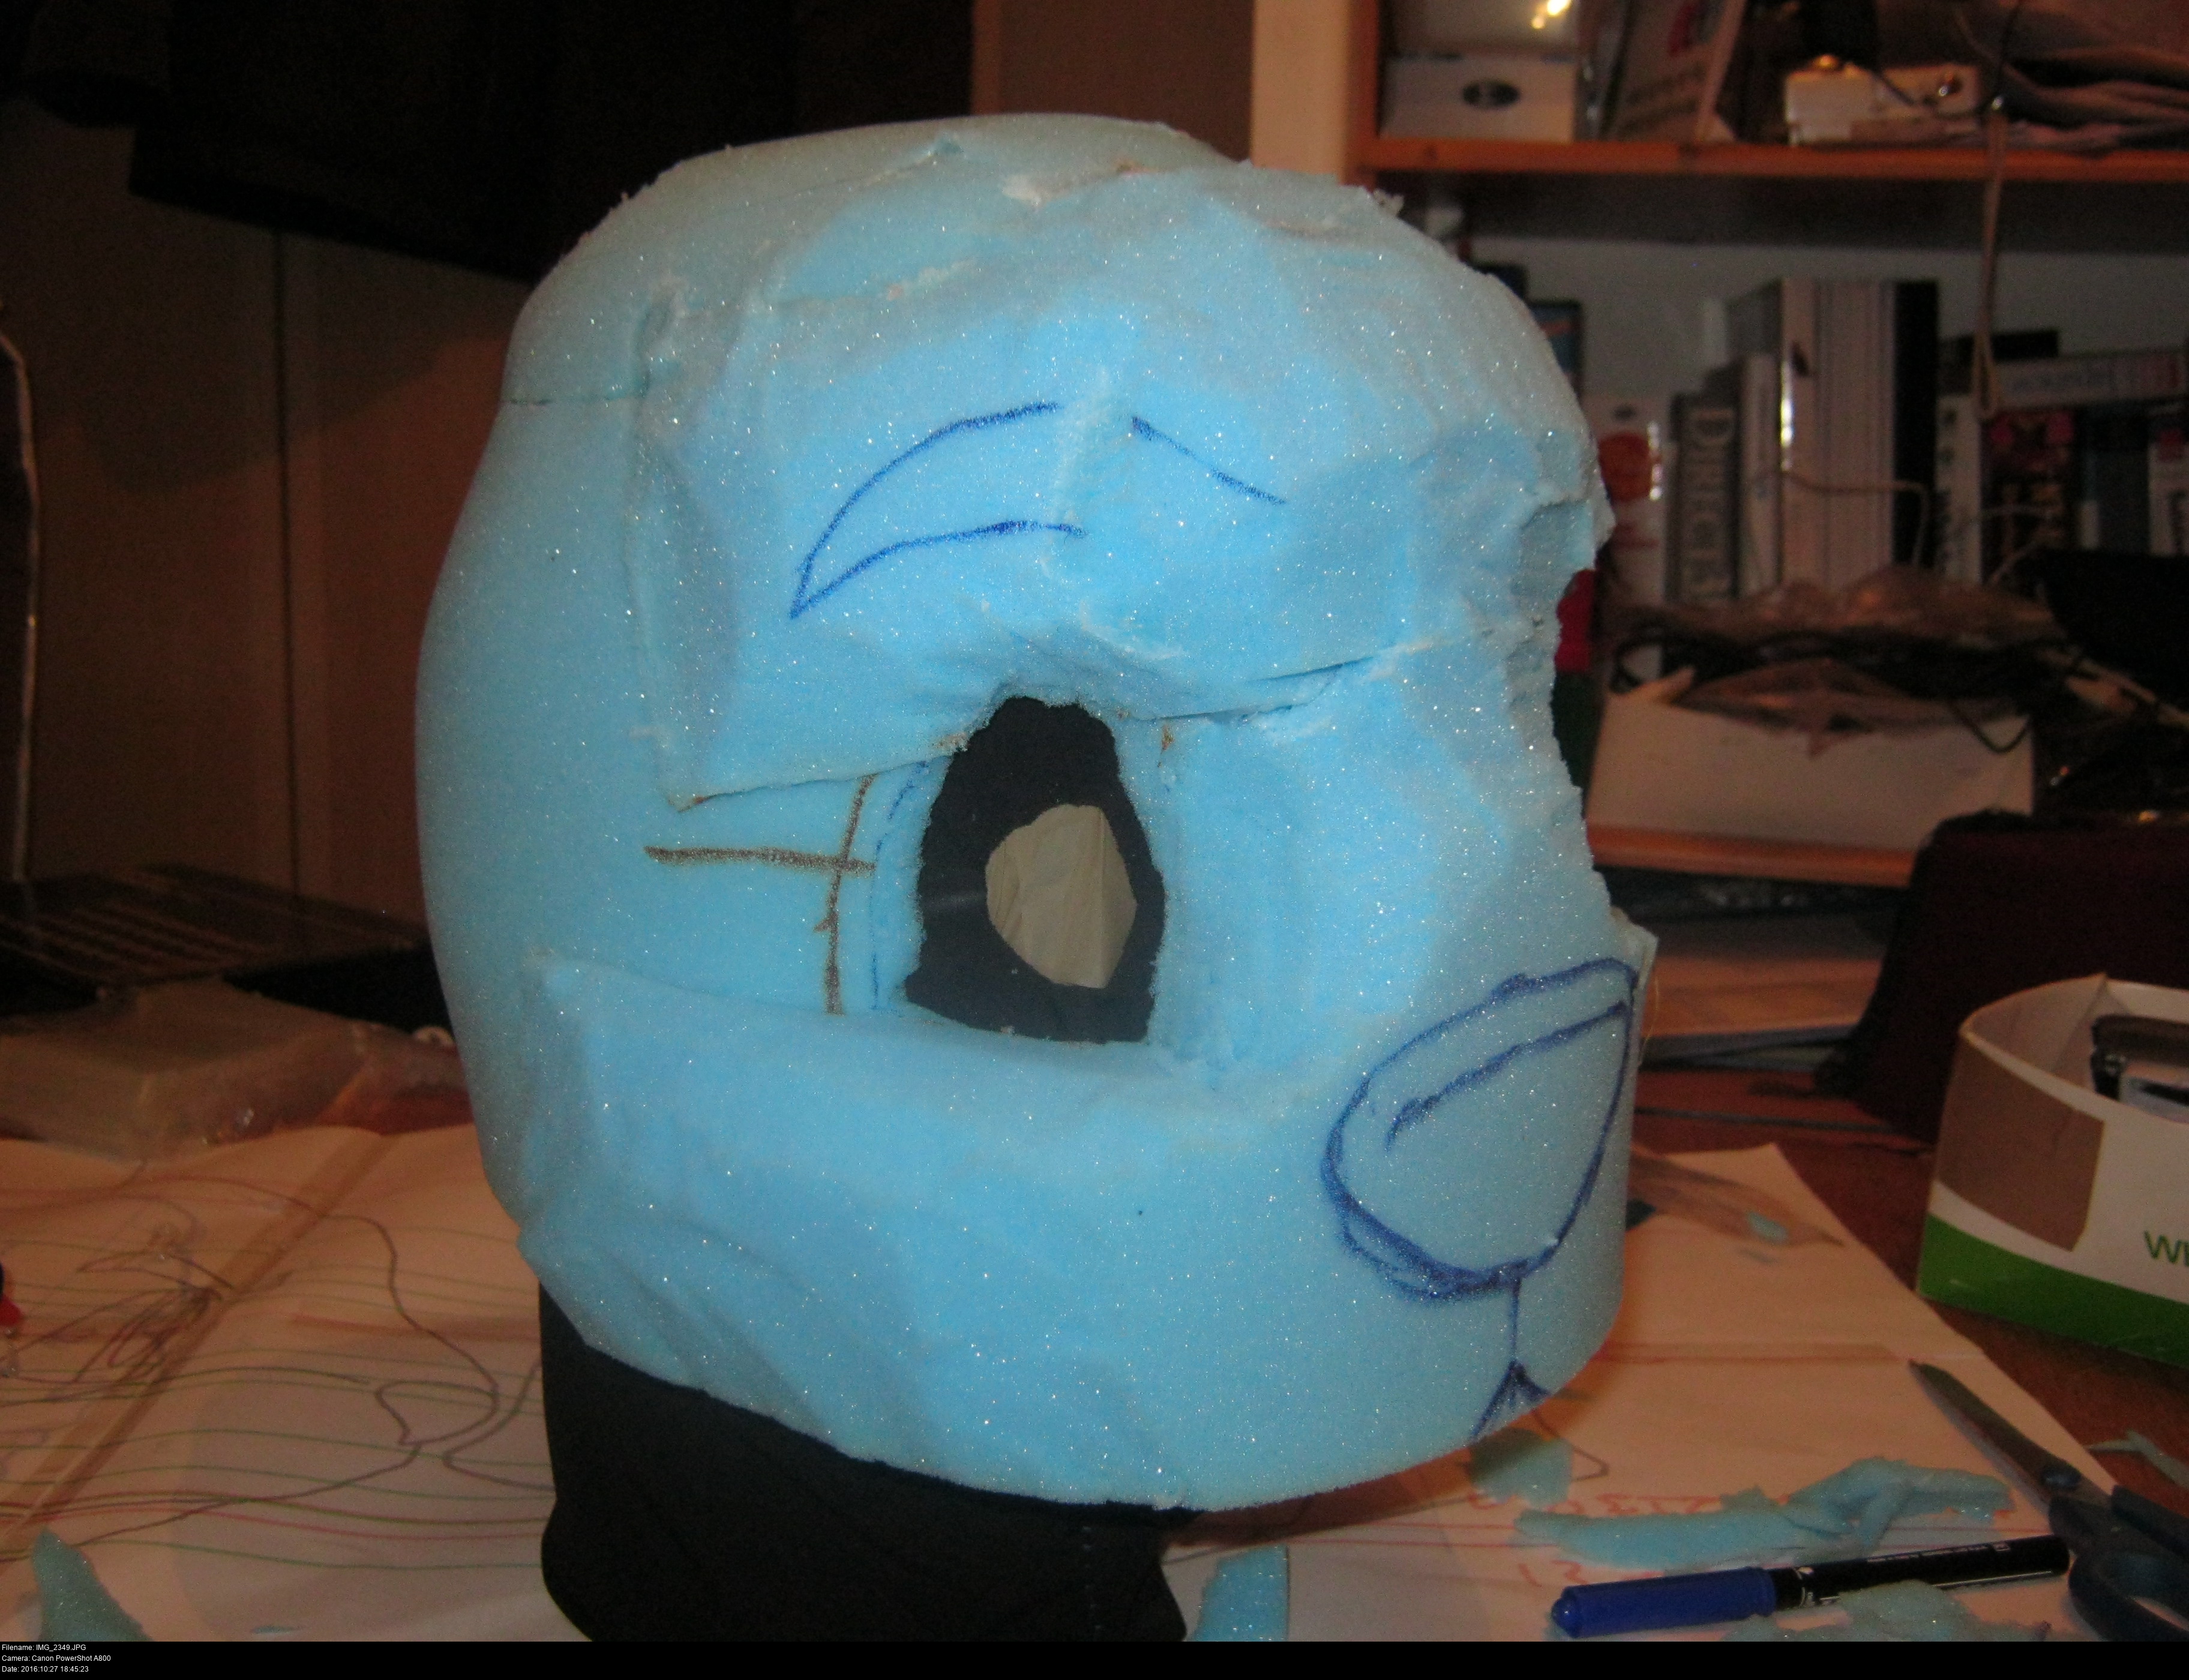
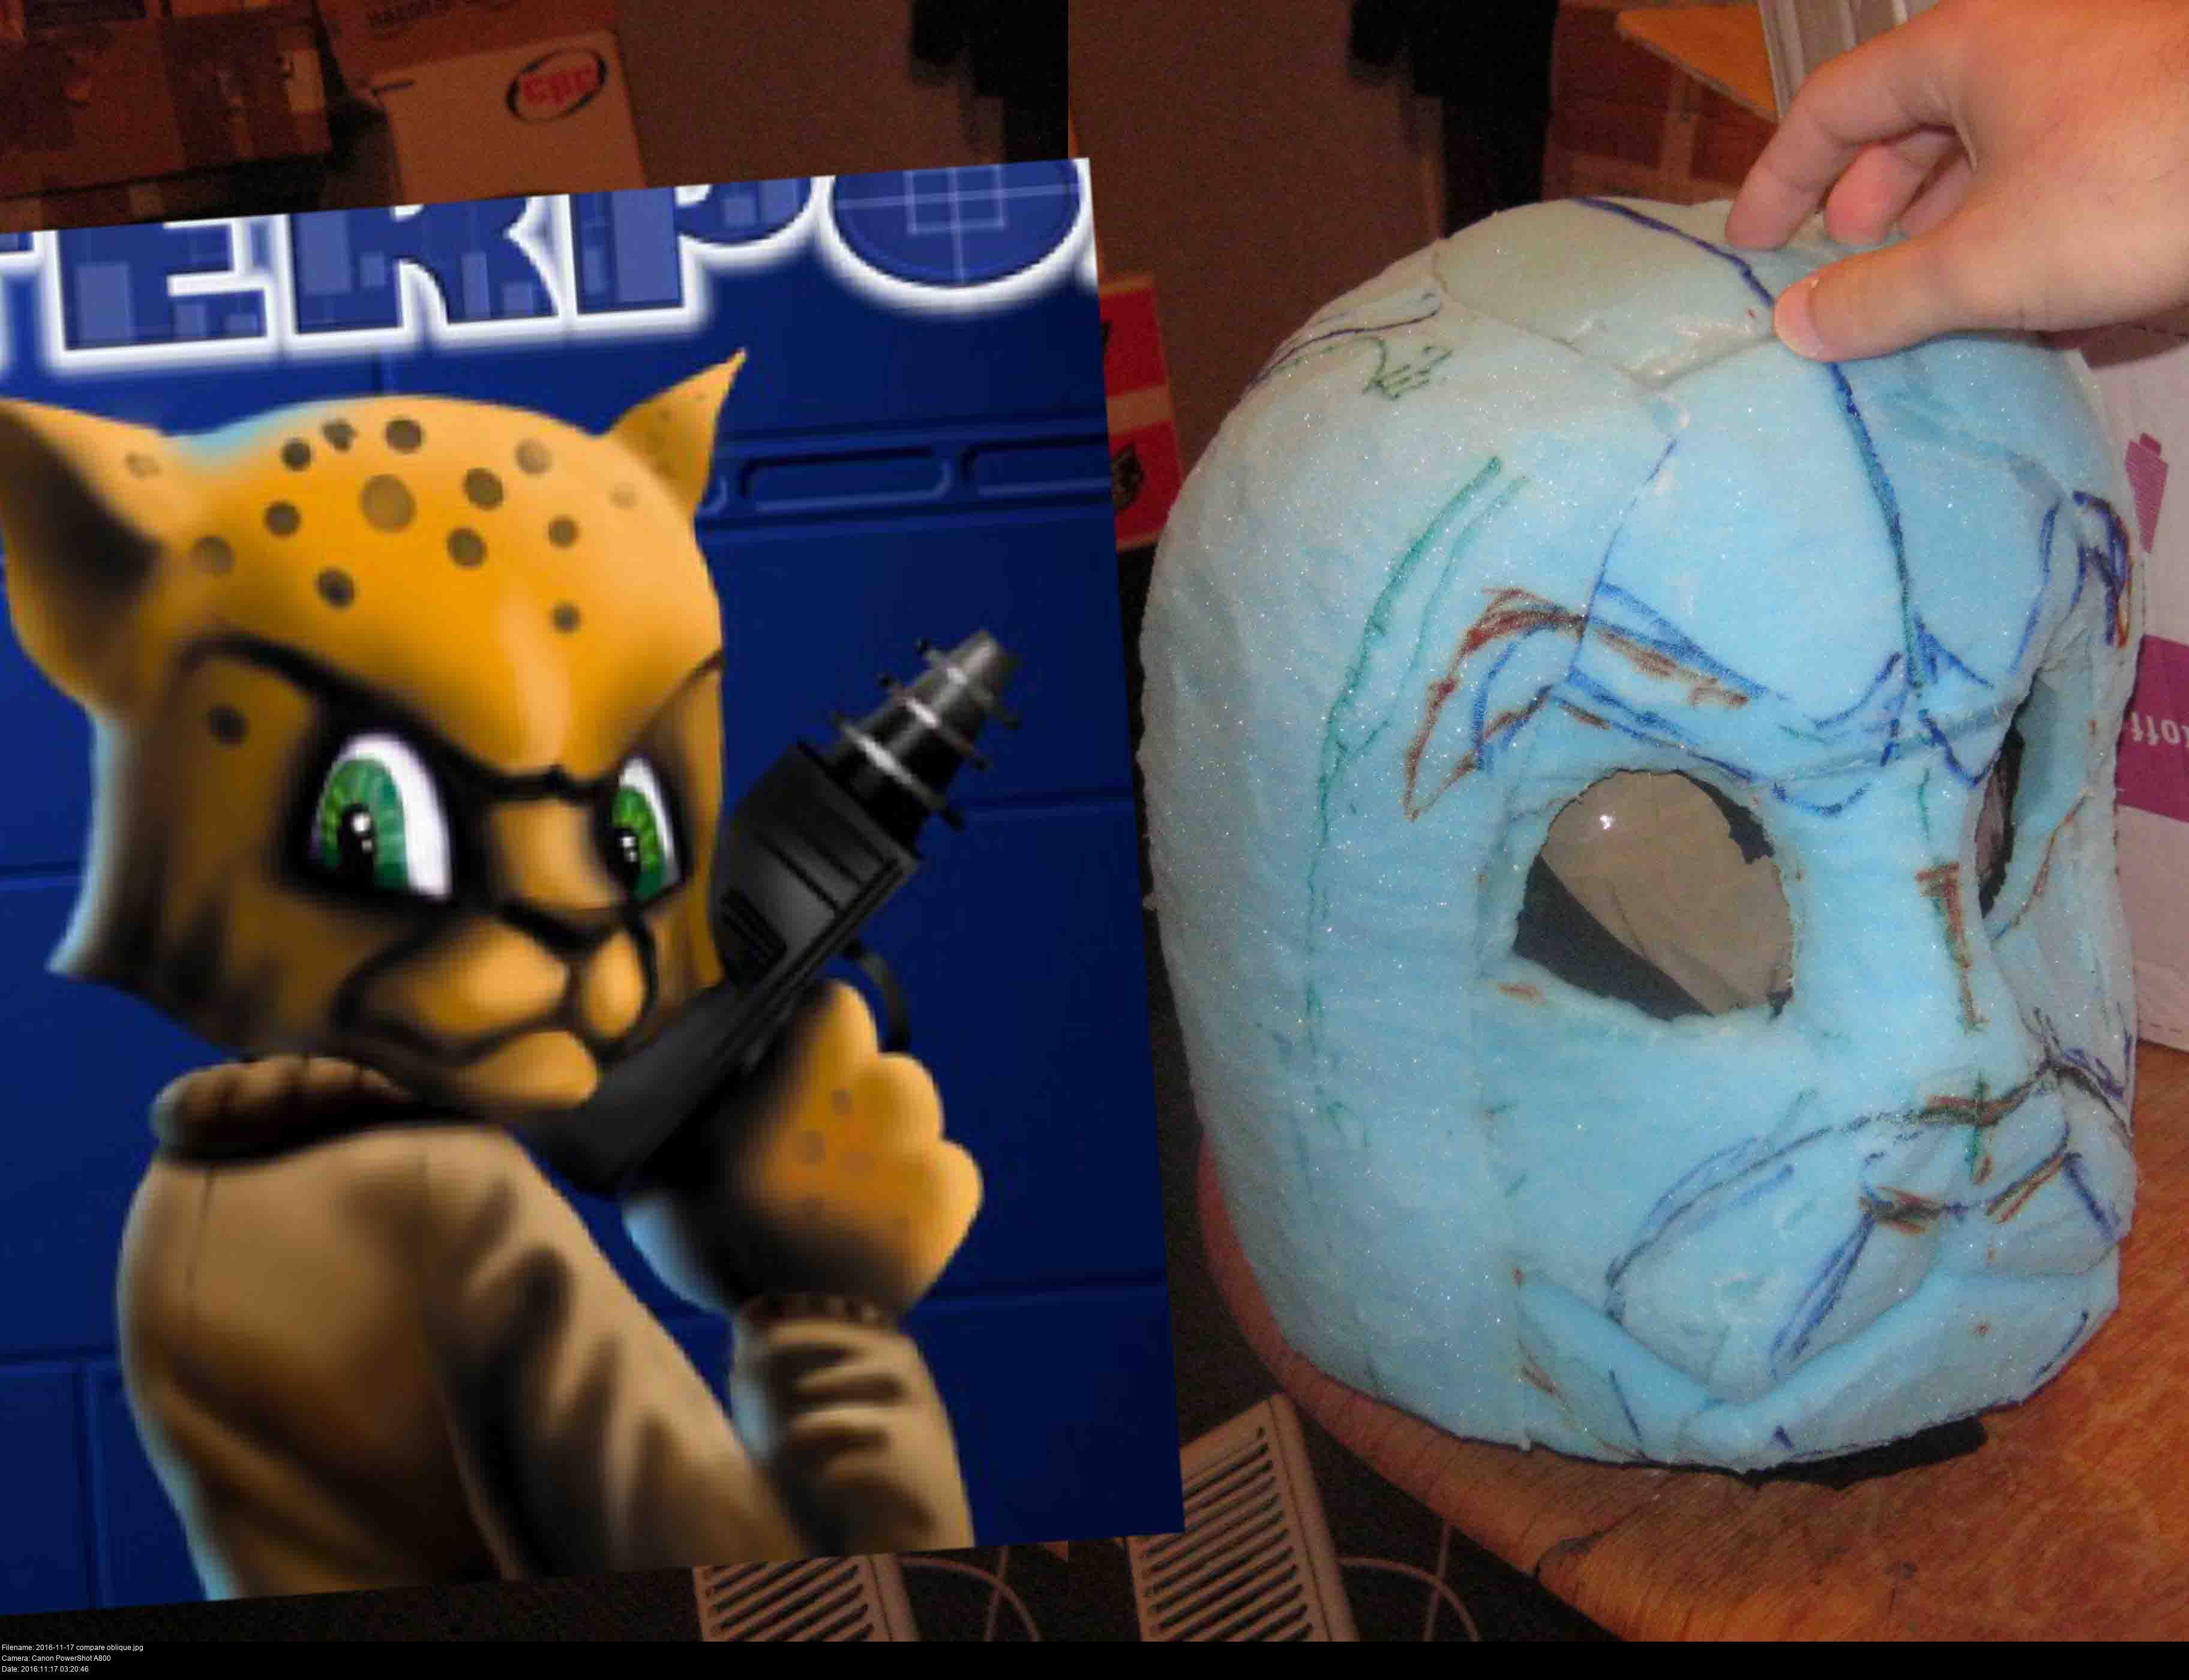
I've got my guide picture, I've got my blocks, let's see what happens.
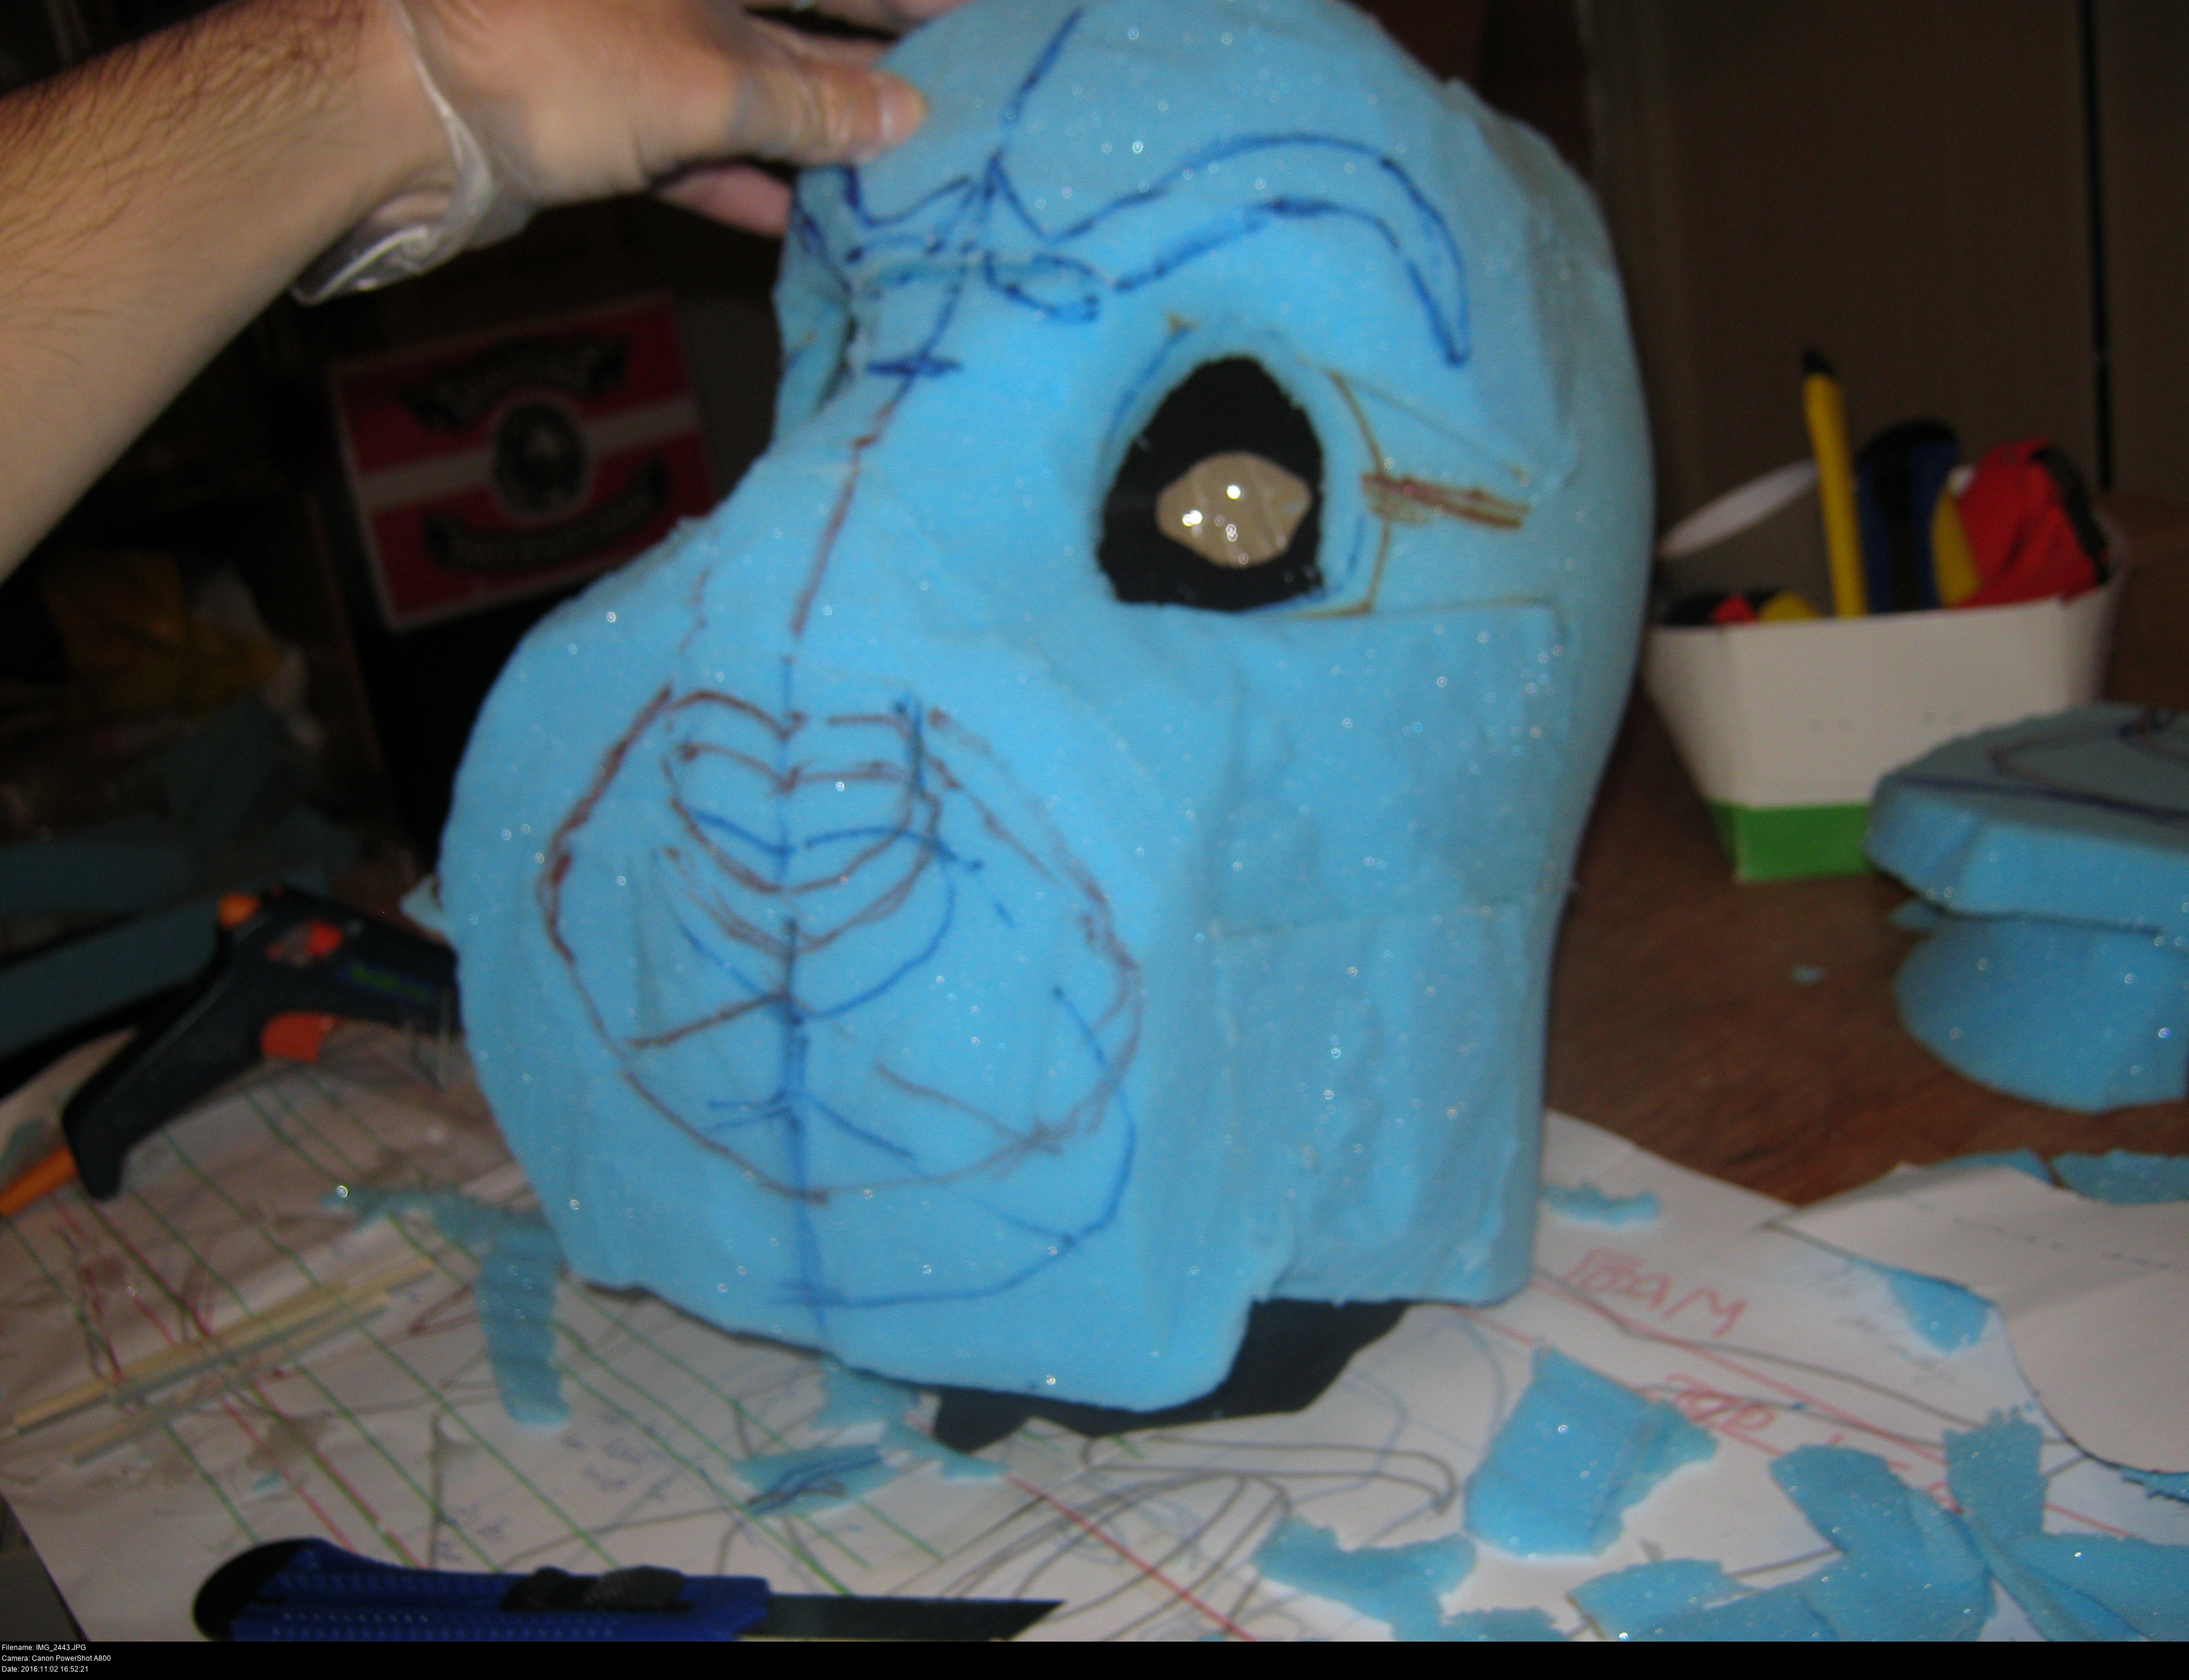
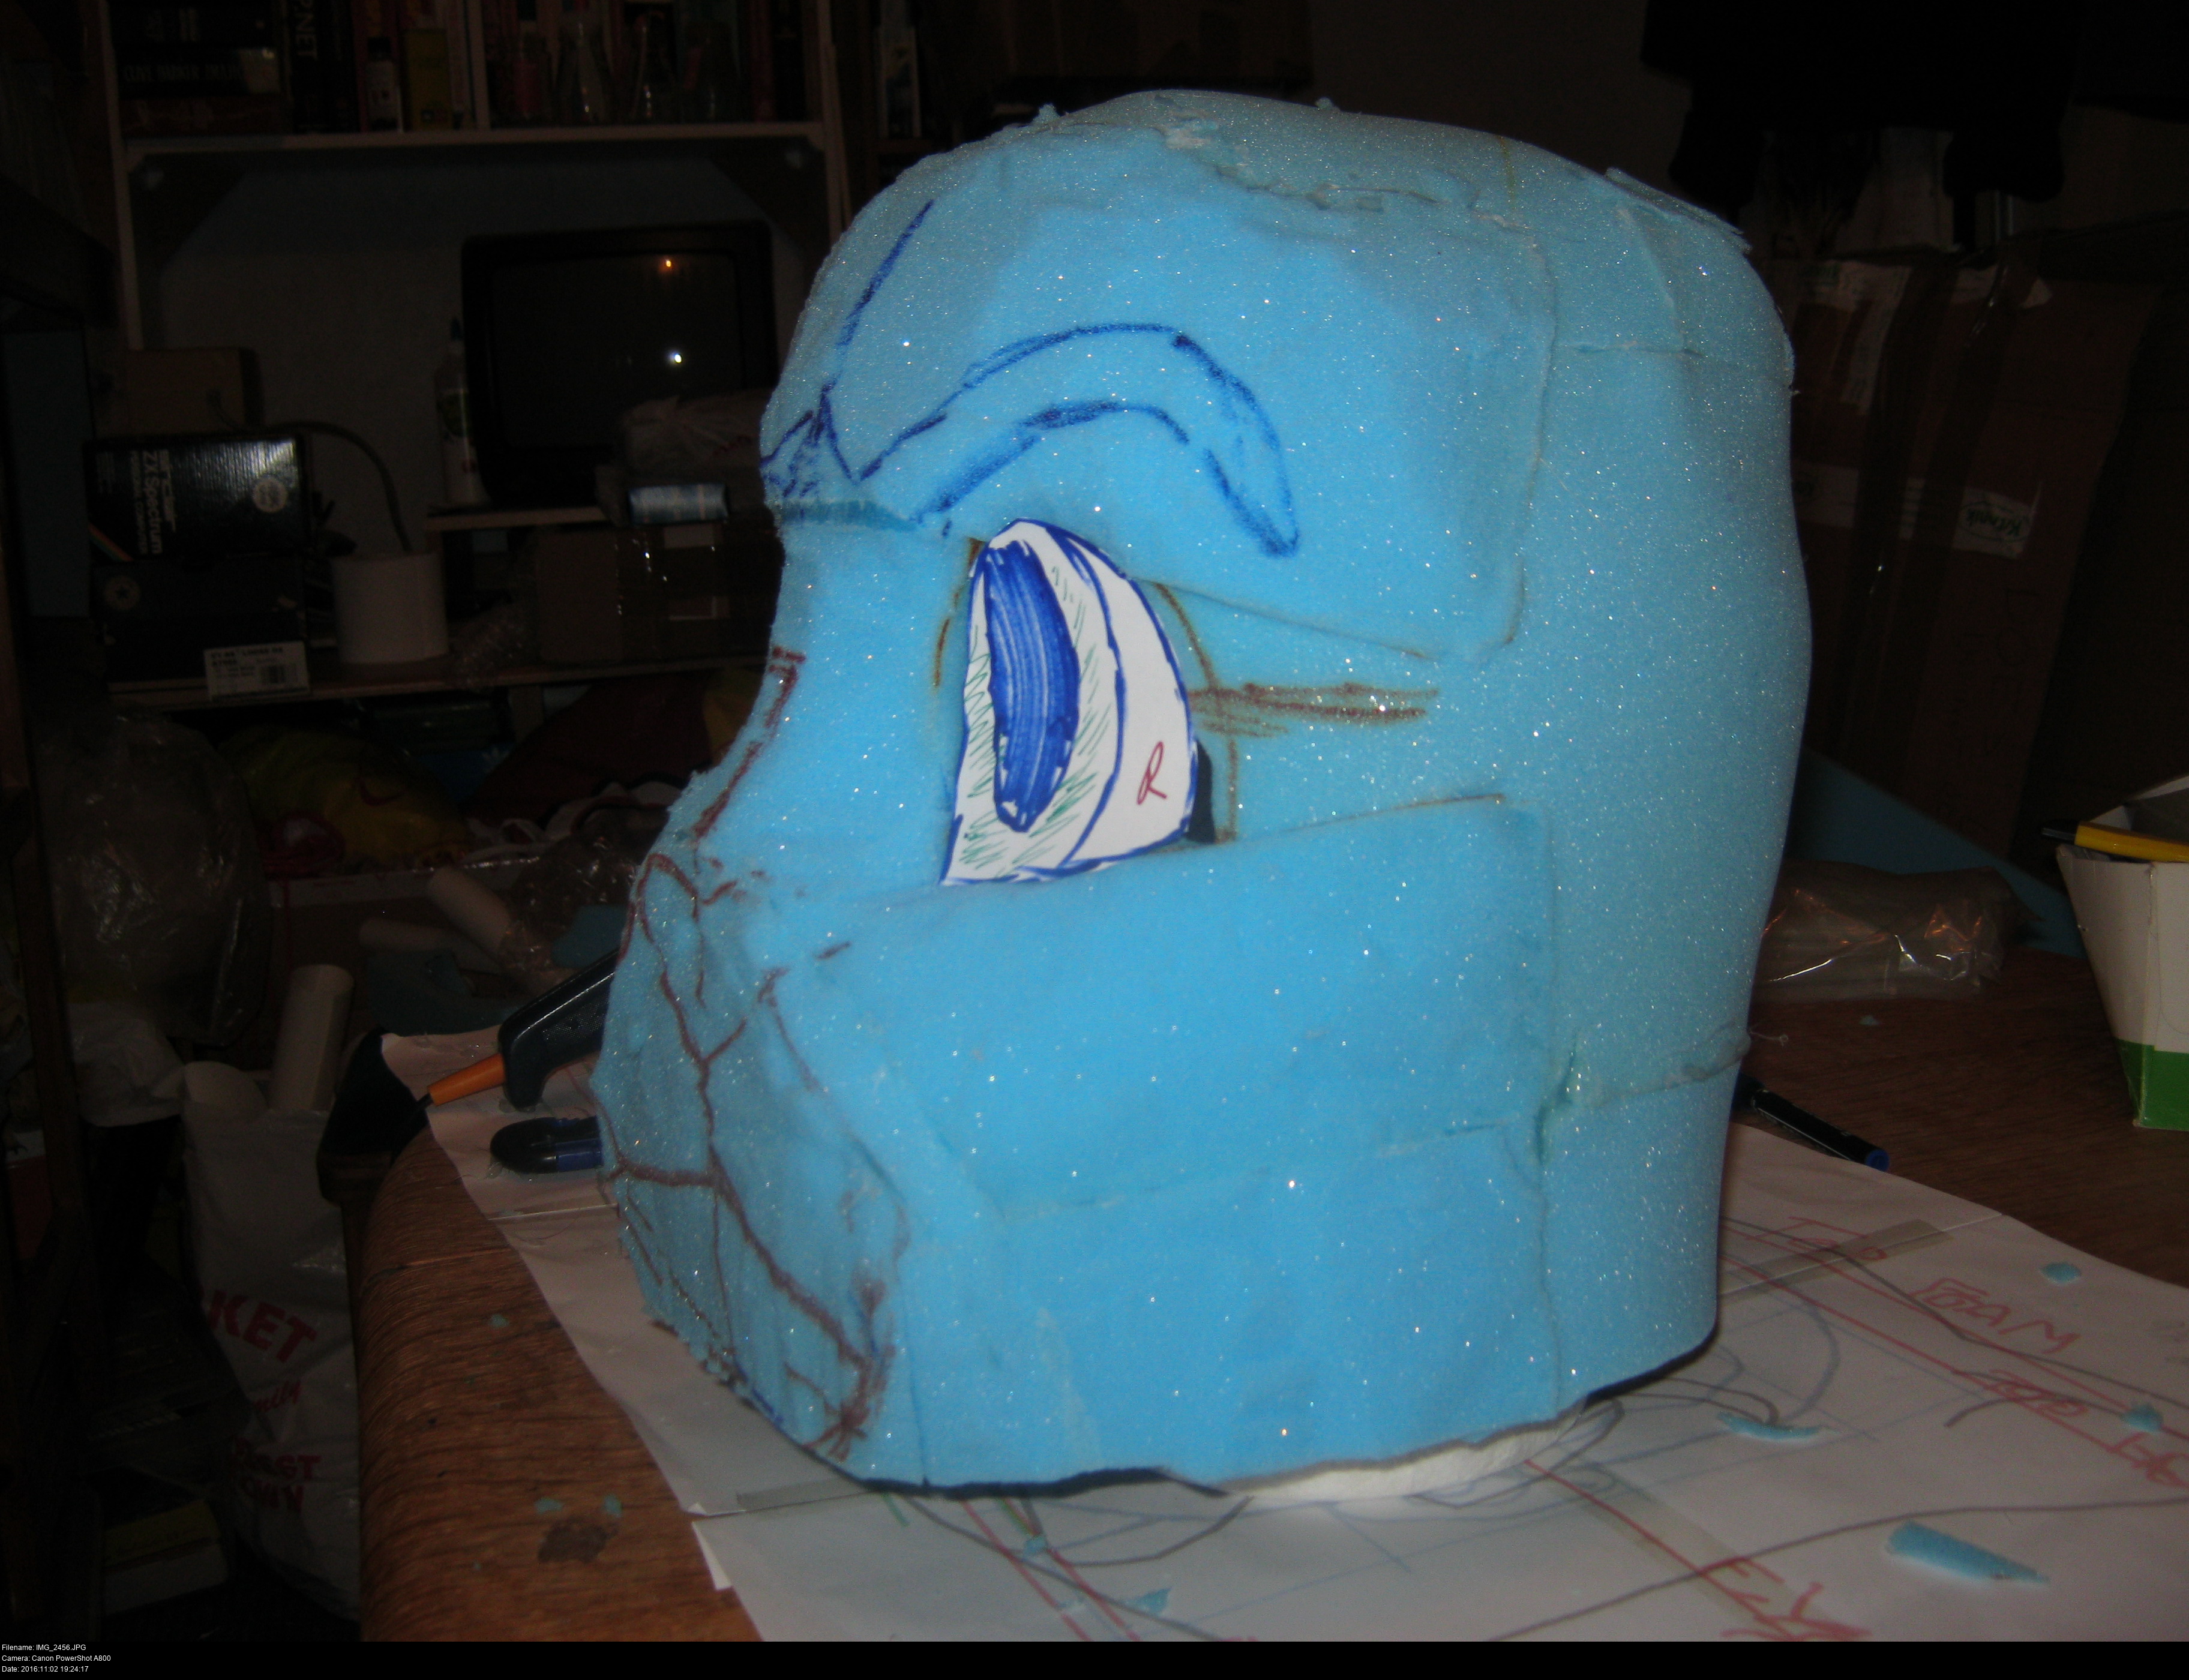
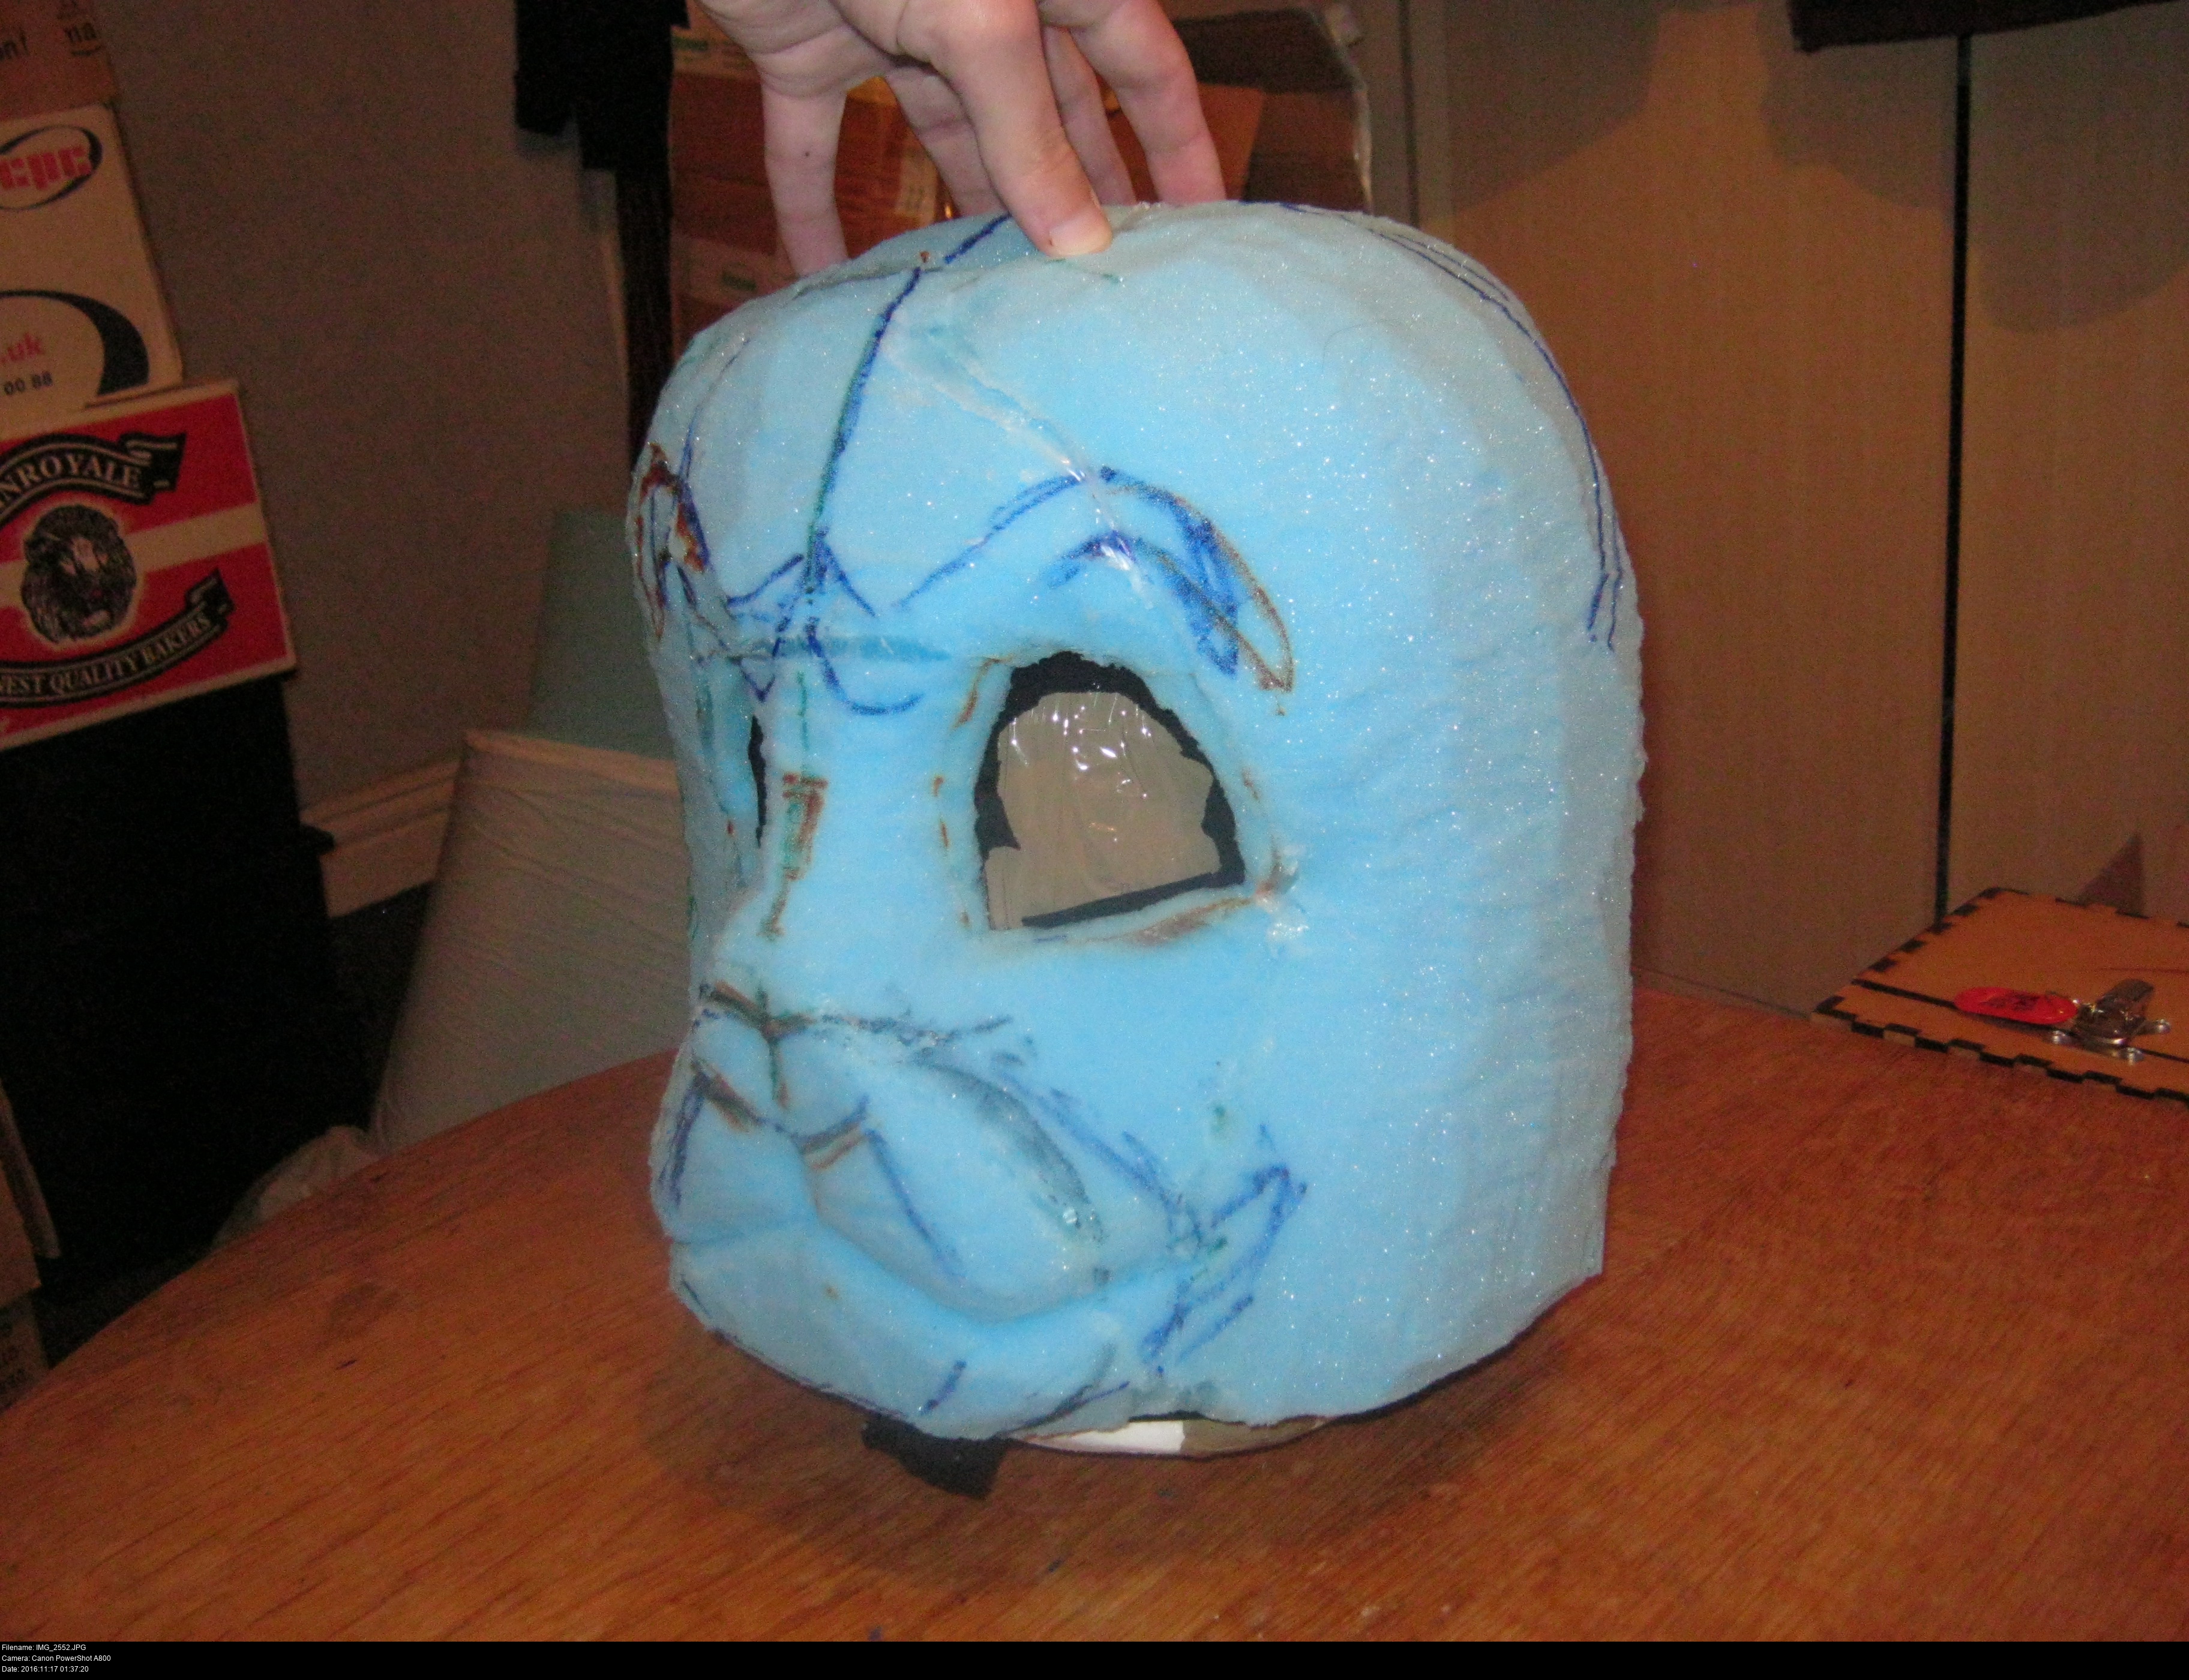
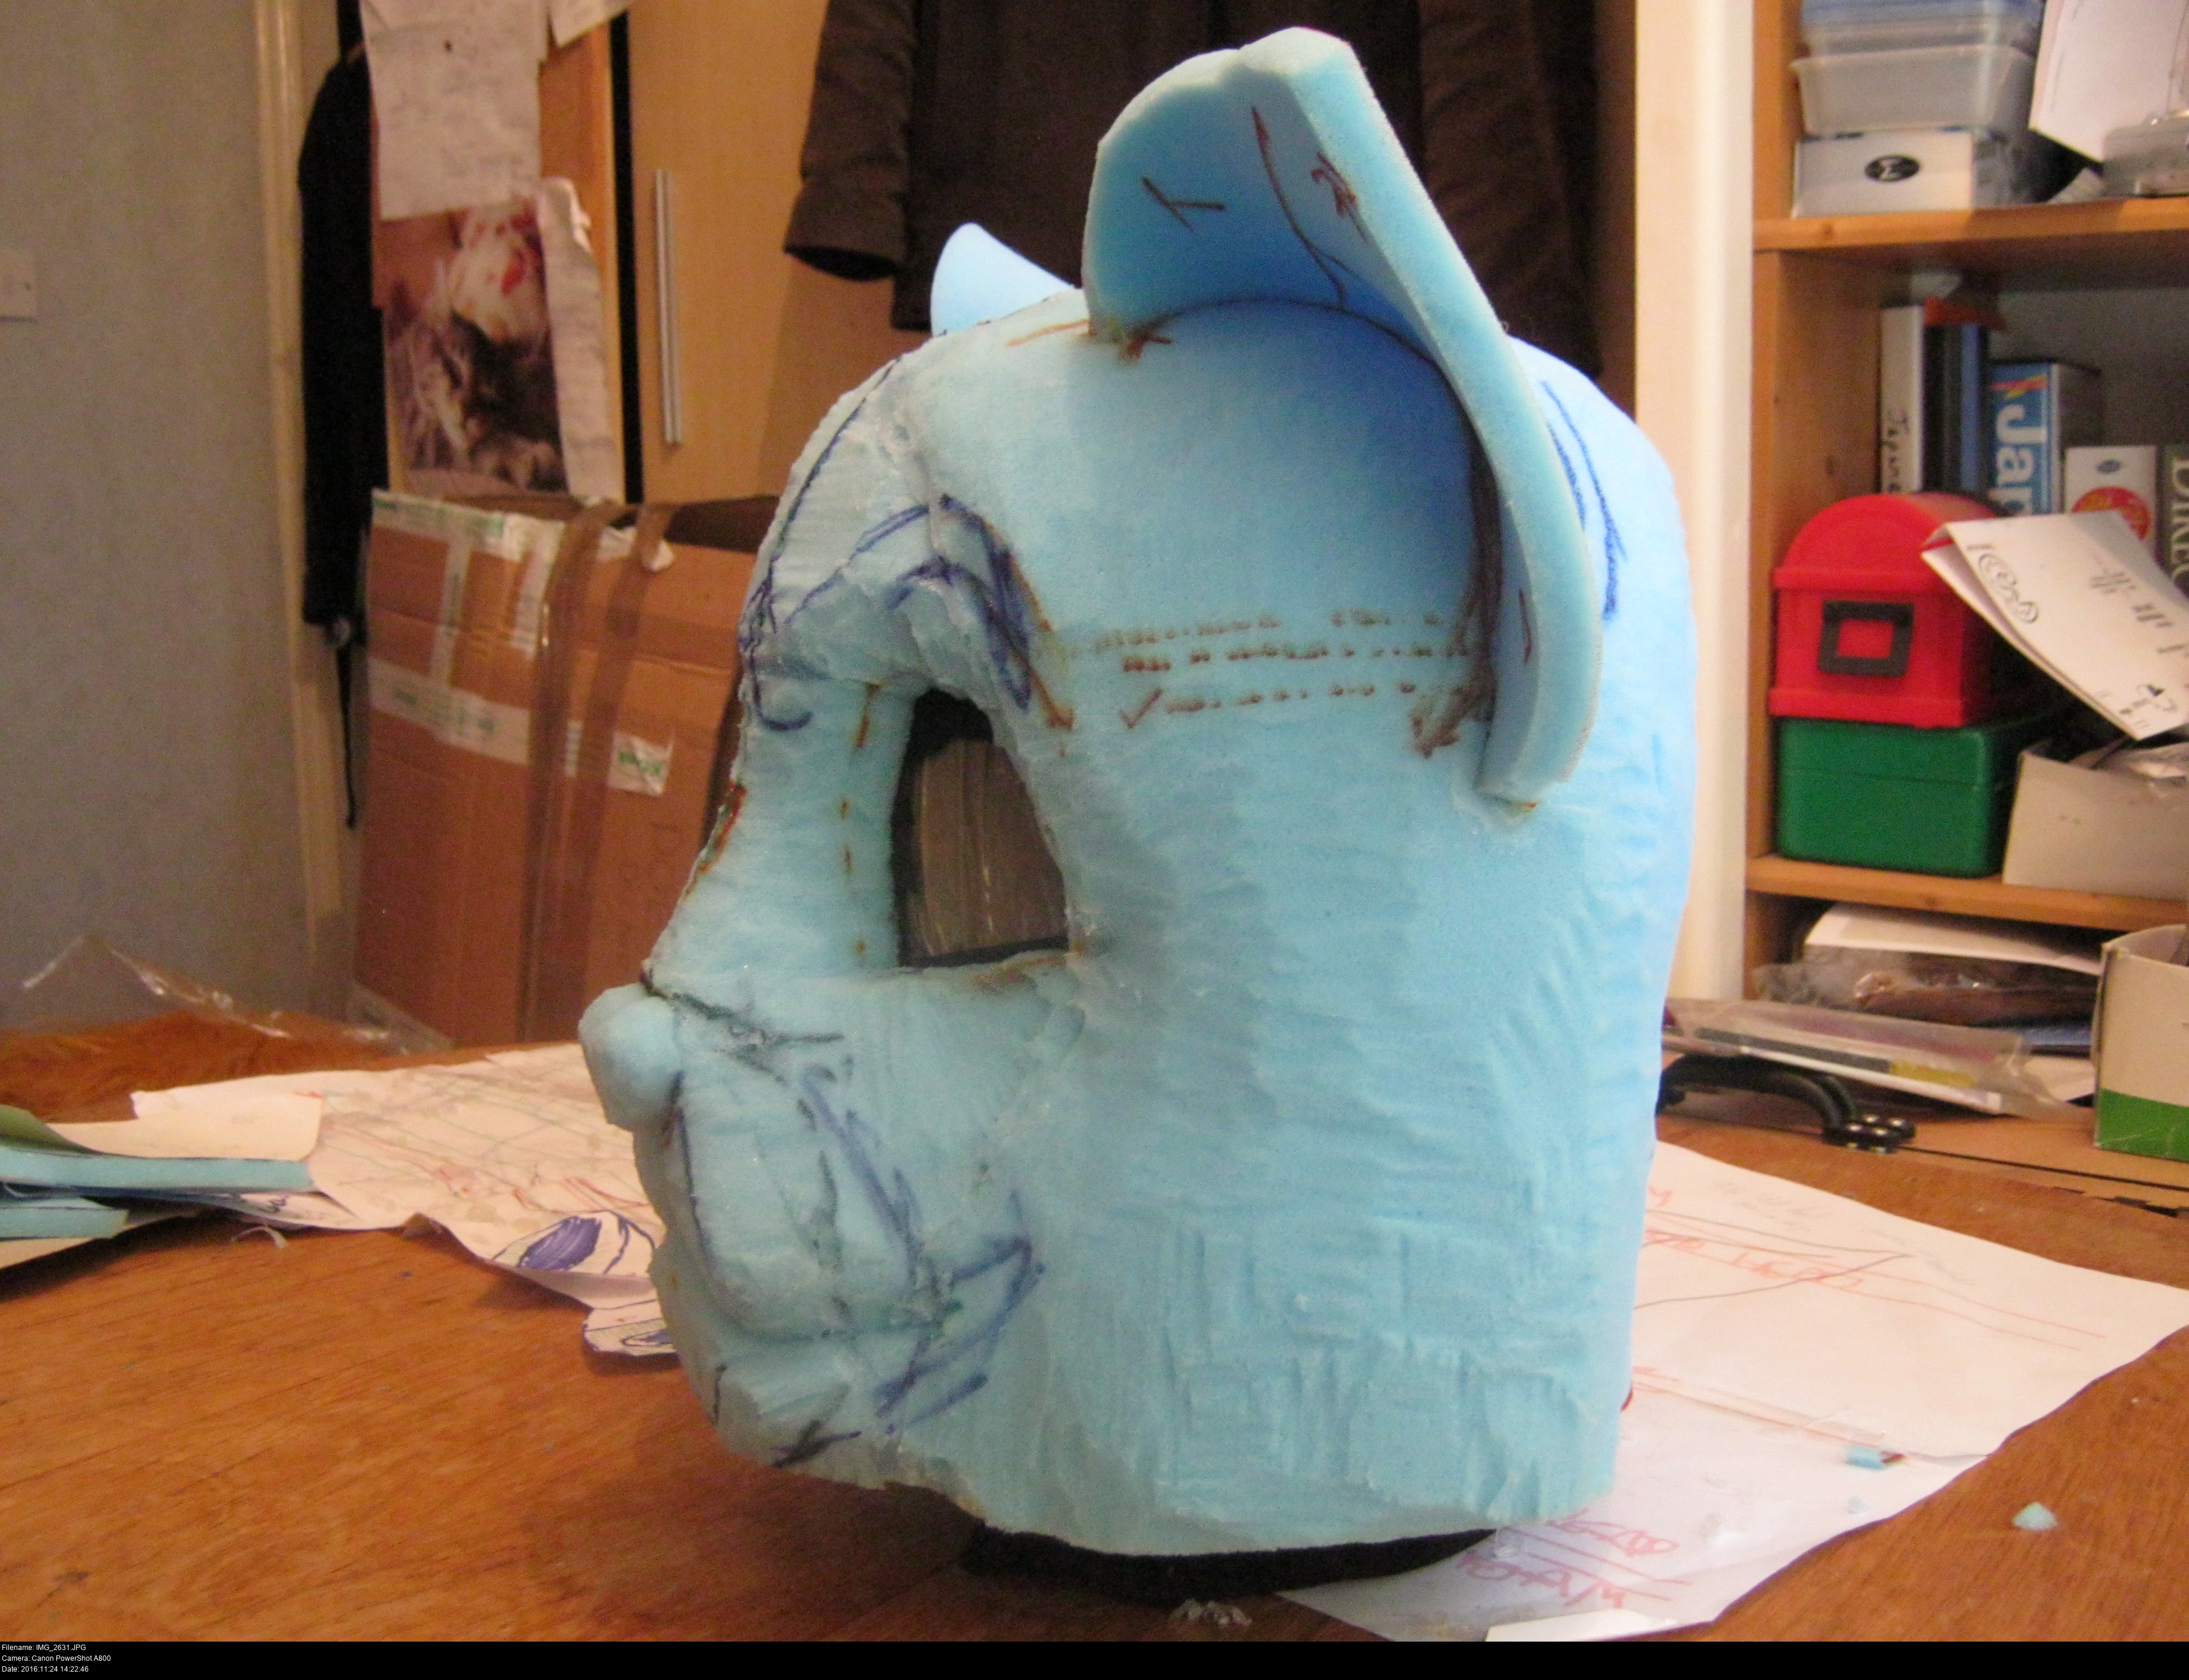
Cut slowly, keep rounding things off: the overlynx is a very rounded kind of guy.
There's no problem with drawing all over this thing to get things in the right place. I just need to keep cutitng.
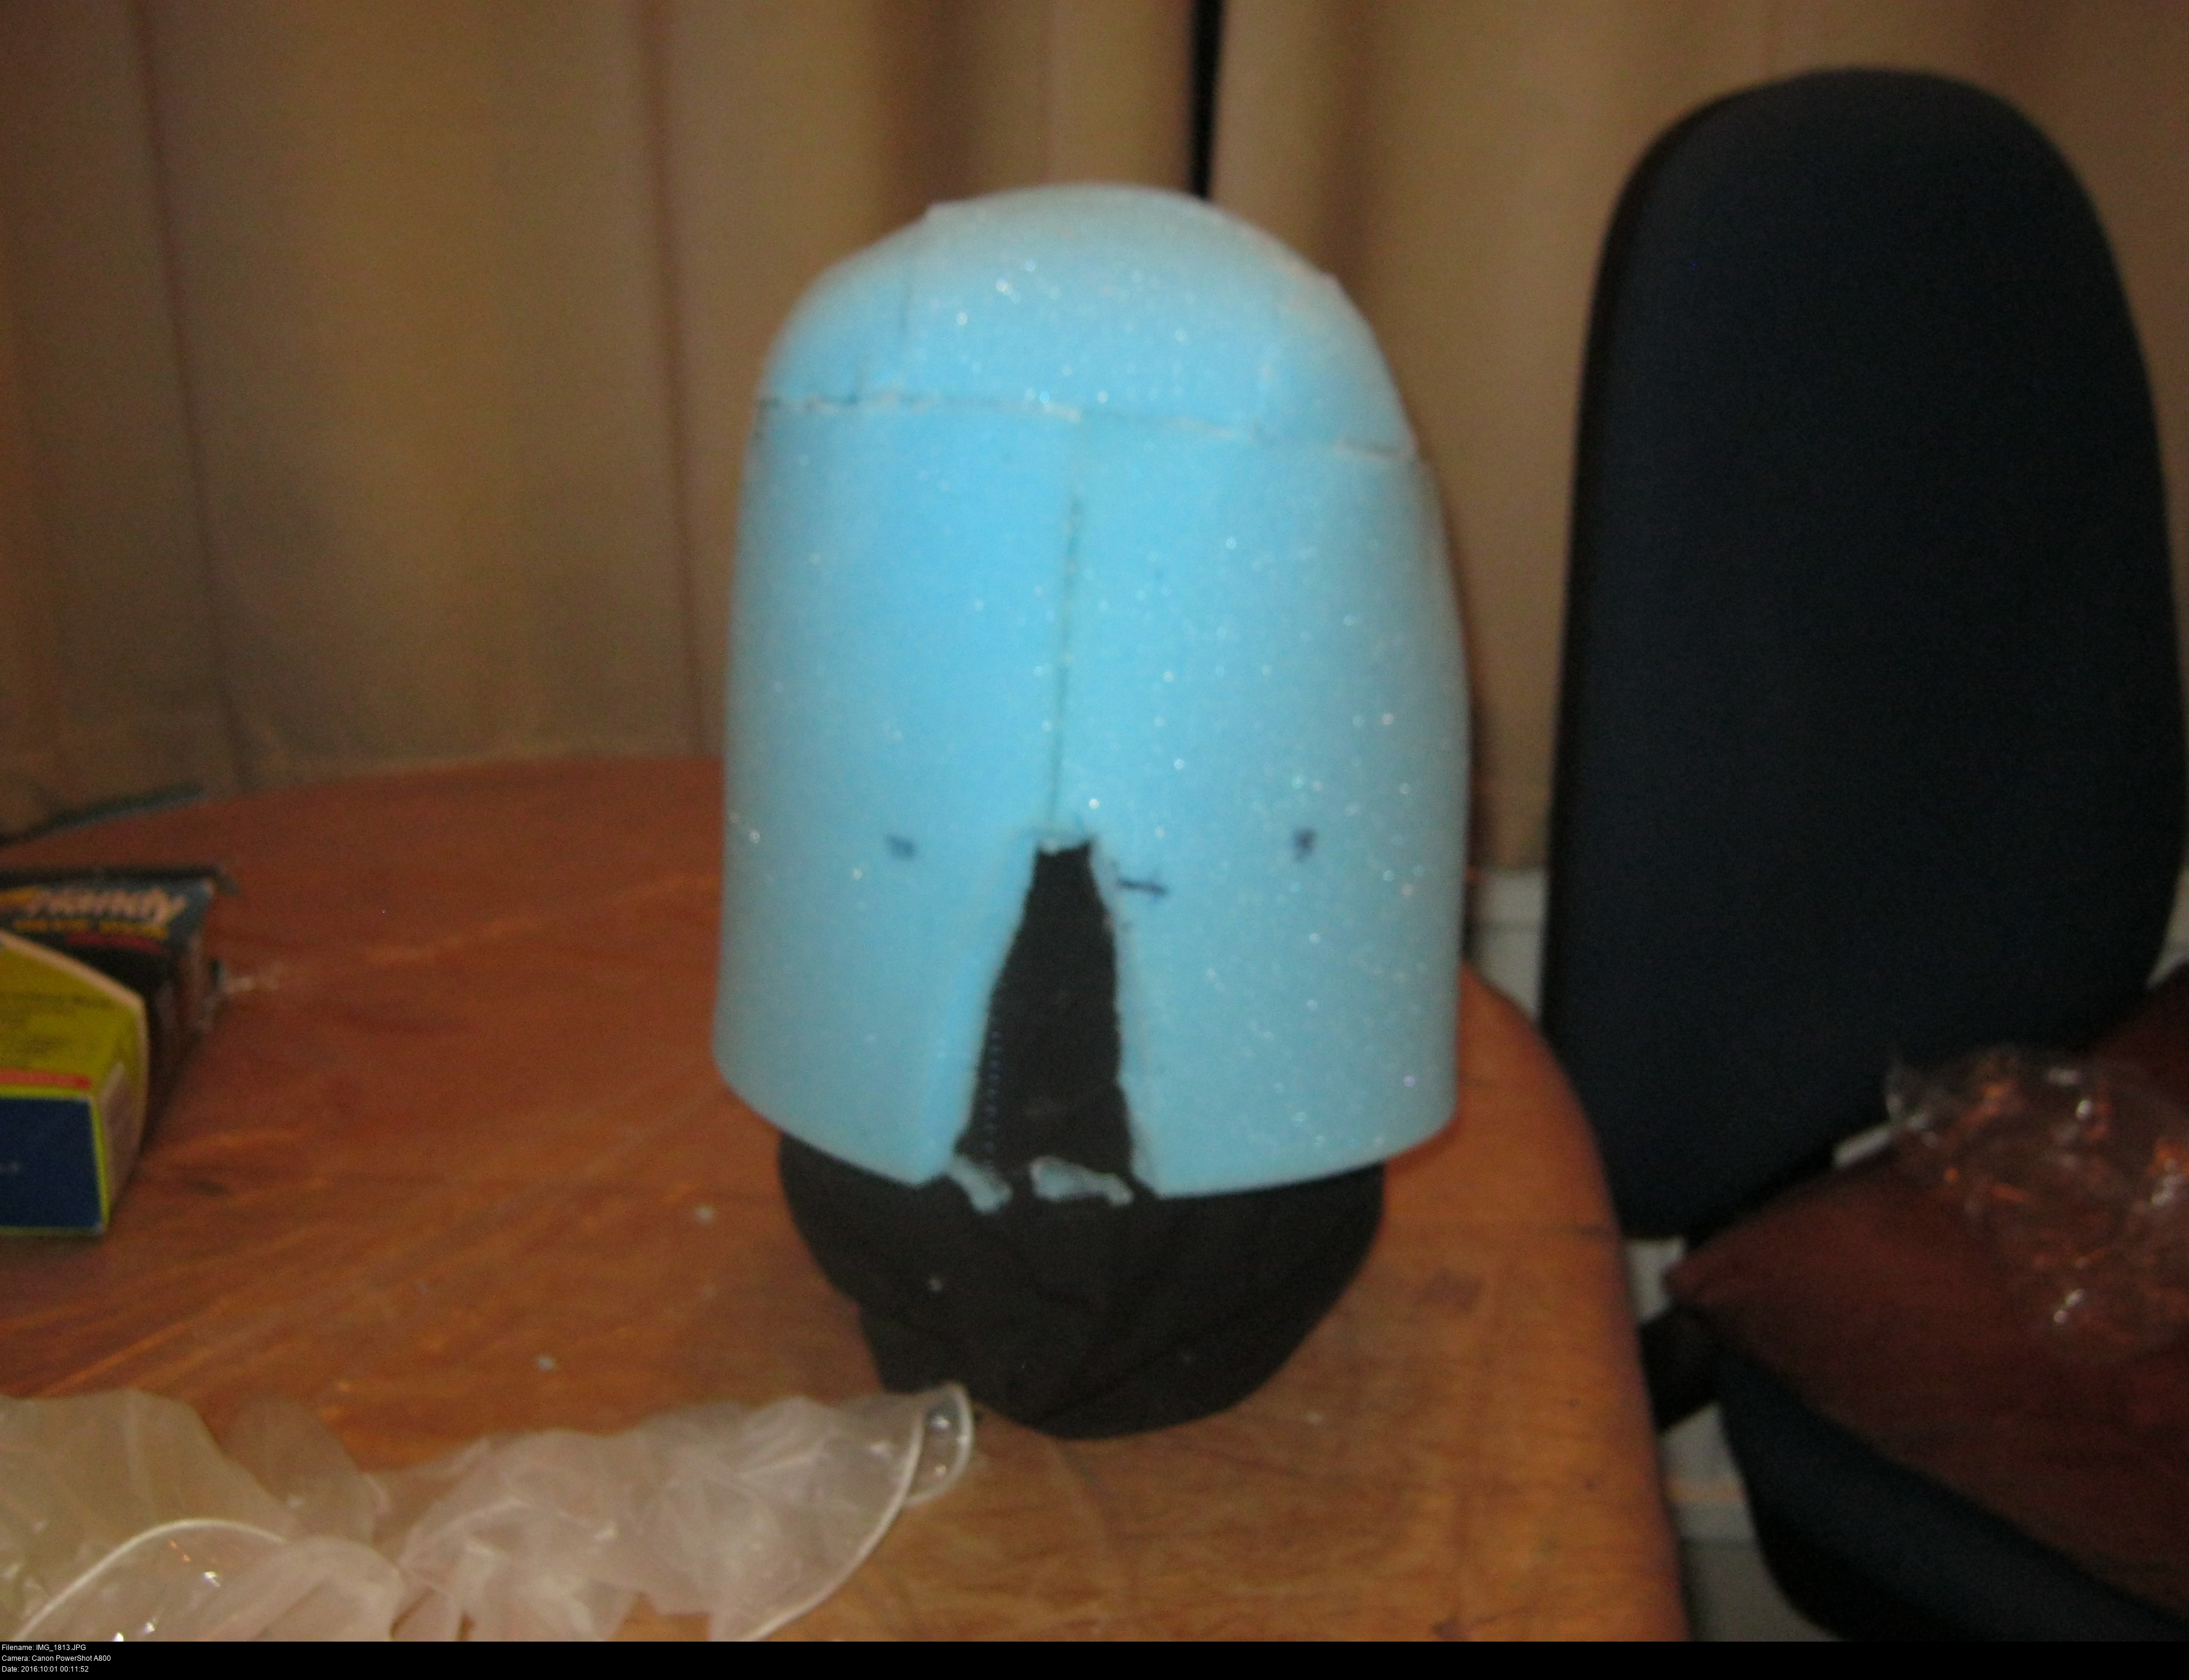
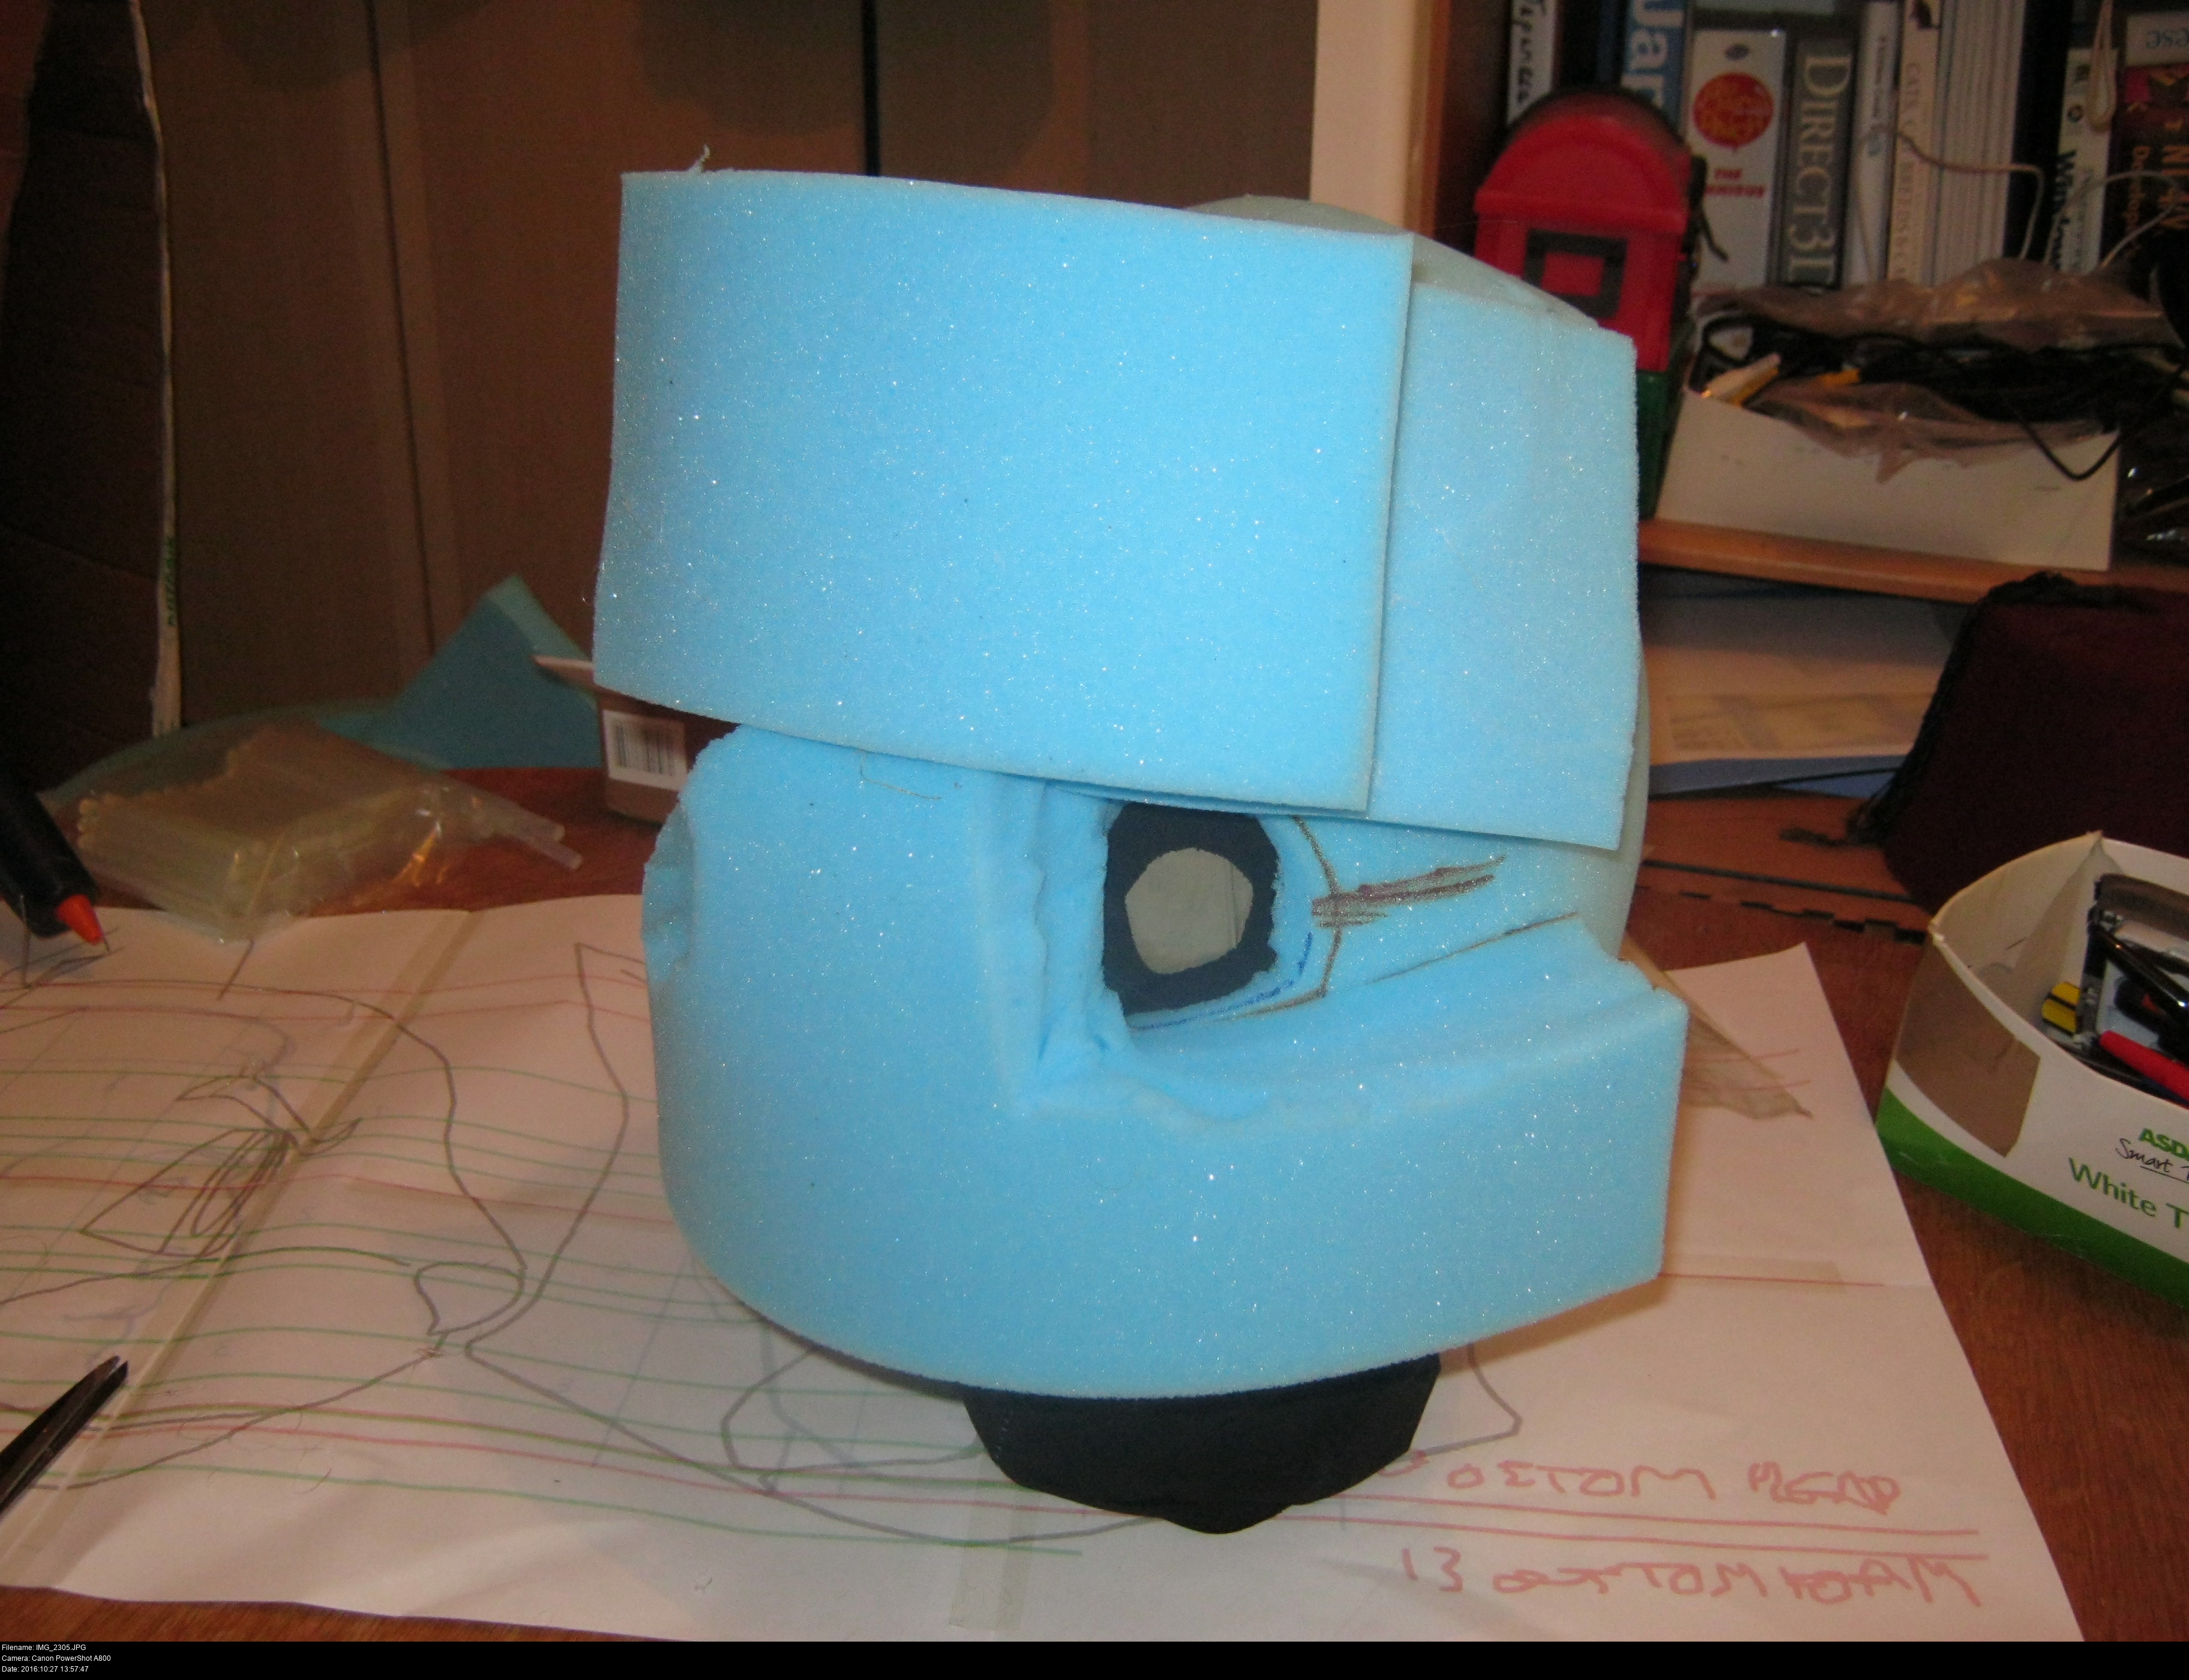
You know, this would probably work better if he had a chin. My cylinder stops just above my mouth, which is kinda useless for making a full head covering mask (if you were making a fursuit head with a moving chin, this where the magic would begin). I cut out more blocks and strips and glued them to the bottom of the cylinder to extend the mask downwards to make a solid mask. Now the carving can resume.
Keep testing and wearing this to make sure it's still comfortable!
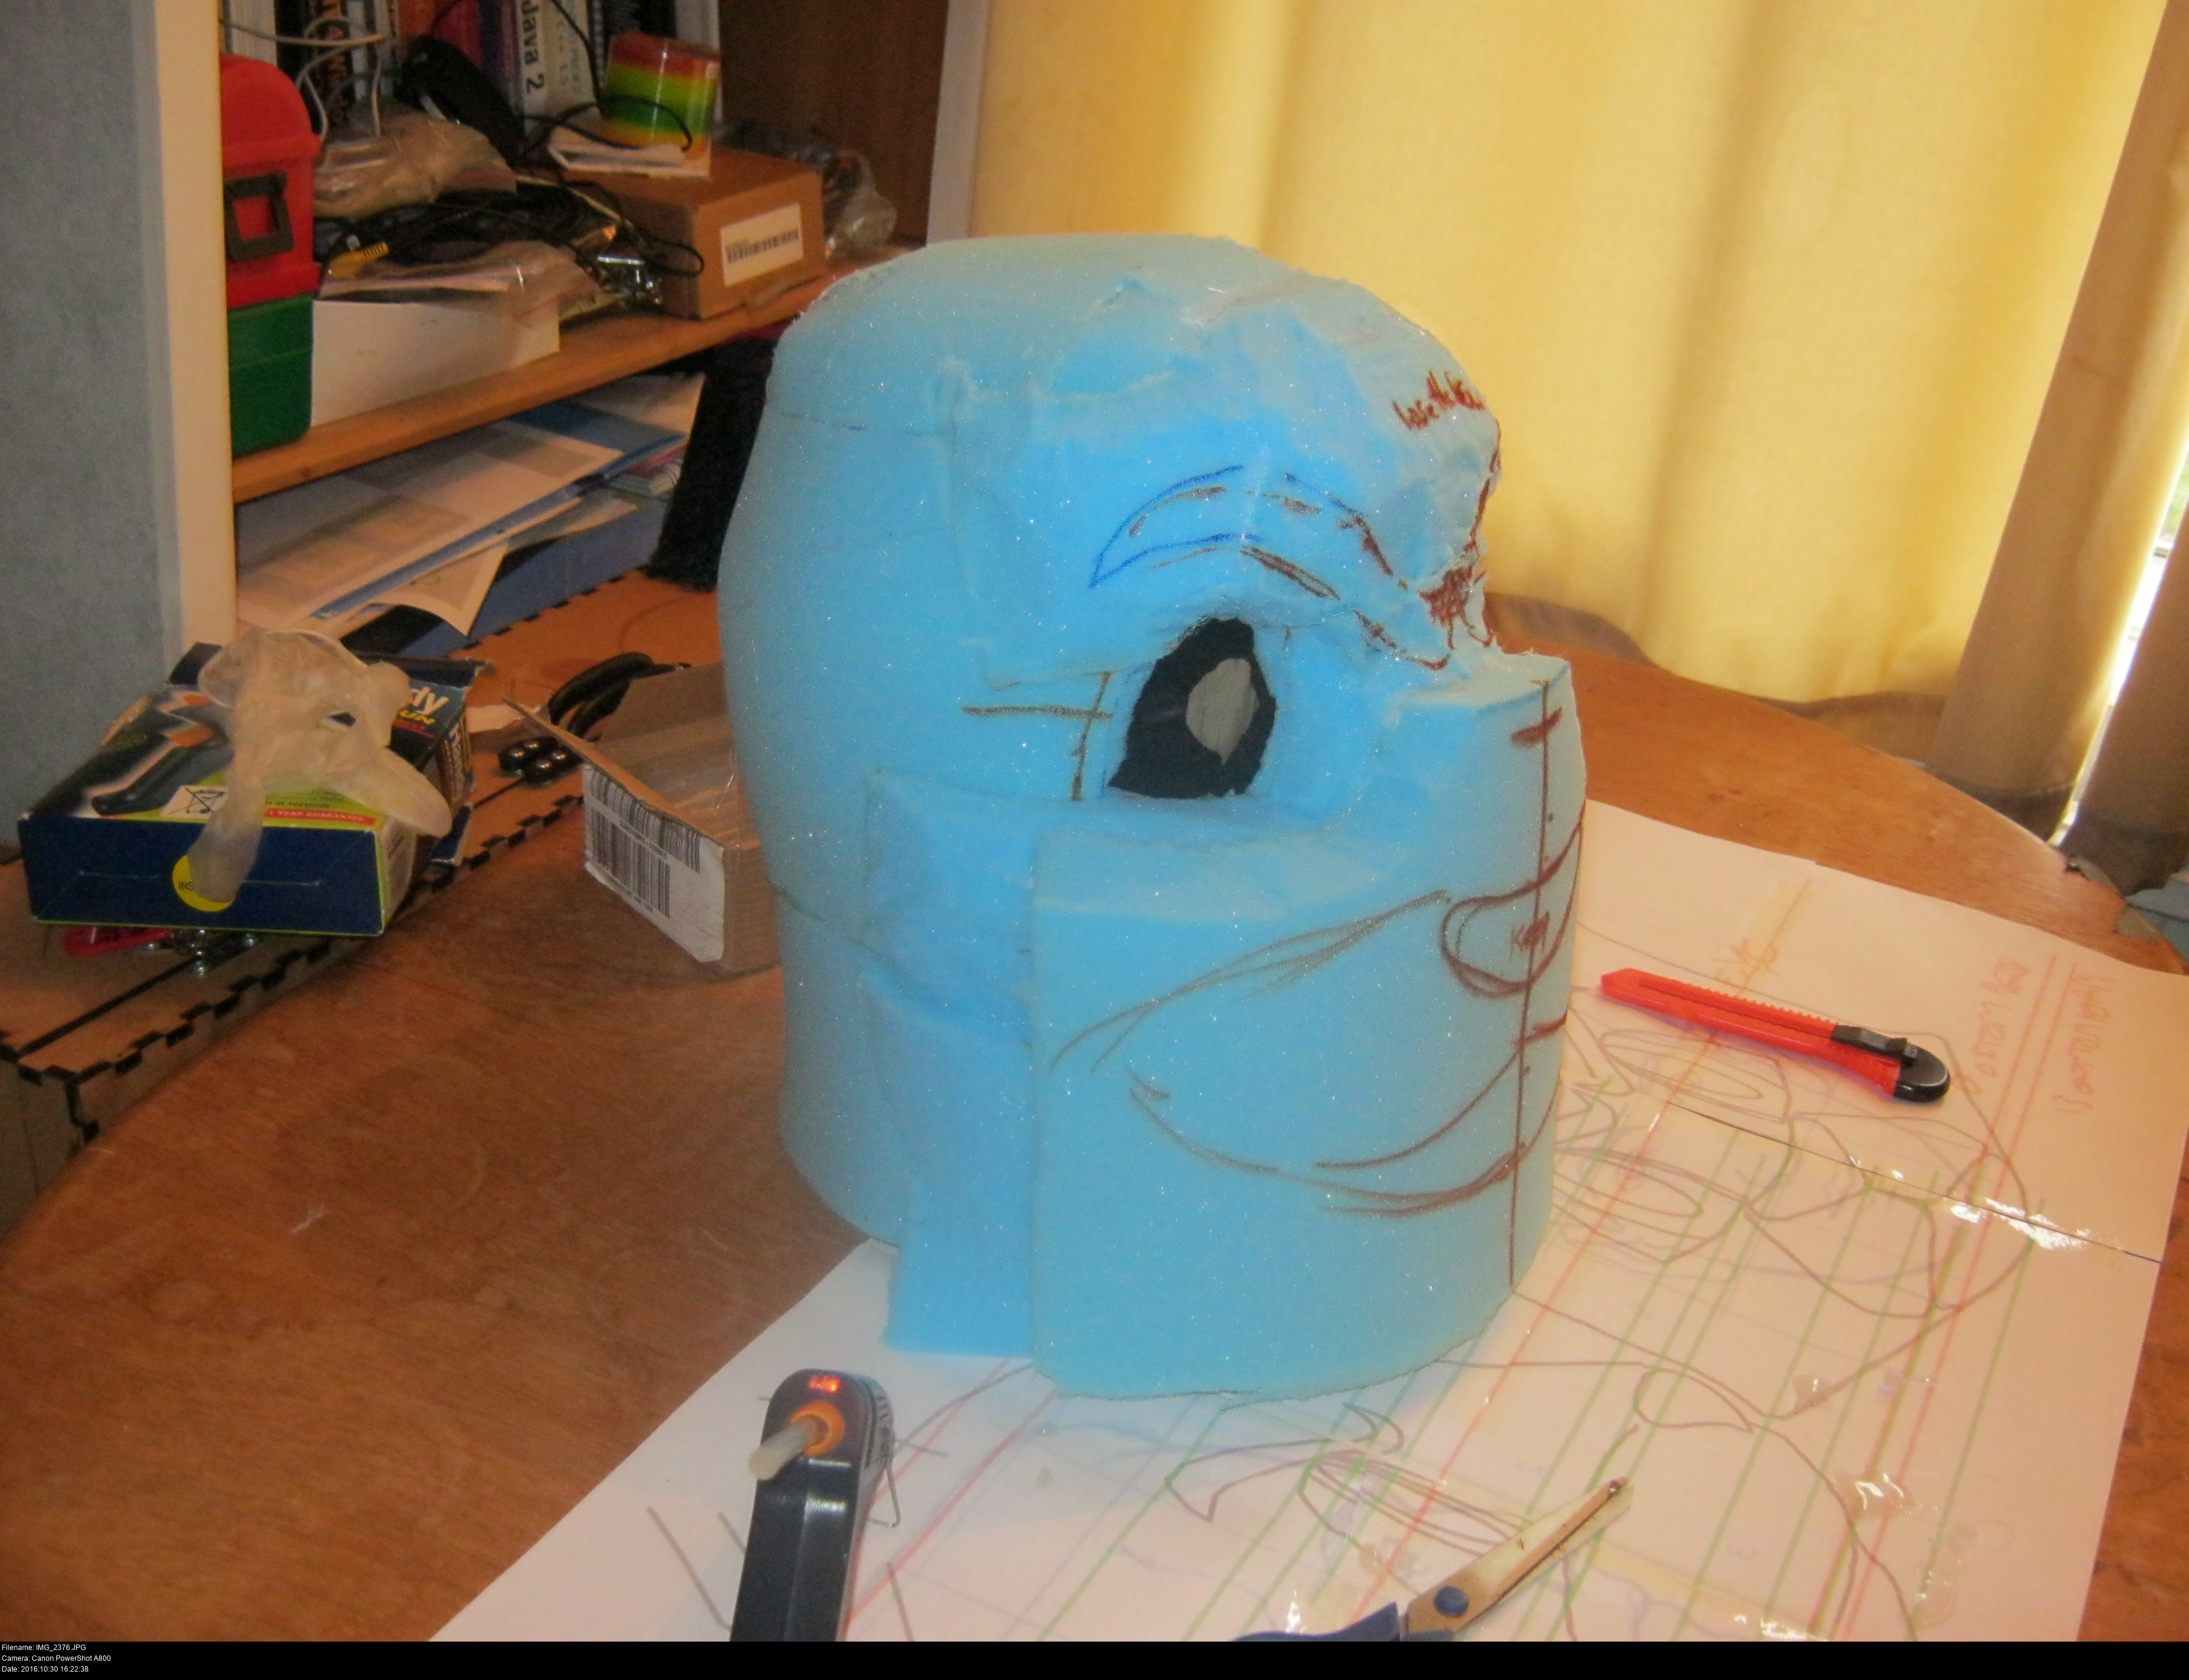
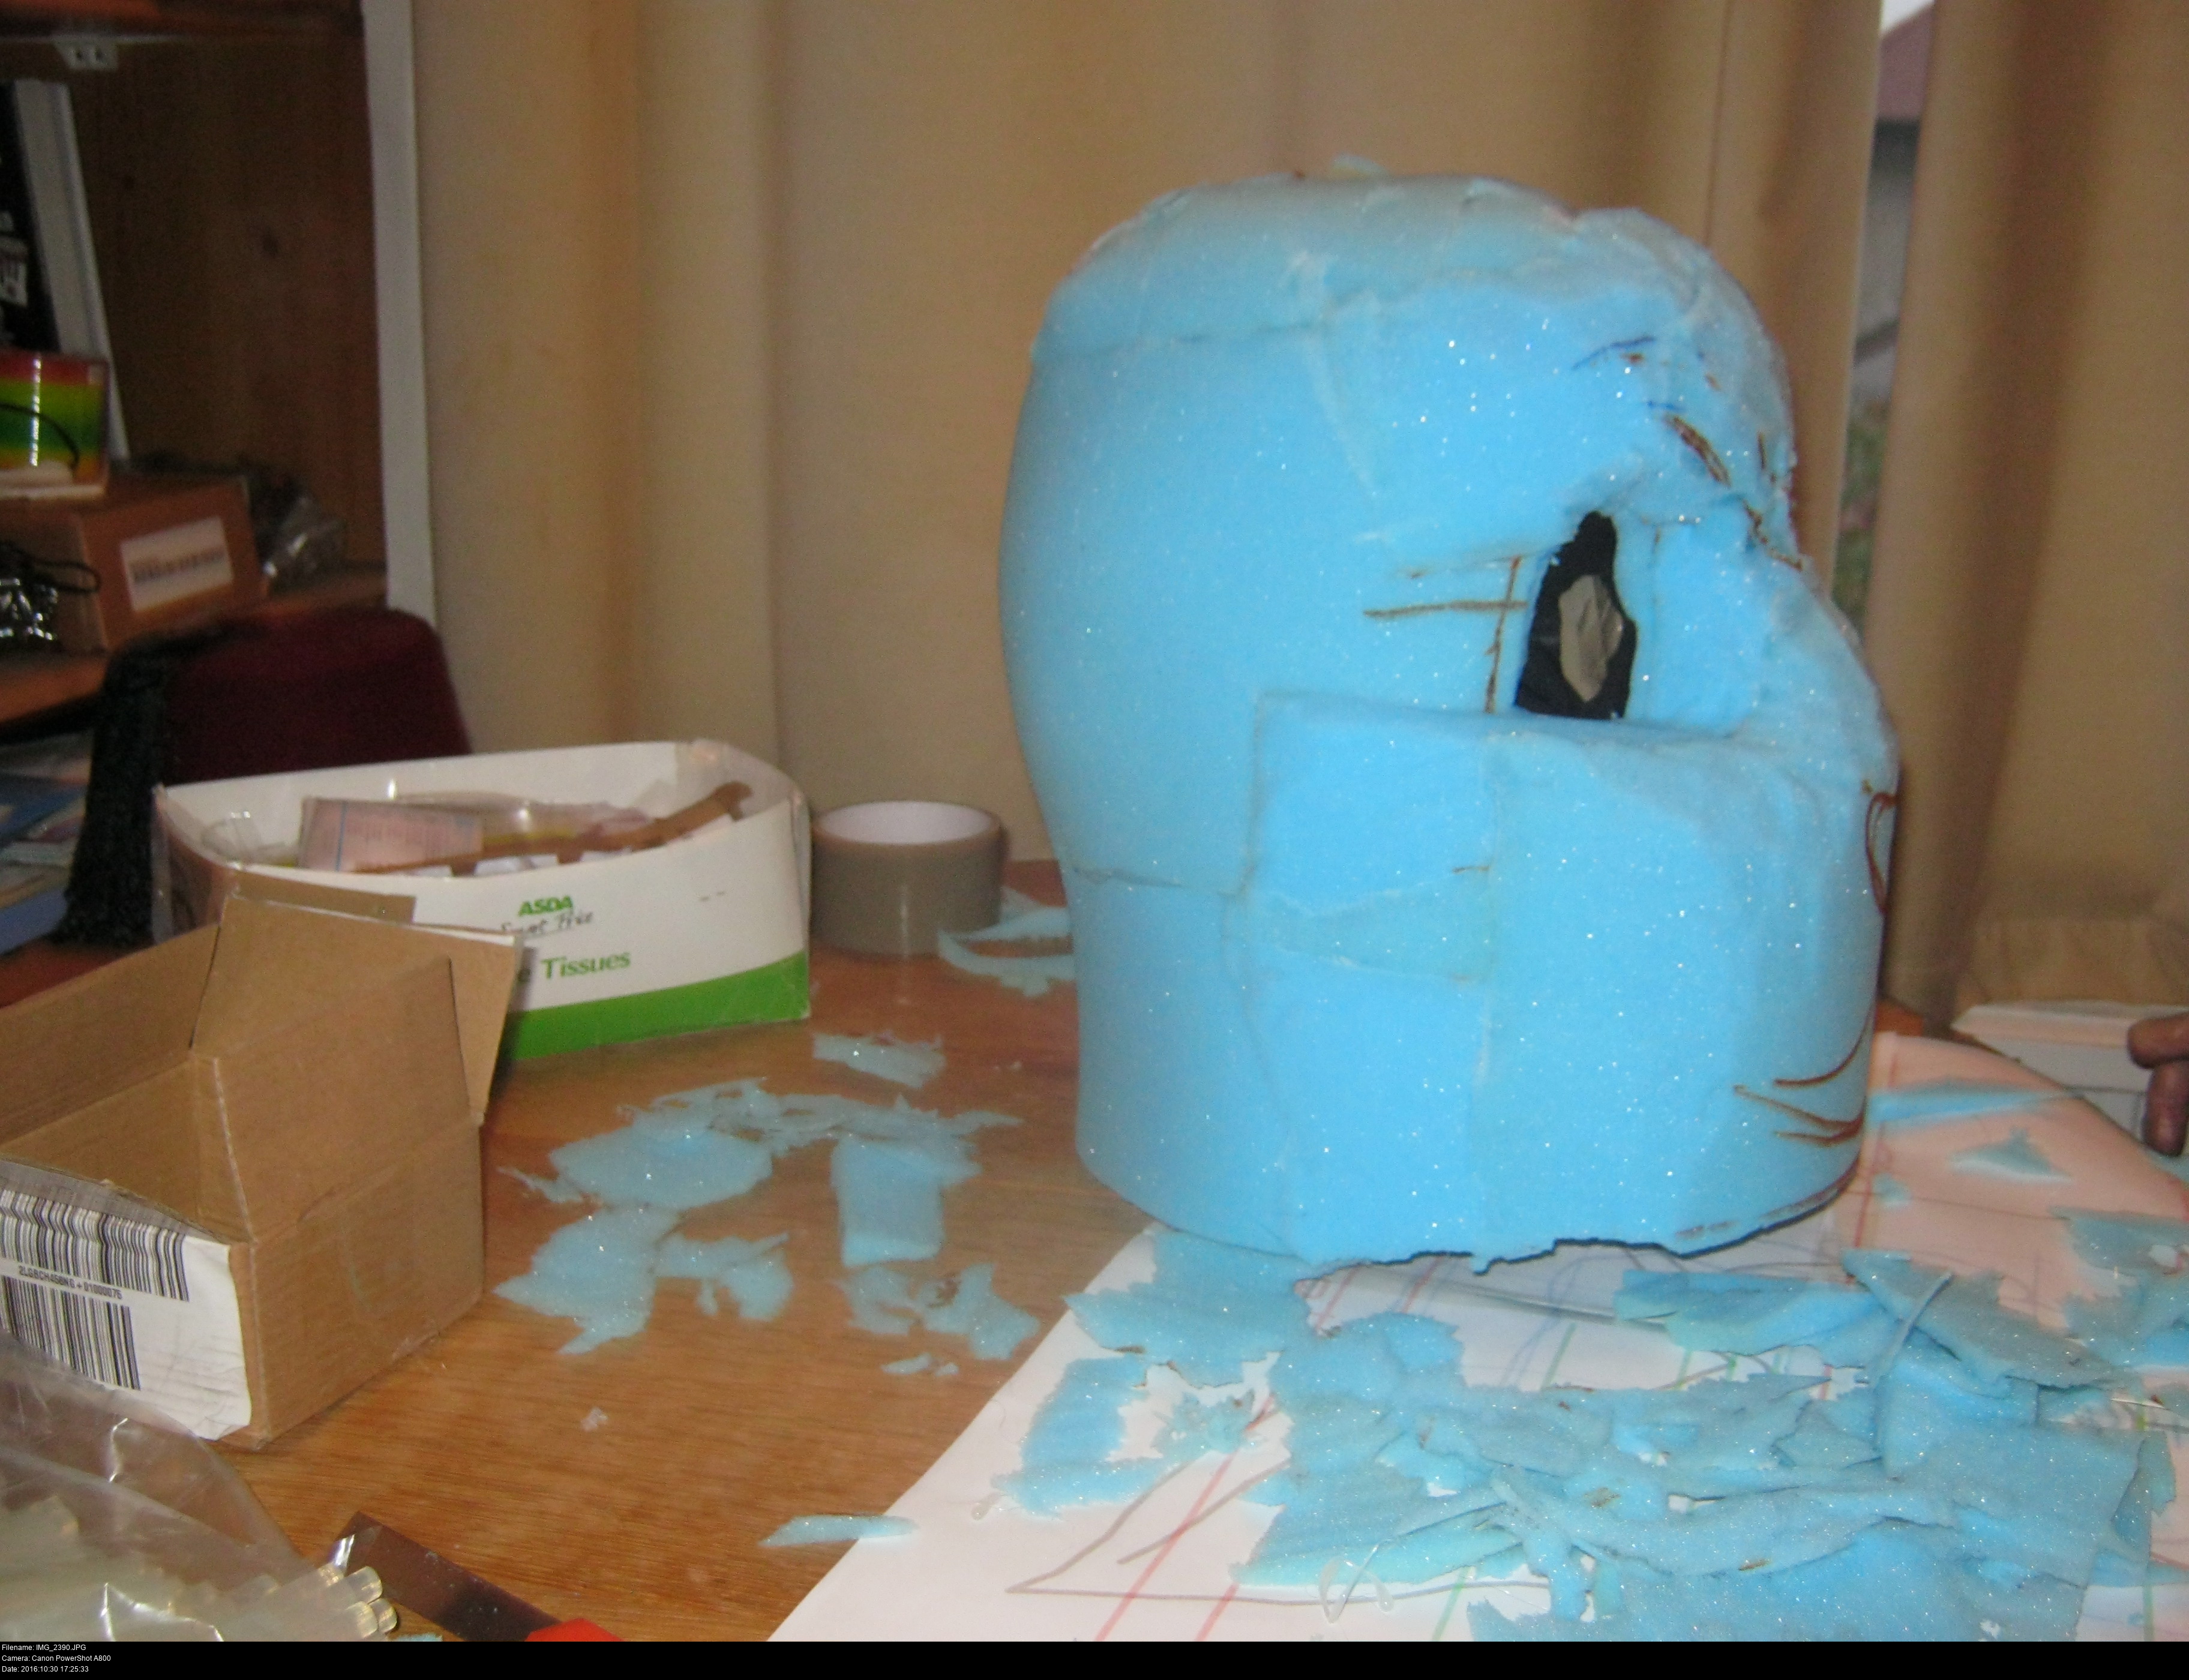

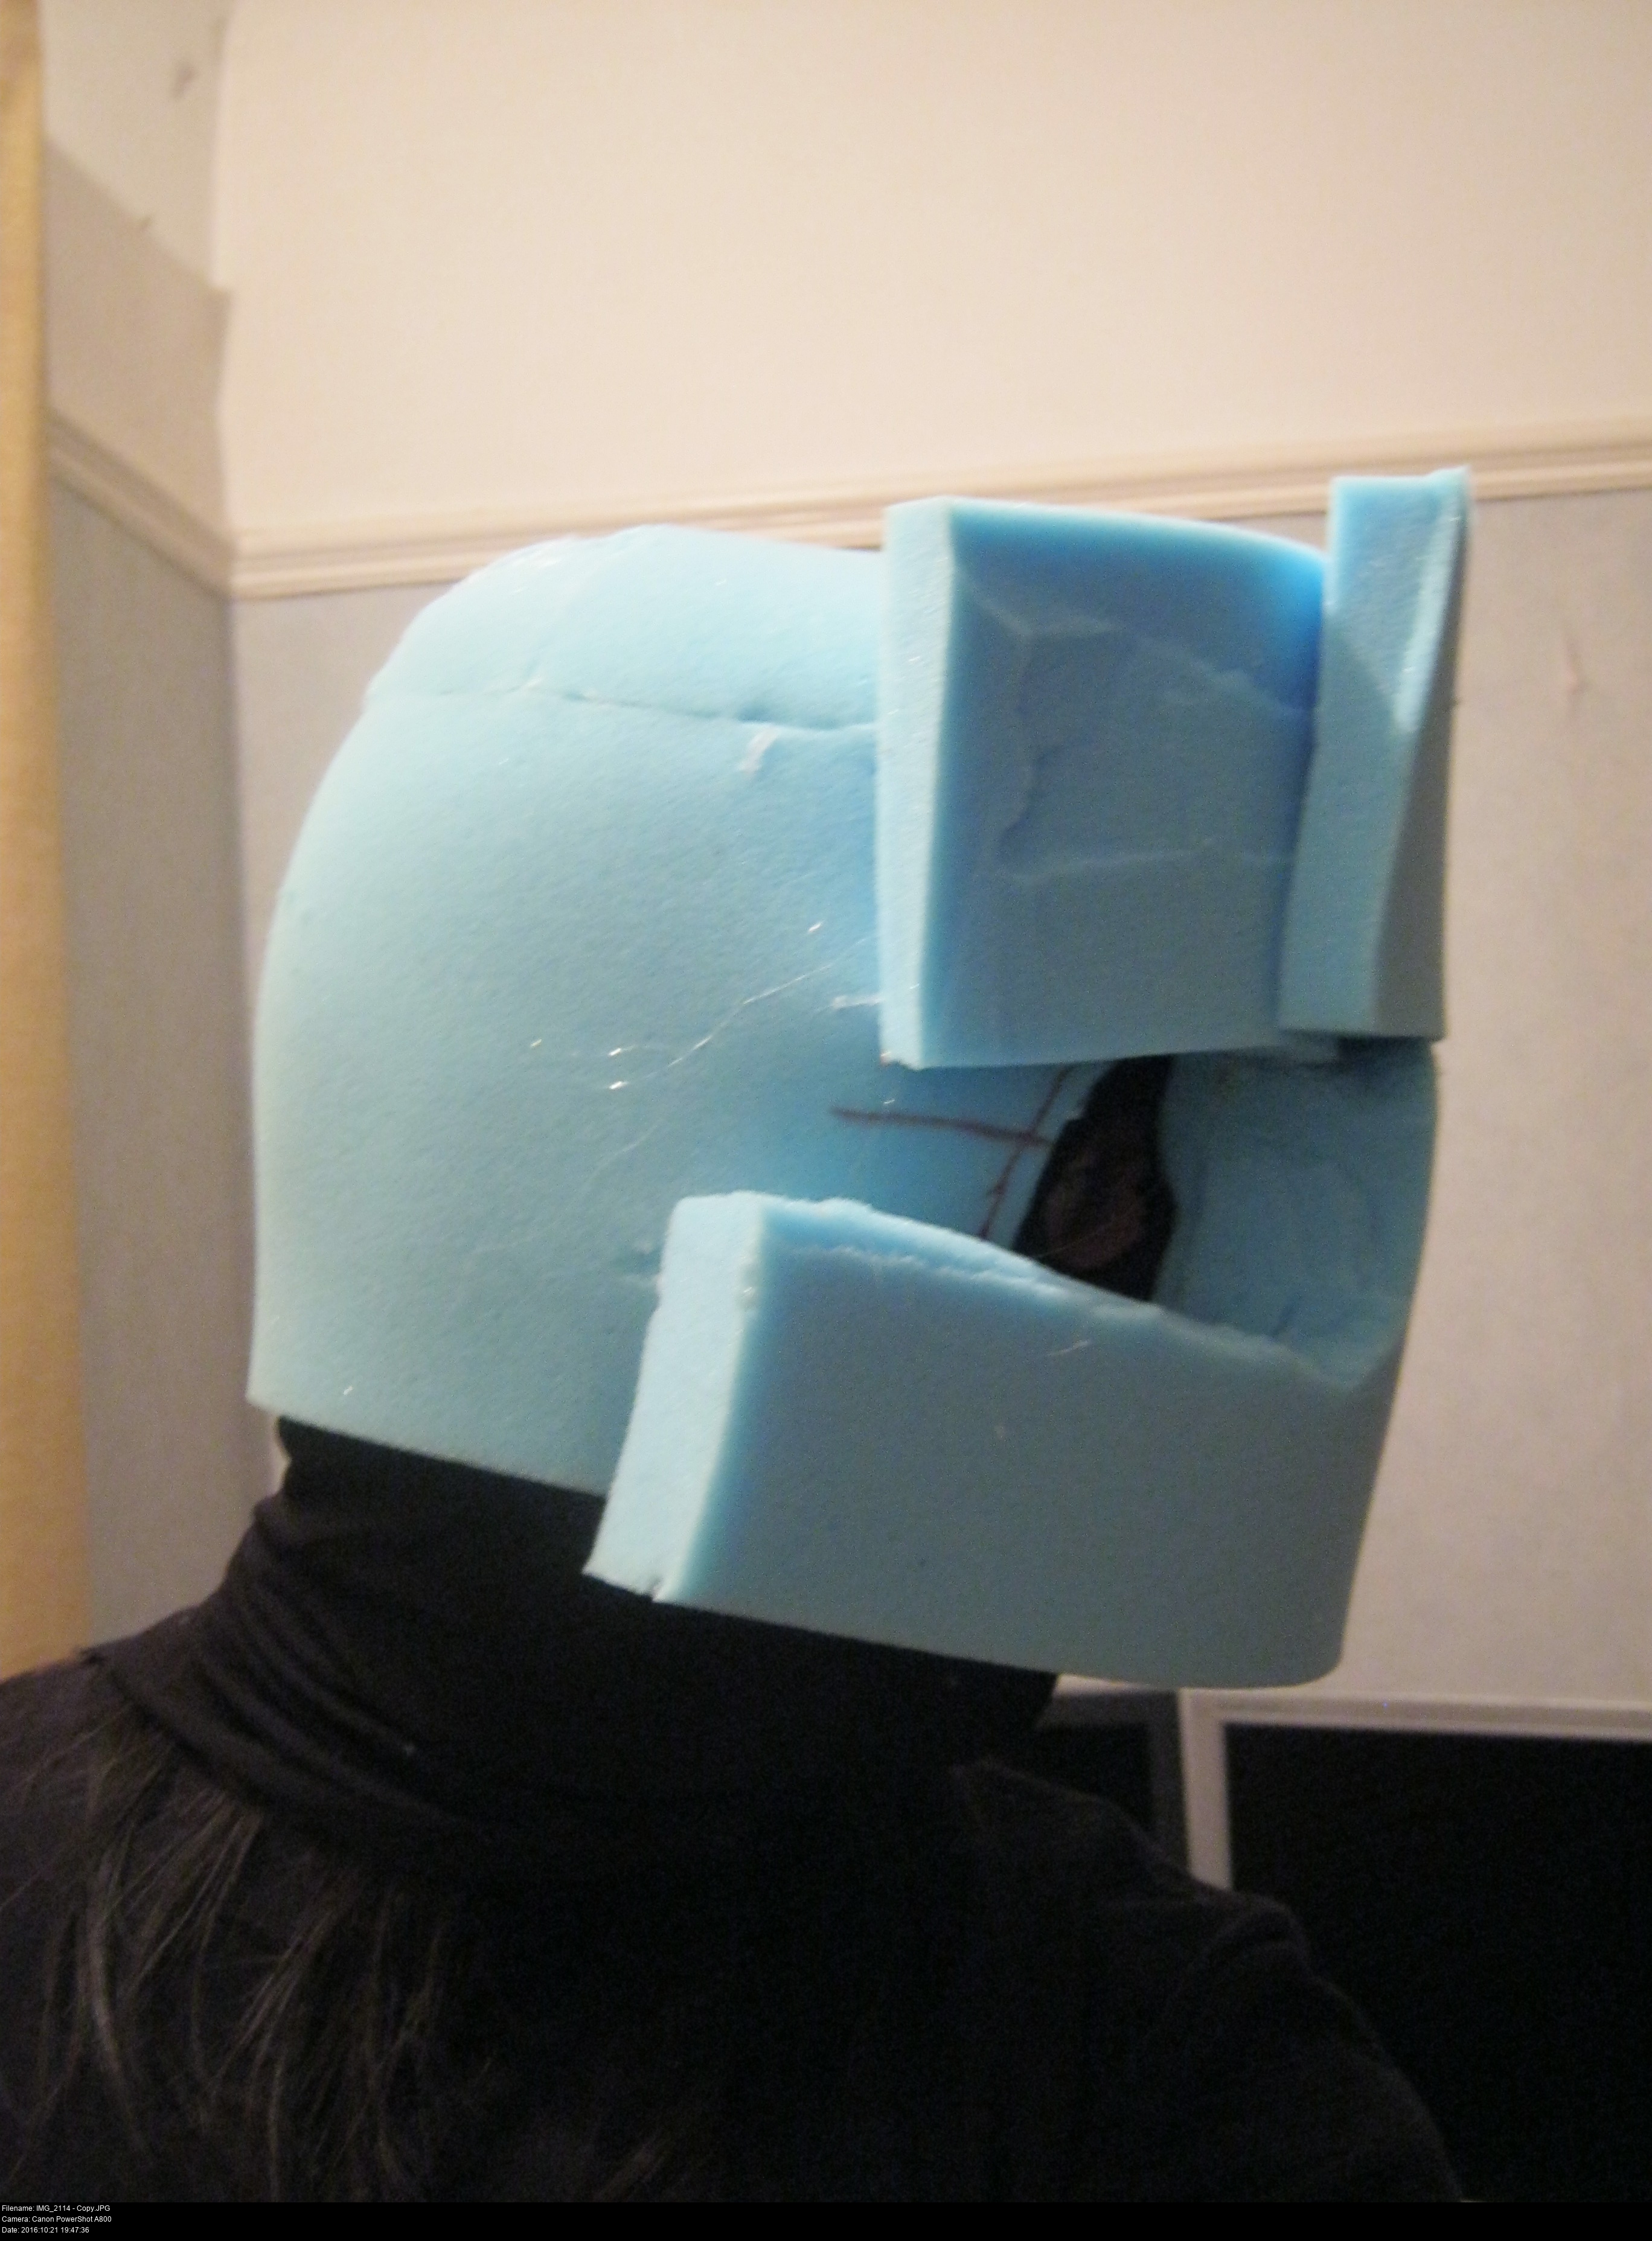
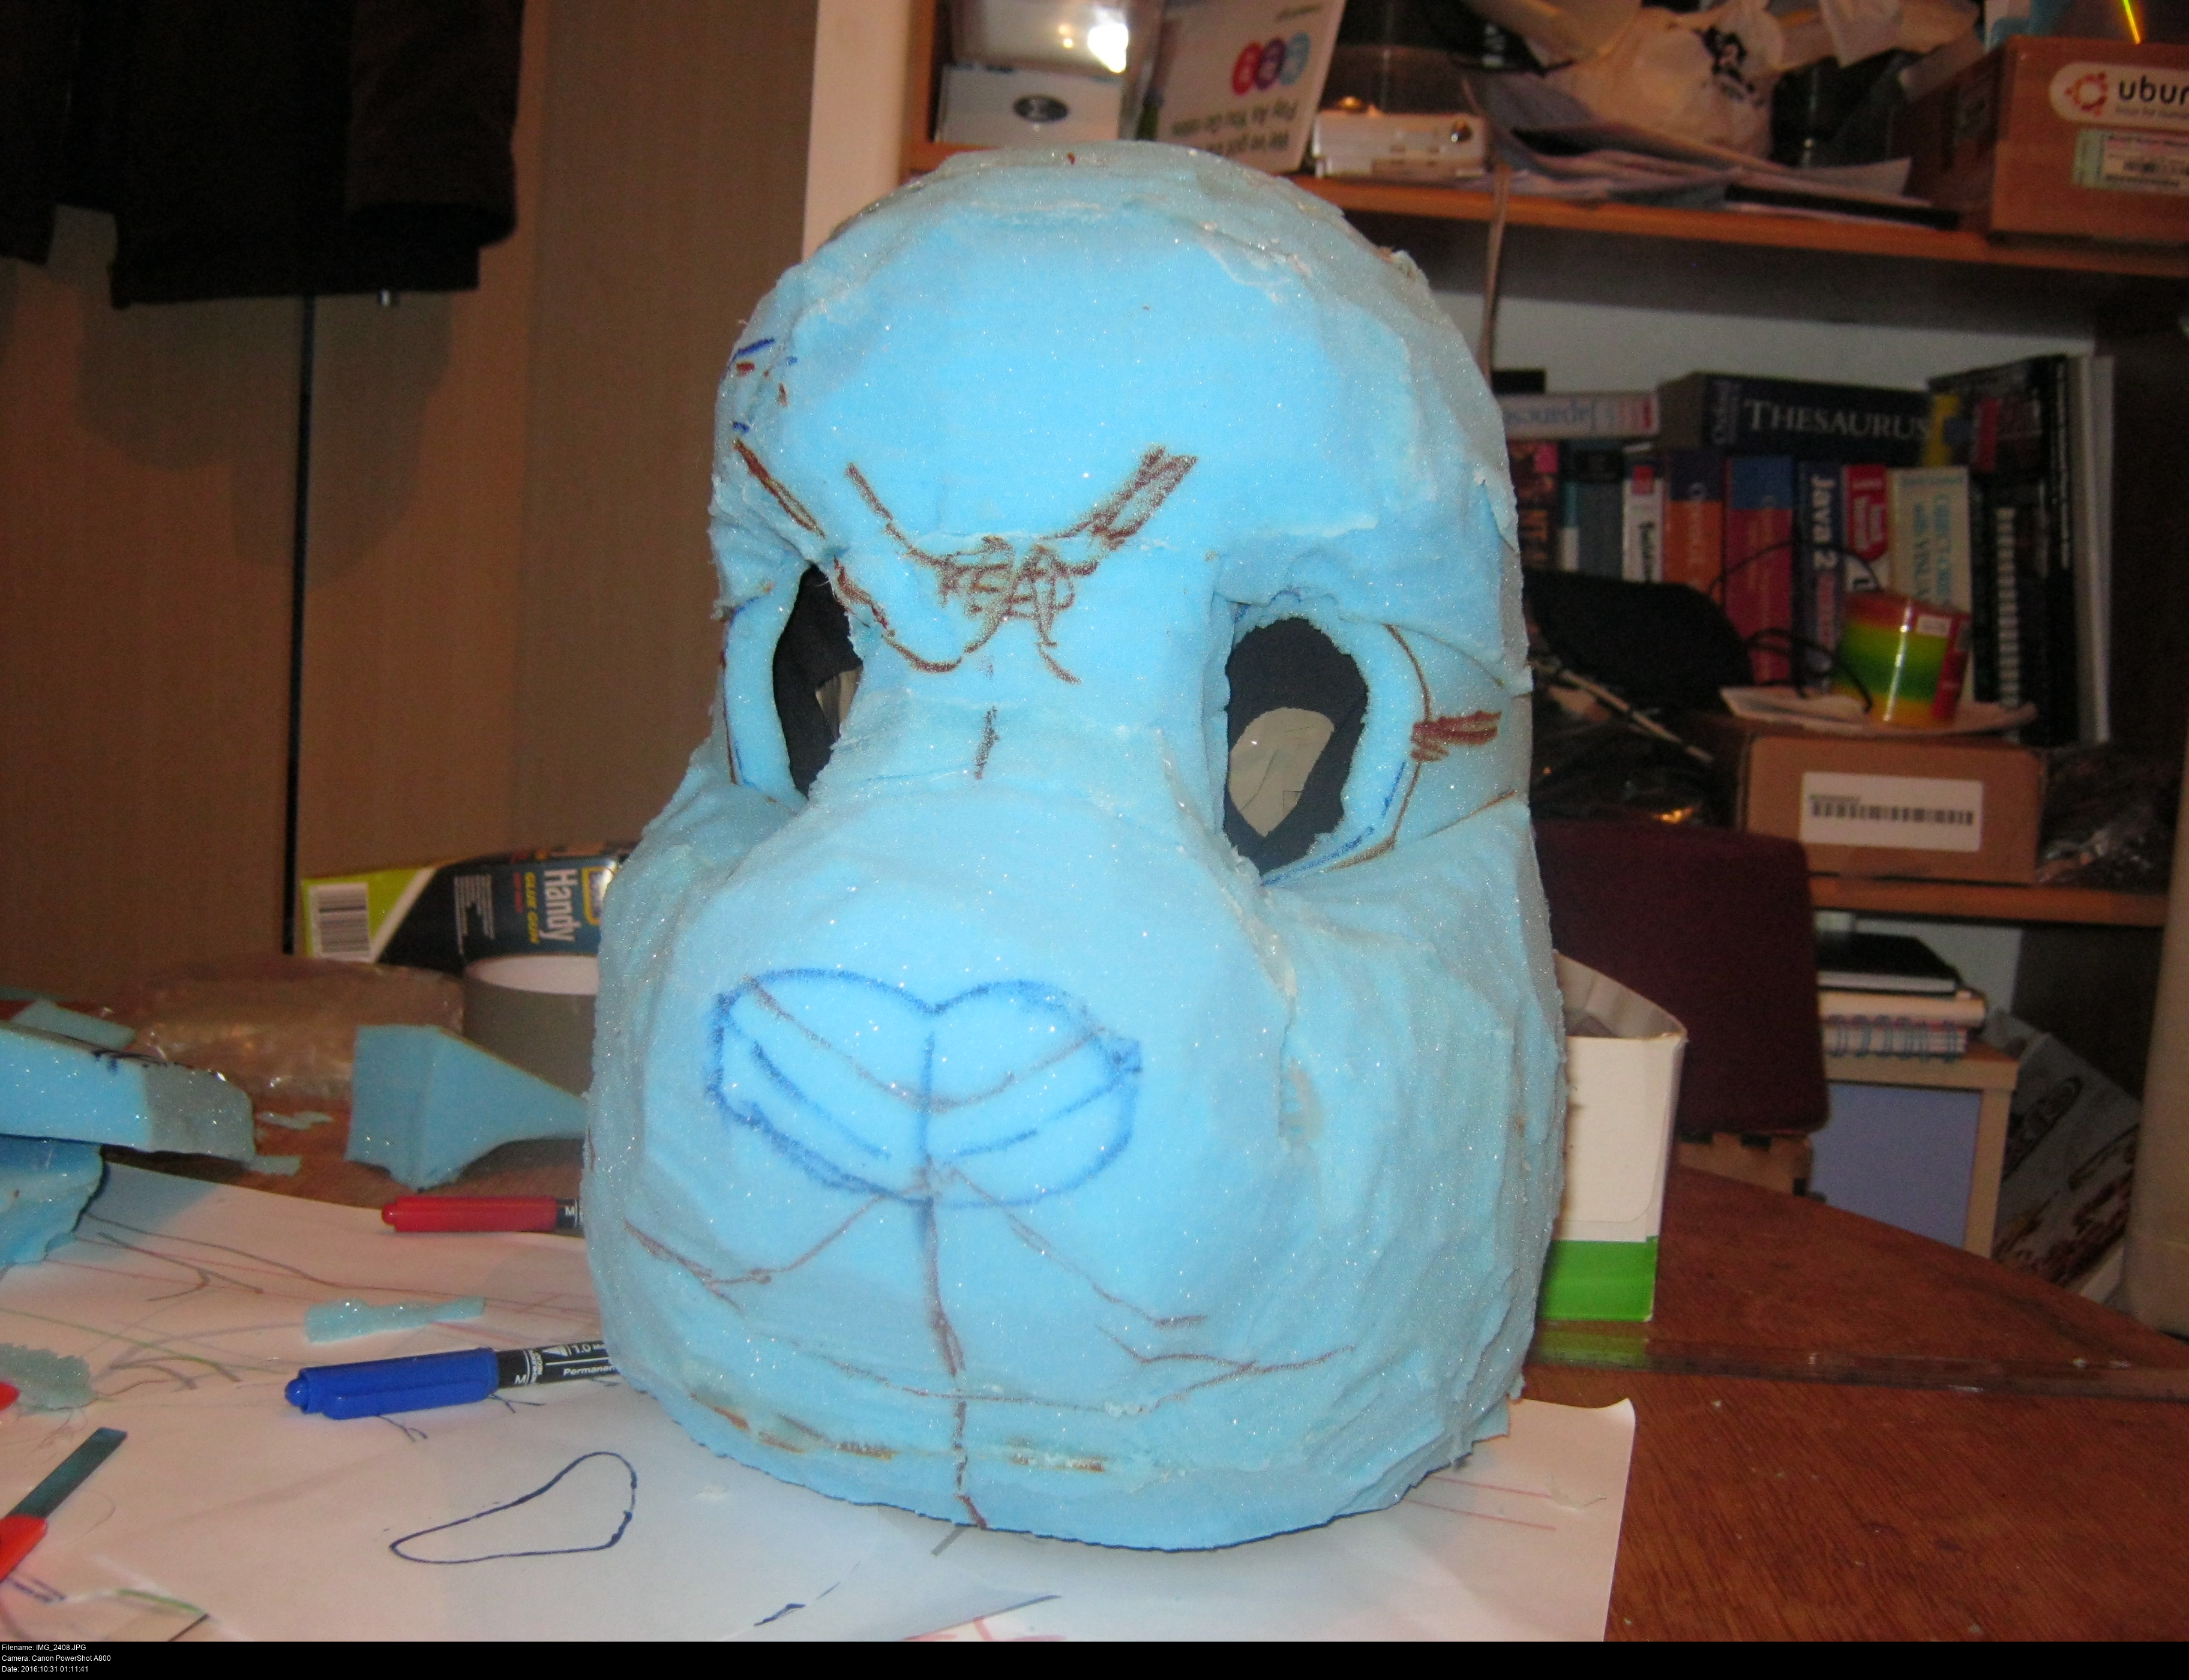
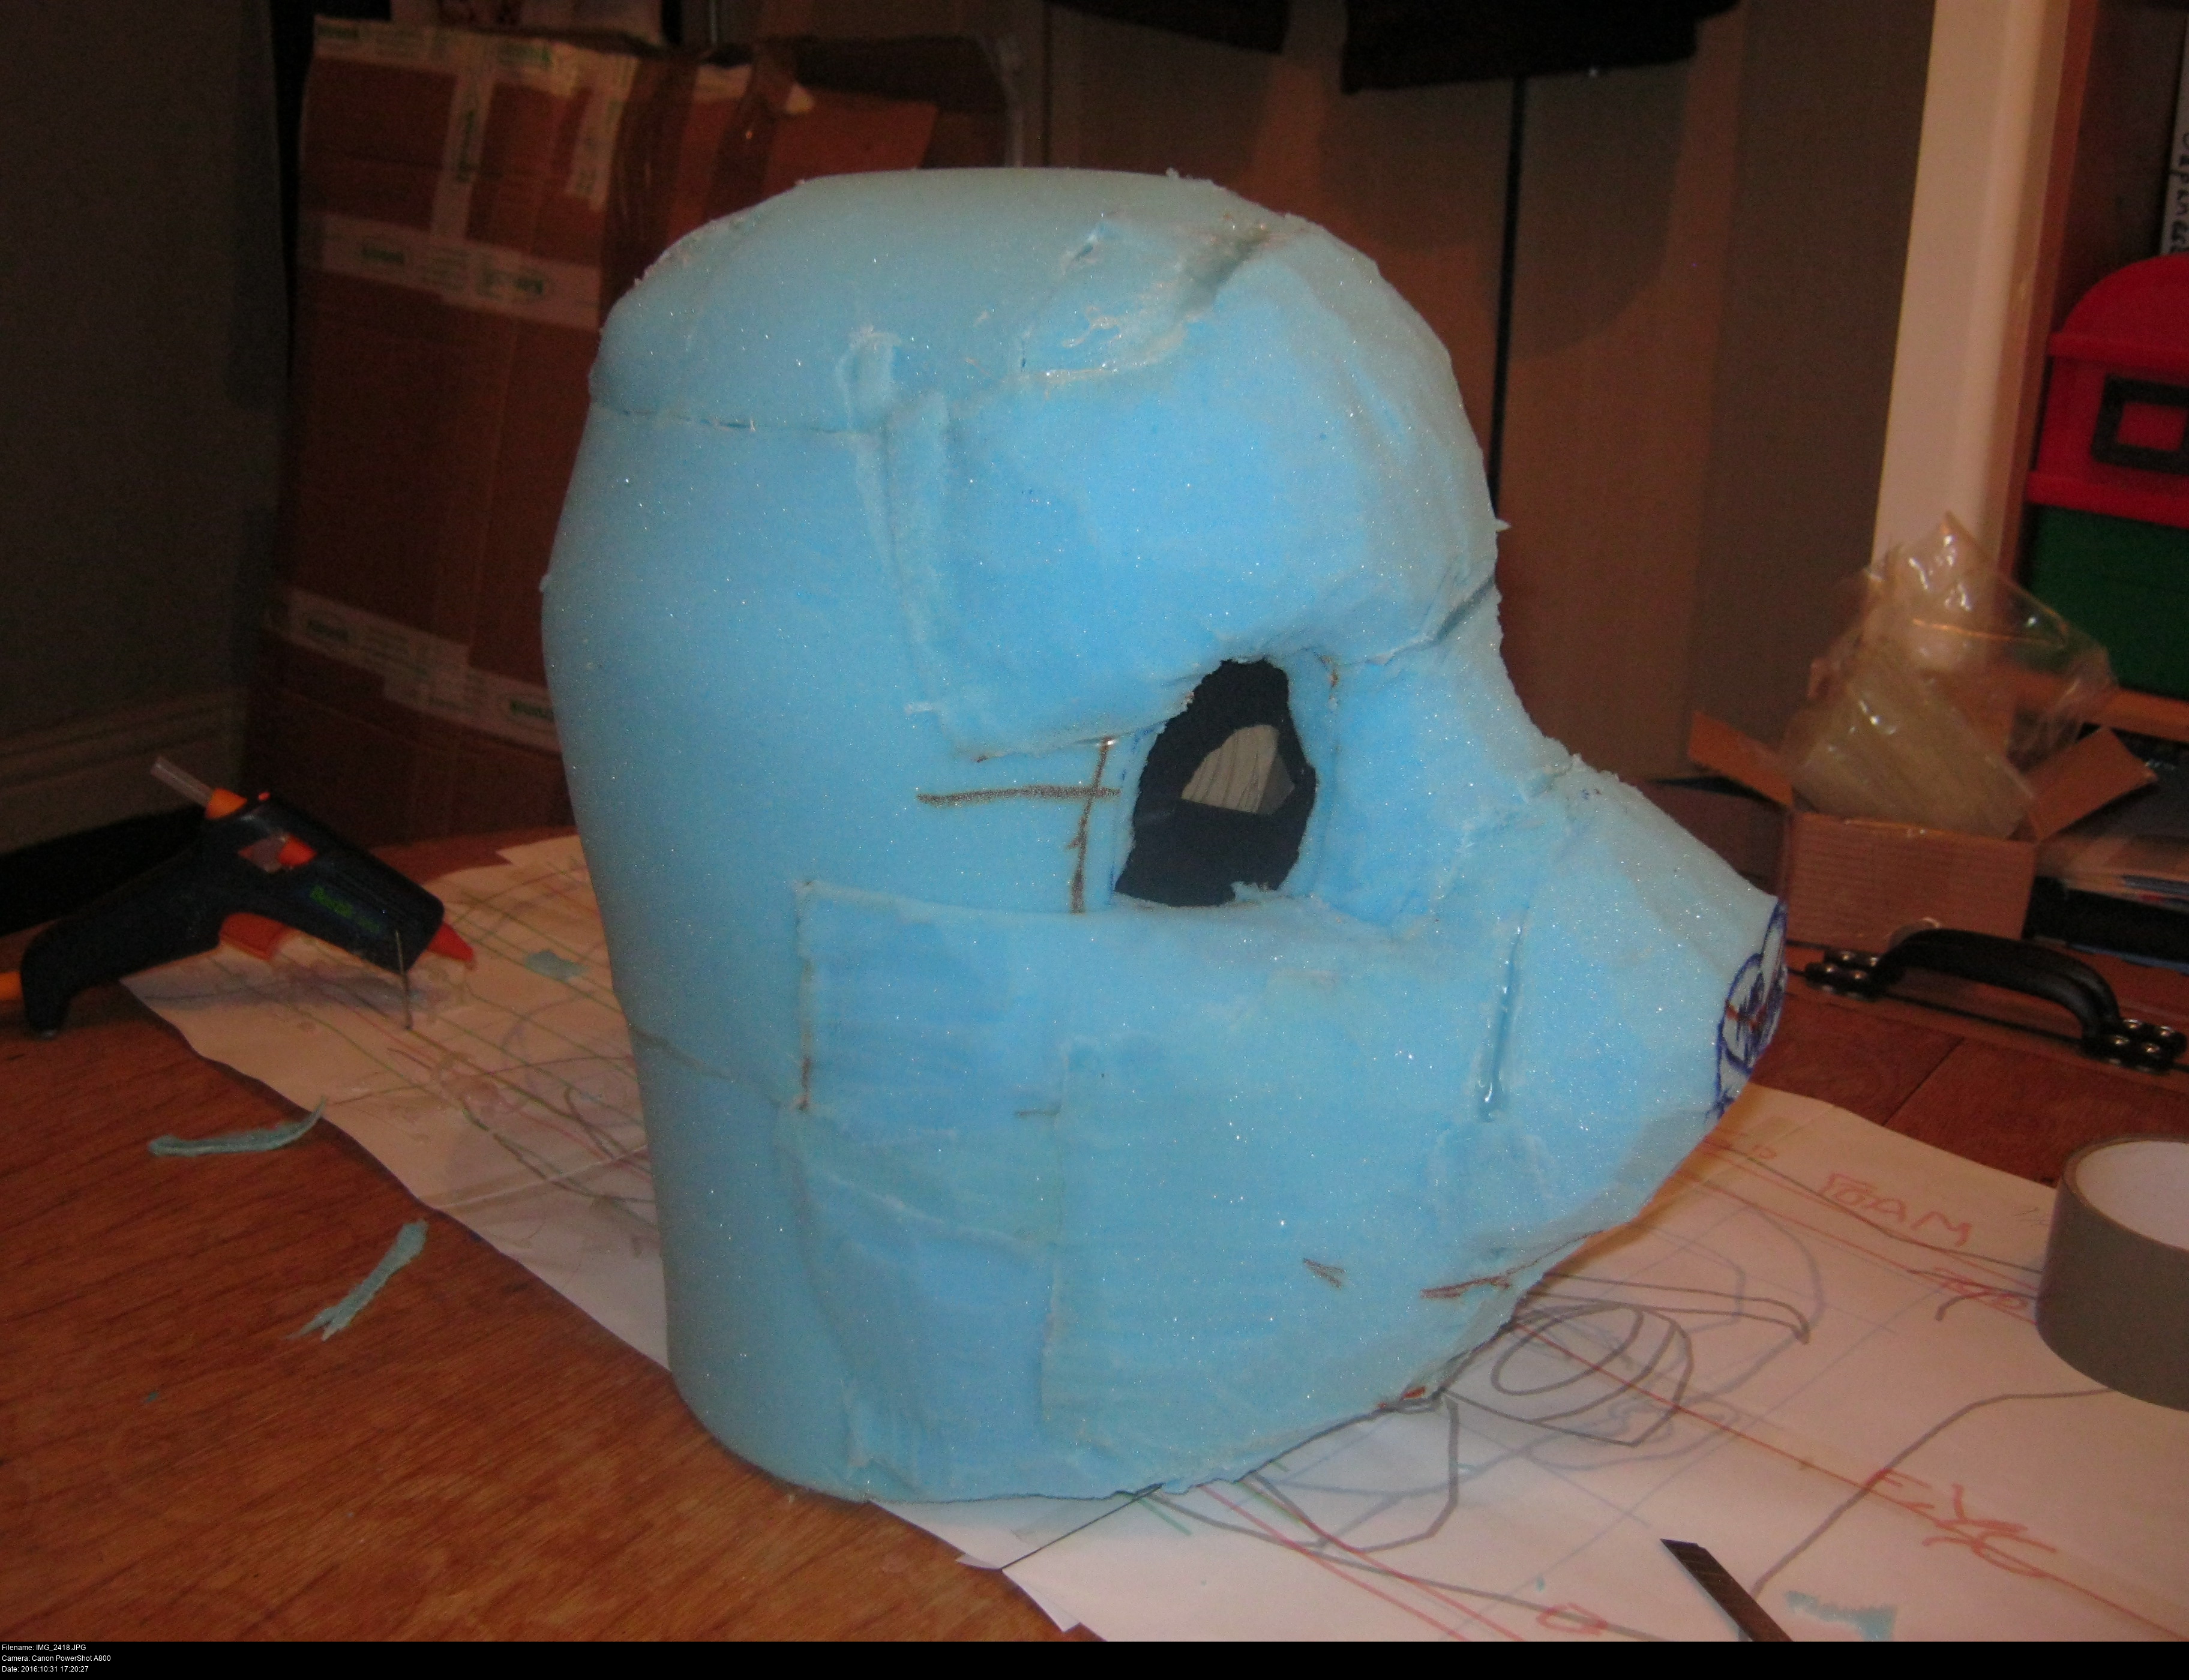
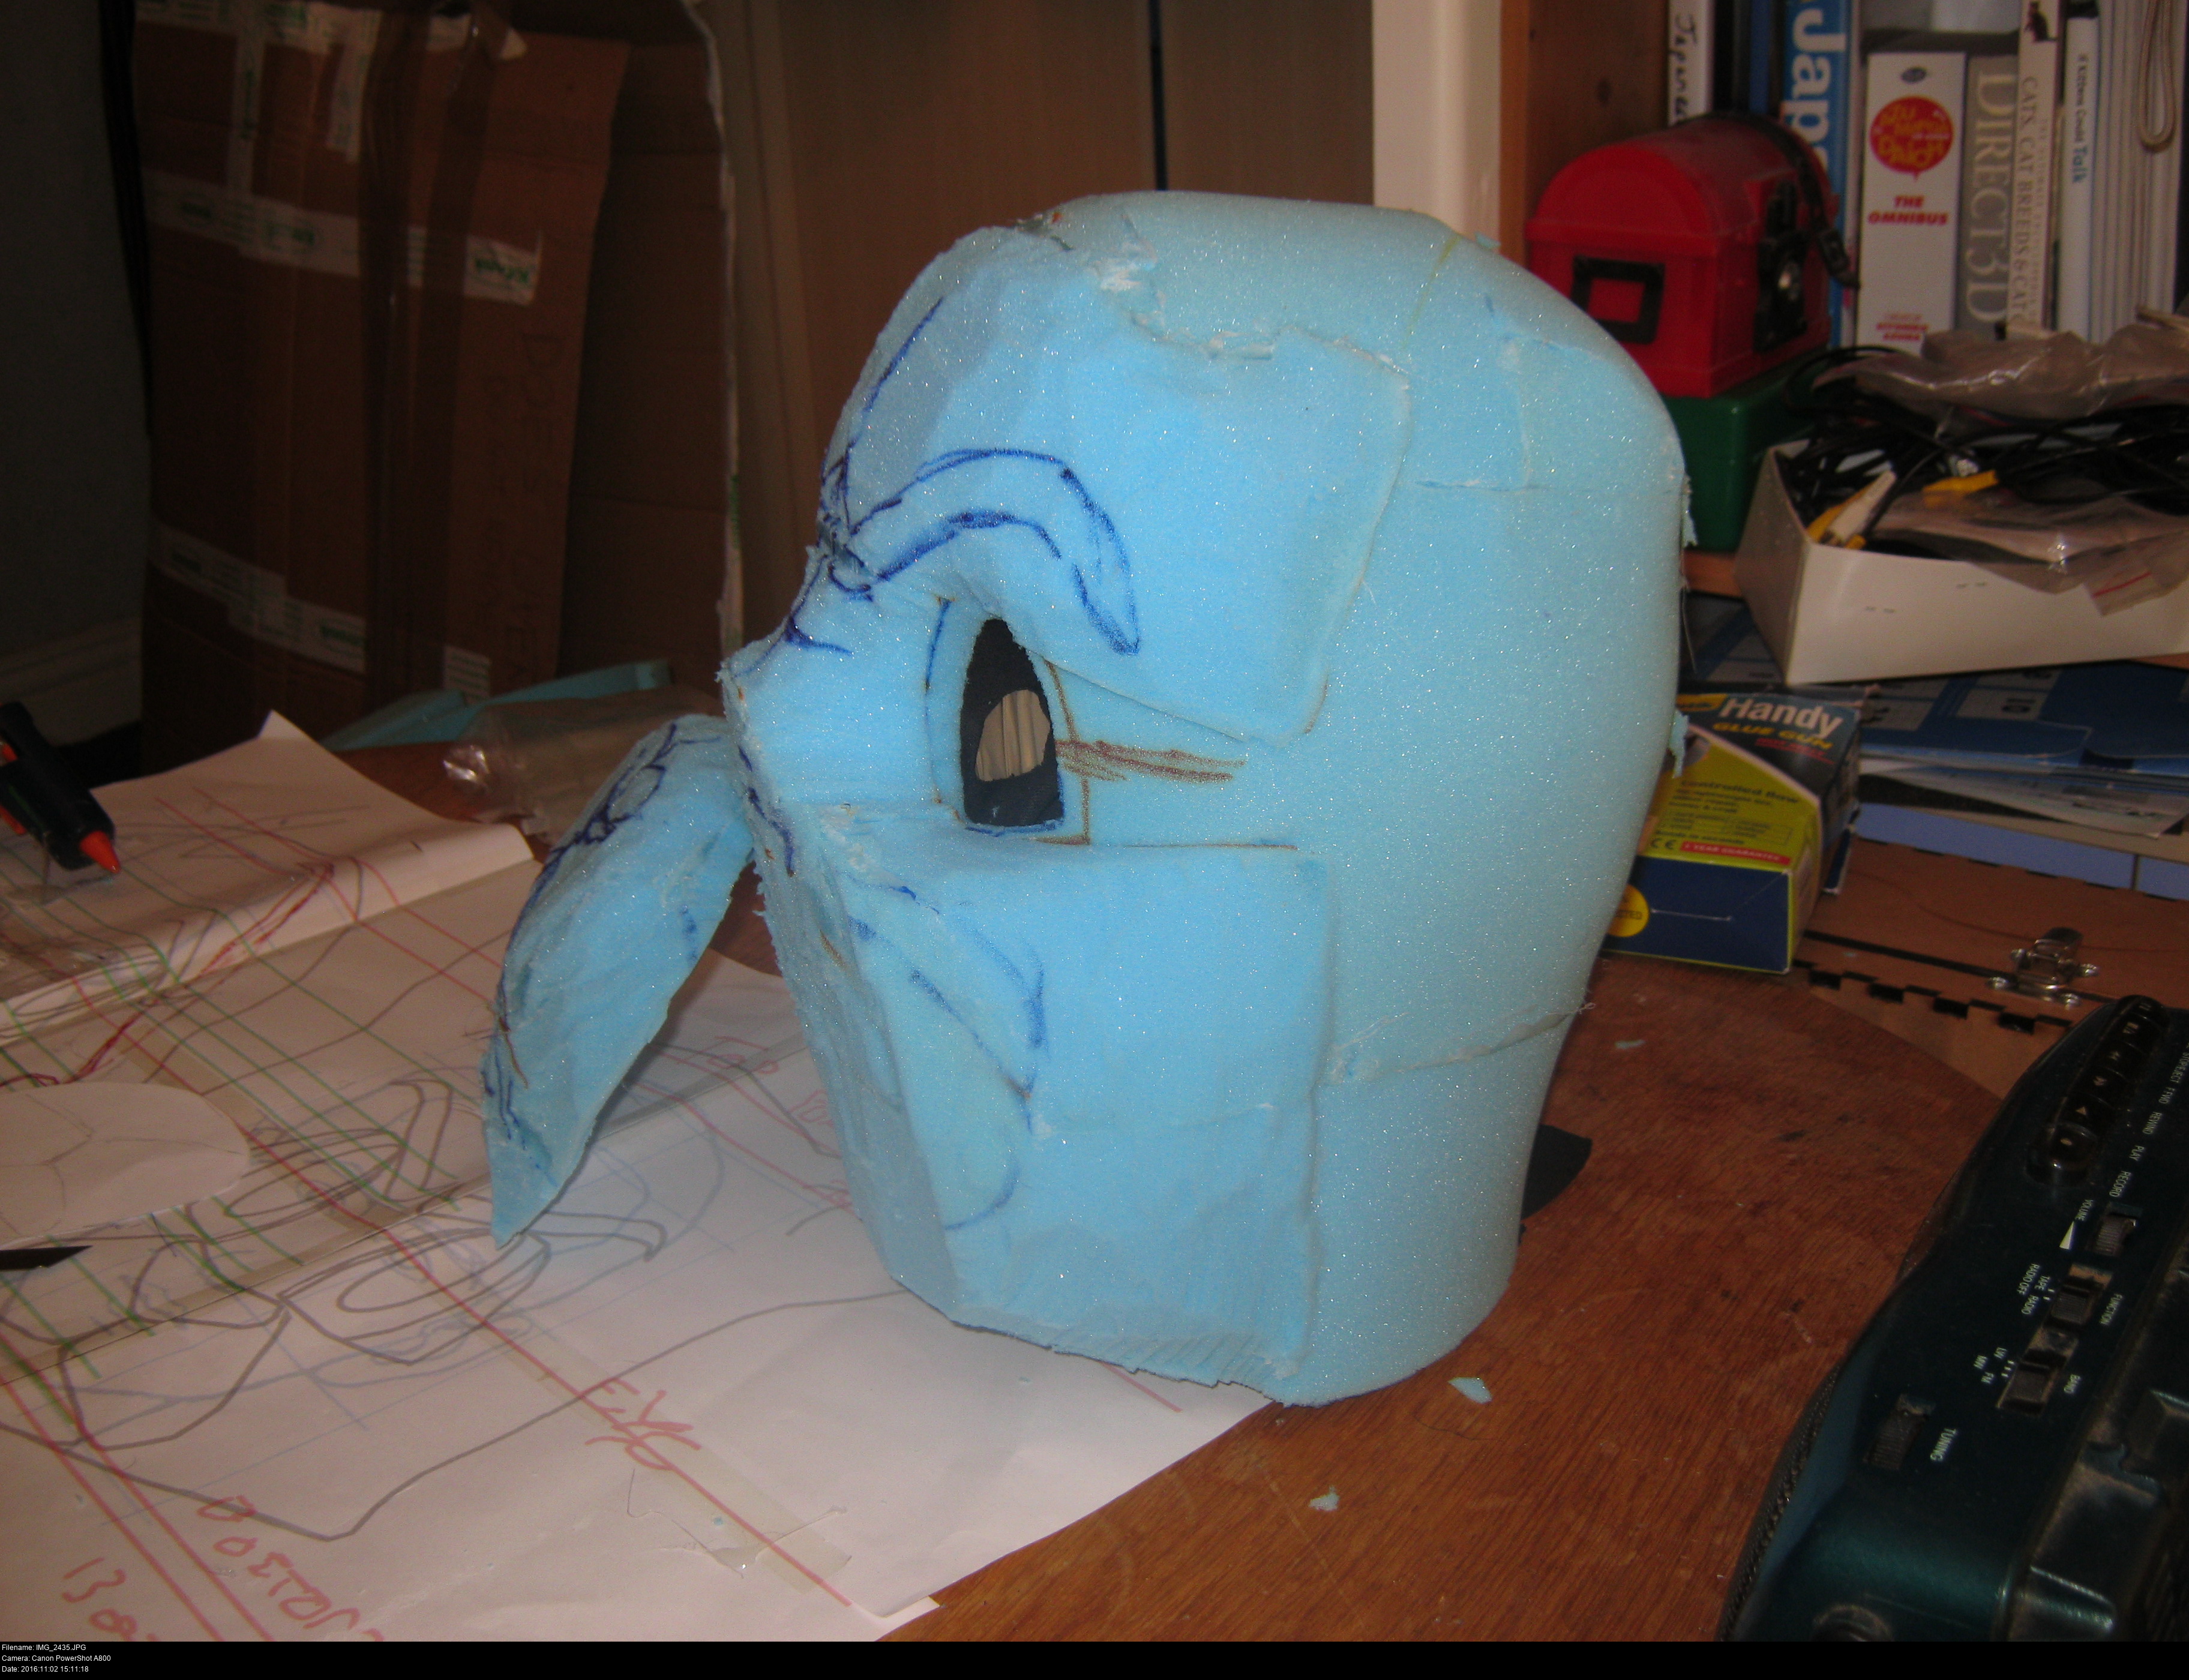
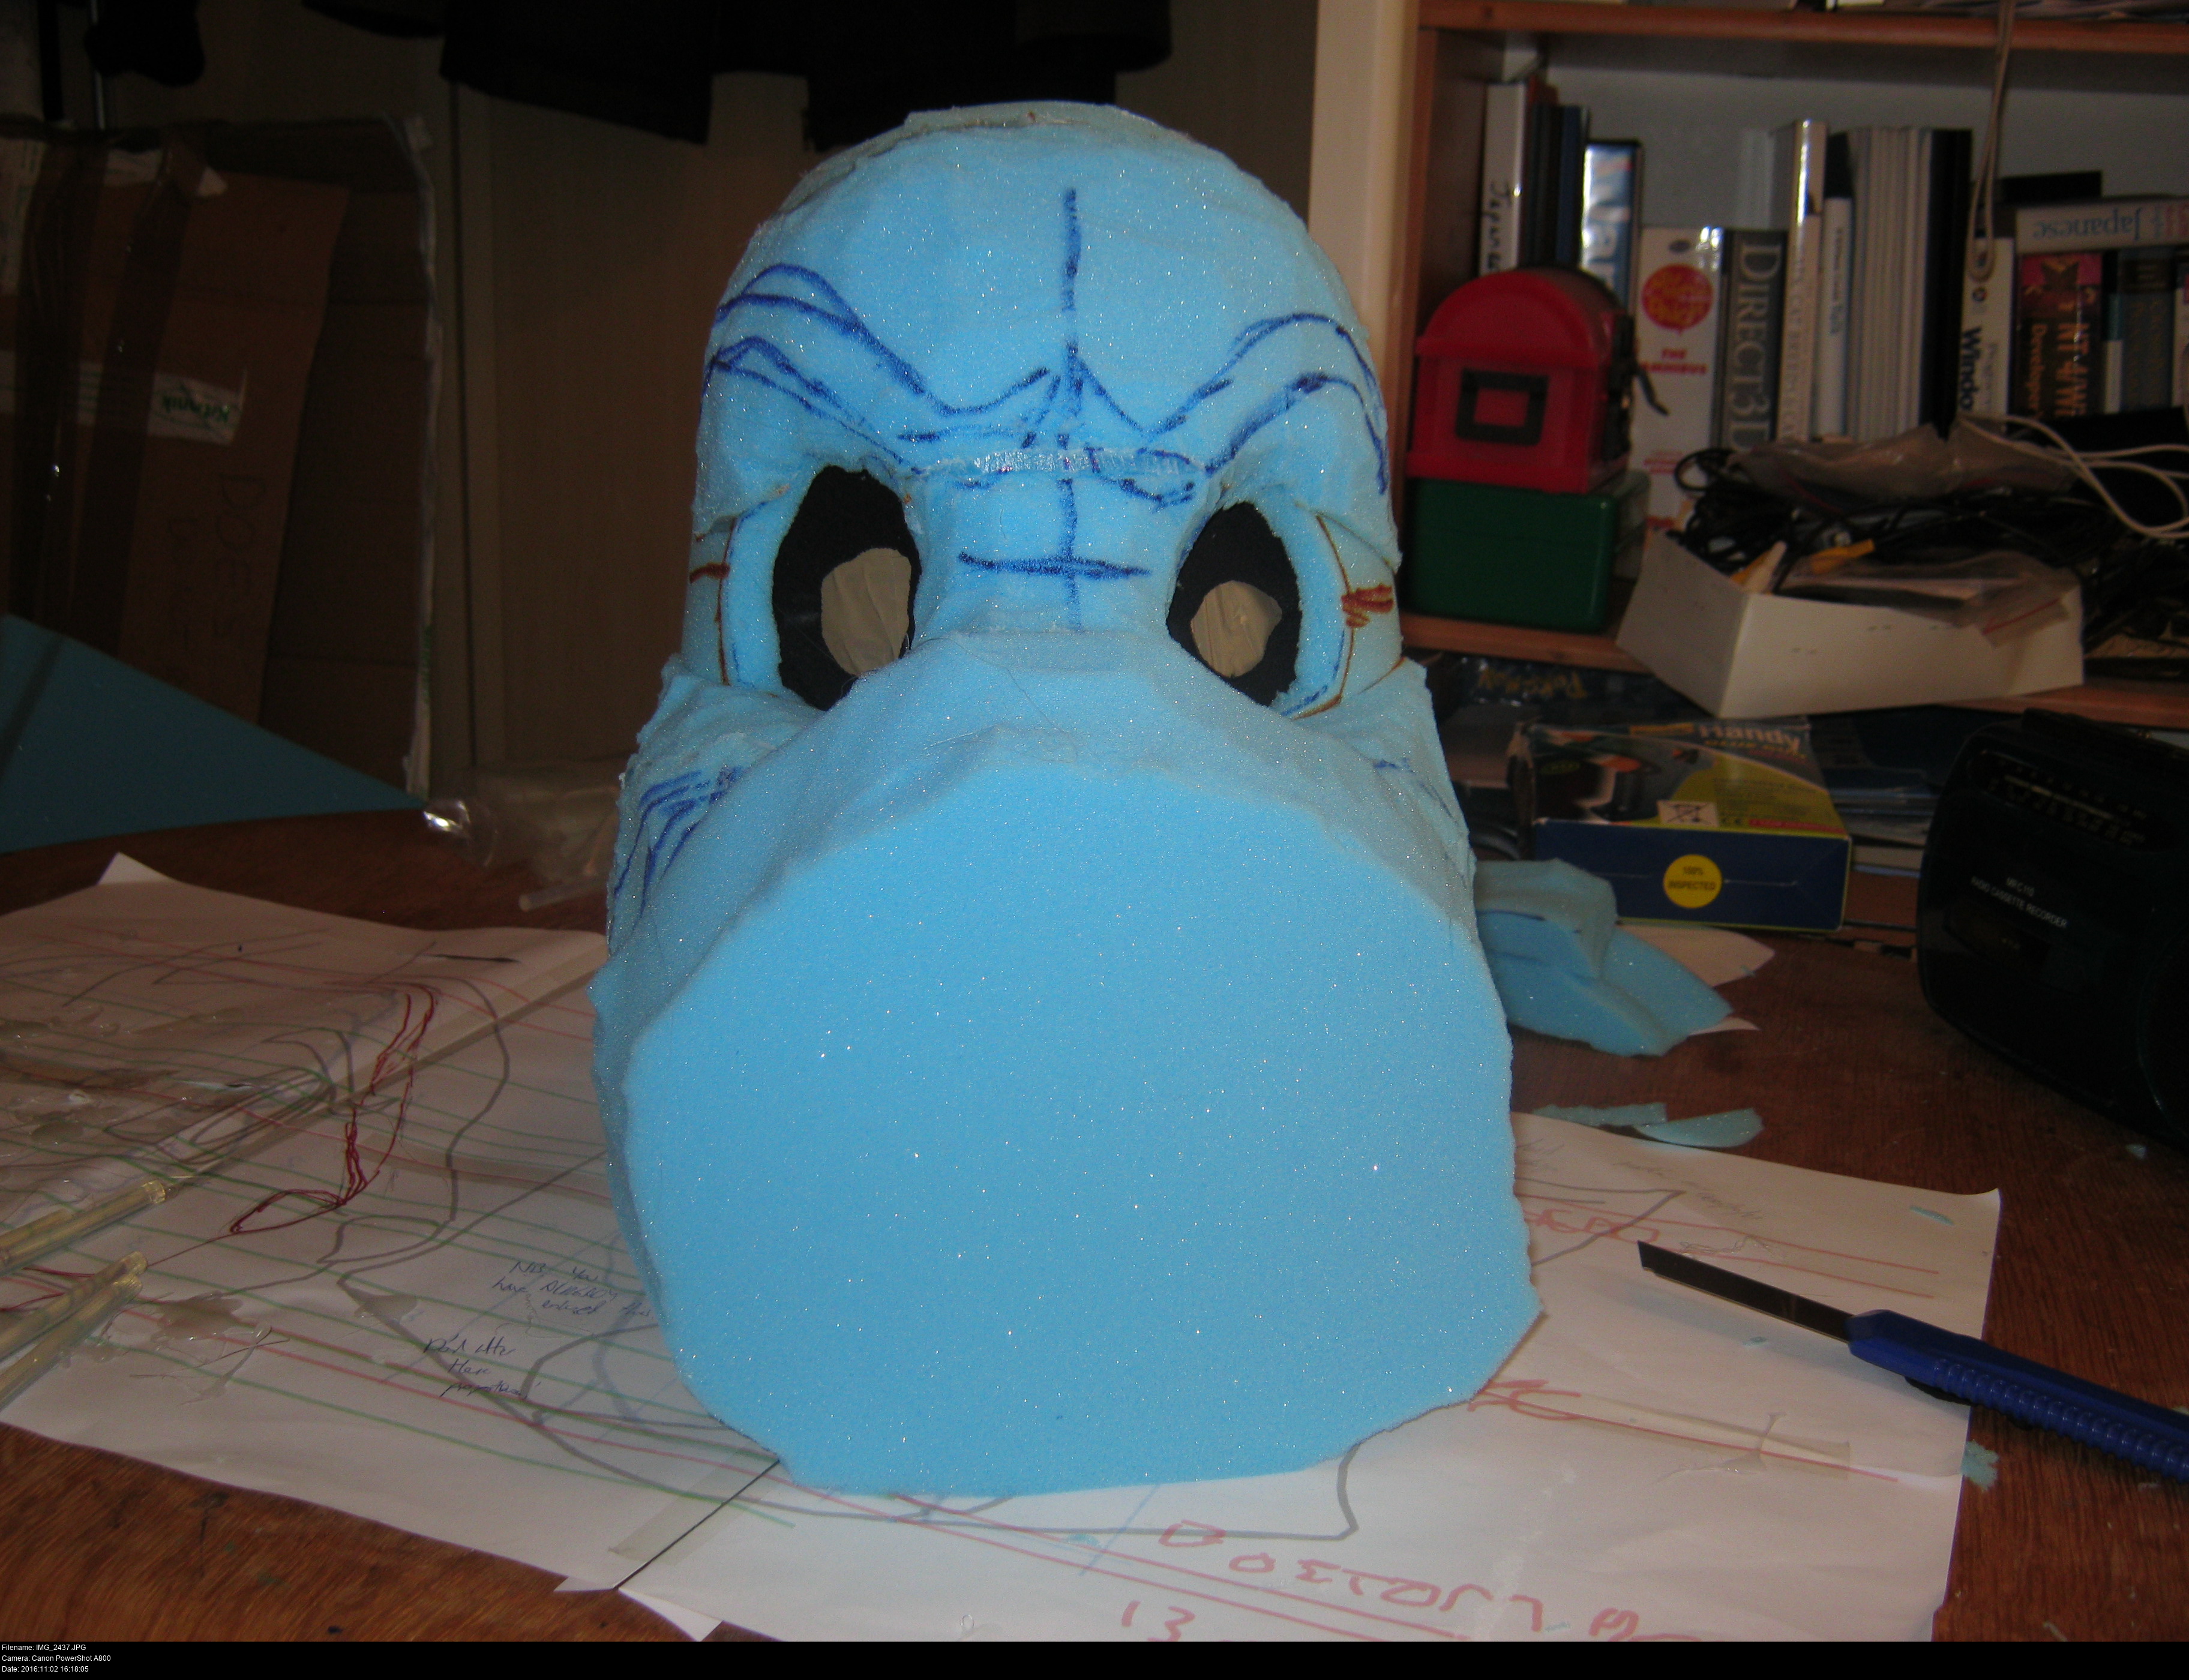
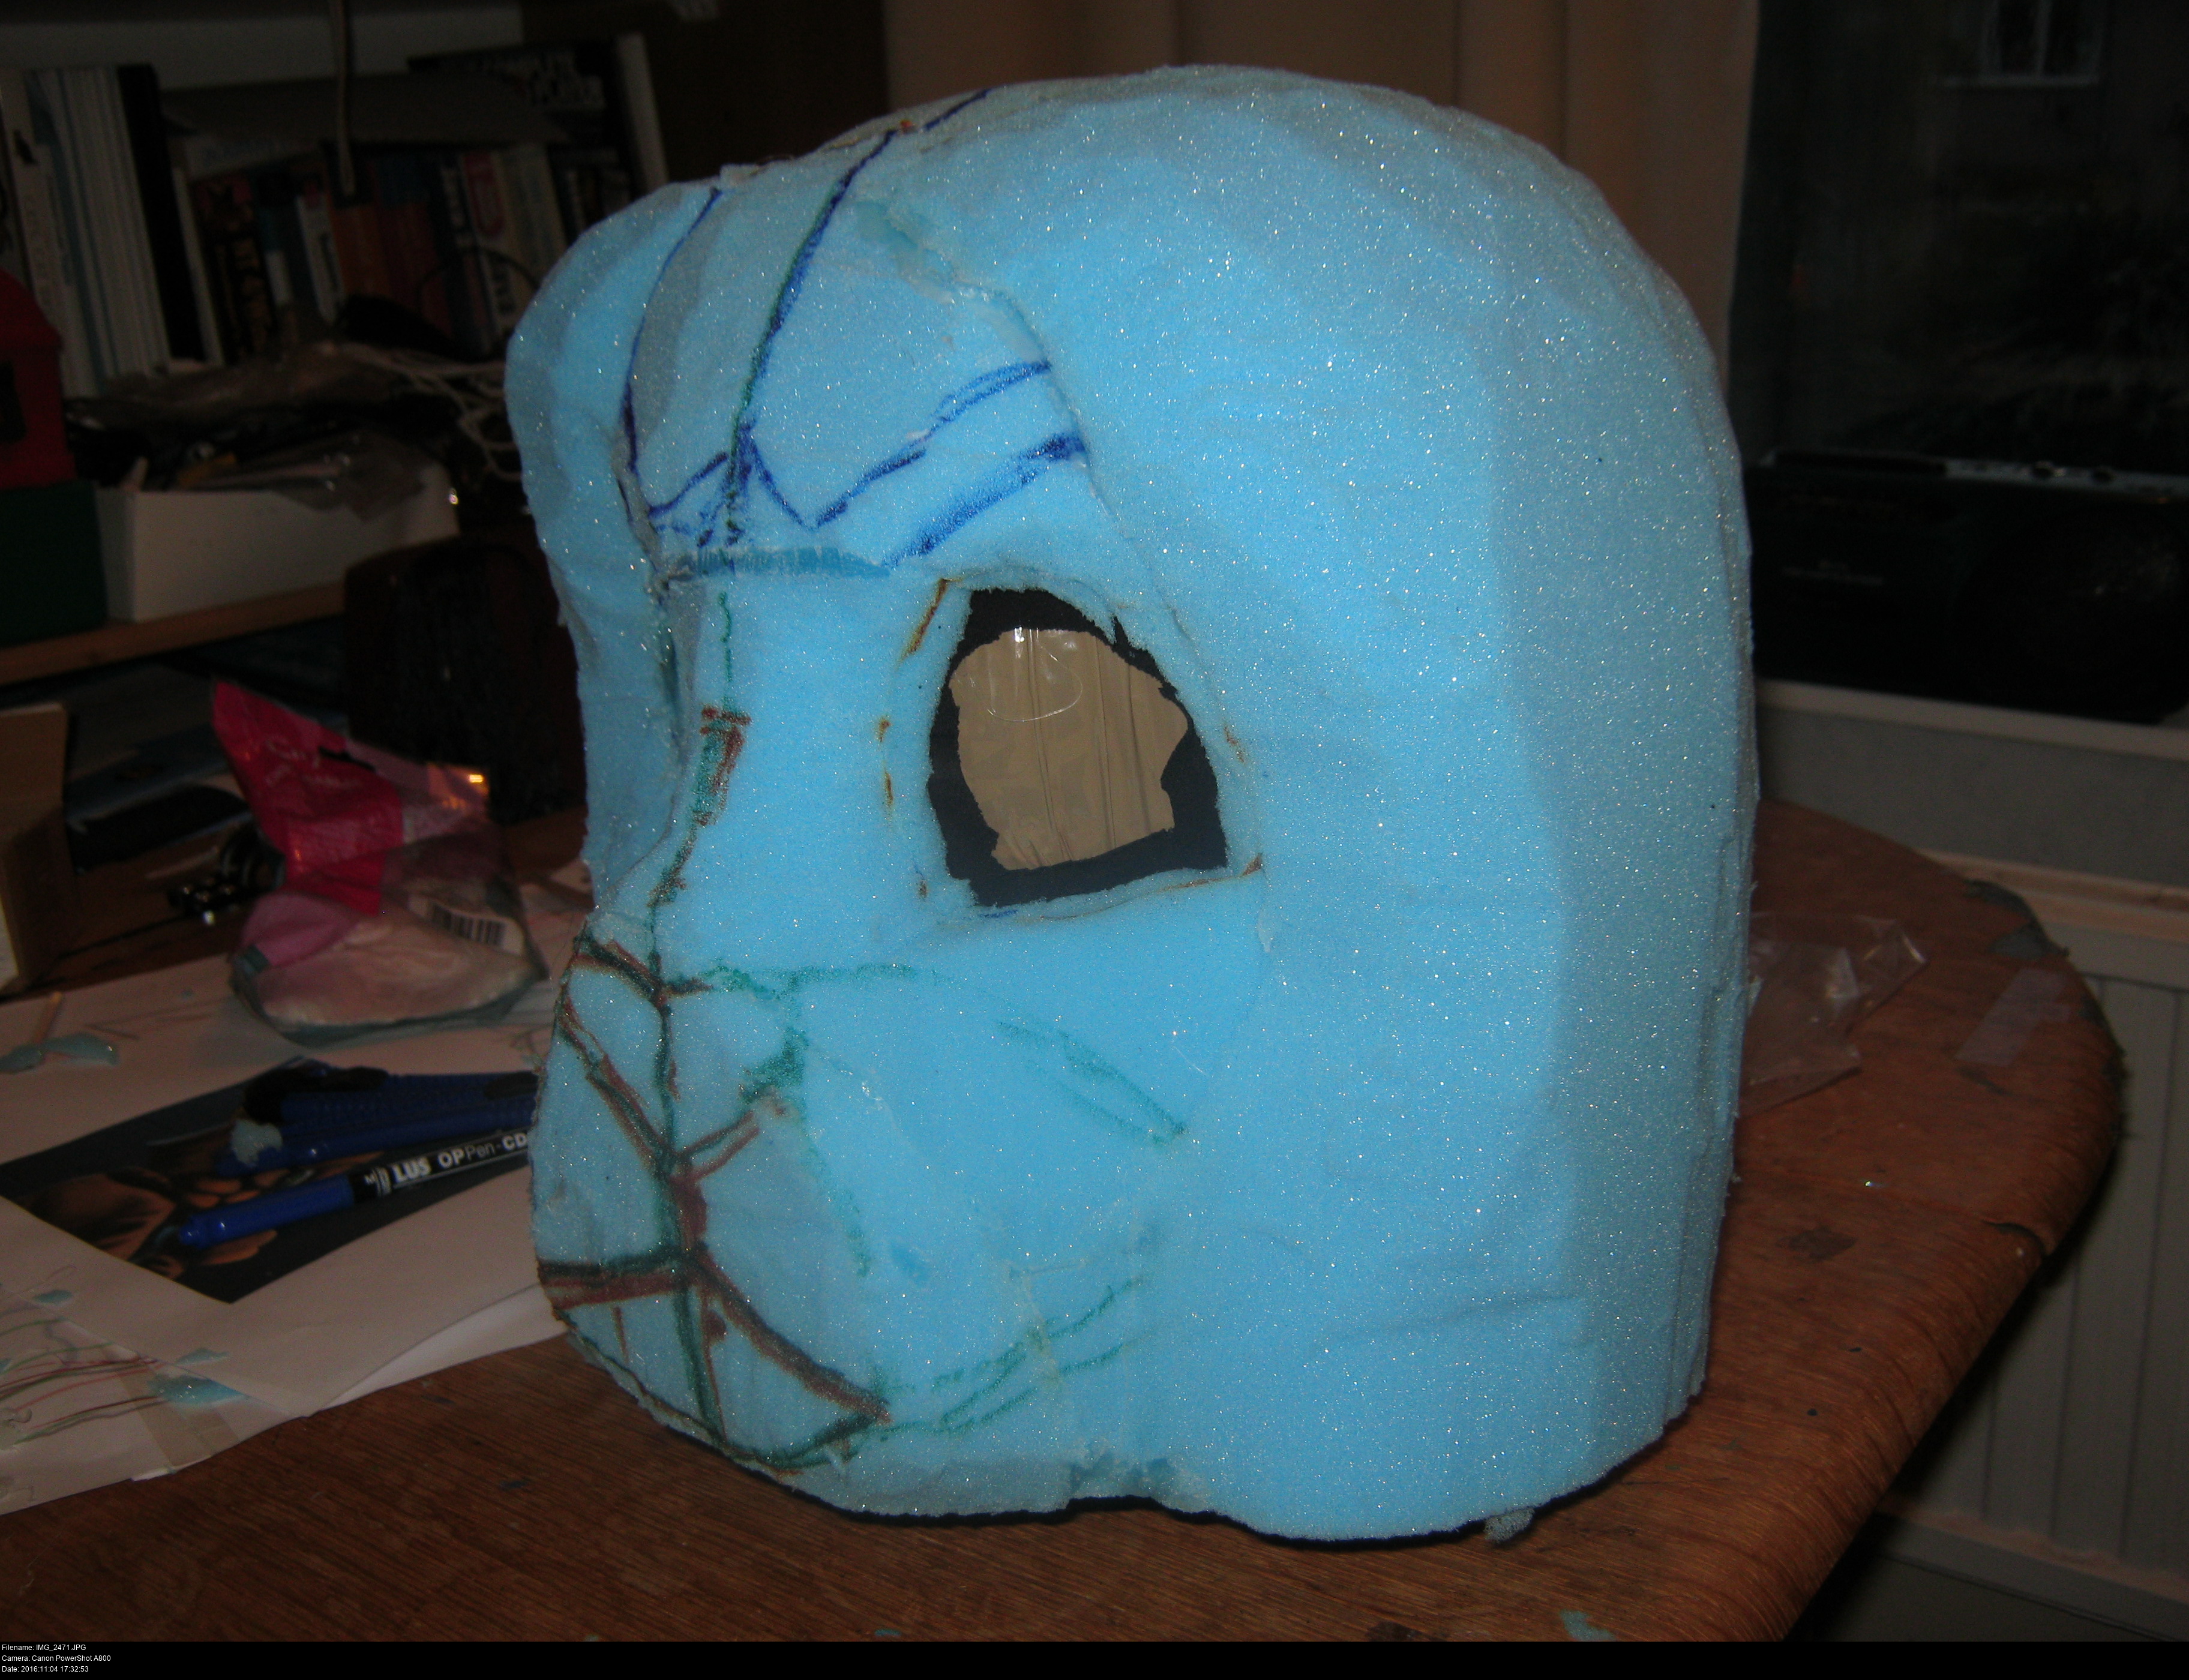
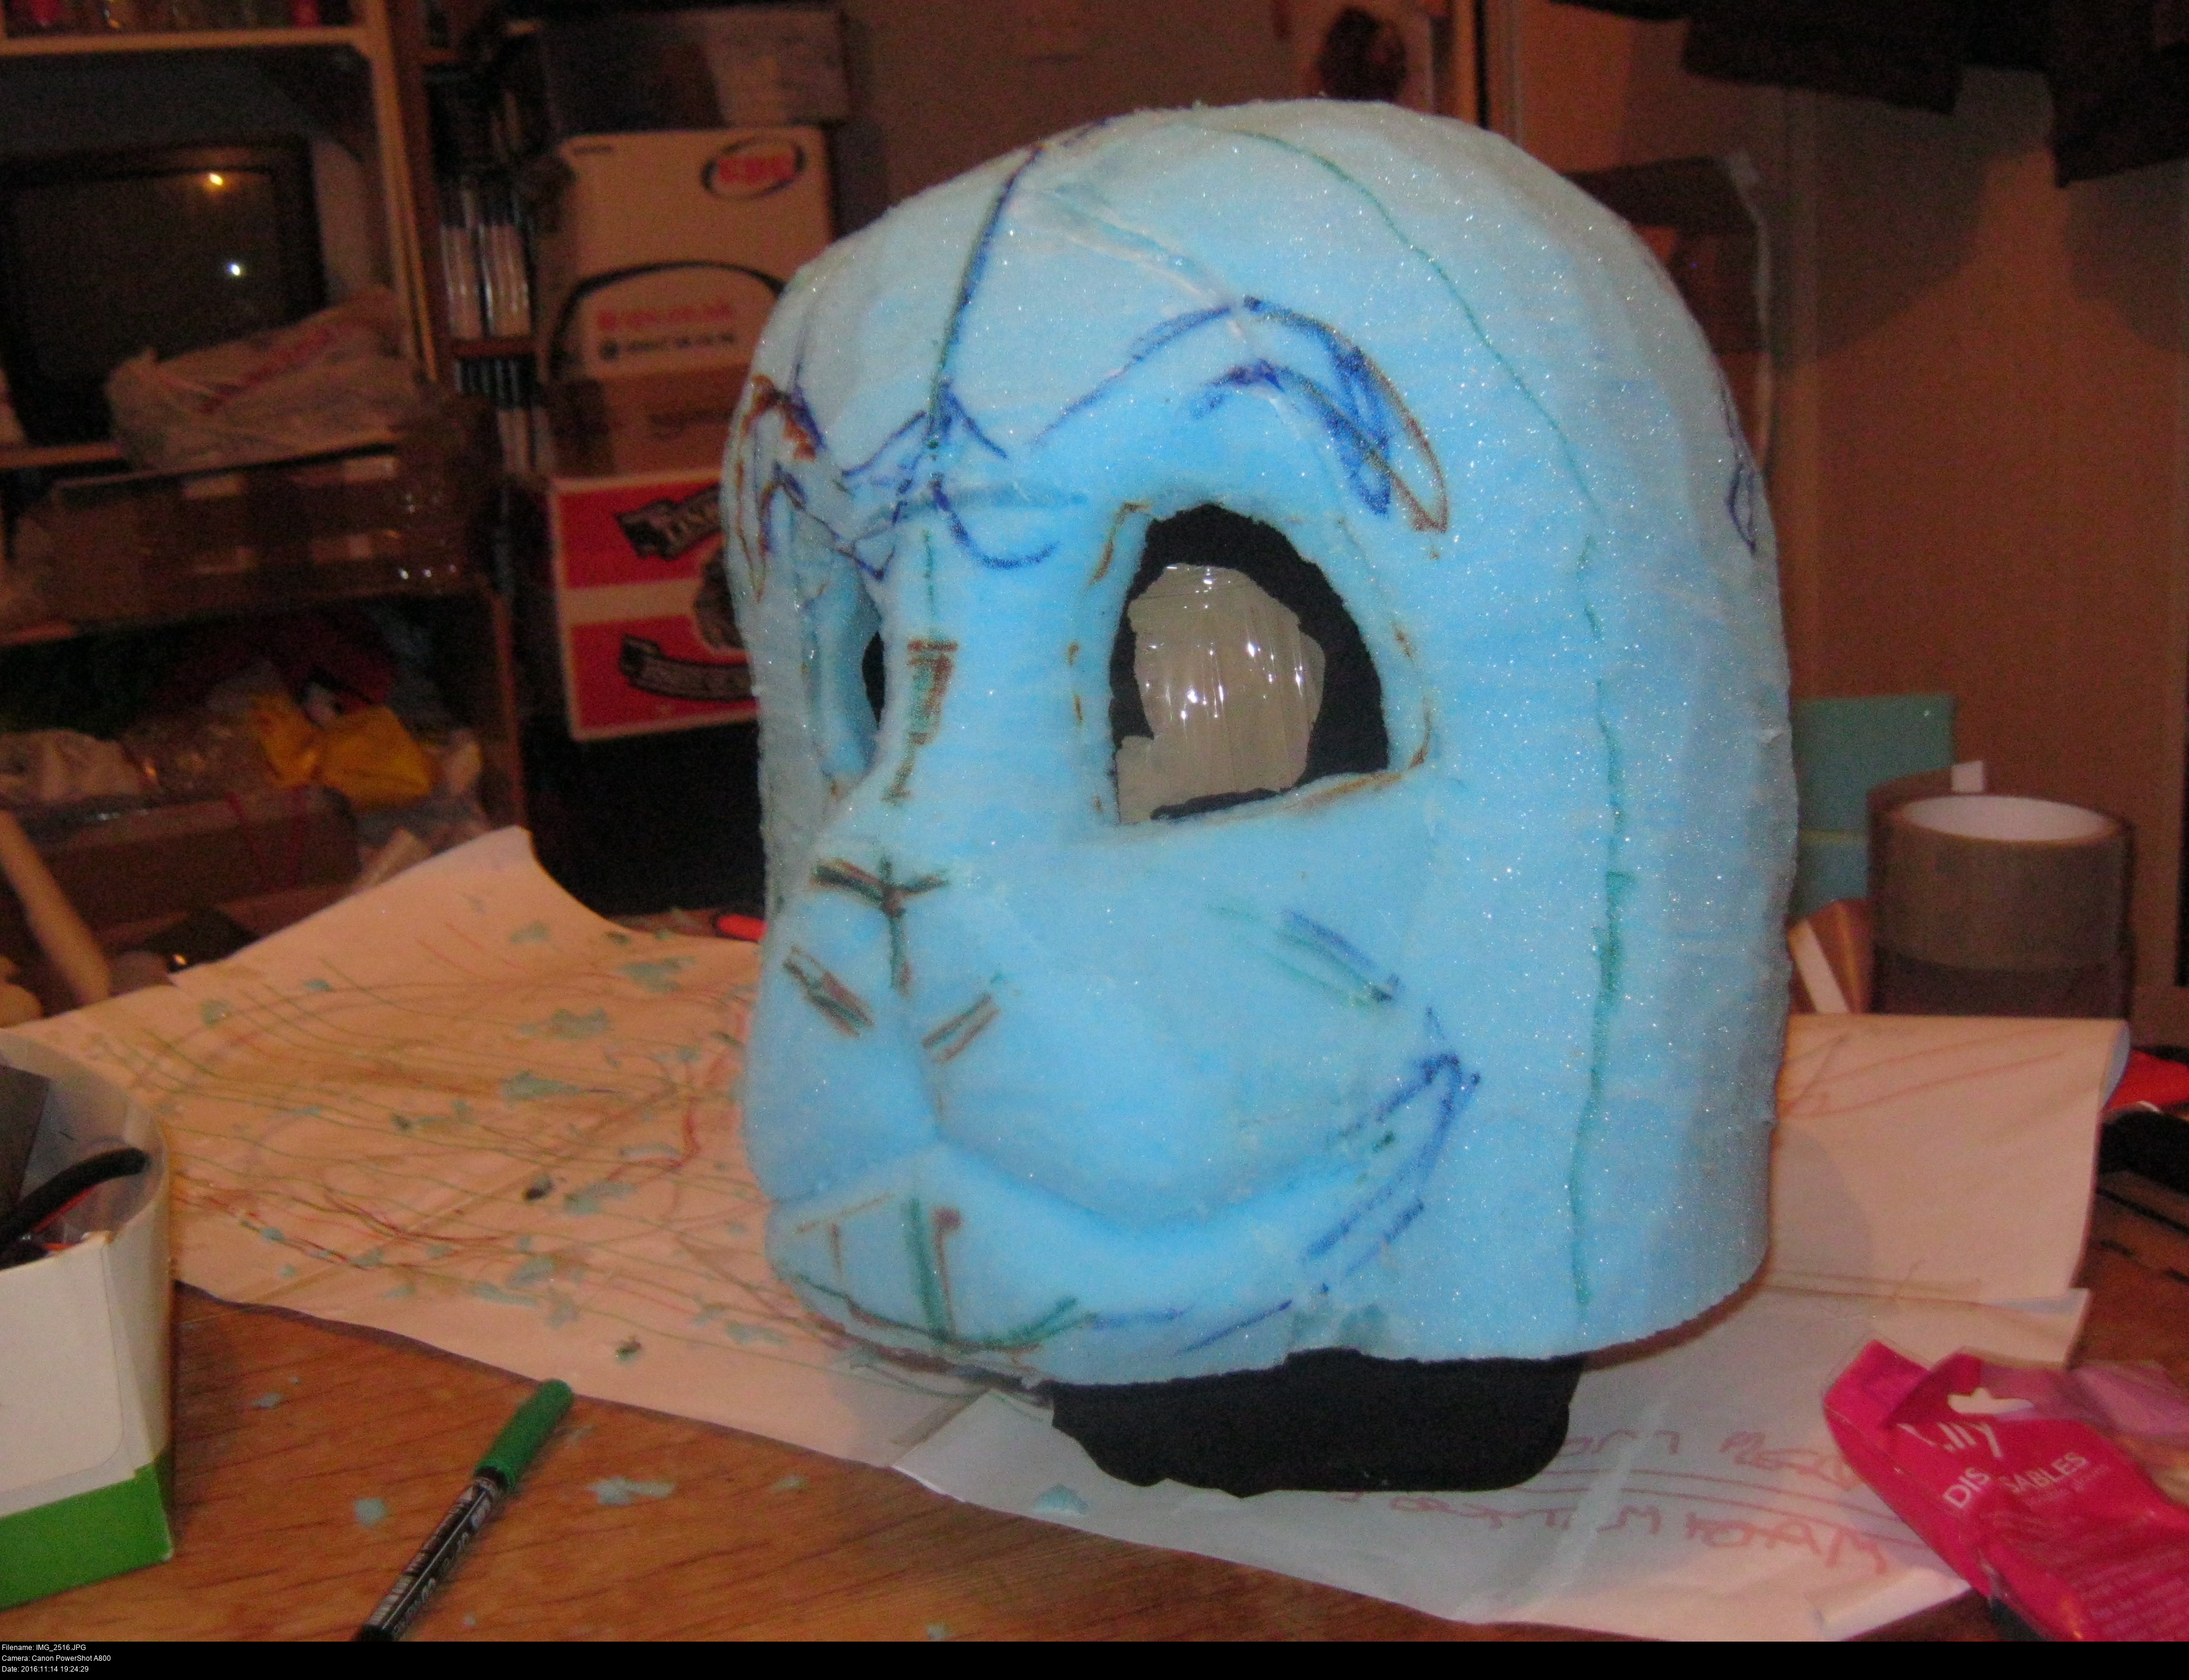
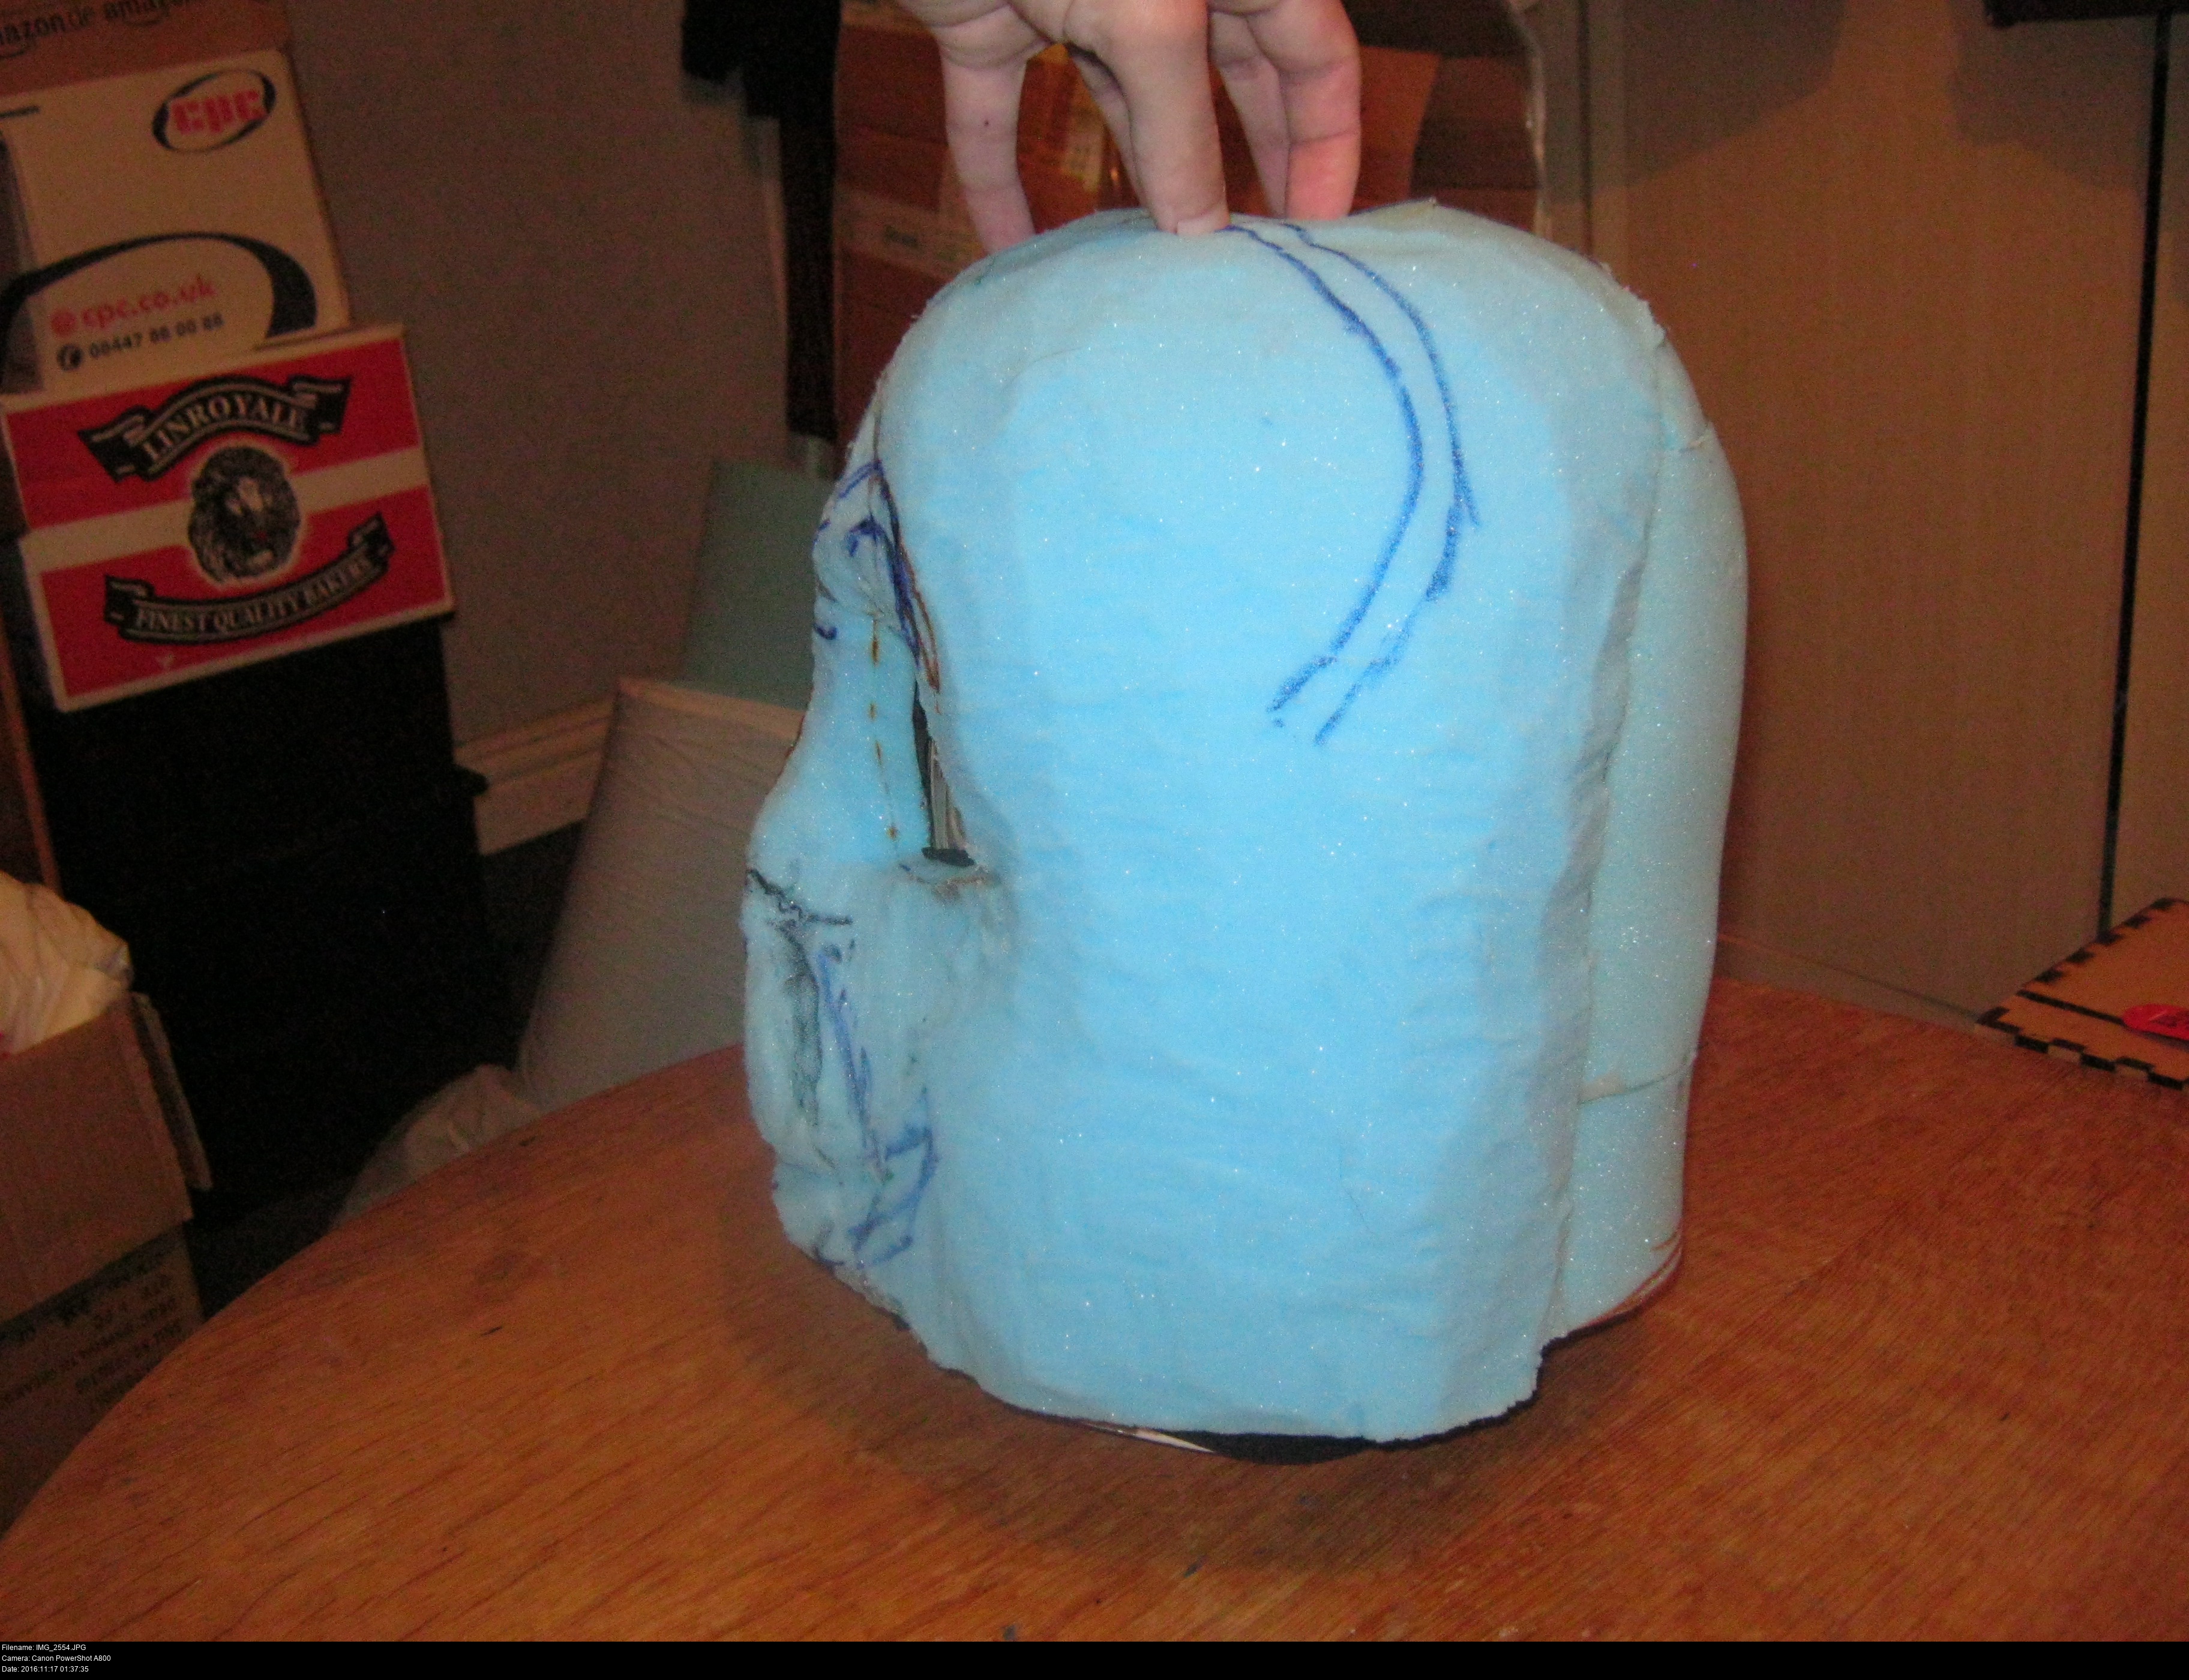
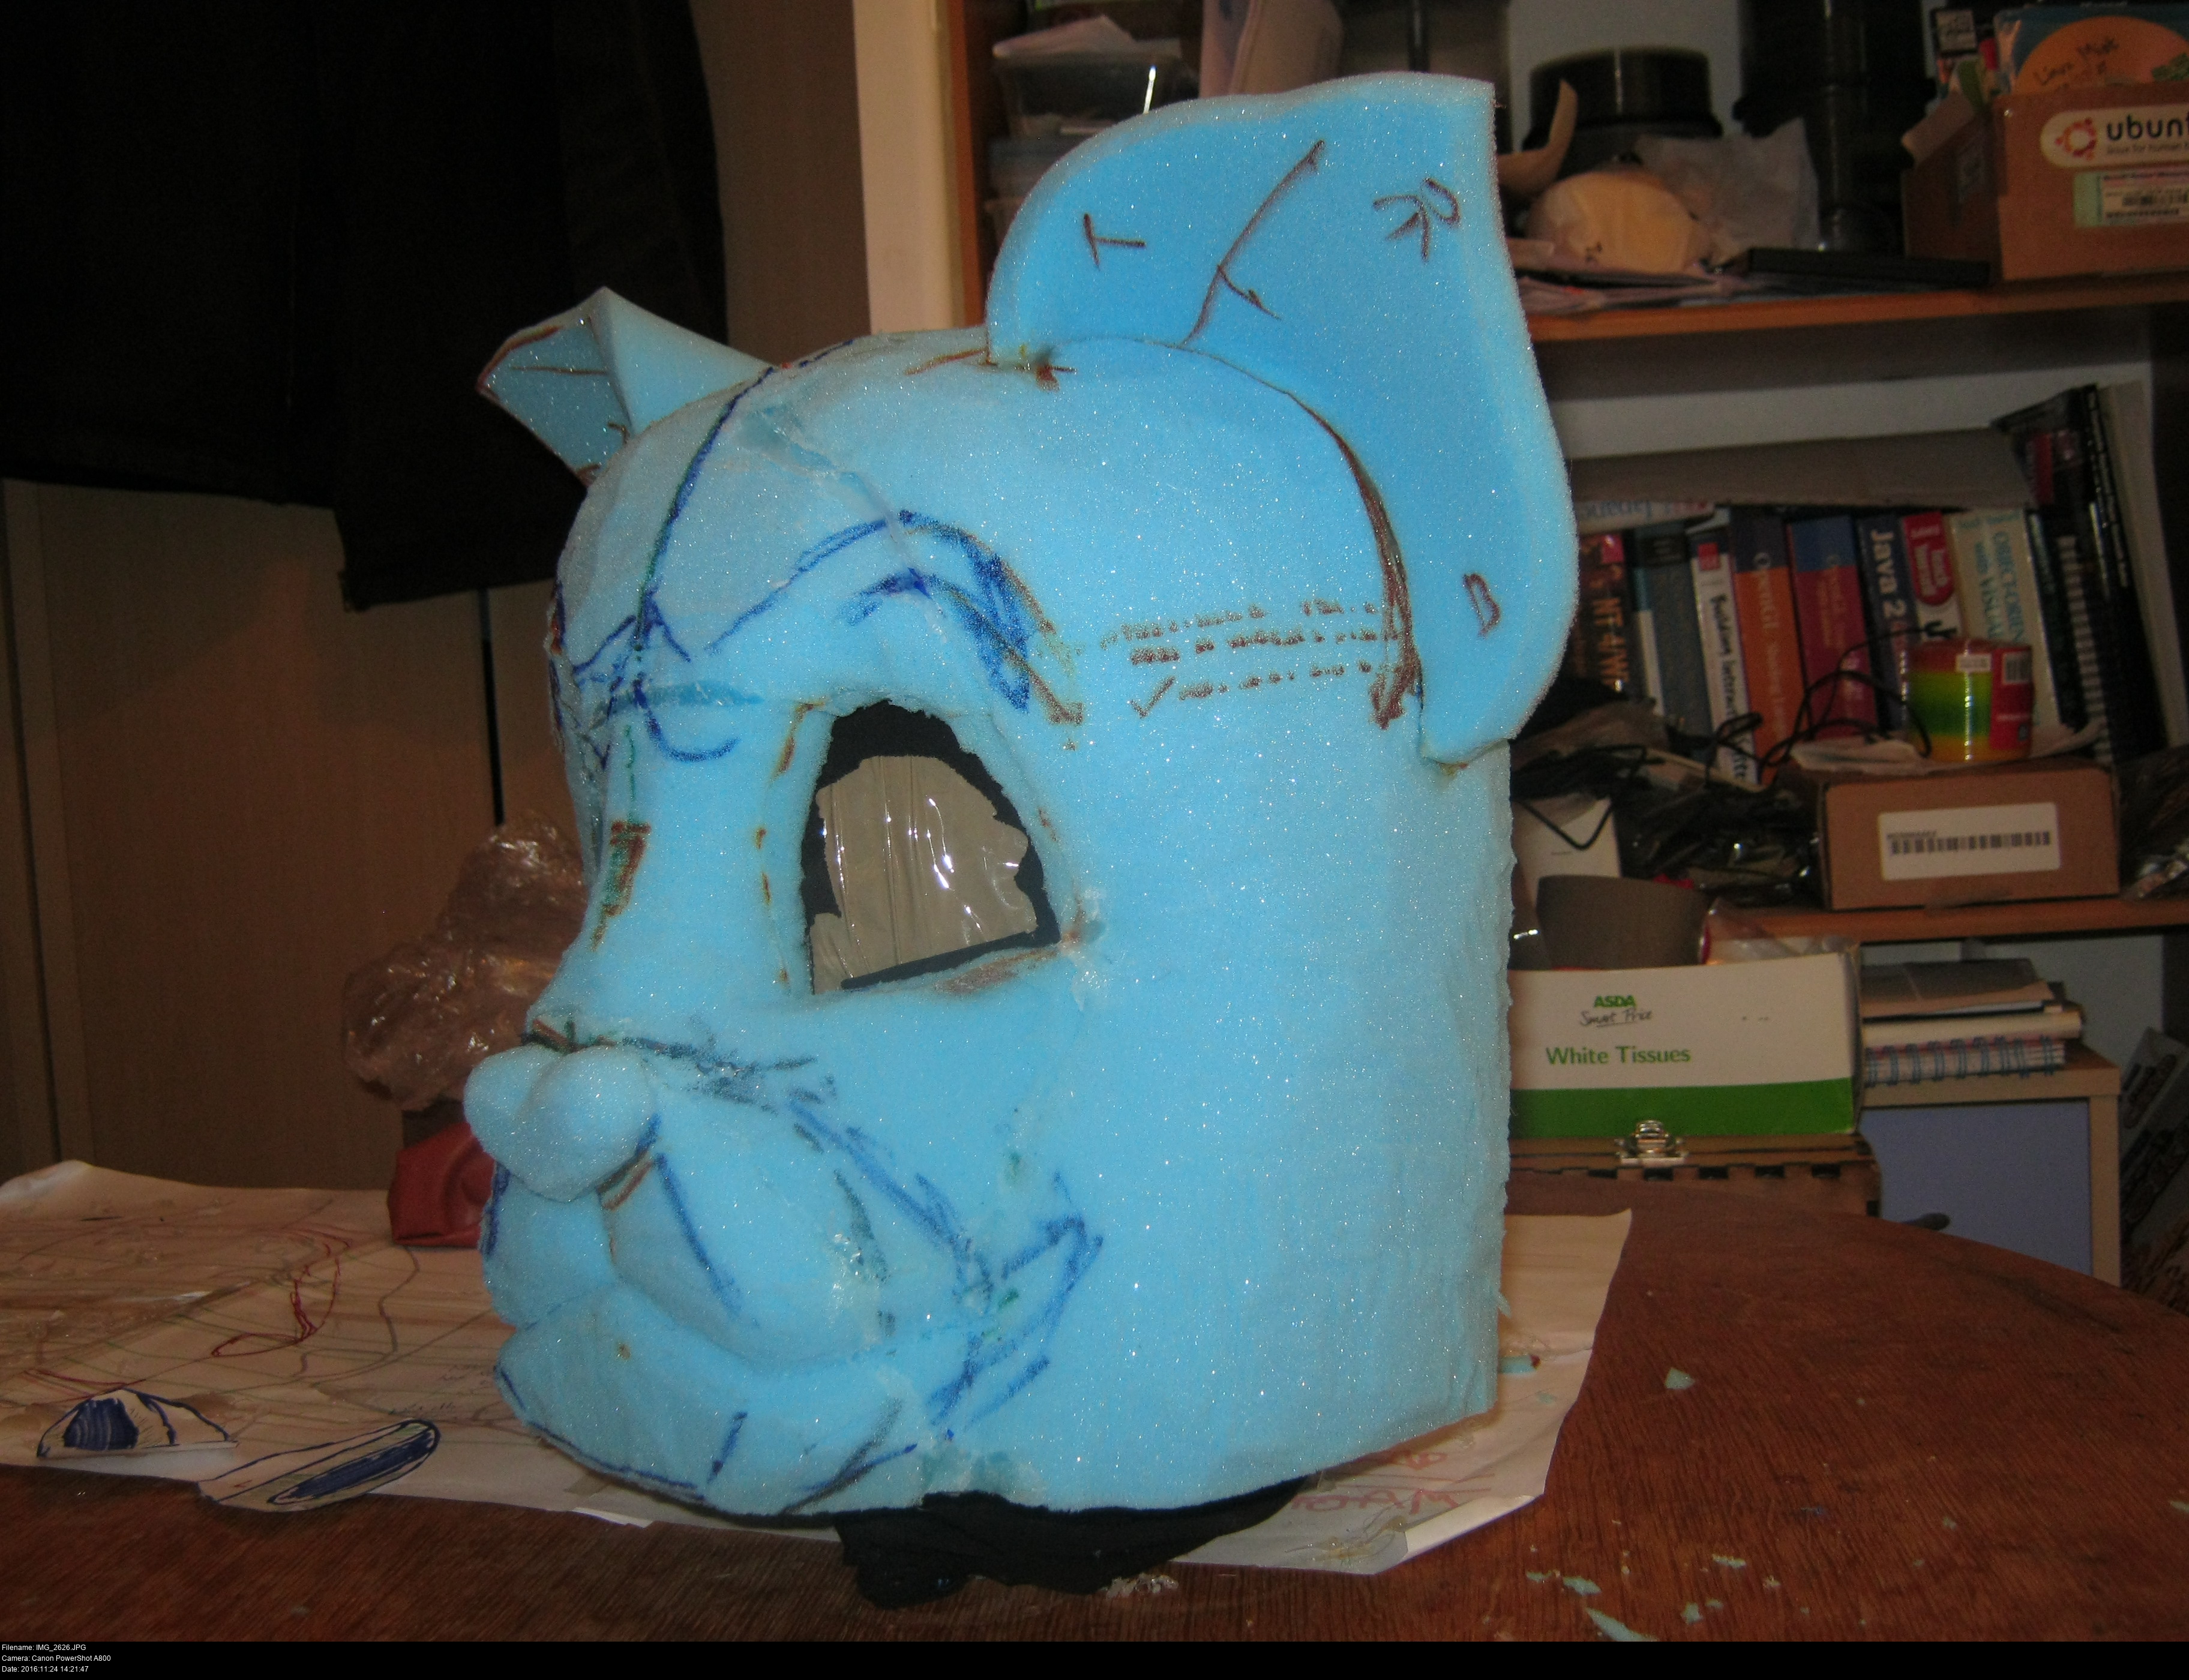
I'm slicing off vast chunks of this brow. It's just way too big and boxy. Needs to go back, right back.
The muzzle is kind of wide? I need to trust in it. This is just the start. Maybe if I round out the sides it'll work?
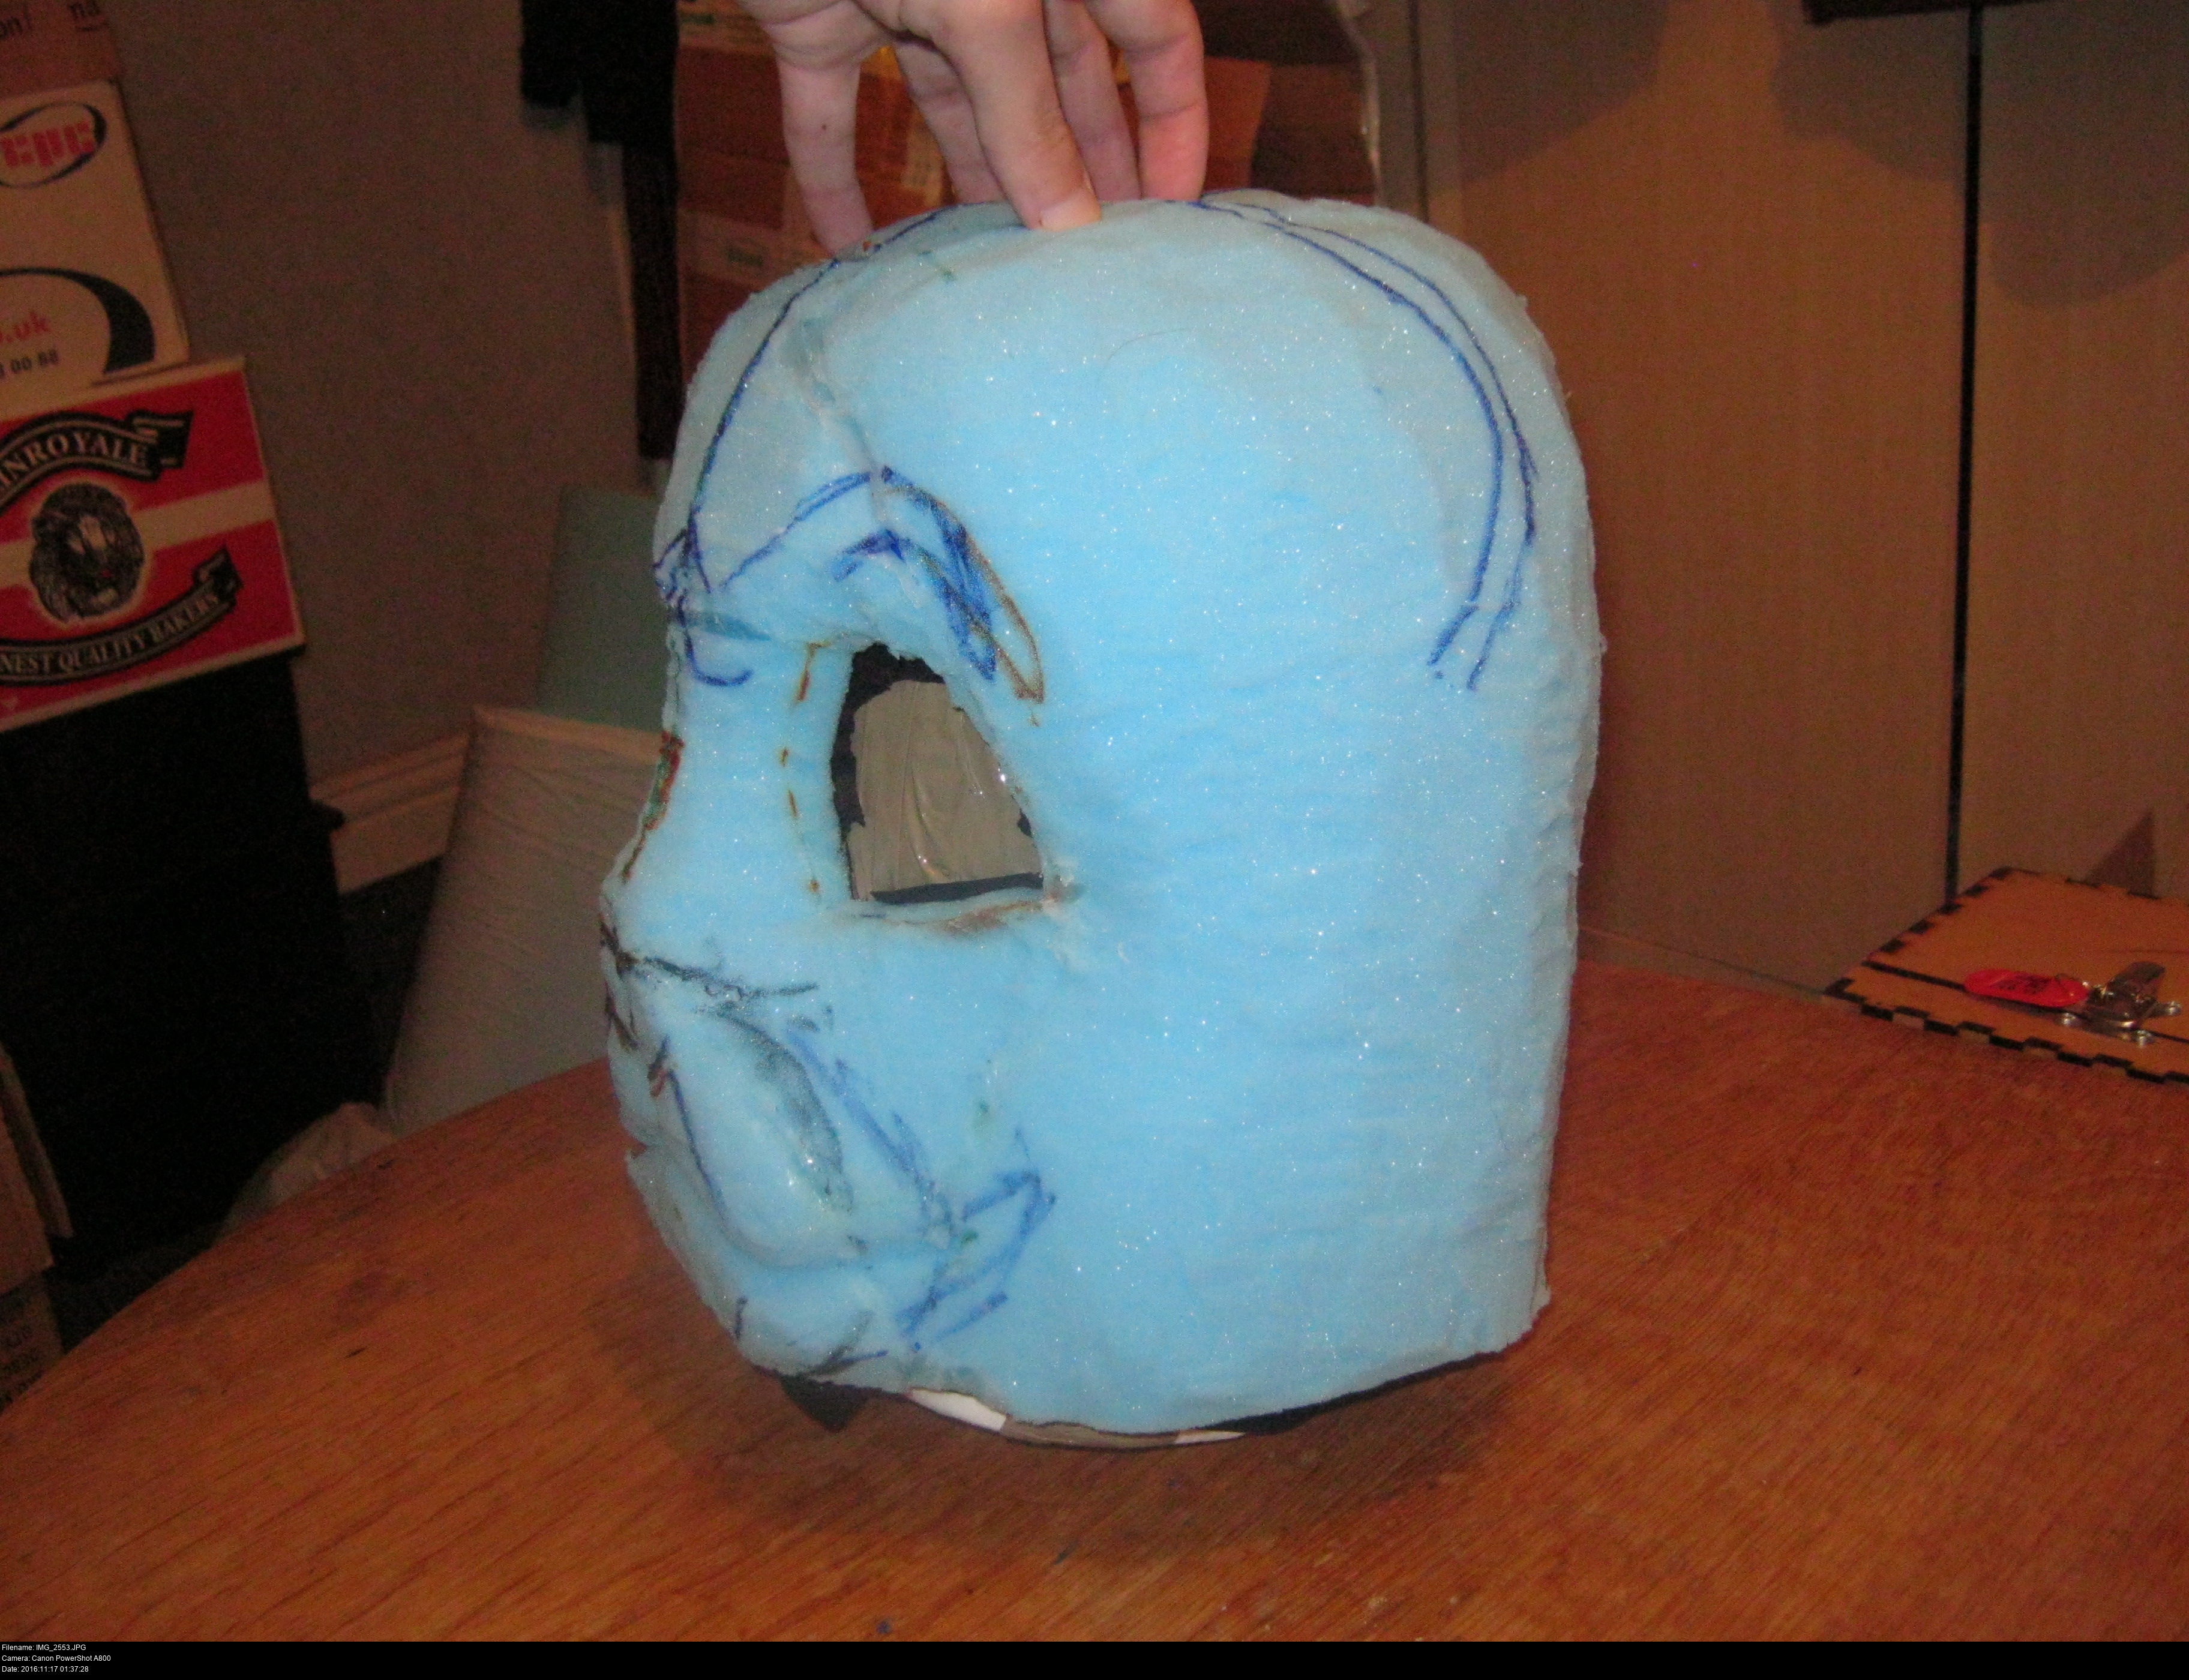
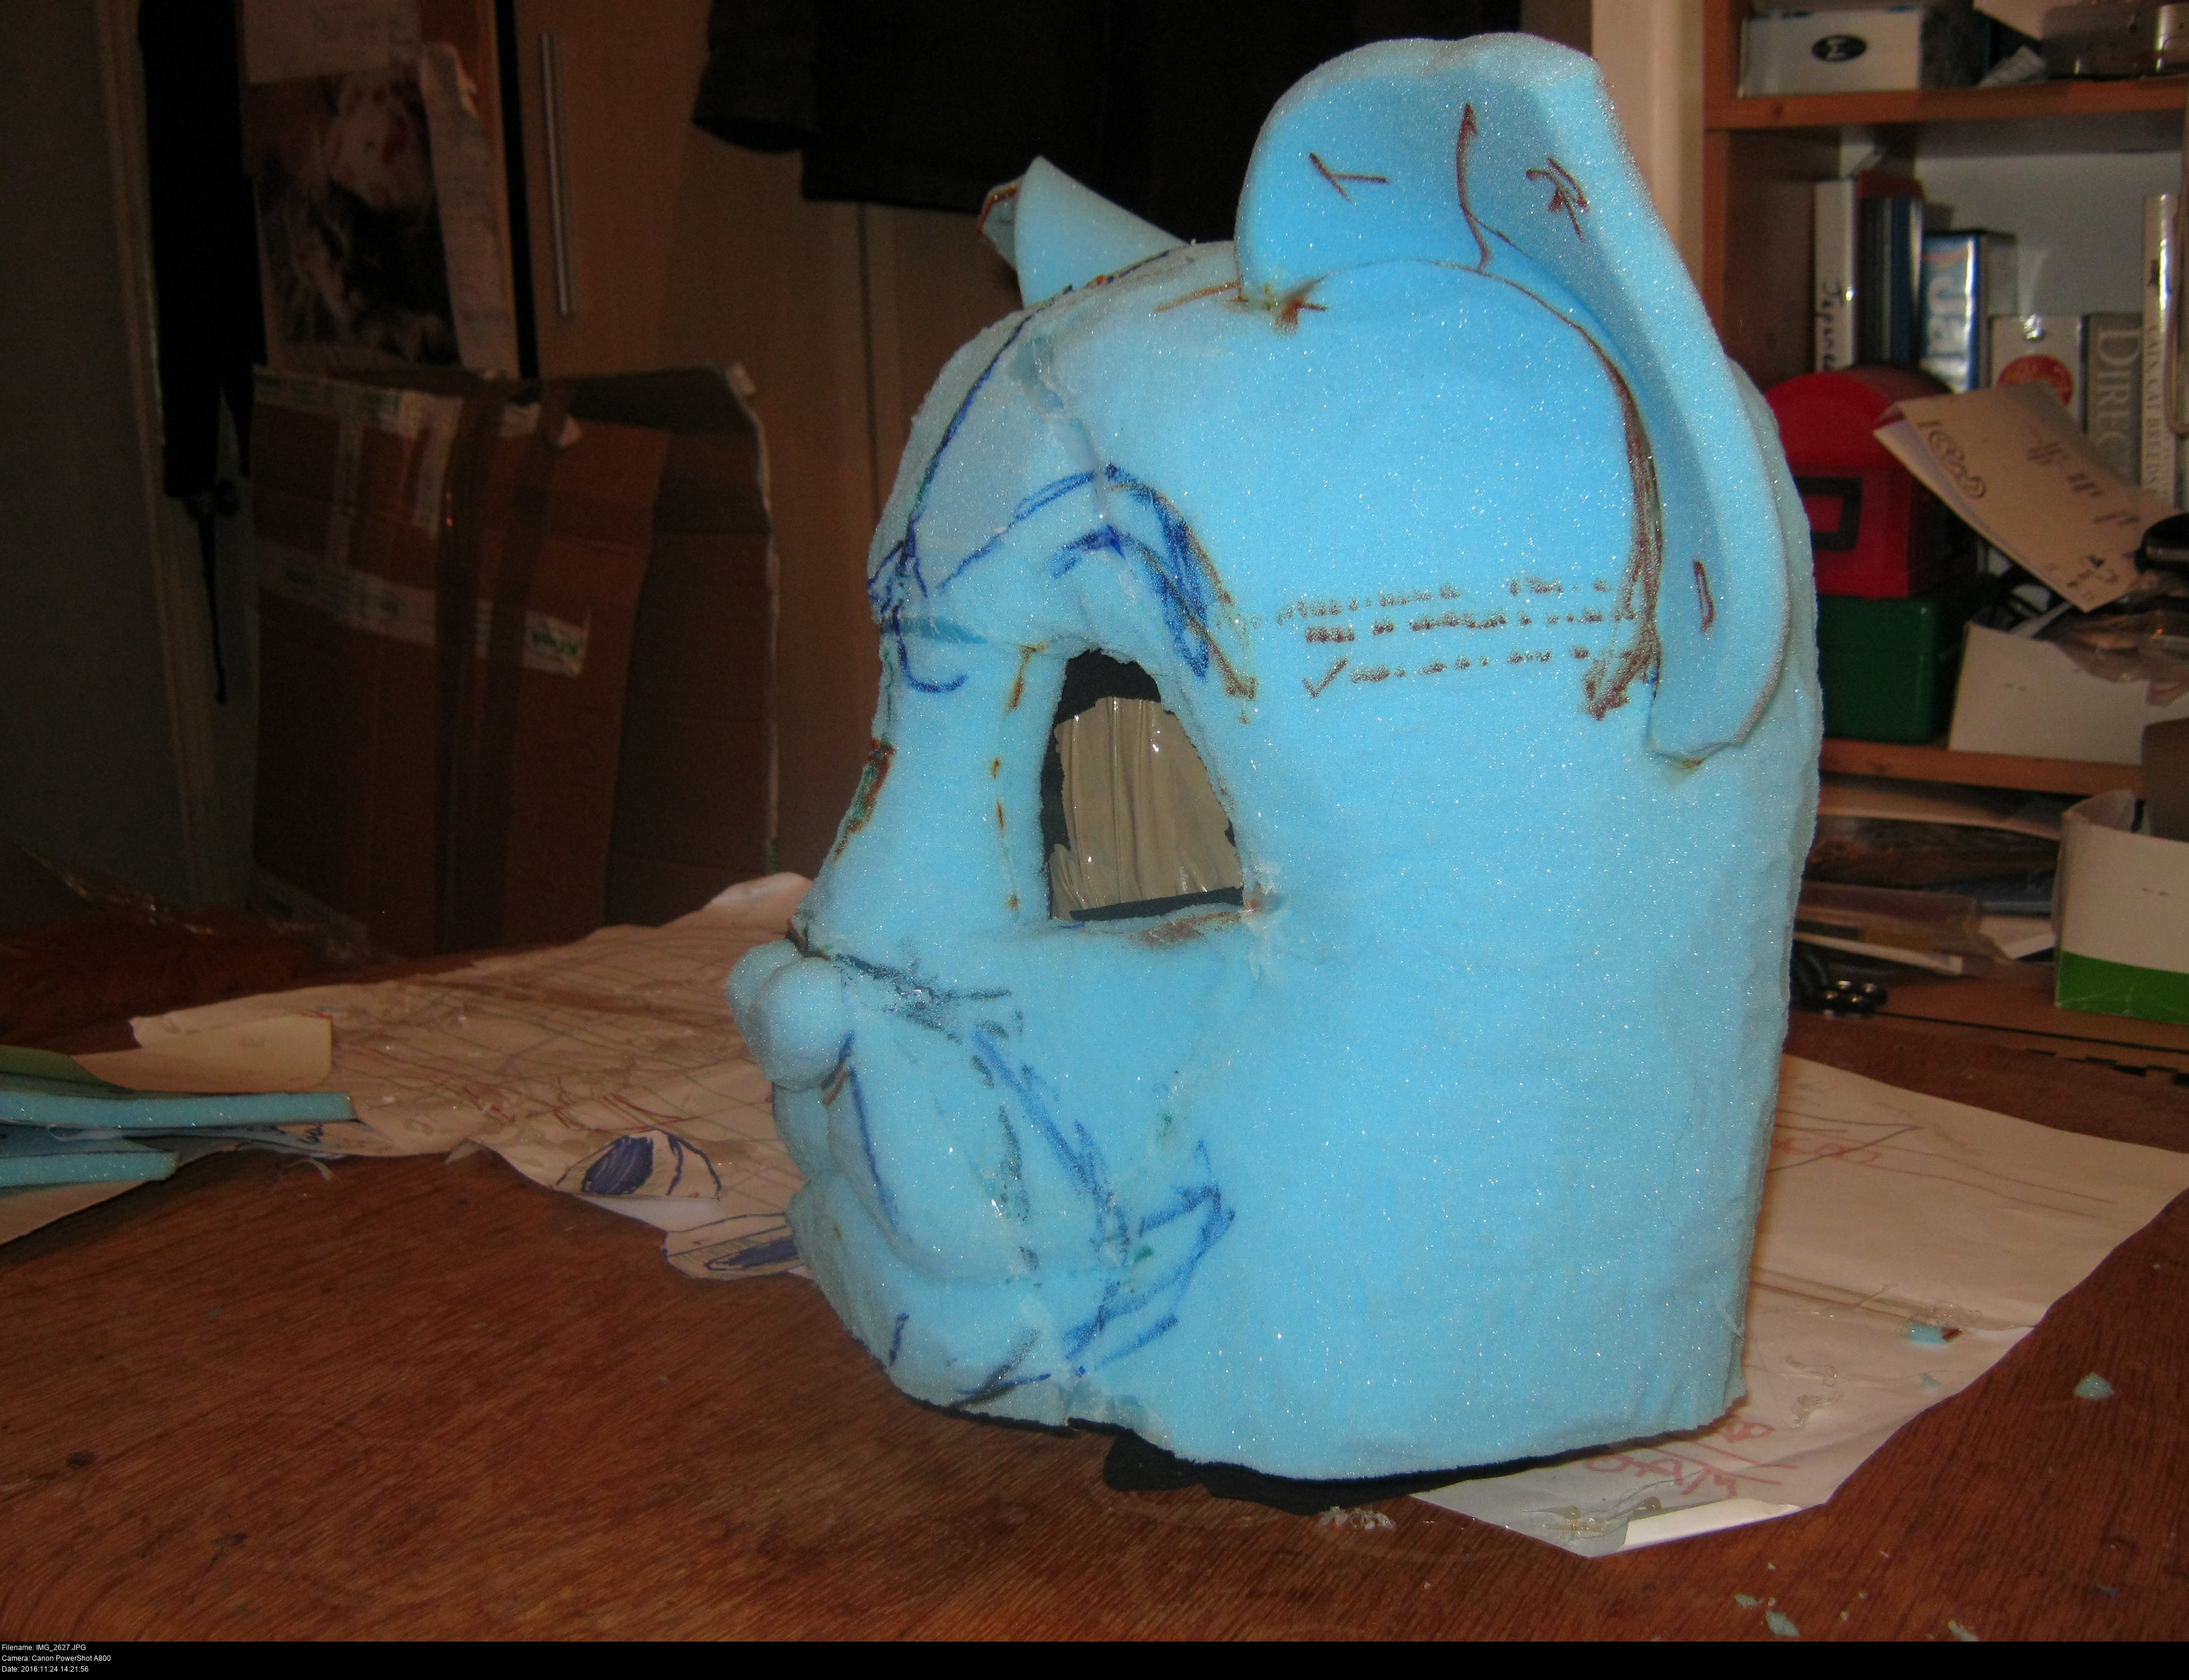
It does look catlike. But it's a big fat round cat.
No, it's...
A bunny! A horribly stodgy blocky inflated bunny!
No! Wrong! Chop that nose off and try again.
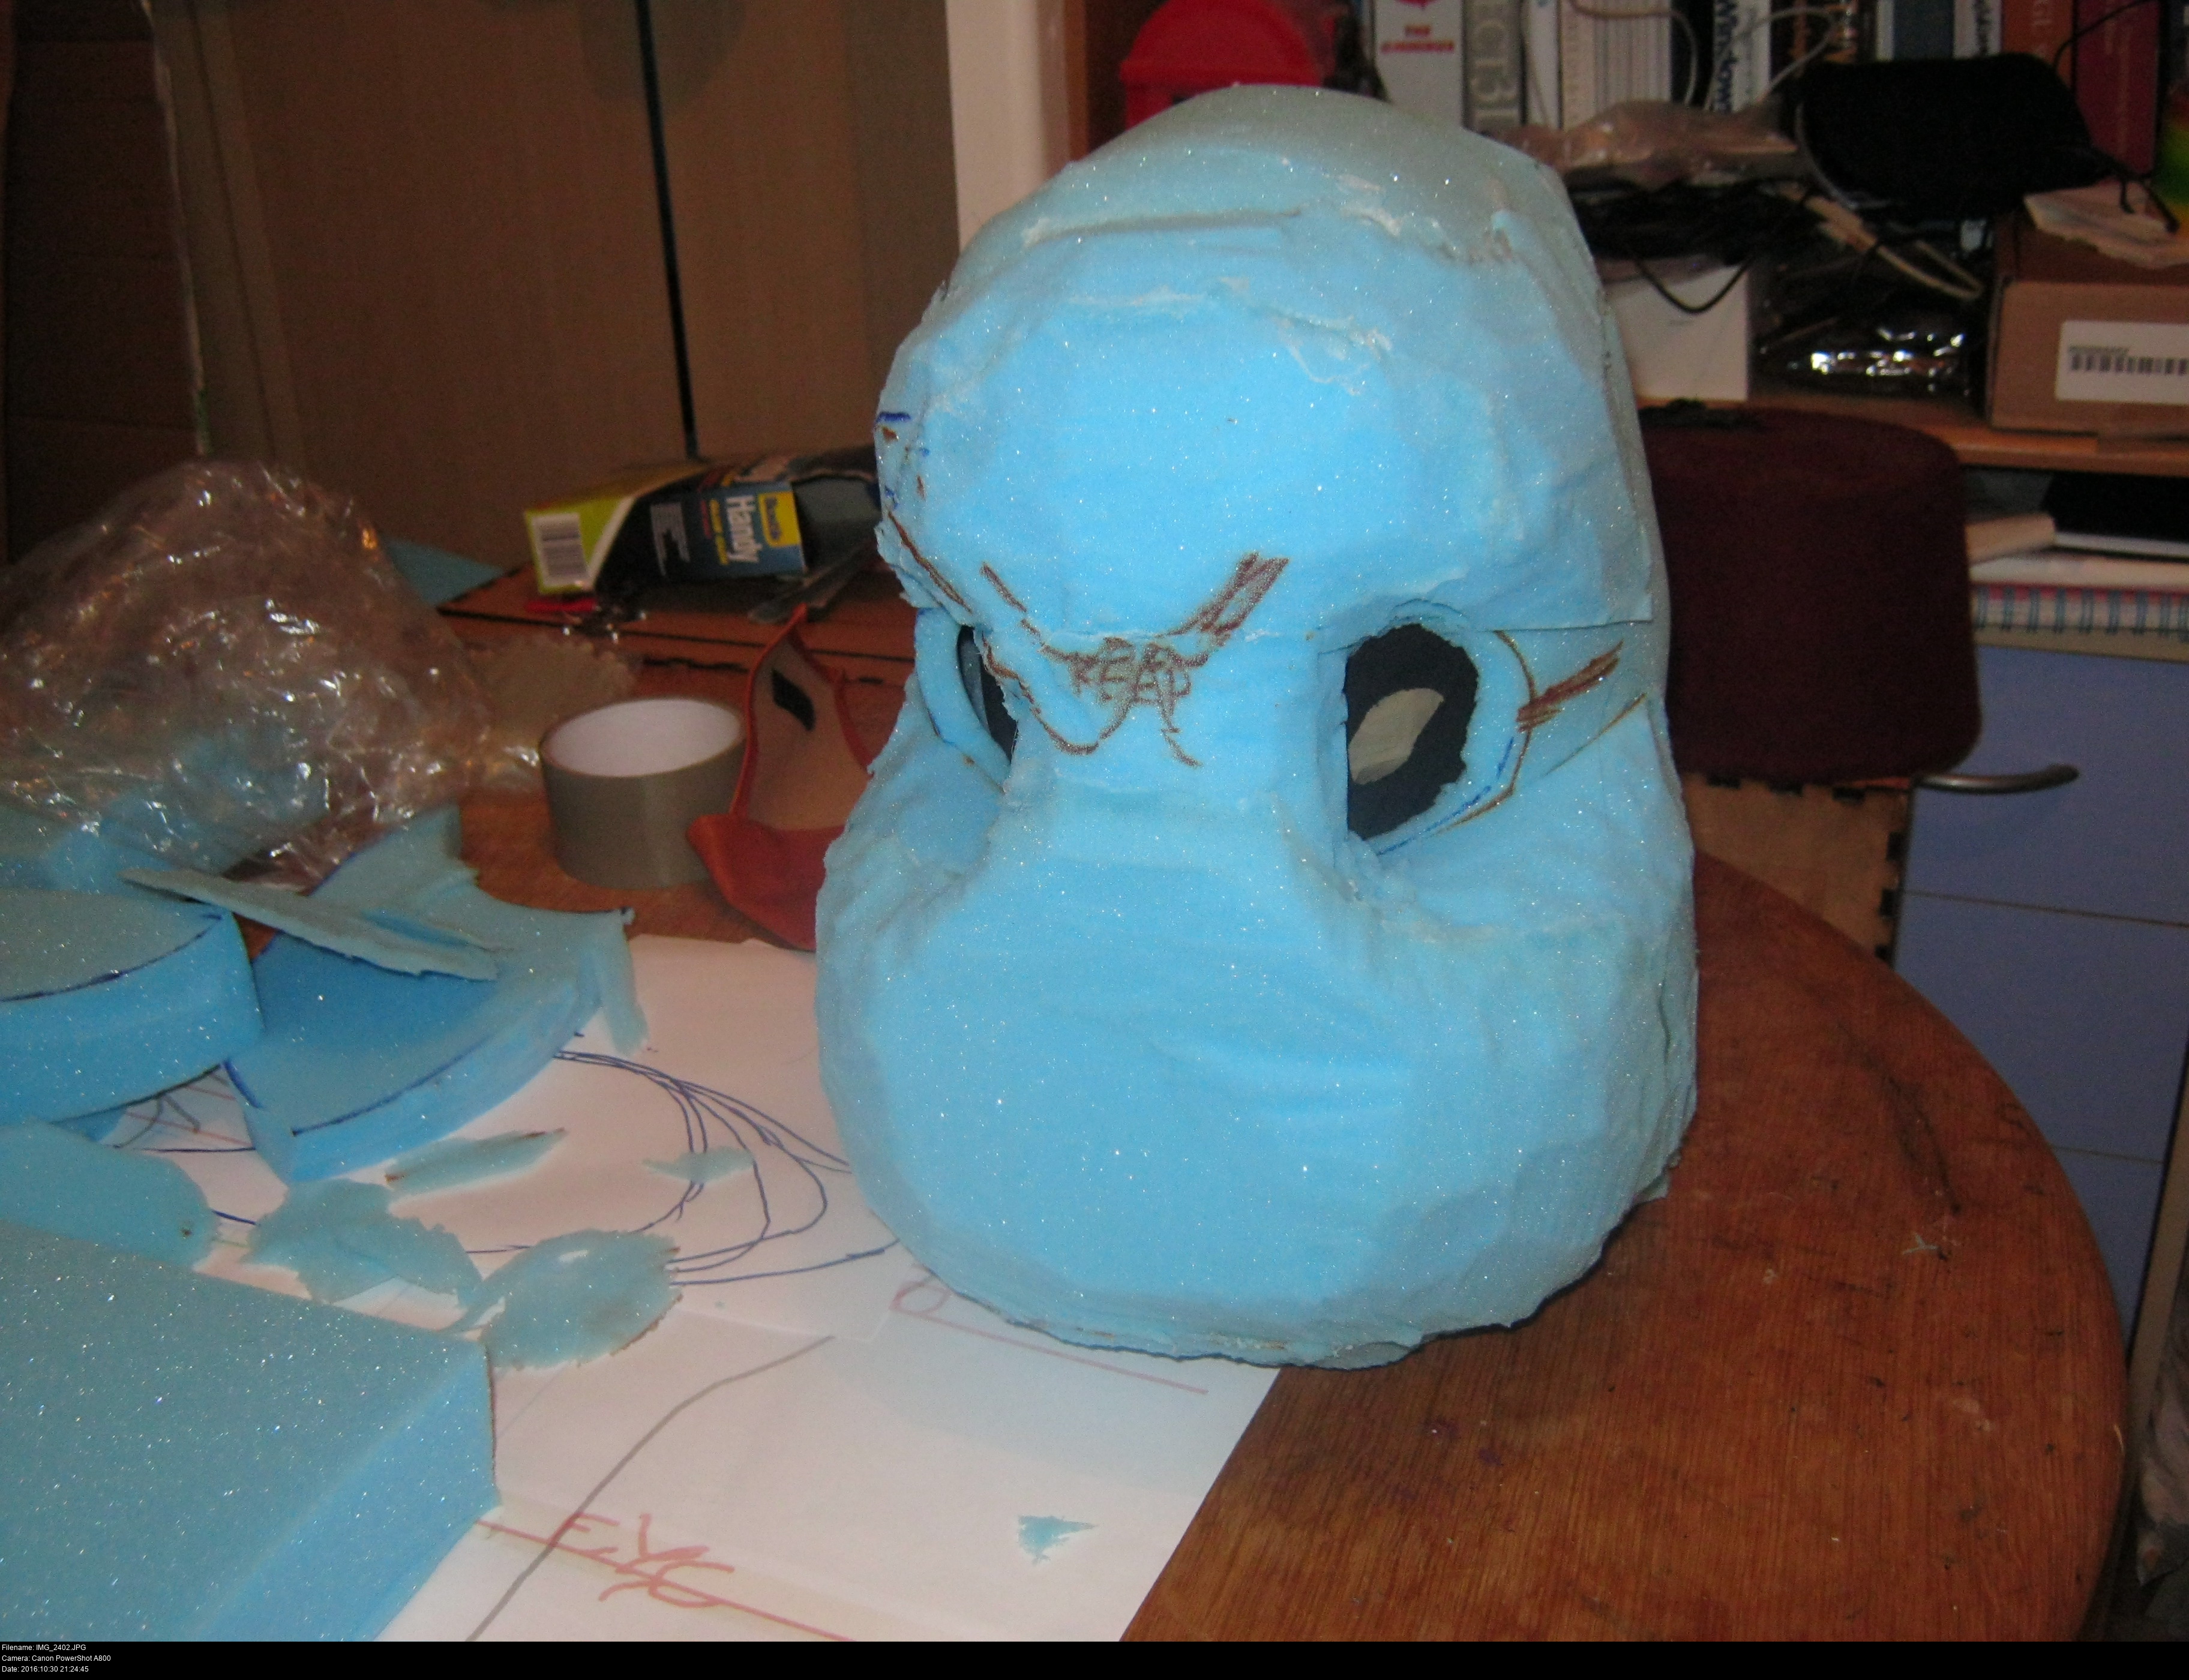

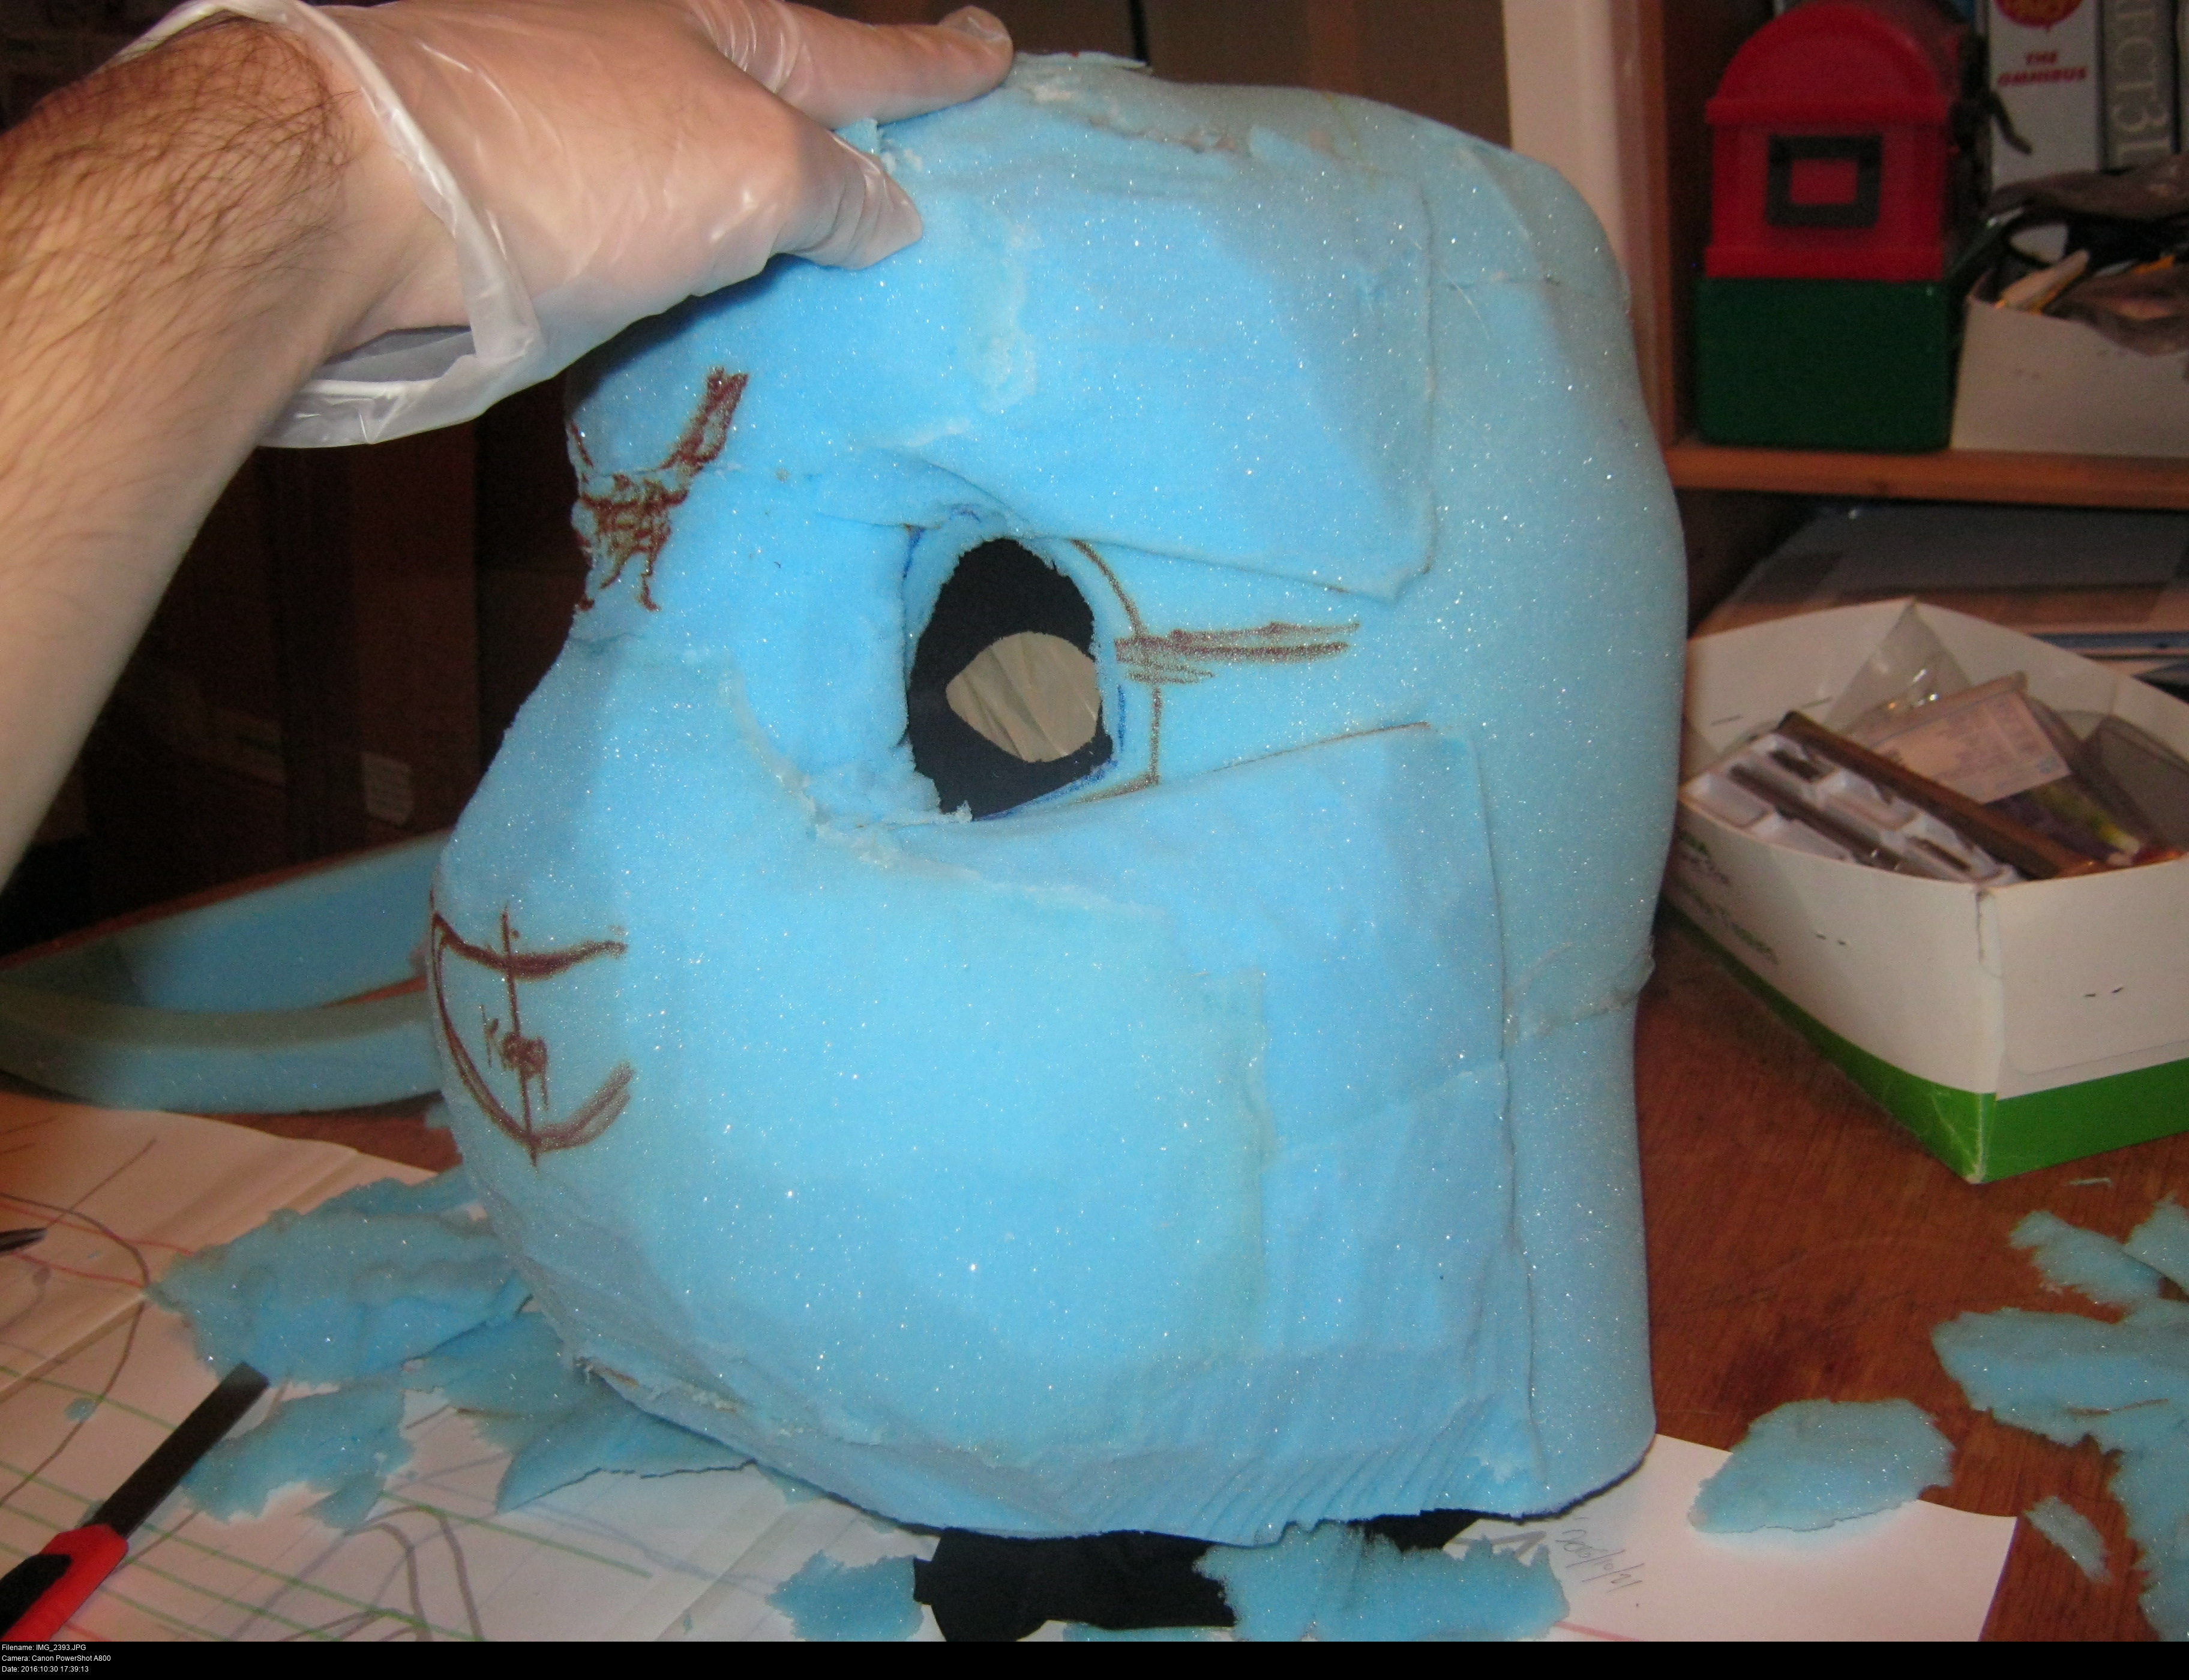
There's nothing wrong with gluing on a new section and having another attempt or twenty. Nobody's going to see the blue foam. I can take as long as I want on this.
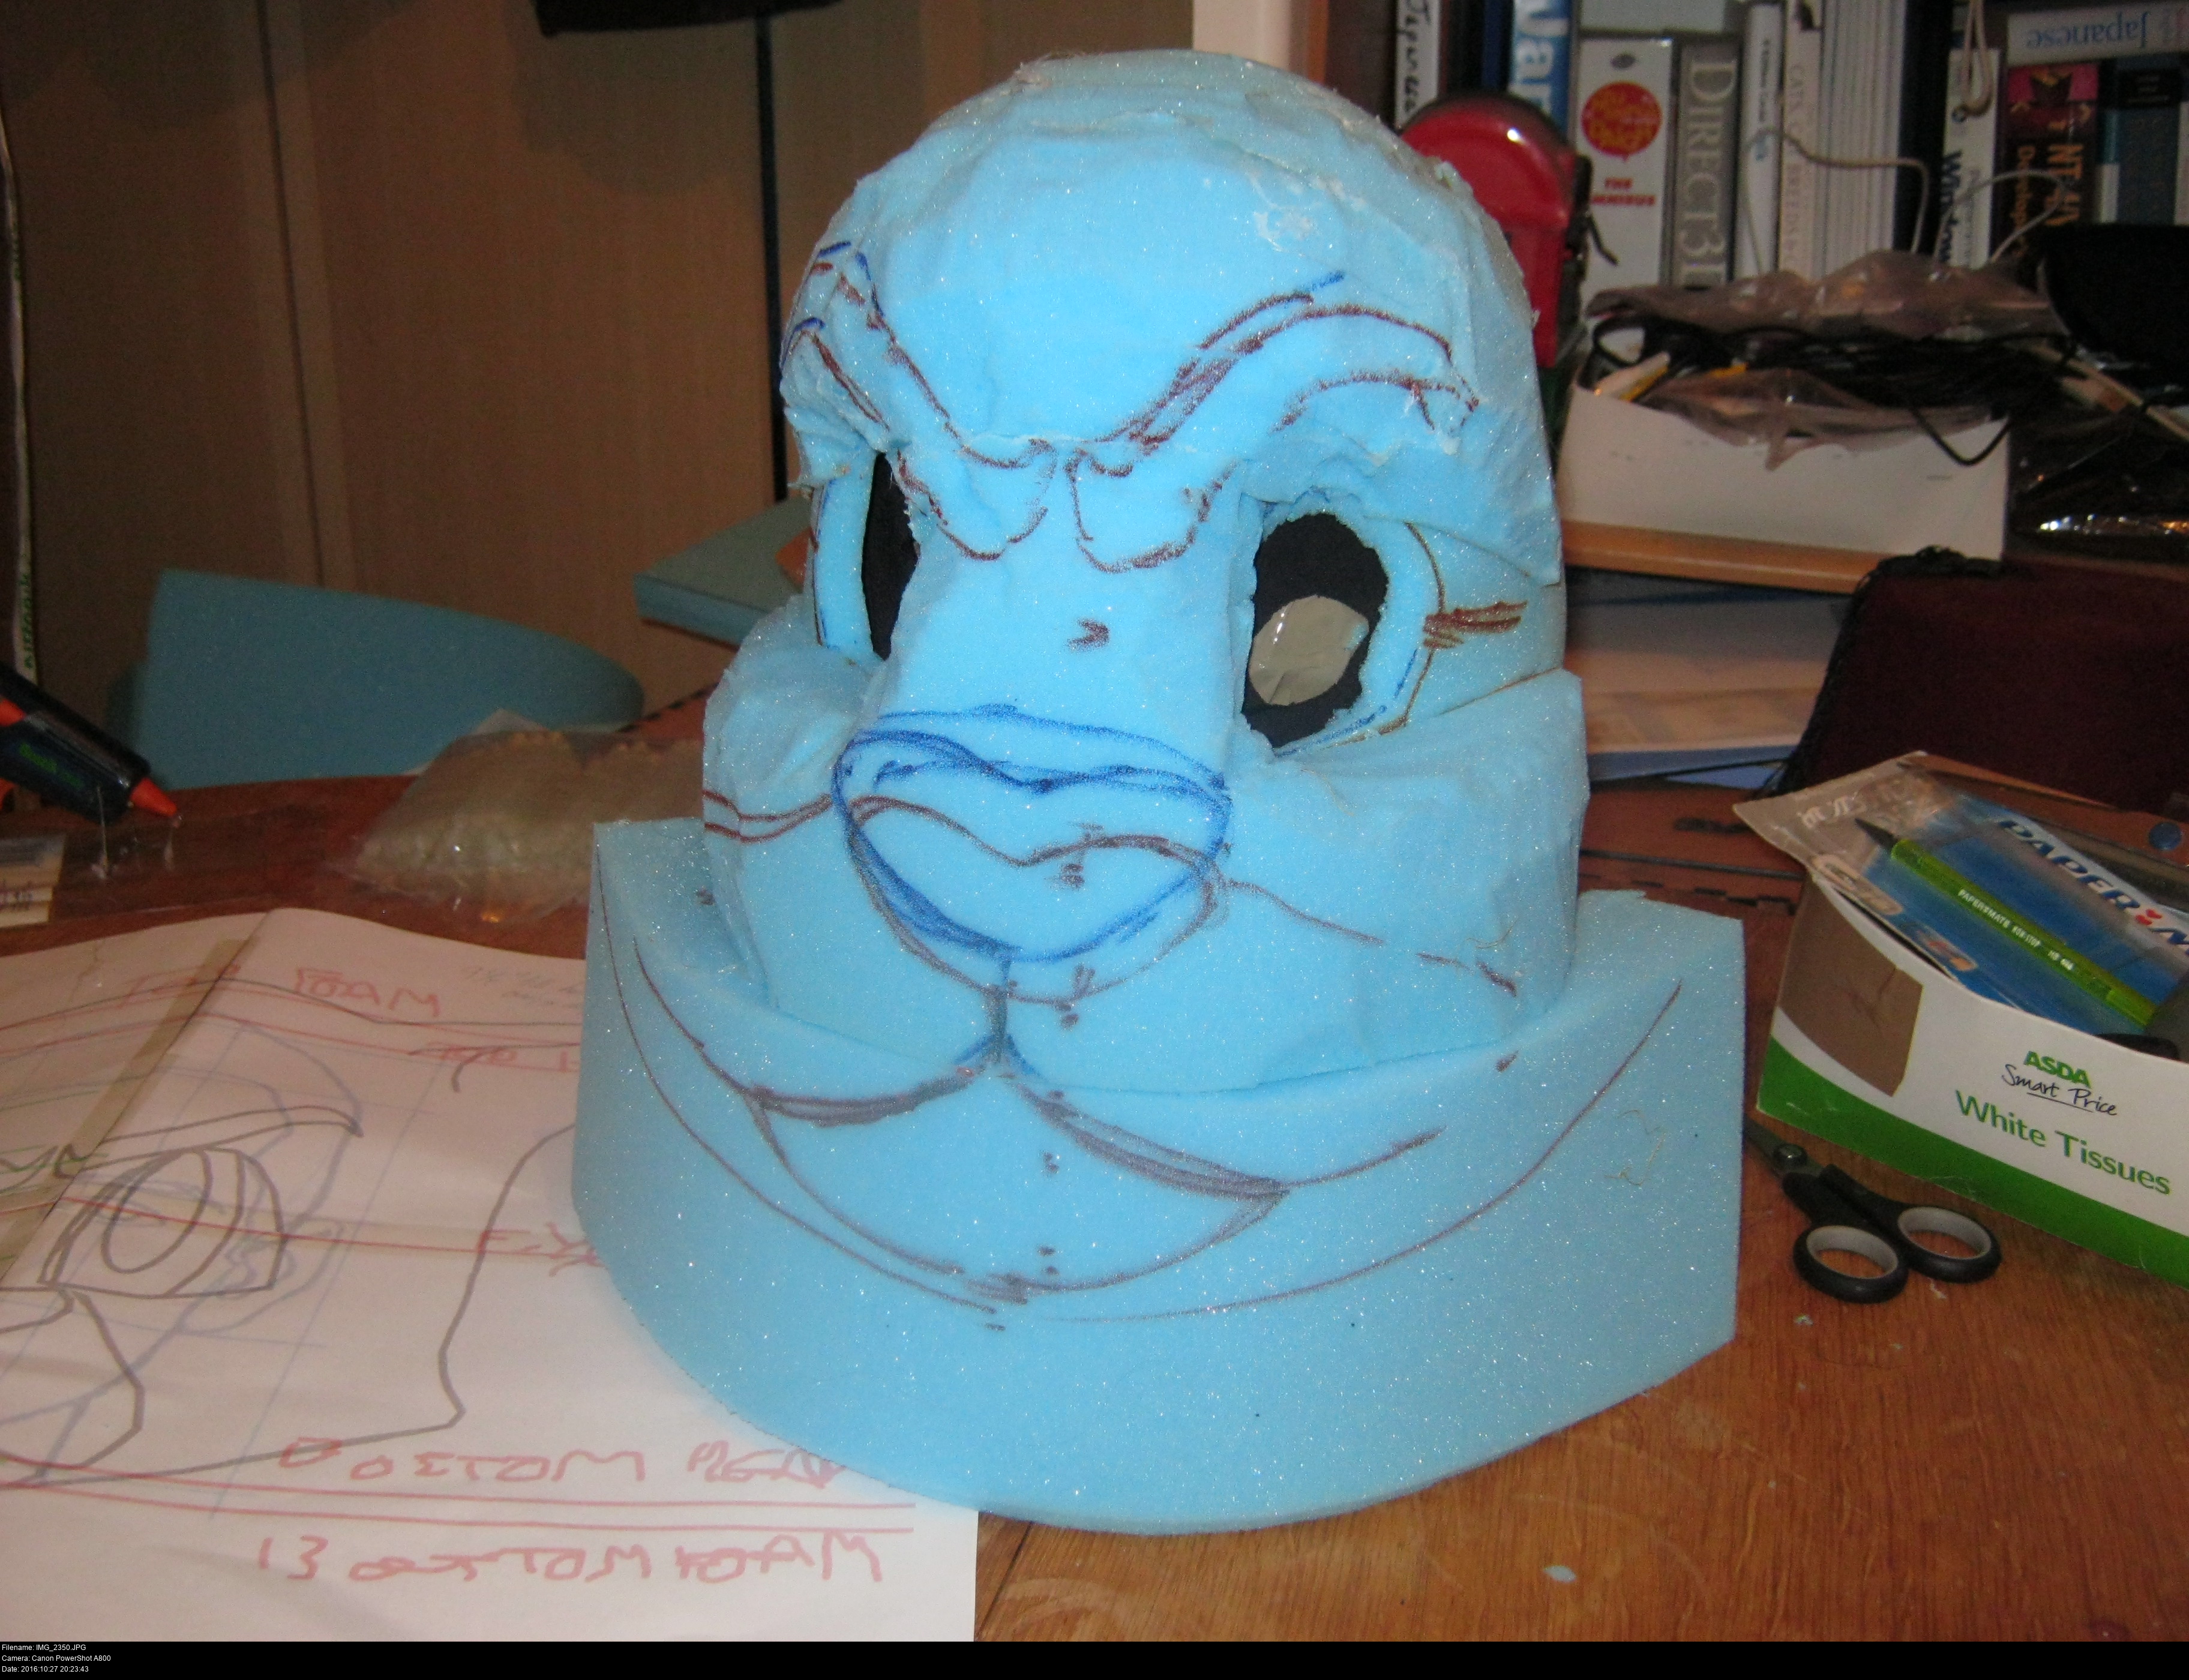
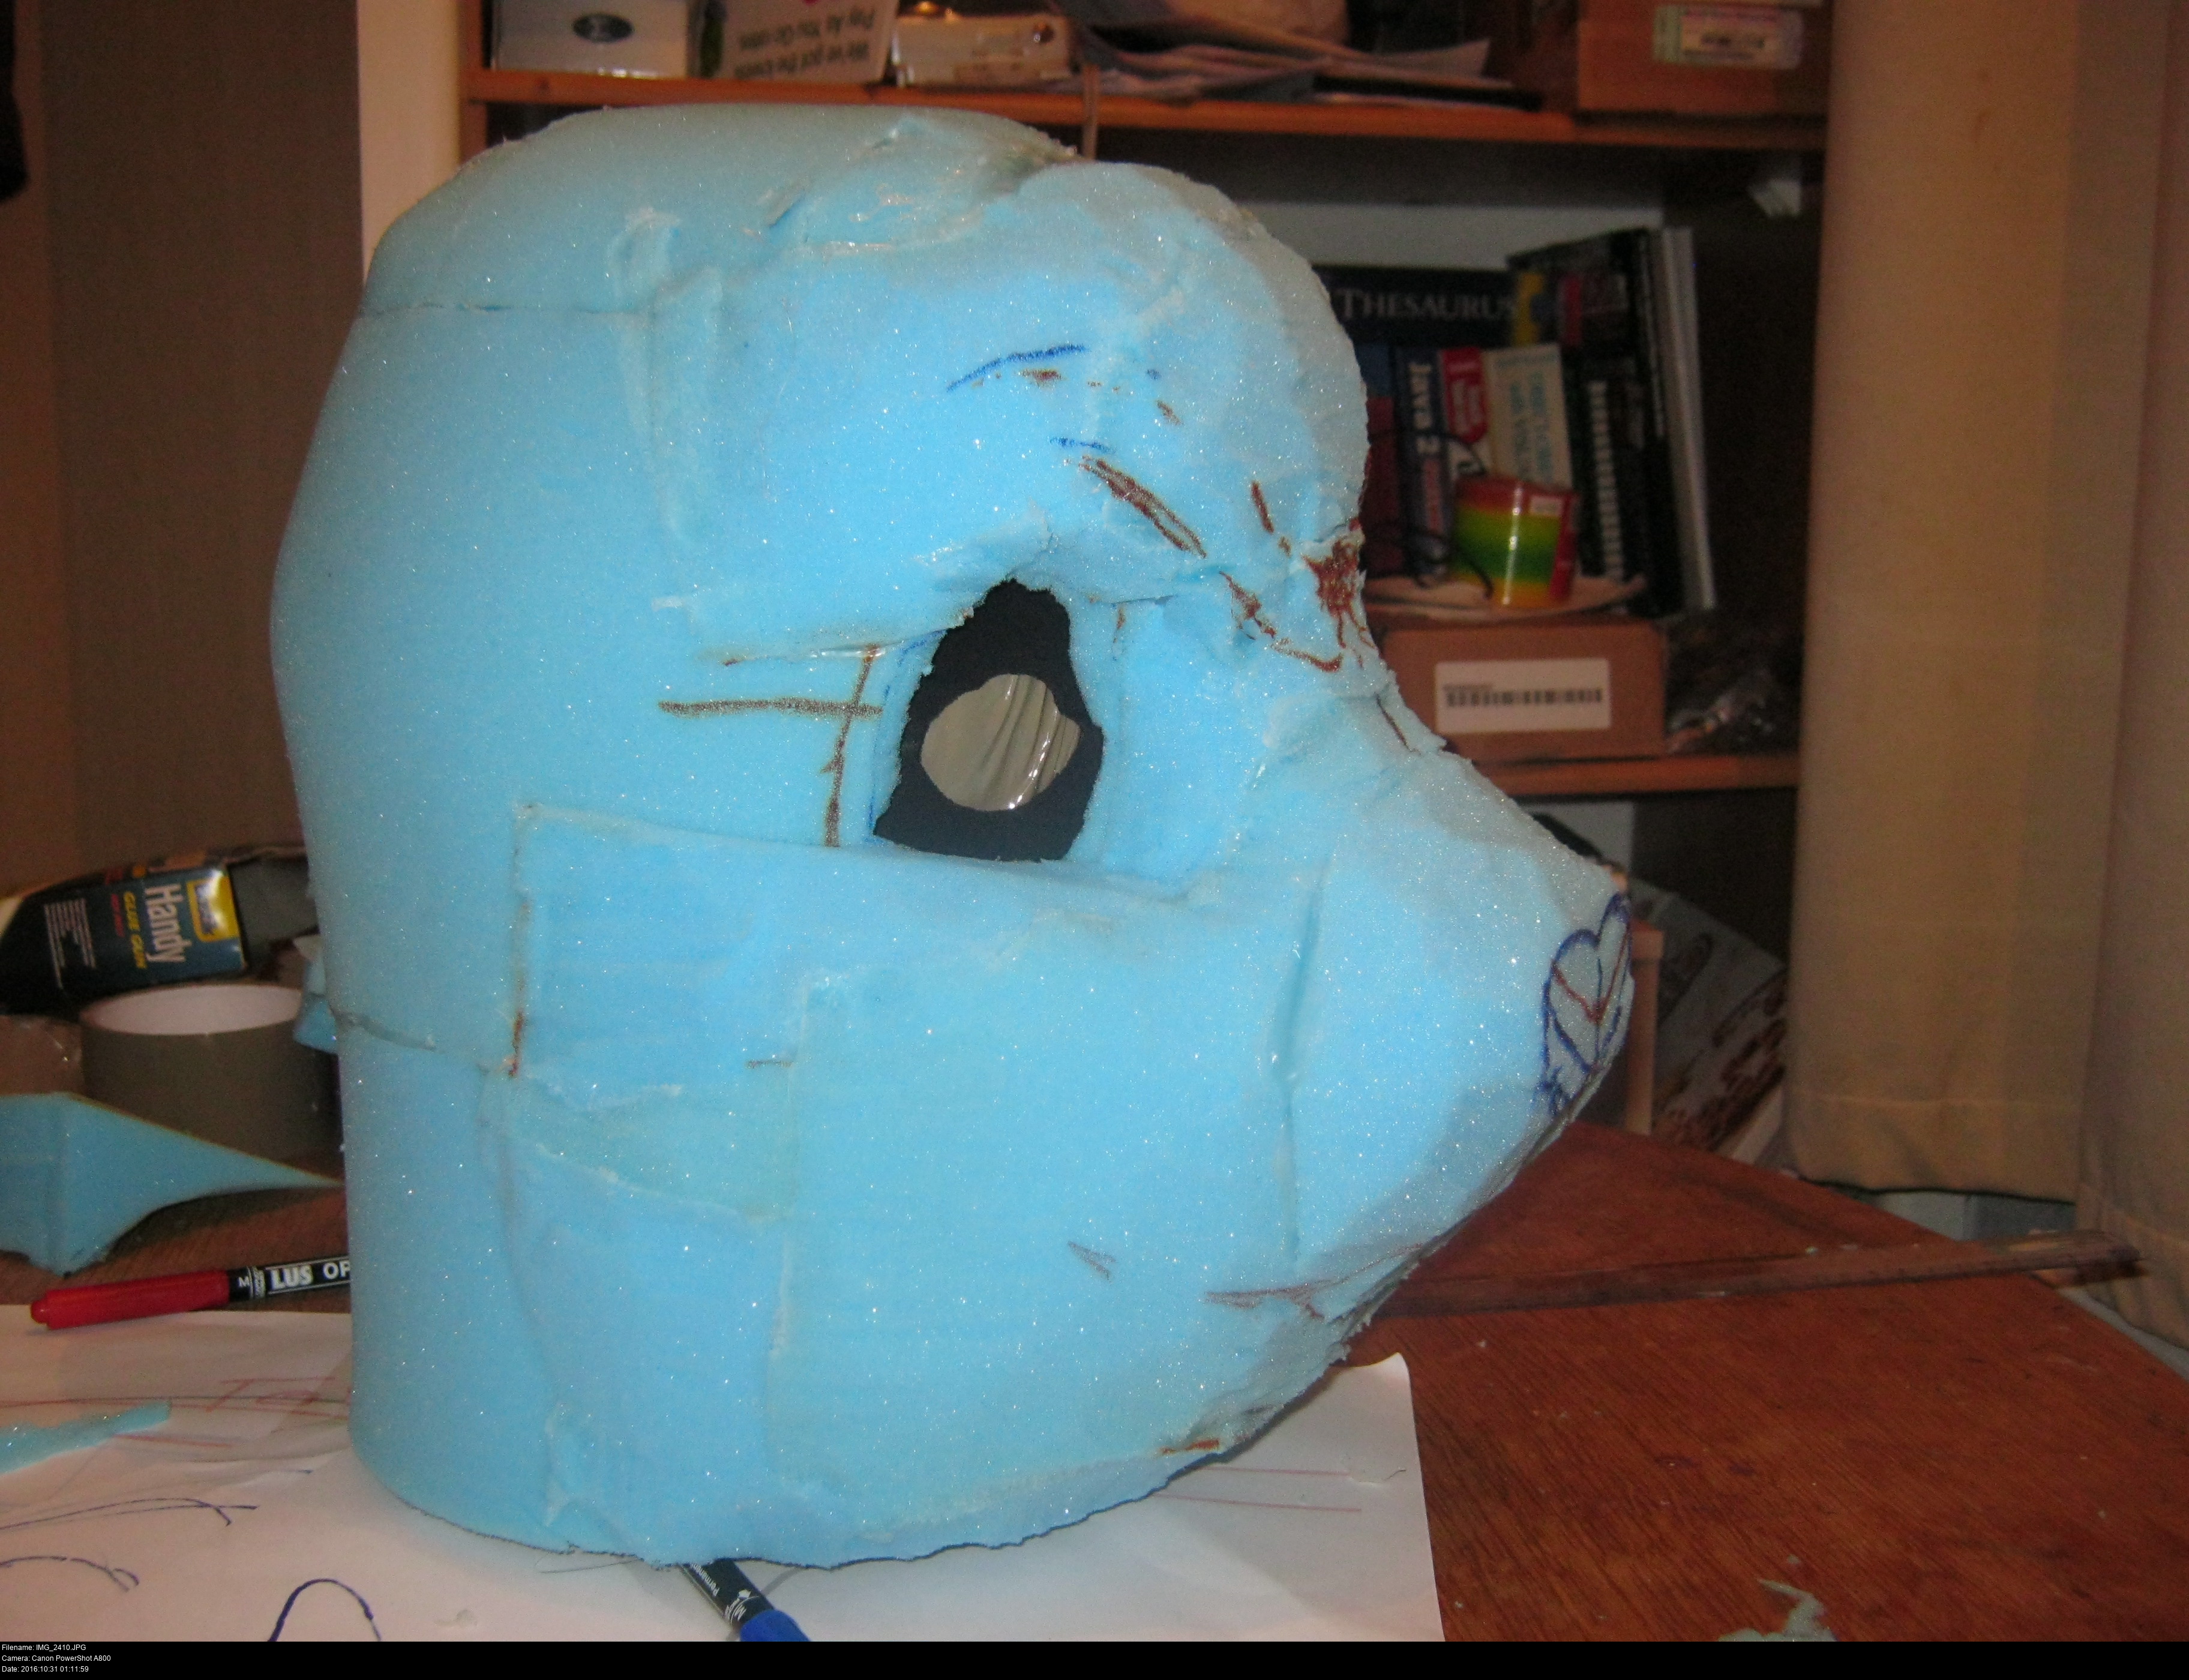
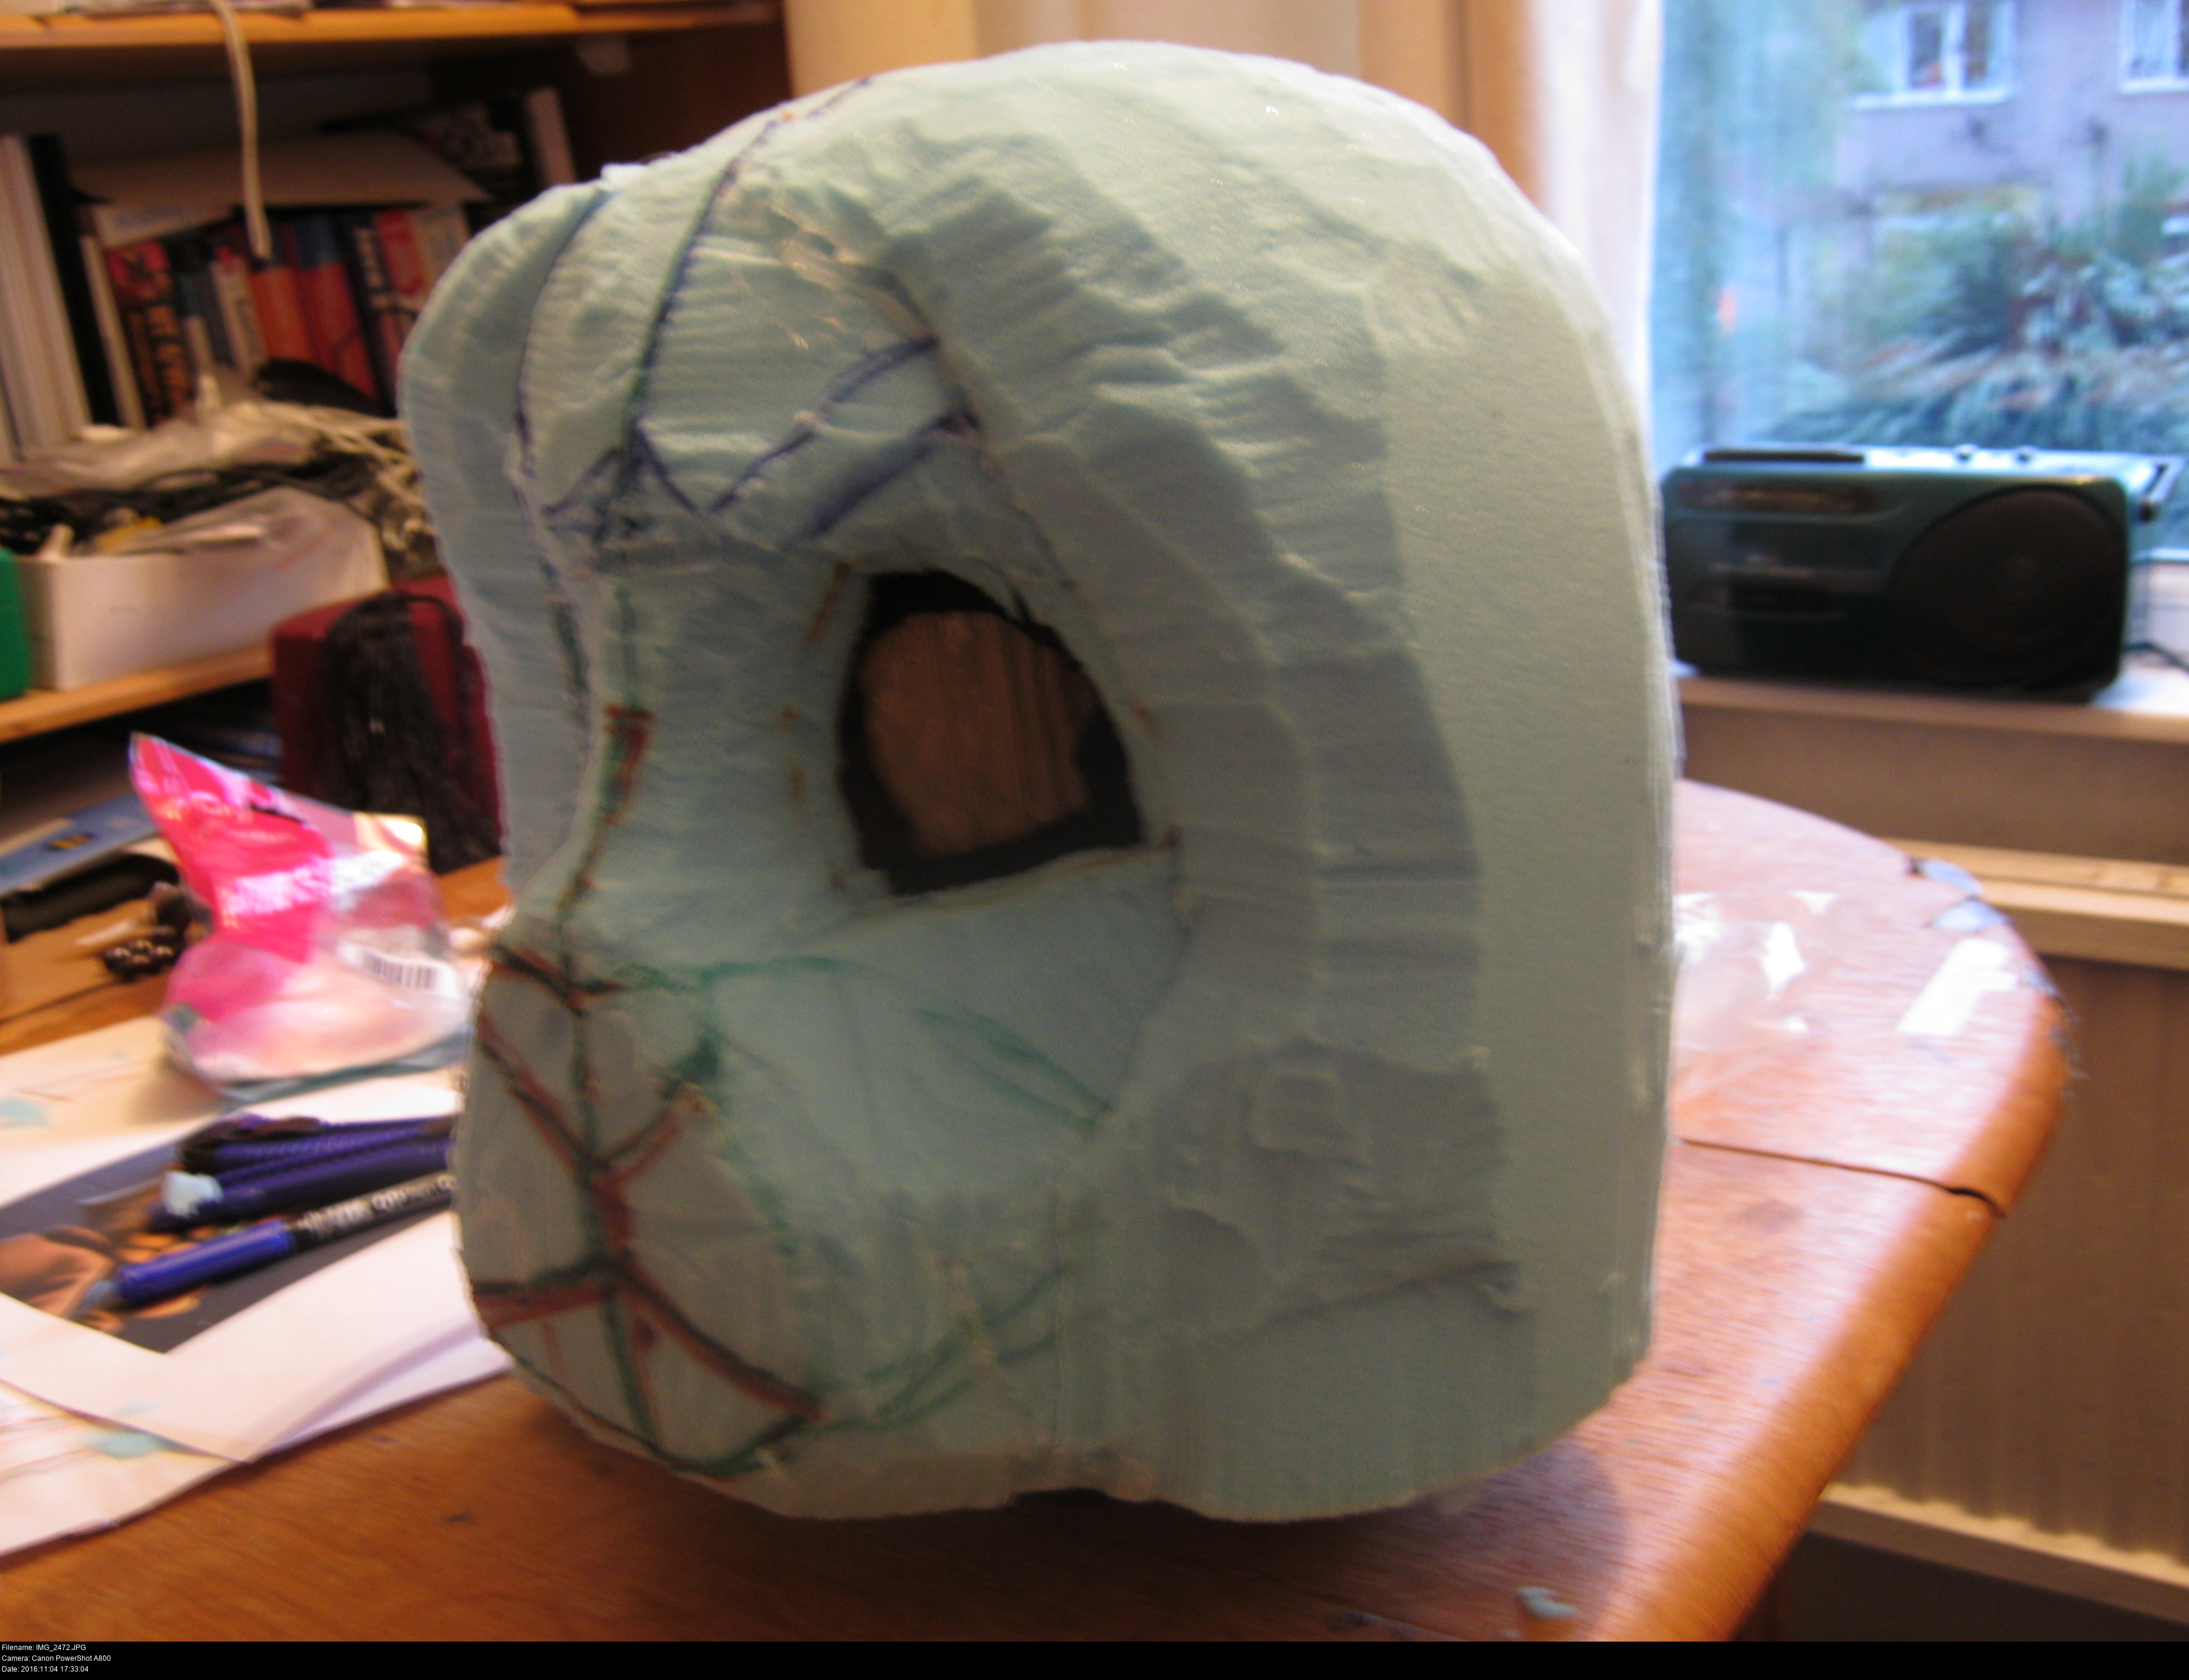
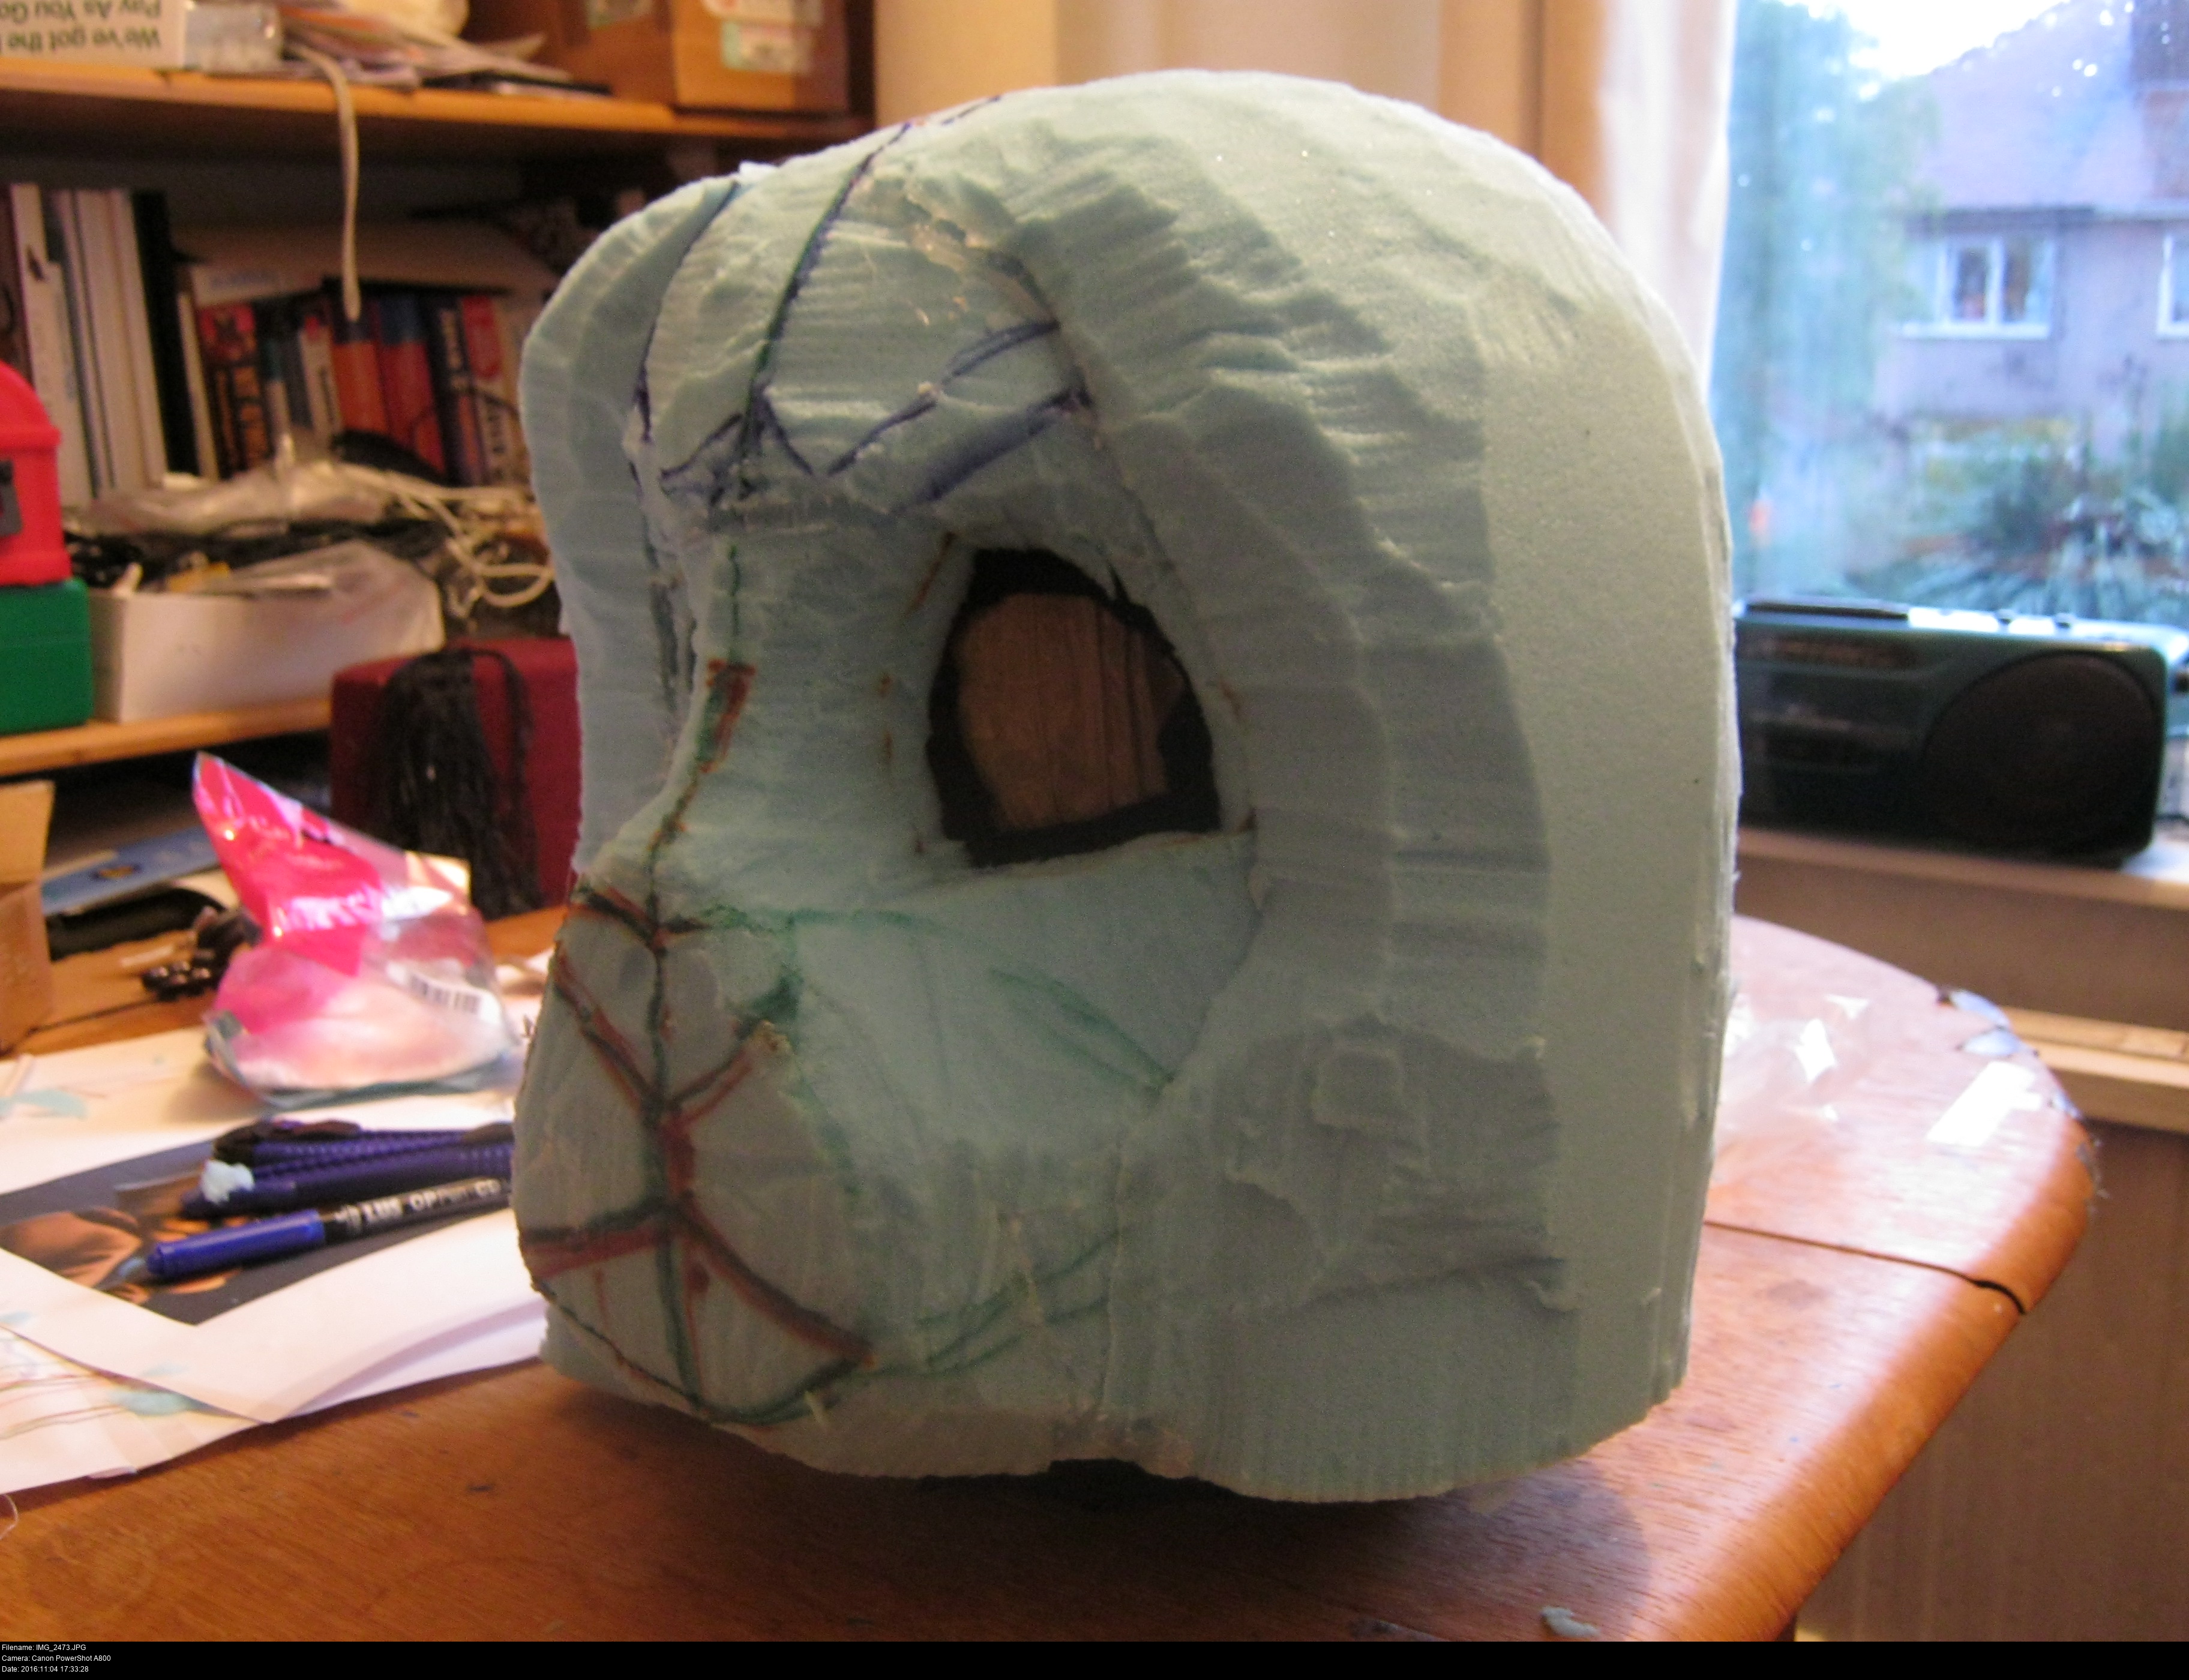
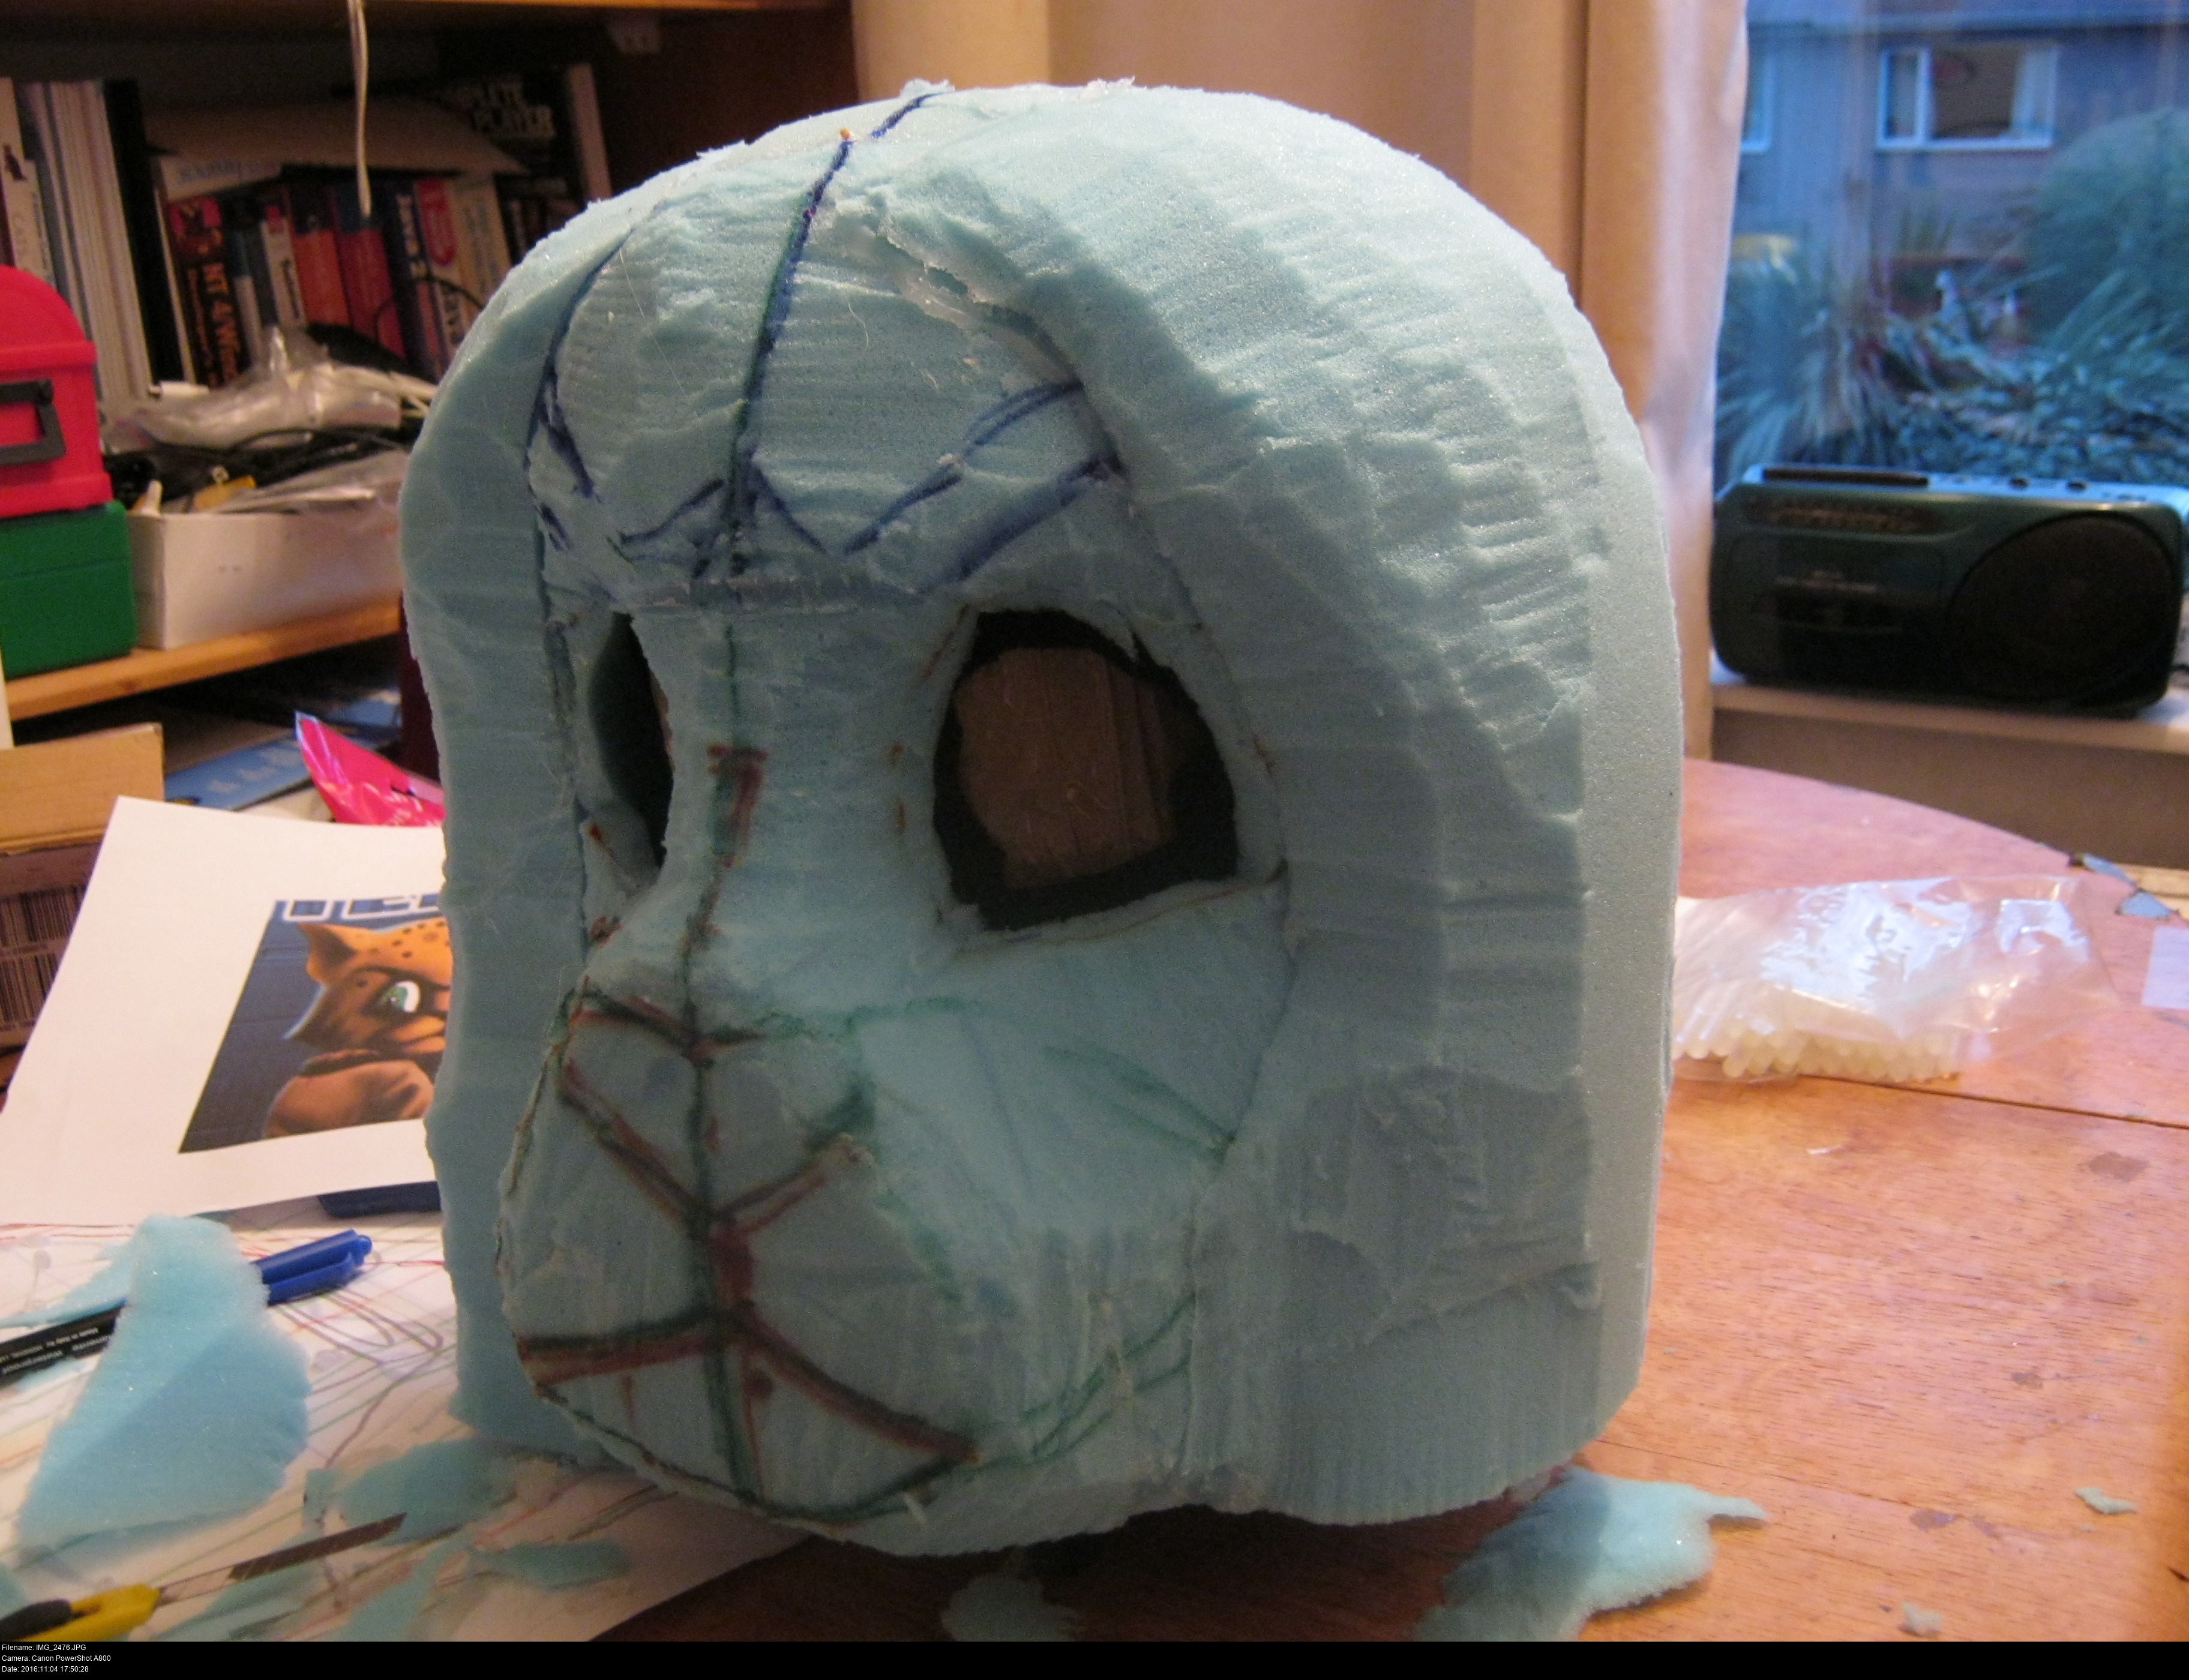
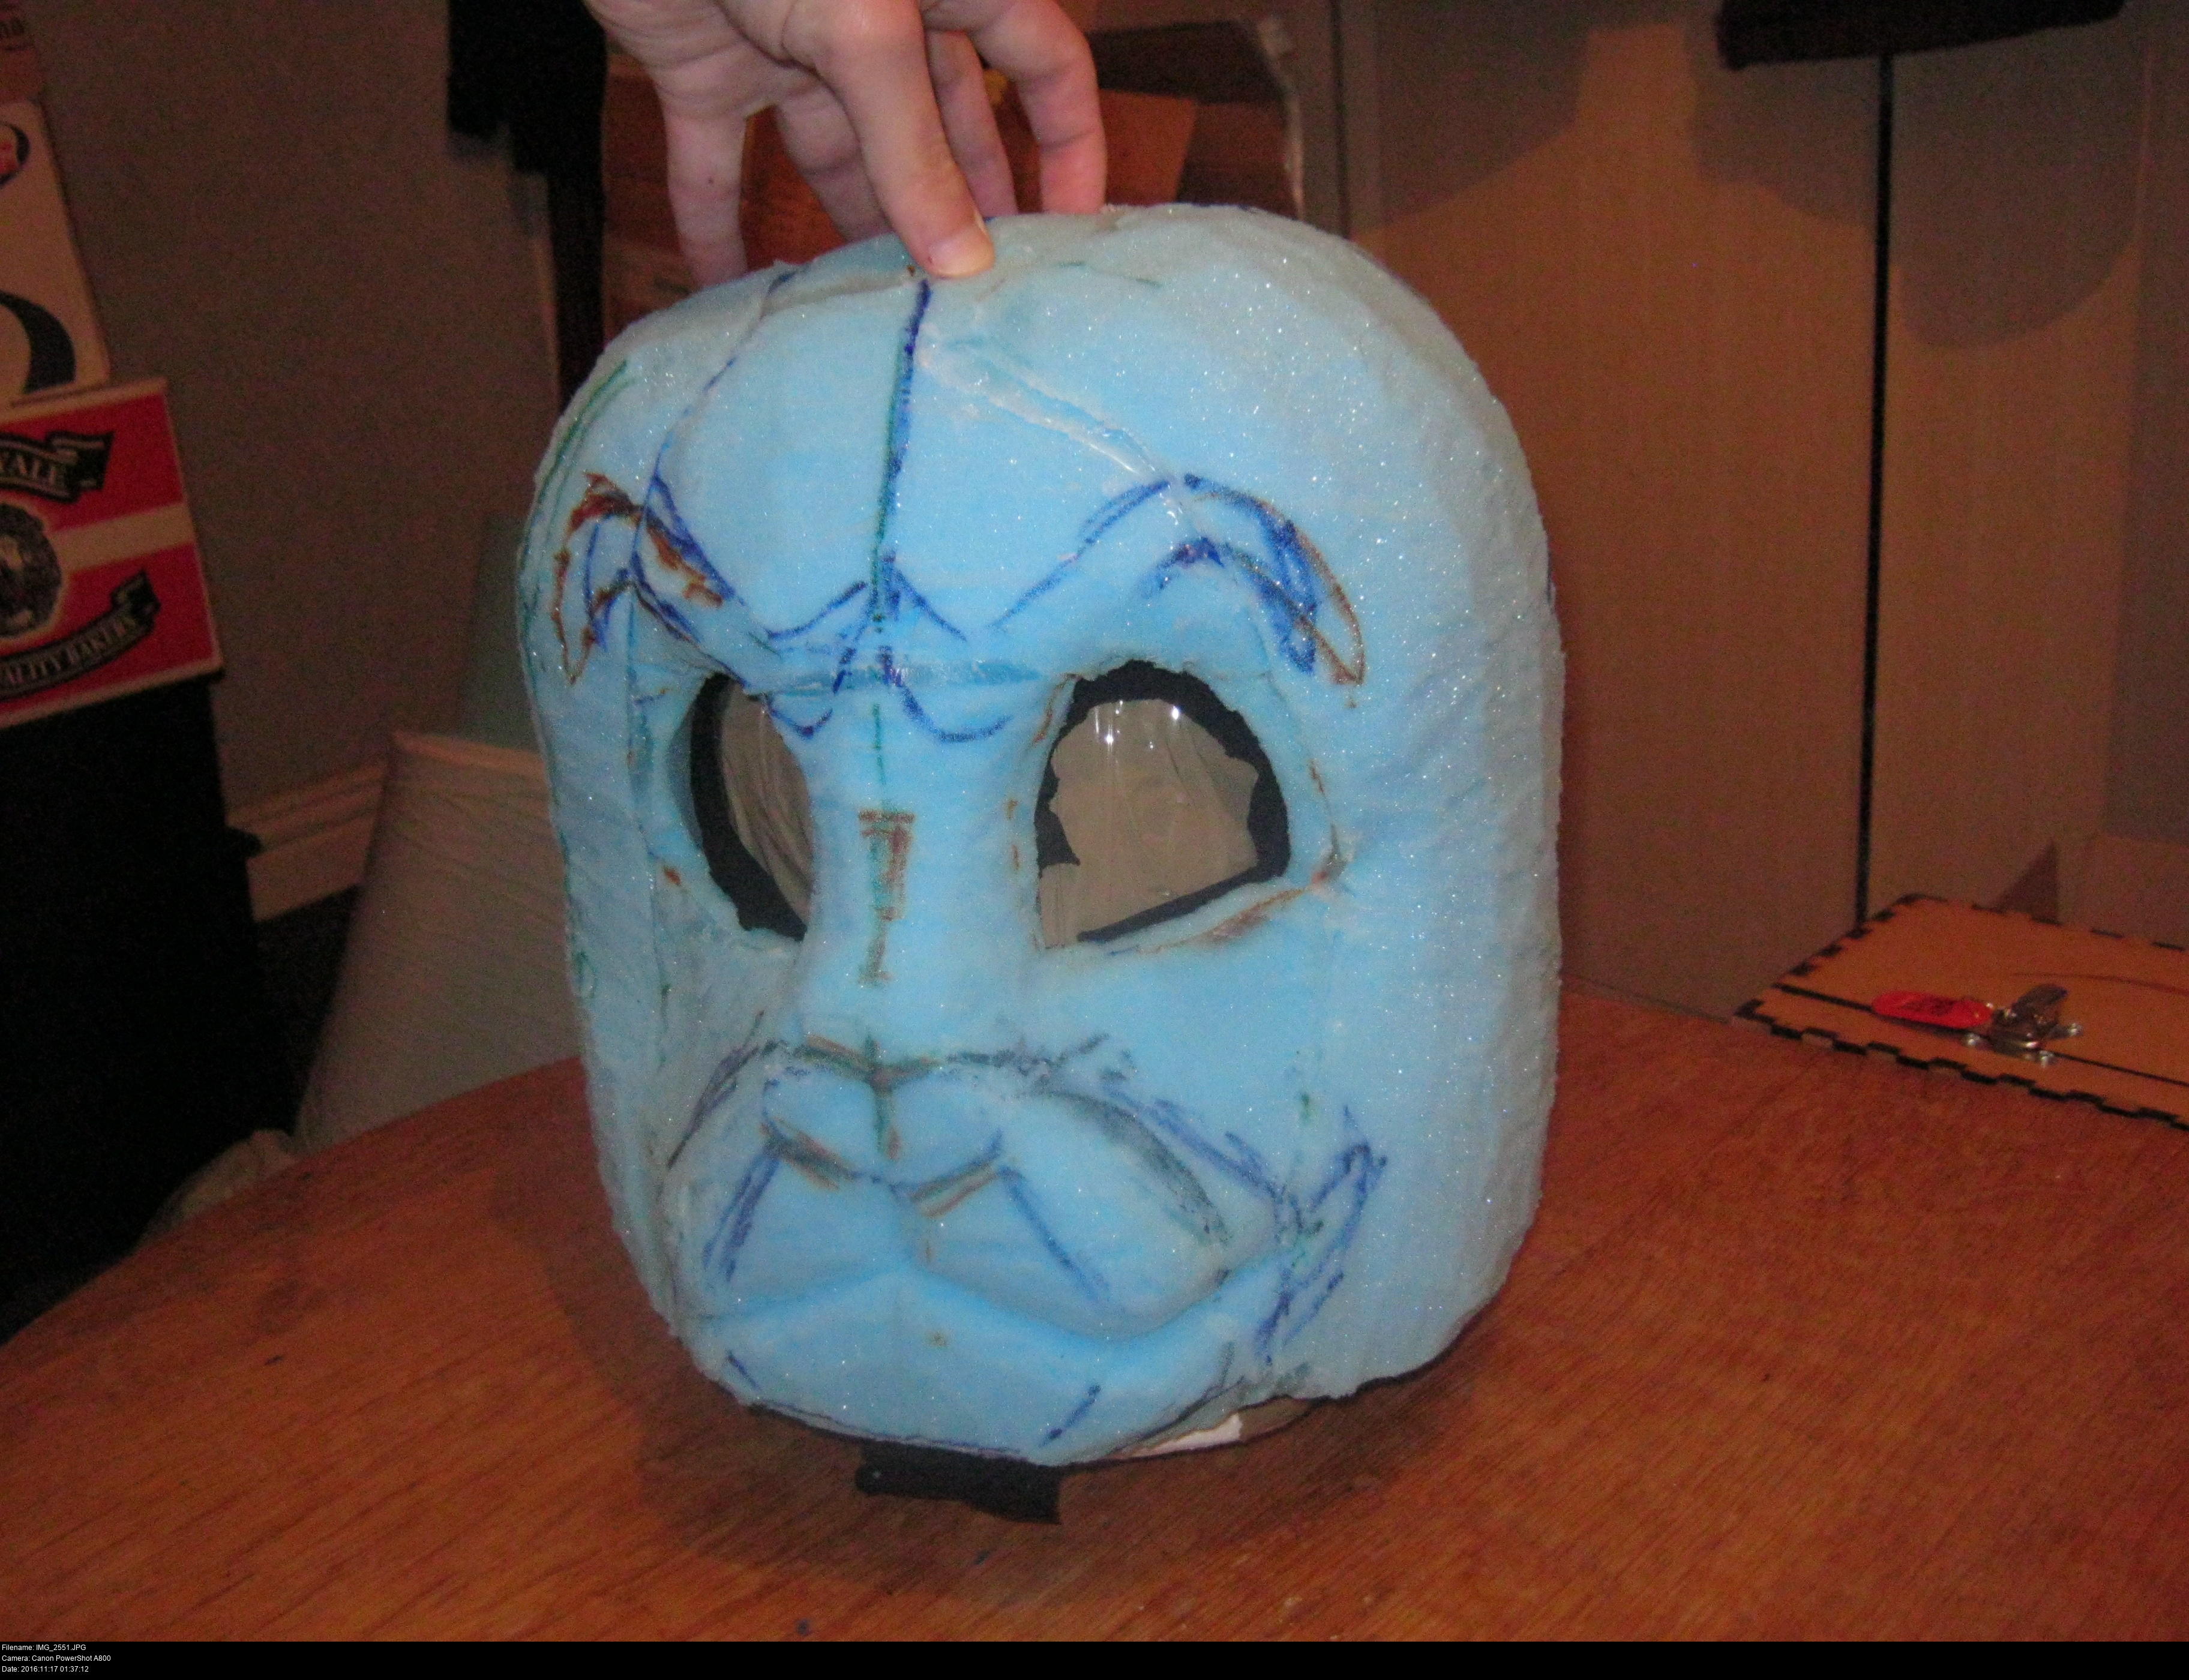
Maybe something narrower this time. Now it's looking vaguely ratty?
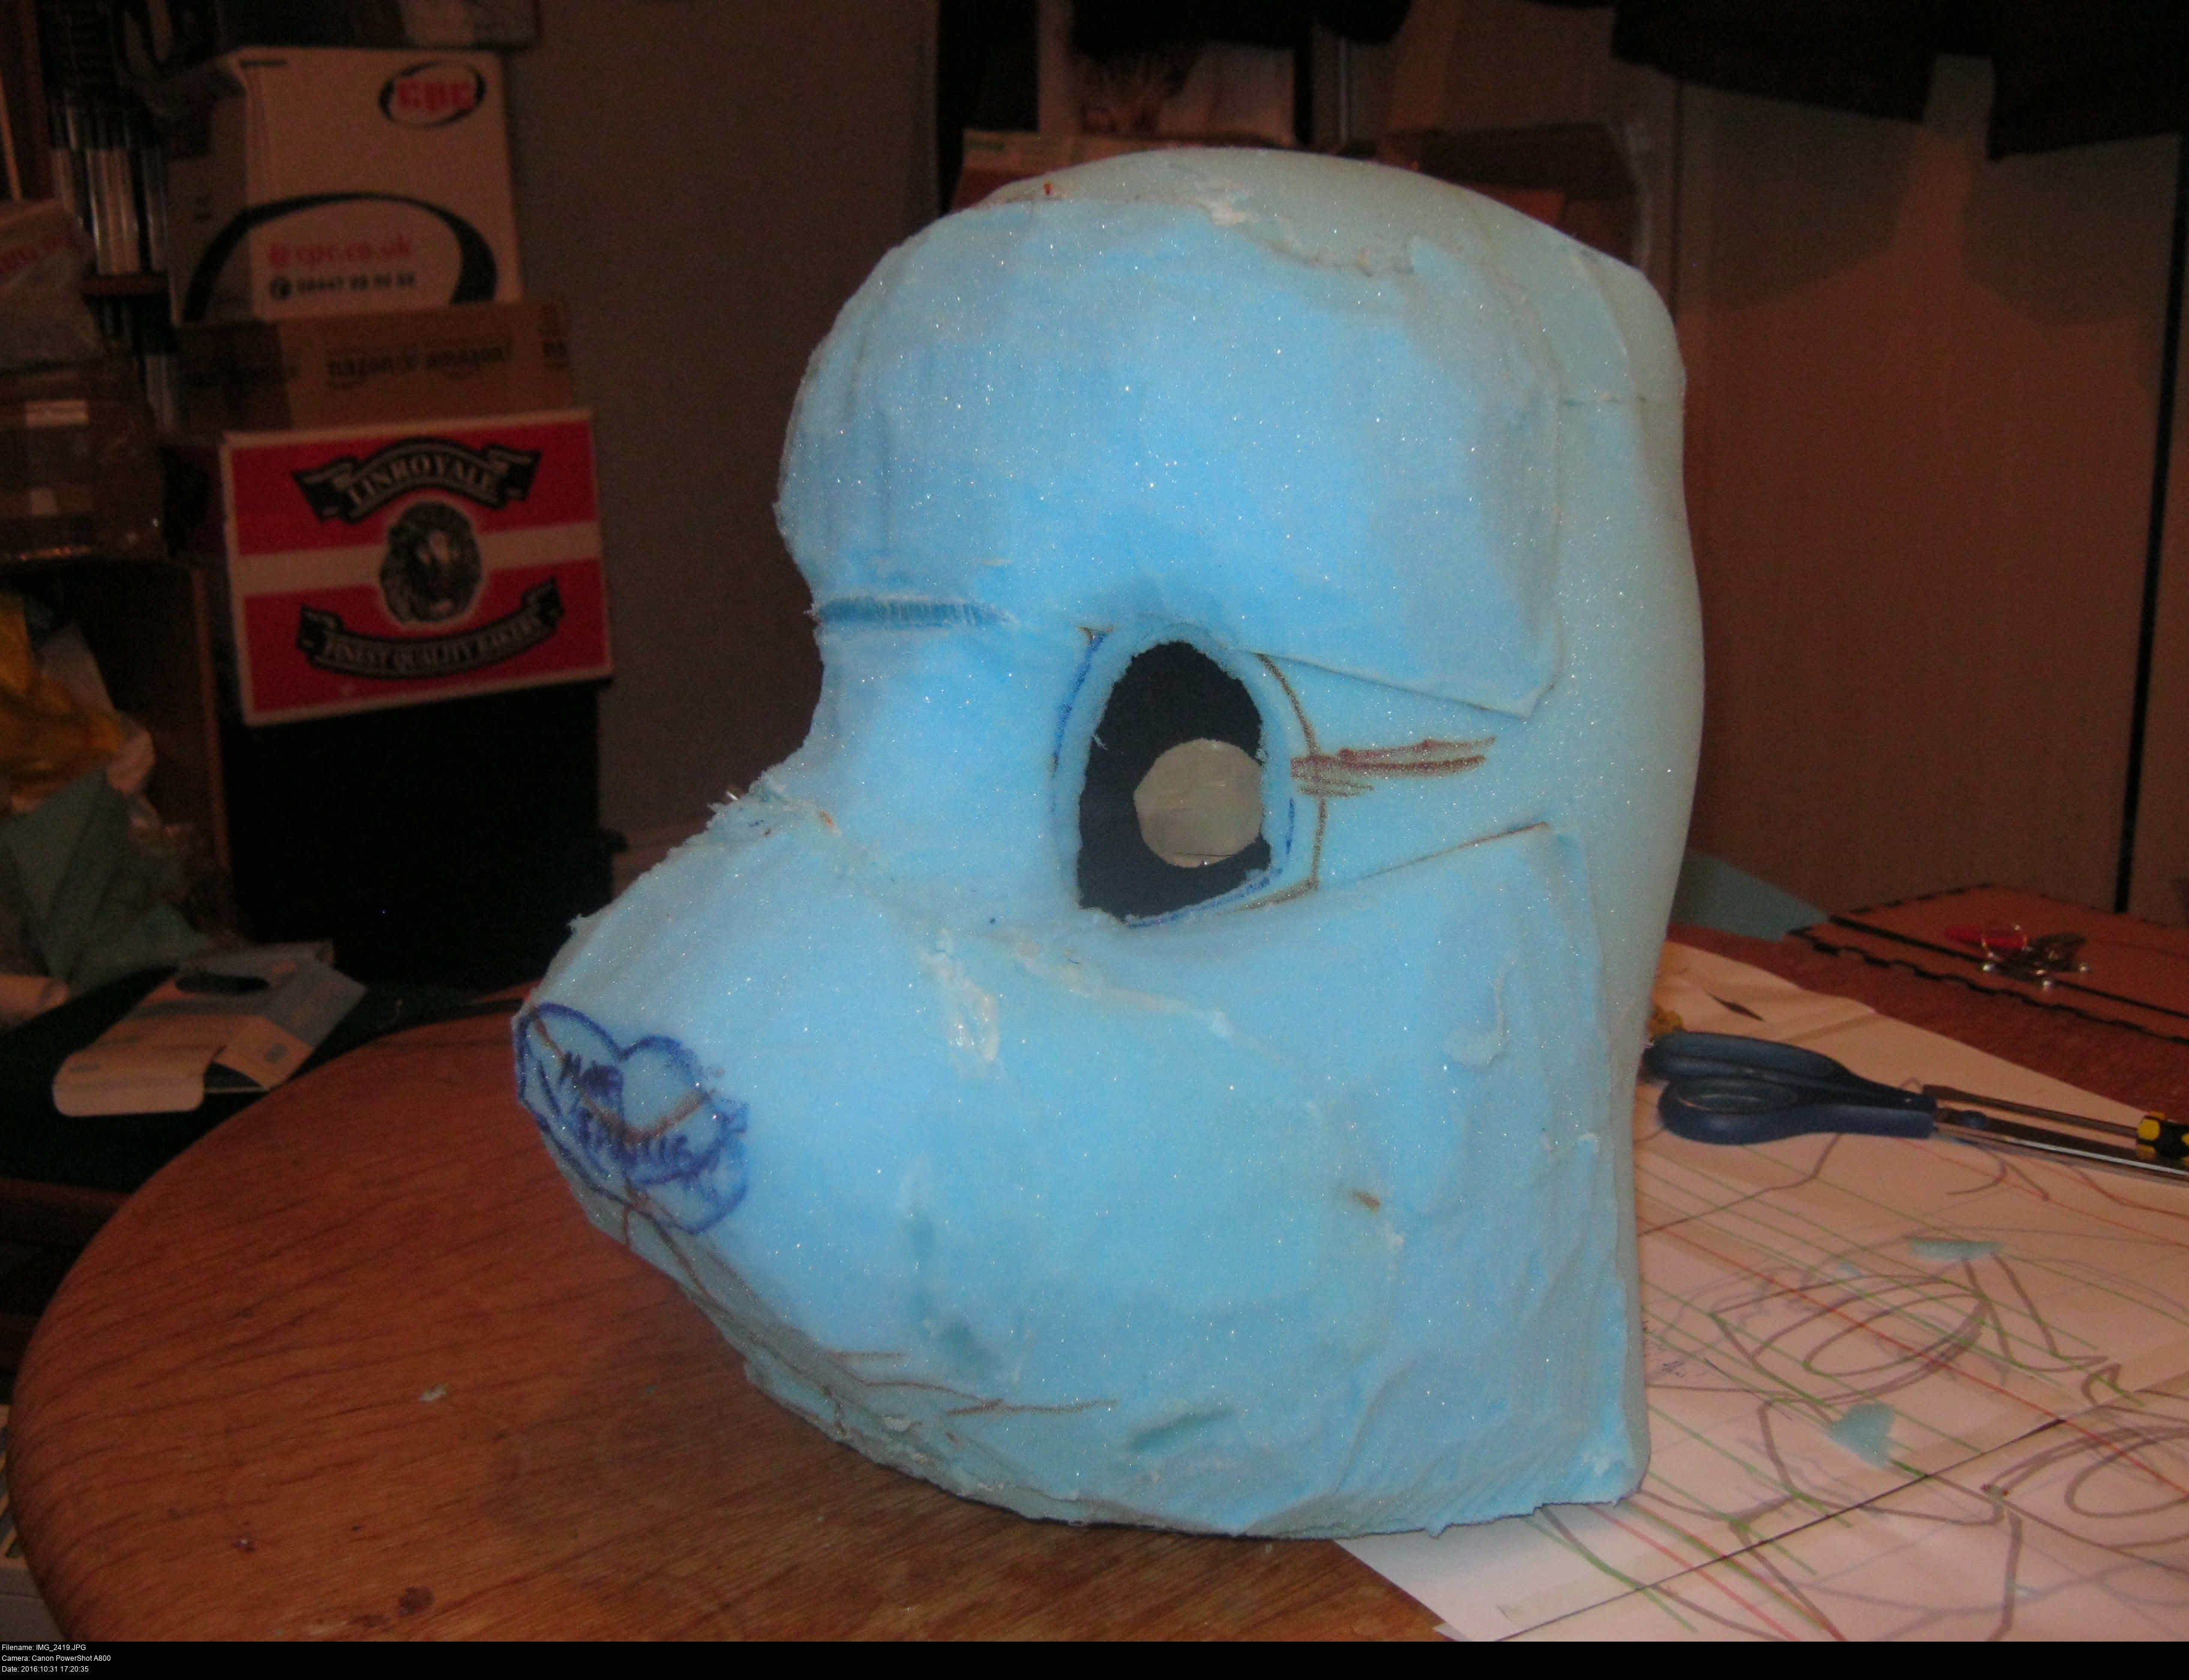


I've drawn the features back on, but even I can tell this isn't exactly going in the direction I want.
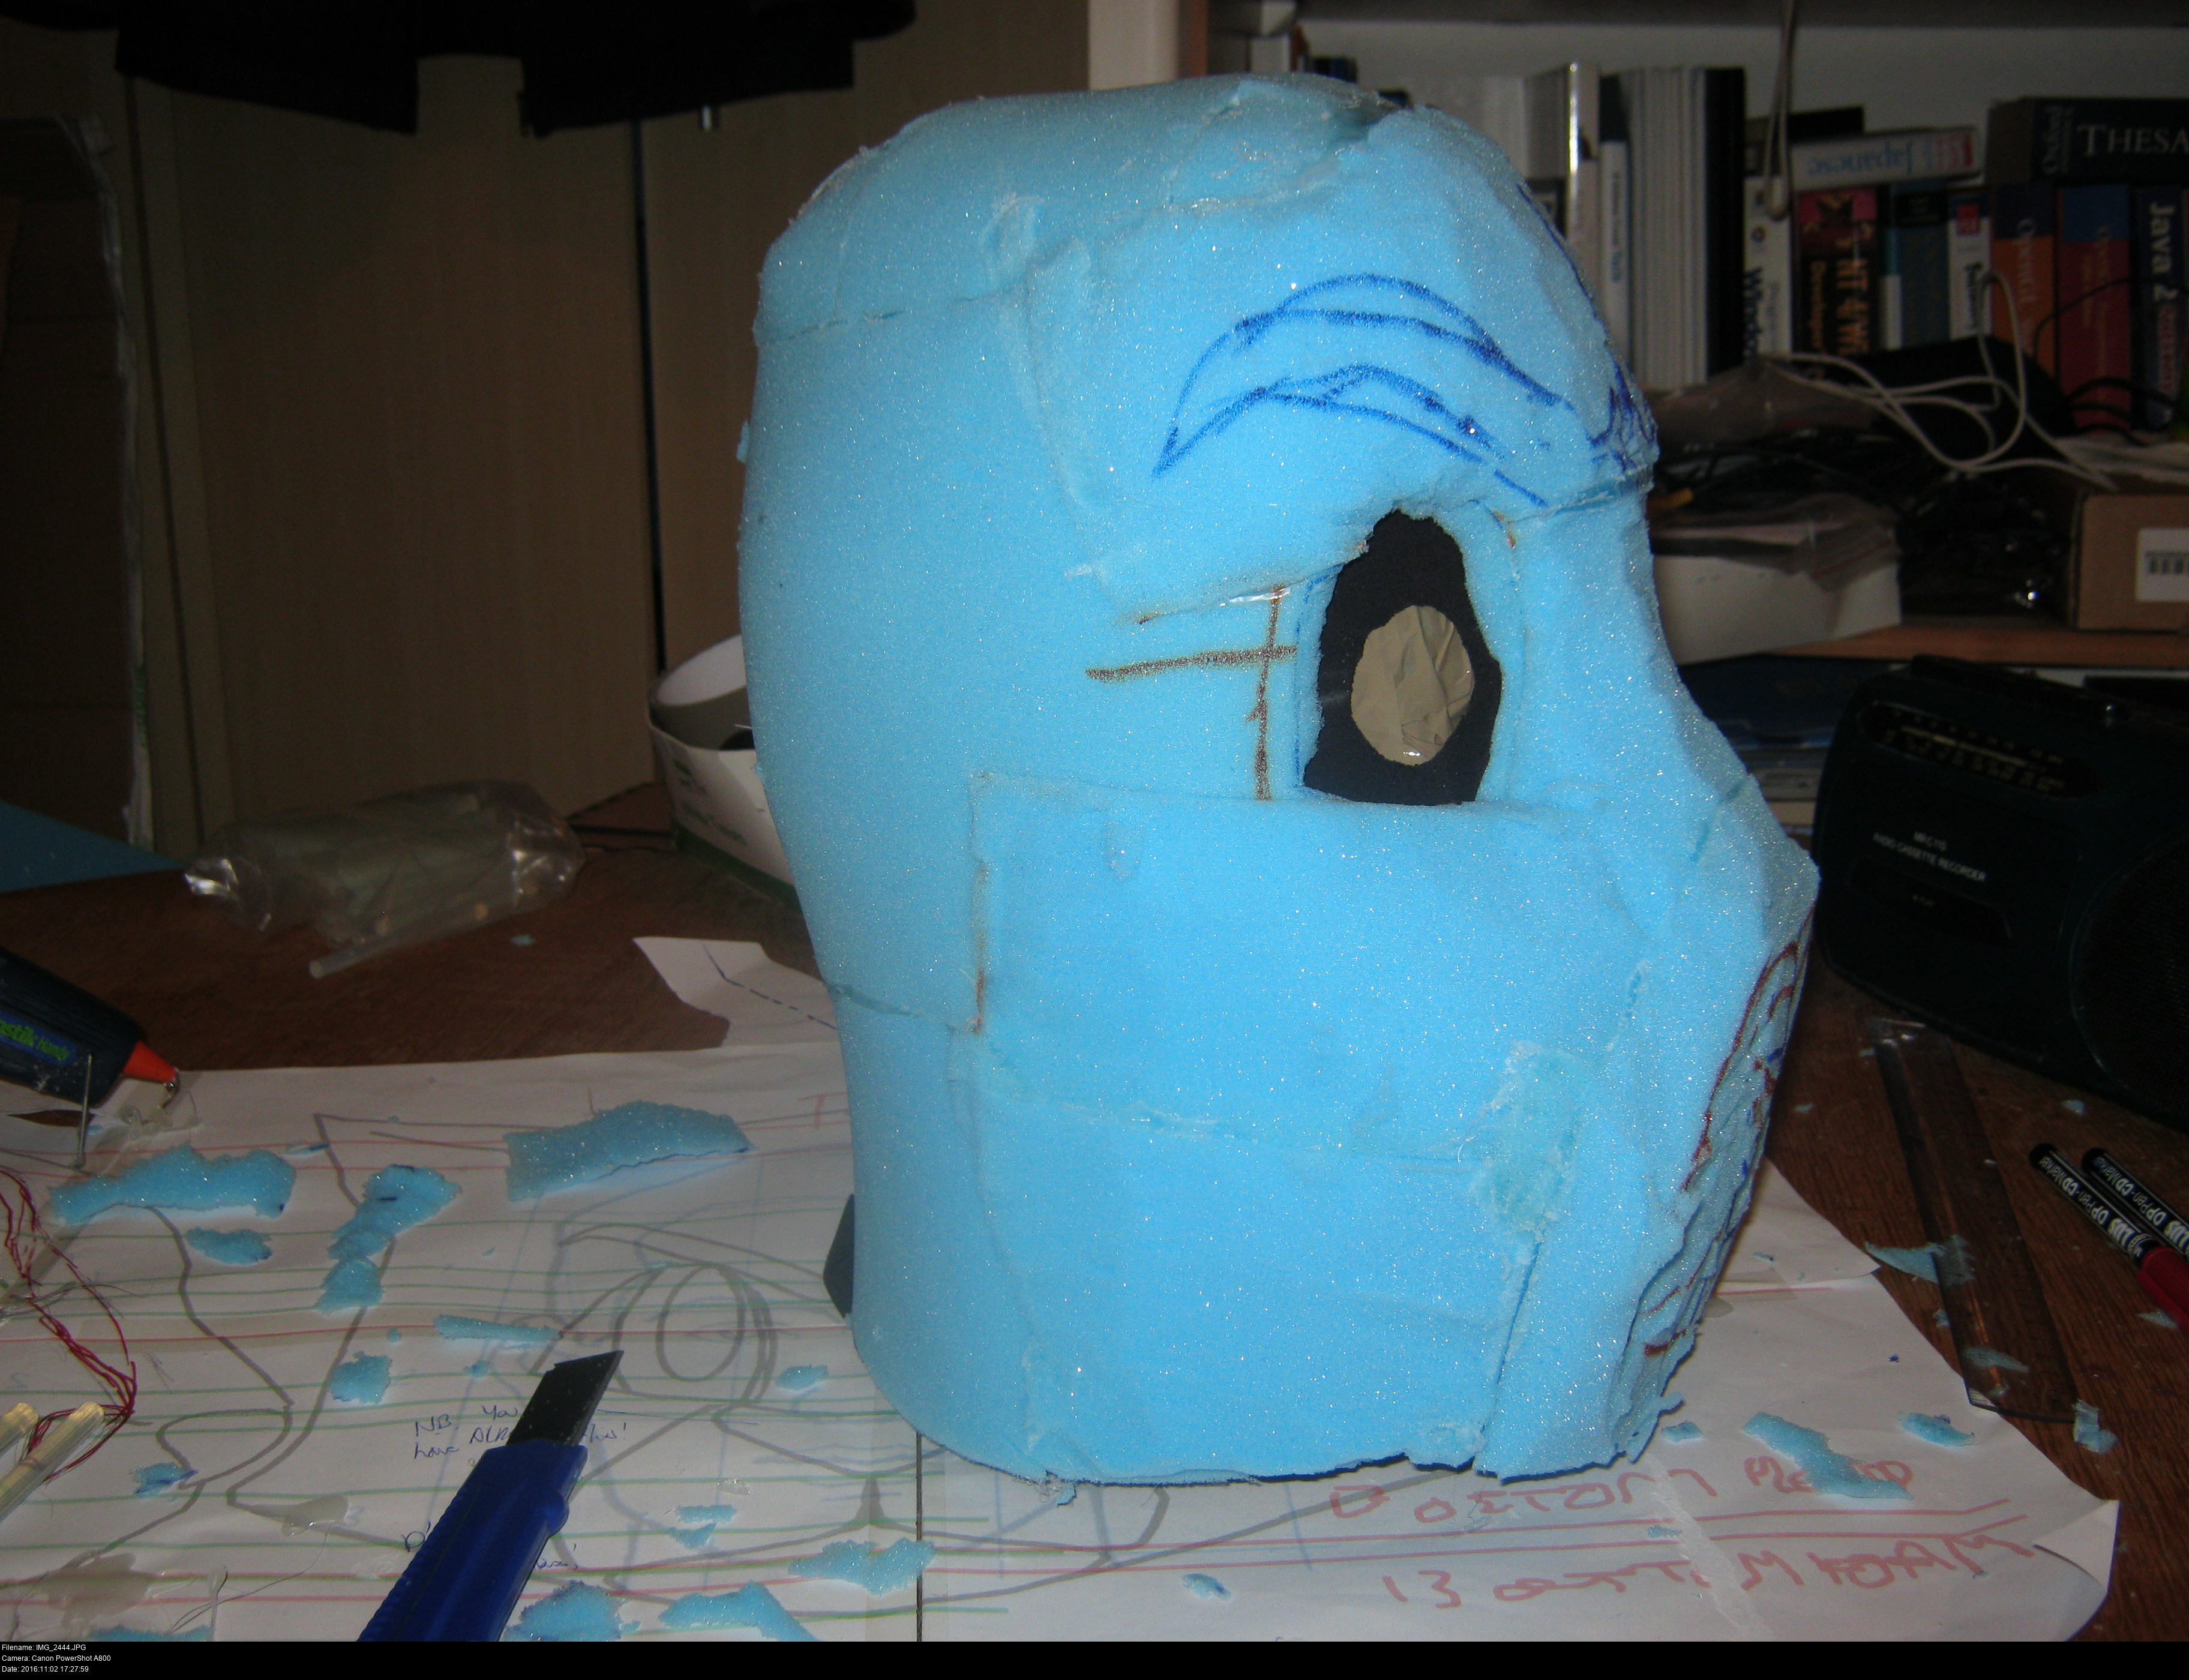
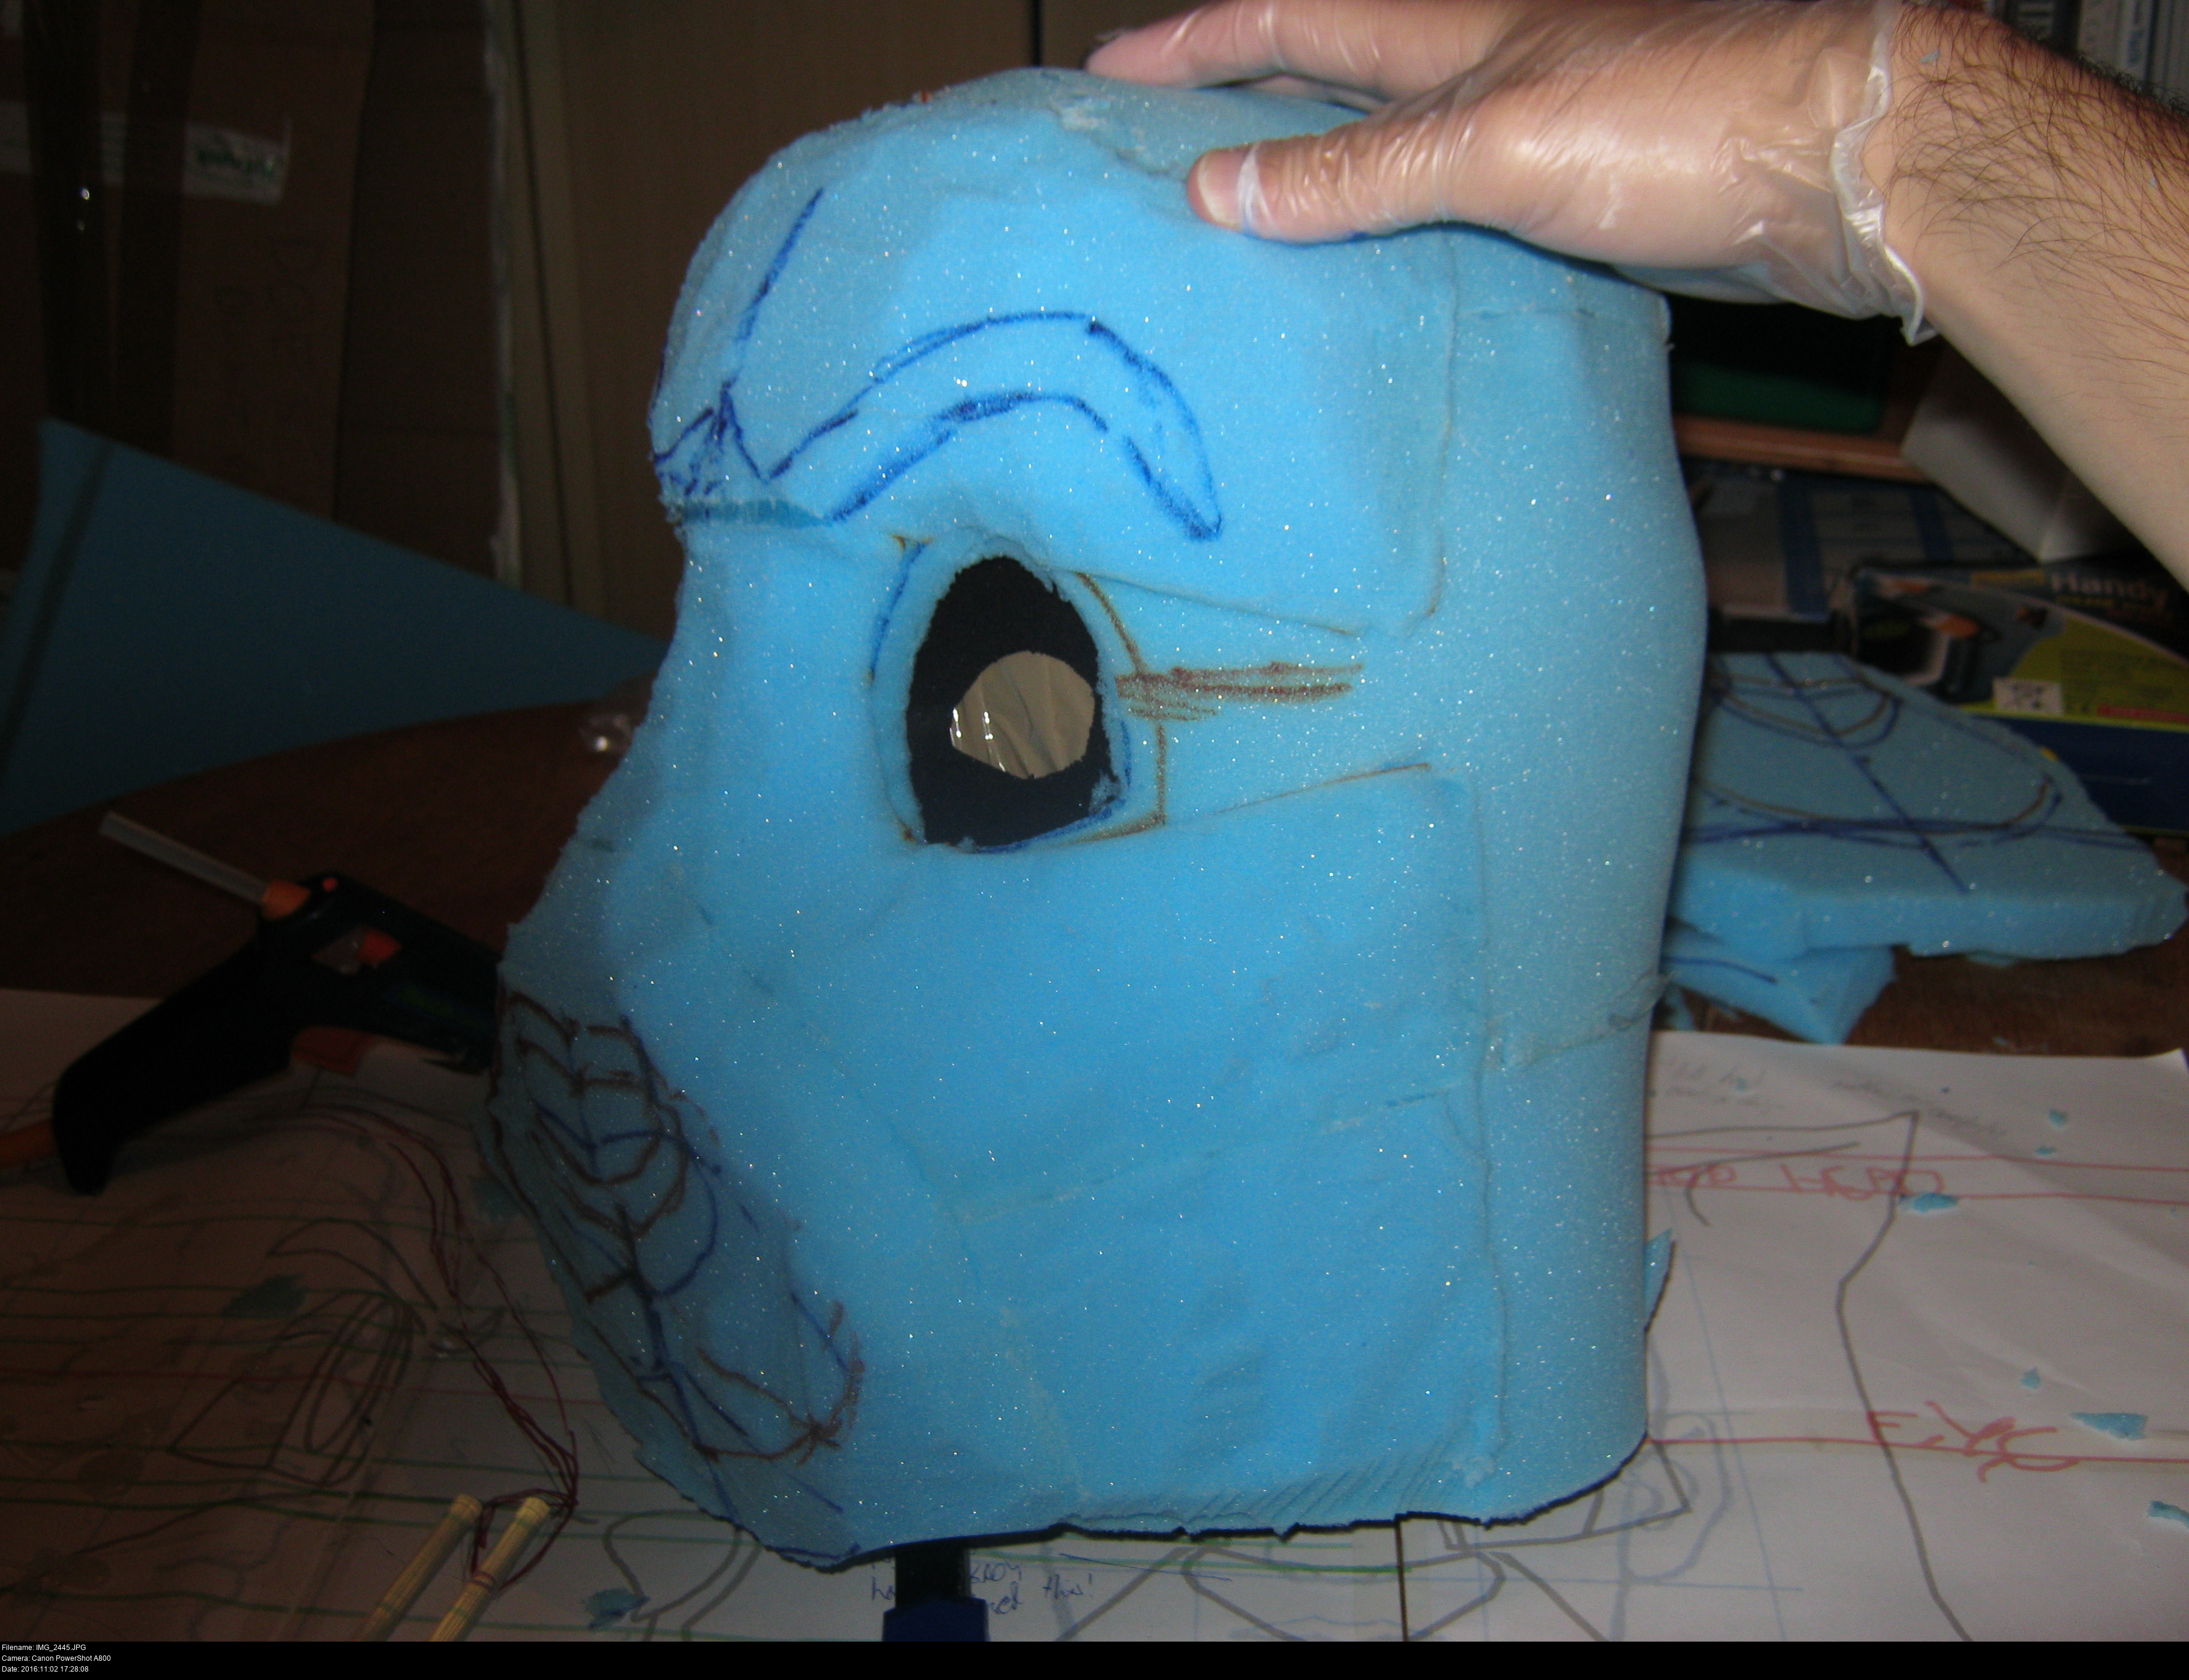
I'm taking the brow back further and further. It used to have a pretty defined hanging forehead (I was going to put the eyes in recessed holes), but his temples were a bit too prominent so I'm slicing pieces back and trying to round things out. I intended to keep the forehead sort of on a diagonal slope from the top of the head to the nose. It's still there, I think.

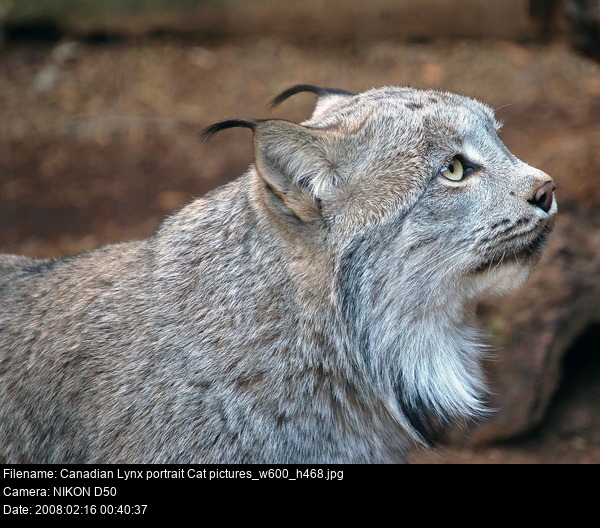

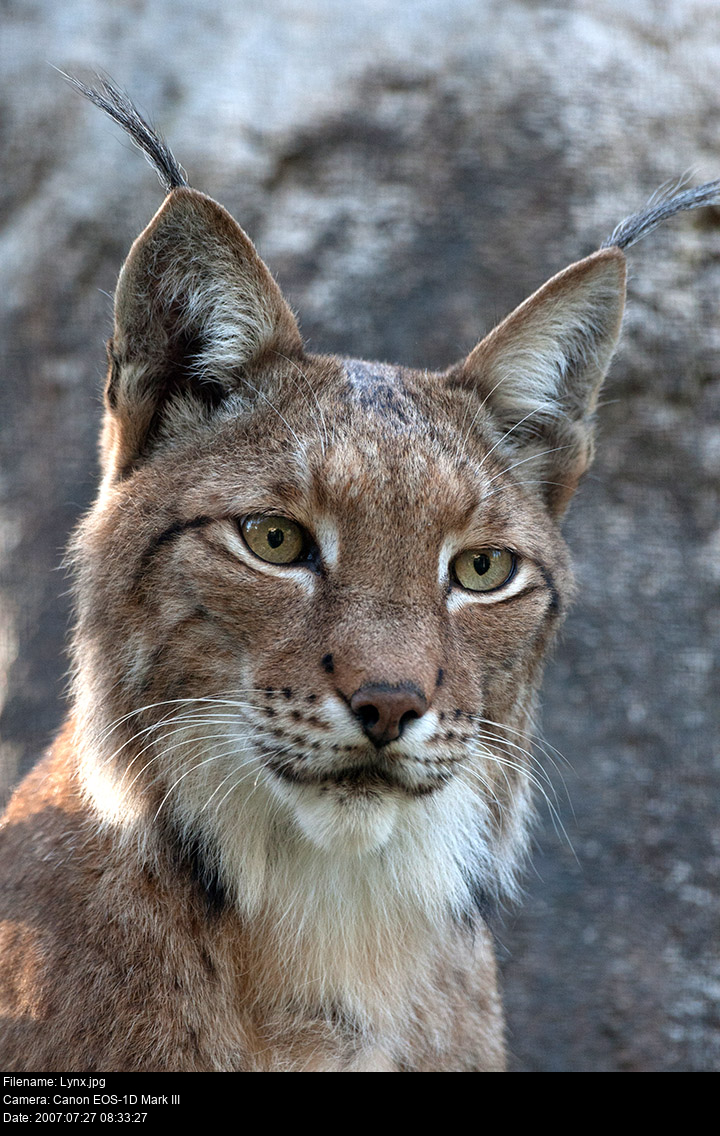

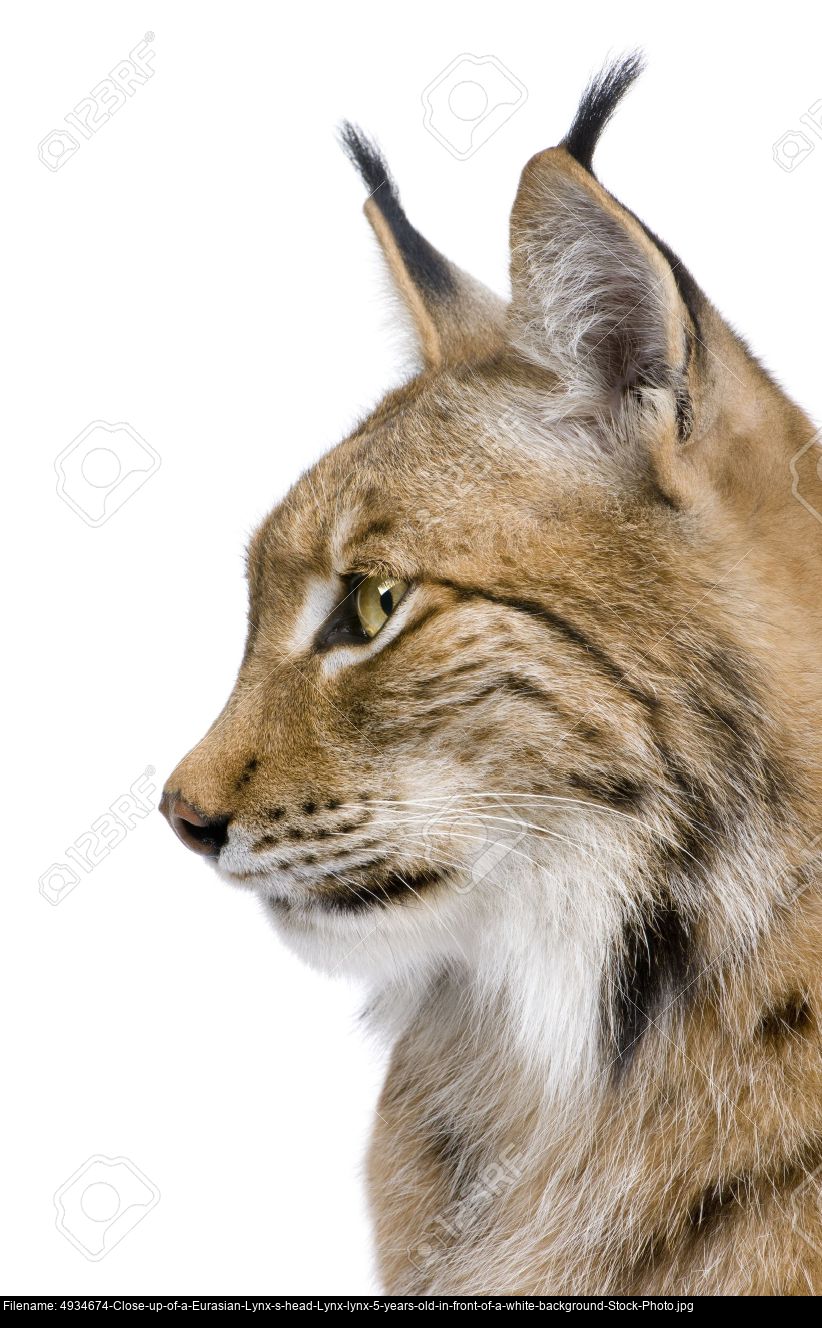
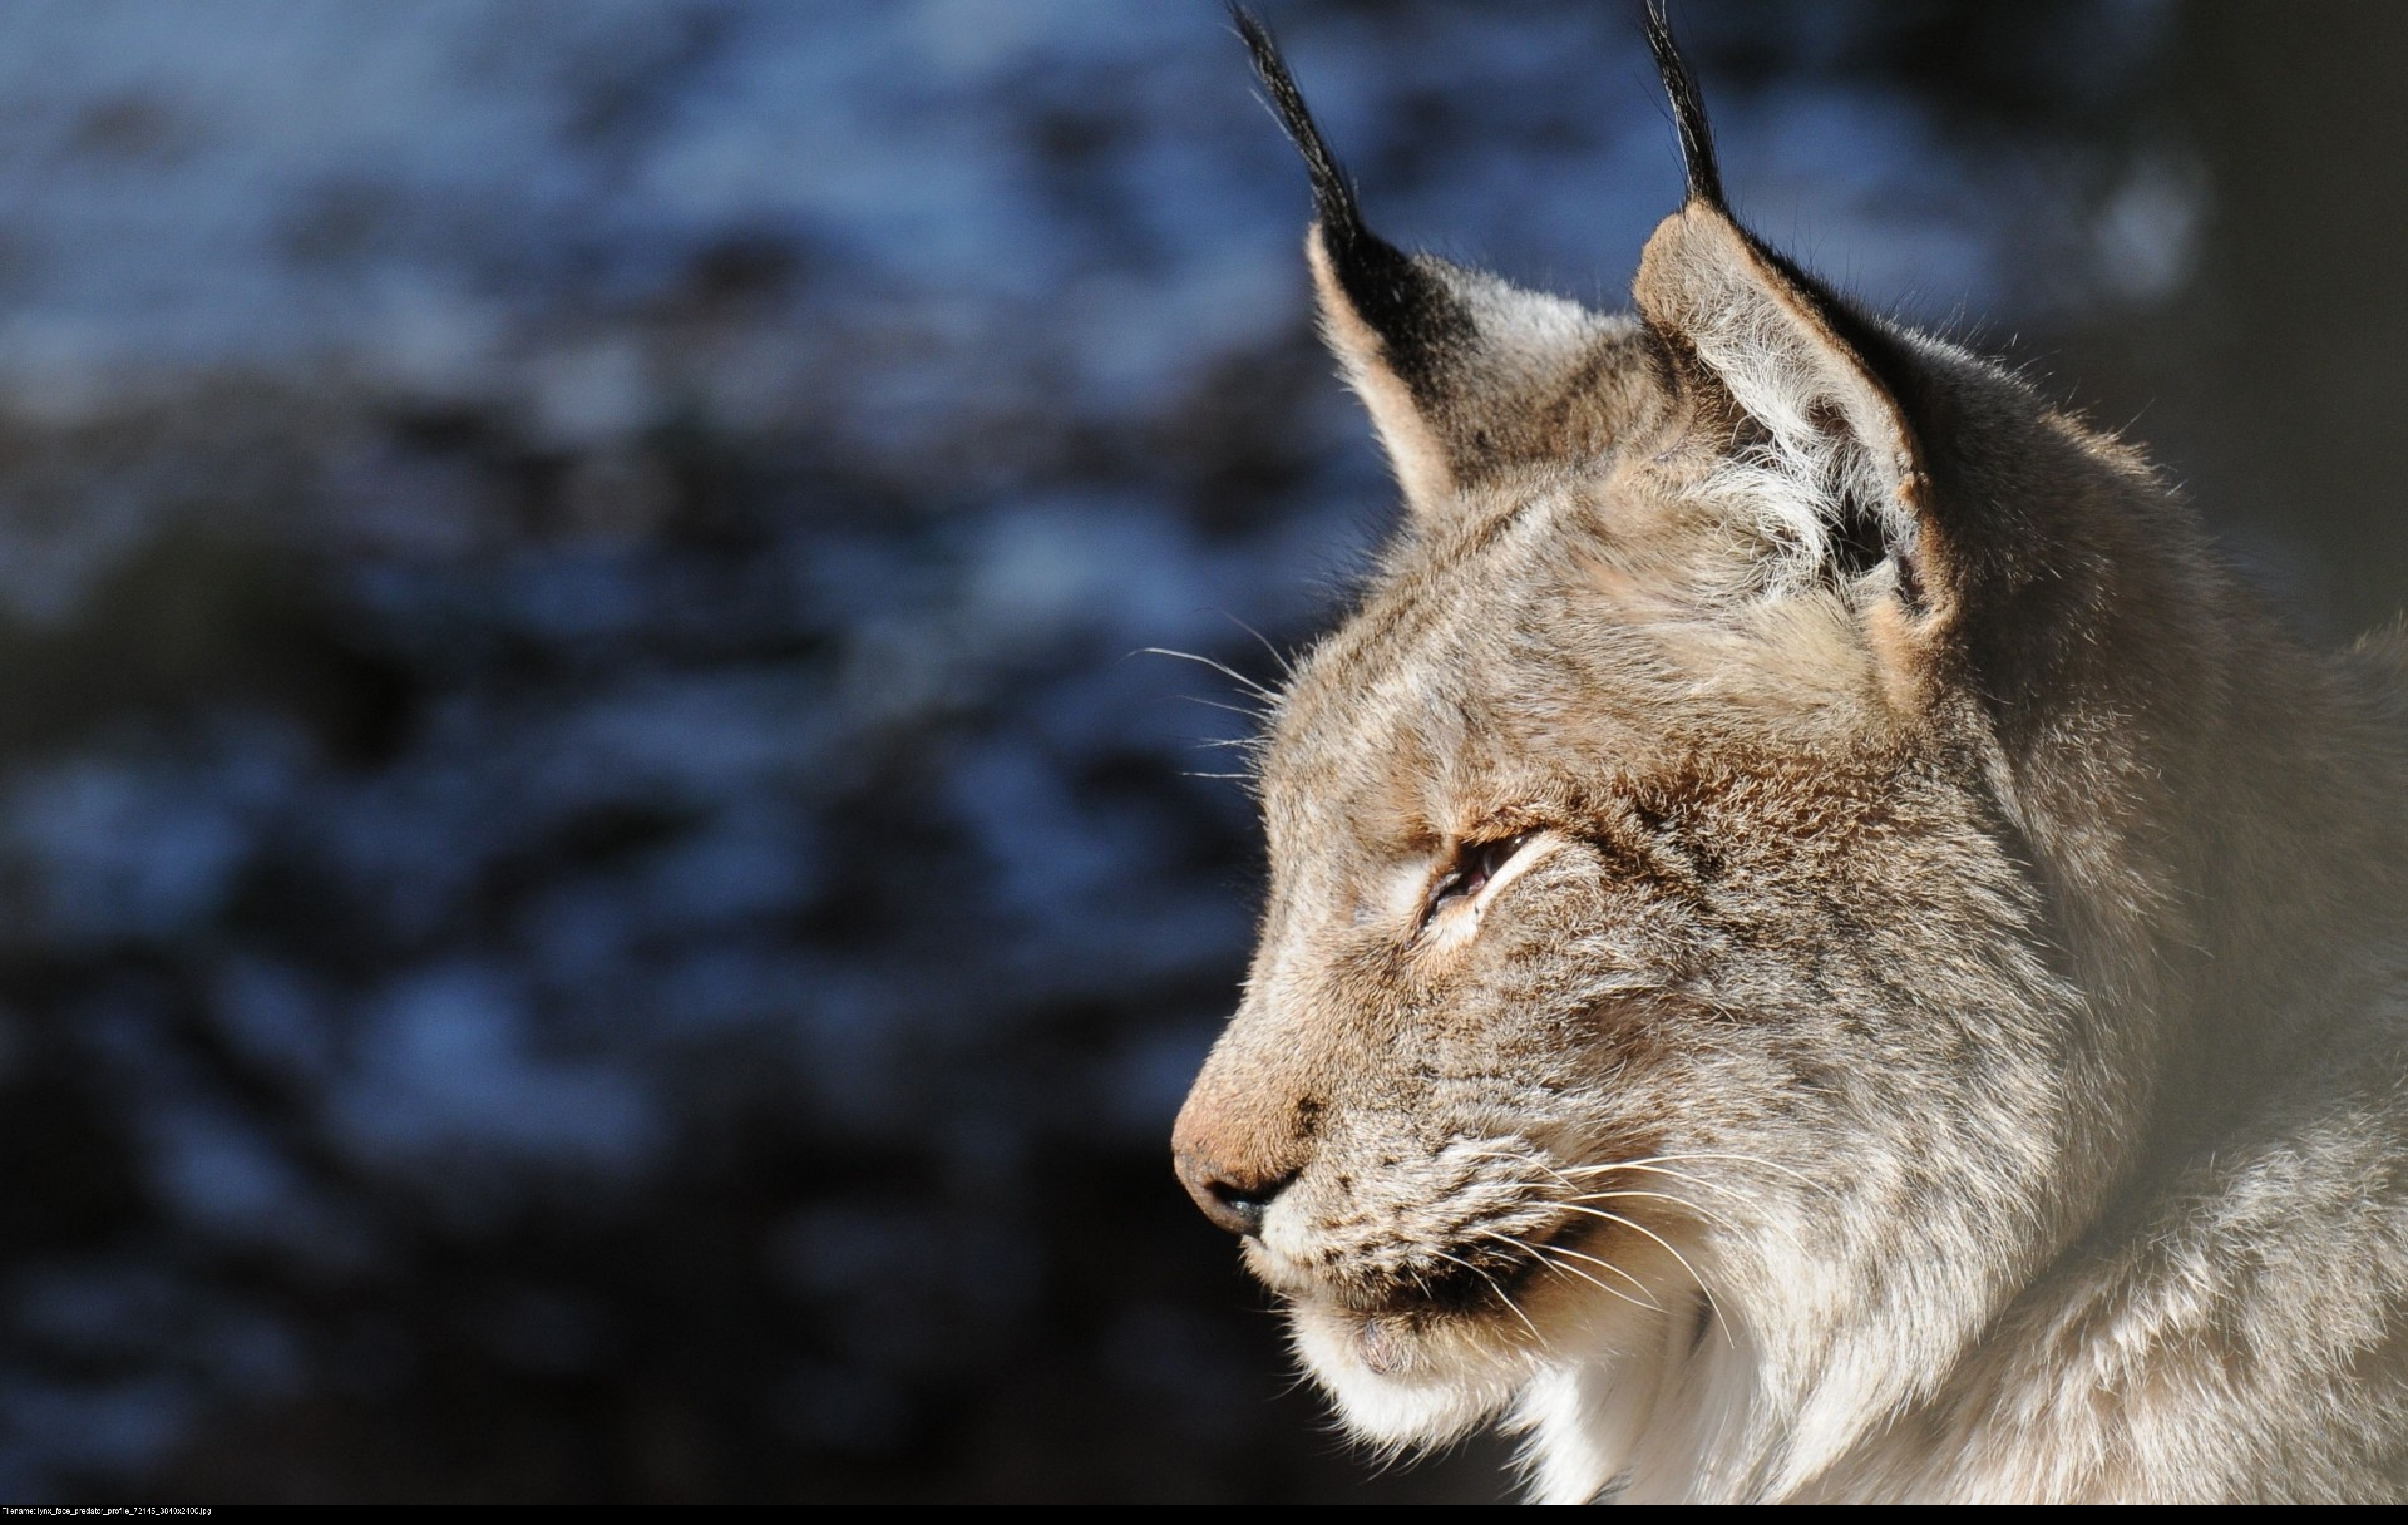

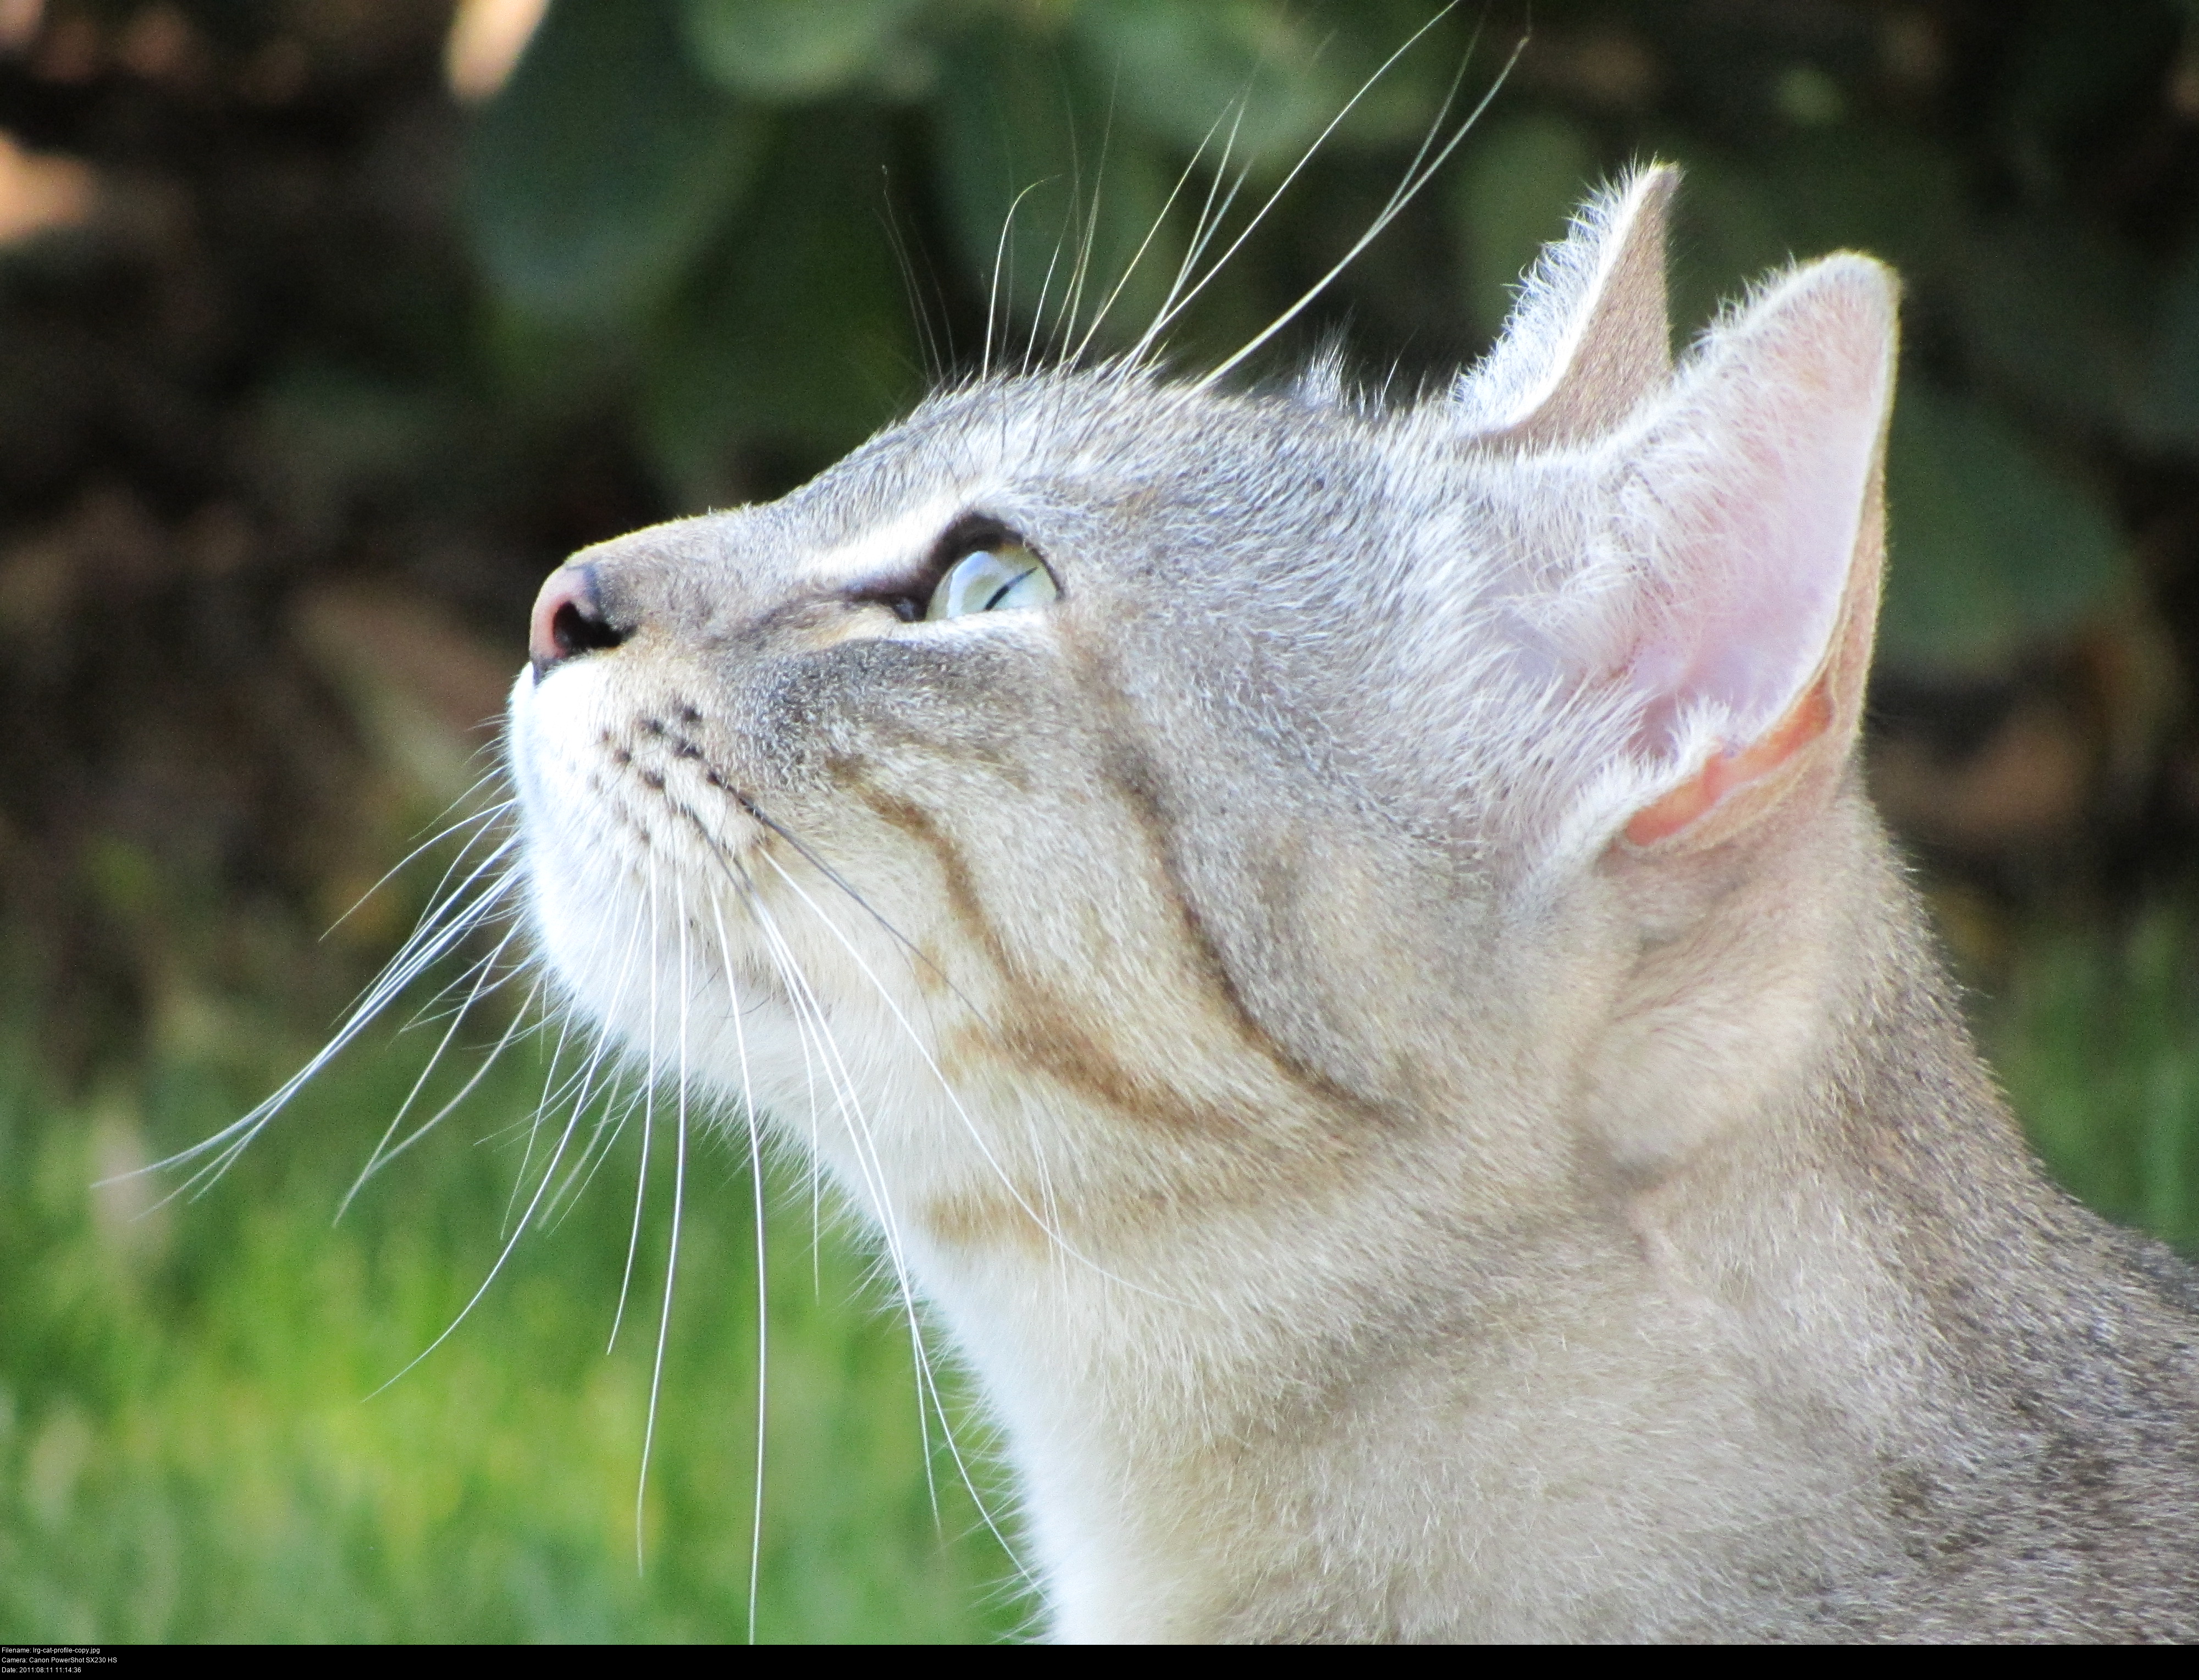
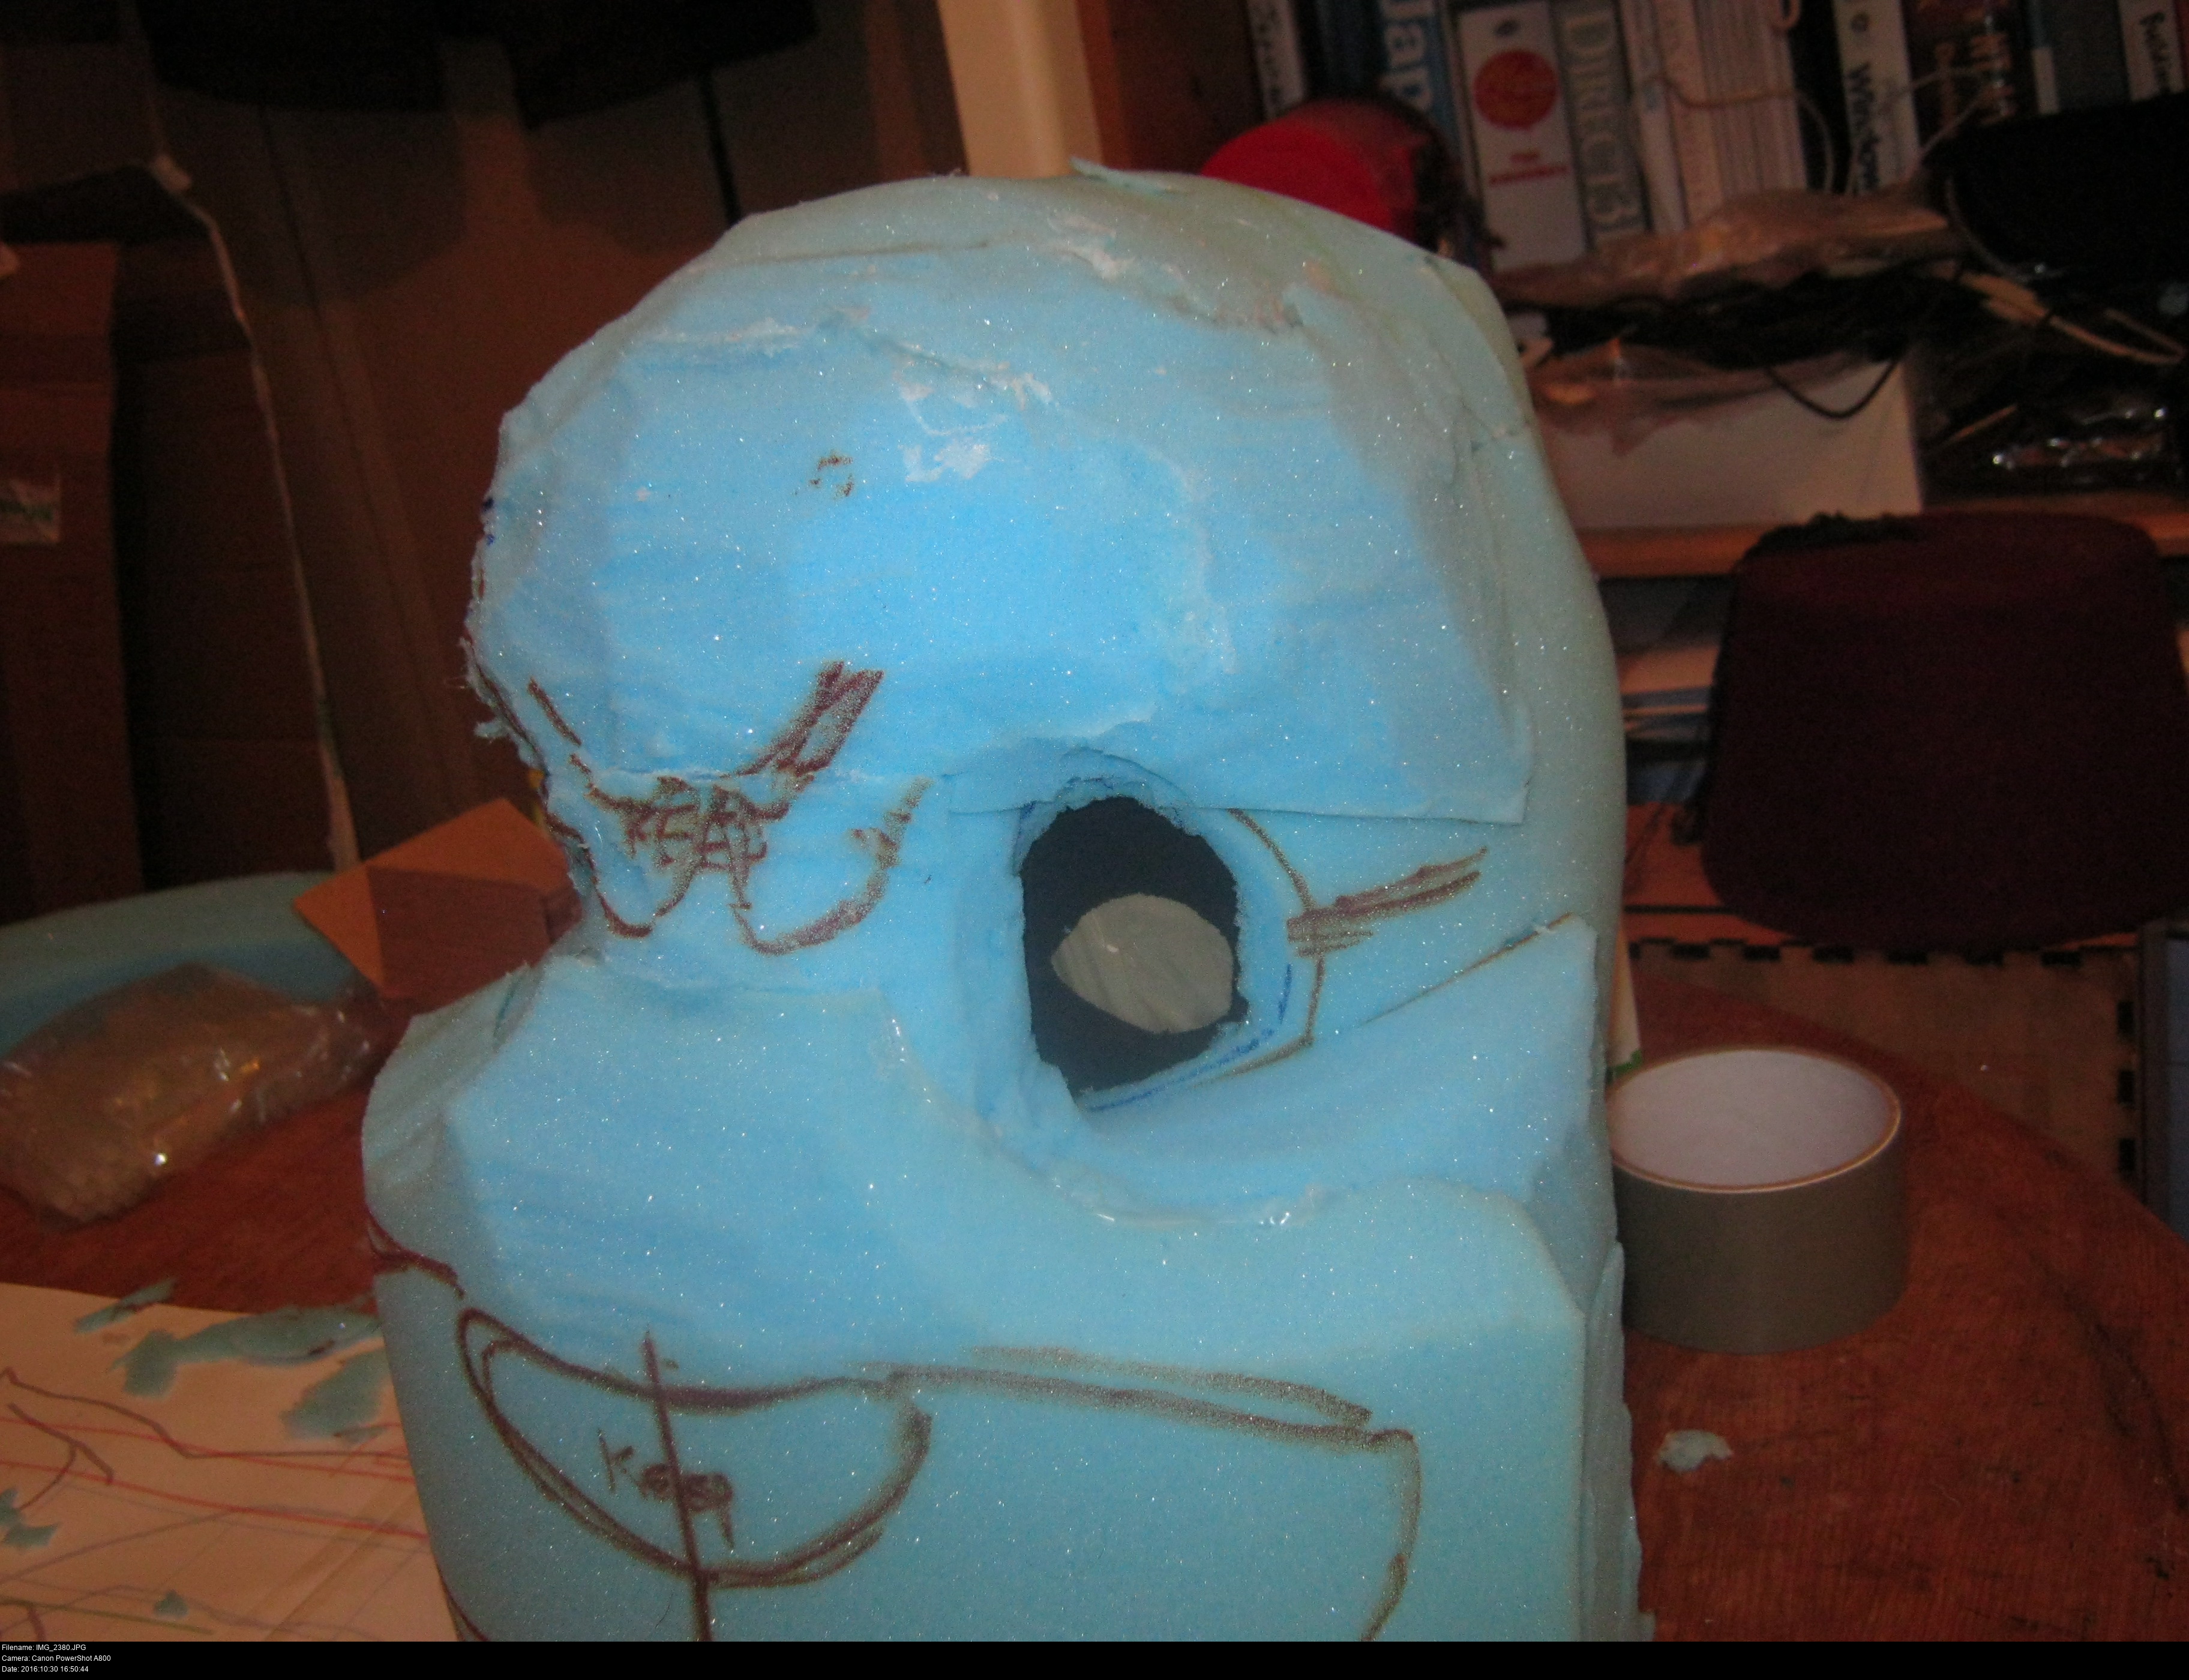
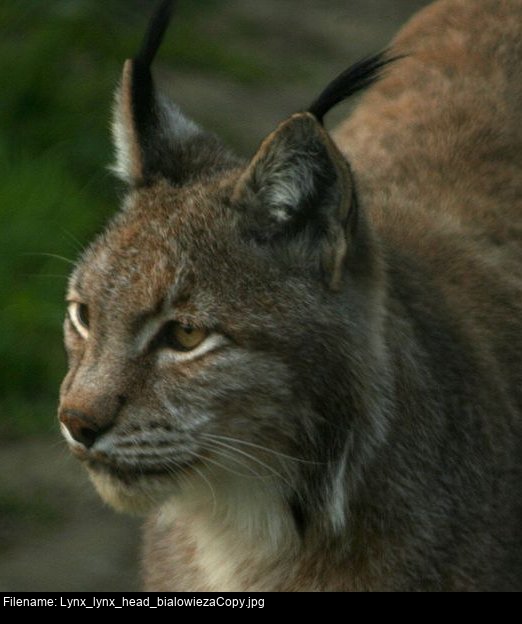
If you saw my head carving so far and accused me of not knowing what a lynx looks like... I don't think I'd be able to defend myself. I need pictures. Tons of pictures. Cats, lynxes, panthers, anything that's remotely catlike. Let's get some fursuit pictures in here too.
Hmm... so a lynx has a very spherical head with a pokey little muzzle that begins right at the bottom of the face and doesn't extend out for very far. Relative to the slope of the forehead that is. Compared to cats, lynxes have a more well-defined chin due to a longer muzzle.
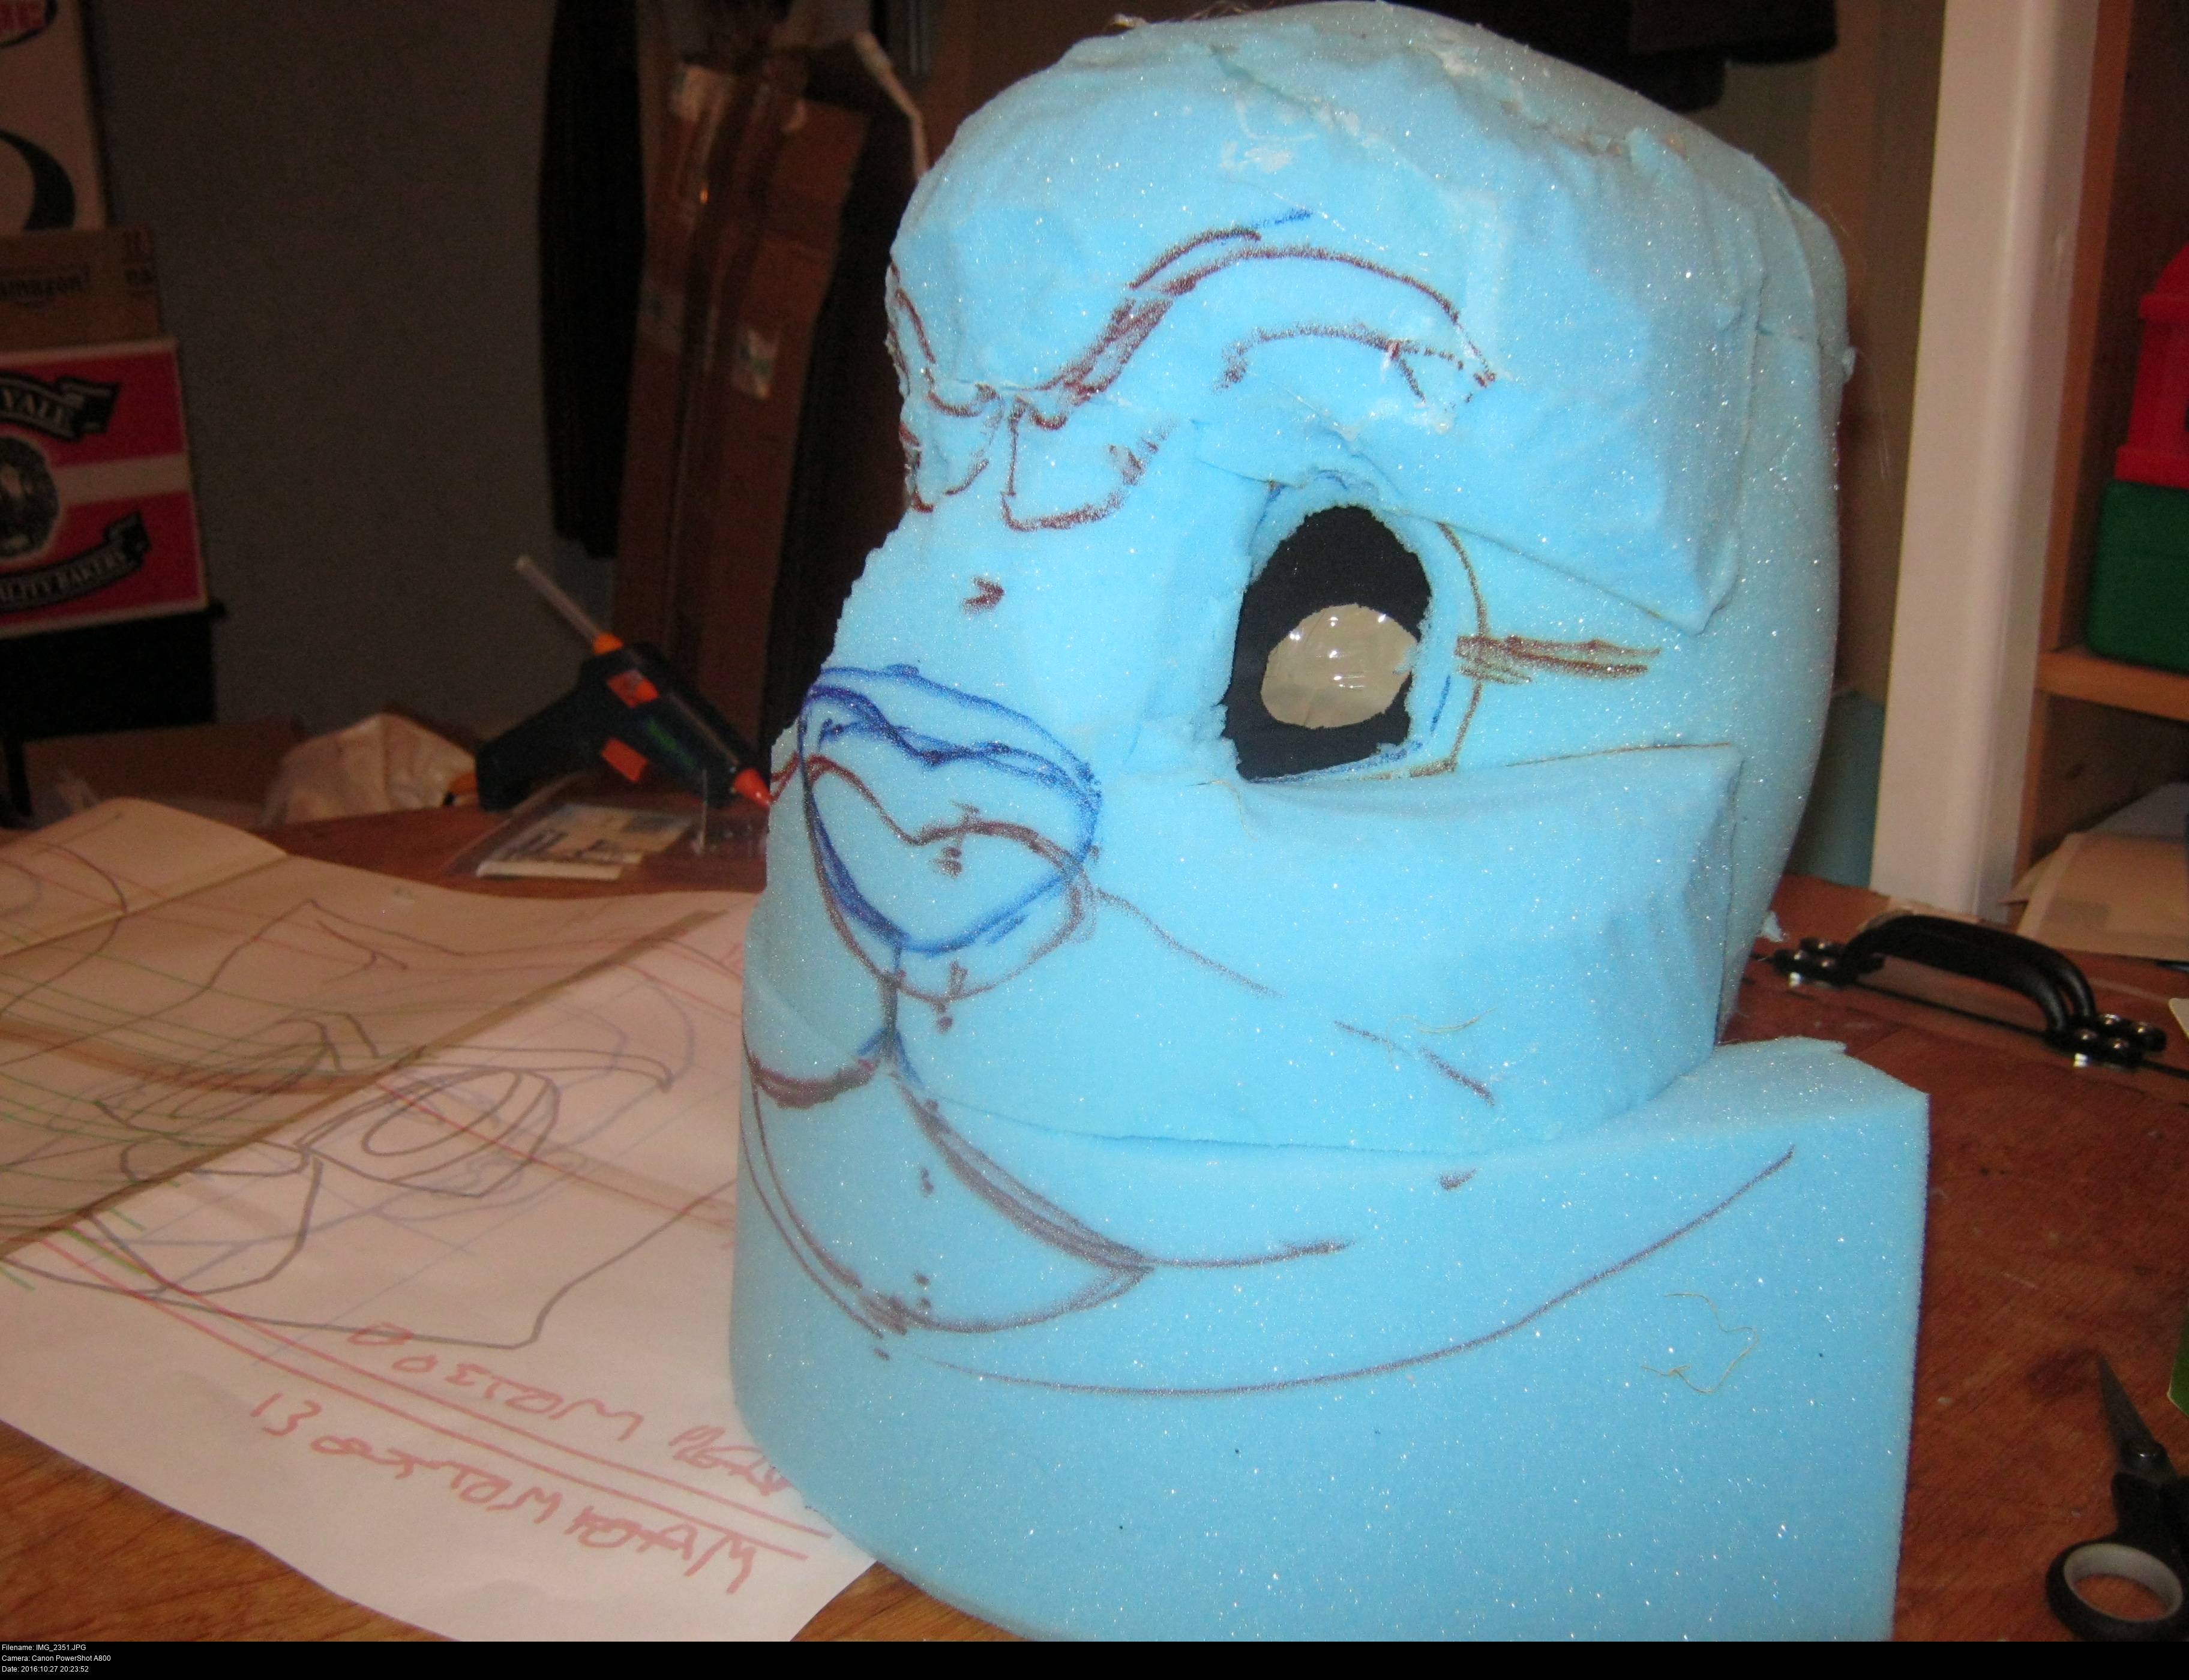
I need to be decisive. I need to incisive.
You're outta there!
Also do you reckon I have too many knives? I've got a whole lot because I keep blunting them on the hot glue seams.
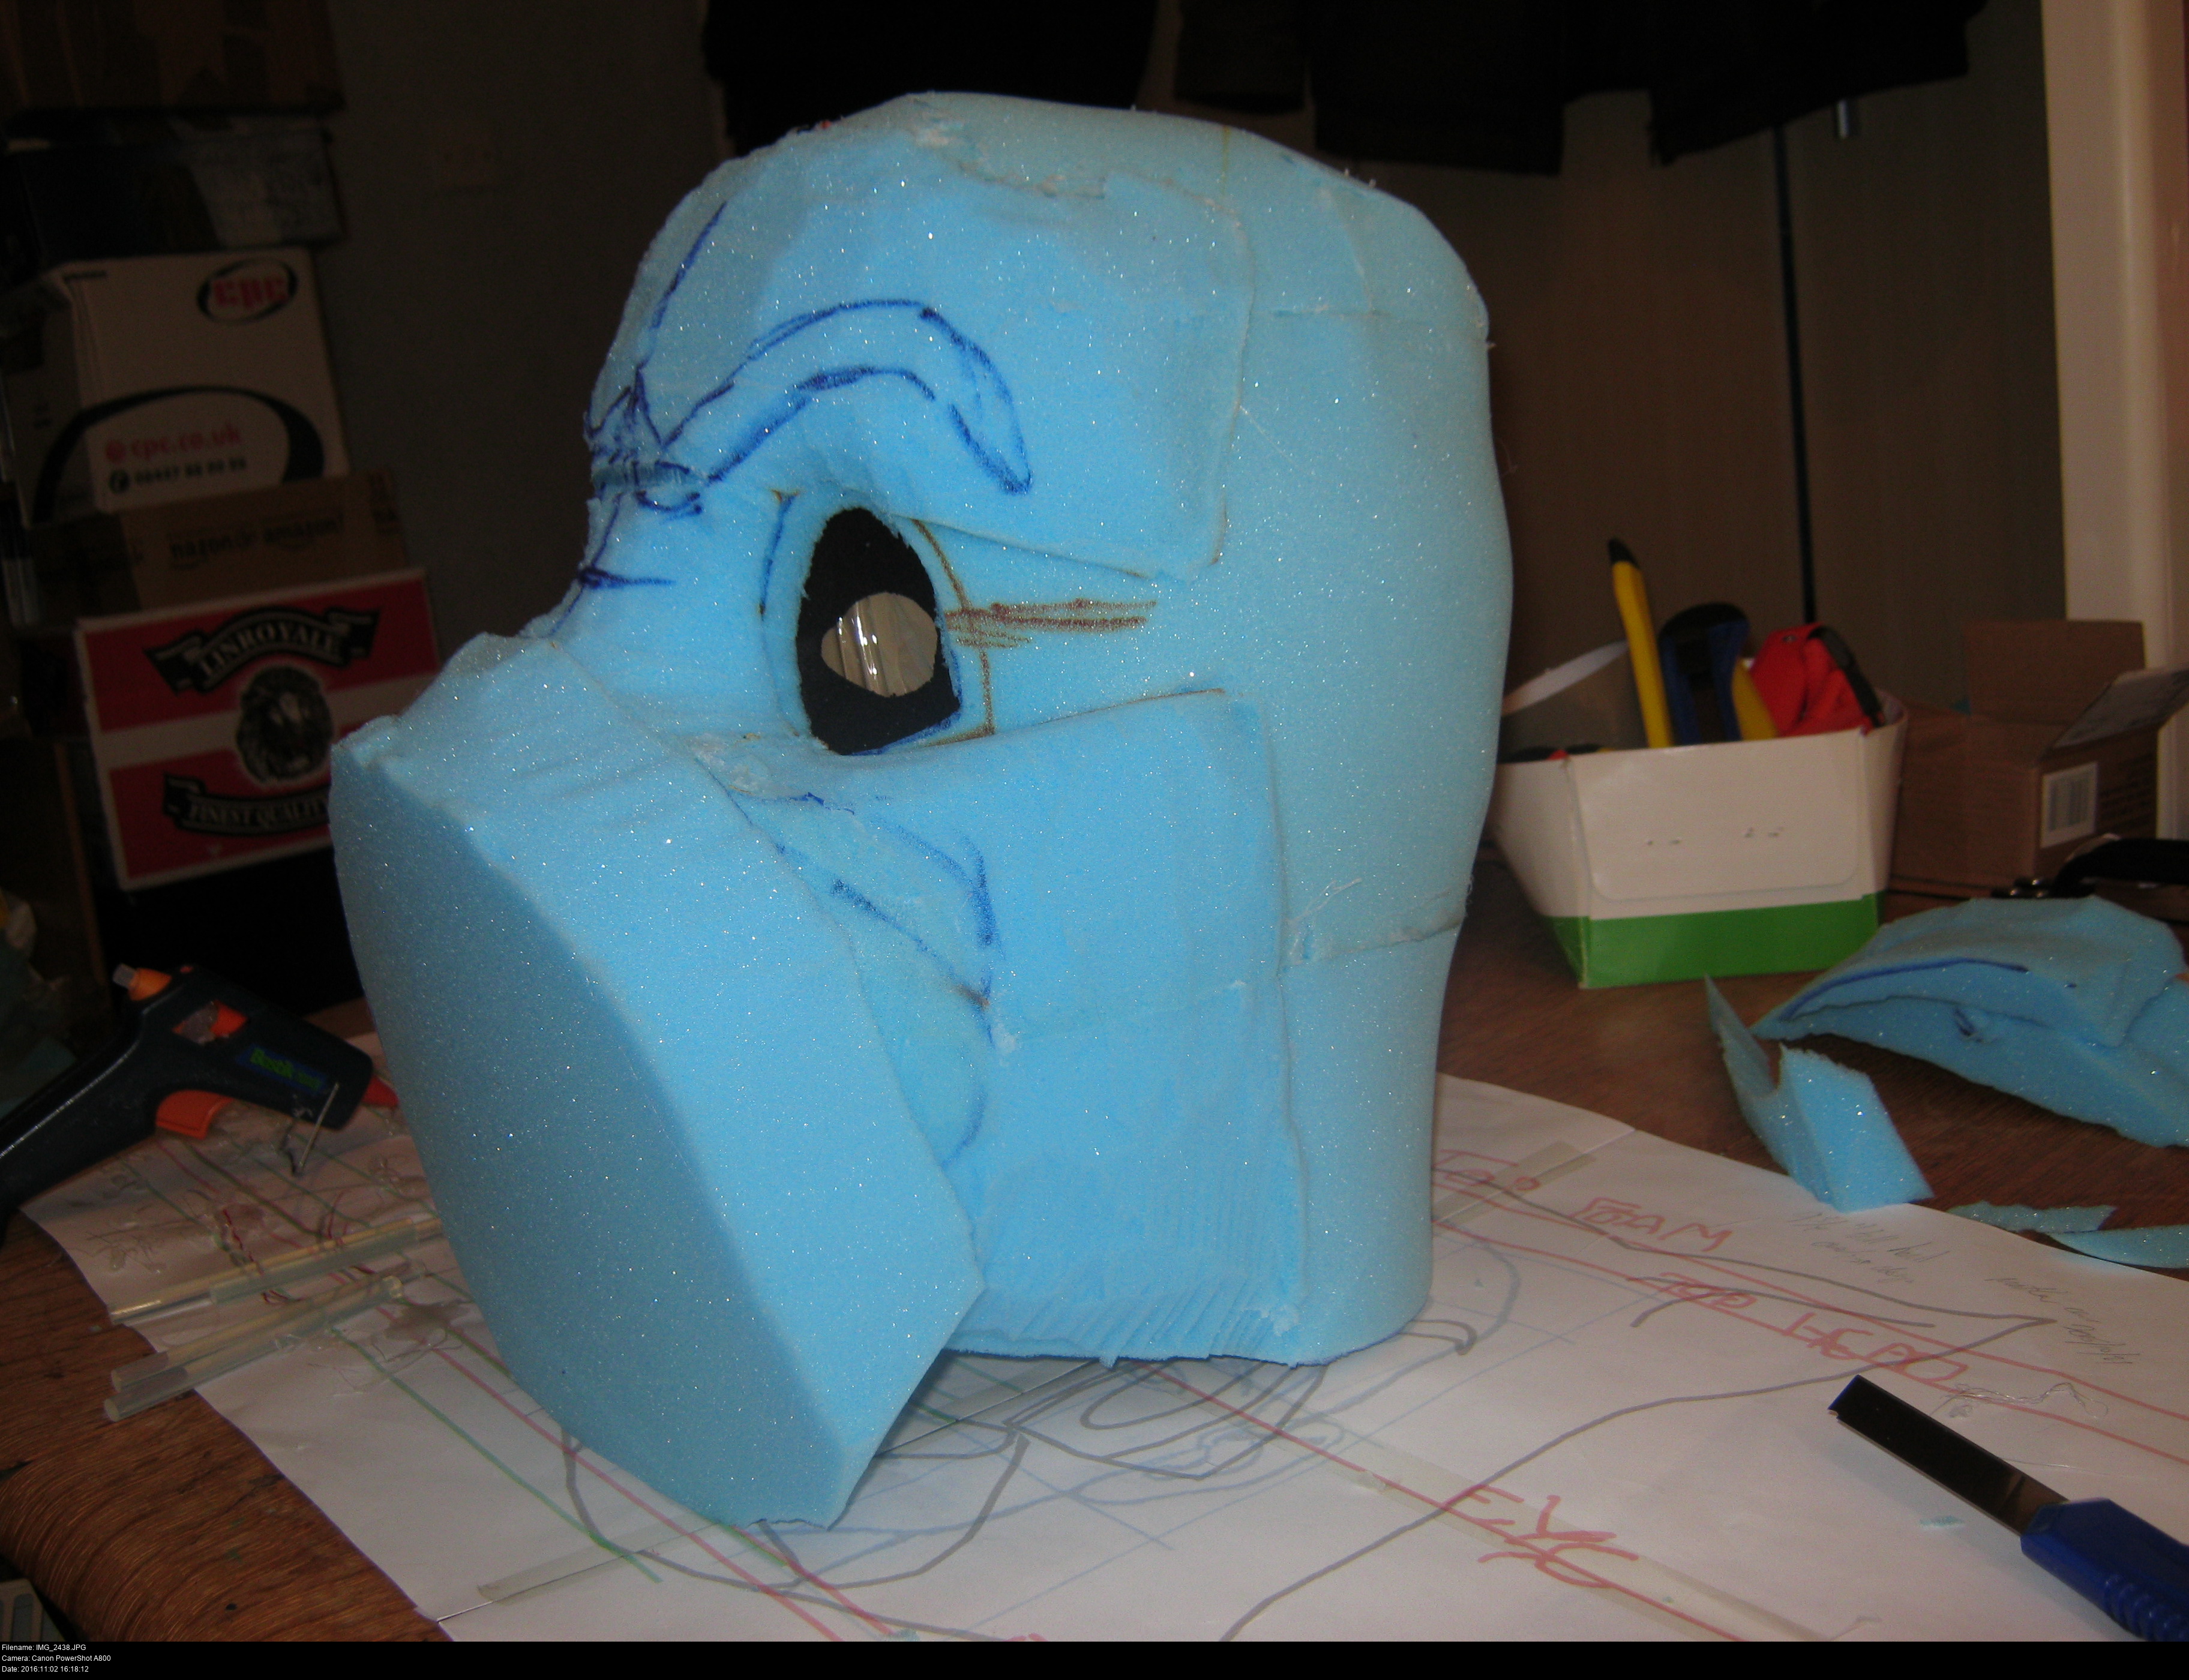
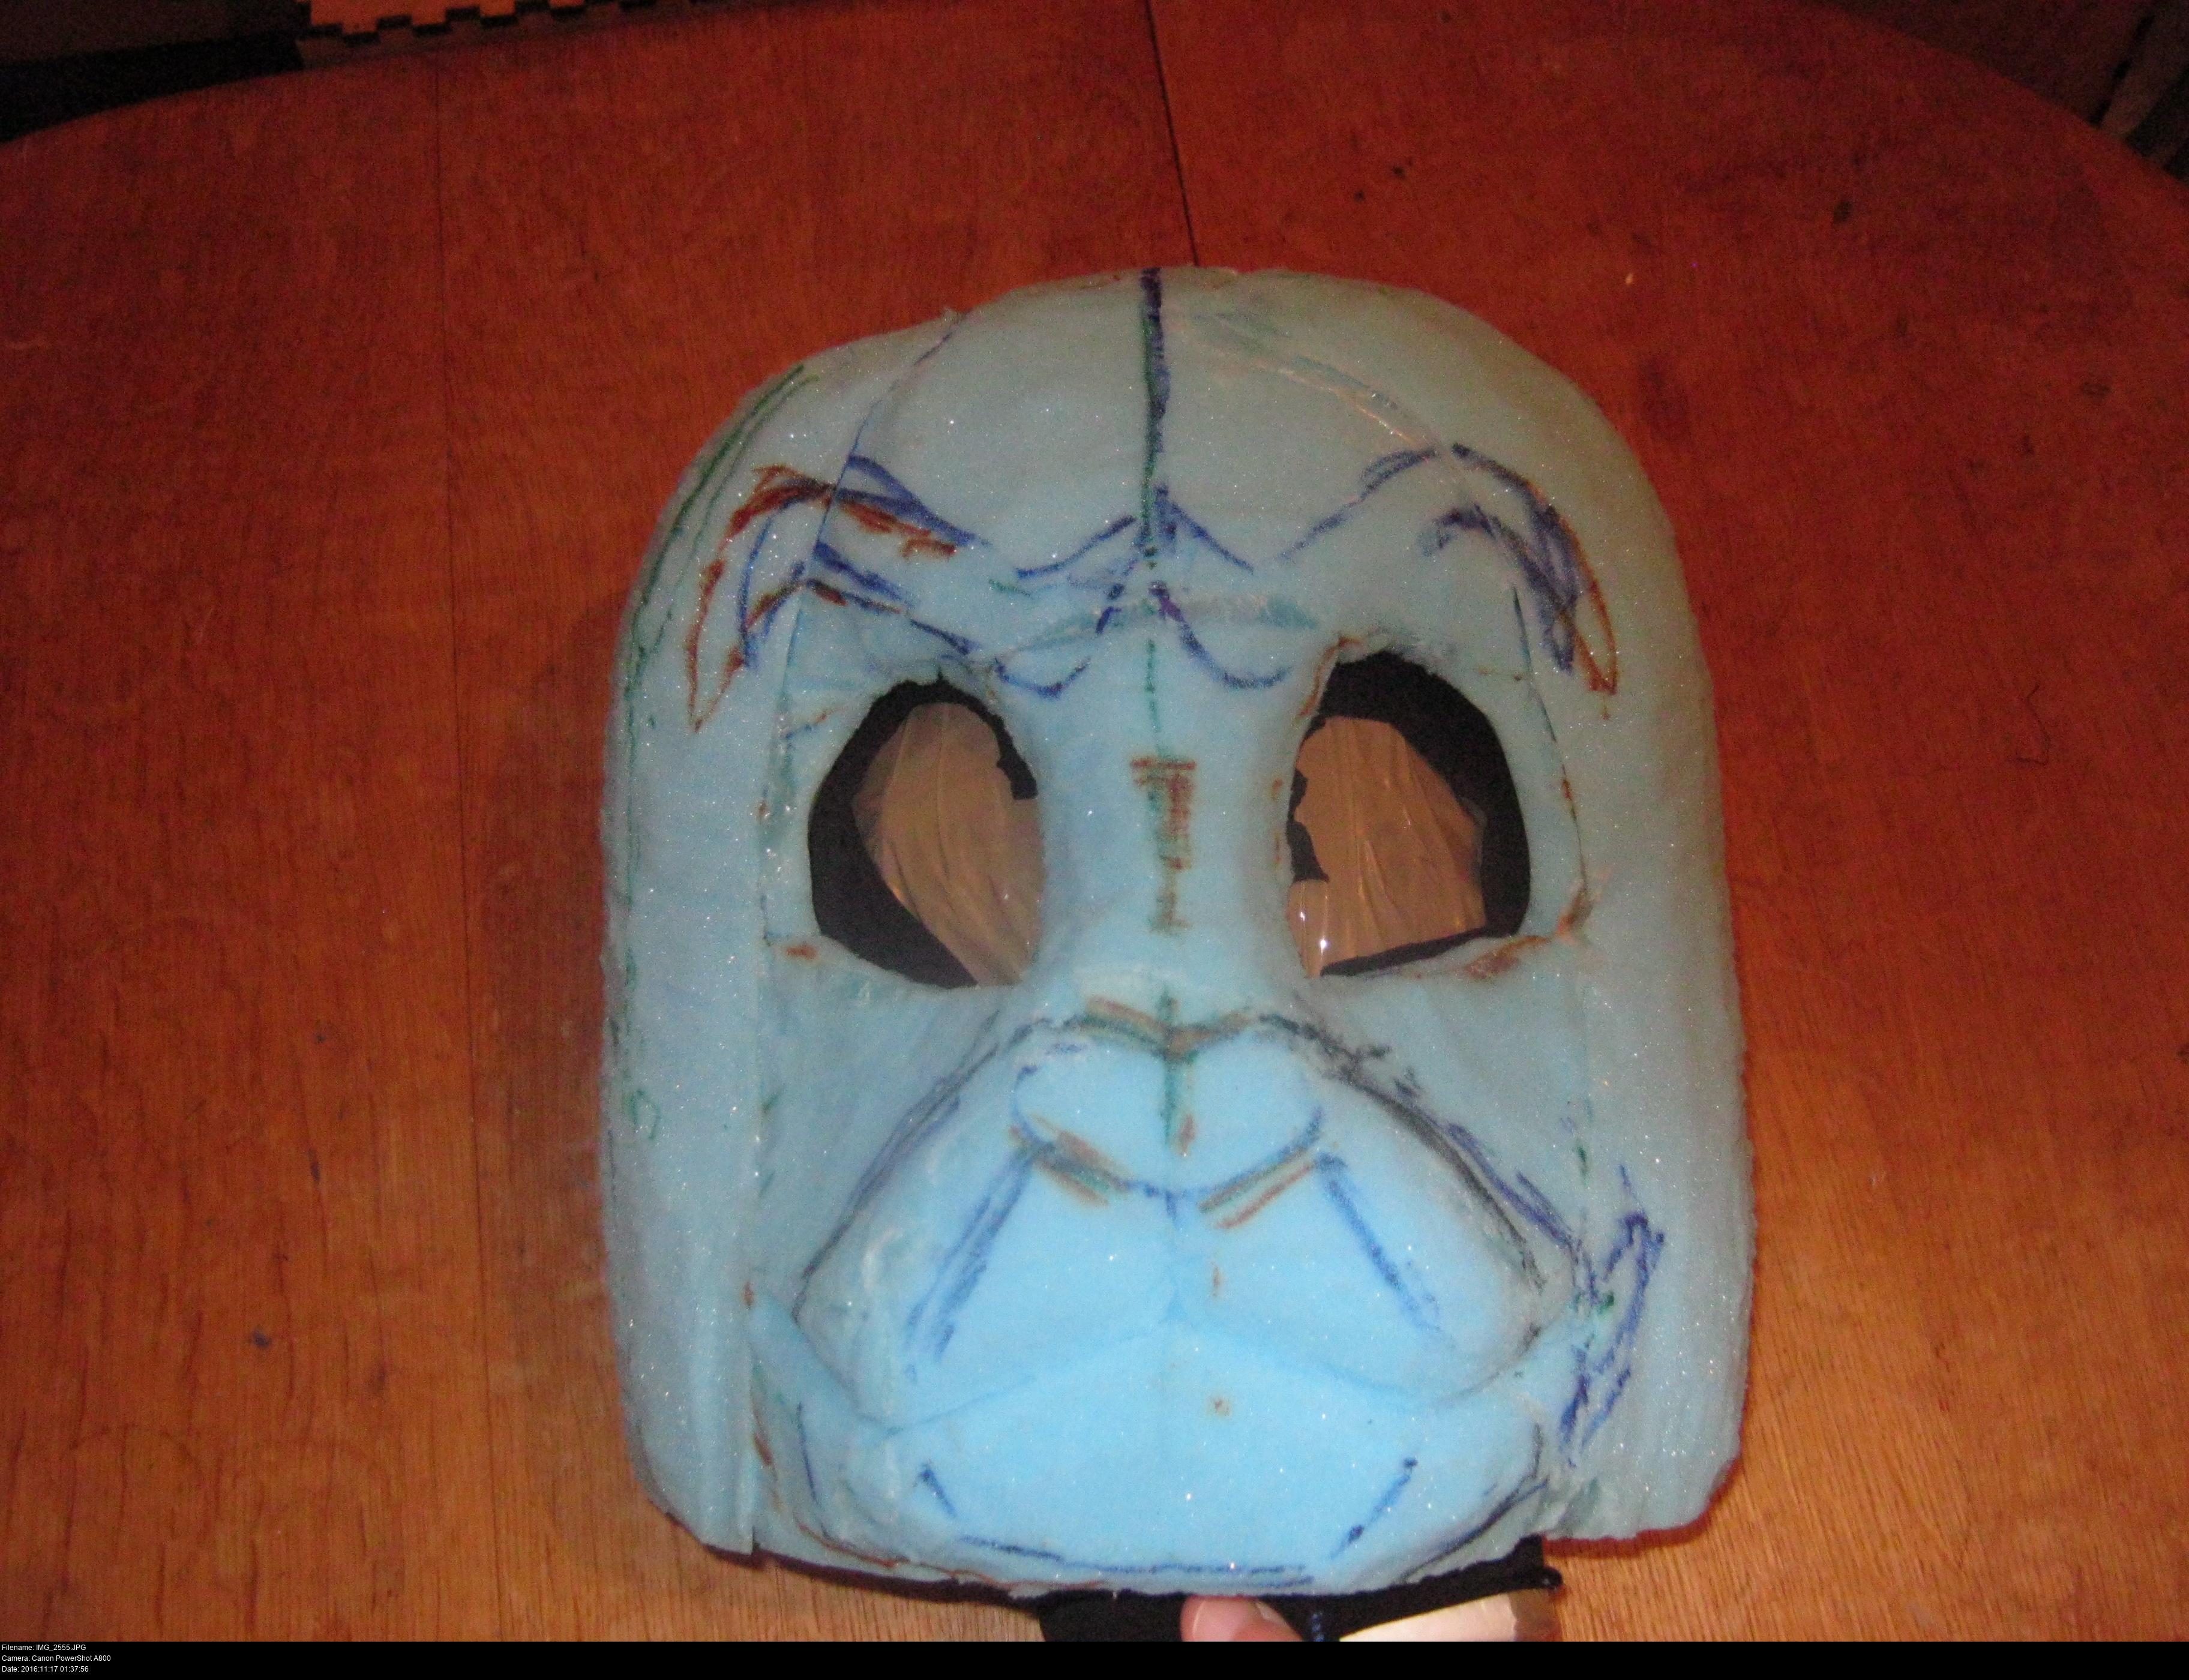
Here's the plan. Muzzle.


It's supposed to be a snooty snouty little hexagonal thing at the bottom of the face. I'm going to draw it down there and try to bring it out.
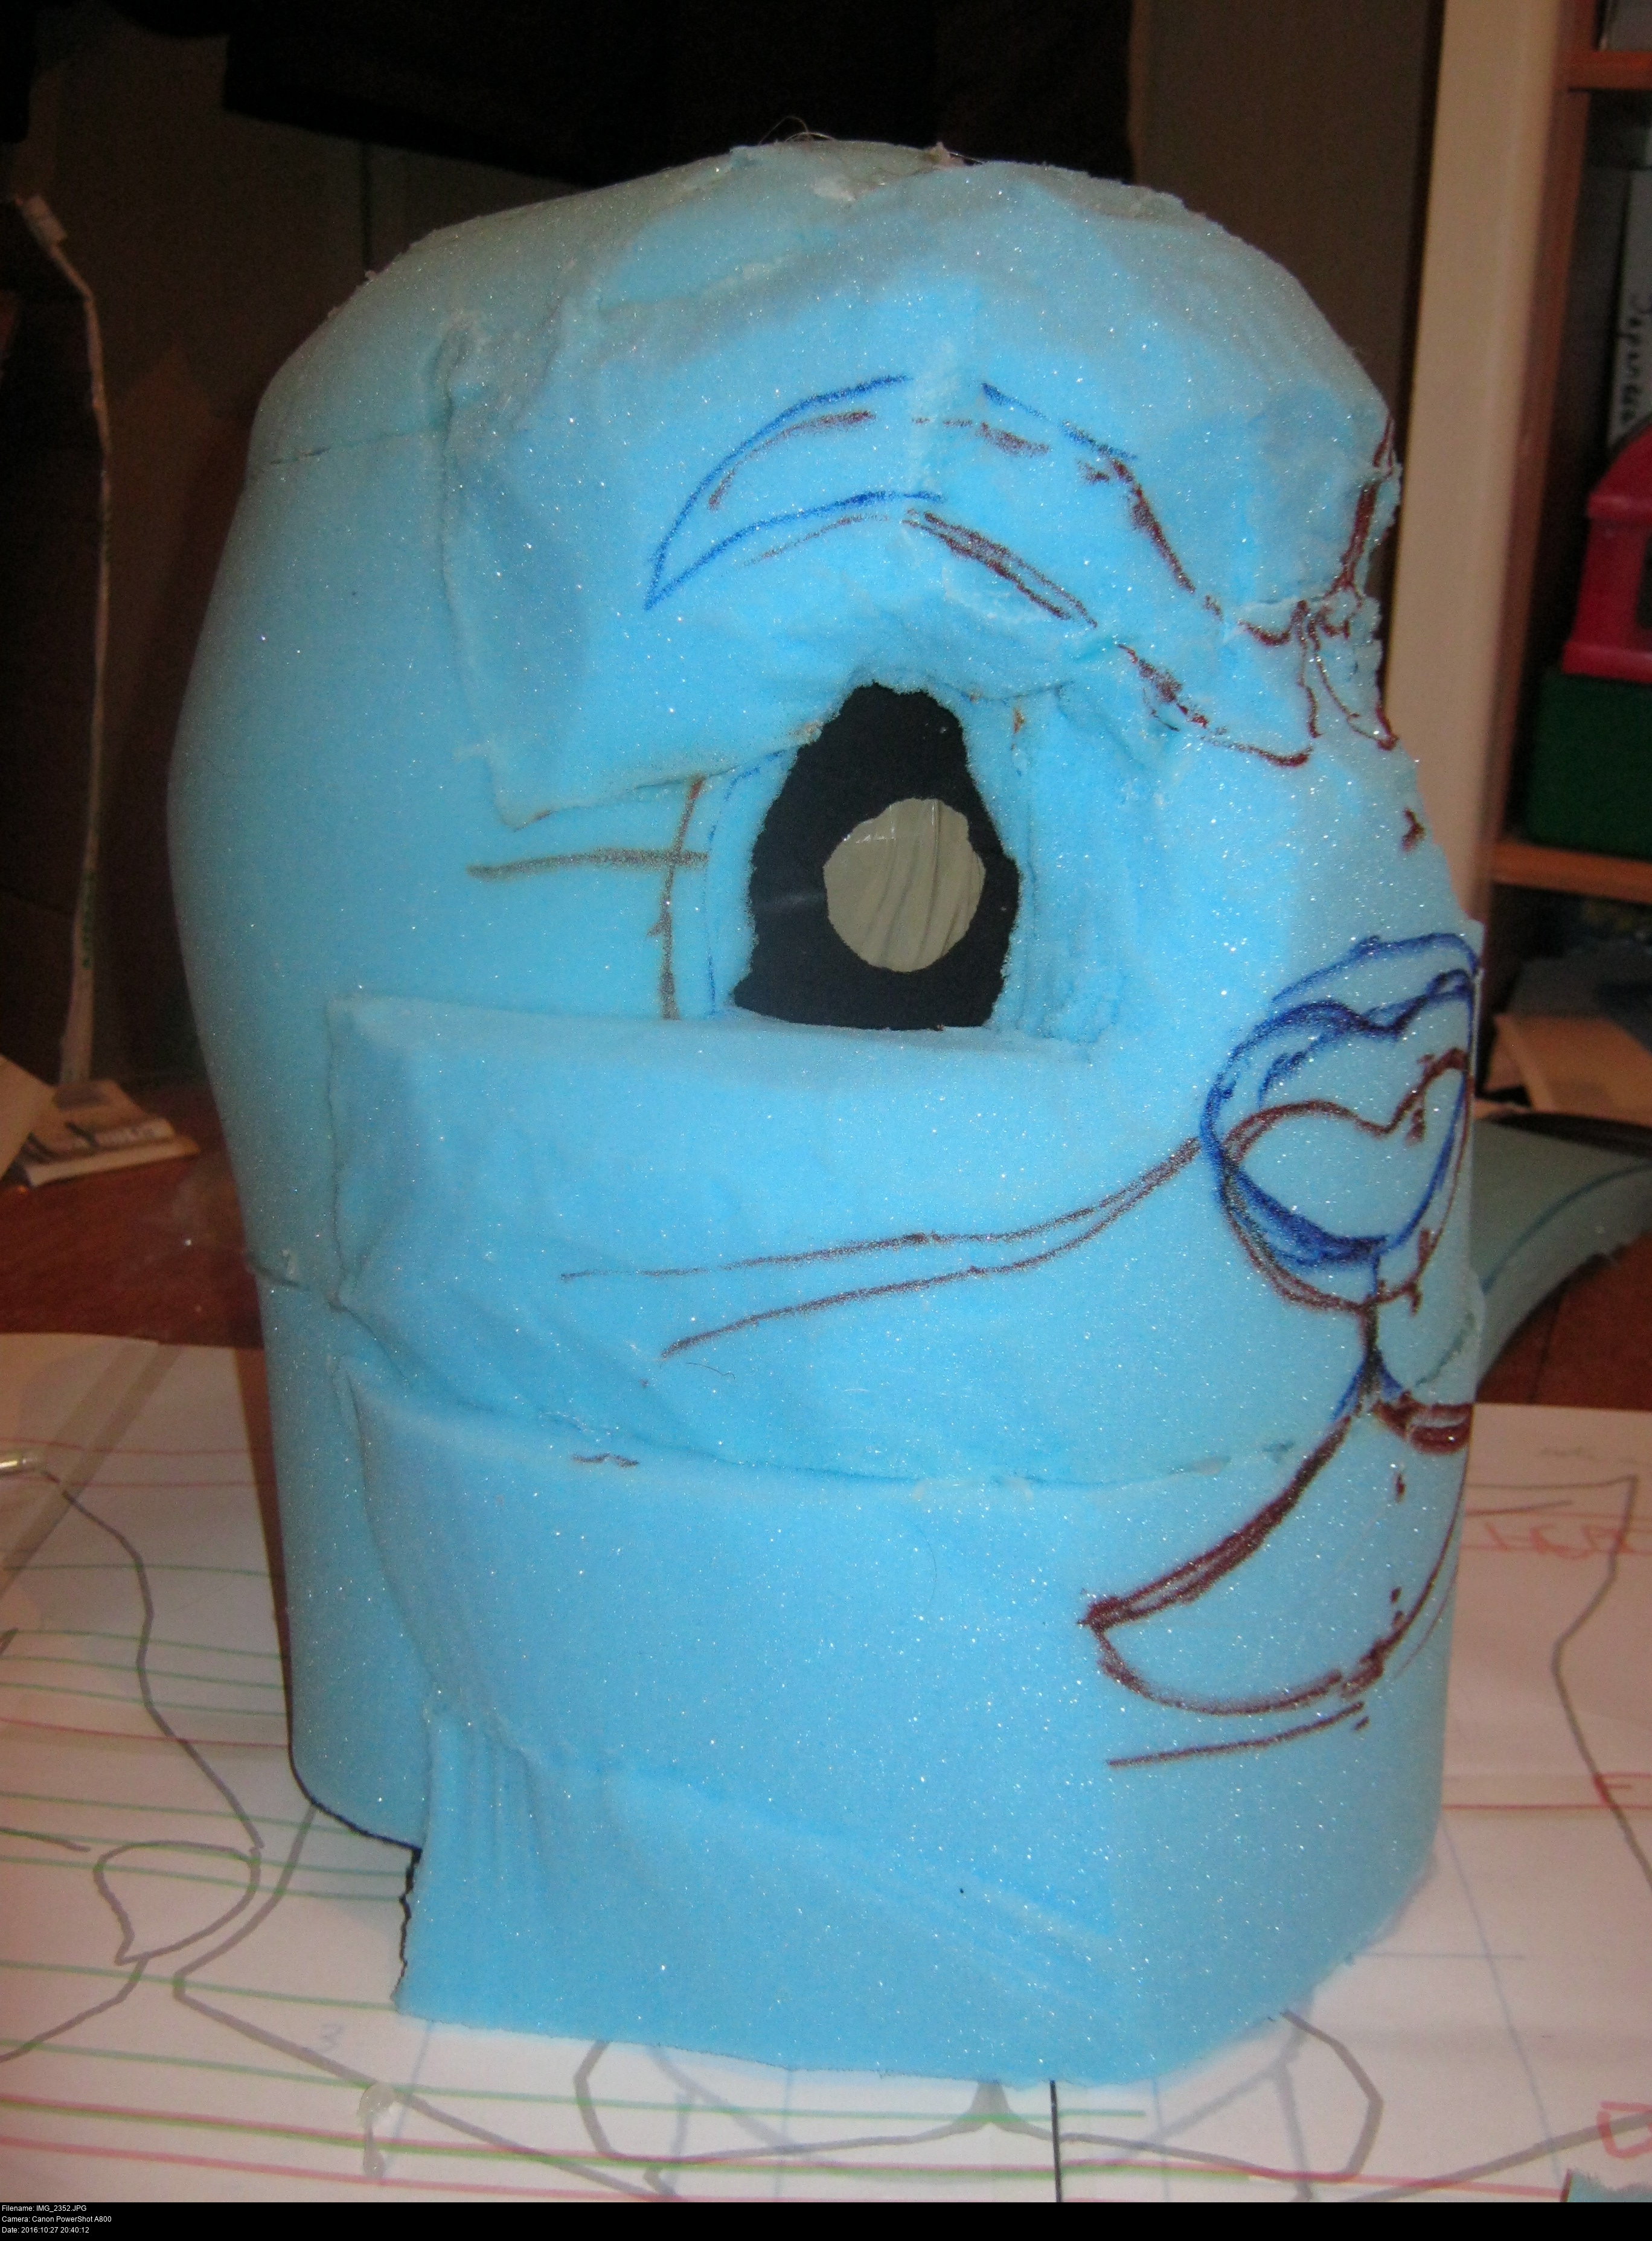
Keep wearing and testing!
Or maybe a little smaller. I've copied it from the lifesize reference I printed out. Bear in mind that that hexagonal shape shouldn't be a flat surface on the final head since that outline is the lighter fur of the entire muzzle including the sections that sweep back towards the main body of the head.

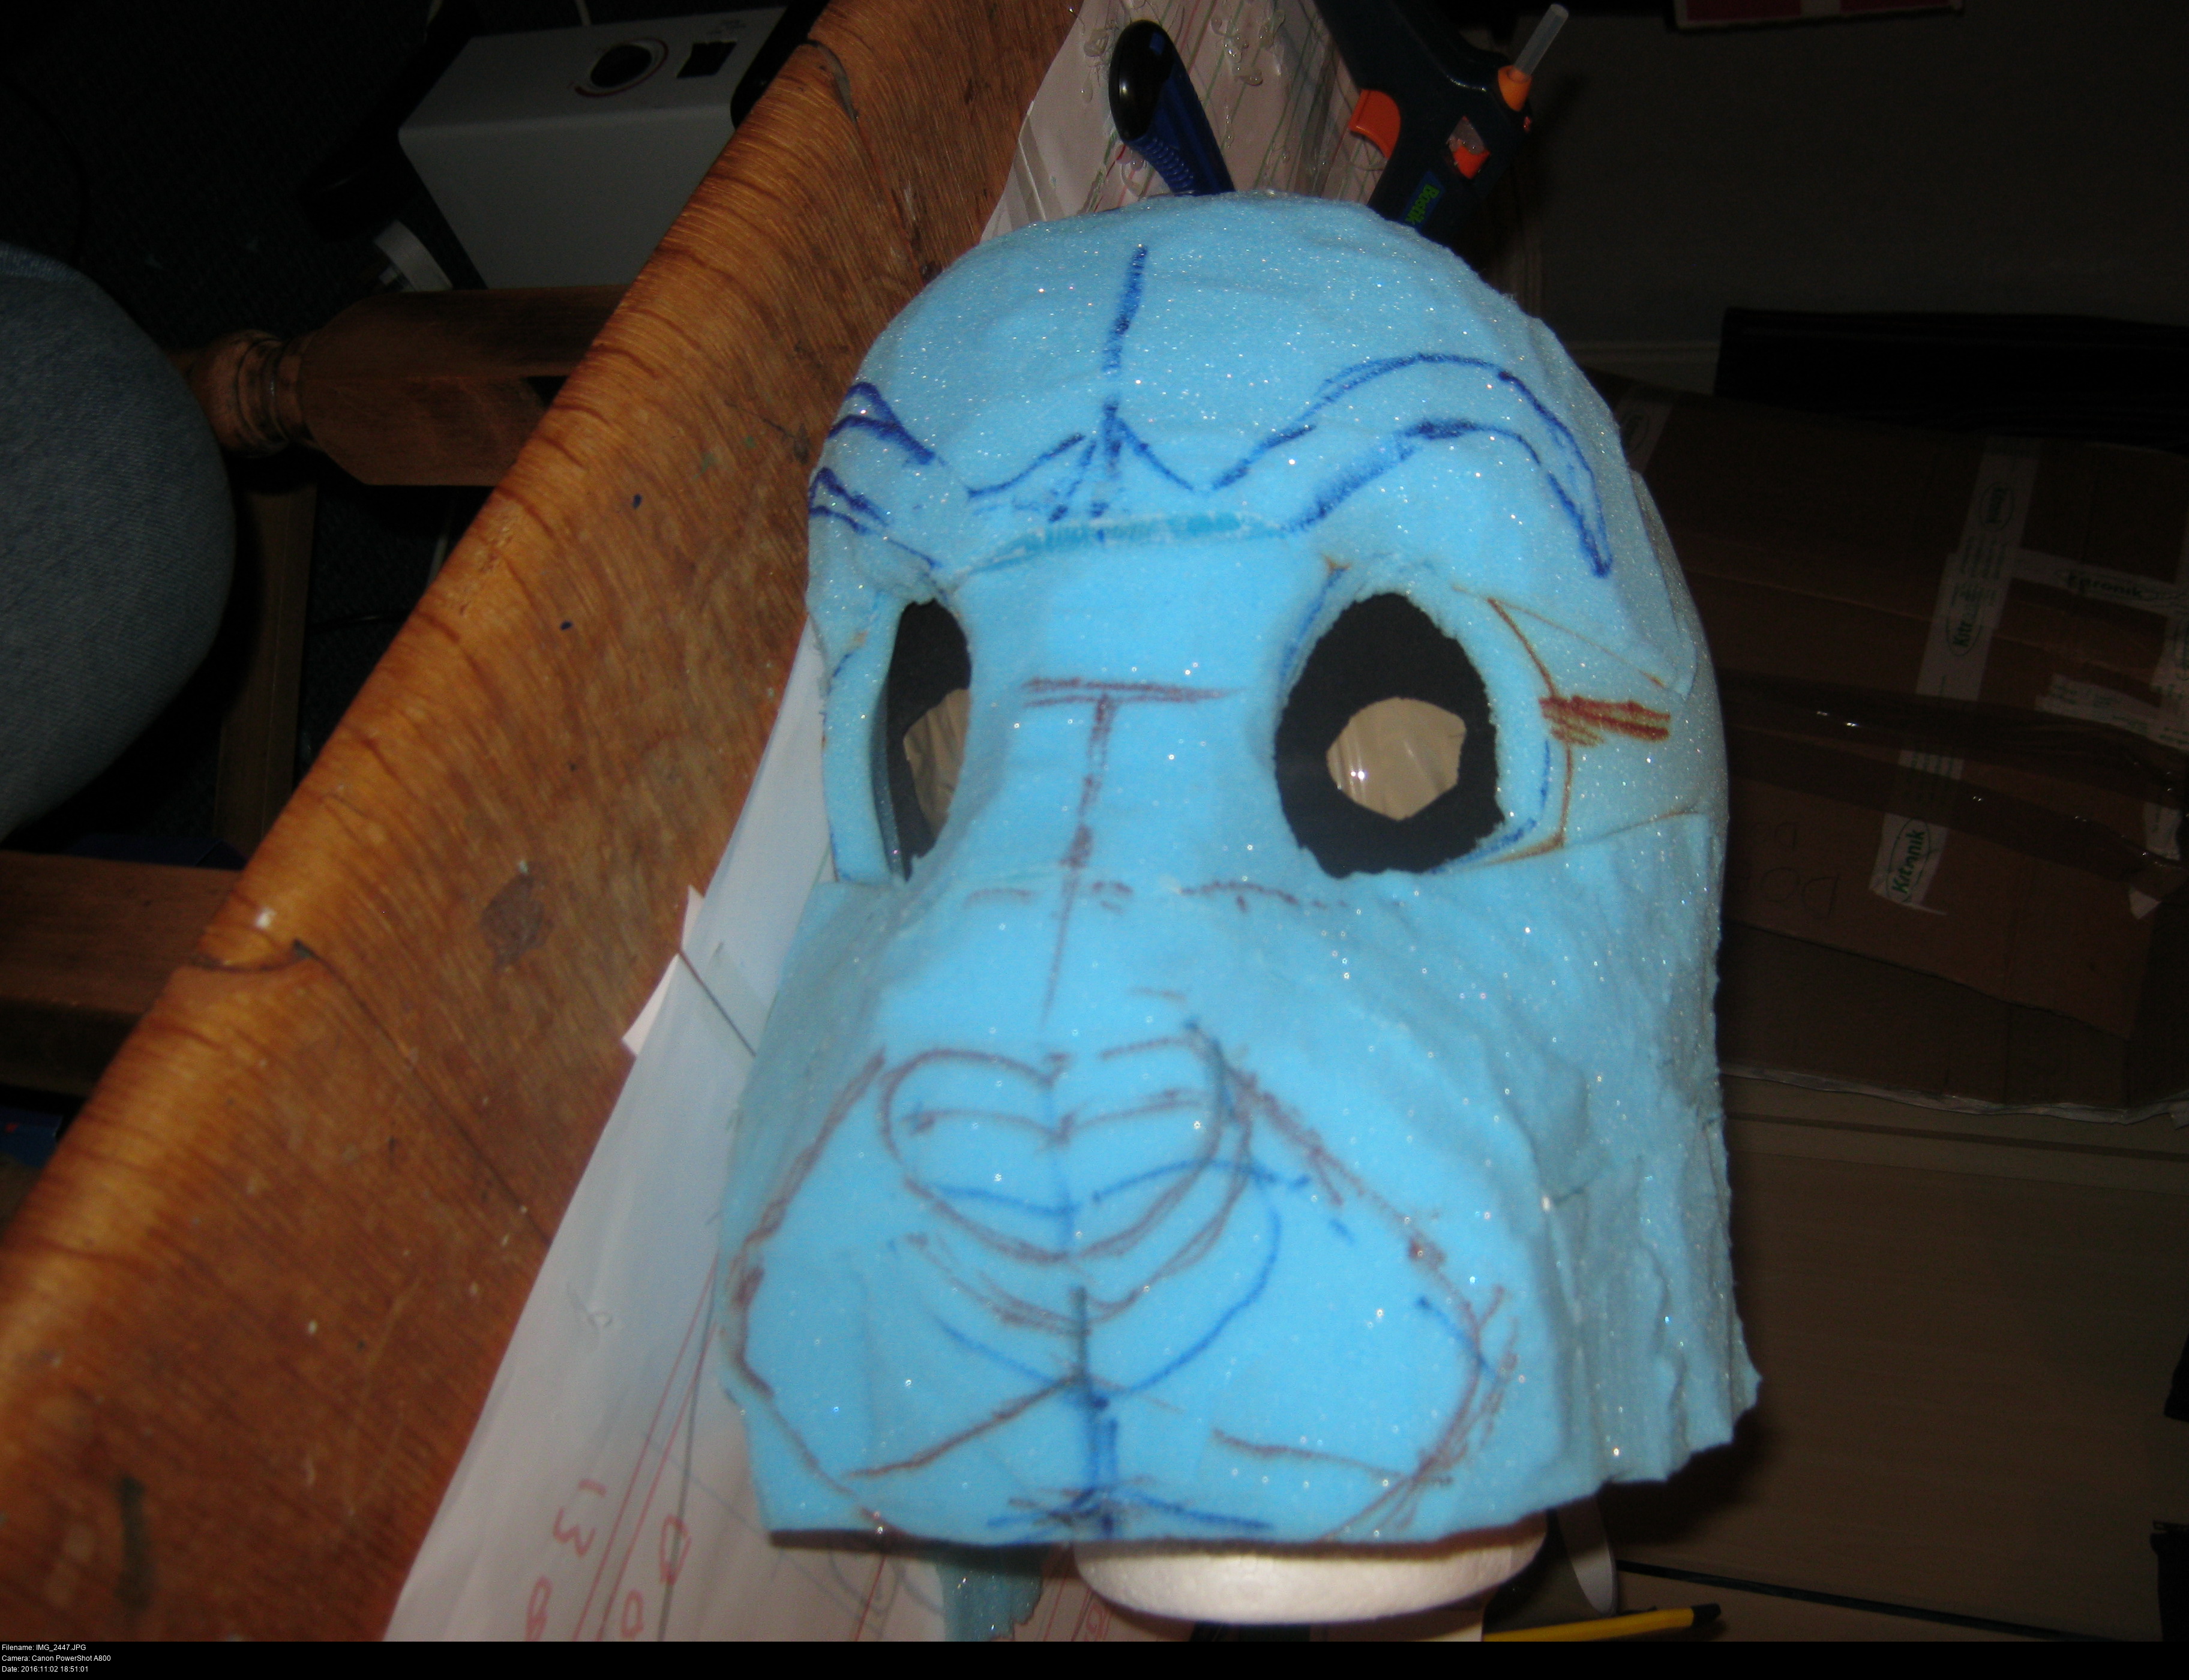

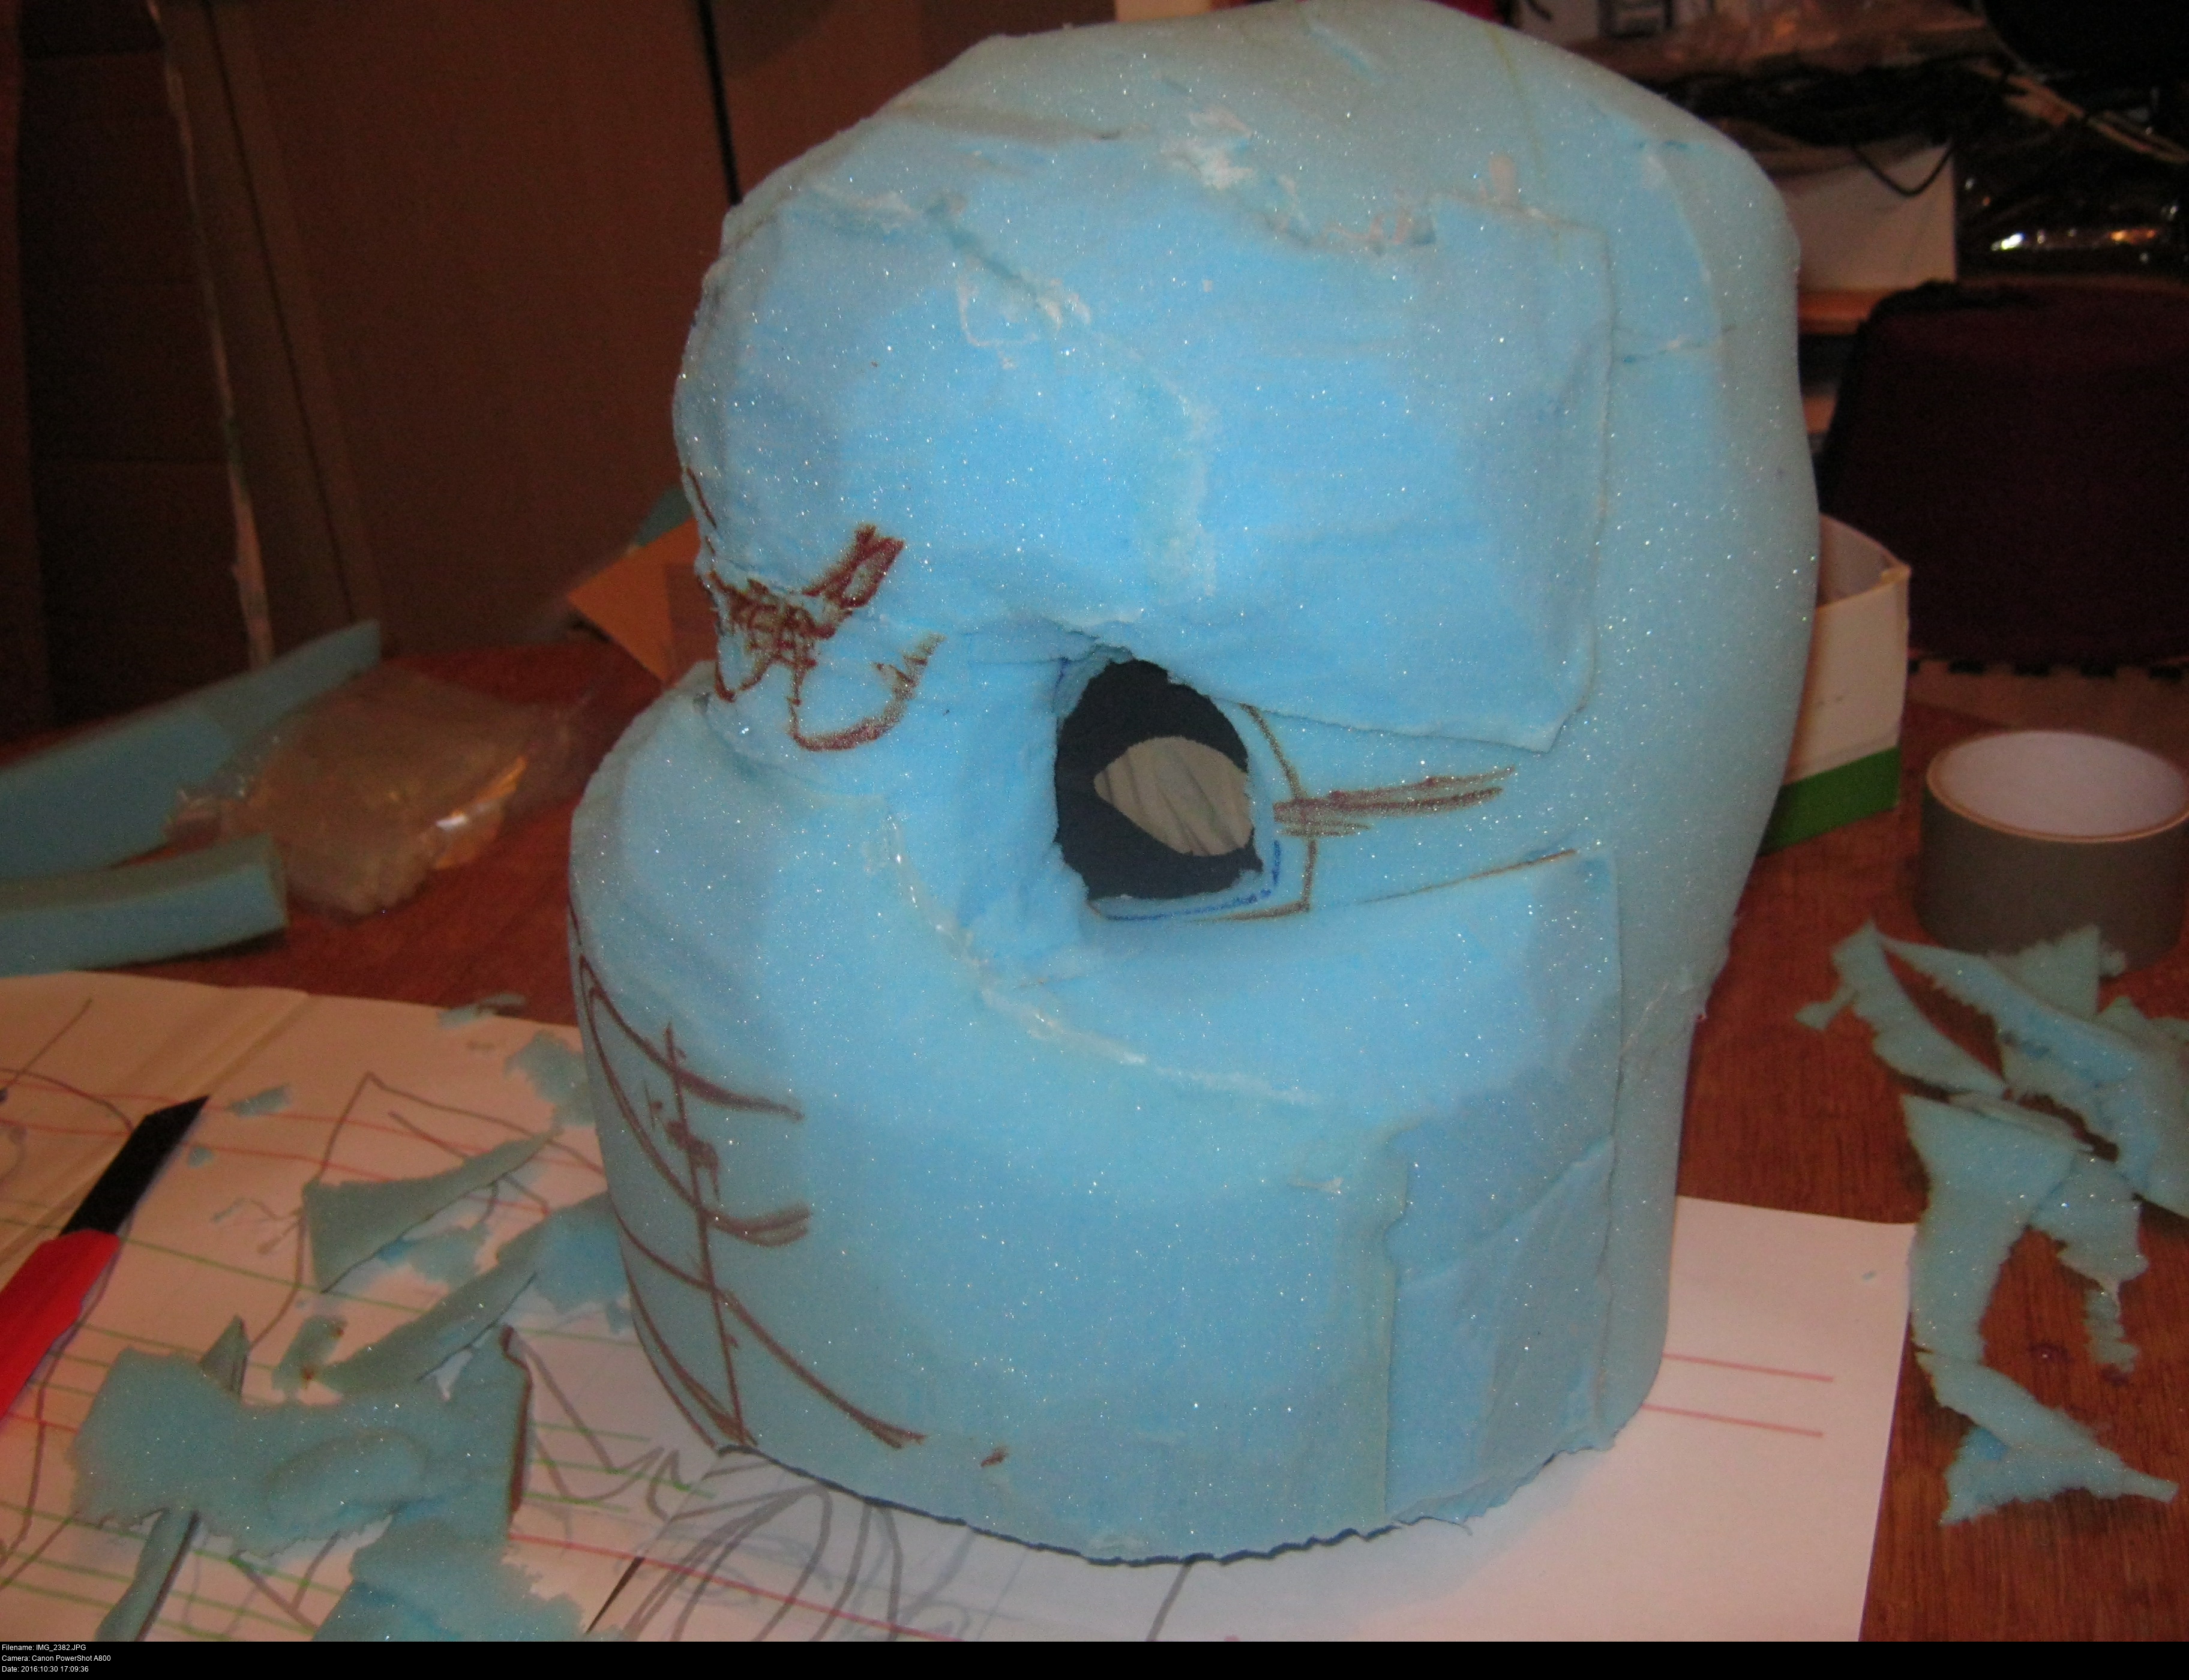
Cut cut cut. Now I have something sort of gas-mask looking.

There's a certain je ne sais quoi that it ne pas has at the moment. It sort of resembles what I'm trying to do, but 'No'.
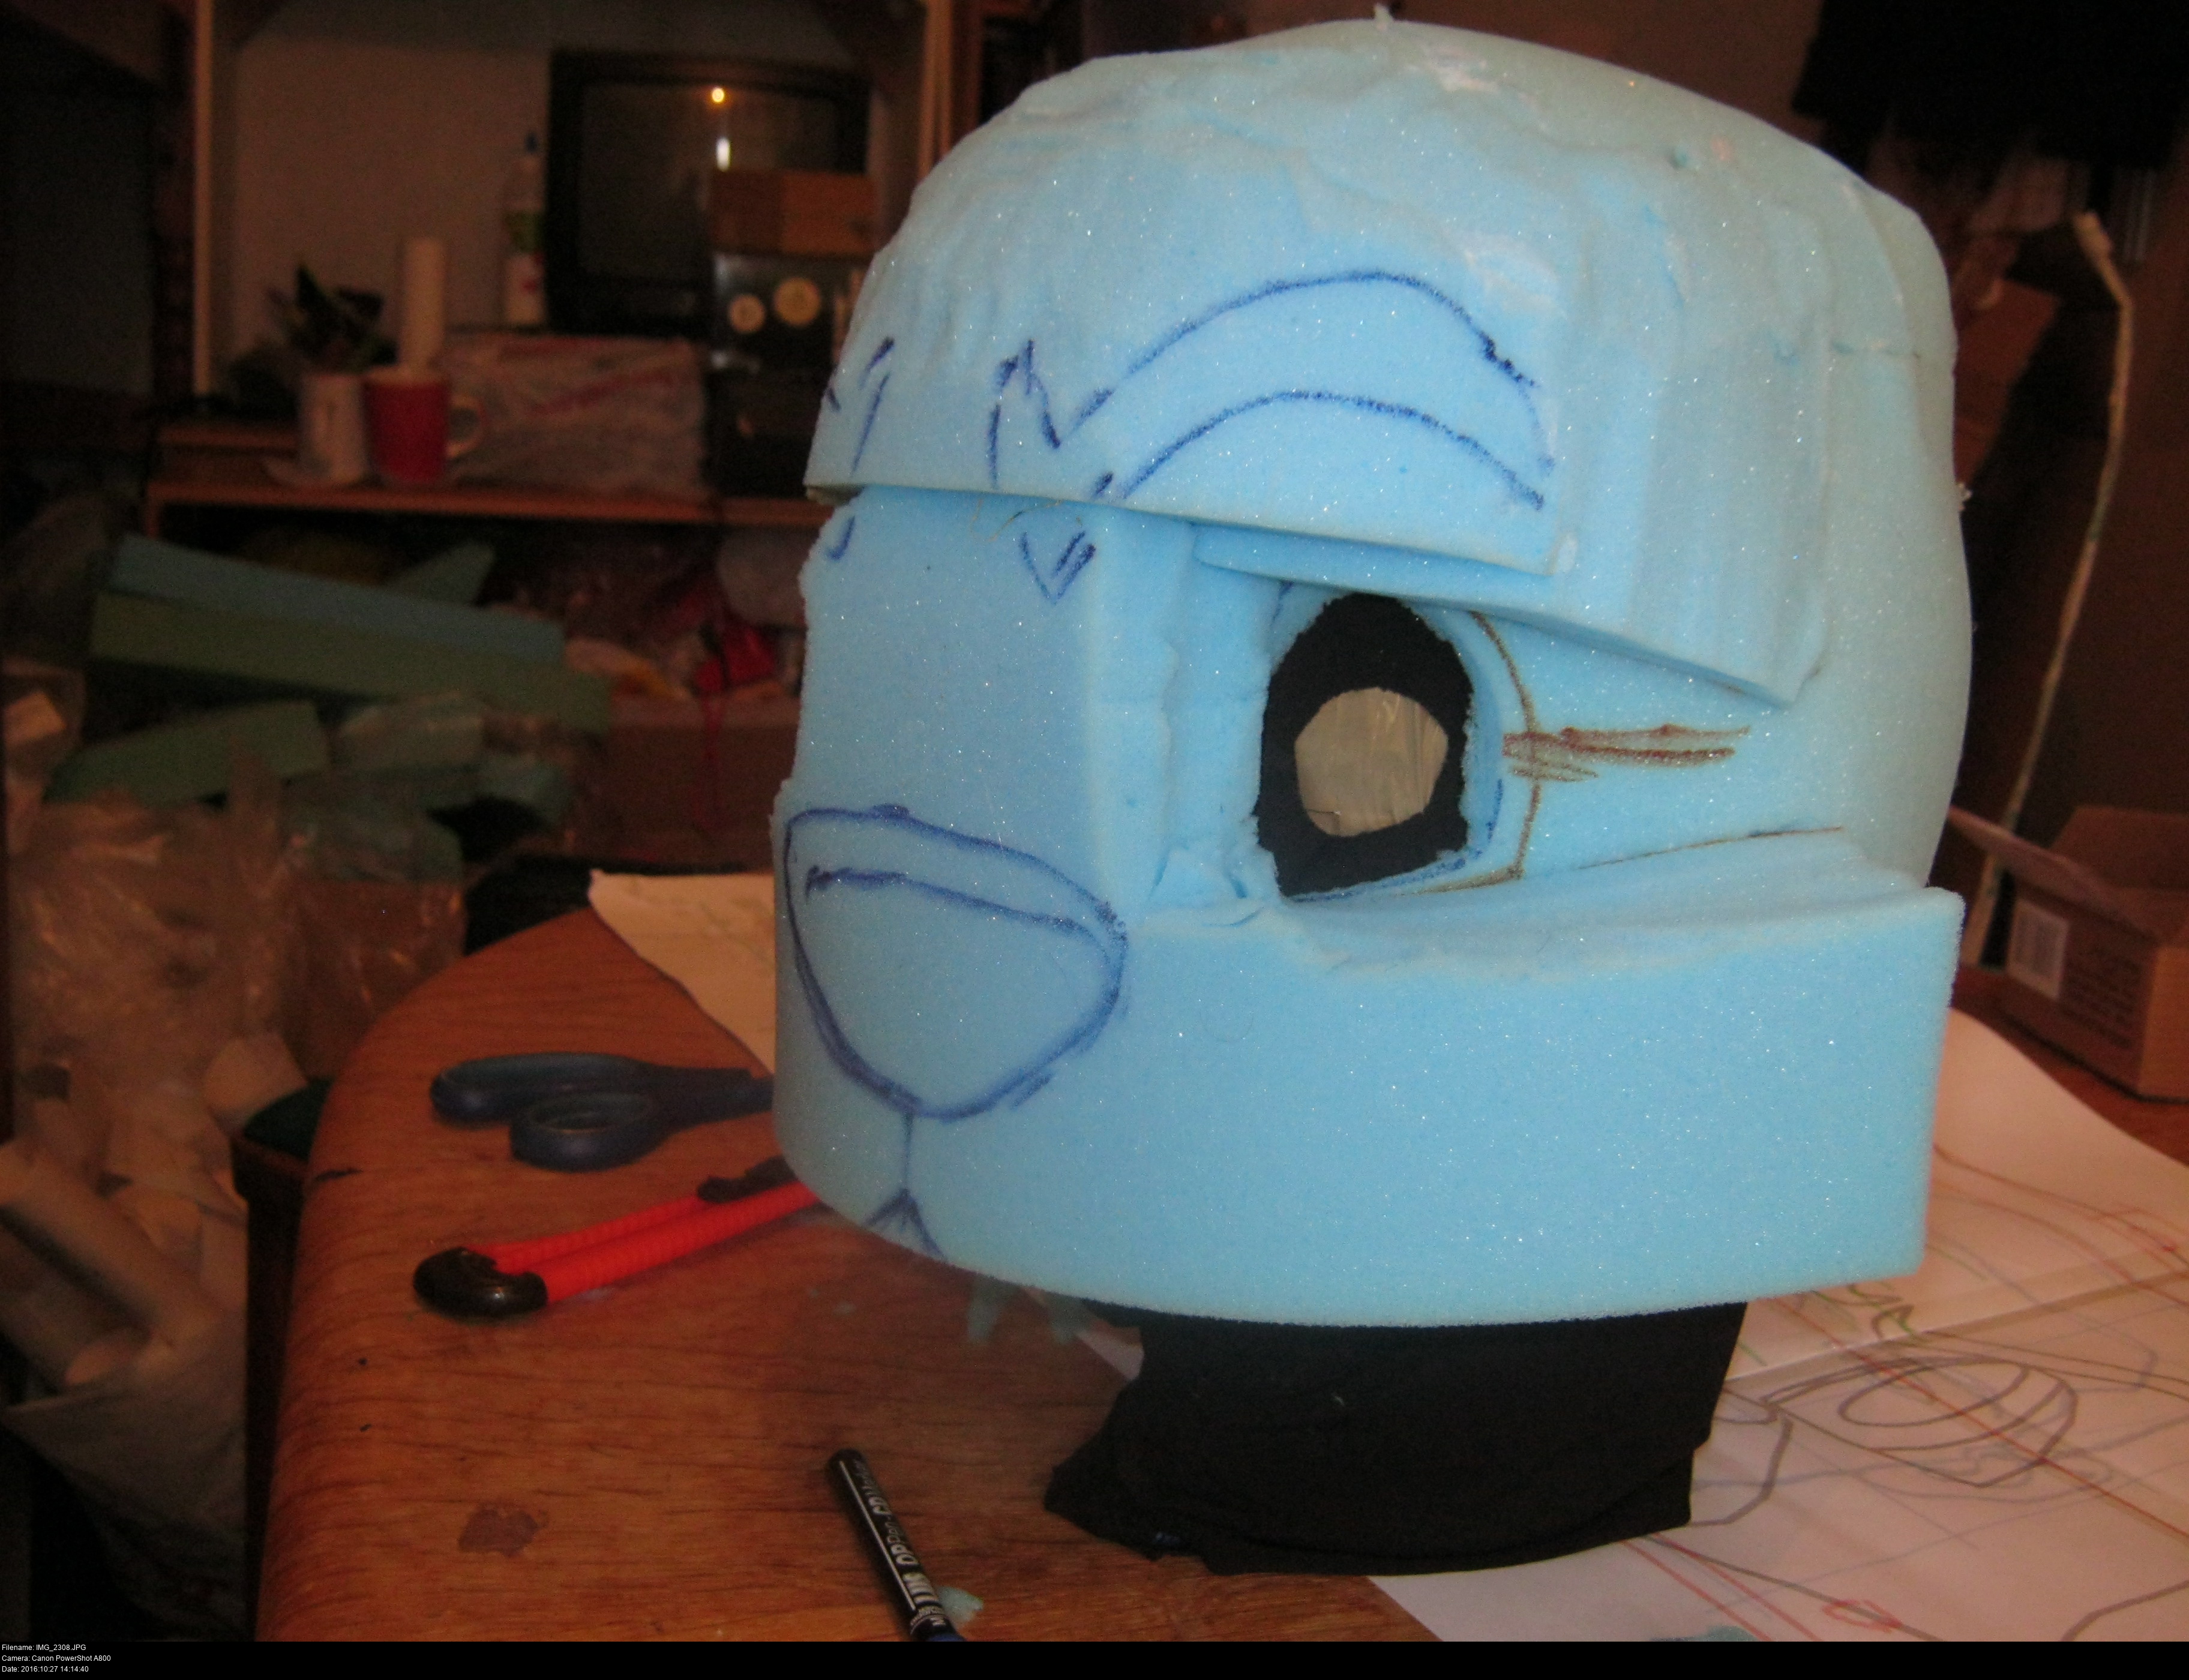
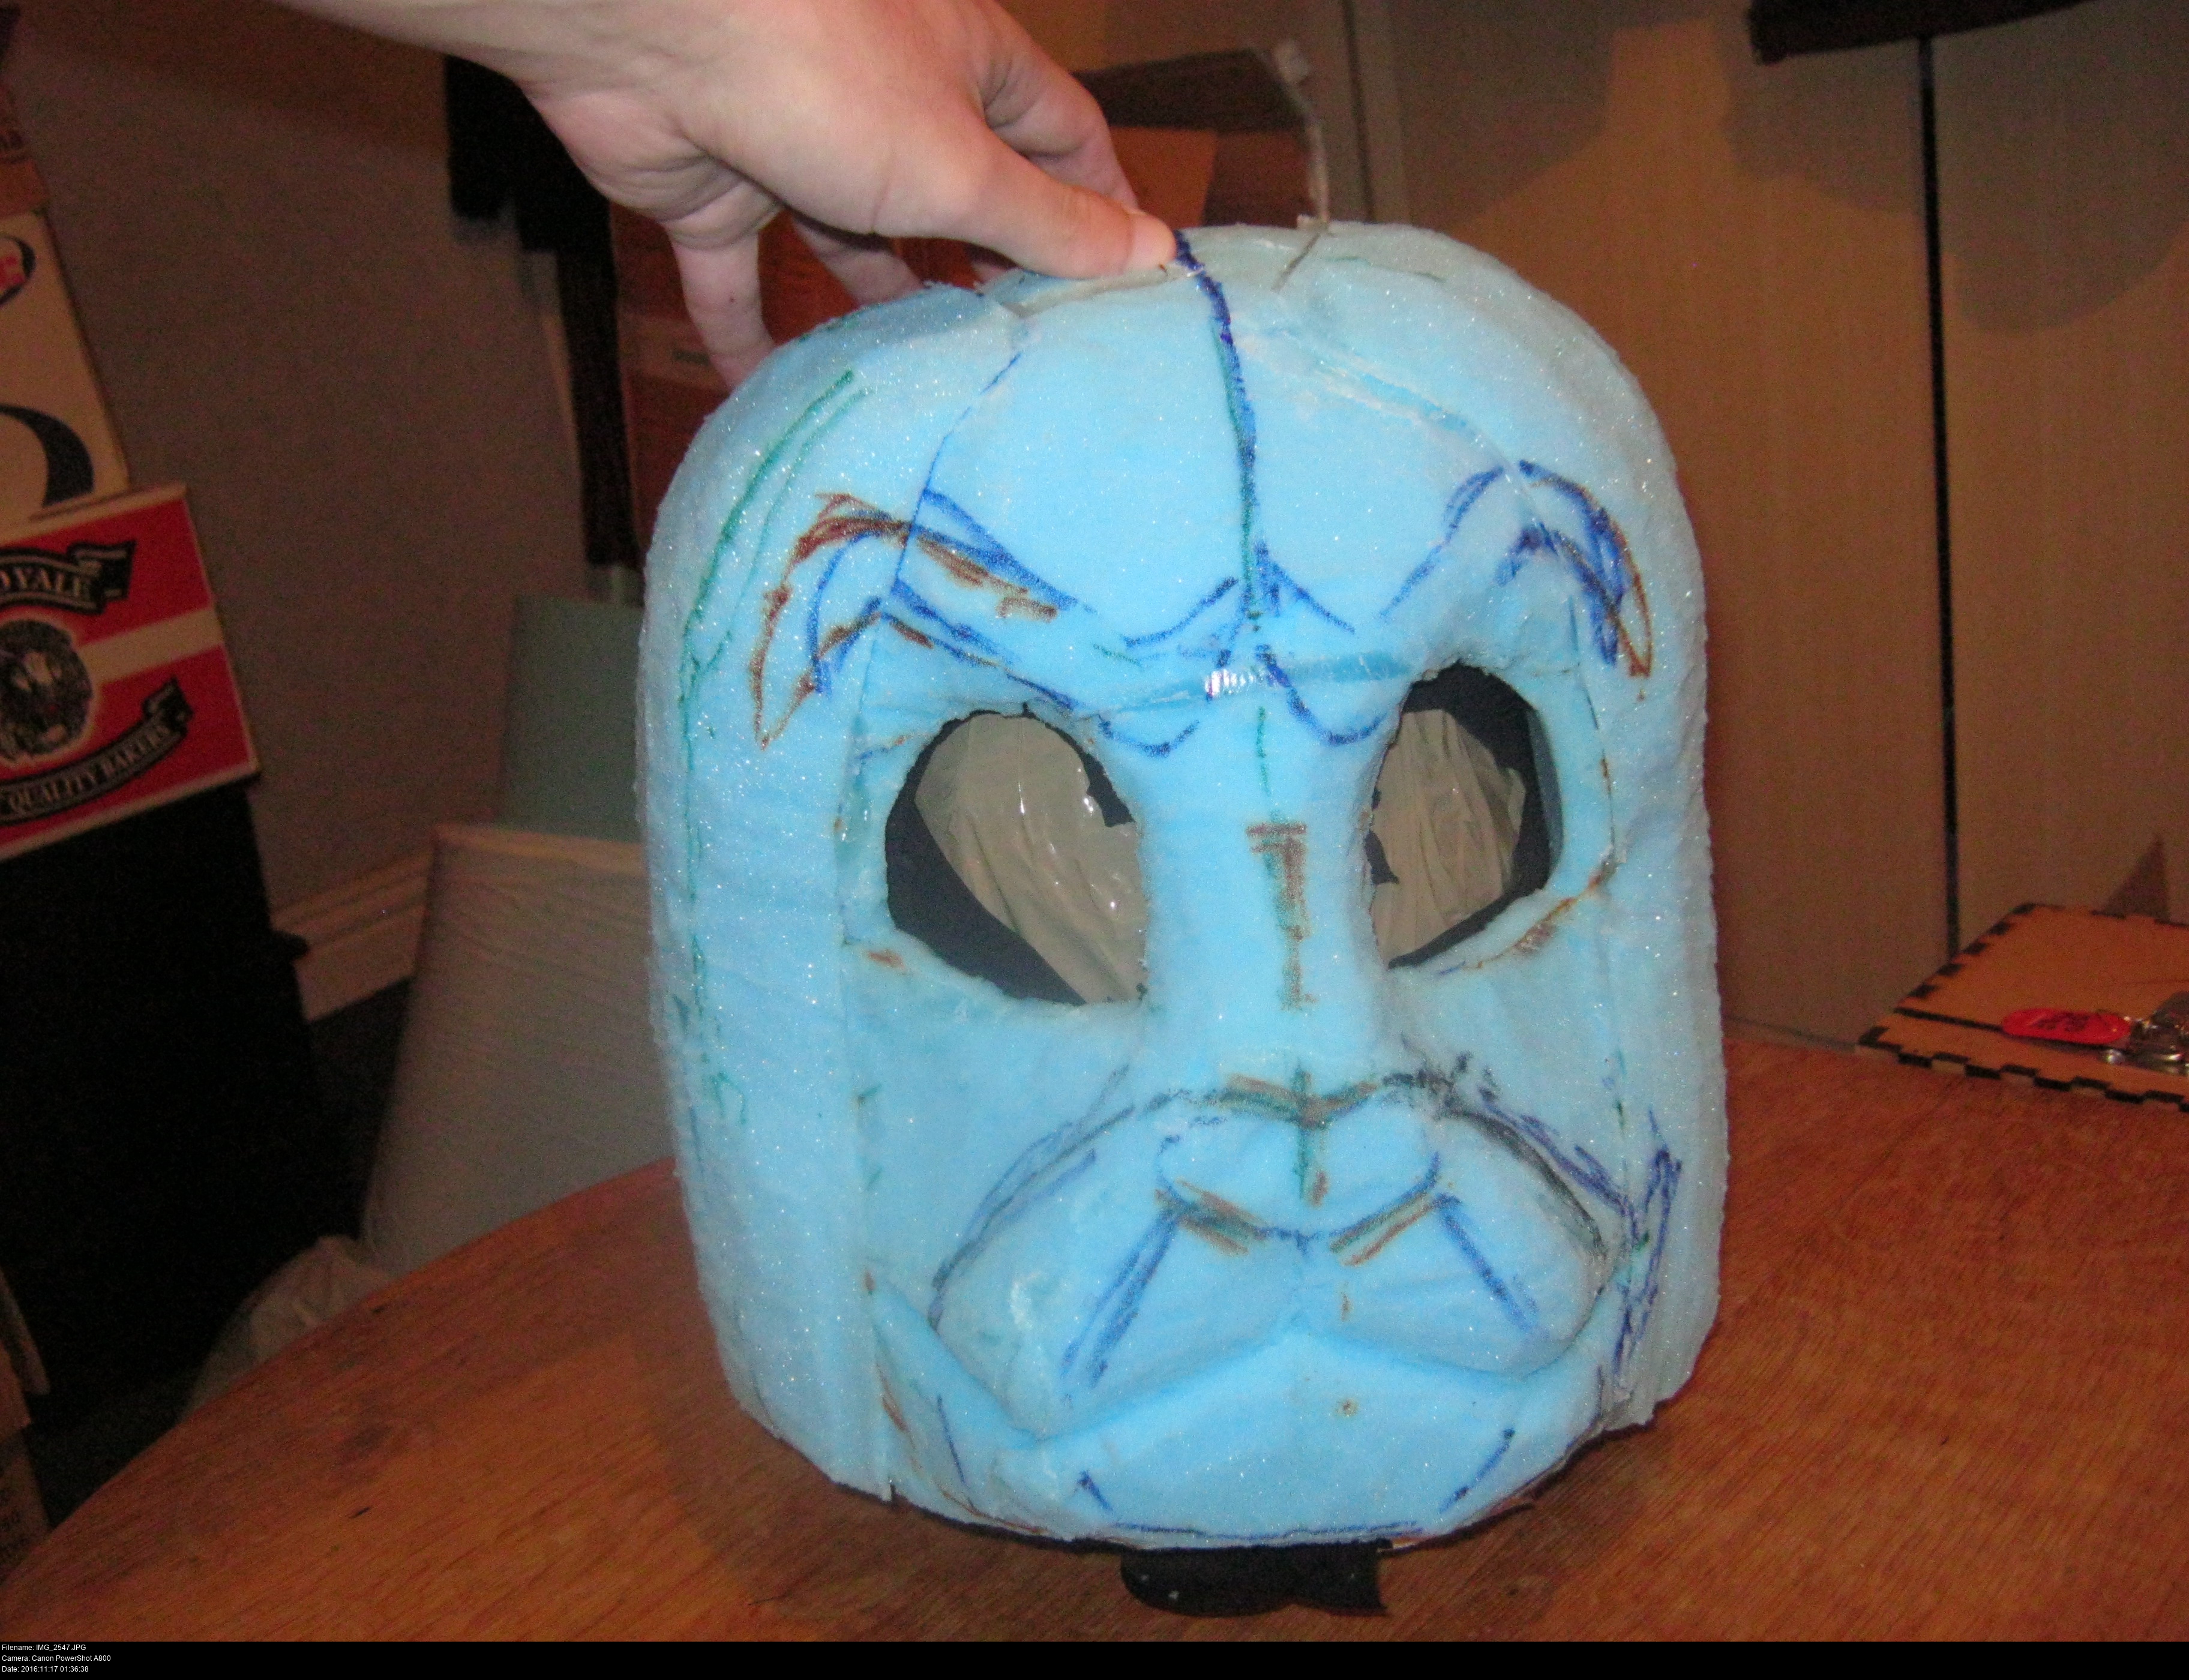
Alright, it's time to put my theory to the test. I said that muzzle shape recedes towards the head, and here we go!
It's looking more overlynxy now, but... uh... not.


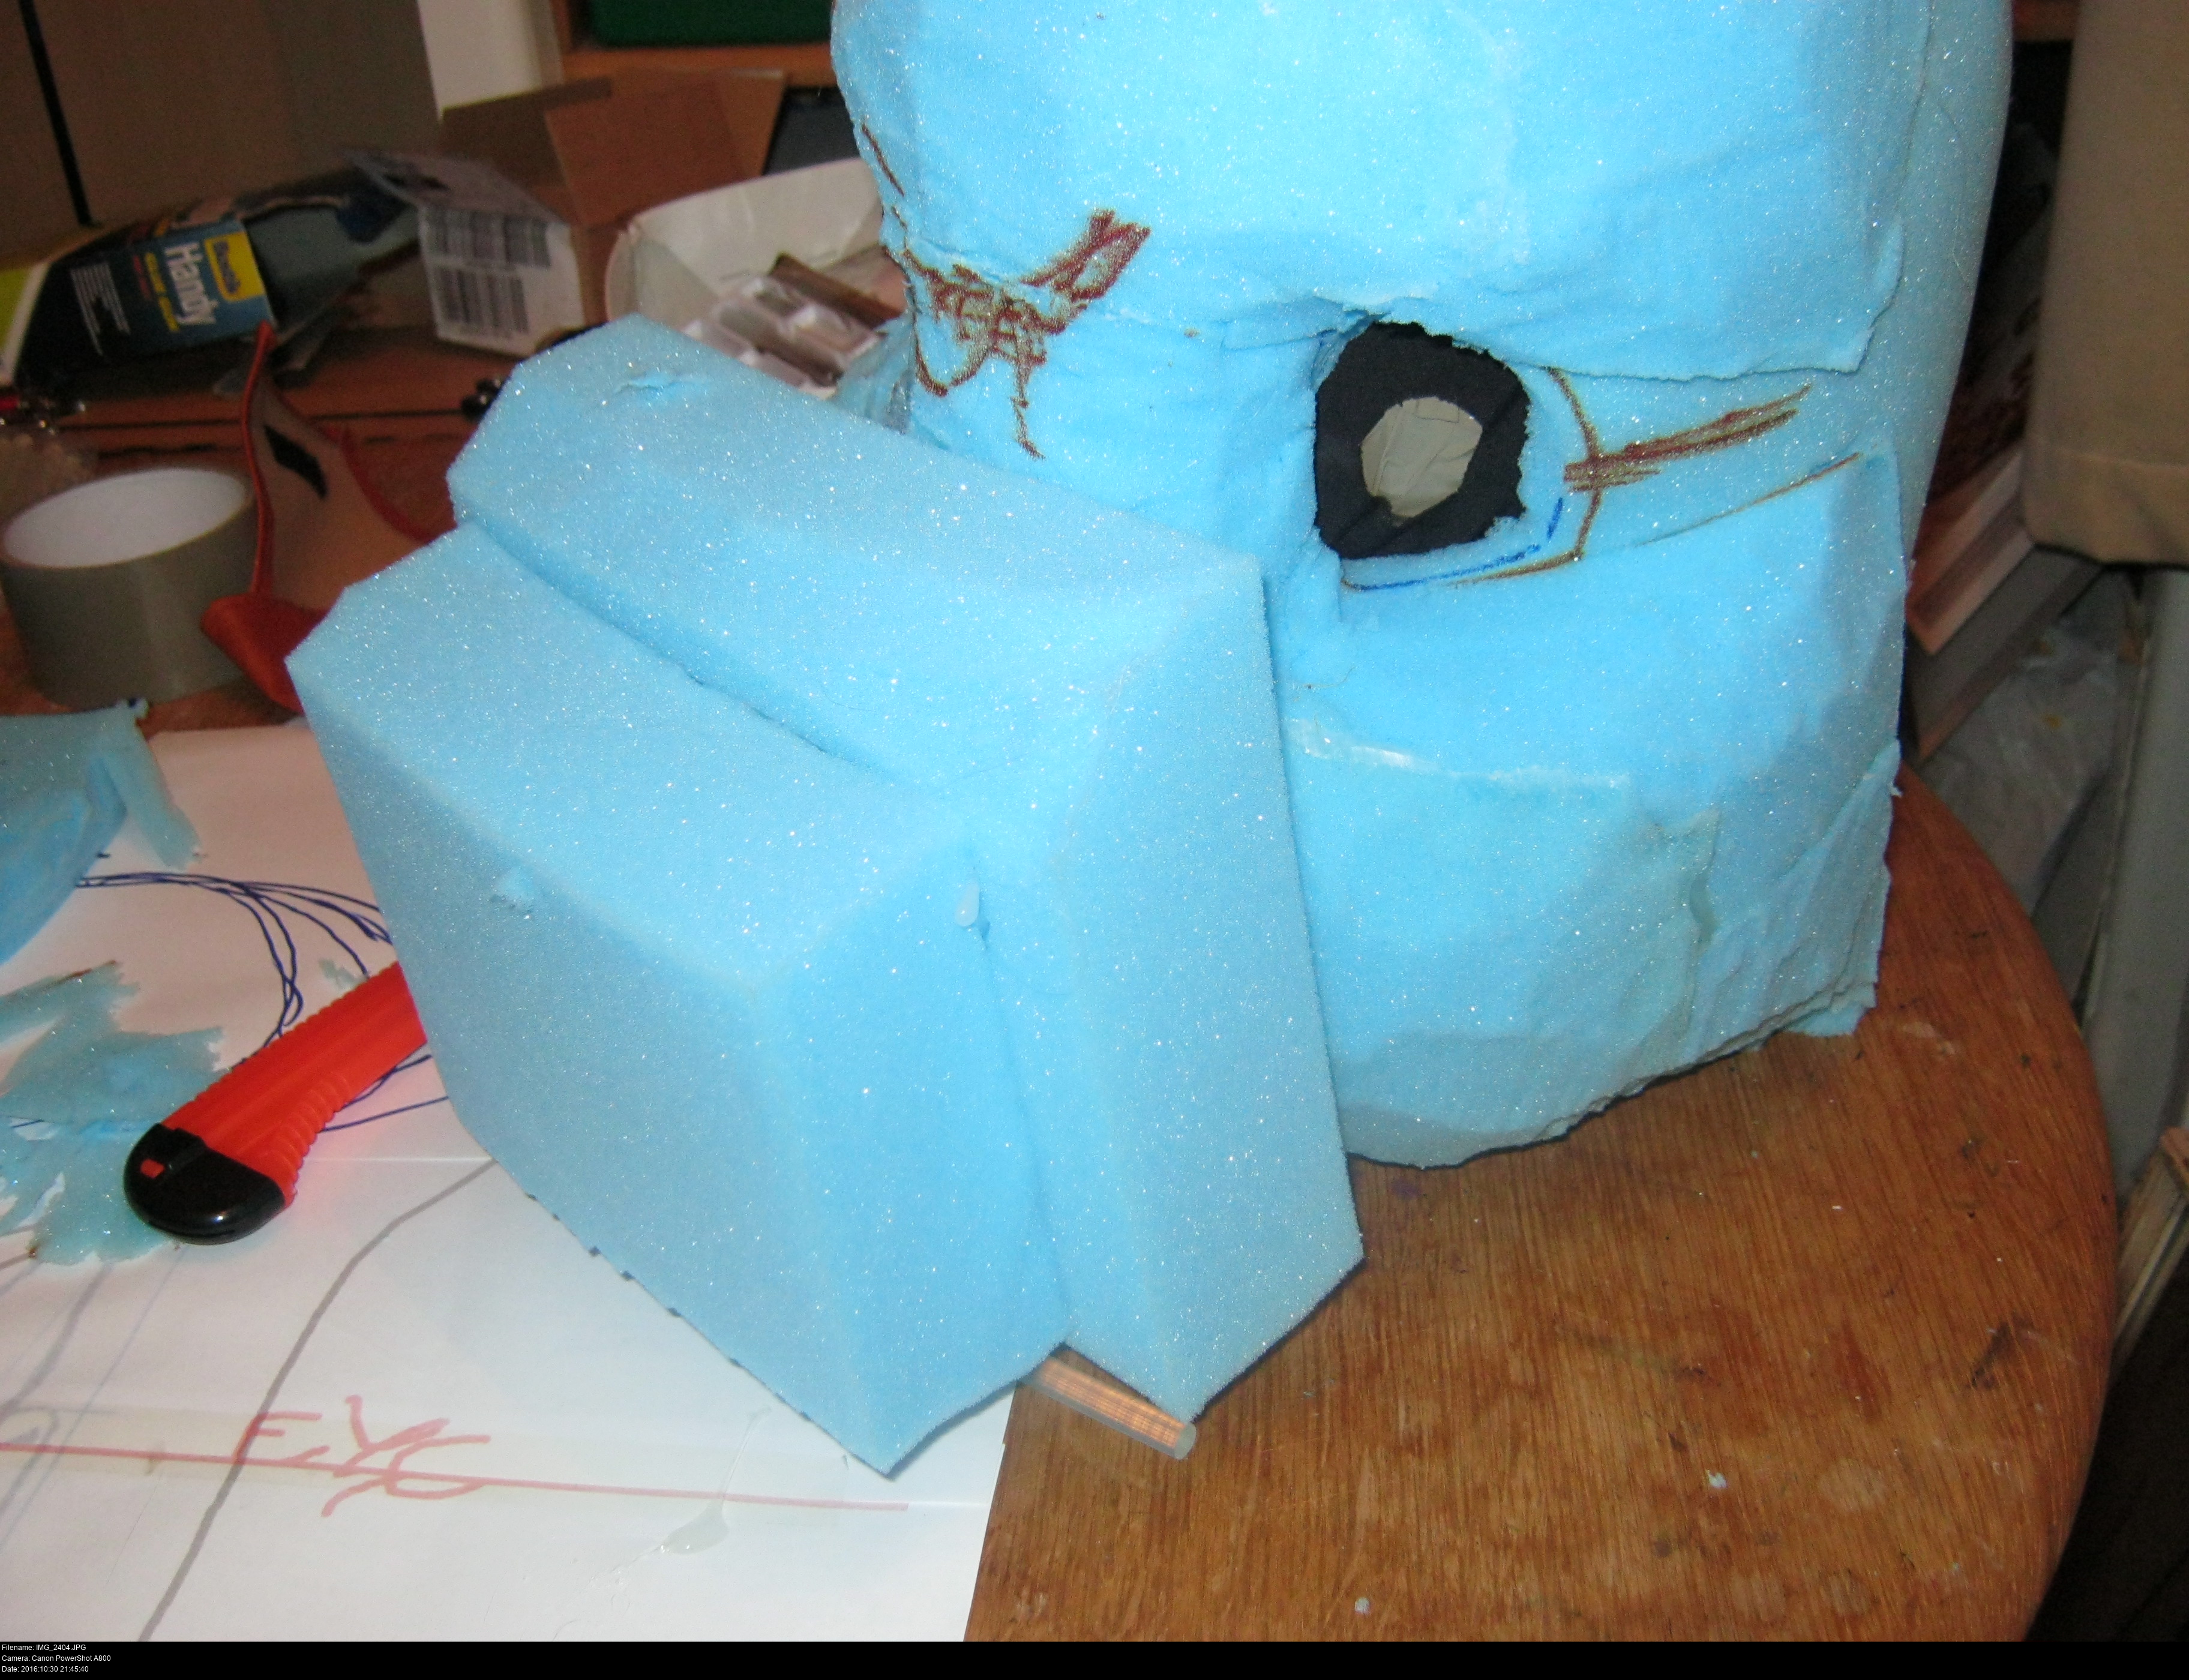
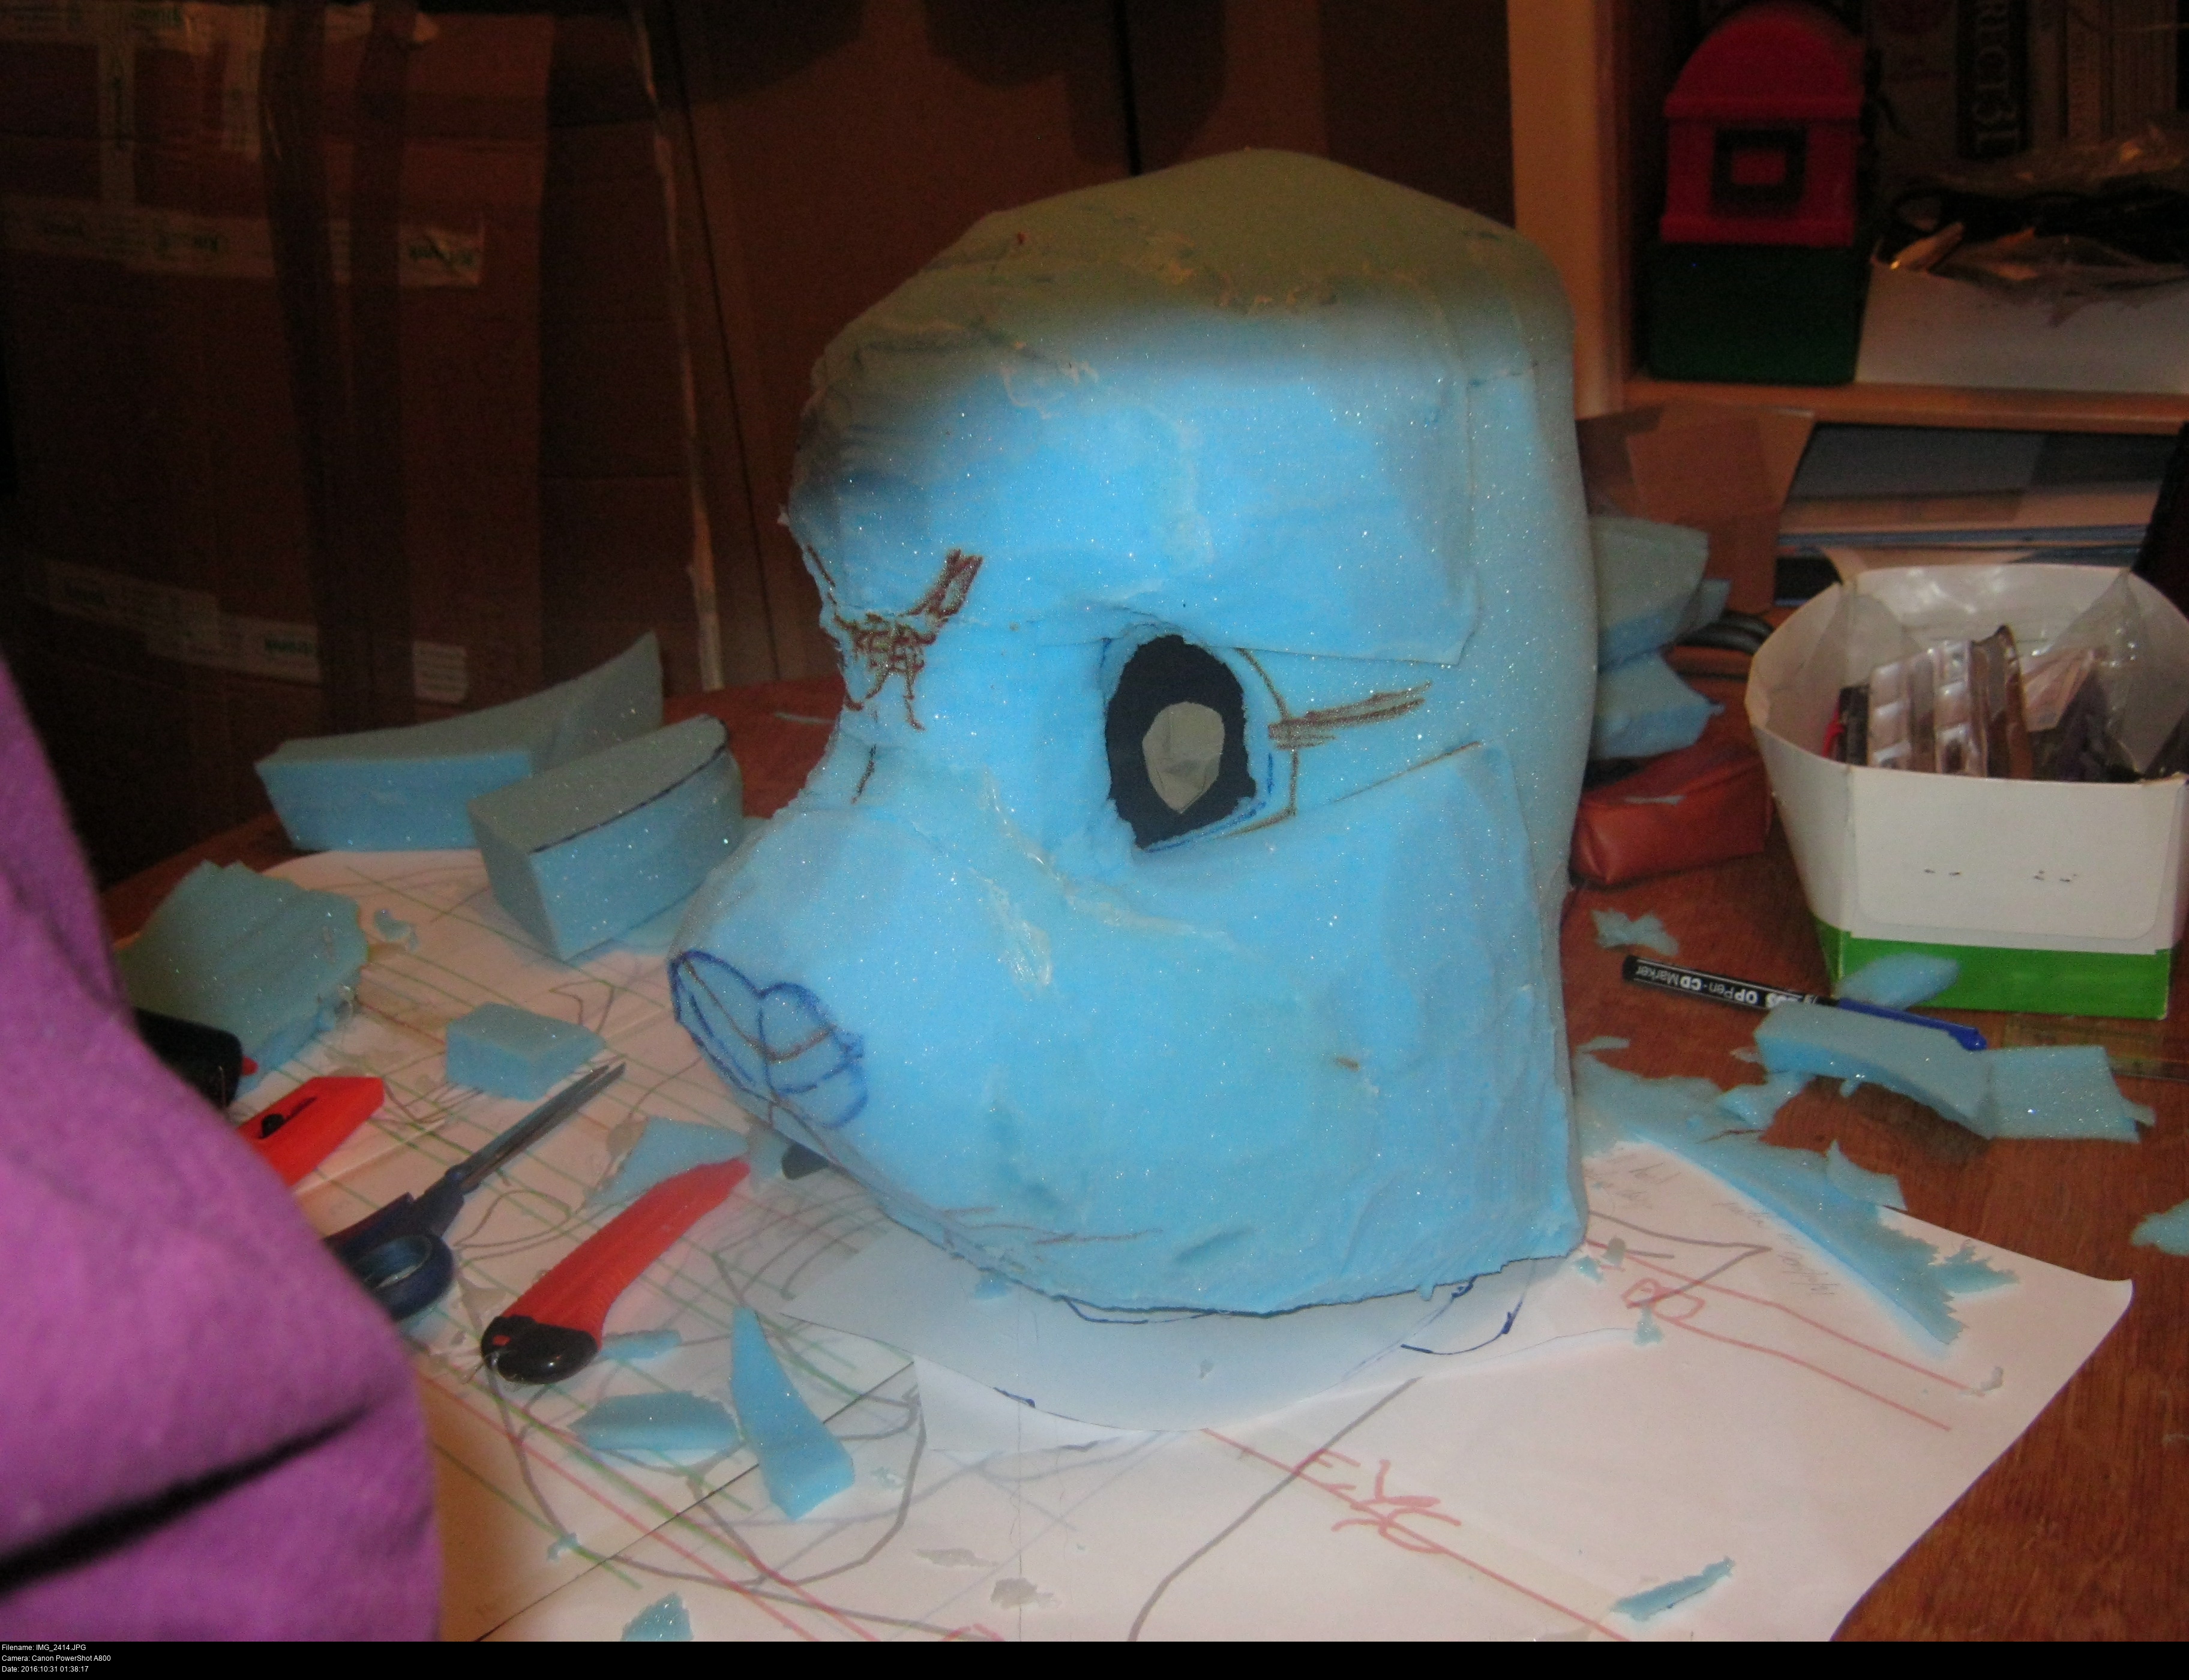
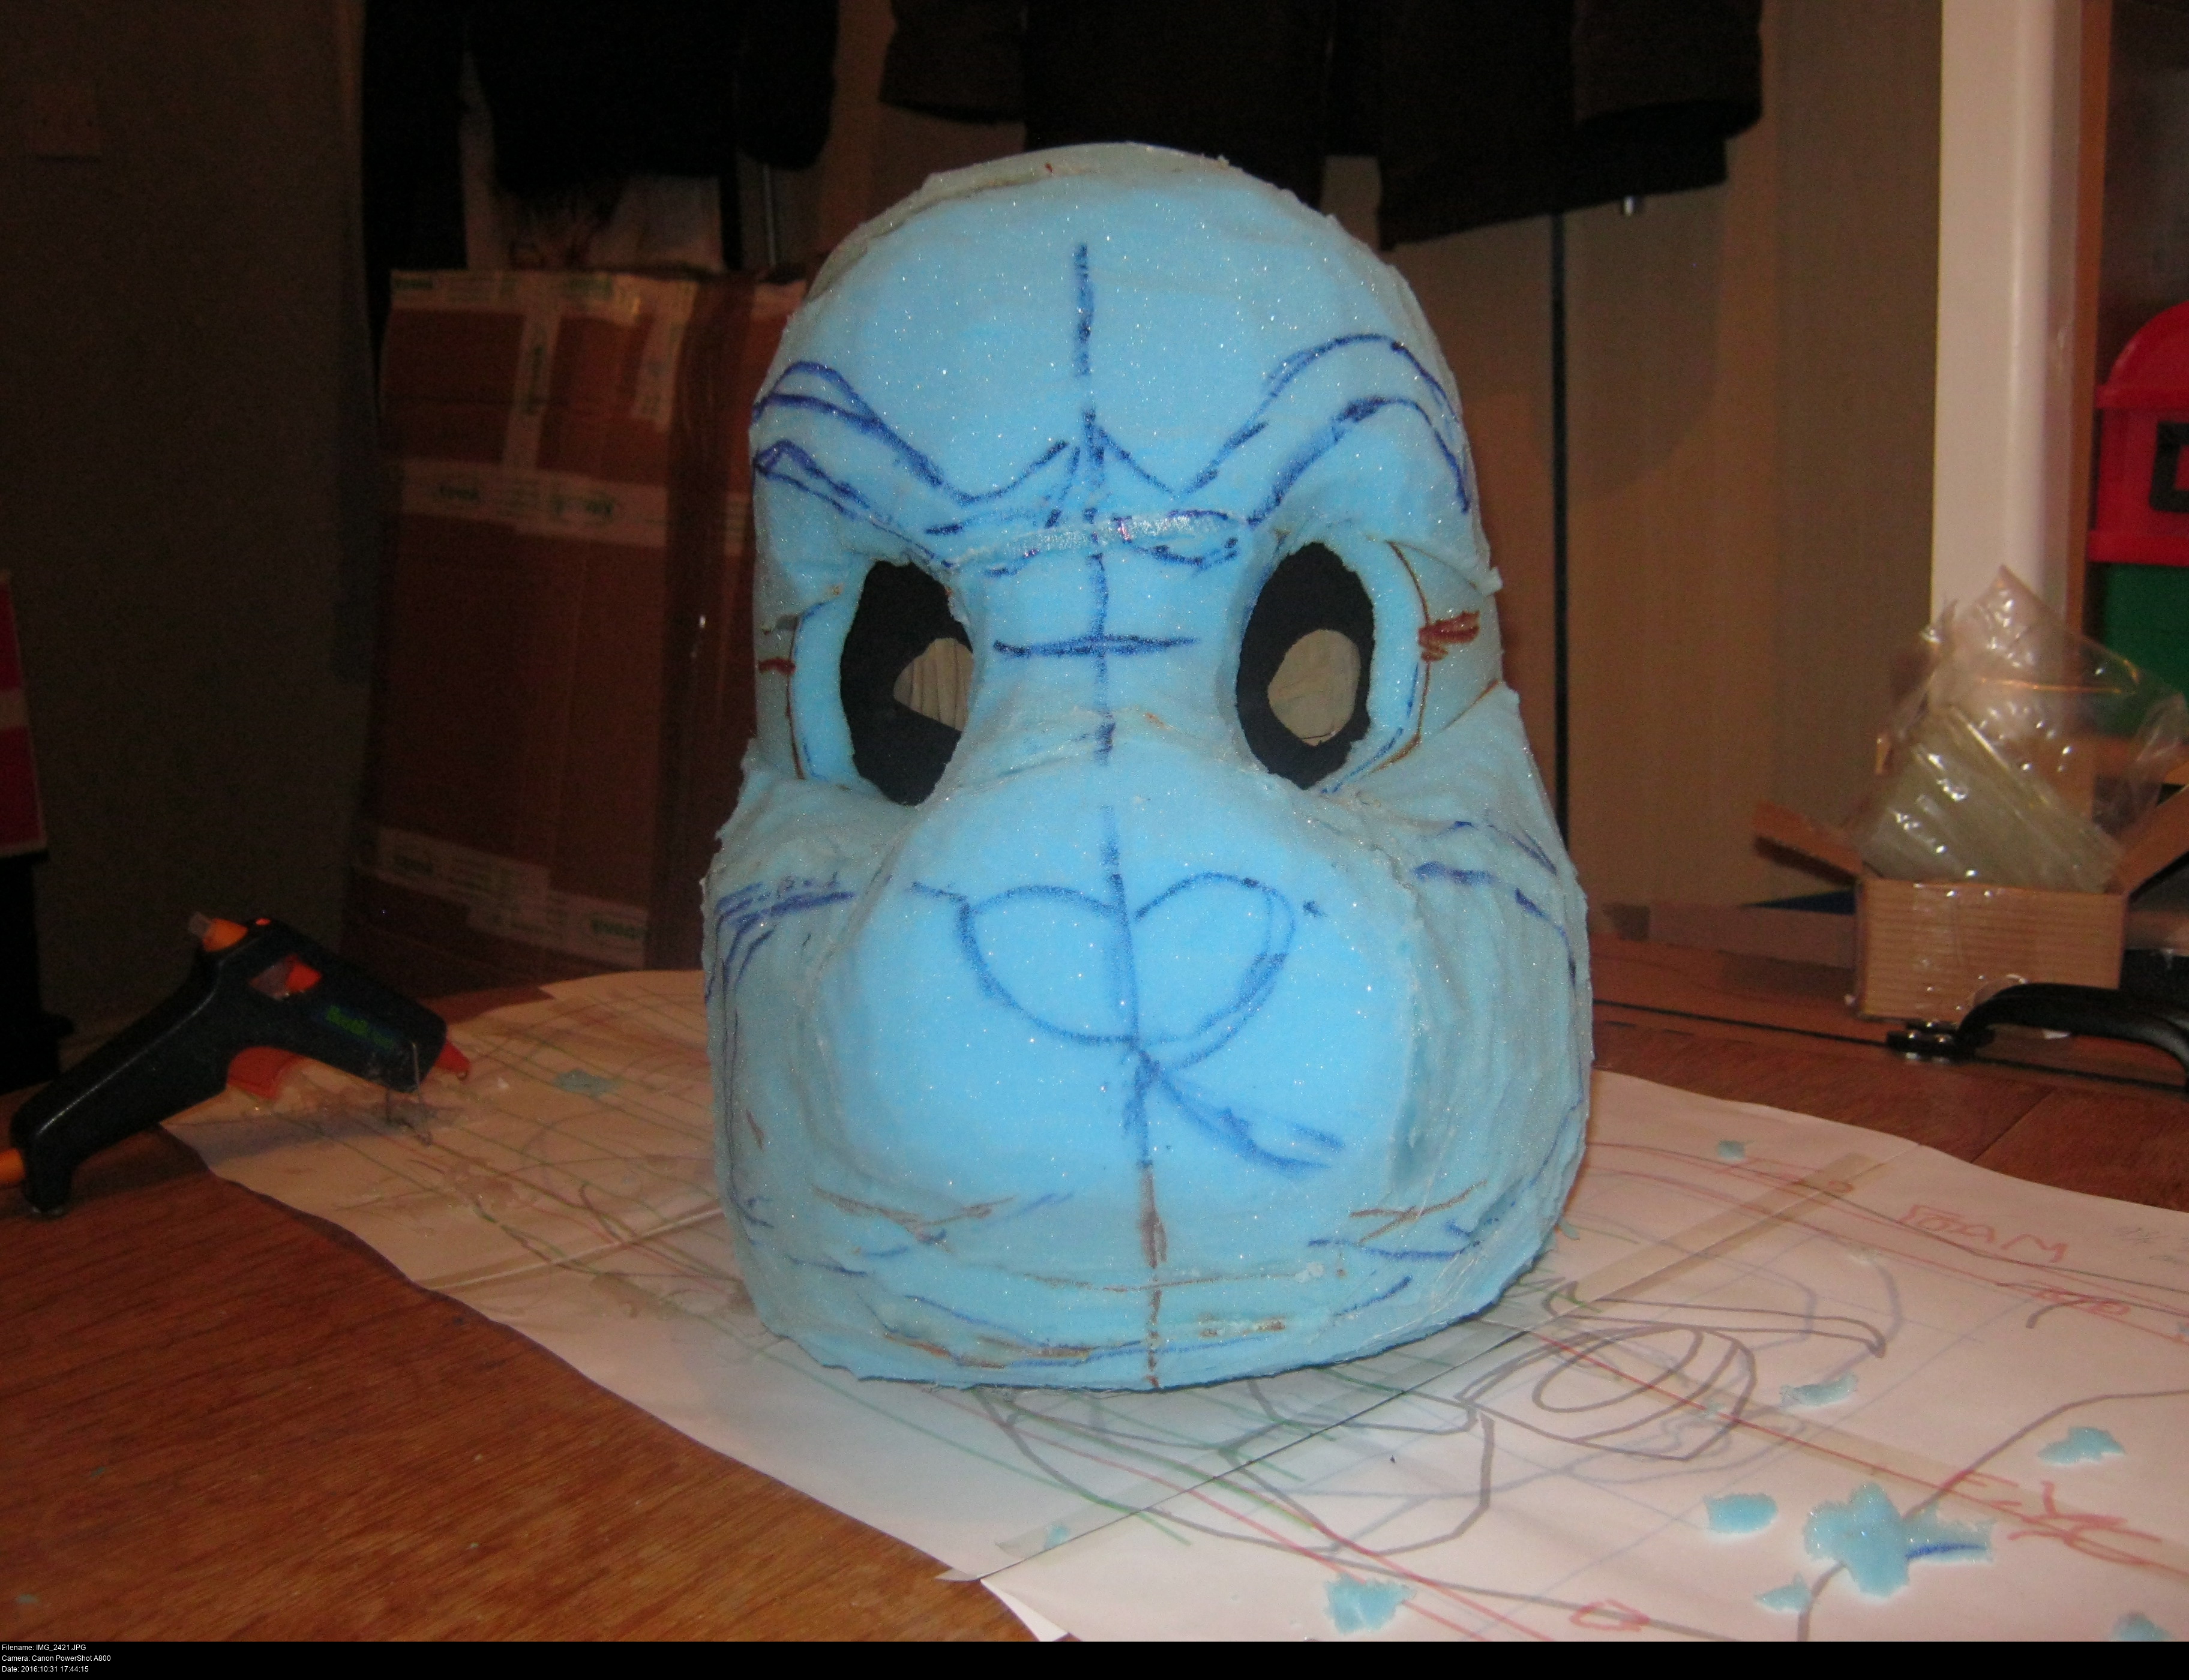
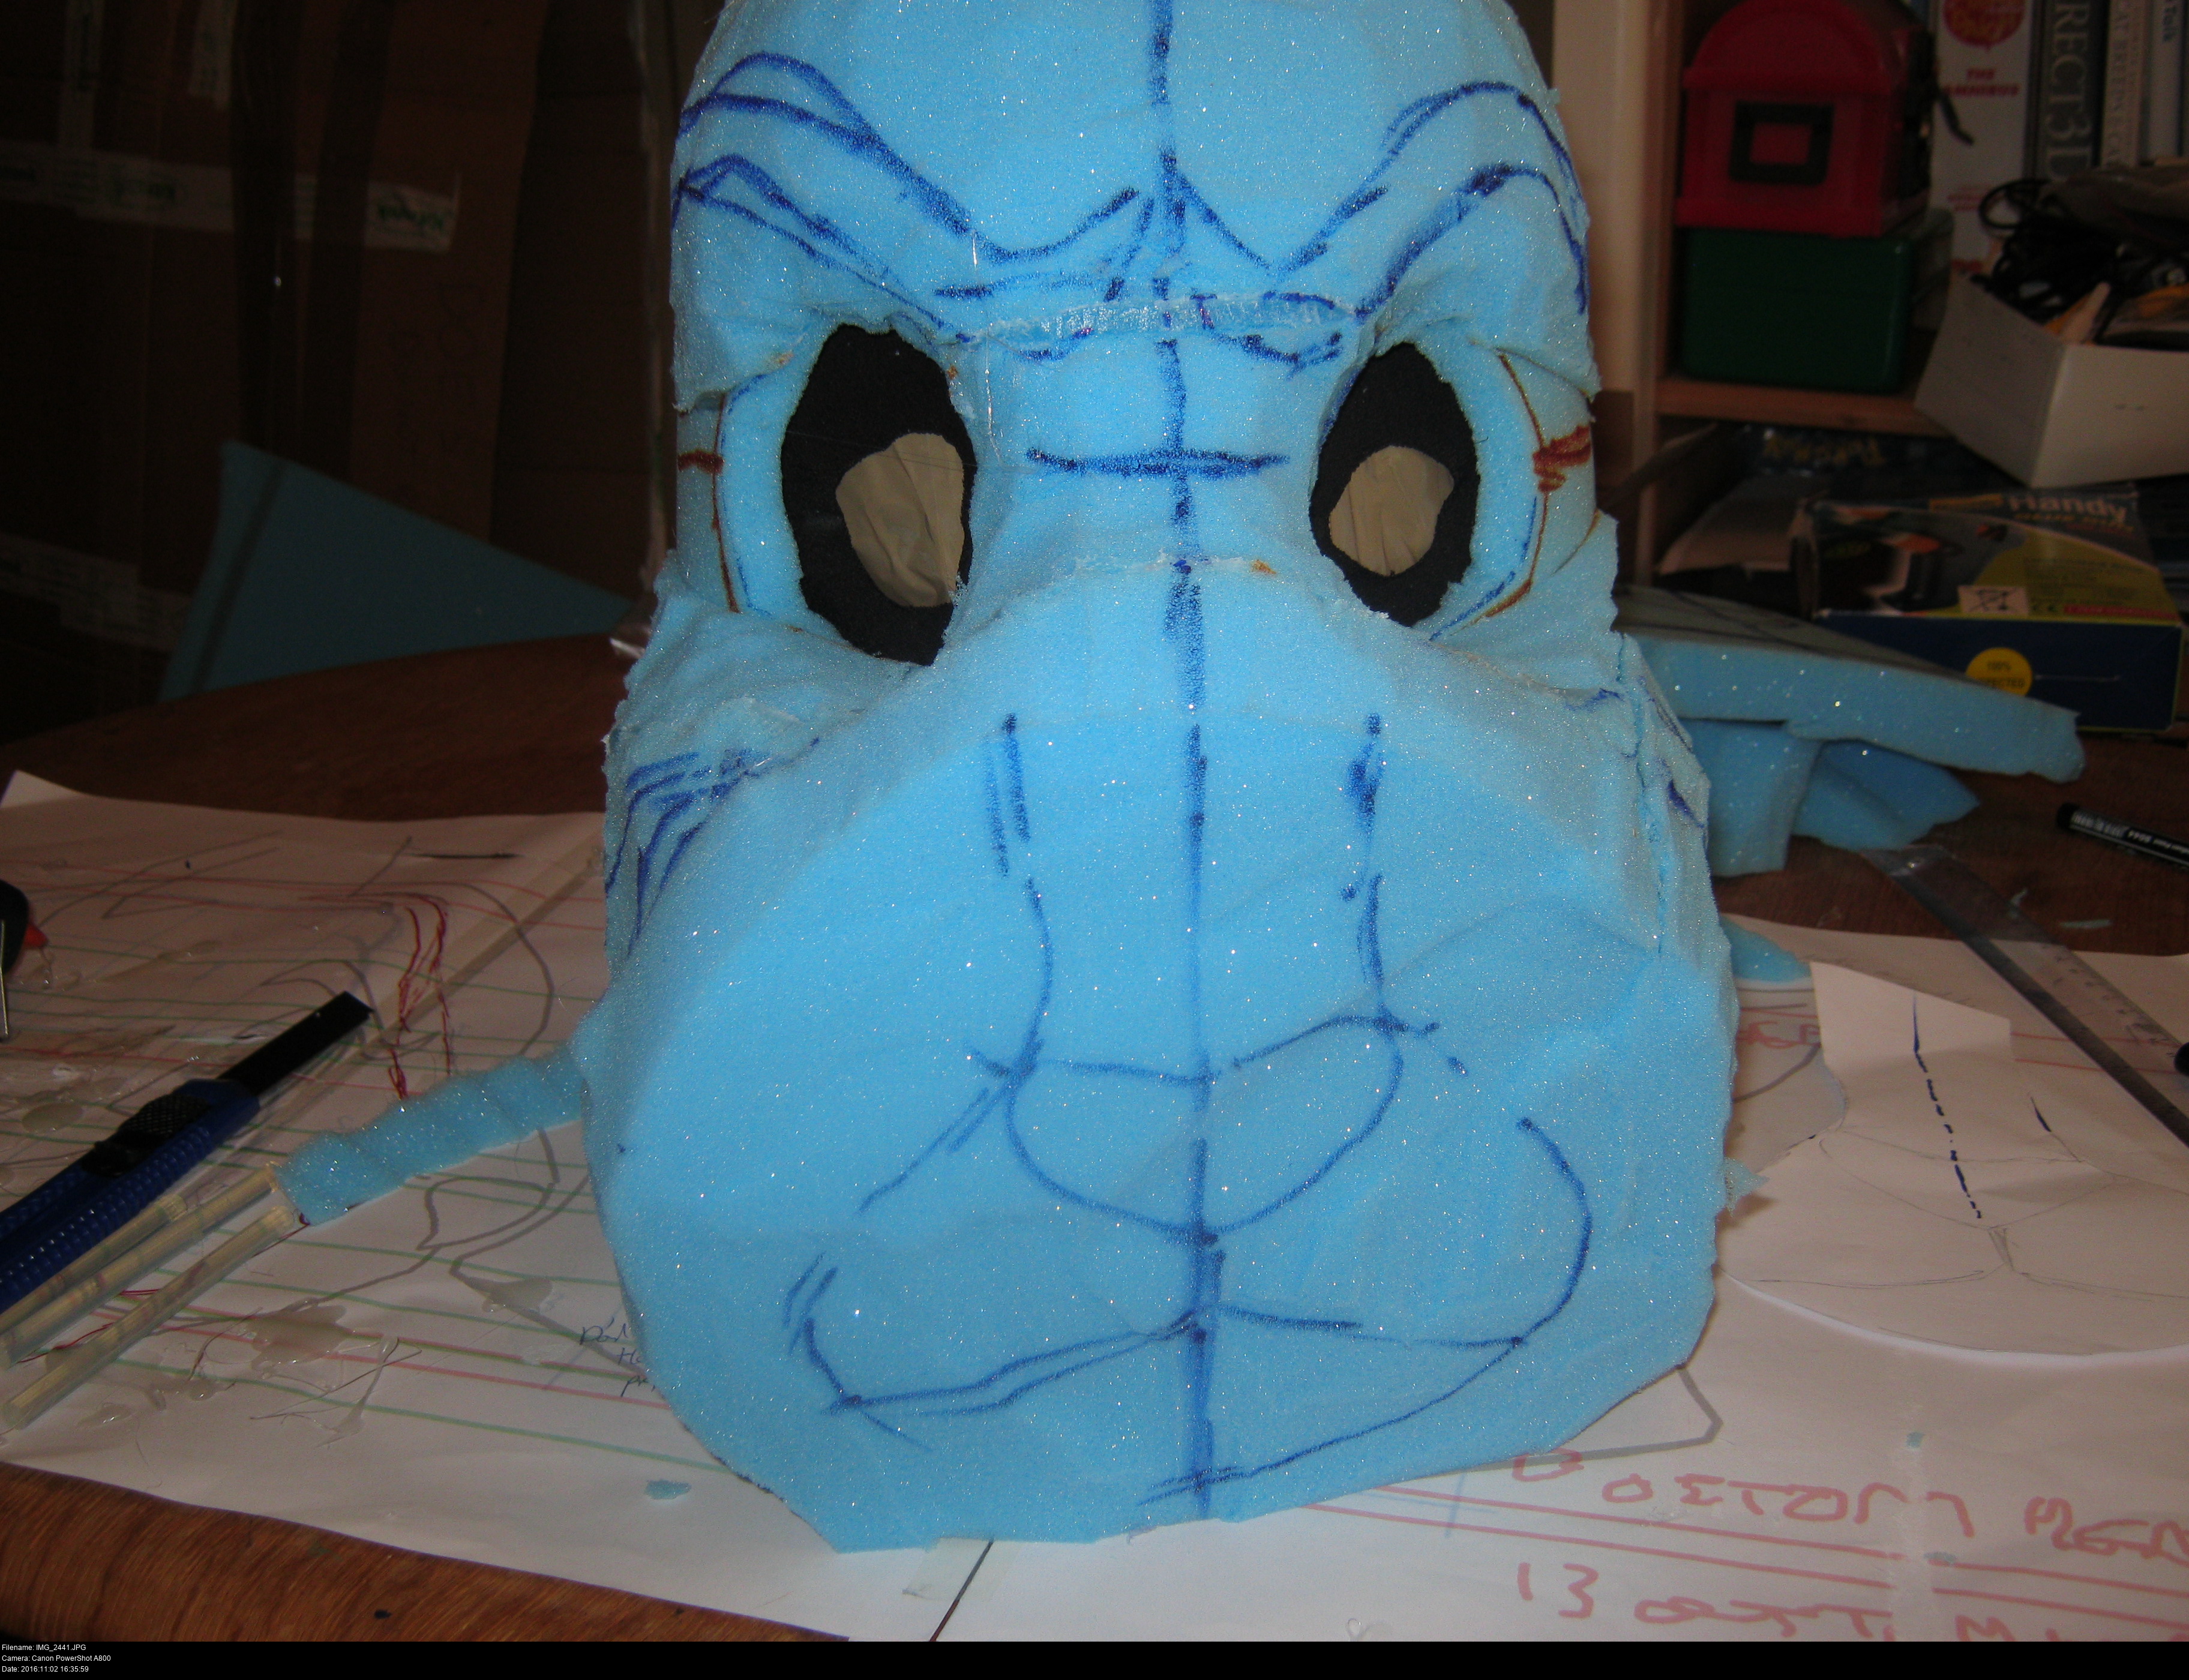
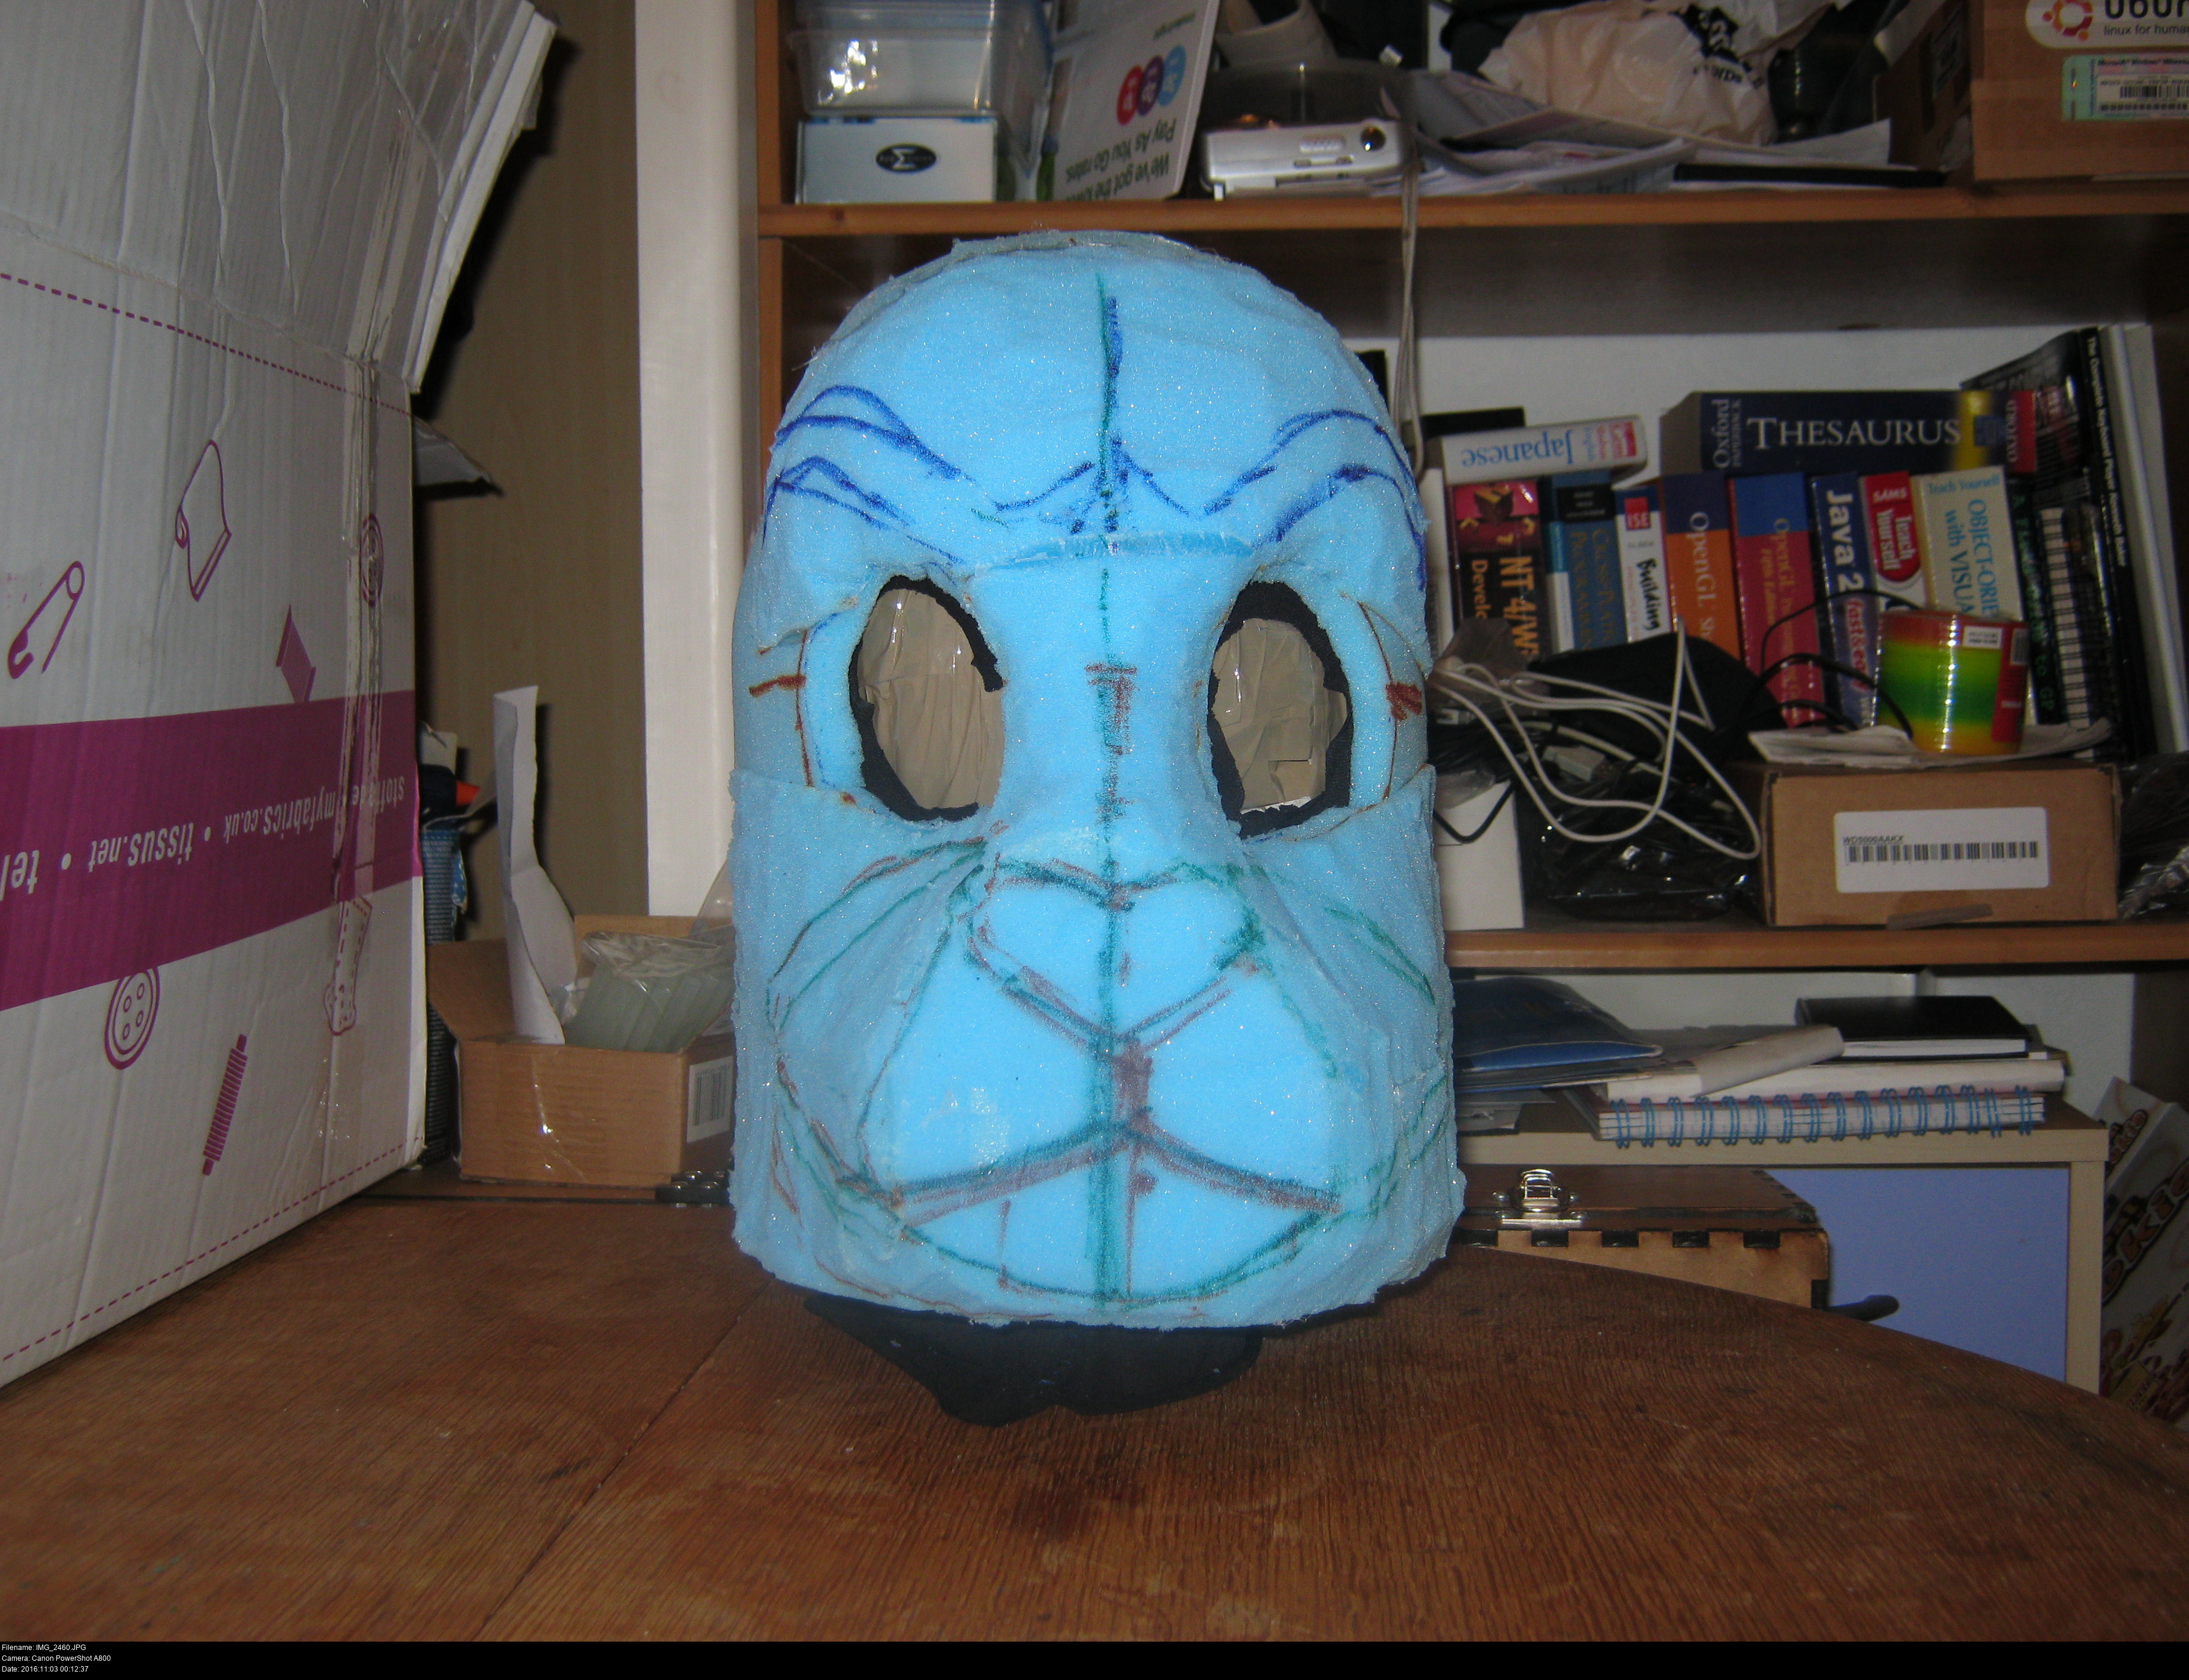
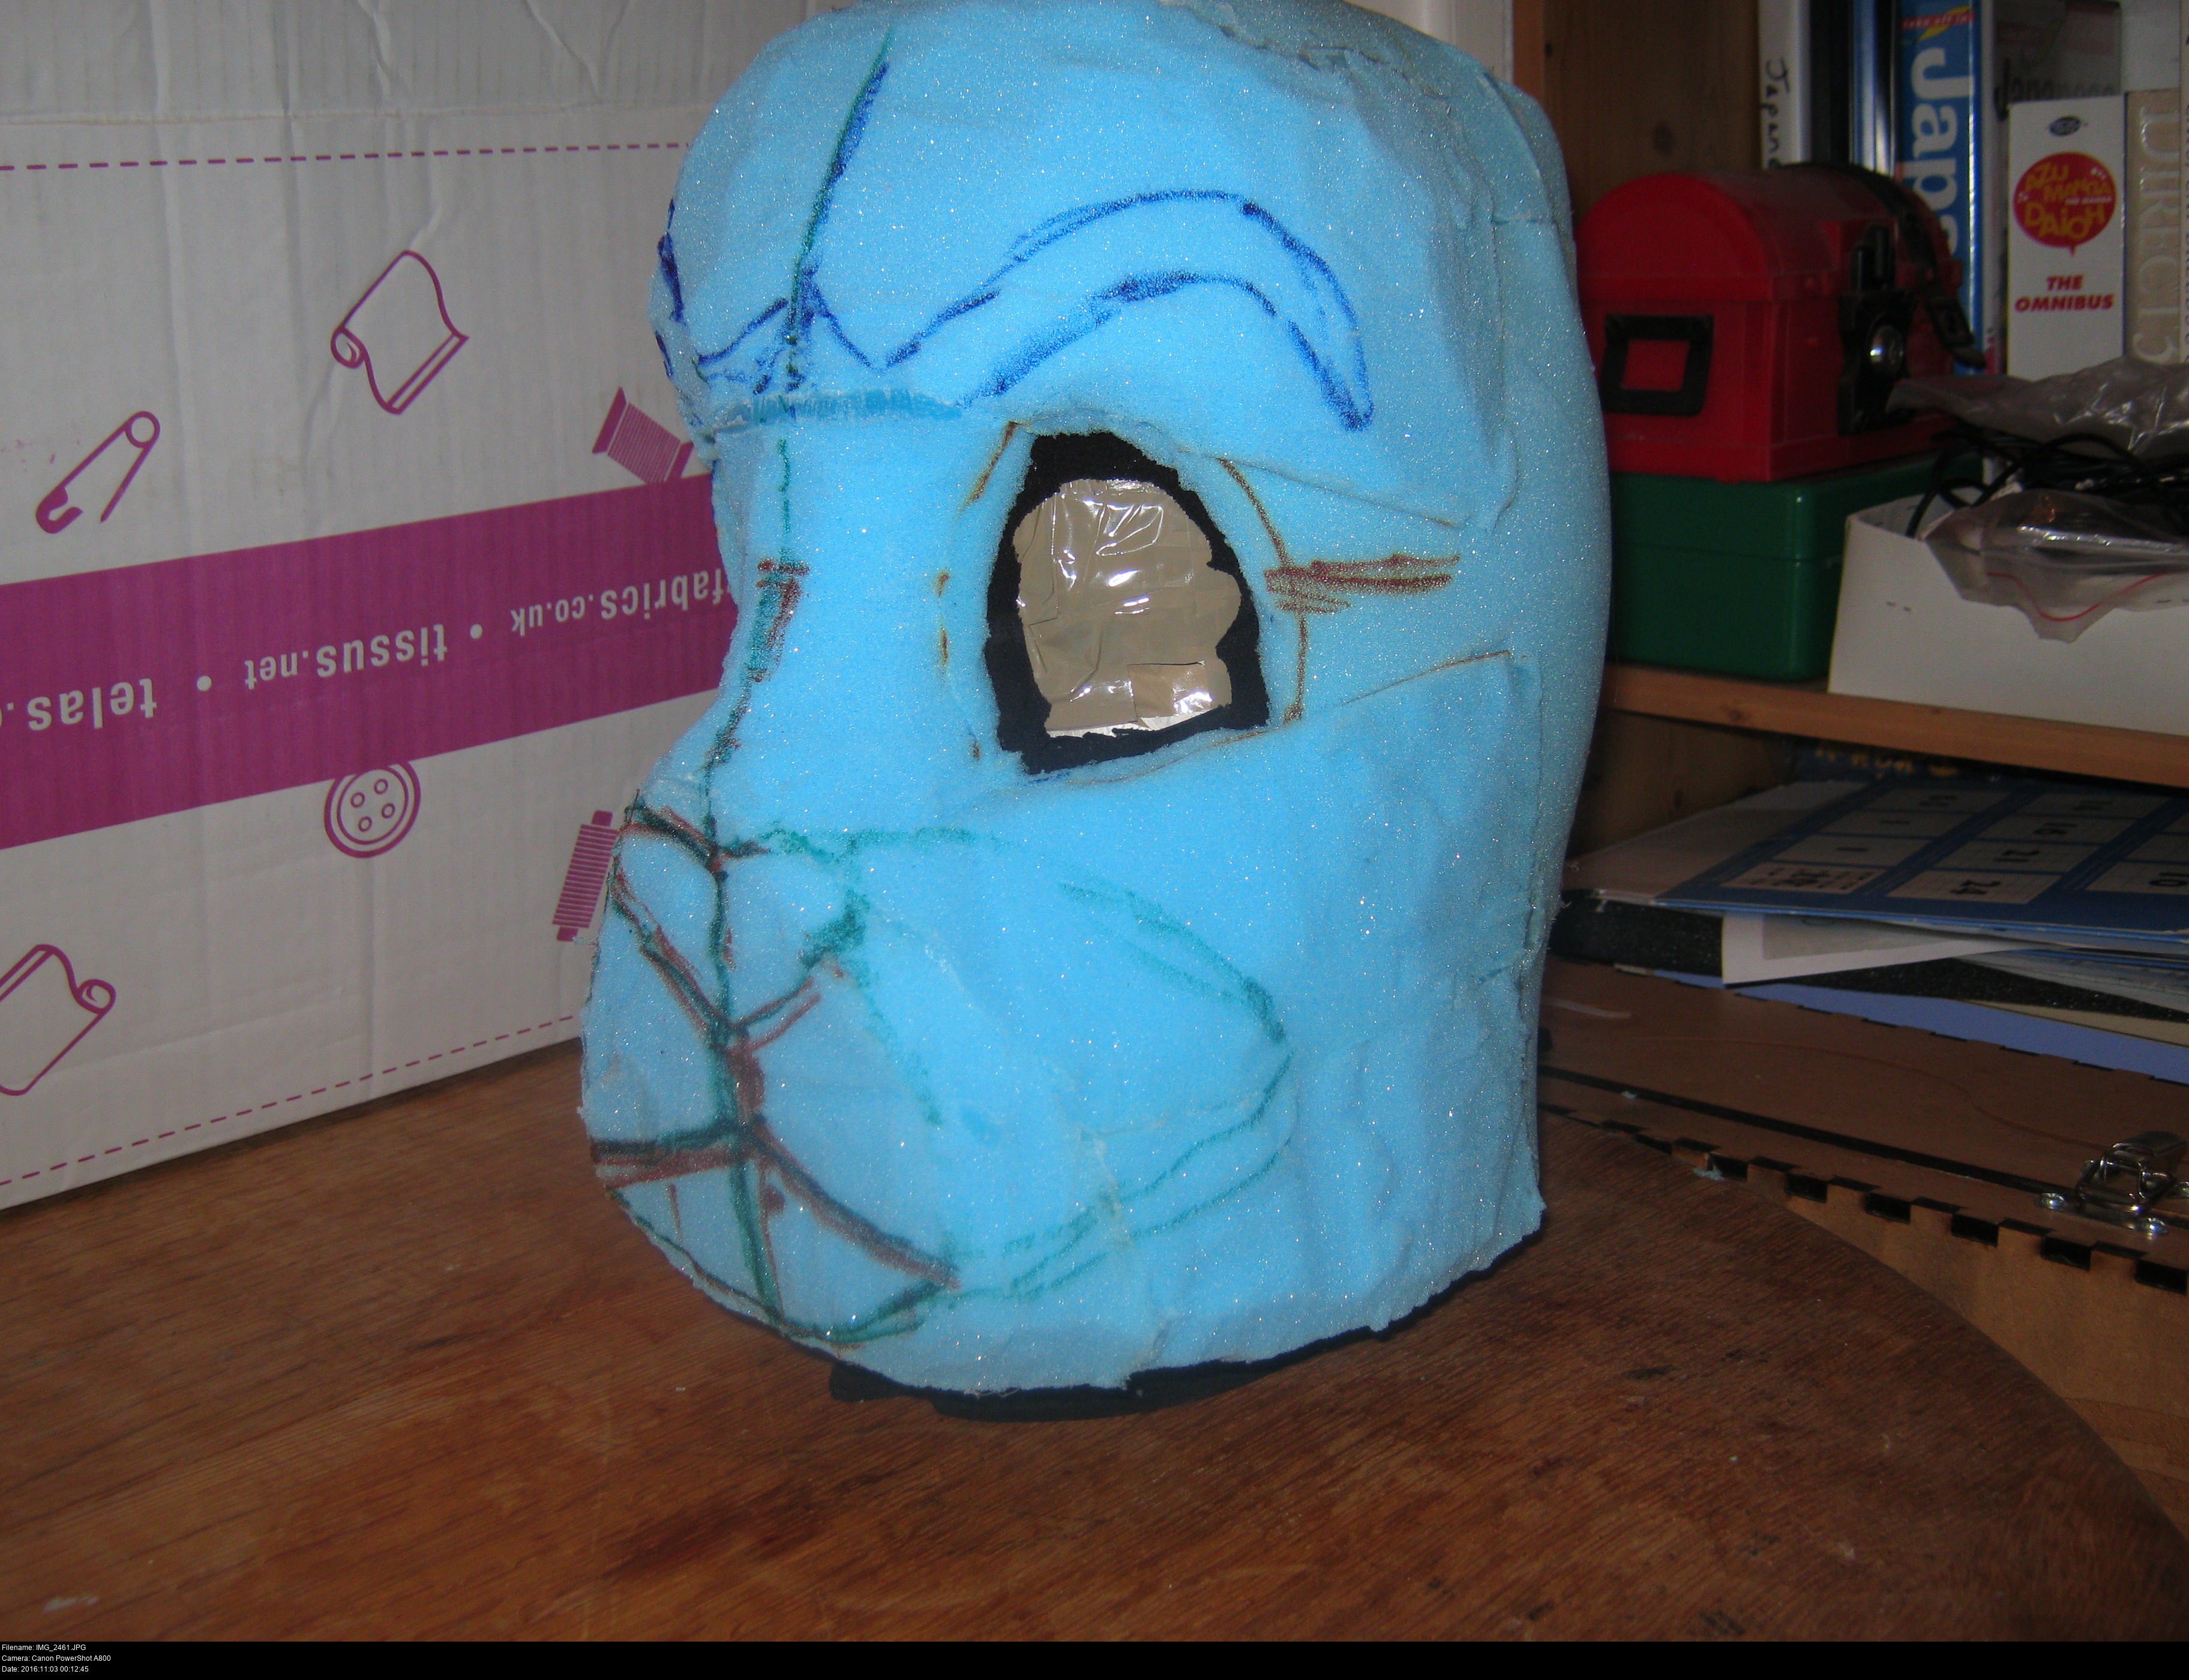
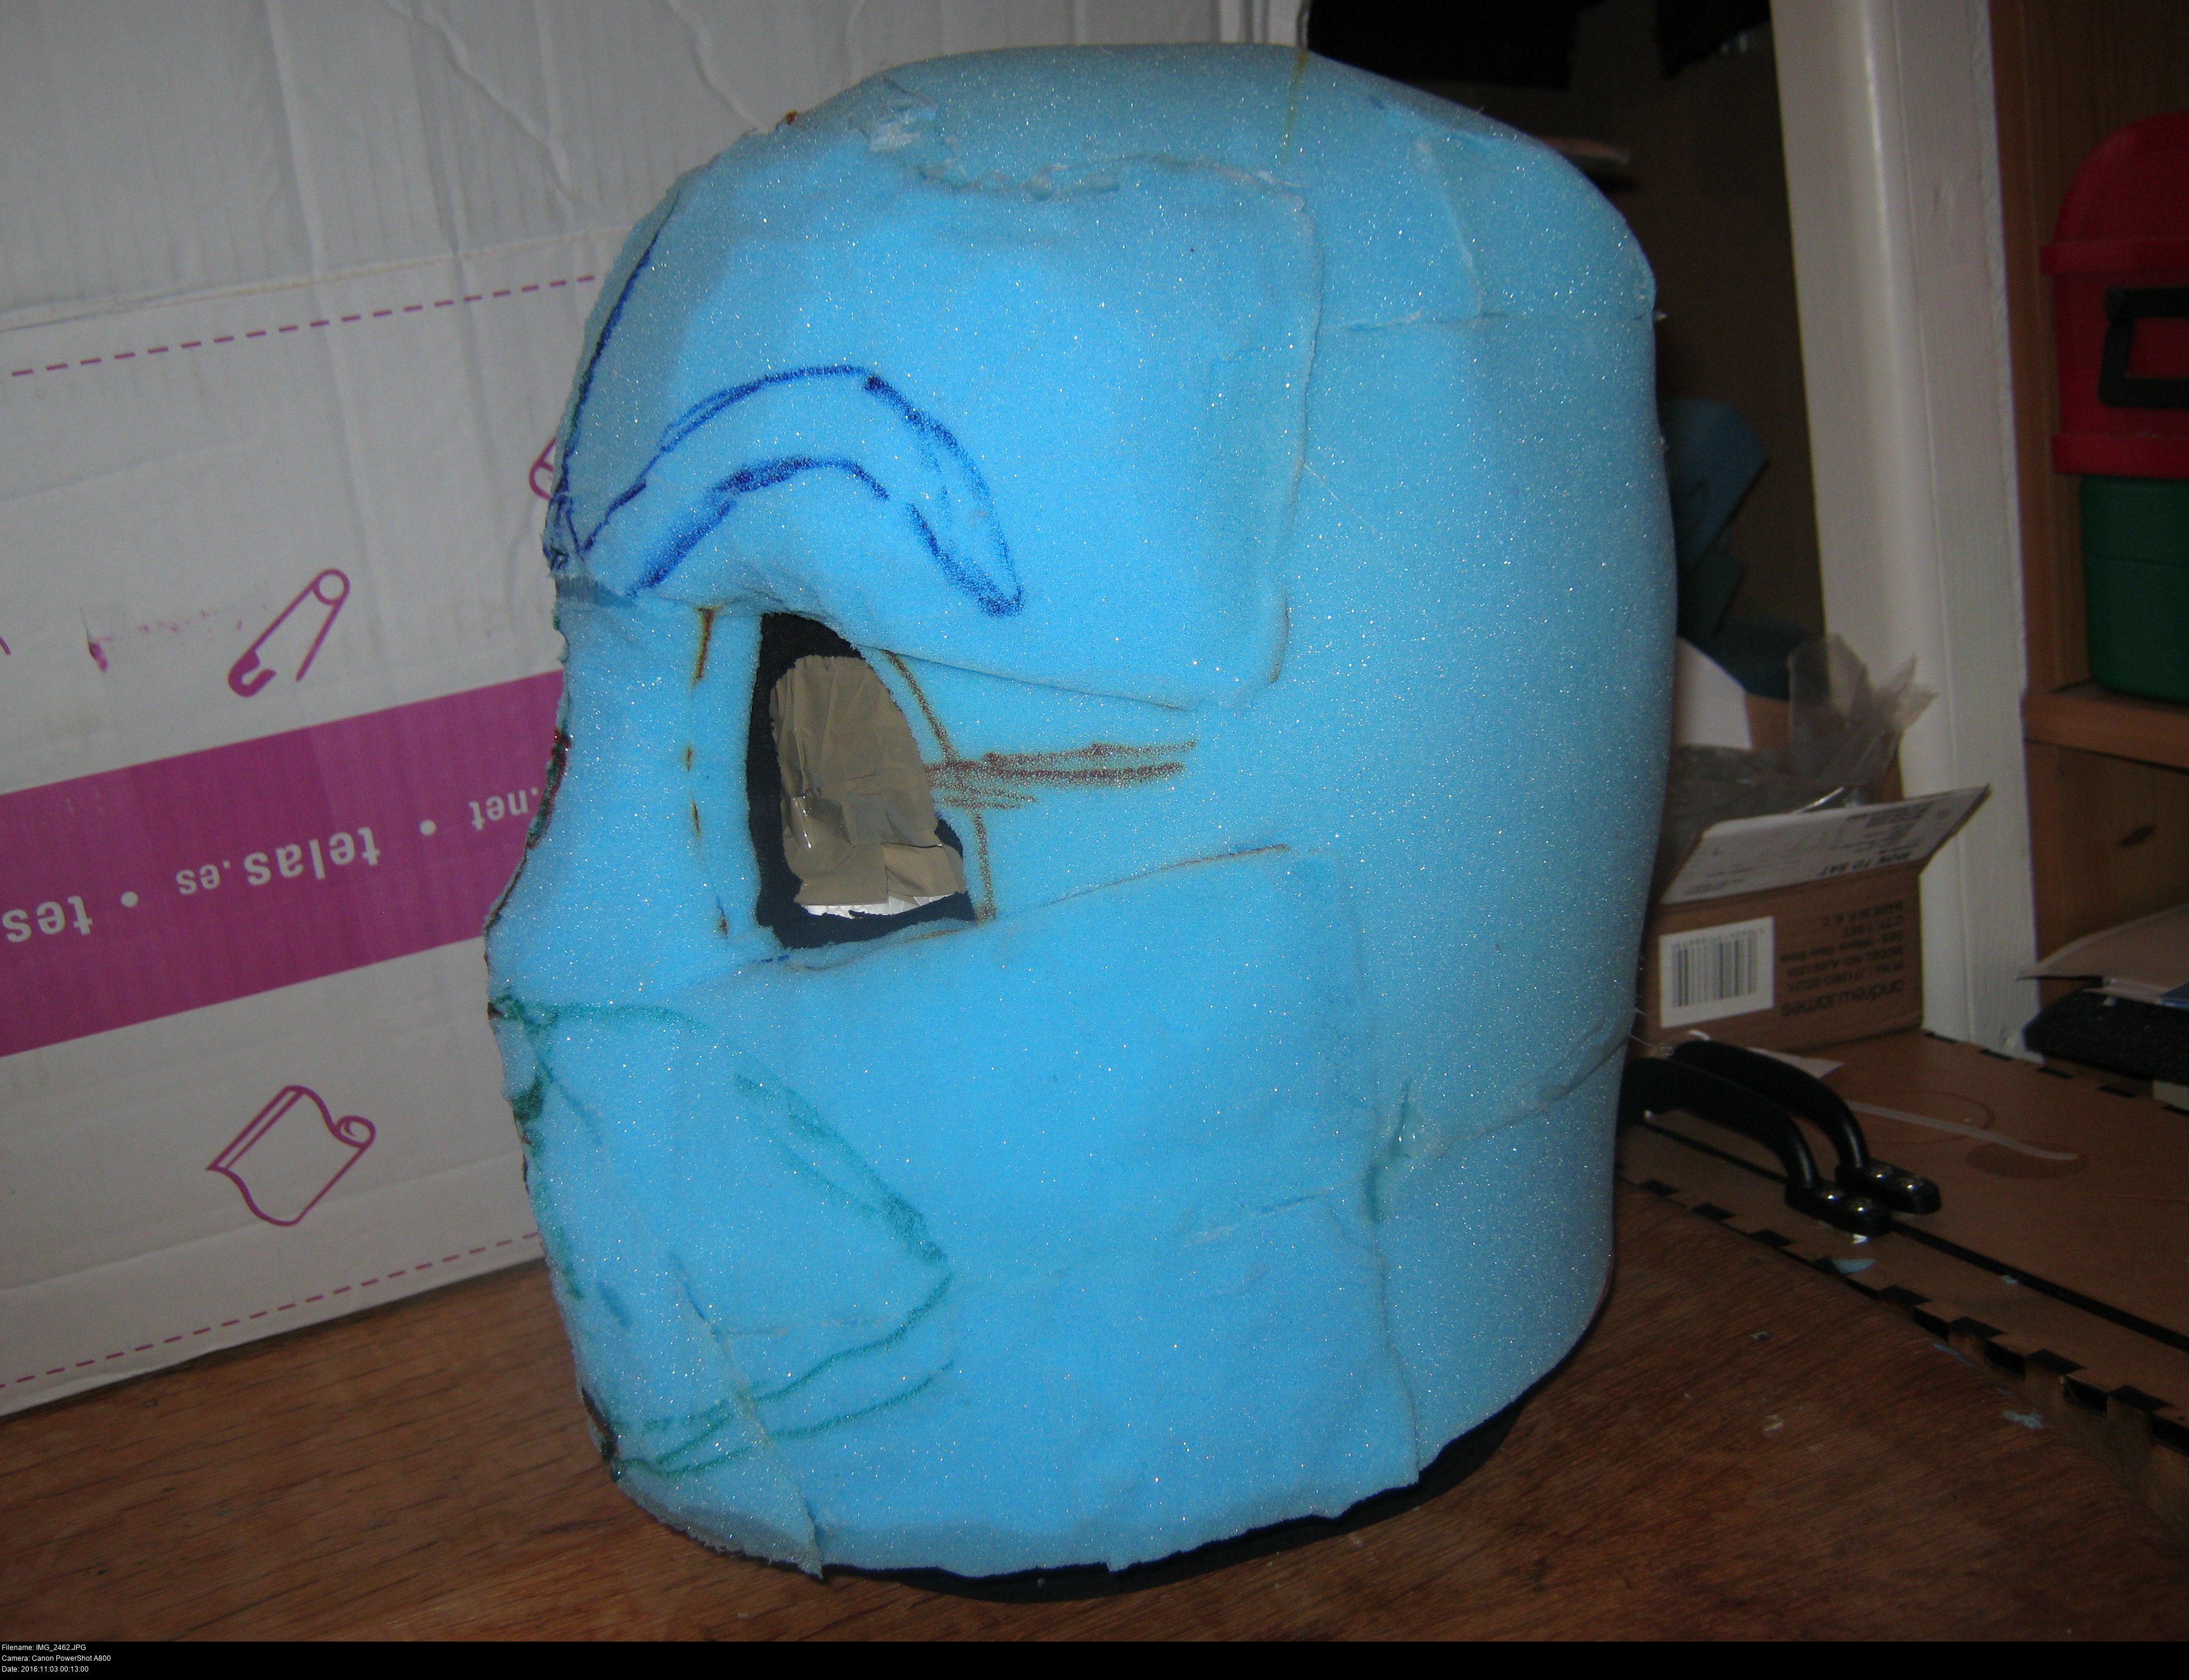
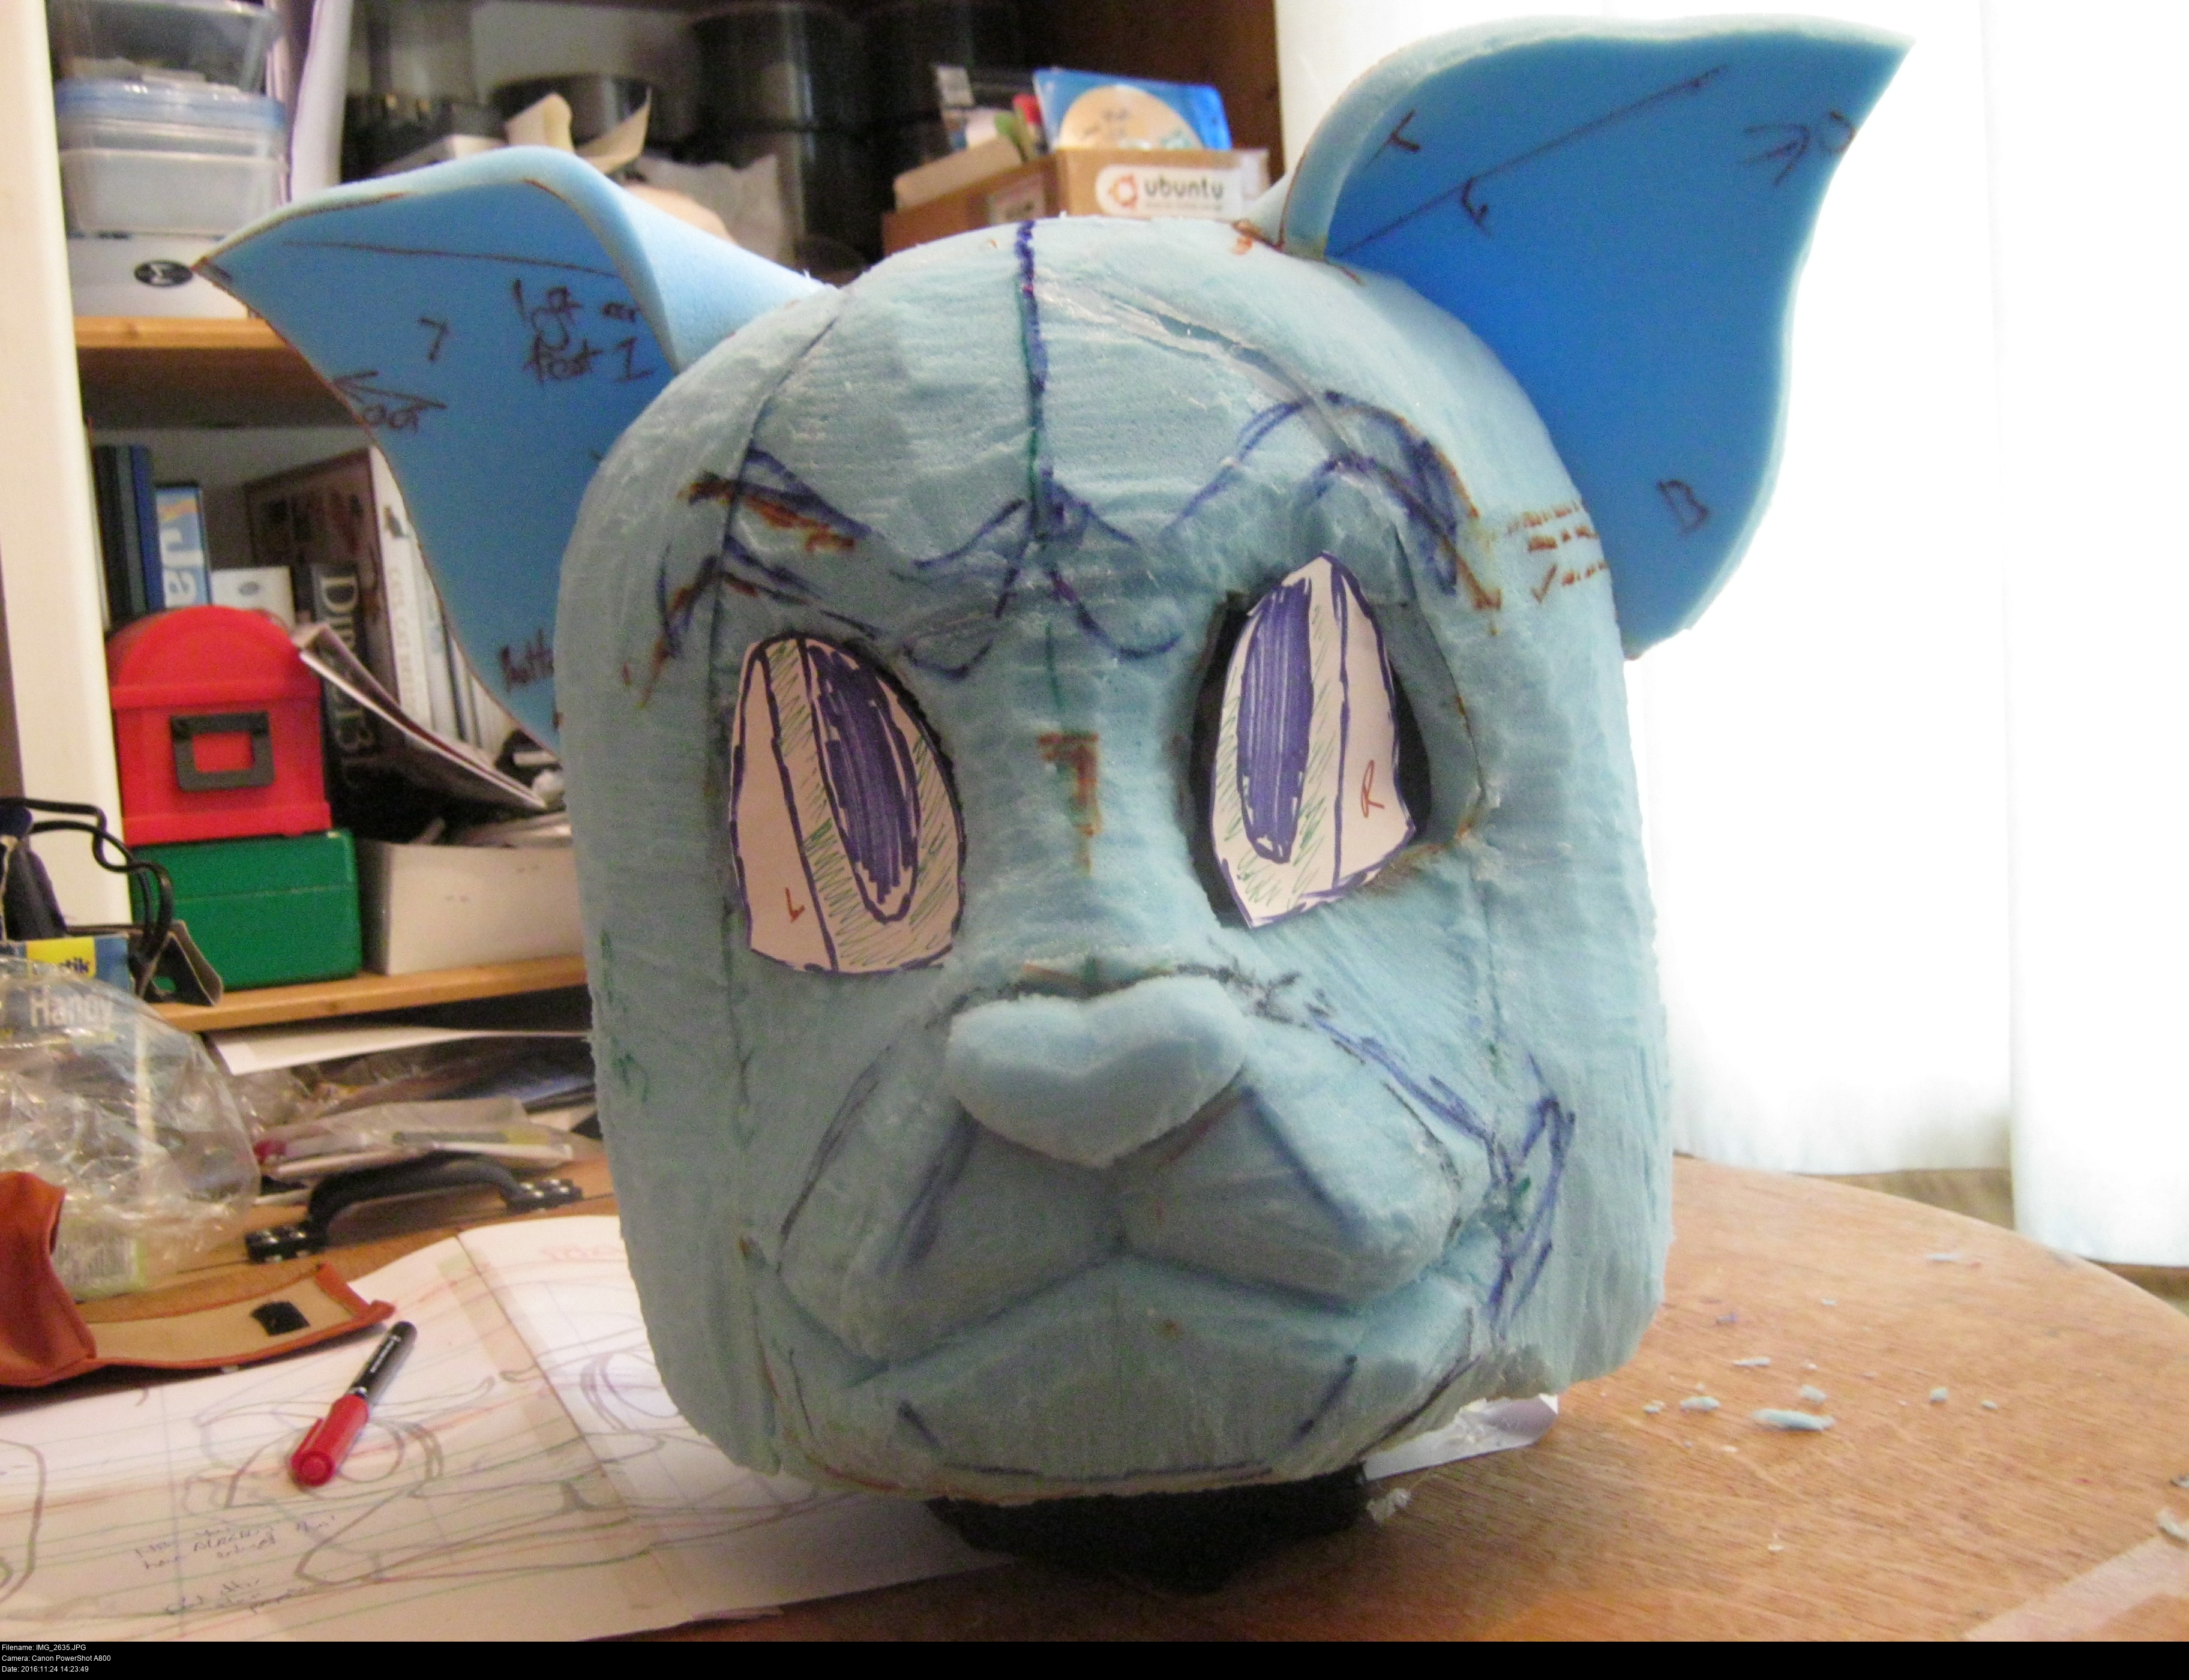
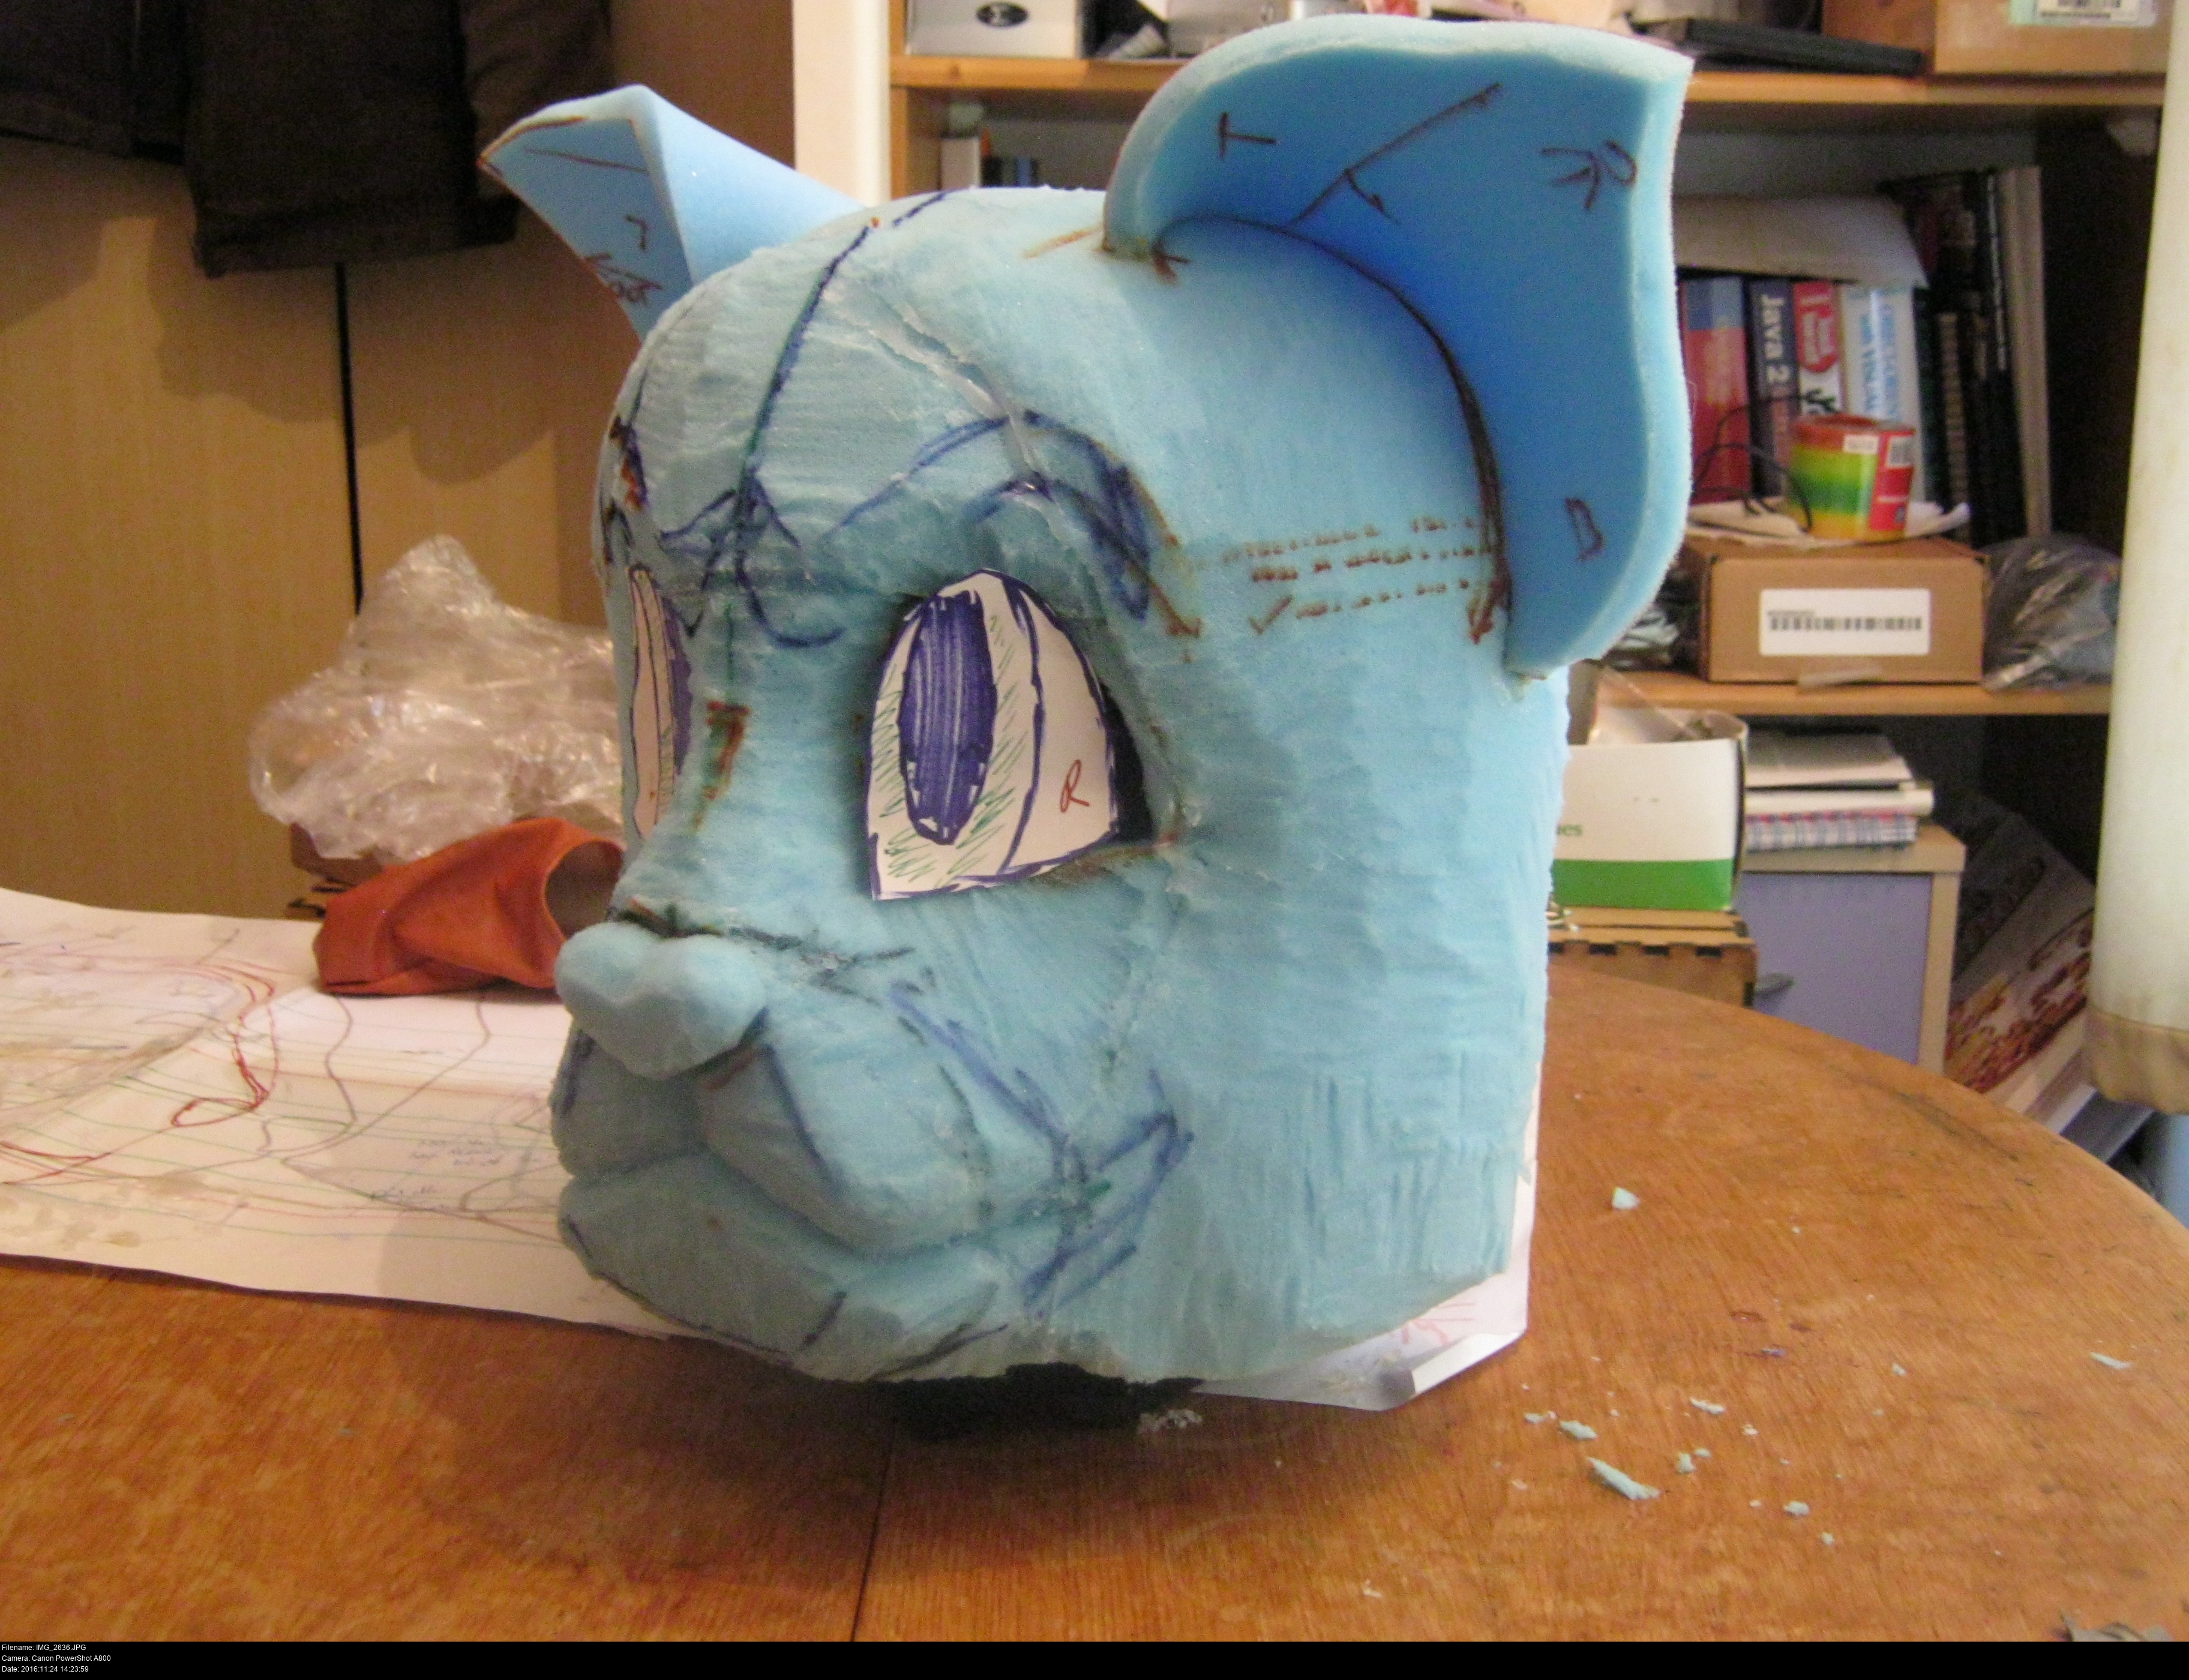
Because it's not wide enough! He's got a big arch-shaped head, not a slim, bullet-type thing! Let's glue some blocks on the sides here and see where that leads.
Awwww, something's happening here!
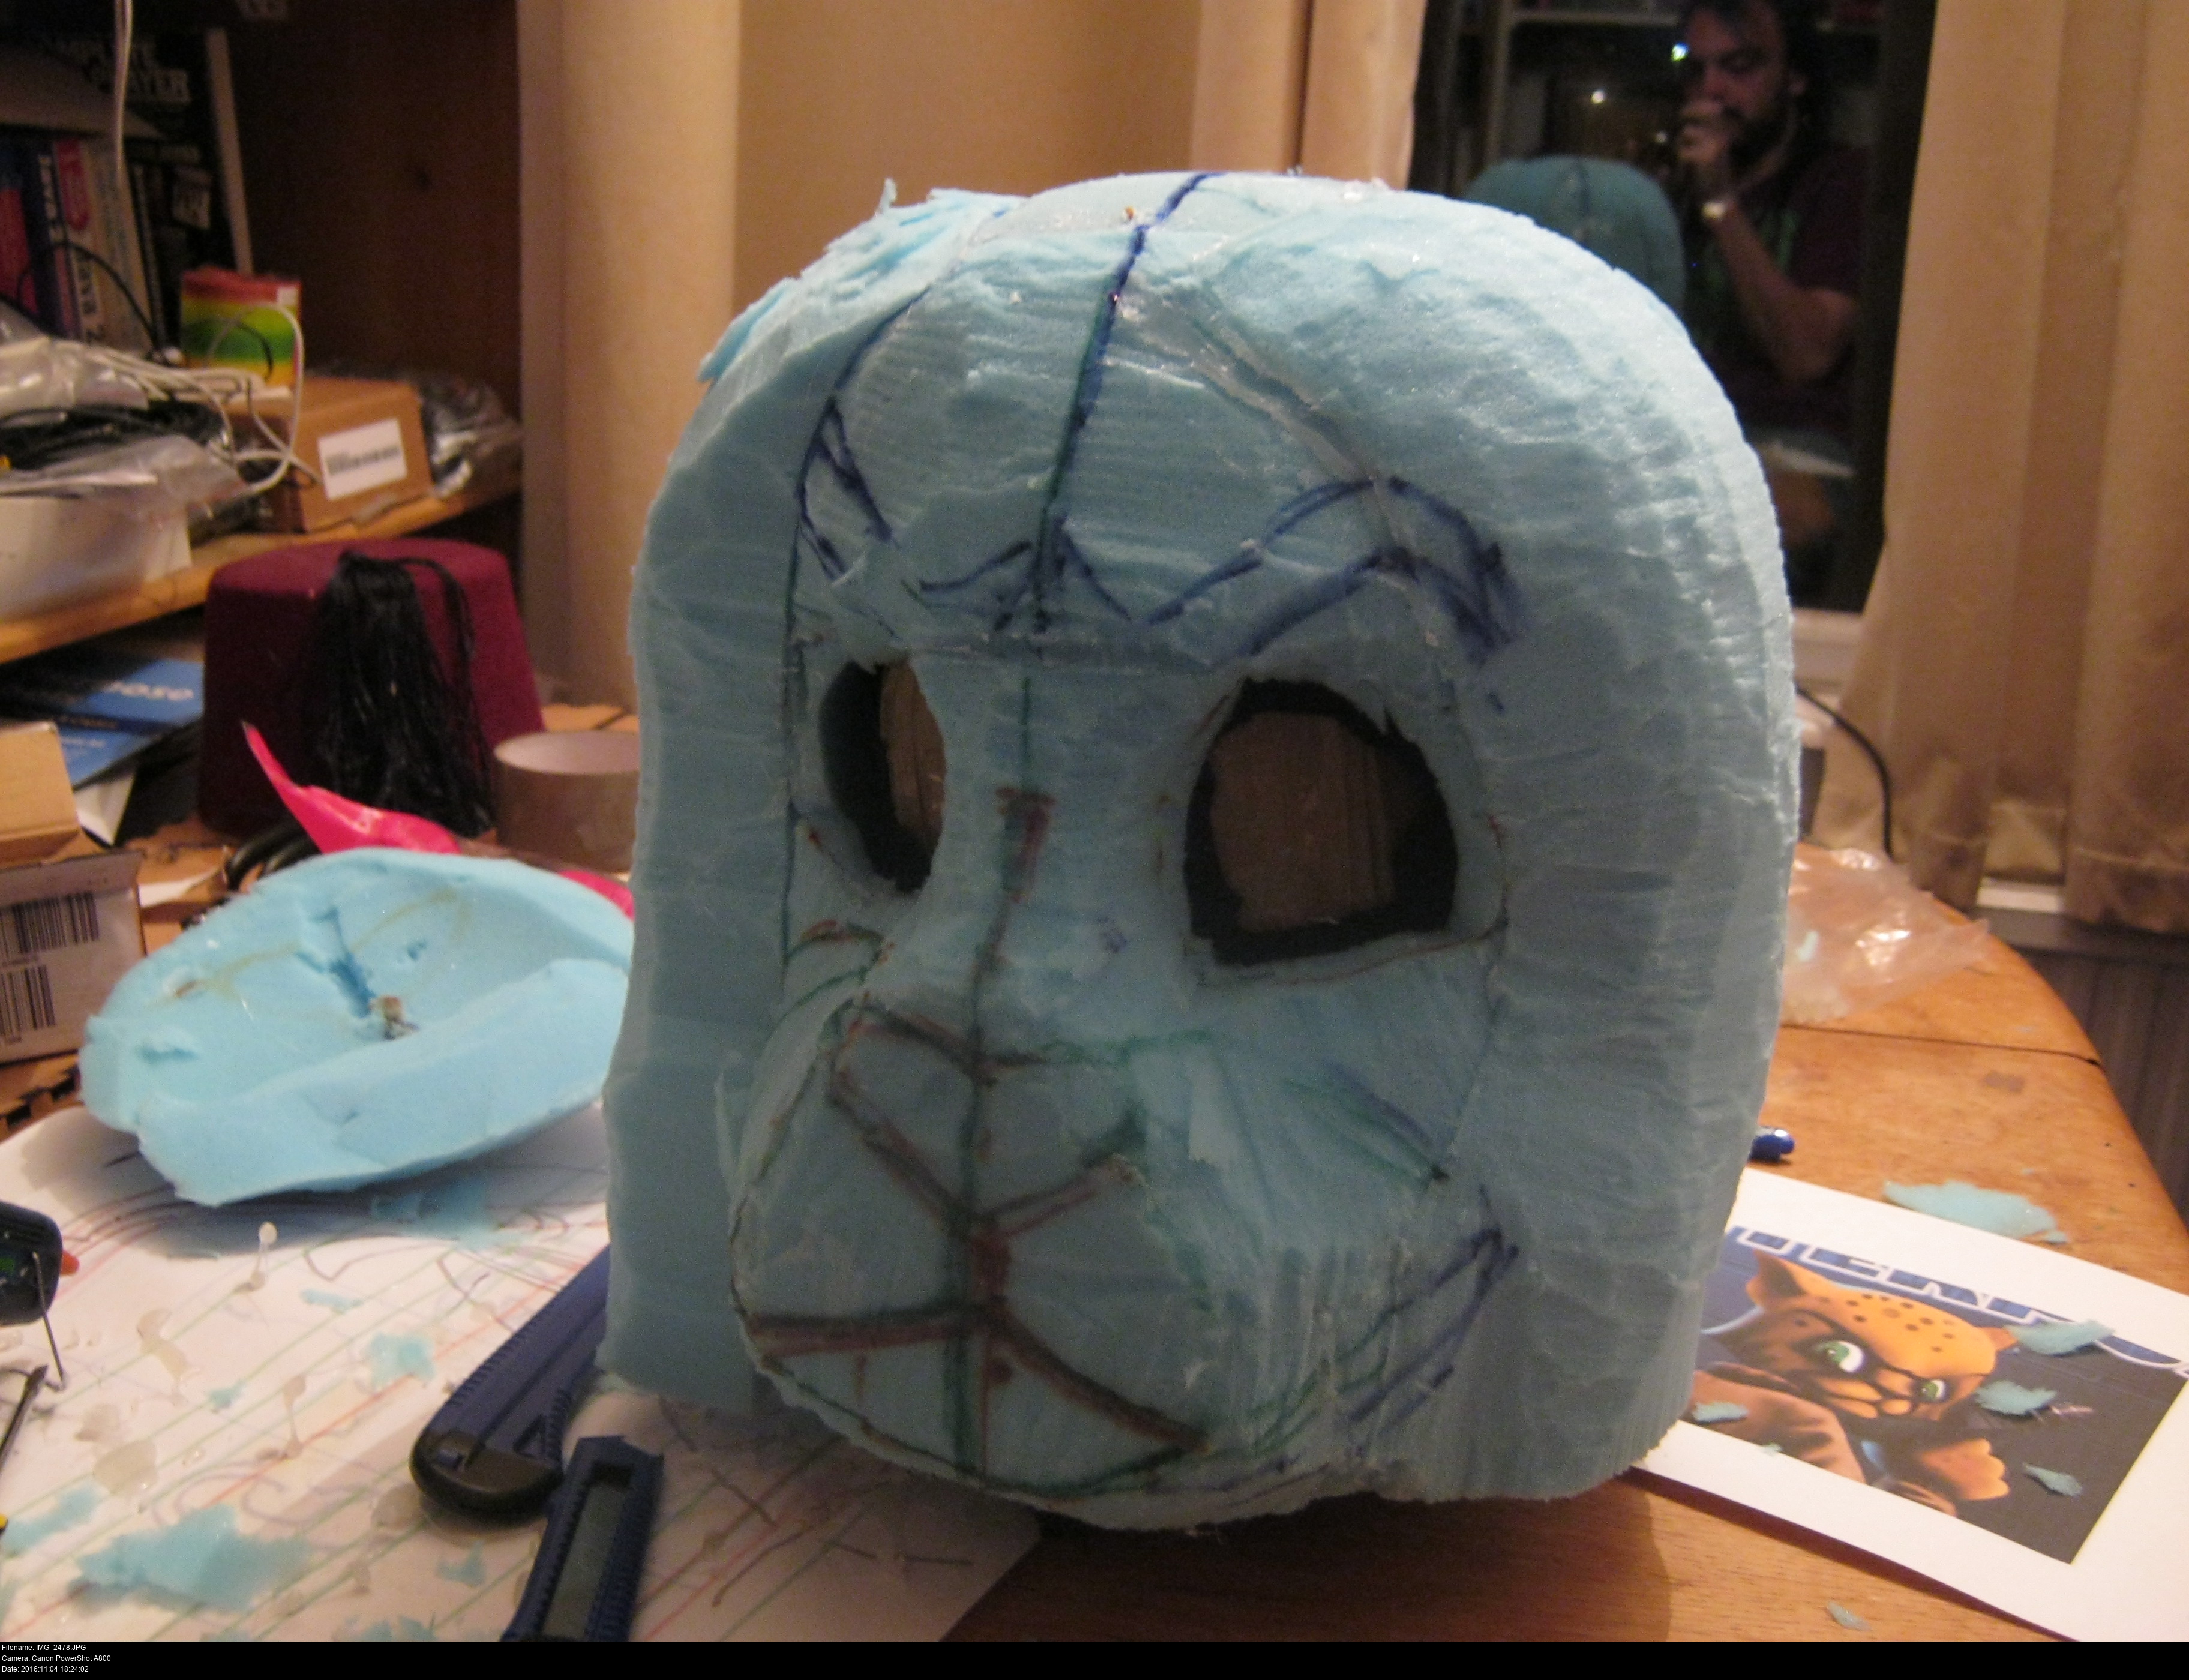


Now looky here. We've gone from 20% to 80% in a snap. I'm liking this a -lot-.

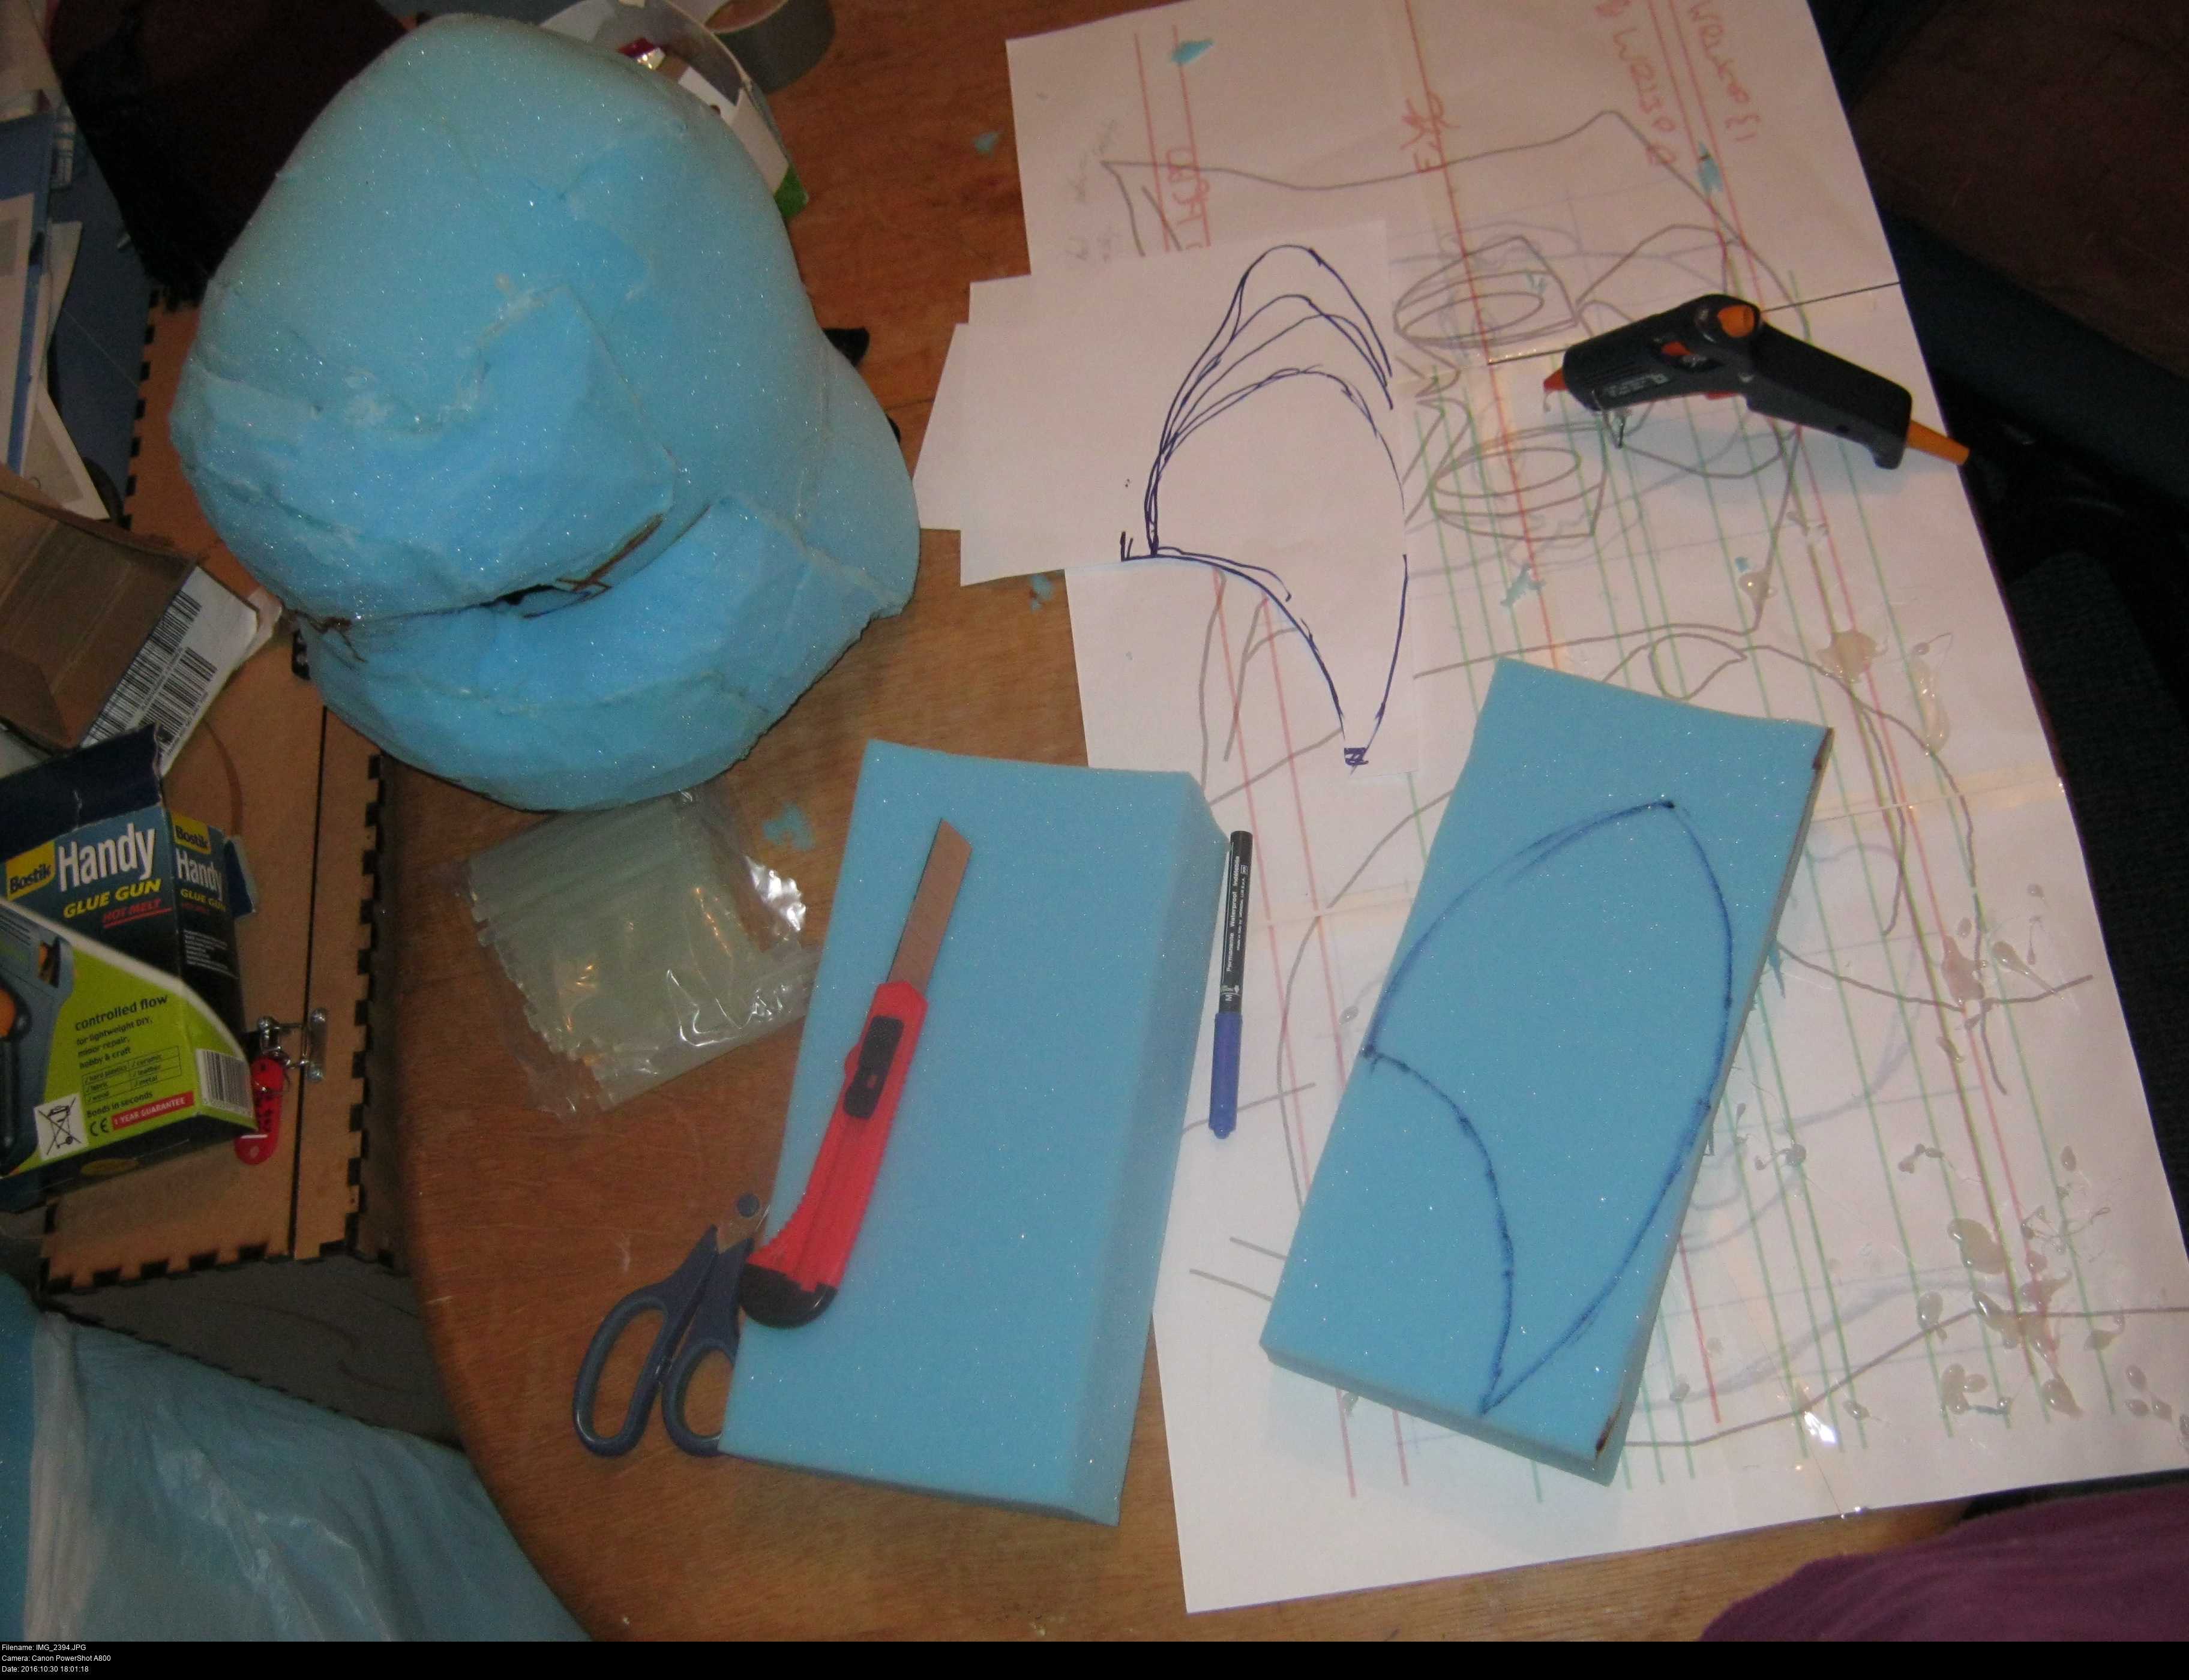
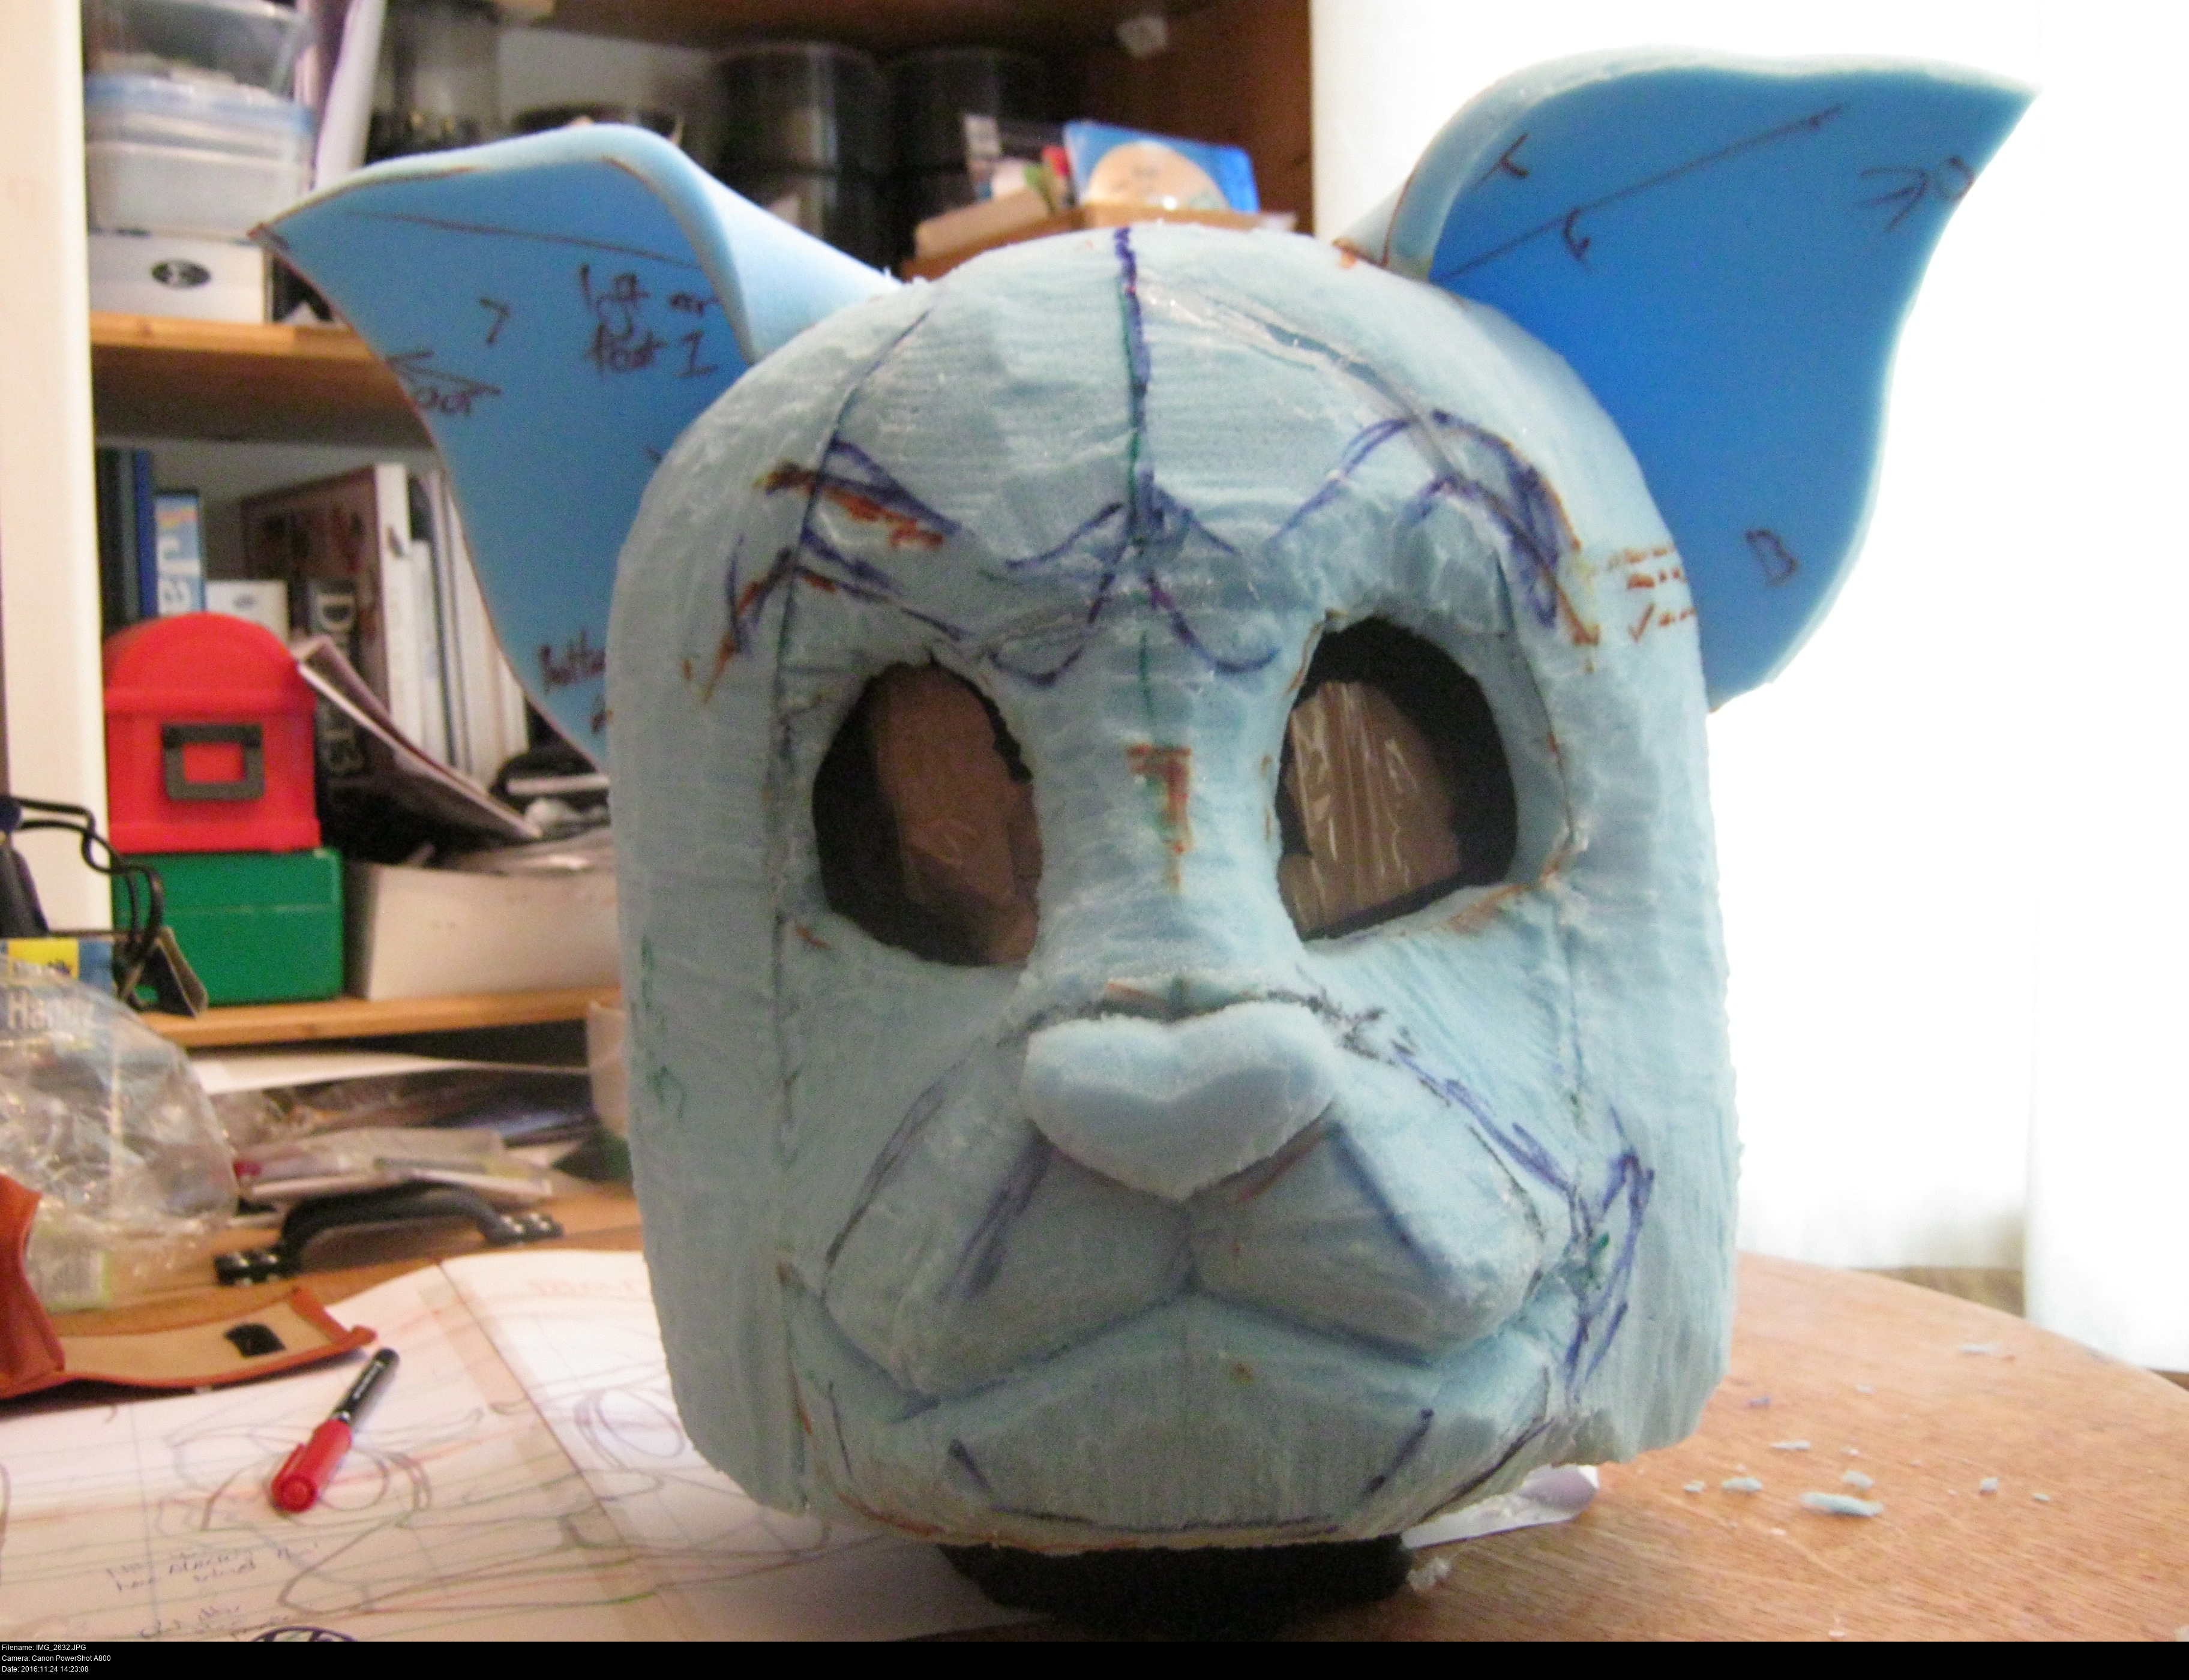
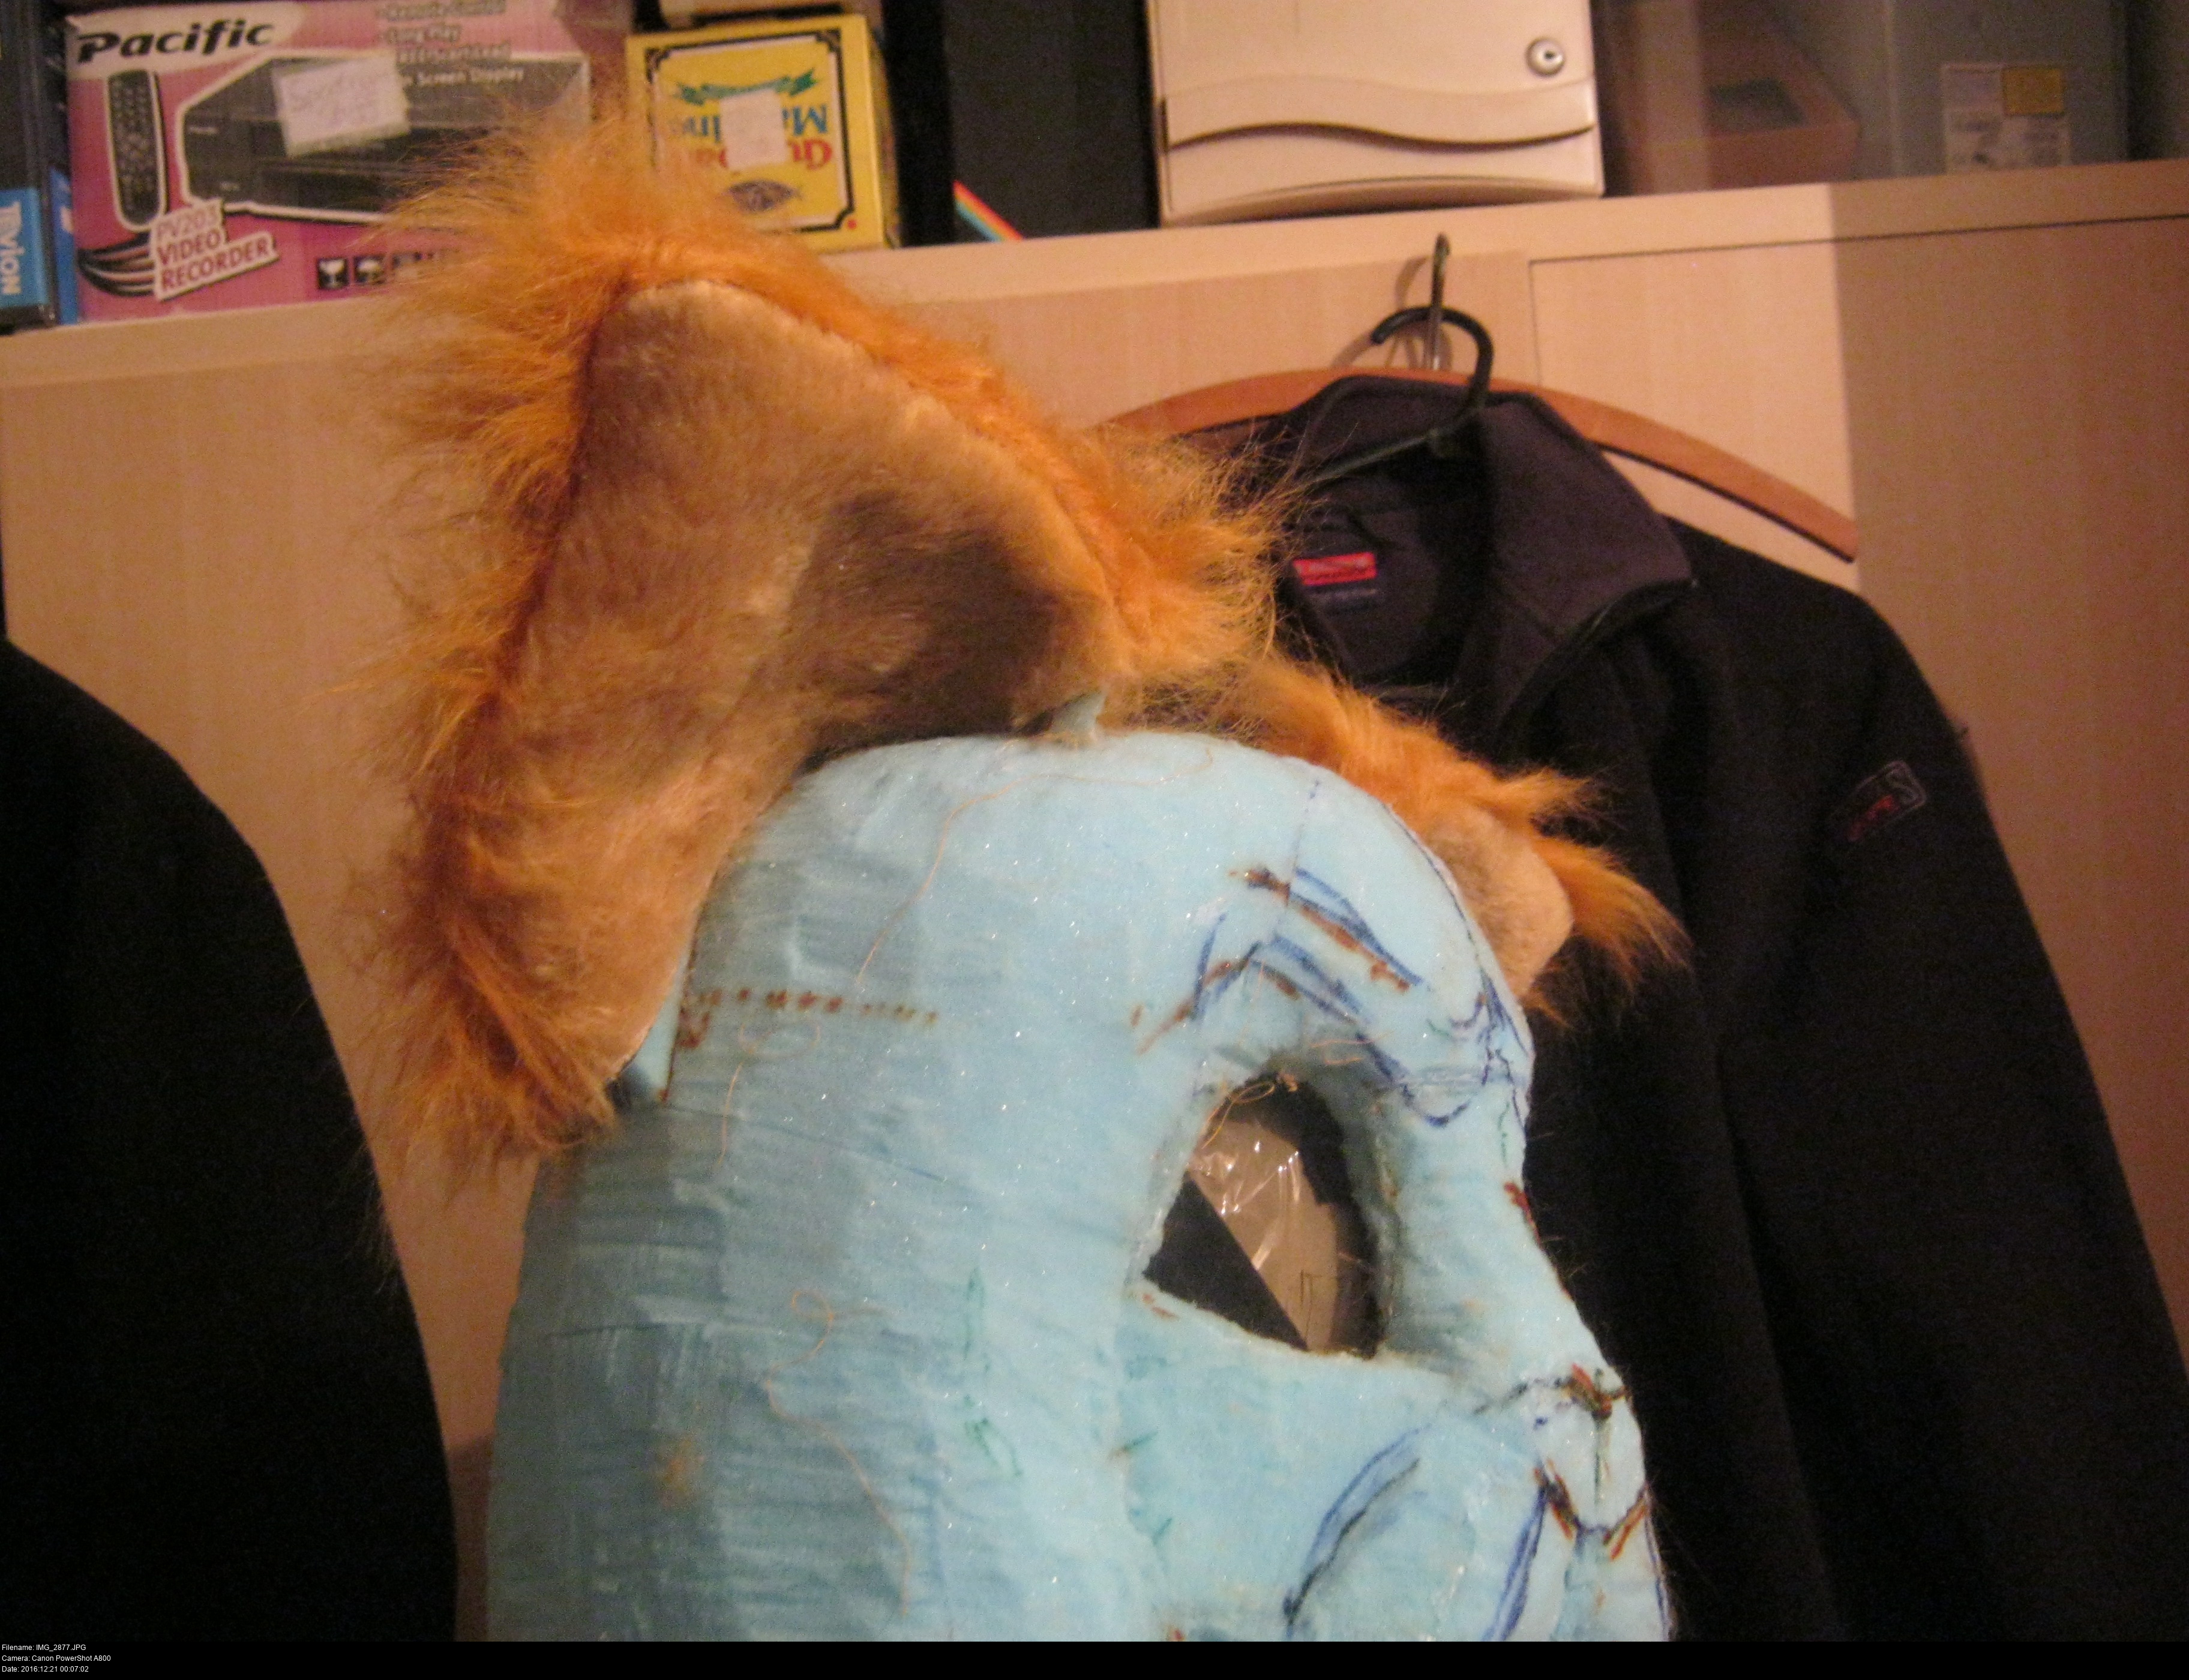
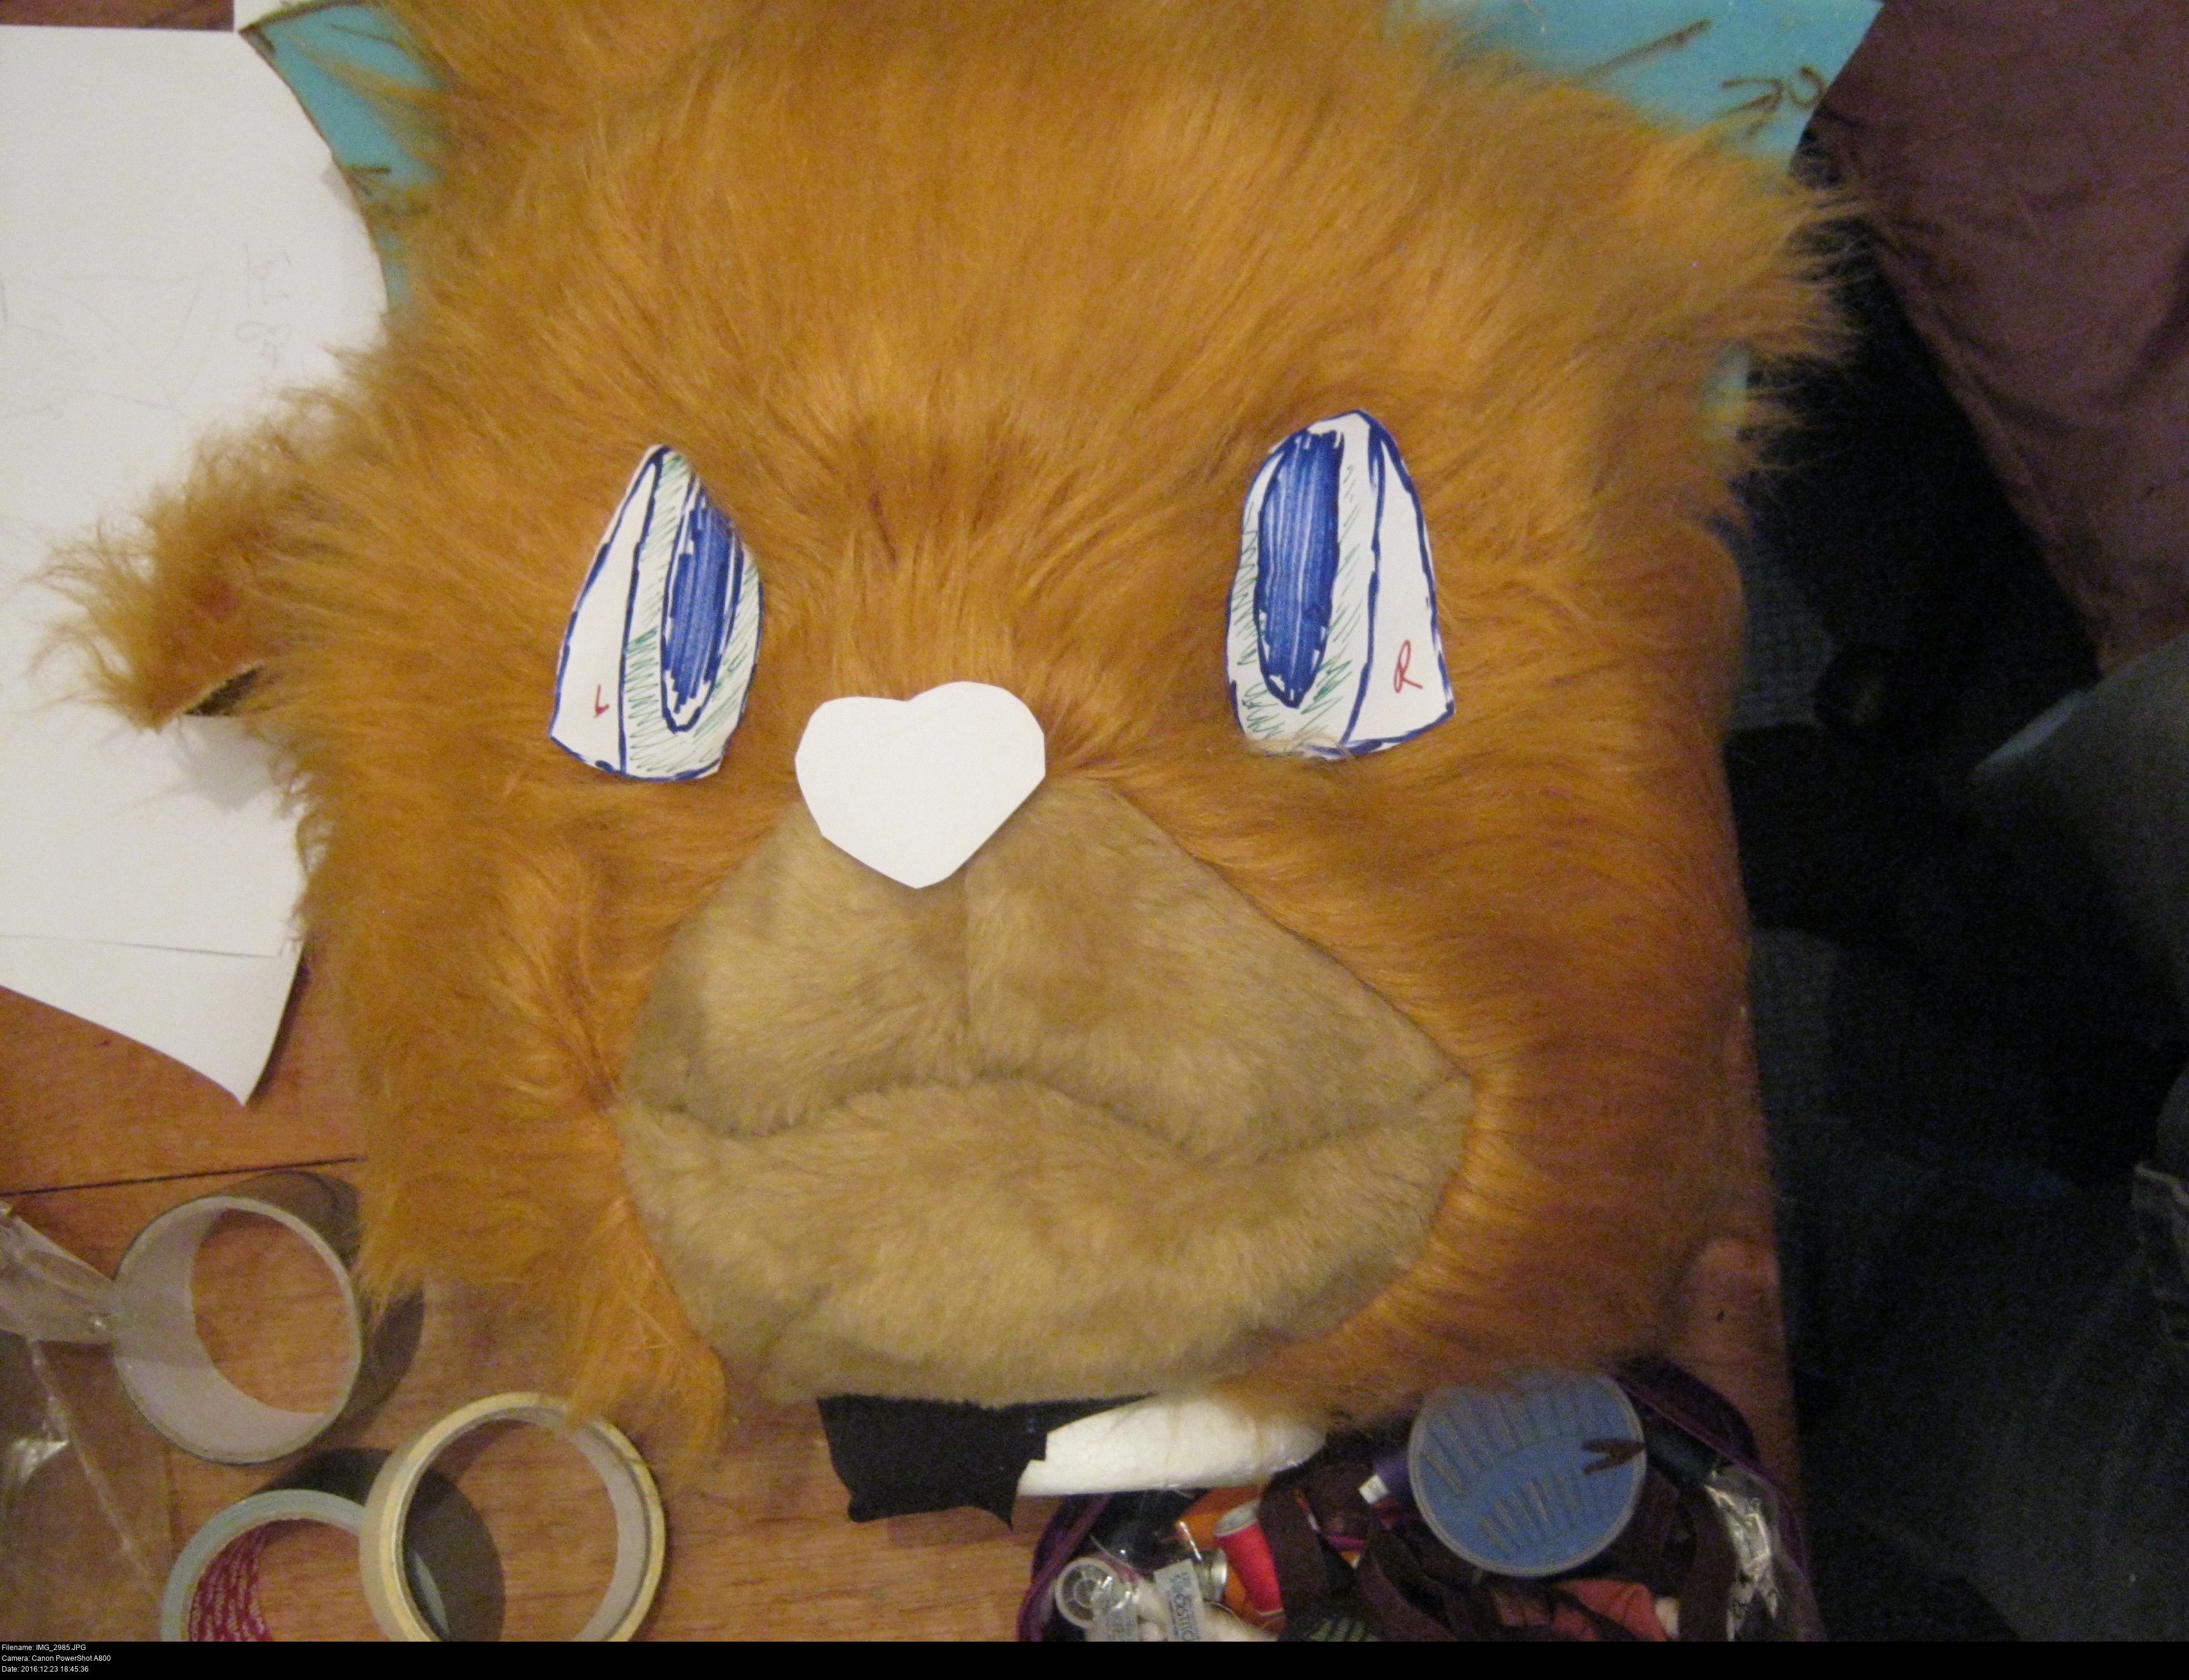
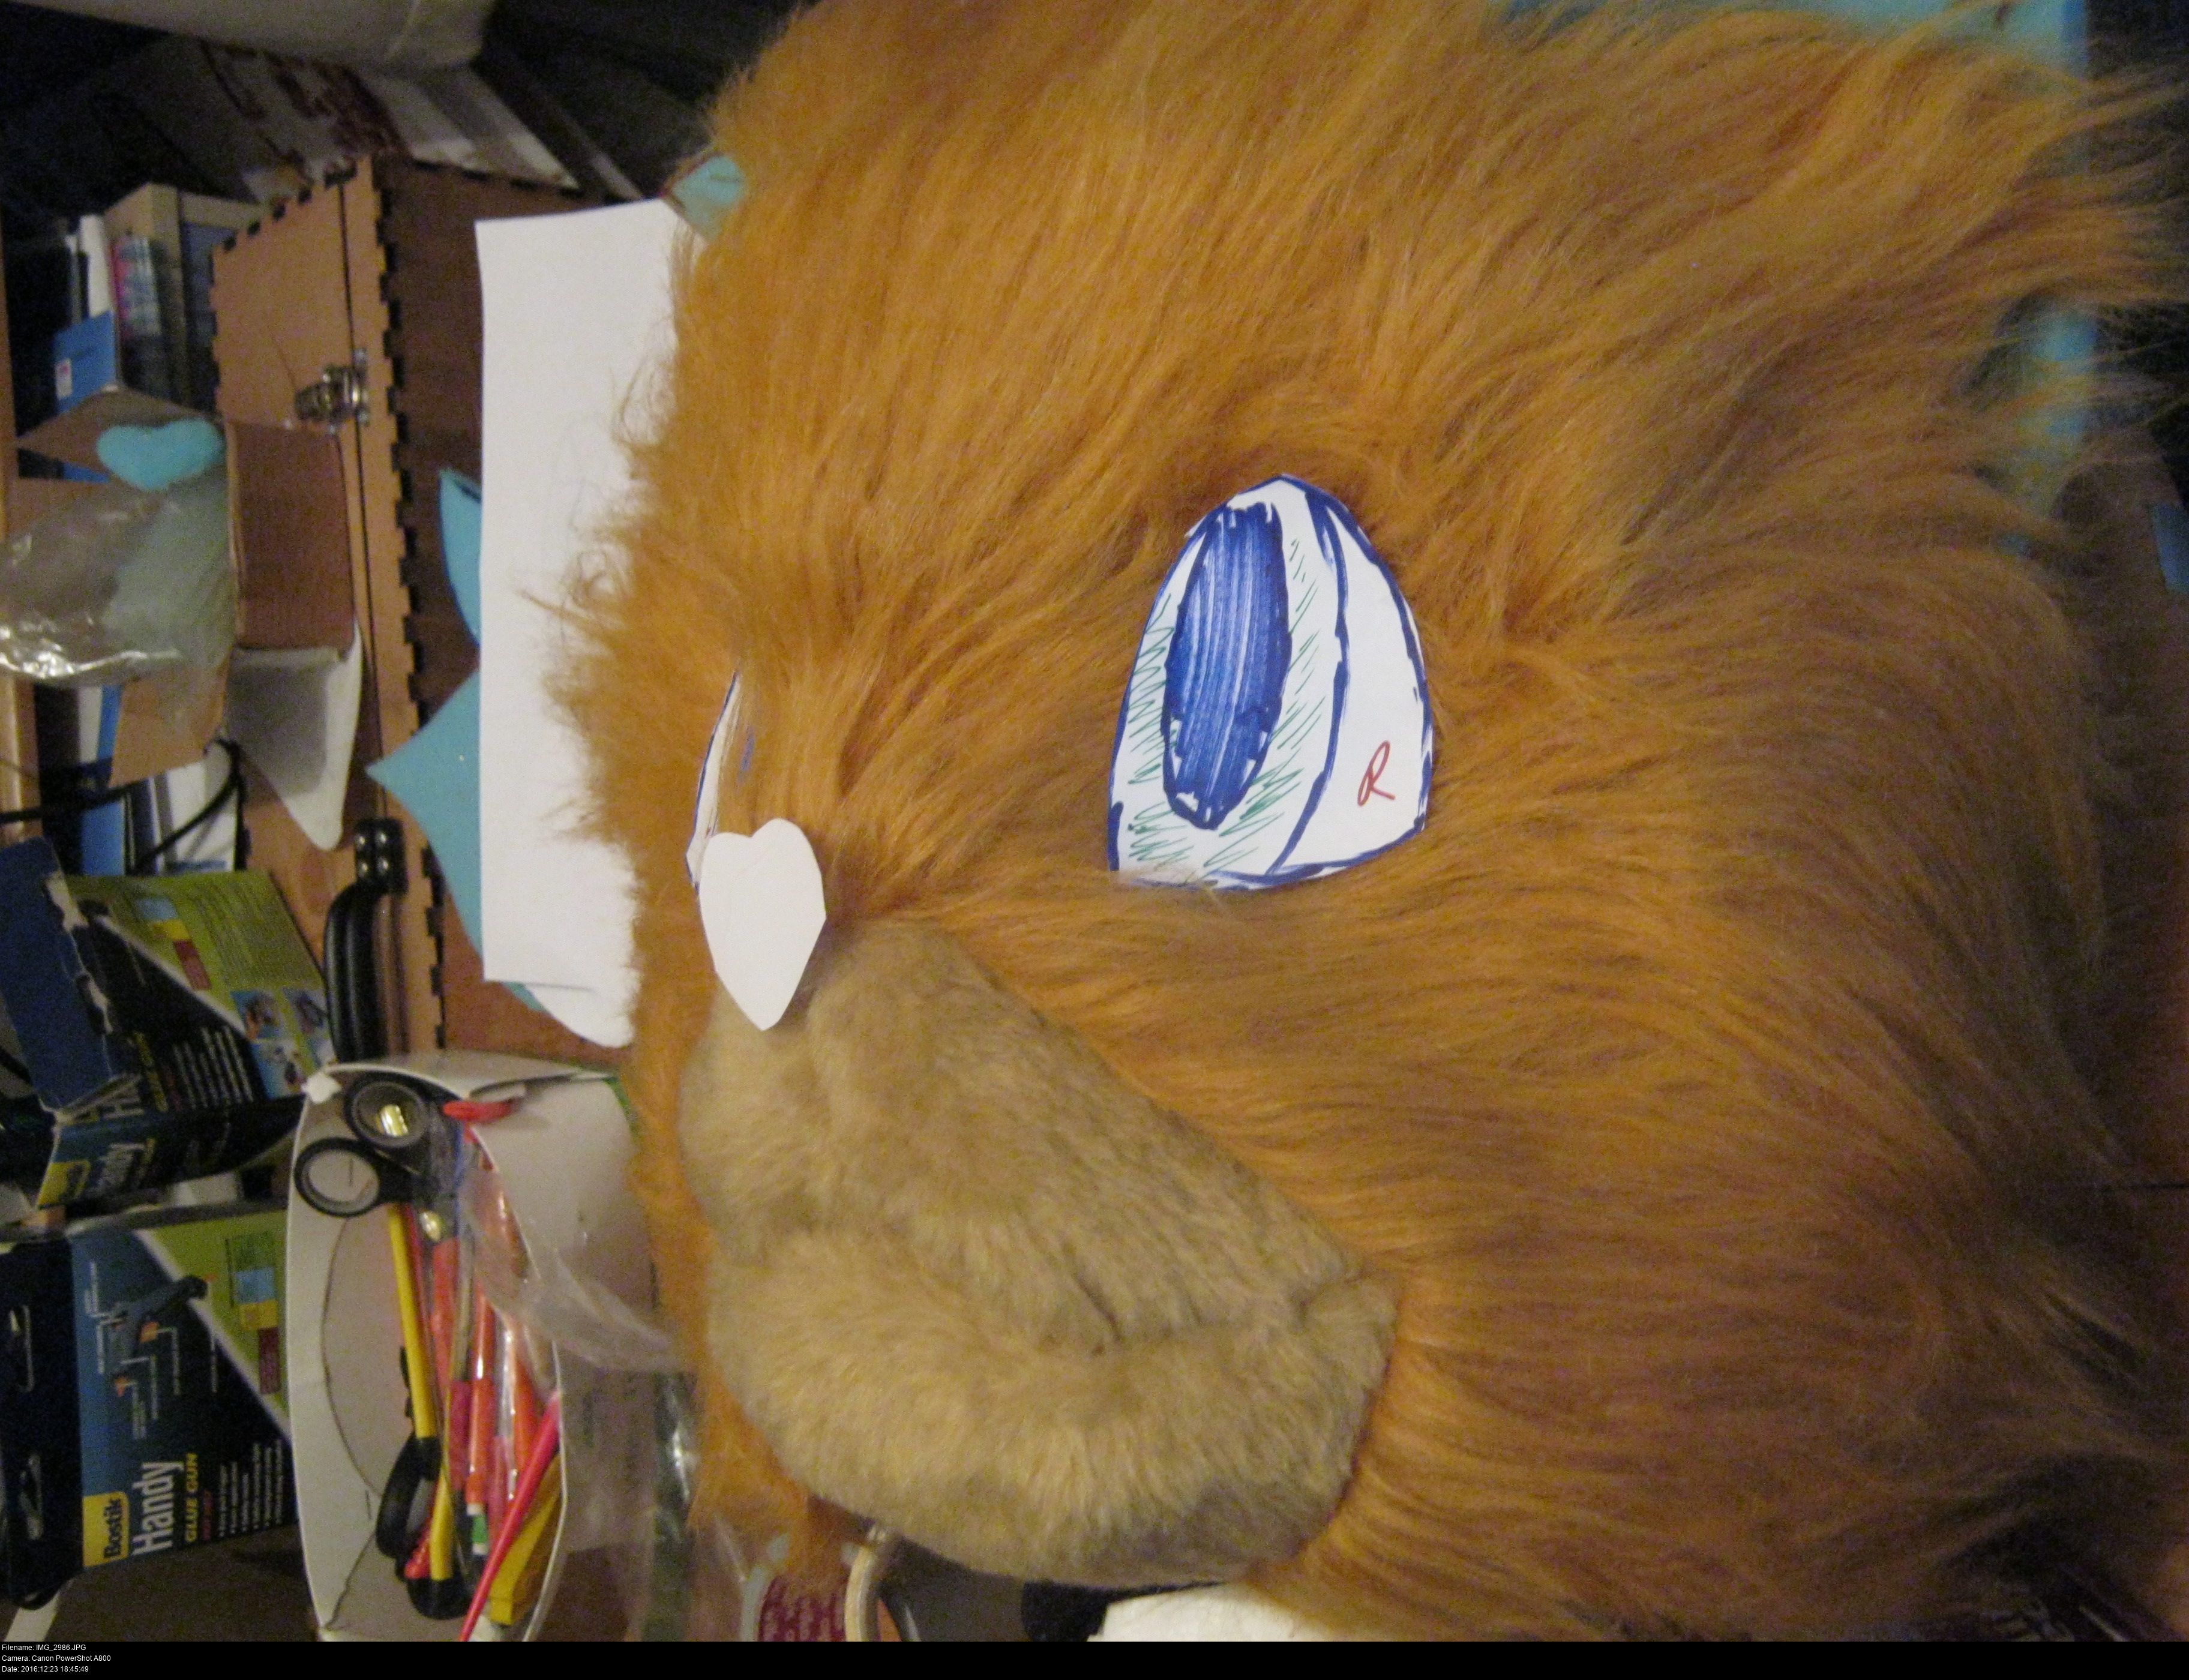
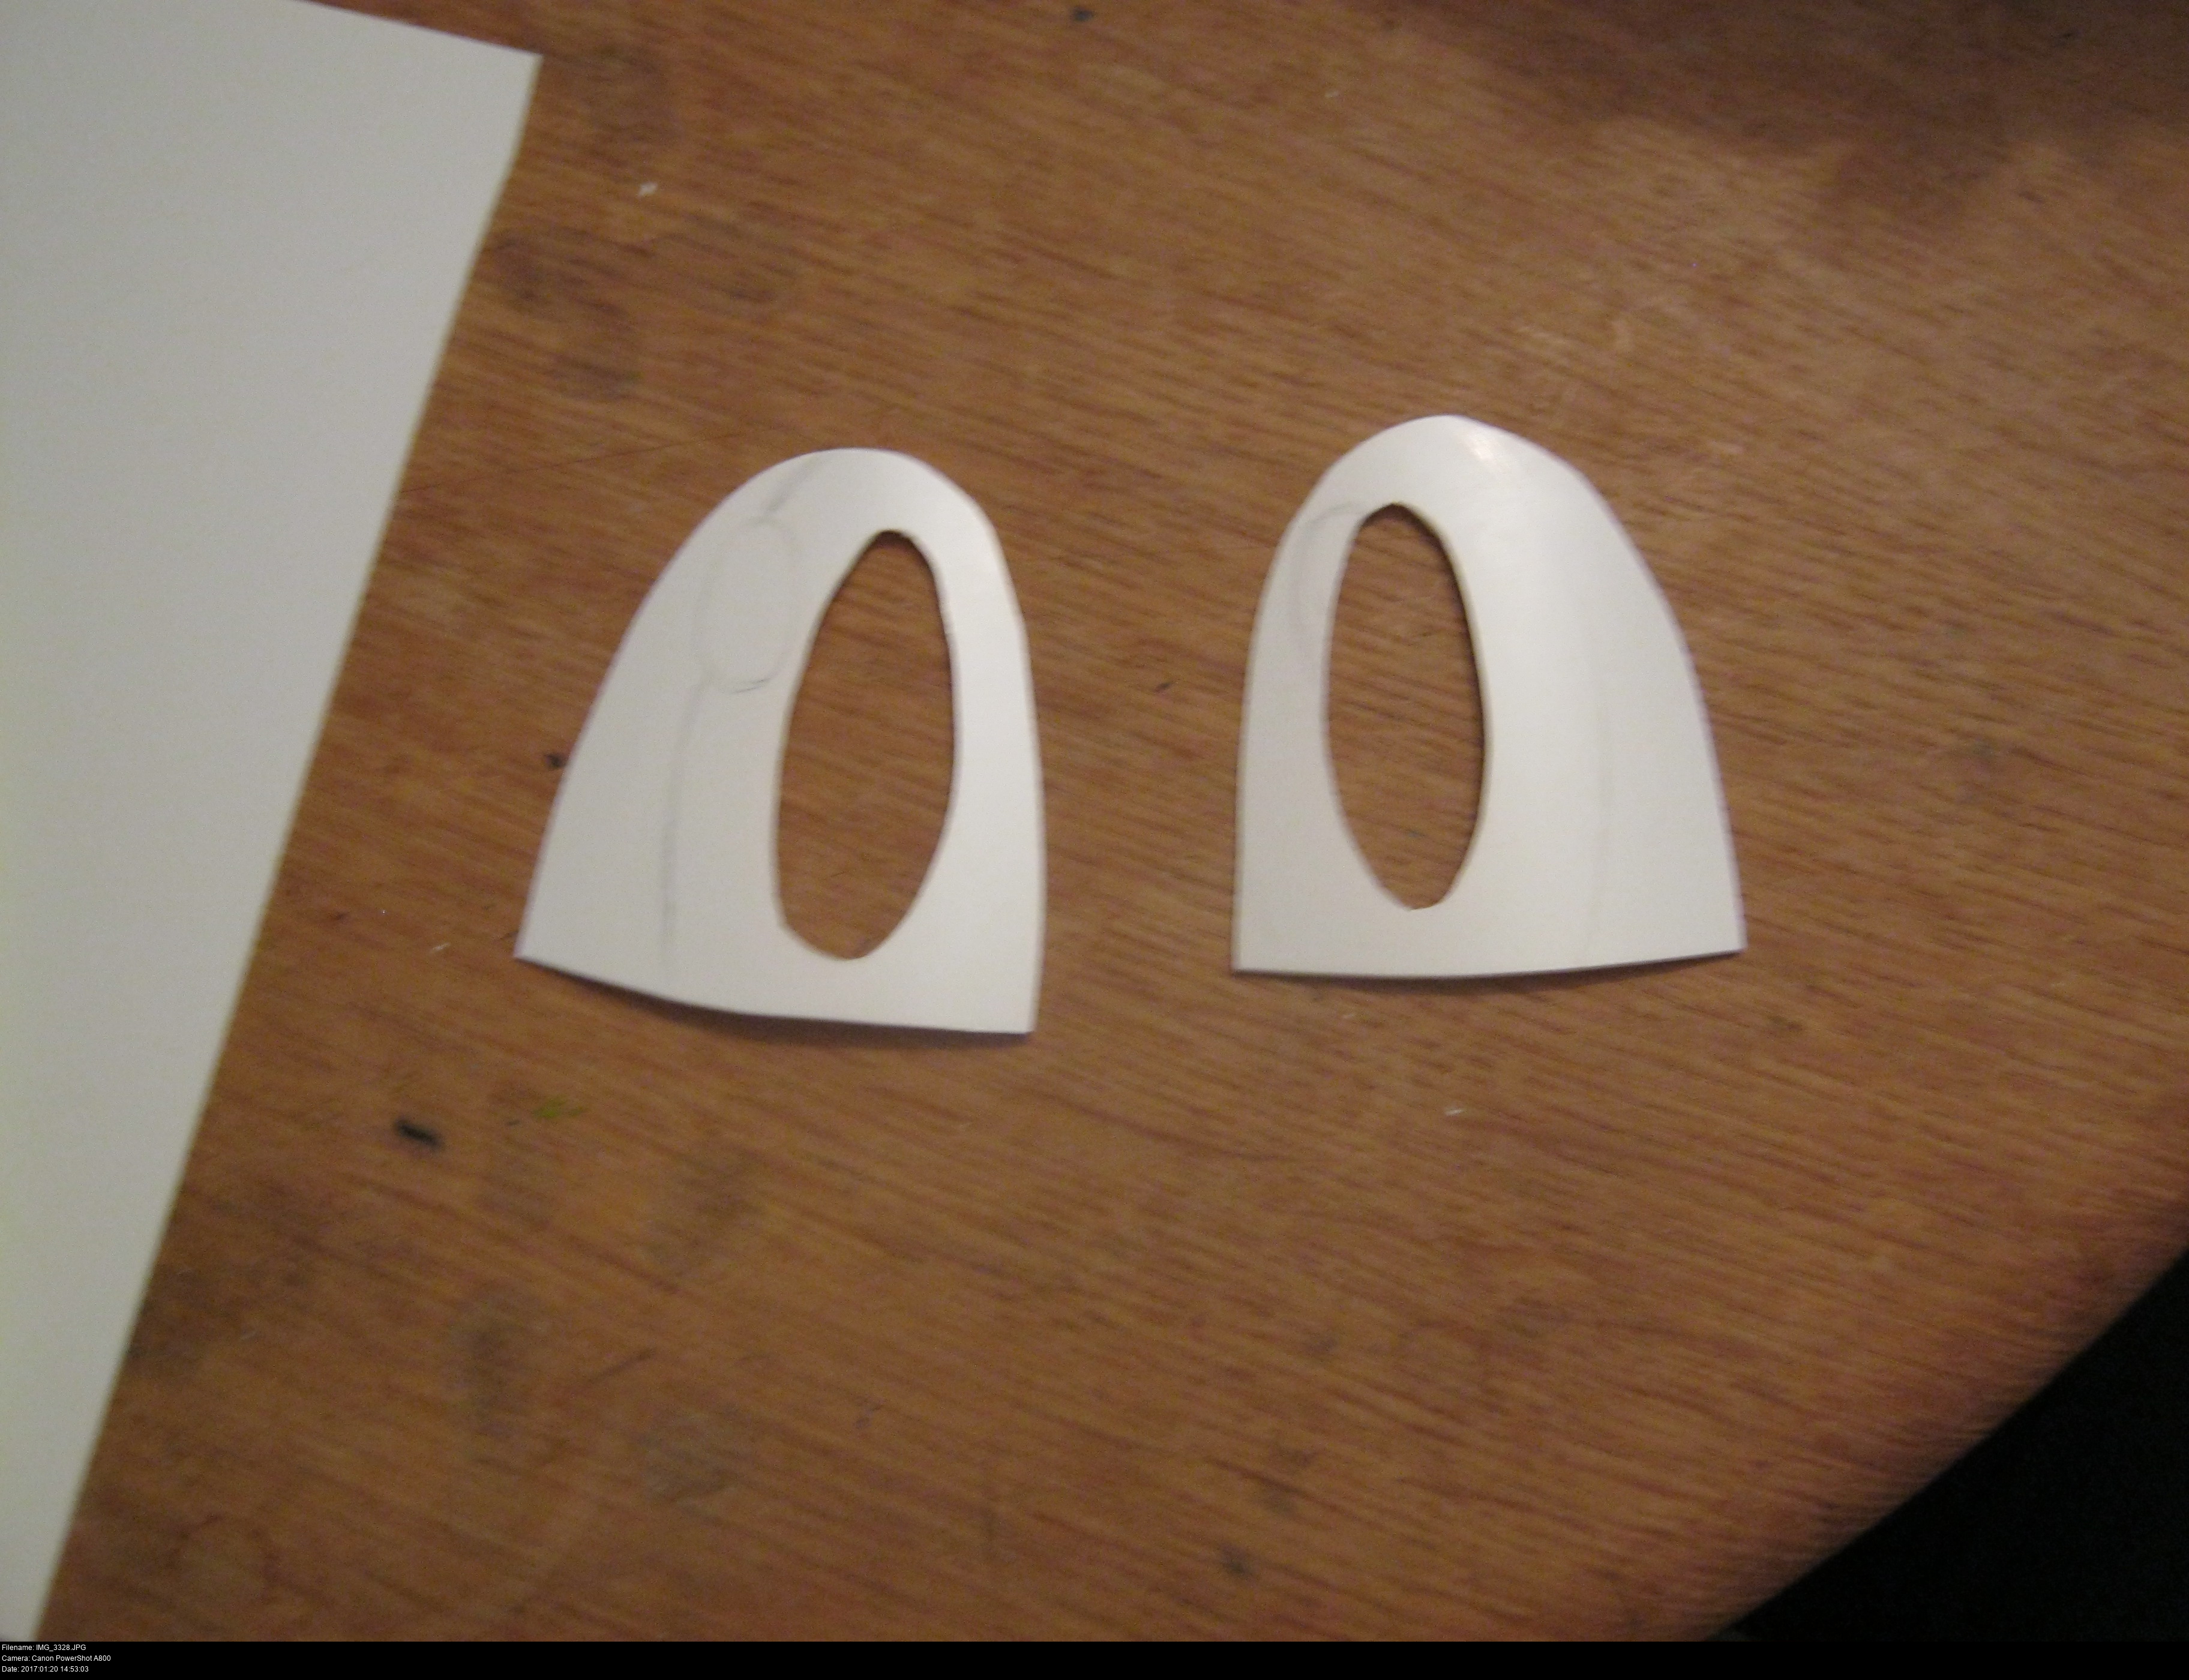
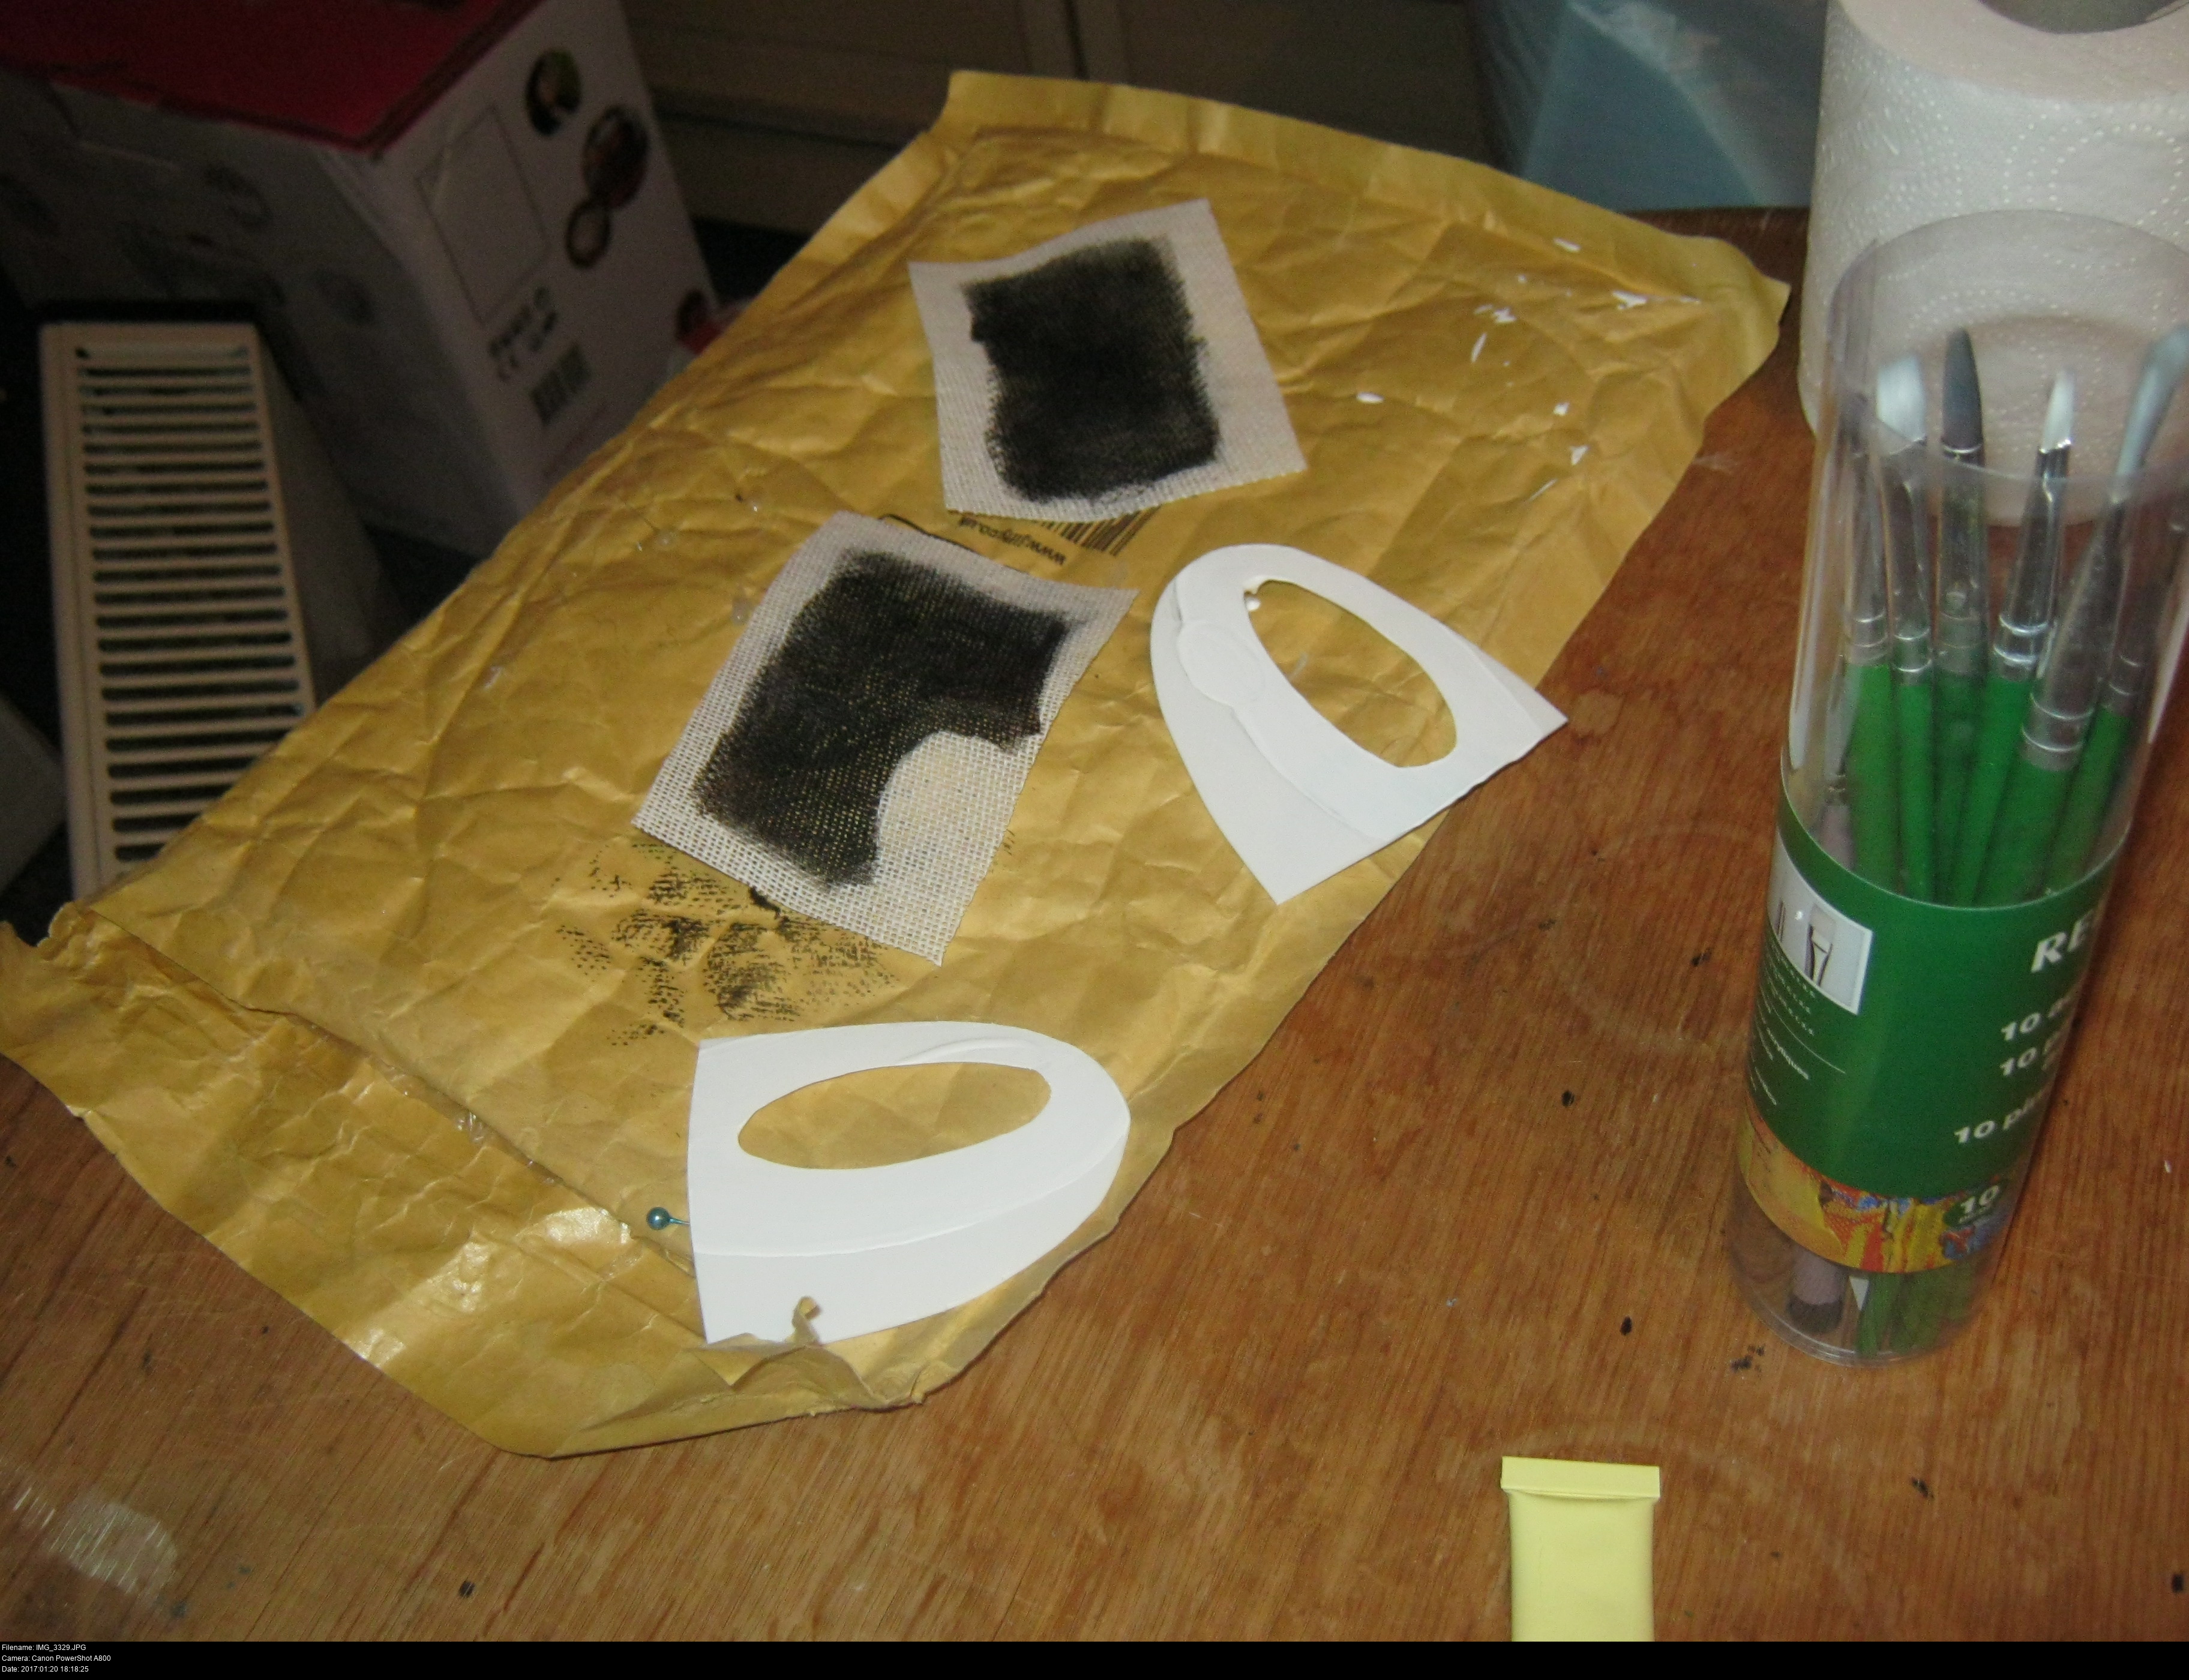
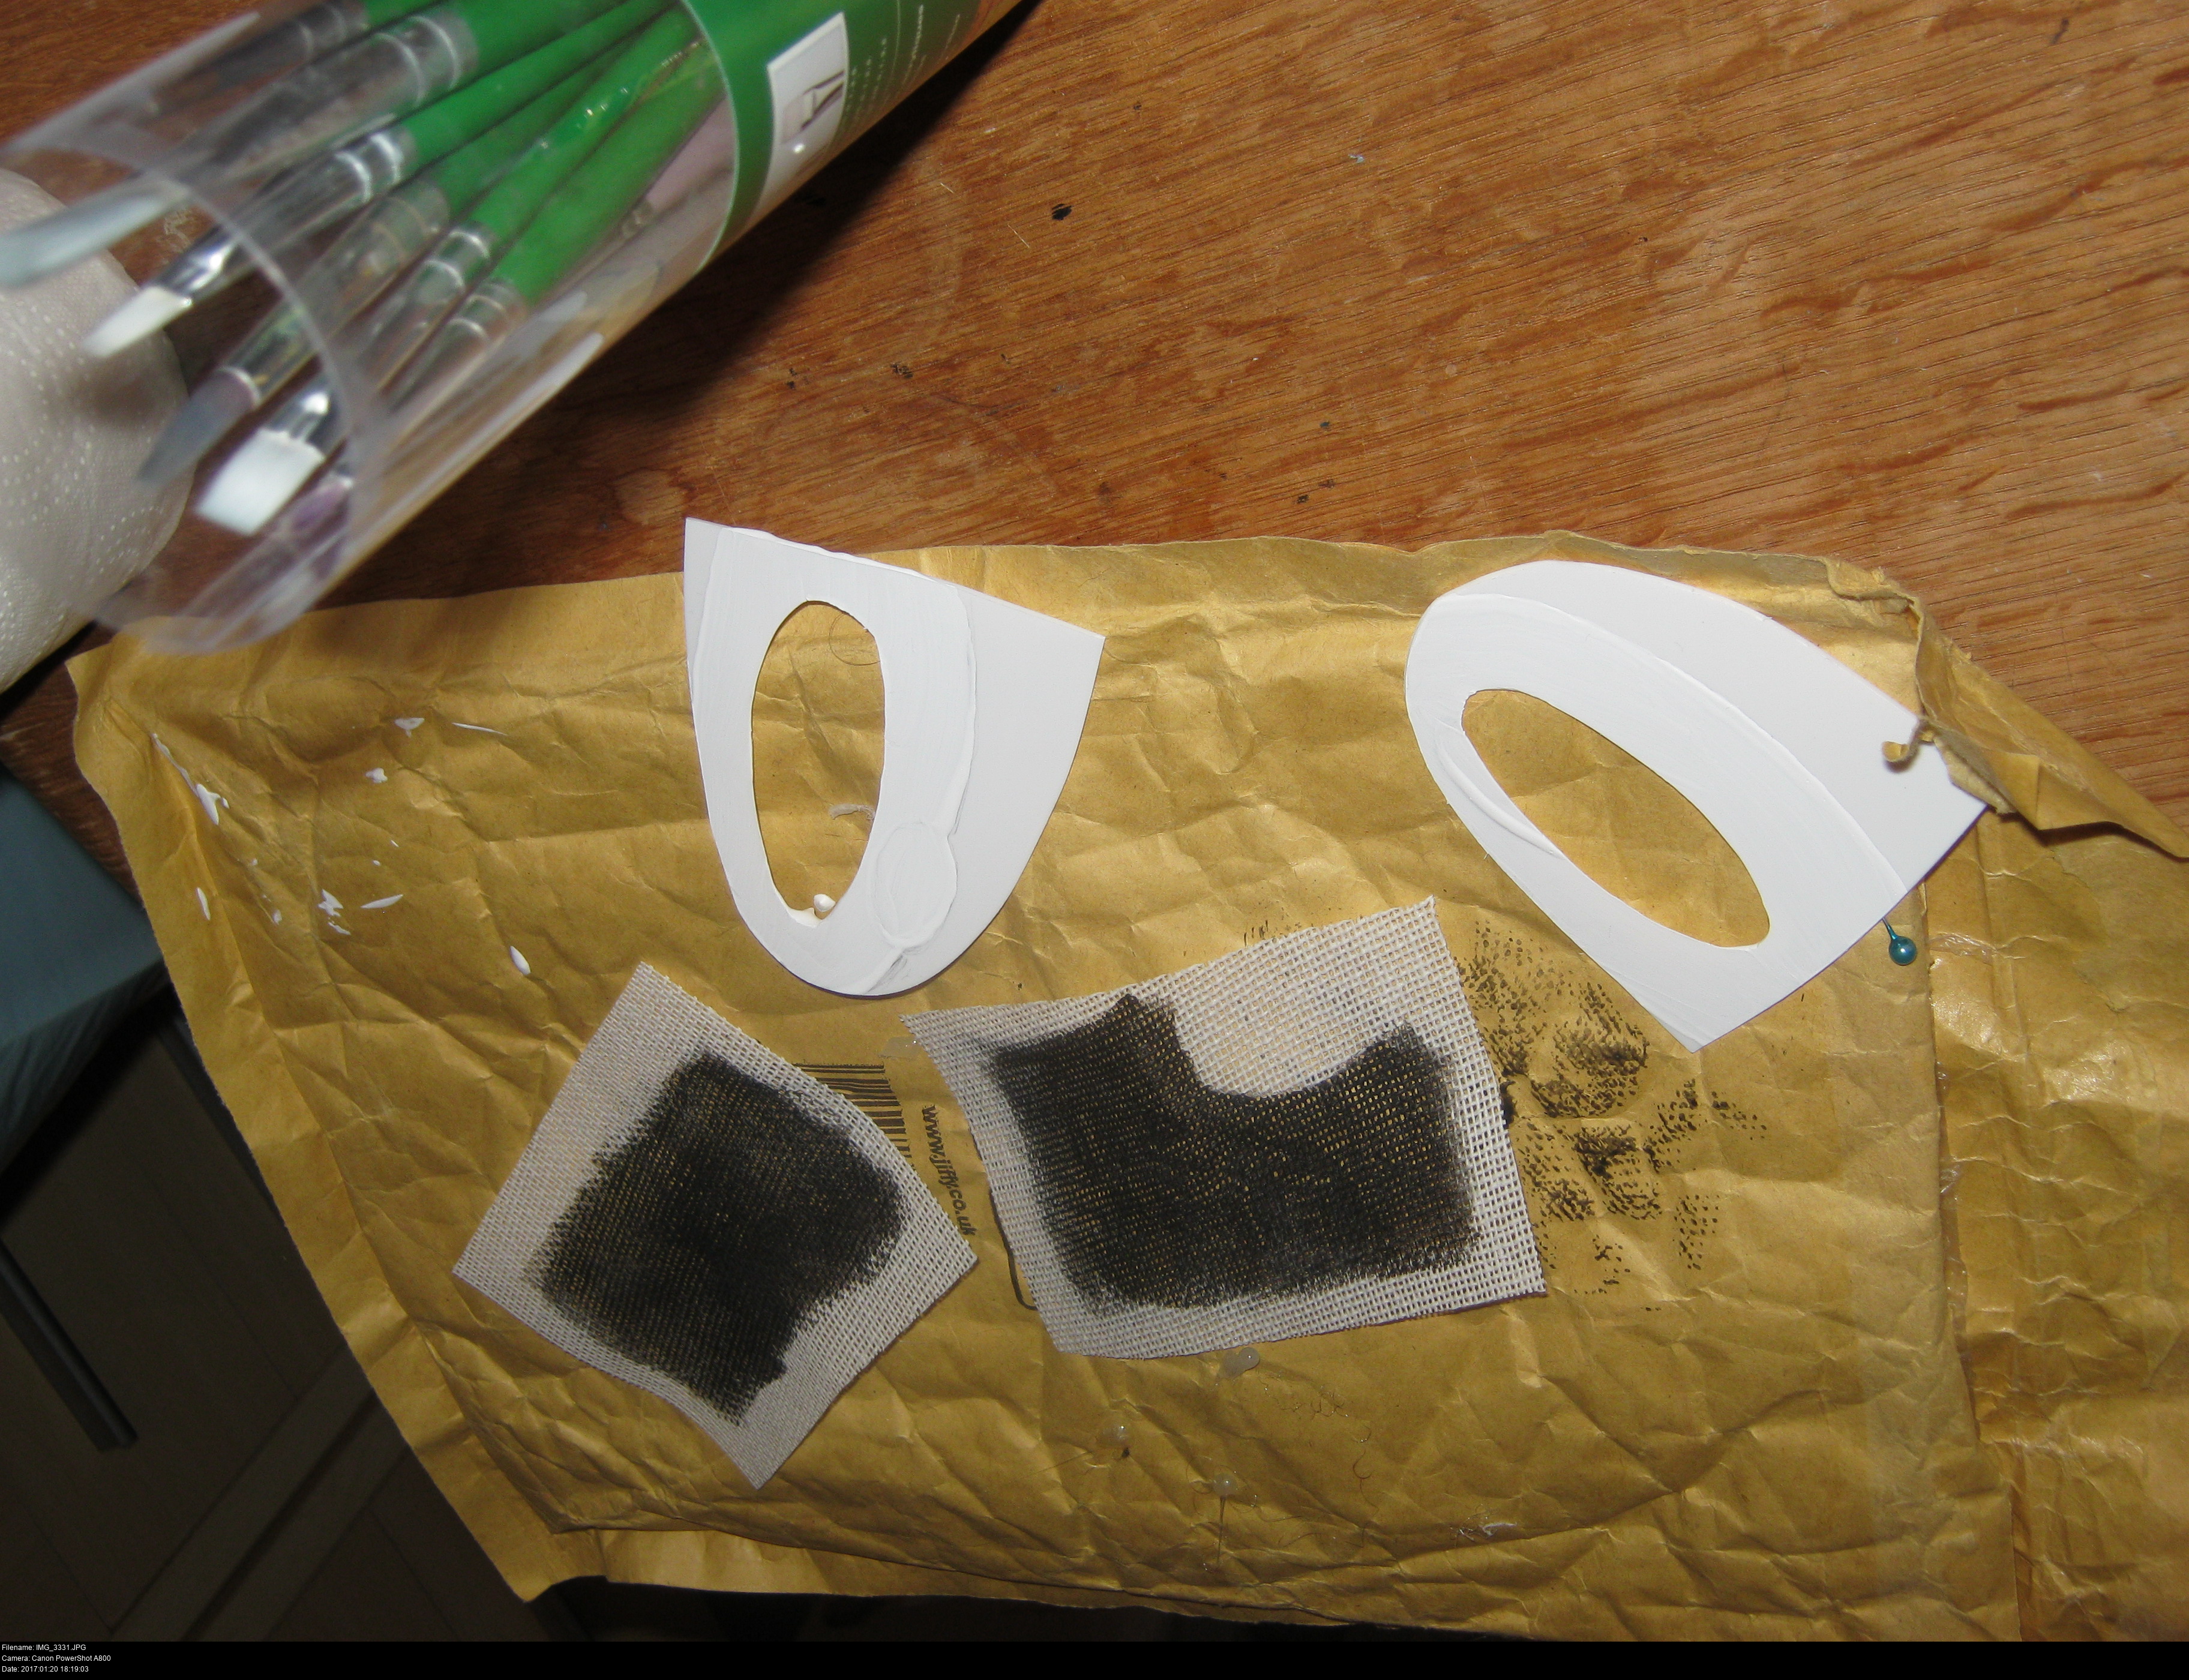
Let's see what happens if I draw out some nice curly shapes and try to fit some ears on his head. Don't forget to make a card template first so you can make an identical mirrored pair of ears.
Mess! Hot glue goes everywhere. I swear that most of the hot glue I paid good money for ends up on the table from leakage between uses.
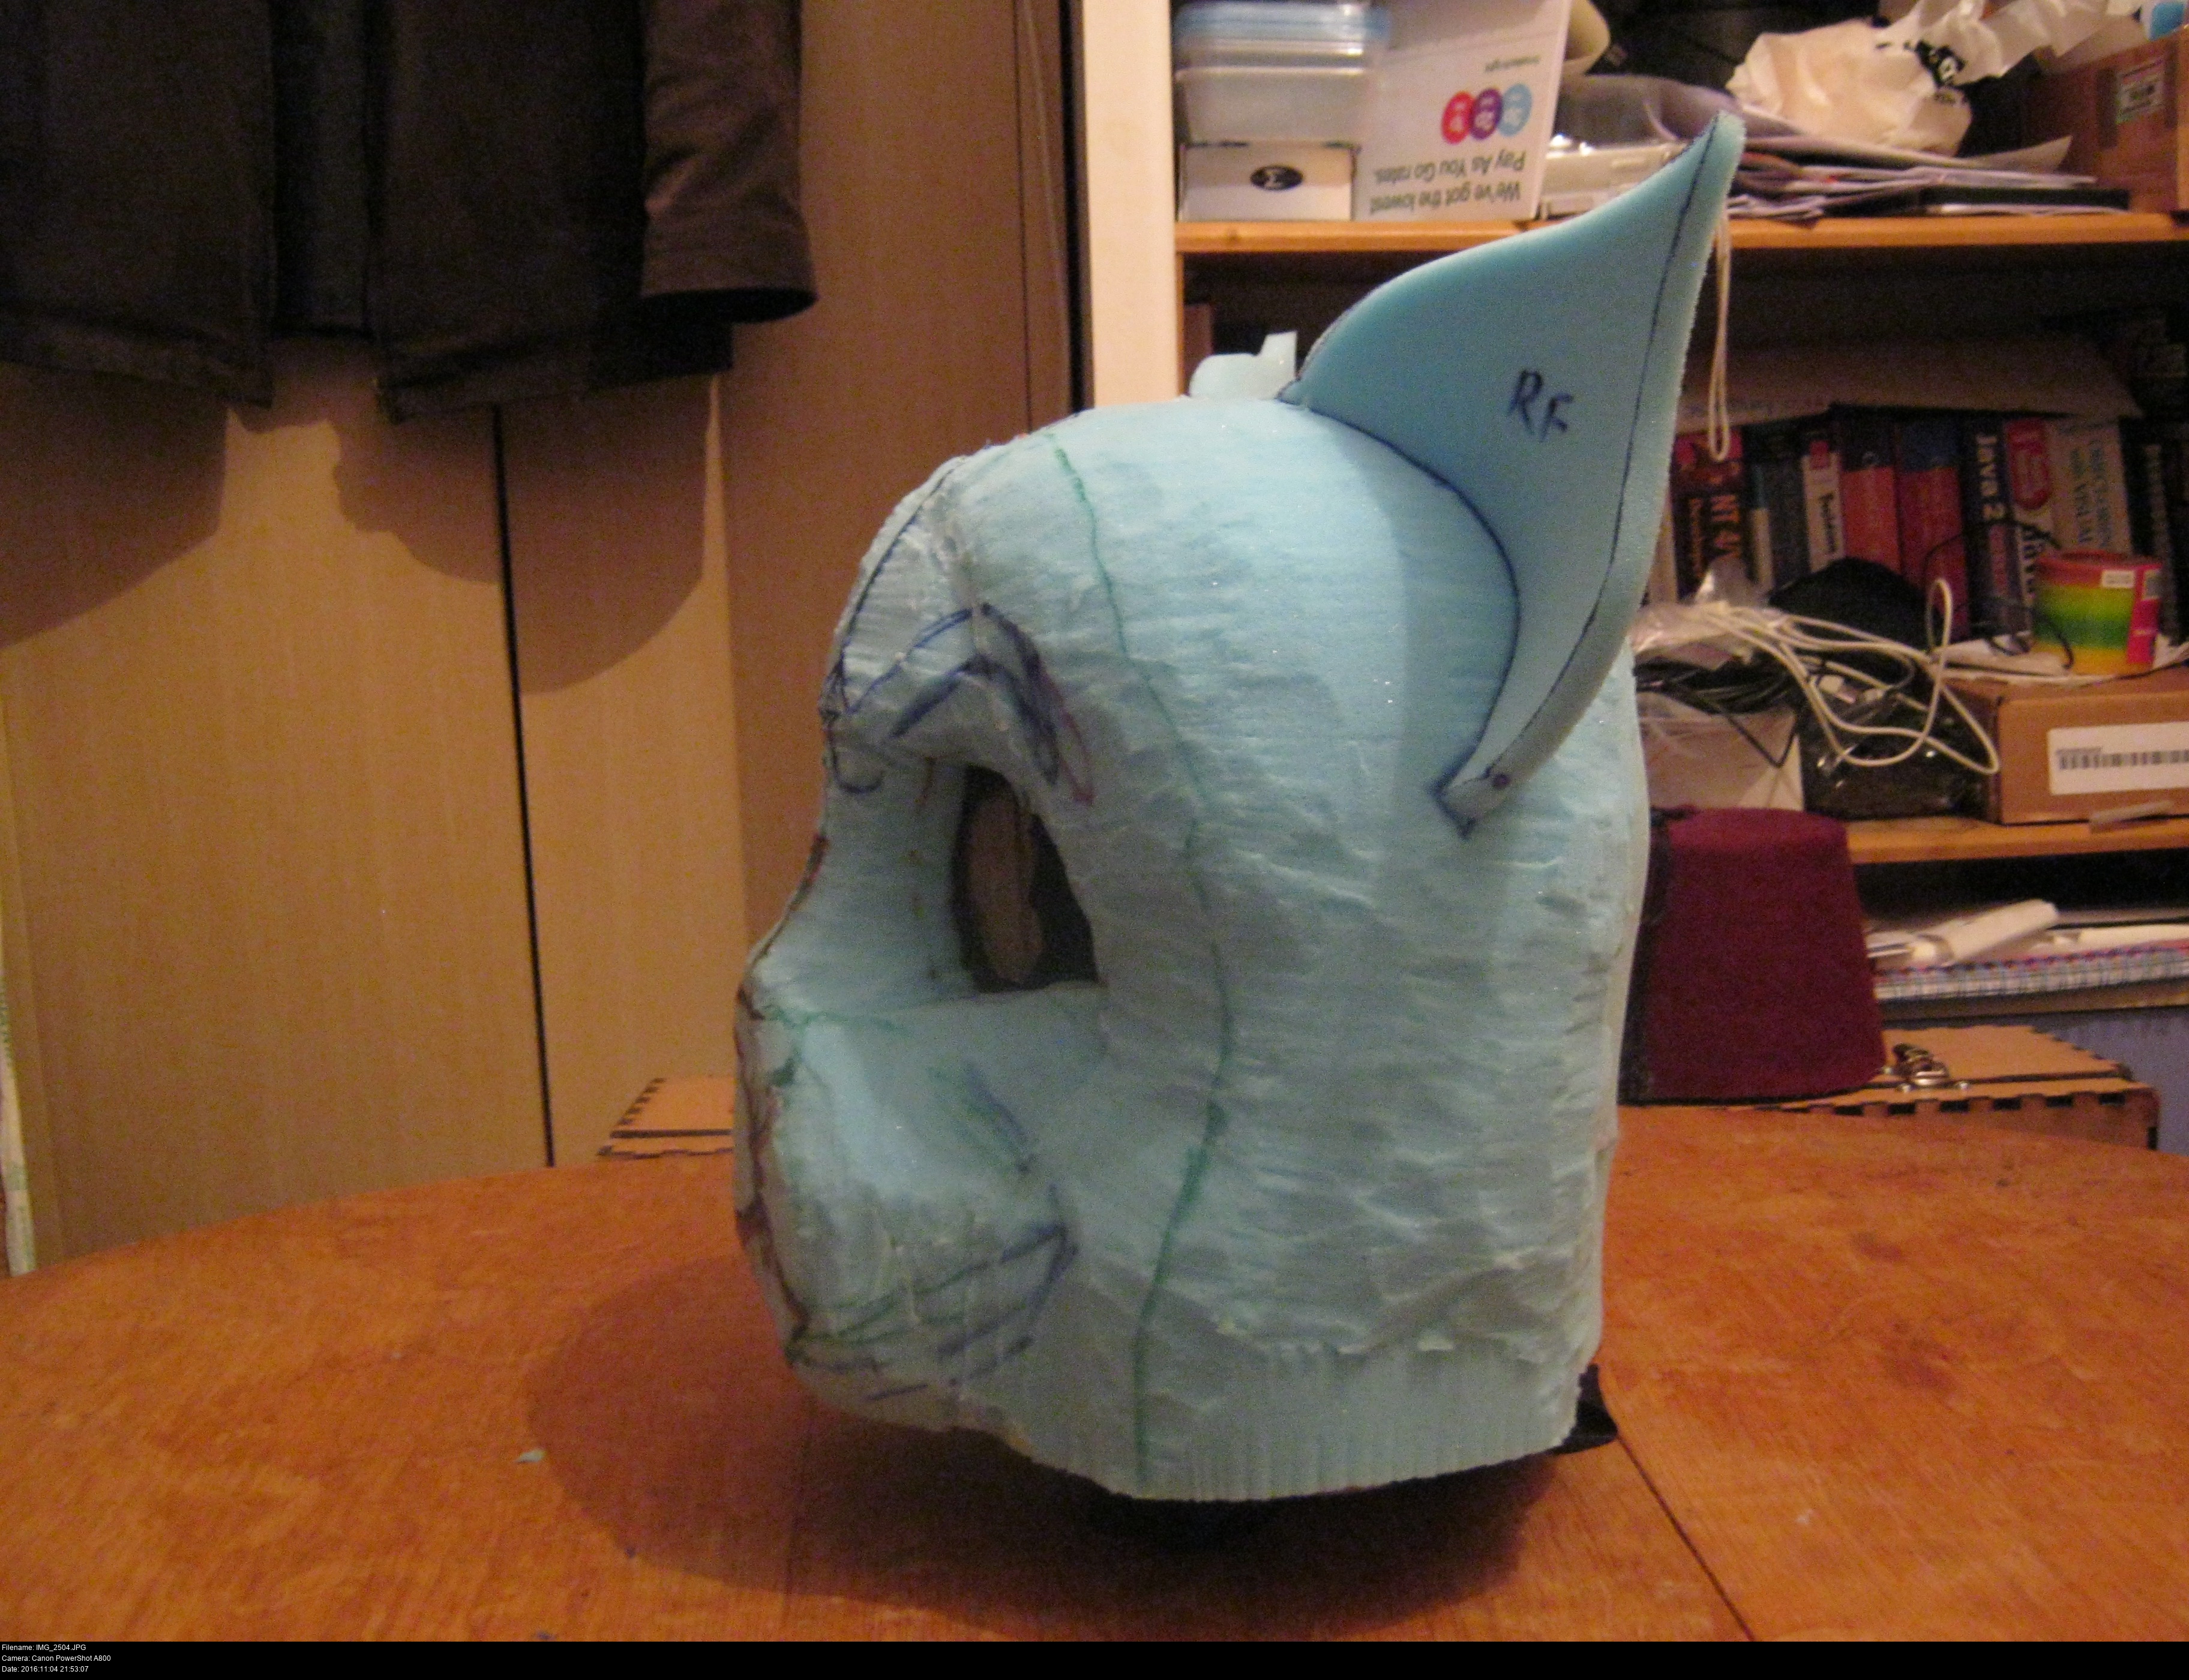
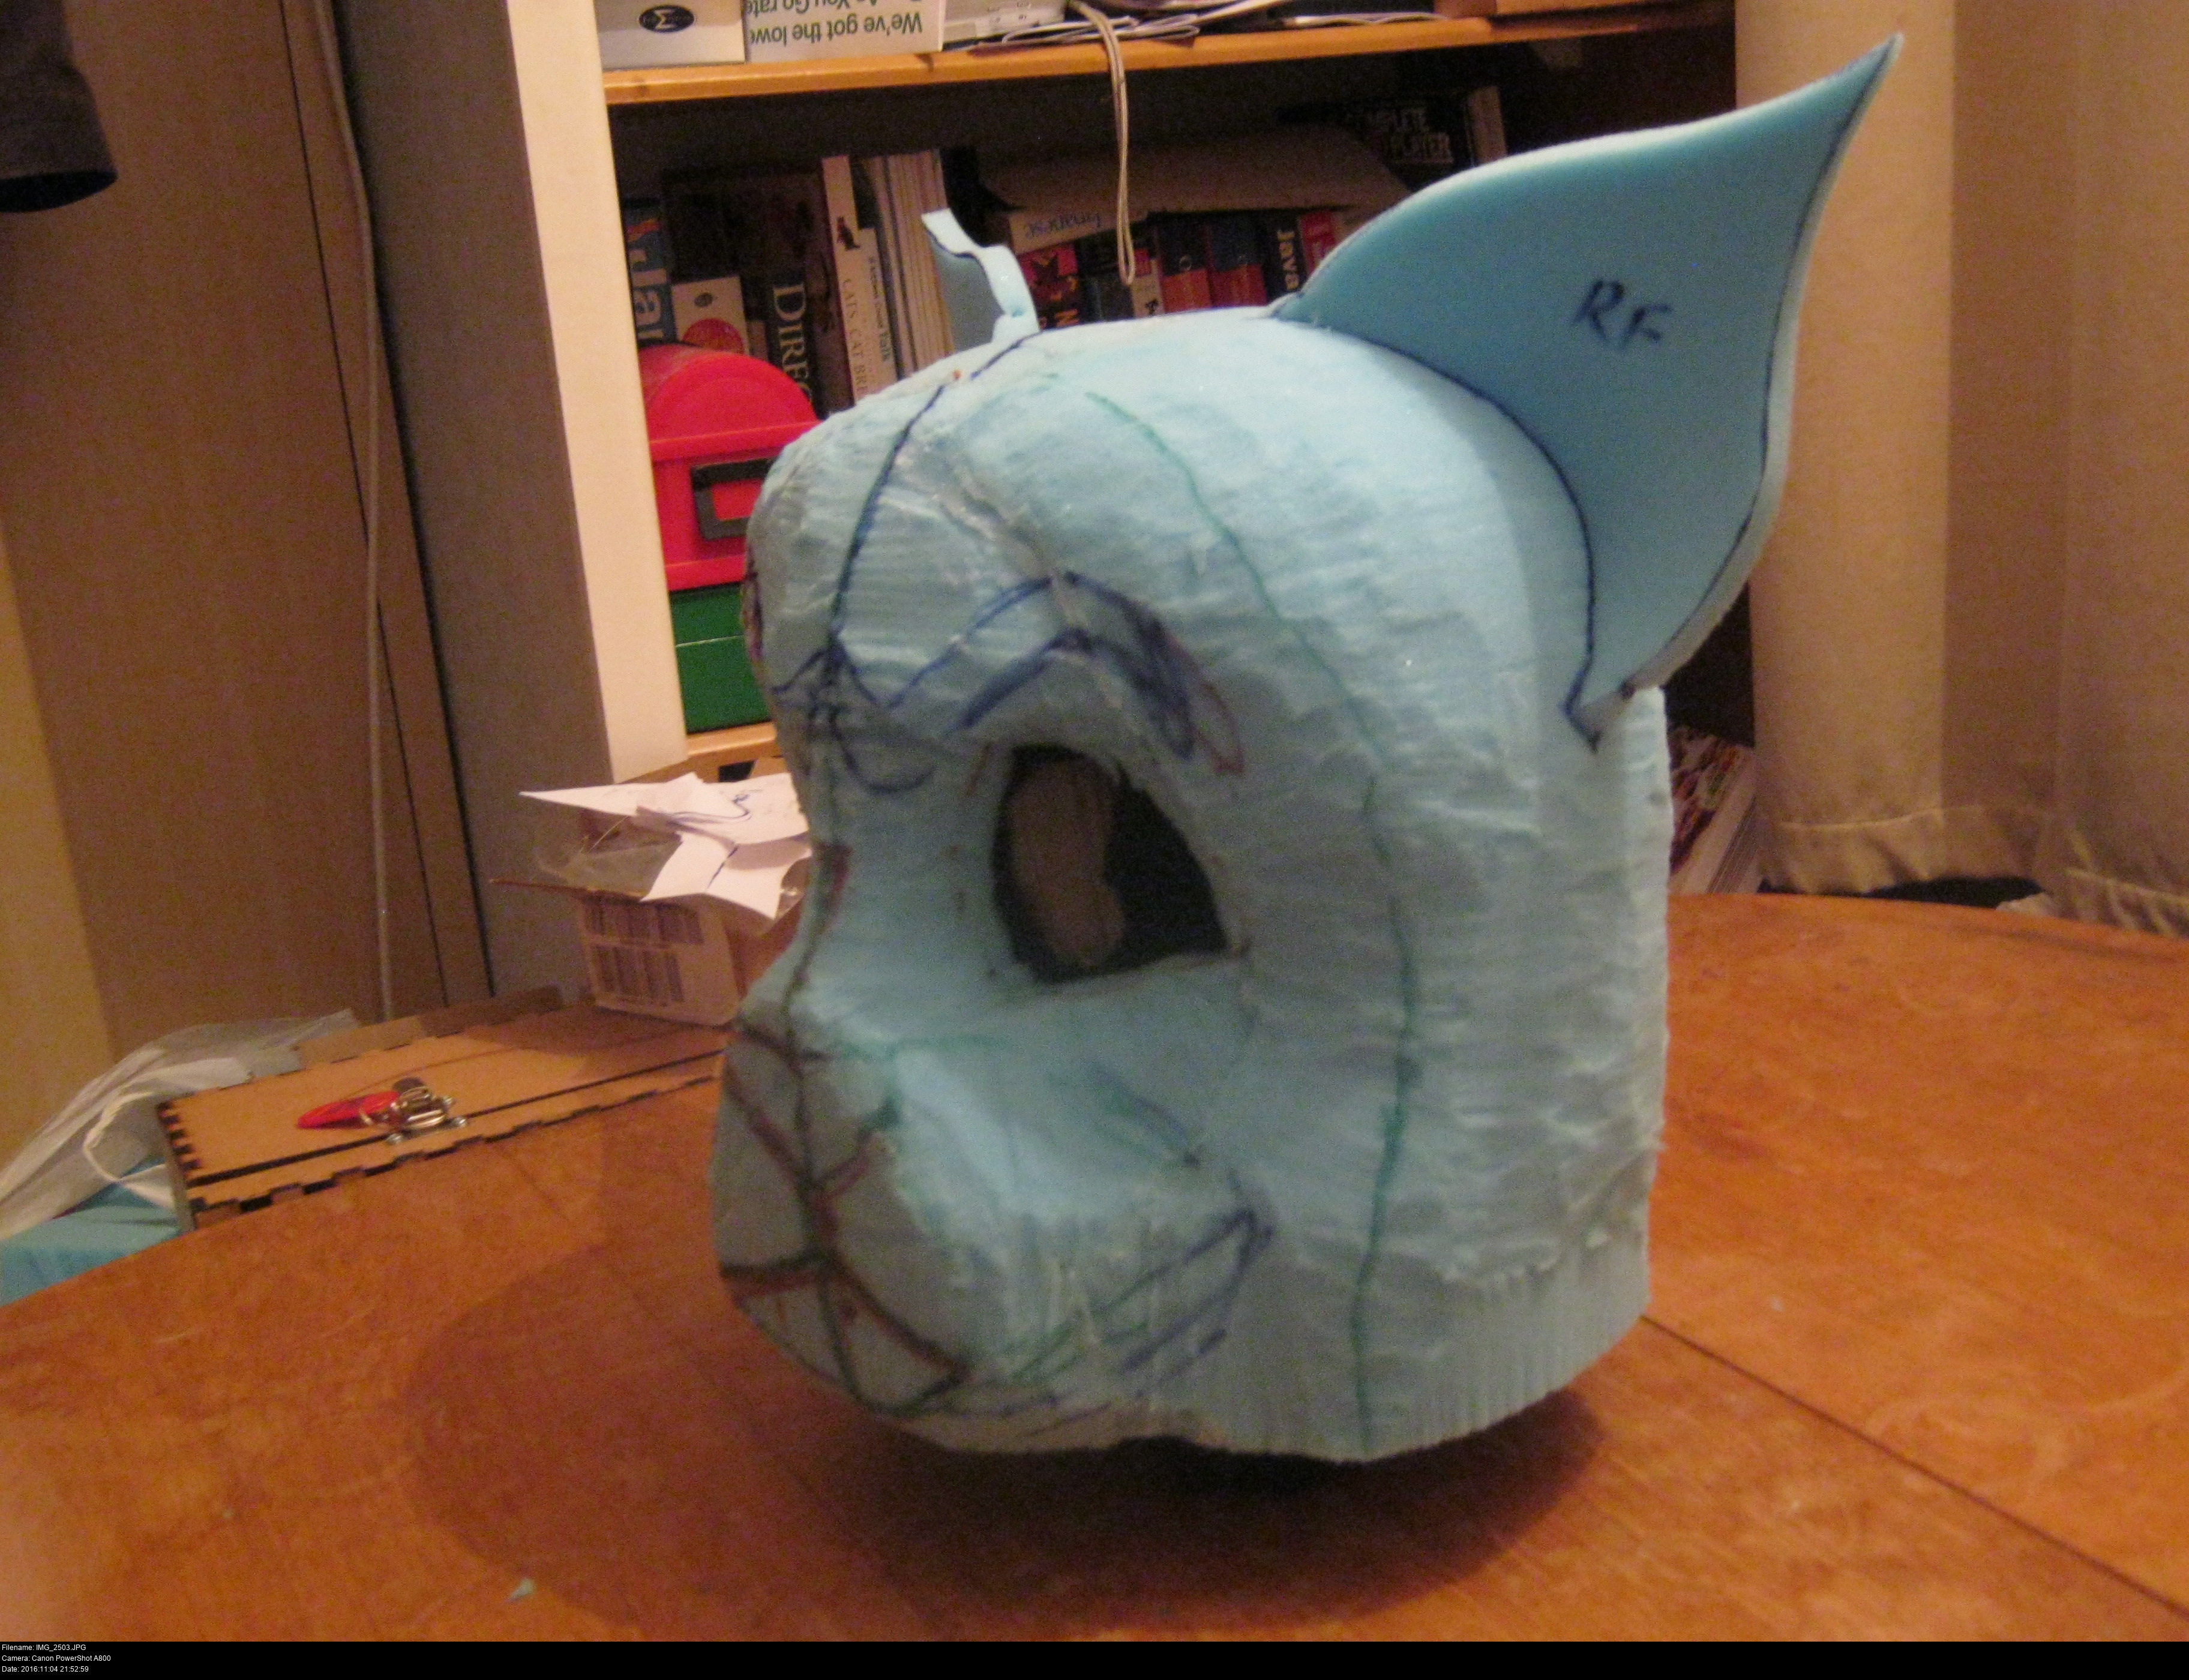
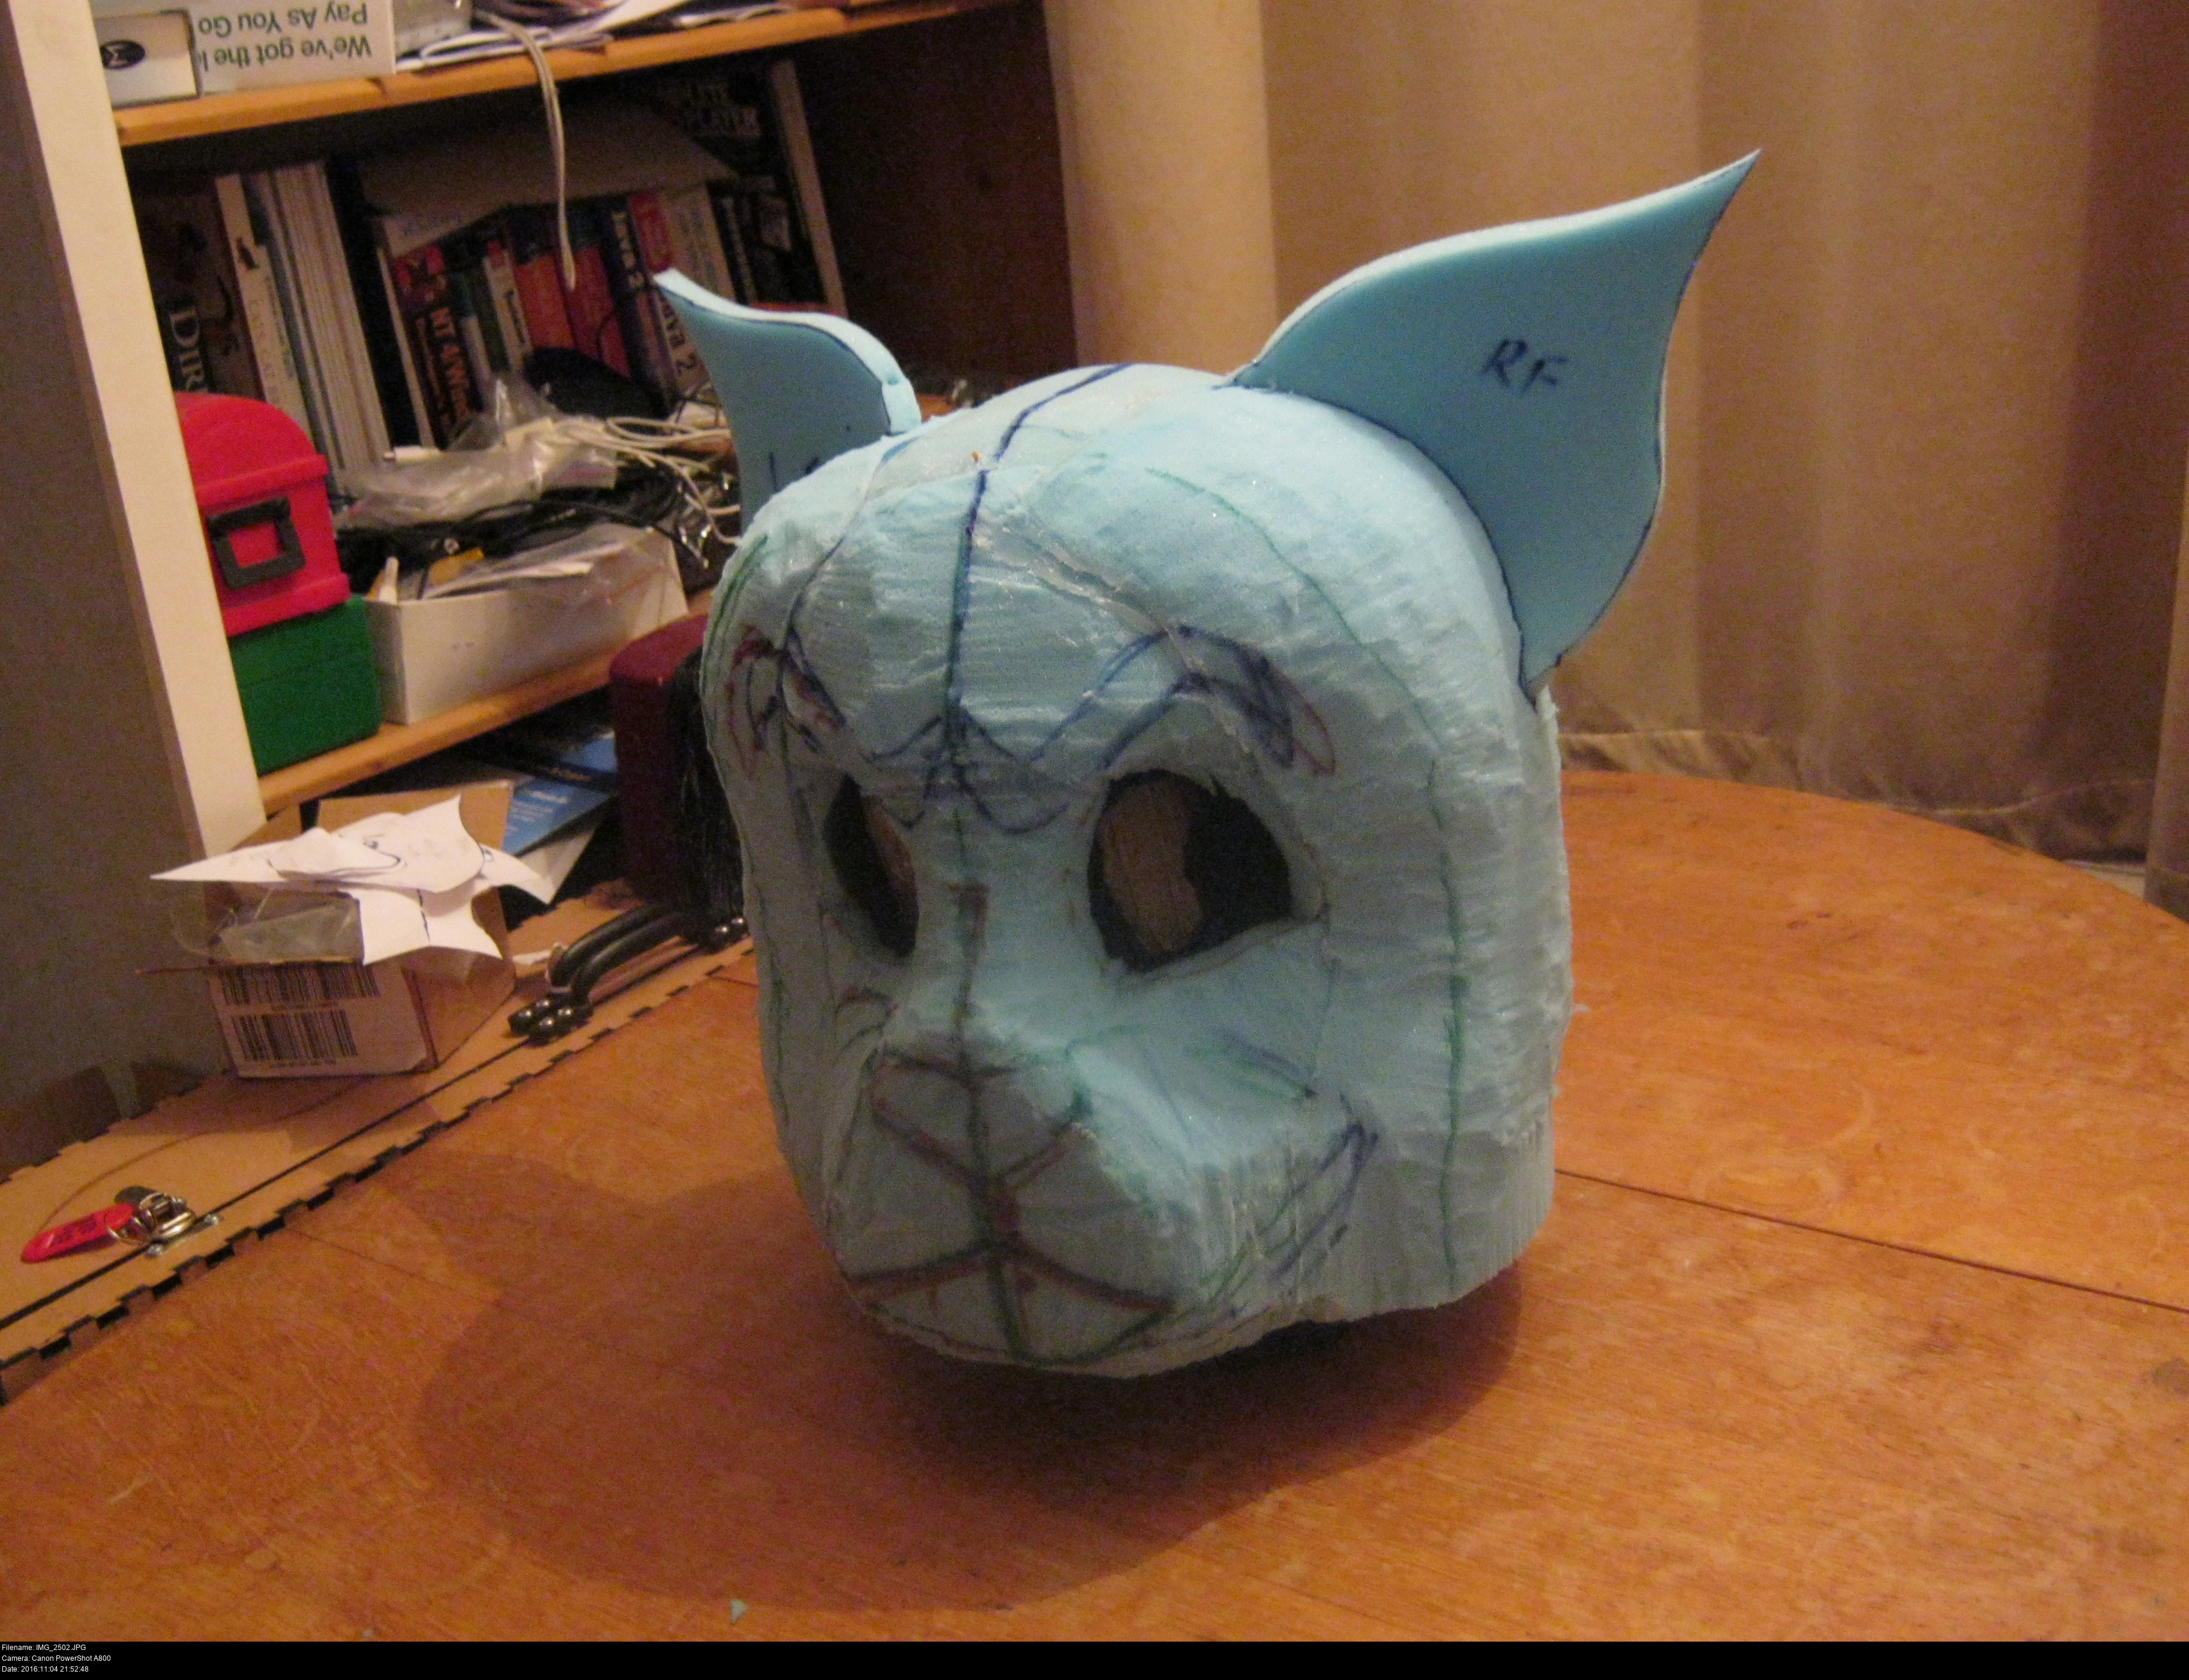


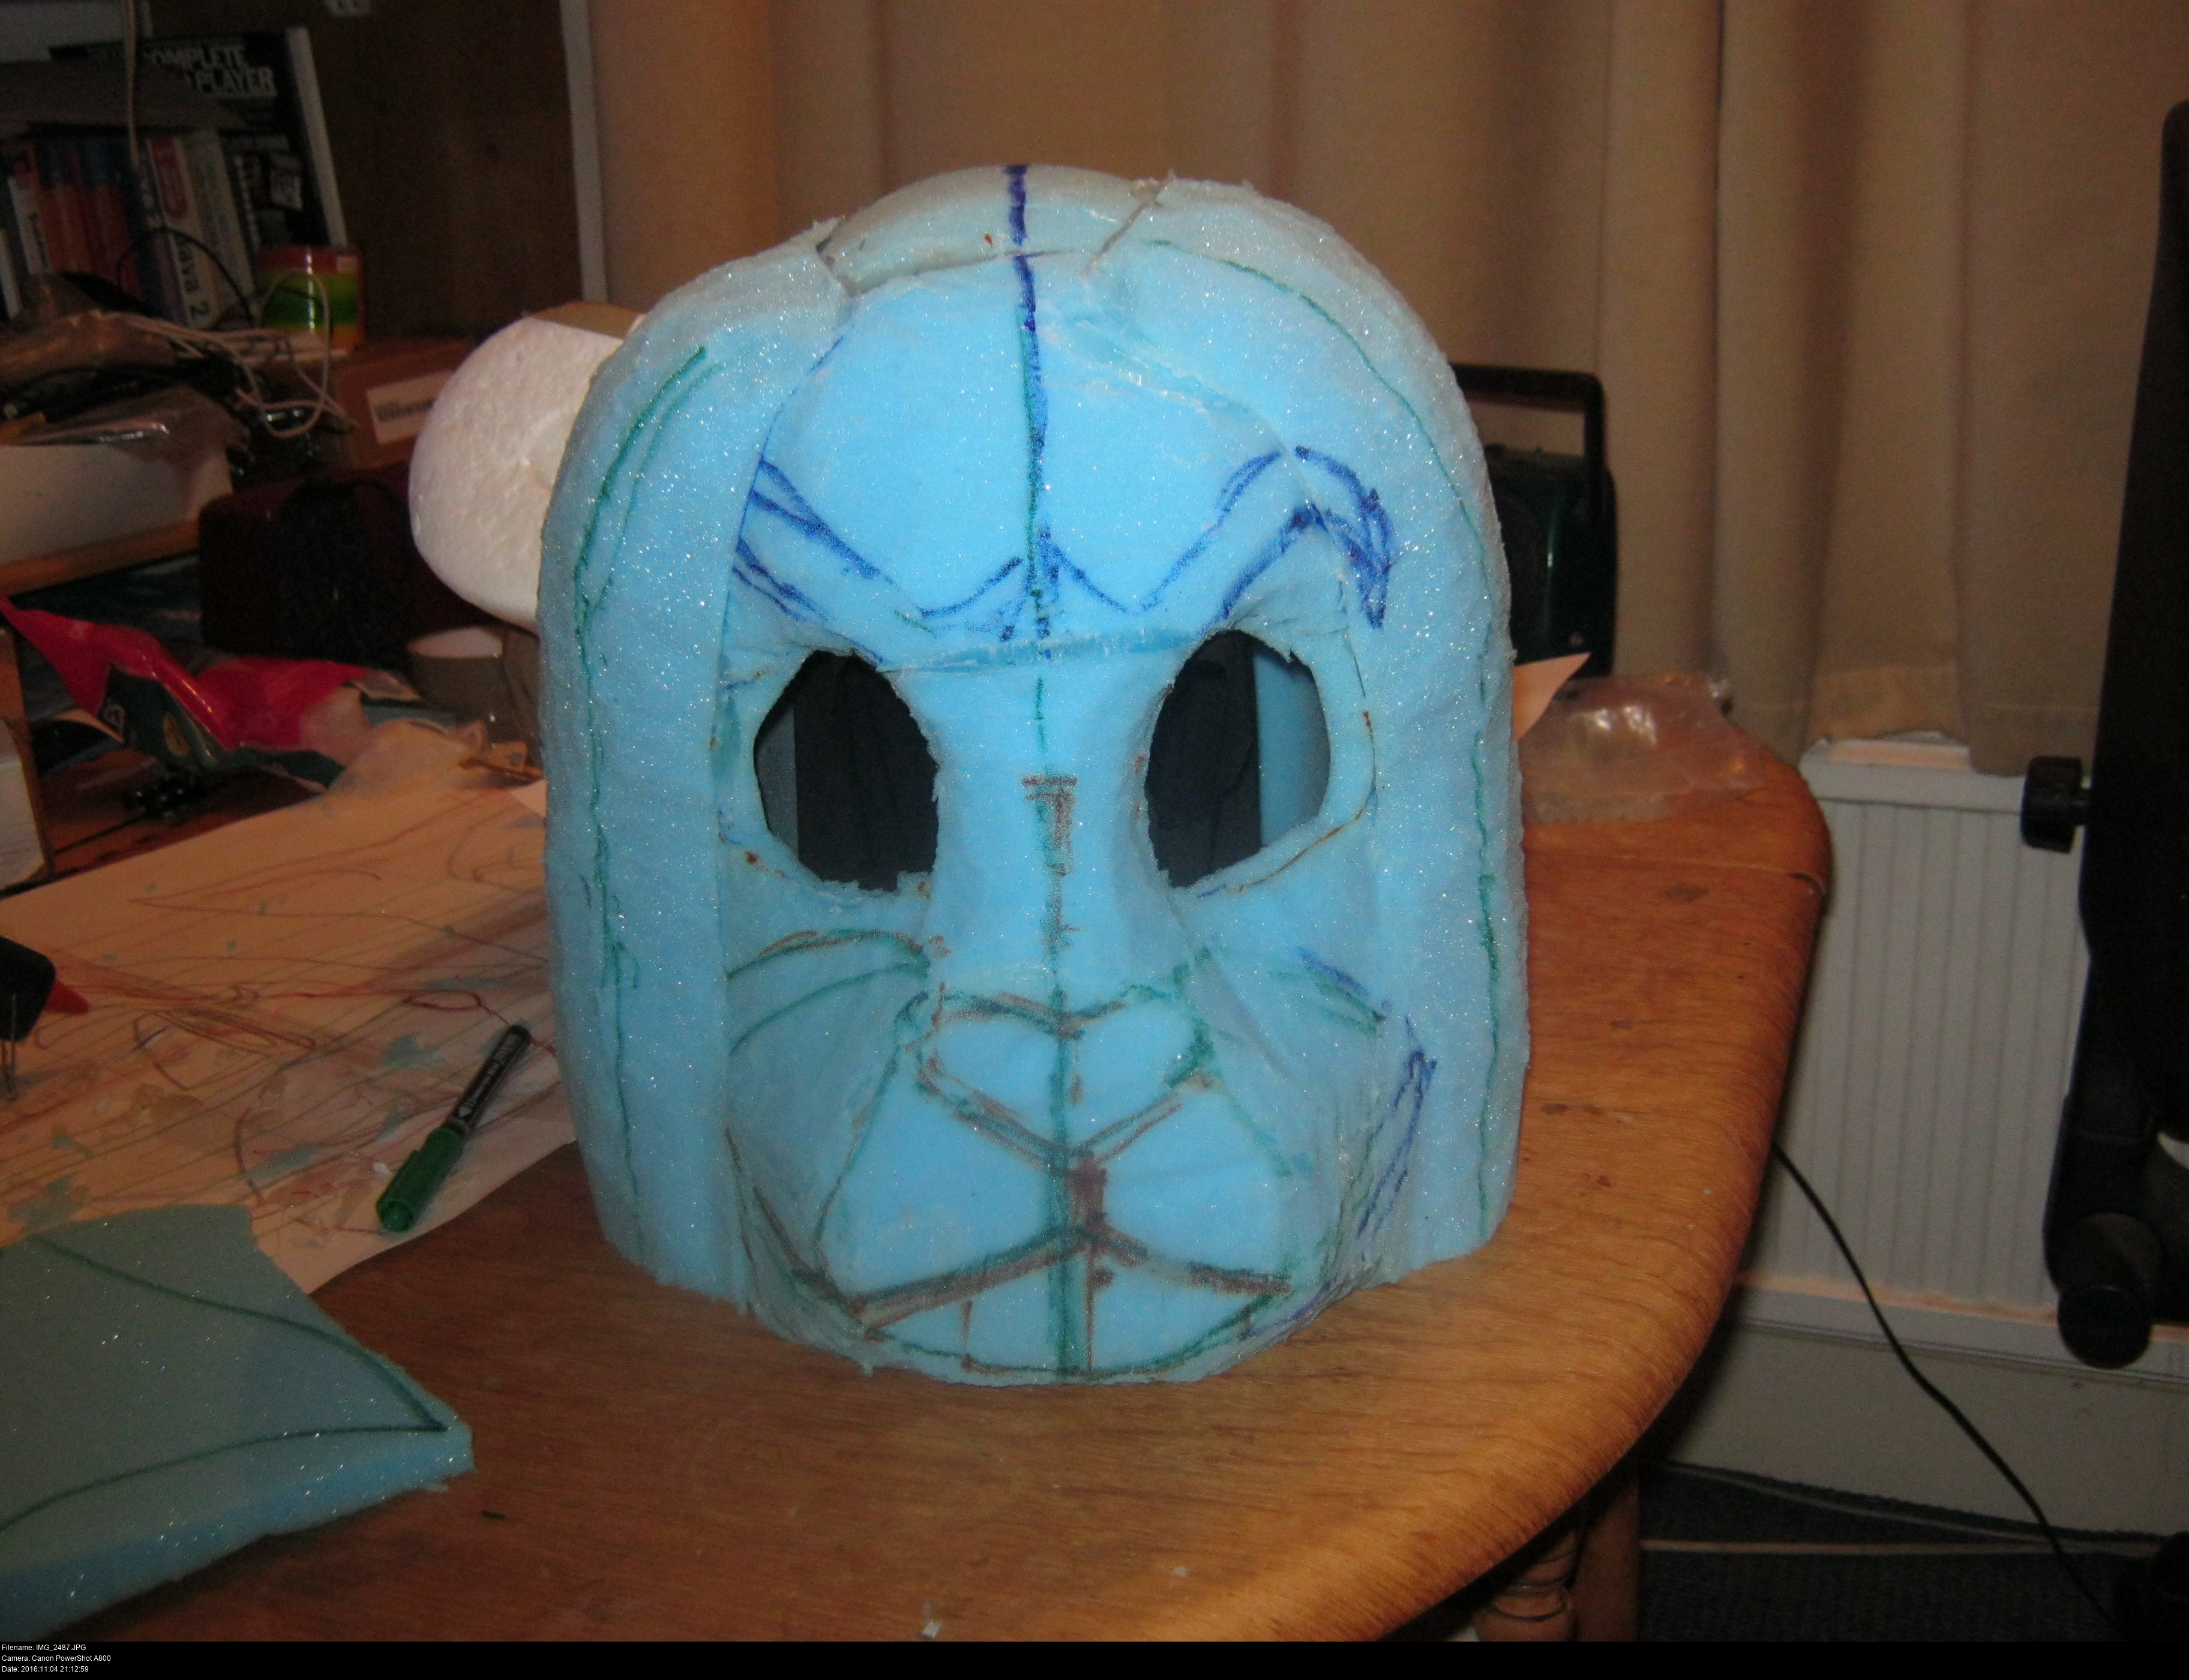
Alright! The ears are a bit too small and perhaps the wrong shape, but I'm starting to think I just might be able to pull this off!
Whoa... I guess that means now I have to look into how to fur the head.
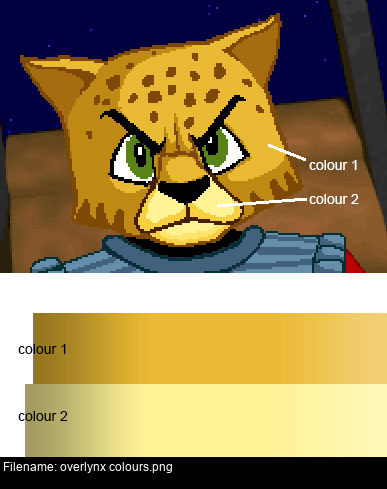
Being systematic is a wise move. Identify the large areas of colour on your character and work out what kind of fur you'll need for them. I'm going to use this illustration as the base for my colours: mustard main fur and custard muzzle. You should take into account the lighting of your character when taking colour from images. This guy is in a brightly lit spaceship cockpit, but your character might be under coloured lighting or in shadow. Consider how they'll look in a fully lit environment. Or alternatively you can deliberately use a coloured version of the material to imitate TV/movie Colour grading, as long as you're consistent throughout your character.
My usual haunt of Abakhan Fabrics in Liverpool has some furs or fur-like-things in the remnants department on the ground floor, but I might need something nicer than that for this. I'm going to need some samples. And that means looking up all the UK fabric companies I can find and asking for samples. Luckily, most of them will send you small swatches of fabrics on request and most of them will do it for absolutely no charge.

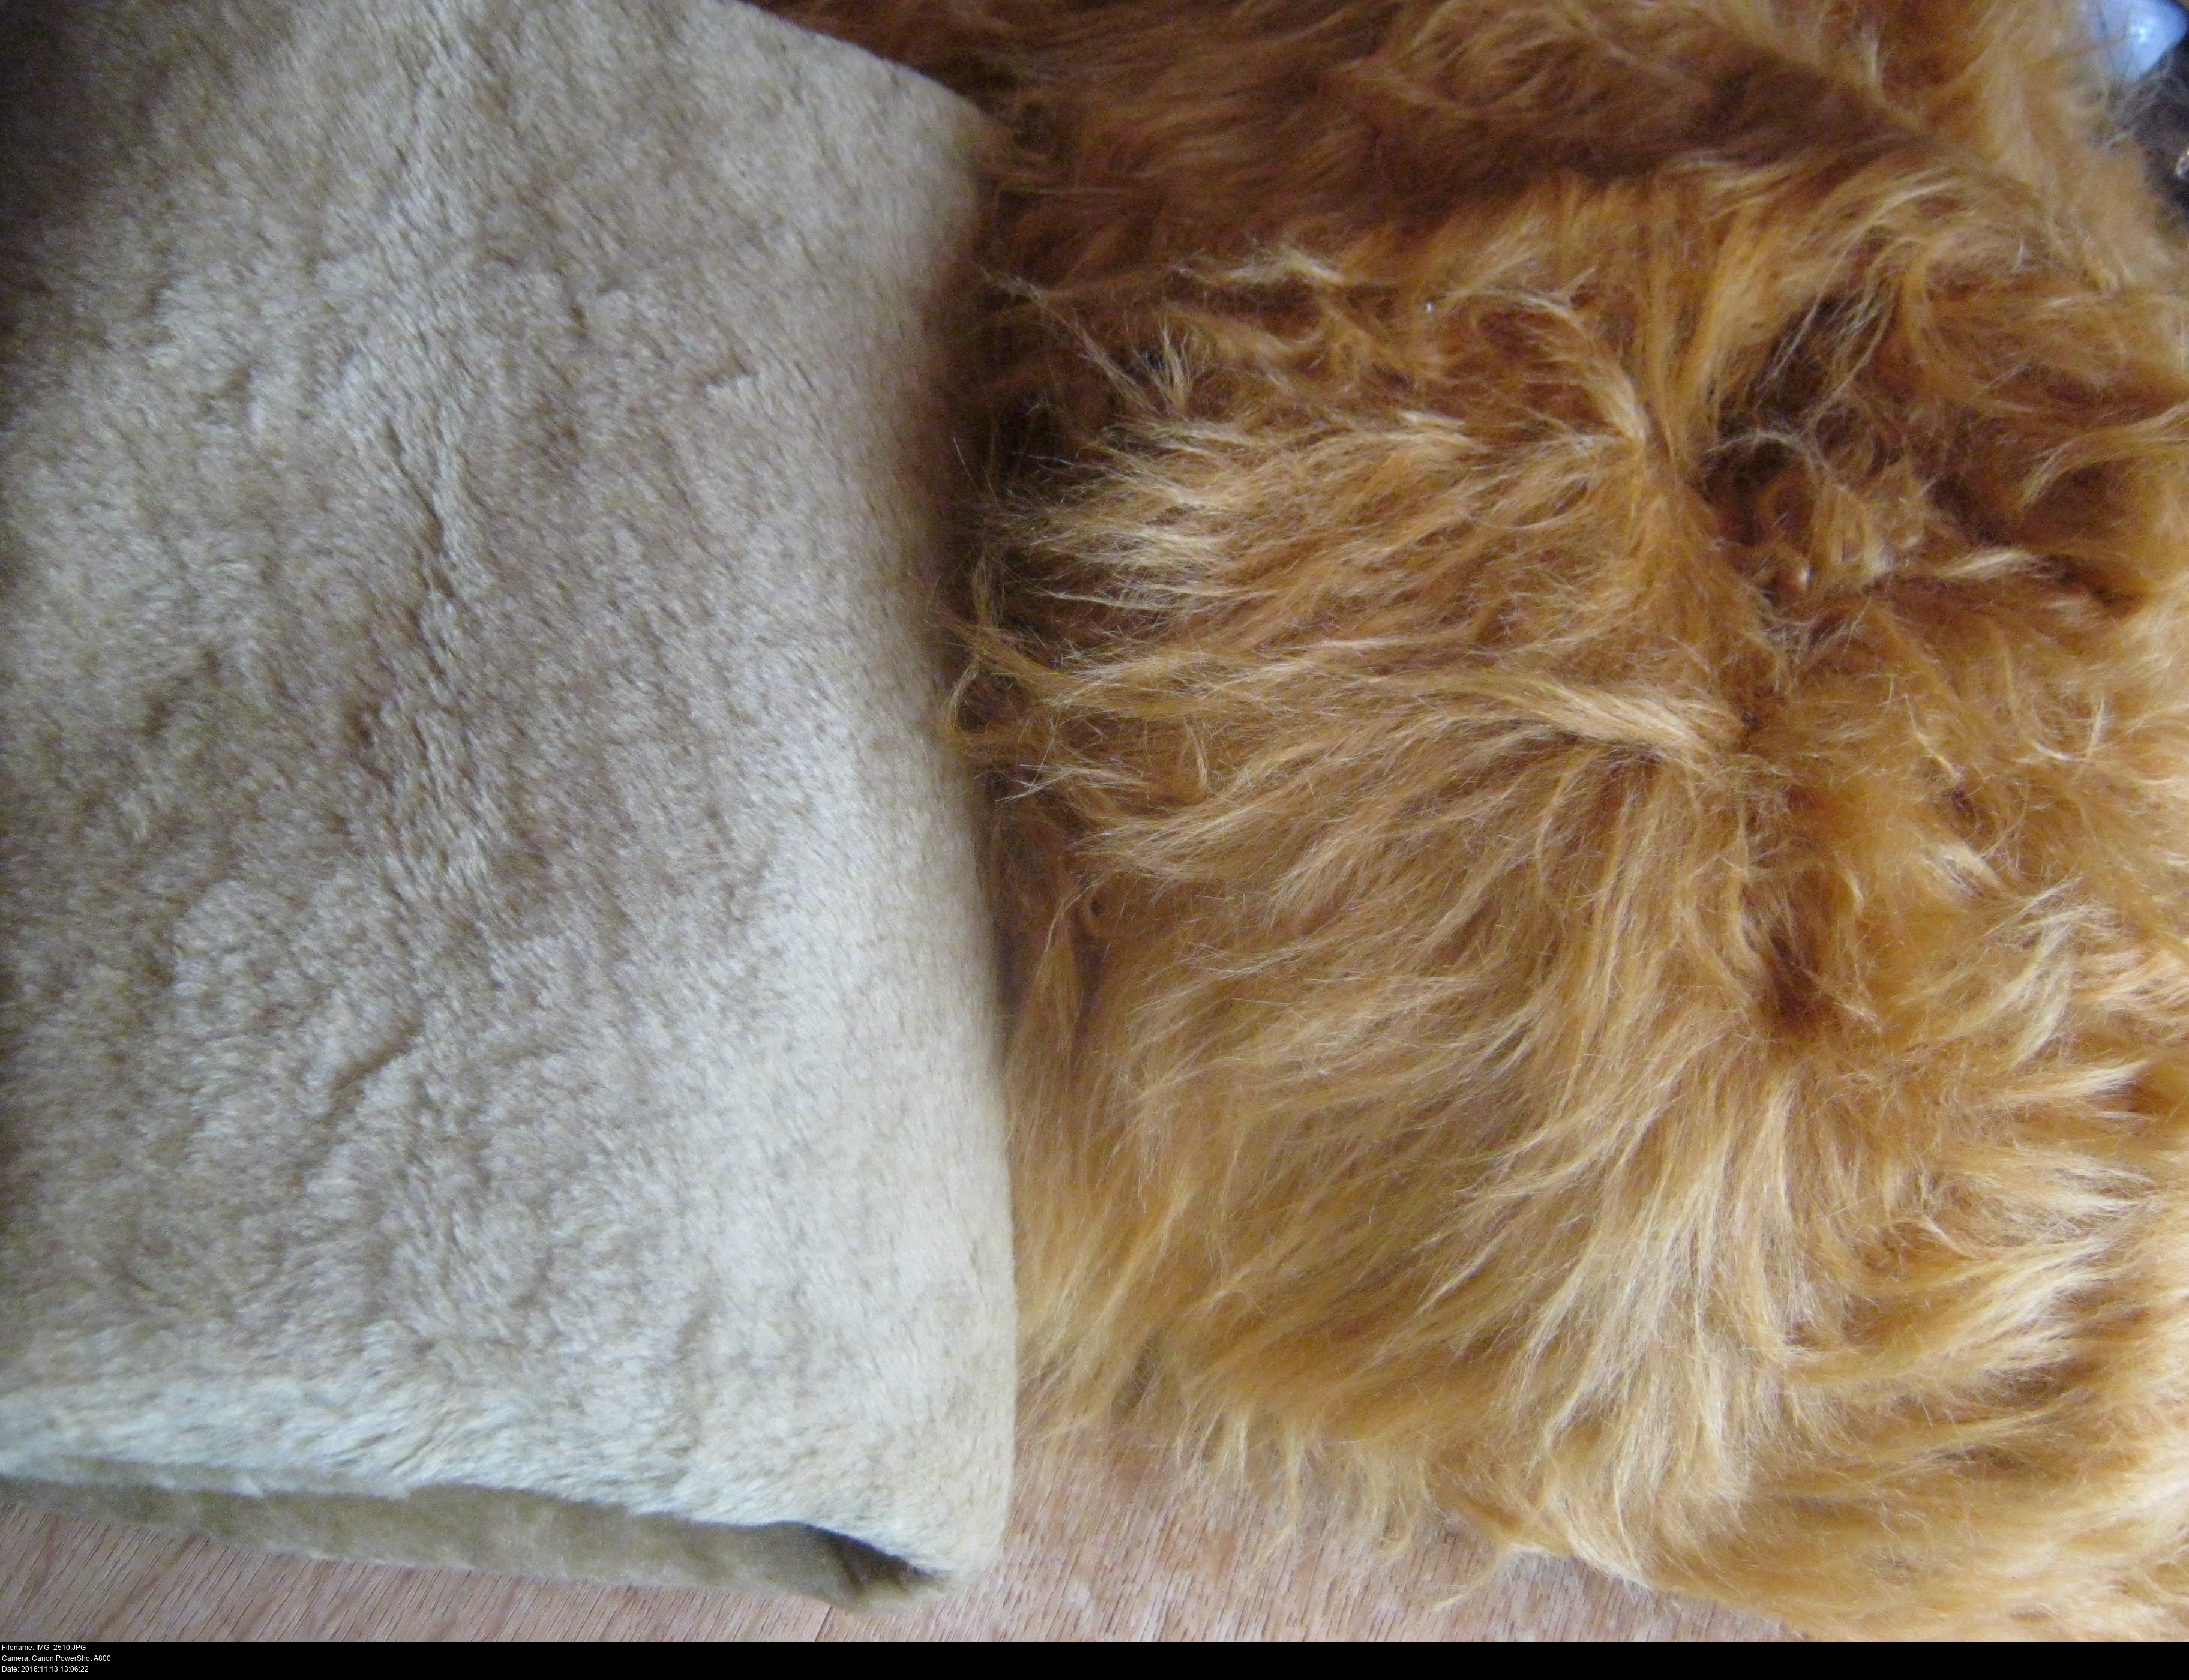
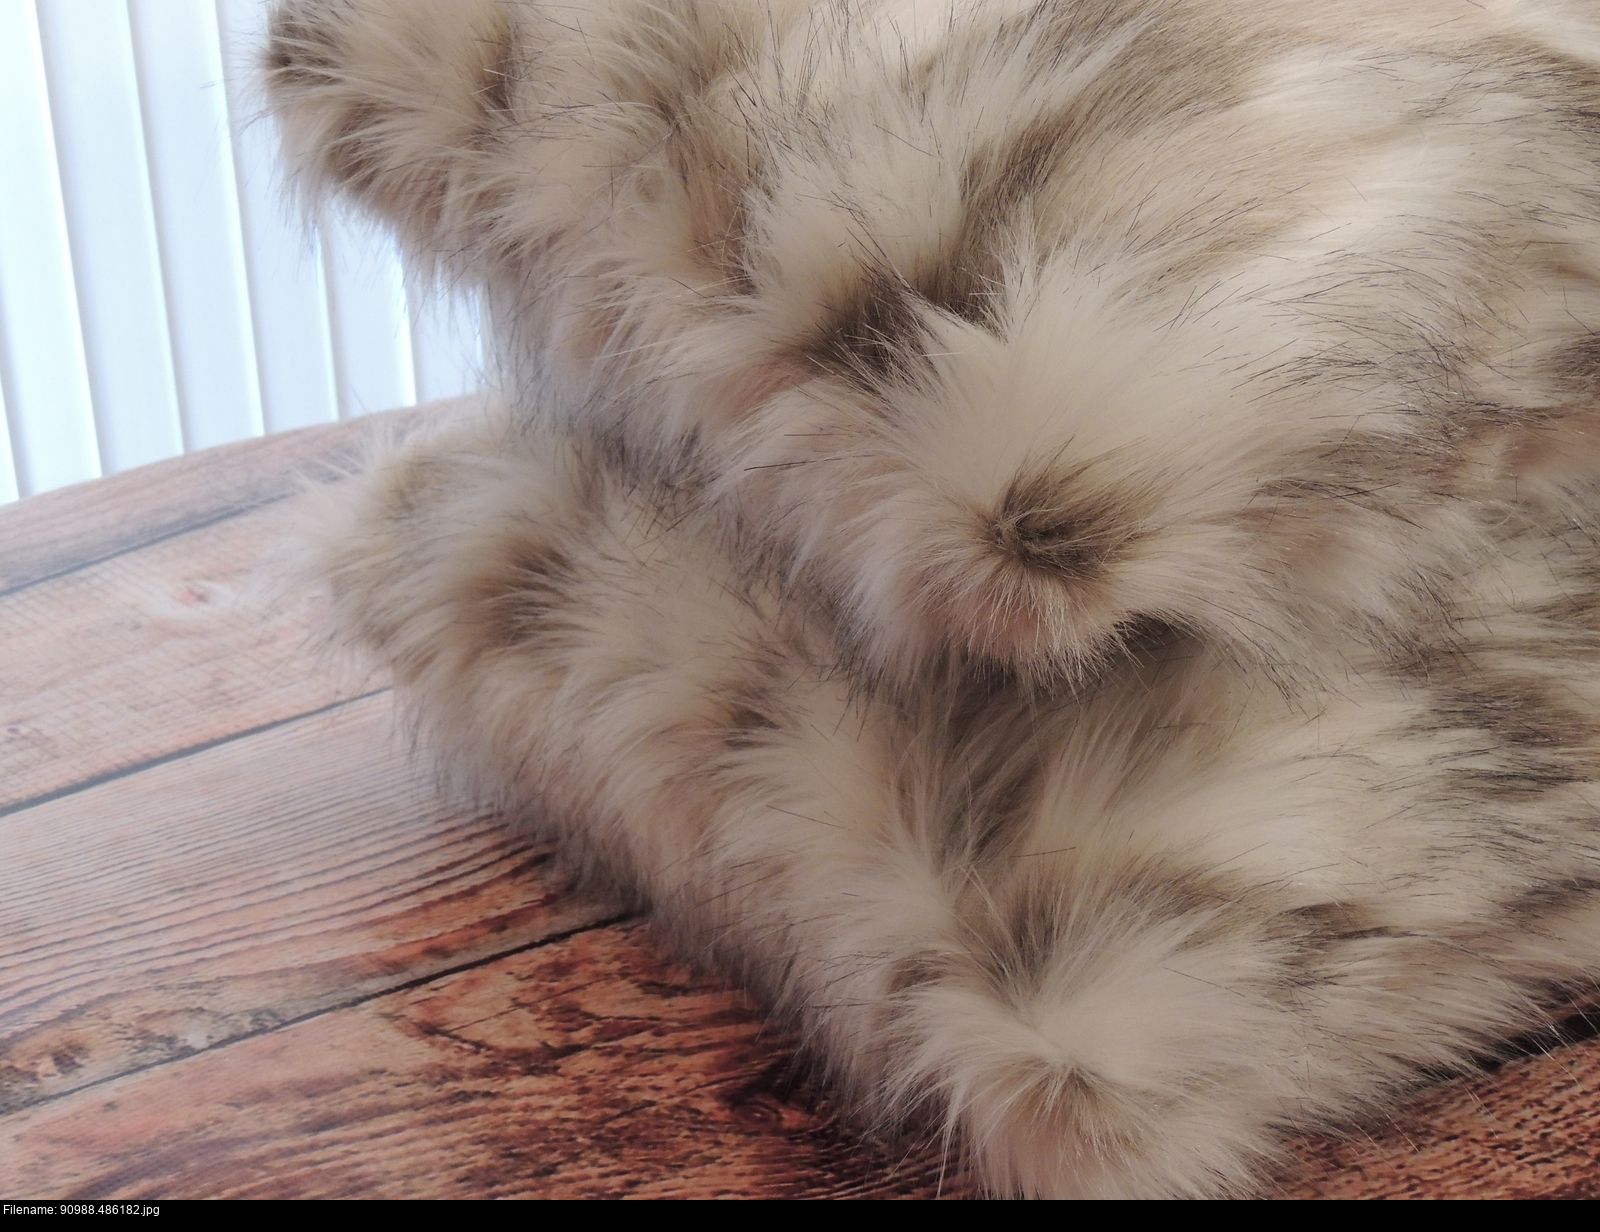
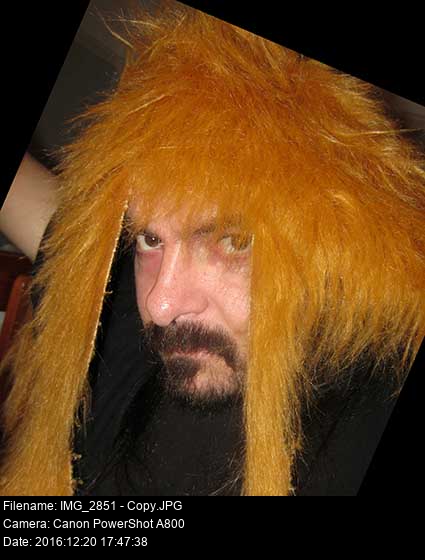
Here's some long-haired honey coloured fur. I can deal with this. This looks good.

Here we go. No sense running around in circles thinking about it: I've bought some stuff. Let's see where it goes.
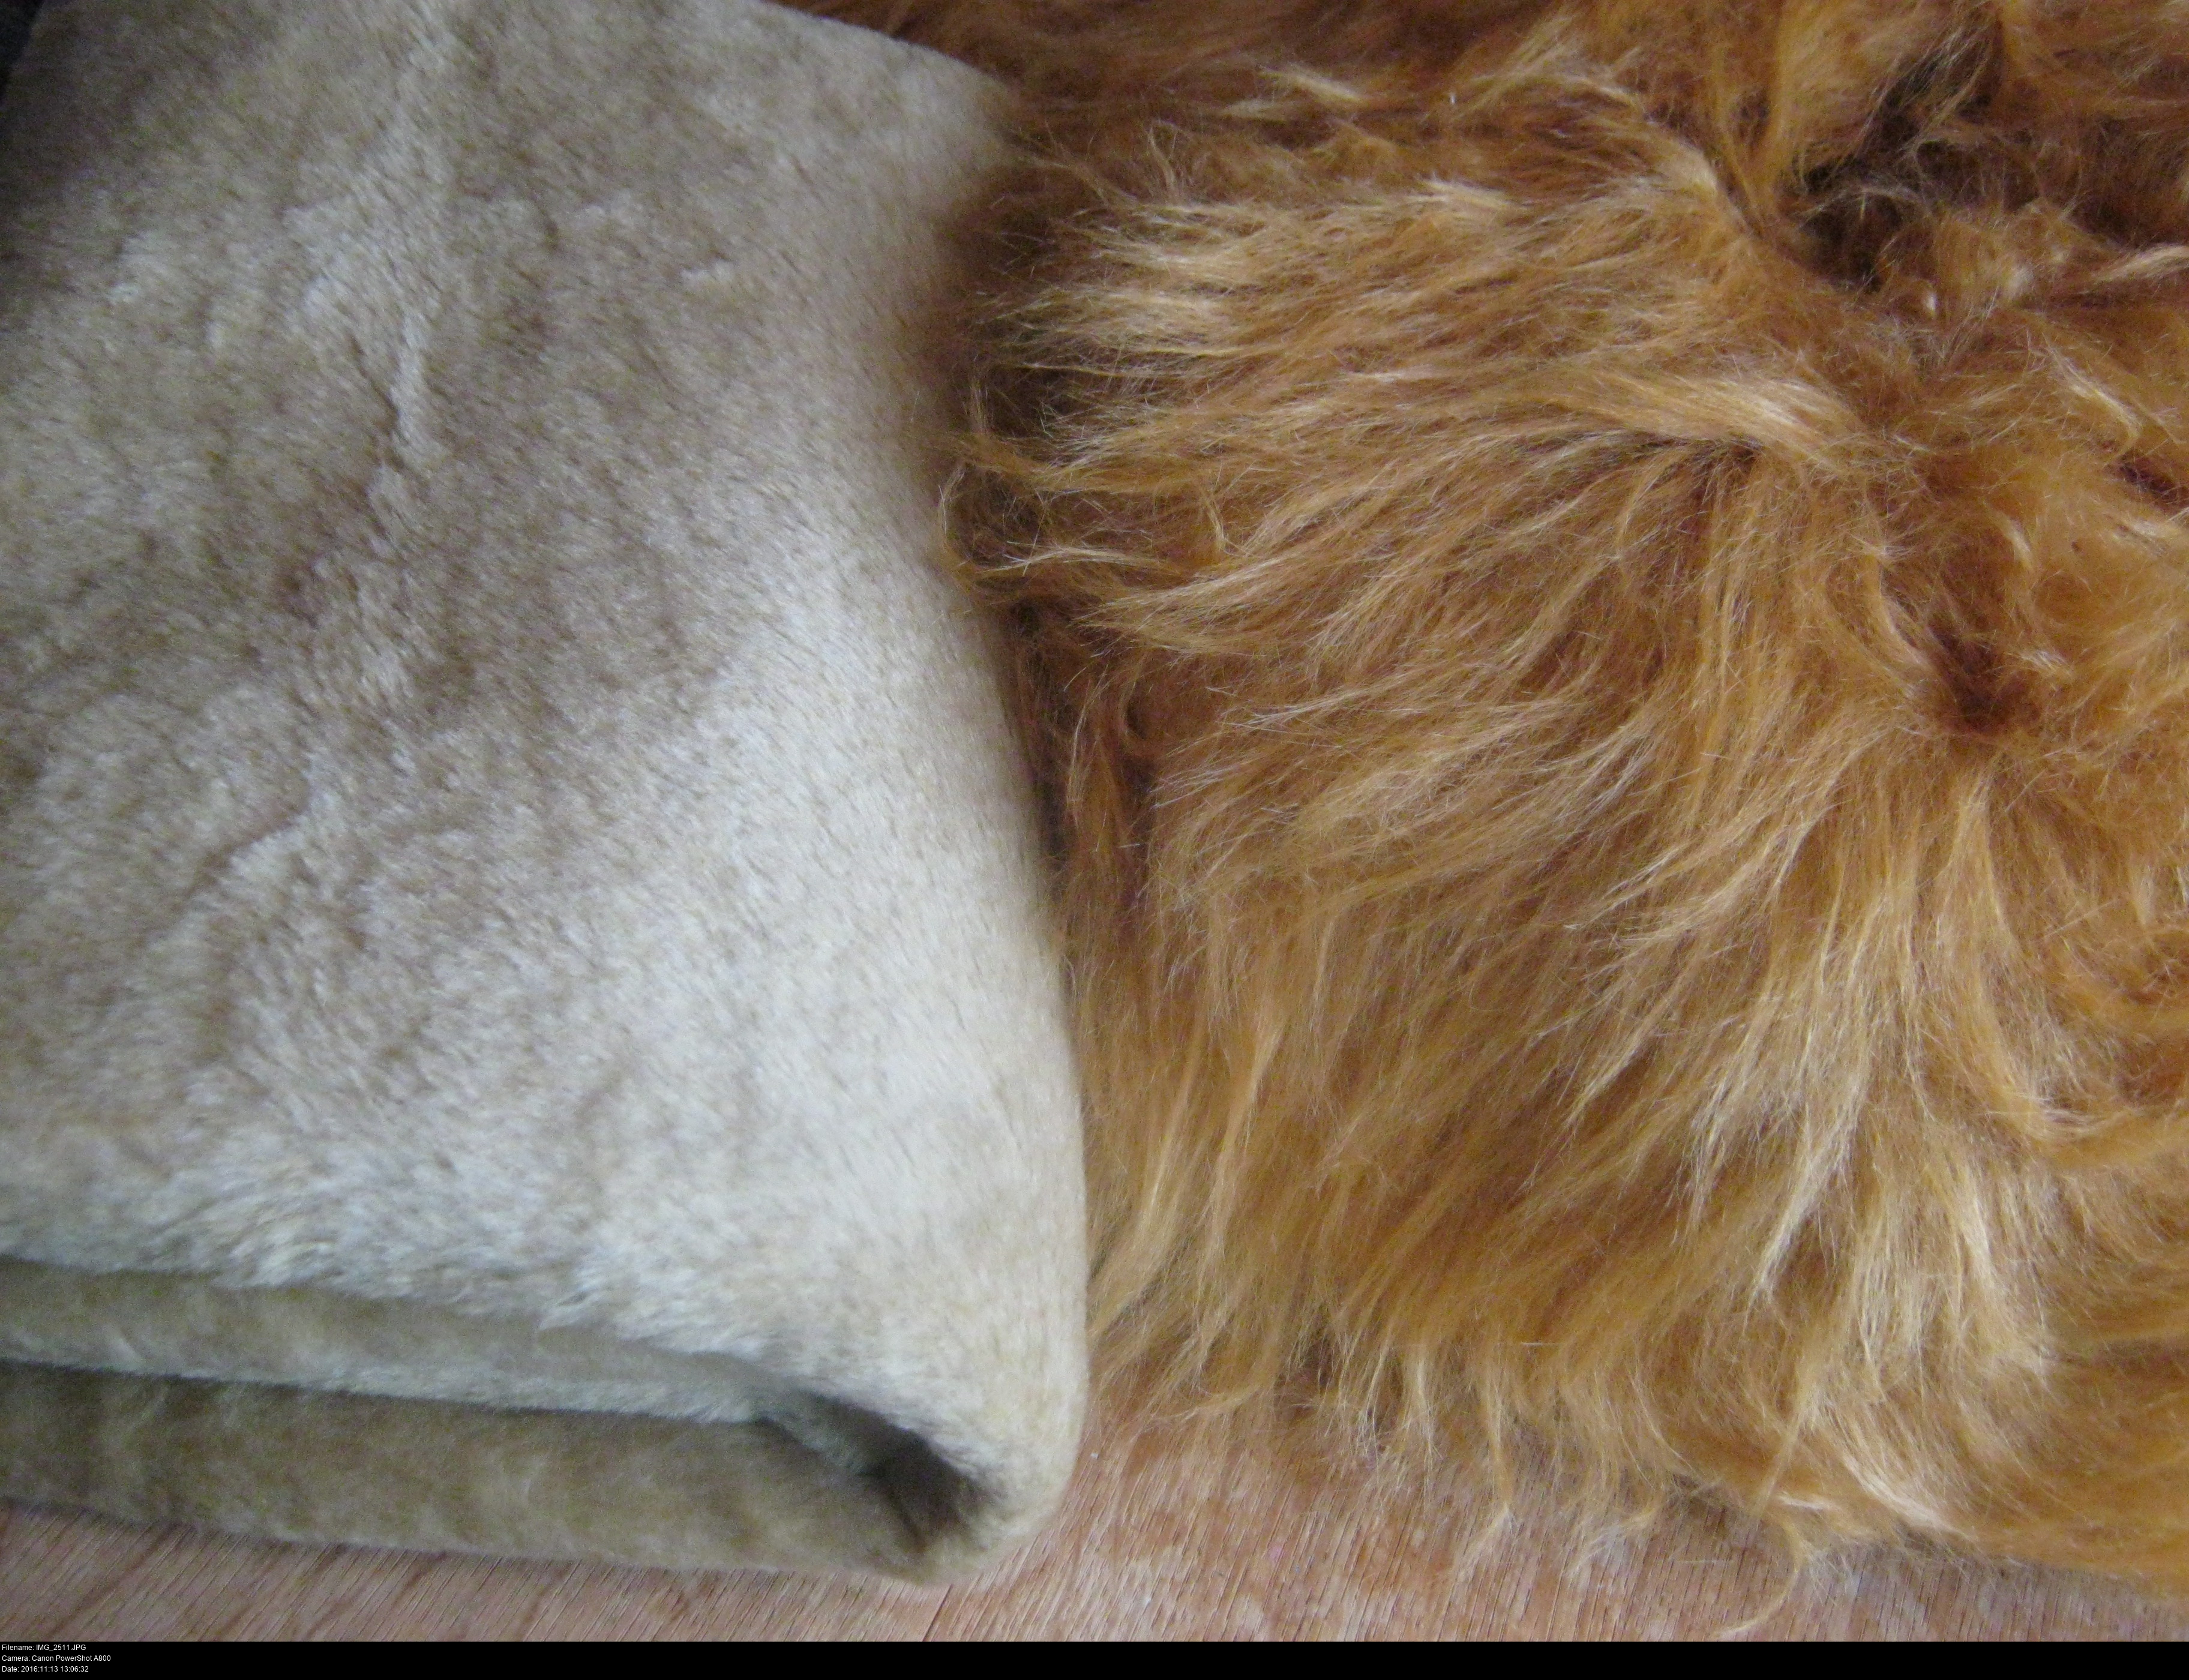
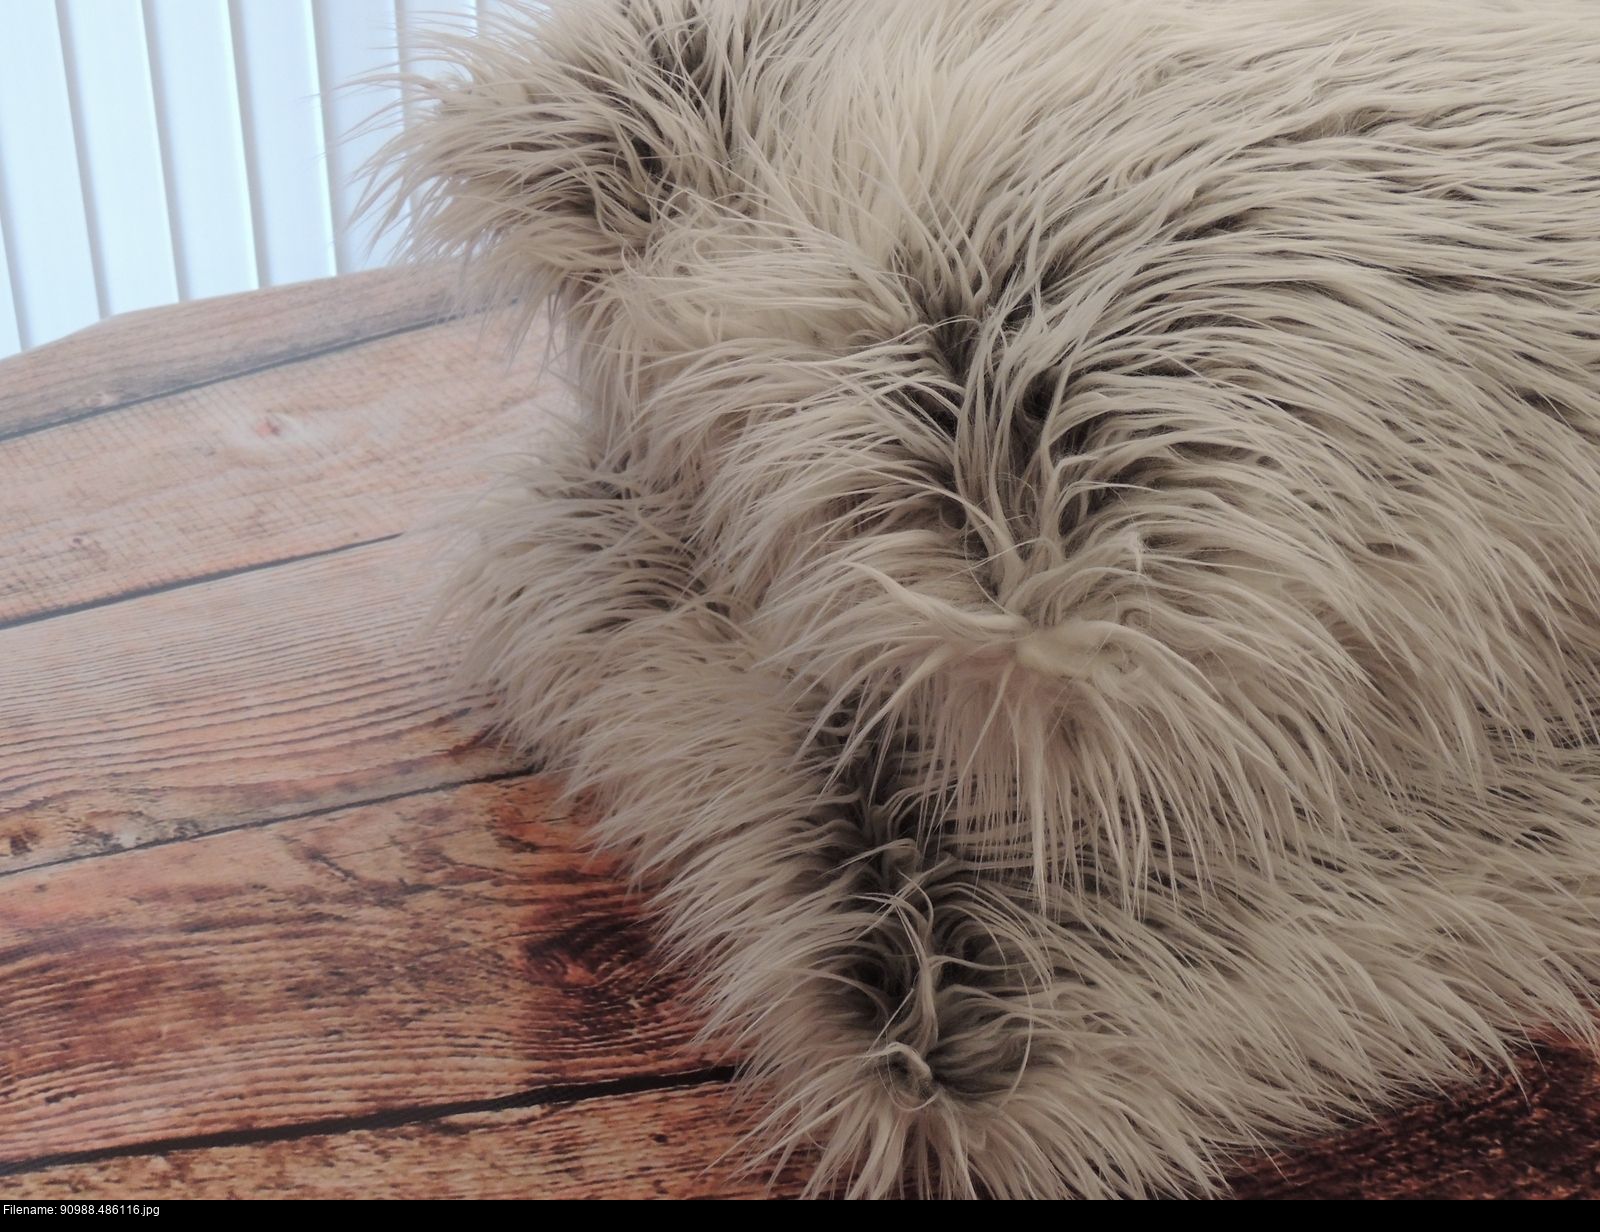
Notice how these two different furs look completely different with and without the camera flash. They'll look different again in sunlight.
Let's talk a little about fur types.
Fur can either be real or artificial. I've not used real fur. Don't know anything about it.
Artificial fur comes in every colour, every pattern, every length and more importantly every quality you could want. Longer costs more and higher quality costs more. Unfortunately for you, you're going to need very long and very high quality fur.
The ideal scenario is that you're working with a very lush, dense, long-pile fur. This is often called 'luxury faux fur'.
Regardless of the length you want the fur to end up as, you should make your fur covering with brushed loose, fluffy and unclipped fur. Once your covering is made, then you clip it. That way you get an even covering of fur over the seams in your project. If you clip the fur first or use a short pile fur, then the fur will look like it's sinking into the seams. You'll see that a little later on in this post!
And the reason you don't want a nasty, cheap-looking fur is because it looks cheap and nasty. Ragged, wispy, clumpy, stiff, plastic-like and string-like. It'll fall apart through repeated work and wear. This is often called 'fun fur' or 'rave fur'. You'll see that too.
How can you tell the difference?
This is the best side by side comparison that I can find of the two types of fur. These pictures are two products from a site called 'custommade'.
One fur is going to clip down to a nice even soft pile, the other is going to give you raggedy awkward little clumps.
BUT!
You should buy fur that suits your budget and level of skill. A beginner can turn £200 of fur into a horror and a master can turn £30 of lame fur into something adorable if not perfect.
The orange fur I bought there was from Abakhan and it didn't cost too much. When I asked a few furry groups to evaluate the fur that I'd found for Hotshot, I was told to chuck it 'cause I'd wasted my money. I'll show them, calsarnit.
Here's an example:
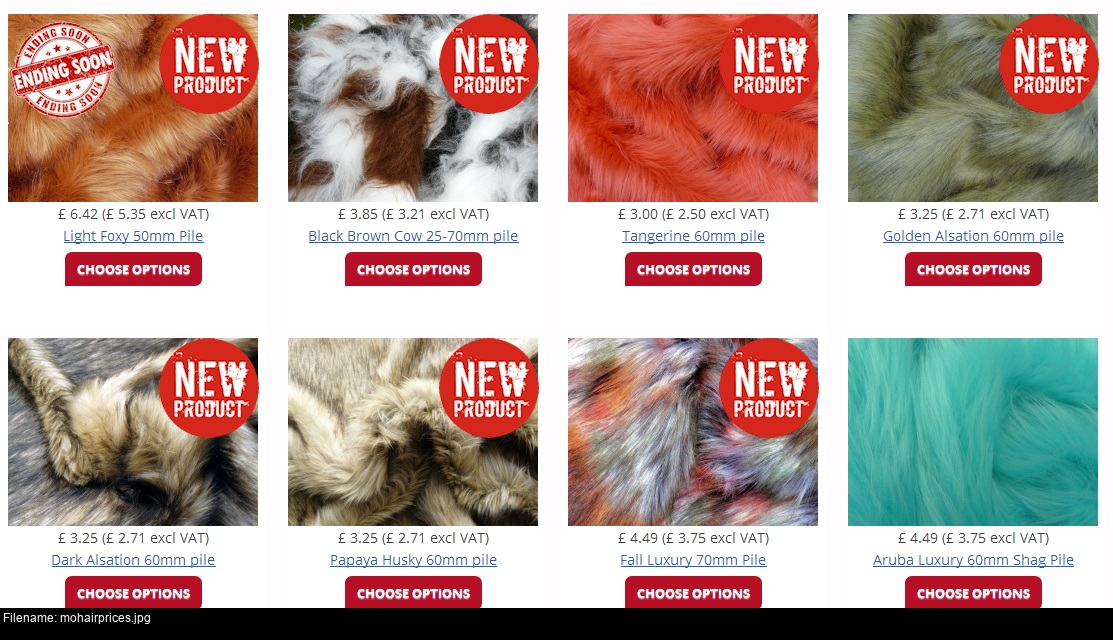
Here's a link to the legendary Mohair Bear Making Supplies website. These aren't the prices per metre. That'd be incredible. These are the prices for 1/16th of a metre. That's six and a half centimetres. To get the price per metre, multiply these prices BY TEN.
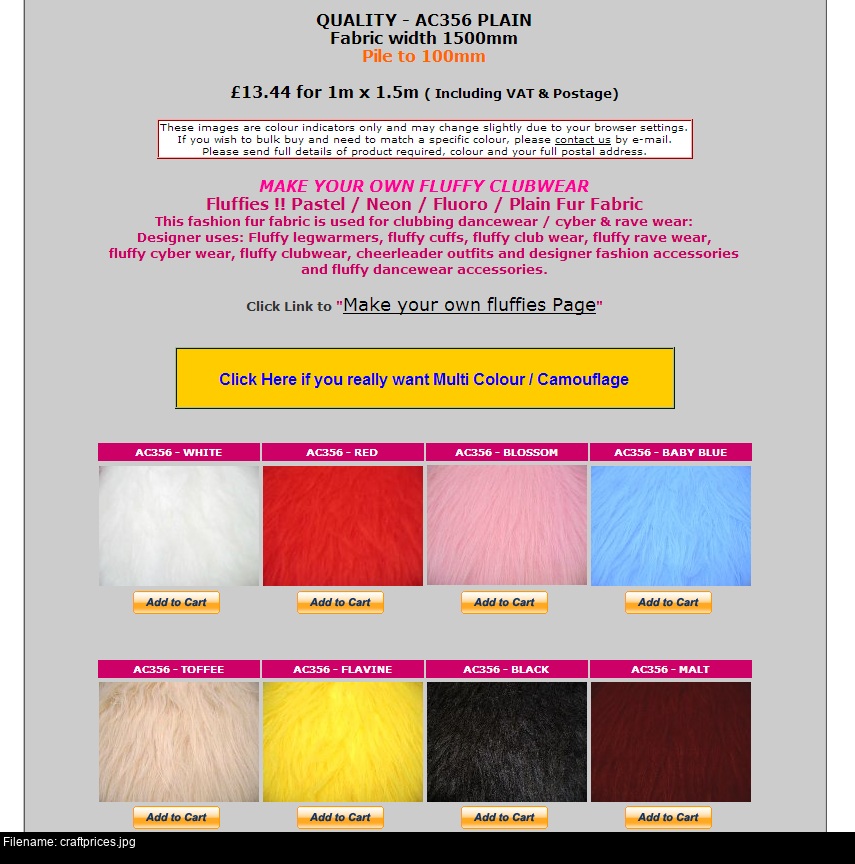
http://www.craft-fabrics.co.uk/Qual_AC356P.htm
Here's some random craft fabrics site that seems to stock the ubiquitous fun fur, and from what I can tell the AC356 Honey is a generic fun fur that is almost identical to the stuff that Hotshot is going to be made out of. £13.44 per metre, no fuss, includes postage. Abakhan's remnants are even cheaper and you get to evaluate them in person.
Are one set of furs three times as good as the other? Probably! I haven't ordered from either, so I can't tell you. You can buy fur fabrics online but you should find a seller that has some testimonials from people you trust. It's very easy for a seller to claim their fur is higher quality than it is using fake or prepared pictures (or believe that it's higher quality than it is). And if you ask for swatches they might even lie with them too.
Some hints for working with fur:
Use test pieces and observe your tension! Do this every hour or so at the very least.
Comb fur away from seams before sewing. If you don't do this, your fur will get trapped in the seams and it'll be incredibly obvious. If you comb away first then the seams between fur panels will vanish almost entirely. Unless you're using fun fur.
Check each seam after you've completed it. You'll have almost certainly trapped some fur in there anyway. You need to pick it out with a long nedle, gently, making sure not to destroy the new seam. You'll know you've unpicked it all when you can shake the material and fluff the seam and it'll vanish.
Clean out under your machine's base plate regularly. Loose hairs will get forced into the underworkings of your sewing machine.
Furries have been around for decades. Furry costumes have been around longer. Sewing using fur materials has been around longer still. Get yourself some books on clothing and toys to find out the best ways to work with this stuff.
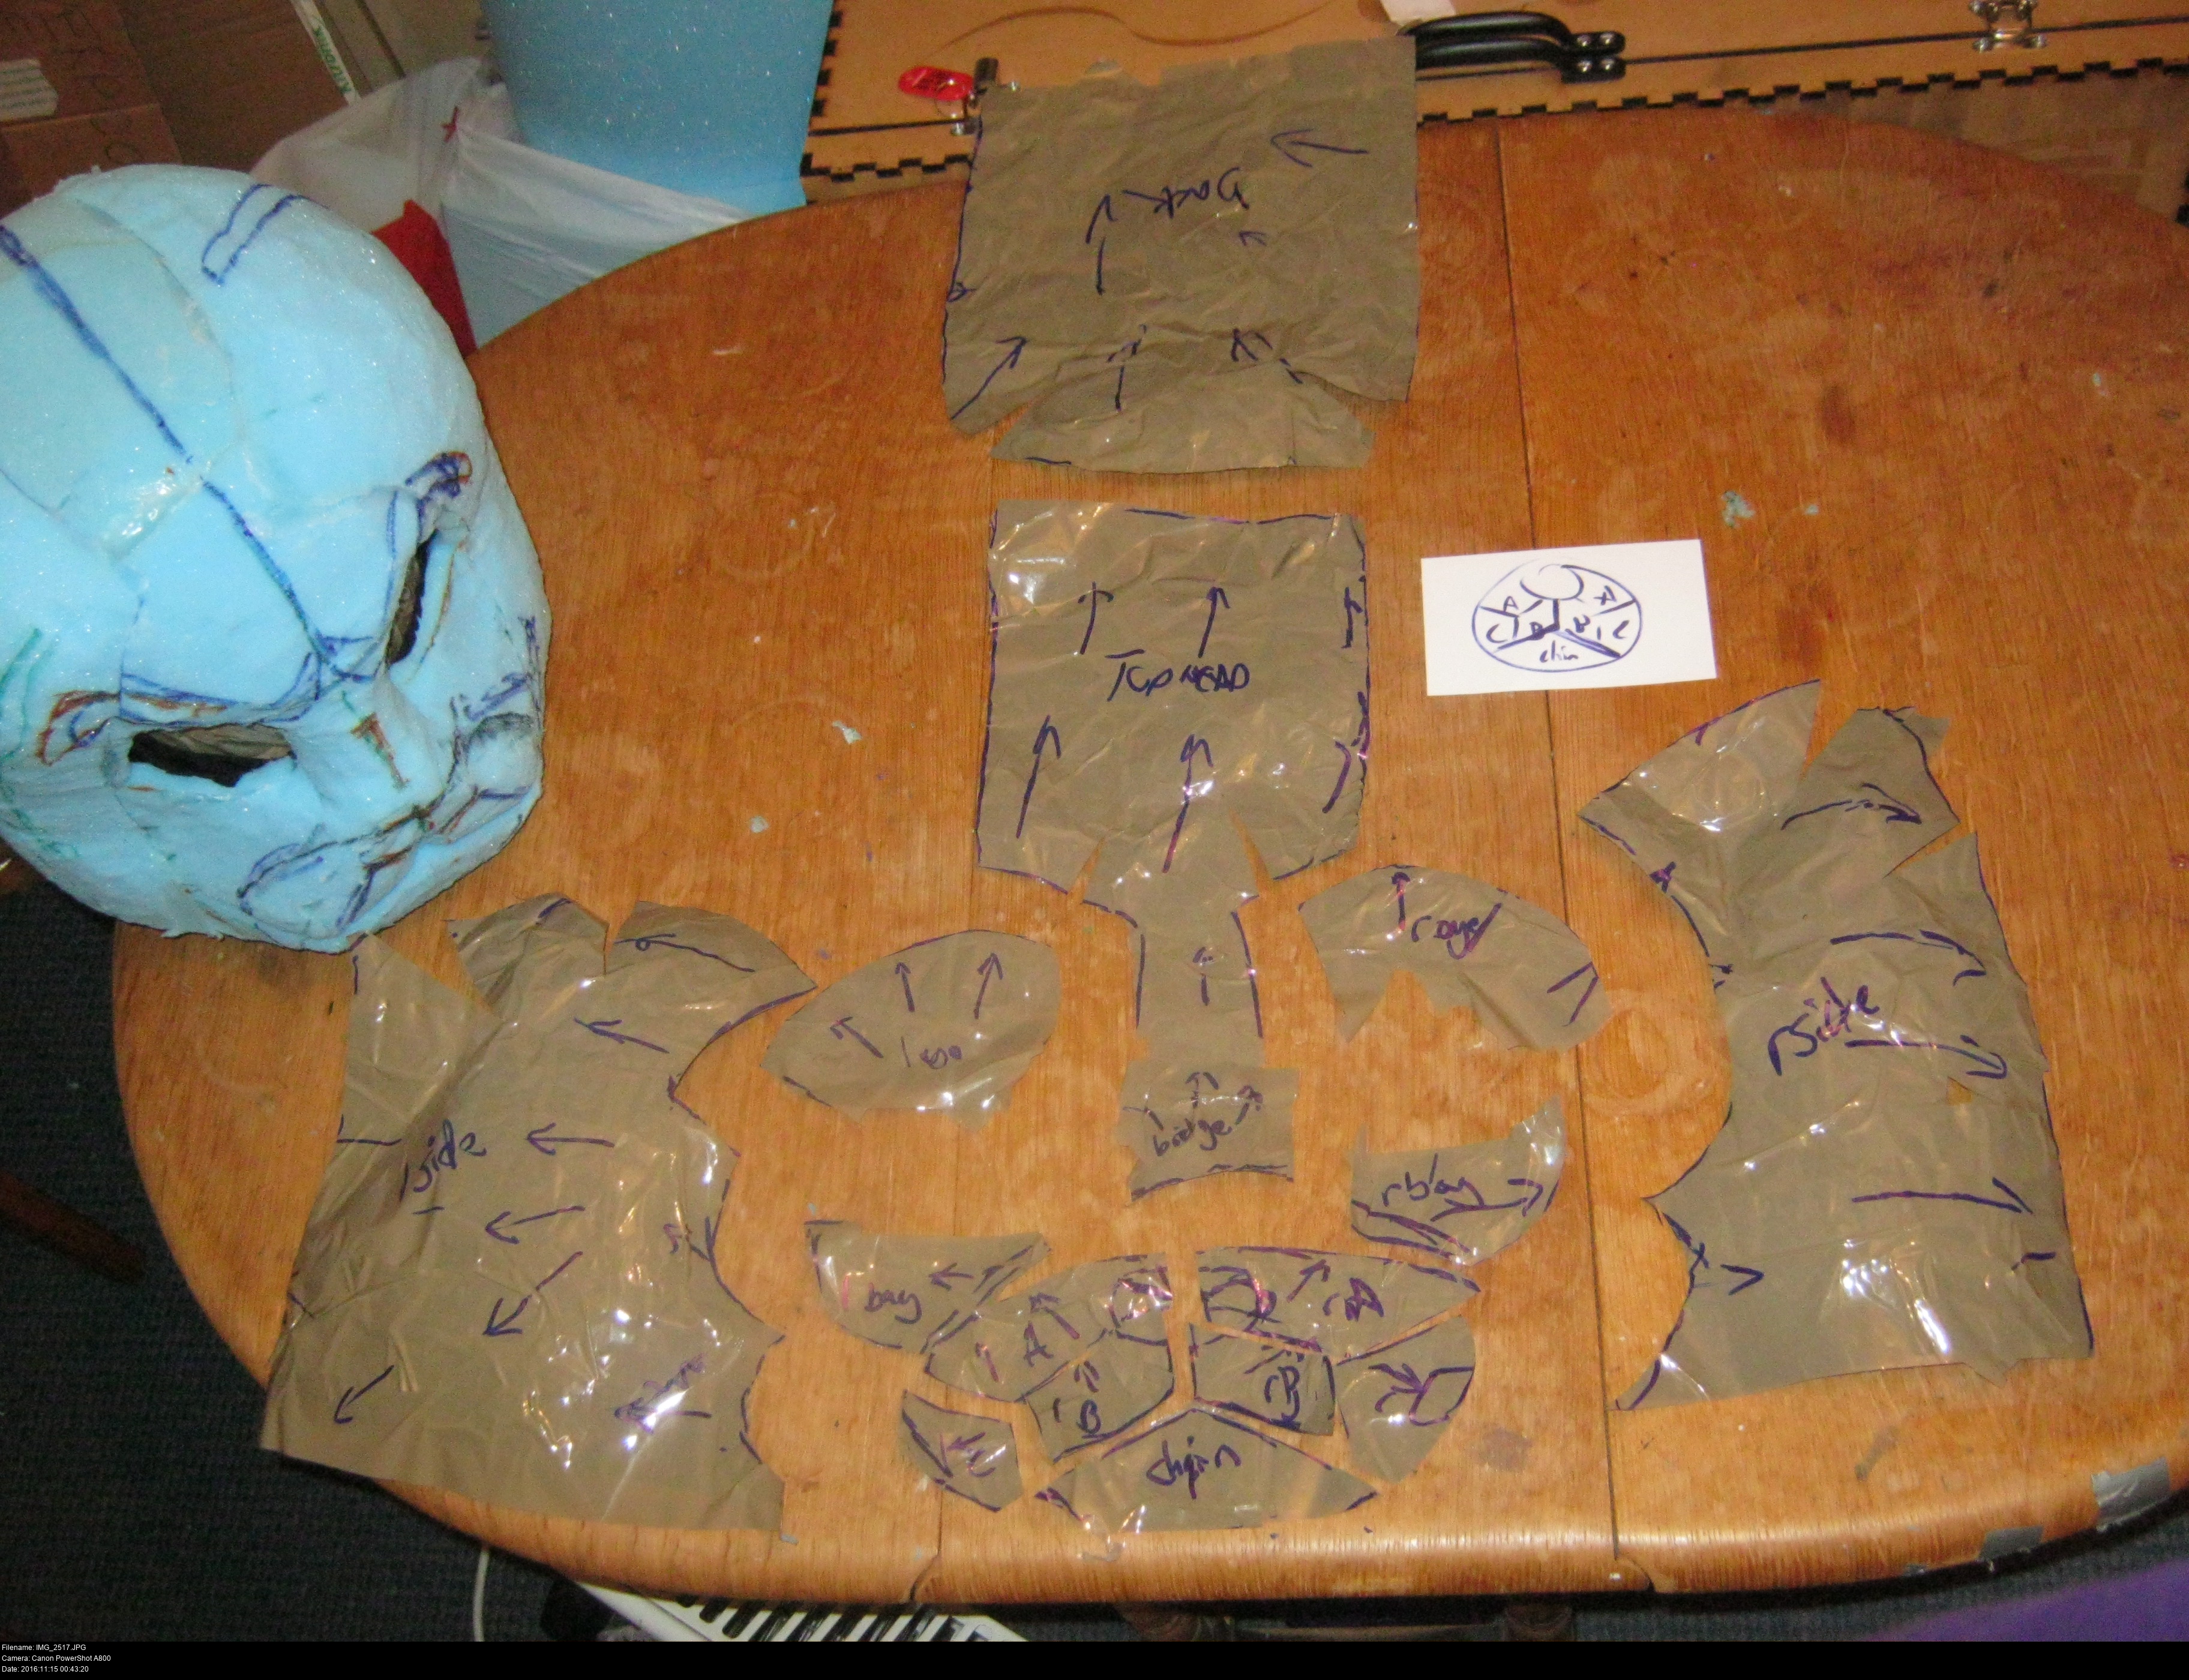
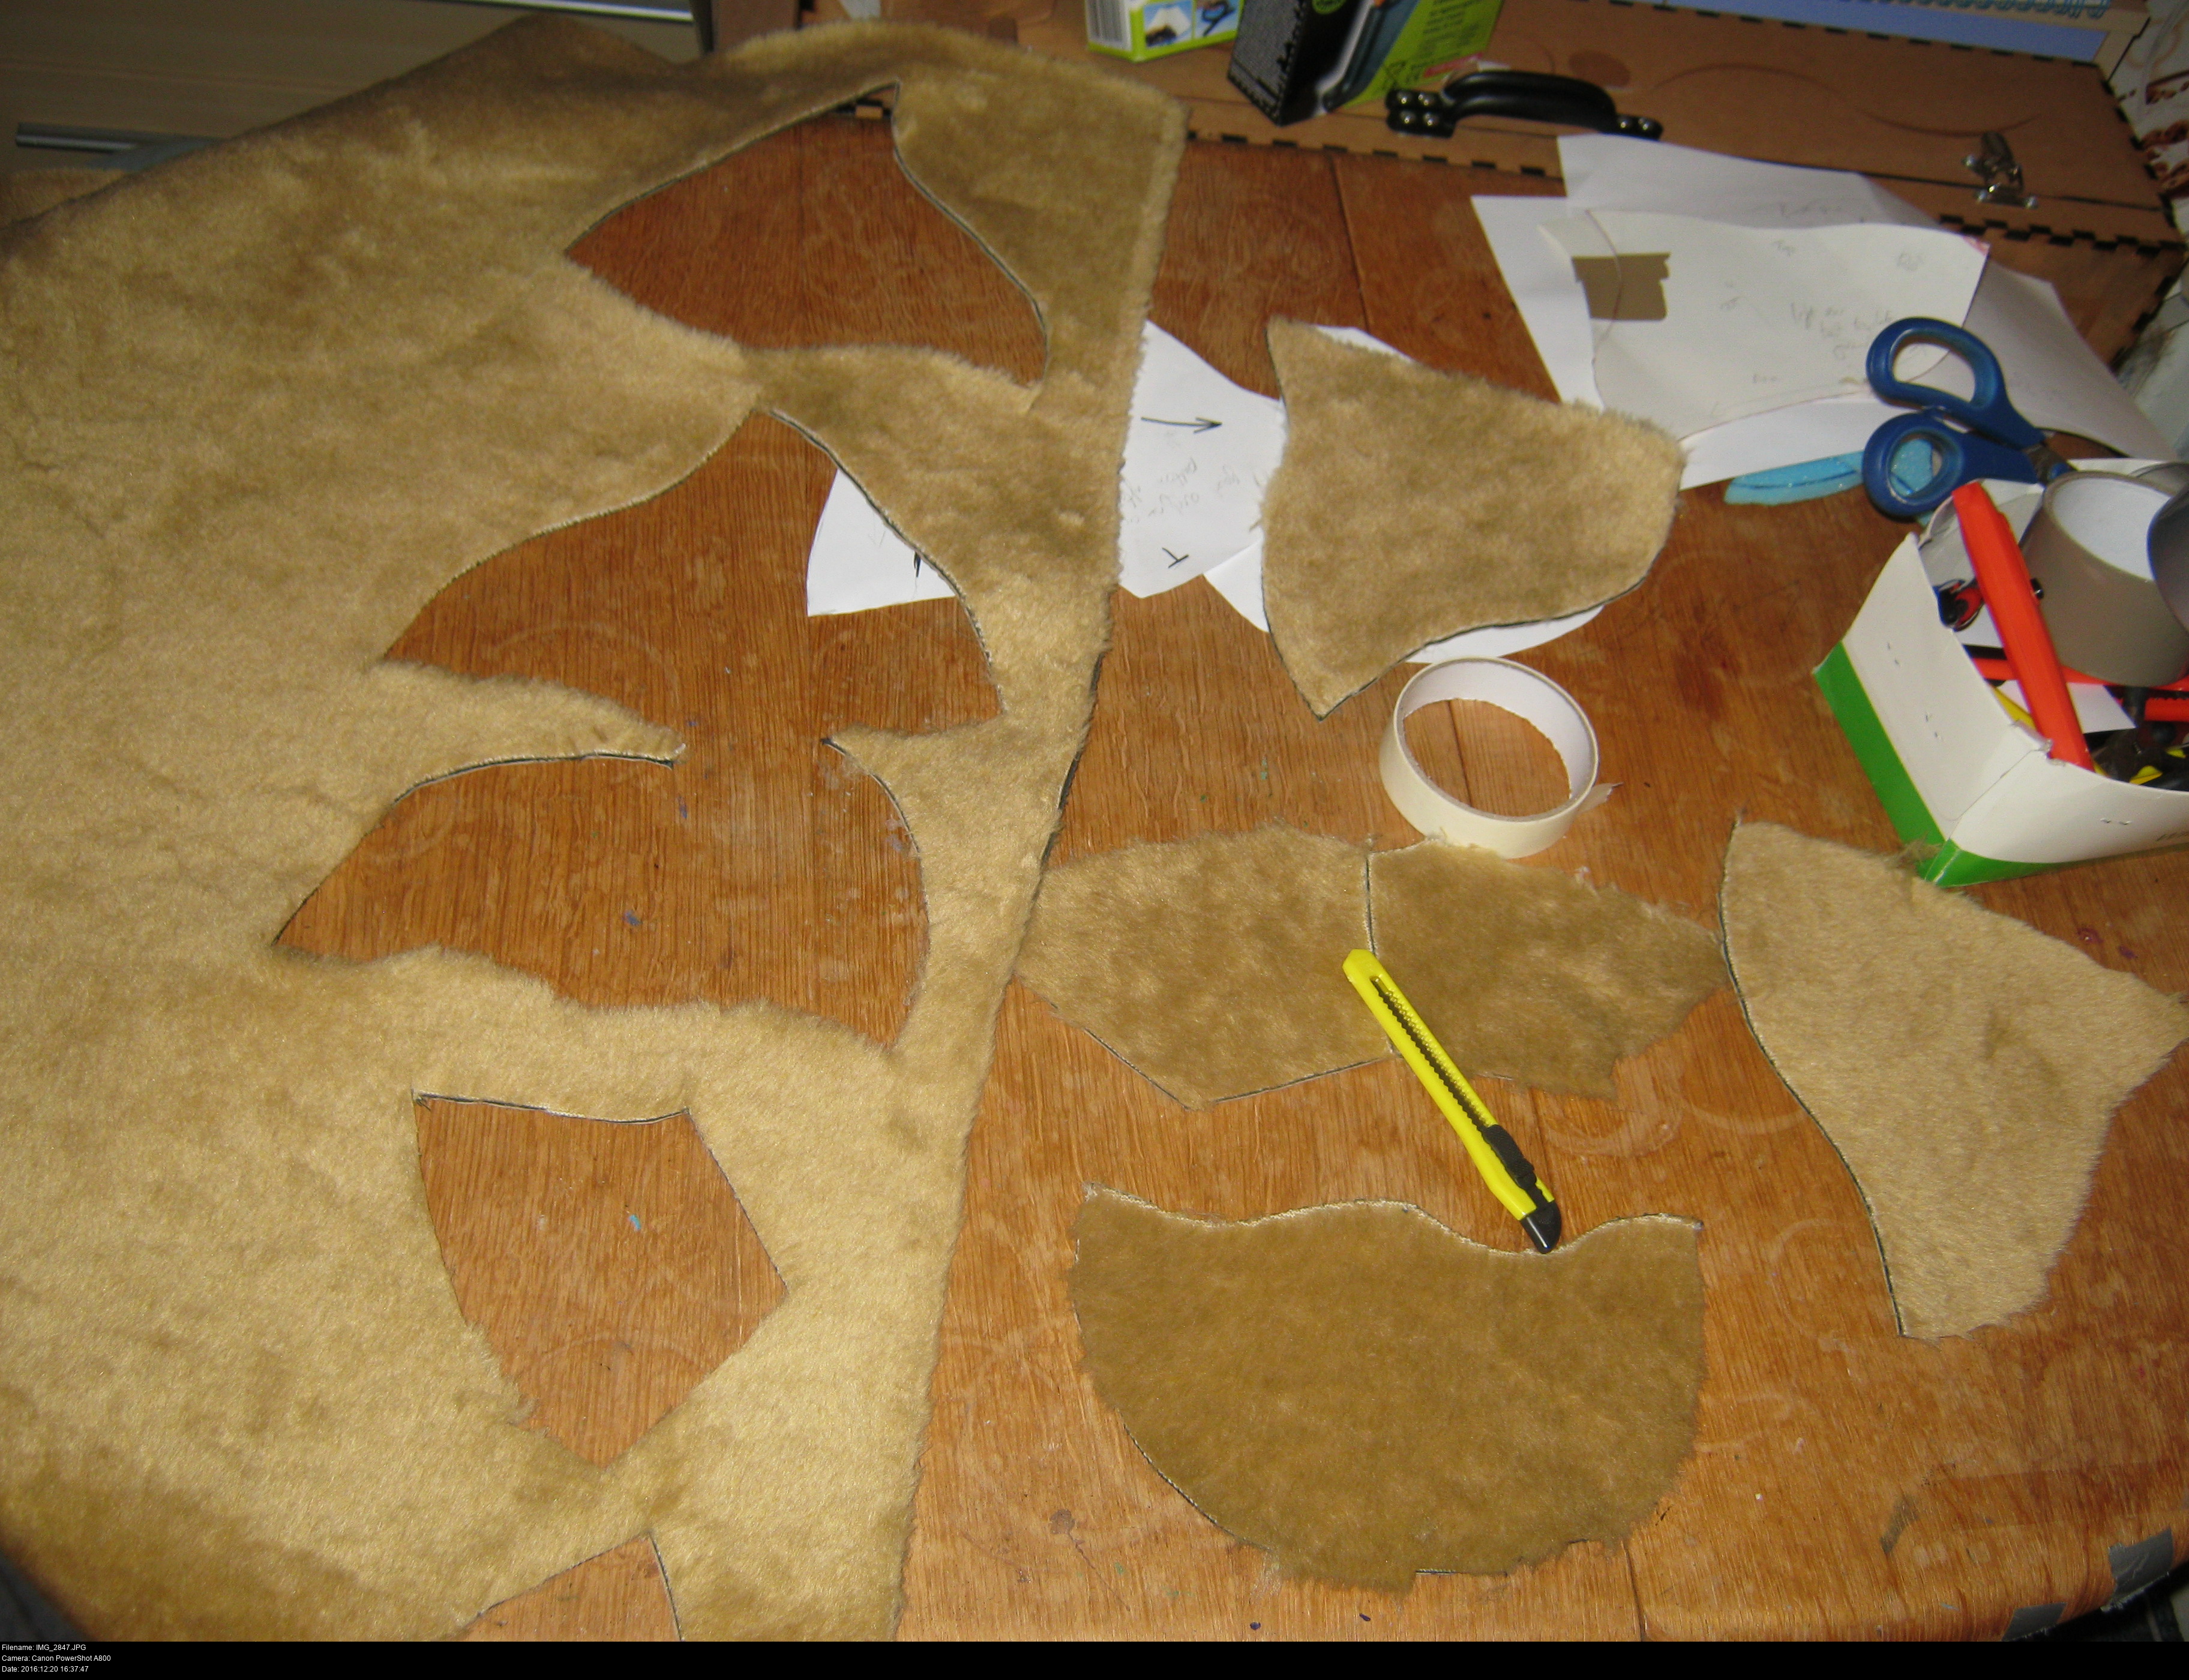
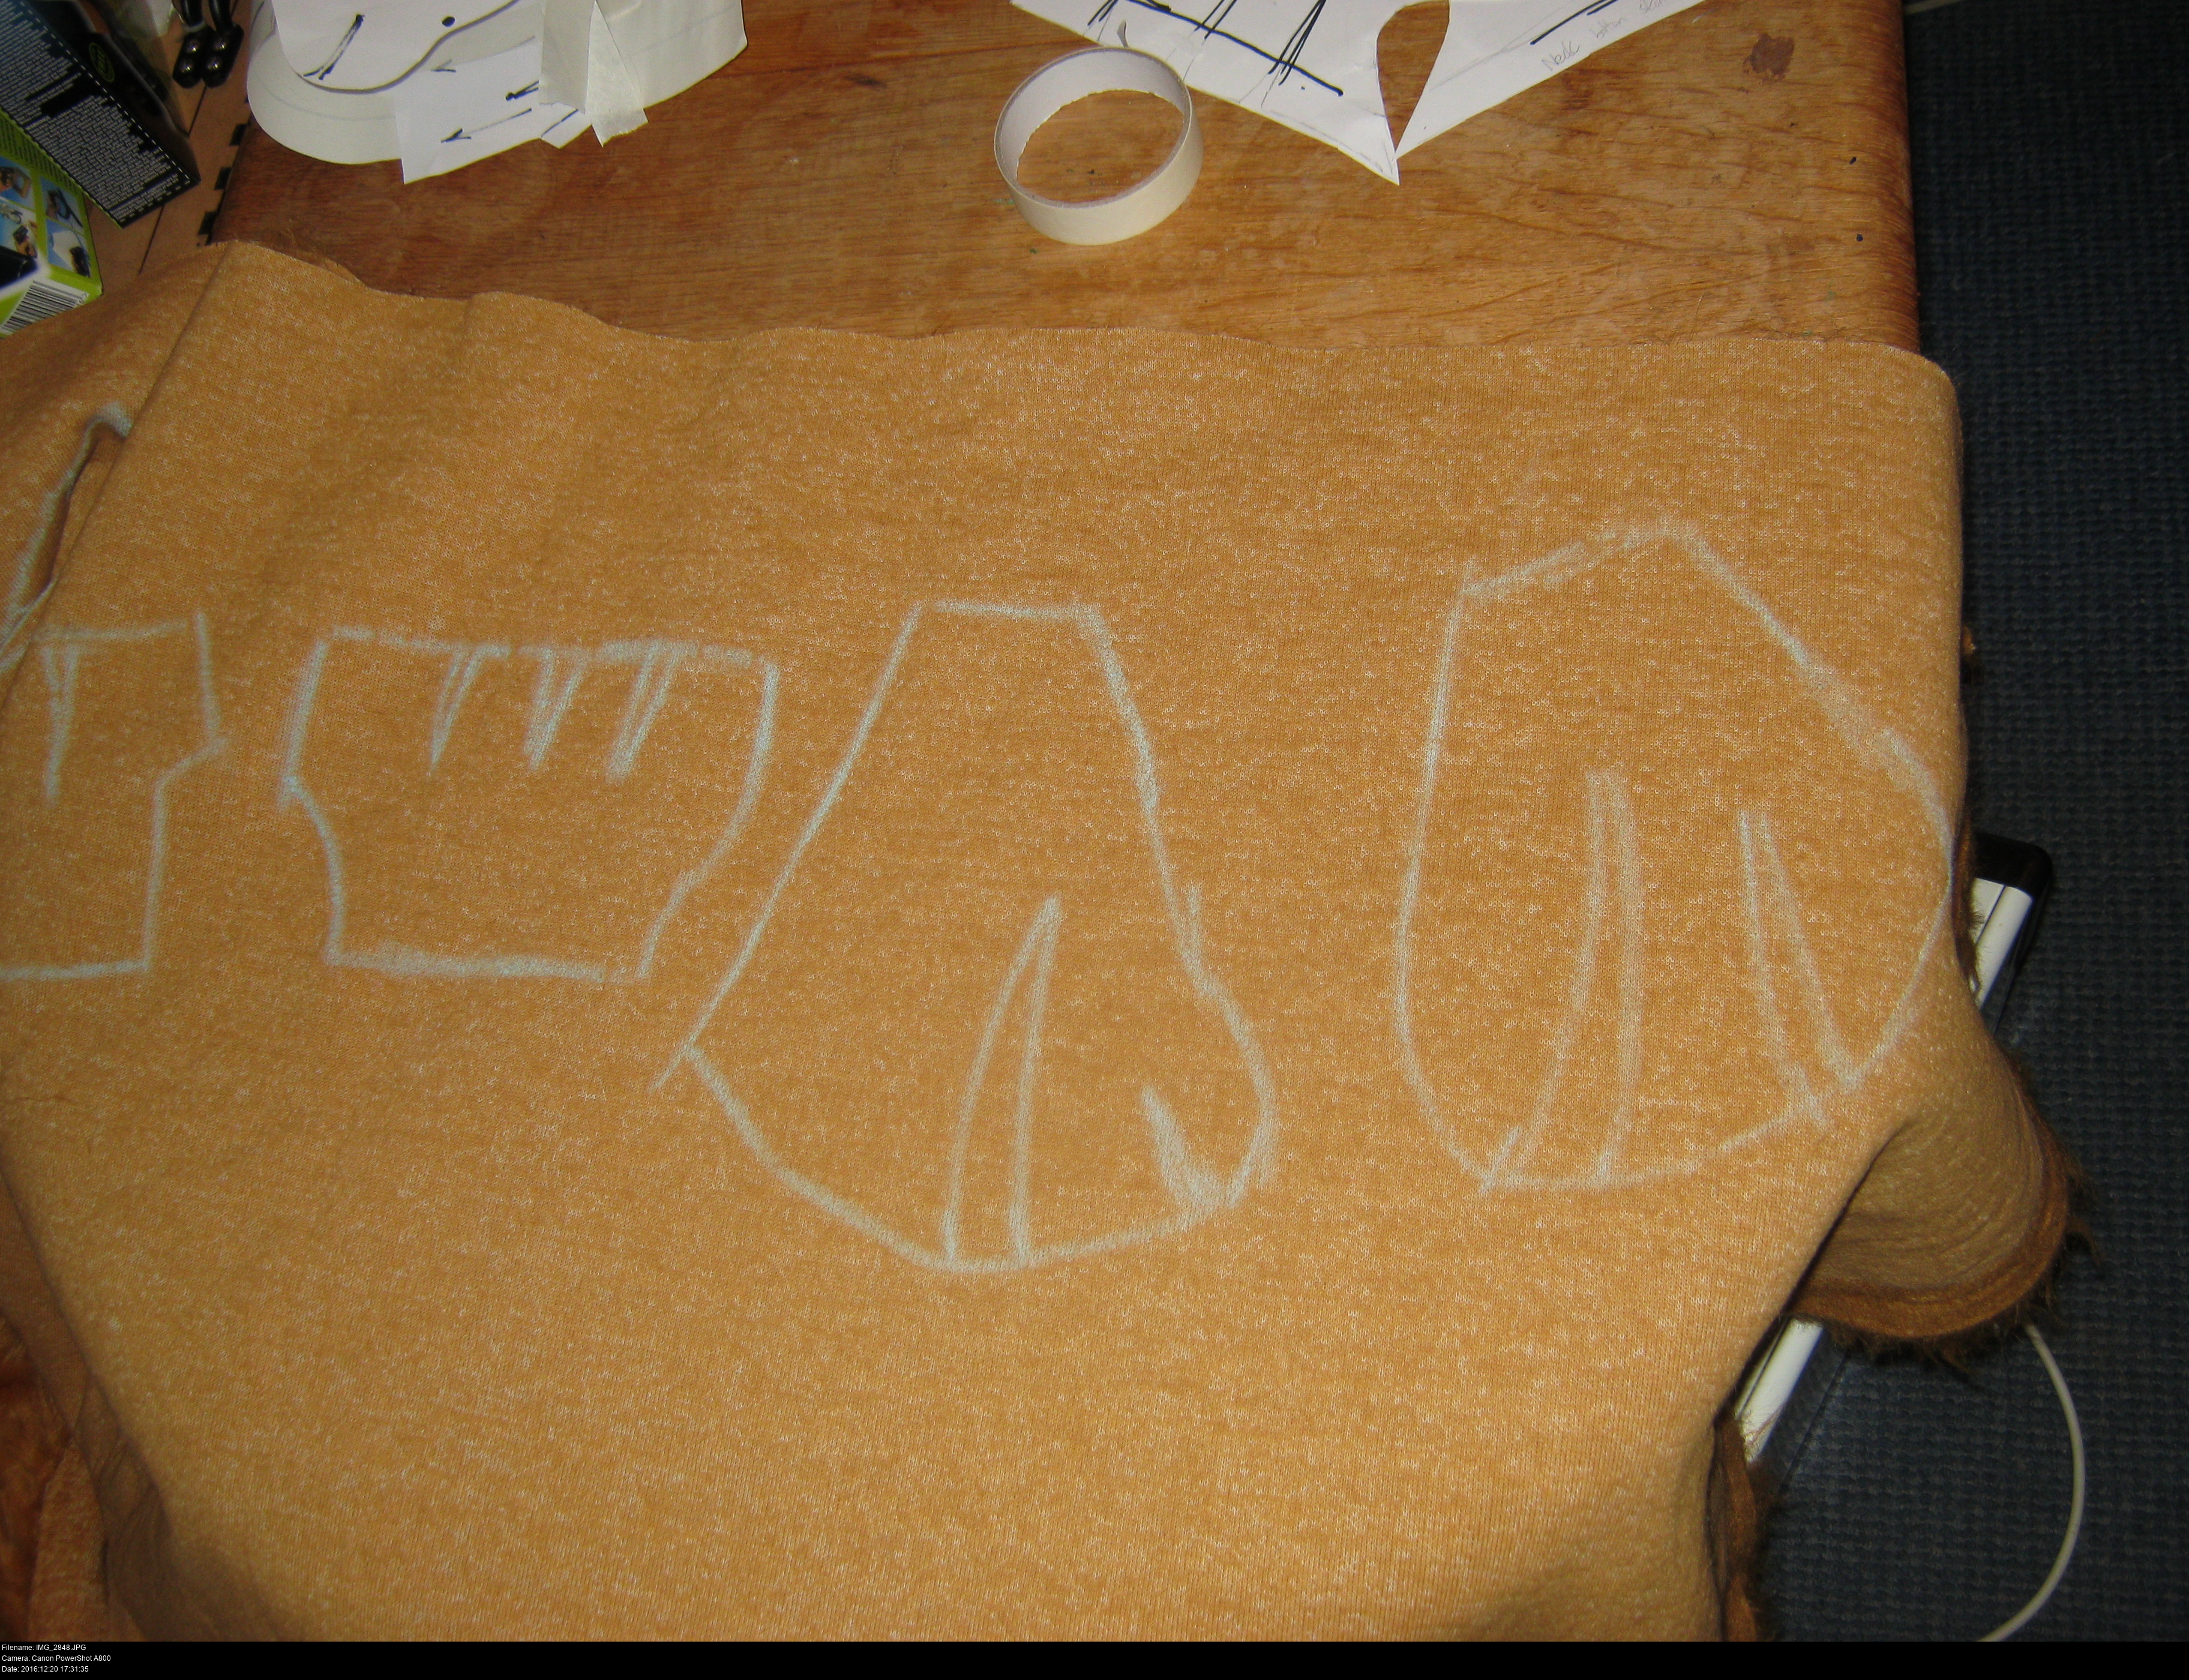
I'm skipping ahead here a little bit, but this is the result of attempting to making a tape pattern using brown packing tape. This tape isn't adhesive enough to the foam to work well, you should use gaffer/duct tape instead for the final pattern. Of course you should test with what tapes are available to you on scrap foam first!
Making a test pattern with a less-adhesive tape lets you experiment with different ways of splitting the pattern up without ruining your foam form, as well as giving you an indication of how much fur fabric you'll need to buy to cover the entire head.
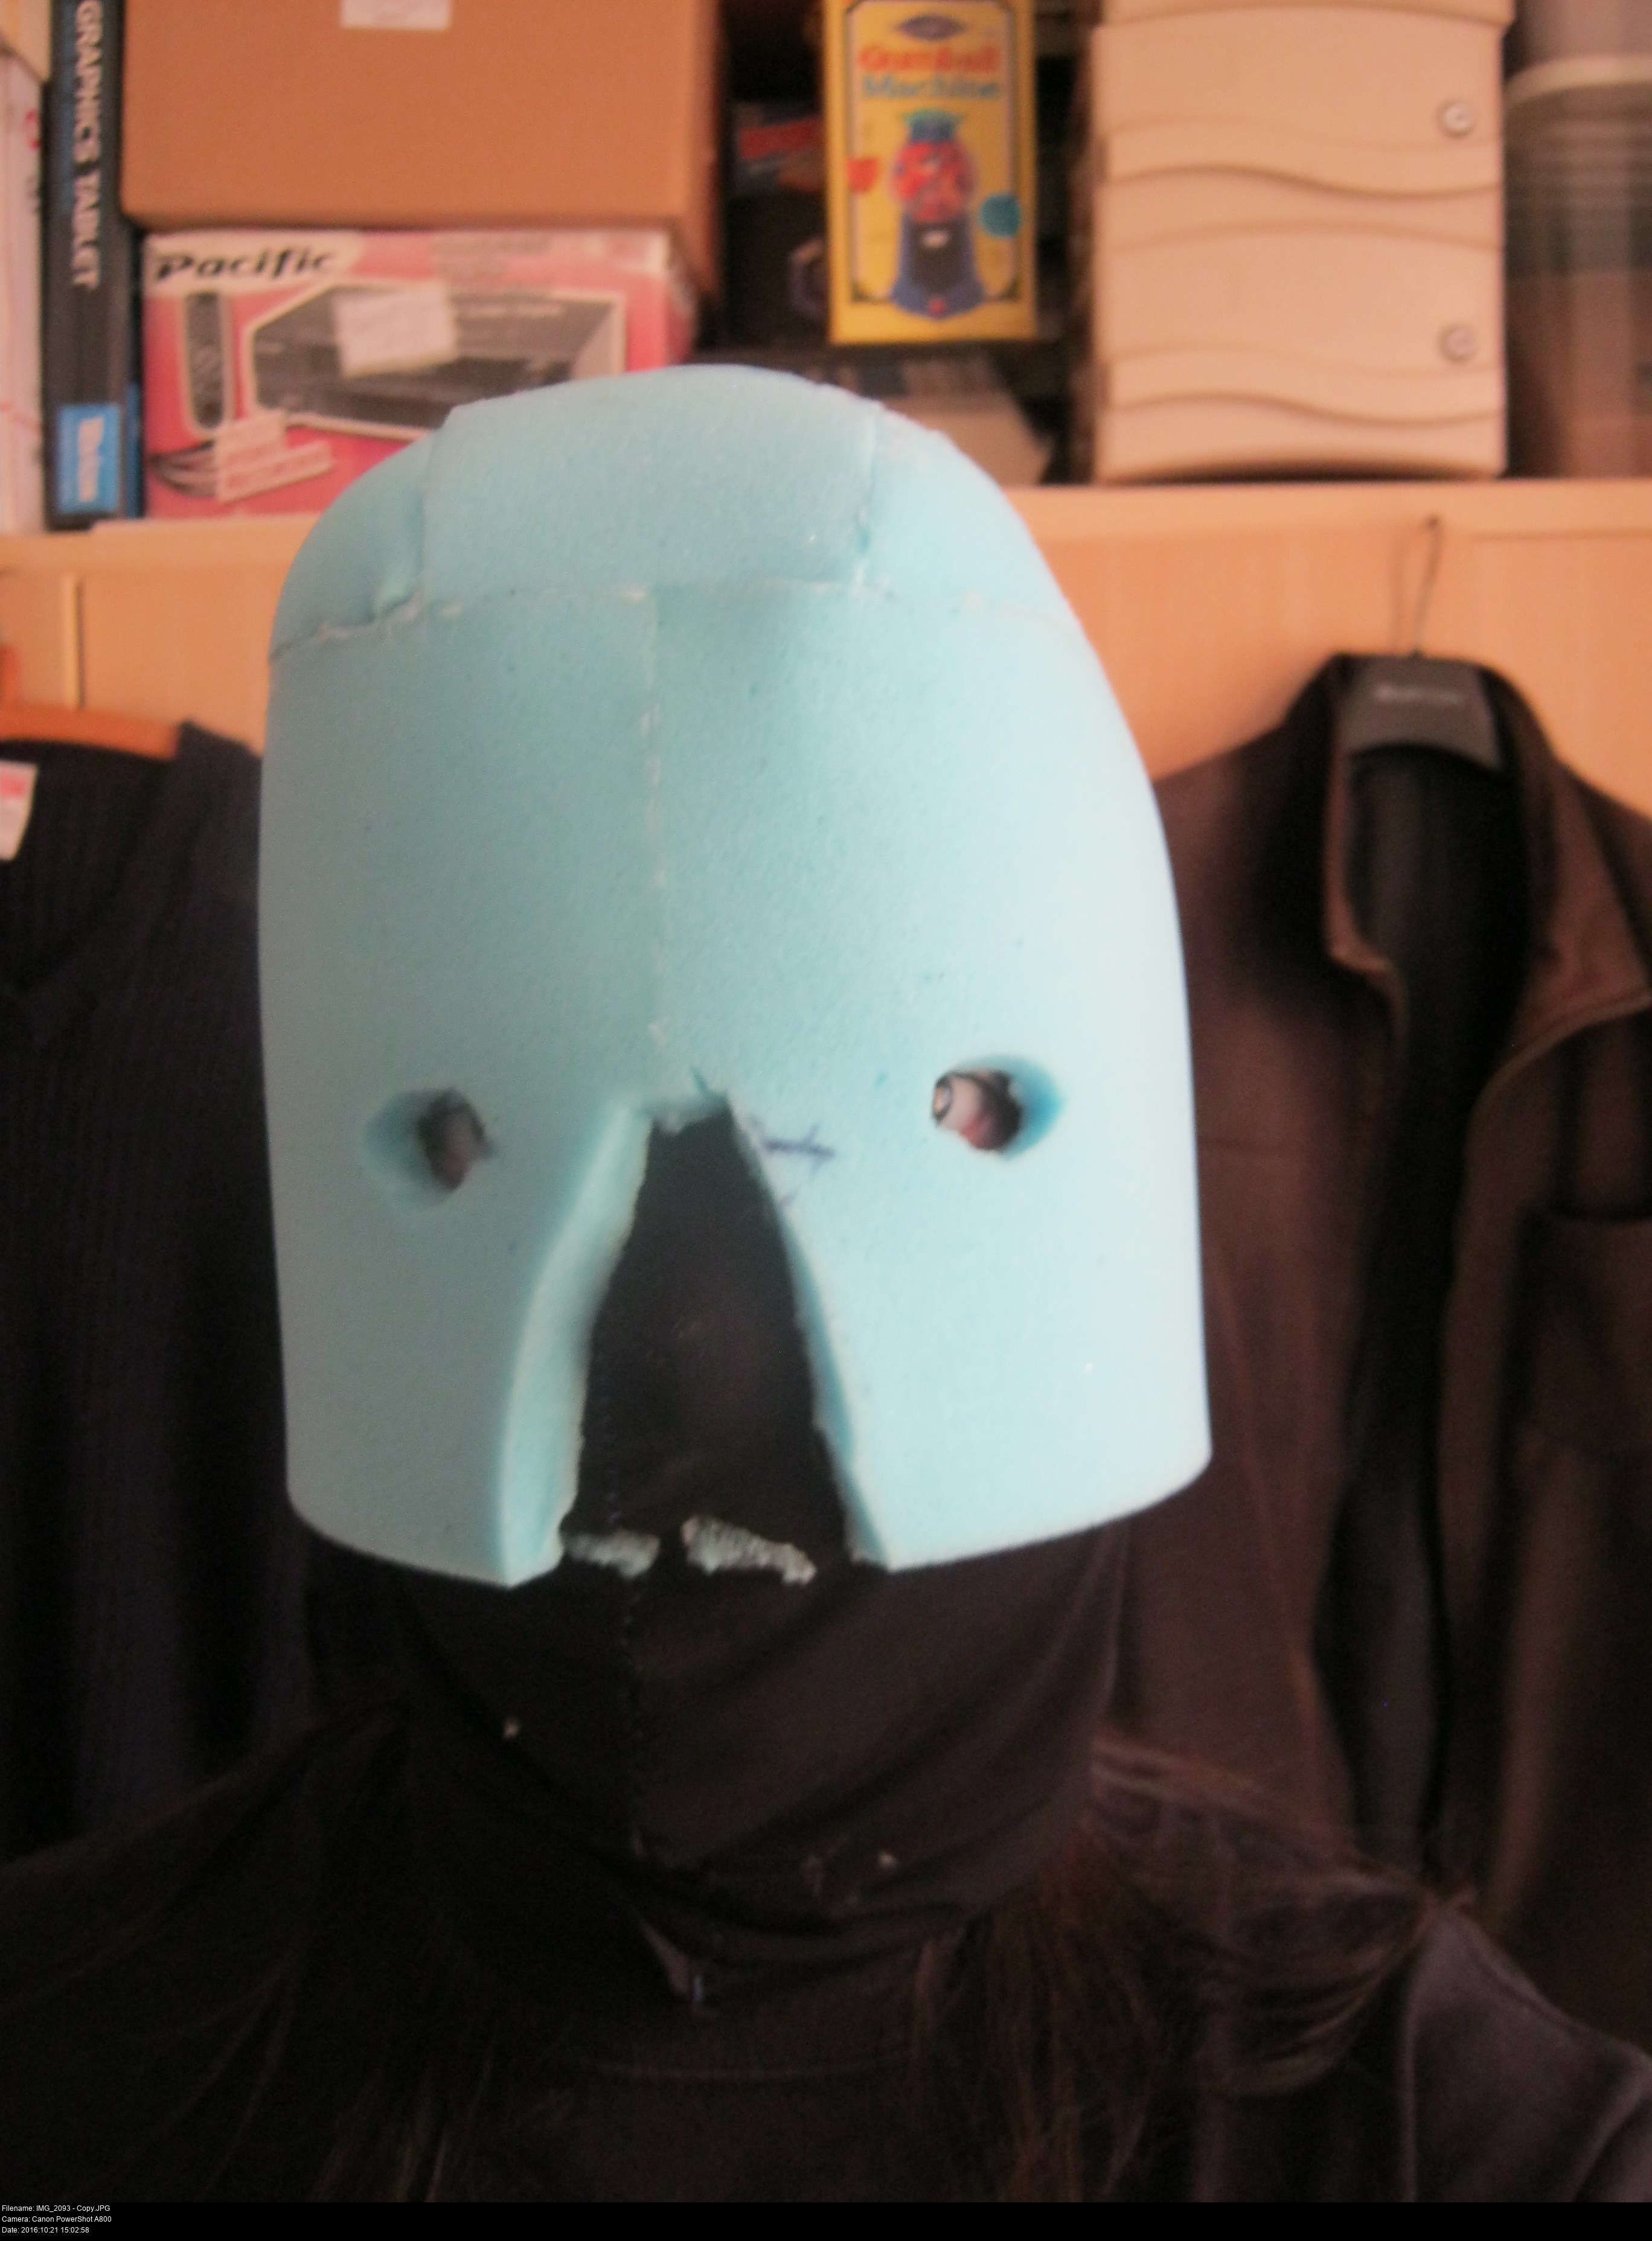
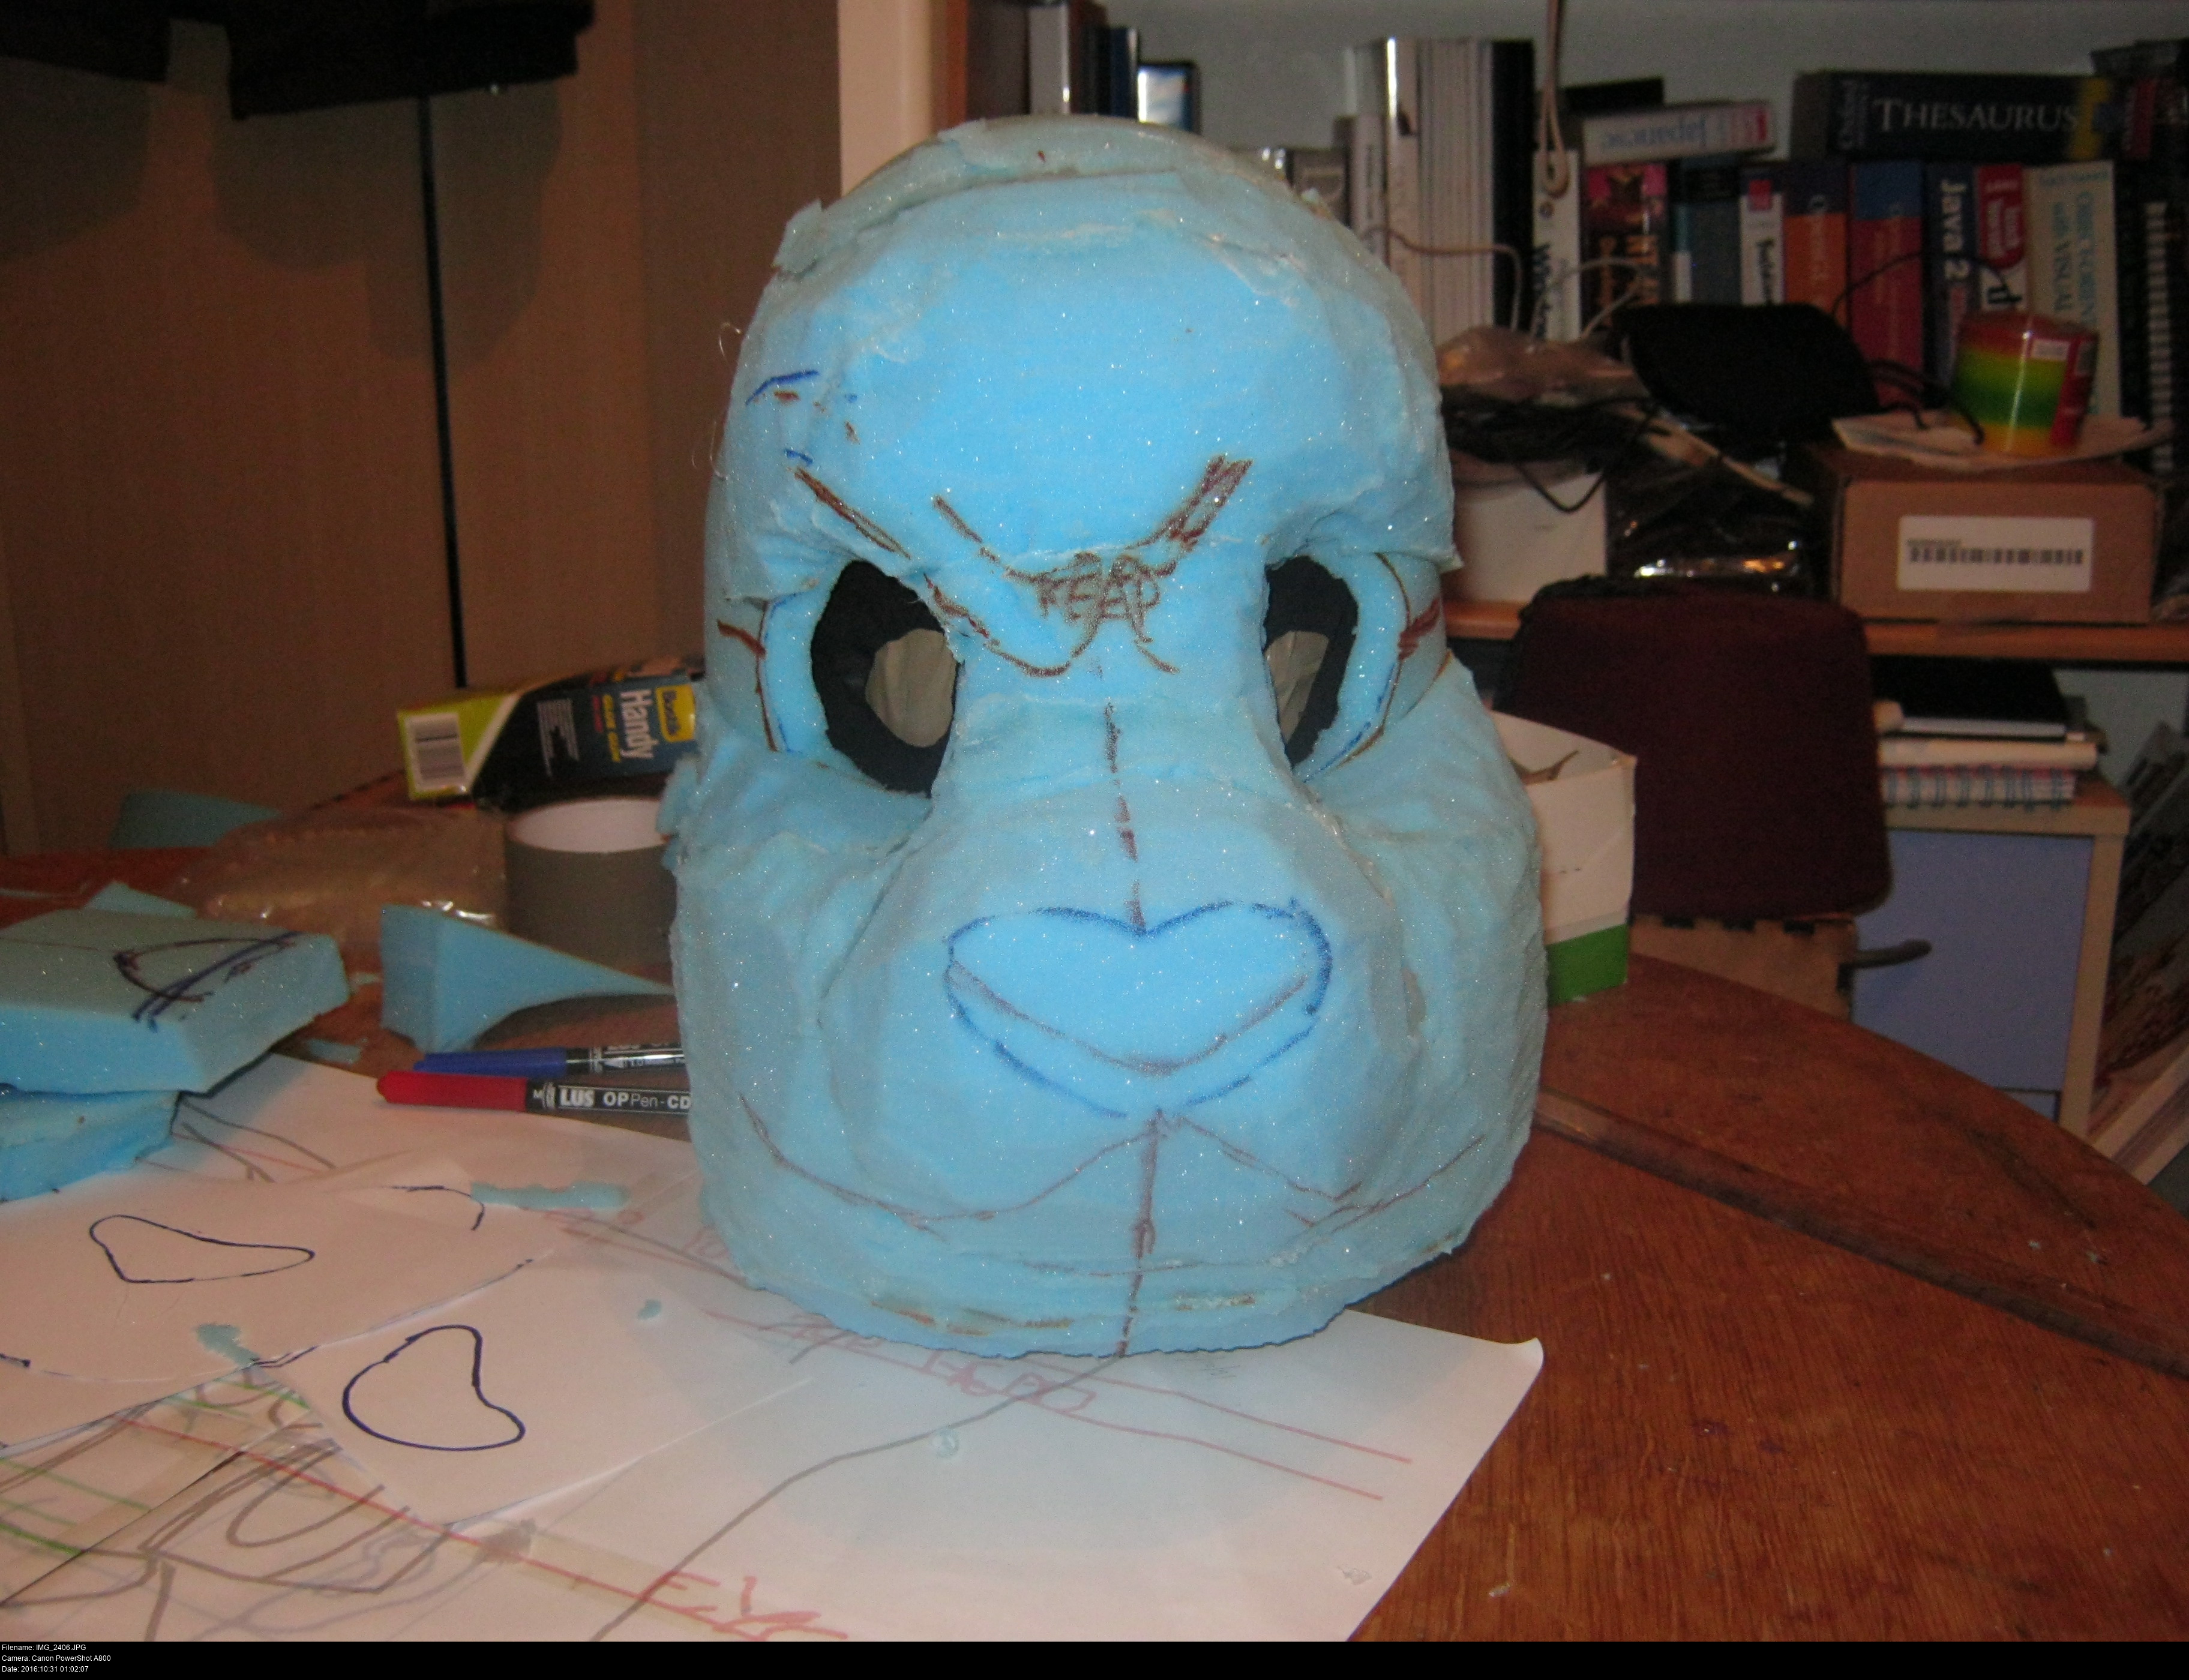
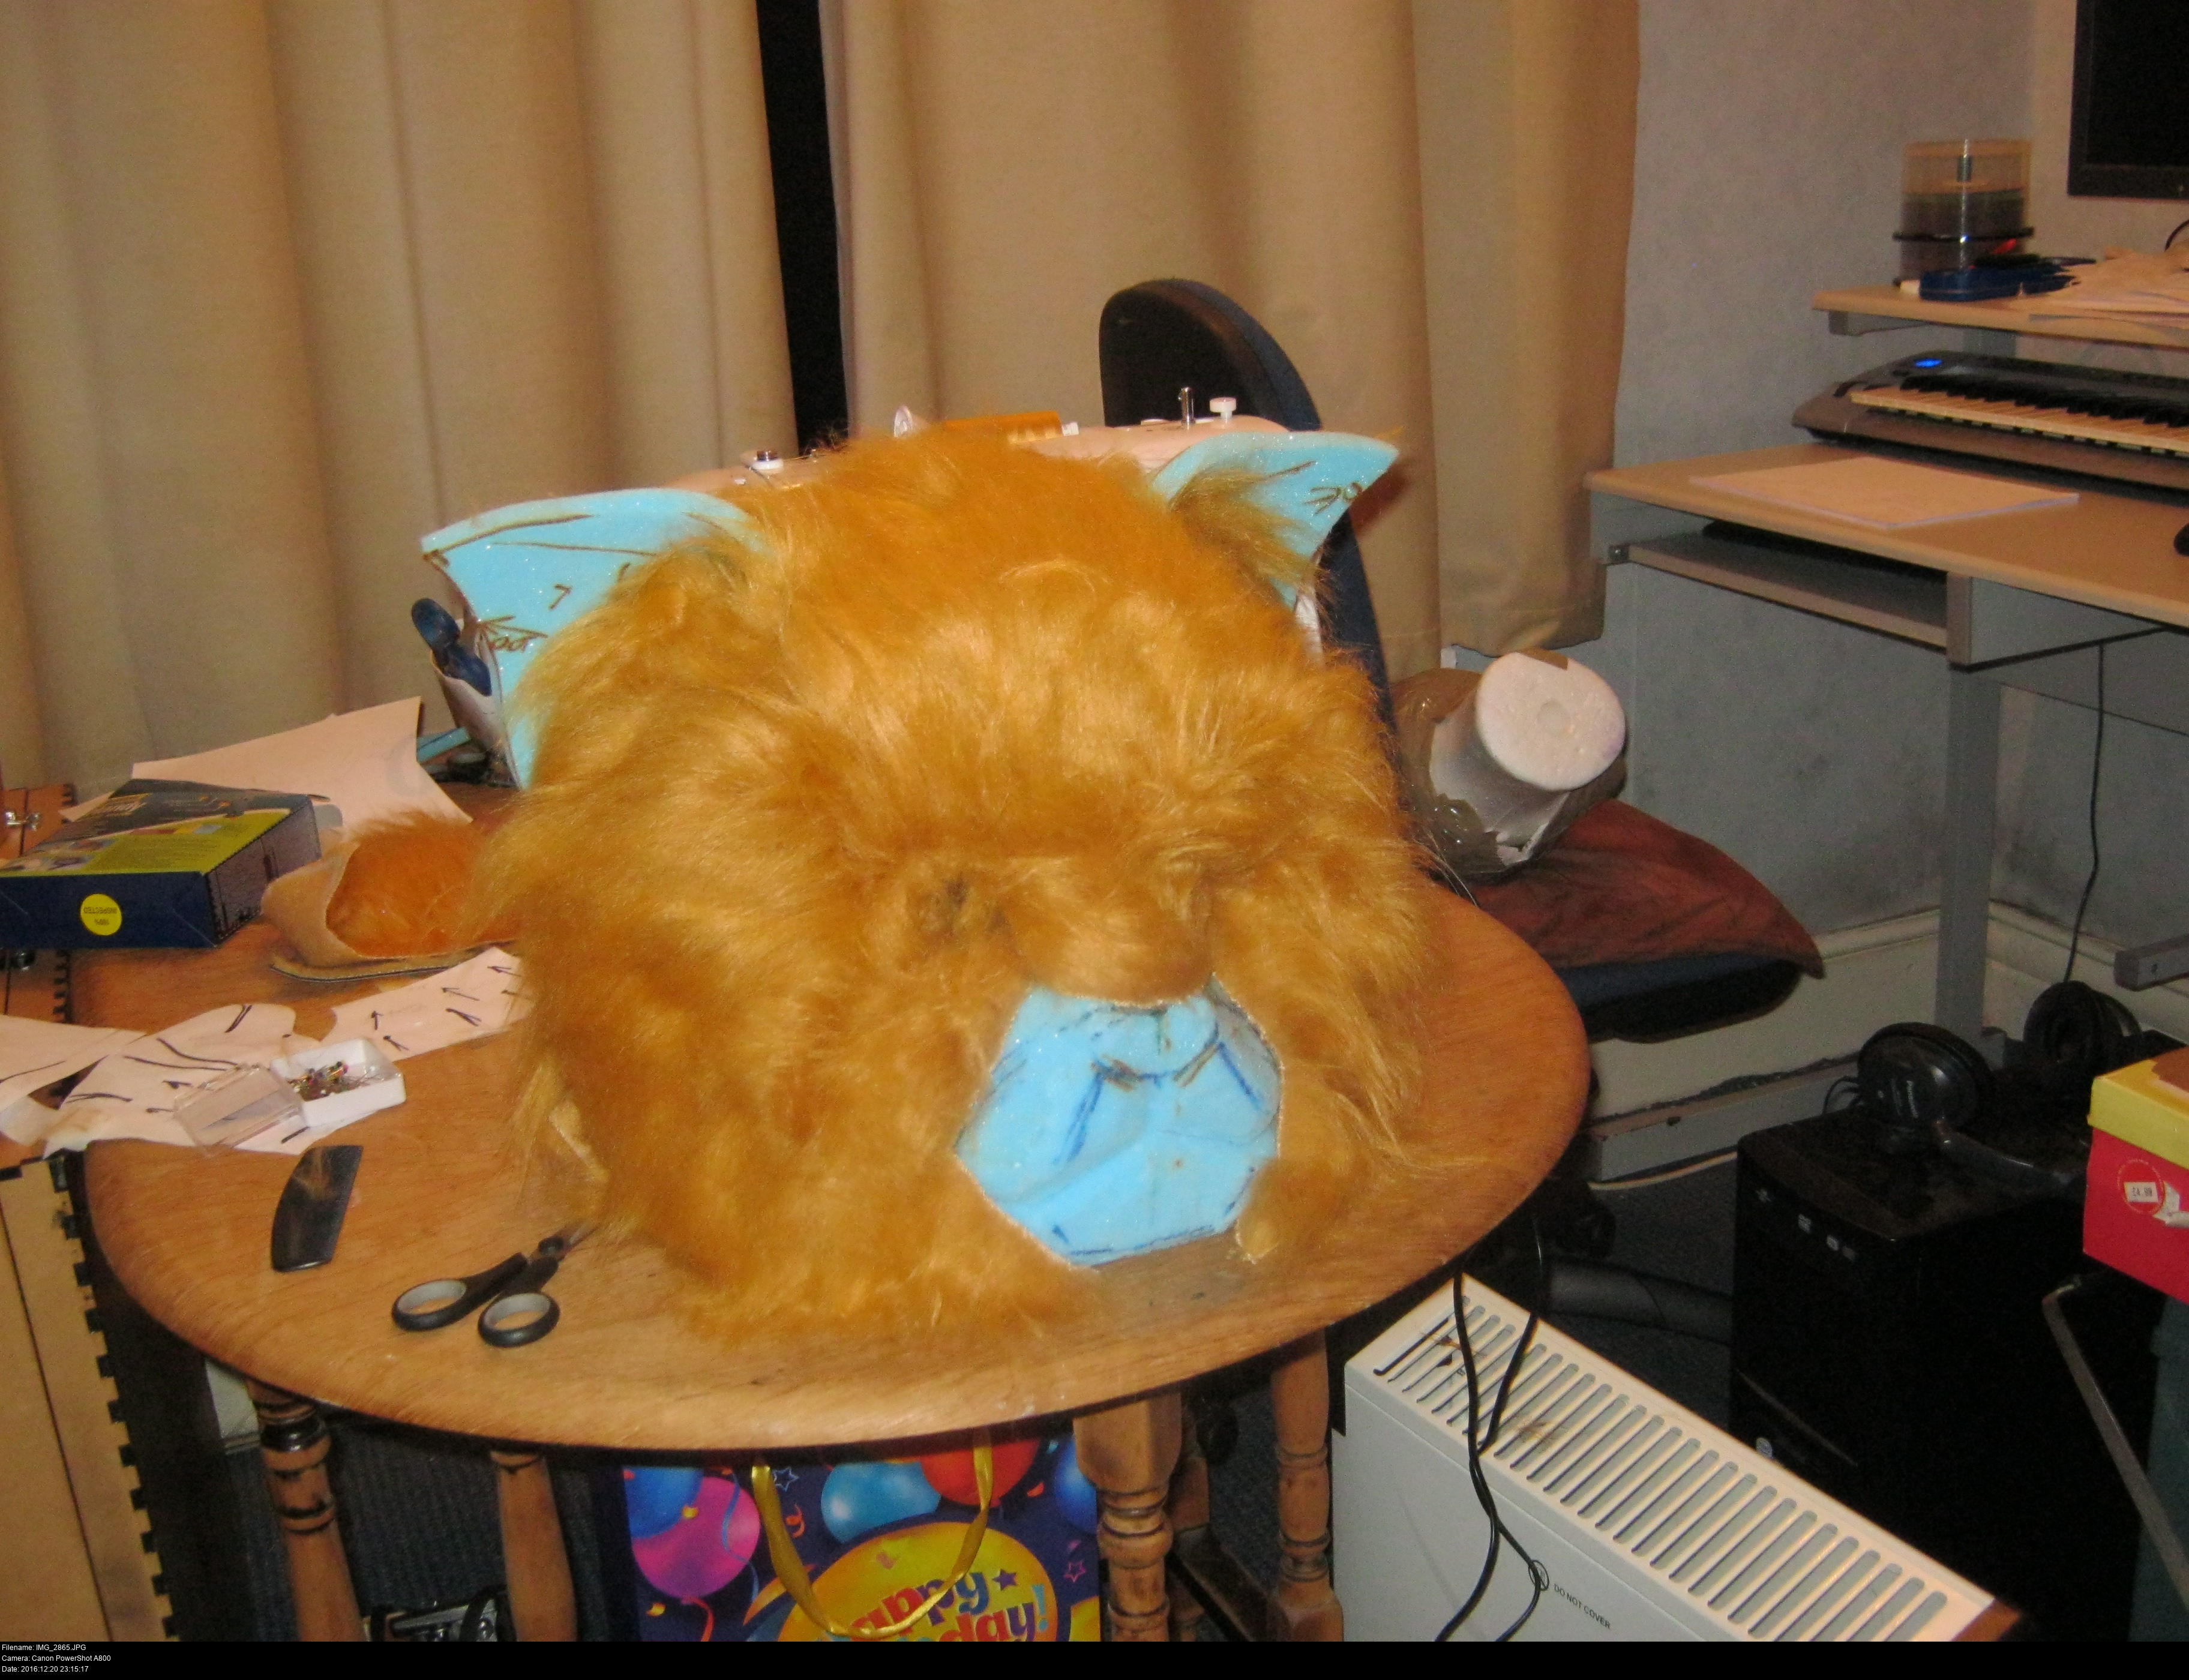
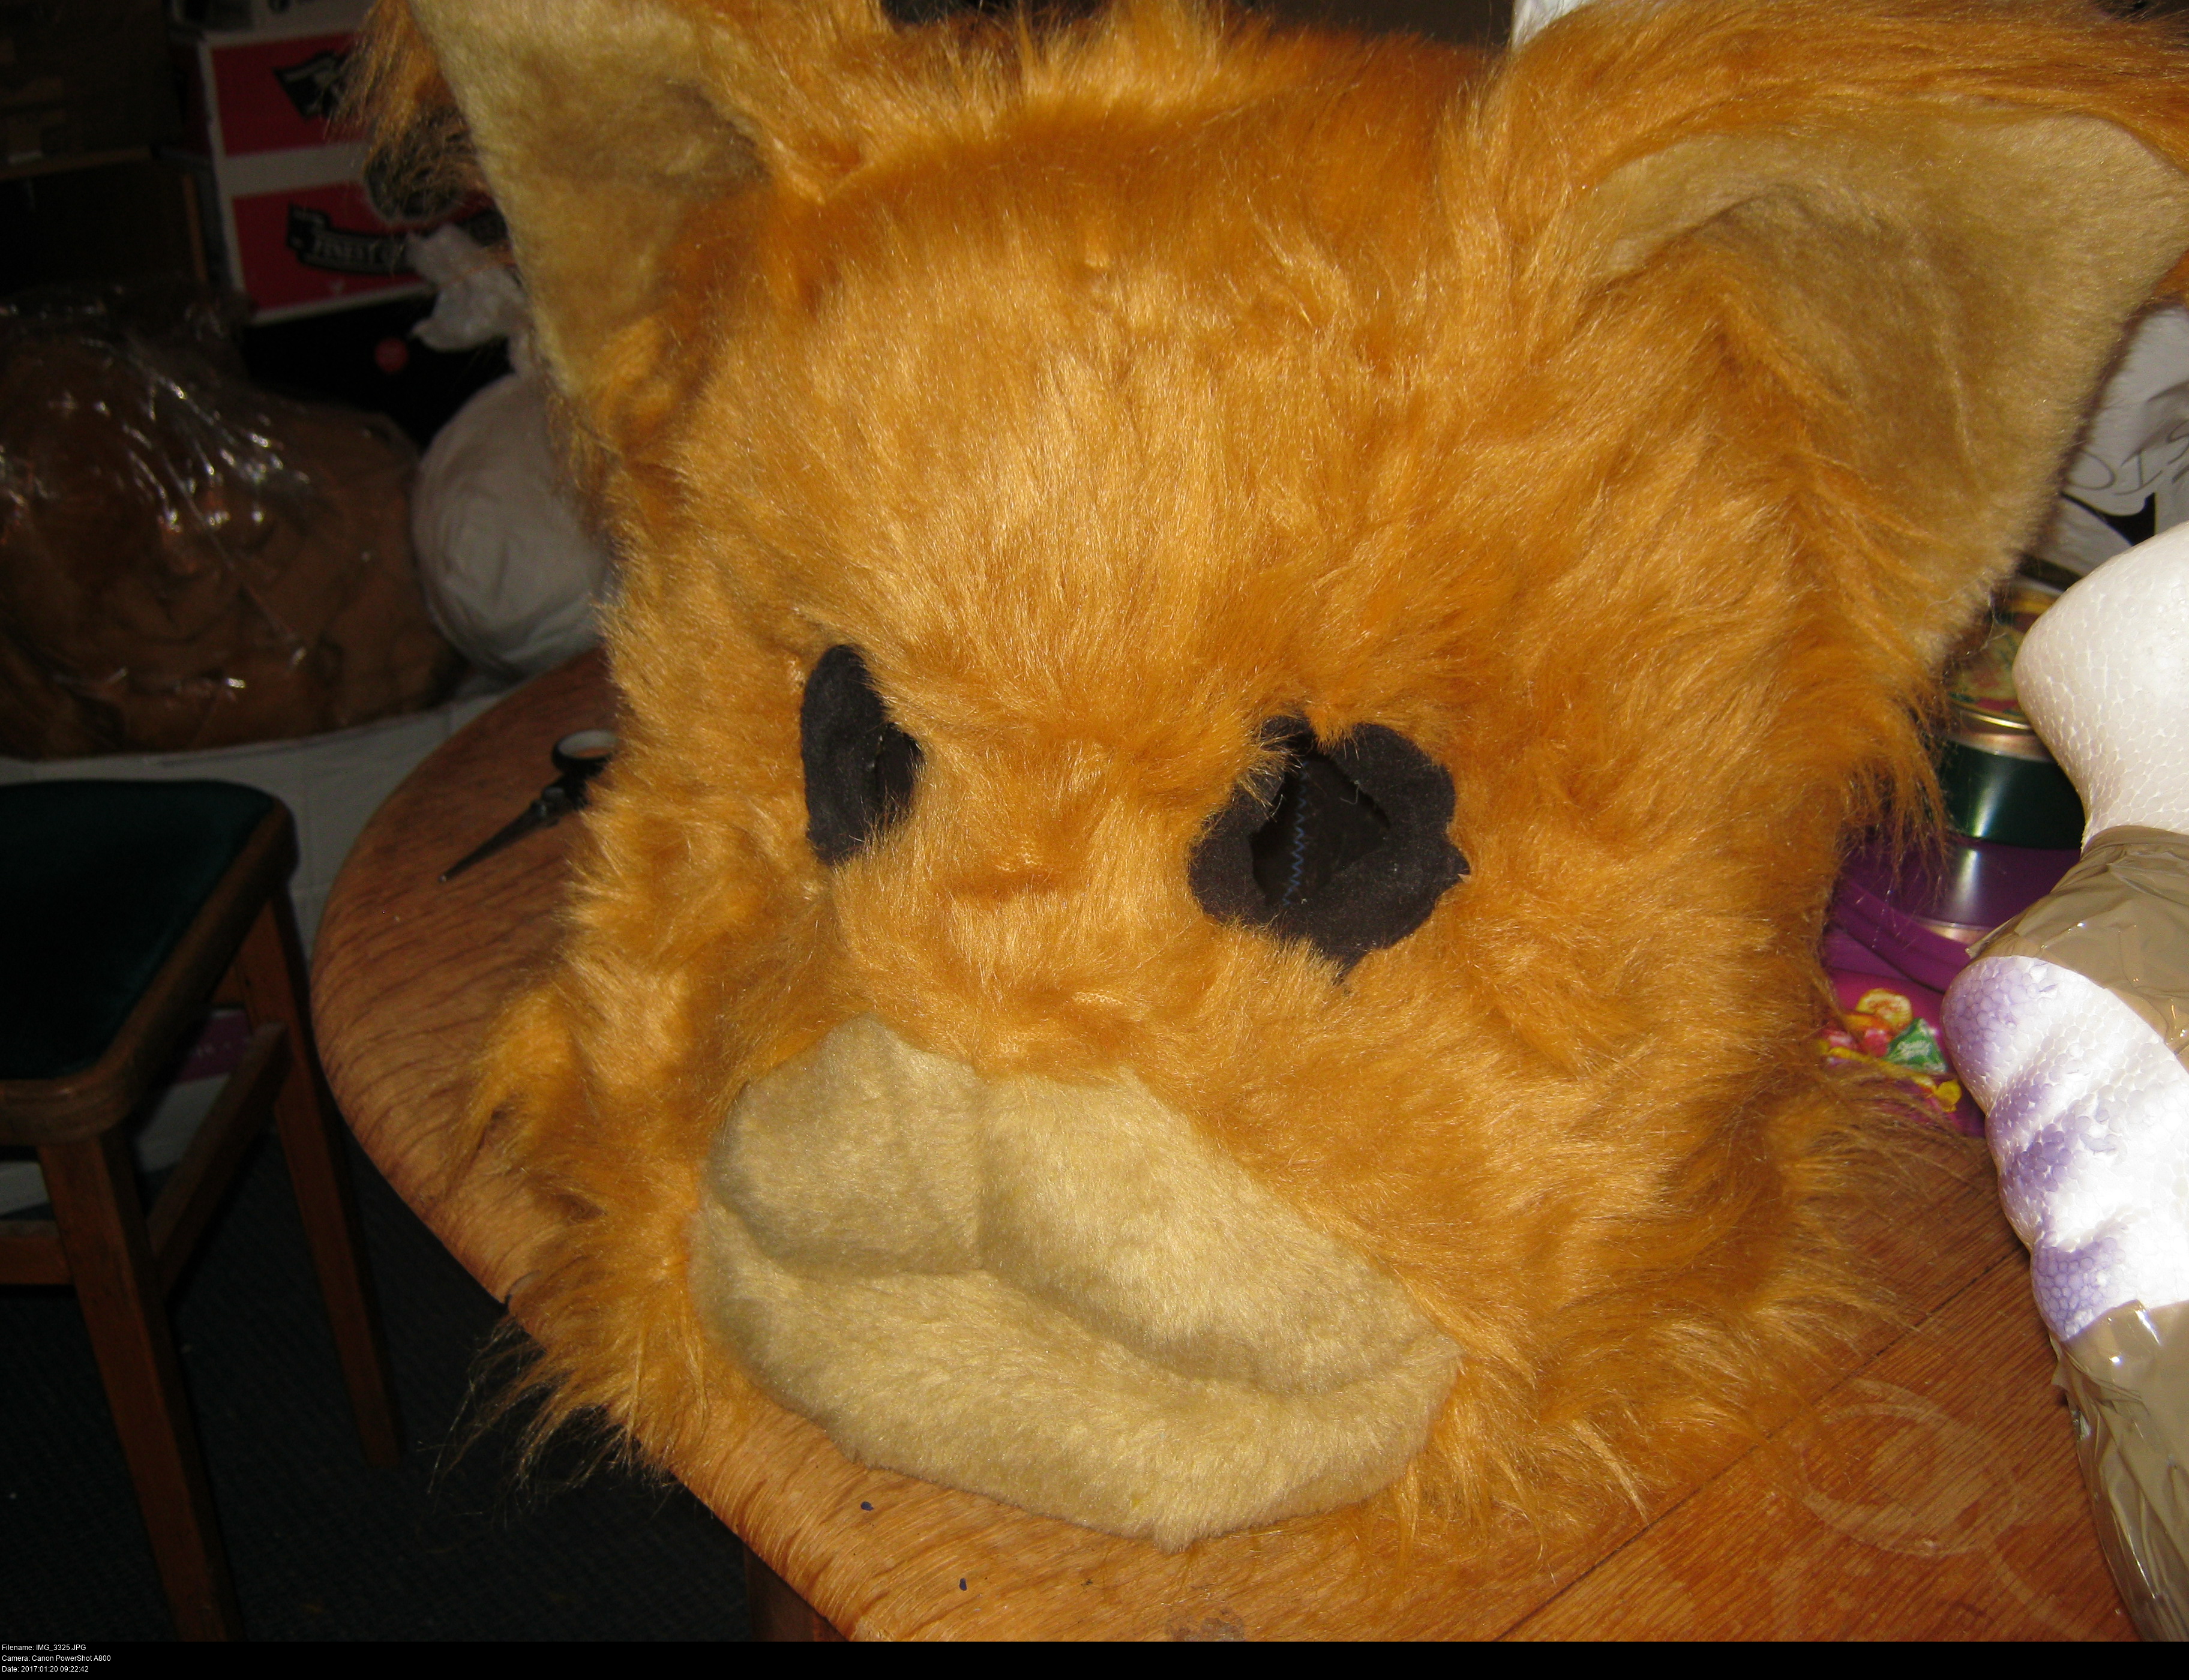
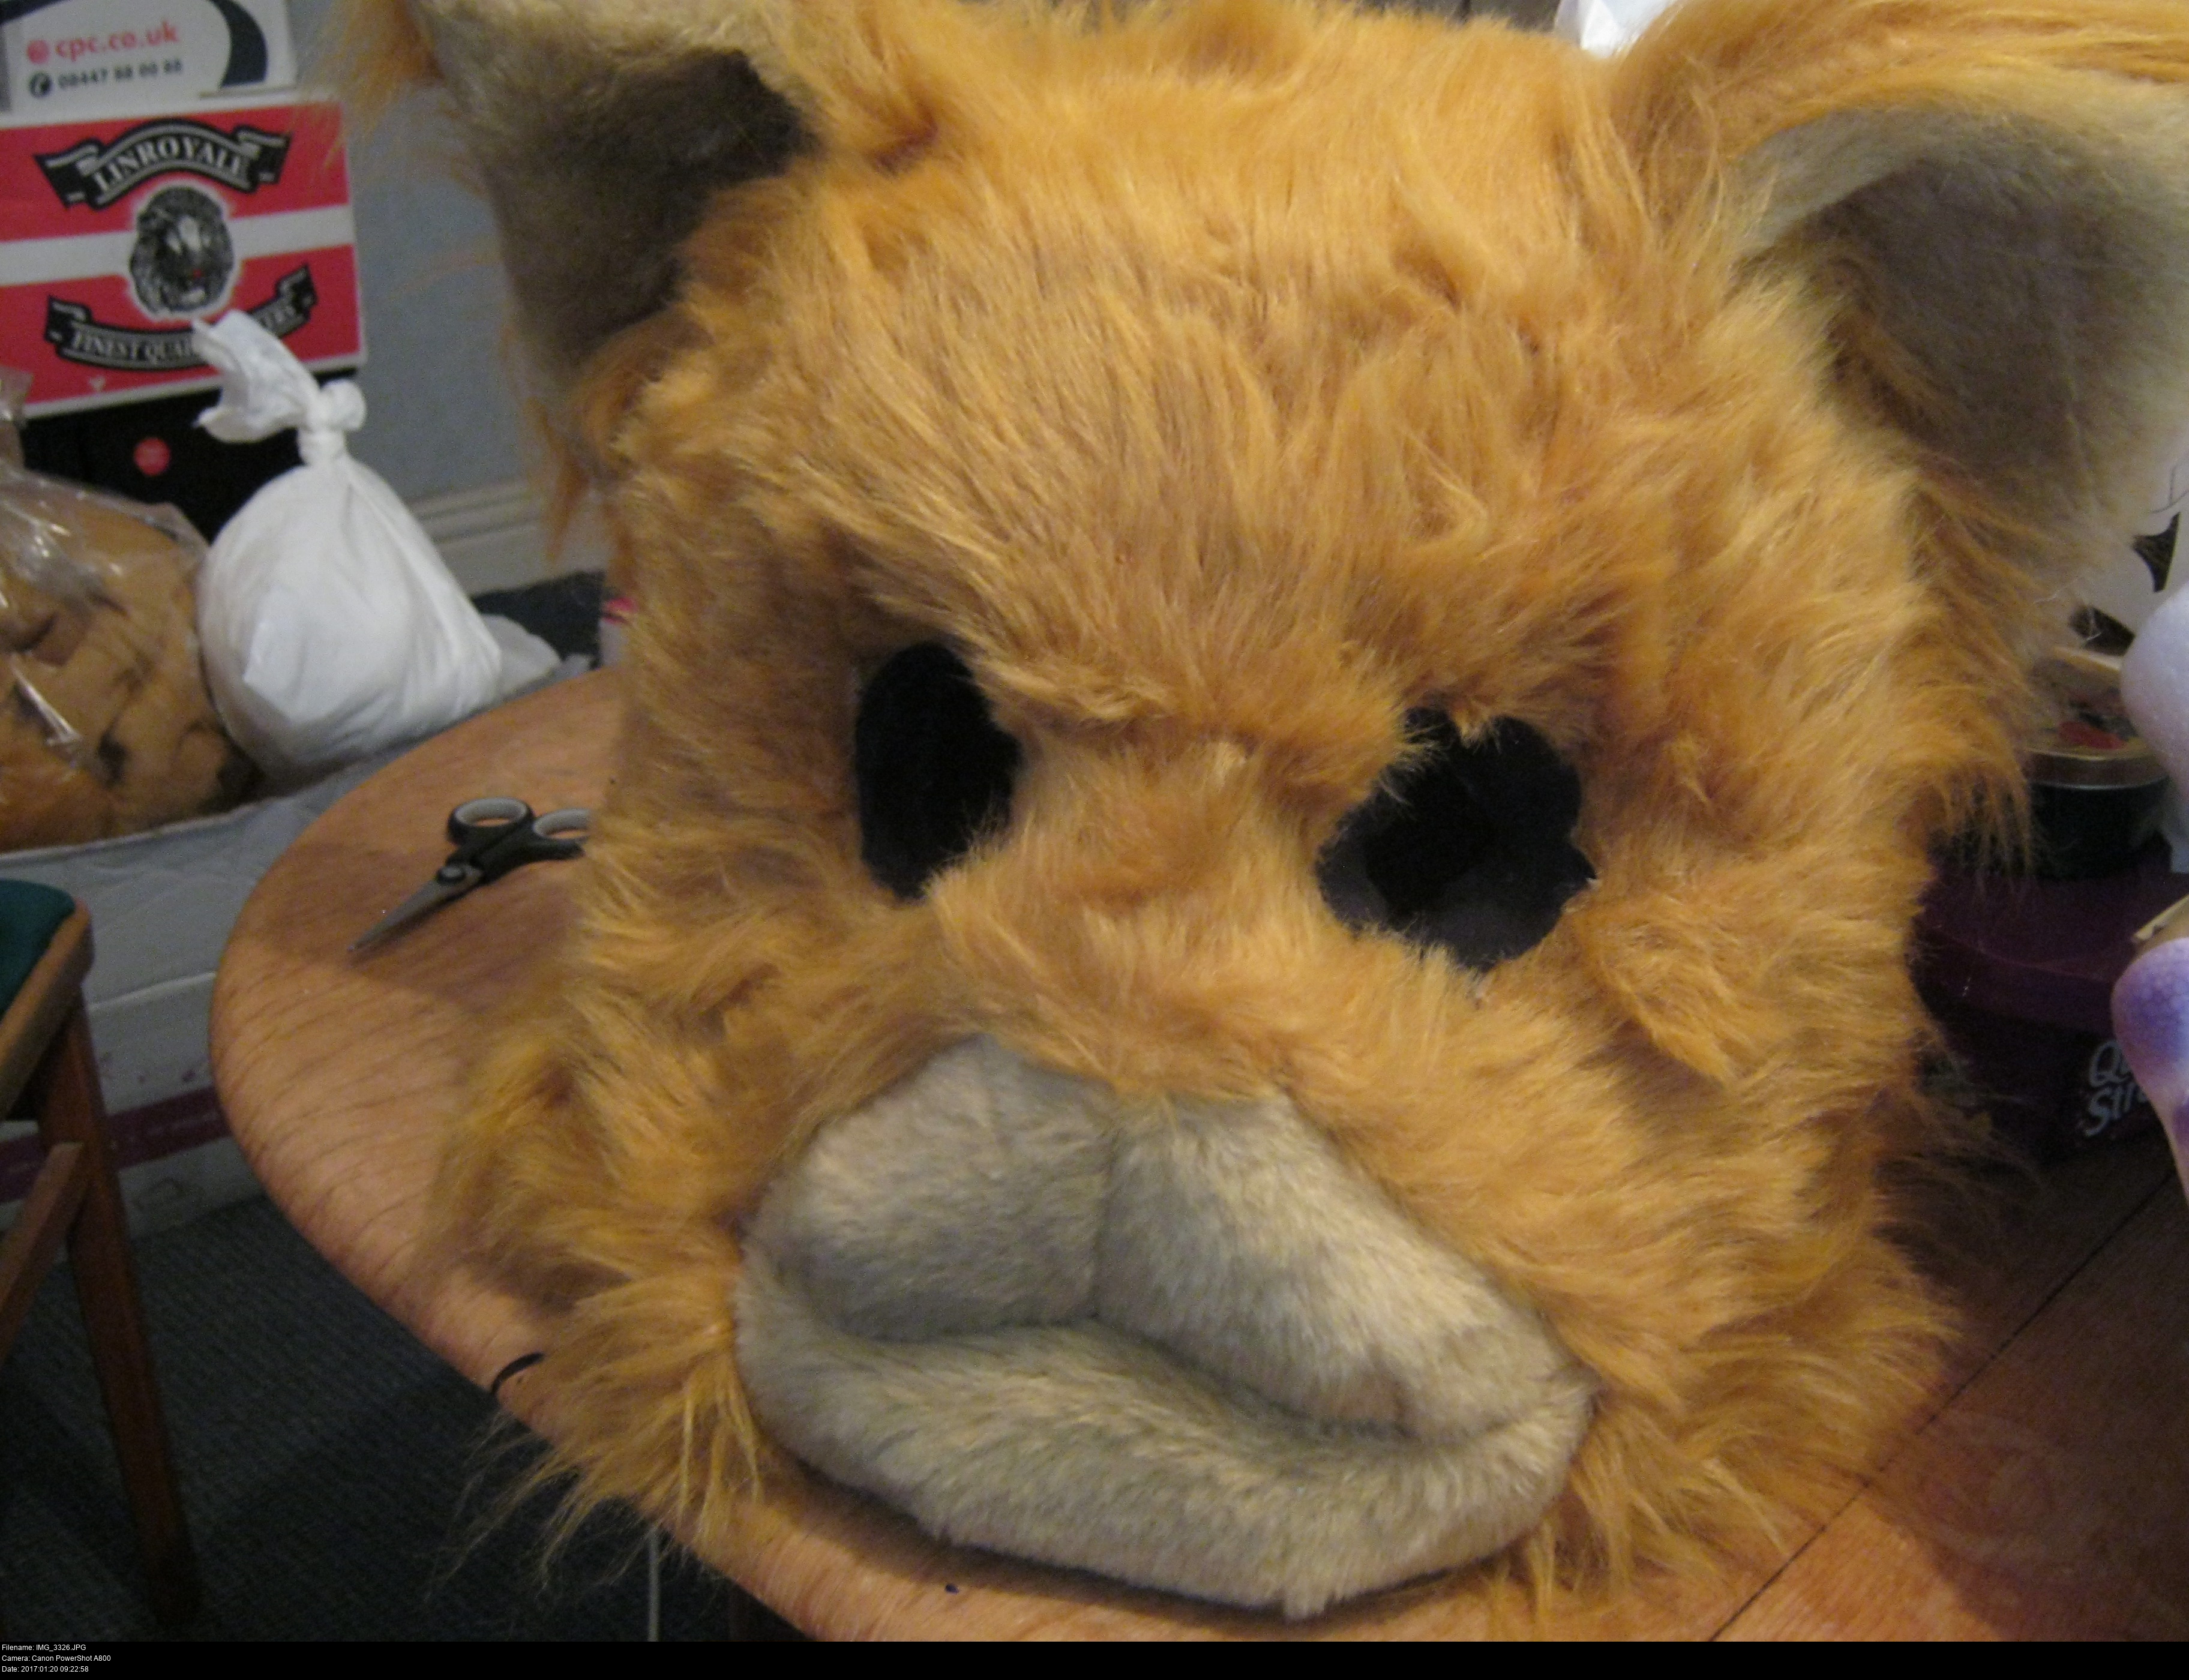
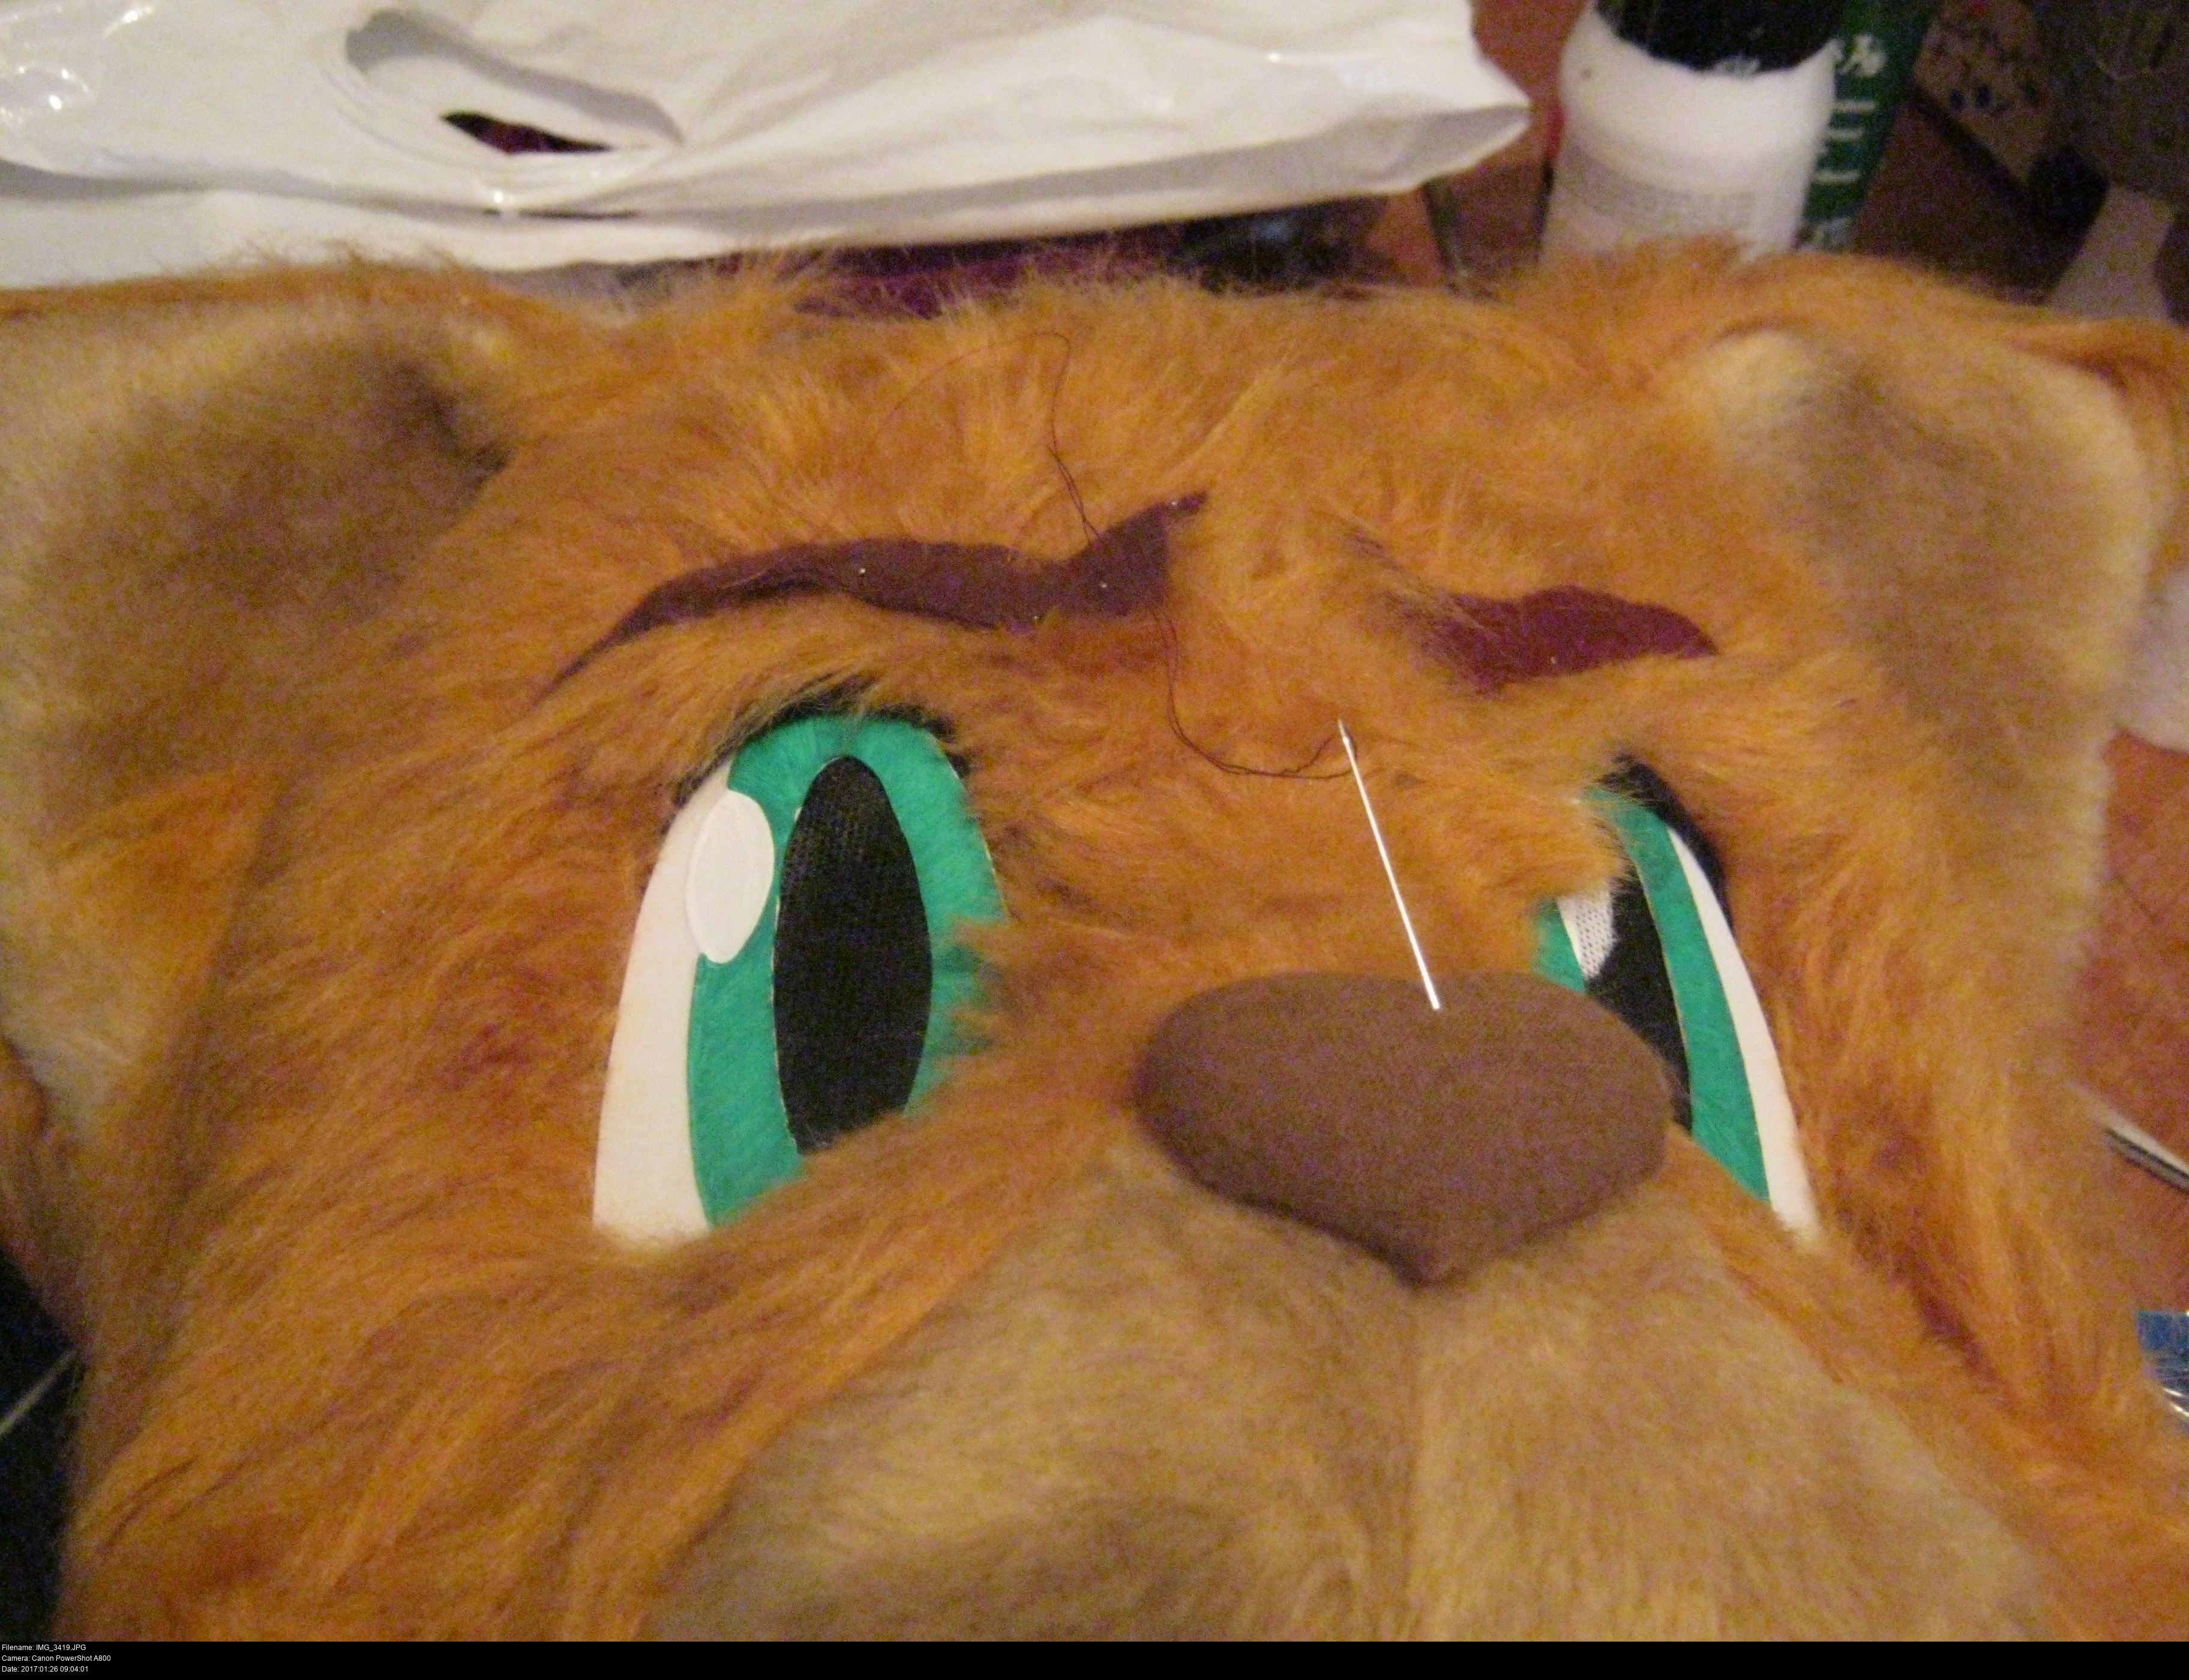
Before patterning the head, there was one change I had to make:
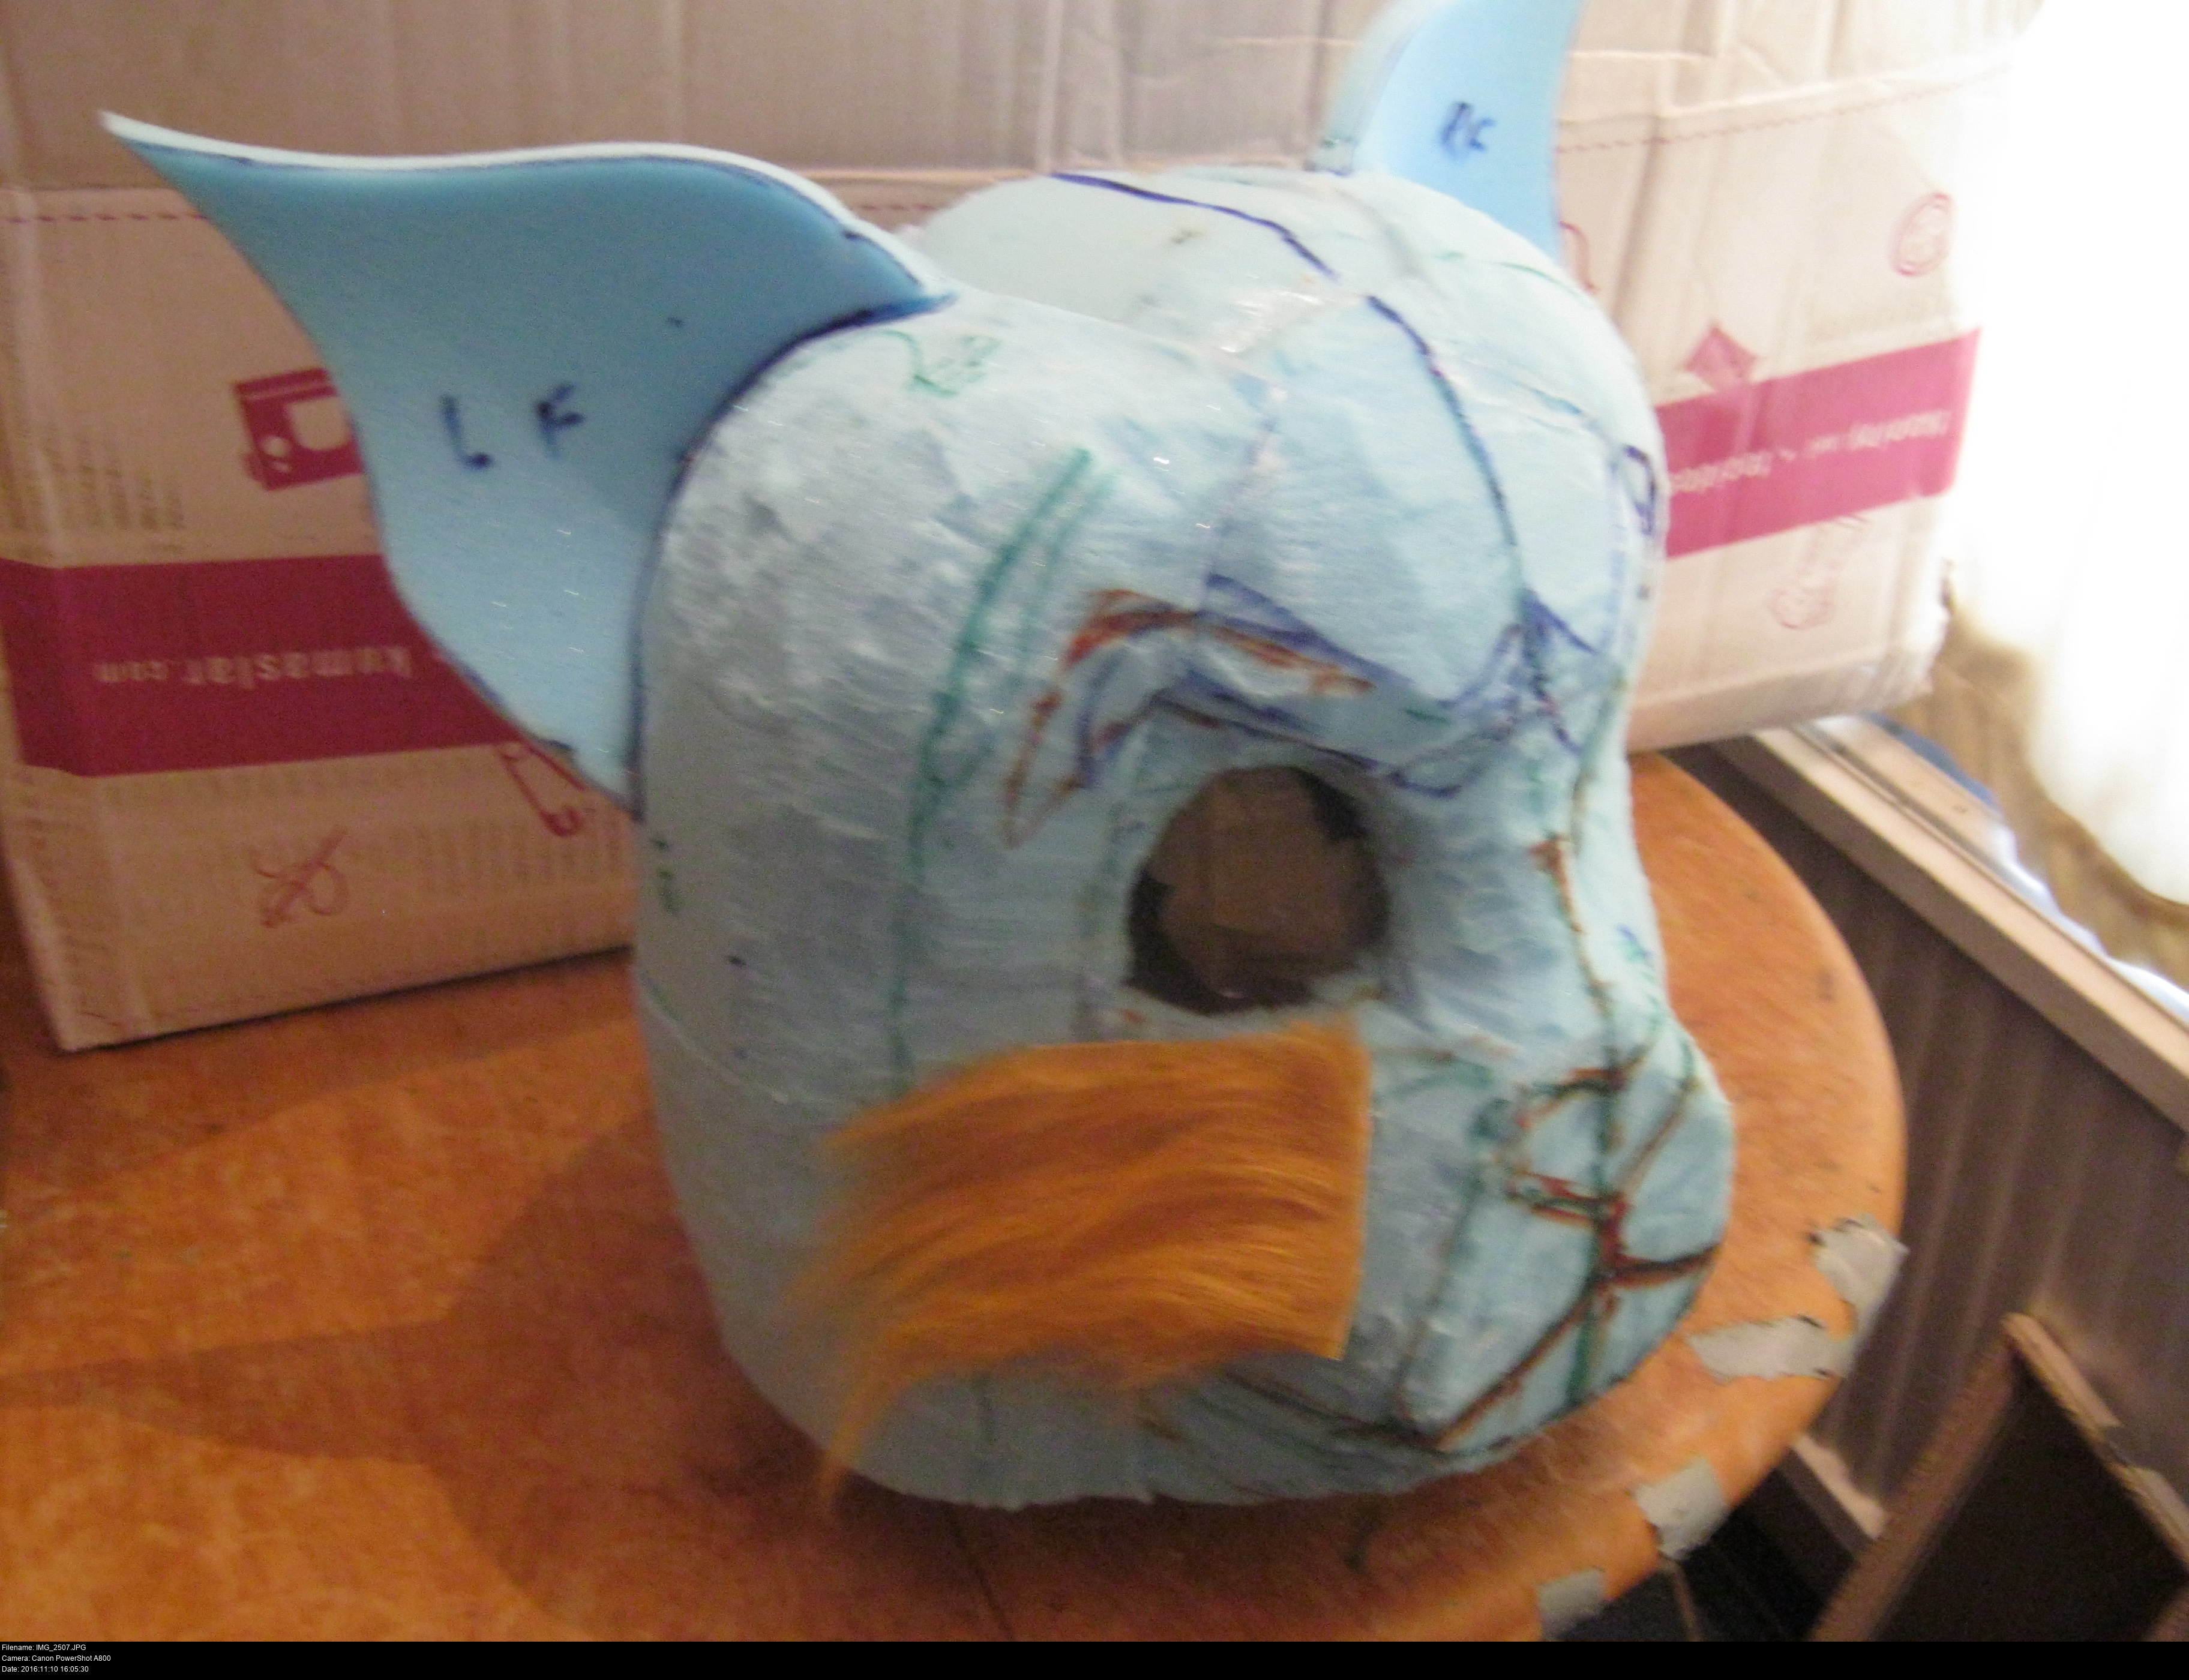
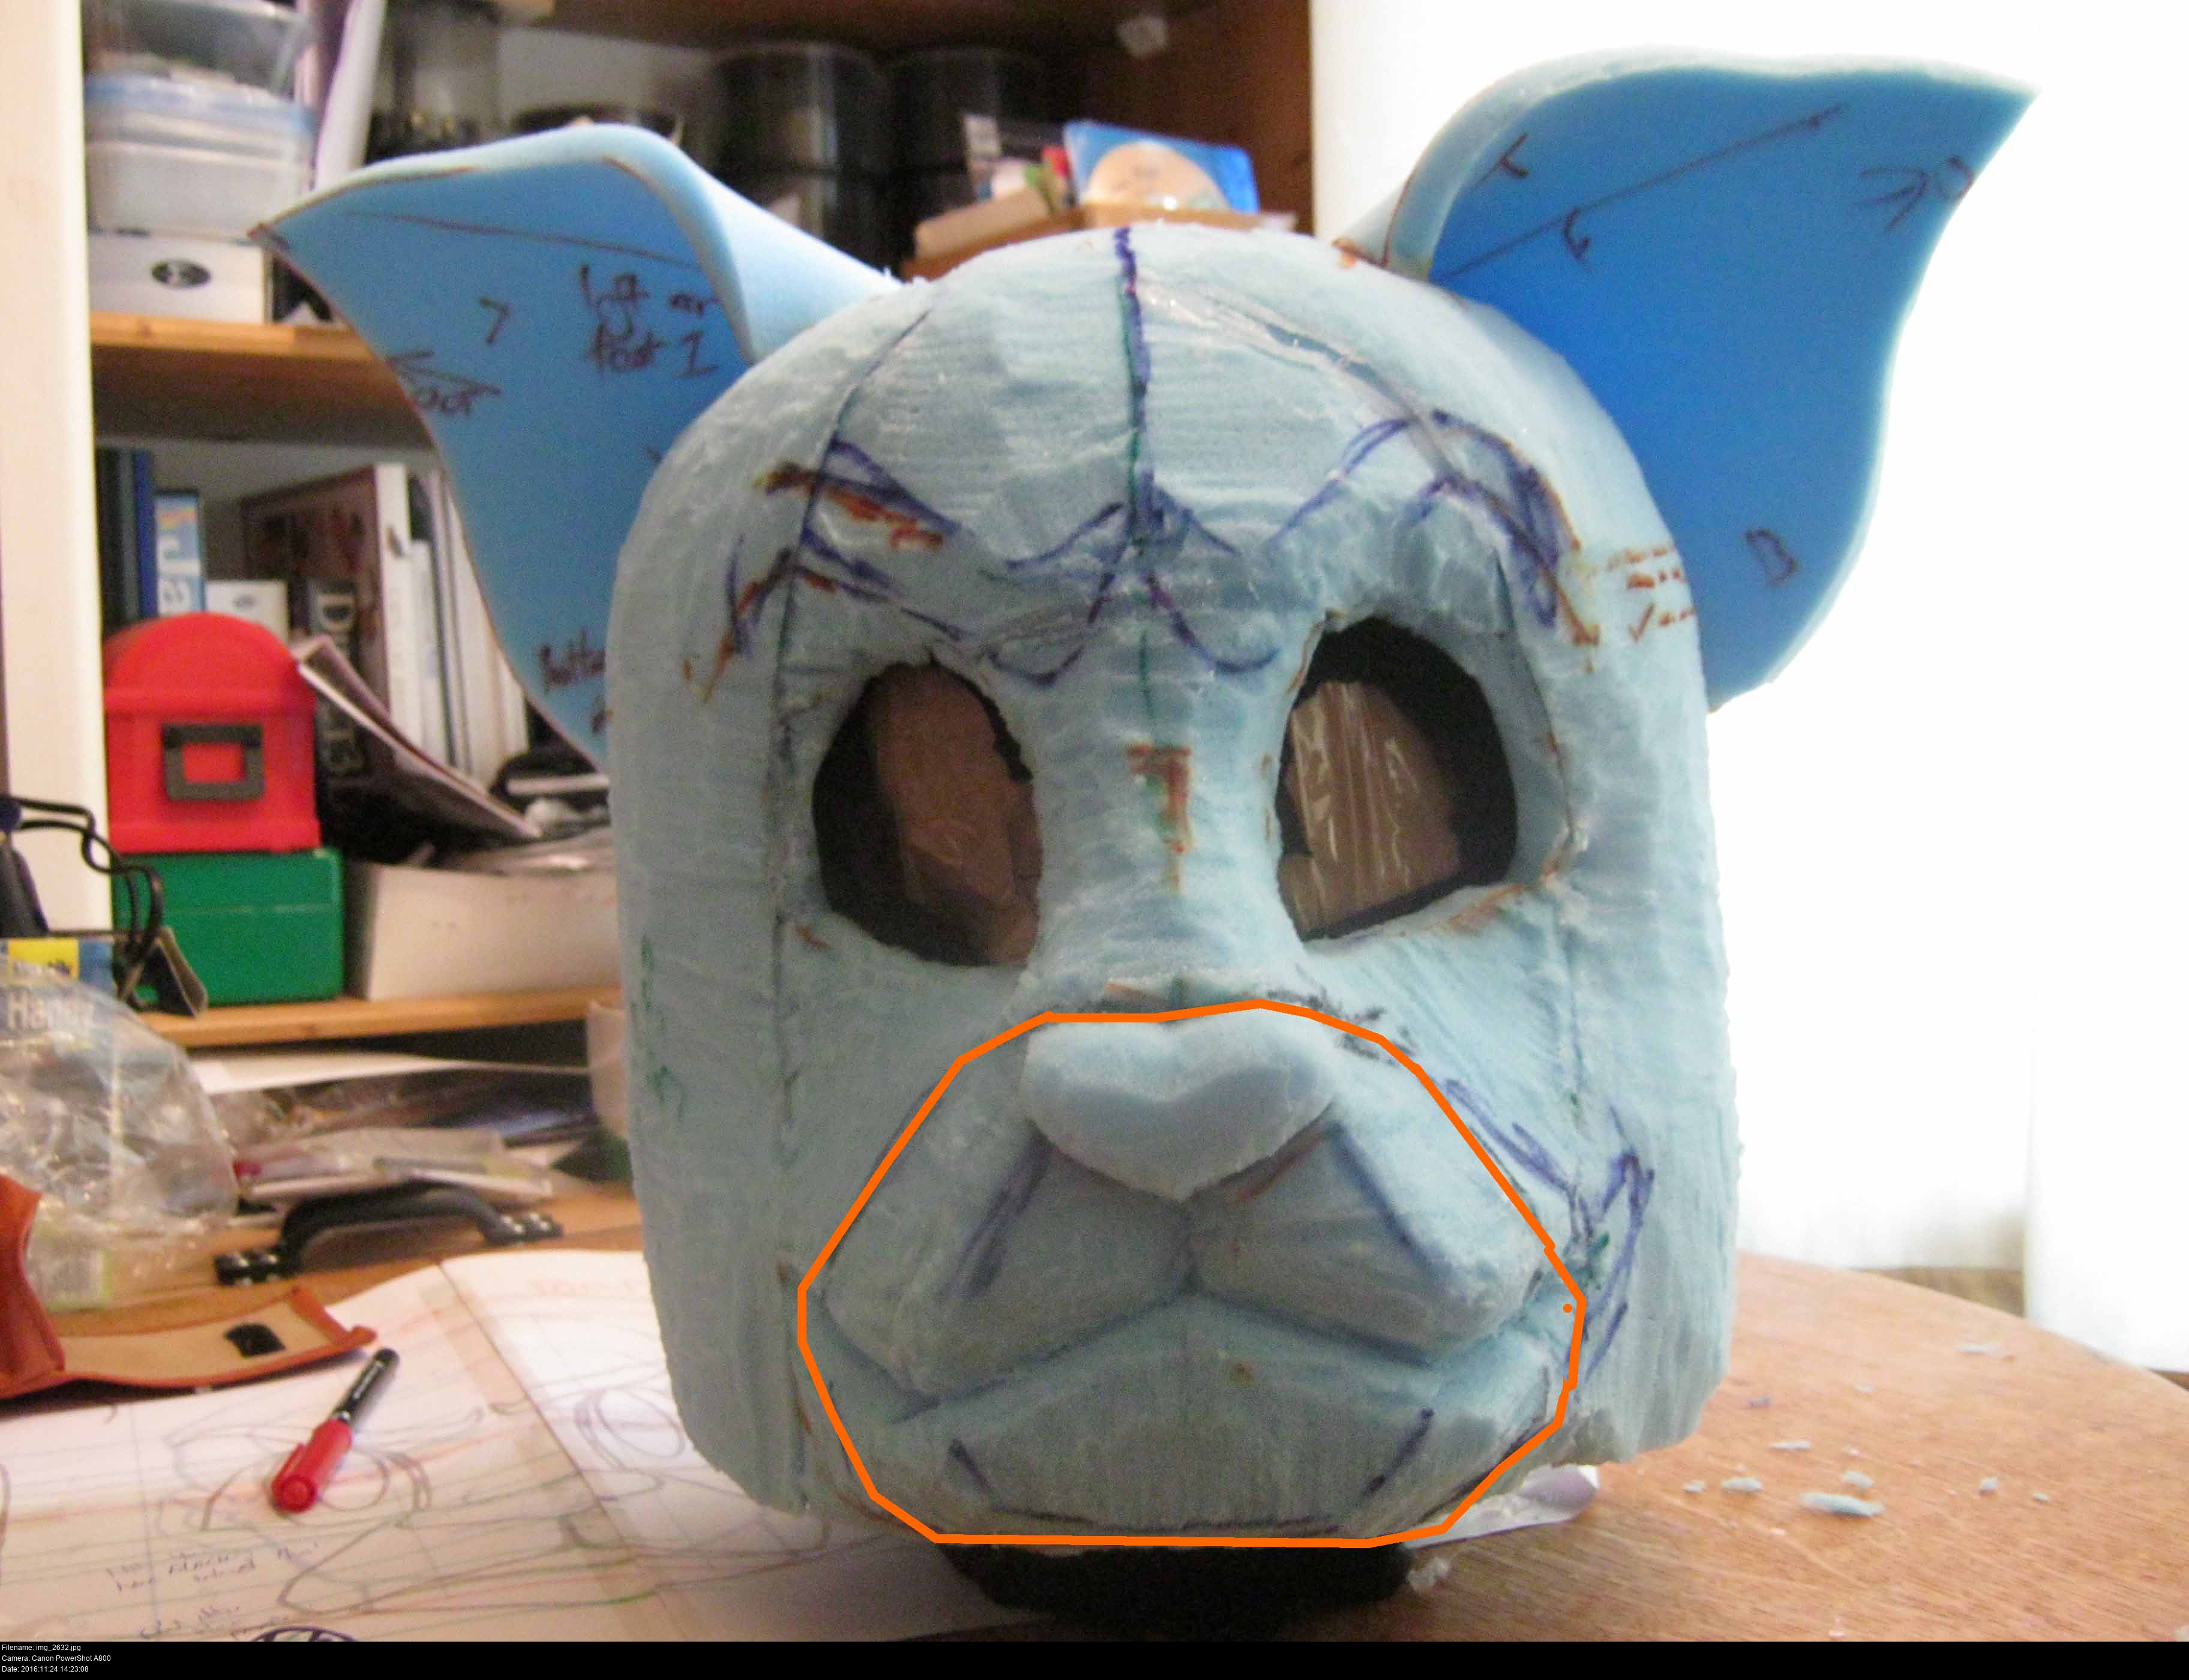
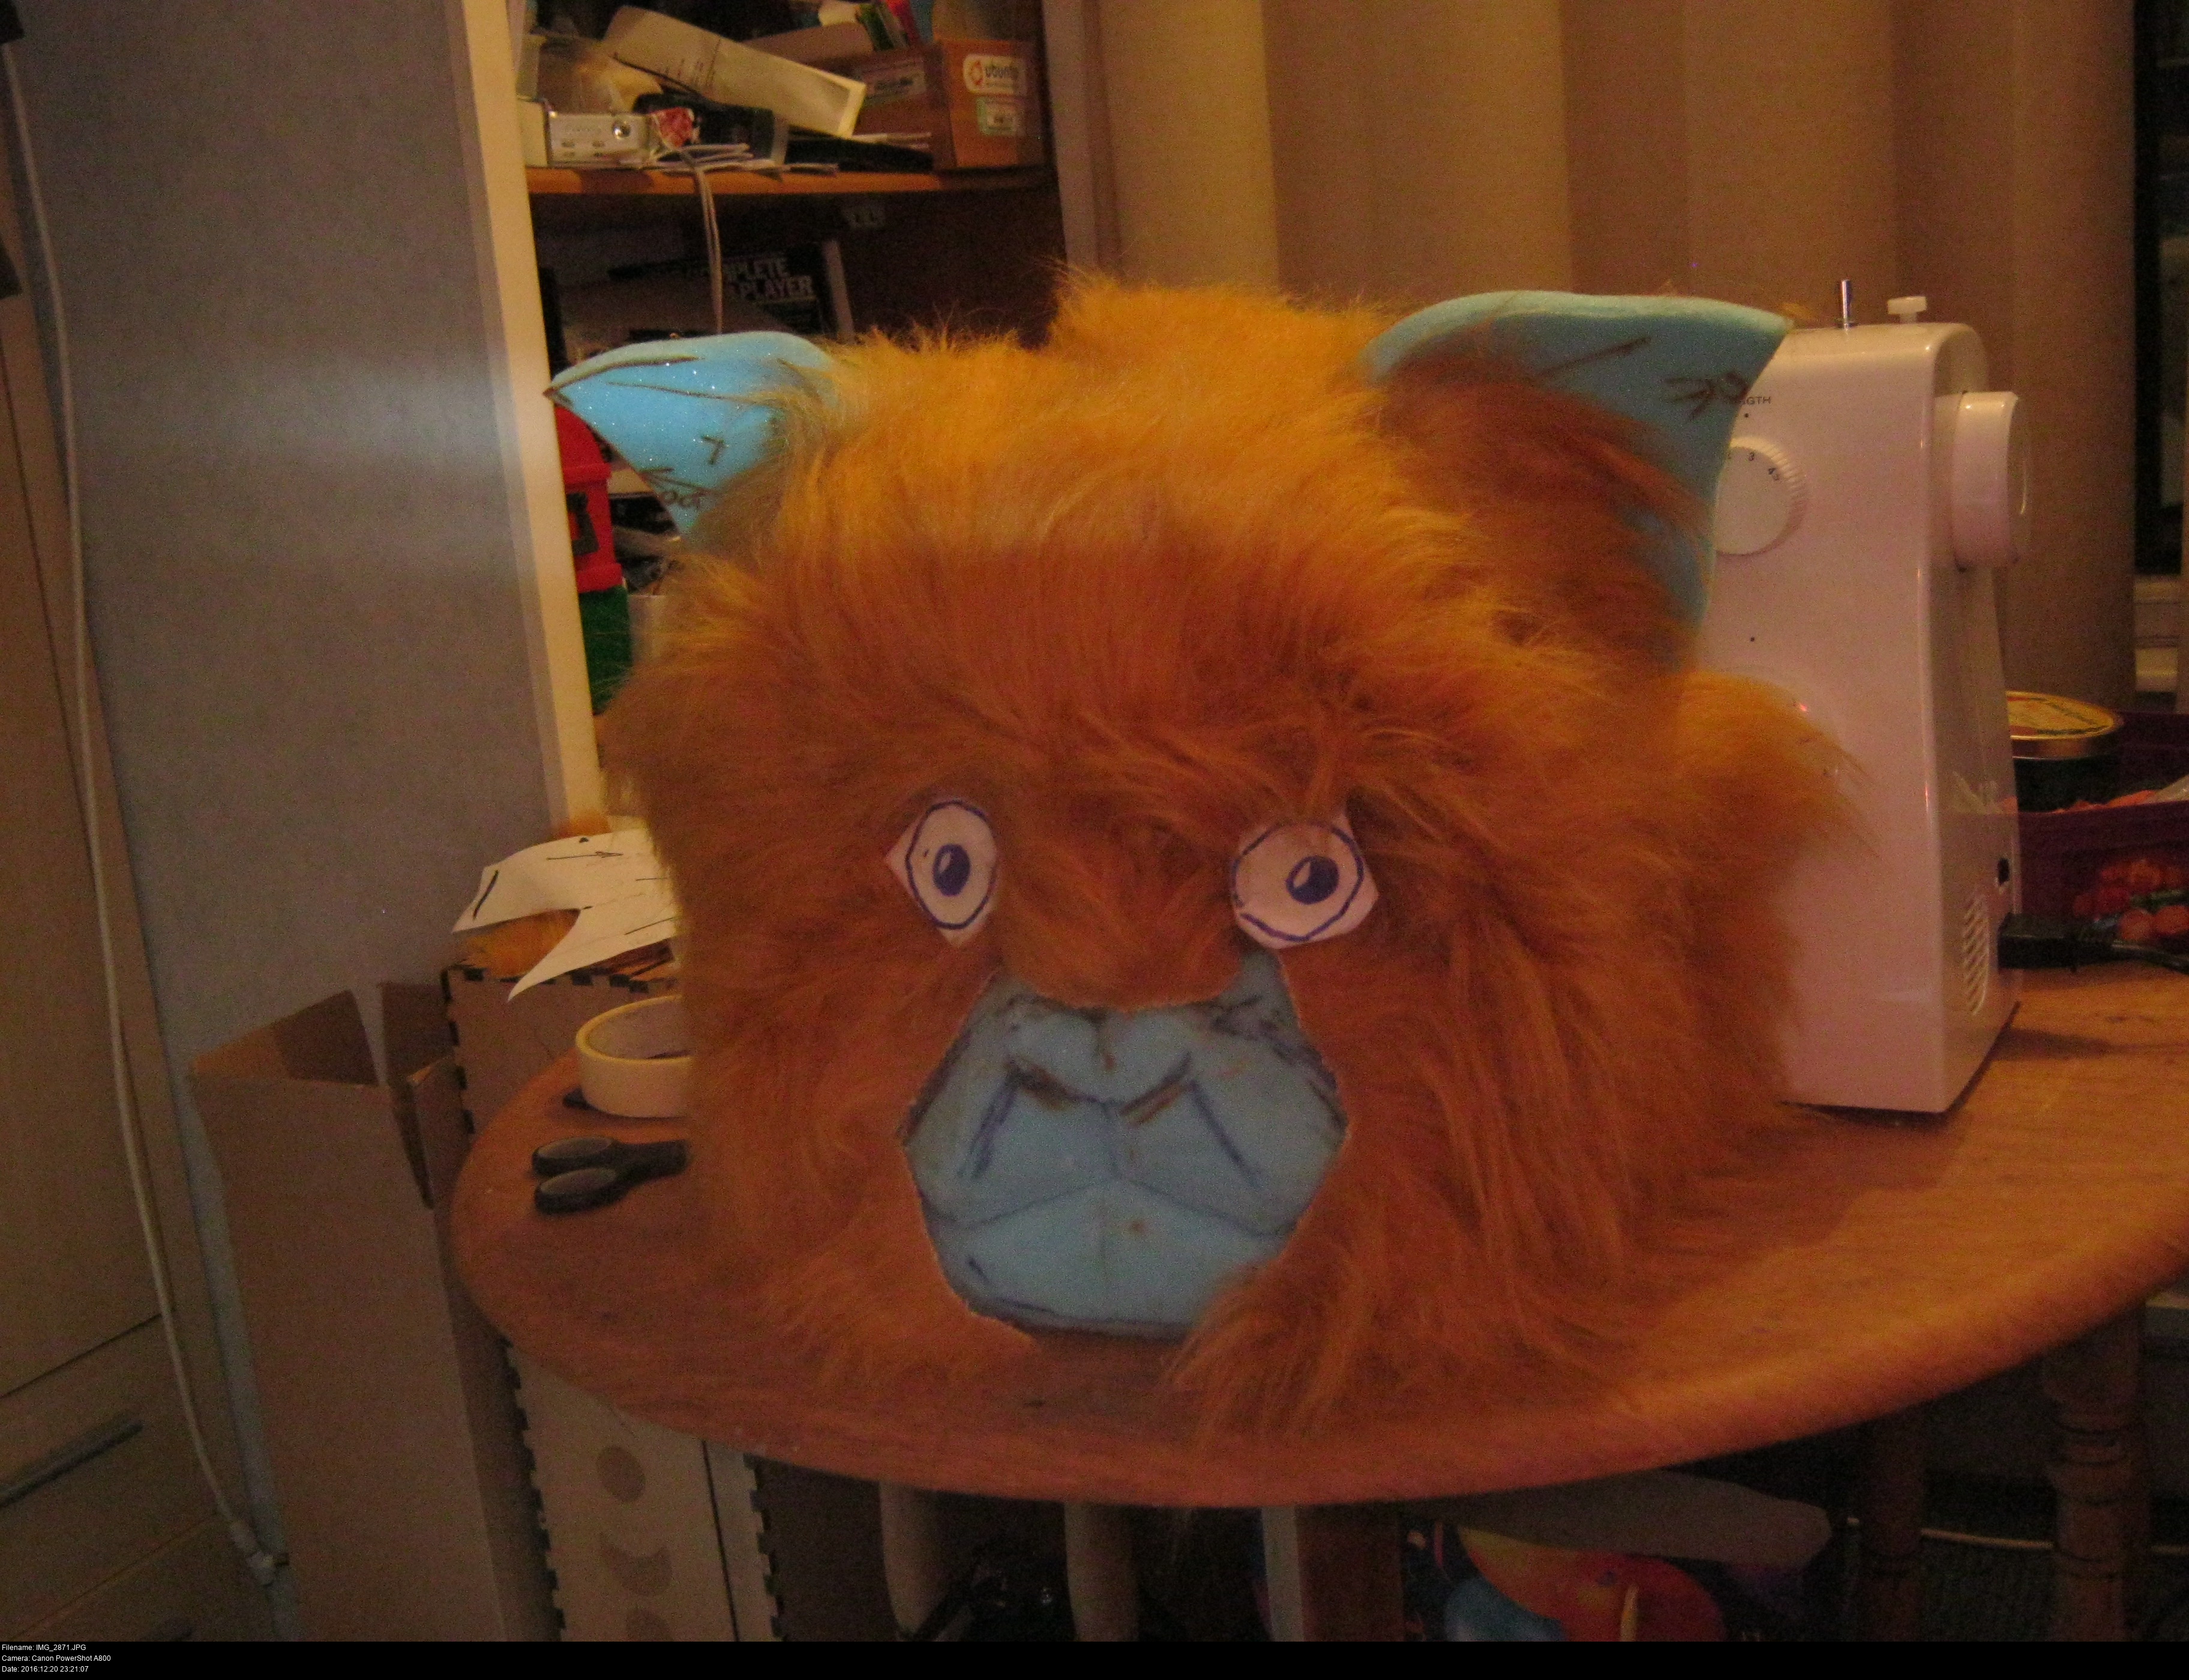
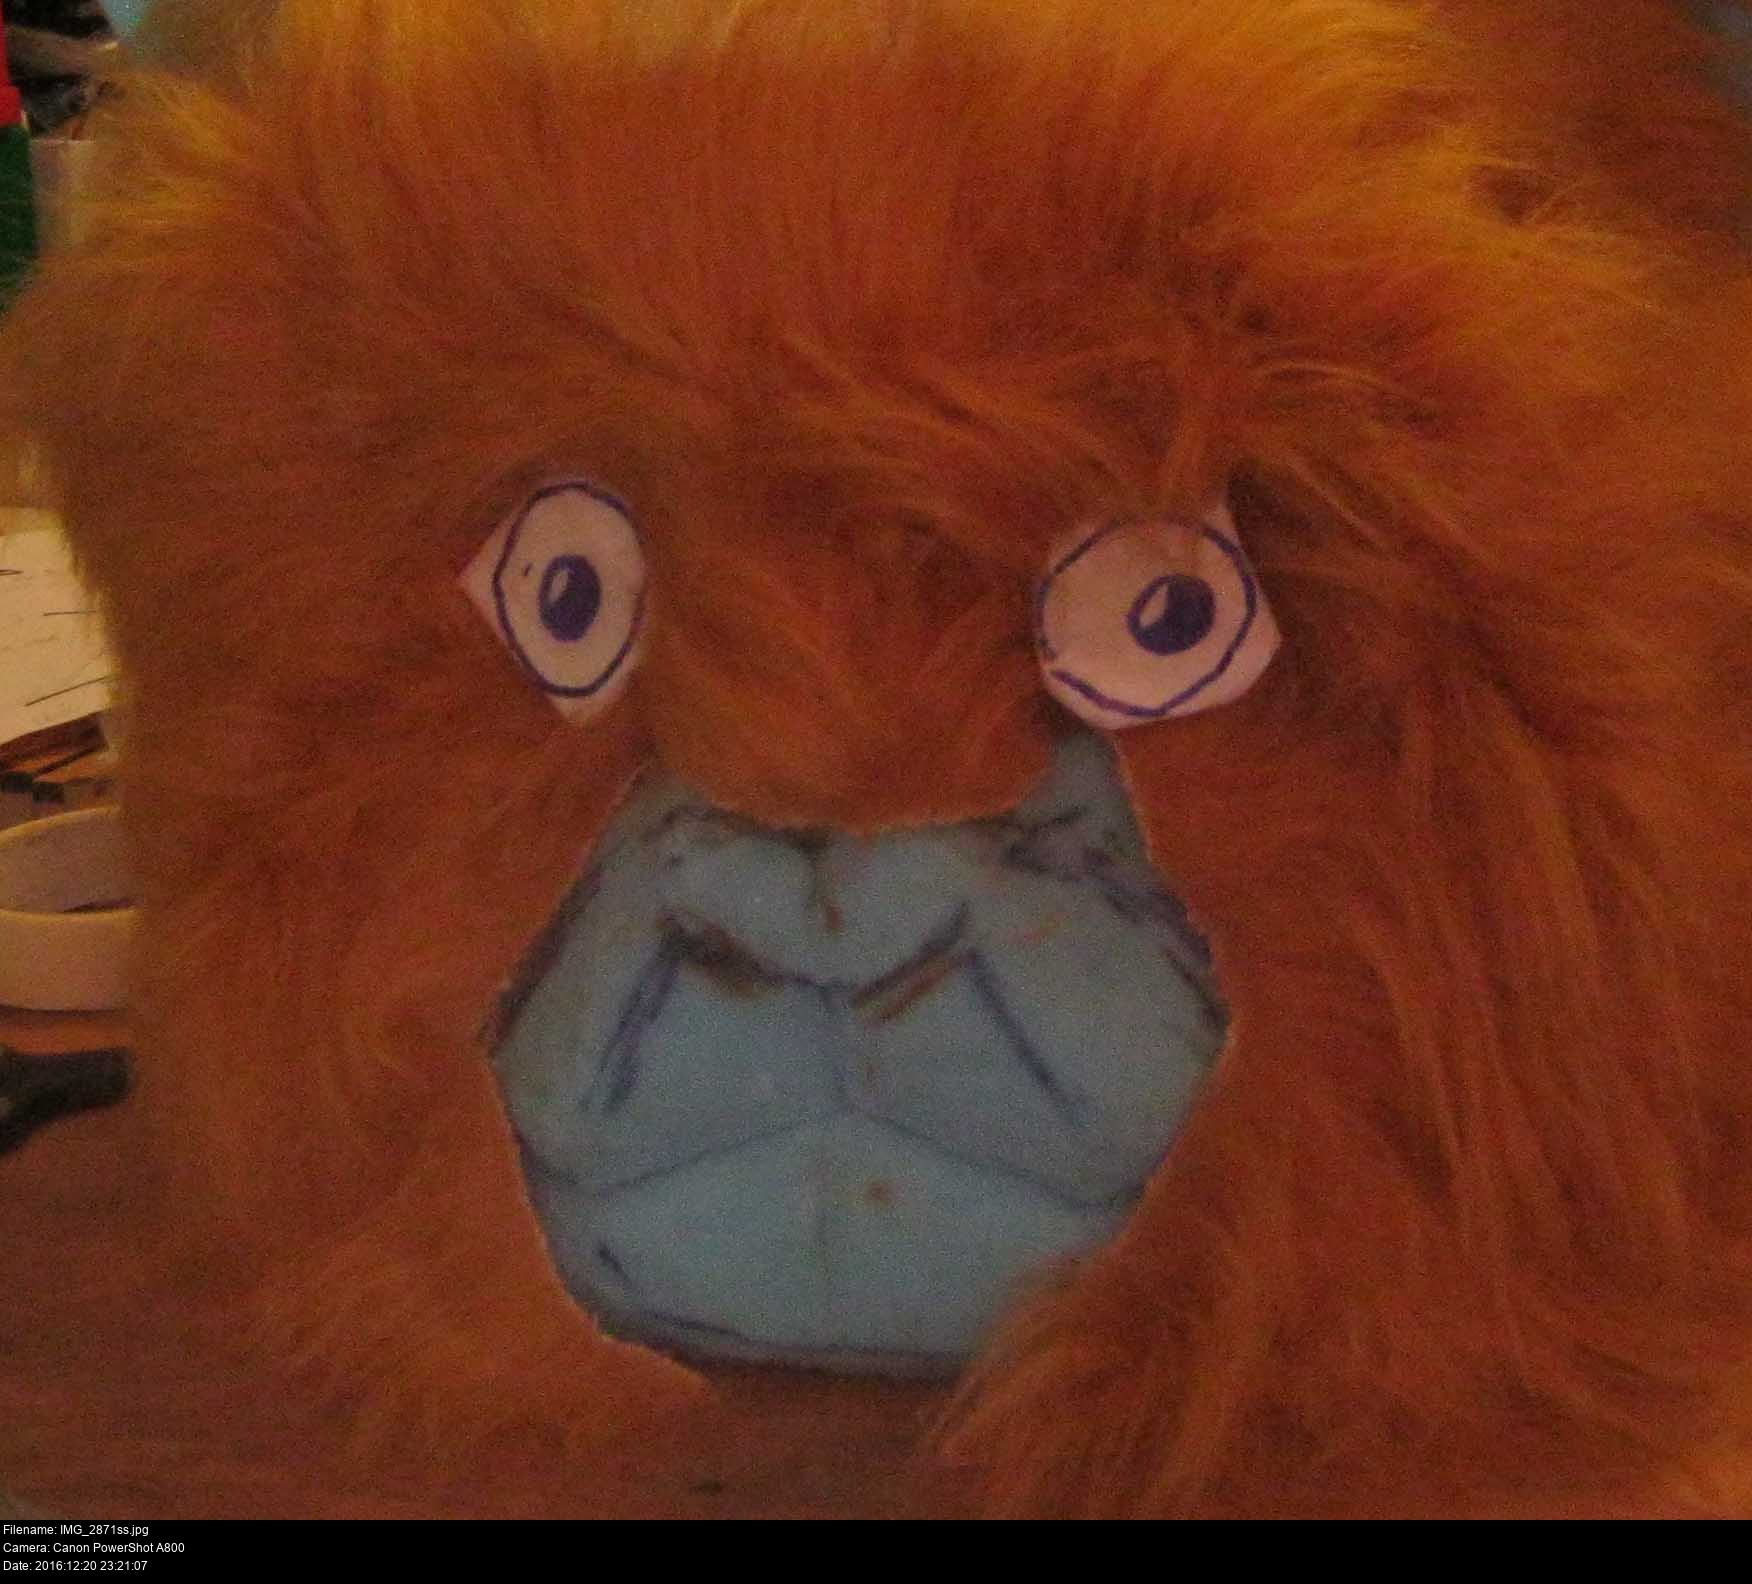
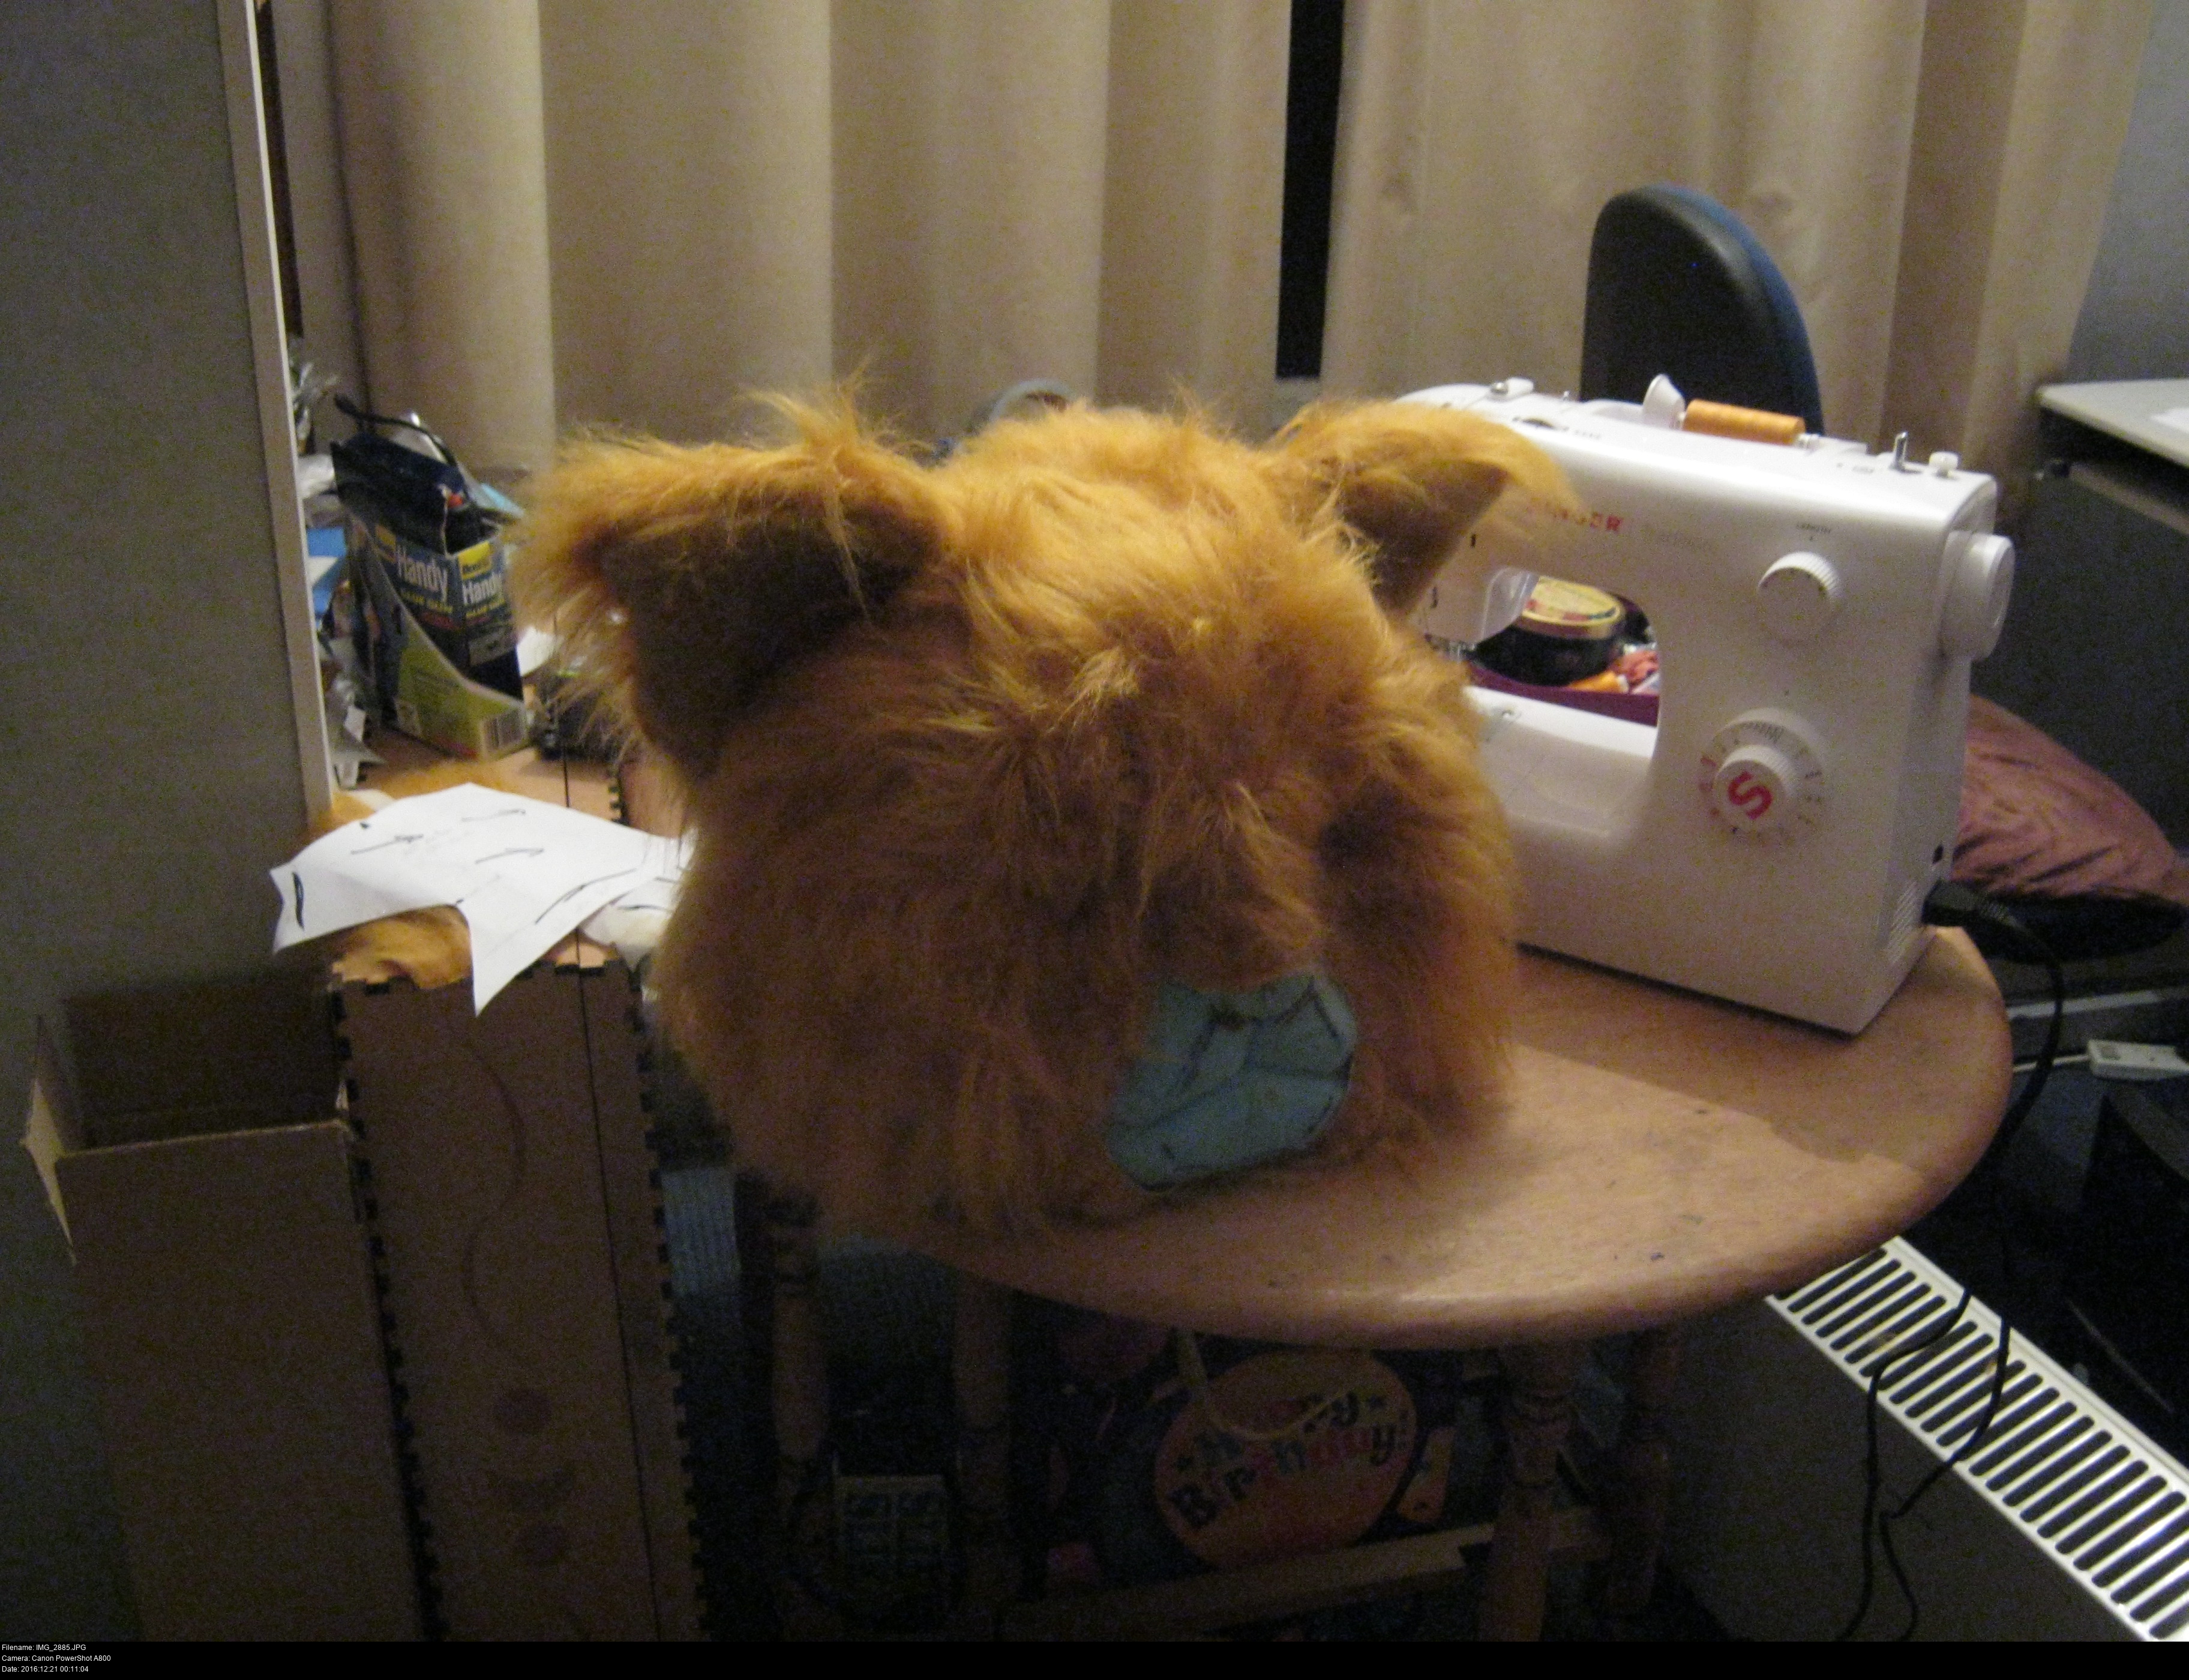
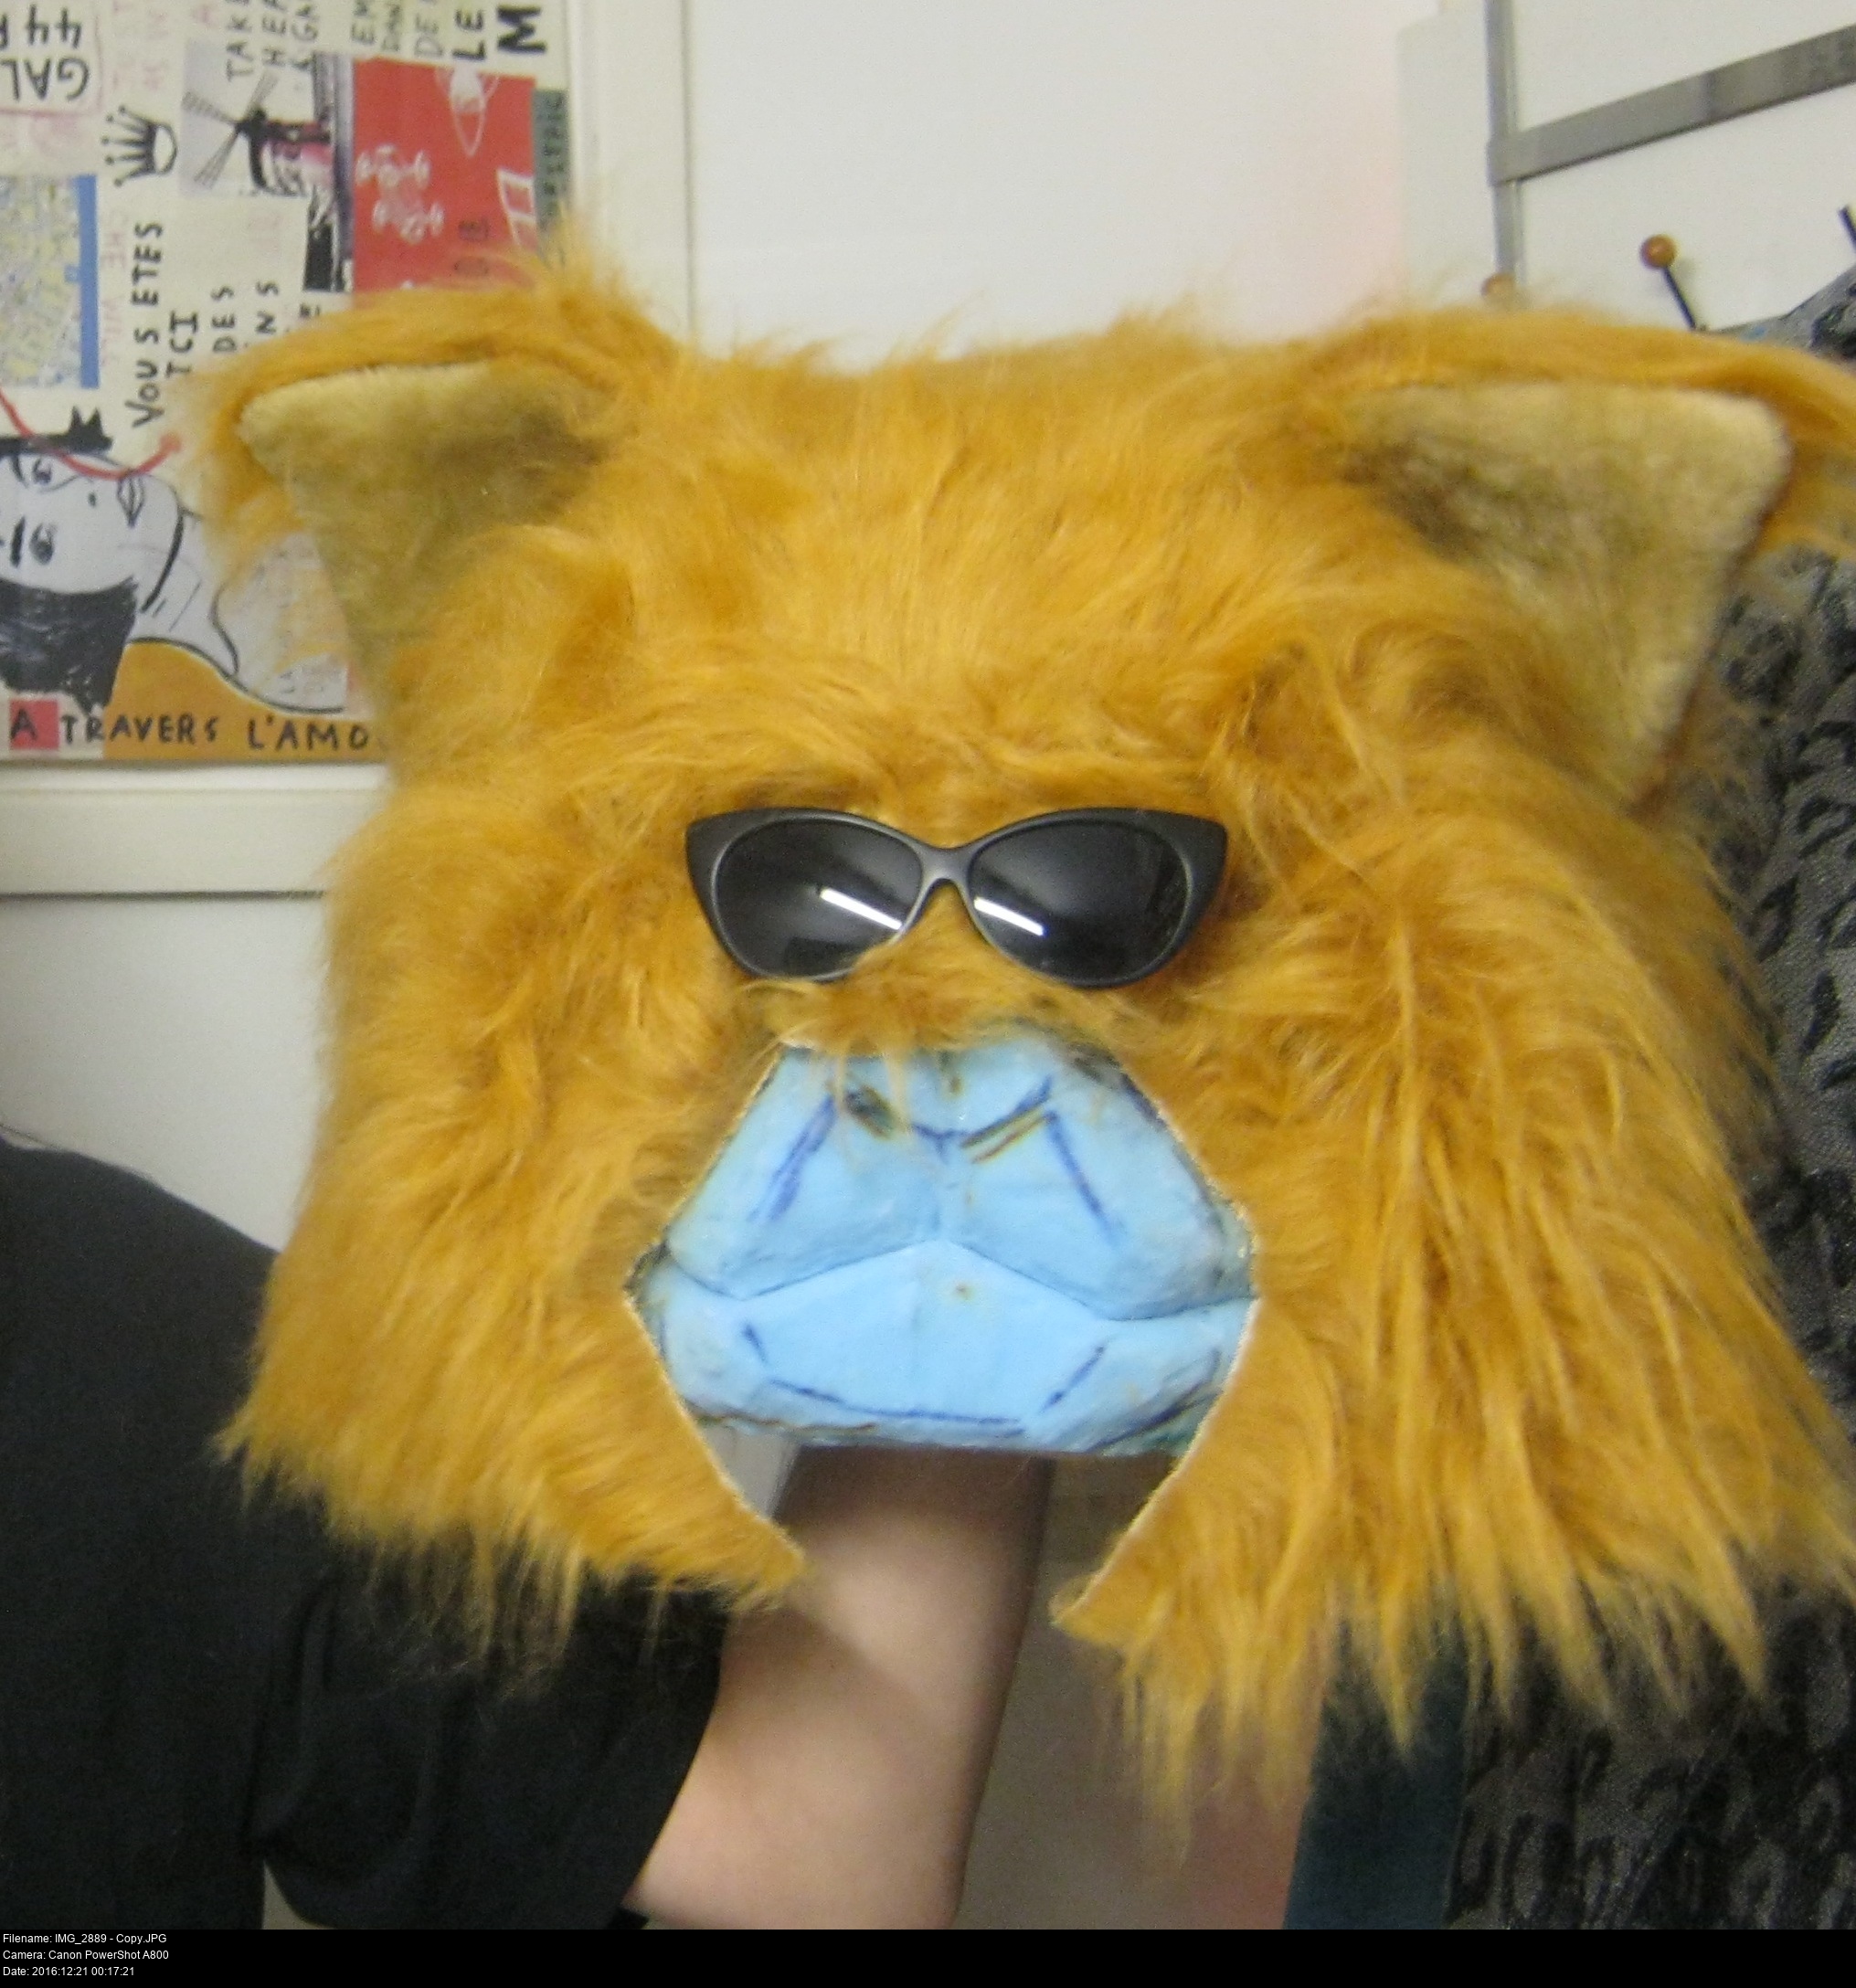
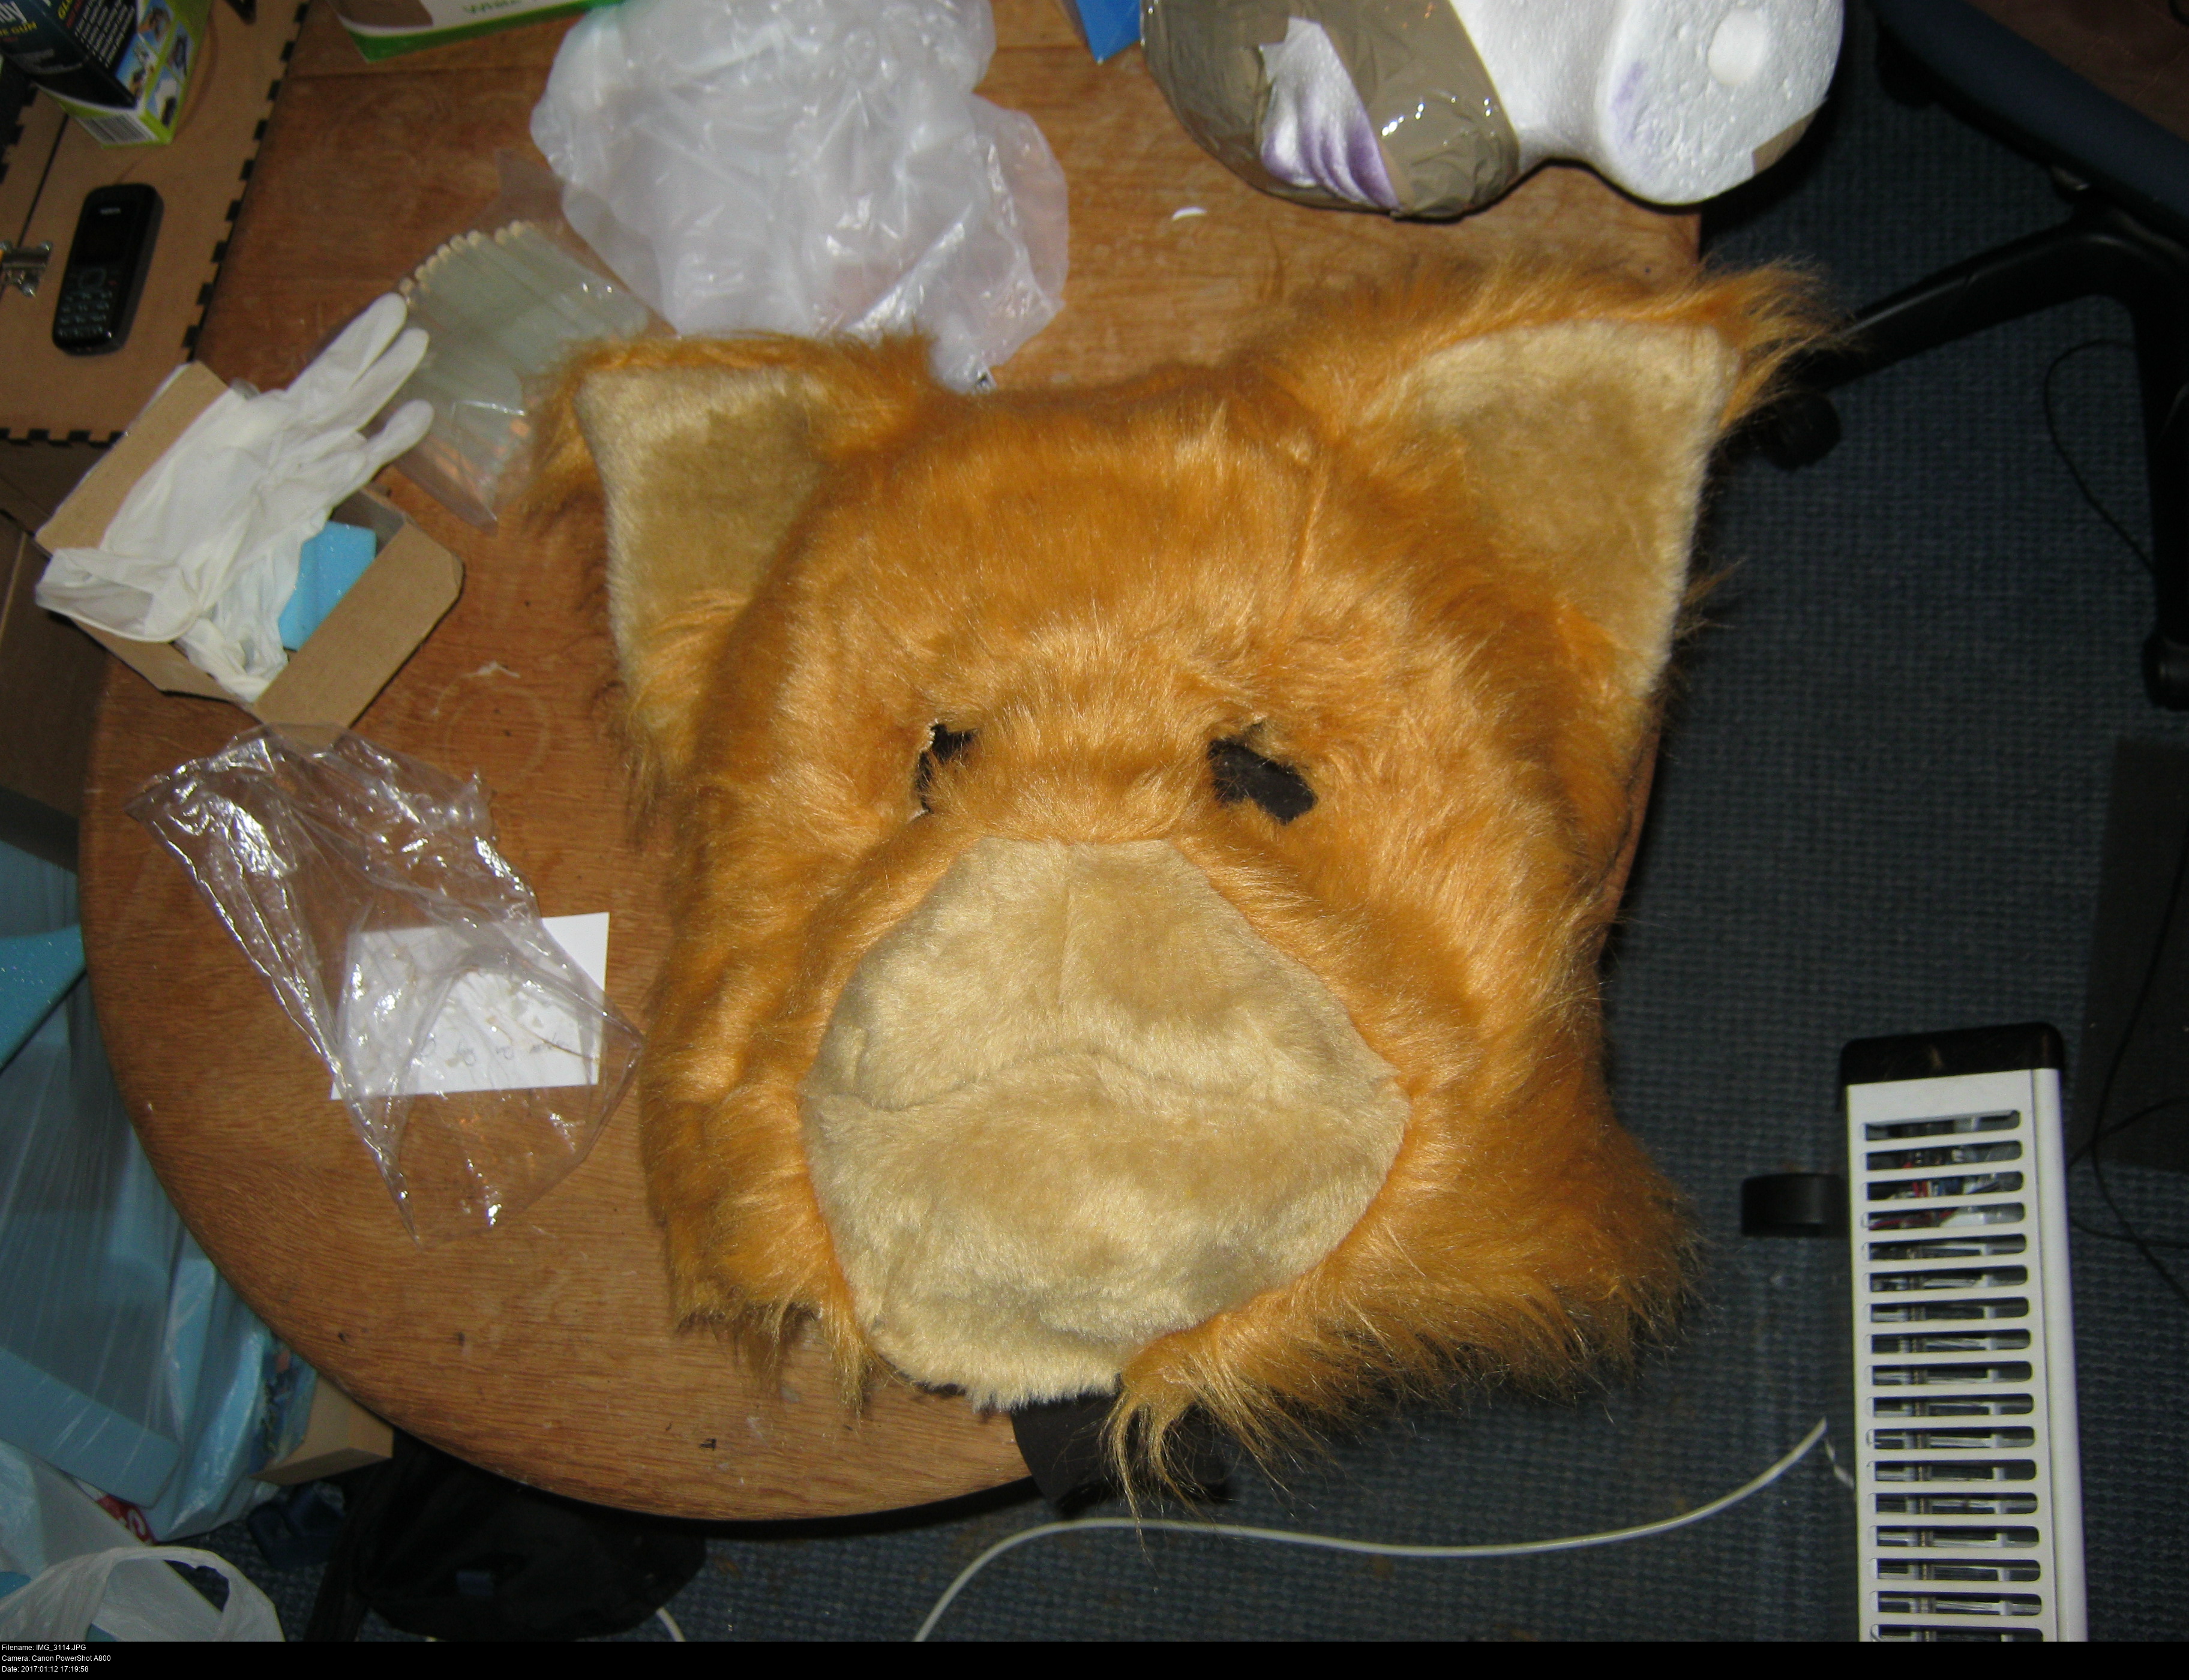
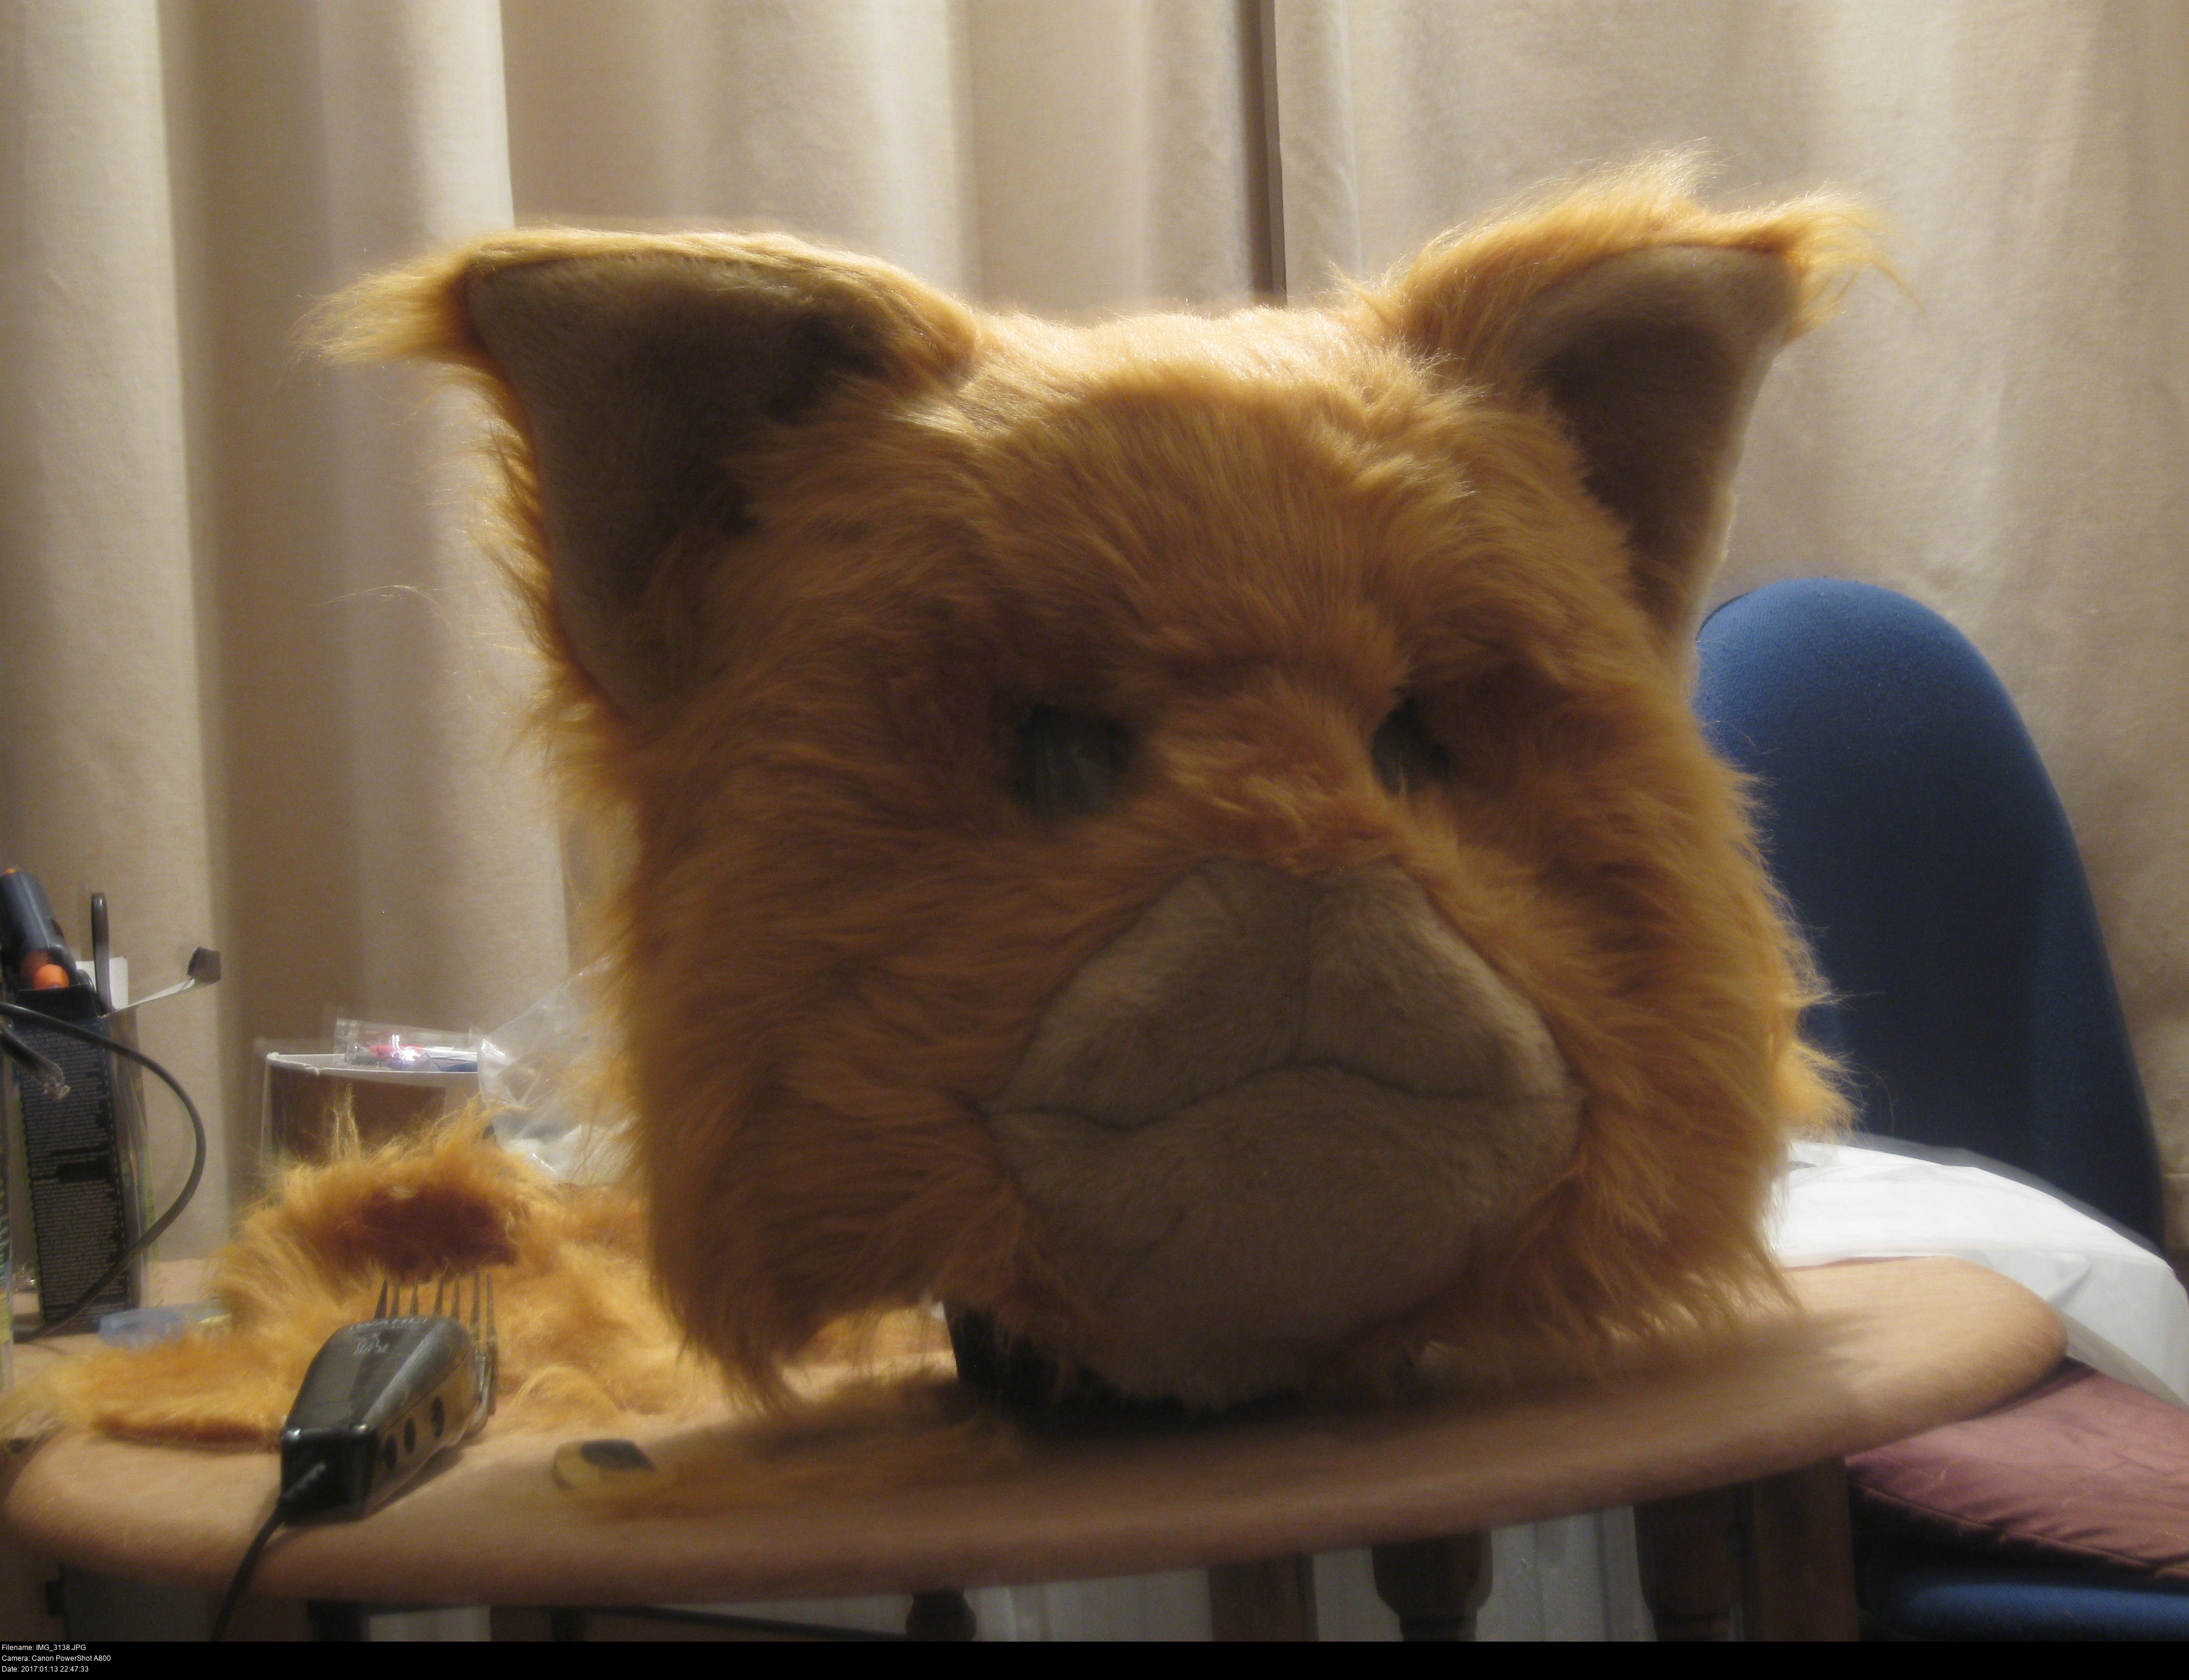
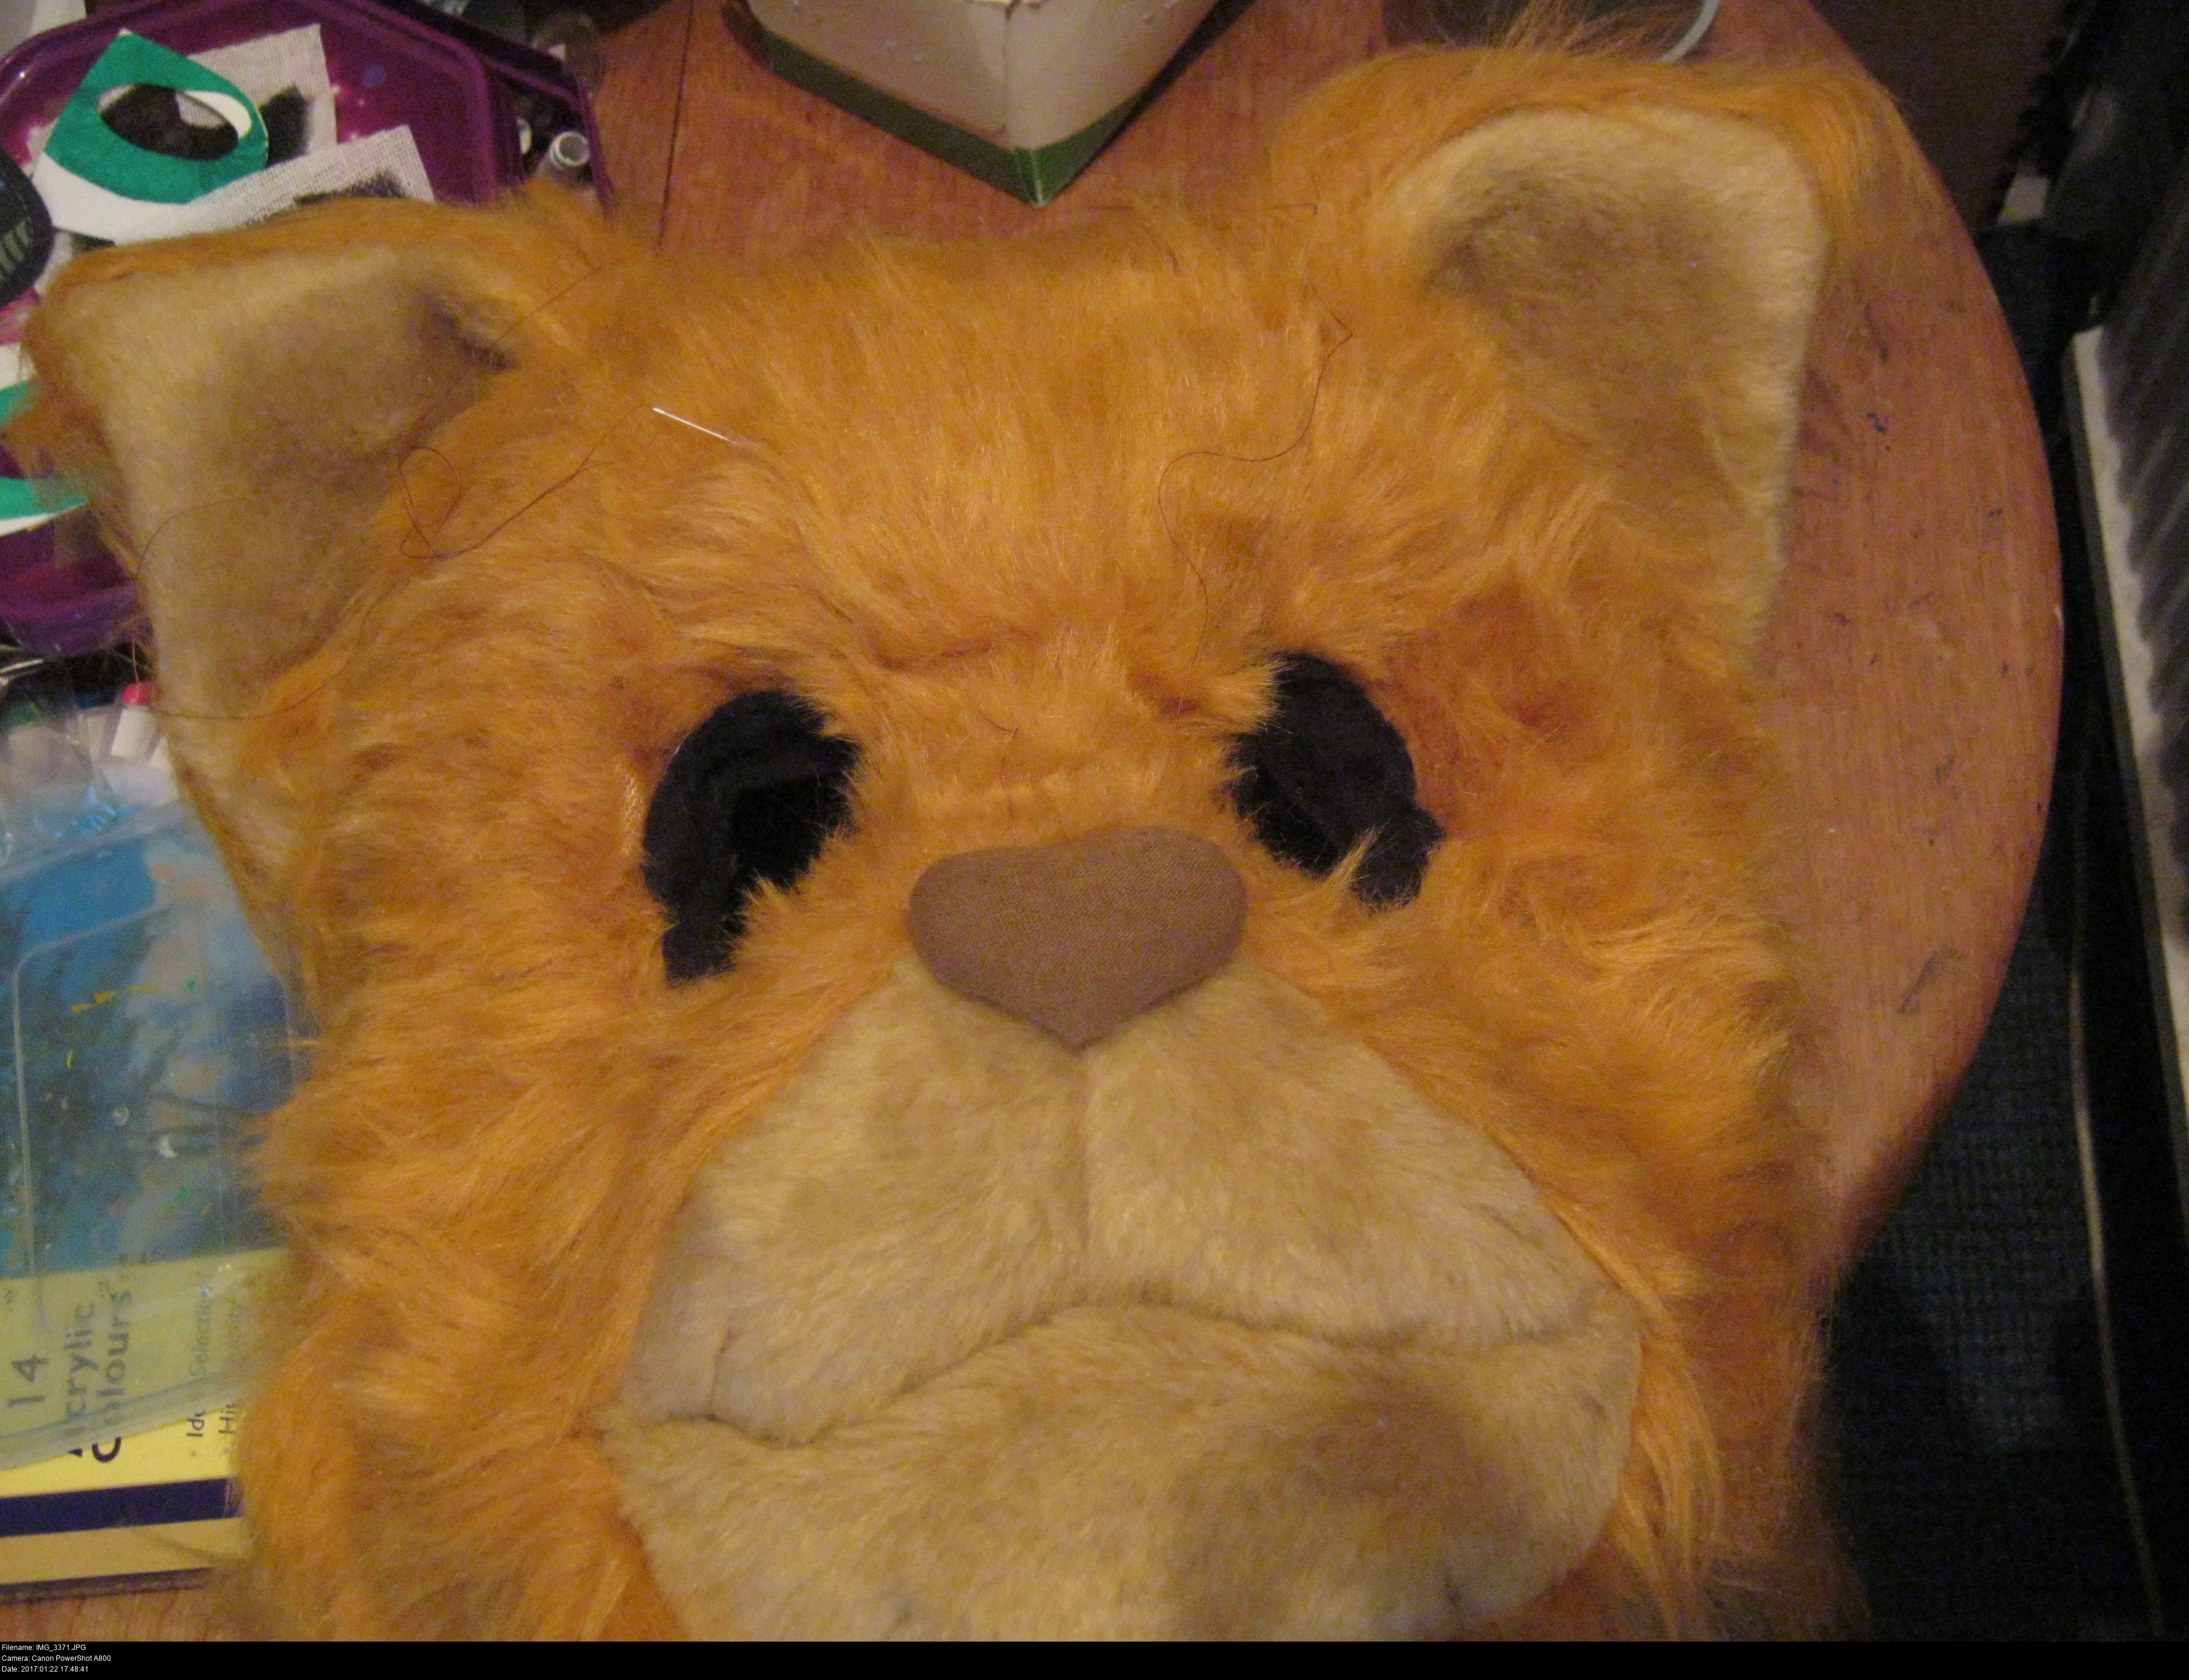
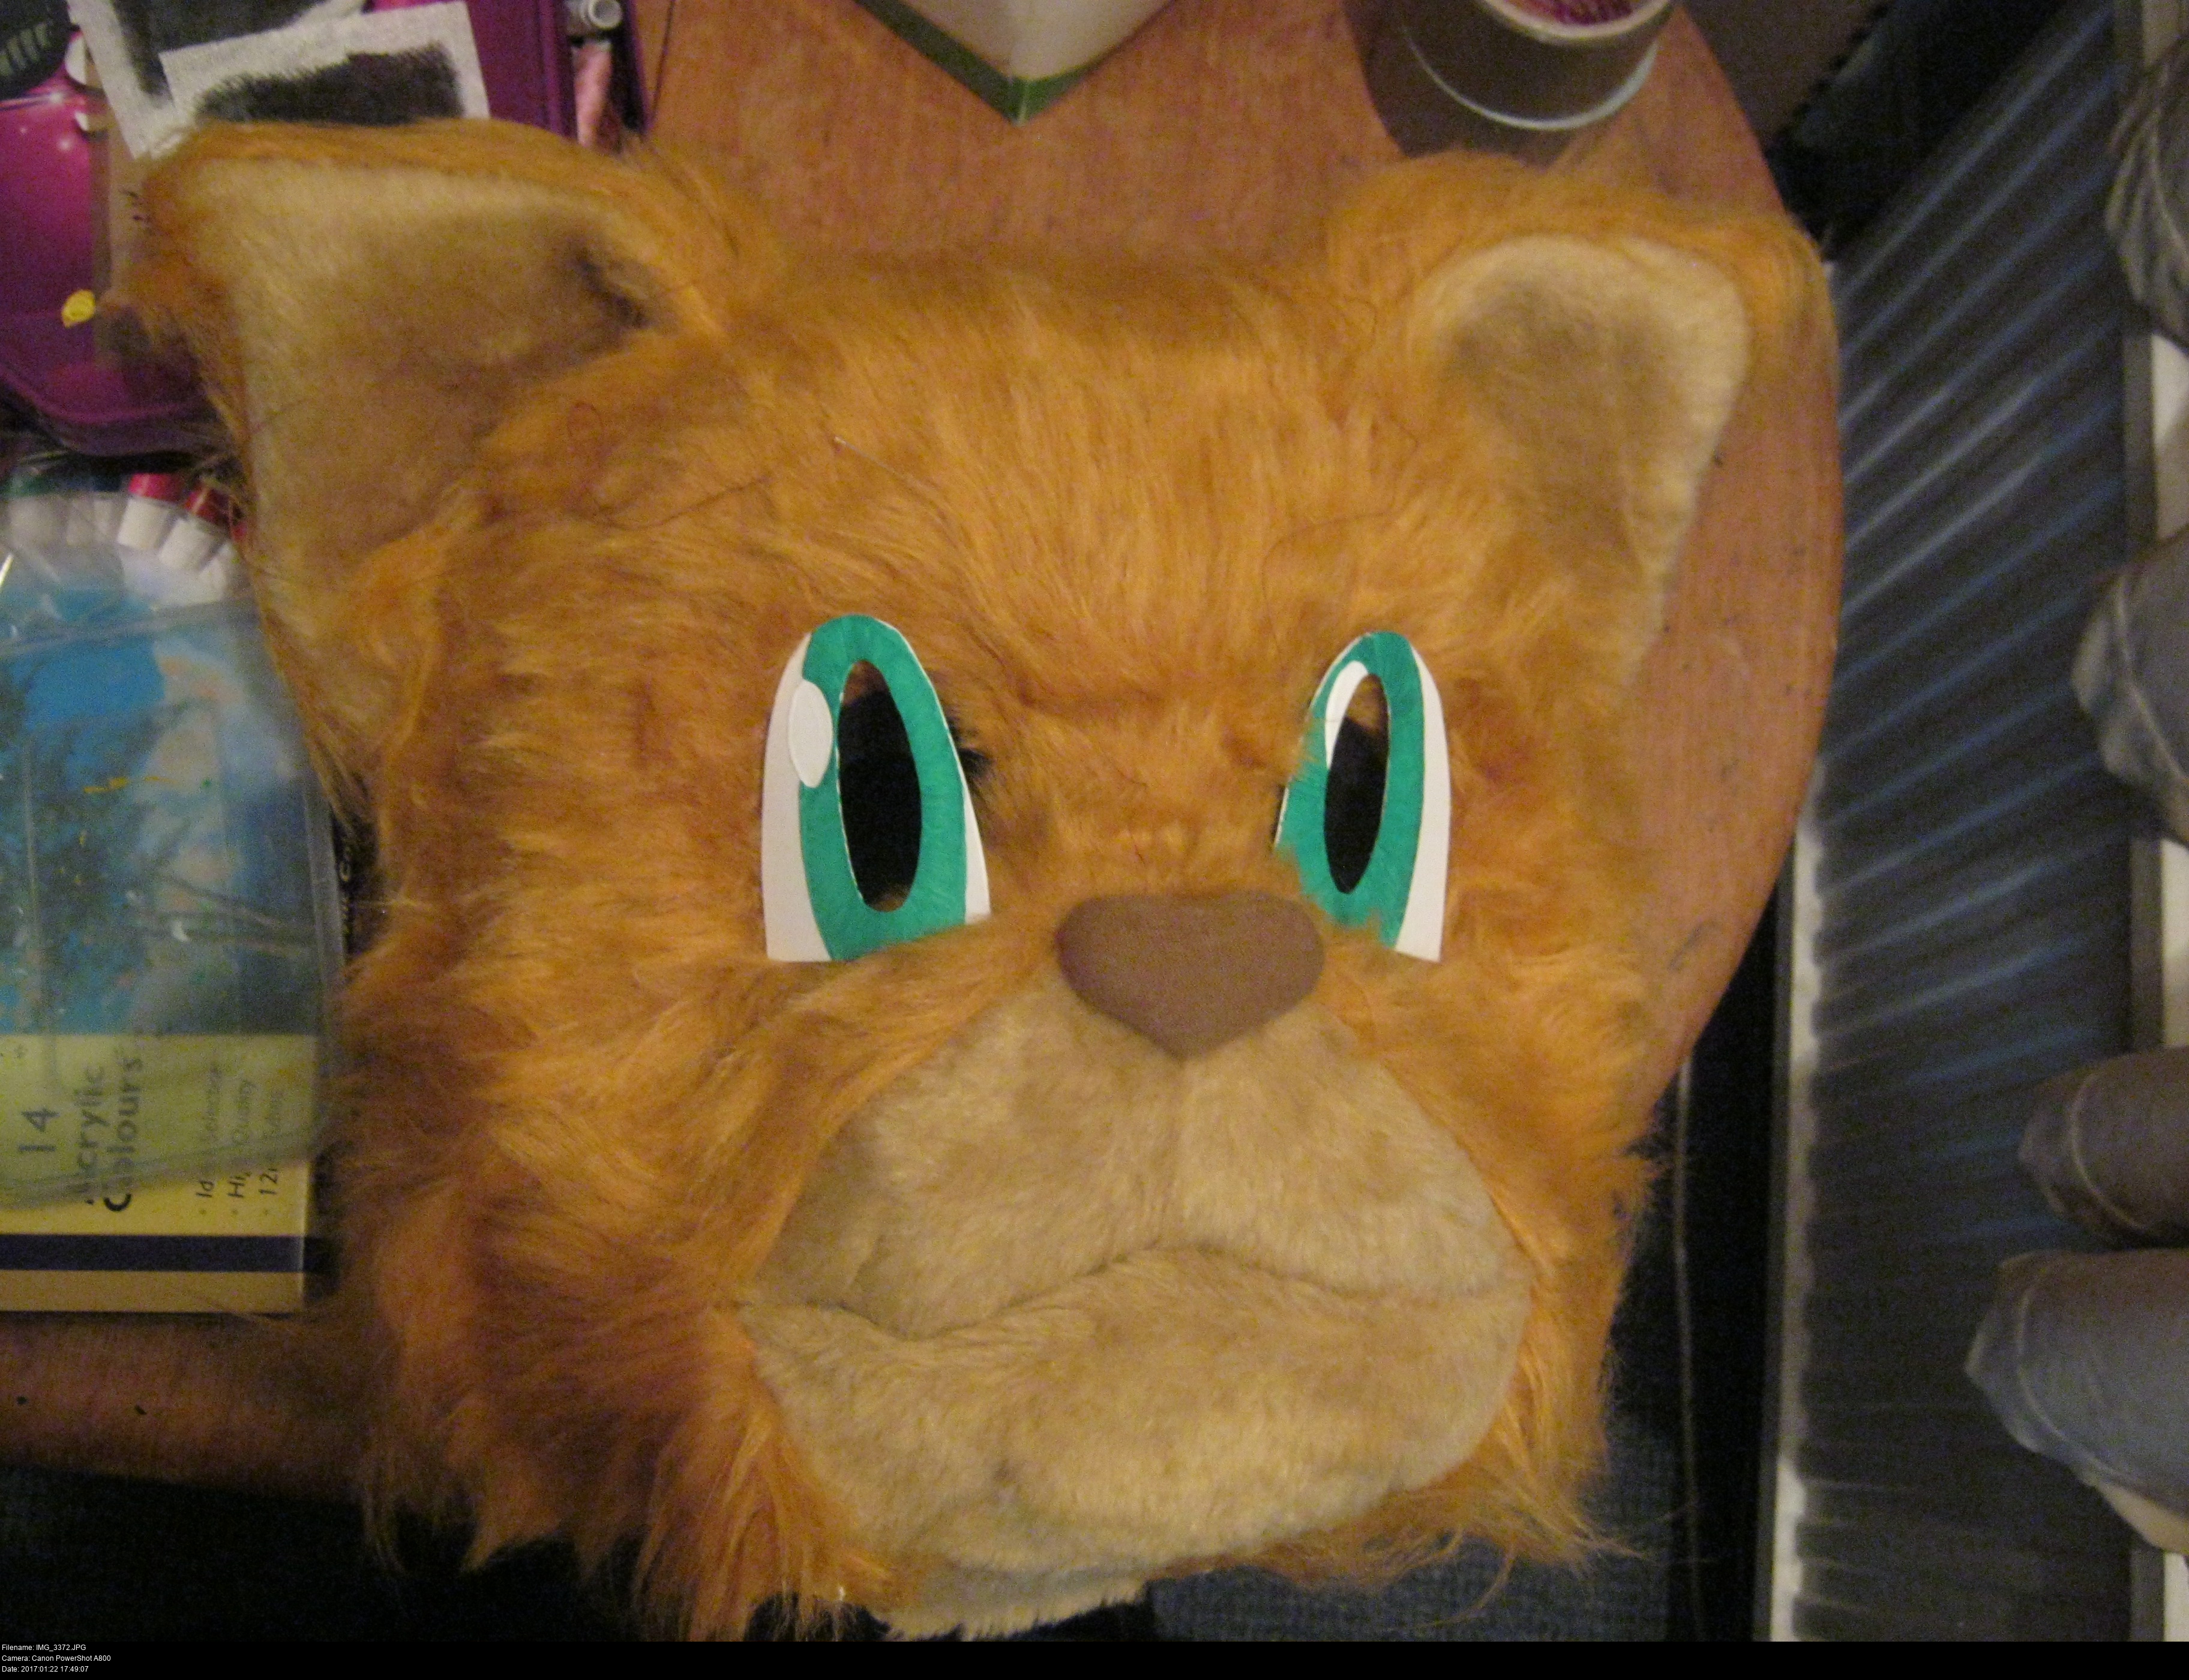
Hotshot's got a nice happy frowny cat muzzle smile on his face. Most furry heads have a much broader cartoony (mostly dopey) expression with the lower jaw distinct from the upper. I haven't got a clue how to make that, but Hotshot doesn't have it anyway. Instead his muzzle is pretty firmly clamped shut. Right now, if I try to cover his muzzle with fur, I can't give him a decent looking mouth since there's no way for the fur to curl around his lips and enter his head to give him an actual mouth.

I've started to cut a jagged slit into the muzzle to give Hotshot the proper mouth shape. When I do the muzzle fur, I can curl it and tuck it into here to give him his proper smile. I've also started to round off areas where the muzzle was angular. When I apply fur on top of this, it will hug the foam a little and round off the angles even more. I hope.
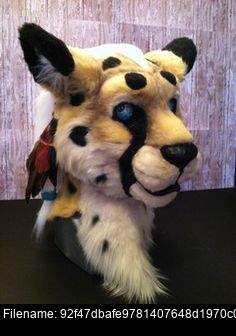
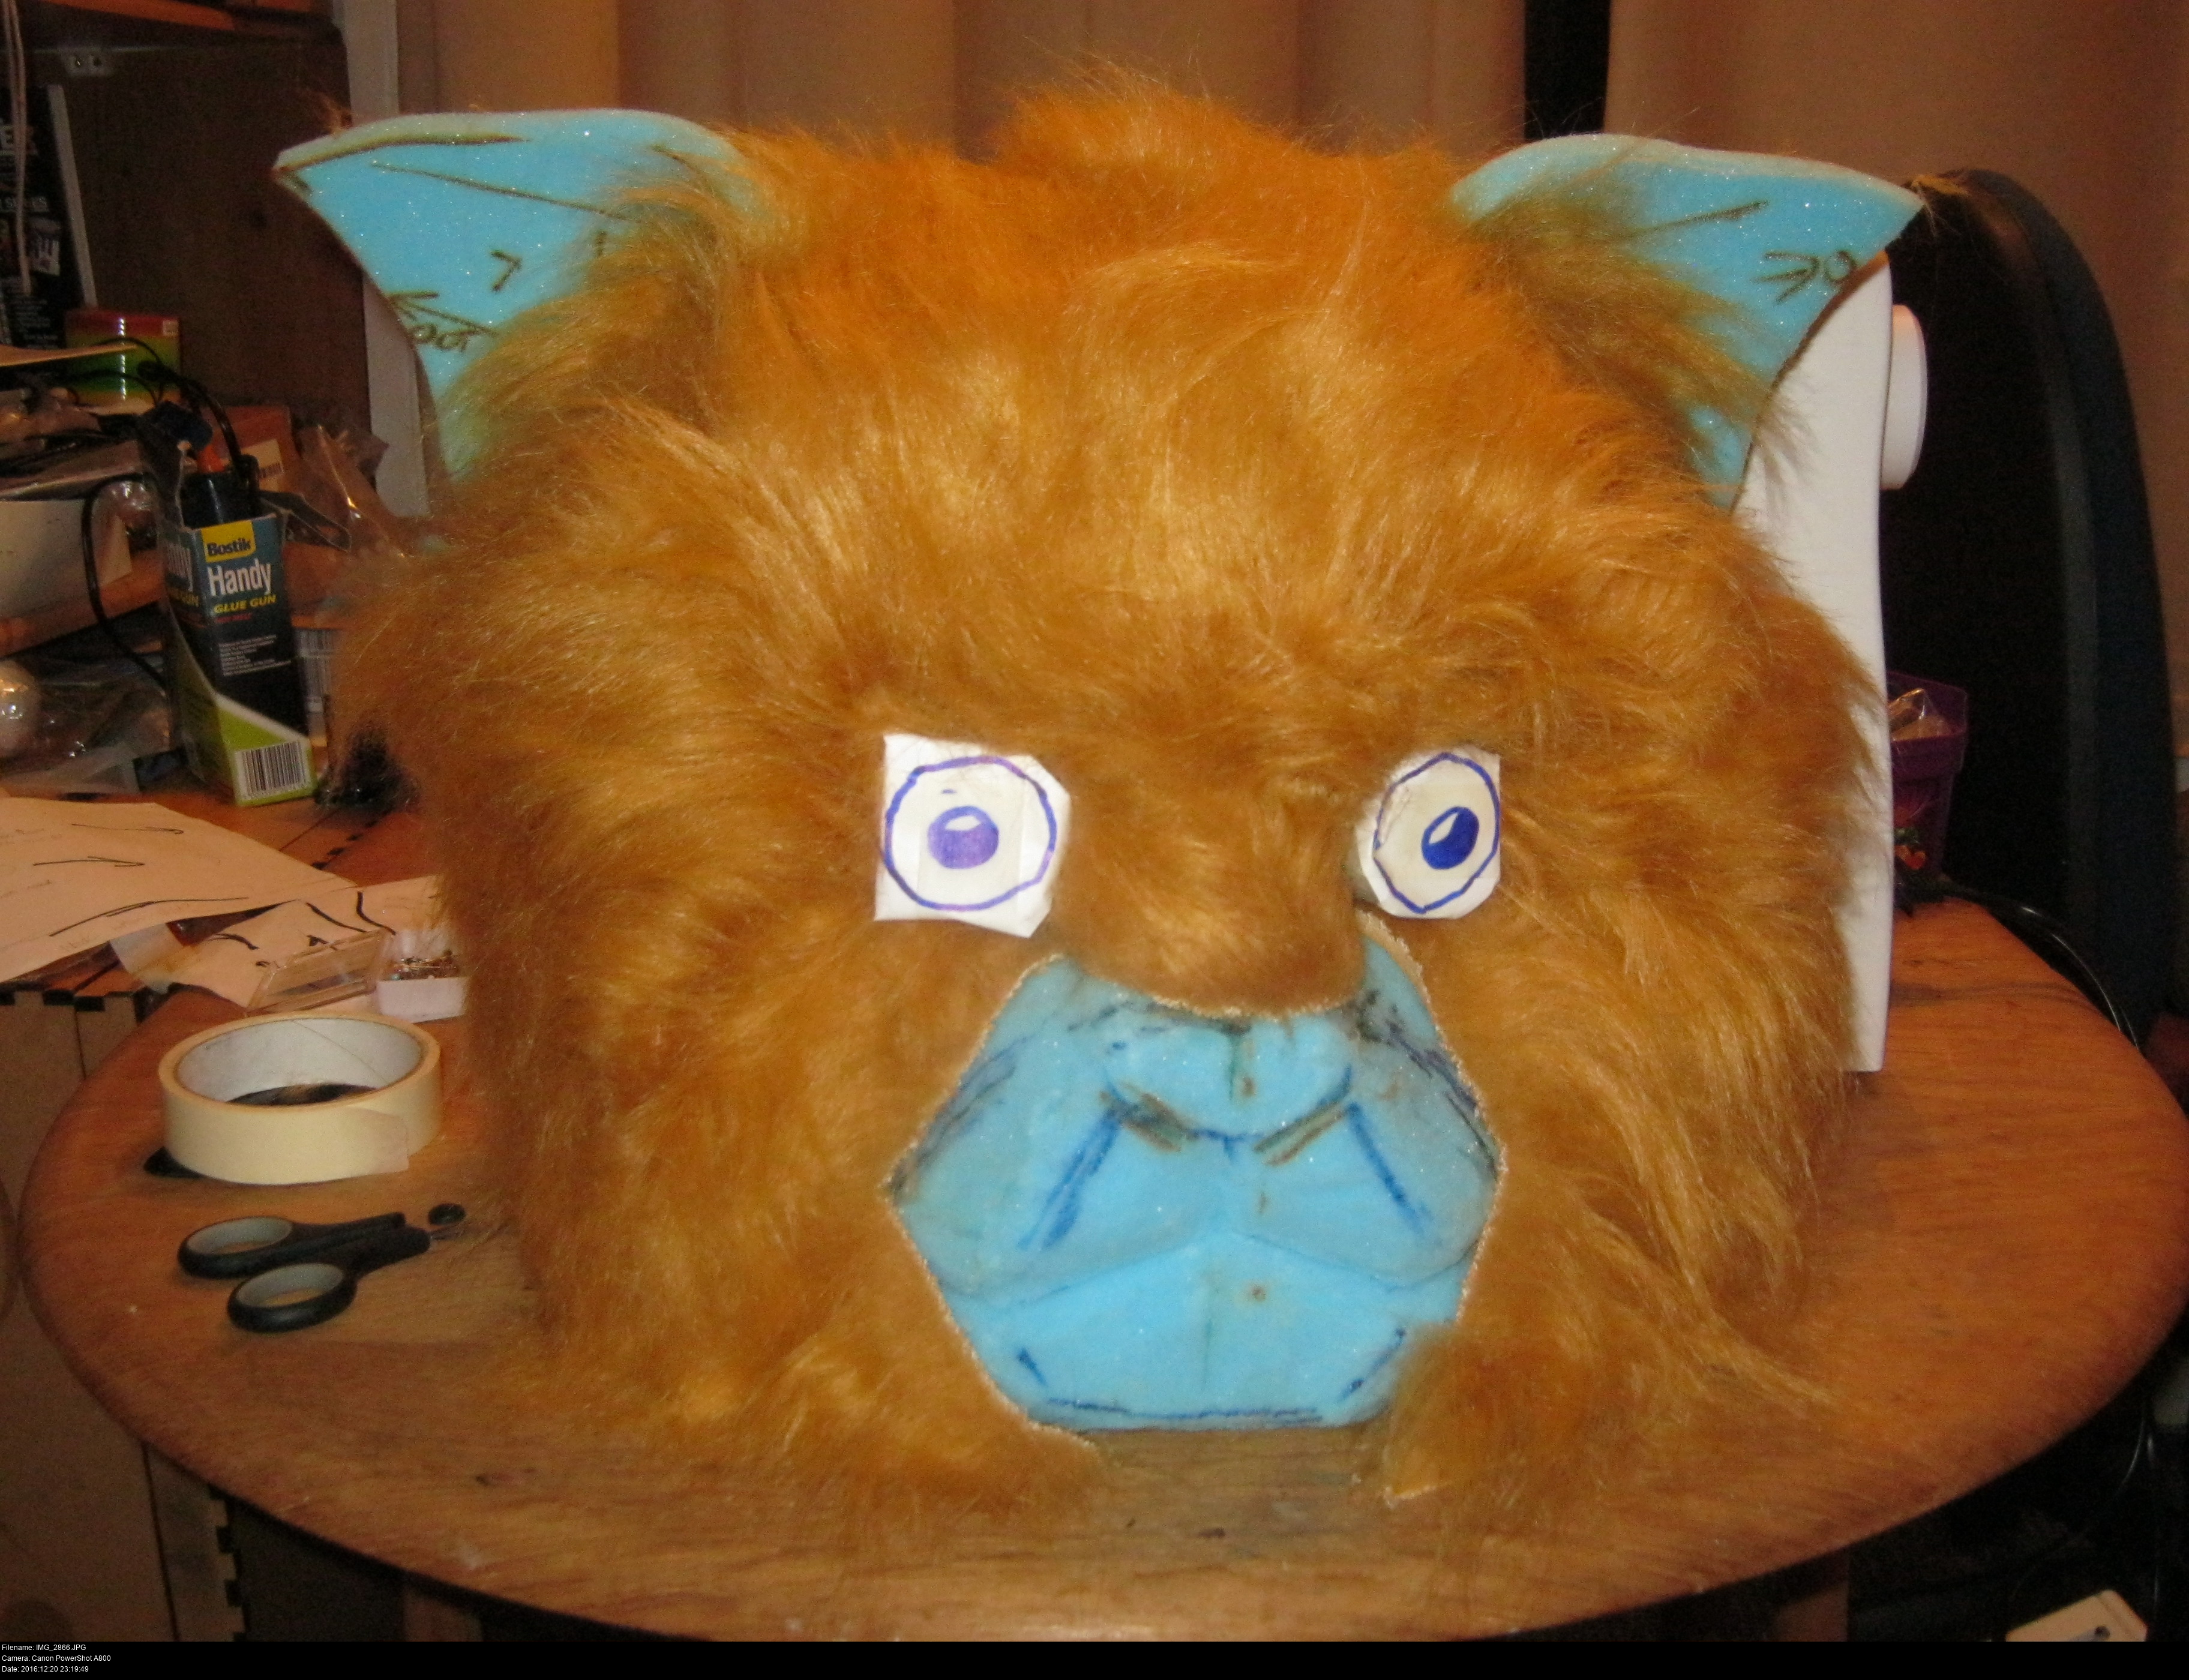
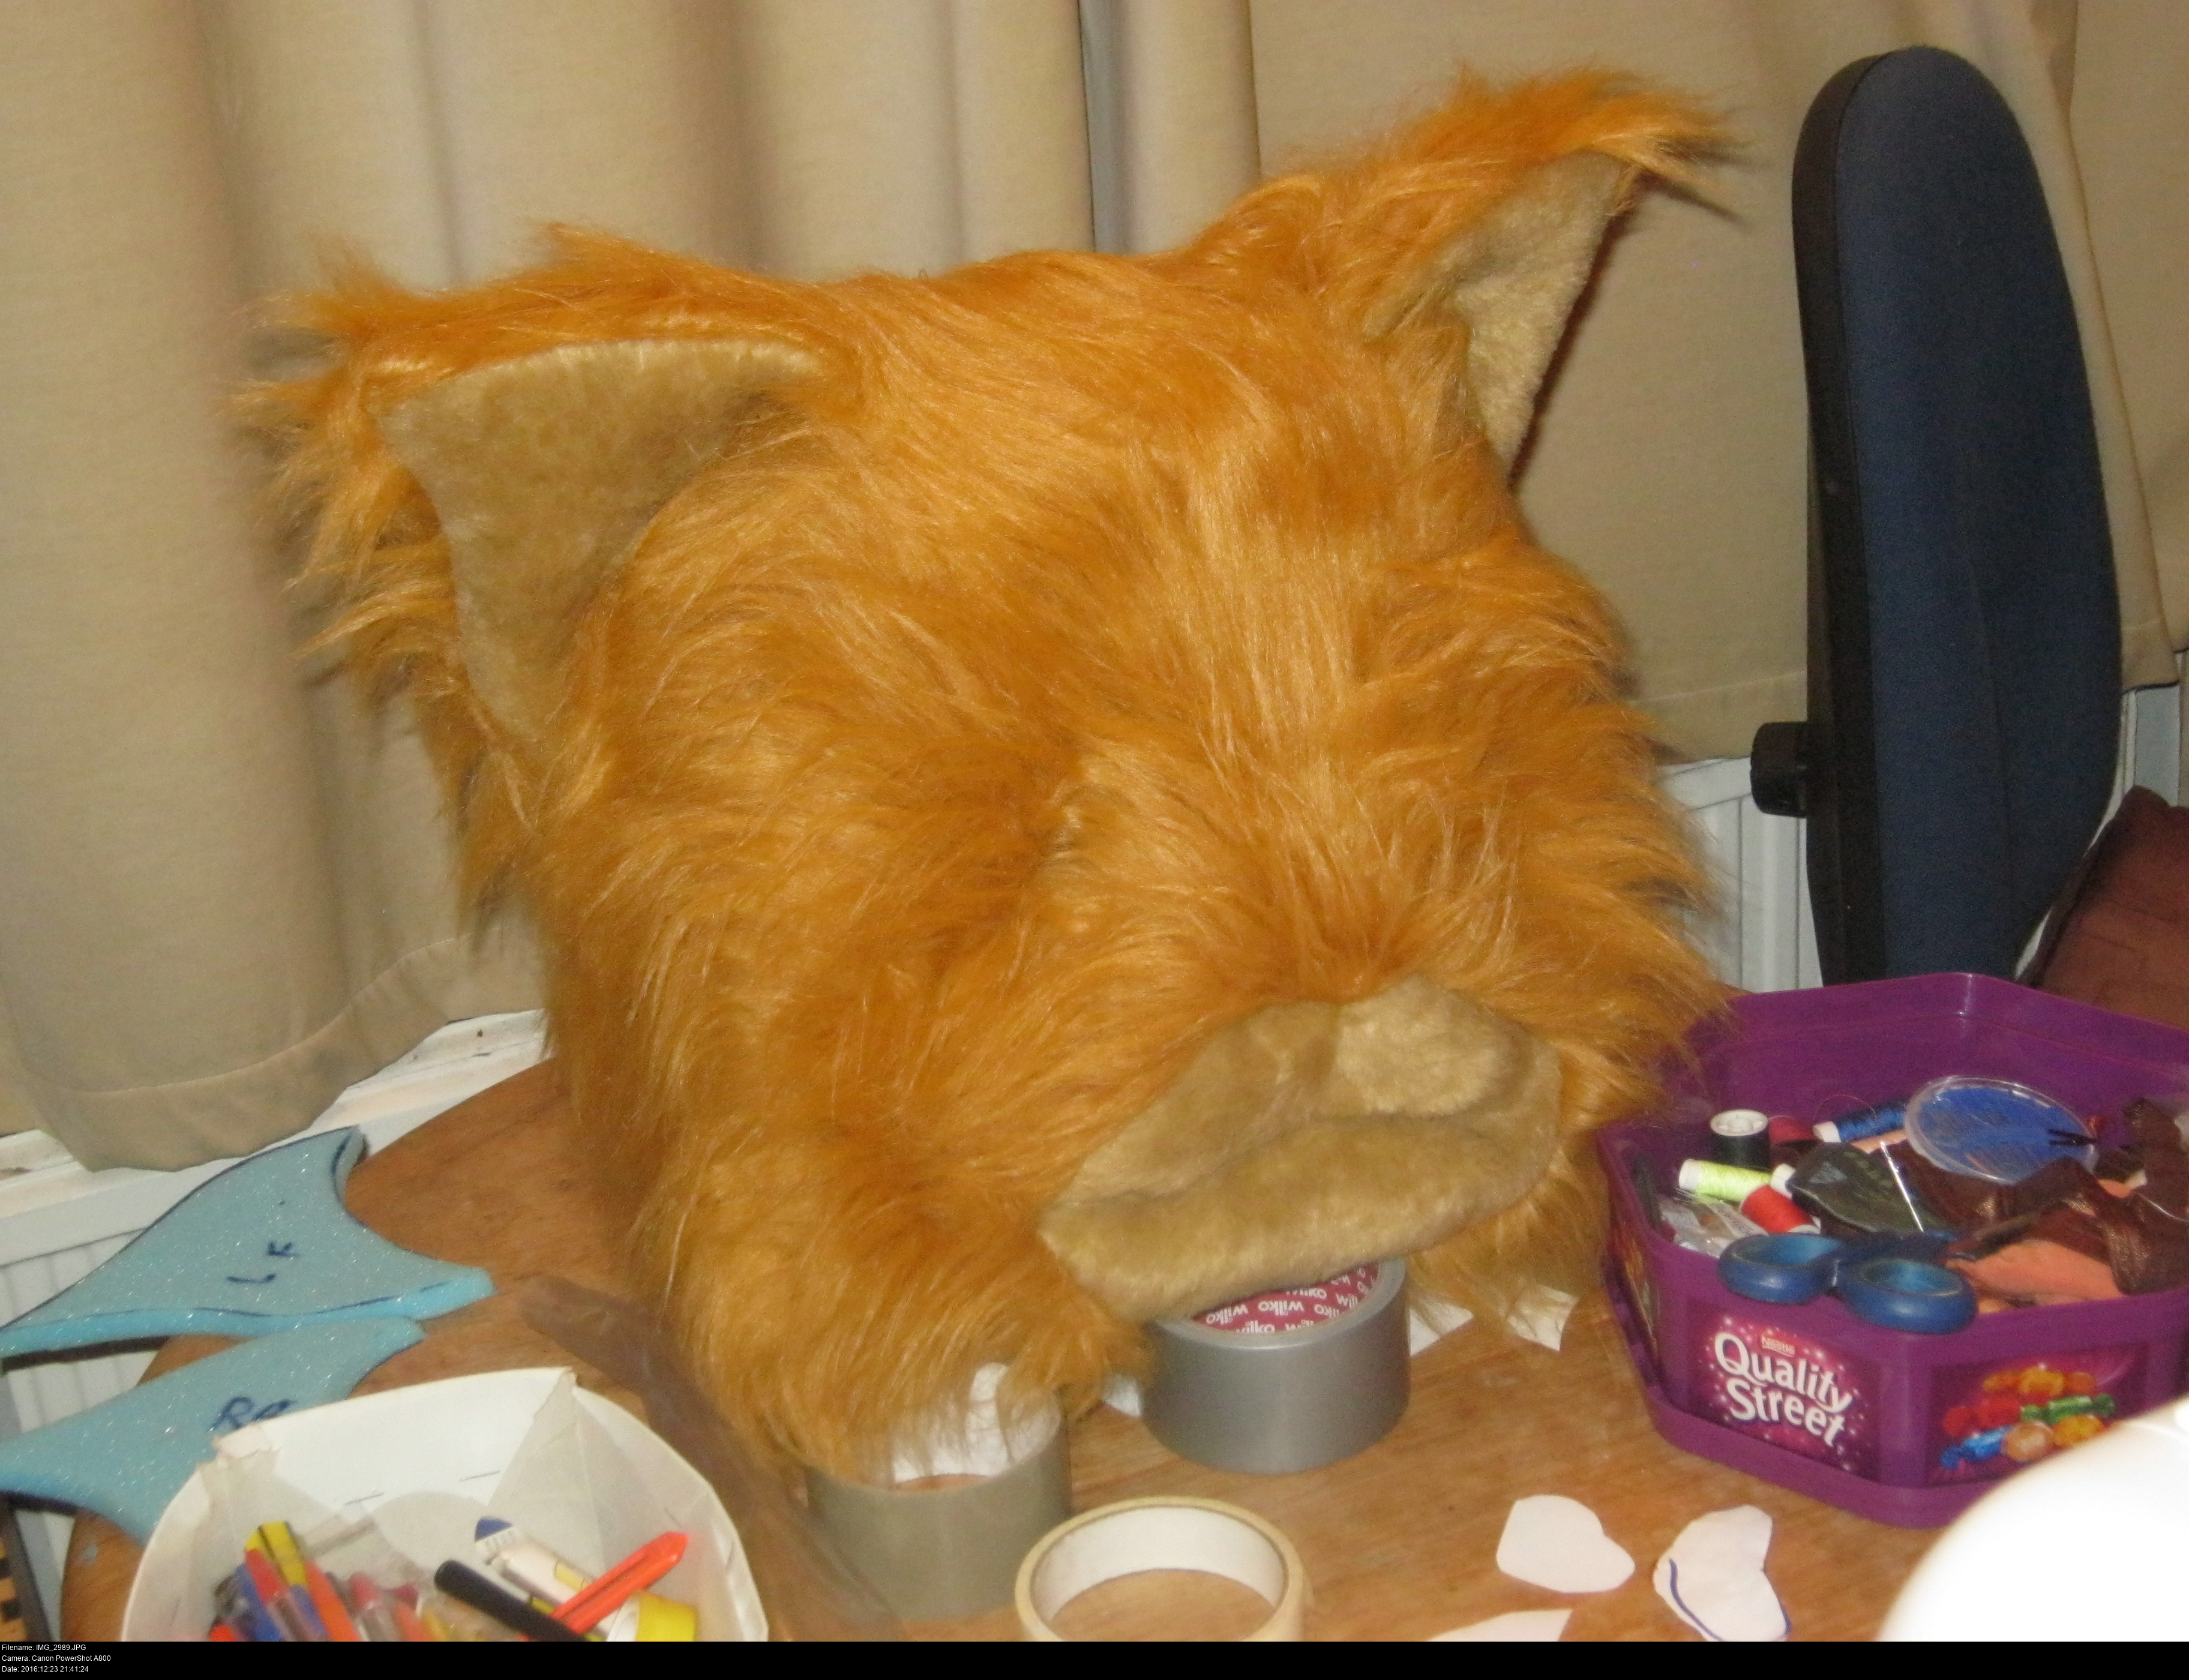
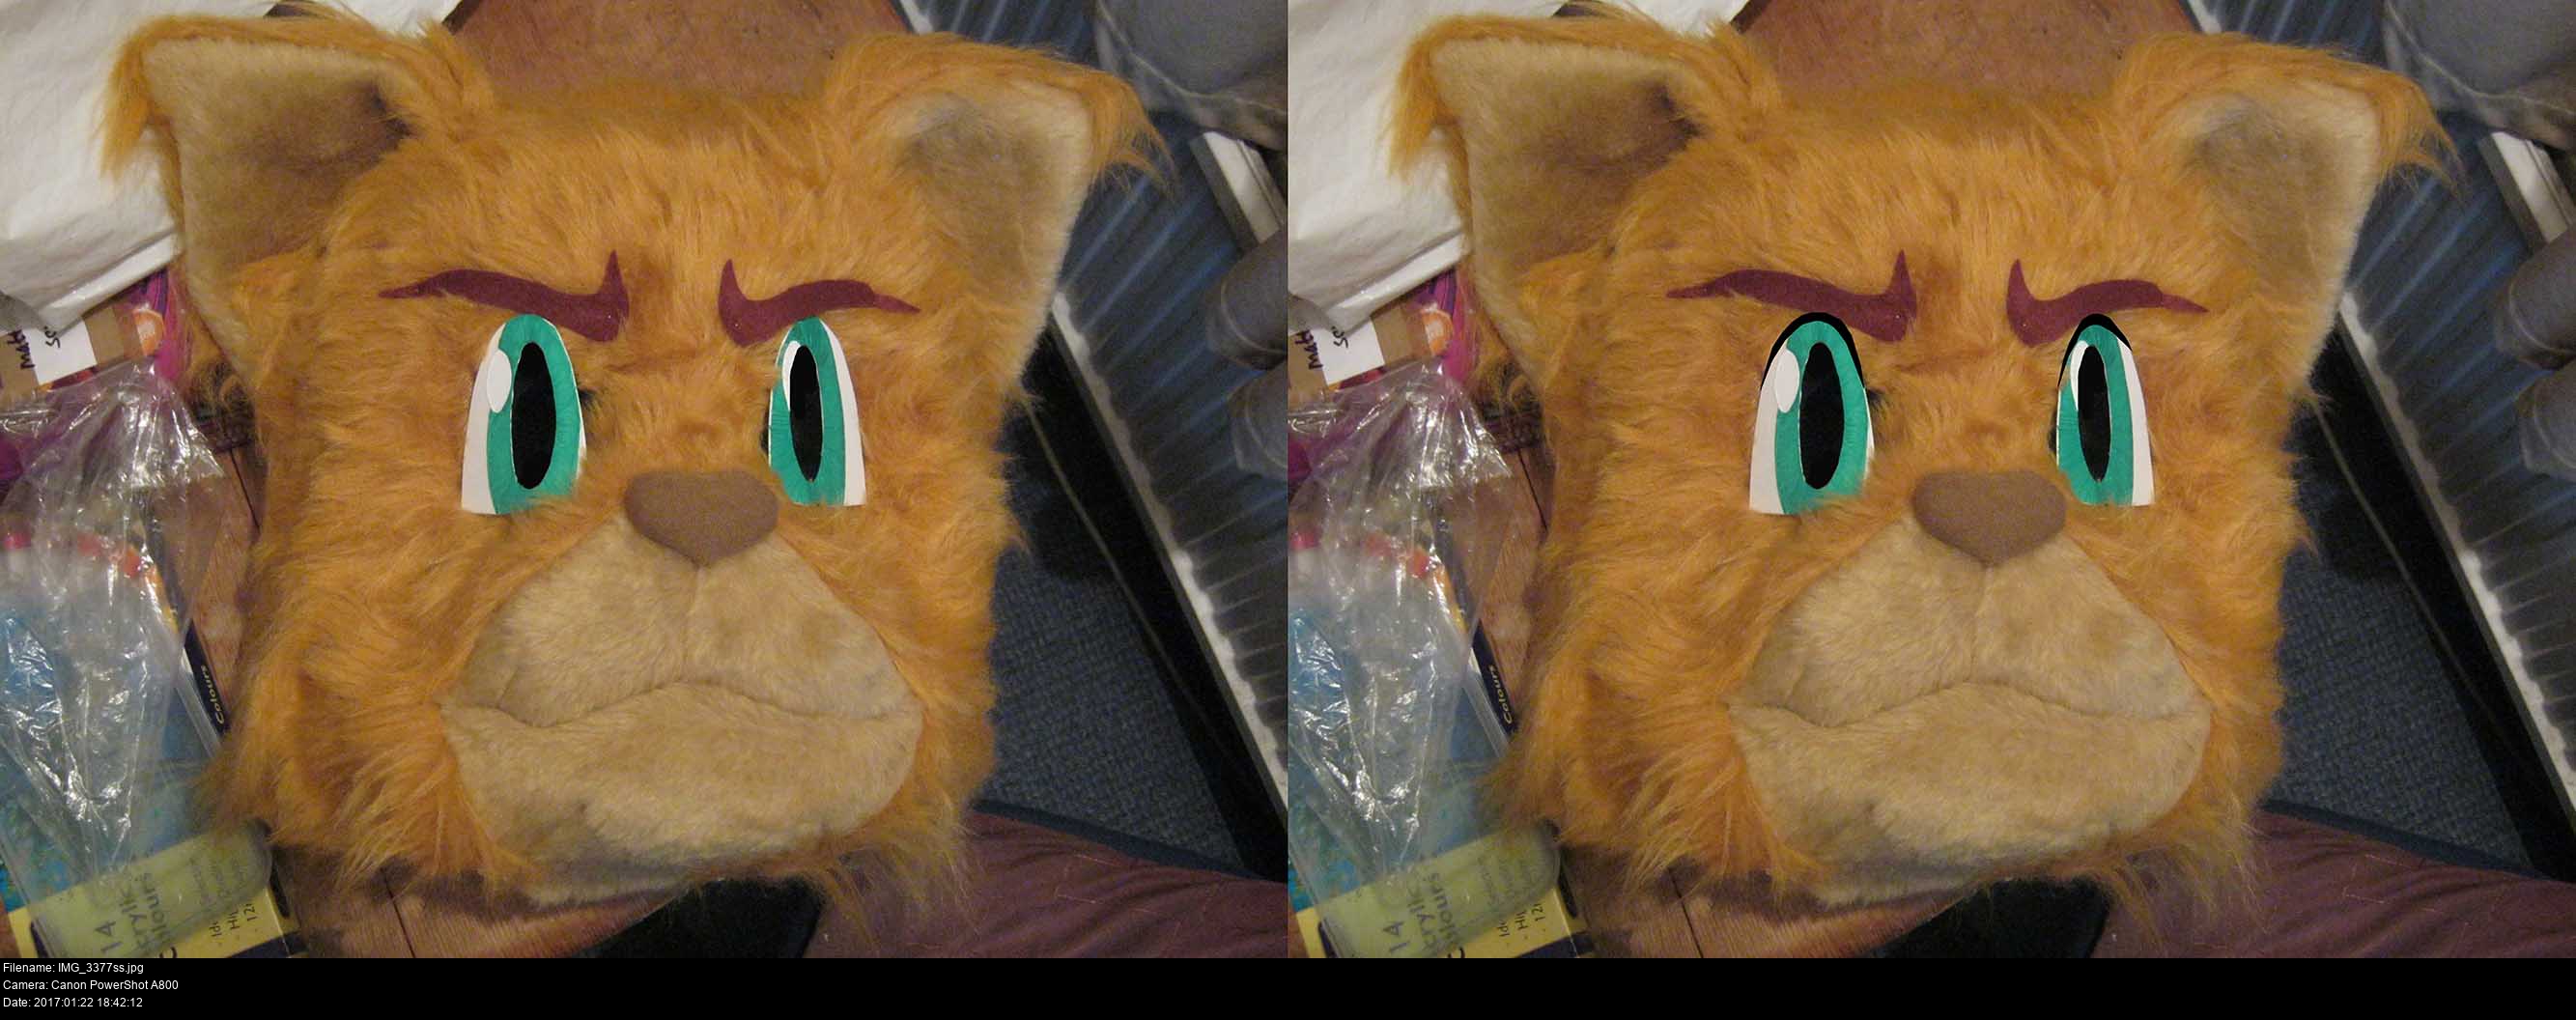
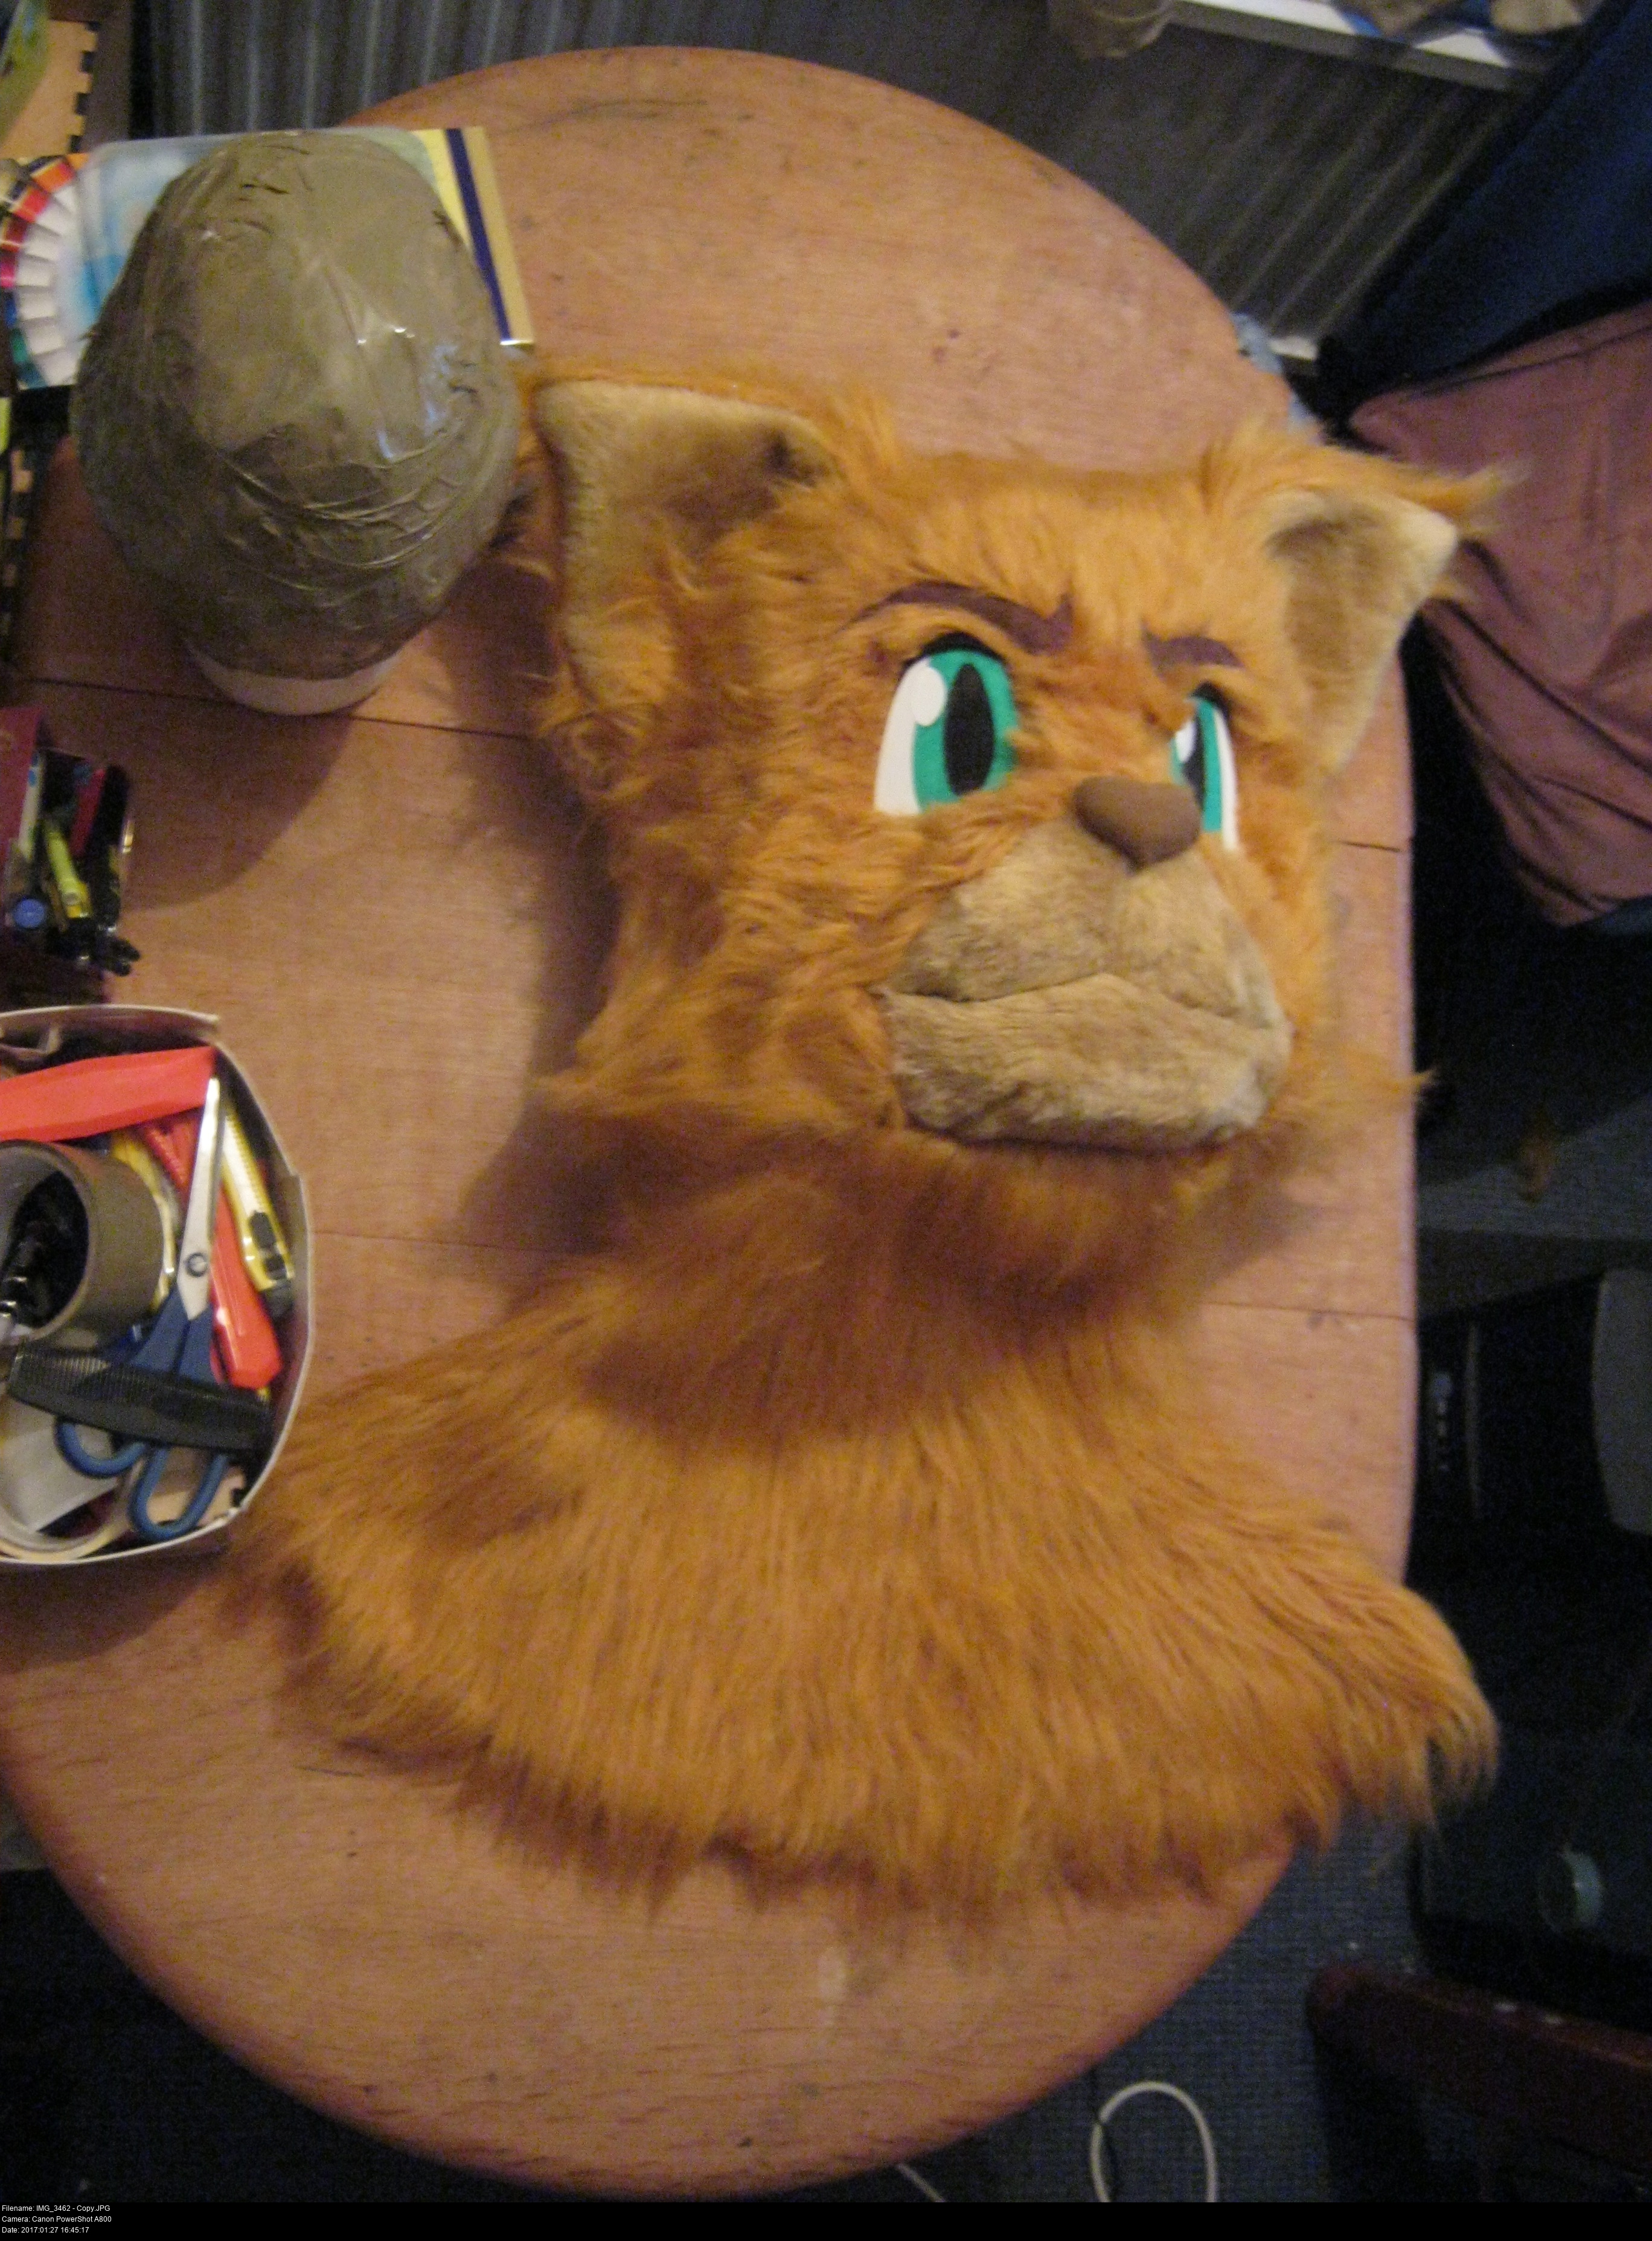
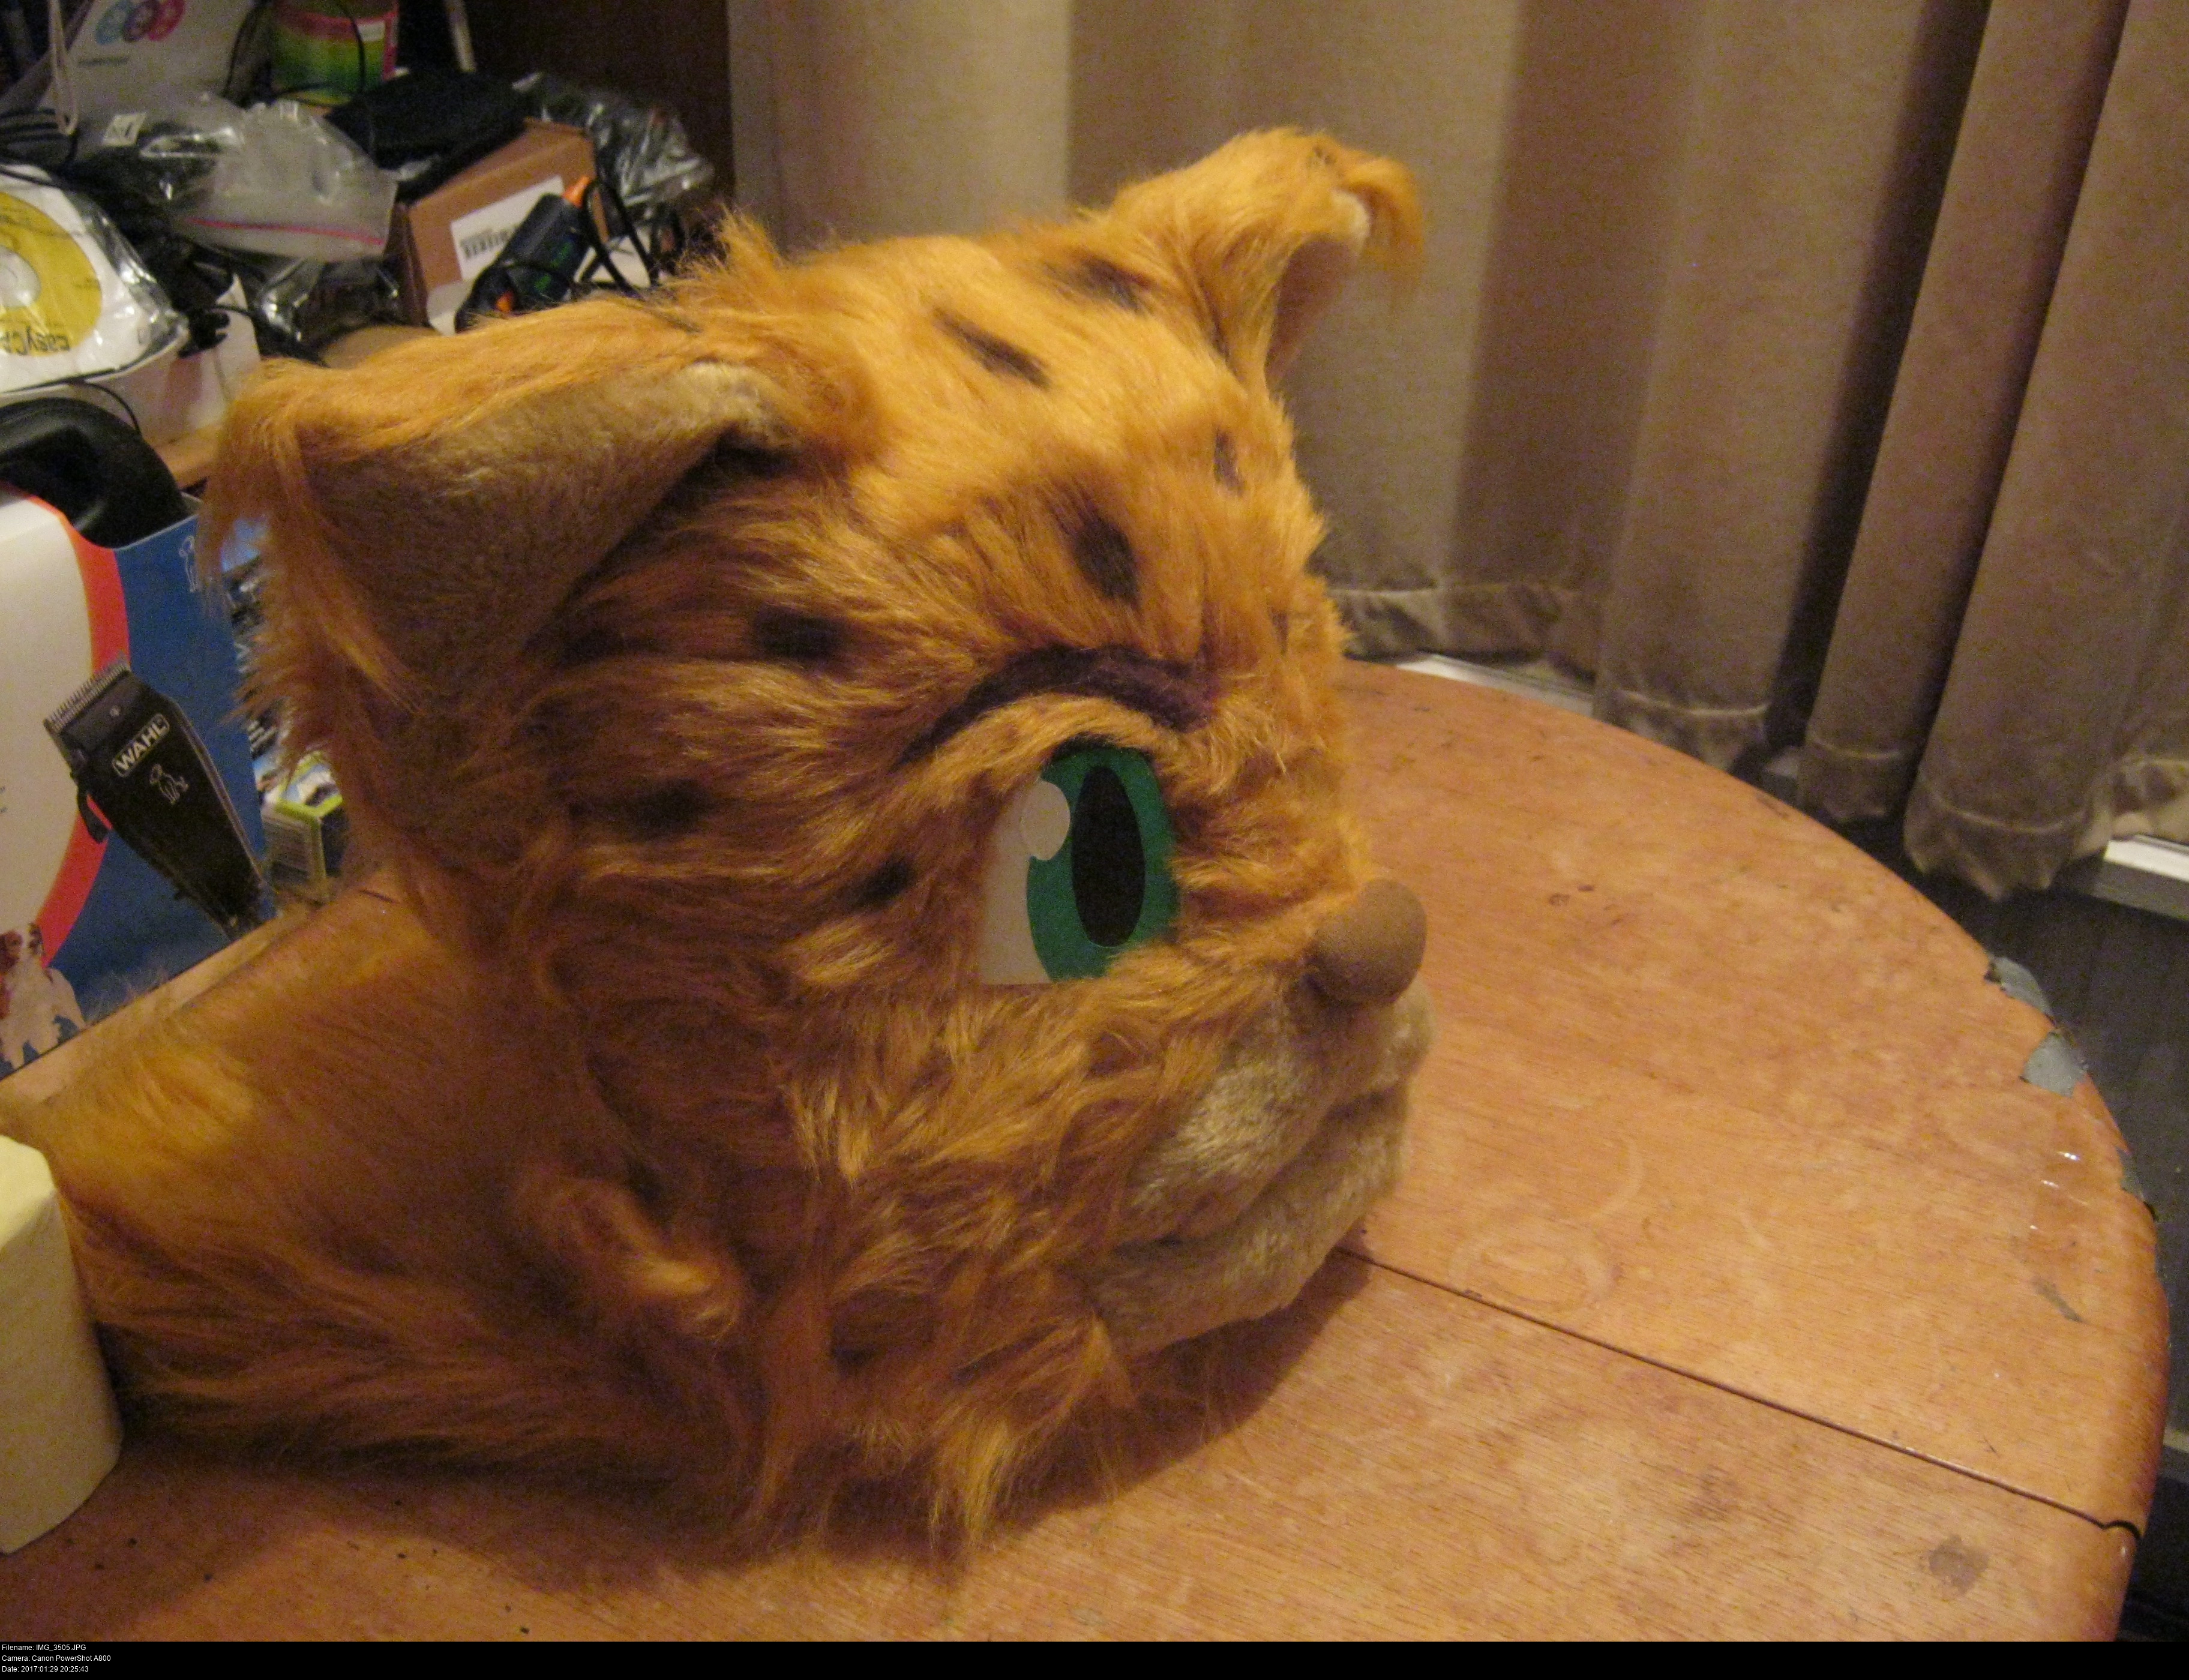
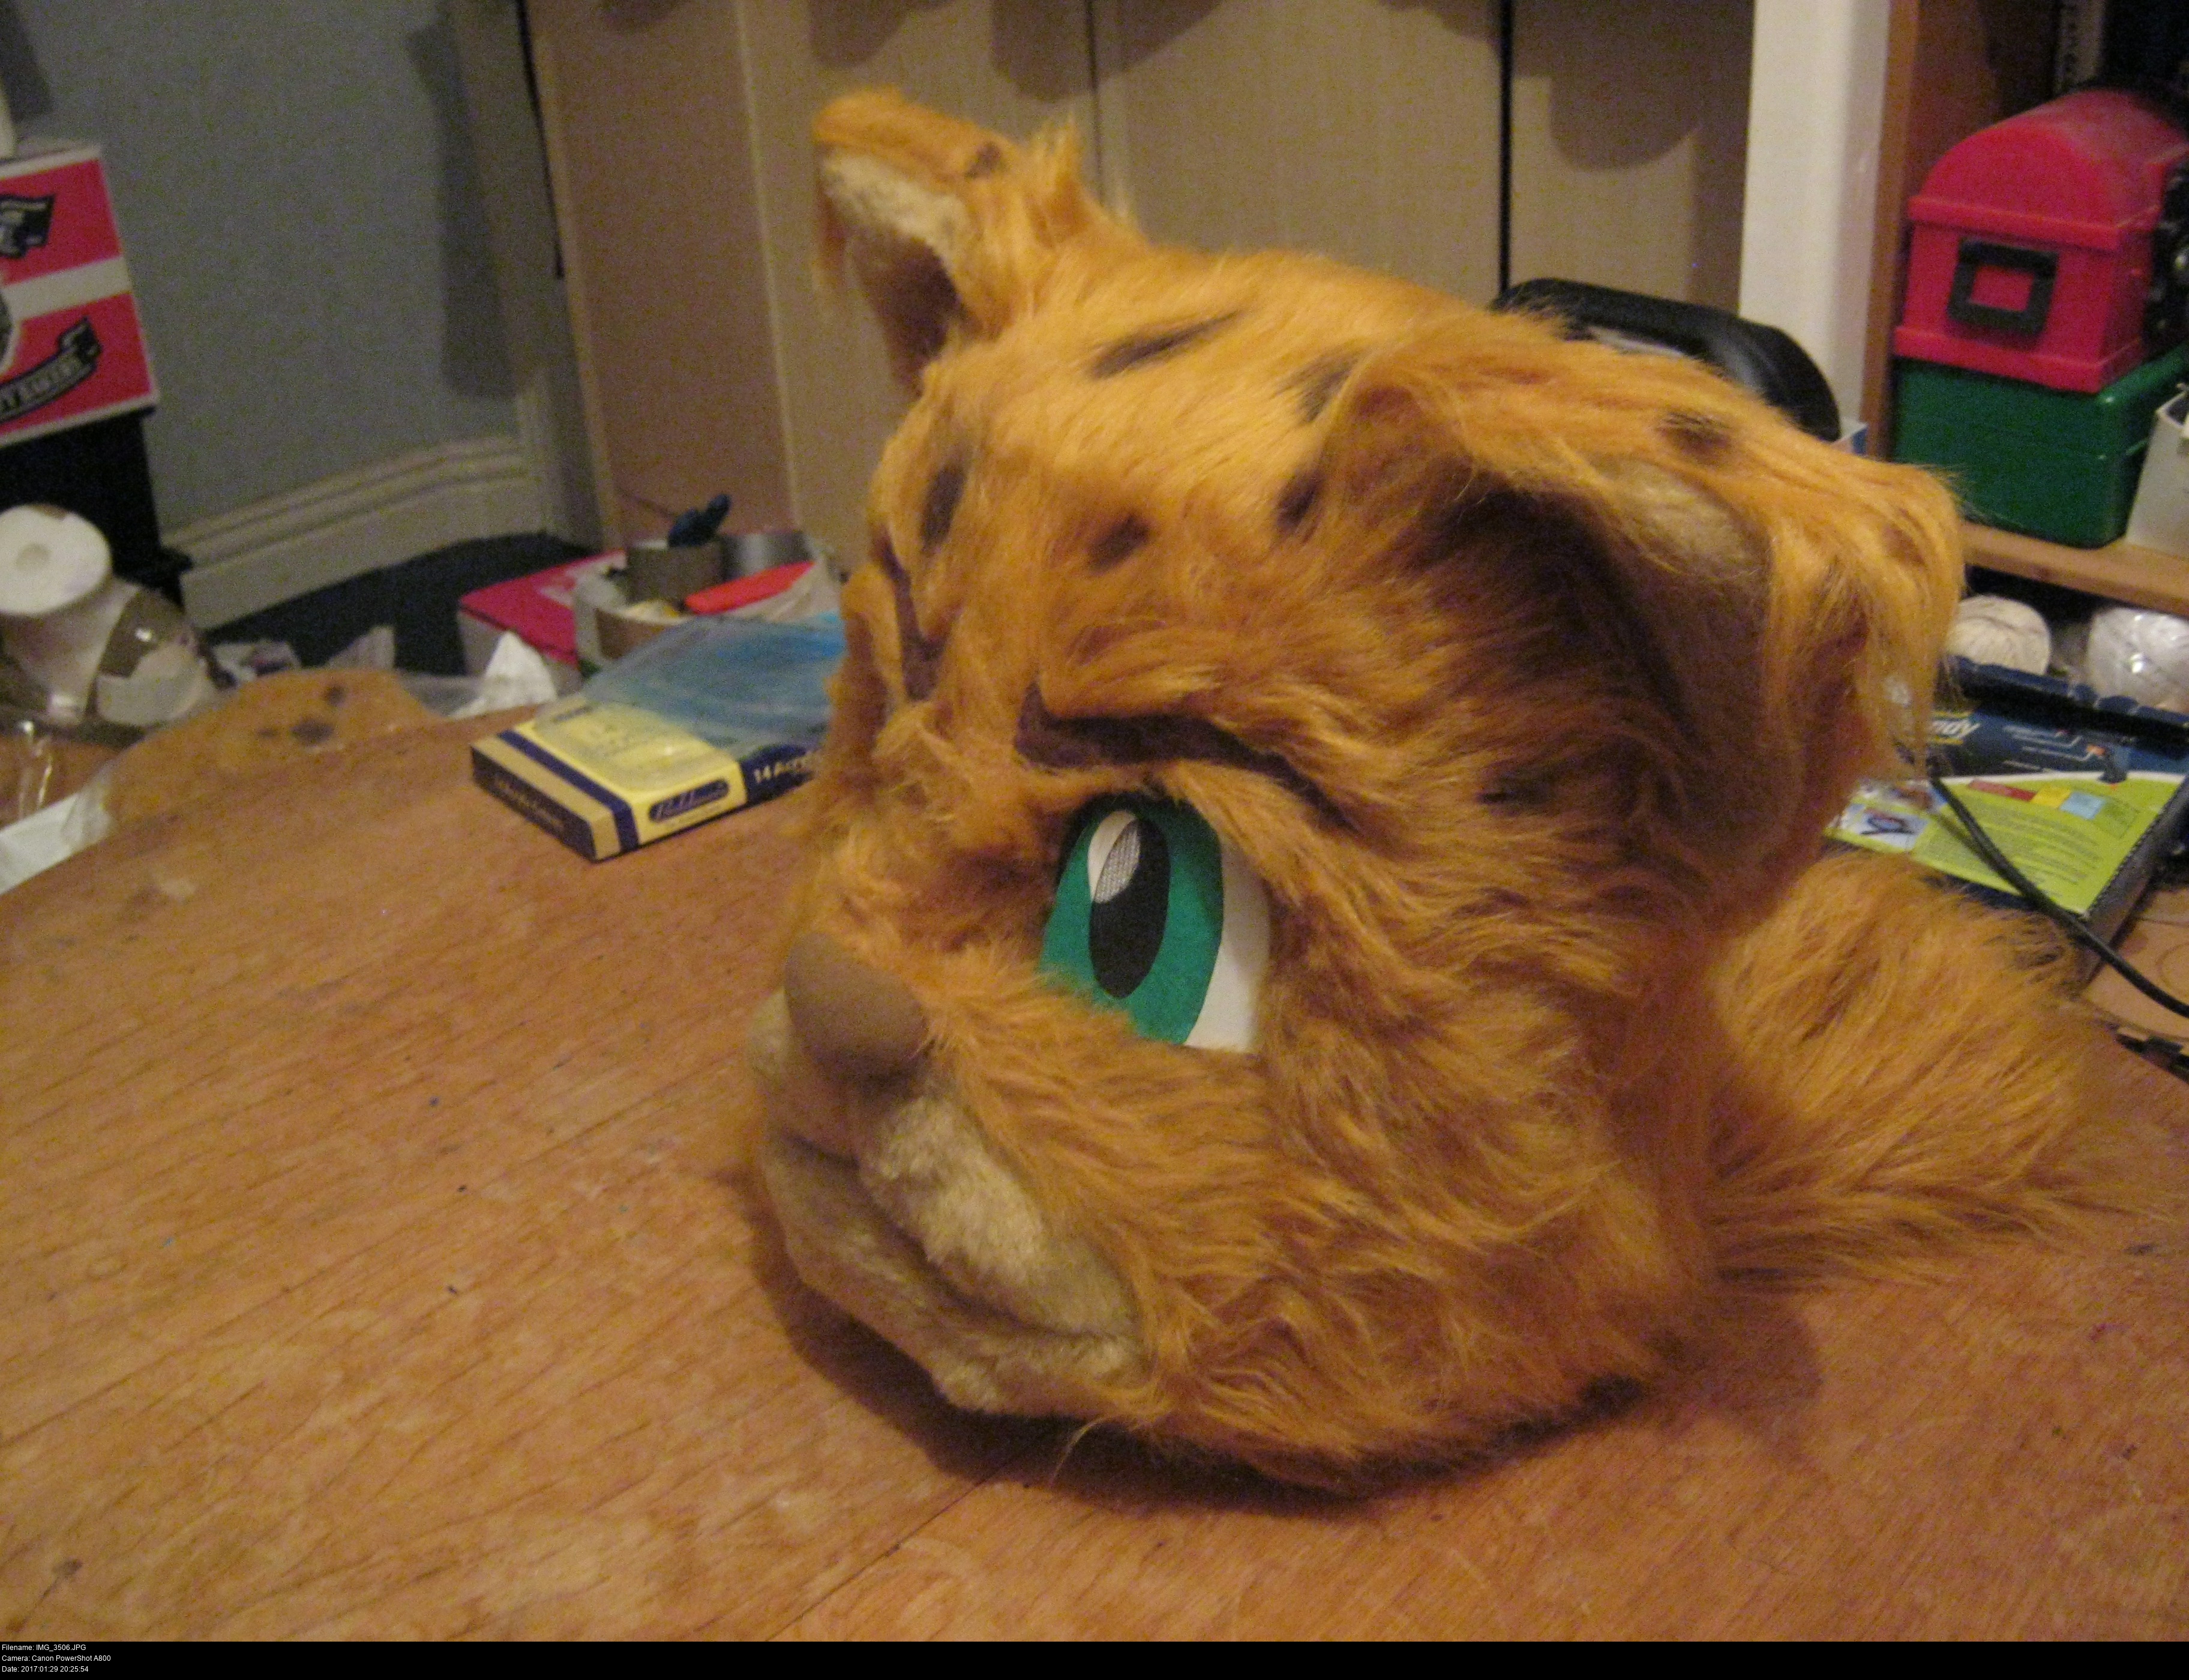
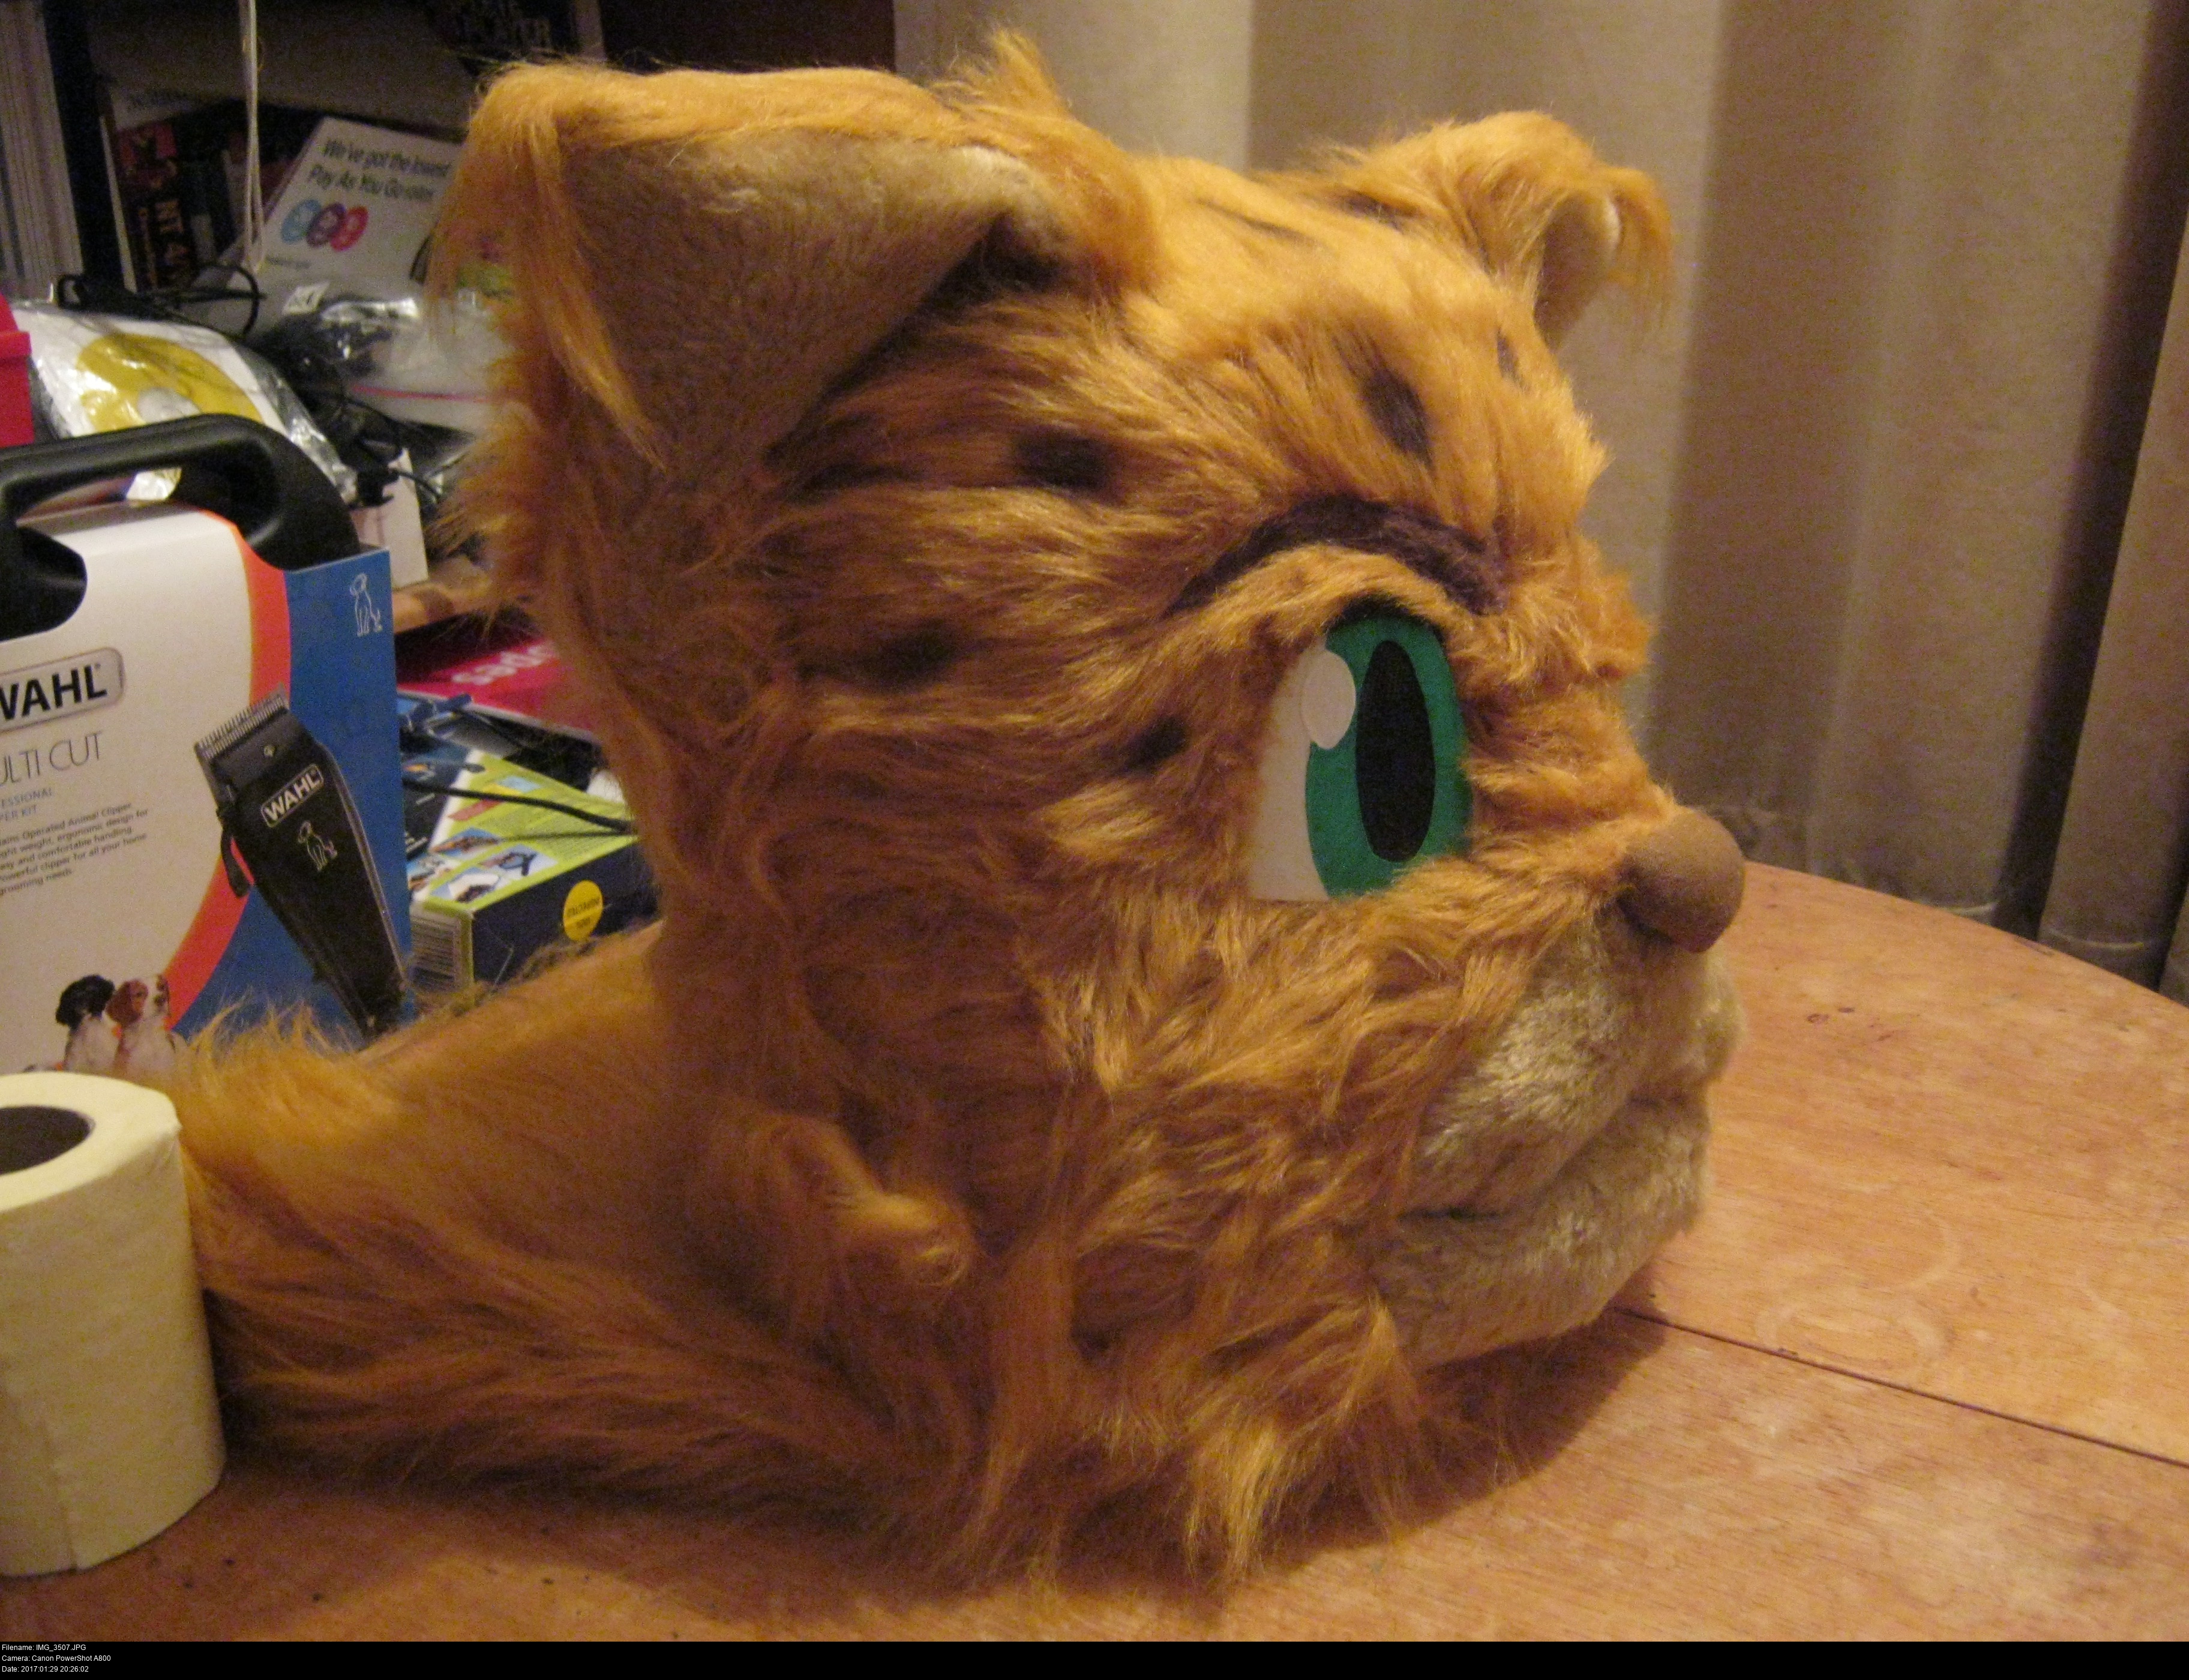
Phew! I wouldn't go so far as to call this a perfect imitation of the illustrated Hotshot or his in-game cutscene counterpart, but I'm giving myself a definite passing grade for my first time. This isn't going to look like an embarassment, as long as I don't mess up the fur or the eyes or the ears.

More pics.

And don't forget to keep testing it as you go. If you can't see out of the eyeholes you'll need to do some magic on the interior of the head to make it so you can! You'll start to get a feel of how you're going to put on and take off the head, and how you're going to breathe inside it. Right now, since the mouth is a solid block unlike most furry heads, that's not entirely easy, but it is acceptable. At least it won't kill me if I only wear it for certain periods of time.
The top of the mask isn't entirely a symmetrical arch here. The two blocks I glued to the sides are slightly different heights and they don't meet equal distances from the centre line of the mask. It doesn't matter. It looks fine! And the fur will cover that up.
I might have to cut away some of the base of the mask to make it more comfortable. It won't matter too much what foam is there since the long tufty striped fur should be there.
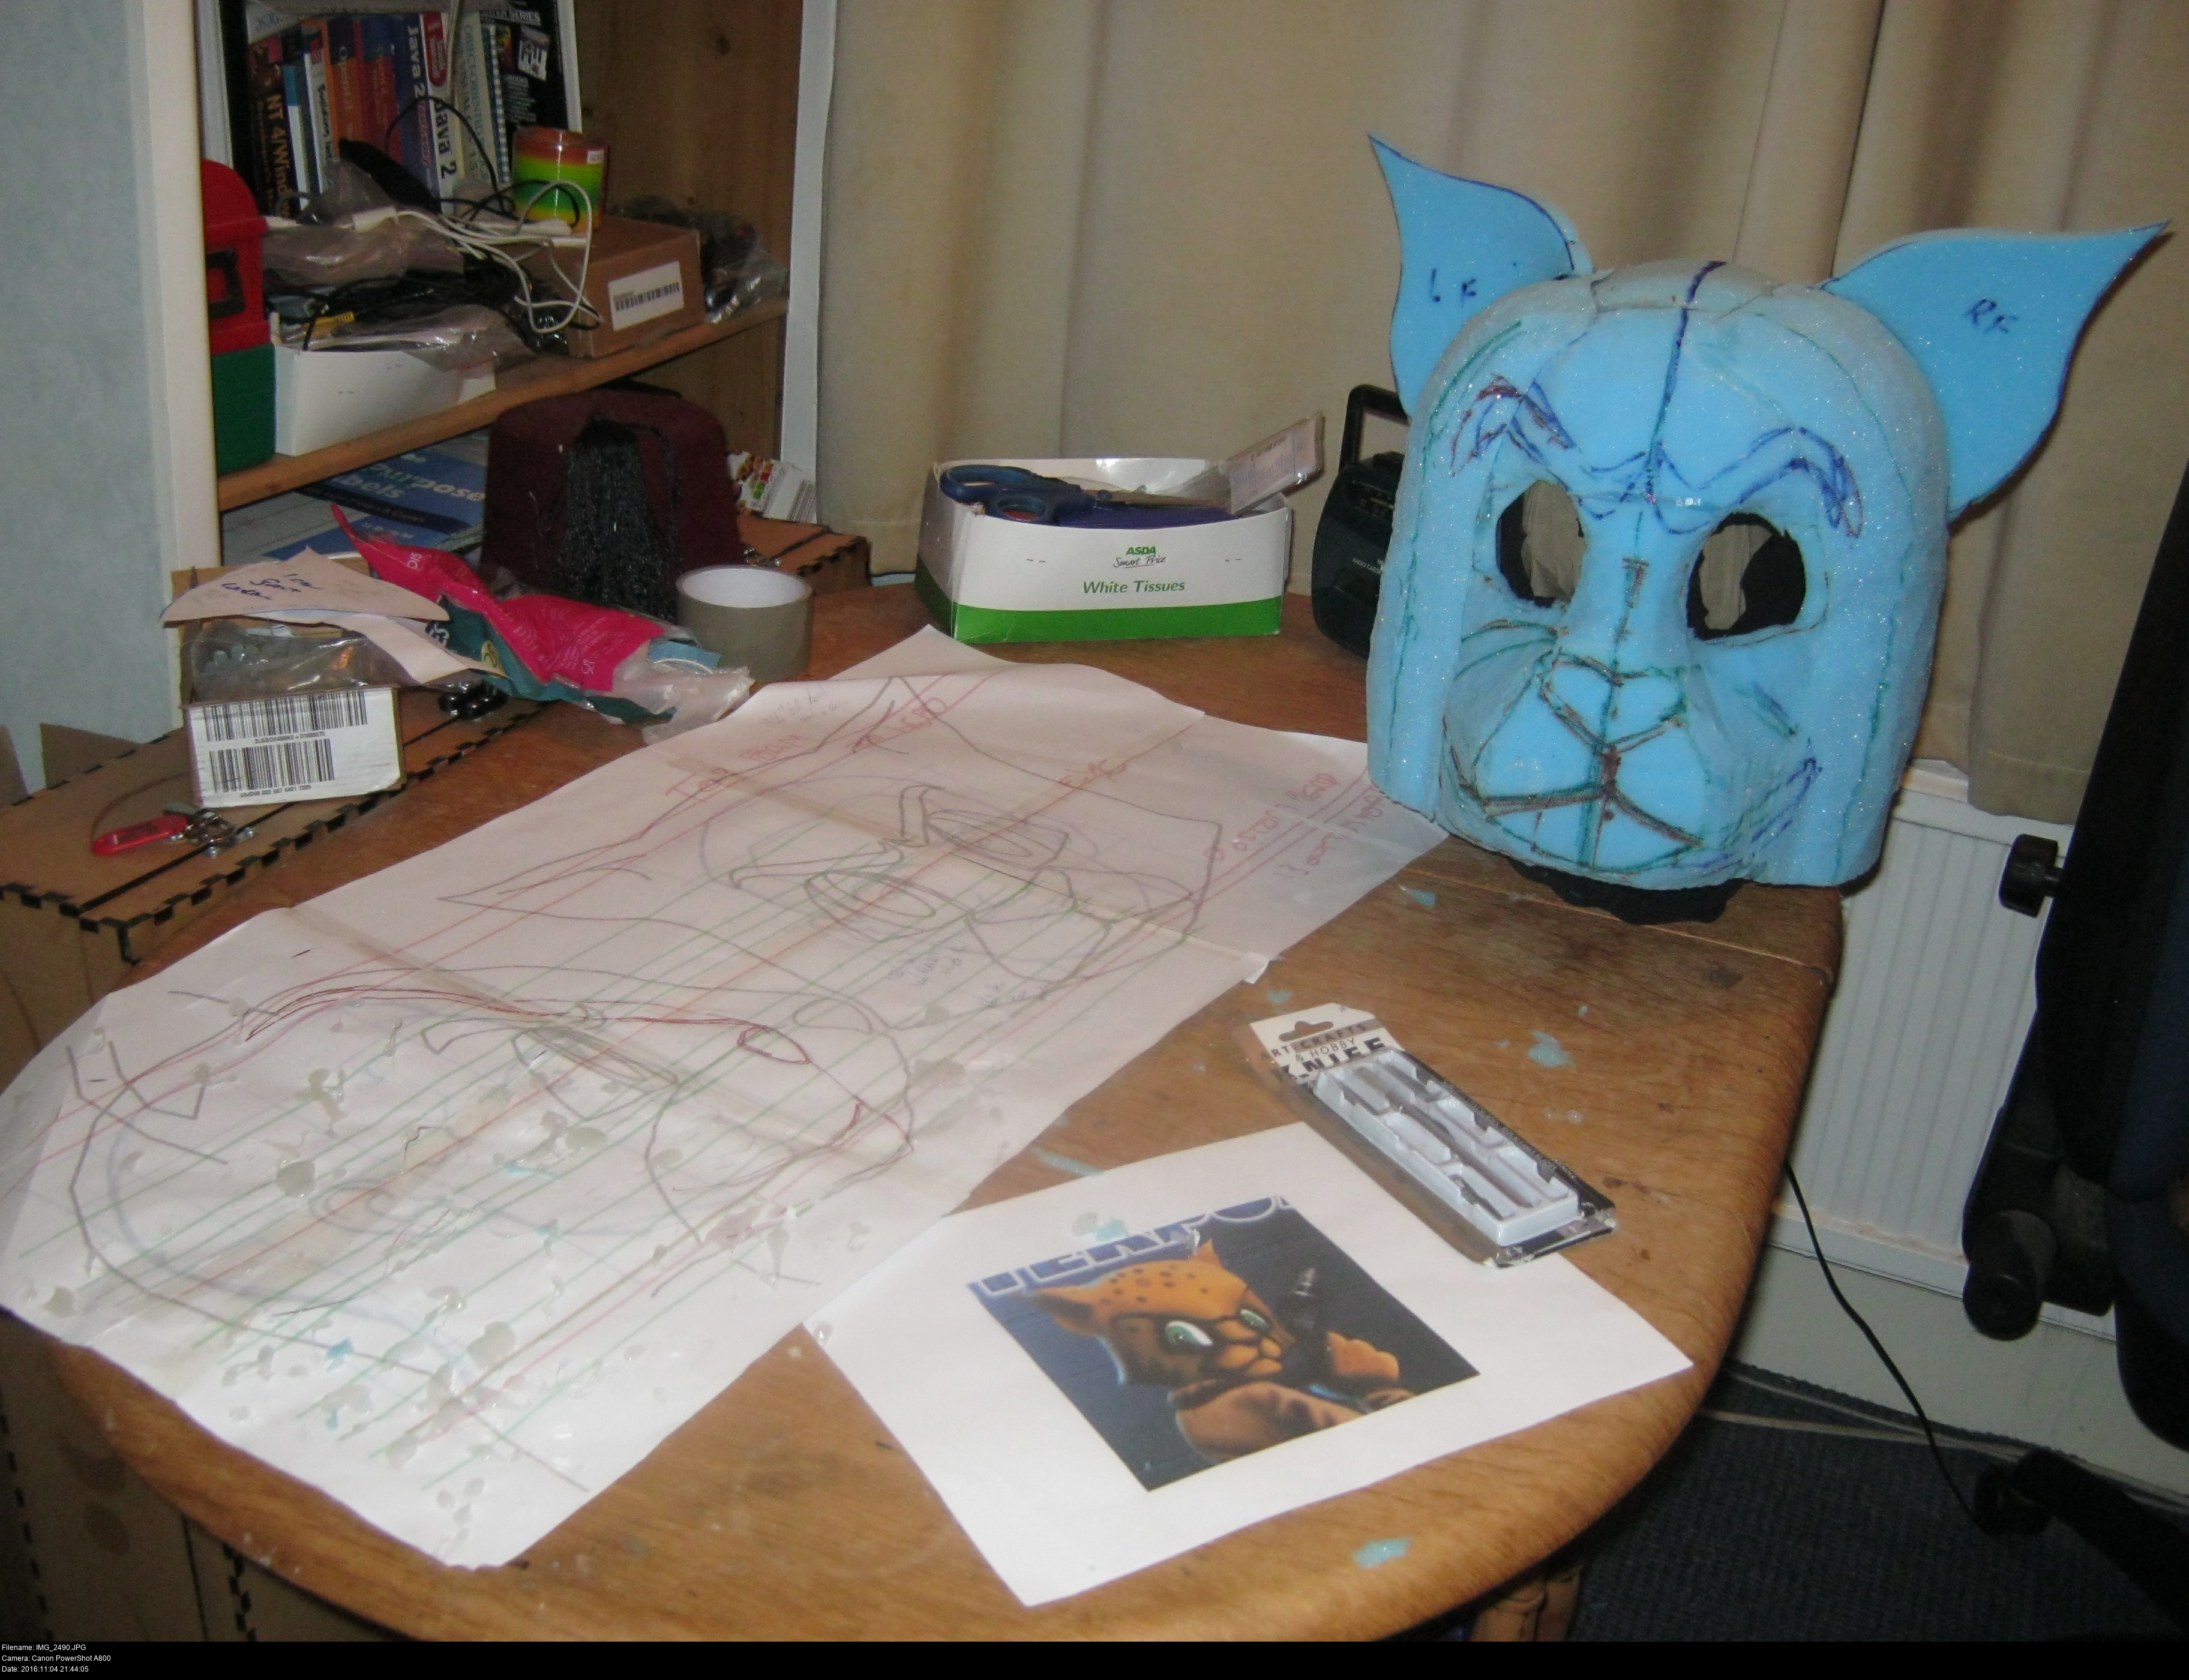
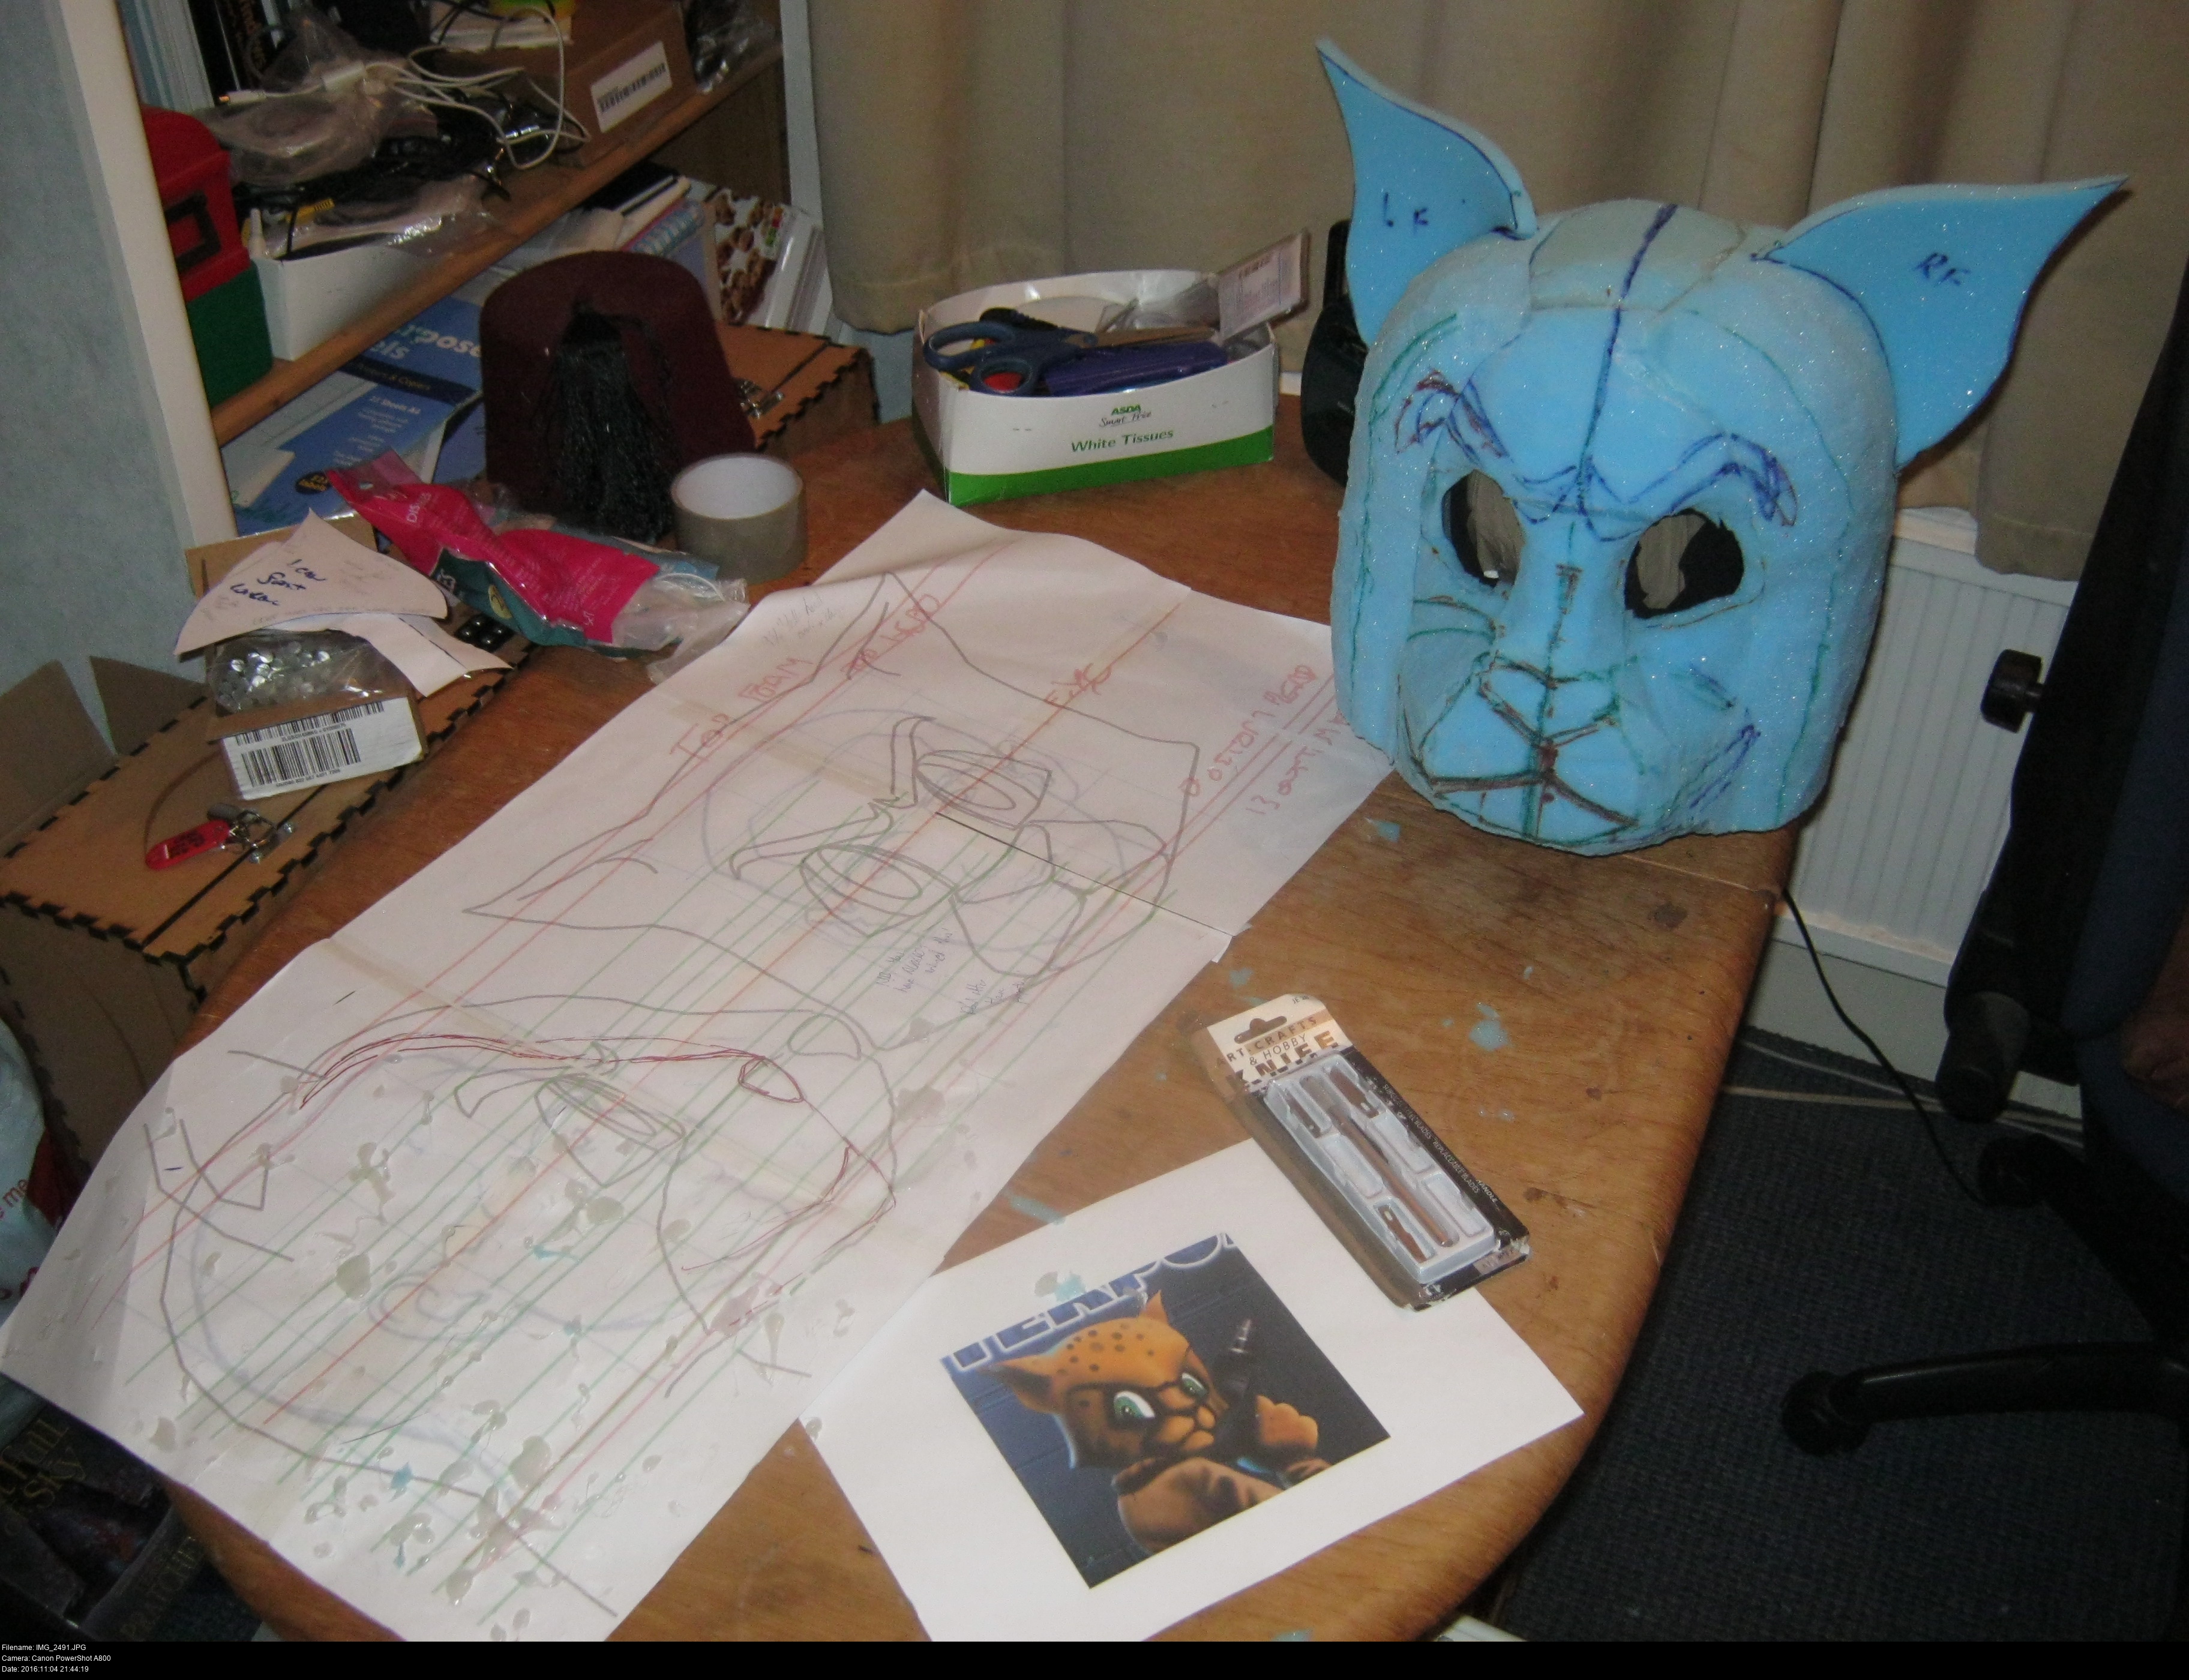
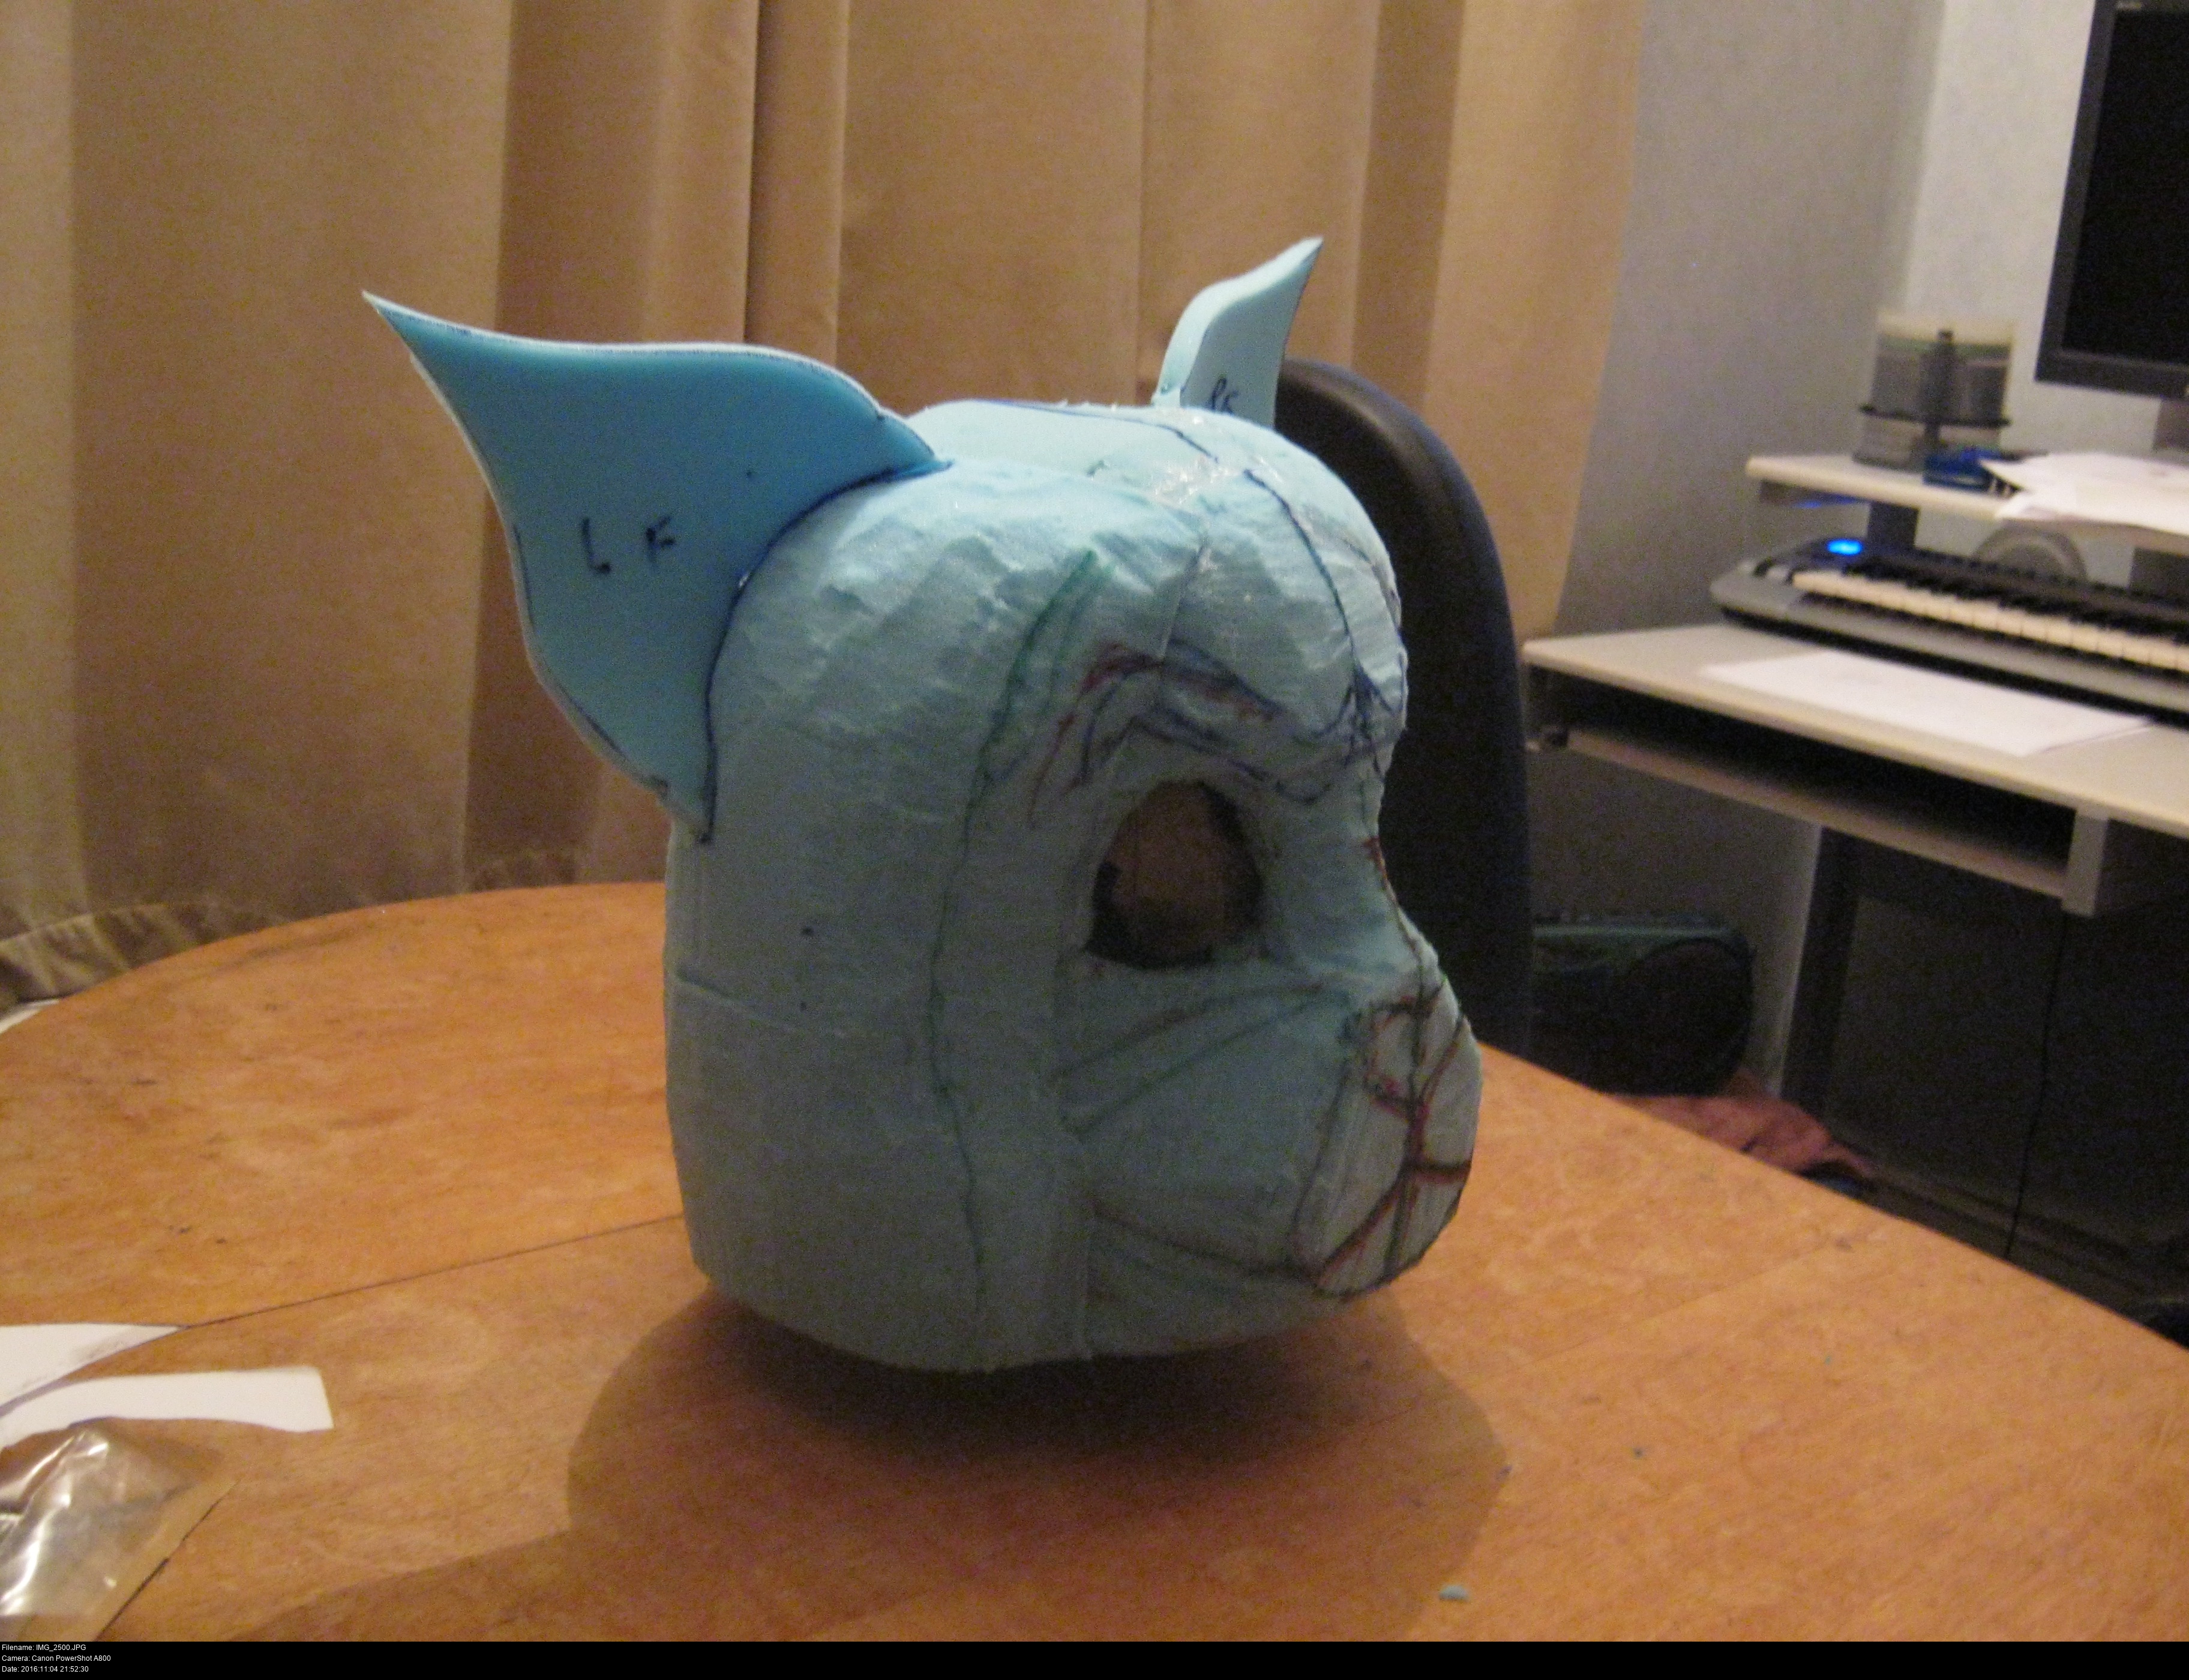
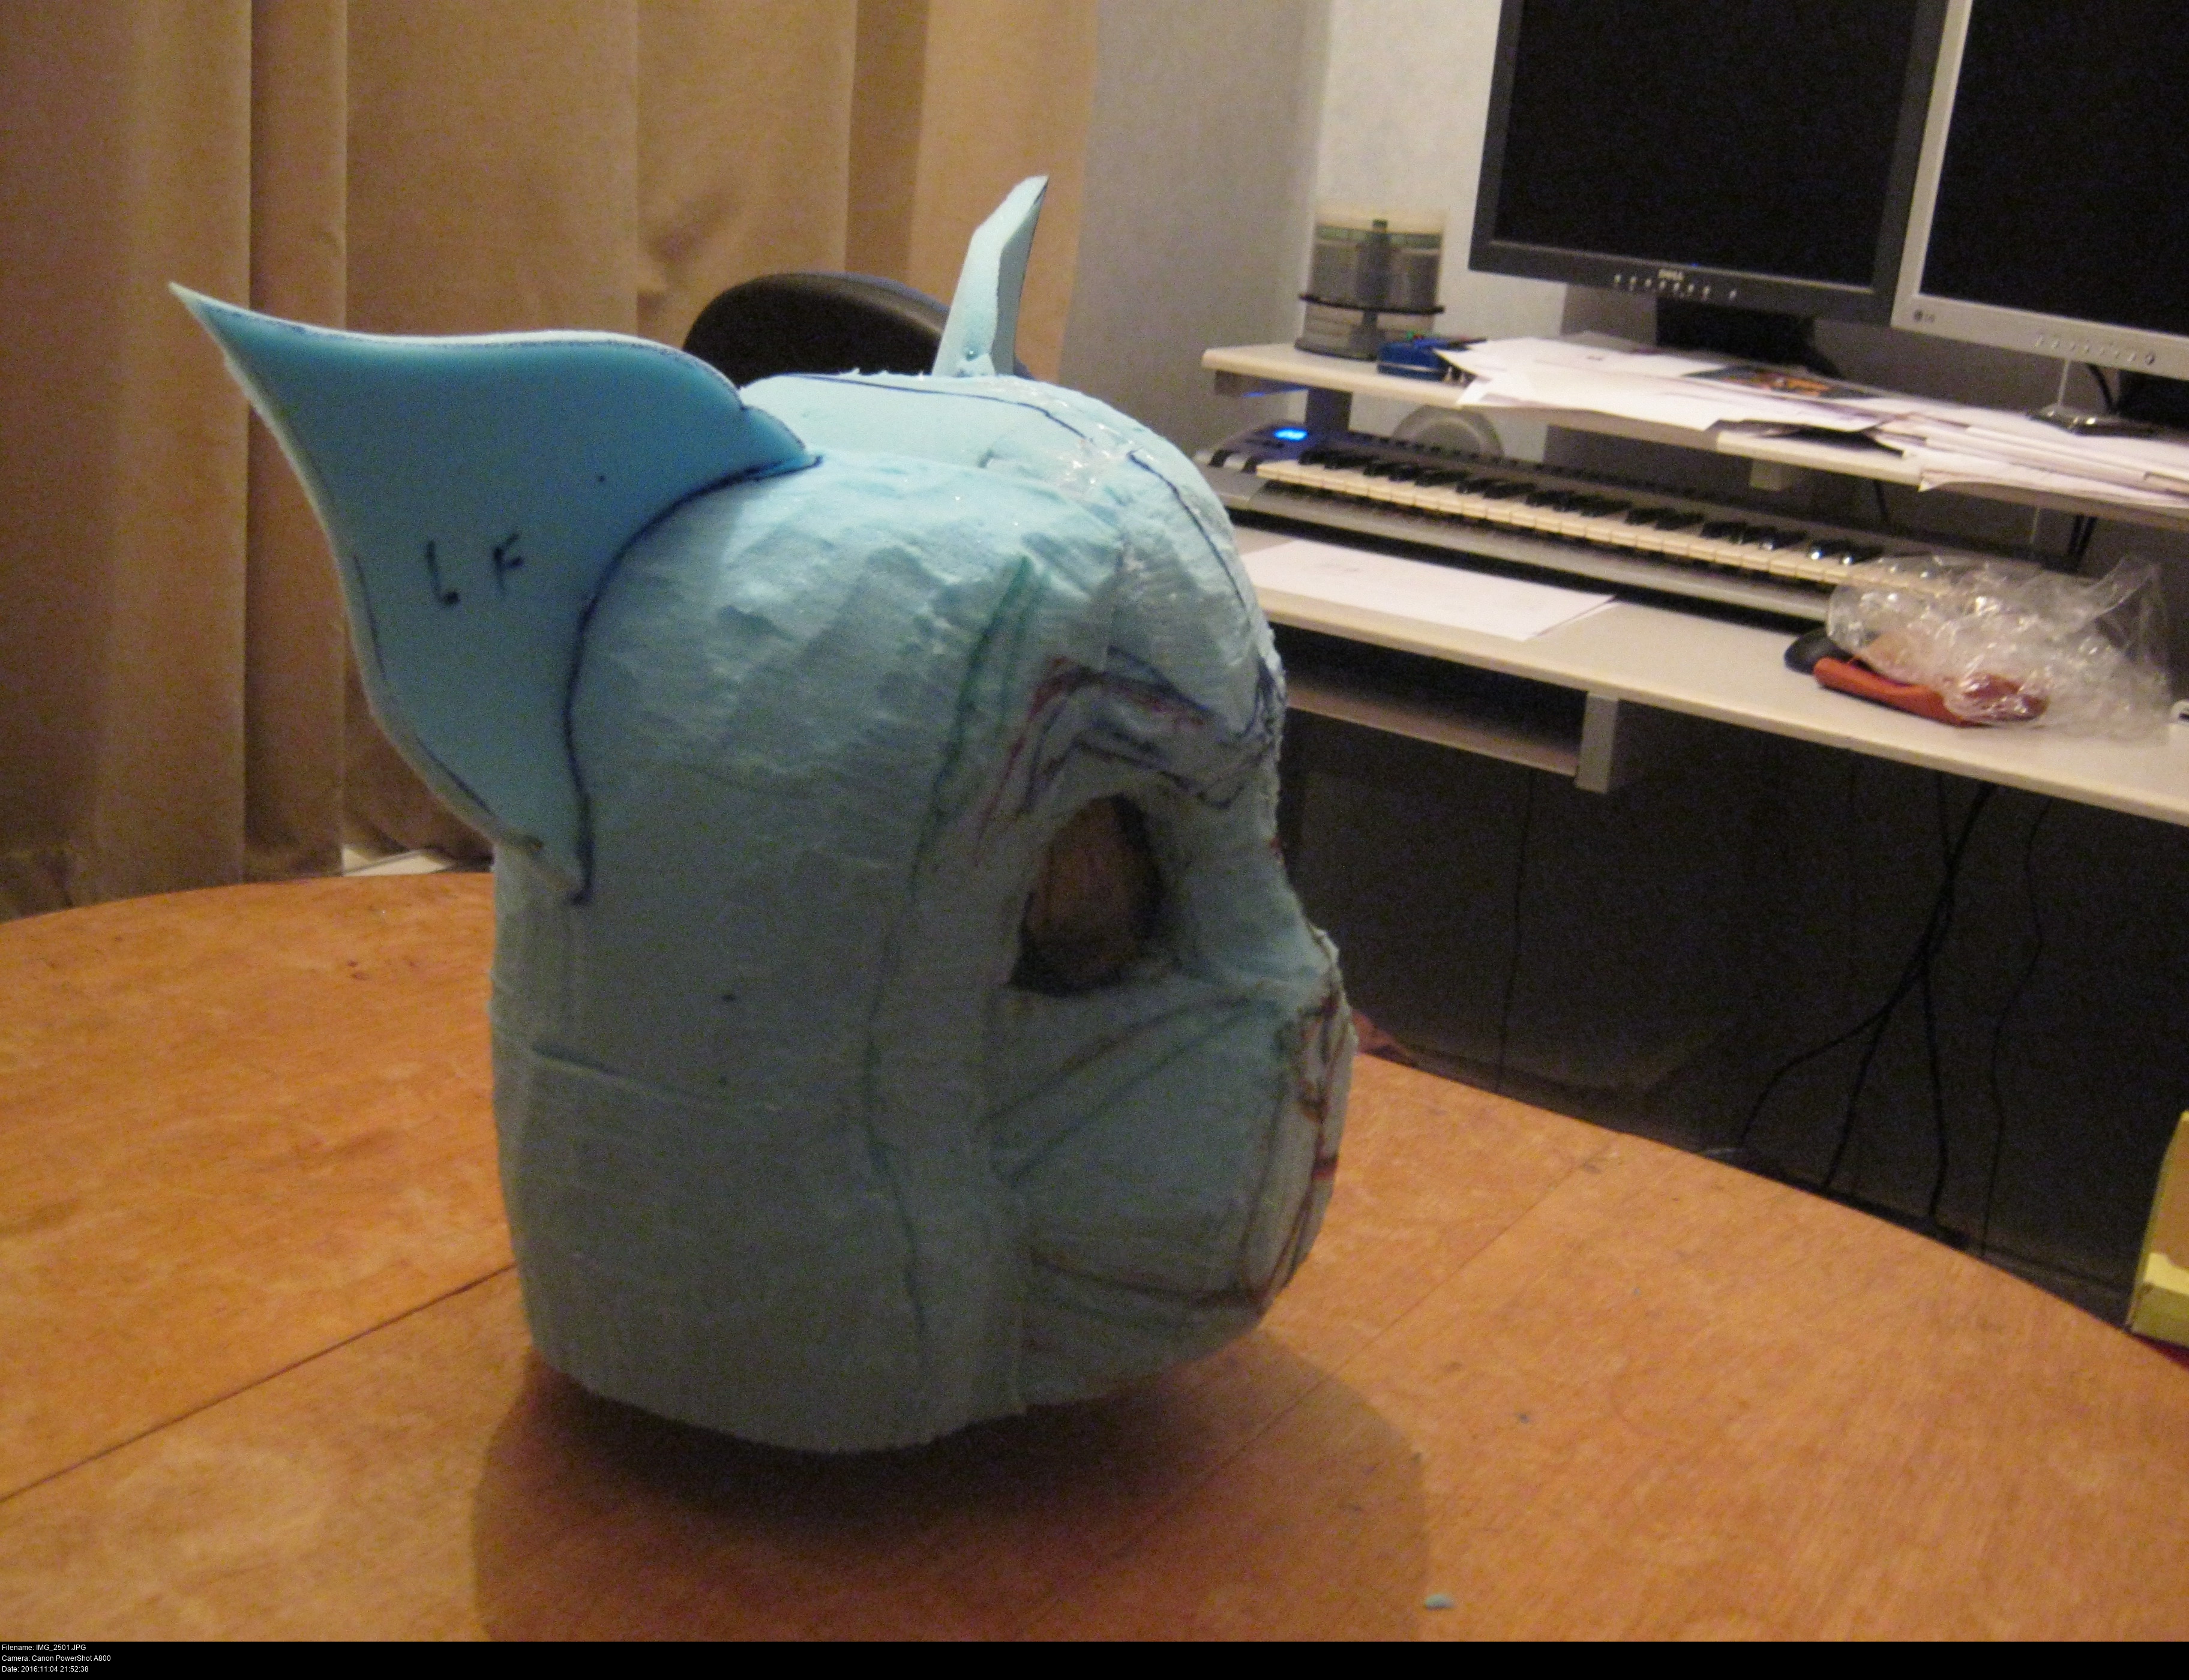
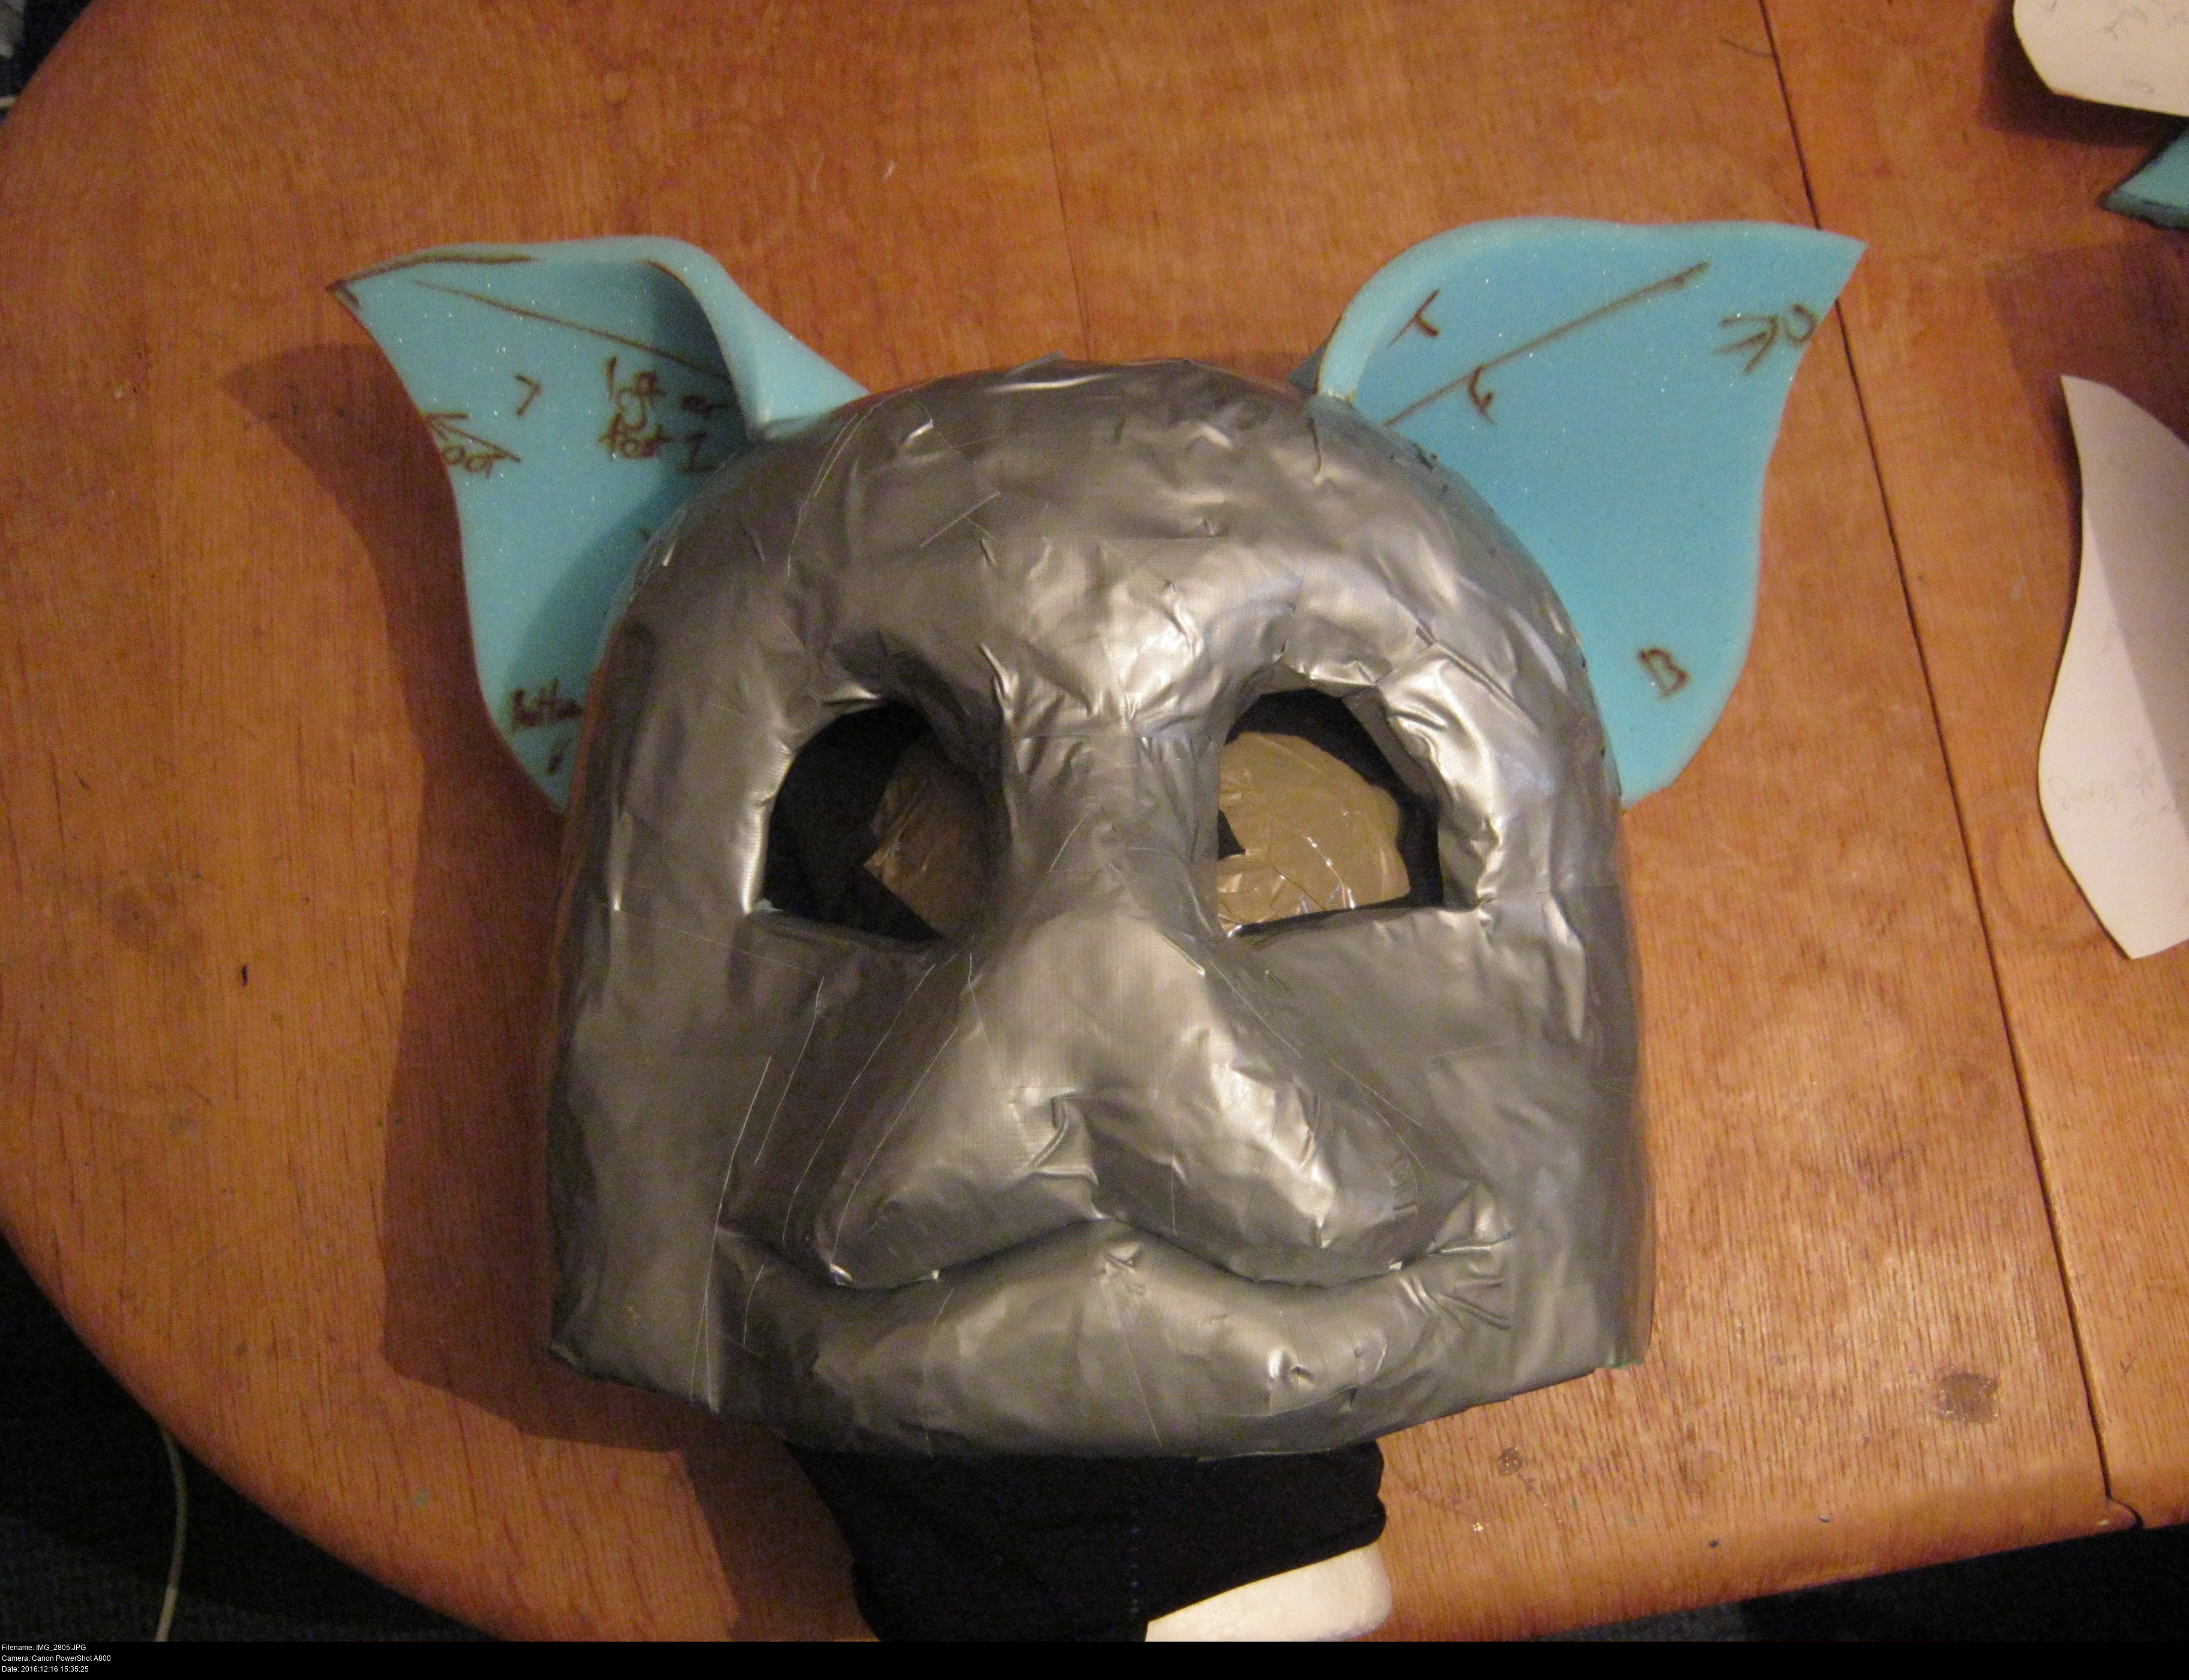
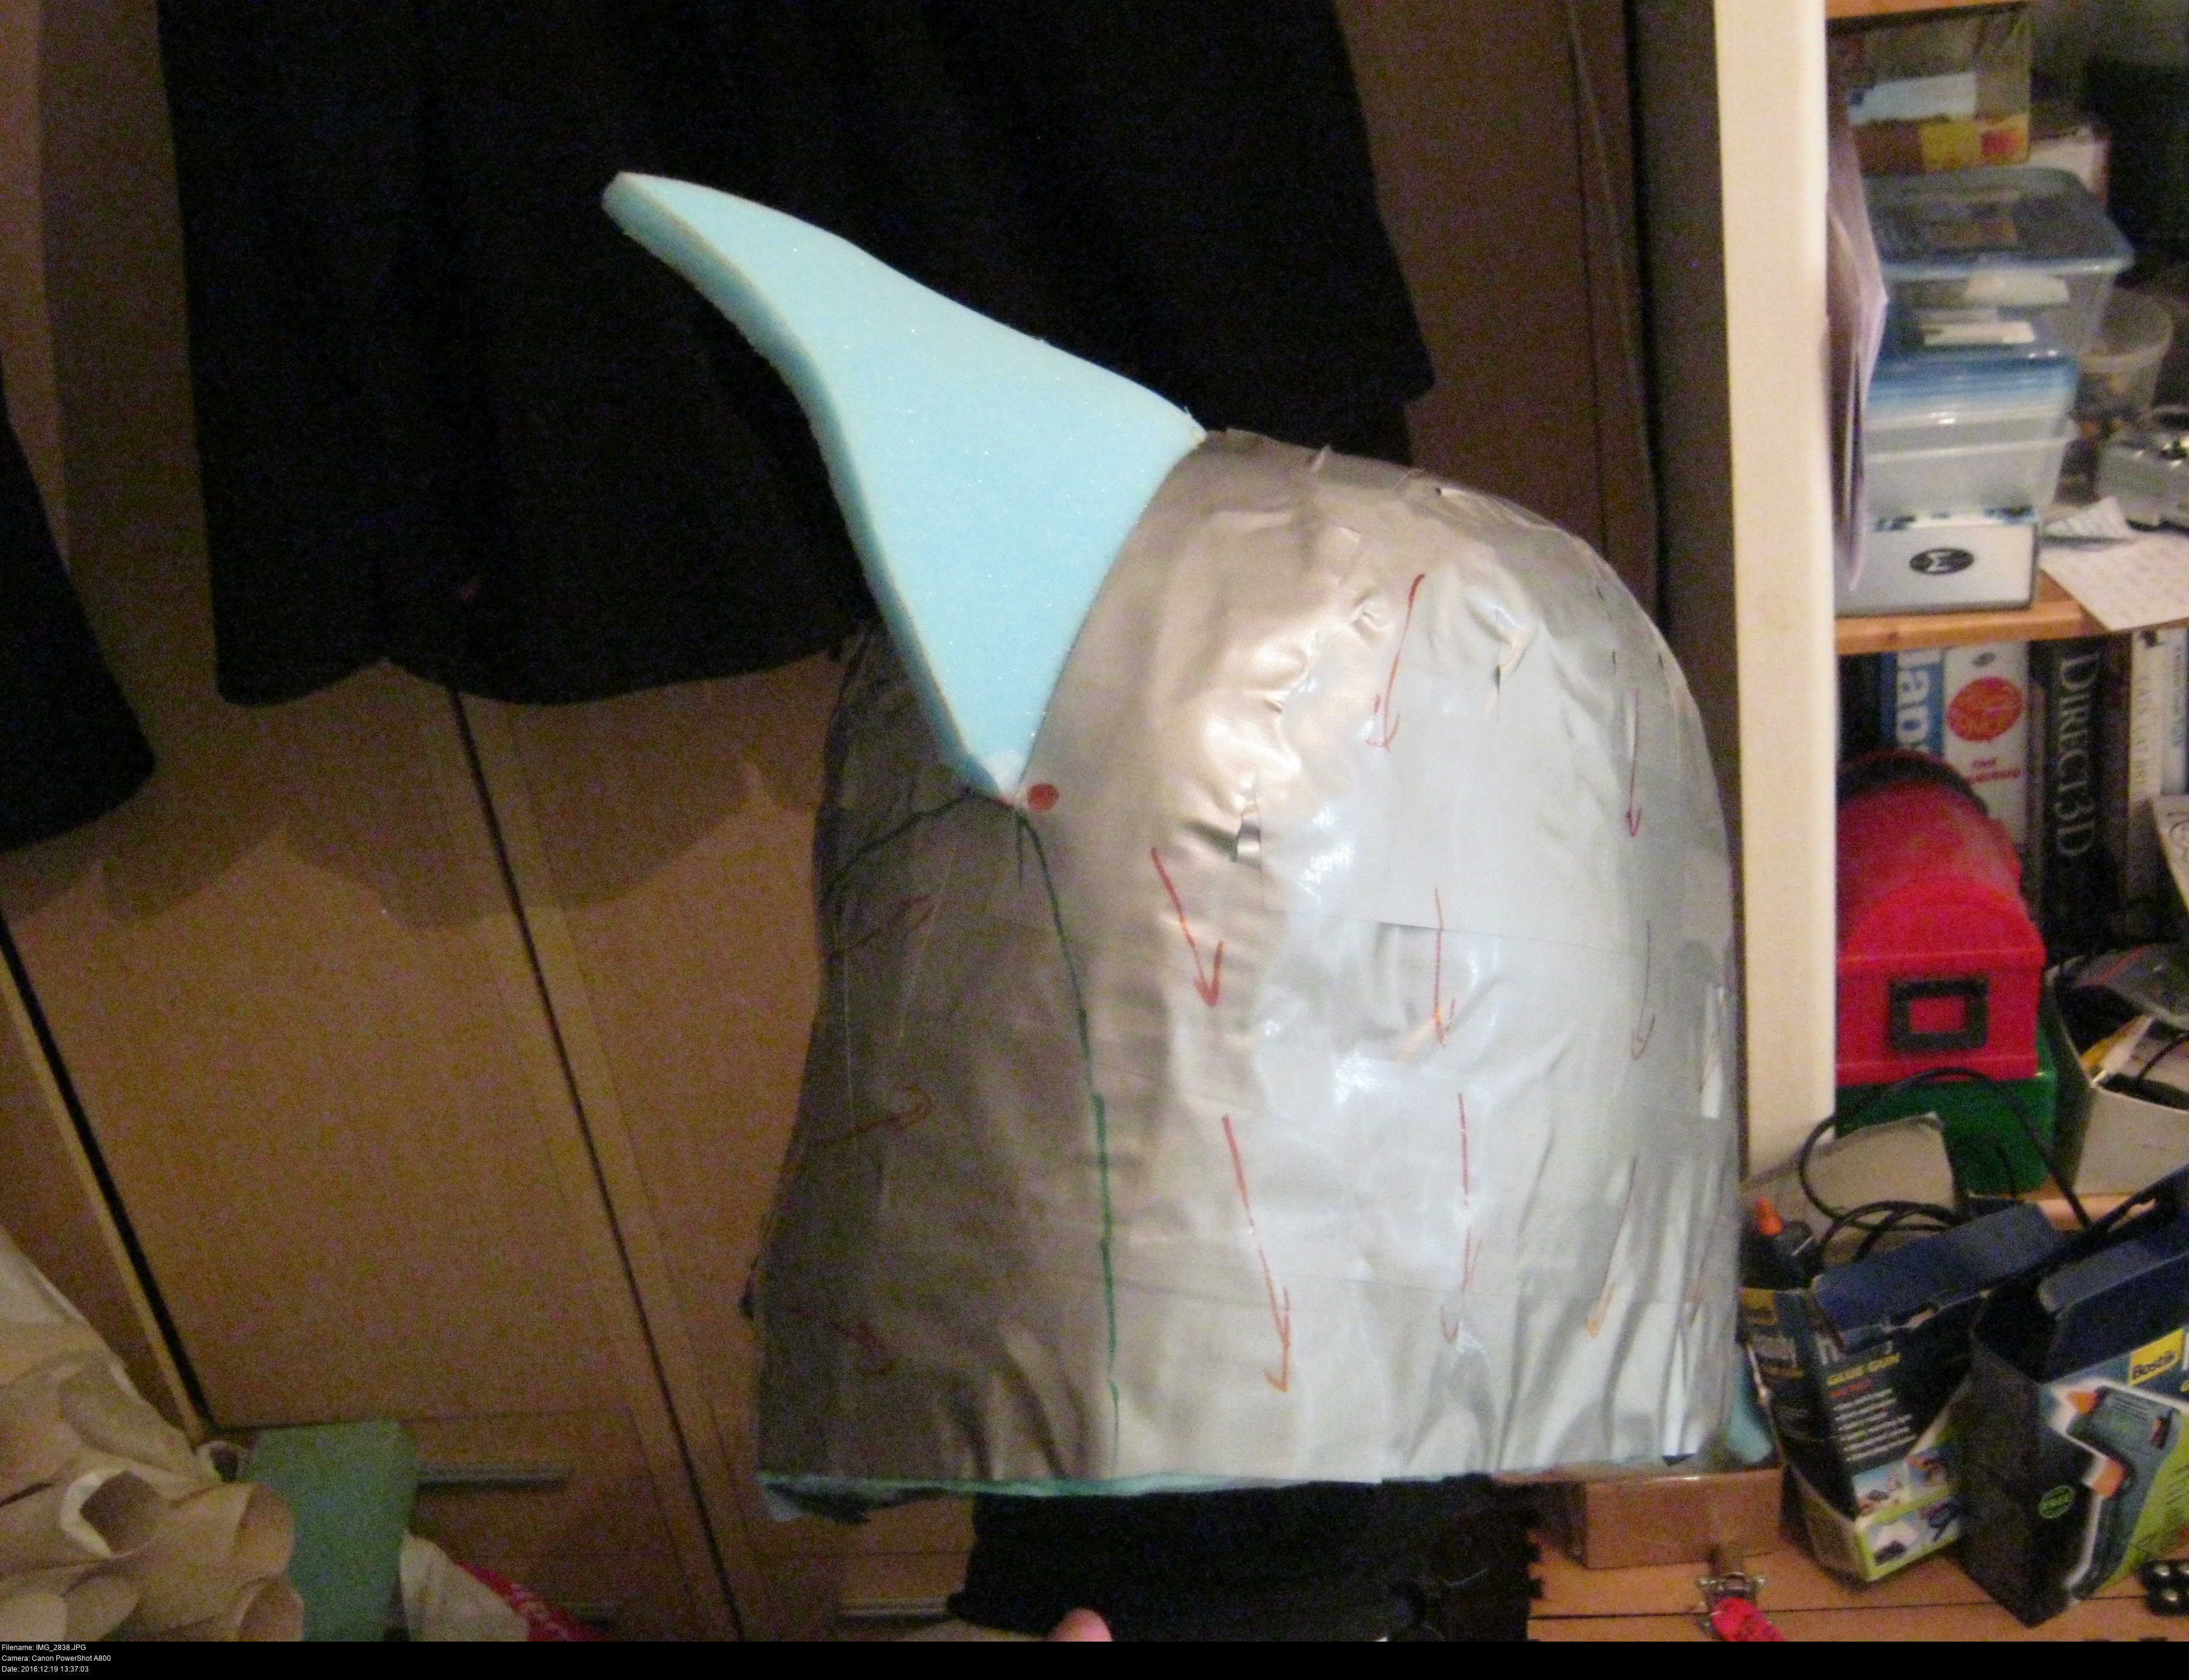
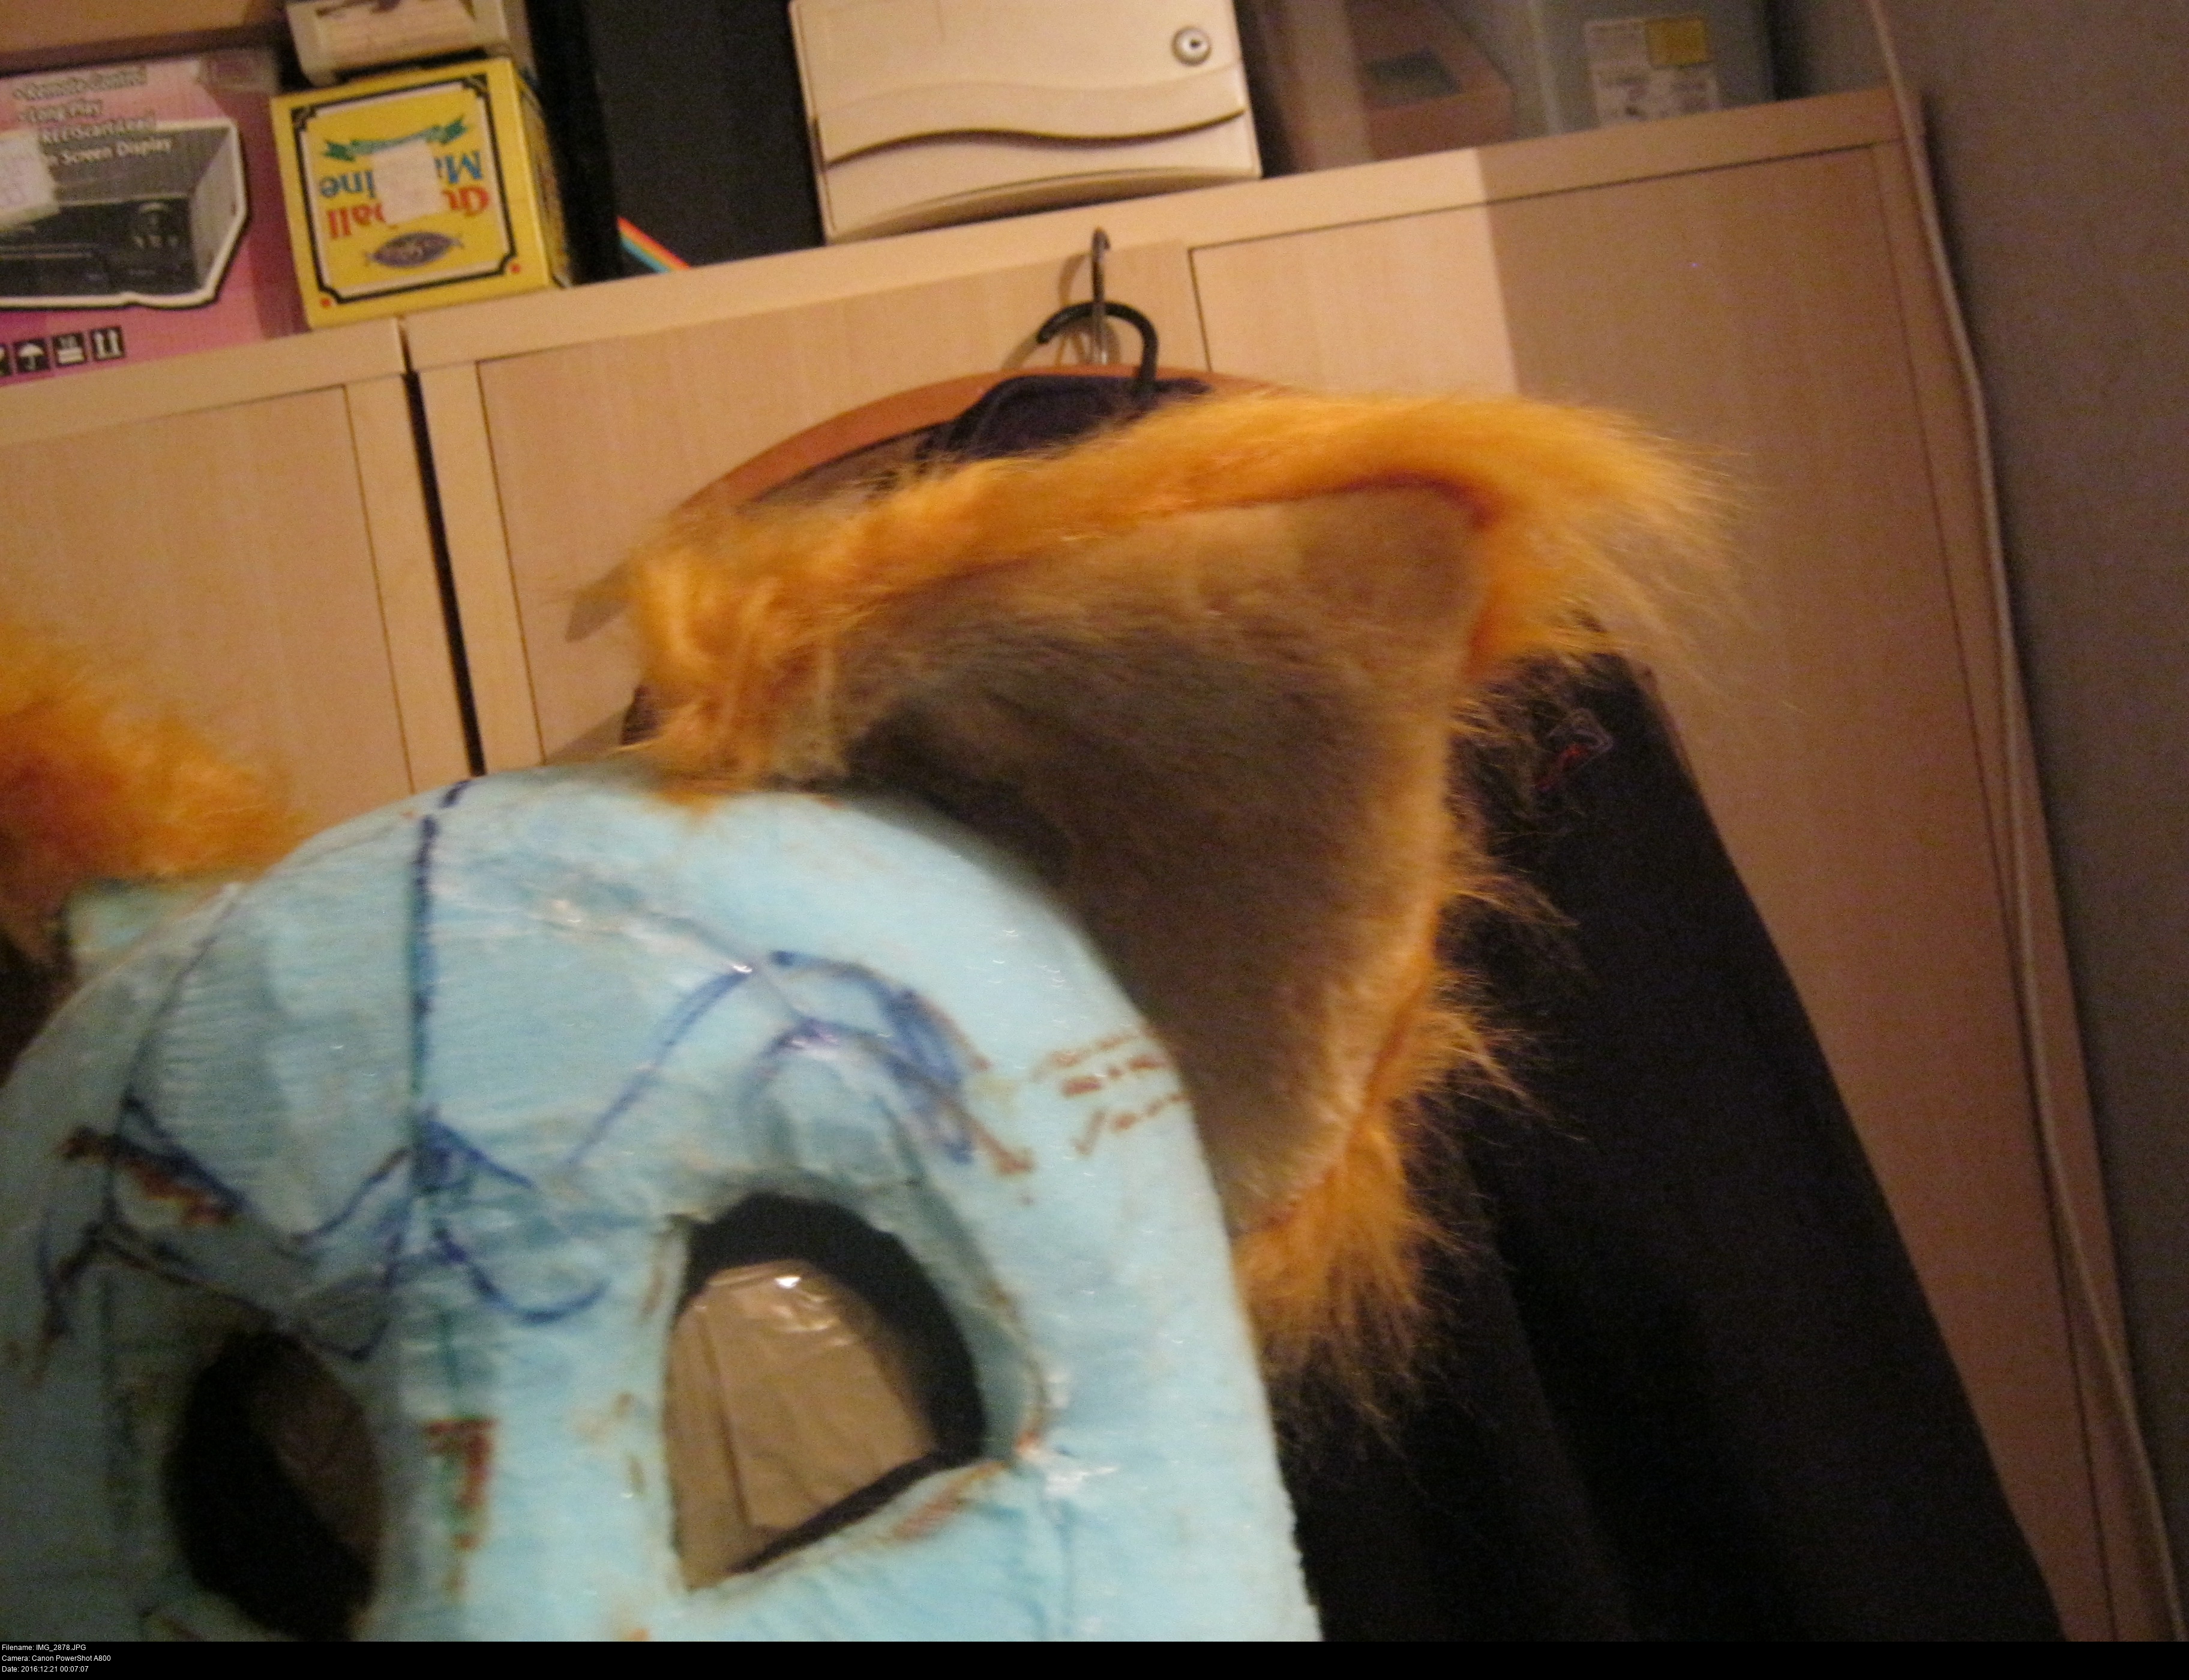
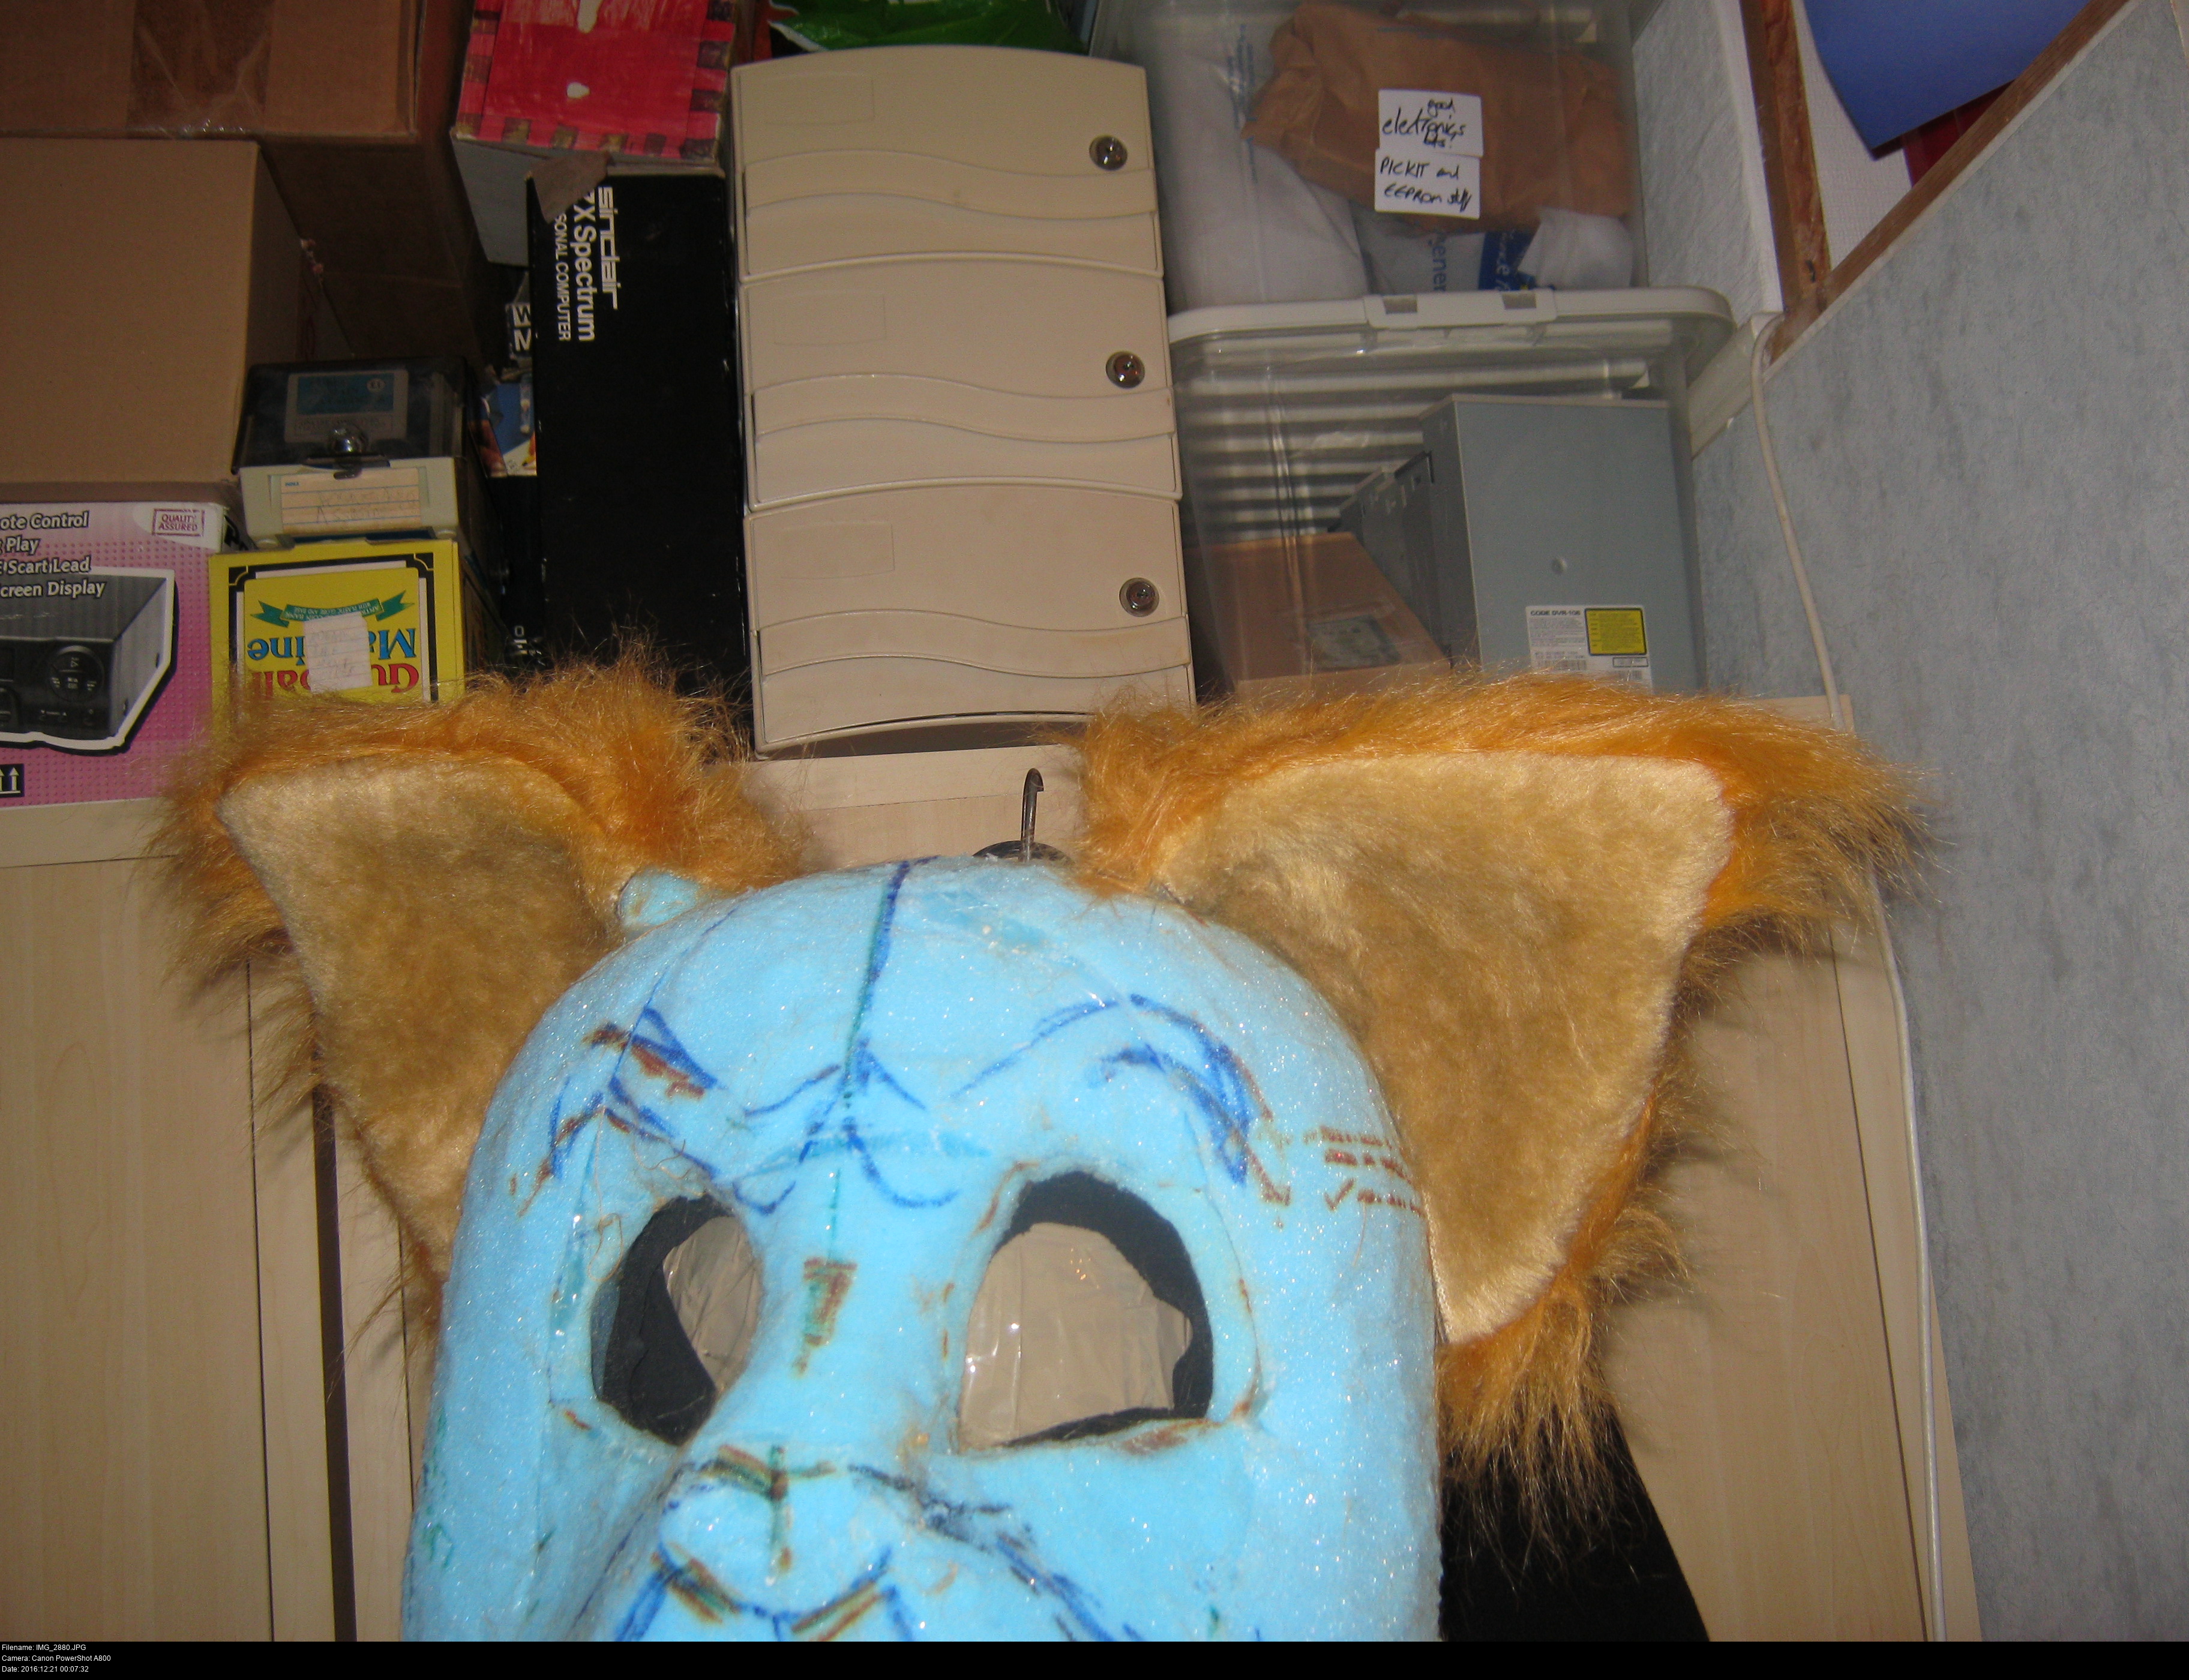
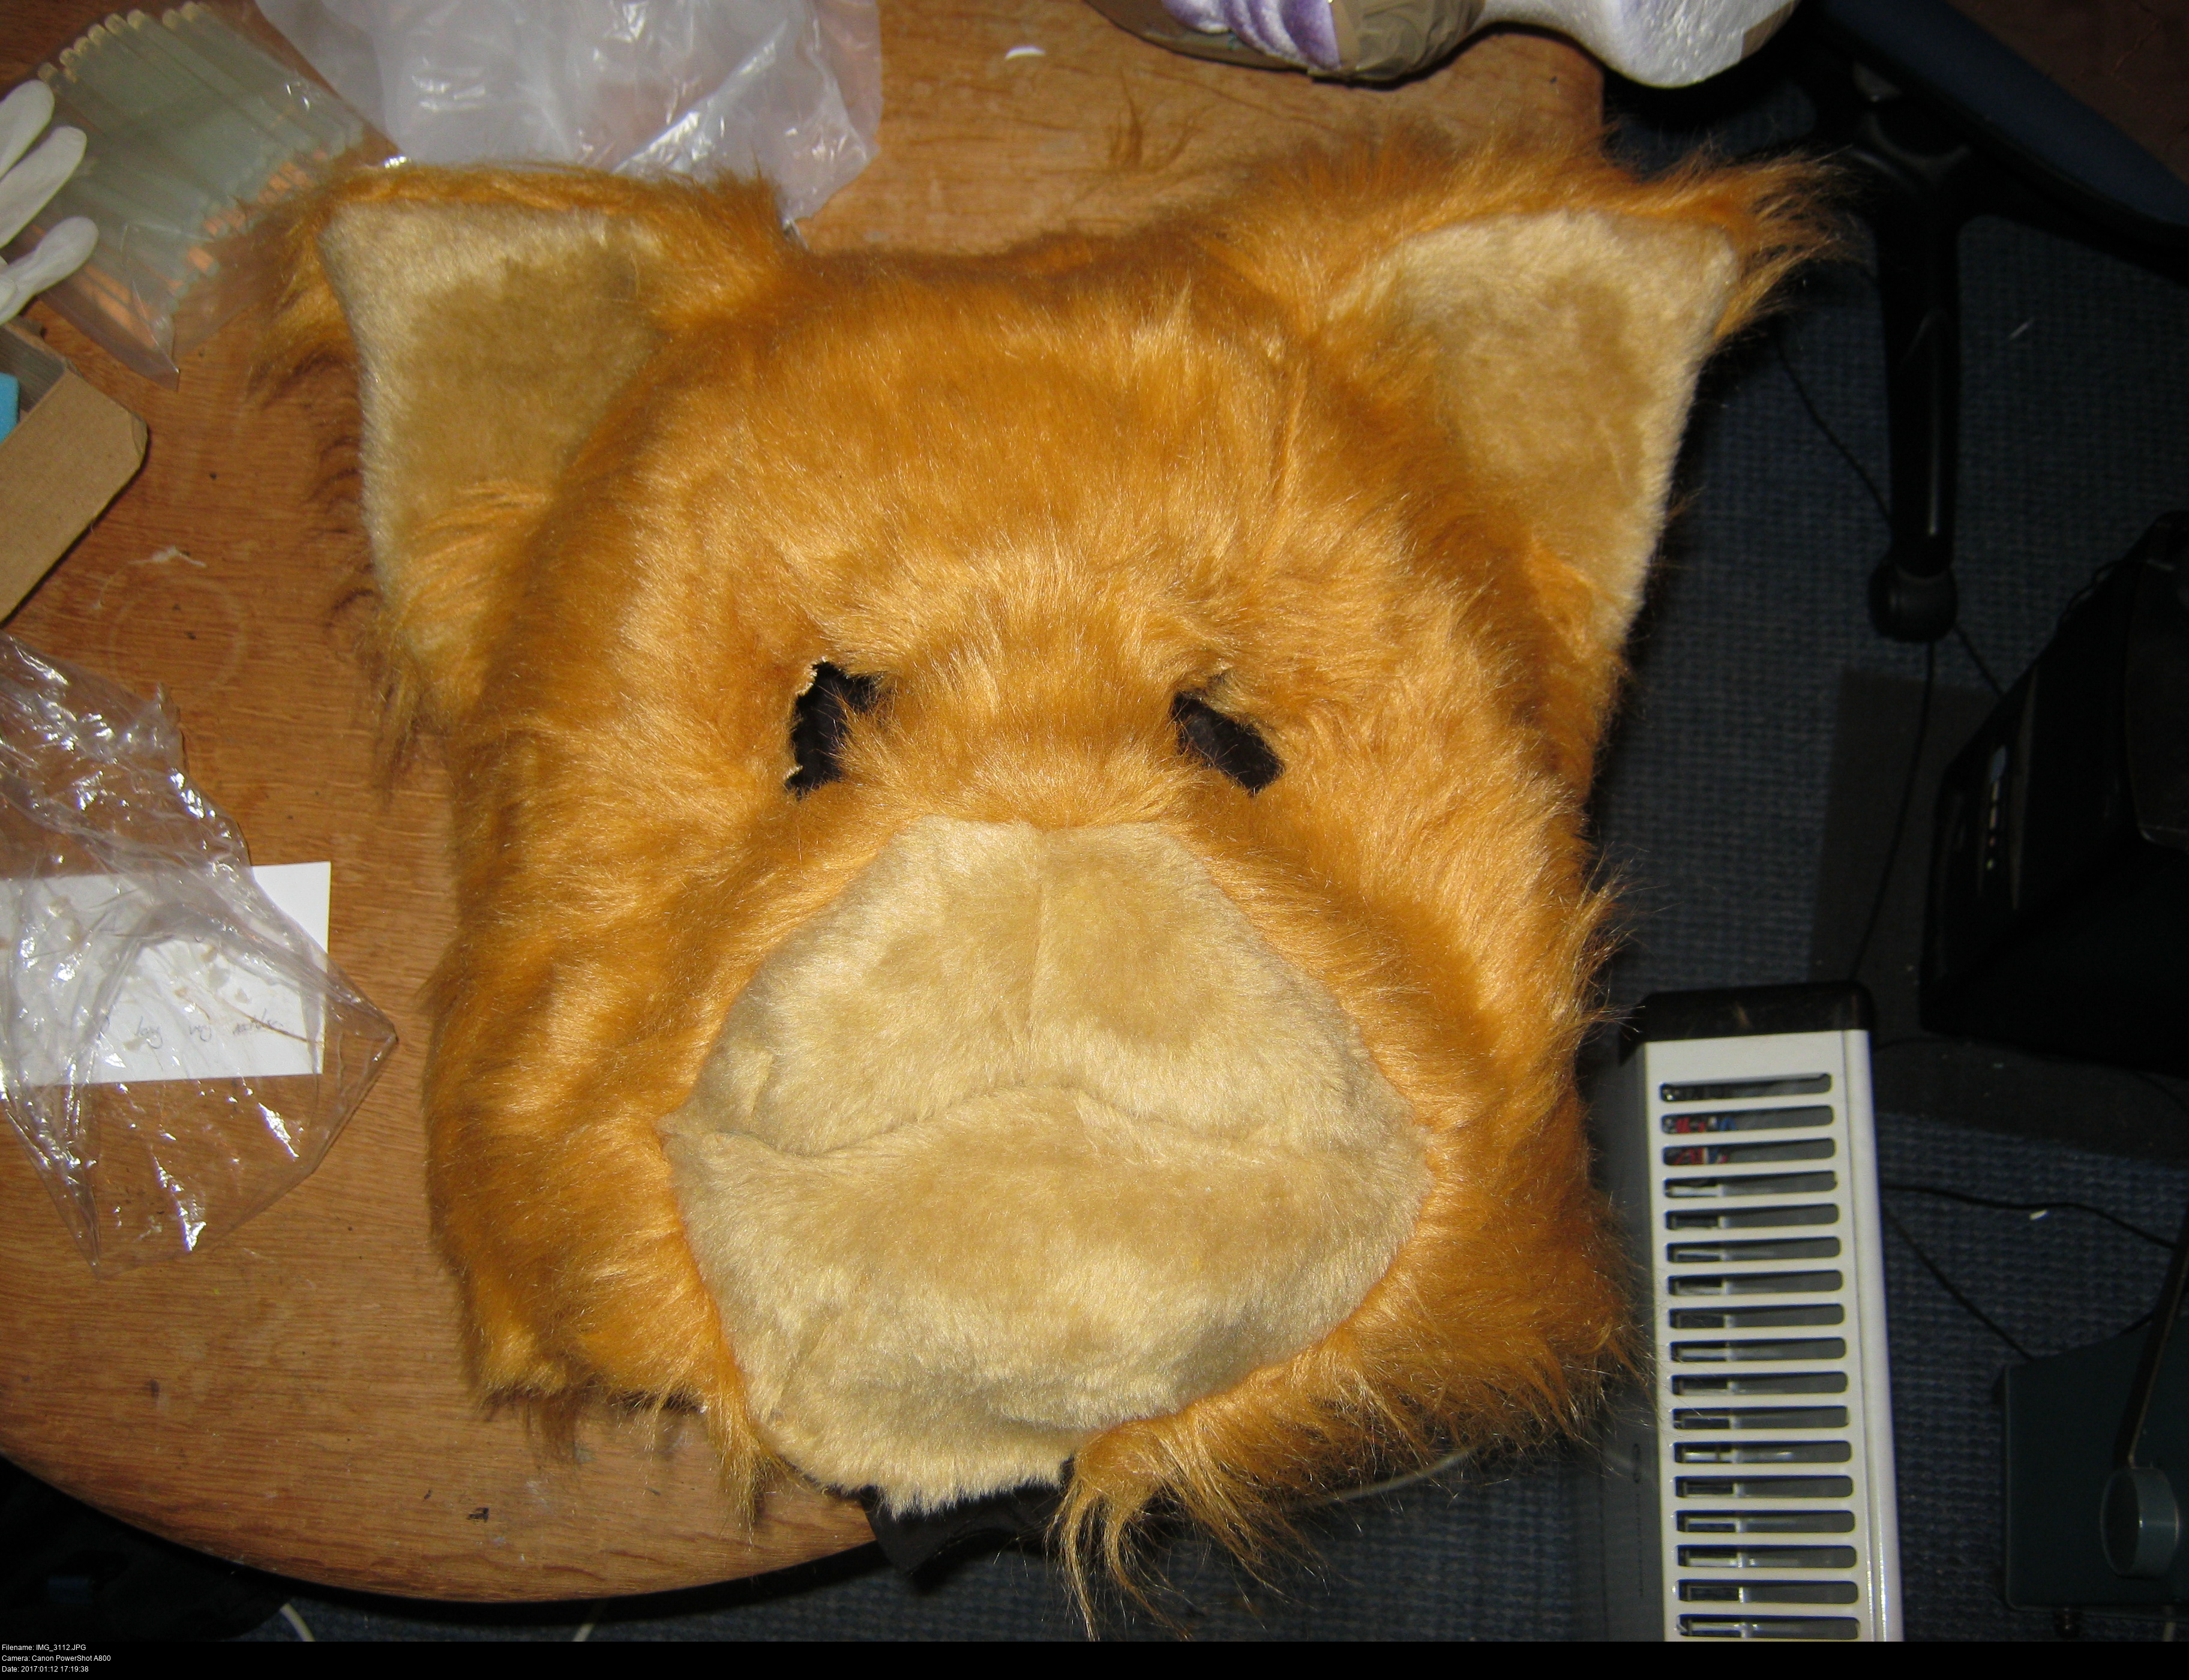
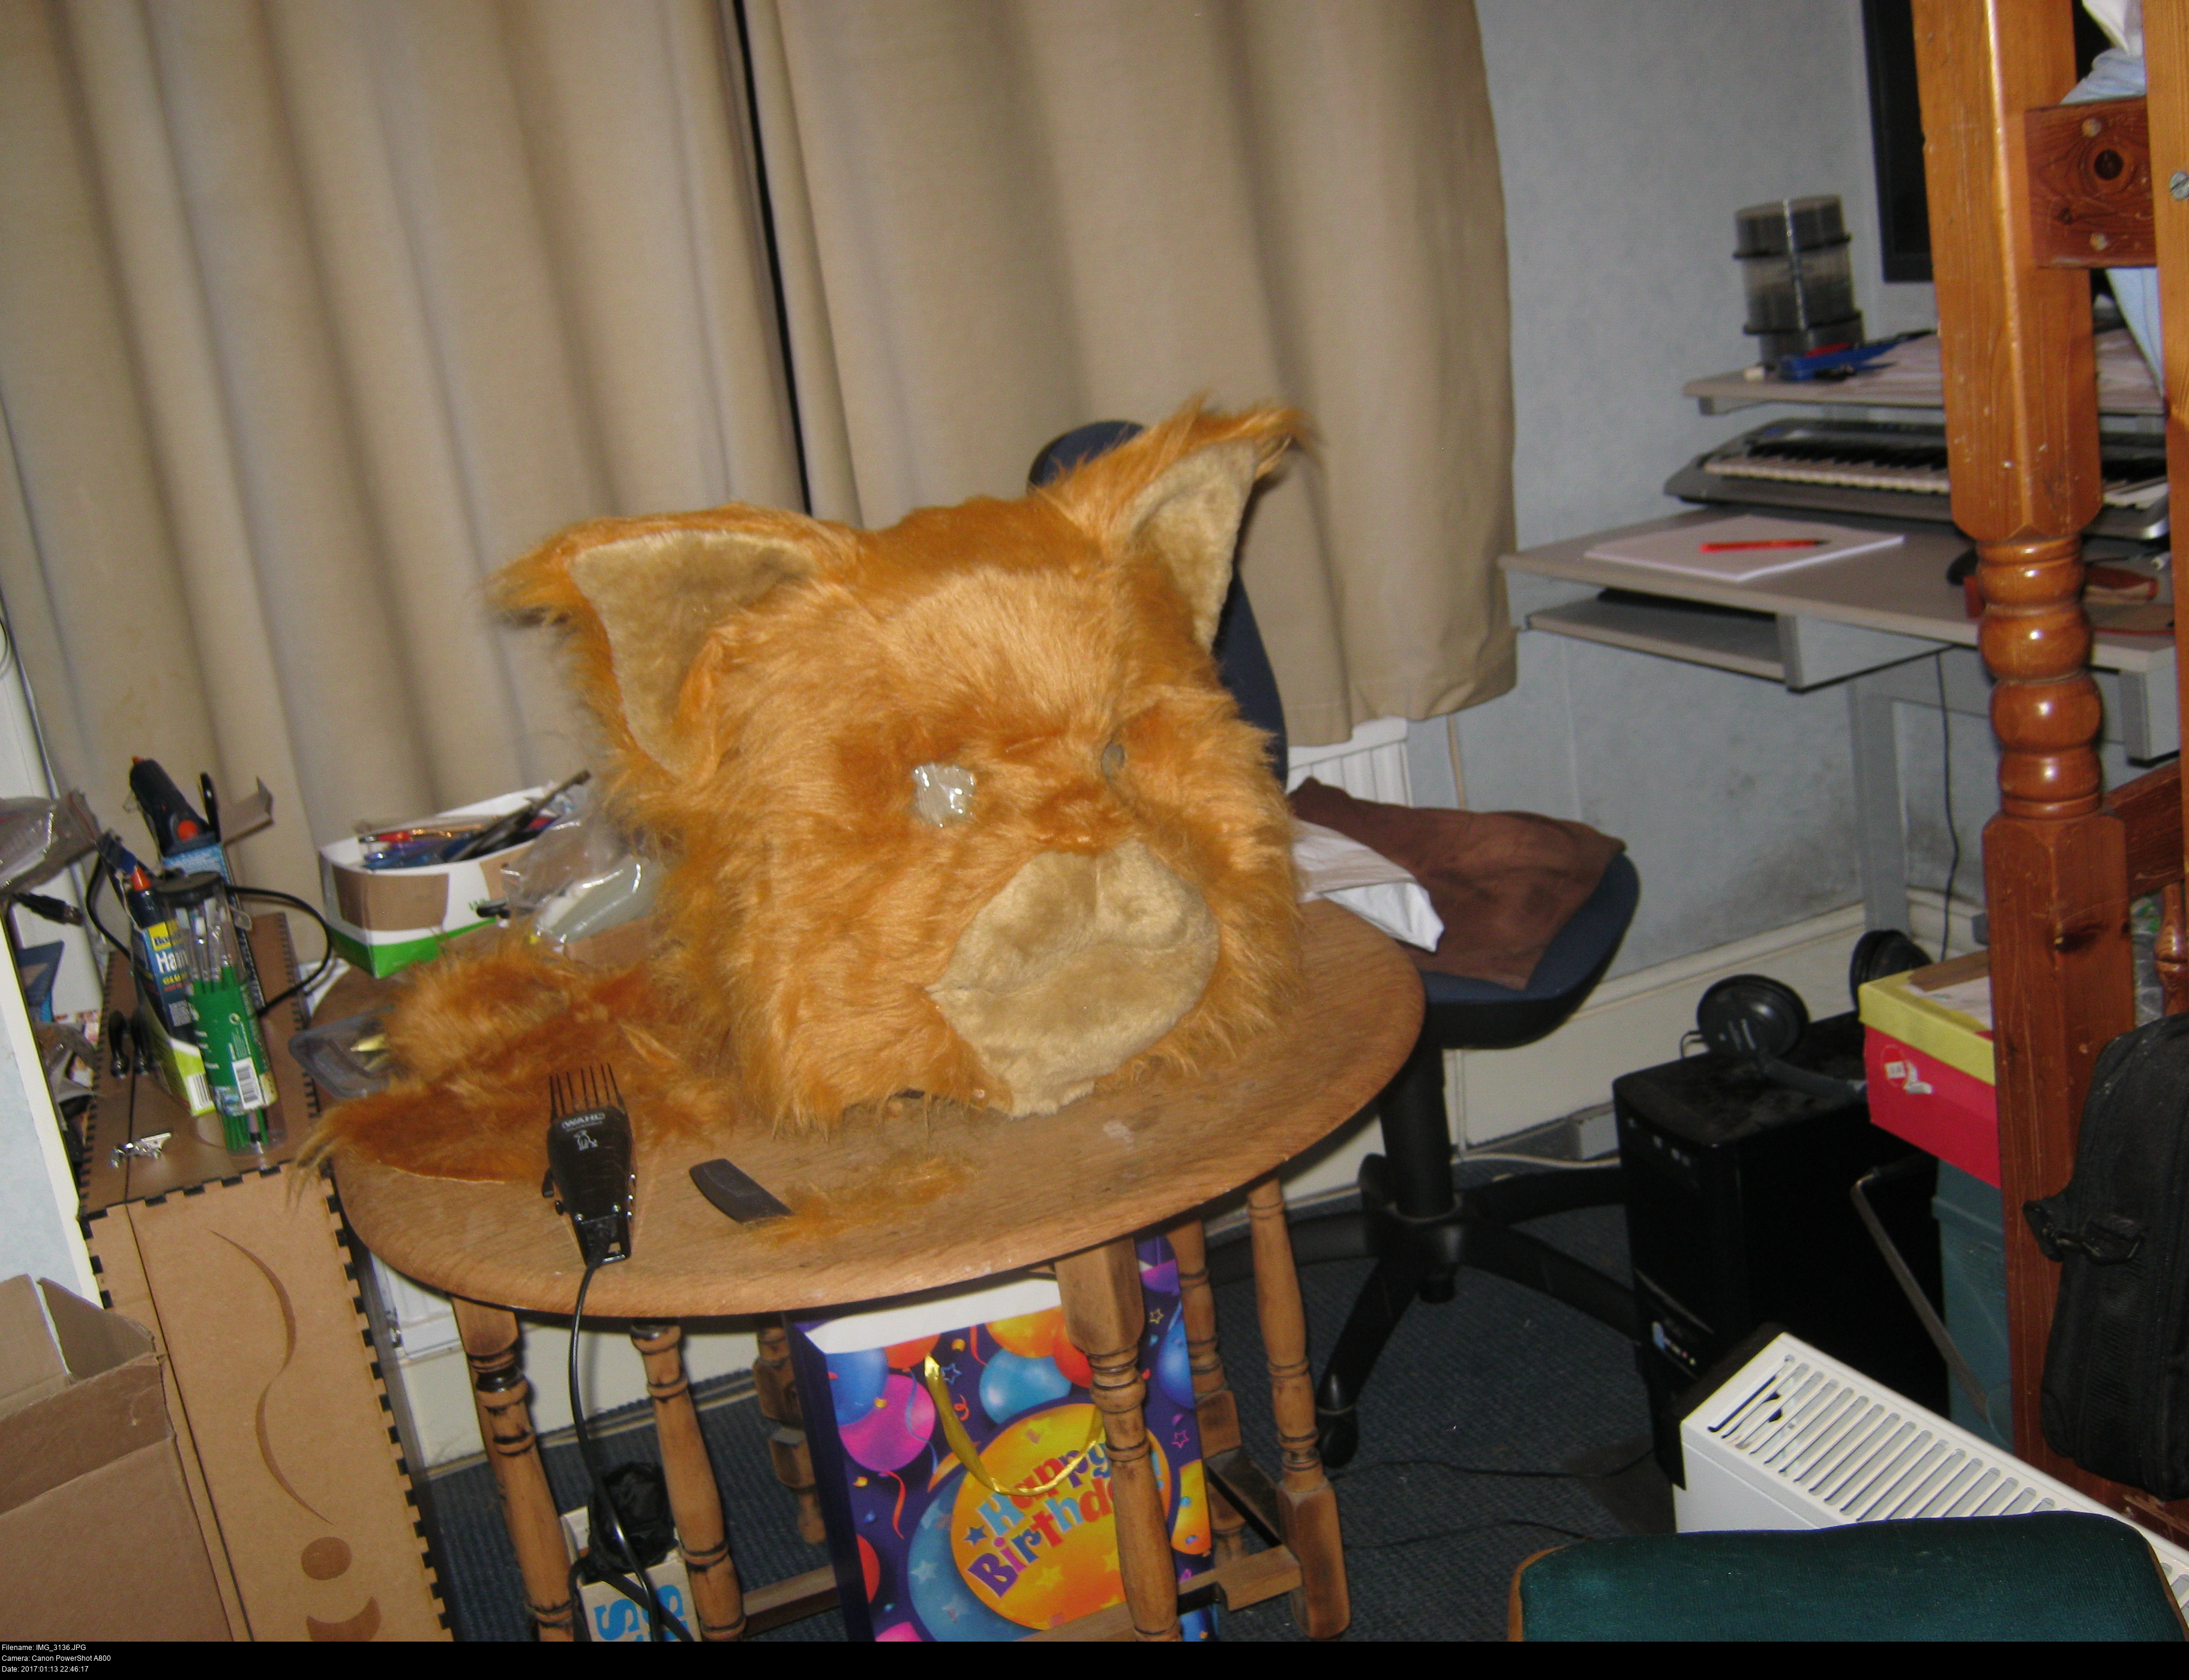
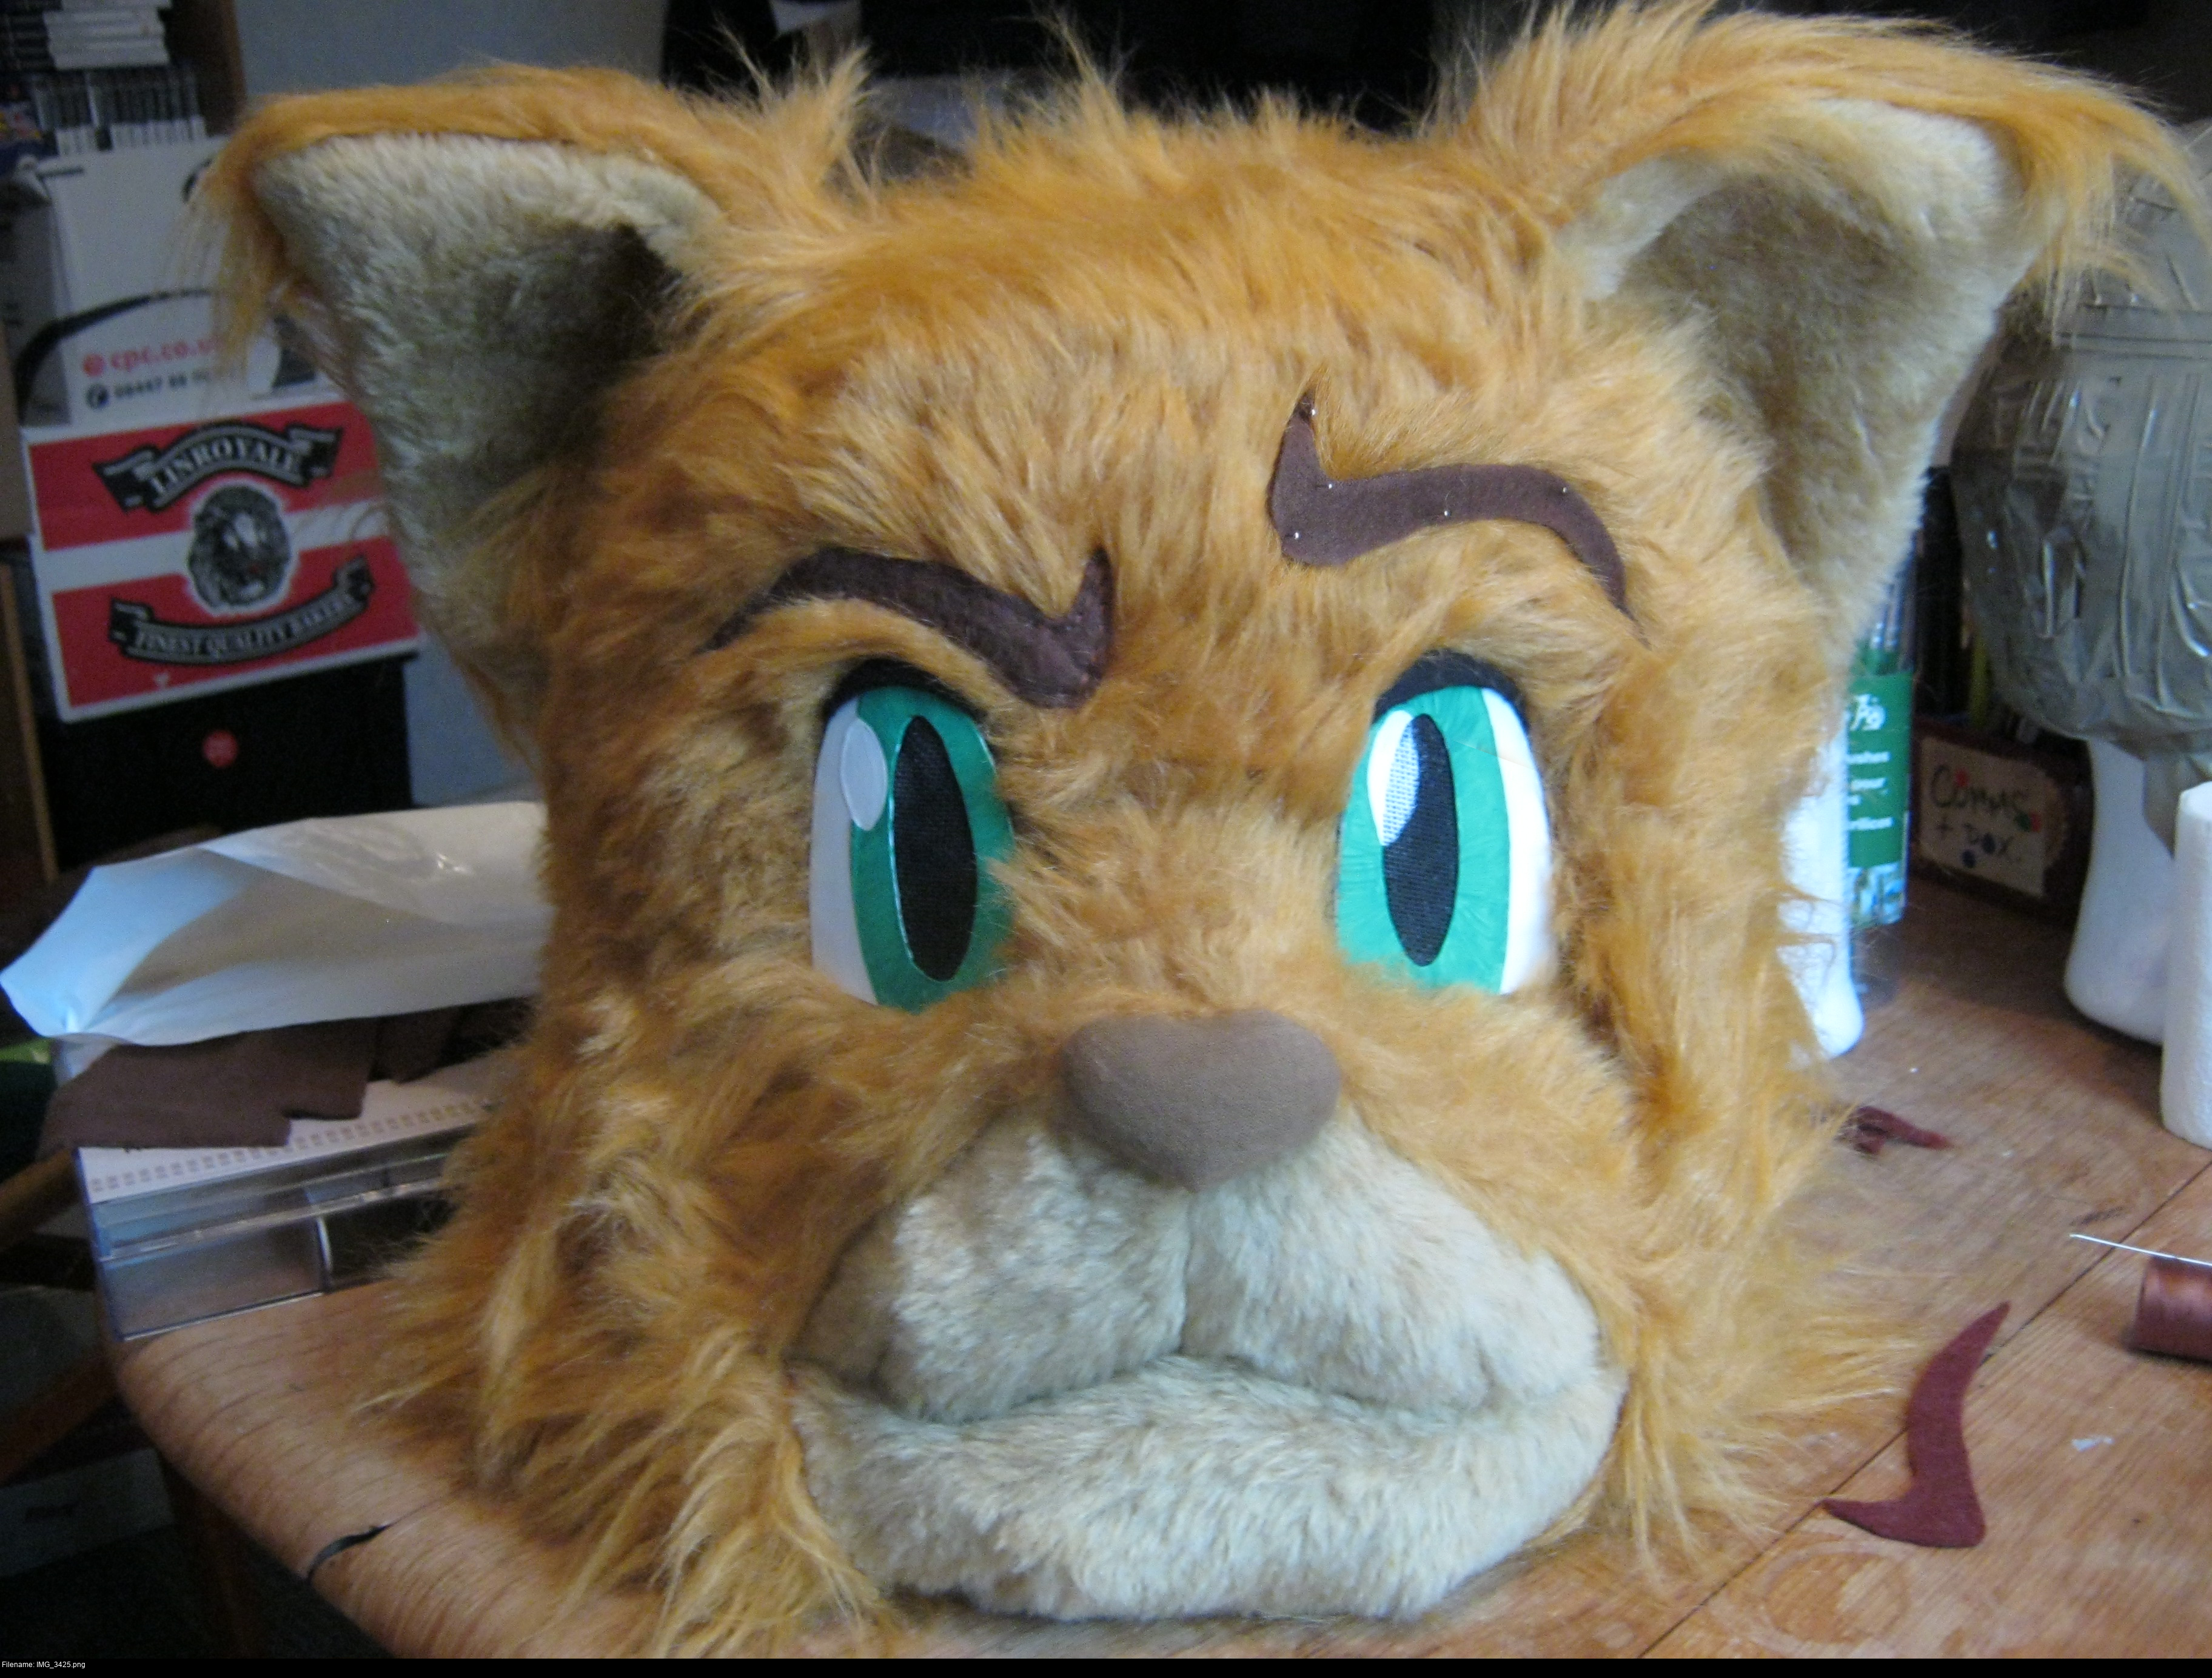
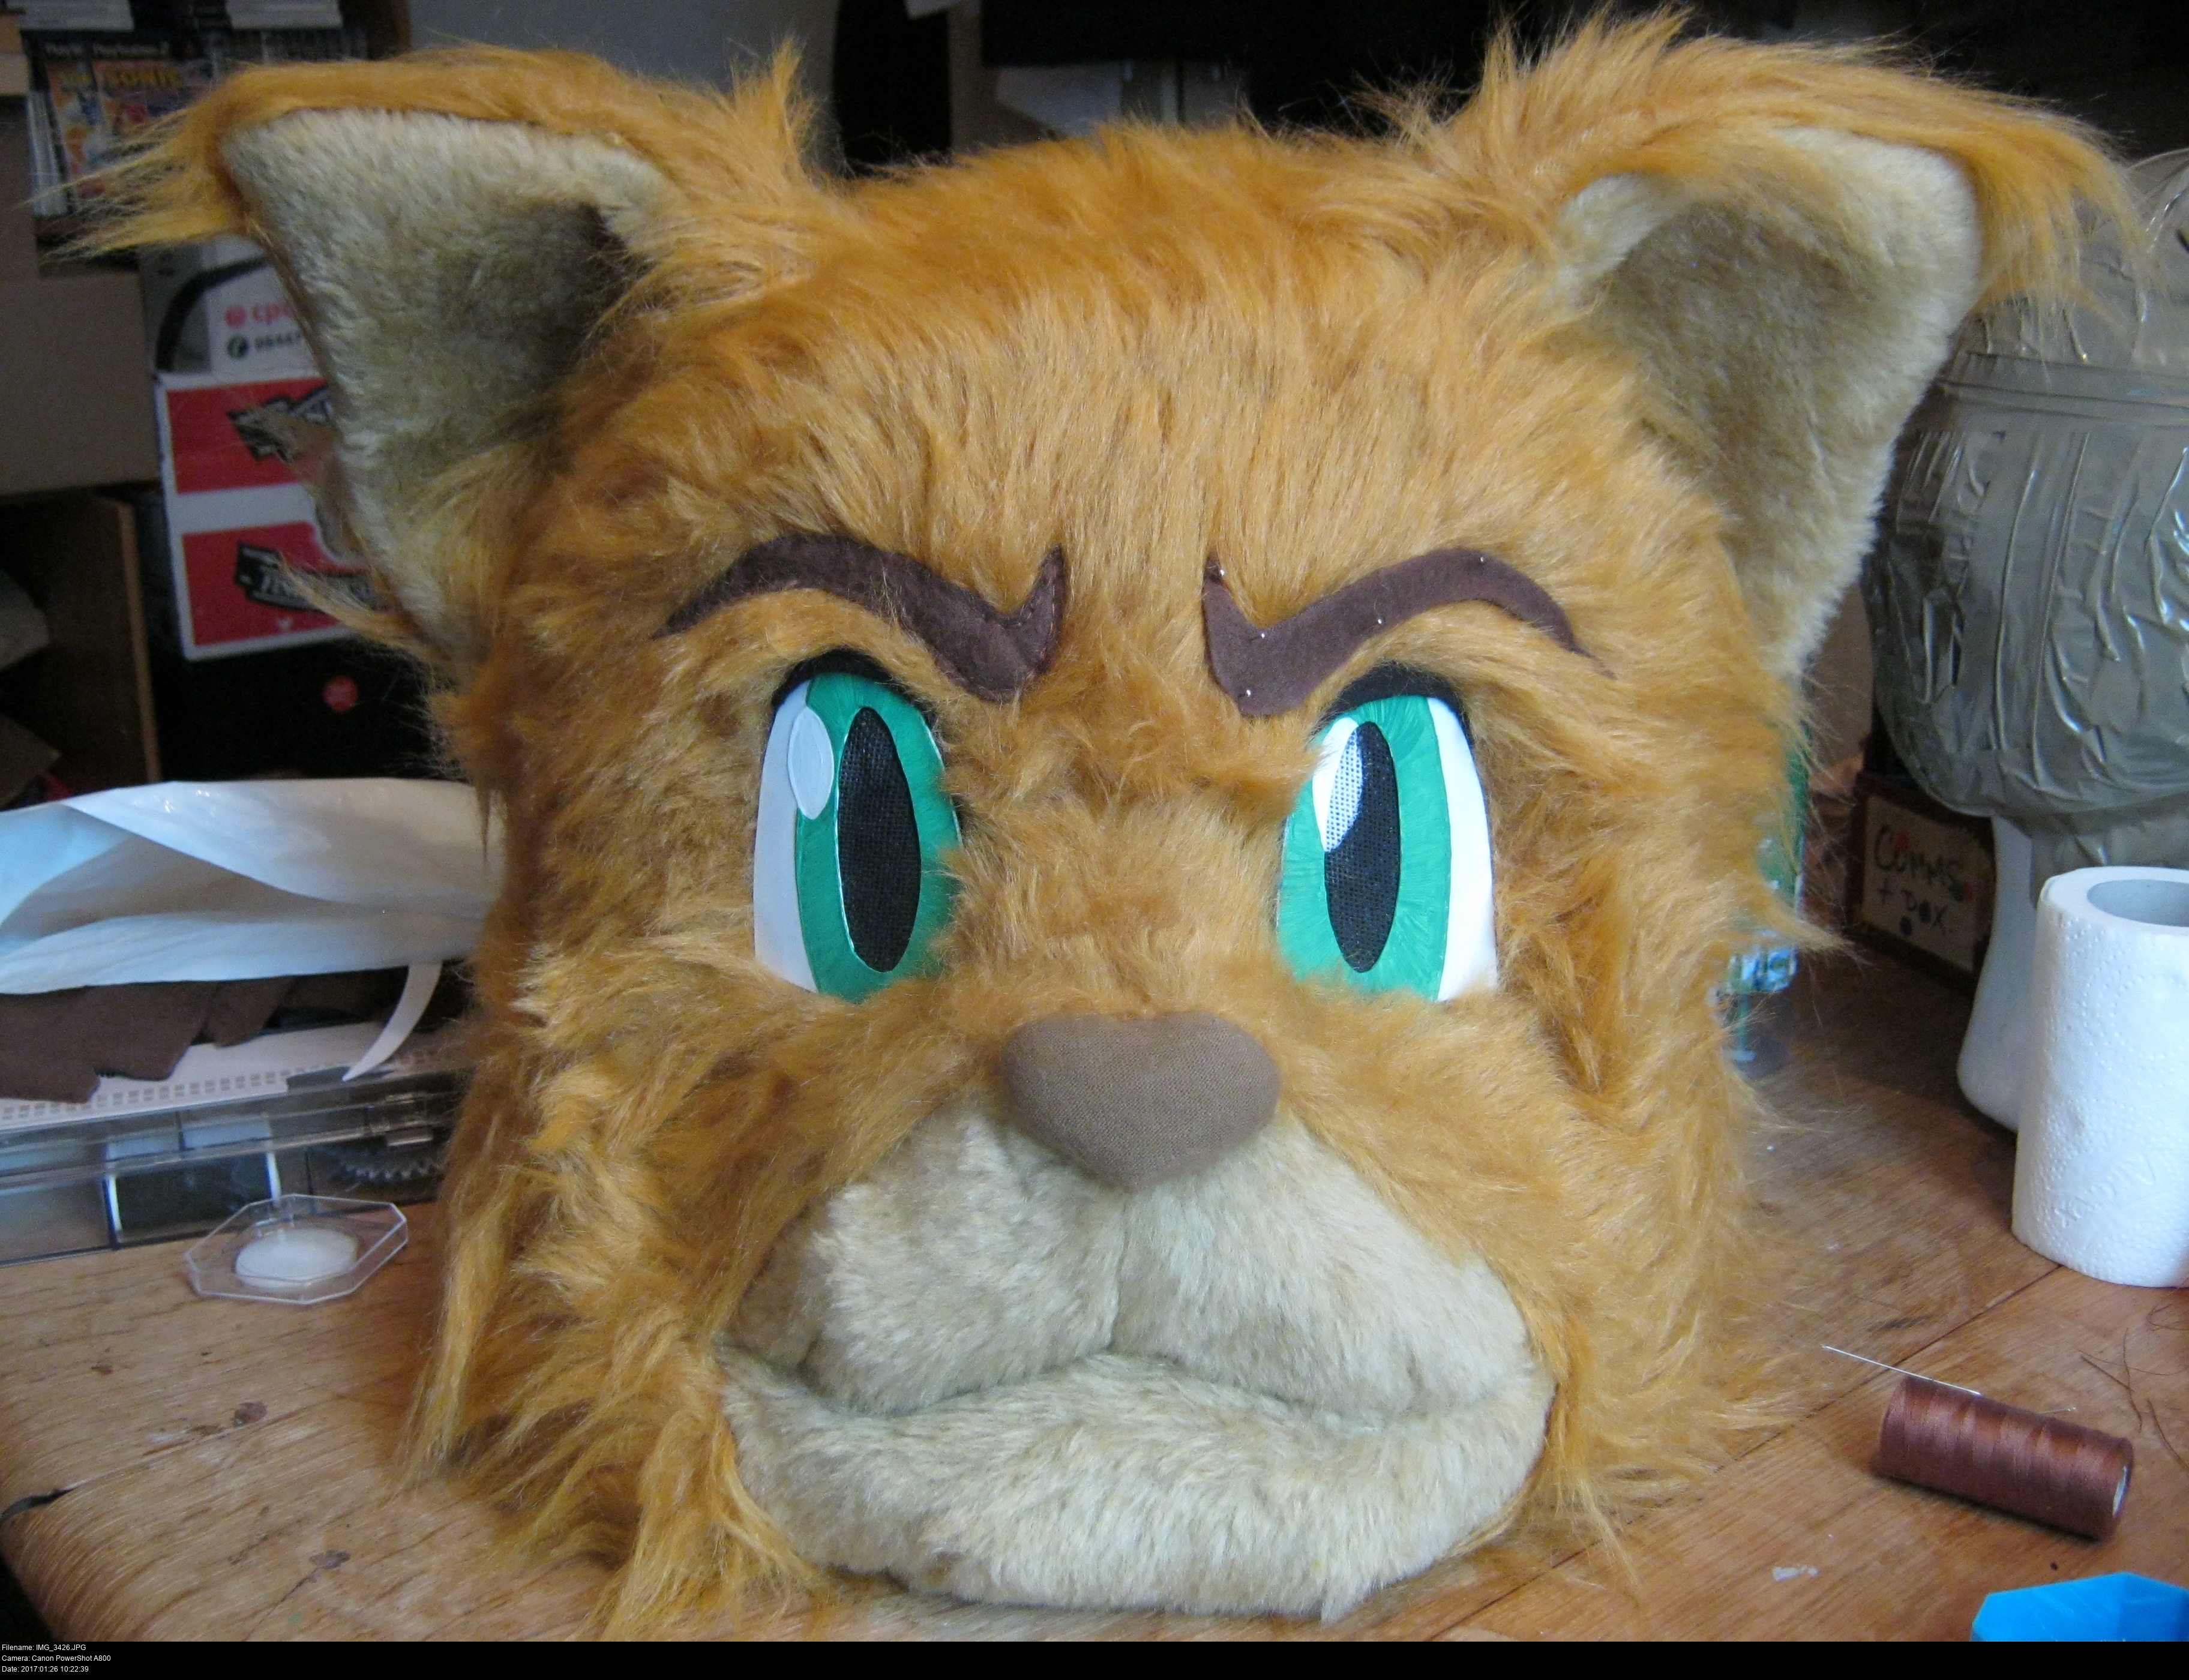
With the head looking as good as I can think I can get it, let's give this guy some permanent ears.


Creating a curved surface that fits into another perfectly isn't easy. I just did trial and error in card until I got a base curve that fit and then tested different ear shapes coming off it.
Hotshot's ears extend mostly horizontally from the corners of his dome head. They noticeably fold forwards horizontally at the front edge. It's hard to get that shape exactly with card, the curve of the card wants to go in every direction but that one. I ended up taping new segments onto the paper and cutting new shapes over and over until I got it looking right.
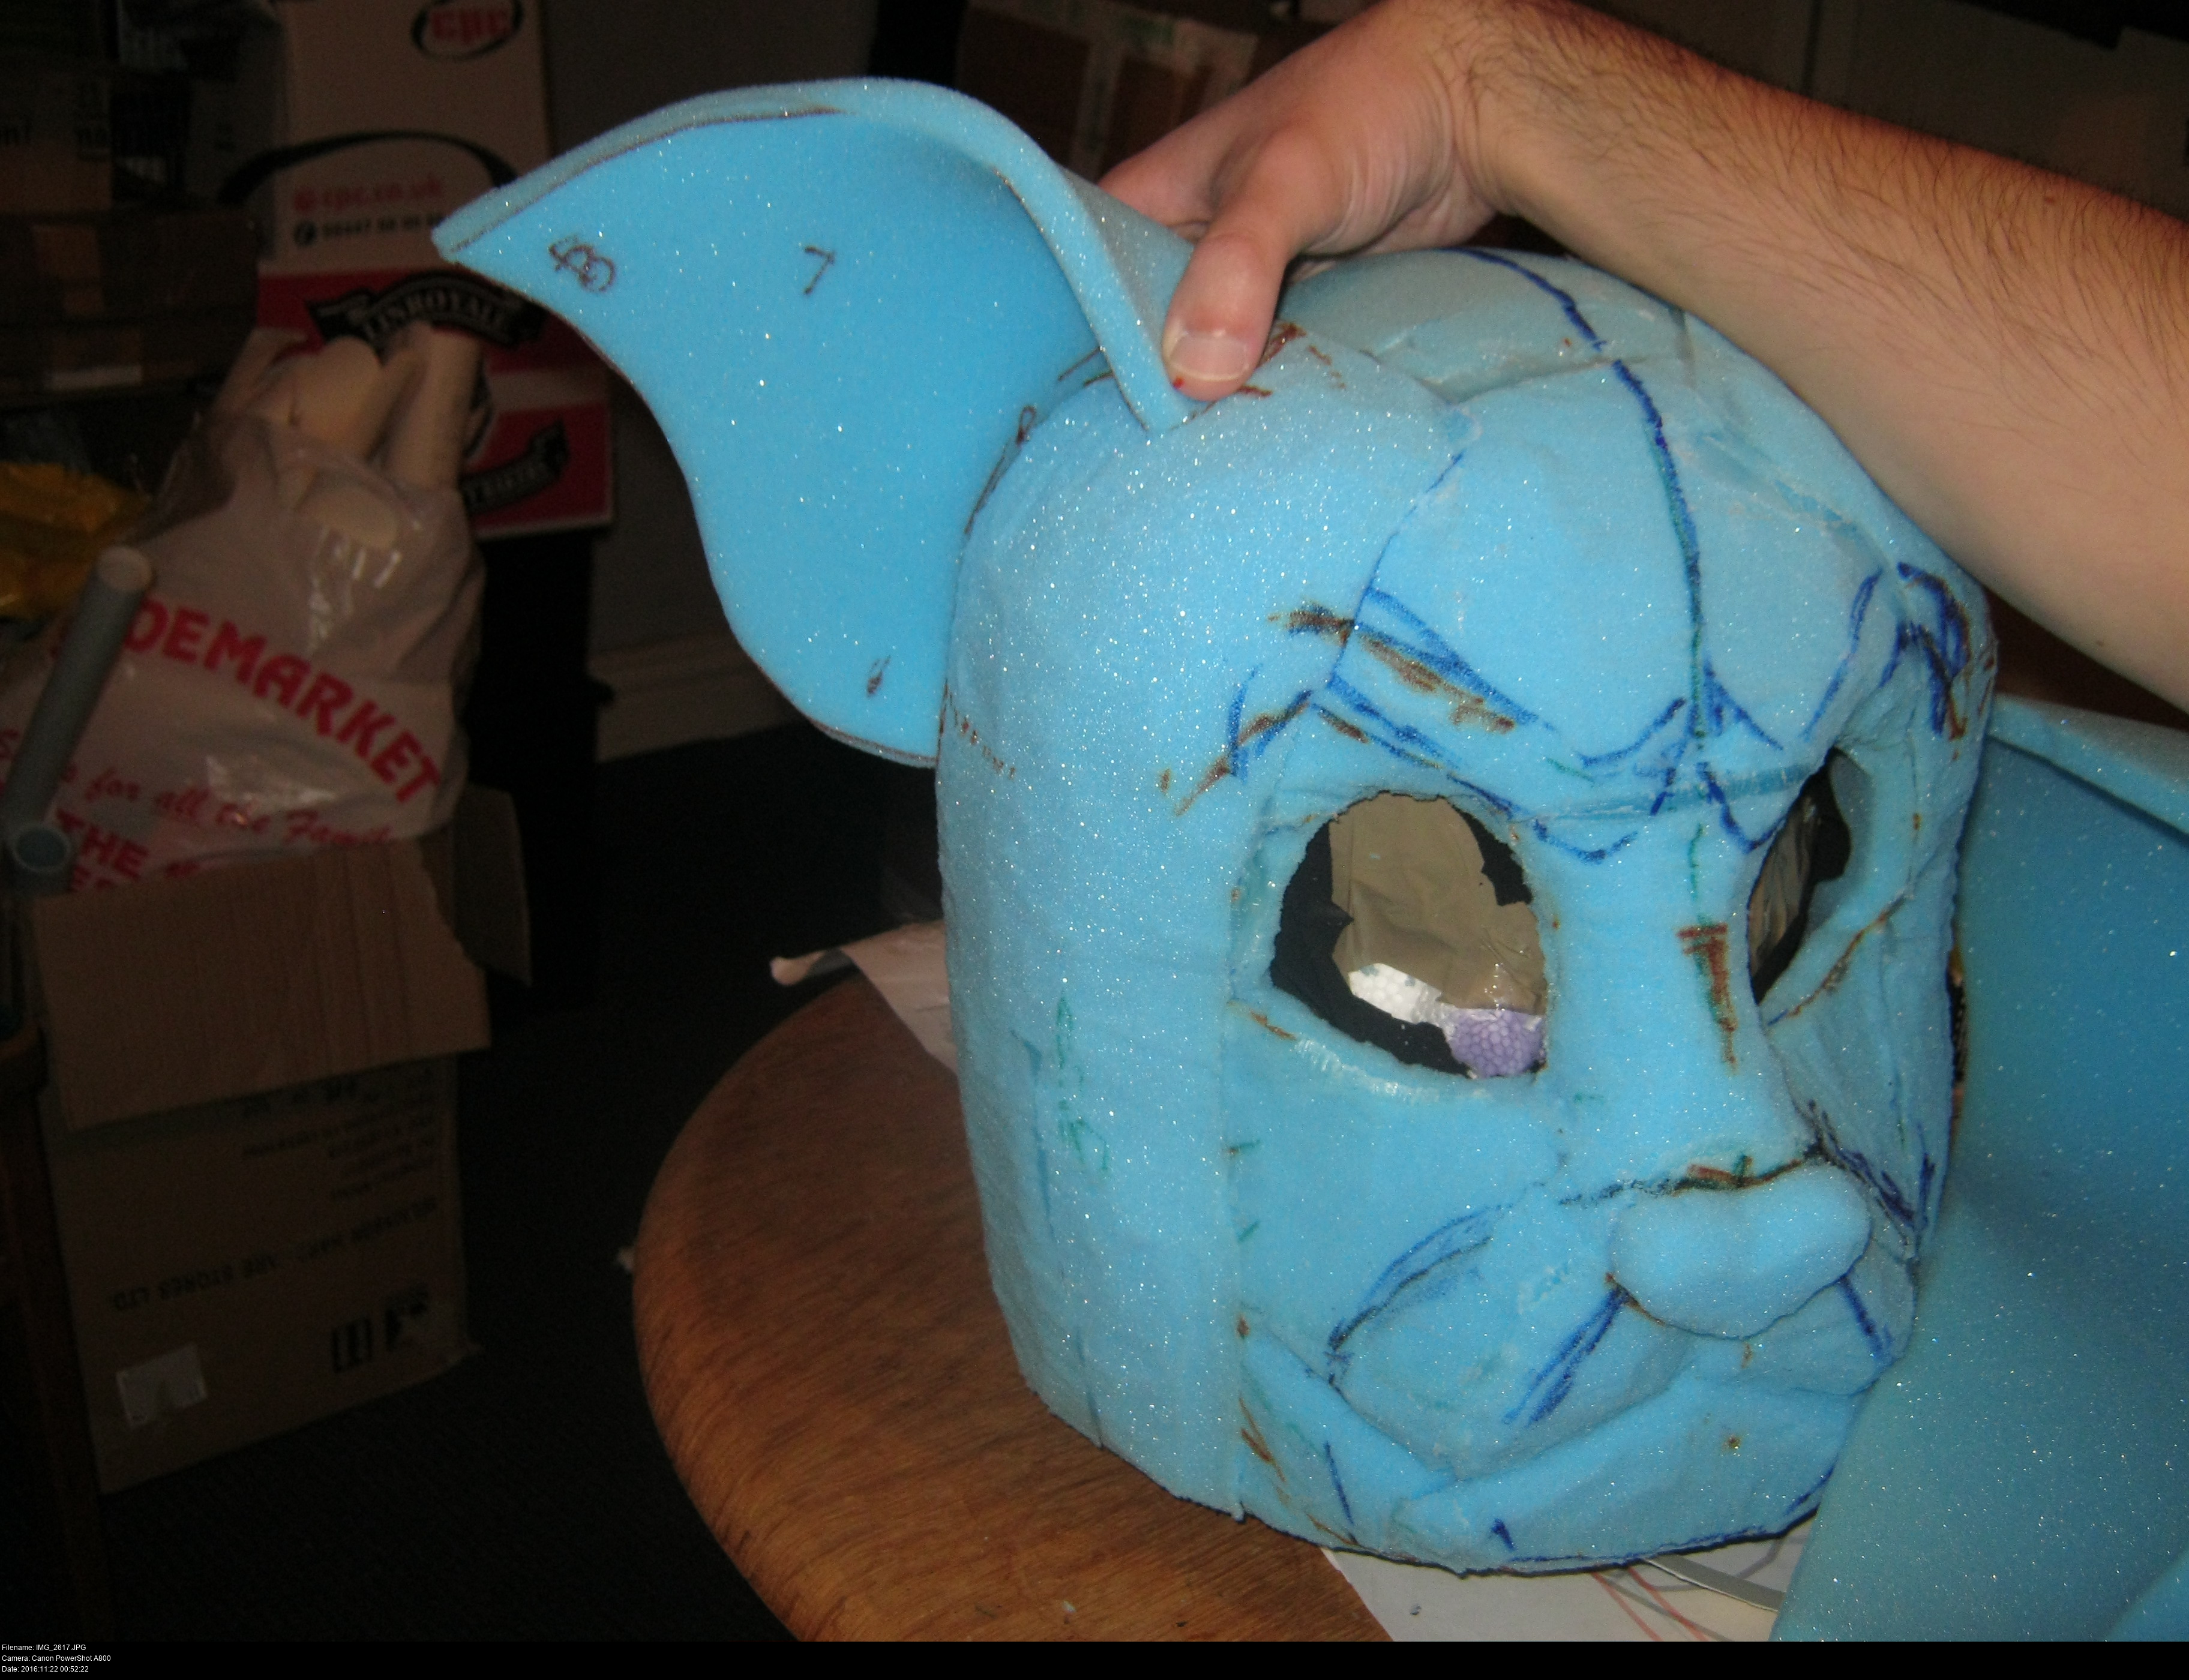
And even then when it's rendered in the thin foam the curve wants to spring out into a different direction yet again due to the tensions in the material. The fold has become a vertical line now instead a horizontal line.
I could coerce it to fold in the correct direction by cutting a horizontal notch in the interior of the foam (following the horizontal lines I've drawn in marker here), but since it's going to be covered with fur I don't know if it will show. I could also try forcing a fold in it by clamping it folded for a few days and hoping that the fold stays.
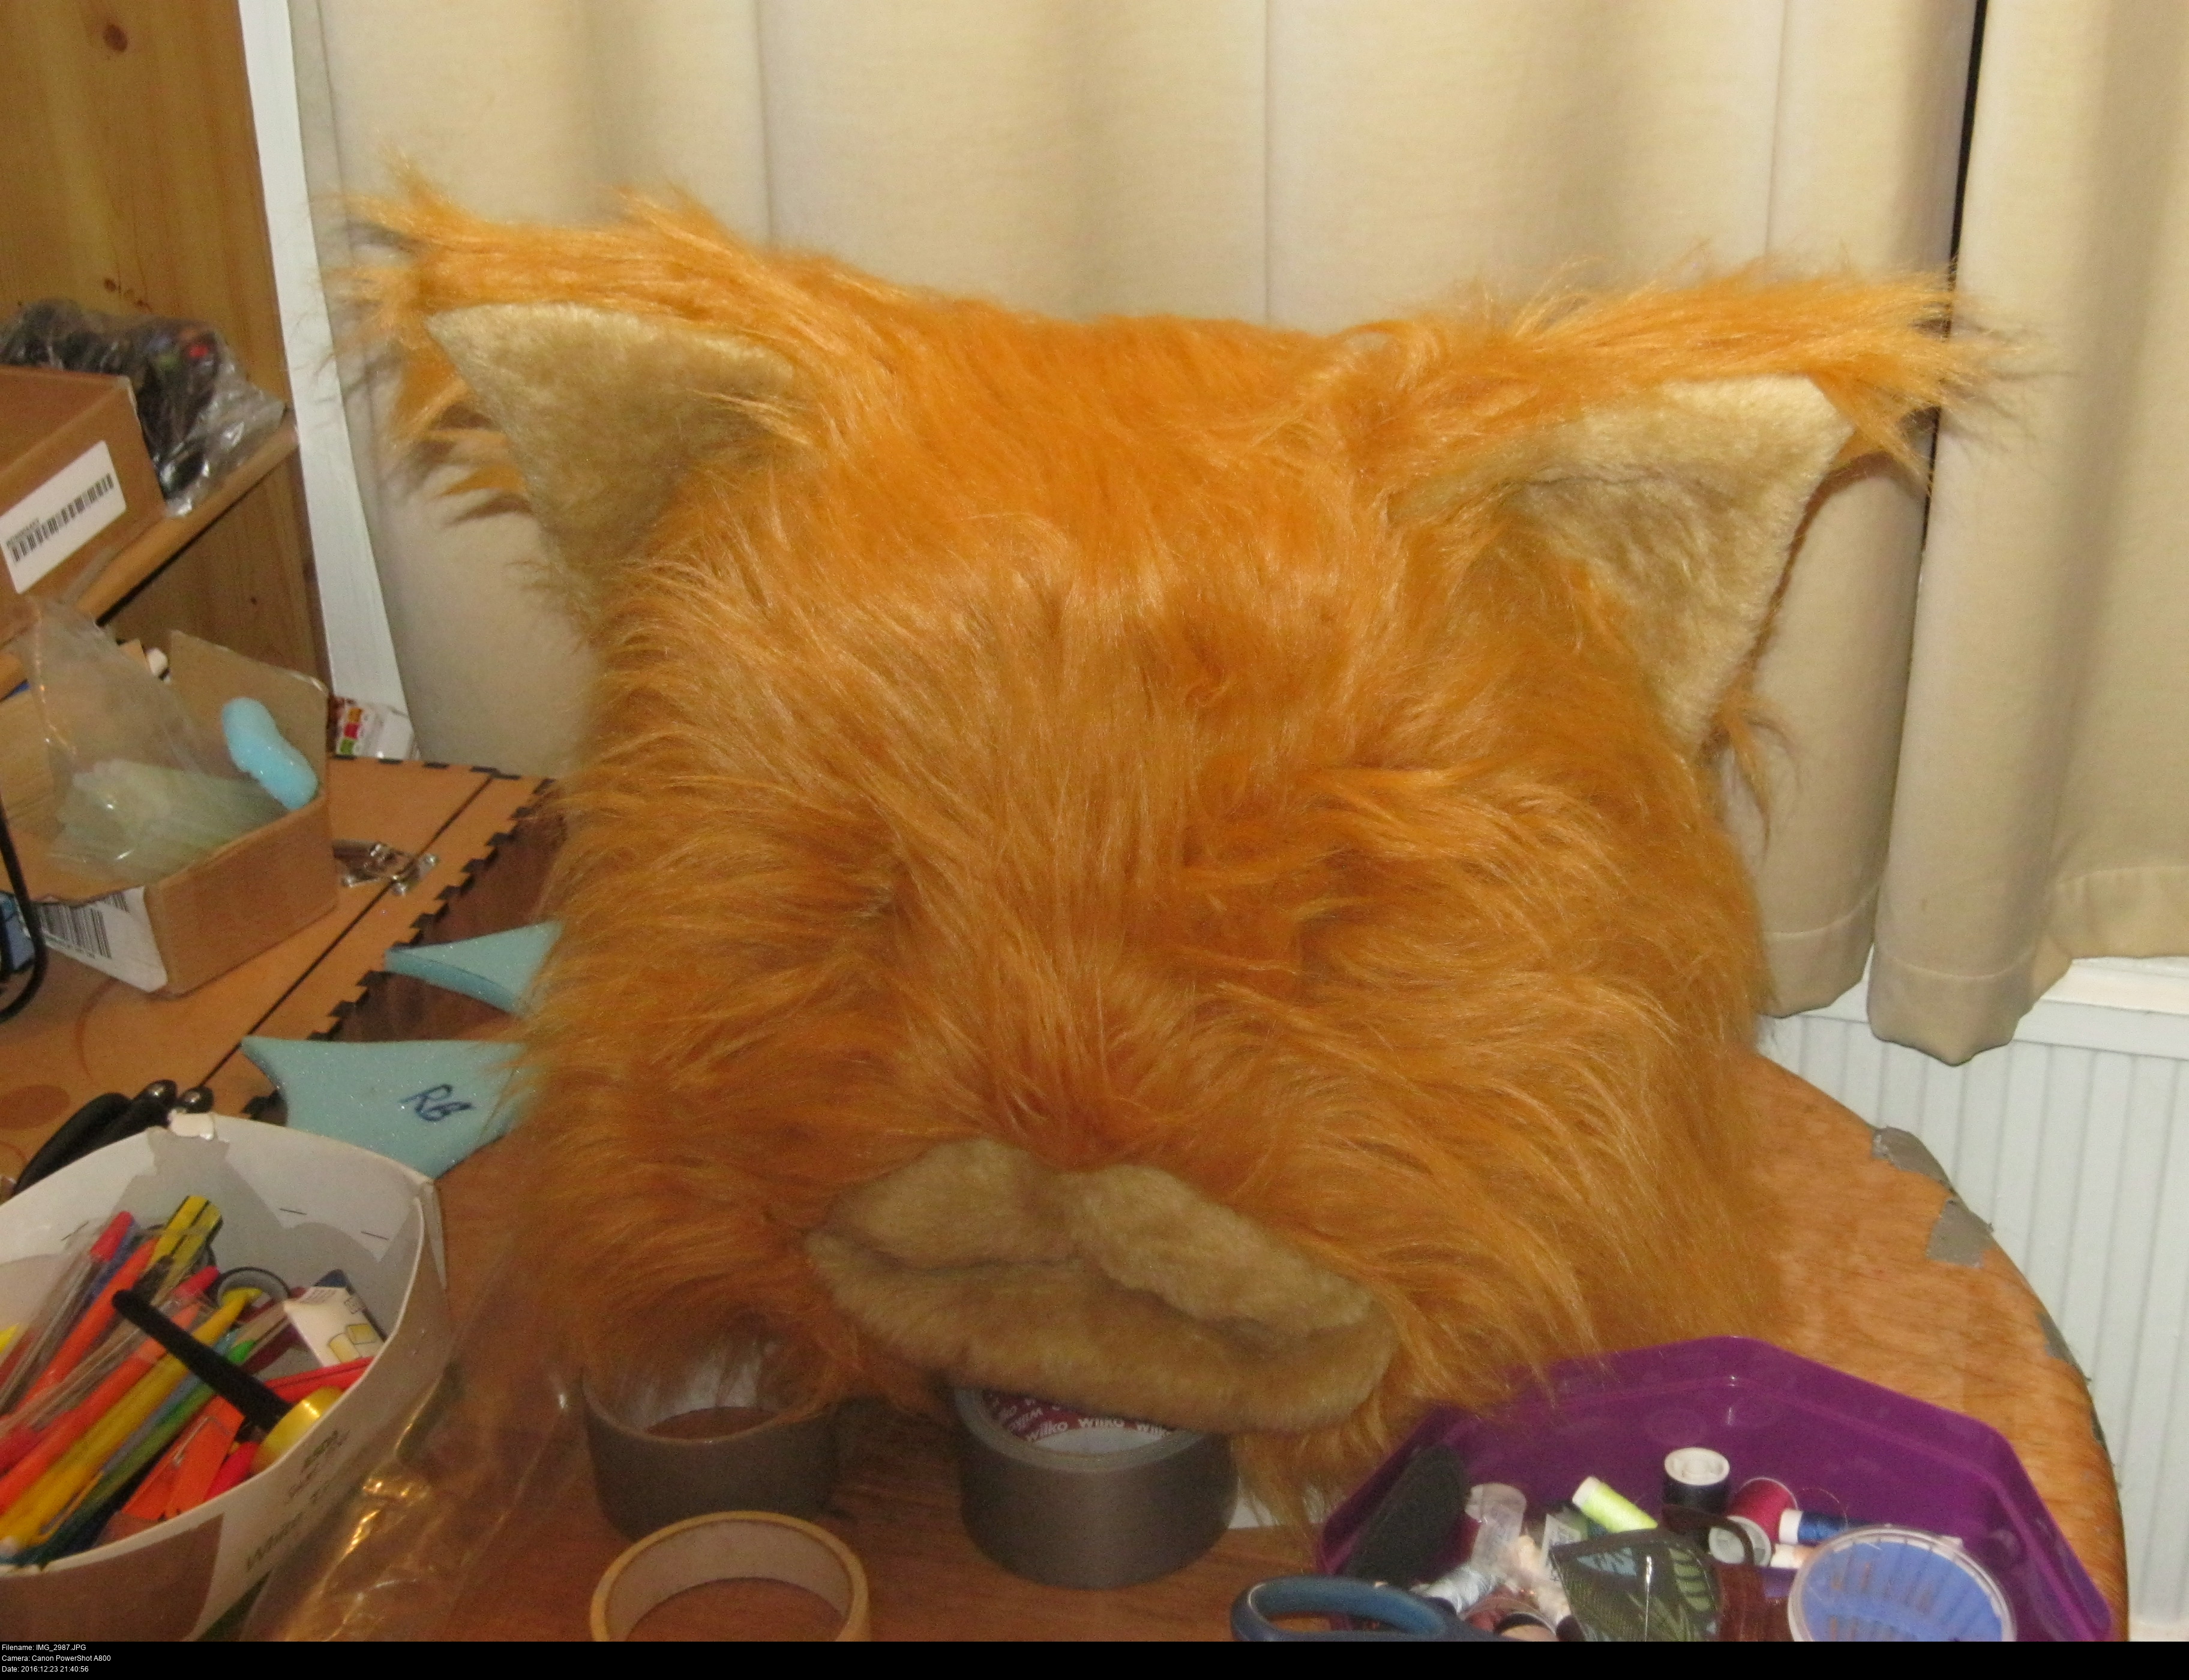
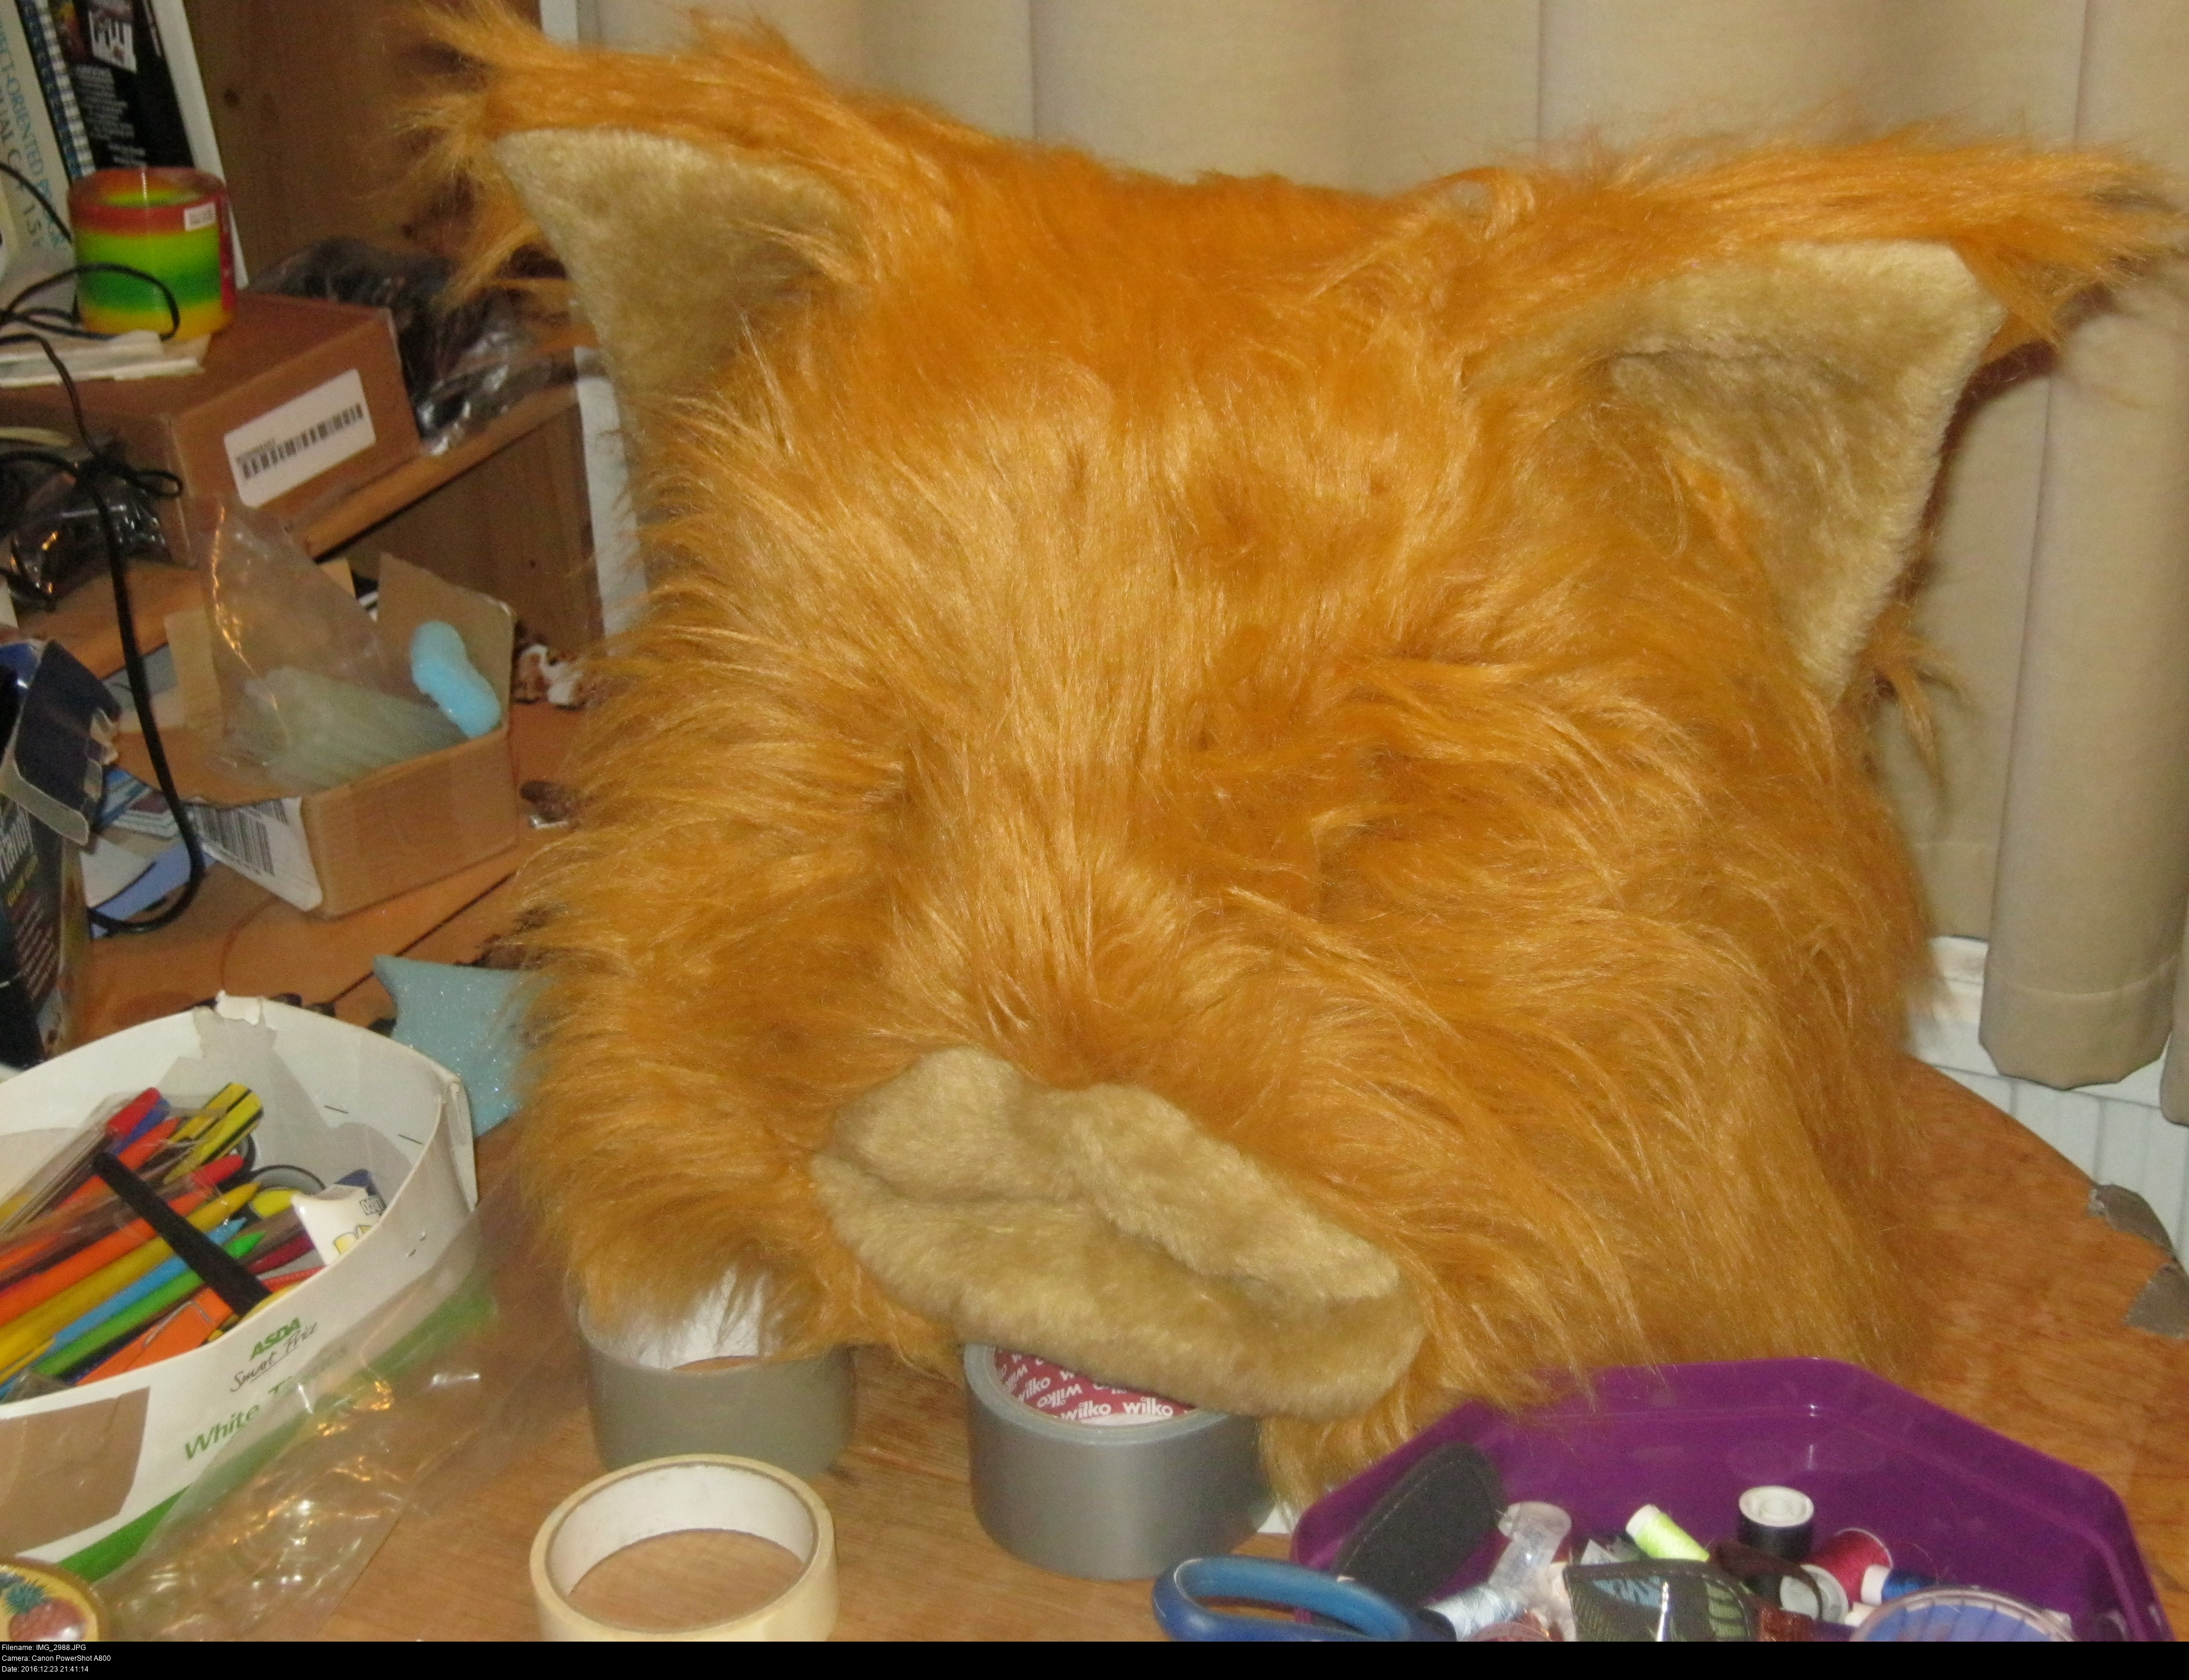
Alright, they're hot glued. It's done. Ears are on.
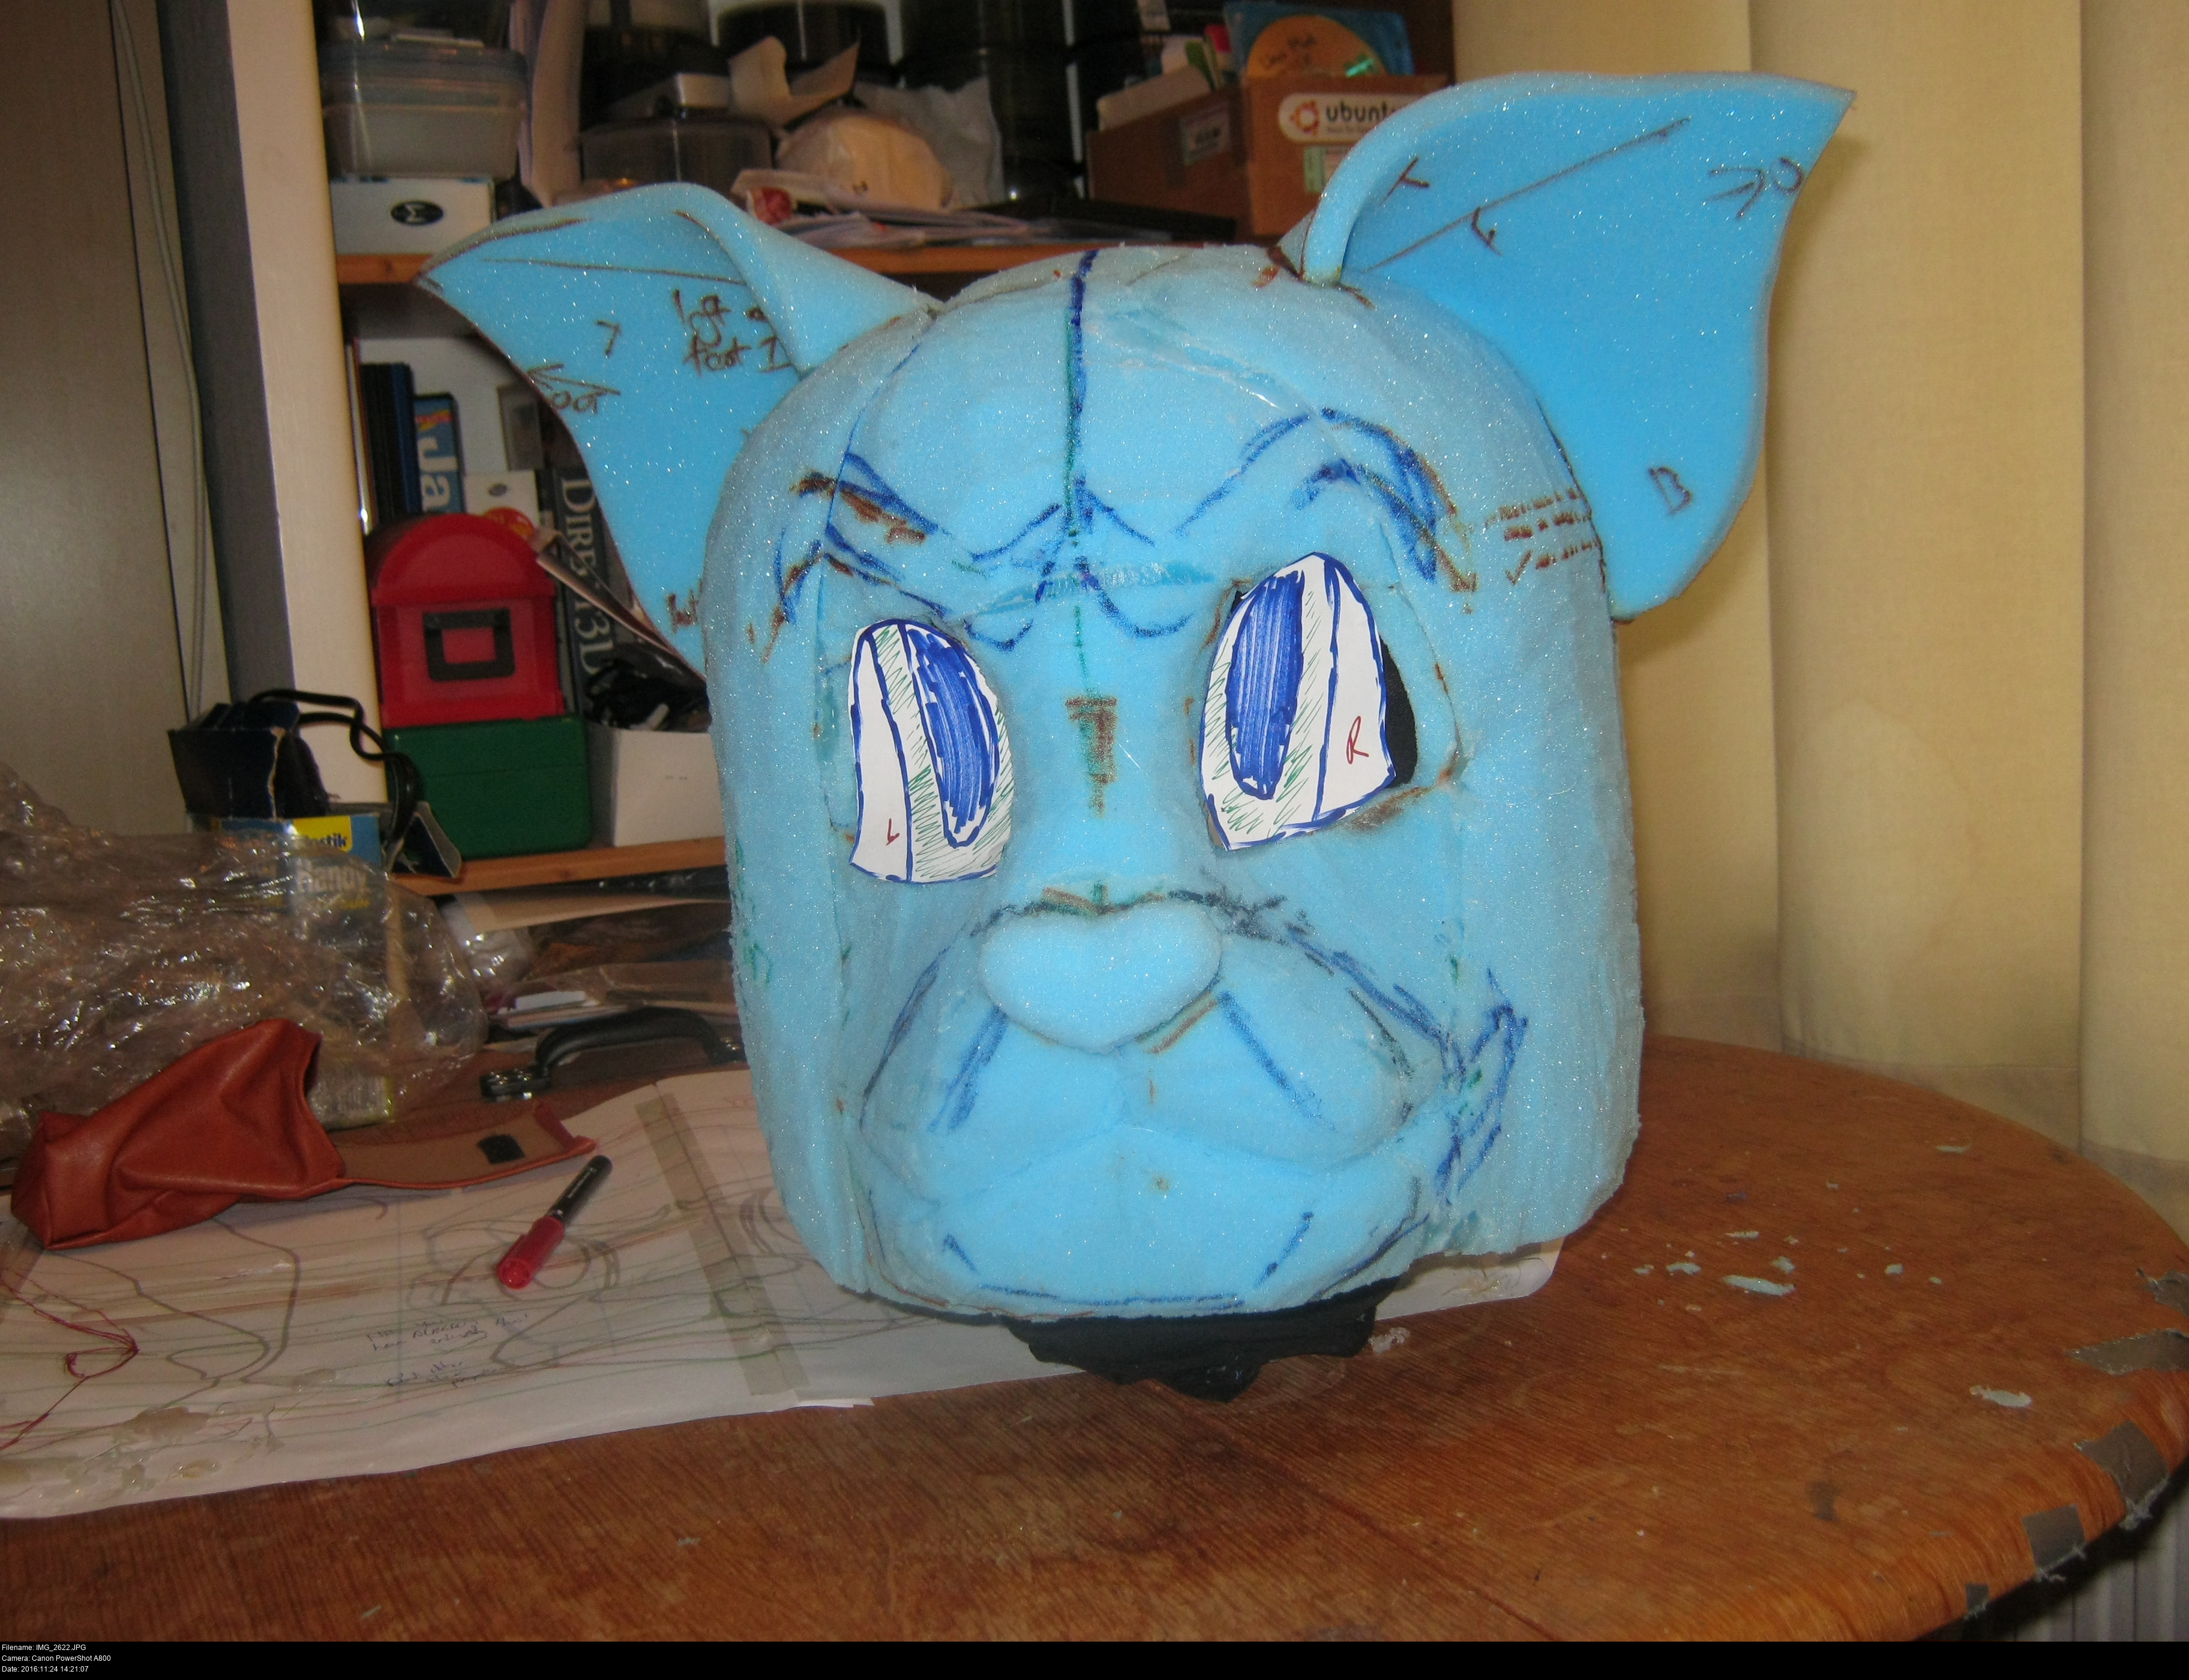
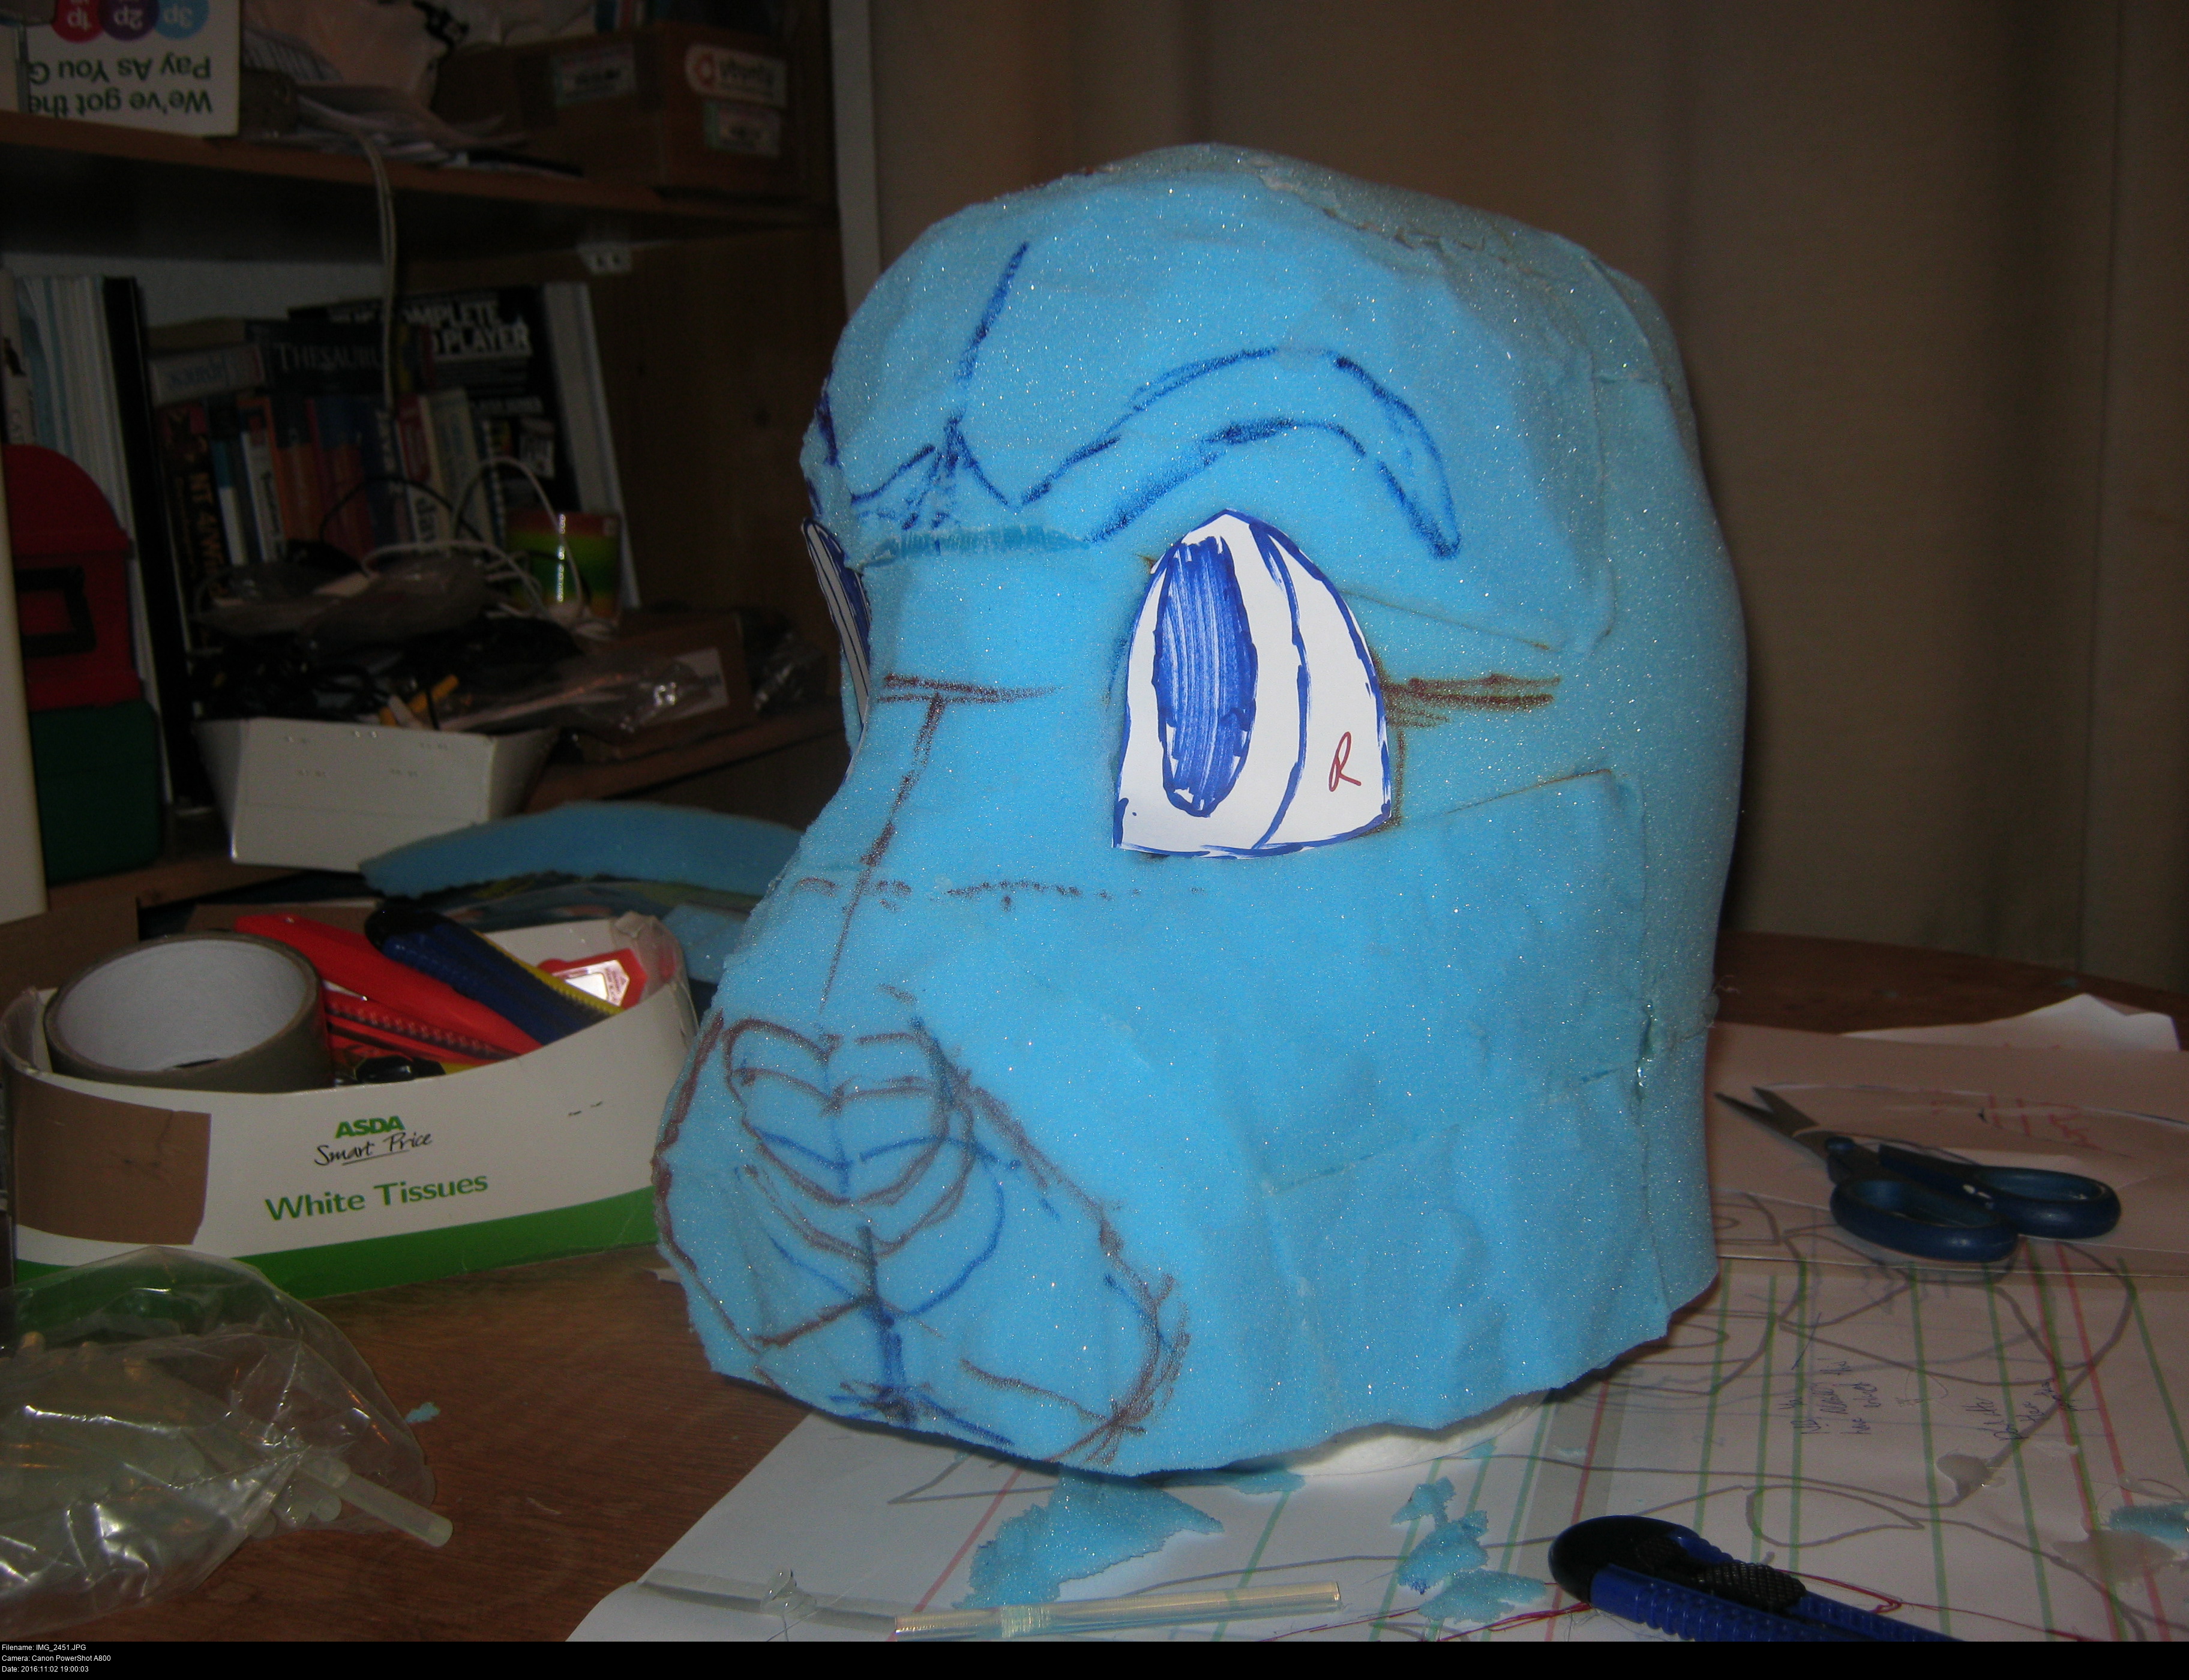
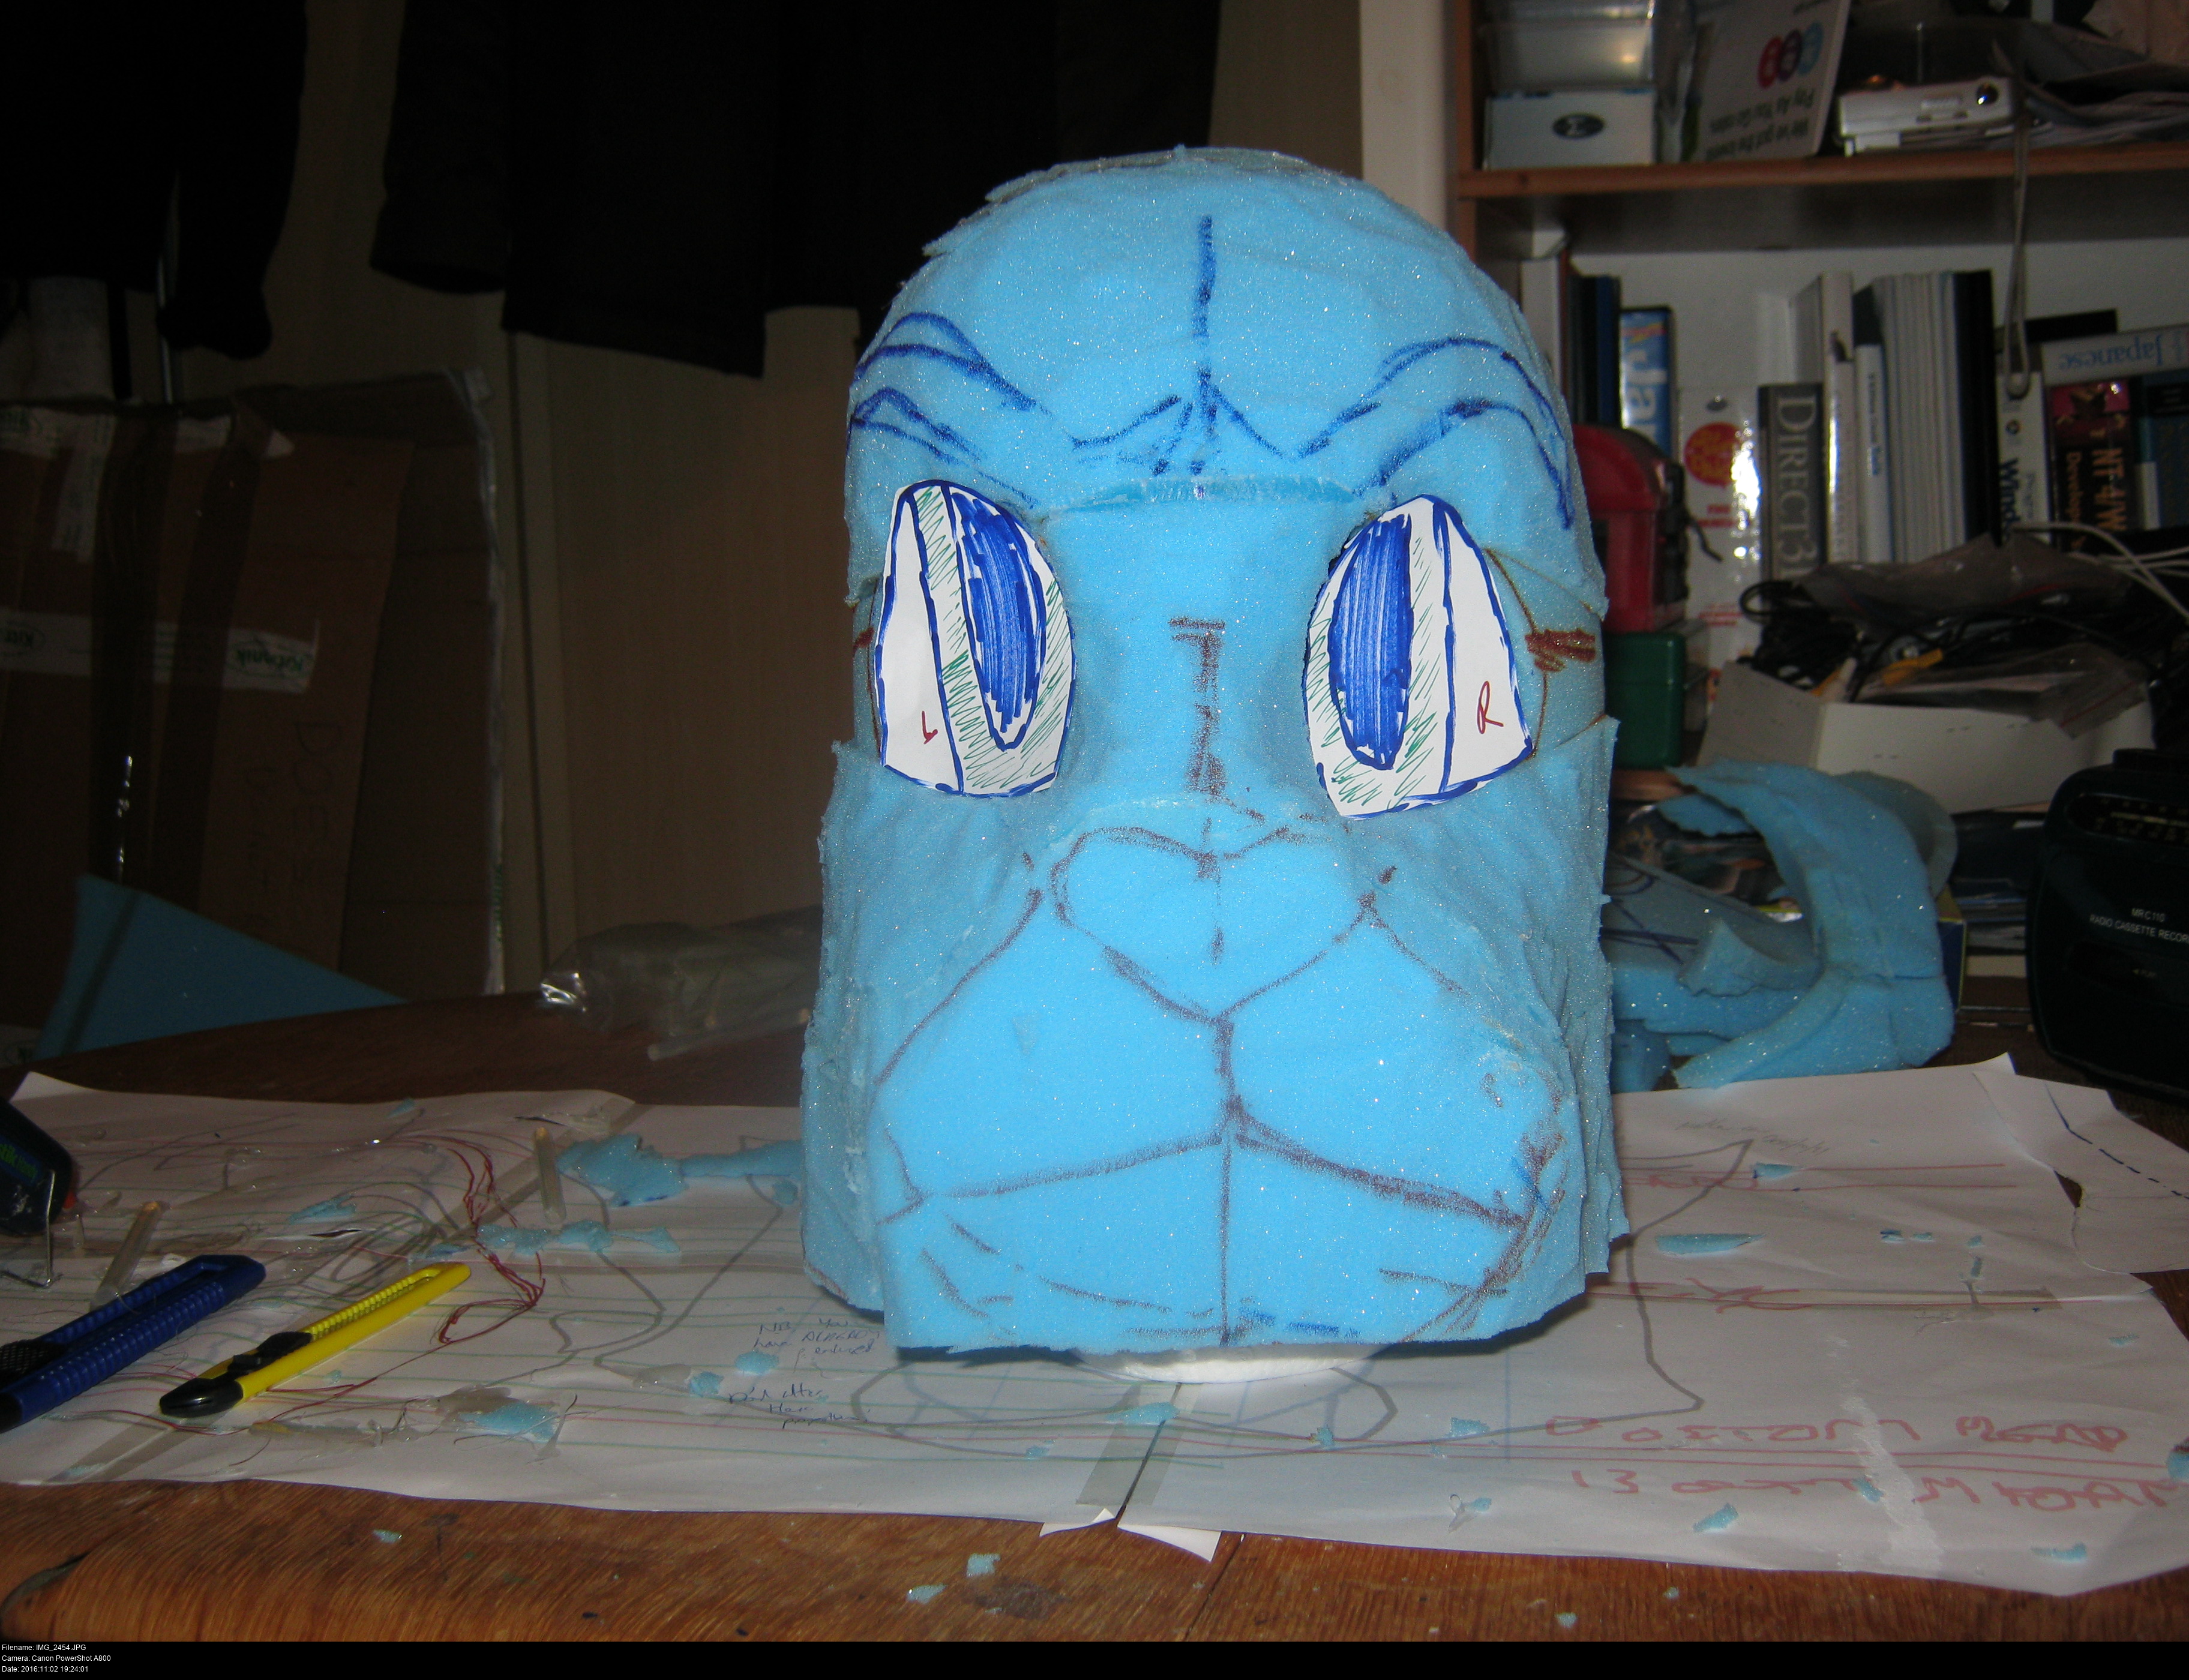
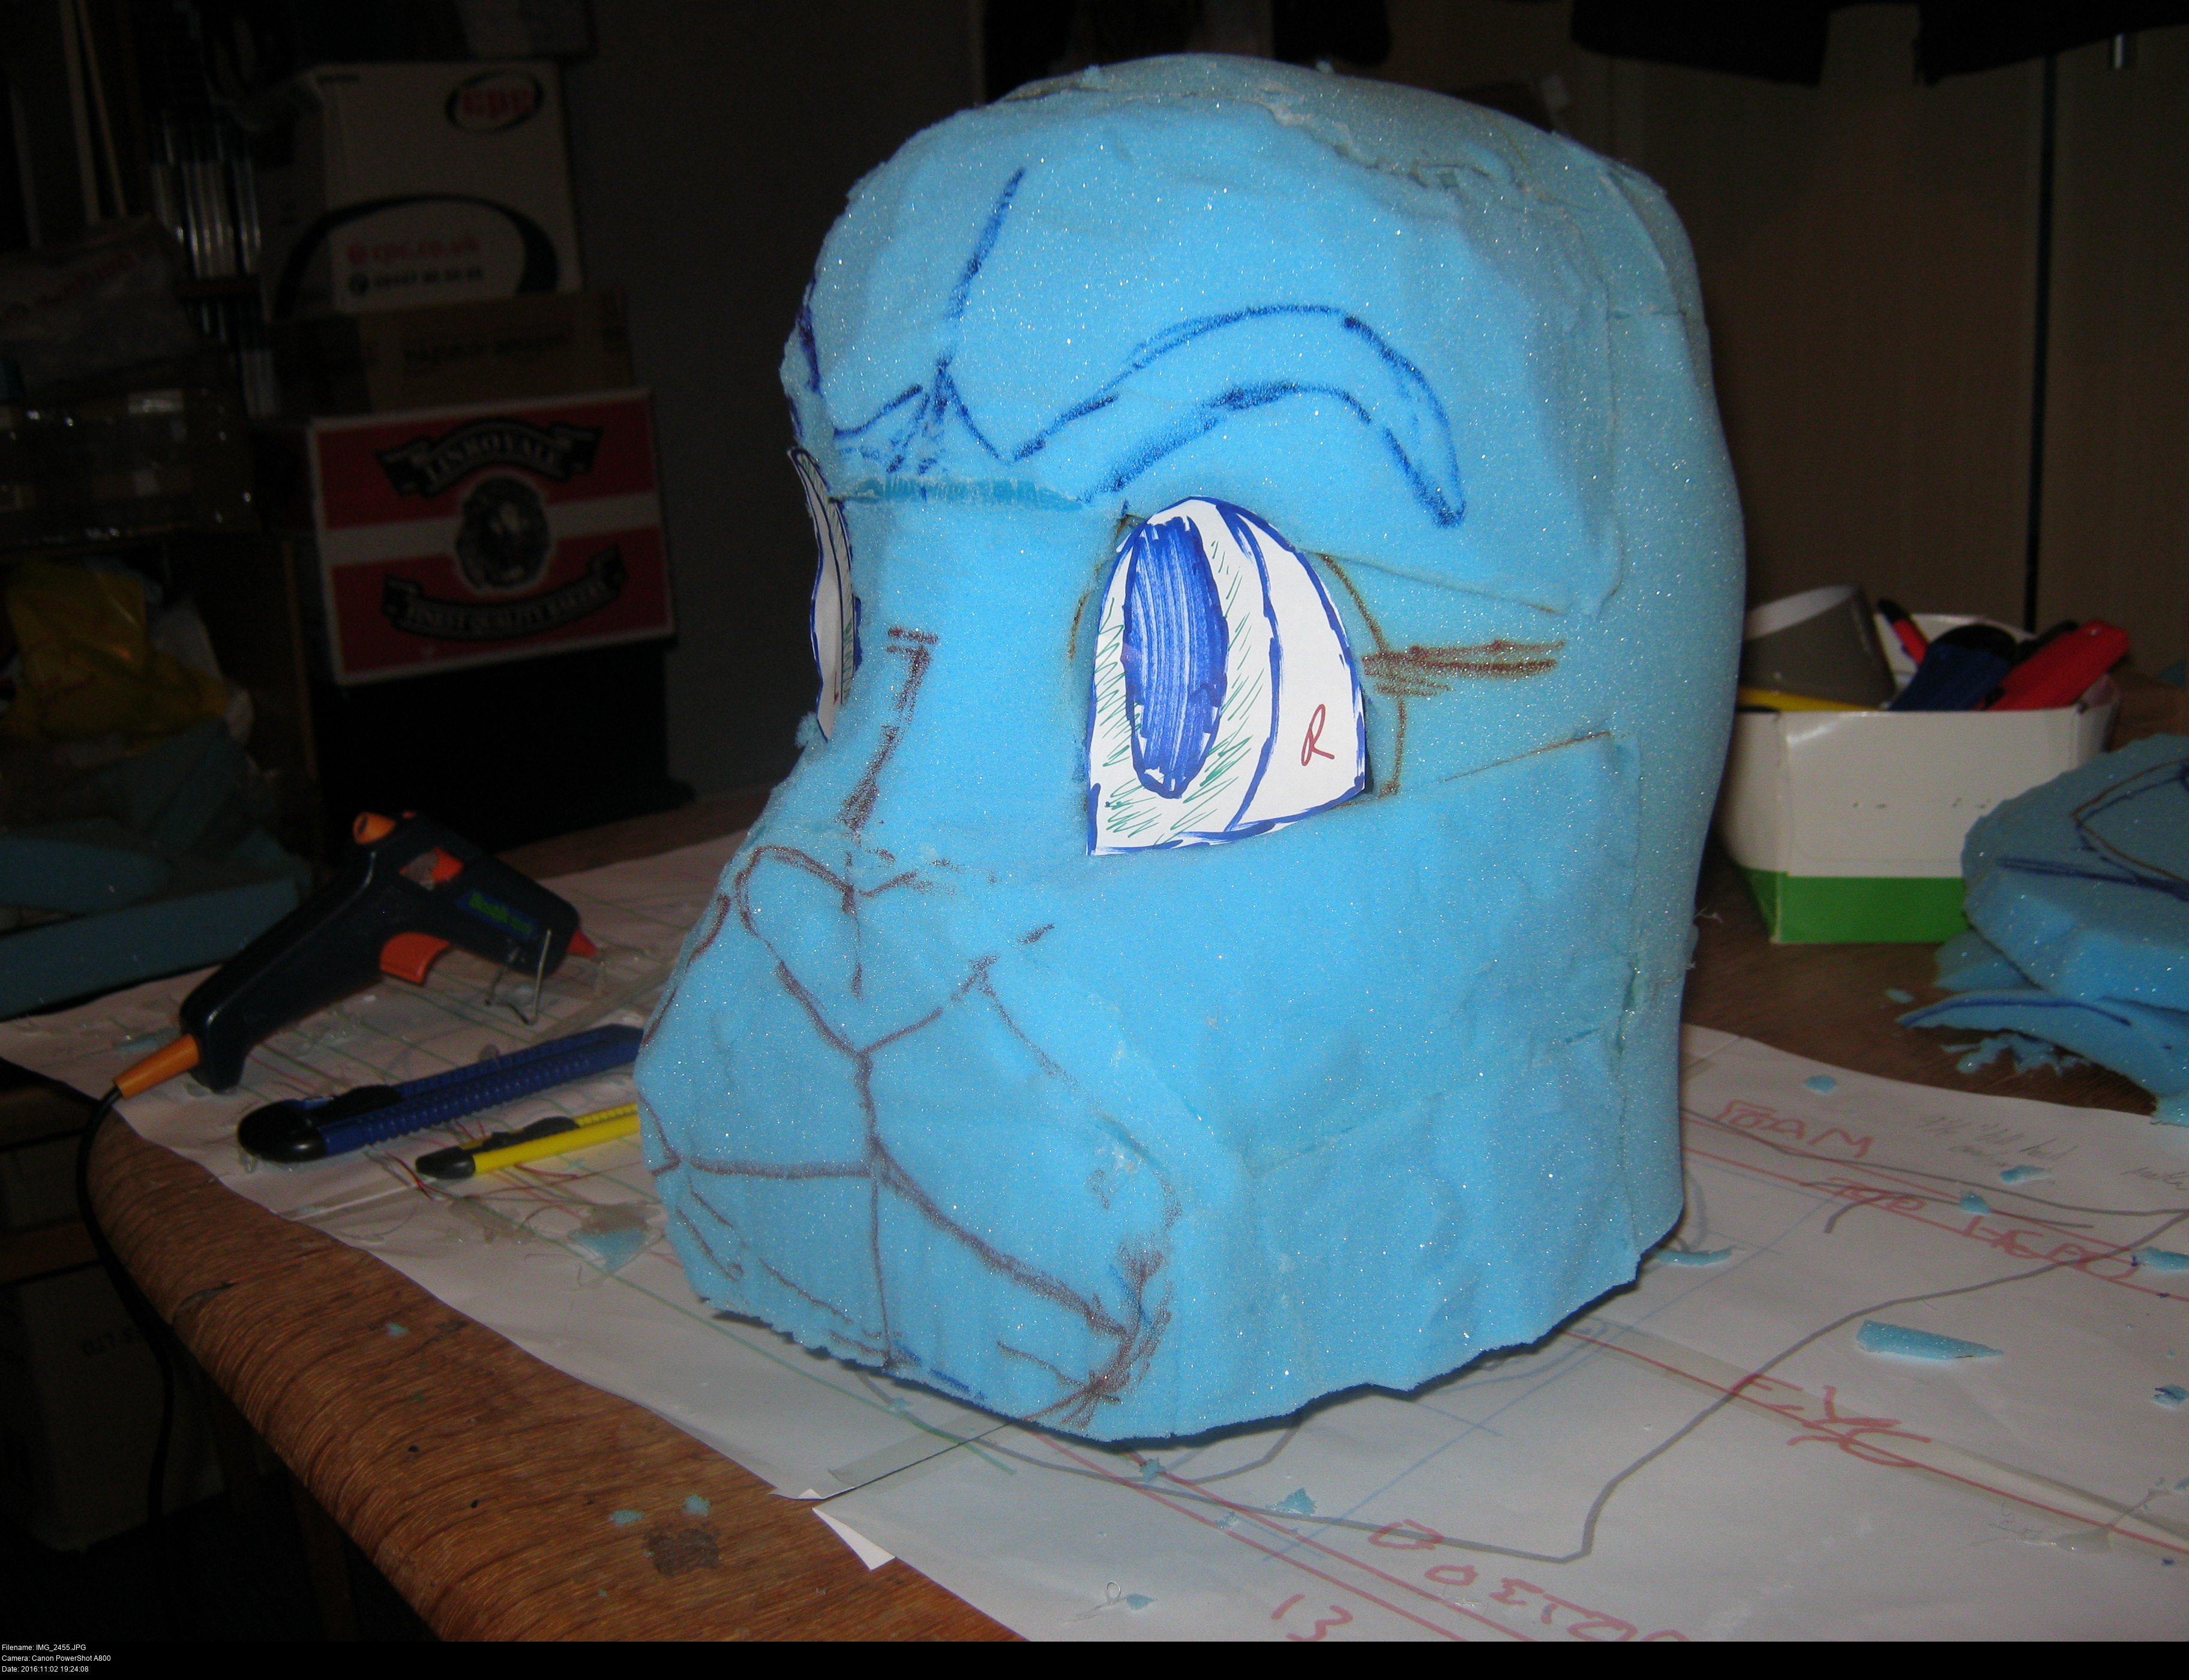
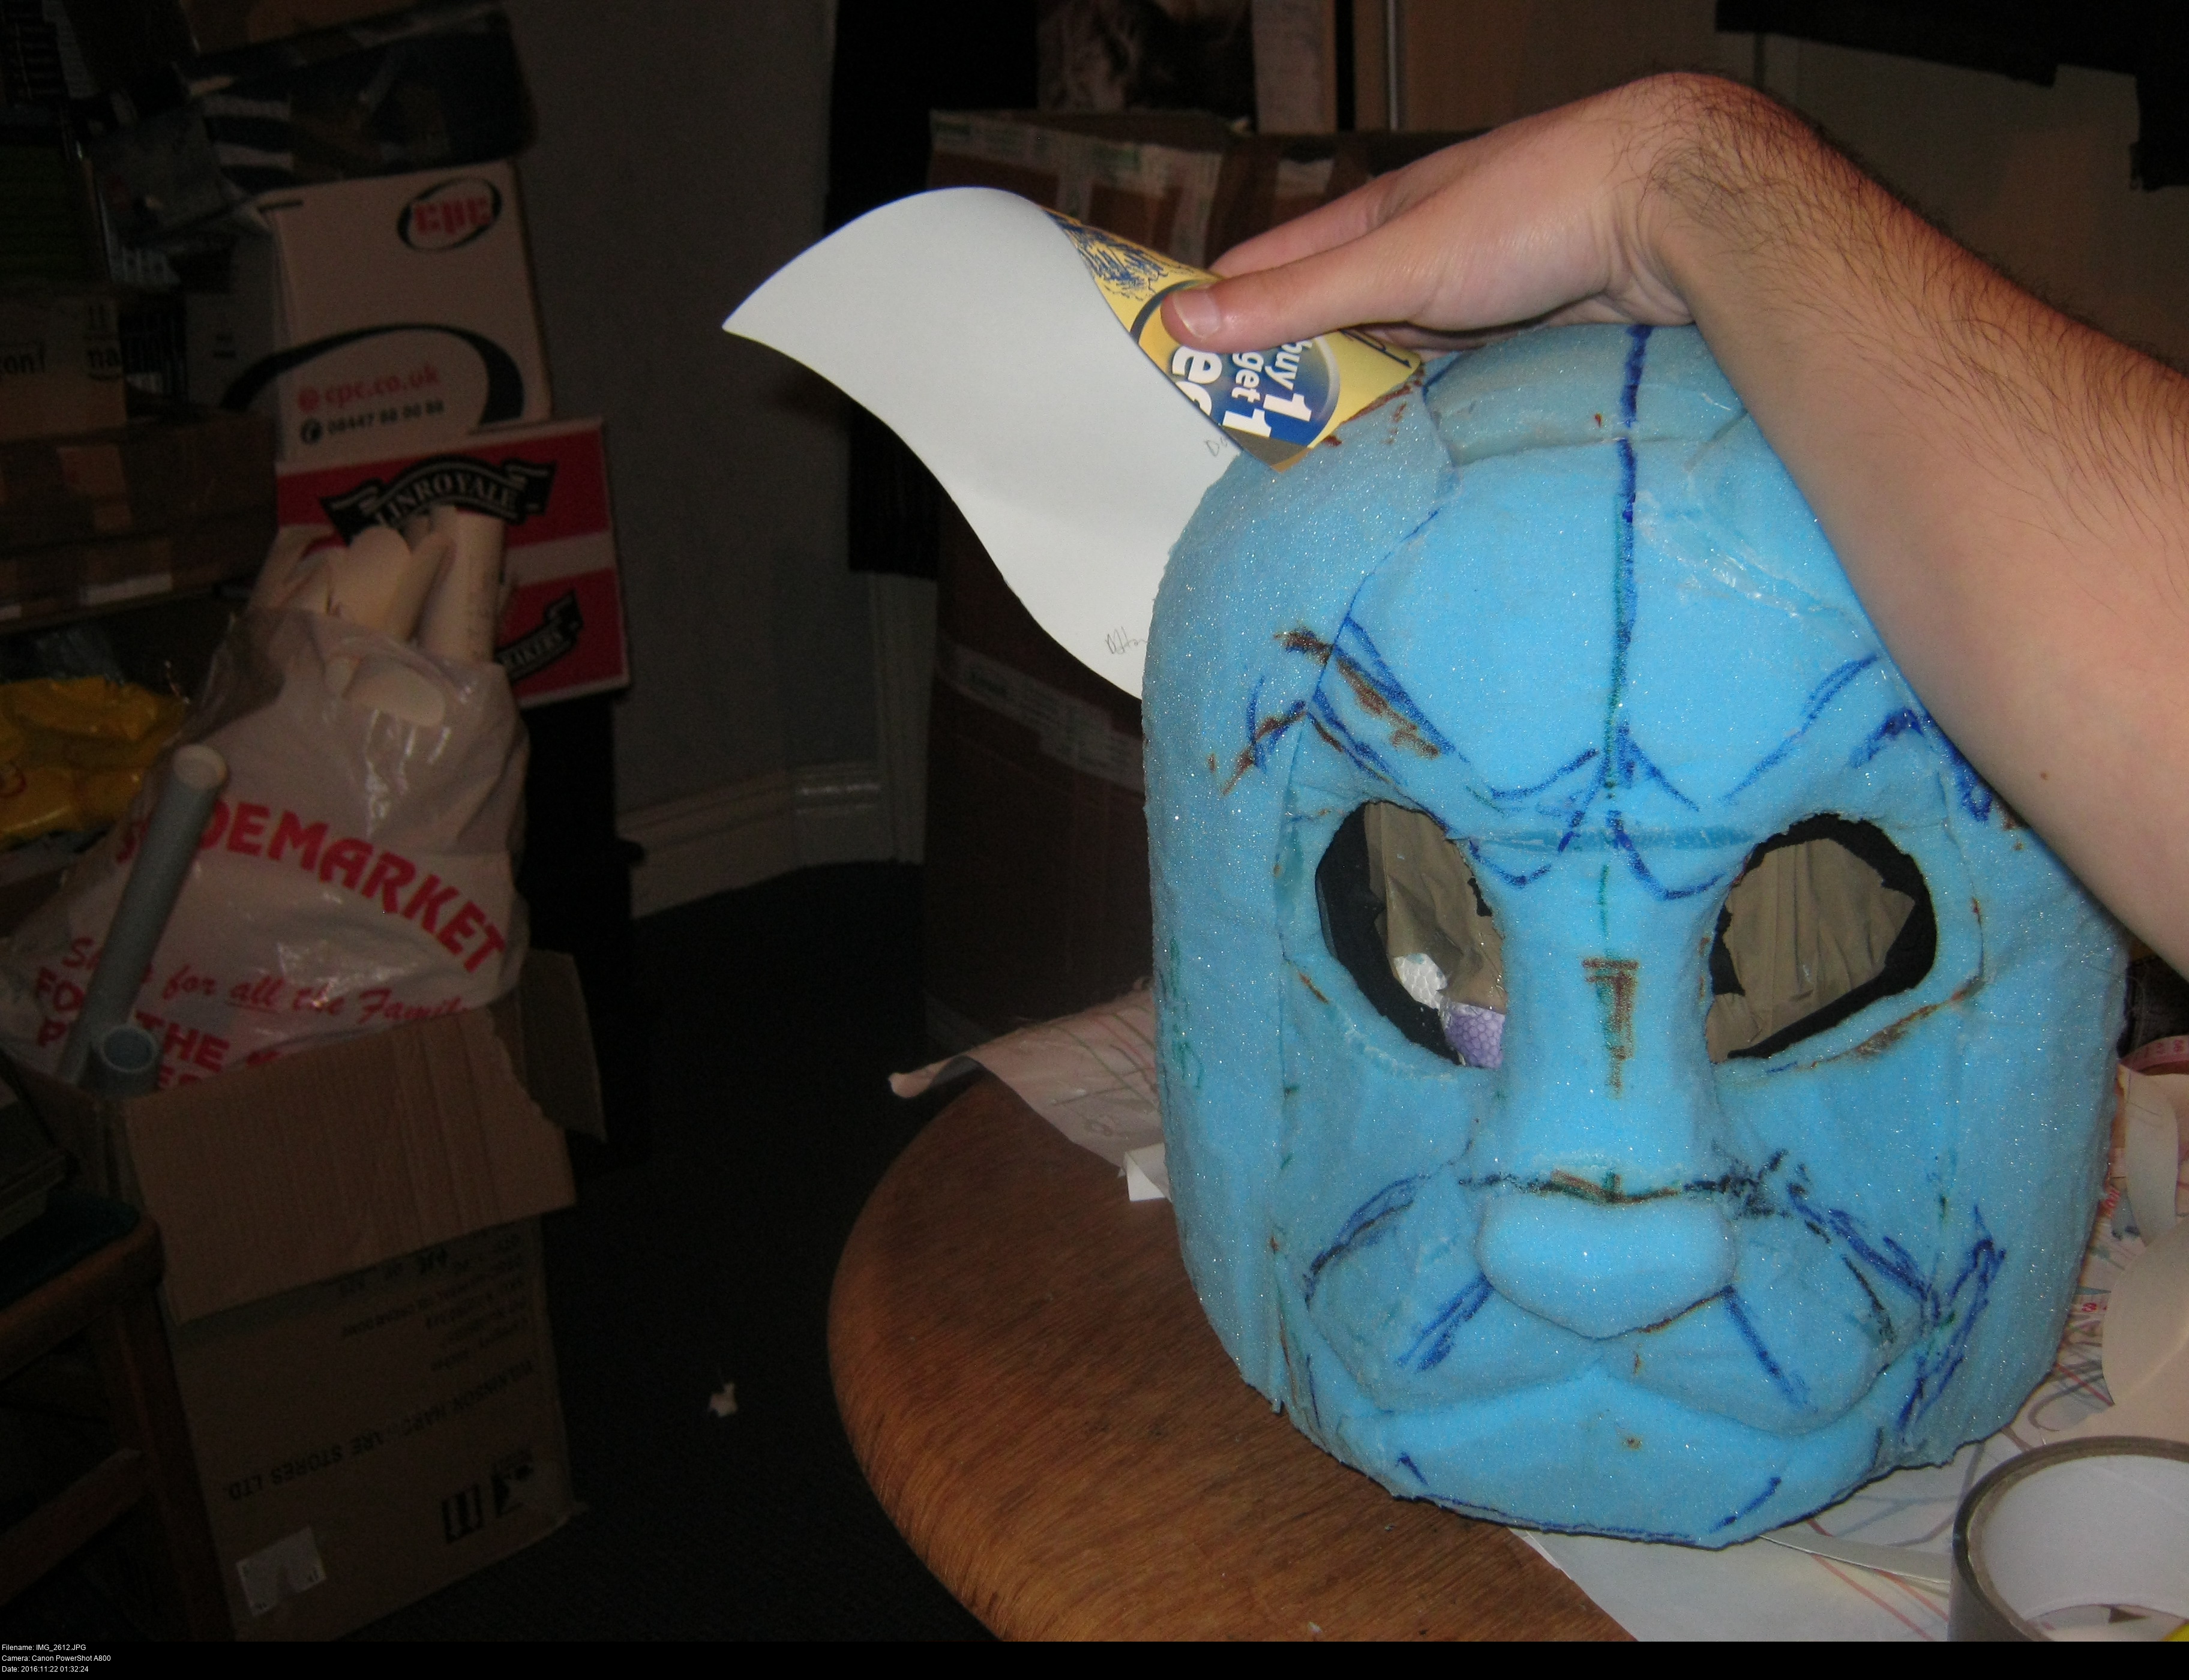
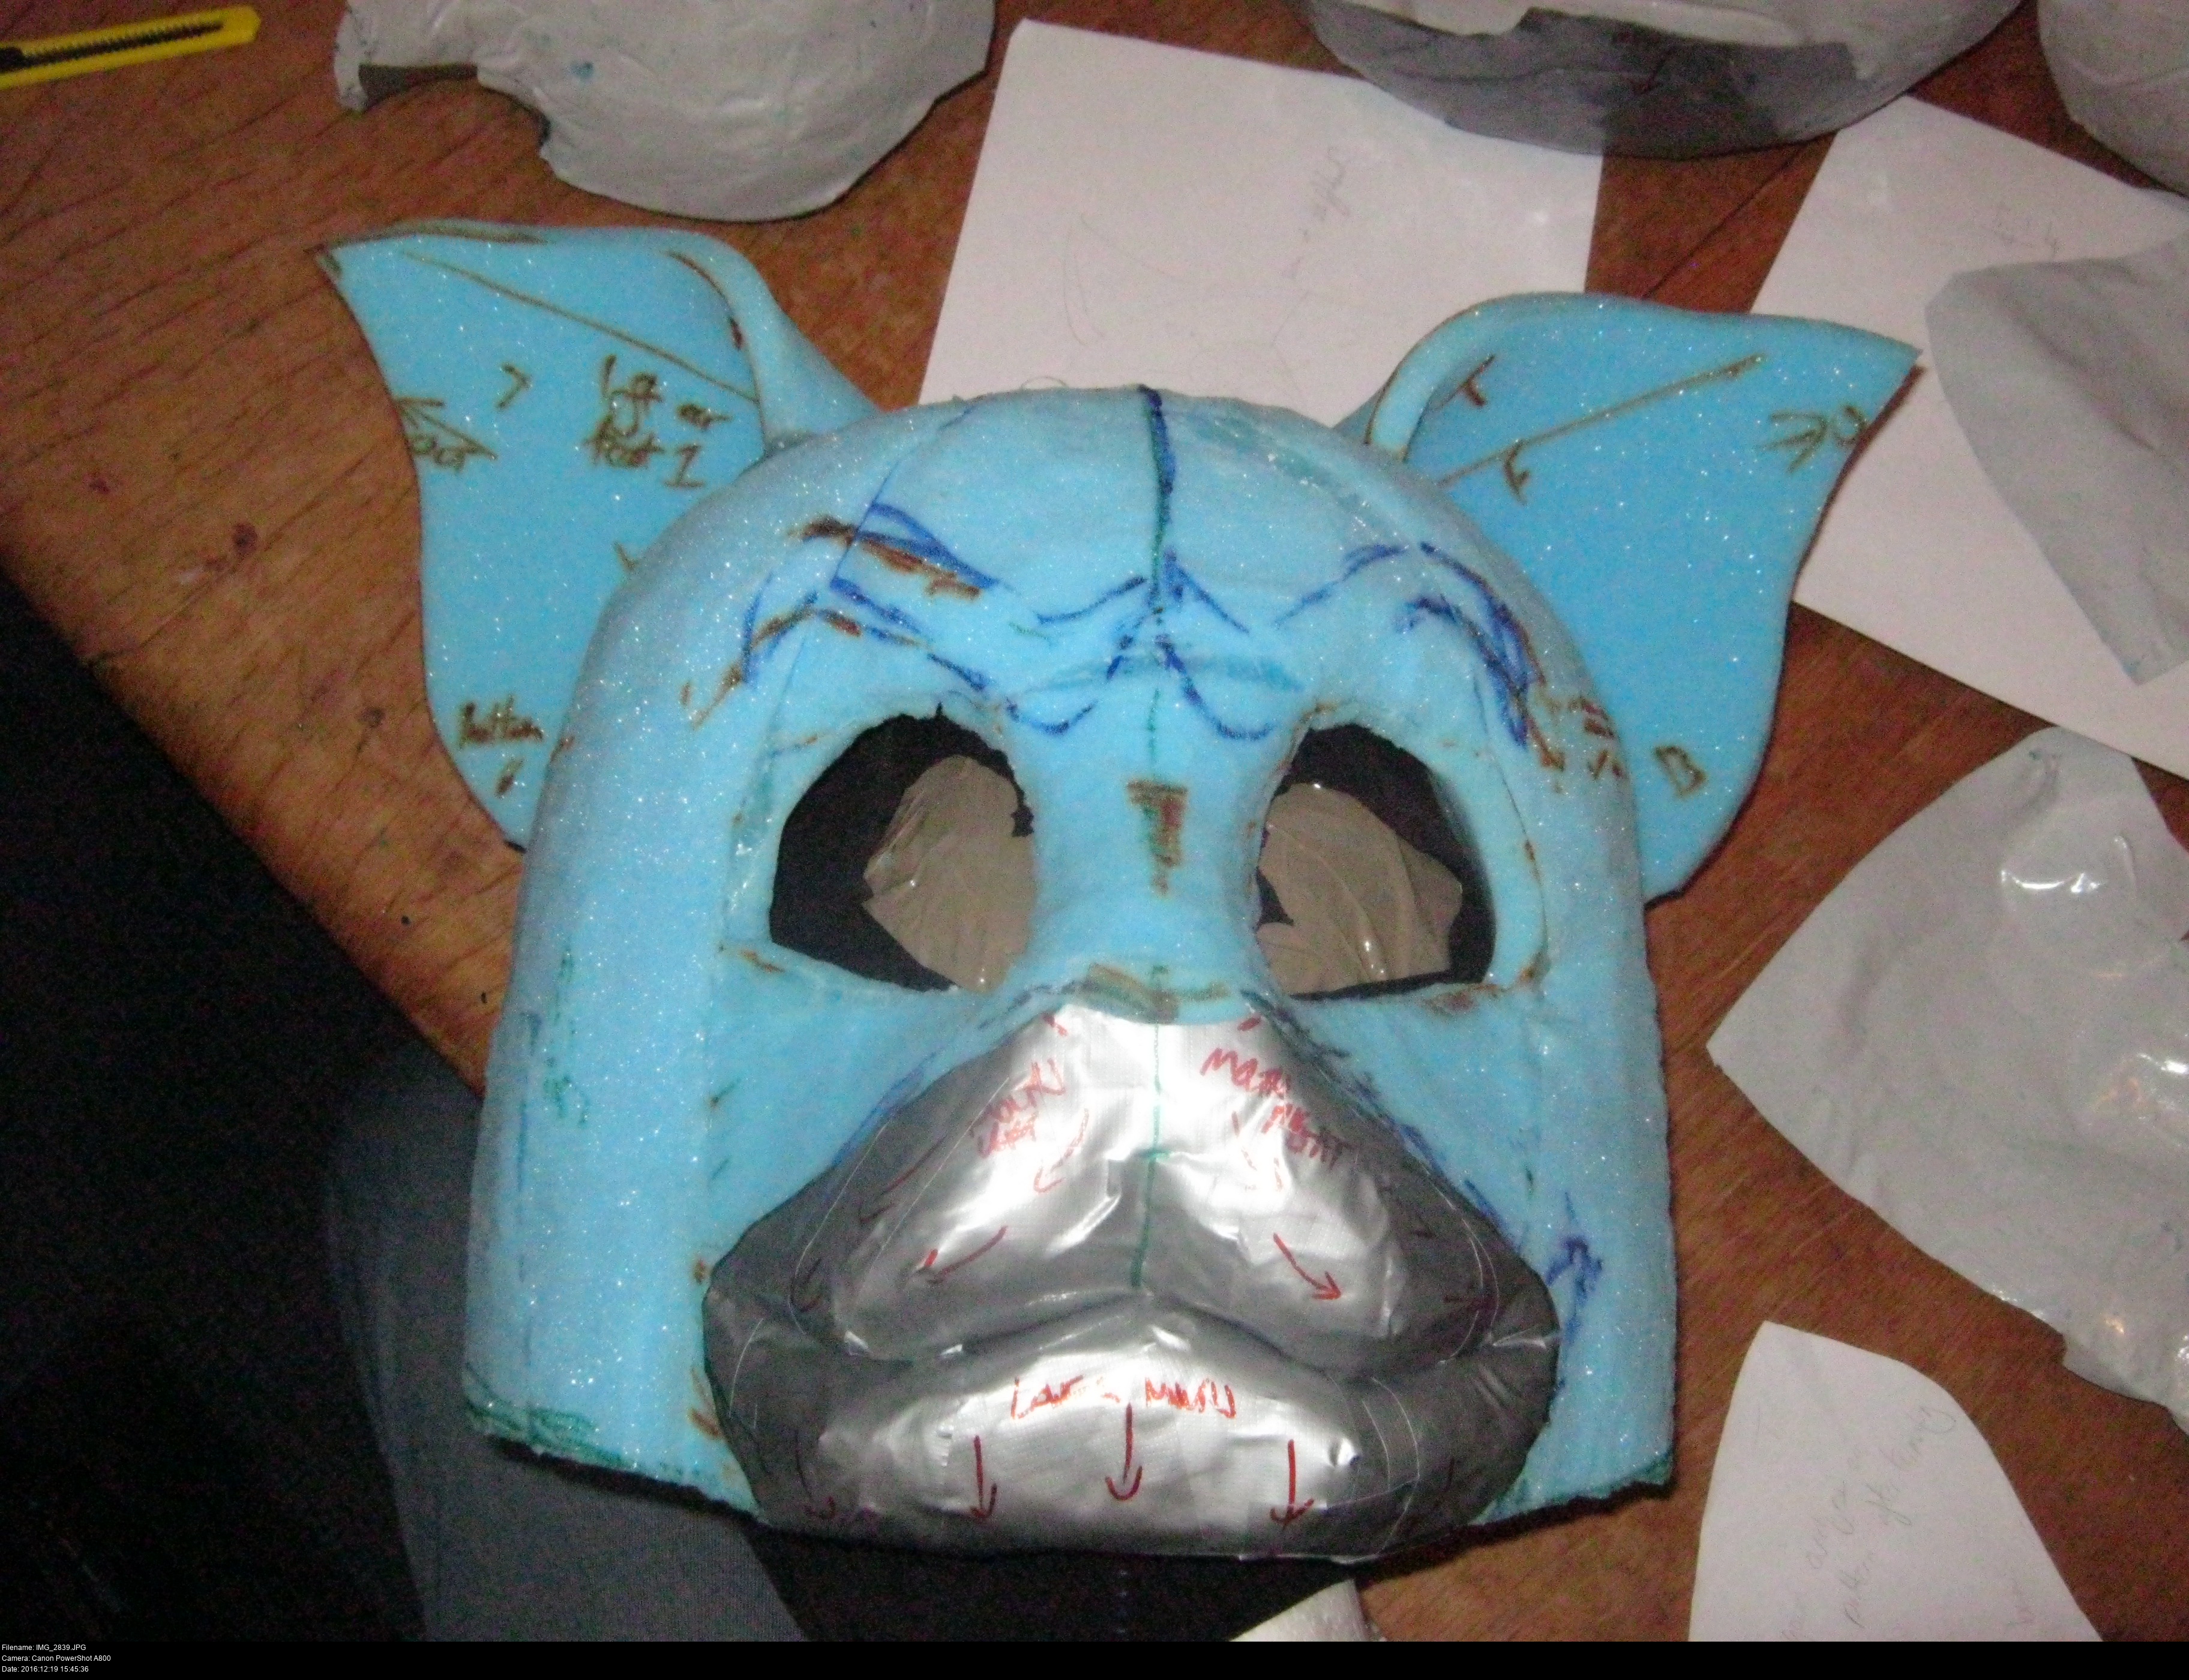
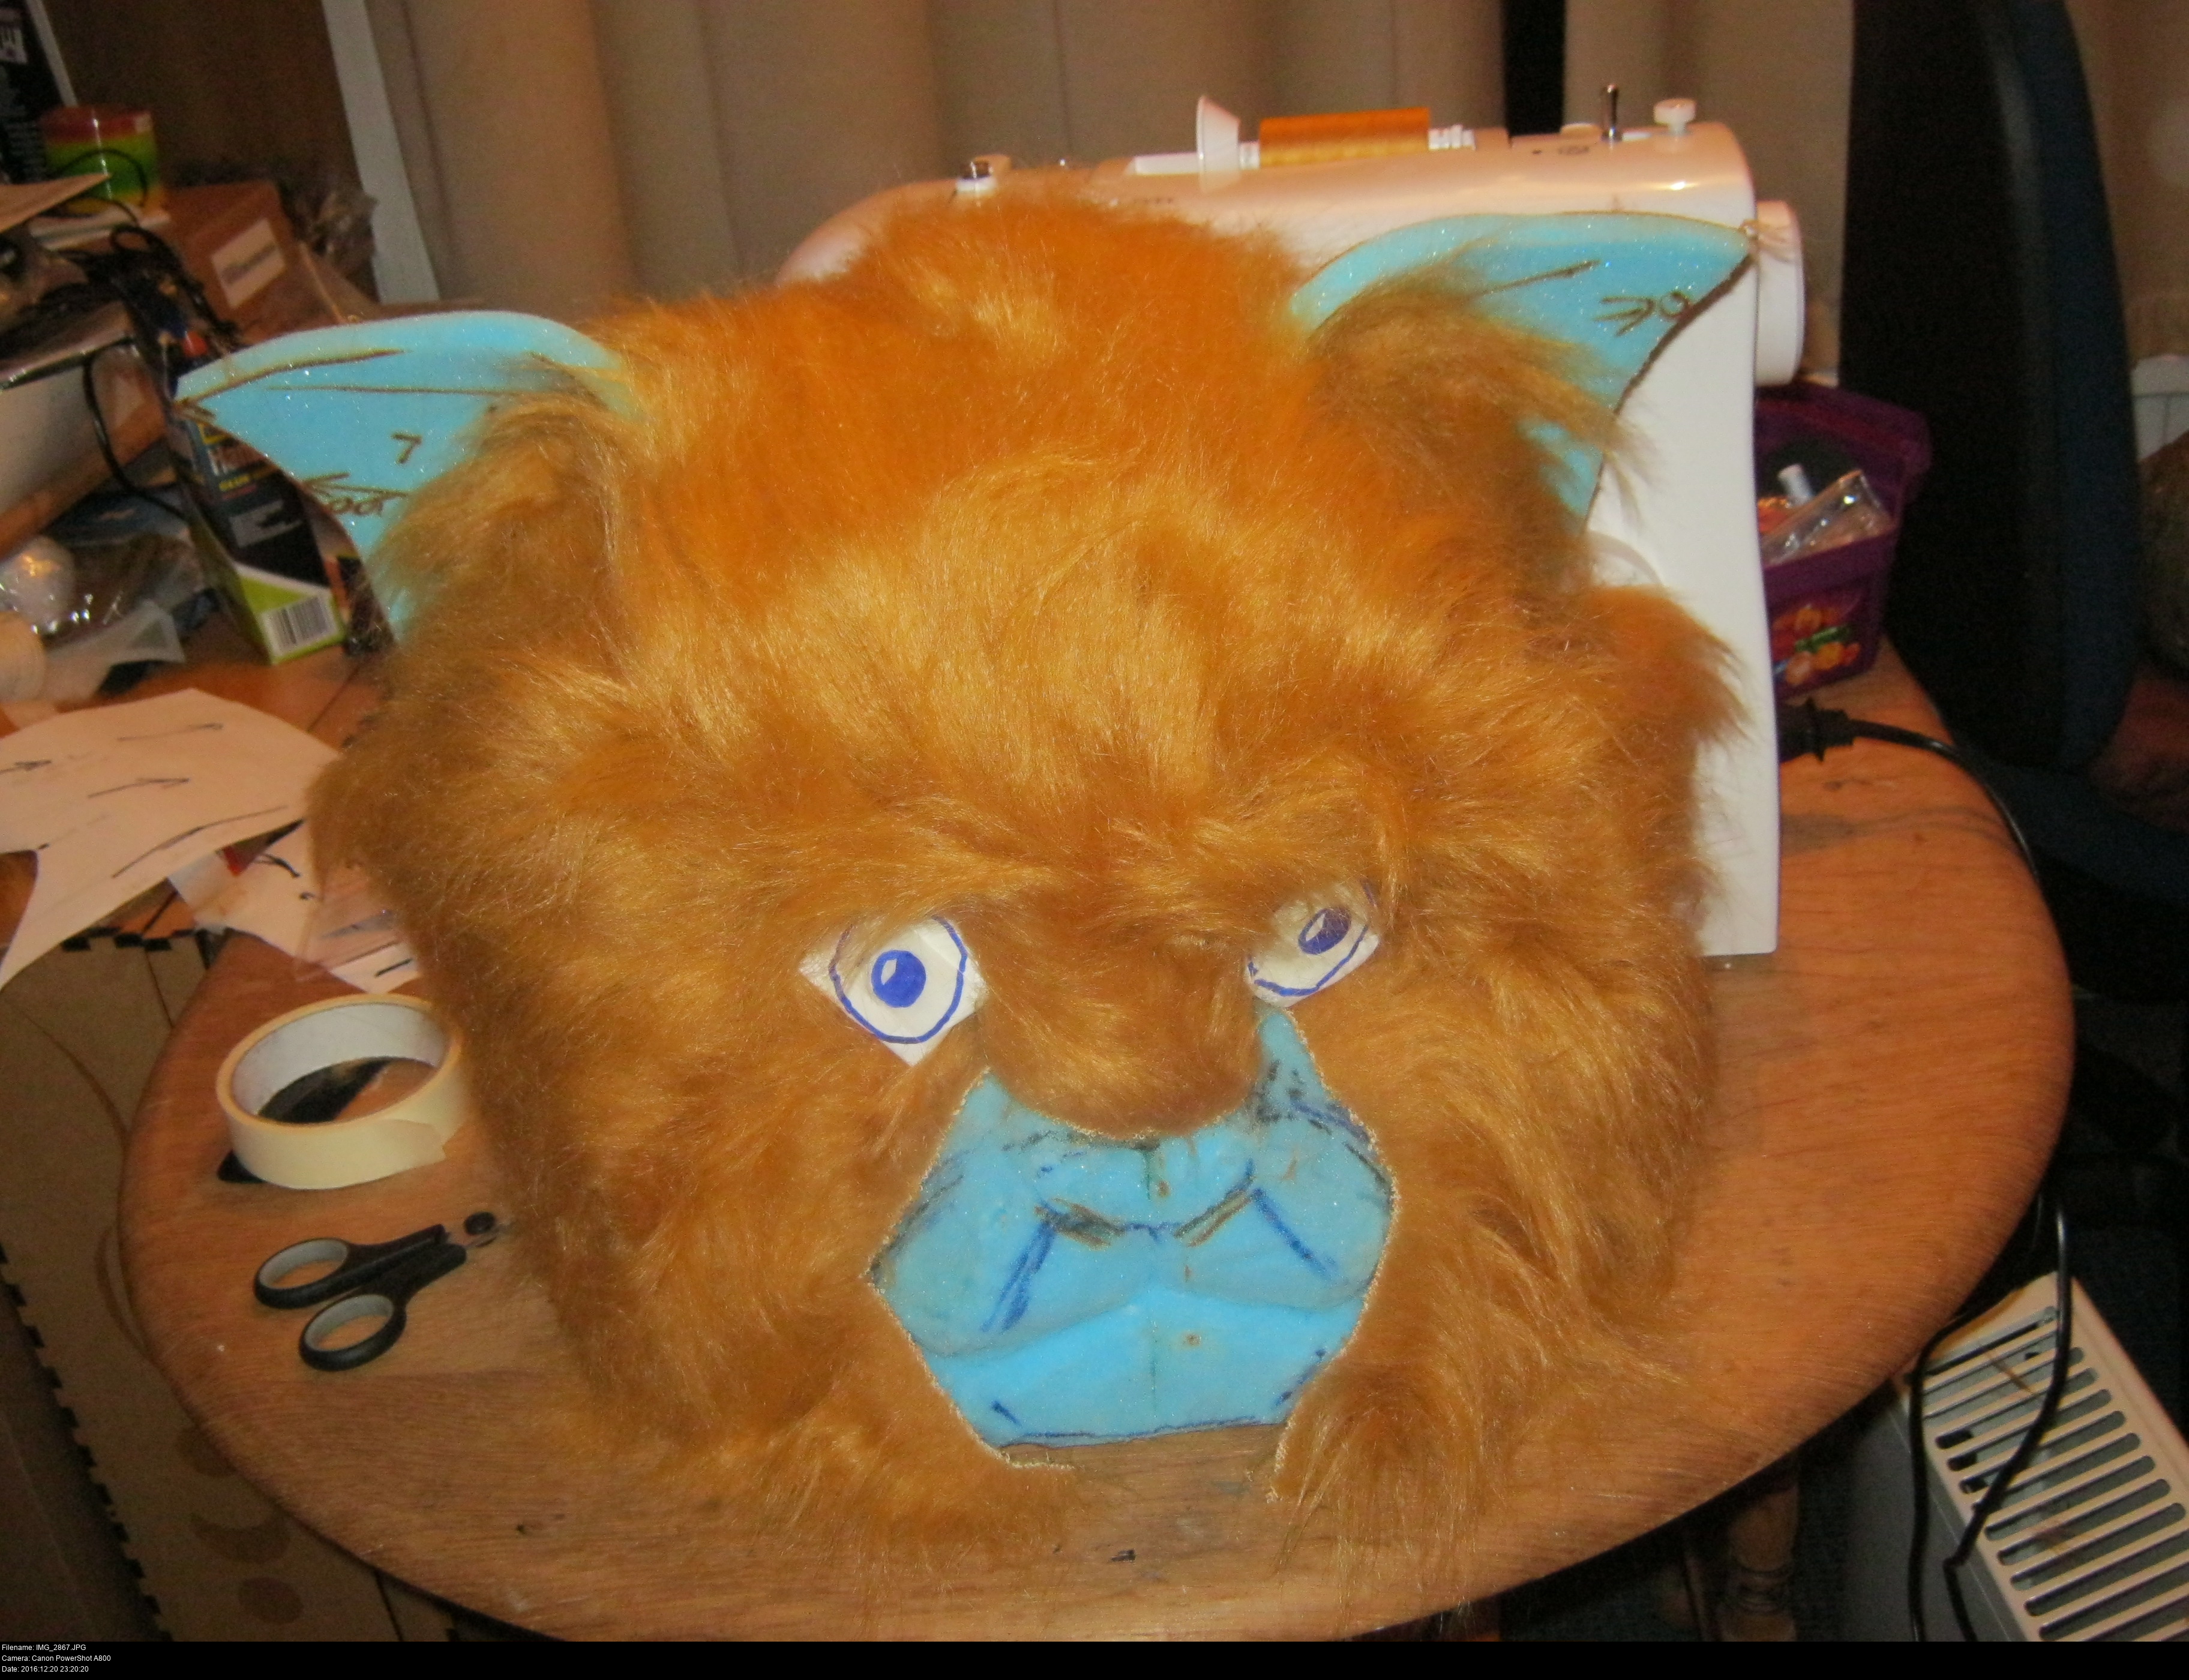
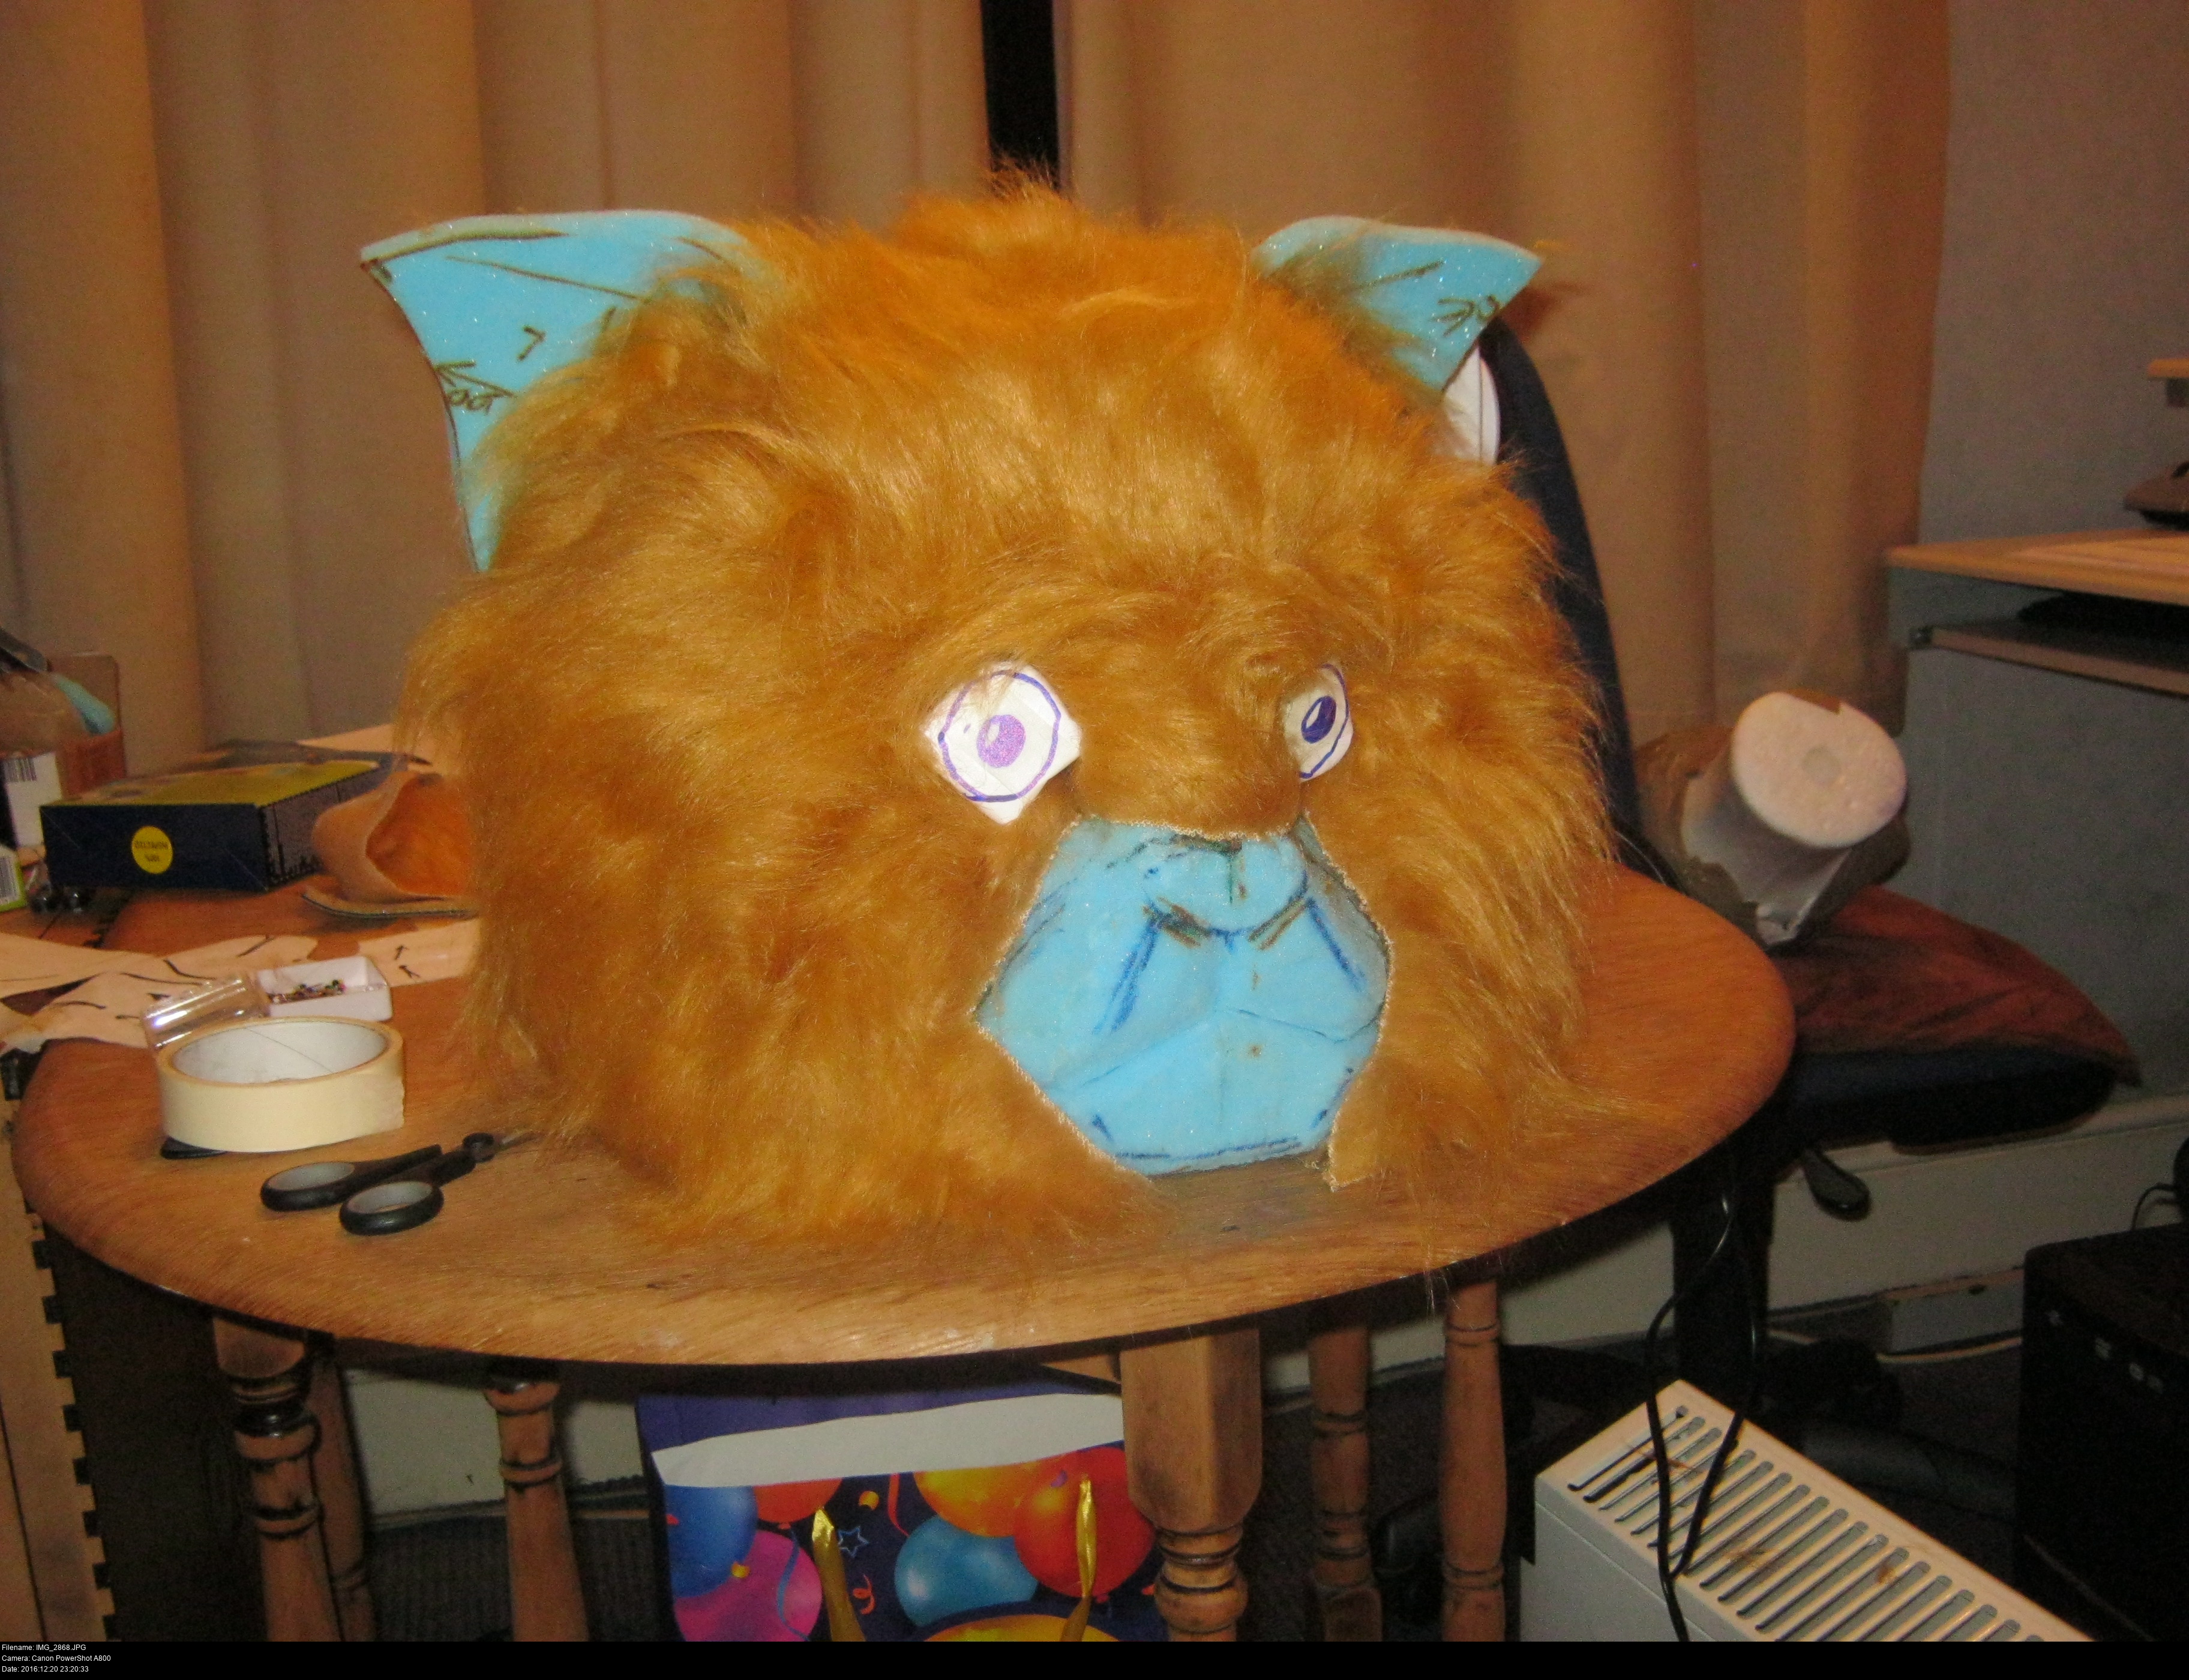
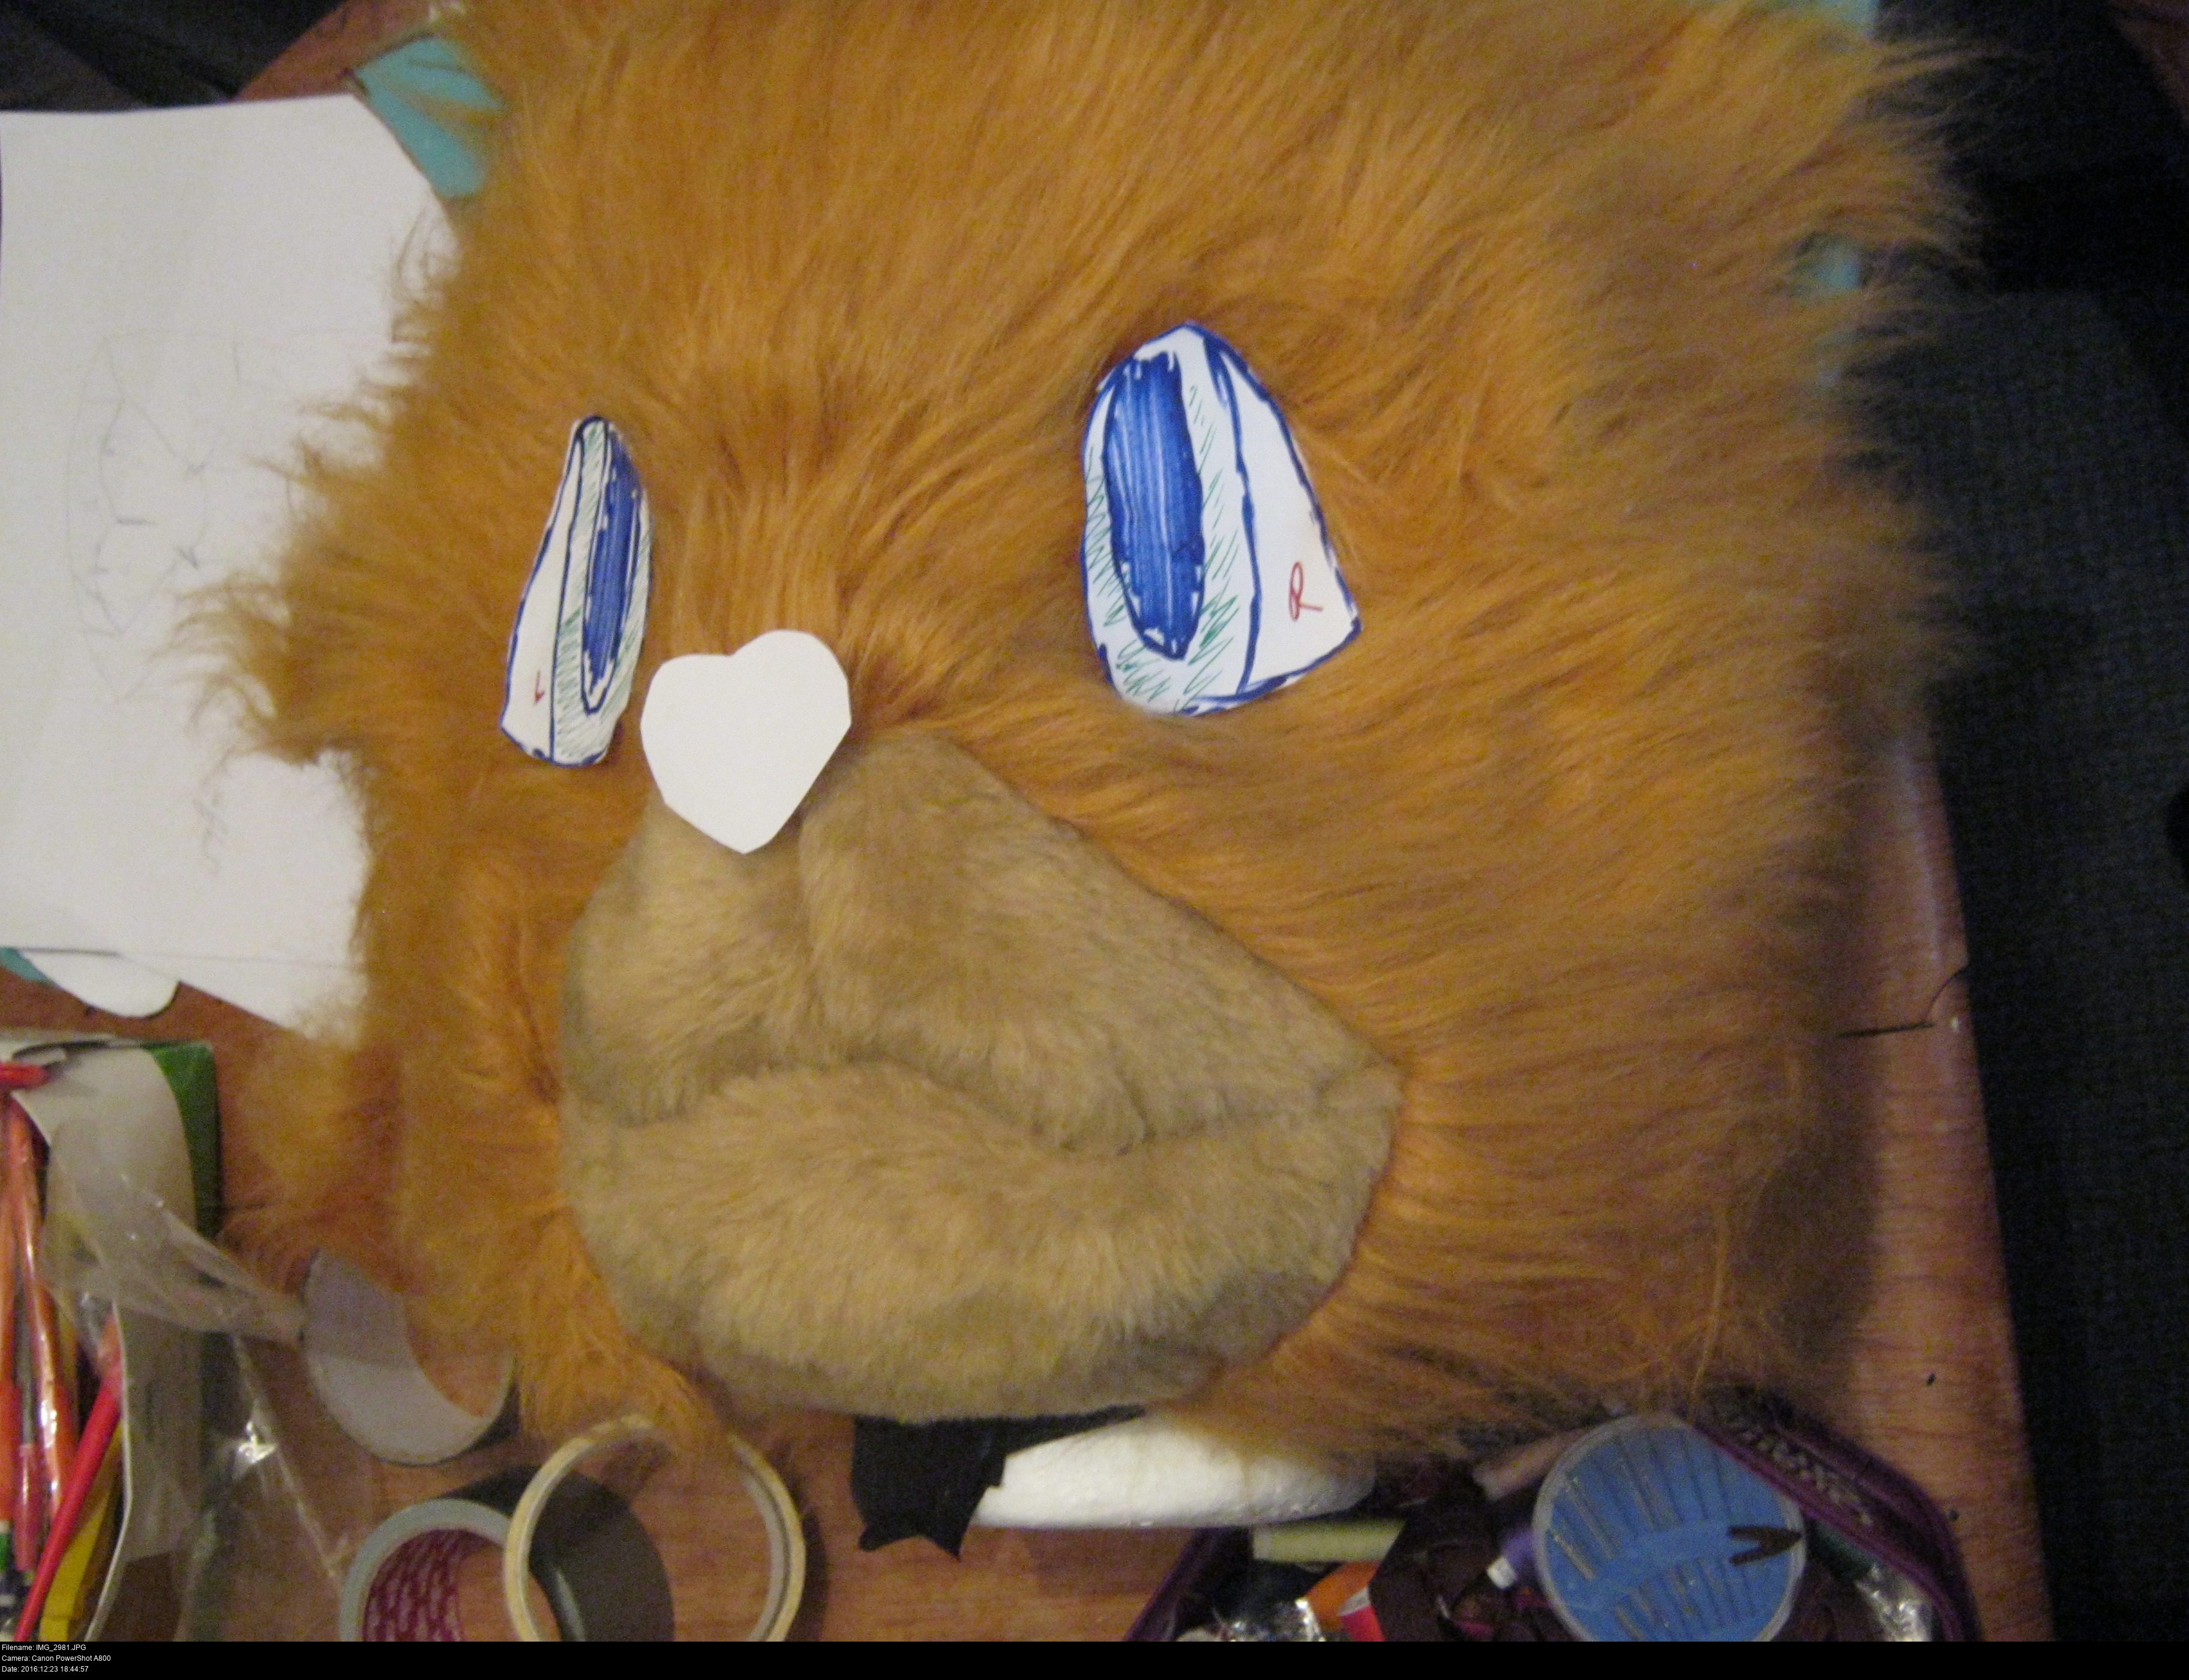
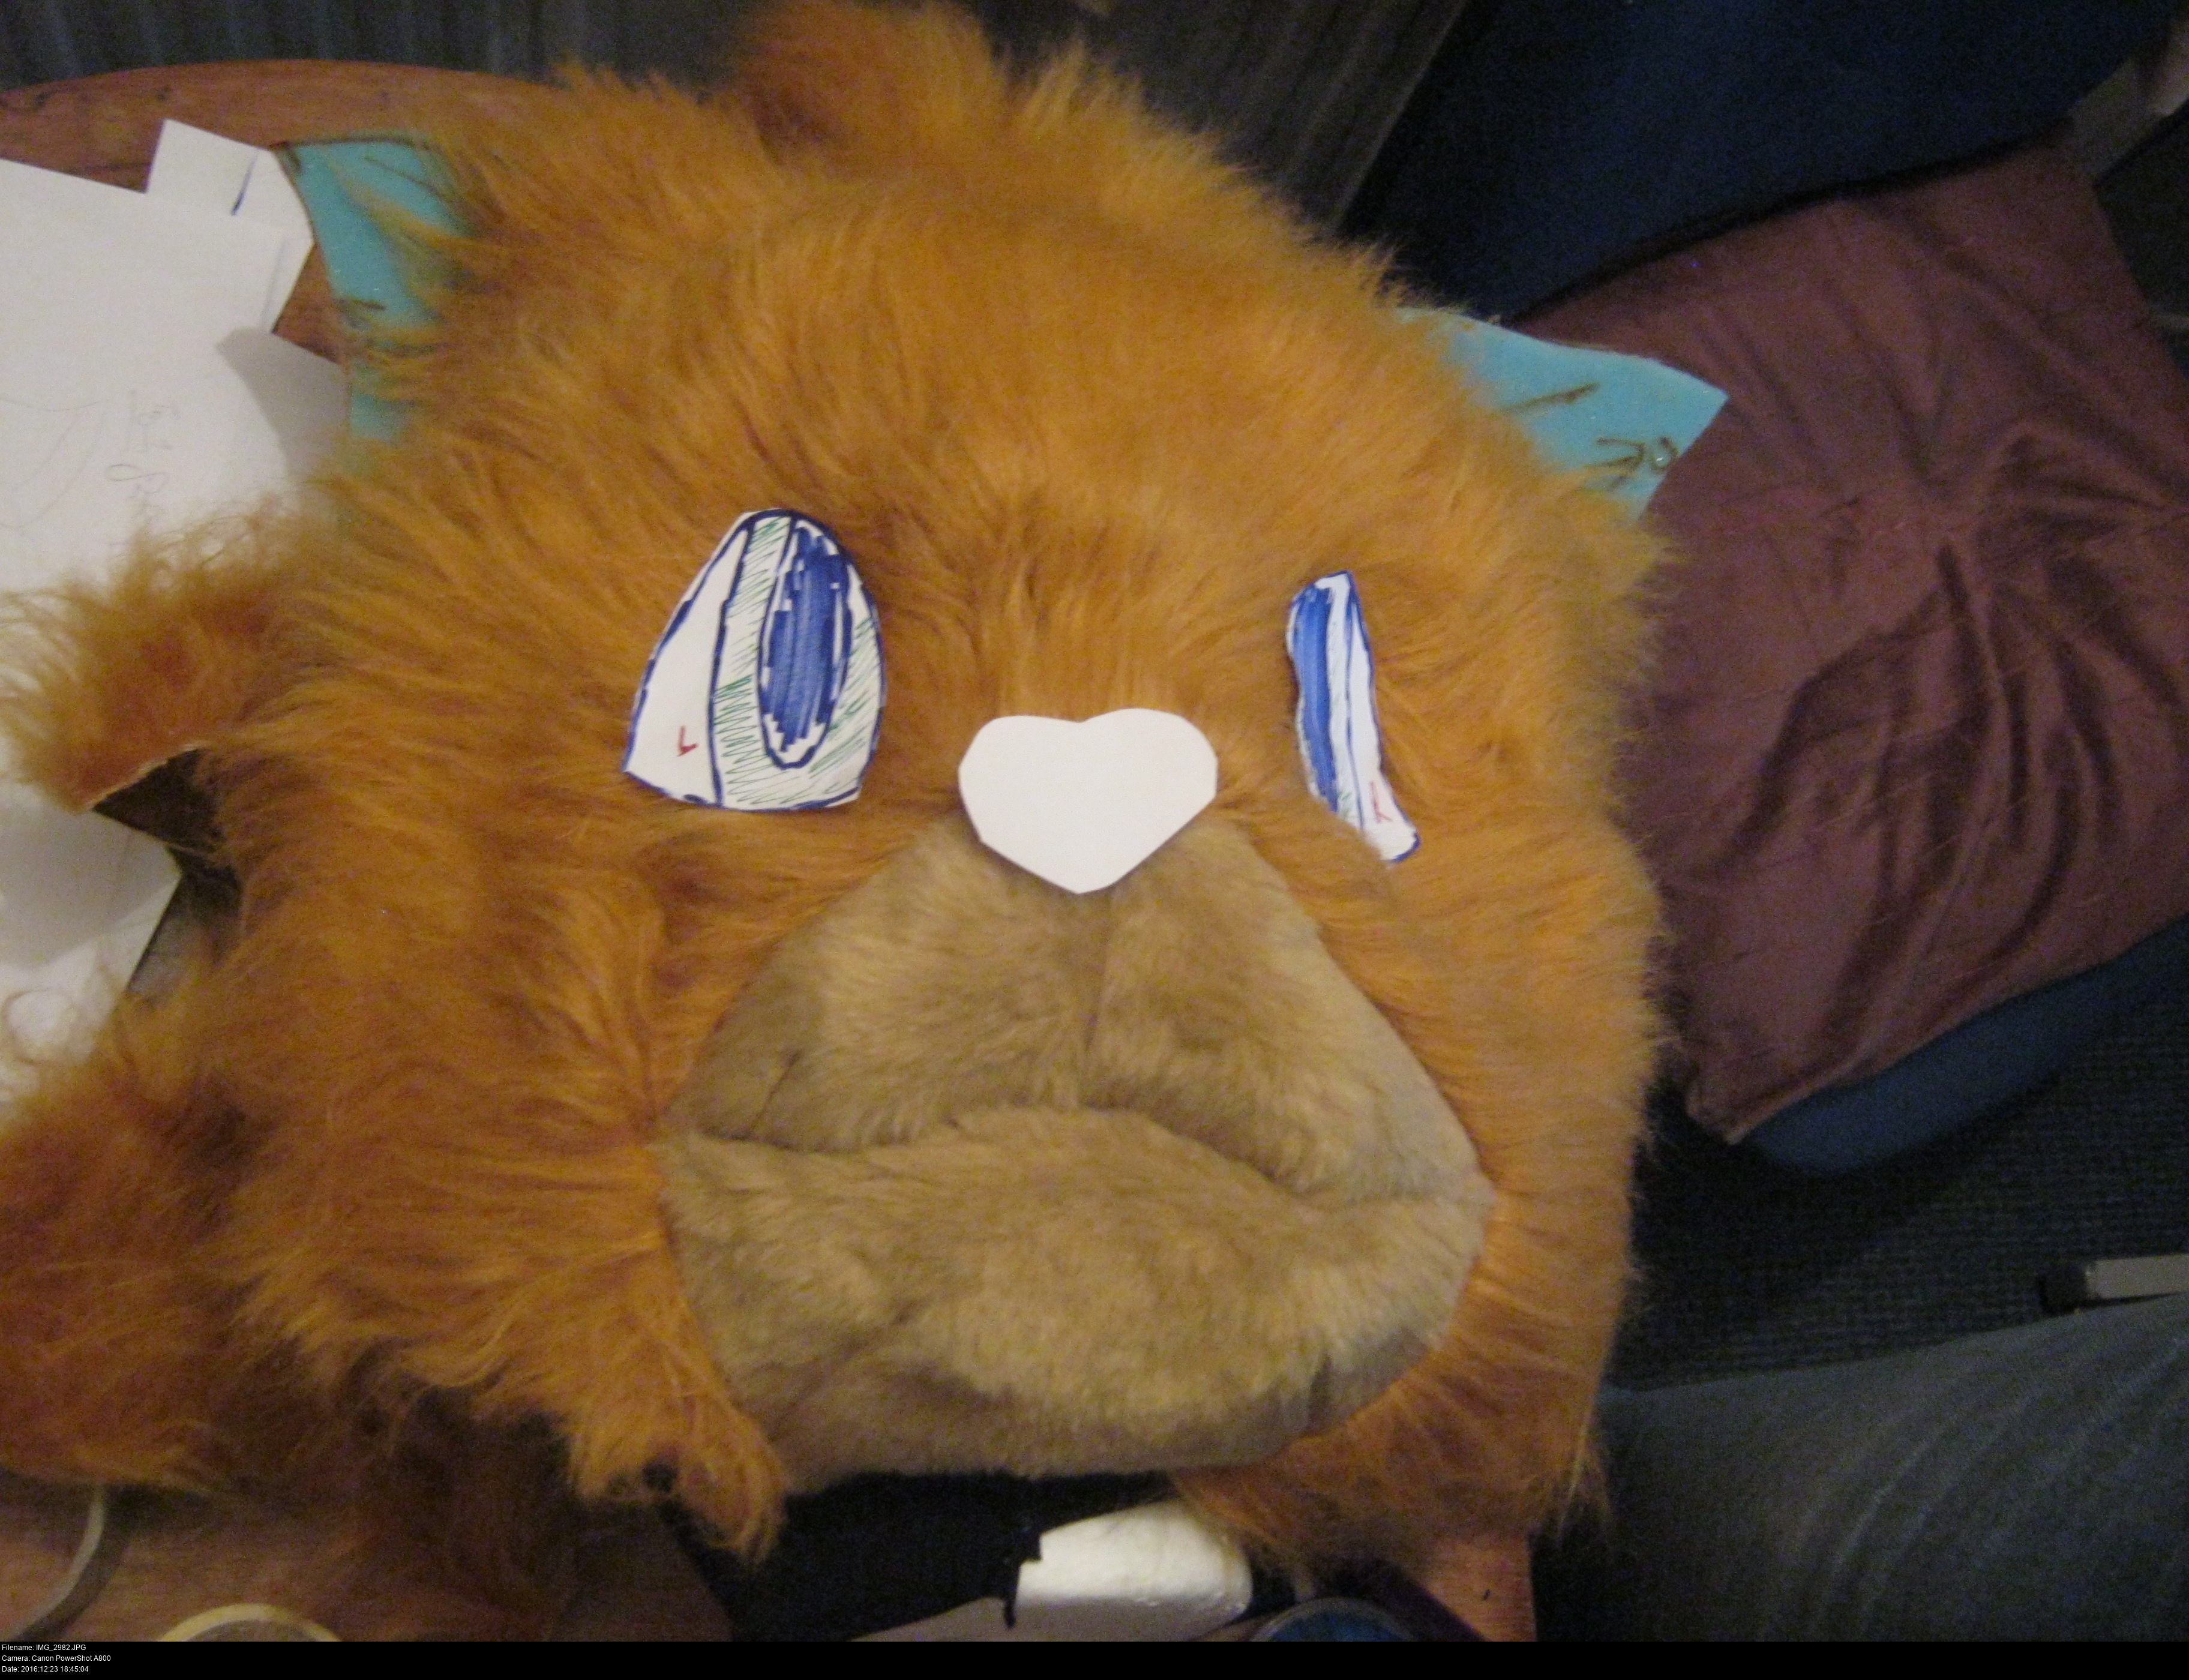
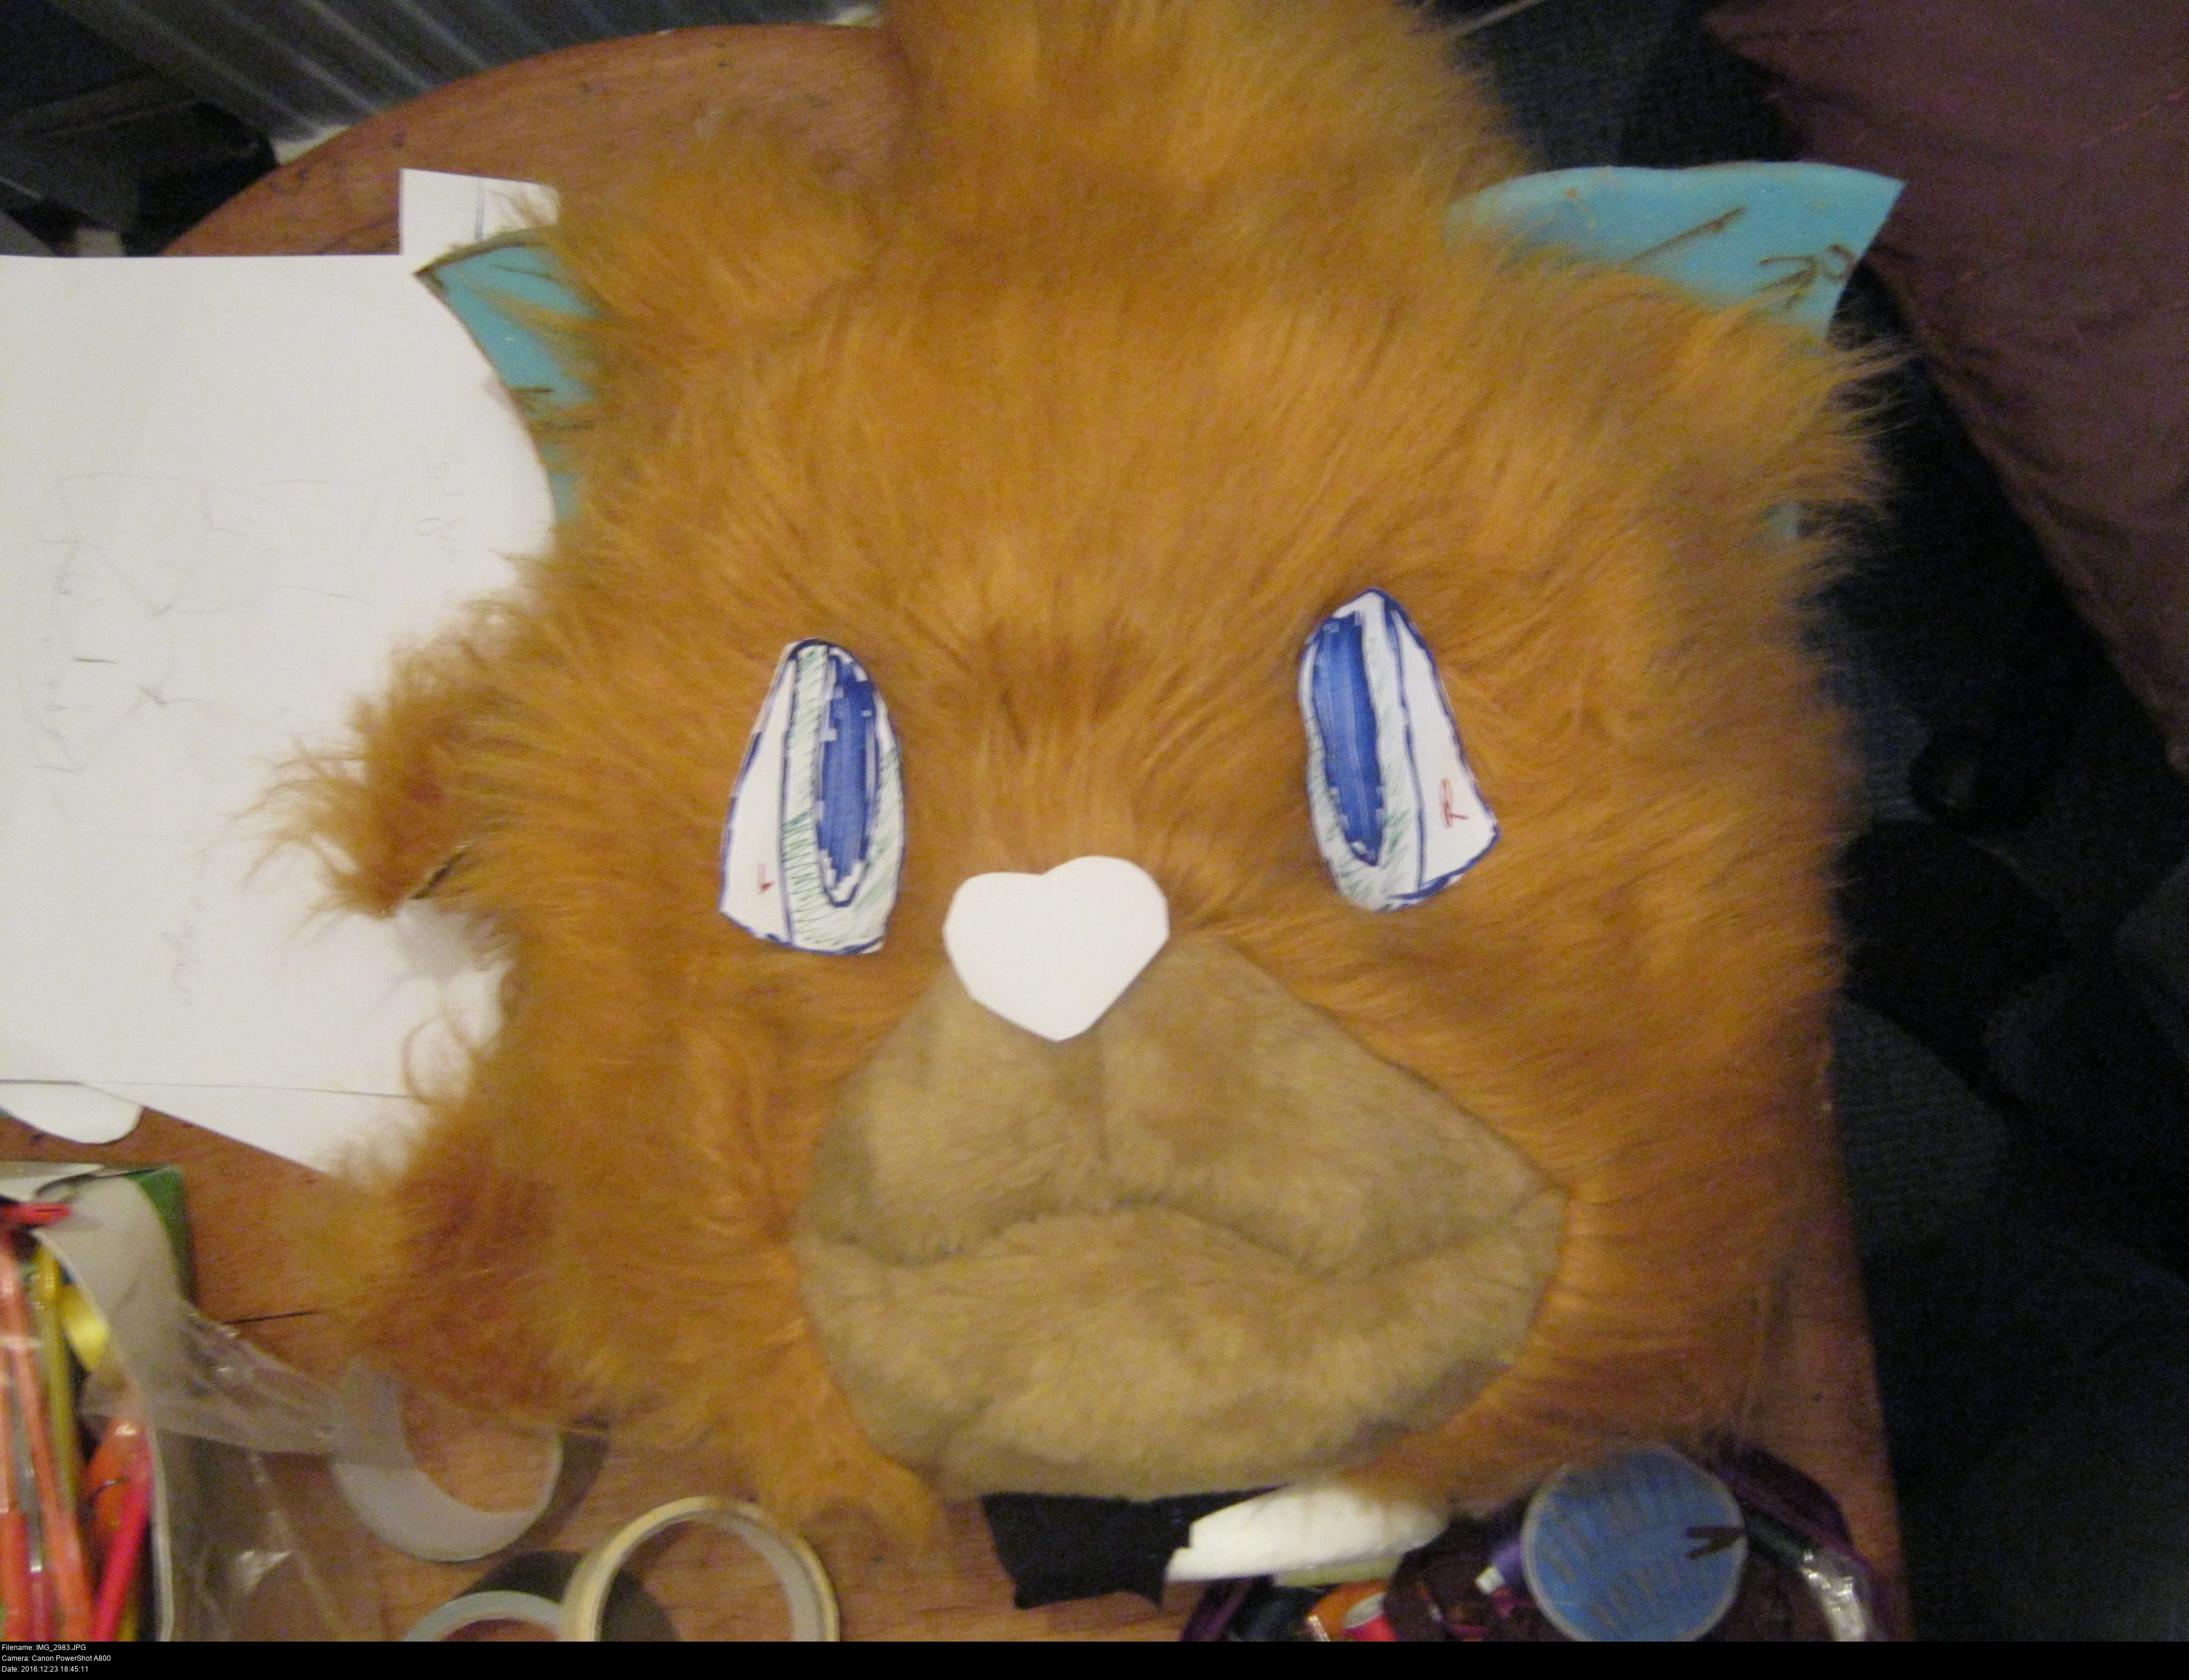
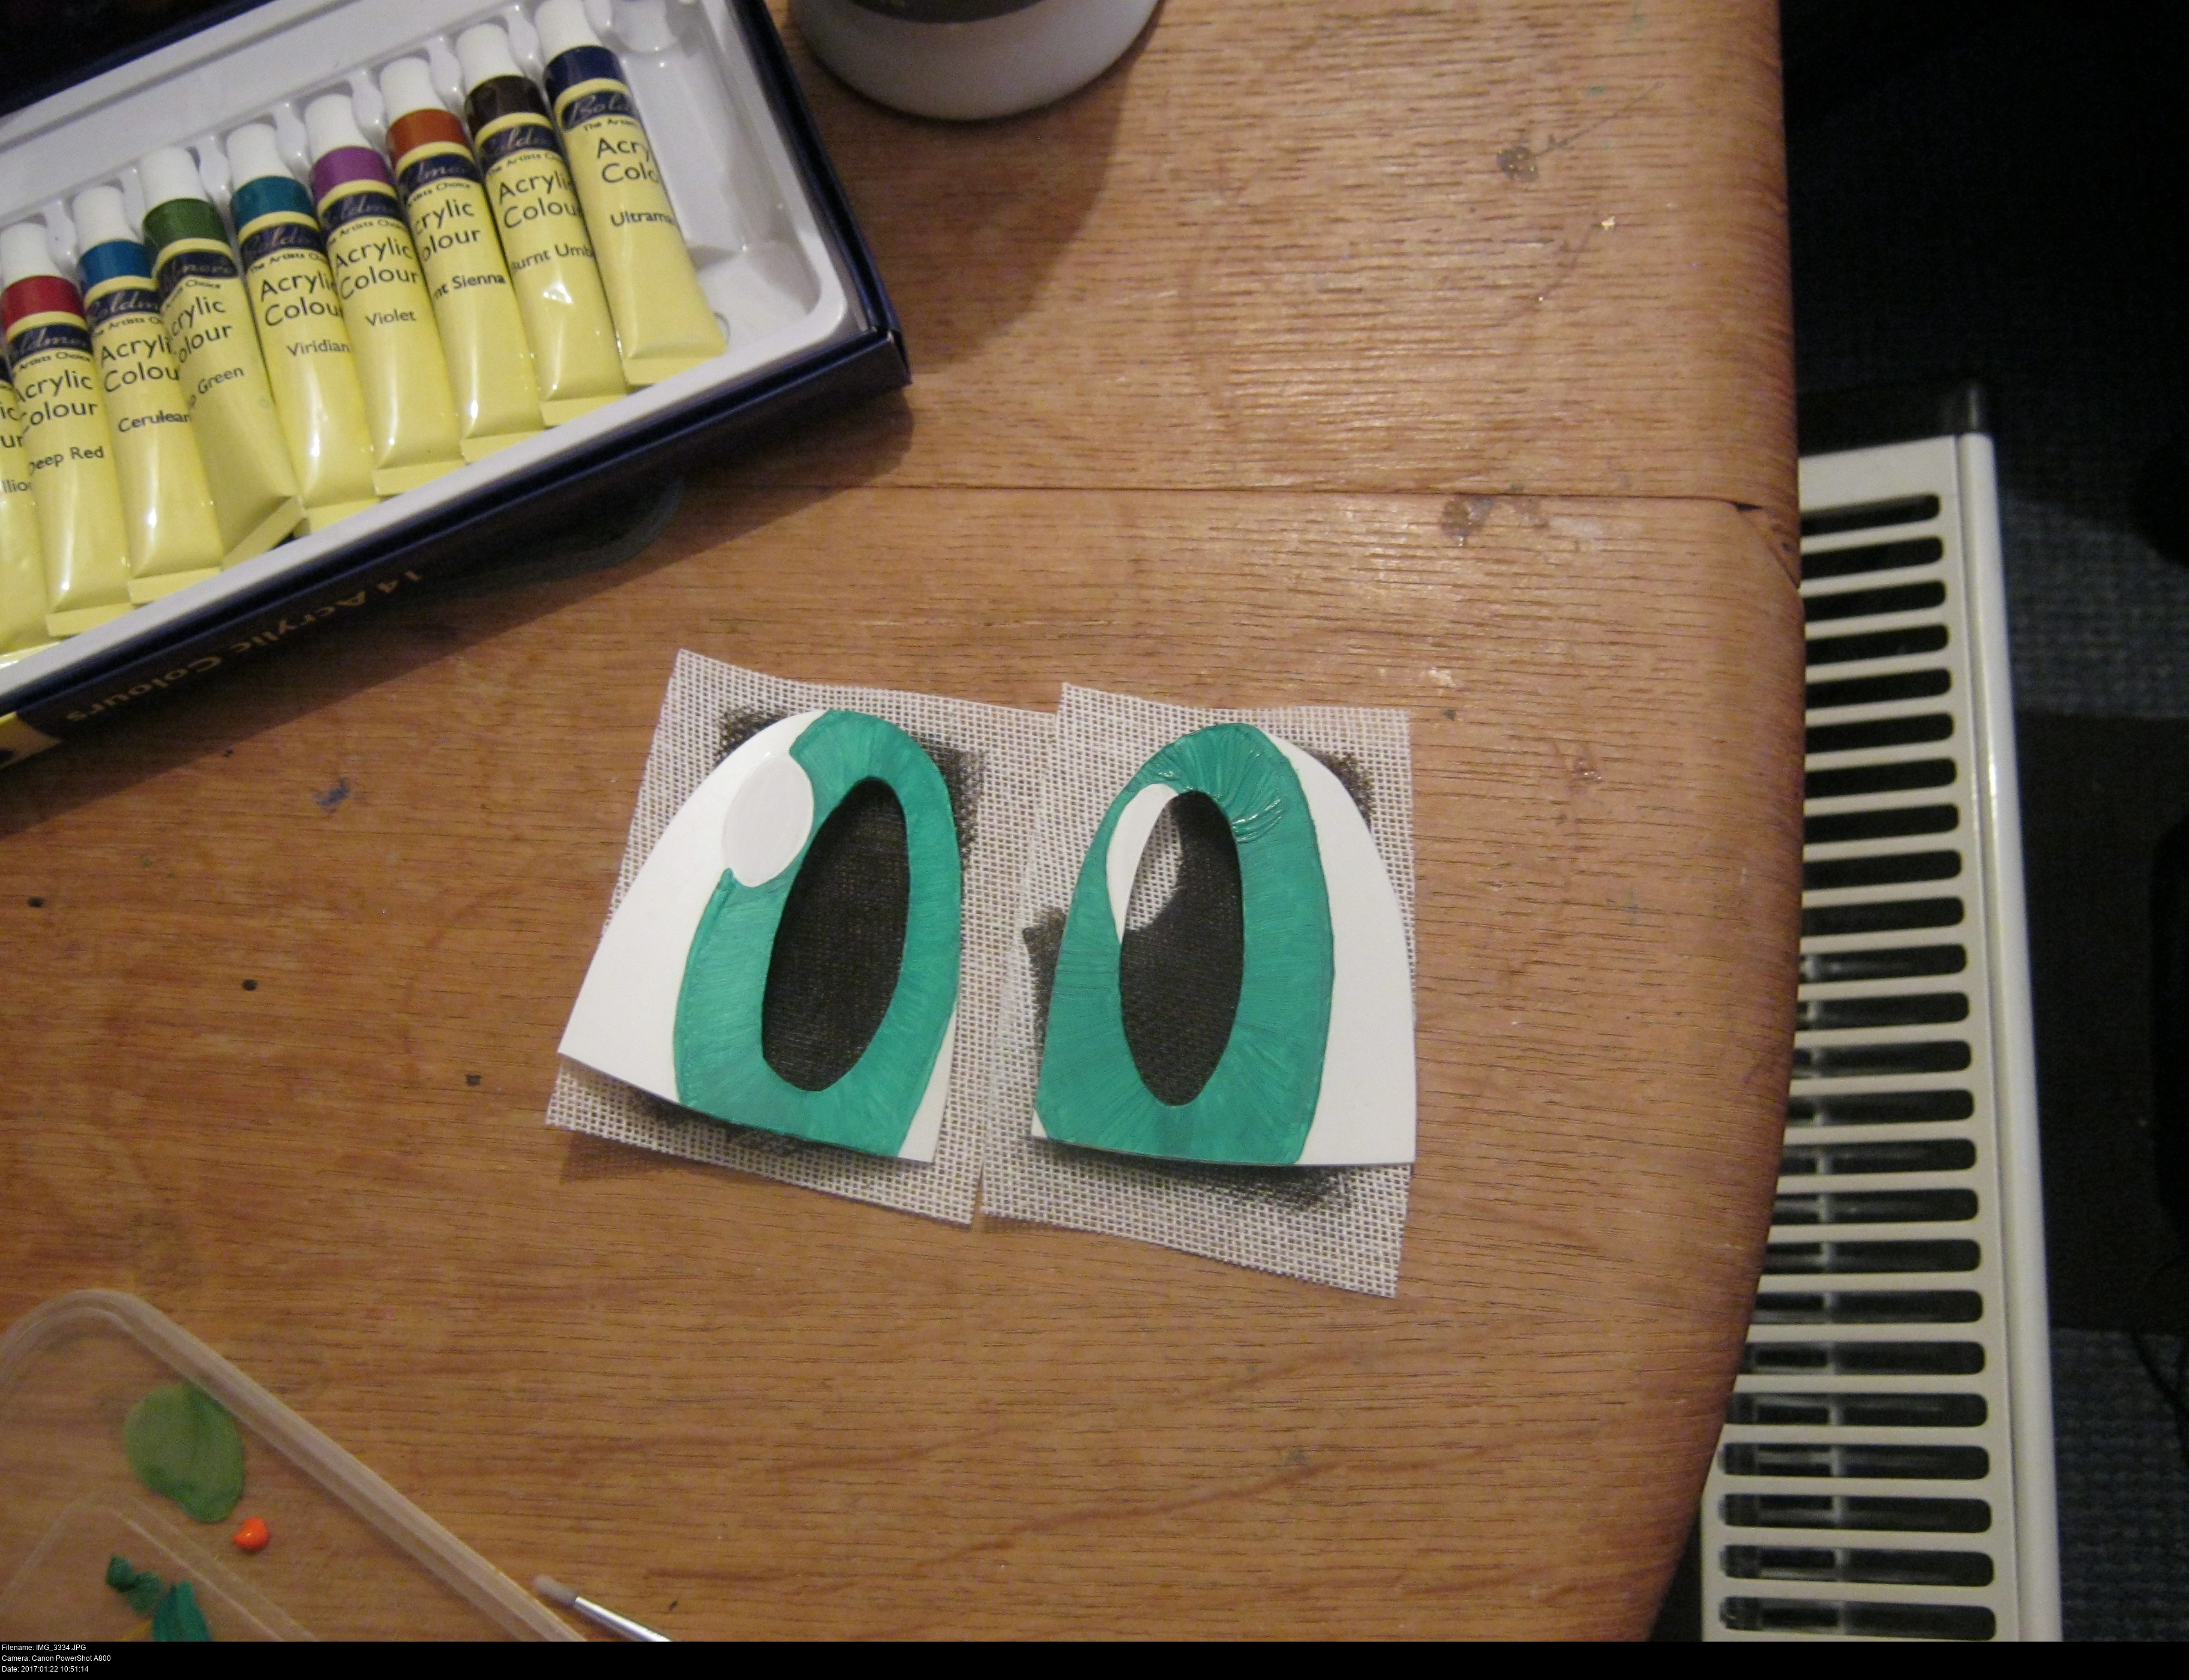
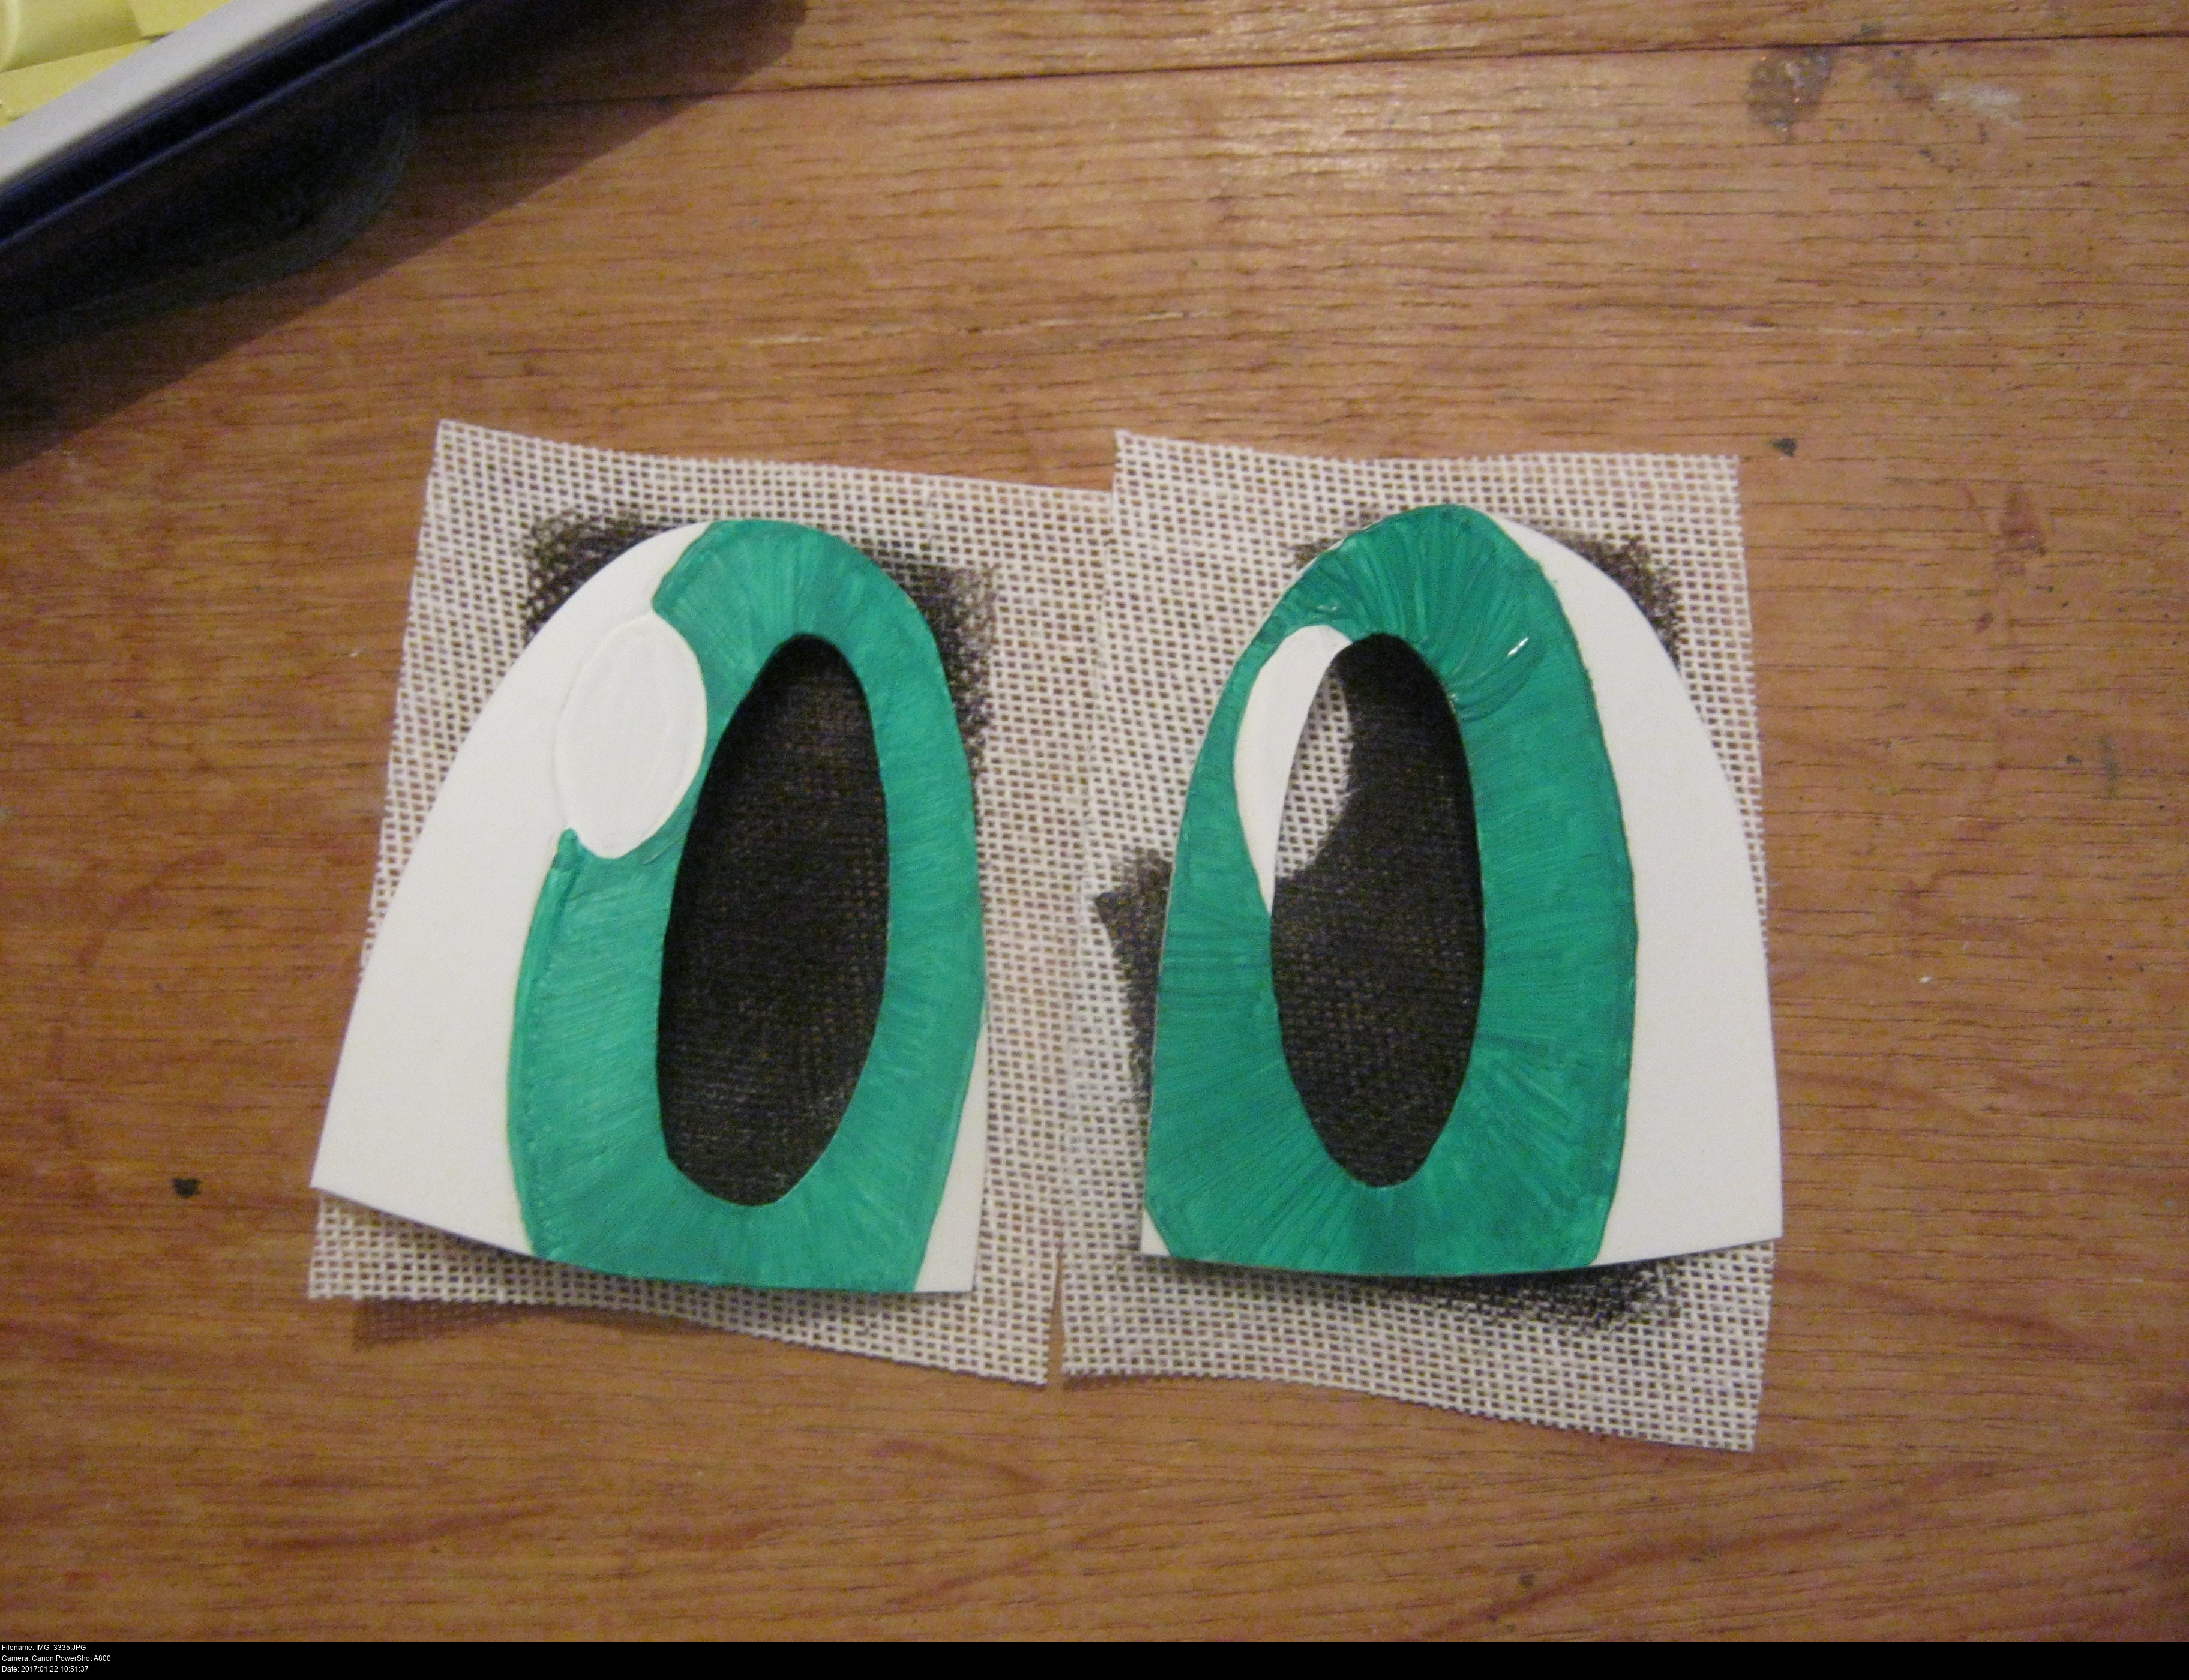
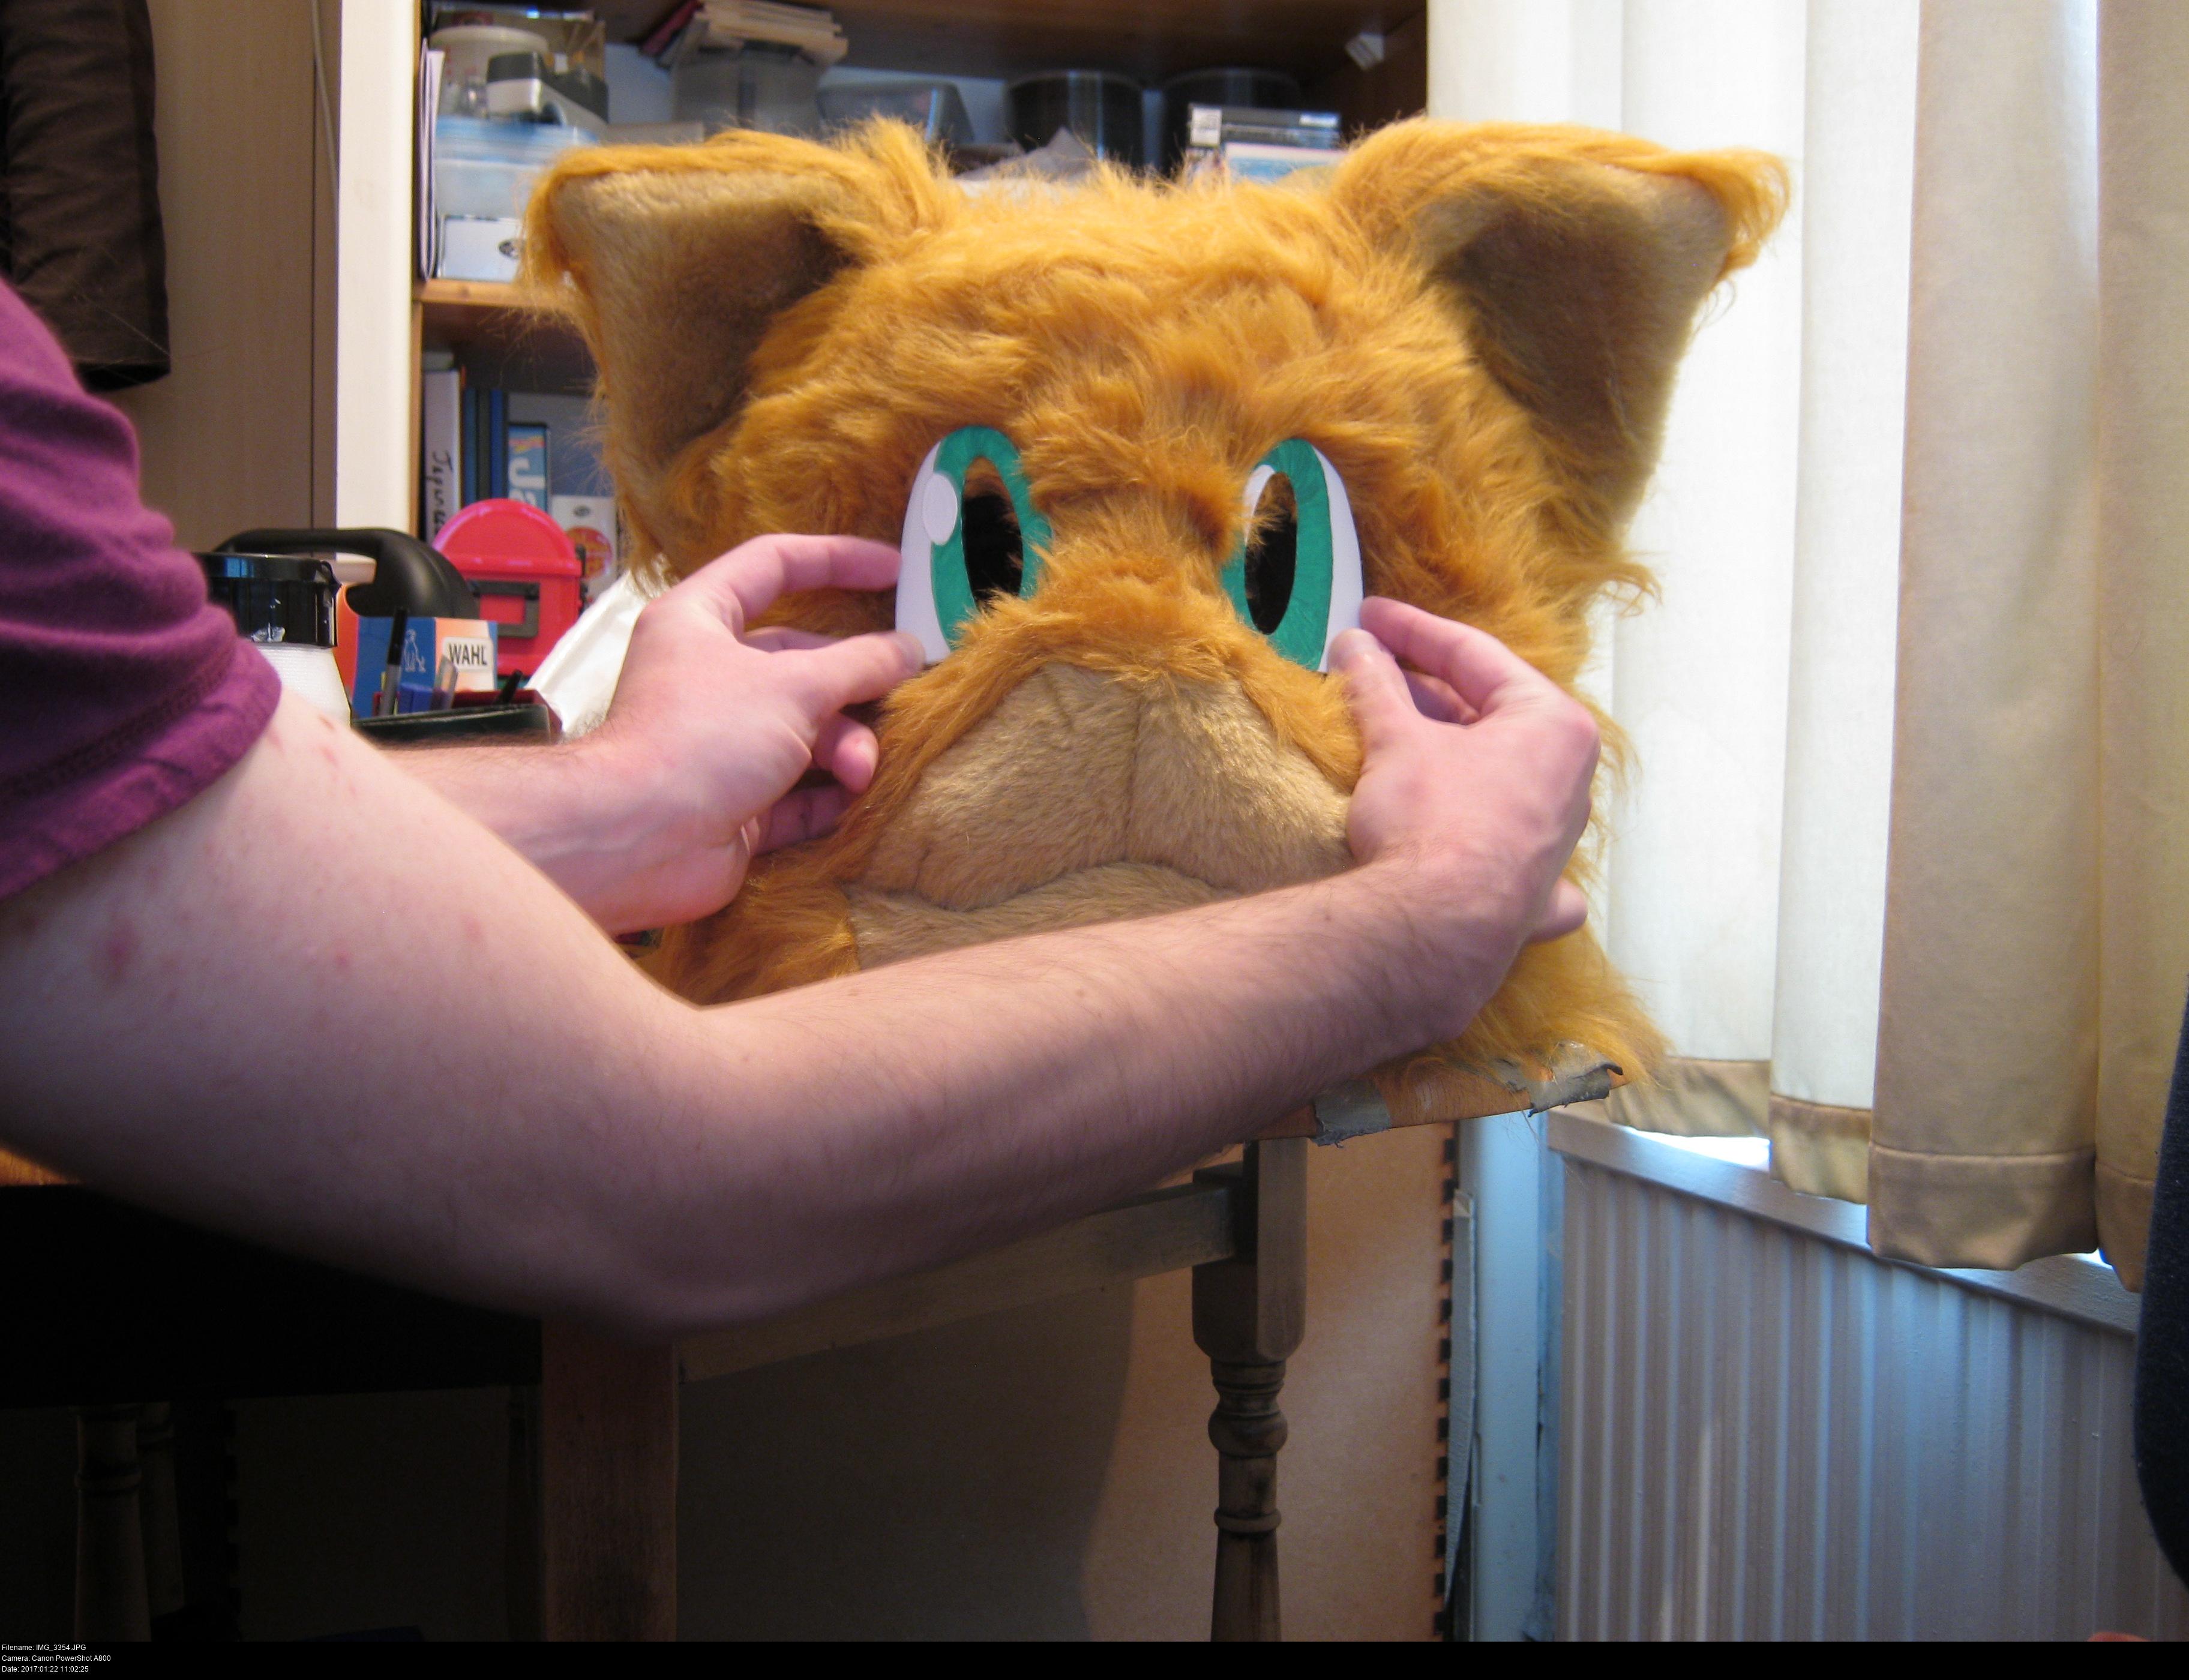
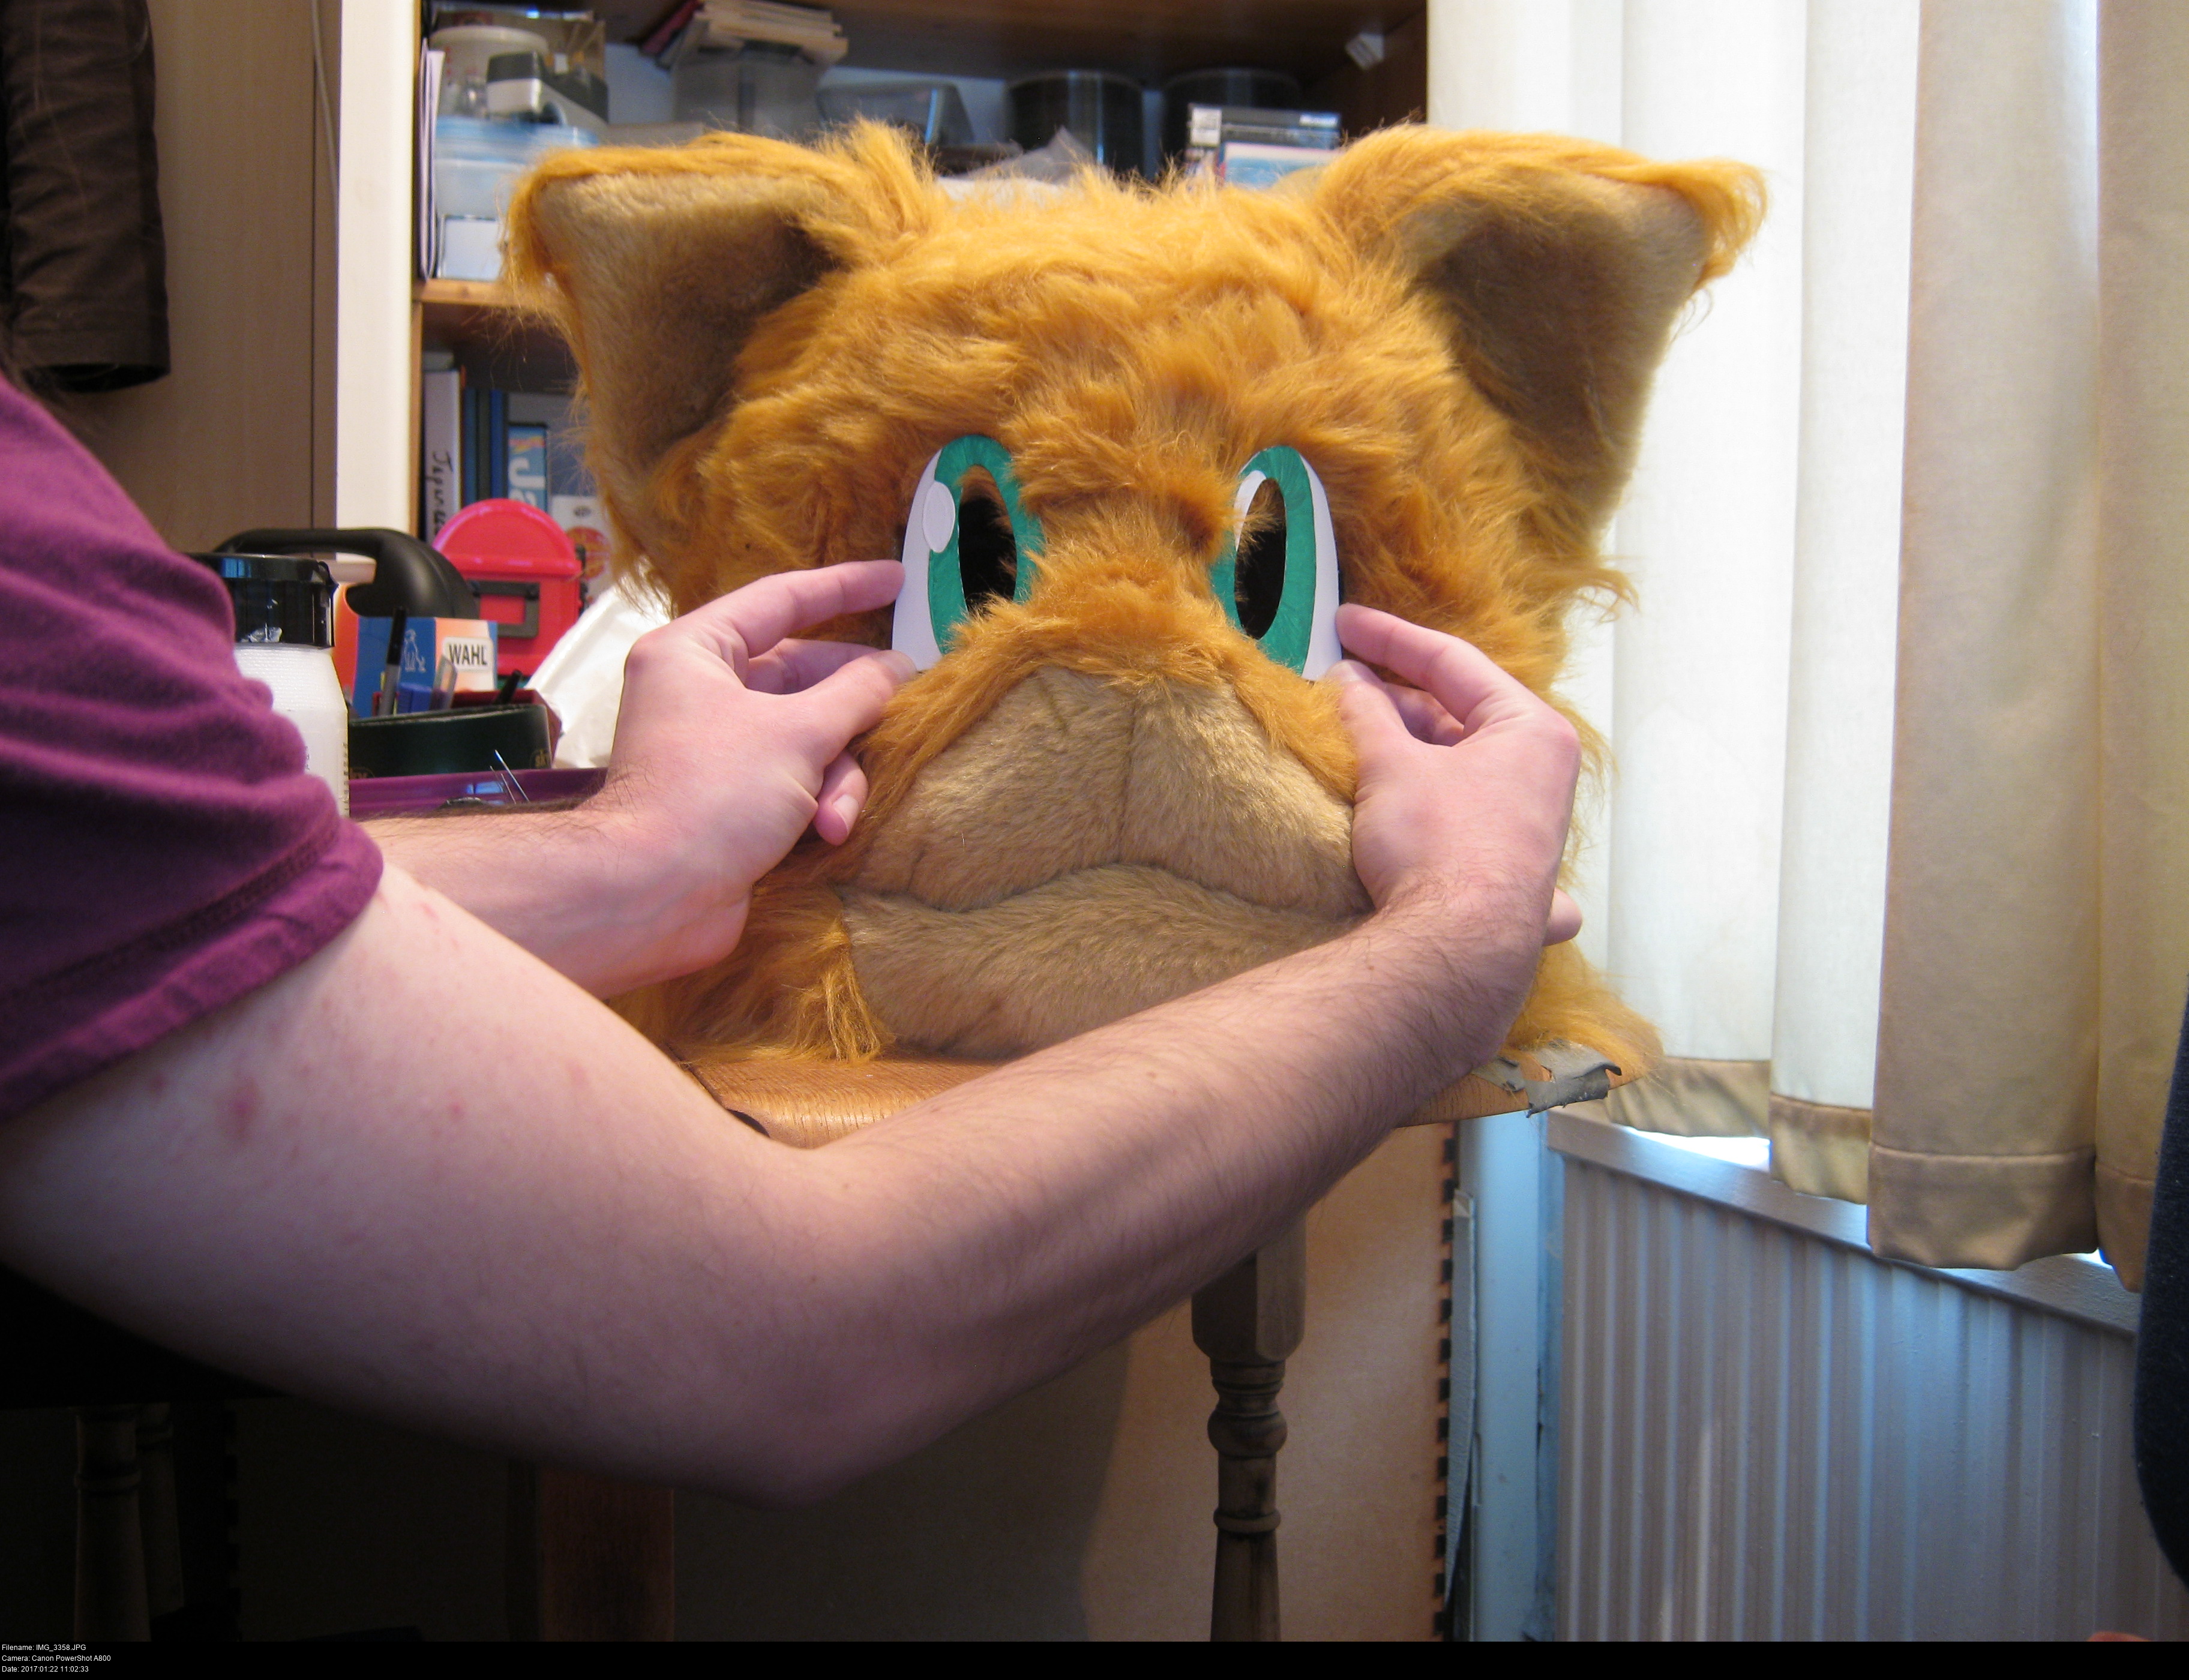
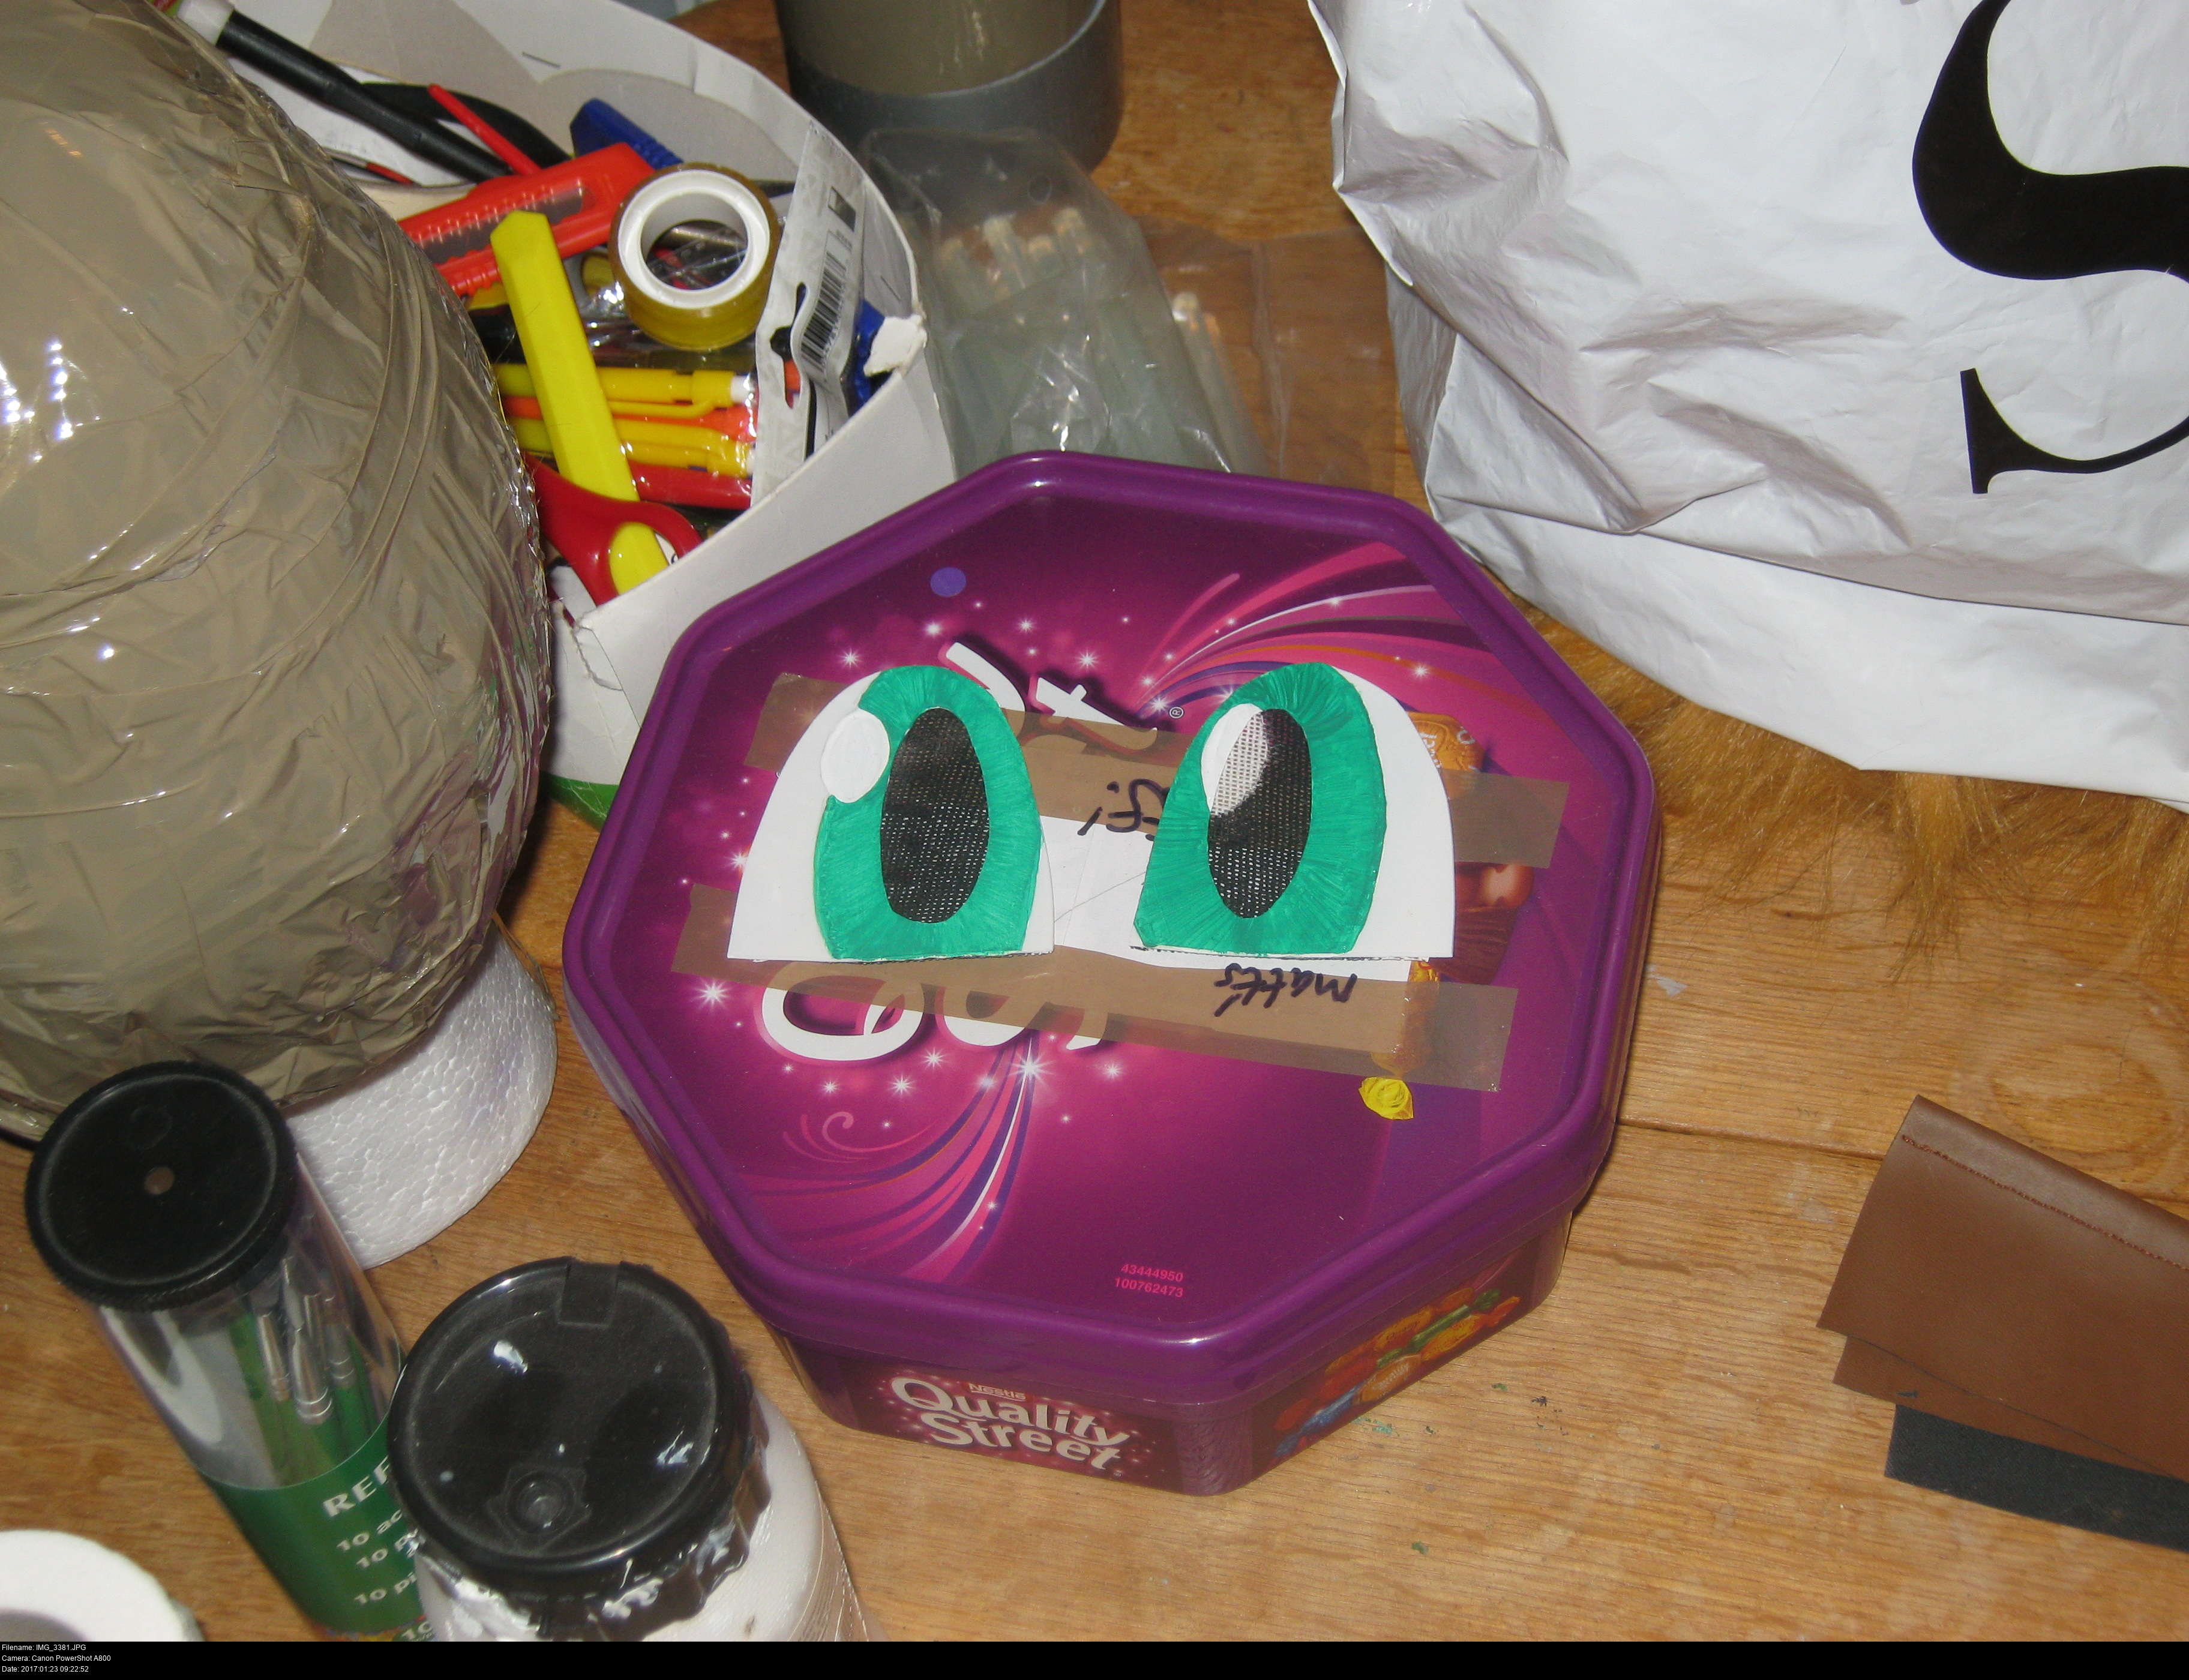
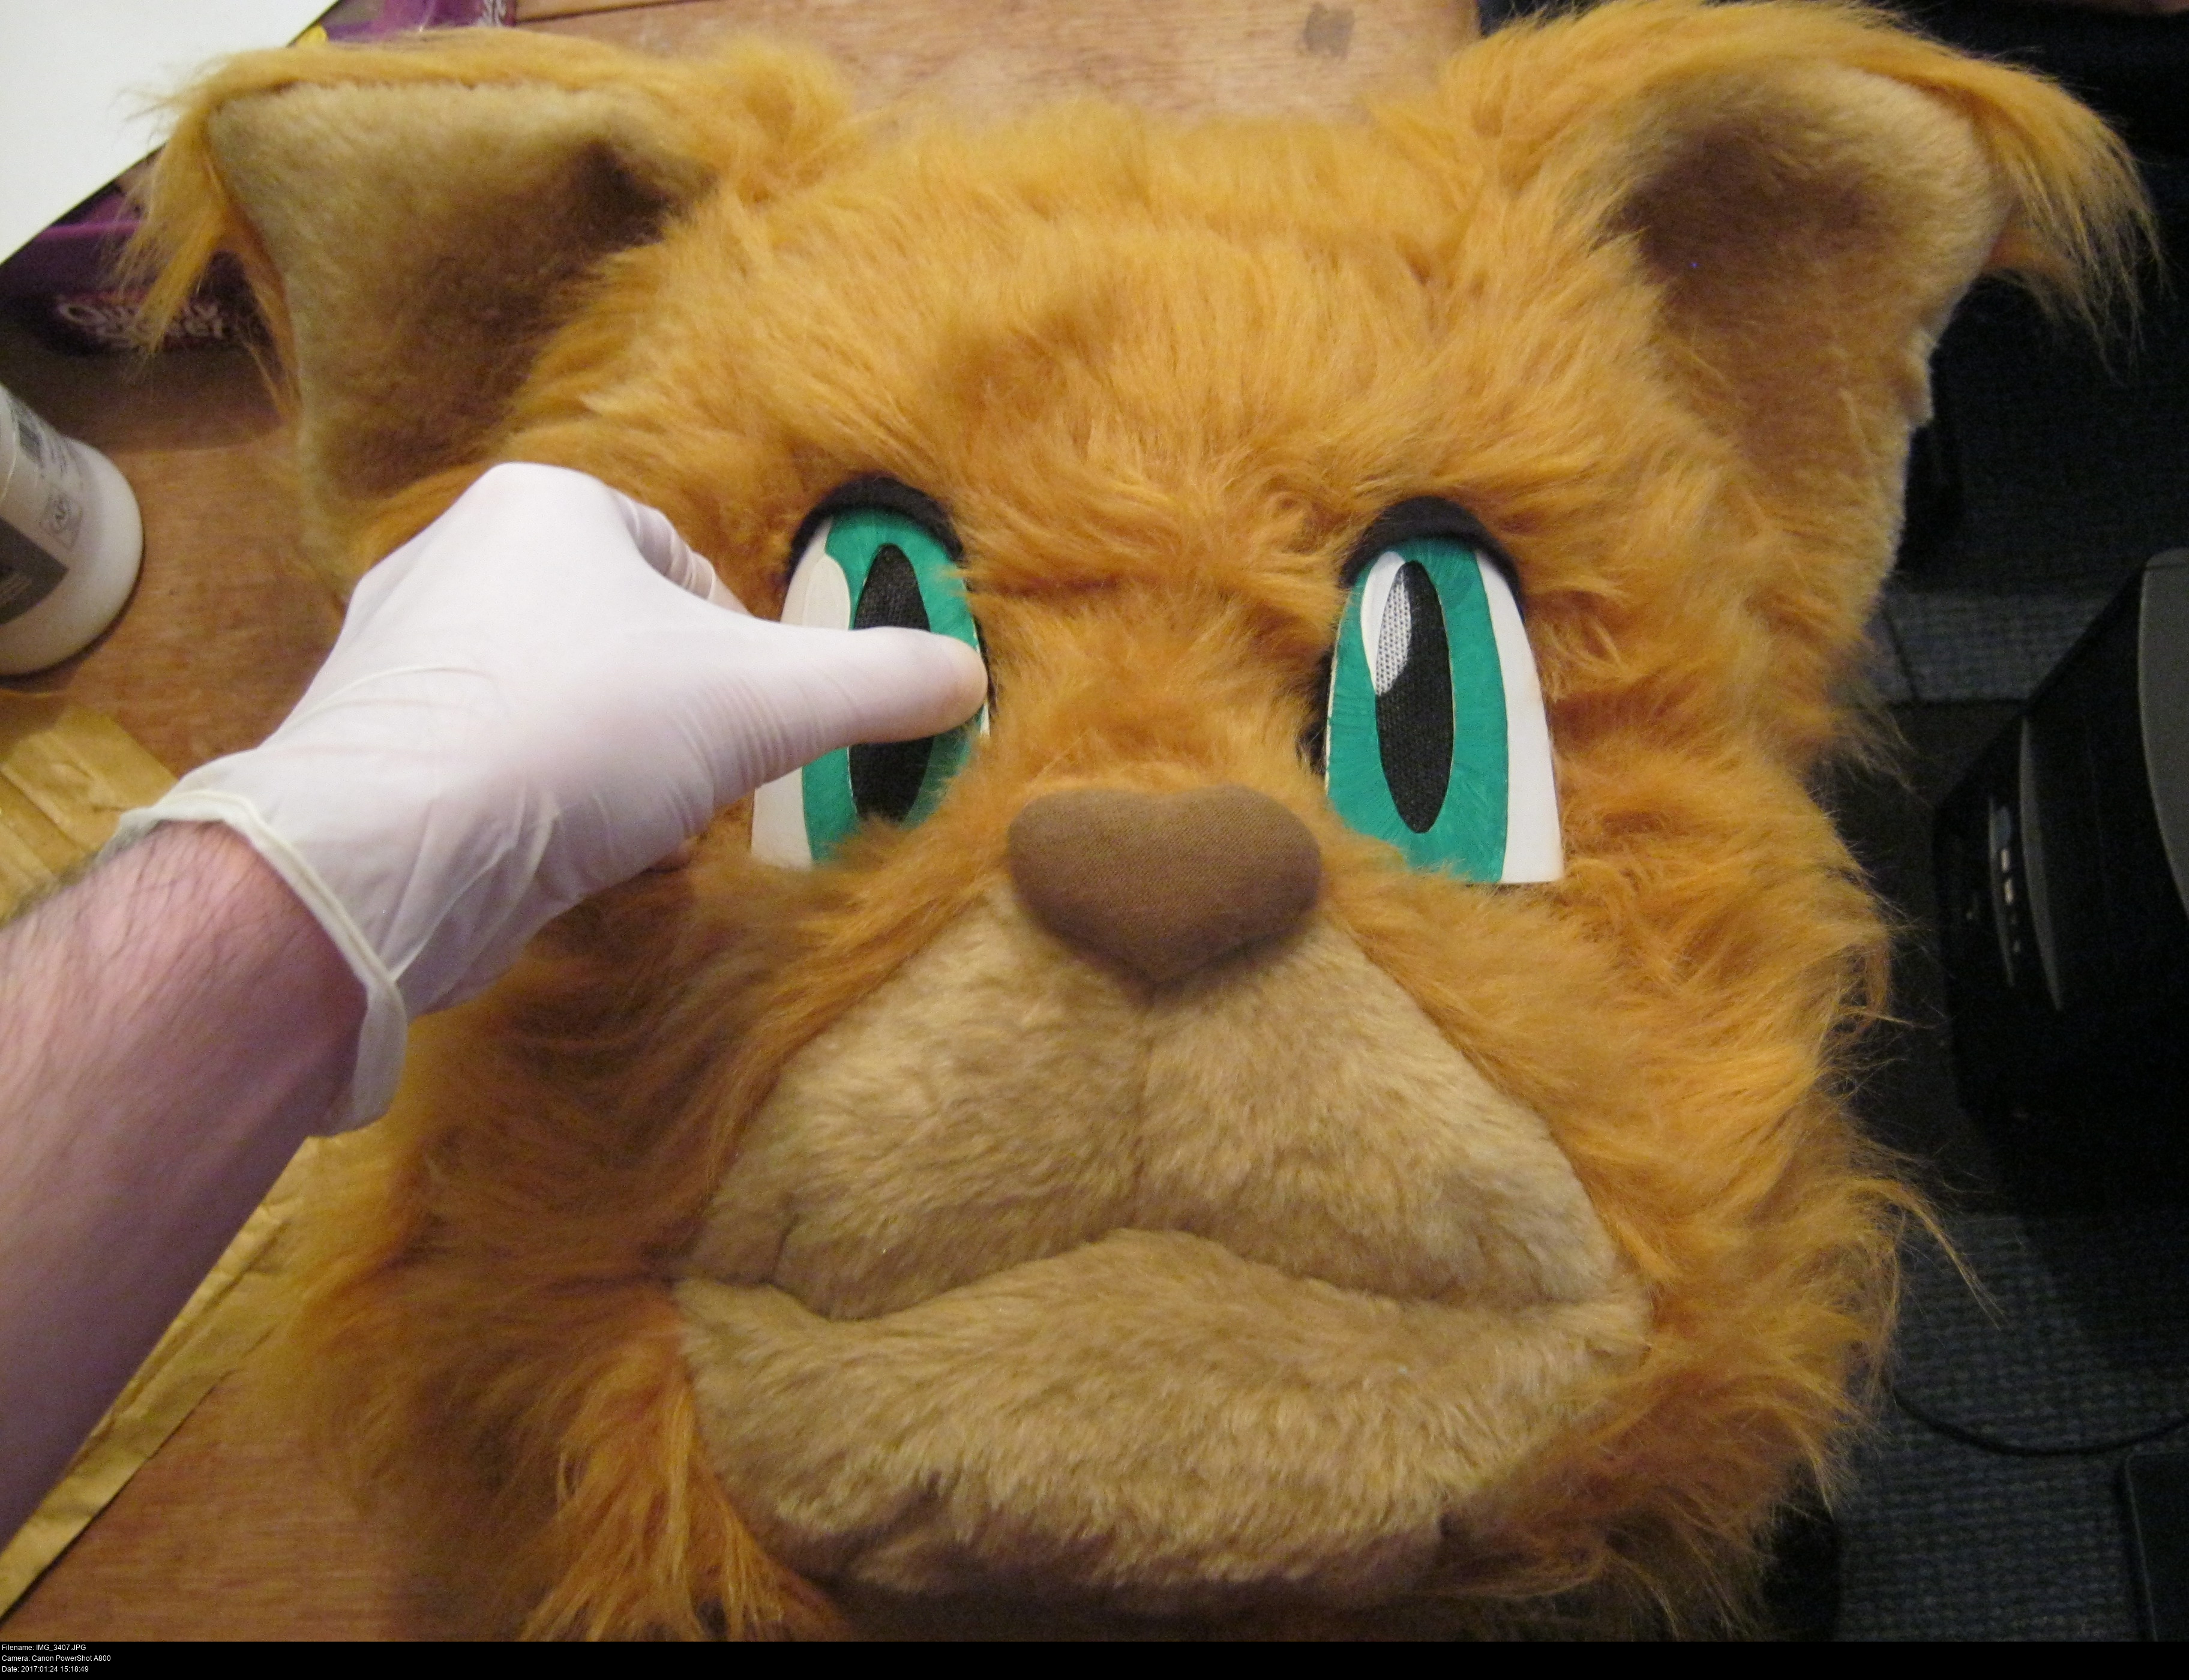
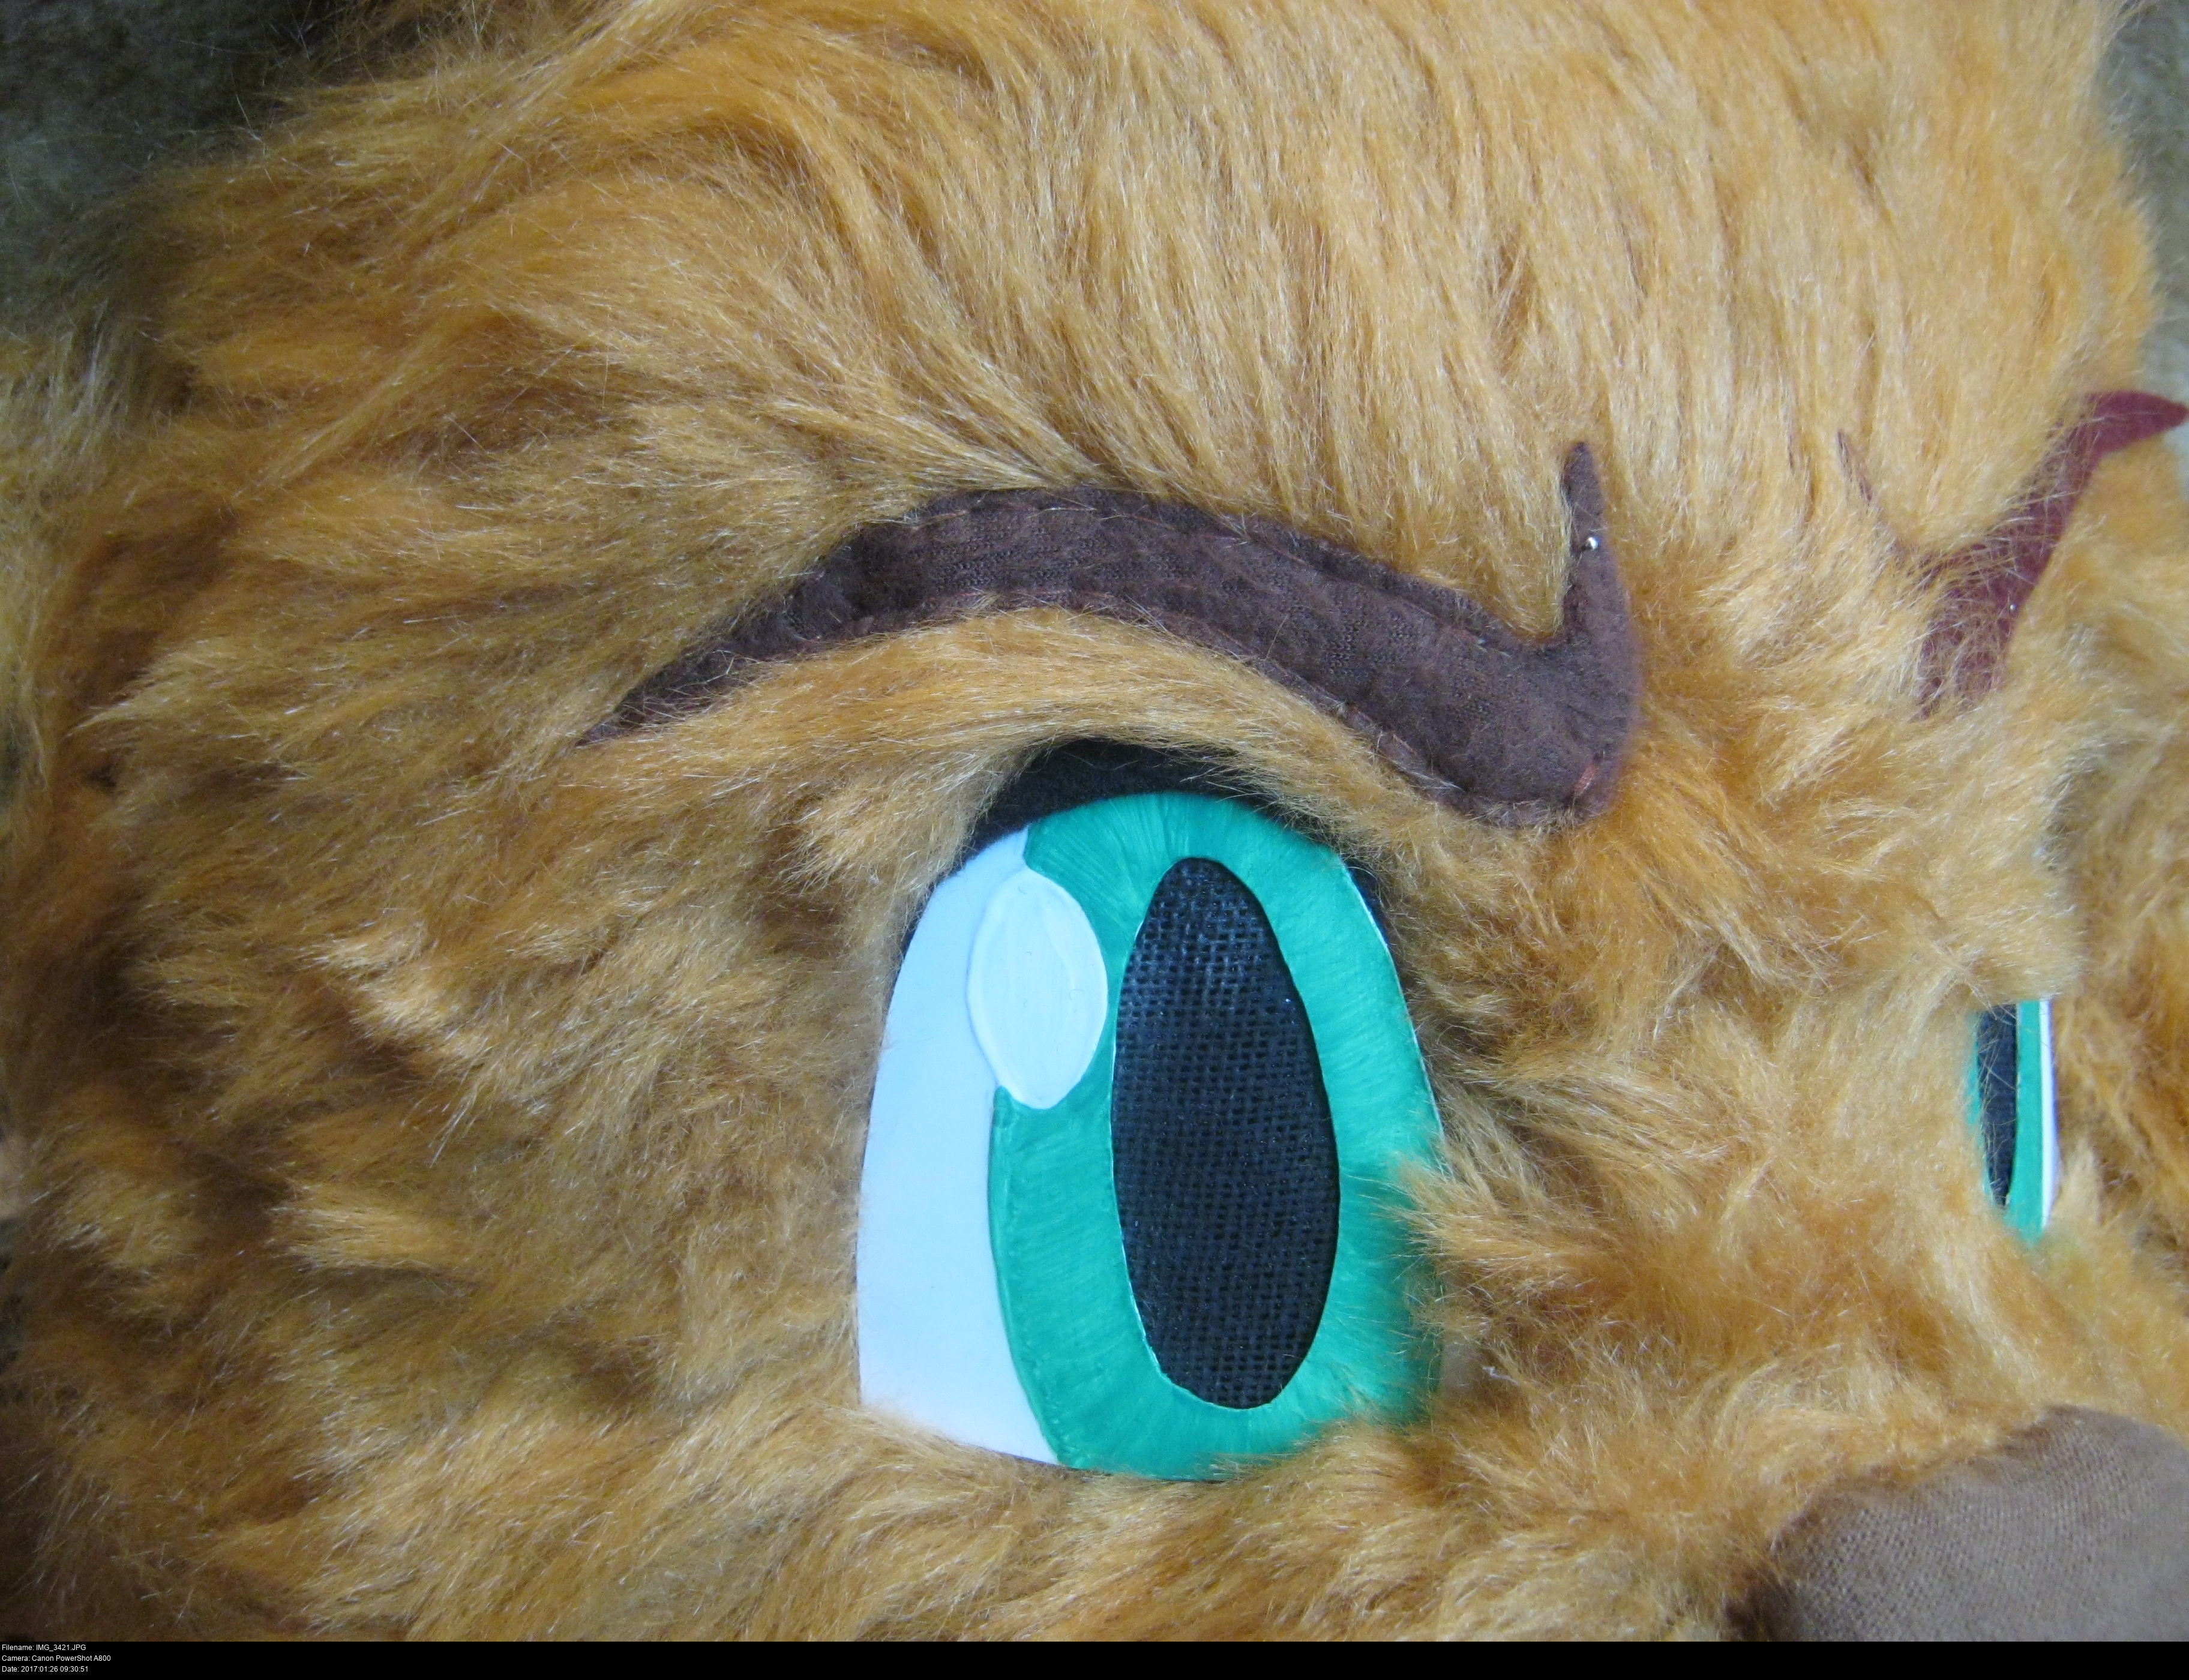
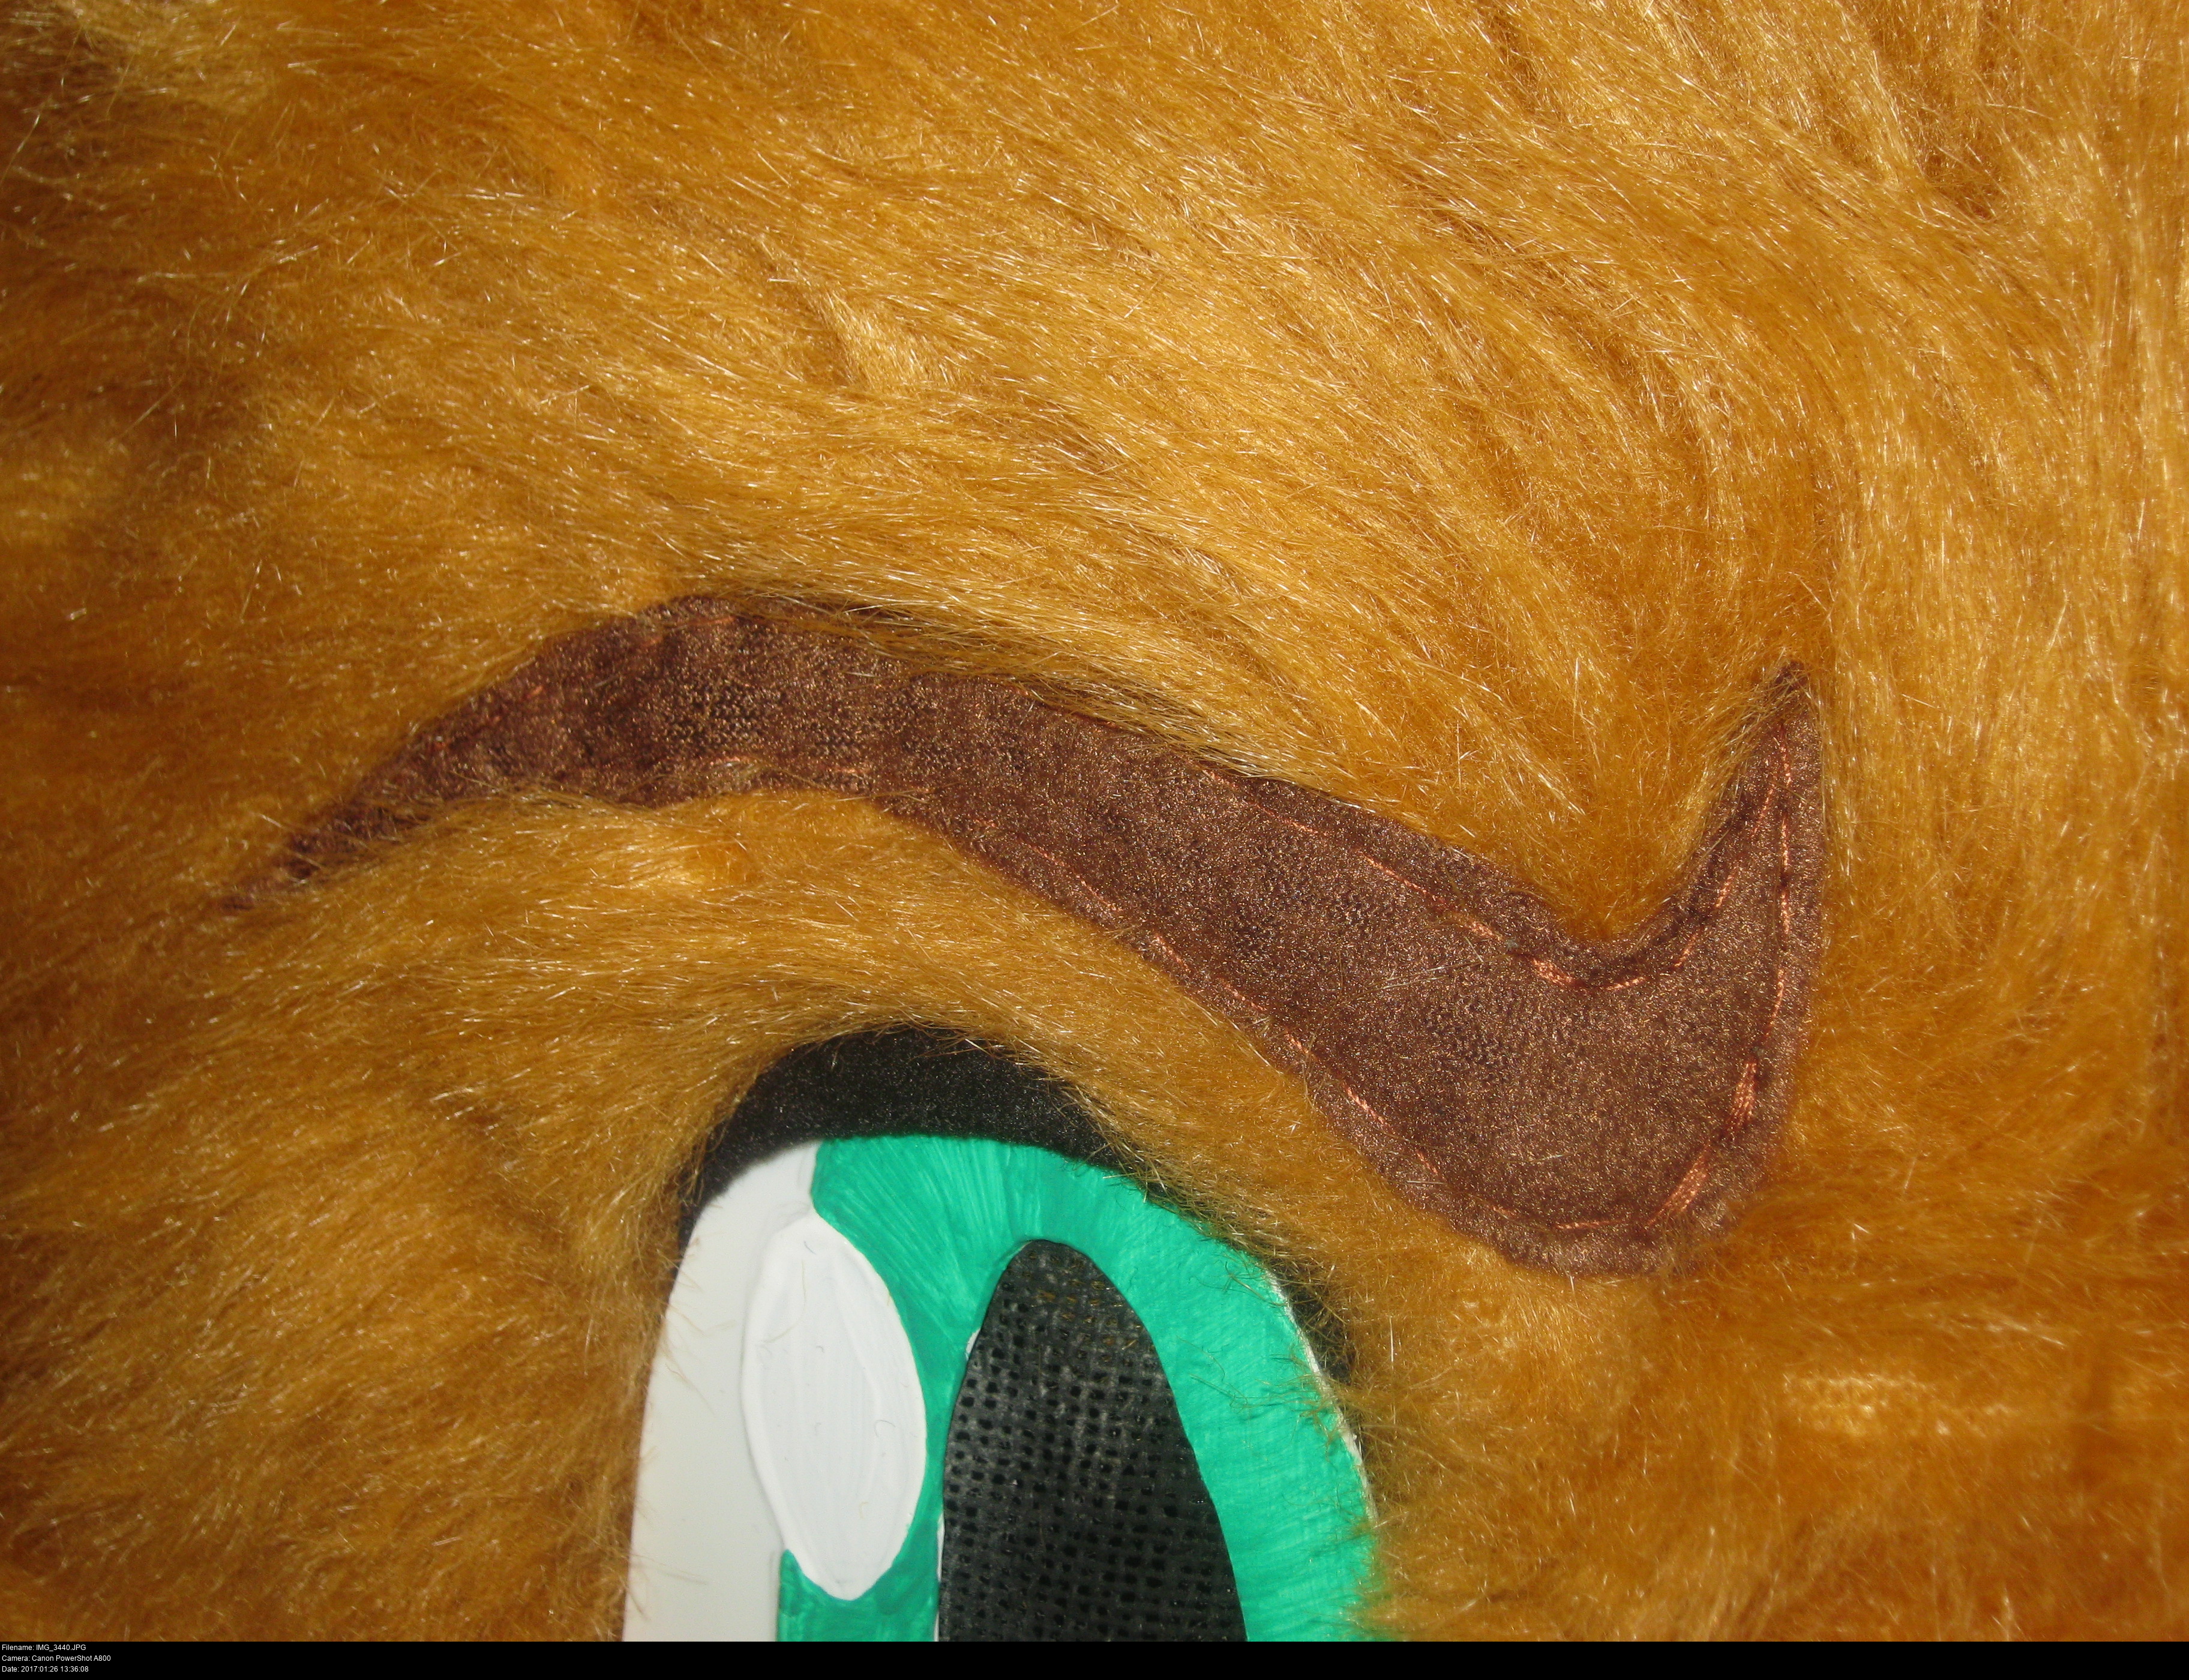
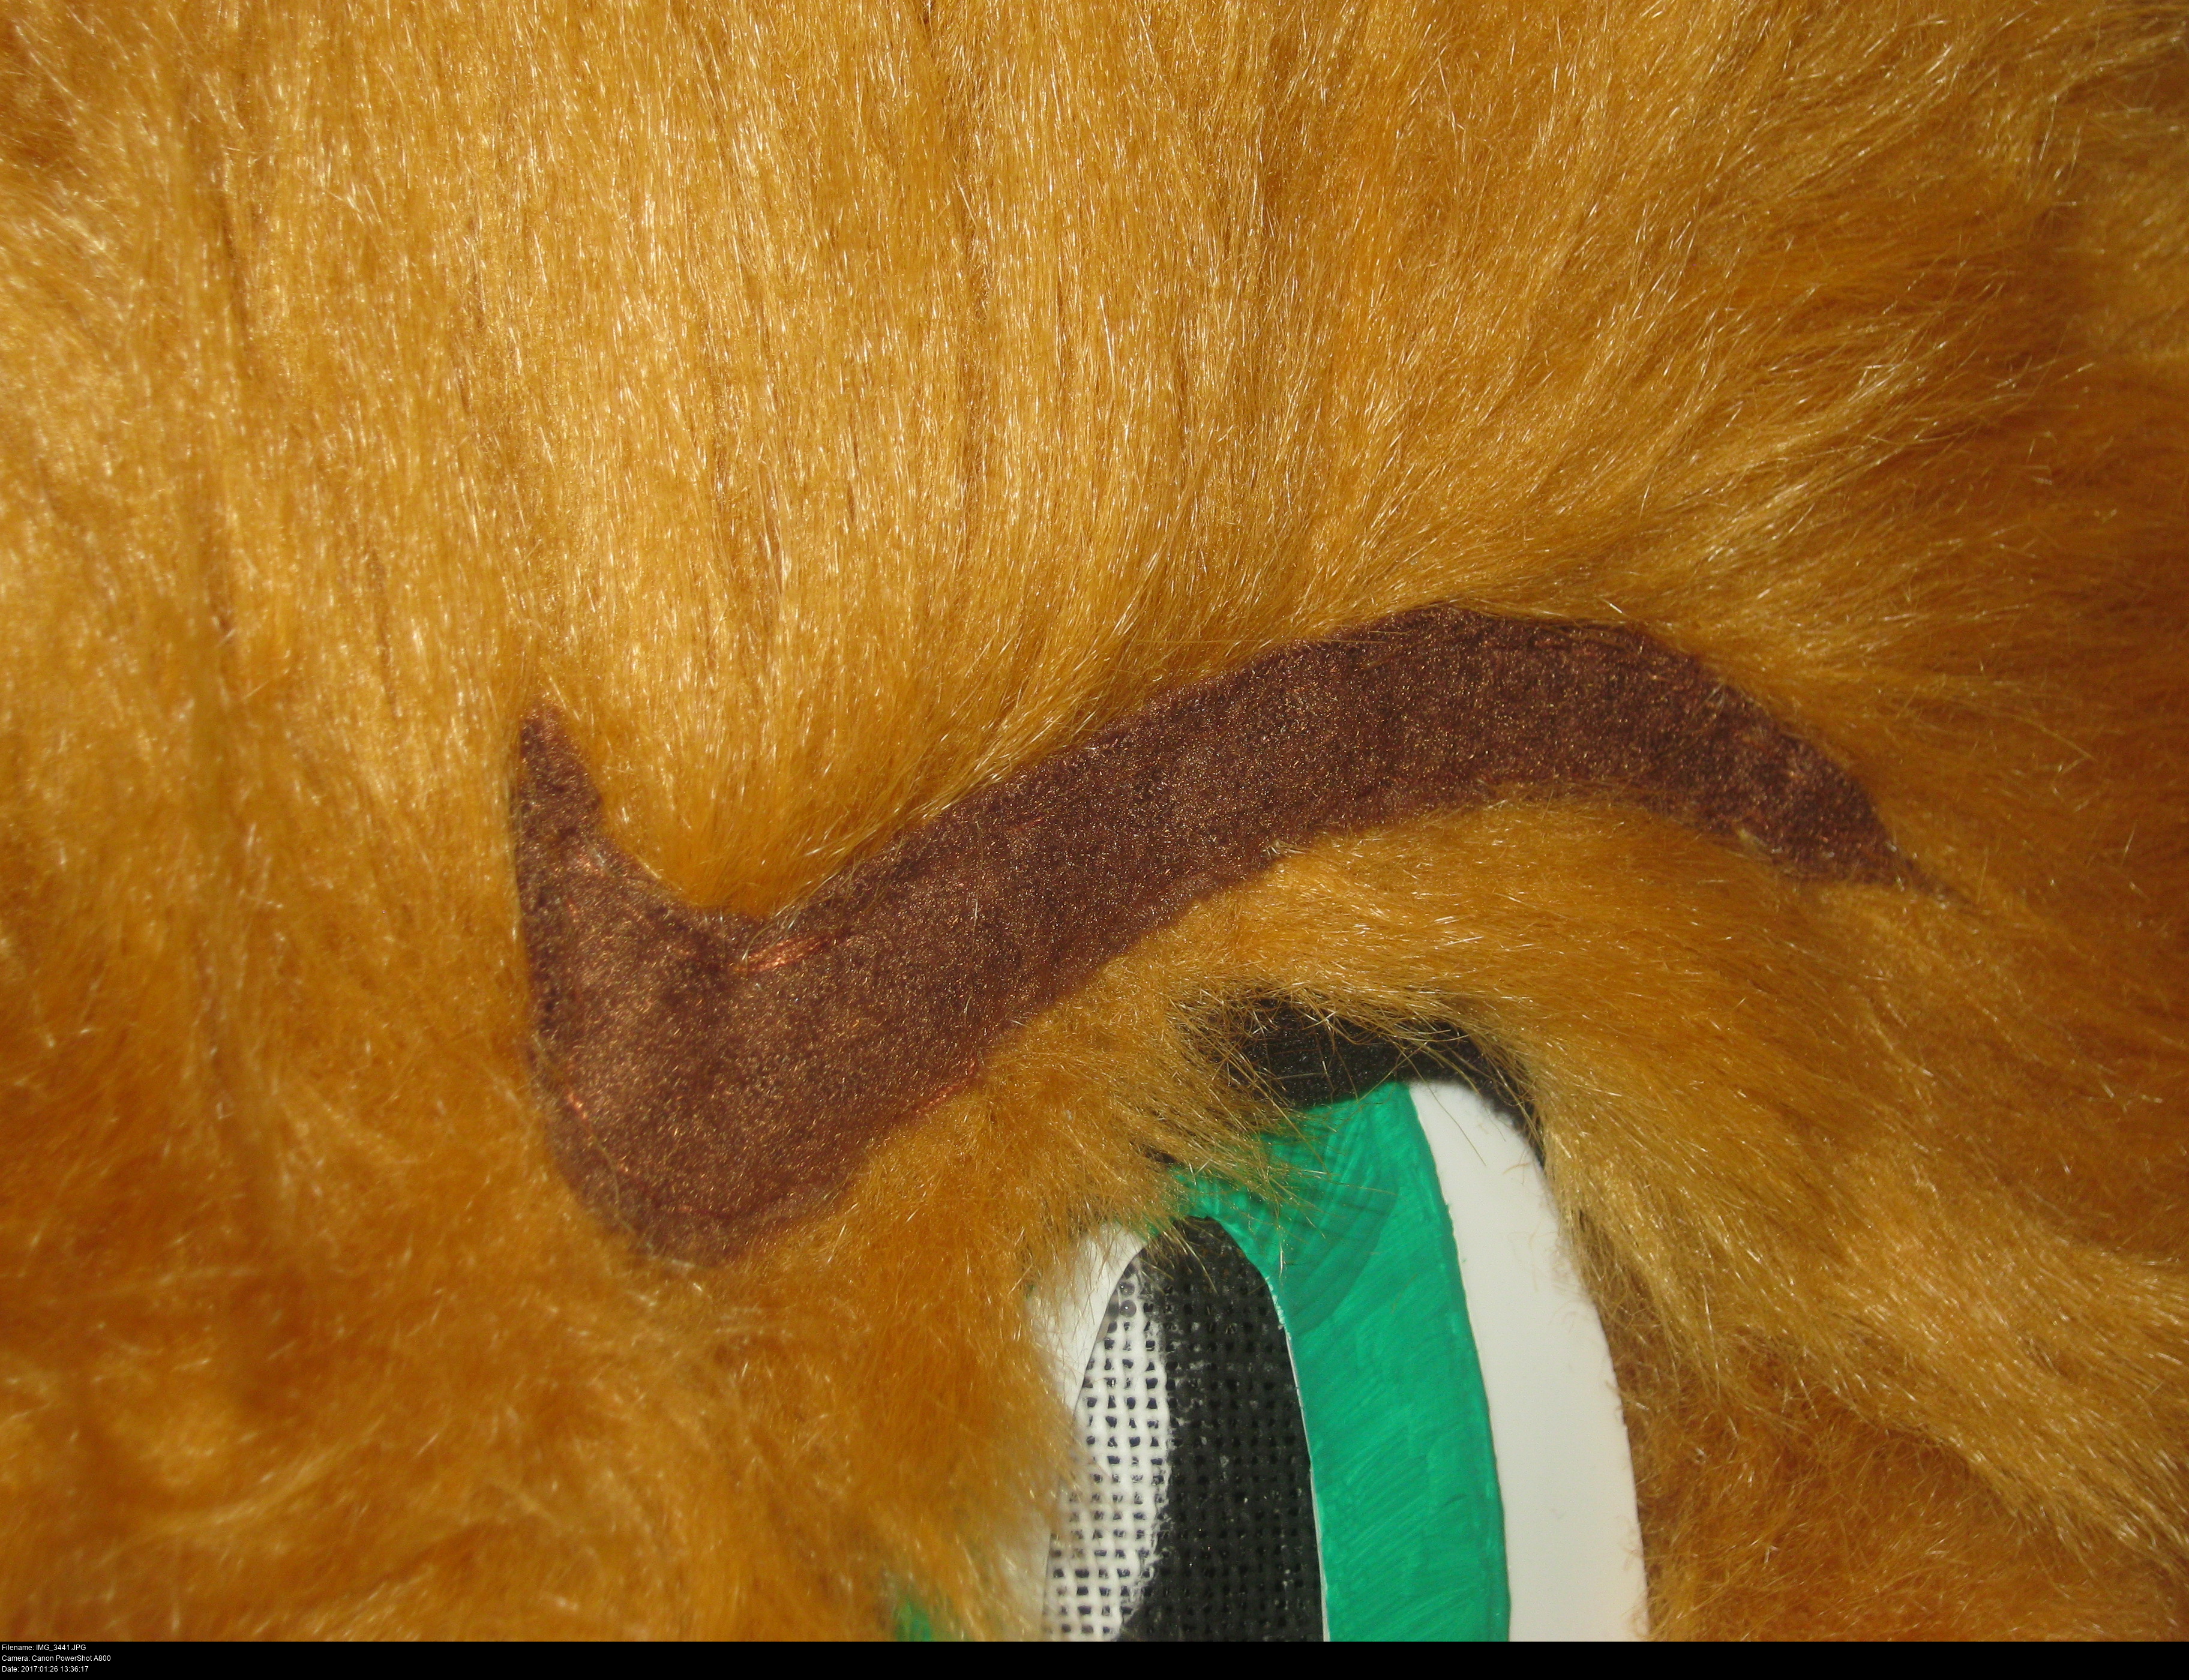
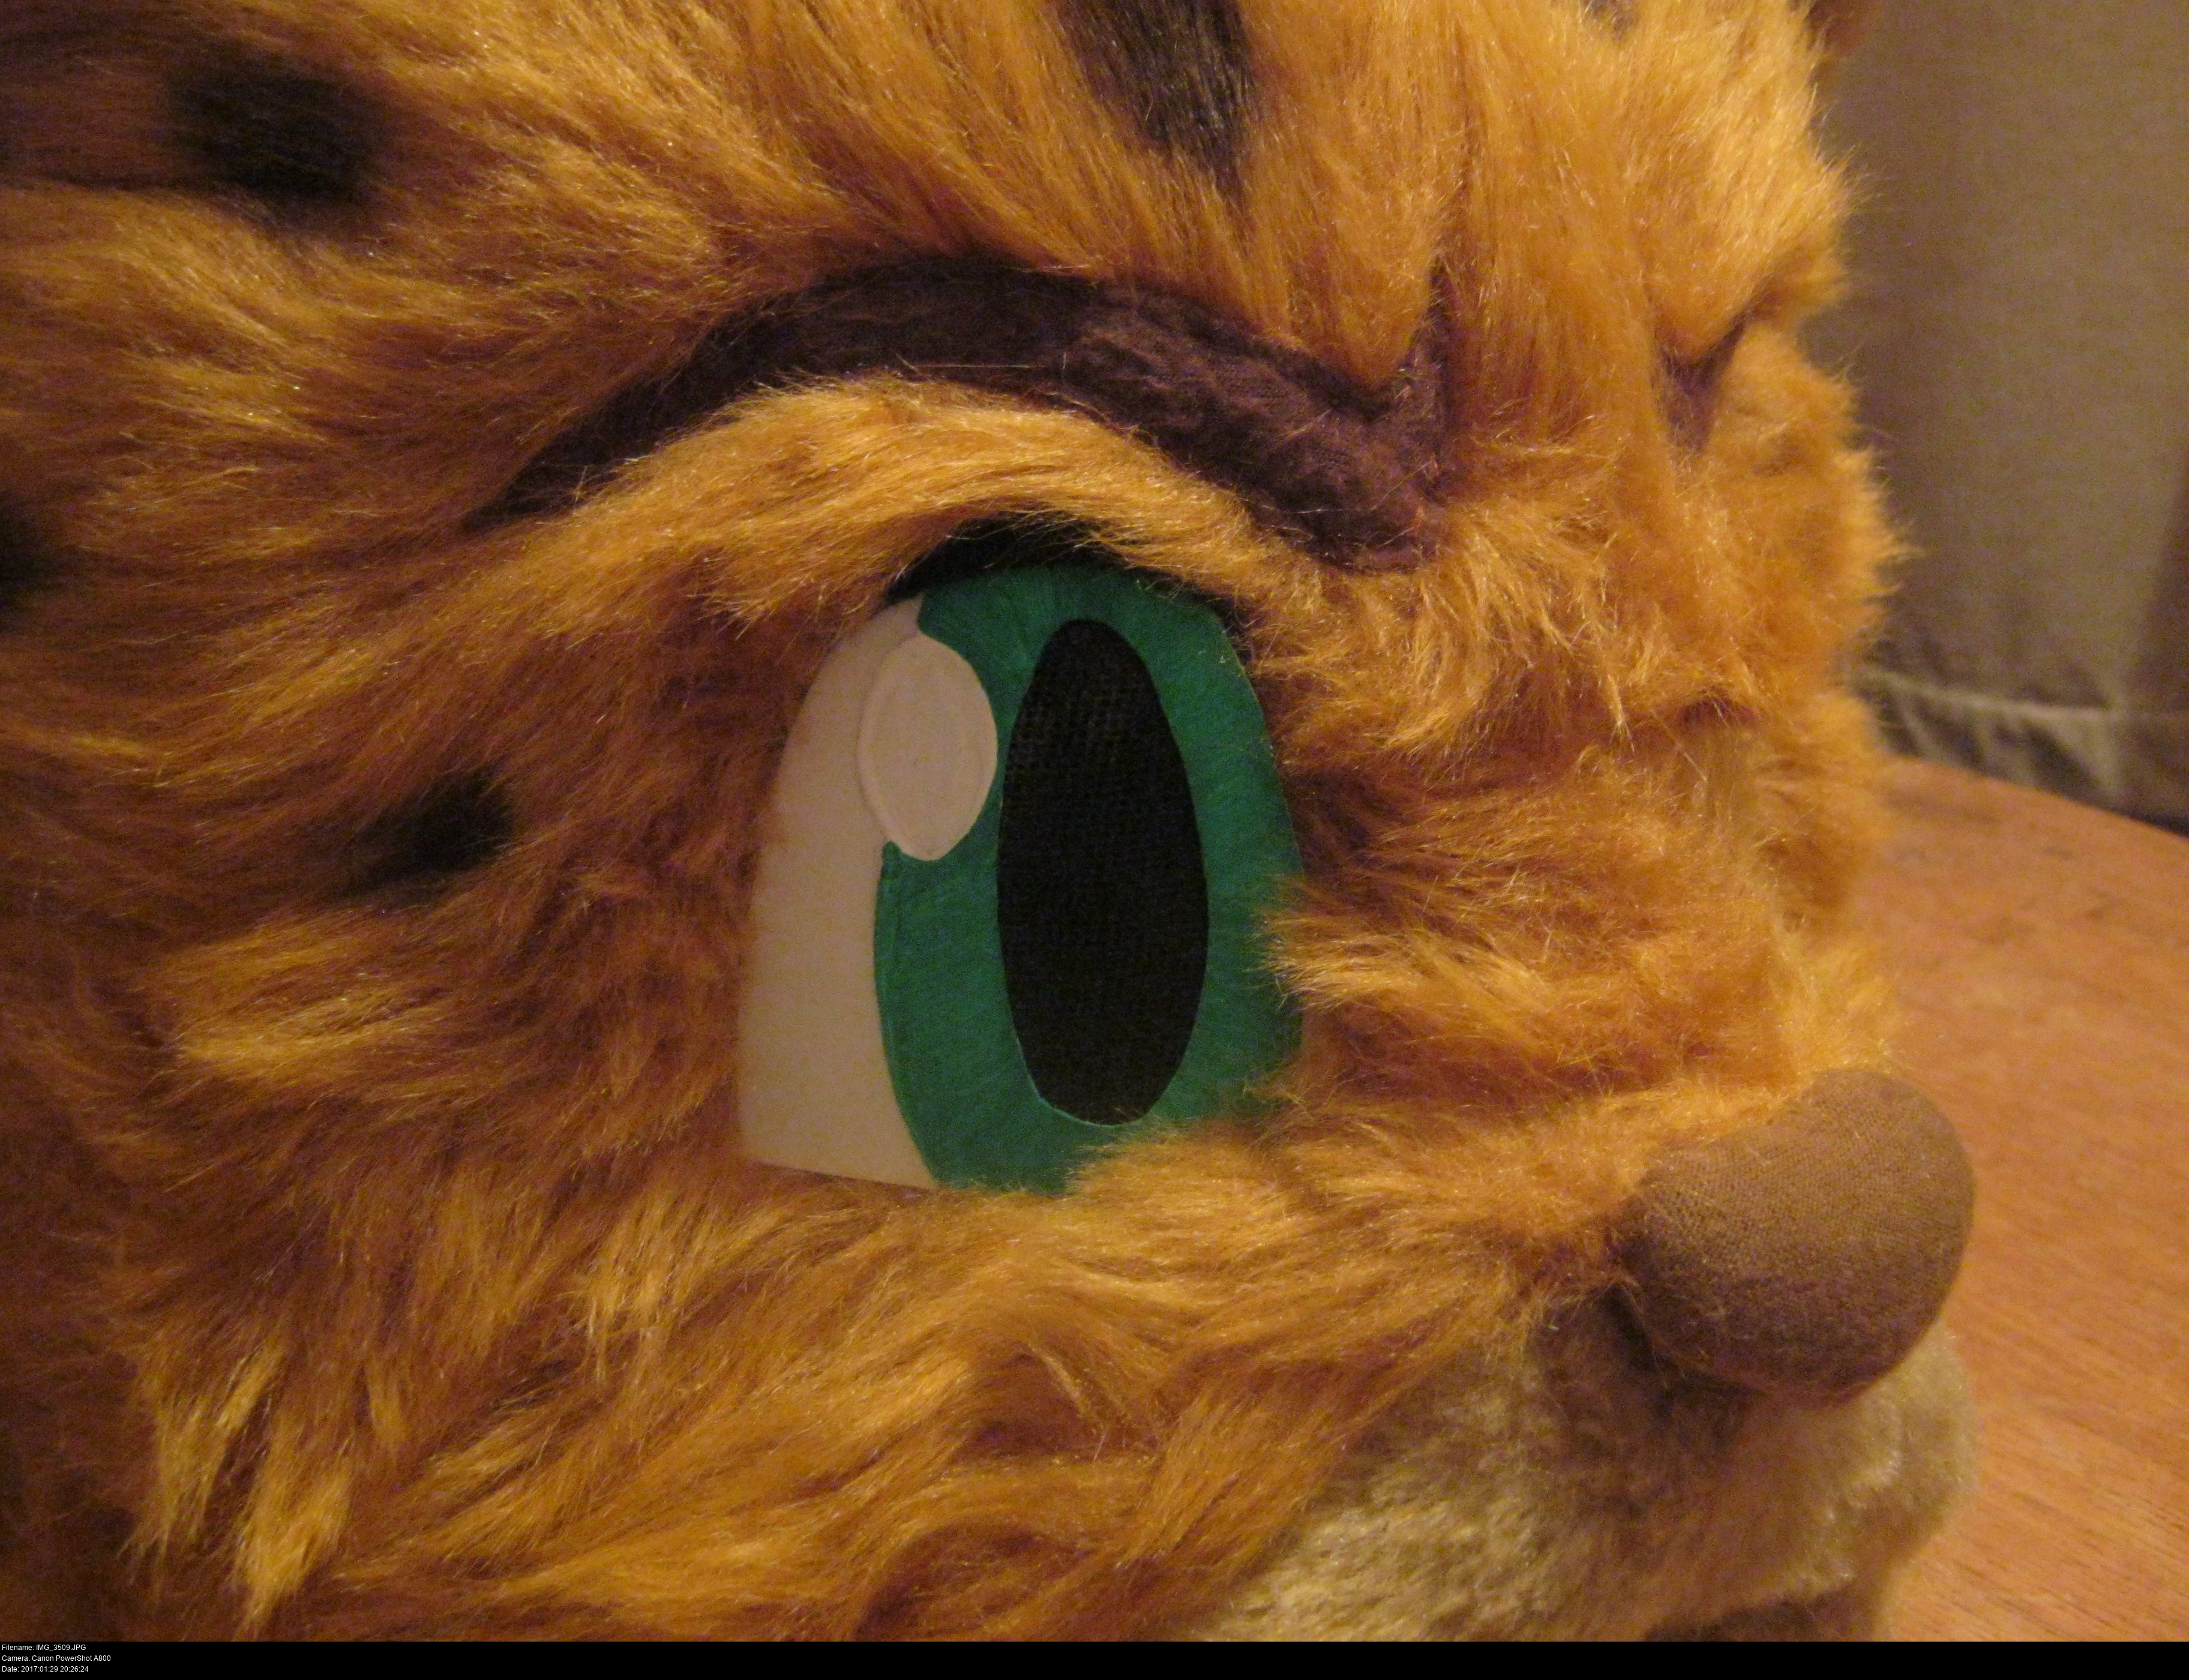
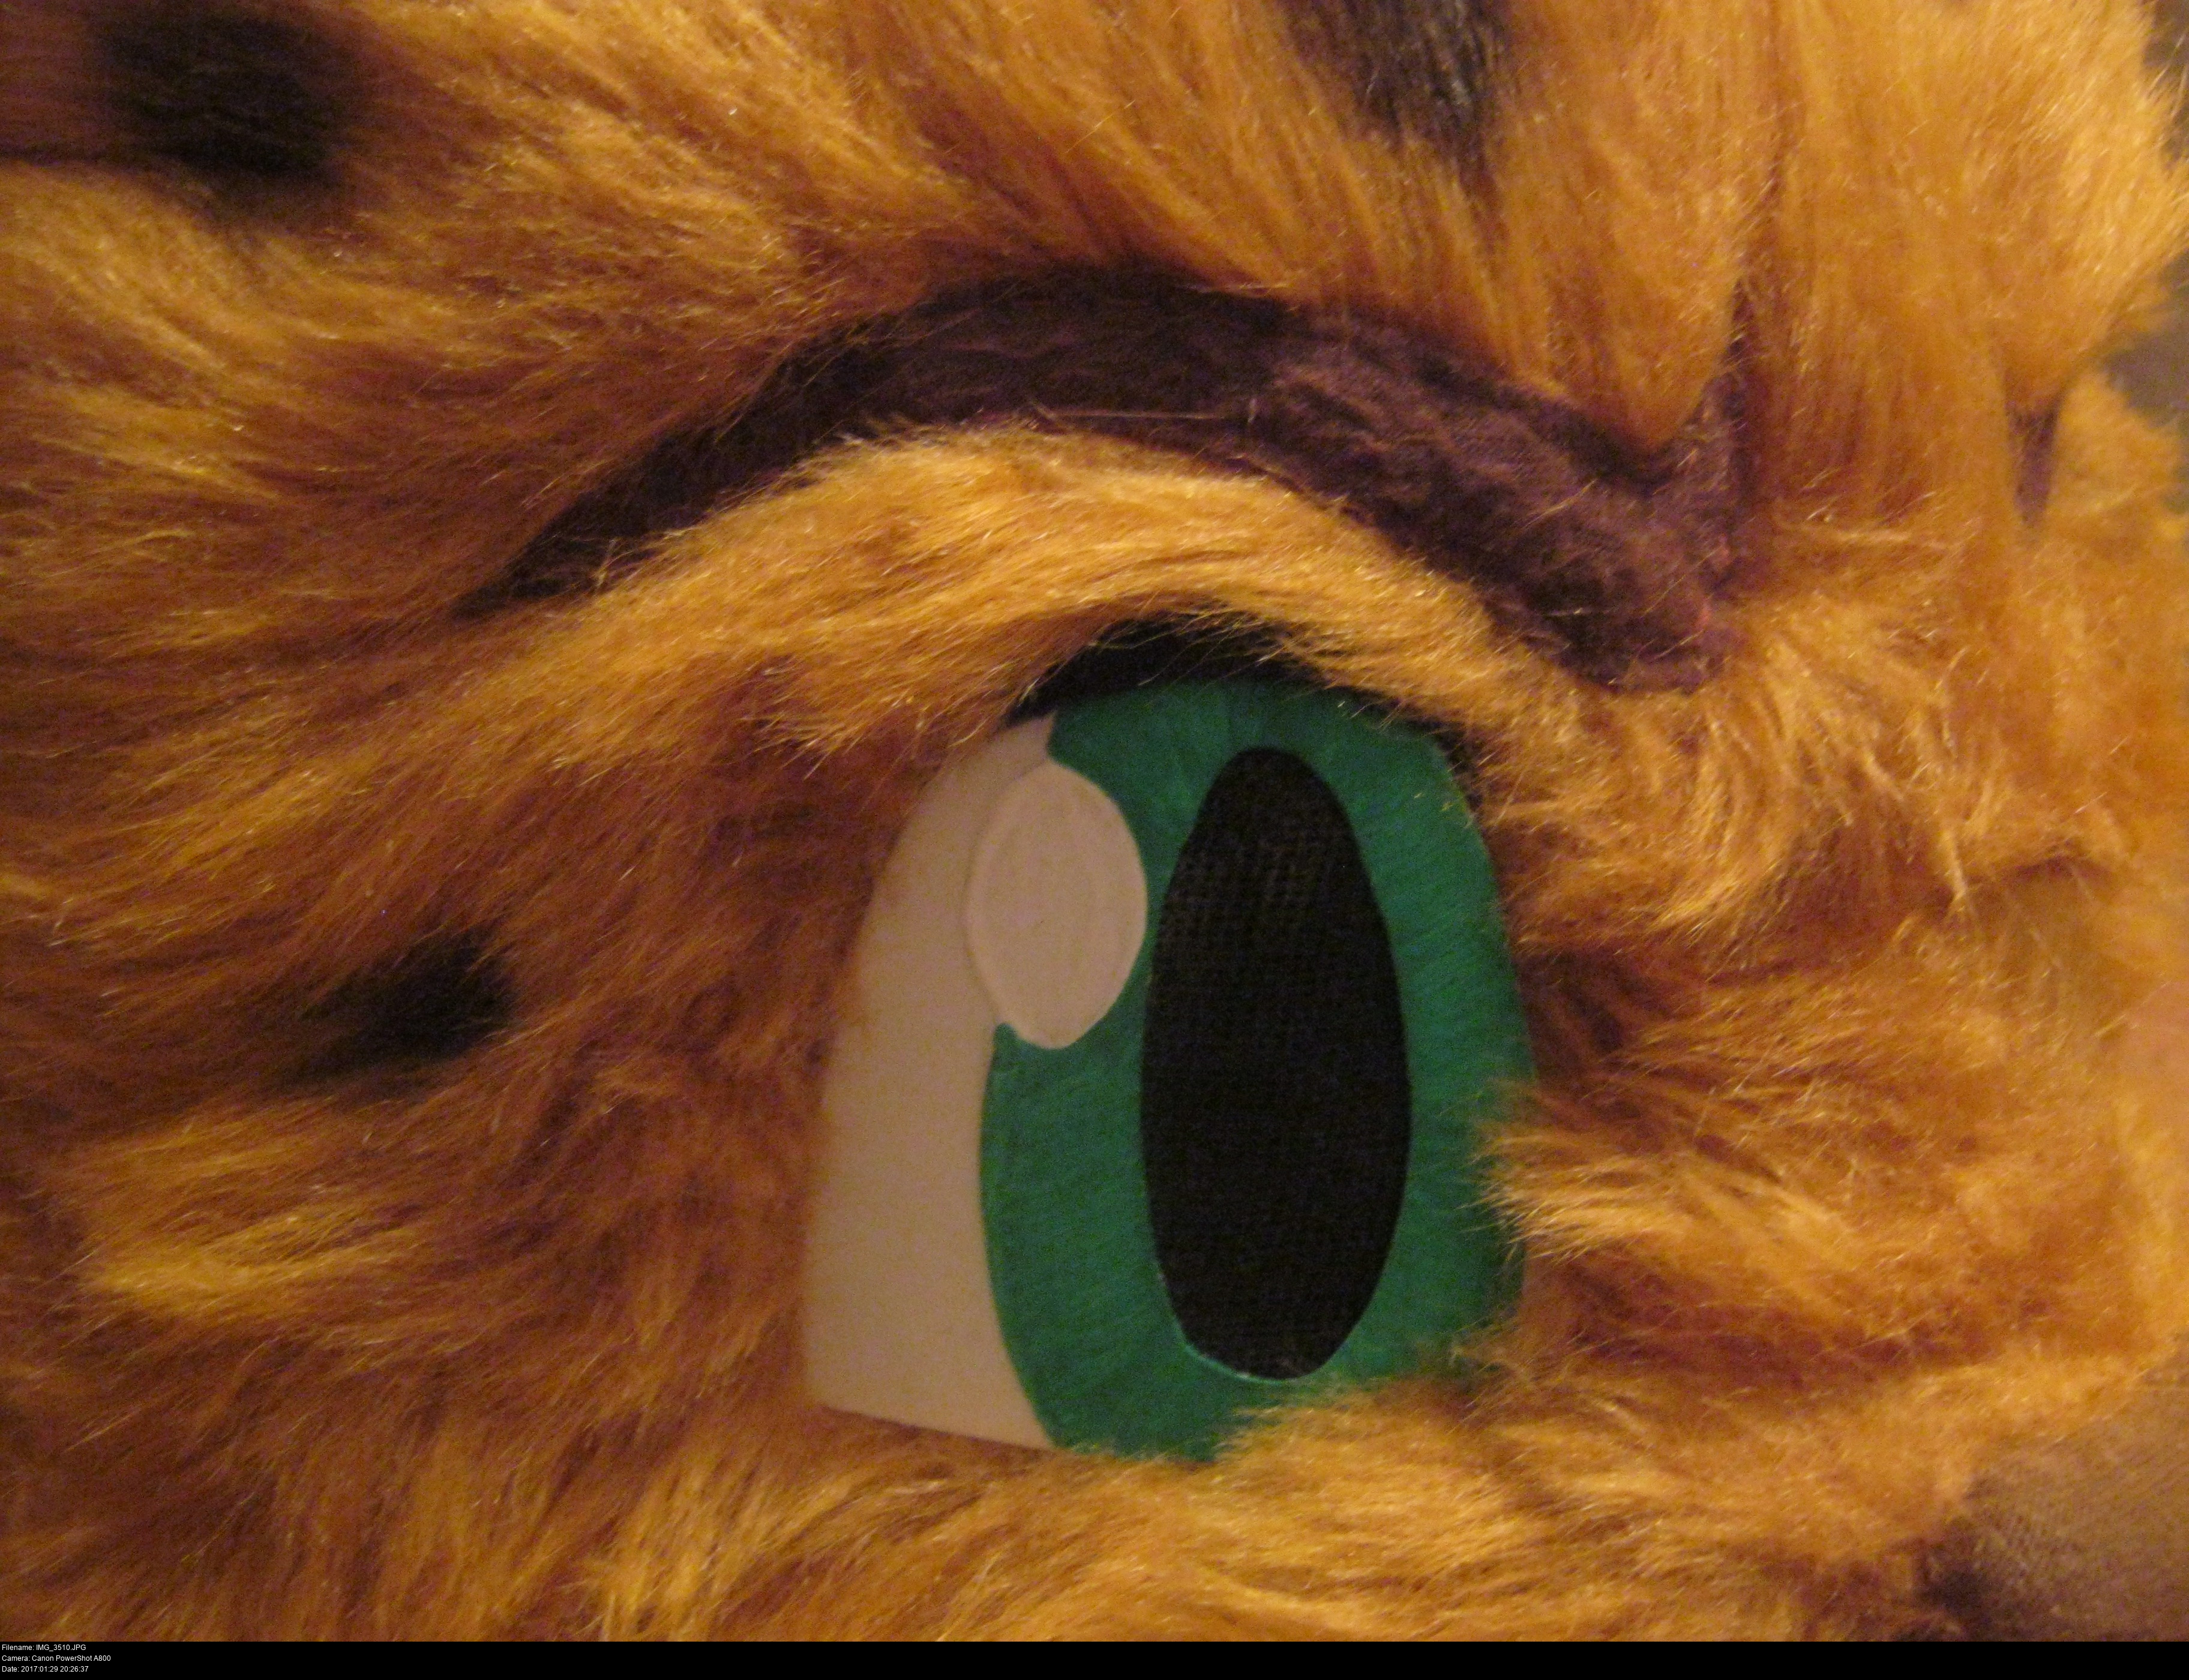
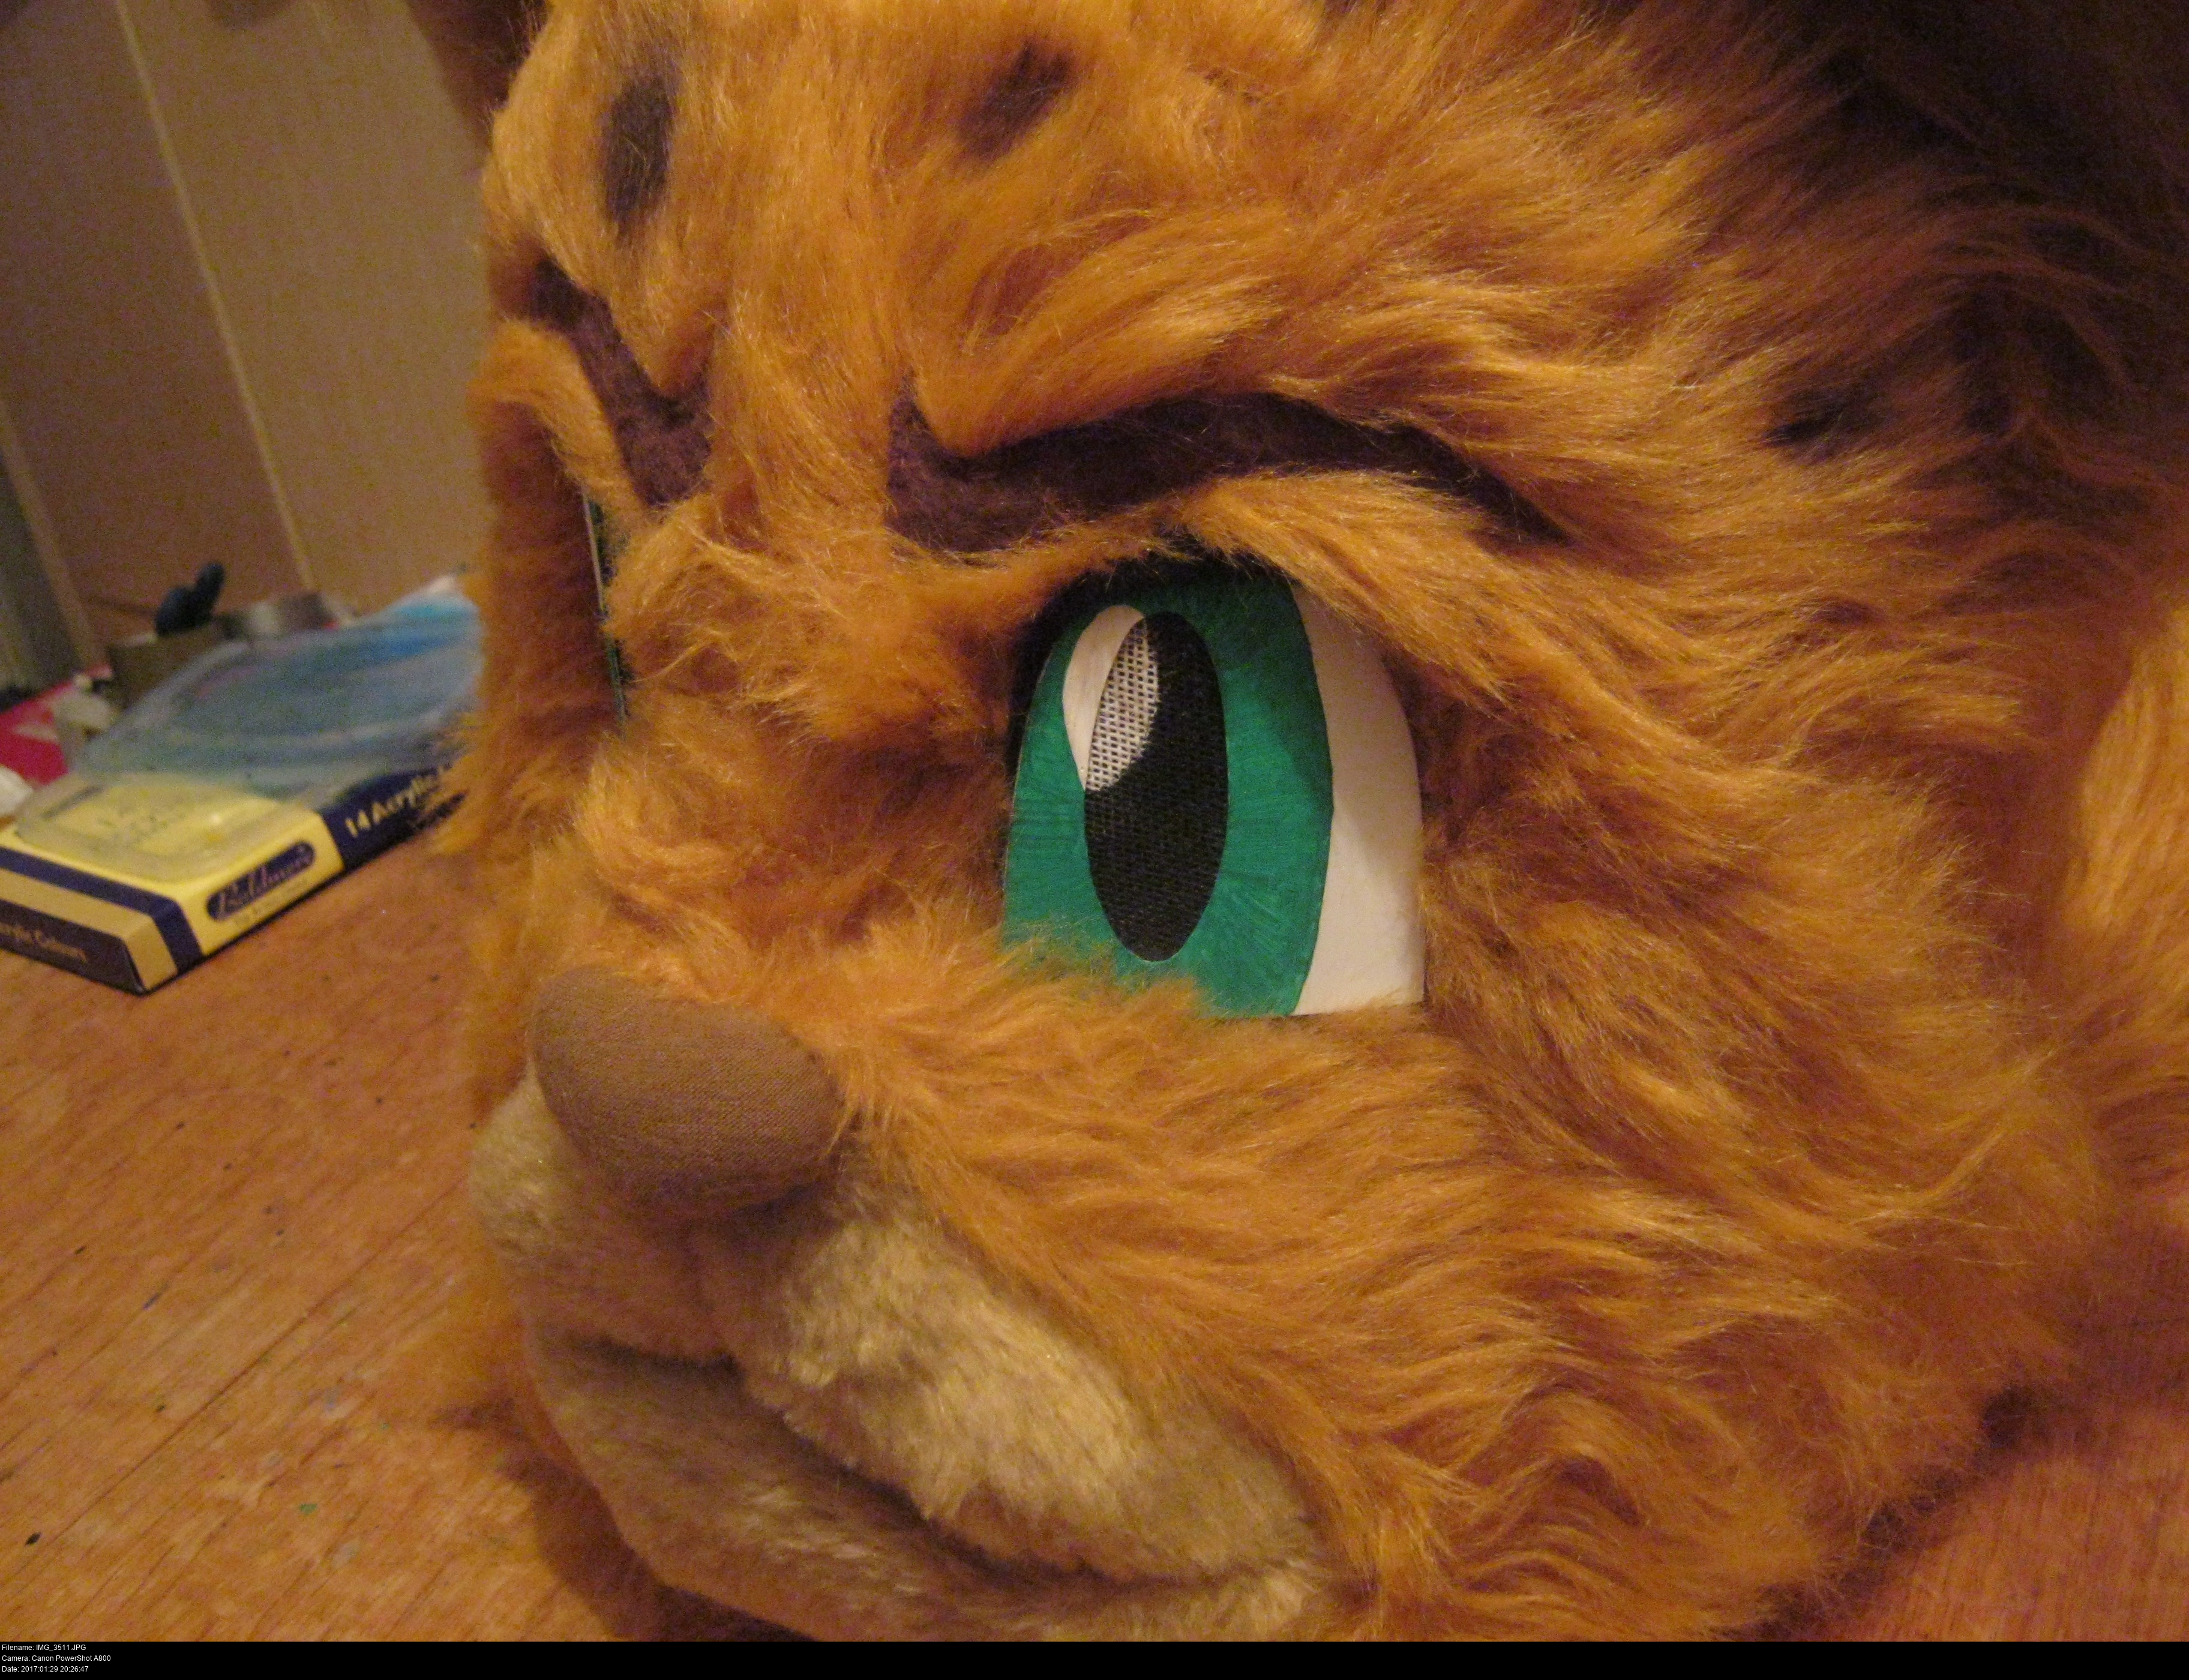
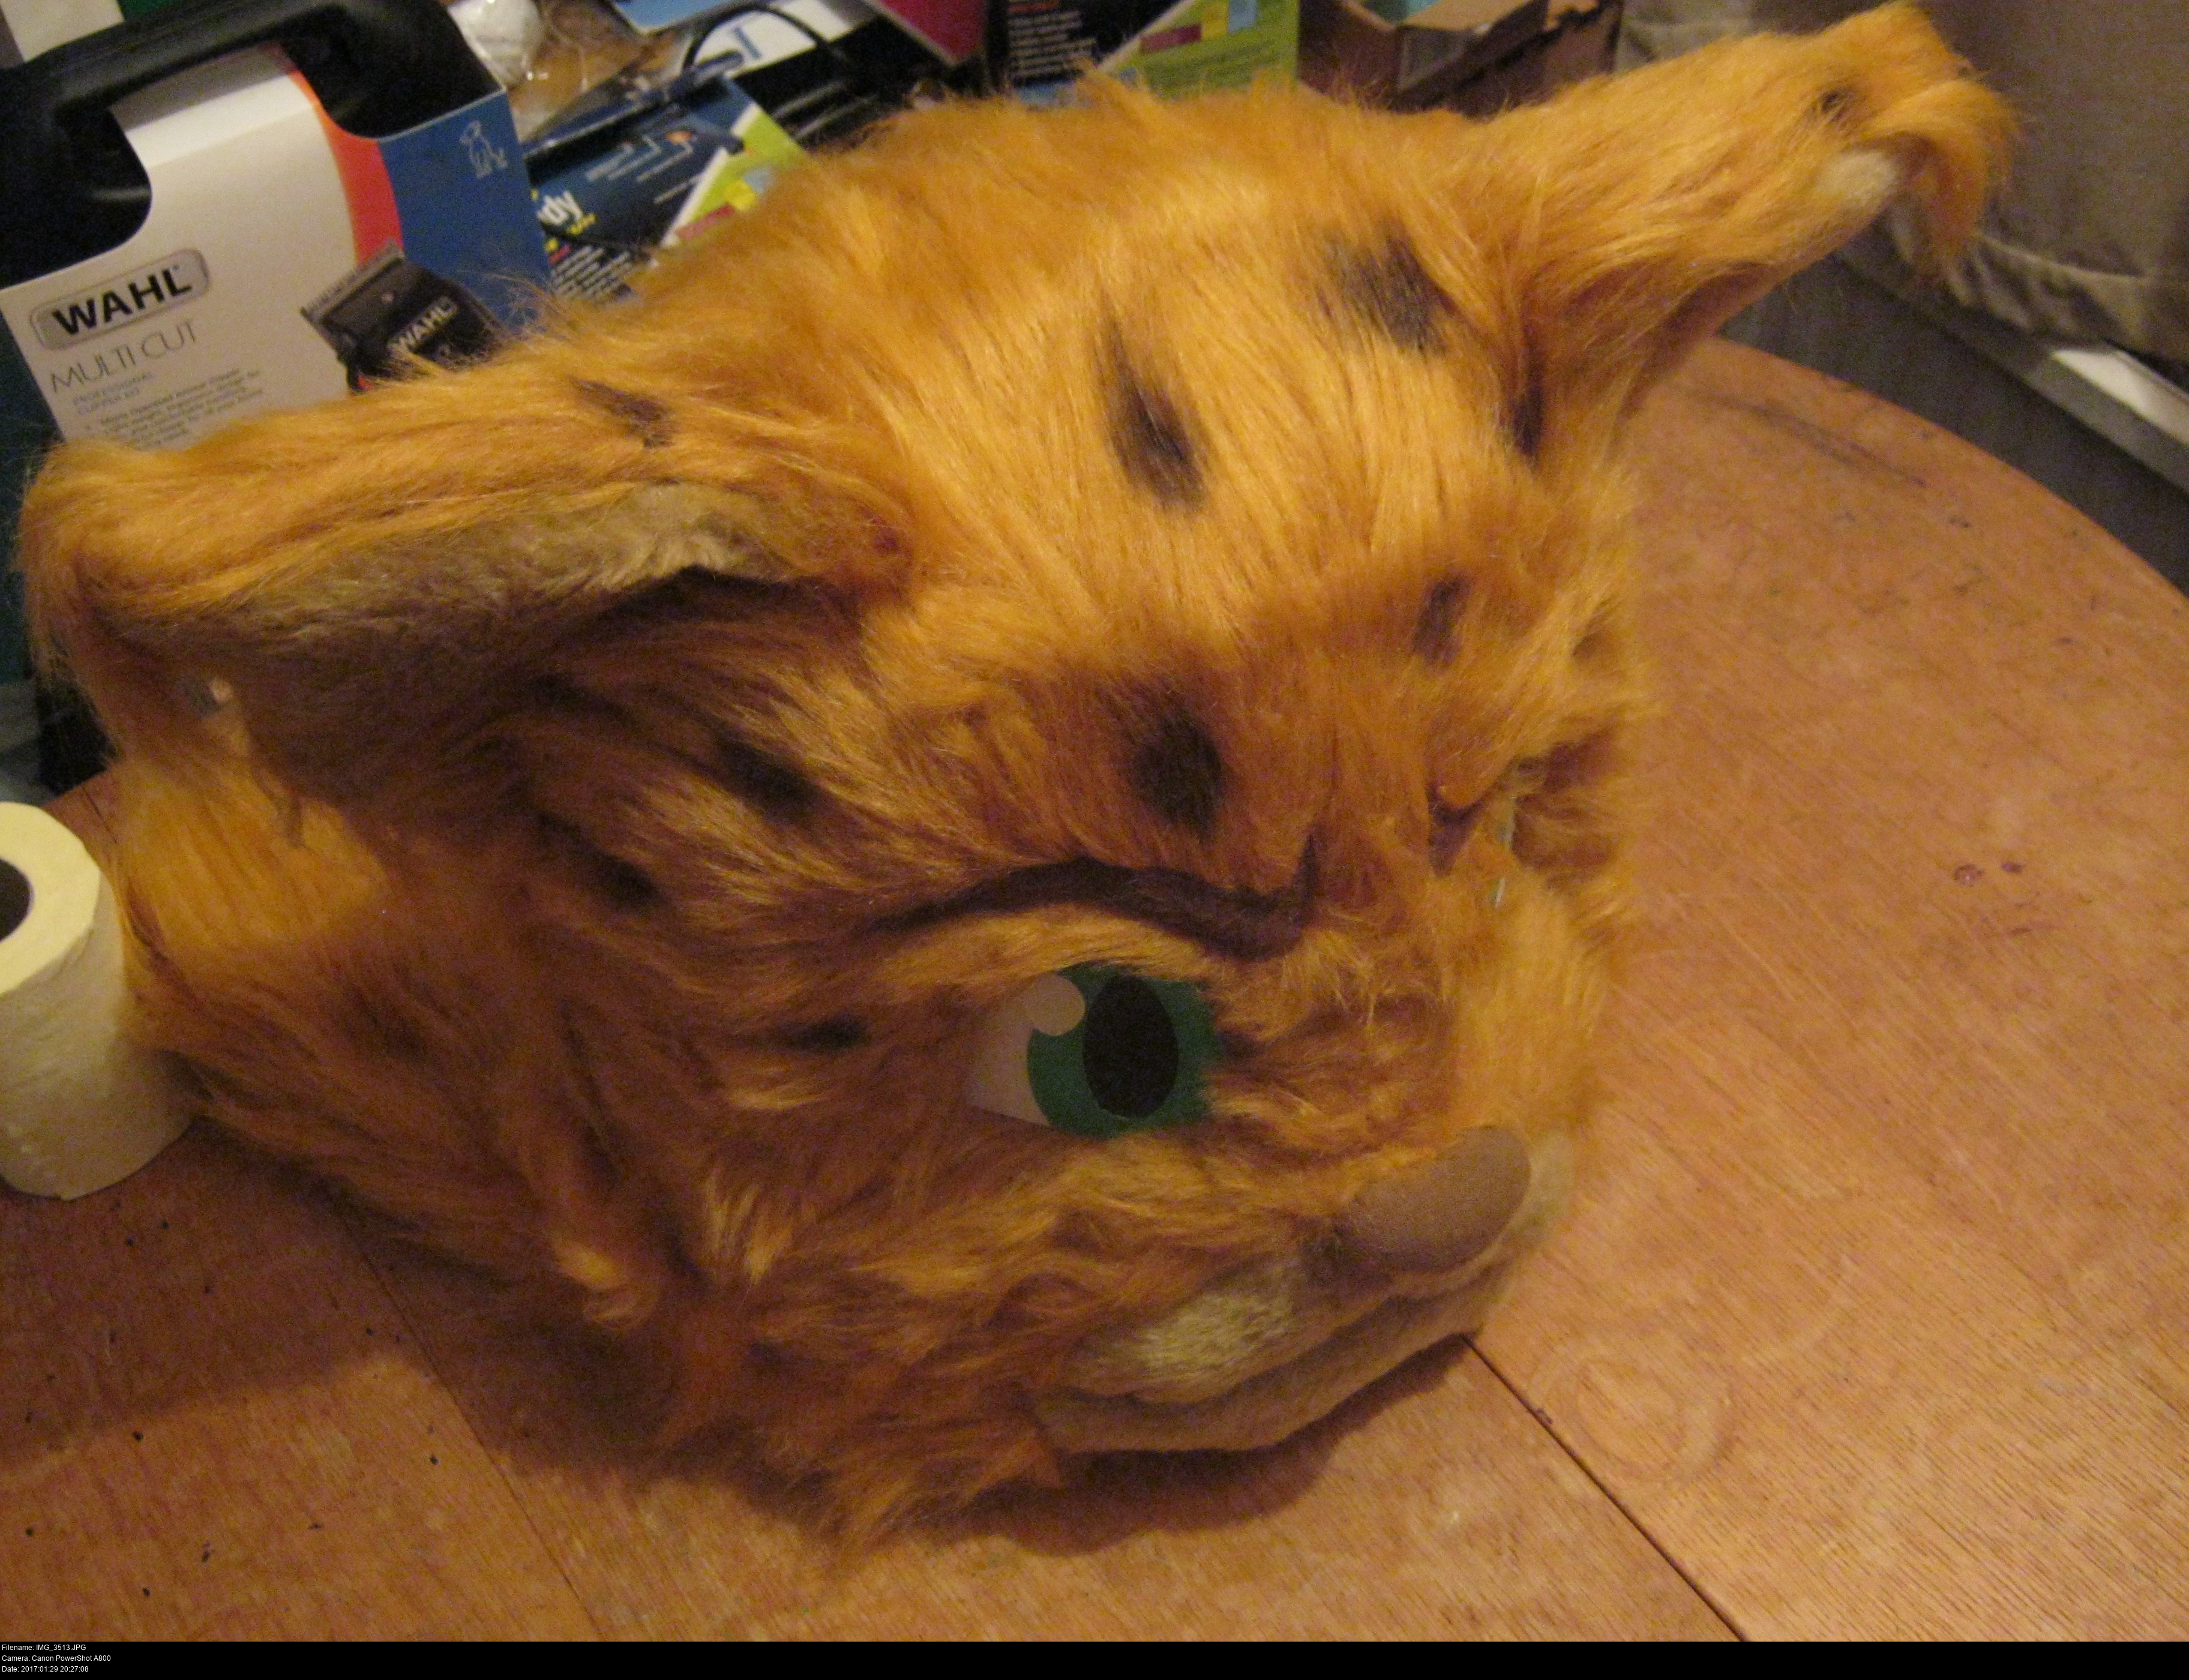
Paper eyes help to visualise! I think these eyes might be a bit too big horizontally and vertically.

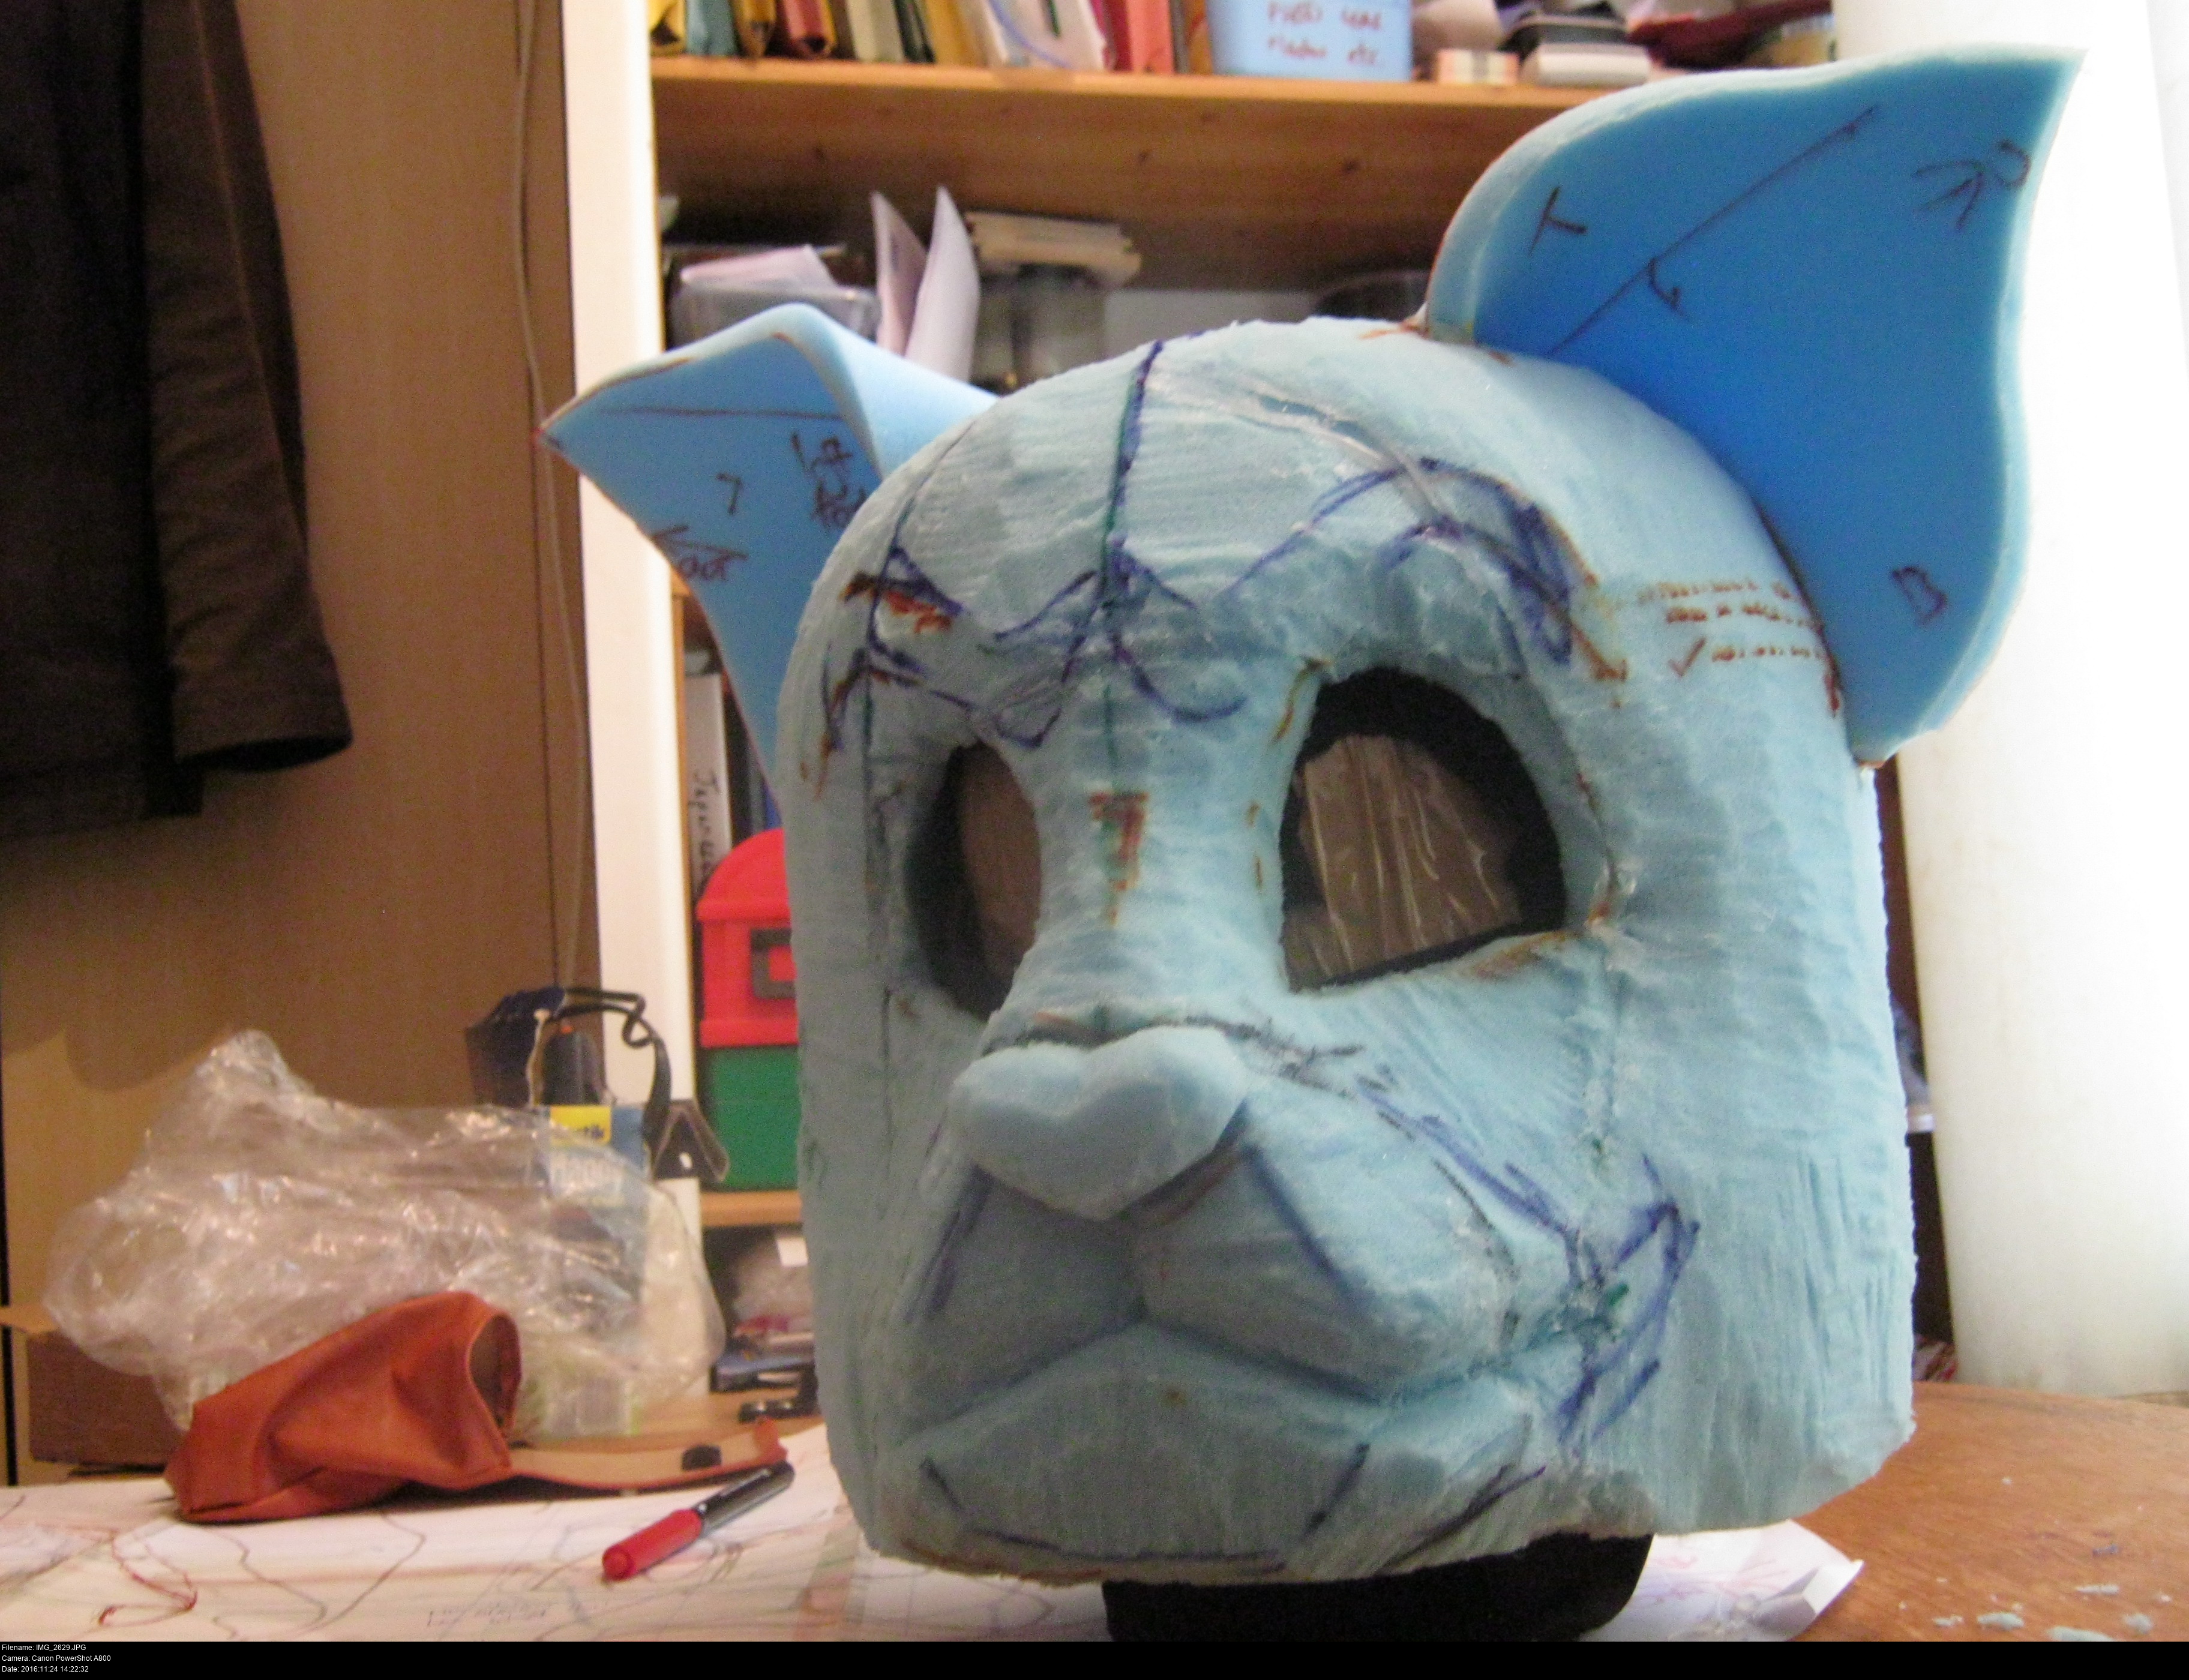

Did you notice the little addition I put on when I did the ears? He's got a little cute nose now! It's just a little bit of spare foam cut into the notched rounded triangle shape and temporarily glued on. I don't know if I'll be able to pattern around a small detail like that. I'm going to take that off before I do the tape I think.
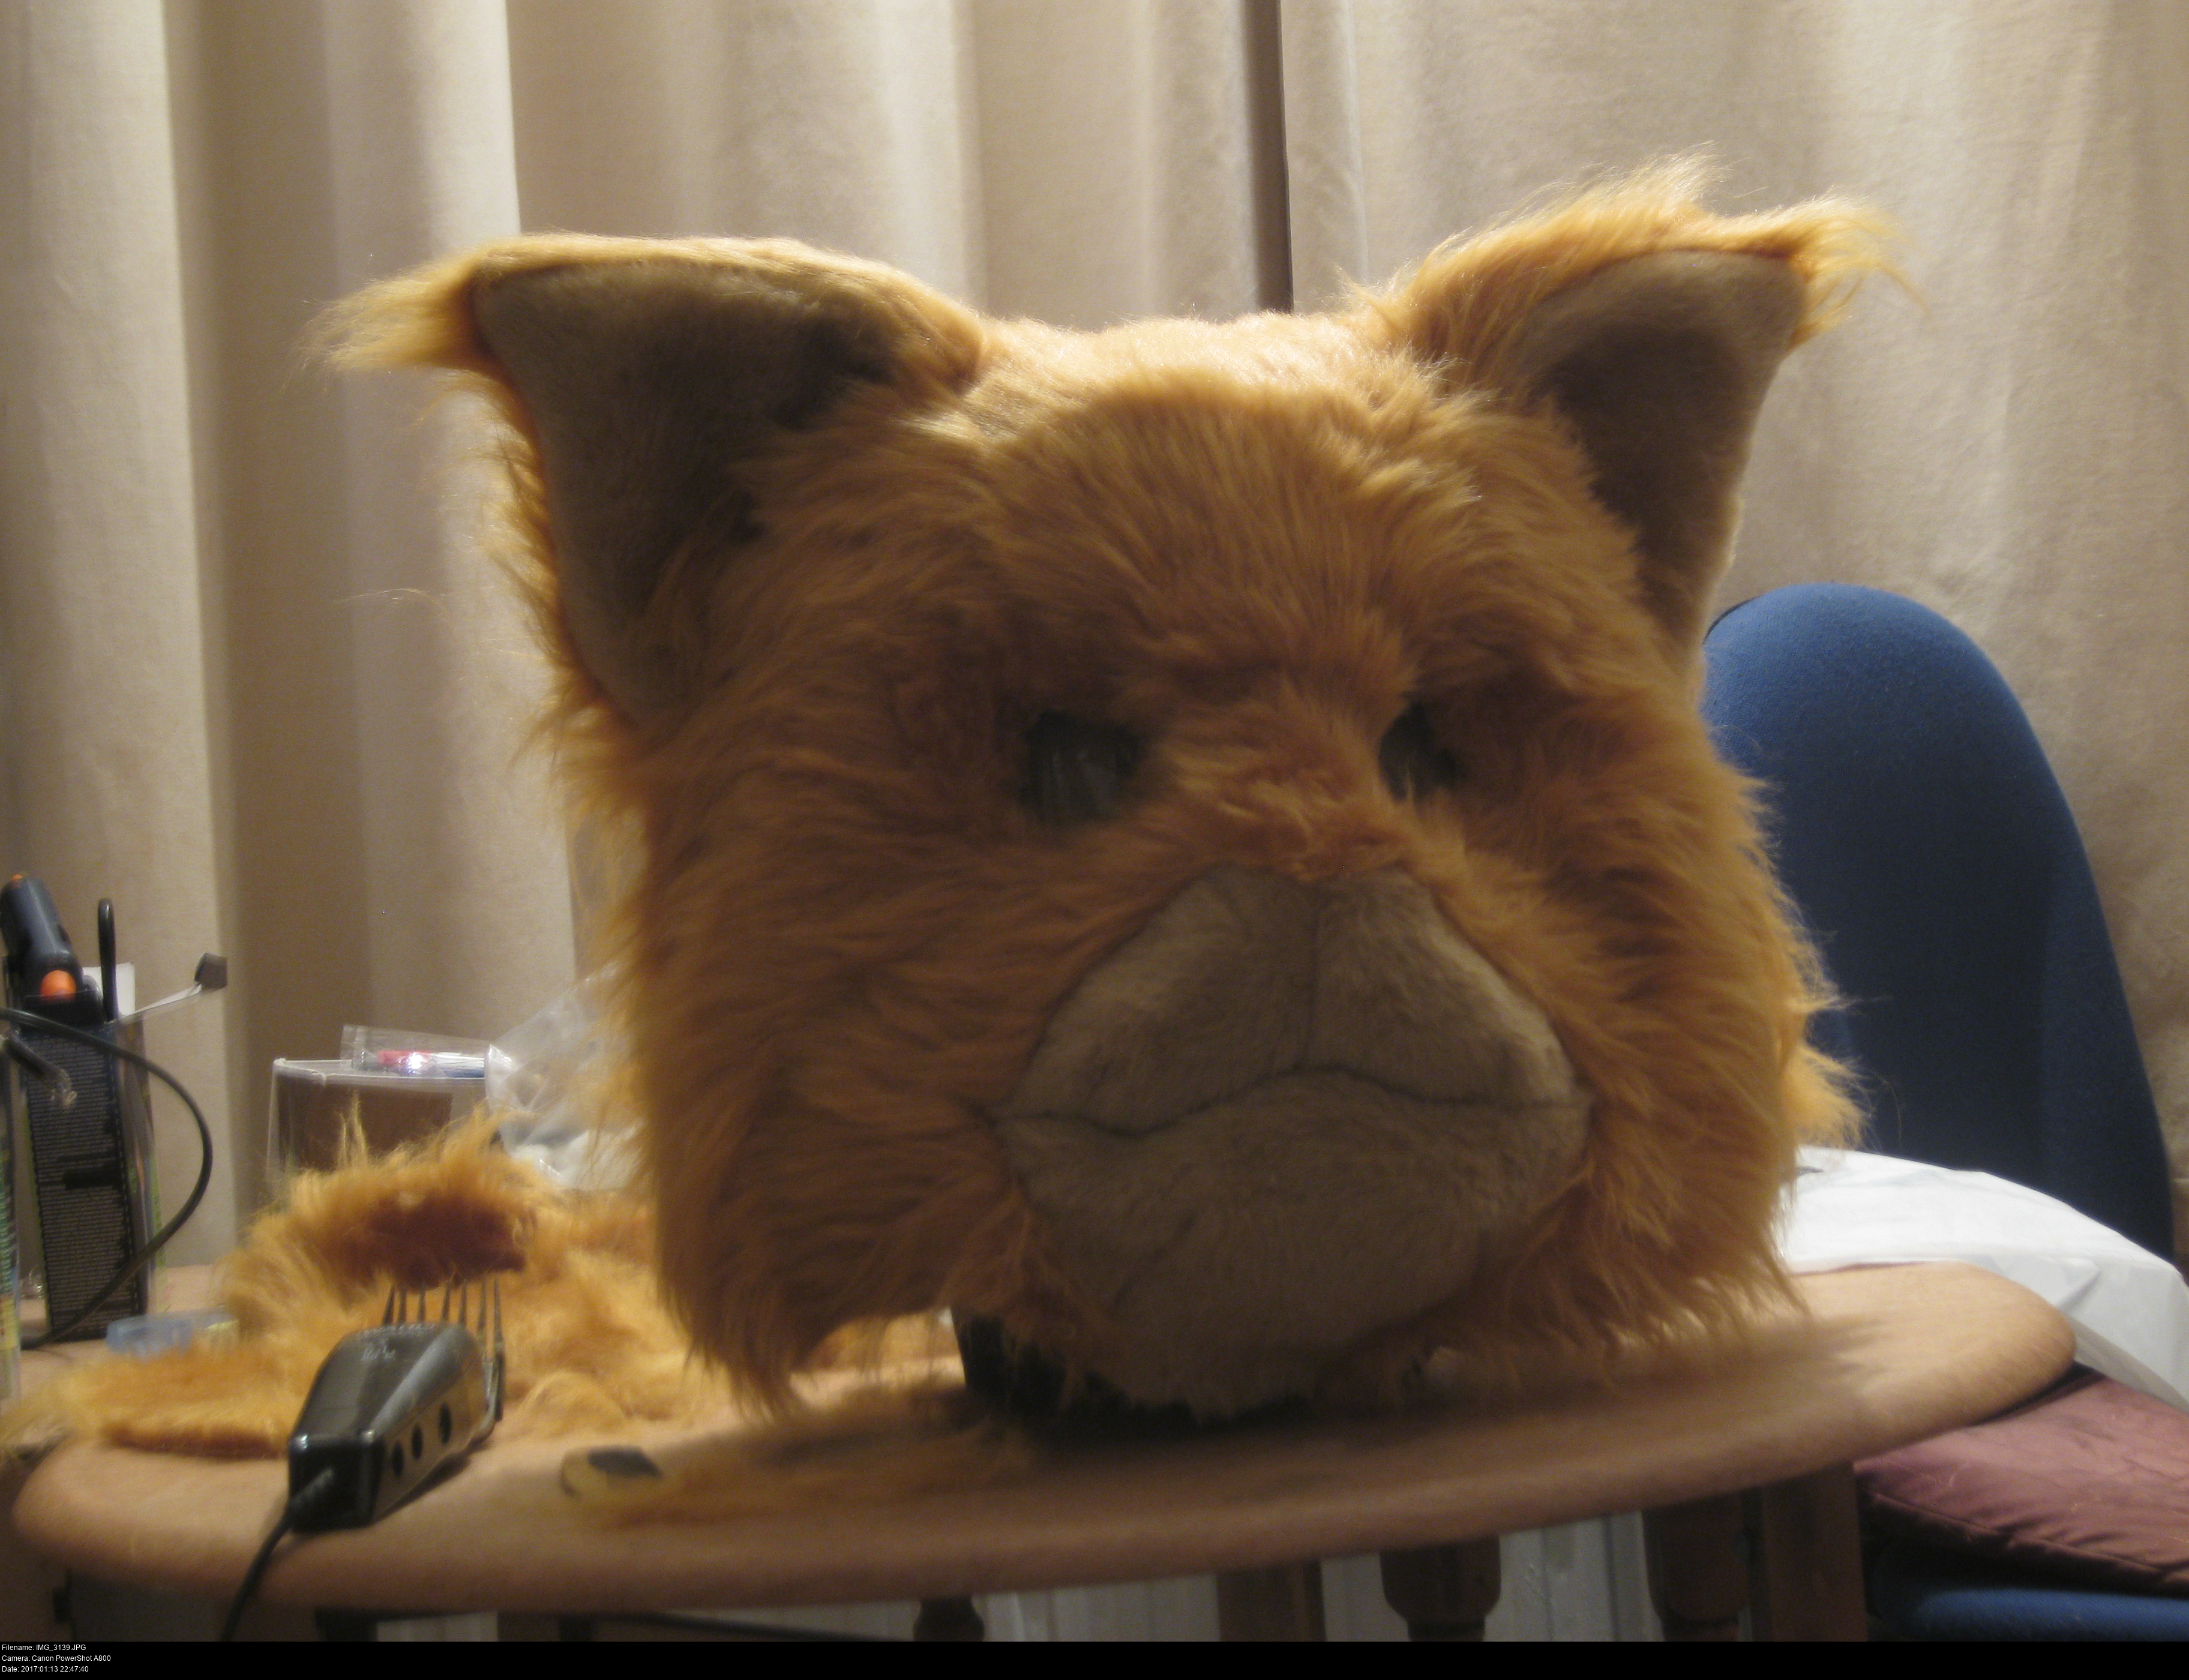
He looks so much more cat-like with the correct nose and ears, doesn't he? With proper eyes, he'll look the business.
He's done. There's nothing more I need to do! It's time to start taping...
I'm nervous. I could easily pull the entire thing to pieces if I do this wrong.
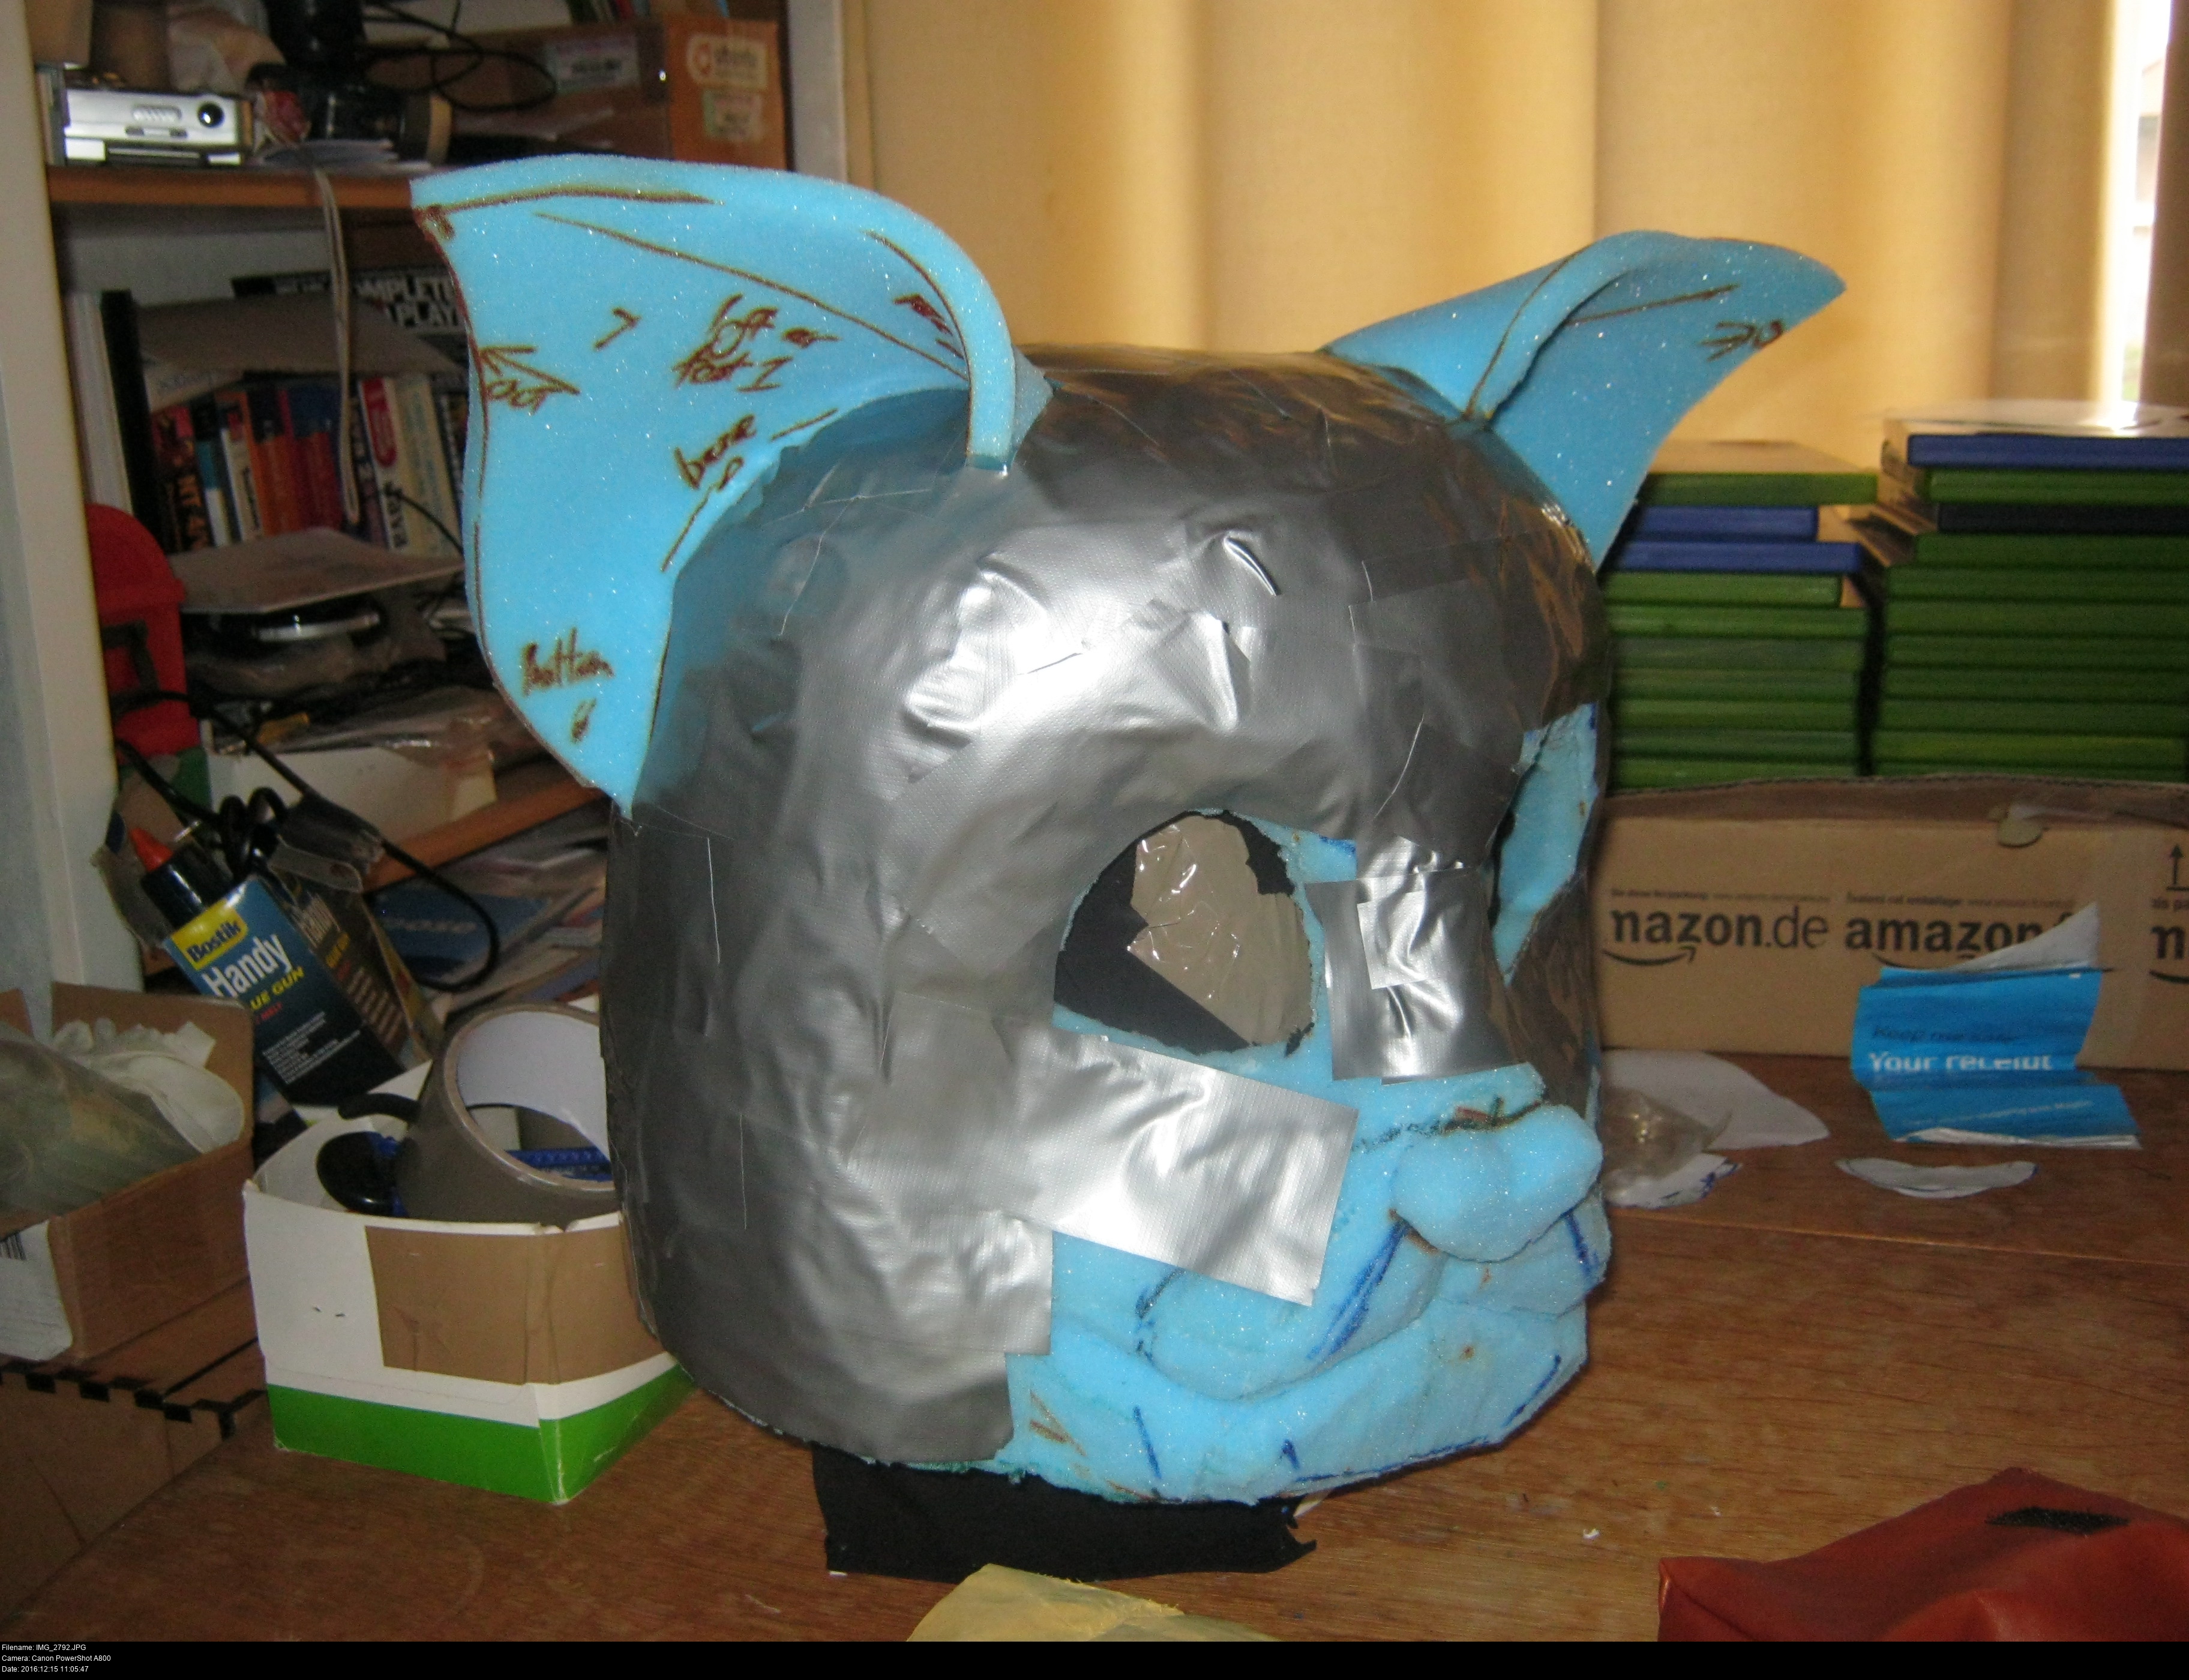
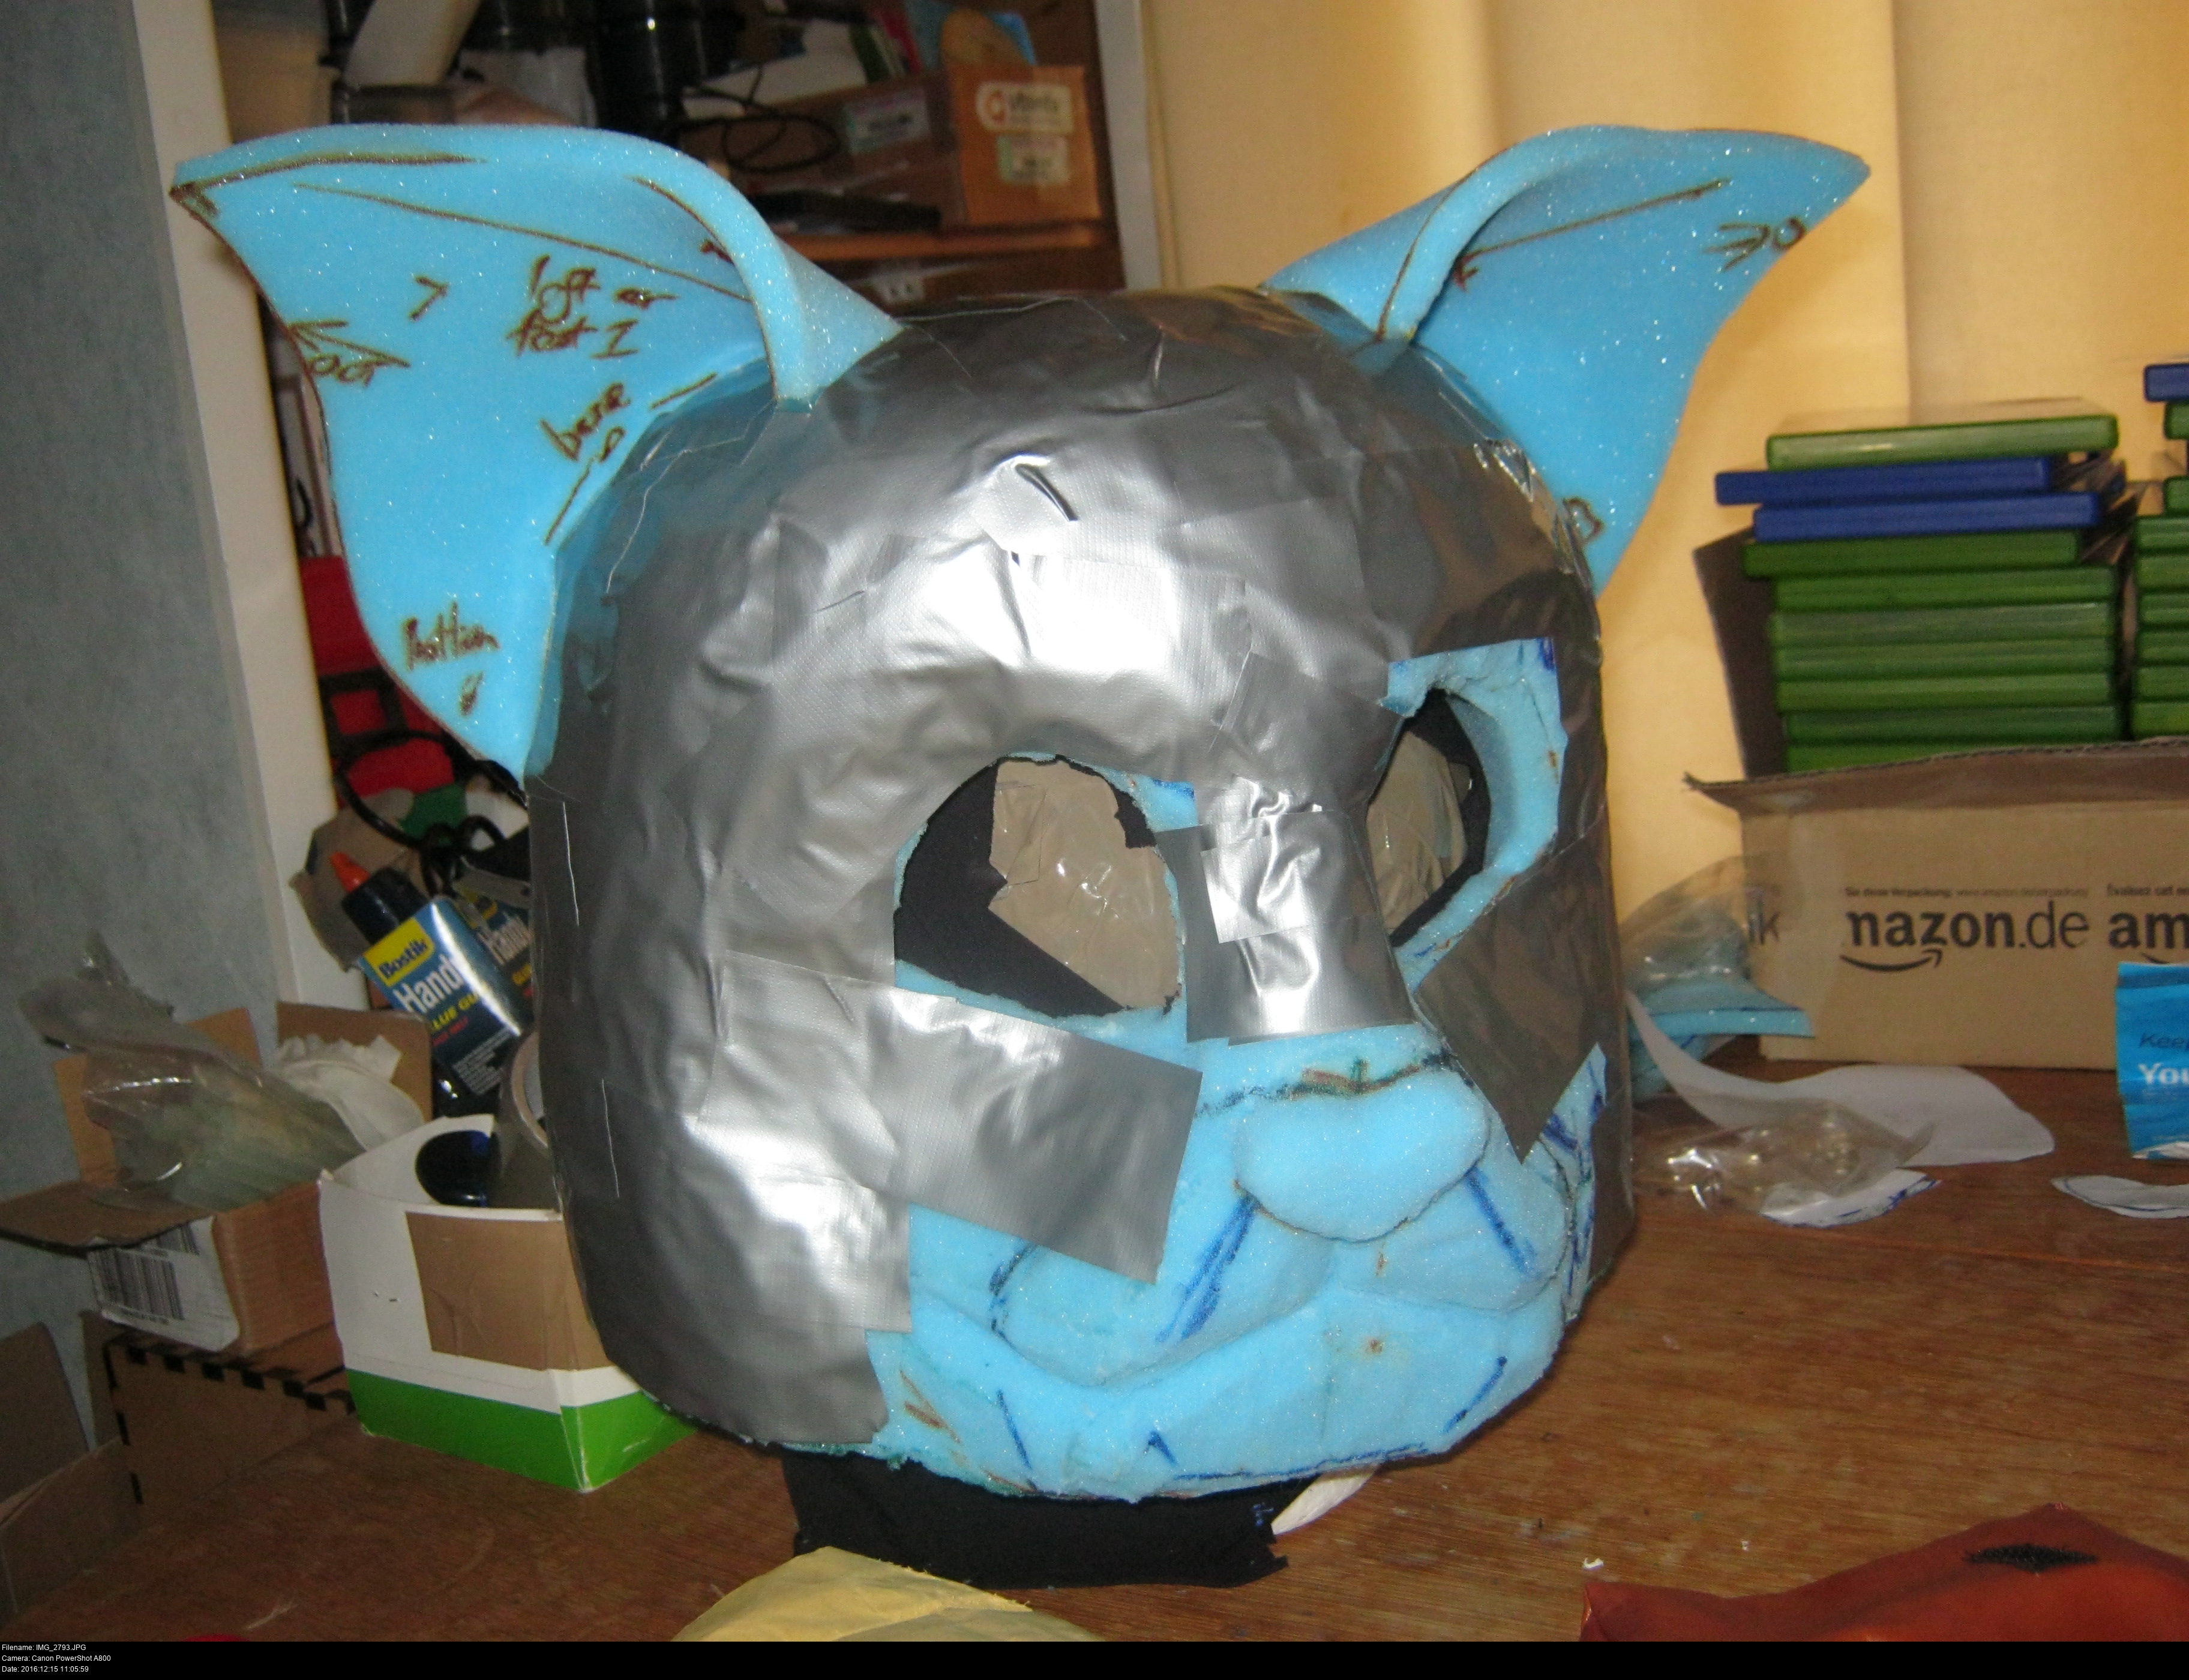
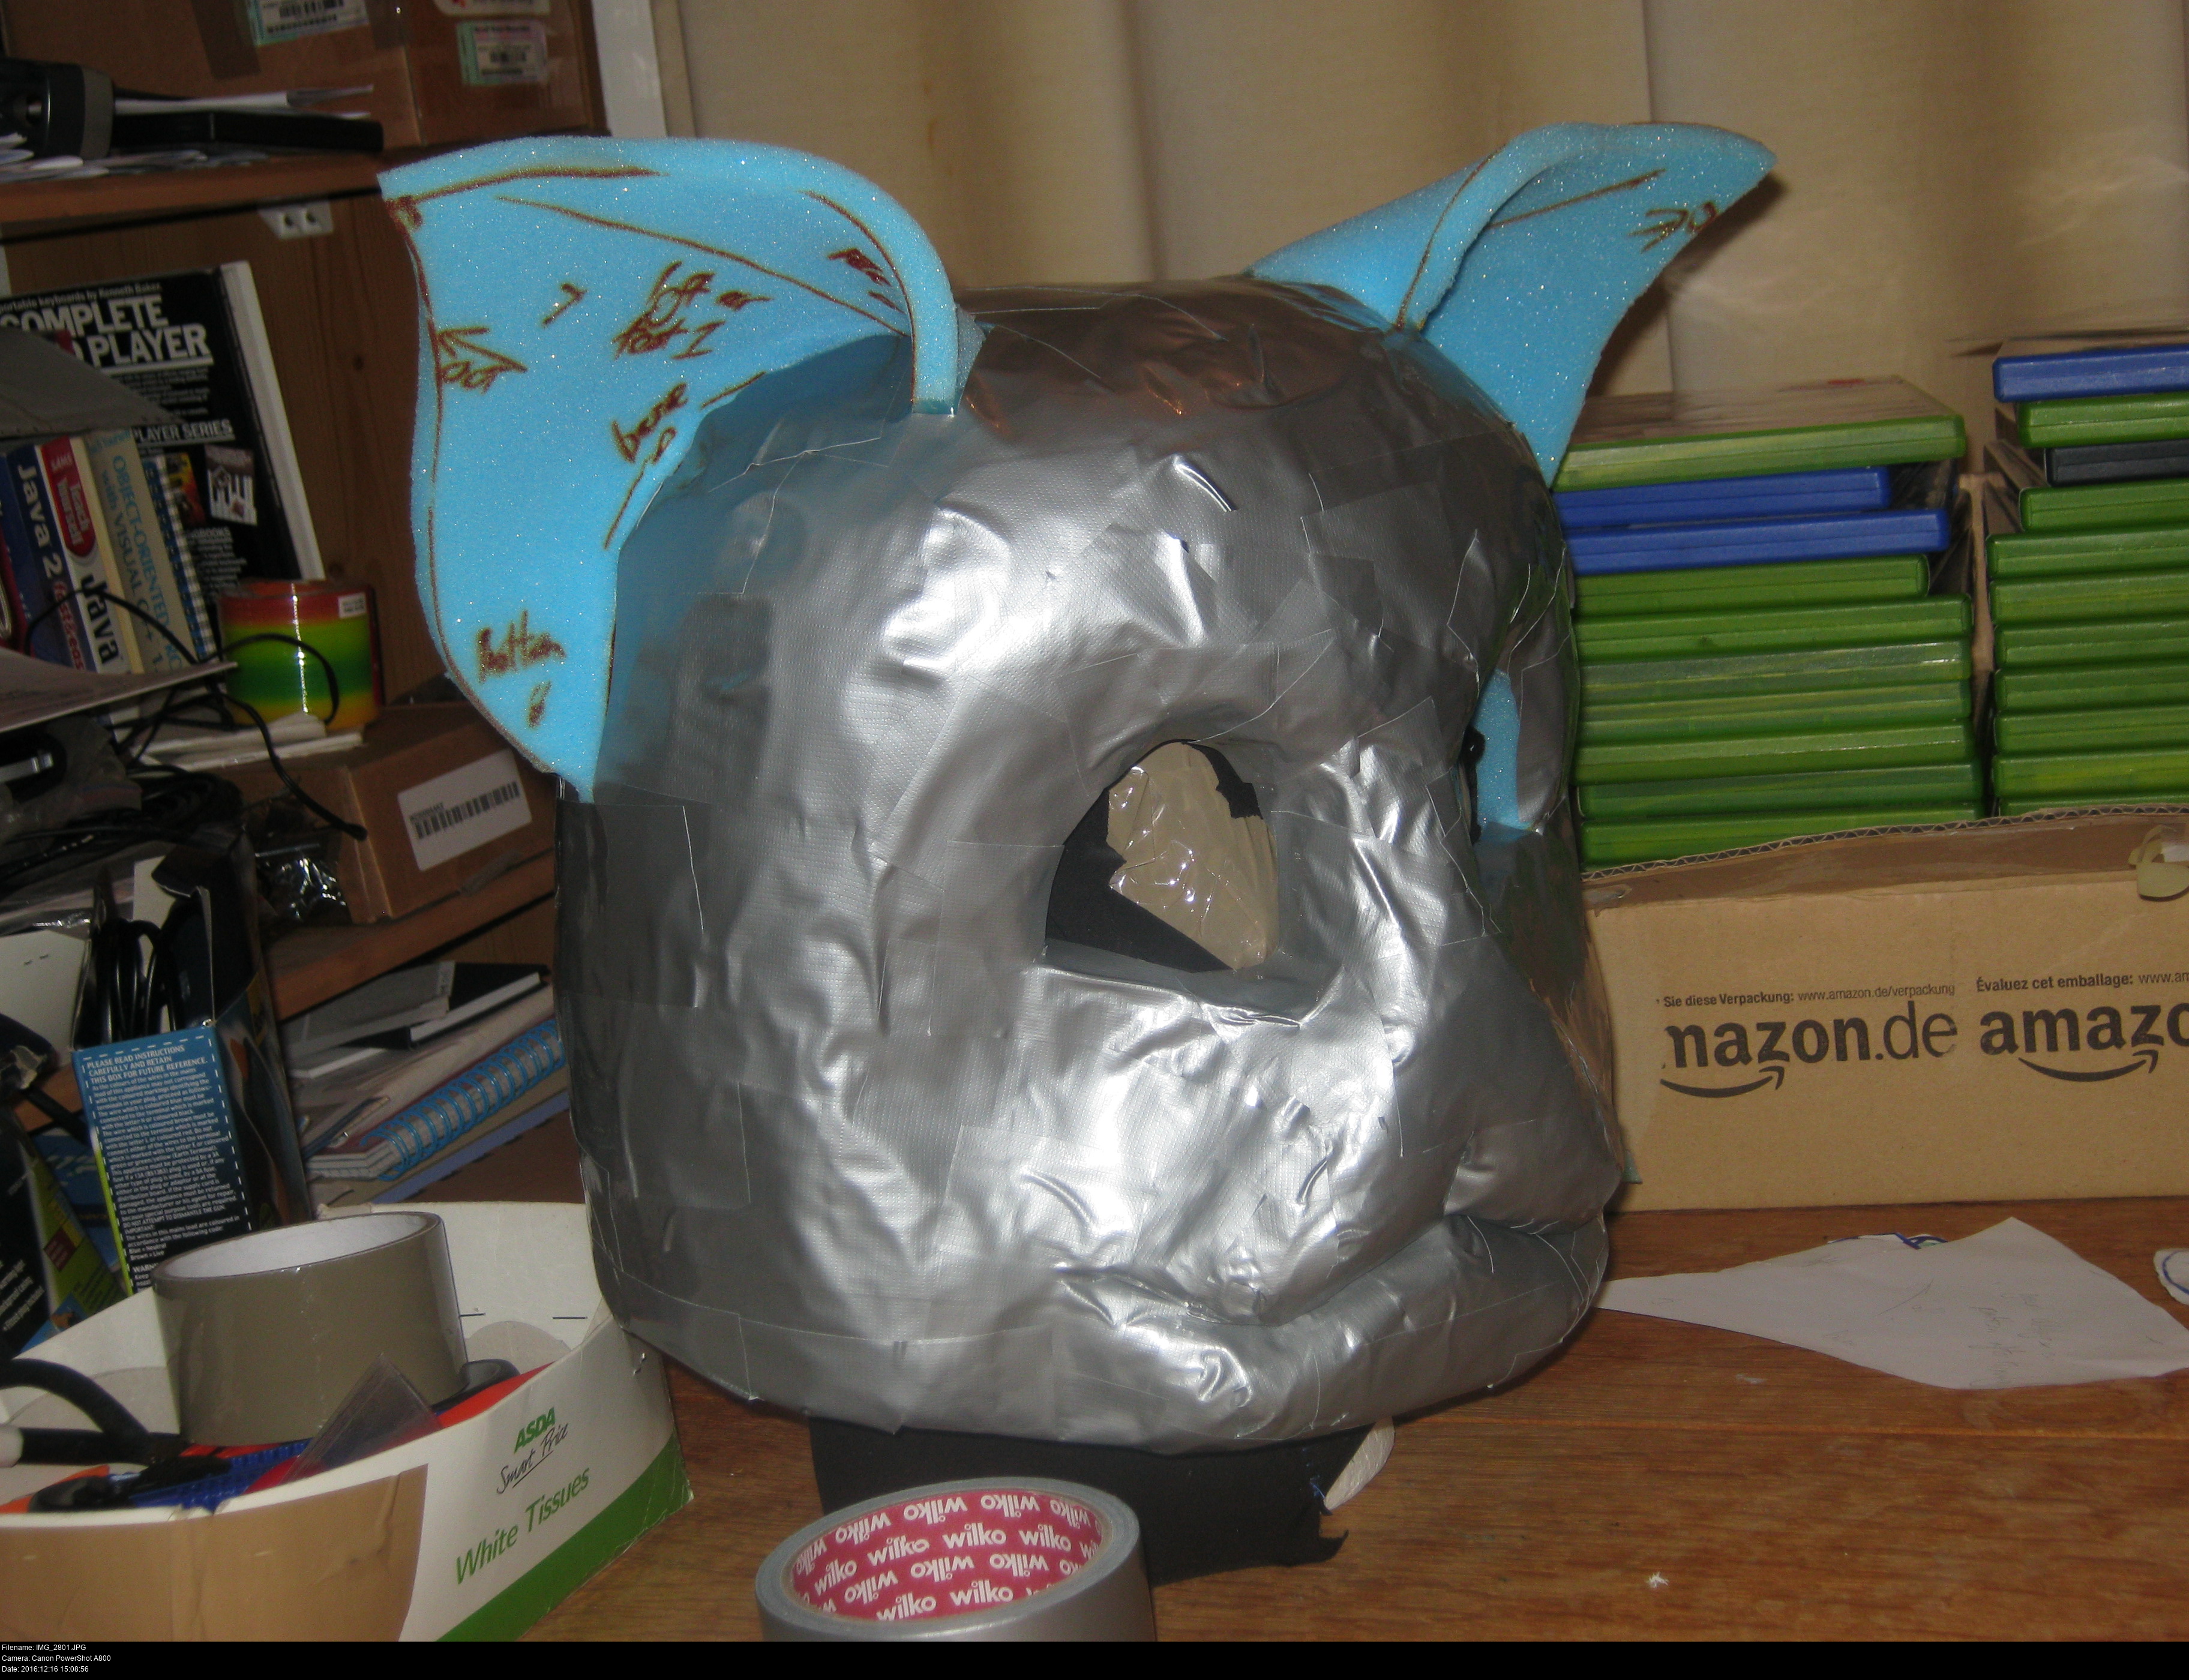
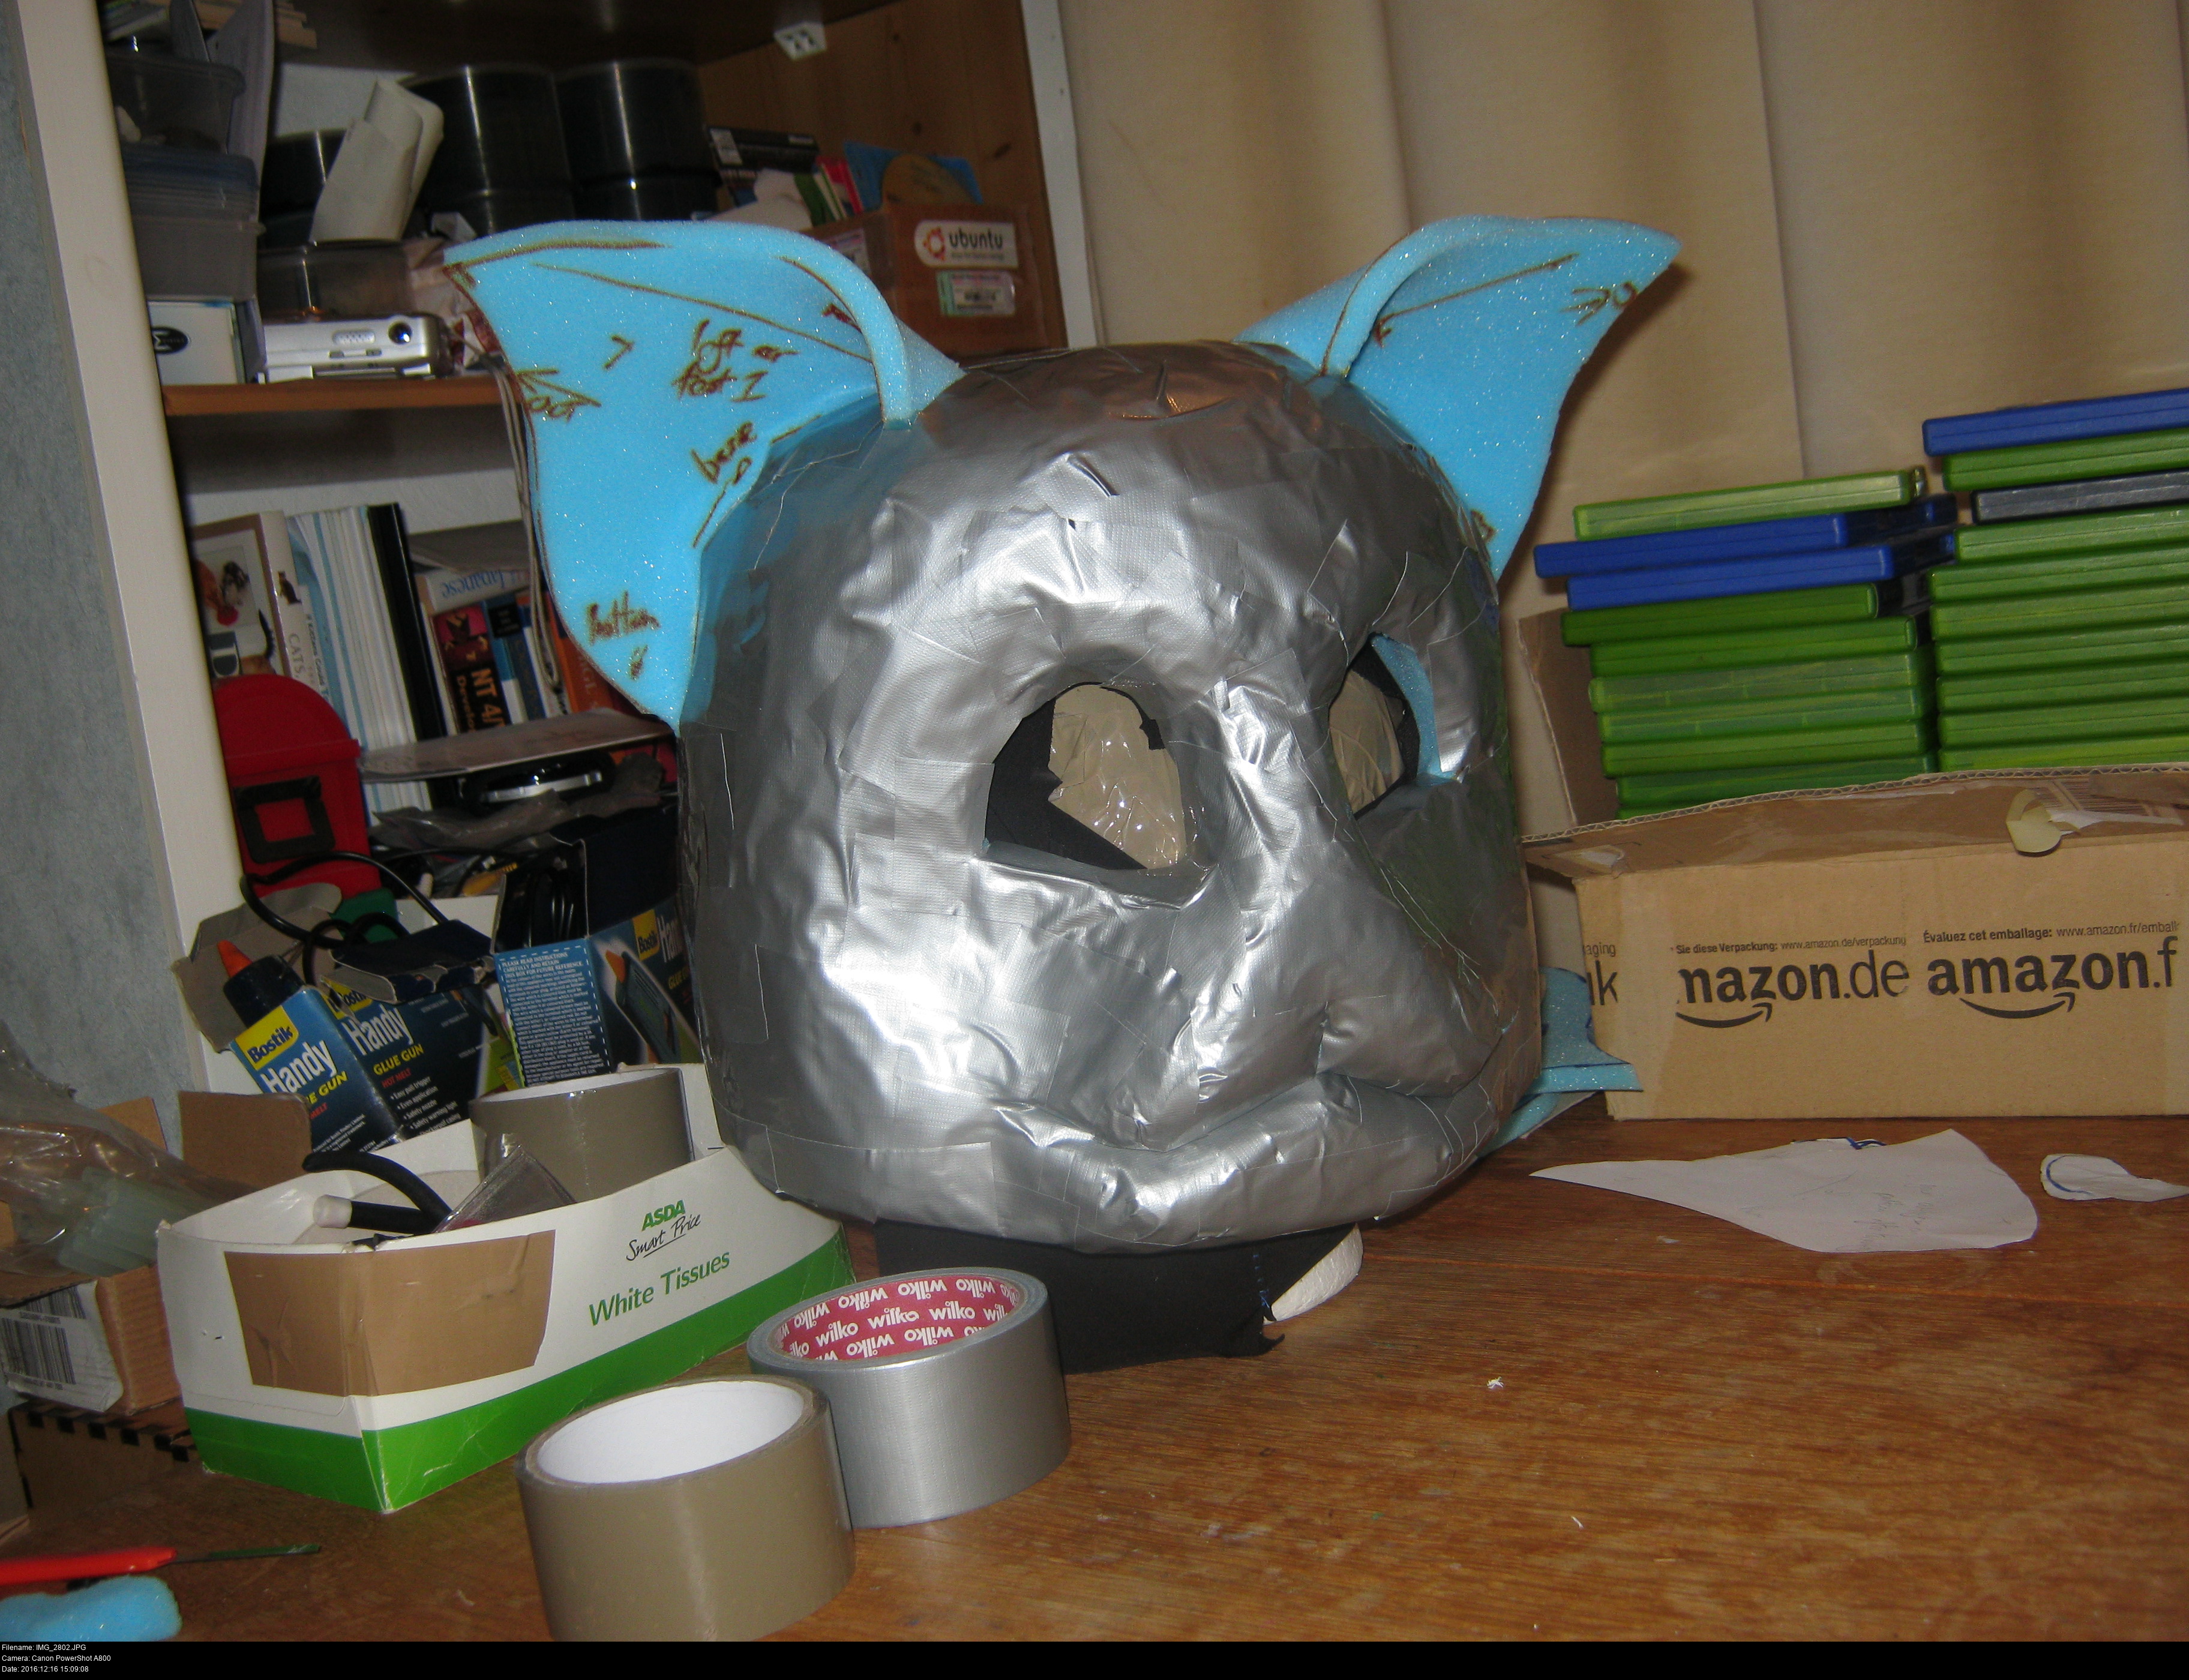

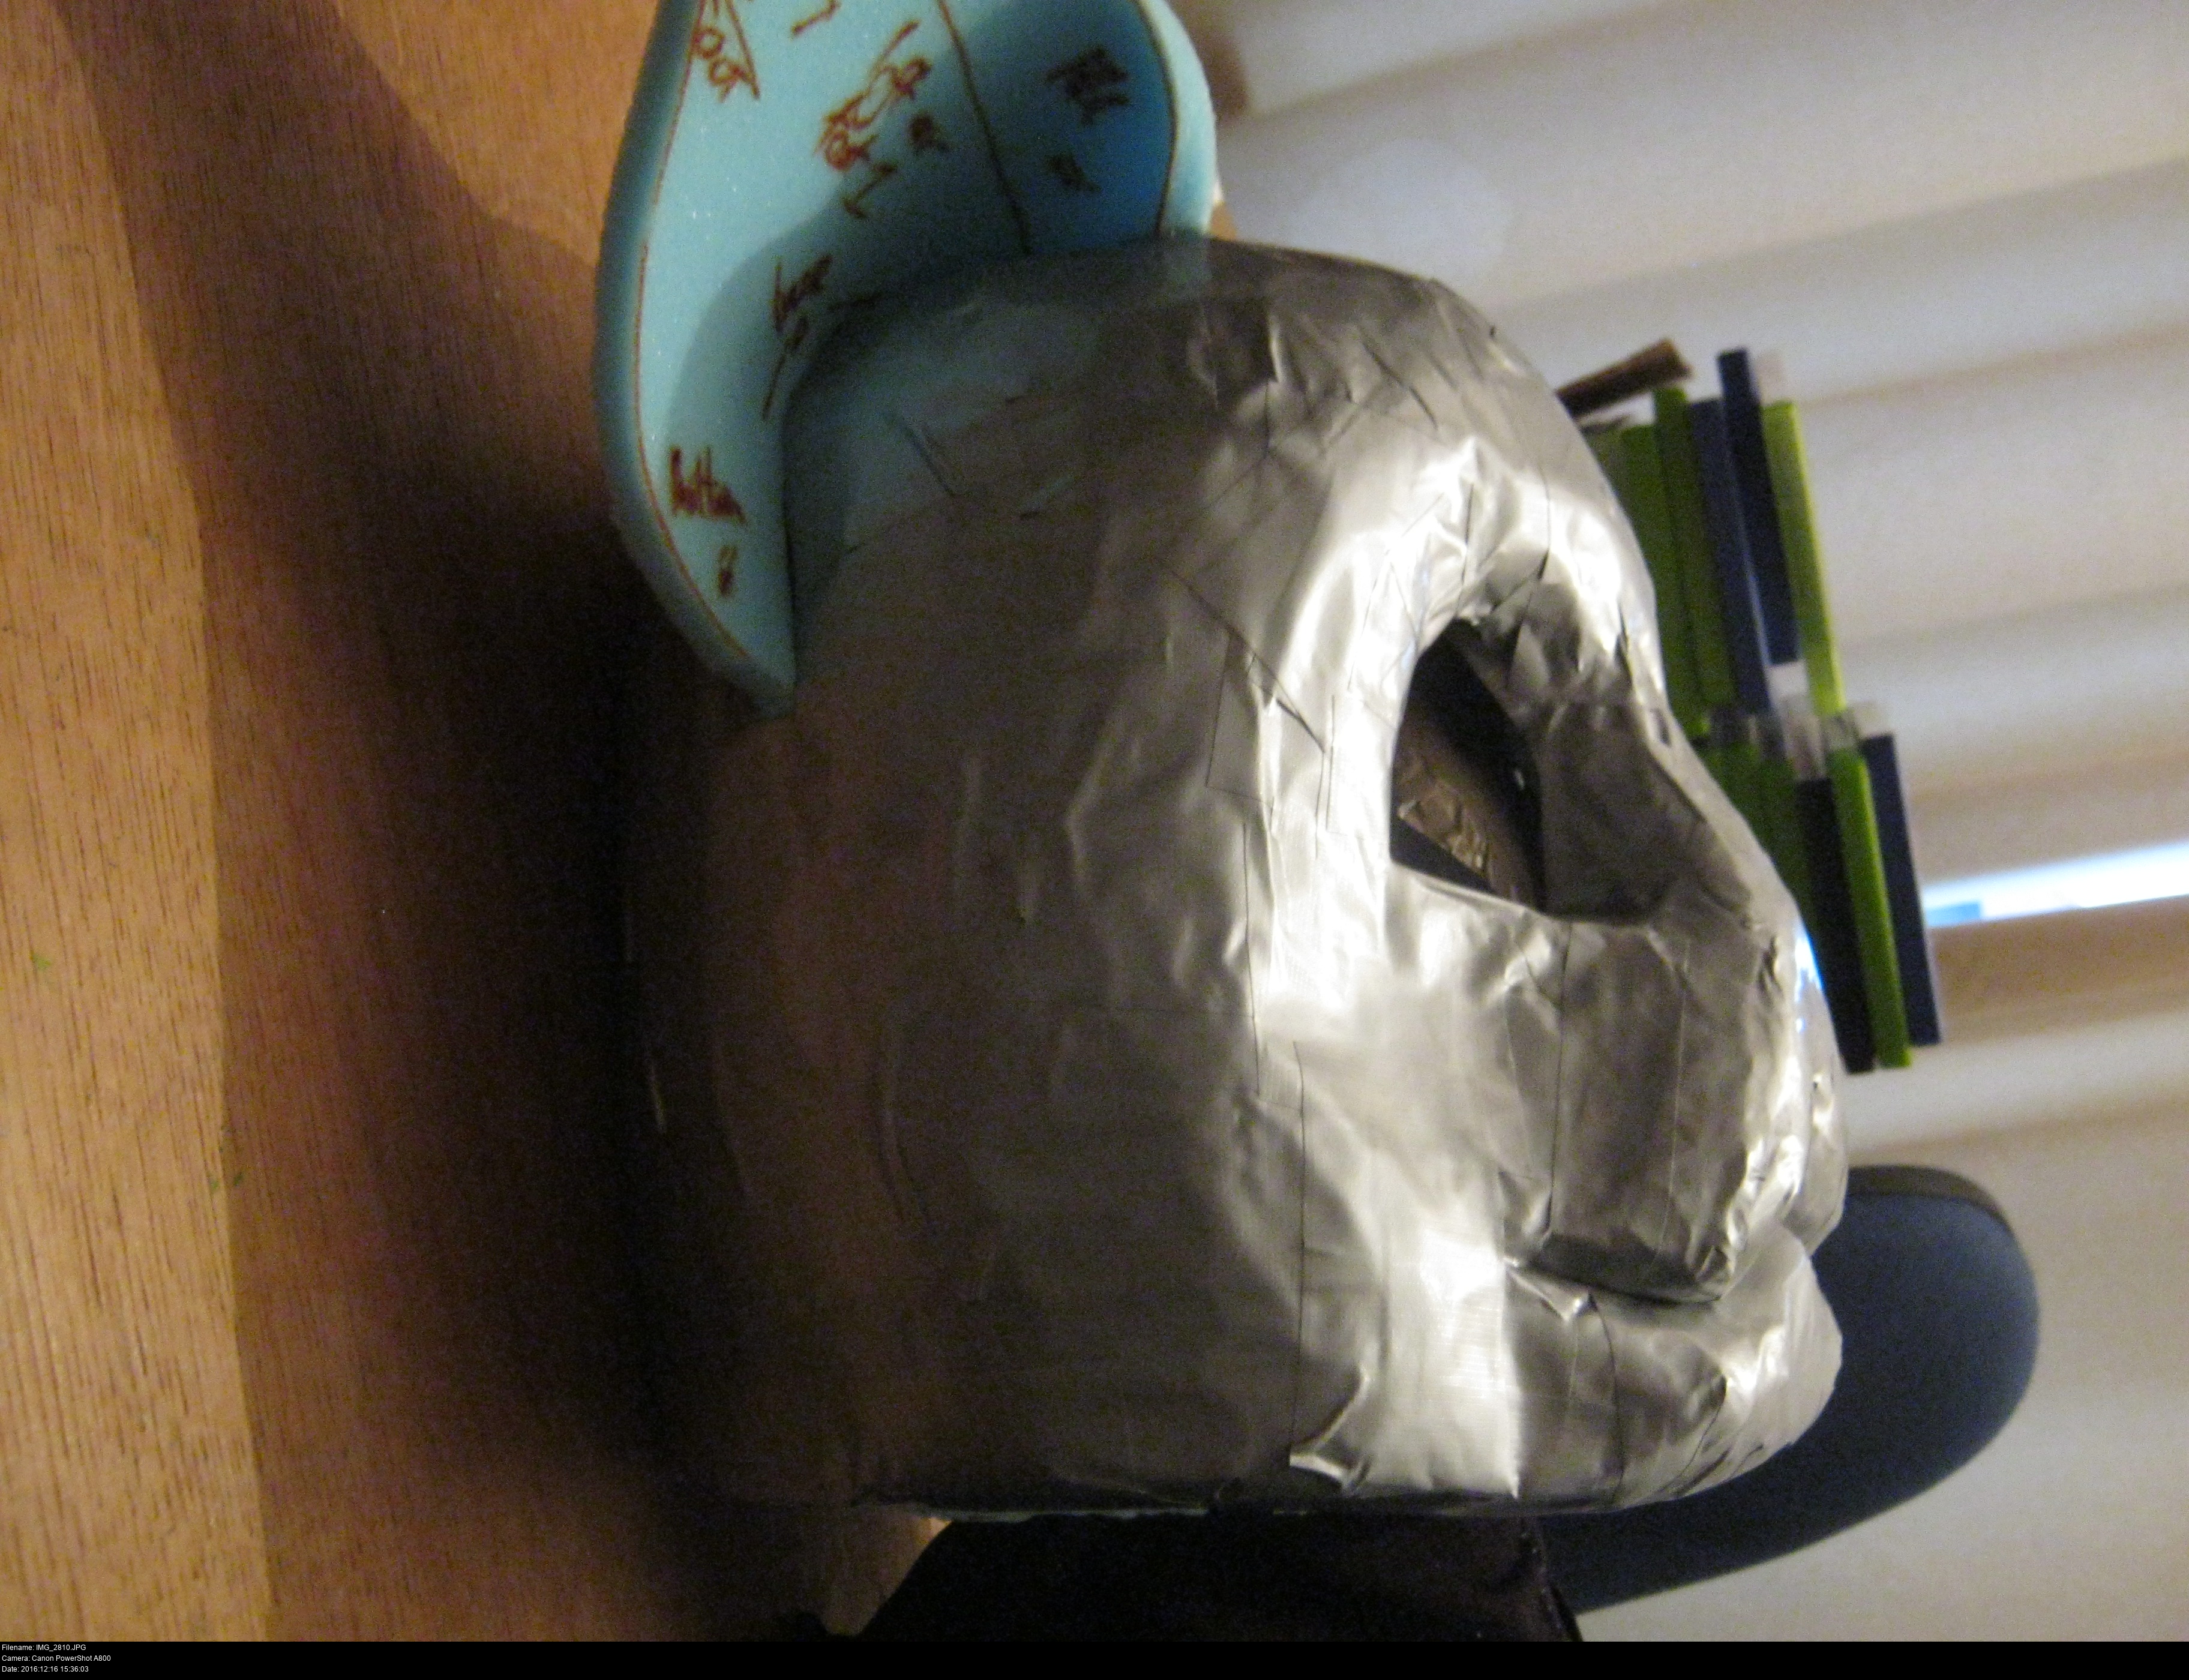
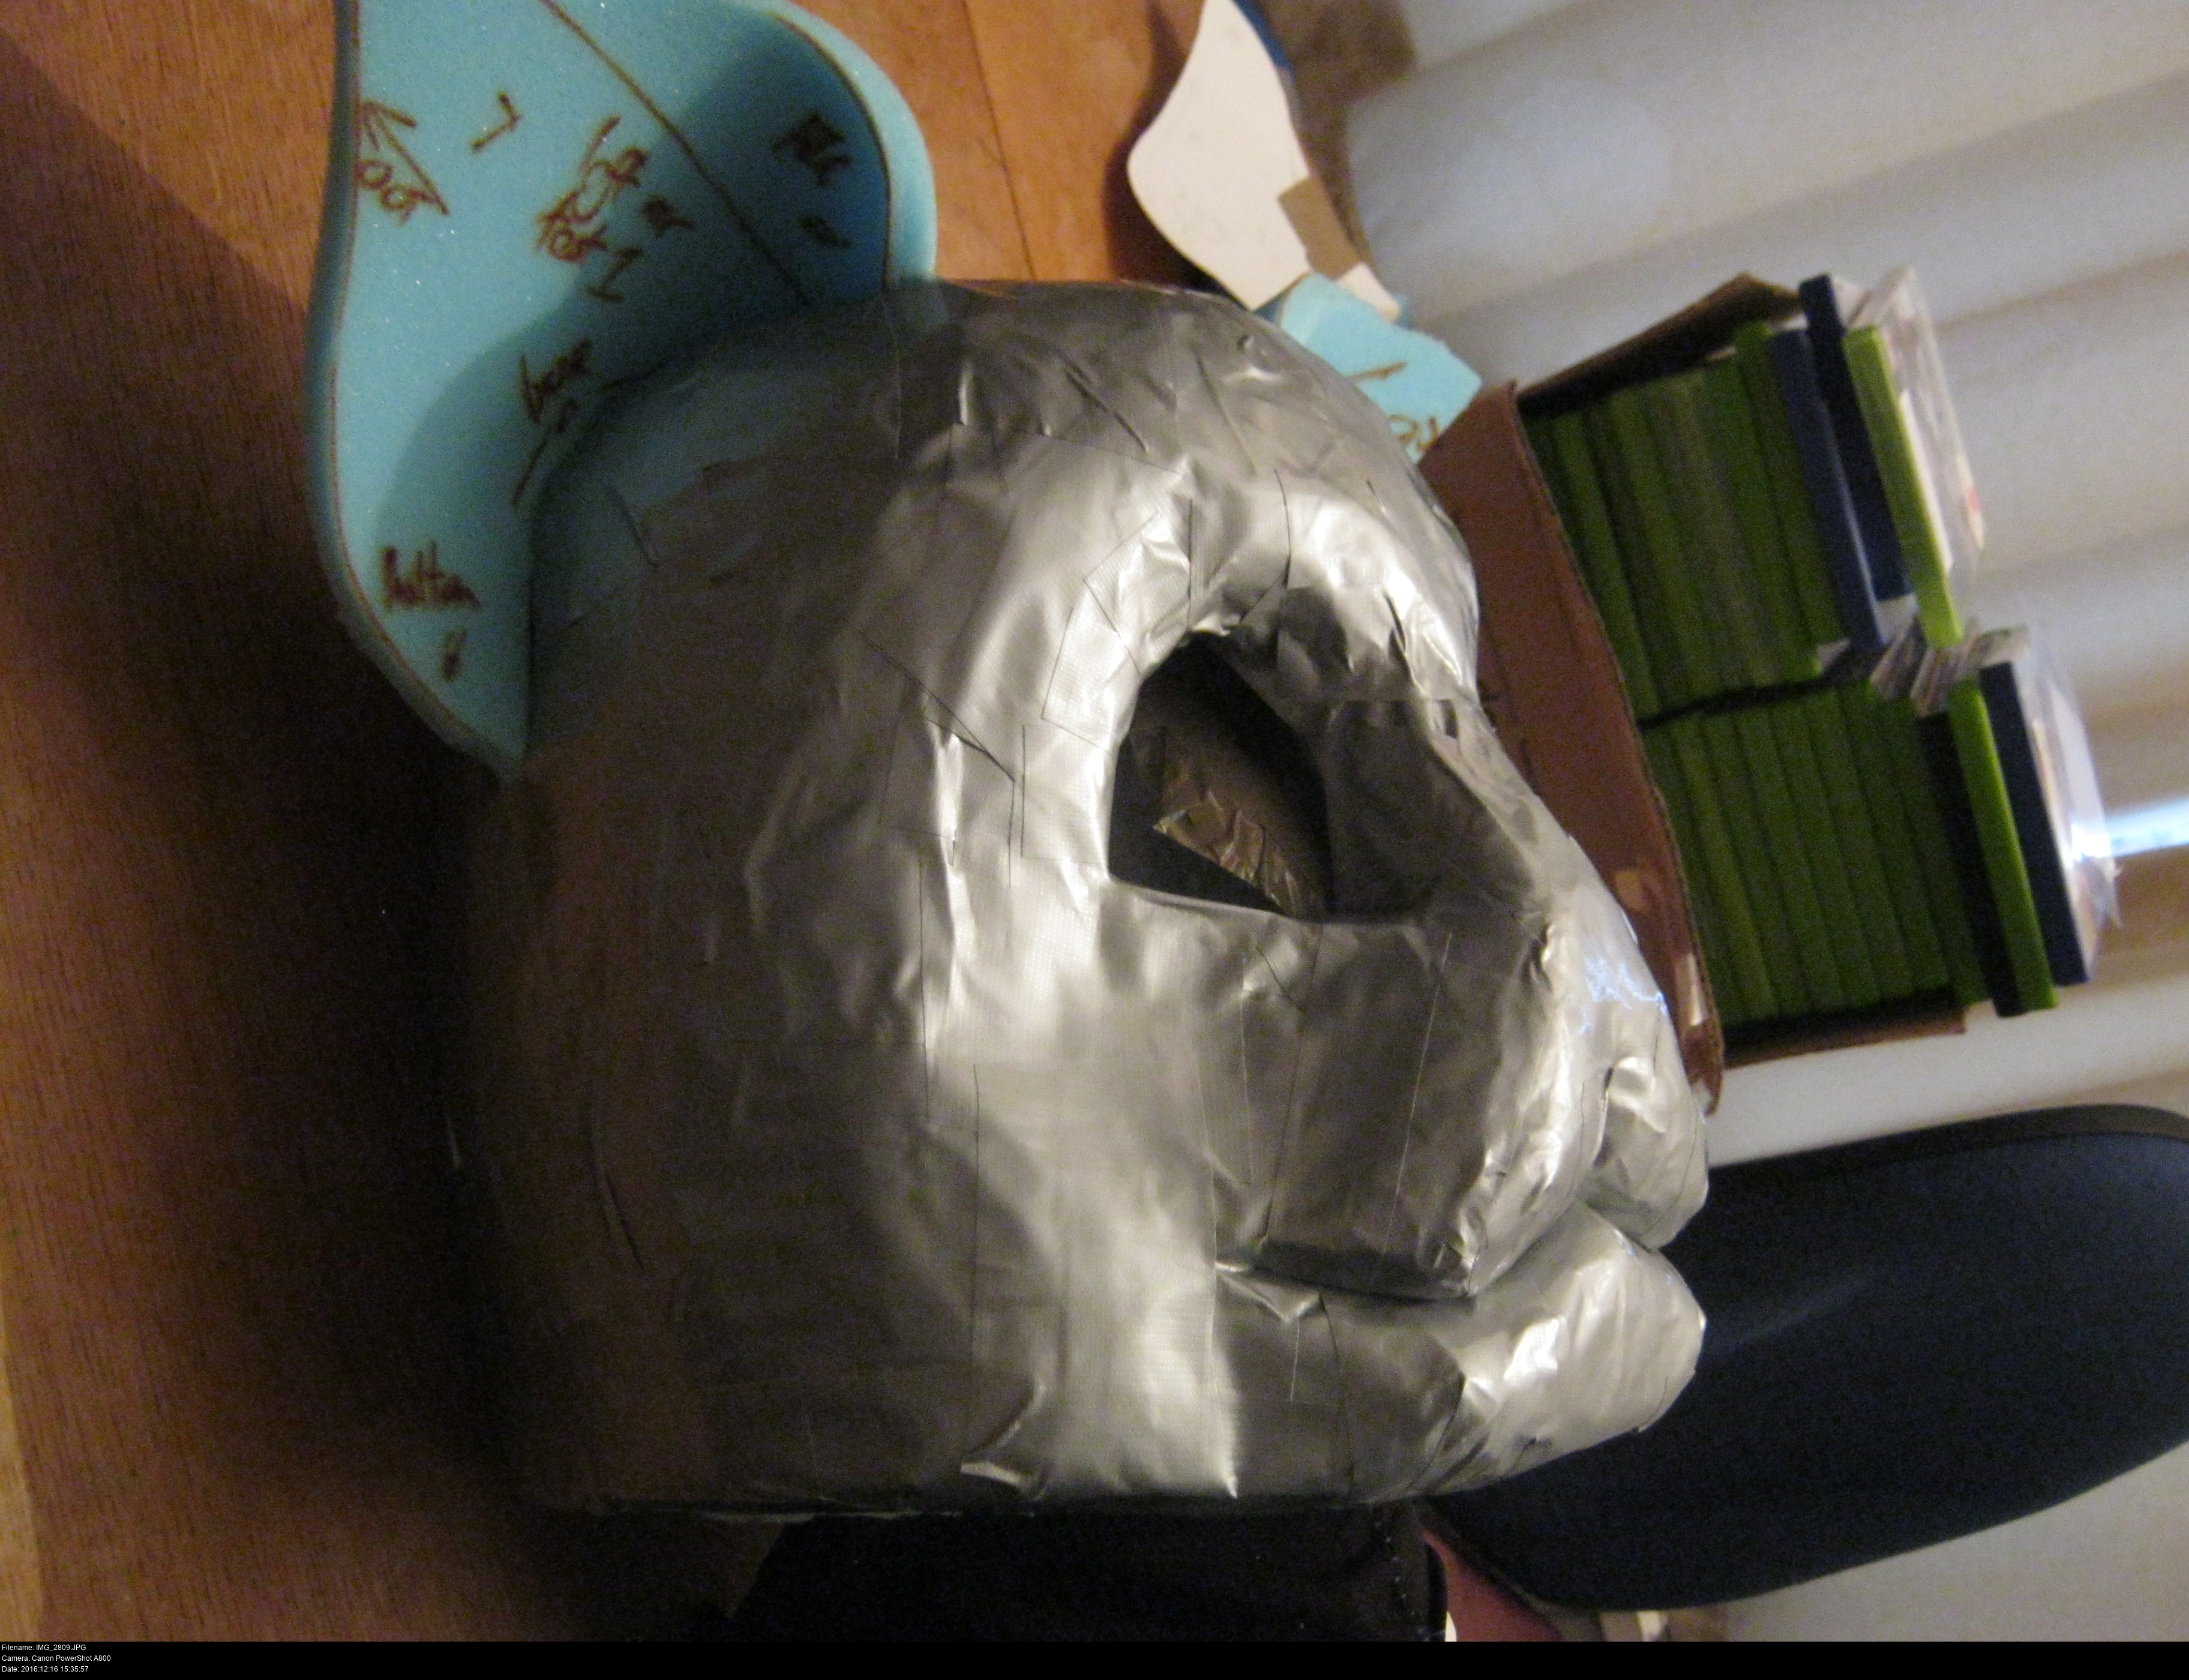
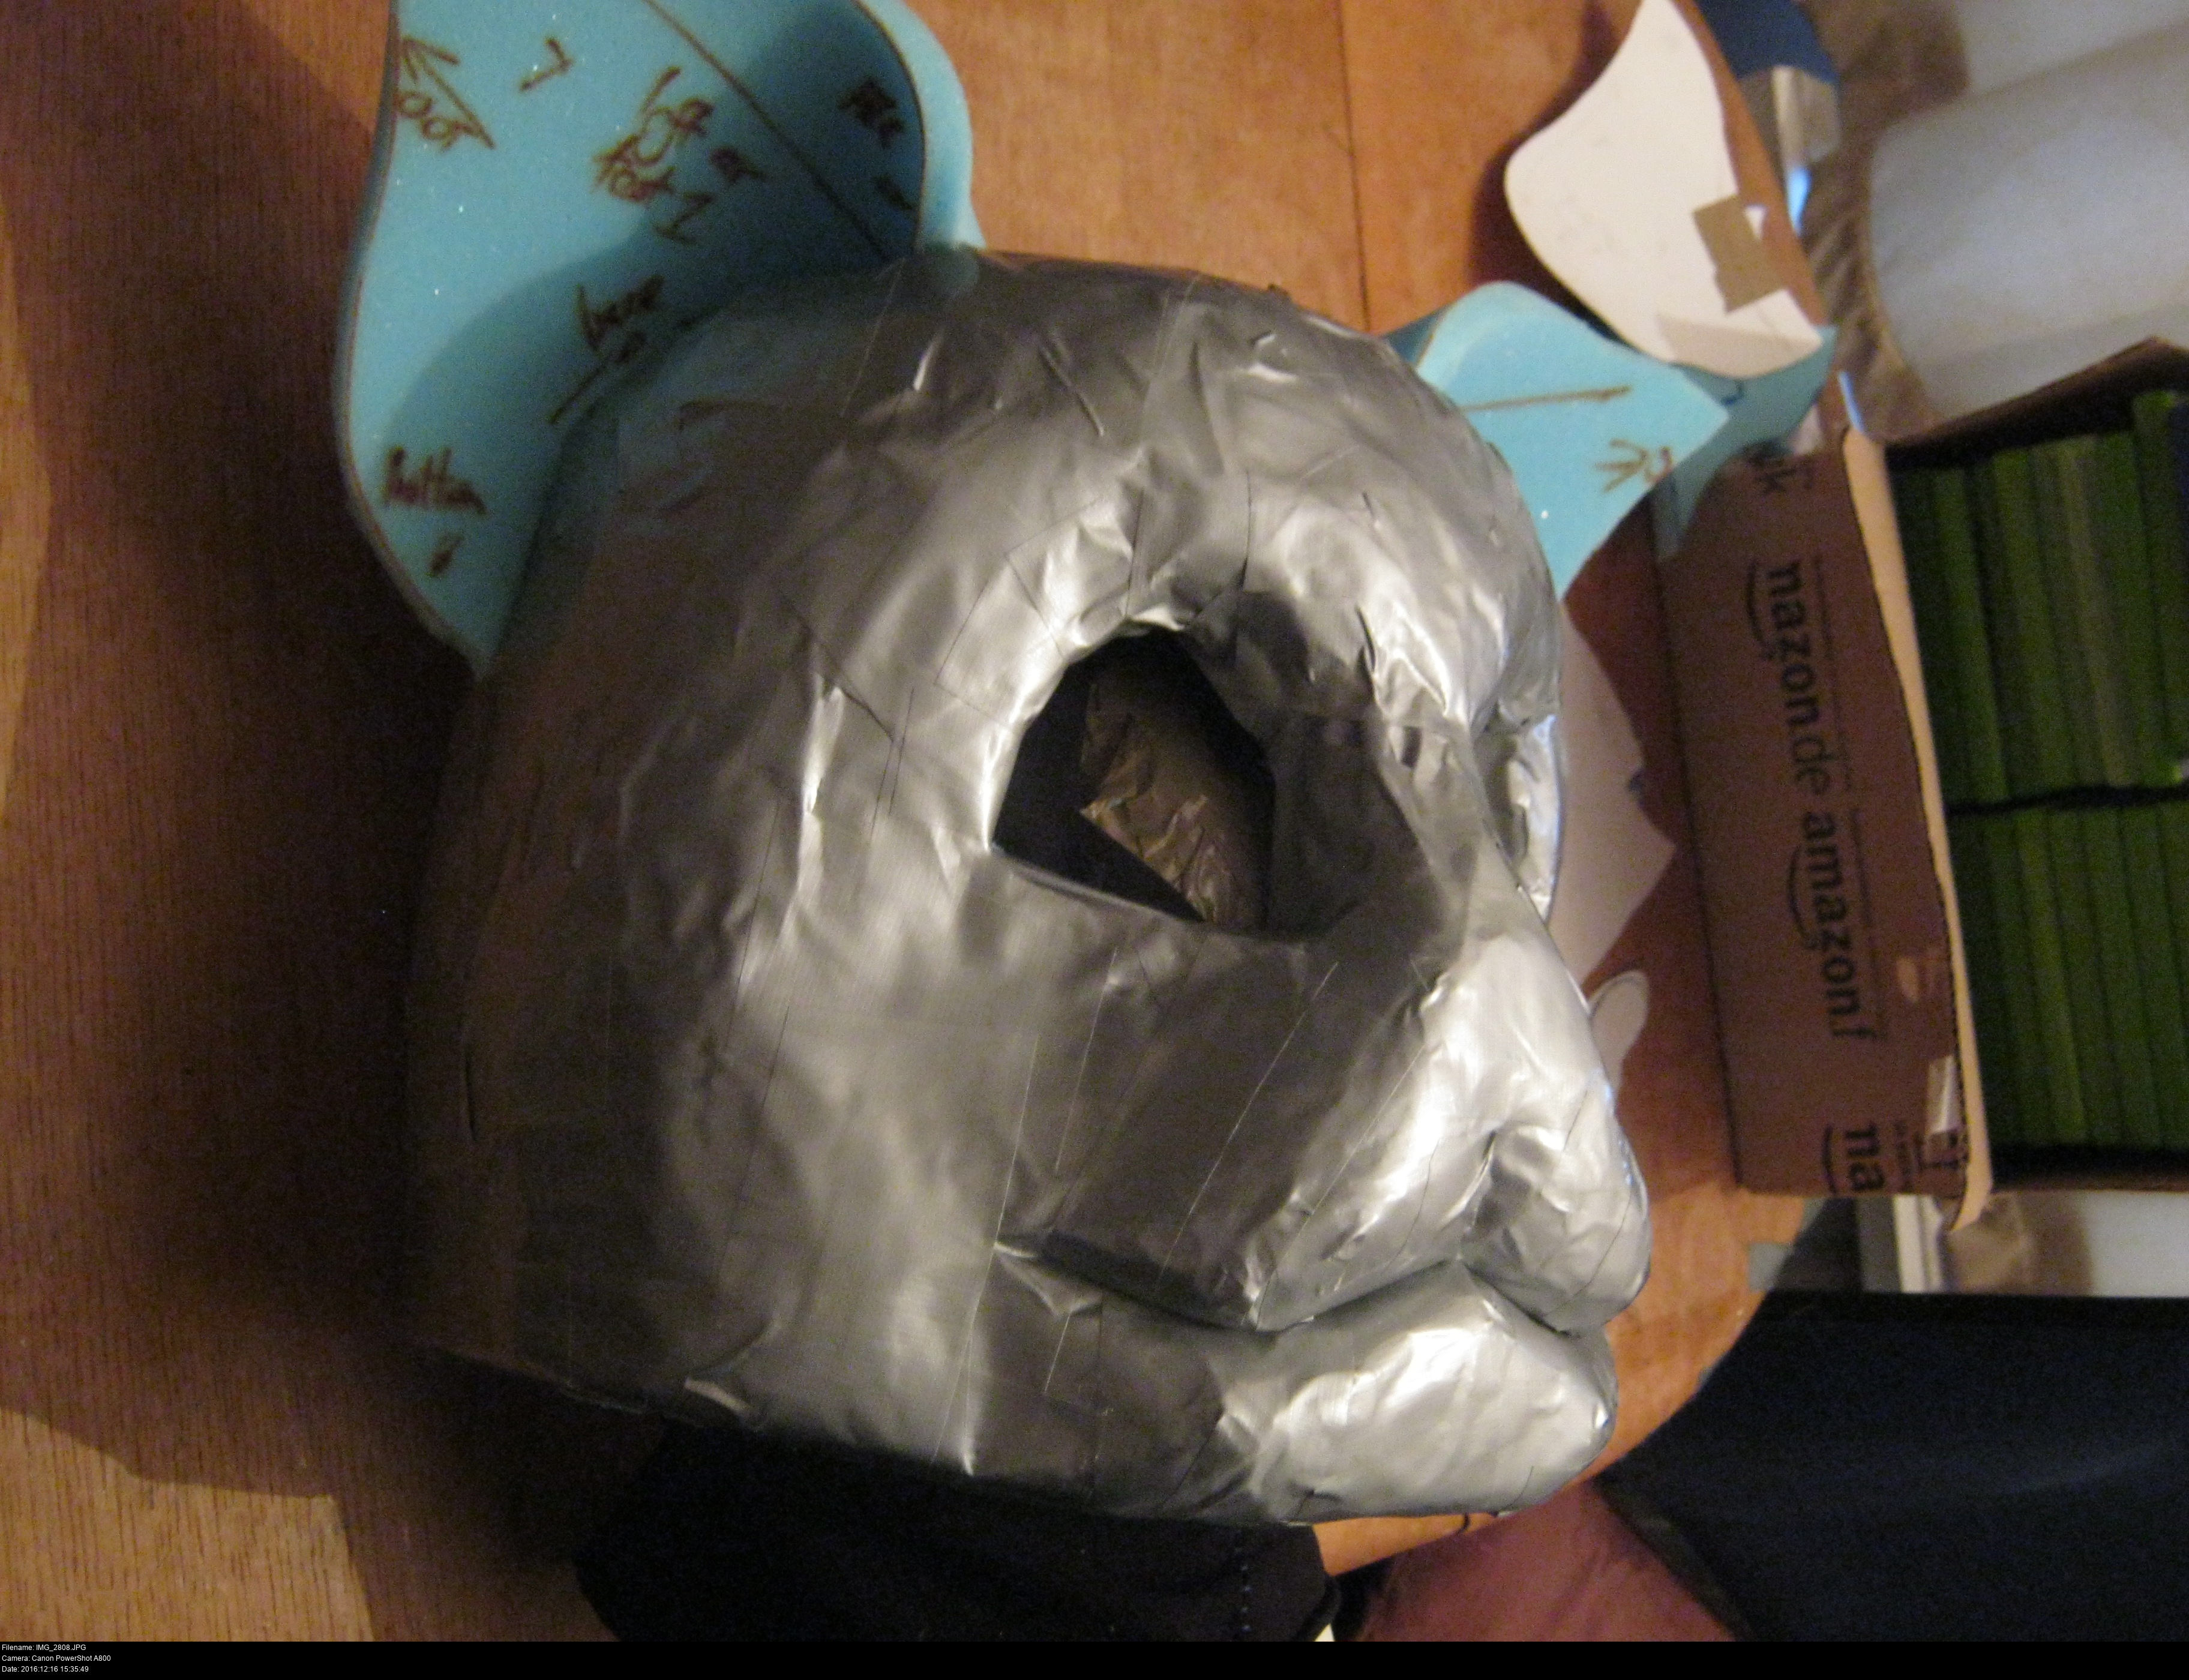
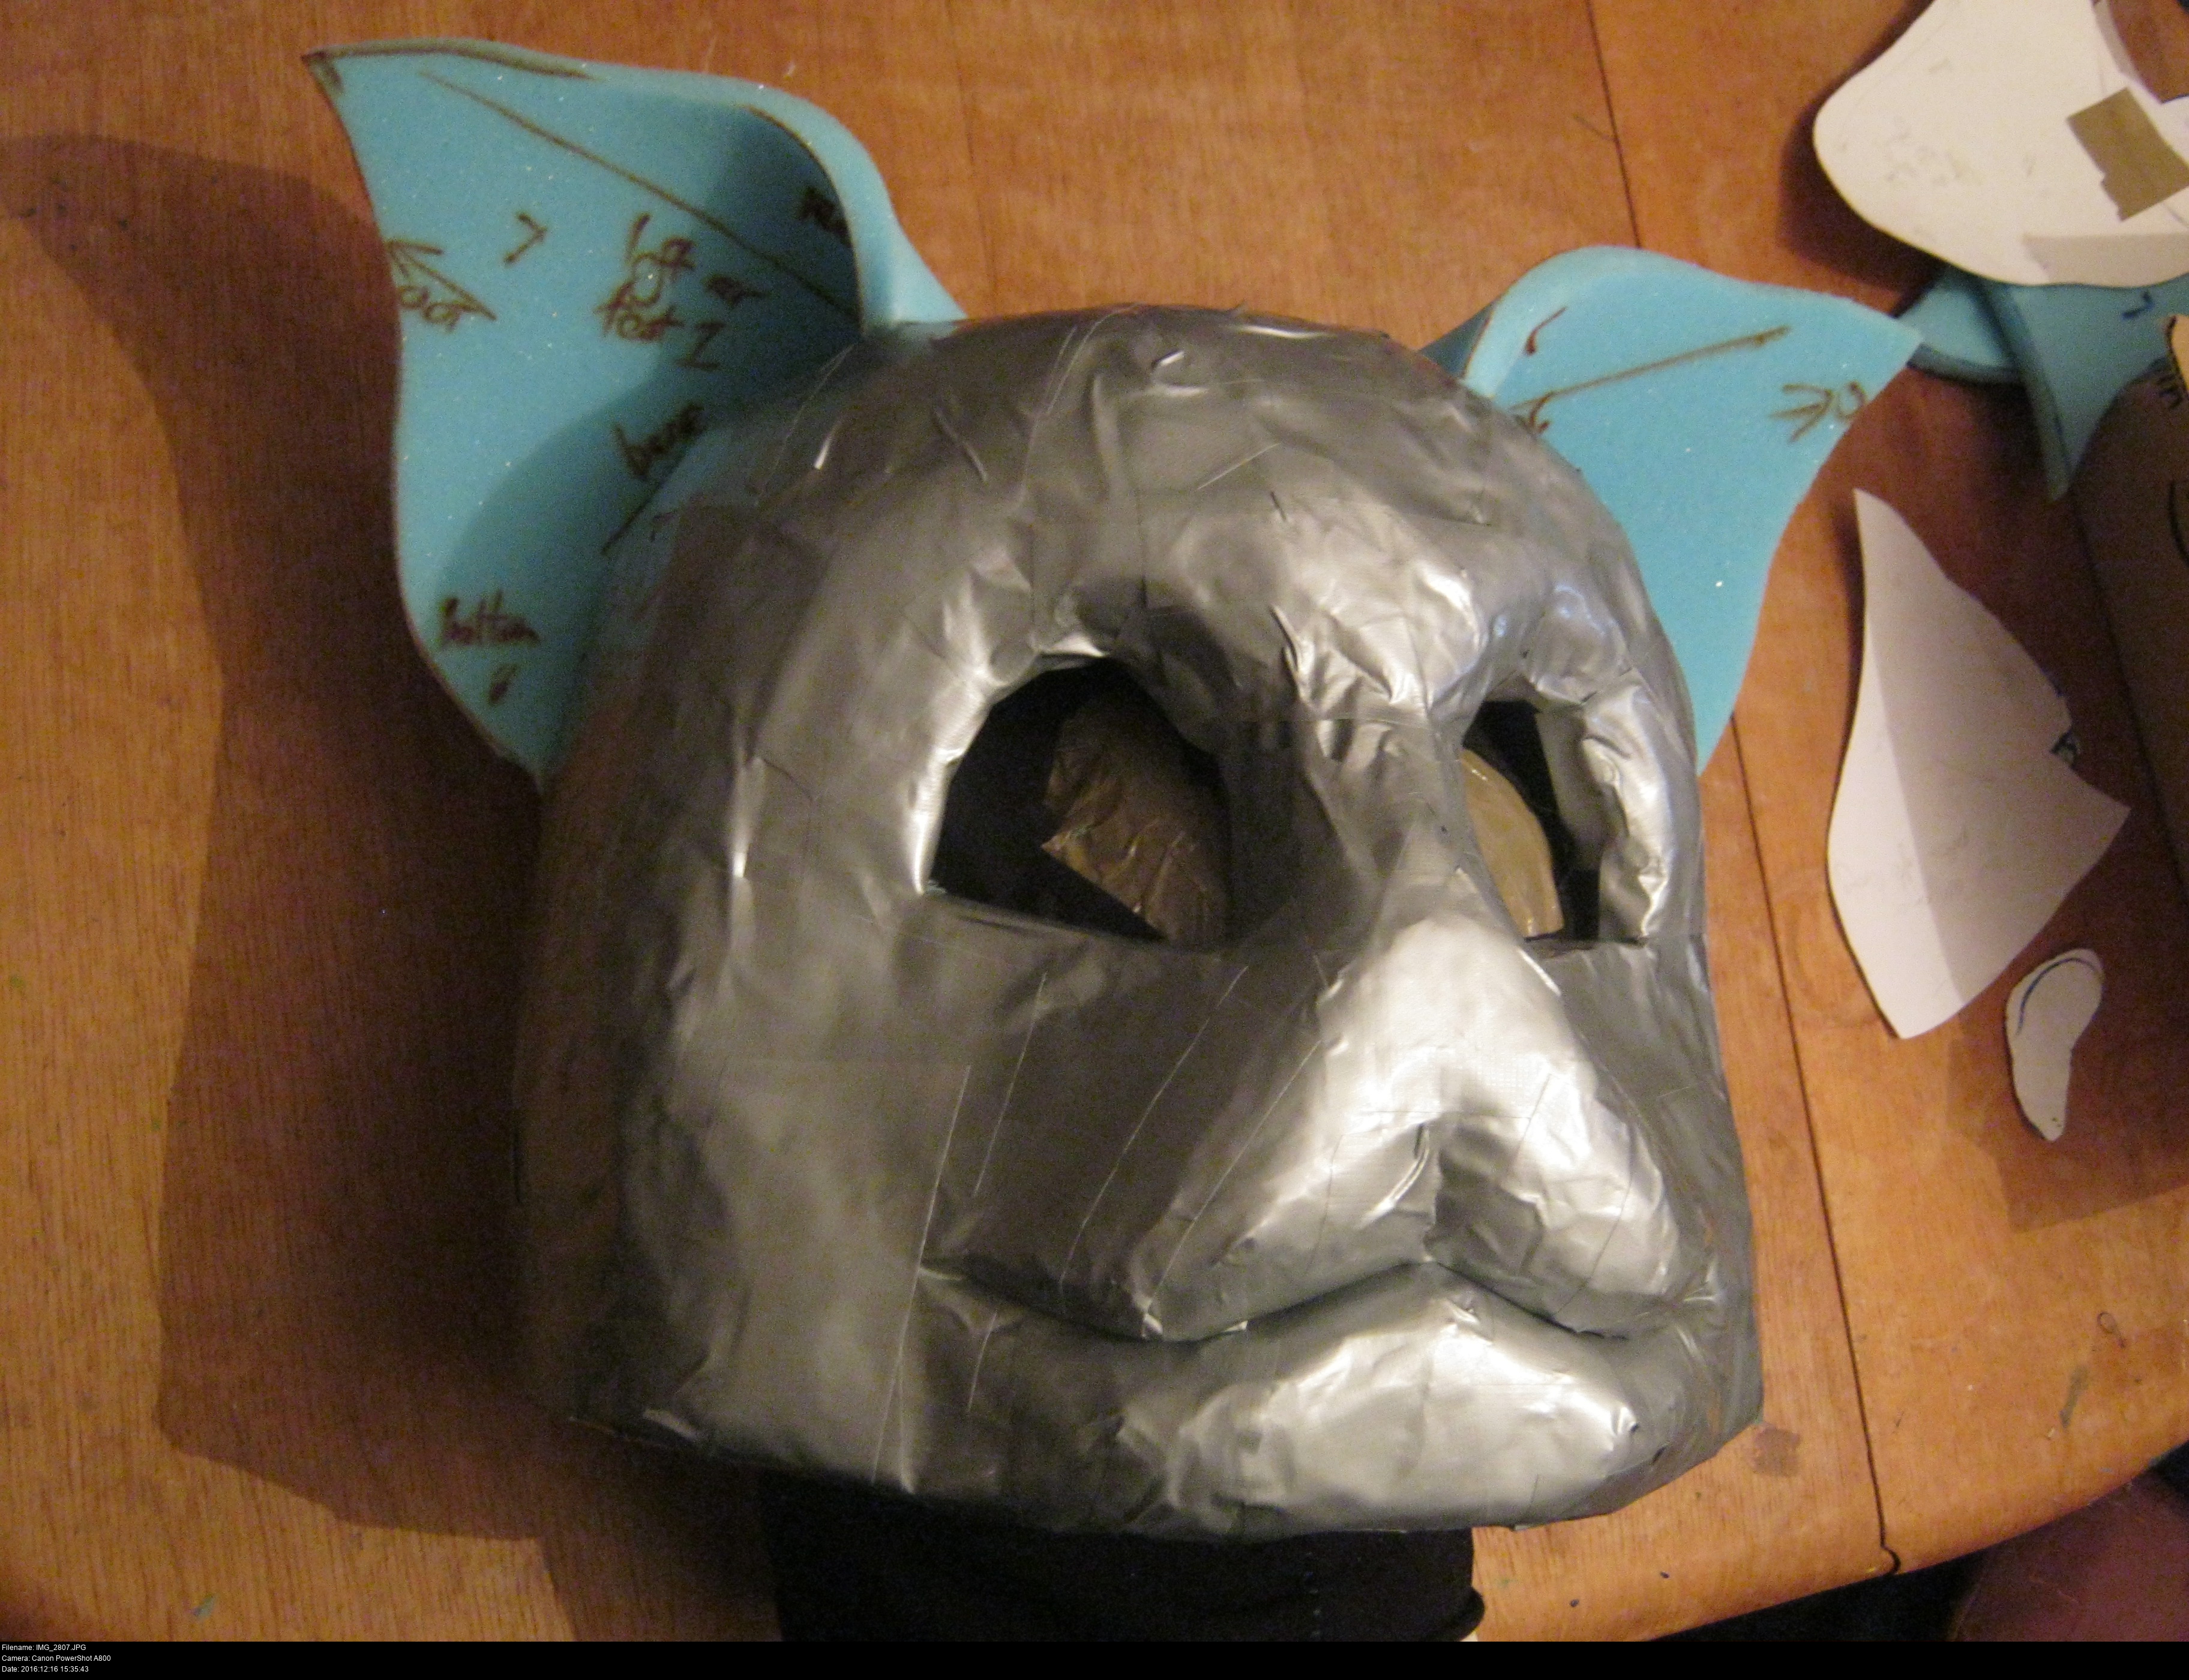


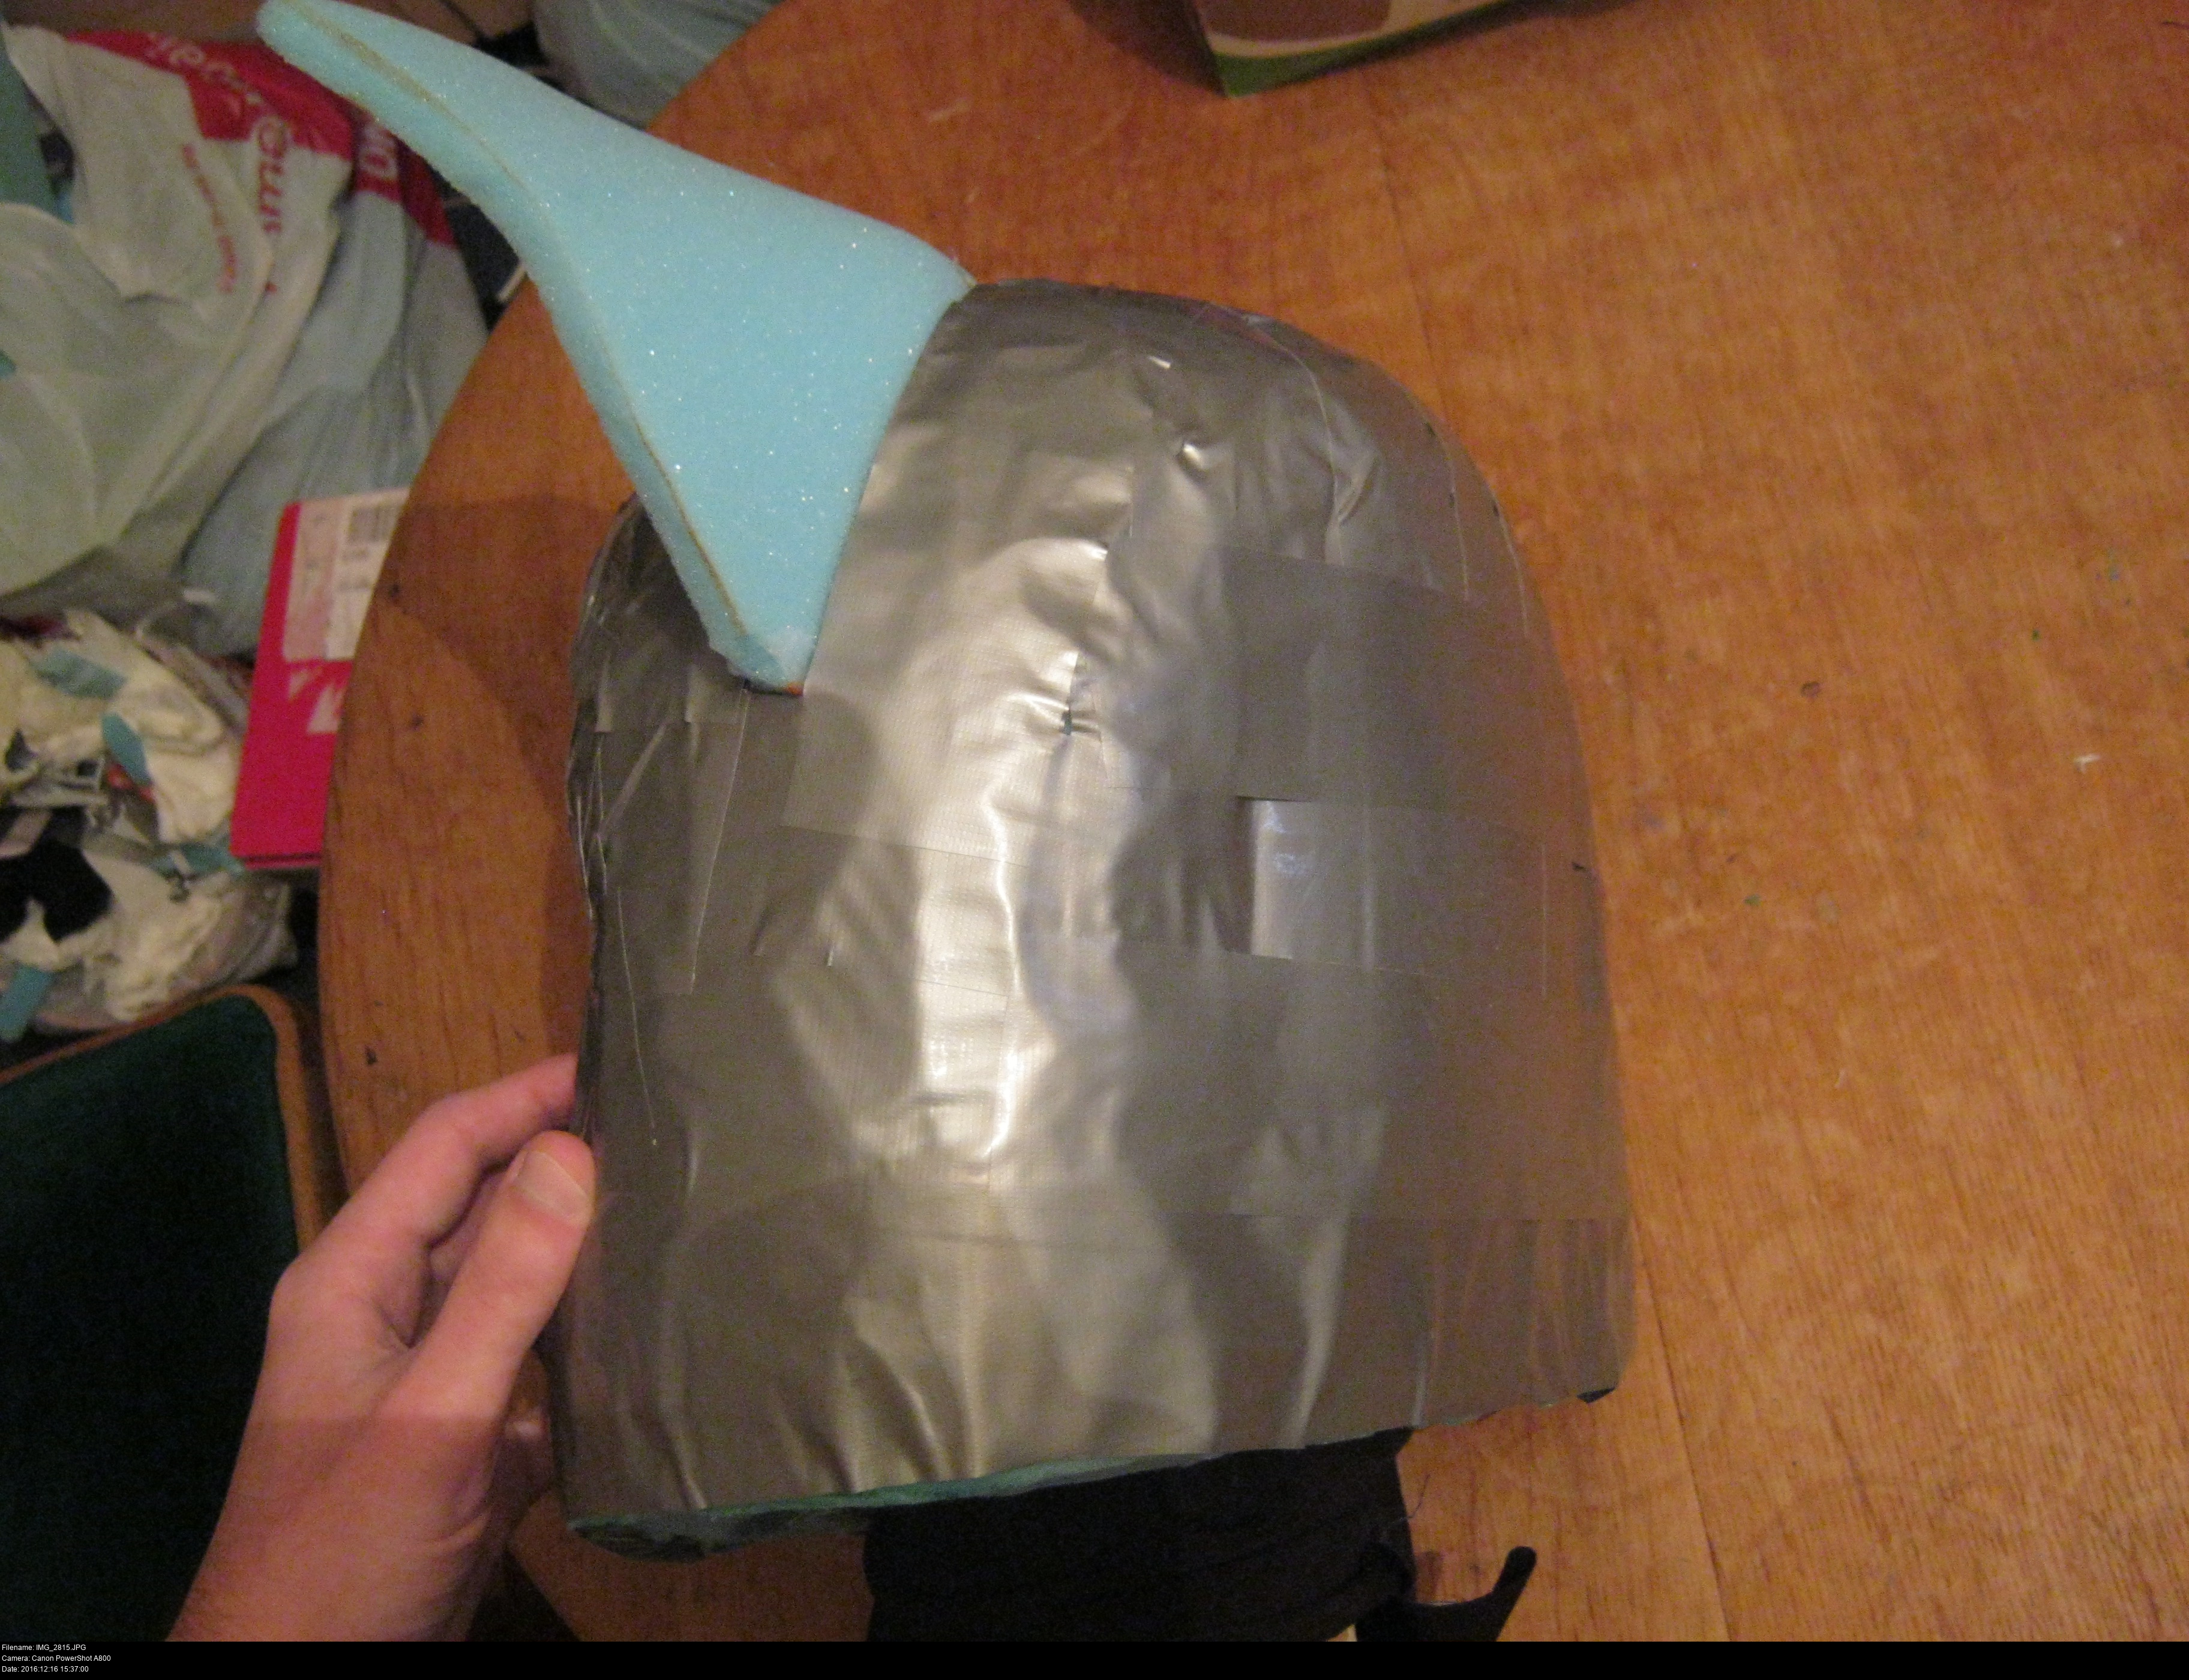
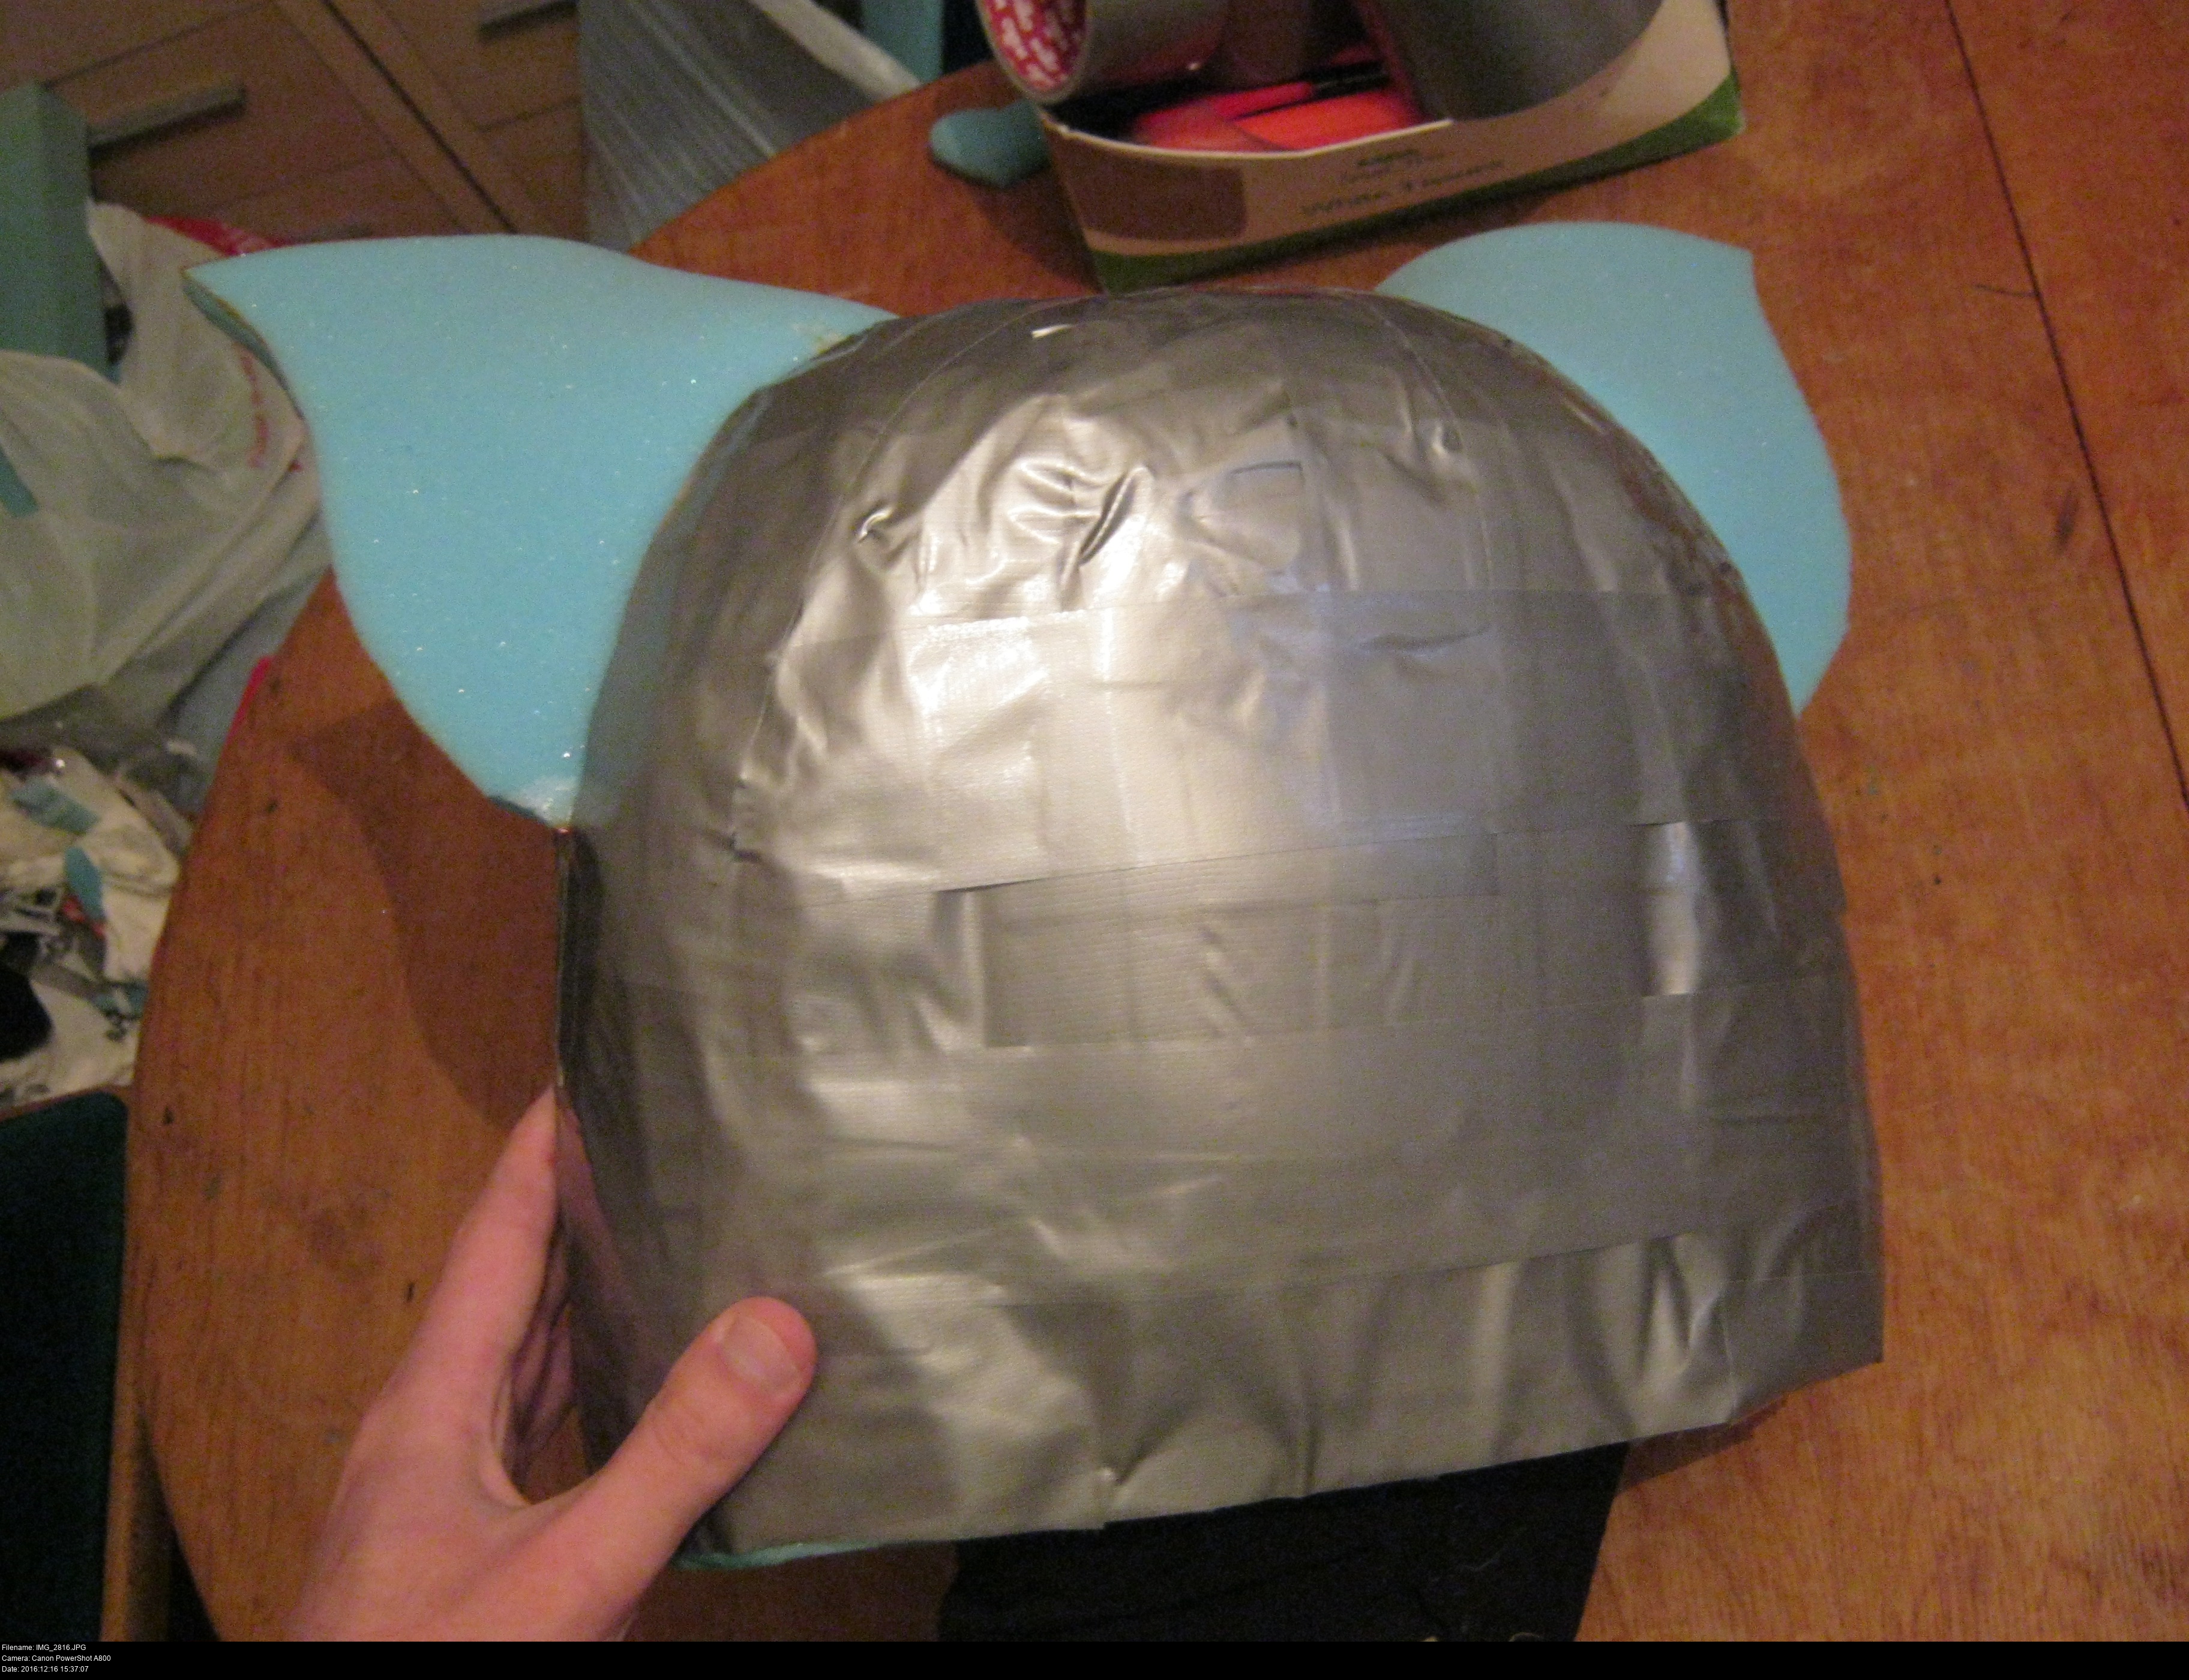
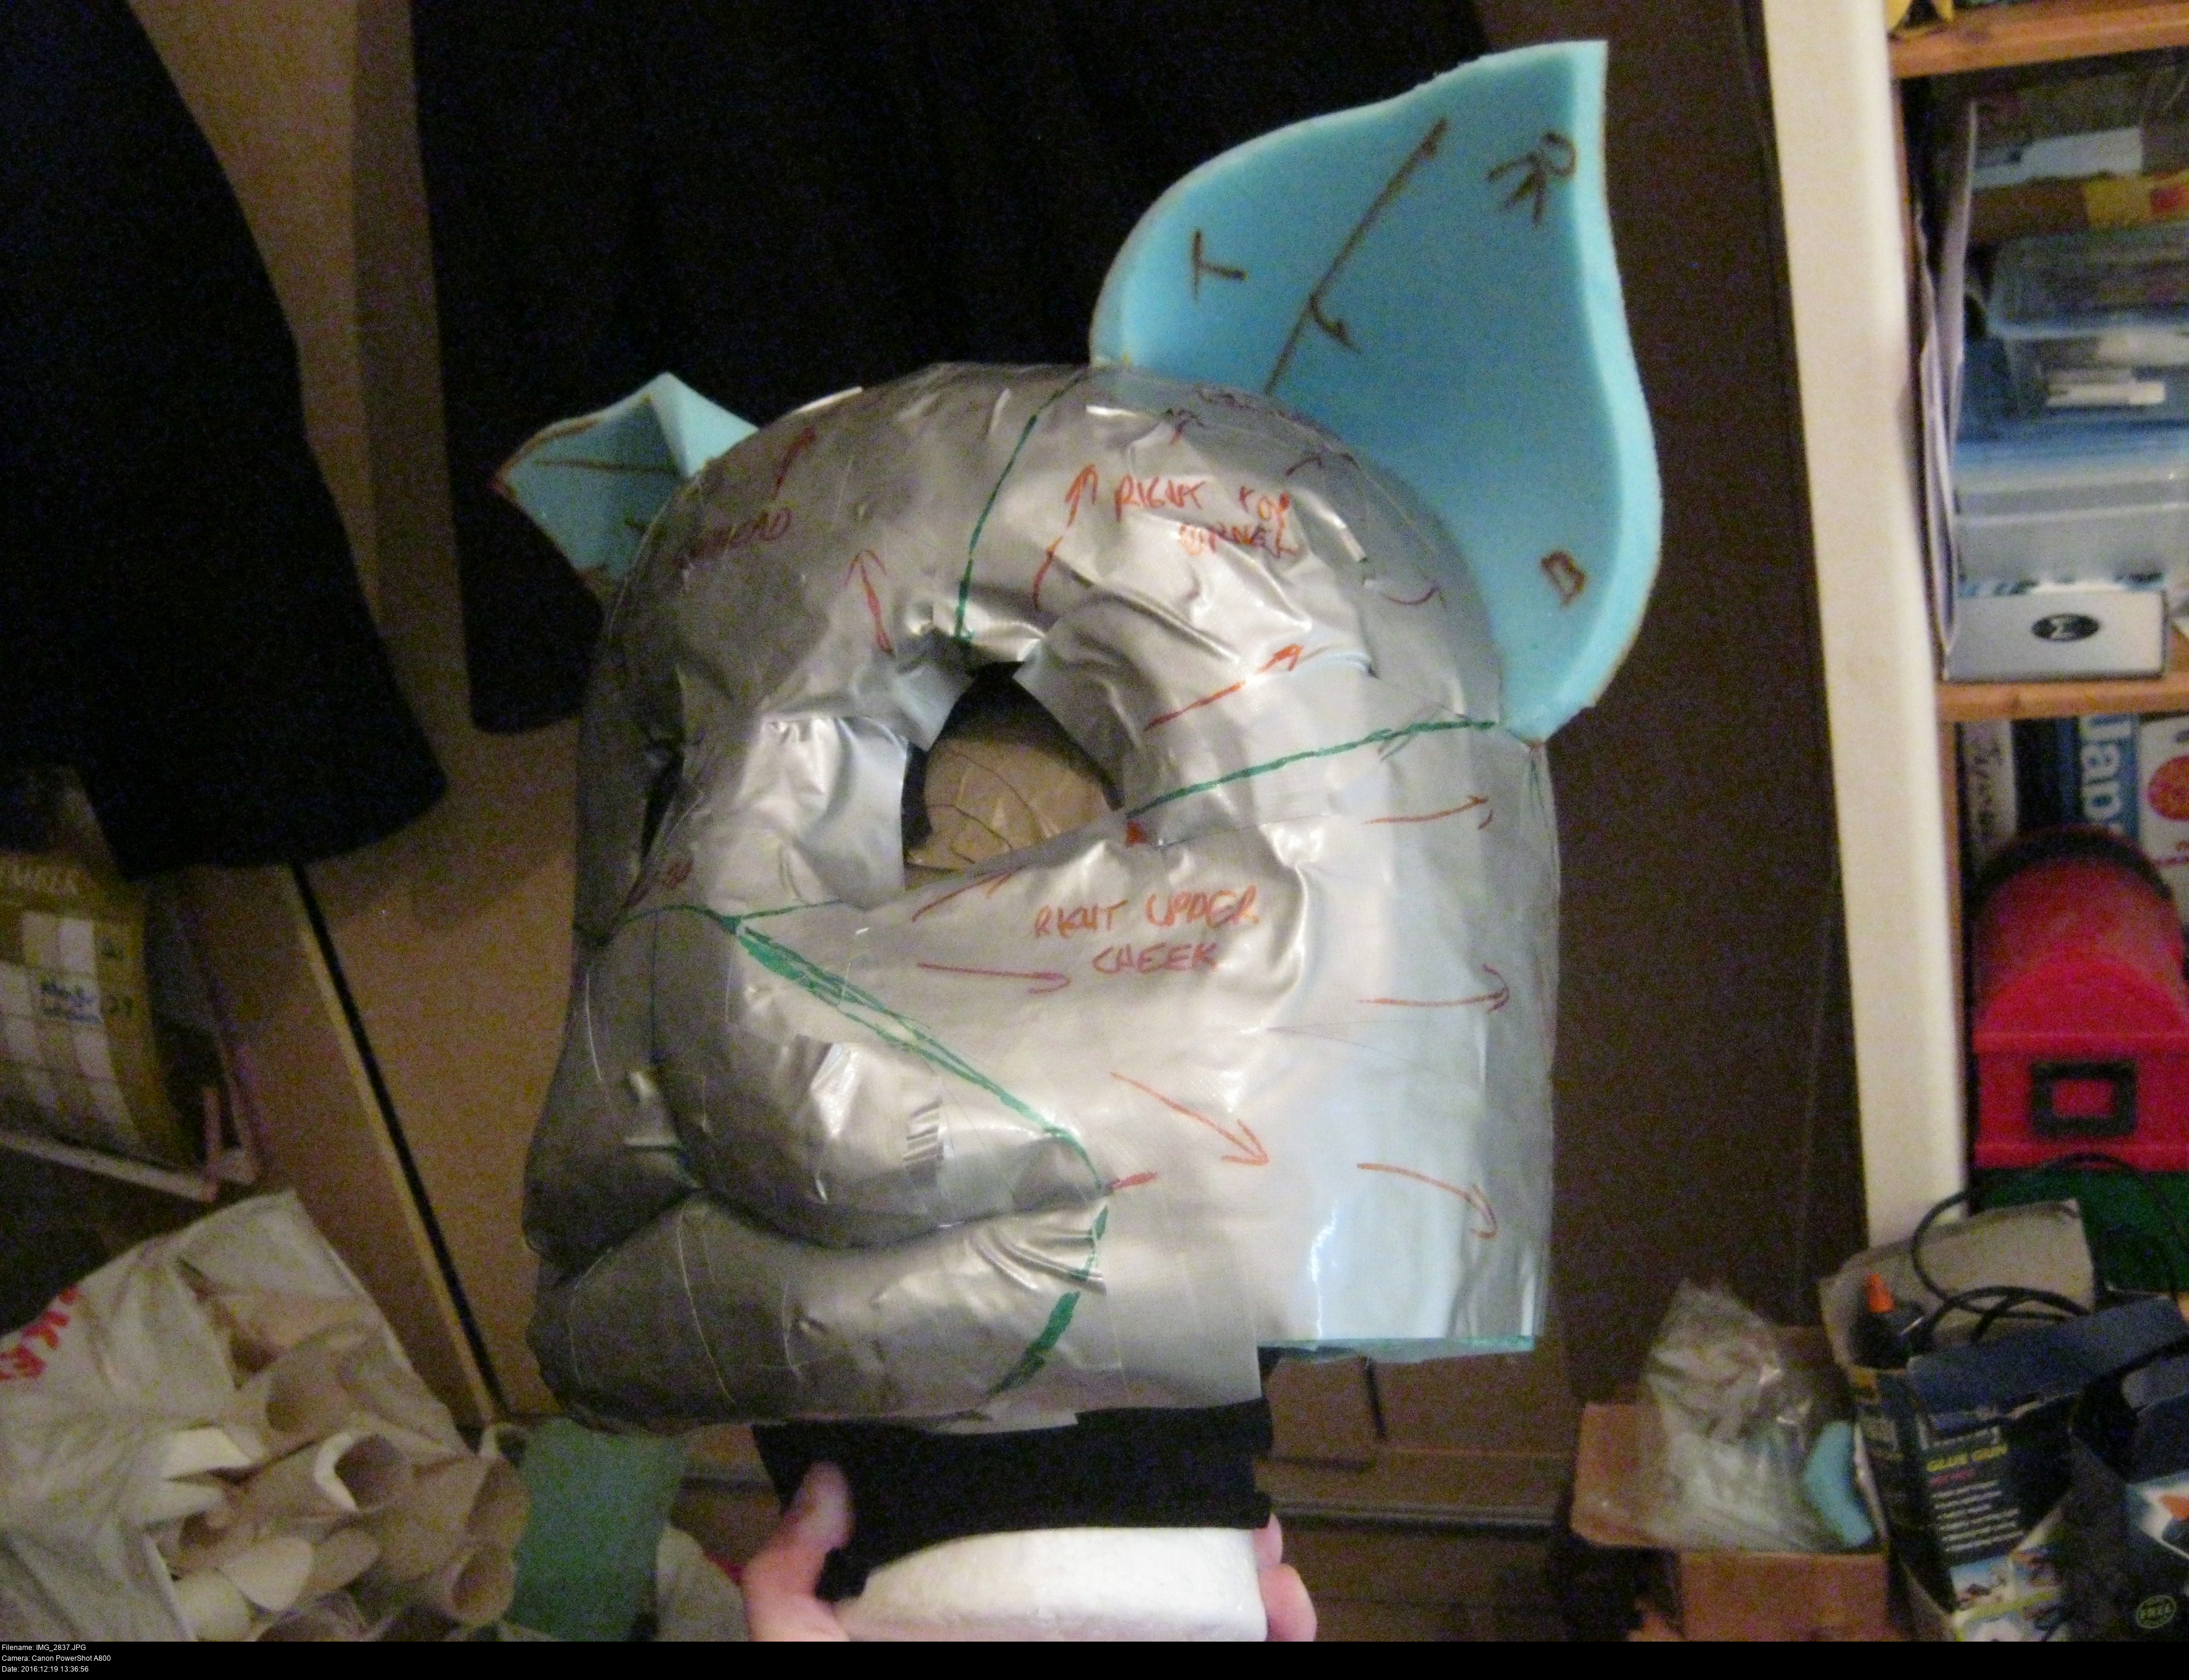
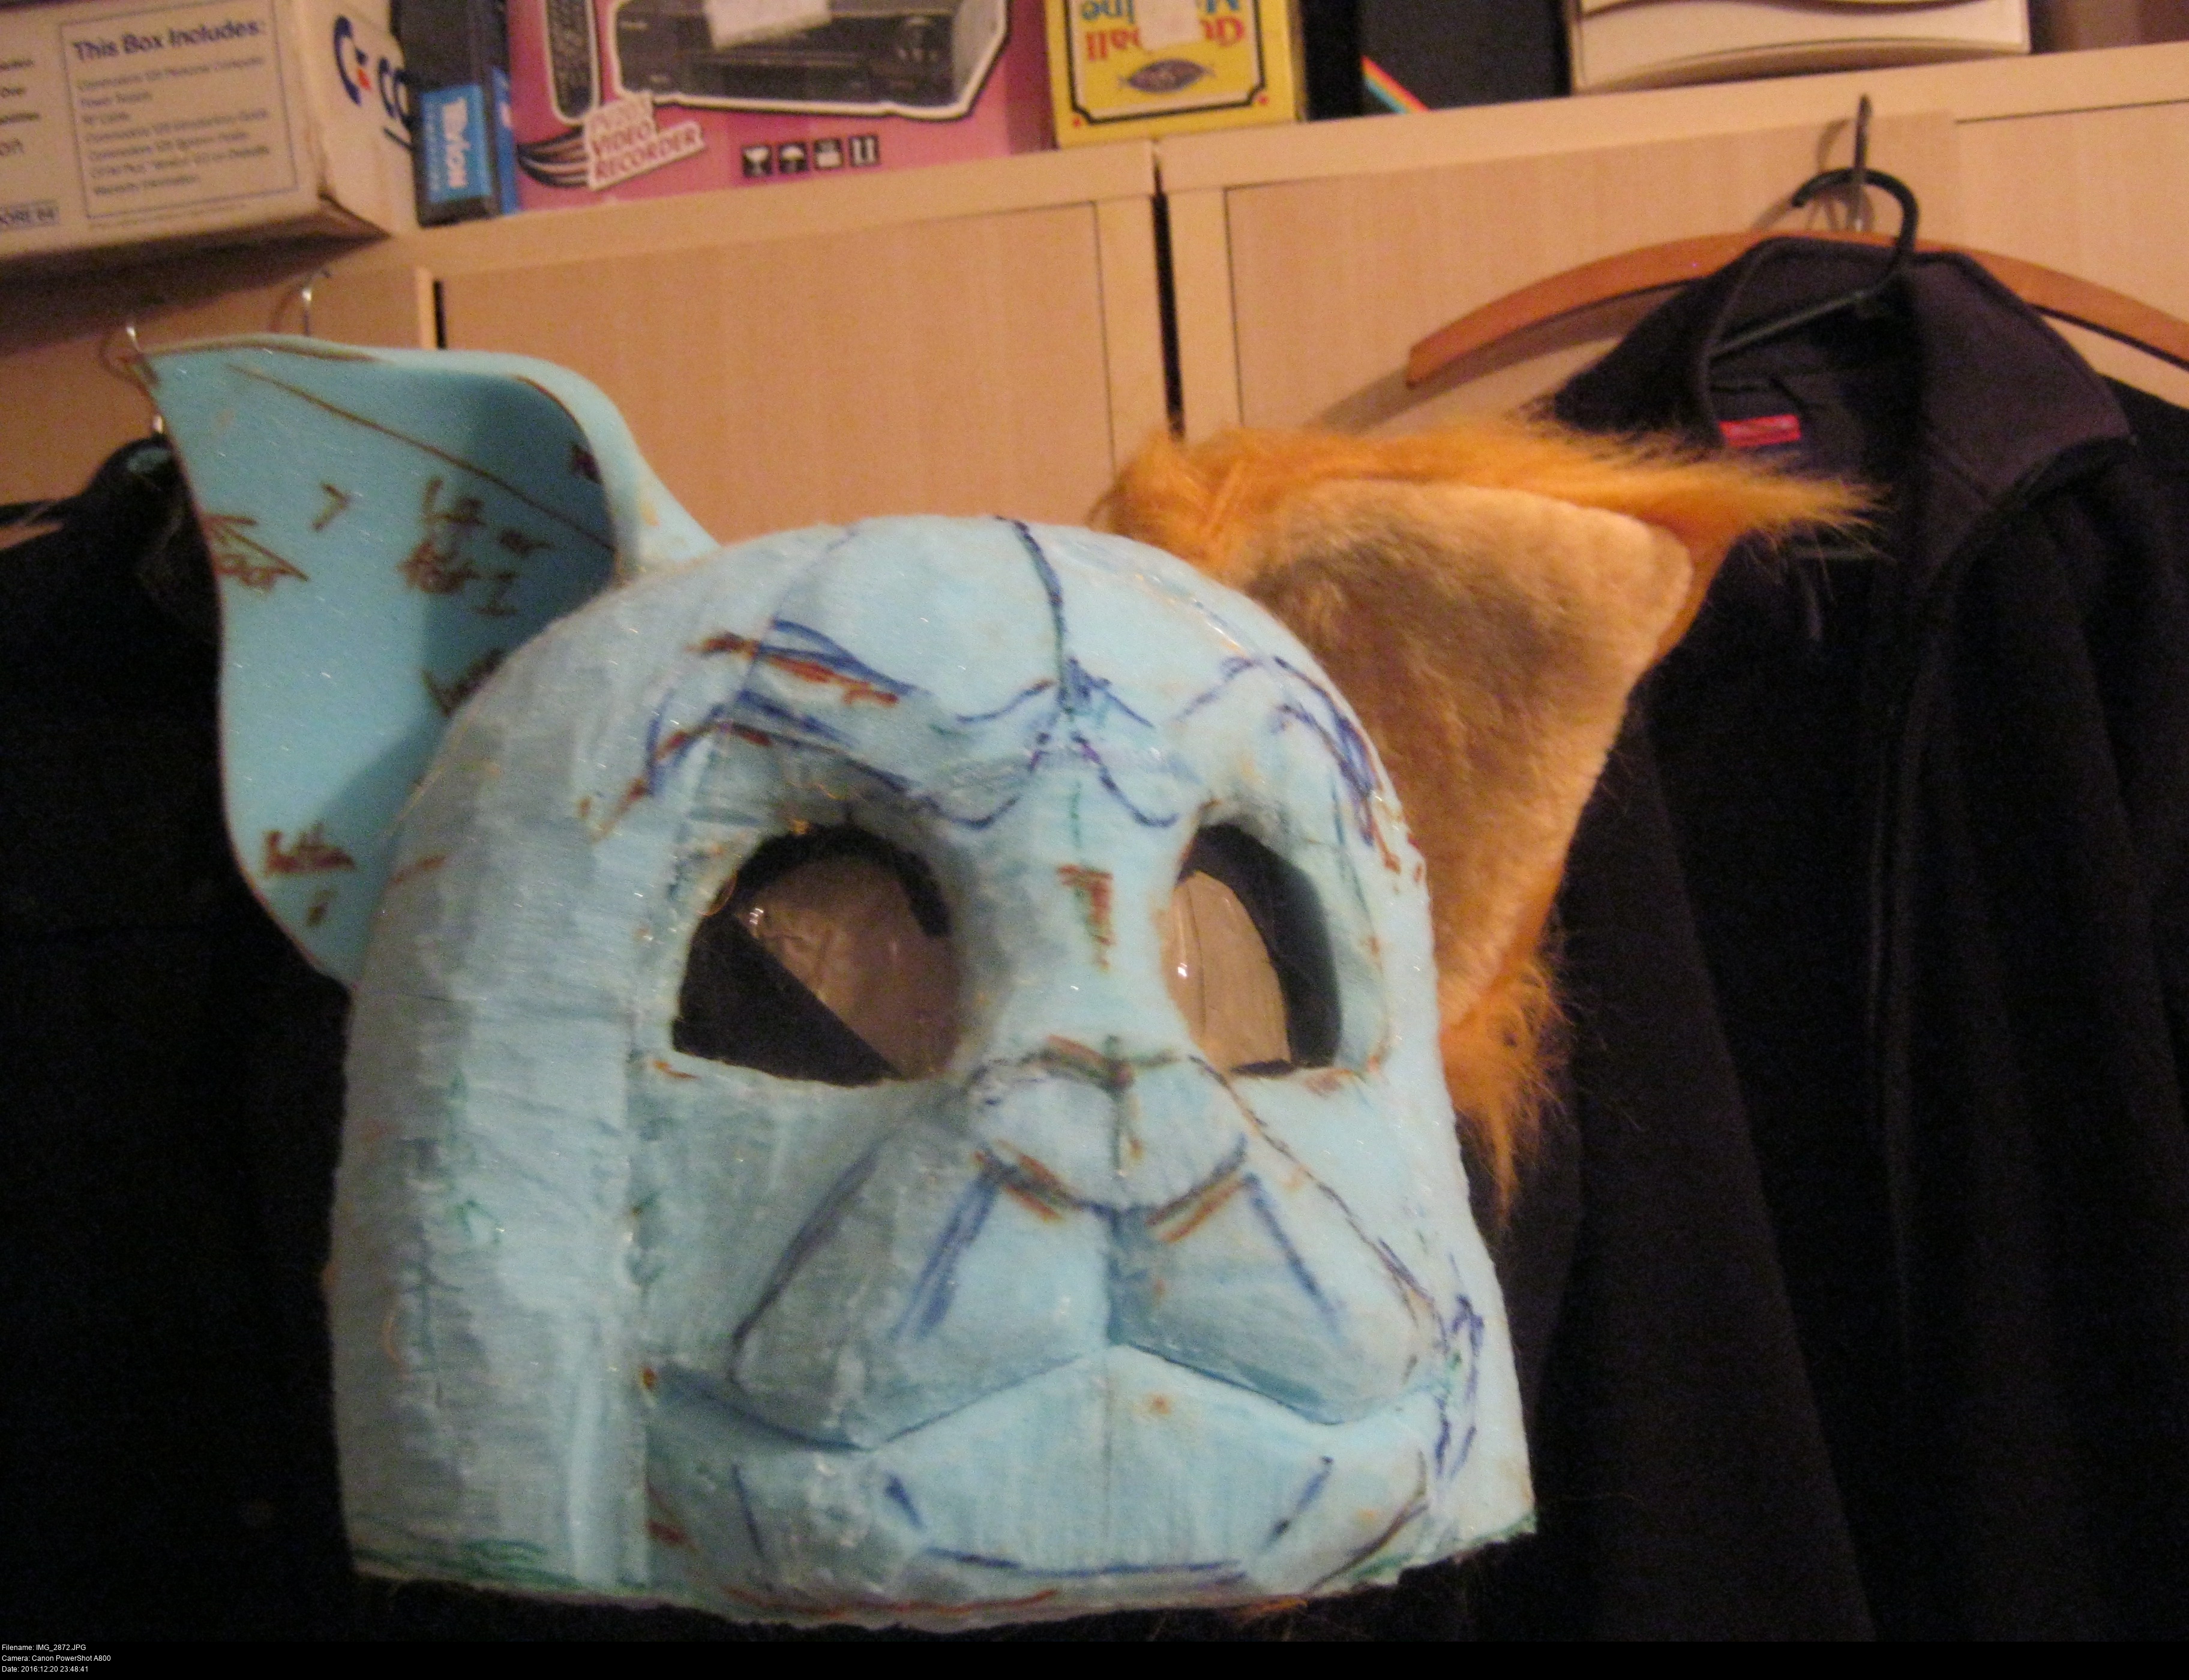
I've got two big rolls of generic Wilkinson's duct tape and I'm gonna use em! Small strips, overlapping, gently applied to the form. Follow all the curves of the head, front and back, including under the ears and inside the mouth cavity, until there's a solid shell of duct tape. I'm making mine three layers deep so the tape is thick and strong. This stuff adheres well to the foam, so be aware that loose foam and angular details will be destroyed by this stuff.
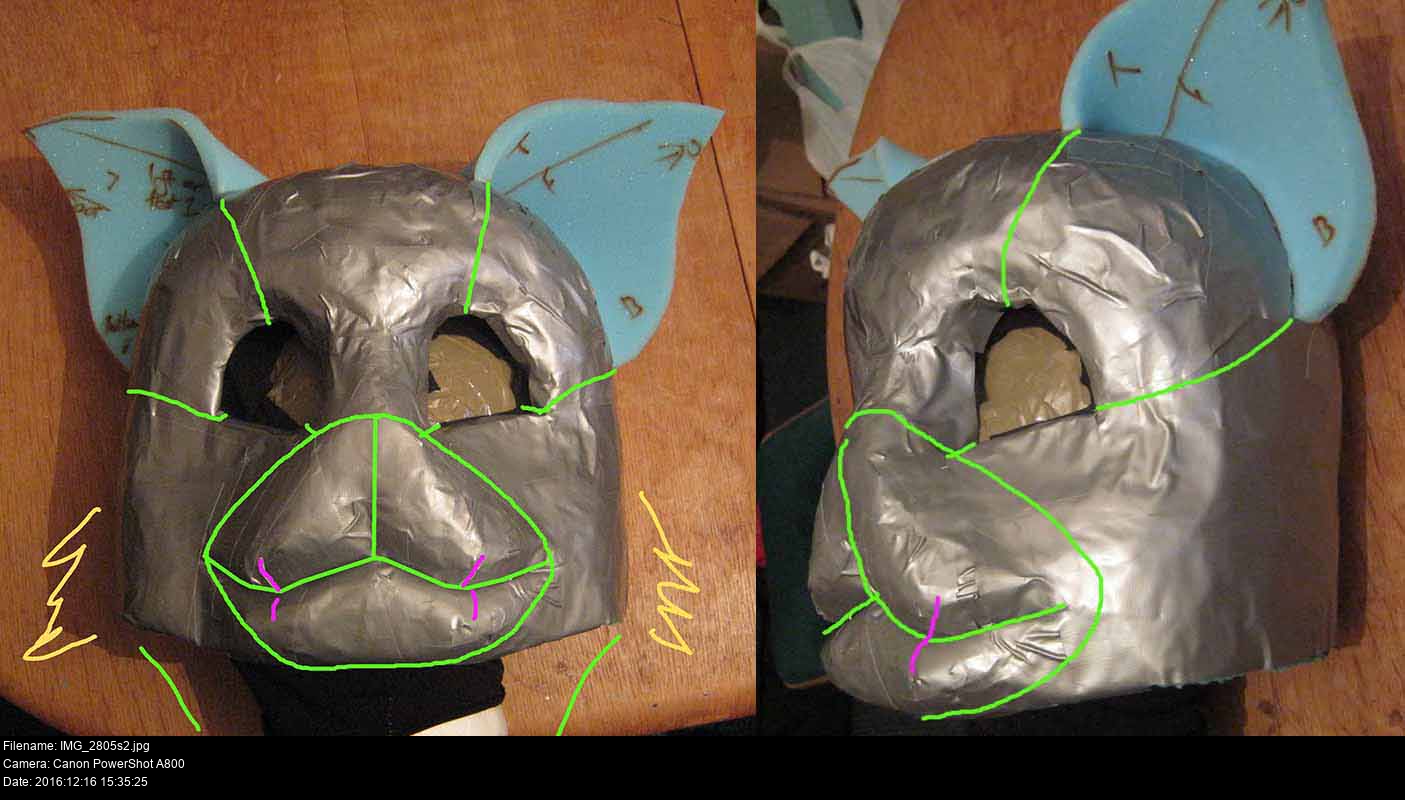
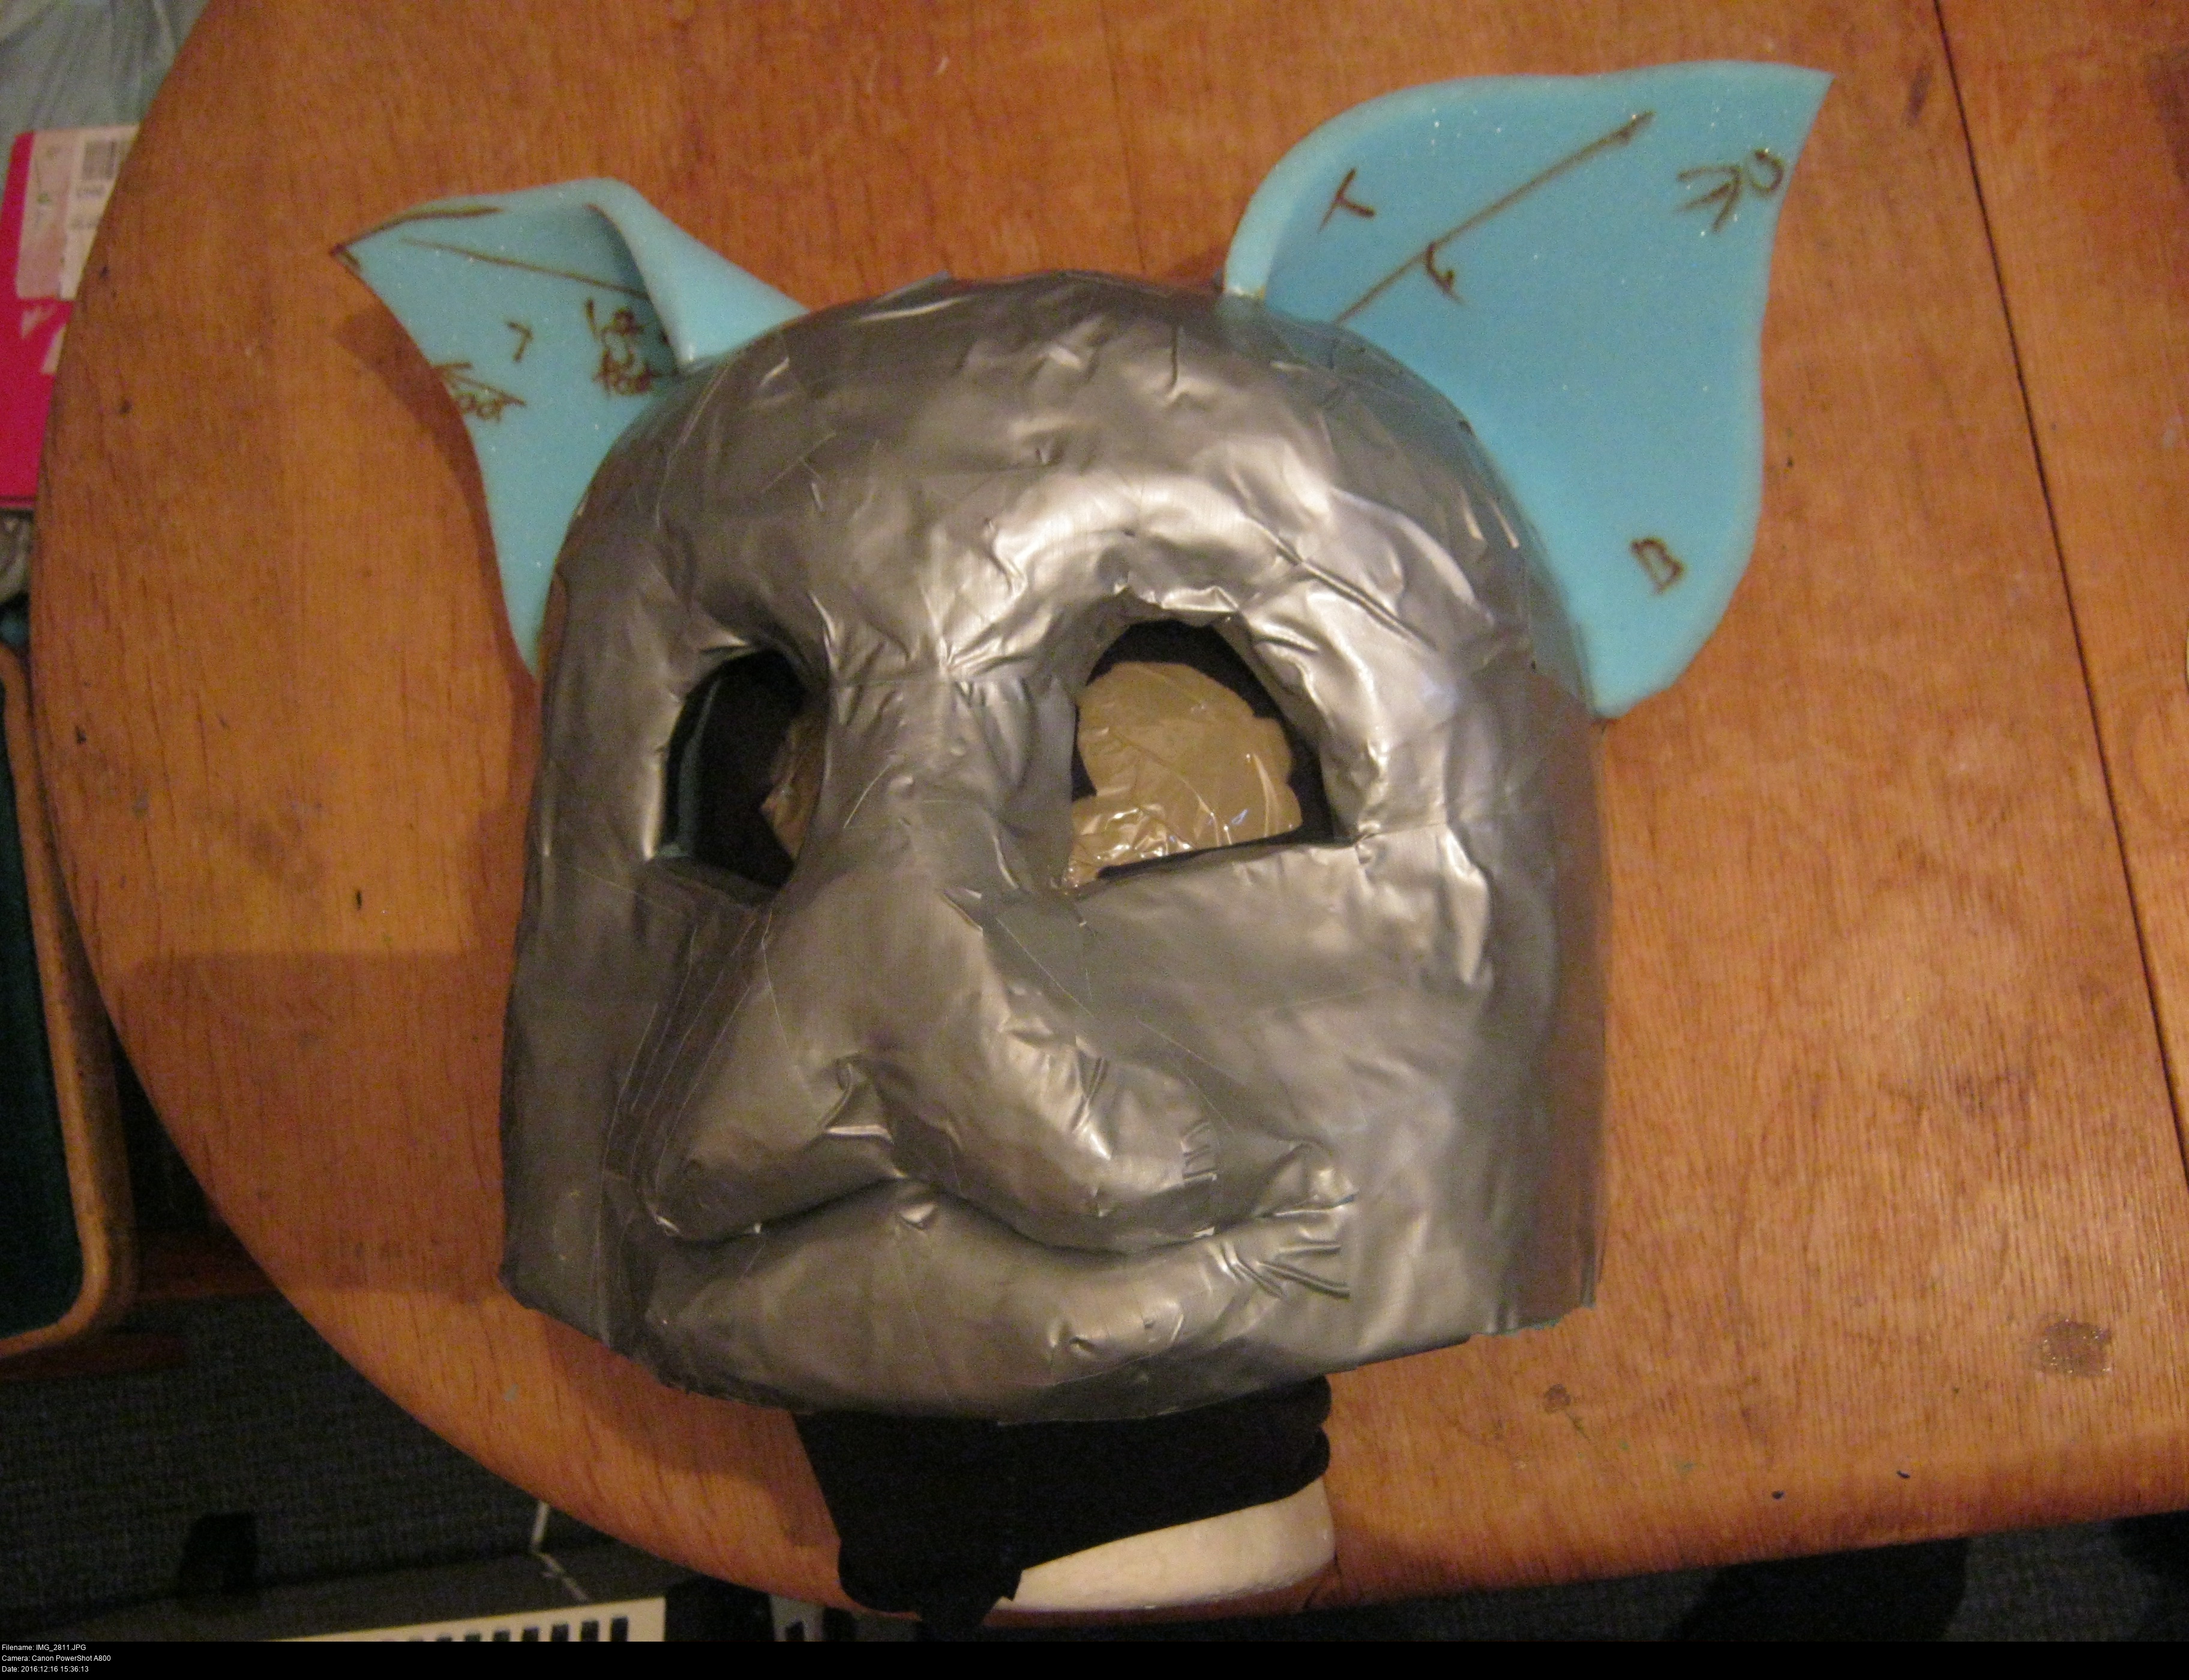
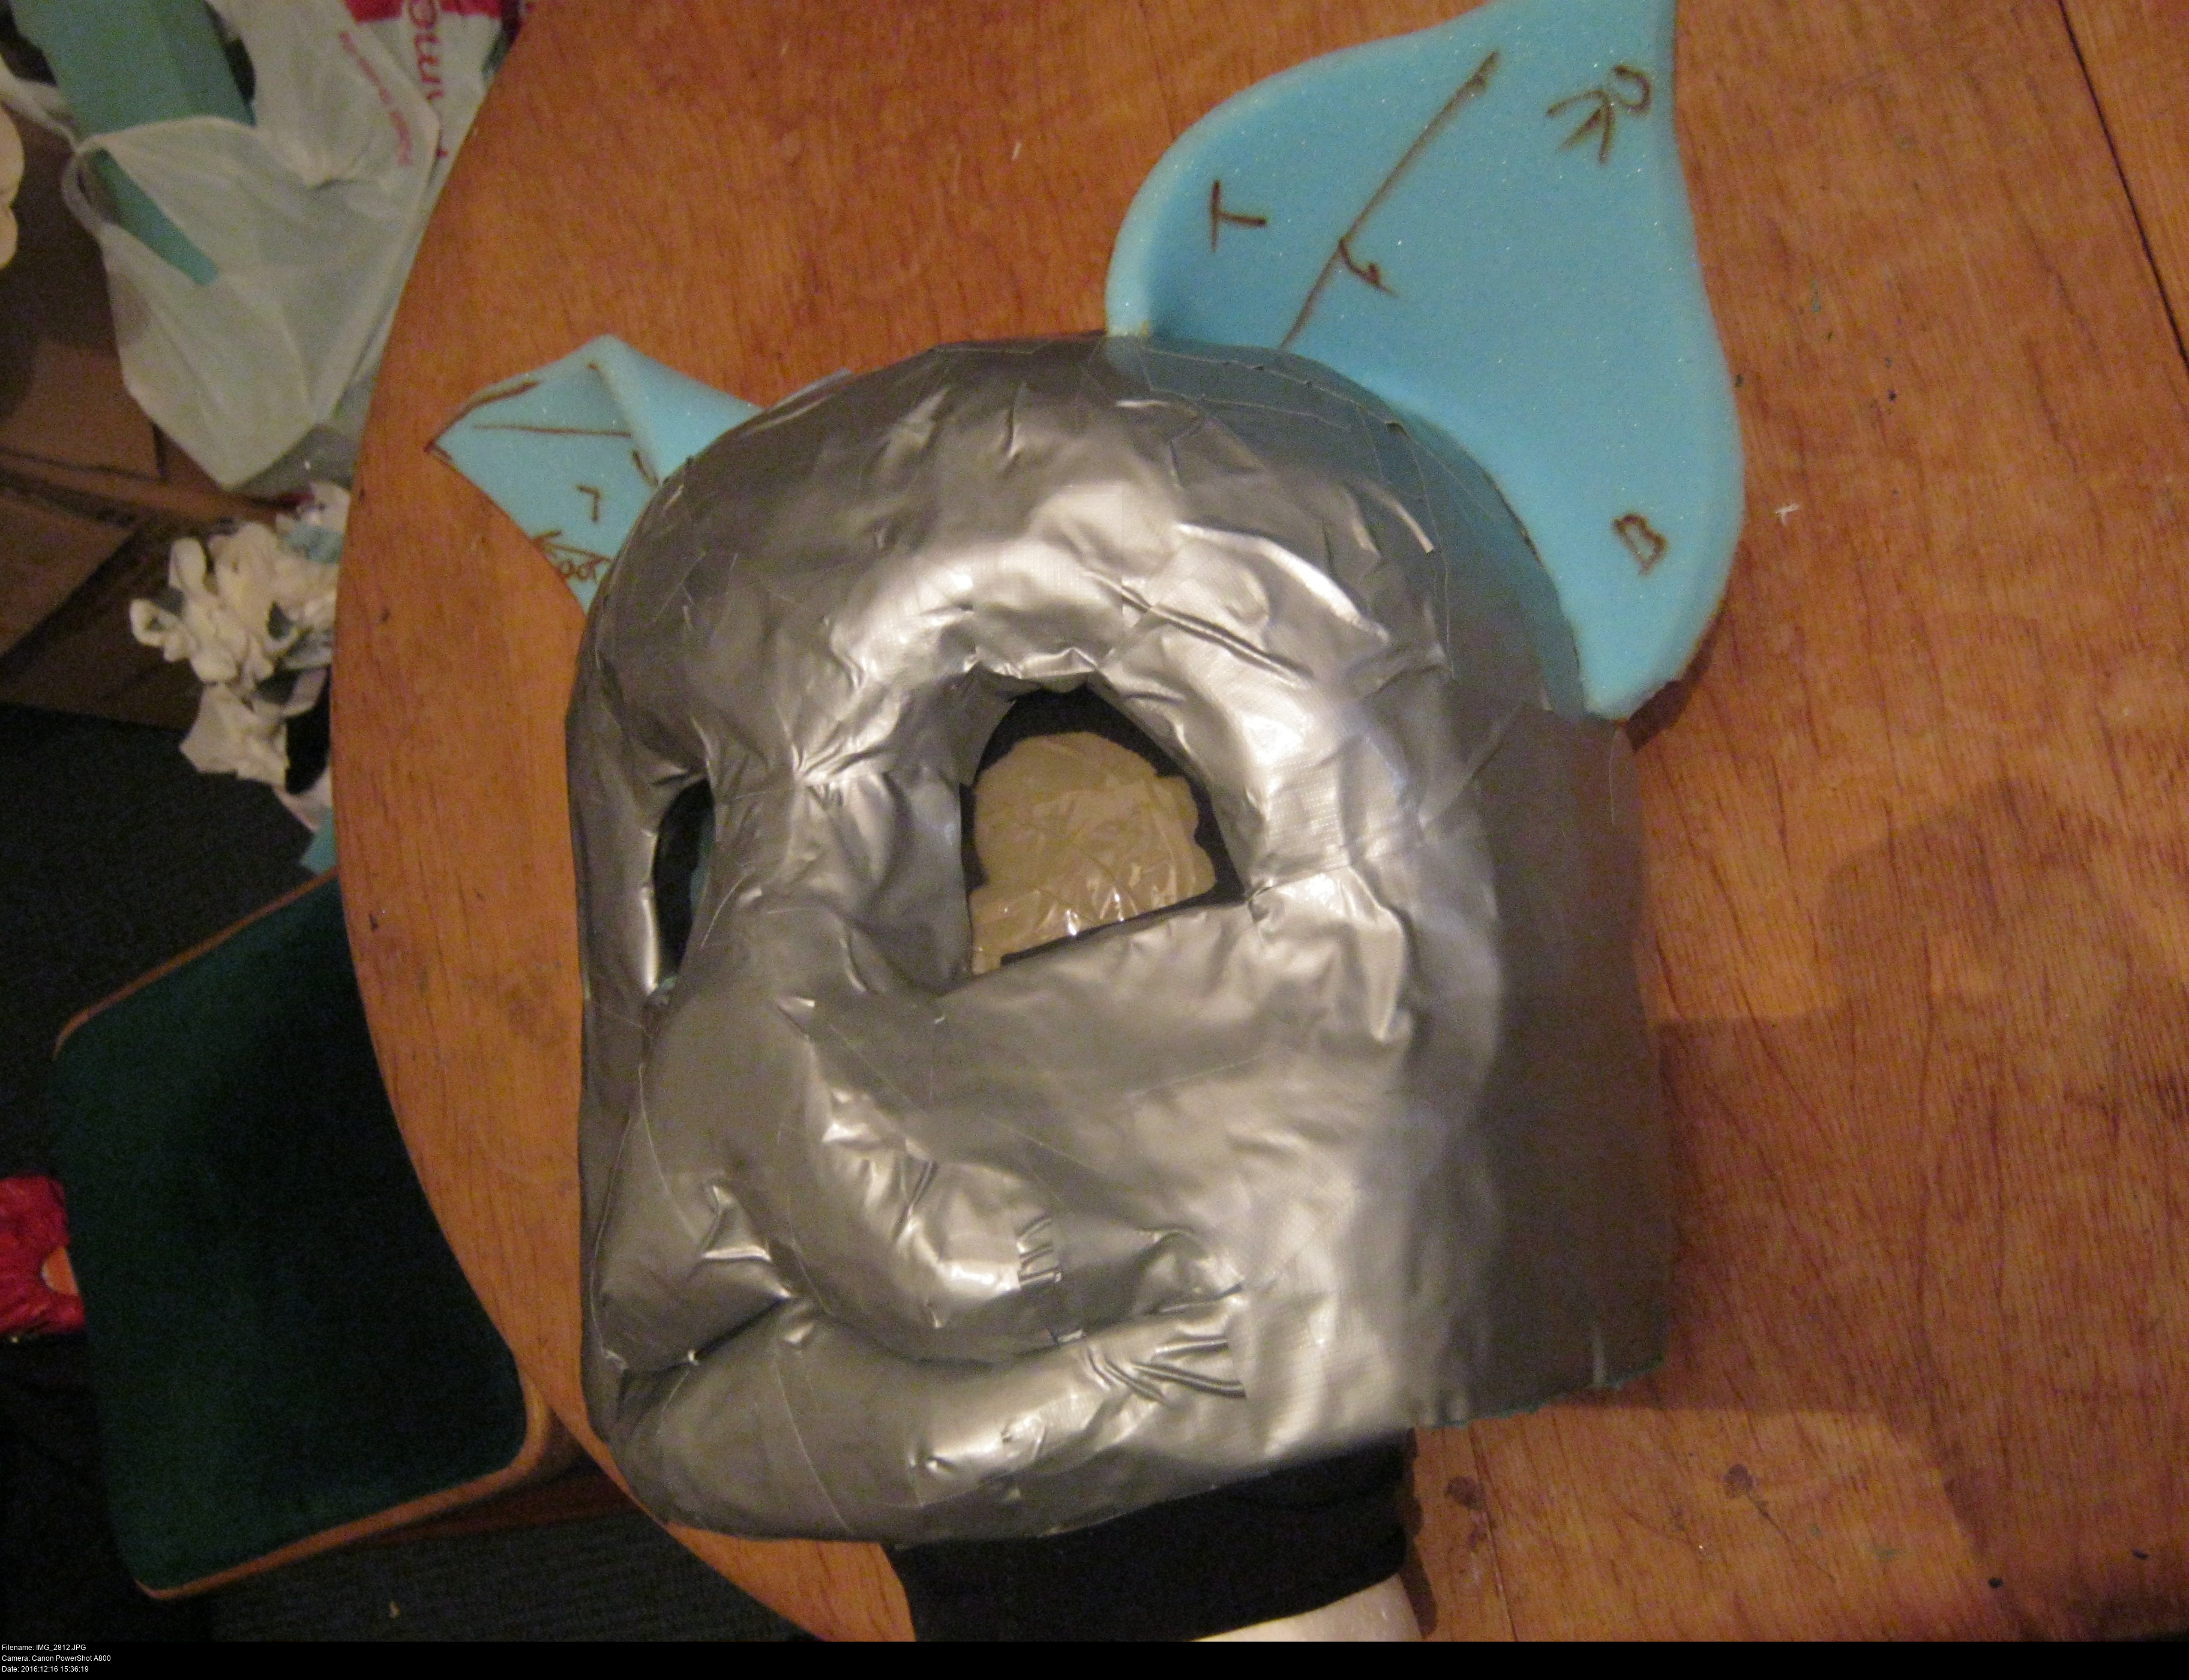
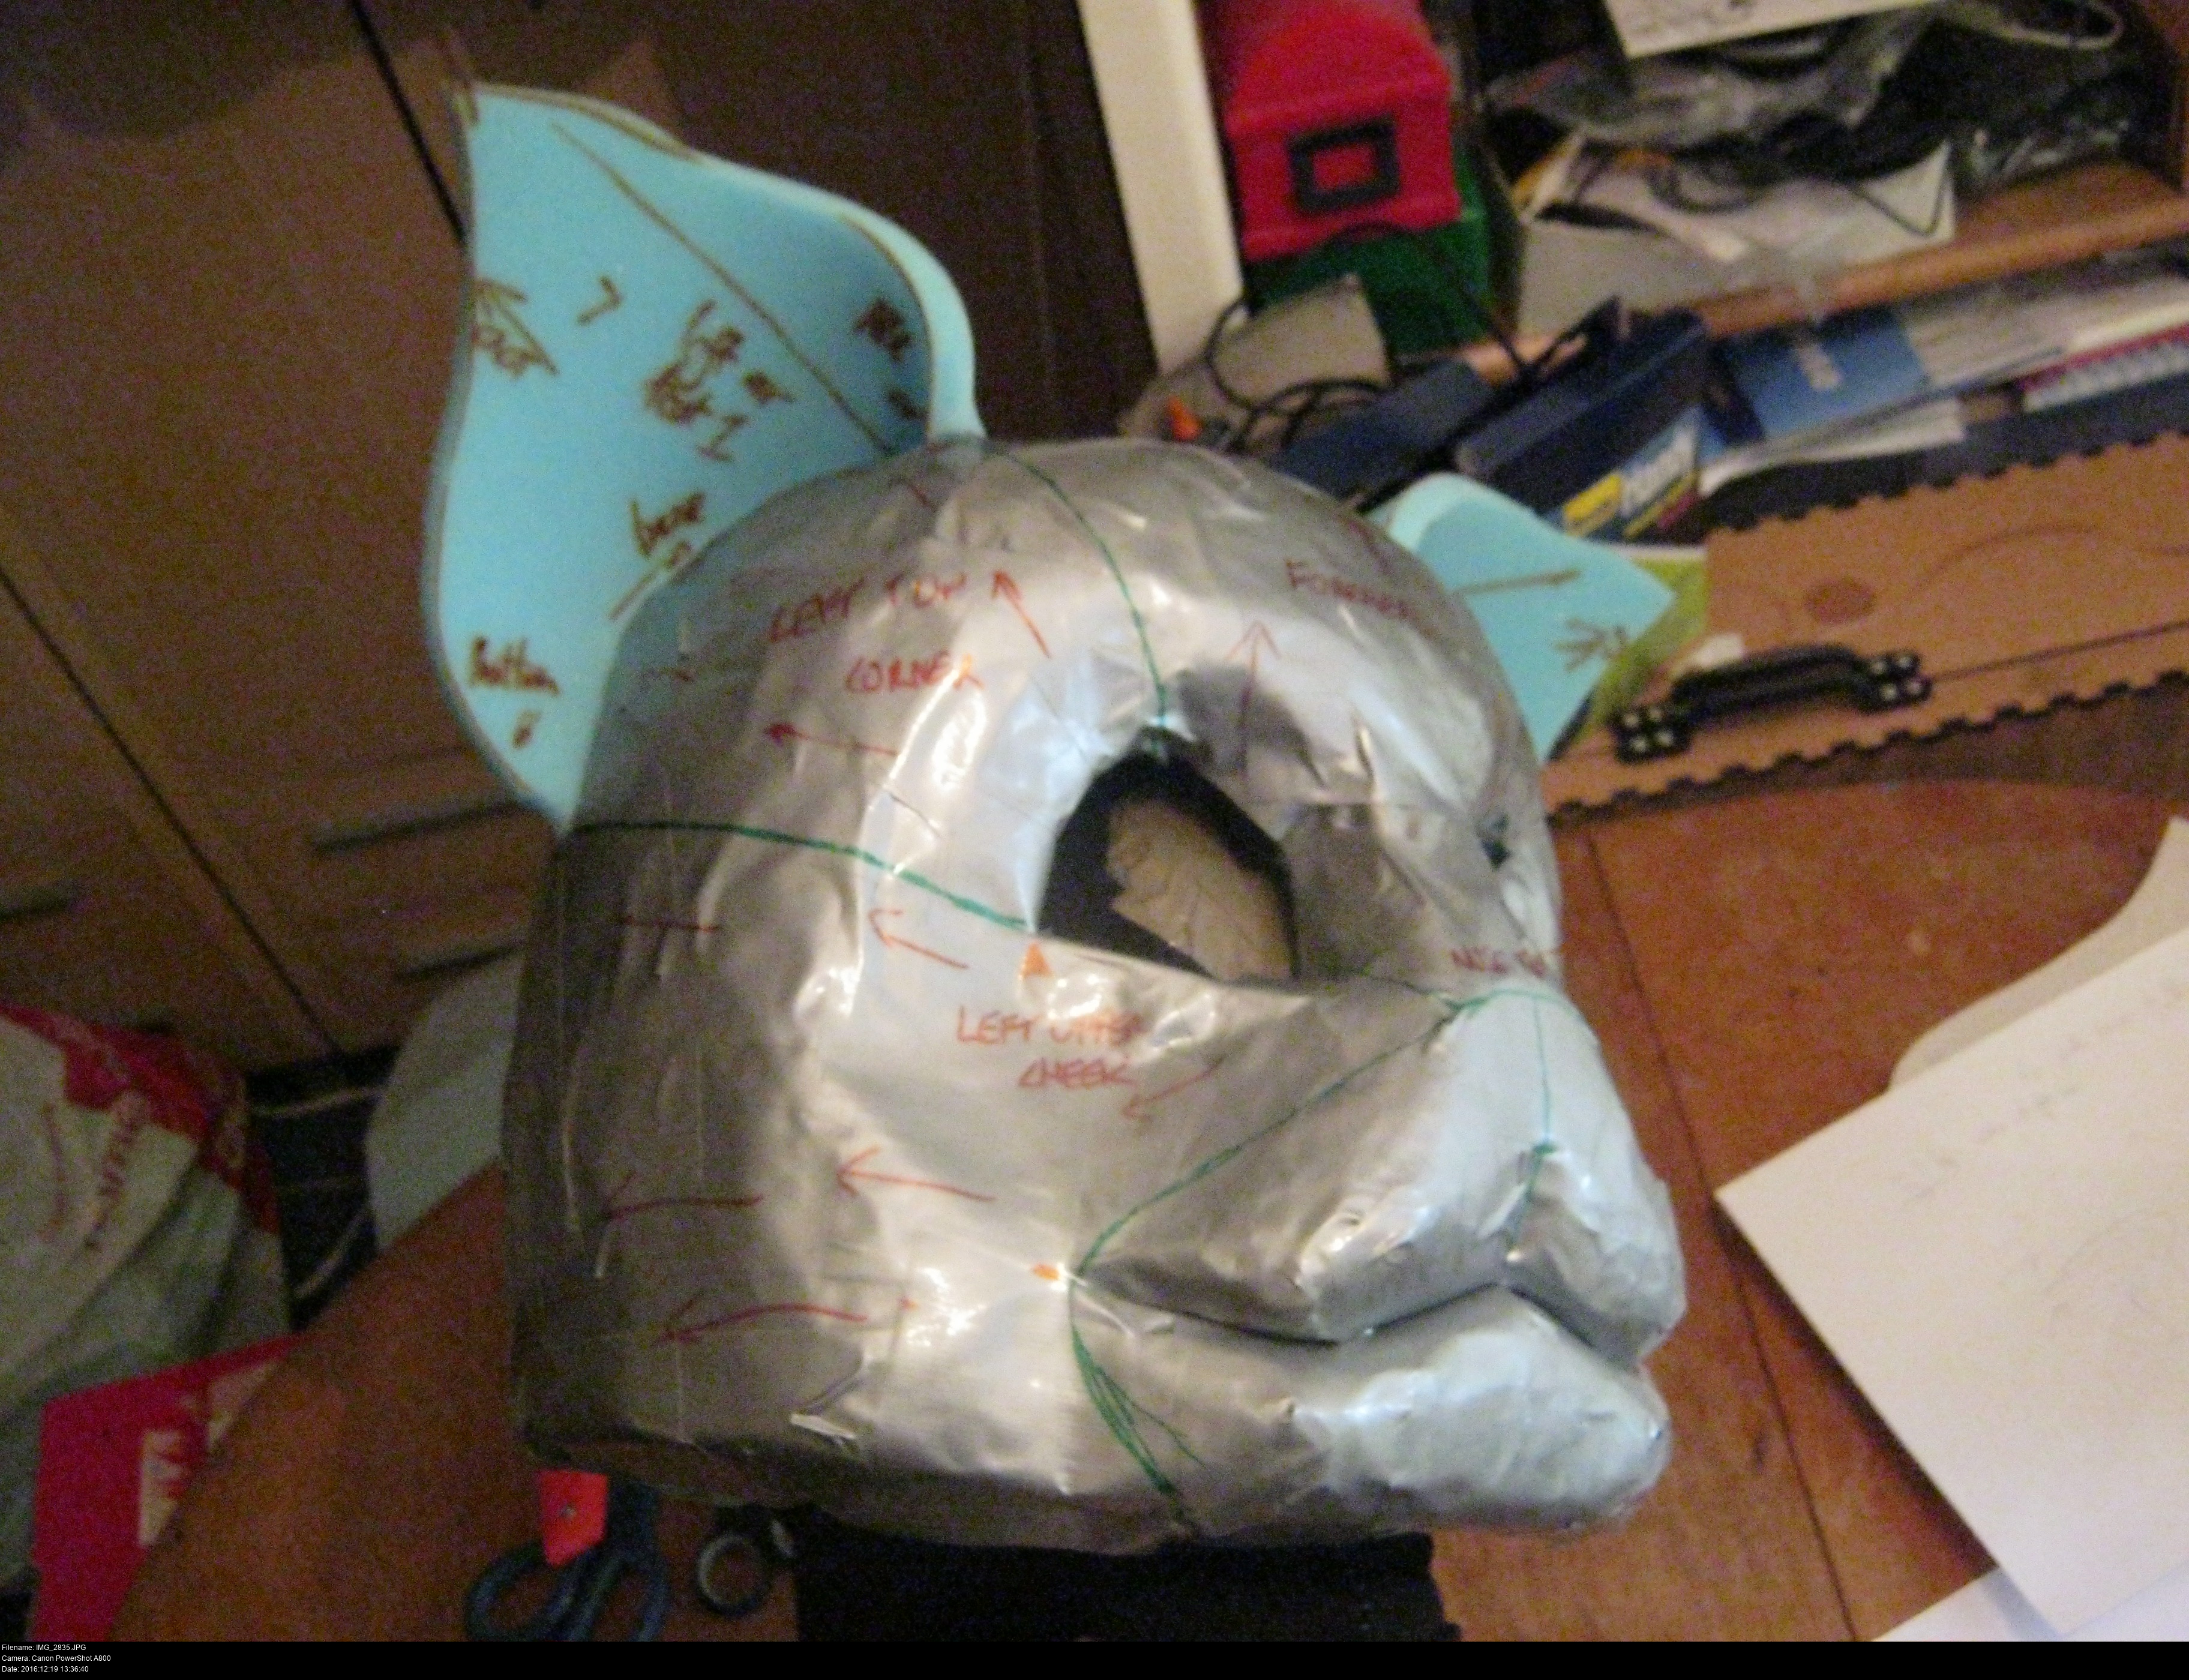
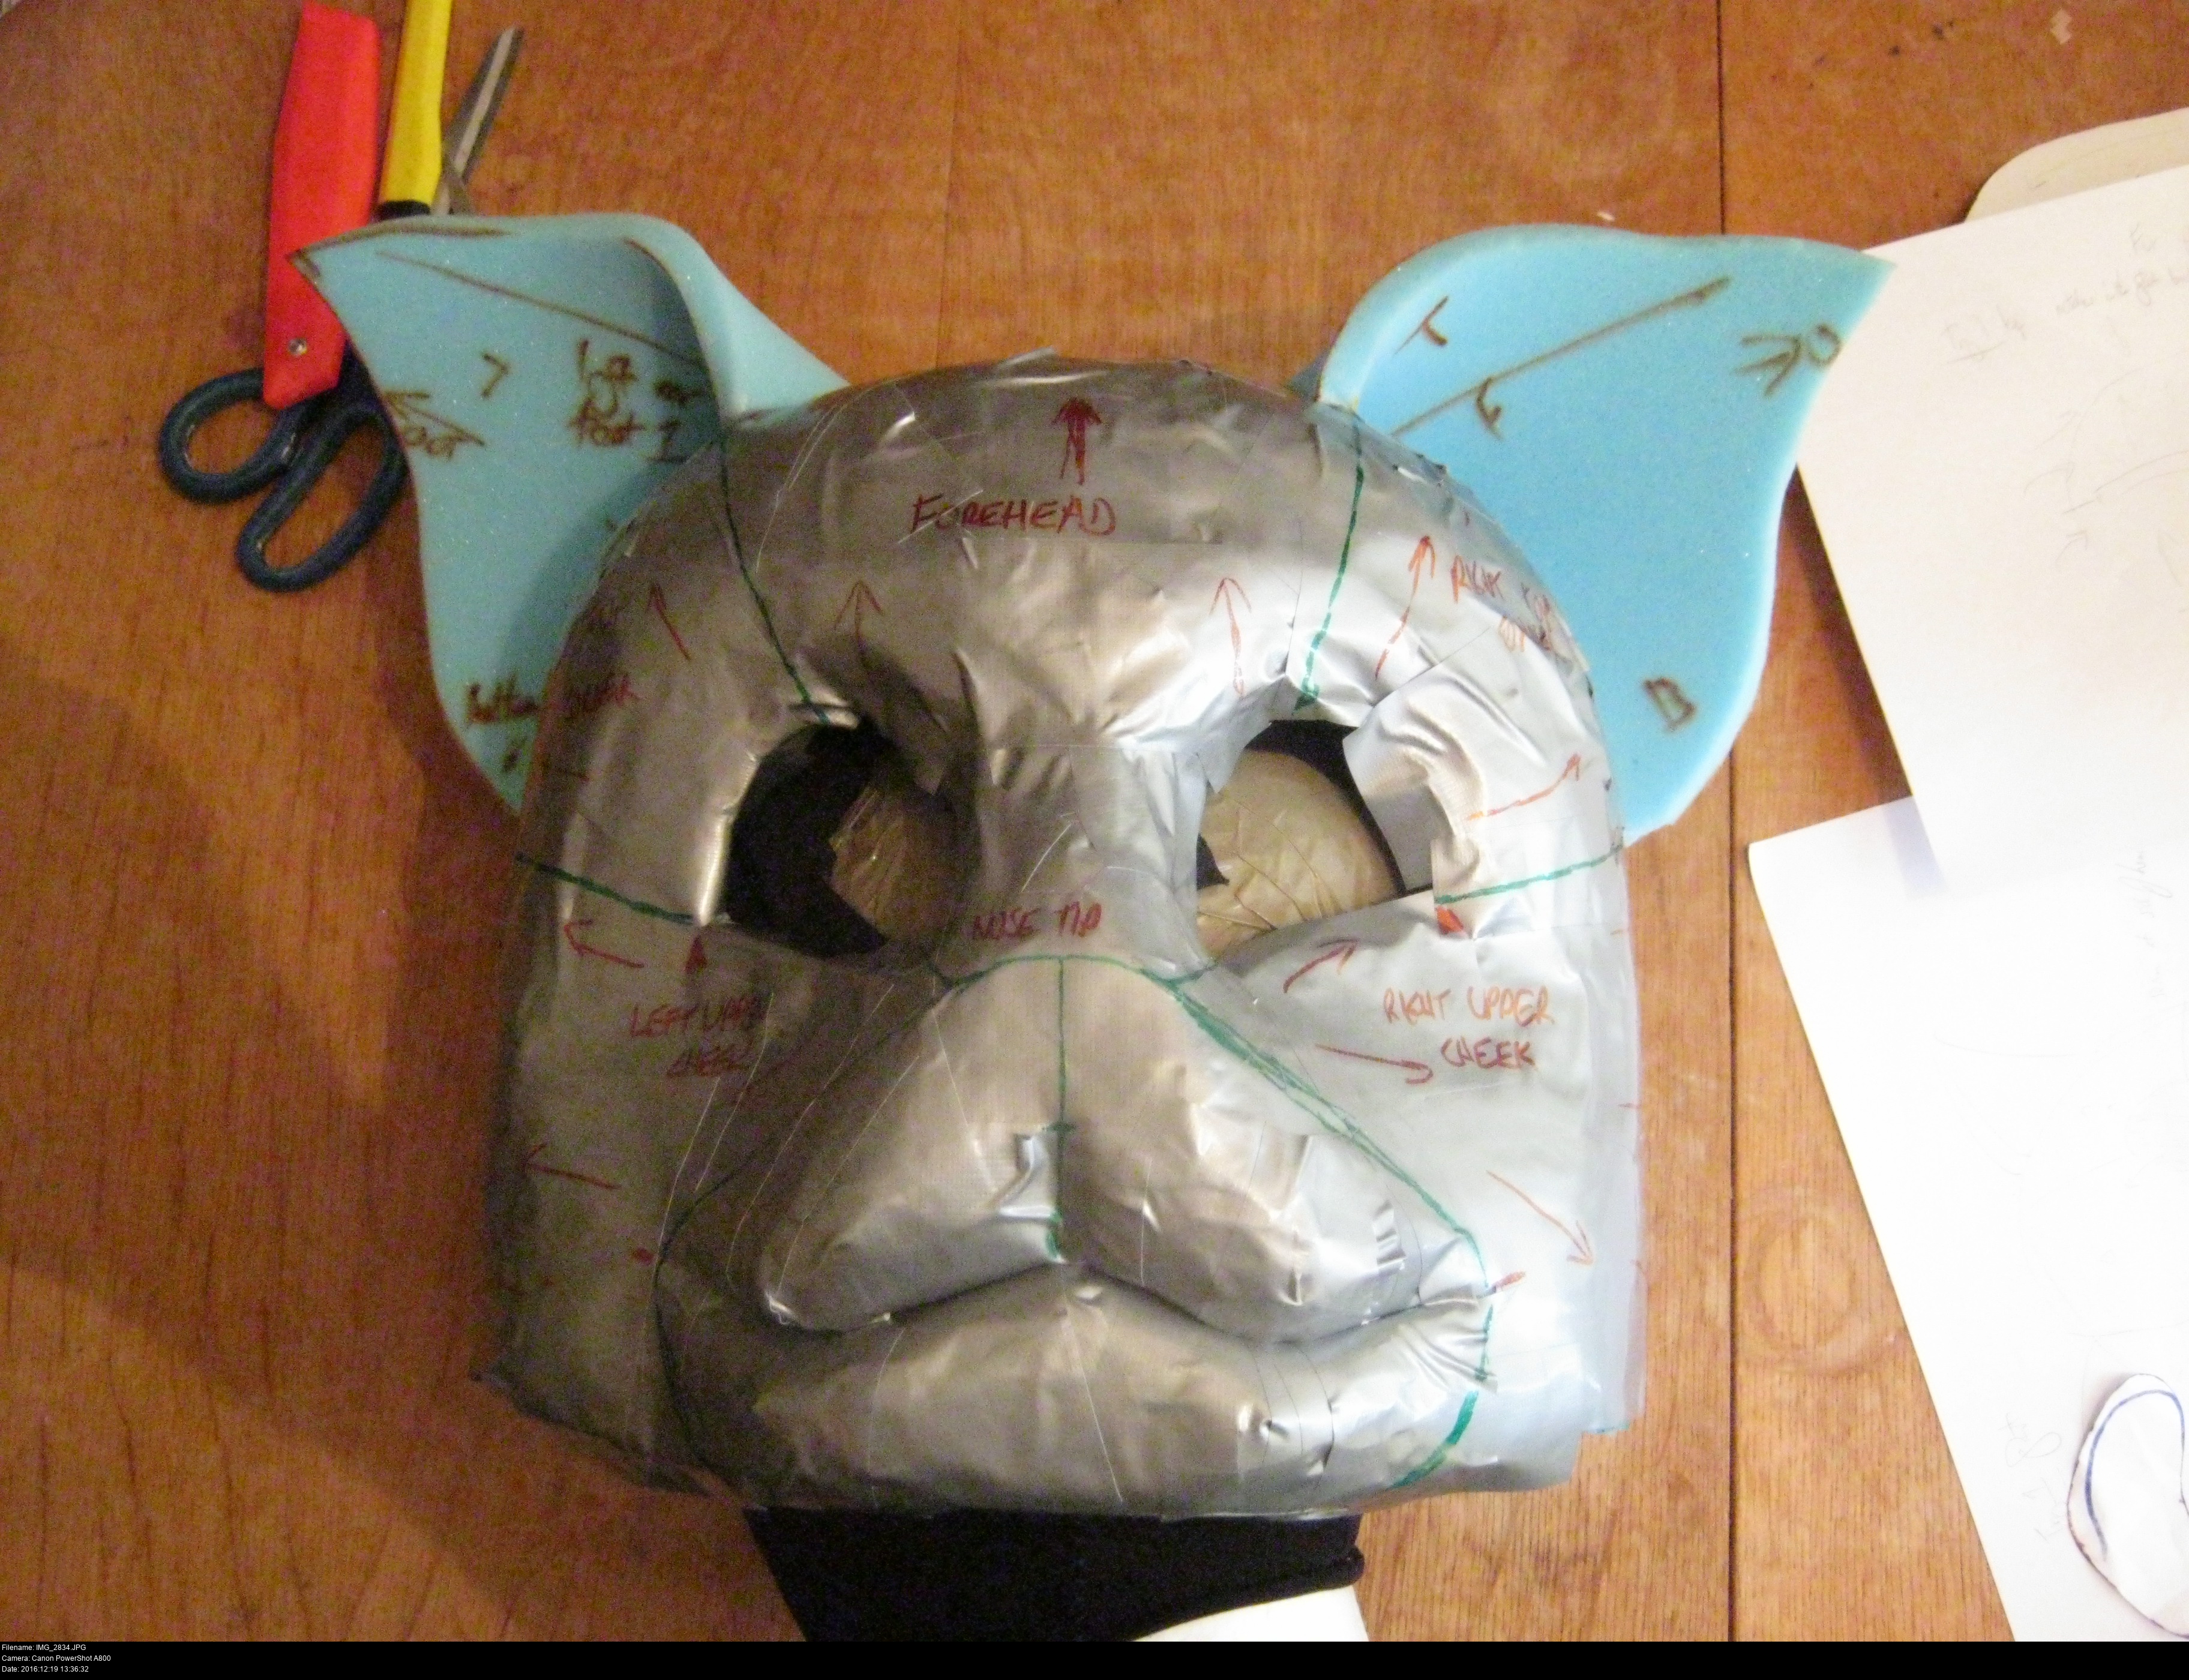
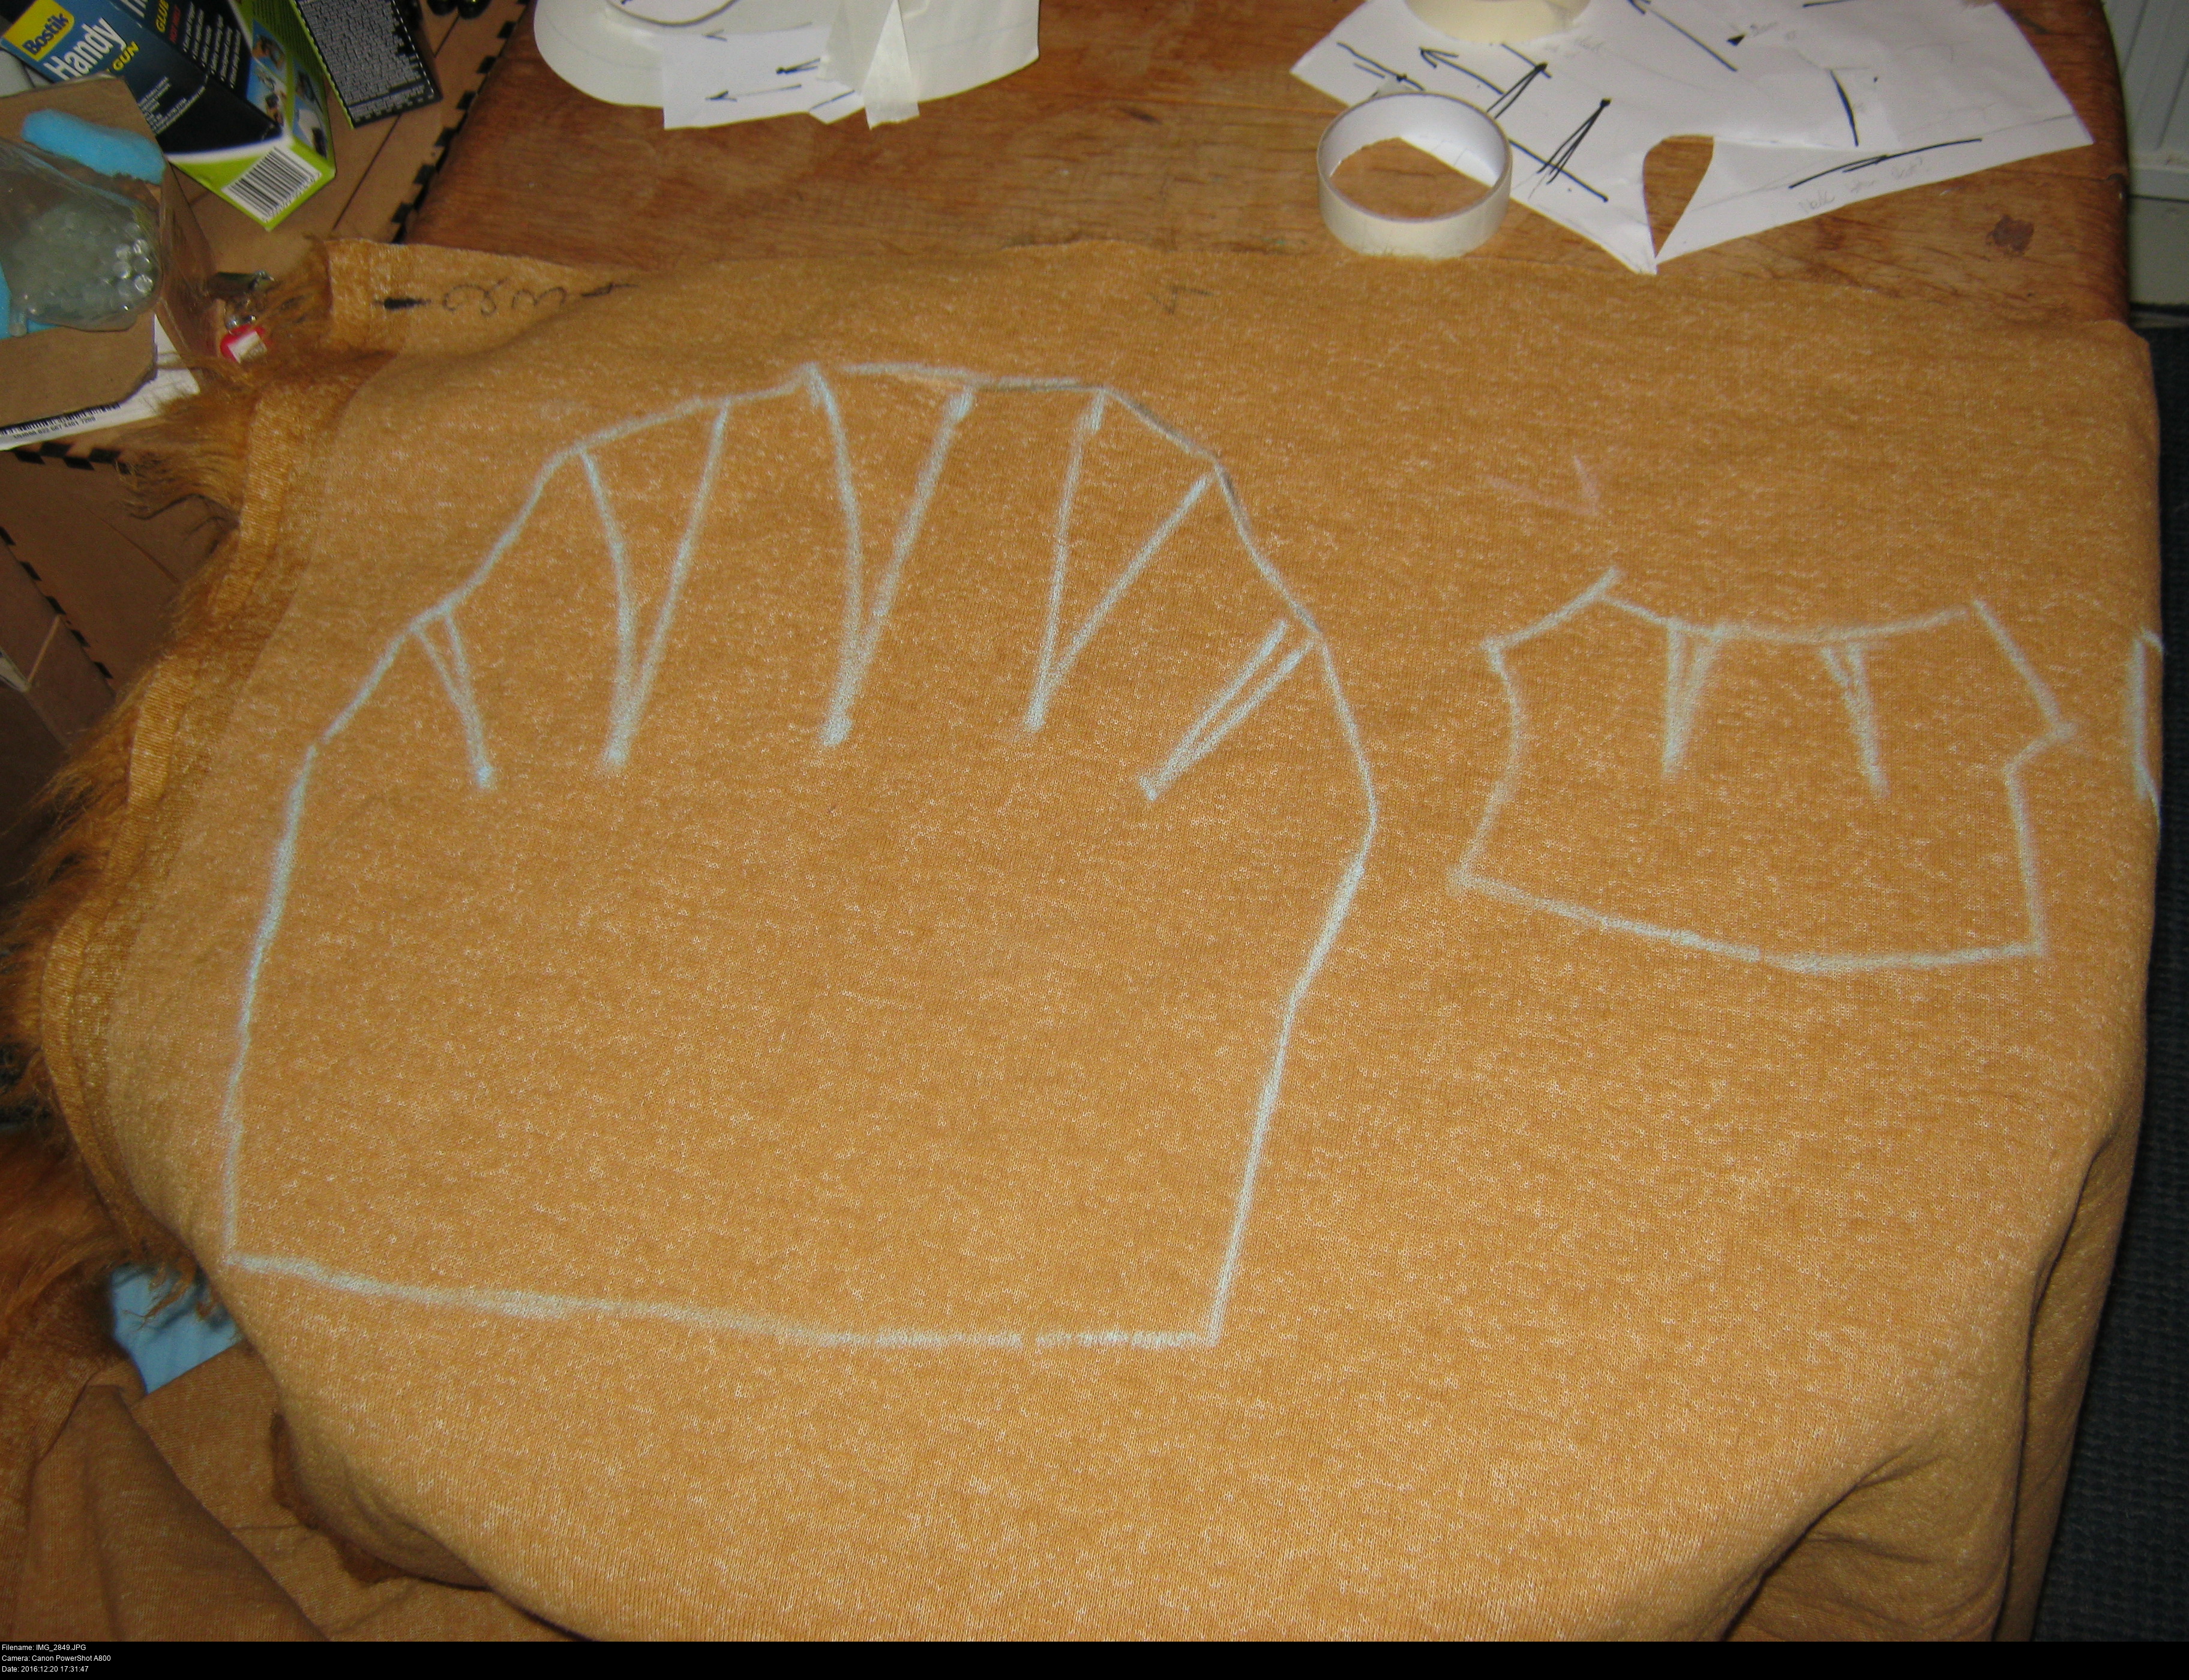
With the full head taped up, I can begin to design the pattern itself. The fur covering to the head is going to be made up smaller pieces which combine to make this 3D shape. I need to draw lines on the tape to split it up into these individual pieces.
Each piece ought to lie as flat as possible when its separate from the rest. If I cut out a piece that's shaped like a spoon, I'm going to need to cut notches (darts) in the shape so that it becomes flat. When I make the shape for real, I'll need to sew those darts back in to make the piece curved.
I've drawn arrows on the pieces to indicate the direction the fur should rest flat on the head.

If you look at real cats, you'll see the fur generally grows away from the centre of the face, like a big sunflower.
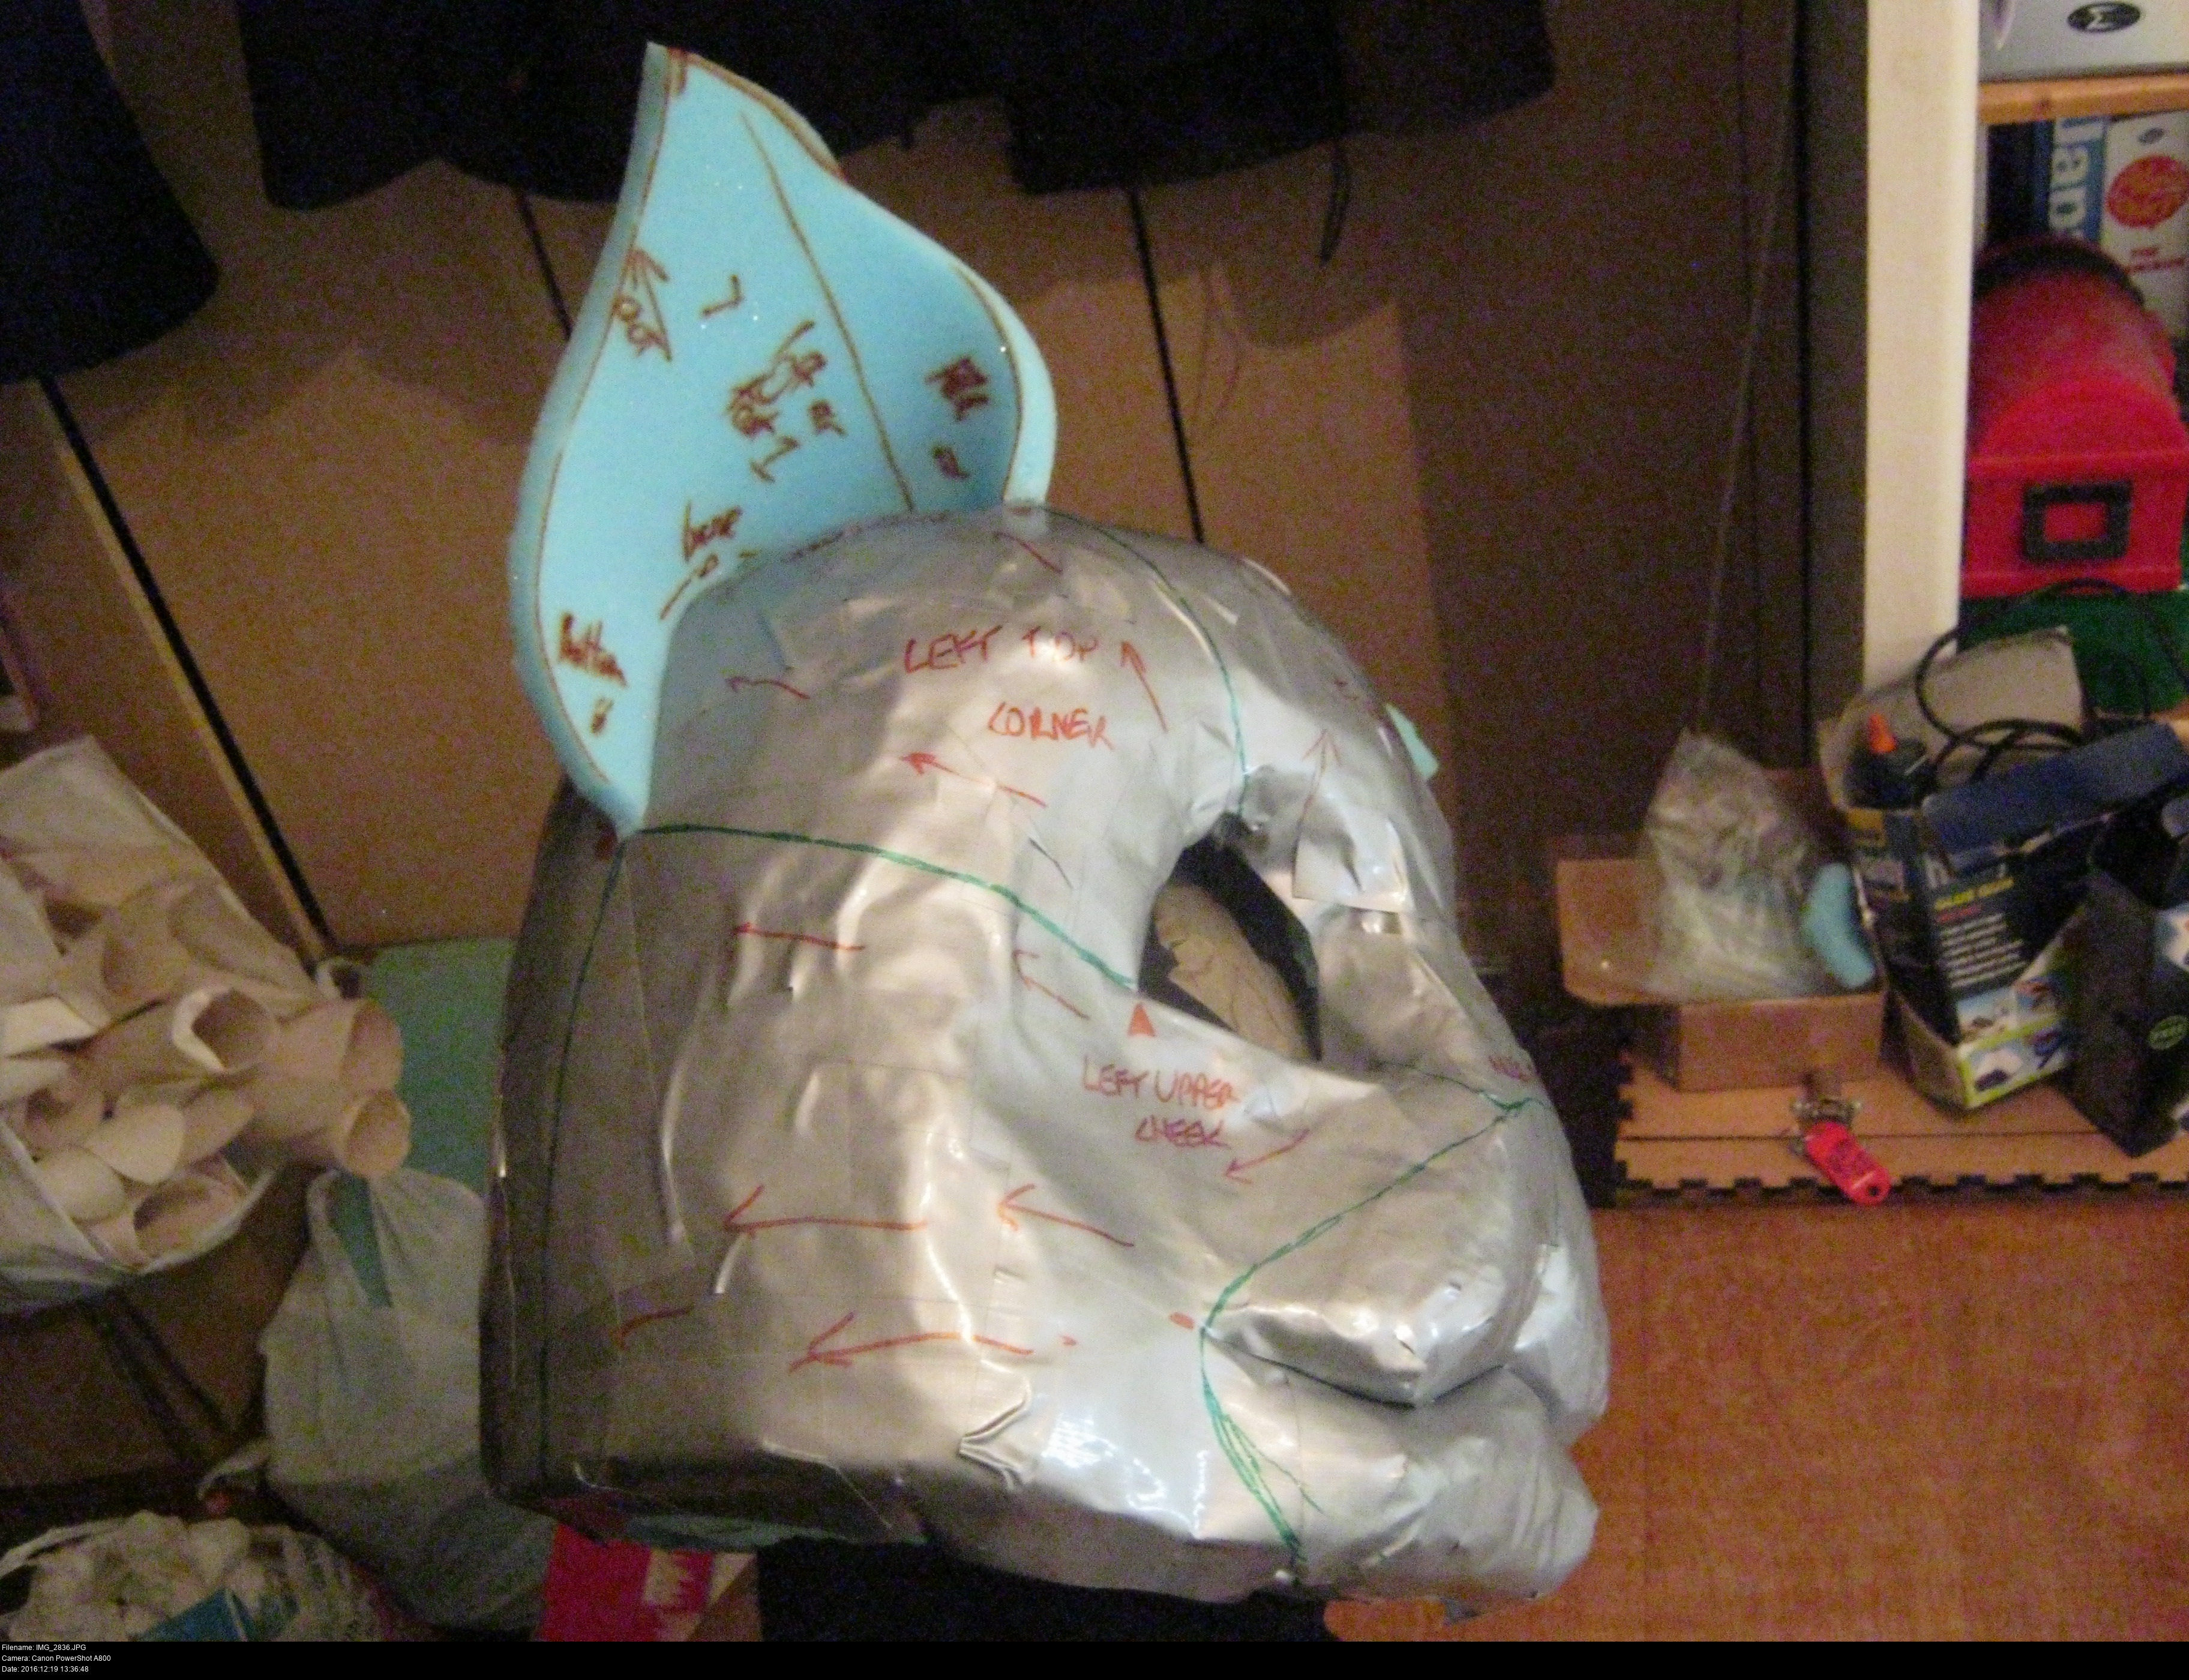
When I cut out these pieces in the real fur, I'll need to match up the arrows with the direction of the fur.
It's a very good idea to take lots of pictures and videos of this process, because when the pieces are all spread out on the table you will have a hard time remembering which piece goes where and what order you should sew them together in.
Make lots of notes and write names on the pieces as you define them.

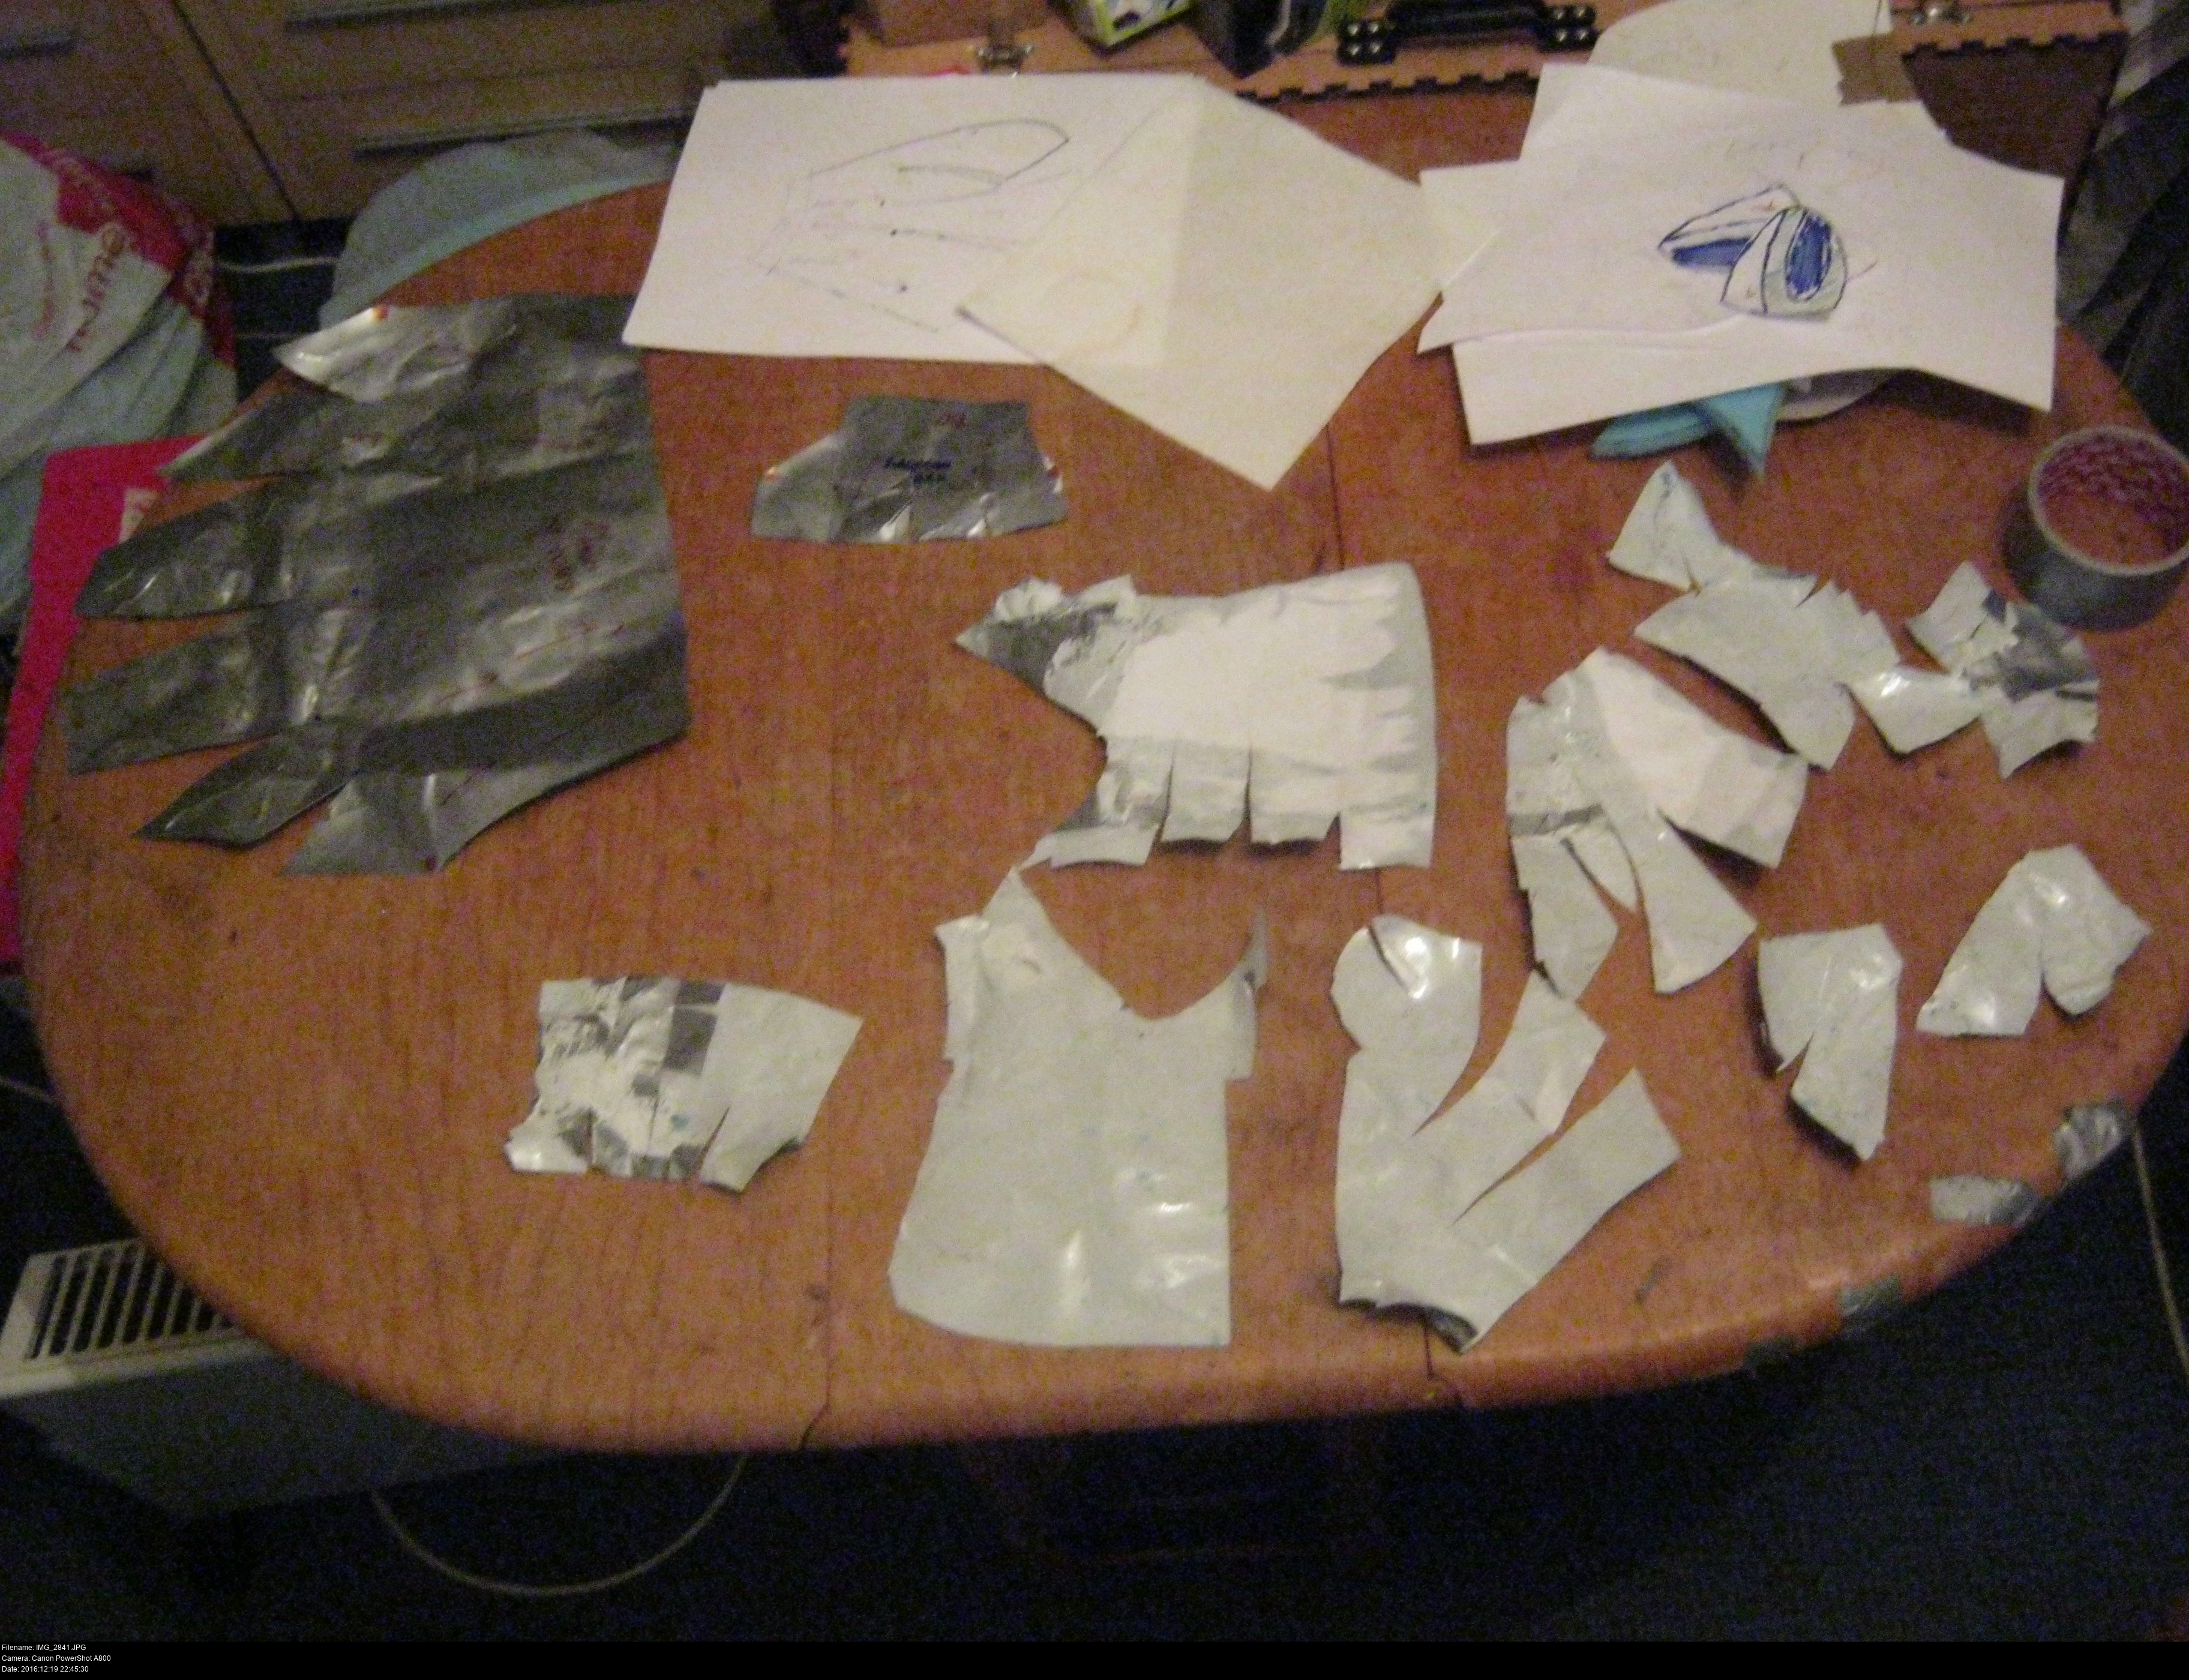

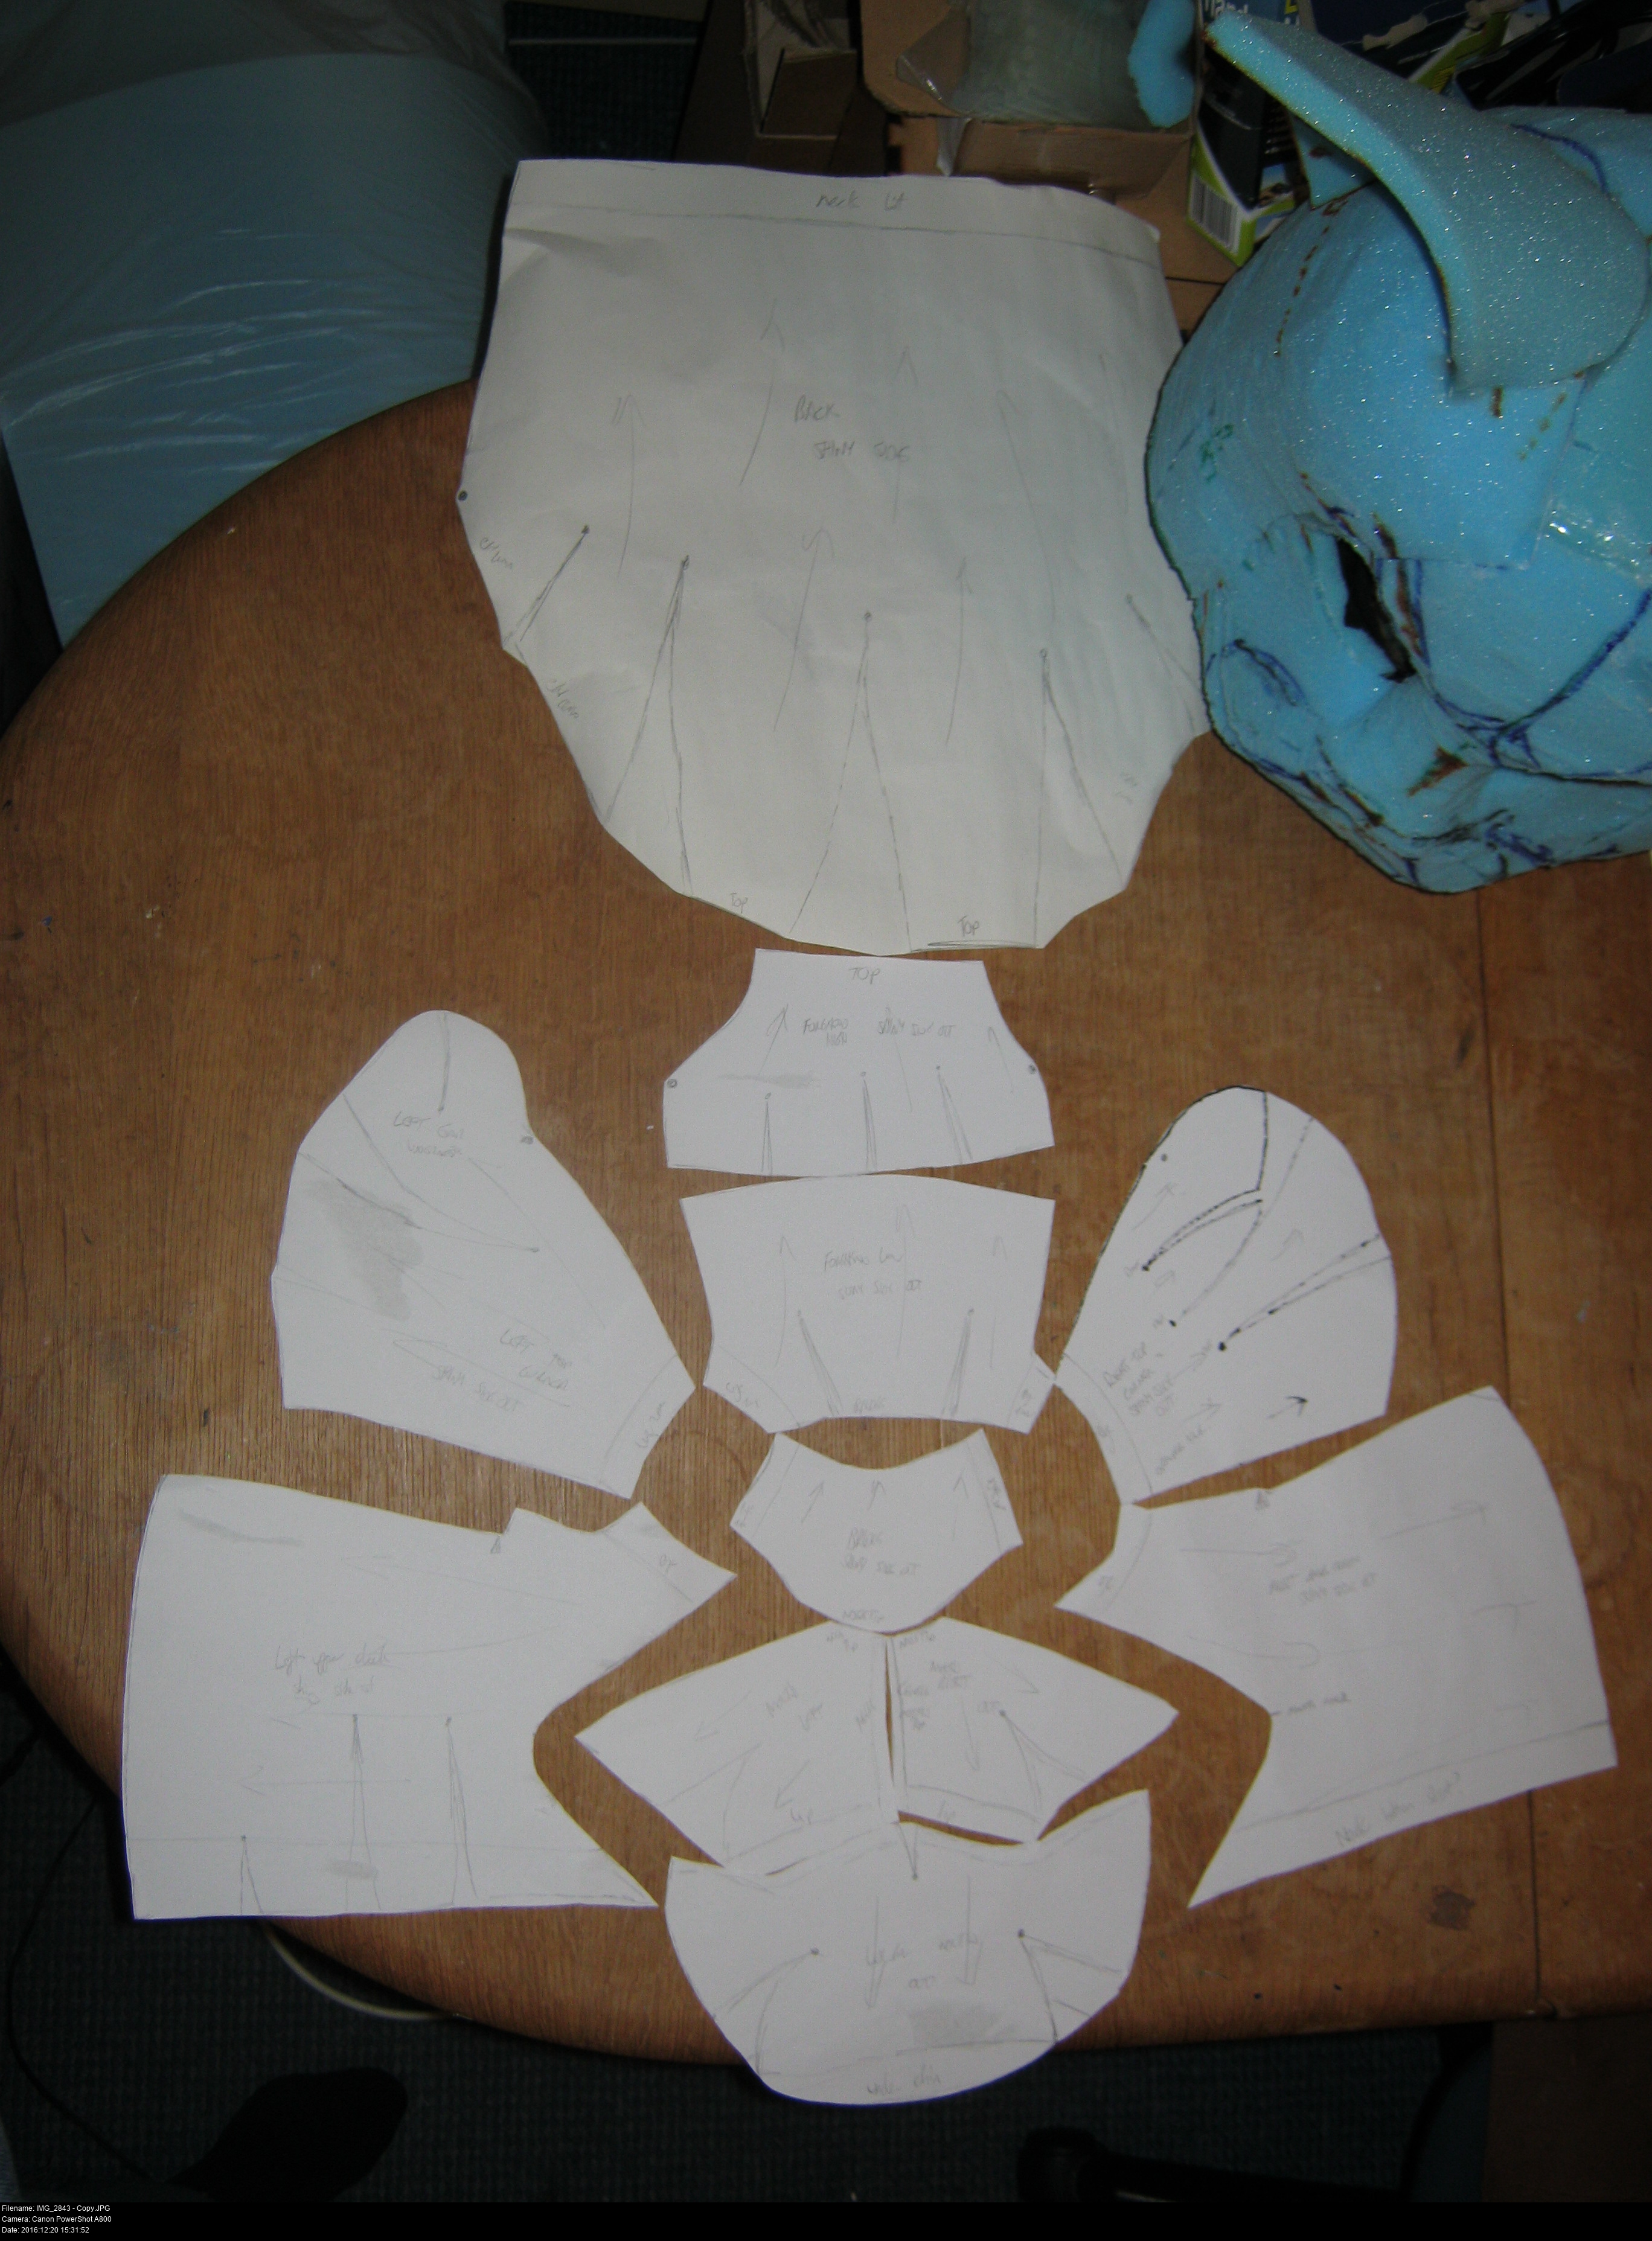
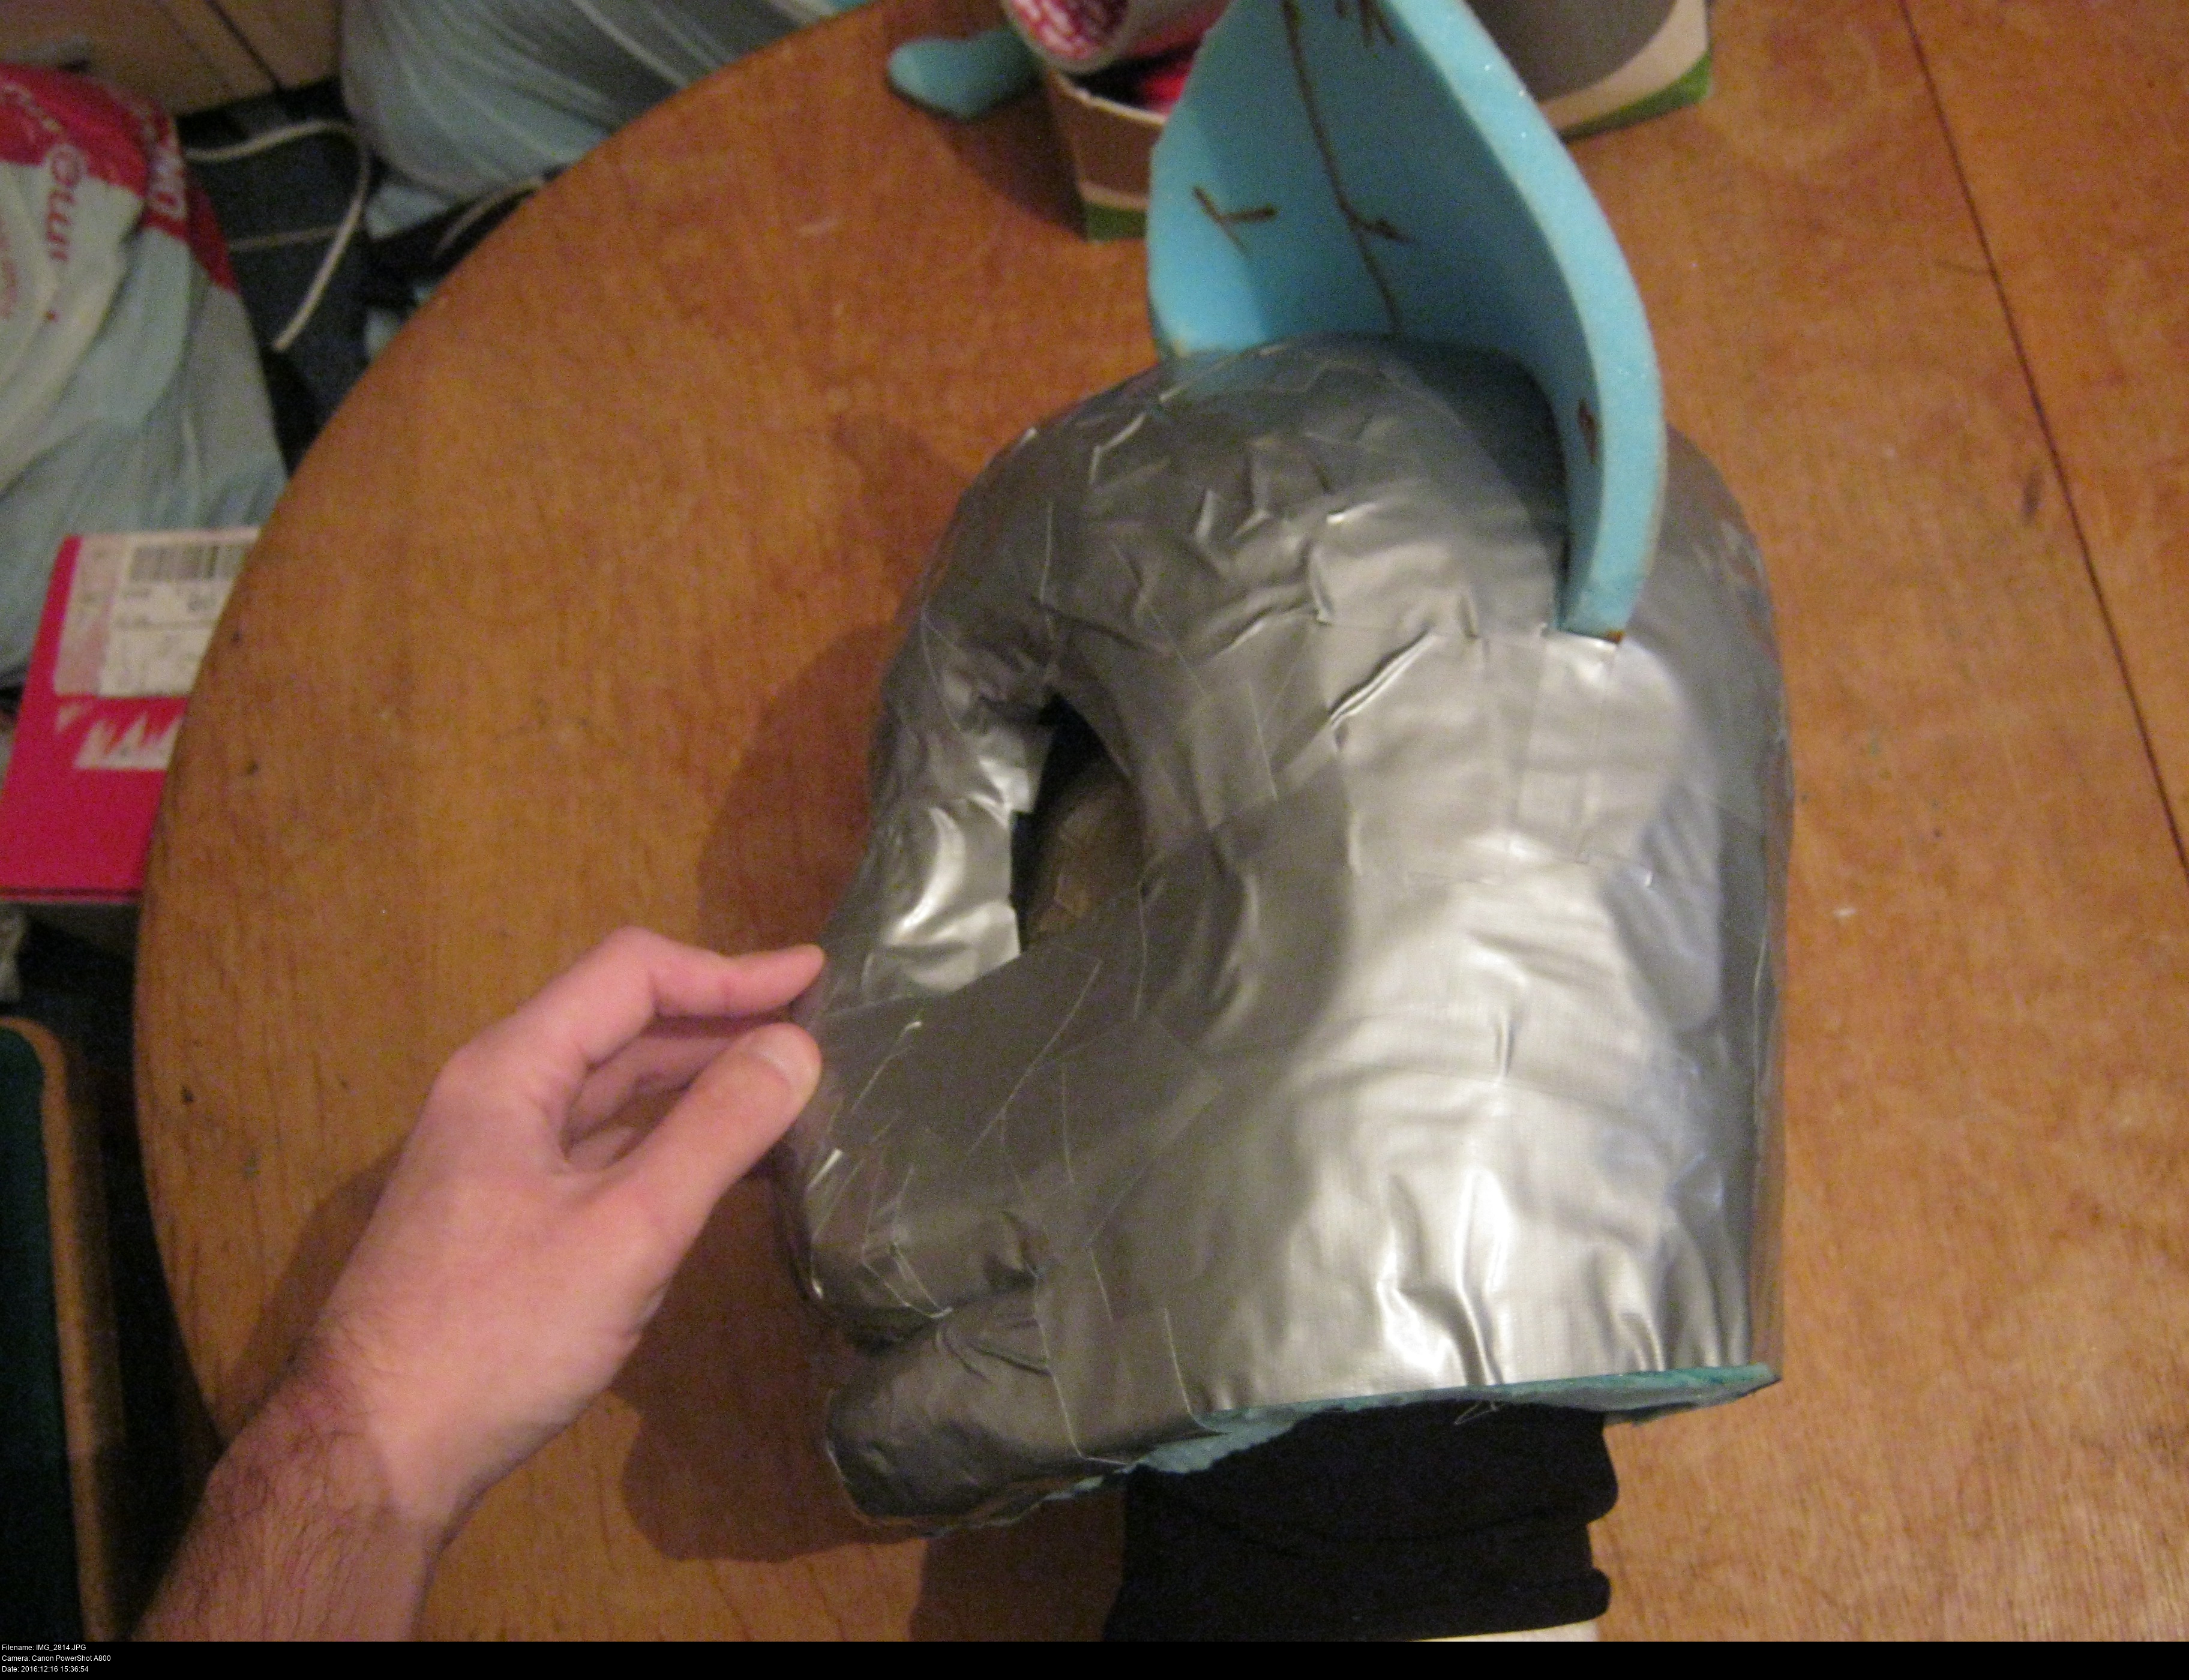
Now you can gently lift away the tape covering from the foam. If you have to, gently make incisions to lift away the tape in pieces from the head.
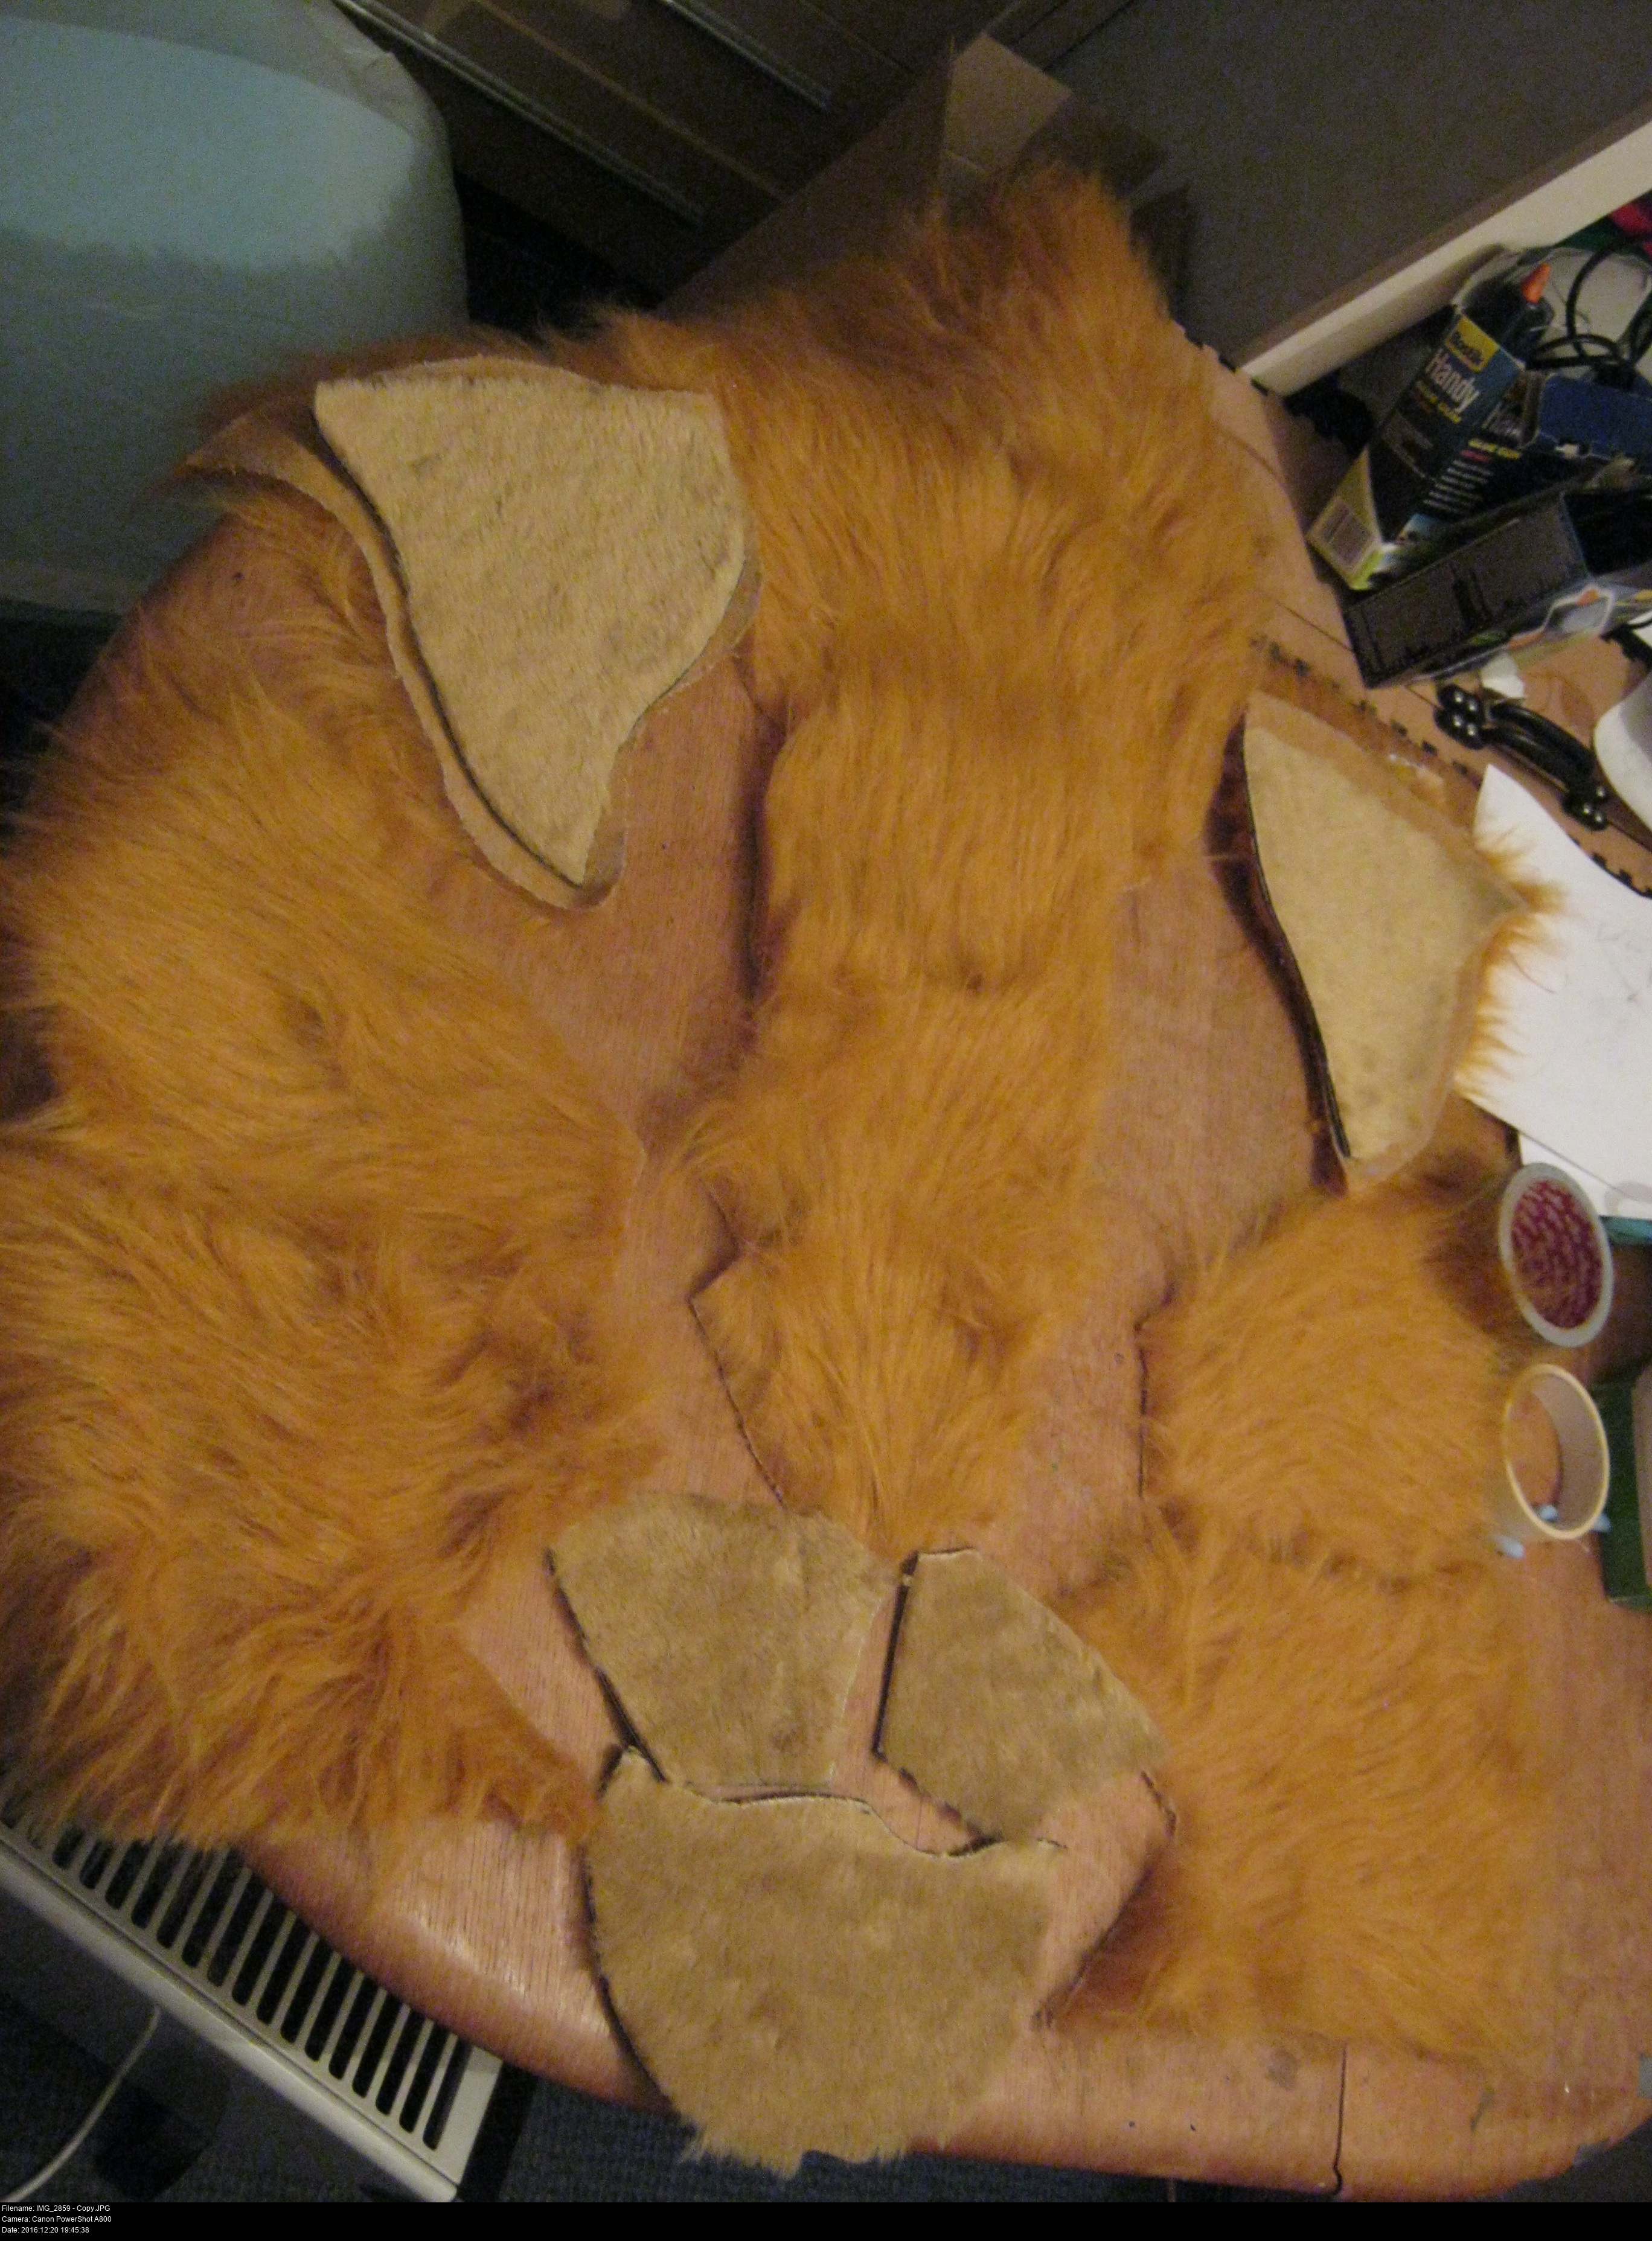
Cut along your lines and you'll end up with a collection of curved pieces. I've got a forehead piece, a top of head piece, a back piece, a pair of under-ear/temple pieces, a pair of cheek pieces, a nose bridge, an ear template and a group of pieces that make up the muzzle. When they're laid out like this, you can sort of see them coming together into the full shape of the cat head.
You need to make all of these curved pieces into flat ones by cutting notches (darts) so they become flat. When I make the pieces for real, I'll need to sew those darts back in to make them curved again. If I do it right, the darts should be completely unnoticeable, like the rest of the seams. However, it is best to plan out your pattern to have as few darts as possible. Bear in mind that the knitted backing of the fur (my long fur at least) has some stretch to it, so a flat piece can be curled around a curved foam area a little.
At this point, take some time to think about seam allowances. All these pieces you've cut away from the tape fit together perfectly to make a covering for the foam form. You're going to have to add on allowances to the edges in order to sew them together! You can either add them to the pieces here as you transfer.
I haven't accounted for the character's neck yet. I'm extending all the lower edges of the pieces a little so that they should neatly tuck around the lowermost curve of the foam to create a little snug chin for the guy. On top of that, I'm giving those pieces a couple inches extra downwards so I have something I can attach the -neck- of the covering to. I haven't made or patterned the neck yet.
The eyeholes are outlined by the forehead, nose, cheek and temple pieces linked together in a circle. It's difficult to say how big these pieces should extend -into- the eyehole, since you can't really tape there. It doesn't really matter how deep they curl through the eyeholes into the interior of the head as long as they don't undershoot. Extend them a little longer than the tape and cut them later if you have to.
For the same reason, I'm extending the edges of the muzzle group inwards so they make a nice tucked-in mouth shape.
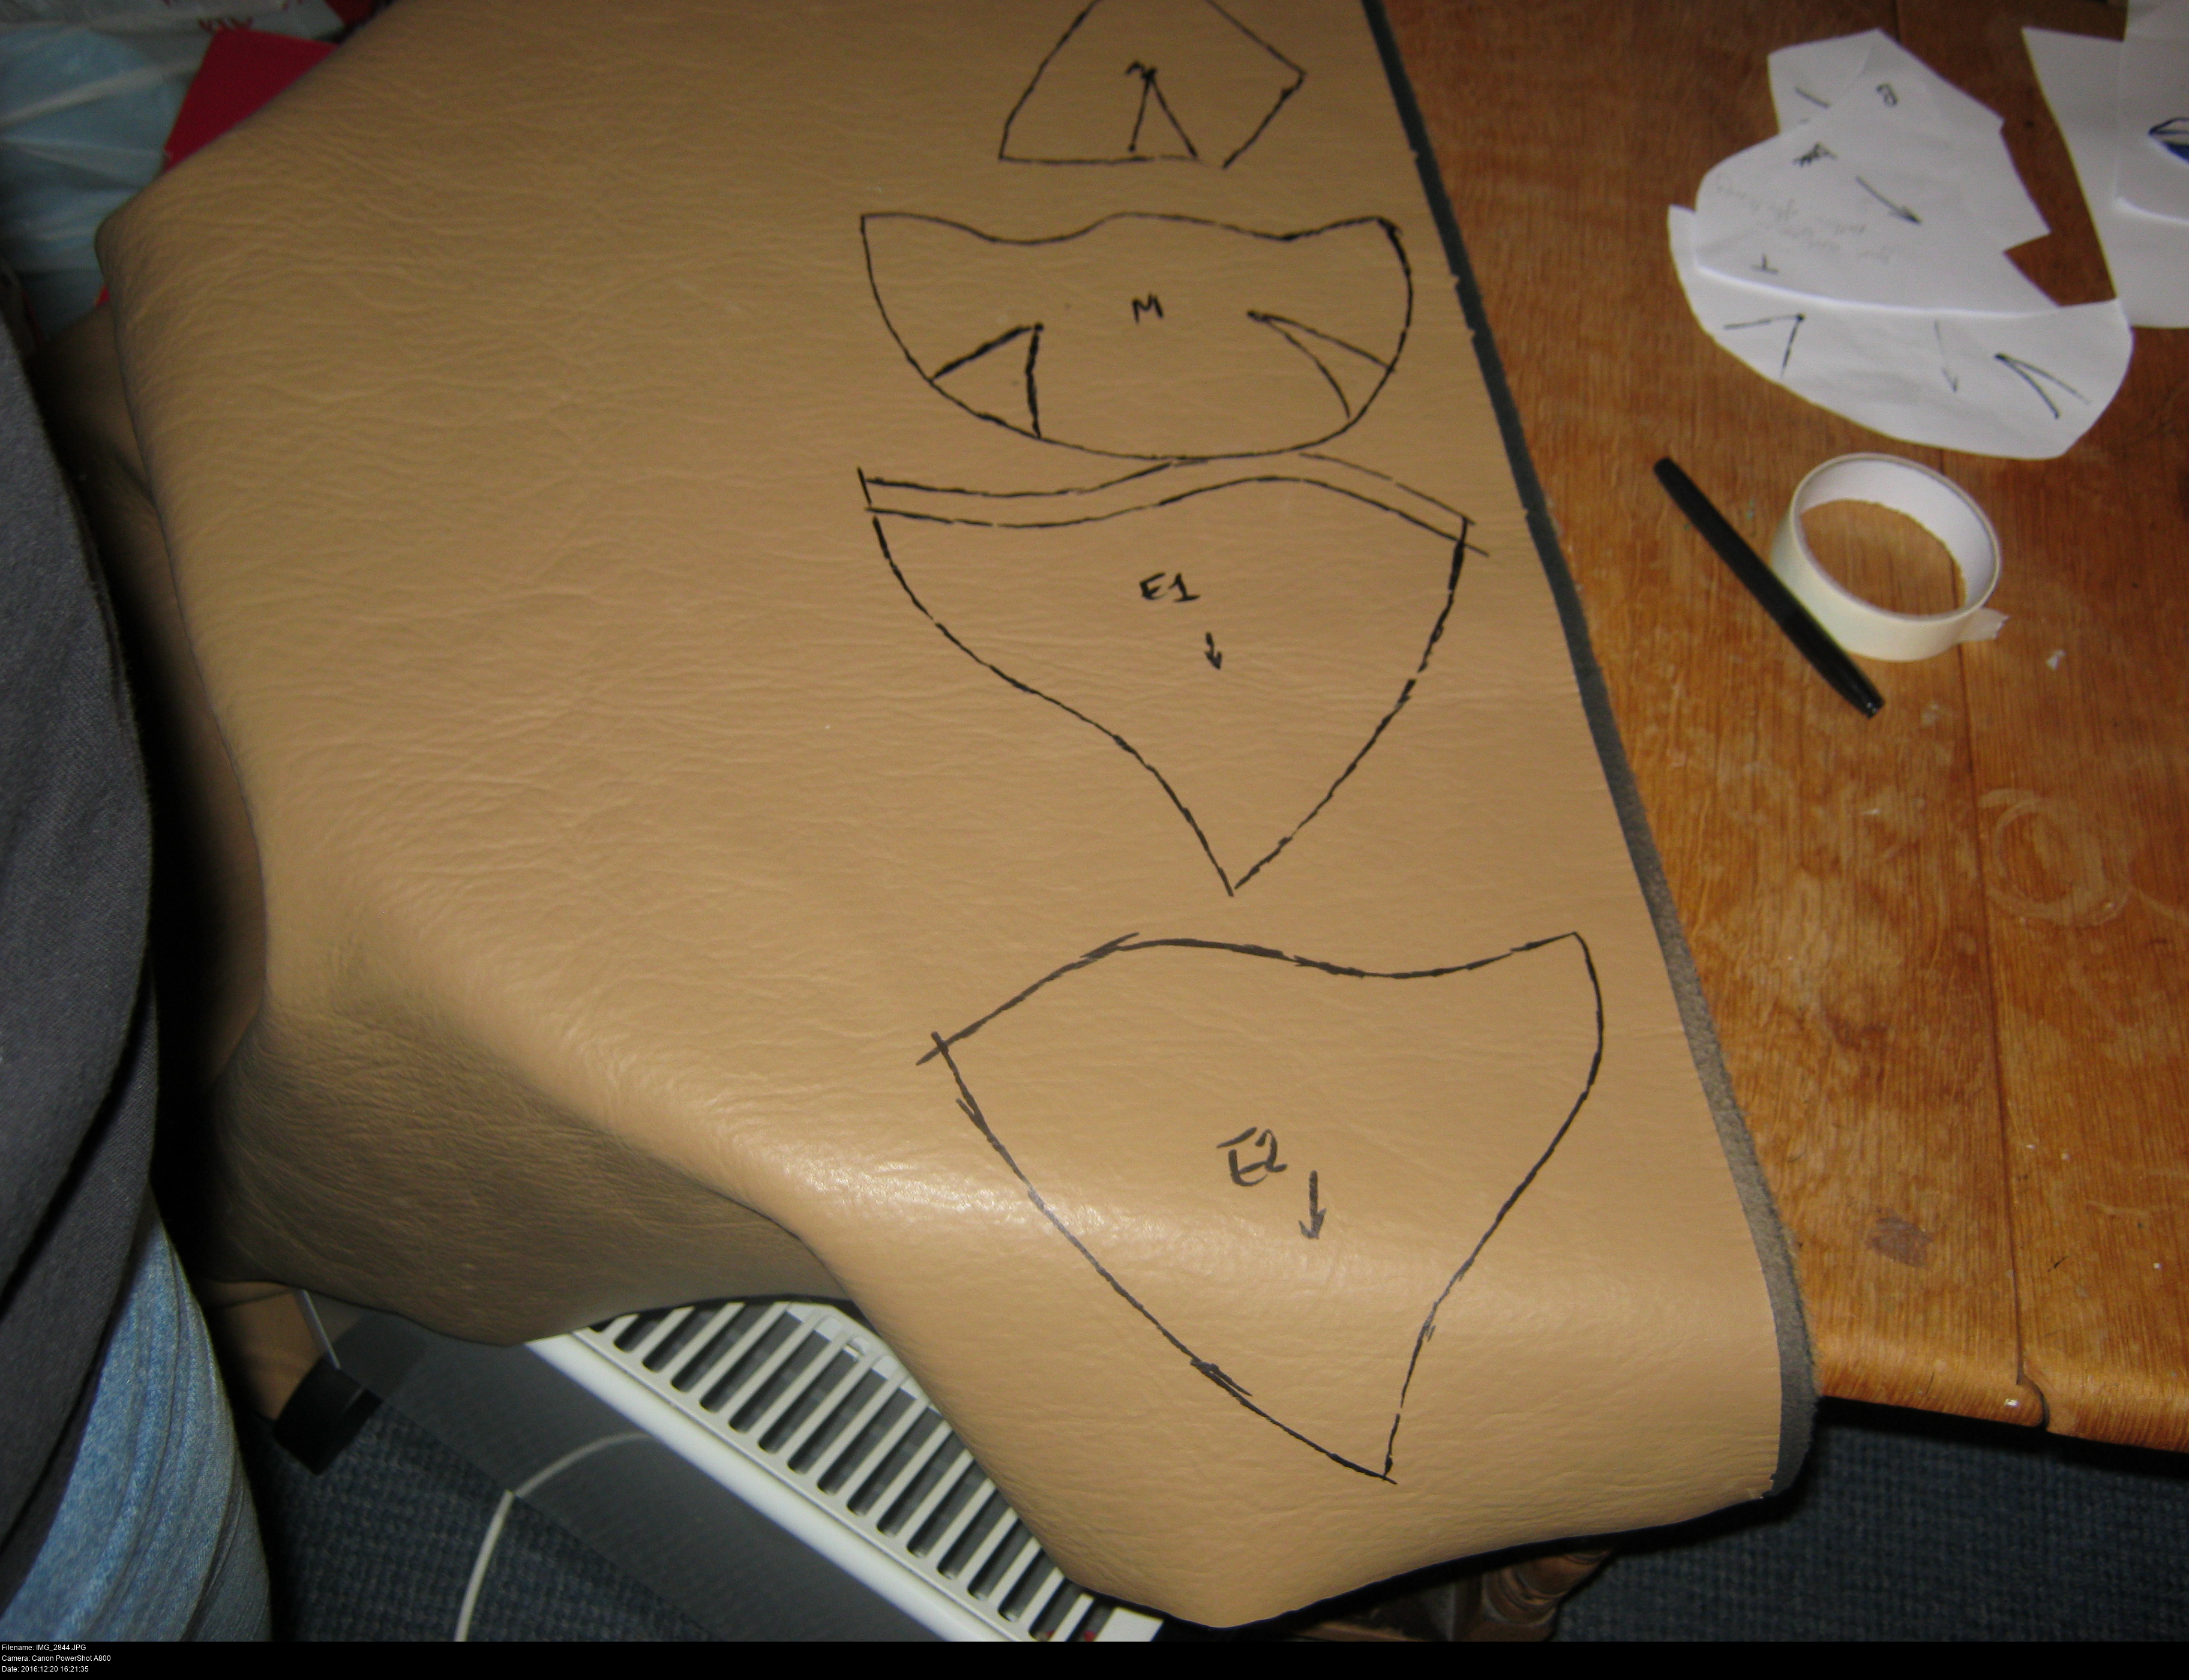
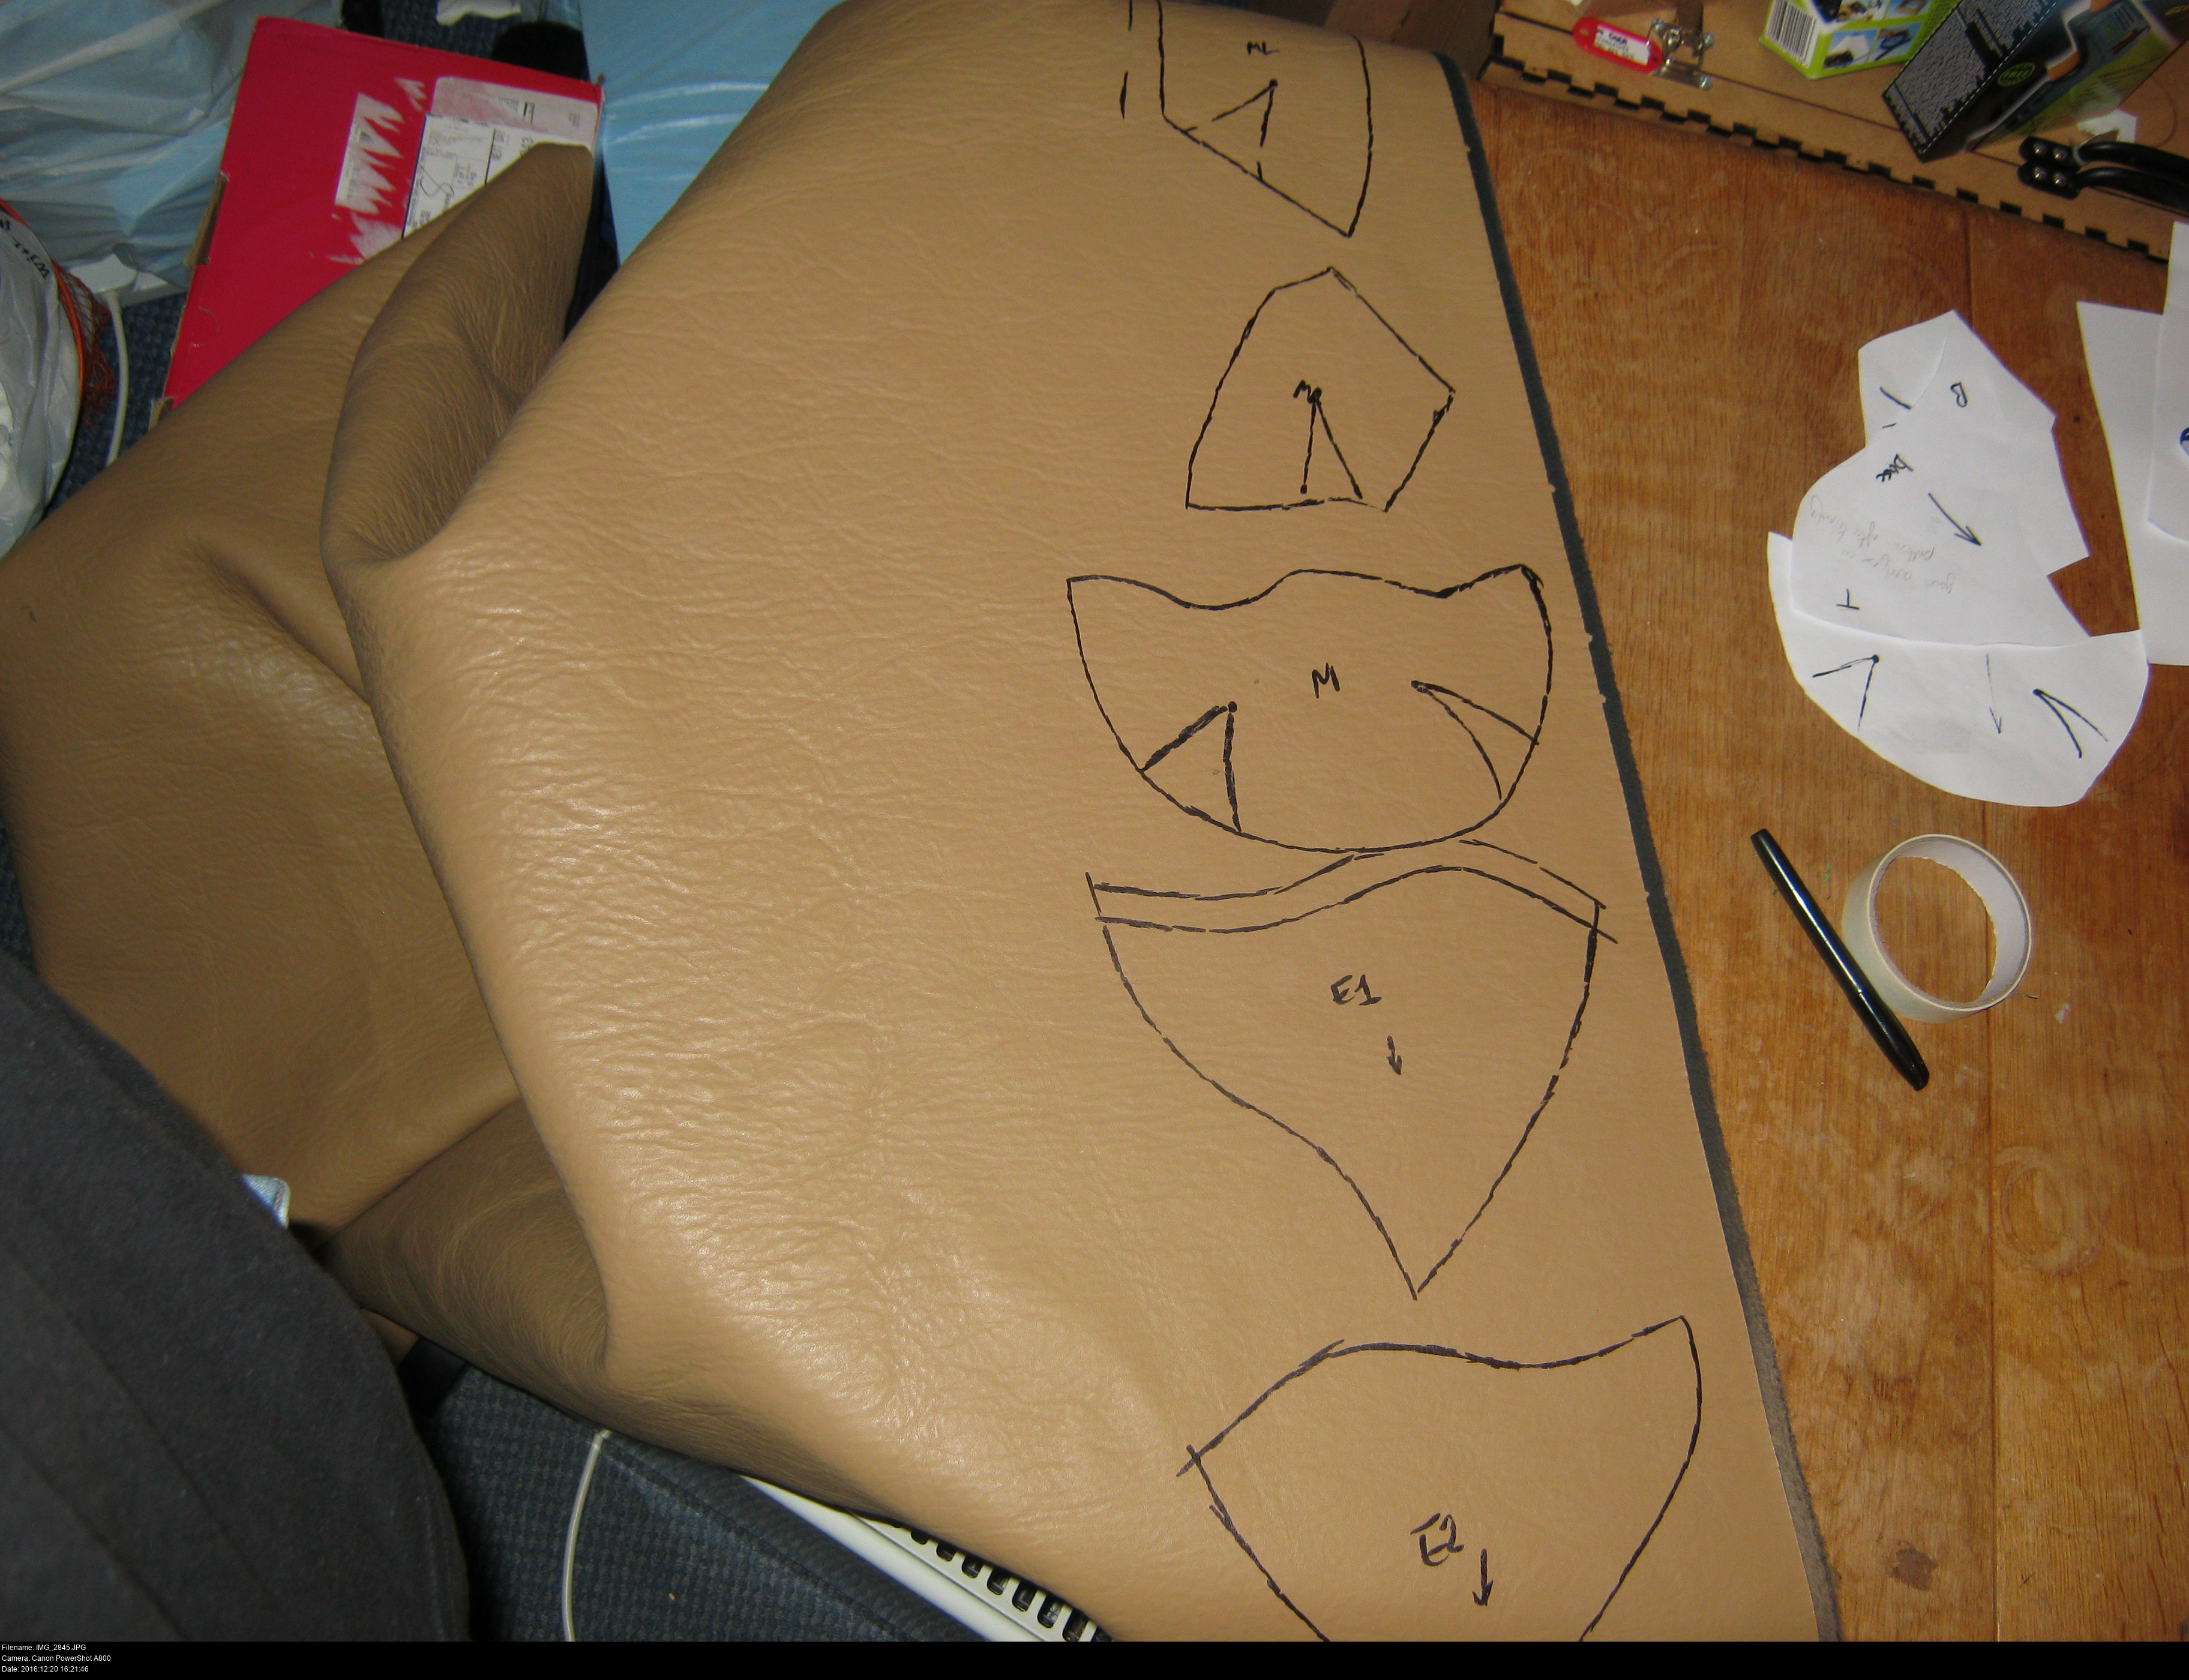
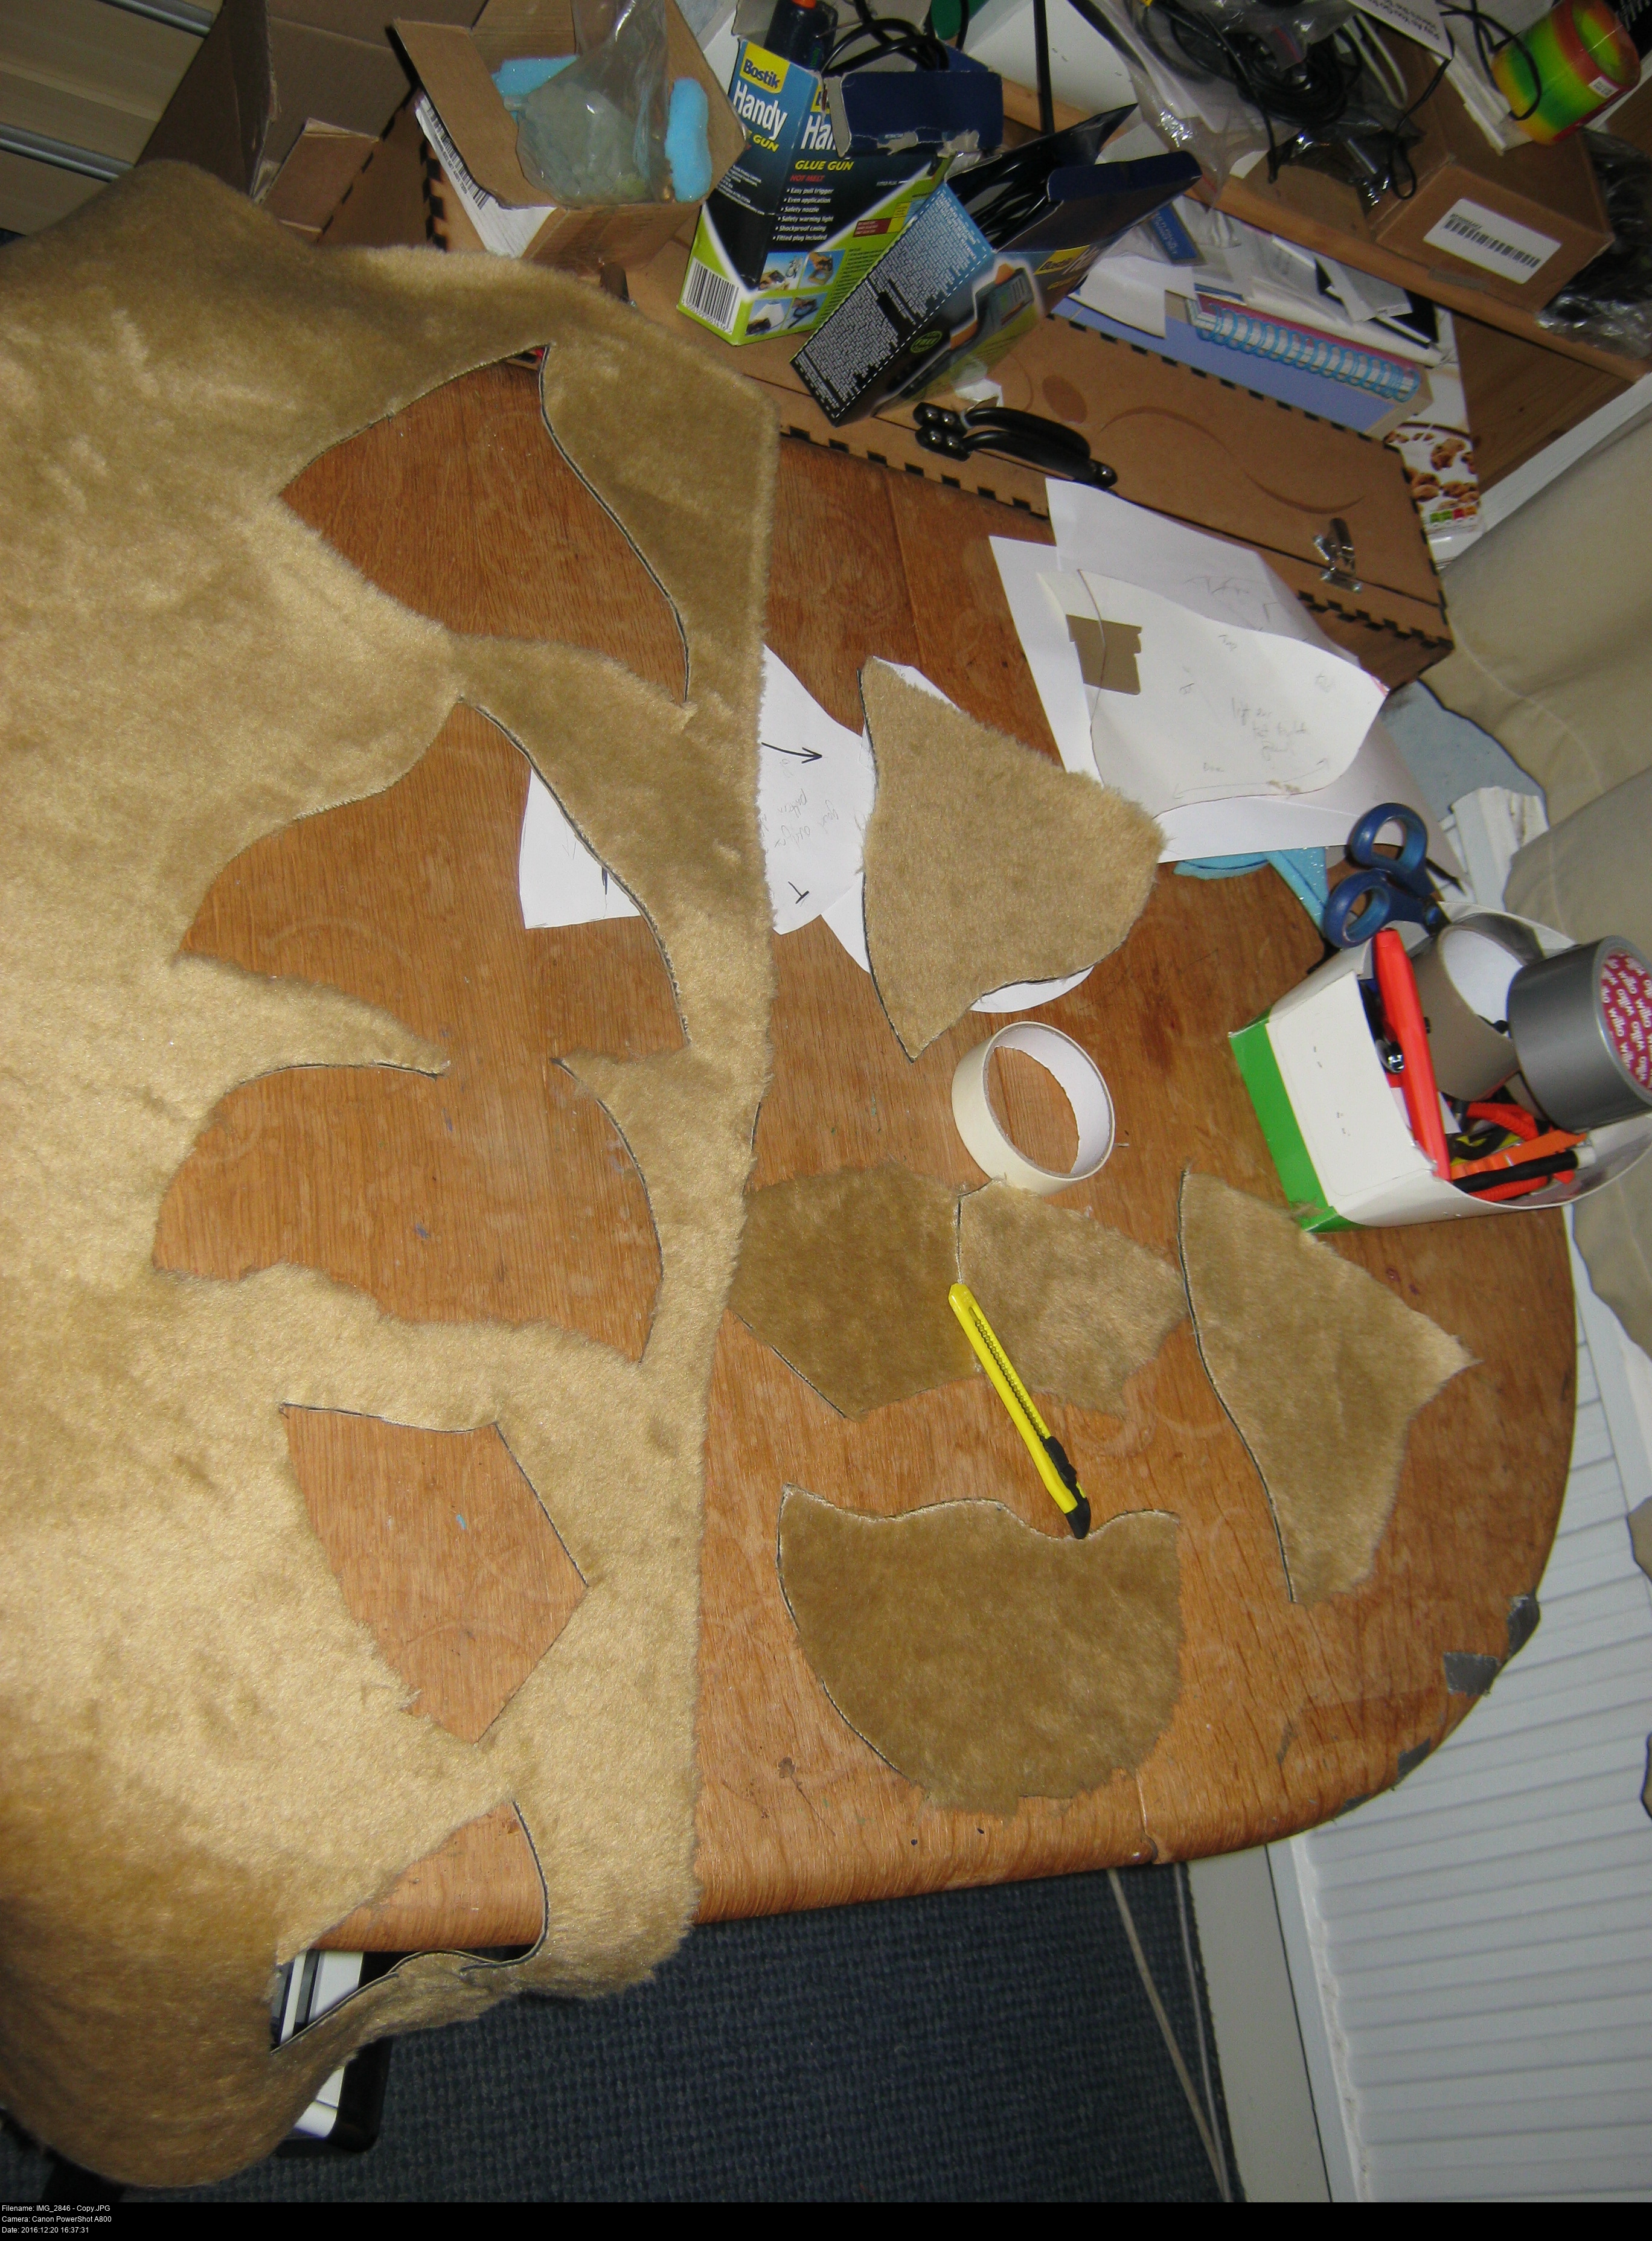

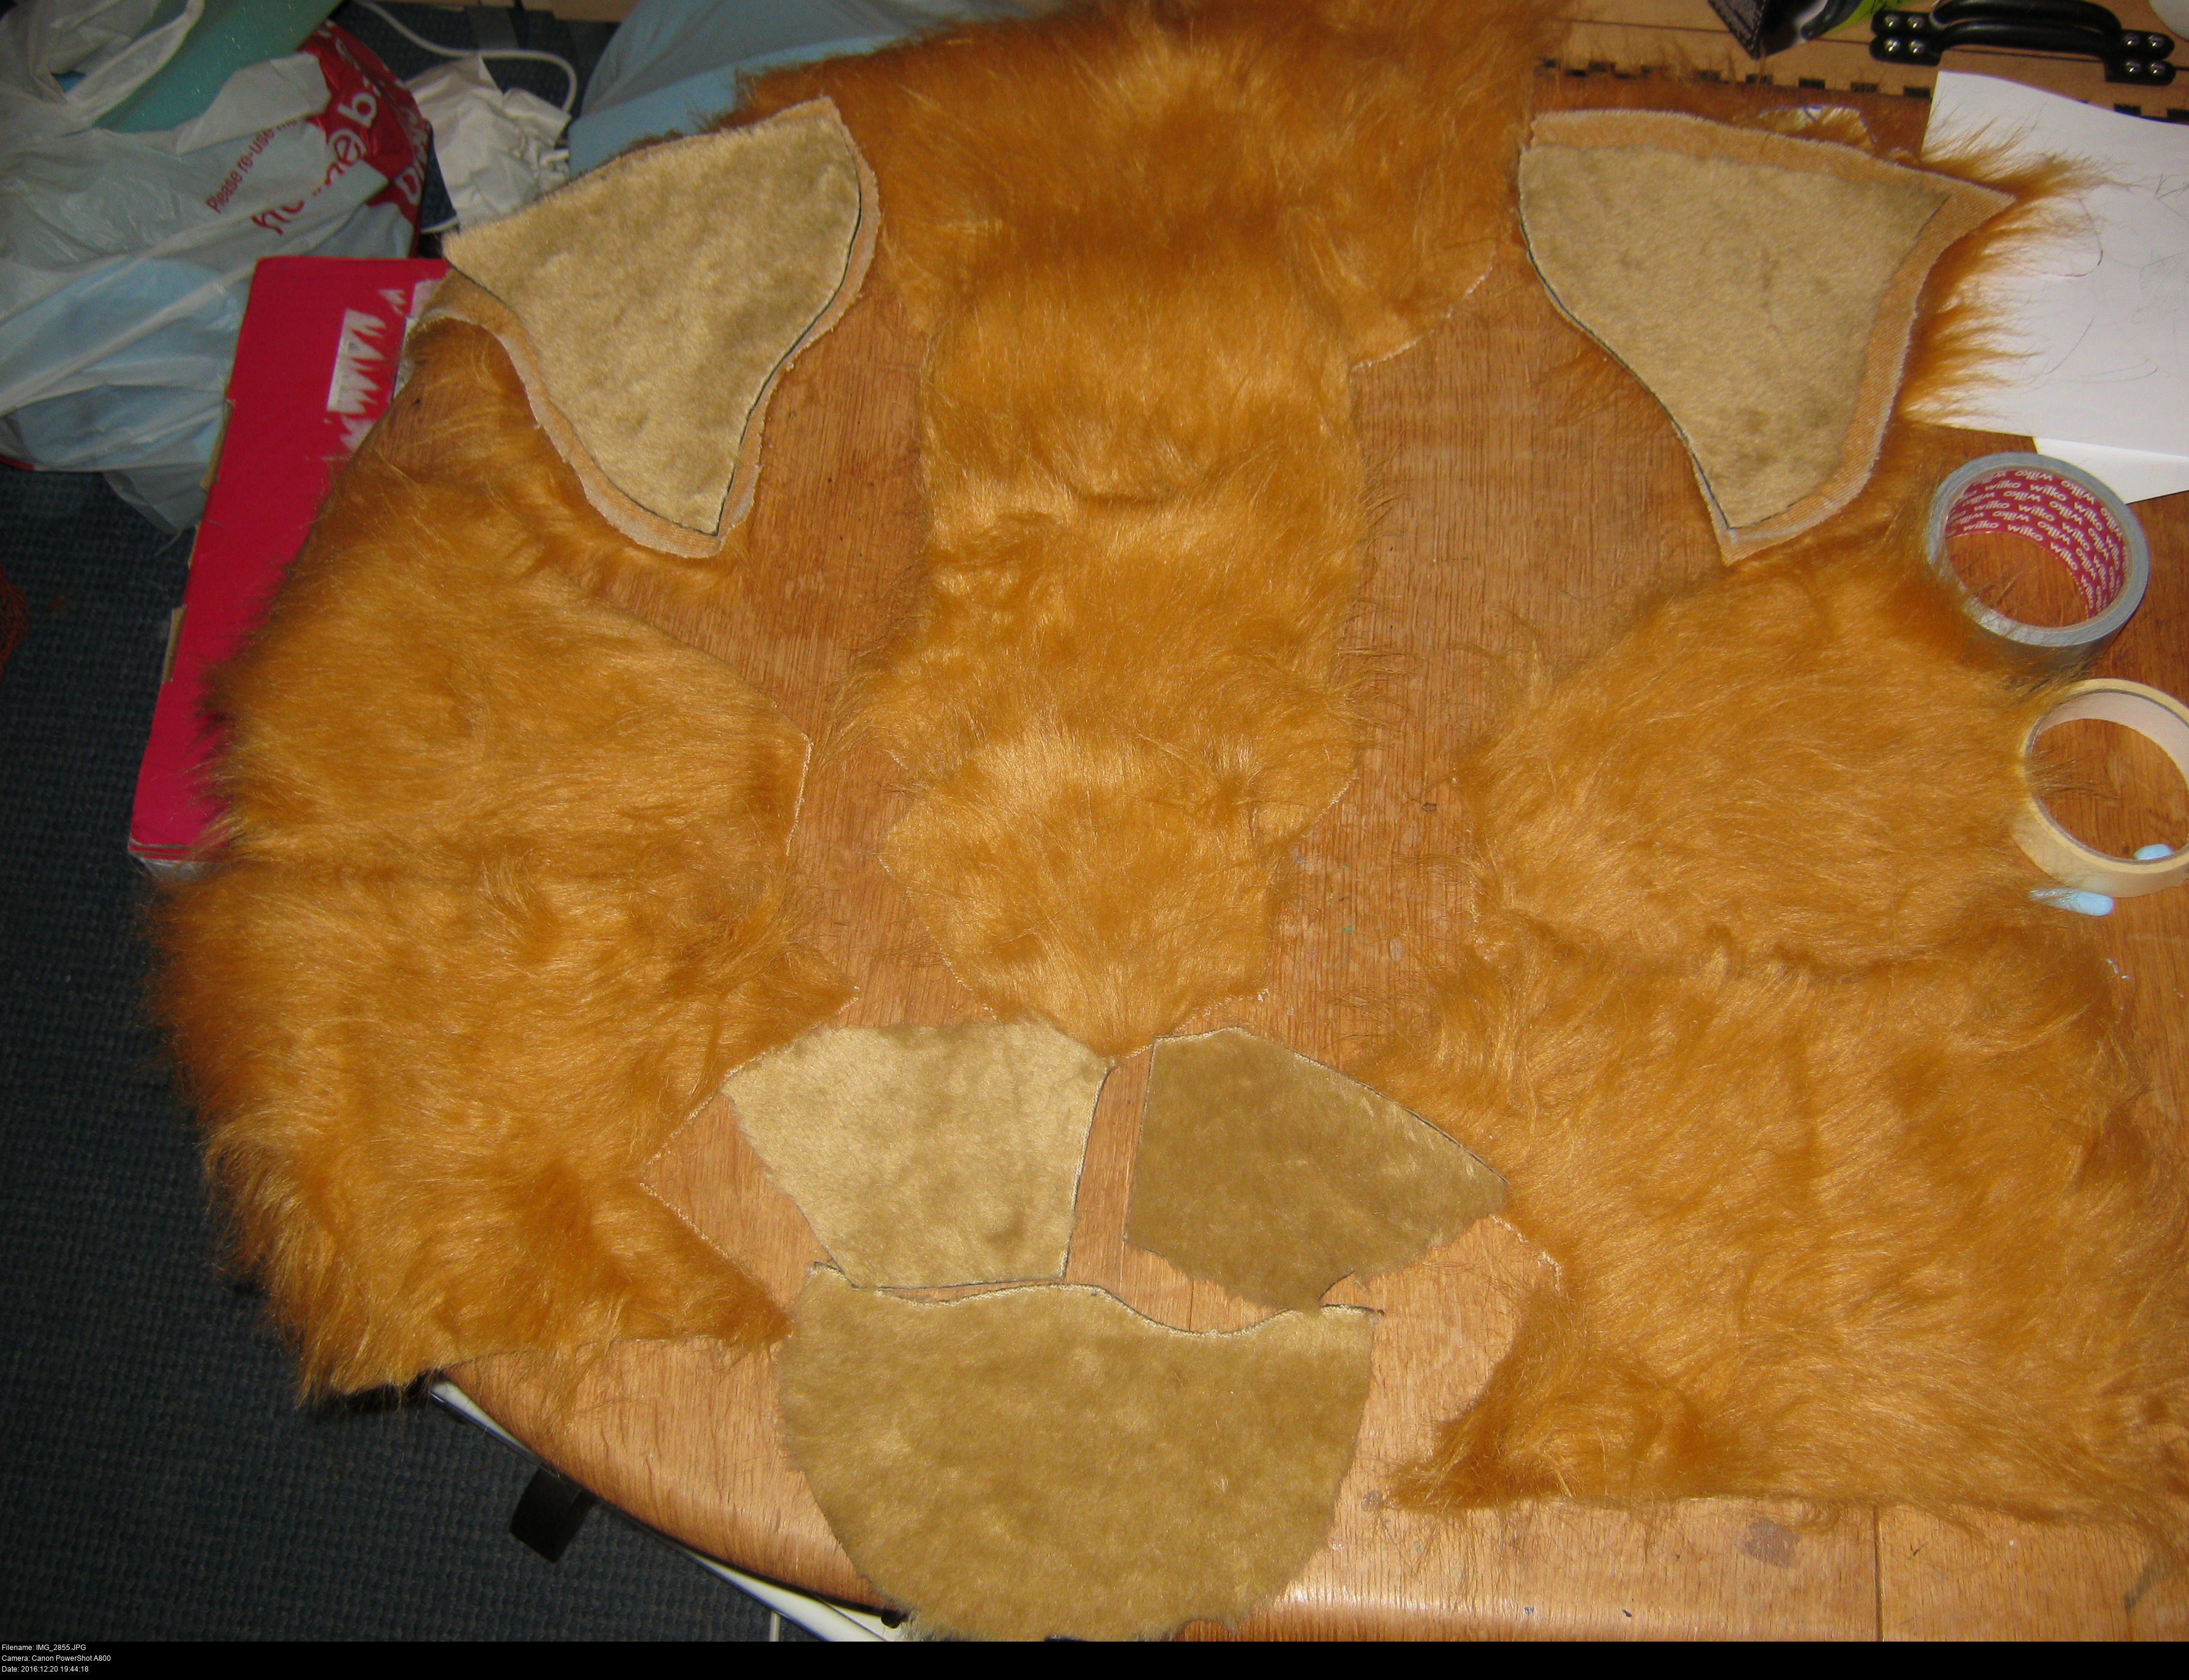
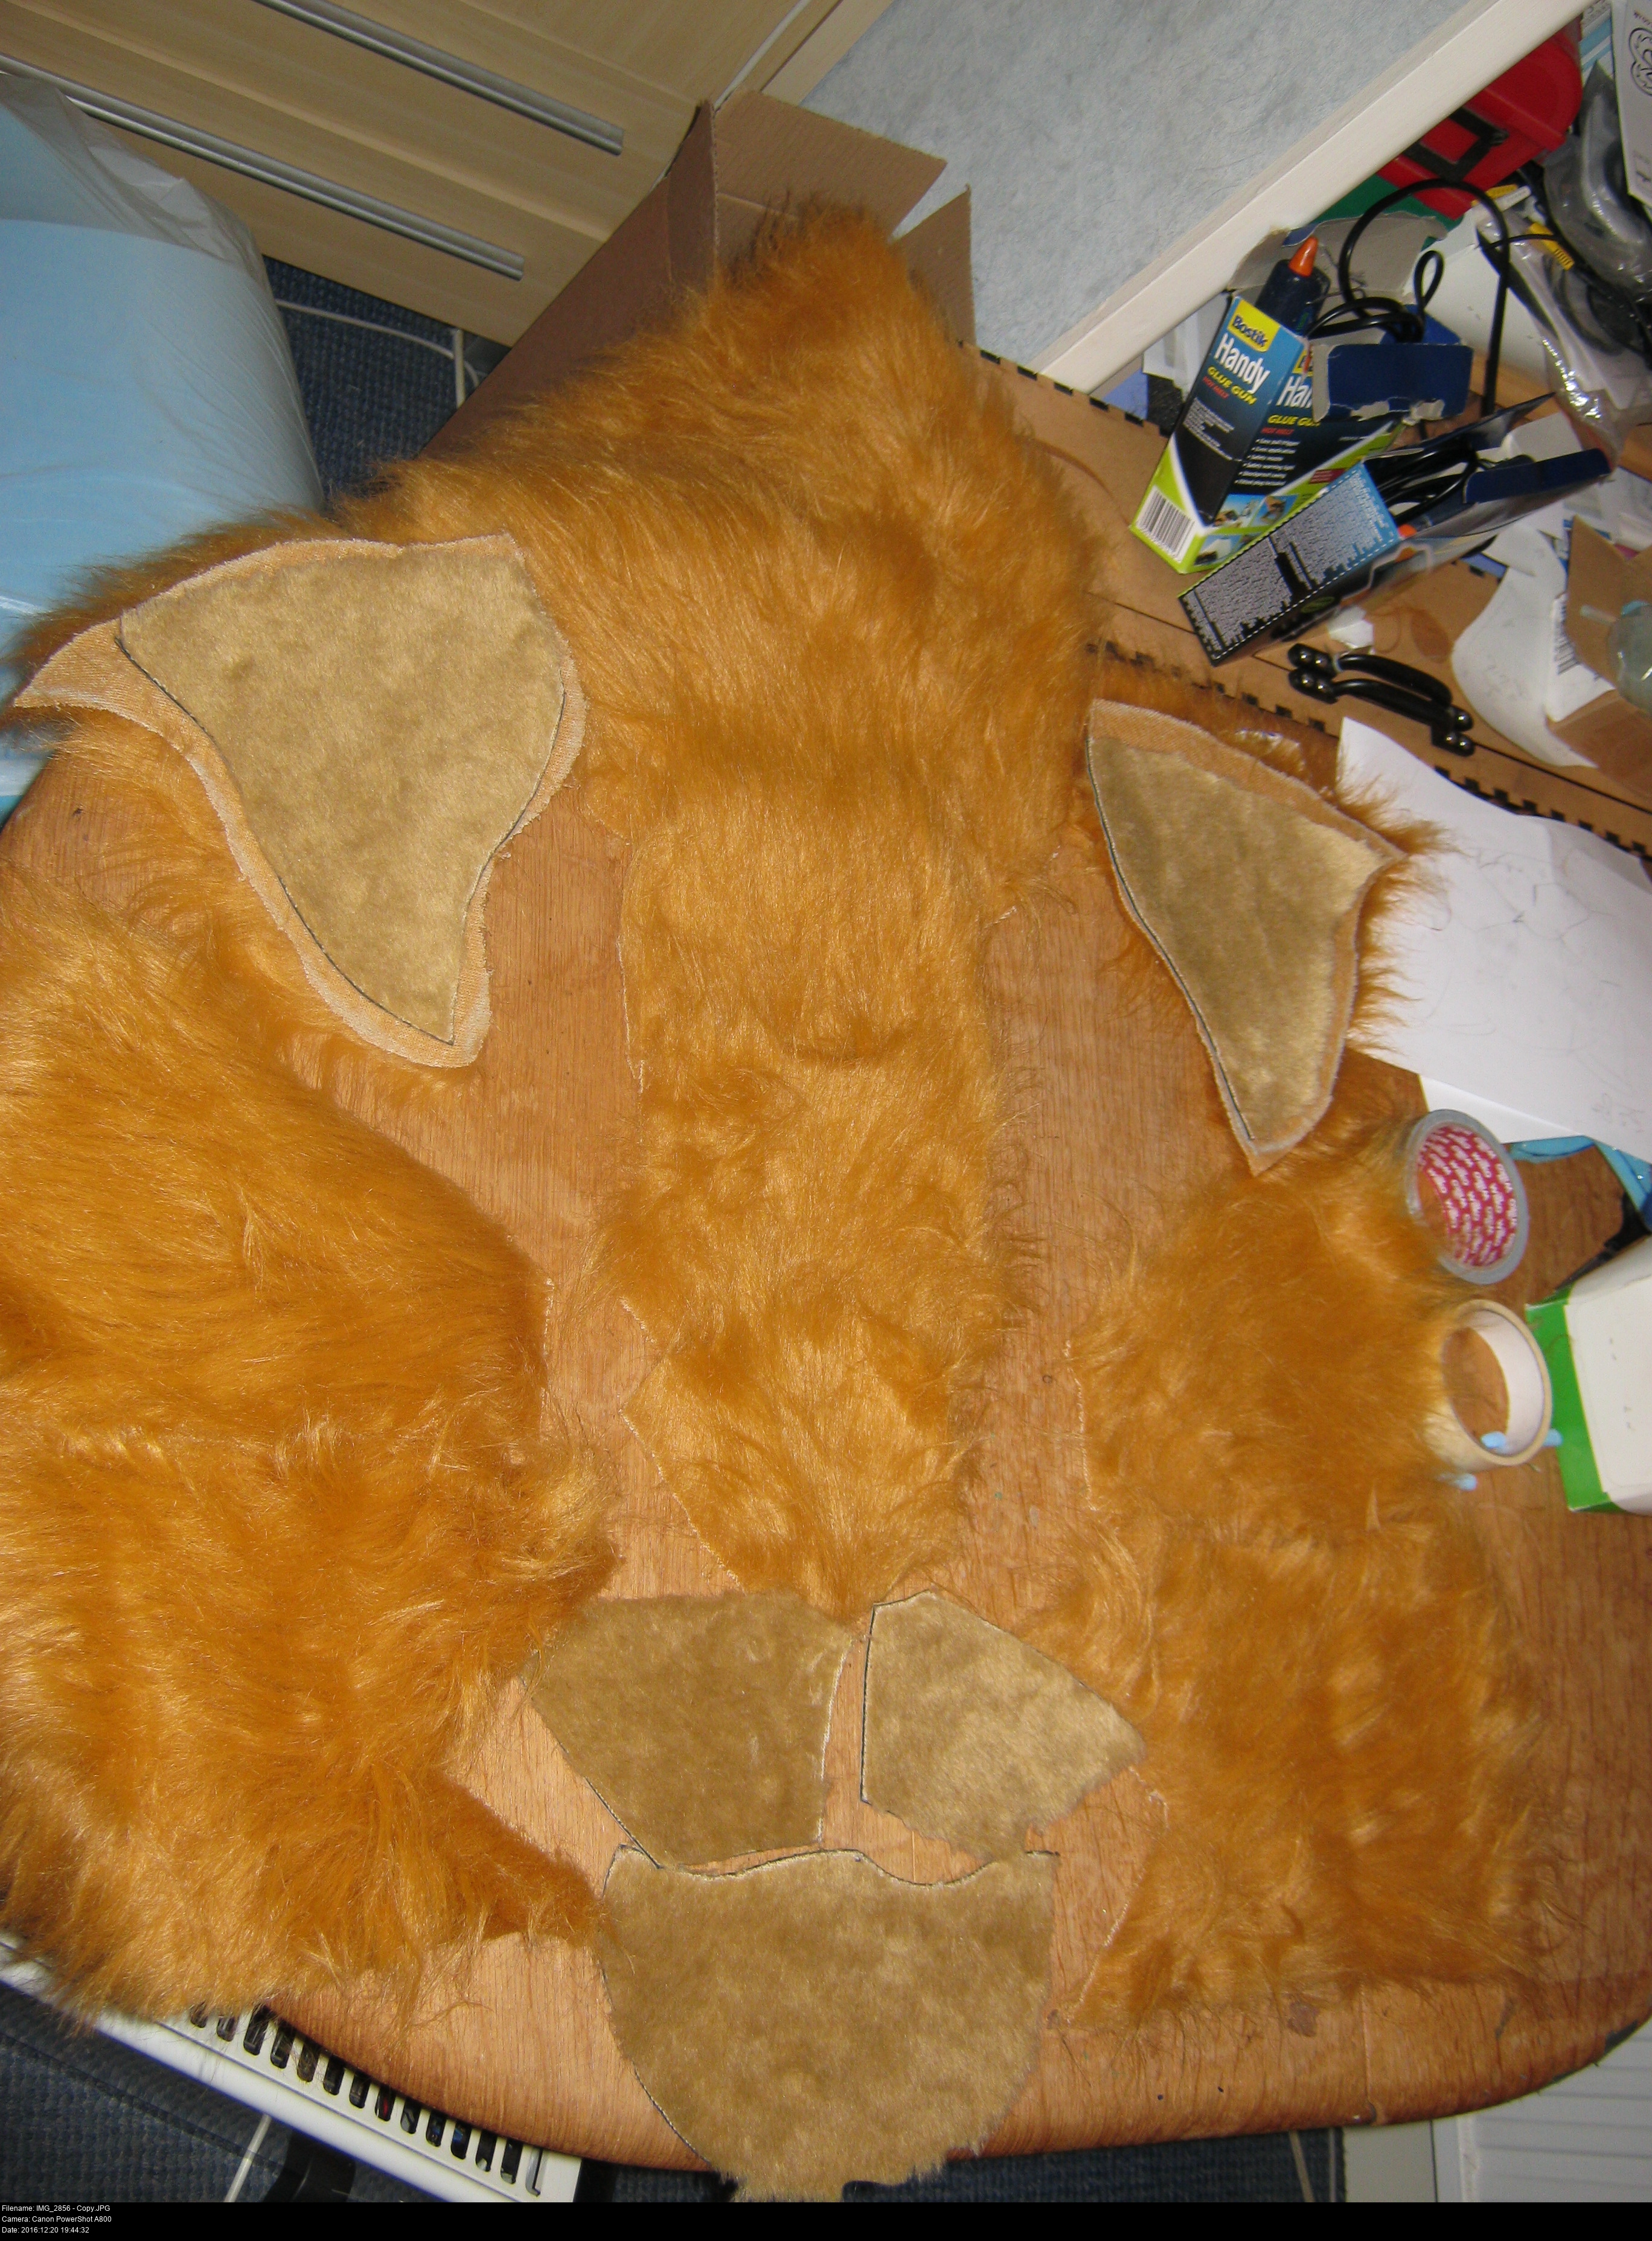


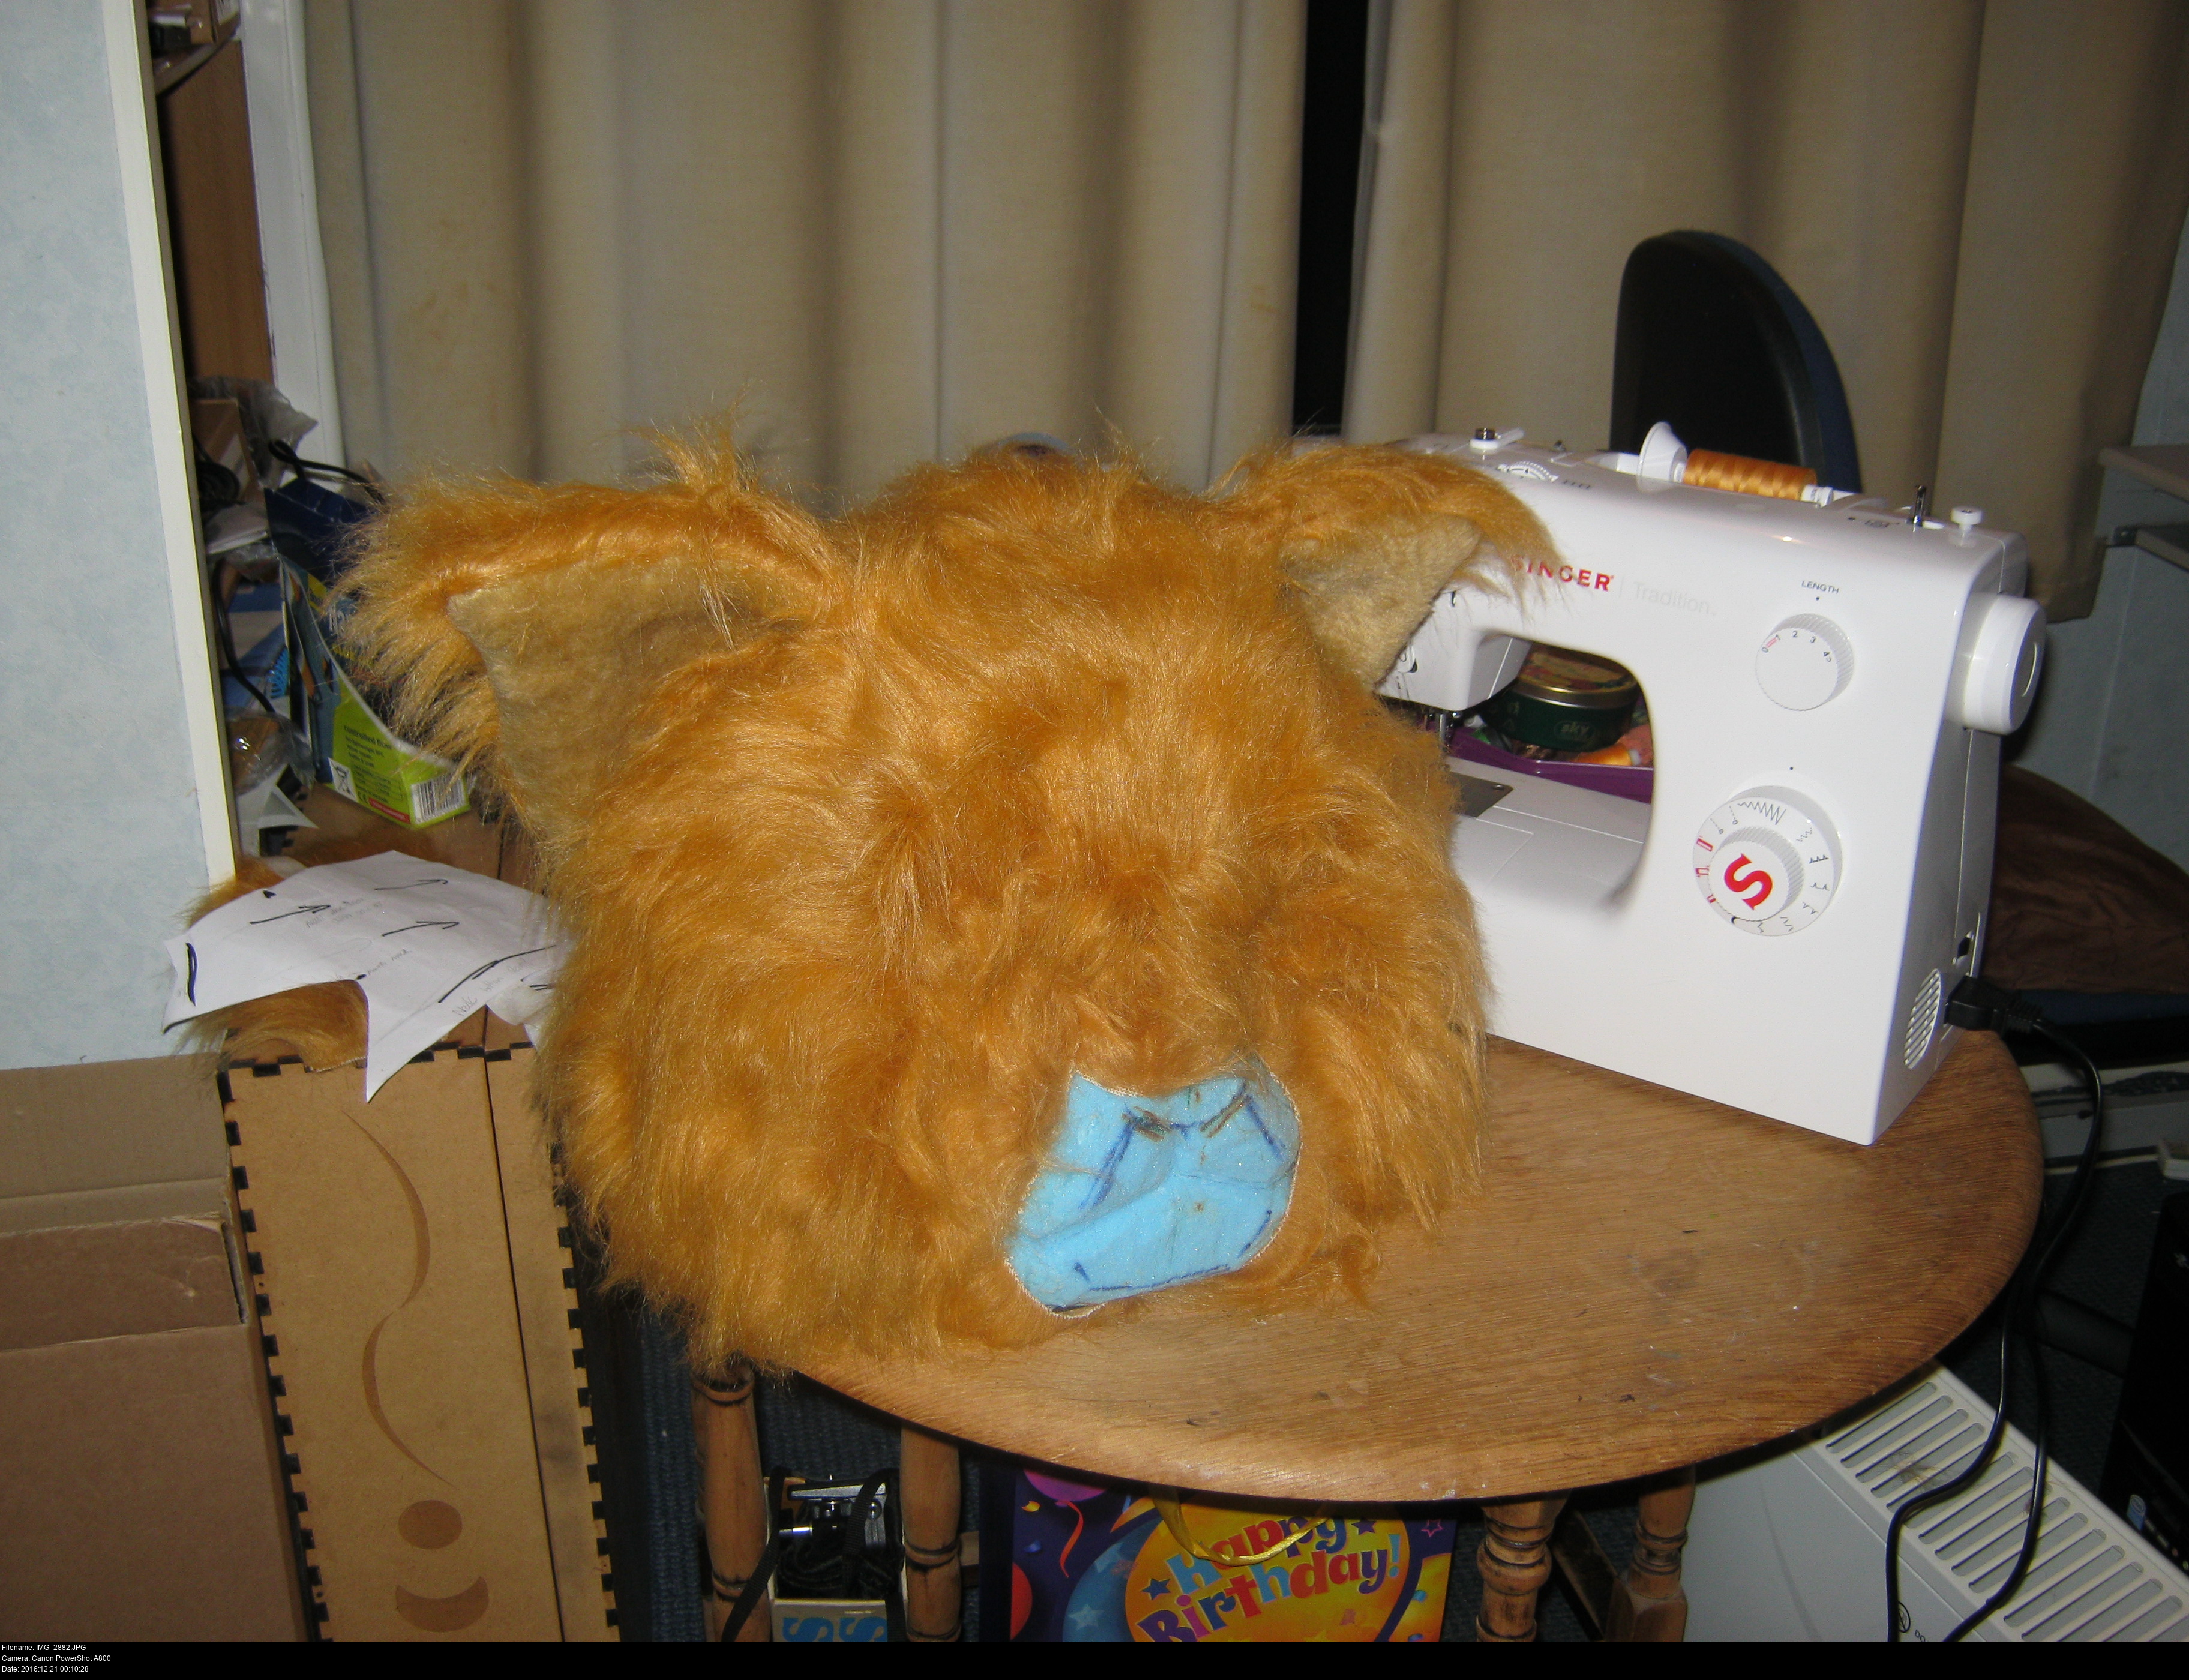
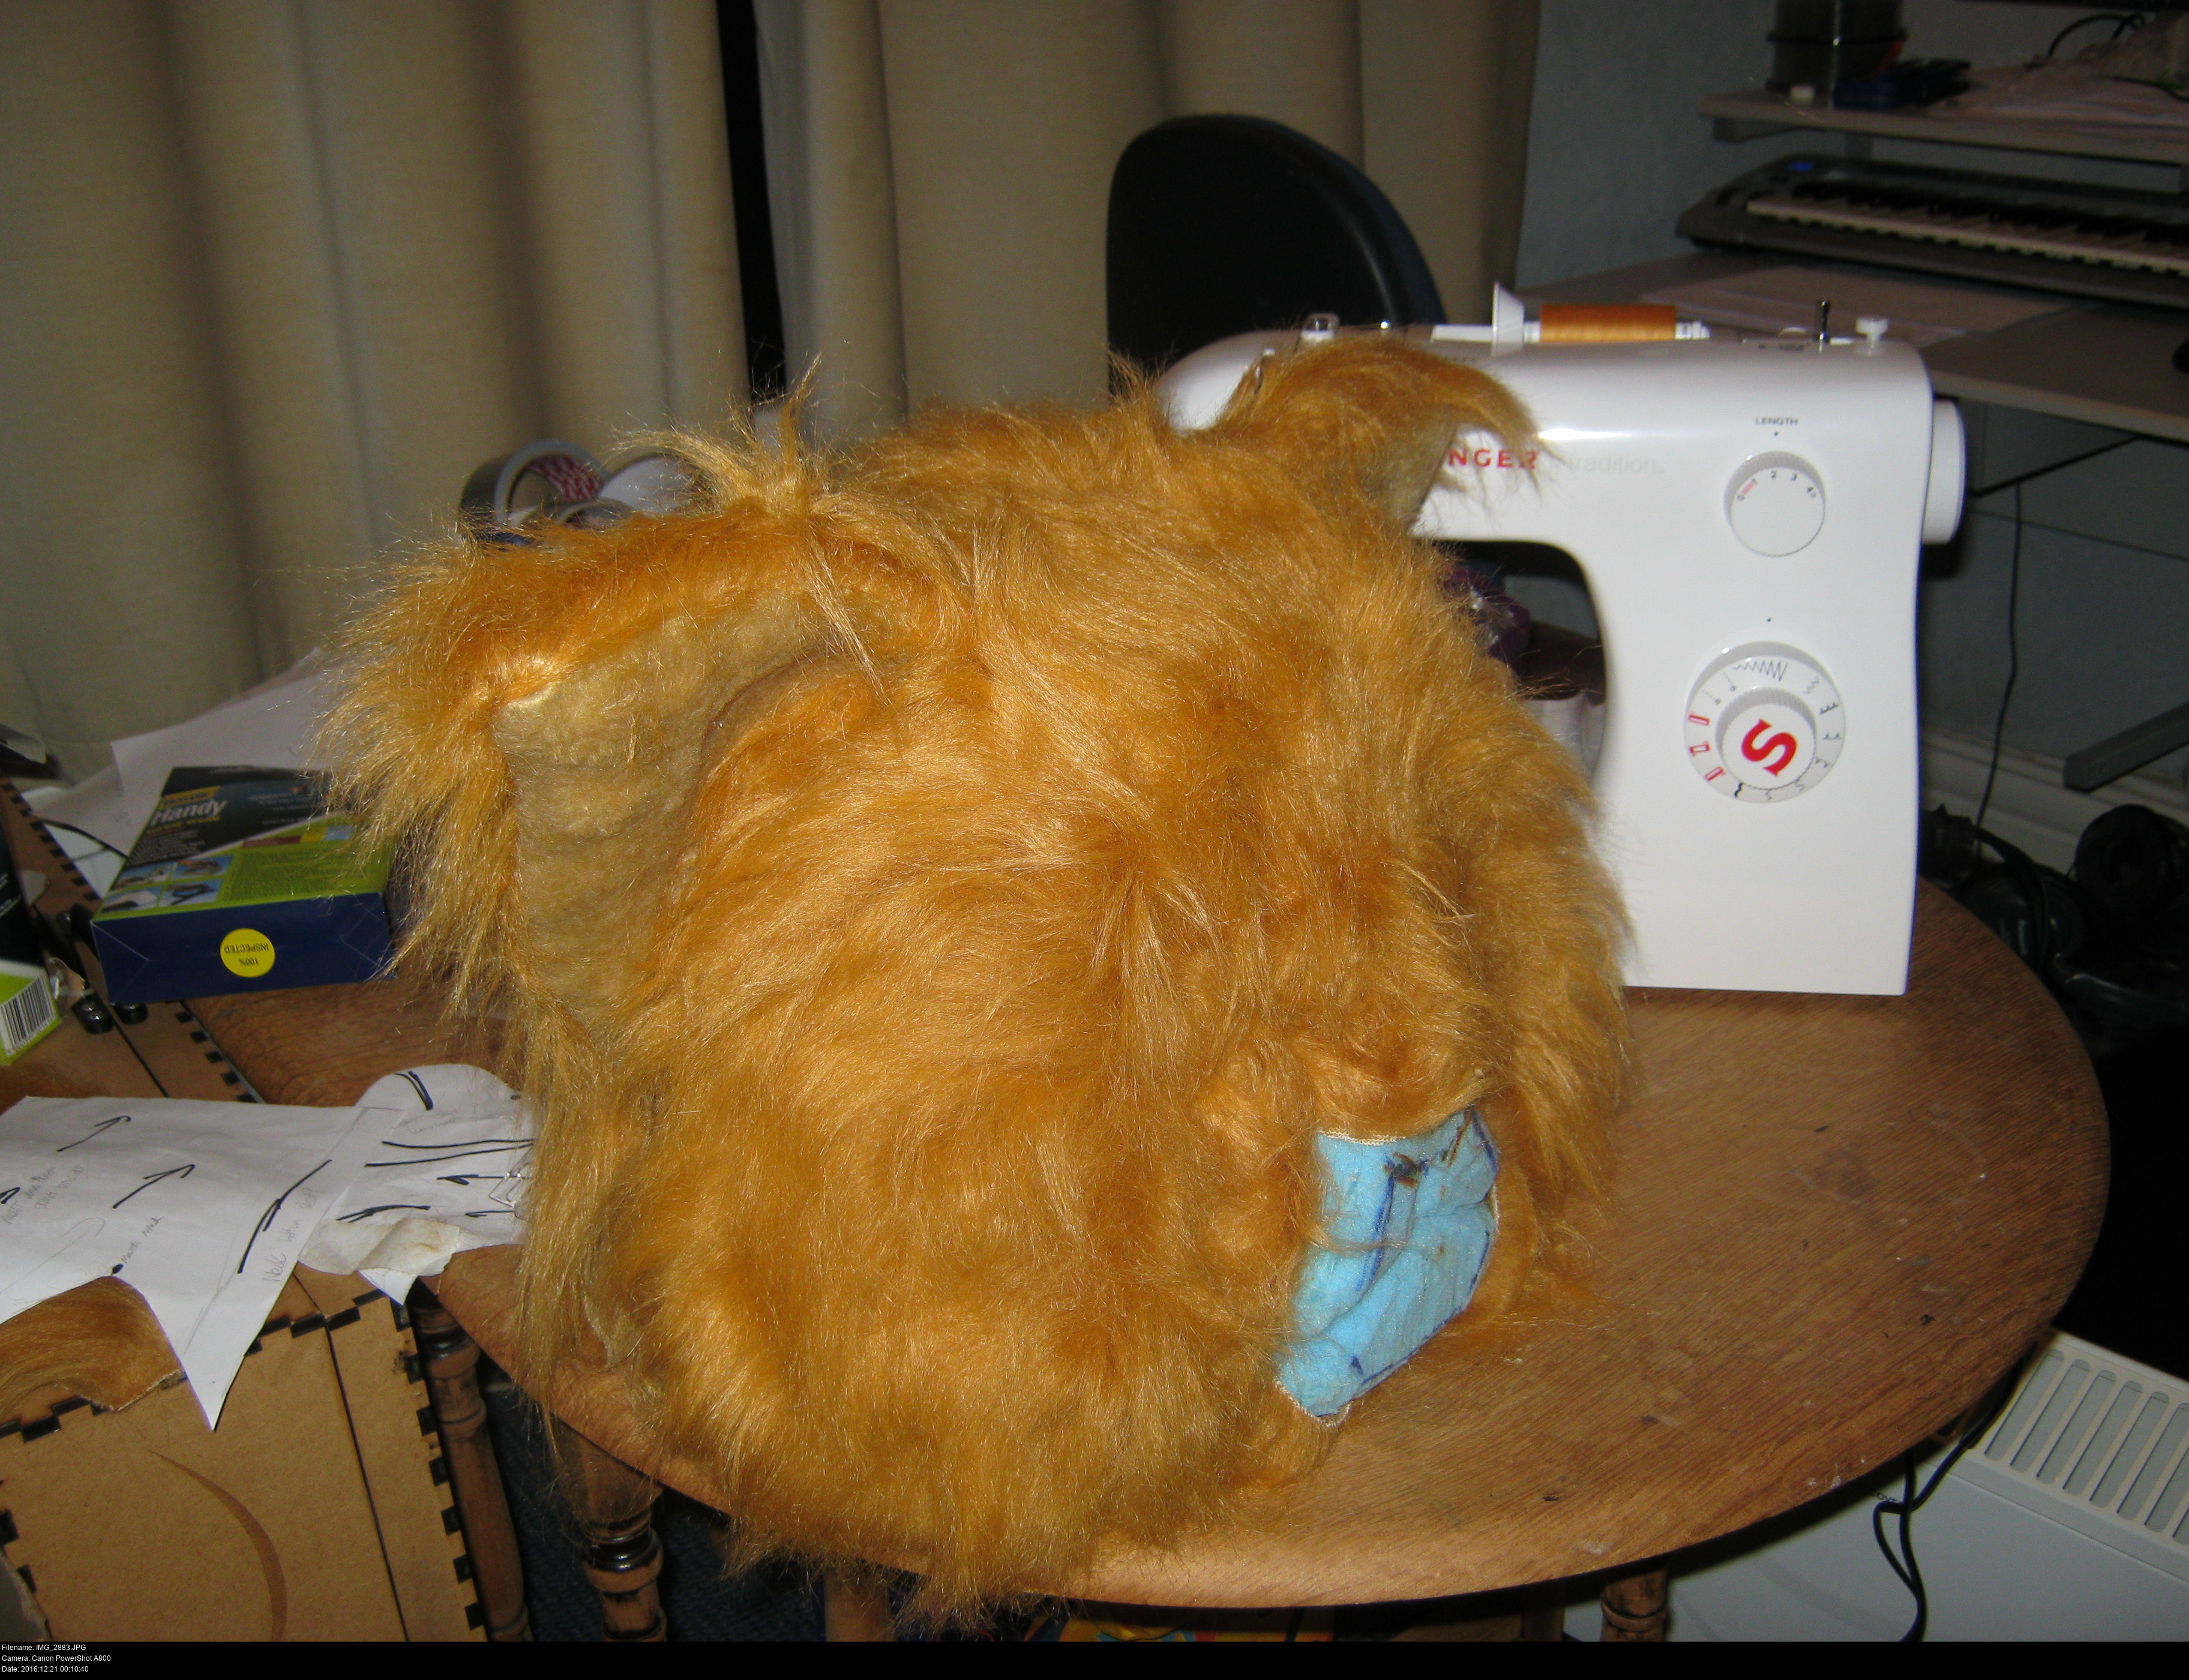
I've got my long fur and my short fur, so let's cut out some pieces.
Use a sparse comb, a dense comb, a brush, and an animal fur slicker to clean and comb and fluff up your fur before you work. Working with mangled fur is bad, and low-quality fur will almost certainly come into your possession mangled: I got mine from the remnants floor, so it's old and tossed around (though critically -unused-).
I'm using chalk to mark out on the knitted backing of the fake fur and marker on the faux suede backing of the short fur. Don't use marker on knitted backing, it might leak all over the place.
When you cut any kind of fur material, use a sharp craft knife and cut only the backing. Don't go at these with scissors, you'll end up mangling fur from other parts that drifts against the blades.
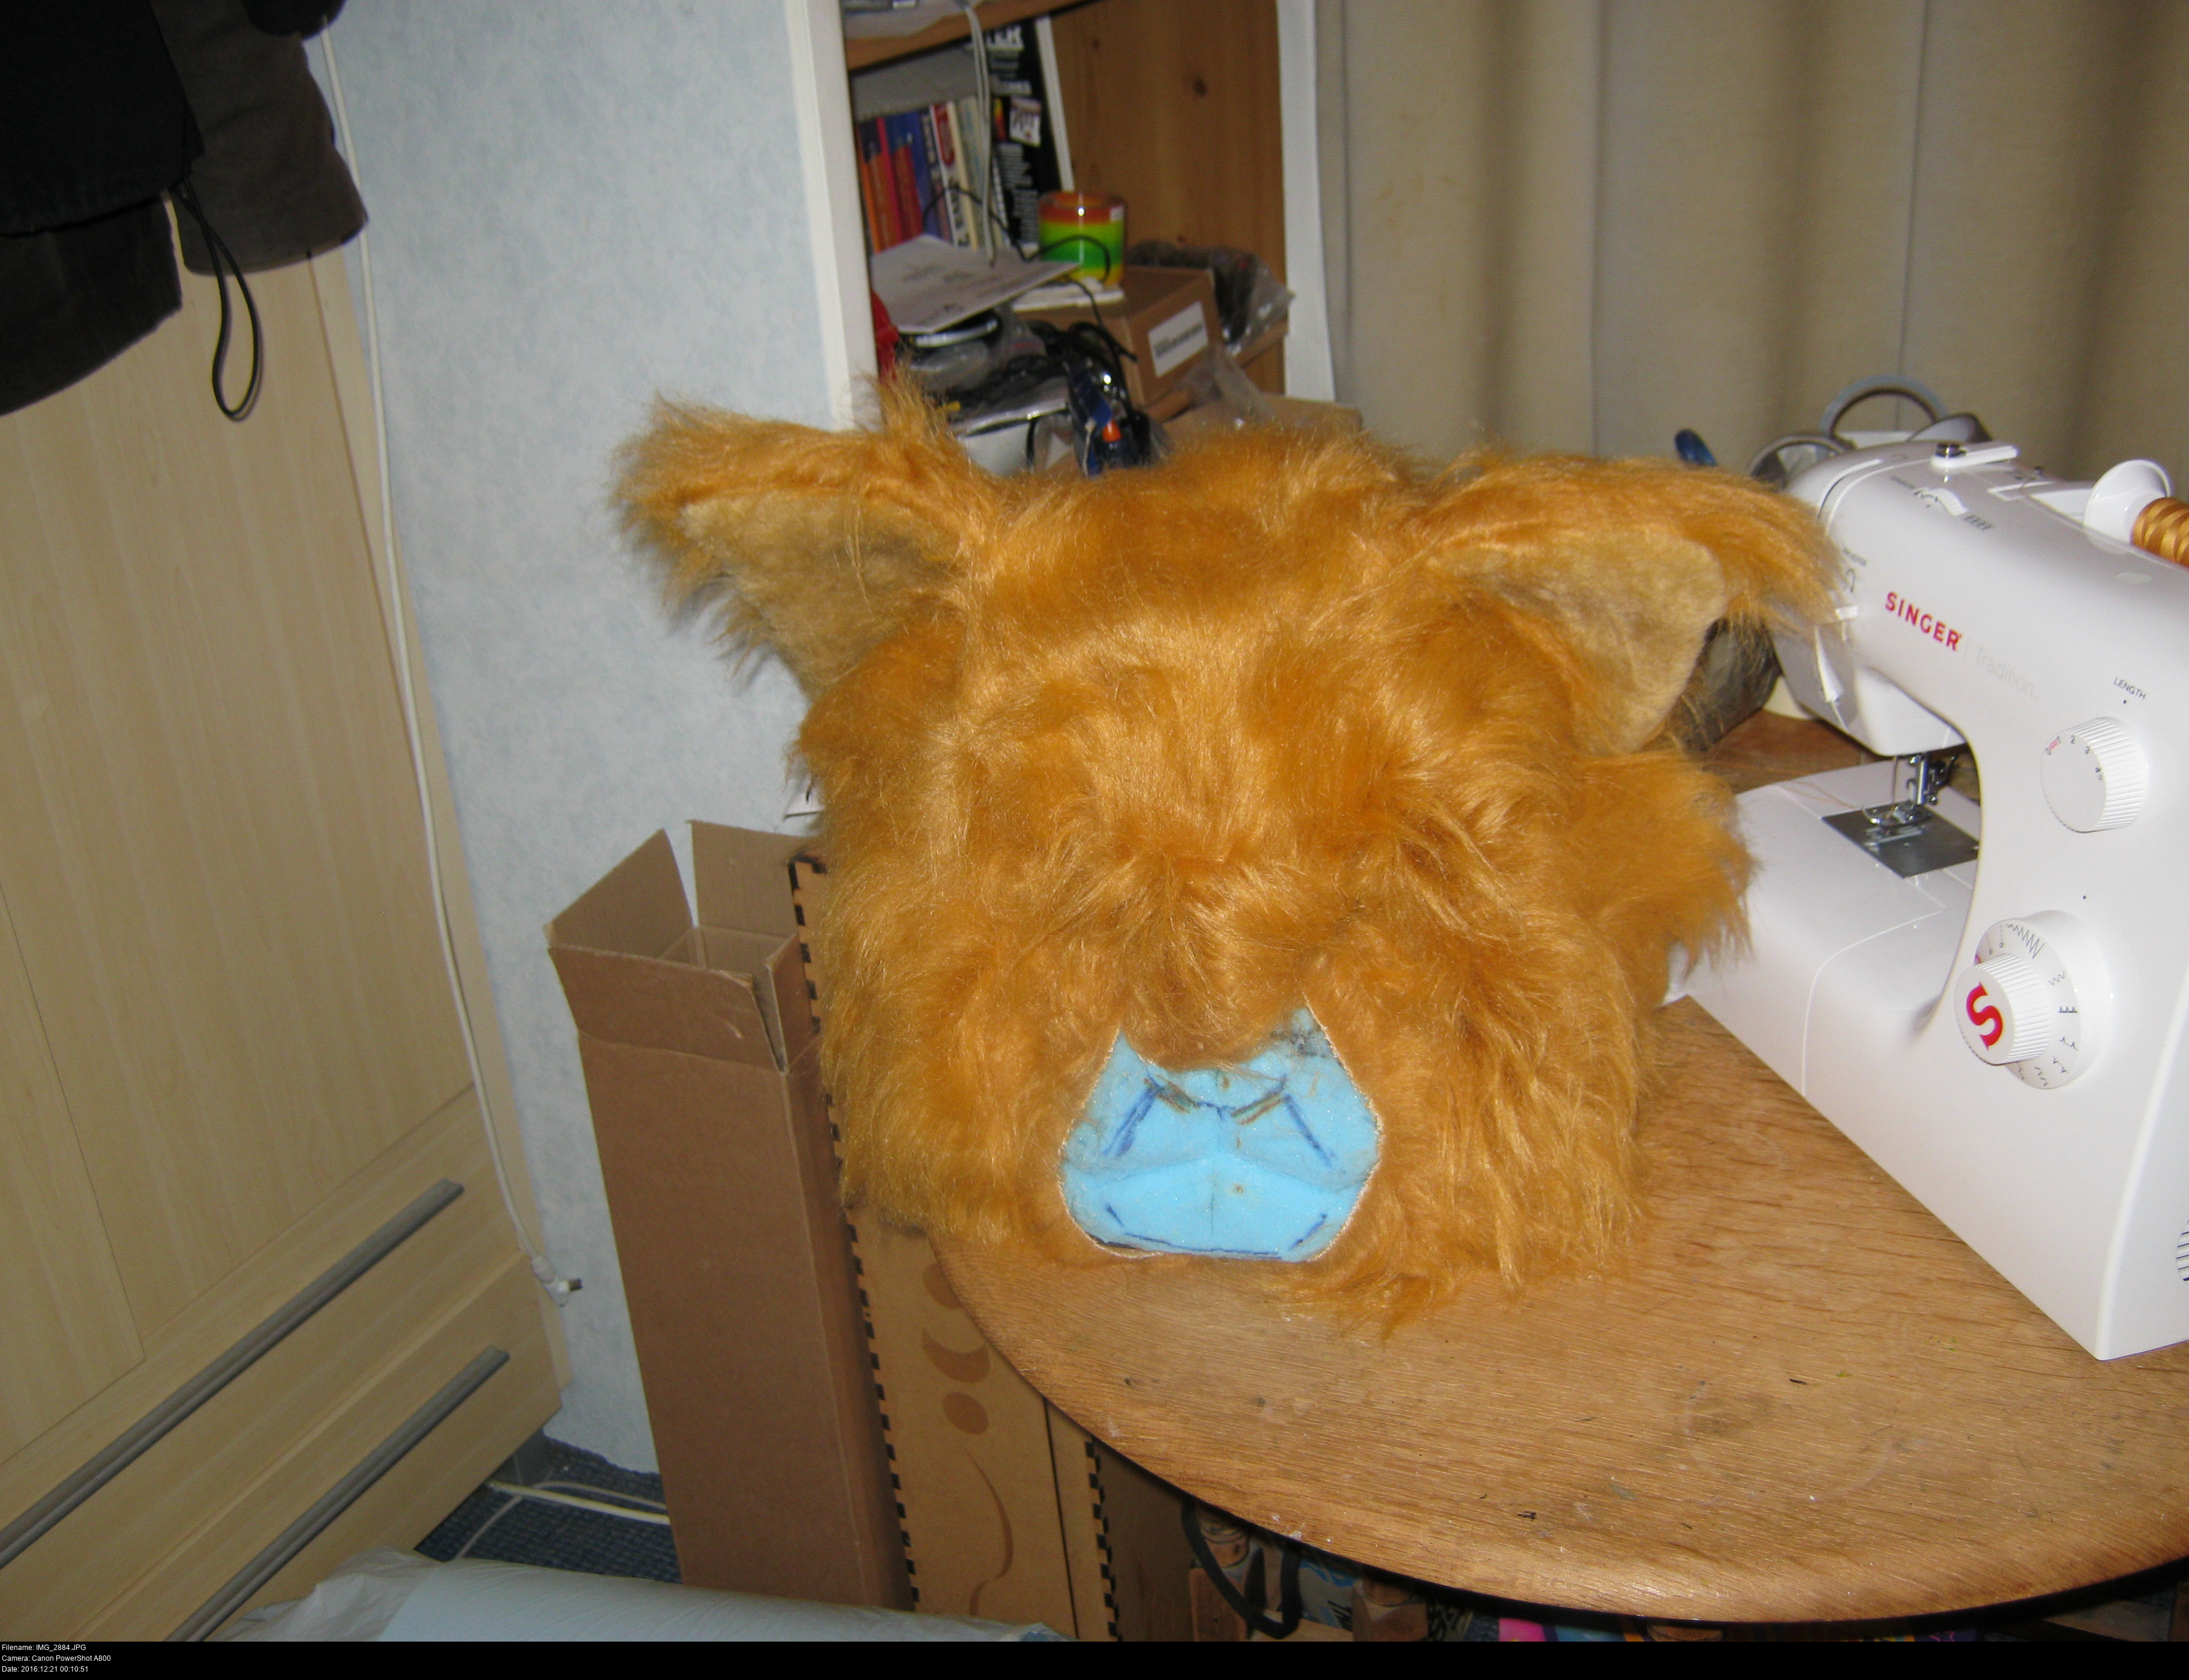
I'm making all of the head out of the long fur except the muzzle group and the insides of the ears. Real cats have very long soft fur sticking out of their ears usually. Hotshot doesn't, because he doesn't in the illustration, and this short fur is all I have to hand.
I am a brooding RPG hero.


There's no trick to this next bit. Just take your time and find pieces that seem to go together nicely to form larger composite sections. Sew any darts you need to, taking care not to trap fur inside them, and then sew the pieces themselves. If you're working on an unfamiliar combination of materials, check the tension and needle. Test first!
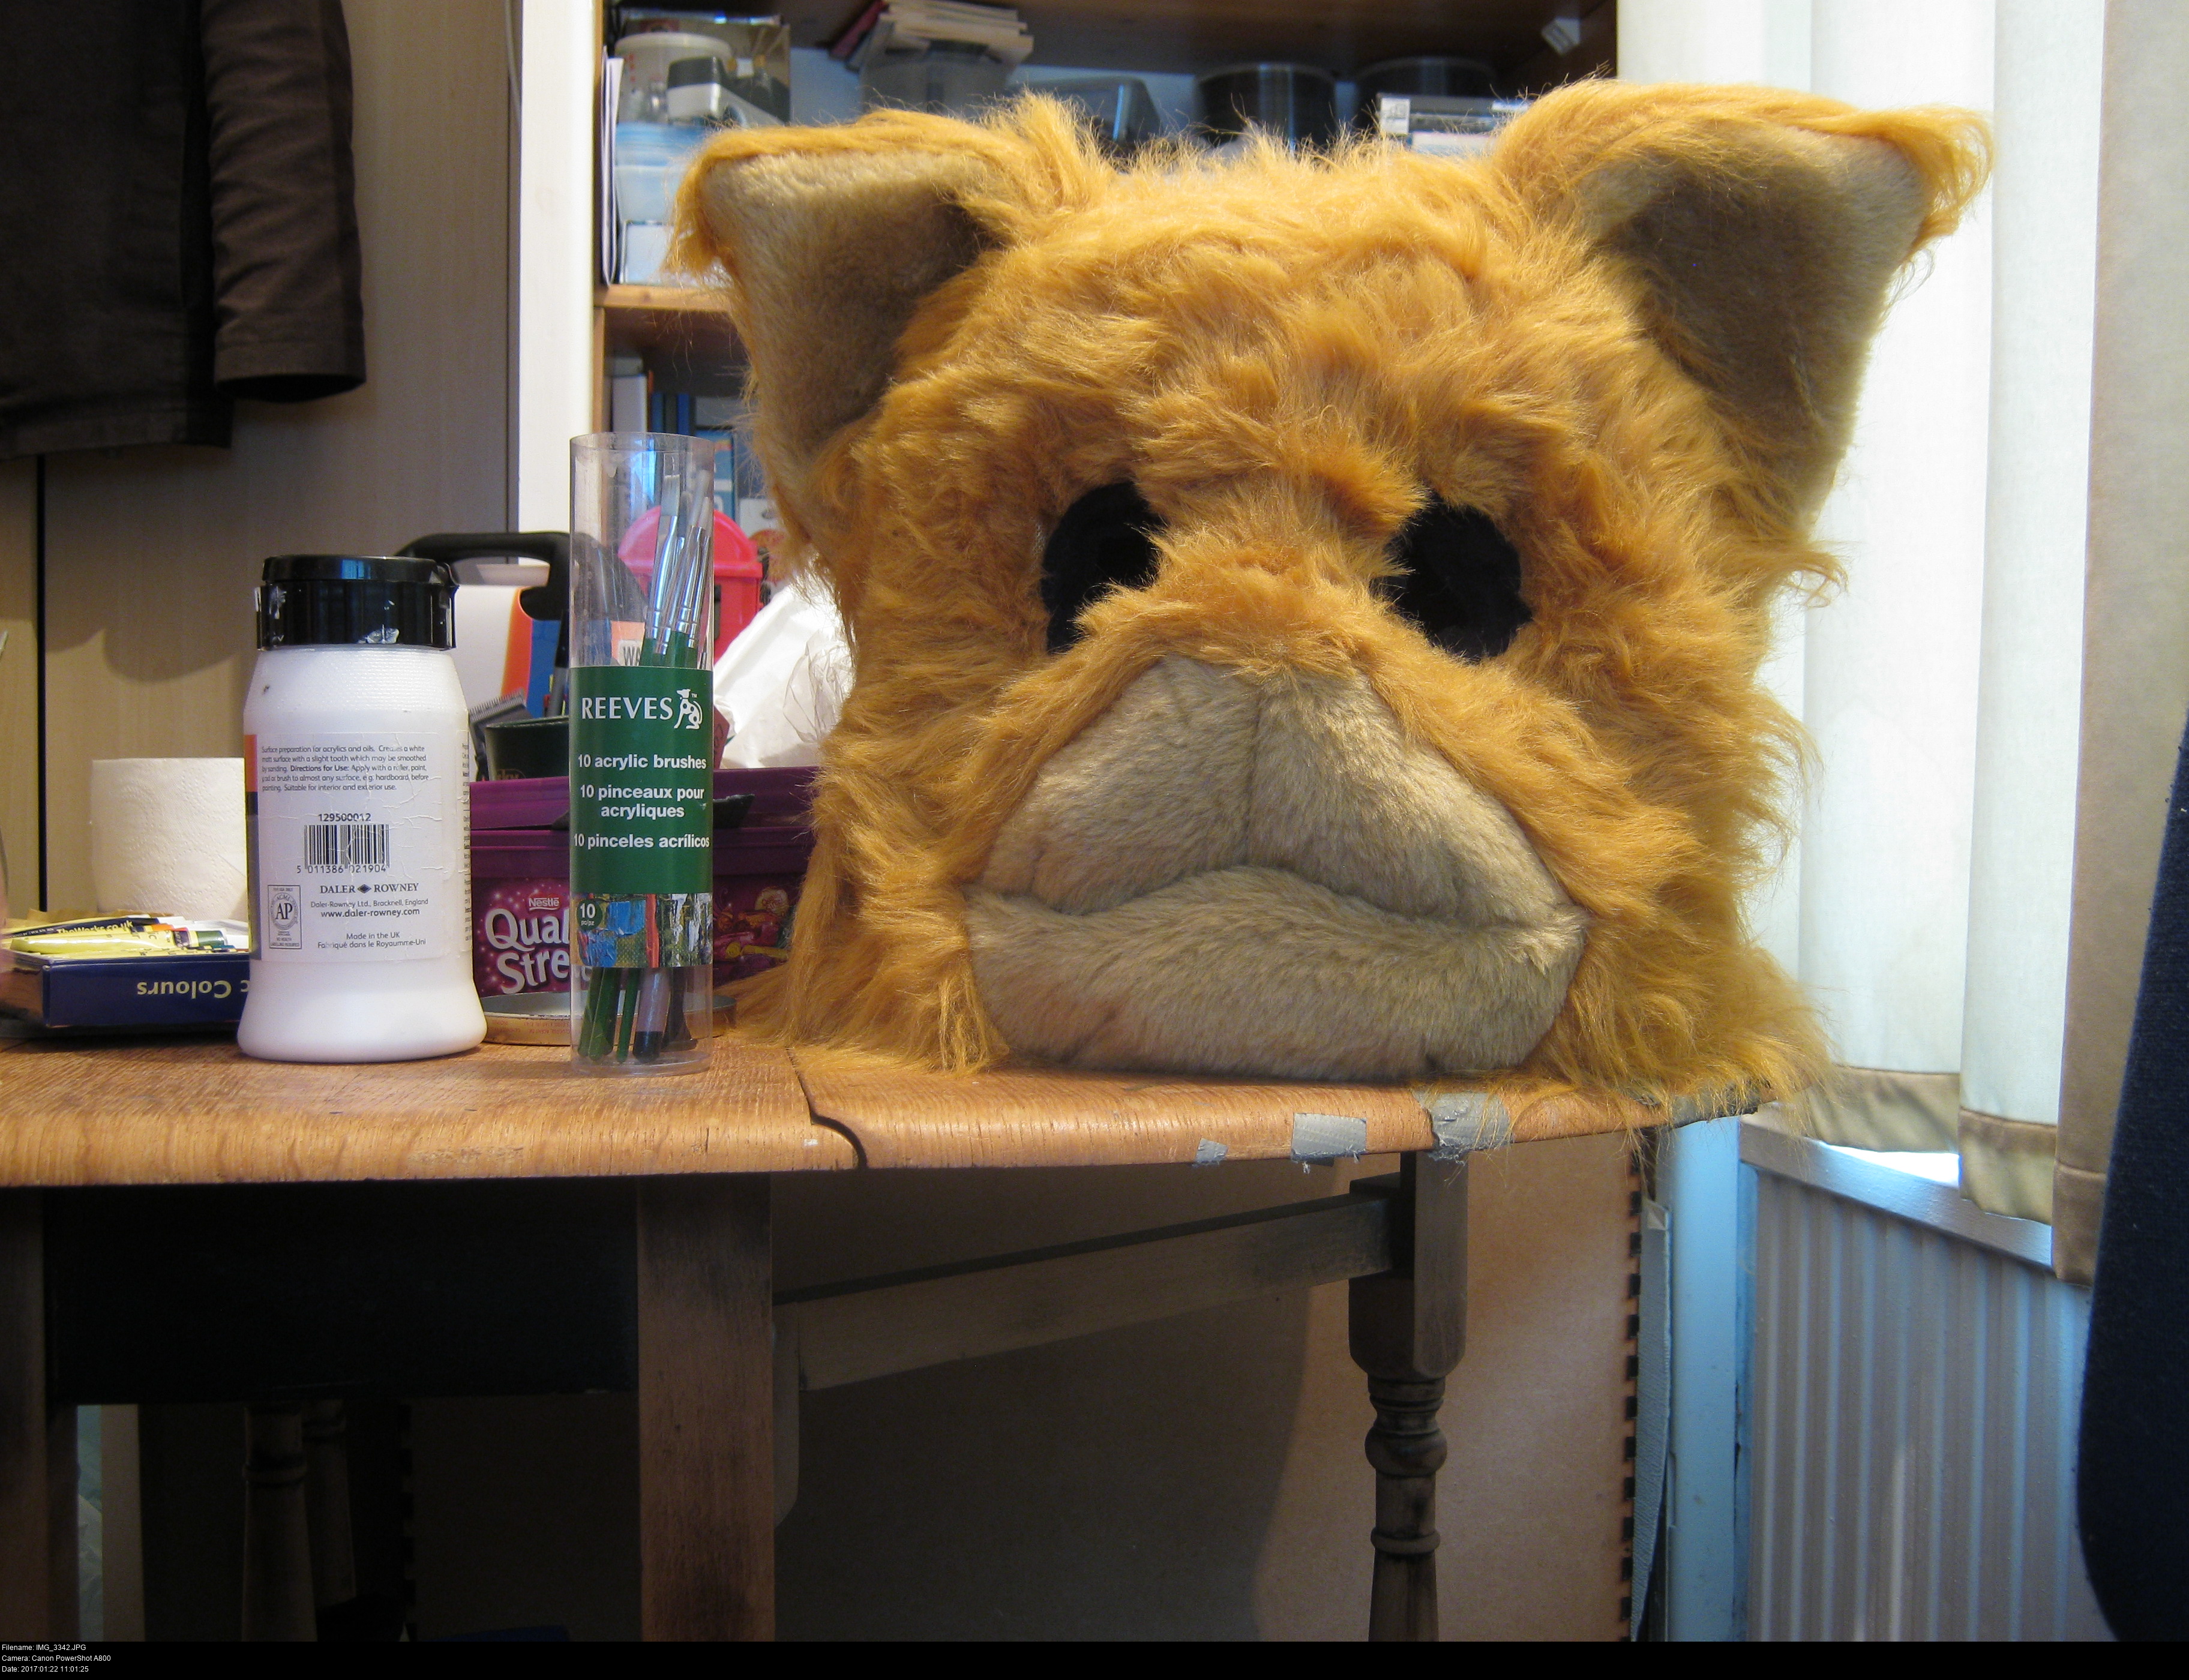
Well that's that, I guess. My dad said it looks like Bungle from Rainbow.

What a strange, sad blob I've created.
"Help me."


Here's the ears all done. I deliberately made the fluffy back sides larger than the interior side so that when I sew them together the fluffy side will curl inwards over the interior a little. All the effort I went to trying to make the ears properly fold has just been cancelled out due to the thickness of the suede-backed short fur I used for the interior. Oh well.
I don't recall why I did the ears separately and then sewed them to the head. It may have been possible to make the head as separate front and back halves, each with their corresponding ear half, and then sewn all along the sides to join them together. I think it was because there wasn't a clear horizontal line linking the interior ear tips together to split the head nearly into two halves. Regardless, I found a way to invert the ear and the head covering at the same and sew them together nicely. Slipping the full completed covering onto the head is a little bit of fuss but it seems to fit nicely.

I haven't yet attached the covering to the foam in any way. That comes after all the sewing has been done. You can see the loose edge at the bottom when I lift it up - when the muzzle group is attached, the underside edge ought to snug up against the lower rim of the foam, ready for me to attach the neck.
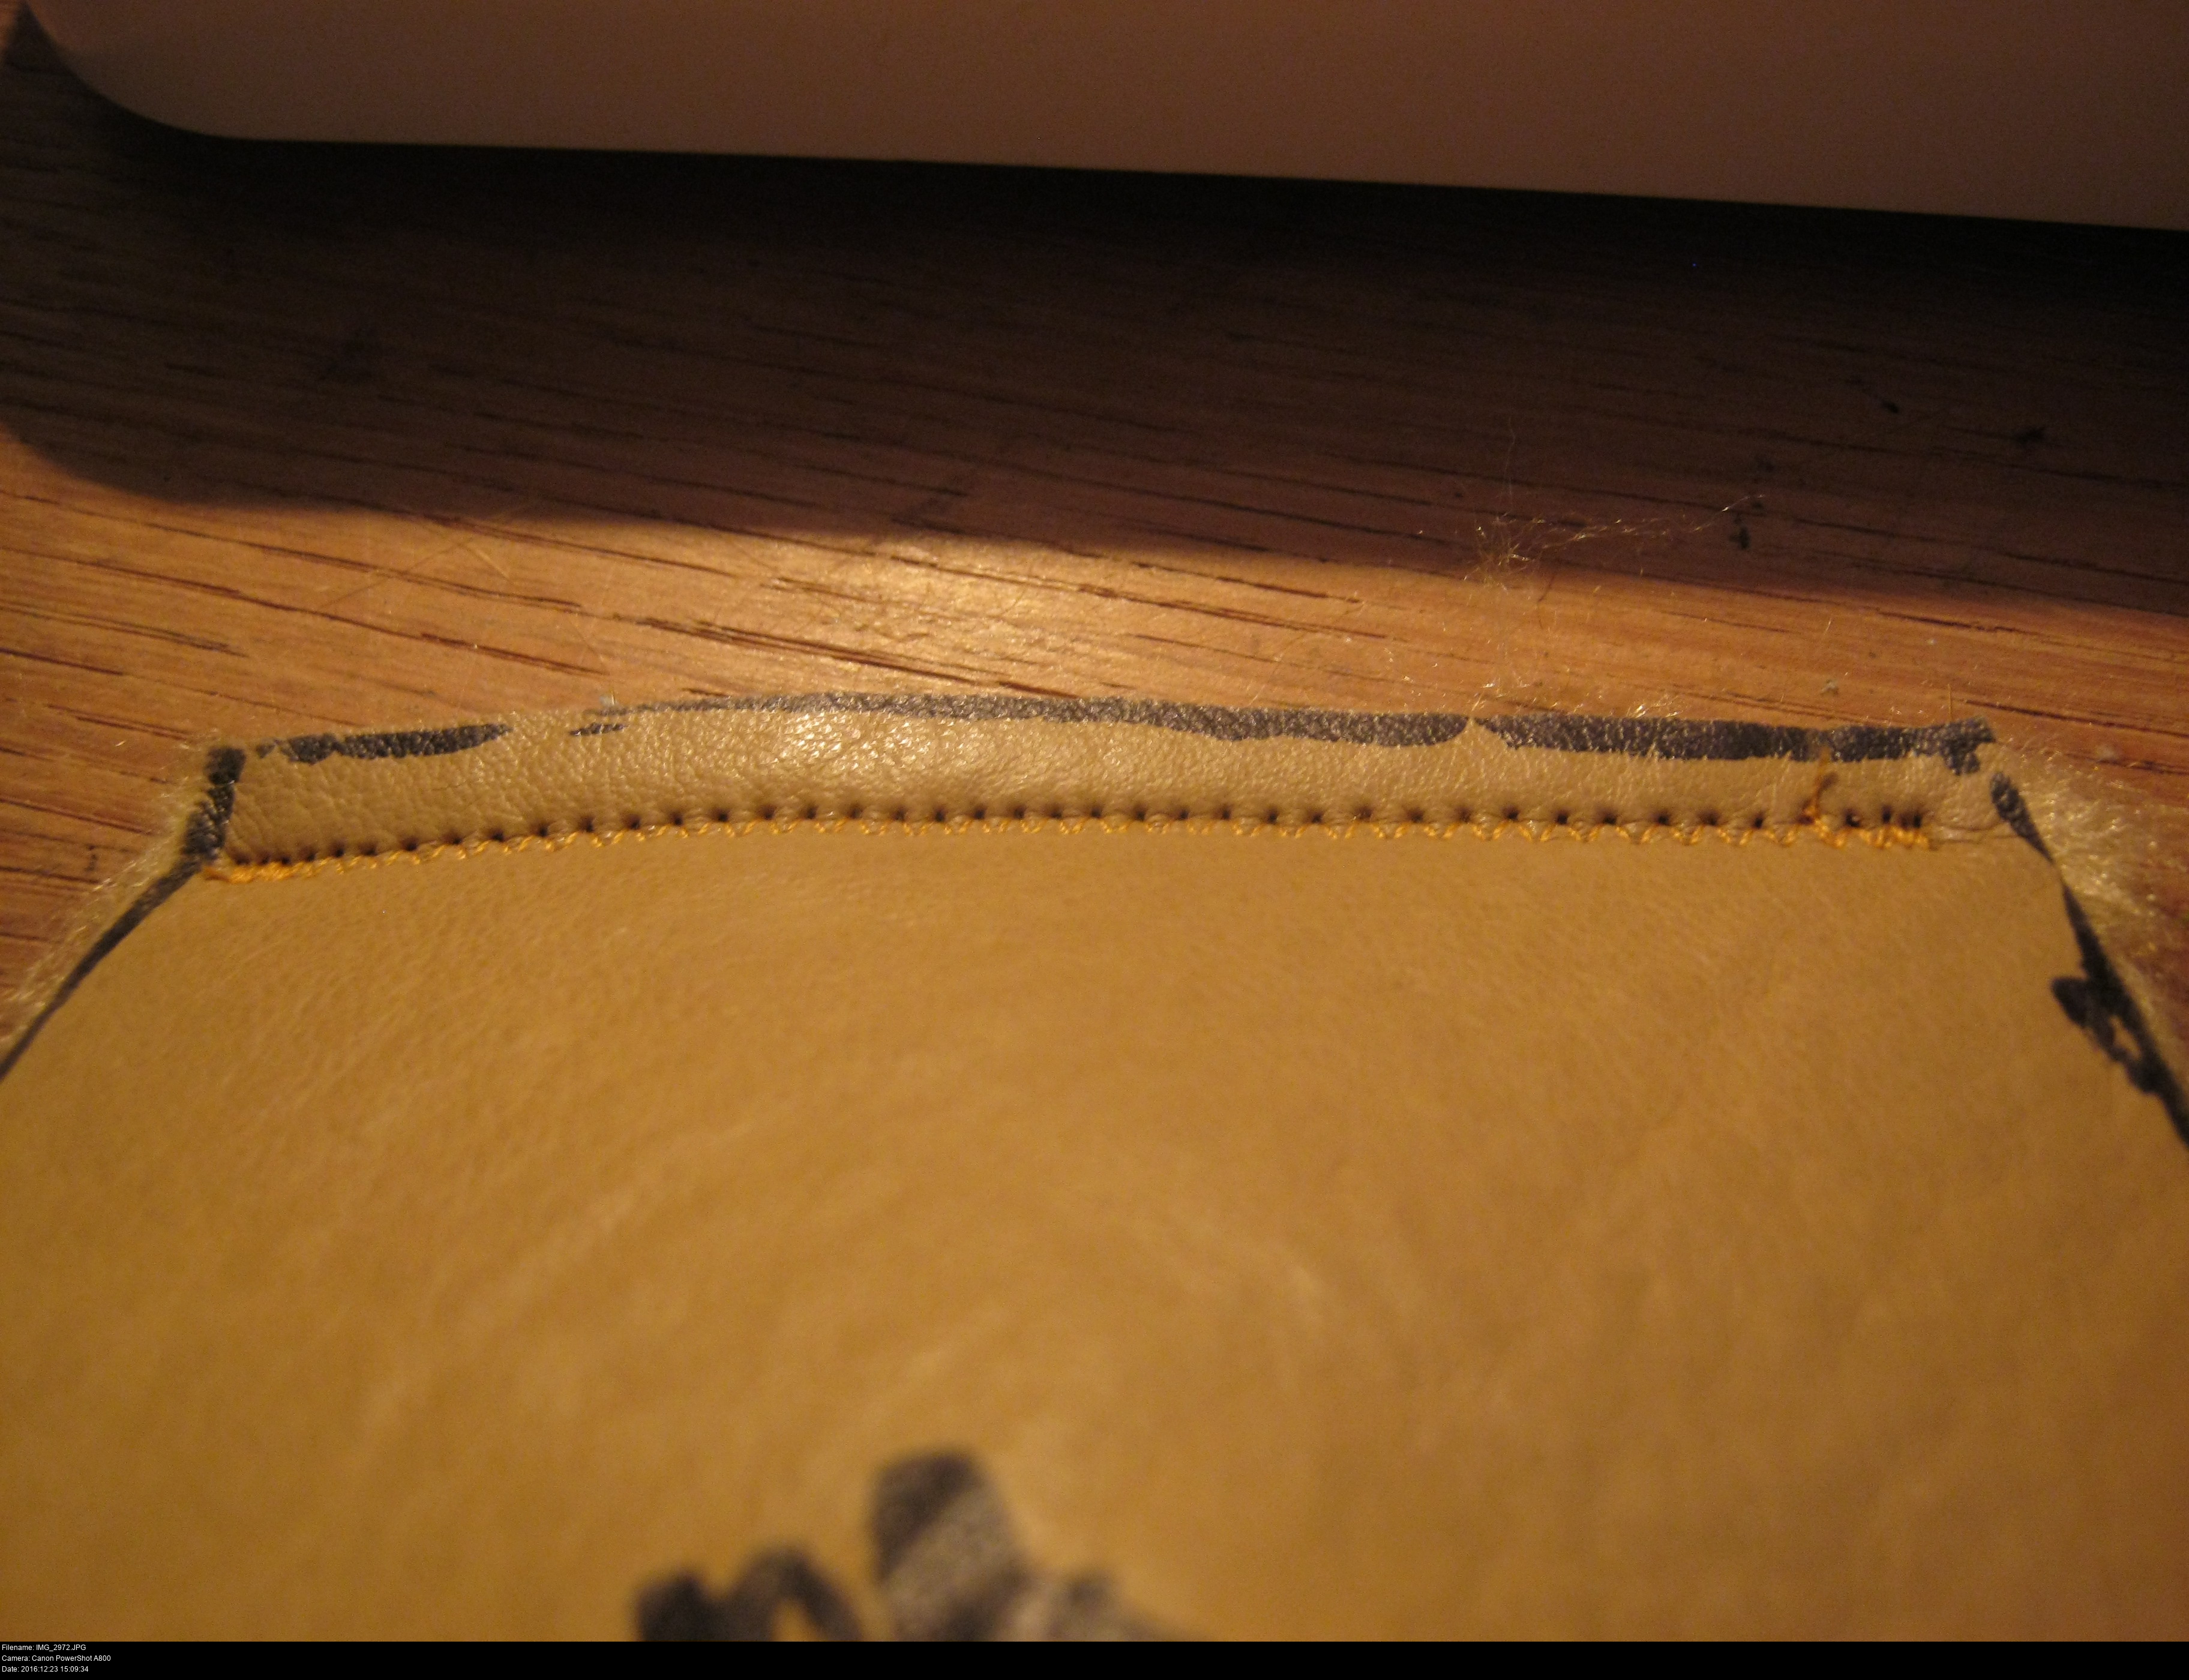

Time to make the muzzle group. A cat muzzle looks like three rounded pieces: two upper halves and a lower jaw. This stitch is the central line linking my upper left and right pieces. I'm not taking much care to comb the fur out of this seam because a) the fur is too short to do that with anyway, and b) I want the seam to be visible on the muzzle.
Here's a small note on the stitching type. If you want your knit-backed fur fabric to stretch over the foam, use one of the zig-zag stitches on your machine.
Obviously, if you're sewing a non-stretchy fabric like this faux suede, it won't make a difference. Experiment with the different stitches at your disposal: some of them will stretch nicely, some will let you unpick the fur easier, and a pair of dense, side-by-side straight stitches will give you a strong, well-defined edge as long as there's no fur trapped in there.
Truthfully though I don't remember why I took pictures of this stitch specifically. It must've been important.
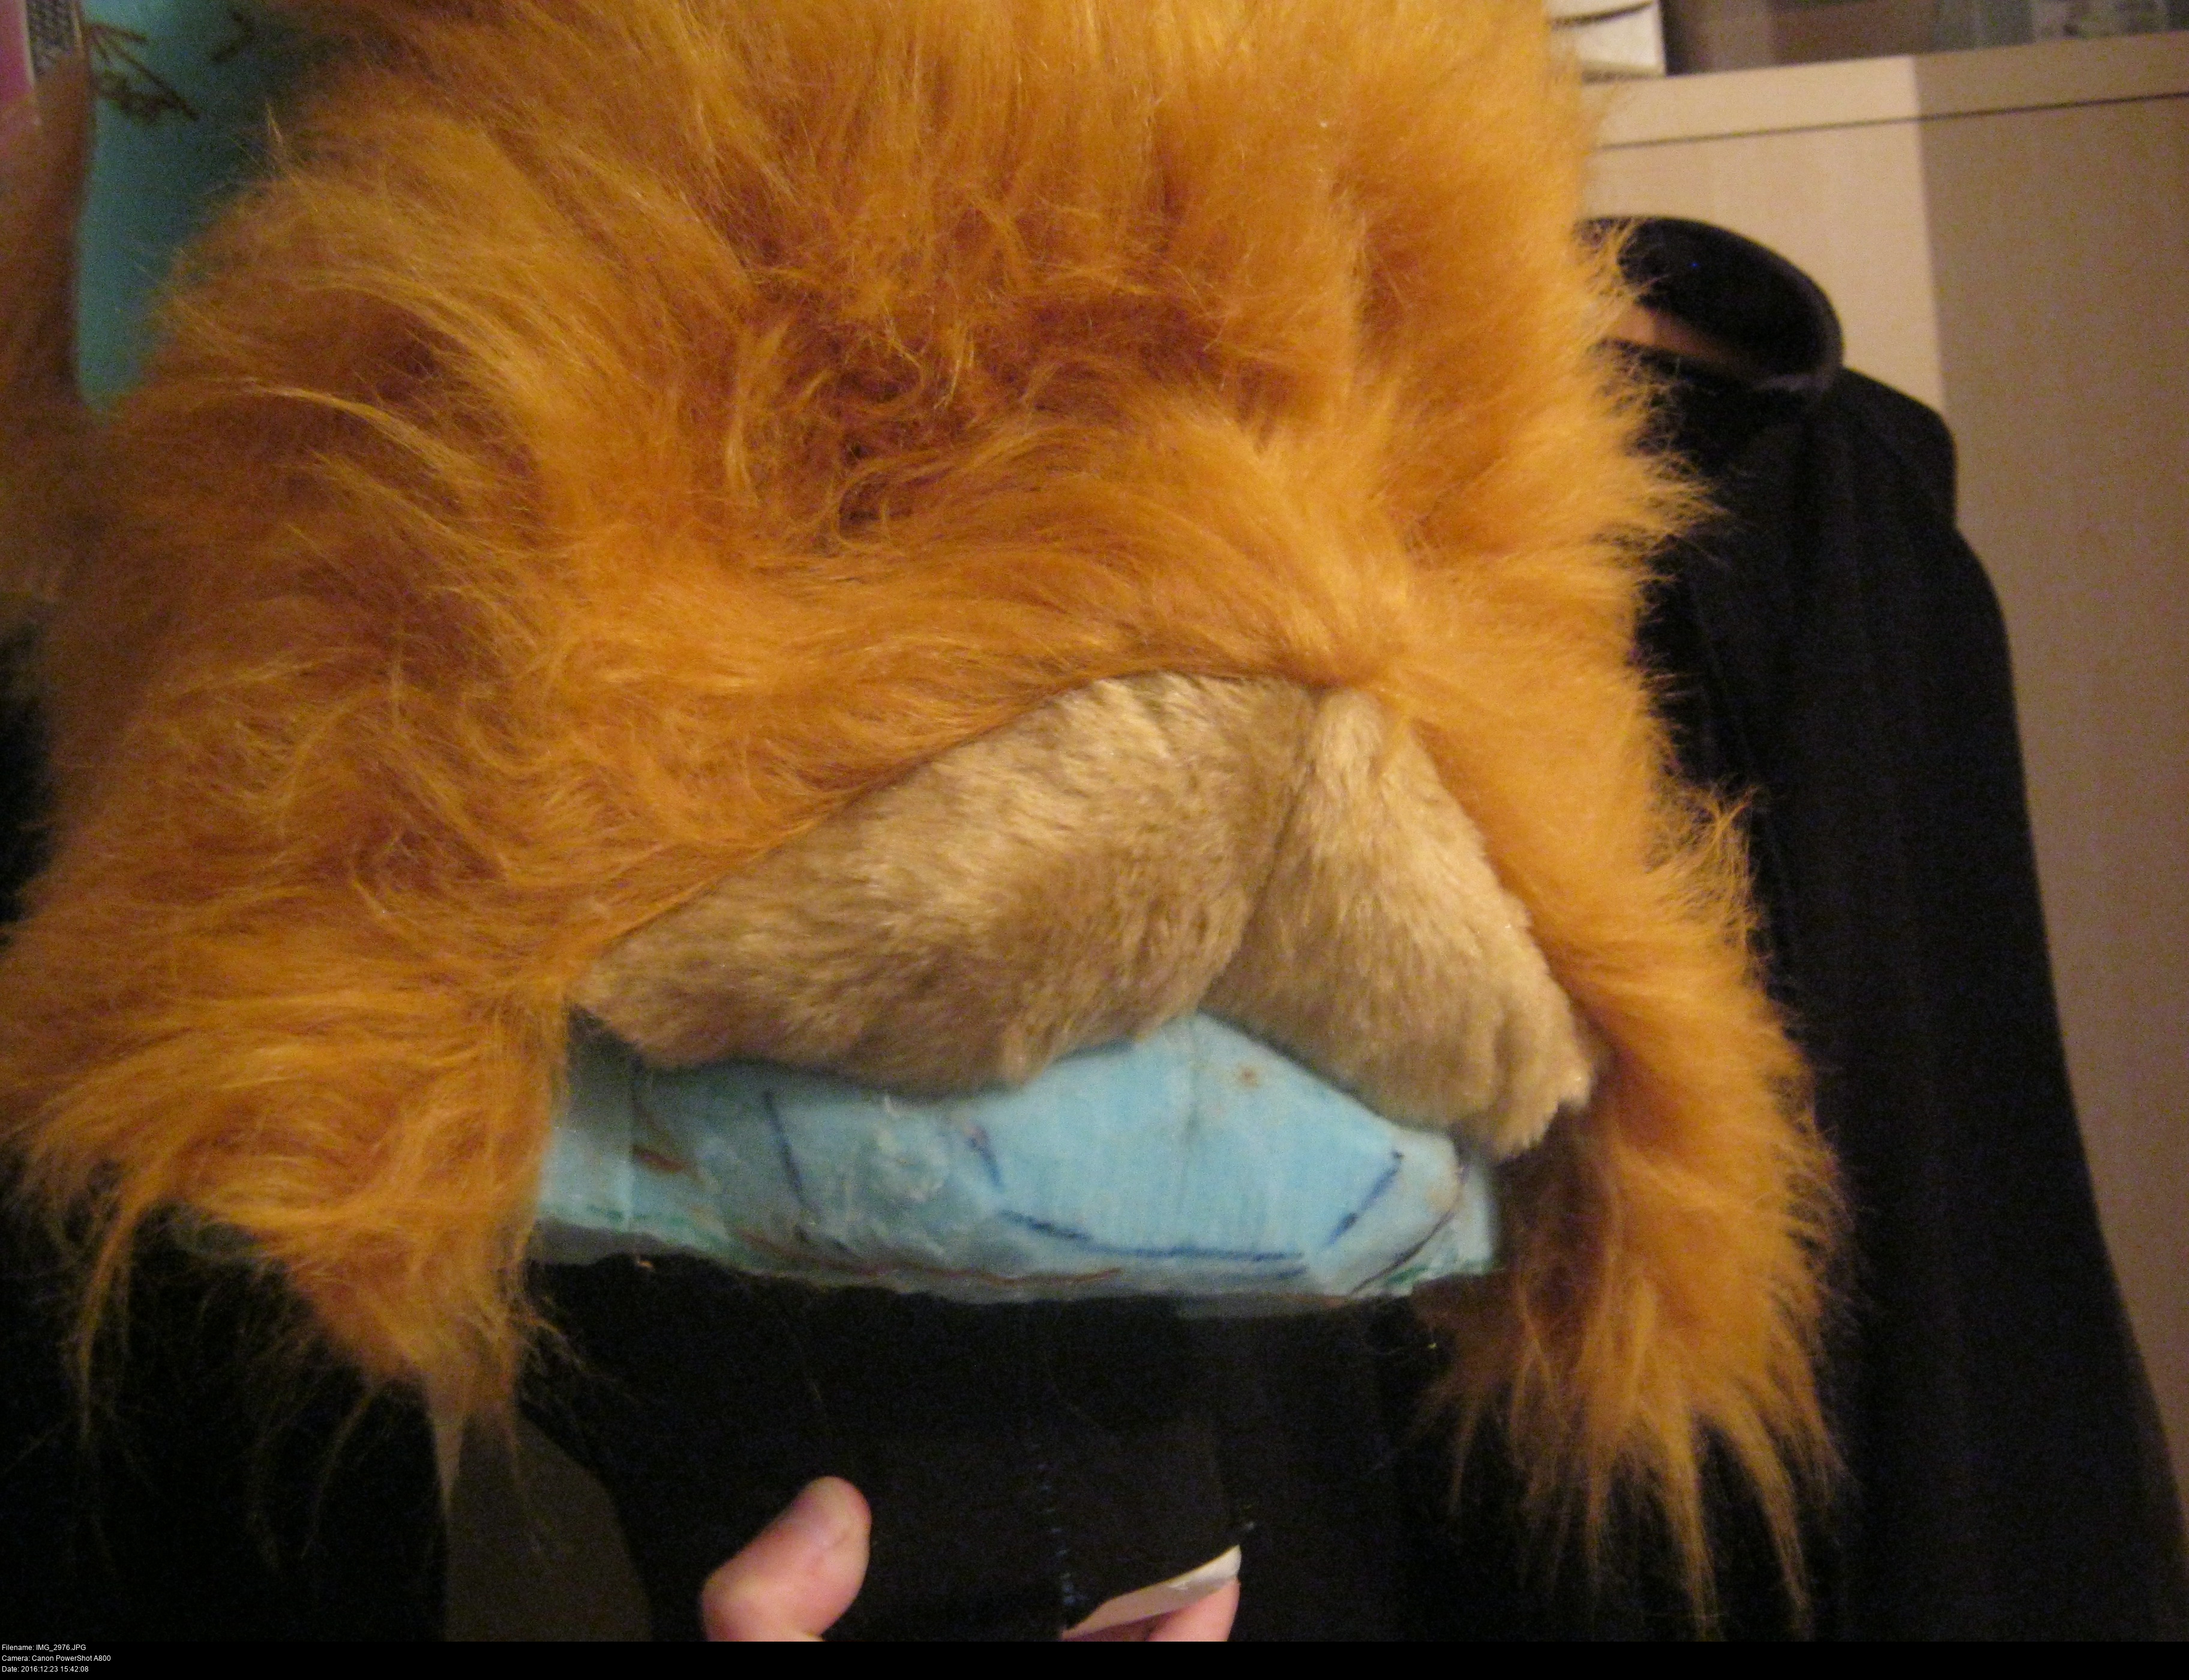
Here's the upper muzzle group sewn into the rest of the covering. You can see how the visible vertical seam resembles a cat's cleft.

Hey, hey! There you go, you happy bastard! We're looking good now aren't we?
Let me point out one major disadvantage of the faux suede-backed fur I chose for the muzzle:
I've placed a dart in each piece of the upper muzzle so that his smile curls up at the sides. These darts are very, very visible in this faux suede material since it is very thick. It's almost like a blanket. If the fur was longer, I could comb over the seam to hide it, but that's not possible here. As a result, Hotshot's got a very obvious notch 1/4 and 3/4 across his smile.
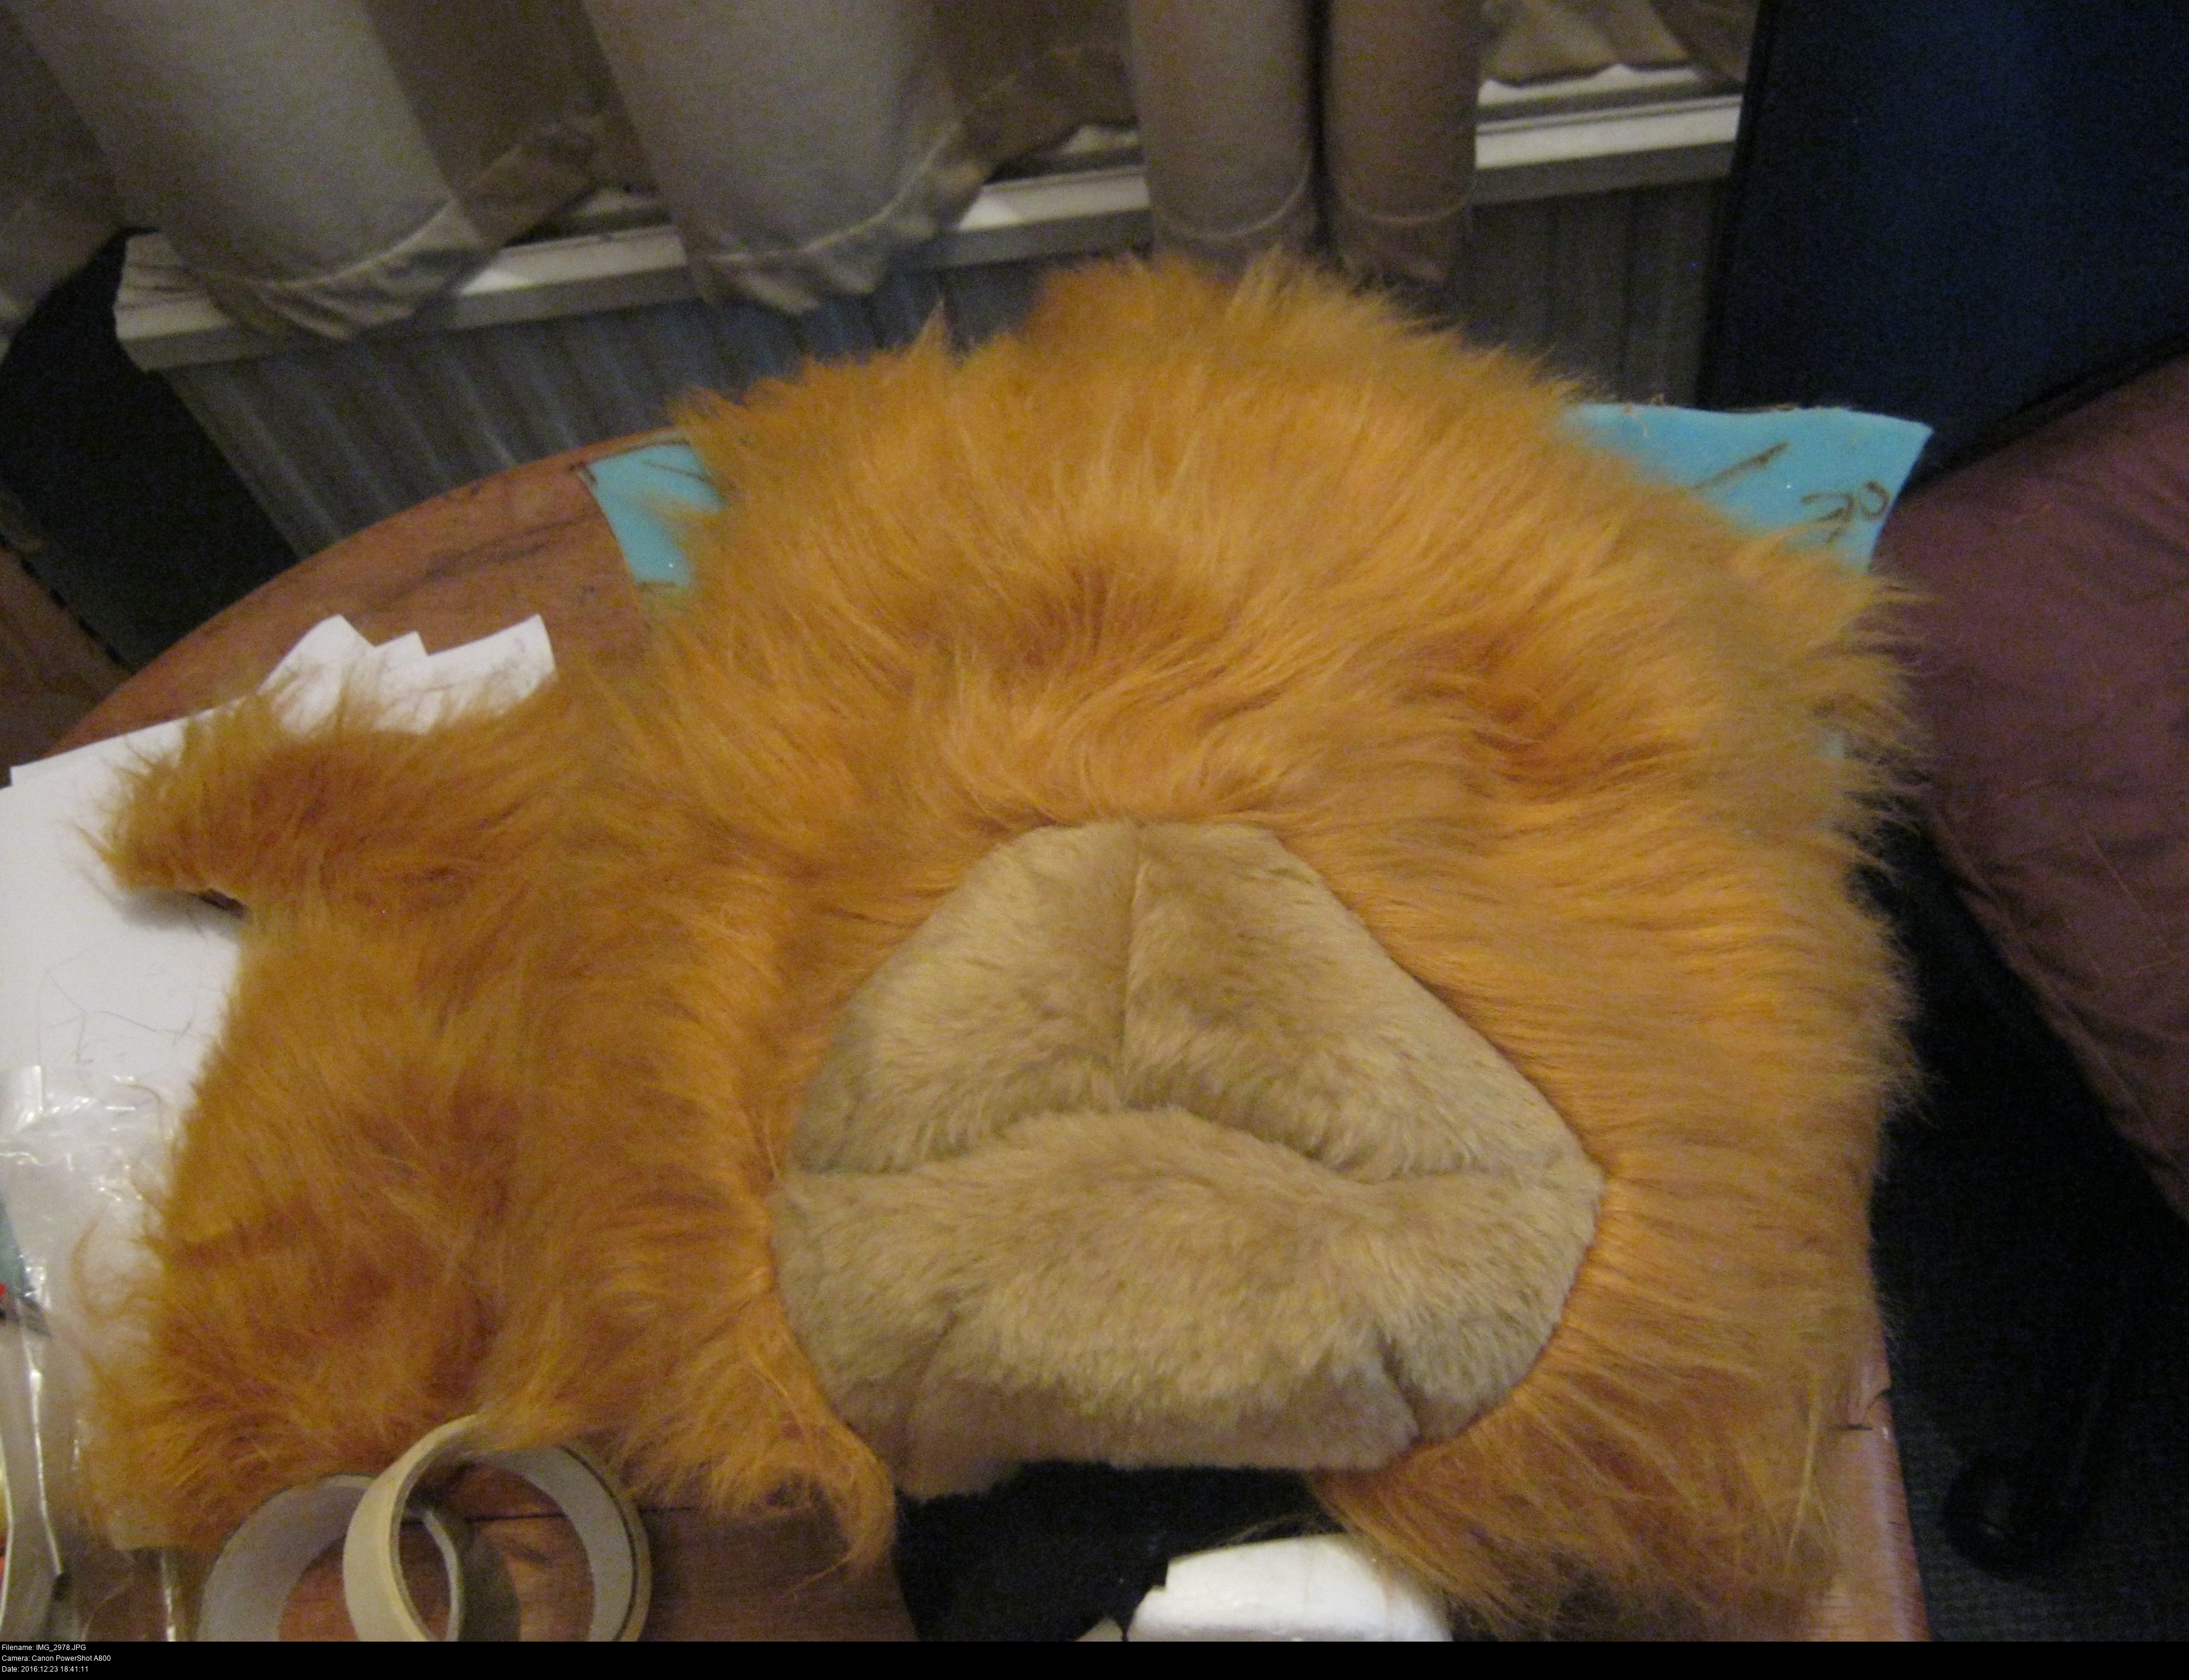
Similarly, the lower section has darts at the edges of his chin to allow it to follow the lower hexagonal edge of the muzzle. That means he's got notches either side of his chin.
You could focus on those disadvantages and fret over them for days, considering dismantling the entire thing just to get the muzzle looking perfect. Or you could revel in the wonderful fact that you've carved and made your own furry head from scratch!!

There is one bit of asymmetry that's bothering me though. The right side of his muzzle doesn't match the left. One side is longer than the other. And what's worse is that I can't decide which is which! It seems to change every time I look at it, and at every angle.
There's all the fur sewn, and I think I've adjusted the muzzle a little at this point. It isn't perfect, but can you tell?
The next stage is to clip the long-pile fur down to a more restained fuzz. You really need lots of references for this. Some areas are going to be long, some are short.
To do this, you'll need a high-quality clipper set. Wahl clippers are recommended.
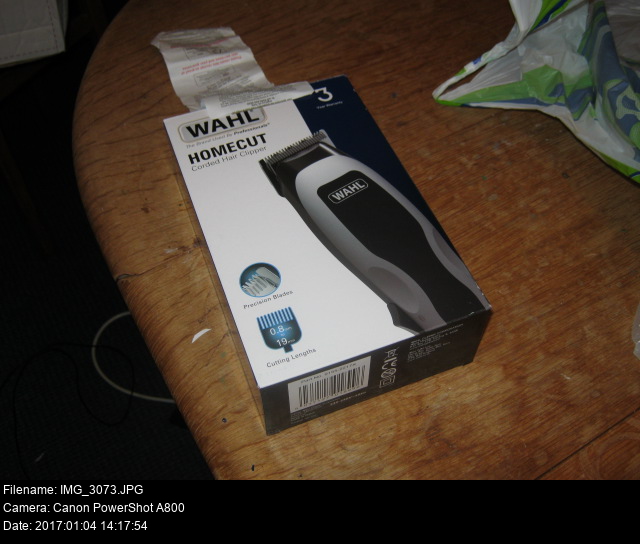
But not these. These Wahl Home Cut clippers are for human hair, and they do absolutely nothing to faux fur. You might think that they'll be exactly the same as any other kind of clippers, but apparently not. Don't even try these.
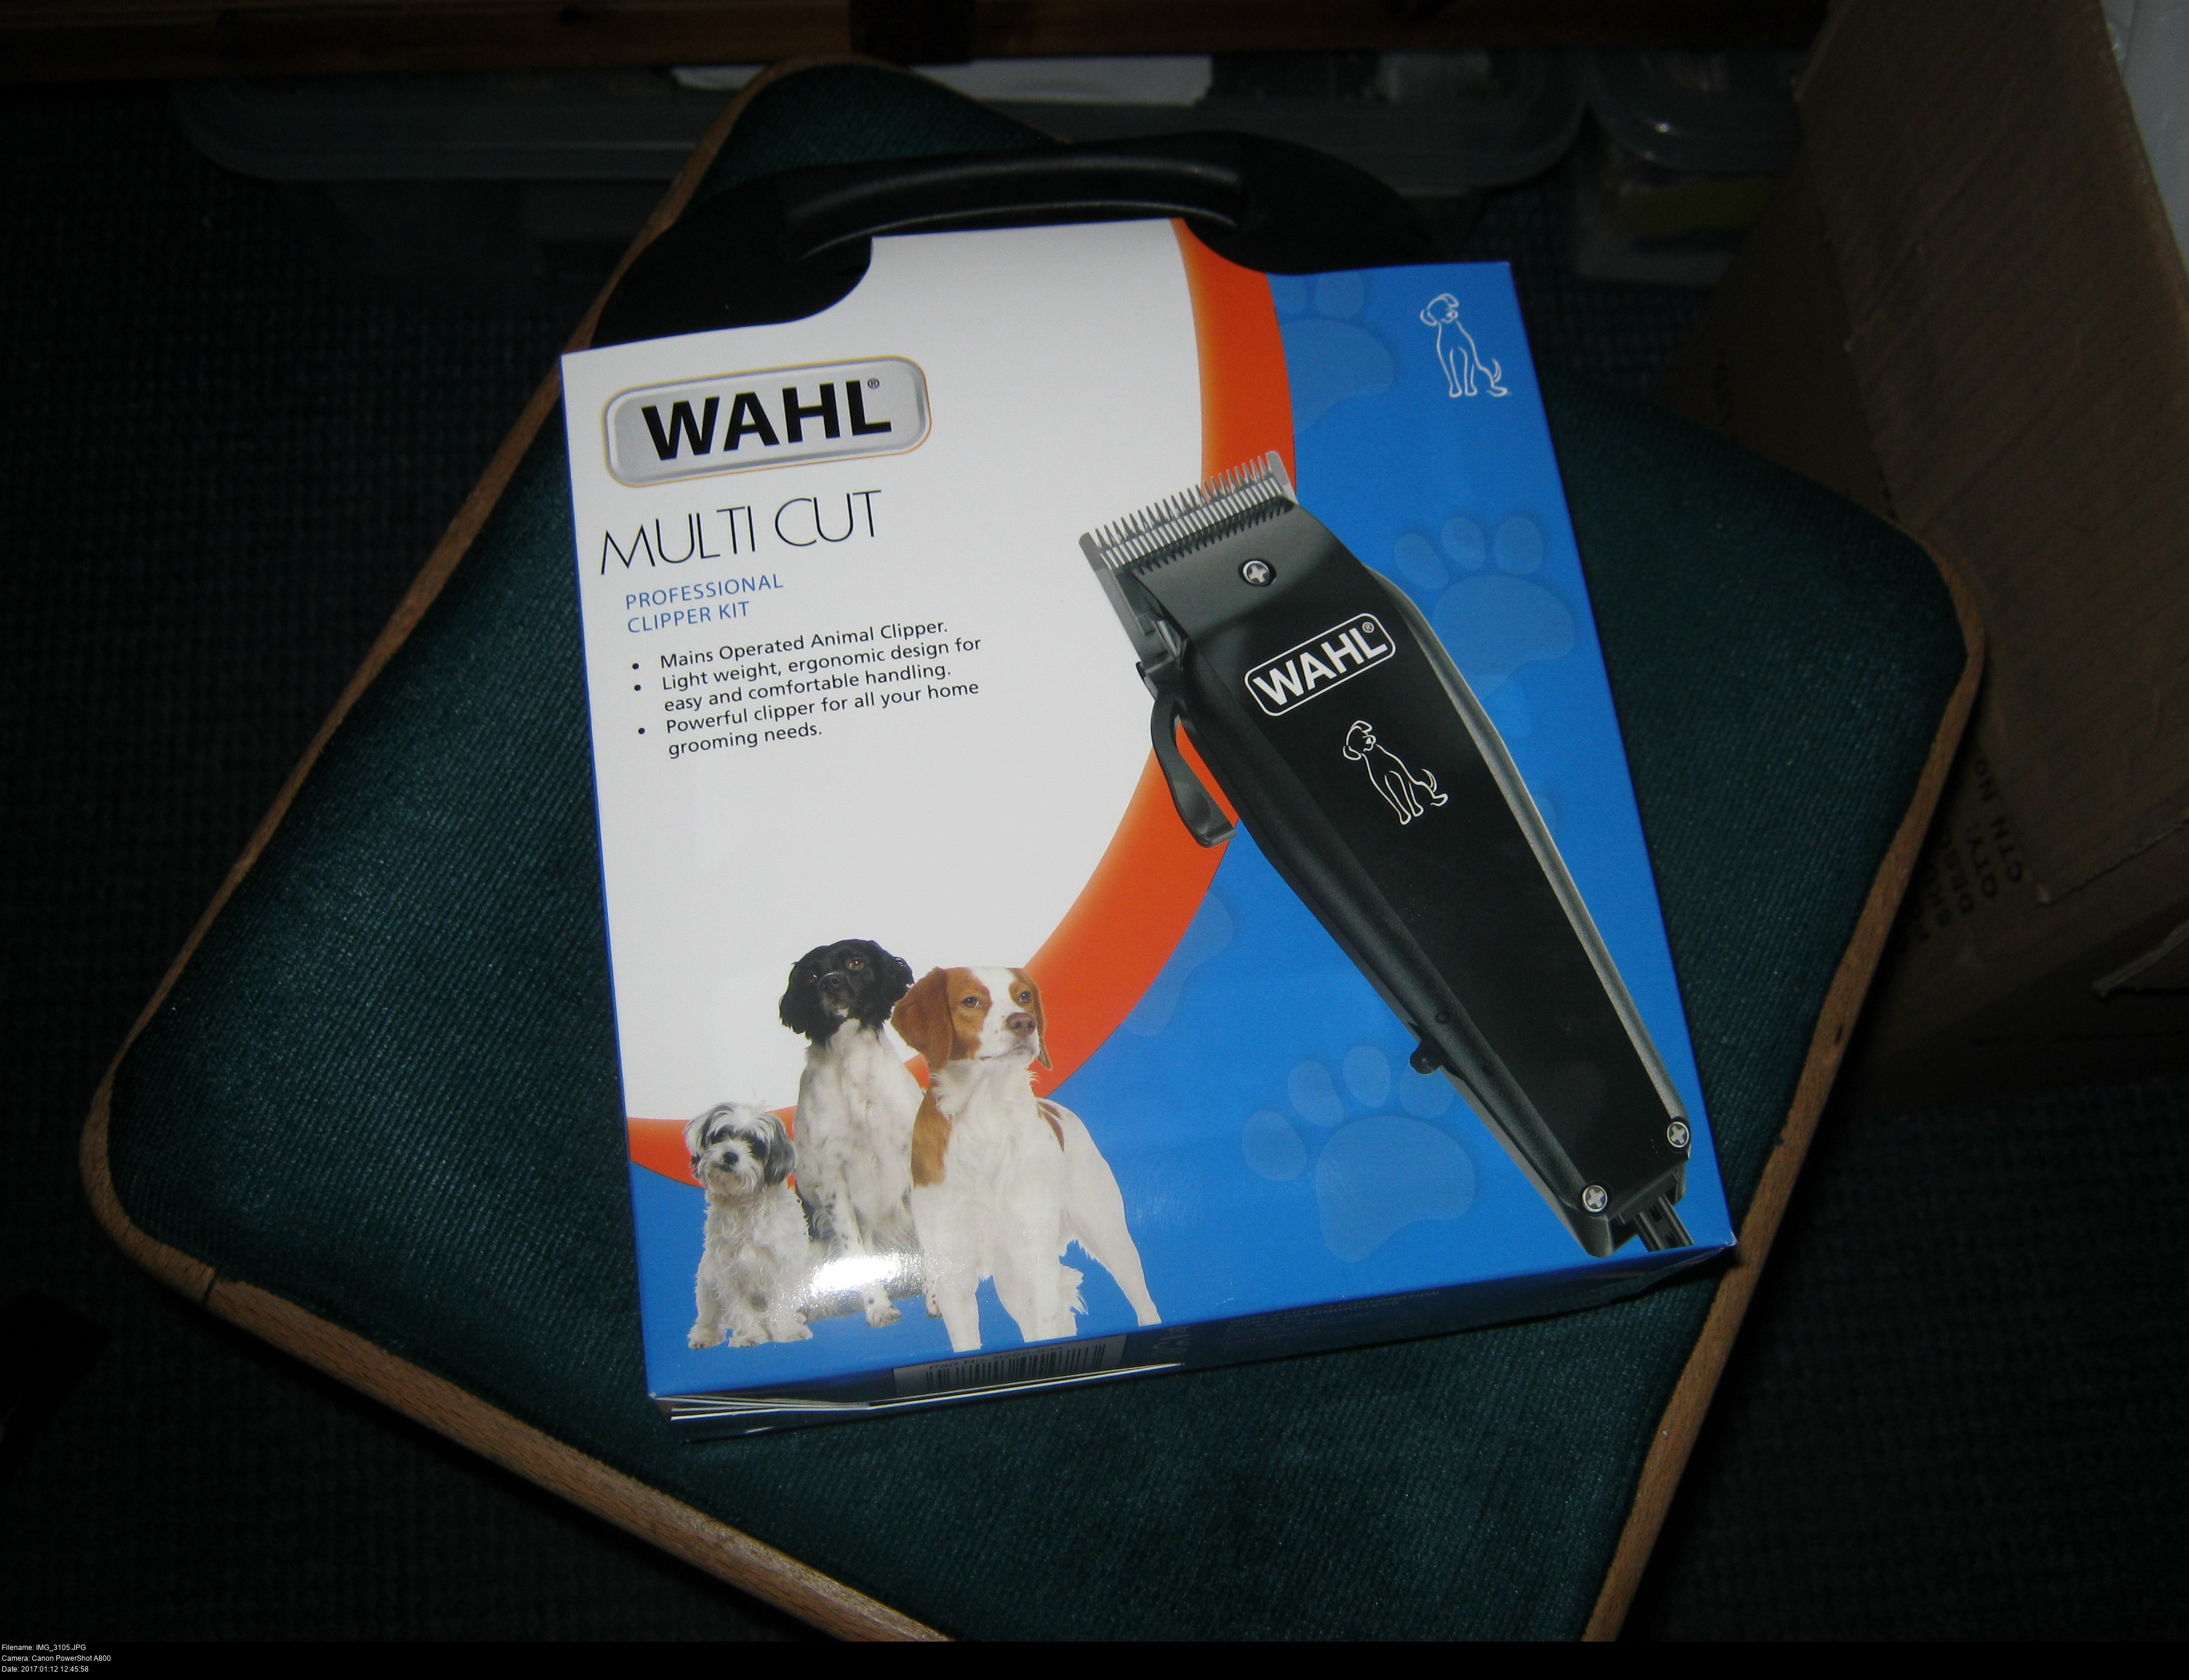
You need these. This is a Wahl Multi Cut Professional Clipper Kit for animal fur. It looks like any other clipper, but this is the one you need. Get a set with various comb grades.
I know it's expensive but you can't cheap out on this. This is the ante for making furry heads. Do it right or be upset.


Have you ever clipped a furry head before? Me neither!
Let's get some generous test sheets of the fur out and see what happens.
Use a sparse comb, a dense comb, a brush, and an animal fur slicker to clean and comb and fluff up your fur before you work.
Work in slow, even strokes.
Clip from the longest possible comb to the shortest.
Clipping with the grain results in longer fur, clipping against the grain makes it shorter. Don't clip sideways across the grain.
You can clip without a comb for the closest shave.
Follow your clippers instructions for oiling the blade.
You should make yourself a guide palette of clipping examples: draw out boxes on your fur, number them, and clip with steadily decreasing grades as you go. This way you can see how long the fur will be for each setting and you can choose the correct length accordingly.
Be prepared for some serious jolting vibrations the first time you turn on your clipper. My hand was buzzing like mad after a couple of minutes of work. It can't be good for your bones or muscles. Take frequent breaks!

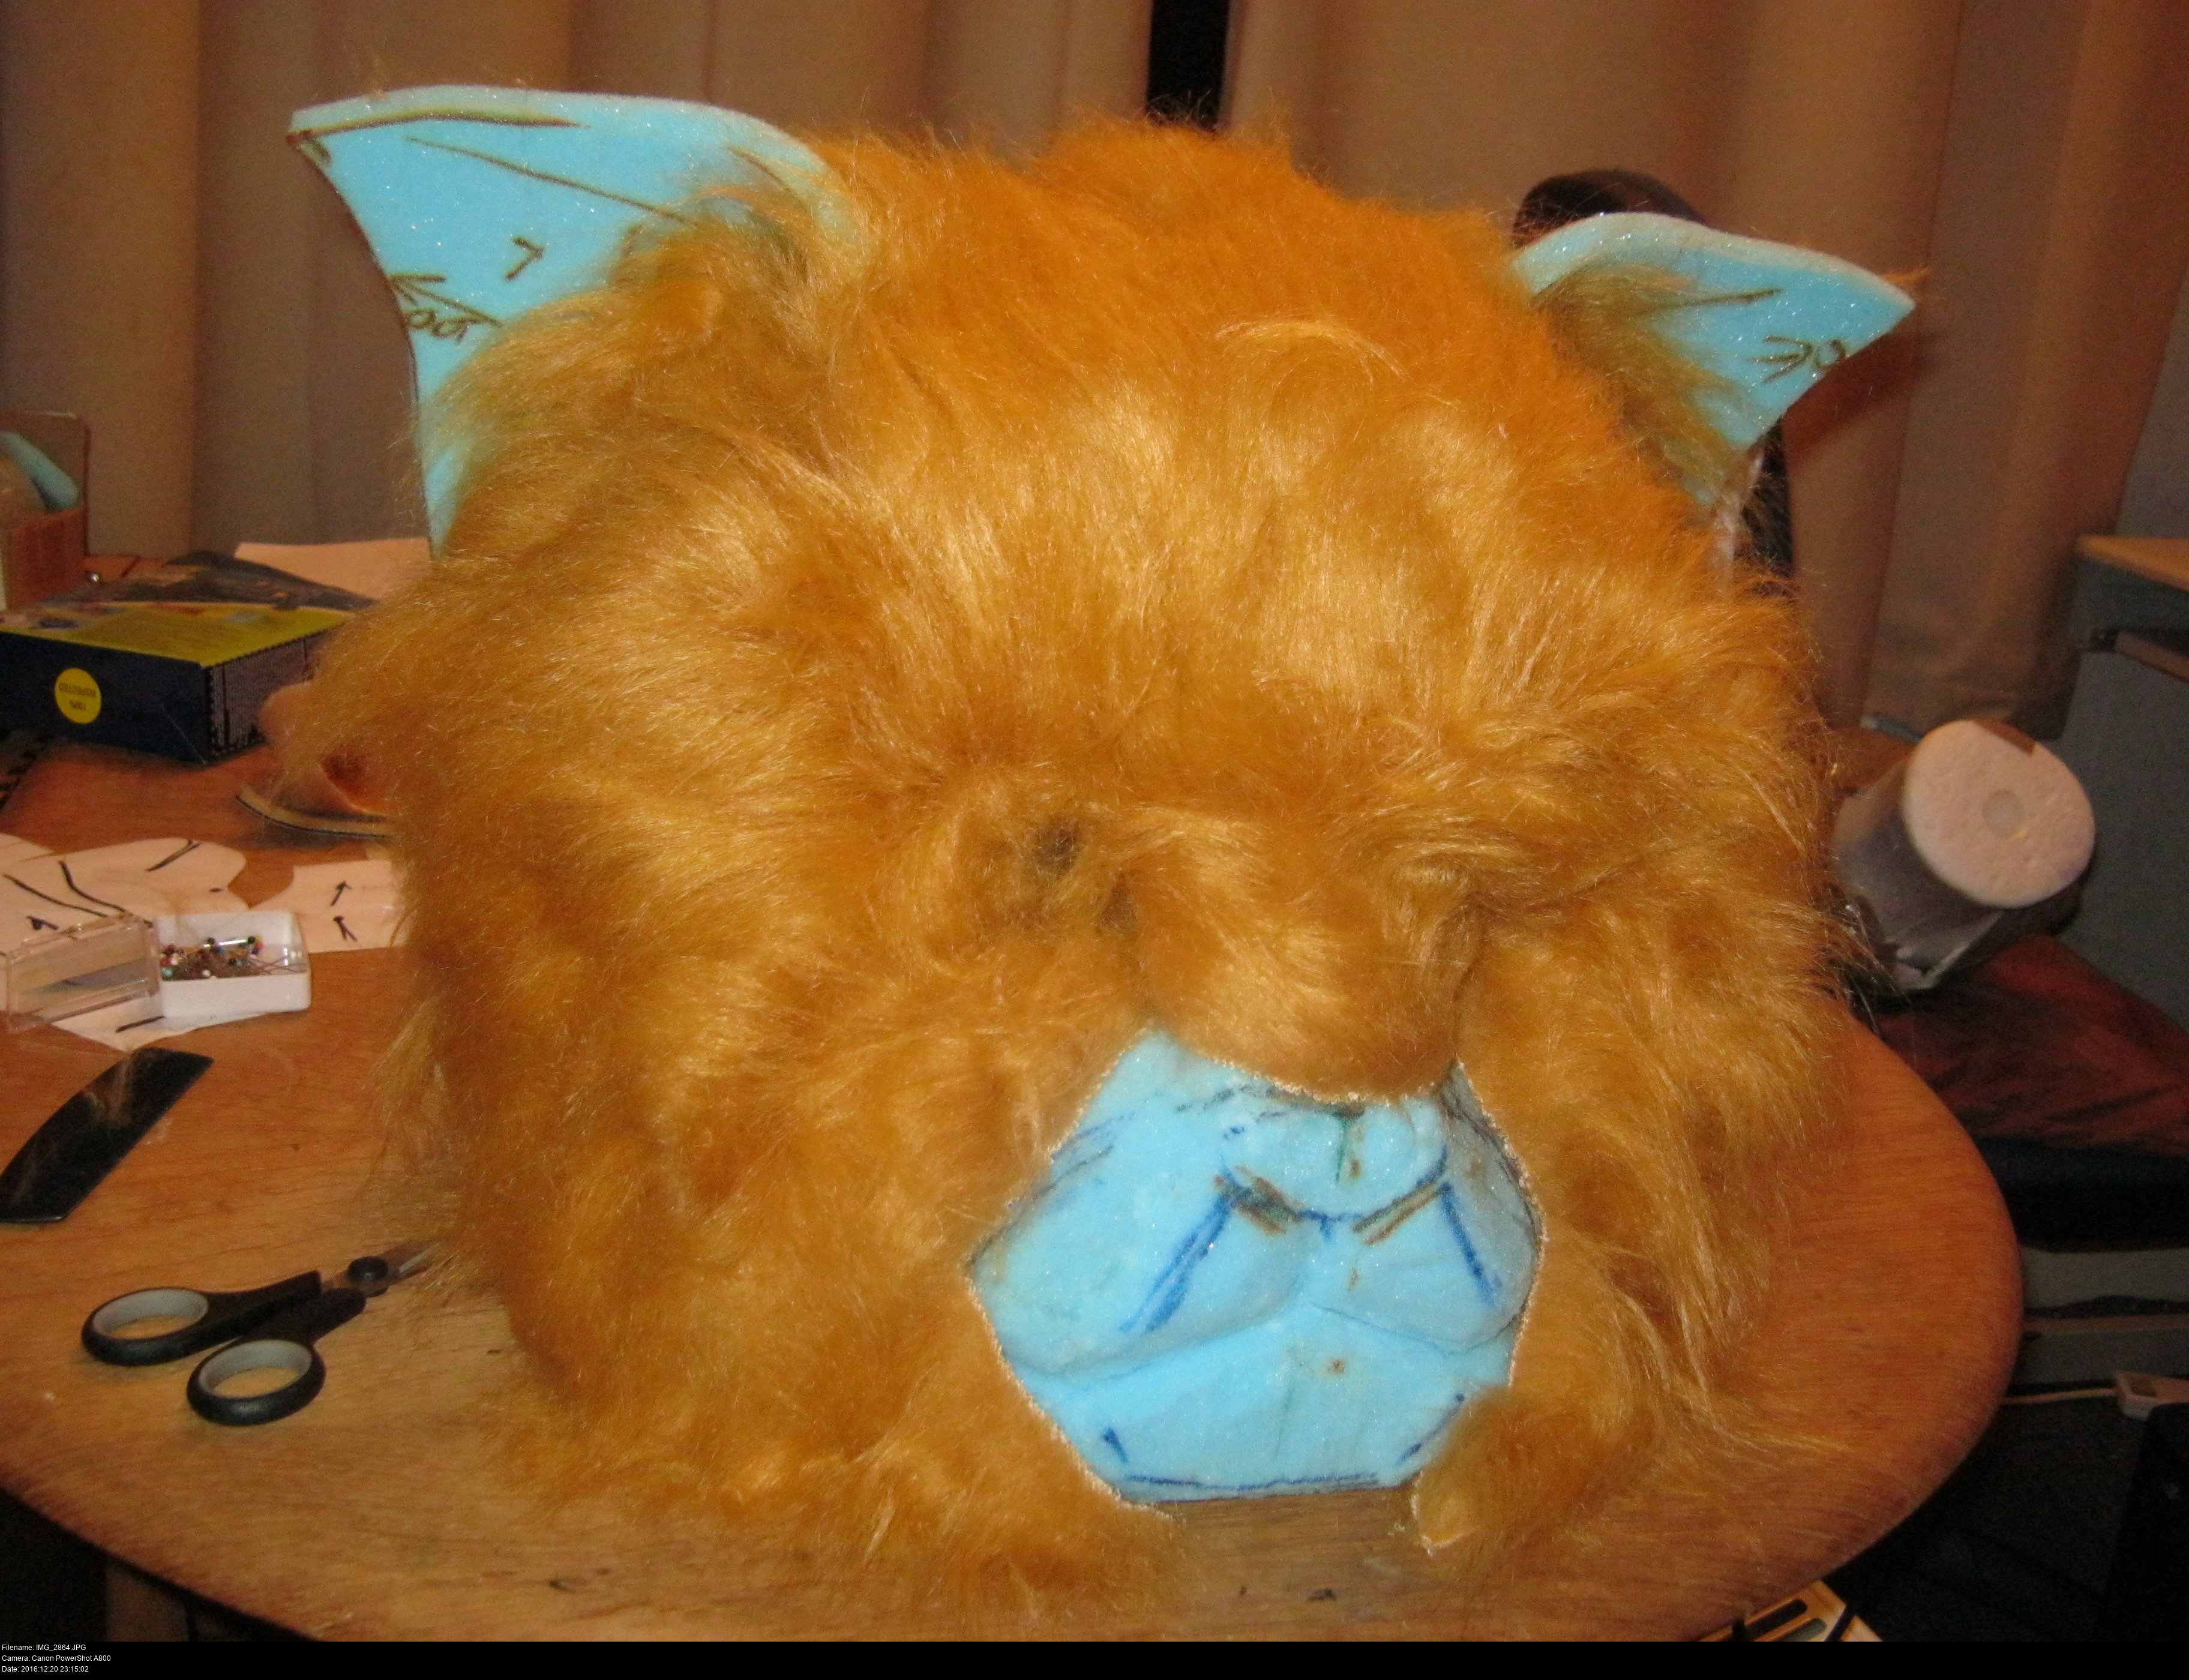
The muzzle is adjusted and the fur is clipped. I made it short around the bridge of the nose, the forehead, the very interior of the cheeks (probably a mistake), the interior of the ears. Everywhere else was left long, since I'm making a lovely tufty lynxie.
Because I used cheap fur, my seams are more obvious than I'd like. He's got a ridge running horizontally across his forehead between the tops of his eyes, another running across the top of his head giving him a funny quiff that difficult to comb out. The darts in the fur are very obvious to the touch because of the thickness of the folded material. The shorter you clip your fur, the more obvious these artifacts will be.
But the clipping is now done! At least, for now. Wow. We've done a lot, huh?
What's next?


Hmm, I don't think there's anything left to do with the fur! I think I need to glue it in.
I've not done this before, so it would be very easy to make a mistake and end up tearing the fur or foam trying to extricate one from the other. I'm using the hot glue again for this. I'm told that you can revert hot glue to softness using a hairdryer, but if you overdo that, you'll end up beginning to melt your foam form.
It's somewhat straightforward to tug the completed covering onto the foam and tuck all the loose edges into the eyeholes and mouth since everything is stretchy and/or squishy. Making a decision as to what to glue first after that is the problem.
The objective in gluing the fur to the head is to secure it in place and make it permanently take on the shape of the foam. That means gluing around the outside edge of any features with loose fur edges, like the eyeholes and the muzzle group. Also, you'll need to glue inside of any concave regions, such as the interior of cheeks where the muzzle begins to extend. Otherwise, these loose areas will billow about.
I think I started at the part where the positioning was most critical: the muzzle curves, since the seams have to sit inside the grooves (I cut a vertical groove in the top muzzle for the upper cleft to sit inside) in the face. Then, outwards towards the back of the mask, such as the eyeholes and the cheek; slowly unpeeling the covering back onto the face, feature by feature. I didn't glue anywhere inside the ears as I didn't fancy trying to get that working at all, so the interiors are a little in-out floppy like bellows. The ears themselves are pretty sturdy from the thickness and curve of the foam and the thickness of the faux suede, so the fabric stays where I push it.
The angles are going to be awkward as heck to work, forcing the glue gun between the folded fur covering and the foam, so work as slowly as you can. Apply glue very sparingly in neat lines and keep pressure on the glue while it dries. Don't get loose glue on the fur, ever.
I didn't glue around the bottom-most edge of the head yet as I might end up carving the foam there a little more, which means I'll have to sew in some discreet darts to make the fur cling to those lower contours.

Time for a test wearing! Can I still see out of this? You bet! Hello there!
Also, this was probably a really stupid idea, those folded-in eyeholes mean I've got fur right in my eyes. Ah well.
Also also, do you know what's really rad?
Seeing yourself with a cat-like silhouette! That's just awesome!
That's it for the fur work, for now. It's time to start thinking about details.
First up, the eyes.


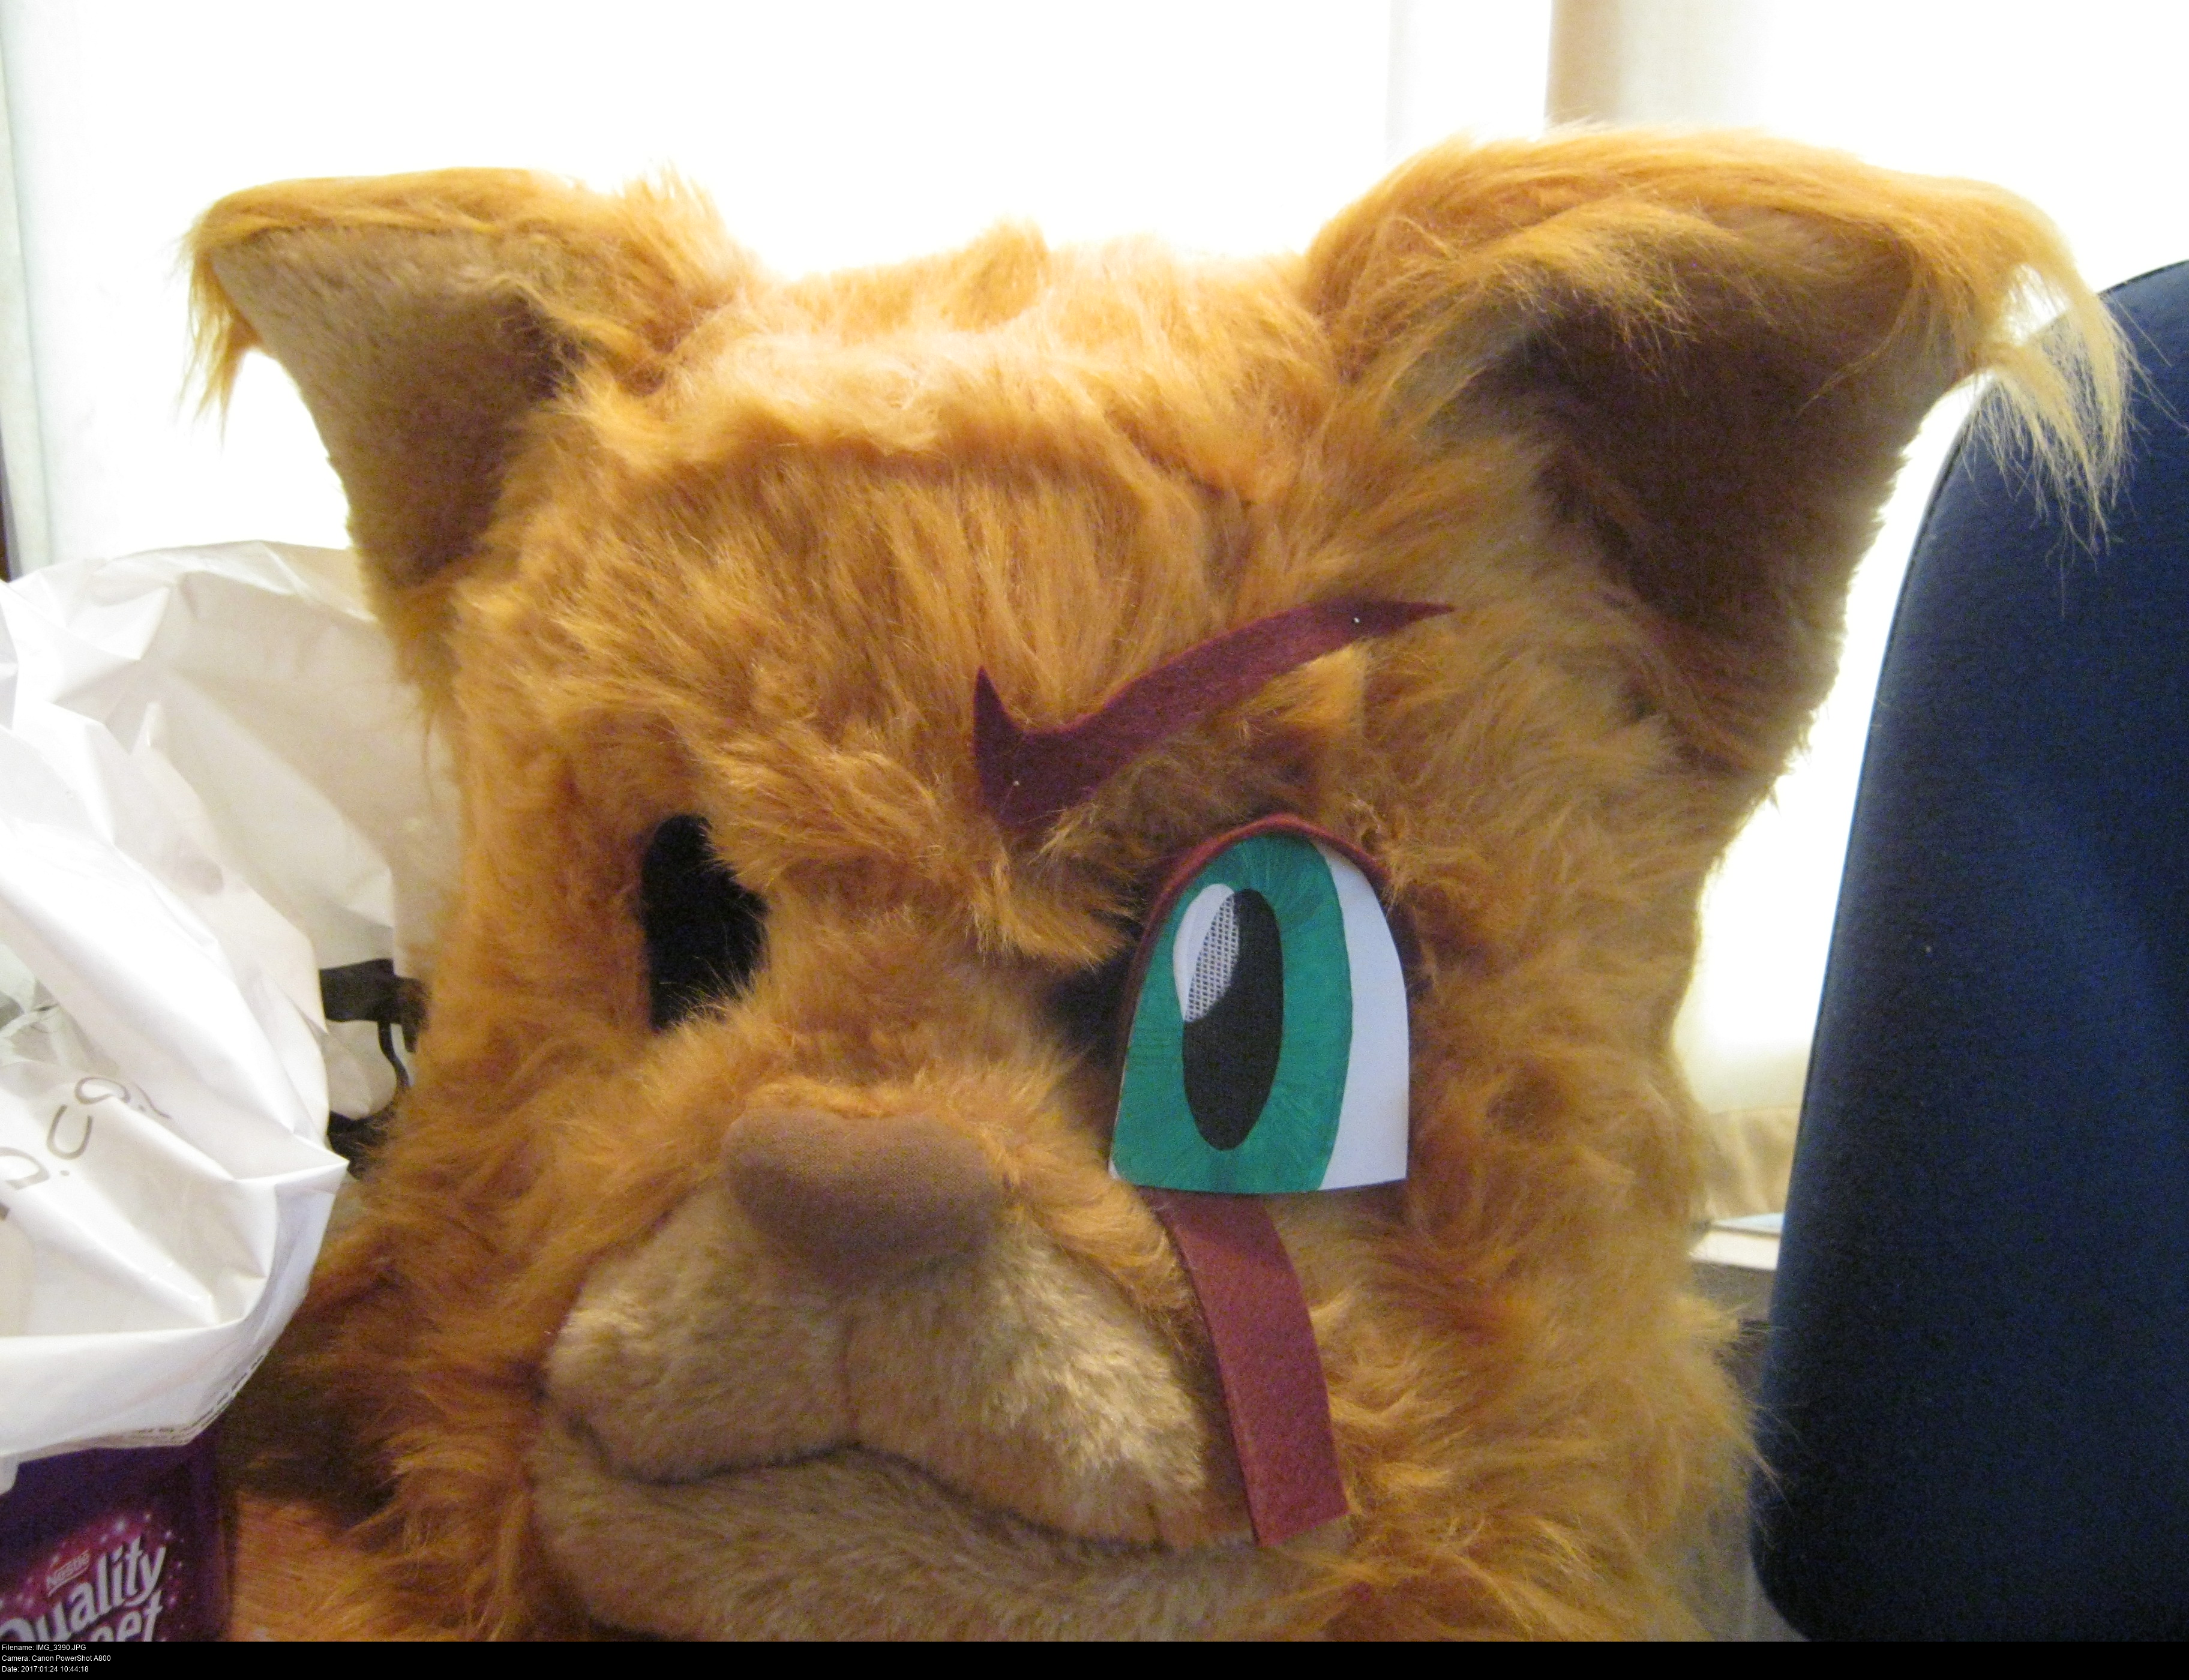
Hotshot's eyes are arch-shaped and pretty convex-looking (you can imagine the sclera - the whites of the eyes - gently curving outwards). He doesn't have visible eyelids in the main illustration, which, together with those blazing bright eyes, makes him look like one staring sunnuva.
There's many ways to make fursuit eyes, depending on the style you're going for. Some eyes are realistic, coloured backing with a shiny covering so they look like shiny marbles. Some eyes are inset into a small collar of material installed in the eyeholes of the head so the inset cartoon eye appears to move when the head is viewed from different angles.
The eyes in the Hotshot's illustrations lend themselves to a much simpler flat appearance though.
The fursuit designer and maker Matrices has a great tutorial on how to make flat fursuit eyes in these two videos:
https://www.youtube.com/watch?v=zyEdS2BM7Gs
https://www.youtube.com/watch?v=Ia922jD20wQ
A very similar method is summarised well in this single image by Lobitaworks.
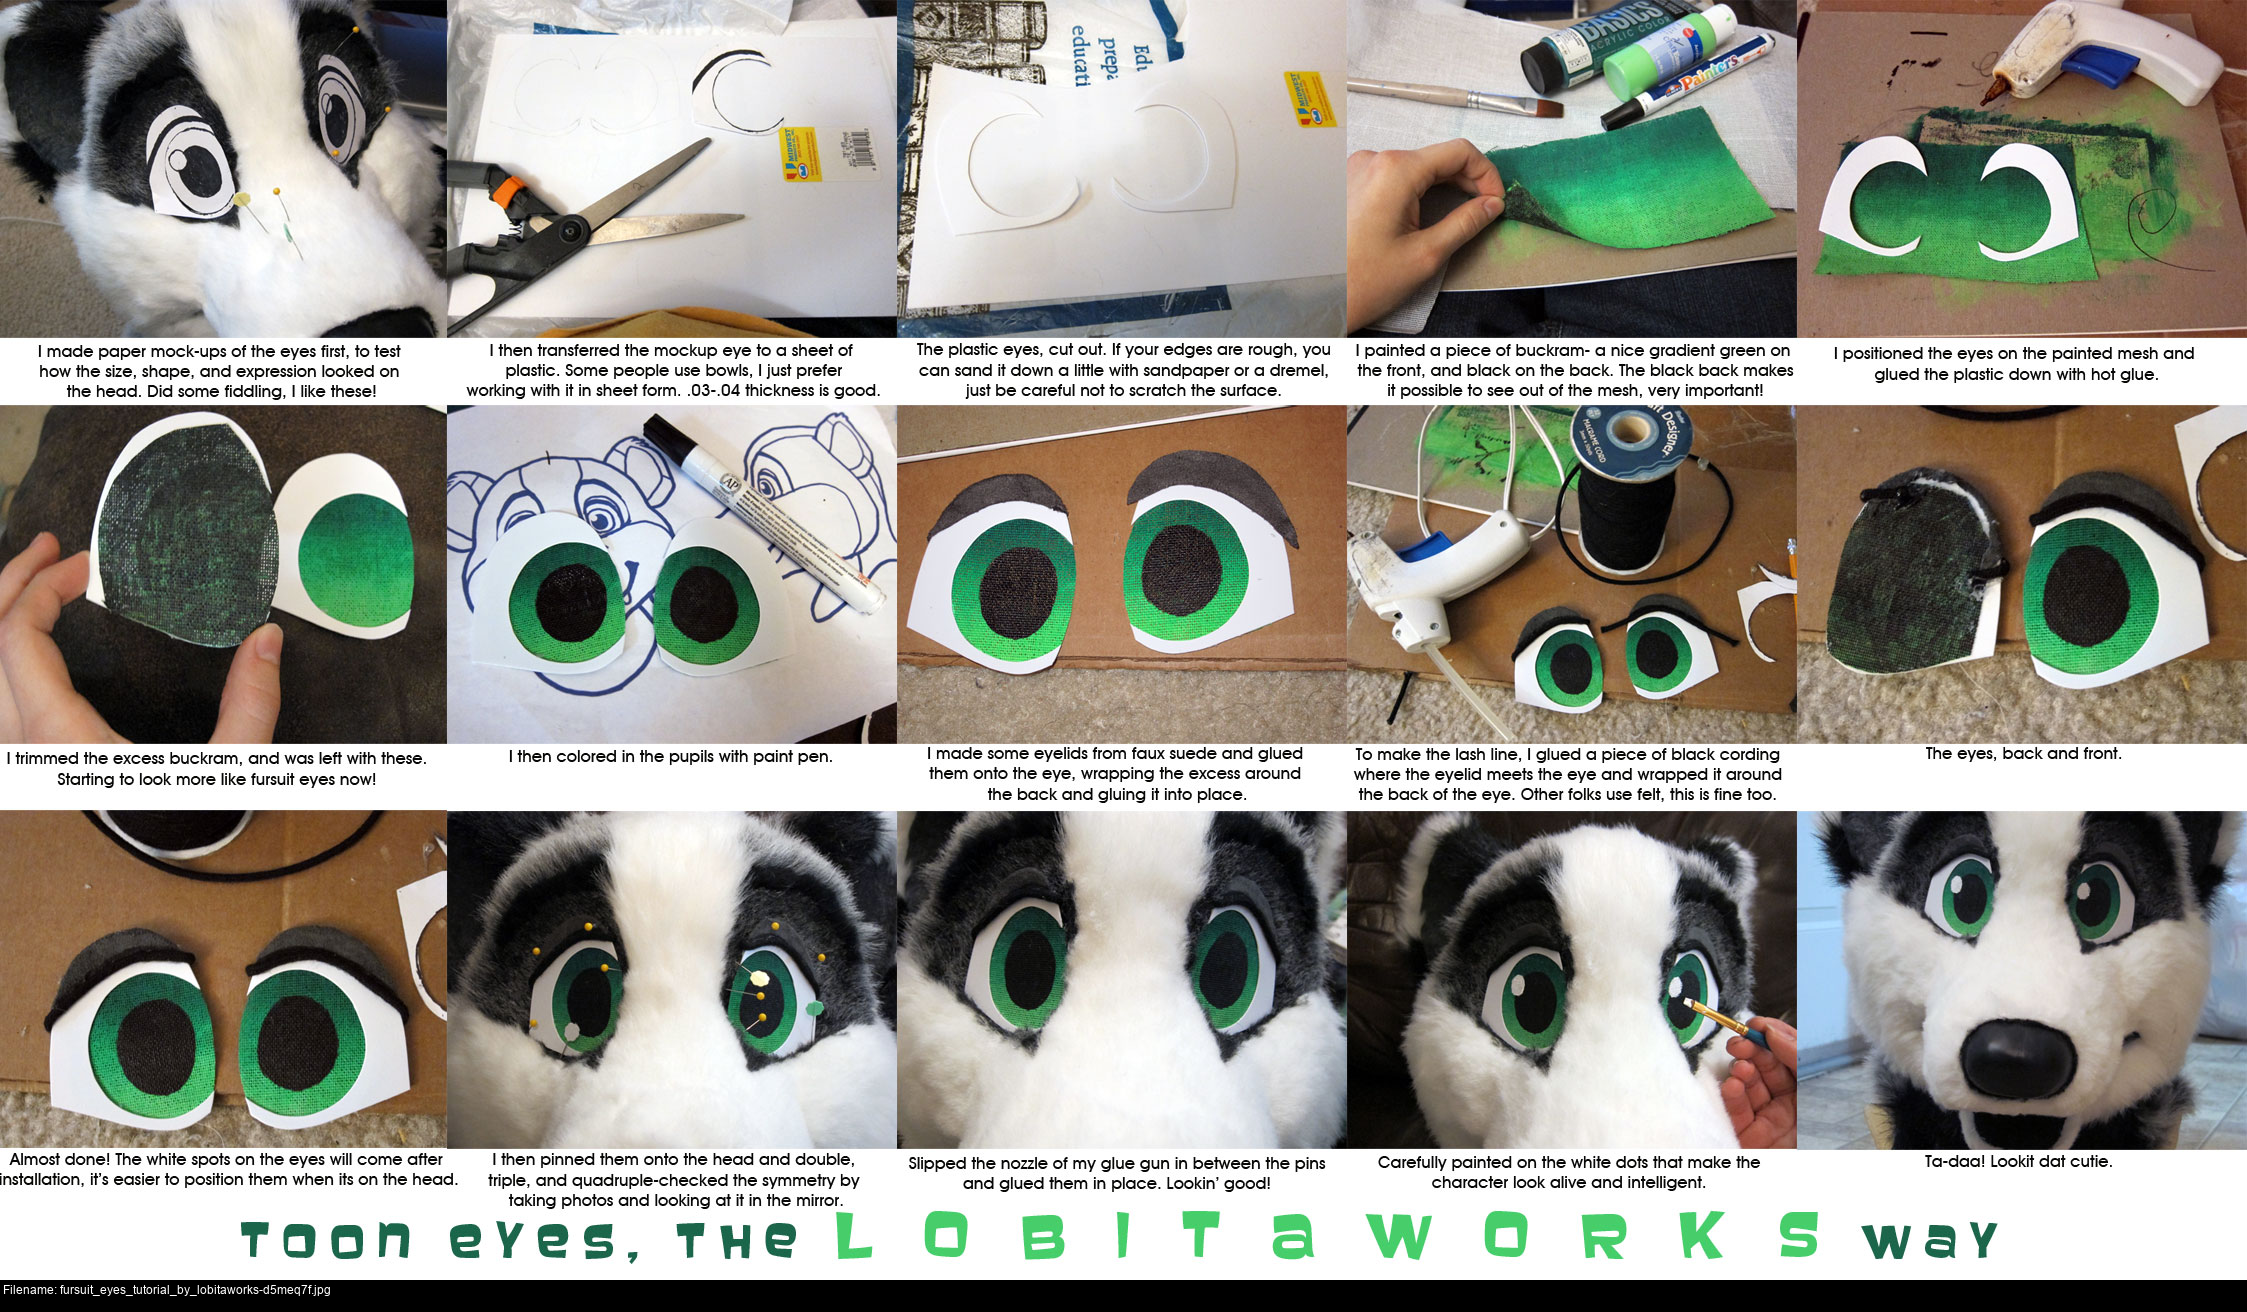
And that's just what I'm going to do.
First, I need some shiny, white, curved material to make the eye plates out of. Tutorial pages recommend repurposing objects such as plastic bowls, bottles, tubs, and buckets.
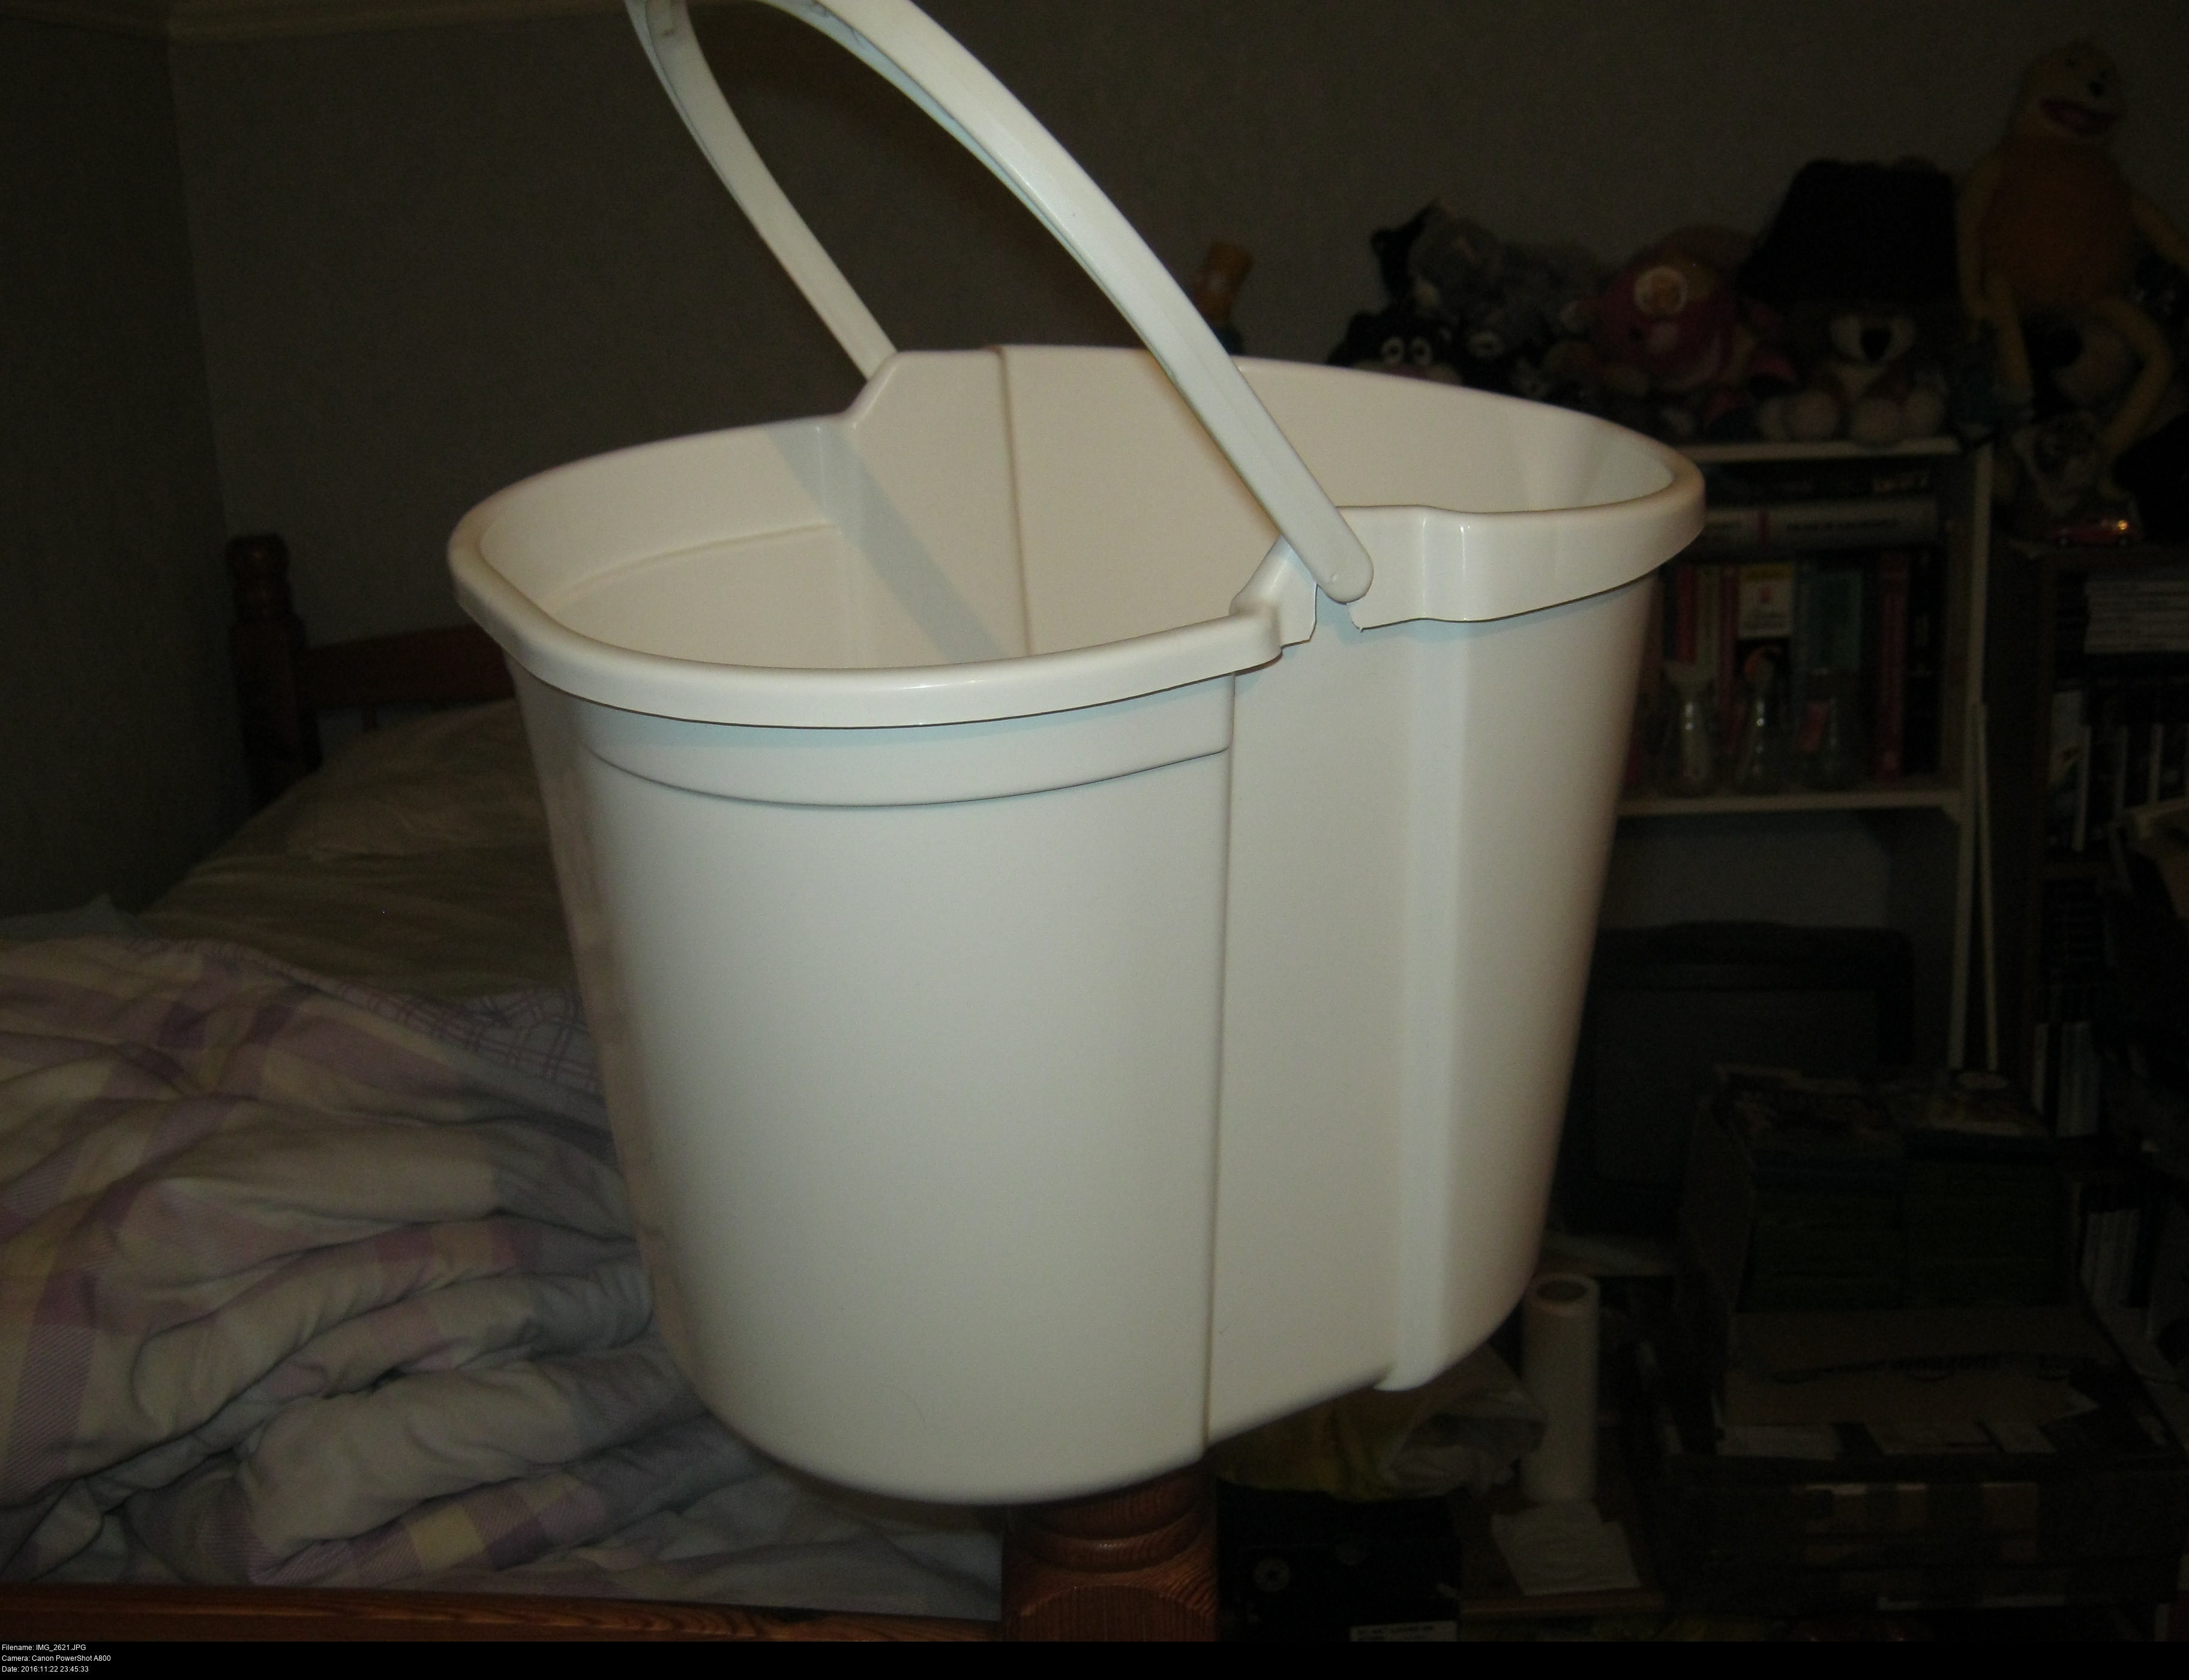
Hey, look! A bucket!
This is a rather large generic mop squeezing bucket that I got a pound from Wilkinson's. Aaand unfortunately it's no use for this. I tried to cut the plastic with the knives I have, but the material is simply too thick! I don't have a Dremel (or Insert Your Favourite Generic Rotary Tool here) so I can't just slice the bucket into easily worked plates very easily. I need something else. Something I can cut with scissors preferably.

Ta-dah!
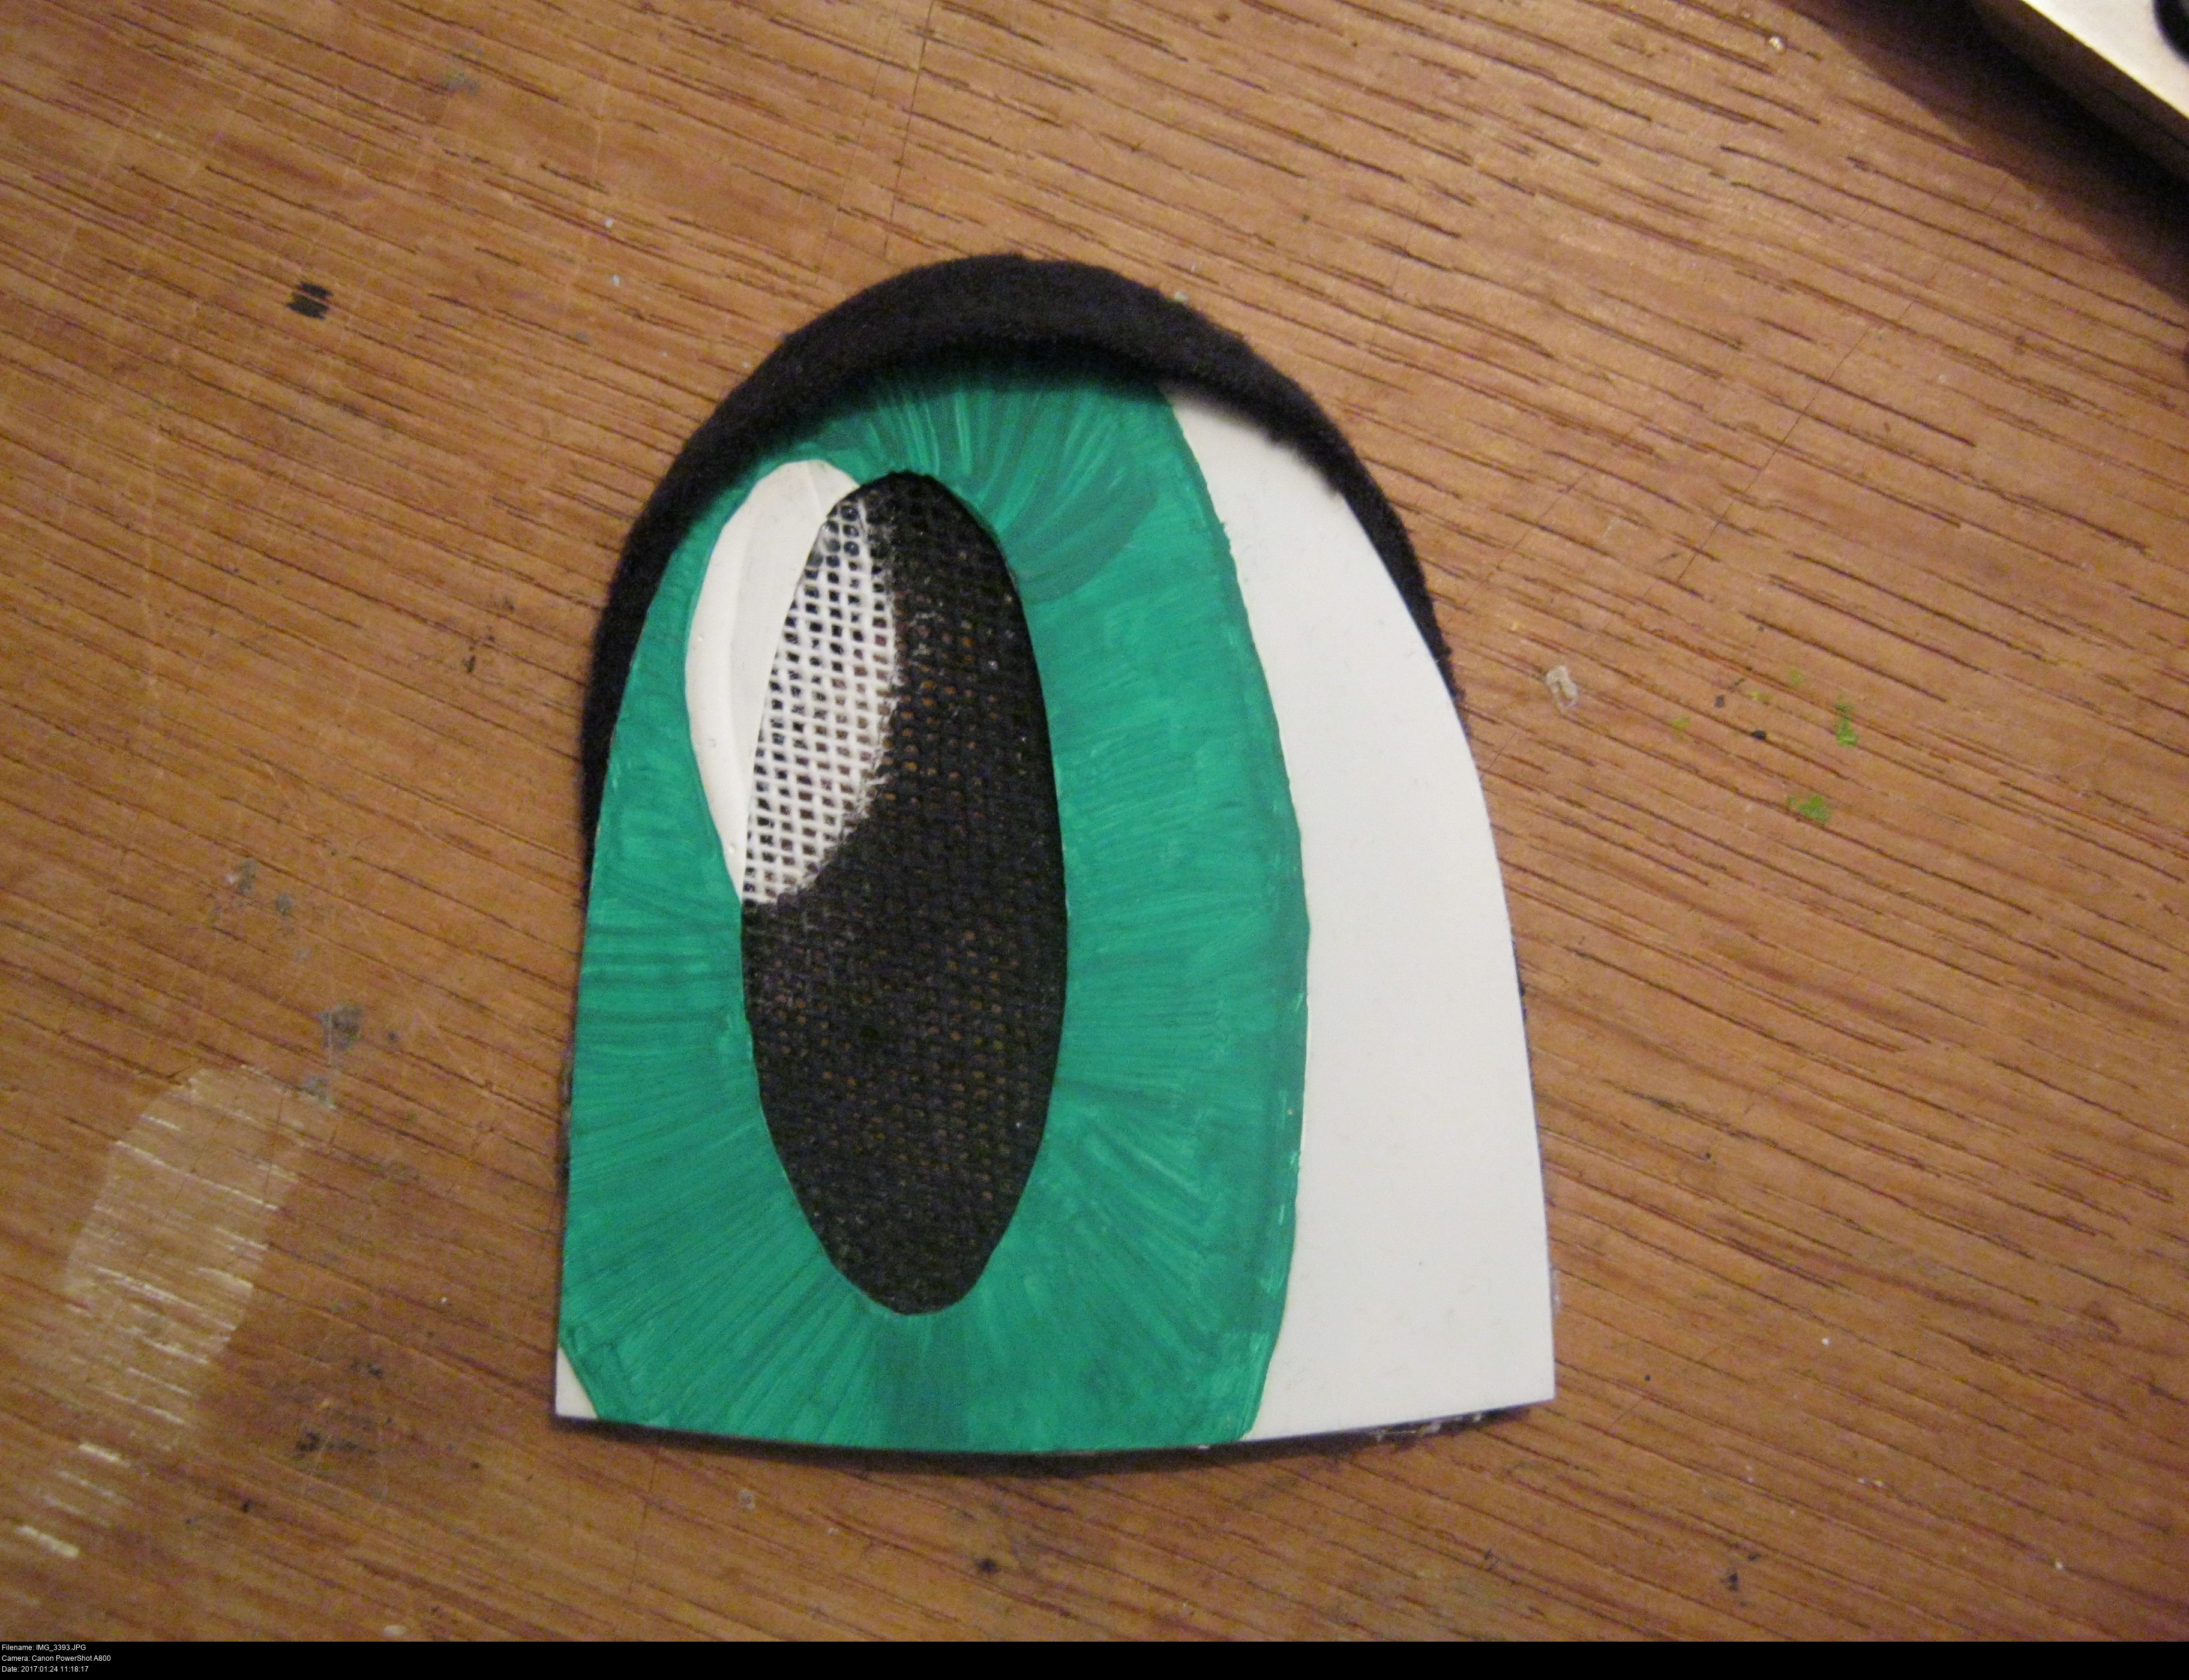
These test eye plates are made out of 'plastic card'. It's a flat, glossy sheet of stiff plastic material in roughly A4 size that can be found in model shops (for train sets and so on). It comes in a variety of colours and thicknesses, just like card from a craft shop. It can be scored with a blade, cut with scissors and sanded with sandpaper (though it's easier and neater to trim loose notches with light strokes of a blade). It can be marked with a pencil and it takes gesso well. It's very easy to work with! Perfect!
The plastic card forms the sclera and iris part of the eye, and the pupil is made from buckram interfacing which is a stiff, sparse fabric used for shirt collars and sleeves.
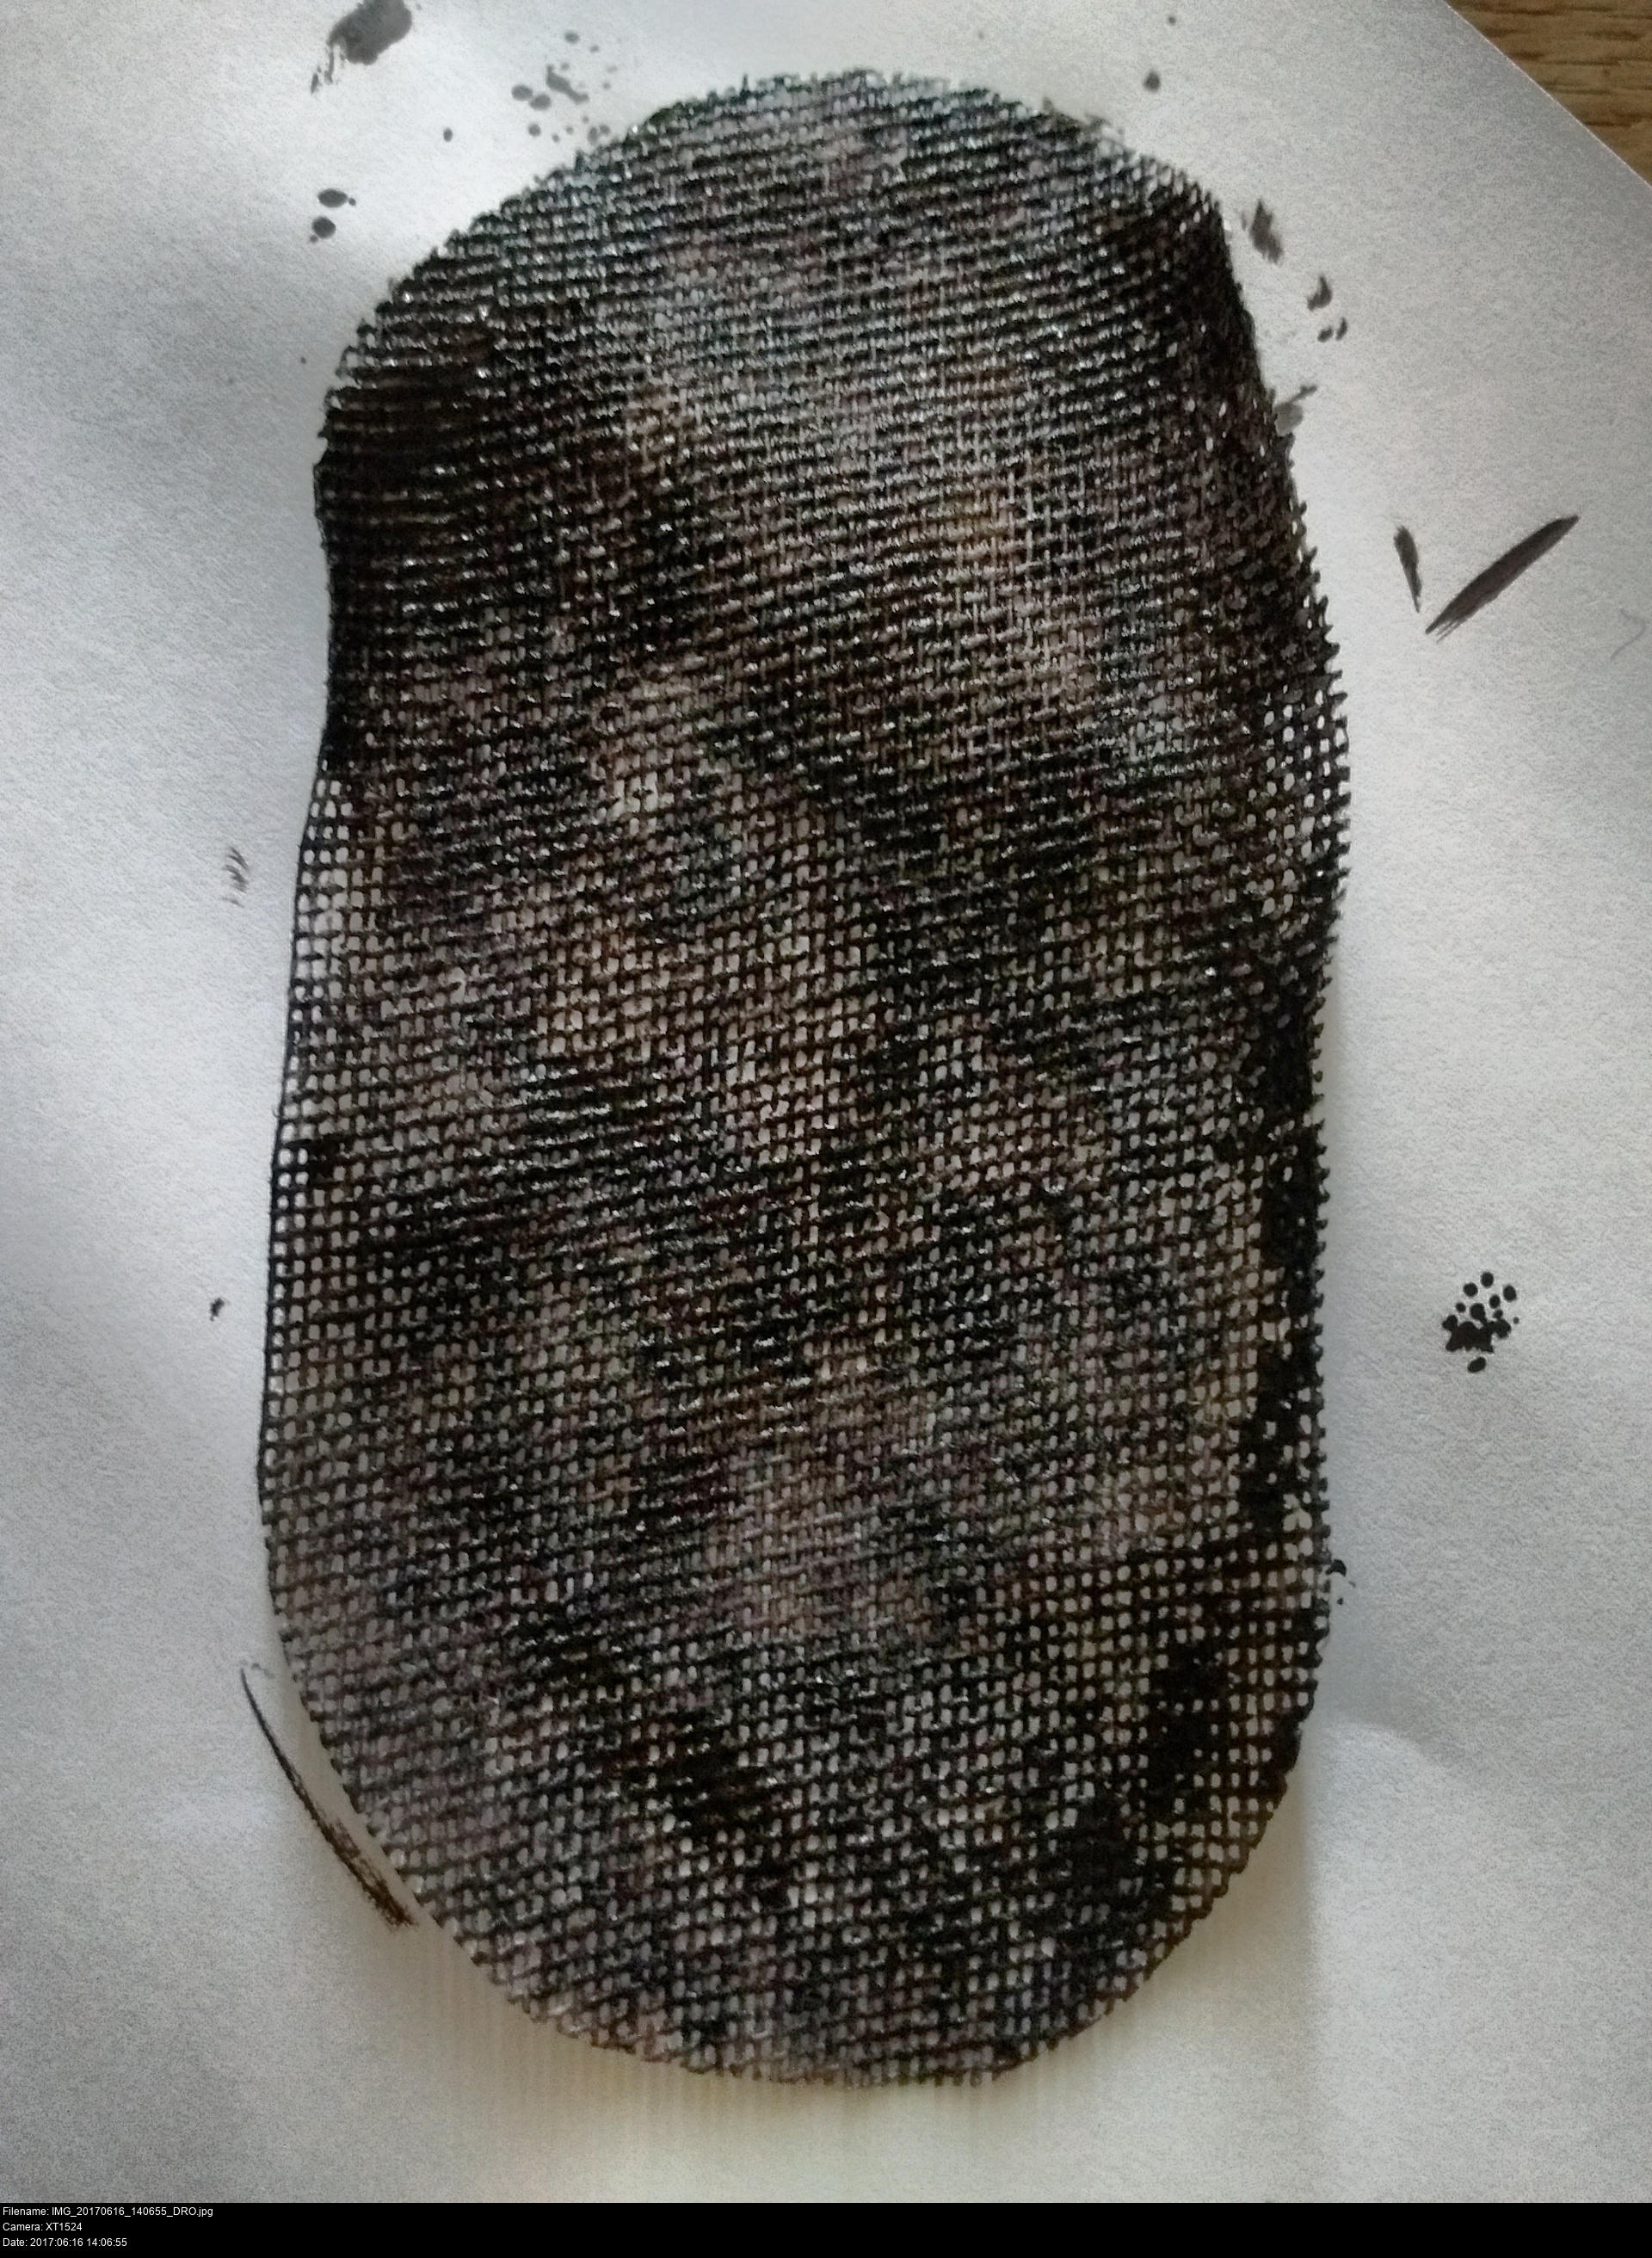
Here's buckram, with one side painted black.
If you hold buckram up to your eye, you can see through it quite well. When I wear Hotshot's head, I'll really be looking through his eyes!
Your eyes can focus on the distant objects and your combined binocular vision helps to fill in all the missing areas.
If you paint the interior-facing side of the buckram black...
You get no distracting reflections and bounces from the material itself, creating an image comprised entirely of incoming useful parallel light. That's a good thing!
In this case, I'm using the buckram to make the pupil of the eye, so I want the exterior and interior surfaces to be all black - with one exception that you'll see below.
Now we're ready to make some eyes.
Making the eyes isn't as simple as drawing out the first thing that comes into your head and sticking it onto the head. Well, it could be if you were reckless. But I'm gonna be smart and make some prototypes!
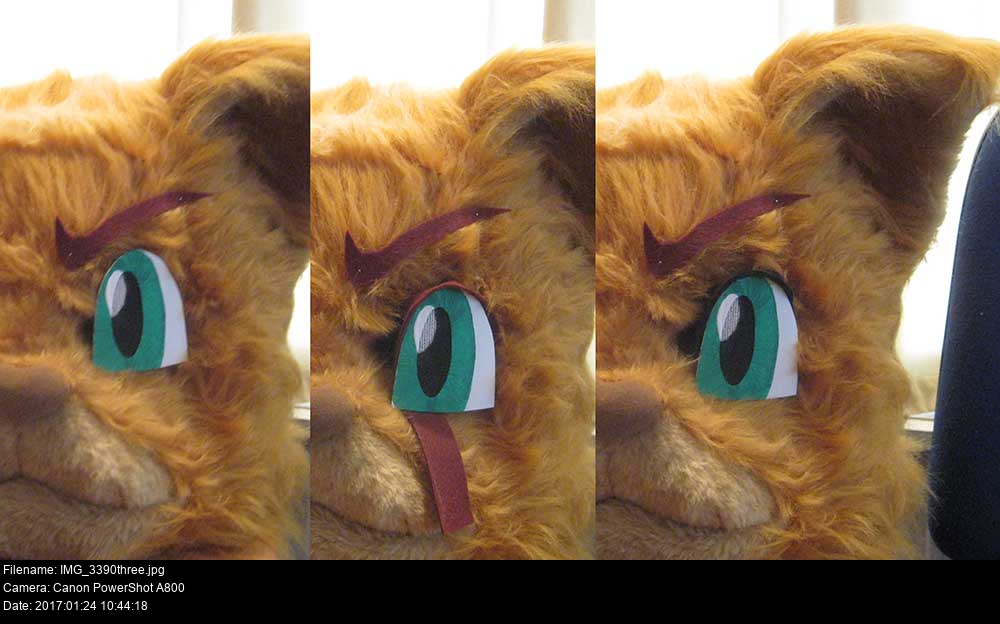
Depending on how I cut the eye, I can make him look down, look up, or look forwards:

Choose your character! Though if you're not into obscure mascot MS-DOS characters from the nineties, you might be disappointed.
With properly coloured eyes, eyelids and eyebrows, he's really starting to look like the real deal, isn't he?
You might be wondering if it would be possible to make the eyes entirely out of the semitransparent backing, like this (ignoring that they're all black):
An inset-eye will have a collar of material that provides the structure, so the painted backing of the eye could be entirely buckram.
For a flat eye, the sclera material provides the structure. Without this, the eye would be floppy and strange. This means that when I design the eye plates, the less plastic I cut away the stronger they'll be.
To make Hotshot look cuter, I'm going to make his eyes bigger than in the reference pictures, which in turn will give him bigger pupils. I can then make my eye-plates so that only the pupil part is cut-away (rather than the pupil and iris both), which will be super fine for looking through.
As always, making templates helps you test out various shapes and ensures that your plates will be symmetrical. Don't make the mistake of making the design on the eyes exactly symmetrical though: the cartoon eye-shine shouldn't be mirrored.
I'm going to go for a looking-forward eye plate:
If I make the eye look up or down, the pupil oval will be very close to, if not overlapping, the edge of the plate. Having a solid circle of plastic with a hole in the centre is a lot more structurally sound than having a U shape.
Even if I make the eye plates with the pupil in the centre, I can provide the appearance of him looking up or down by the position of the eye plates in the head, as well as the shape and size of the eyelids.
The reason why plastic bowls, bottles and buckets are used as a source of plastic for fursuit eyes isn't just because they're white and shiny and hardwearing, but also because they're -curved-. This lets you make even more appealing, faux-spherical cartoon eyes.
My plastic card comes flat, so before I cut out these final plates I tried to force some curve into the material by leaving it tightly coiled up in the inside of a DVD spindle for a few days. It sort of worked, but it isn't nearly as curved as it ought to be. It'll still be fine to use though. If you would really like to make plastic card curved, consider using heat somehow - heat it up, coil it up and let it cool to retain the curviness.
The plastic card is easy to draw onto and takes gesso without any fuss. Since I'm painting my iris and eye shine detail onto the eye plate itself, I need to gesso the areas I want to colour. I've tried to add some surface texture on the iris and eye shine here with the thickness of the gesso. It's not very visible, but I think it works.
Painting buckram black is easy but has a couple of caveats that you need to be aware of:
Buckram is stiff stuff and it'll probably have a slightly creased or twisted texture by the time you've cut it and got it ready to paint. As you paint it, it'll become even more warped from the drying paint. Consider flattening it between some heavy surfaces for a day or so when the paint is completely dry.
If you paint the buckram with paint instead of darkening it with a wide-tipped permanent marker, you'll end up with films of paint blocking the holes in the buckram. The way to fix this is to individually pierce each film as it appears with a thin steel sewing pin. Watering down the paint tends to make more films appear, so I try to use the paint neat and sparingly. Keep holding up the buckram to the light to check for films. You can pierce them after the paint is dried but it's more difficult.
I'm thinking ahead here to how the buckram is going to be installed in the back of the eye plates: I'm not going to paint the entire surface of the buckram black, I'm going to keep the oval for the eye shine white so that when they're glued into their eye plates the eye shine matches up with the paintwork on the front seamlessly.
Don't rush things. Before you can do anything else, all this stuff needs to fully dry!


Let's take a good look at Hotshot's big ol'... aahh... too close.
With the magic of digital technology, I can extract the exact colours of his eyes and make a palette that I can show on my laptop as a reference while I paint the eye plates. Get some references of real eyes to work from as well, if you can stand being stared at by a bunch of blank-eyed strangers as you work.
I didn't deliberately mean to have those radial stripes emanating from the pupil. (I wanted to do a flat colour first and then work over the top.) It was a side effect of the consistency of the paint and the texture of the gessoed plastic. Once I realised what was happening, I decided to use it, 'cause it looks cool! Although he's a cartoon character, his eyes would never be a single totally flat colour - his fur has going to have real texture to it, doesn't it?
Let it dry!
To attach the buckram to the eye plates, I used yet more hot glue, applied as far away from the pupil as possible. It doesn't take extraordinarily well, so be prepared to pressure the surfaces together as soon as the glue is applied onto the plastic.
I wouldn't recommend cutting the buckram to the correct shape before gluing: the eye shine has to match up exactly on the front, so you'll be shifting the surfaces about as you apply the glue. Make sure to hold everything firmly in place until it's completely set. And don't let any glue ooze out in front of the pupil. That'll more or less ruin it and you'll have to try again.
Notice in these pictures my eye shine doesn't line up. That's because I haven't glued it yet. :P The finished eyes look lovely, you'll see them shorty.
Once that's all dried you can carefully trim the buckram back just inside the rim of the plastic and you've (almost) got yourself some beautiful eyes!
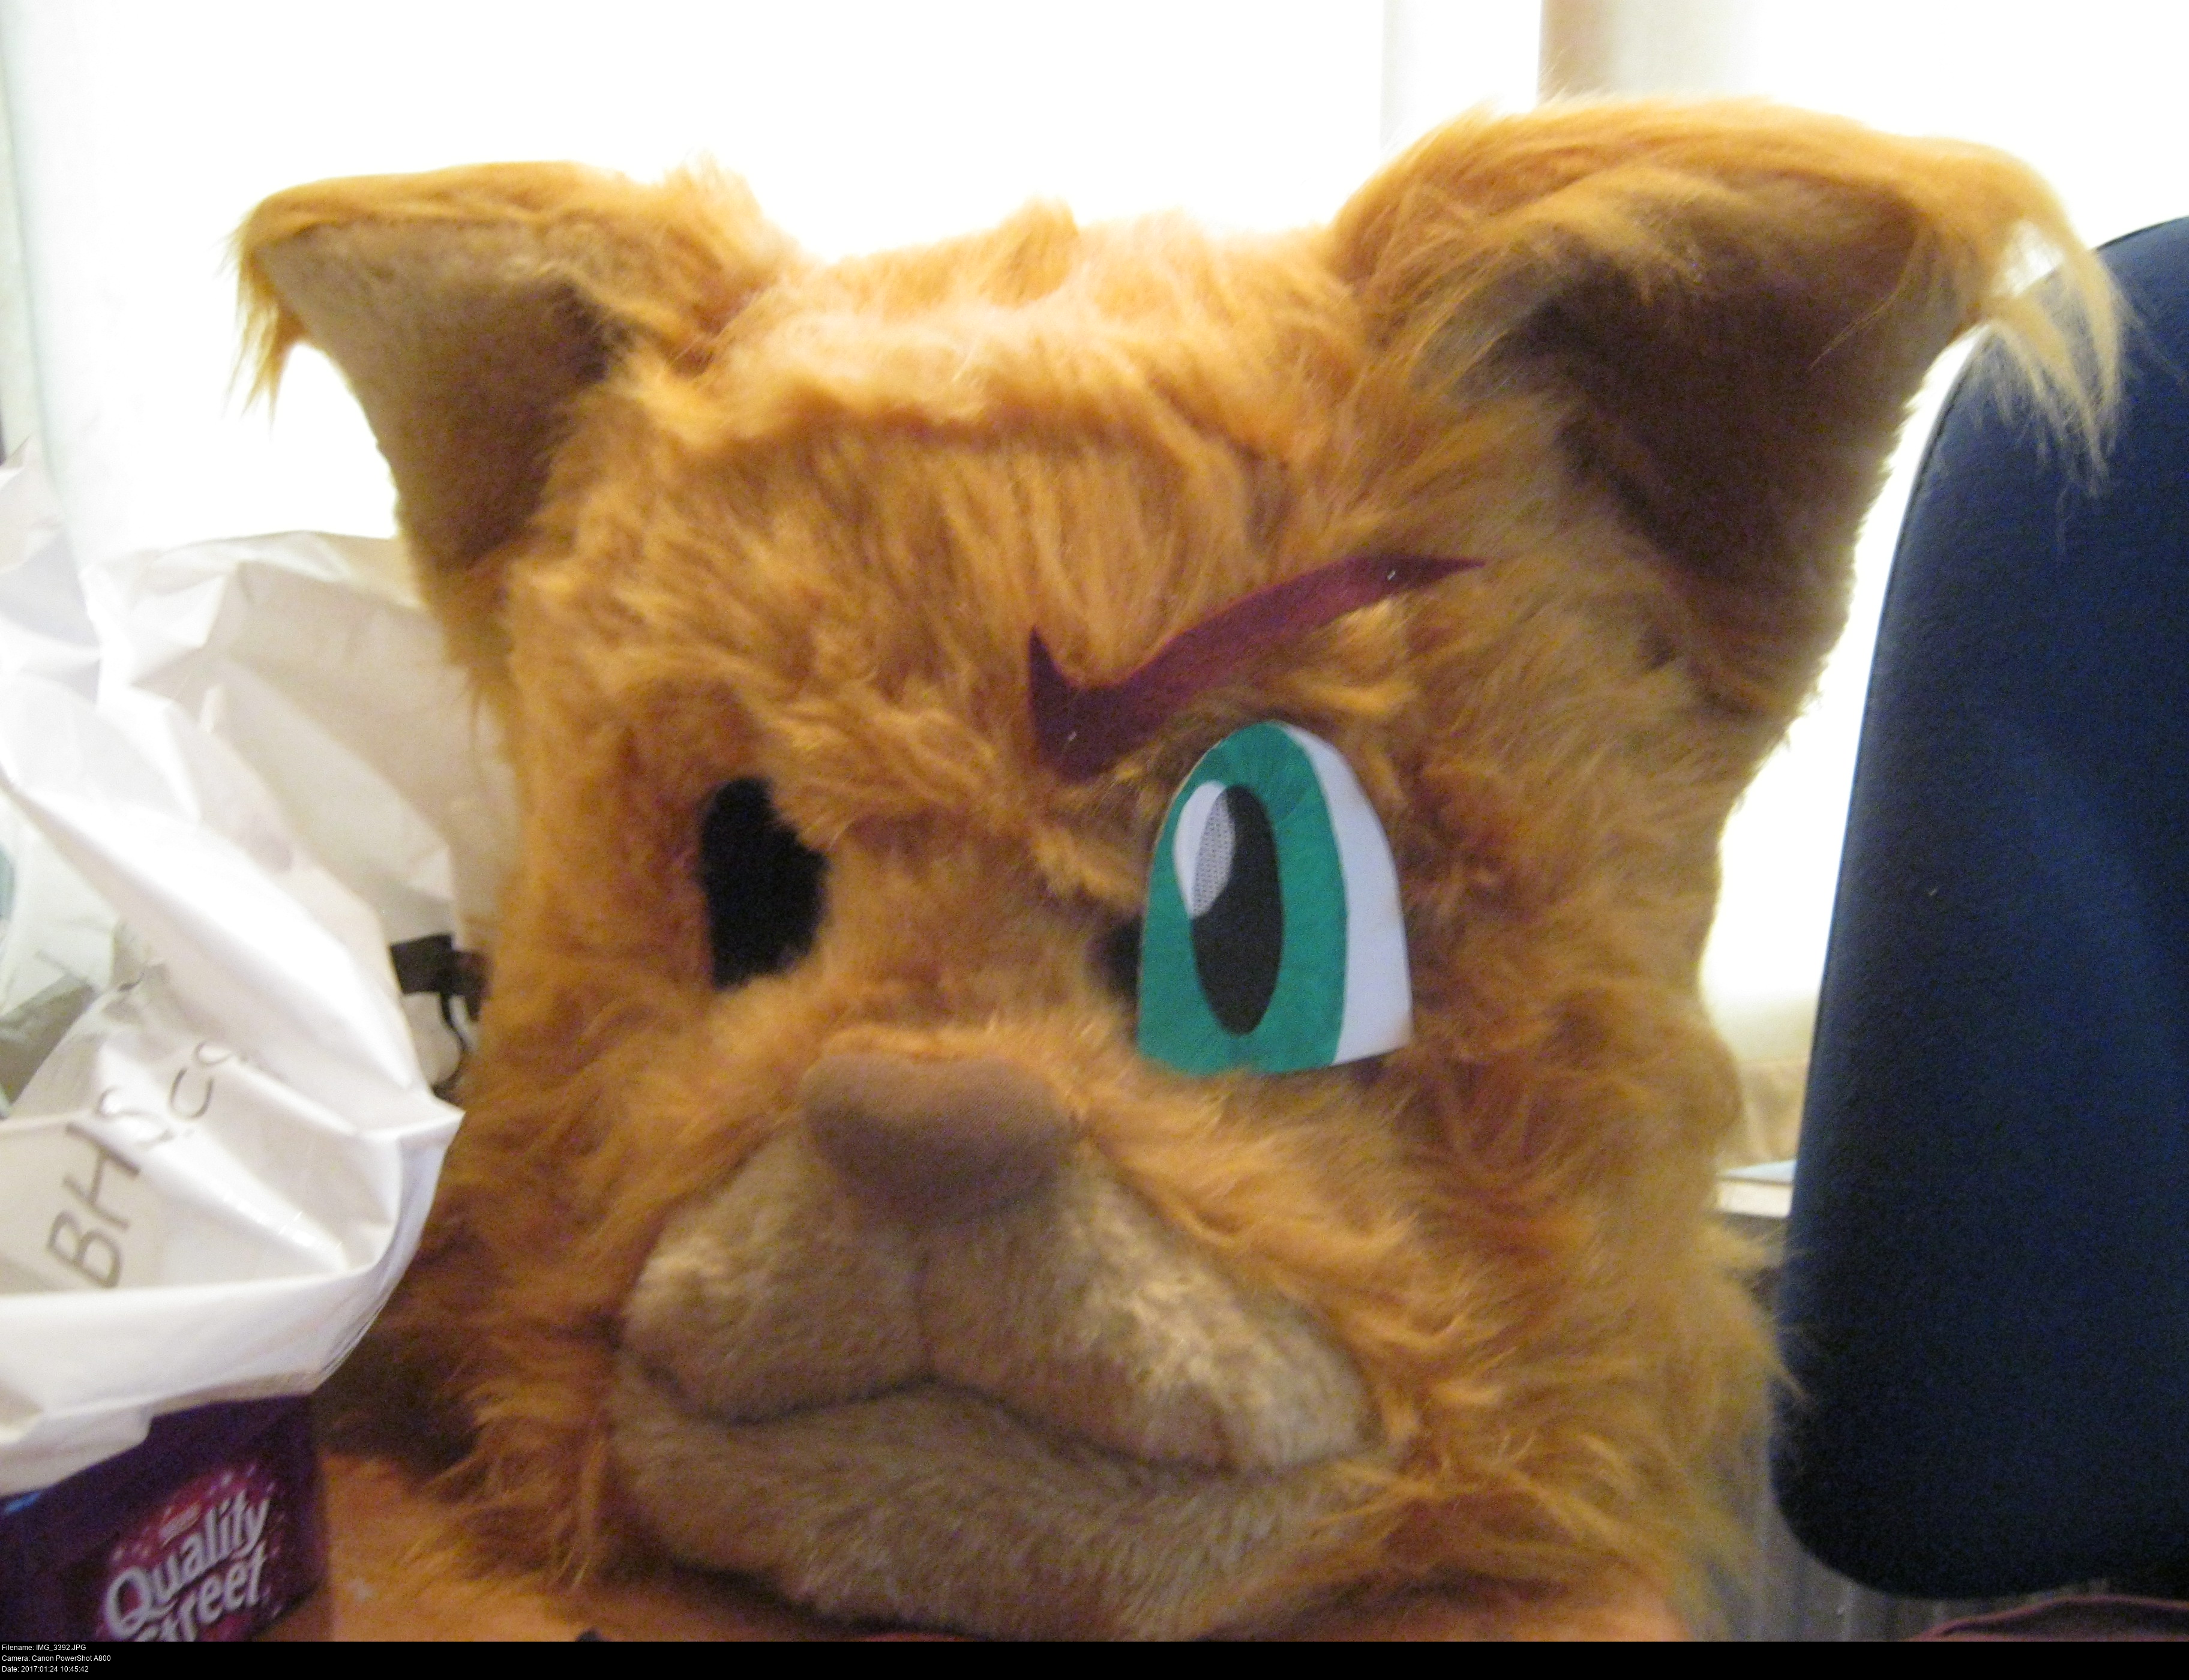
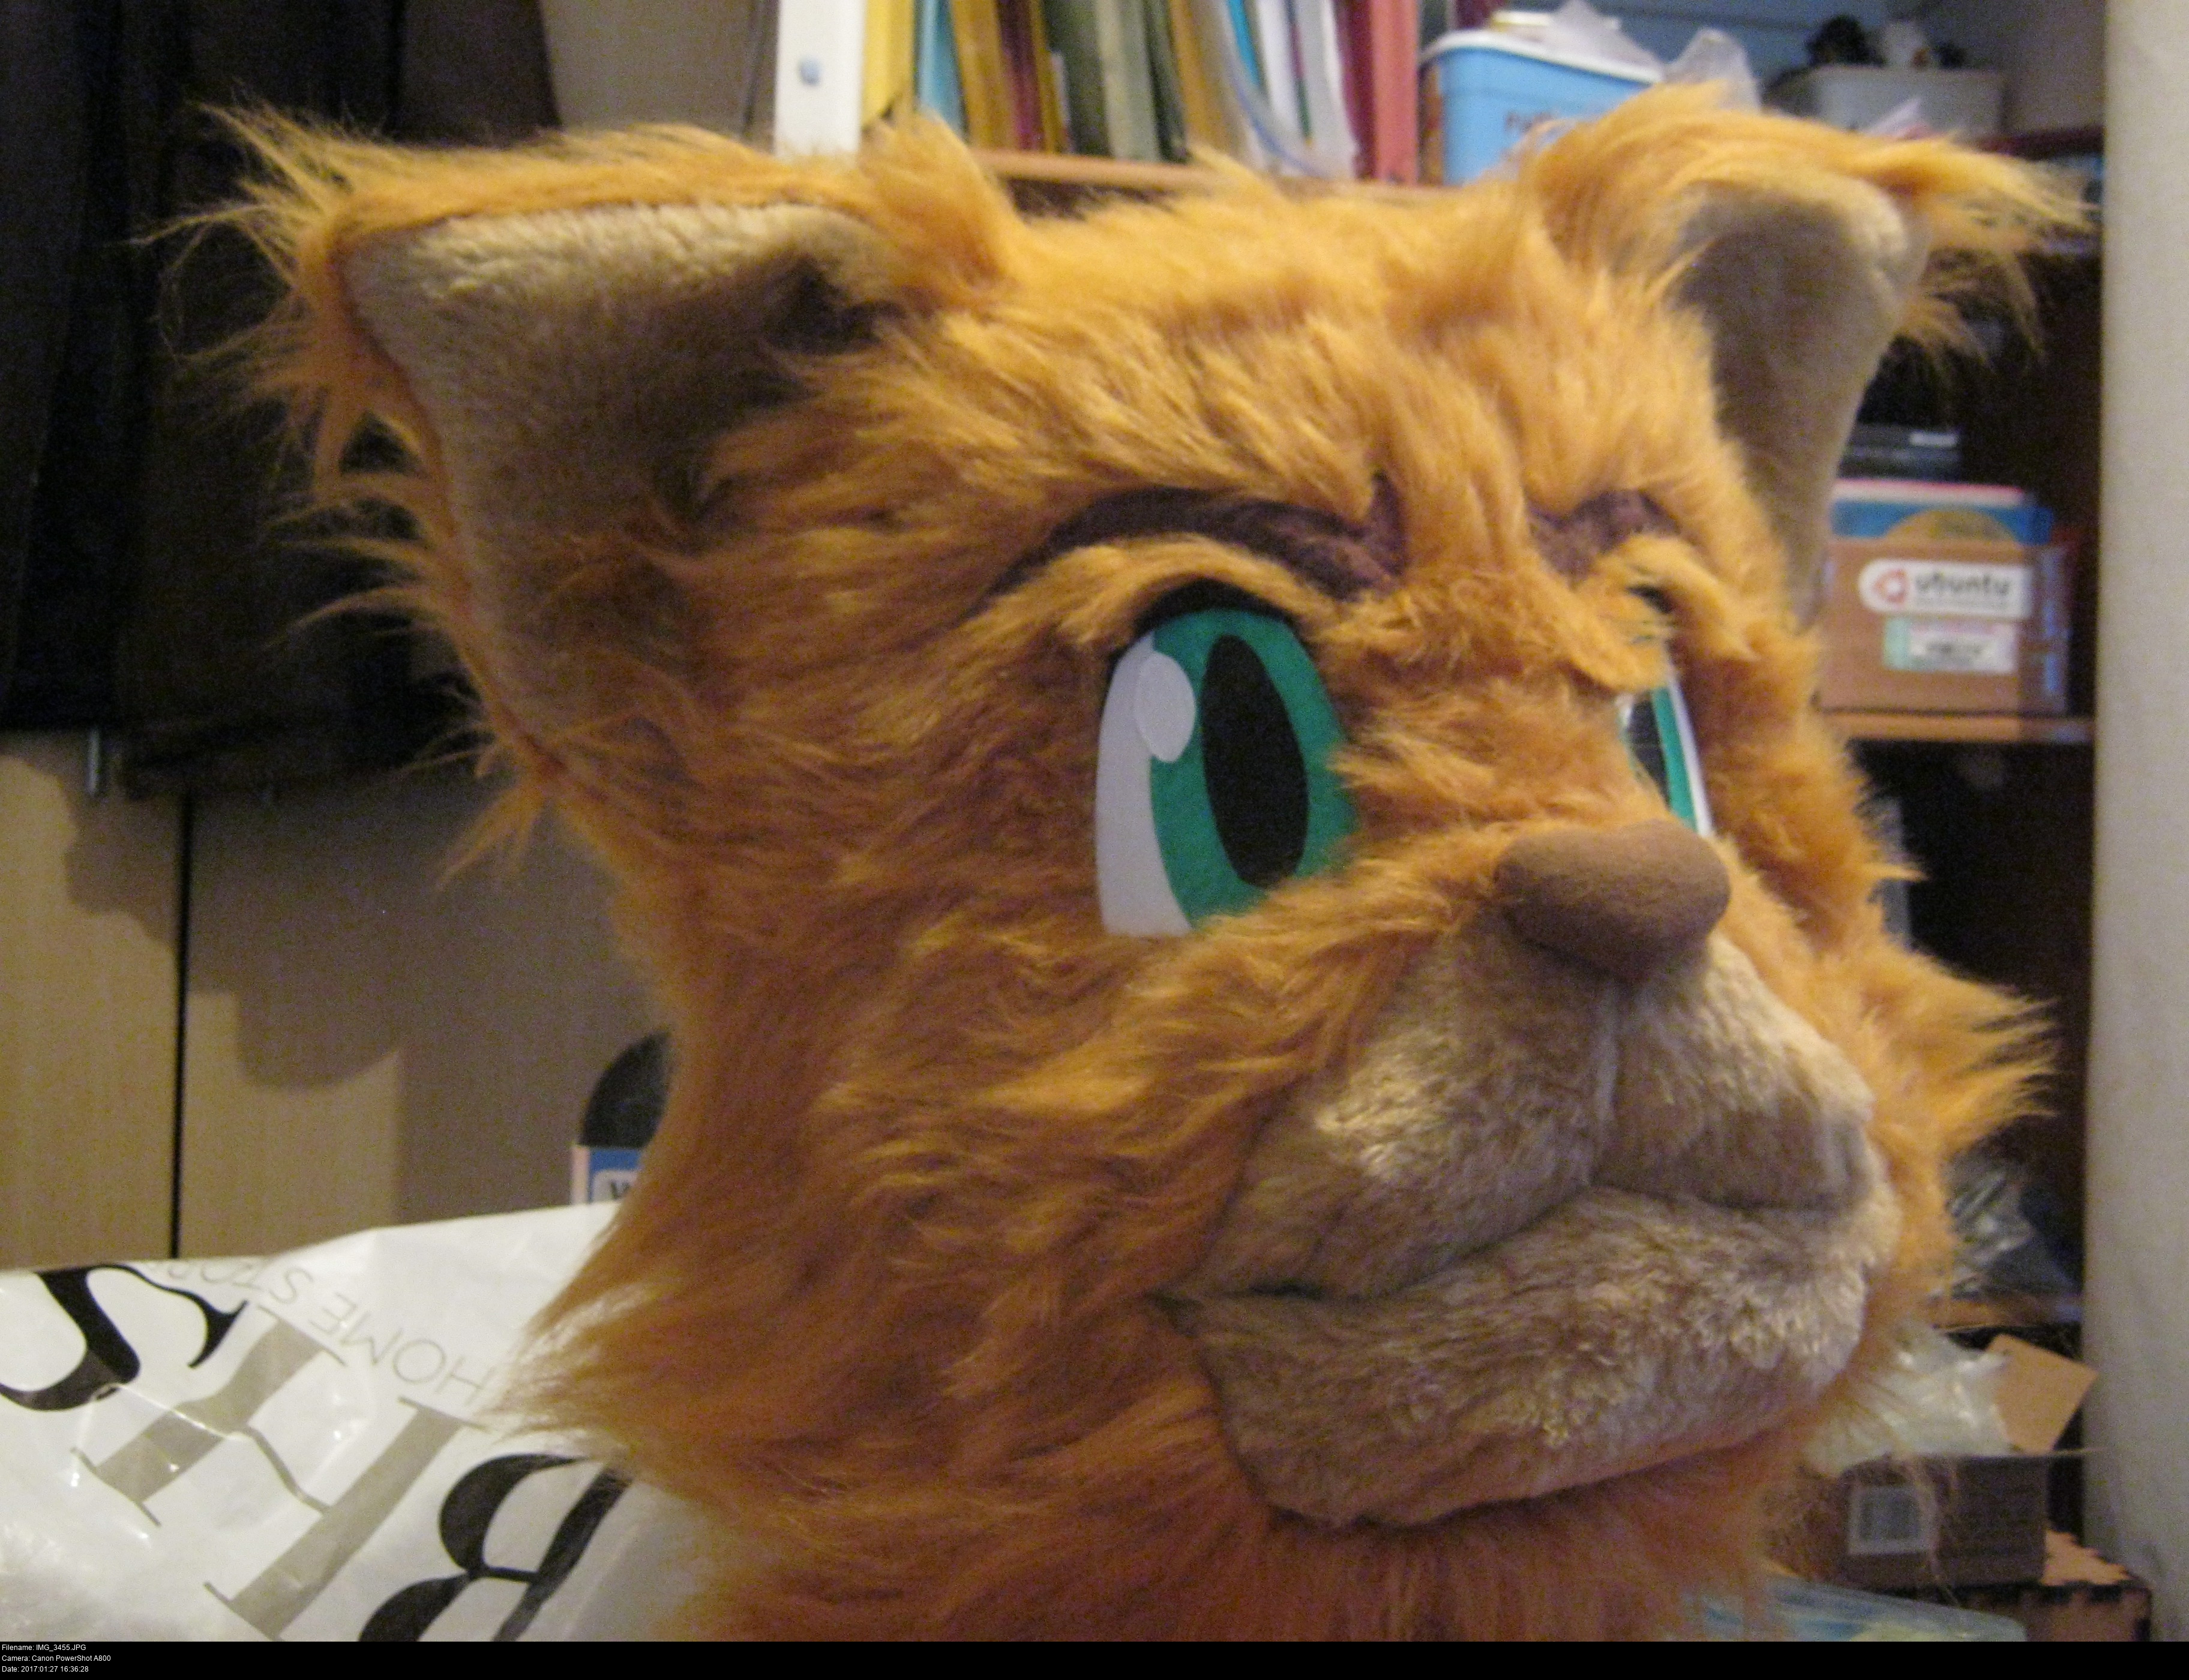
Alright! Looking good, Hotshot!
He's missing a little something though...
Ding! Give the lad a nose!
He's looking better by the second! Such a far cry from the bizarre, empty, furious bunny he once was.
This nose is the triangular piece of foam that was temporarily glued onto the head before I started taping the pattern. I've used the brown stretchy cotton from Skull Kid's original shoes and stretched it over the top of the foam, backstitching it to the foam tightly to create a little cotton-wrapped block. Then I can ladder stitch the nose to the fur covering to make a snug, tight, secure seam linking the nose to the face! Luckily there's no hot glue gluing the fur to the head at the nose's position, otherwise that'd be really annoying.
I wonder what he'd look like with some eyebrows as well?
Let's bring on the brown felt and try 'em out!

Lovely!
I haven't attached these yet but it's a good idea to have all the facial features ready so you can shift them around on the face to get an expression you're happy with.
DEGREELESSNESS MODE ON
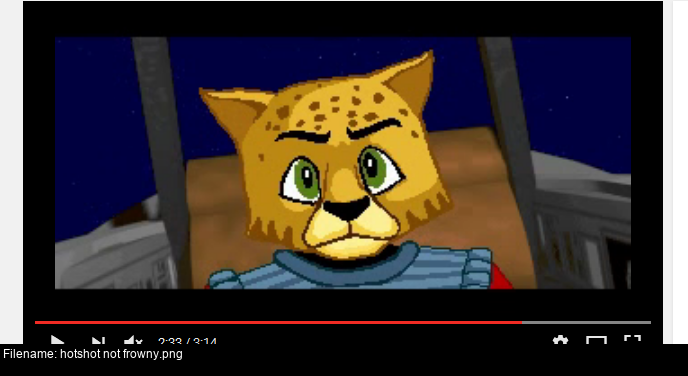
Here's a super rare shot of not-frowny overlynx from the intro, just to prove that he does have other expressions.

Meanwhile, the buckram has been glued to the eye plates and is drying.
My sewing box is kawaii now!

Time to think about eyelids.
He looks alright without them, but he might look better with them. He'll definitely look calmer at least!
But what should I make them from and how should I form them and attach them?

I can roll some fleece around the top edge of the eye plate to make a little outline-like lid, maybe?


And should I make it brown or black? The brown felt I have here isn't very visible against the fur, but the black might be too dark? Nah, the brown isn't working. Black it is.
And it definitely needs to be more visible than this. When the loose tufts of fur fall around and over the eye plates, these eyelids would be completely invisible.

Here we go! That looks cool, doesn't it?
It wasn't particularly easy to do this, though. I watched Matrices' fursuit eye tutorial a dozen times before I finally picked up the hot glue gun and had a go.
Cut a two inch wide strip of fleece.
Fold it in half and sew it flat.
Form the strip of fleece over the top of the eye to form the eyelid shape you want. In the video they used pleather, but even with fleece the eyelid will become a nice 3D overhanging arch shape.
Hot glue one side of the fleece down onto the plastic card on the reverse of the eye plate to begin with.
Form the strip of fleece over the top of the eye again to ensure you still have the shape you want, and hot glue the opposite side of the fleece down.
Apply a line of hot glue along the upper edge of the eye plate on the inside gradually flattening down the fleece as you go to finalise the full eyelid.
Trim the side extents of the fleece strip away, and trip any fleece that hangs over the inside of the pupil of the eye on the inside.
Before the eyes can be completely installed, there's a little preparatory work that needs to be done to the head. In the images above it's already been done, but here's a bit more about that stage.
Before installing the fursuit eye plates onto the head, the tutorials recommend lining the eyeholes with dark material first. This means making small loops of stretchy material about 3/4 inch thick and hot gluing these snugly around the eyeholes. About 3/8 of an inch lies each inside and outside of the eyeholes. When I glue the eyes onto the head, I'll be gluing onto this stuff.
I made my lining pieces out of the same fleece as the eyelids, since it's something I have a lot of lying around.
The reasons to line your eyeholes:
The dark material prevents unwanted light getting into the mask and interfering with your vision.
It provides a secure surface for you to glue the eye plates onto.
It forces you to clip any fur that would sneak inside the mask and irritate your face.
It provides a slightly more comfortable edge against your face when you wear it.
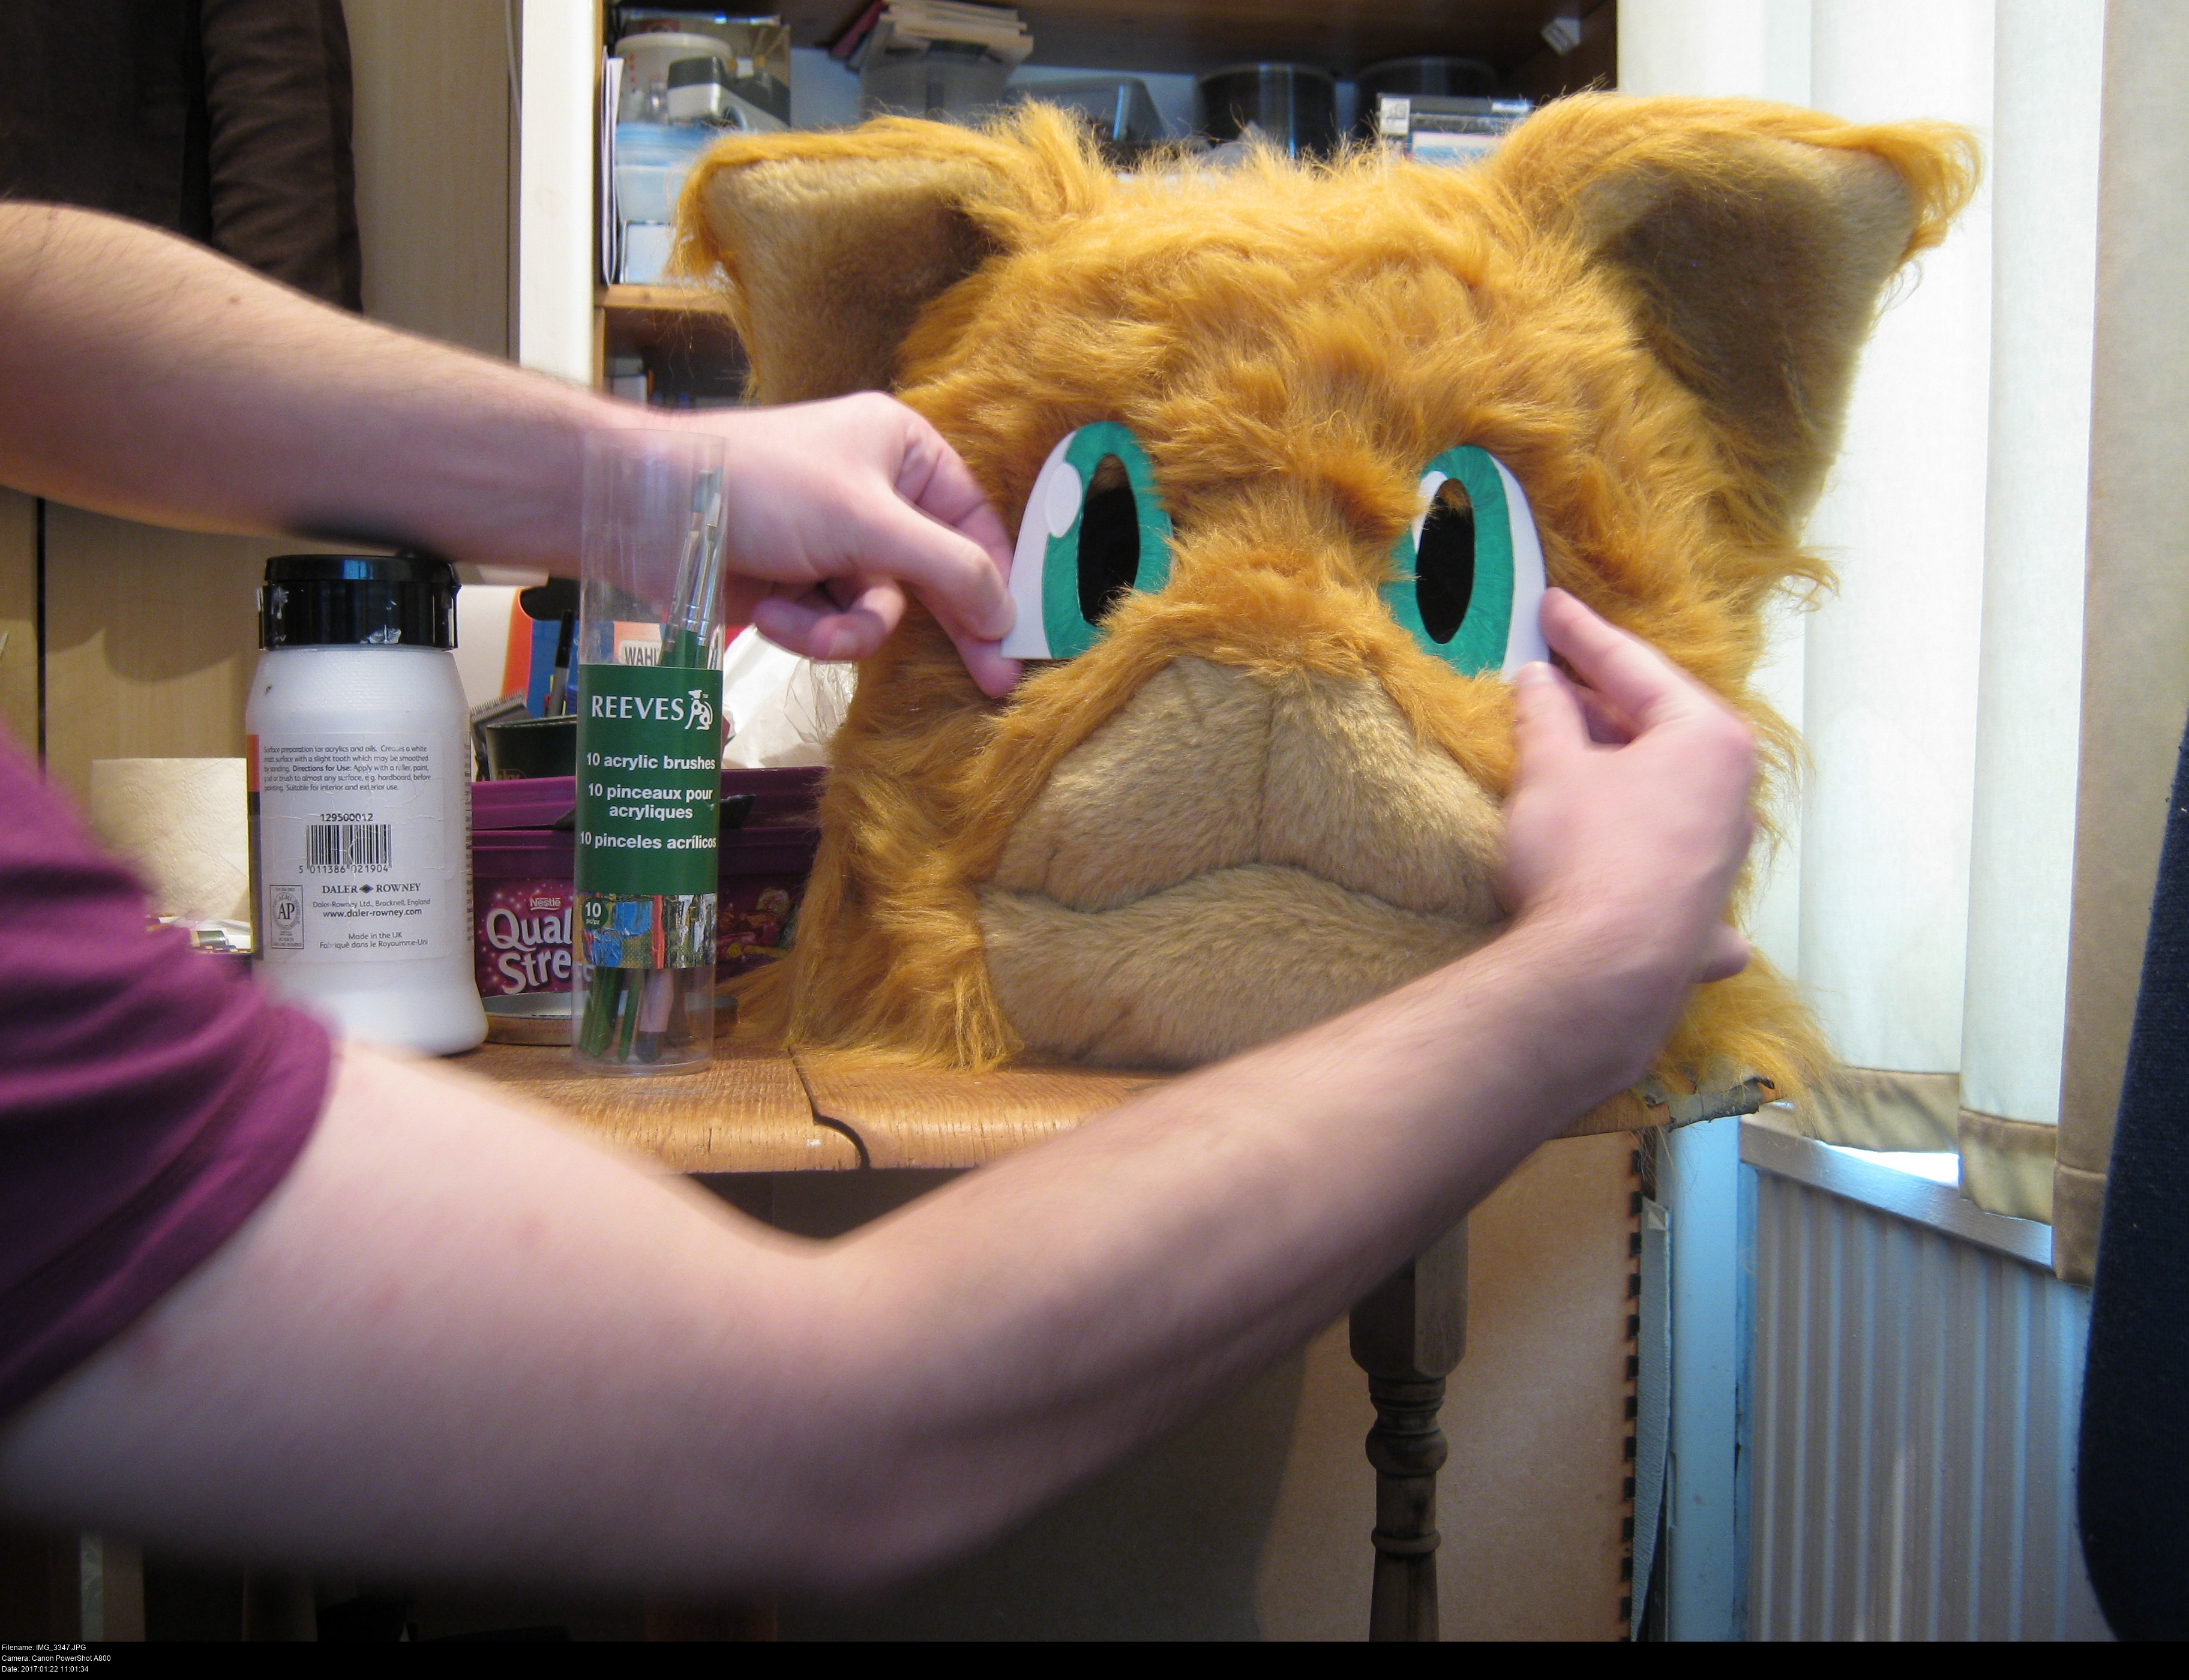
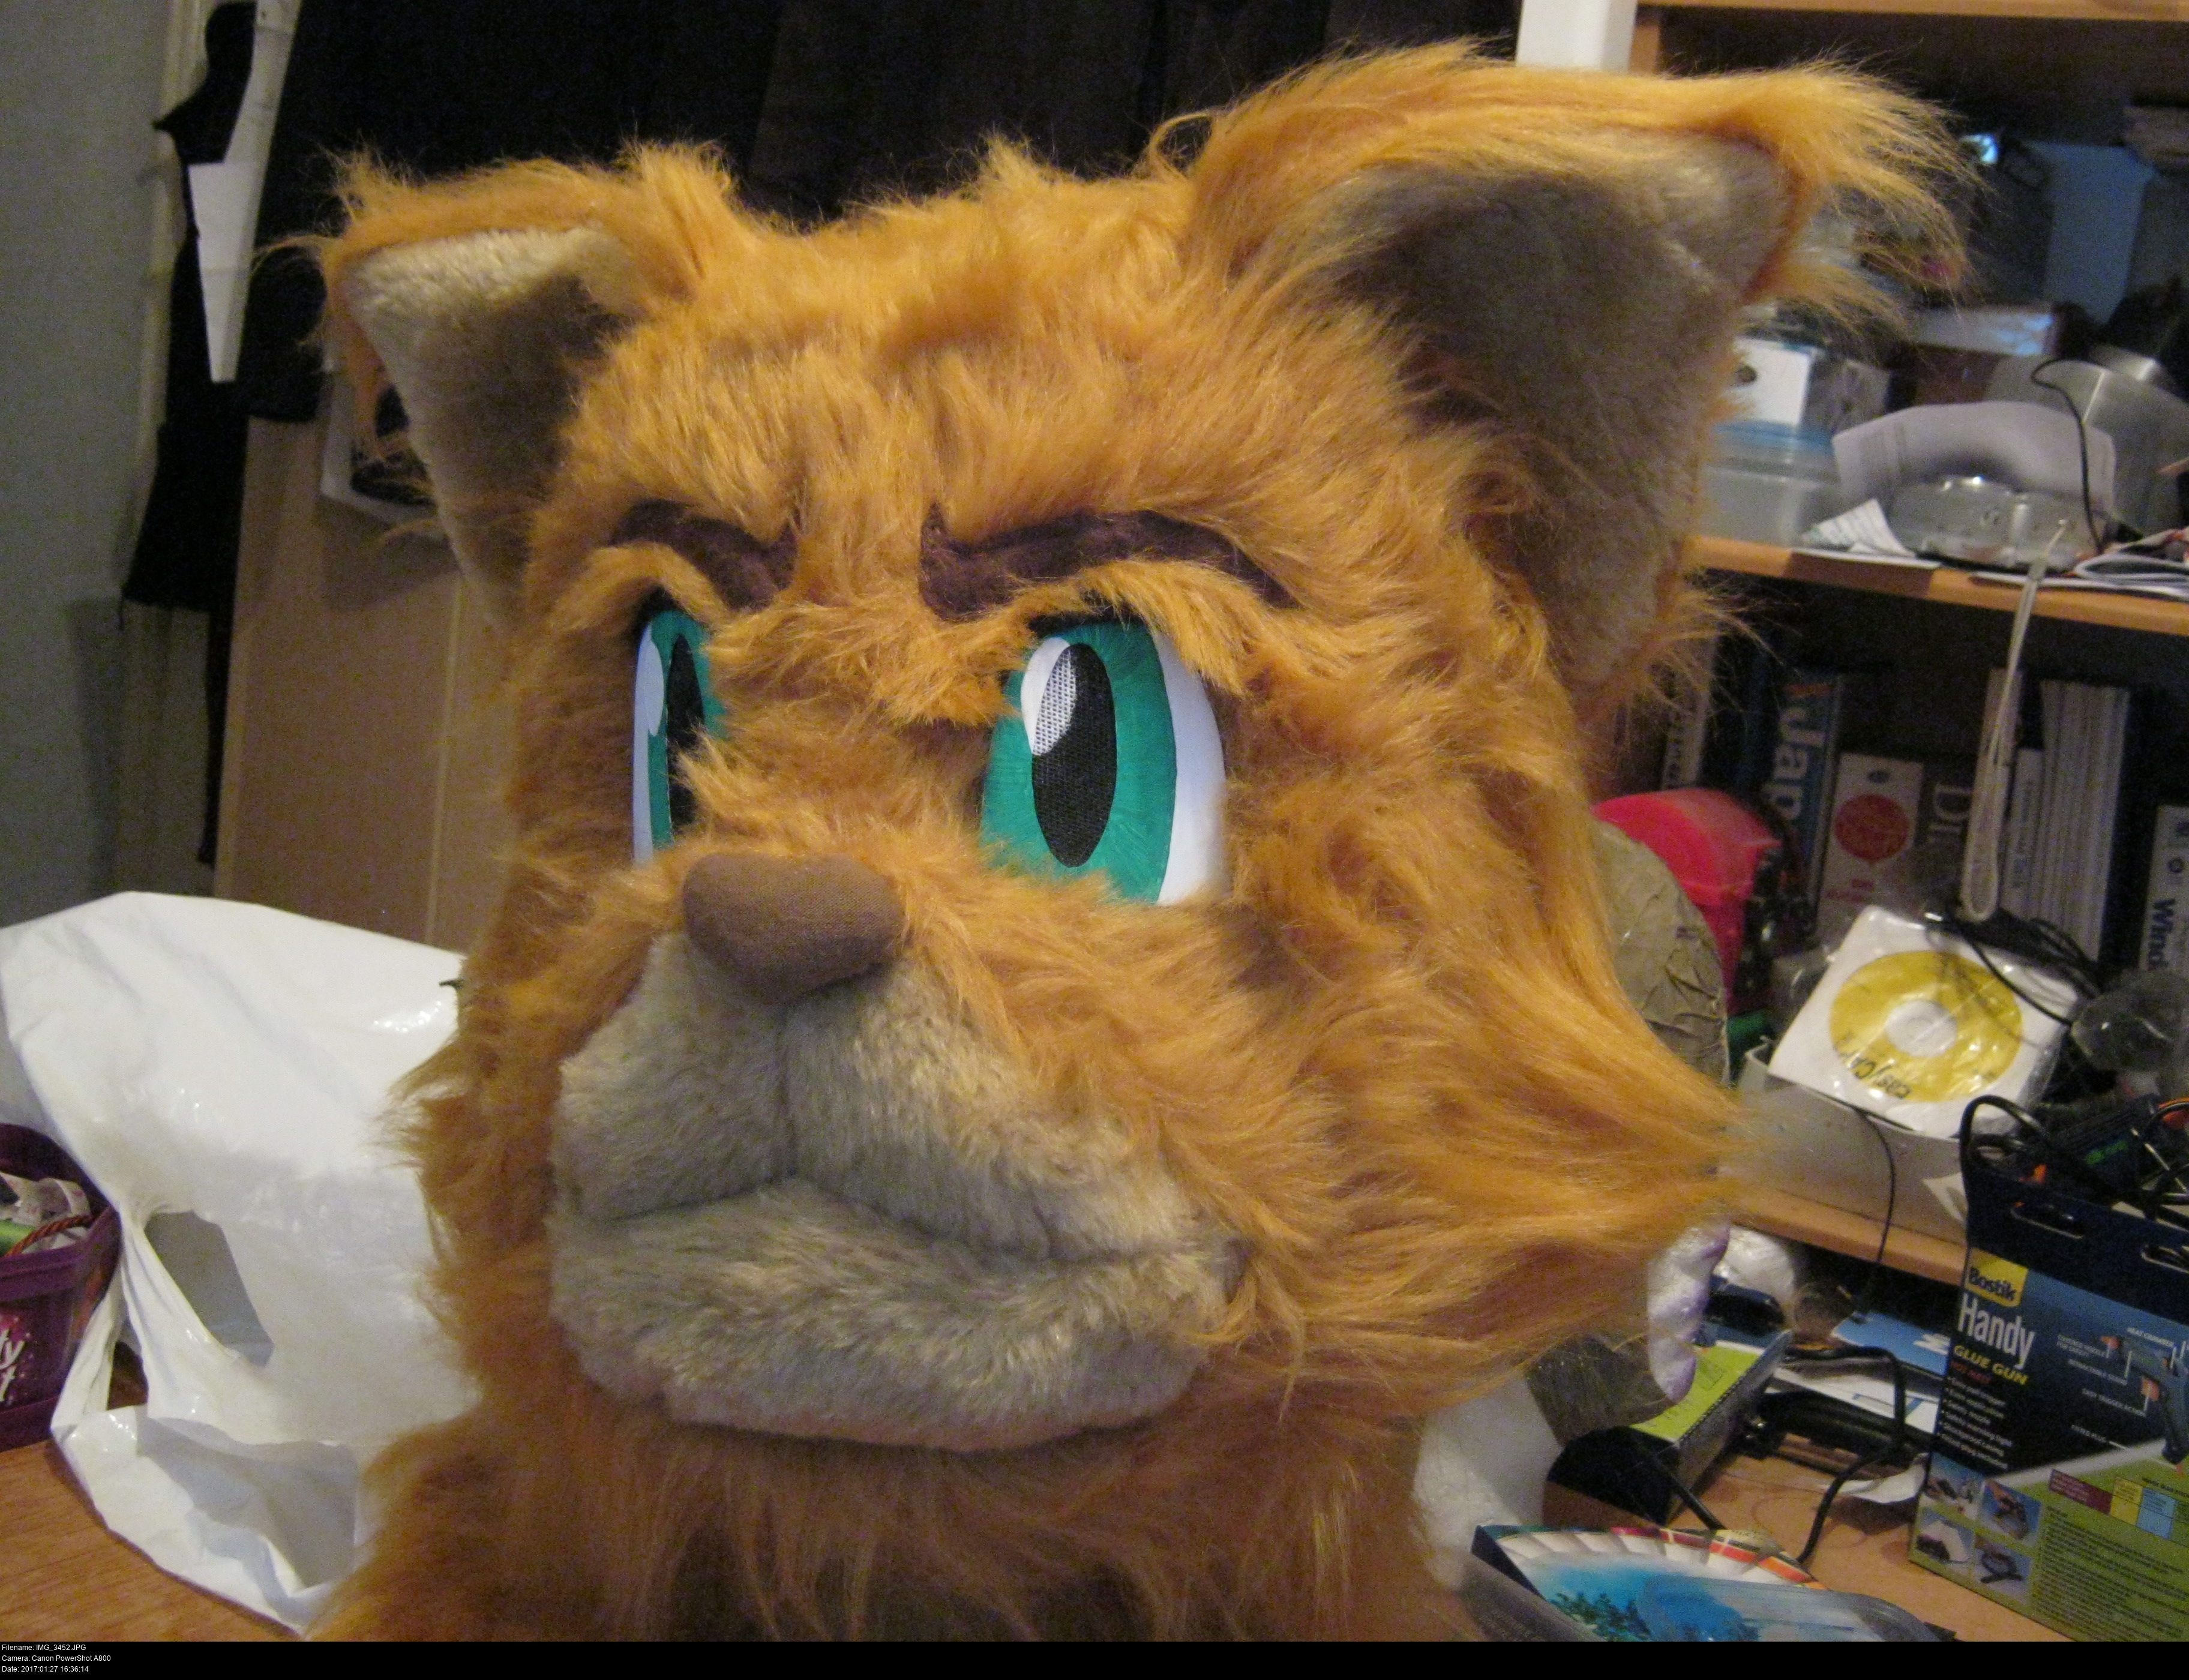
Let's see how these finished eyes look if I temporarily place them on the furry head!


Are you a FURRY WIZARD?
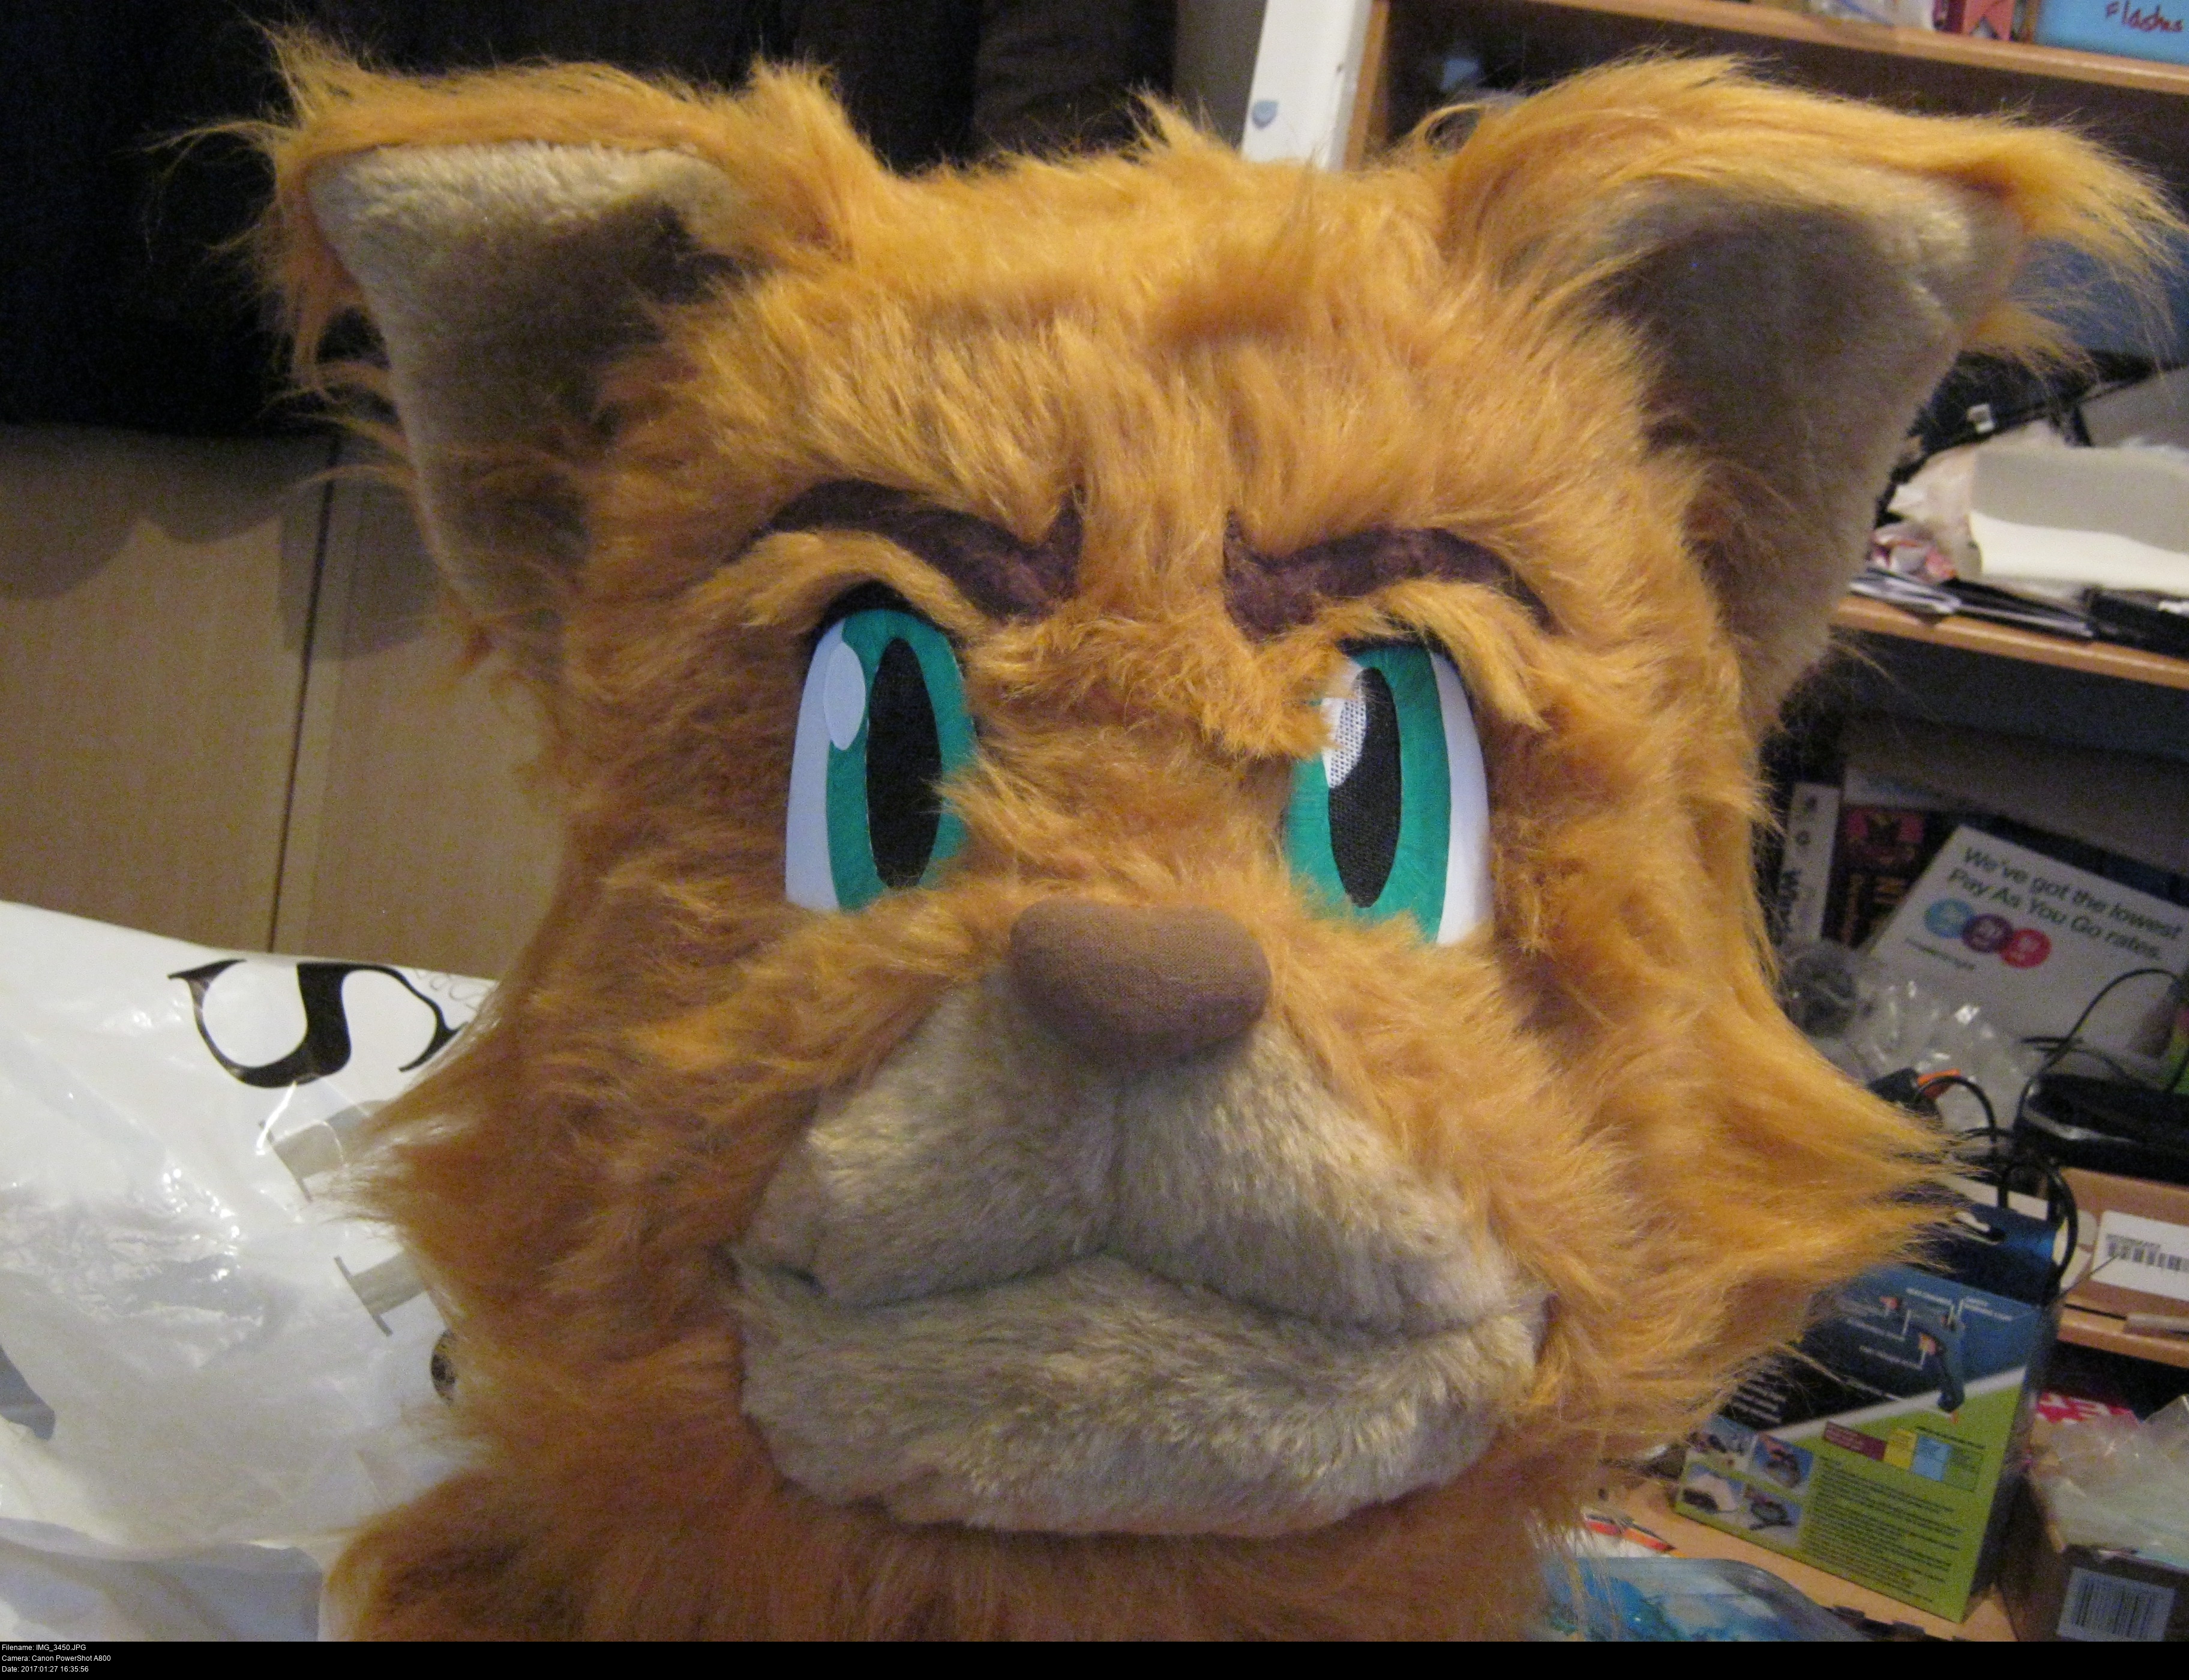
There we go. Wow, what a cutie. What a hero!
You can see all the little imperfections with the camera up close like this: The far corner of the left side of the muzzle is a little non-straight due to the multiple attempts I took at fitting the pieces together. The thick short-pile suede of the muzzle has very obvious darts in it. The rough, cheap honey coloured fur is clumping up a little instead of becoming a sleek, uniform fluffy coat. But I made a gorram furry head!!
Now to apply the eyes onto the head for real...
This is really nervewracking. There's a lot of mixed up stuff at the back of the eye plates now, and none of it is stuff I'd consider particularly compatible with hot glue, and I'm gluing it onto the fleecey eyehole linings which seem to me to be the worst kind of fluff to try to glue to!
Gently does it. Applying a small amount of glue in a line onto the innermost nose-edge eye plate and pressing it into the correct position firmly, and holding it, making sure to glue it to the fleece and nothing else. If it's in the right place, try the other eye to get it symmetrical. Alternate between the eyes as you do each additional edge, using the give of the foam to push and hold the eyes into the correct positions relative to each other and the head. Do your best not to get strings of glue draped across the fur or you might have to cut off little tufts.
Wahoo!! Look at him go! You have no idea how awesome it feels to get this far. Also, show your mum because she'll love it!
Now that the furry head is looking good, it's time to put some serious thought into a method for putting it on and taking it off properly. I've decided that the best way is to treat the majority of the head as dead weight and reach inside and tug on the balaclava part and pull it down until it's tight. Then I can adjust the head into position and all is well.
'Can you see out of that thing?'
Well, yes and no!
Normal human vision covers a very wide angle with each eye. You can almost see a full 180 degrees!
Wearing the furry head is like looking through two narrow tubes pointed slightly outwards in different directions. I can see forwards and to the left, and forwards and to the right, but I can't see directly forwards at all! If I want to see where I'm going, I'll have to either walk digonally or slowly bob my head from side to side with each step to get flashes of forward vision!
Don't, -don't-, even think about tackling staircases while your vision is both reduced and darkened by your furry head. Take it off!
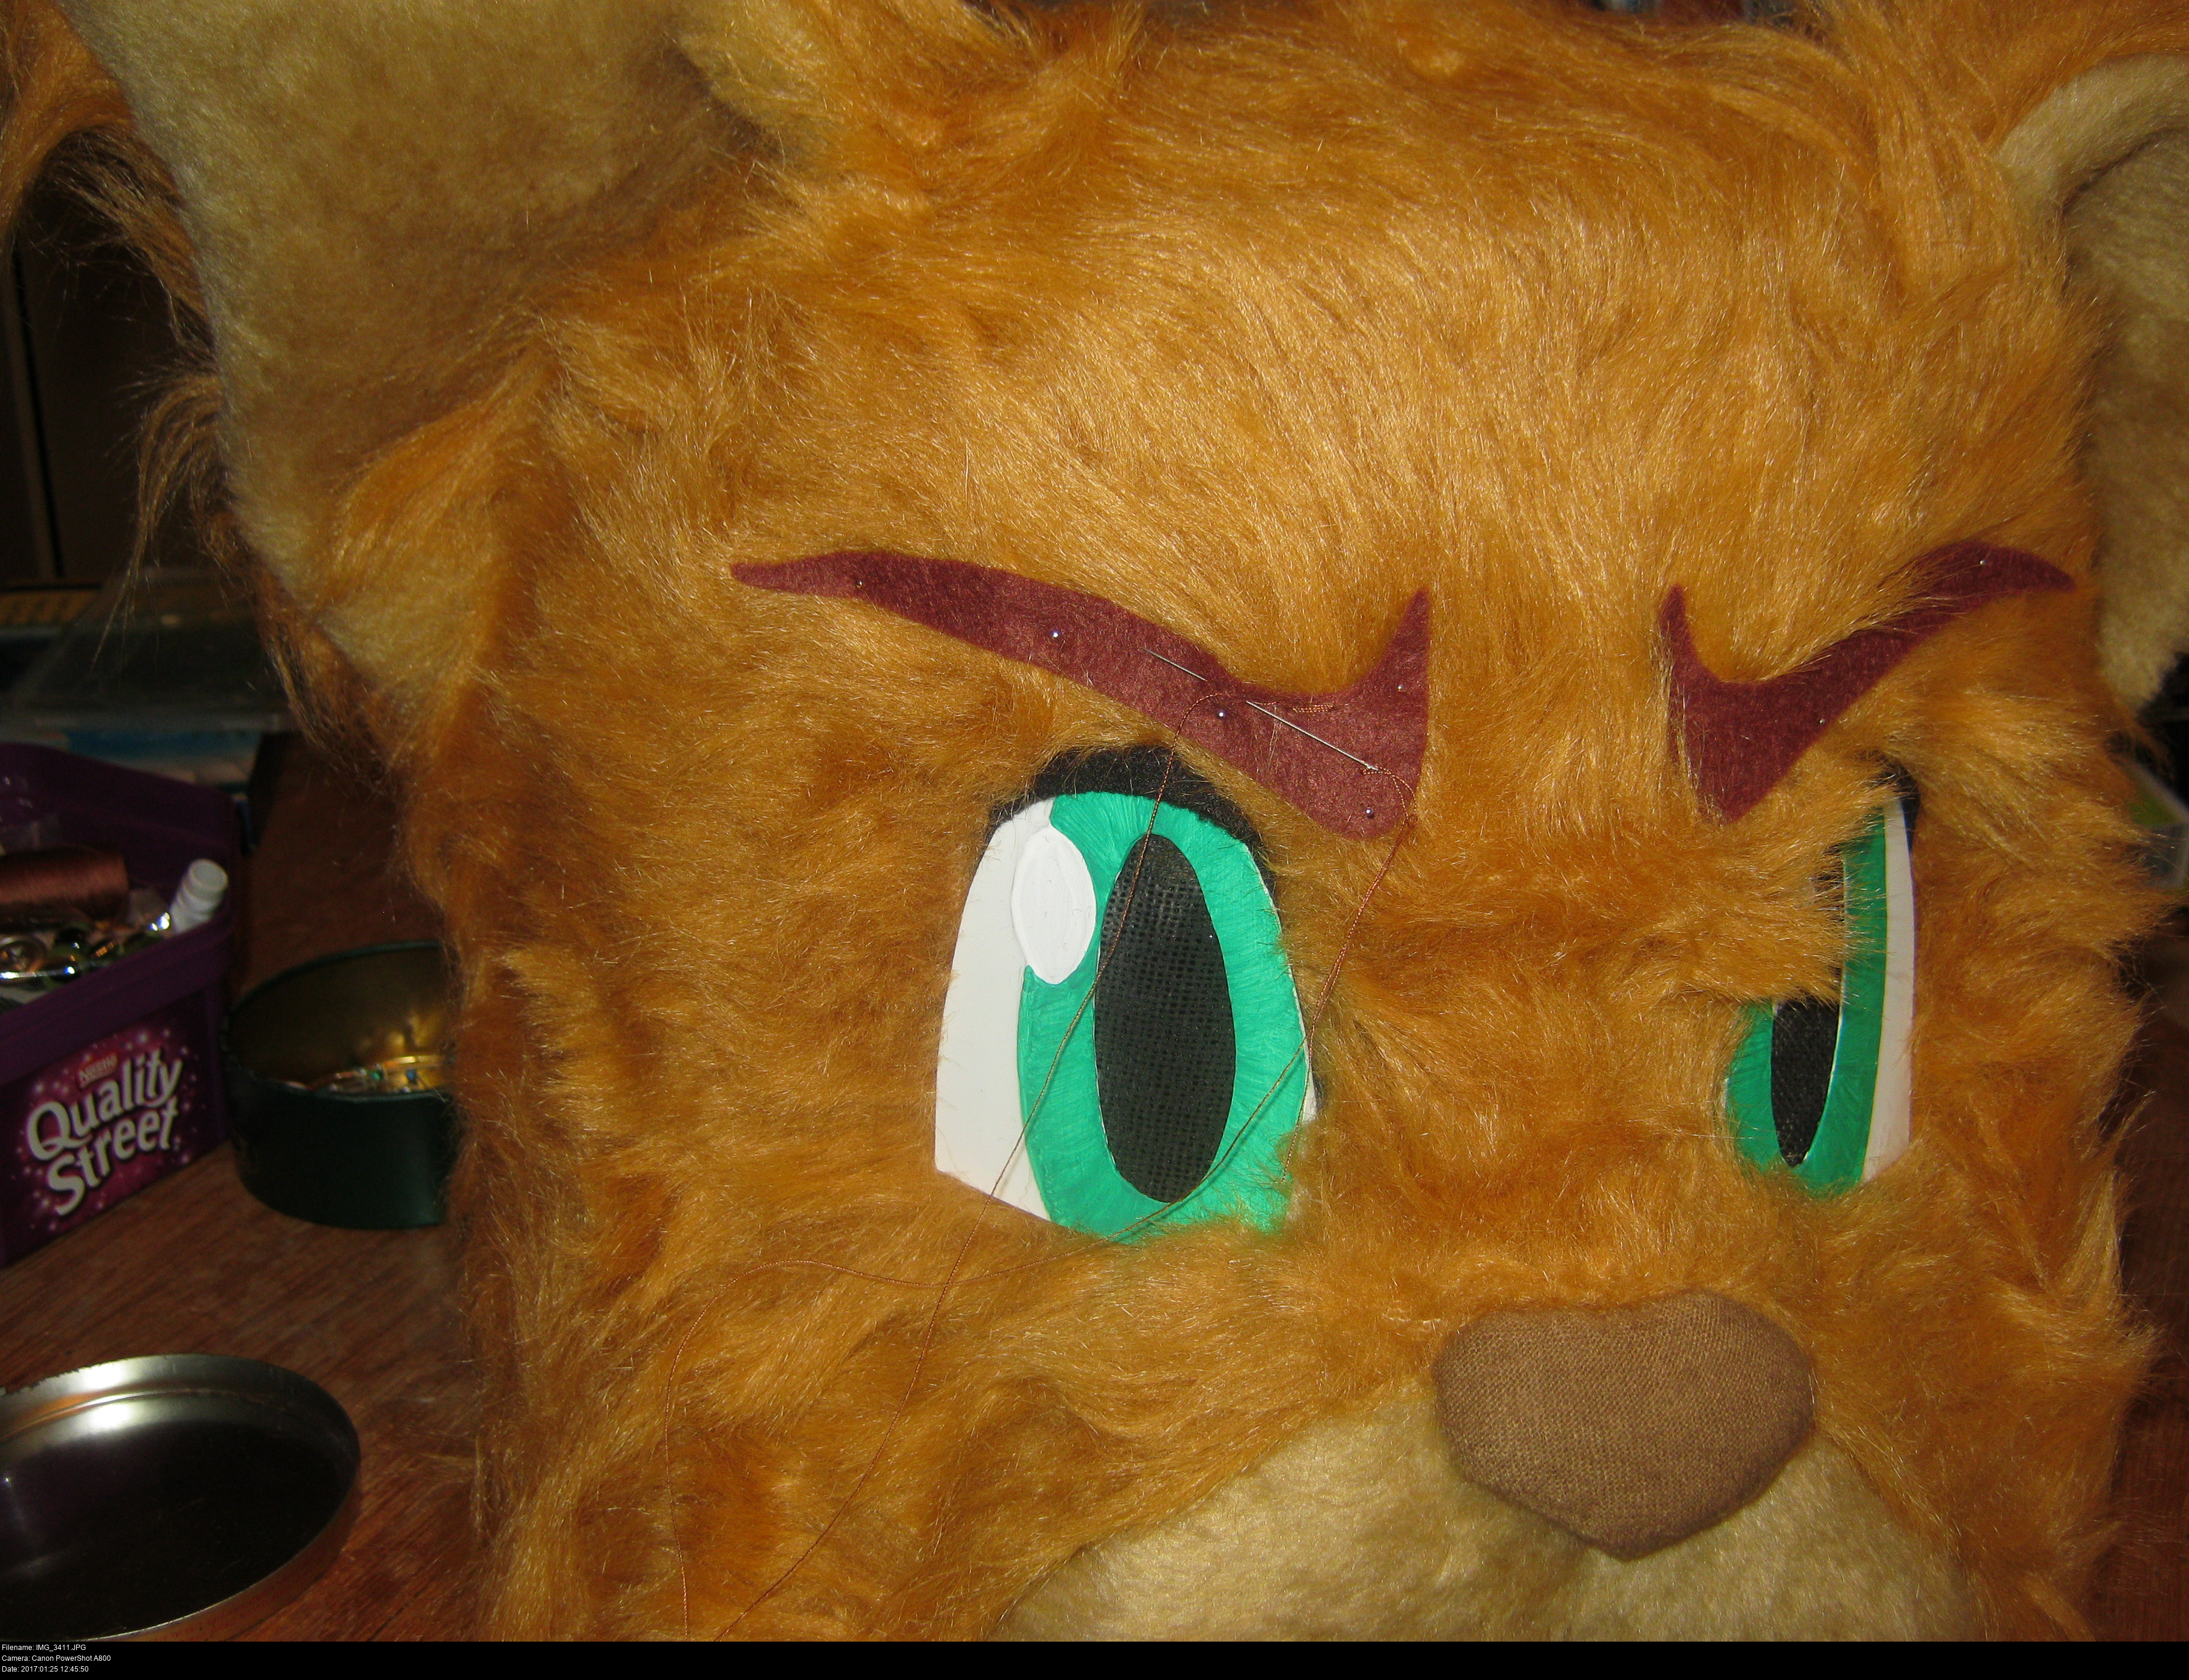
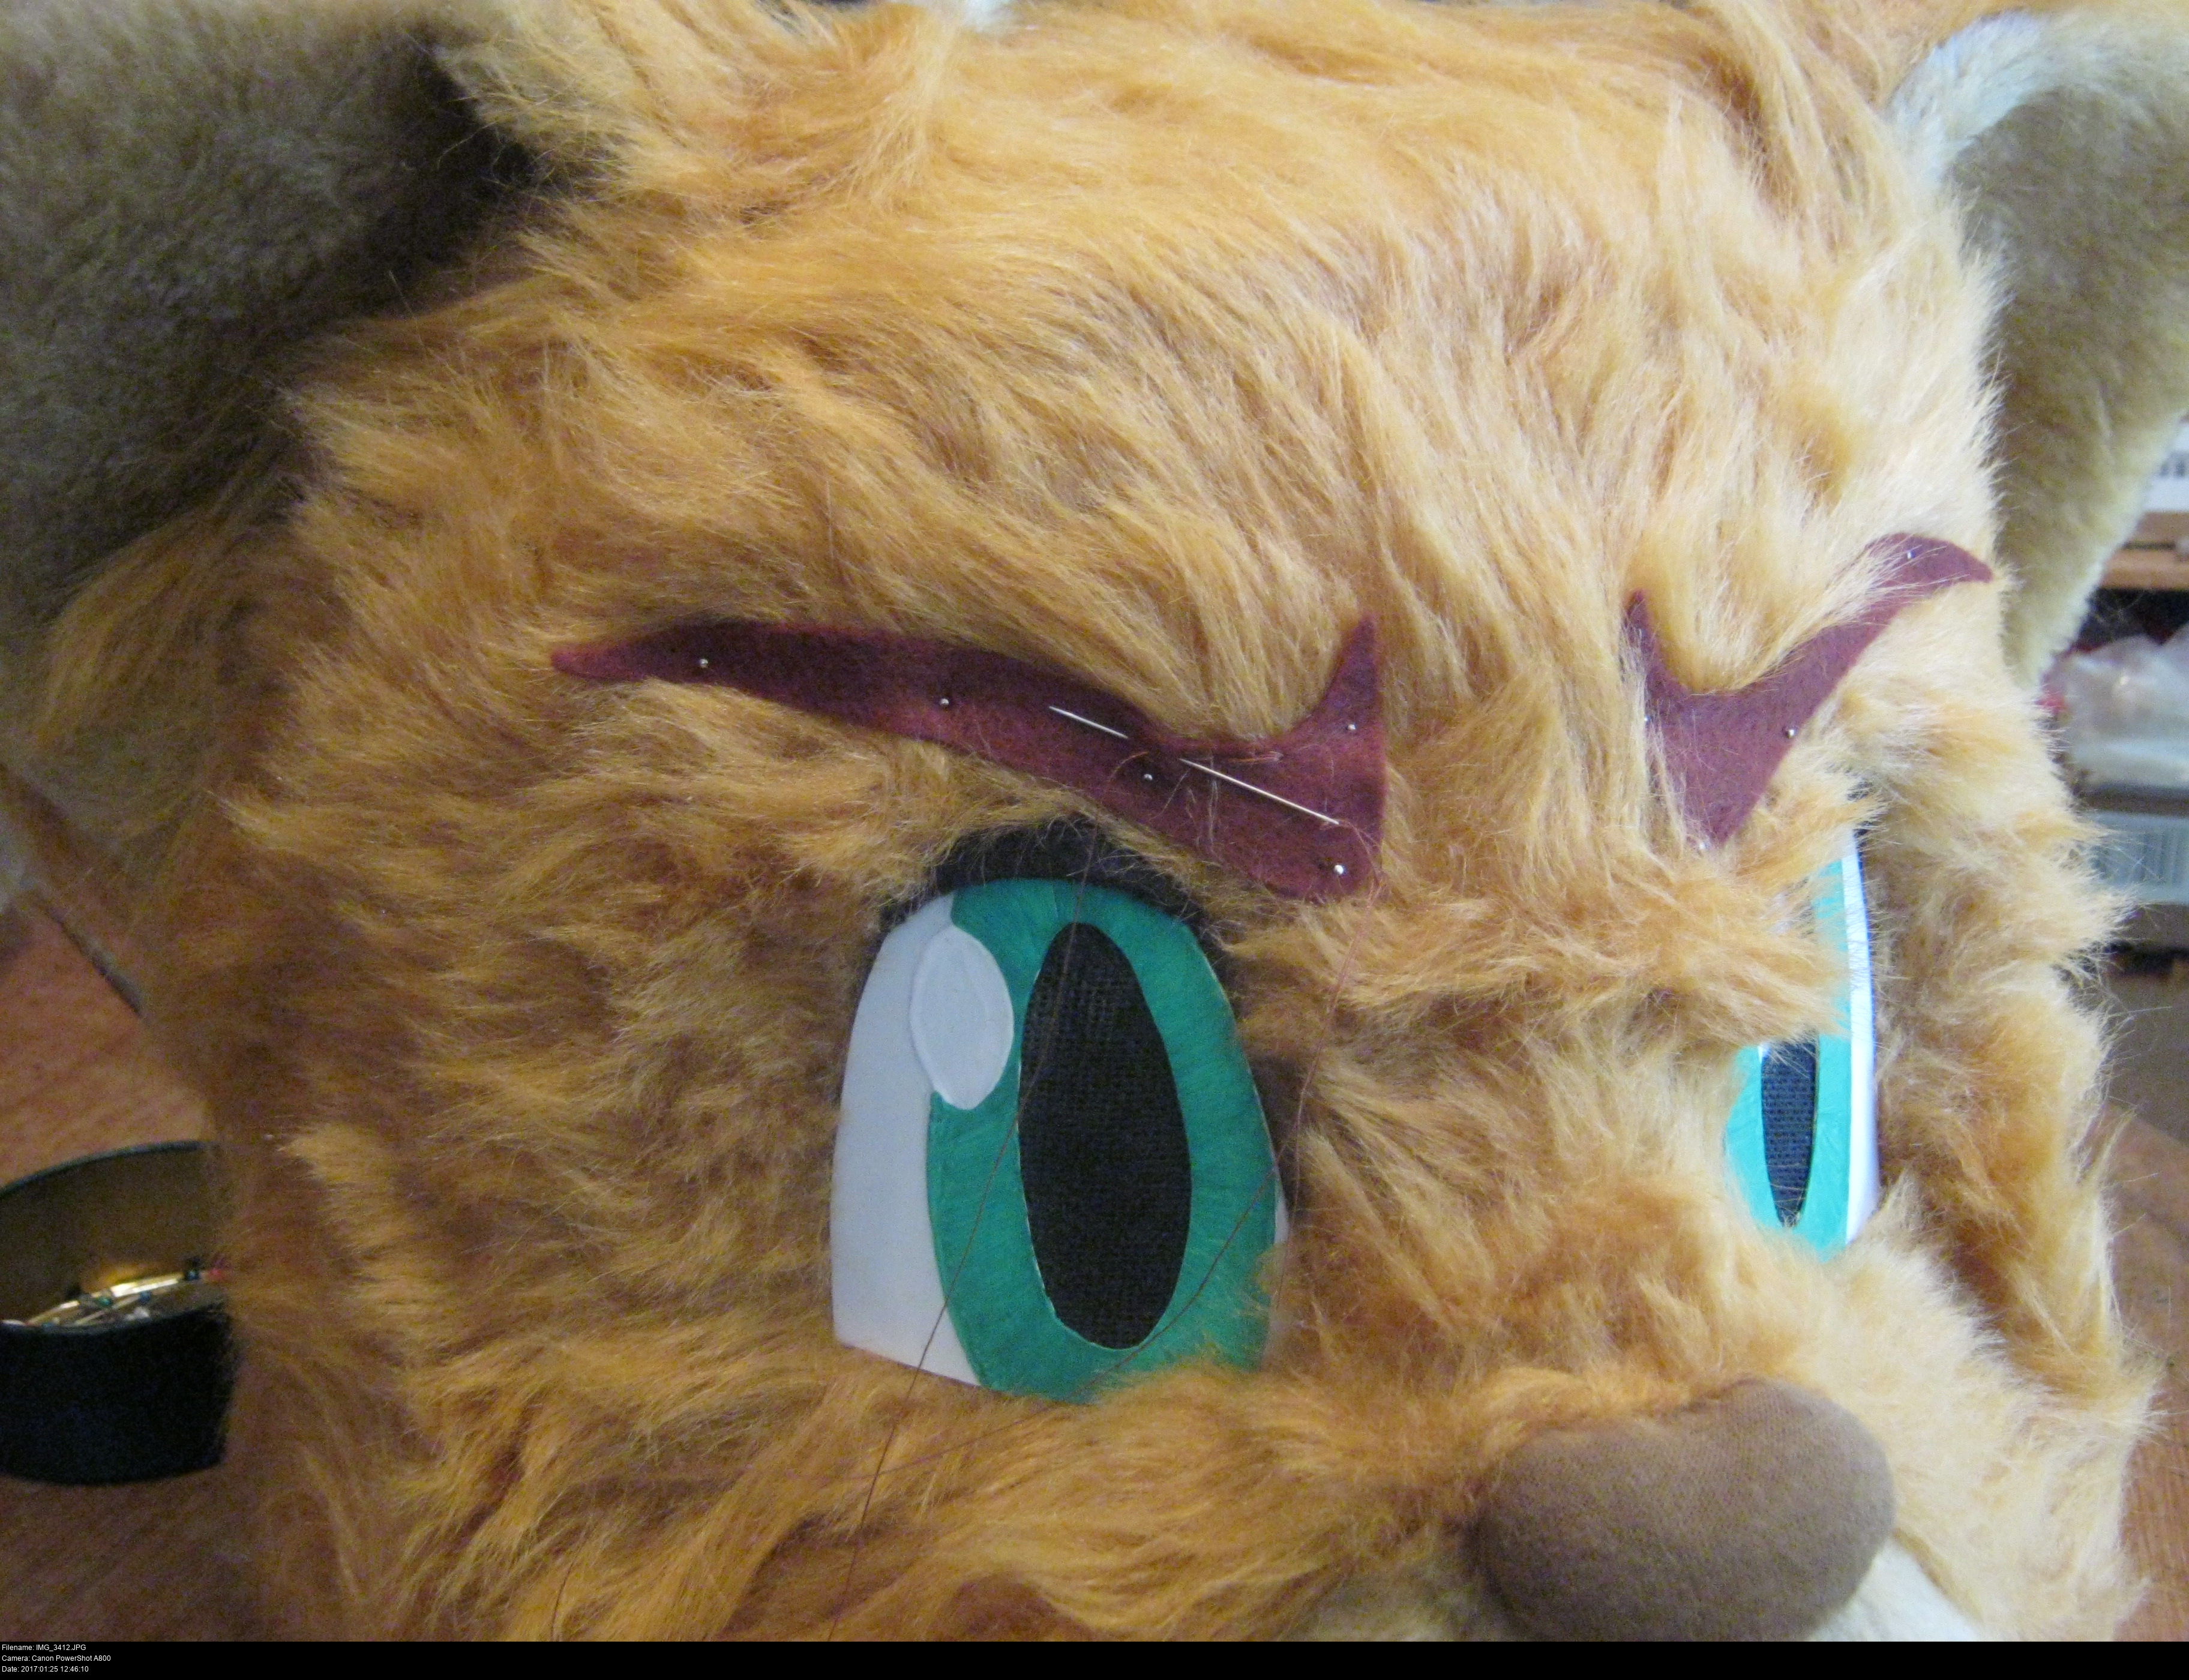
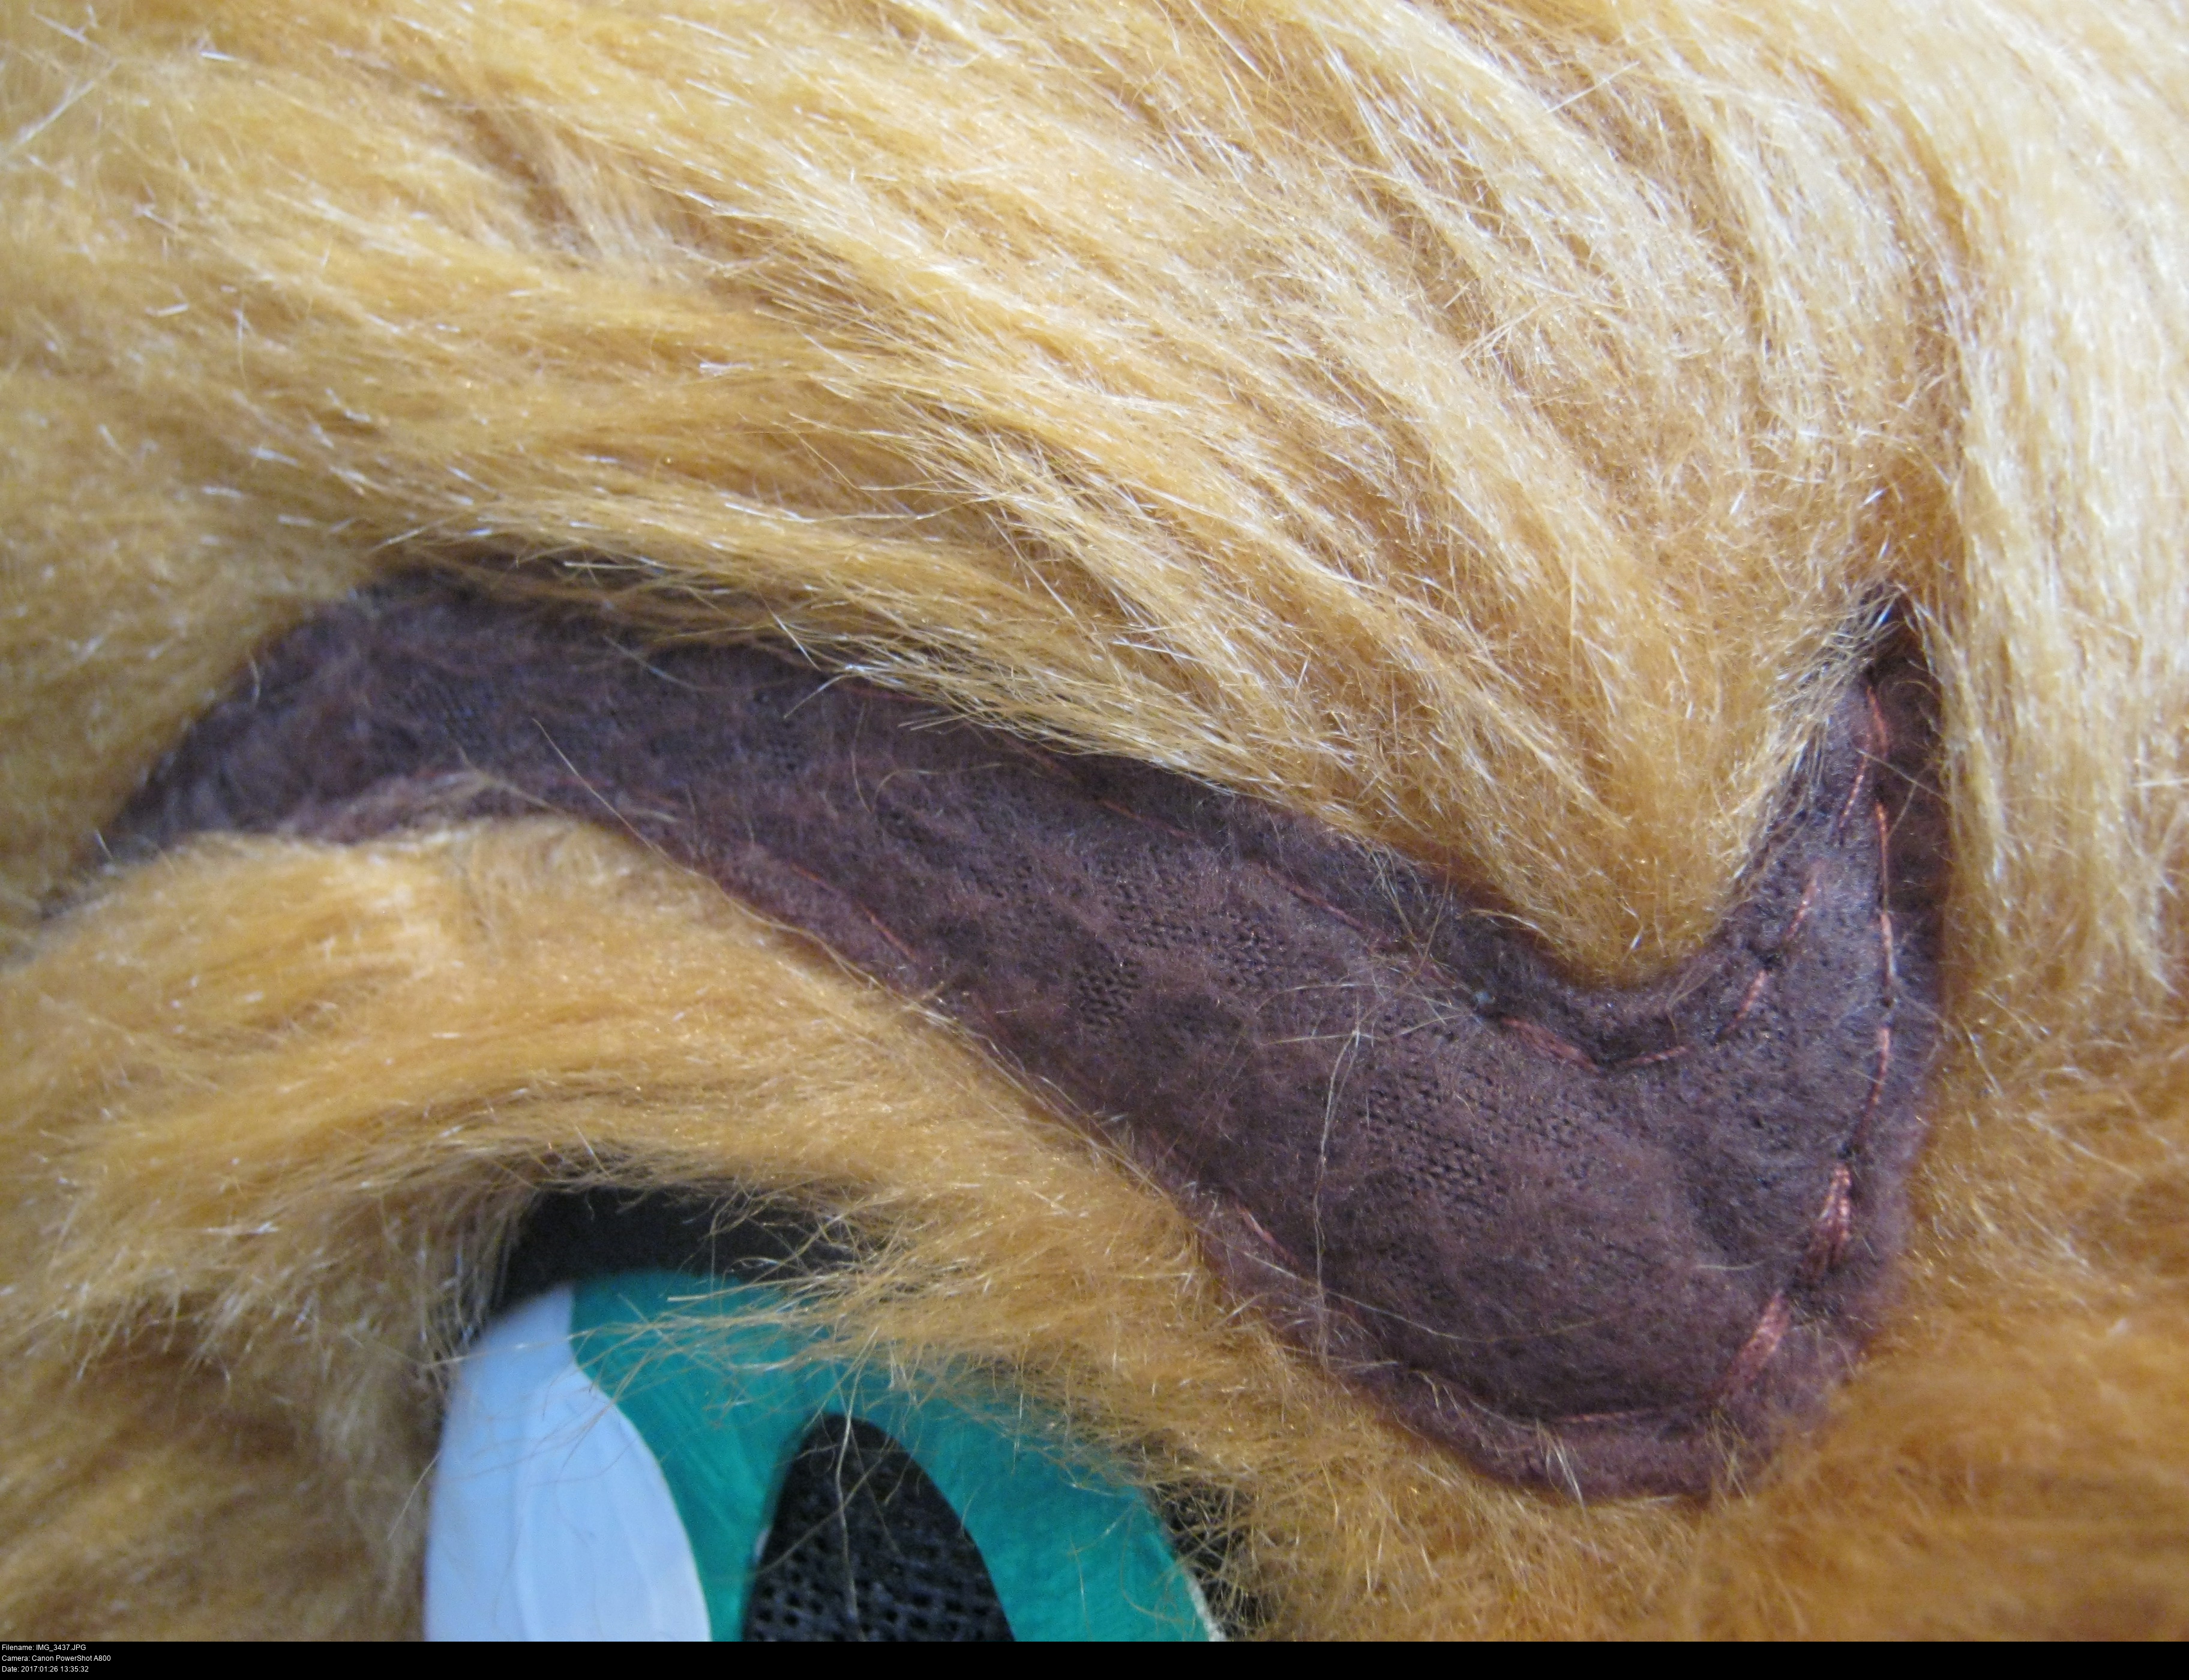
Only a few things left to do on the head now. It's time to finish the features and put on his eyebrows.
I've made a basic template, but I'm not entirely sure about this shape. Or this material. This is brown felt, but it's really low quality, it's falling to bits in my hand as I practise with it.
Basically, whenever you think you could use felt in a project, don't. Use fleece instead. It's basically the same except it'll last much longer and it'll be lovely to work with.
Some furry heads have very distinct cartoony eyebrows like Hotshot's, but it's not super clear sometimes how they're applied. I've been told that some are hot glued, but that sounds like a recipe for goopy disaster. If you were super clever, you could so something with velcro or magnets or something to make the repositionable. But I bet any head that appears to have reconfigurable eyebrows actually has them manually sewn into position differently for every shoot and then removed for the next. I could sew them on... but... ah, darnit, I'm going to have to sew them on.
There's two kinds of stitches that I know that you can use for this:
Whip/overcast stitch. This stitch appears on the top face of the fabric as a series of lines spreading outwards from the material and clinging around to the underside. I've never liked the whip stitch look all that much since if you apply any tension to the thread you'll get obvious notches in your edges. Plus, at this point I was a hand sewing noob and all the example images I could find of the whip stitch made it look as awful as I imagined it.
Backstitch. This stitch appears as a visible unbroken line of linked stitches on the top face of the fabric. This is the one I'm going to do.

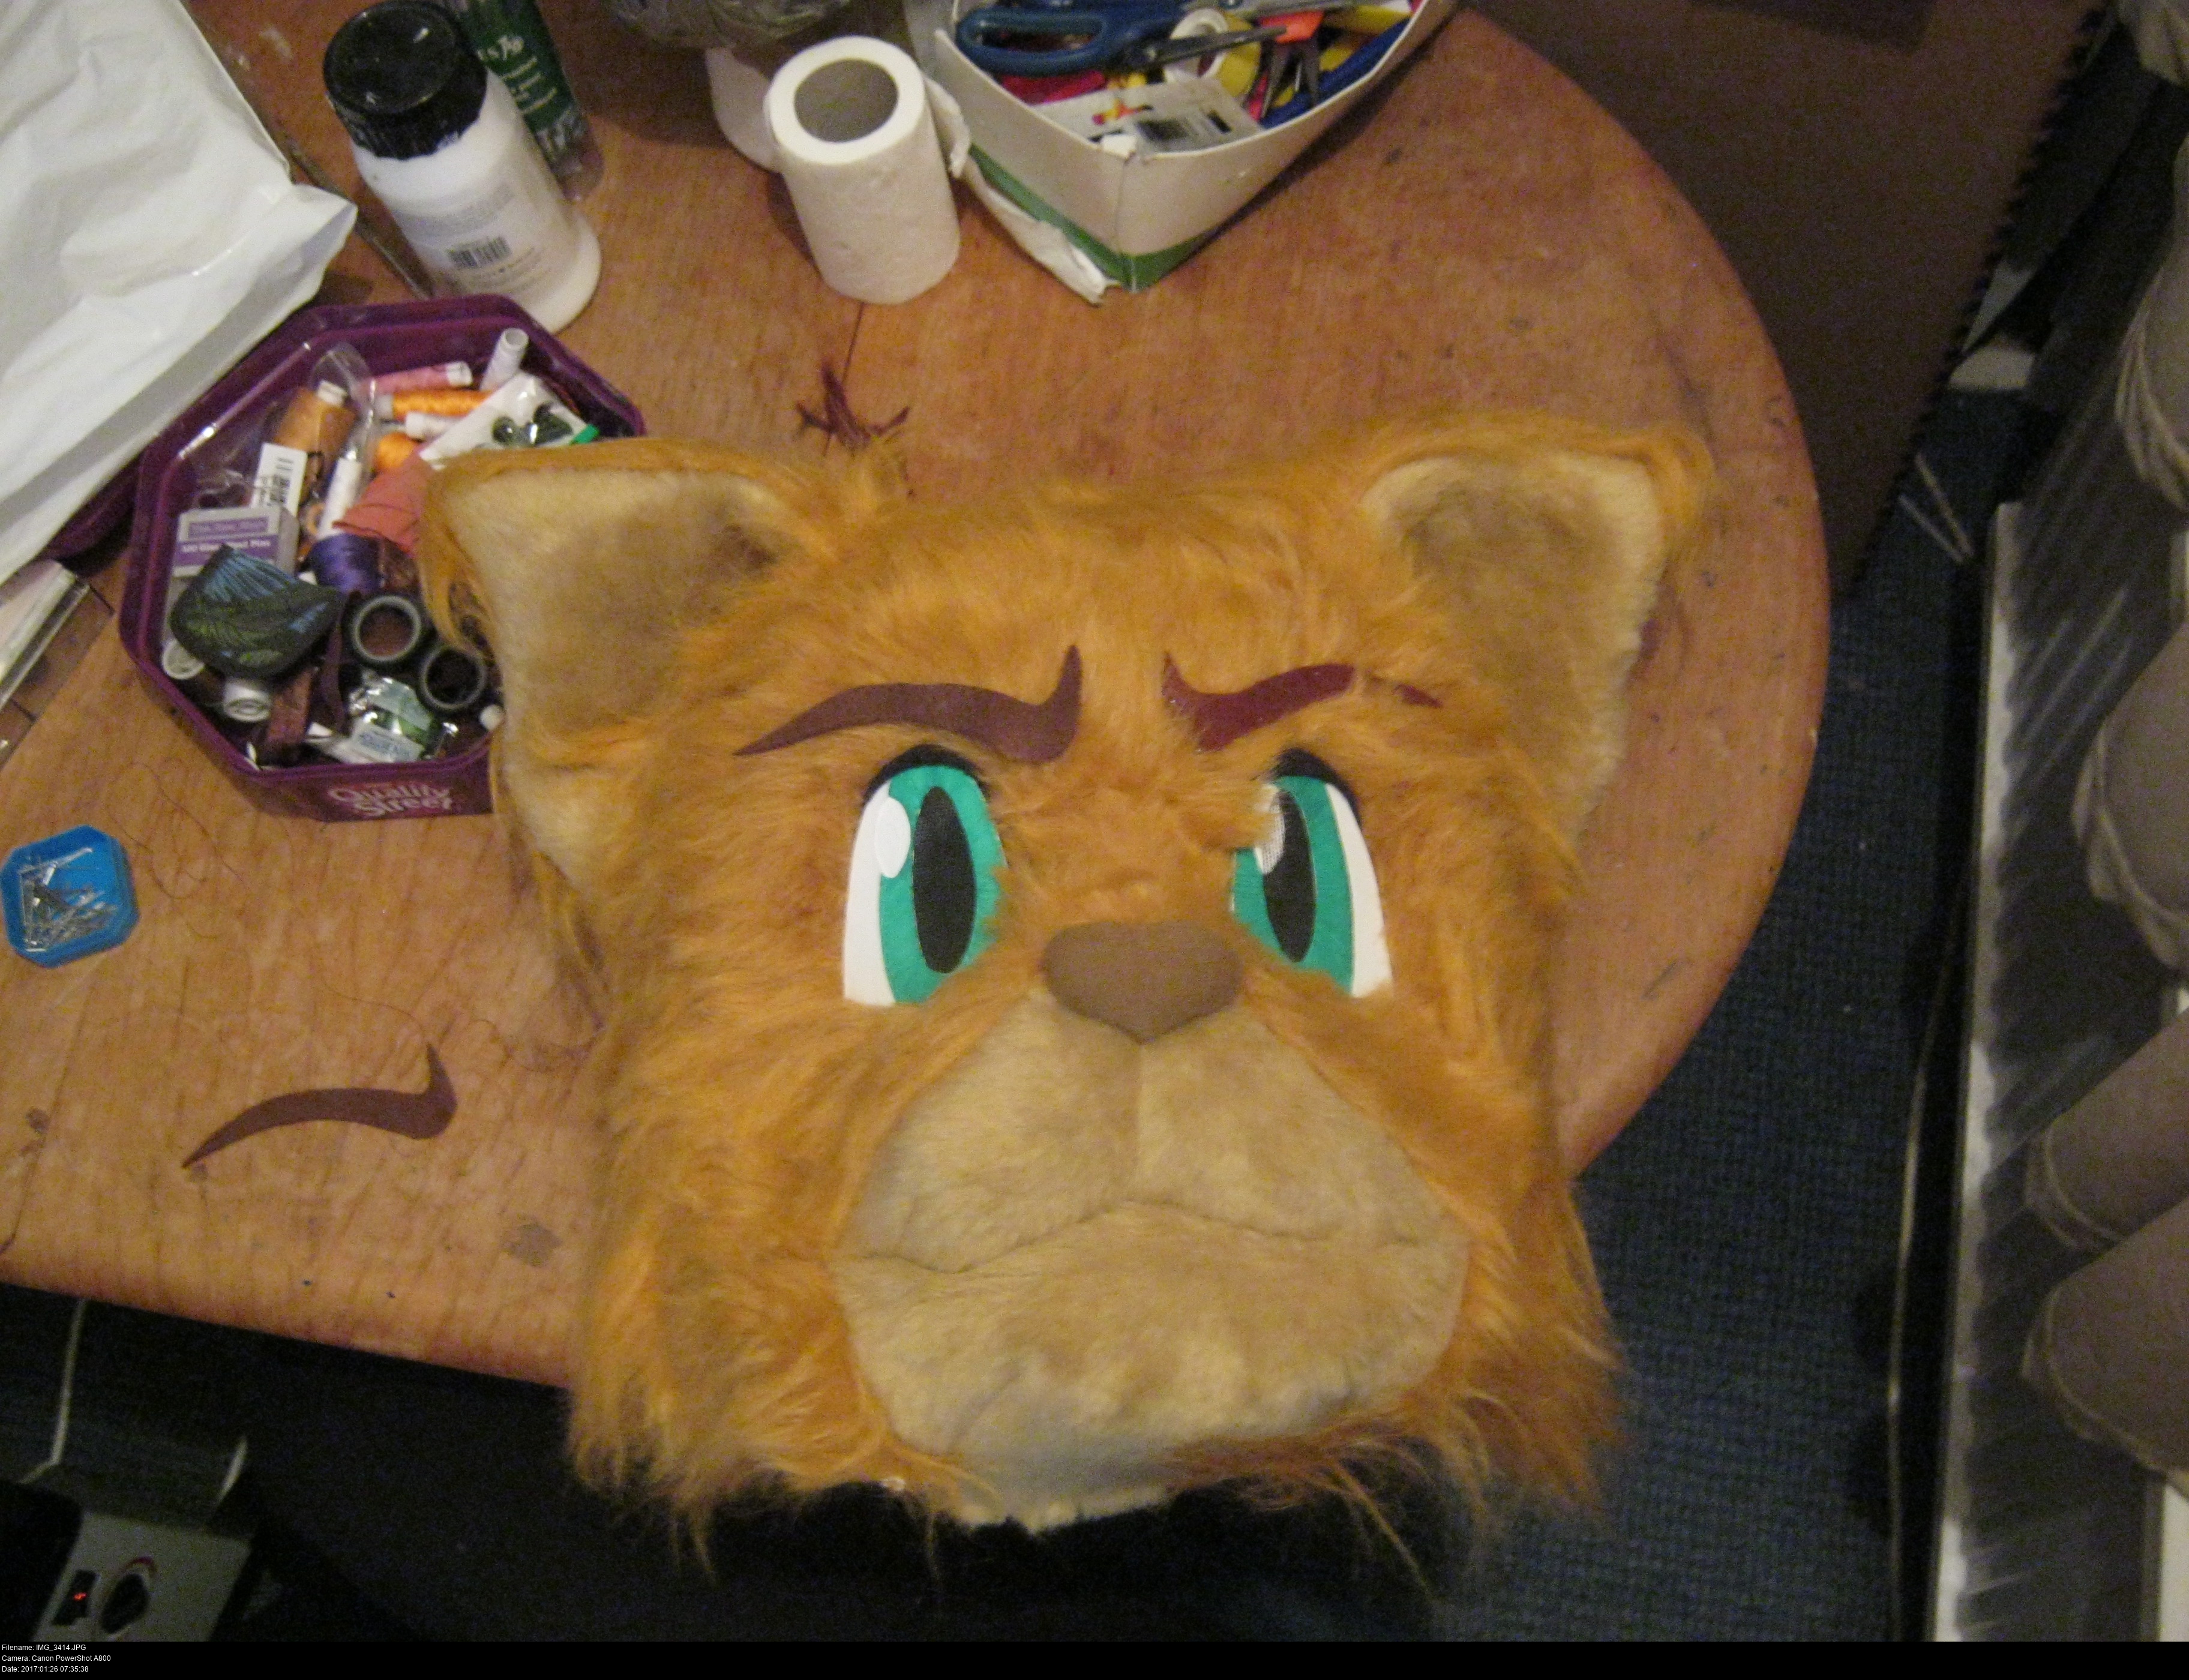

Here's a nicer shape. A confident but still somewhat frowny eyebrow. If I can get this in place, I'll be so overjoyed.
You can see the difference in the brown fleece and the rusty brown-red felt. My new shape is a lot nicer.
I couldn't pin the eyebrows to the clipped long-pile fur fabric like you'd usually pin fabric, I just had to shove steel pins into the head and hope that the foam foam held the pins in place sufficiently.
My stitches are going to begin at the top edge of the innermost flick of the eyebrow going anticlockwise around the shape.
Making and locking first stitch is important. Tugging the stitch tense and seeing the material lock into place onto the head for the first time is a good motivator. I couldn't think of a discreet place to begin and end my backstitches, so I'm back-backstitching over my start and end positions on top of the eyebrows. If you were making a toy or something else, you might want to have these locking stitches somewhere out of sight underneath some other feature, but on top of the eyebrow is fine - I'll just have a slightly thicker couple of stitches. It's good.
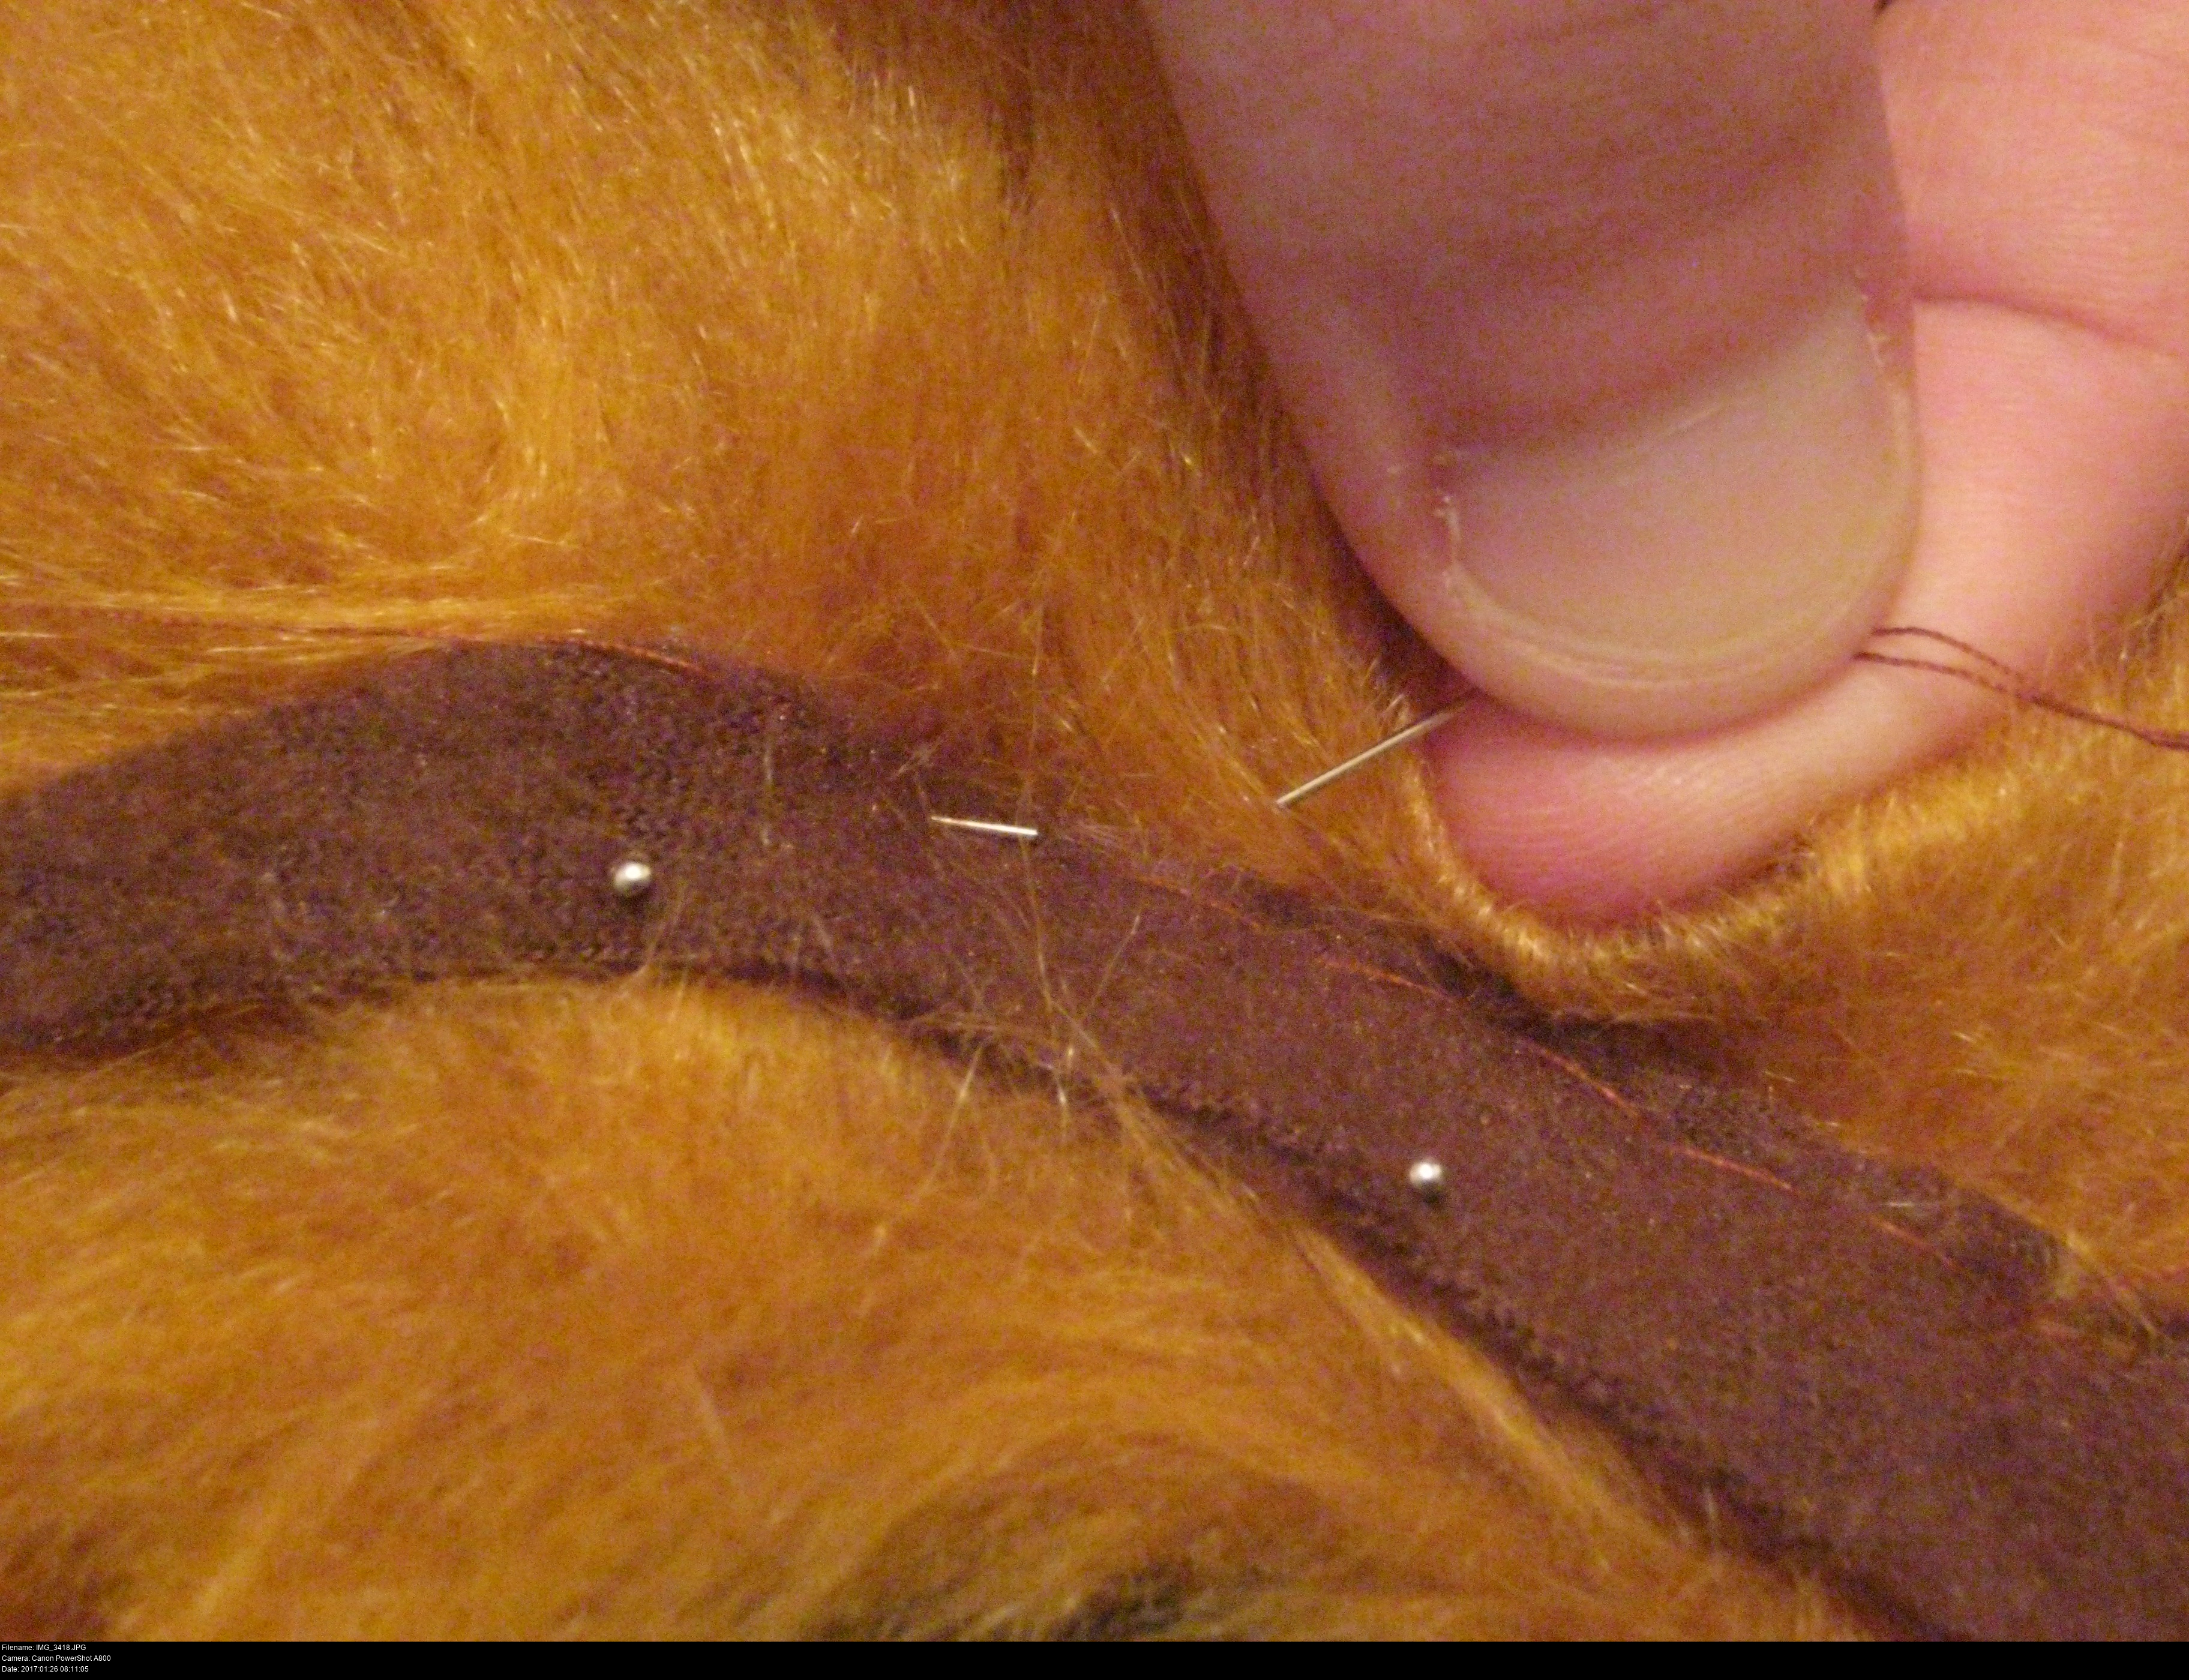
Here's what a backstitch looks like up close. It looks like a row of unbroken stitches. The front stitches here go left to right (opposite the way I'm advancing), and the back stitches go right to left. Sewing through these soft layers requires a bit of skill: I usually push the needle in far so I know it's caught the fleece, long fur, and foam, and then slowly tug it back until I can physically feel the foam part unhook from the needle, leaving just the layers I want pierced, then I can proceed with the stitch.
As I go on, I'm removing the pins and gently pushing the eyebrow into the shape that I want, as well as flicking the fur into the direction I want it to lie. The fleece is soft and slightly stretchy so I could reshape it a lot here. I just need to take breaks often and lean back and look at the head as a whole occasionally so I'm not making a mistake in slow-motion. I've picked I point where I want the curve of the eyebrow to stop and I'm not deviating from it.

And for the observant, yes I -did- manage to break my needle trying to sew the eyebrow. I guess the needle I used was too thin?
If you're having trouble, unpick what you've done so far and start again.
Poor Hotshot. I'm sorry, but your nose is such a convenient pin-cushion!

AaaaaaaaAAAAHHHH, THAT'S A VICTORY!
Doesn't that eyebrow look the absolutely mindblowing super-lovely business? A decent backstitch gives a quality hand-made look to any item. The subtle ridges made by the lumps of fur and the imprint made by the stitching just give it texture. It looks -uniform-, is what it looks like. This eyebrow looks like it was professionally made for this head and installed by a true craftsman.
I won't tell if you don't.
Are you a bad enough dude to sew on the second eyebrow?
Well, are ya?
Whenever it comes to trying to make identical pairs of things, I'm terrified of making them asymmetrical. I worry that the second attempt at something will look nothing like the first. But you've got to try. Sewing, unlike gluing, is something that you can often make infinite attempts at. Get that first stitch right. If you start well, you're off to a good start. Um. That sounded more profound in my head.
(Plus I'm also lazy so I feel like if I've made one of something that should be it. Making two seems like repeating myself. I would be absolutely atrocious at making a full suit of armour plates. Arms, legs, gloves AND boots??)

KABOOM!
How about that, folks? Two wonderful, identical eyebrows. Neat, curved, settled and secure.
Give yourself a medal and a cake and a cup of tea.
What's he missing now? His forehead dots. And a neck.
He can't be a neko without a neck! It just wouldn't work.

The neck is a curved cone of material that extends down from the chin and jaw of the head to however far down your chest you'd like to cover with fur.
My neck is made out of four pieces following this tutorial:
http://matrices.tumblr.com/post/51899557133/tutorial-making-a-neck-for-a-fursuit-head
When all four pieces are combined together (and test worn to make sure it's comfortable and not too big or too small), they're backstitched onto the lower edge of the fur covering.
The seam between the neck and the lower edge of the fur dictates the look of the character's jaw. Until this point, Hotshot doesn't have a well-defined chin. If I pucker up the fabric at the lower edge, it'll cling more tightly to the foam and give him a tighter jaw.
This stitching (ladder or backstitching) is between two layers of the easily-sewn knit-backed fur (except for the muzzle section), so it's a quick job and easy to remove. These stitches don't have to be particularly neat or dense.


One neck, fully installed. Yay!
Now that everything is sewn in place, I can work on the cheek tufts. Without hairspray I don't imagine anything I do would stay in place for long, and the cheap fur doesn't really have the density to stay anyway.
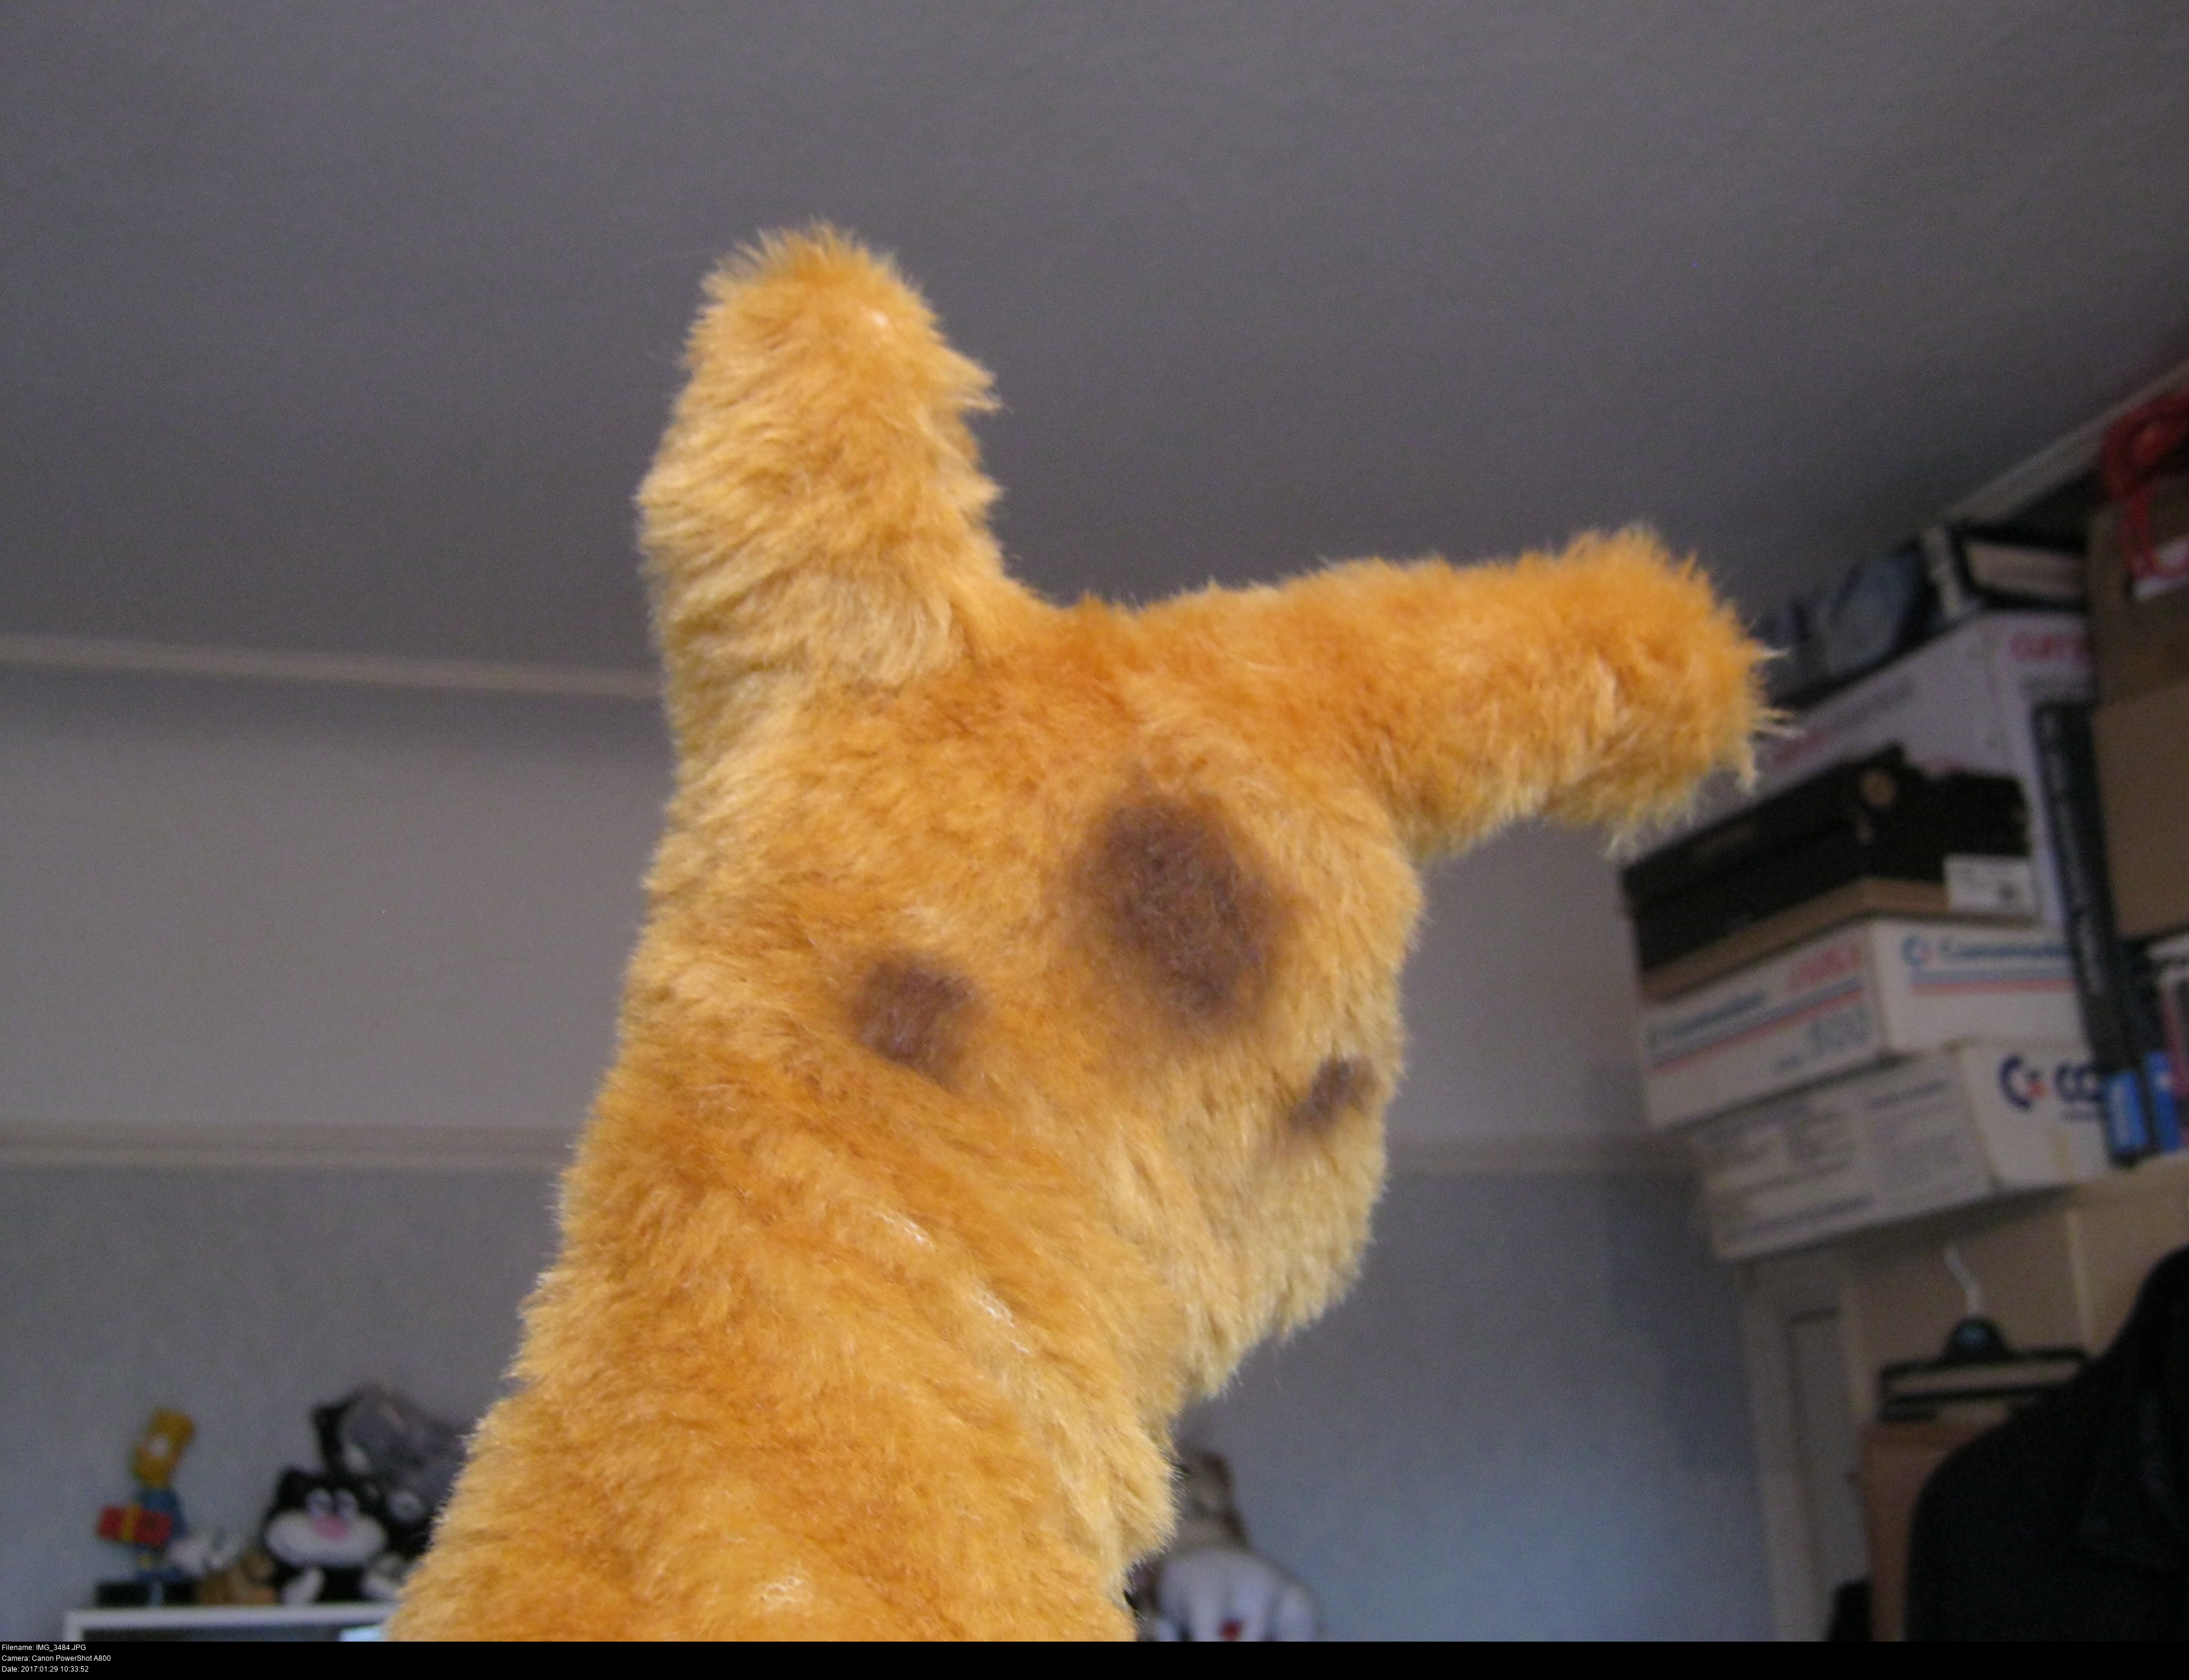
The only thing left to do on the head is his brown spotted markings.
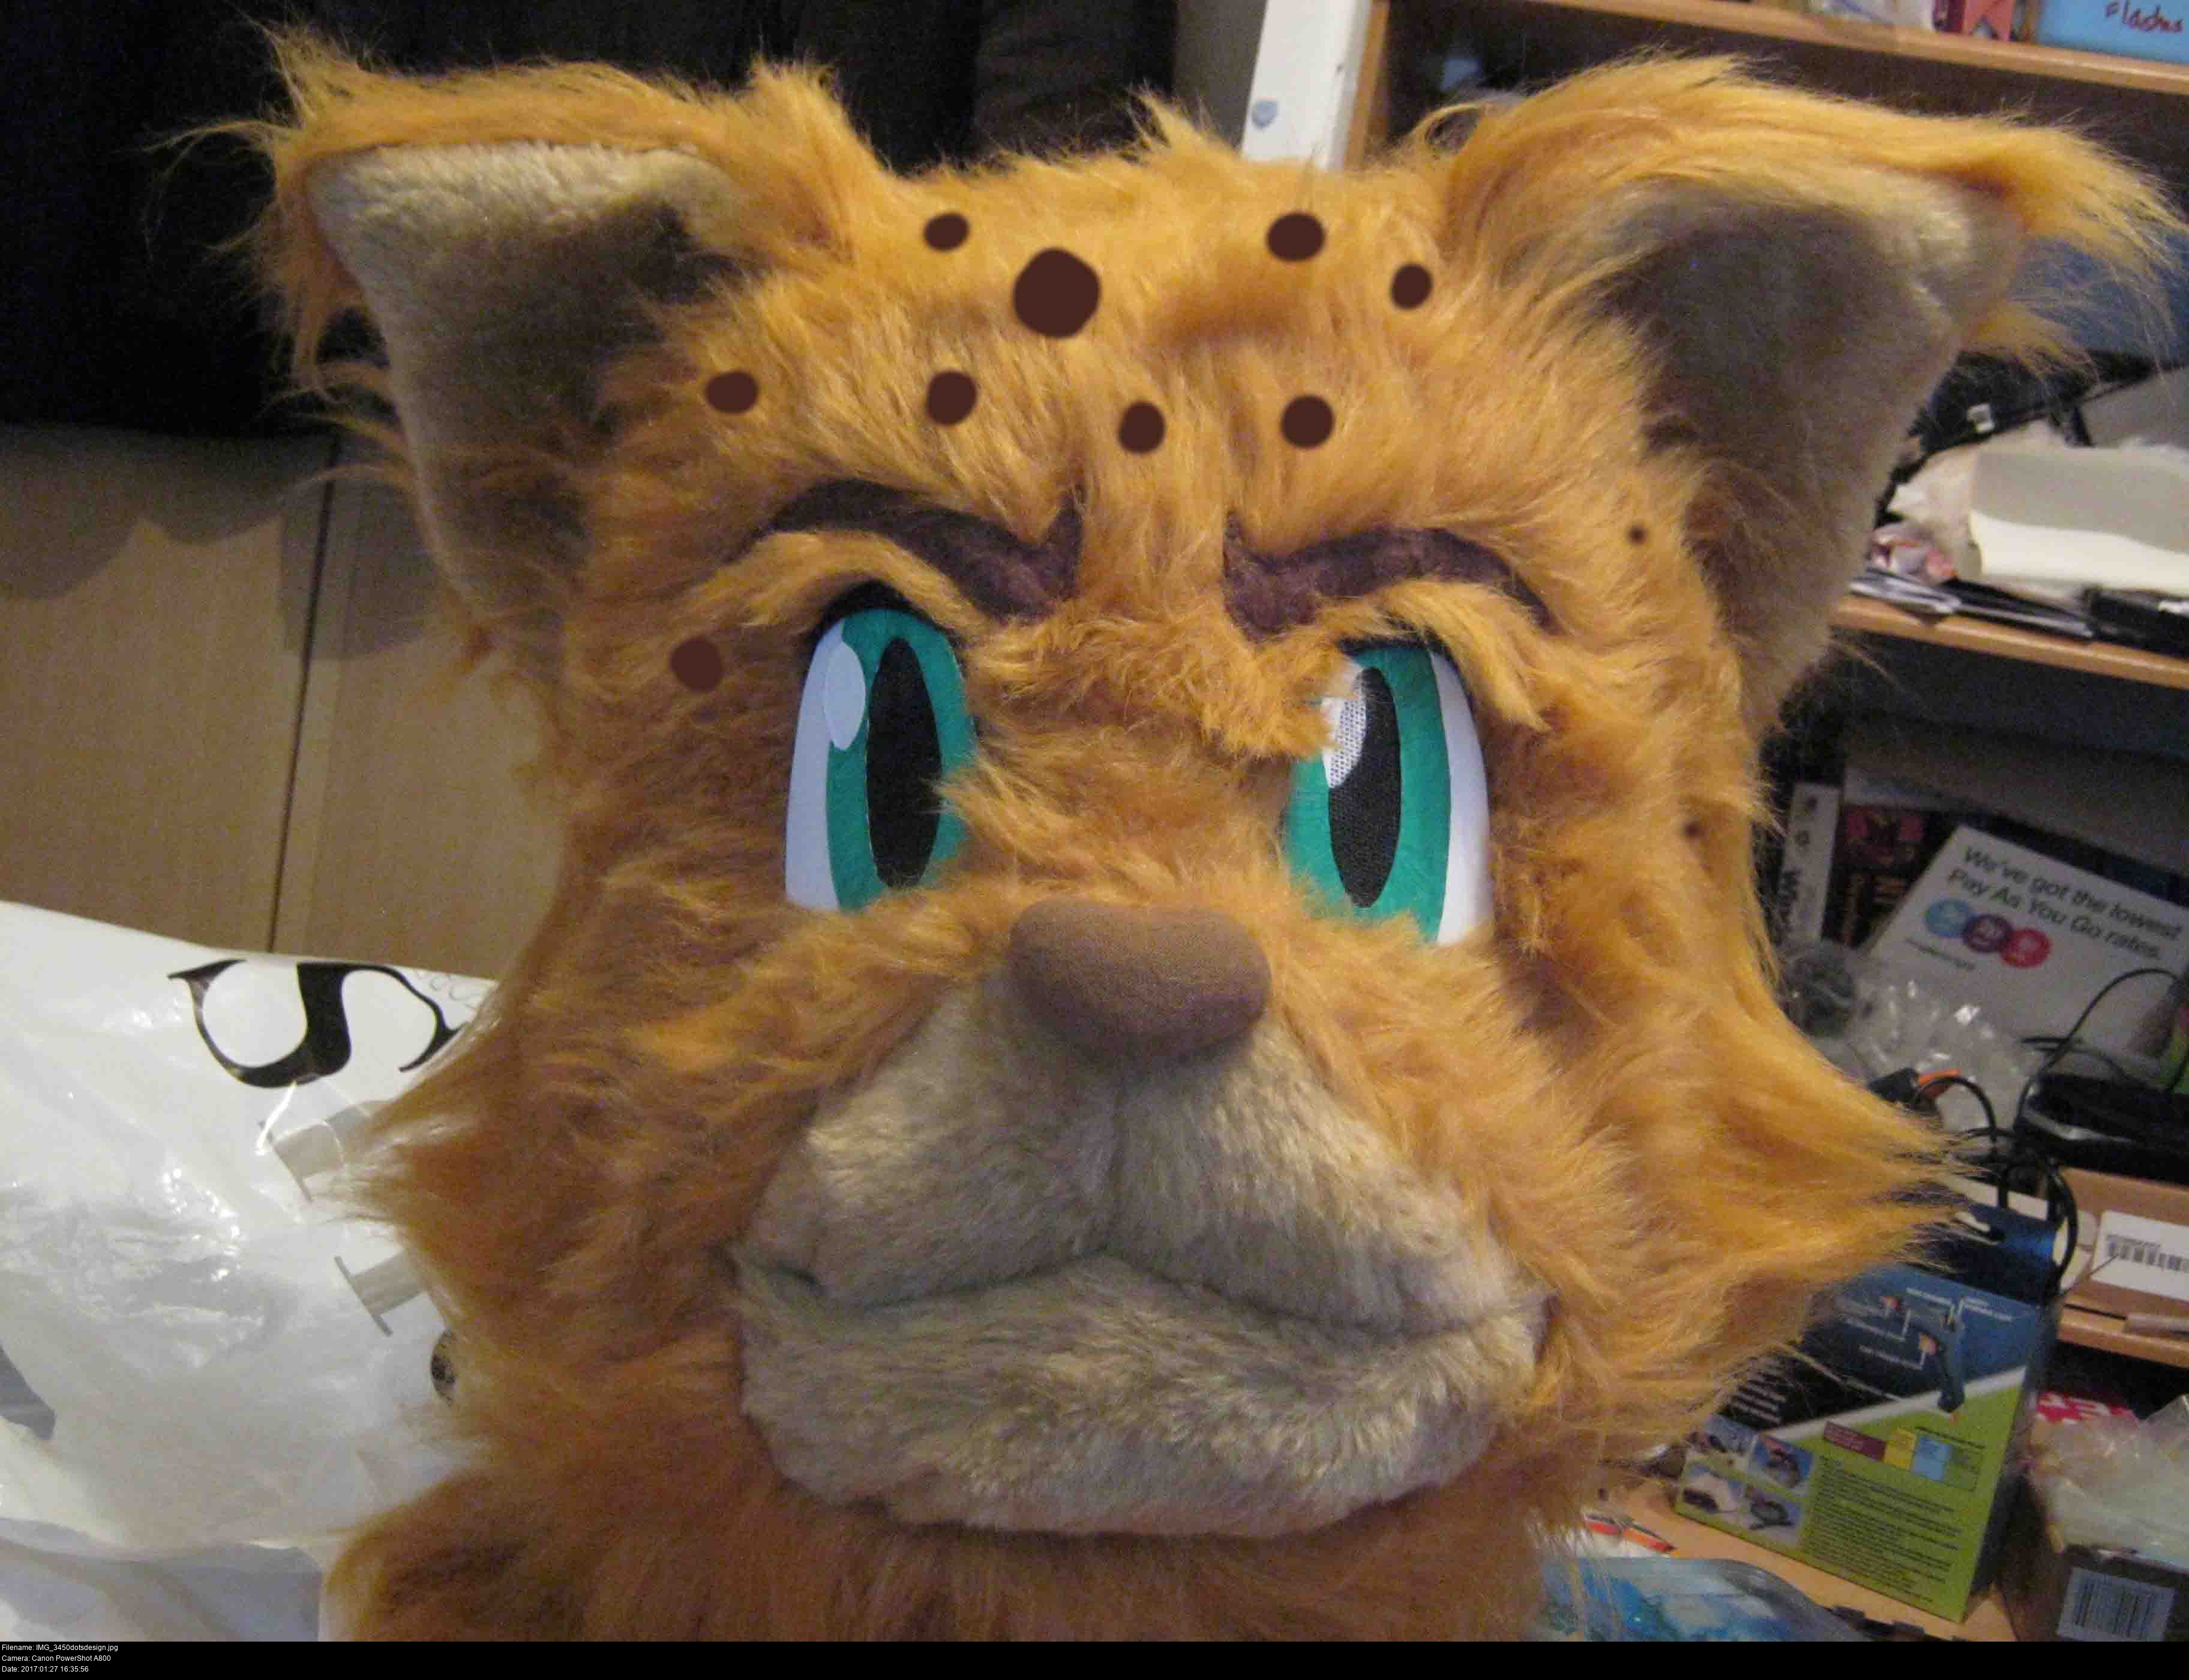
They're laid out across the head like this. Larger spots at the top corner near the ear, smaller as they go towards the temples and opposite ear. I'm making the spots a little bigger to match his exaggerated cartoony features.
Now, how am I going to apply these?
There's a few methods I'm aware of:
Airbrushing. That's fine if you have the correct paint and tools, but I don't. And I don't fancy buying them just for this.
Sharpies. I've read that folks making Cats-style wigs colour their kanekalon wigs with Sharpie markers, either directly or by brushing on the ink from an opened pen.
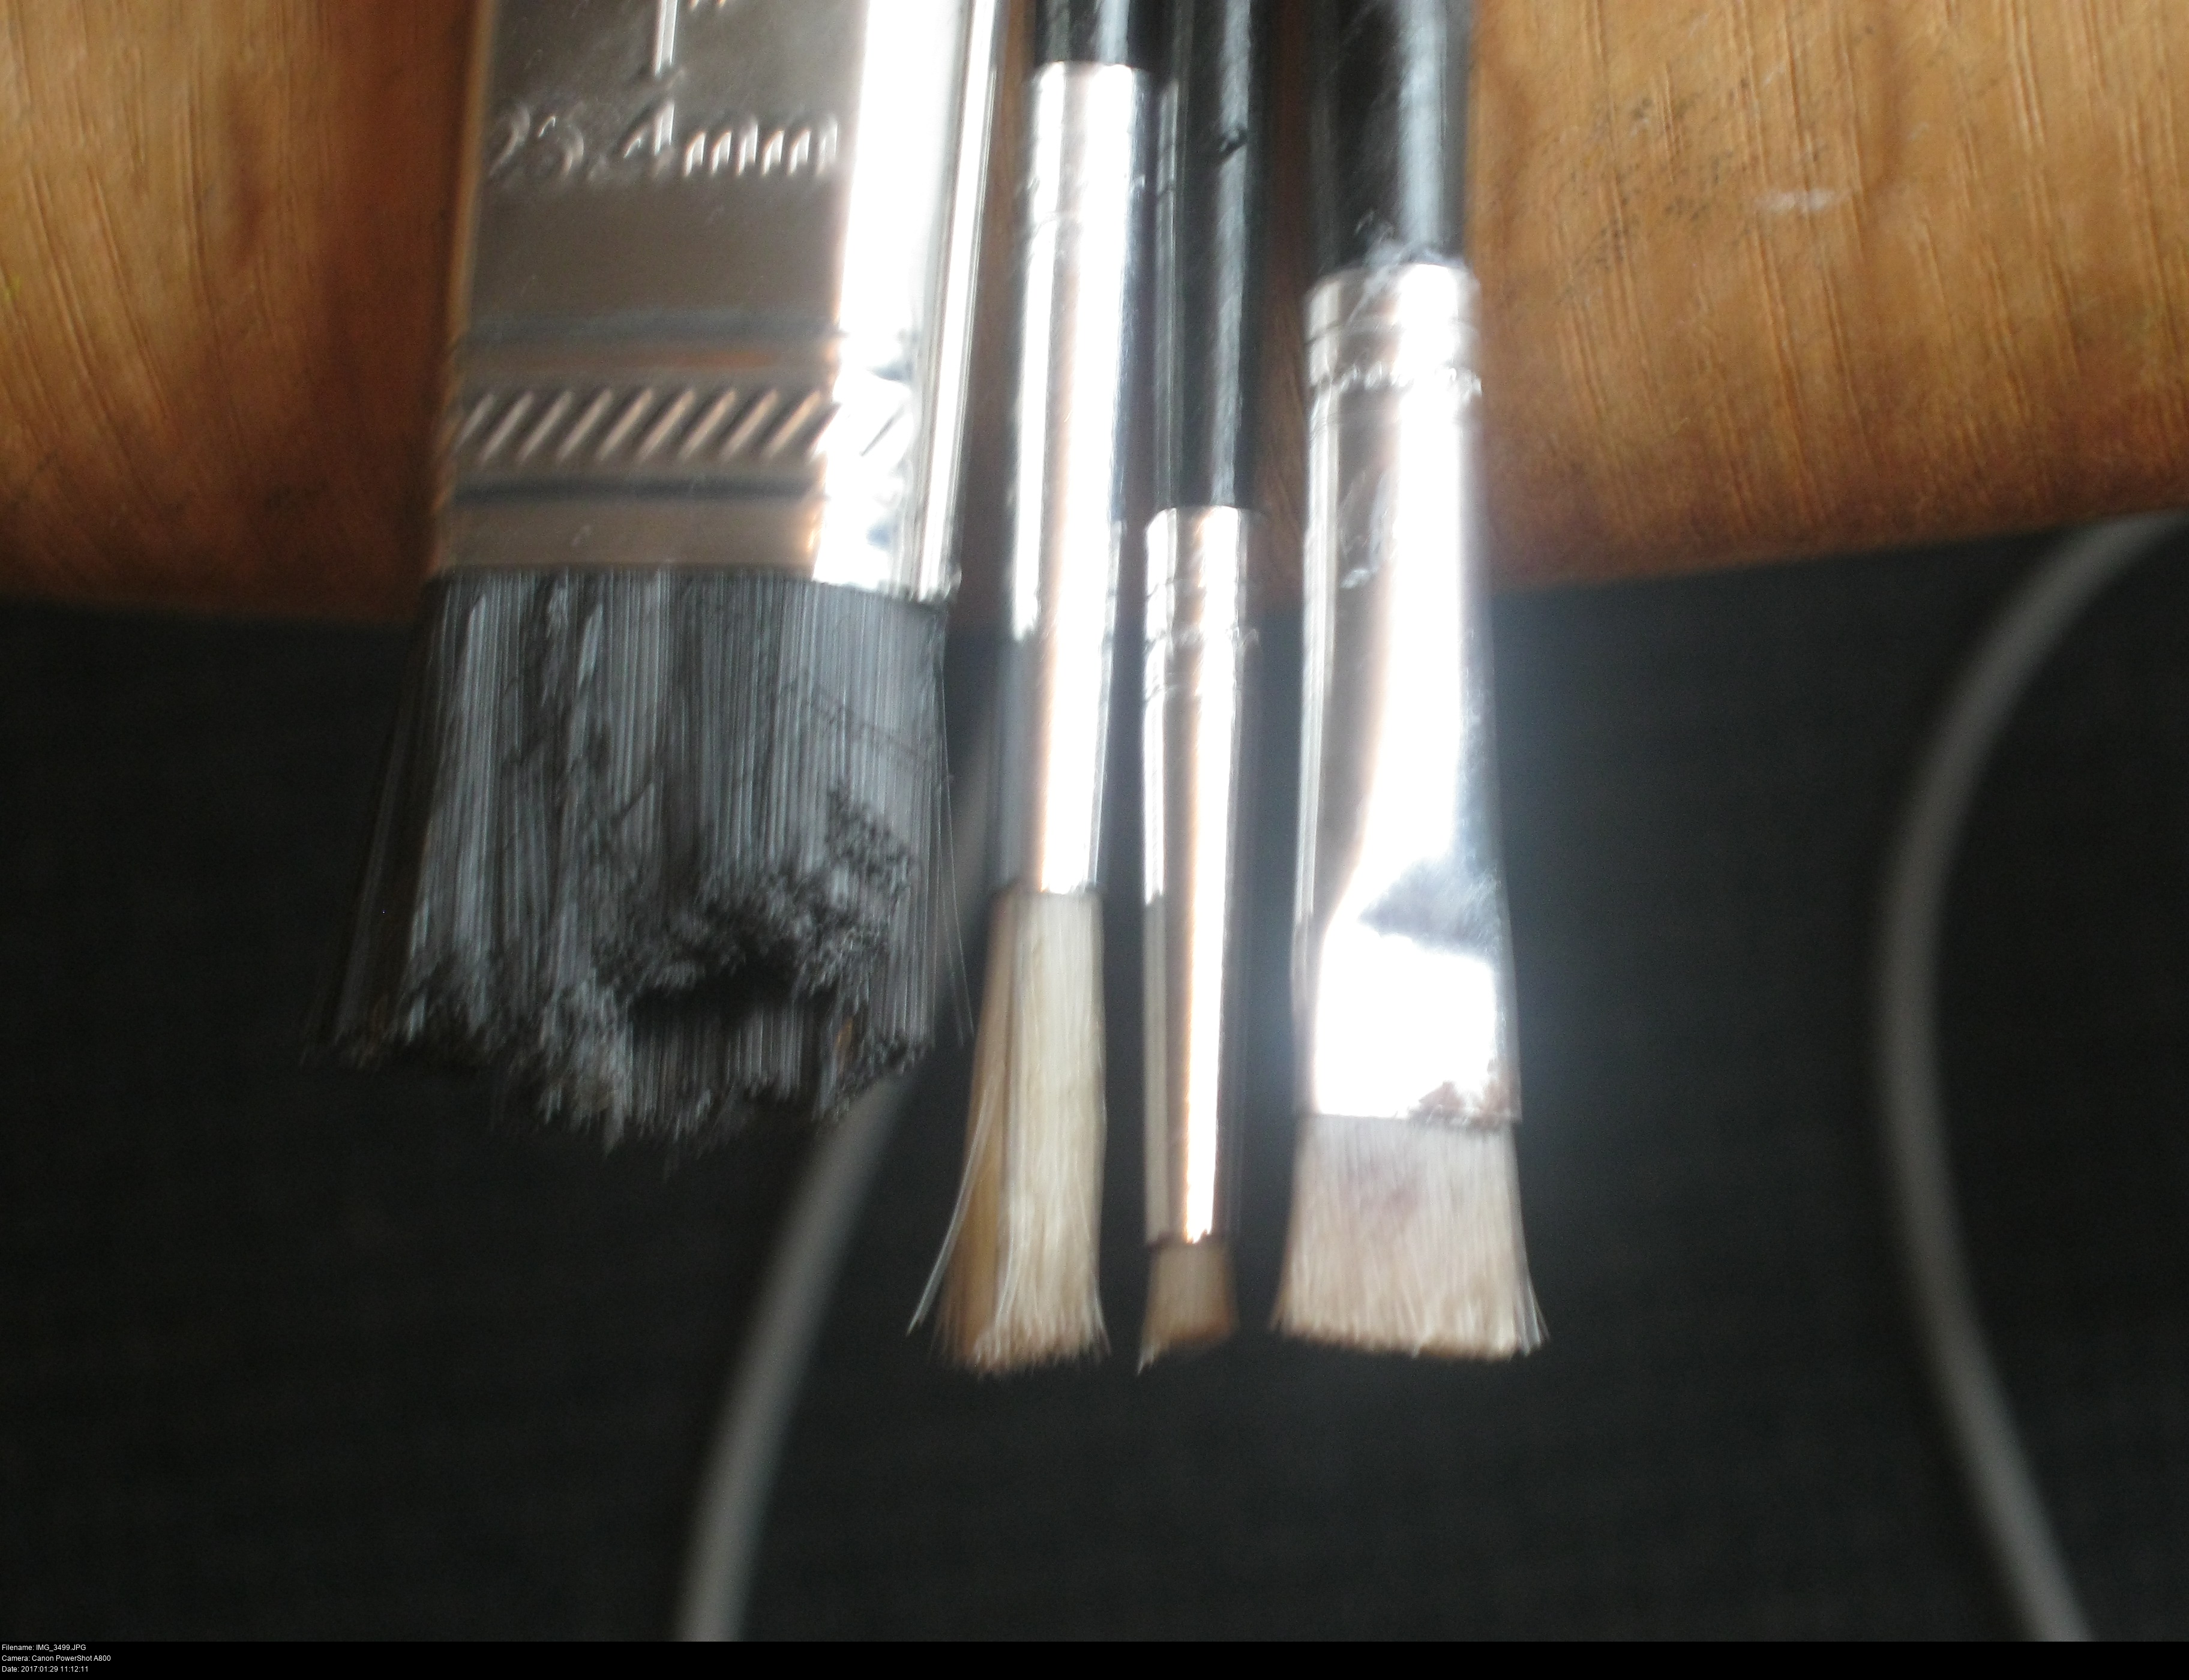
Drybrushing!

http://matrices.tumblr.com/post/139954950913/drybrushing-to-add-details-to-faux-fur
Drybrushing is the application of very small amounts of almost dried, perfectly neat acrylic paint using a short, stiff-bristled brush. After applying the paint, brush it out a little. Reapply if necessary.
There's basically nothing else to it, which is just about as much complexity as I'm able to handle.
Definitely do not use any water, don't try to clean your brushes until you're completely done. If that means your brush gets wrecked, that's fine.
I chopped off the bristles of some wiry brushes to end up with the two on the right. The chunky black brush on the left is a large DIY style brush I mangled to create something that would let me brush out the details of the fur.
But DO NOT try out brand new, irreversible techniques on your almost-finished fursuit head.
Try it out on scrap fabric! I tried out drybrushing techniques on scrap faux fur clipped to various lengths before refining my technique on Hotshot's gloves. Only when I was sure it would work did I move onto the head:
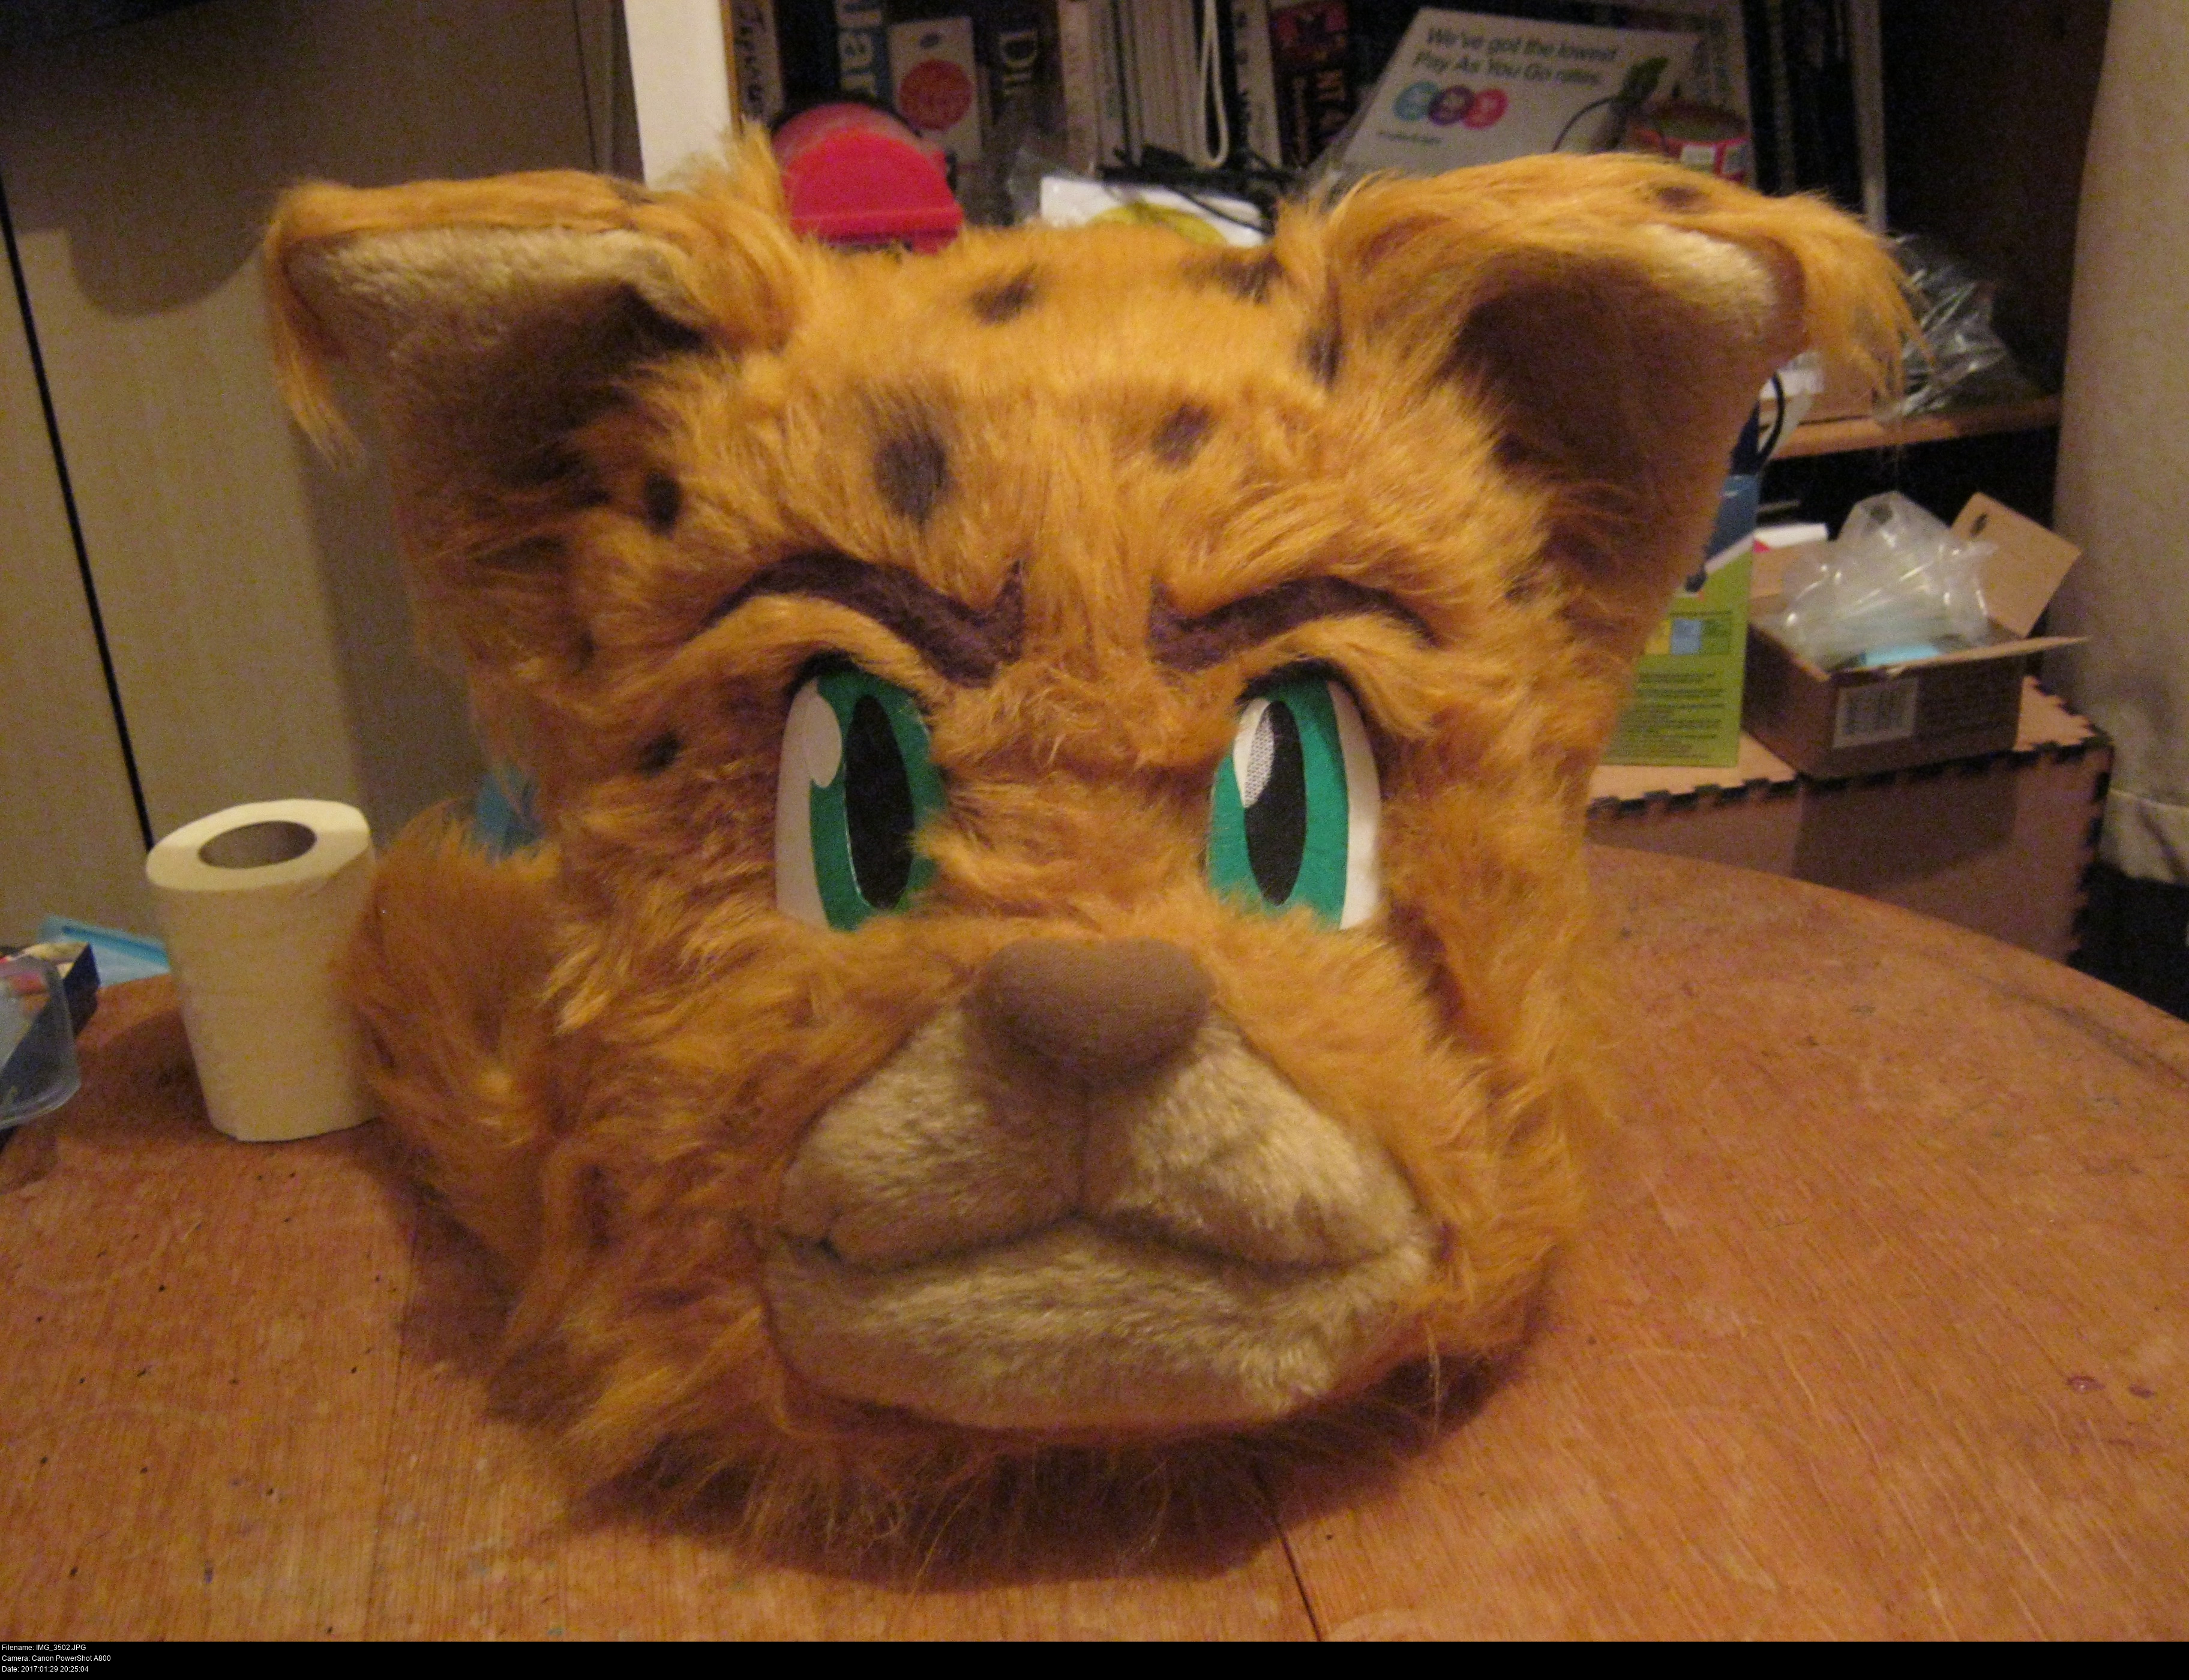


A few spots here and there, and he is DONE! Leave him to settle, gently comb out the painted details with a dense brush or comb, and that's it!
The spots aren't as dense as I envisaged, but drybrushing isn't easy. If I added more dots it might look messy. I'll definitely settle for clear large dots here.
Caring for your fursuit head! Where does Hotshot live?
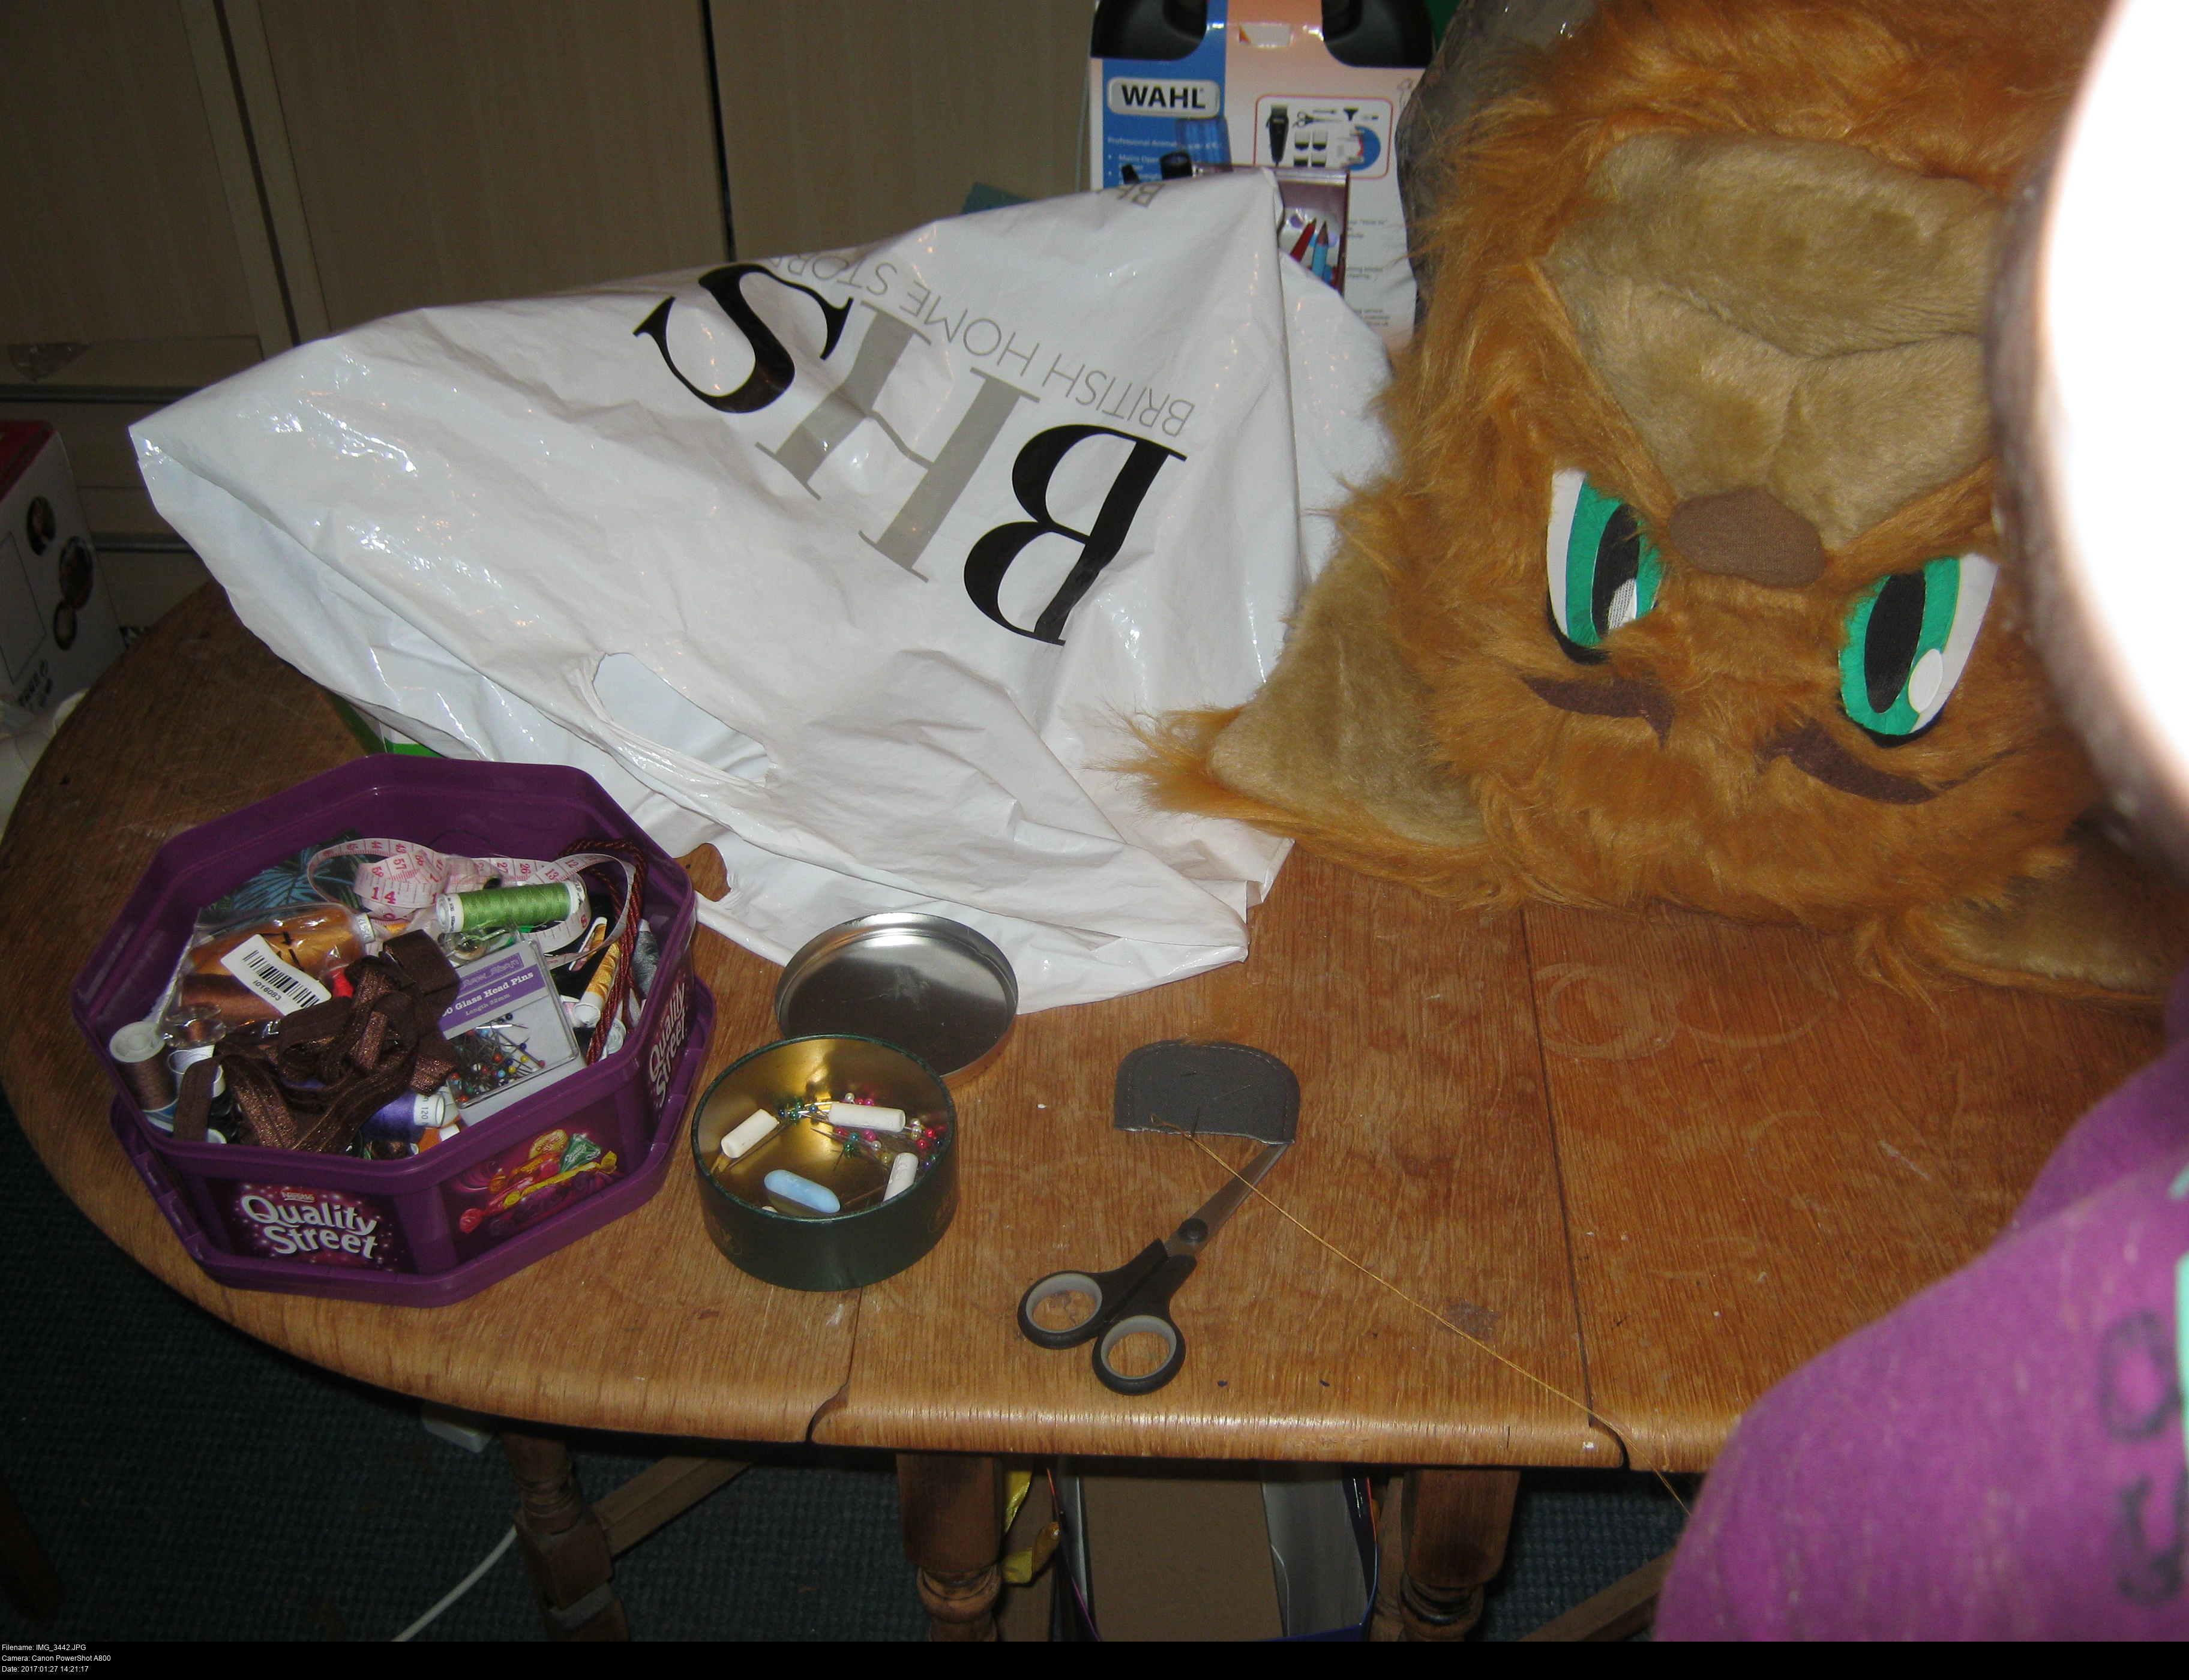
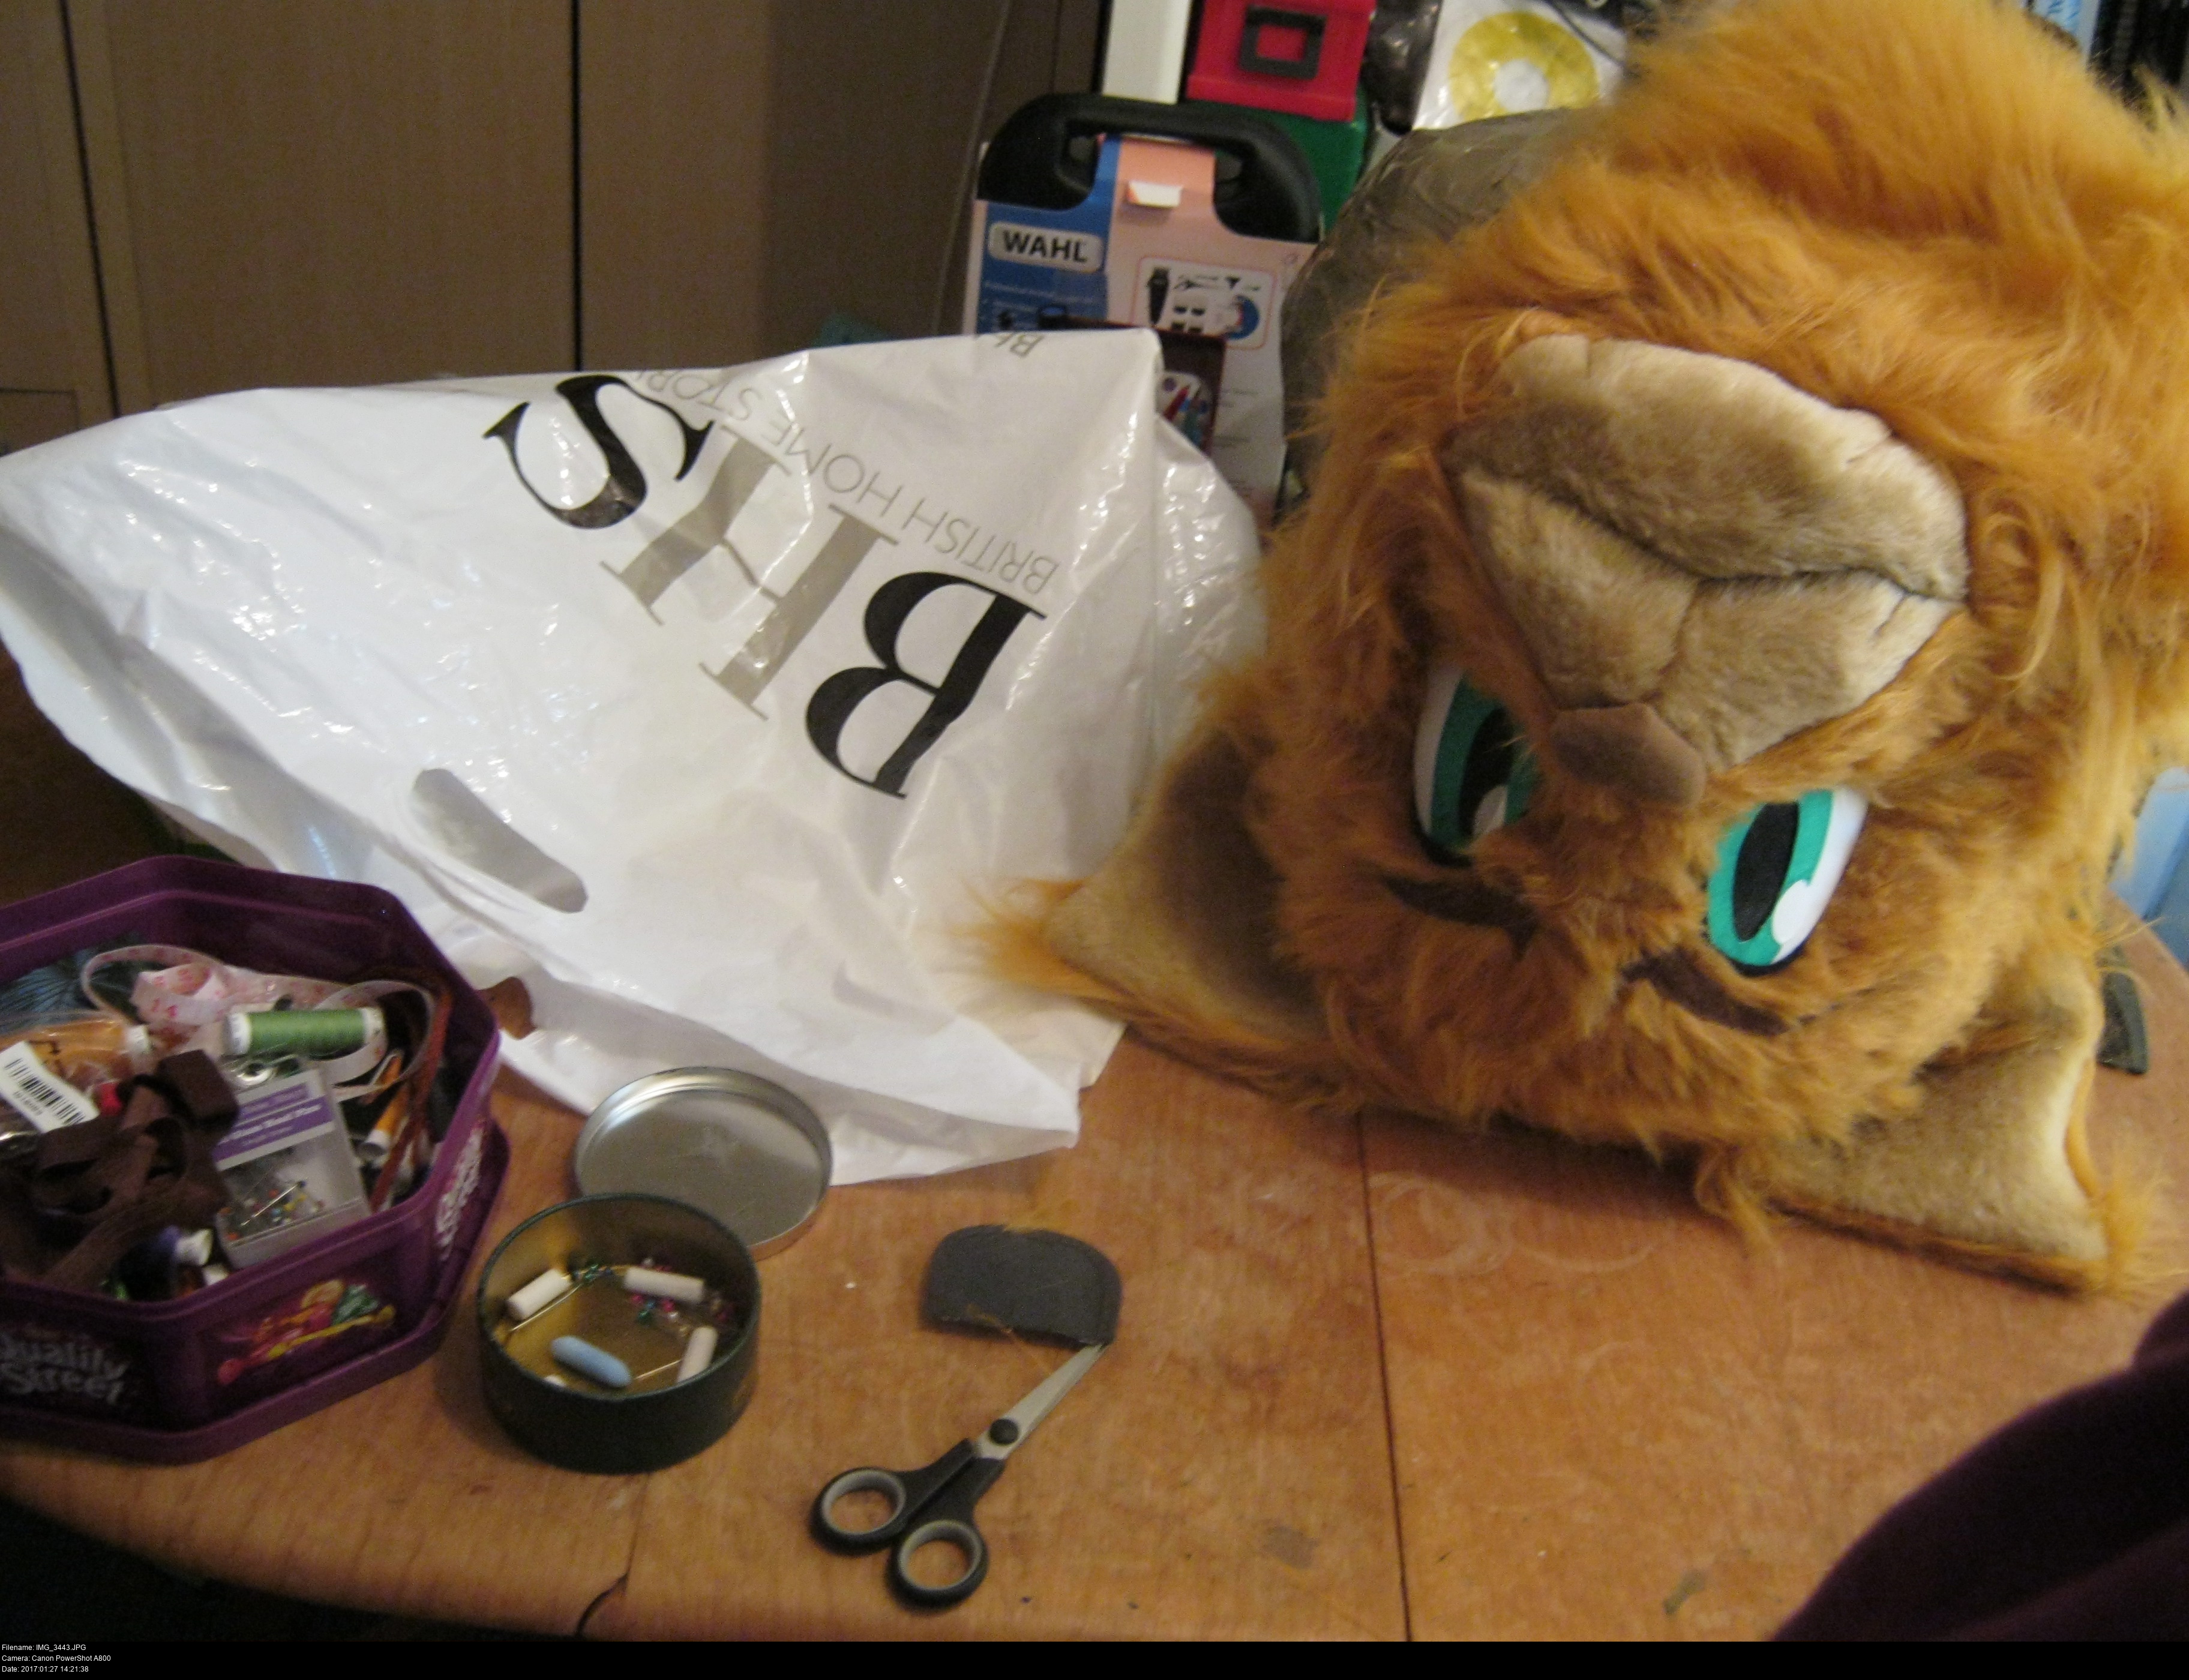
For now, he lives inside a large BHS bag. (Hey, now that the shop's died, maybe that bag is a collectible!) That's no place for a work of art to live. What would be nice is a chunky, hardwearing, stiff, roughly cuboid, waterproof bag for him to live in.
Sadly, I haven't found any such thing. A laundry bag would be nice, and ideally it would be sized just right to fit the head.


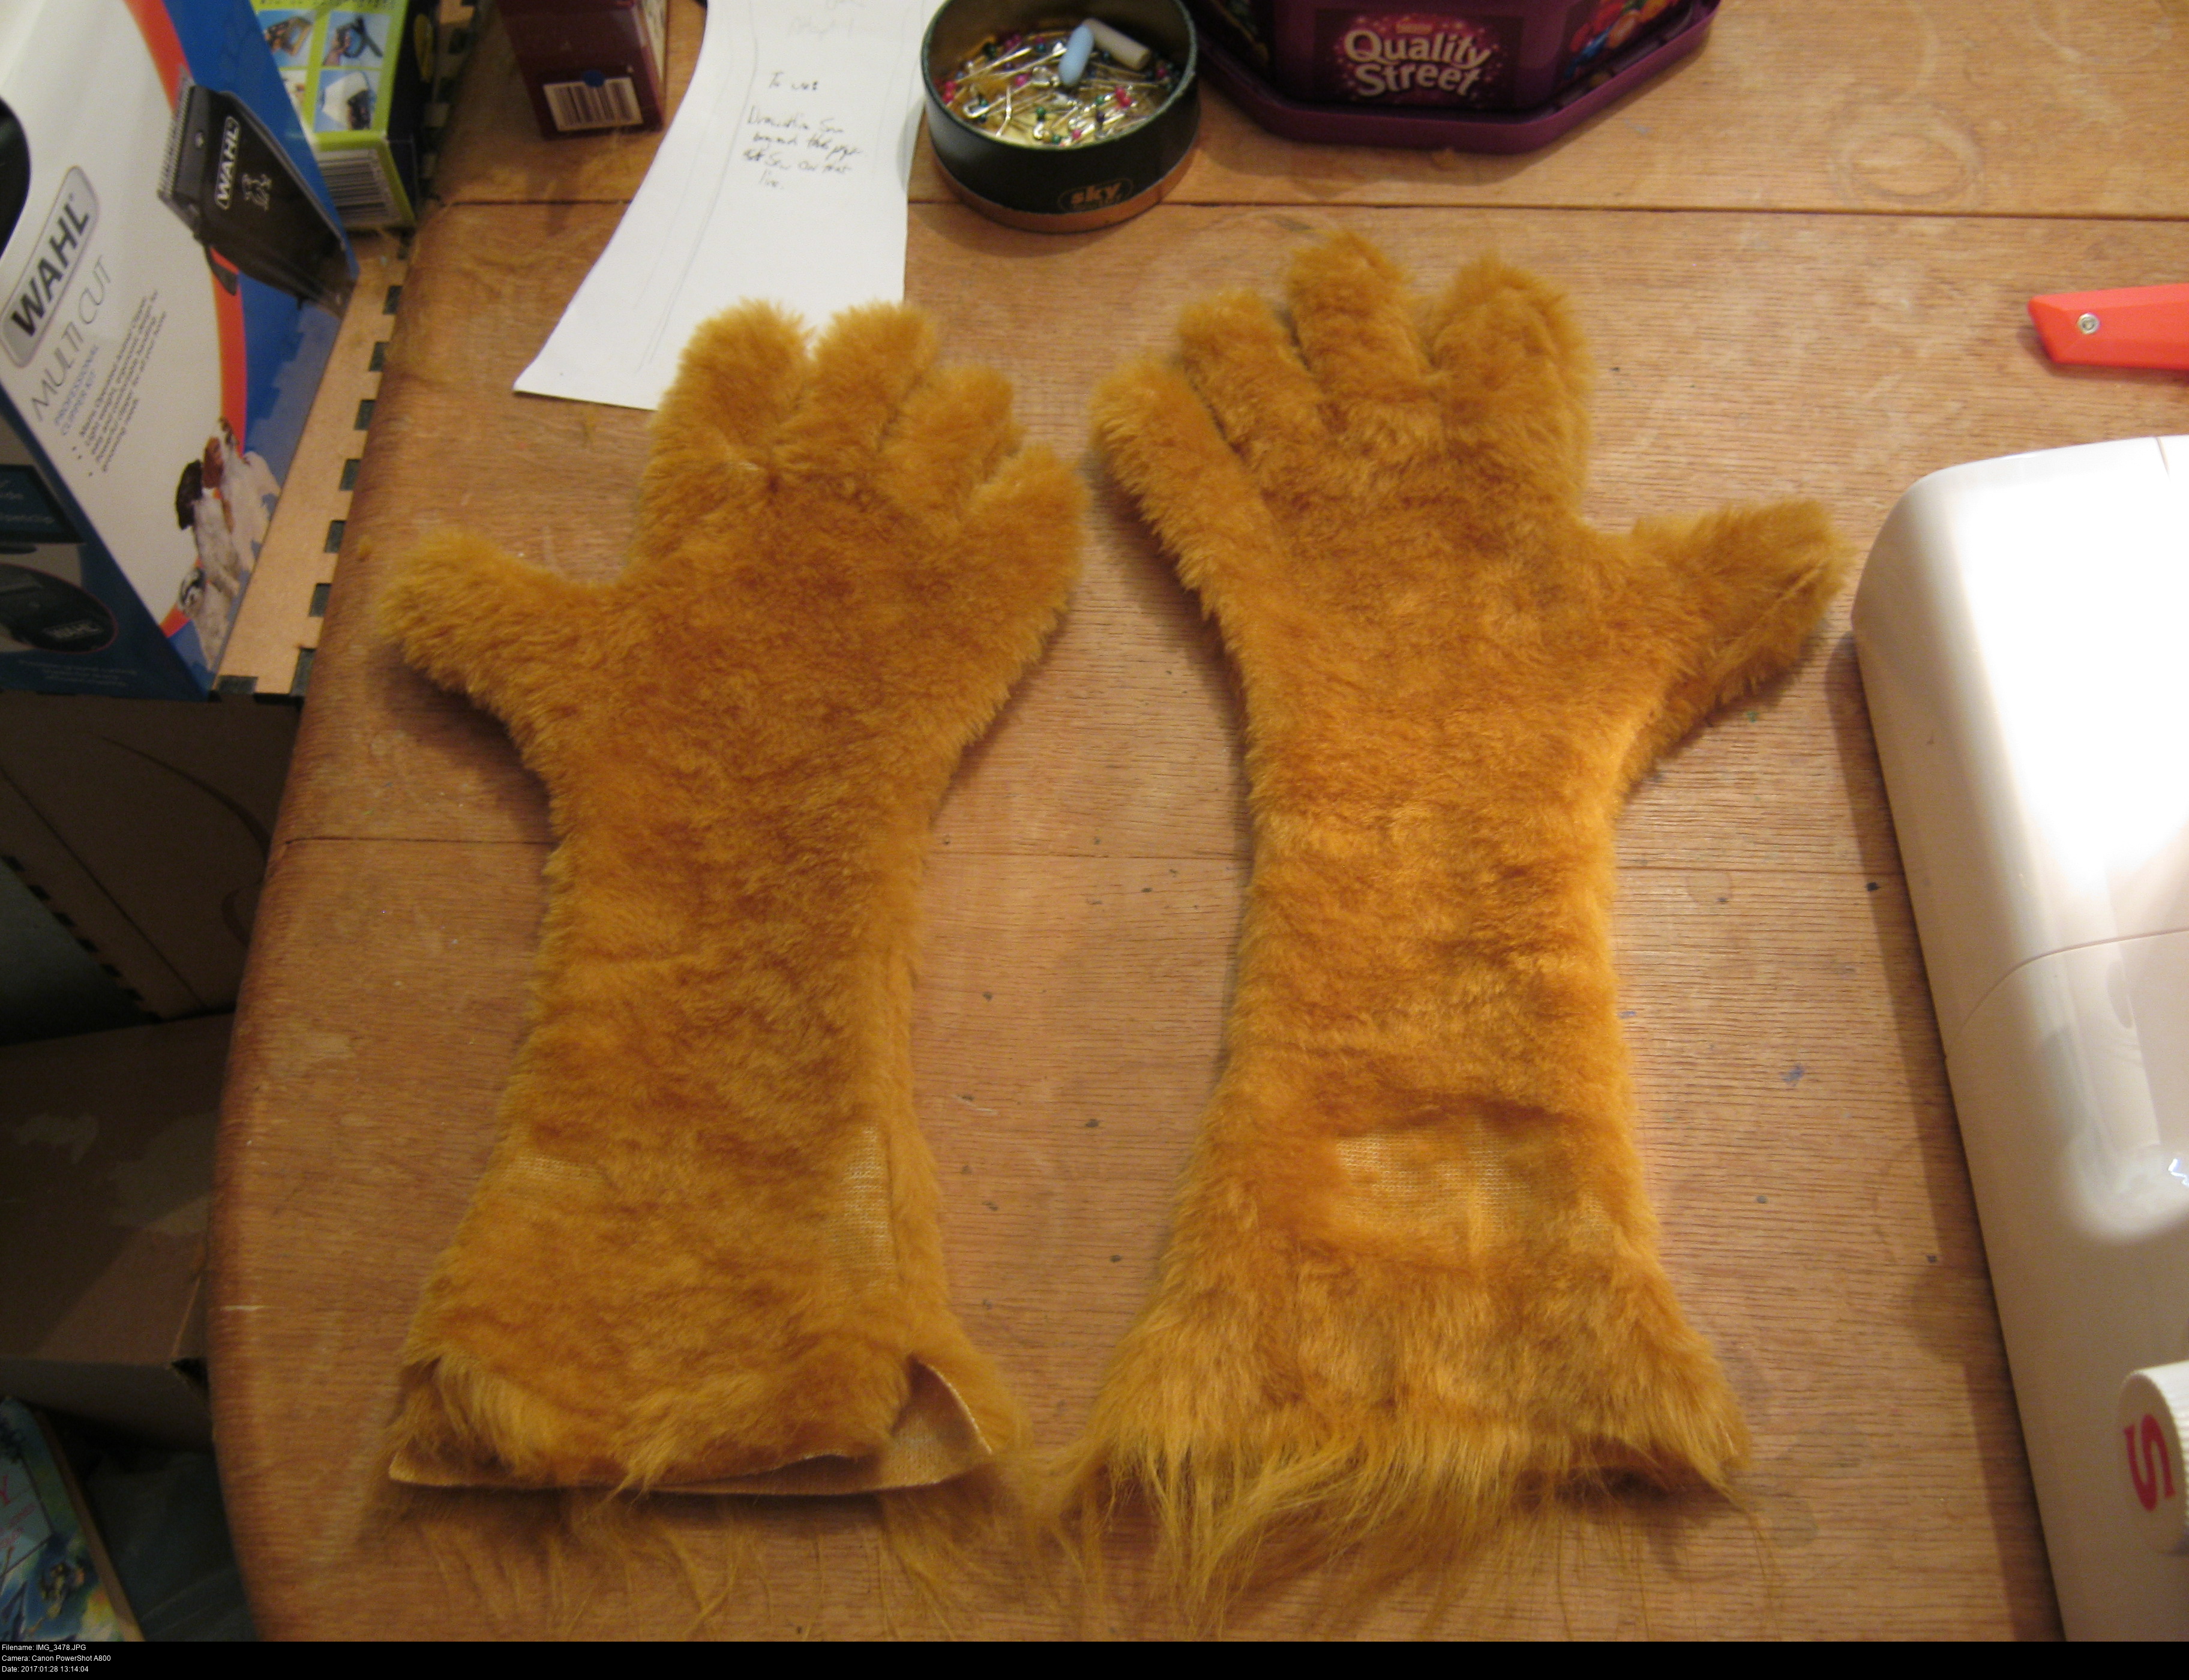
He's got a head, now it's time to do his hands.
If you're playing as a human-like furry character, you don't have to do hands if you don't want to, but it'll look weird if you don't at least think about it.
Unlike some cartoon characters, overlynxes have four fingers and a thumb on each hand! That means I won't have to worry about trying to emulate three fingers with an uncomfortable glove, phew. Also, notice just how hand-like his hands are! He doesn't have paws at all, just furry hands. That suits me just fine!
Hotshot's hands are the same colour as his head and they've got the same dots on too.
There are a lot of ways to make furry paws for fursuits and I'm basically just going to ignore them all in favour of something I can throw together in half an hour and will look awesome.
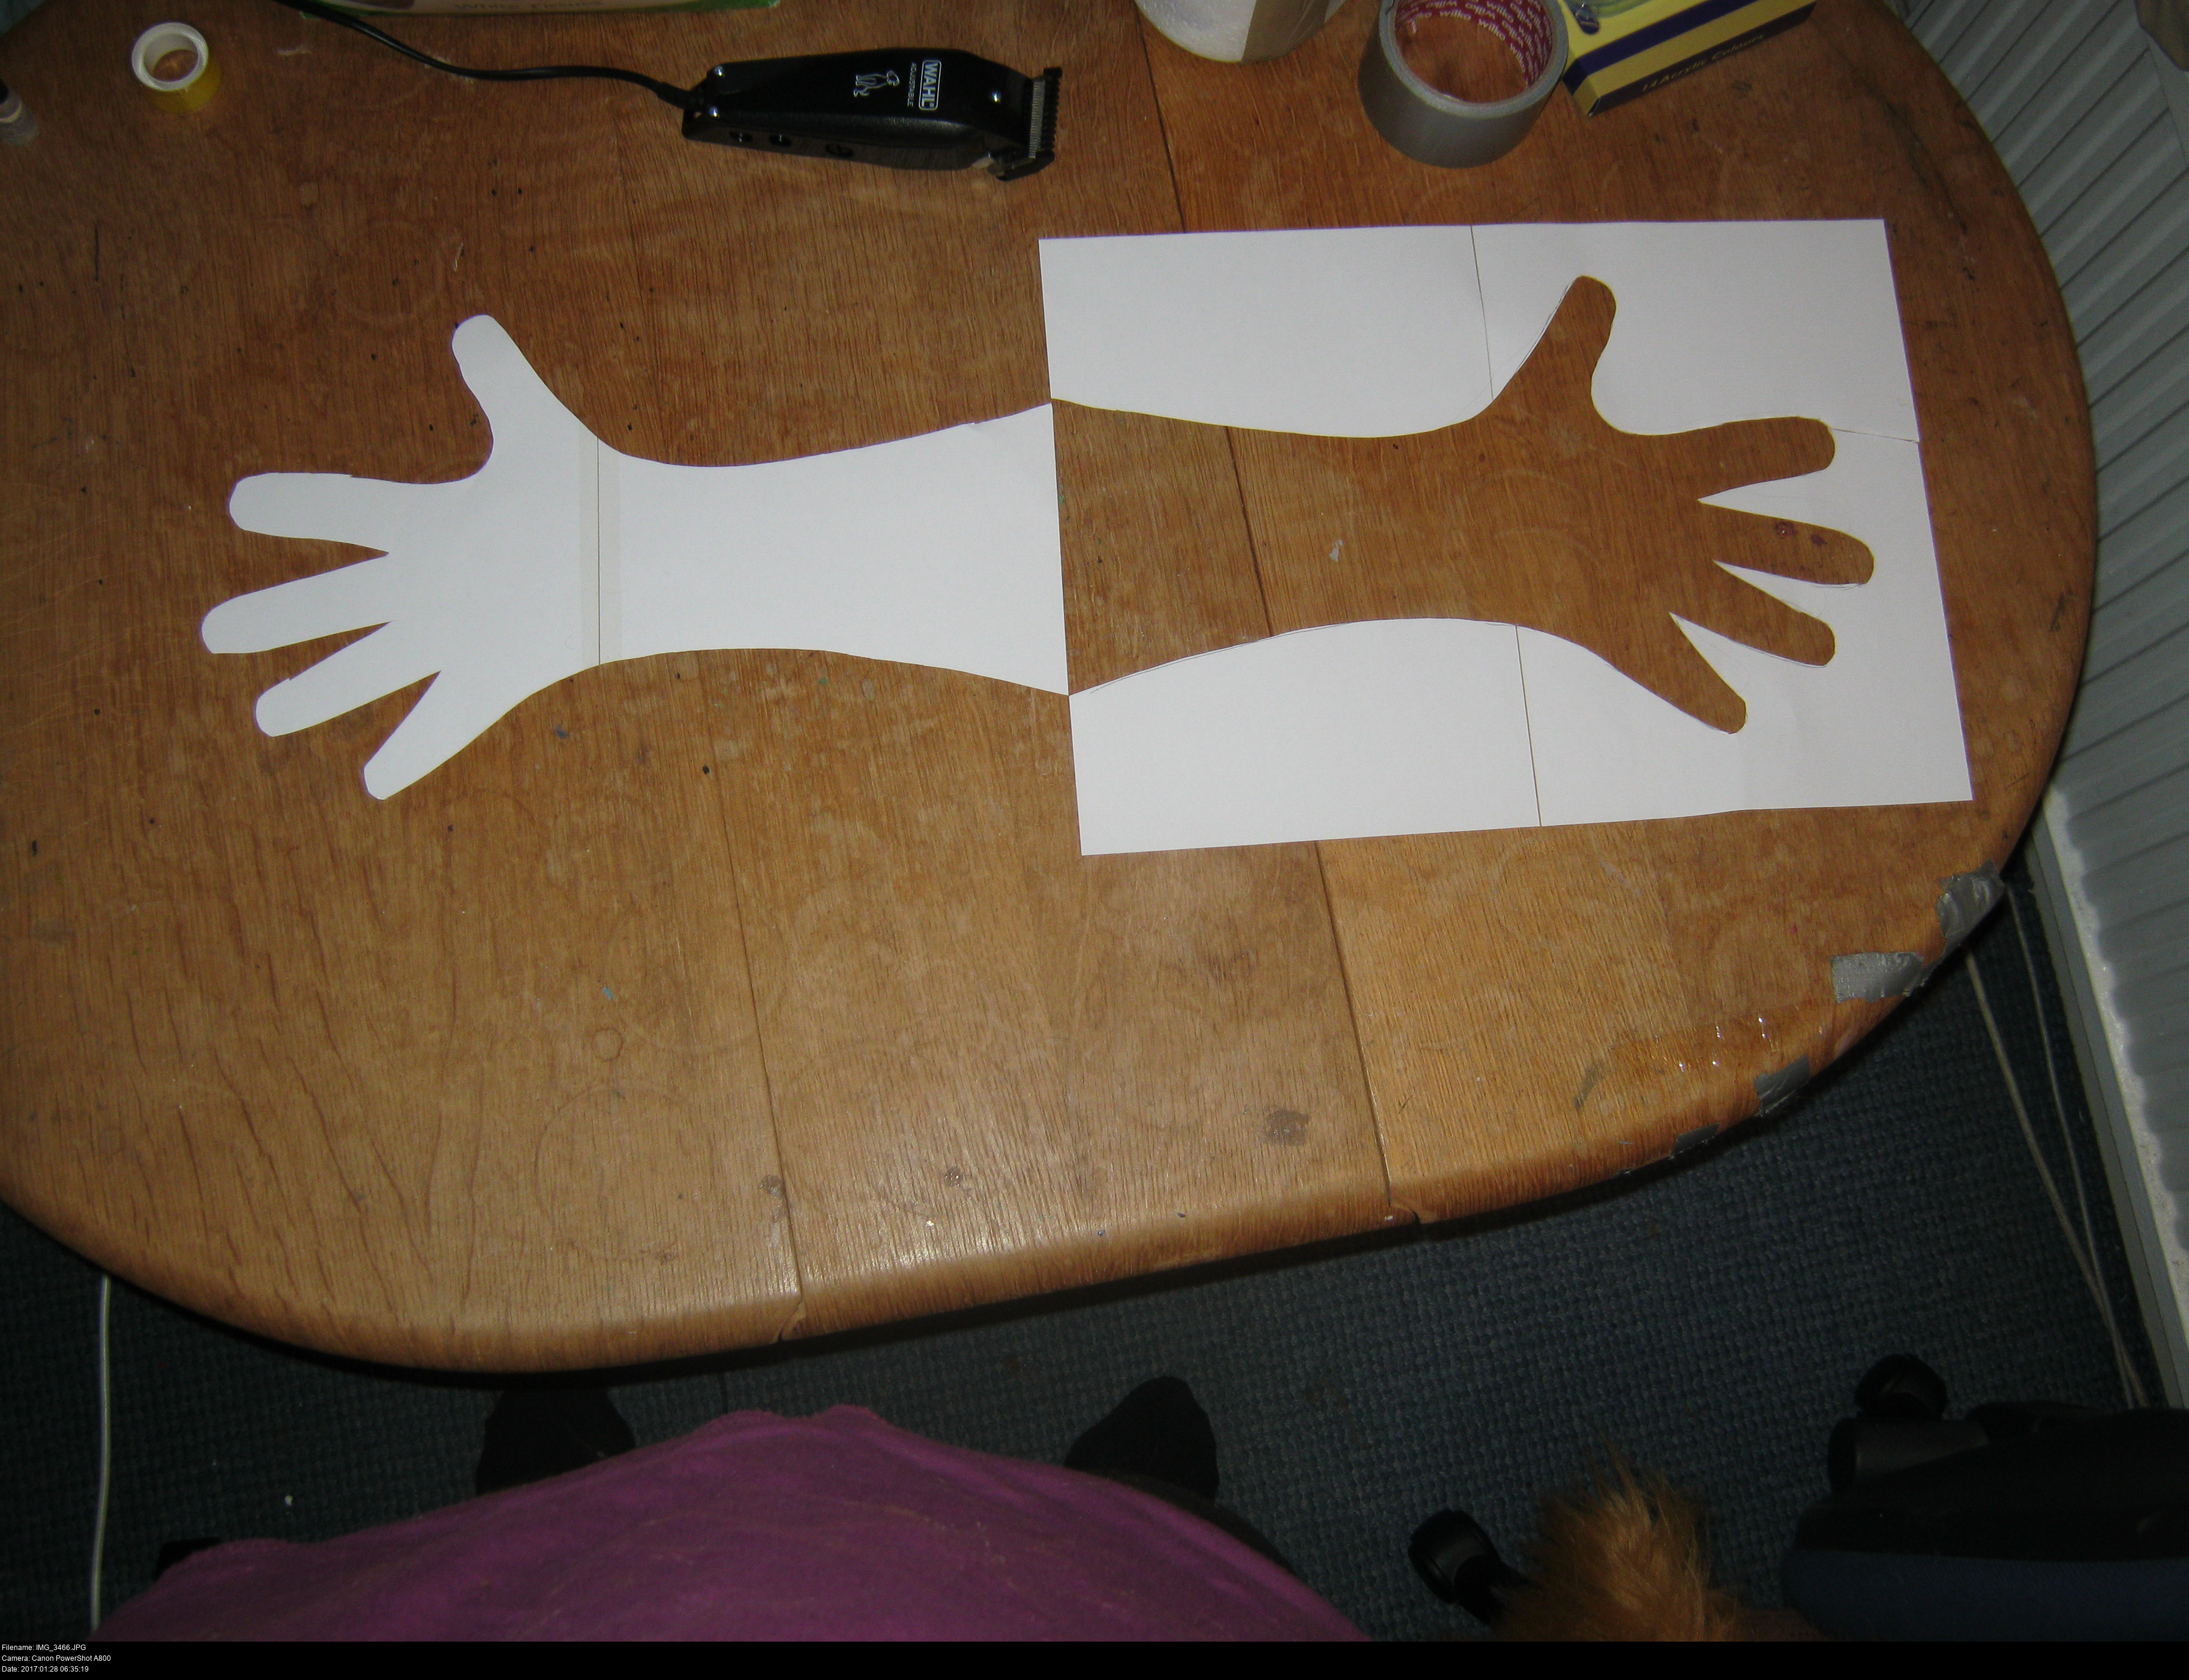
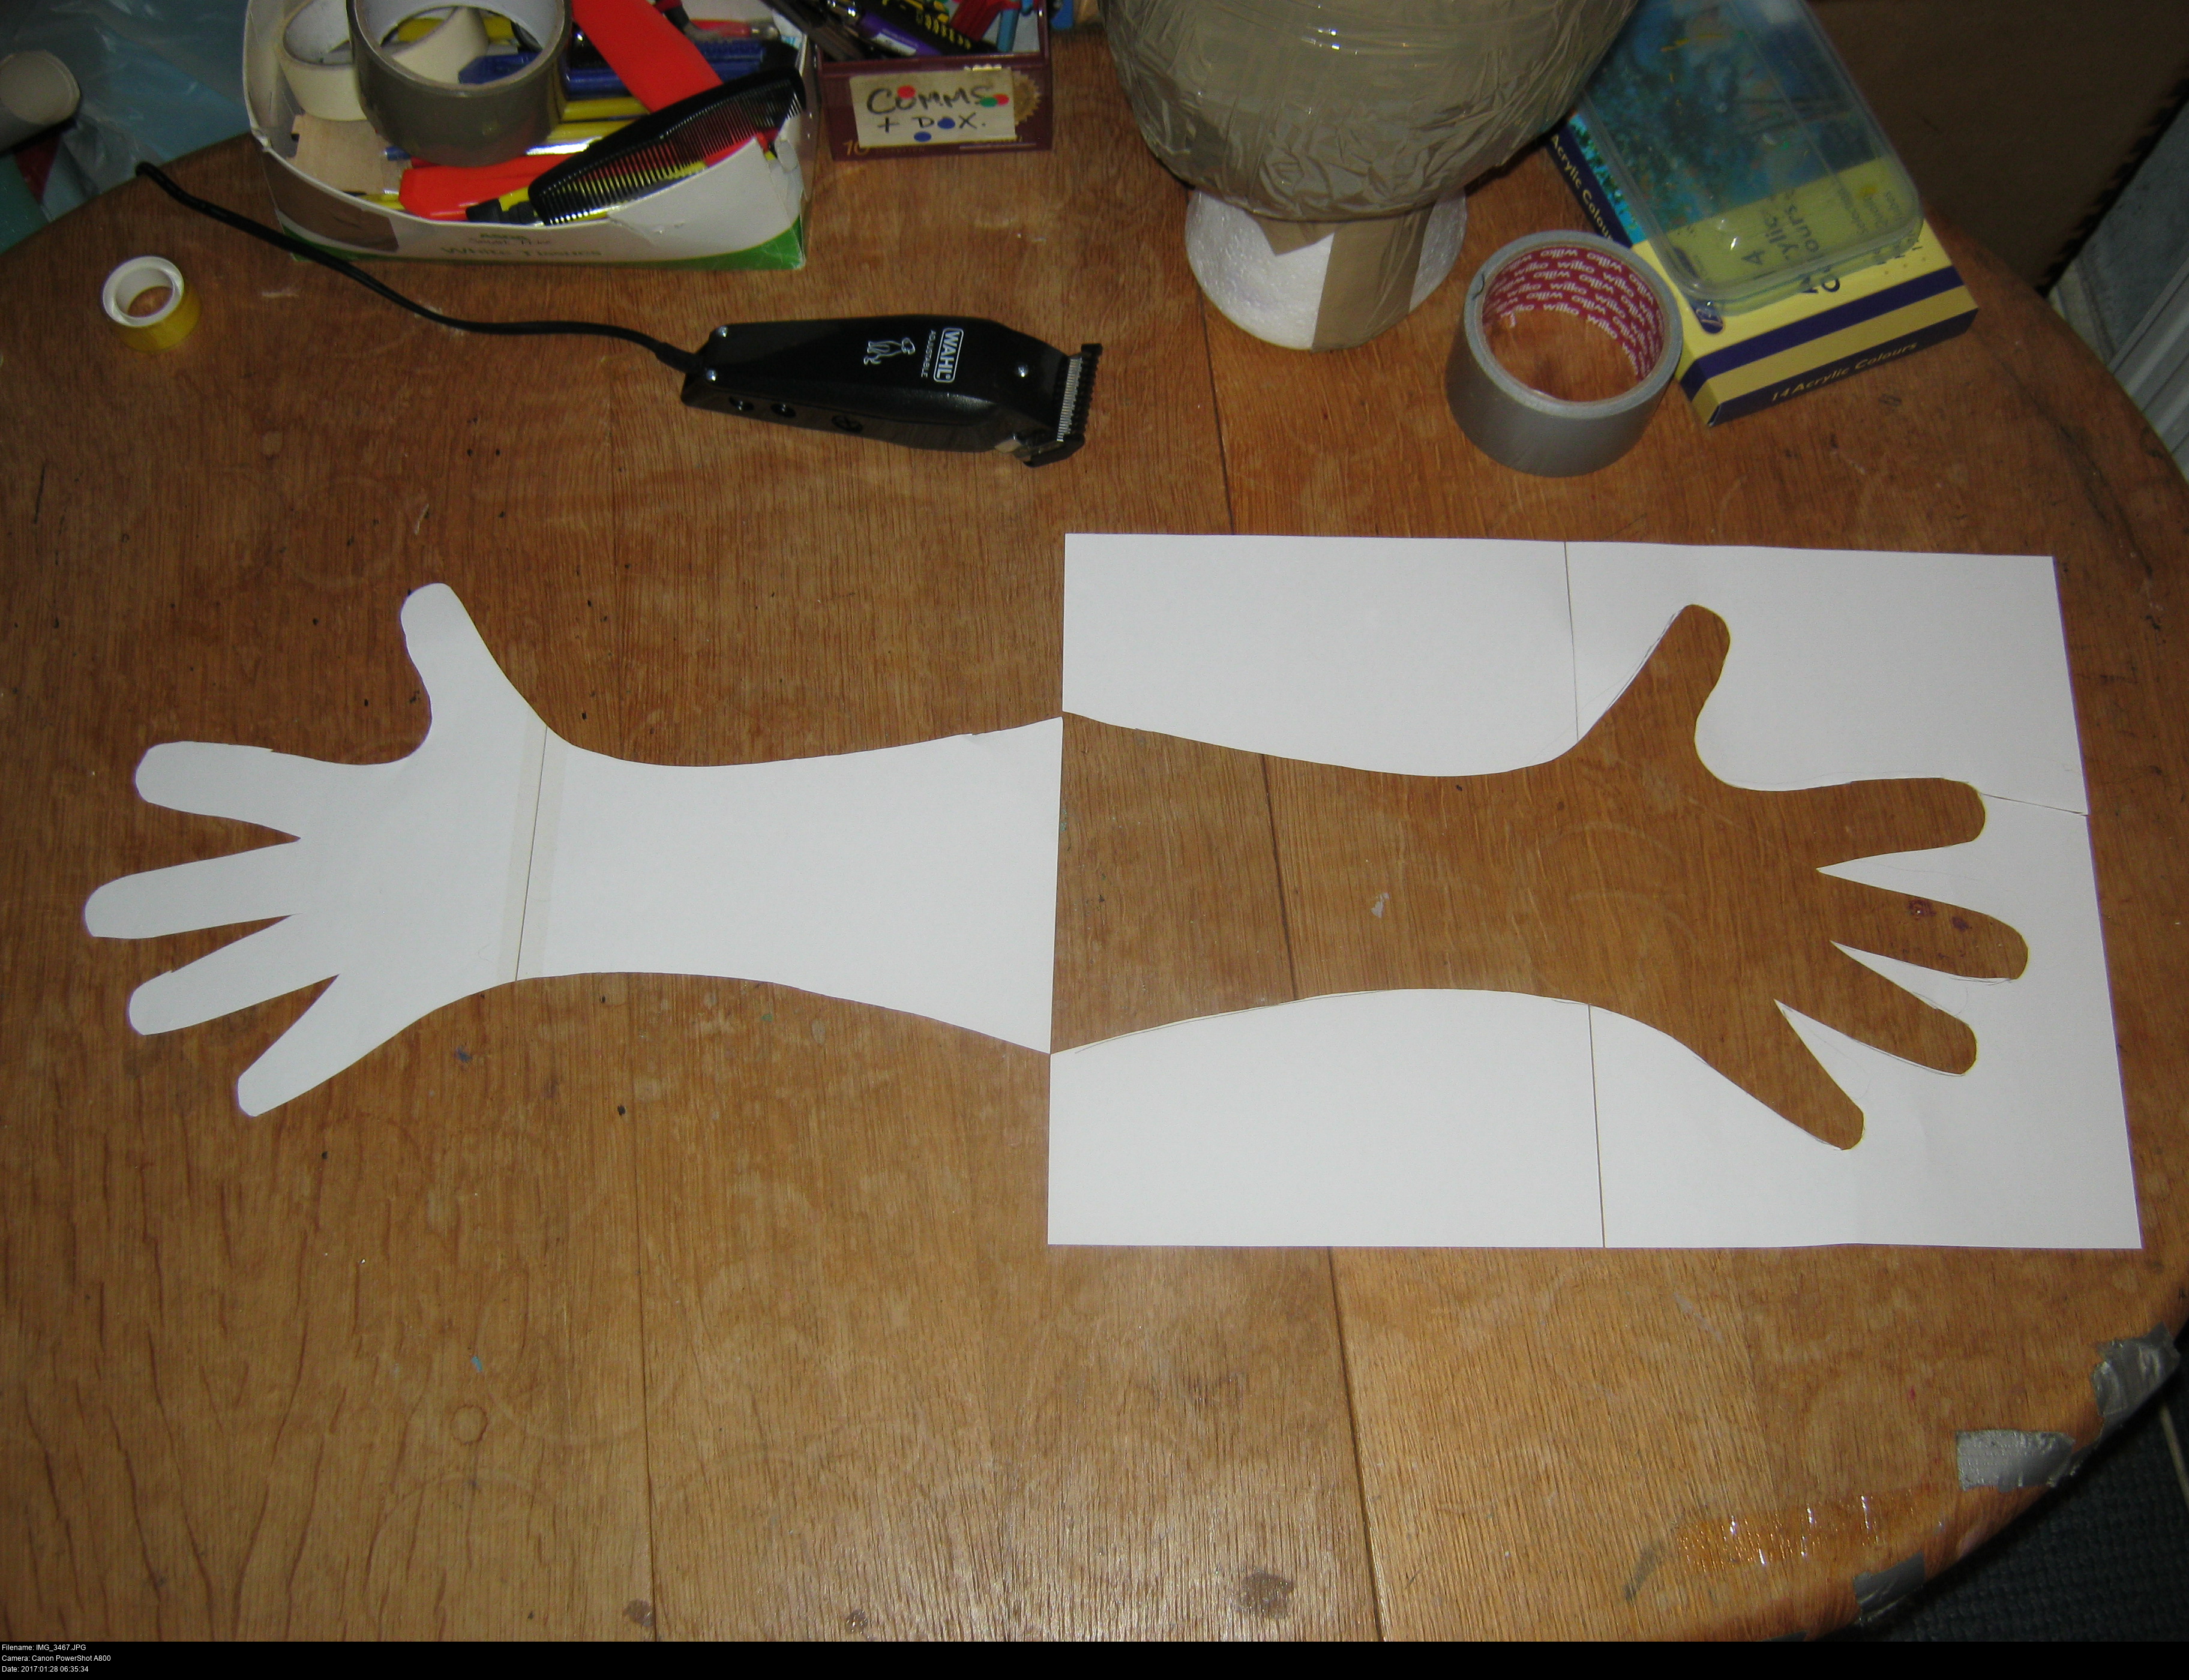
Step one, make a pattern for gloves. These gloves are going to just be two layers of fabric sewn back to back. No fourchettes (those are the vertical segments between the fingers of a glove that act as gussets to thicken them up) and no special wrist seam.
Spread your hand out on a large piece of paper and trace around it as best you can. Trace as tightly as you can, making sure to keep the pencil as vertical as possible. Then you need to visualise the circumference of your fingers and wrist, and expand the thickness of the glove's fingers and wrist to accomodate your hand. My knit-backed faux fur is a little stretchy, which helps a lot!
I want my gloves to finish just before the elbow, so I've measured that distance and tried to extend the wrist of the glove down the arm.
Add on an extra few millimetres all around the outline for a seam allowance, and that's it.
When you're drawing out these patterns, make sure to label which lines are your original lines and which lines are the ones that include seam allowance. It's very easy to get mixed up and end up with pattersn you're not sure include seam allowance or not.
Also that eerie logo there is now a trademark of Skull Kid's Cosplay Stuff Inc.!
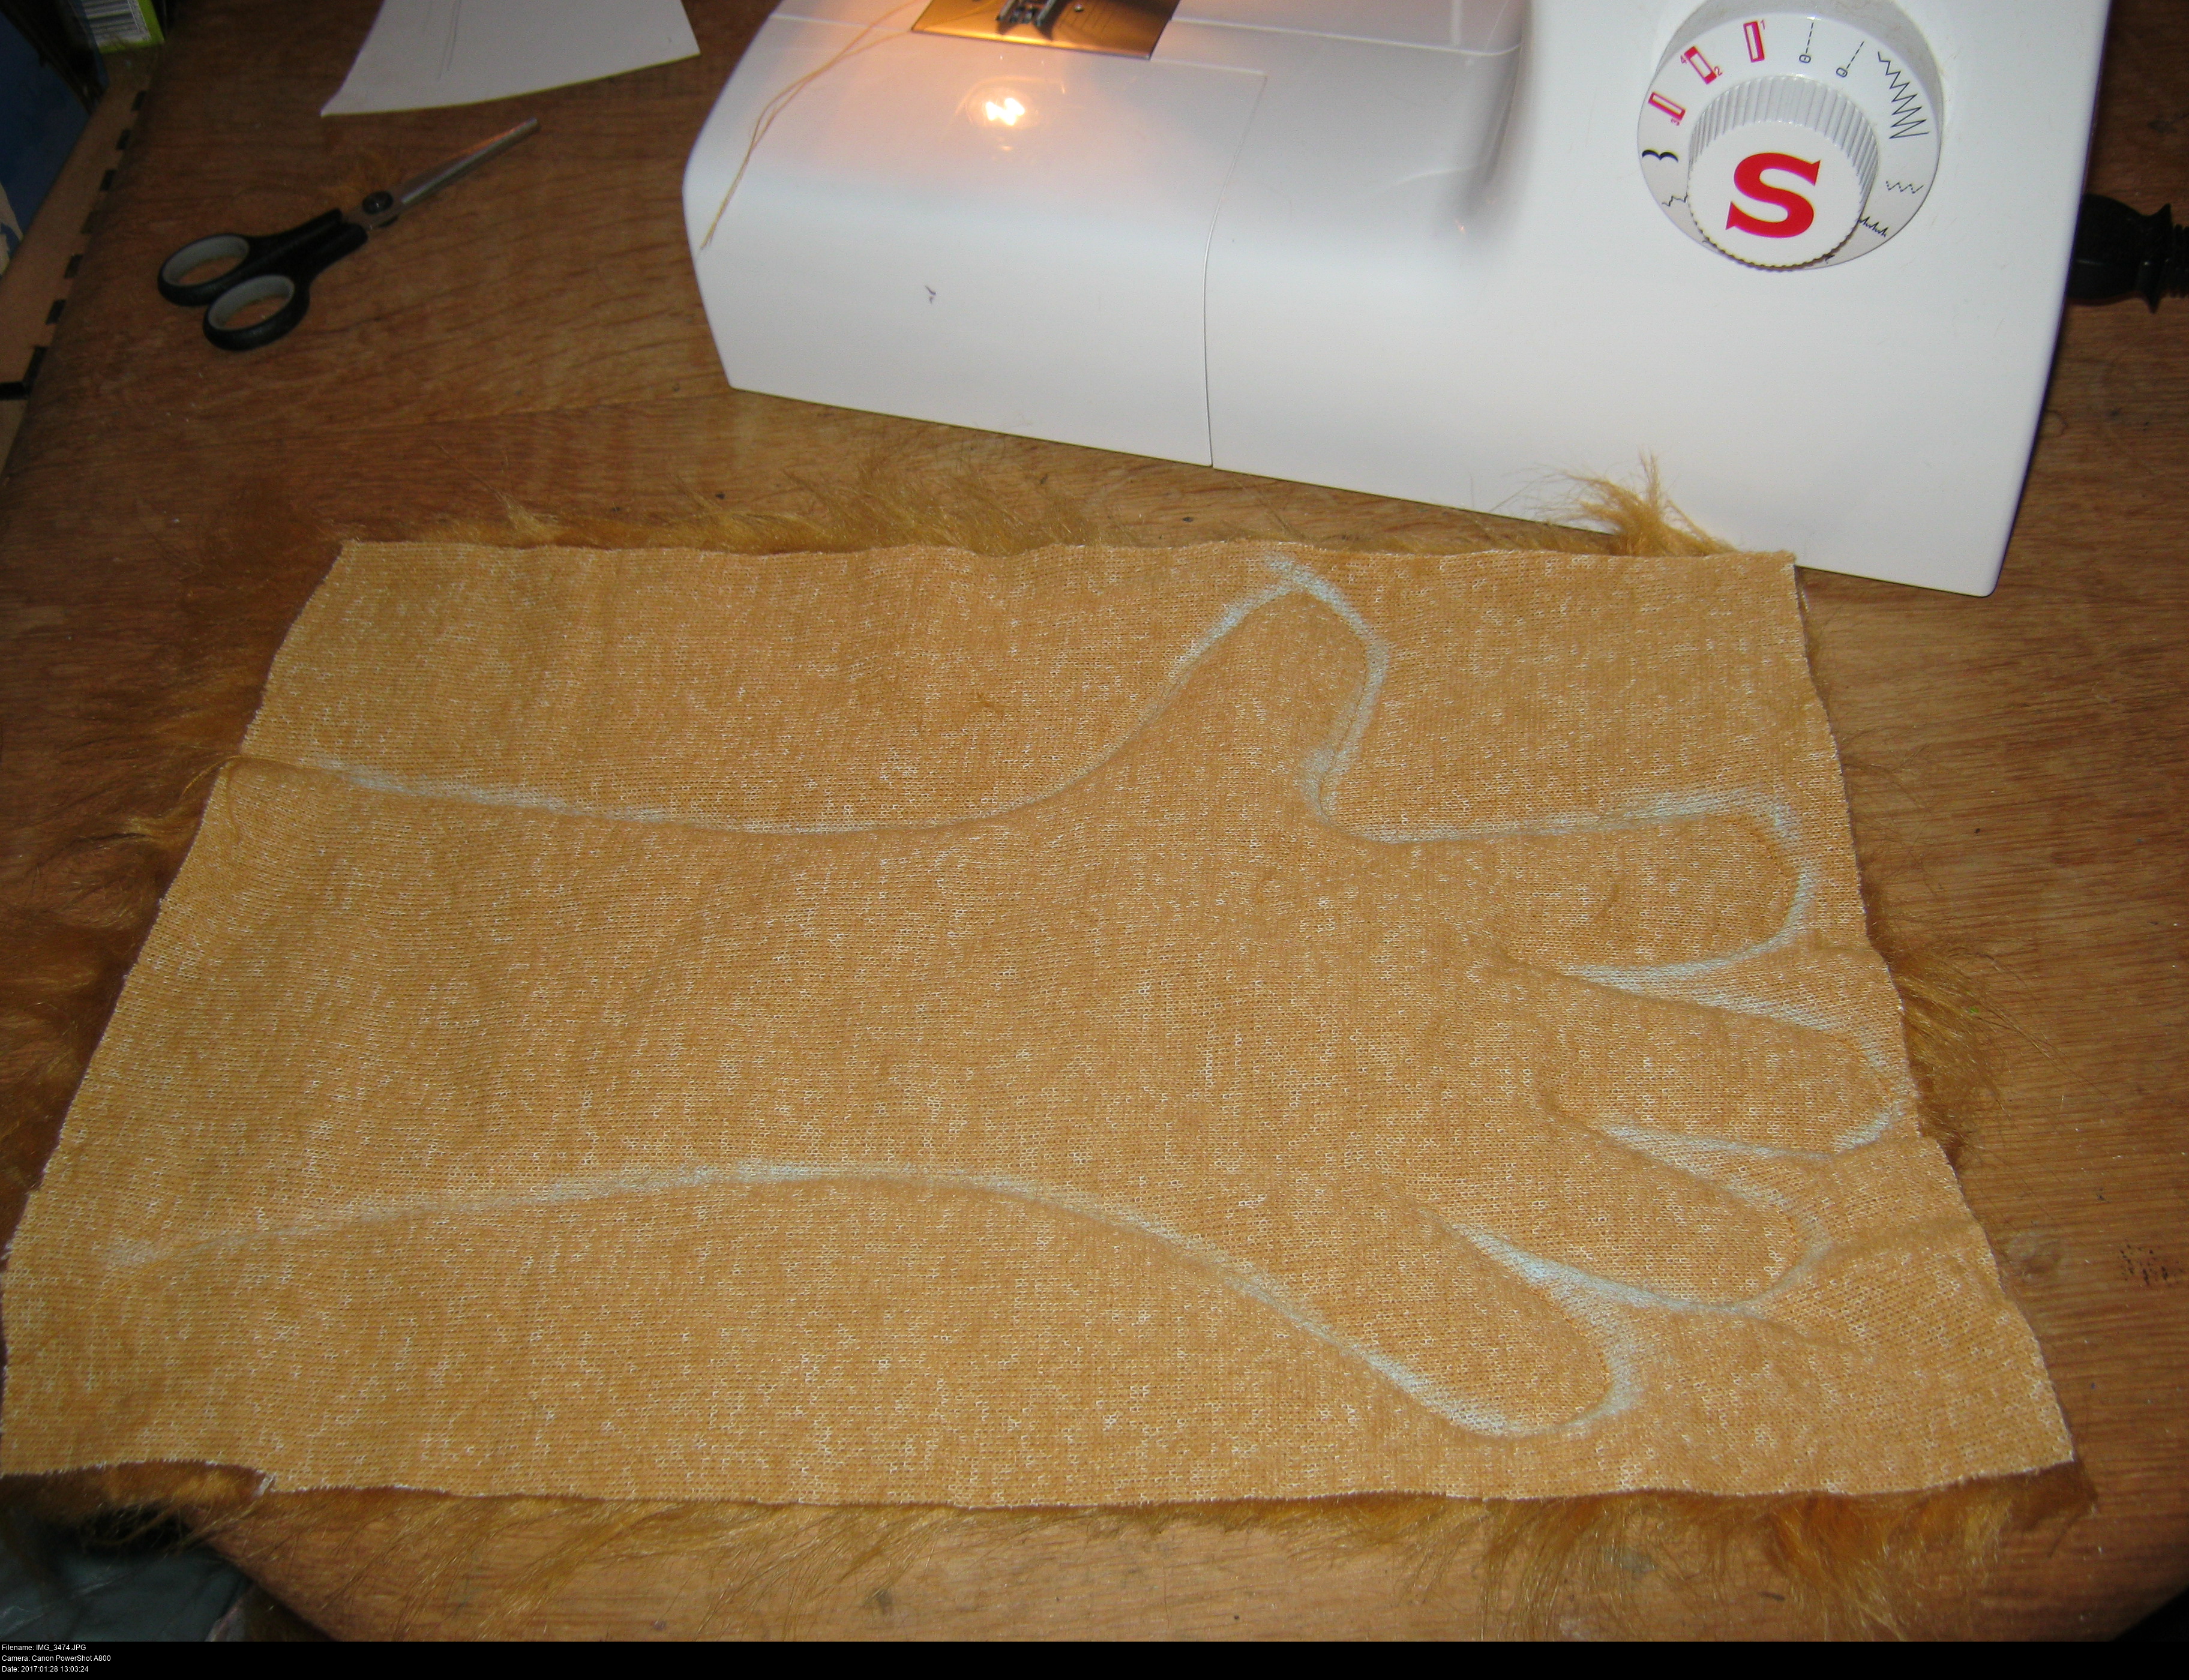
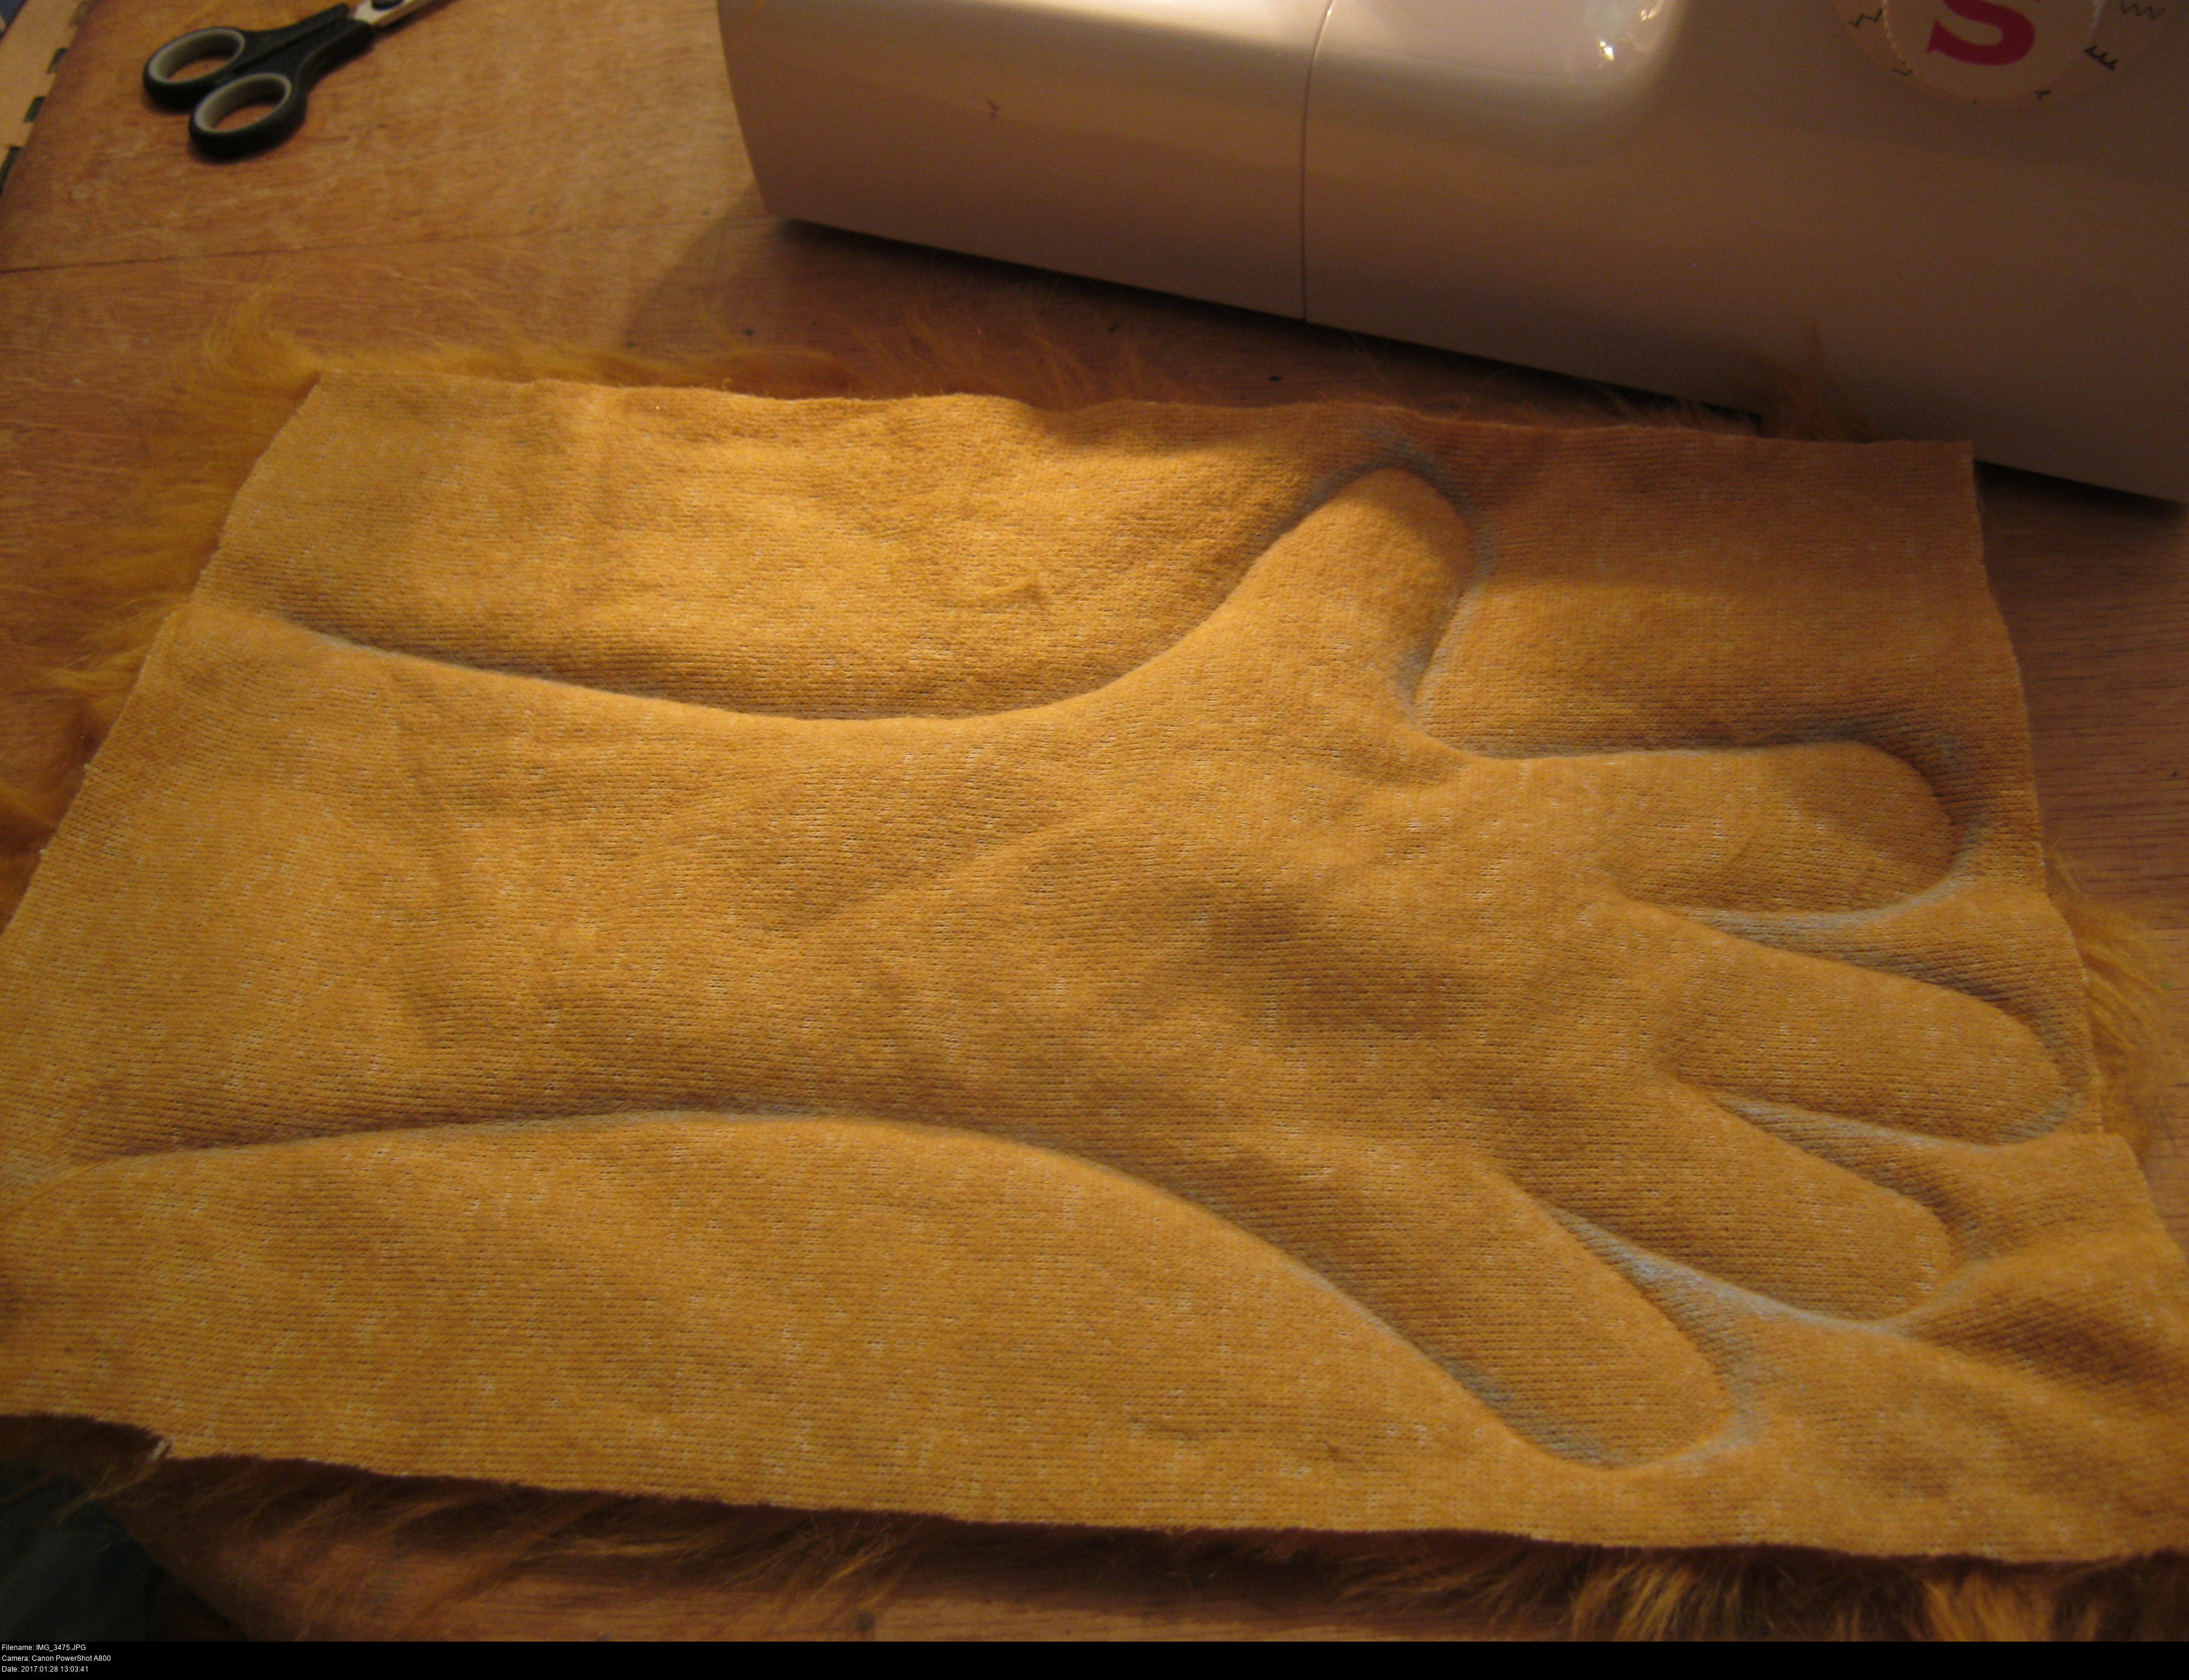
Unlike my earlier advice with the head, I'd recommend that you think about clipping the fur shorter before sewing it (maybe not to its final length, but shorter than the original pile) so it's easier to run through the machine and you don't have to spend the rest of your life trying to unpick it.
And definitely don't try to cut around the hand shape before sewing. That's a mistake I made with my first prototype glove. Save the cutting until the sewing is done, otherwise you're trying to sew into raggedy fingers and it'll be frustrating. In fact, I think these sheets of faux fur are too small for the pattern I've marked on it, I should've used larger sheets.
Before marking and pinning, make sure the grain of the fur is pointing in the correct direction. You almost certanly want it to run away from the fingers up towards the elbow. Make sure both sides match!
Alright! How cool do these look?
They're slightly tight, just enough to give me mobility and dexterity without falling off. I'd have preferred the fit of tighter gloves, but these are wonderful.


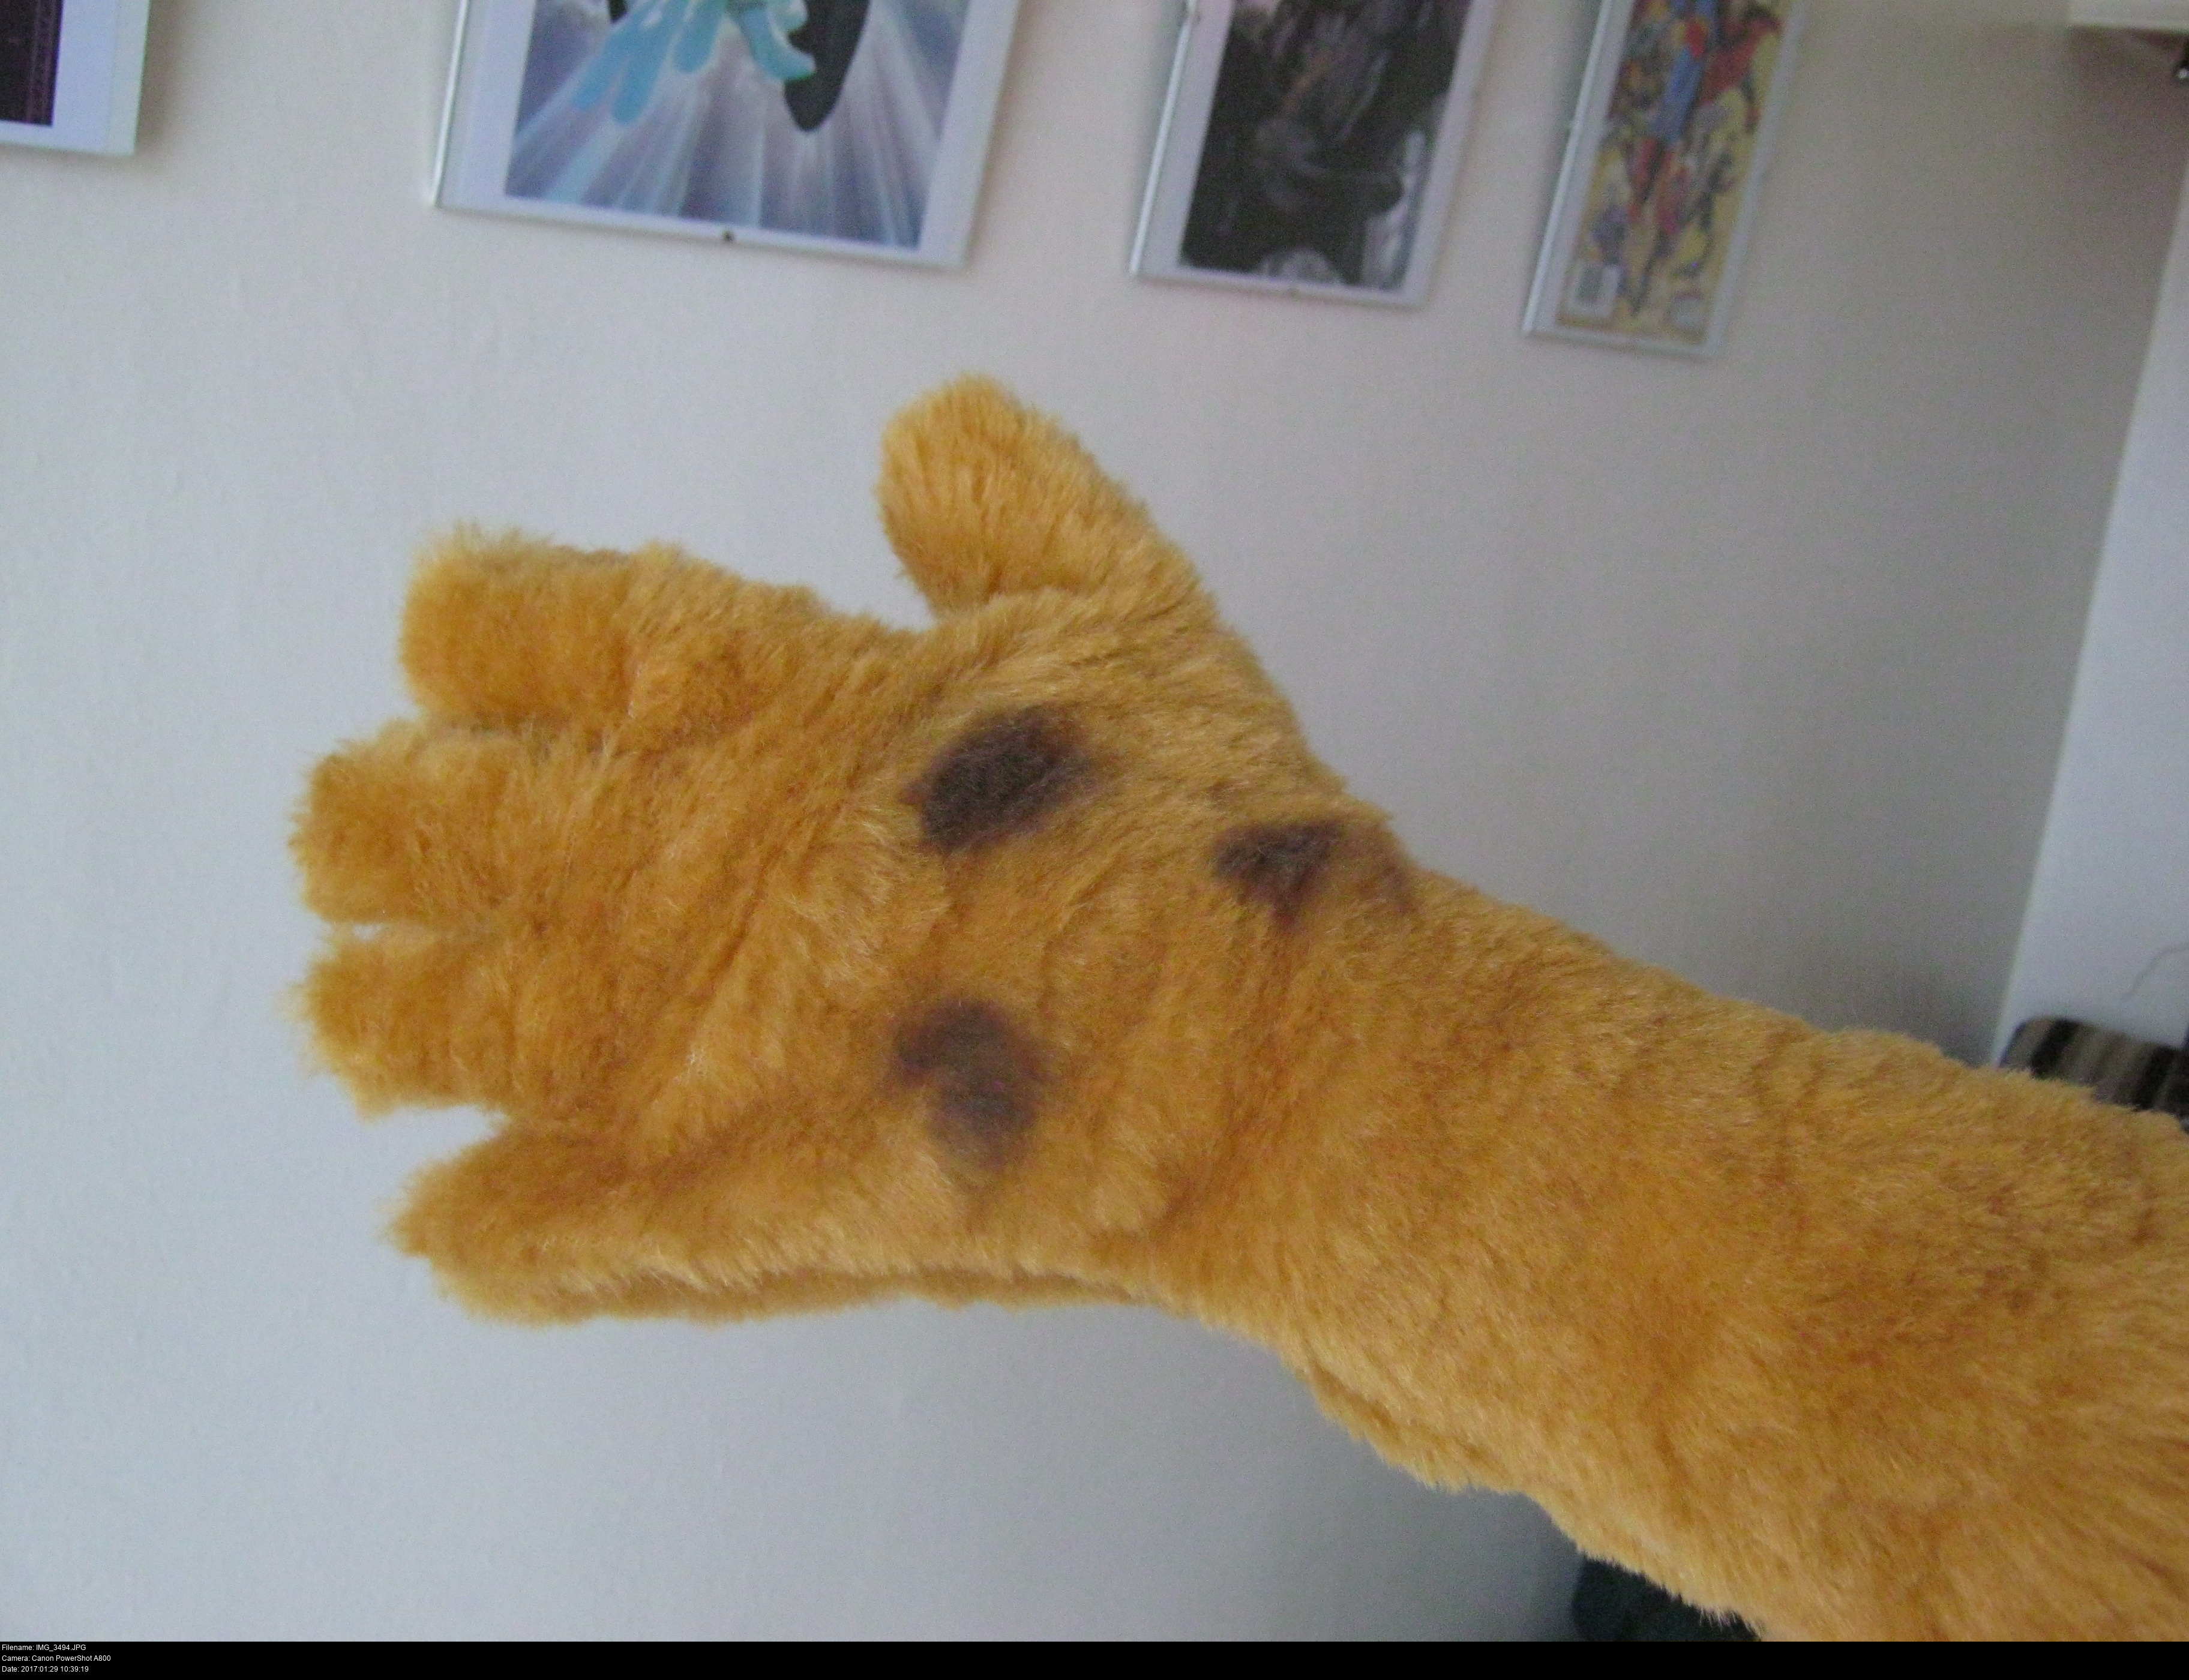
And there we go. One pair of faux fur overlynx gloves with drybrushed spots!
That's all we need to try out the full costume for the first time. The weather's nice, so let's go!


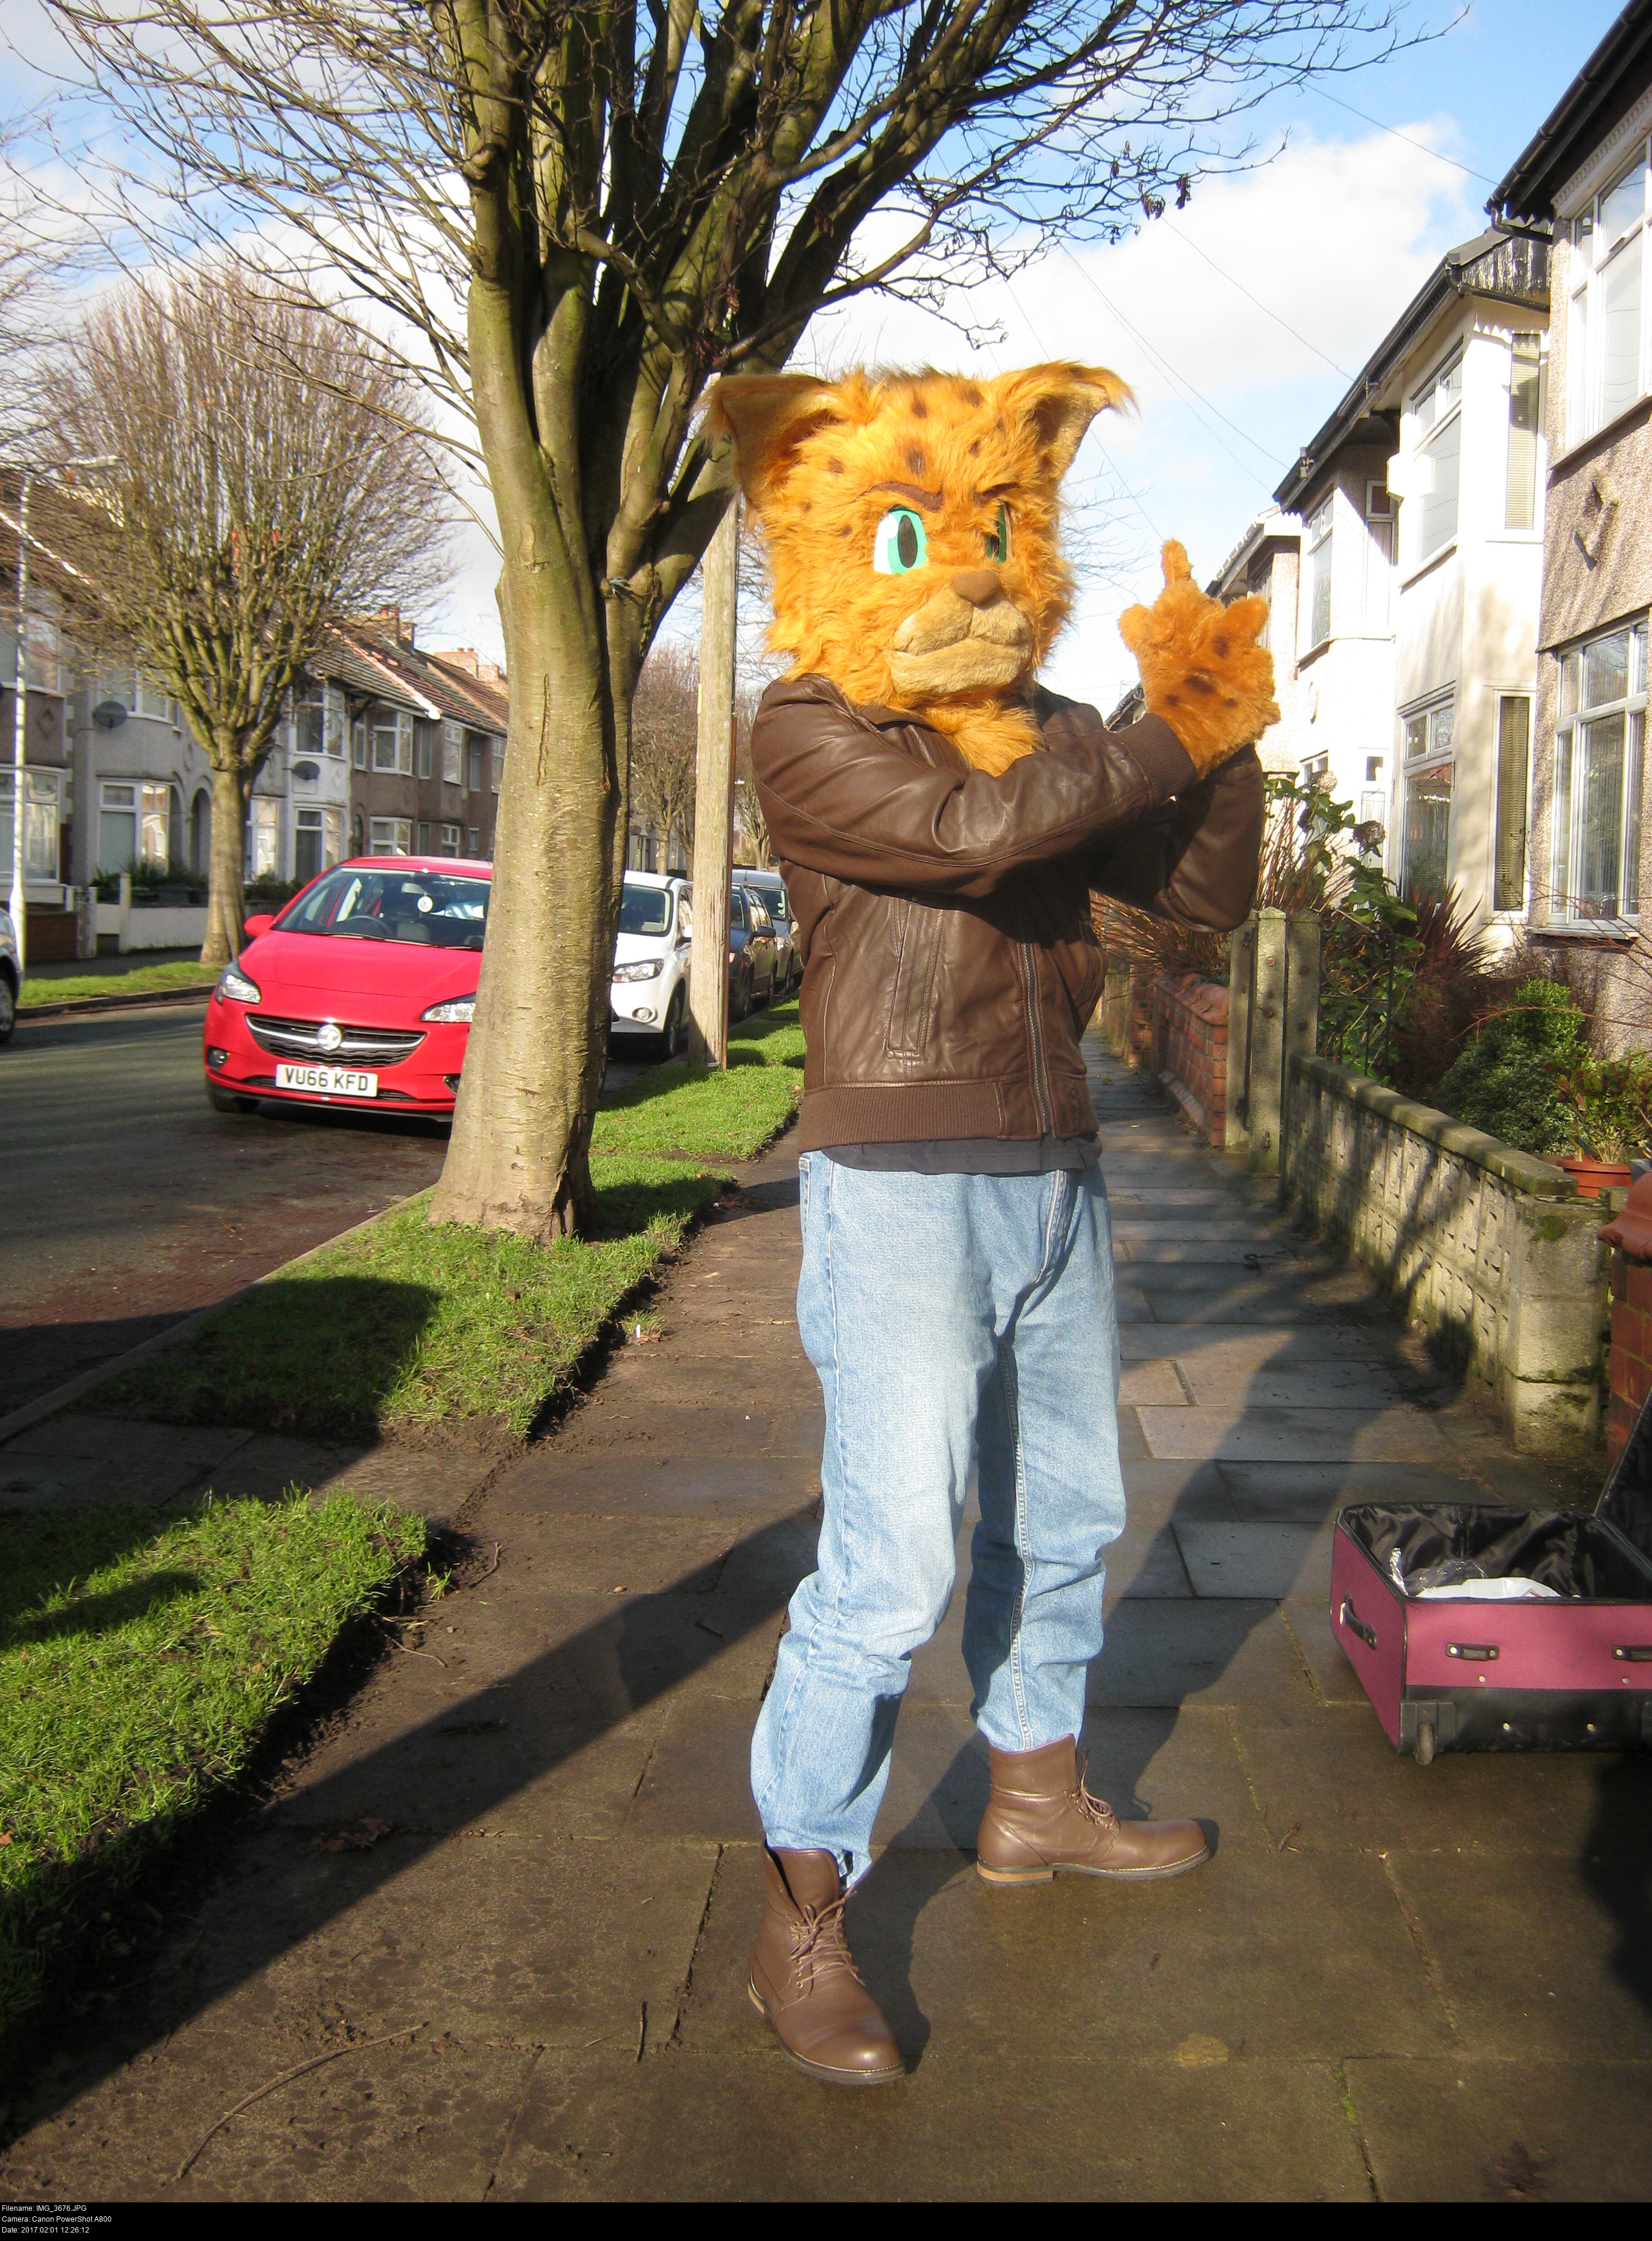
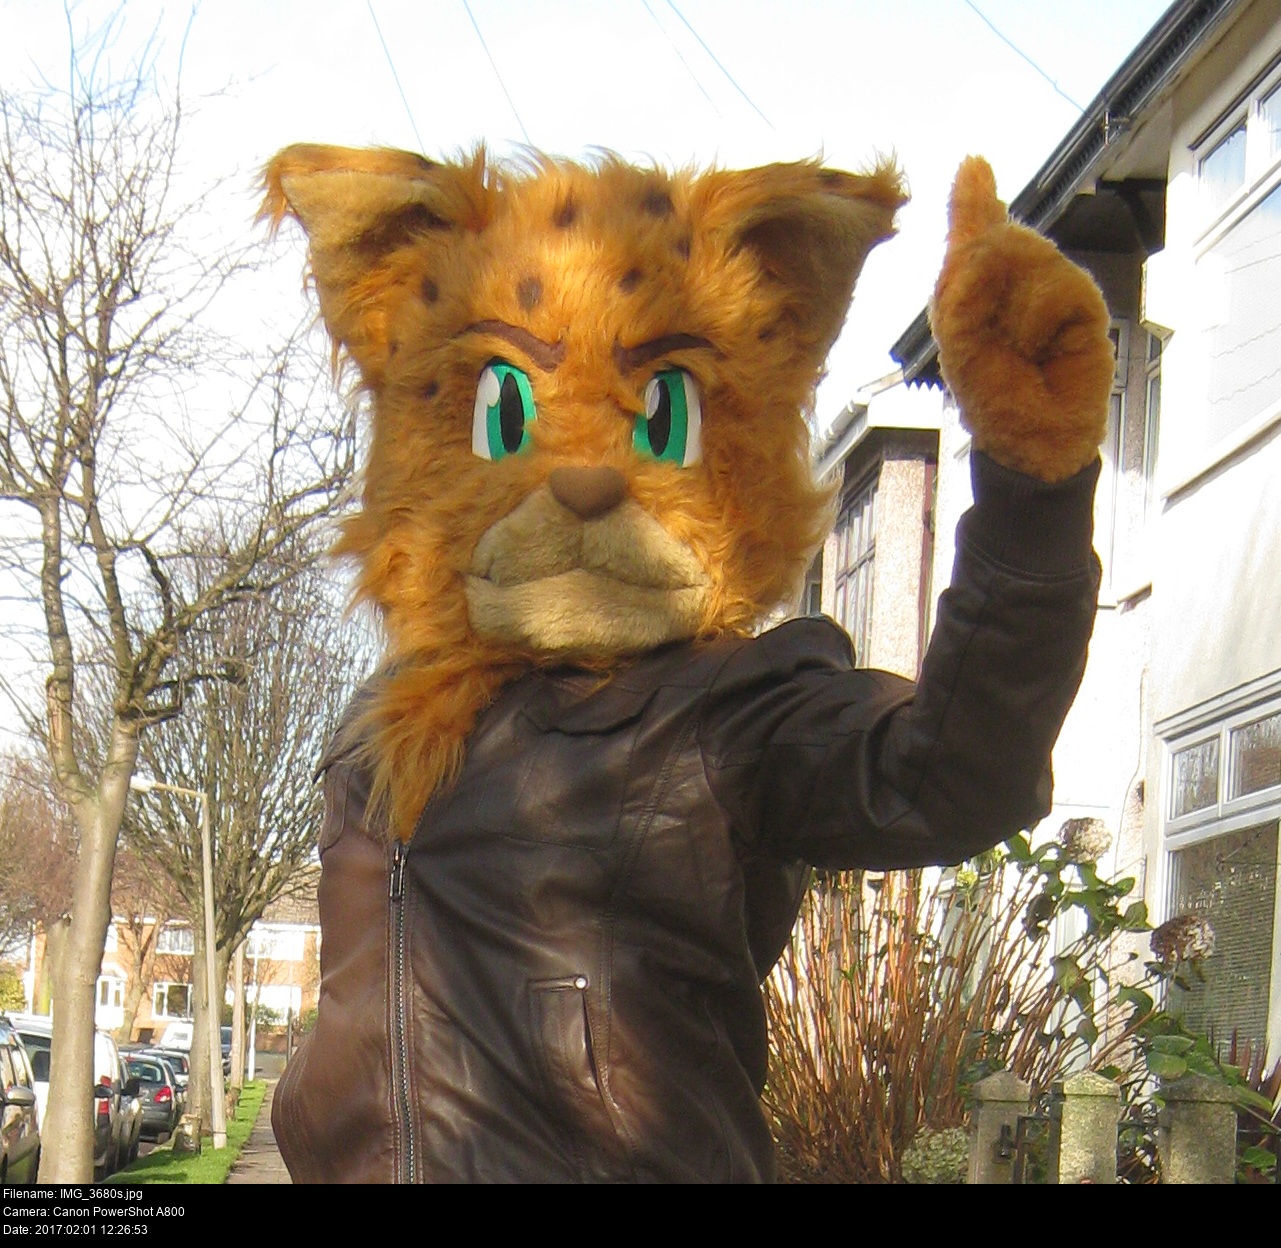


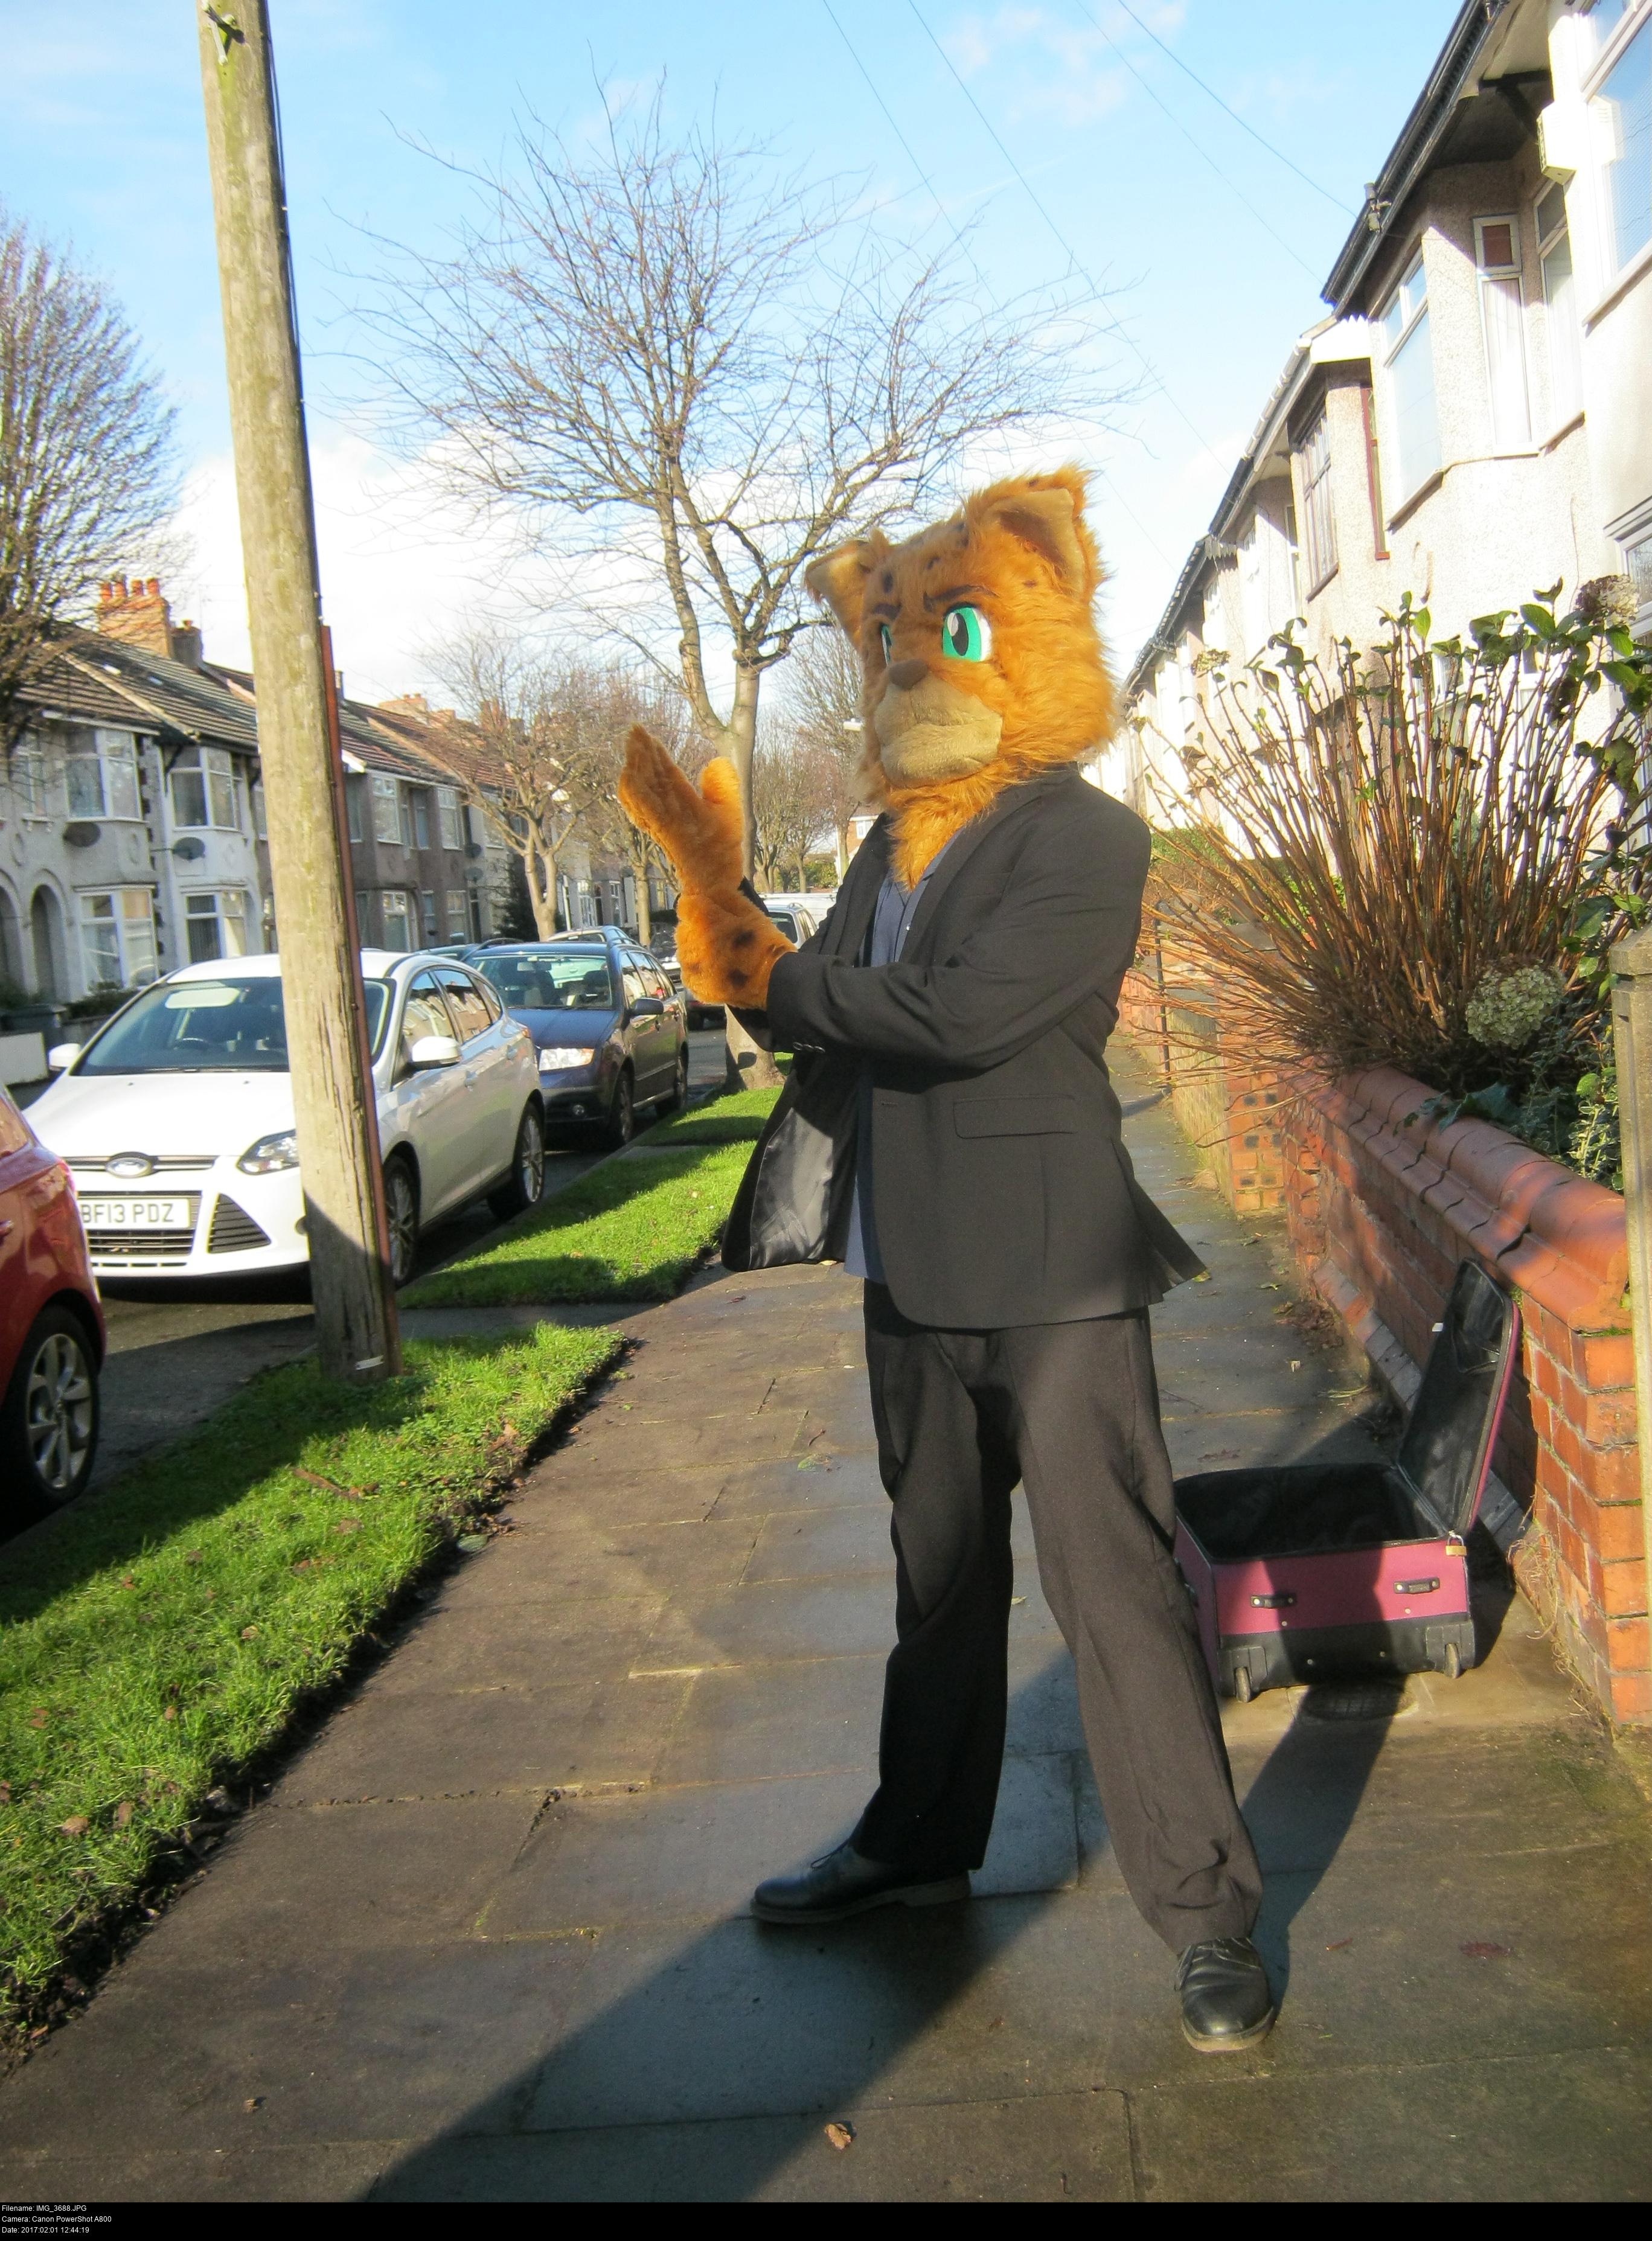
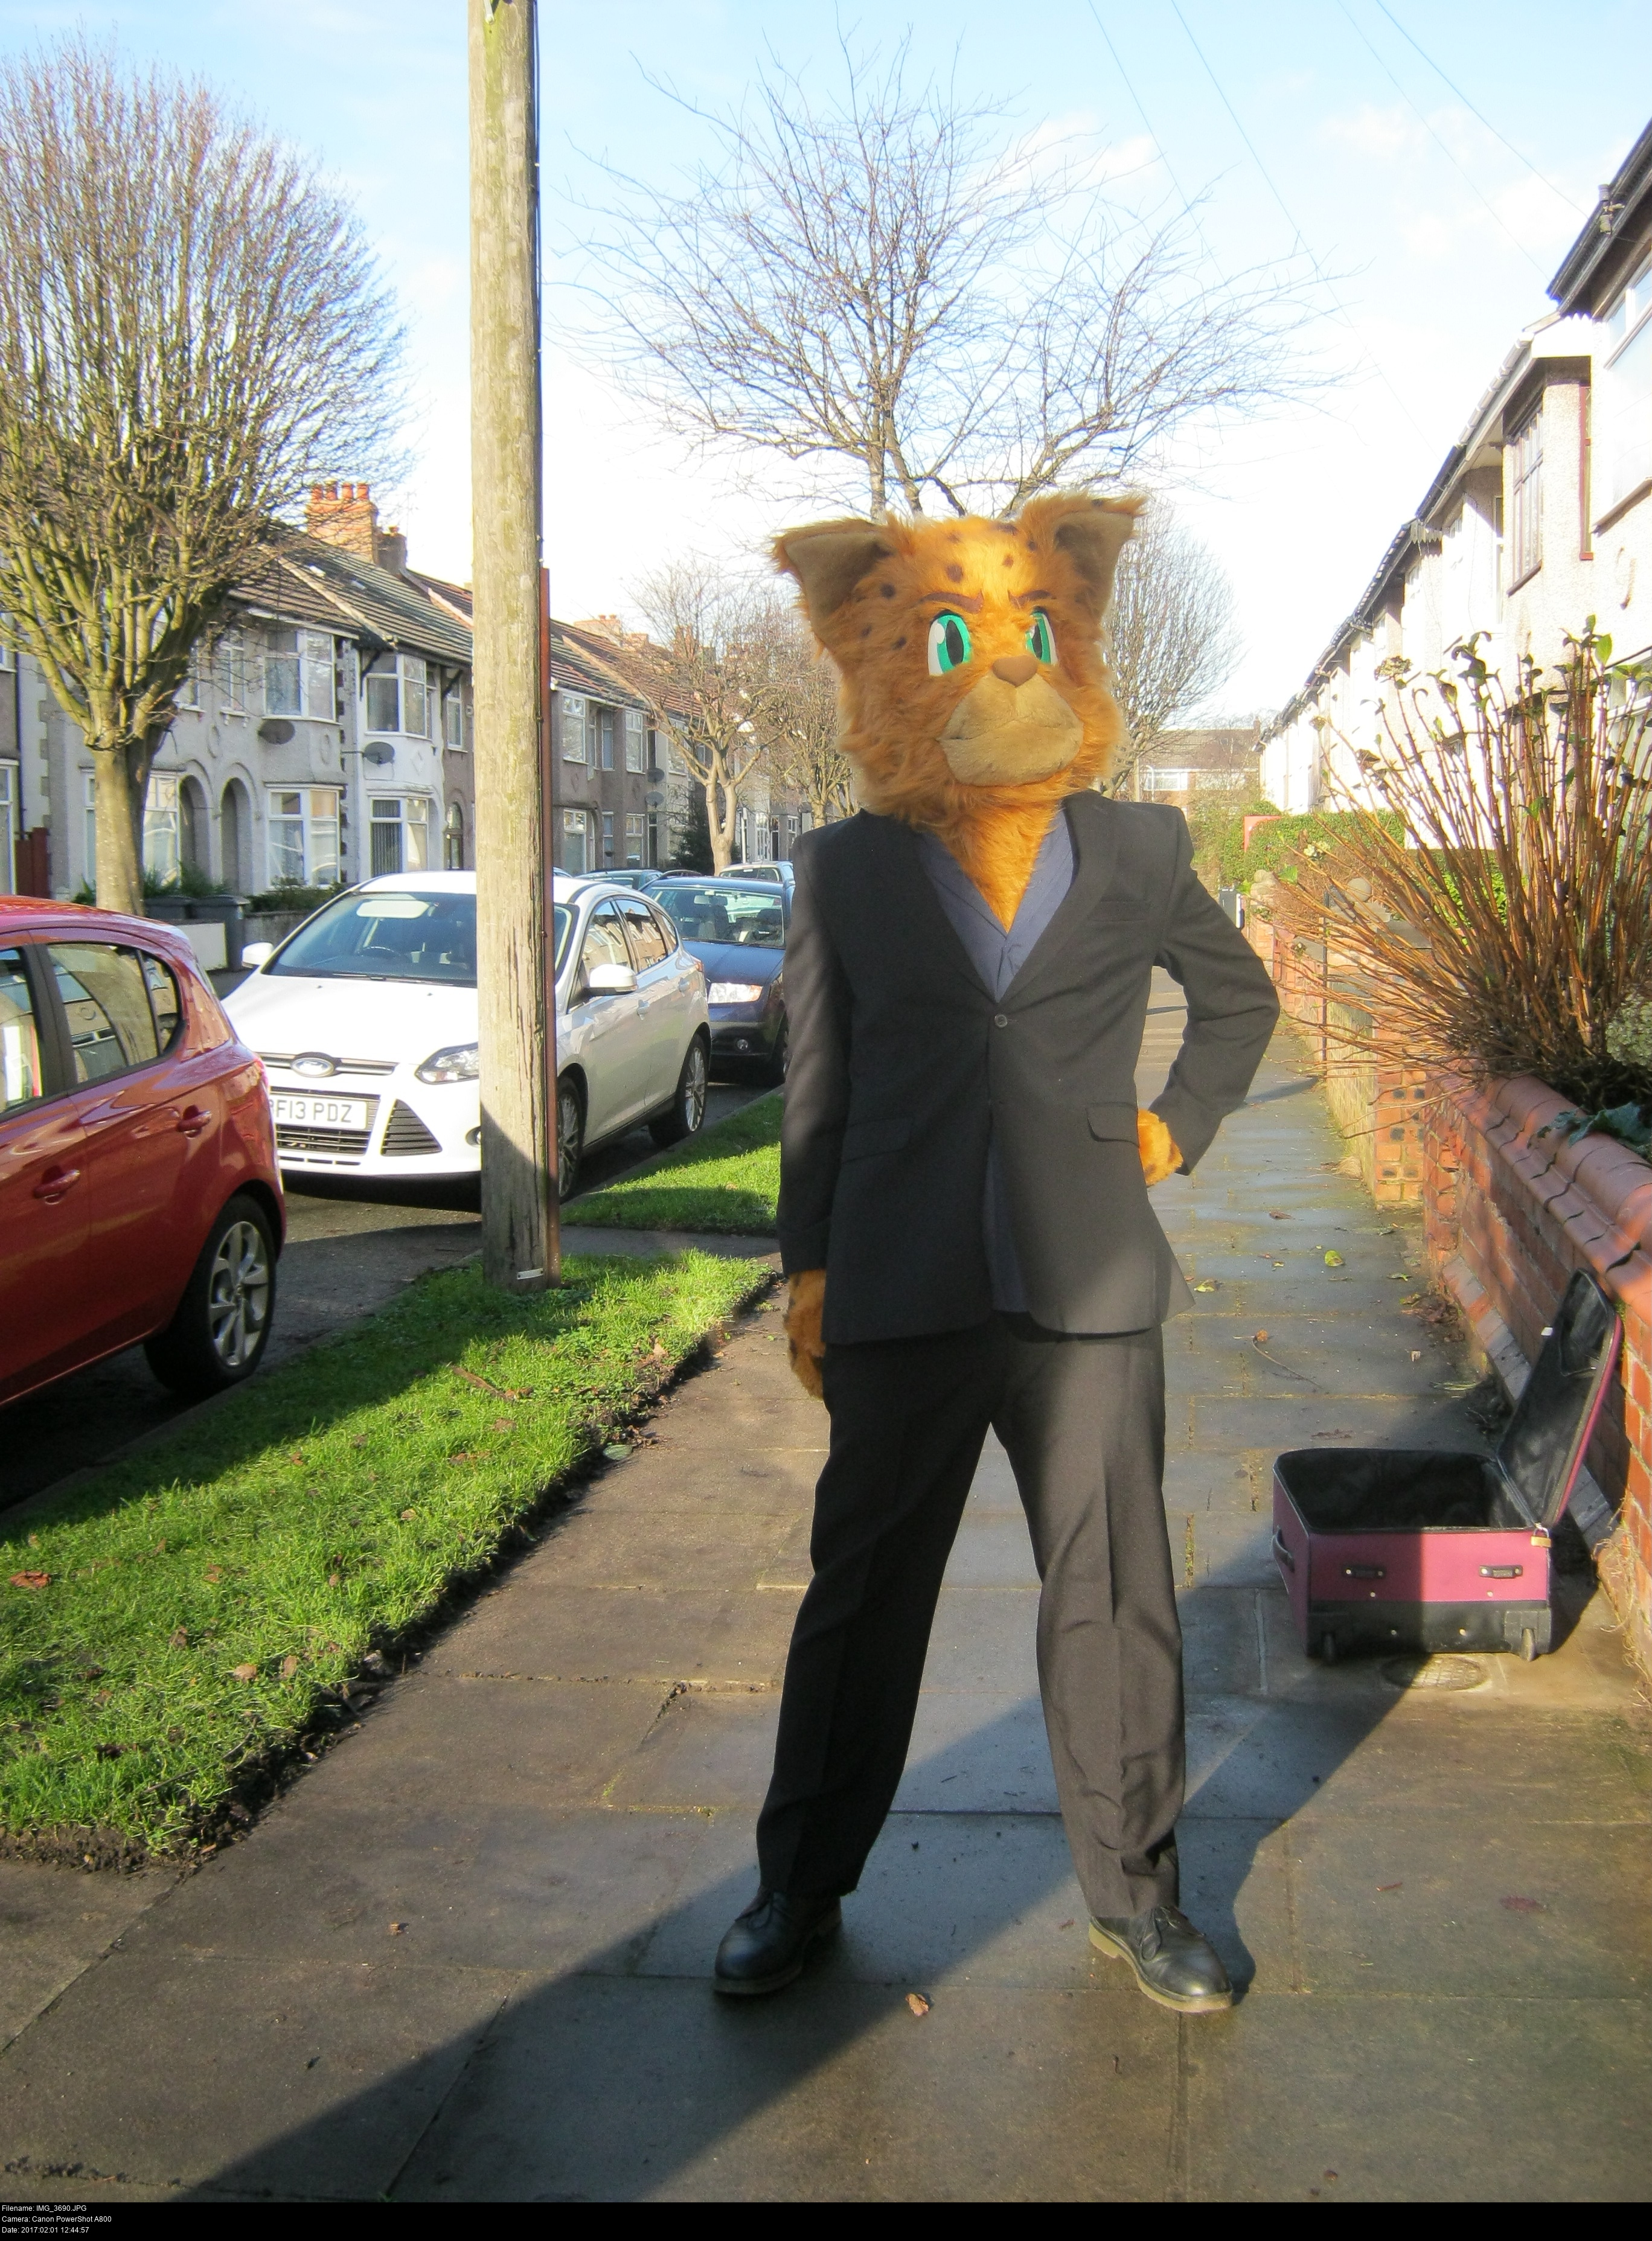

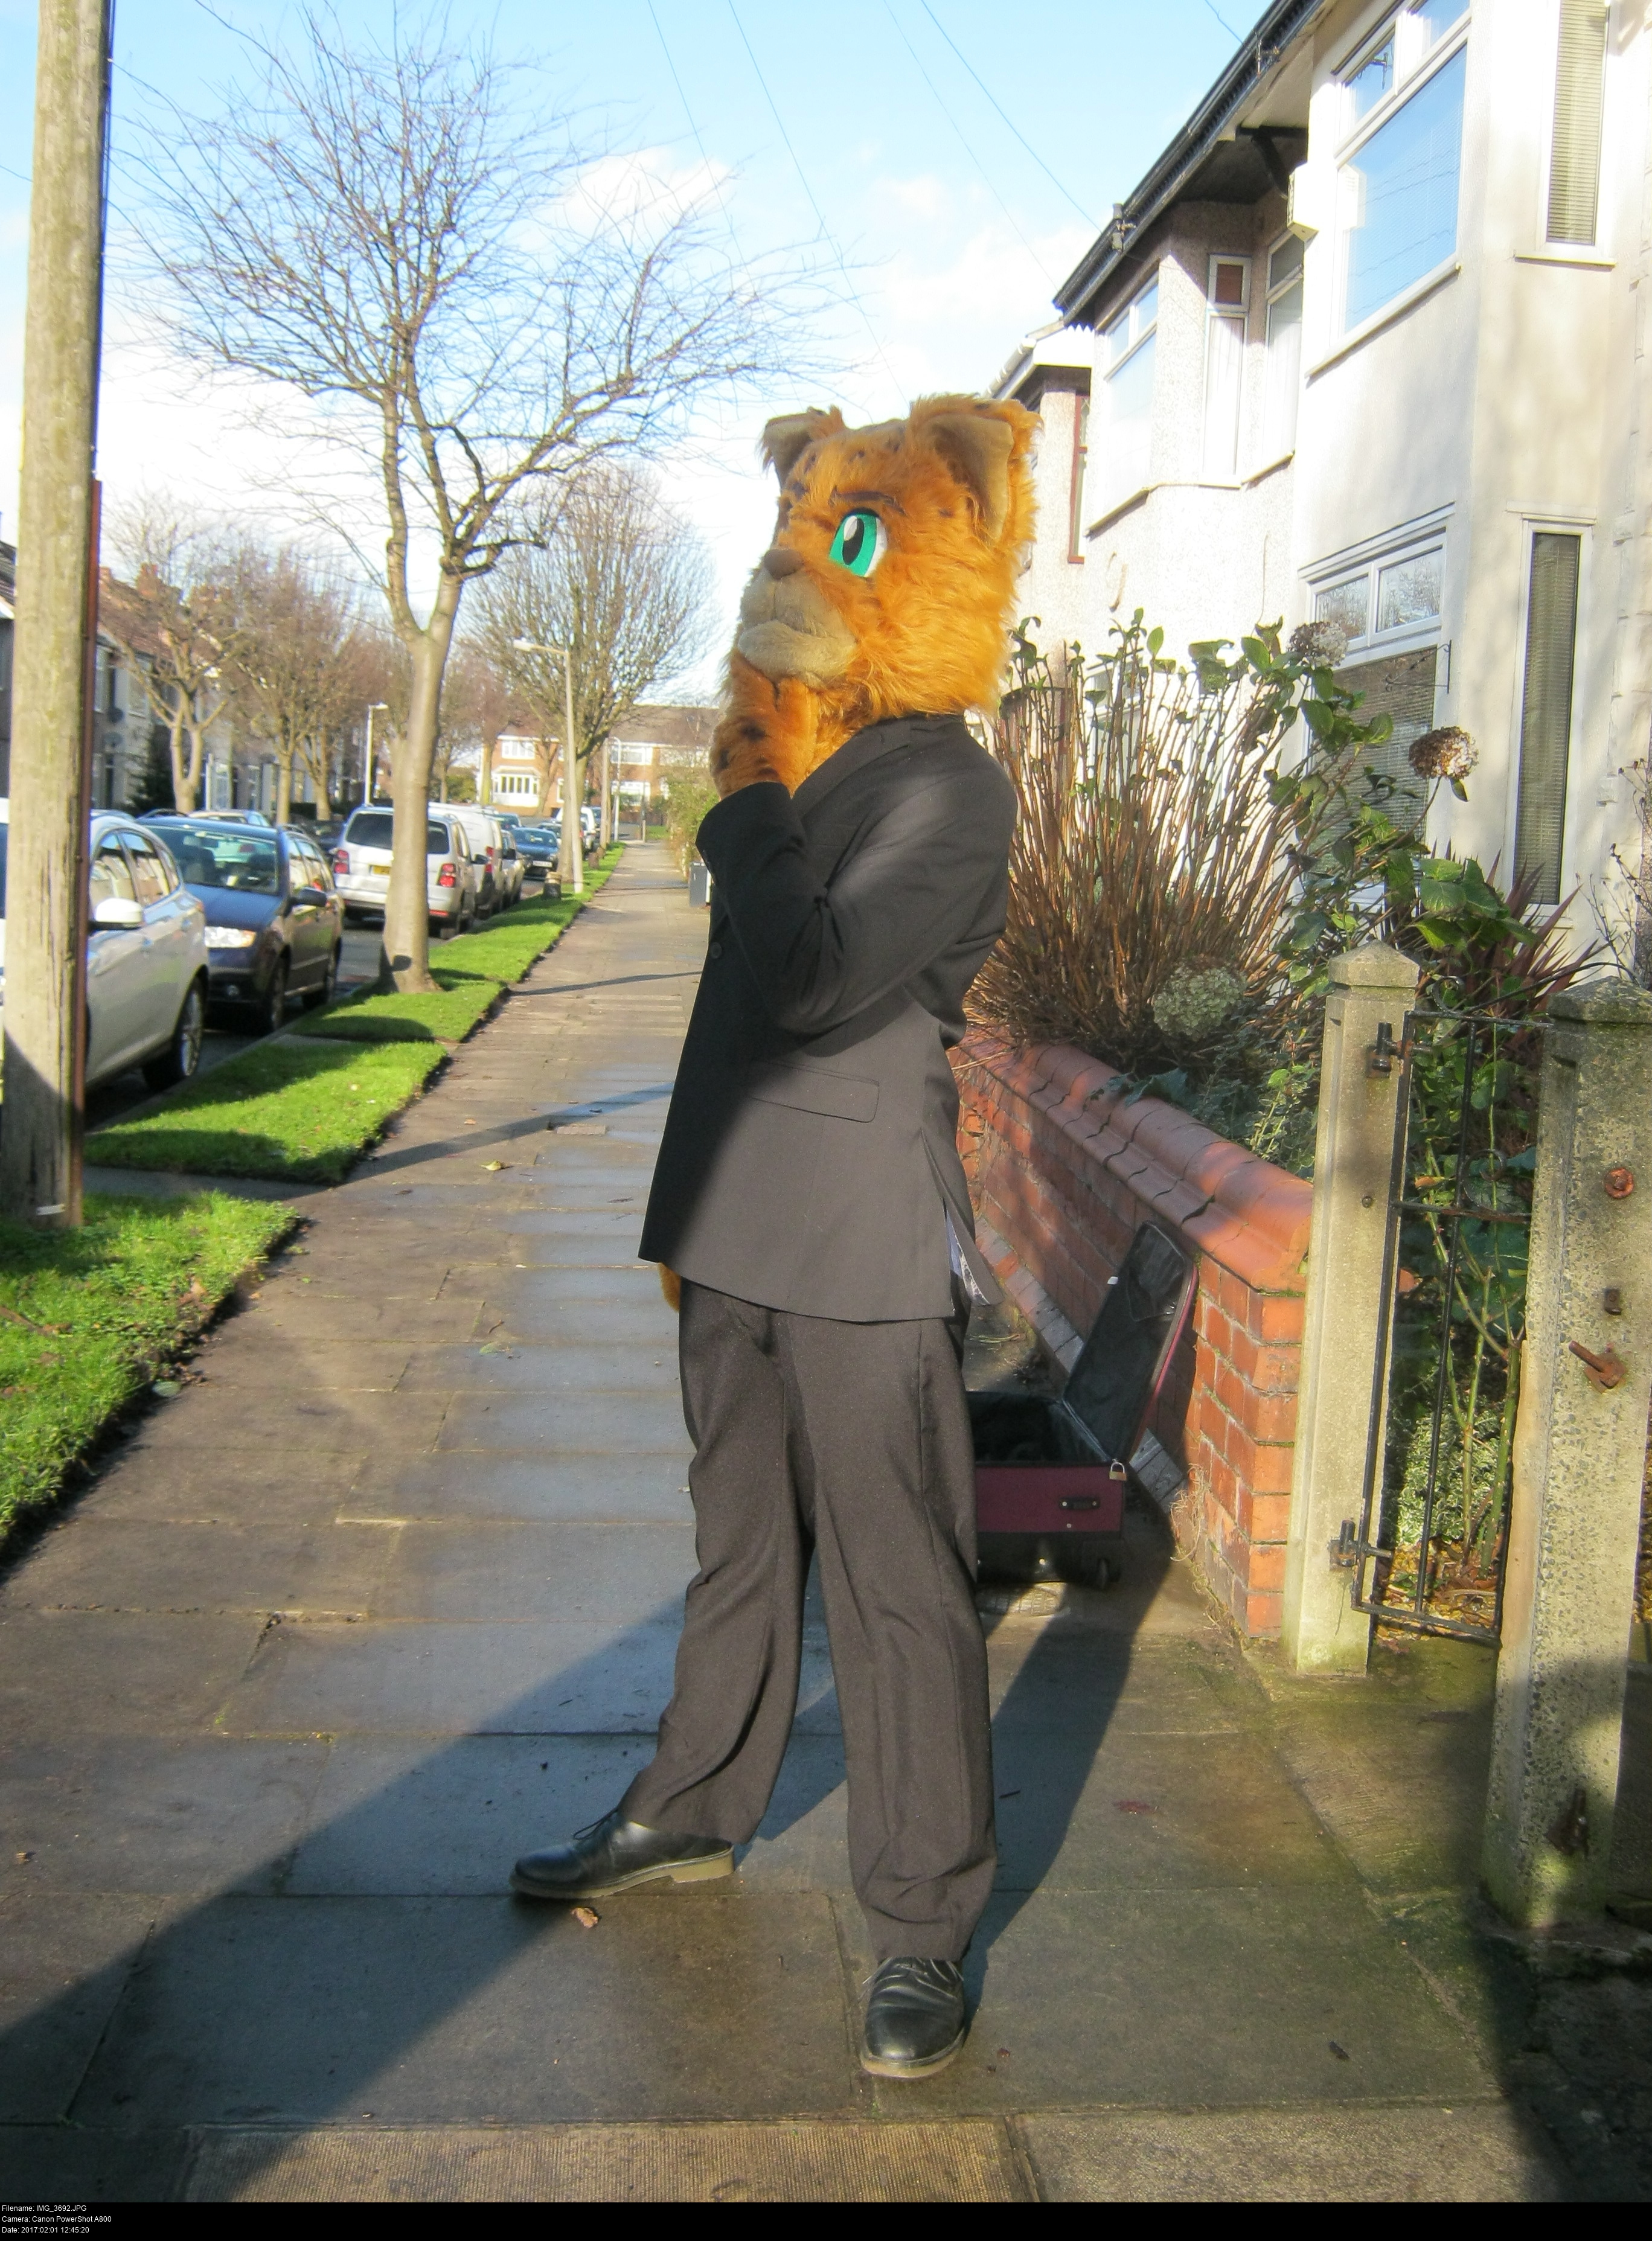
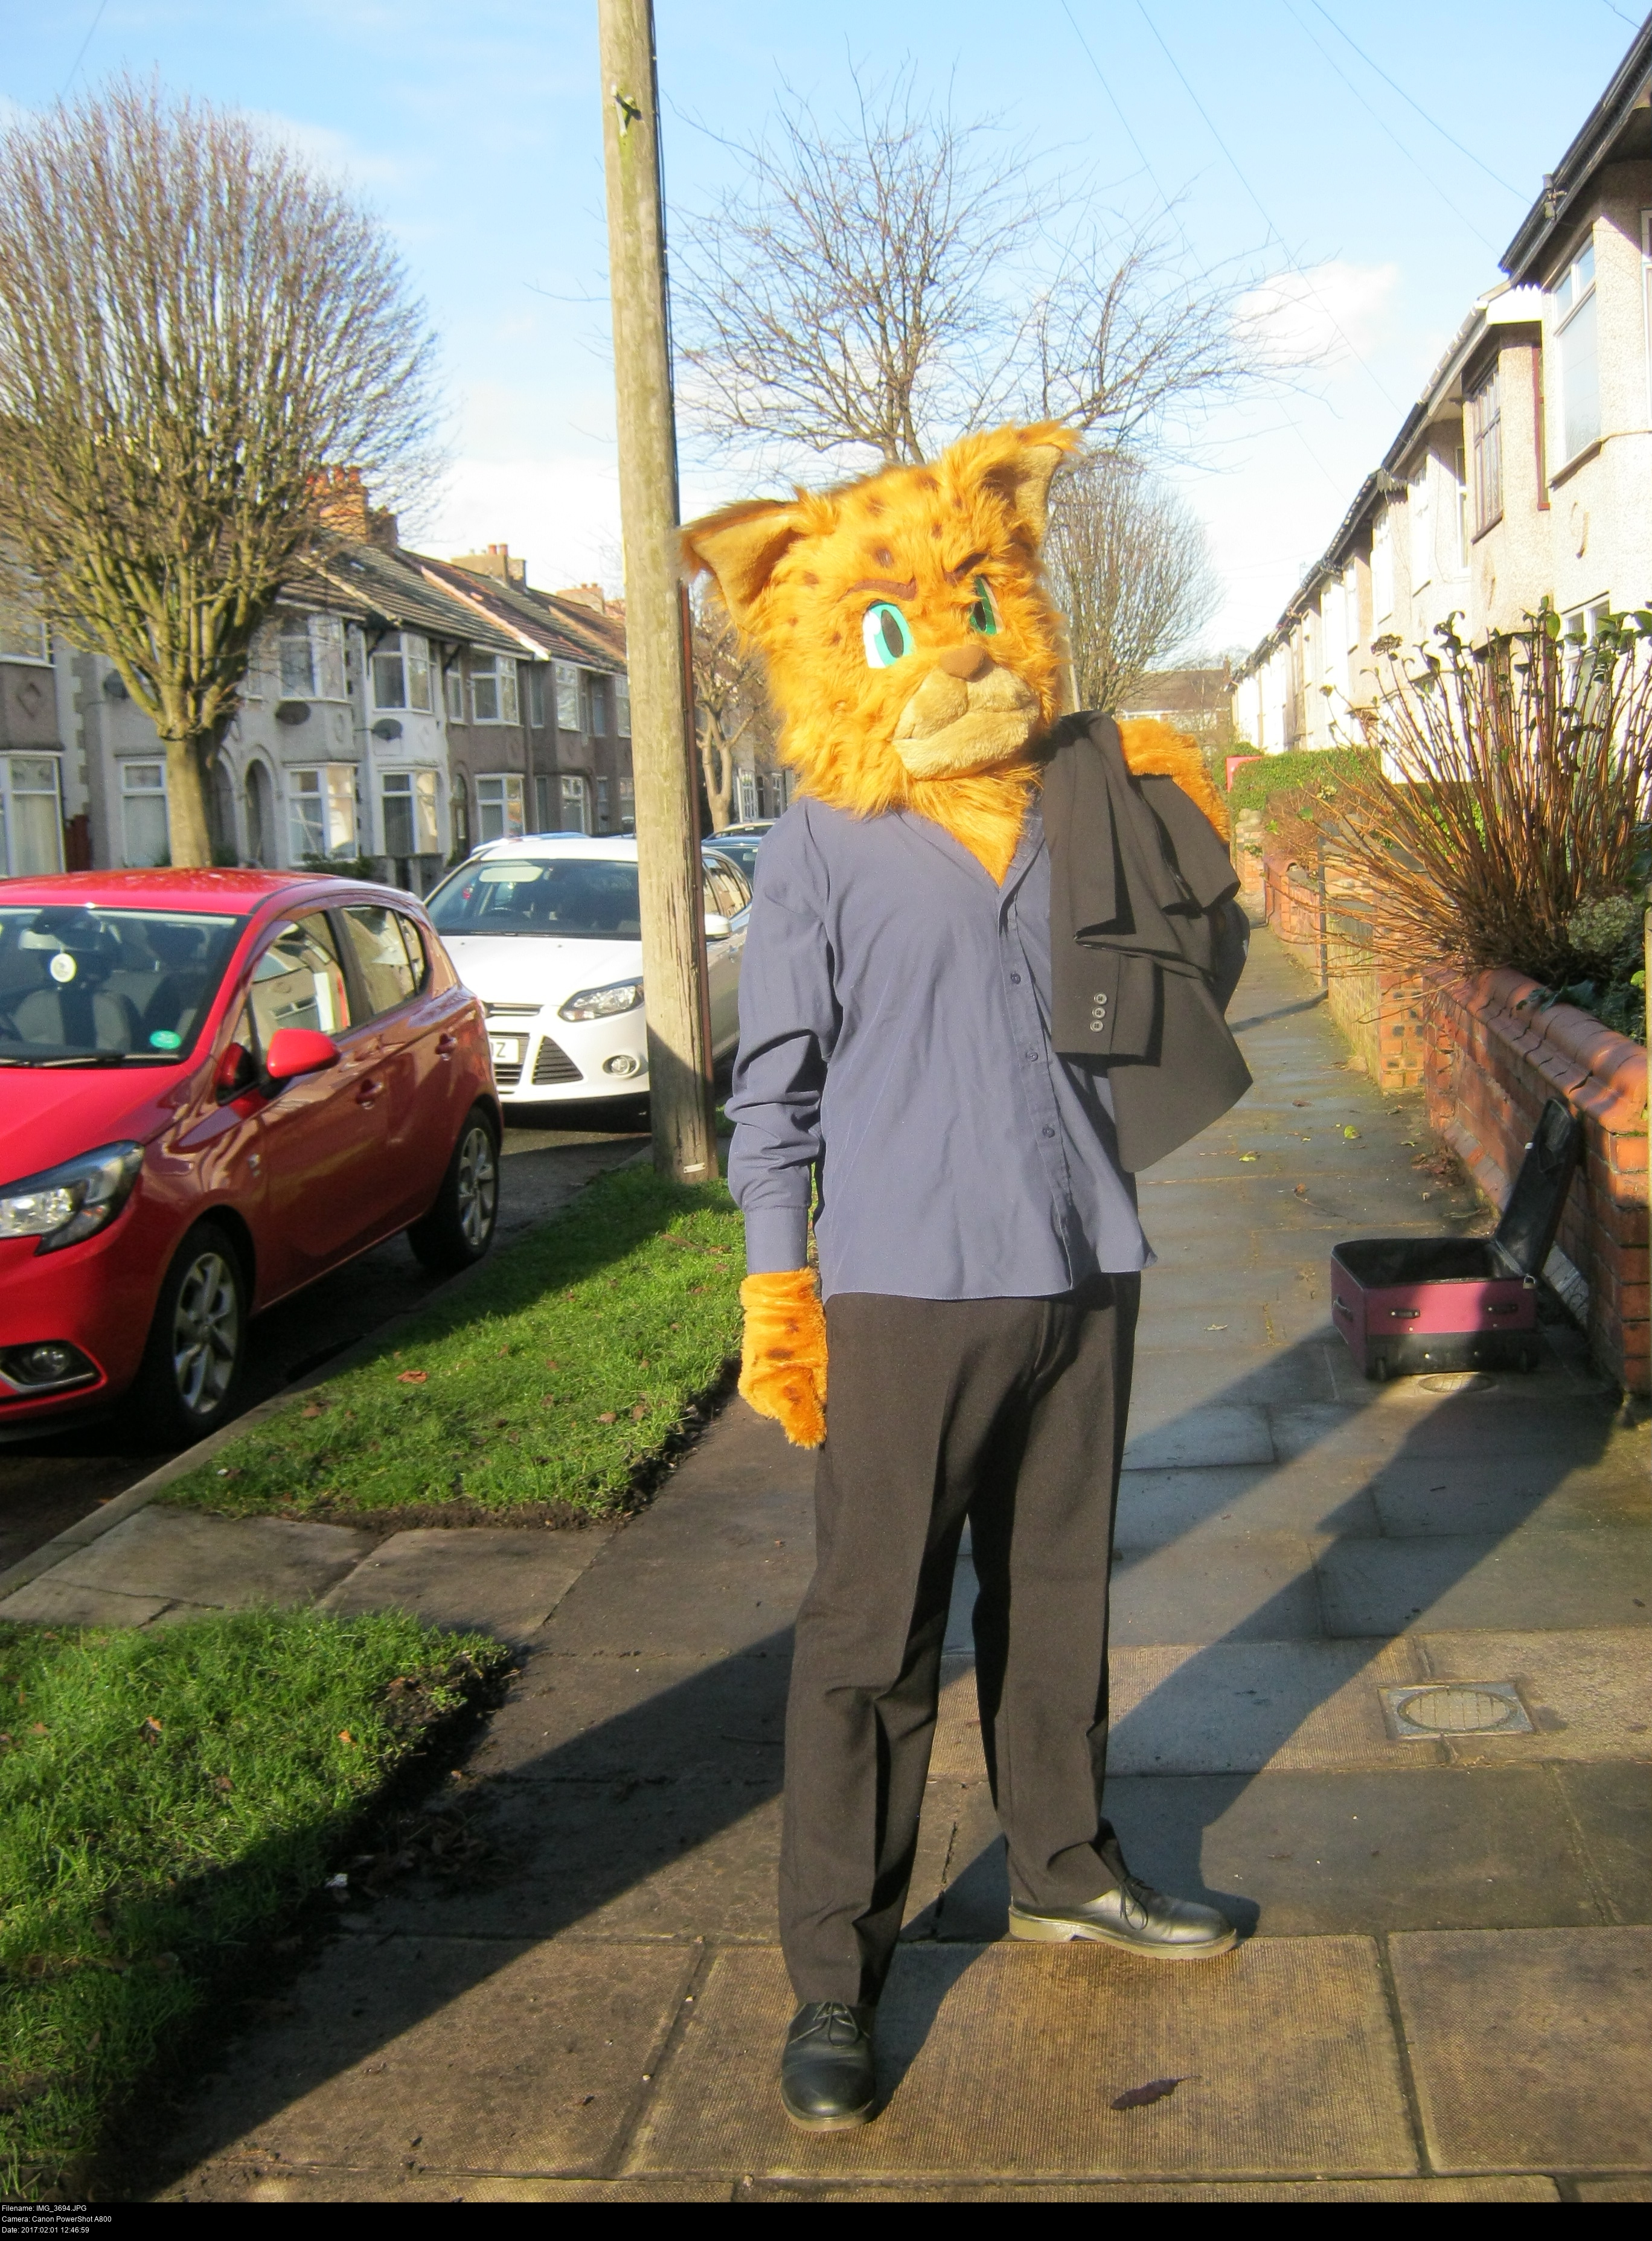
Yaaaaaay!! What a sight!
Try out all your poses and get your photographer (thanks, sis!) to take lots of pictures of you from all angles.
You're not only trying out how it looks, but how comfortable it is and how easy it is to put on and take off, and how you're going to store it.
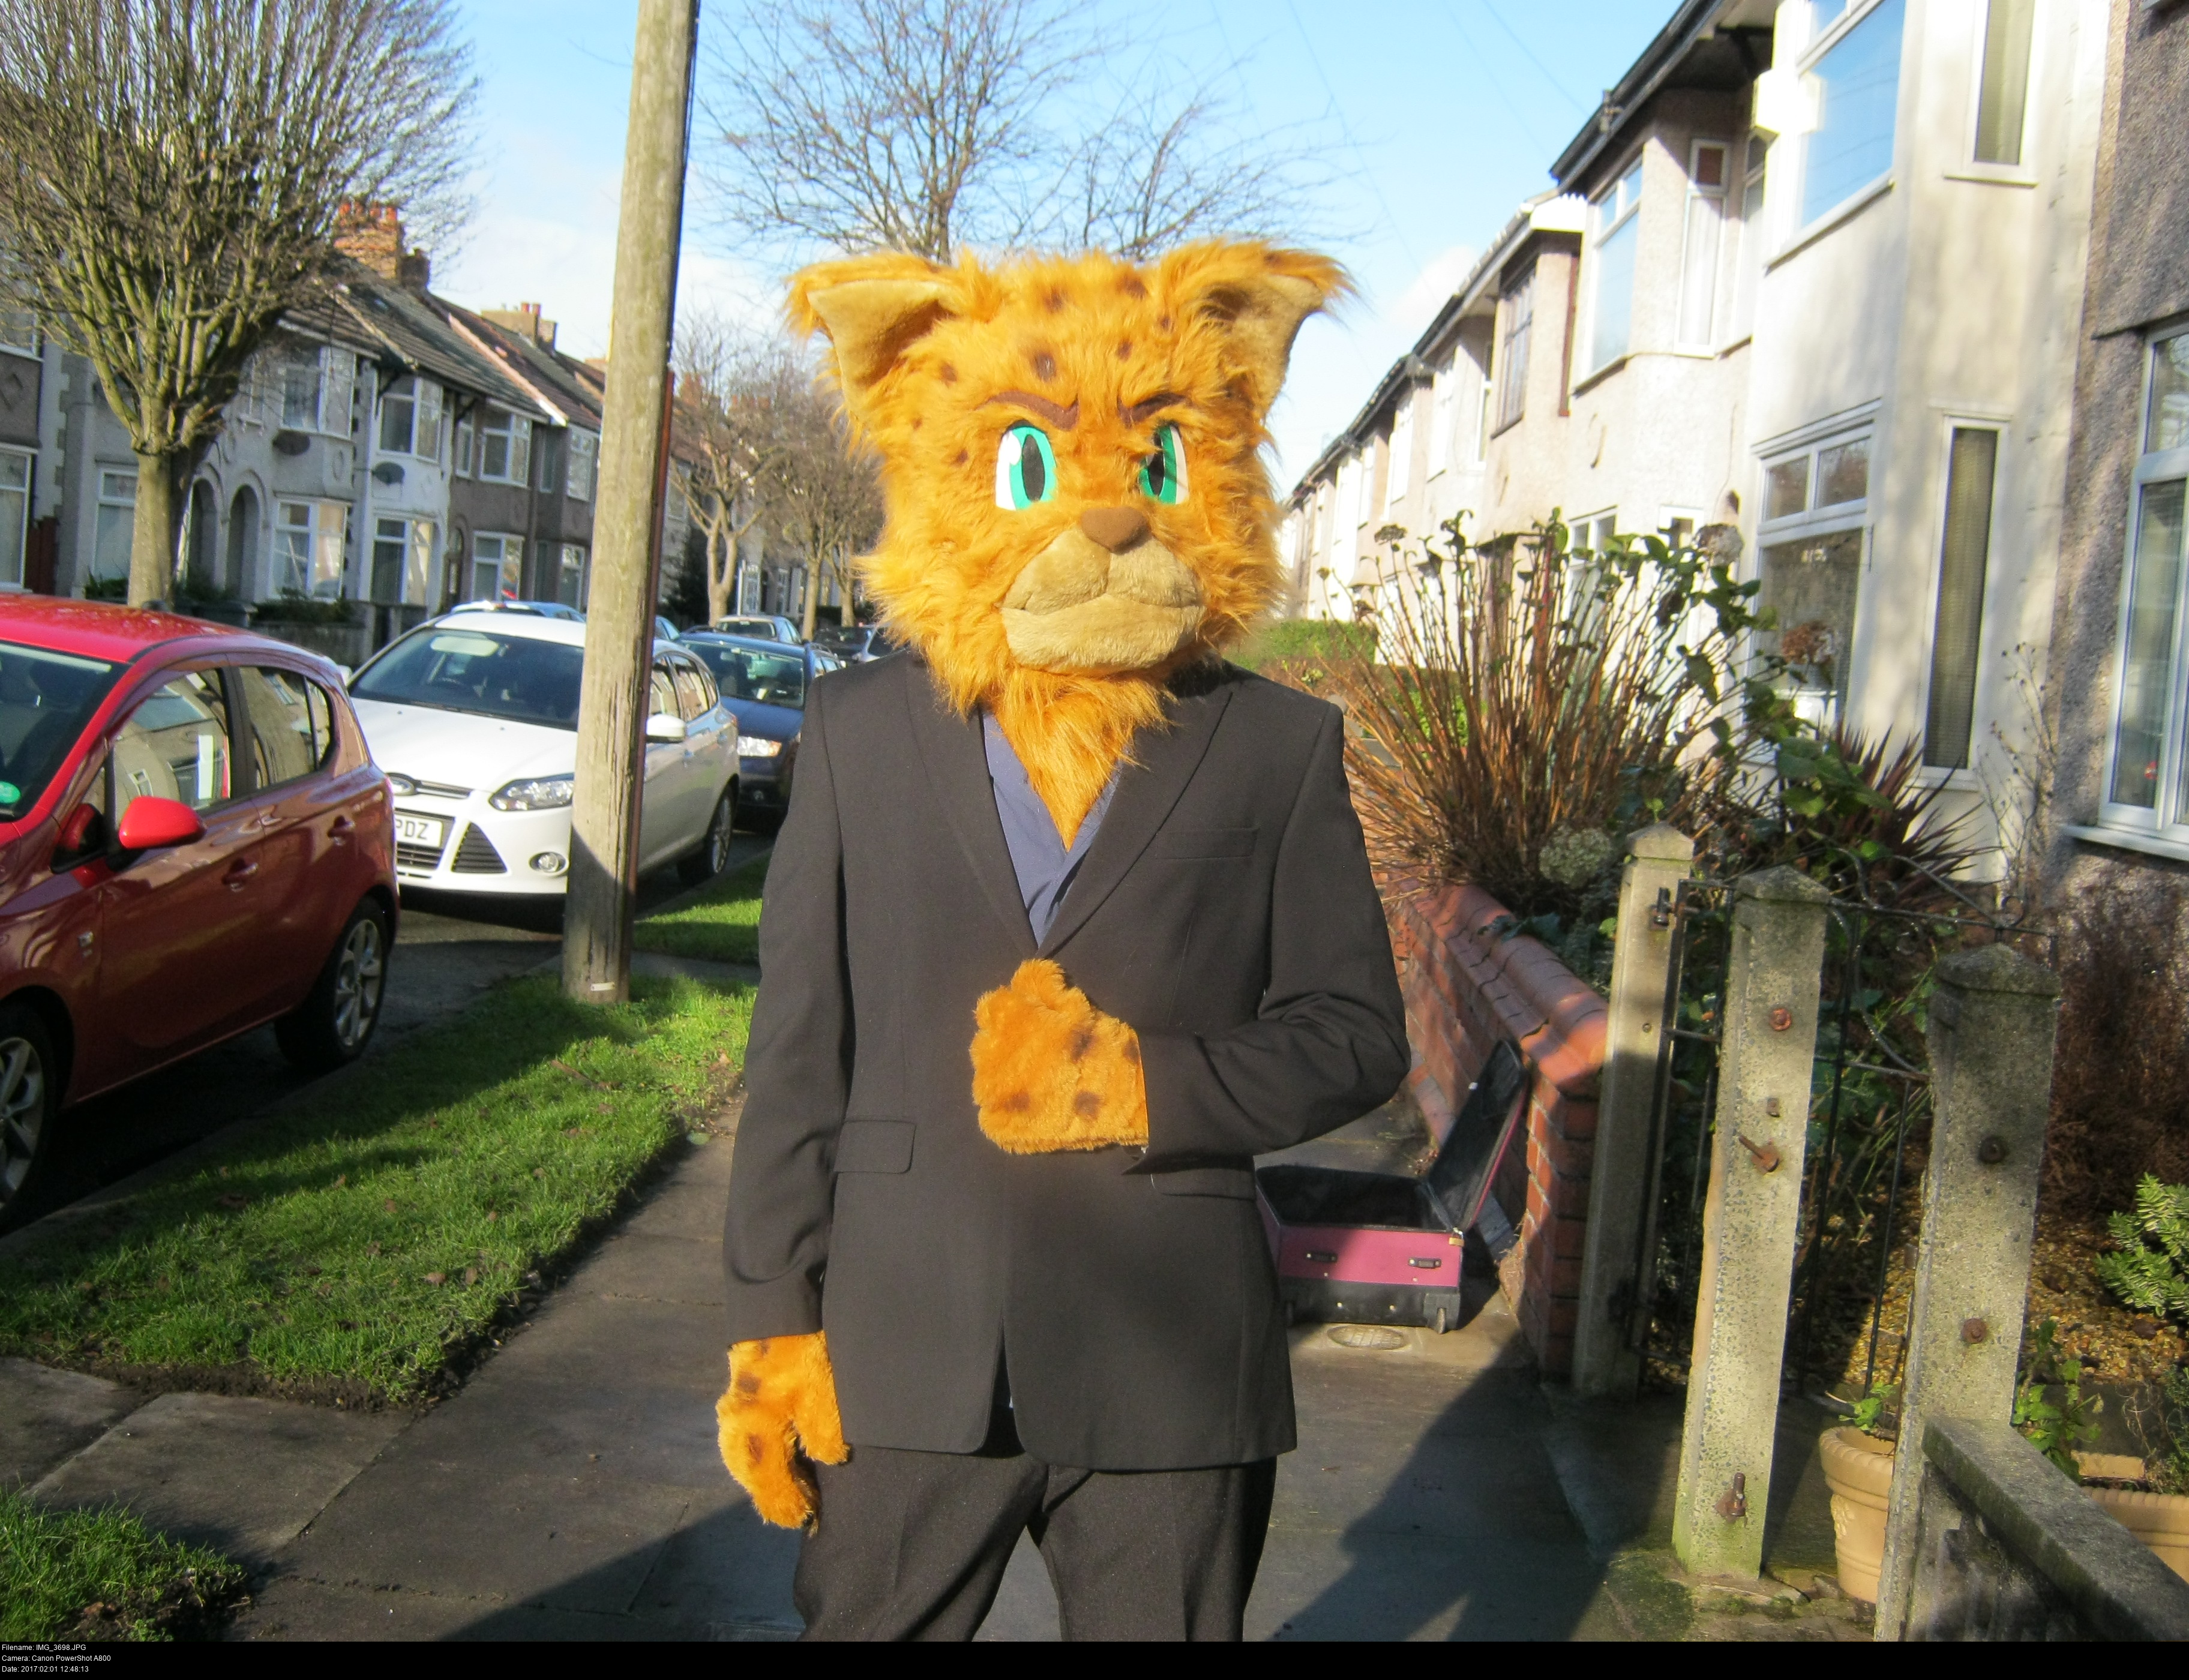
"I've been Hotshot the Overlynx, good night!"

Oh yeah, Hotshot's ready to save the Earth!
Wait a minute... he can't do aught without a gun!
So you've got a lovely head and a pair of nifty gloves, but what else could you make?
Many characters have some kind of props. Props give you an excuse to do something with your hands while you're getting your picture taken, and saves you having to think up poses yourself. What's Hotshot got?

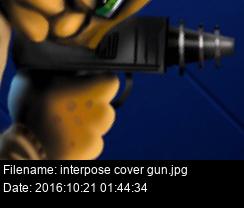
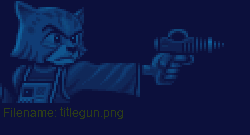
He's got a gun!
But... um...
Well, Interpose is a side-scrolling shoot-em-'up! There's no on-foot sections so you never play as the overlynx pilot wielding a gun!
I suppose it's like the Star Wars poster with Luke holding the lightsaber up when in the movie he spends most of the movie either flying or holding a blaster.
Getting references of real guns is smart, but bear in mind that this overlynx pistol is a pulpy sci-fi nonsense cartoon gun.
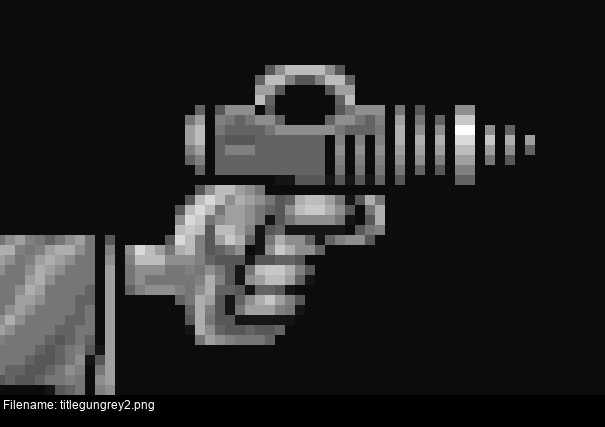
Let's describe the overlynx pistol:
Black metallic finish.
The main body of the gun is rather chunky and box-like.
Above the grip is either a transparent dome or a kind of rail. Unfortunately the back of the gun is obscured by the overlynx' head in the colour illustration!
Along the side of the gun above the grip are a series of vertical notches that become more dense near the emitter.
Emitter barrel is a metallic cone going from chunky at the gun end to narrow at the far end.
The emitter has three large concentric rings equally spaced down its length.
The back of the gun has a rounded detail.
There's a rounded trigger guard.

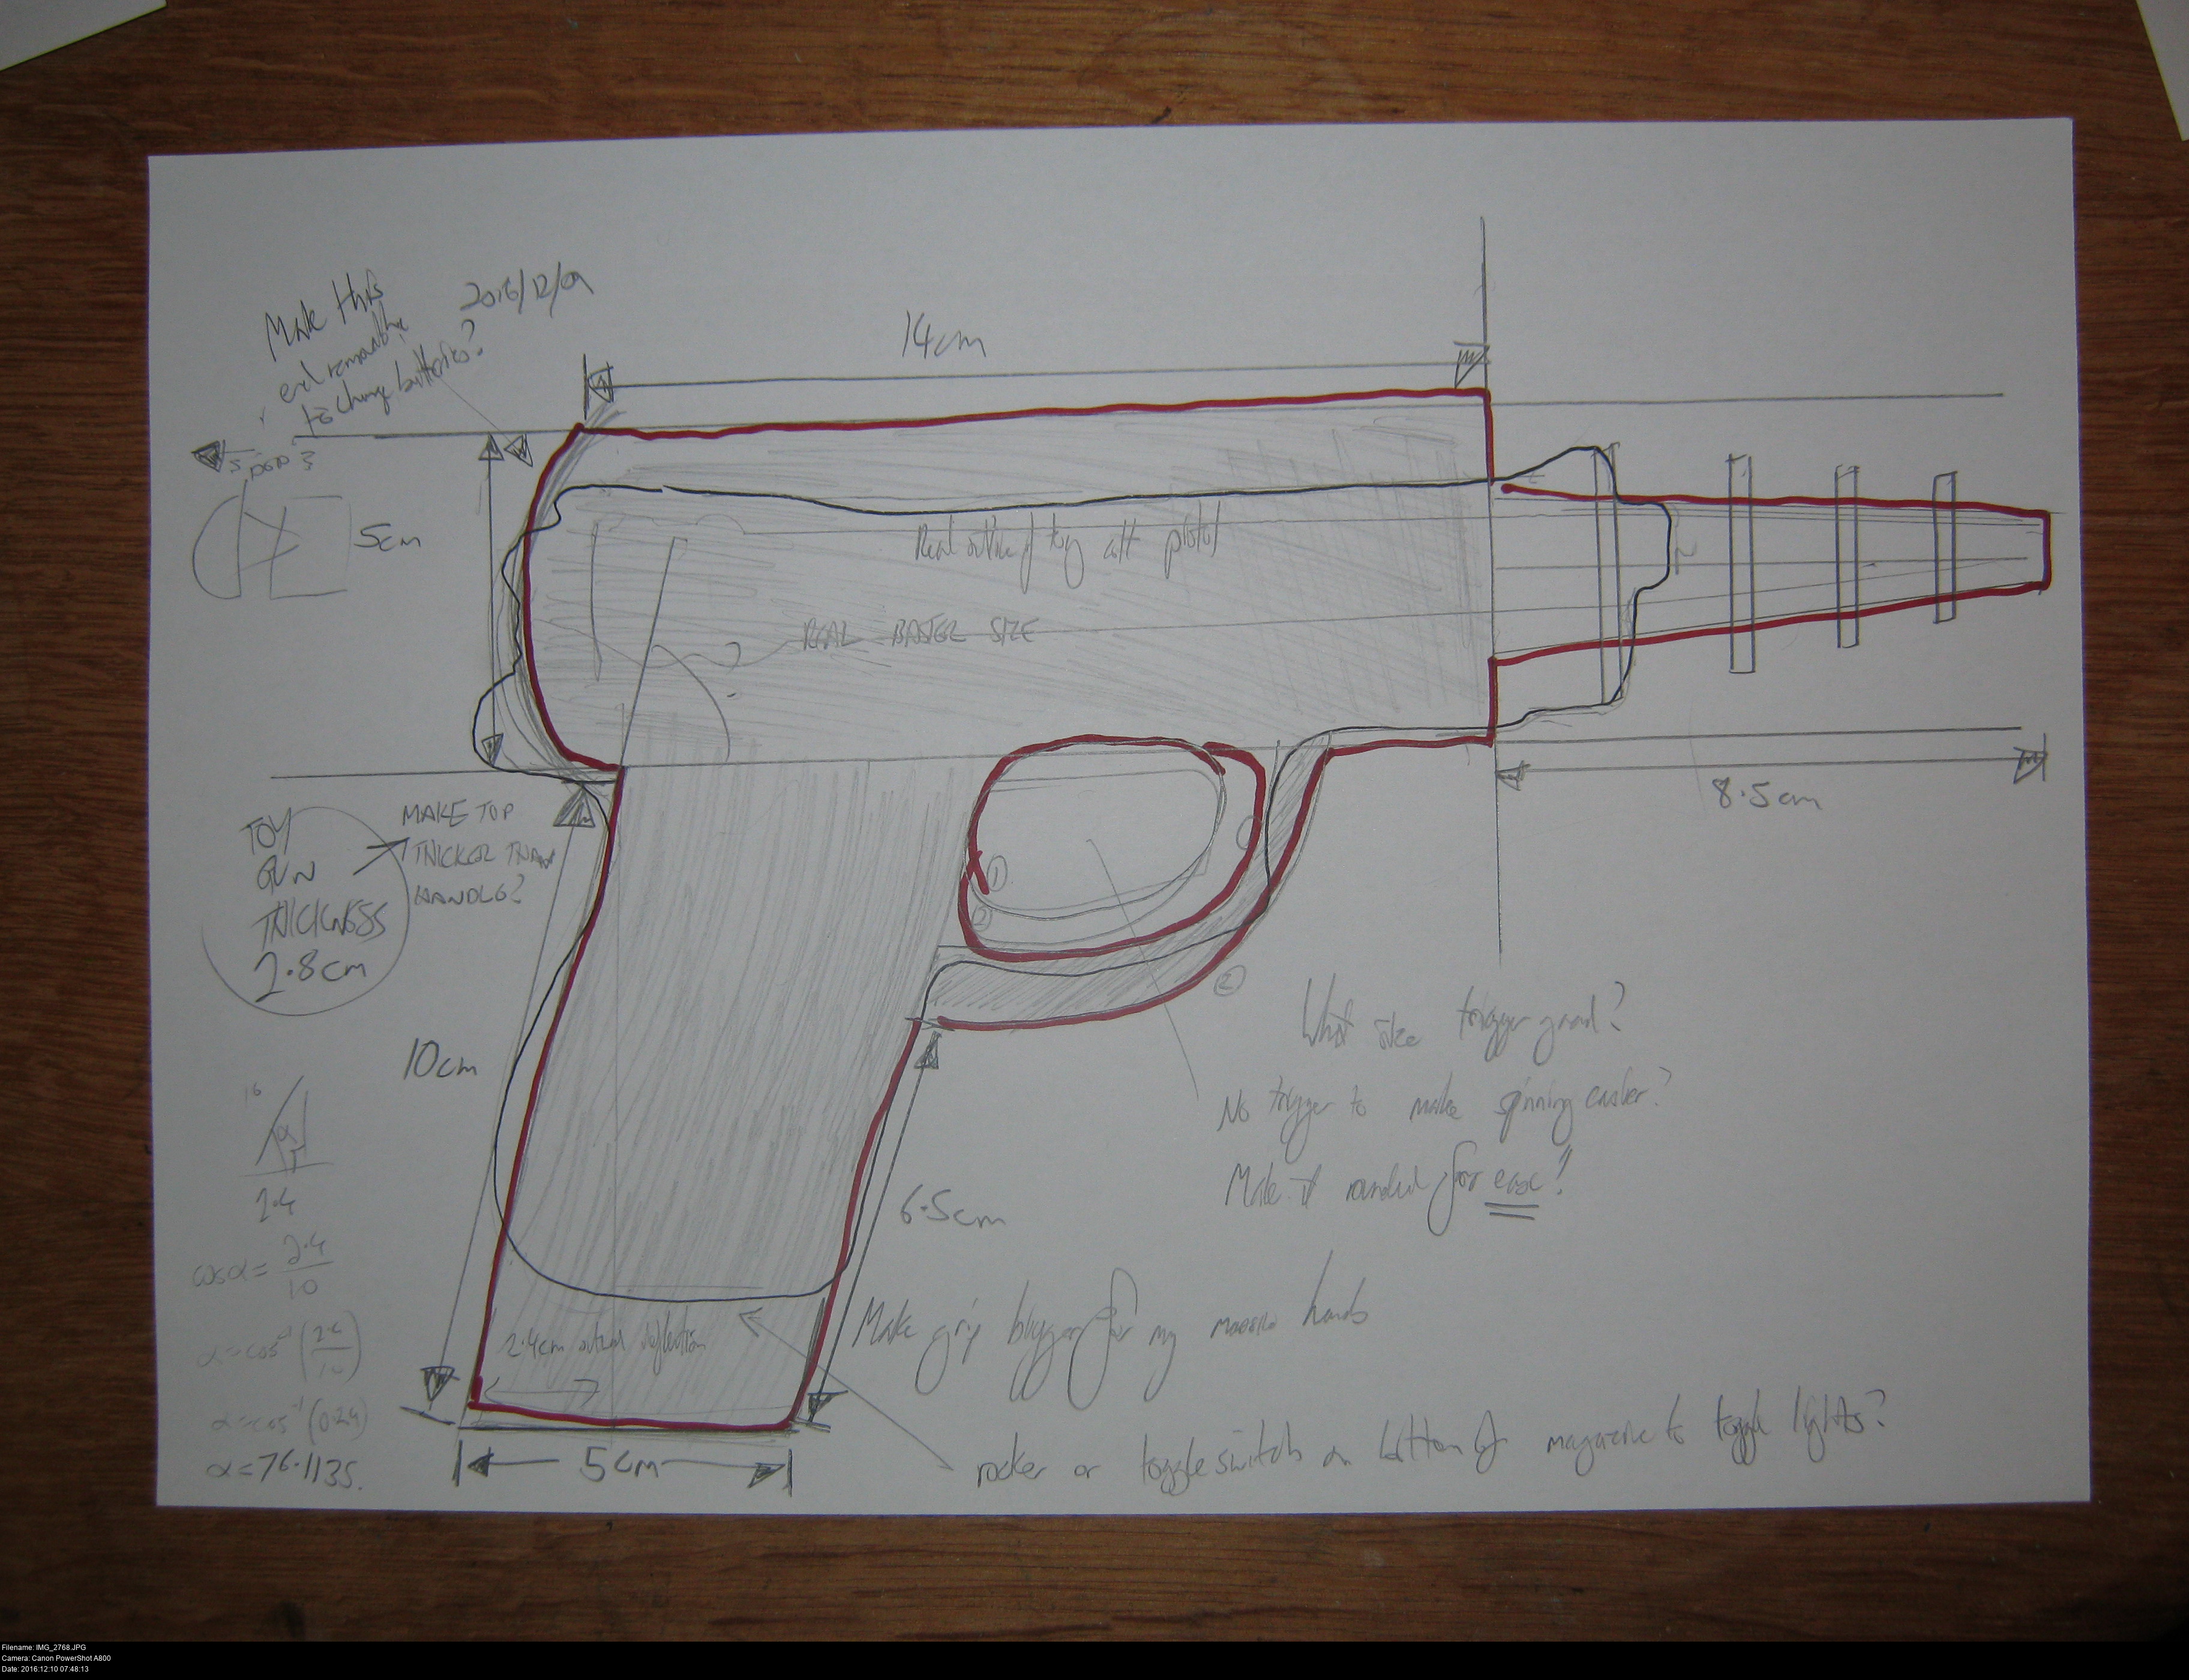

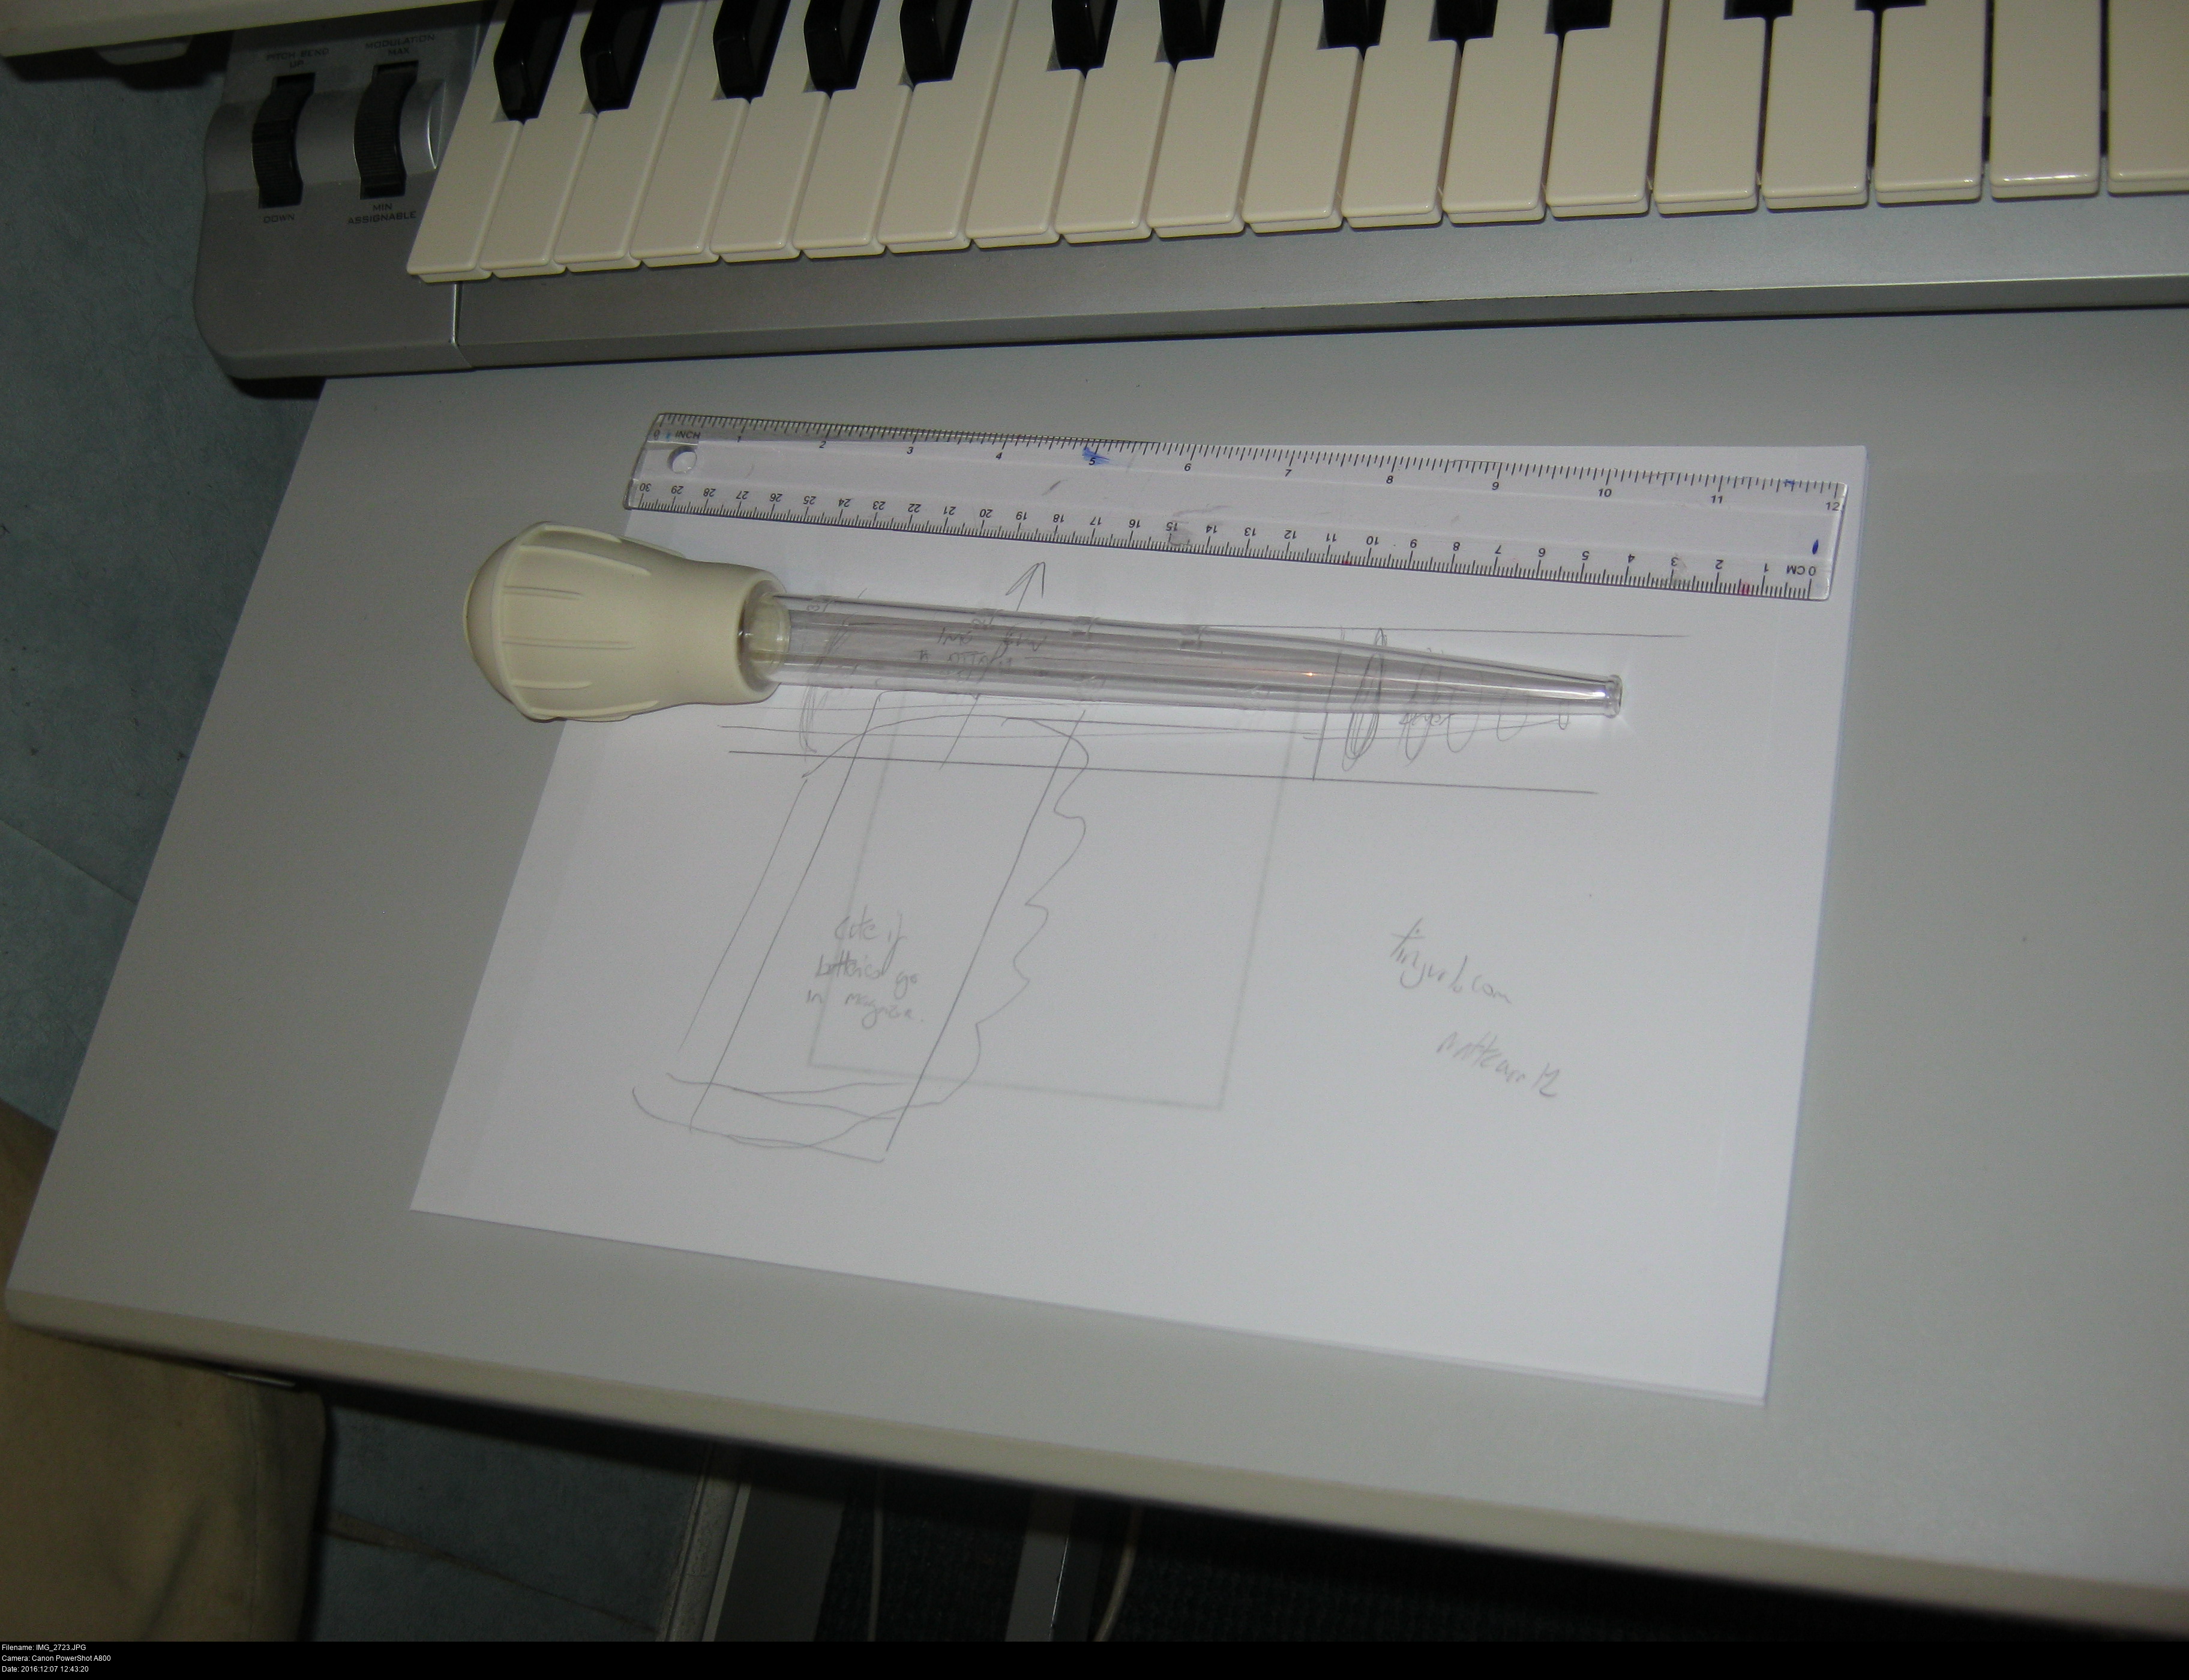

Draw, measure, cut out paper templates, try, draw, measure! Engineering, not art.
My gun is going to be made out of two cuboid shapes and a rounded trigger guard:
The topmost box is the main body of the gun, holding the emitter barrel inside it.
The lowermost box is the grip of the gun.
The trigger guard piece will fit into a slot in the grip, and together these two pieces will slot into the main body.
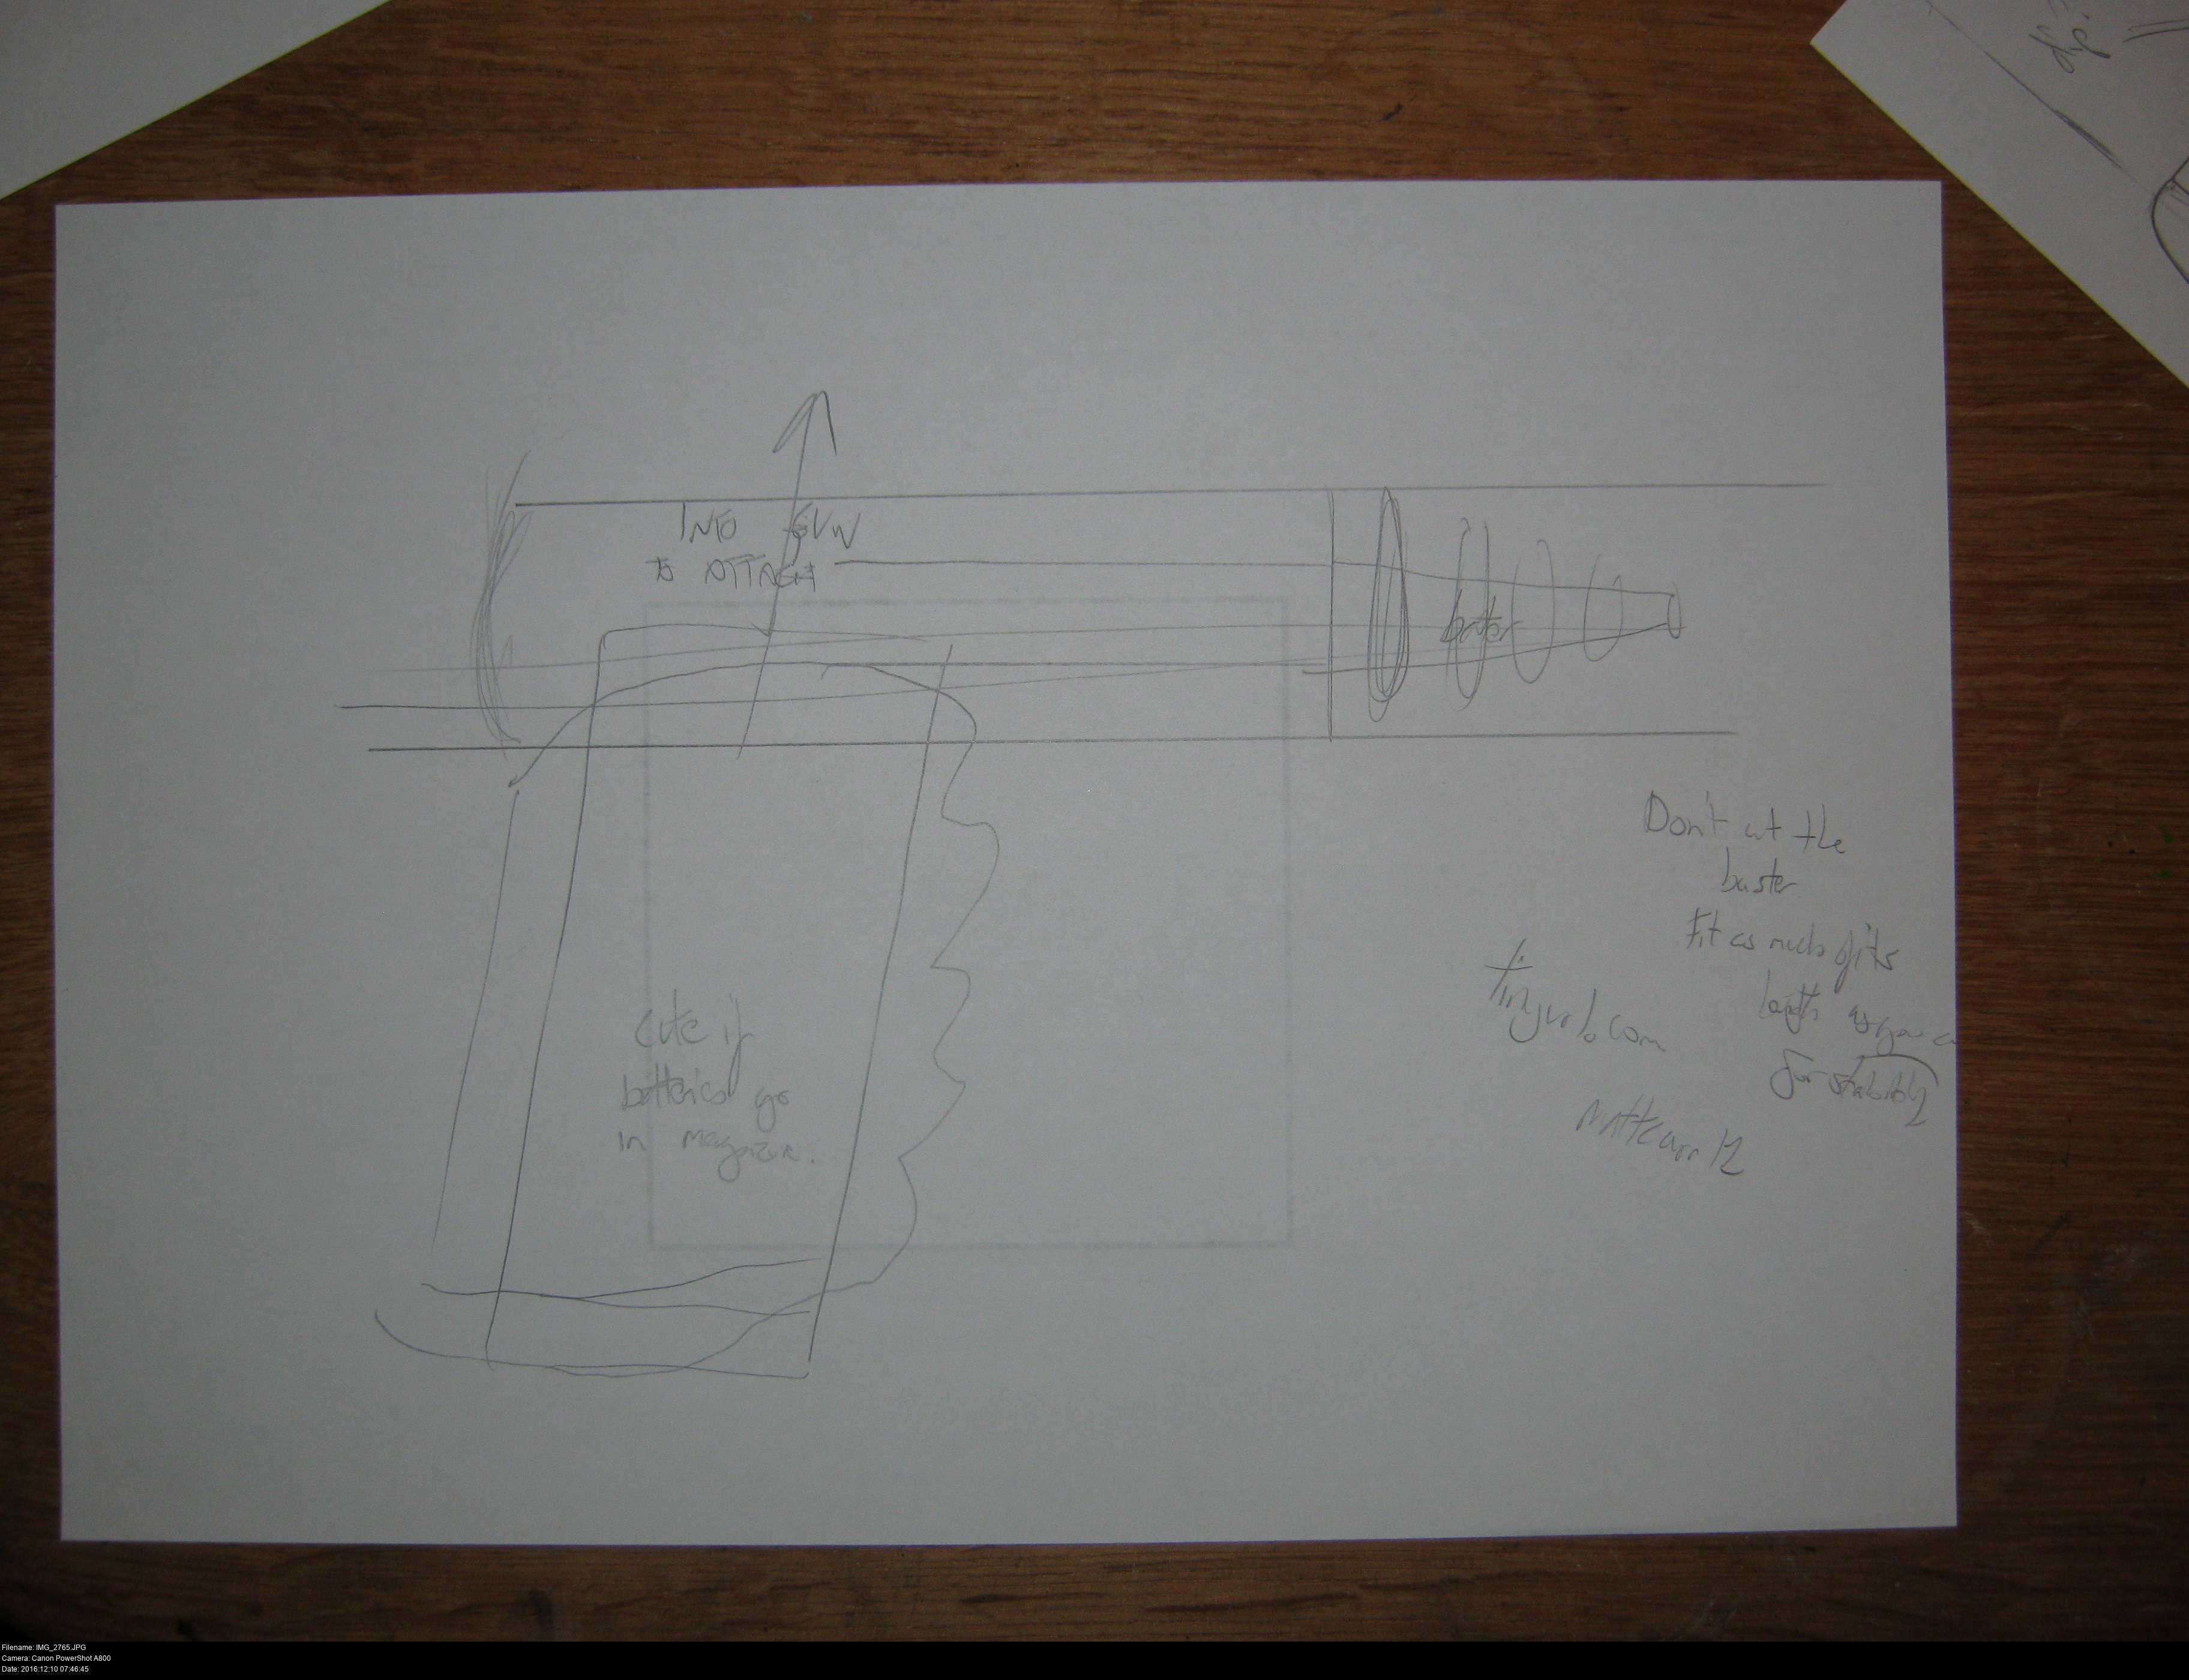
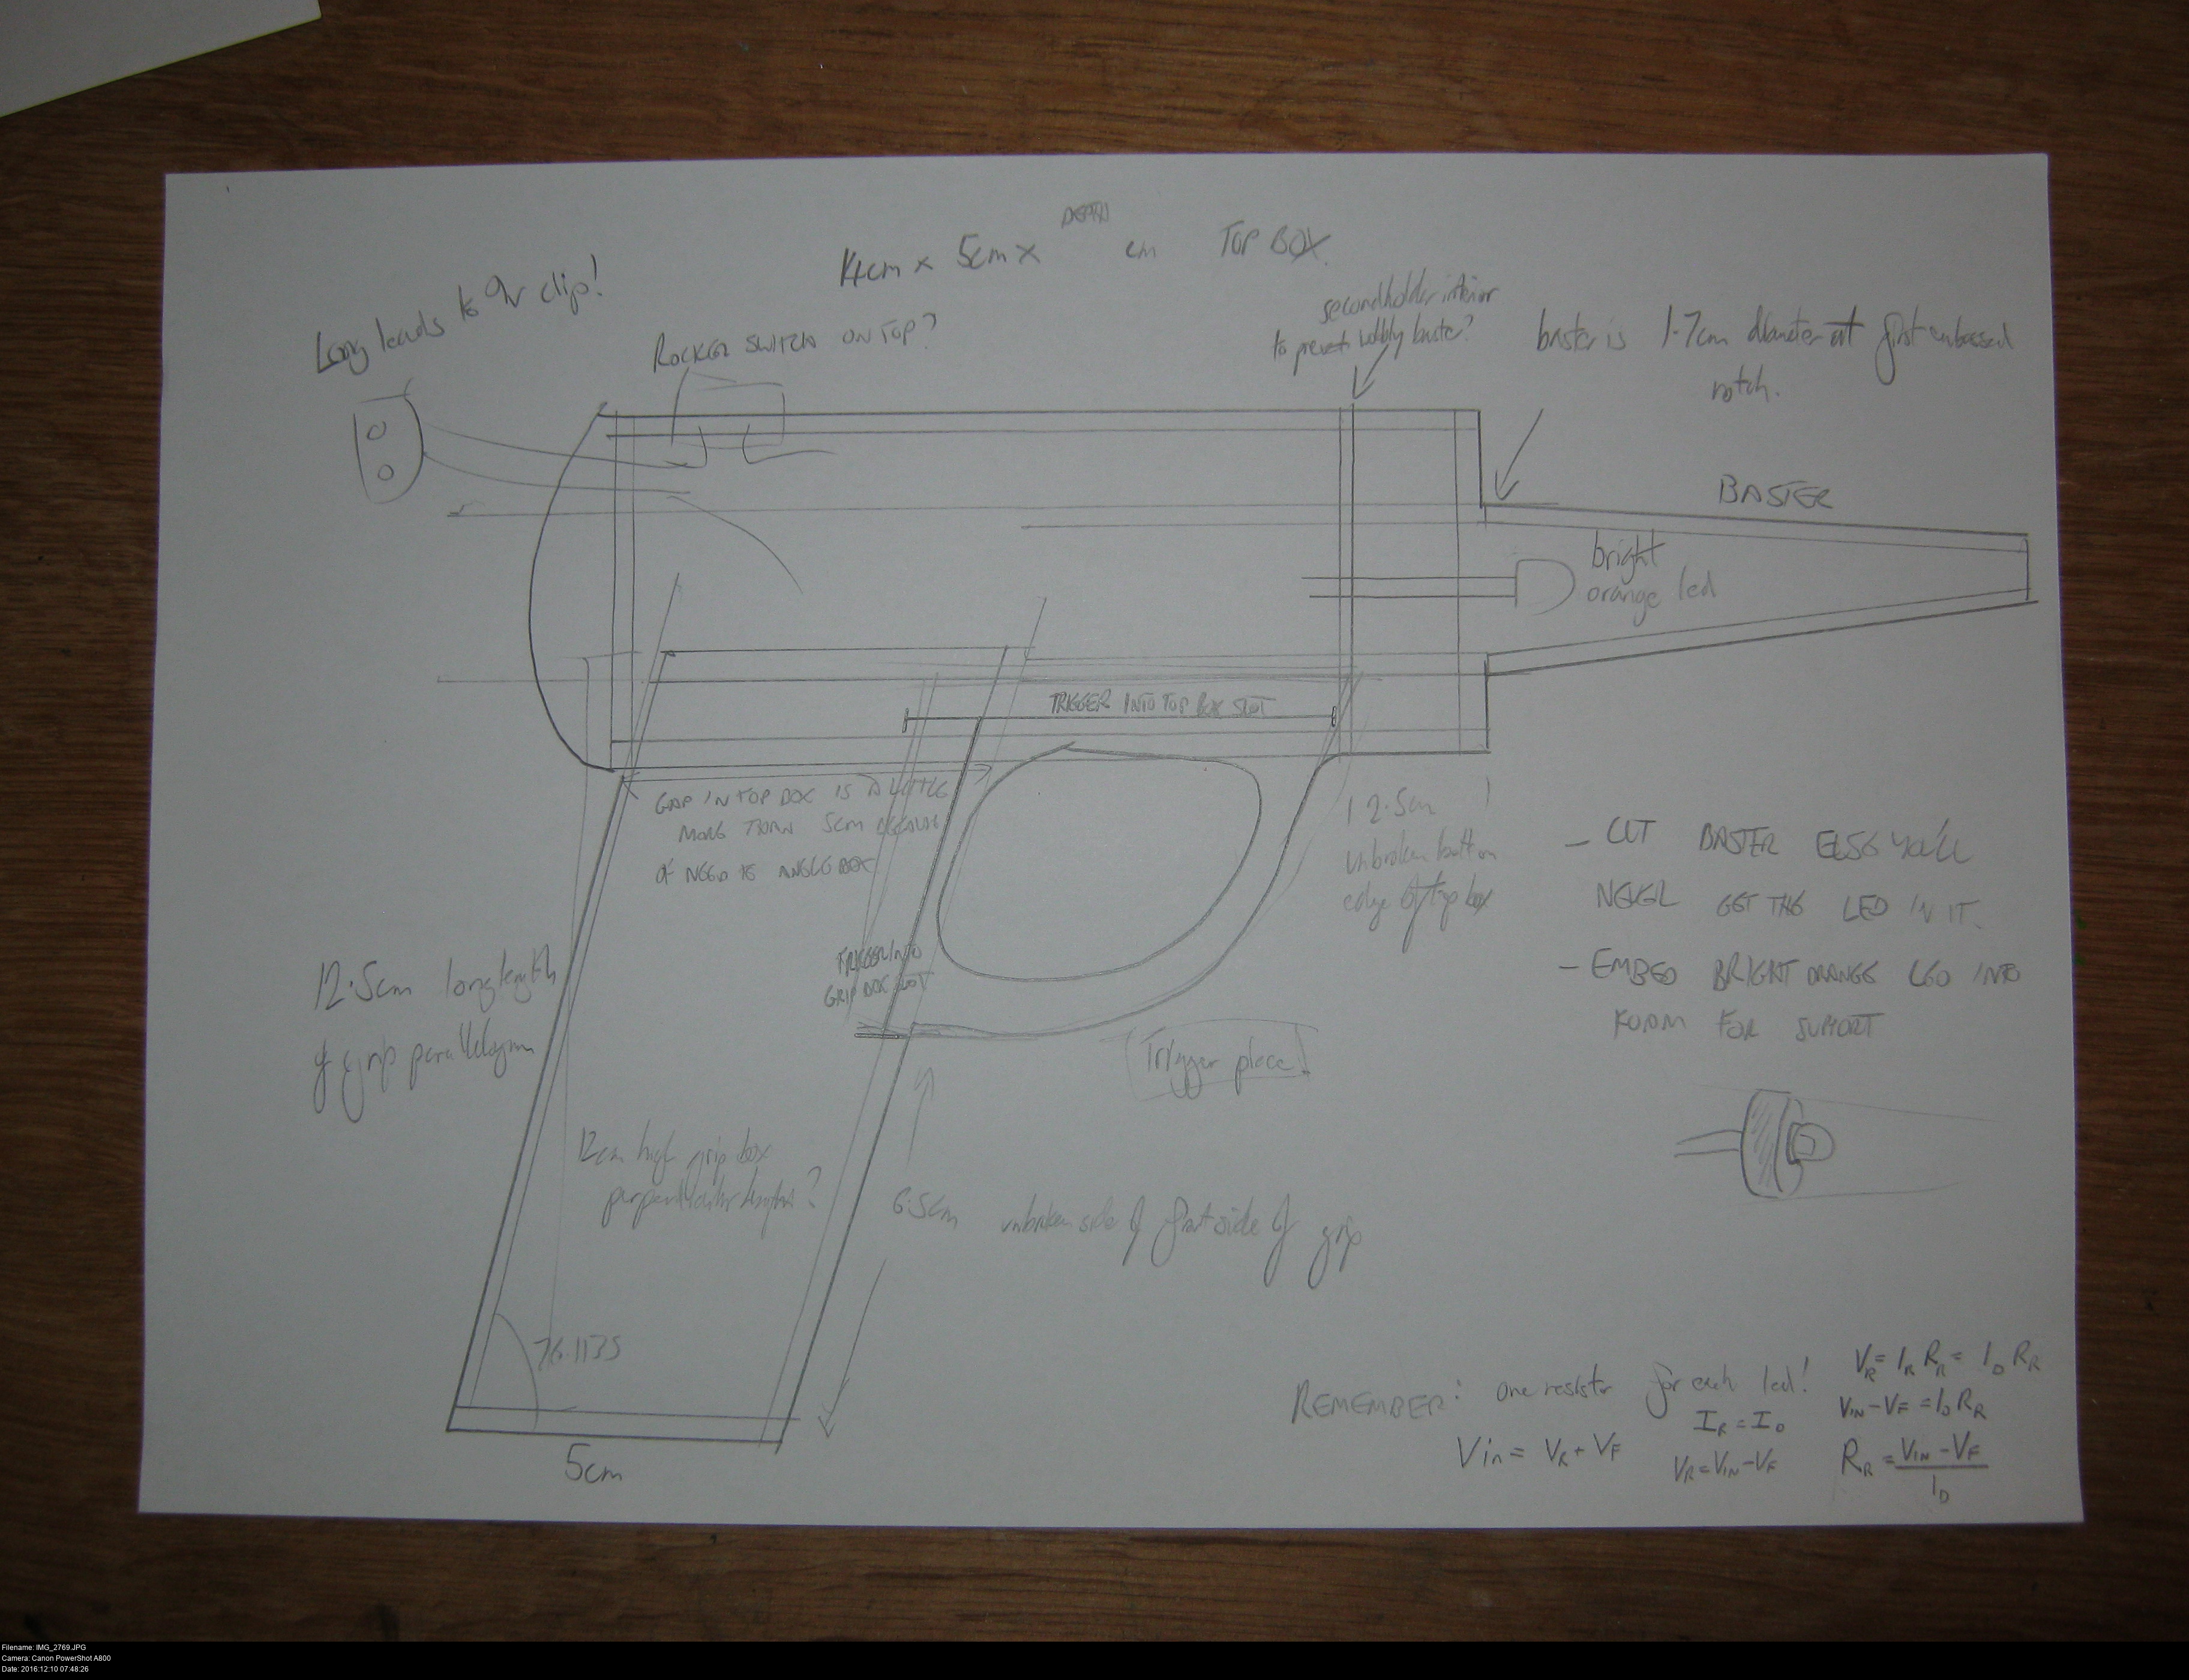
That long plastic rod is a turkey baster, almost exactly what I need to make the emitter barrel of the pistol. Since it's transparent, I could even put a light in there so the gun lights up when I pull the trigger...
I don't know what I'm going to do about the dome though. Is it a plastic dome? How does it attach to the rest of the gun? Or is it just a pair of arched rails making a little bridge across the gun? Metal? Plastic? Any way I think of it it sounds fragile.
And if I put a light in the emitter, where am I going to put the battery? I guess the logical place would either be in the side of the gun (so it would have a catch flap like a toy, which would give me the notches I want) or in the grip (which is just plain classy).
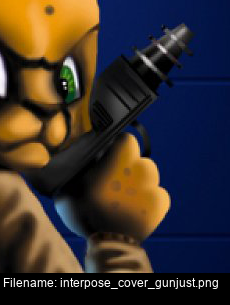
You should constantly make paper templates to verify that the size of your gun makes sense. Don't just make your props match the size of real toy guns, because they're usually slightly smaller than real guns anyway, but also you're not making a real gun!
This cartoony gun has exaggerated proportions compared to a real gun: the top box is larger and chunkier (and there's no telling how wide it could be) and the emitter could be any size and made out of anything.
Remember I'm going to be wearing big ol' chunky furry gloves while chucking this gun about. Hotshot's big hands mean that the grip has to be extended downwards if I want it to be visible below his fist, and the trigger guard has to be large enough to accomodate a gloved finger.
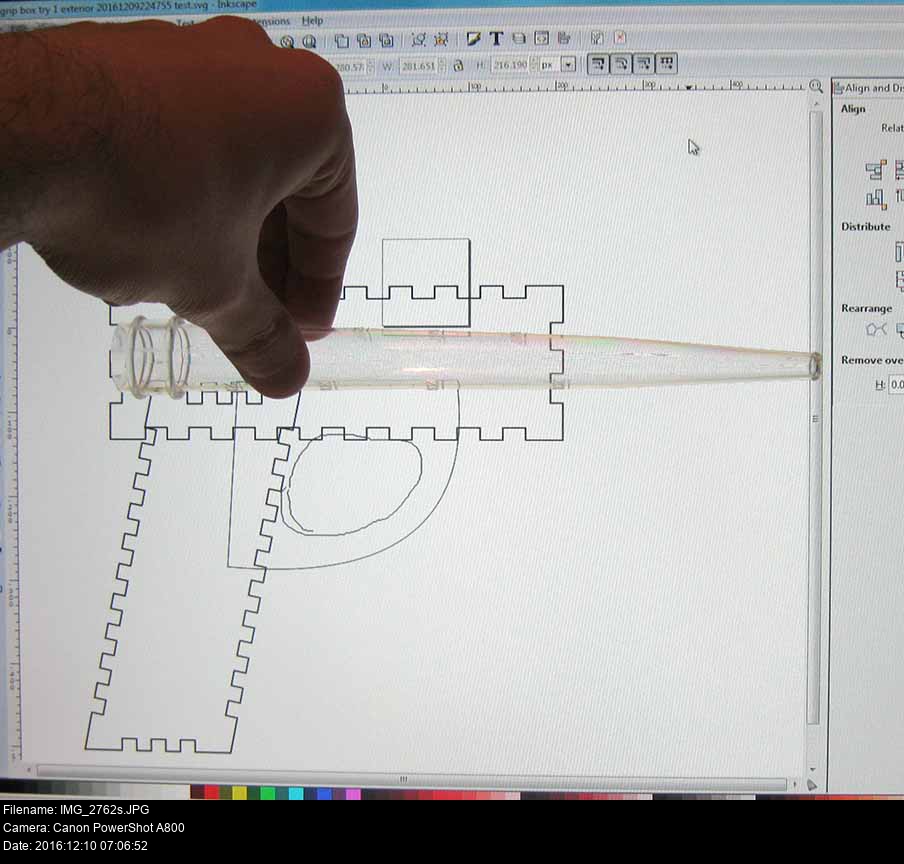
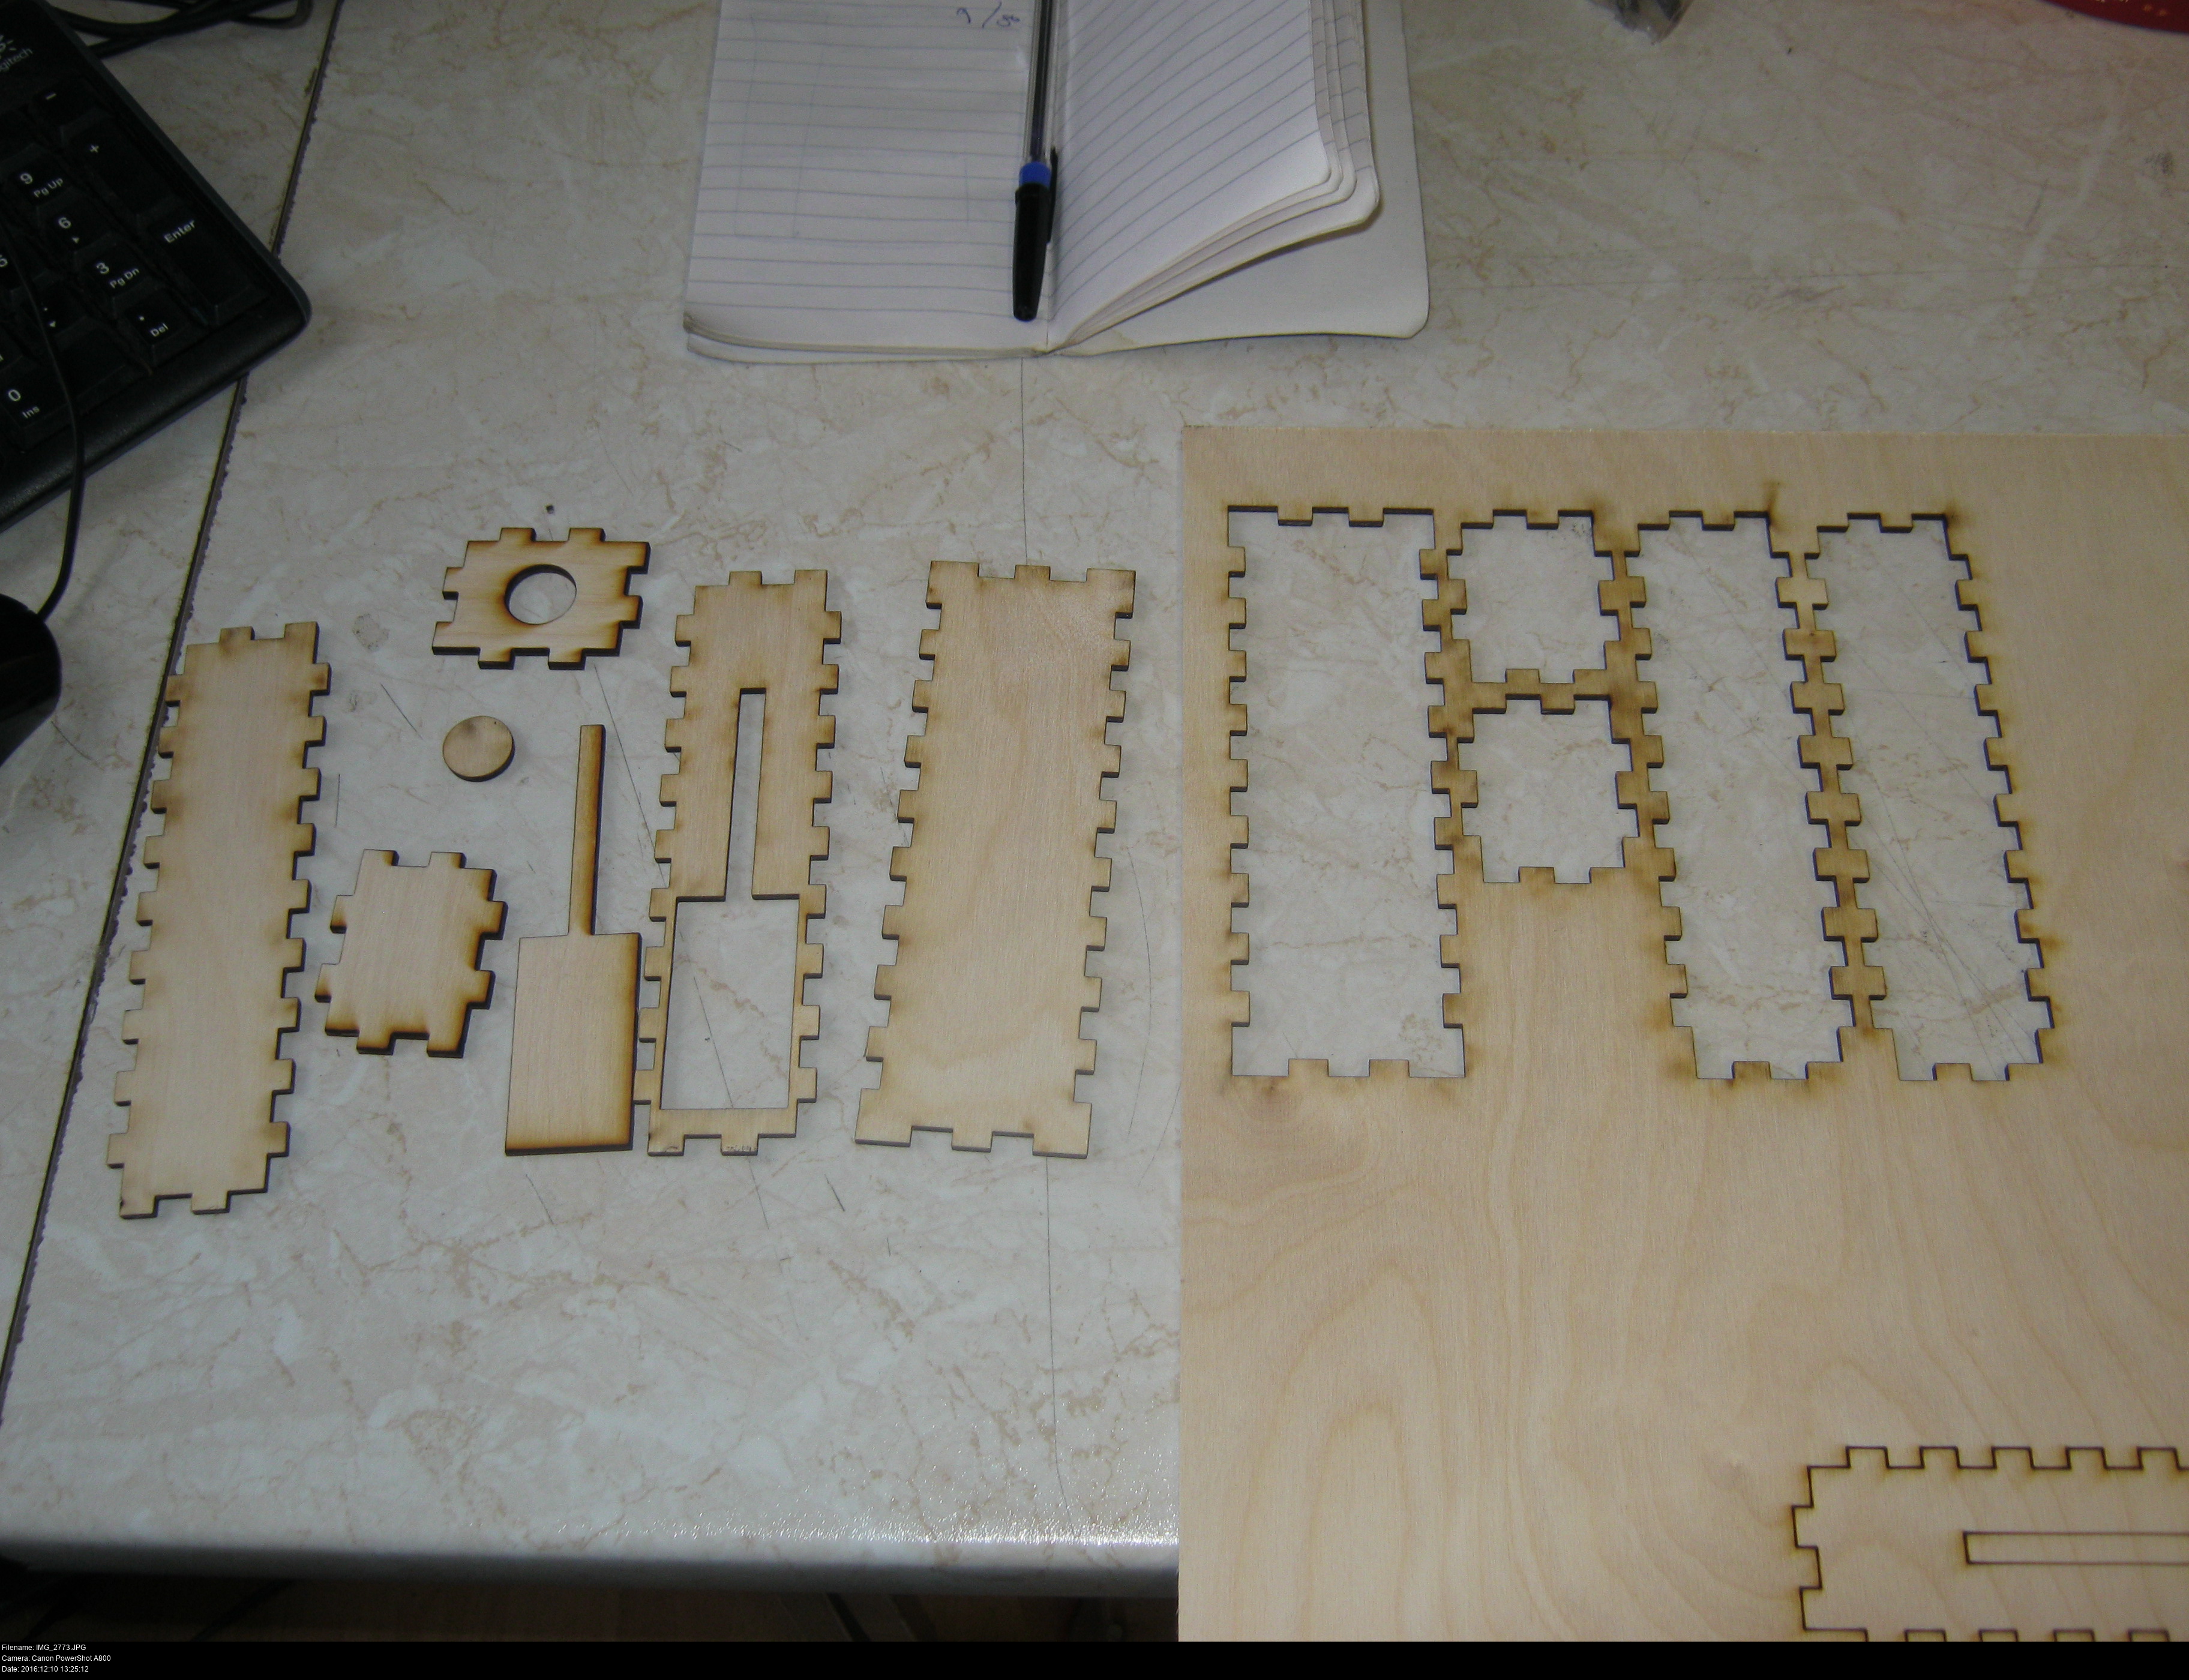
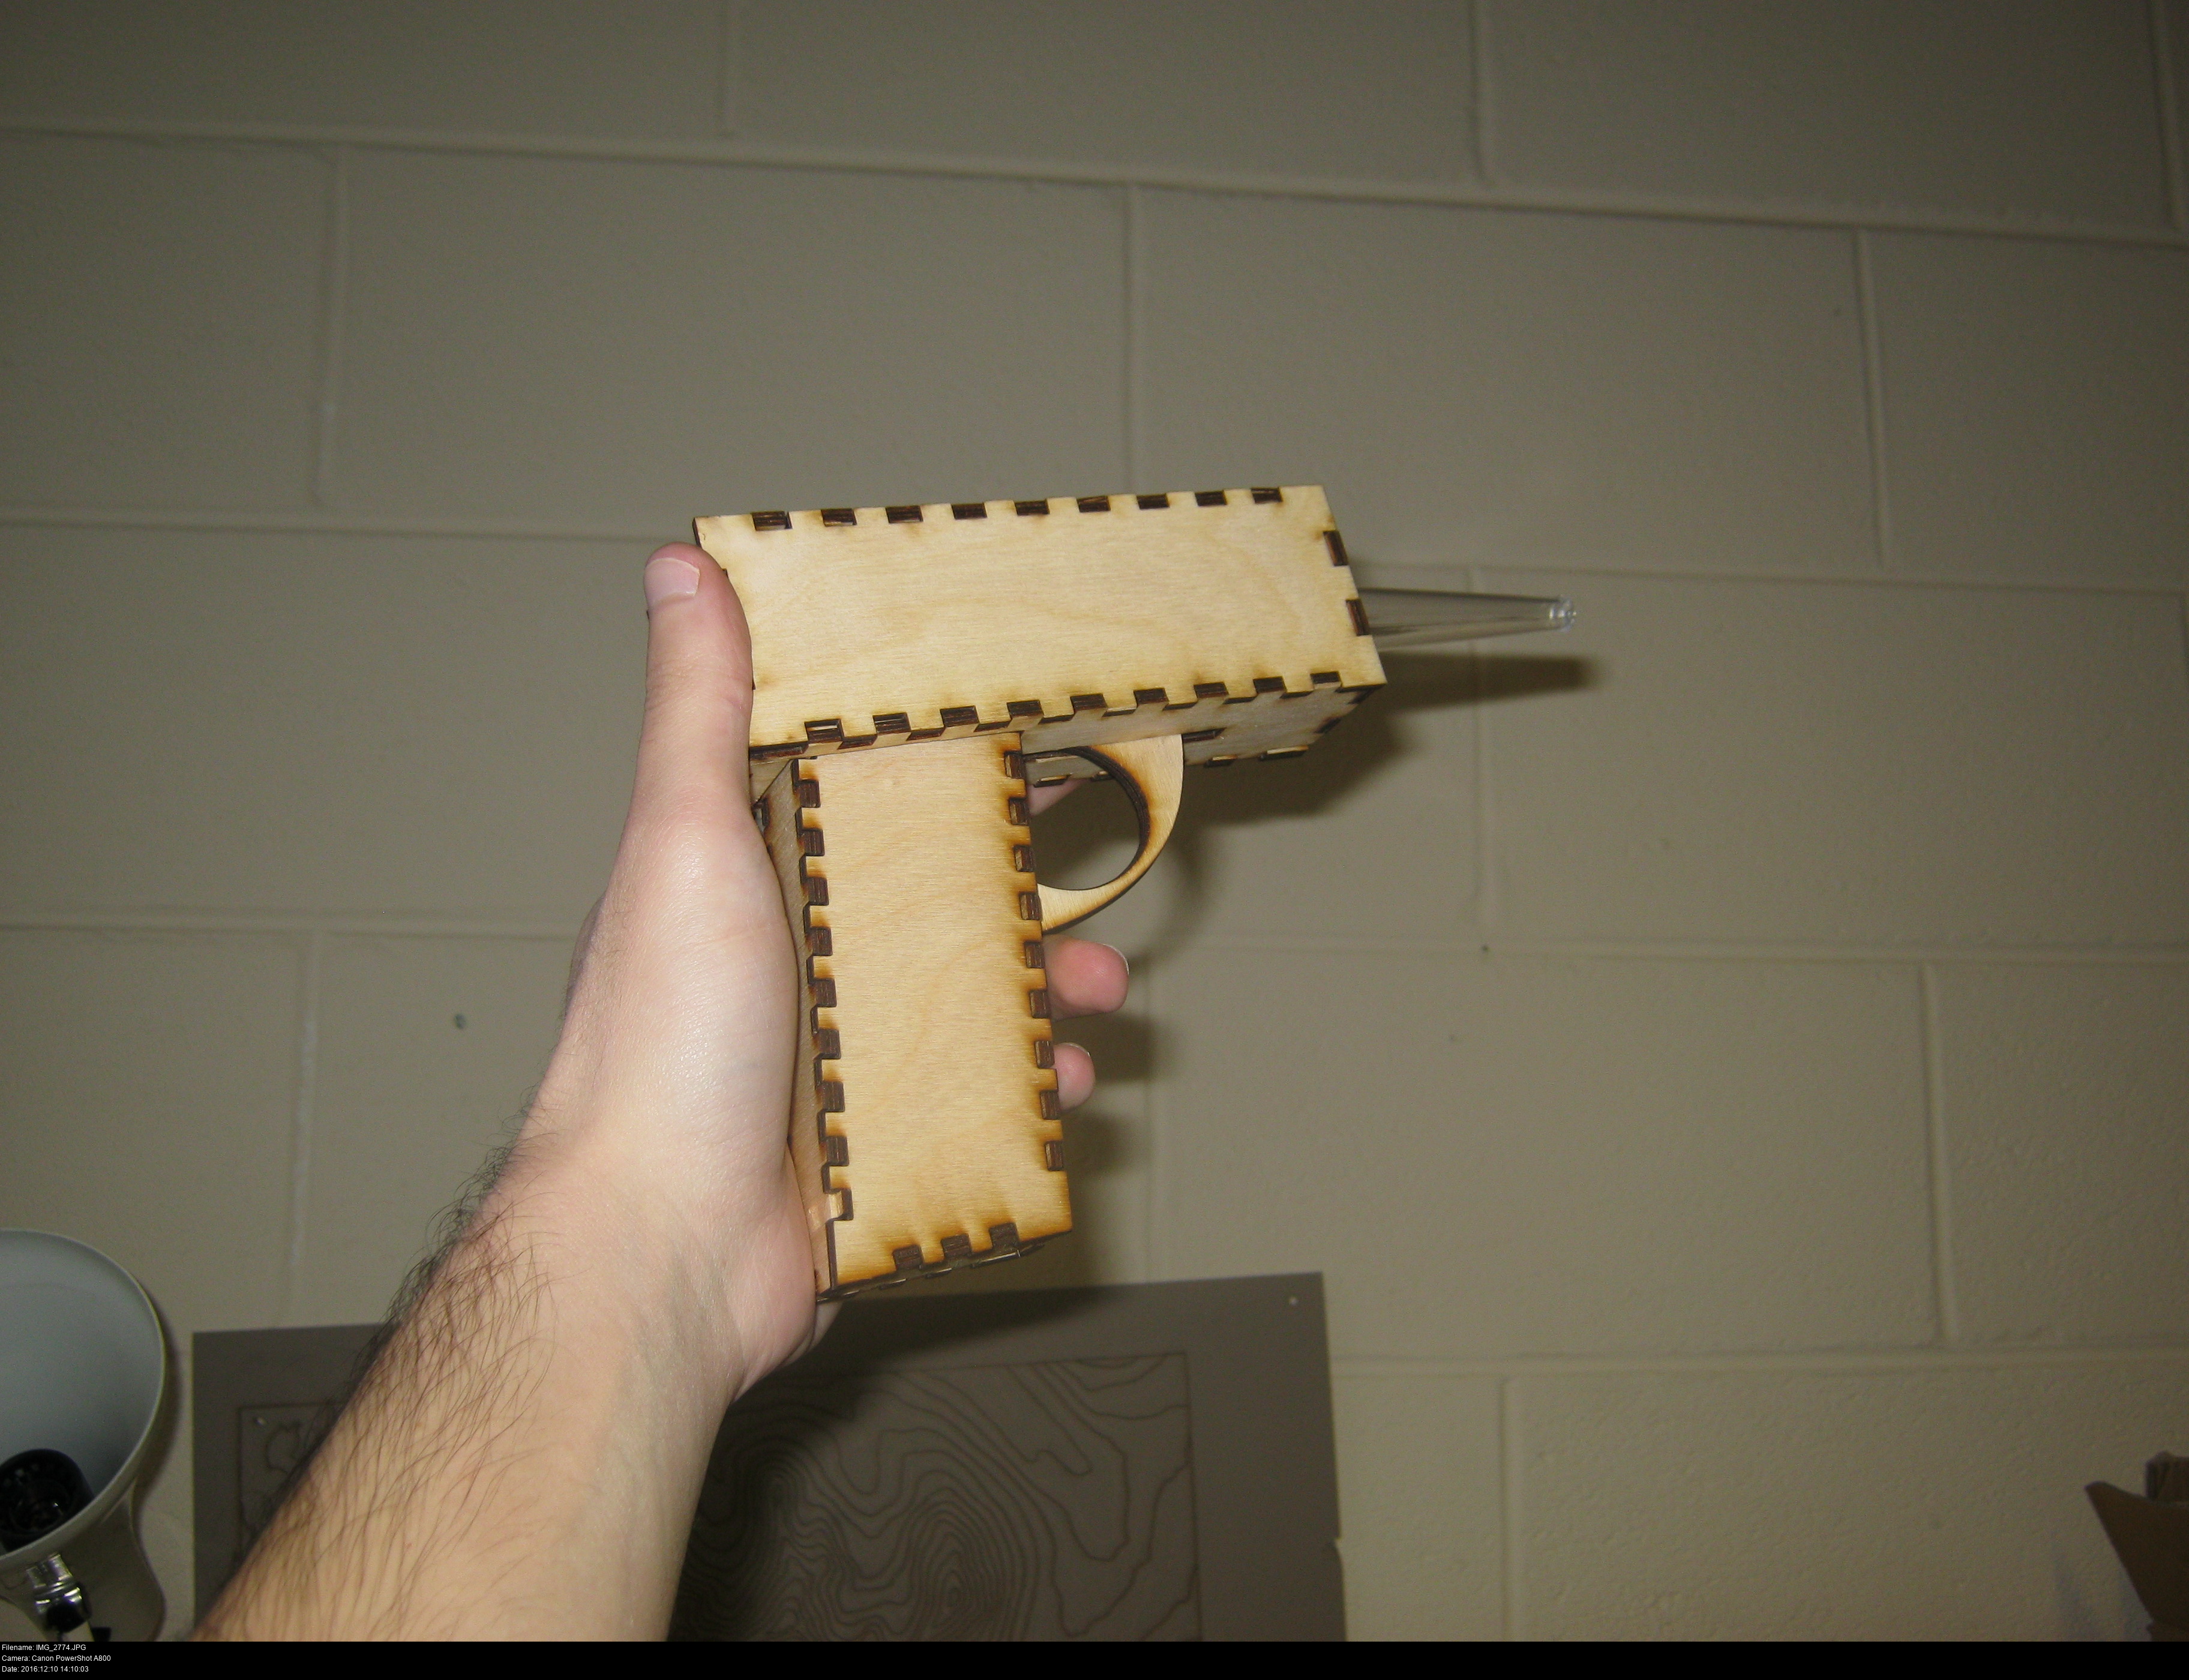
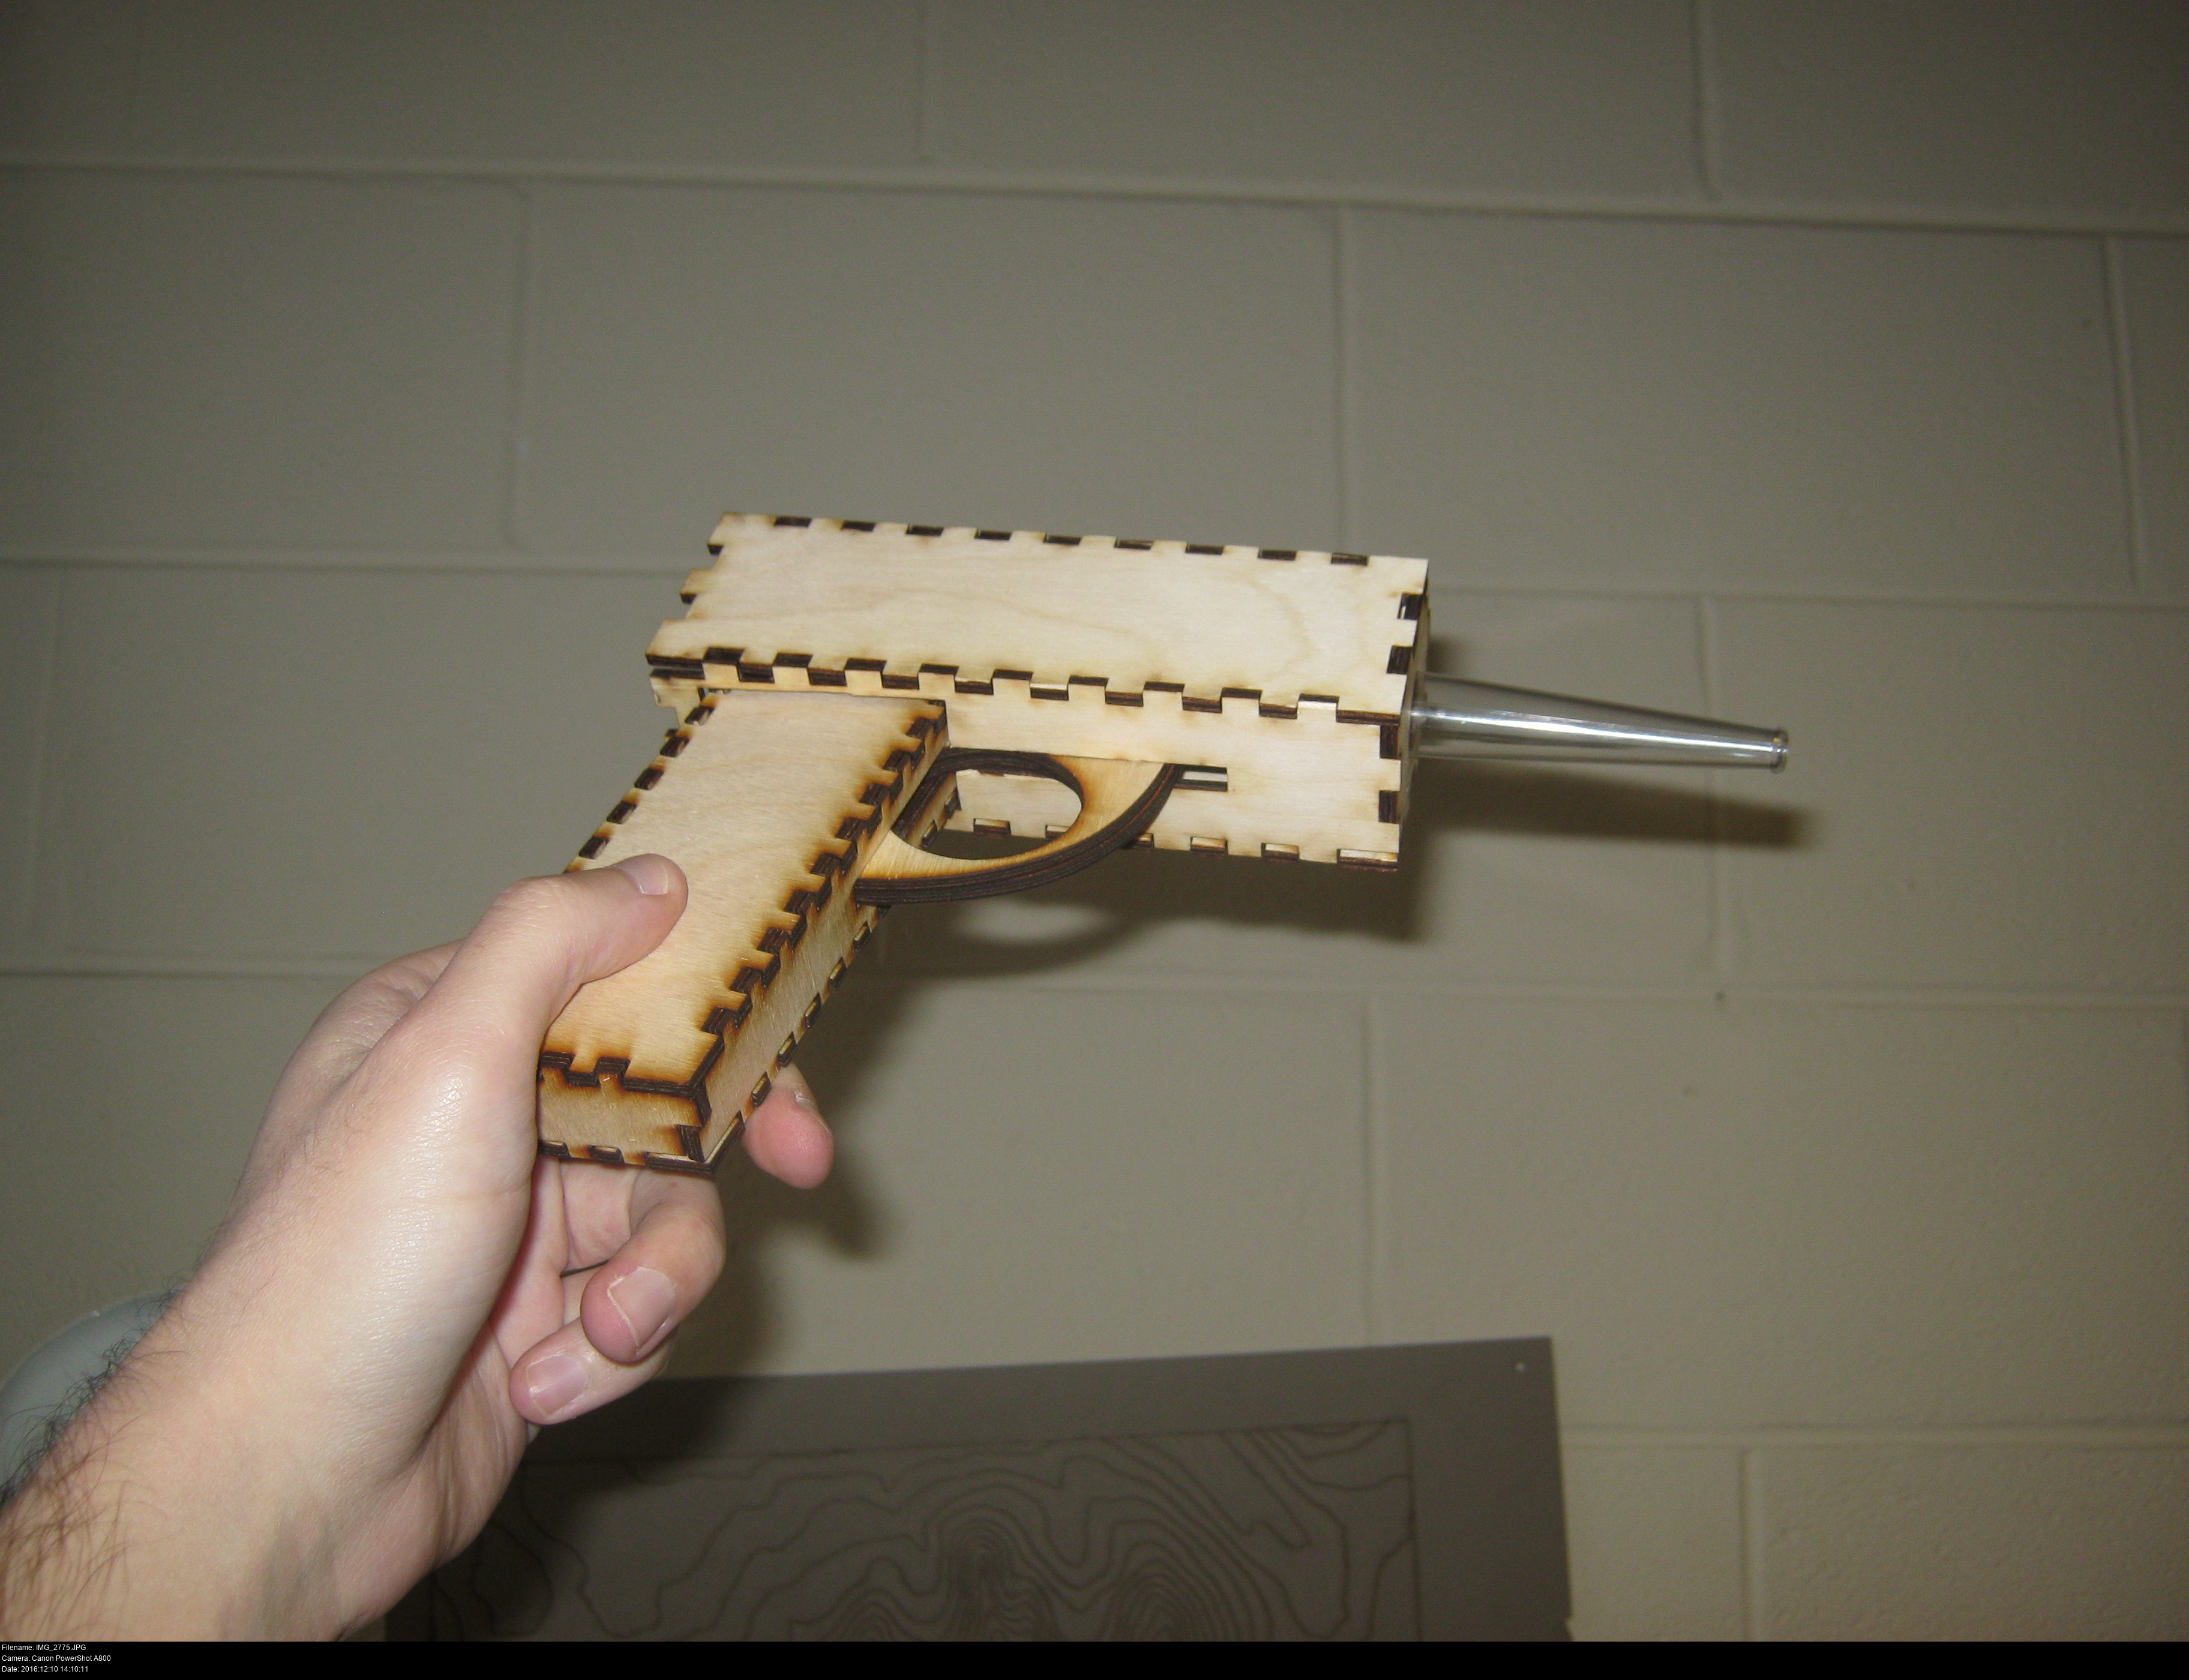
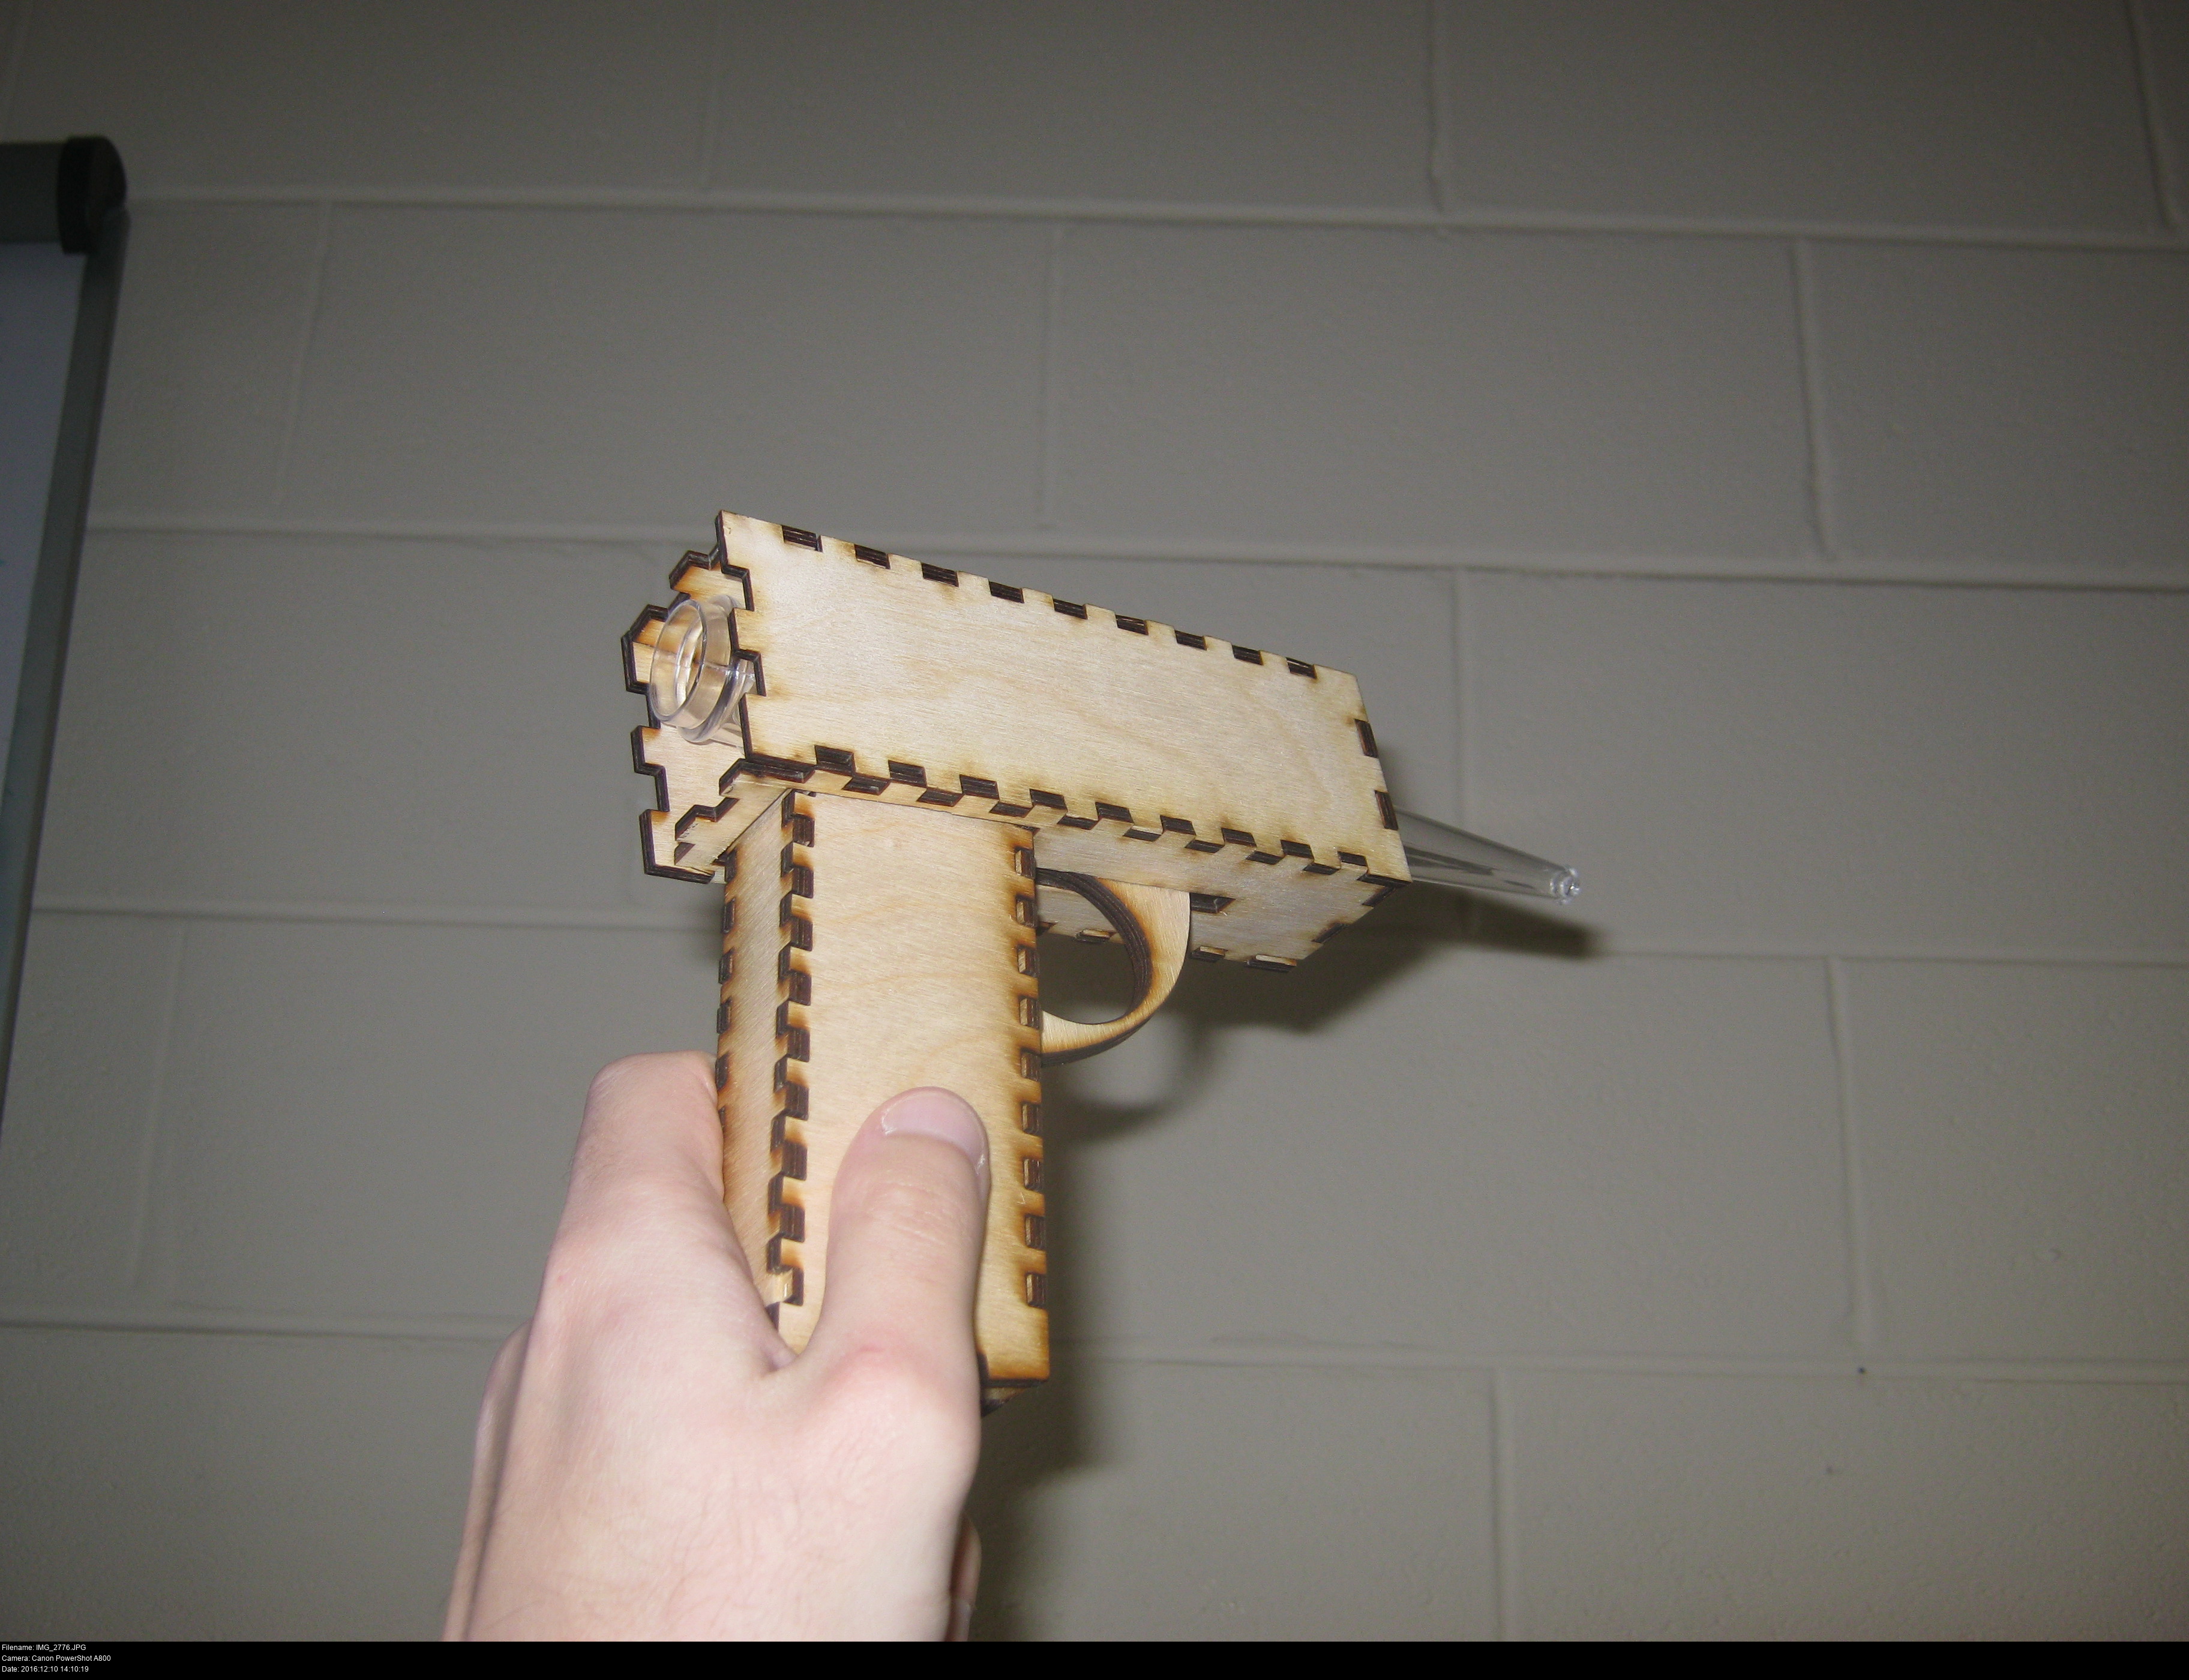
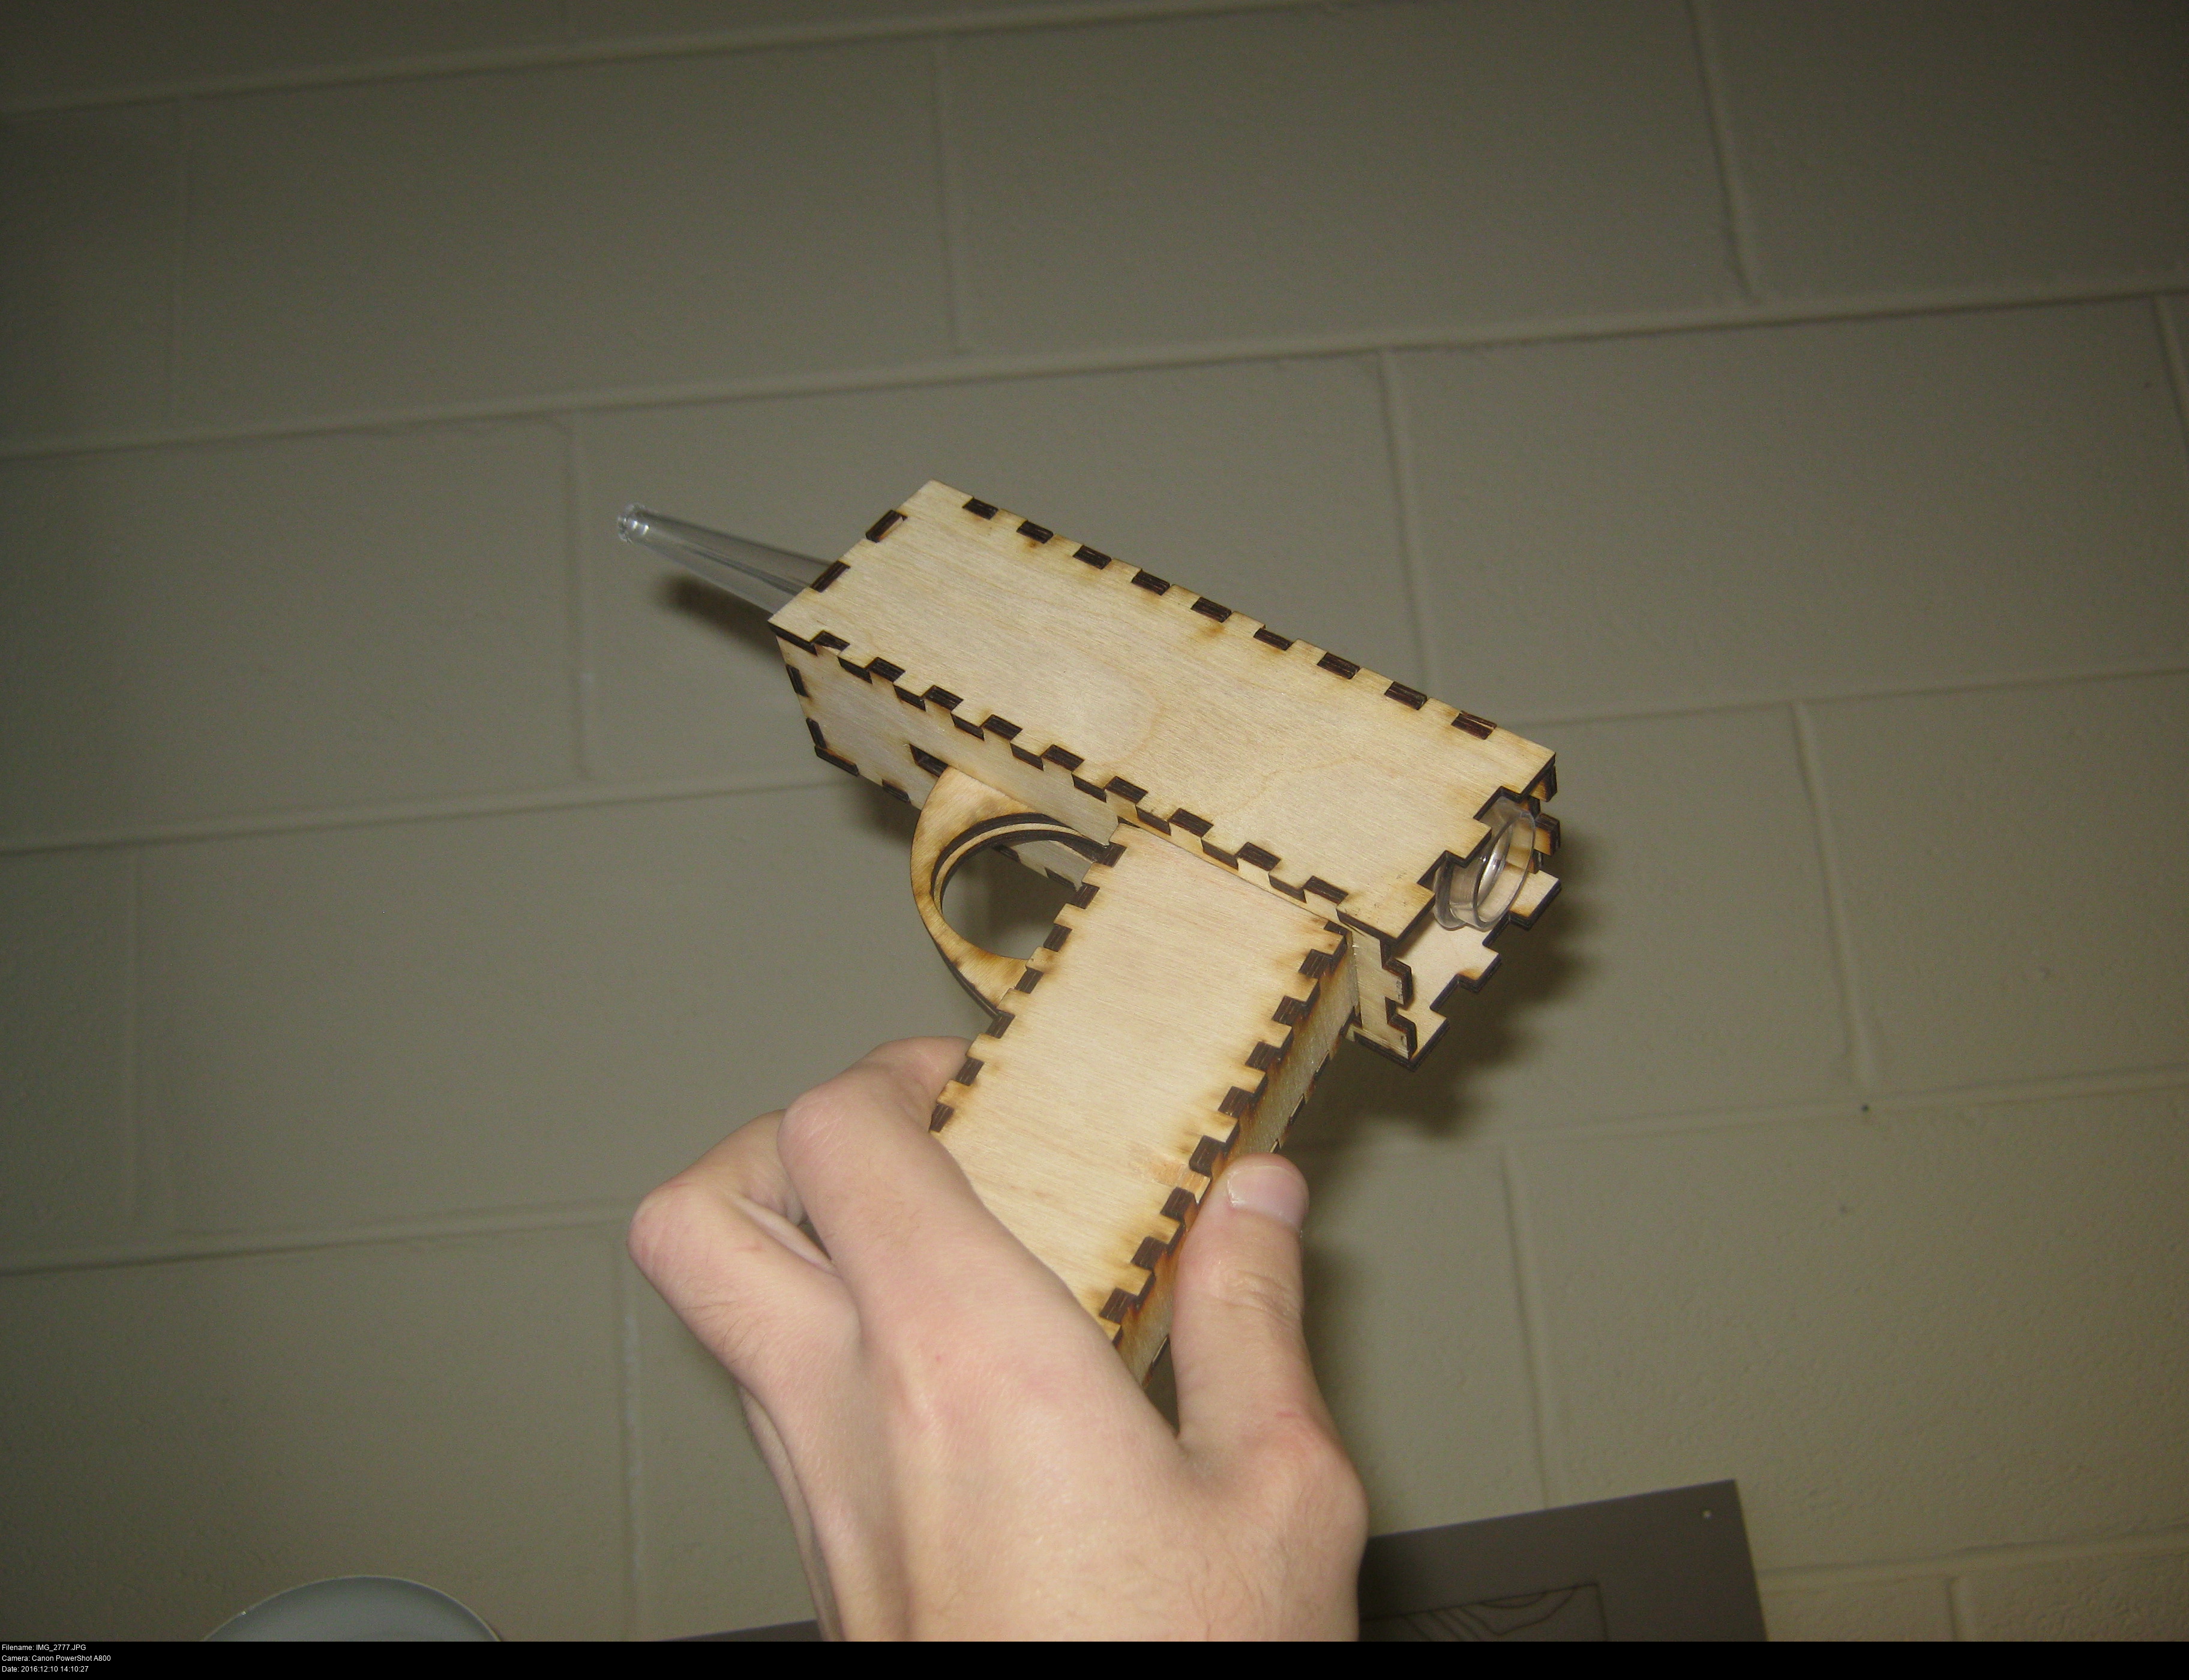
And how am I going to make cuboid shapes? I'm going to use my case maker tool again, of course!
It's off to DoES Liverpool to use their laser cutter and make myself some boxes. I'm using 3mm plywood because why the heck not. It'll be reasonably light, hardwearing and I can work it easily. And it'll be cheap. The trigger guard is made from two 3mm layers glued back to back.
The baster barrel fits nicely inside the boxes, but I'm going to cut it shorter anyway. I'm not certain how I'm going to fix it into the gun. I can't do that until I'm certain exactly what's going inside here.
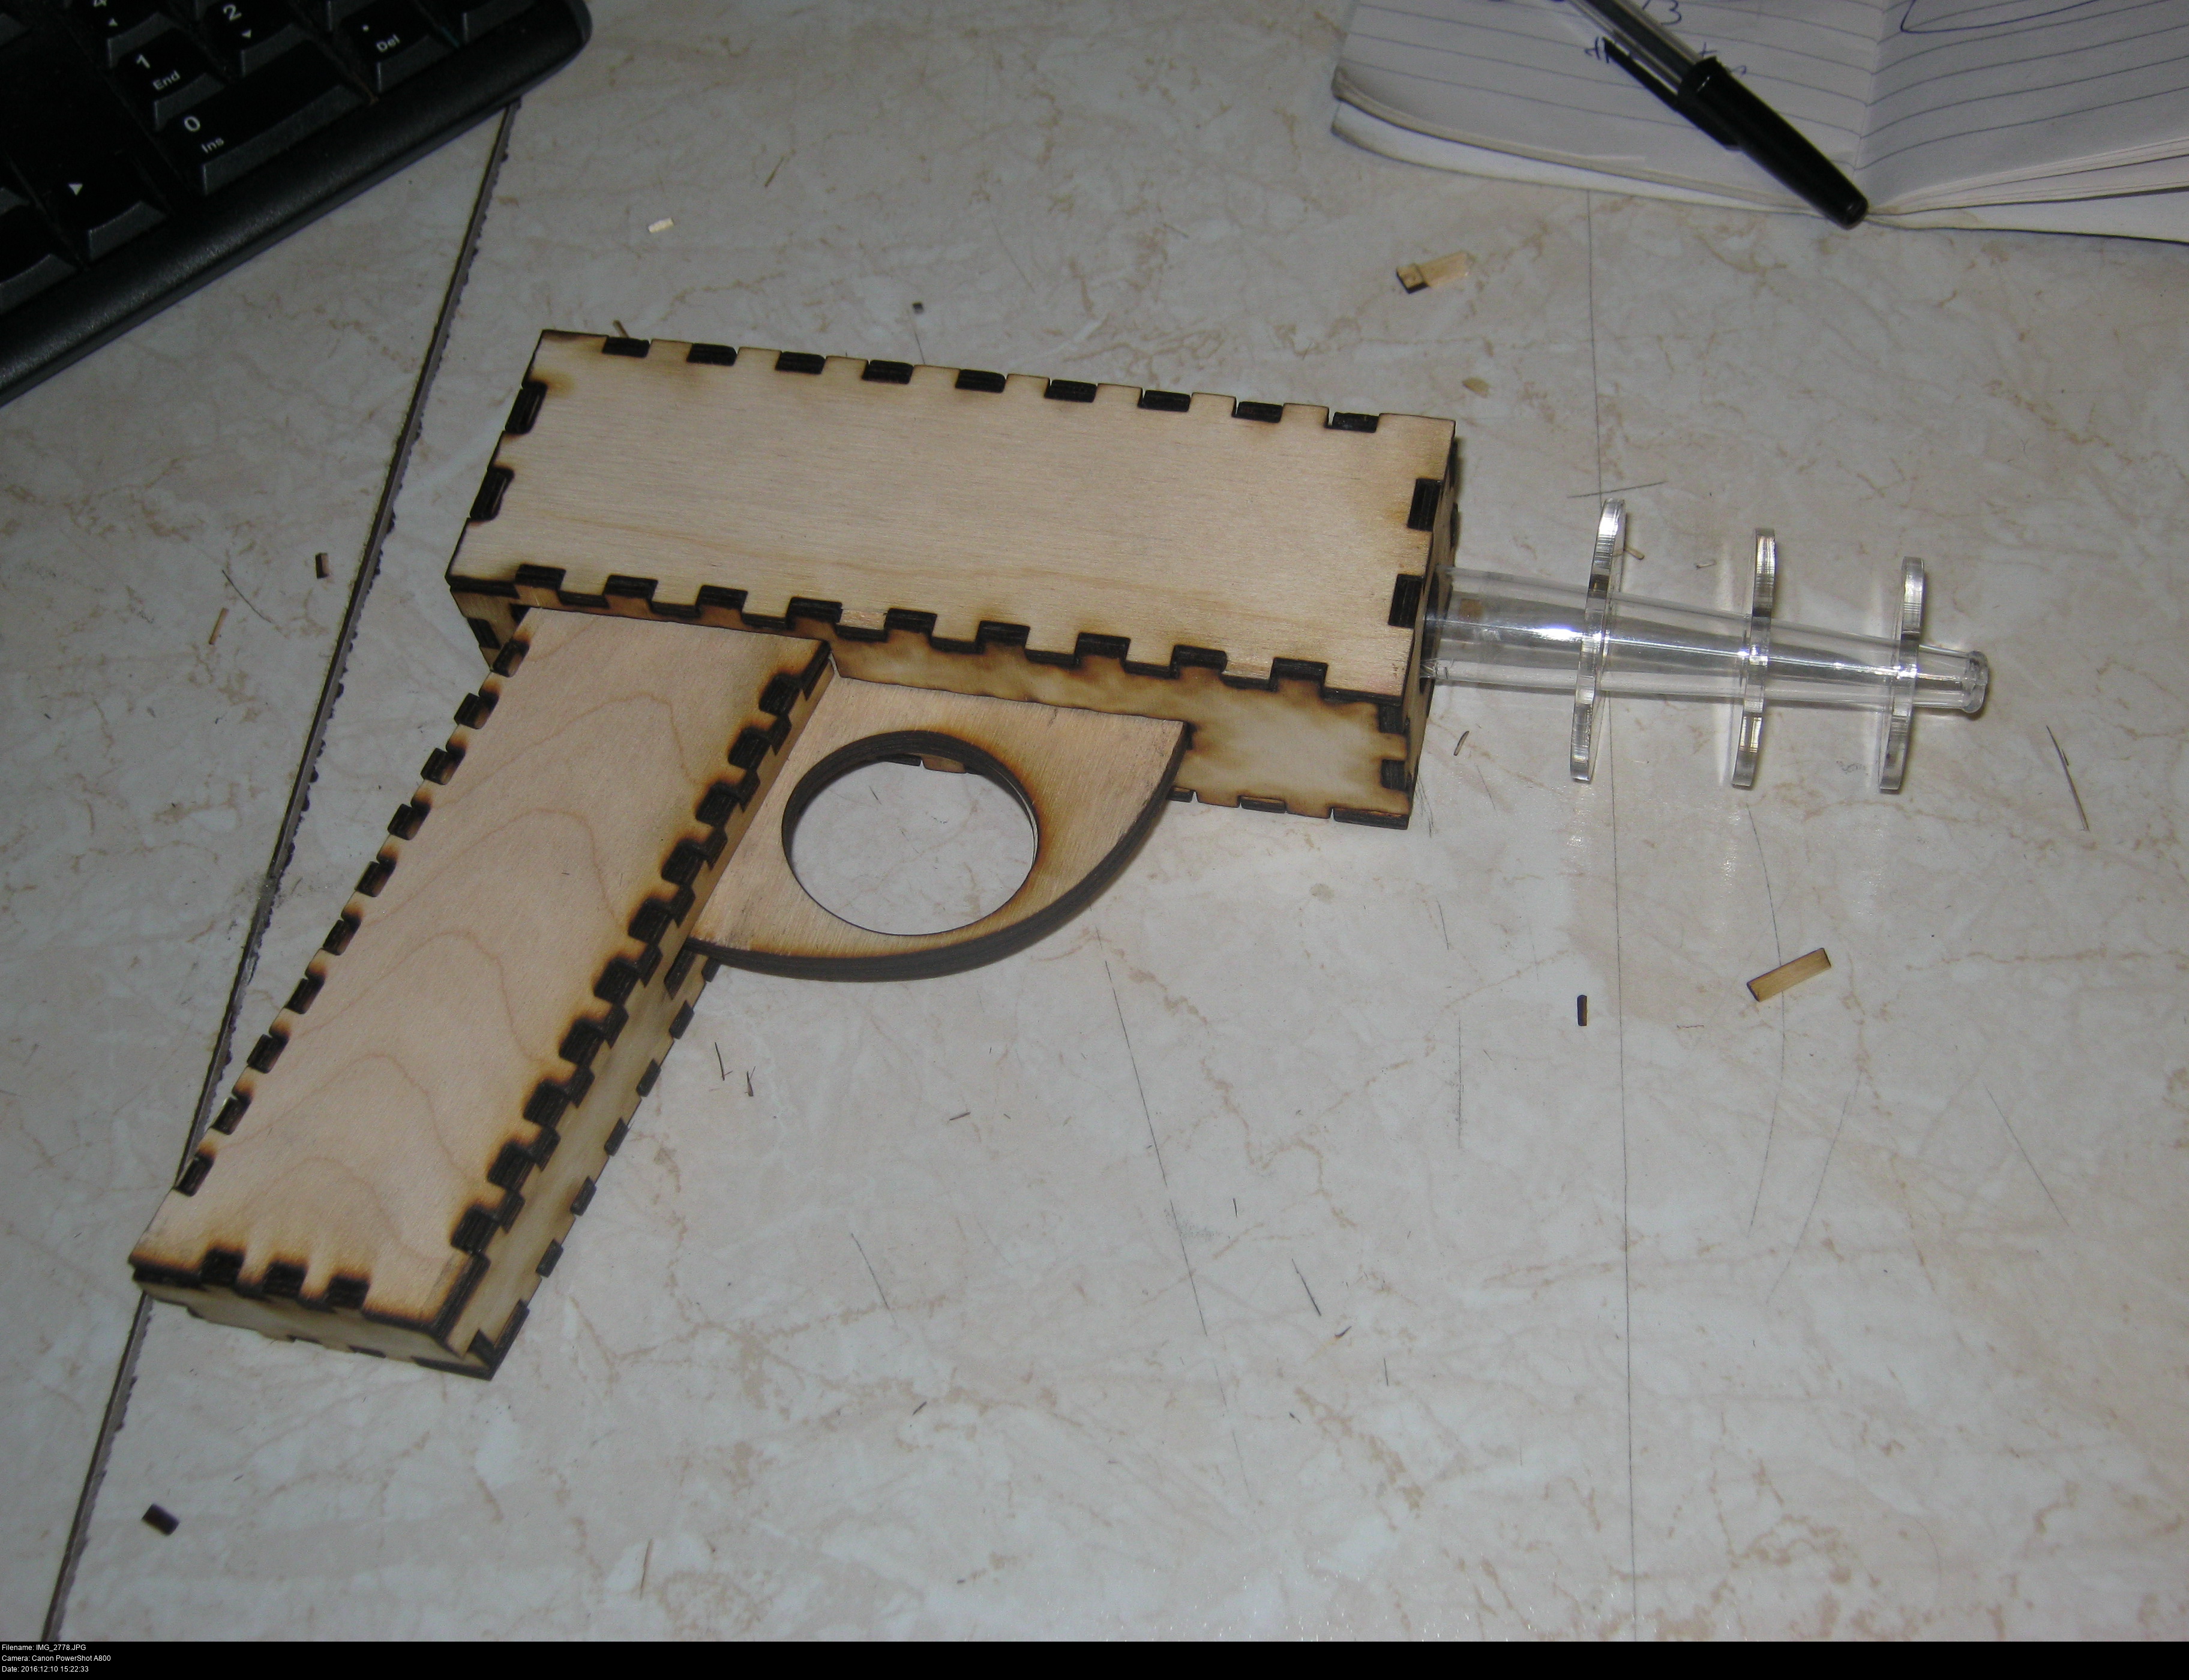
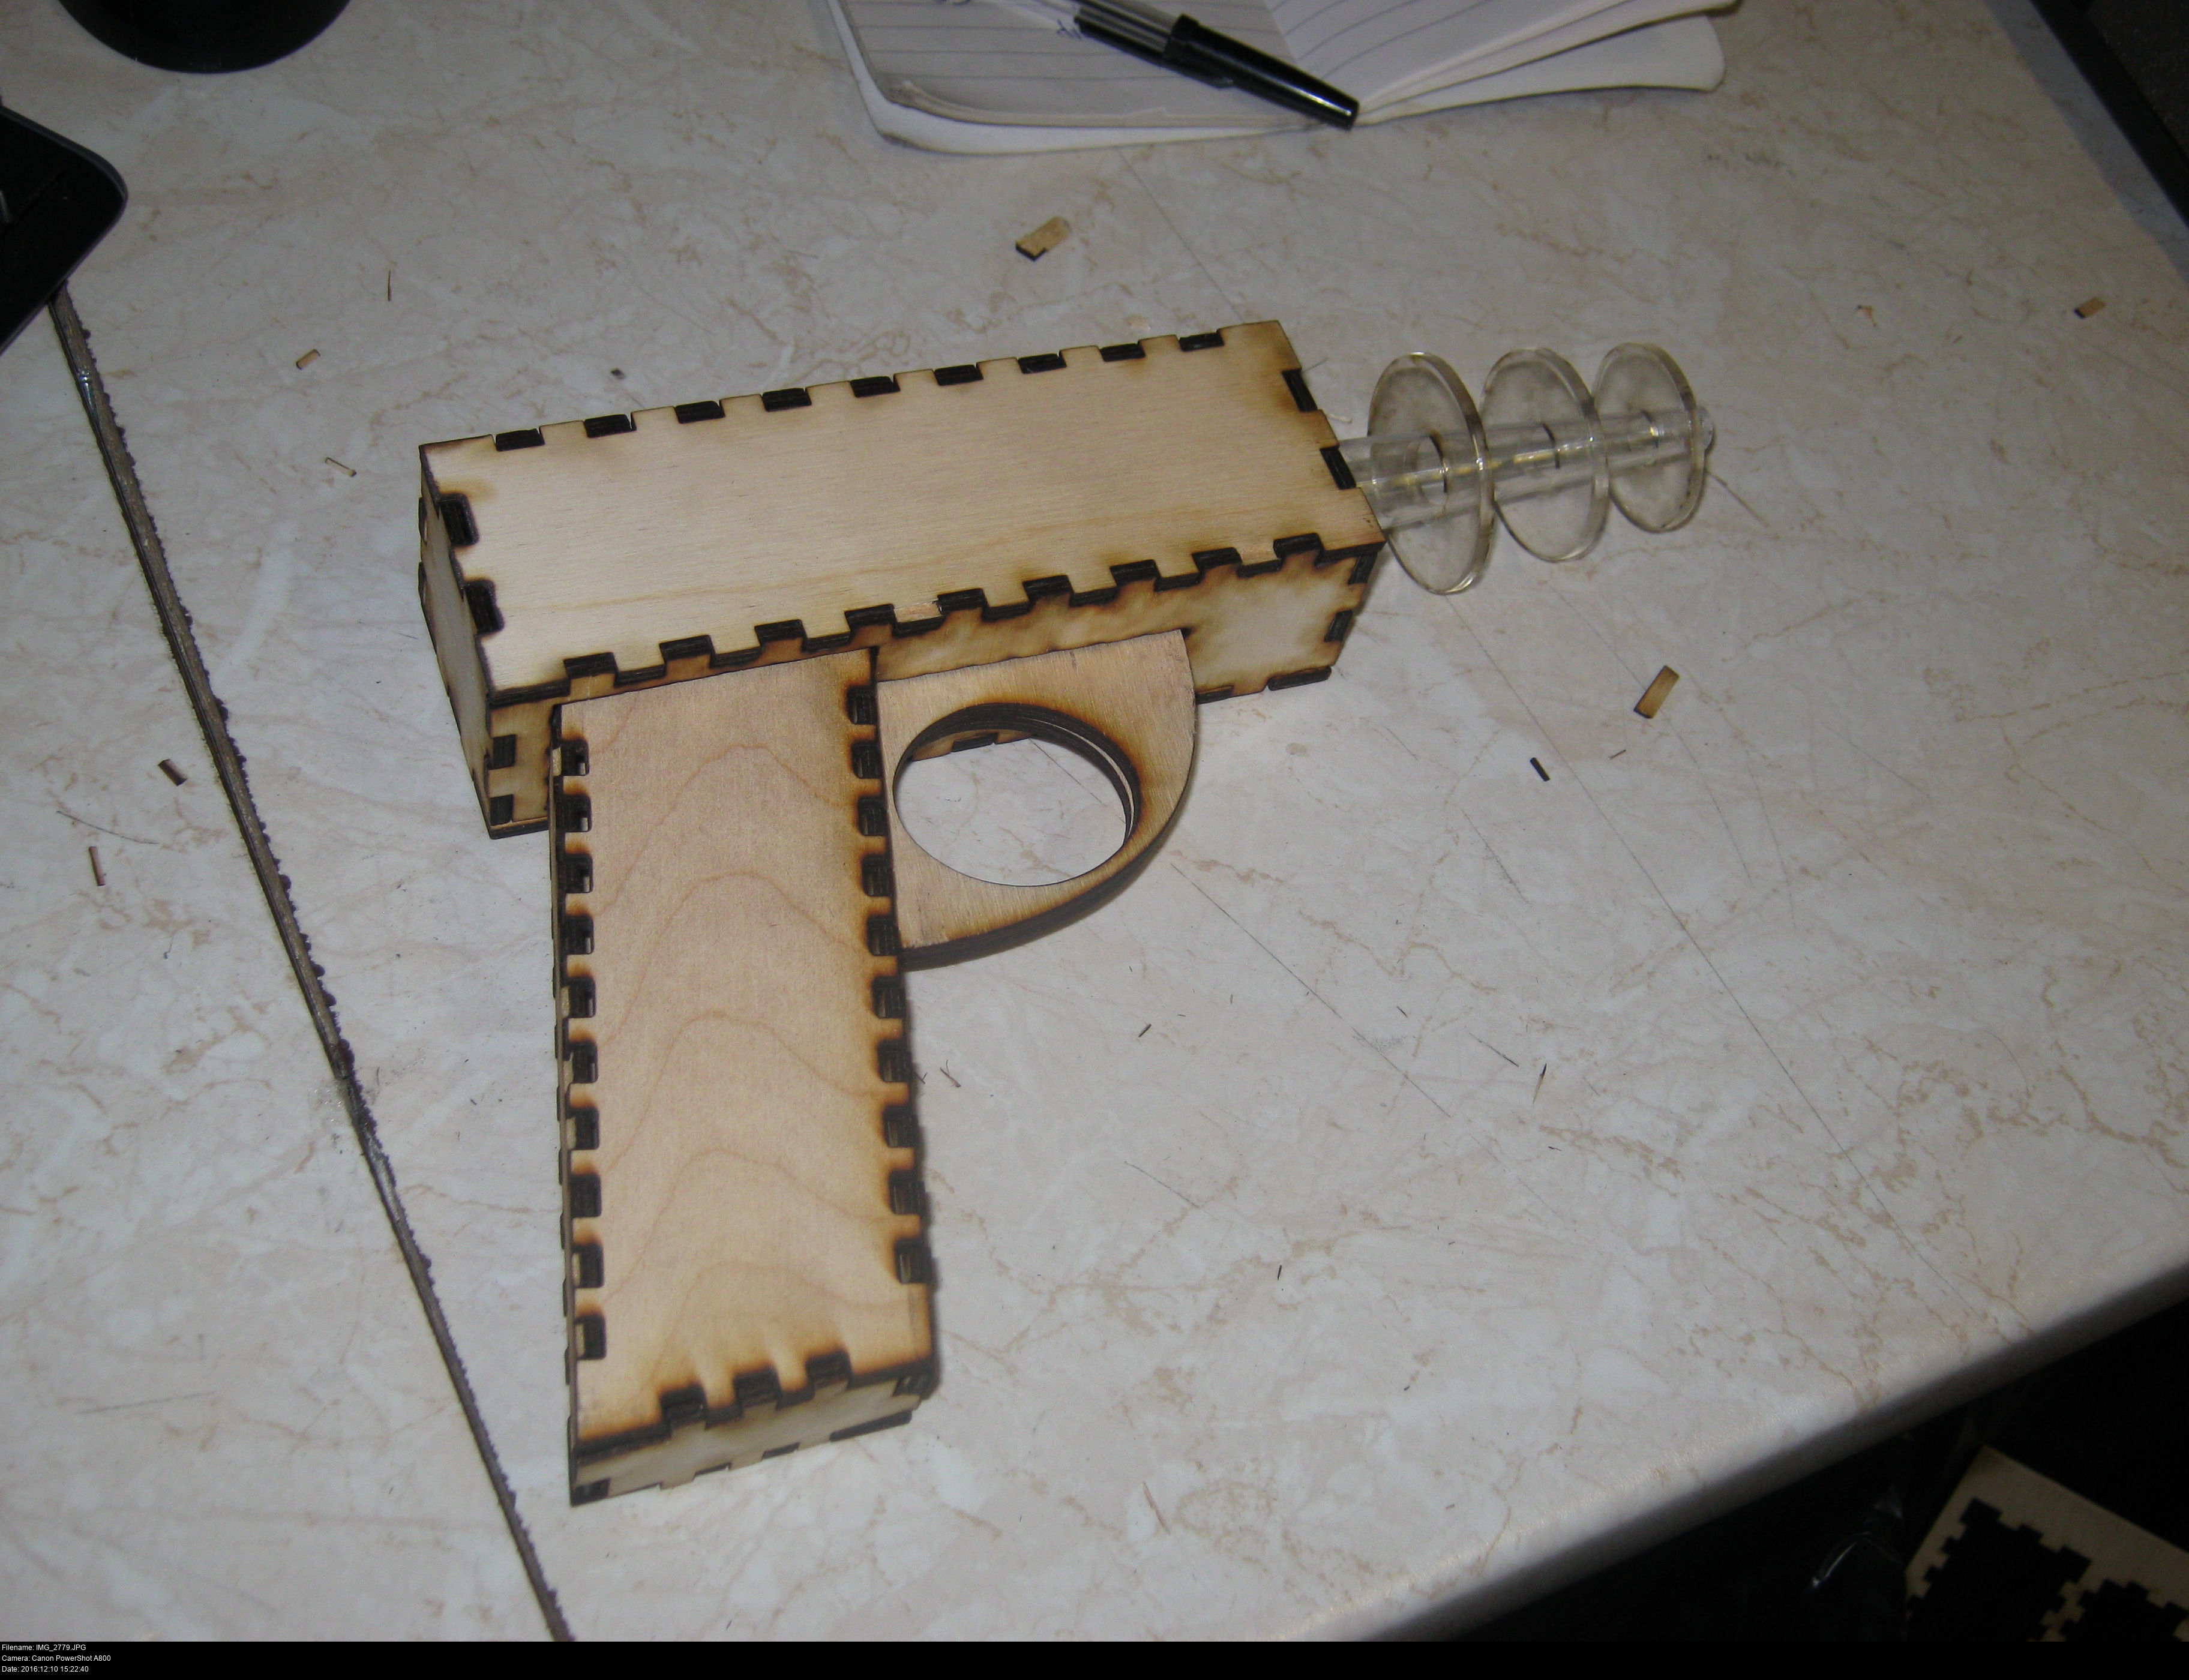
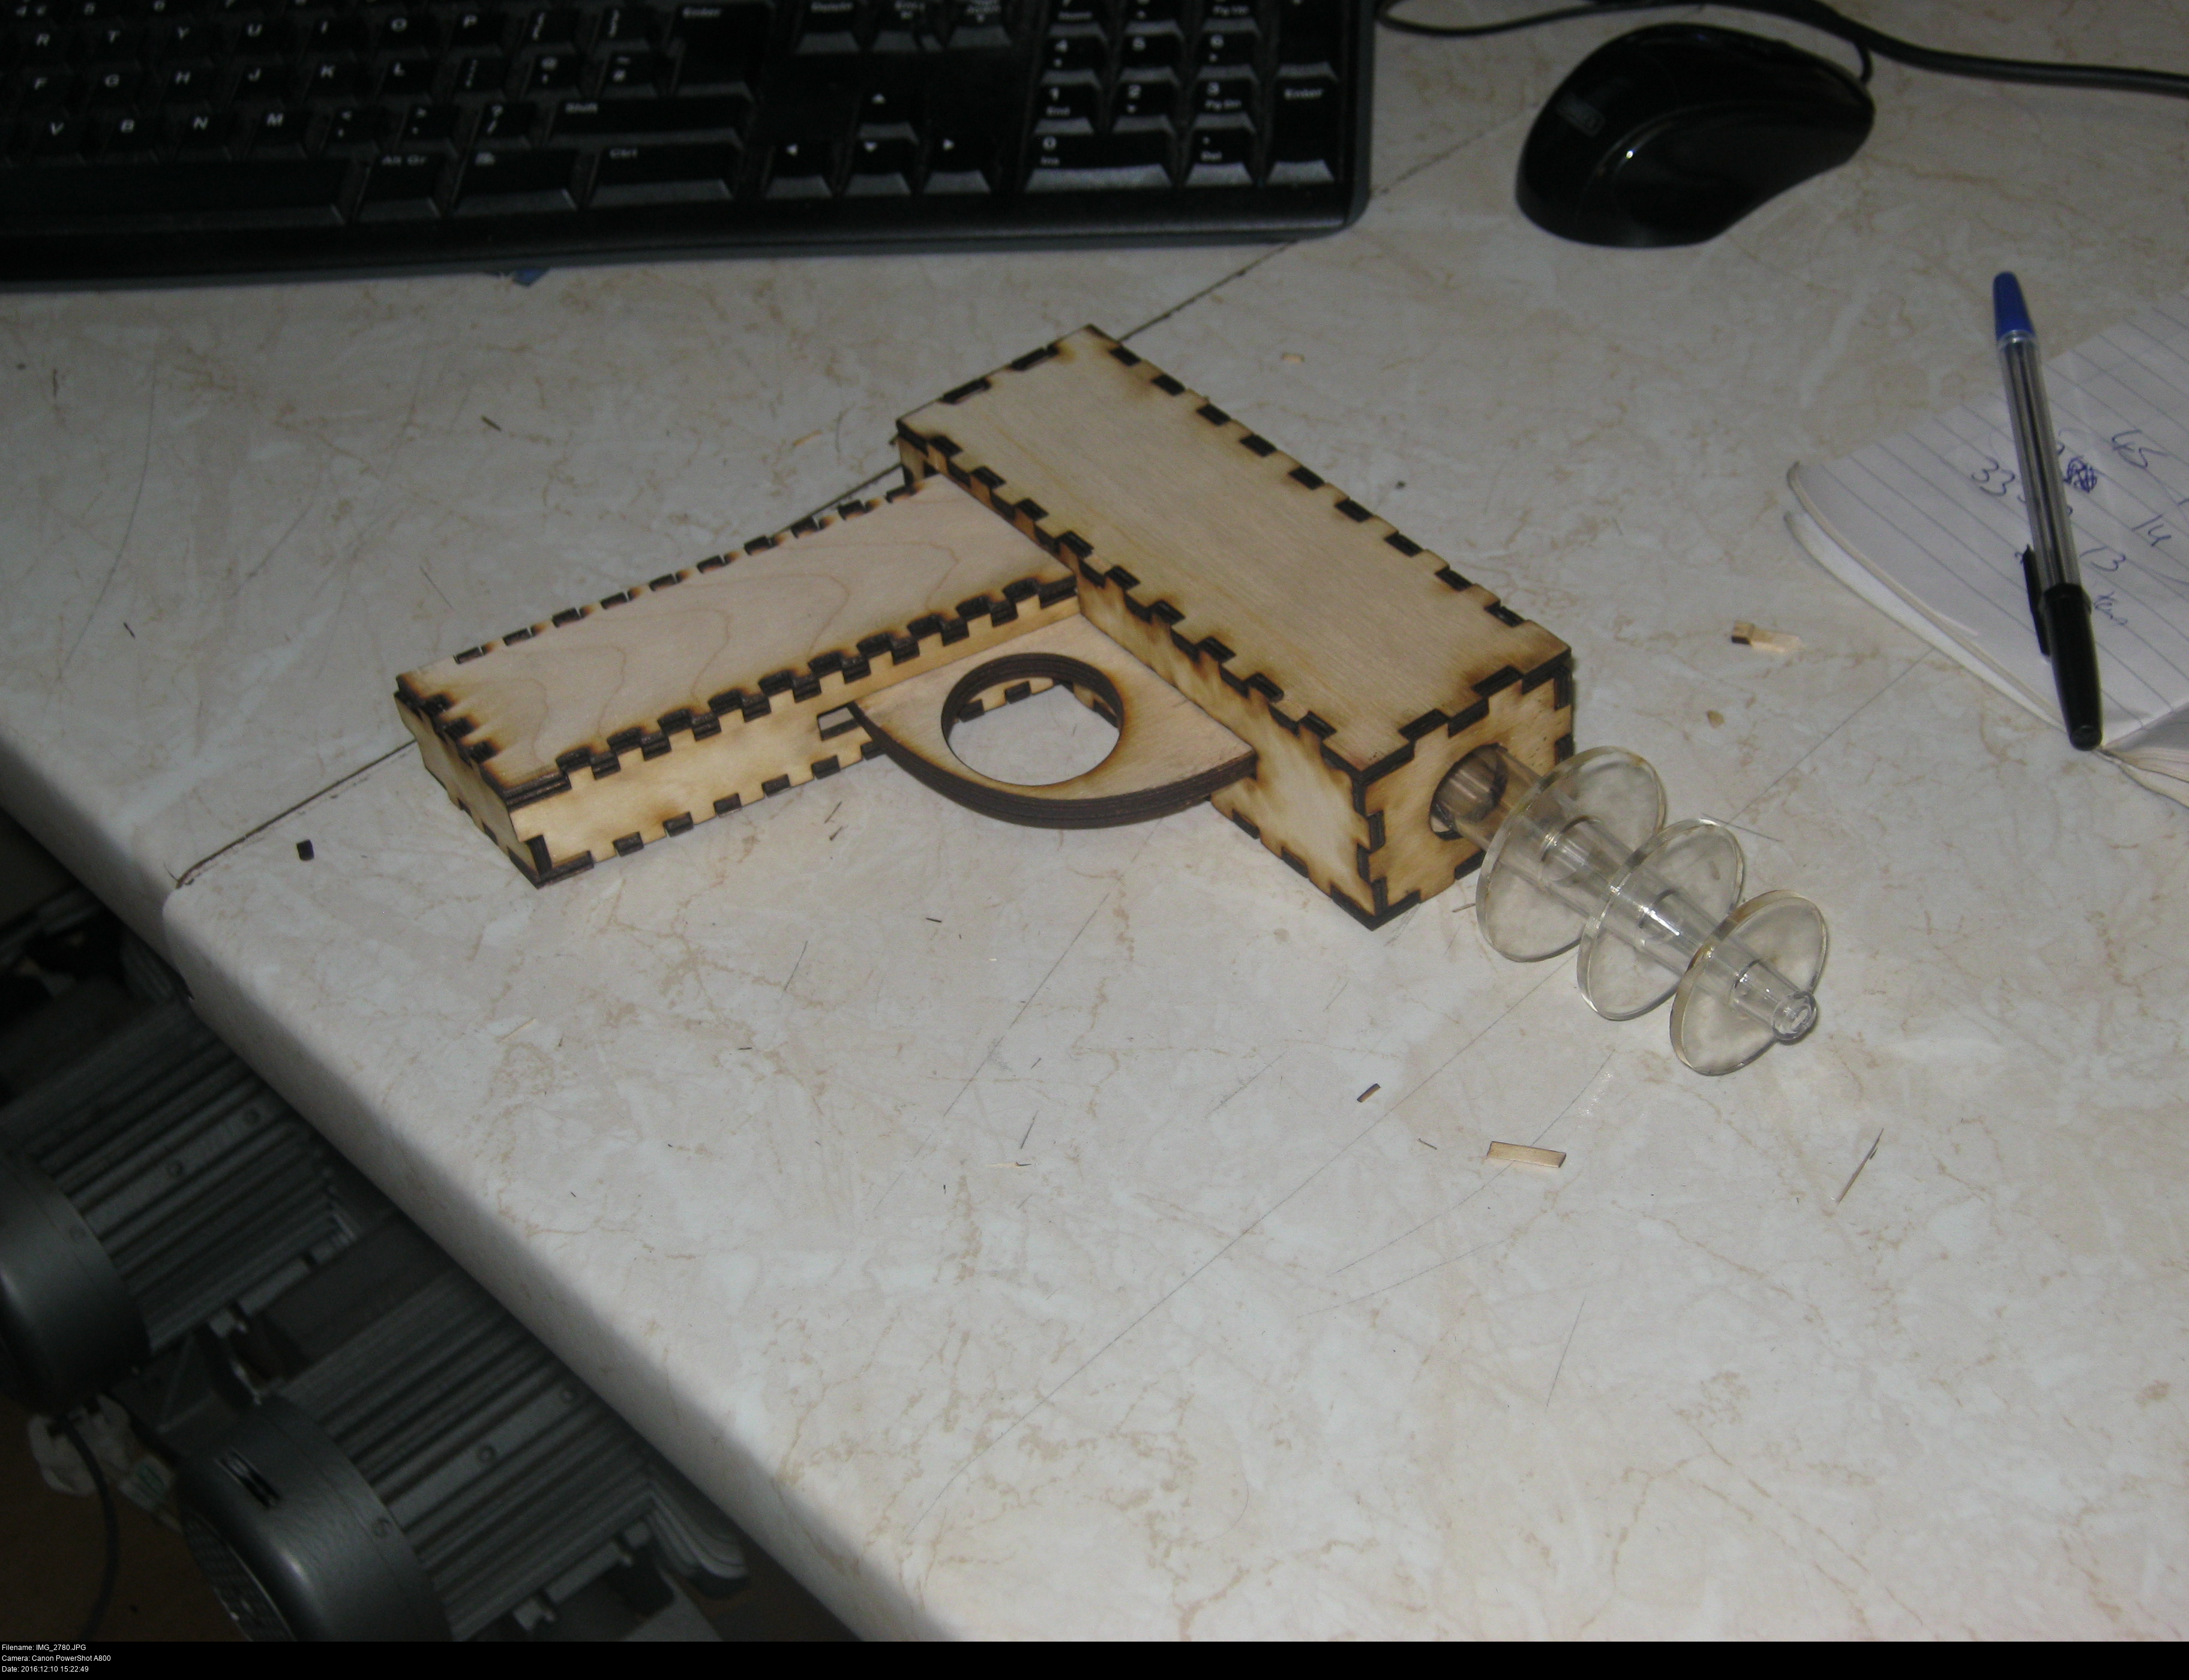

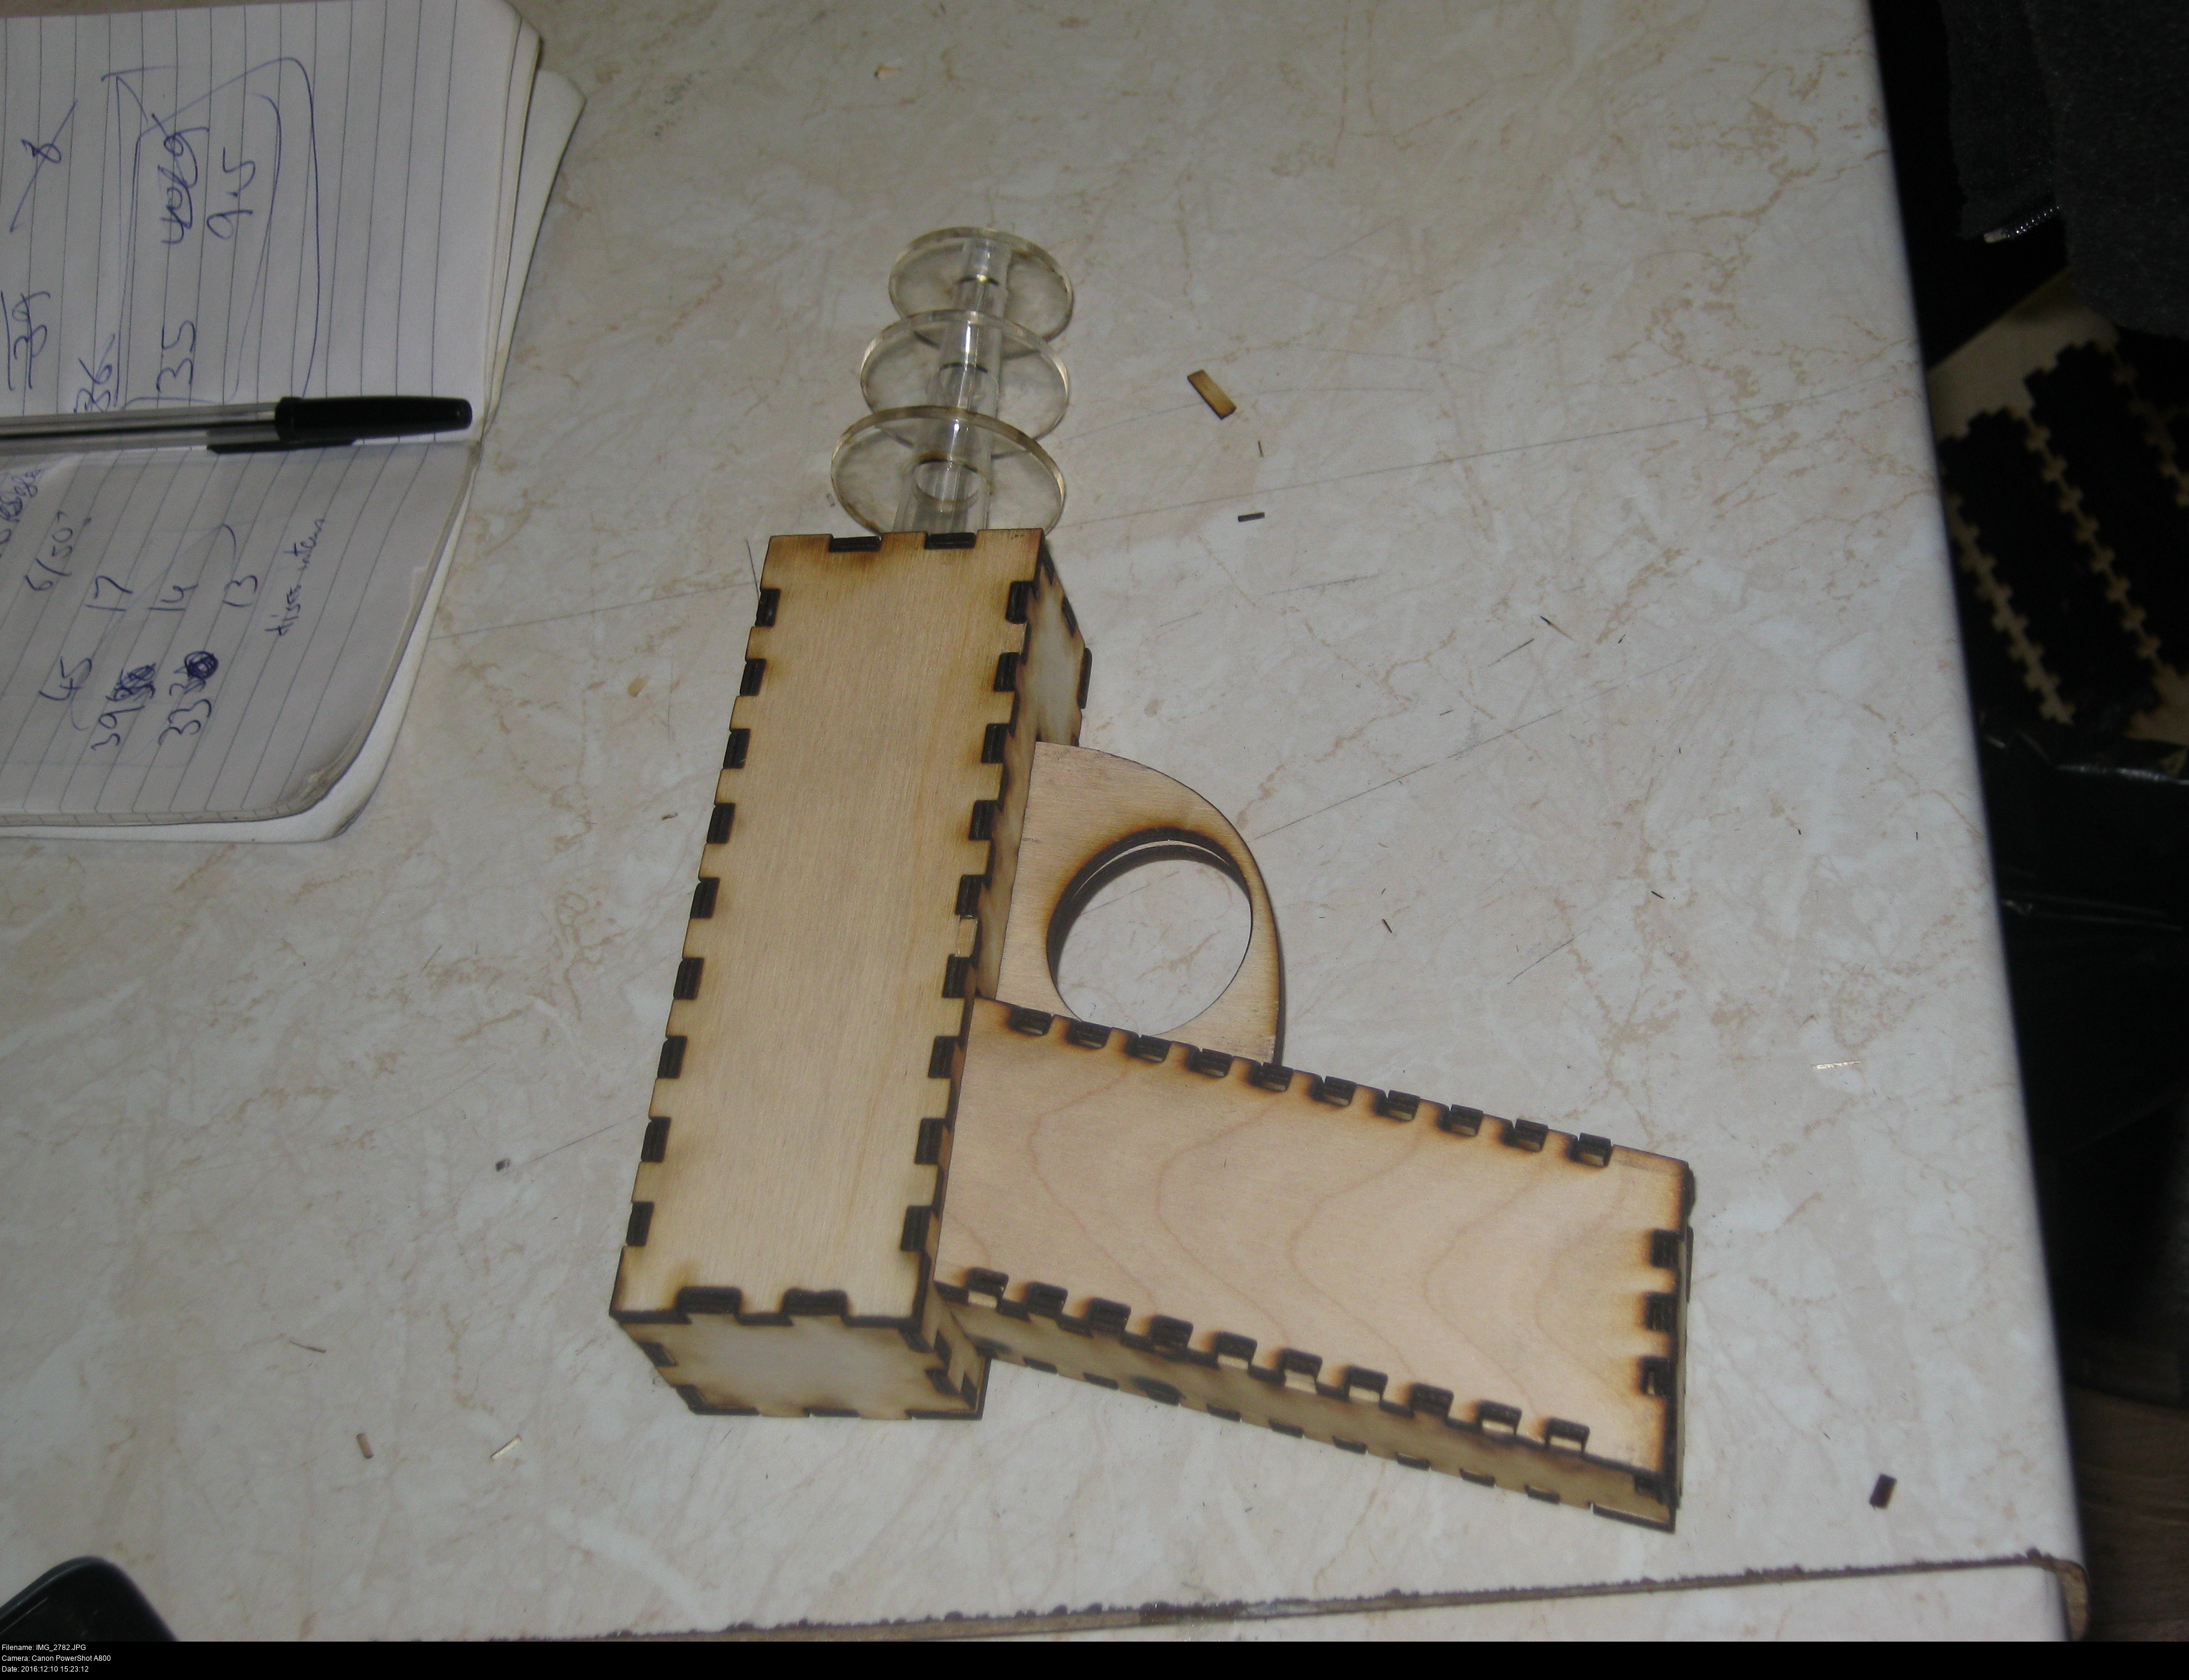

Now I can try making some rings for the emitter barrel!
These are made from acrylic from the scraps drawer at DoES.
I measured the diameter of the barrel with some calipers and produced a whole bunch of rings of different sizes until I found three that I liked together and that fit snugly onto the plastic barrel. I've got to find a kind of glue that works between these surfaces now...
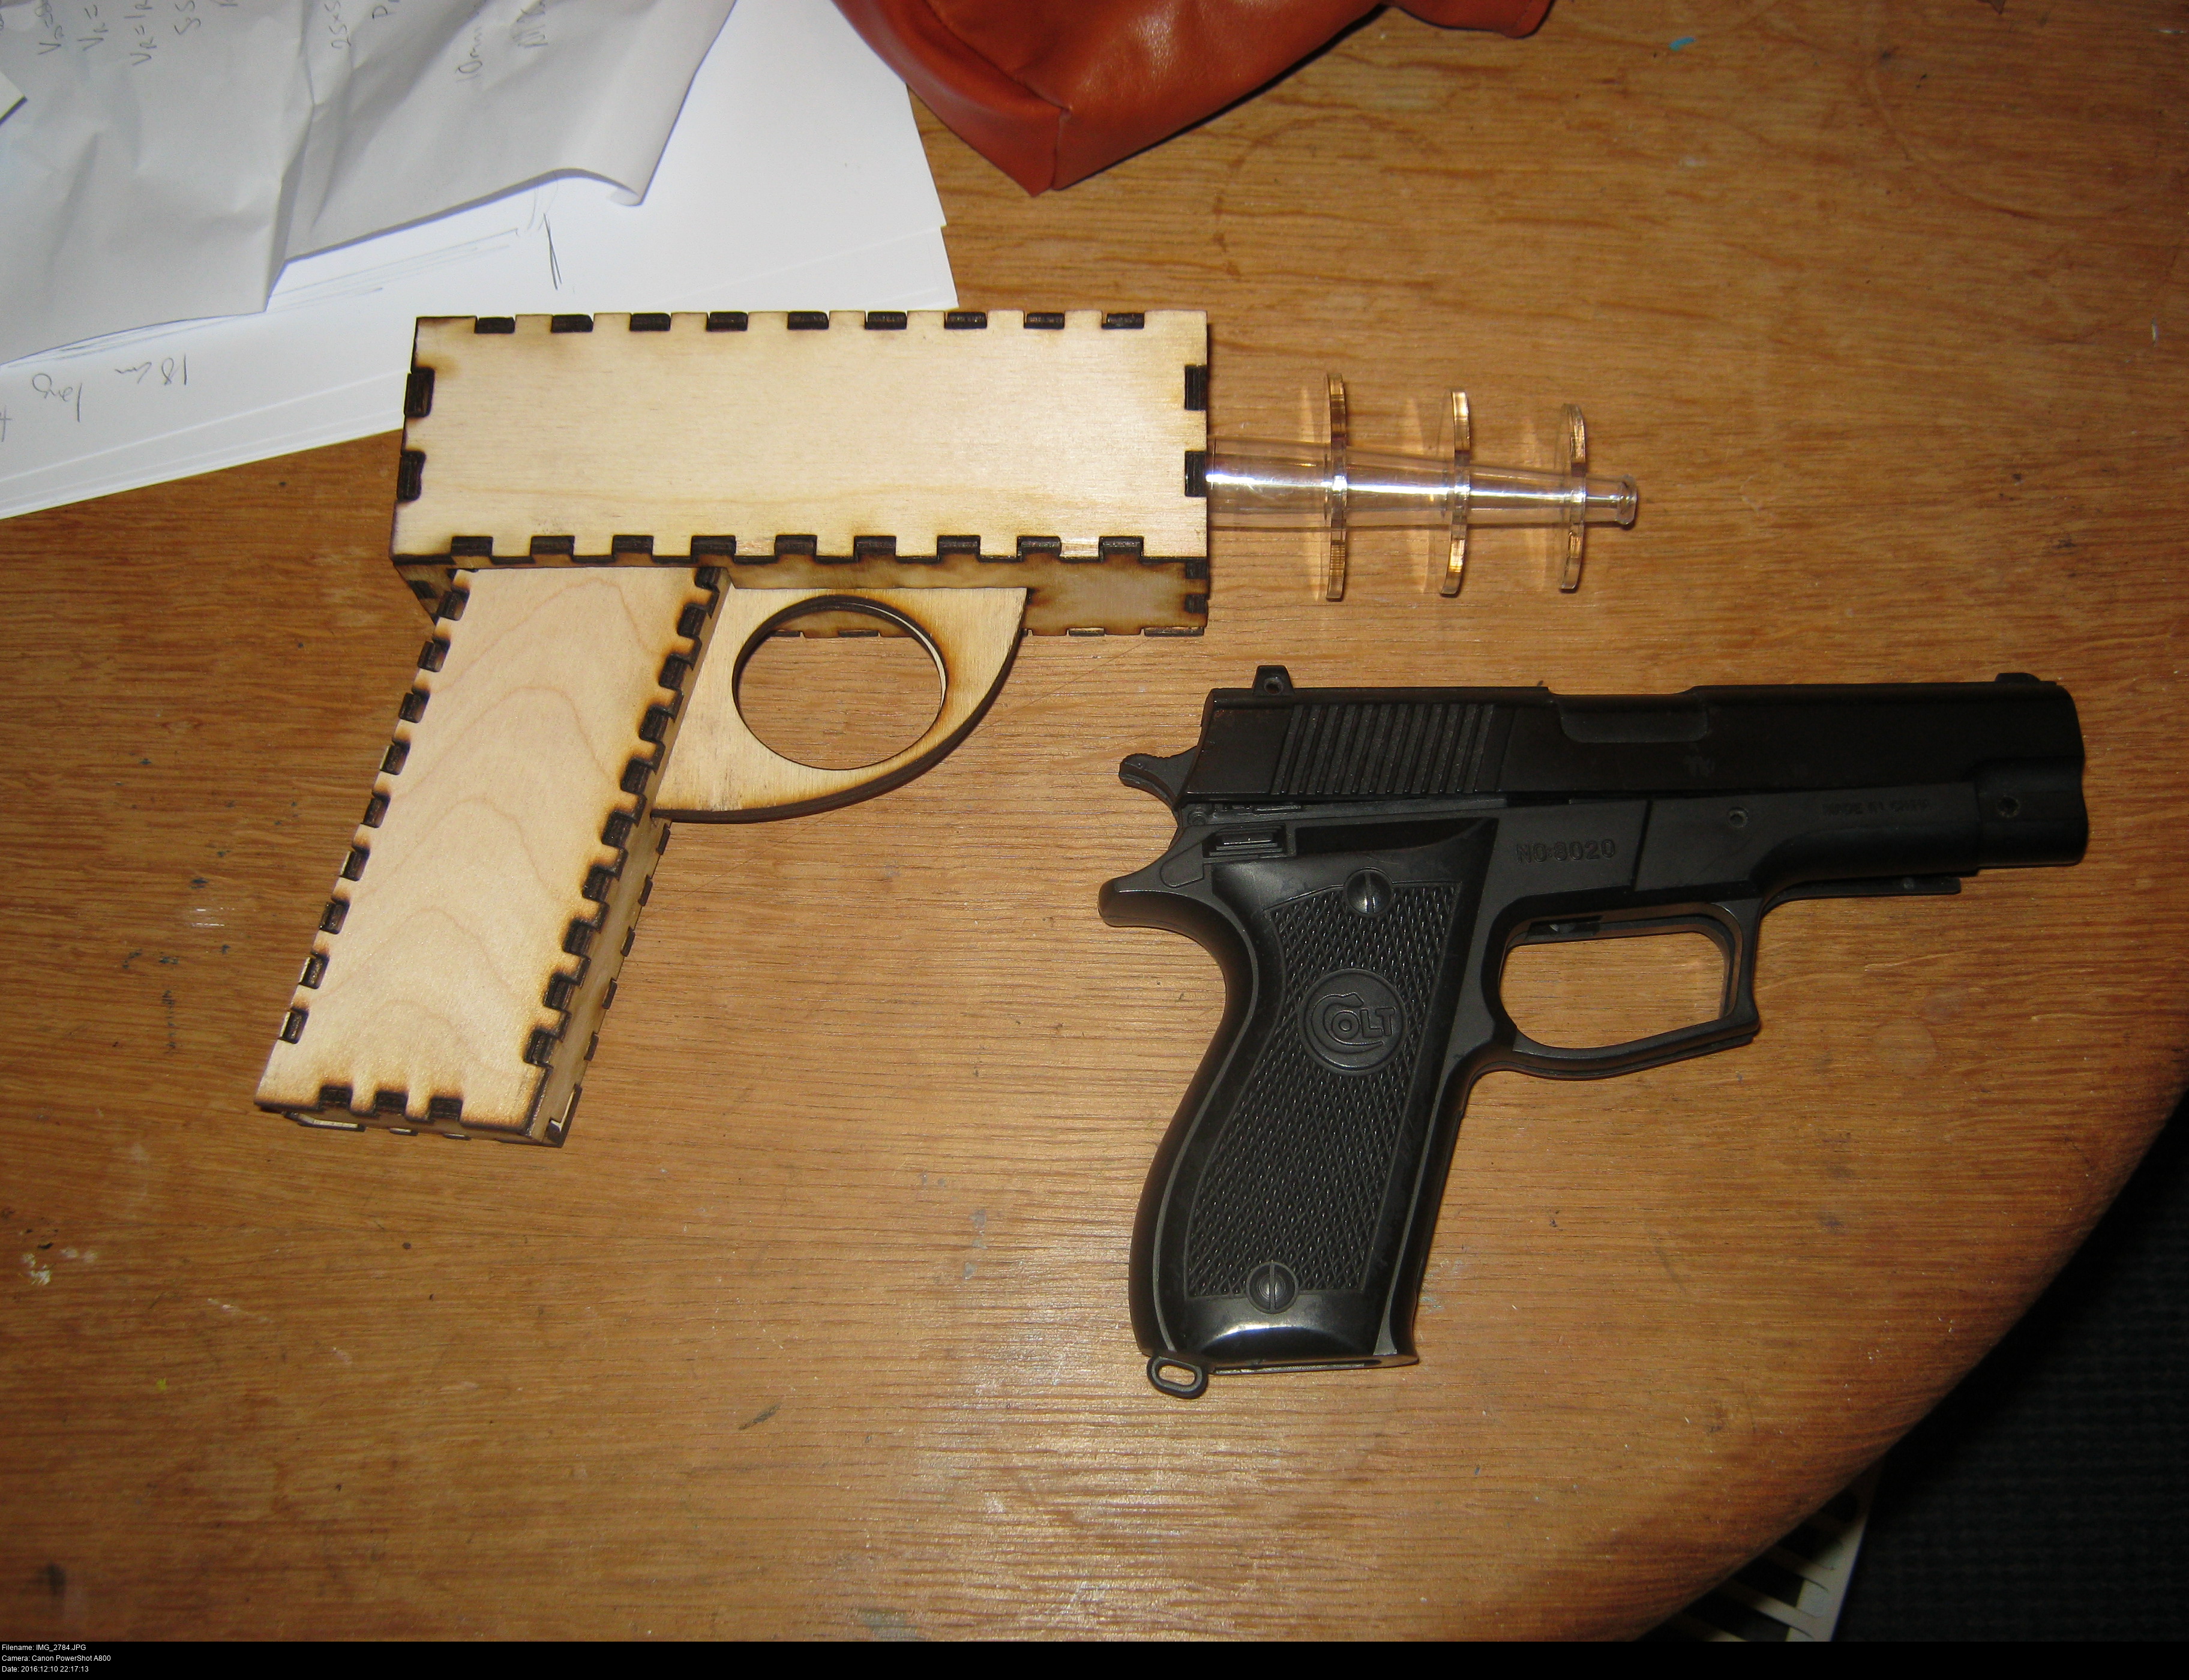

Now I have a whole bunch of wooden pieces to make a gun from!
Here's how the overlynx pistol compares in size to a toy pistol (I don't know the type).
But what about that light idea?
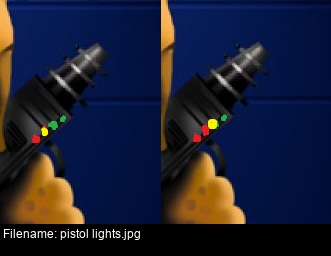
If I just make the gun all black, wouldn't it look pretty boring? Most sci-fi guns (I'm thinking mostly Mass Effect here) have all kinds of ridges and boxes and overlapping layers to them. This guy's just going to have a cuboid?
What if I put some more blinky lights on the gun! Blinky lights all over! A light up dome! It's my damn gun I can do what I want!
But... what would be functional? What would make sense for there to be on sci-fi gun?
How about a series of lights to show how much a shot has charged up, or how much power is left?
Something like this perhaps? I think Red-Yellow-Green-Green looks a lot better than Red-Red-Yellow-Green.
It's off to my favourite online electronics shop http://bitsbox.co.uk for some stuff!
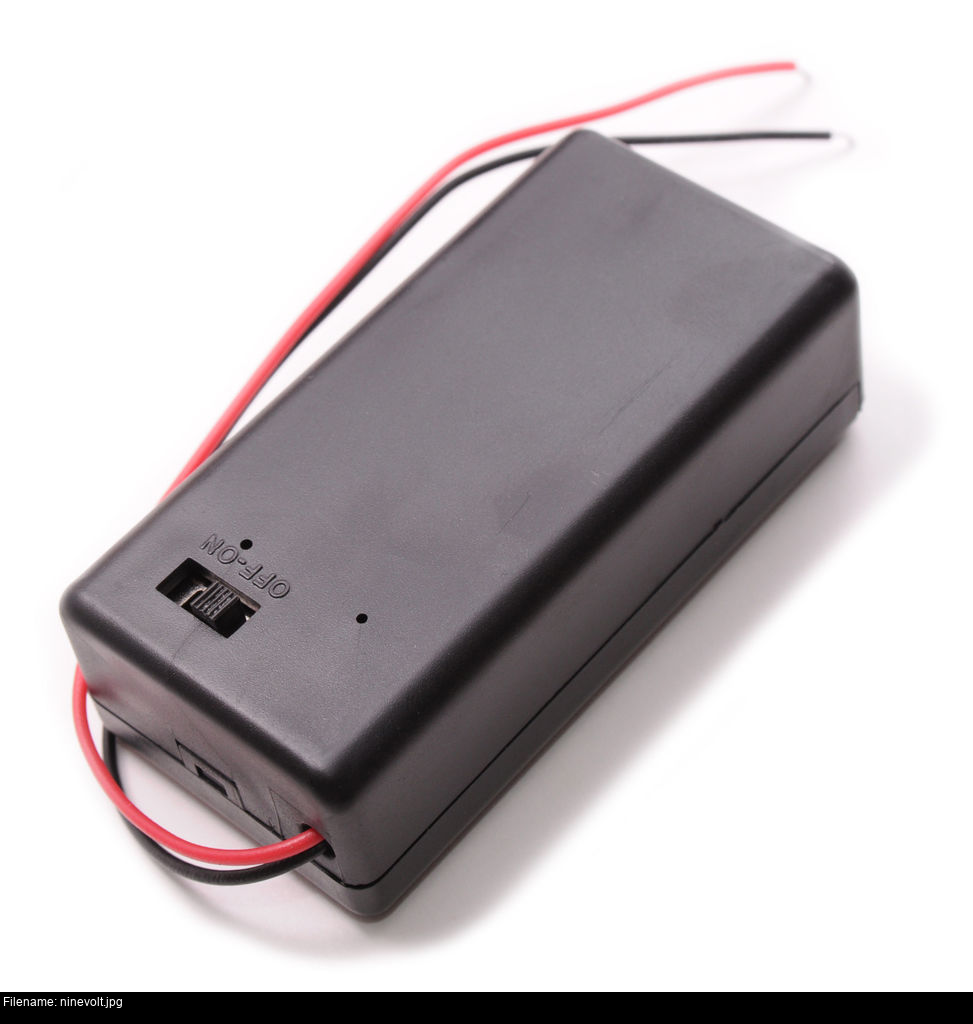
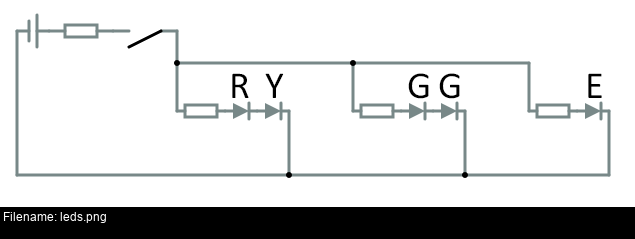
So let's say you've got a big ol' chunky nine volt battery, and a swanky, professional-looking but most importantly SAFE switched case for it. How do you wire up LEDs to a battery? (Skip this bit if you don't like numbers! Remember: engineering, not art.)
On the datasheet for your LED, it'll have a listed forward drop voltage. This is the minimum voltage it needs to light up. If you give it a slightly bit less, it'll do nothing. If you give it a slightly bit more, it will provide no barrier to current and lots and lots of amps will flow and give you the tiniest little 'pop' in a second or so.
Together with the forward drop voltage, the LED will have a maximum listed current that it likes to operate at. You need to regulate the current through LED so that it operates at the correct value and no more, and the simplest way to do that is to put a resistor in series with it.
If you have a 9V supply and an LED with a 2.1V forward drop voltage and a 25mA forward current that means that the remaining 6.9V is dropped elsewhere. Without a resistor, this would be dropped by the low-resistance wiring resulting in a huge current through the LED. If you put a resistor in series with the LED, the voltage will be dropped at the resistor instead. If you model the 6.9V as a stable power supply, you can cause 25mA to flow by choosing a resistor of value 276 Ohms (you could pick a 330 Ohms here).
If you want to, you can either have each individual LED coming off the 9V supply with its own resistor, or you can combine multiple LEDs in series with a single resistor IF they have the same current value. If you put two LEDs in series, treat them as one LED with a voltage drop equal to the sum of the individual drops.
https://www.bitsbox.co.uk/index.php?main_page=index&cPath=172_174
Two Green 10mm LEDs have a combined forward voltage drop of 4.8V. To run them from a 9V supply, gives 4.2V remaining. This means I need a 168 Ohm resistor (or 180 Ohm) to make a current of 25mA.
Treat all these values as approximations and design conservatively! Assume the worst case and never let too much current flow.
This advice will help you build something with LEDs that are always on, not blinking or cycling or pulsing. You'll need a special auto-blinking LED and/or a microcontroller for that.
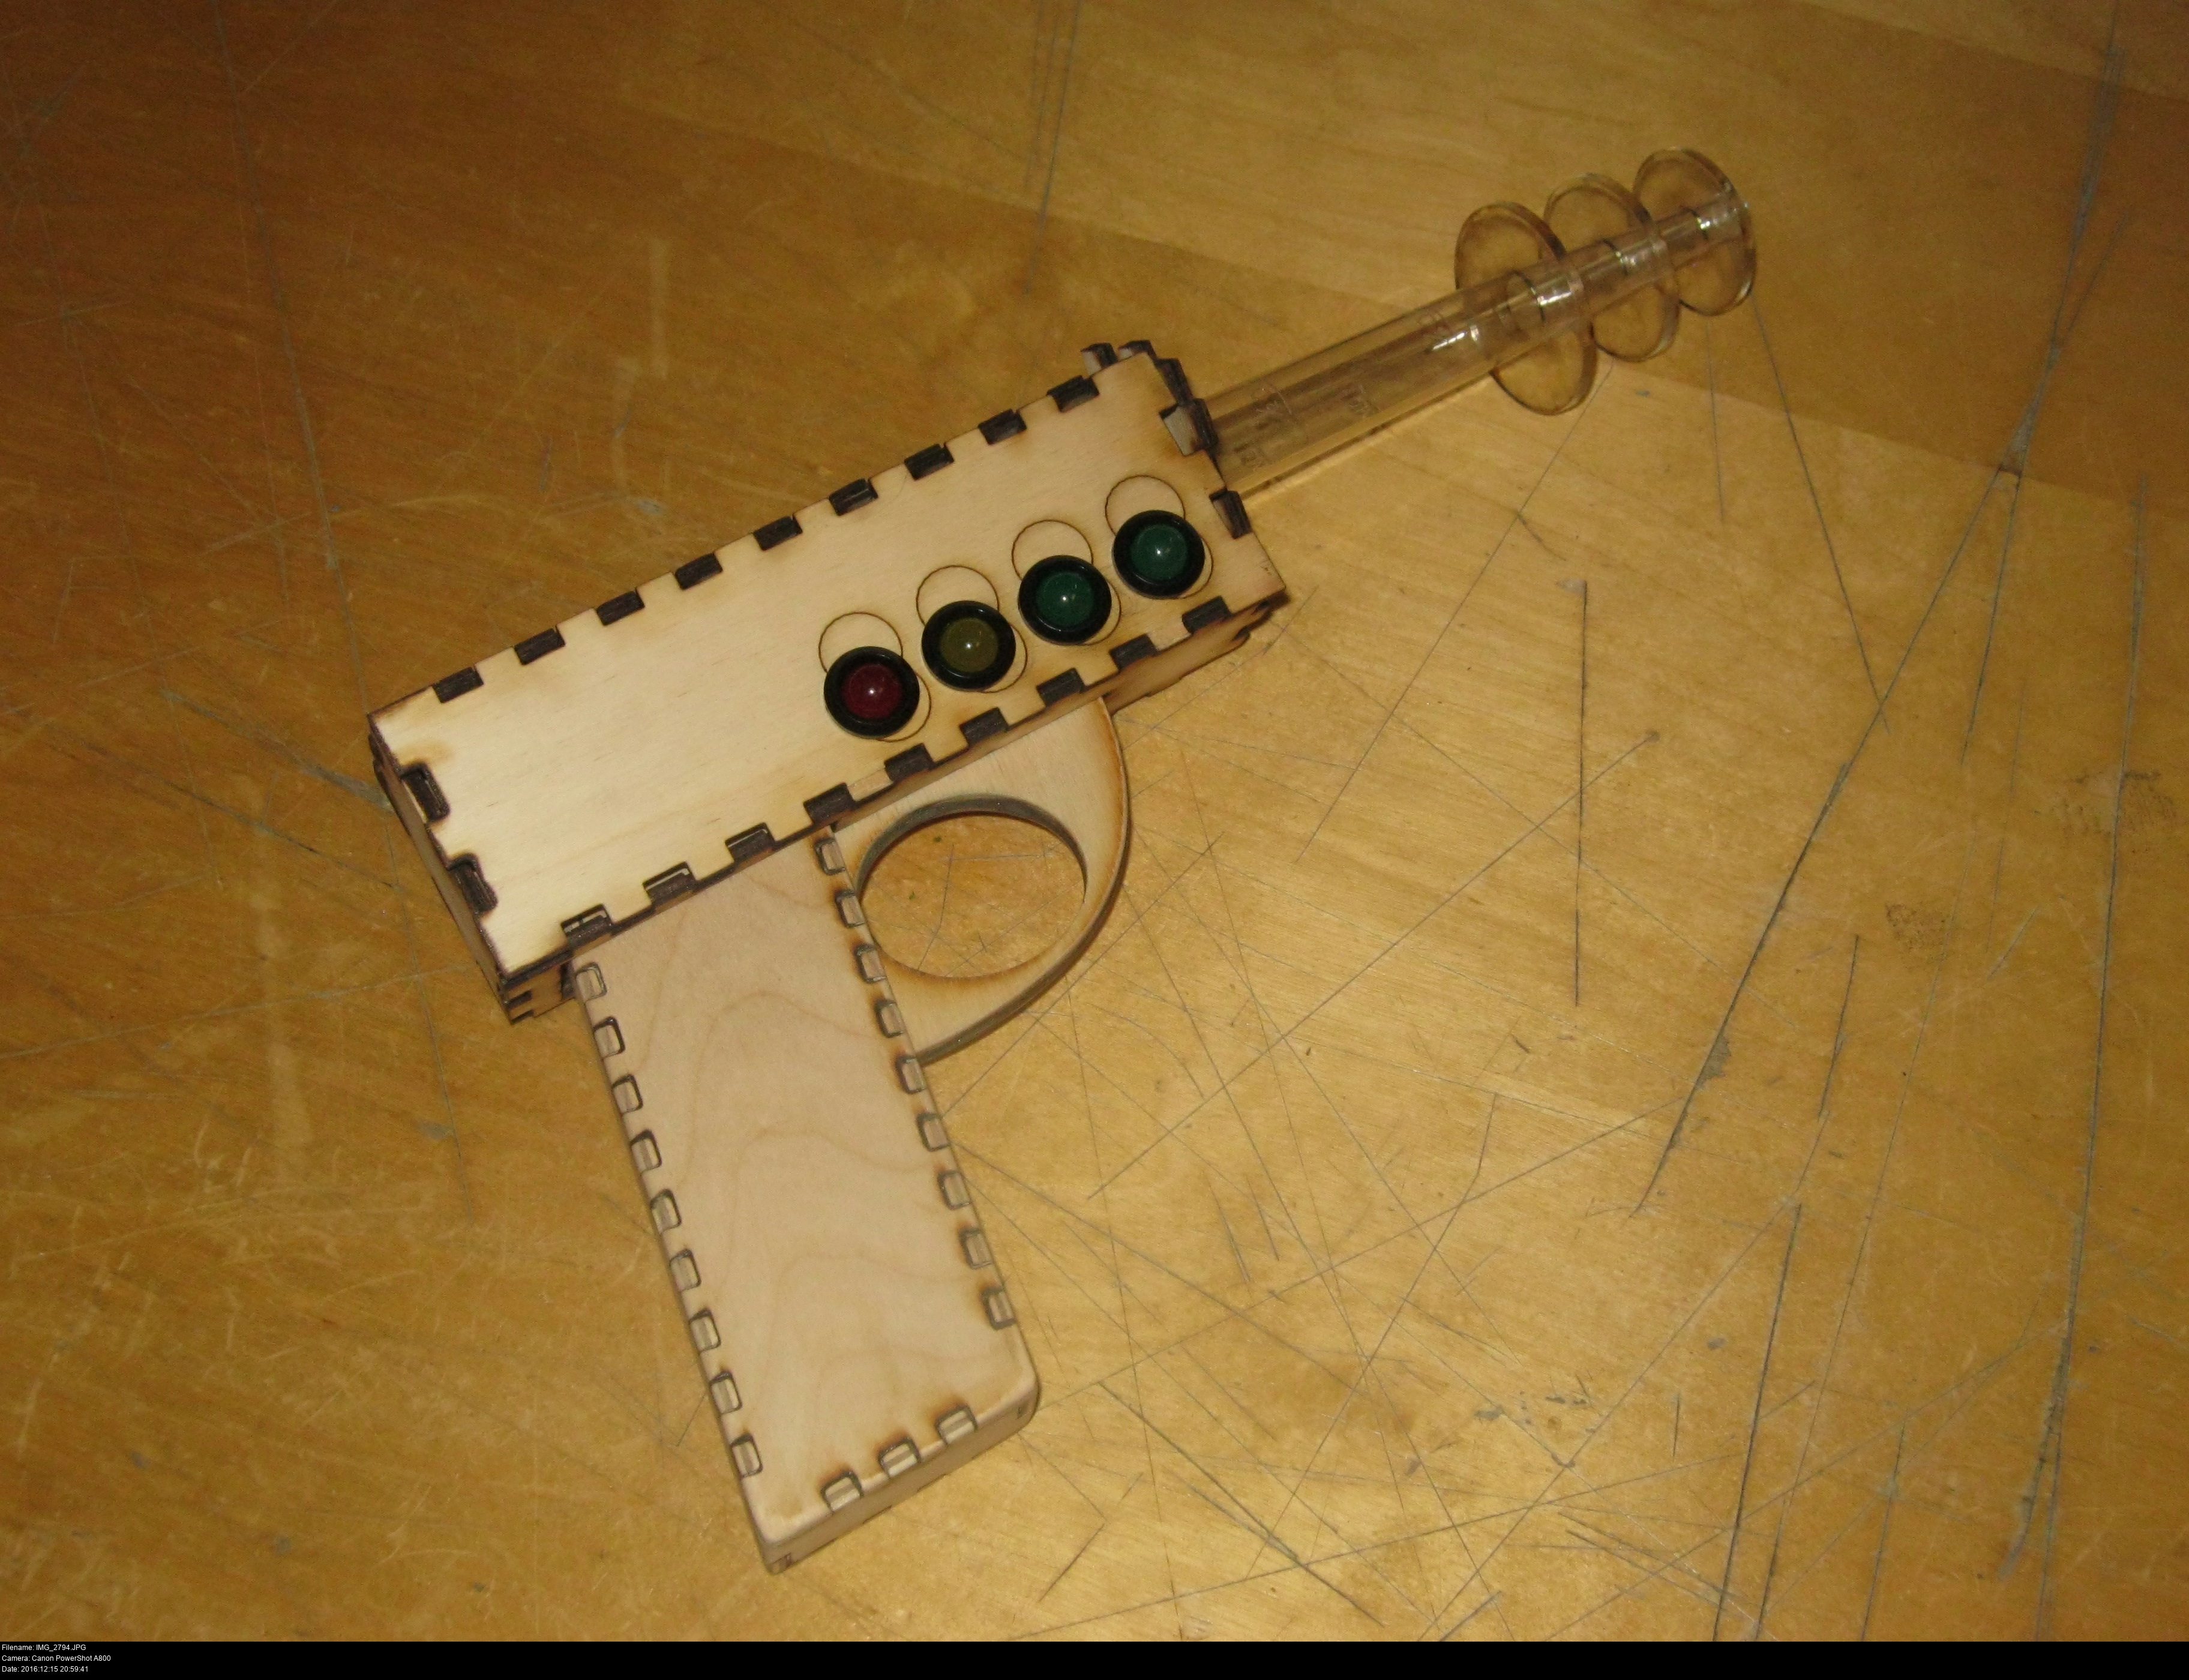

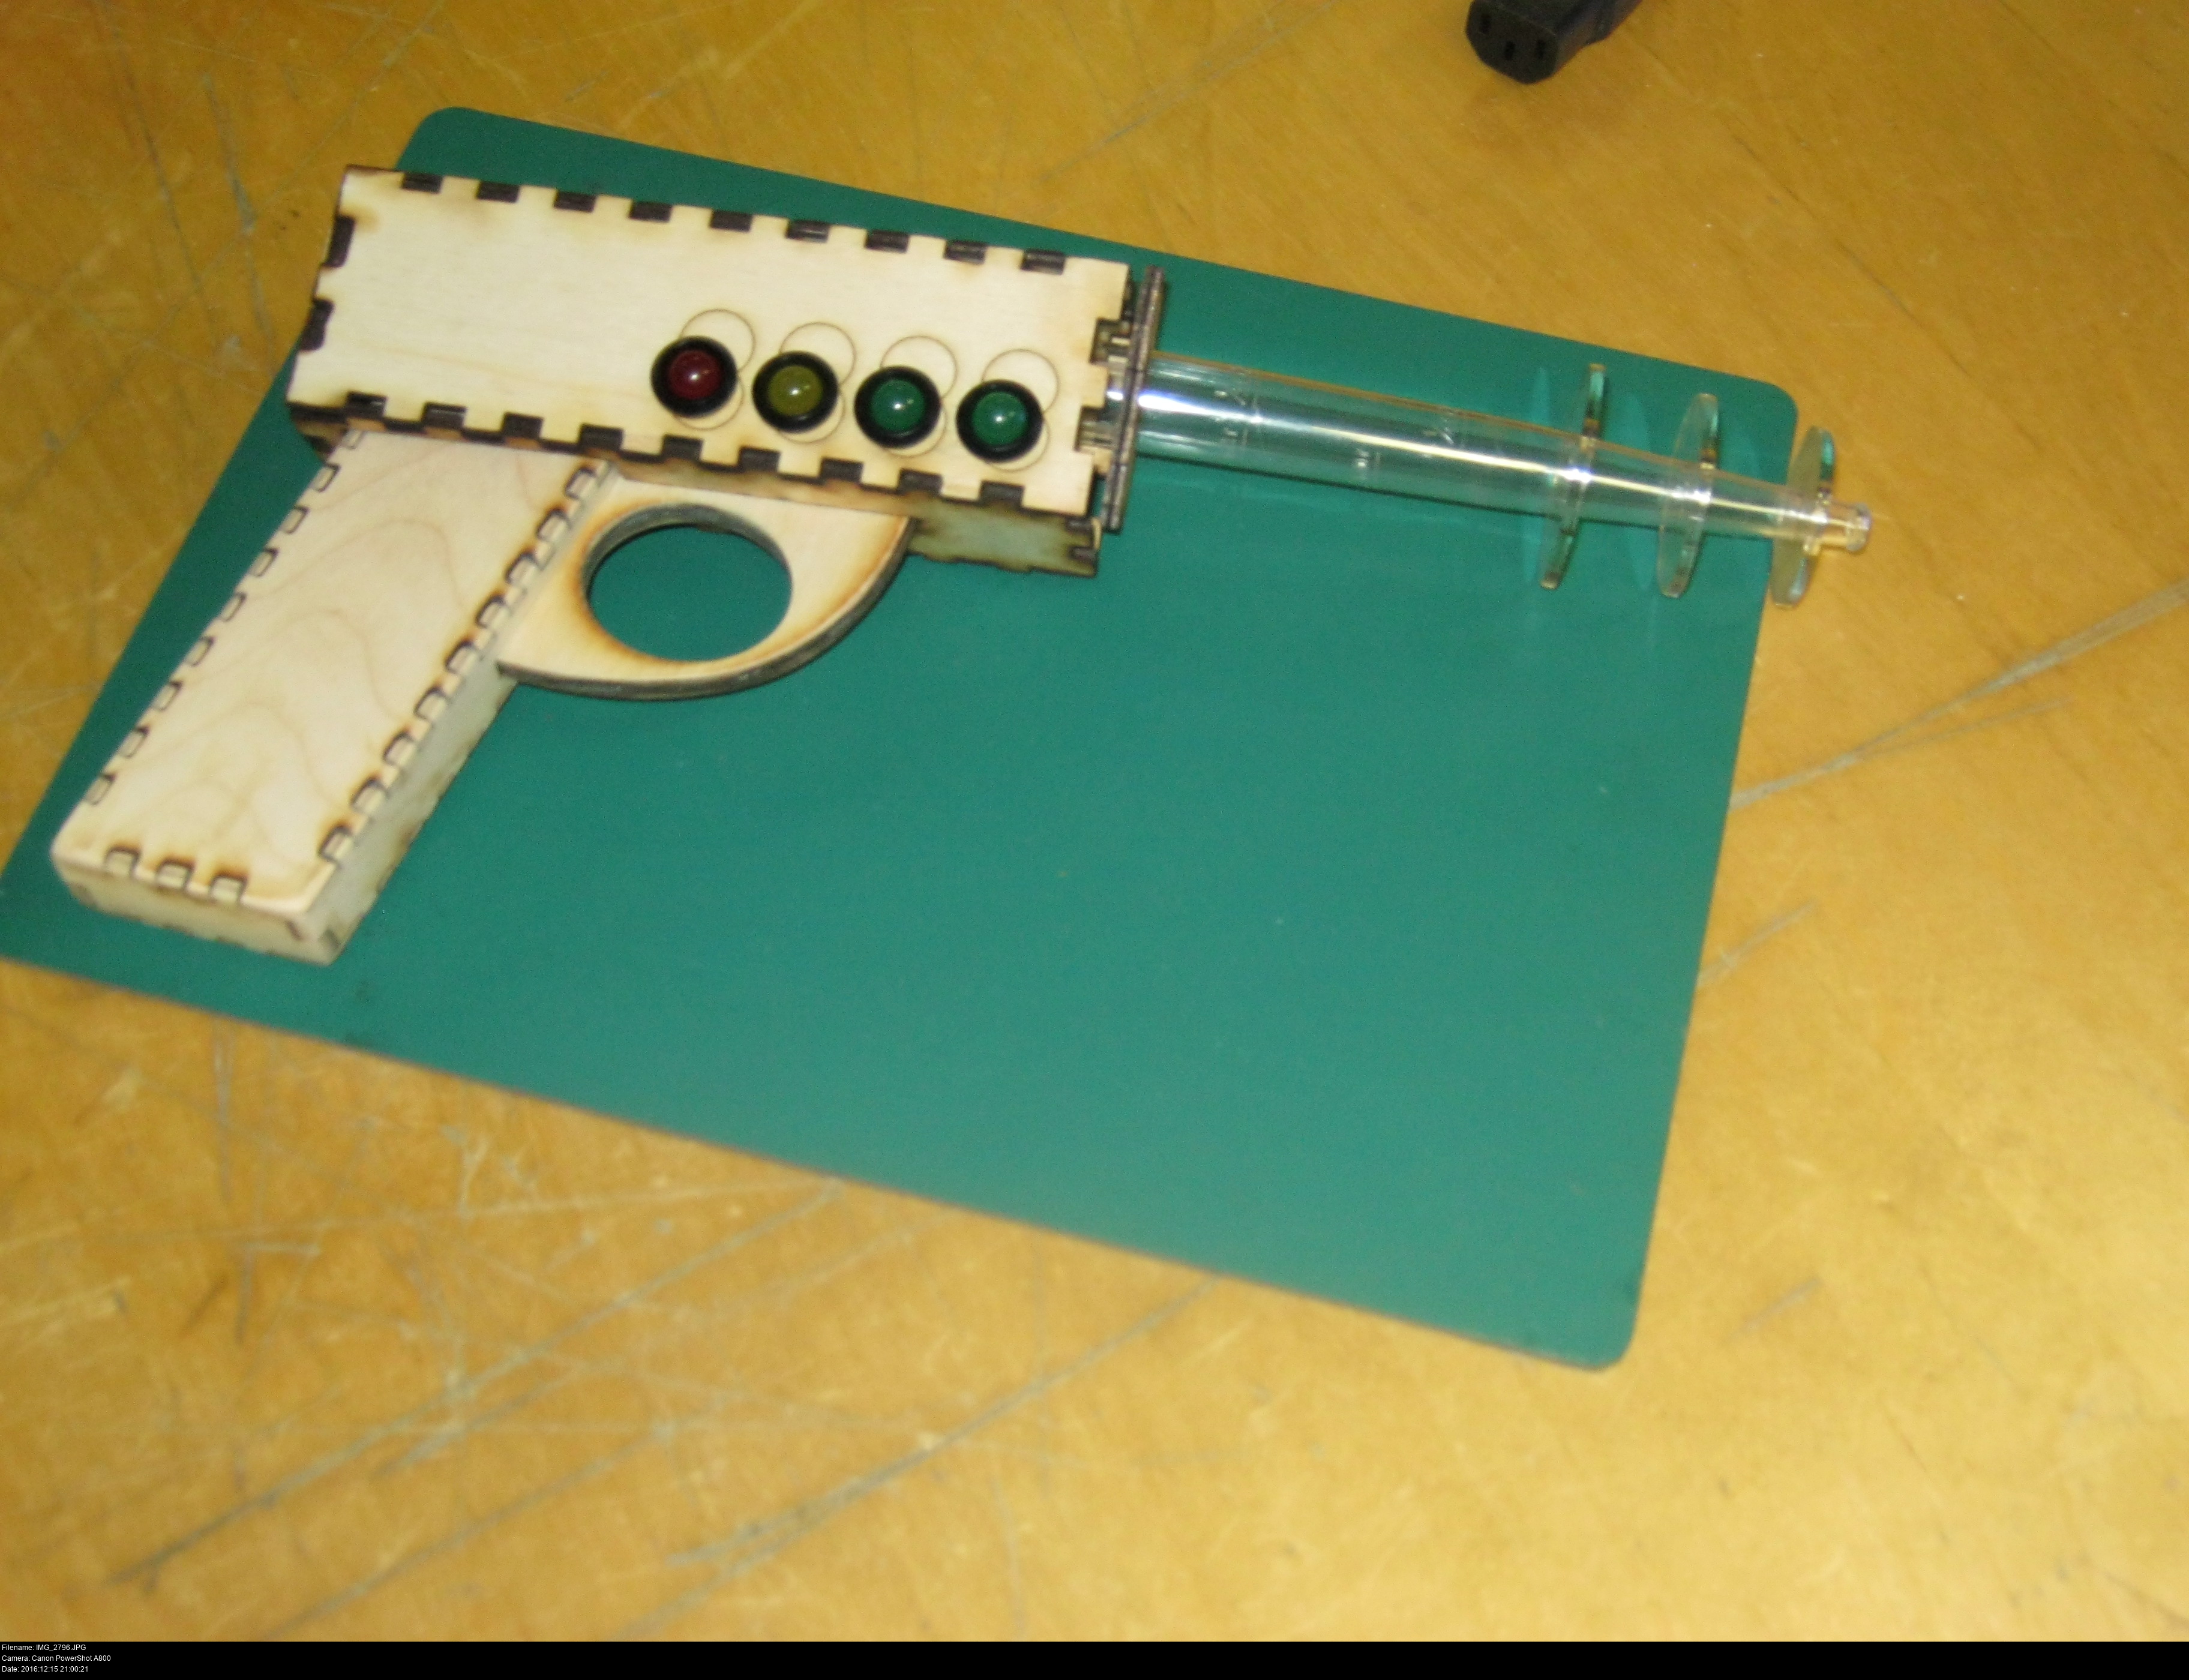
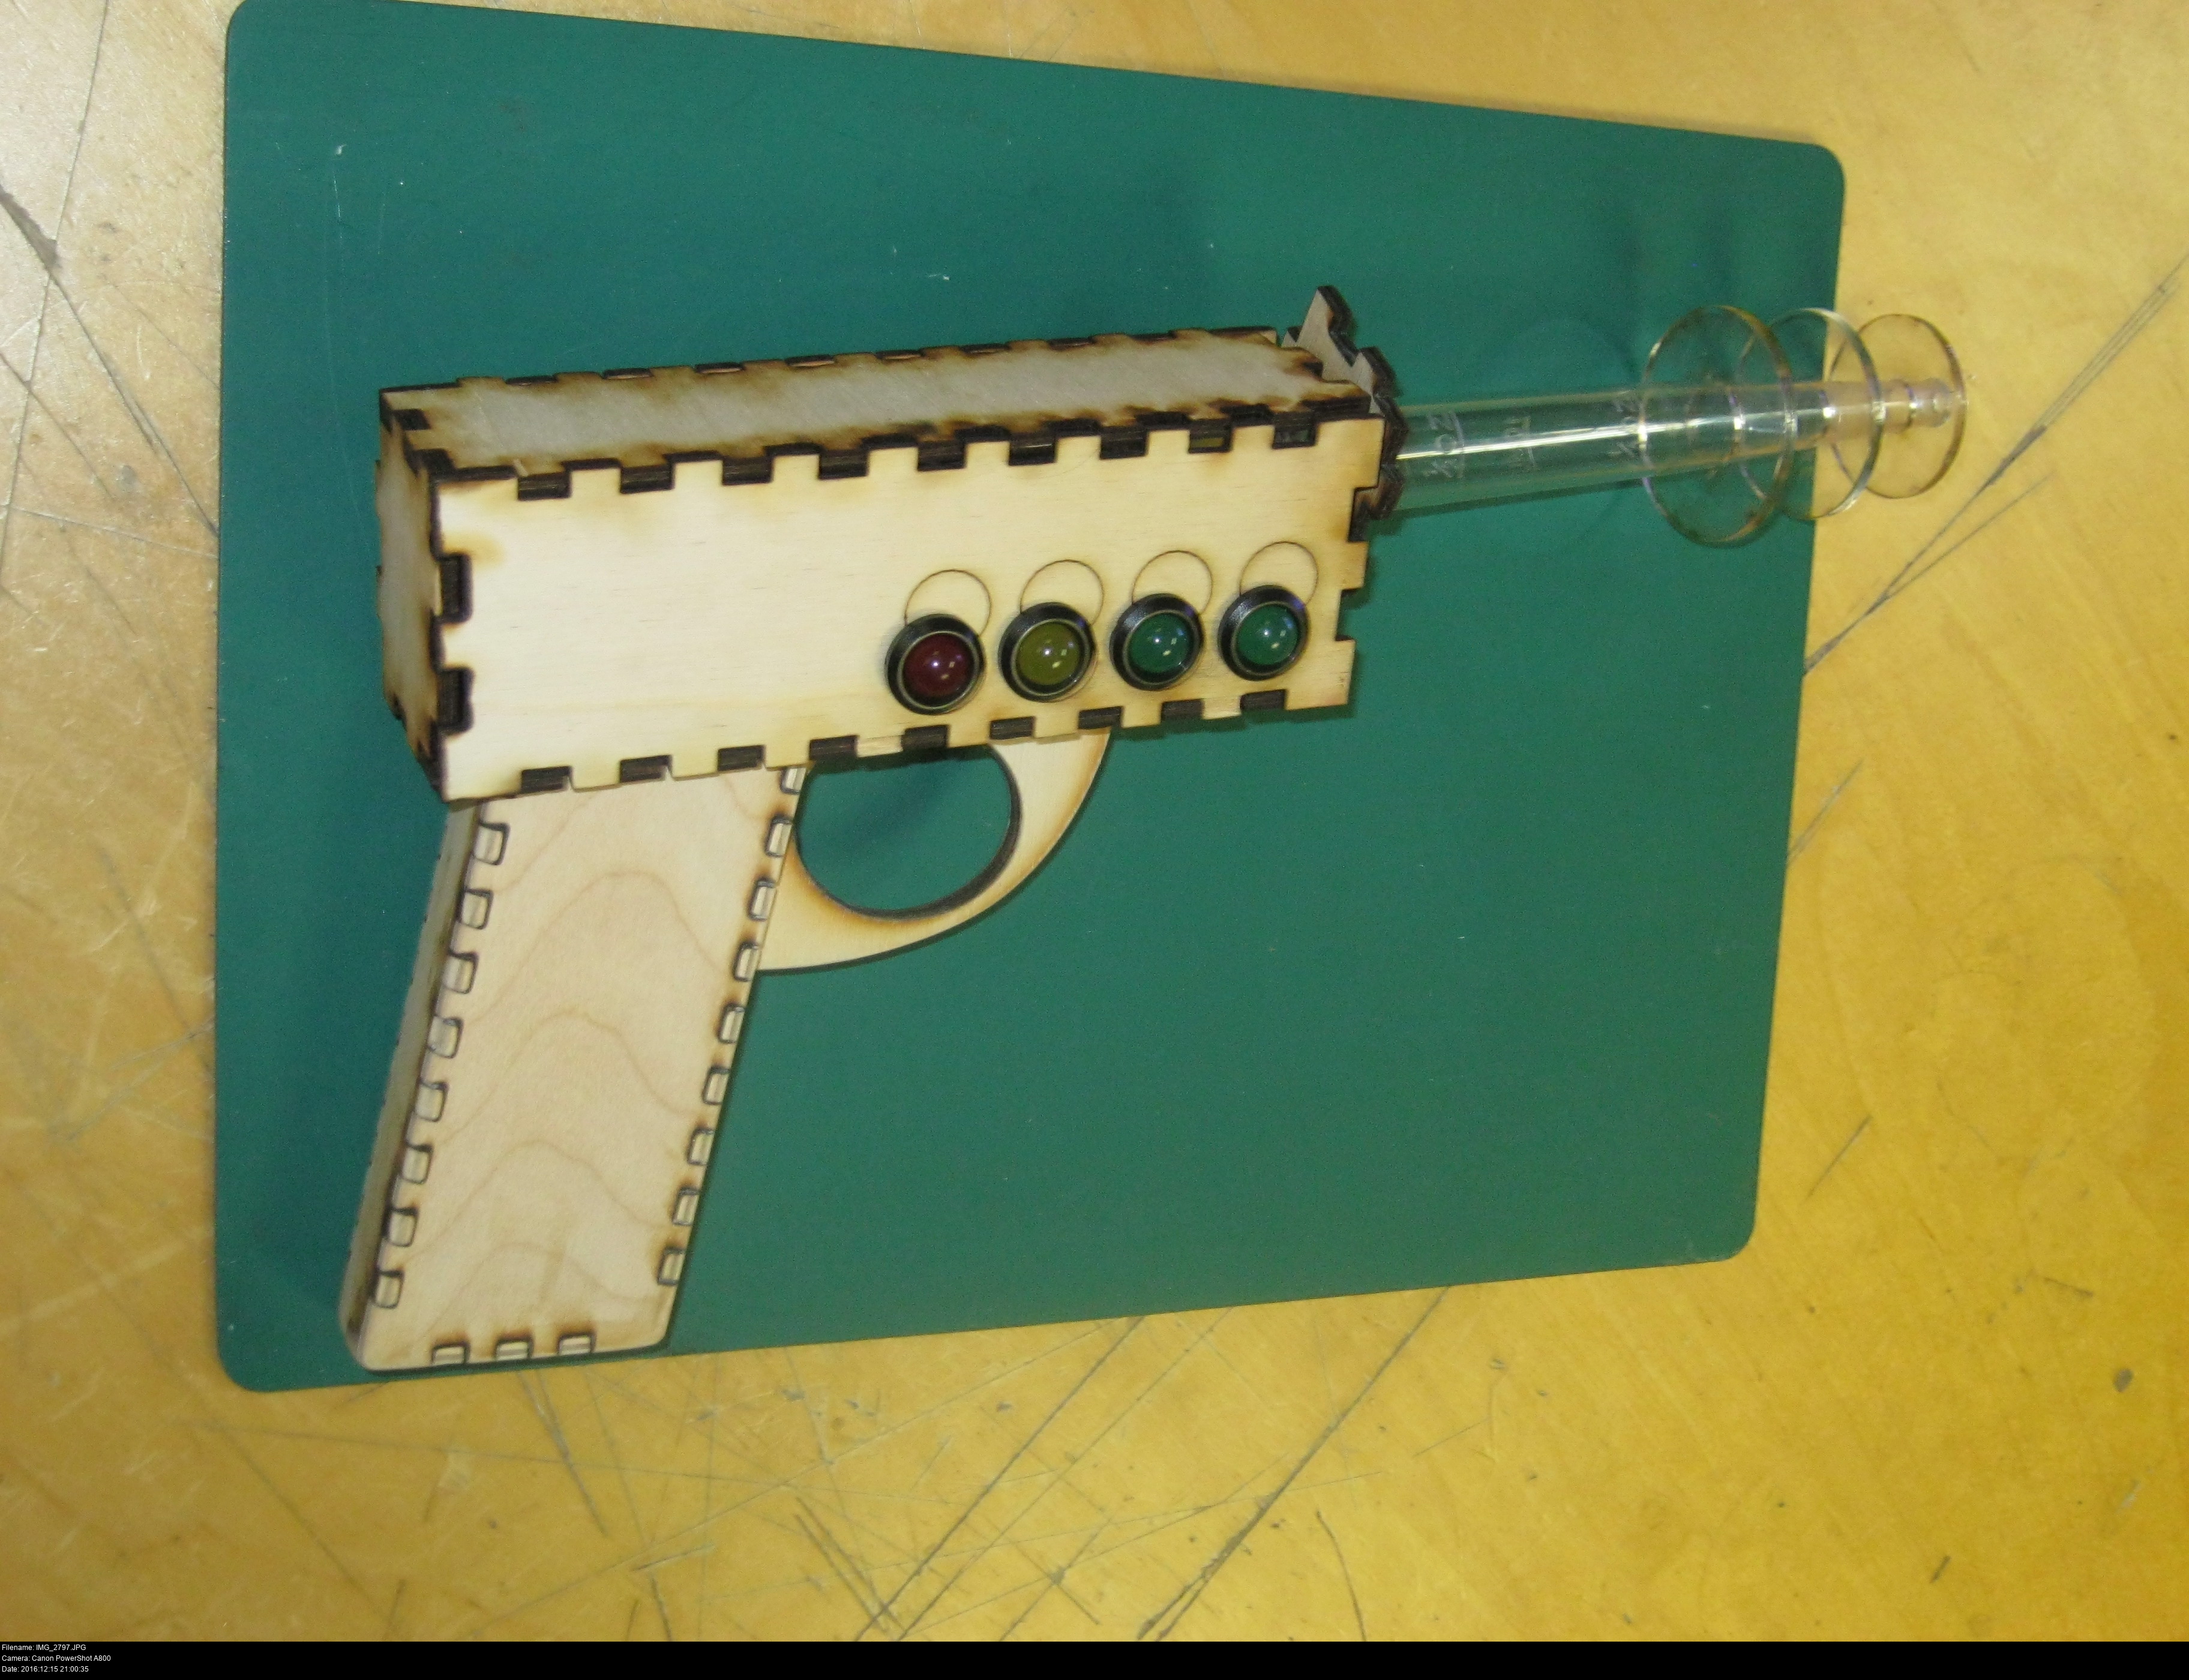
With the baster not yet fixed in place, I can try out different styles of barrel. These are more rifley, but I prefer it more pushed in.
In my gun, I'm going to put my Maplin 5mm Hyper Orange LED in the emitter barrel, and have Red Yellow Green Green 10mm LEDs running along either side of the gun in the lower front corner.
I've used the DoES laser cutter to cut the correct holes in the side plates of the gun (this is why you assemble the gun LAST), using calipers and test pieces to ensure that the 10mm LED clips fit correctly into the wood.
http://www.maplin.co.uk/p/5mm-hyper-orange-led-n49at
I'll wire up the emitter LED with its own resistor, and for each side wire up Red Yellow and Green Green as pairs of LEDs each with their own resistor.
Here's a tip: if your prop relies on a number of fiddly little components that each cost less than 10p, order a couple of spares just in case.
I'm going to deliberately ignore the advice I just gave and pick resistors that -will- cause too much current to flow:
I'm going to assume that my 9V battery is a cheap Poundland pile of crap, and when I start loading it, the supply will dip to something like 8.5V or 8V. This means I'll pick slightly lower resistors and take my chances. On the plus side, if the lights are designed to work at a lower voltage, it'll last longer as the battery is used up.
(The extra-smart thing to do would be to test the battery and see how its available voltage varies with current draw.)
Why did I pick a 9V supply instead of something smaller?
Because I've had a brainwave! That nifty little secure case for the battery? What if I just attach that to the top of the gun in lieu of a dome! It'll be a nice feature, it's the right colour, and there'll be an easily accessible switch for me to toggle the lights on the gun. You'll see.


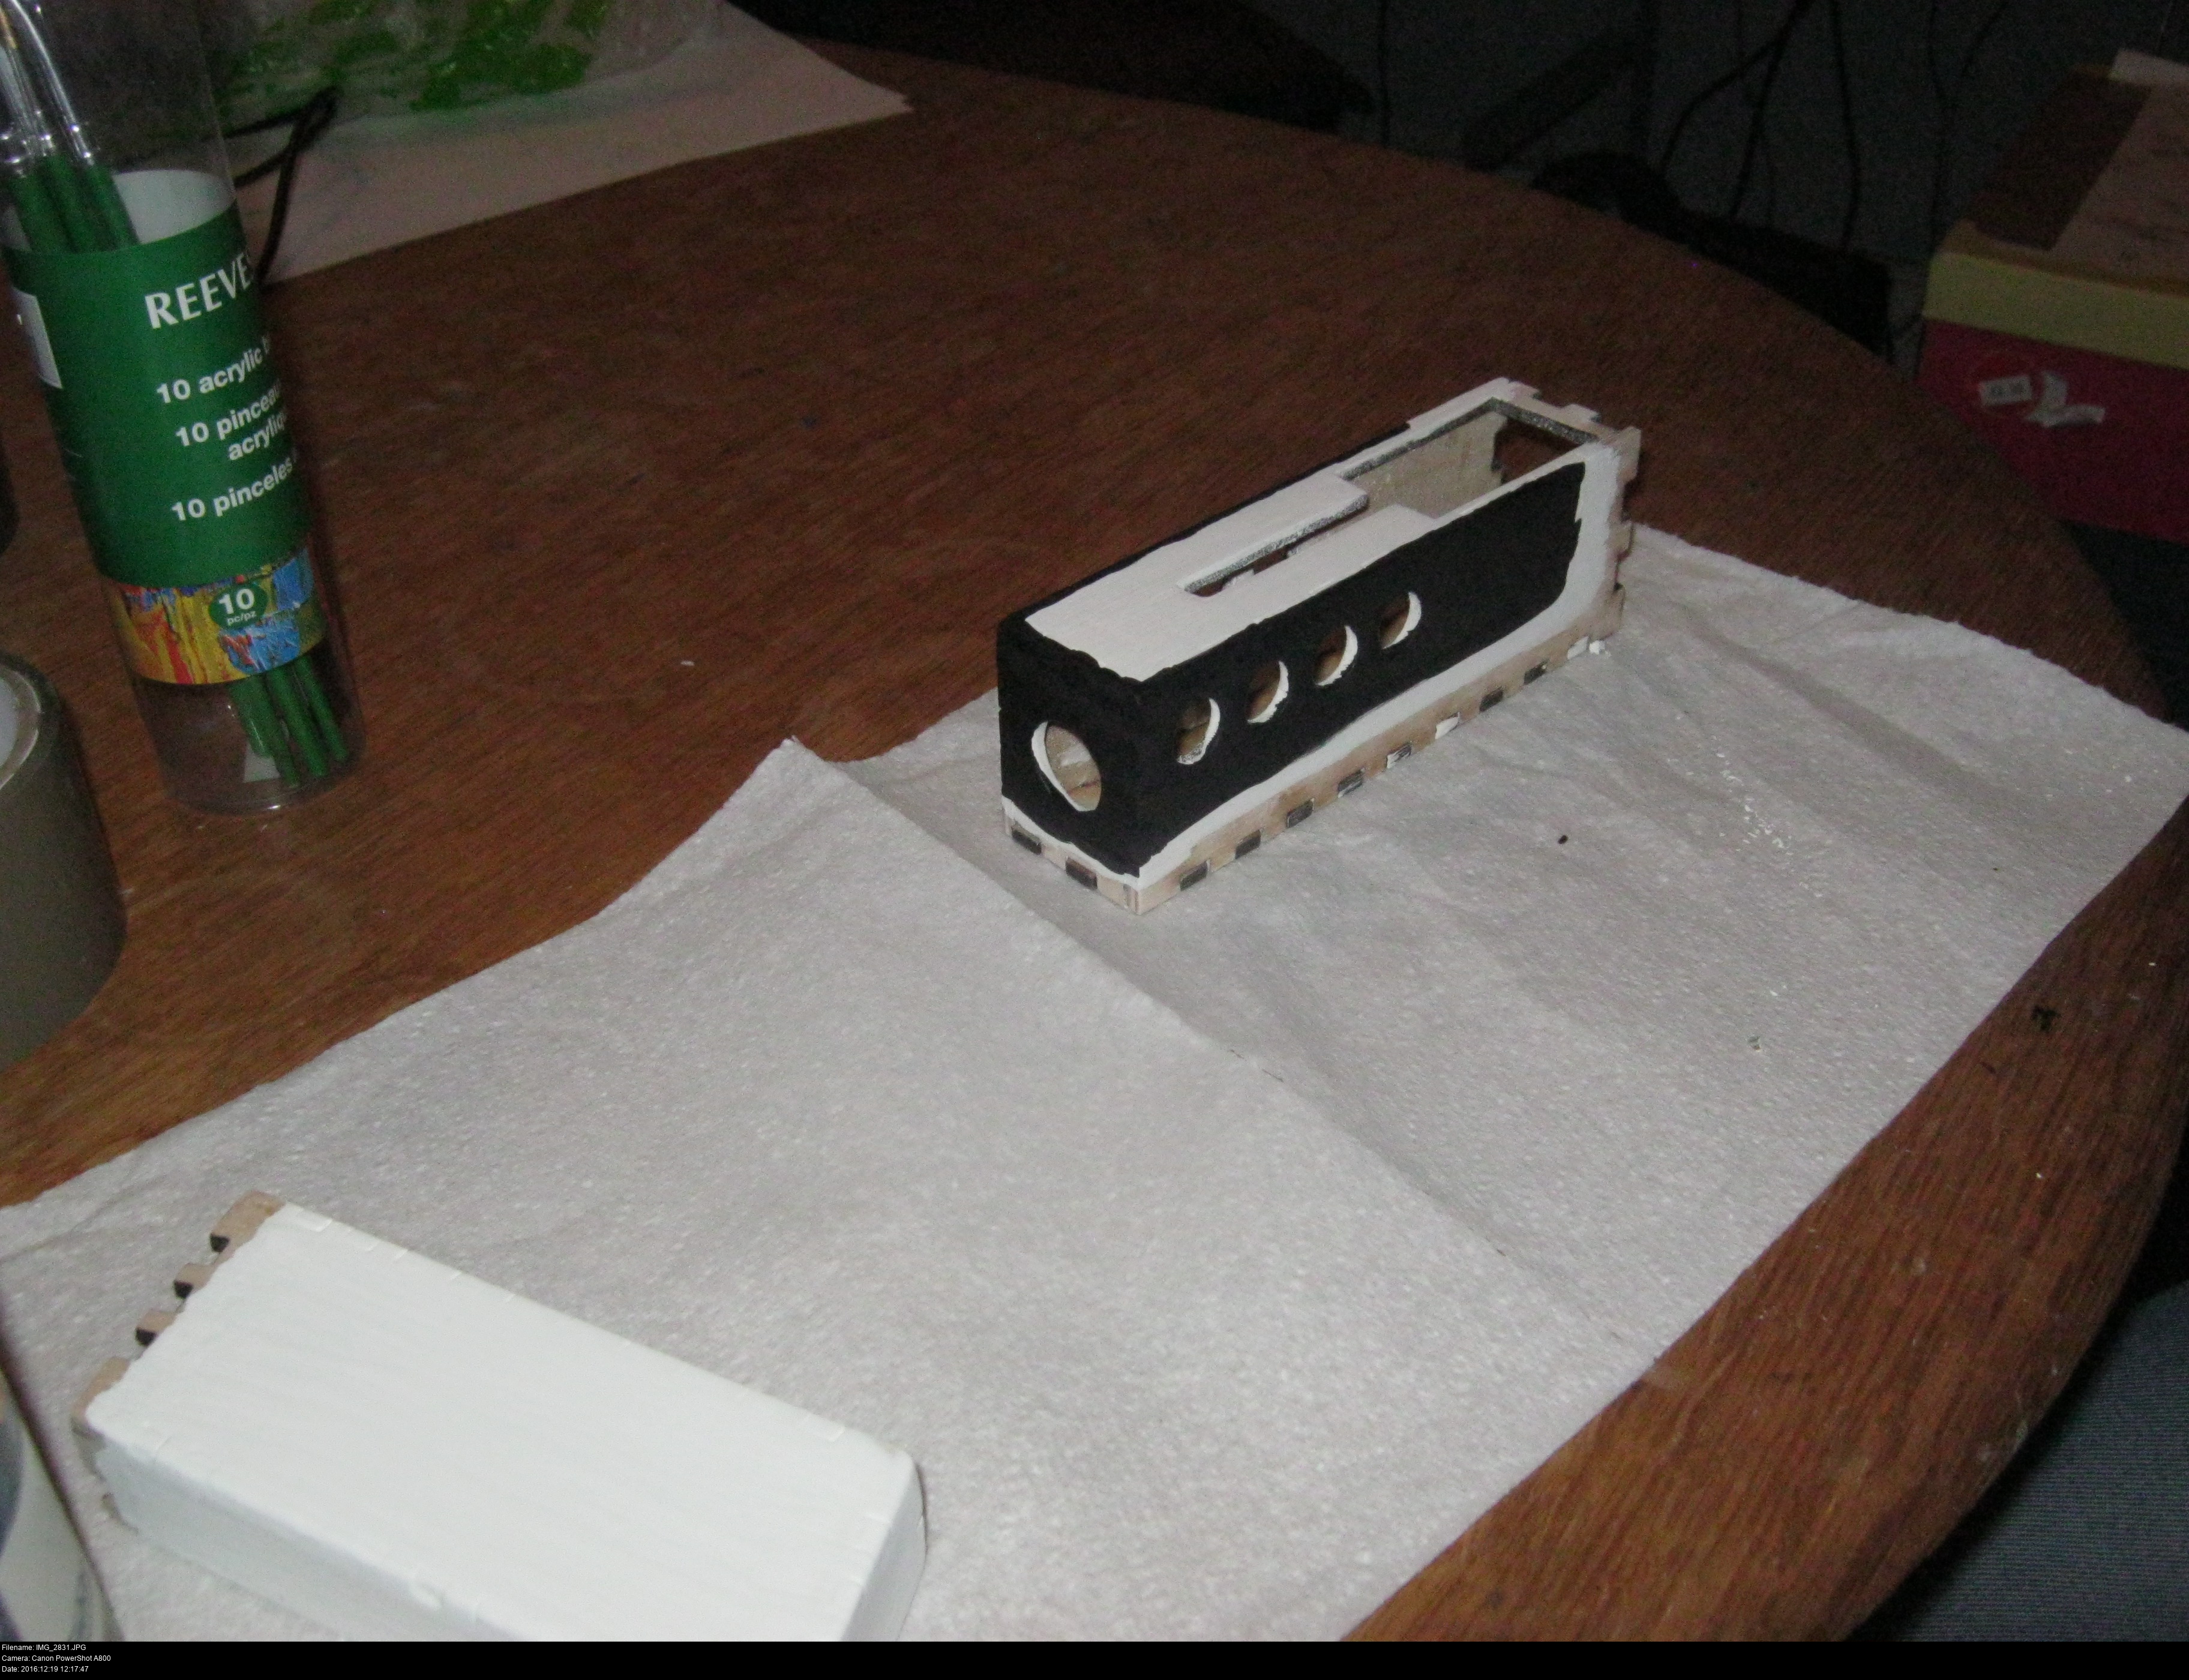
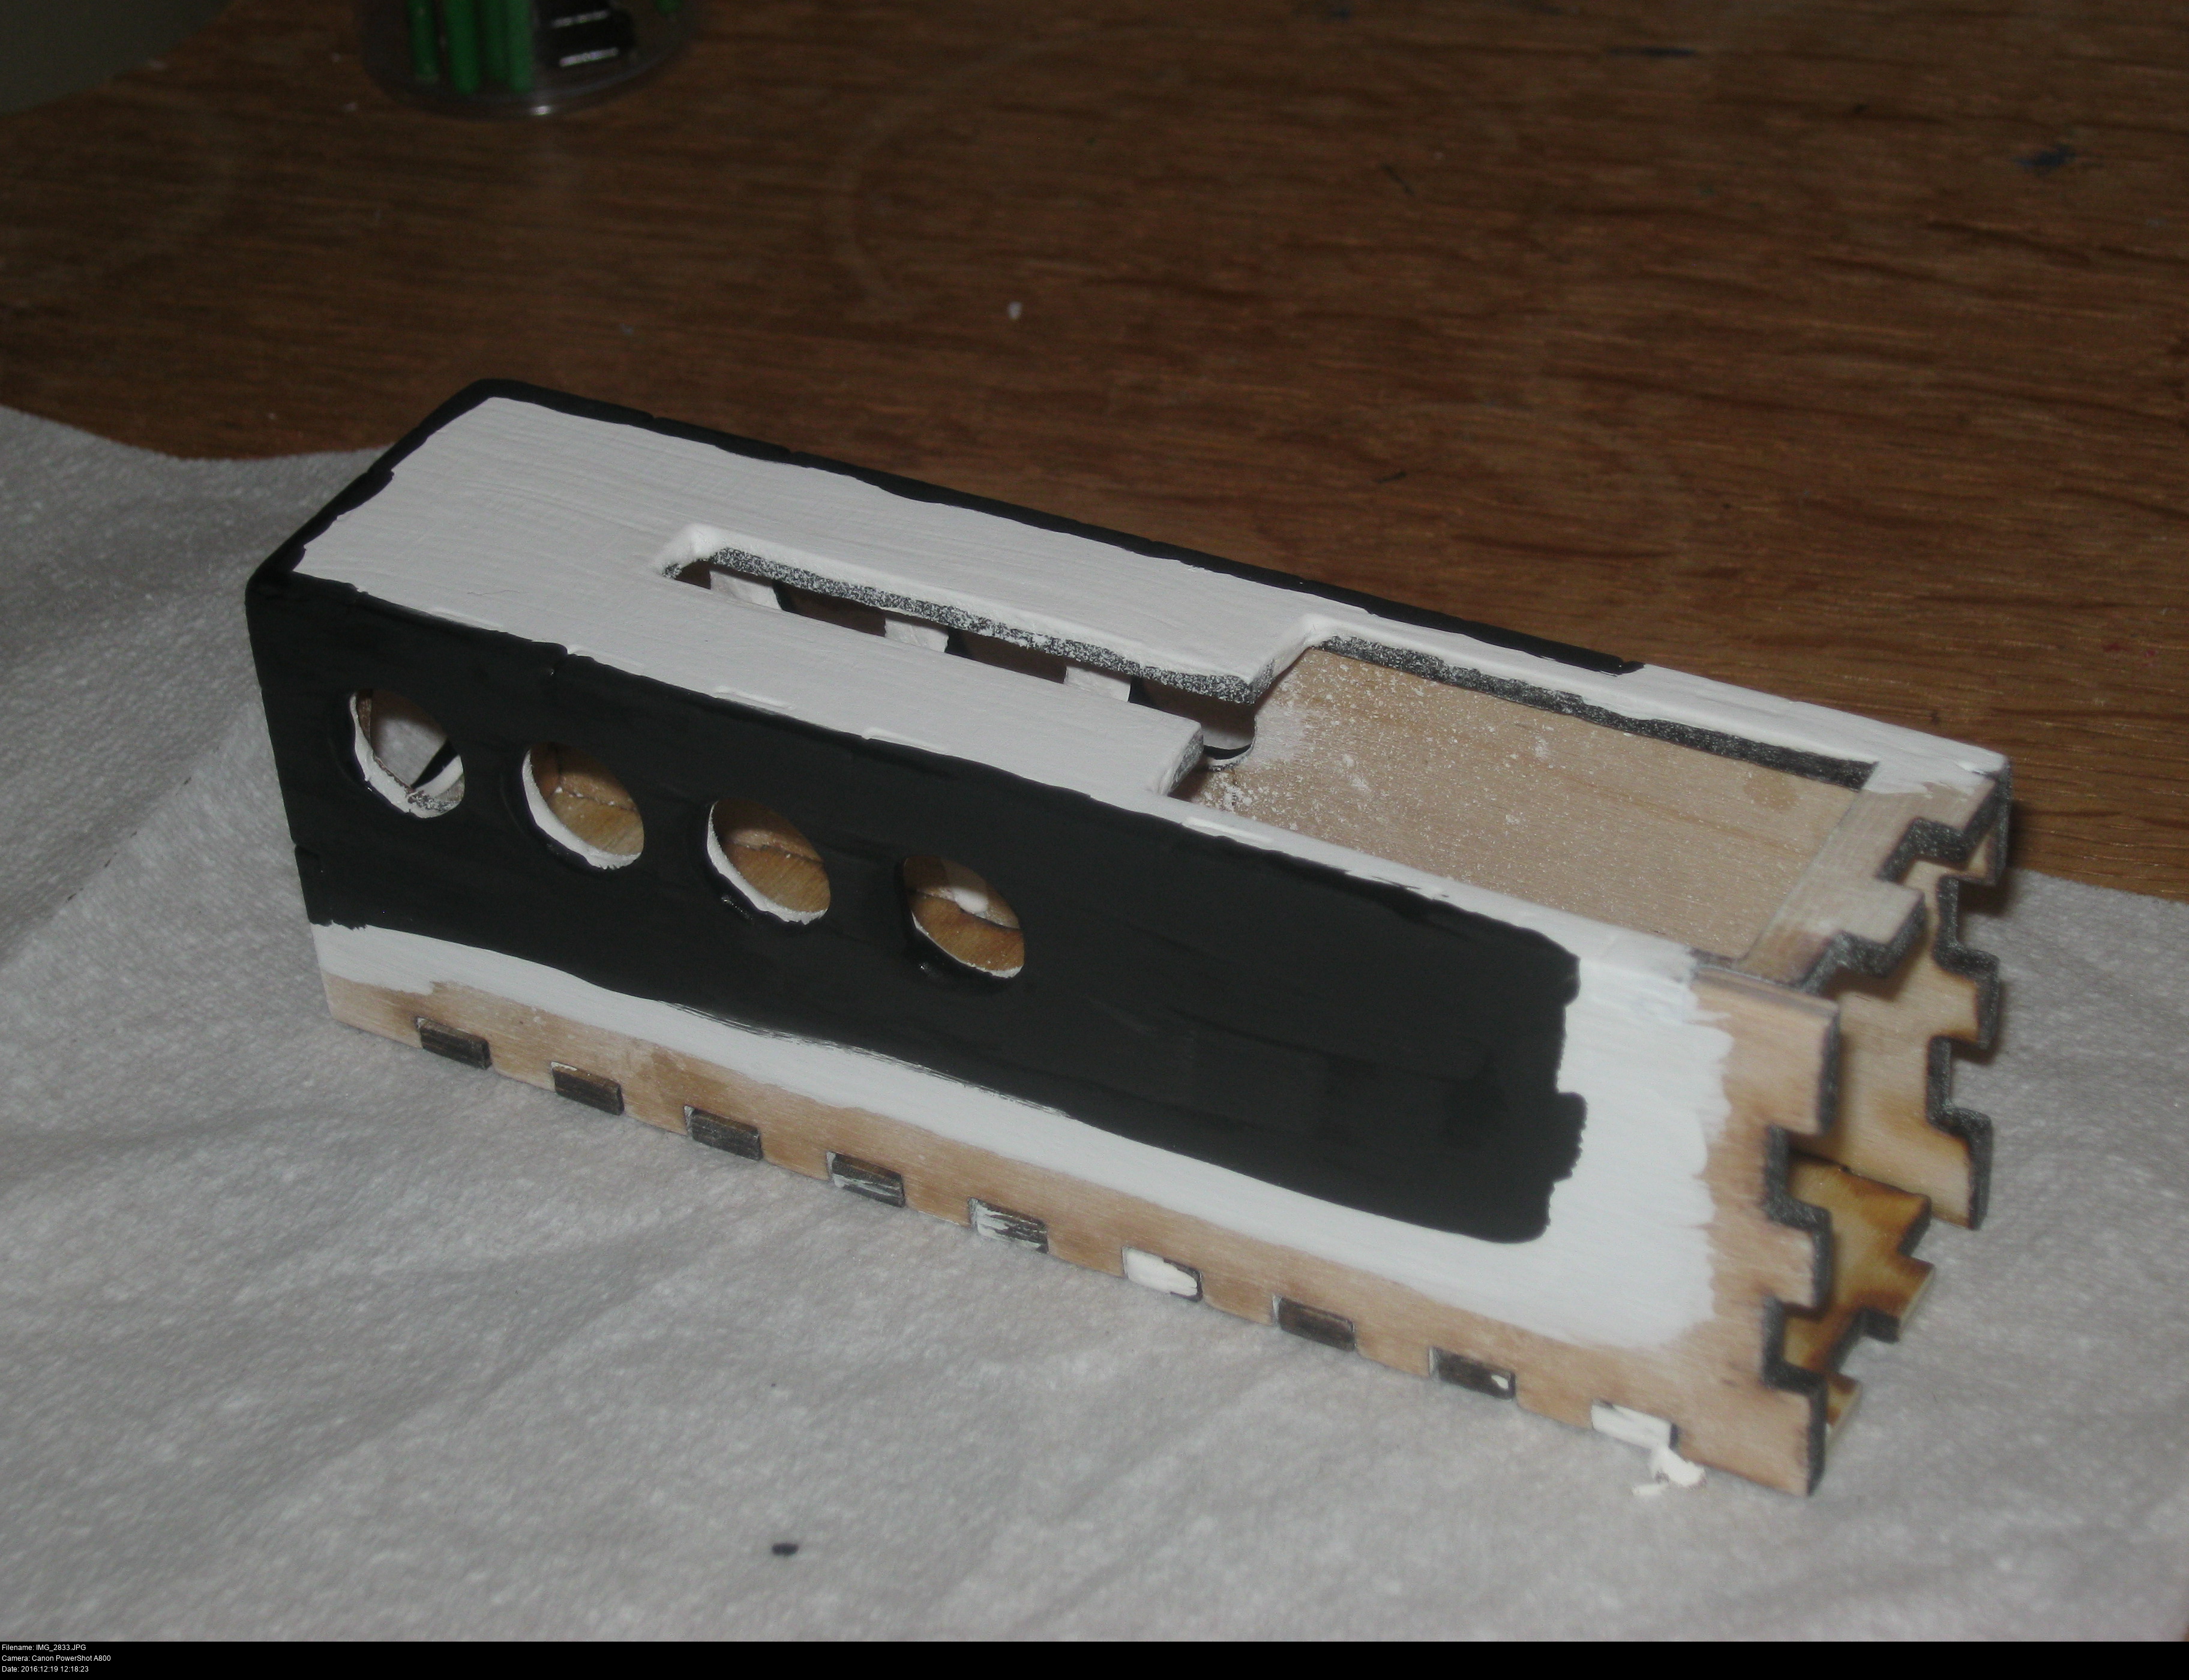

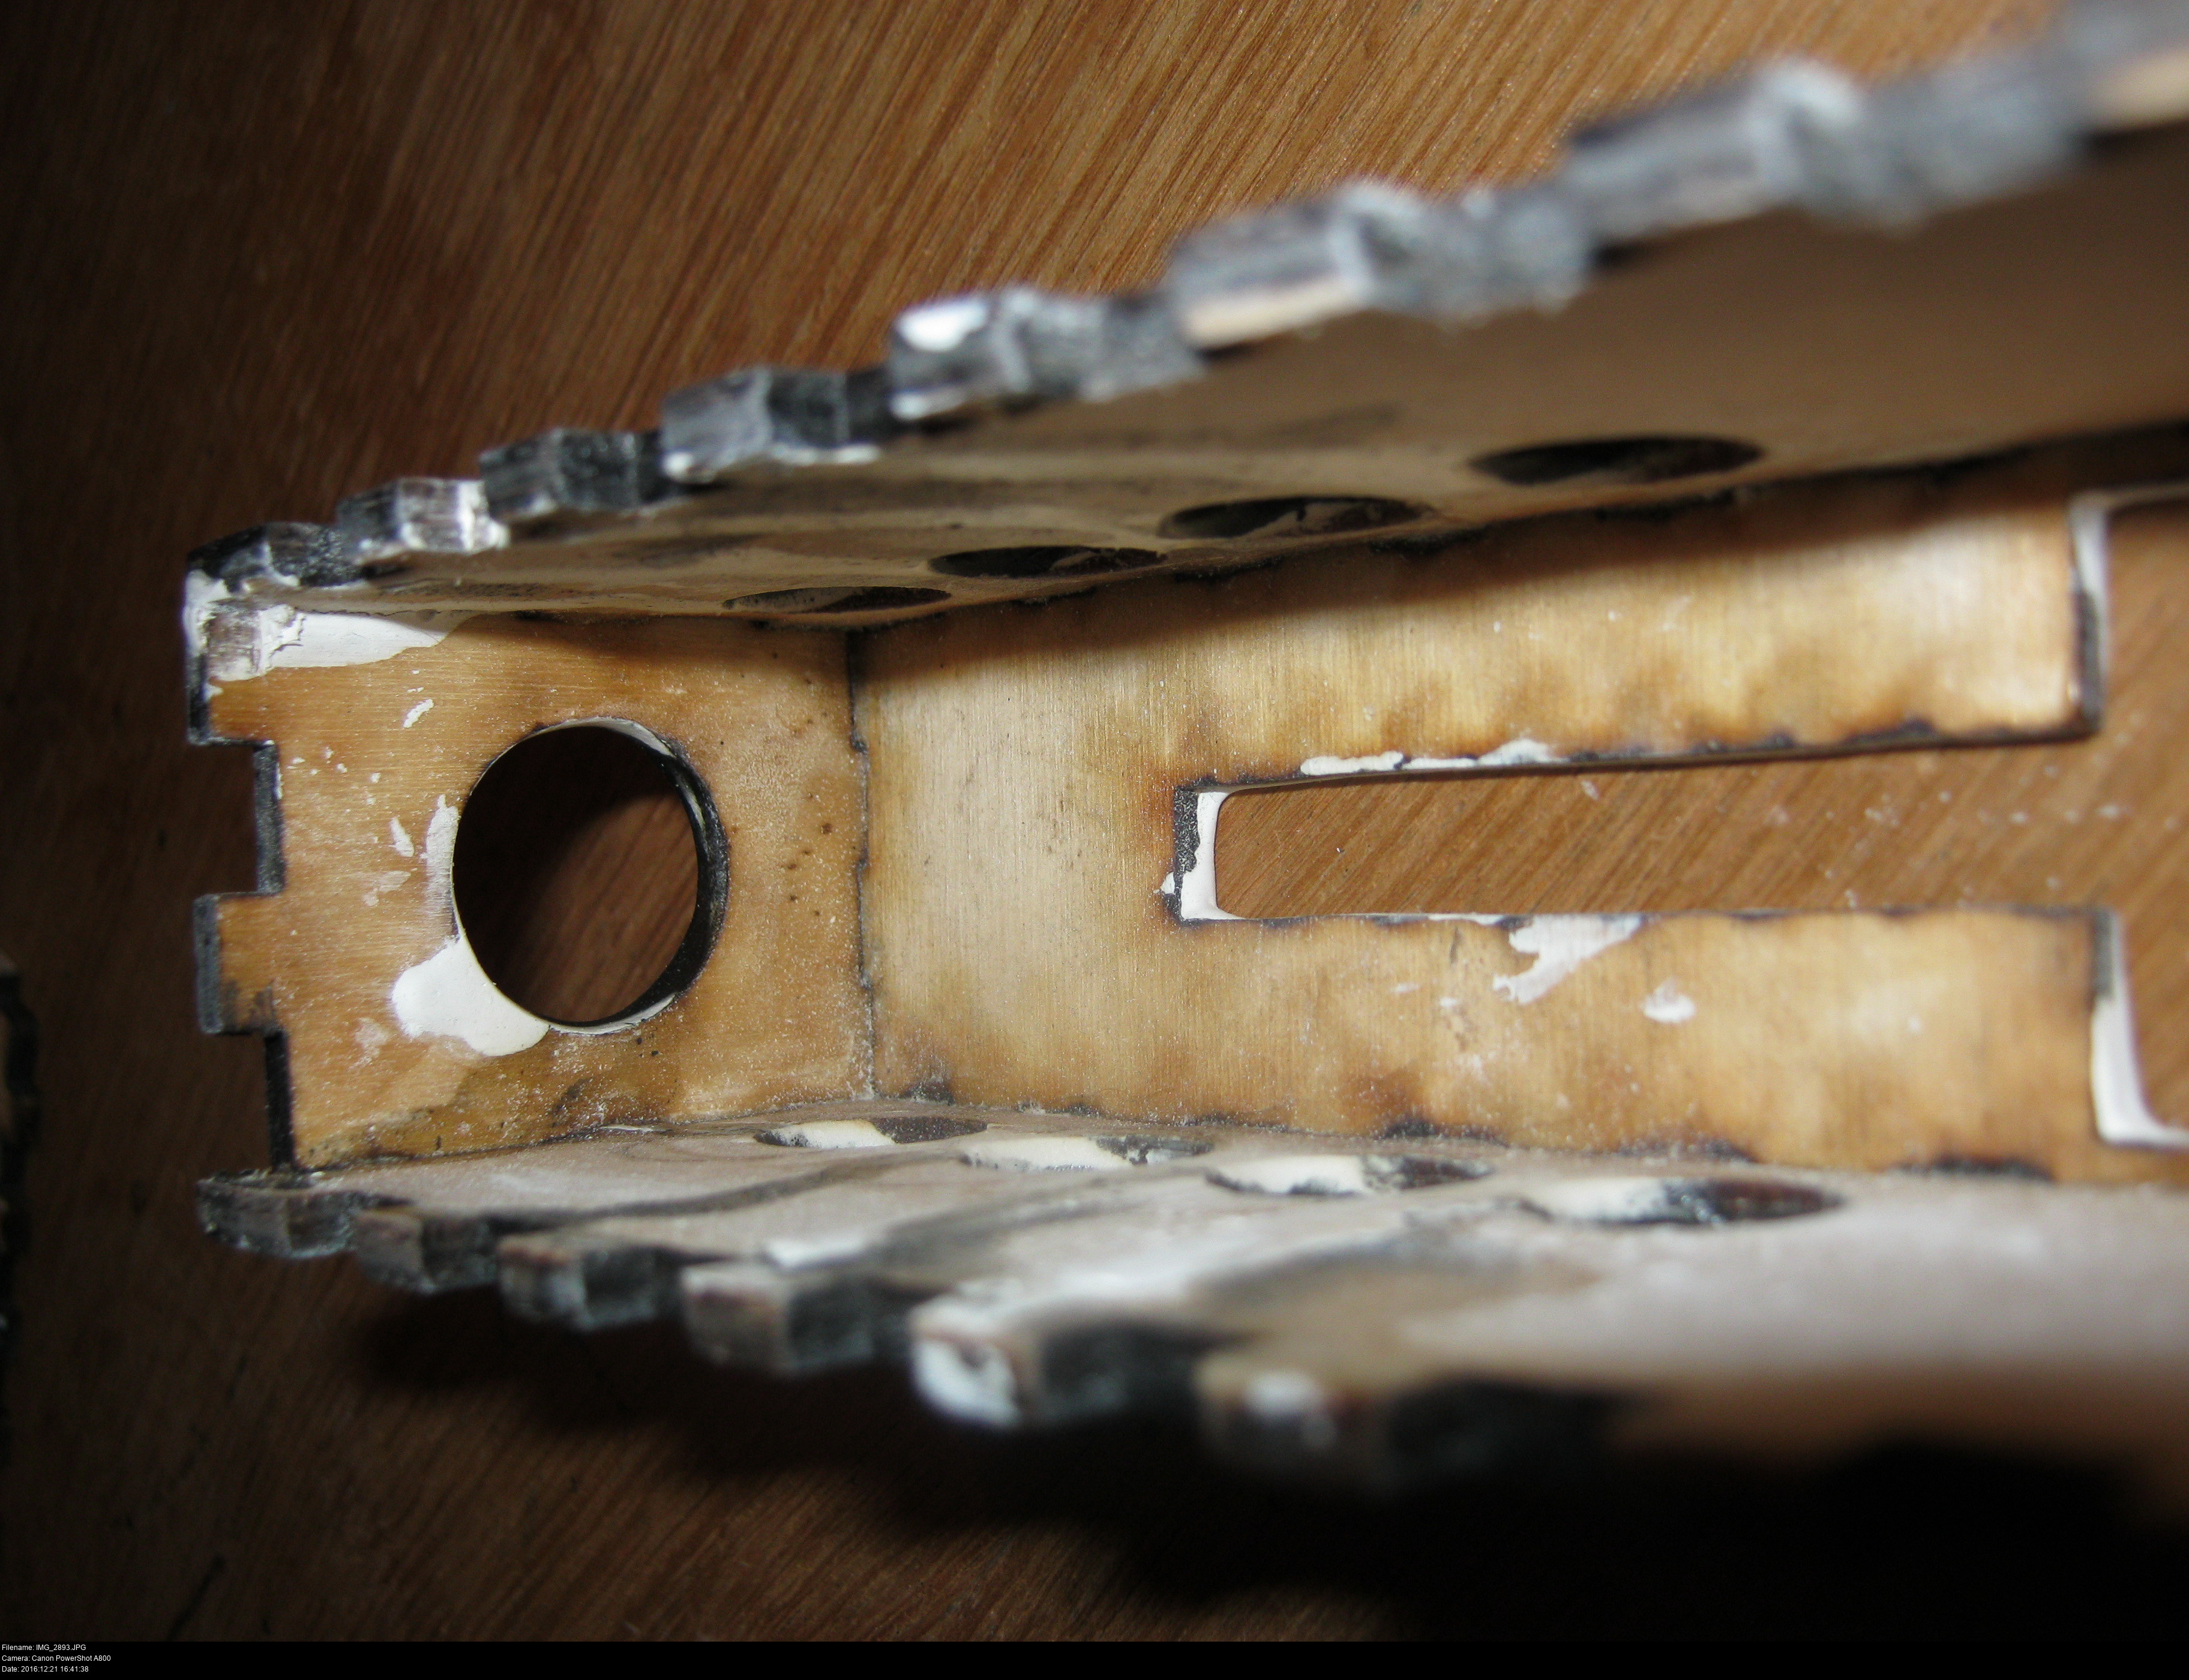

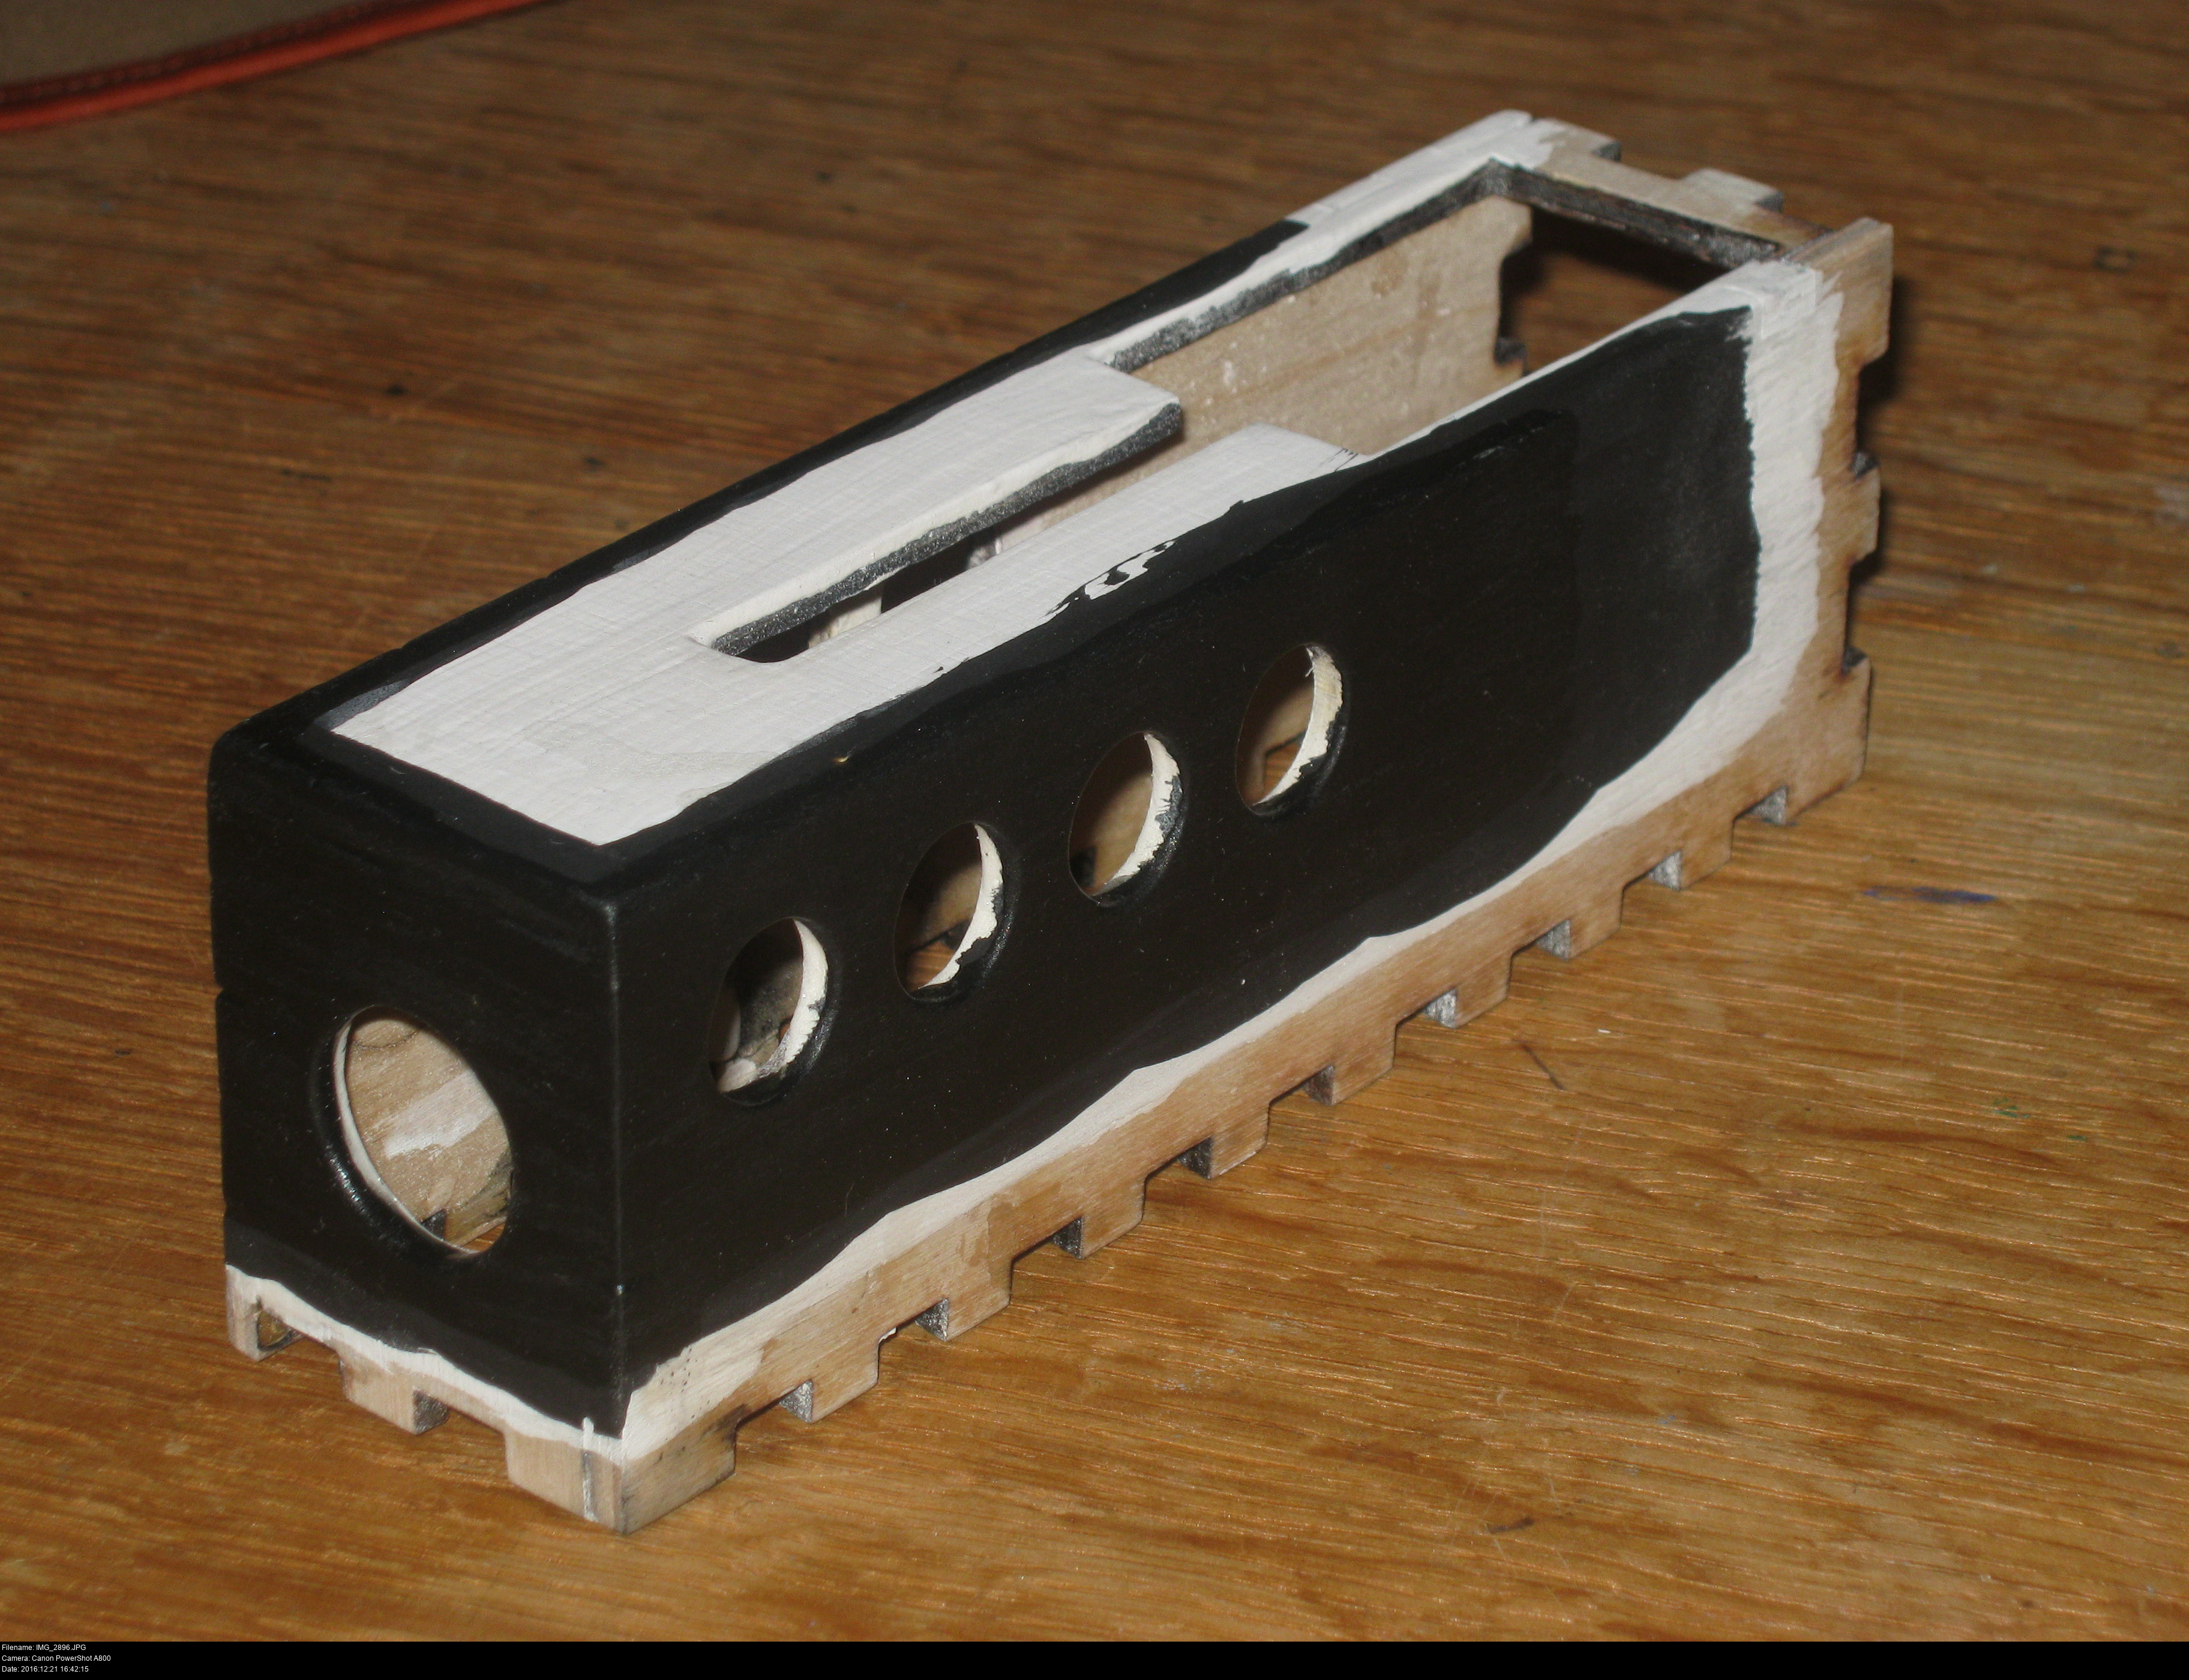

Here we go.
I've started by building the underside of the main body of the gun without the top face. I've used wood glue, sanded it gently (outside), and begun to prime it with some generic wood primer.
My sister had a big bottle of black poster paint** lying around, which was handy, so I've started painting the areas where the LEDs will be fitted. I won't be able to paint around these areas easily once the LEDs are in so I'm getting as much done as I can now. I need to put the LEDs in and do all the electronics before I assemble the remaining faces of the gun body together.
(** these asterisks mean DON'T USE POSTER PAINT. Acrylic. Acrylic. Acrylic.)

The grip of the gun won't have any electronics in it, so I can glue, sand and prime that fully now.
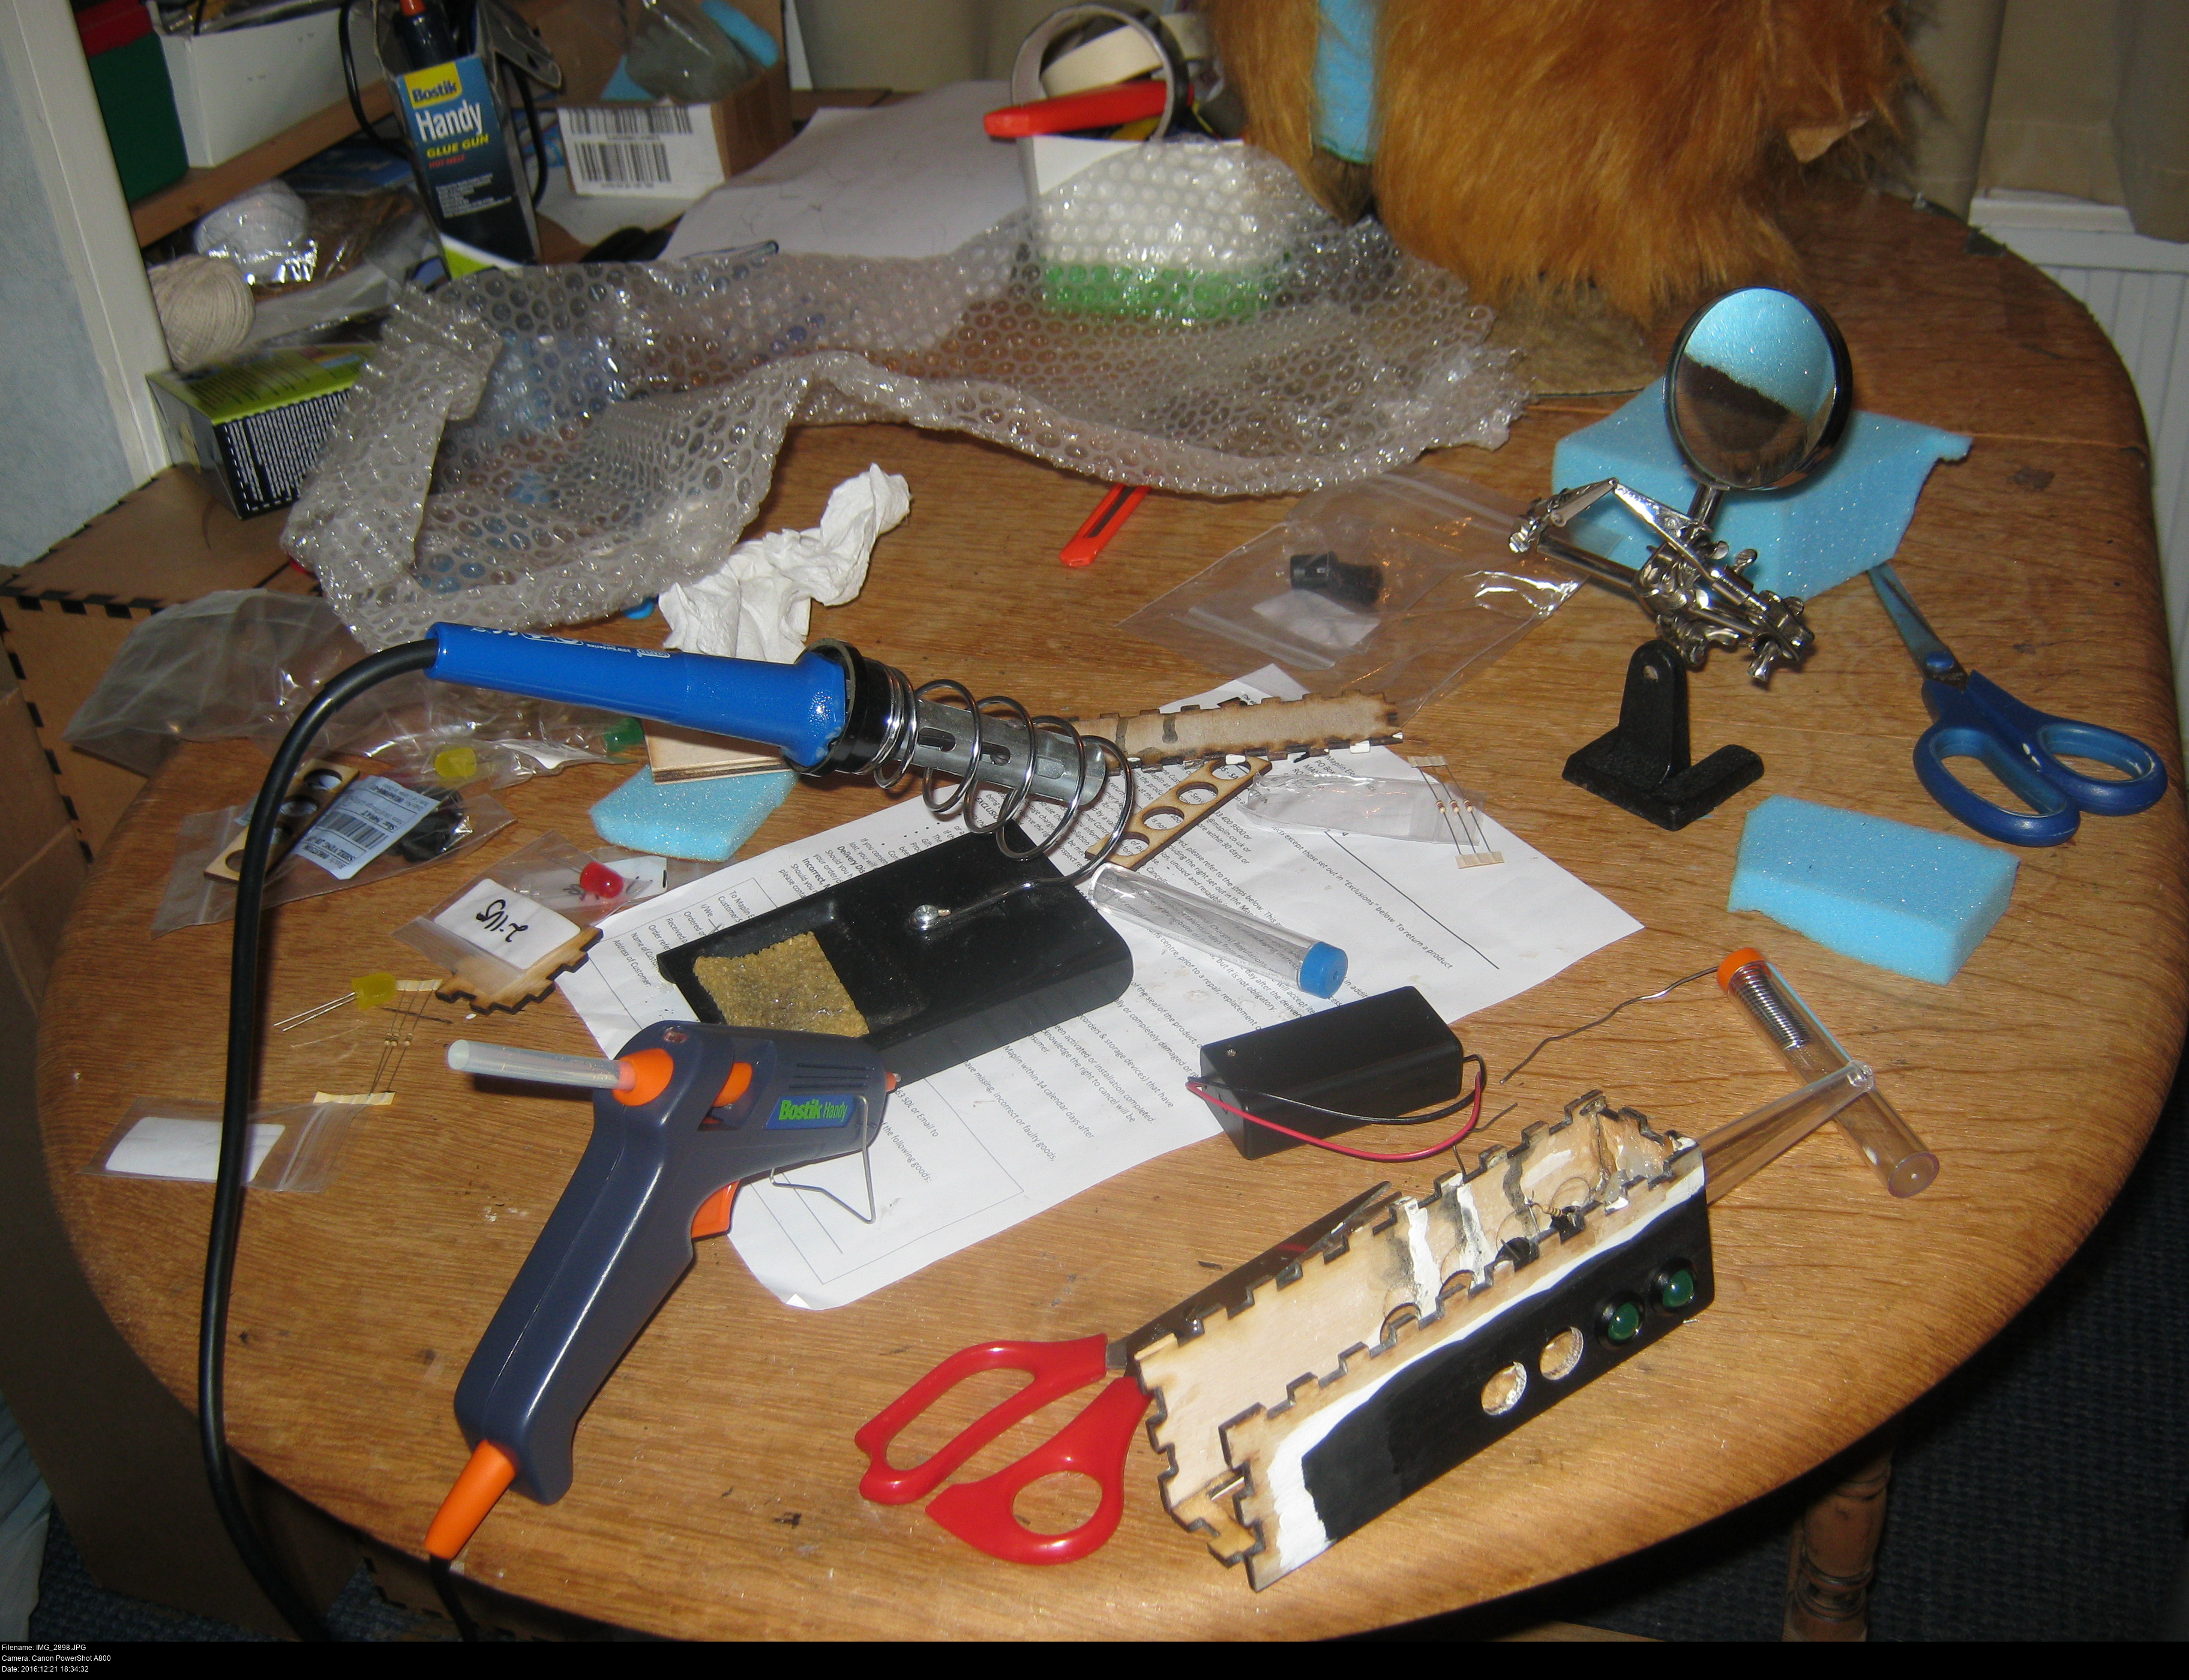
Now what the devil is going on here?
The shaft of the baster has been cut so it ends just inside the gun. I've pushed the legs of the Hyper Orange LED into a small block of dark soft packing foam to keep it steady, and then pushed that foam into the cut end of the baster and secured it with a big blob of hot glue. Once the LED is secure in the baster emitter barrel, I've hot glued that into the -interior- of the gun as securely as I could. That gives me a big transparent emitter barrel sticking out of my gun, with a LED embedded inside, with the leads neatly exposed inside the gun body.
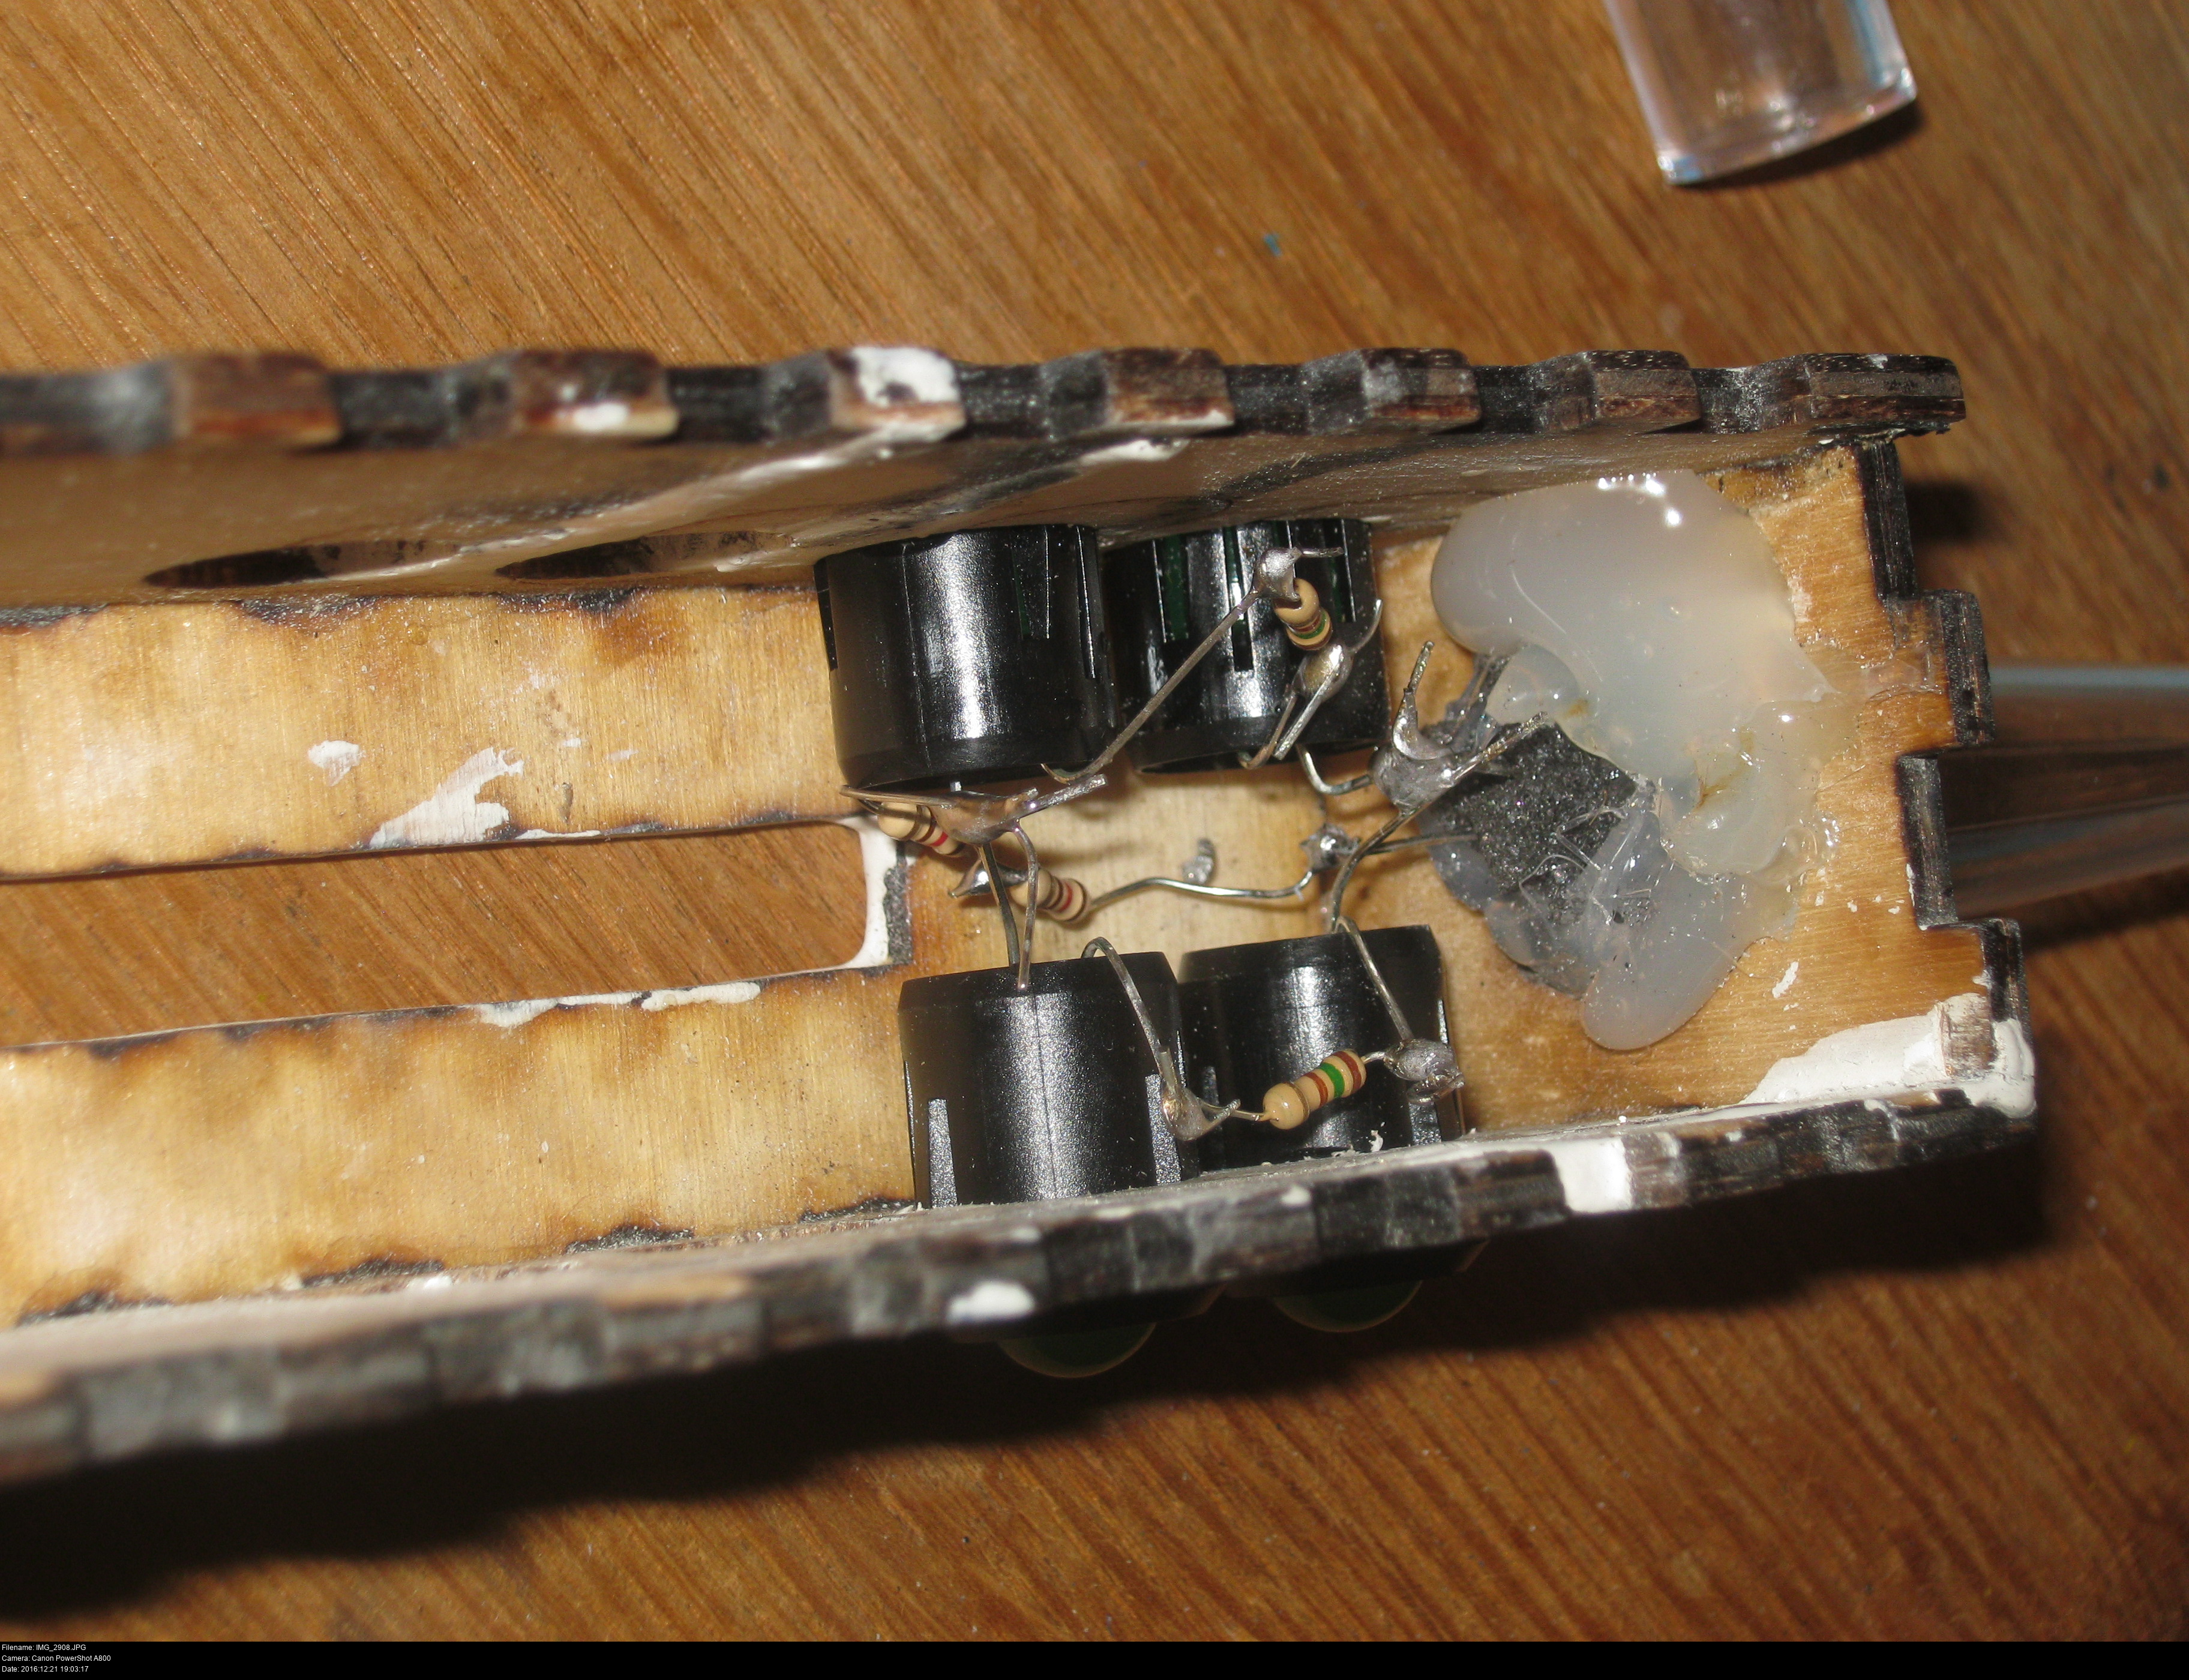
Working towards the back of the gun, I've started to insert the 10mm LEDs with their collar clips. I've linked the LEDs into their pairs down the gun using the required resistor as a bridge: Red-Resistor-Yellow, Green-Resistor-Green, Resistor-Emitter.
That gives me five distinct units with two exposed leads each that all need to be connected to the positive and negative of the 9V battery case. I've decided to link together the exposed ends with leads so that there's a single positive and single negative connection to be made.
But before we get too carried away, let's see if the LEDs I've connected so far work:
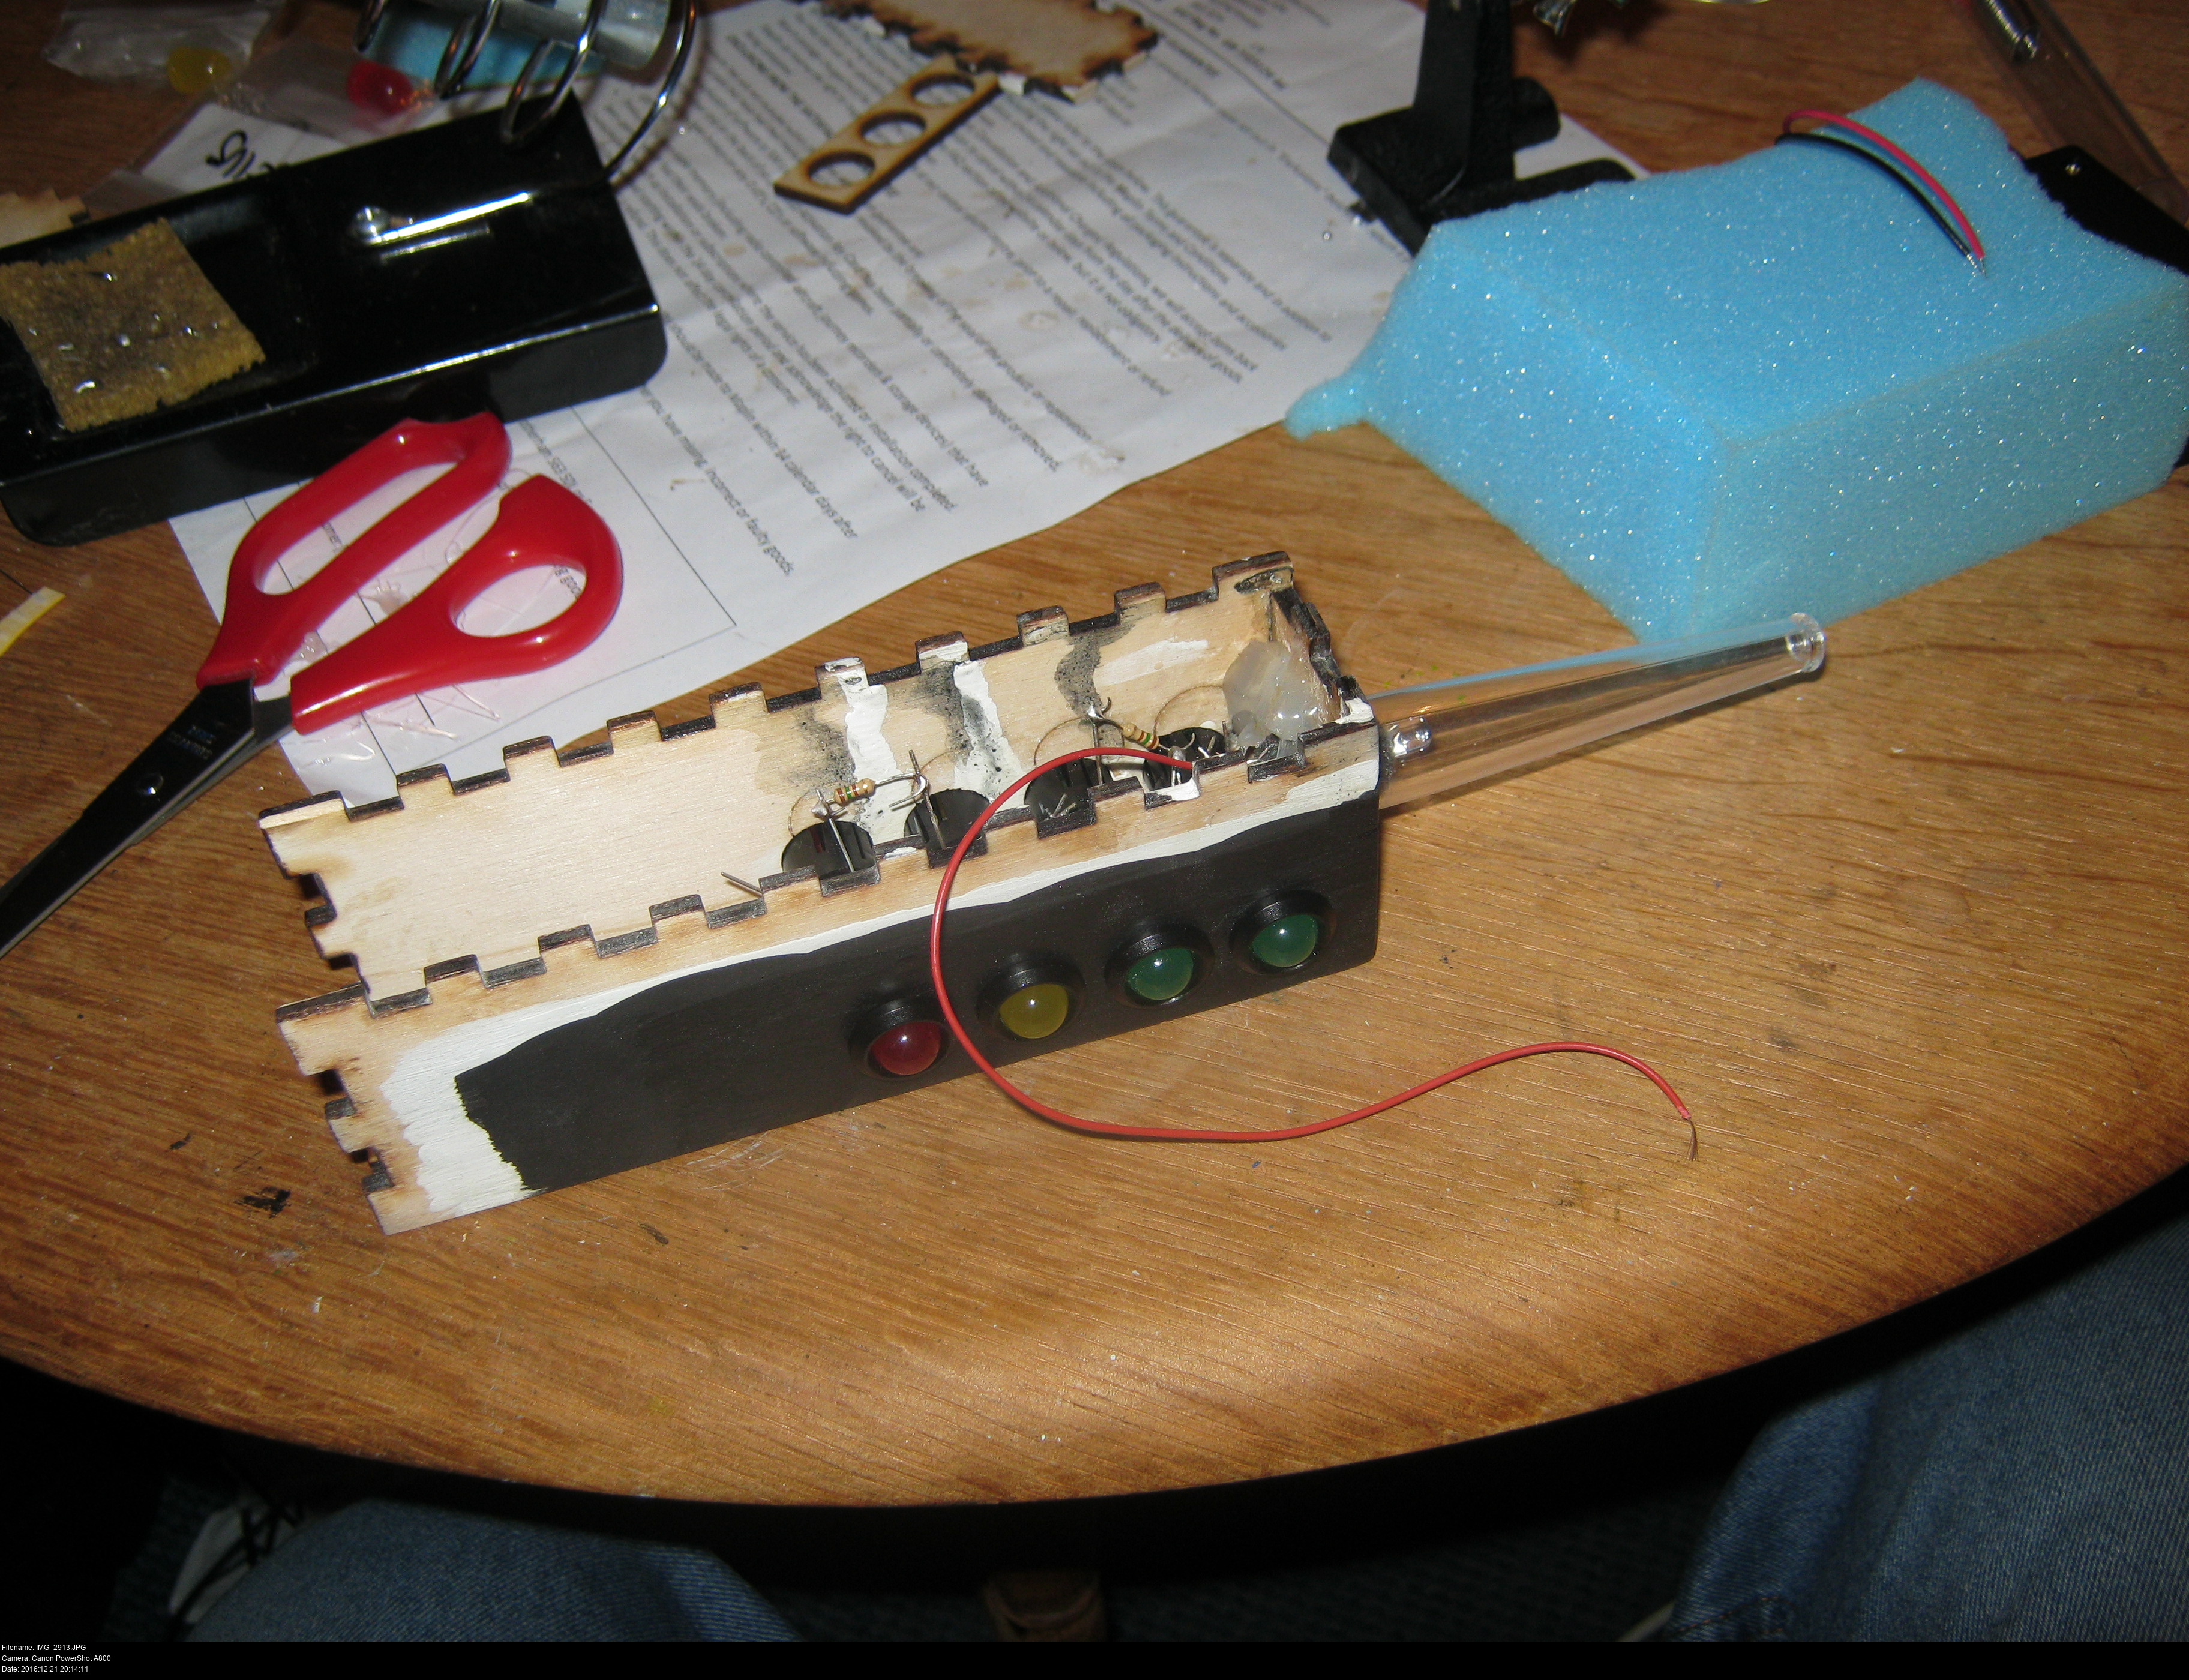
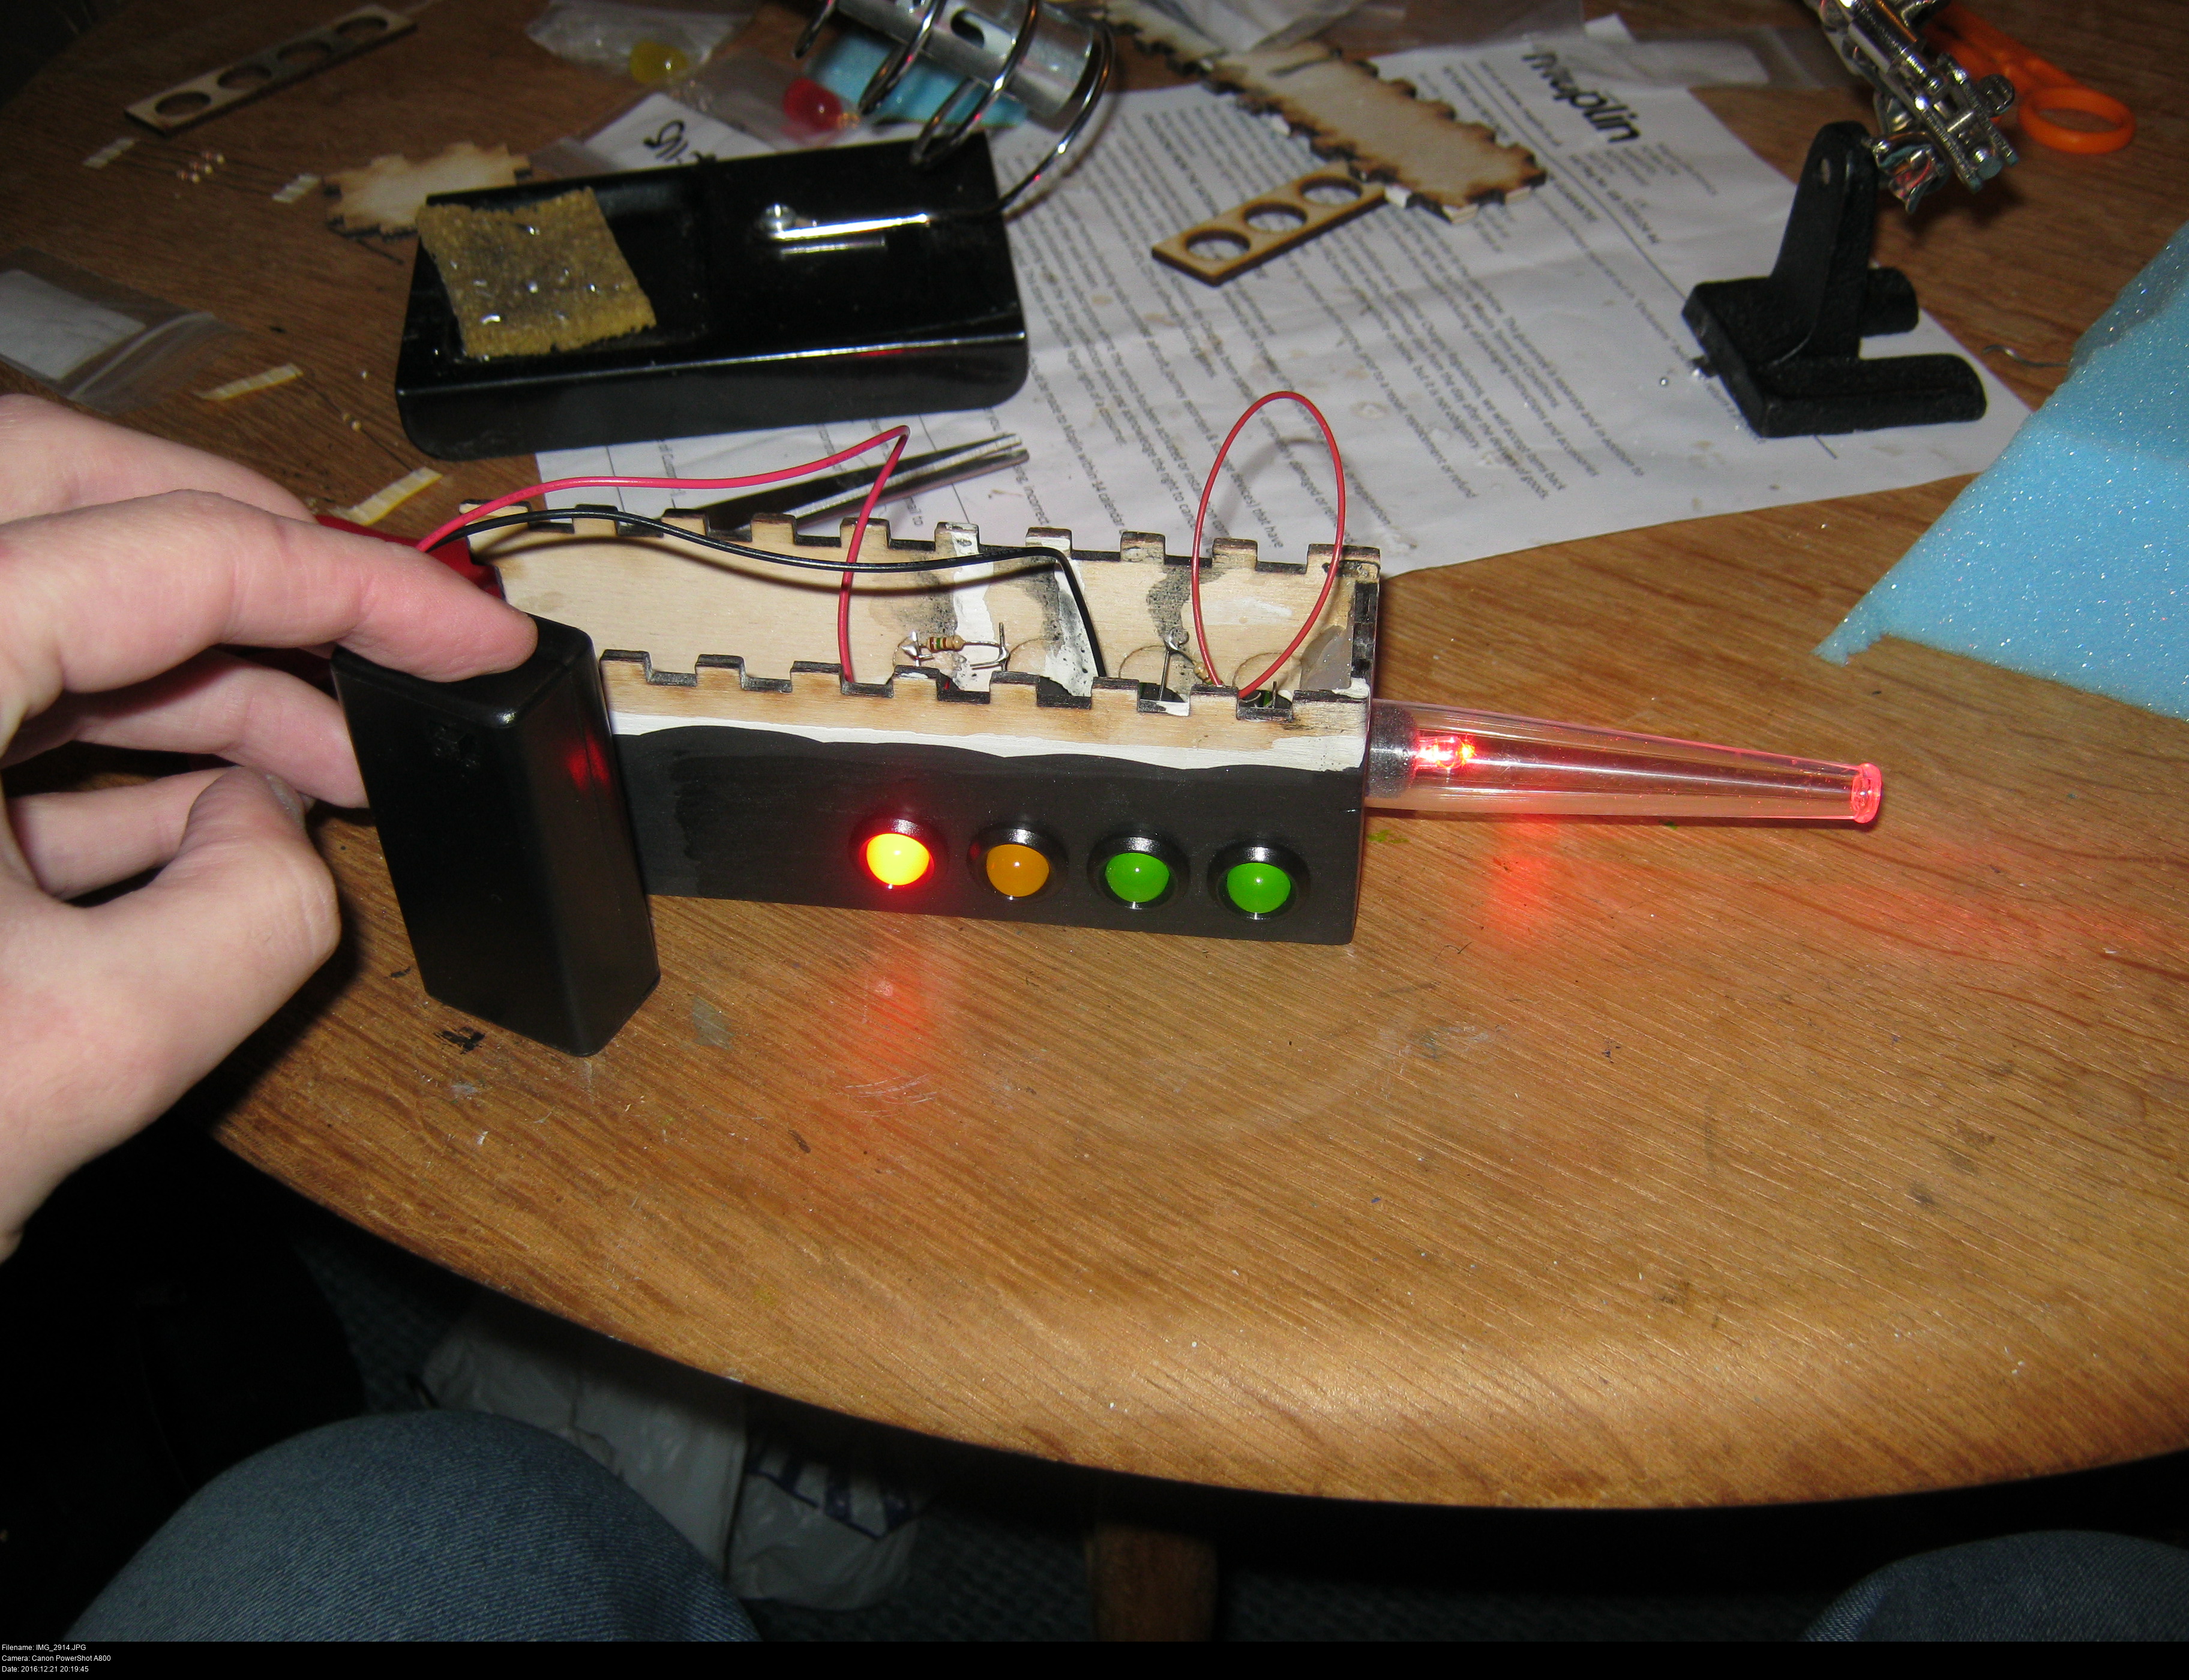
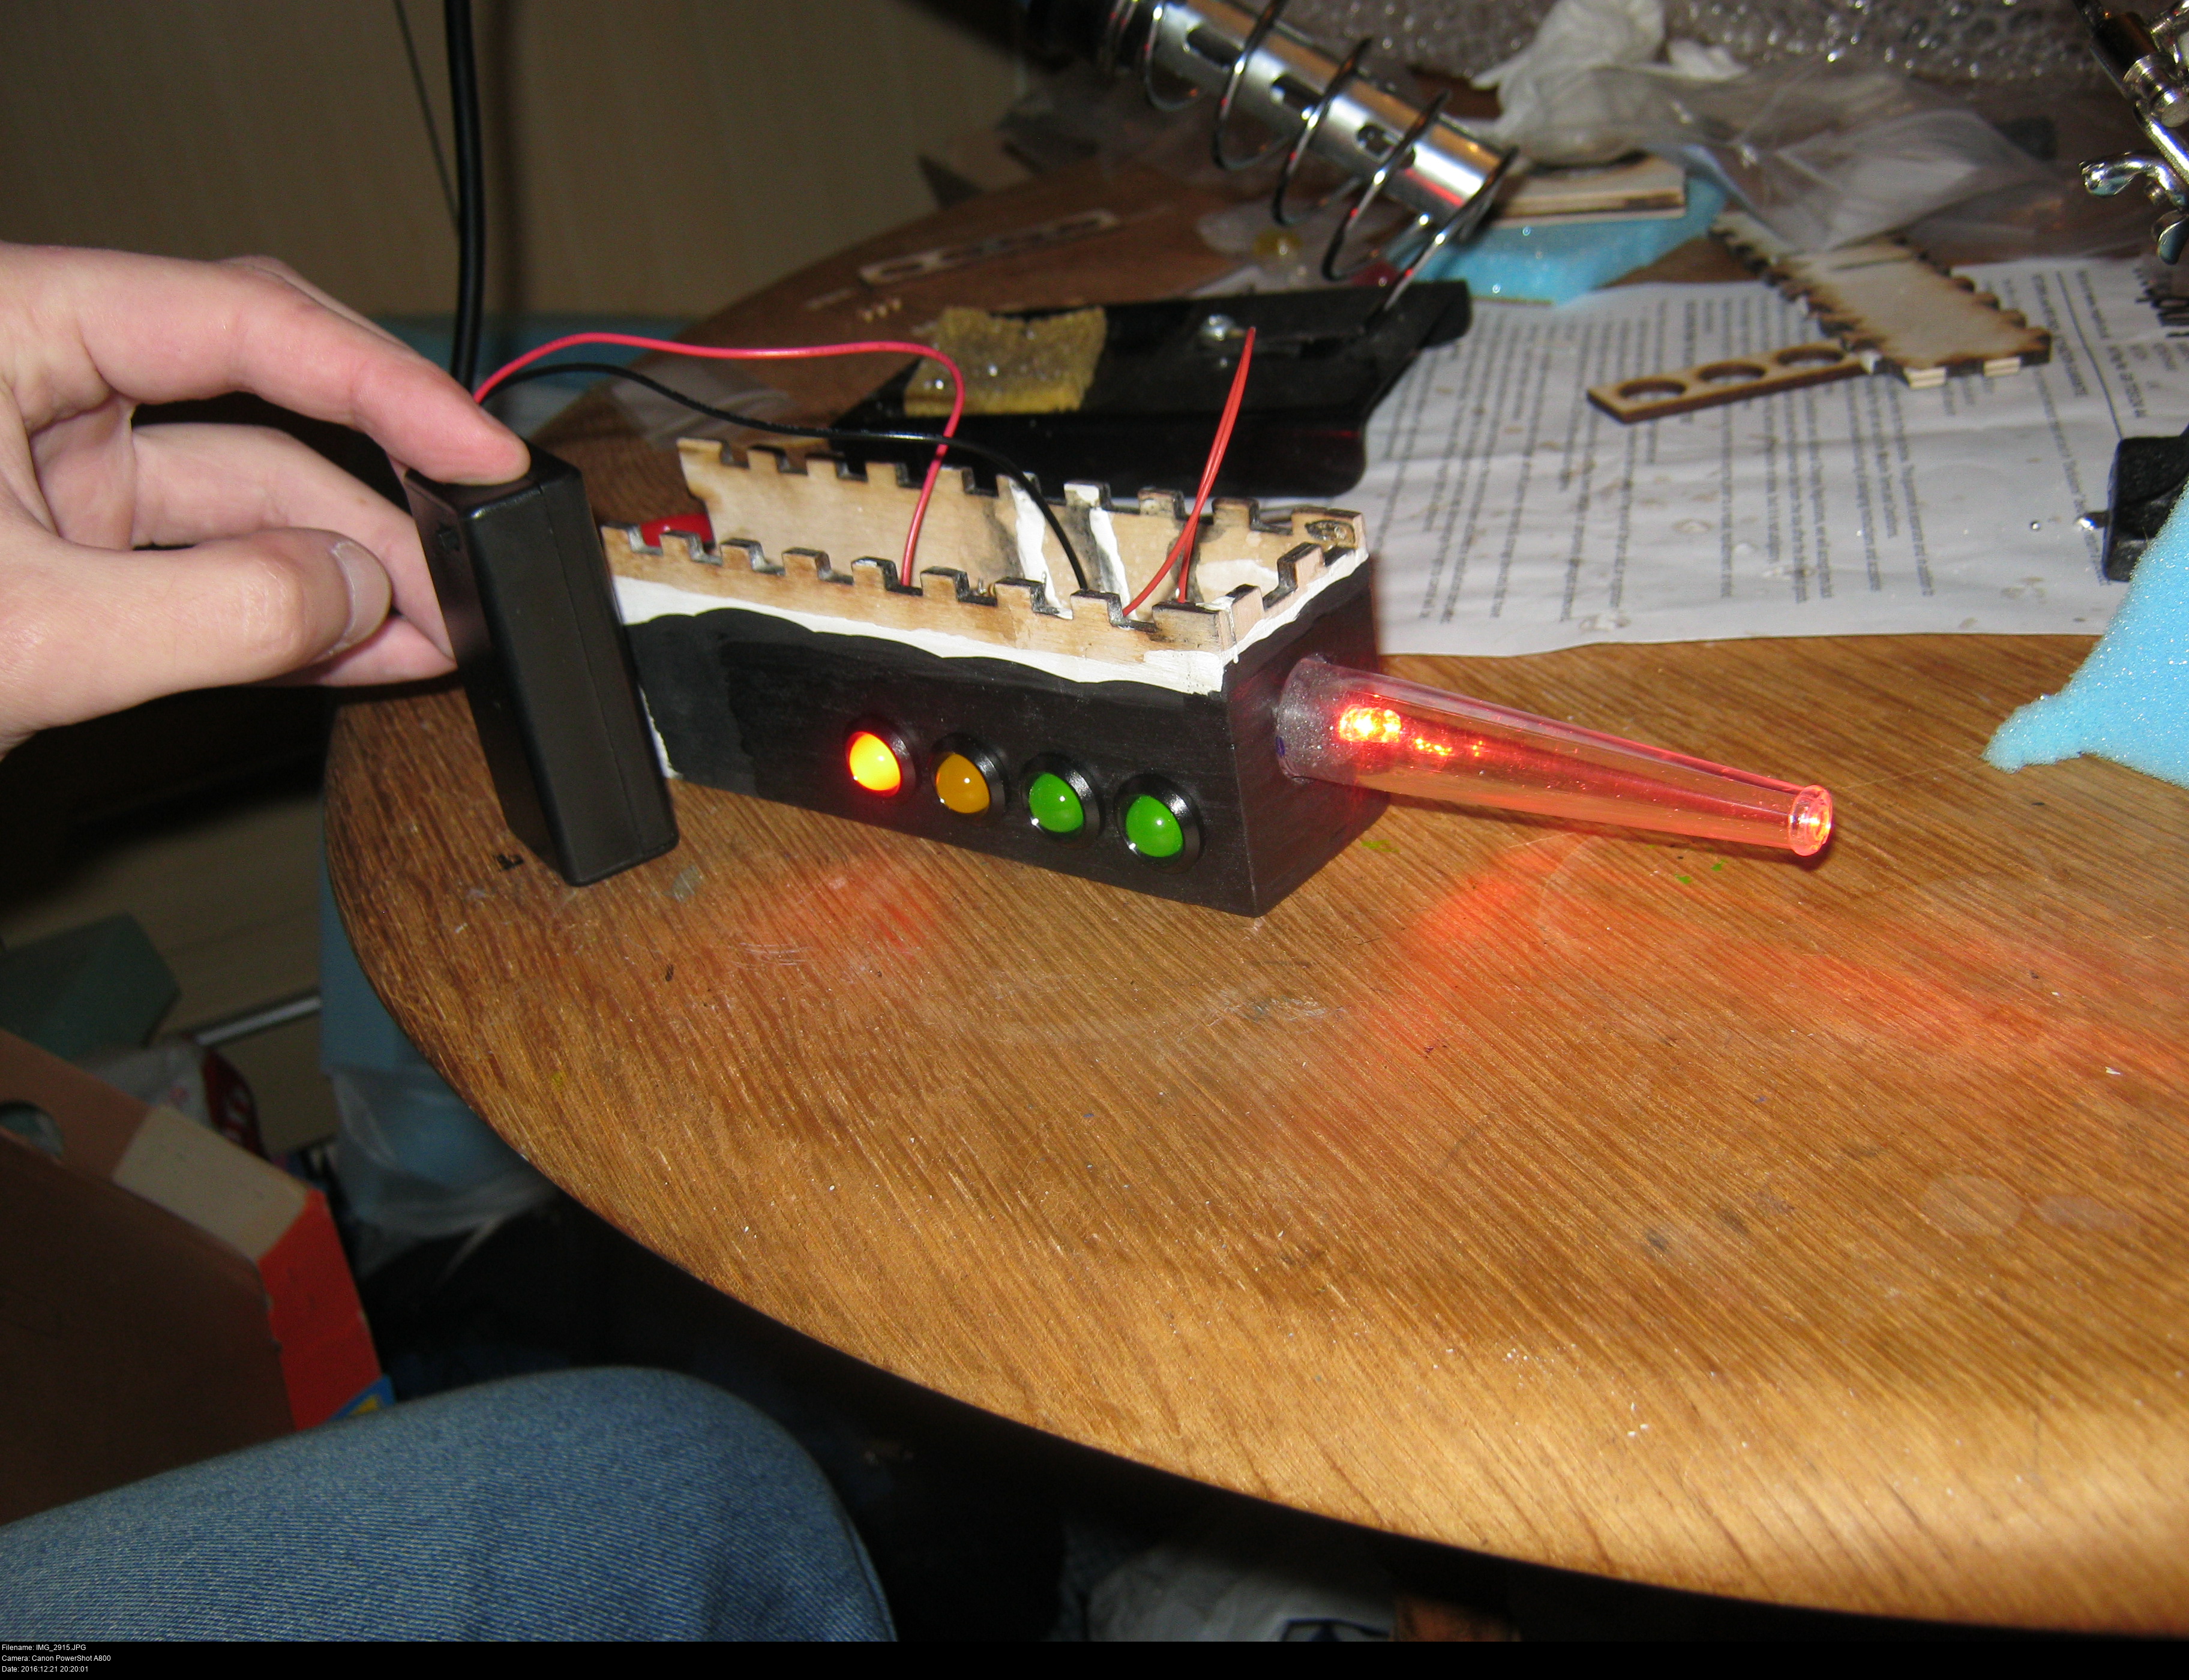
Yay!
The yellow and green lights on the side don't look like they're very bright in this image, but that's just because of the angle of the shot.


In the second of these photographs, you can see what I've done:
The LEDs are arranged so that all the negative terminals are facing towards the centre of the cluster of LEDs. This gives a single (horrible looking) solder mass where all the negative terminals combine. There are positive terminals at the front and rear of the gun, so I've added a red cable that bridges from the positive terminal of the emitter LED to the positive terminal at the rear-most LEDs. These two locations are where the leads from the battery case need to go.
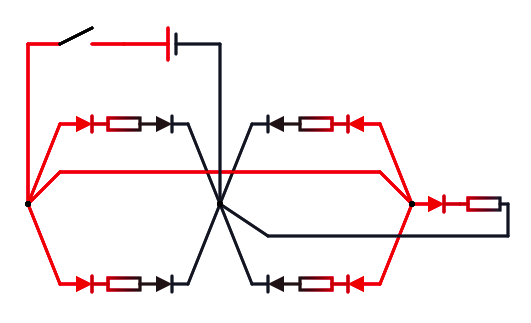
However, I'm not going to solder directly to the case leads, I'm going to put in a couple of longer leads into the gun first since the ones on the battery case are rather short.
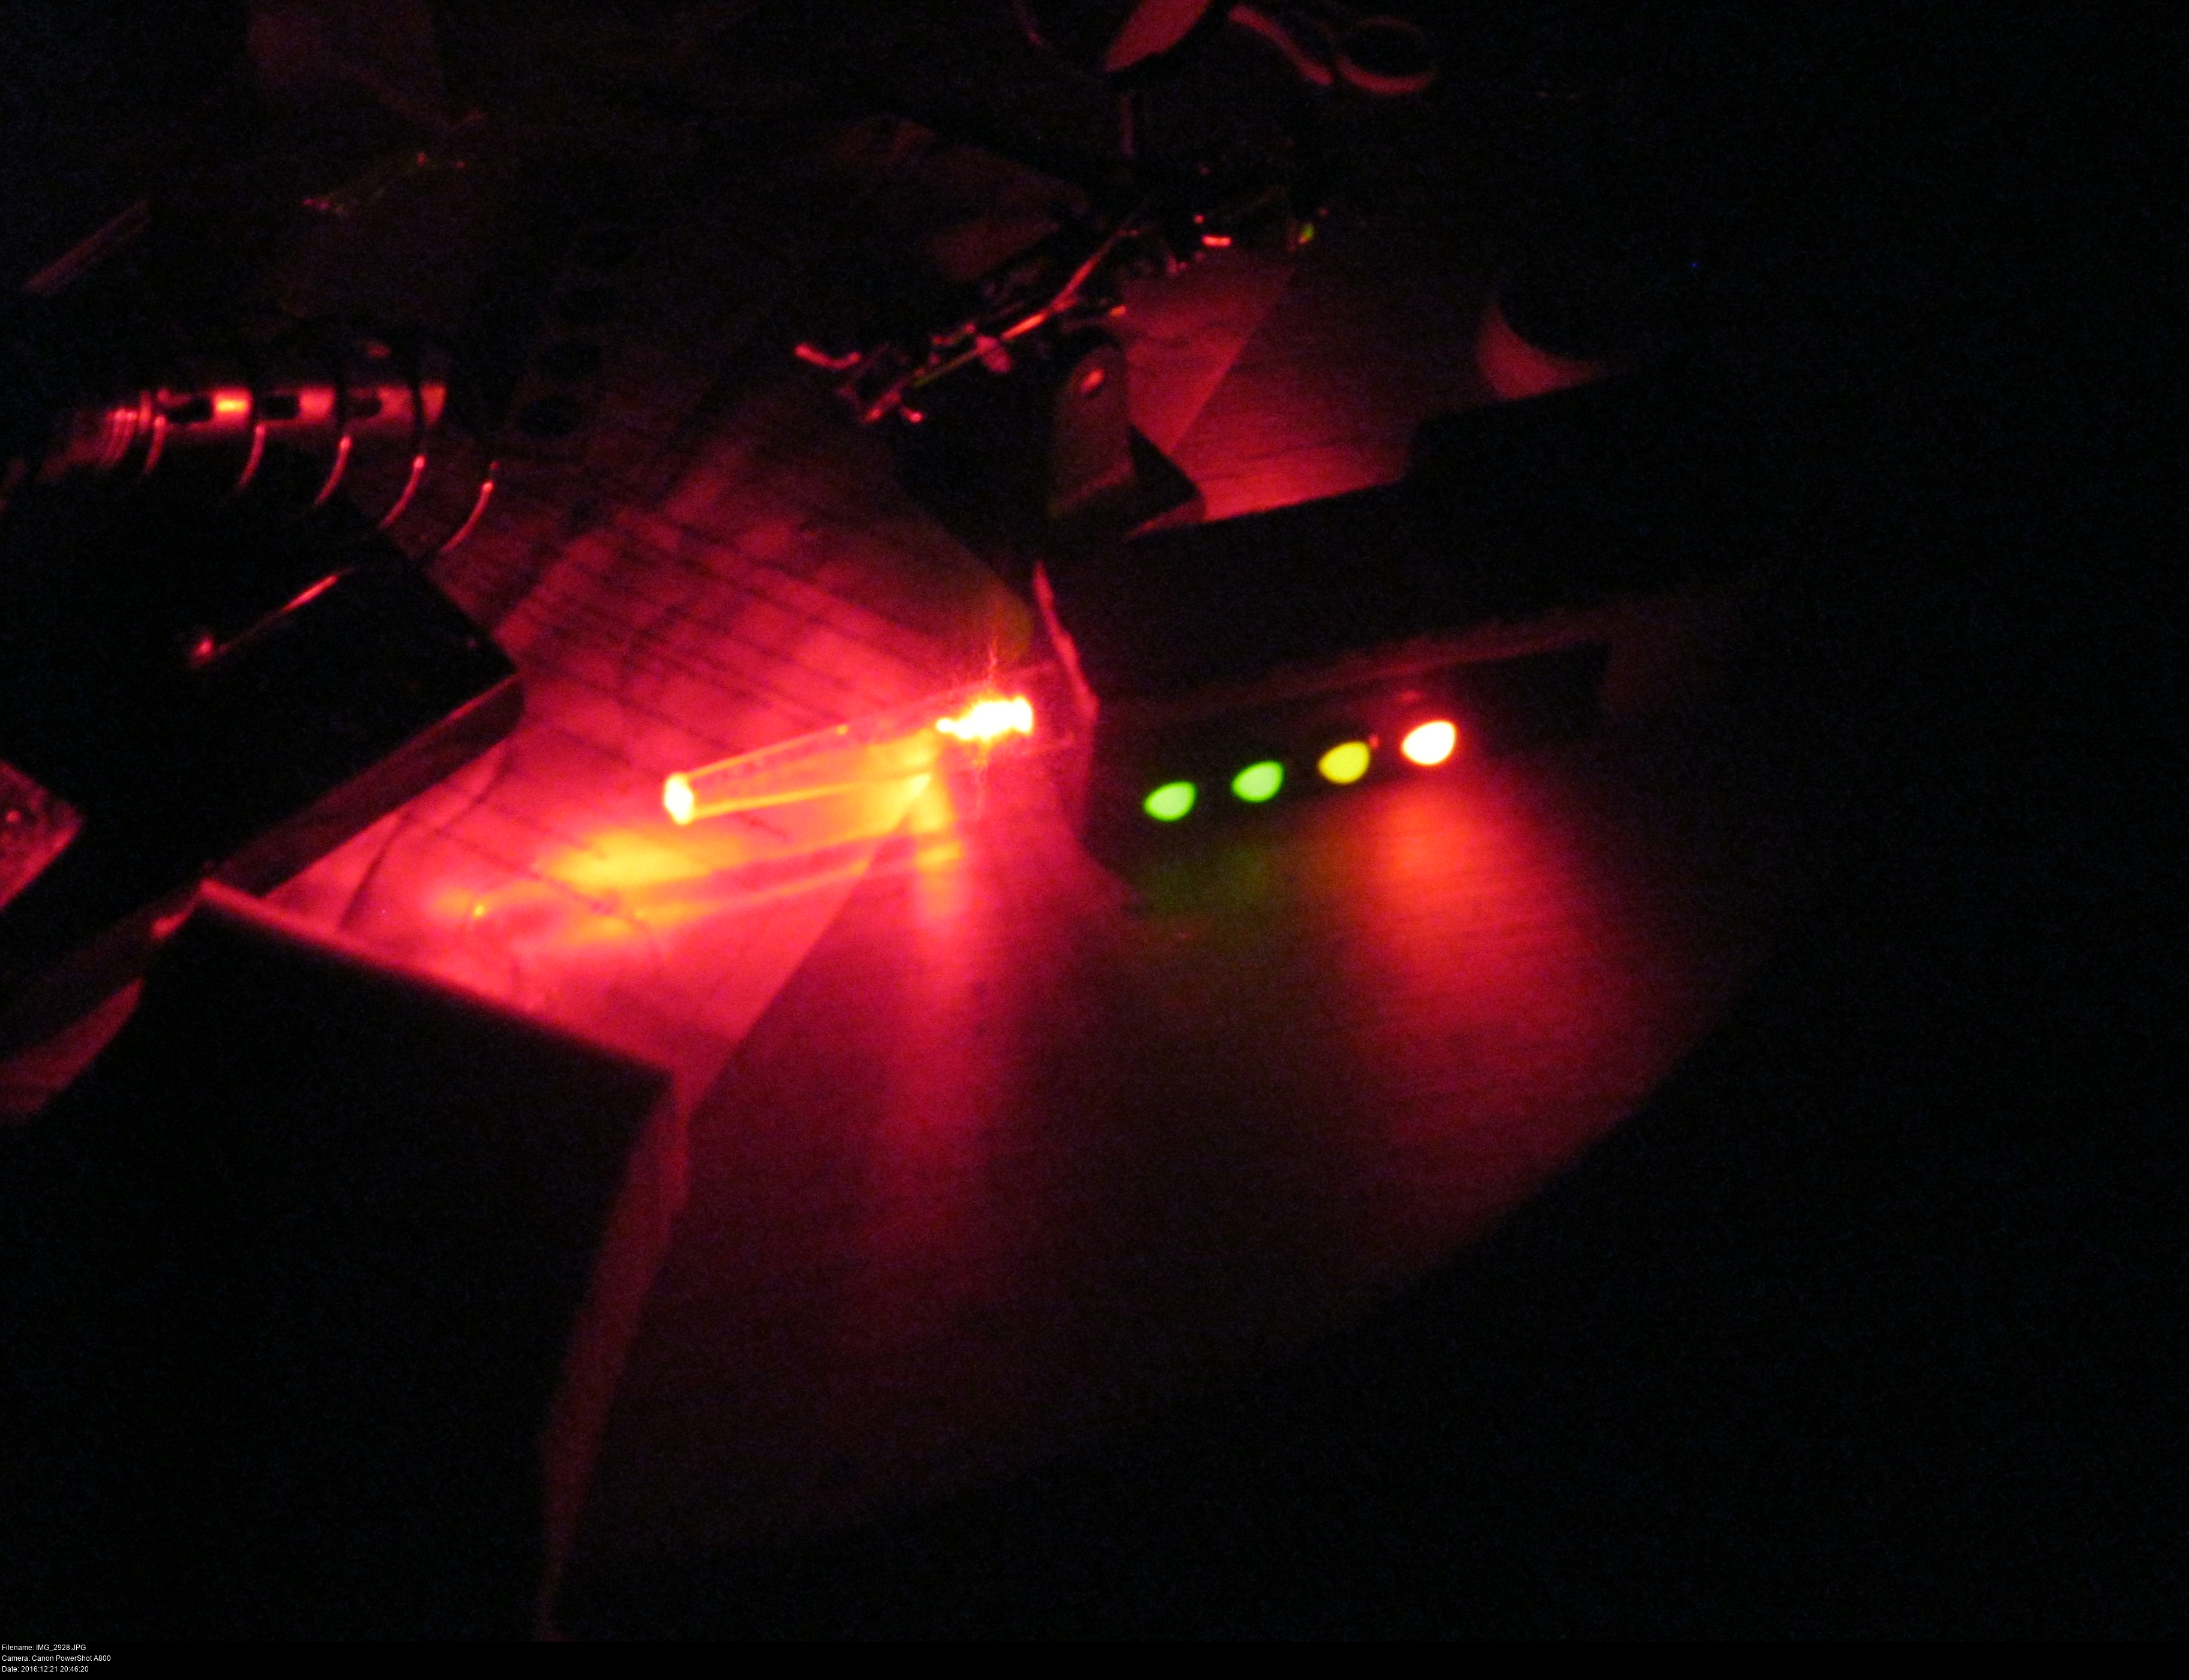
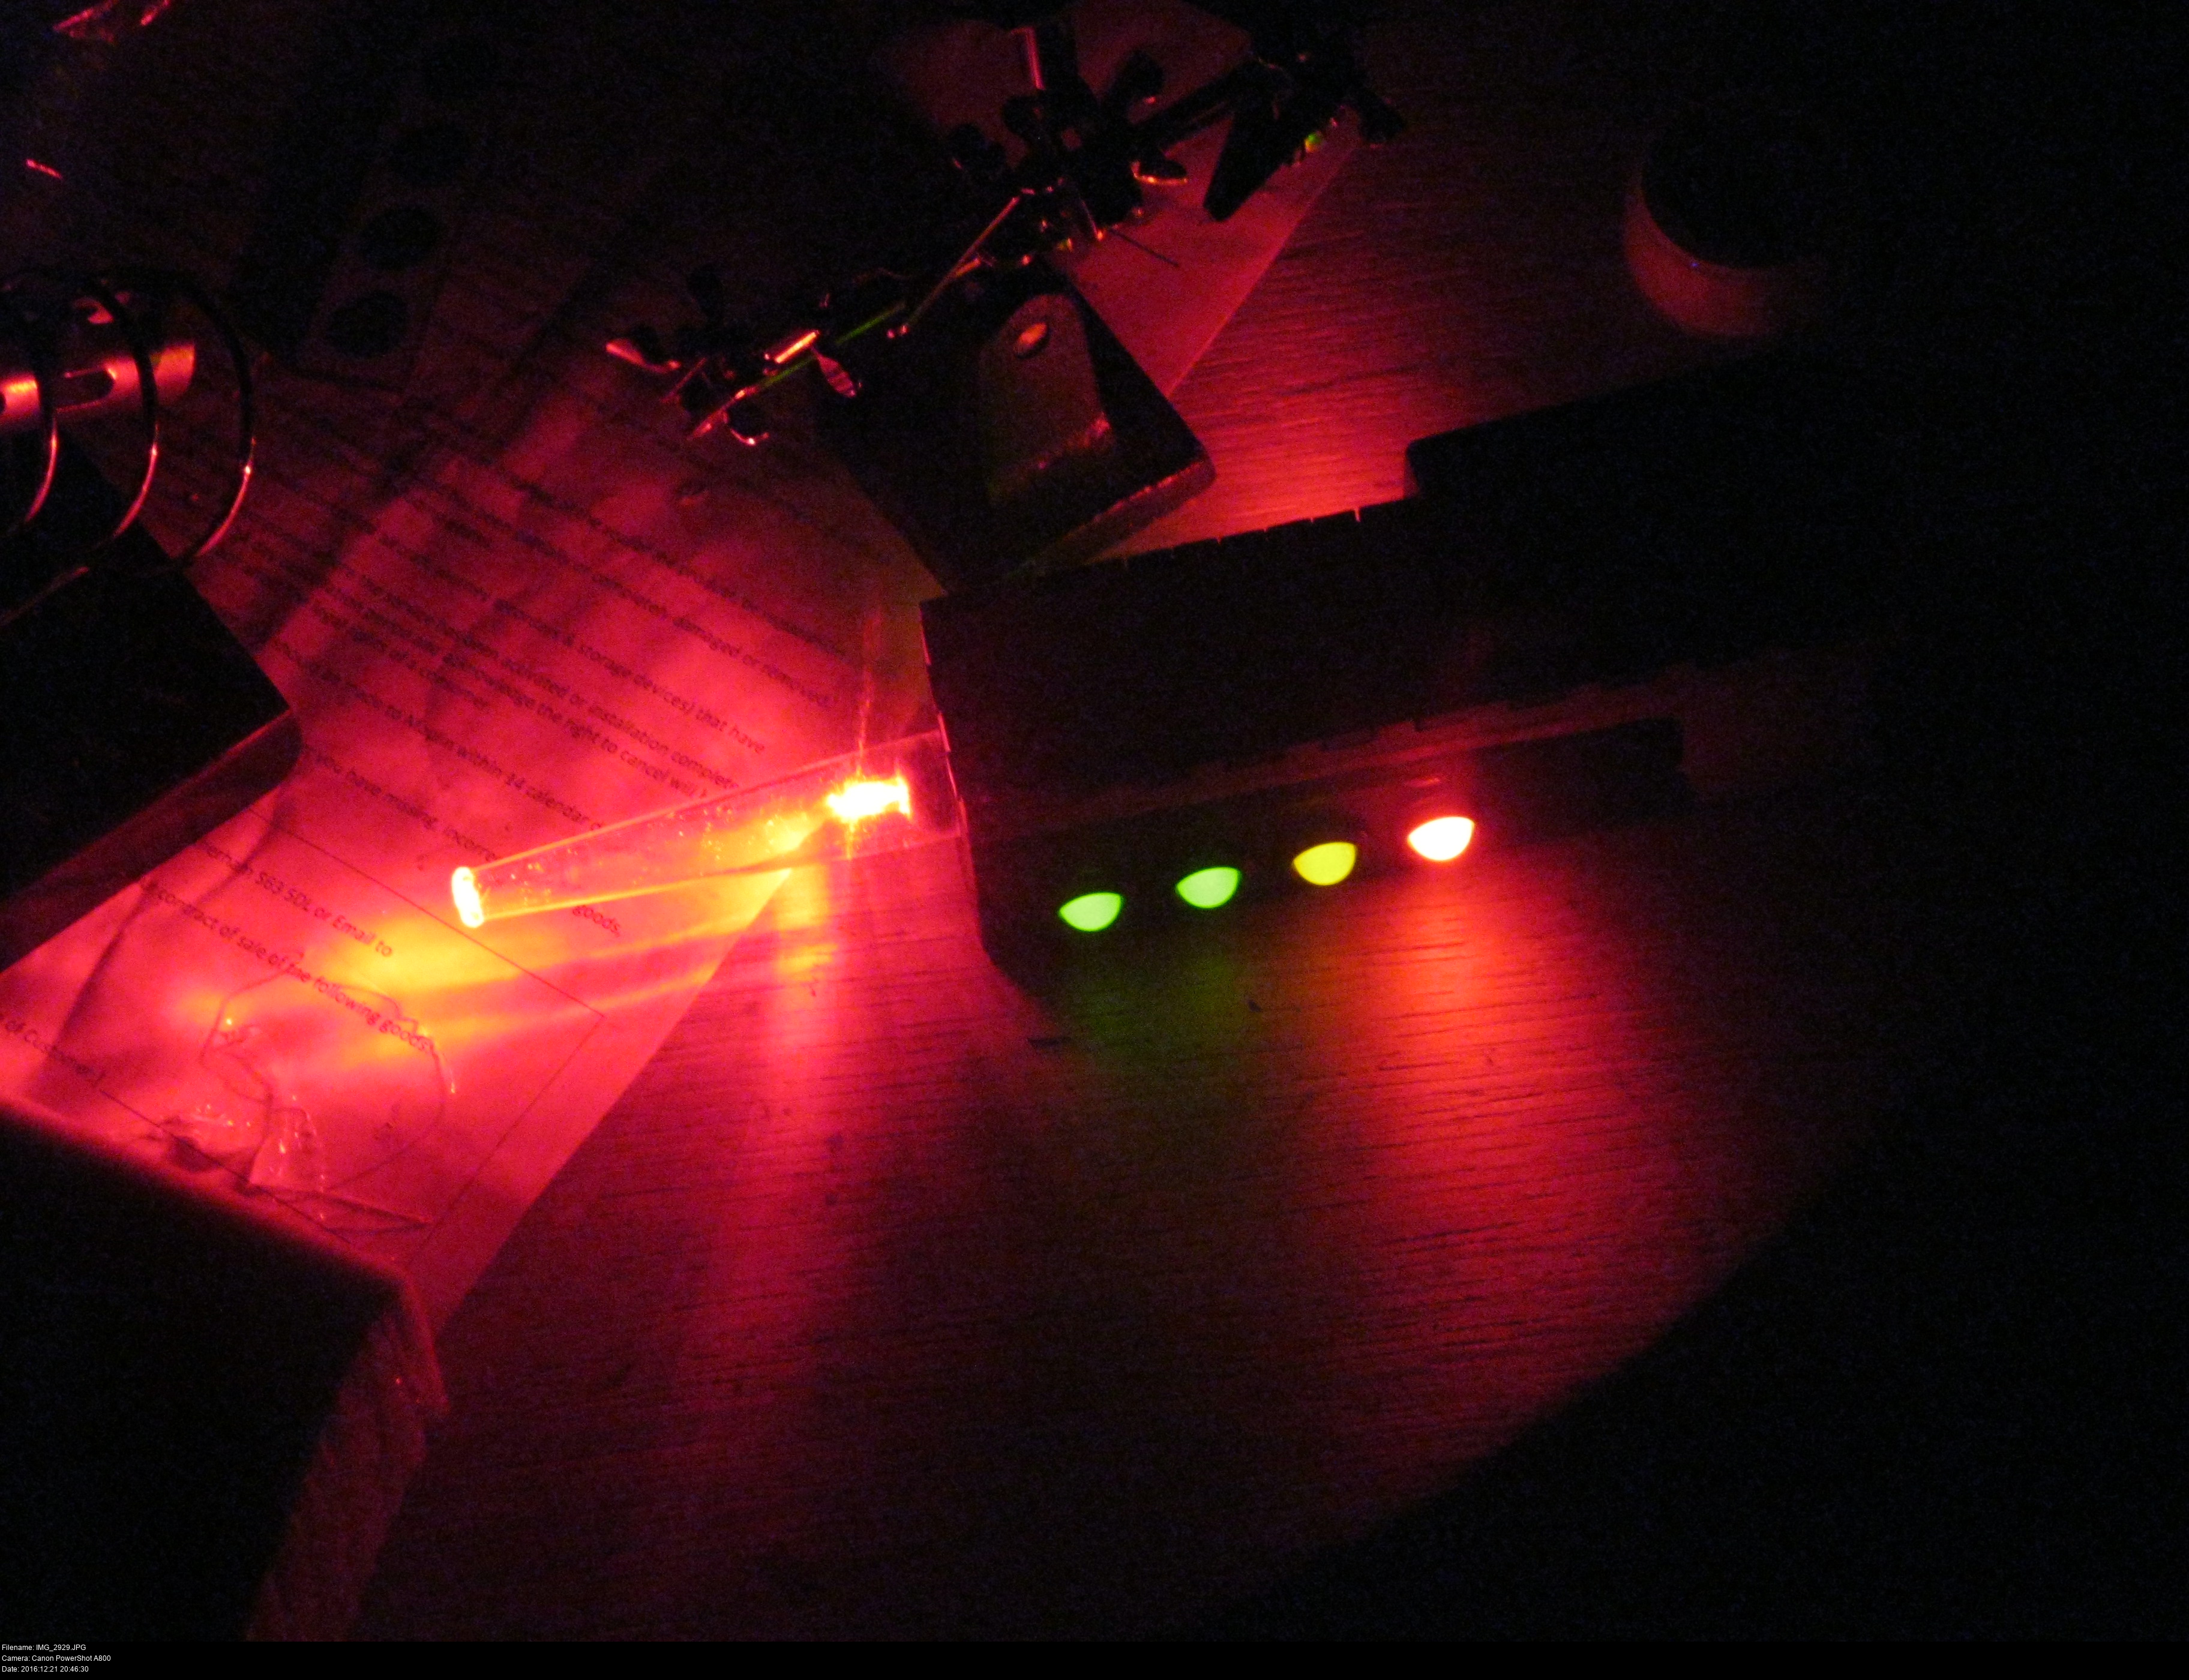
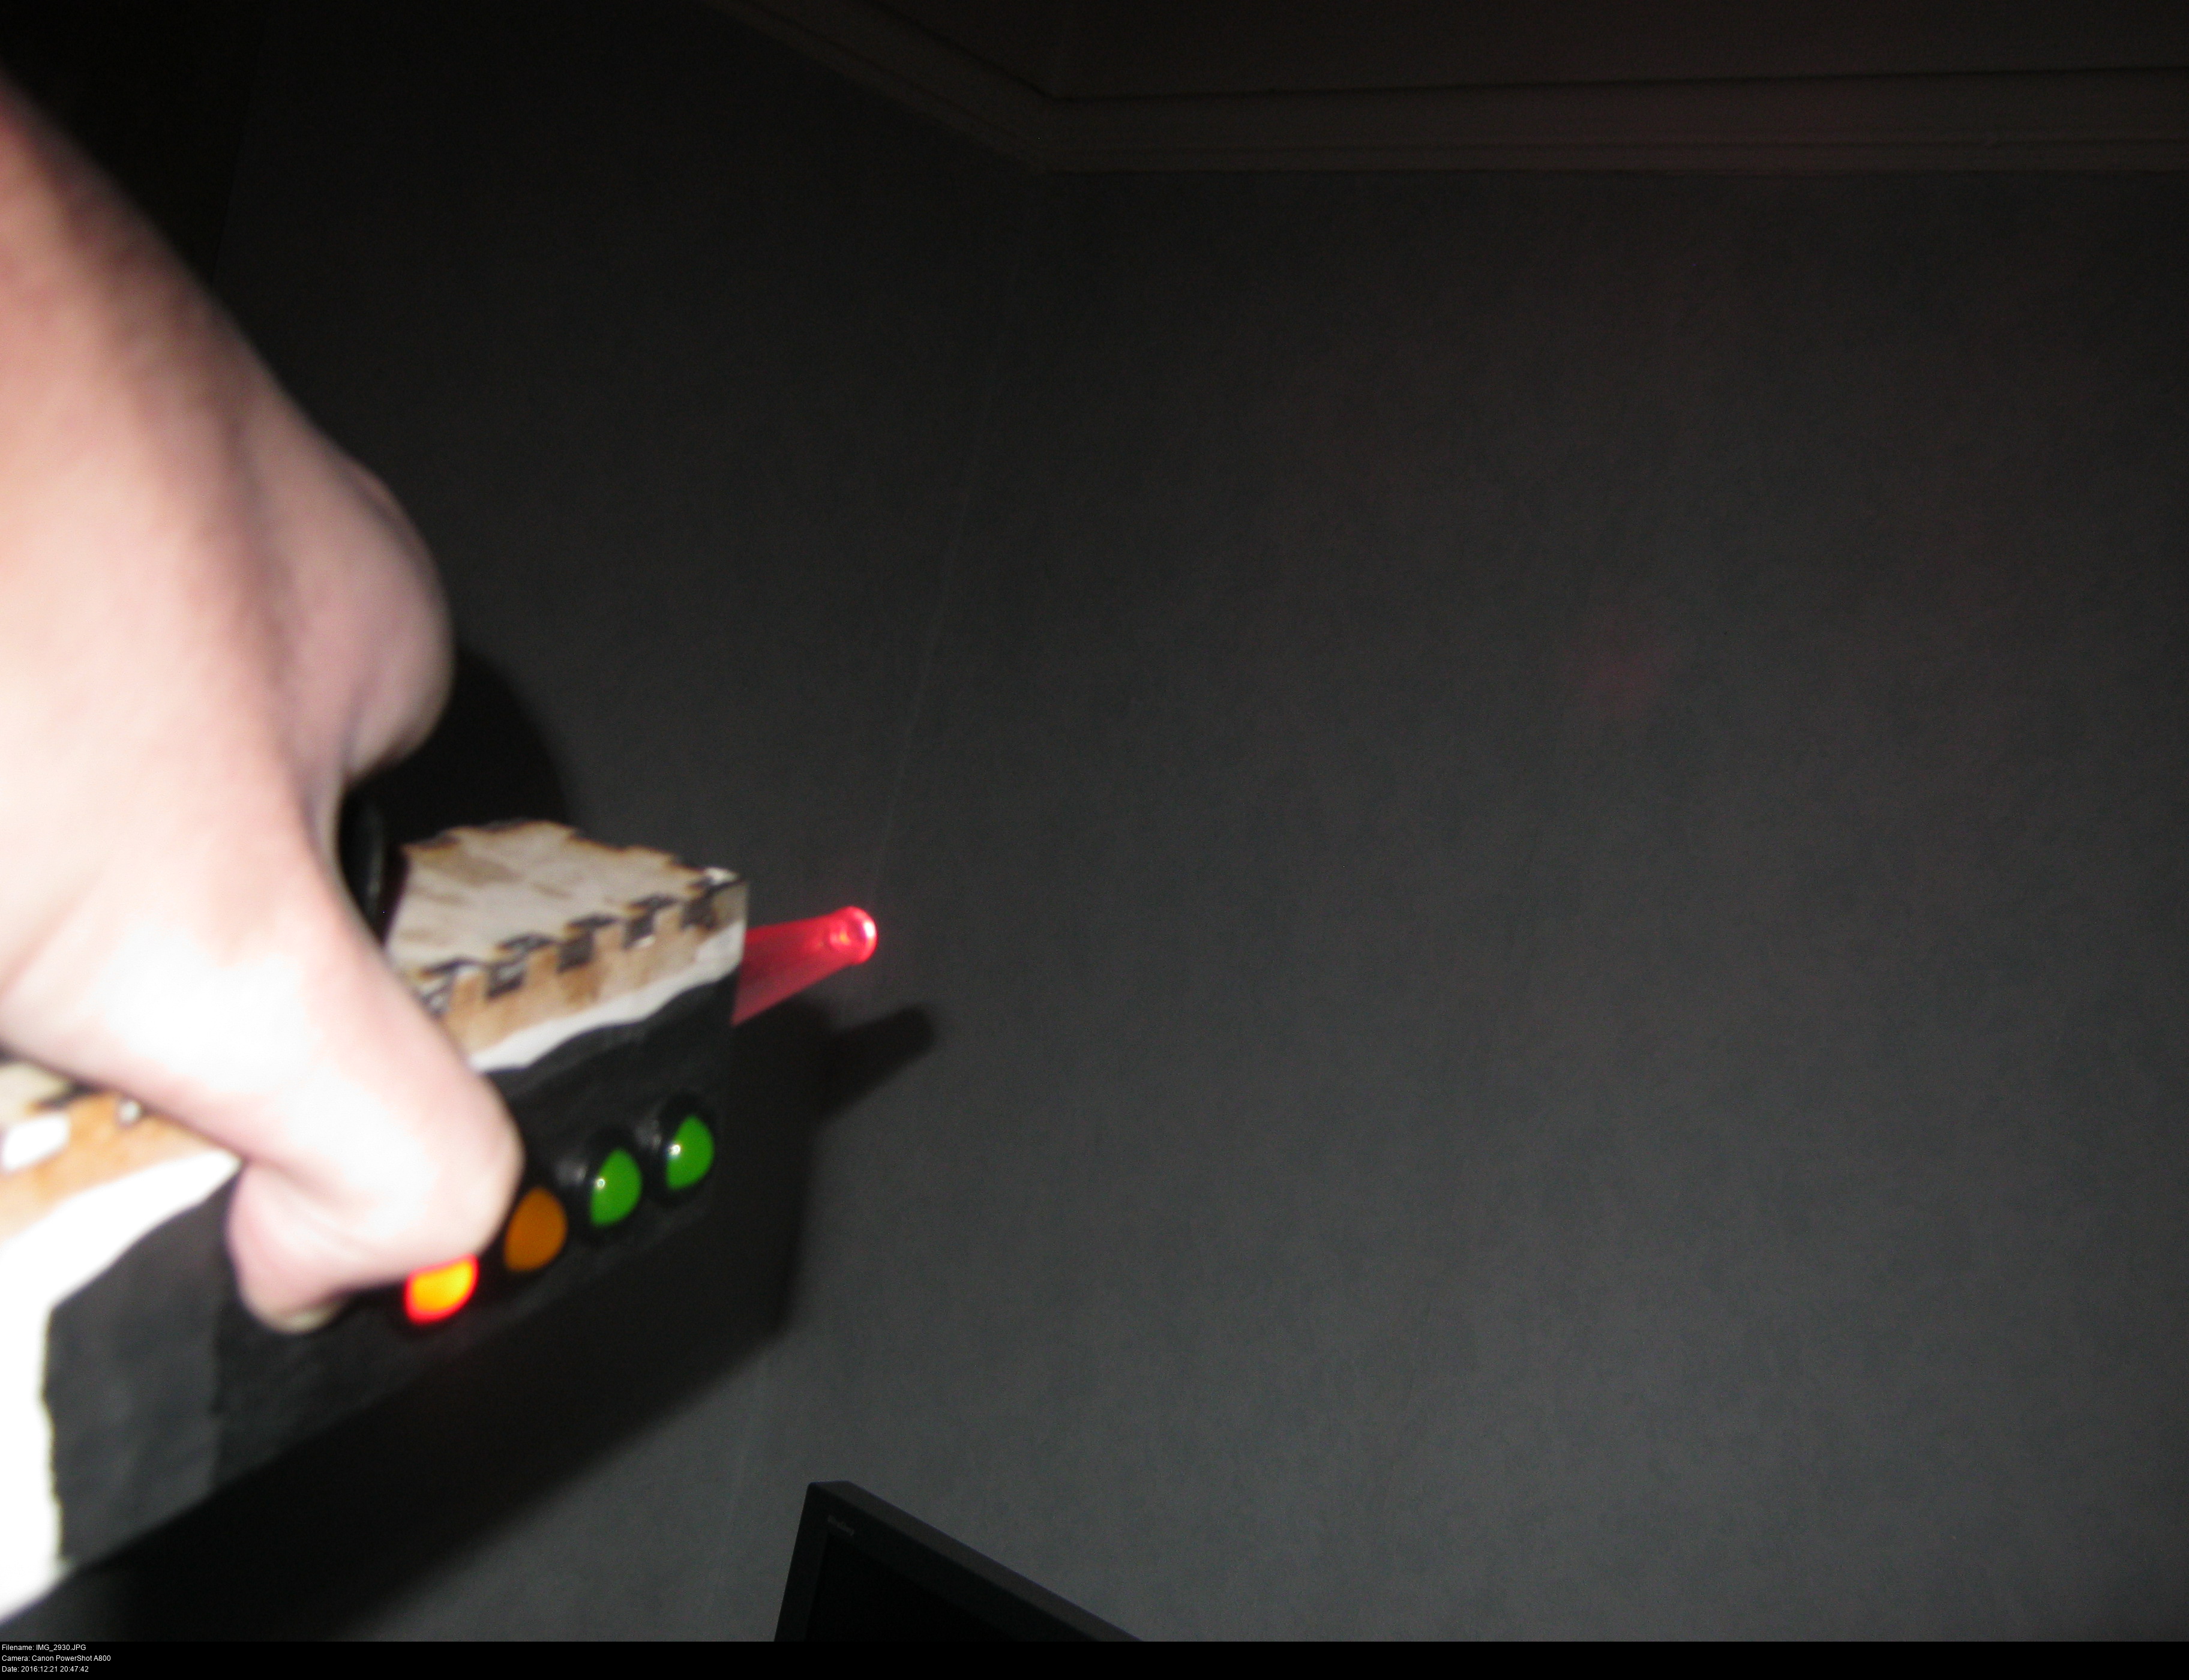
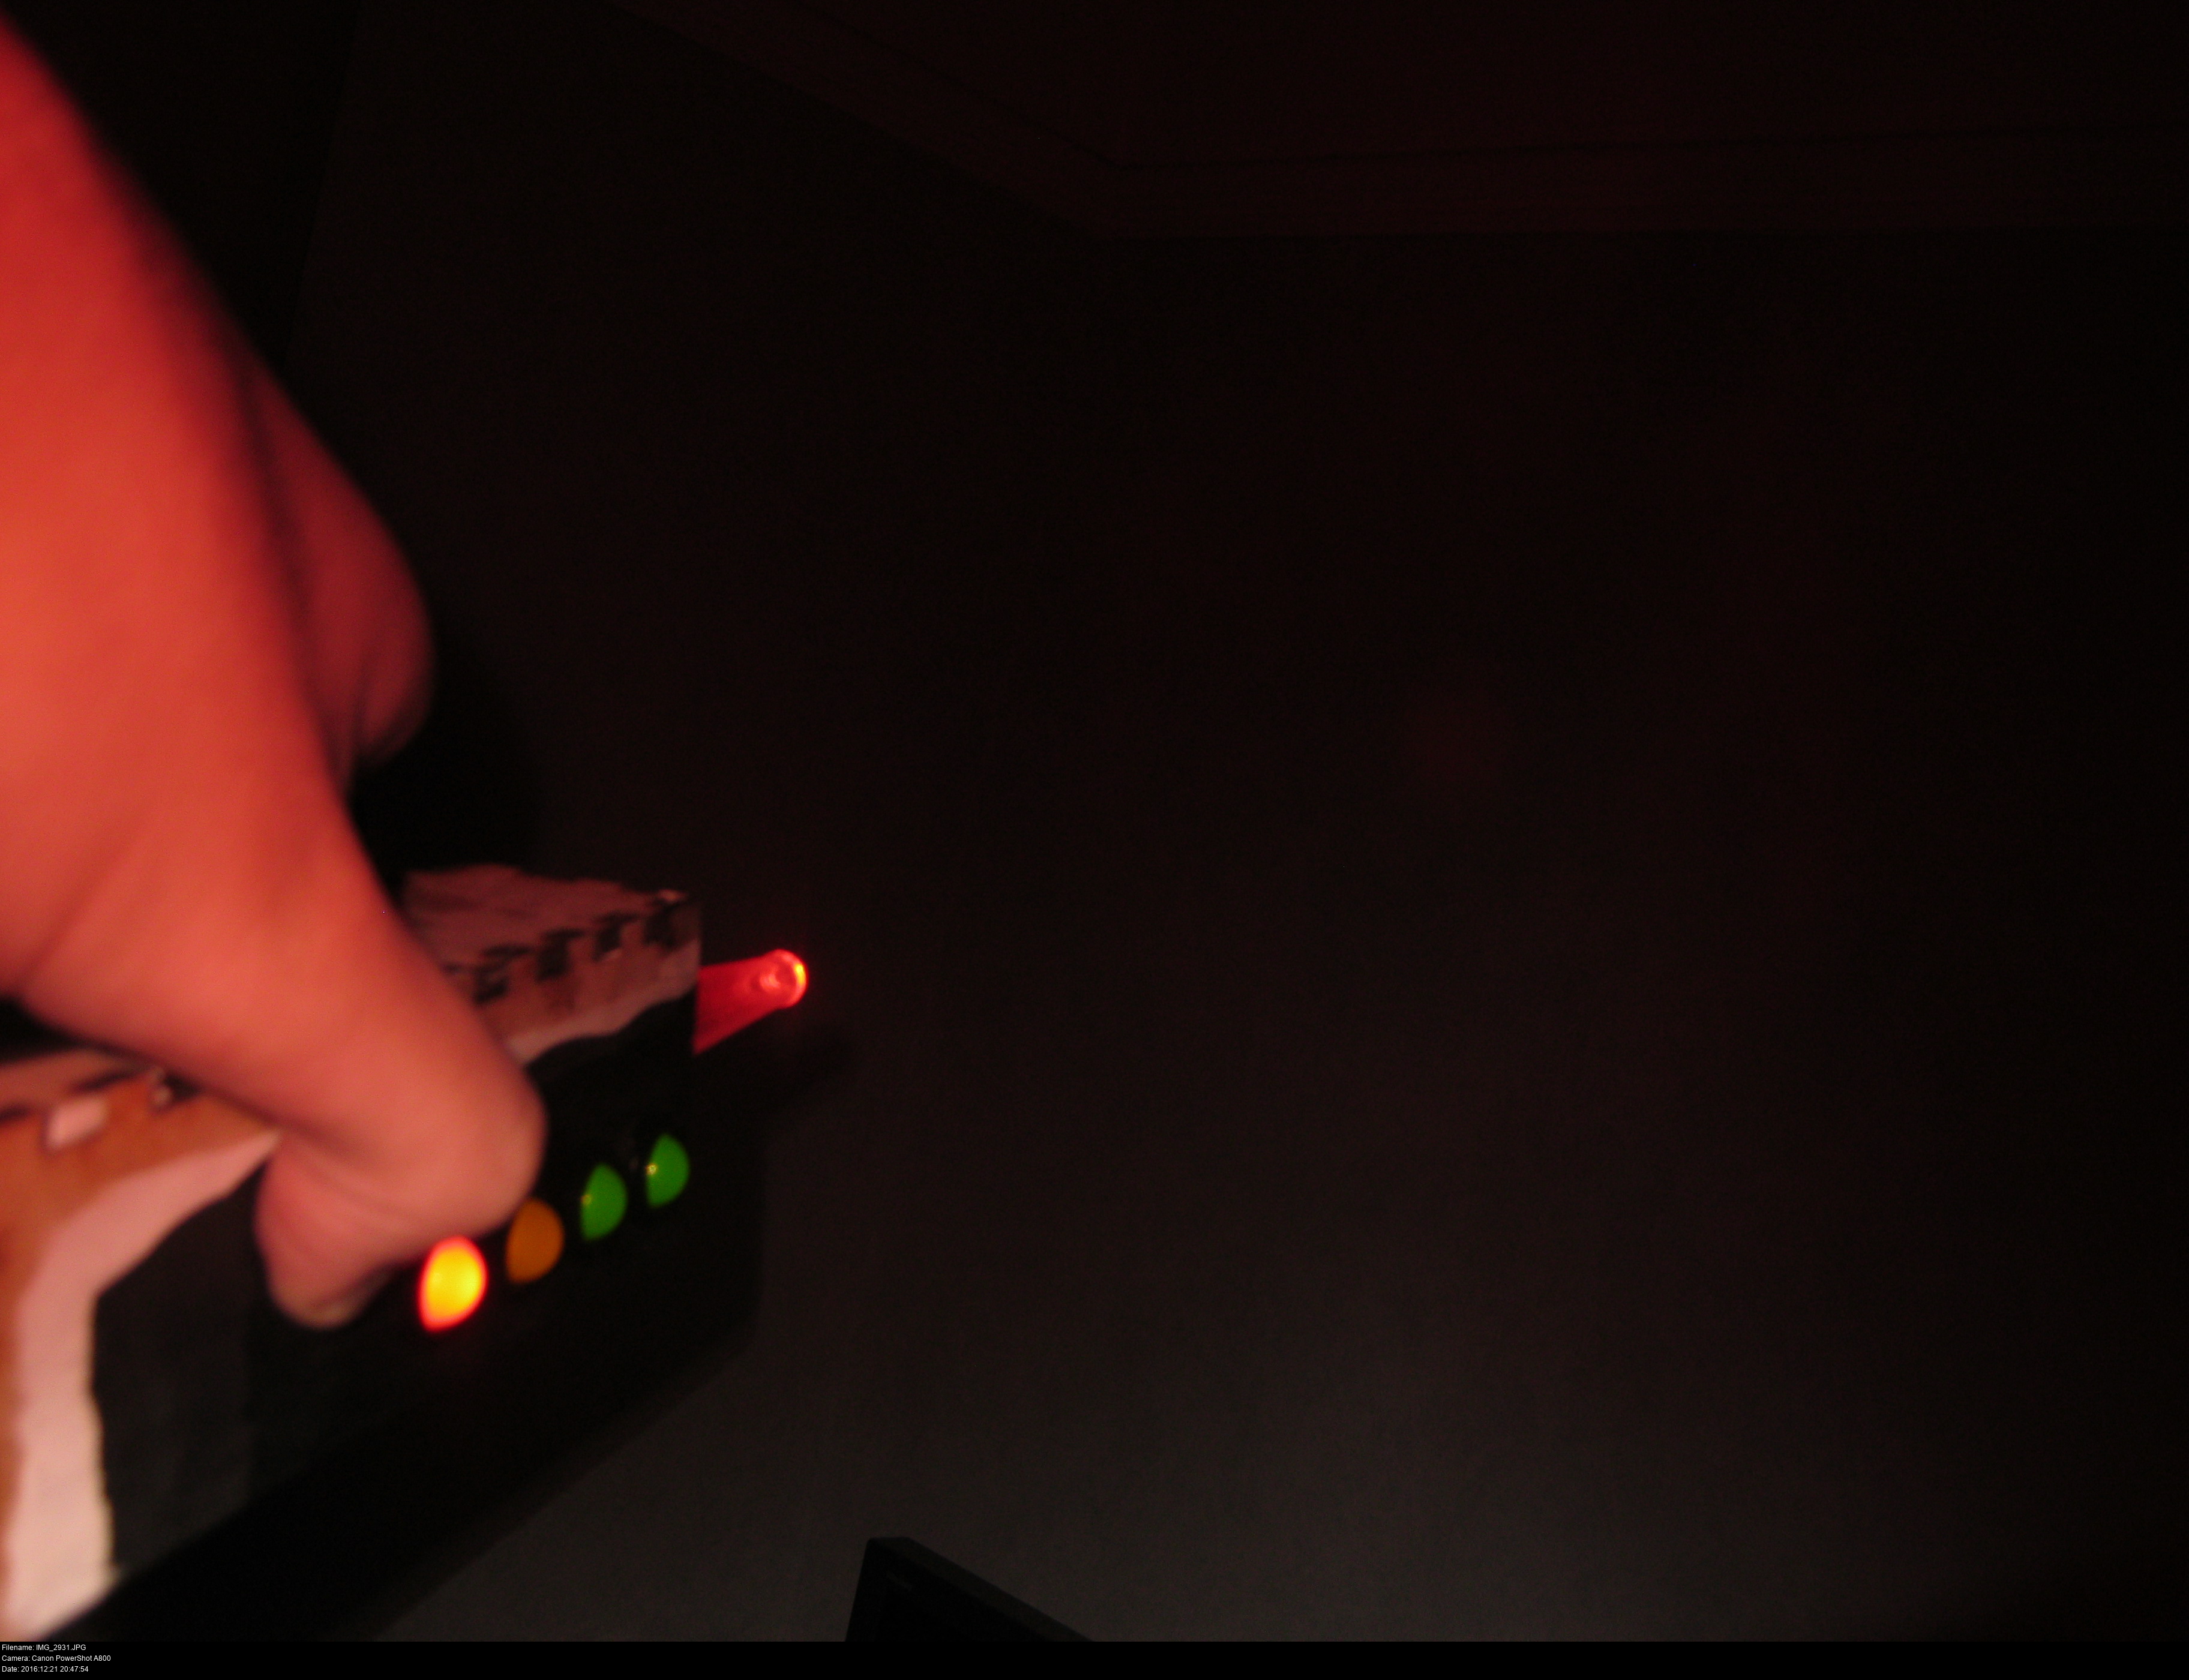
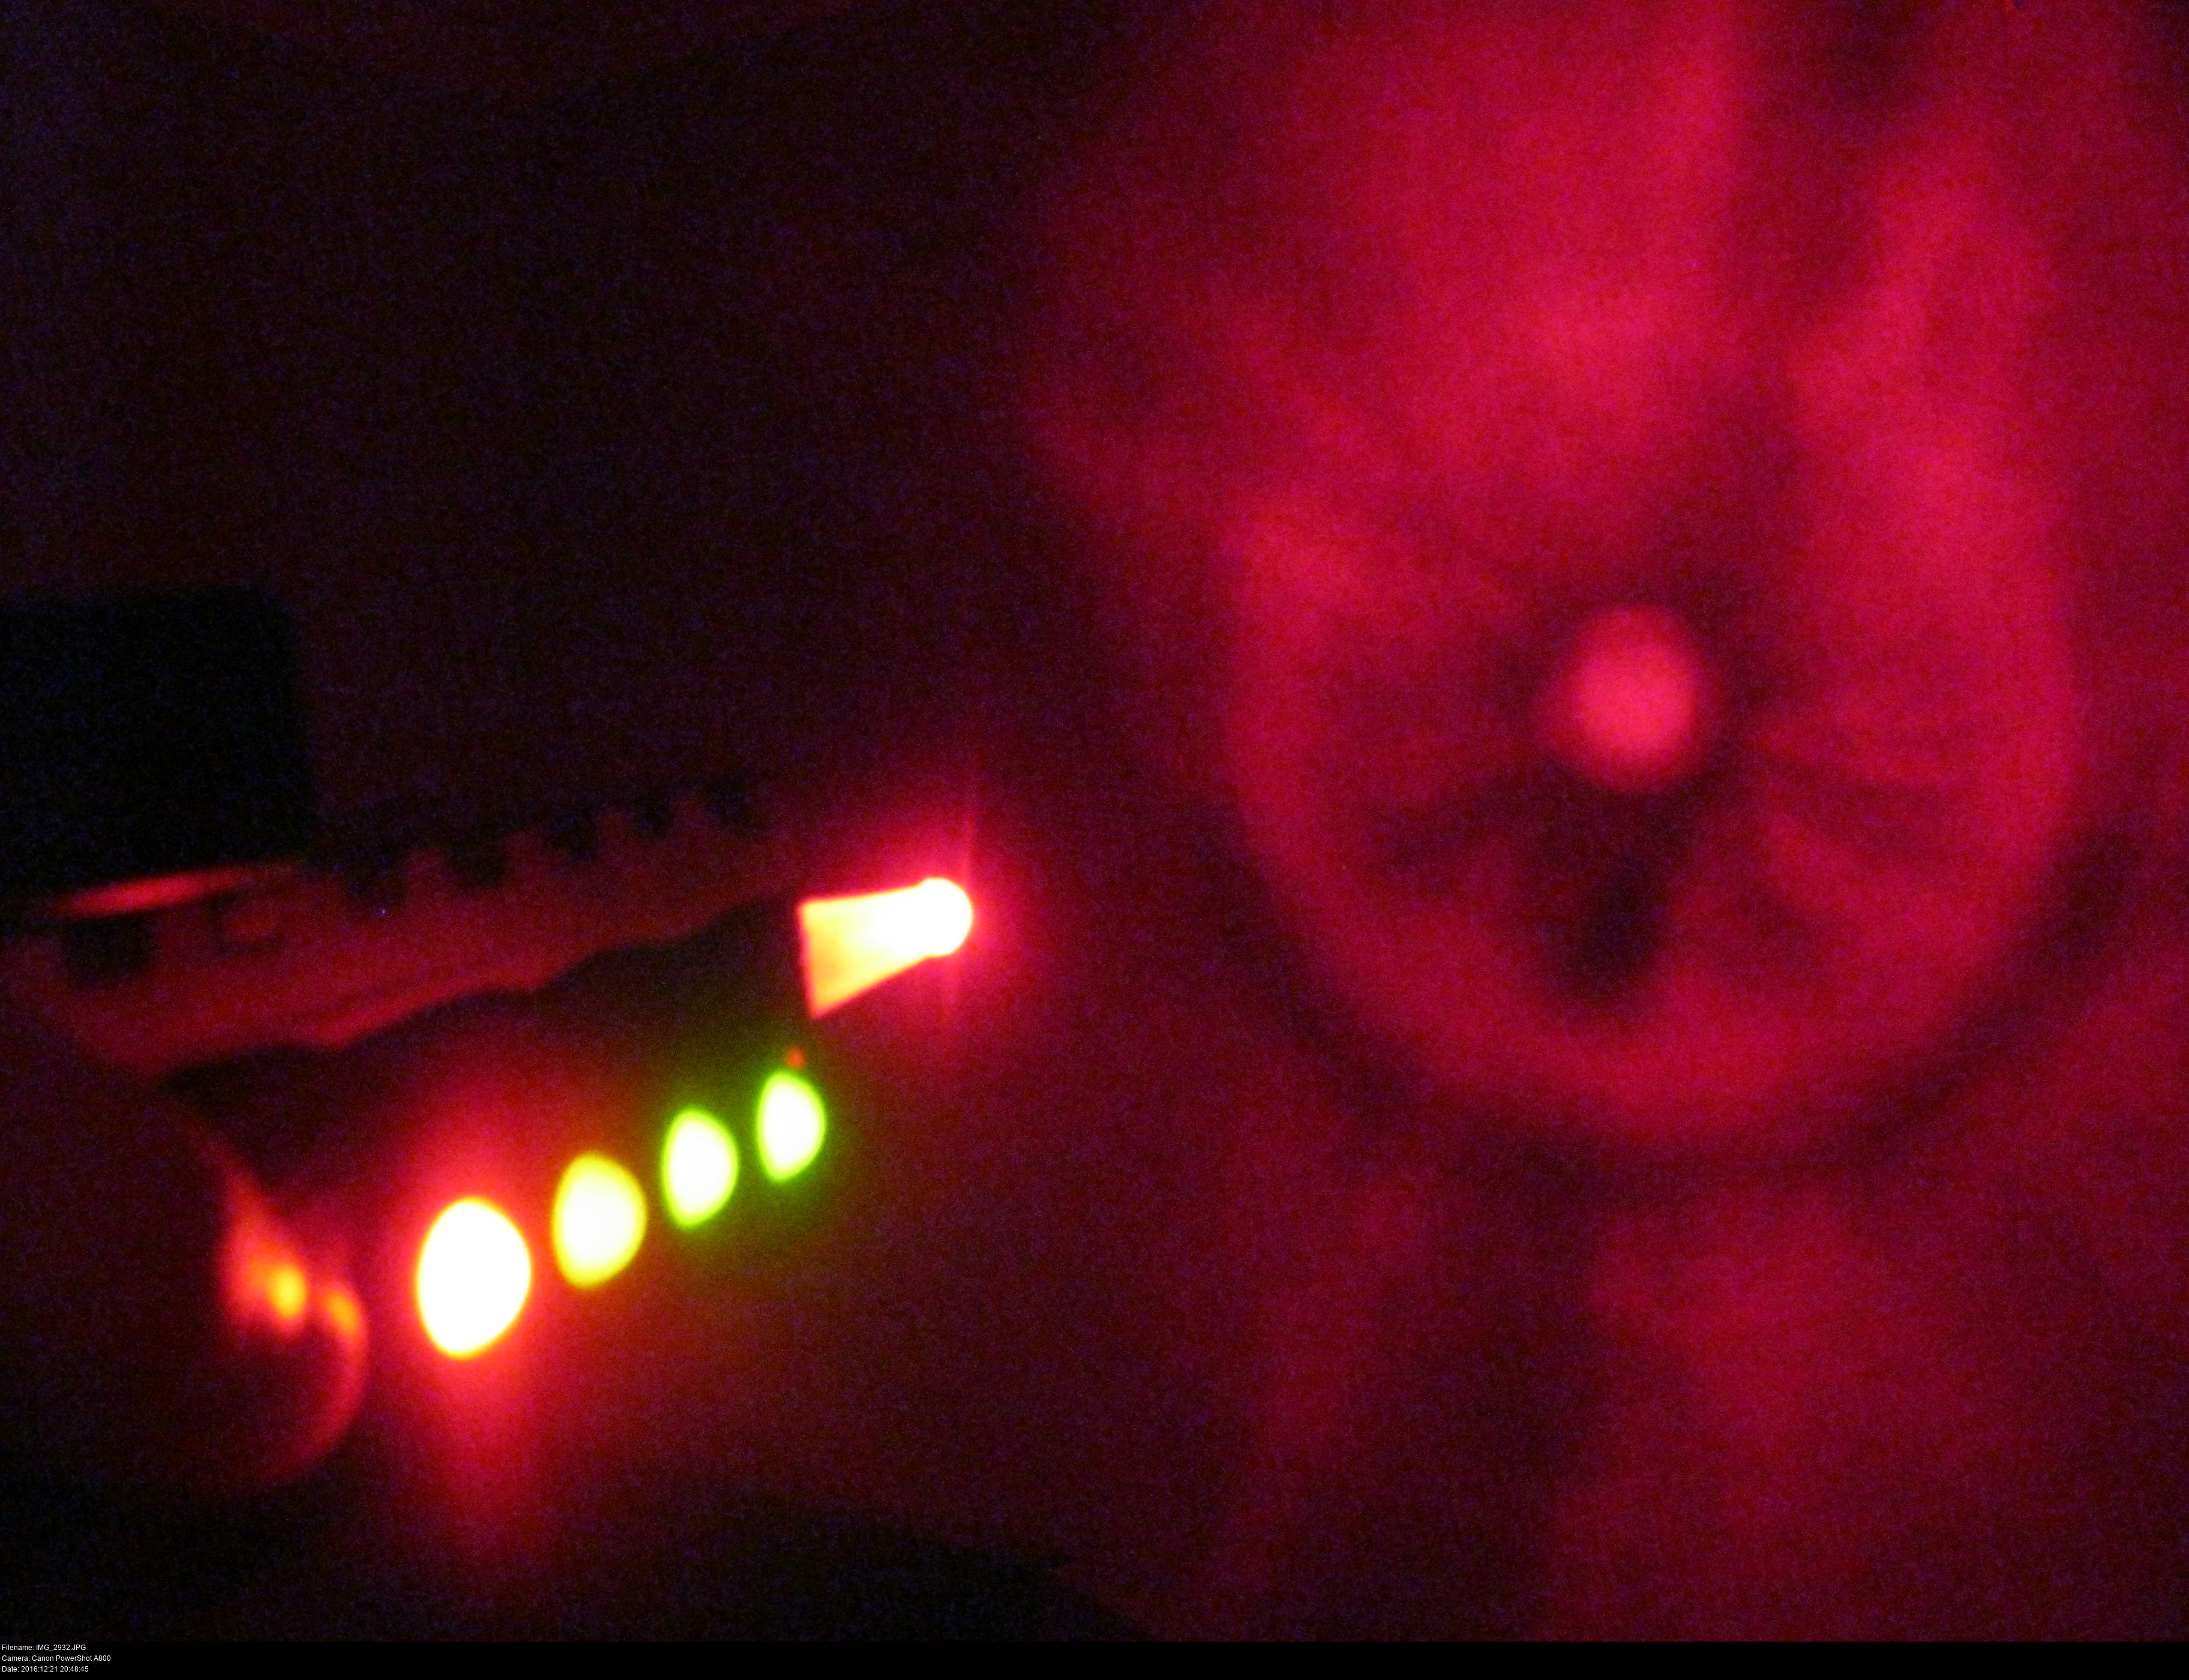
It's a cliche, but let there be light. :)
This is why I went to the trouble of tracking down a transparent cone to make the emitter barrel out of. The plastic baster and rings are going to glow when the embedded LED shines through them! Though I need to bear in mind that it is still a bright LED and I've installed it so the light is shooting out of the gun. If I point this at somebody's eyes, they will not be pleased. You shouldn't go around pointing guns at people anyway.
This "Hyper Orange" LED I bought (and waited months for Maplin to have in stock) isn't particularly orange in colour. Ah well. My laser gun is just going to have to have a red emitter!
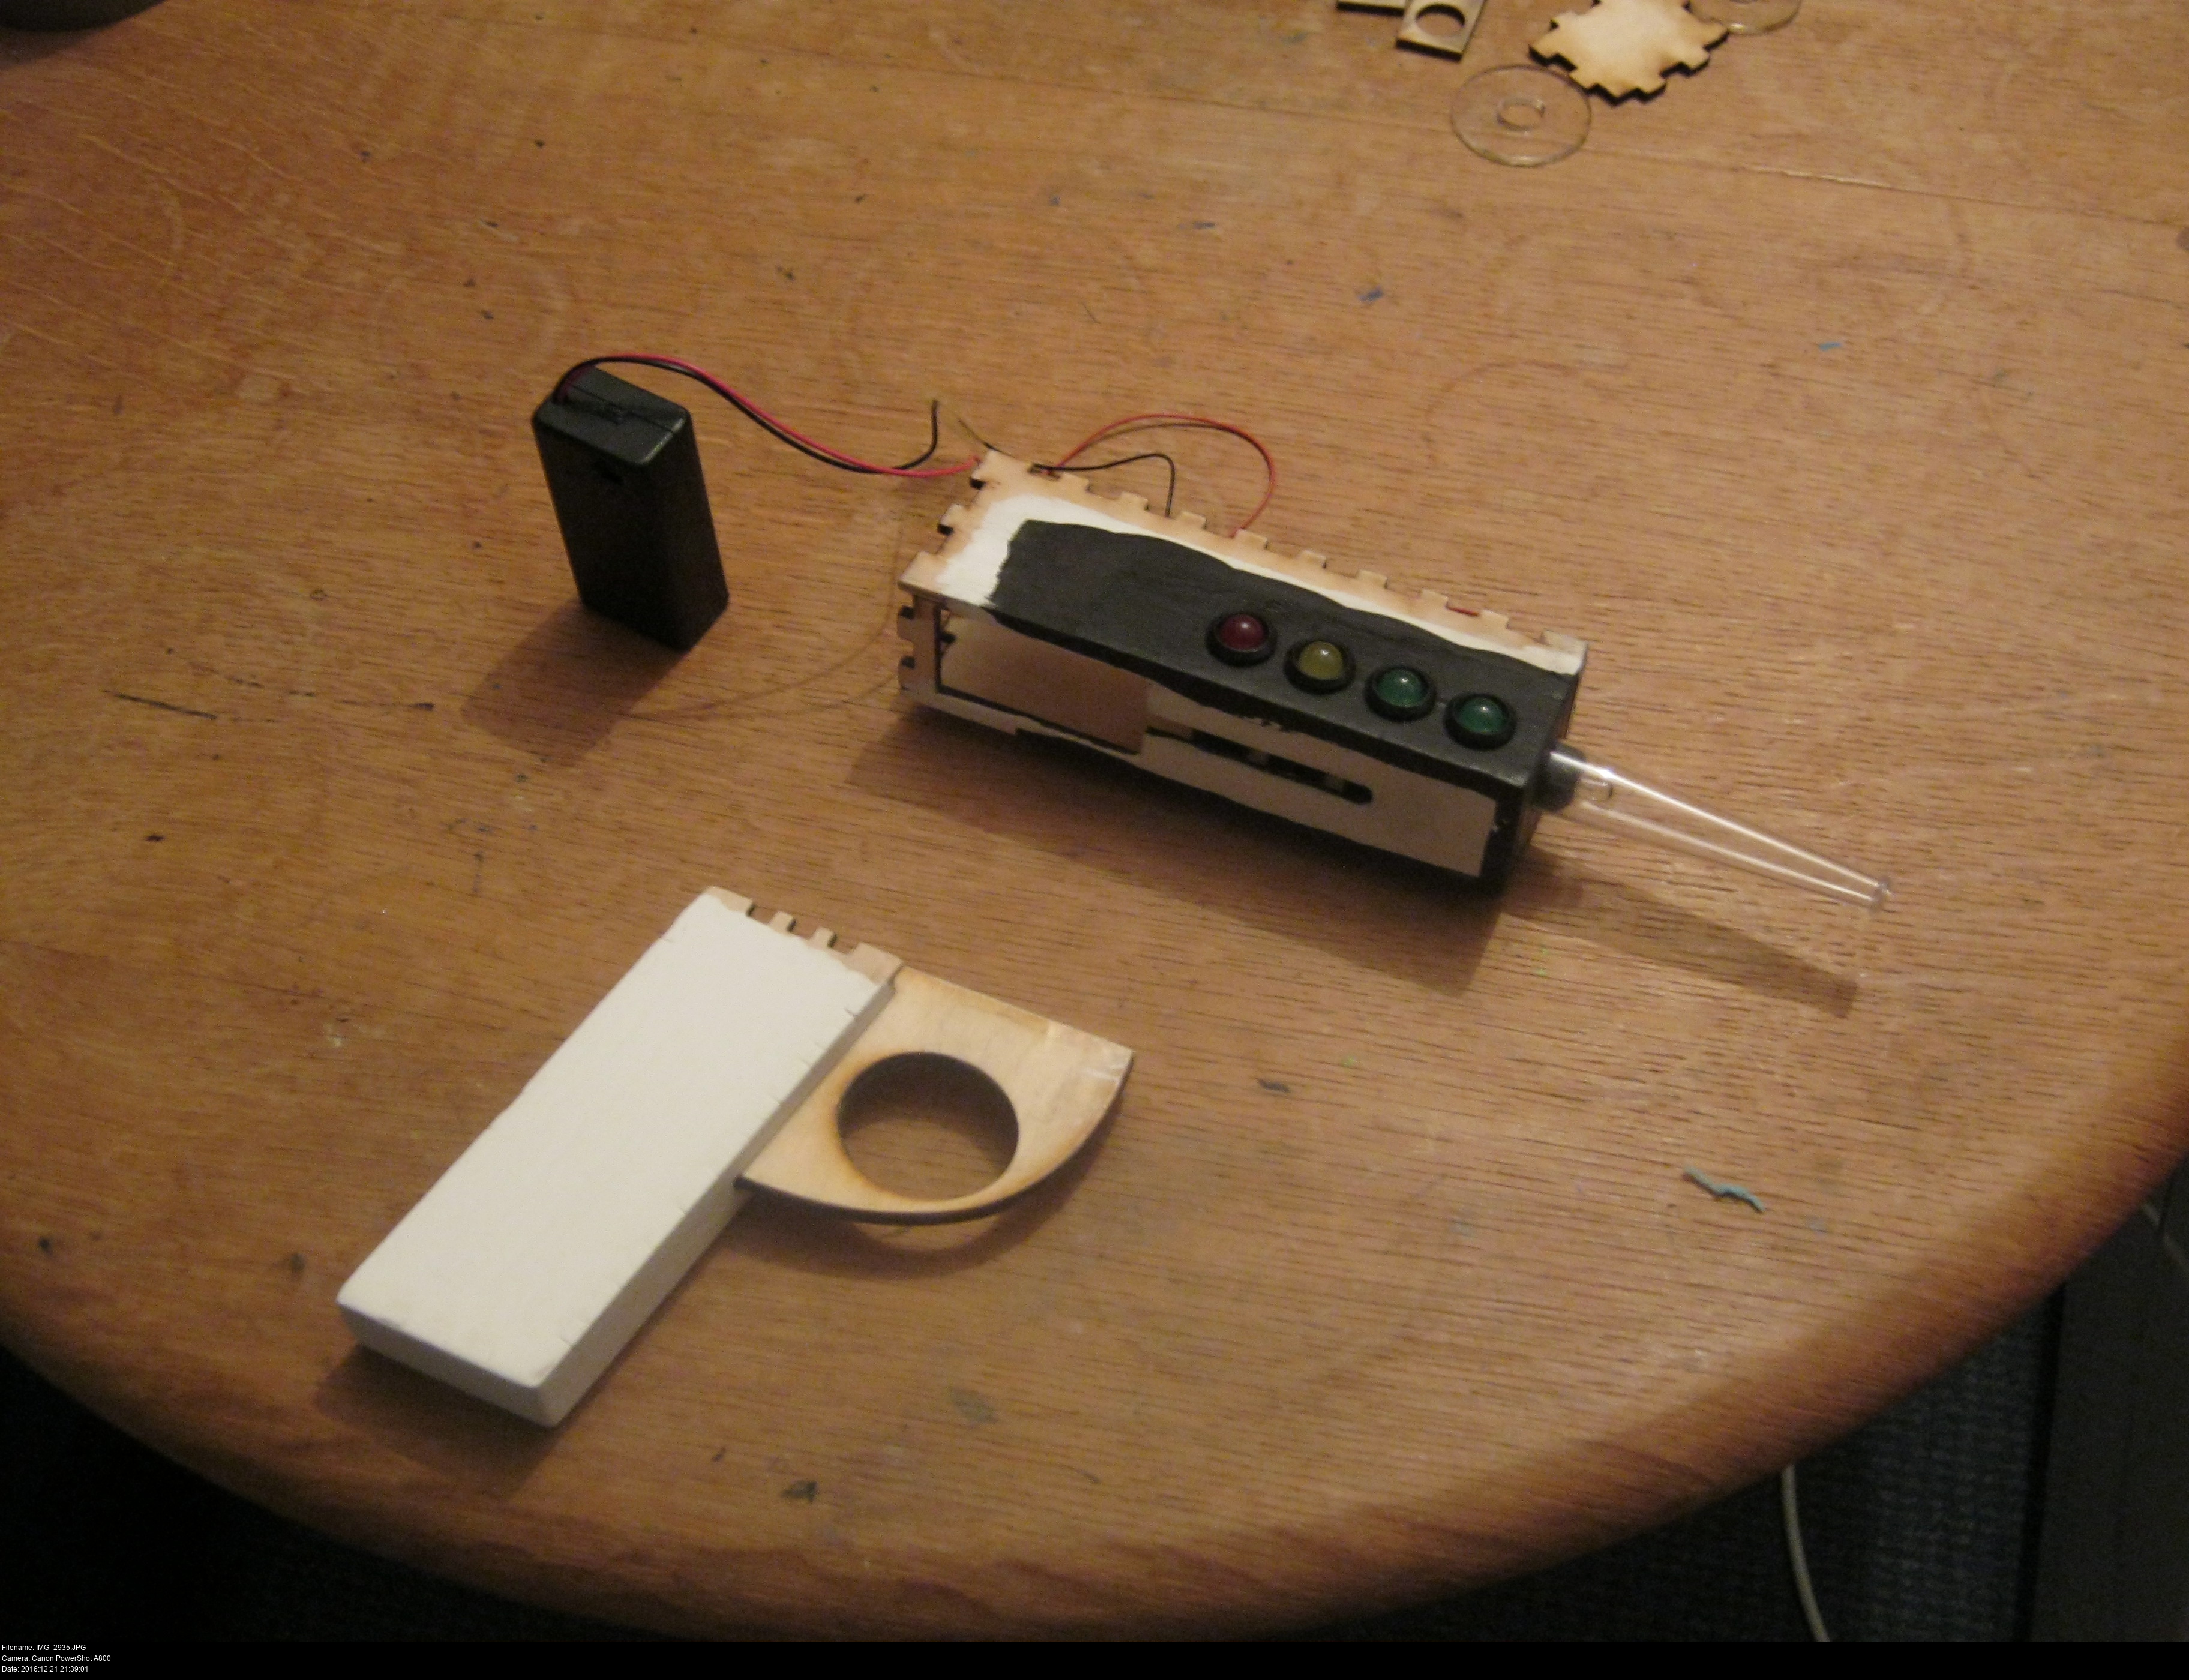
So now I have the top section of the gun with all the electronics fitted but without a top face, the bottom section of the gun with a primed grip and a sanded trigger guard. Time to combine everything together.
The top face of the gun is going on last, in case the electronics go bad and need attention.
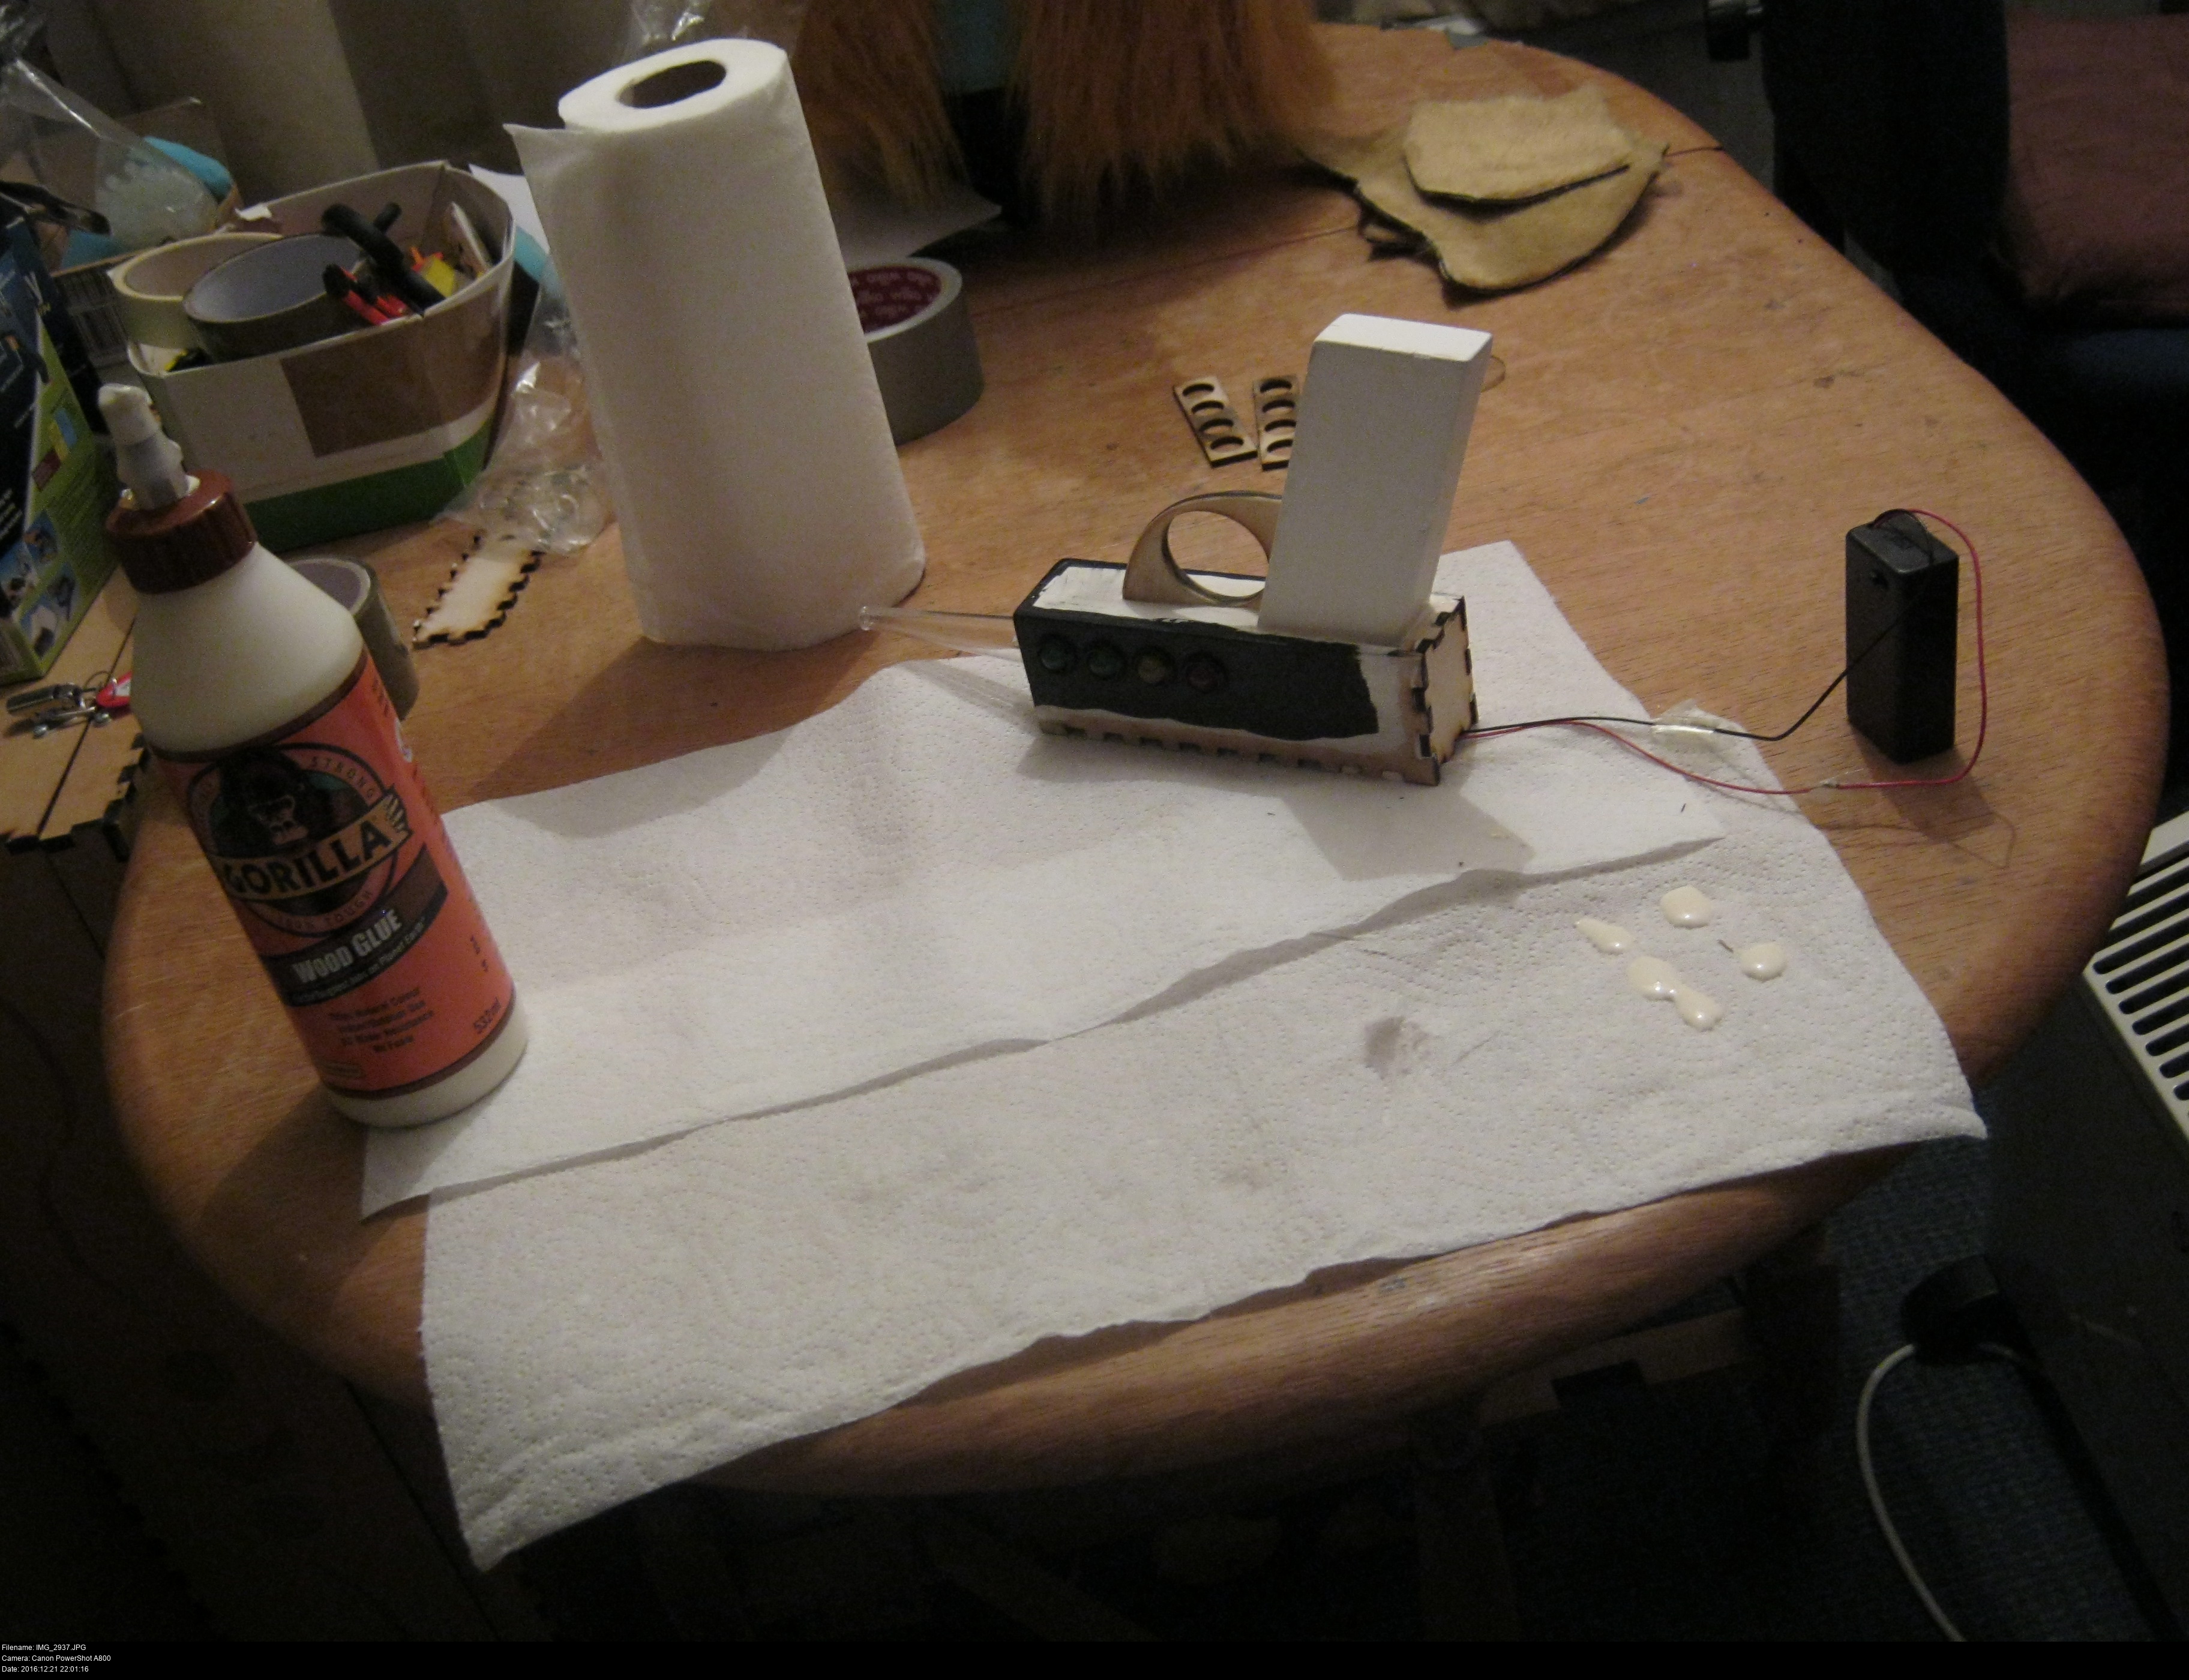
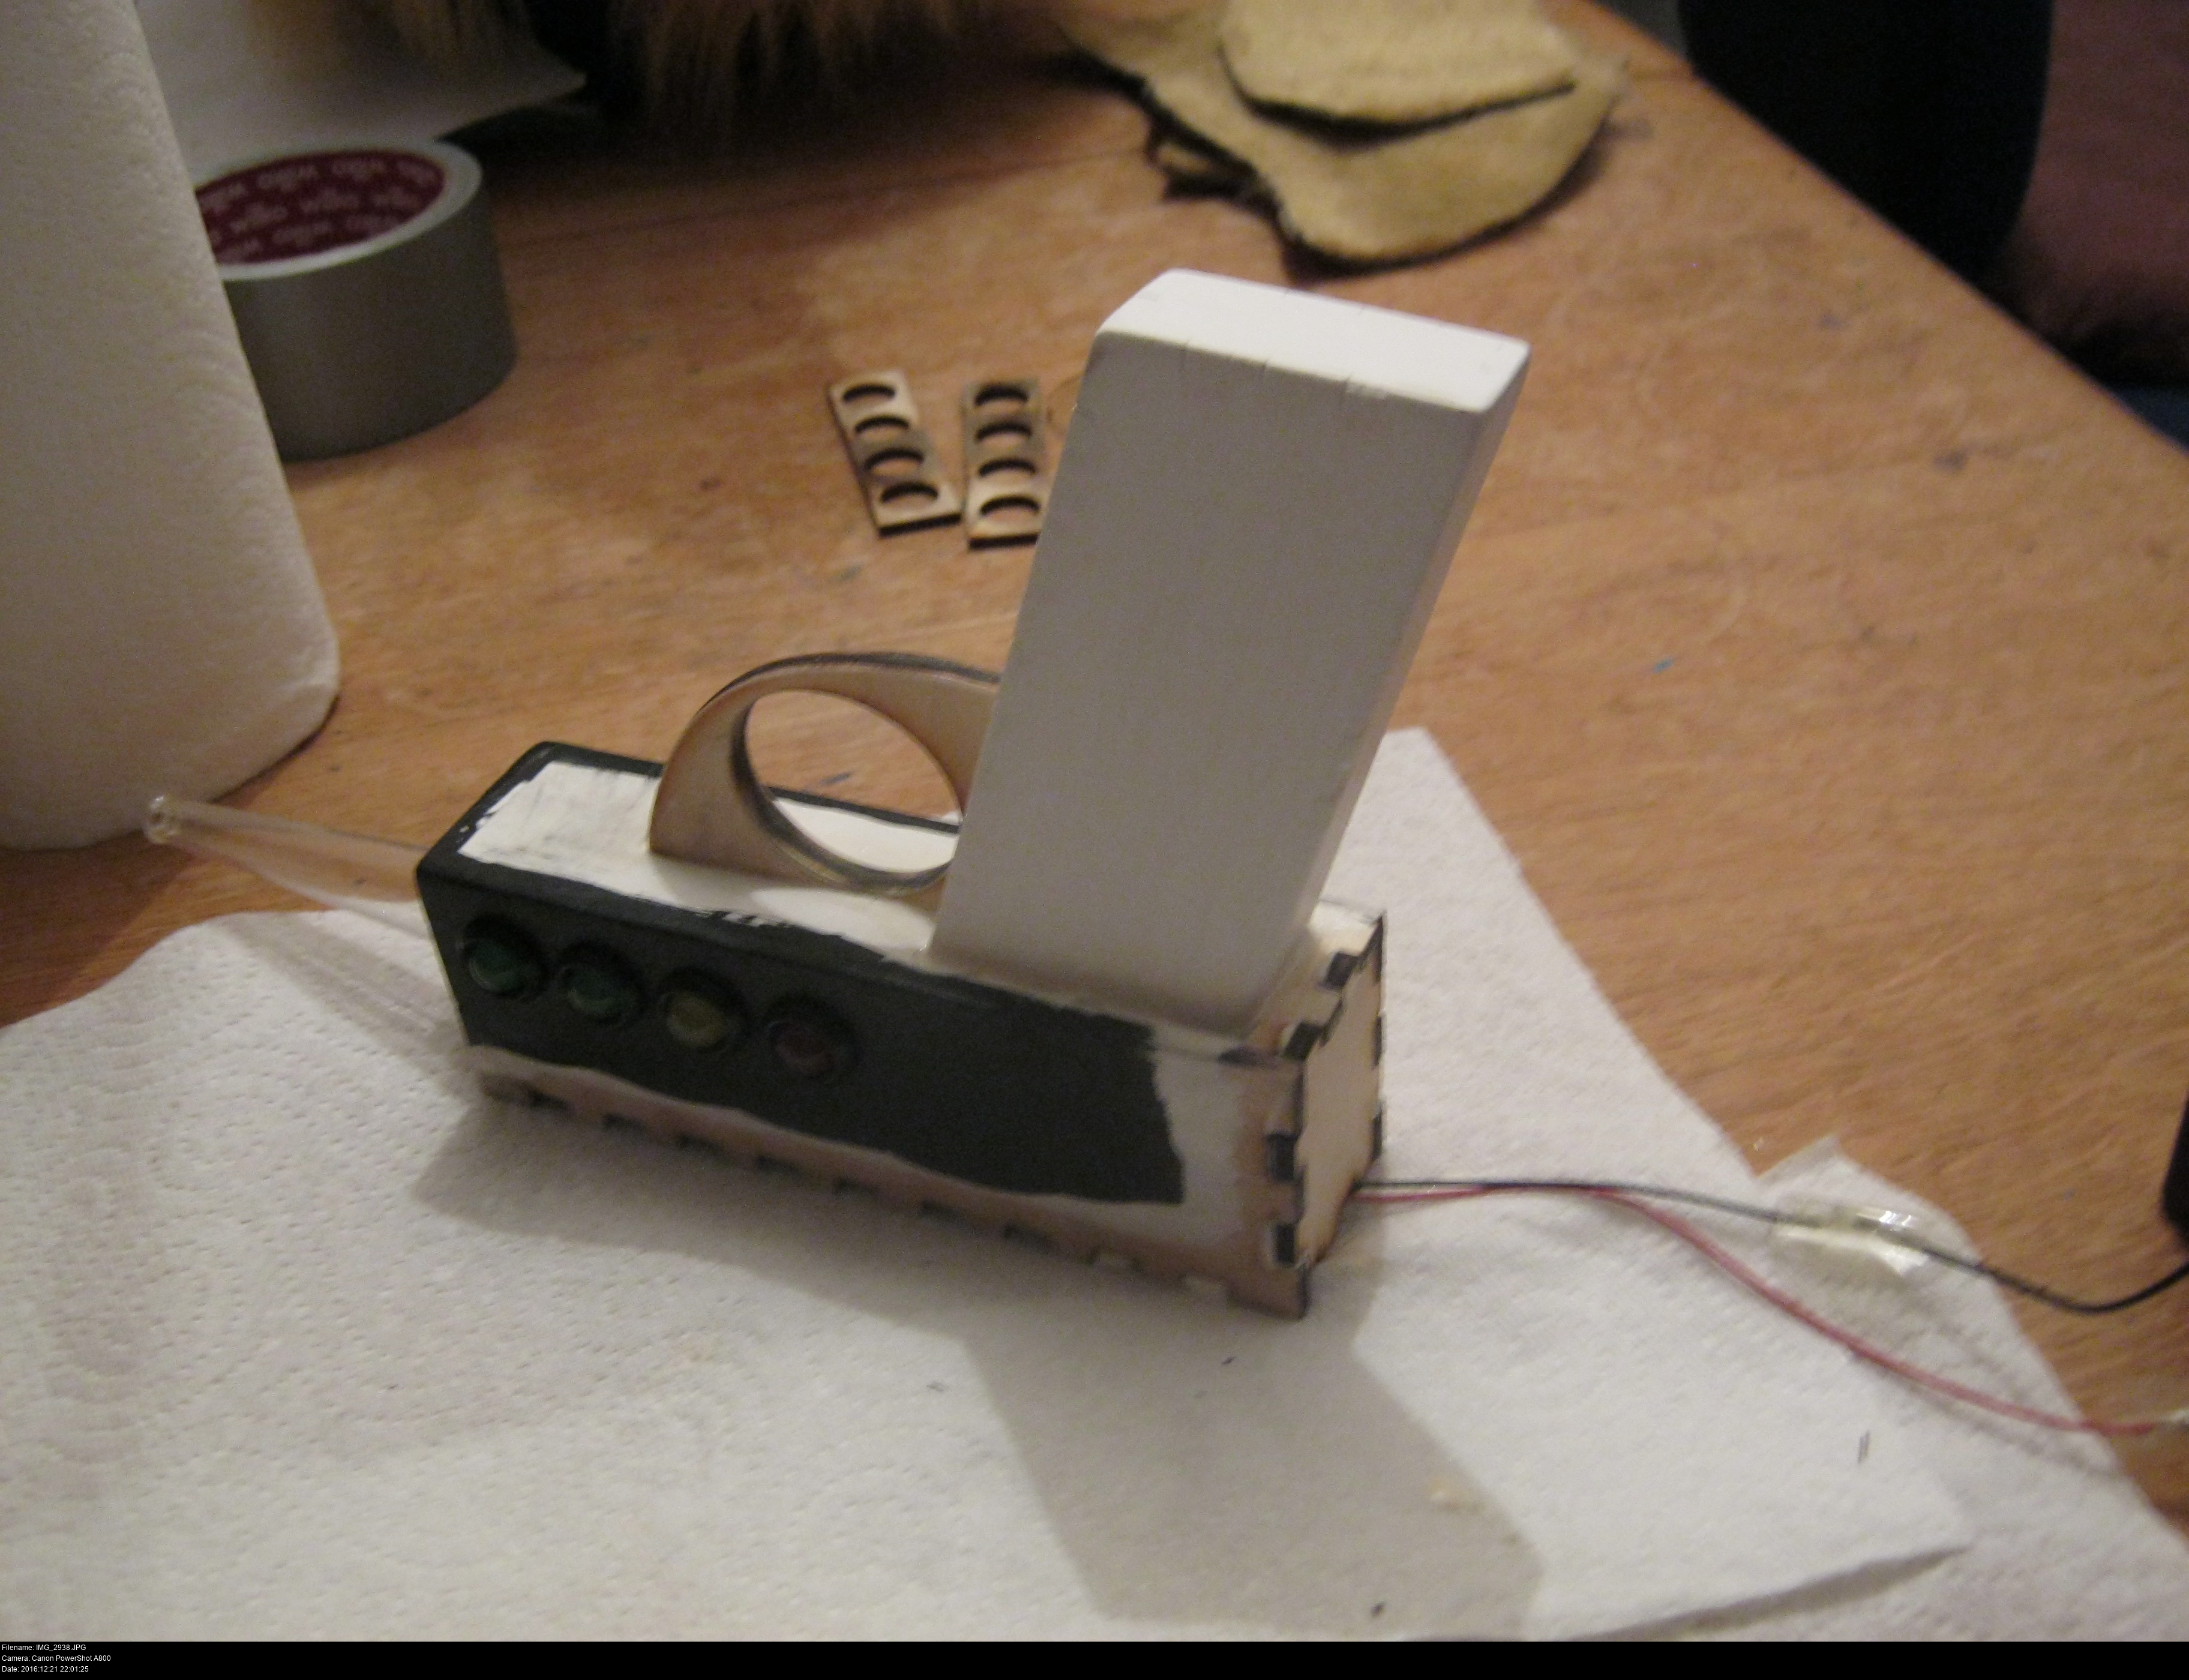
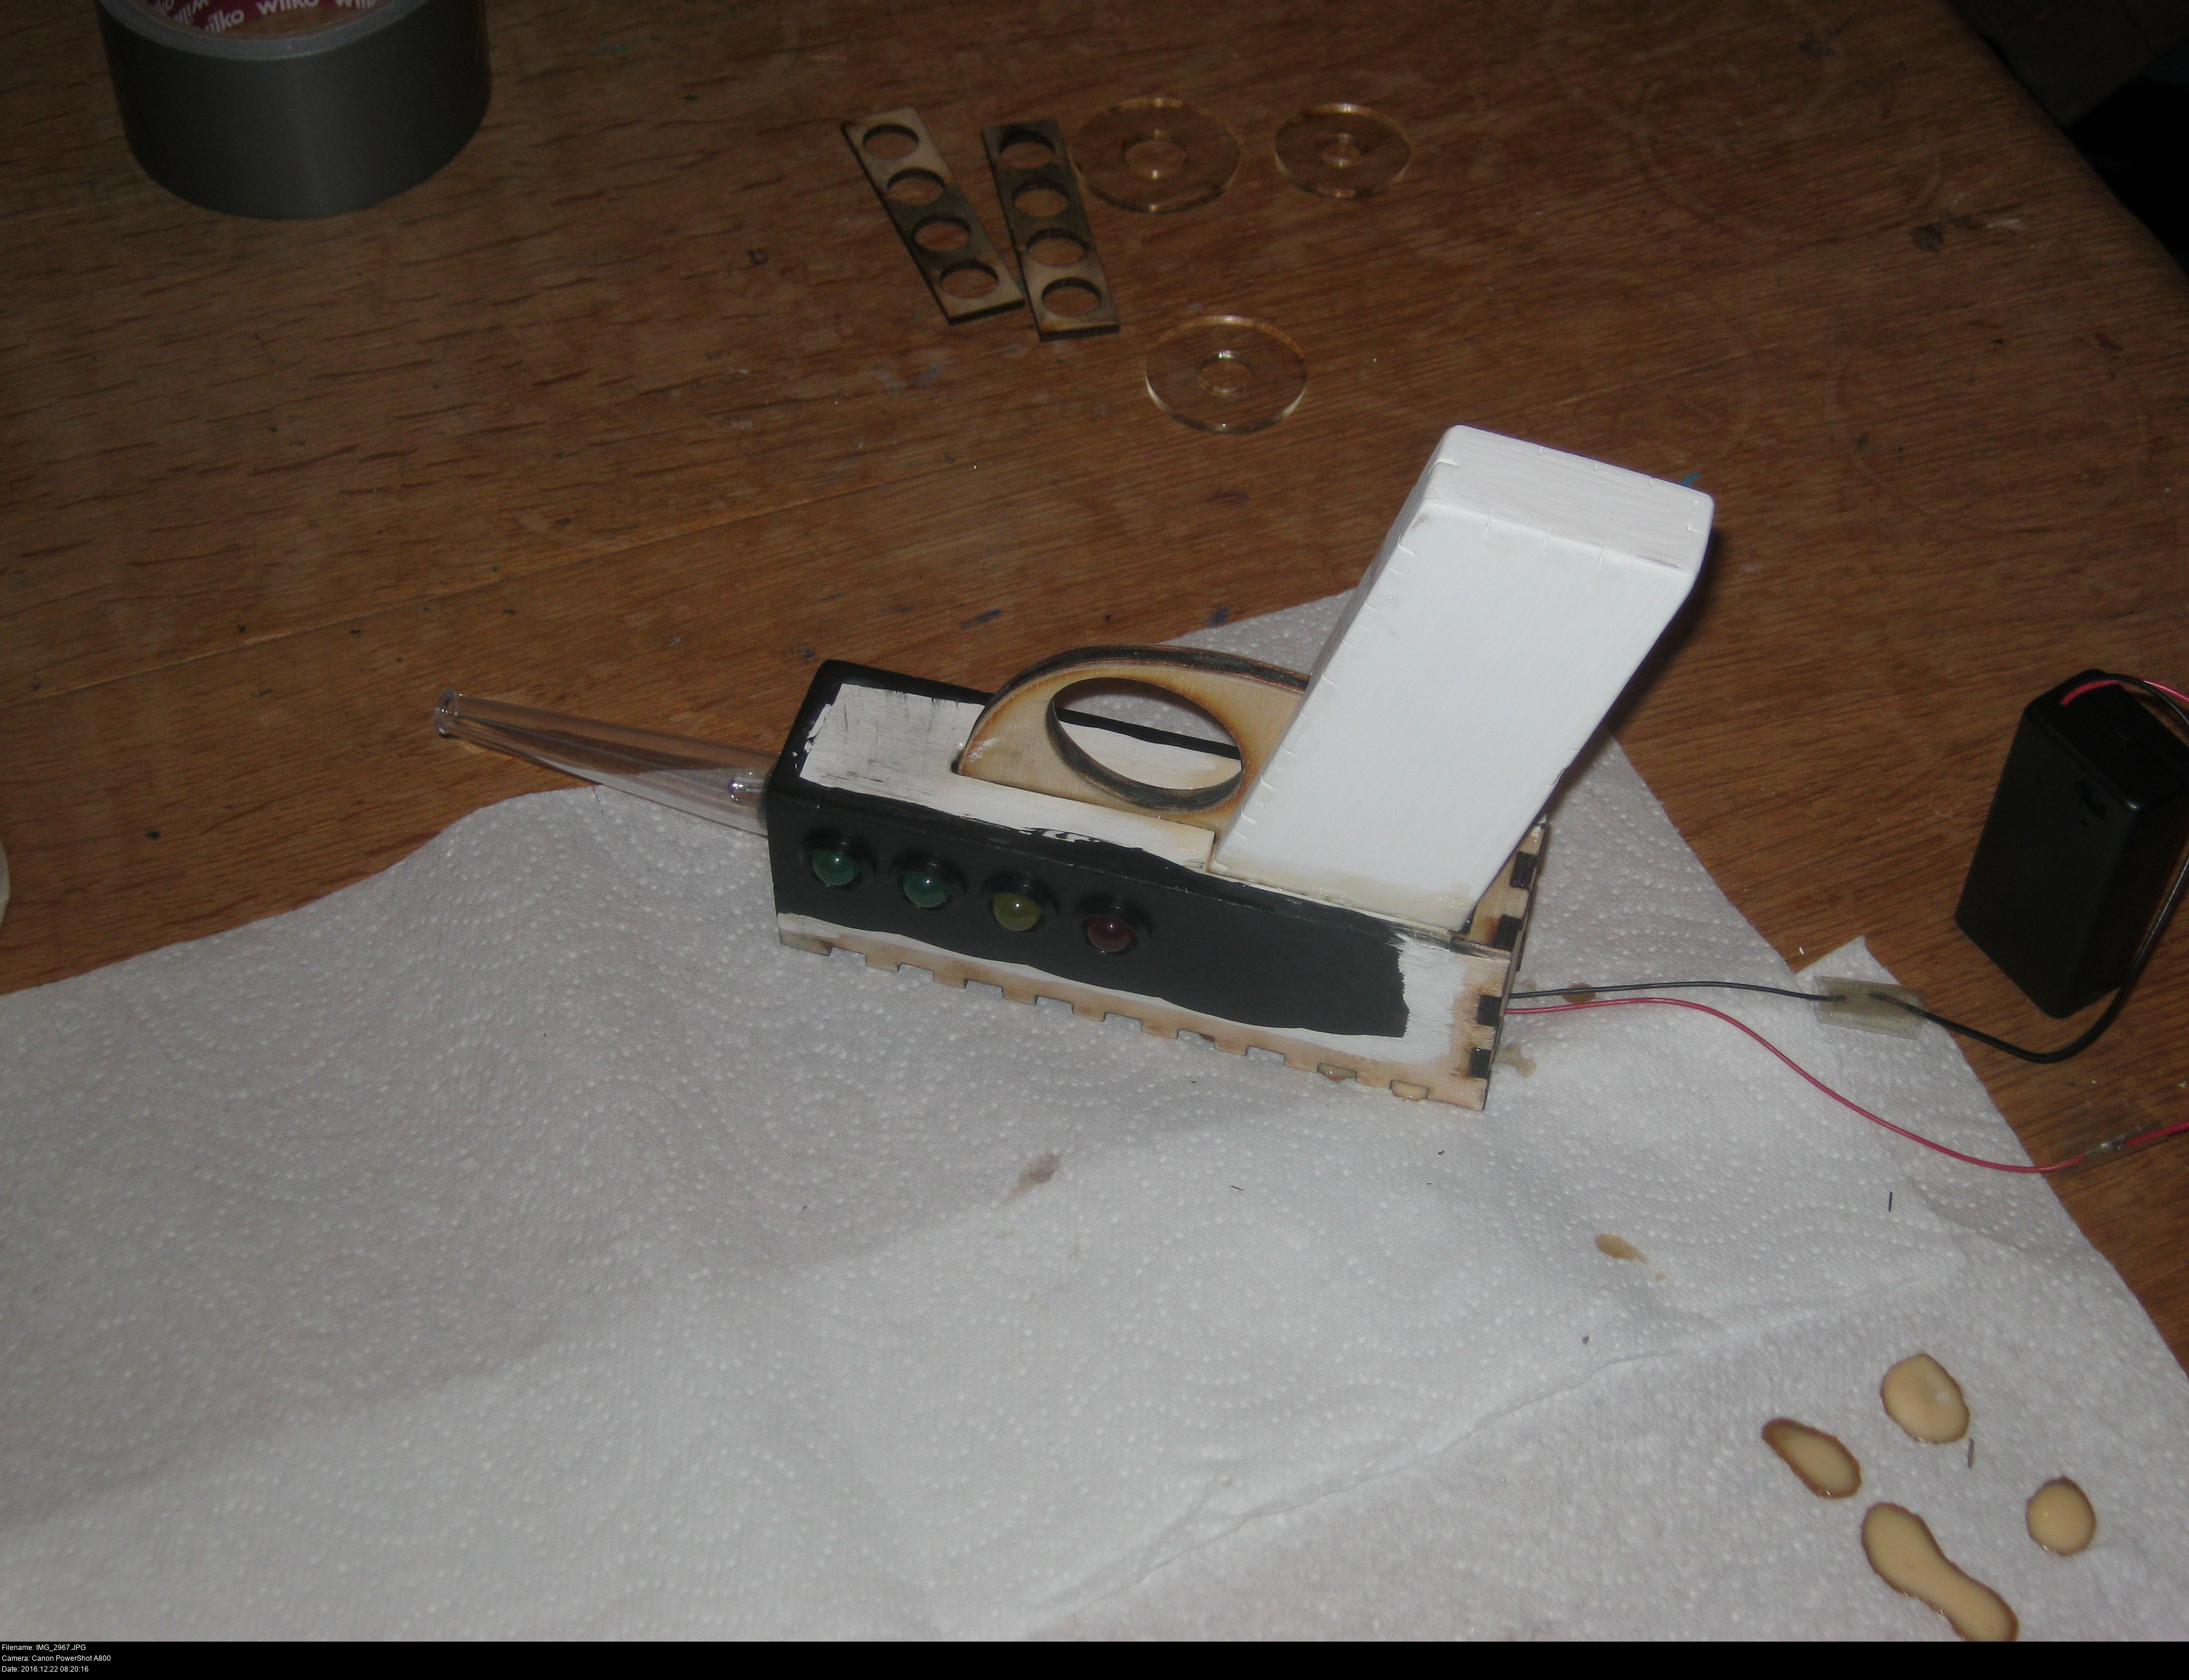
There's just a little issue here.
When you're gluing wood to wood, you typically have some kind of prepared joint that physically locks the pieces together while they dry, like interlocking fingers or a jigsaw-puzzle style tooth. My gun doesn't have anything, the grip section is just resting in a rectangular hollow in the base of the body of the gun. All I can do is prop it and secure it in place, and hope that if I apply enough glue in the correct place over enough time and coats (allowing it to dry), then the two sections will have enough of a glue bond between them to hold permanently.
Because, hypothetically, if it doesn't work, I'll end up gluing the damned gun to the table.
Ah well, it's only paper.
(This is why we -cover our work surfaces-.)
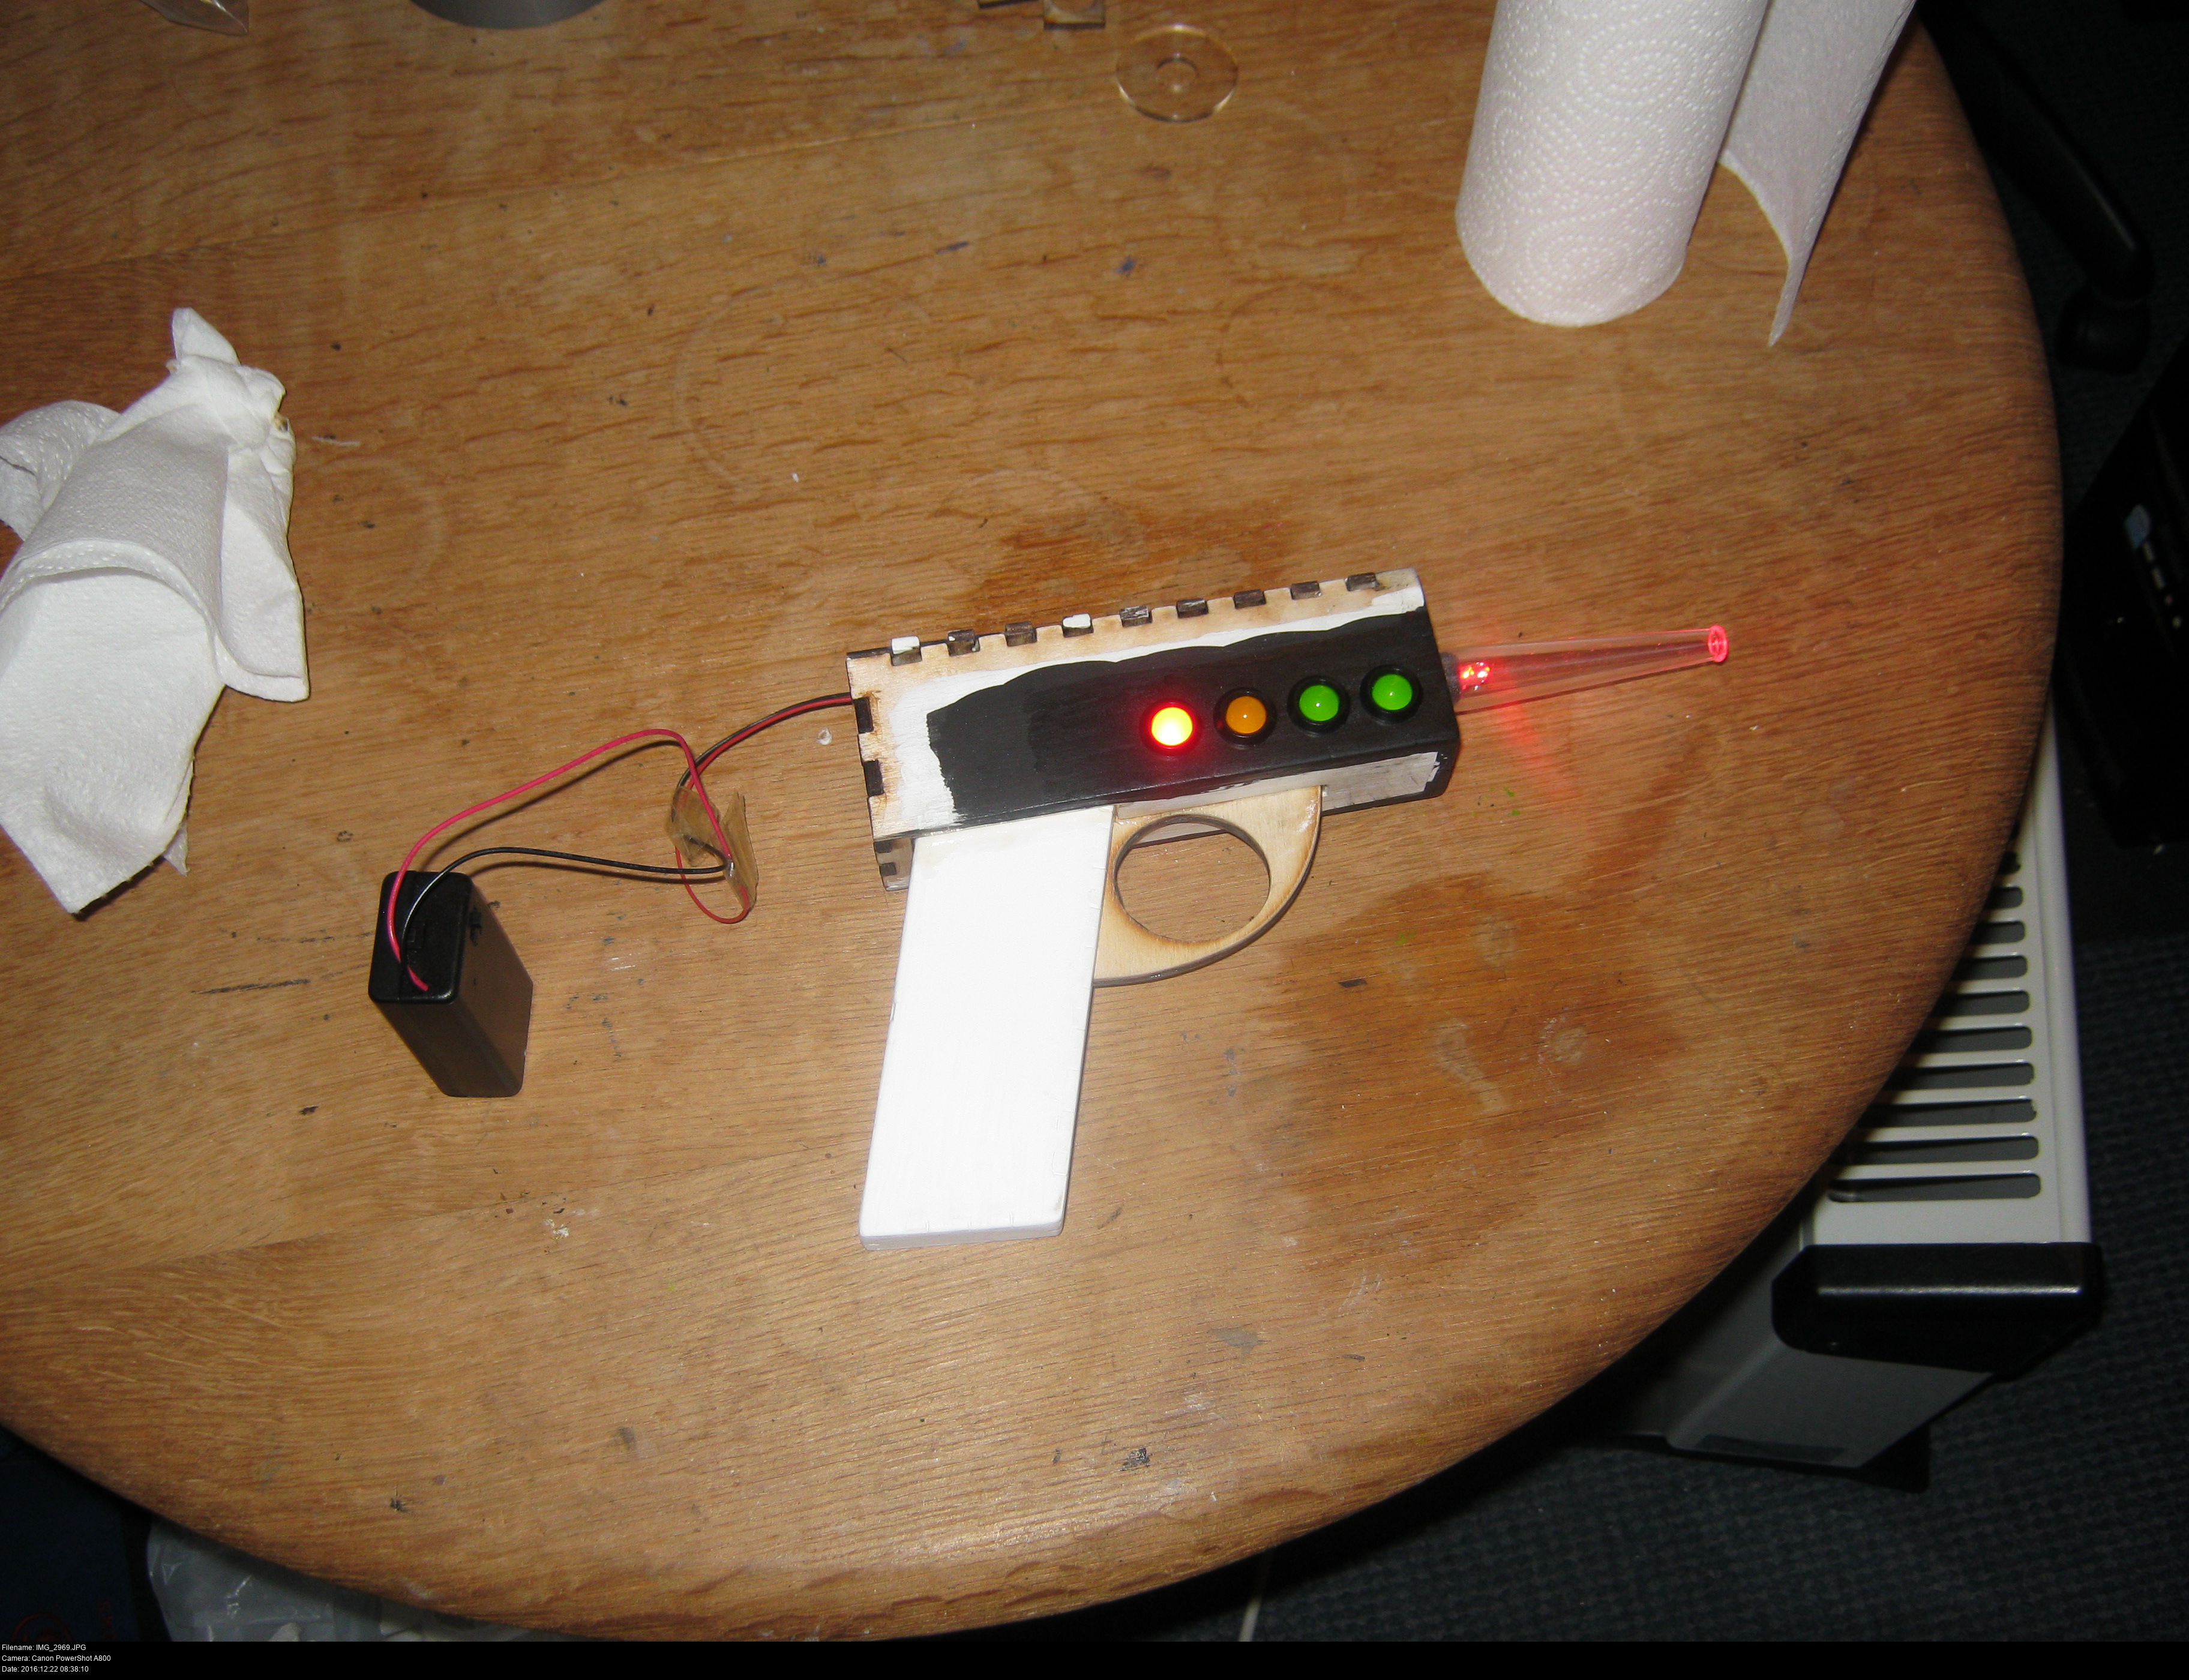
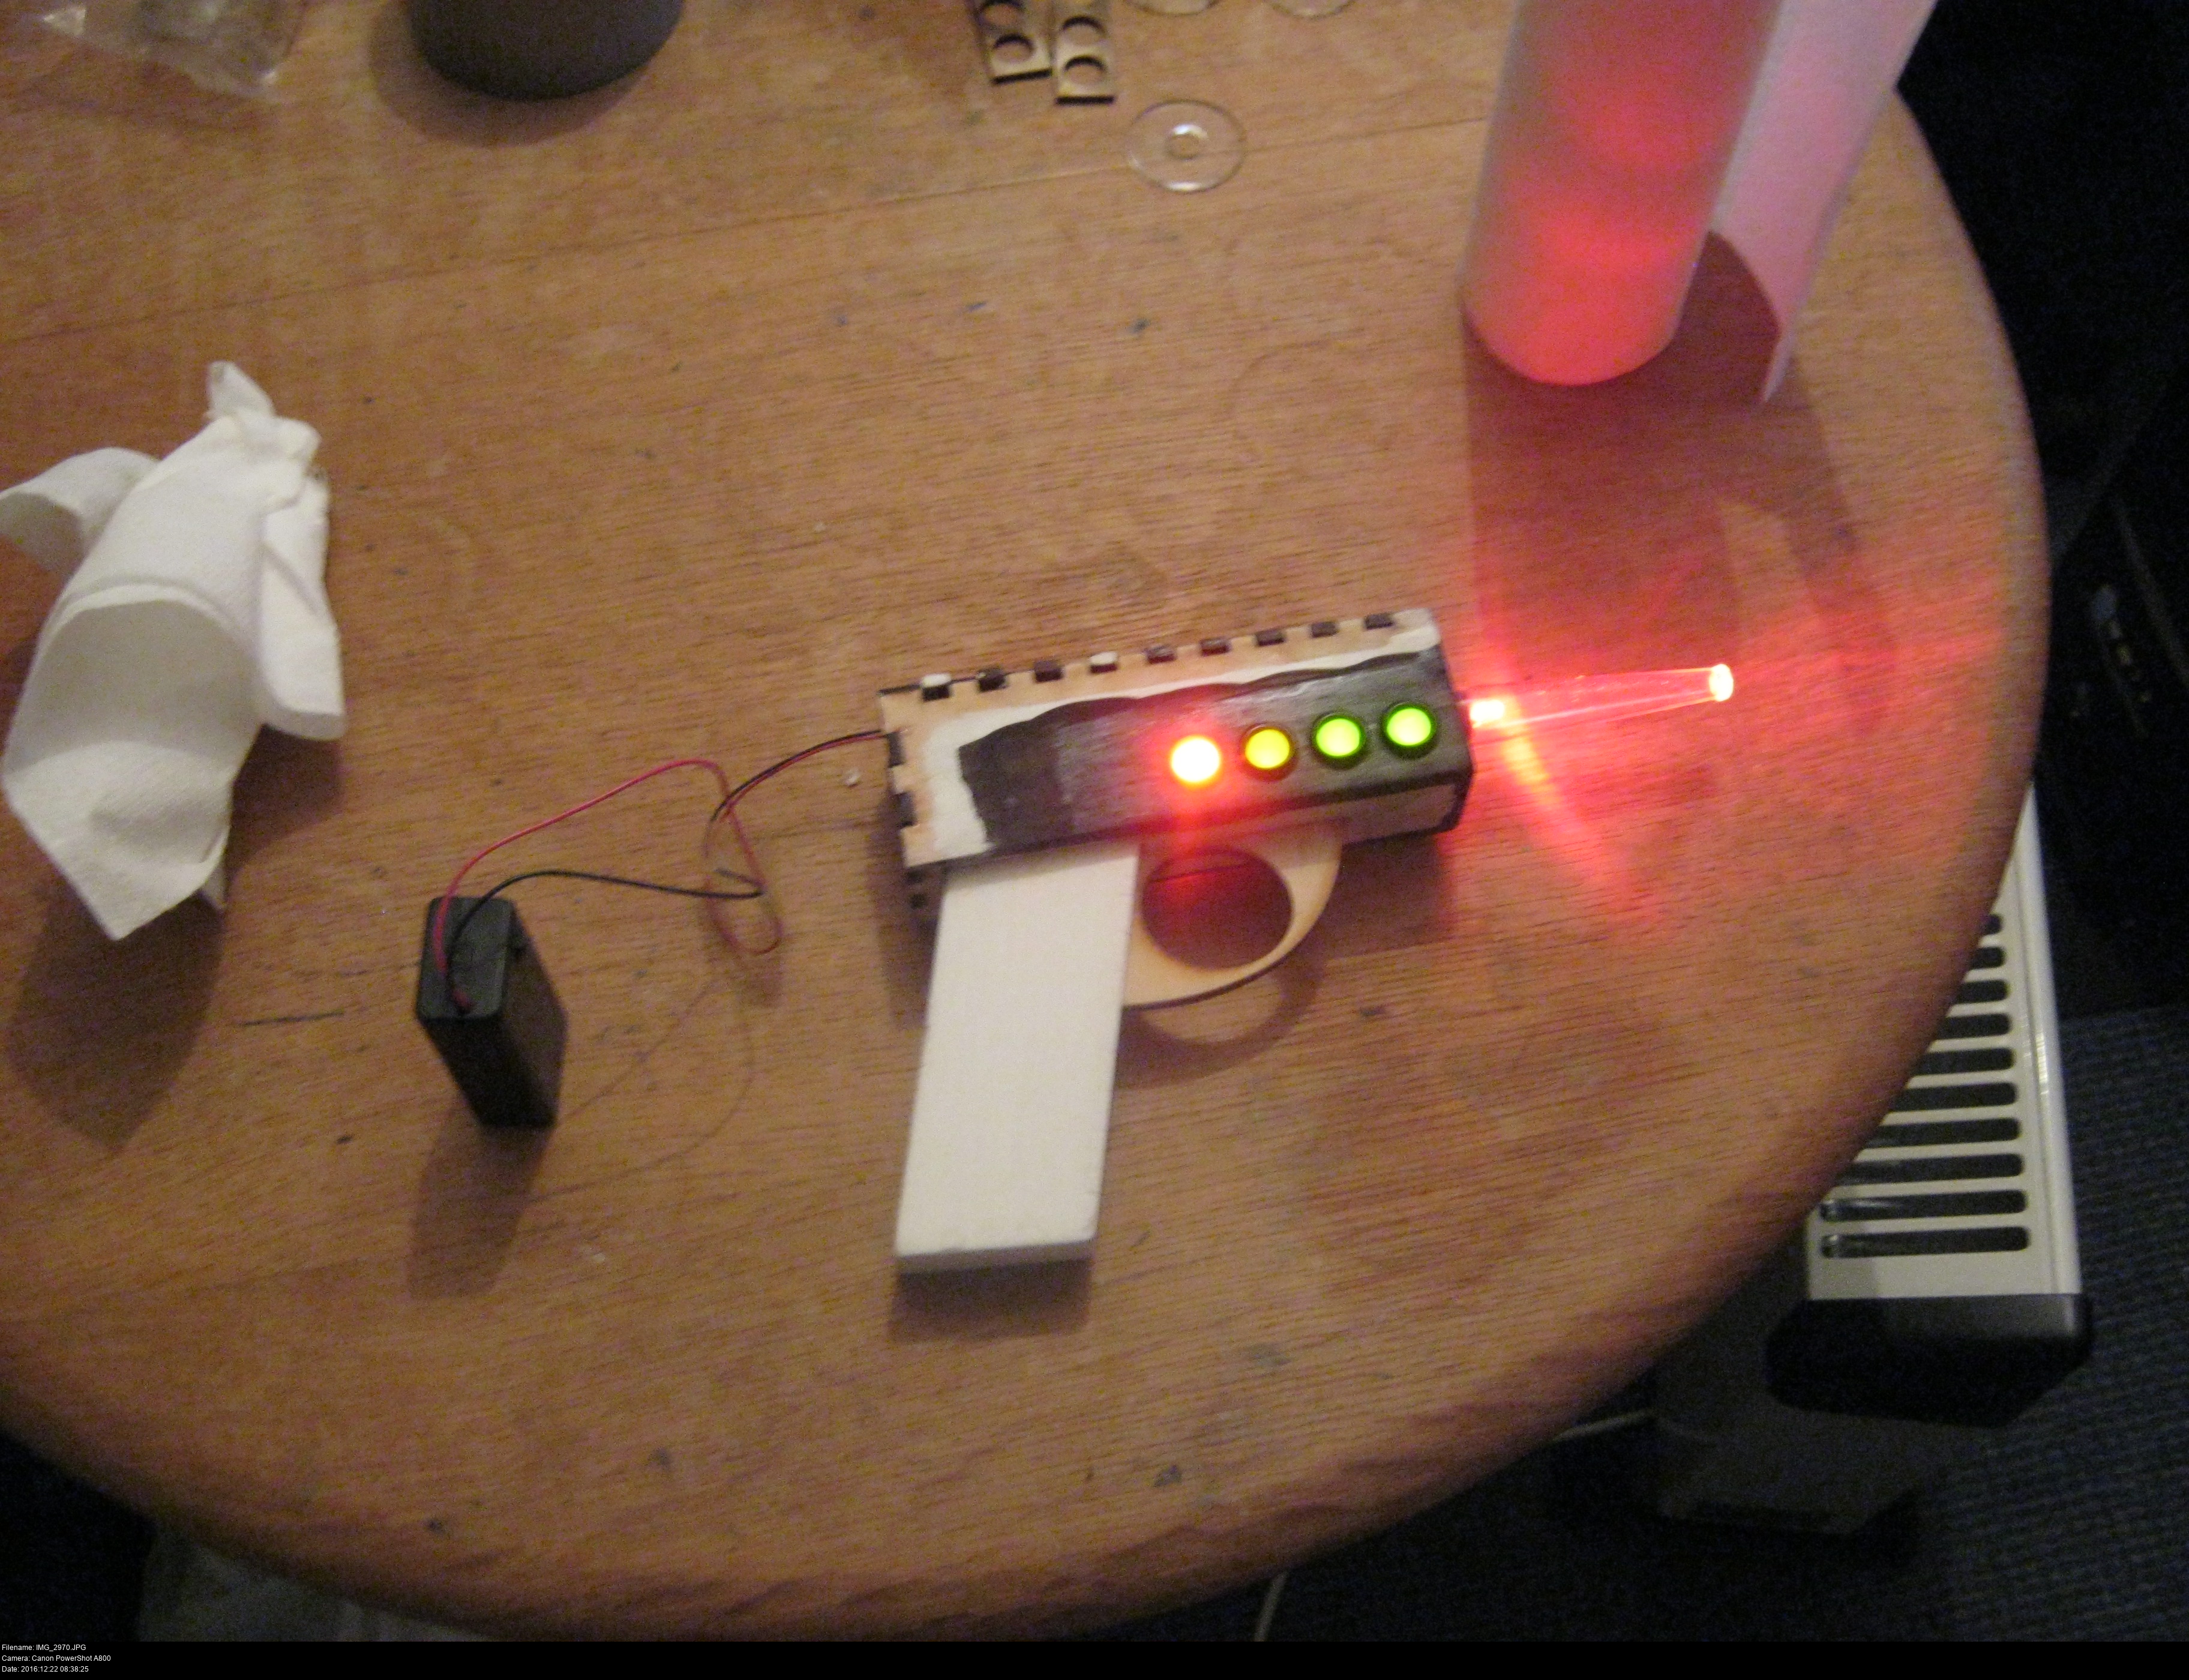
Does it still work? Good.
Now to continue priming and sanding and finishing the rest of the gun. Try to have all of the sanding done before the electronics are fitted.

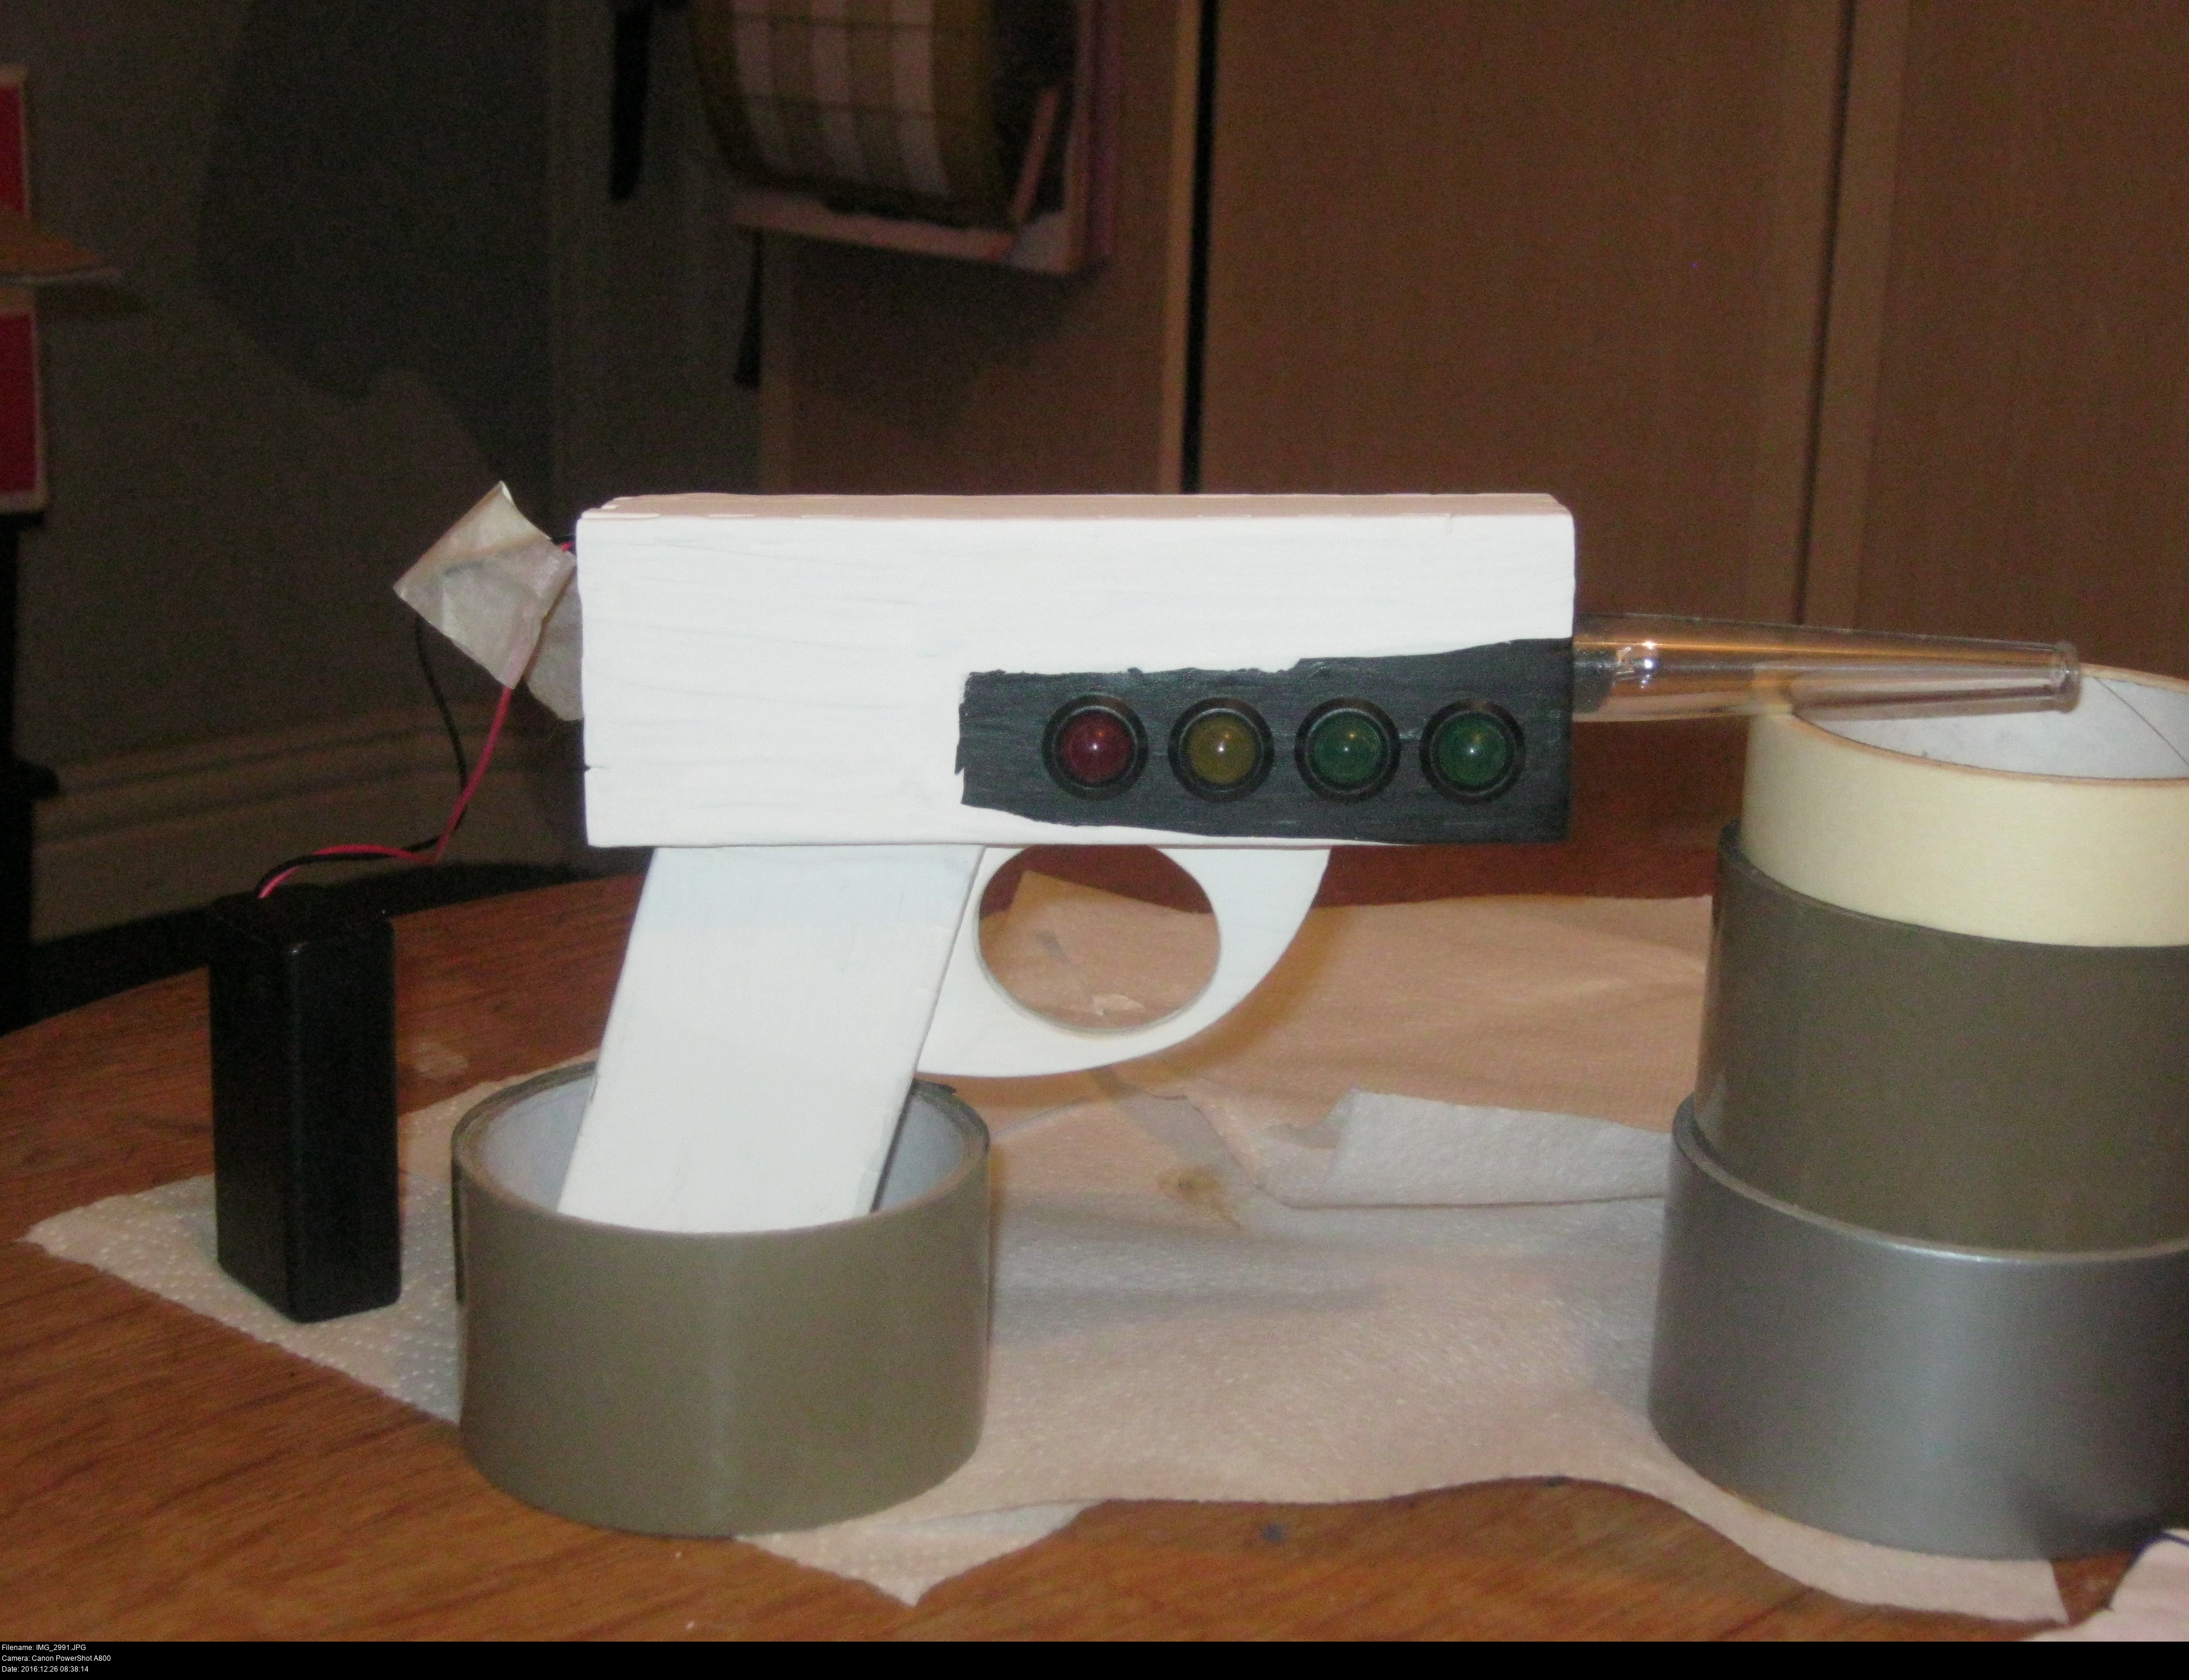
I've glued on the top face of the gun now, sanding the teeth gently and keeping as much dust out of the gun as I could, and doing the last of the priming.
The battery leads are soldered to the extension leads inside the gun body, with a single pair of red and black leads exposed out of a small gap between the teeth in the upper edge of the back face of the gun. Sci-fi guns are allowed exposed leads, right? Looks cool.
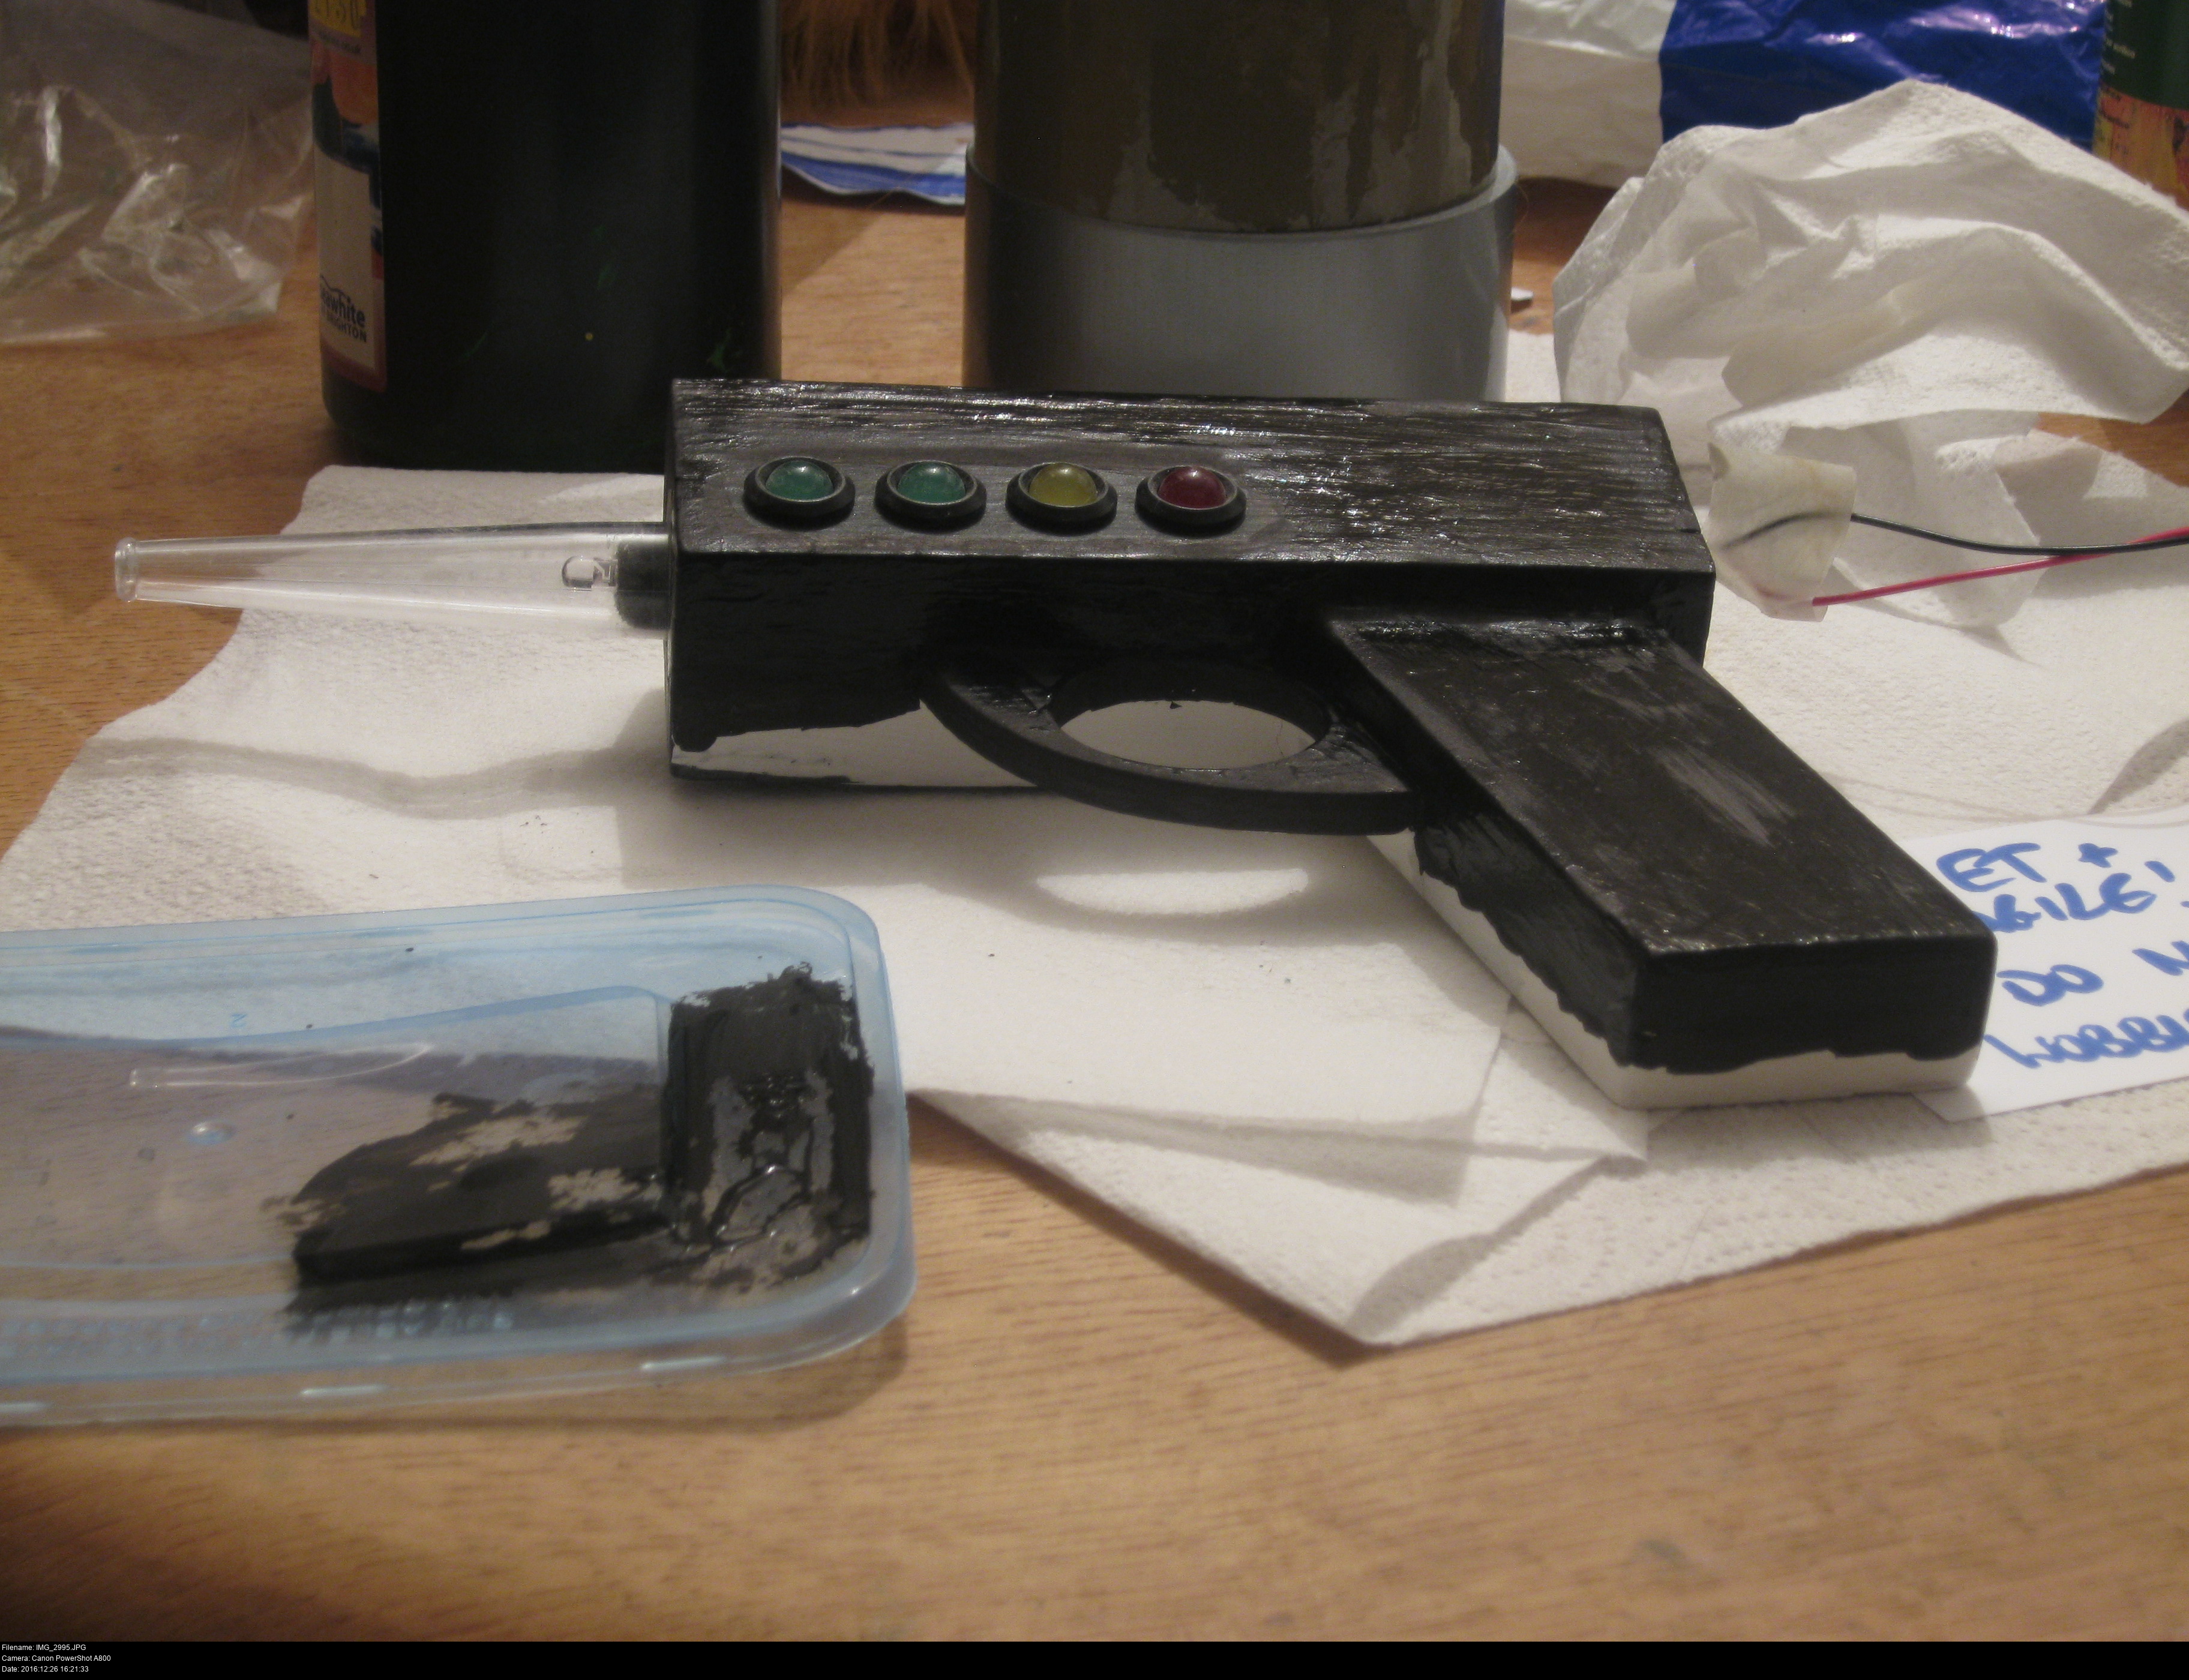
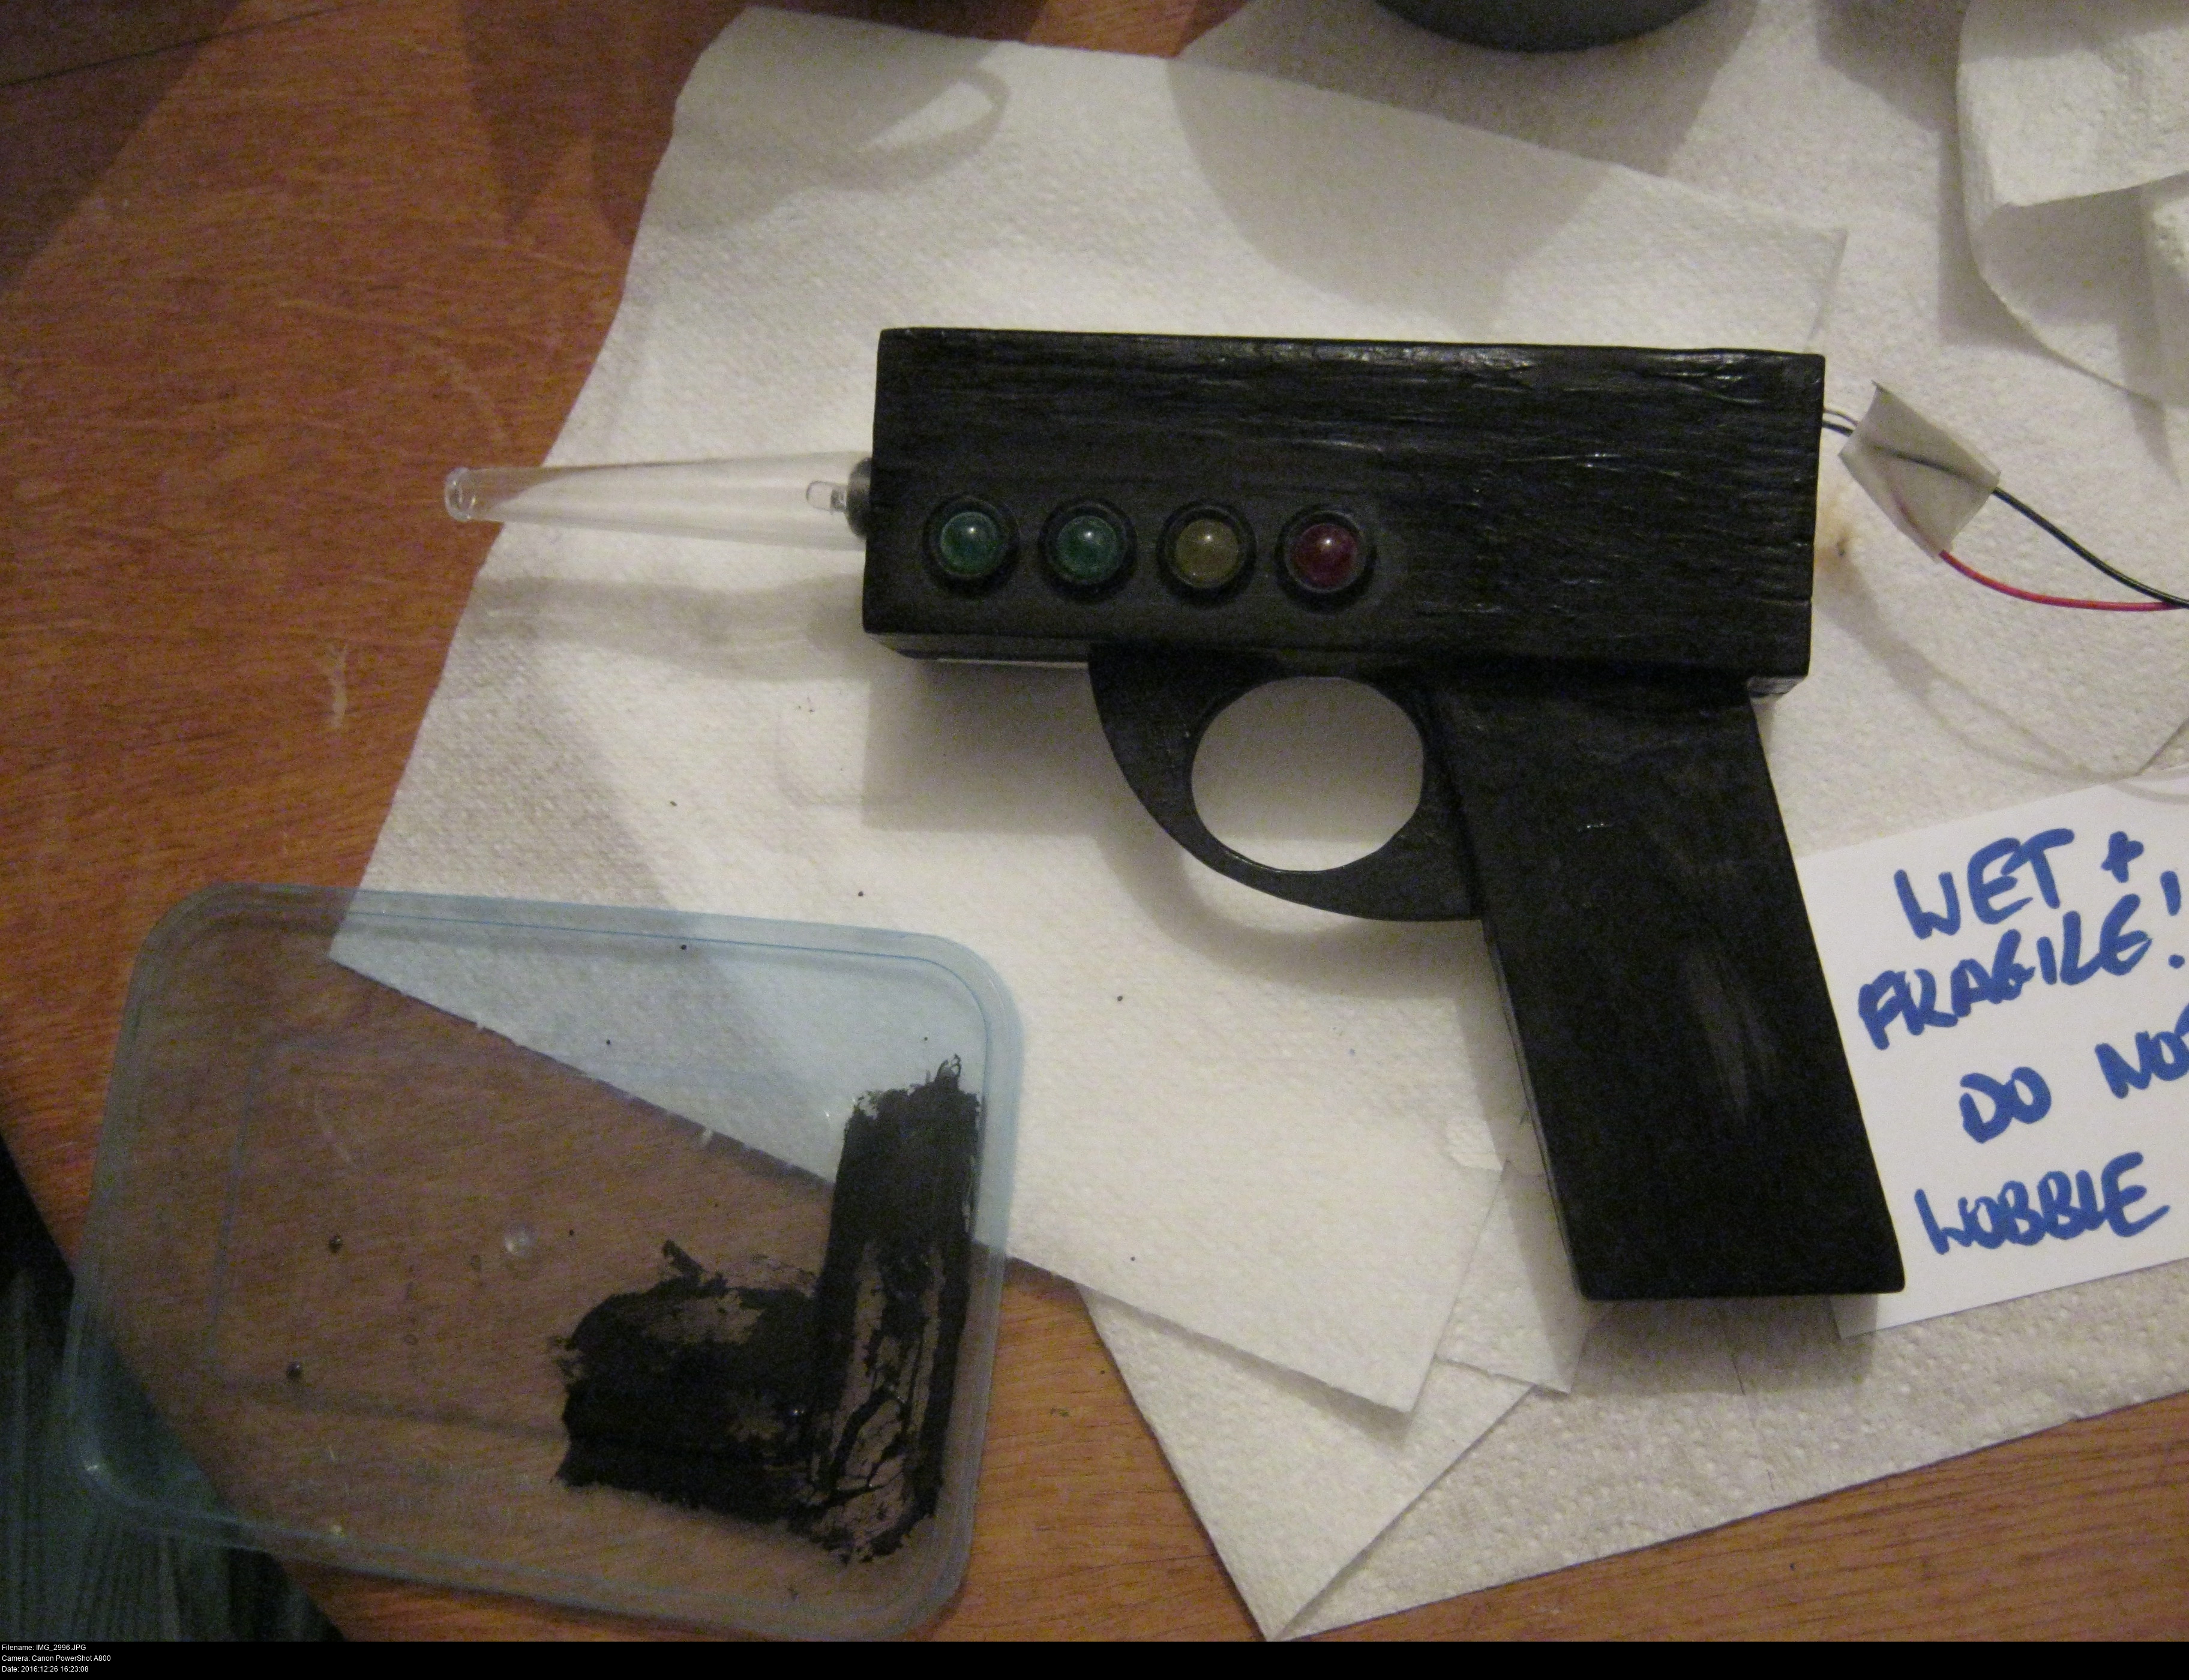

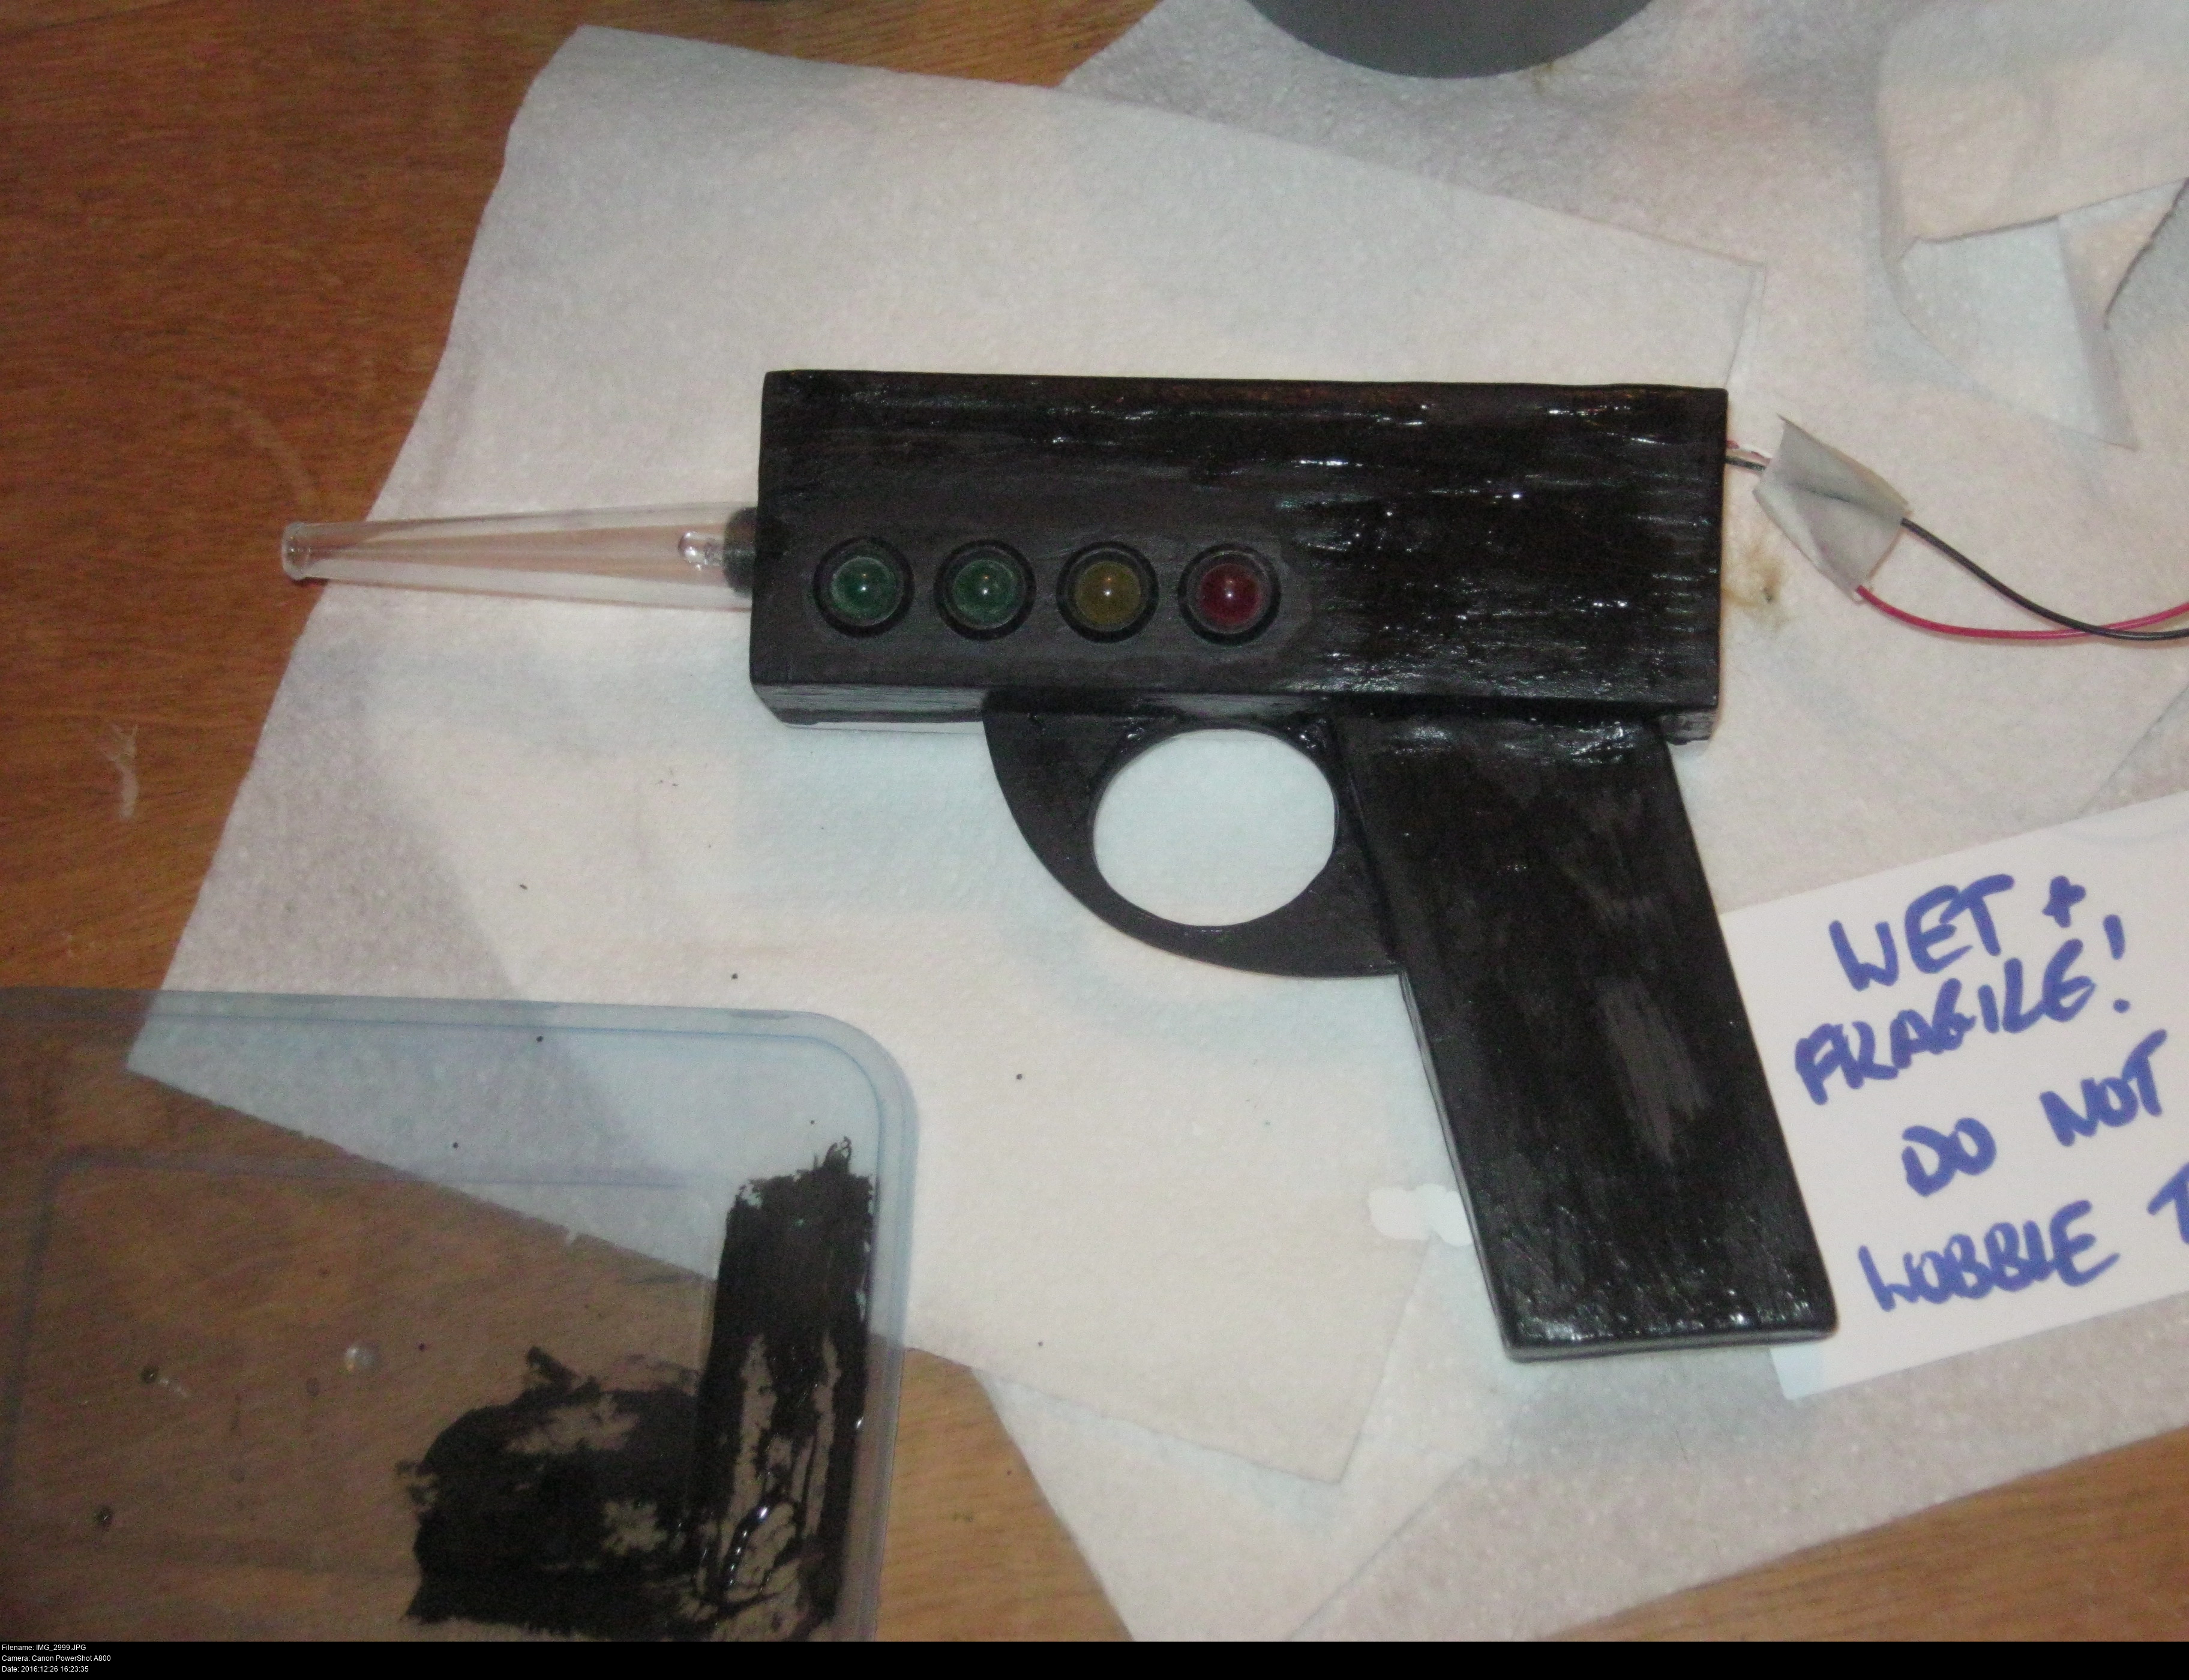
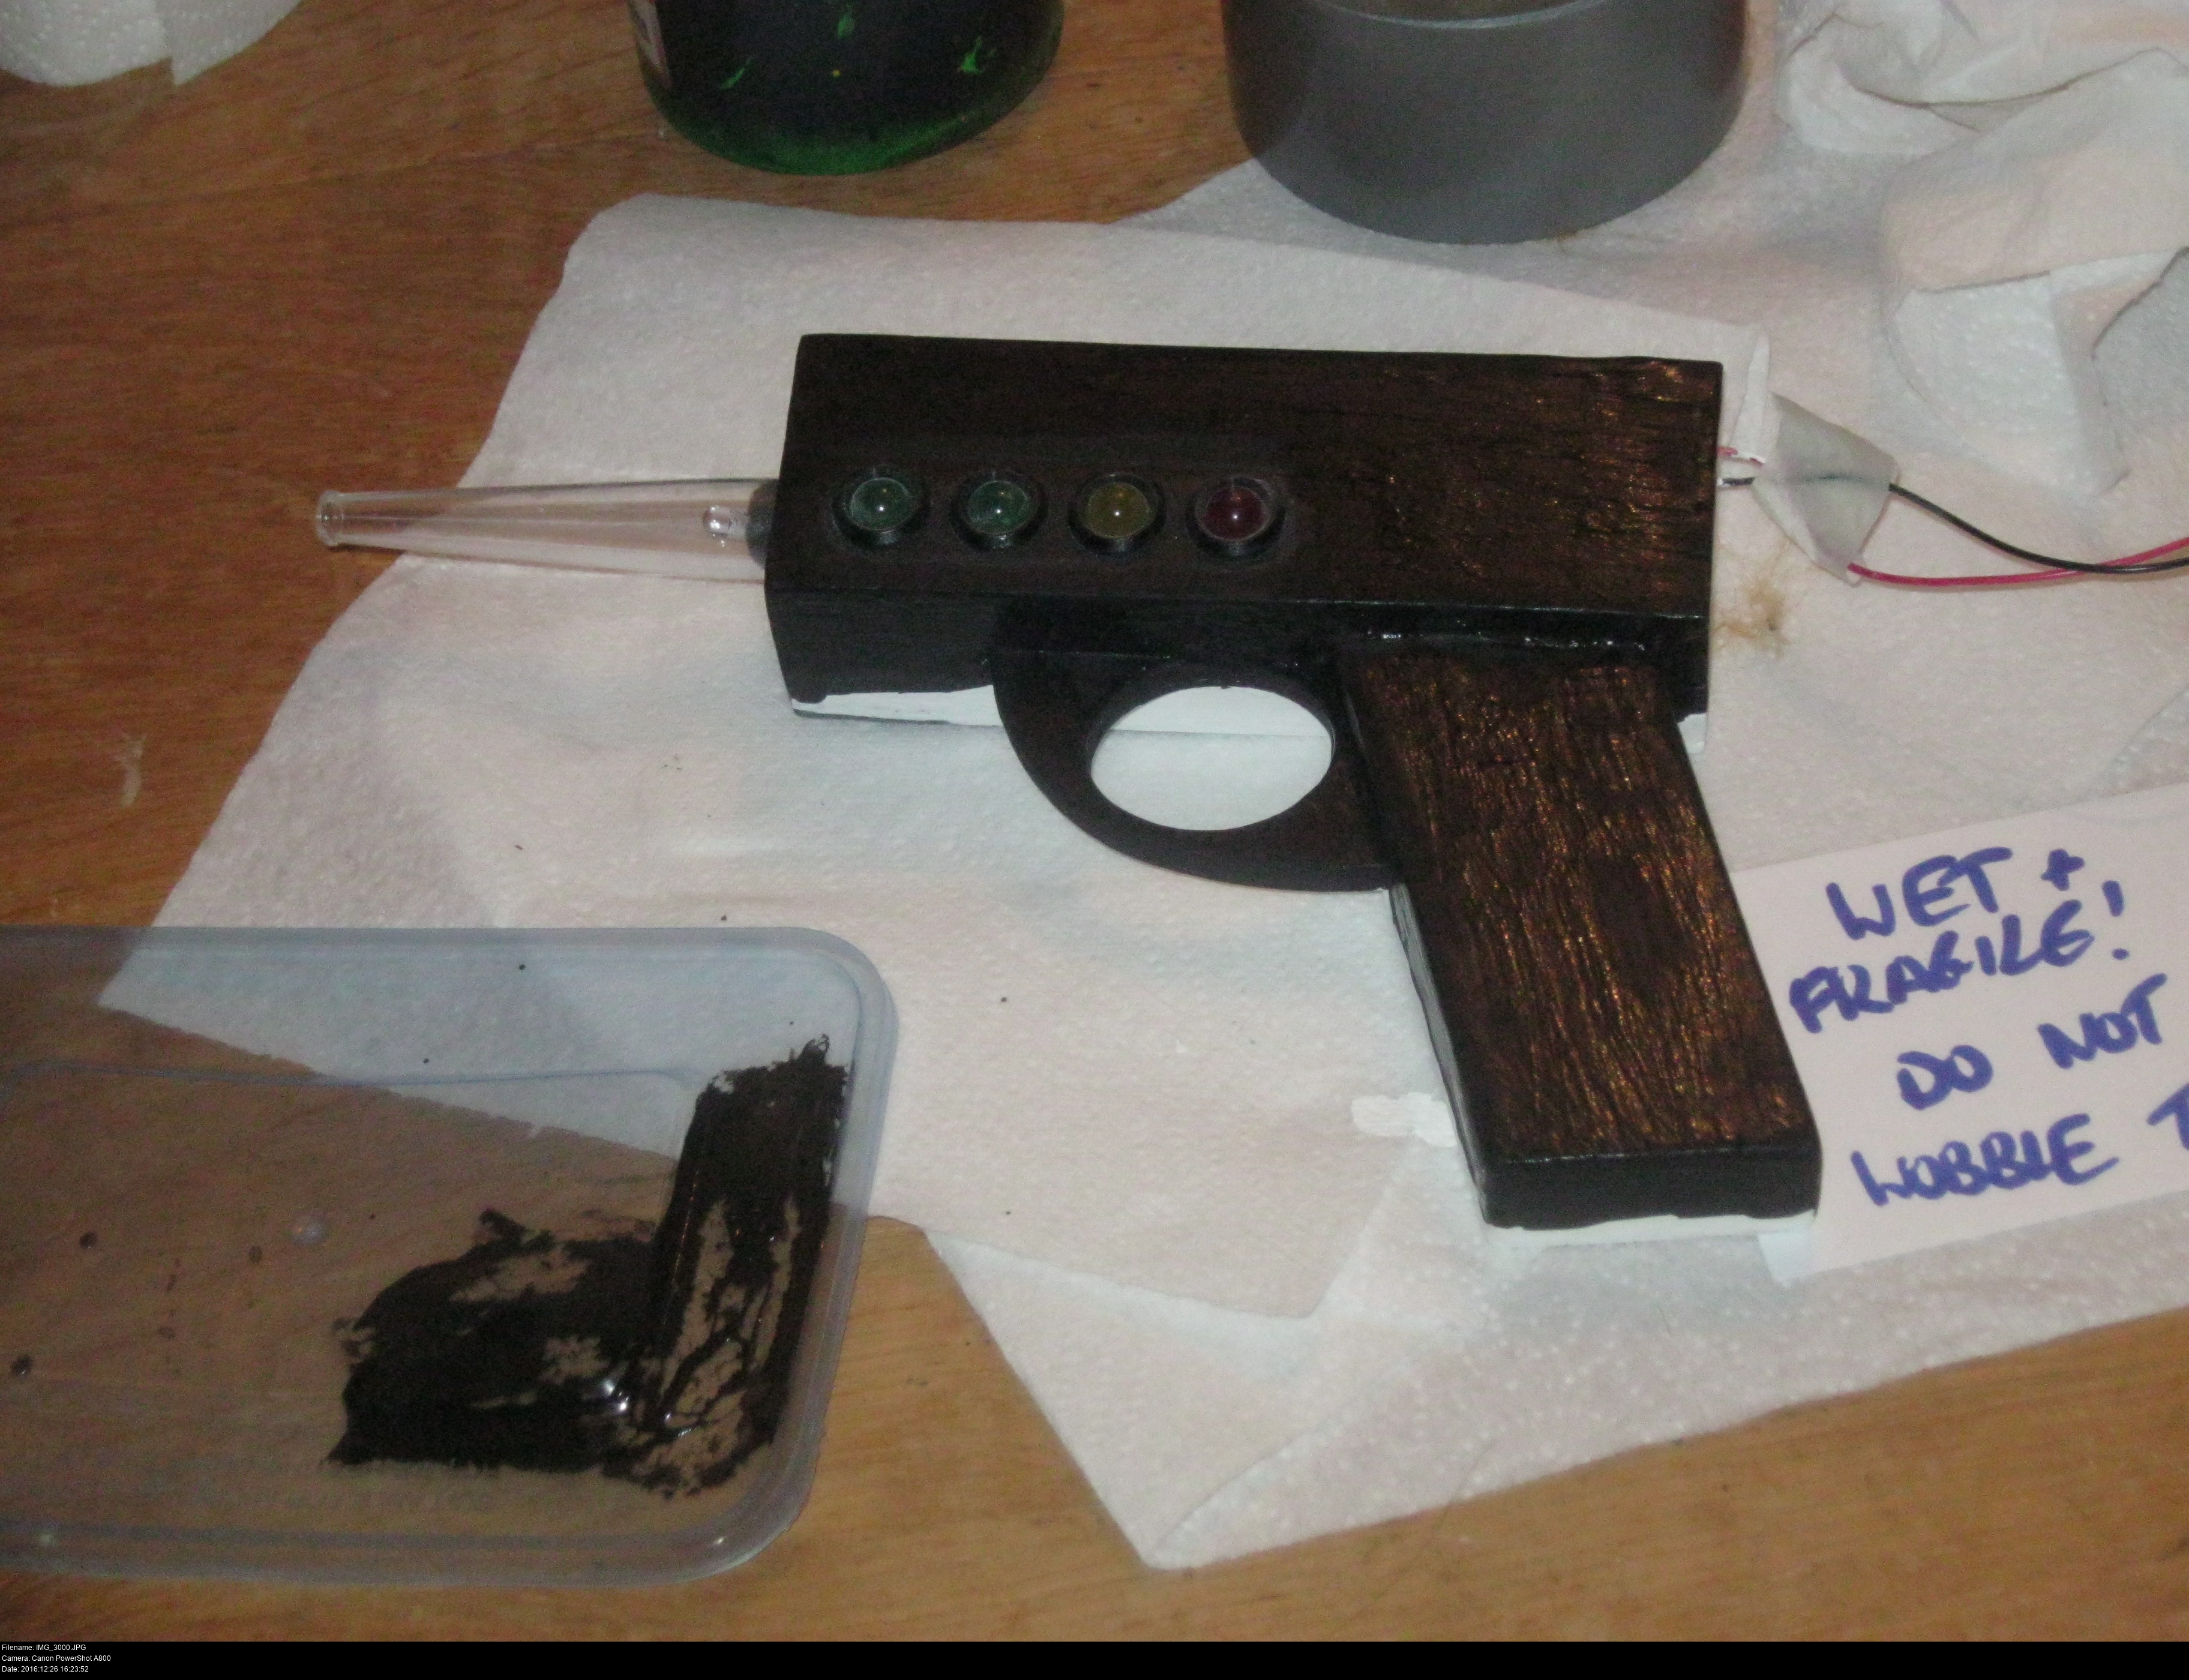
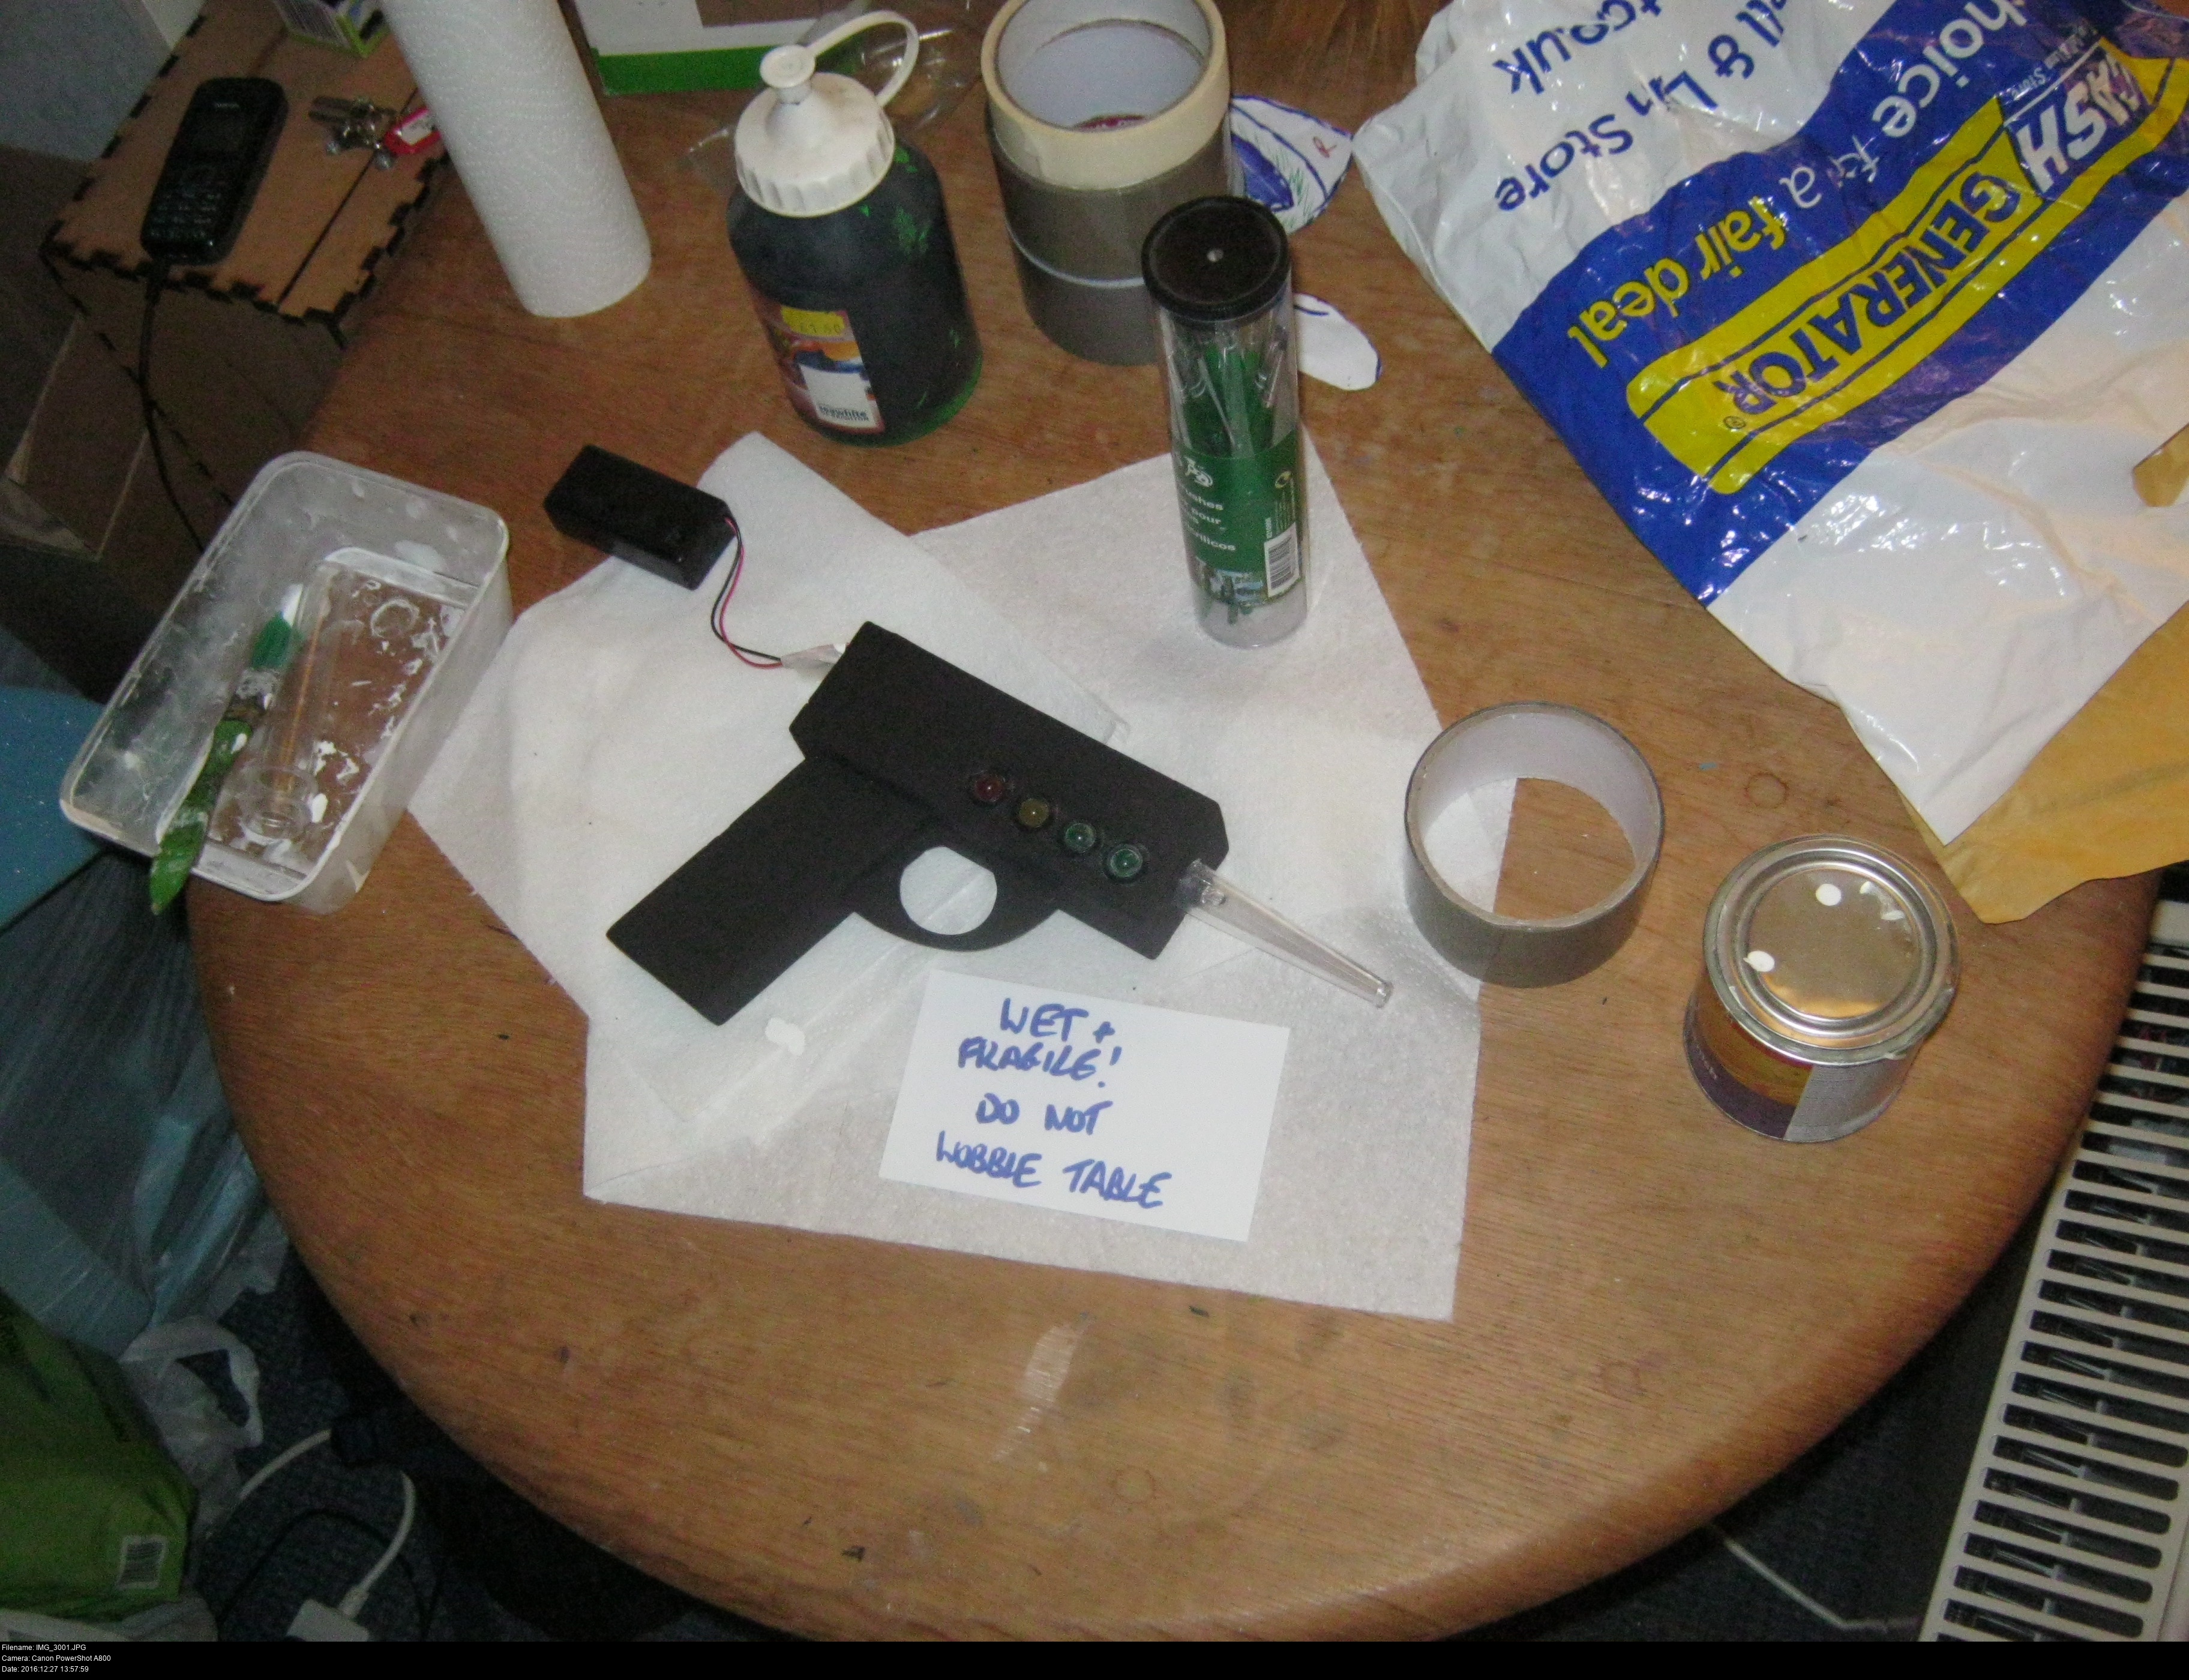
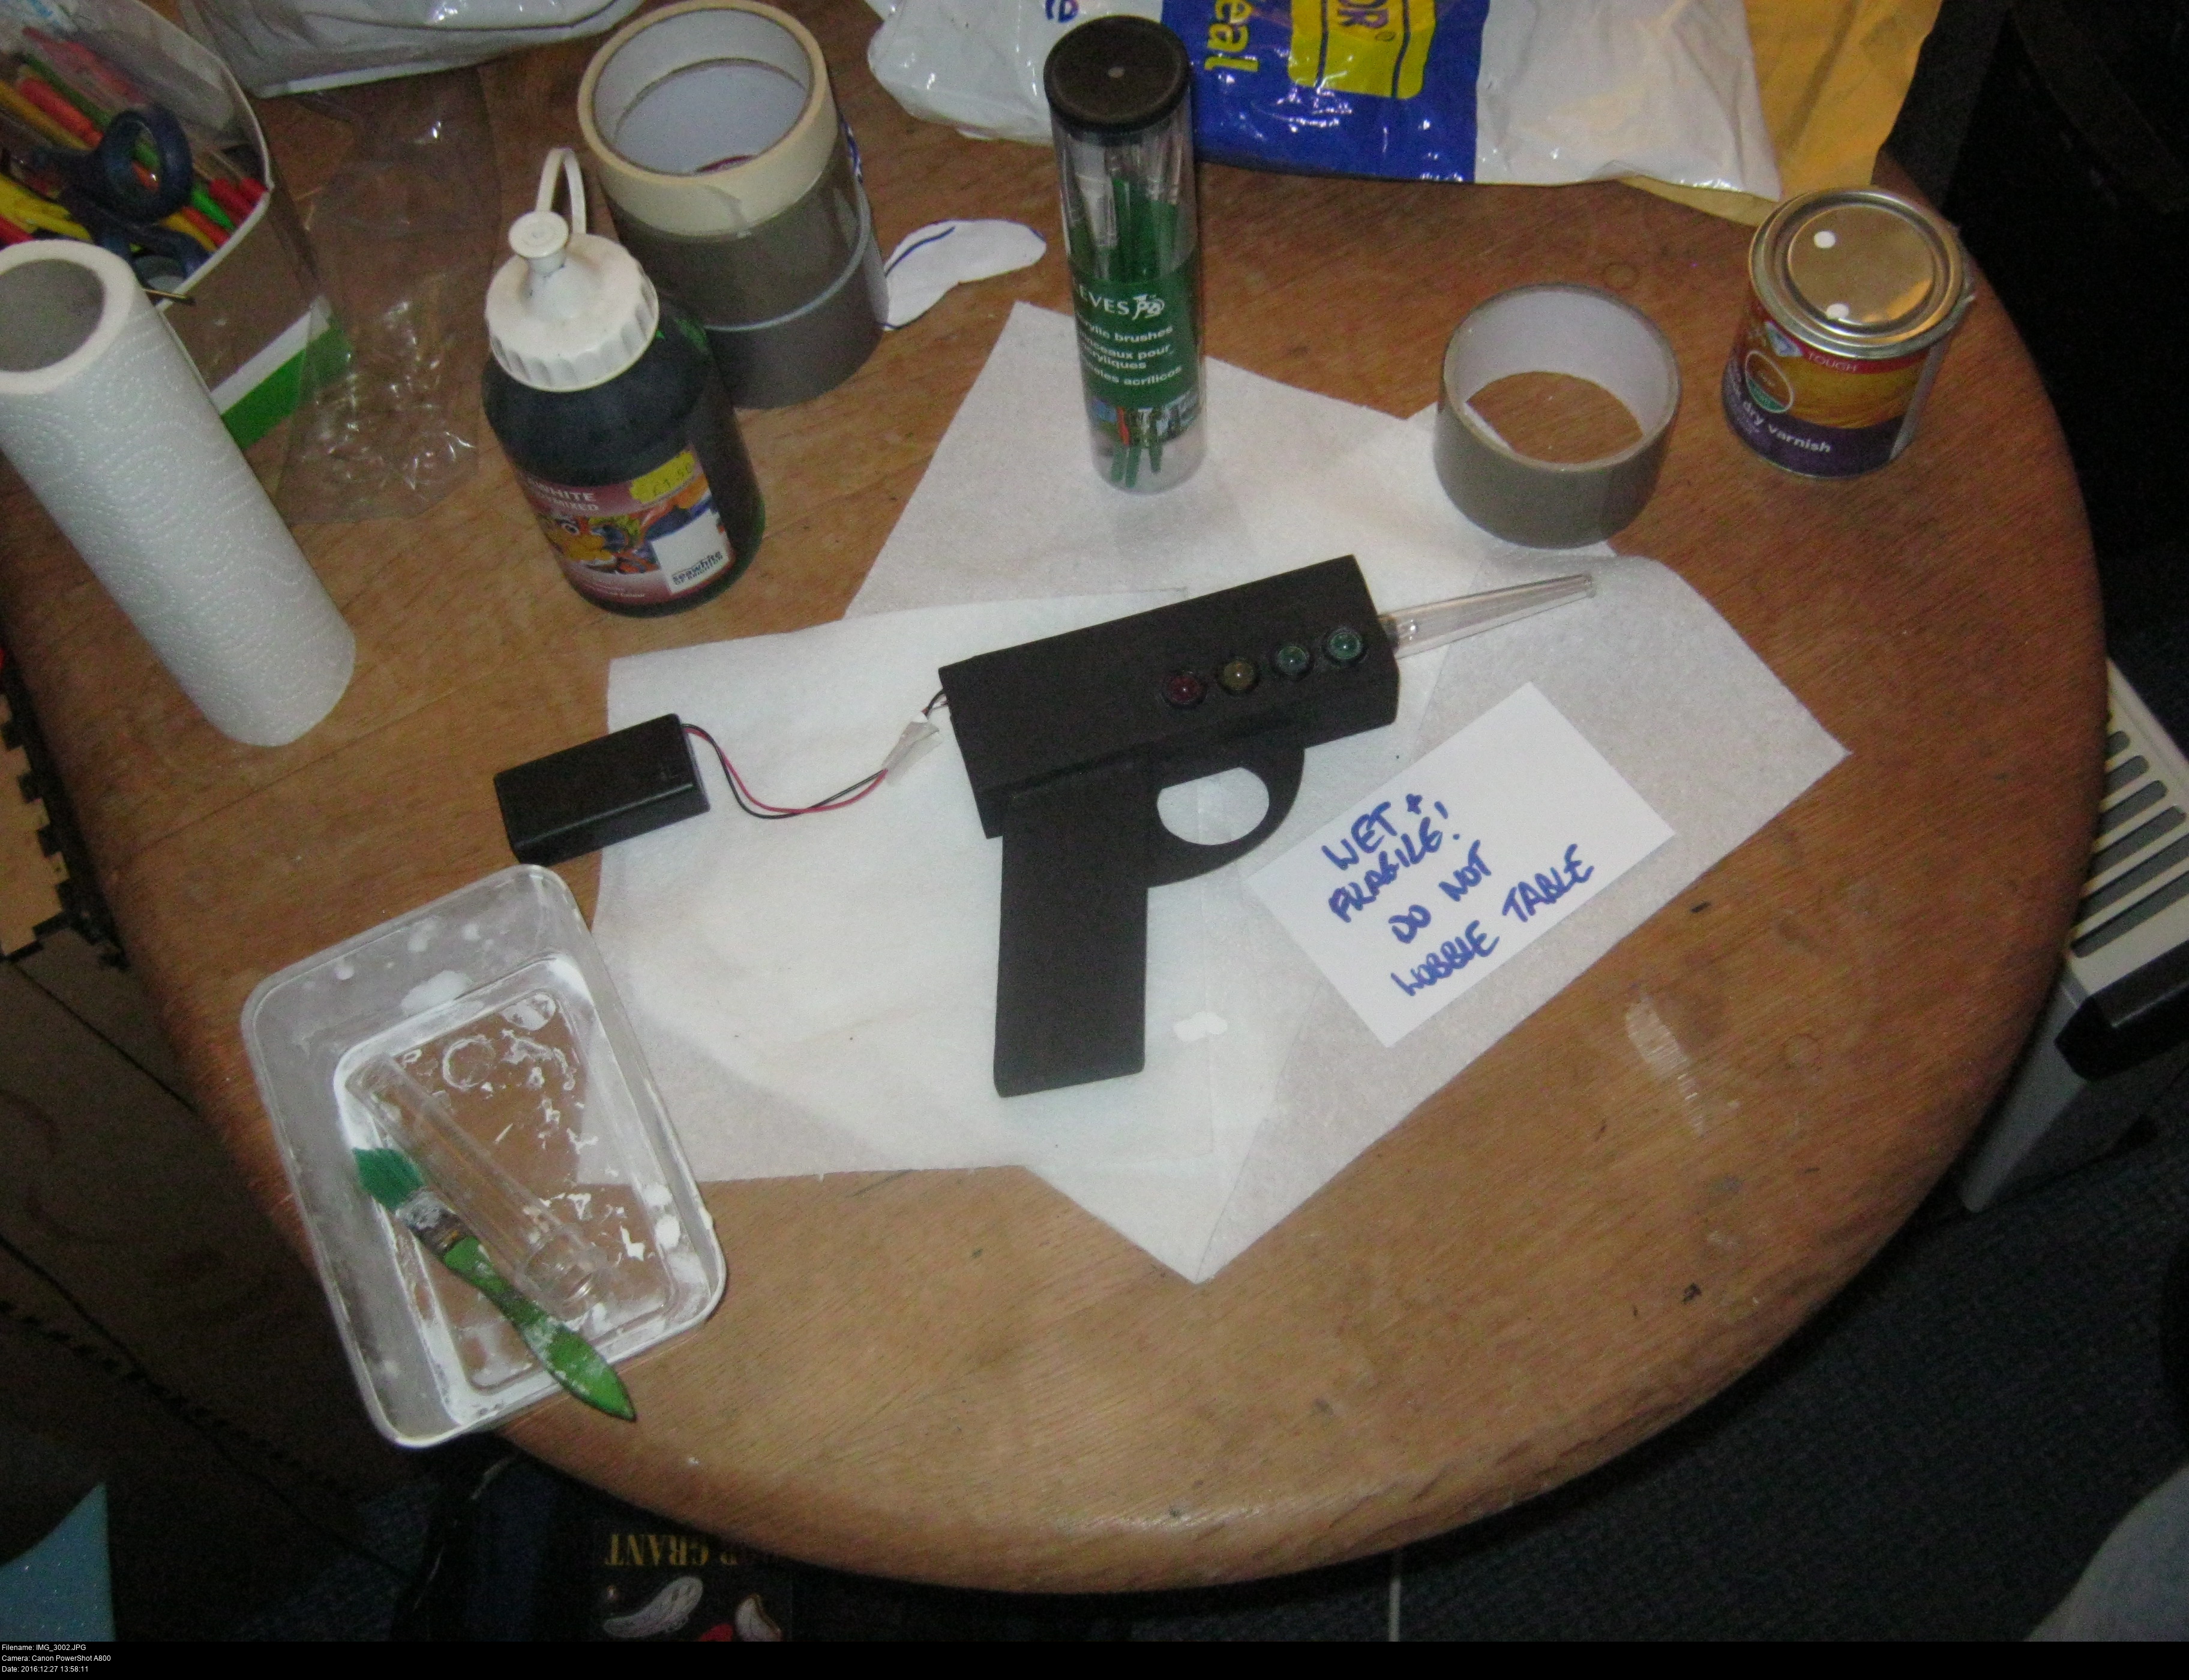
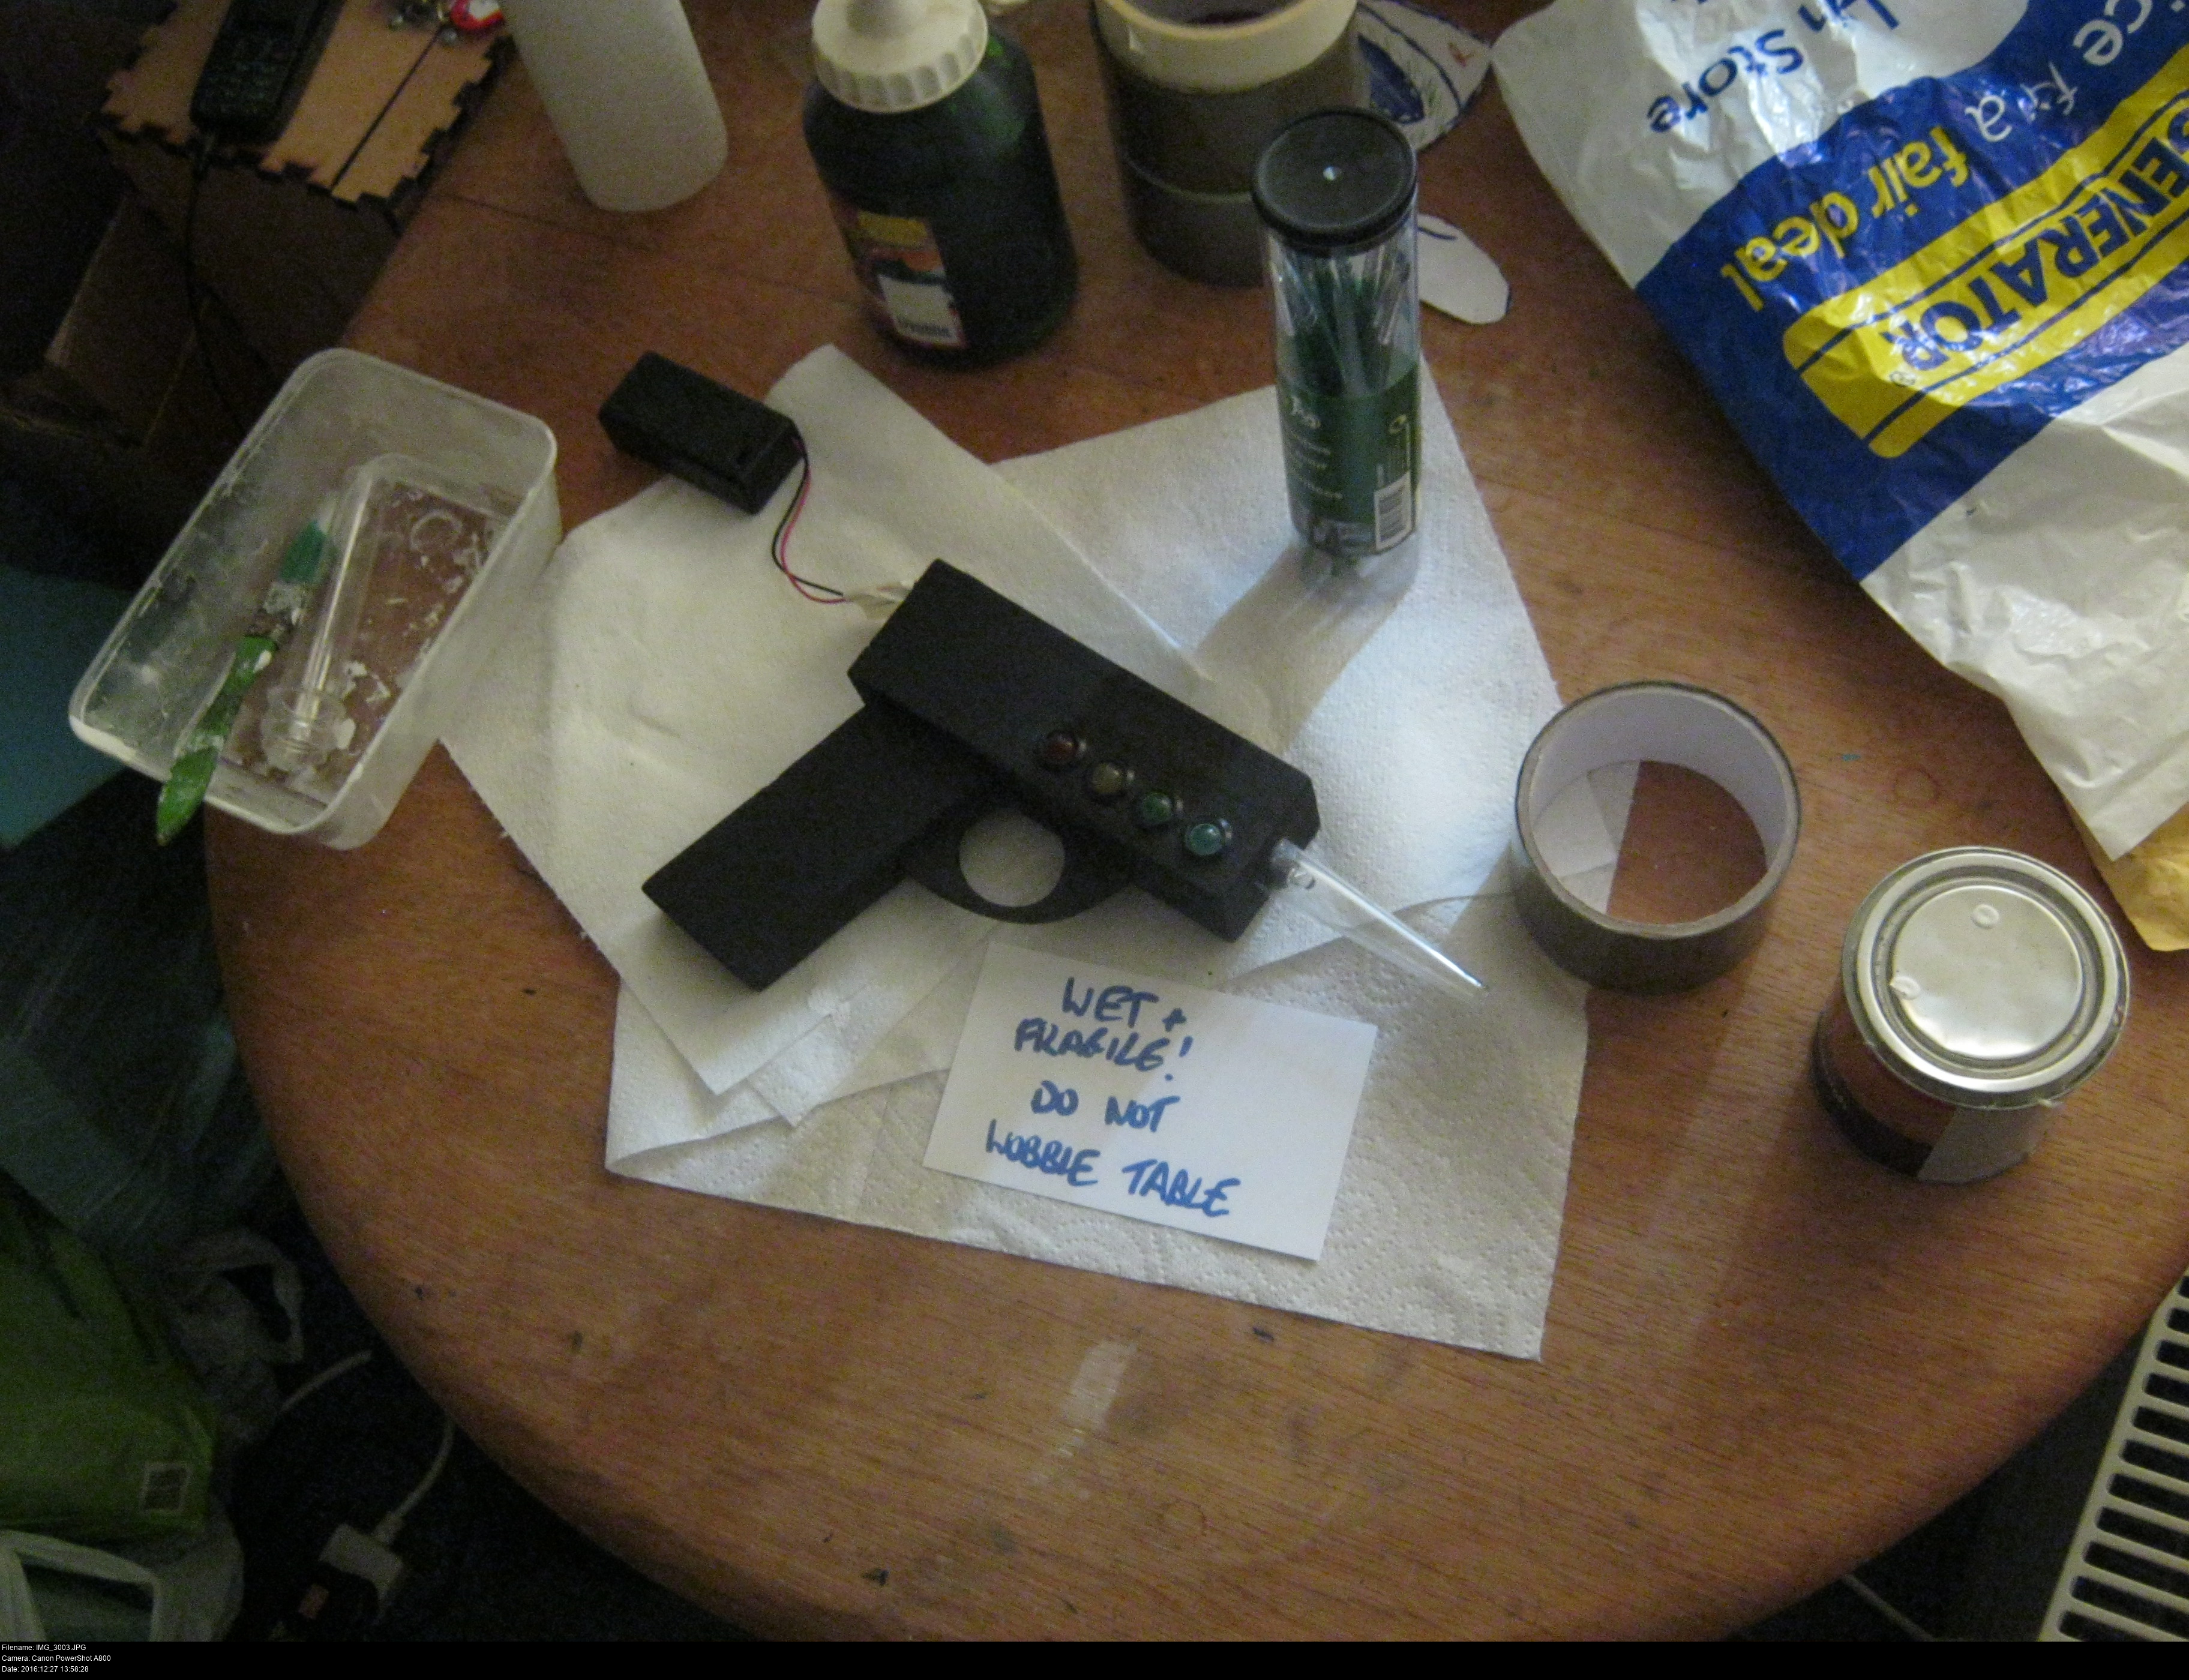

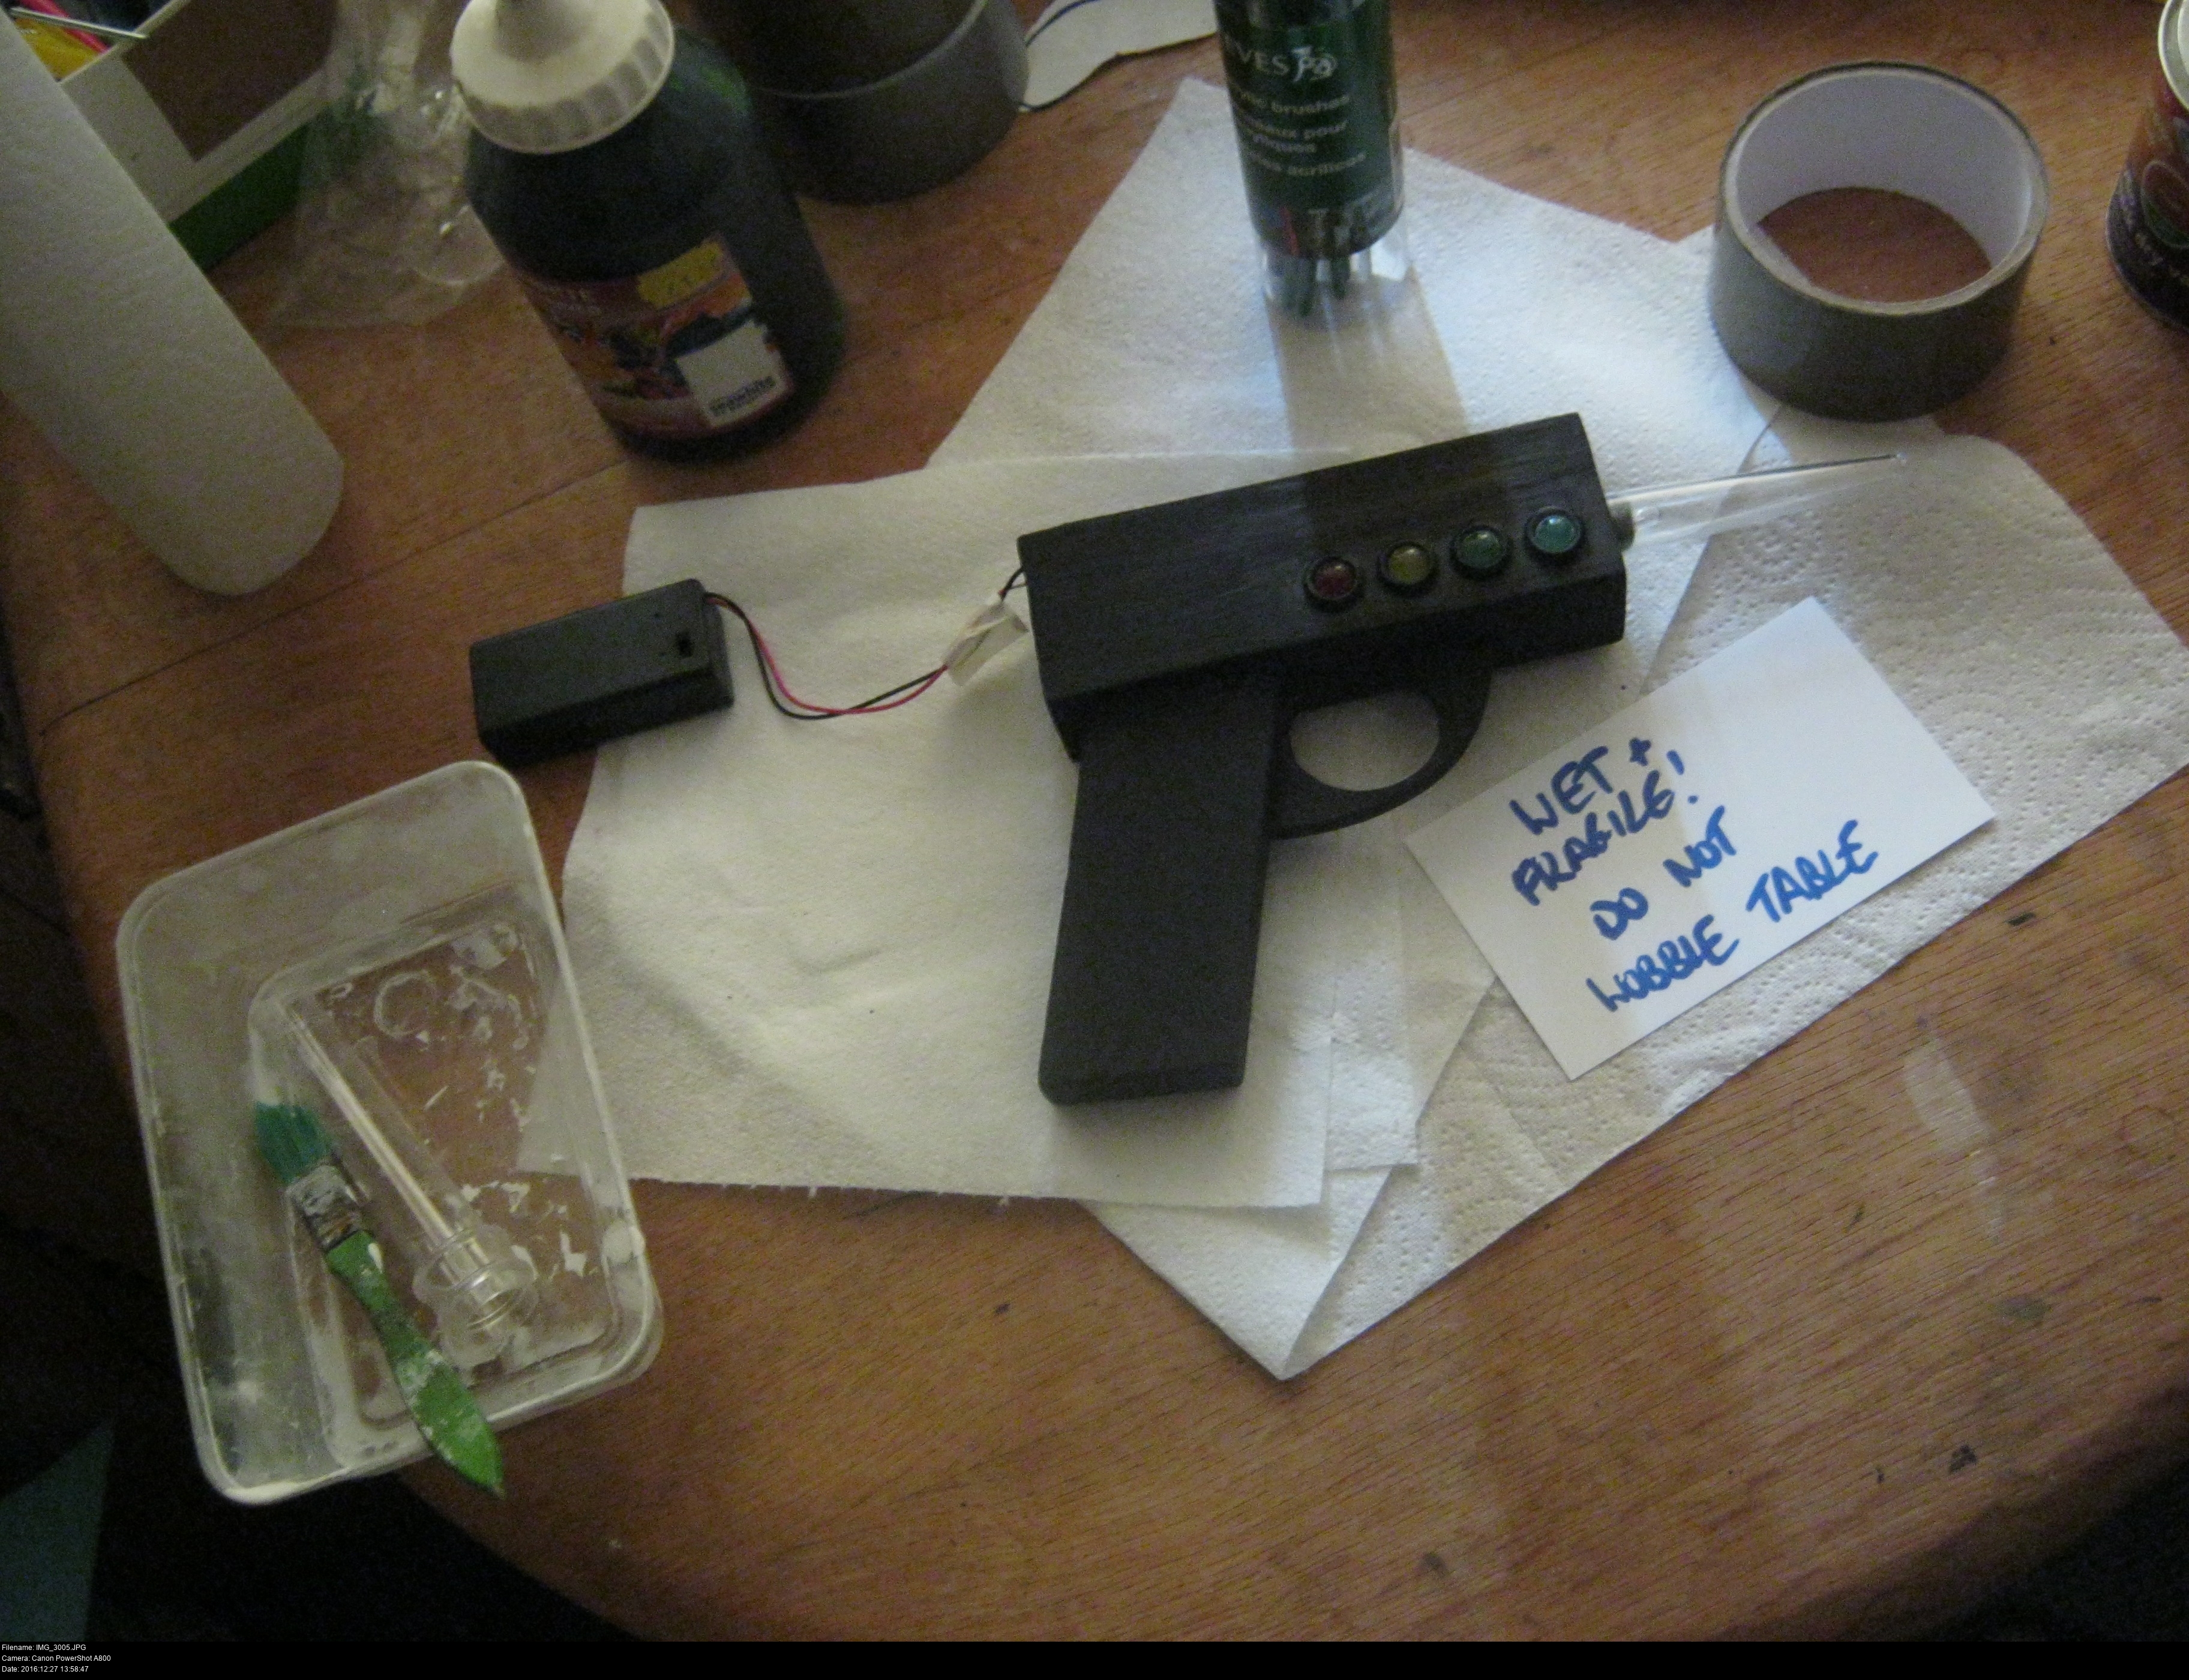

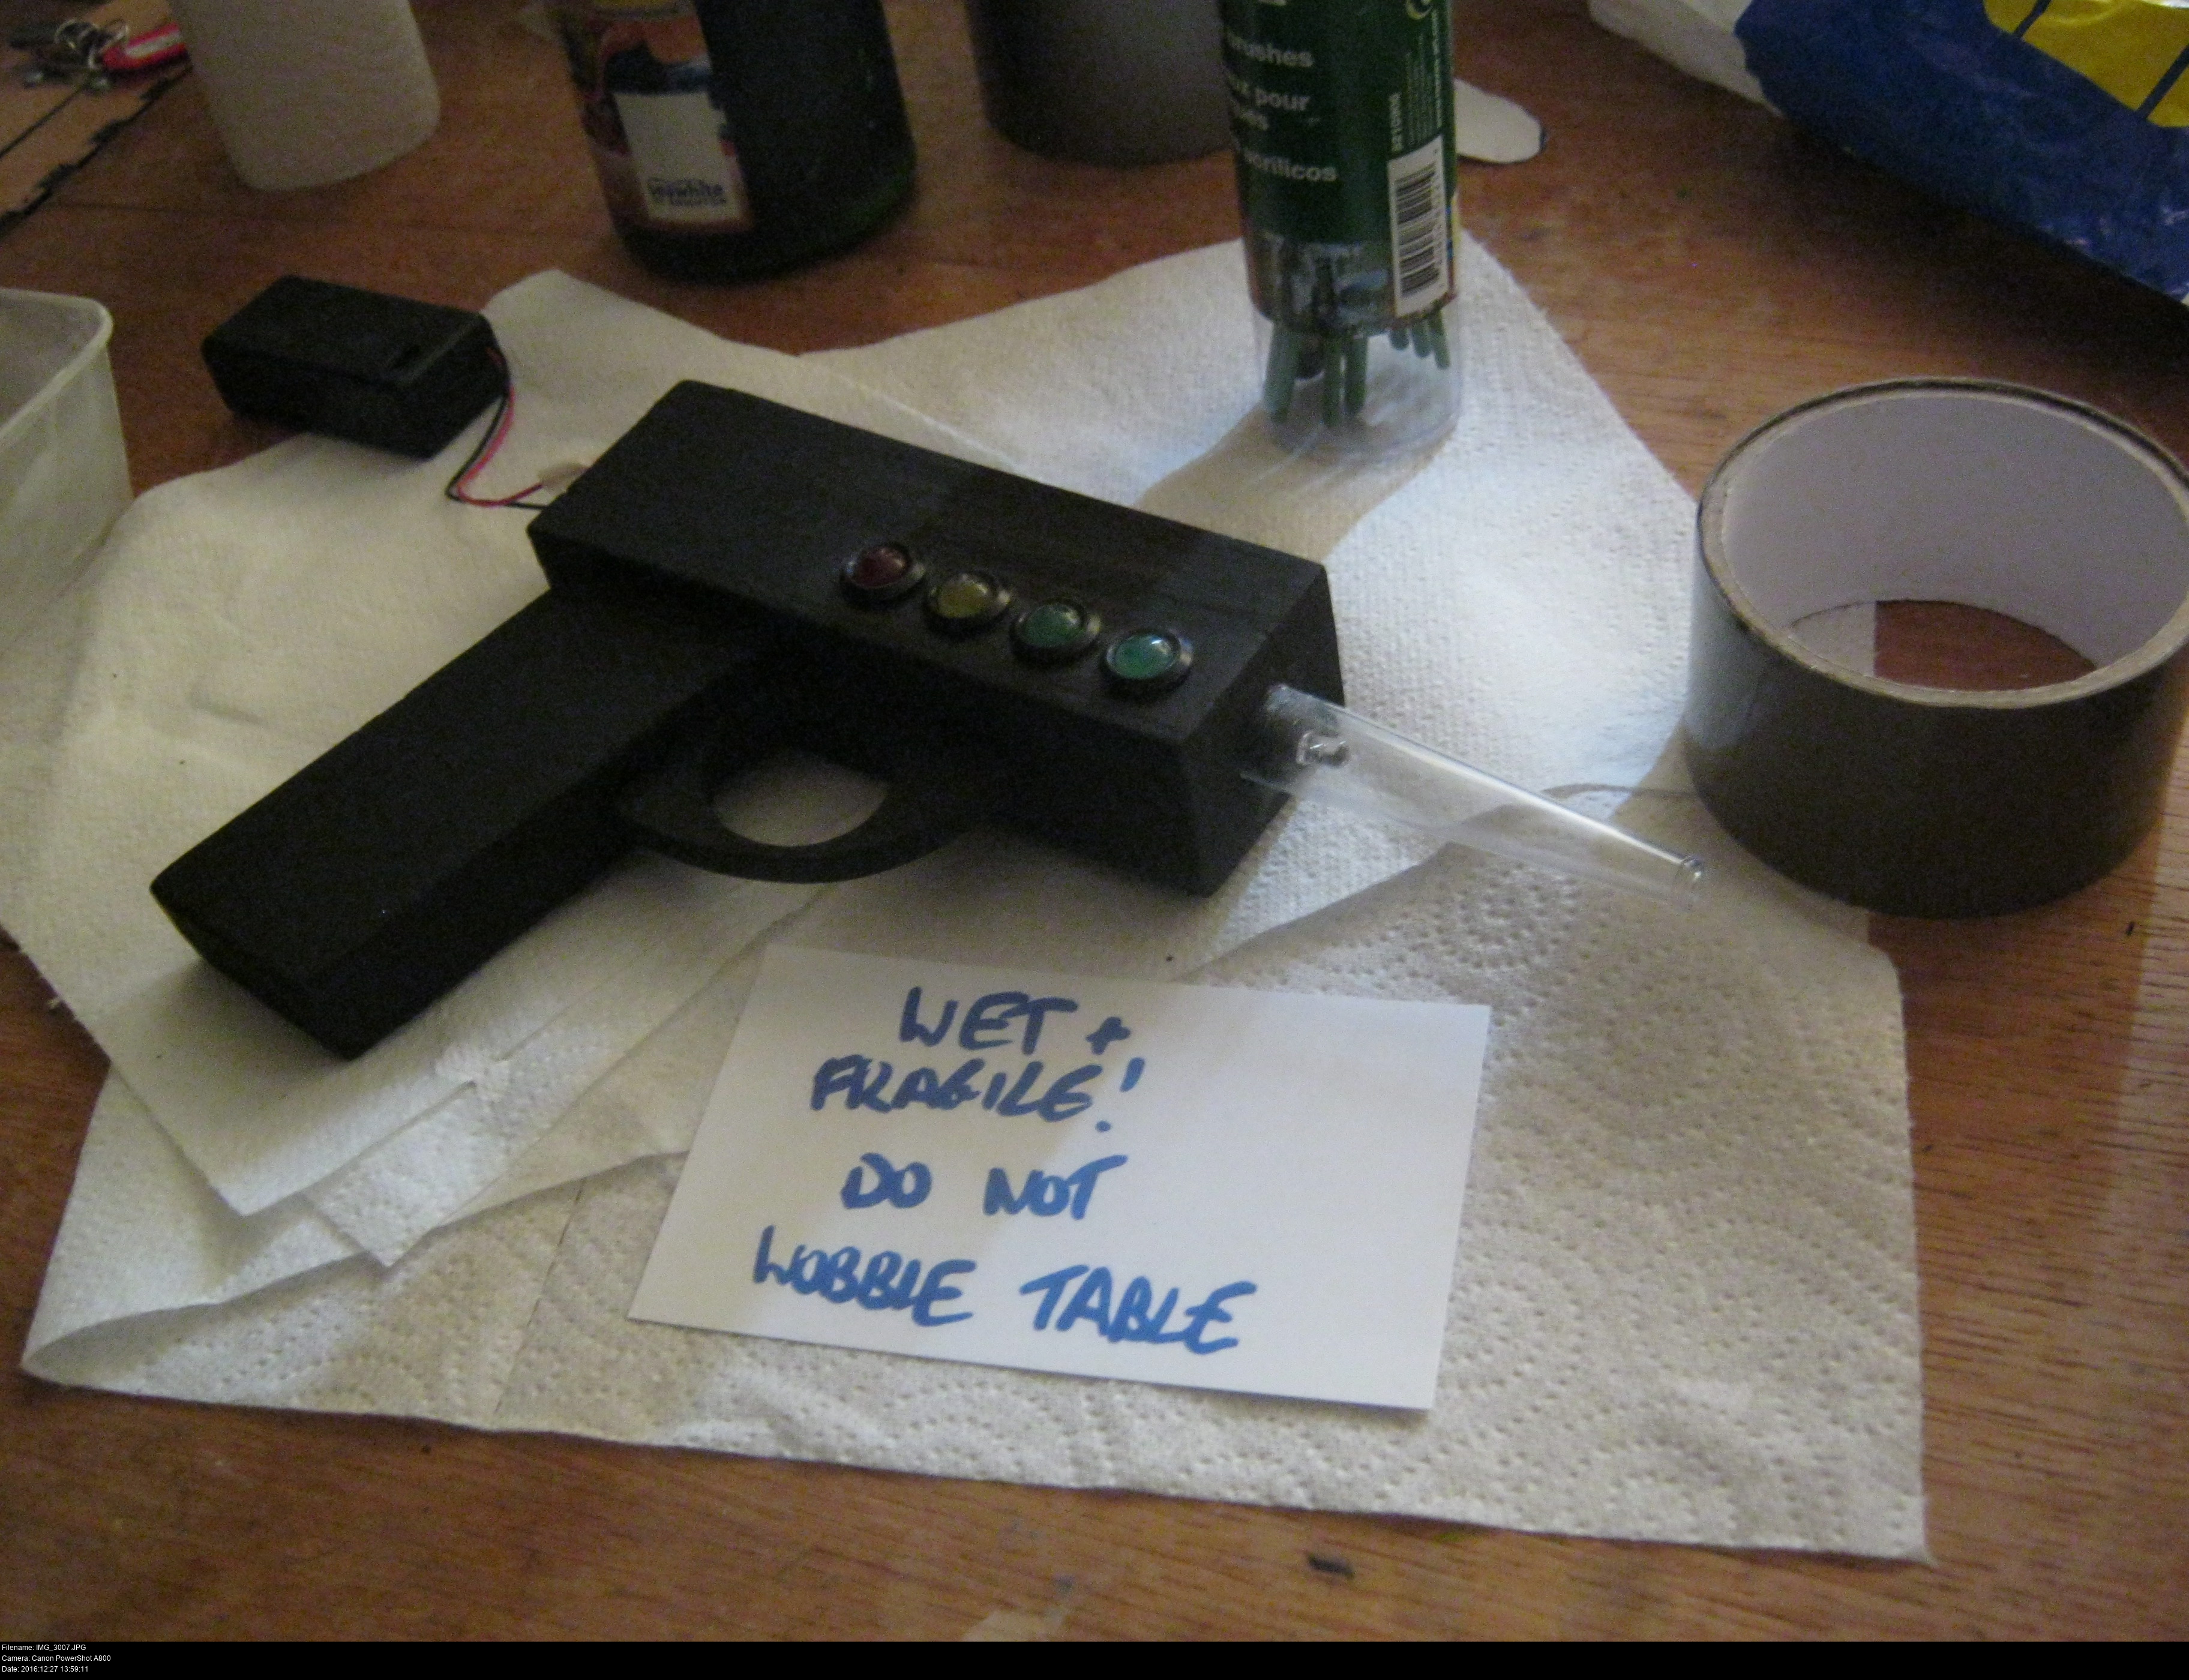
Slow and steady. One side, then the other. Let it dry.
I've decided against putting notches or any other details on the gun. I'd only break it, and I can't be bothered. I've reached sufficient coolness with this, considering it -lights the heck up-.
Once its dried, it can have some wood varnish on it.
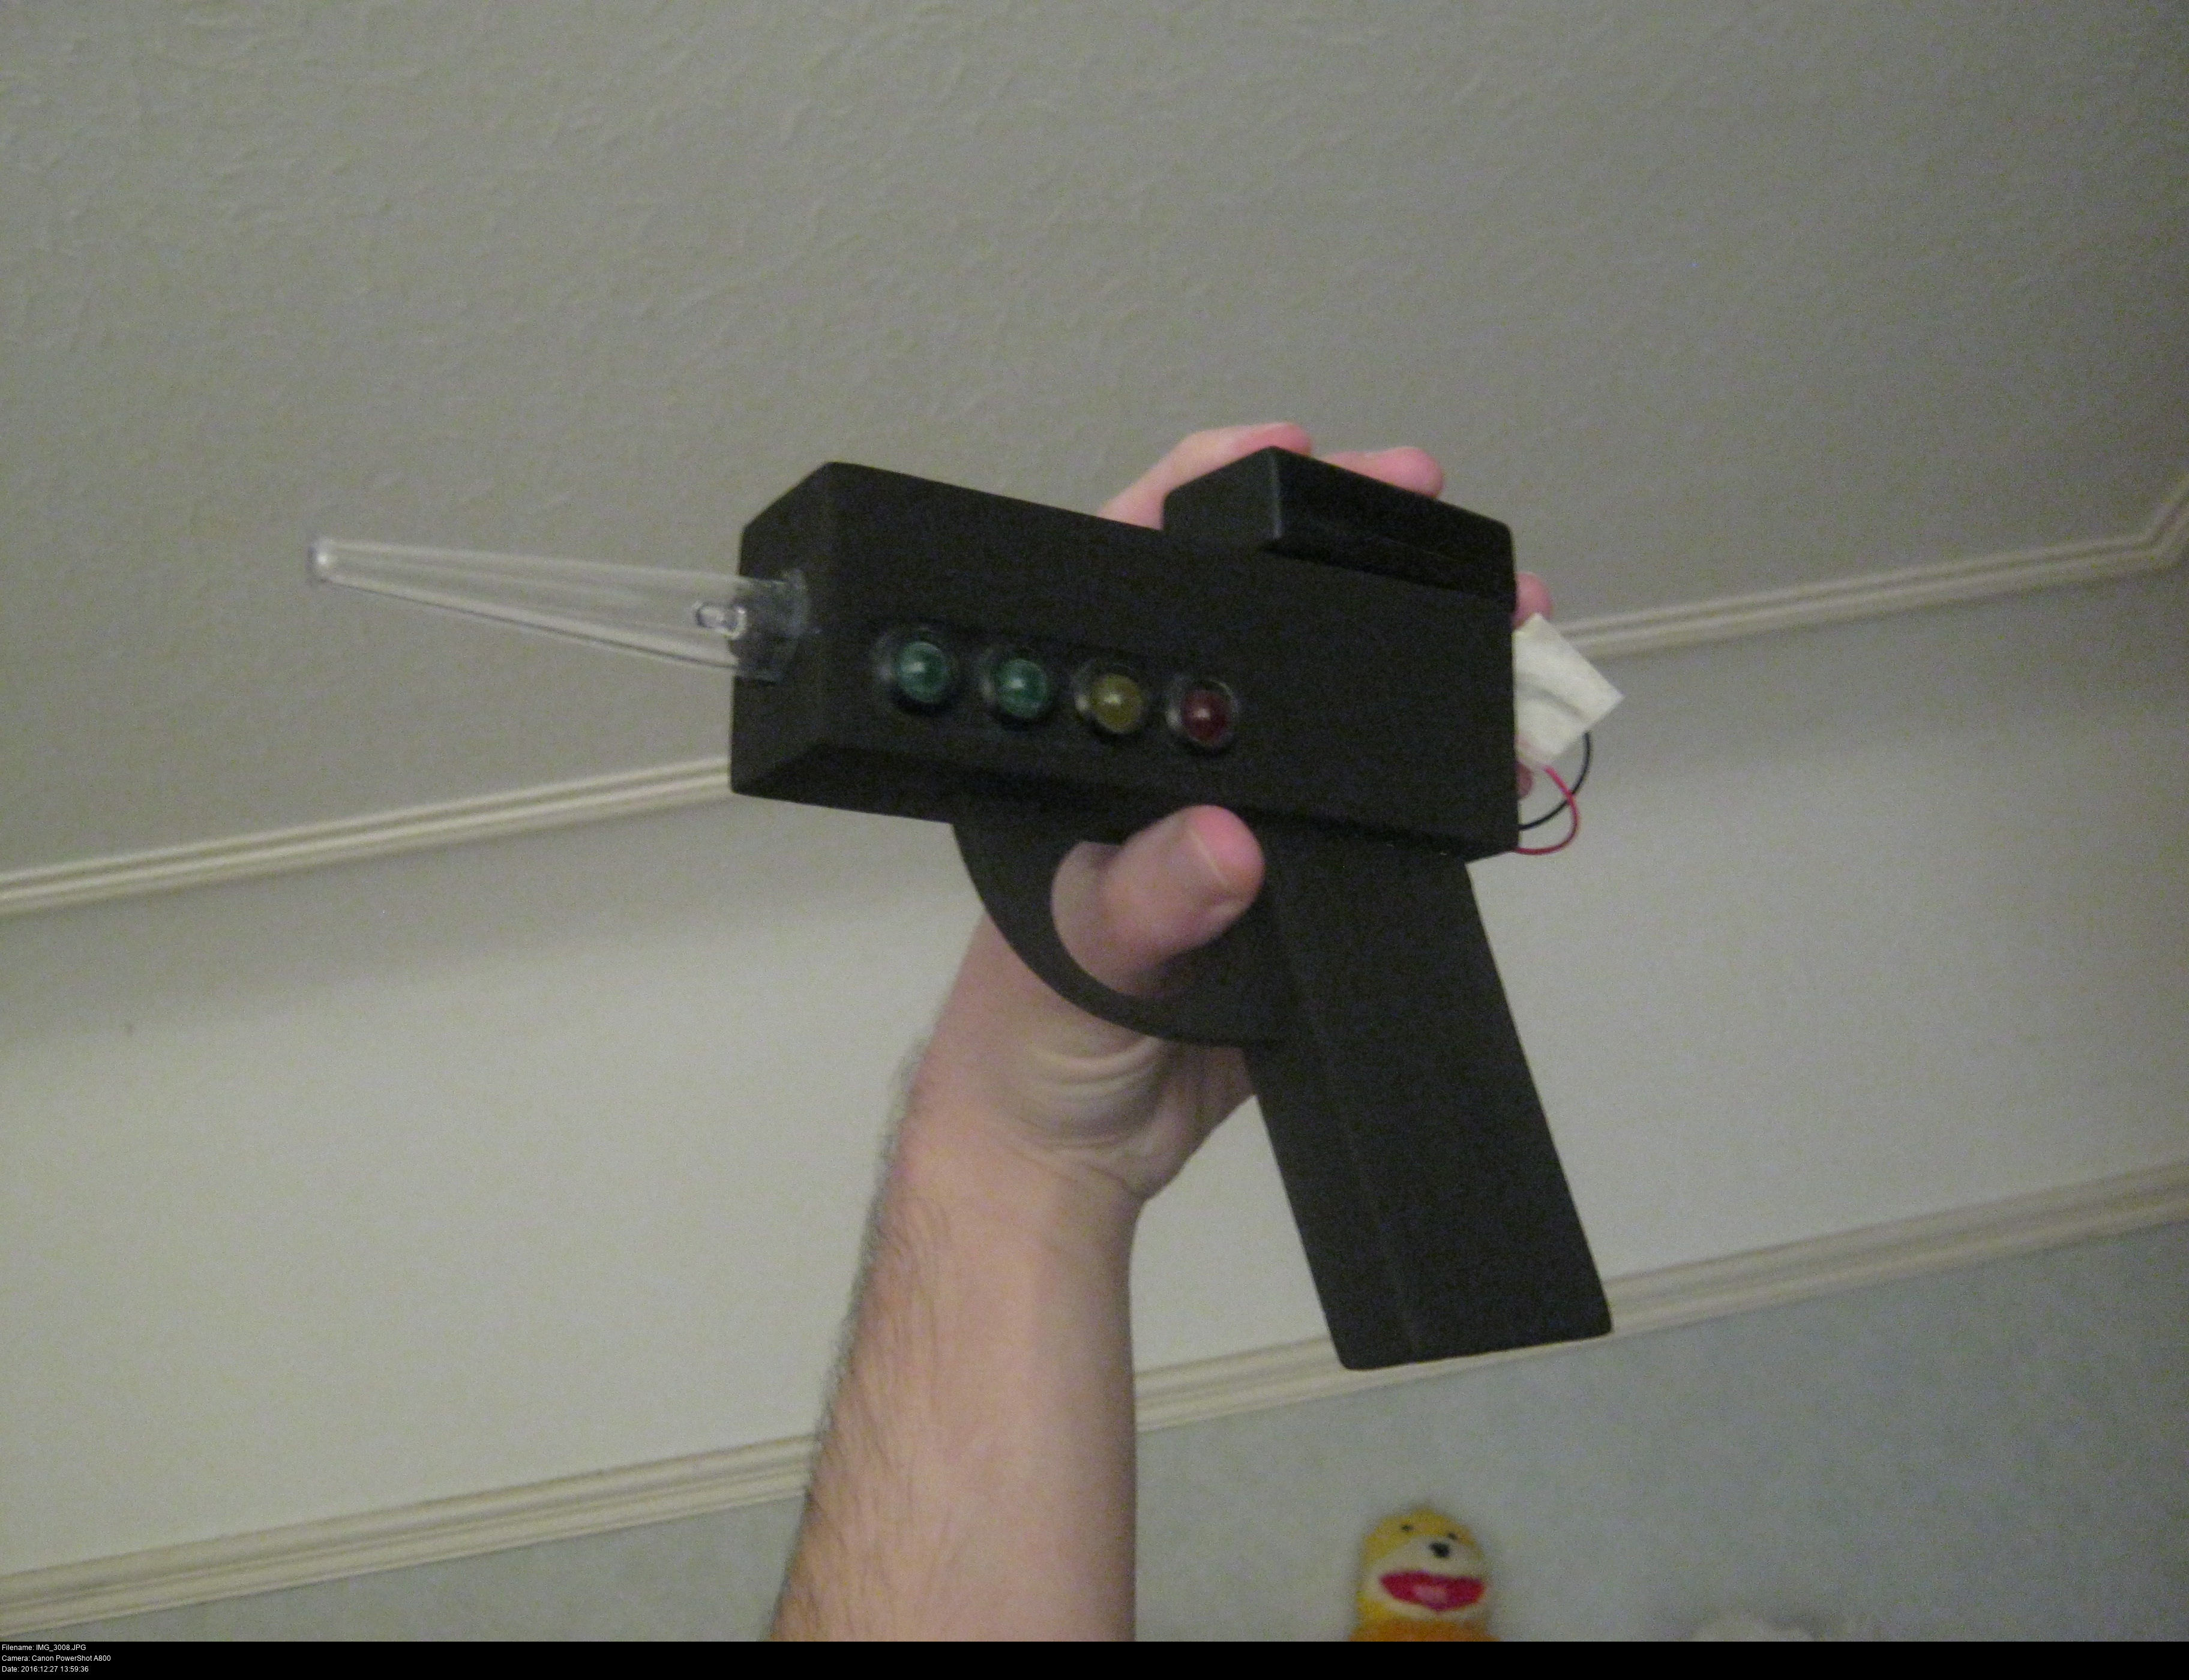
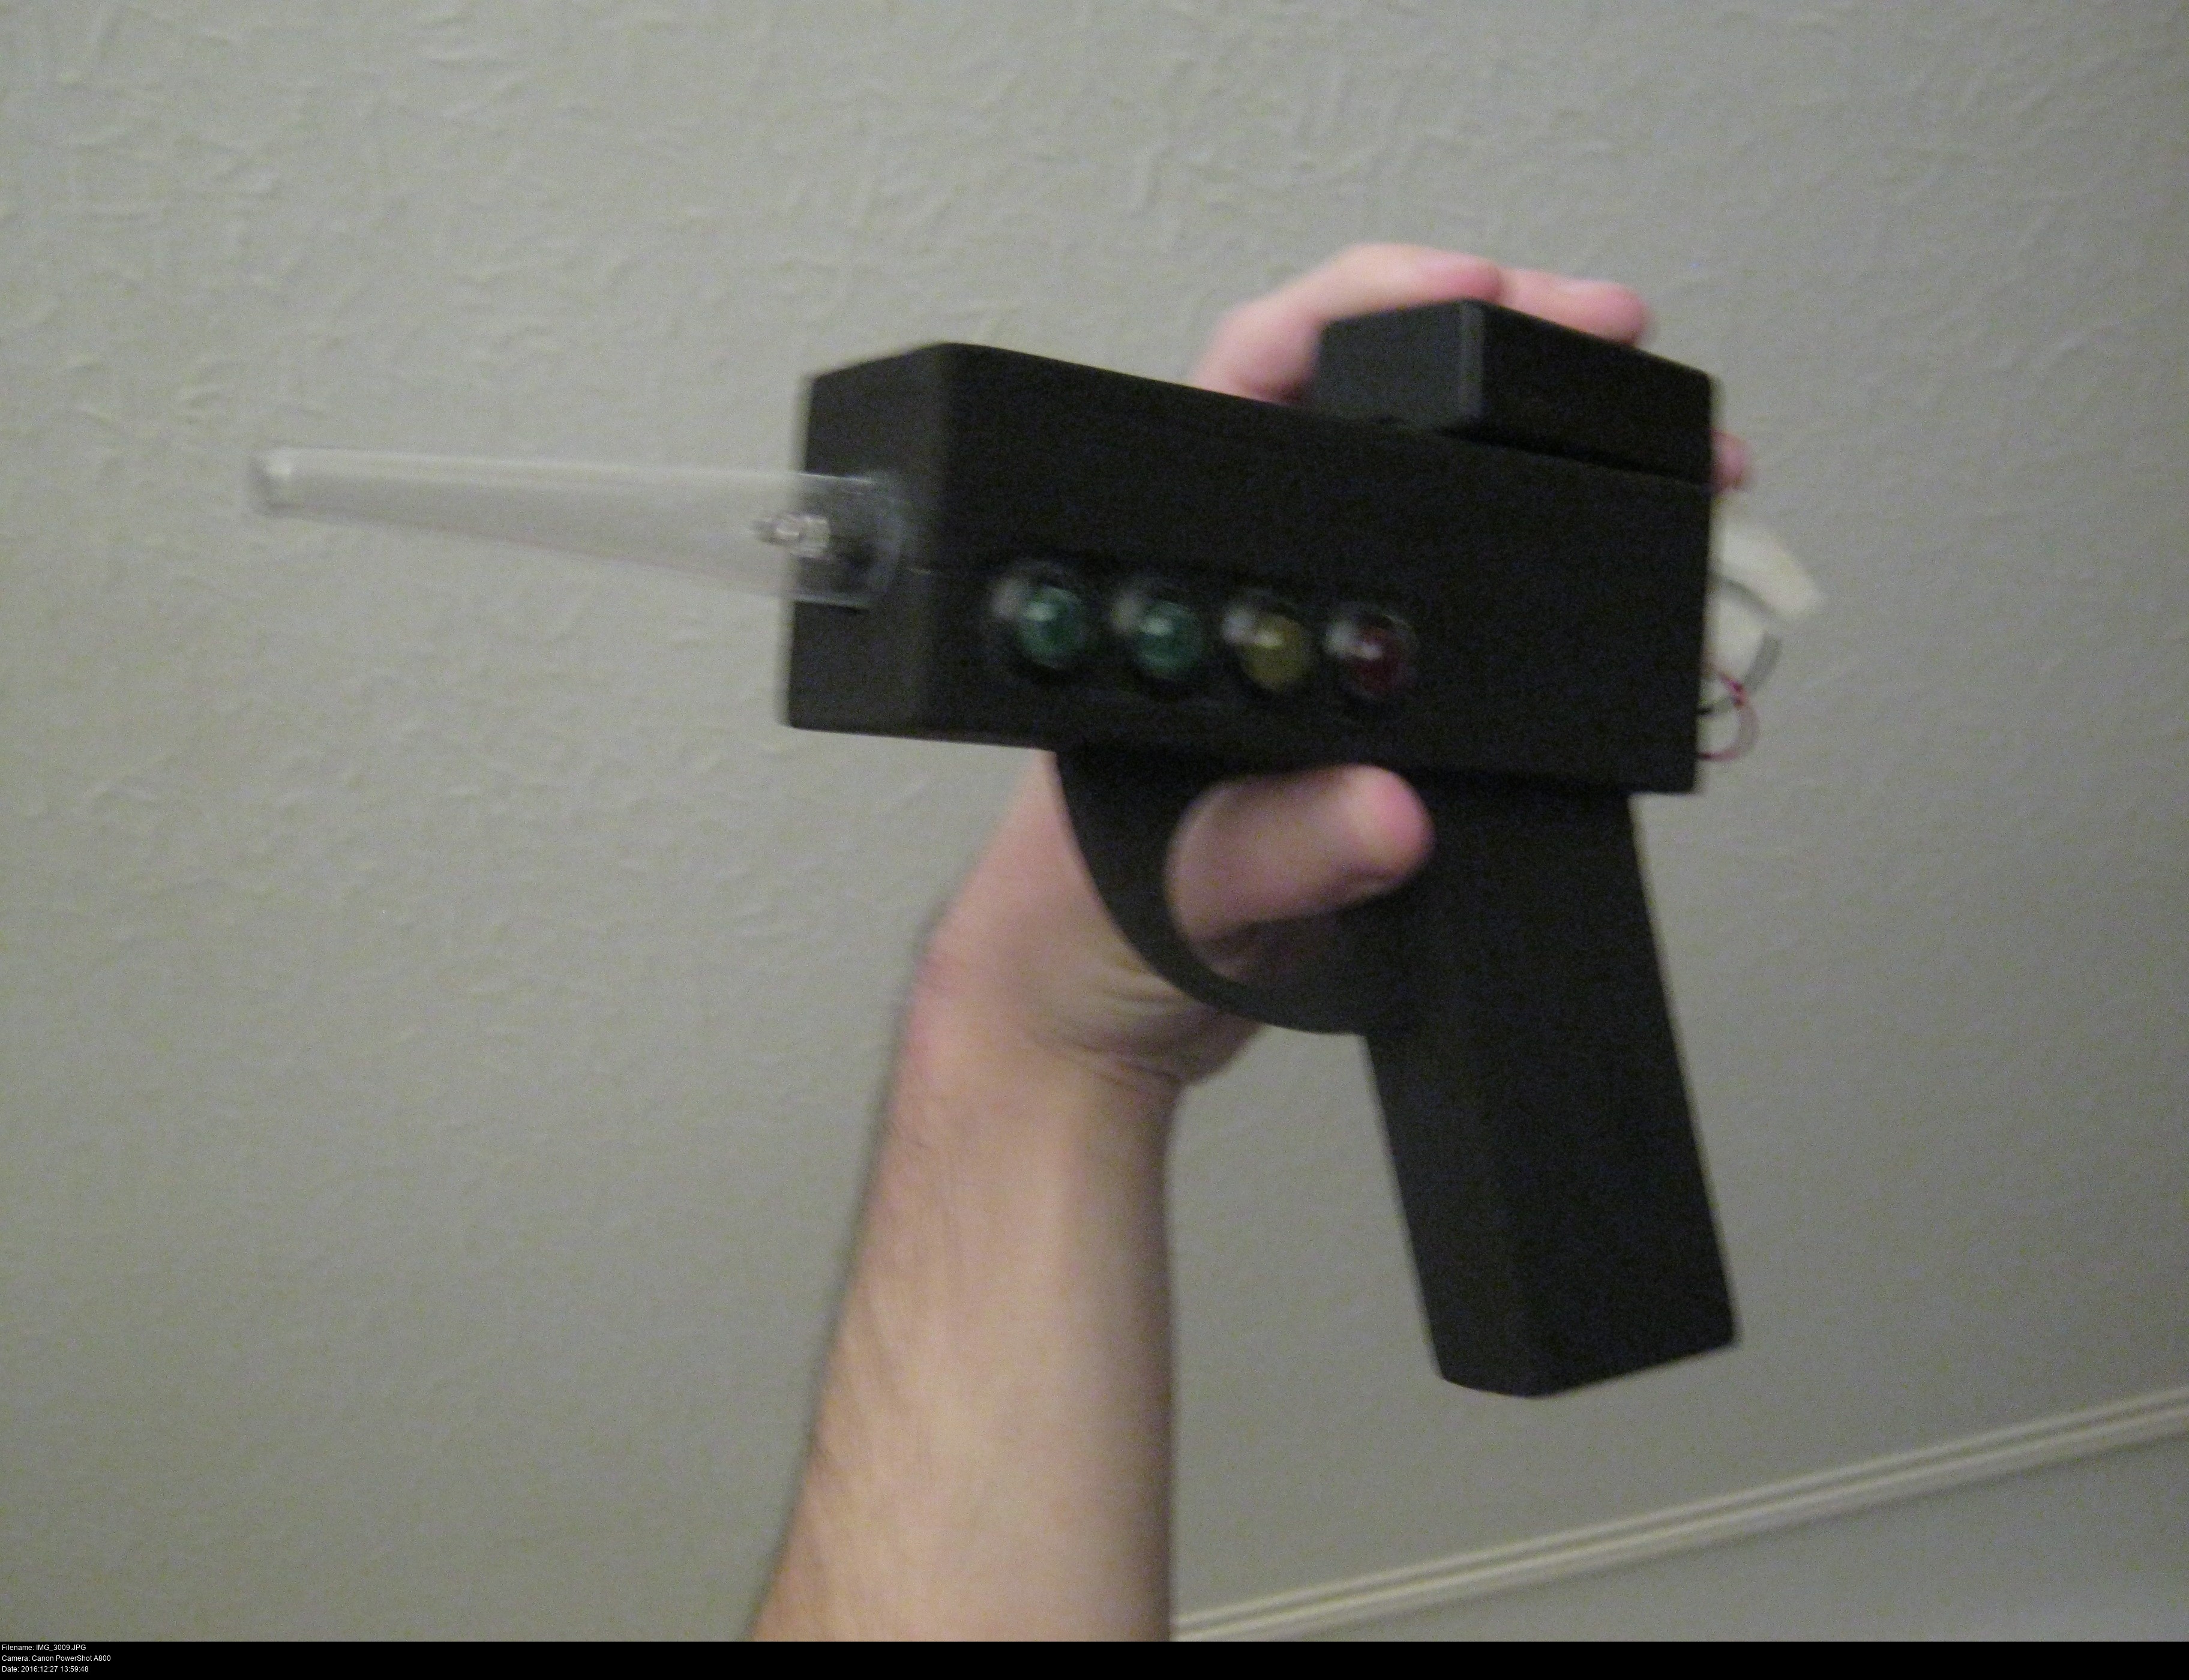
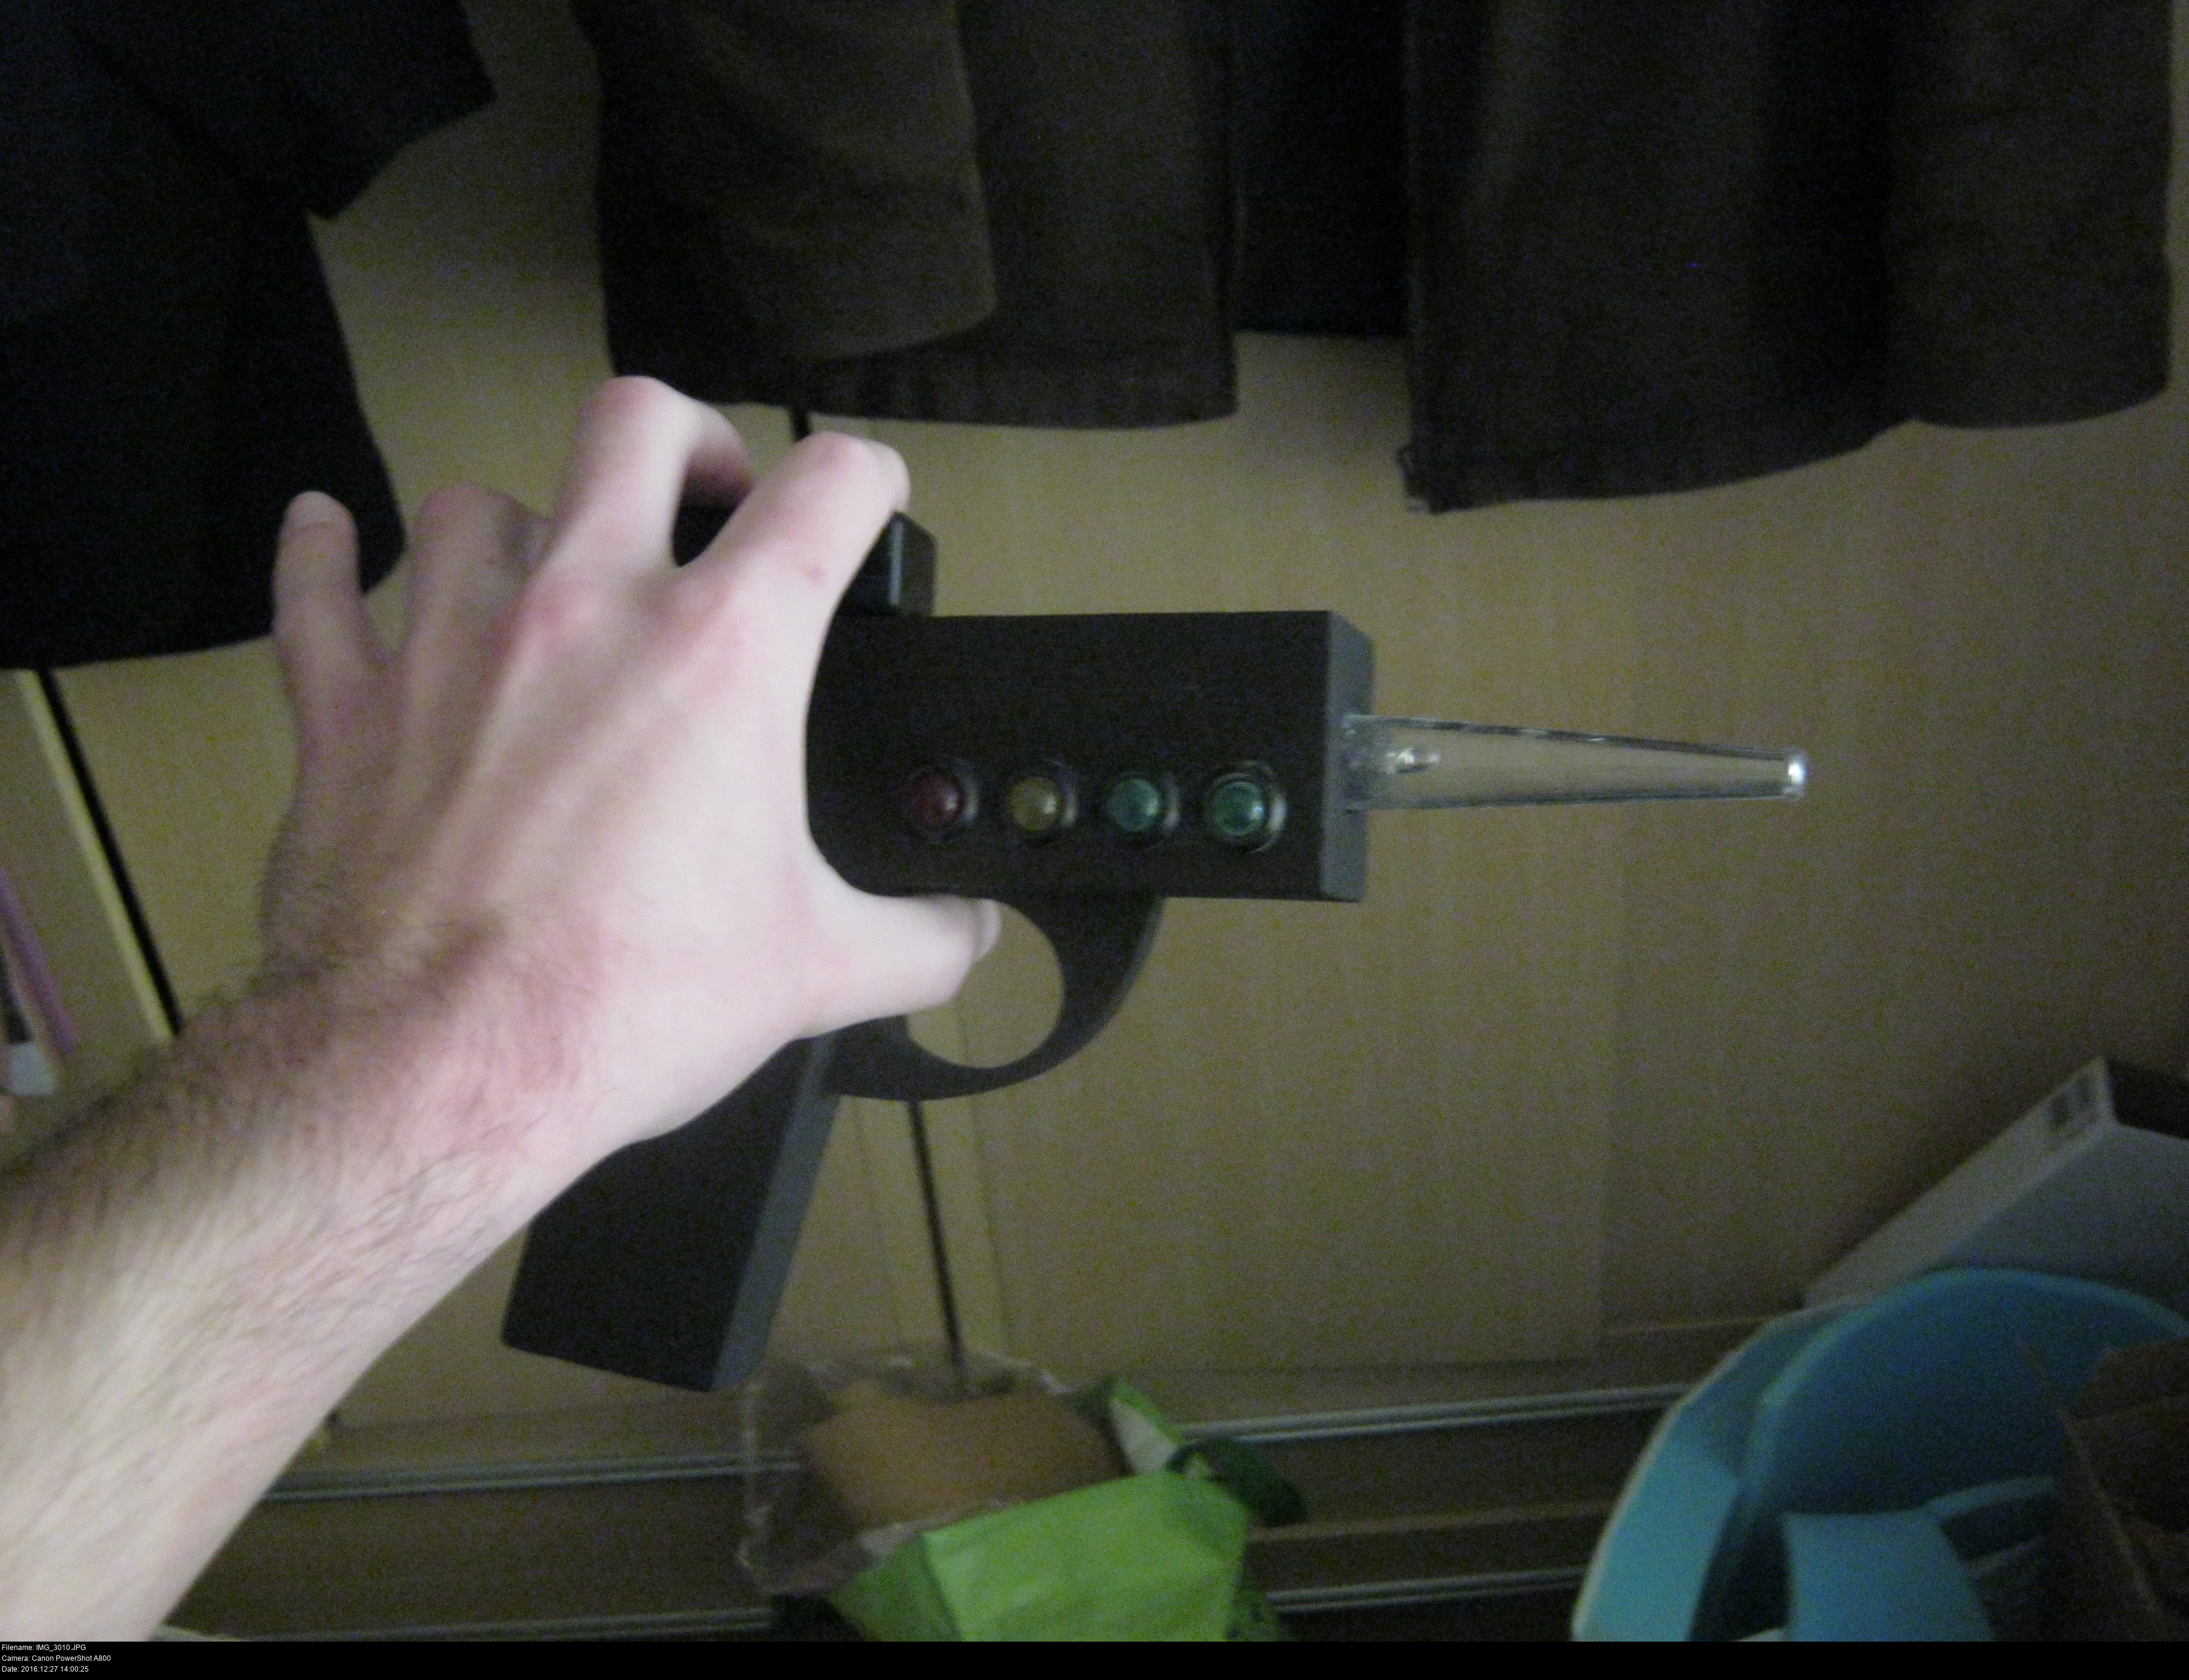


I'm holding the battery case in place with my fingers here to show how it could look attached to the gun. I could equally mount it to the side or the grip if I wanted, but it's a good subtitute for the dome.
I don't want to glue the battery case onto the gun frame permanently, so I'm going to attach some velcro strips to the gun and case with some shoe glue (just to be absolutely sure).
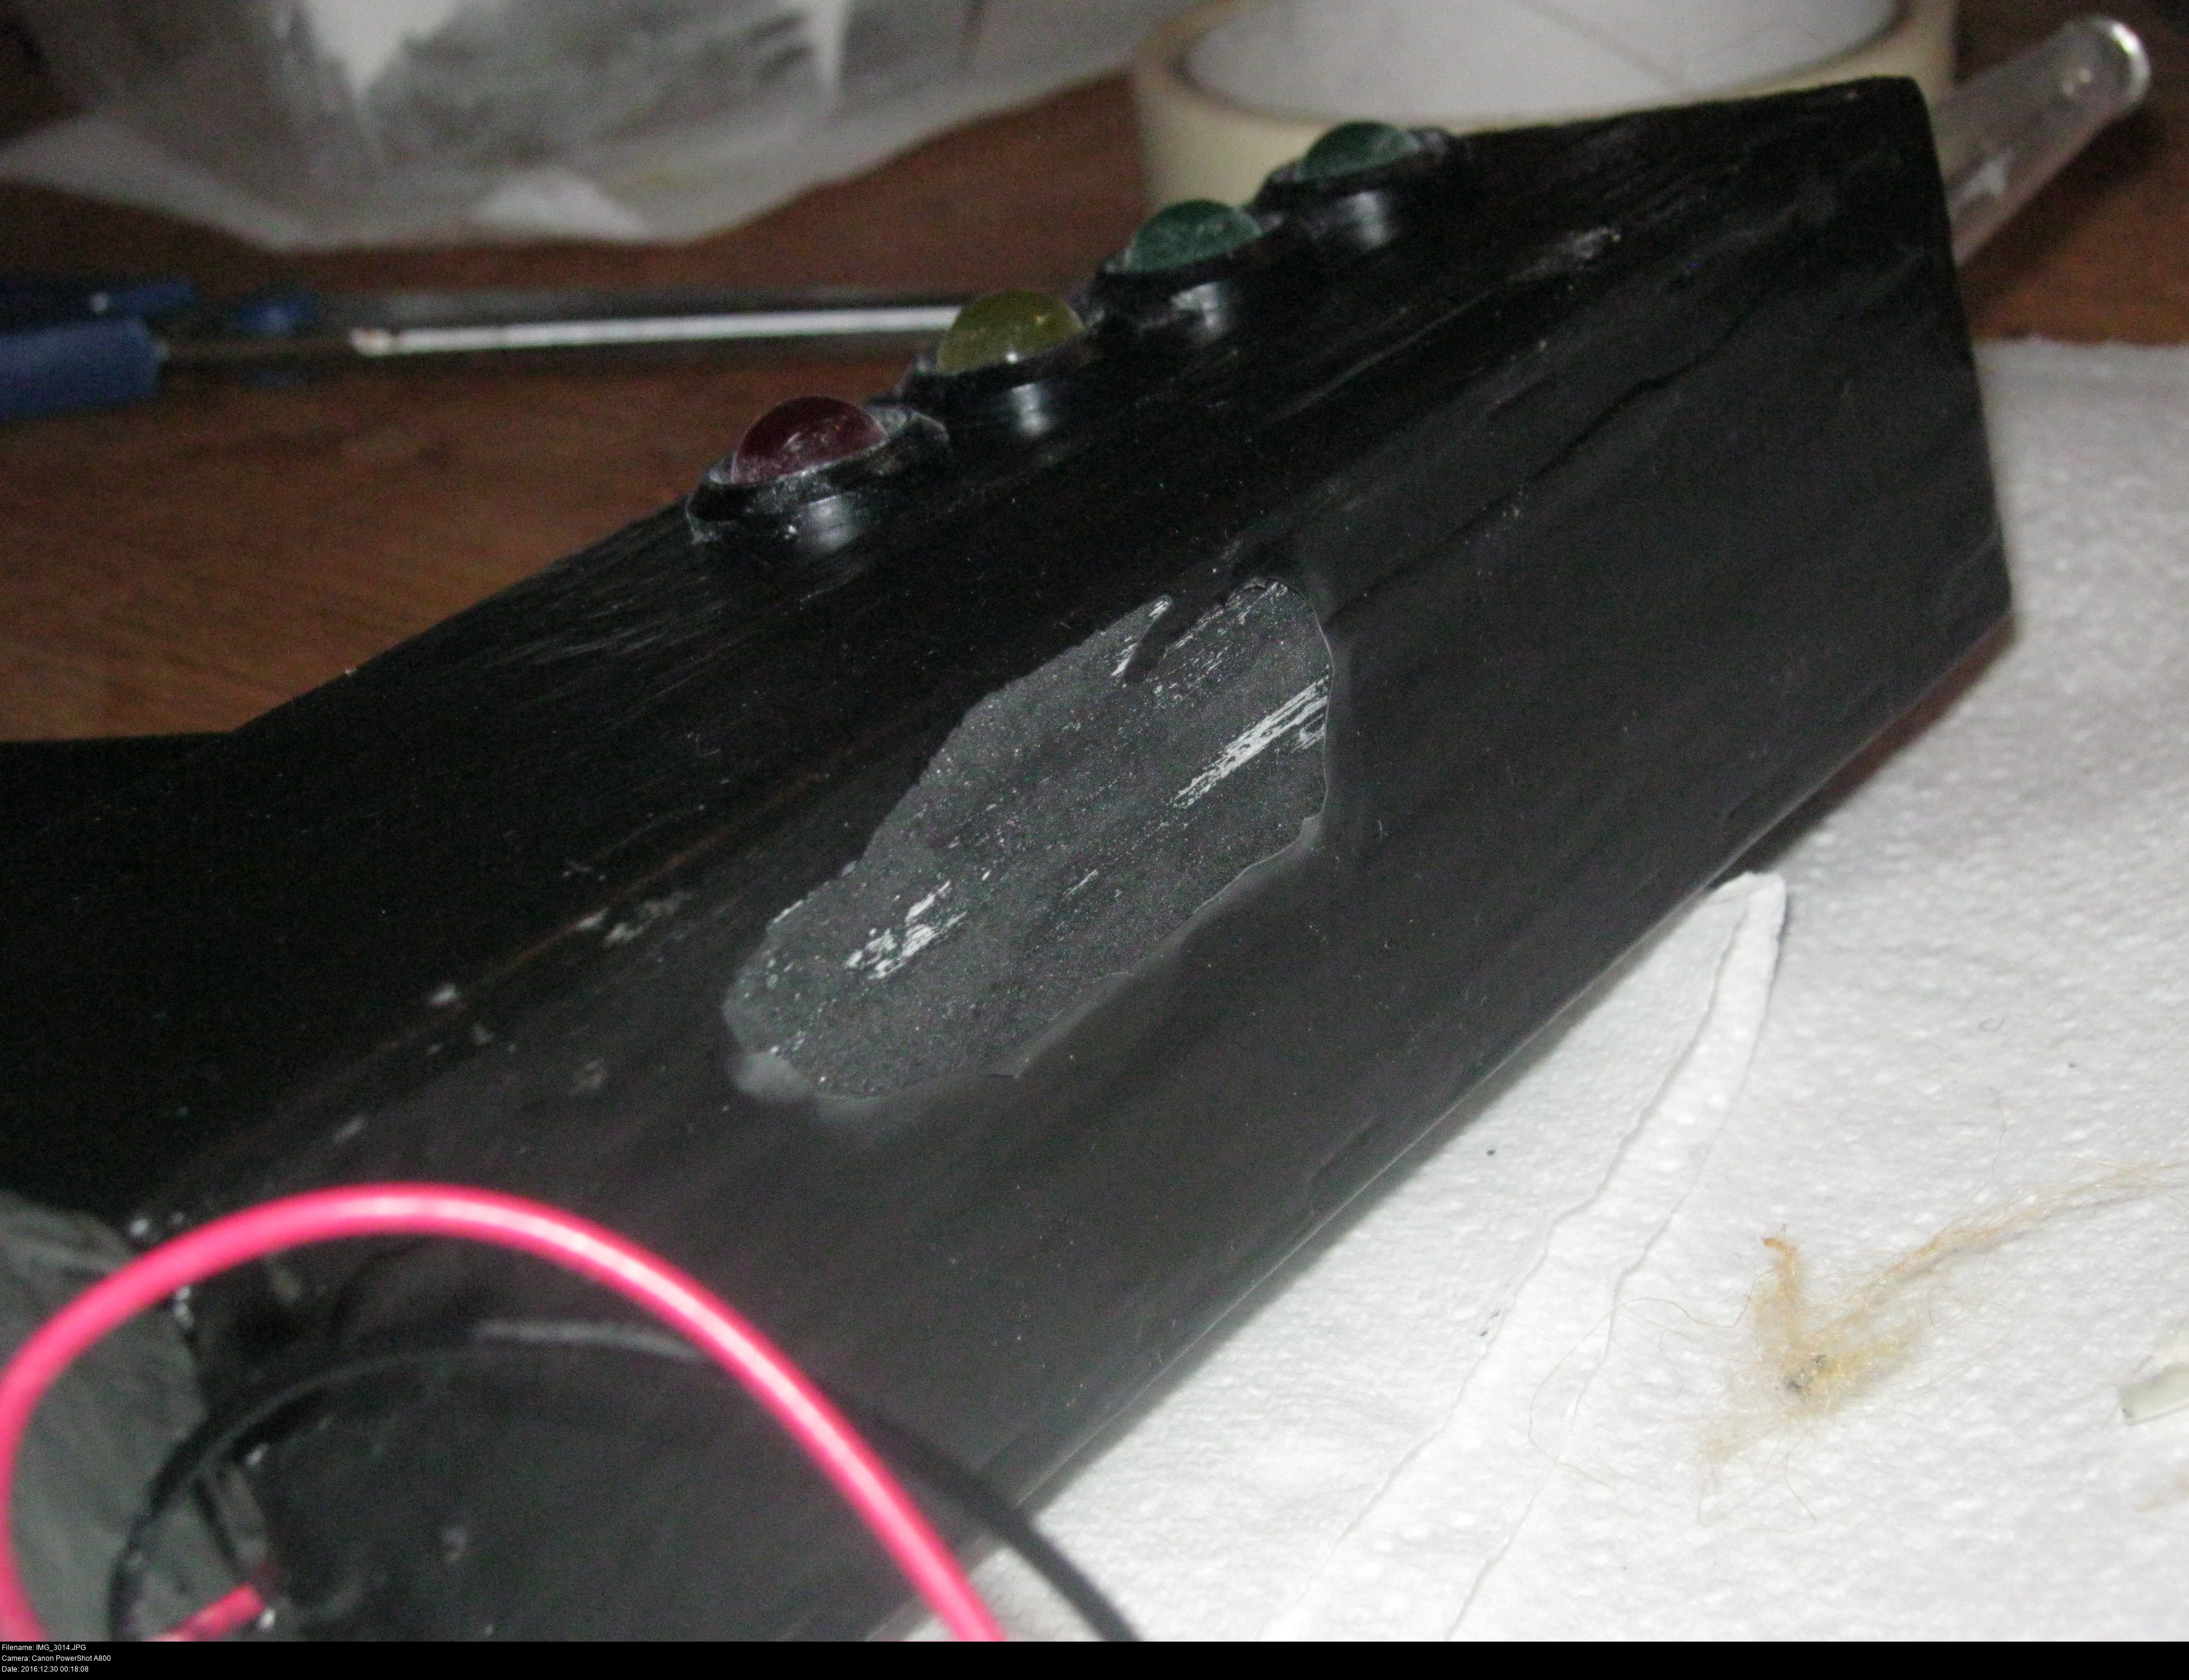

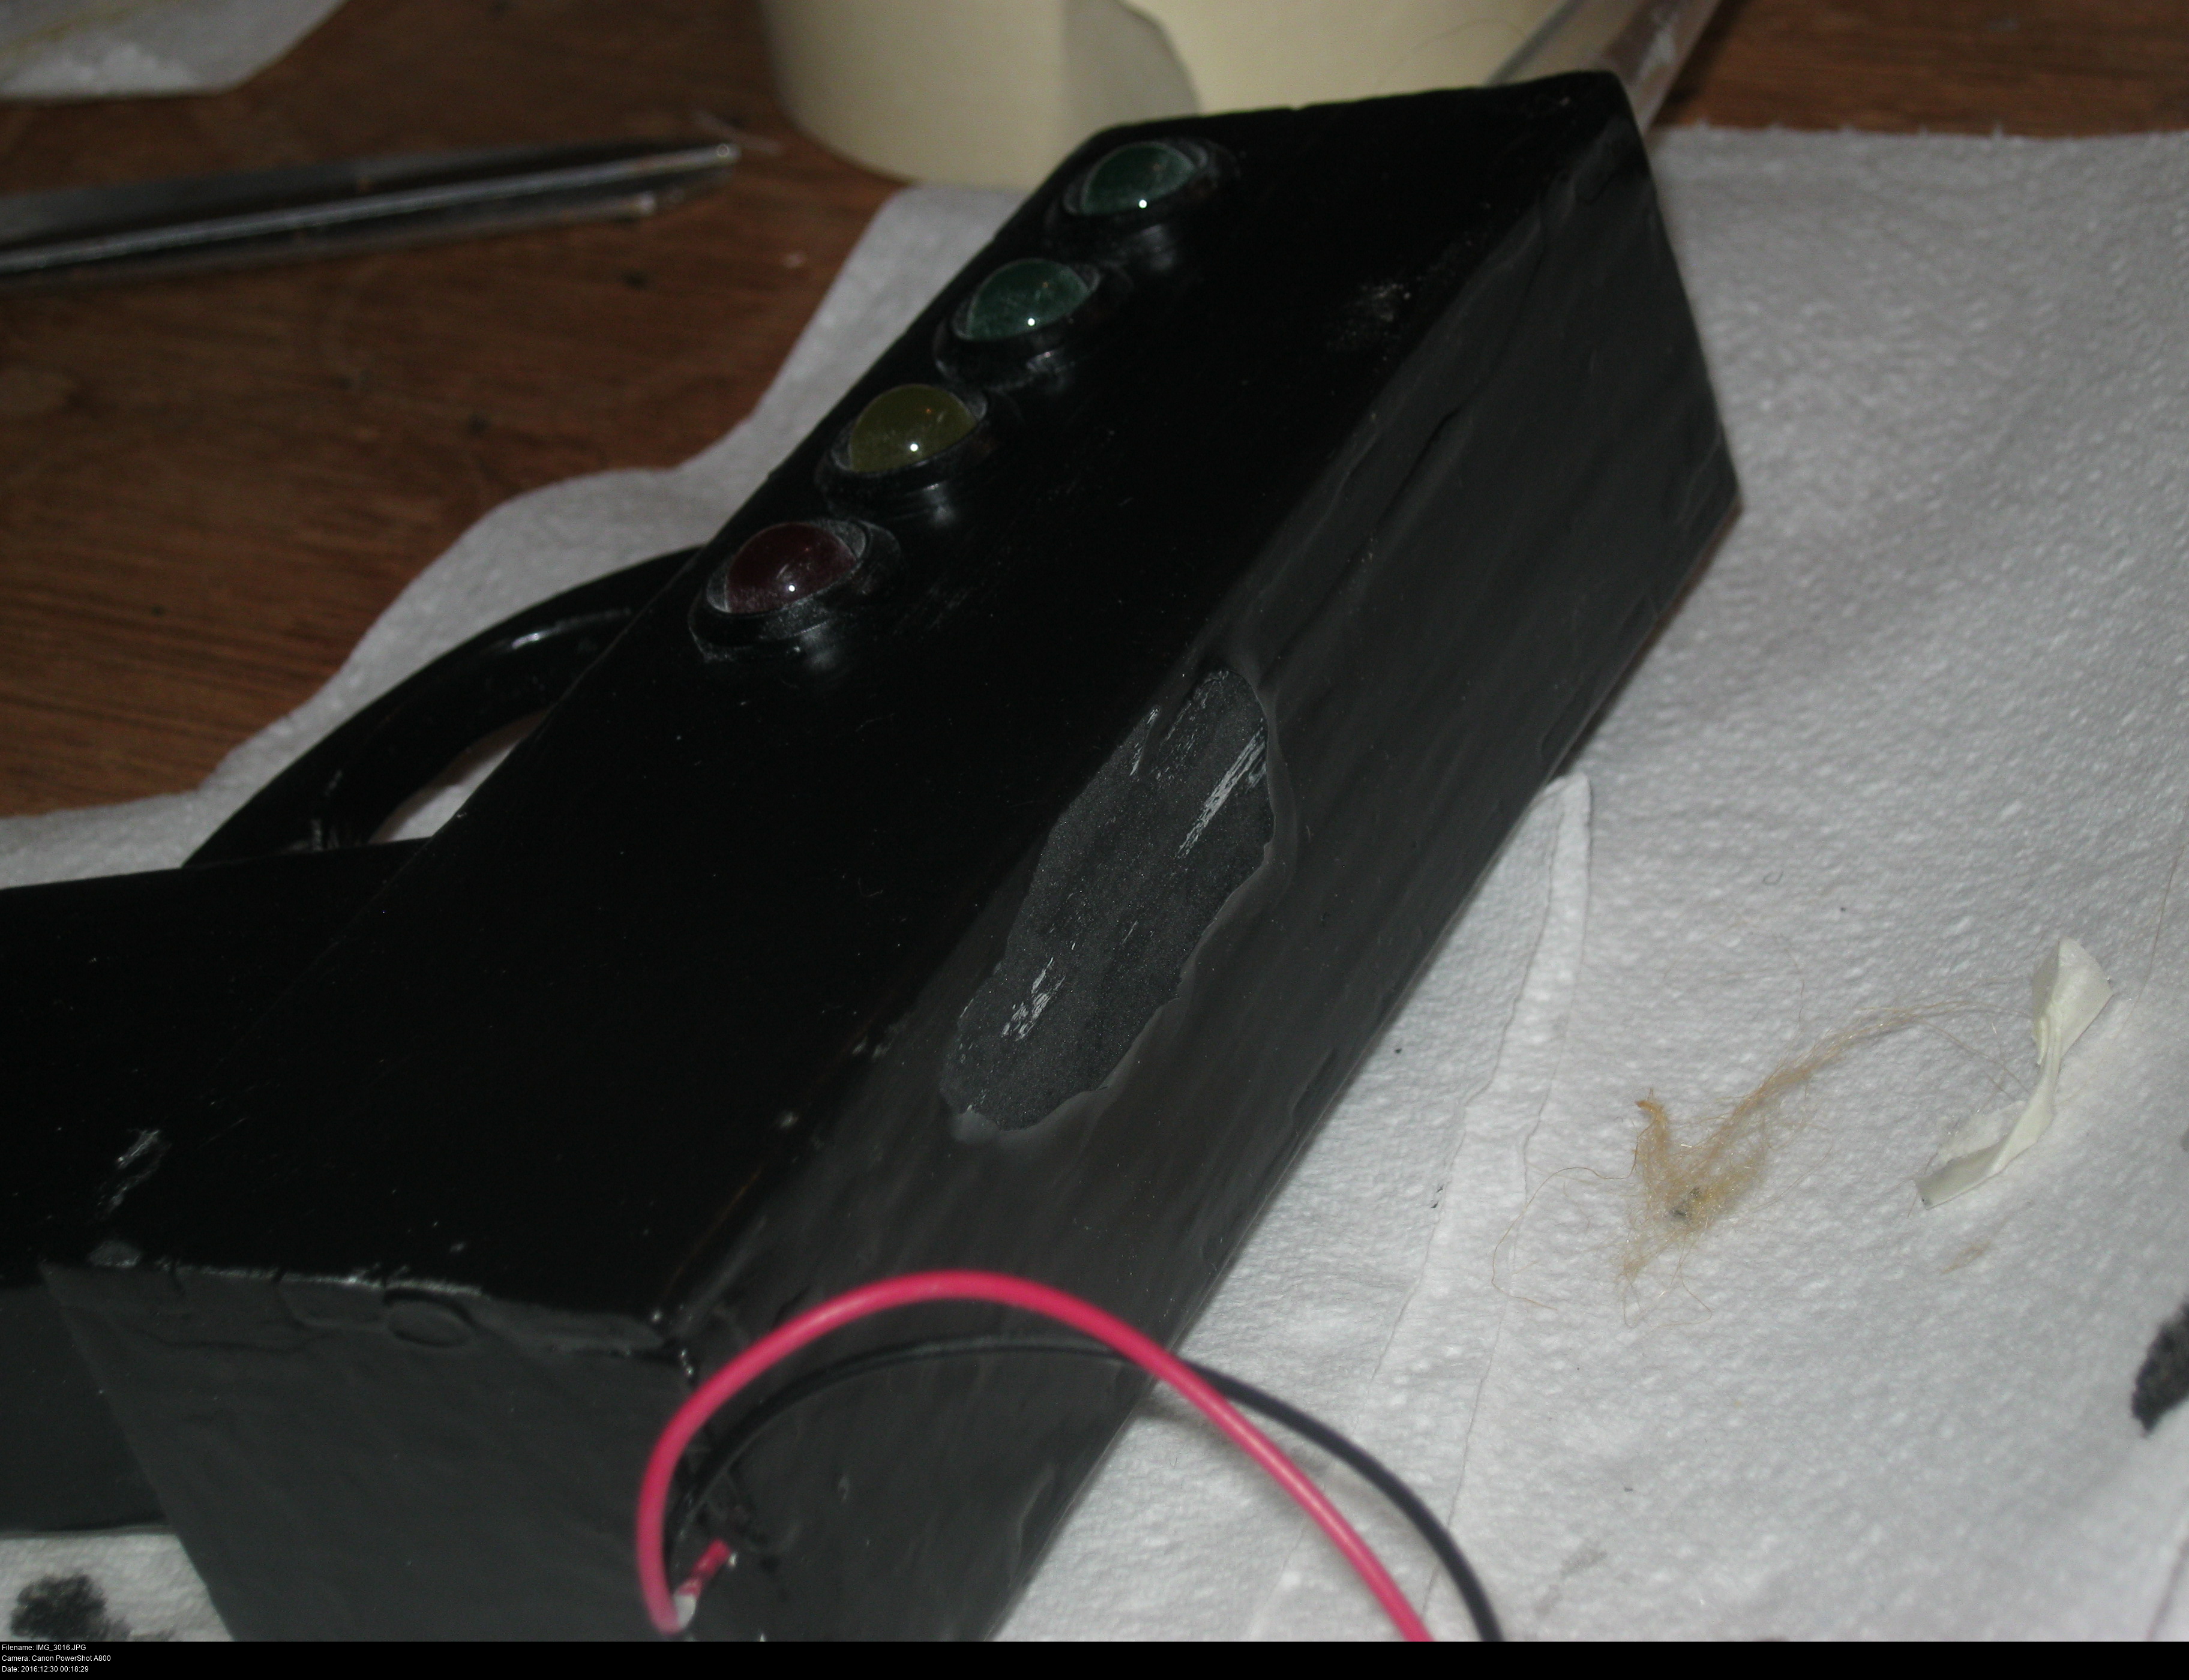
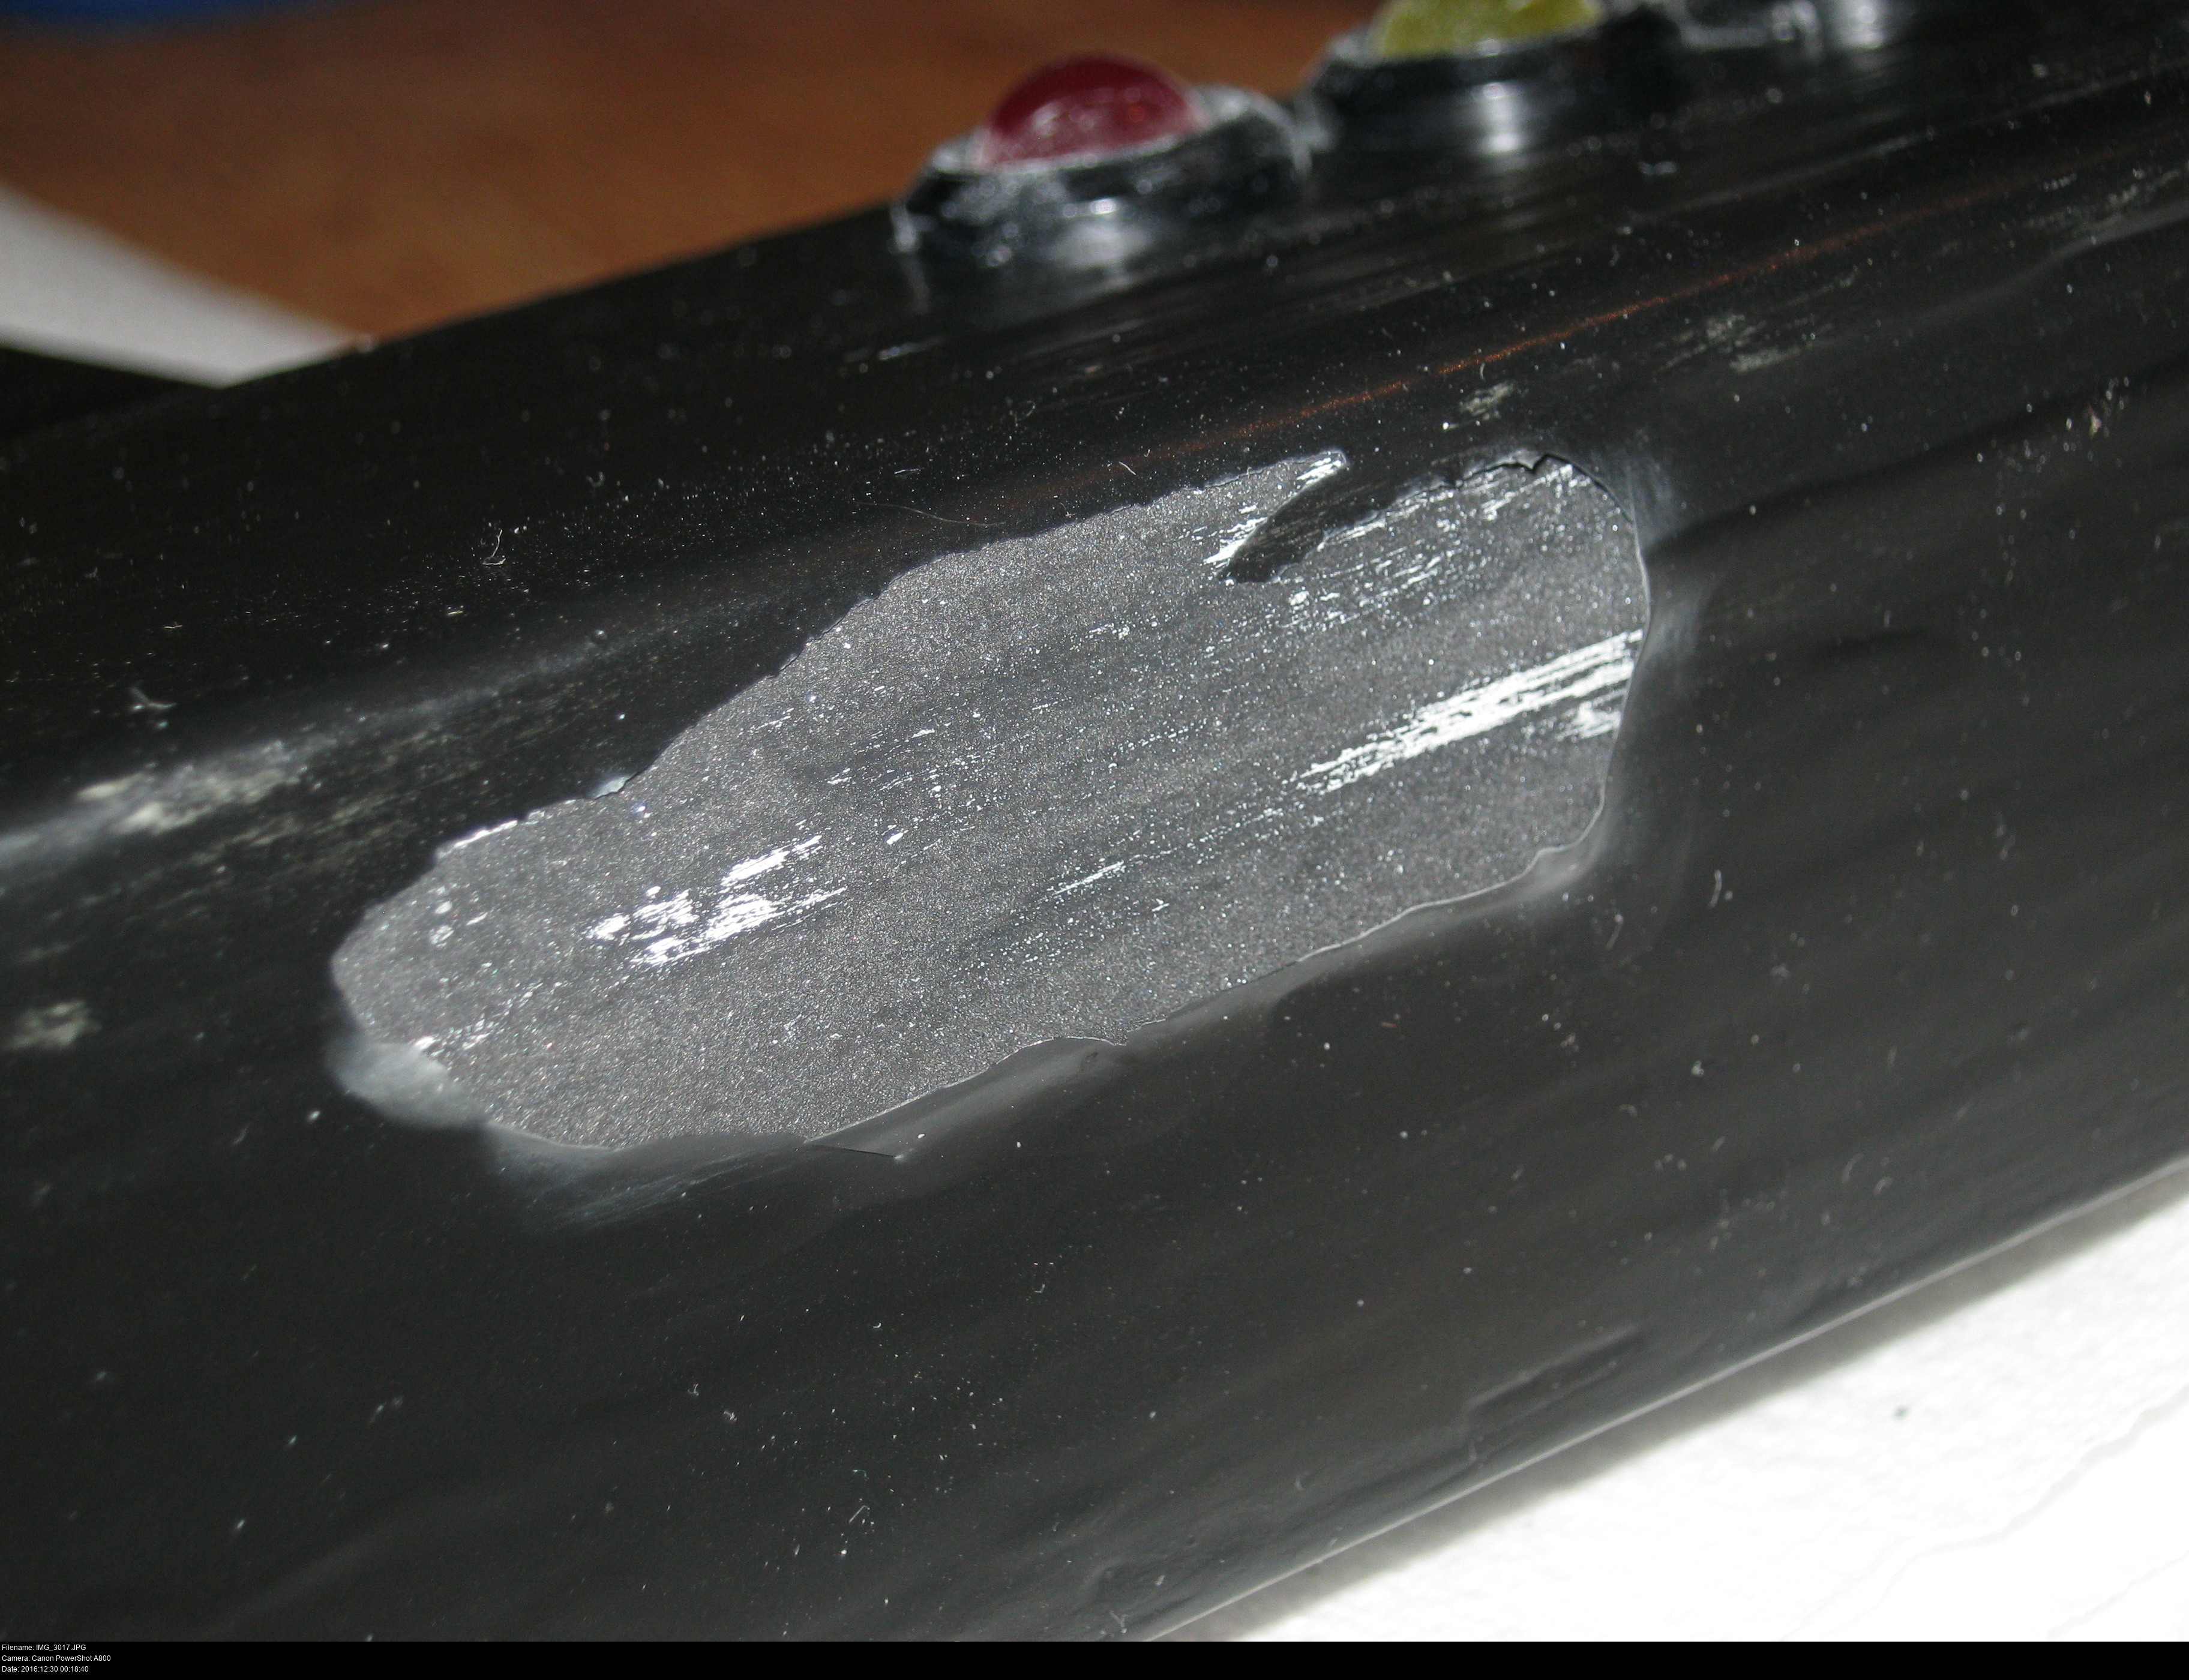
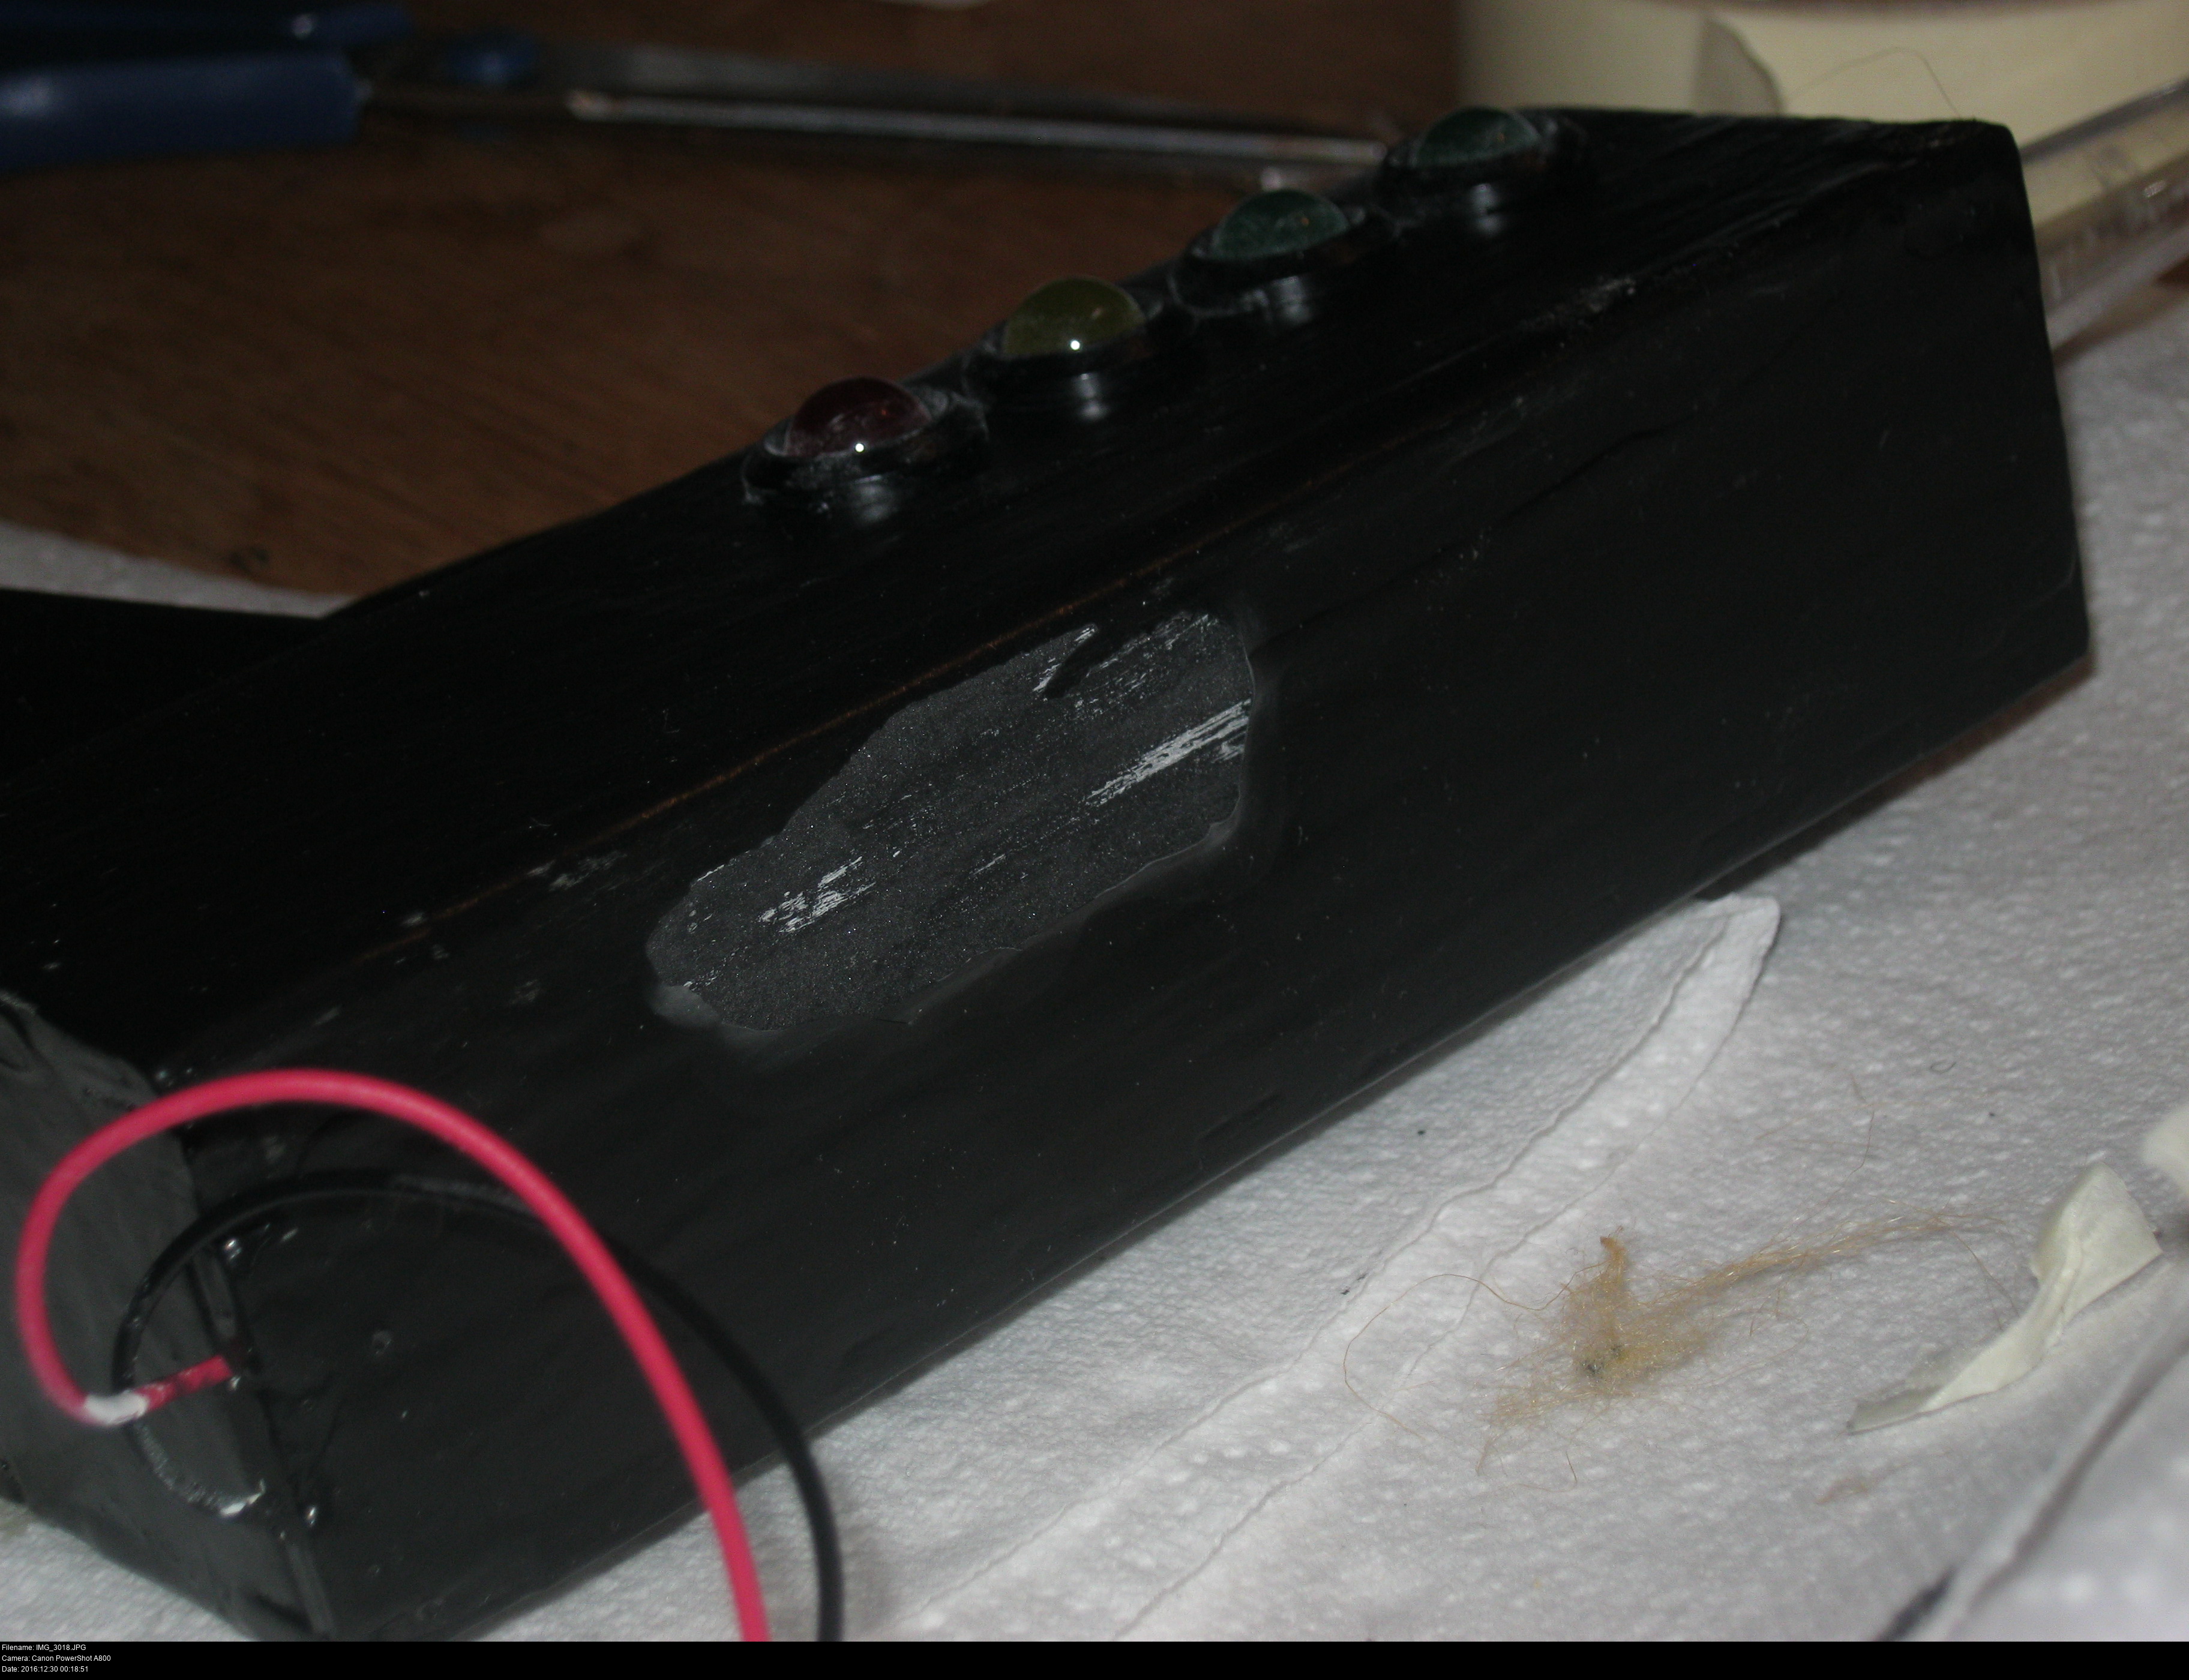
It all worked wonderfully. The shoe glue held the velcro to the gun... and the gun was covered in varnish... and the varnish was applied on top of the poster paint and... oh.
What a mess.
The velcro has peeled away the varnish because poster paint is water soluble and the water-based varnish dissolved it. I noticed that I was getting black flecks in my varnish as I coated the gun, but I just thought it was because the paint was cheap, not because it was -completely the wrong type of paint and the entire gun is covered in it now-. The entire black coat of paint here is useless. I wouldn't be surpried if it's just a thin powdery dust barely held together by its shell of acrylic varnish.
It is vitally important at this point to not panic. Do not panic. I told you not to panic!!
Don't use poster paint. Don't even think about it. Unless your paint says acrylic on it, it's something else, and you should not use it (unless you need that type).
Just peel away anything loose. Sand away any affected areas. Don't disturb anything that's still nice.
There's also a lesson to be learned here about mixing structural and presentation layers. Wood and glue are structural layers, they hold the prop together. Varnish and paint are presentation layers, they're there to make it look pretty. If you glue onto varnish or paint, it'll peel away like the strap on my original Majora's Mask - glue onto gesso instead of glue onto modroc or plaster.
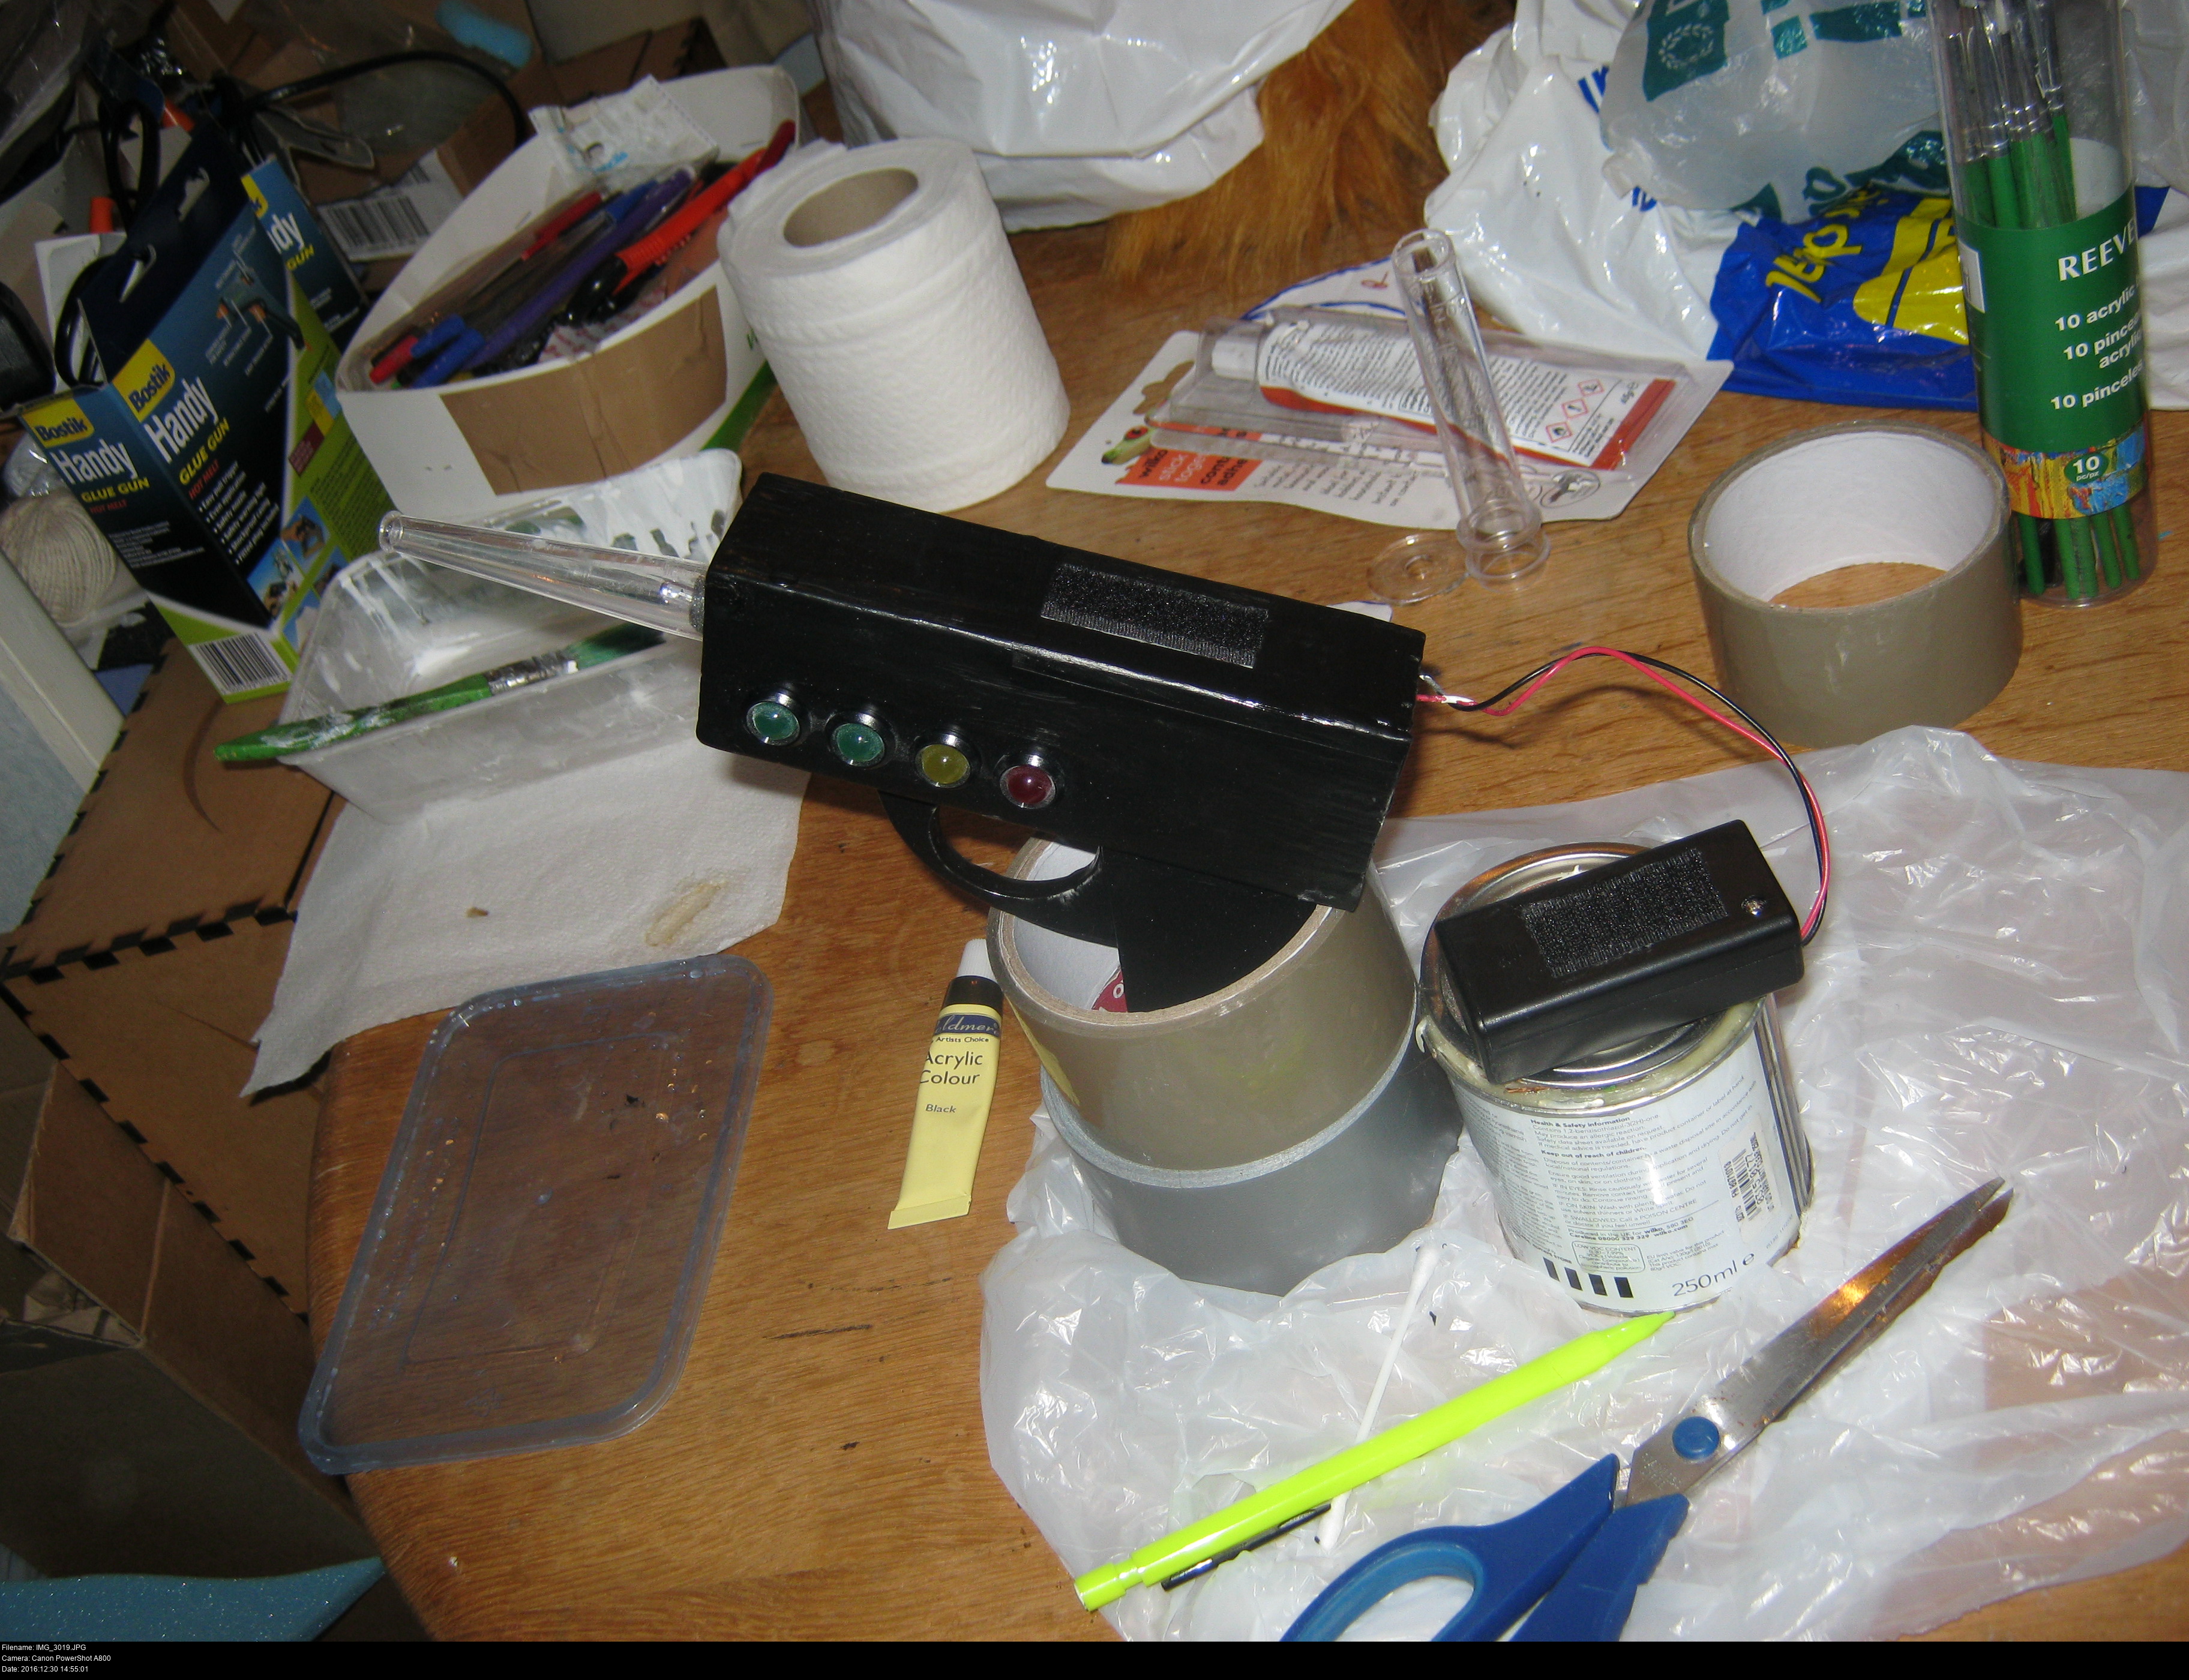

This time, I'm sanding away a small layer on the top of the gun to expose the wood, then I'm going to glue the velcro strip into position to the gun frame. Then I'm going to slowly rebuild up the paint and varnish around the velcro to complete the top of the gun. Maybe two coats of varnish.
Just don't panic.
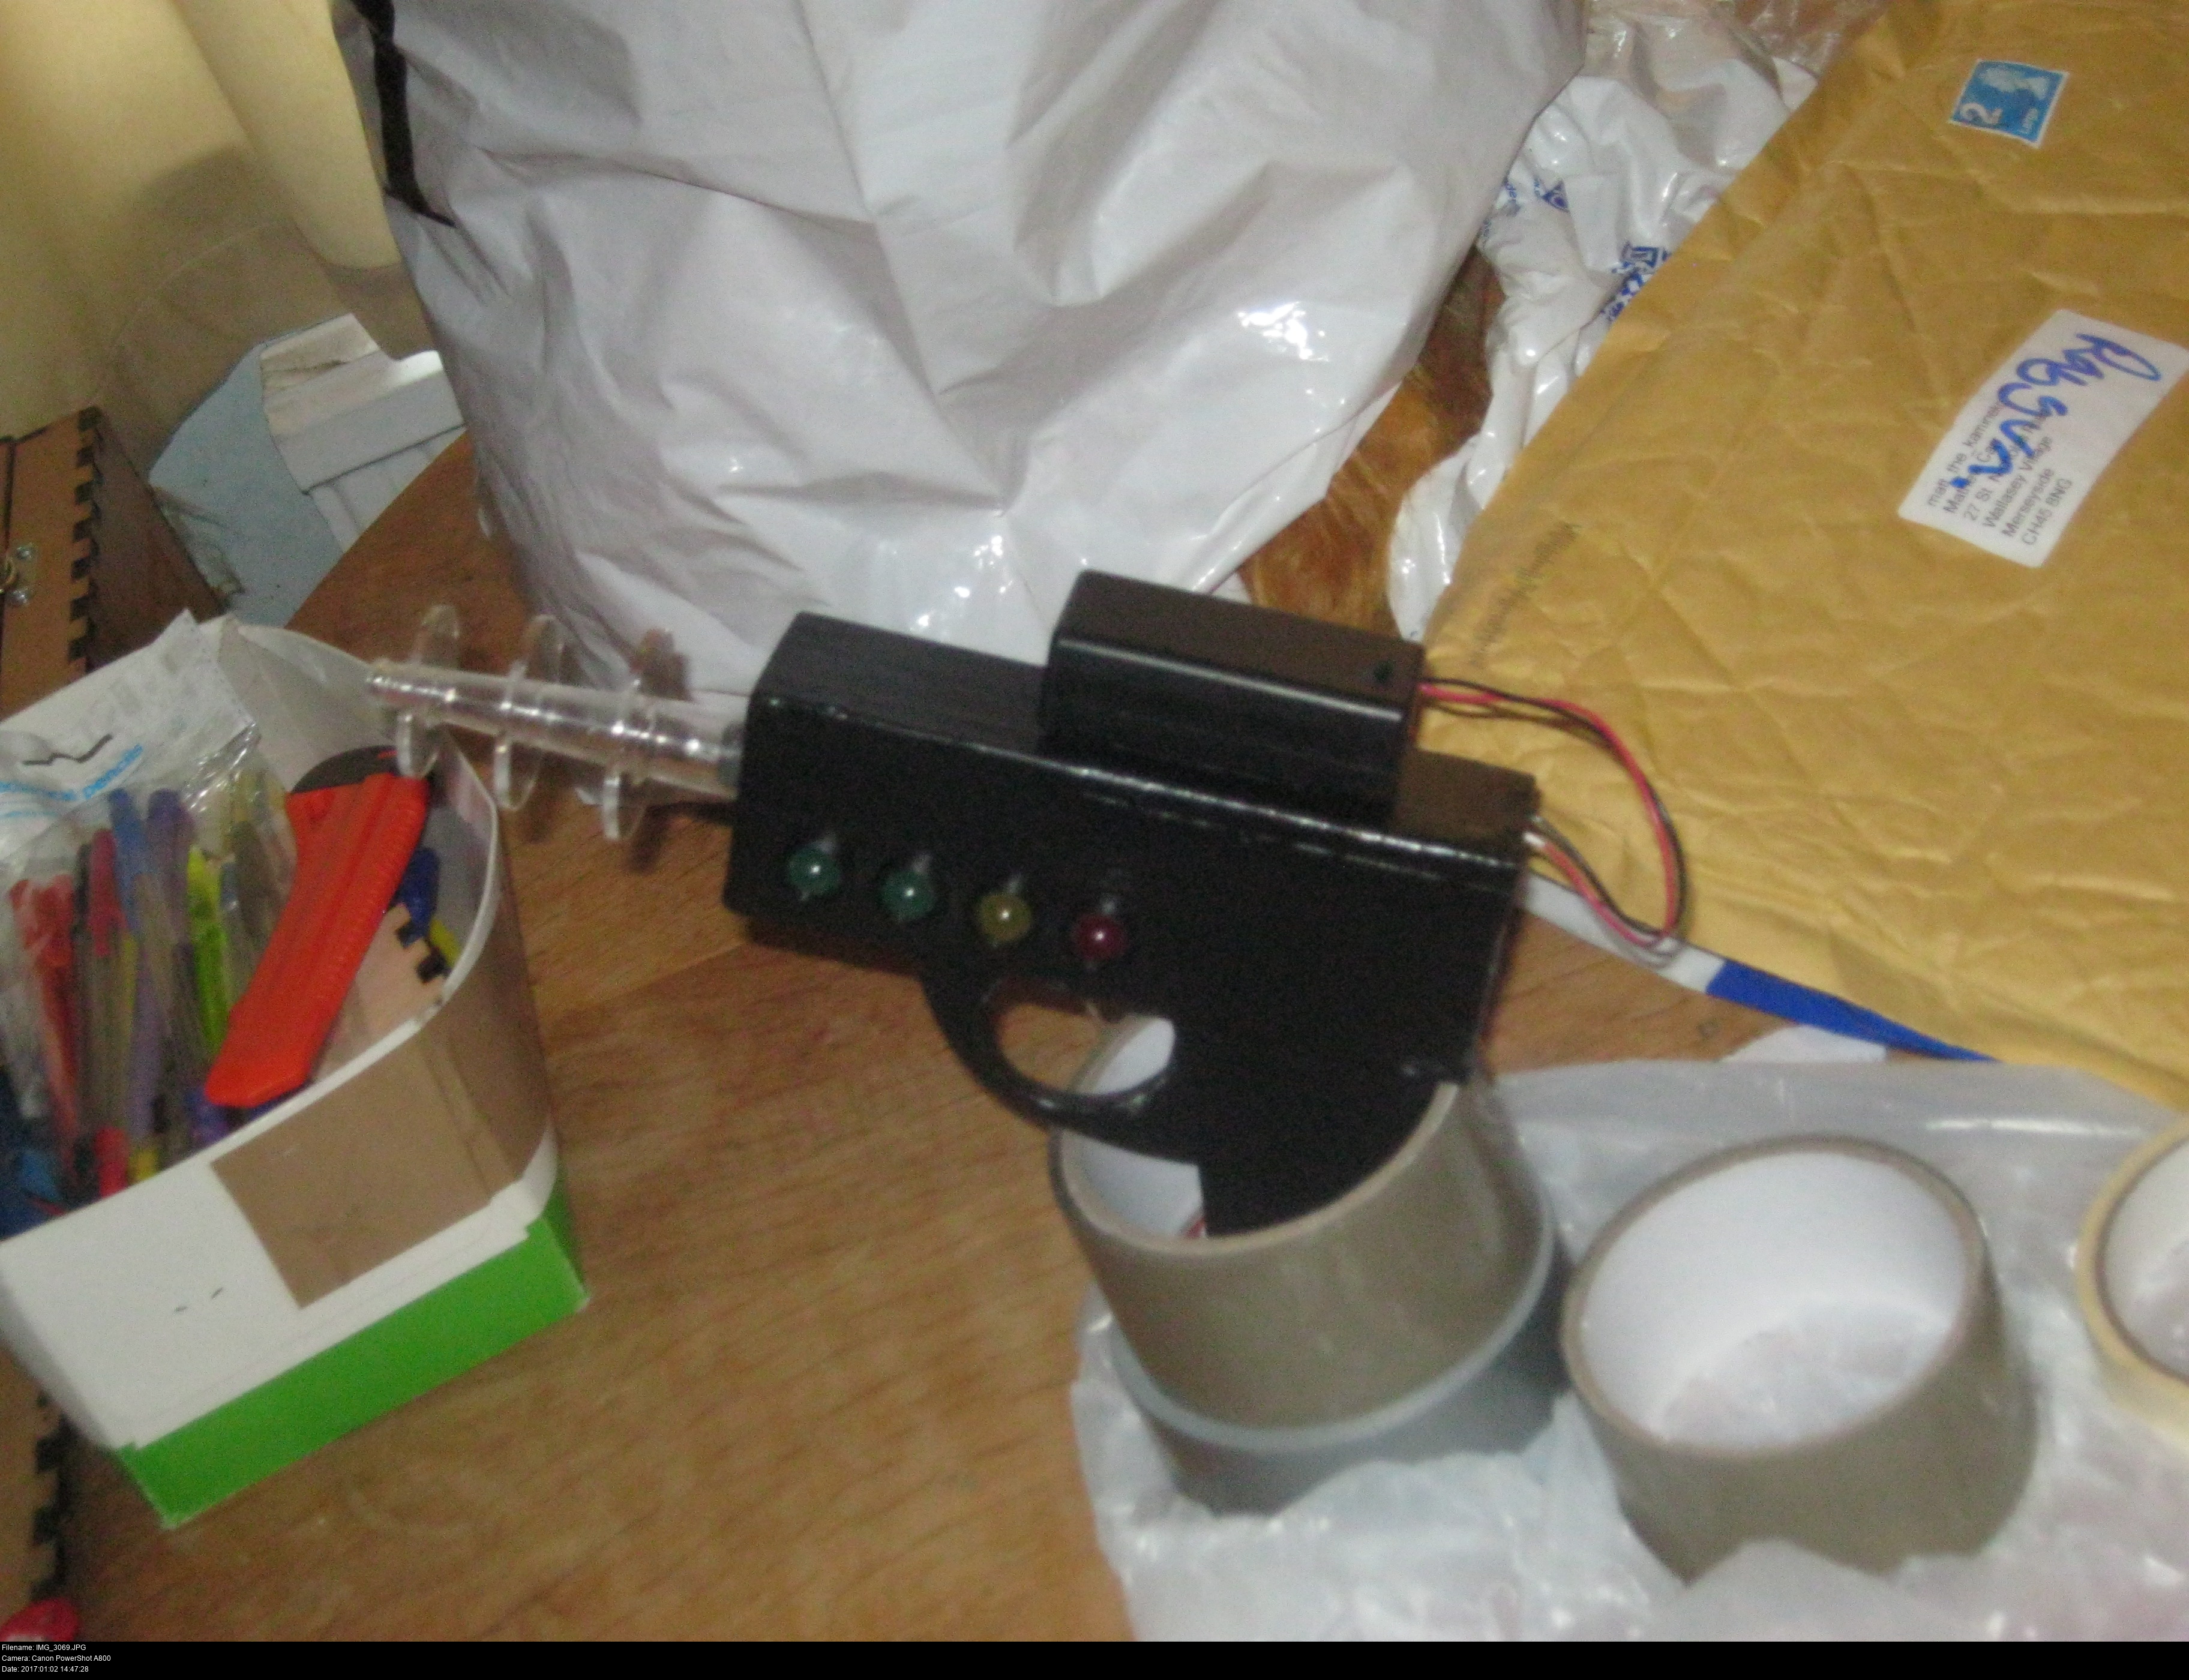
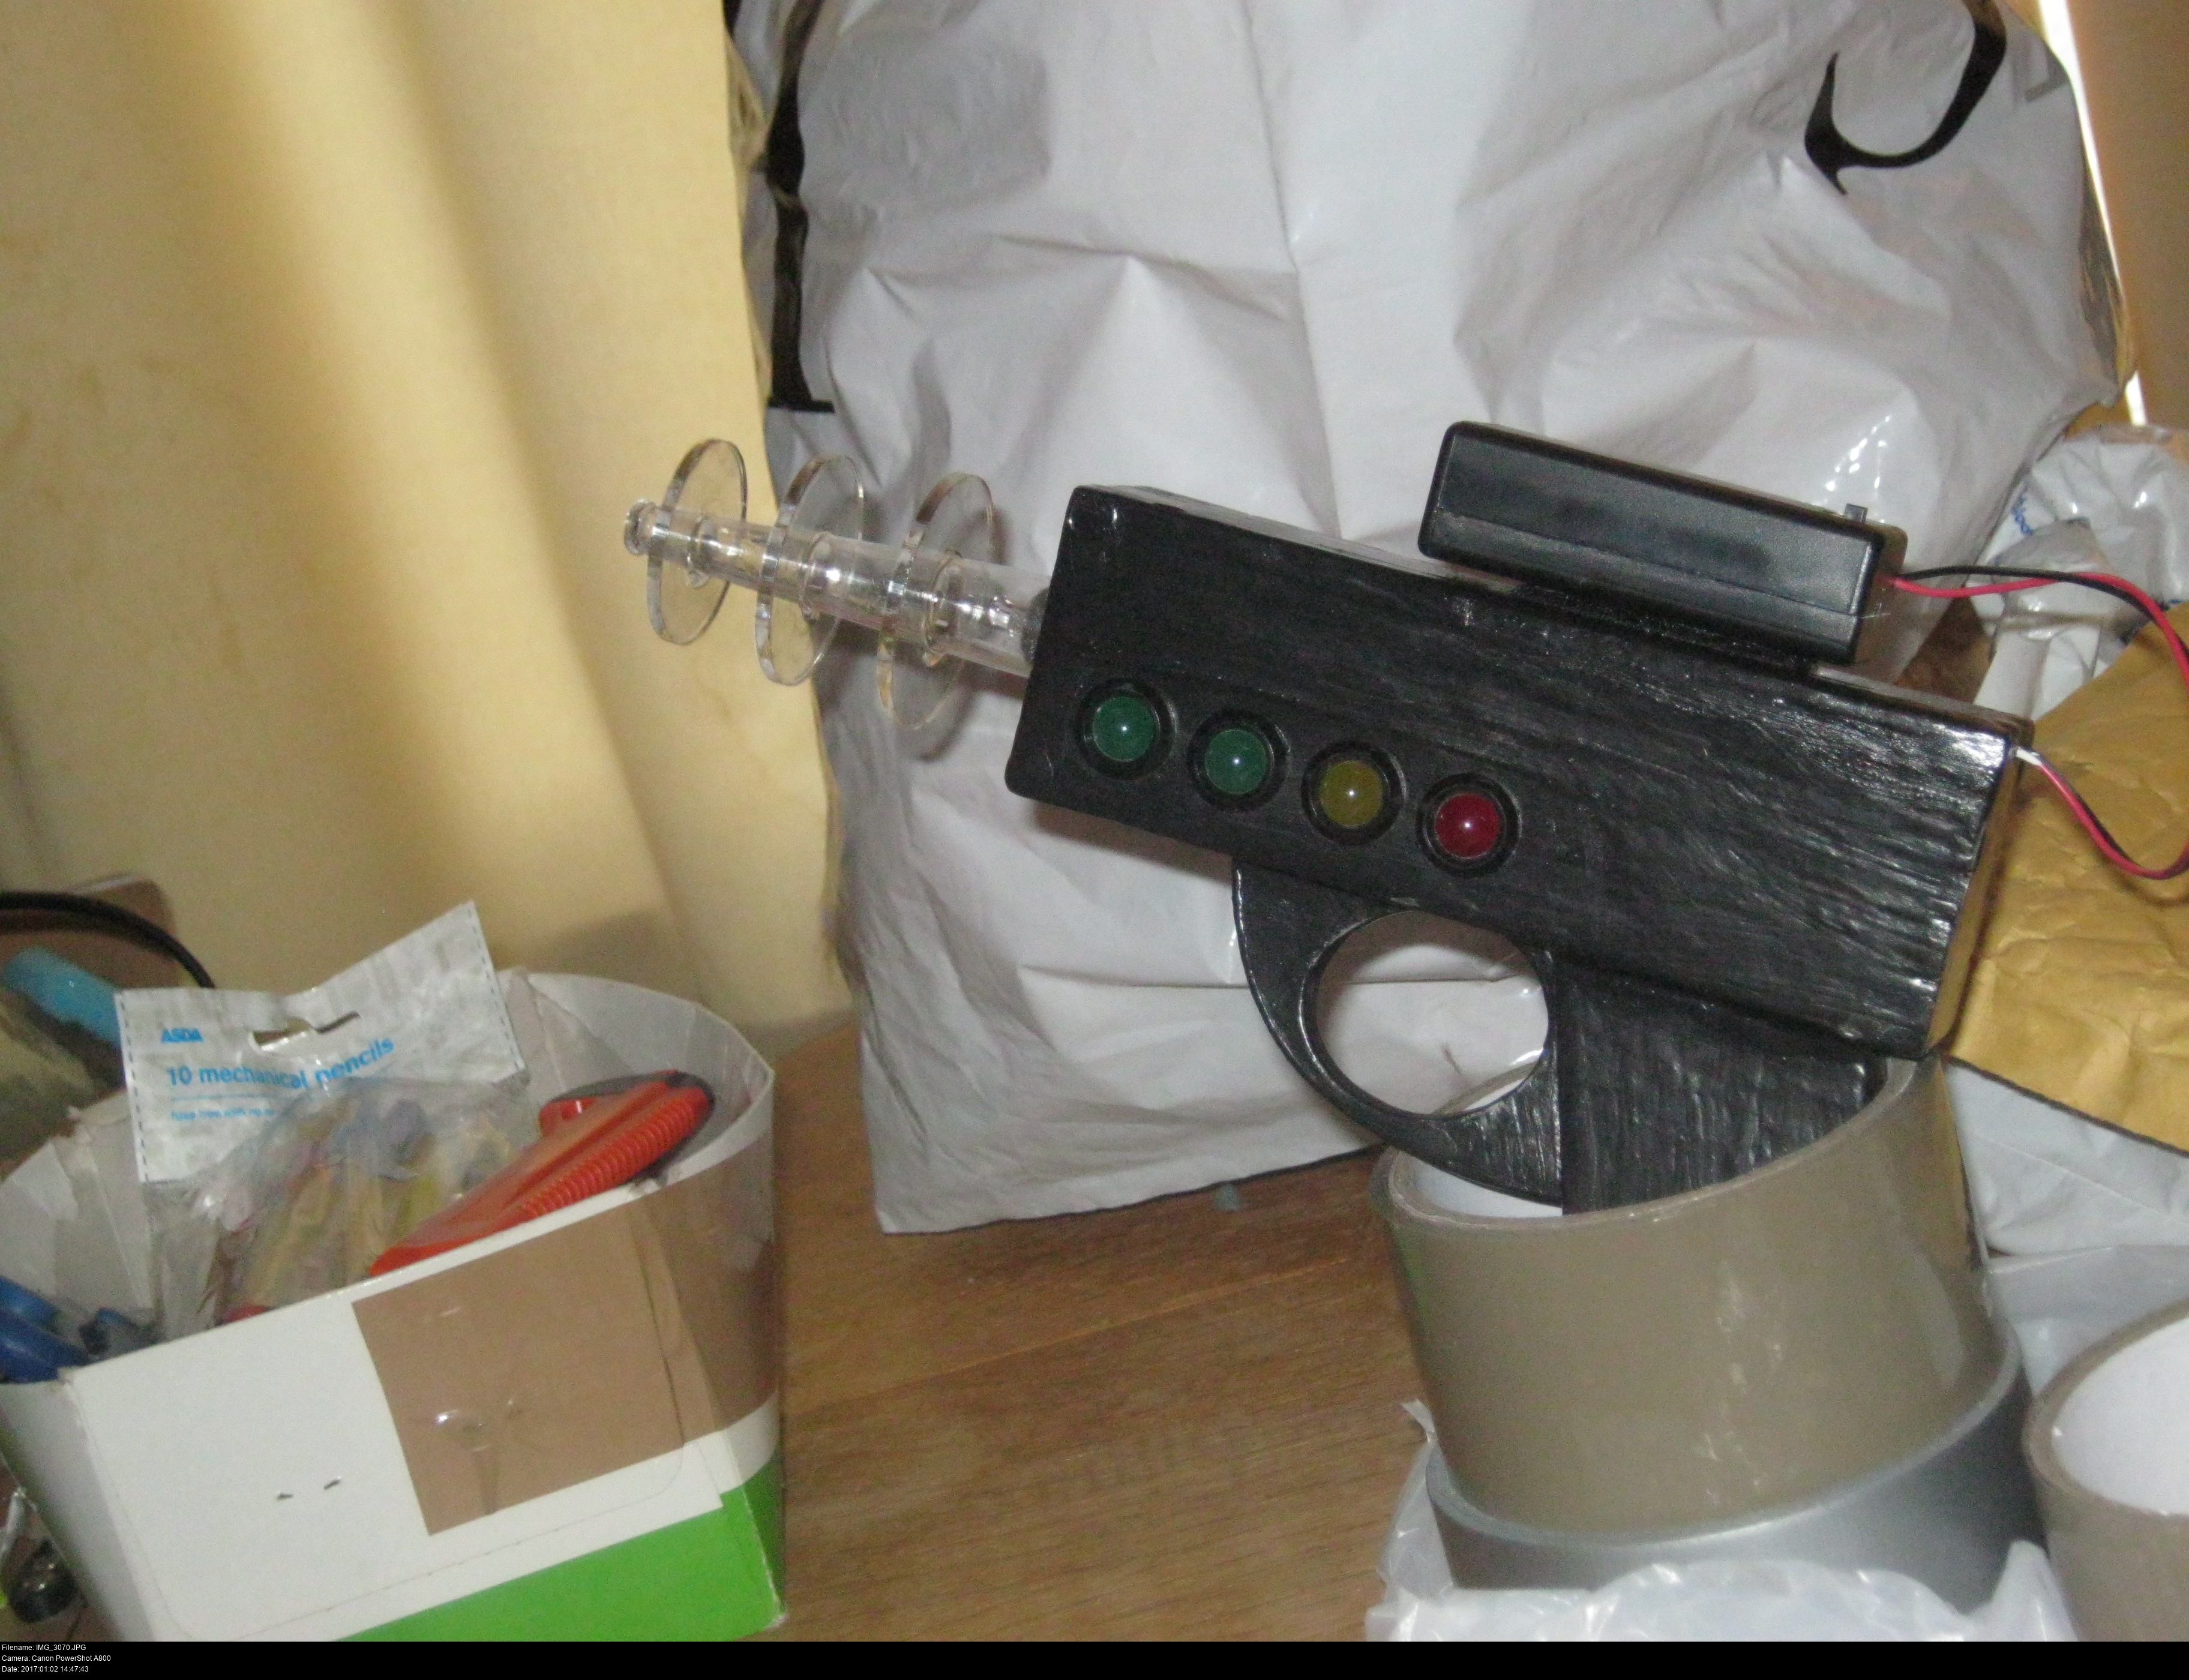

All that's left is to glue on the raygun emitter barrel discs. I've tried a few different types of glue and astonishingly the only type that's remotely suitable is UHU All Purpose Glue which I've previous tried and failed to find a use for dozens of times. But in this case, a colourless, transparent super-glue-like glue that dries to a mostly-hard-but-slightly-tacky finish that works on these two plastics is what I need. I've forced the discs into position on the barrel (so the tension holds them tight) and applied as little glue as I can. Once they're dried I can repeat the glue to make the bond stronger.
You might be wondering what I did about the trigger. I didn't put a trigger on the gun. It doesn't need one. It wouldn't trigger anything and it would just make the gun harder to hold. Plus if anybody searches my bag (like as happened frequently throughout 2017) they won't freak out about my gun.
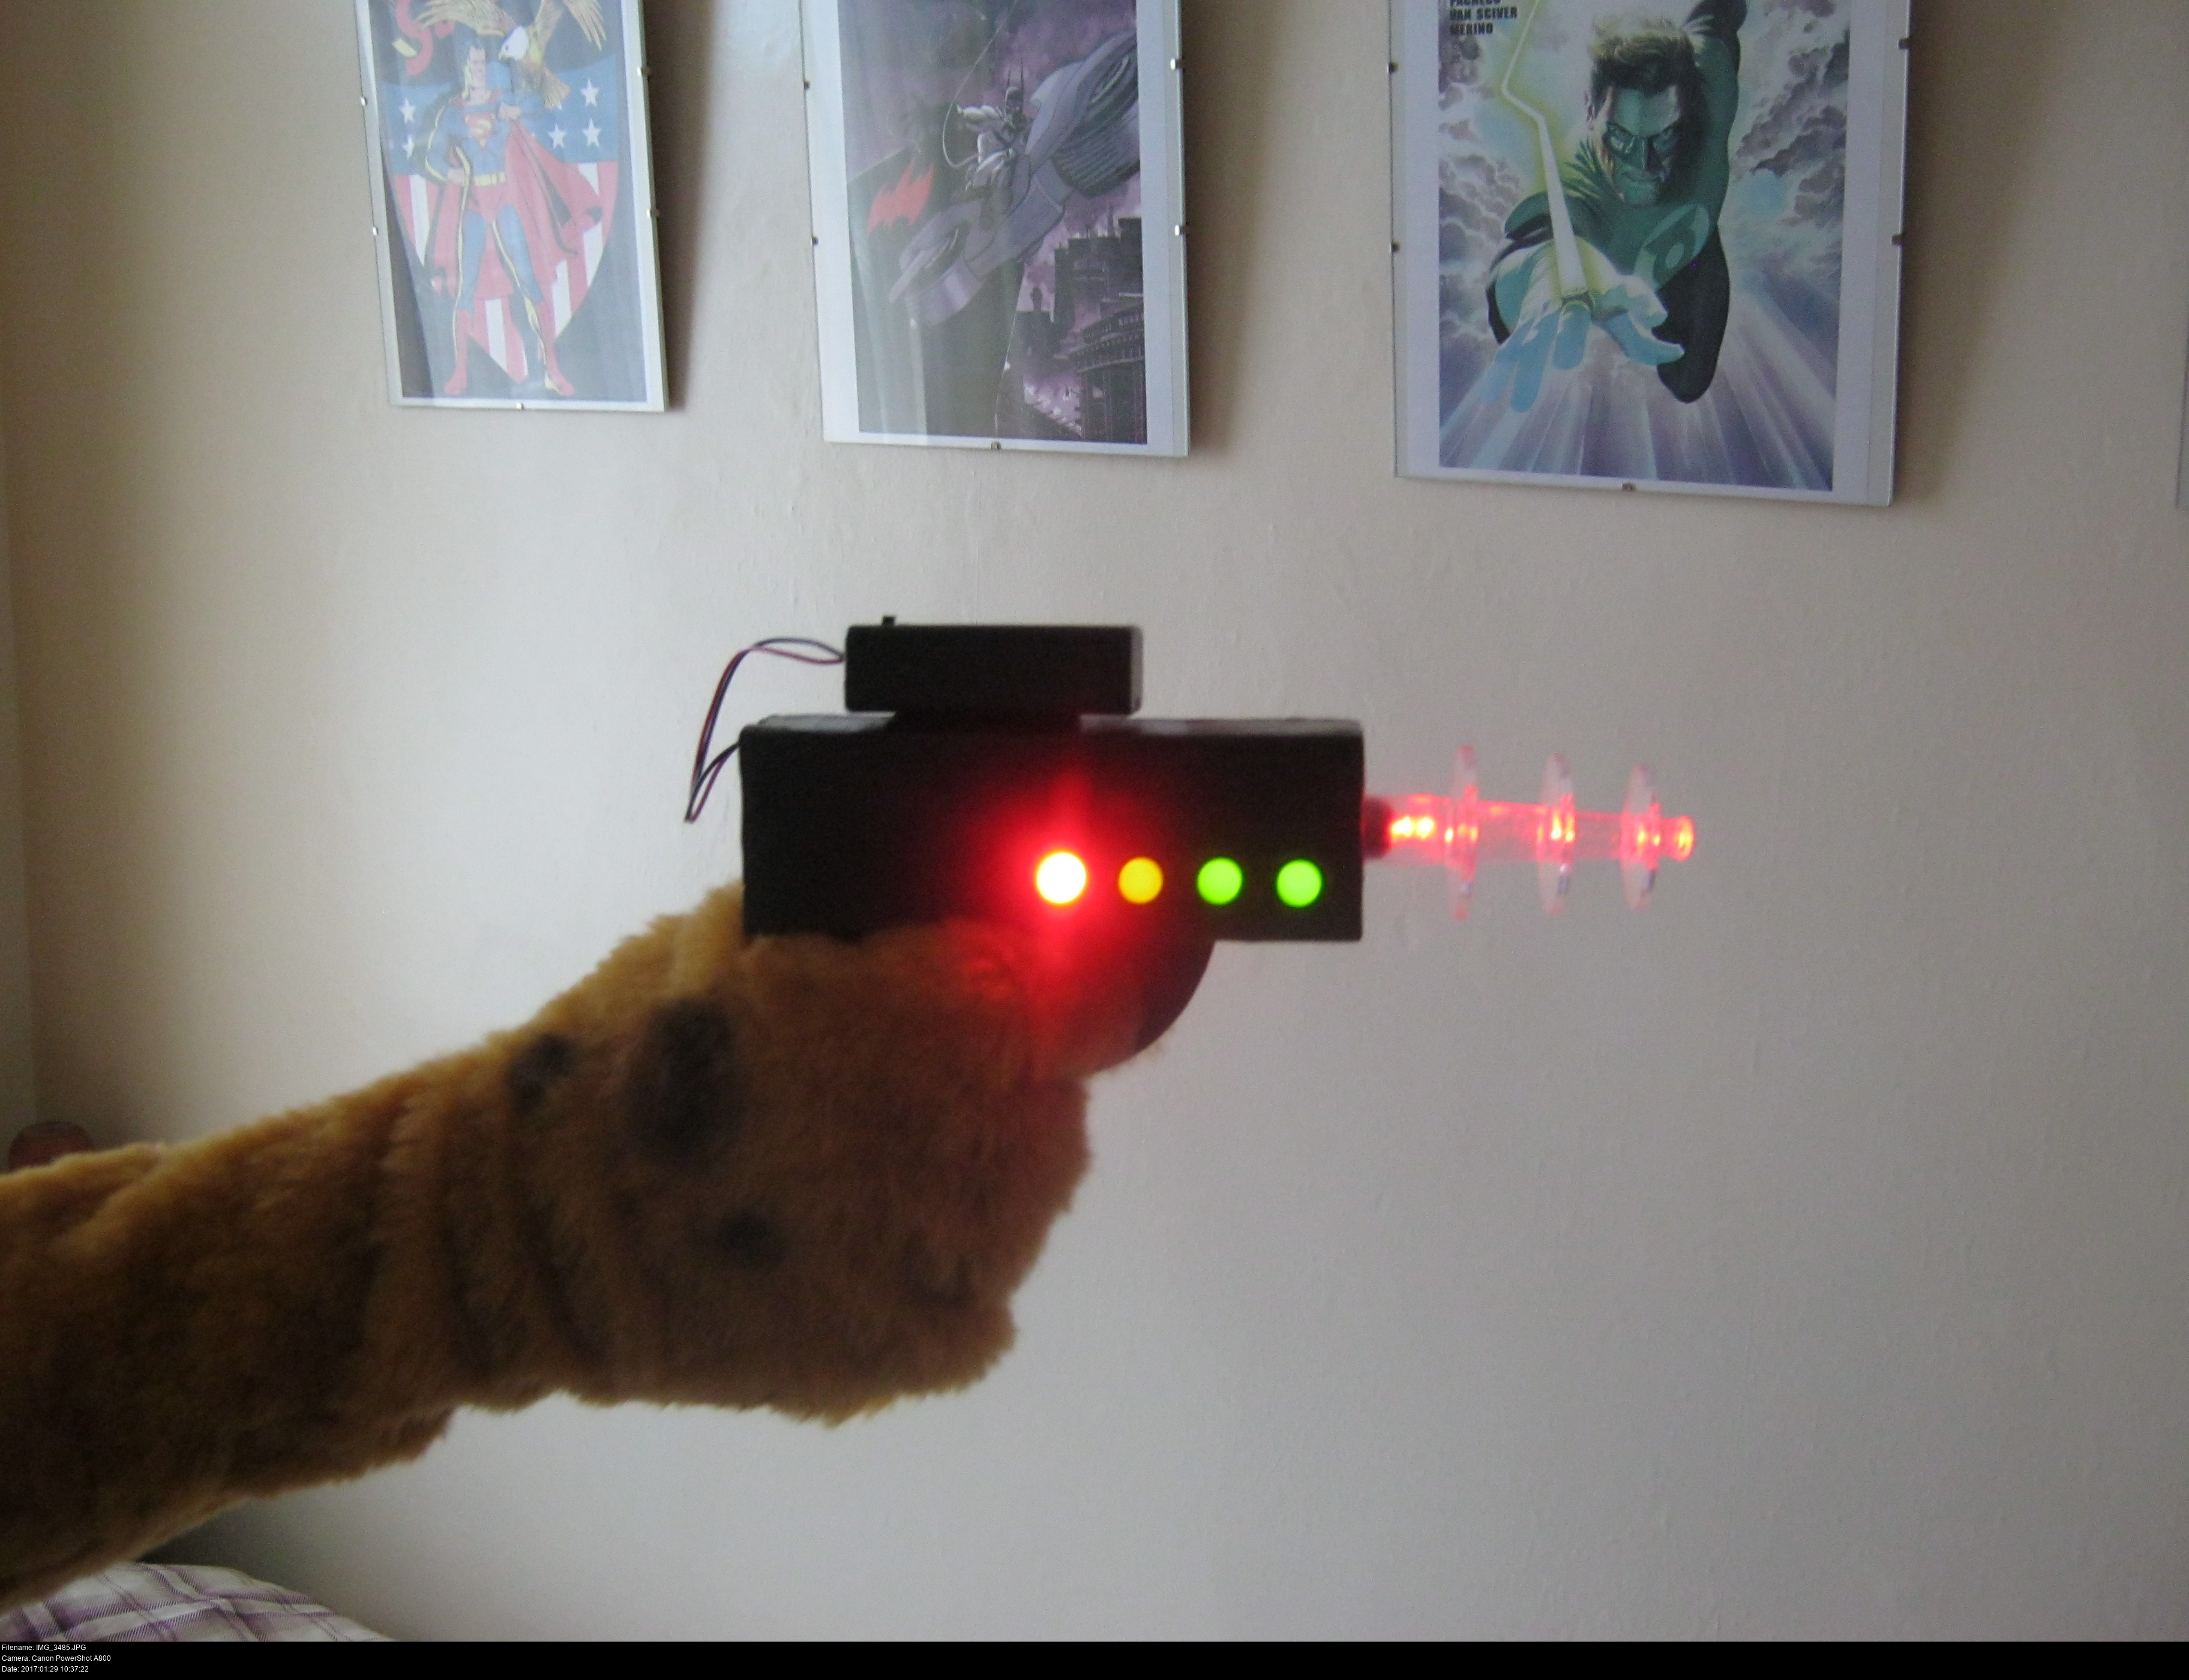
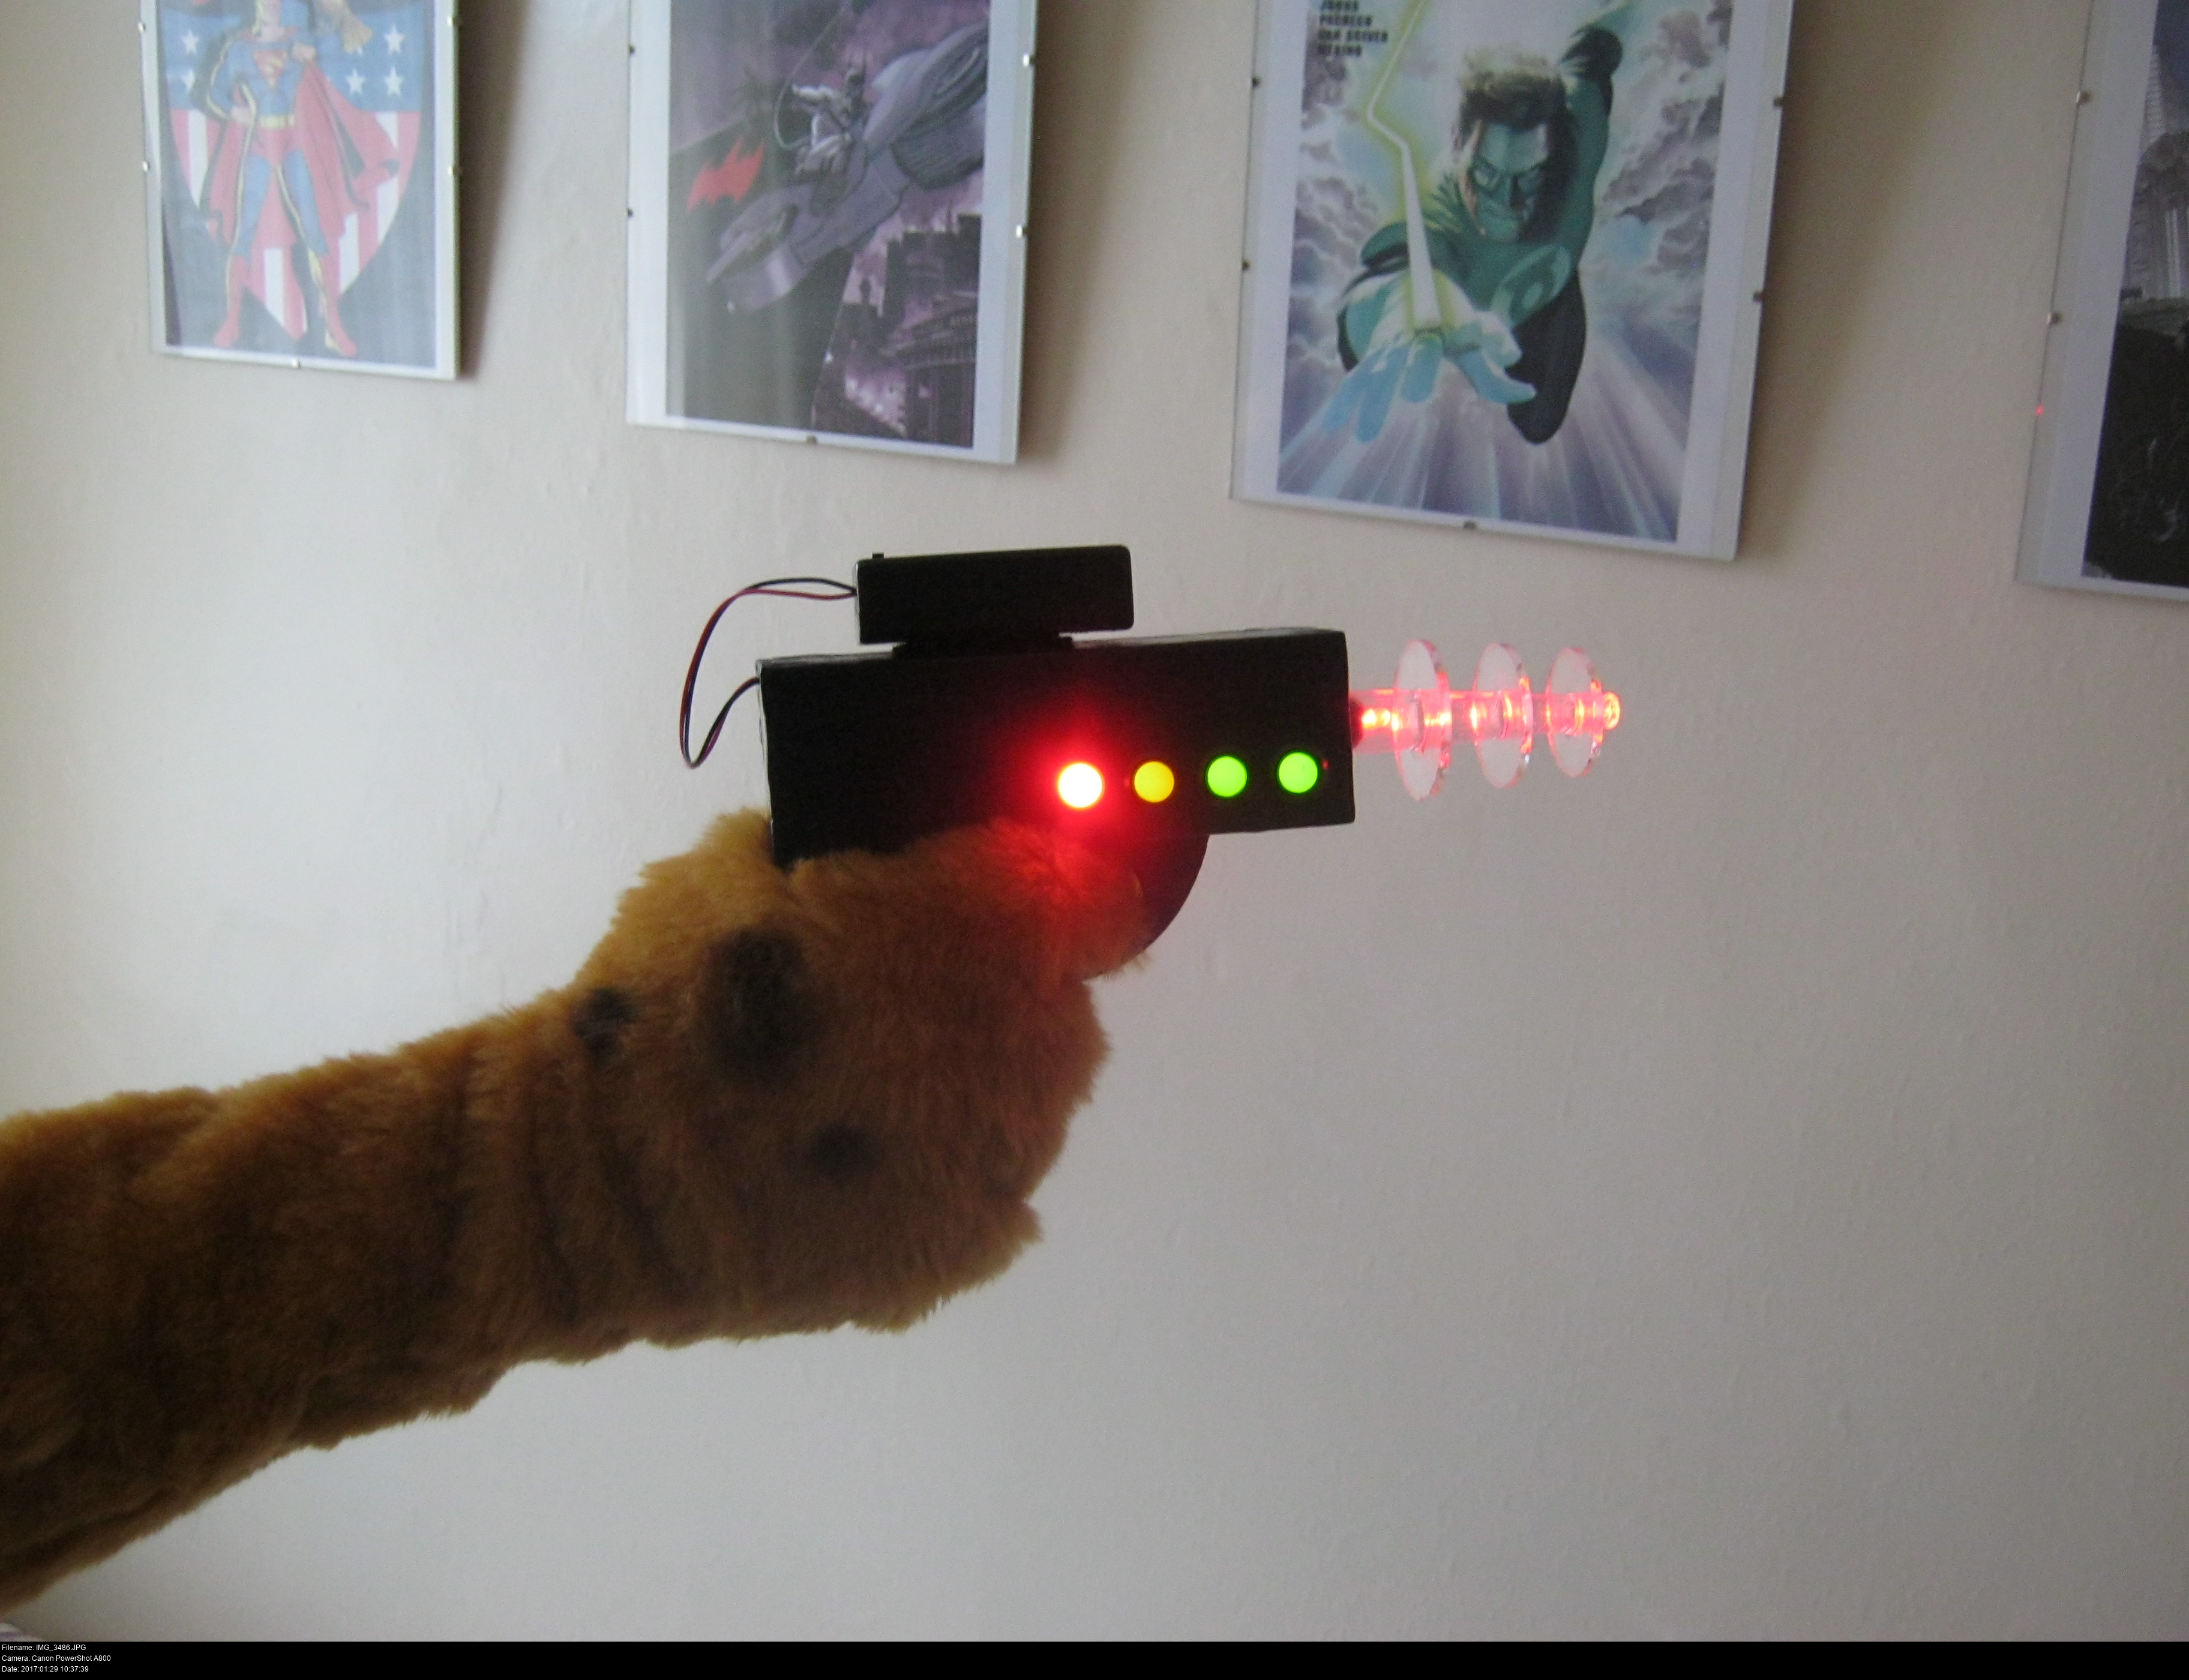
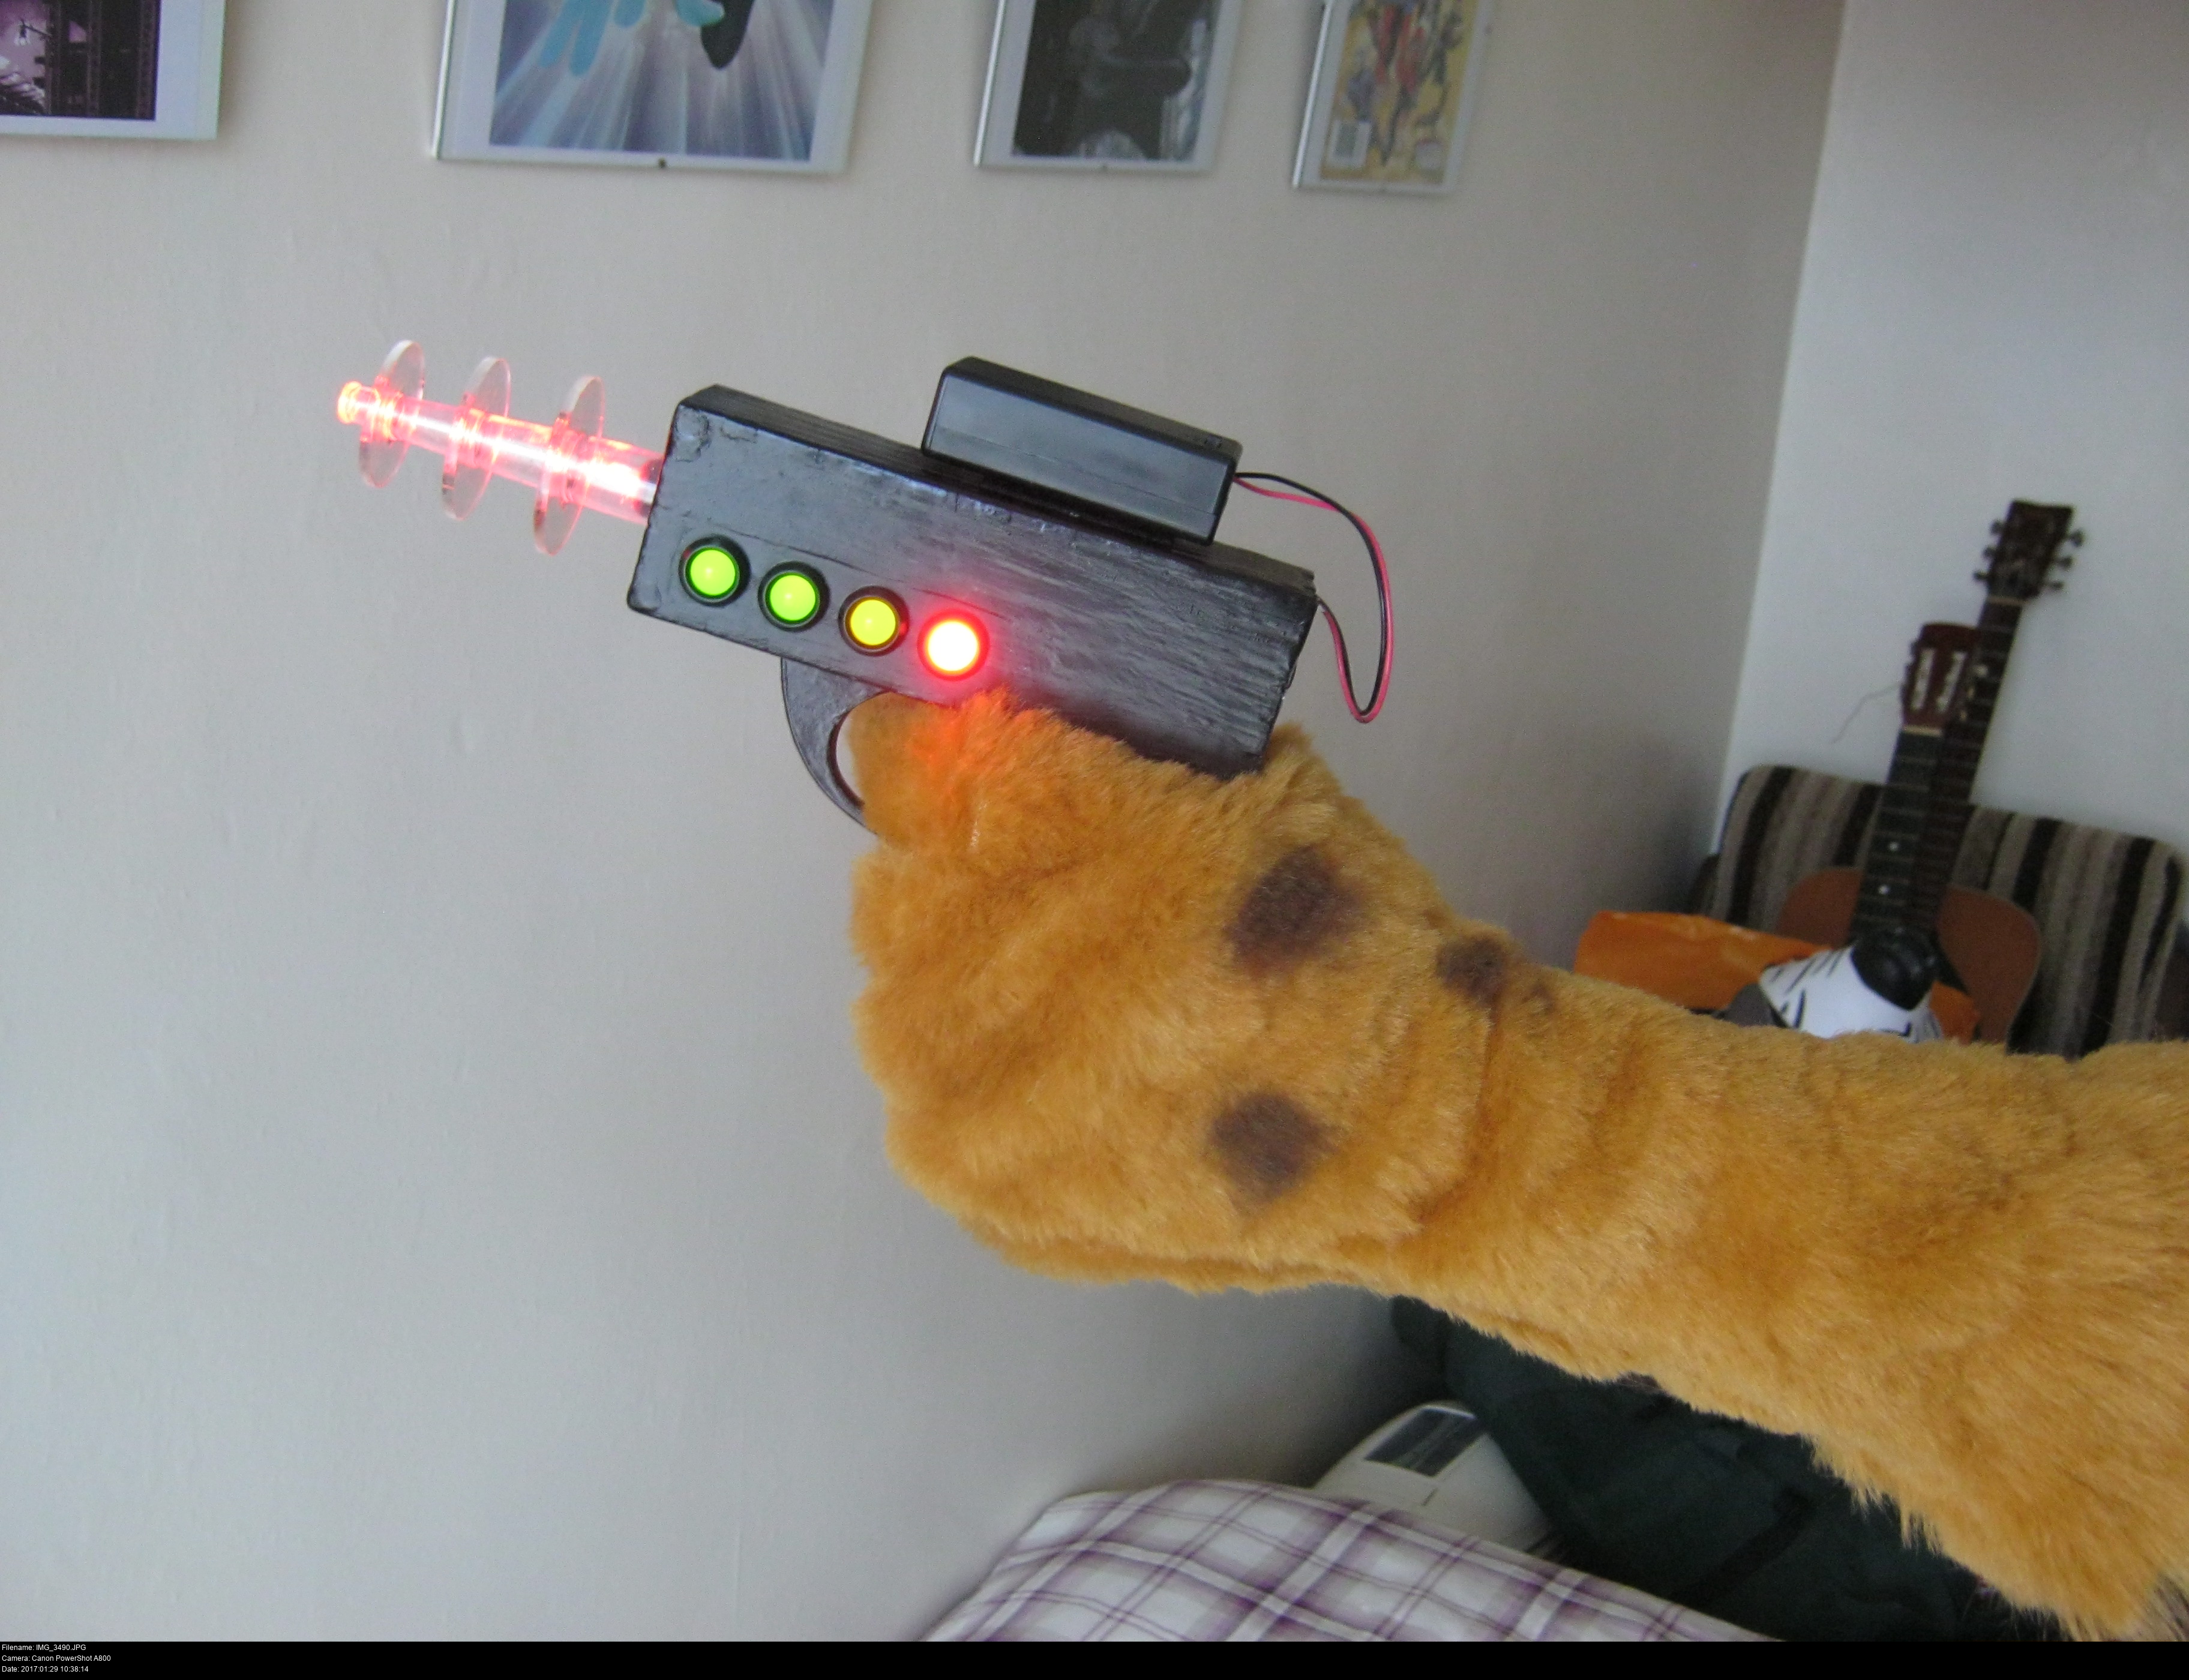
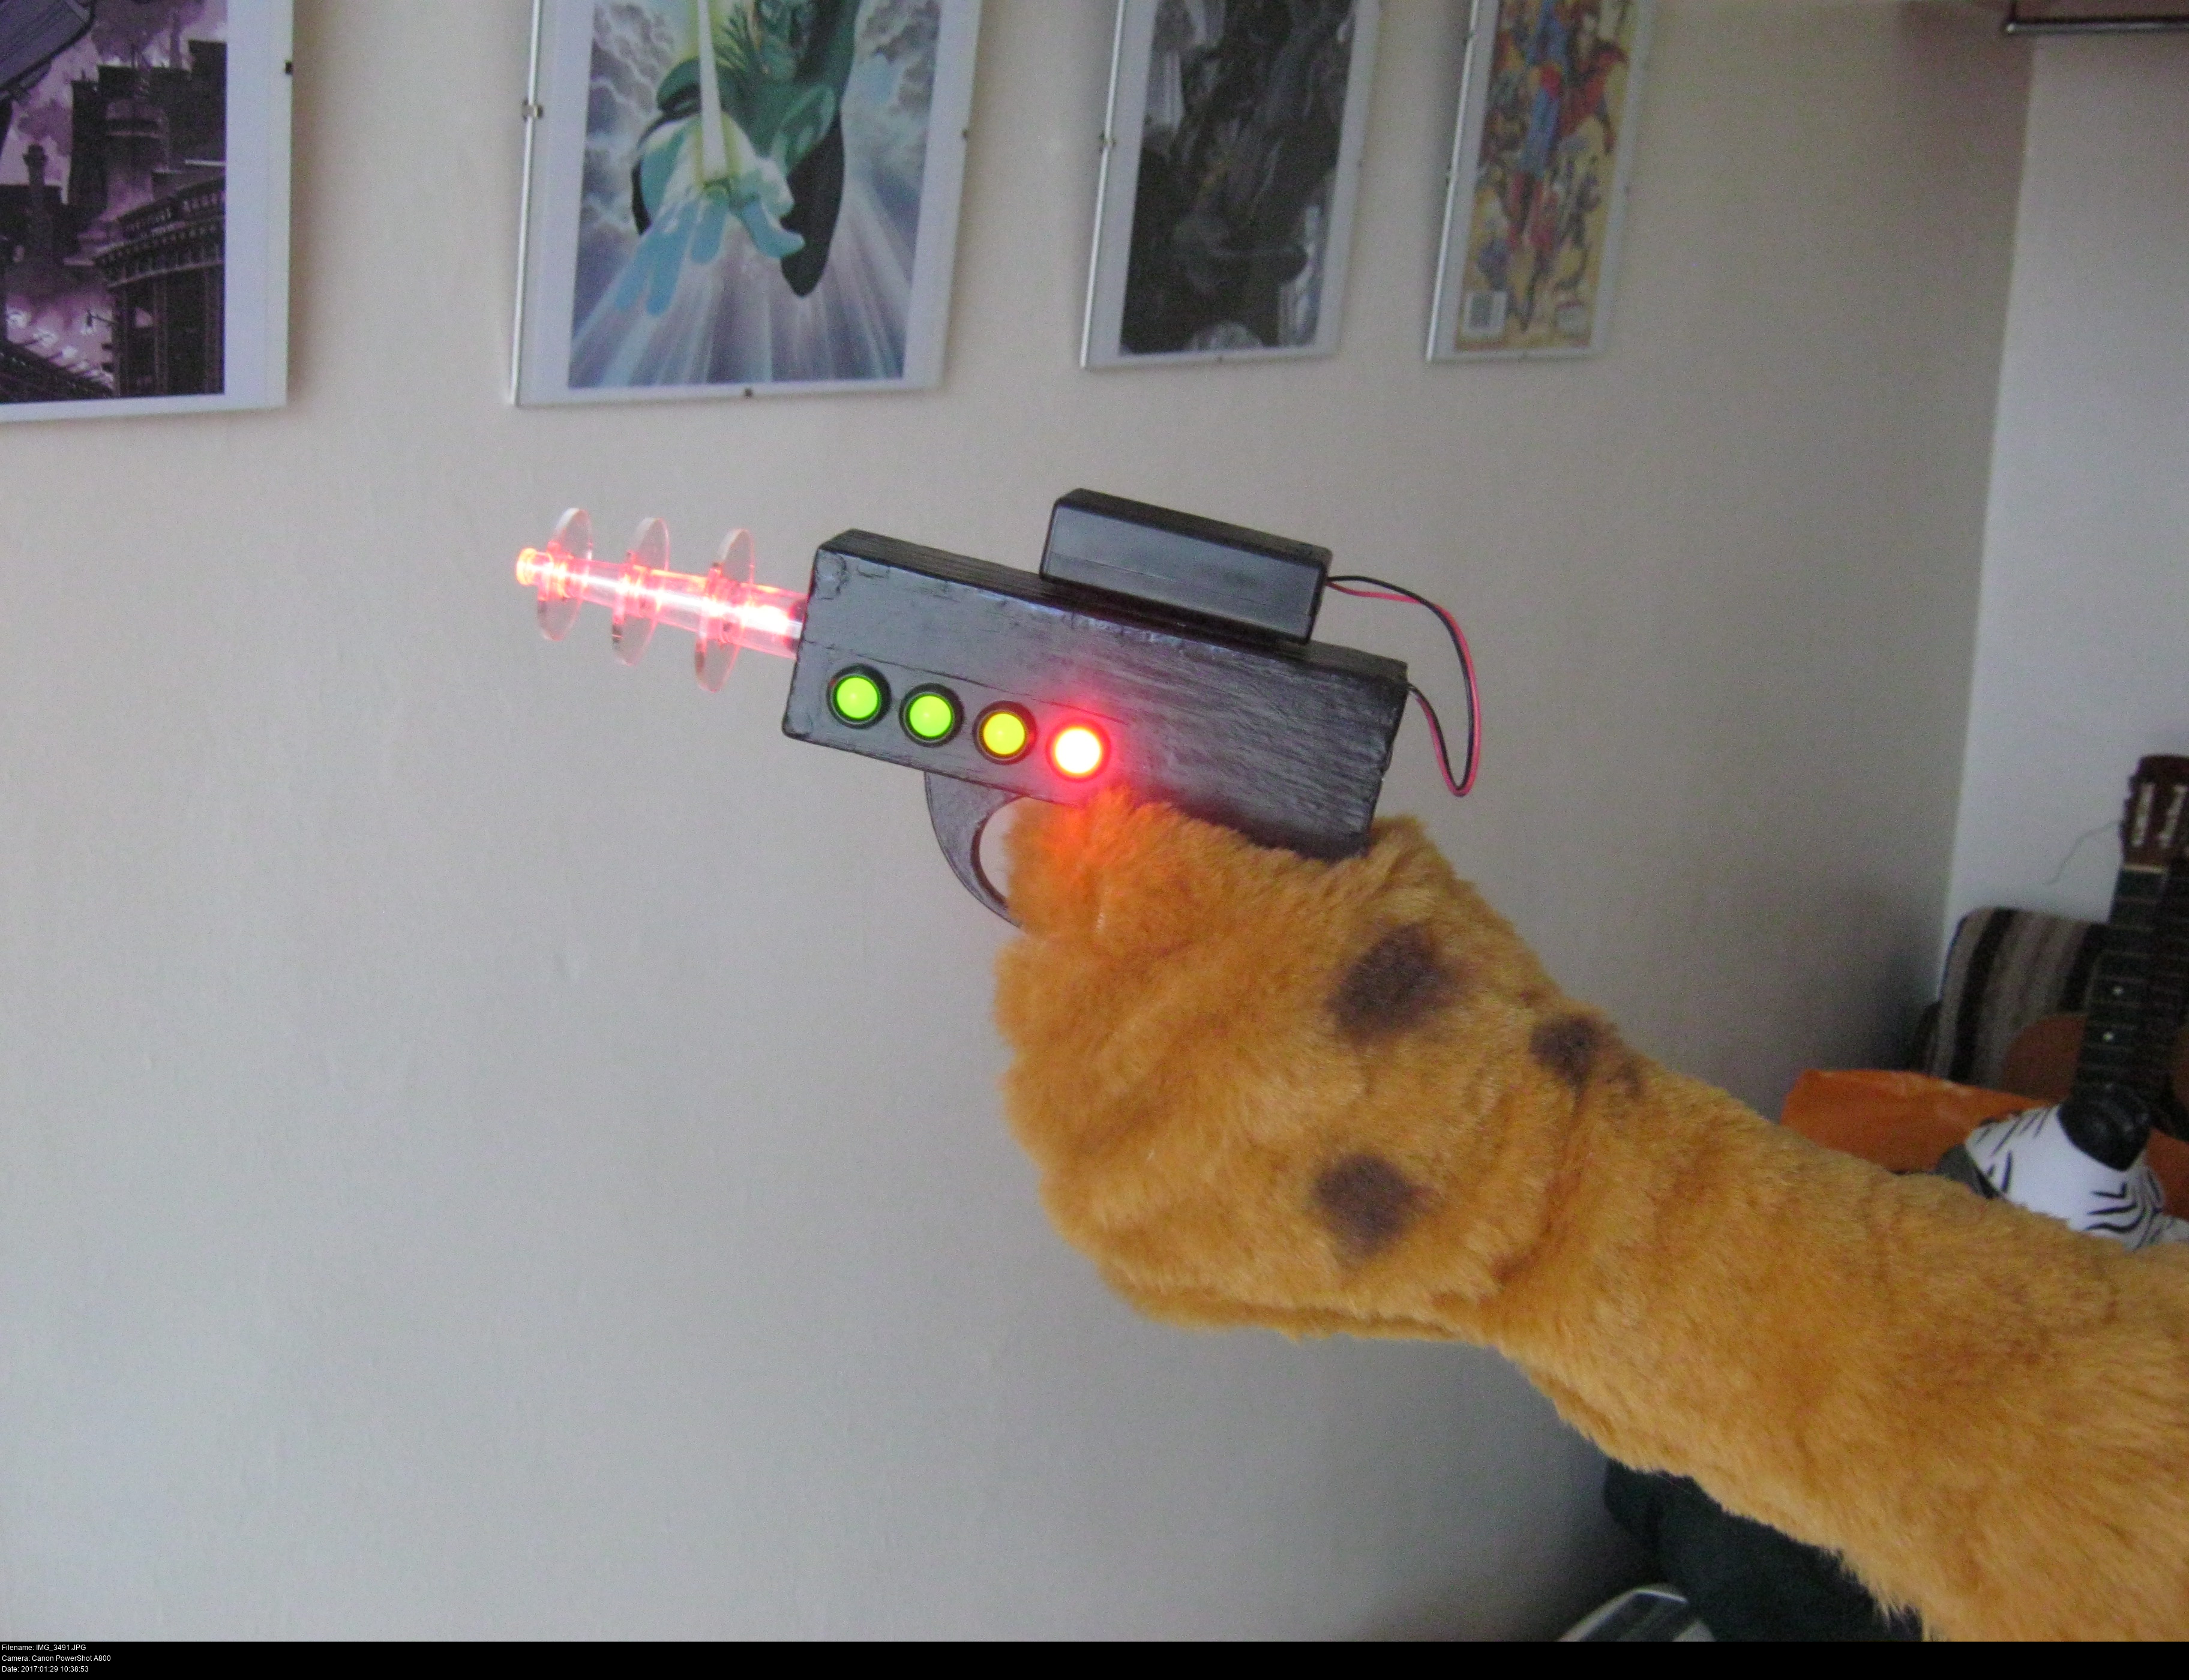
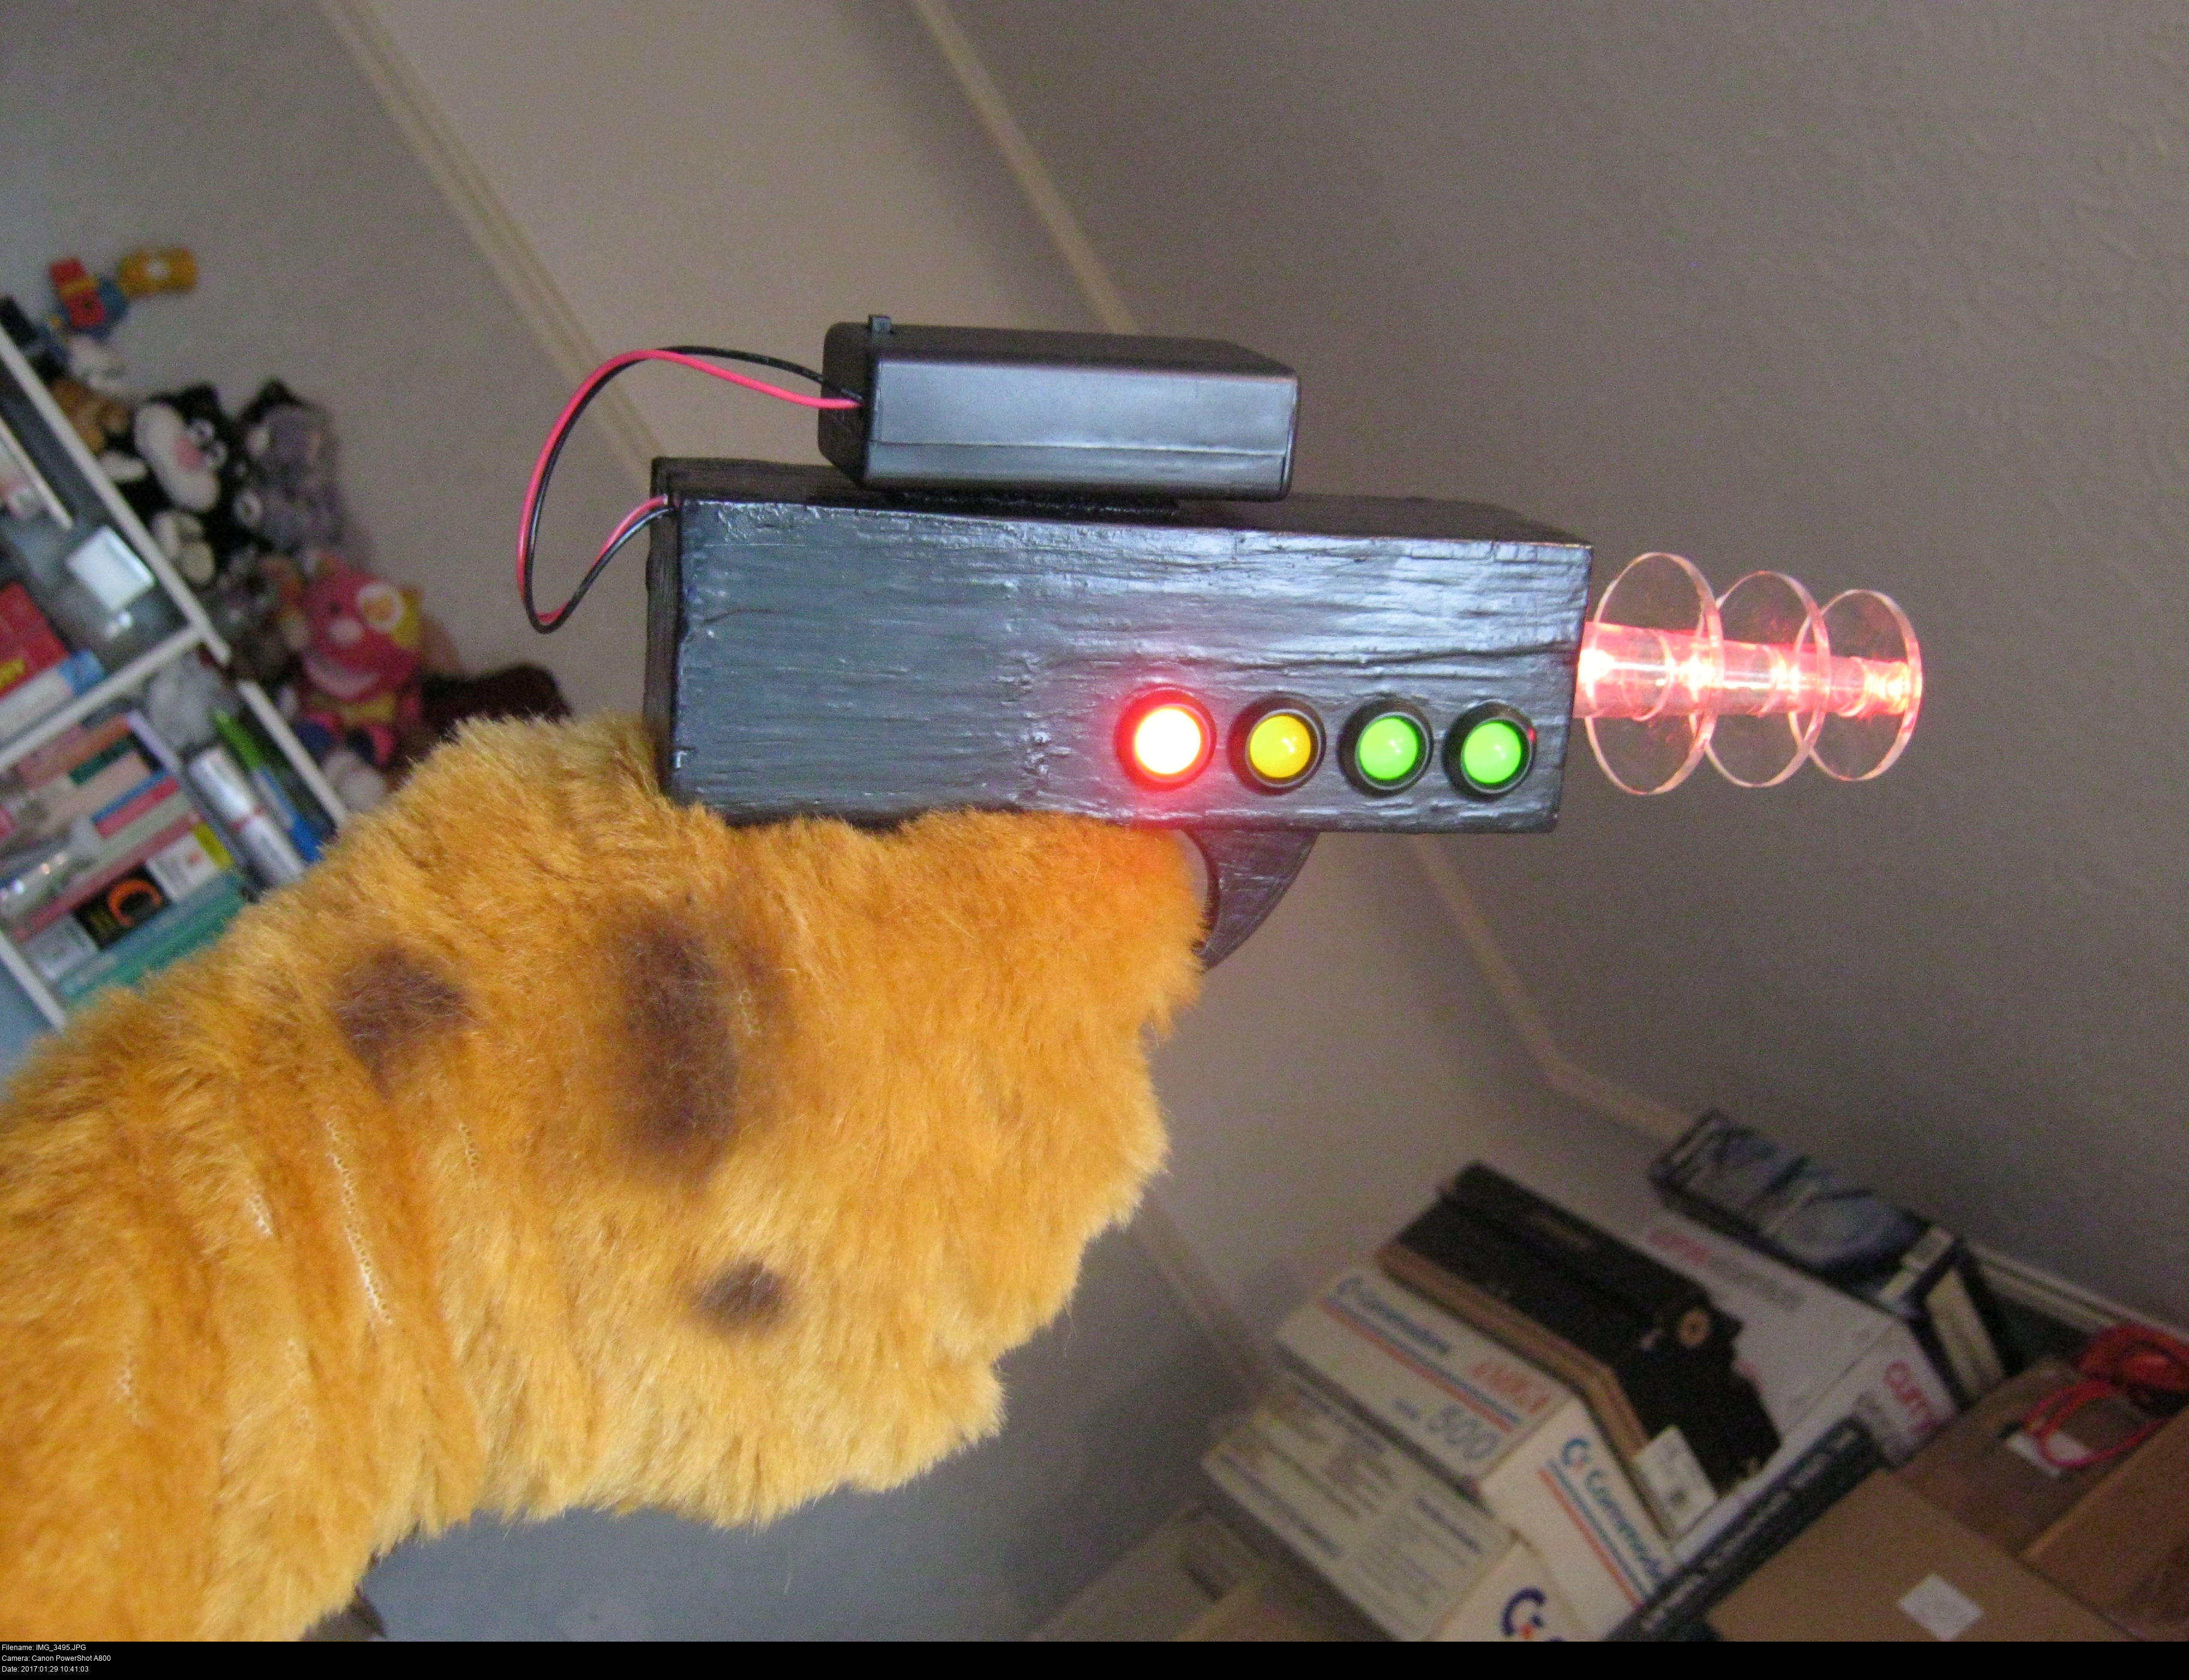
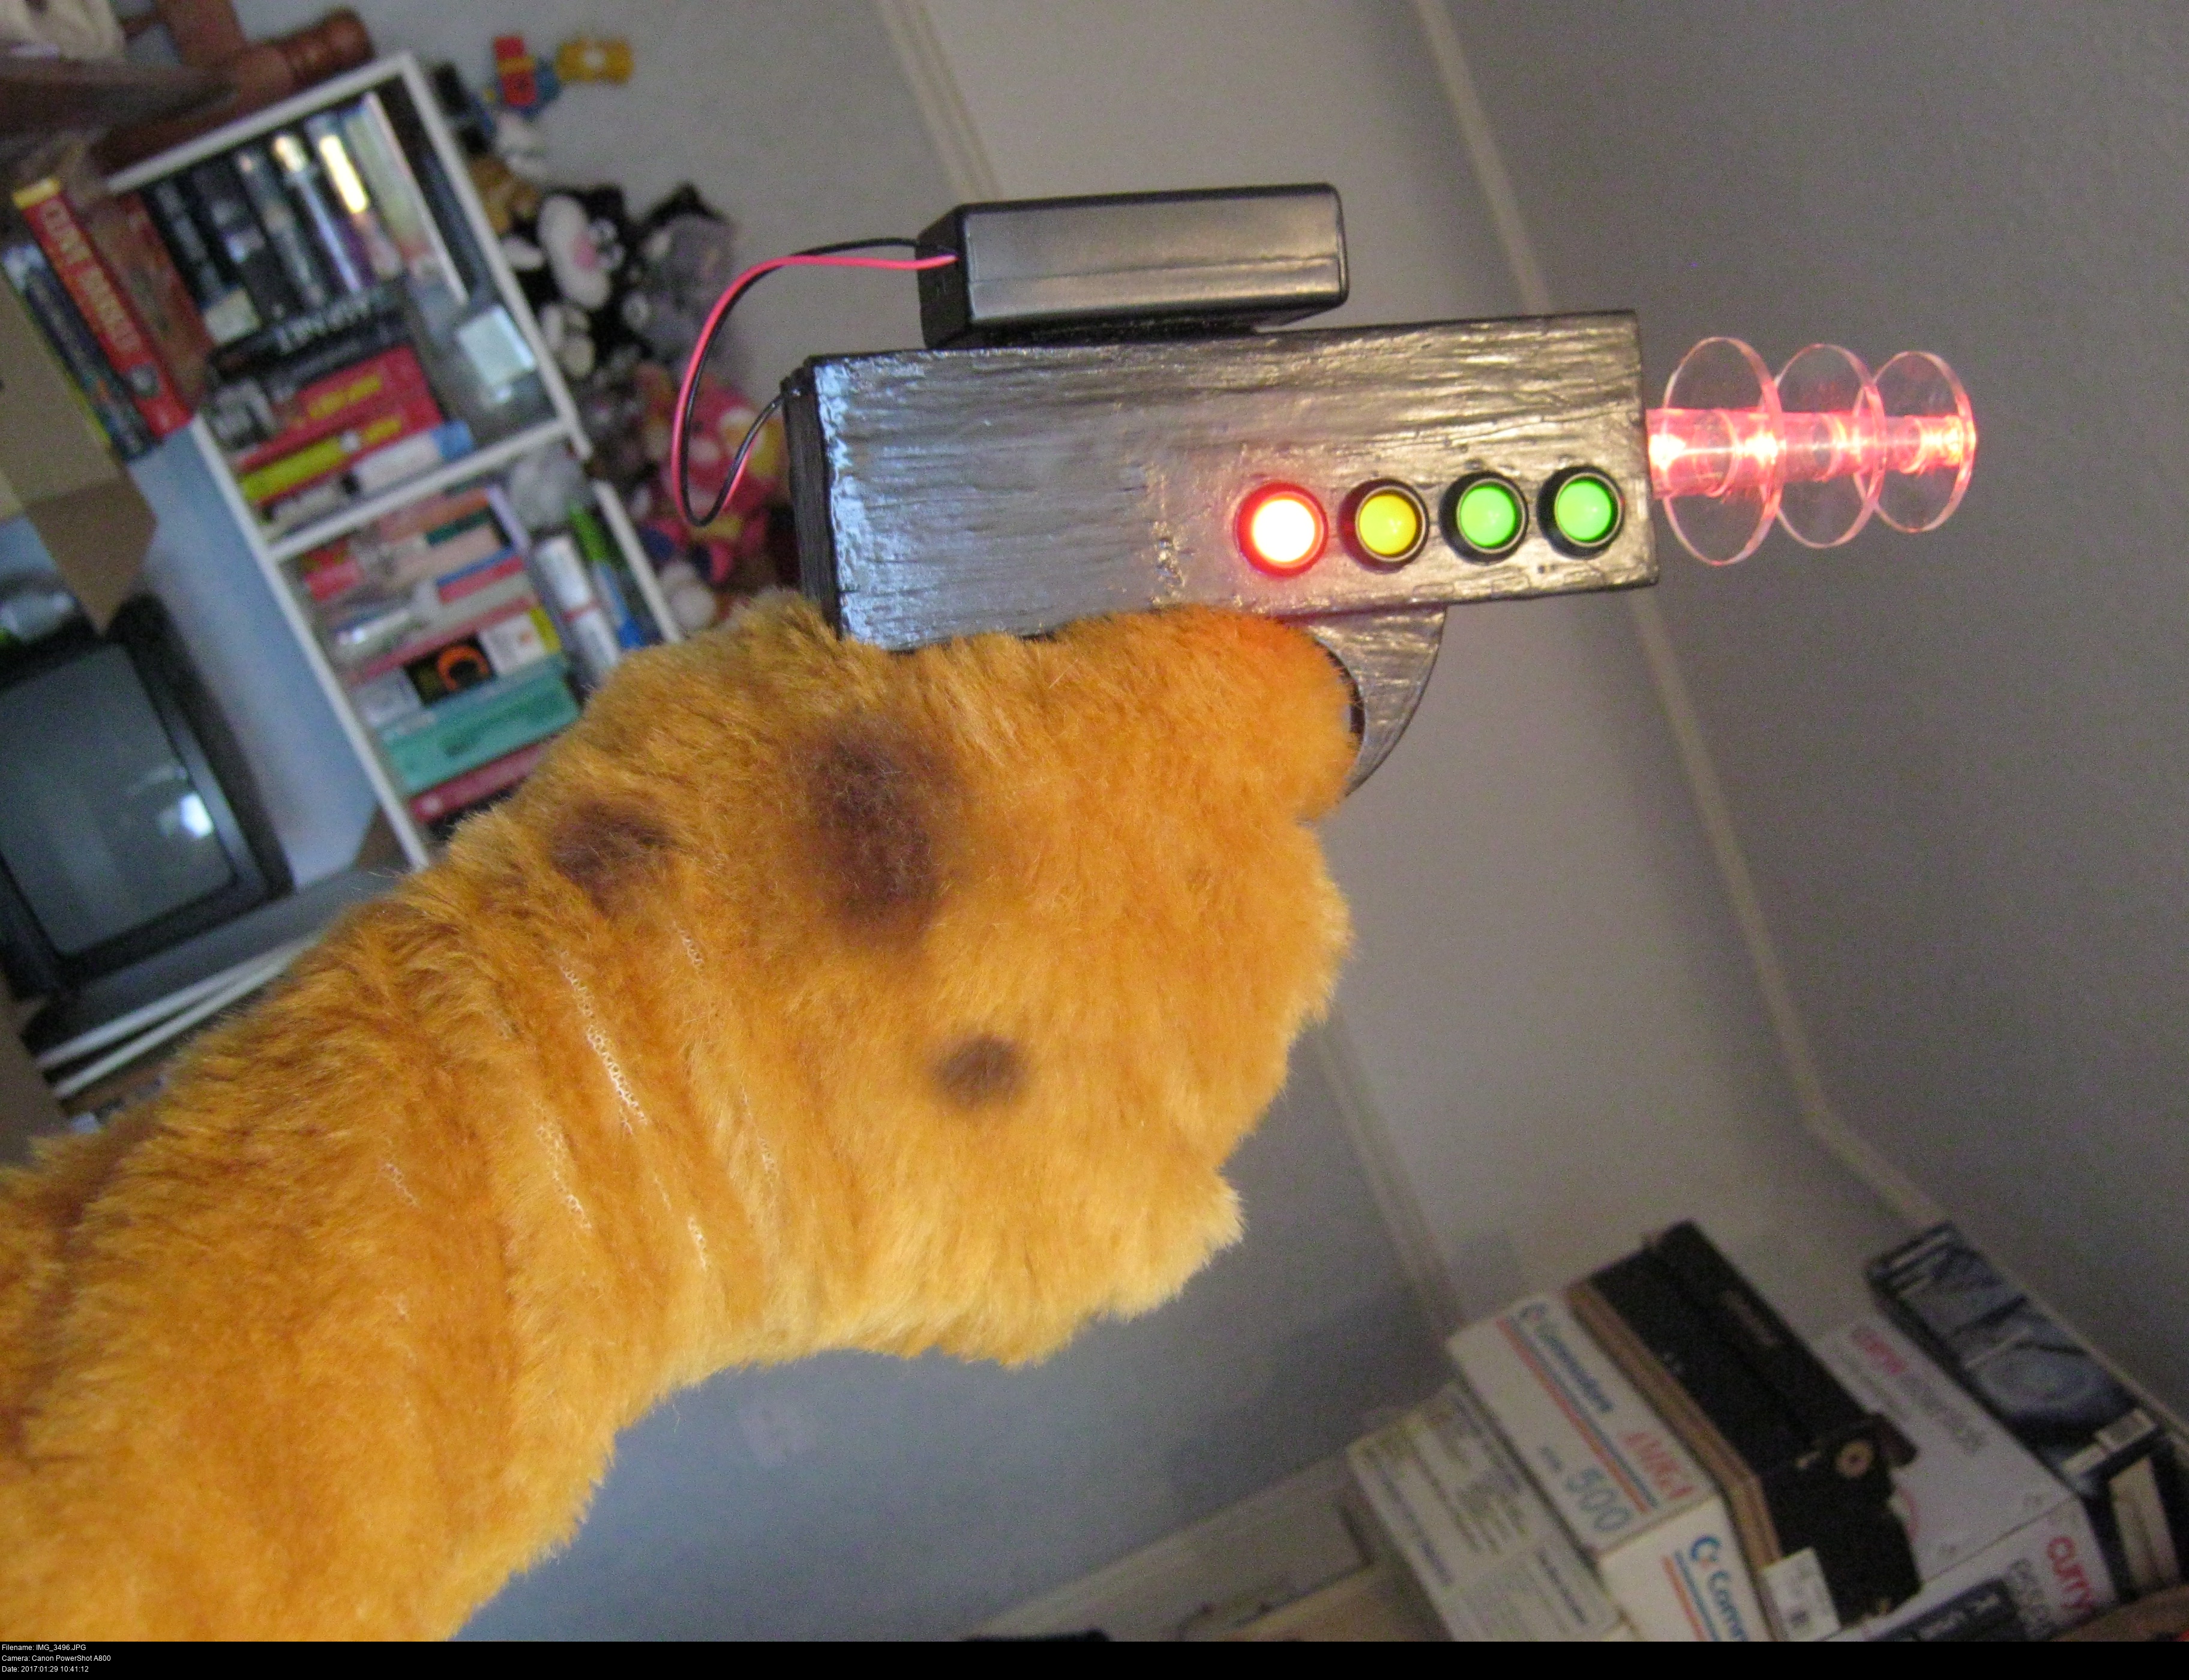
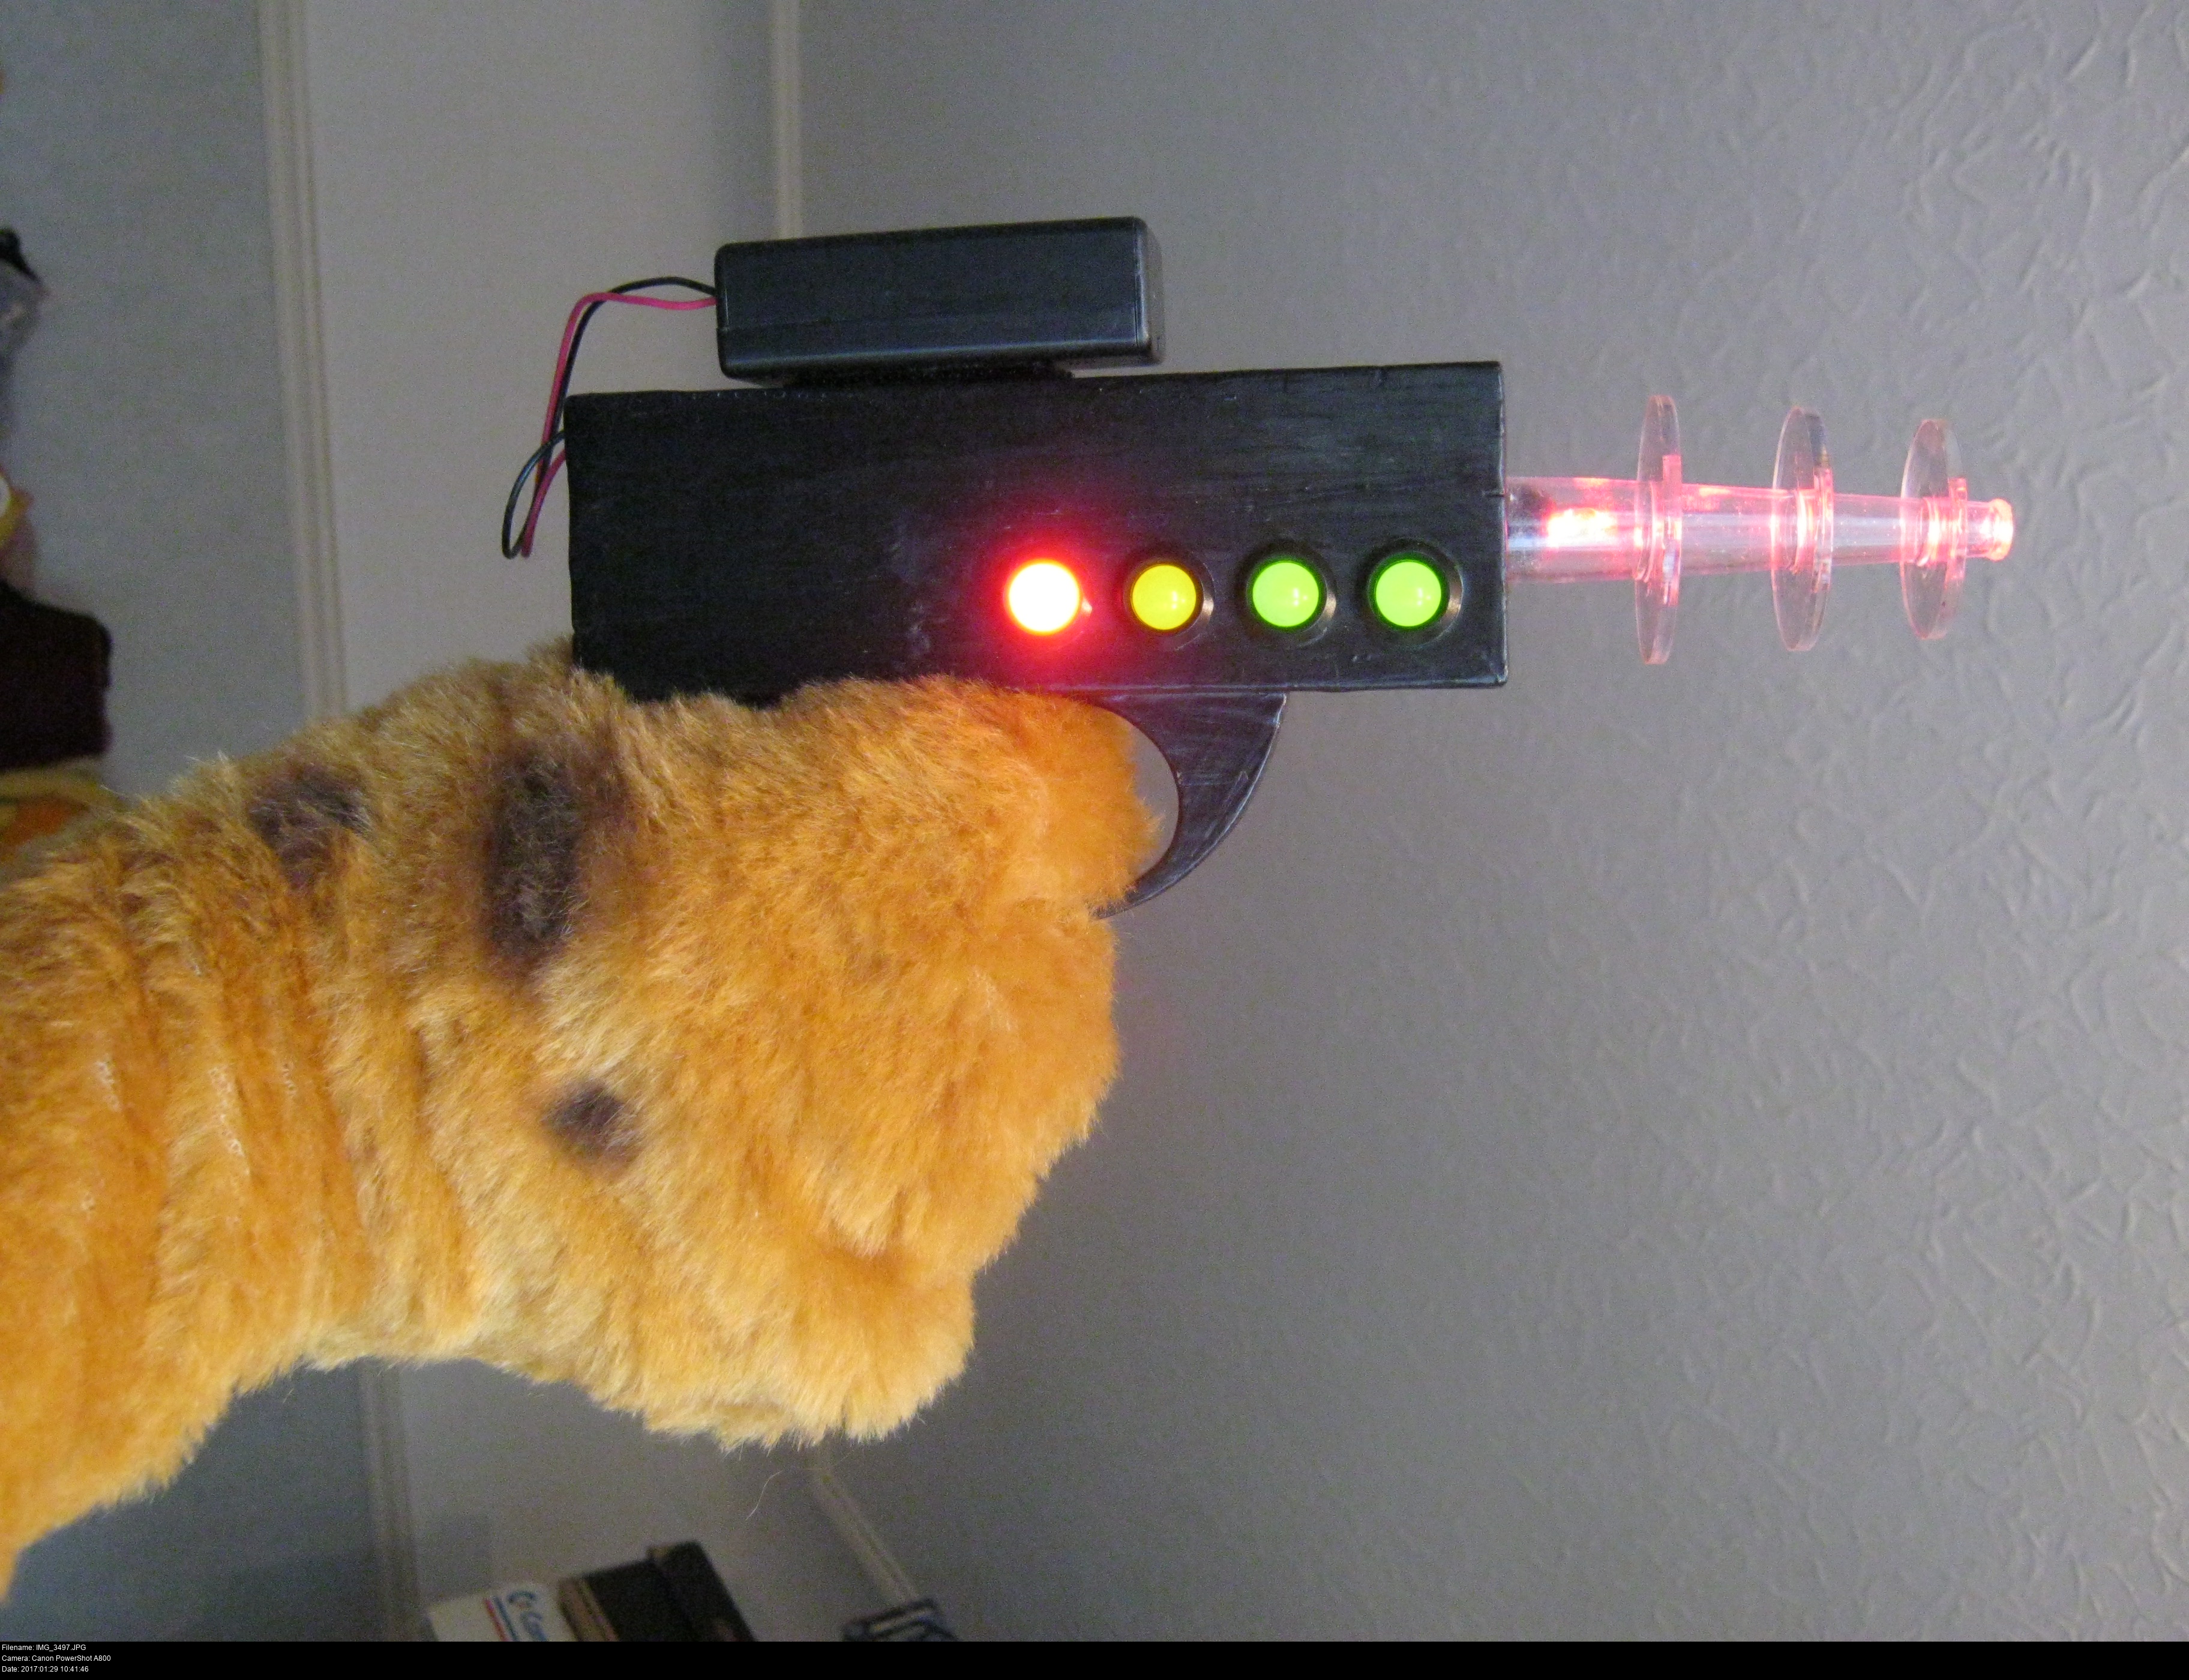
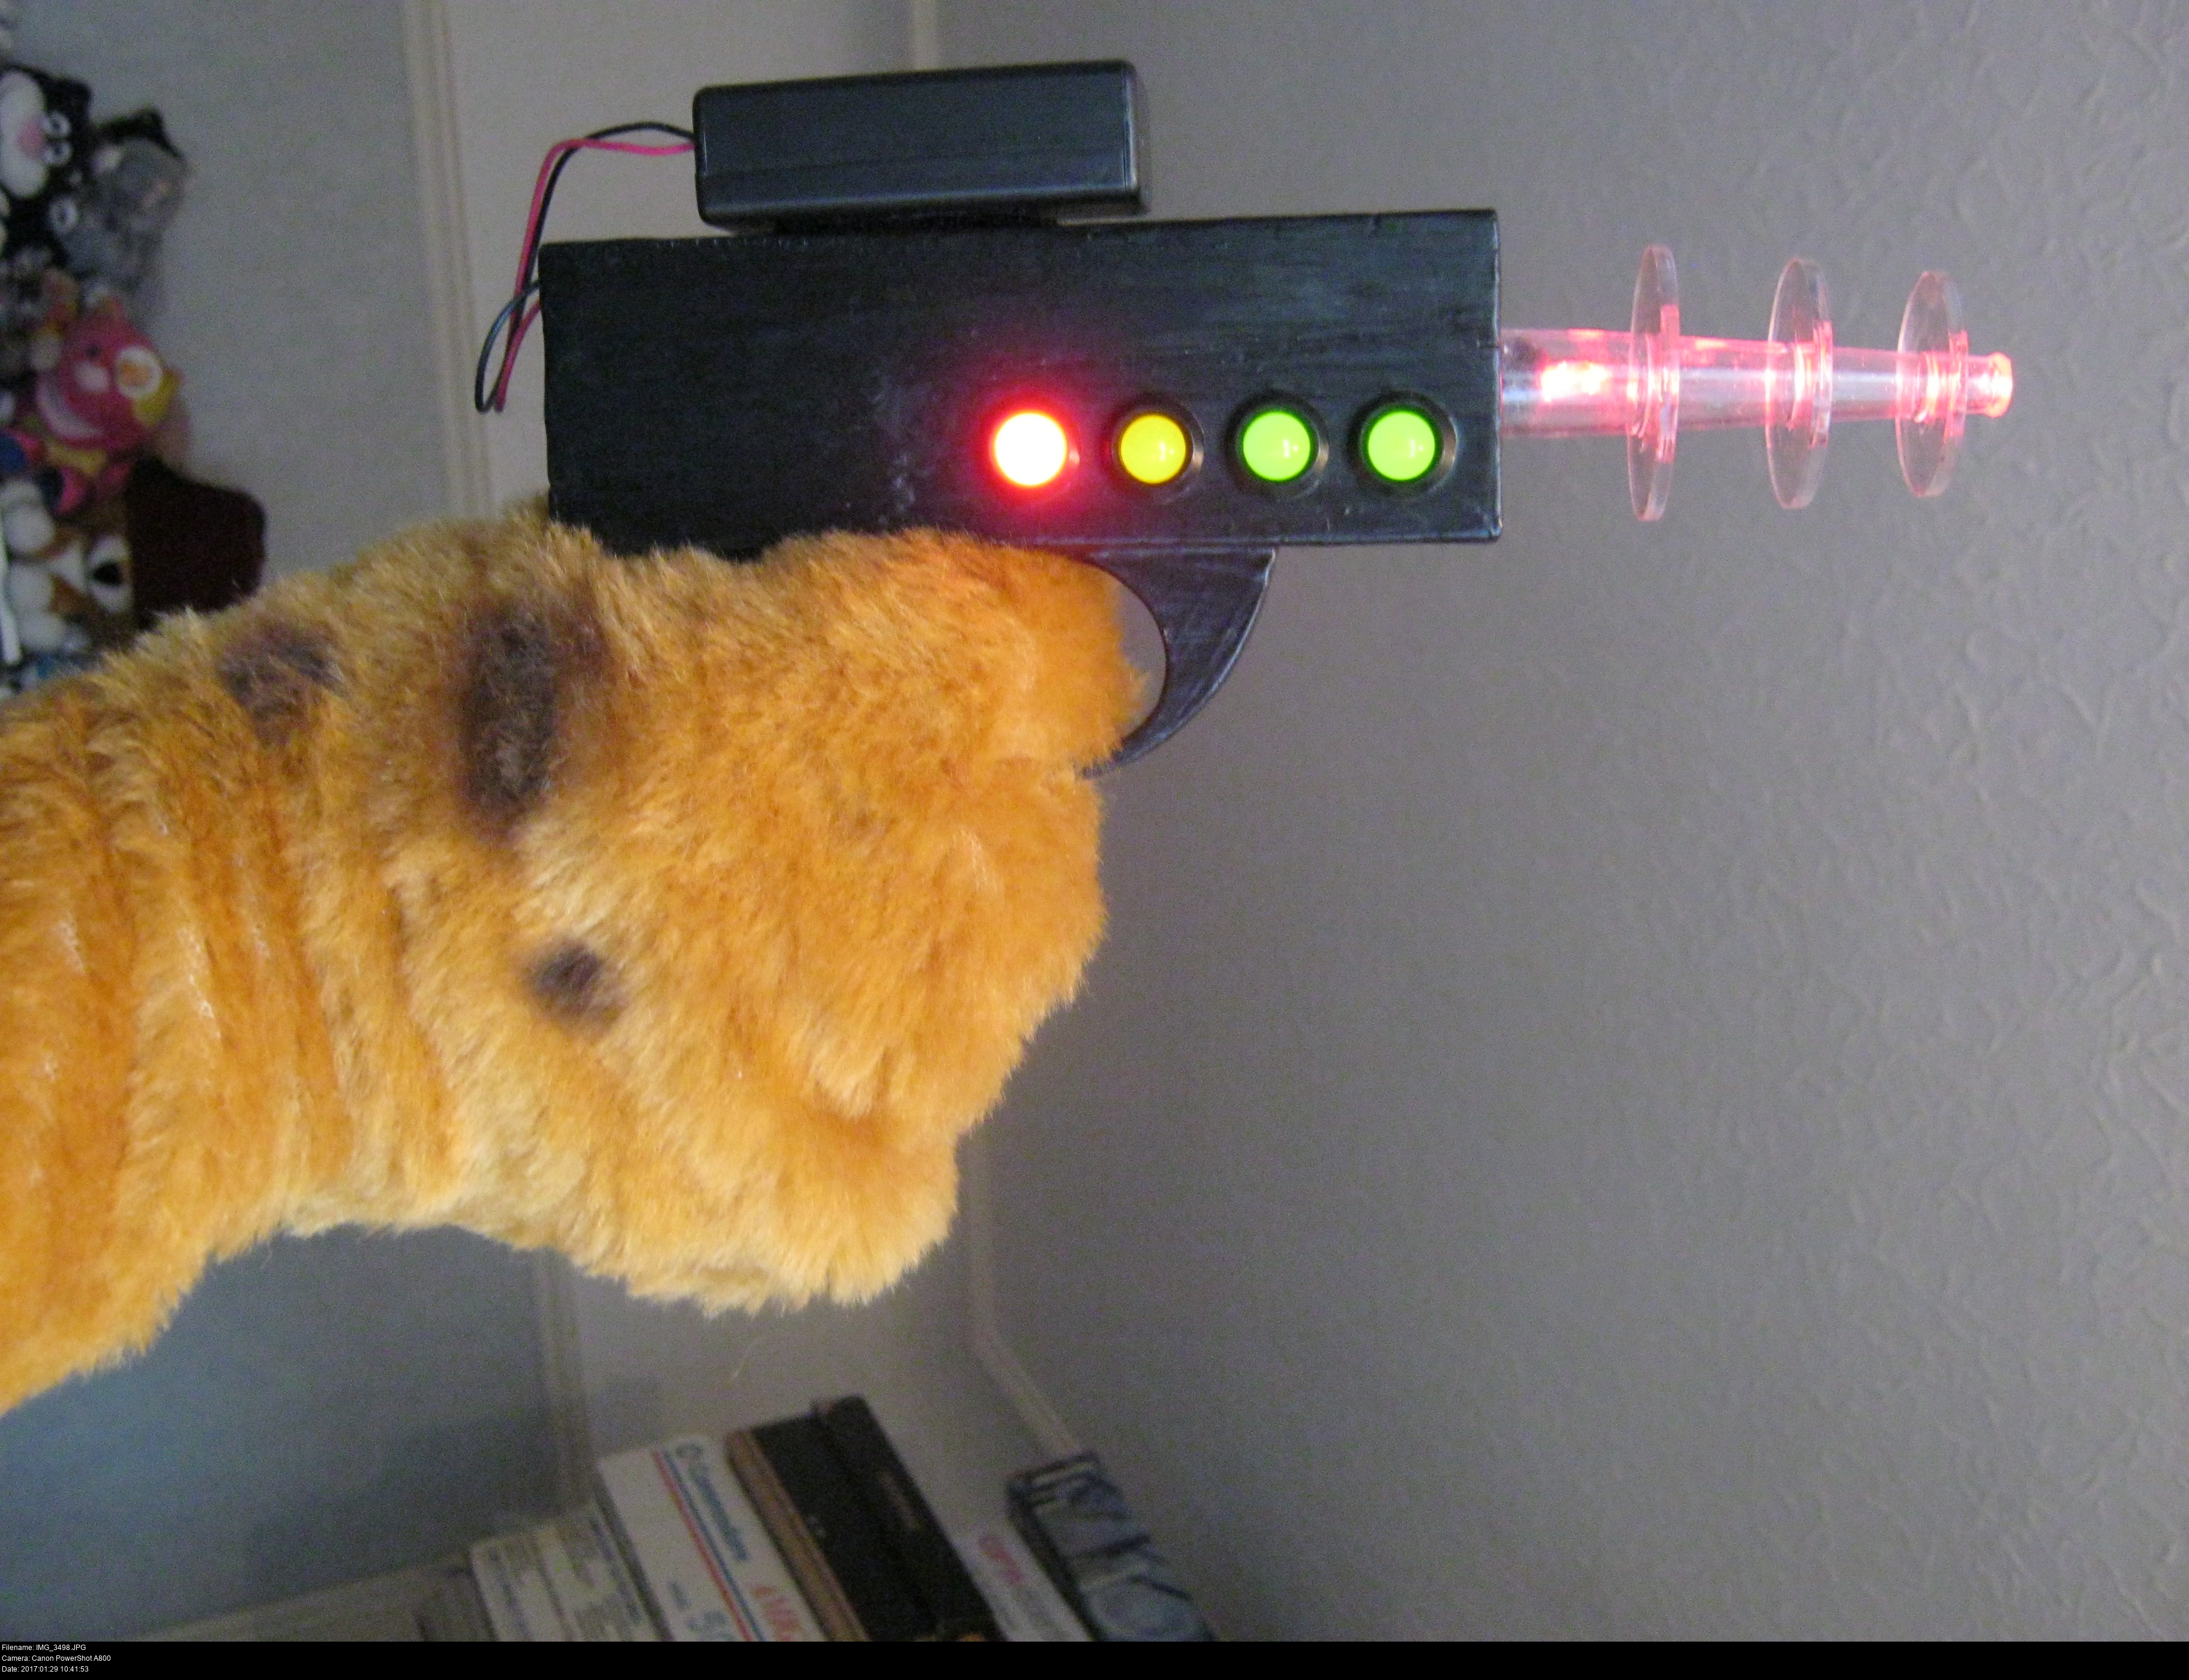
And that is it, one completely completed overlynx laser pistol! Ready to shoot up some humans!
But... what if...
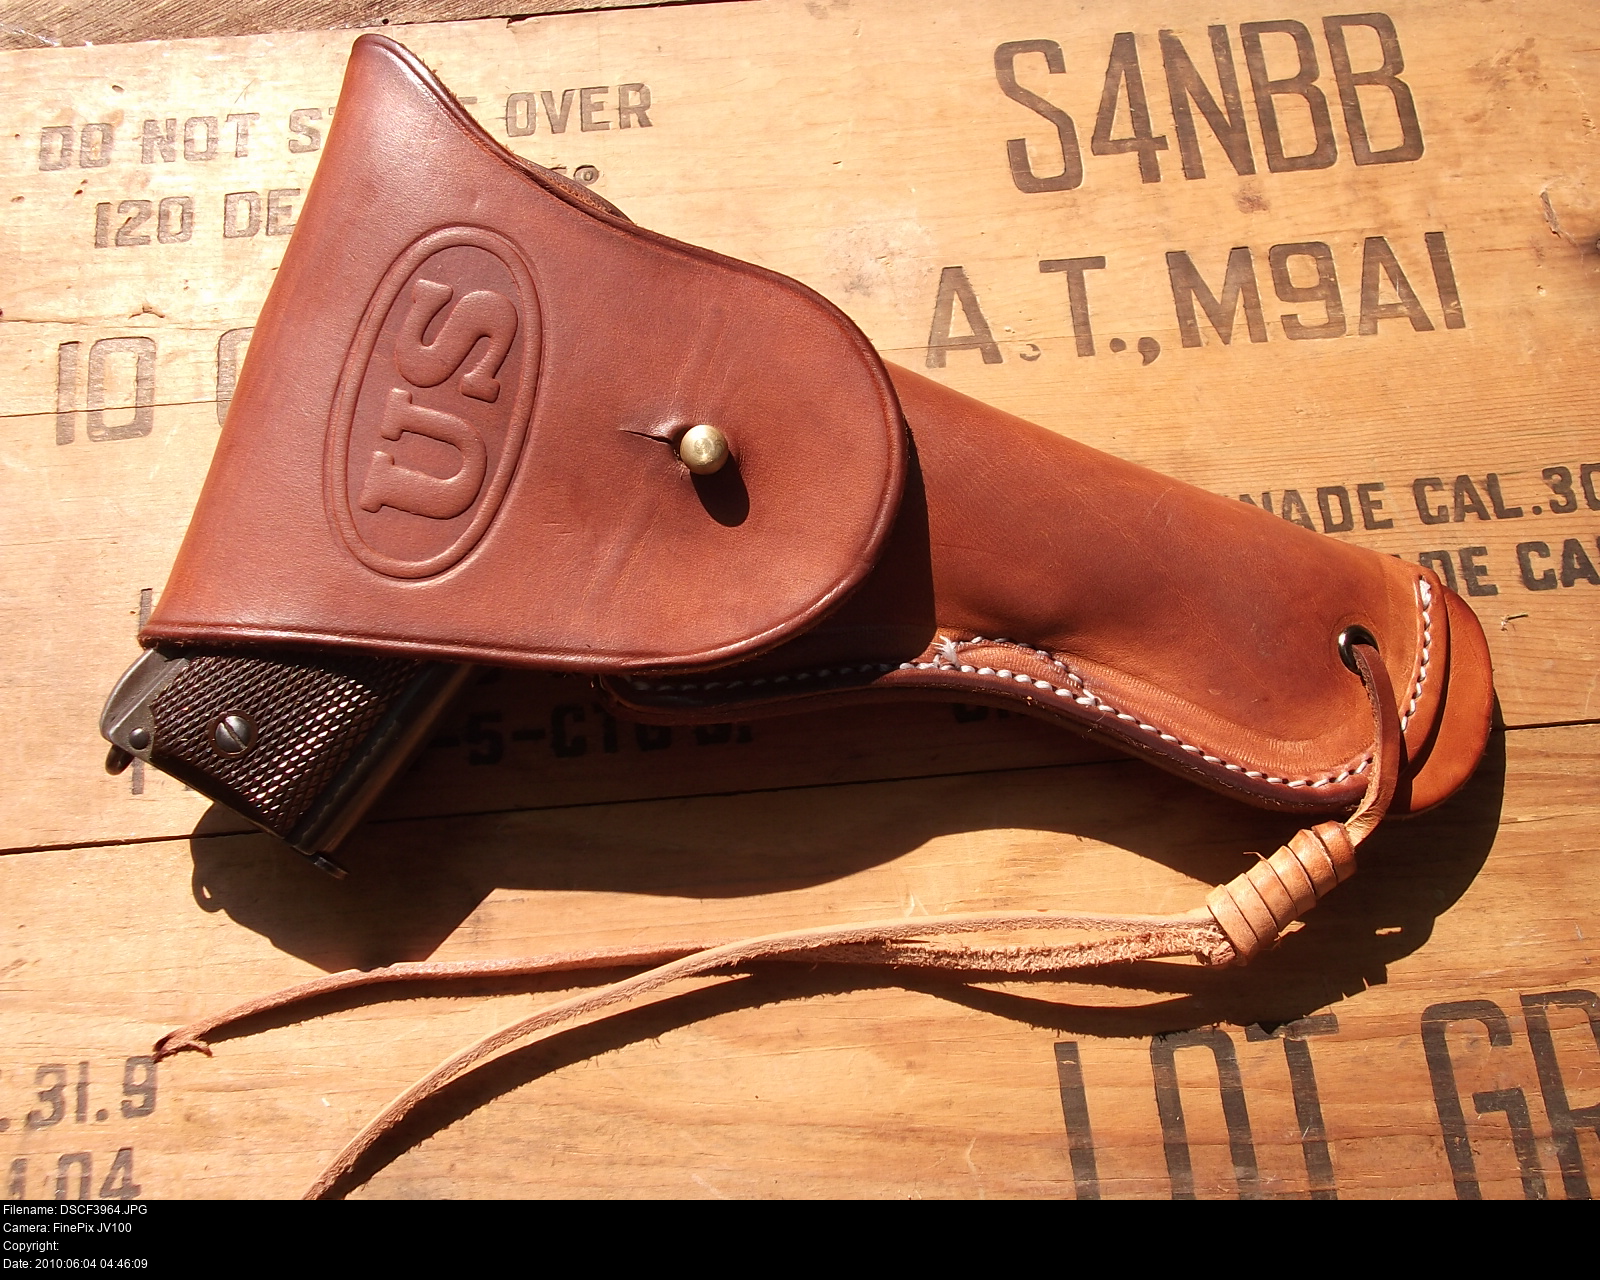
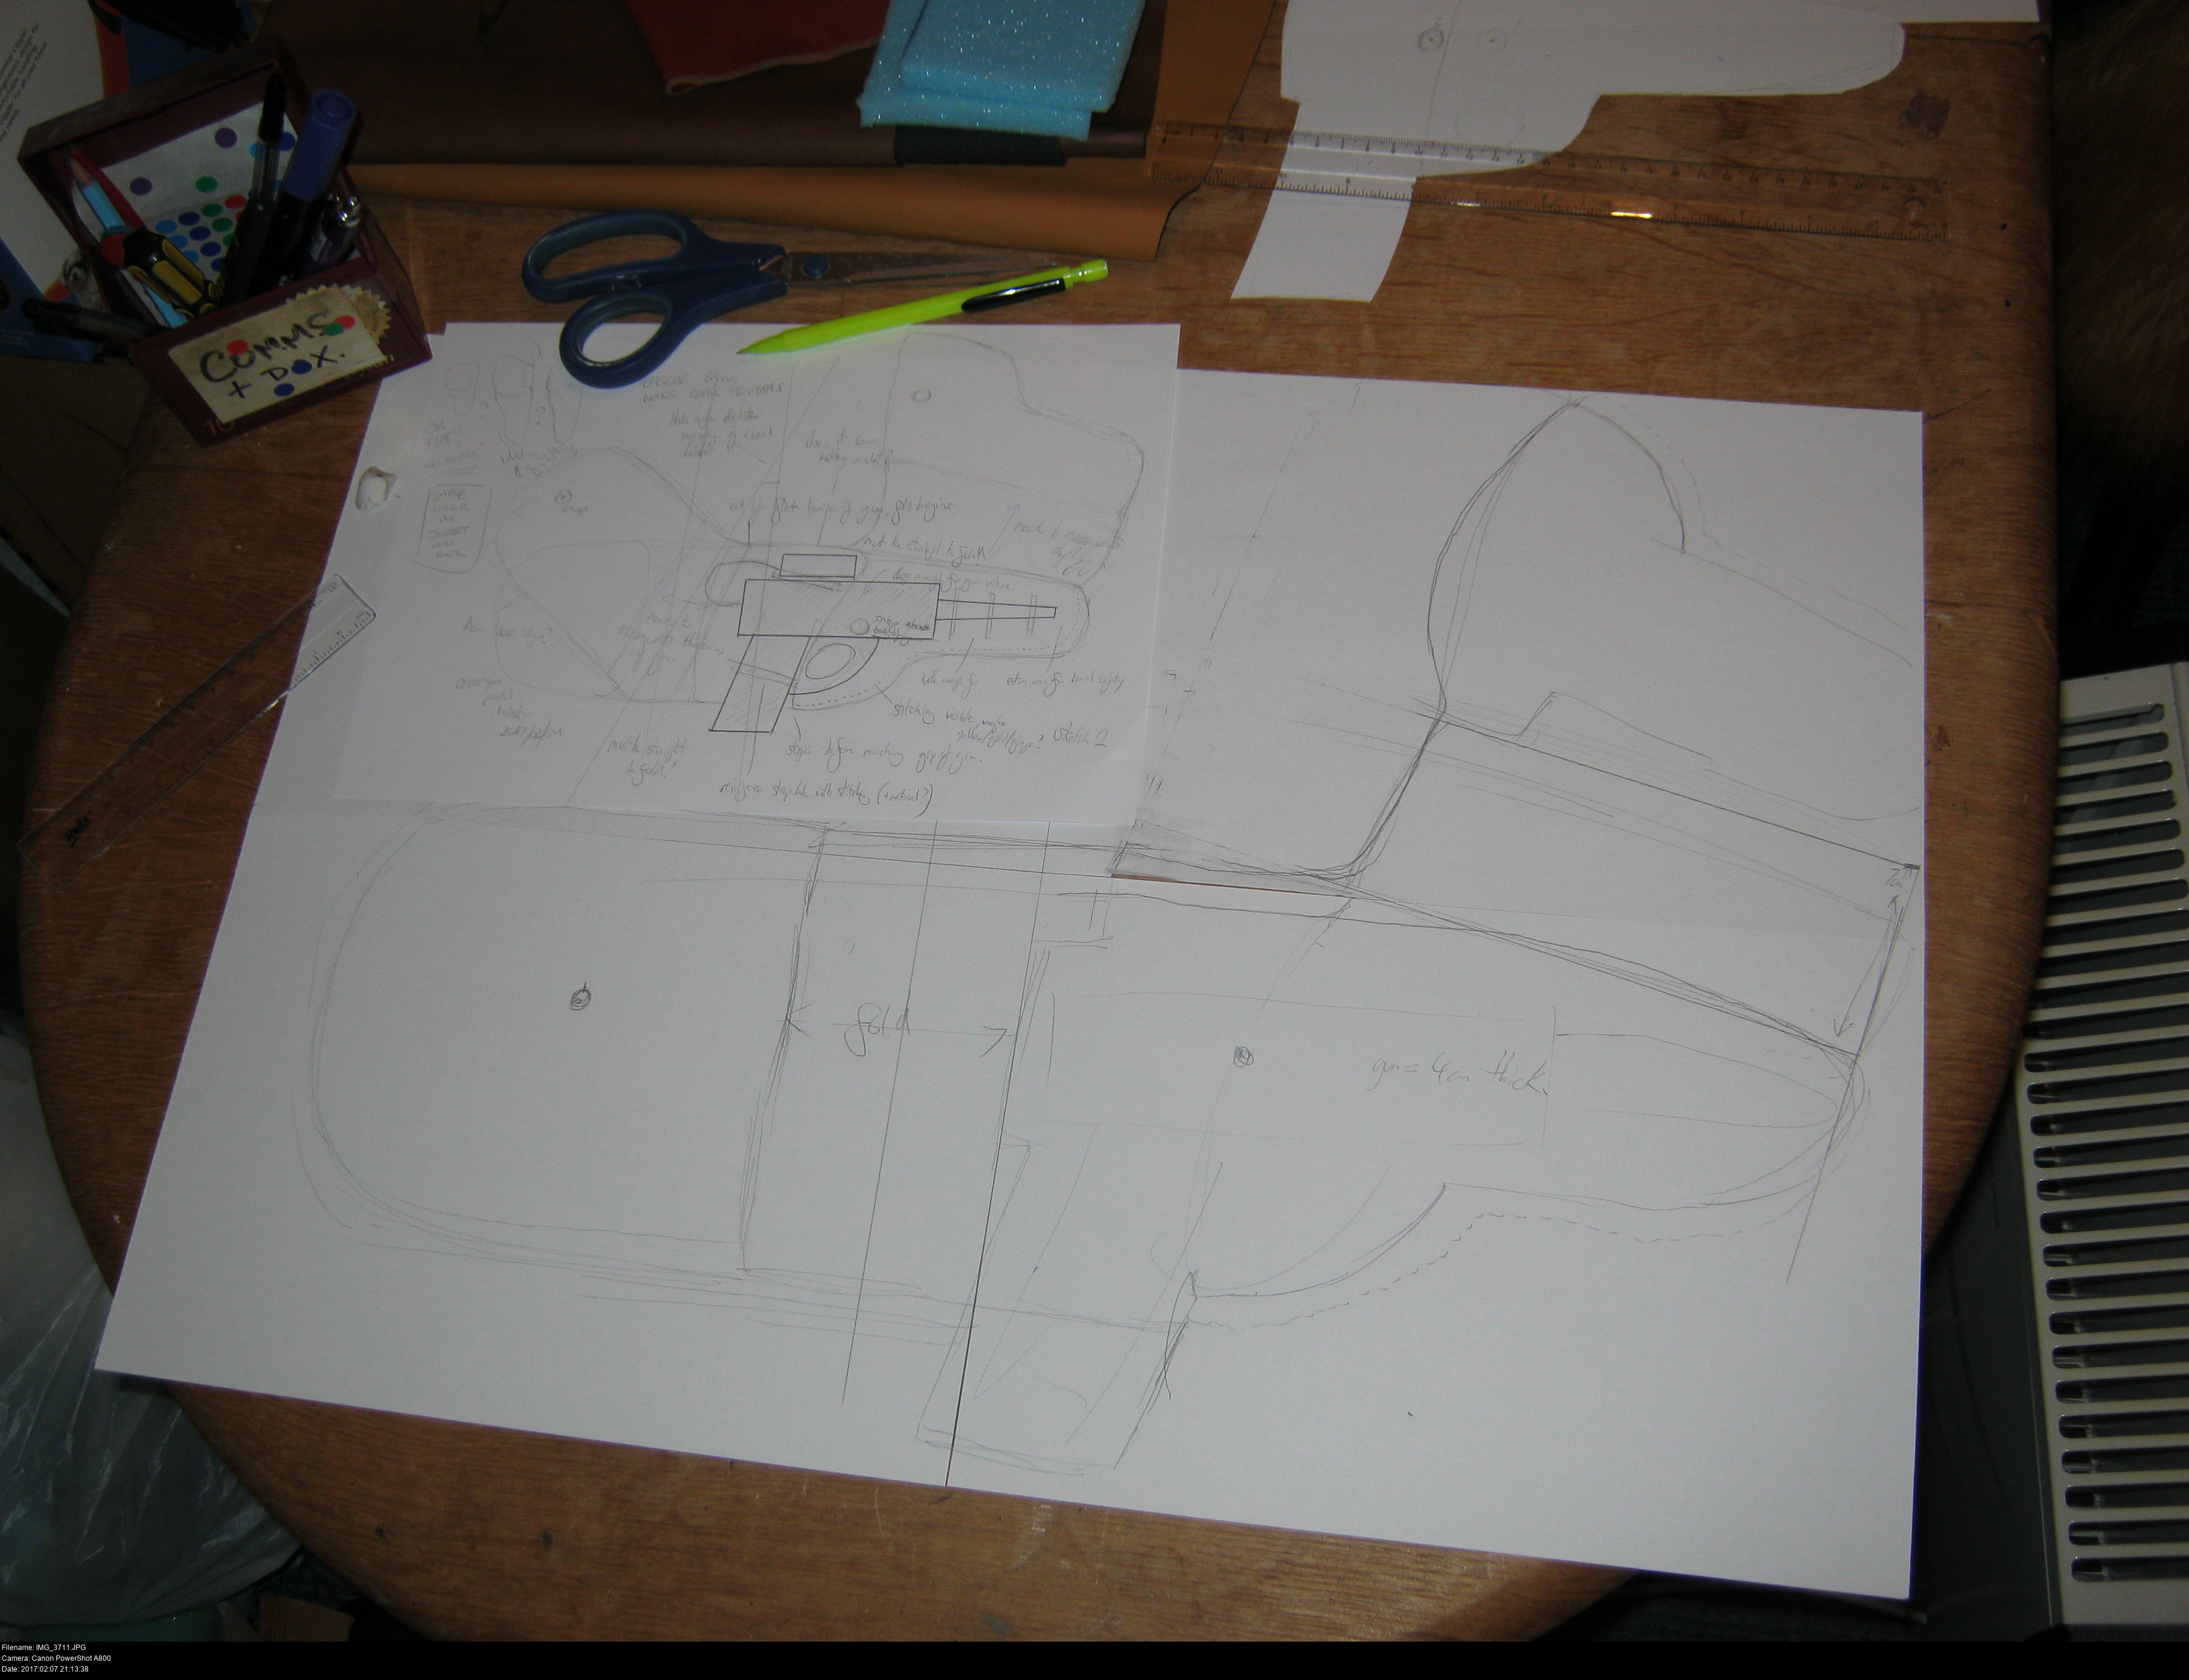
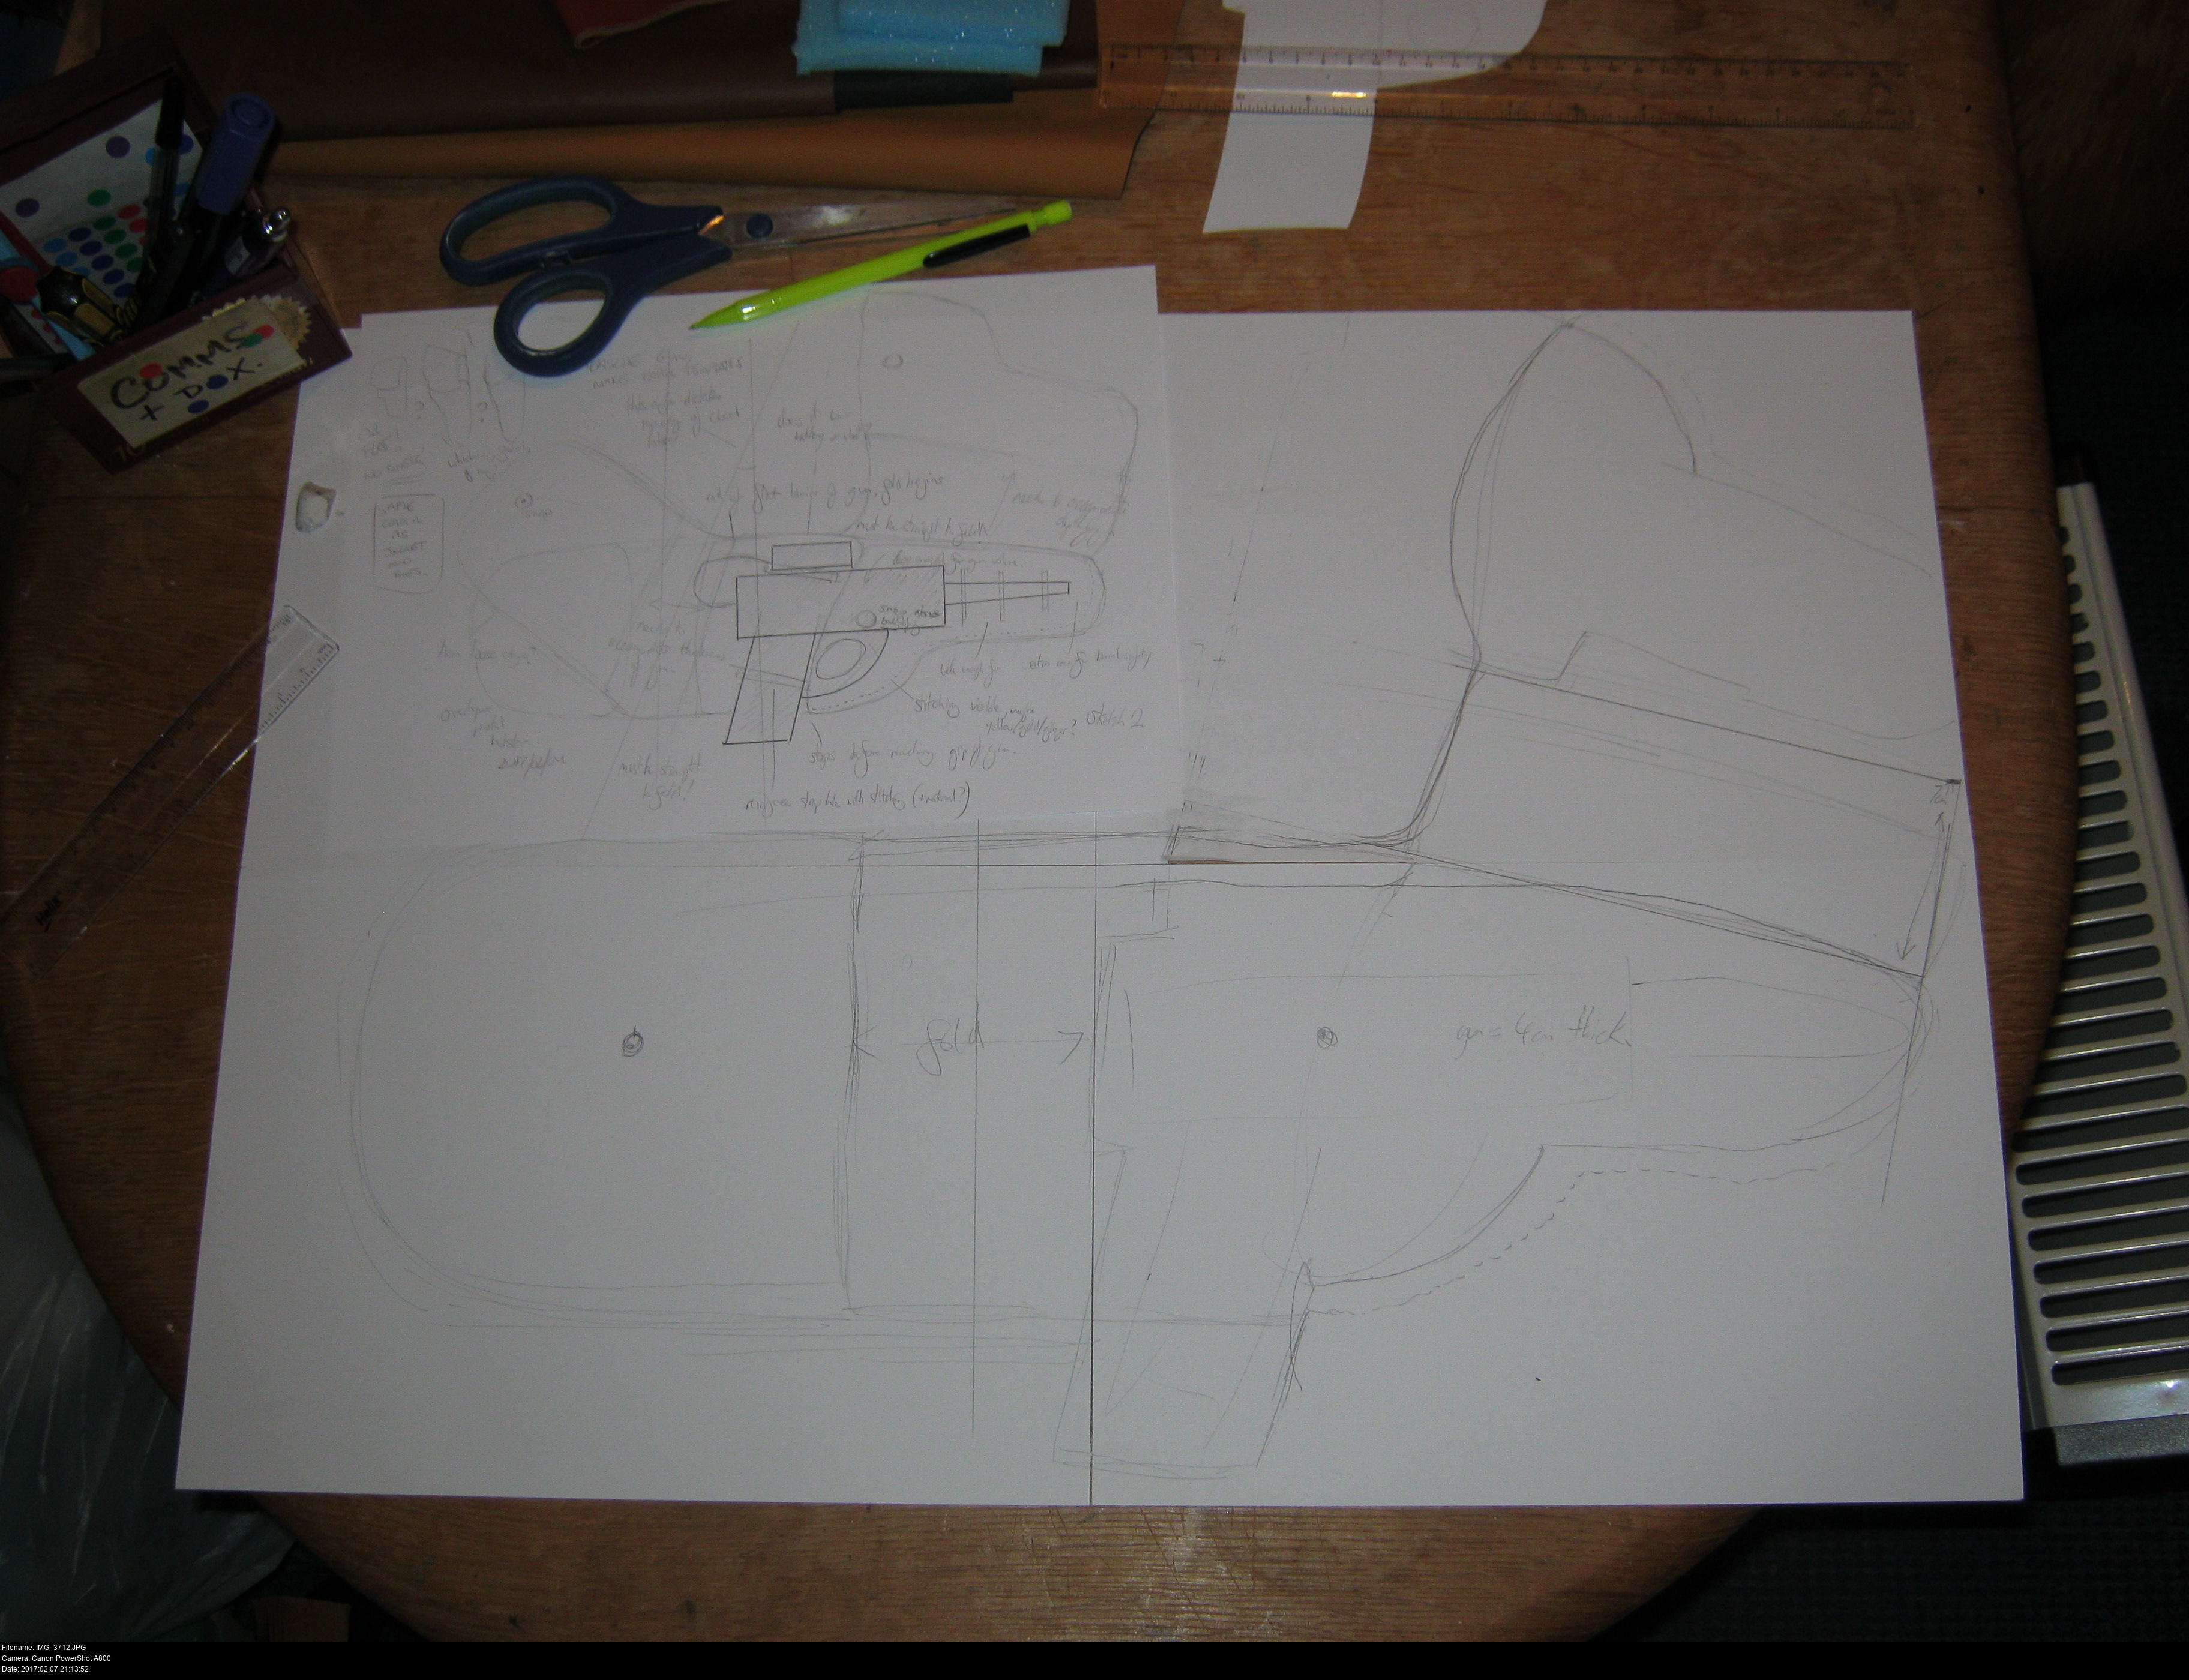
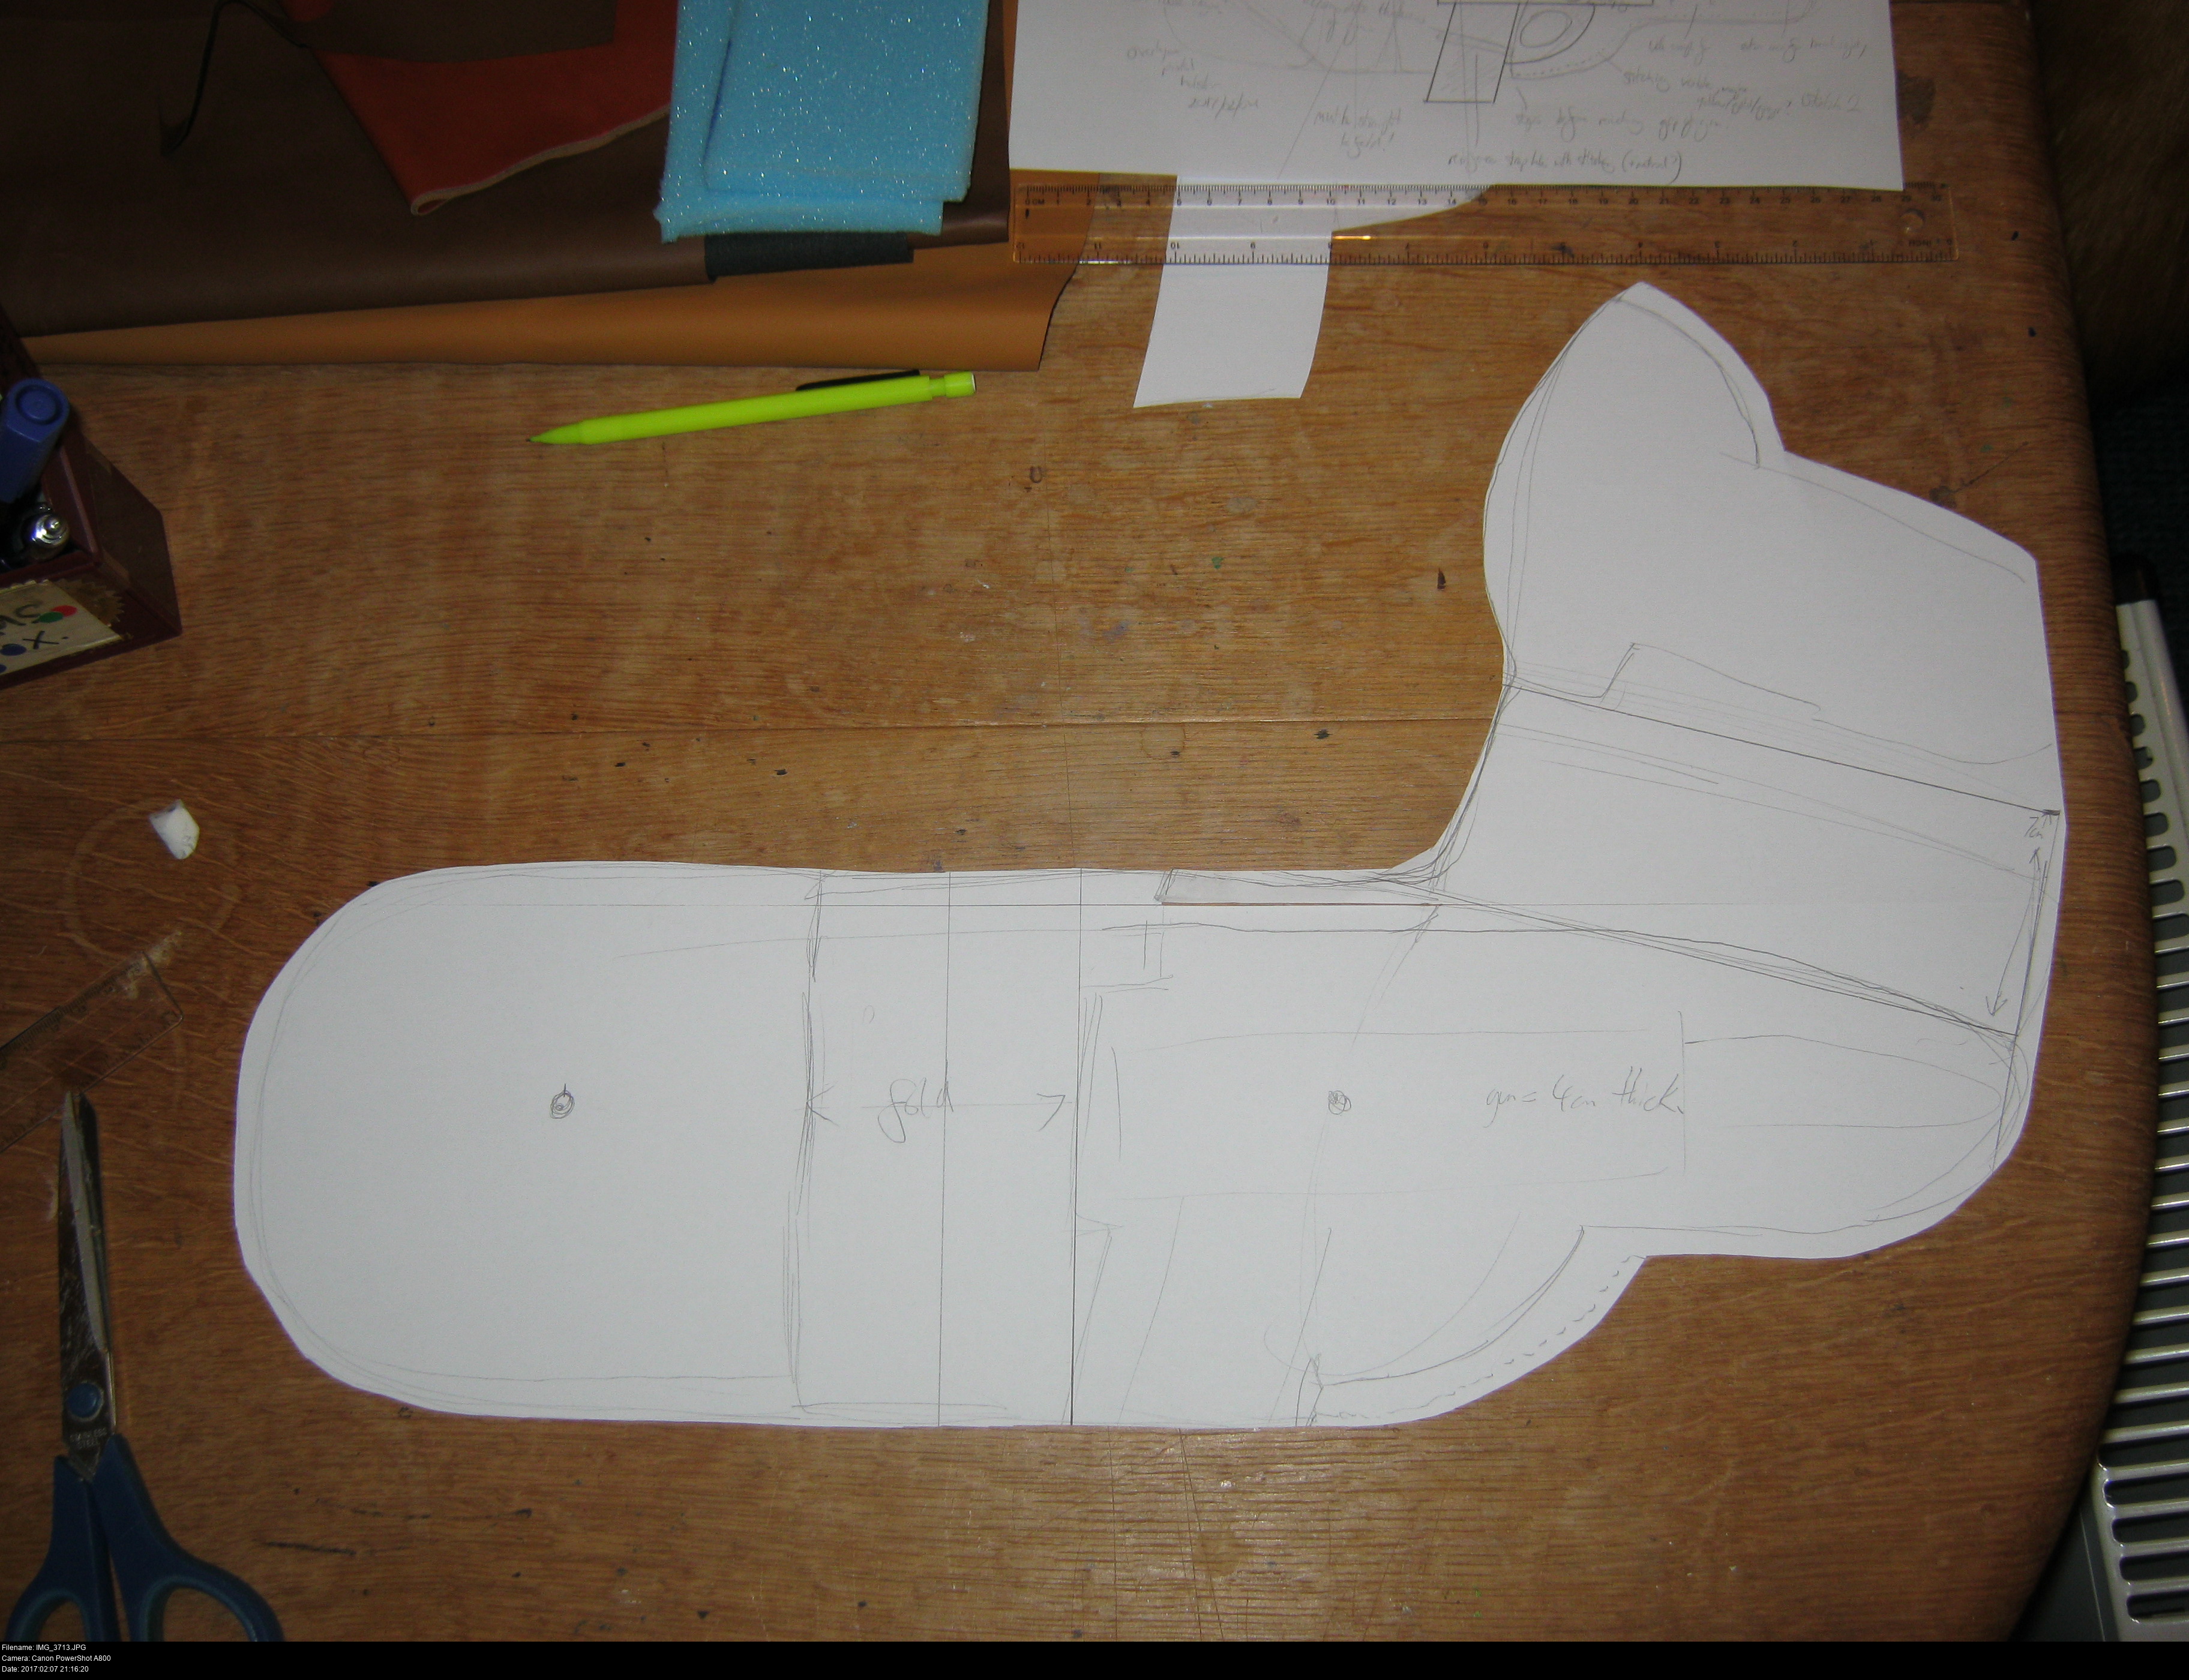
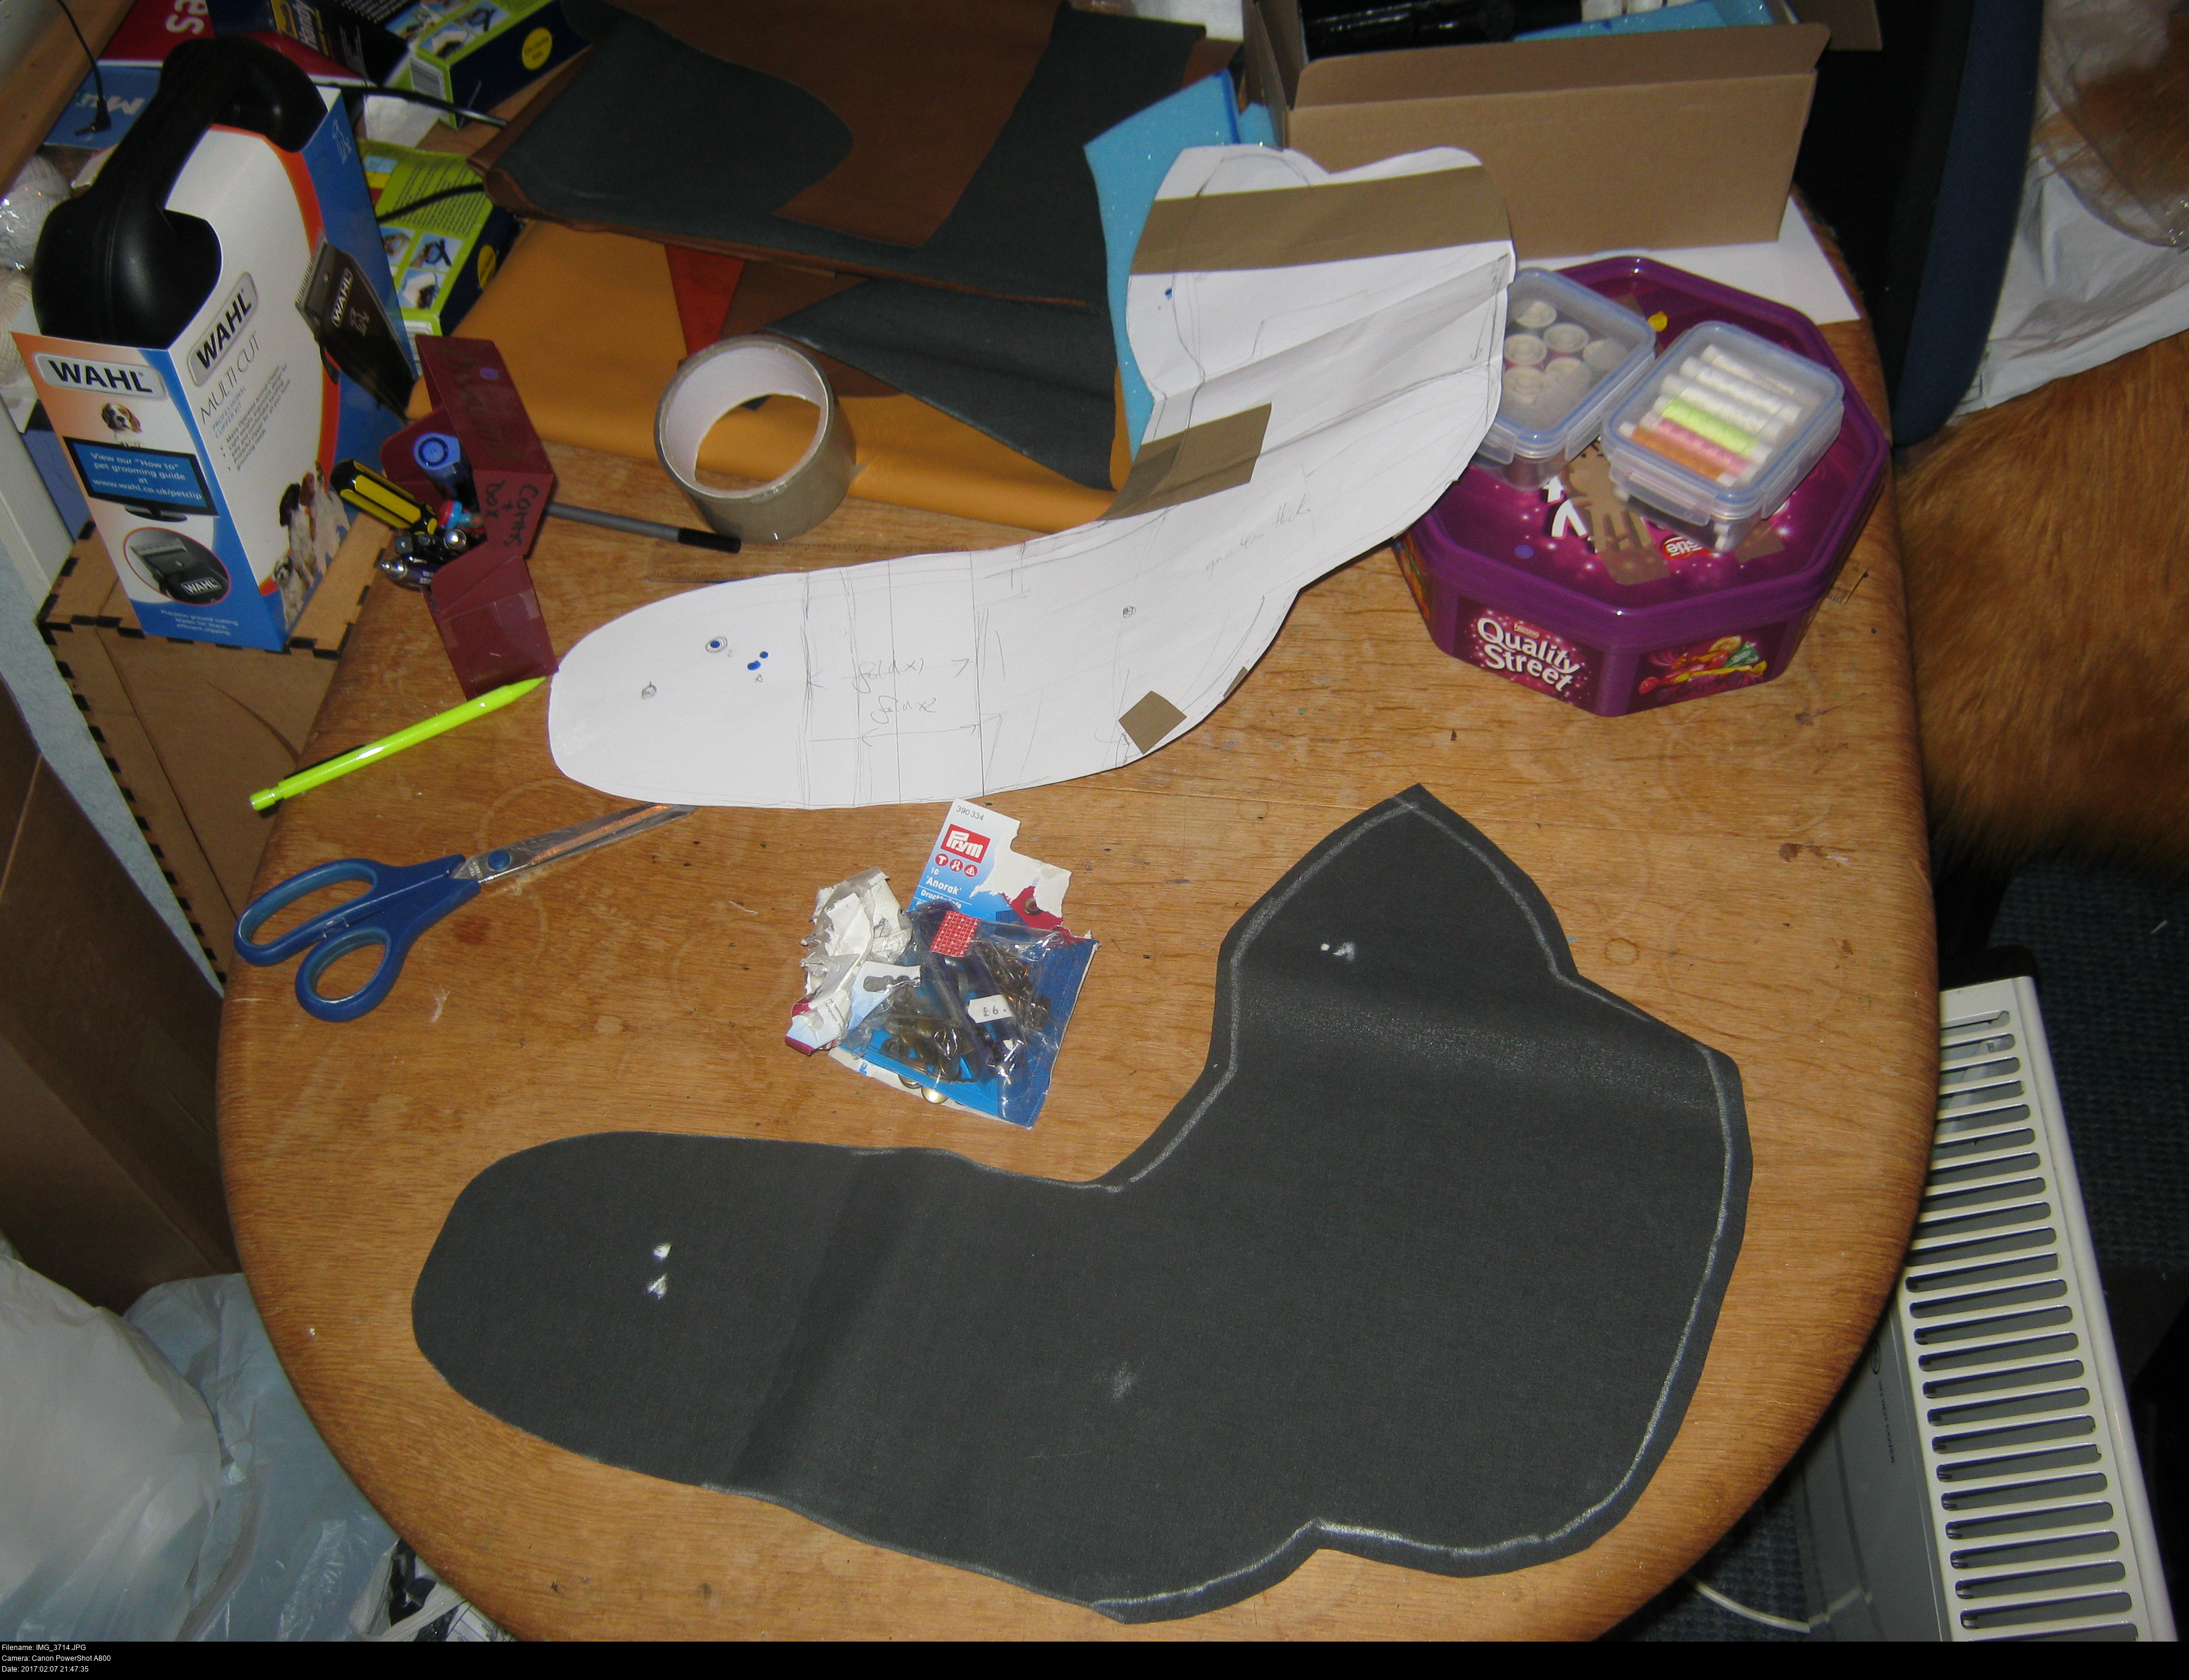

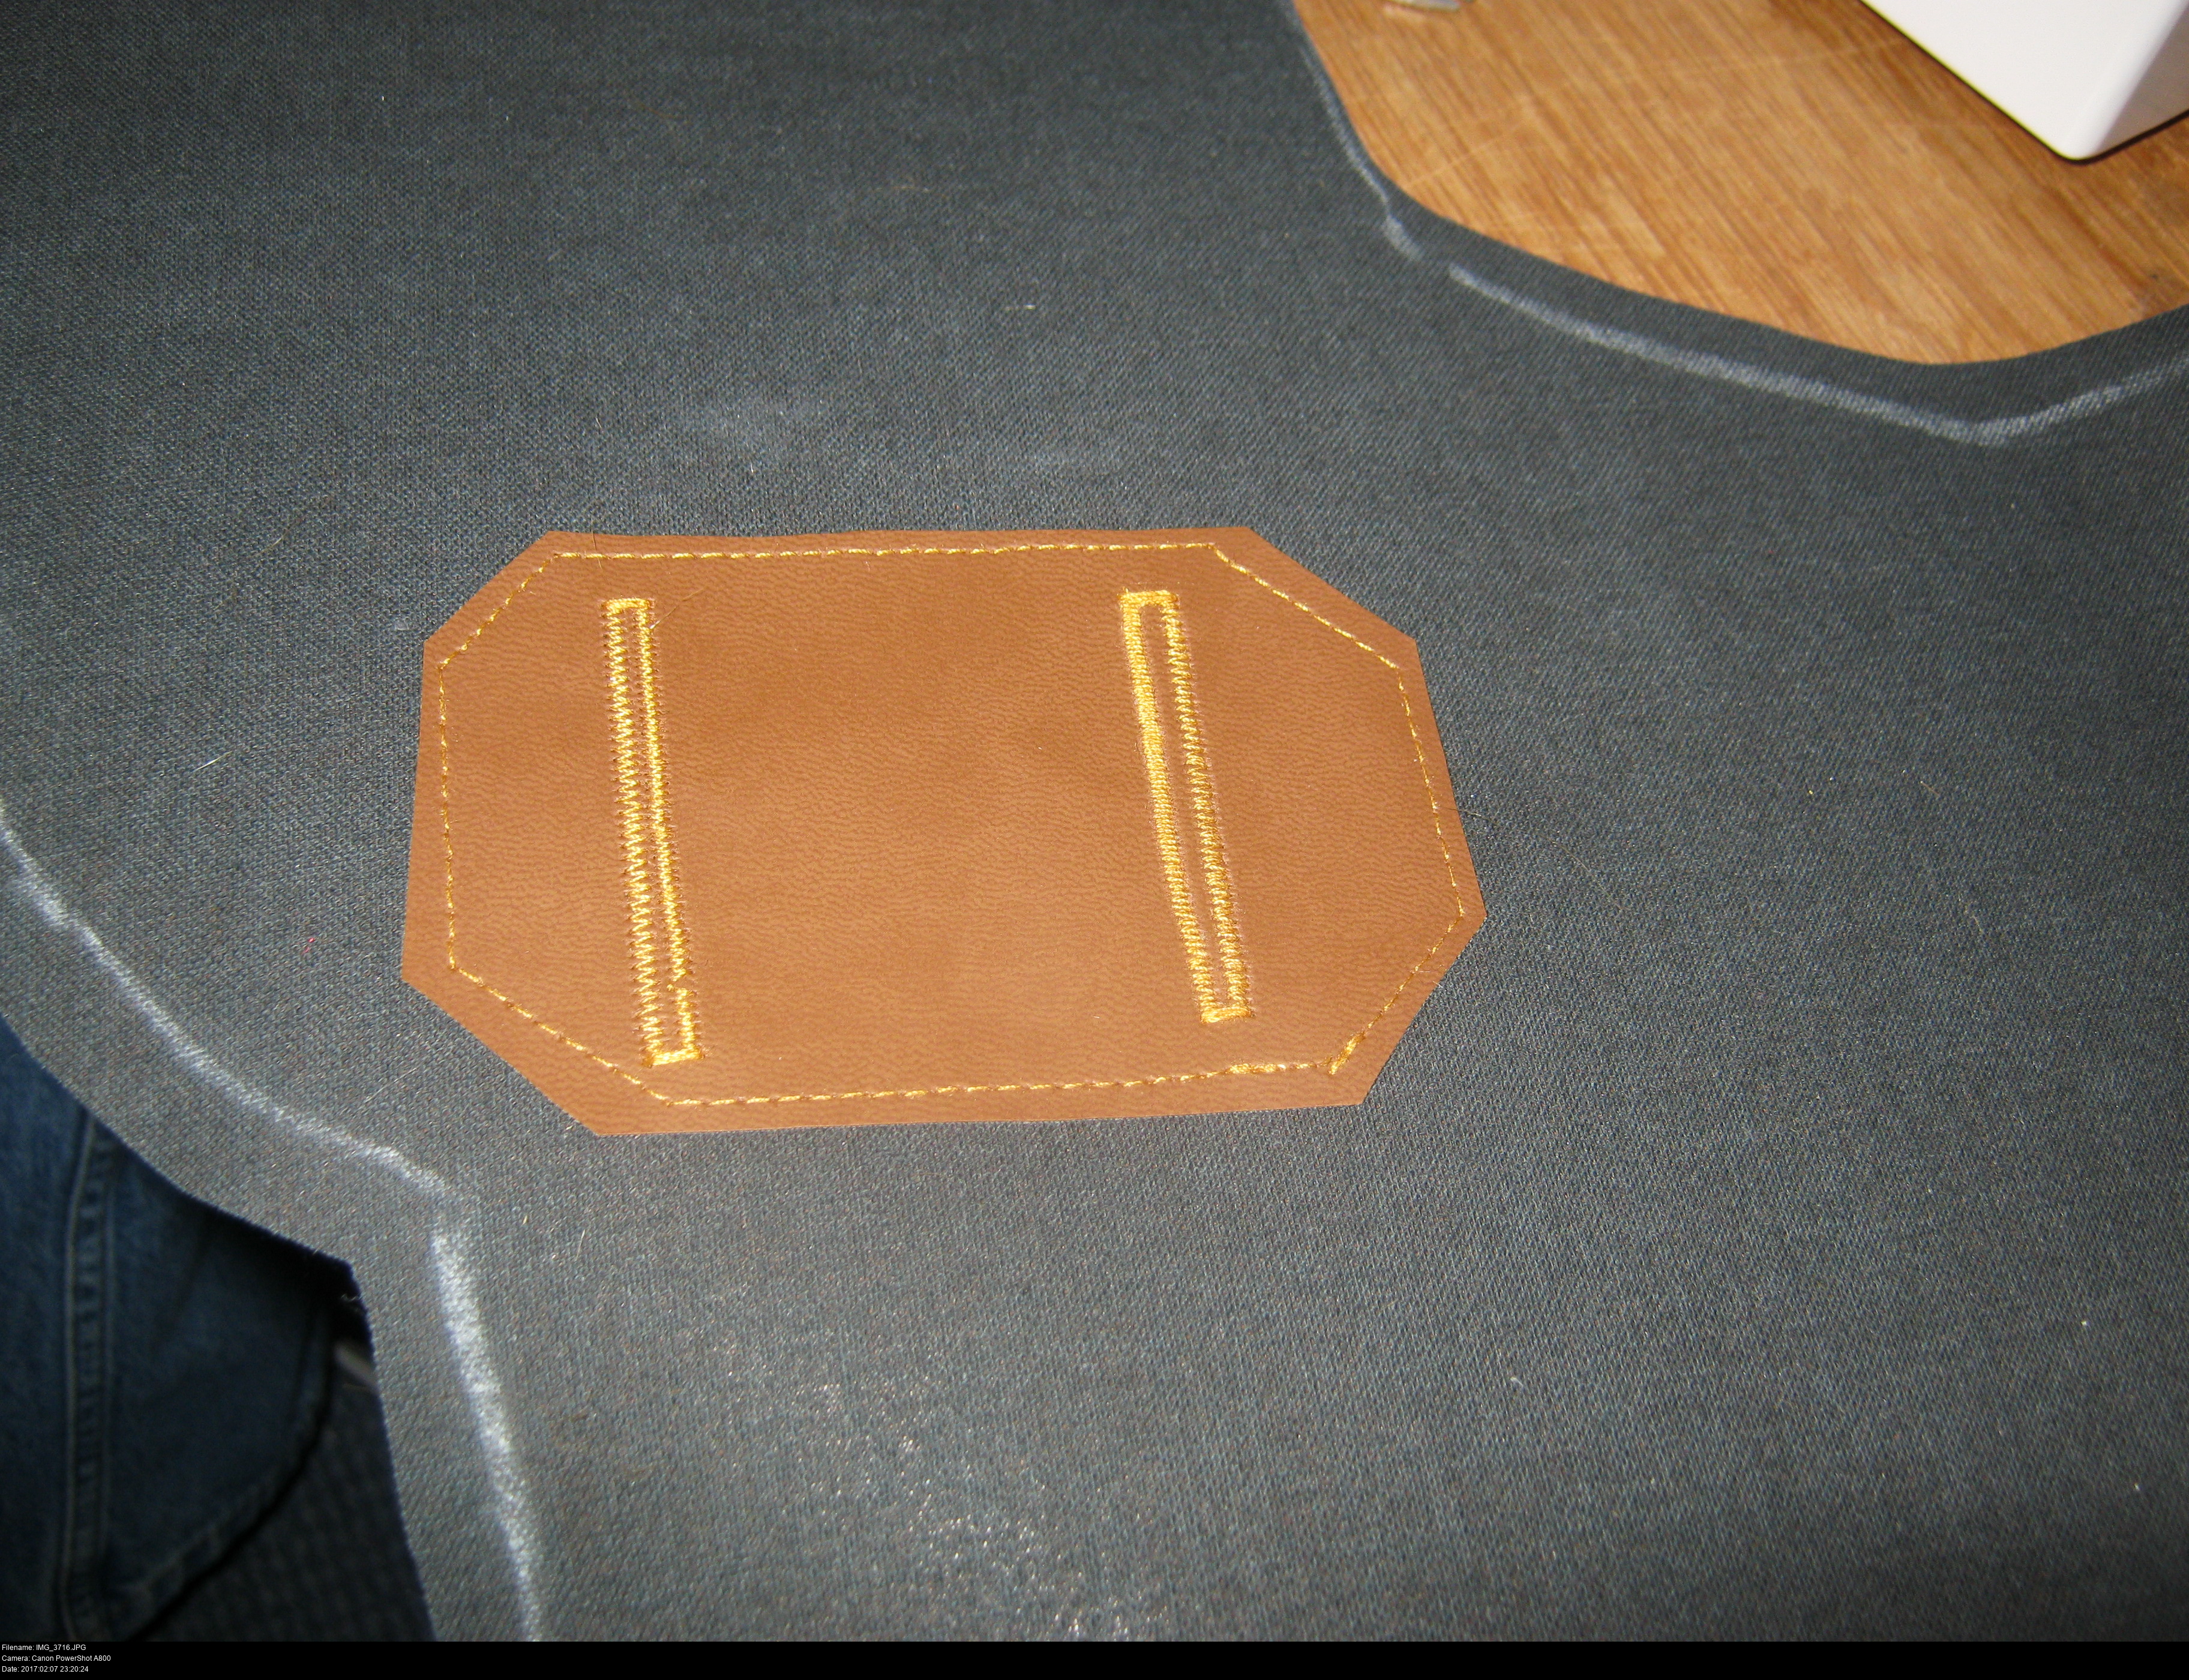
A Han Solo type needs a holster, doesn't he? I've got a bunch of pleather from Skull Kid left over. Let's give this a shot.
The barrel part is a long section folded over to make a pocket, and there's a long flap that extends outwards and folds over to over the upper grip and back of the gun.
Using my paper templates and some guesswork, I can come up with a pattern for a single piece holster... ding!
This material is very floppy and weak, so I've reinforced the area where the strap connects with a second layer and some embroidered holes. My strap is another one of my elastic strips with velcro ends like Majora's Mask.

And there we go. A collection of overlynx-style accessories to give my costume a bit of extra oomph.
I'm storing the gun in a sturdy small cardboard box lined with foam and filled with packing peanuts. It's not perfect, but it's certainly better than keeping it loose, since the emitter barrel raygun discs would be prised off accidentally without question.
But what're those in the bottom right? Are those... kick-ass ATLANTIS mission patches? Where did THOSE beauties come from?

The pilot's jacket here is a little dull, maybe. It's all one colour, and it's cool as hell, but I'm going to be cheeky and make up a little bit of extra detail, just to make it mine.
I want a mission patch. They look so damned cool. And with a jacket that's already as cool as mine, a patch might just make us all freeze to death from the coolness.
Now... what do I want on it? Does he have a unit? What does he represent?
He's a cat. And he flies a spaceship. Maybe a colourful spaceship whoosh? There are all kinds of patches with whooshing spacecraft on, right?


Yeah. No.
If you haven't gathered by now that I have no sense of style, you've skipped to this point instead of reading through, haven't you?
Even if I neatened this up to some smooth crisp vectors in Flash (I wouldn't show anyone these sketches and tell them to make a patch from it, goodness!!) I'm just going nowhere with this.
Try again.
Alright, let's say that this pilot is stationed on that big space station that the overlynxes have orbiting their prehistoric Earth. His wing watches over the Earth. But since the overlynxes are pacifists, he's mostly there to represent his race and homeland of Atlantis.
It's got to be nice, happy. Non-provocative.
Earth. Good start. Ooh, I've got a plan. Watch this.
Let's take a full map of the Earth. And miraculously, lets find an online JavaScript site that takes in full projections of this exact type and turns them into interactive globes that you can freely rotate.
And where could Atlantis be? Philosophers and historians have put Atlantis pretty much everywhere on the globe, but luckily for a simple-minded person like me, many suggest that Atlantis was somewhere in the Atlantic.
In the intro, it seems to be placed to the southeast of Africa, near Madagascar, but in the ending, it could equally be in the northwest, off the coast of Spain.
I want people to be able to recognise this badge as being of Earth even if they're not familiar with Interpose, so I need to pick an angle which would obviously be Earth to an English-speaking observer. (You know I've not seen what a Japanese or Chinese image of Earth would look like. English depictions put England centre, so I assume they do a similar thing there?)
So let's rotate this to show the Atlantic!


It's depicted as a roughly circular island in the game, but if Interpose was a 90s cartoon, Atlantis would -totally- be a cat-shaped island.
There we go.
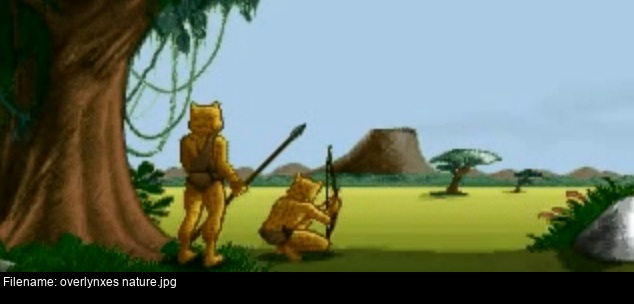
That means that Atlantis would be very similar to Spain, home of the adorable Iberian Lynx, and Morocco, which will give my Atlantis the climate, vegetation and wildlife similar to how it's shown in the game! Yay!


The border was going to be red to make it more NASA-ish, but a kindly dragon suggested I go with blue since that's a nicer, more defensive colour. Blues are my favourite colour, but I've been deliberately avoiding them in things that I make since my first instinct is to make everything blue!

I needed to fit ATLANTIS on it somewhere, either above or below the main symbol. I could've put it as a separate patch but that would've turned out mighty fiddly, plus I might want to put "Hotshot" as a second patch instead.
I was messing about with triangle shapes, and I was originally going to put them at the top to resemble cat ears. But if I did that, then ATLANTIS would cover the island (or at least distract from it) and that'd be no good.
With the text at the bottom, the high-centre island is visible clearly and everything is nice. The bottom sticking out triangles sort of resemble the letter A. One odd distinguishing feature of the overlynxes is their very solid-looking cheek tufts around the base of their head, so the triangles sorta resemble that too!
I tried adding a top triangle to complete the A, but it looked a bit odd.
It's all well and good seeing how the badge looks in isolation, but test it against the colours and textures of the jacket too.

Now that... that looks bad-ass.
It's simple, recognisable, says ATLANTIS and has a cat on it. It doesn't look warlike or especially dangerous. If you see that emblem, you're looking at somebody who's here to help.
I've gone through a few revisions, simplifying the contours of the islands and removing any small areas of colour (such as the part of the blue circle that would be visible below the upper right serif of the letter I).
Getting embroidered patches made is a fuss. I went to pretty much every school uniform shop on Merseyside, and got a load of non-committal not-sure-if-we-can-do that answers. I could get it done online, but I wanted to see the quality of the badges for myself, plus I didn't want to have to commit myself to a large order. These are good, and I bet everybody would want one, but I don't want a hundred of them right now.
I decided to go with Design & Print in Birkenhead Market. They wanted a (scandalous) fee to get the image translated to embroidery instructions and then there's a flat cost for them to realise the badge for real. (So to speak.)
On top of that fee, if I want them to send me the translated embroidery file (so I can take my design to another embroider without paying -their- translation fee), I'll need to pay yet another fee.
But, dammit, it was worth it...

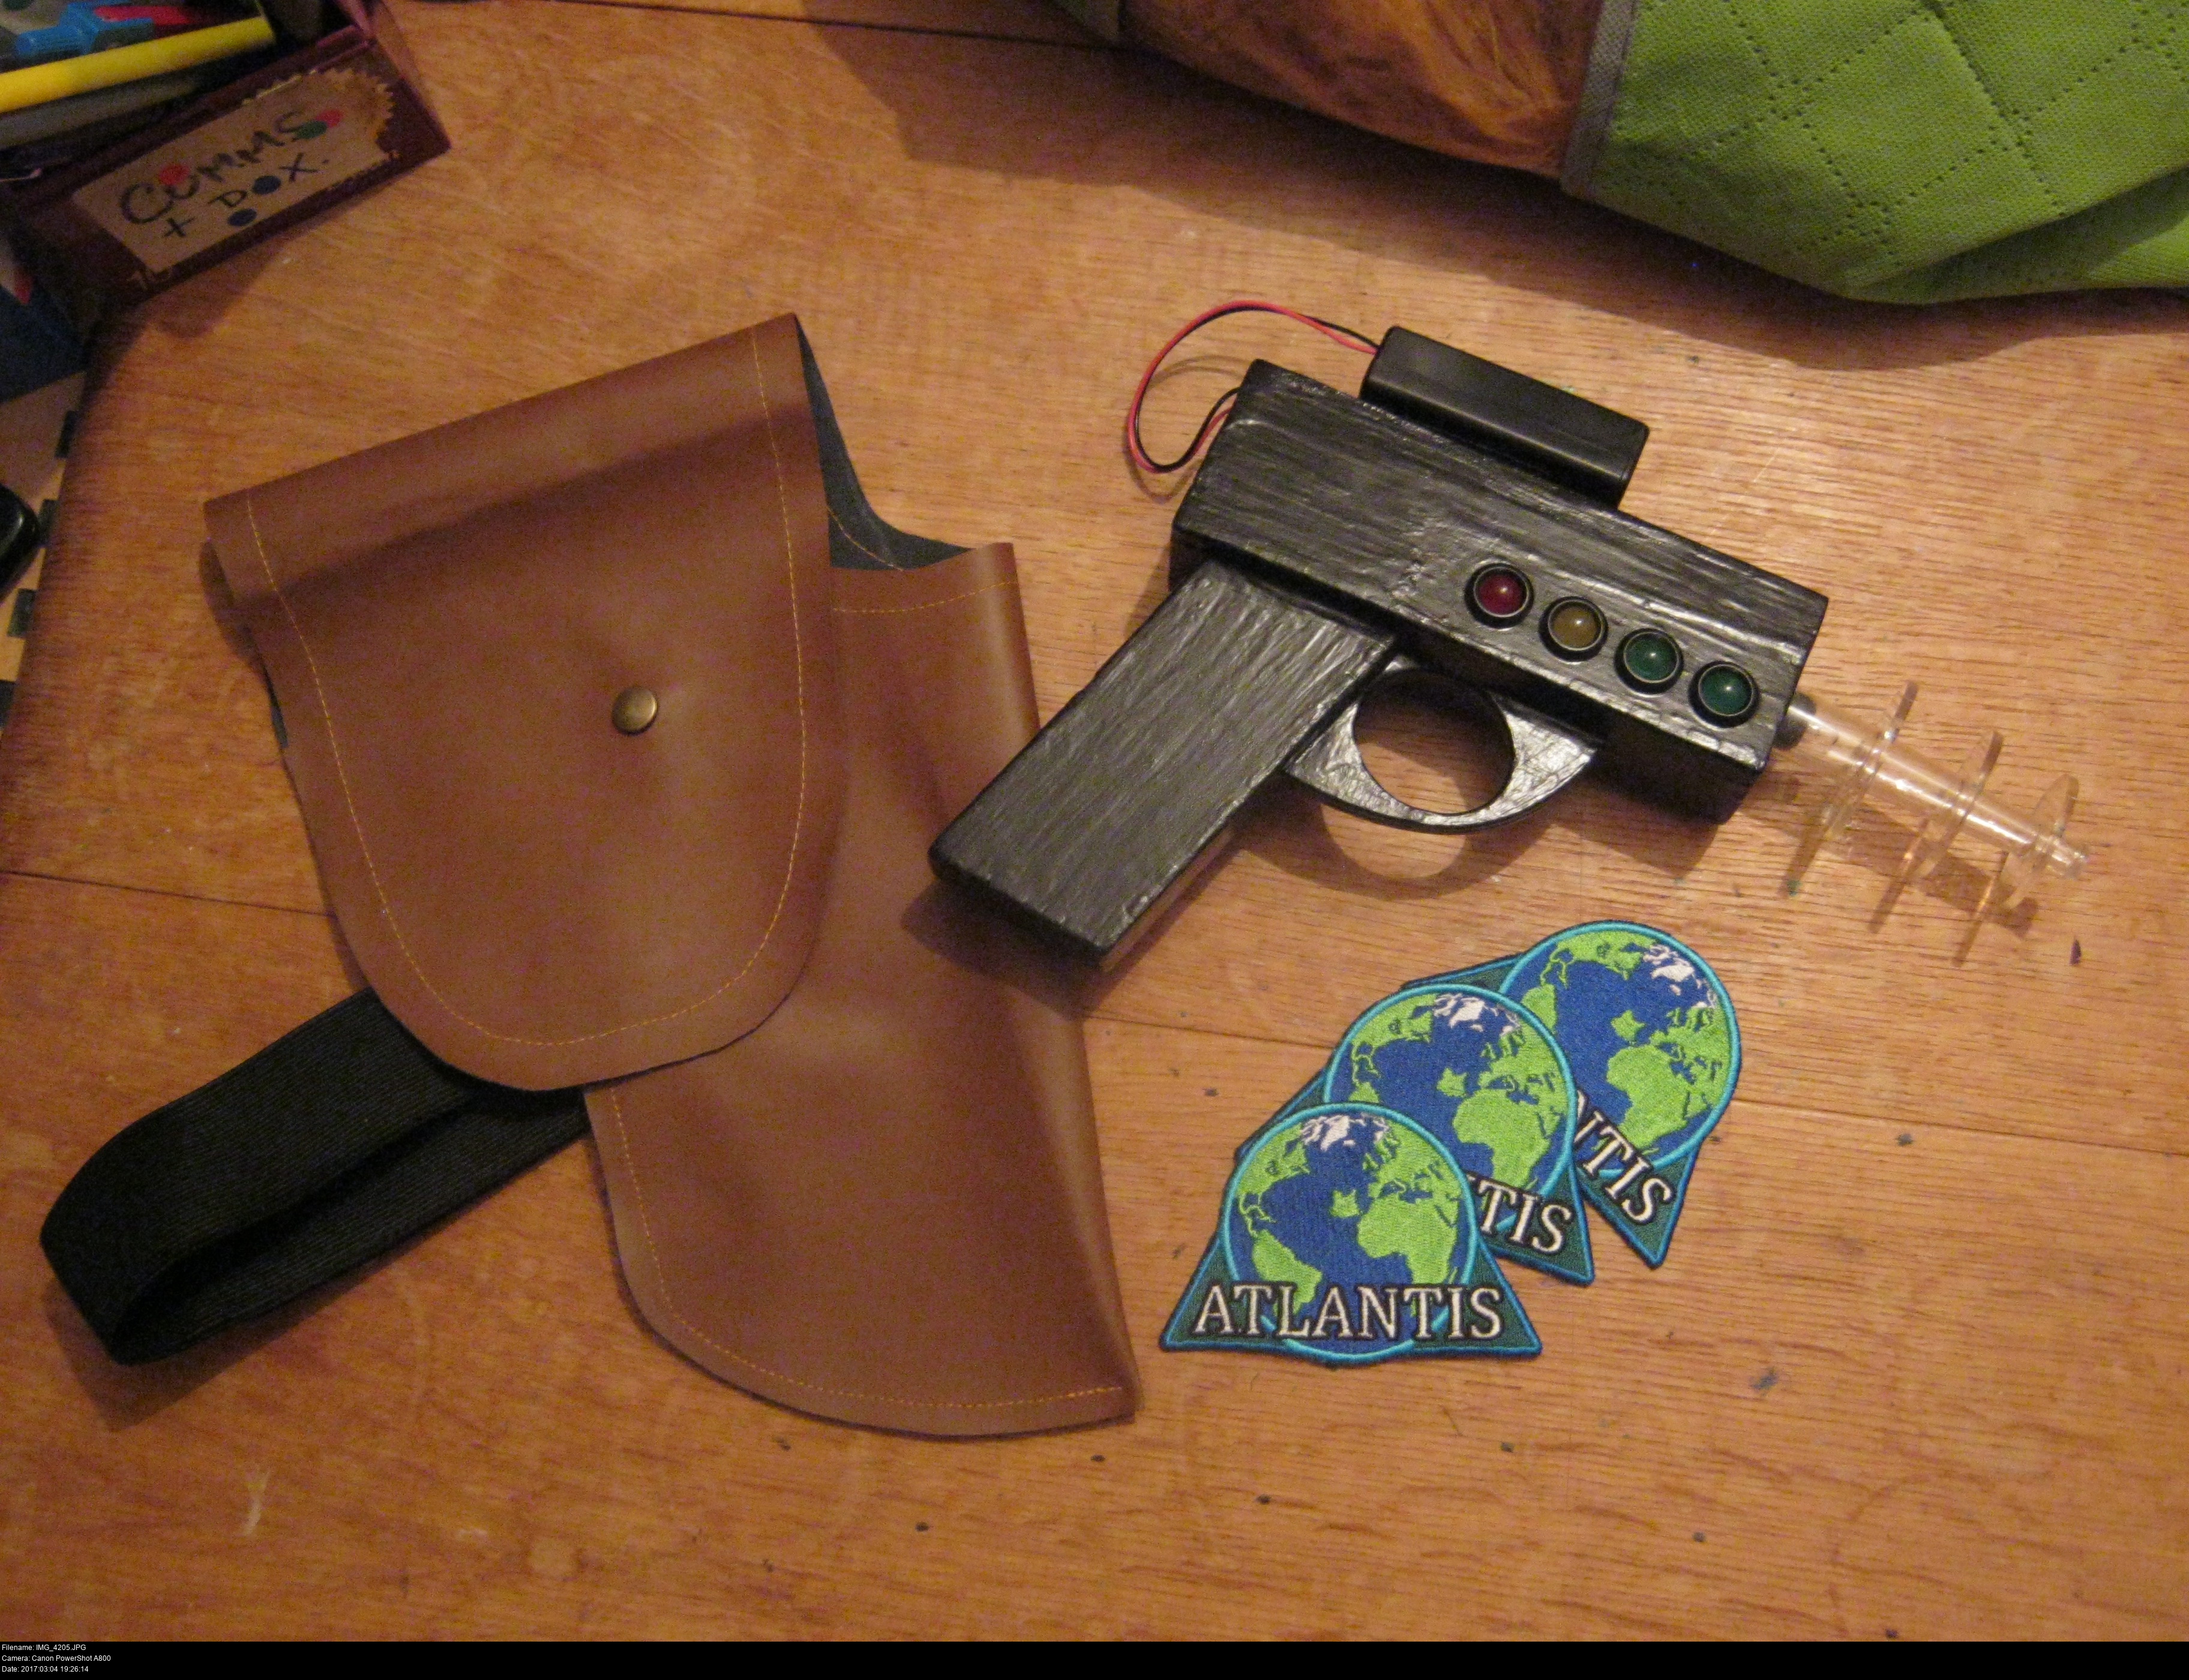
These badges are 3 1/2 inches wide, big enough to rest on the shoulder of my pleather overlynx pilot jacket. They might be a -little- smaller than I imagined, but the quality is phenomenal. The stitching around the edges is perfect, all the little details are present in the Earth graphic and the text is bold and clear.
I couldn't be happier with how these badges turned out.
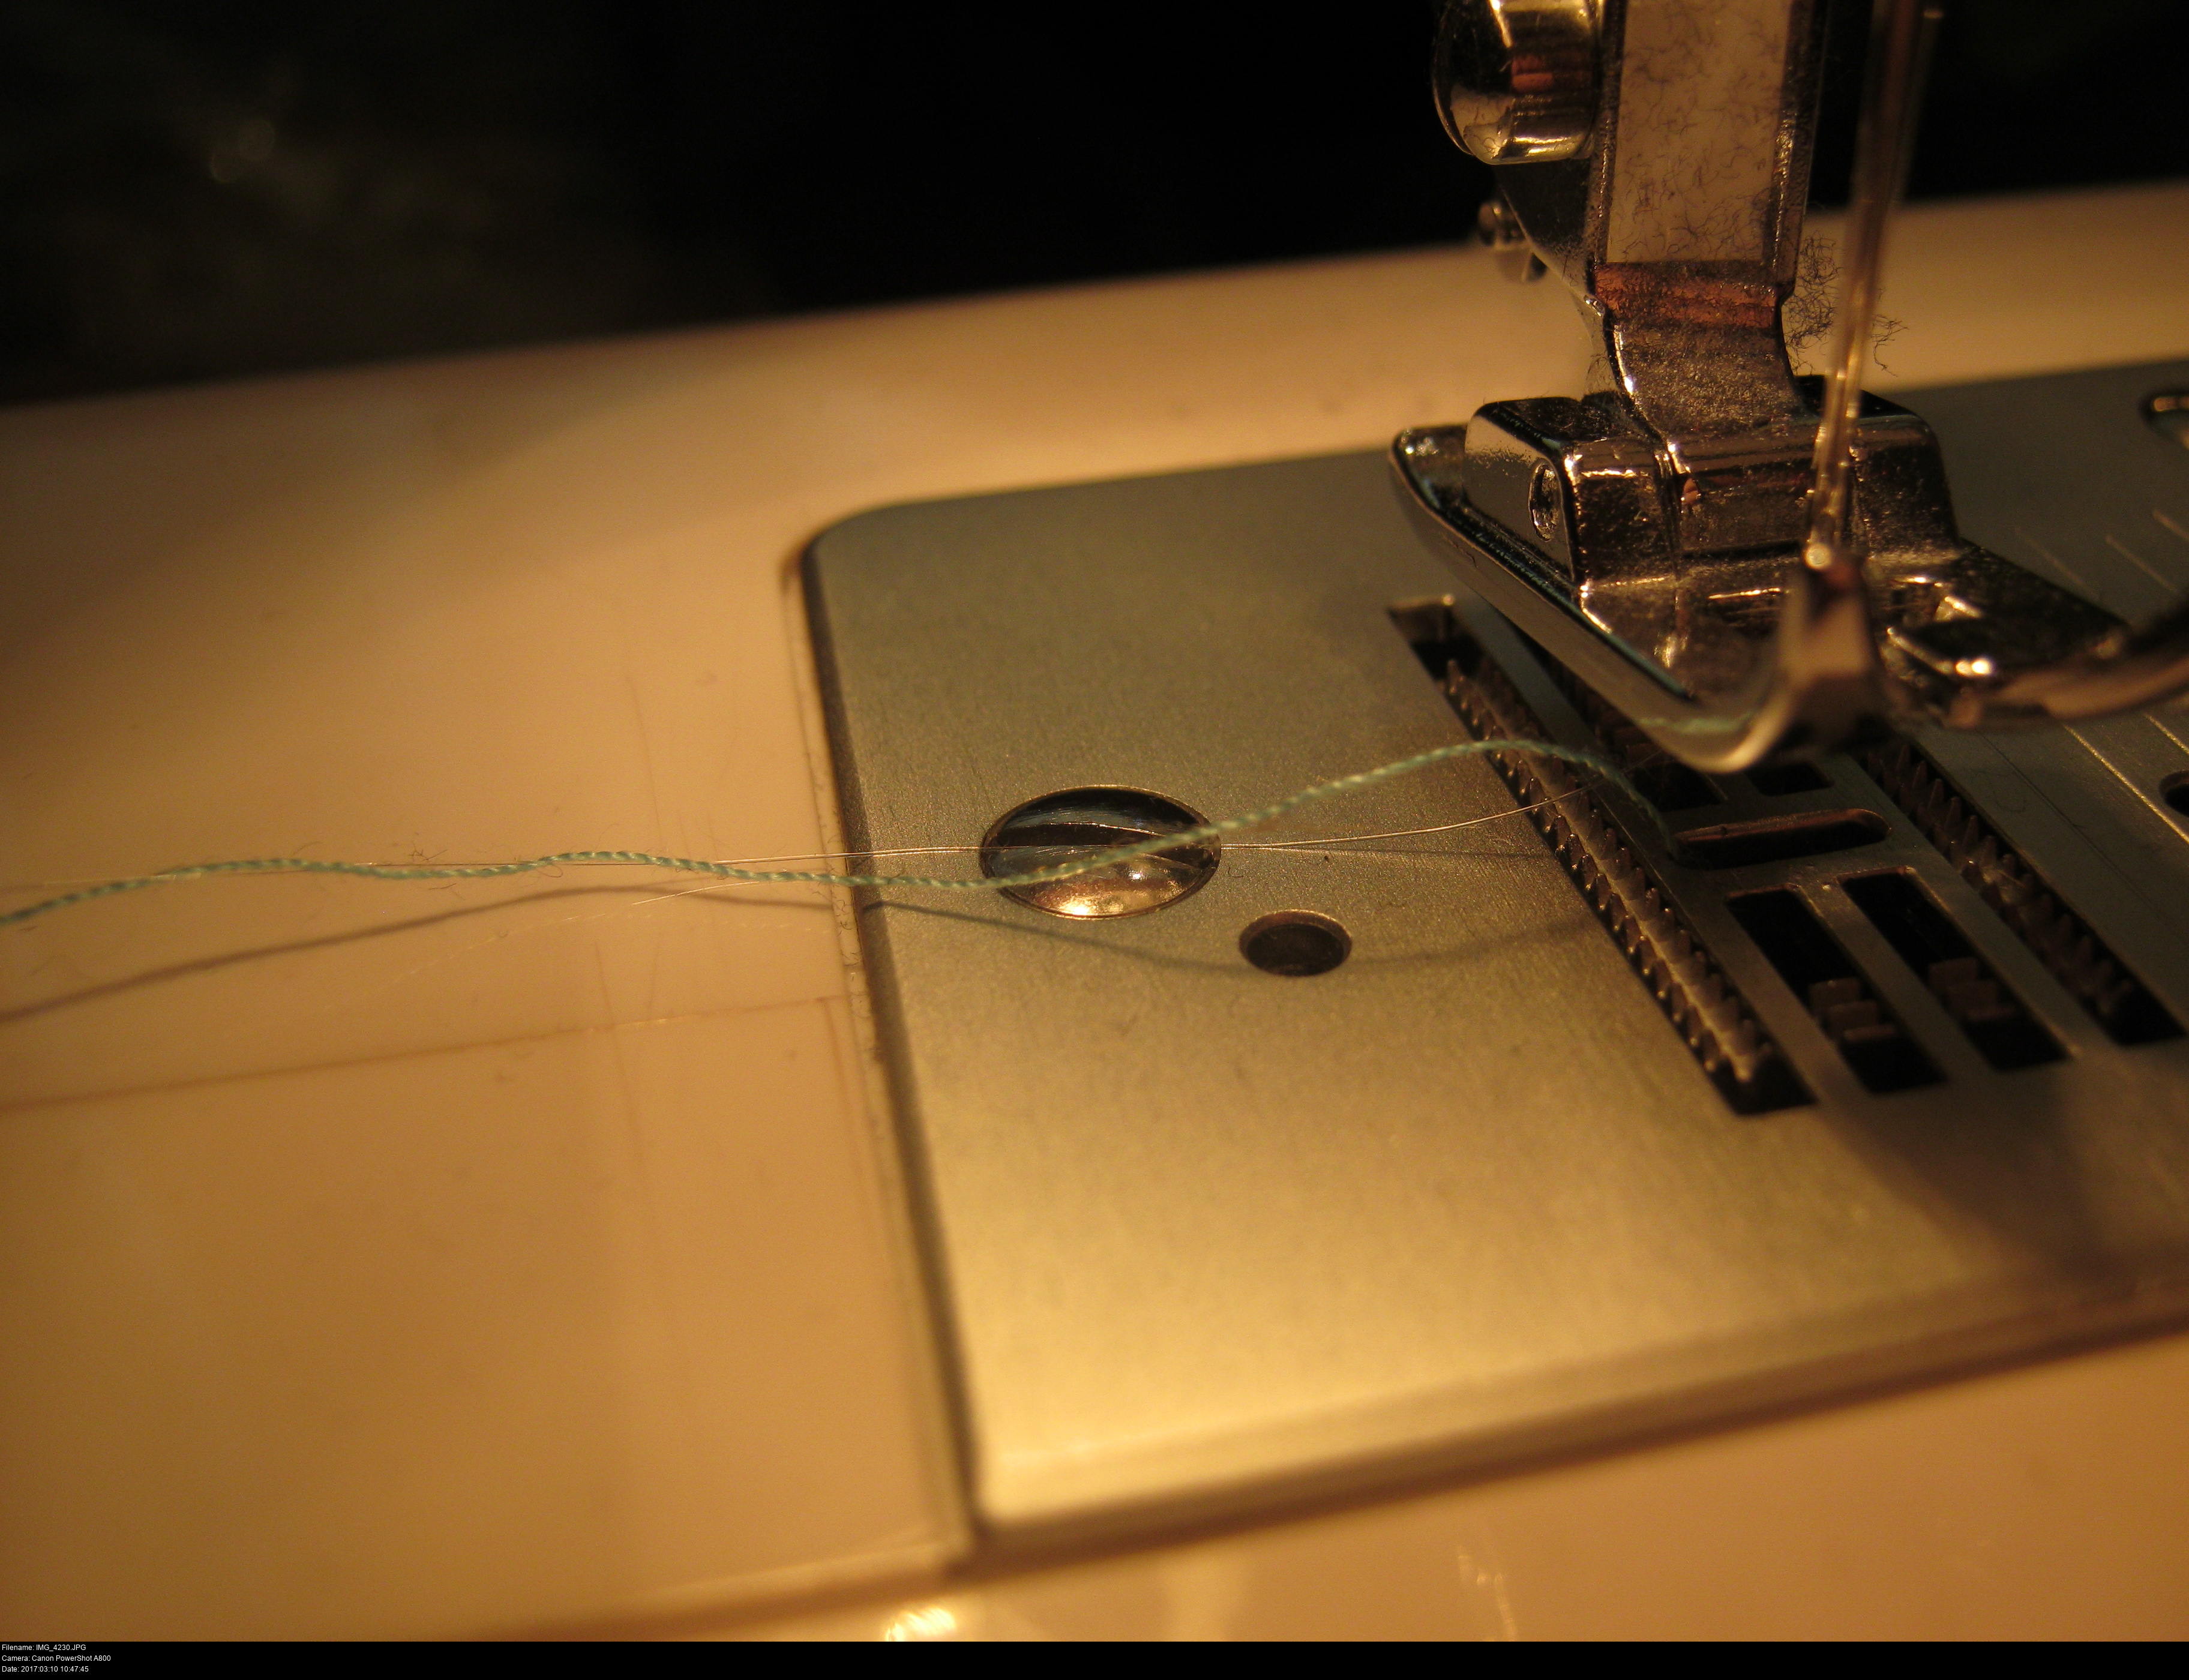
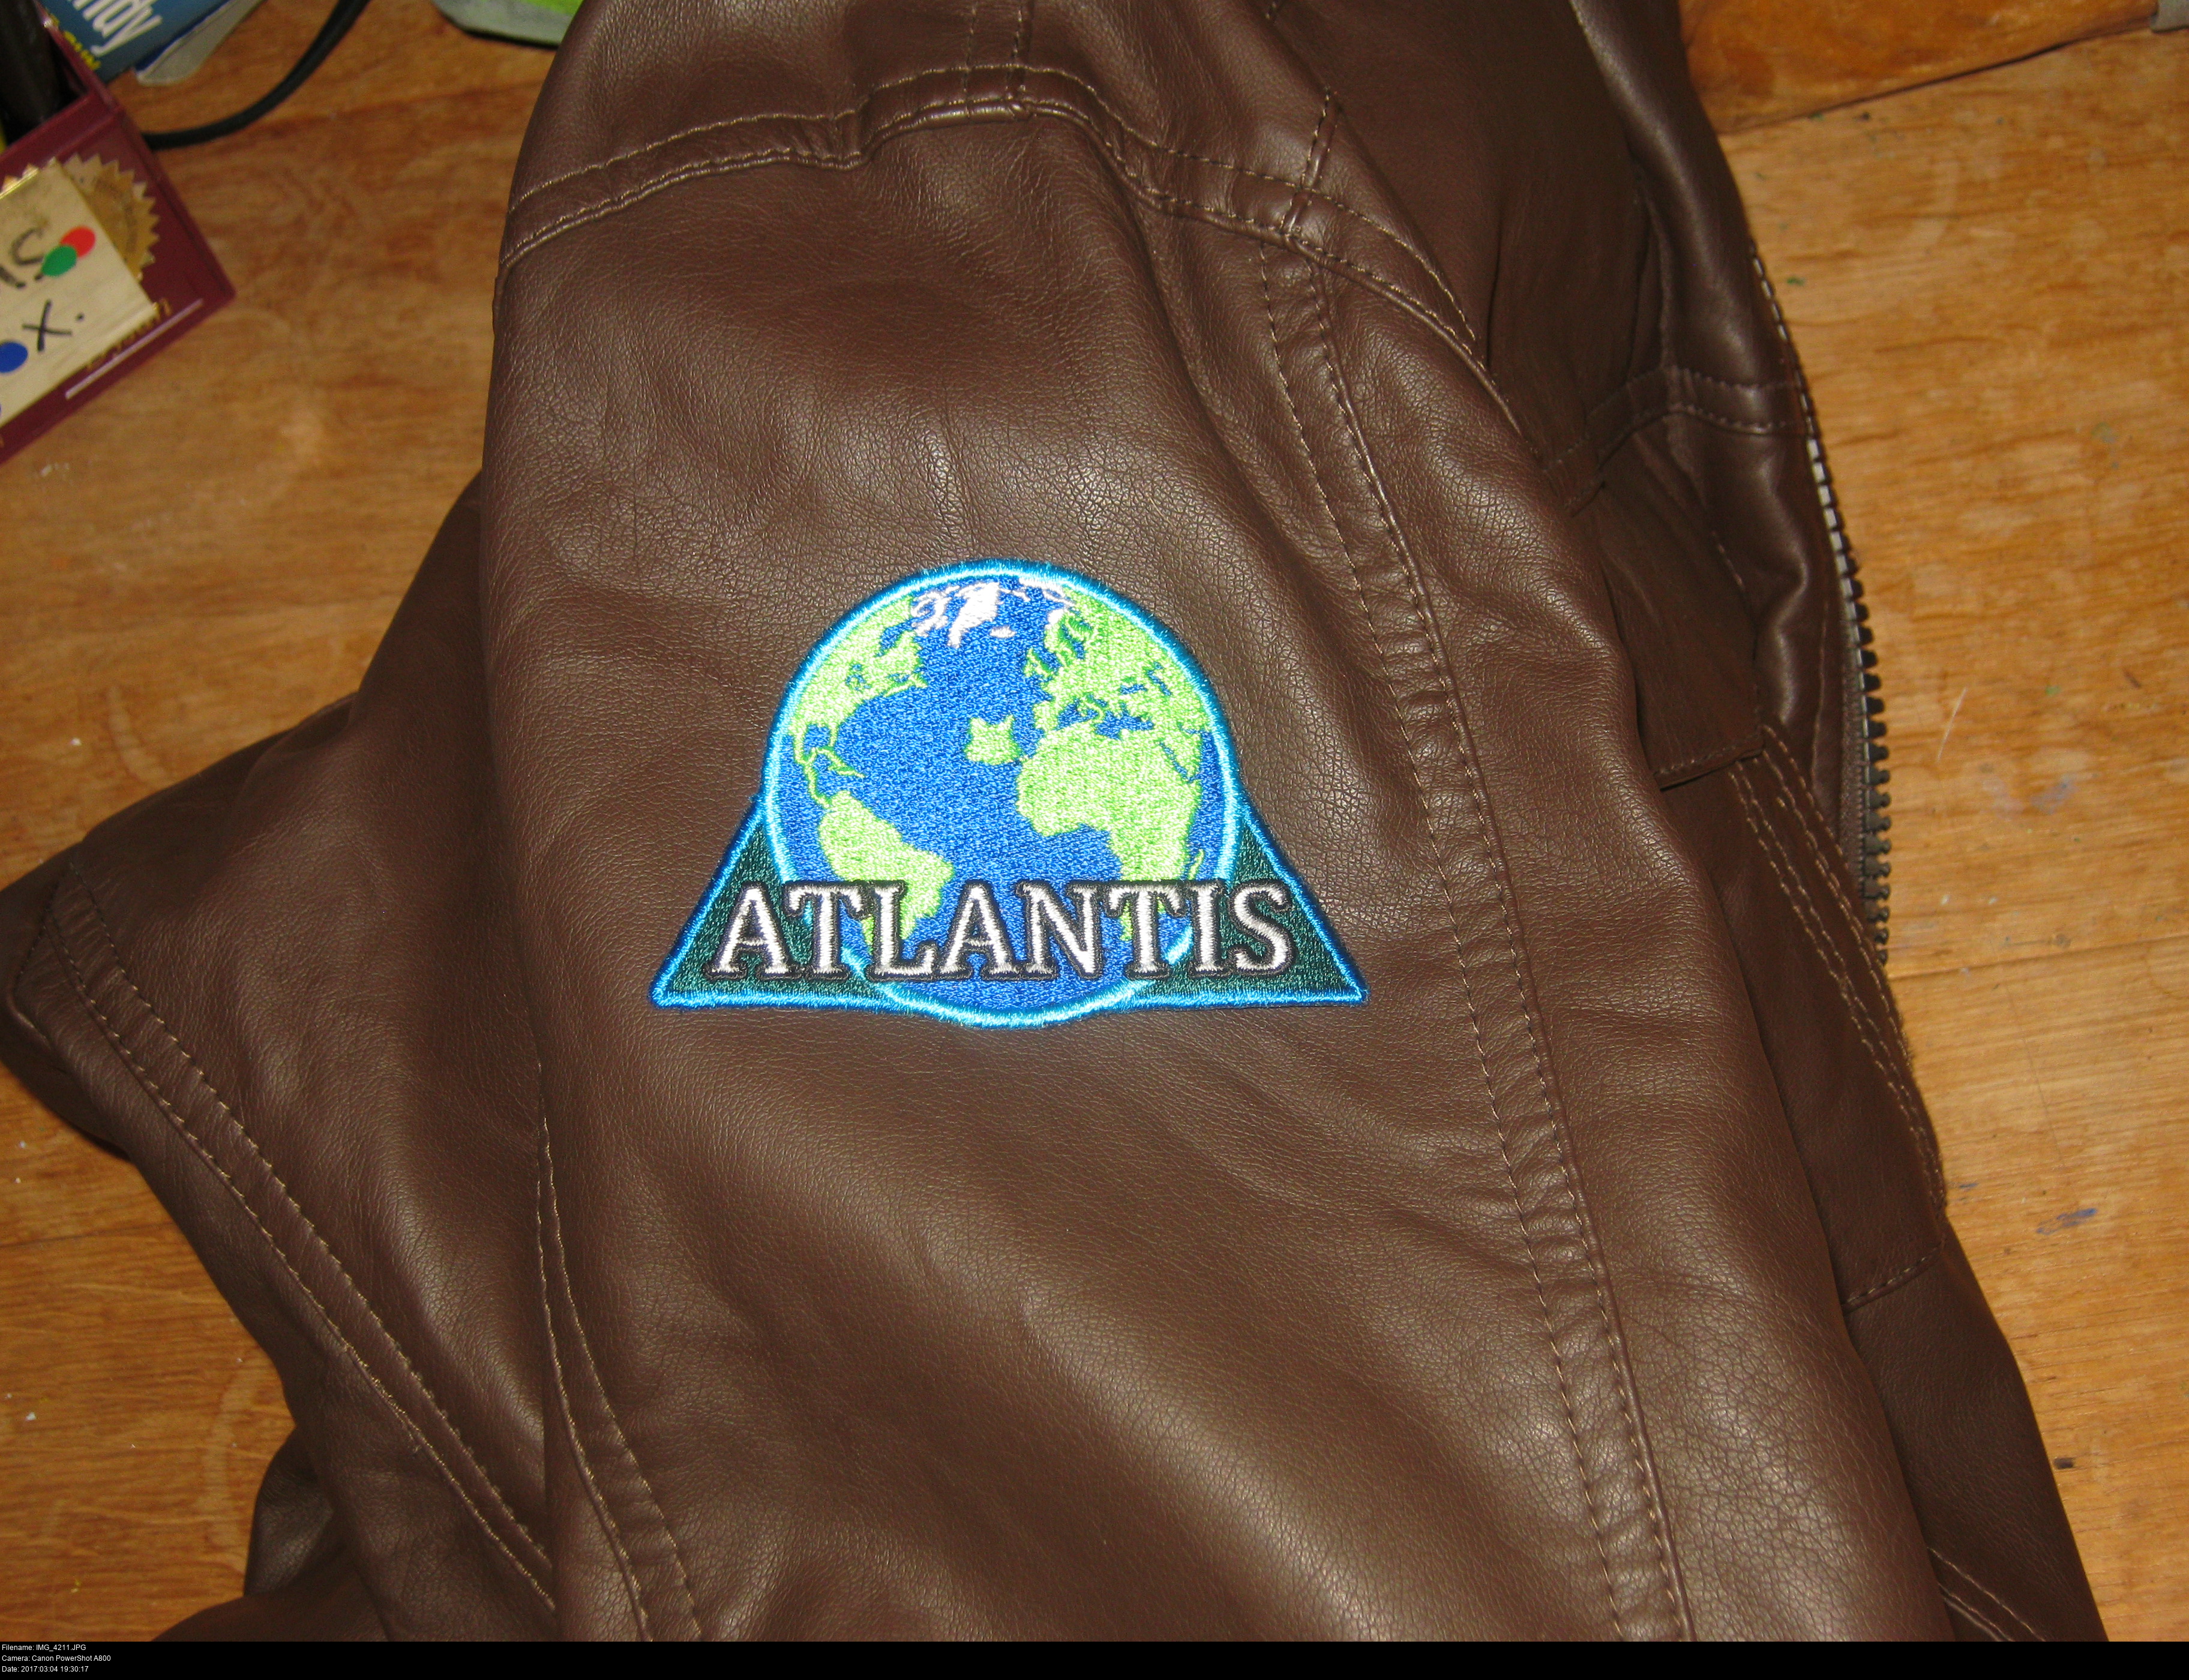
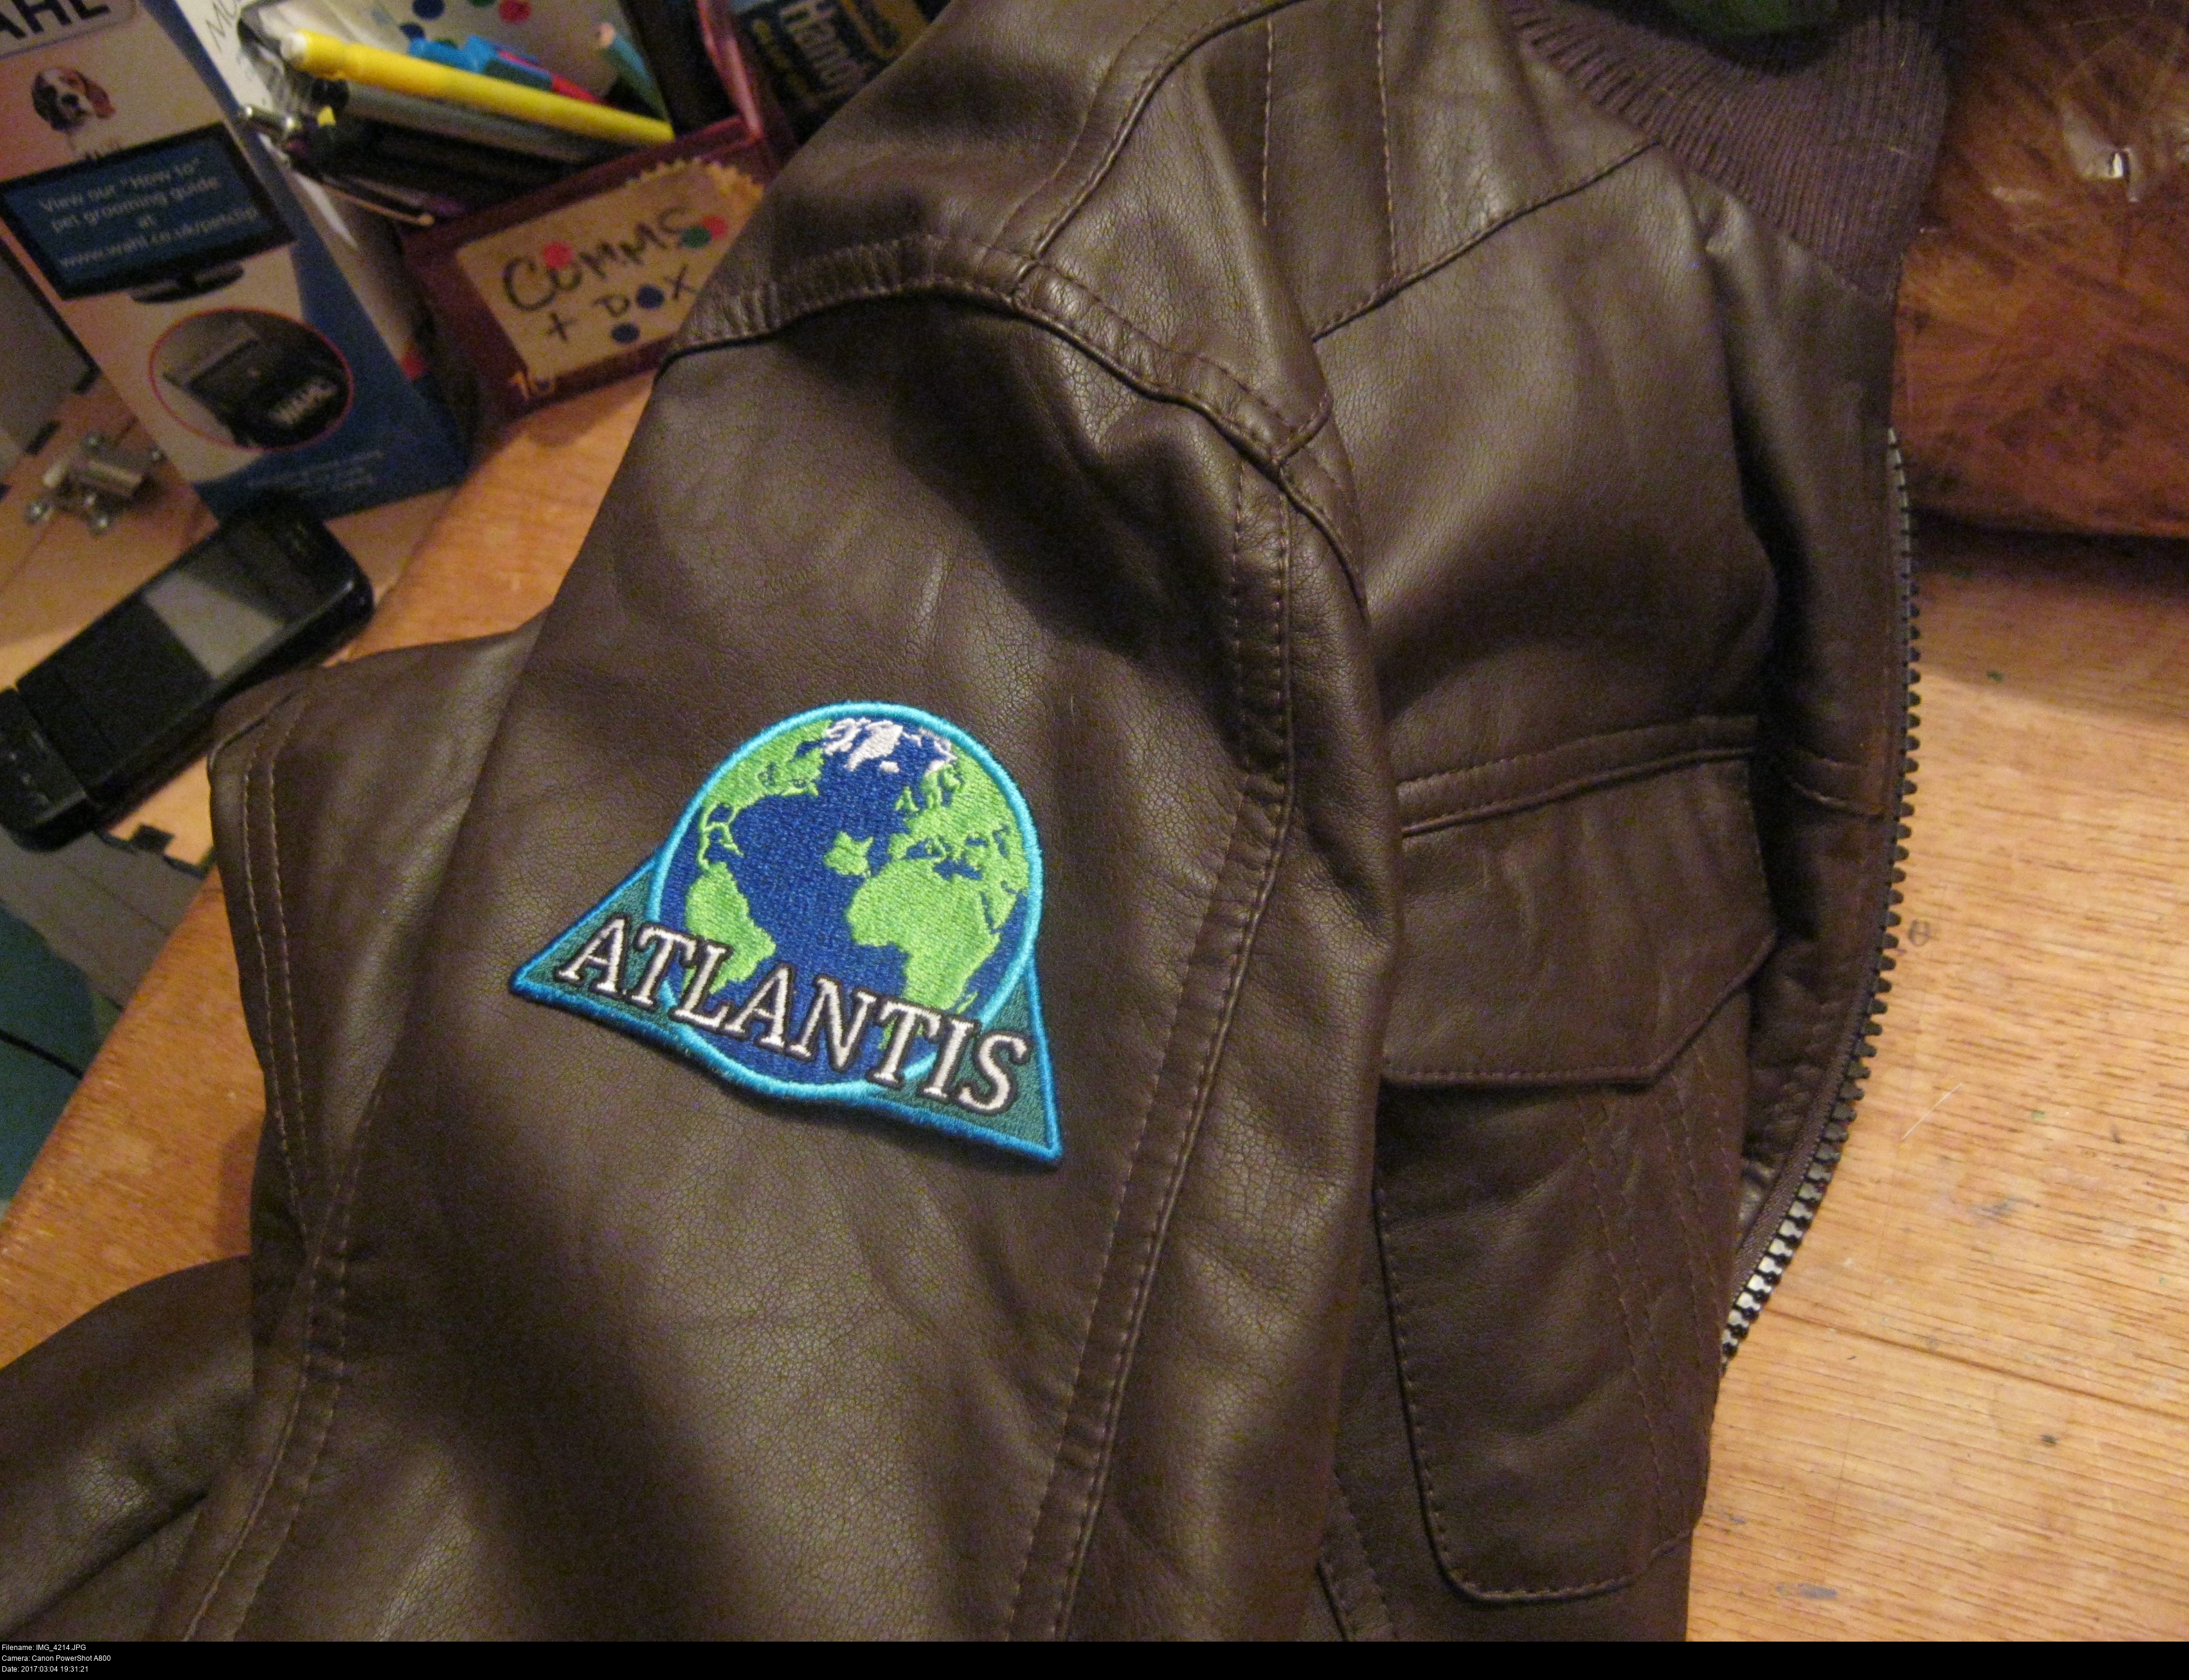
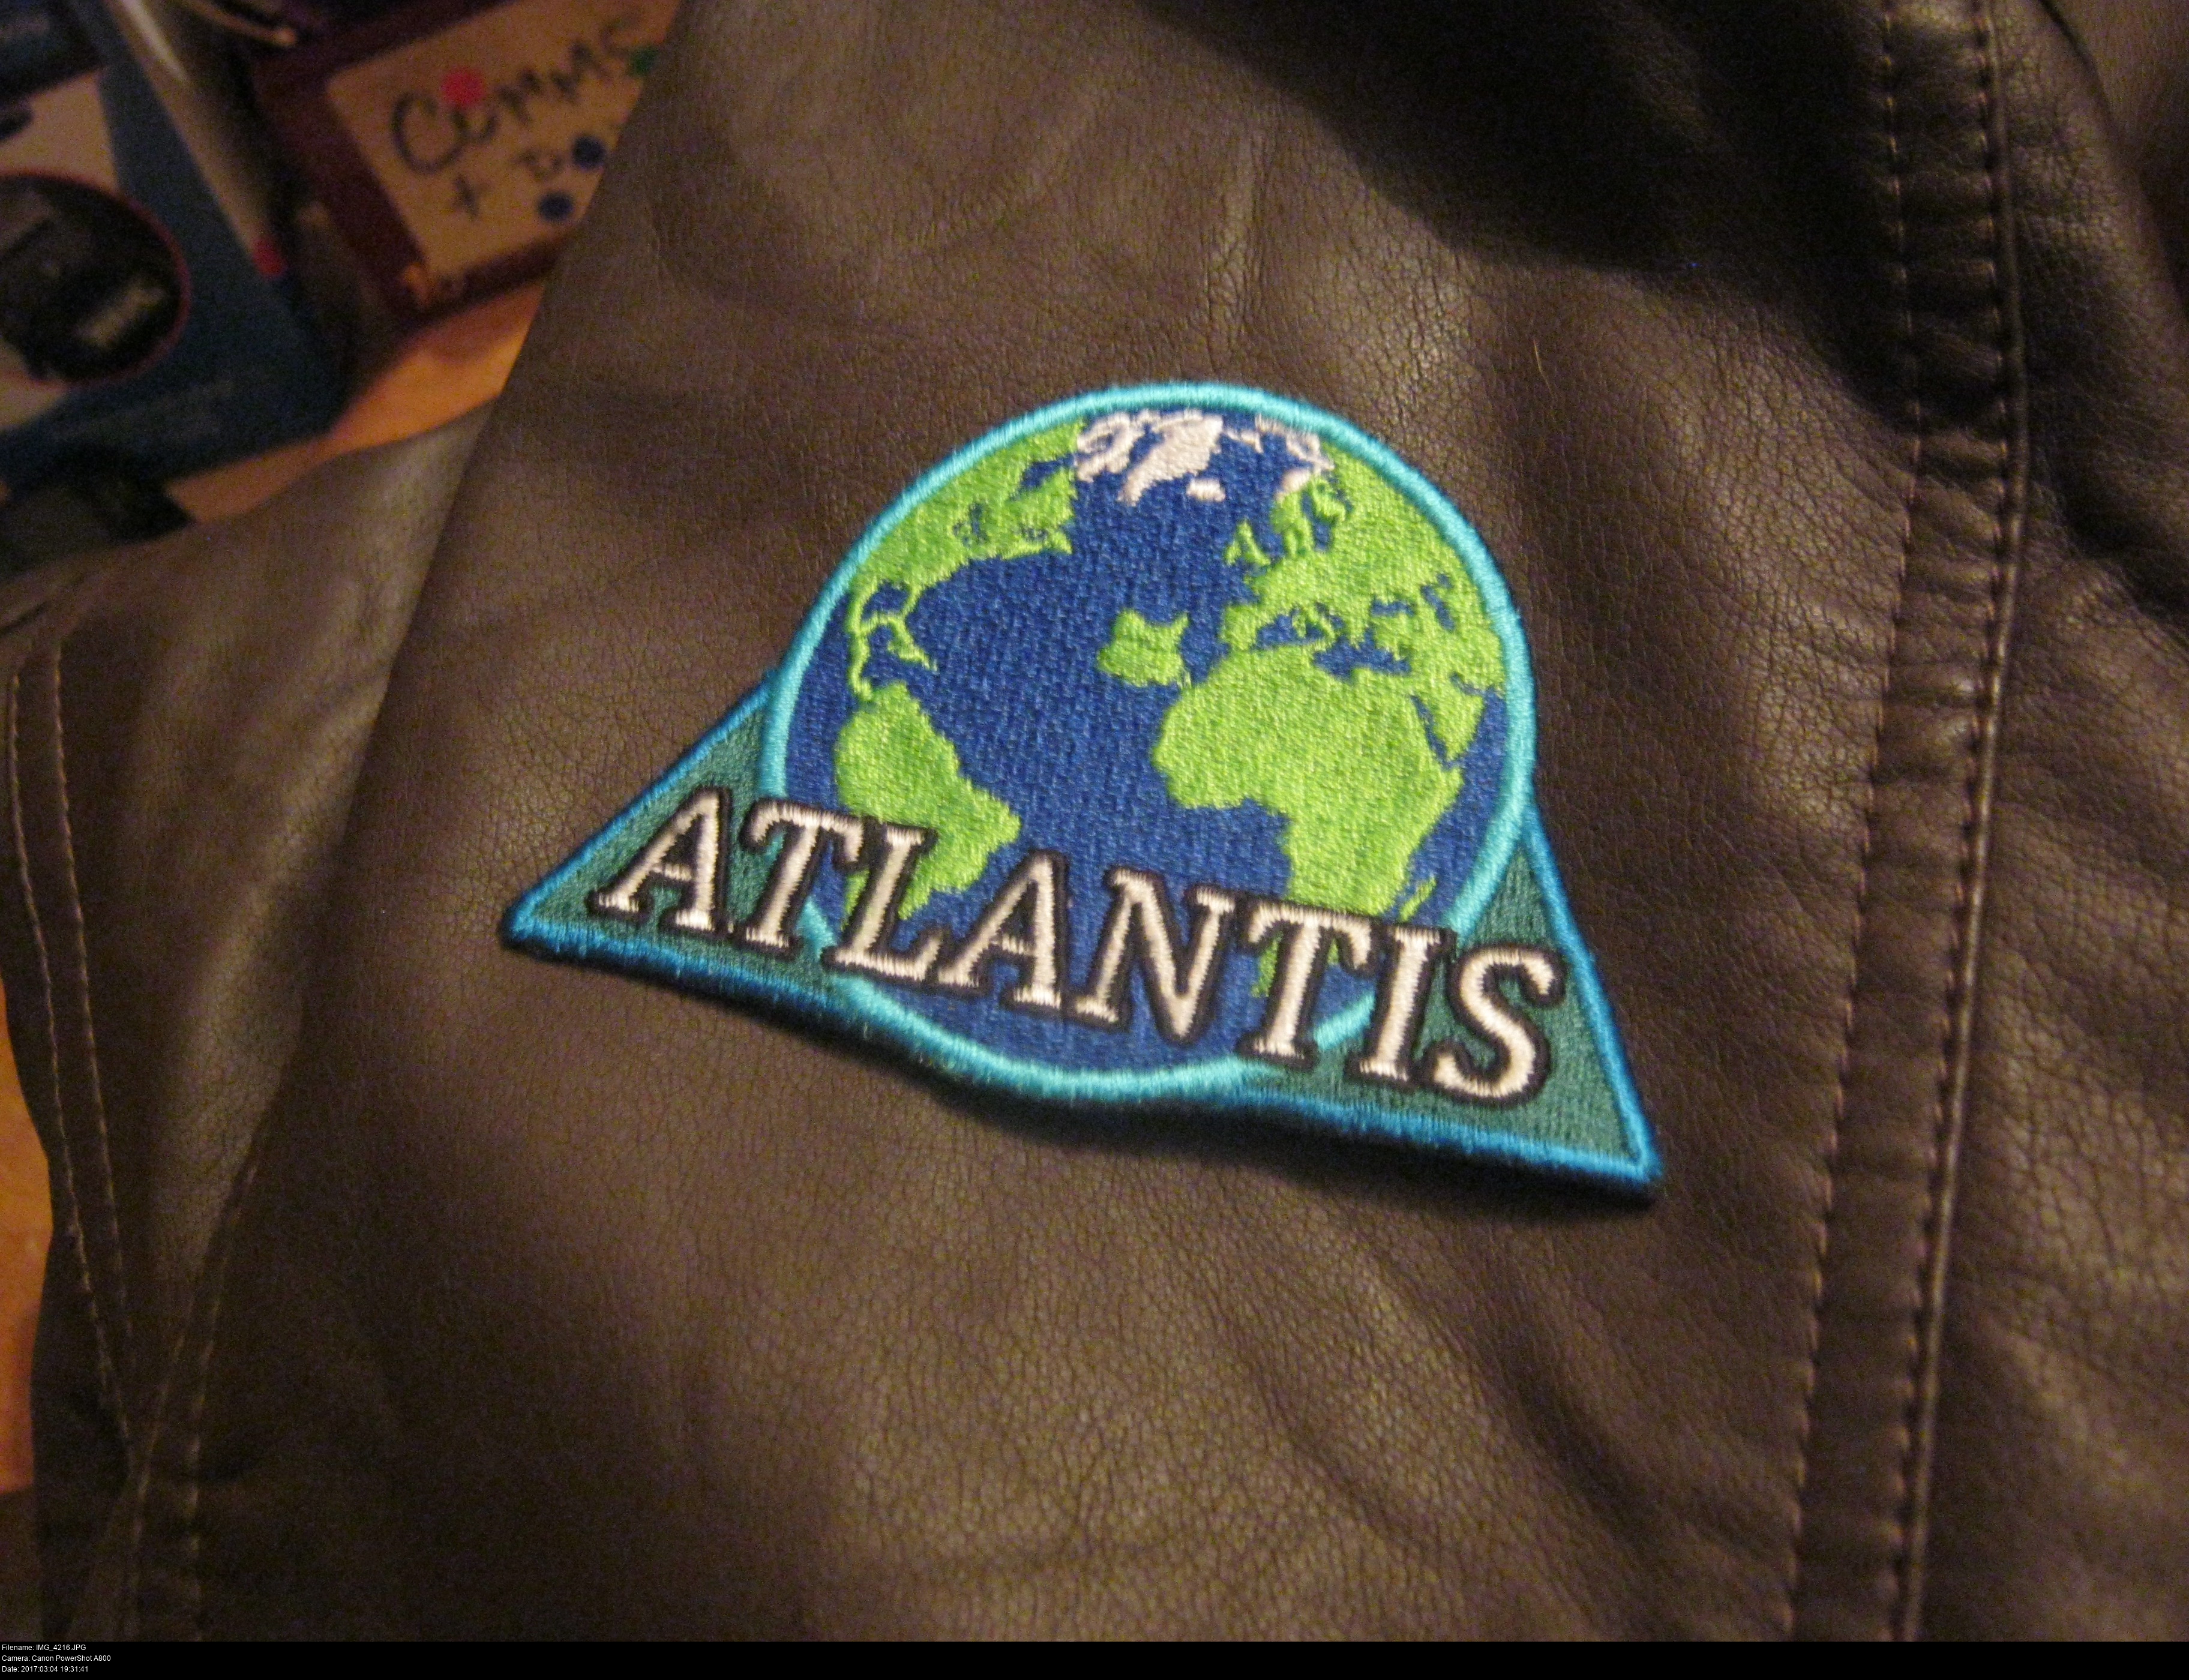
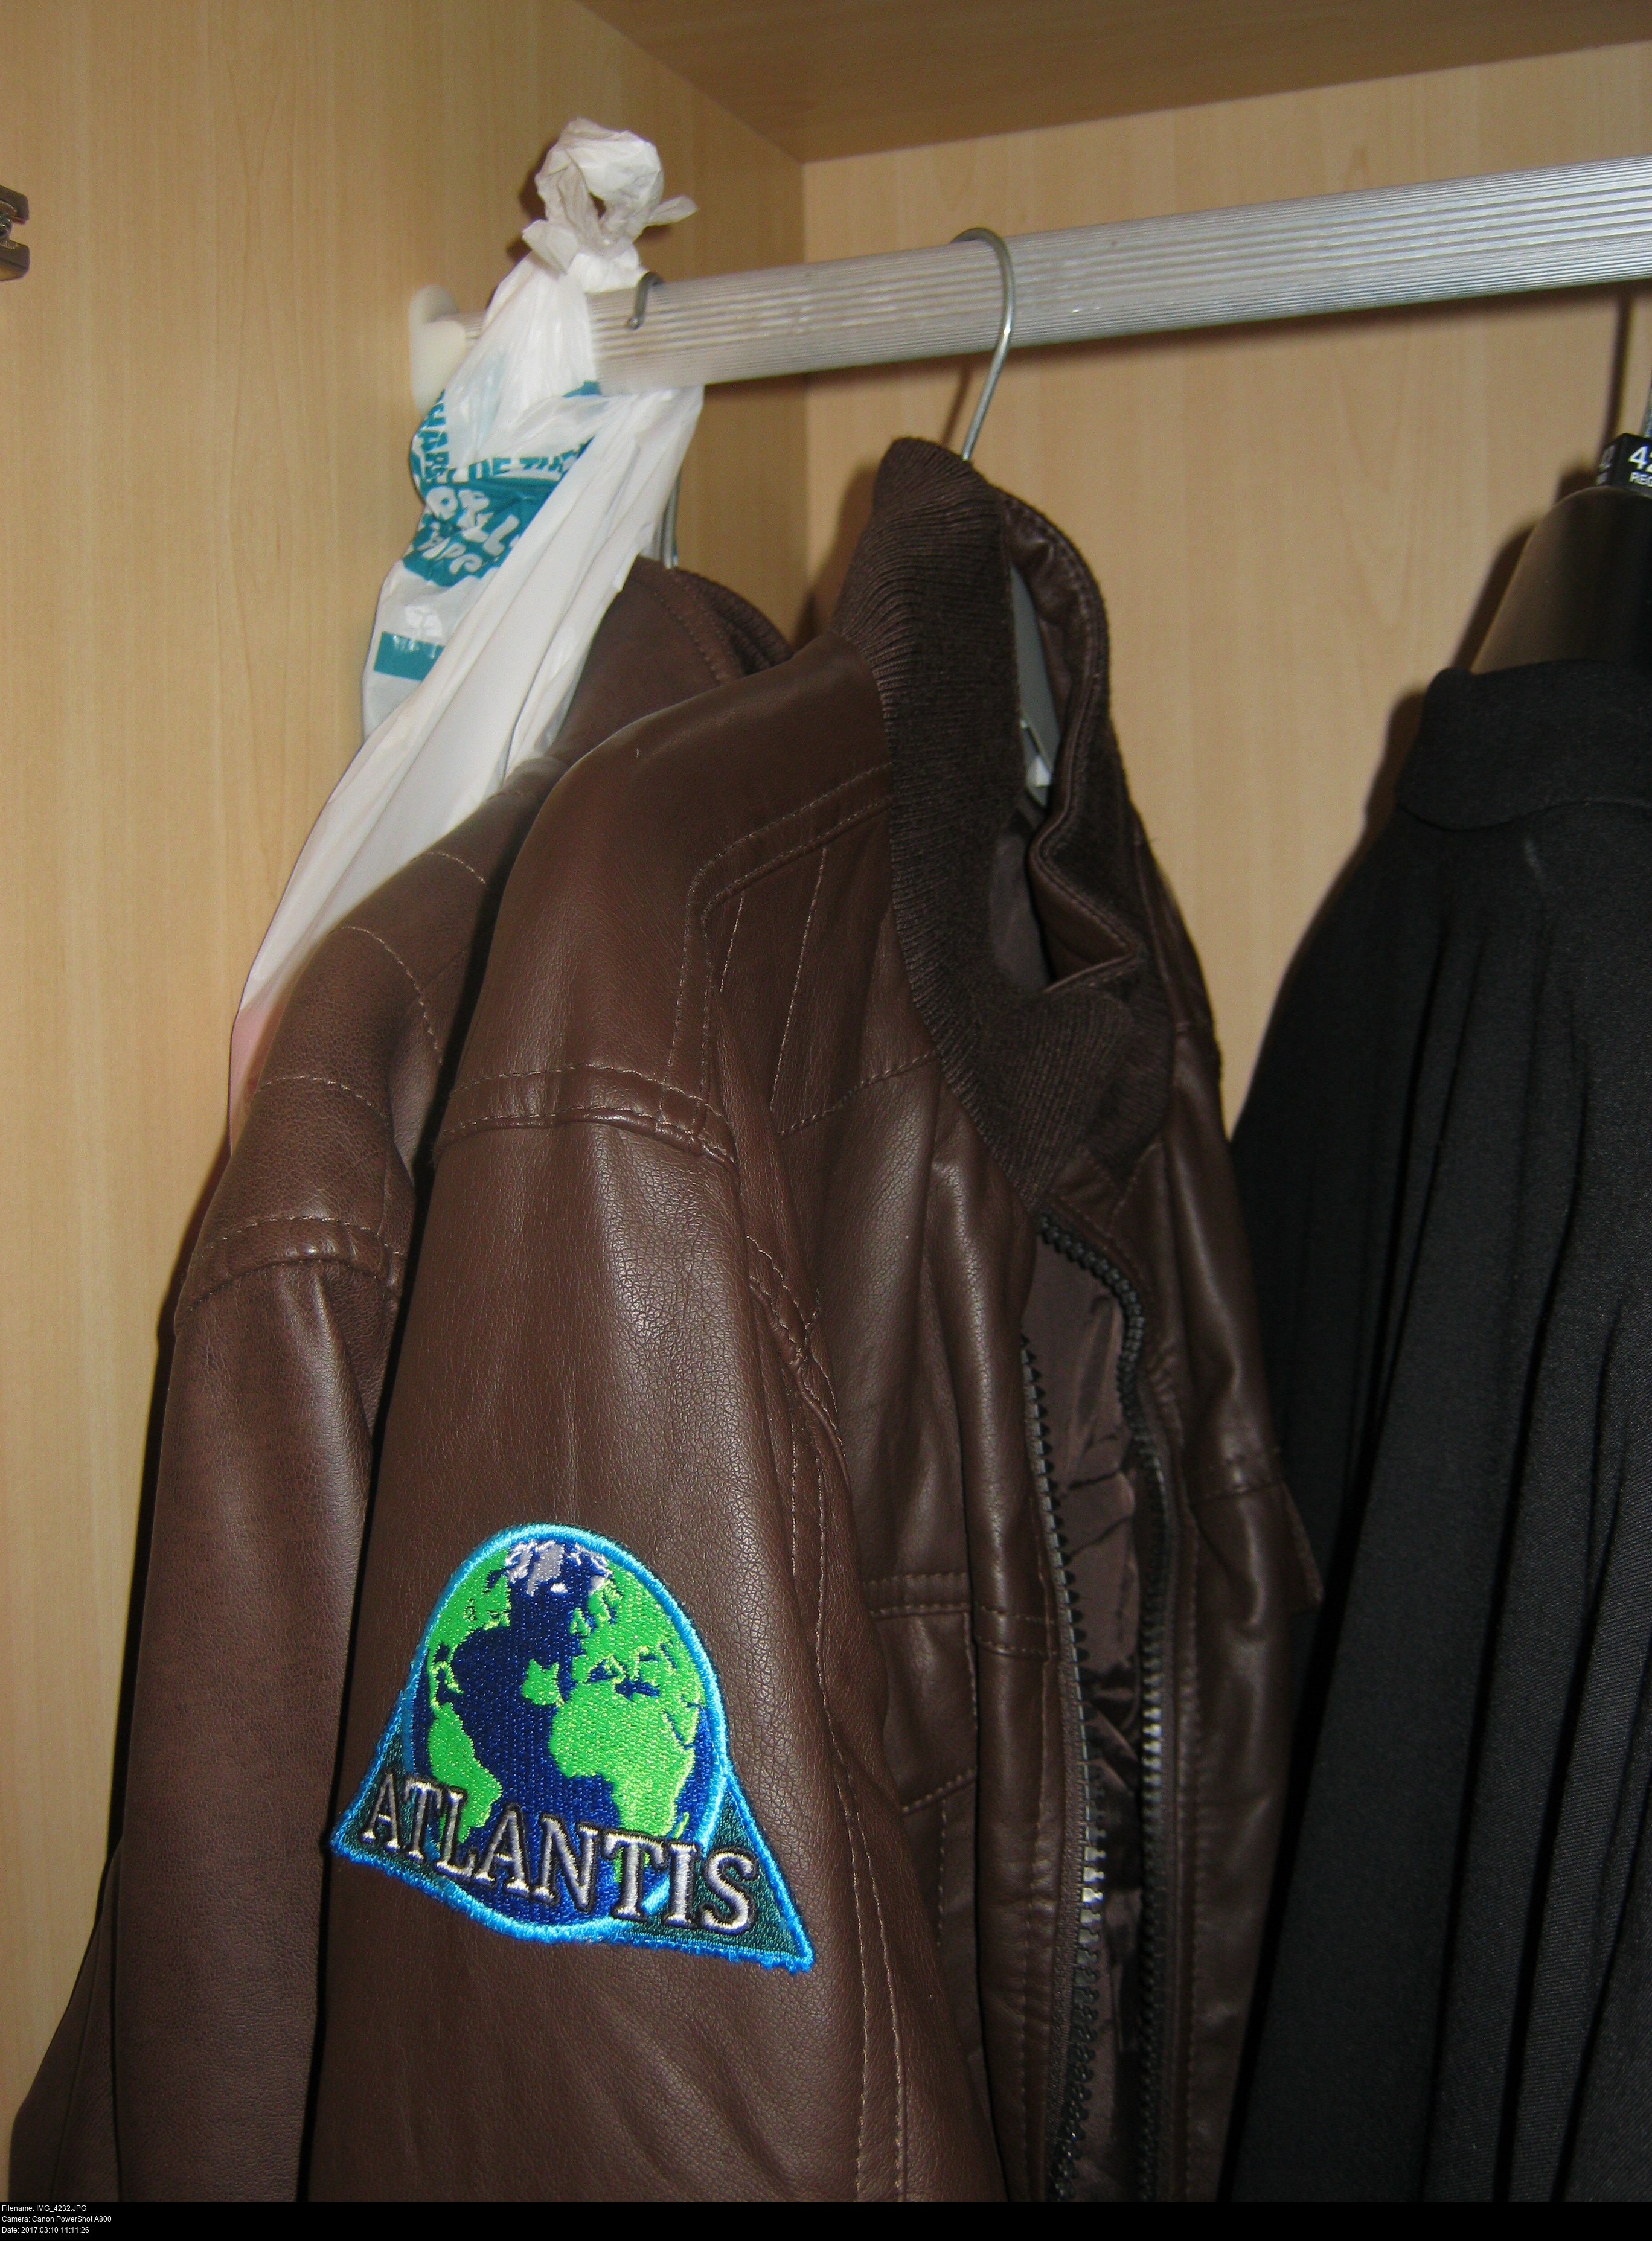
There's just the question of how to attach them to the jacket.
Some leather suits have sewn-in velcro patches to allow the wearer to remove and affix patches freely. I don't want to do anything that would damage my jacket, so I need something glue-like. I've heard of various kinds of gum and removeable glues, but I'm going to go with double-sided adhesive tape instead. The badges are felt-backed, so trying to tape onto the felt will just result in fluff coming off them.
Instead, I've cut out a backing piece out of Skull Kid's spare pleather stuff, and sewn it very carefully onto the reverse of one of the badges. This gives the badge a nice, clean, smooth flexible backing so the double-sided tape will stick much better. I used invisible nylon top thread and light blue bobbin thread to minimize any damage to the badge.
(Like the gloves, it probably would've been smarter to sew the backing on first and then cut it down to the correct size, but I was slow and careful here so it worked.)
Who am I kidding? I never want to take that patch off. That's awesome.
Wearing Hotshot is easy, but making sure that all the fur edges are tucked into the collar and gloves is annoying. Having a partner helps!
The head gets very hot very fast and I sweat a lot. The only ventilation is through the eyeholes. This is why fursuits have those daft gaping mouths. An hour into wearing Hotshot for the first time, I got out my penknife and cut a little horizontal slit in his muzzle.
Breathe deep and slow, pretend you're in a diving suit underwater.
Don't panic. This might contradict the second half of what I said above, but hey.
I love people's reactions while I'm wearing Hotshot, though it seems few people know what to make of him. There's wacky furries who just goof around, there's performer furries who stay in character and only squeak, but I'm a cosplayer in a costume, so I'm not prone to doing silly stuff and drawing attention... Plus, since my suit is in a unique style, other furries don't know what to make of me either. It's odd.
Check out my cosplay FAQ for an interesting answer about acting in costume at the con!
I store and carry the overlynx pistol in a small postal box that I've lined with foam and filled with packing peanuts. It's not perfect, but it's certainly better than keeping it loose, since the emitter barrel raygun discs would be prised off accidentally without question.
You need something relatively sturdy to keep your head in for storage and transportation.
I've got a canvas laundry bag. It's not as thick or reliable as I'd like. I was hoping for something chunky and plastic-coated, like a high-quality shopping bag.
So how are you going to get your furry stuff to the convention?
I've seen other fursuiters with large costumes use wheeled luggage for transportation and check them into the cloakroom at the convention. I wasn't so keen on leaving my bag behind, so I came up with a somewhat-solution that's worked so far:
I wear Hotshot's clothes to the convention, with the head, gloves and pistol in its box in the large laundry bag. I also carry Skull Kid's drawstring sling bag in there too. It's got lots of handles, so it's easy to carry. I have to take care that I hold the bag so that none of the objects are resting on top of the head though.
When I get to the convention, I take the head, gloves and pistol out, fold up the laundry bag, and move everything I don't need into the sling bag.
This way I can swap between carrying everything safely in the laundry bag and furry-ready with everything in the sling bag.
Would you like to hear a tale of woe?

This is the only photo of Hotshot that I've got with the holster on.
It looks cool, sure, but there's a bit of a problem with it. Because the material is so floppy and weak, it doesn't hold its shape, and so it's useless for holding the gun!
I tried holstering the pistol after getting this picture taken and it slipped out of the holster and hit the ground -hard-, landing on the barrel.
The discs didn't come off, but the hot glue holding the barrel onto the body of the gun broke so the barrel was loose.
The only thing I could do was head straight to the cosplay desk and see what tools they had. They had all kinds of glue except hot glue, so that's what I did. I used every single kind of glue except hot glue! Pouring them all on and holding the gun vertical so they could dry. It bloody worked, it did. I had to be very careful with the gun for the rest of the day, but it held.
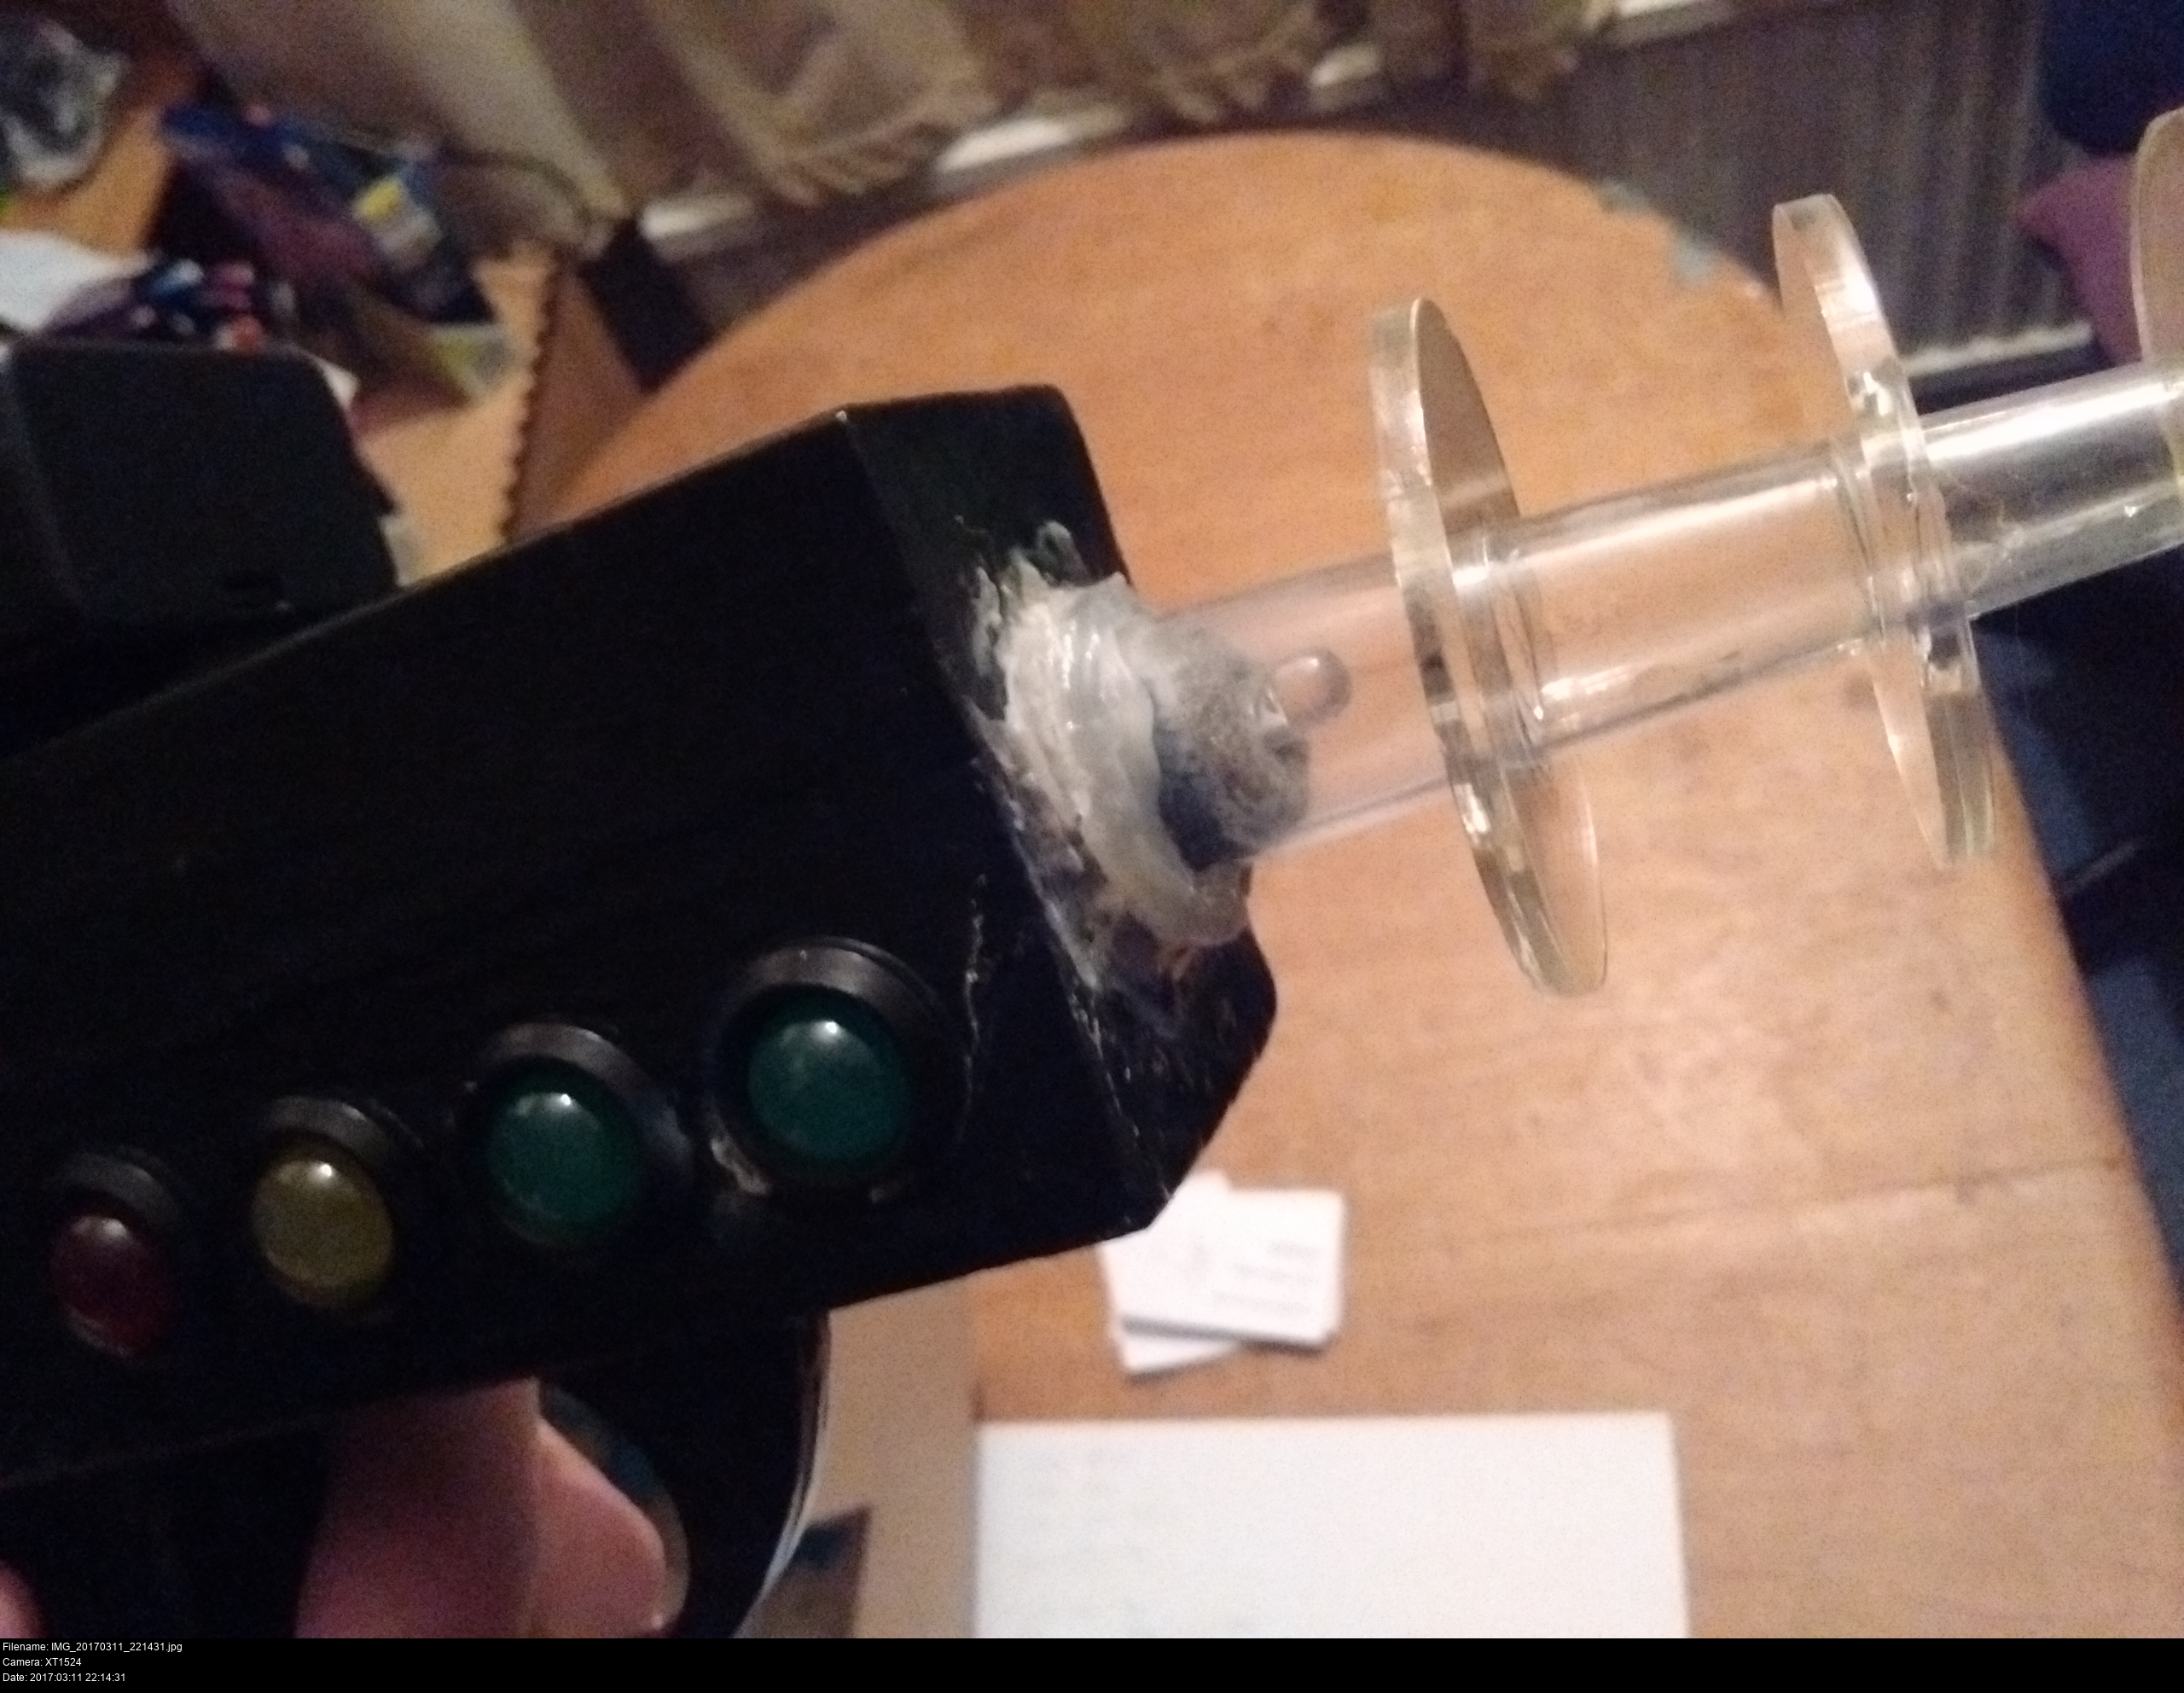
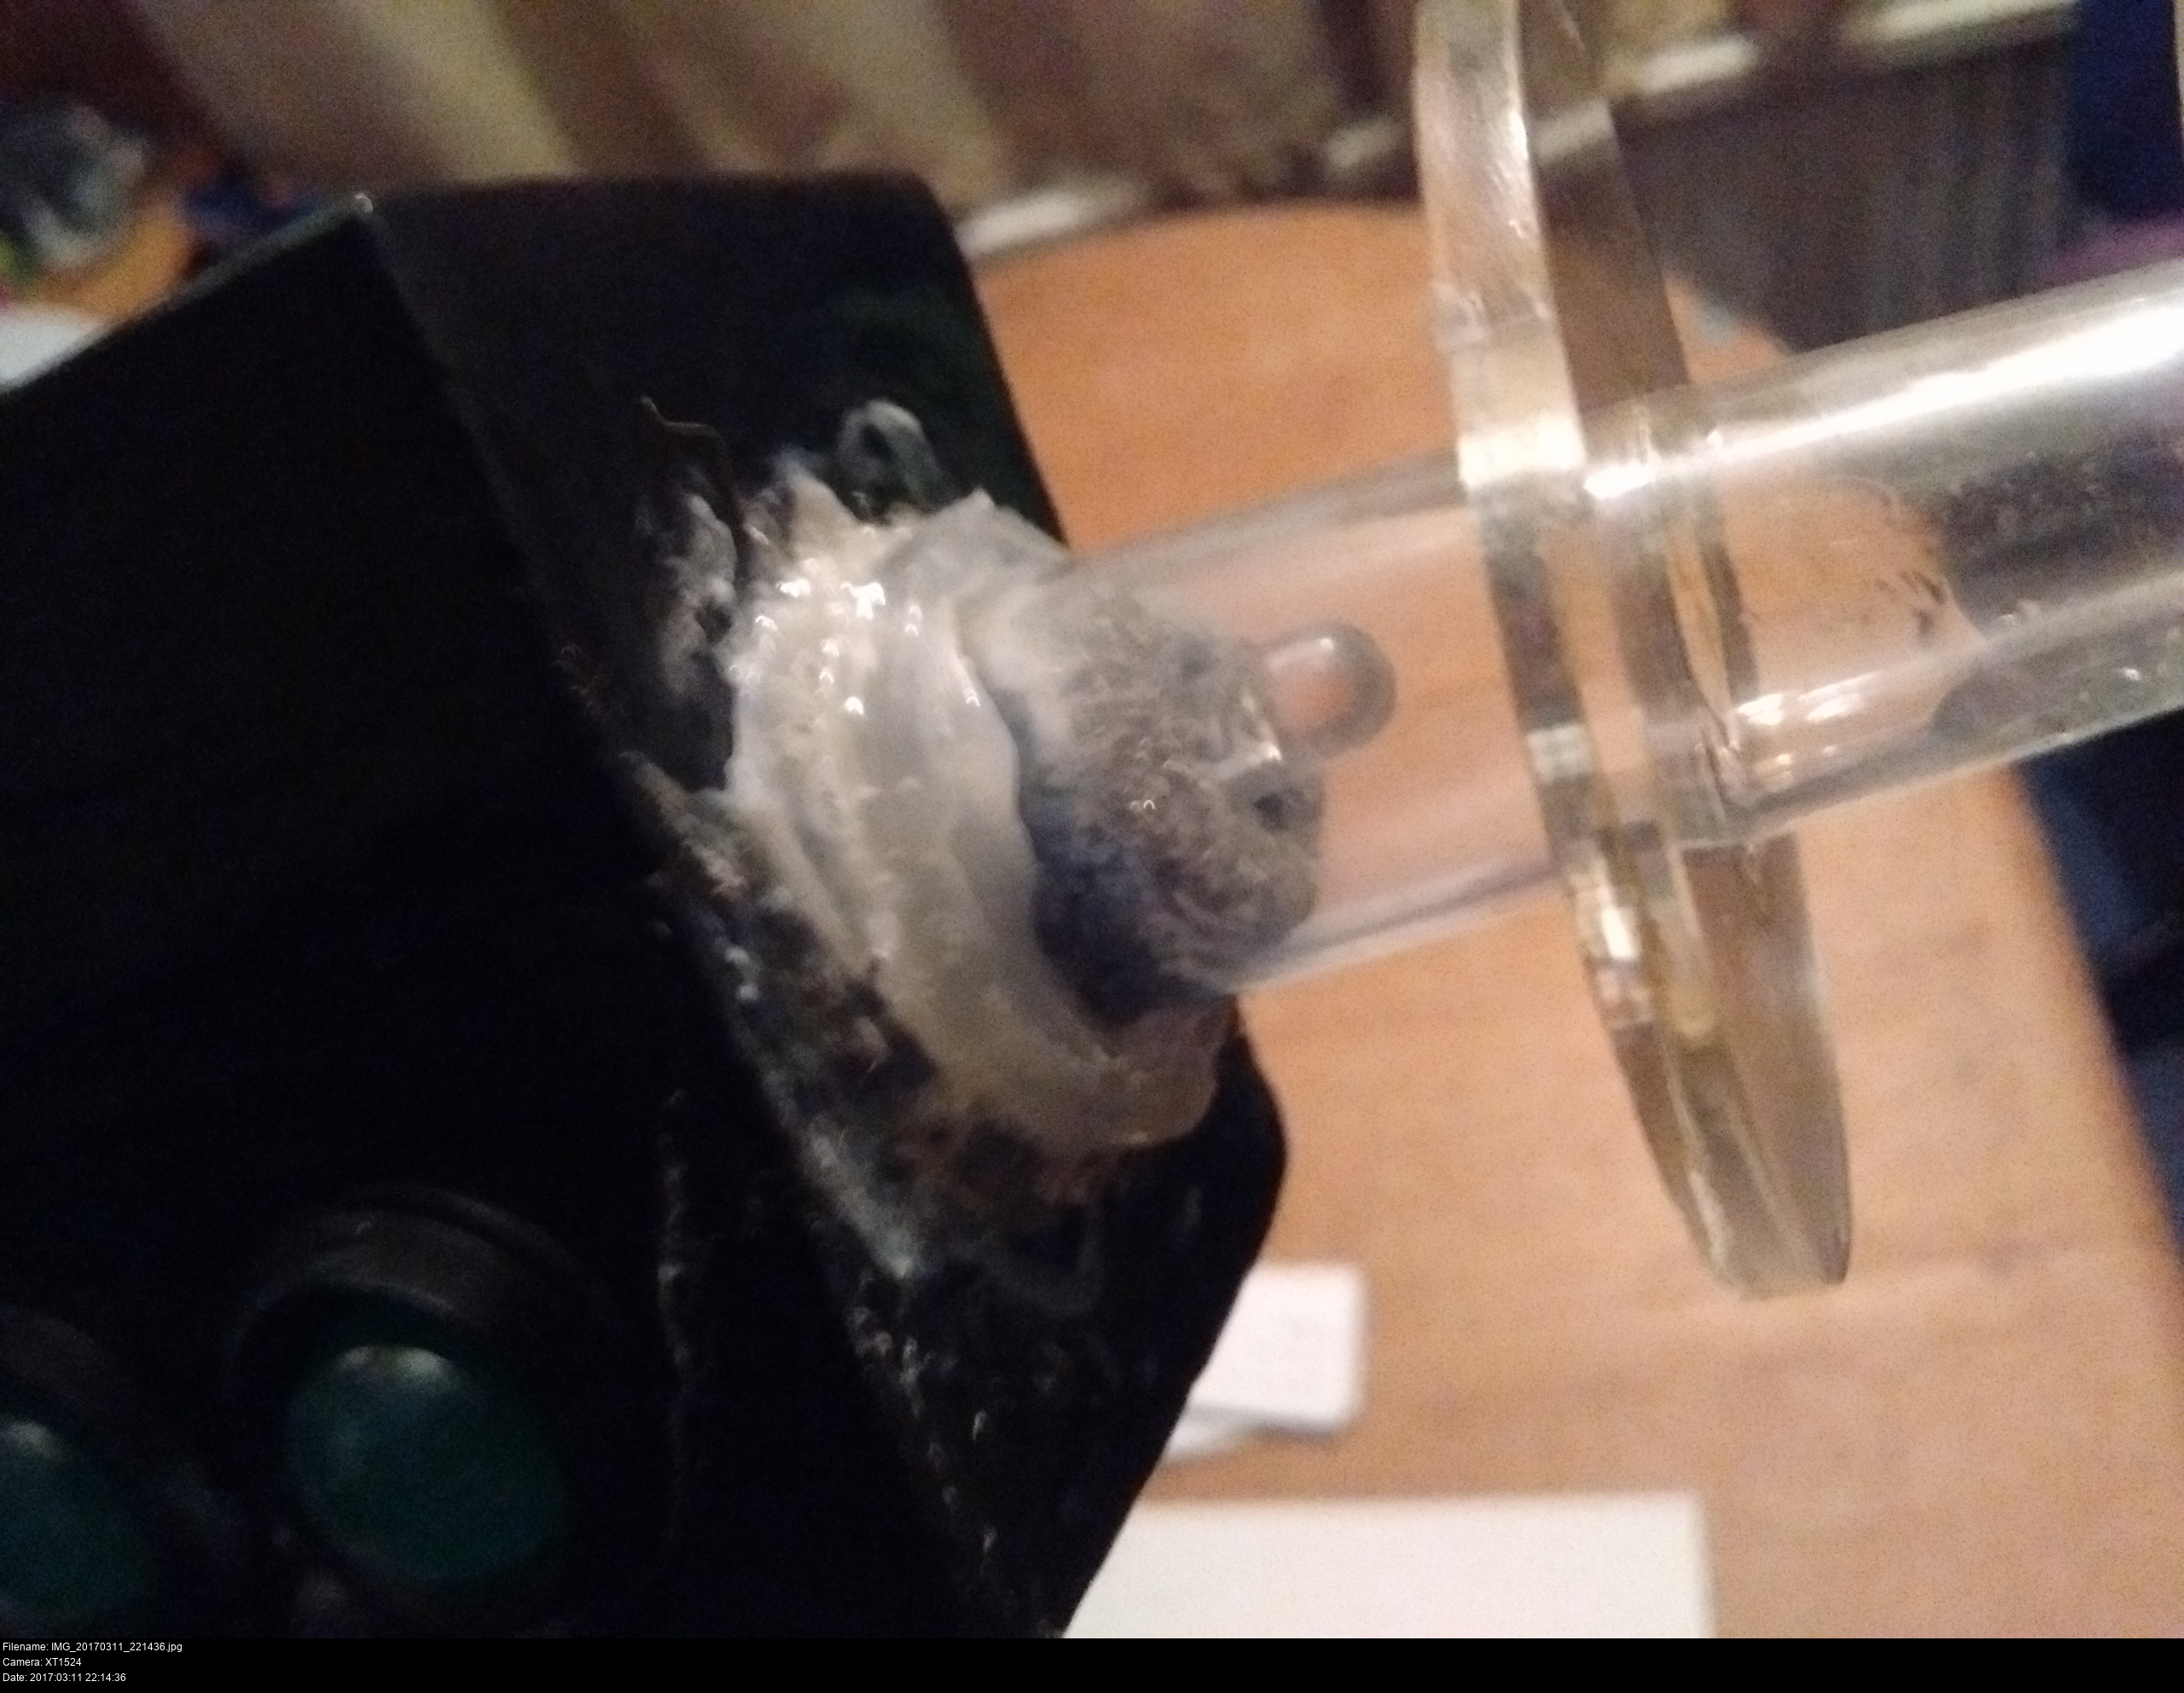
As soon as I got back home, I got out my hot glue gun and tried my best to add some more glue to hold the barrel secure. It was, as you can guess, a mess.

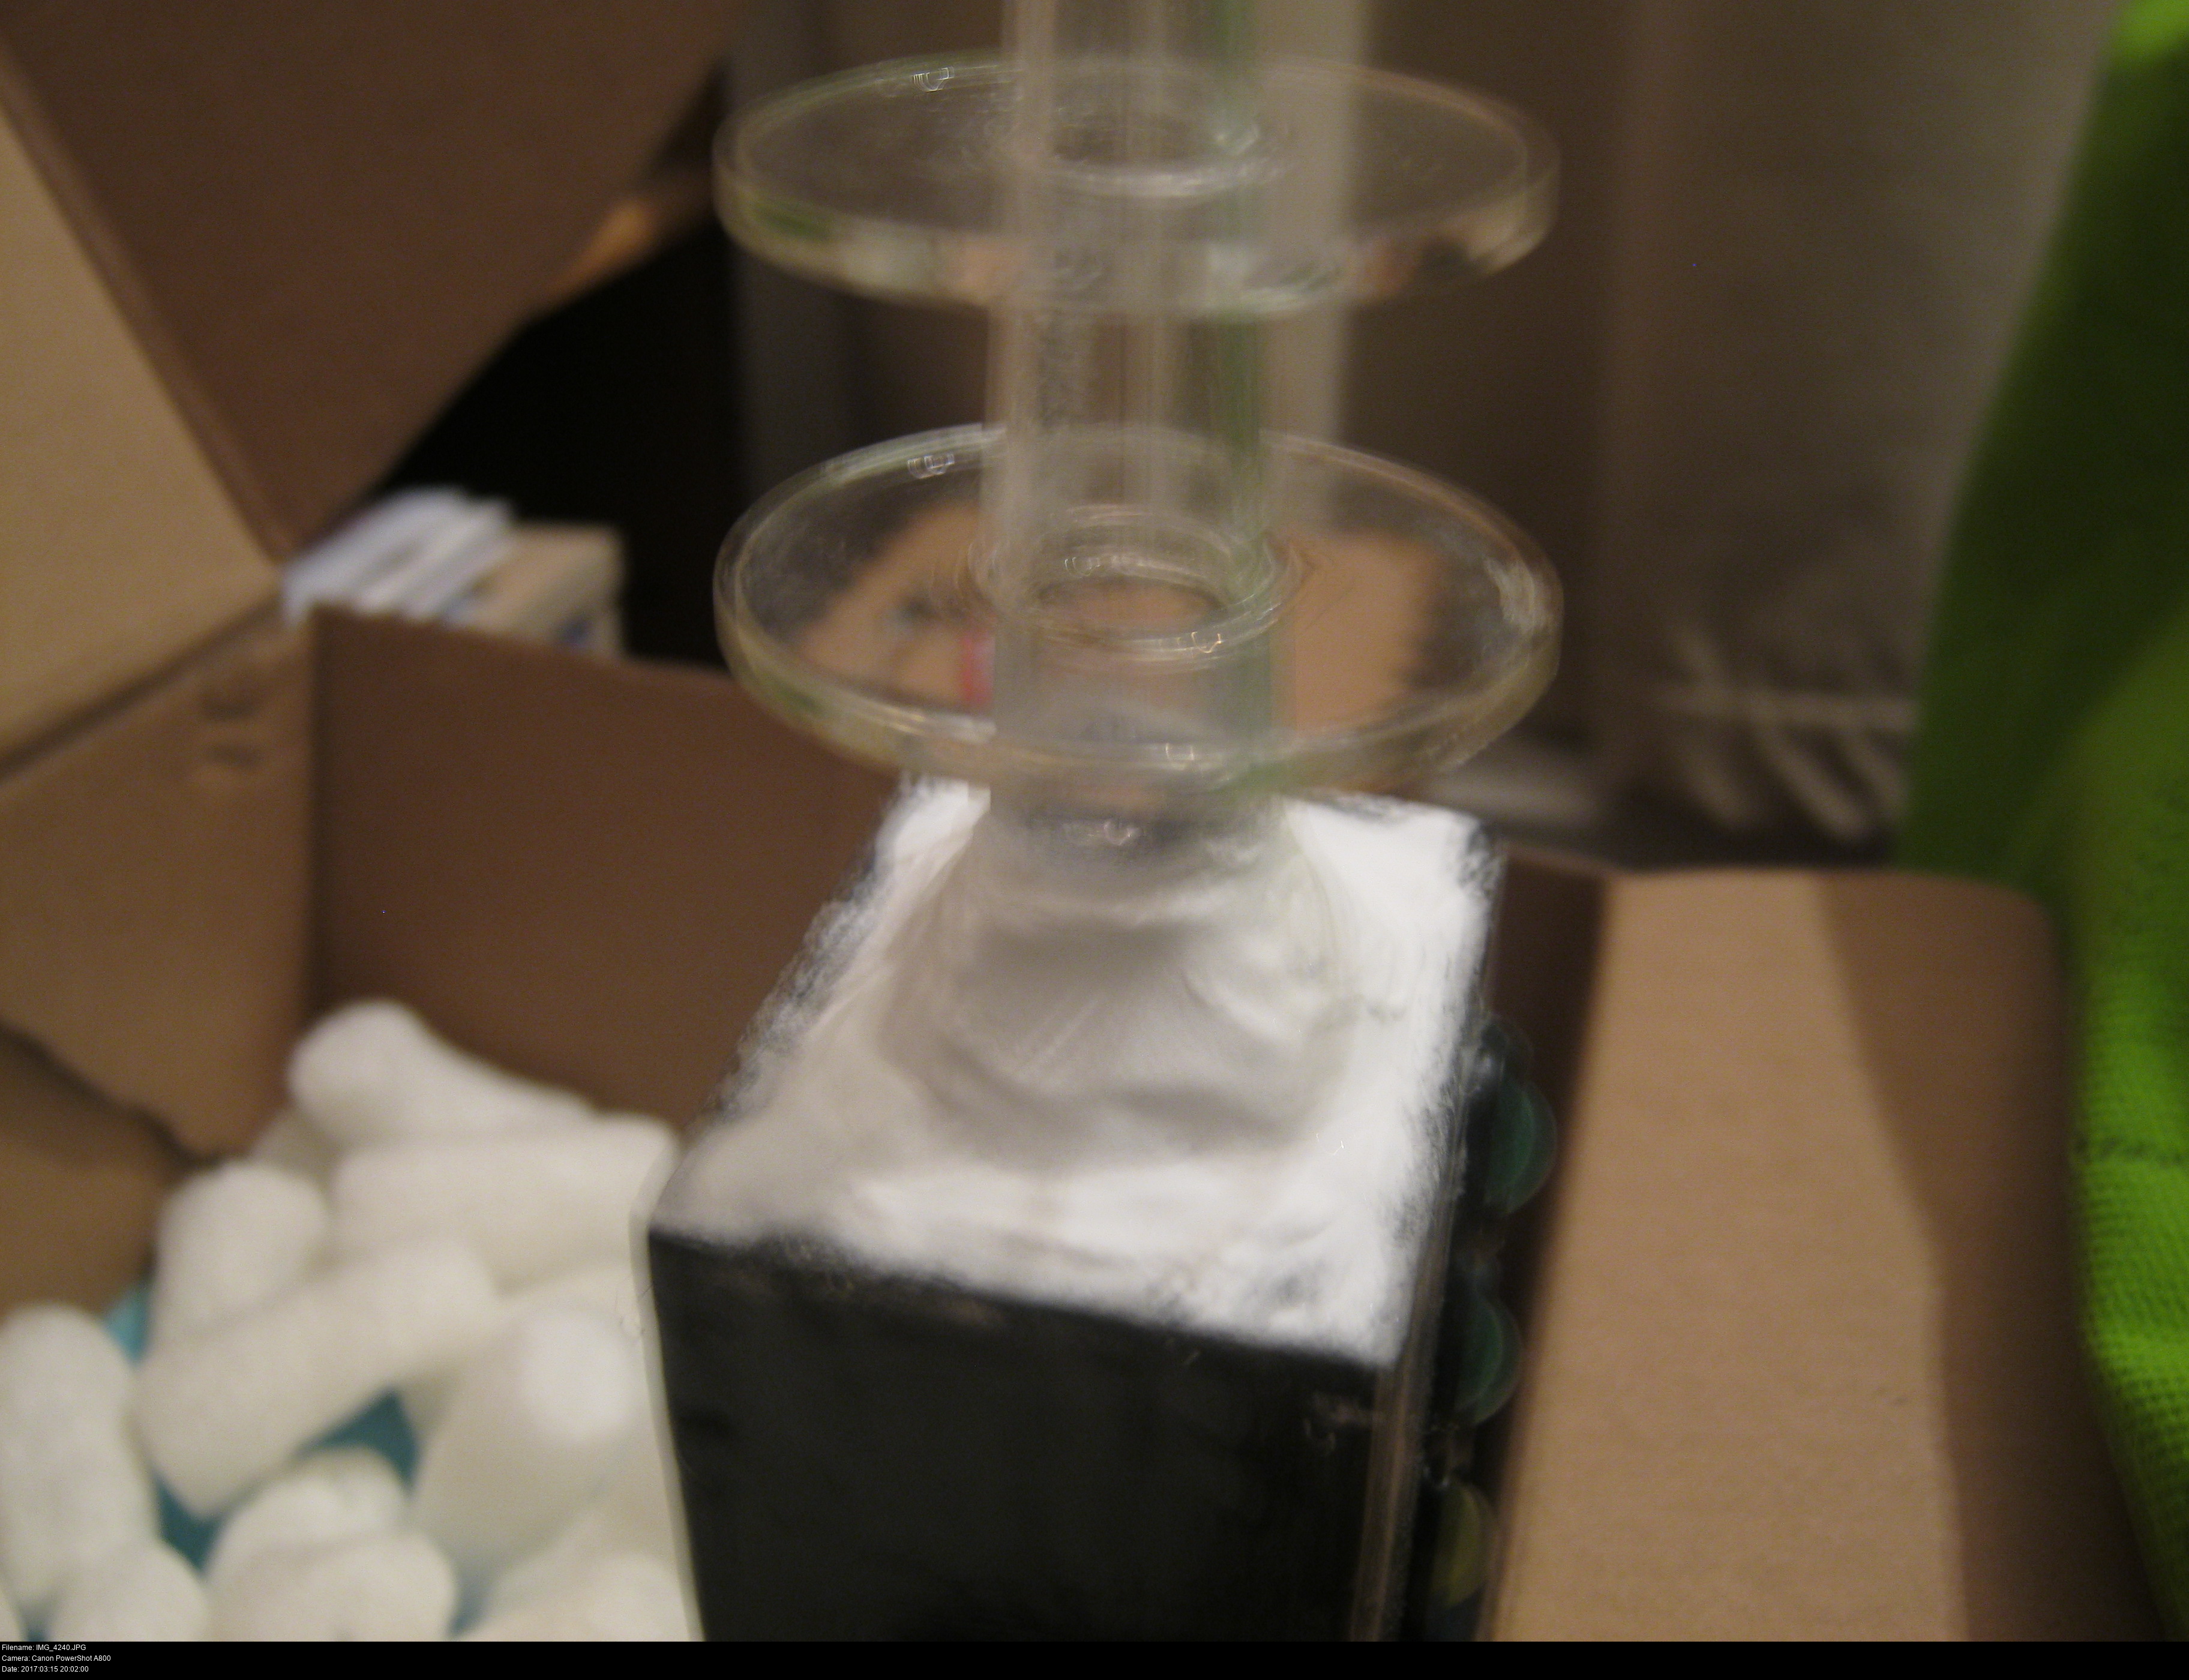
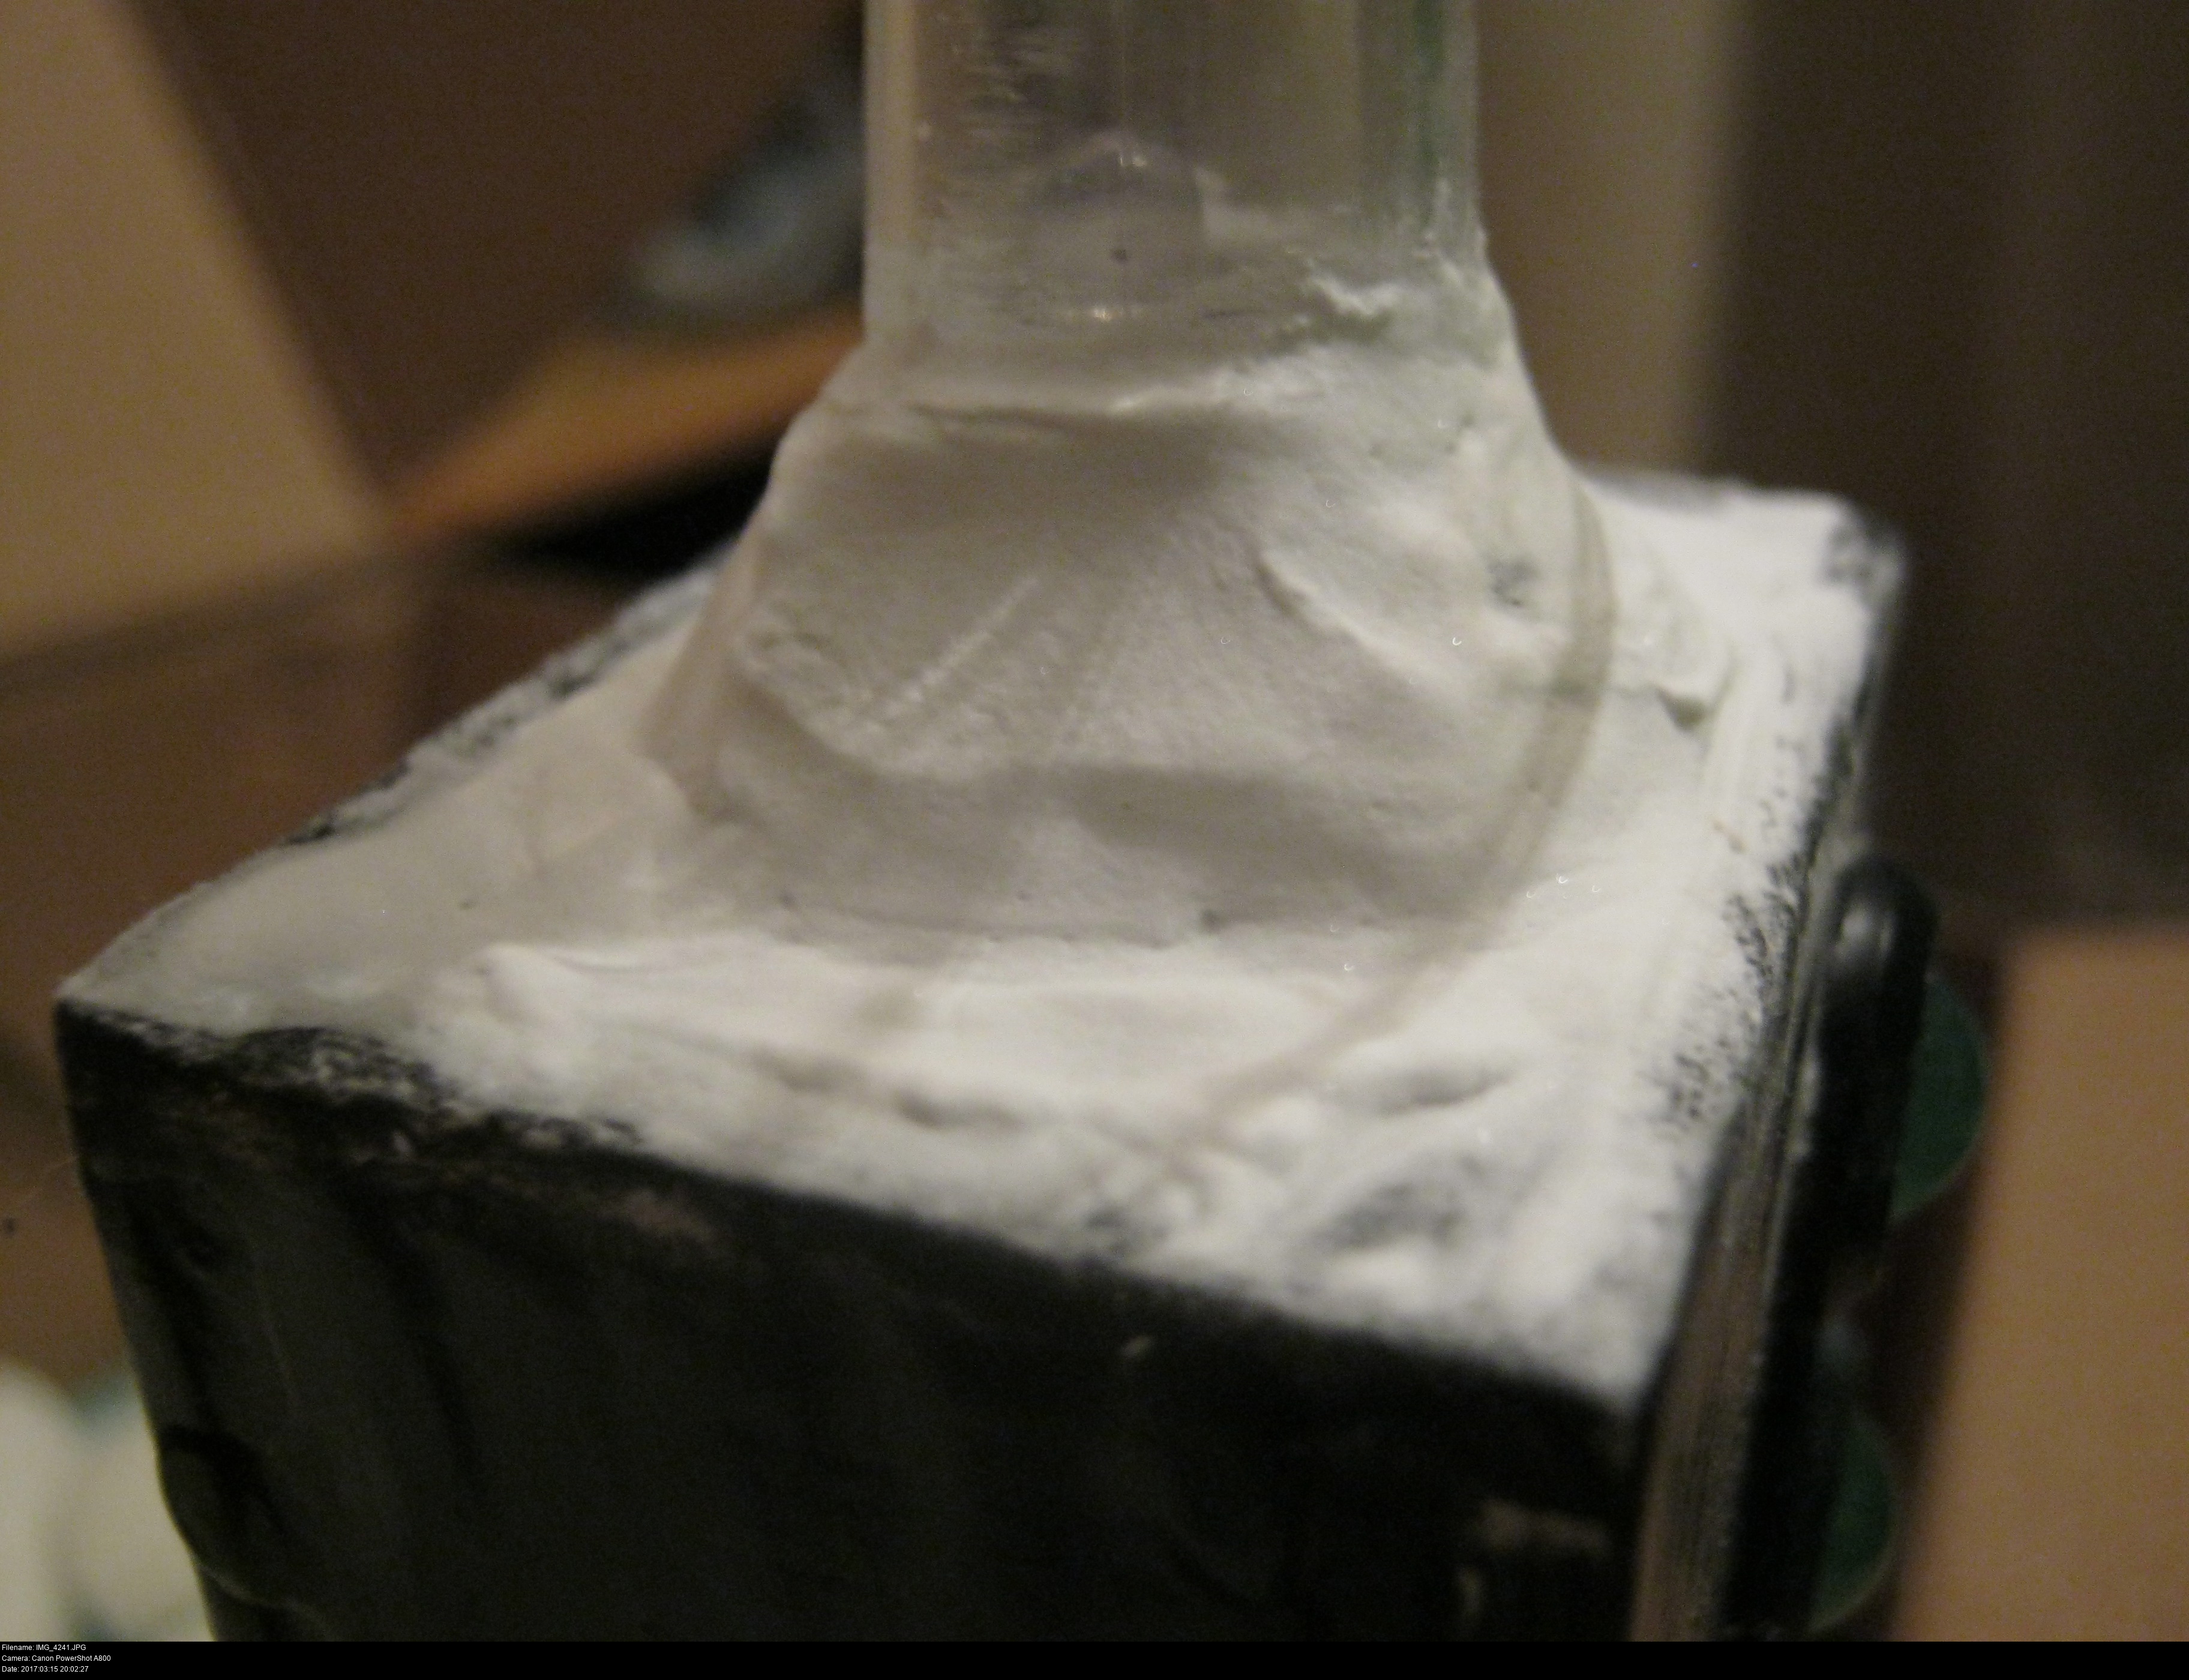
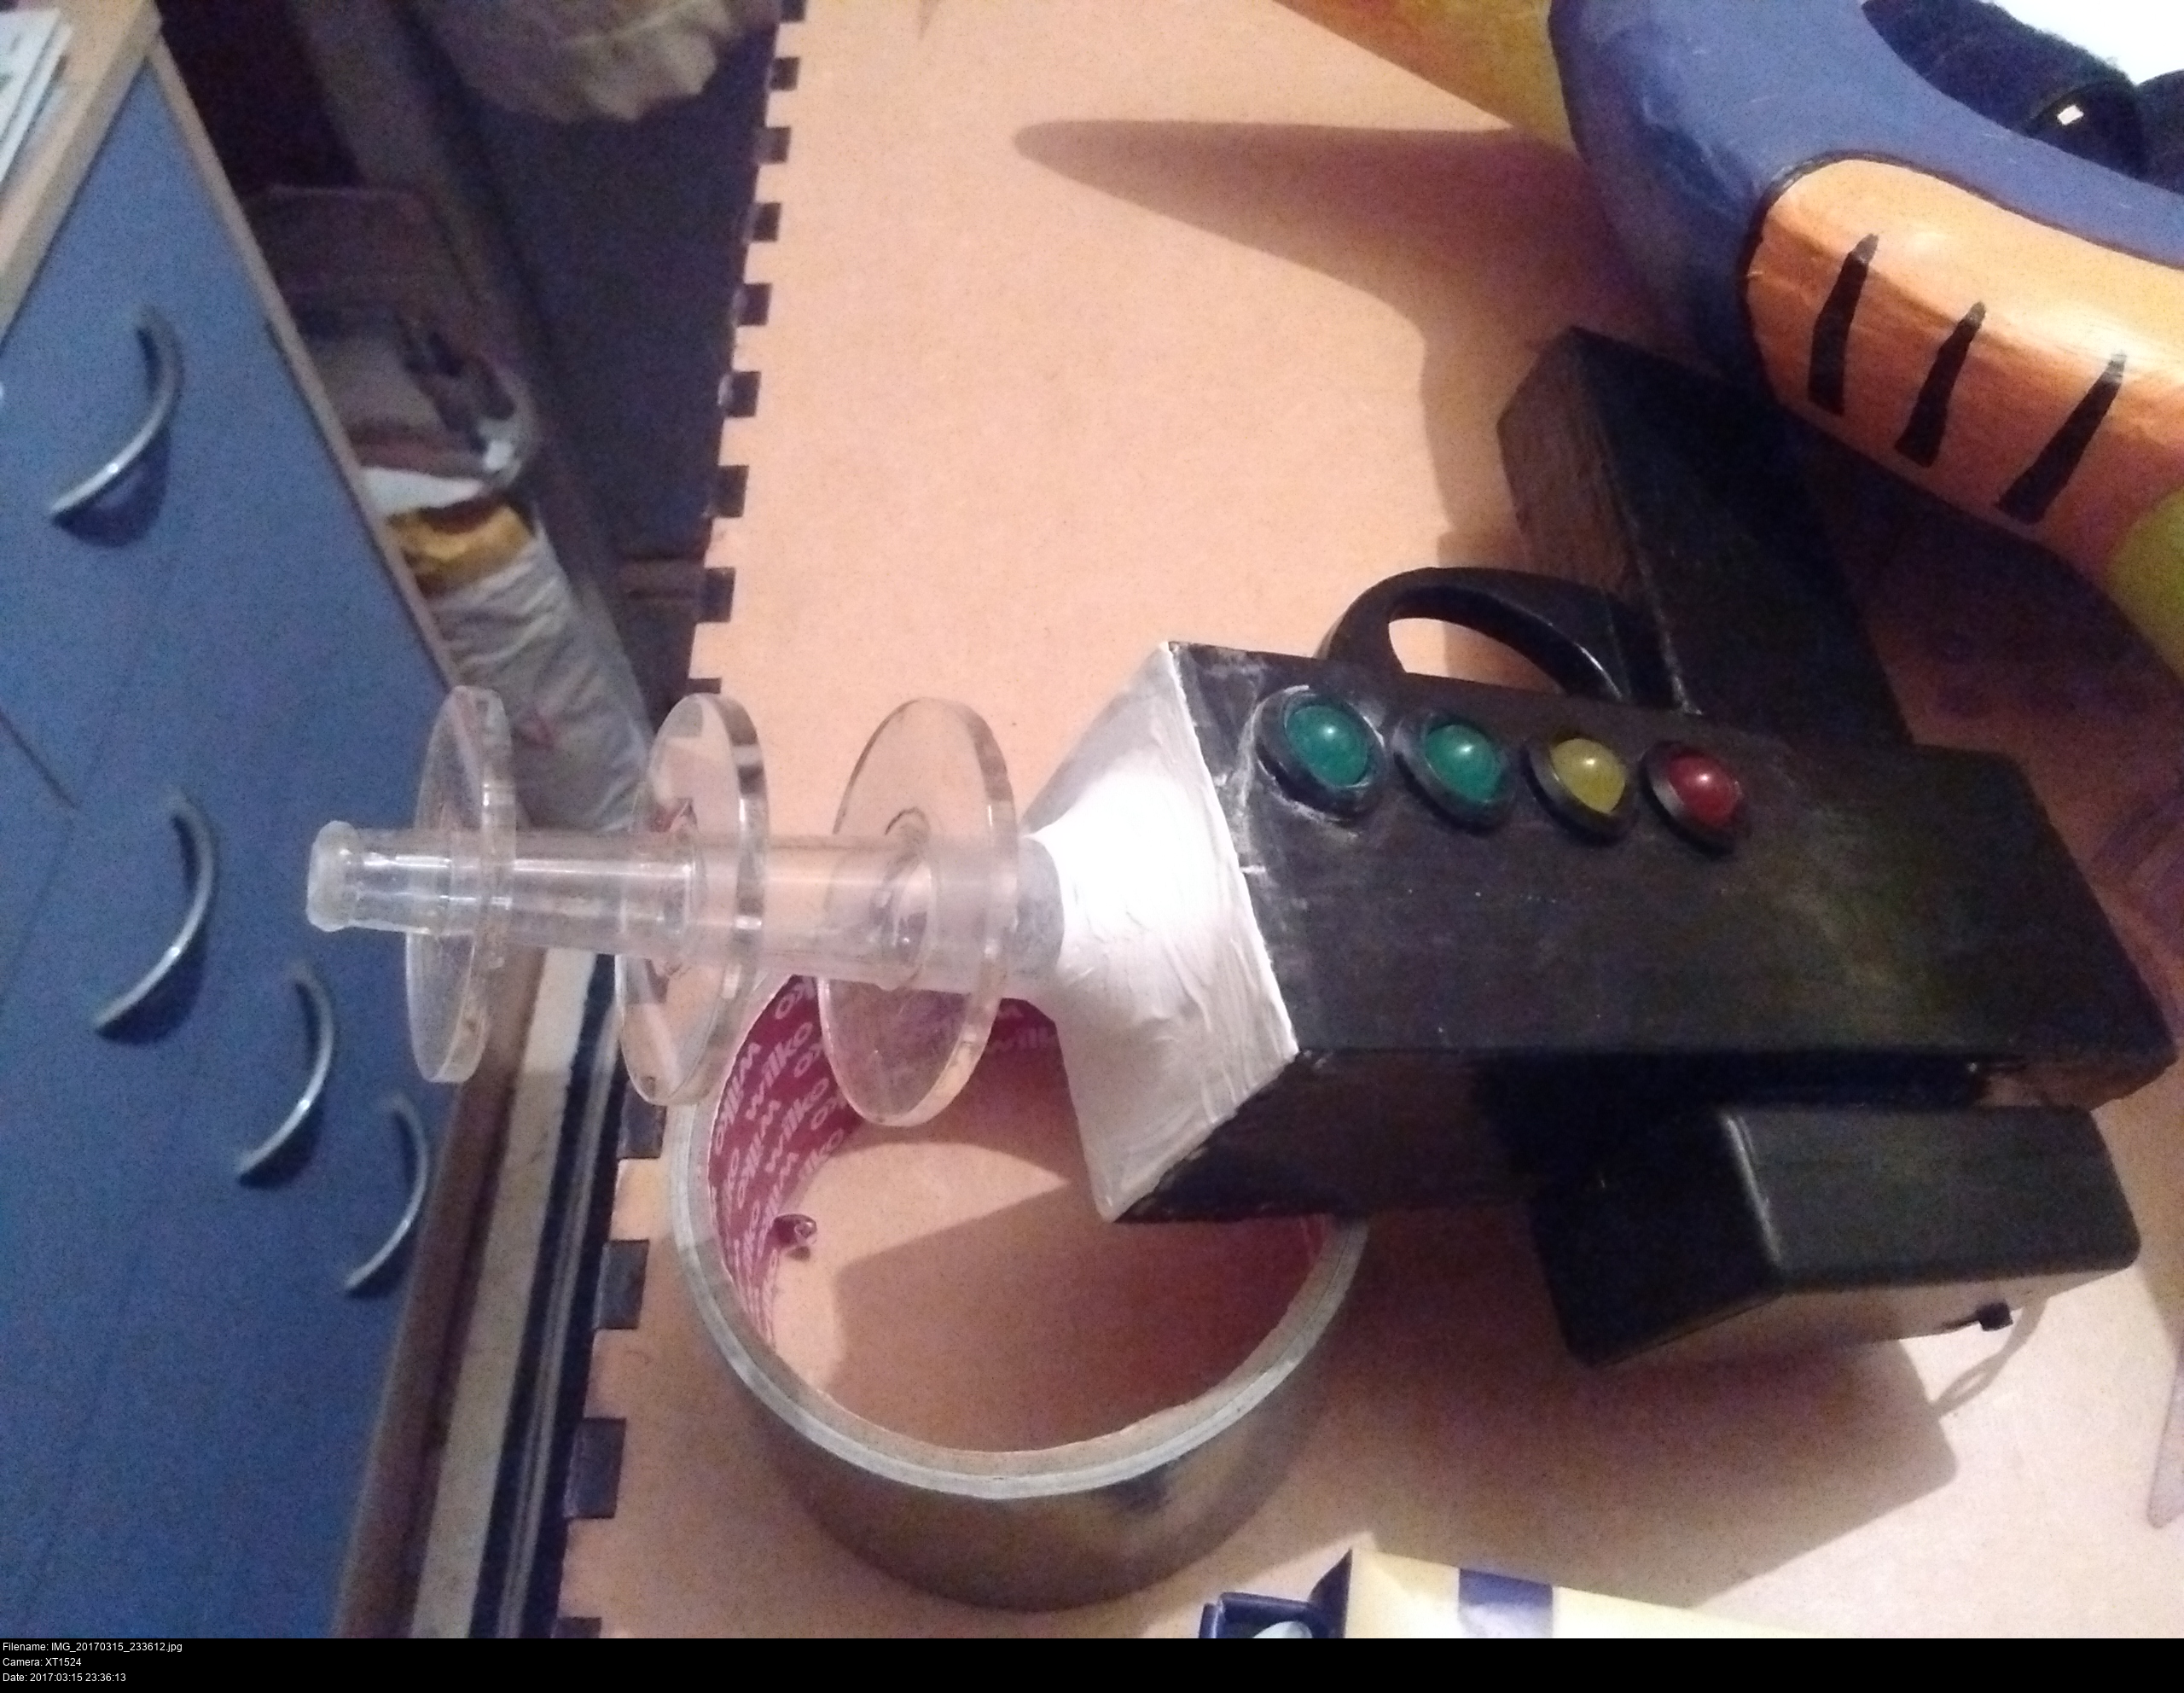
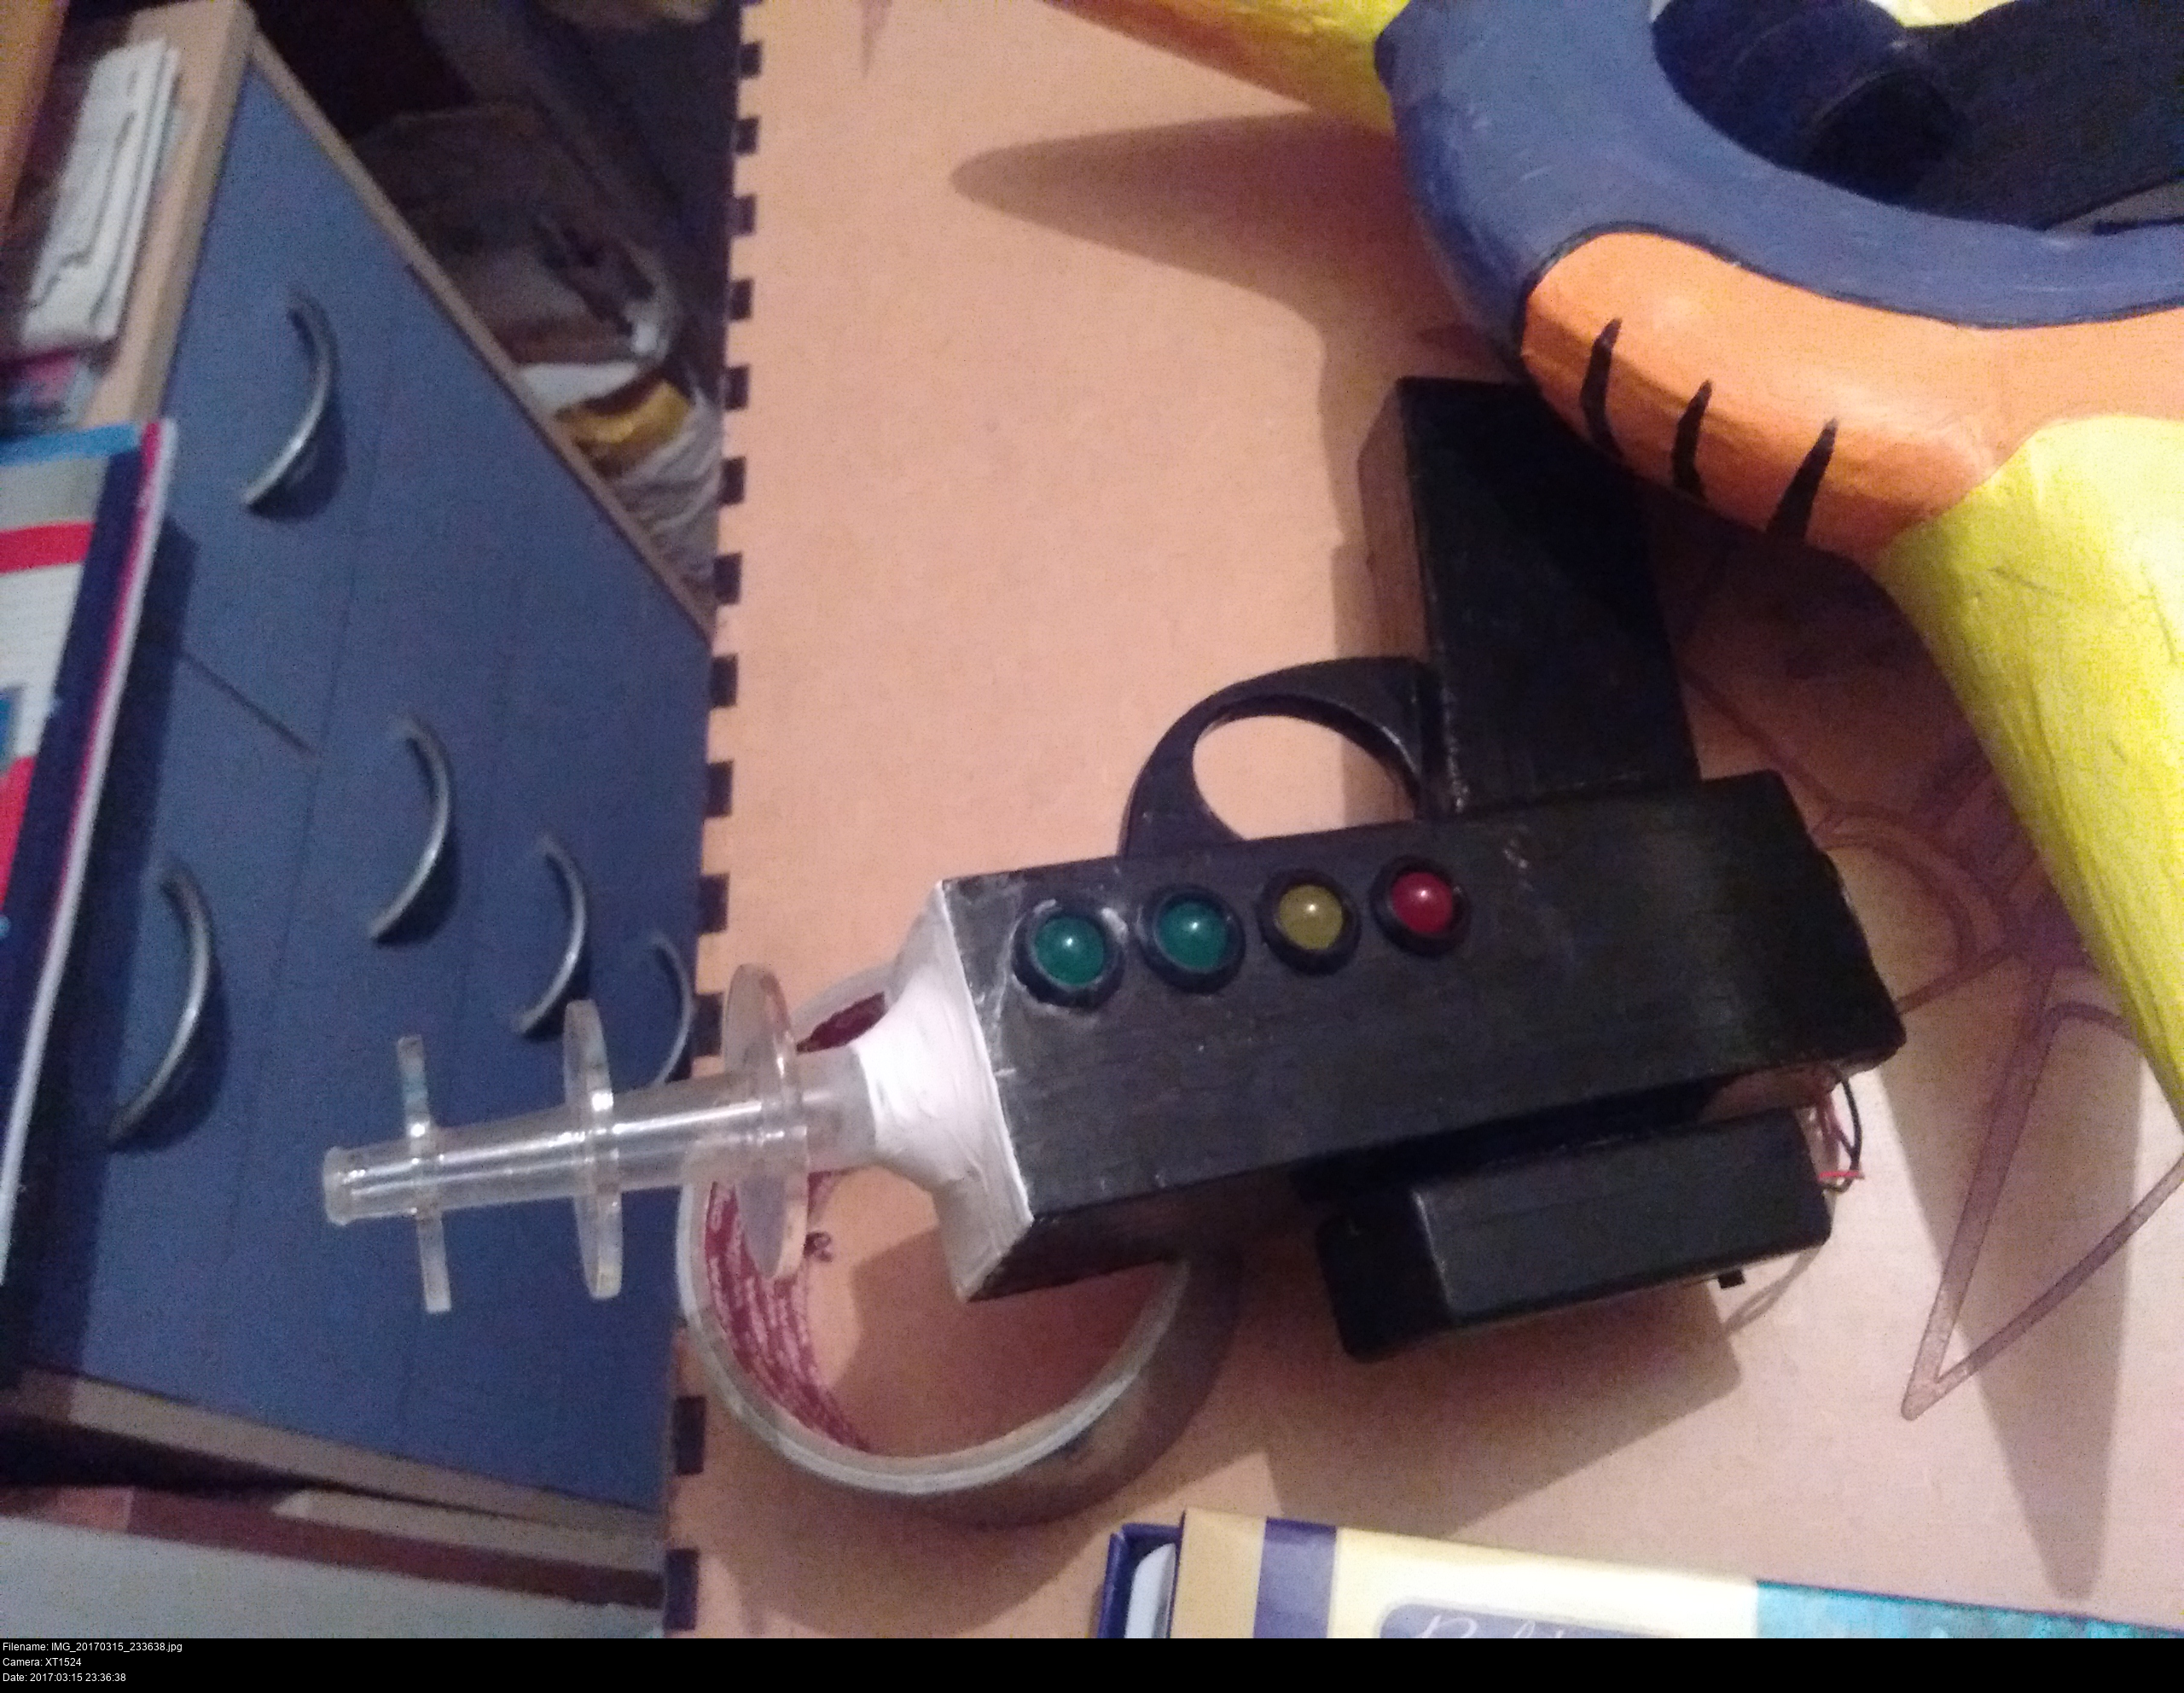

But, y'know, you can always try to fix a mess by adding even more mess on top of it.
After the hot glue set, I got out the all-purpose filler and started piling up a little mass of it around the base of the barrel. When it'd set, I very carefully sanded it down into a smooth cone. After that, a coat of primer, a coat of silver paint, some detail work in black, and a coat of varnish. I haven't got a picture of it handy, but now the barrel is joined to the body of the gun with a little metallic connector! If the barrel breaks off a second time, I don't know if I'll be able to put it back on without sawing the gun in half, but I'm just going to try to not let it get to that.
One problem with having all of Hotshot's stuff in the laundry bag is that it means that if I take him and Skull Kid to the same show, I've got to manage the wheely luggage, the mask box and the laundry bag all at once! Somehow I managed it, even the bus journeys.
On the way back from MCM Manchester 2017 though, the laundry bag finally gave up. Every handle fell off one by one and I was left with no way to carry everything. I got home, but that bag's done for. I need to measure Hotshot's head and get him a nice sturdy proper bag.
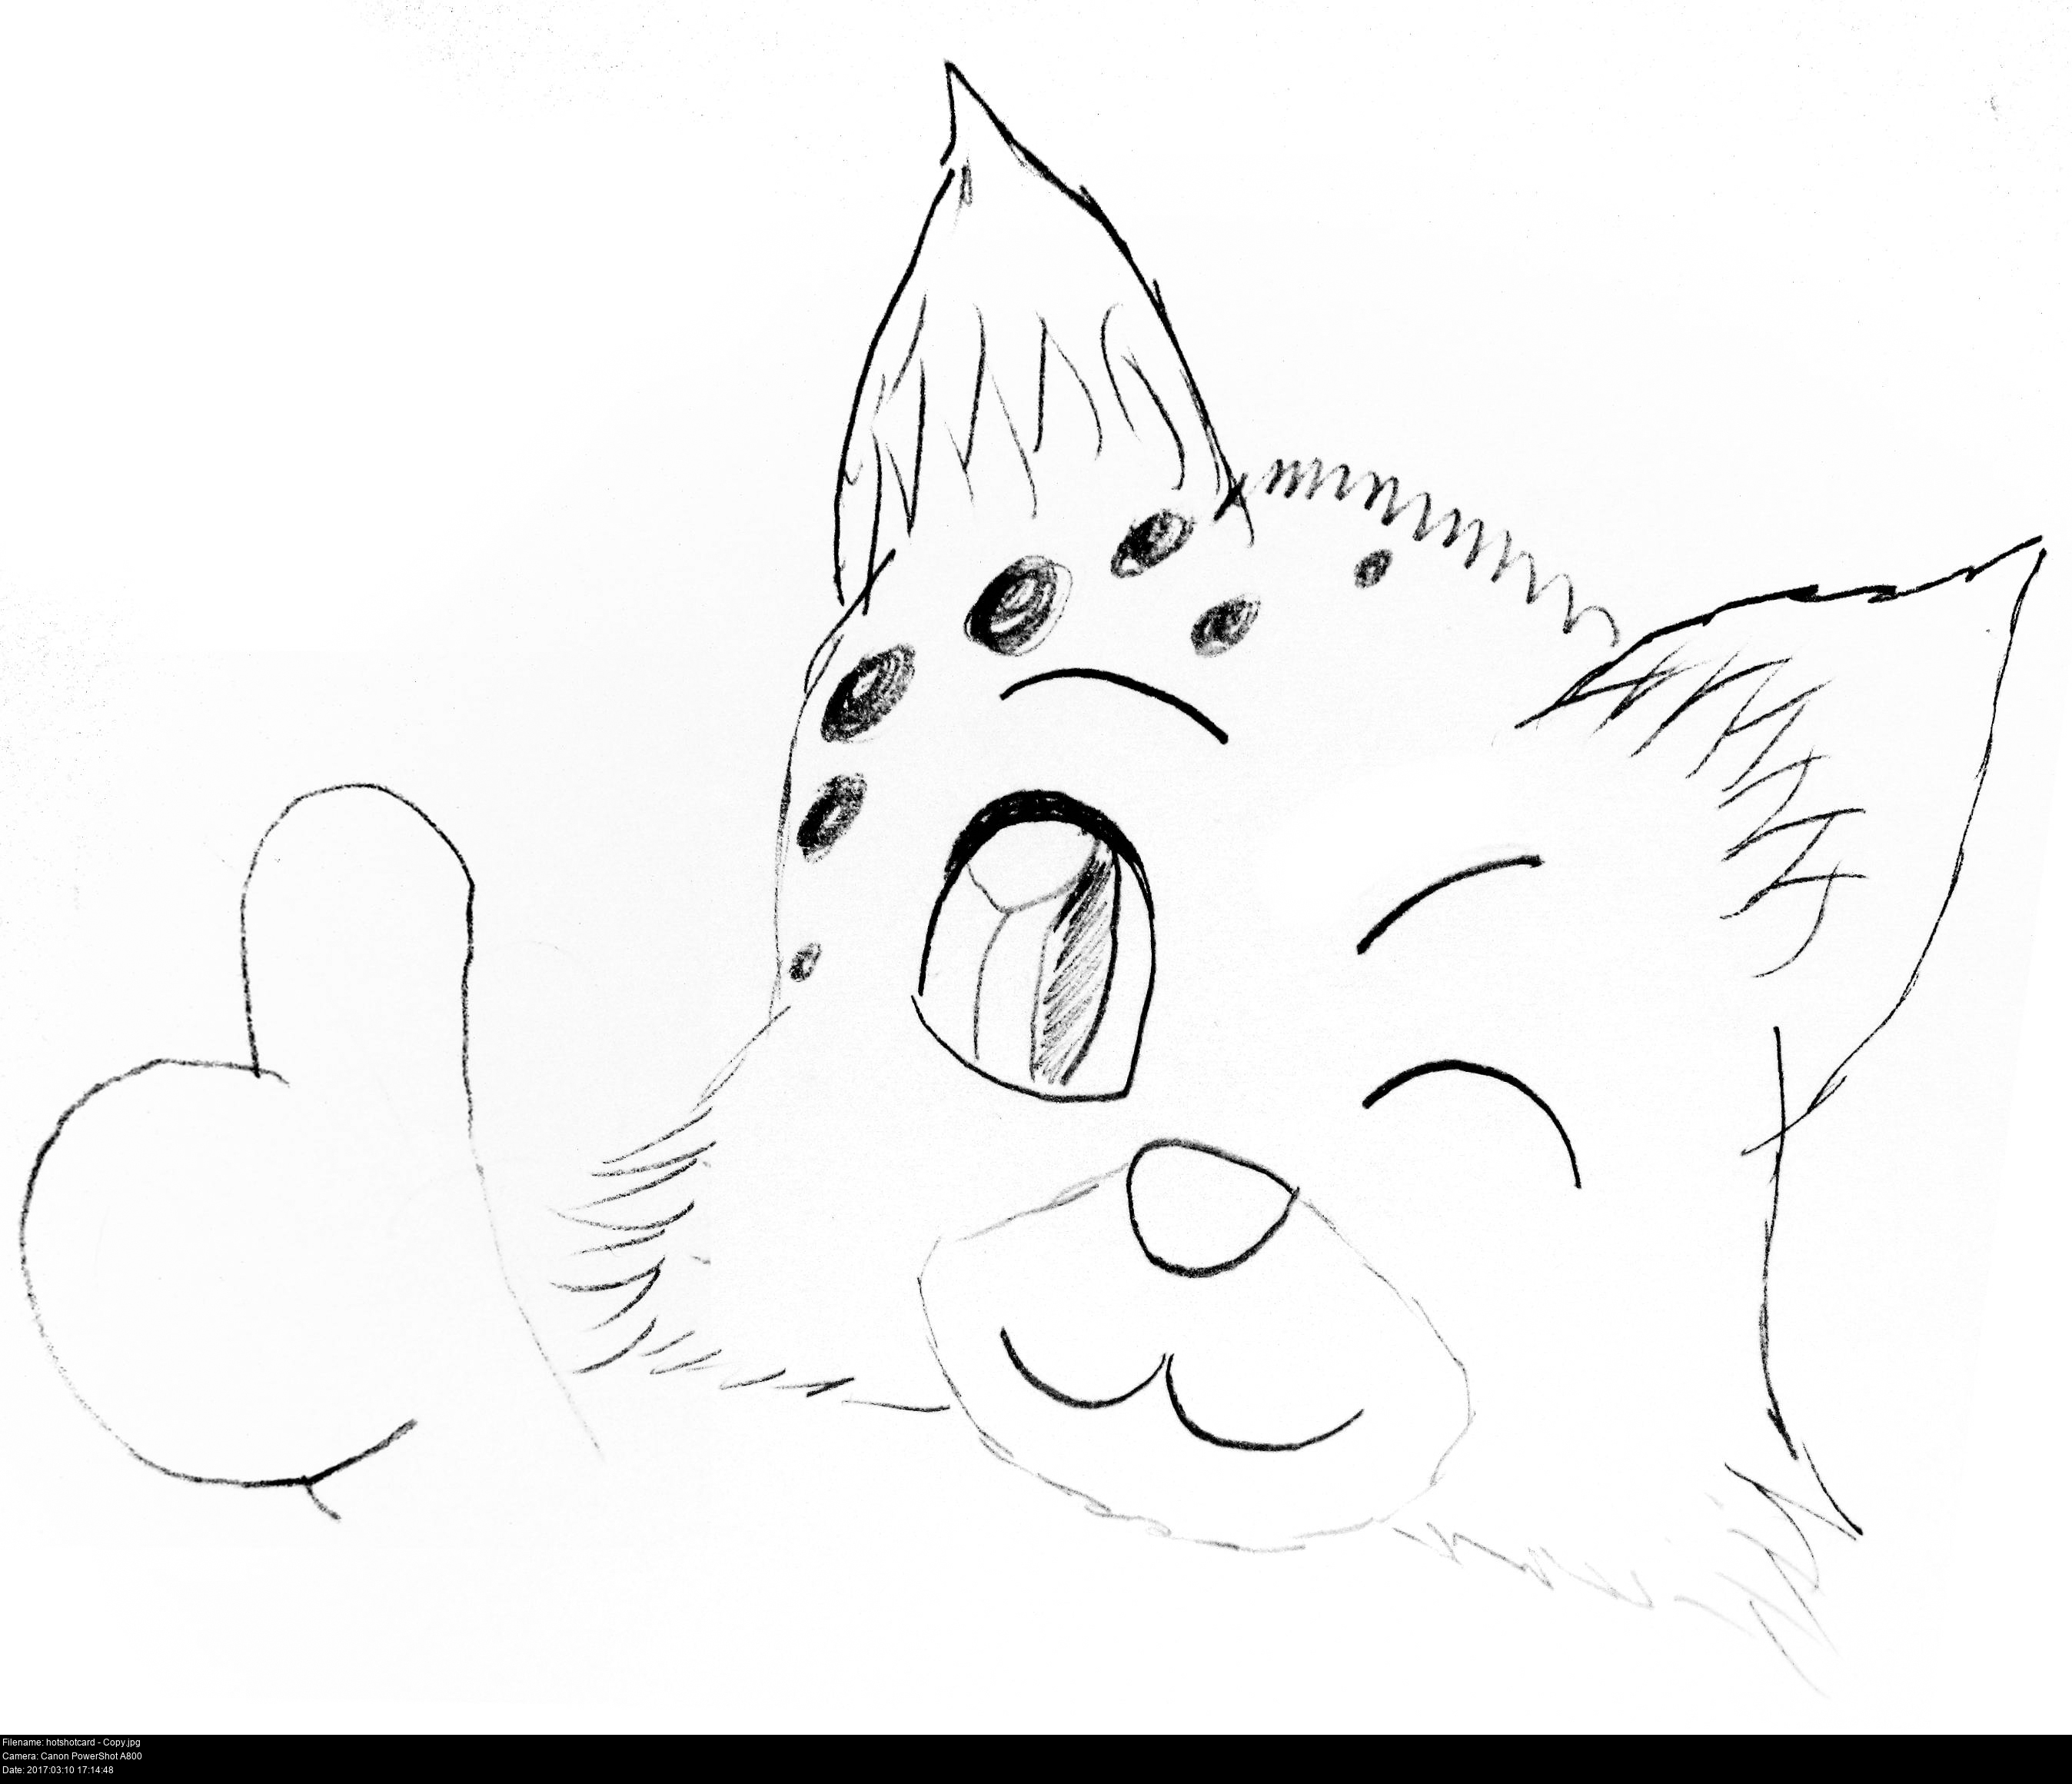
I guess that's everything...
Oh, and don't forget to let people know how to find you if you want them to send you pictures of you in costume!
Thanks for reading!
Written by Matt Carr! mrdictionary.net nonsense.
Questions? E-mail 'em to me, skullkid@mrdictionary.net!
Twitter @SkullKidUK - Facebook facebook.com/mask.smith.cosplay