Making the Case
My mission today is to come up with an enclosure that I can 3D print at DoES Liverpool to protect the PSCD32 prototype from damage when I take it out or put it away (or if I take it somewhere to show someone for some reason).
The design is going to be straightforward:
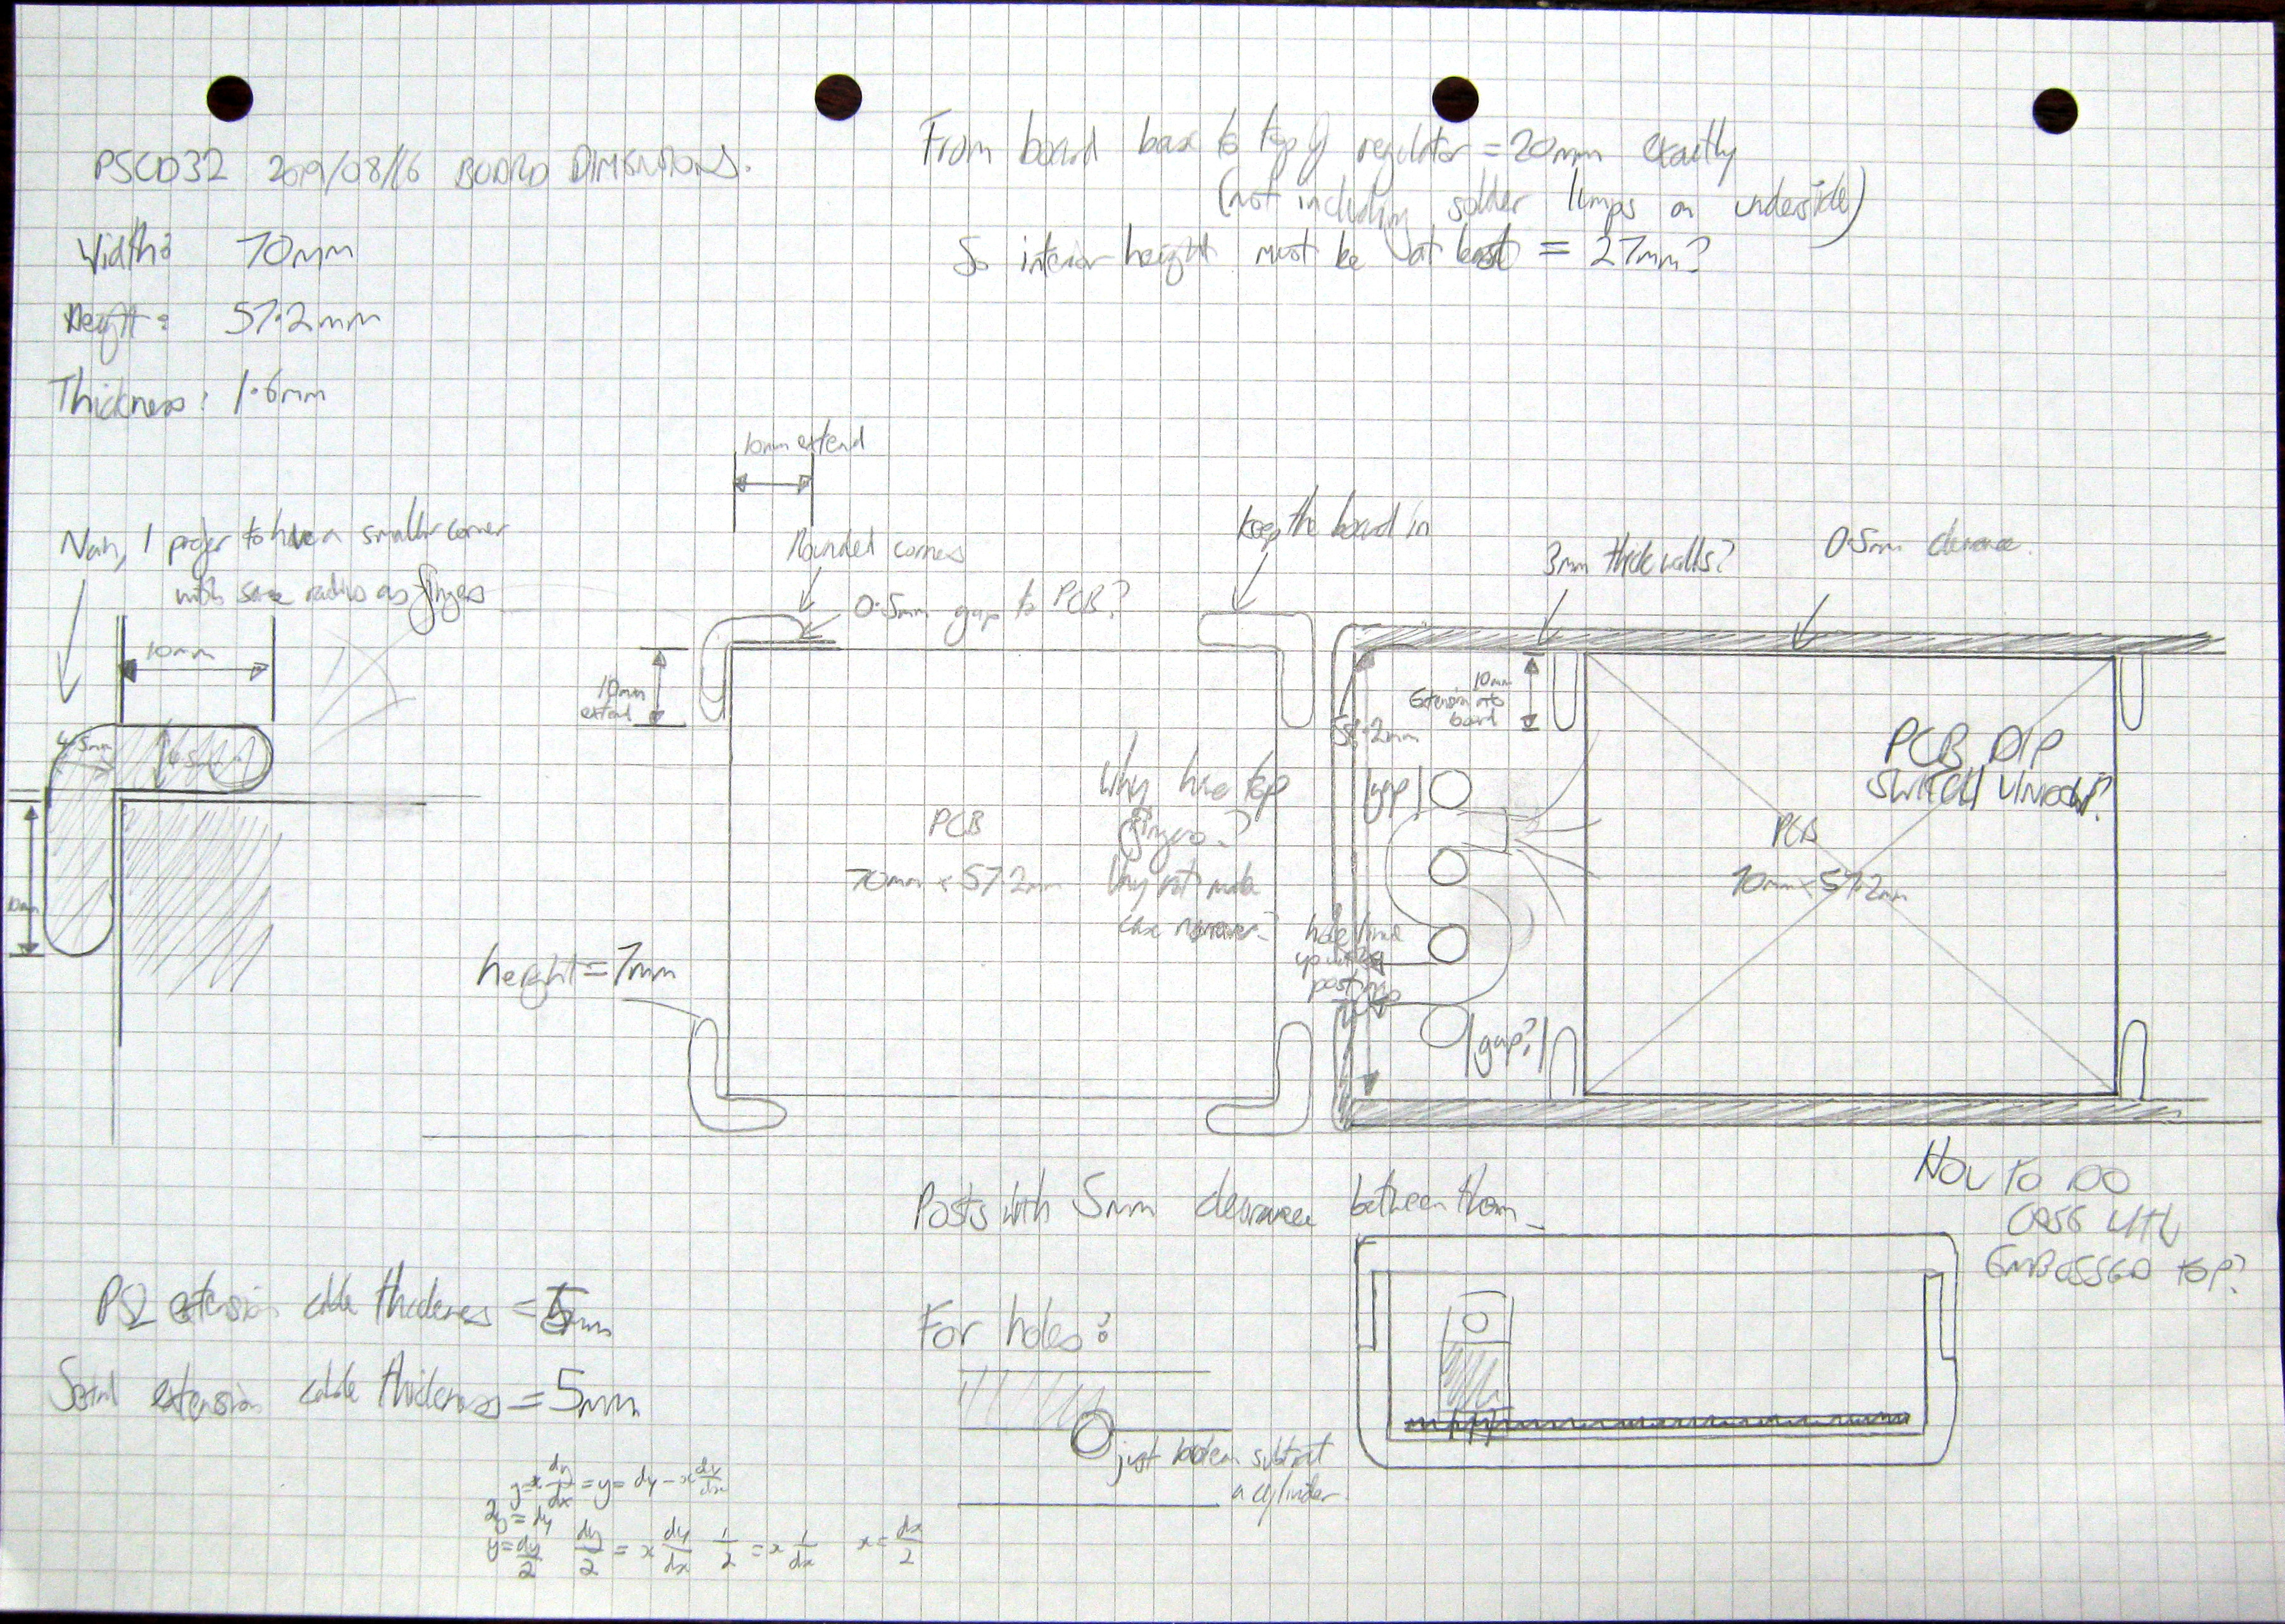
• A cuboid box in roughly the same dimensions as the PCB (70mm x 57mm).
• Two pieces: a base piece and a piece that slides on top.
• The top piece may possibly have a window to allow the DIP switches to be set?
• 5mm diameter holes on the sides to allow the fitted cables to emerge.
• The holes will be carved as arch shapes into the sides of the pieces so that when the case is assembled only a circular hole for the cable will be present.
• On the left and right where the cables emerge there needs to be a line of four cylindrical posts for the insulated part of the cable to be forced around in an S shape in order to keep the cable firmly in place. (This is just like the PC keyboards I cleaned recently.)
• A cool design either proud or recessed into the top face.
• Walls within the box to securely hold the PCB in place so it doesn't rattle about. There's no mounting screwholes on the PSCD32 PCB, so this'll have to do.
 The use of 3D printing sets some constraints on the design, such as minimum wall thickness. If I'm reading the DoES wiki right, this would be made on an Ultimaker 2.
I'm going to assume a minimum wall size of 3mm. But I don't want to waste lots of material having 3mm walls on the outer sides where the top meets the bottom... so maybe I can get away with having 2mm there?
The use of 3D printing sets some constraints on the design, such as minimum wall thickness. If I'm reading the DoES wiki right, this would be made on an Ultimaker 2.
I'm going to assume a minimum wall size of 3mm. But I don't want to waste lots of material having 3mm walls on the outer sides where the top meets the bottom... so maybe I can get away with having 2mm there?
 An industrial designer is me. Just need to expand the box beyond these minimal volumes (these represent the vacant cavities, rather than the outer edges).
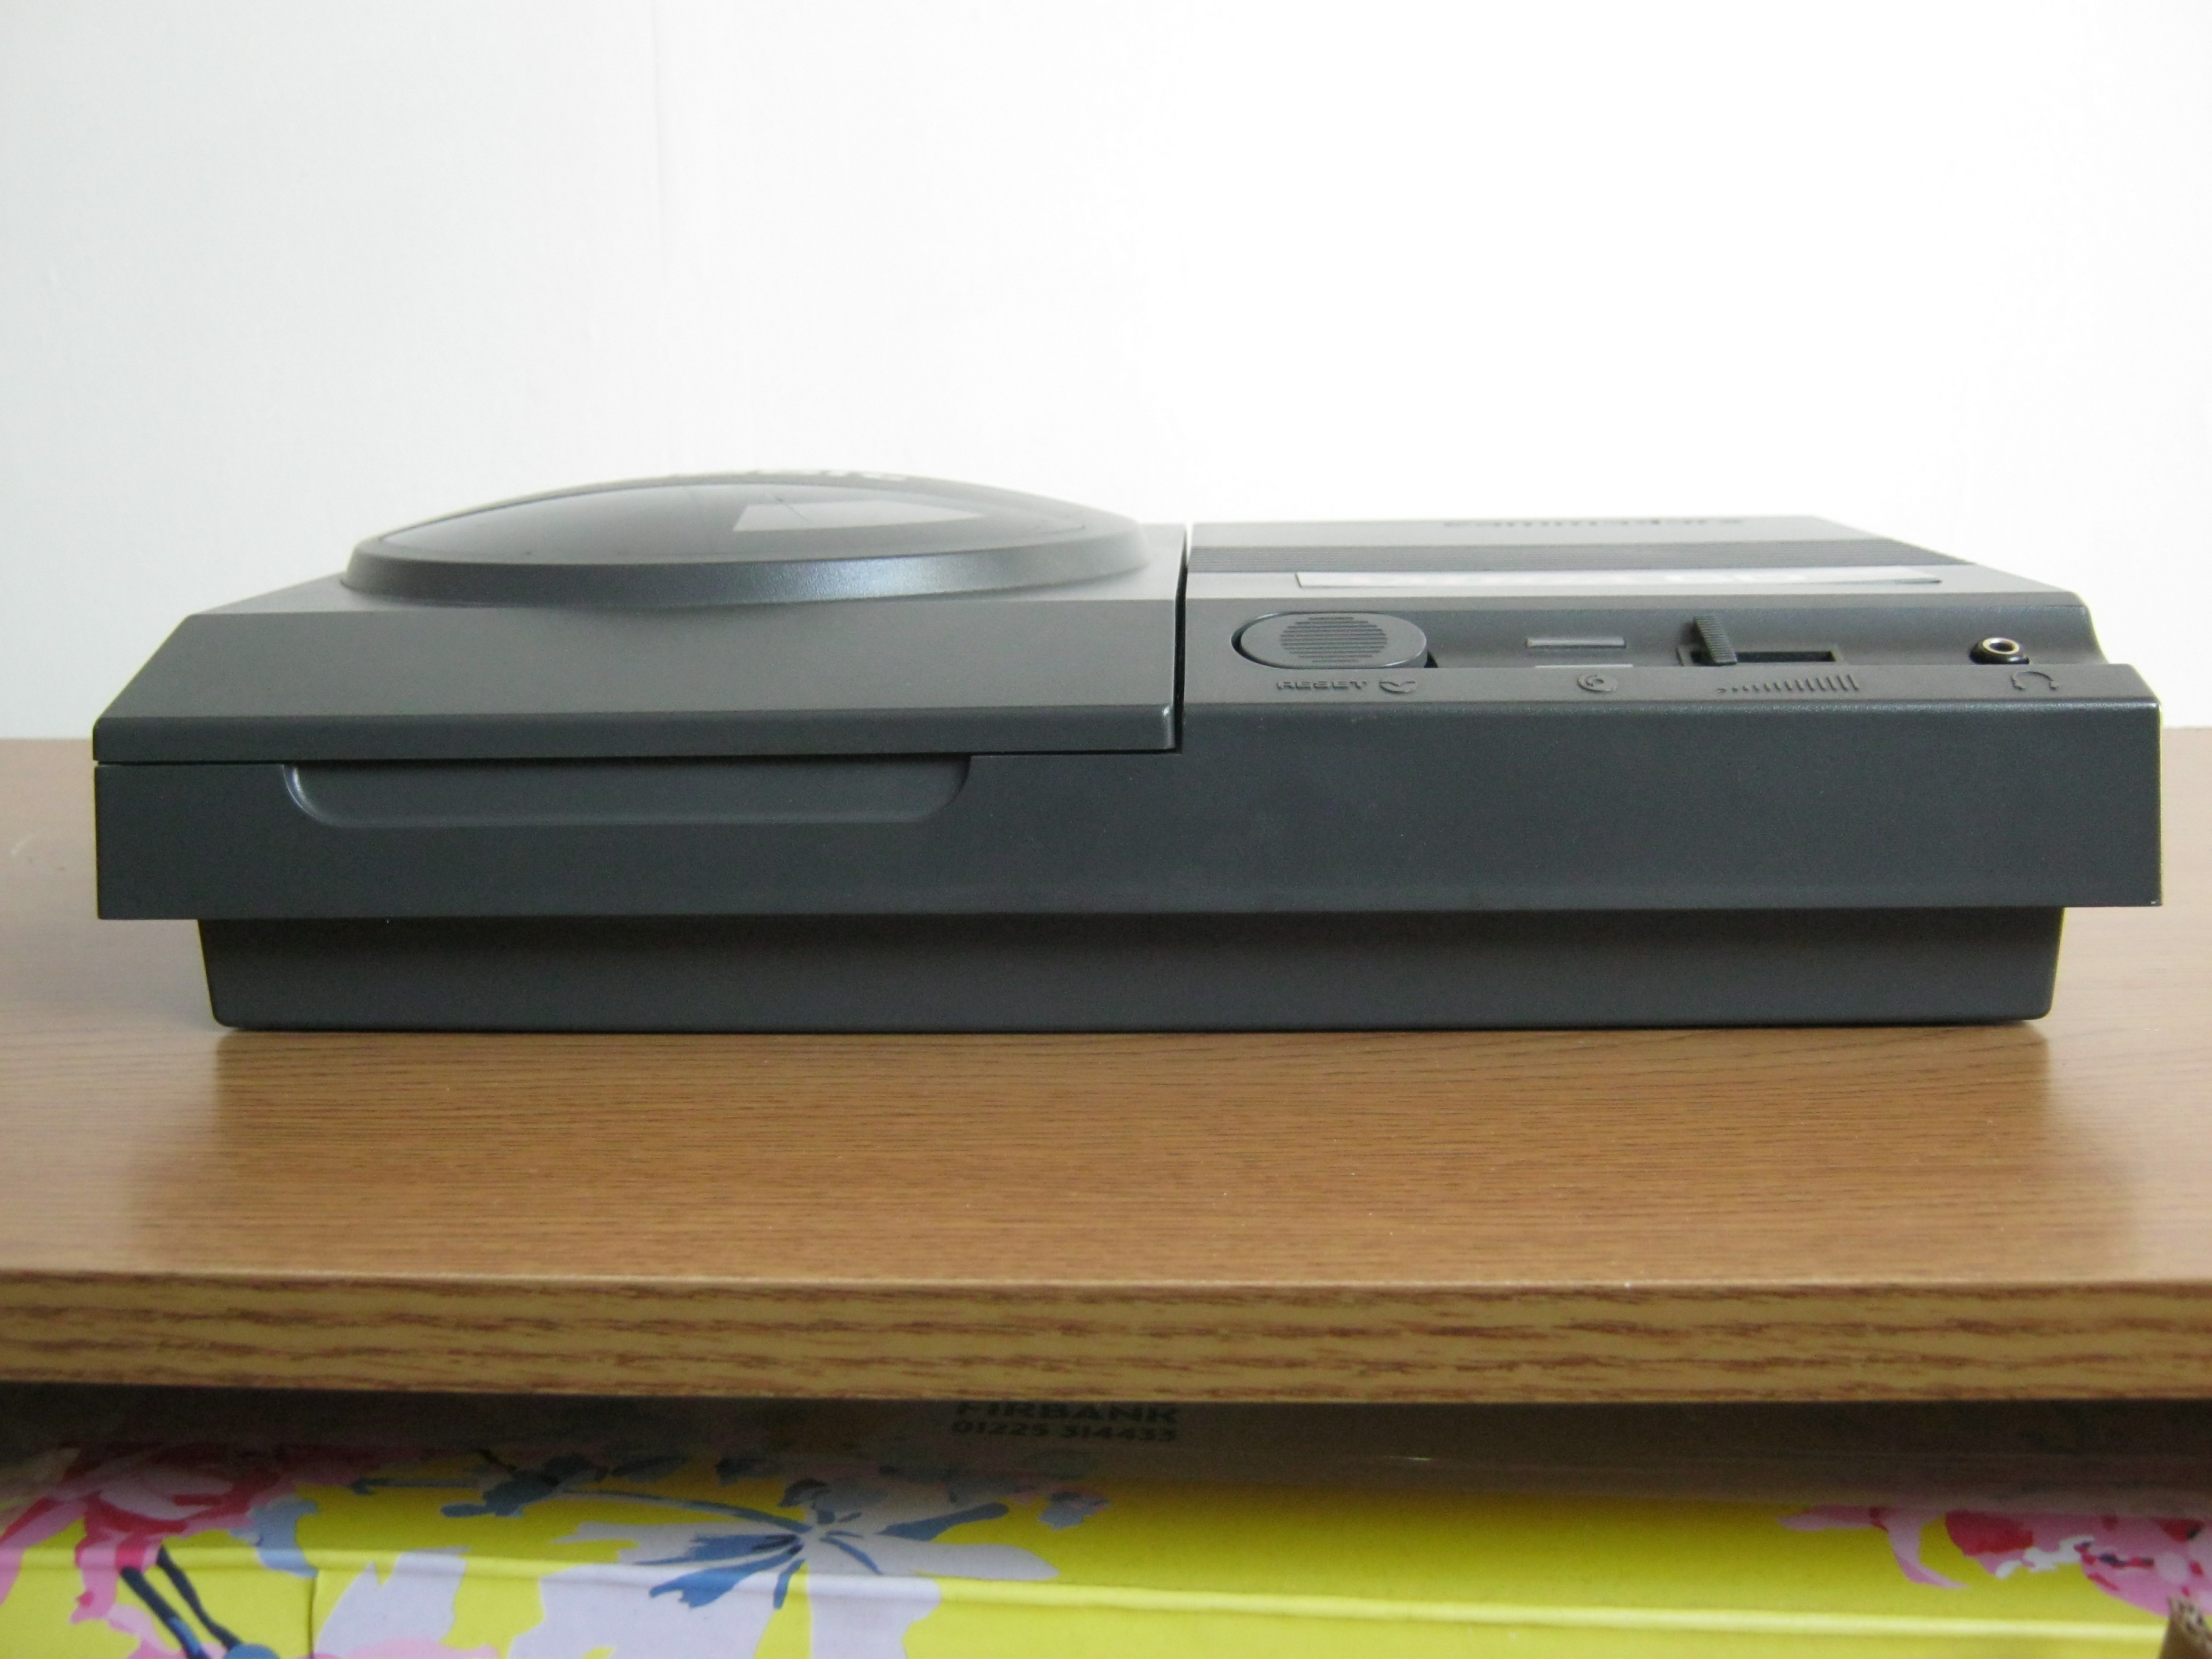
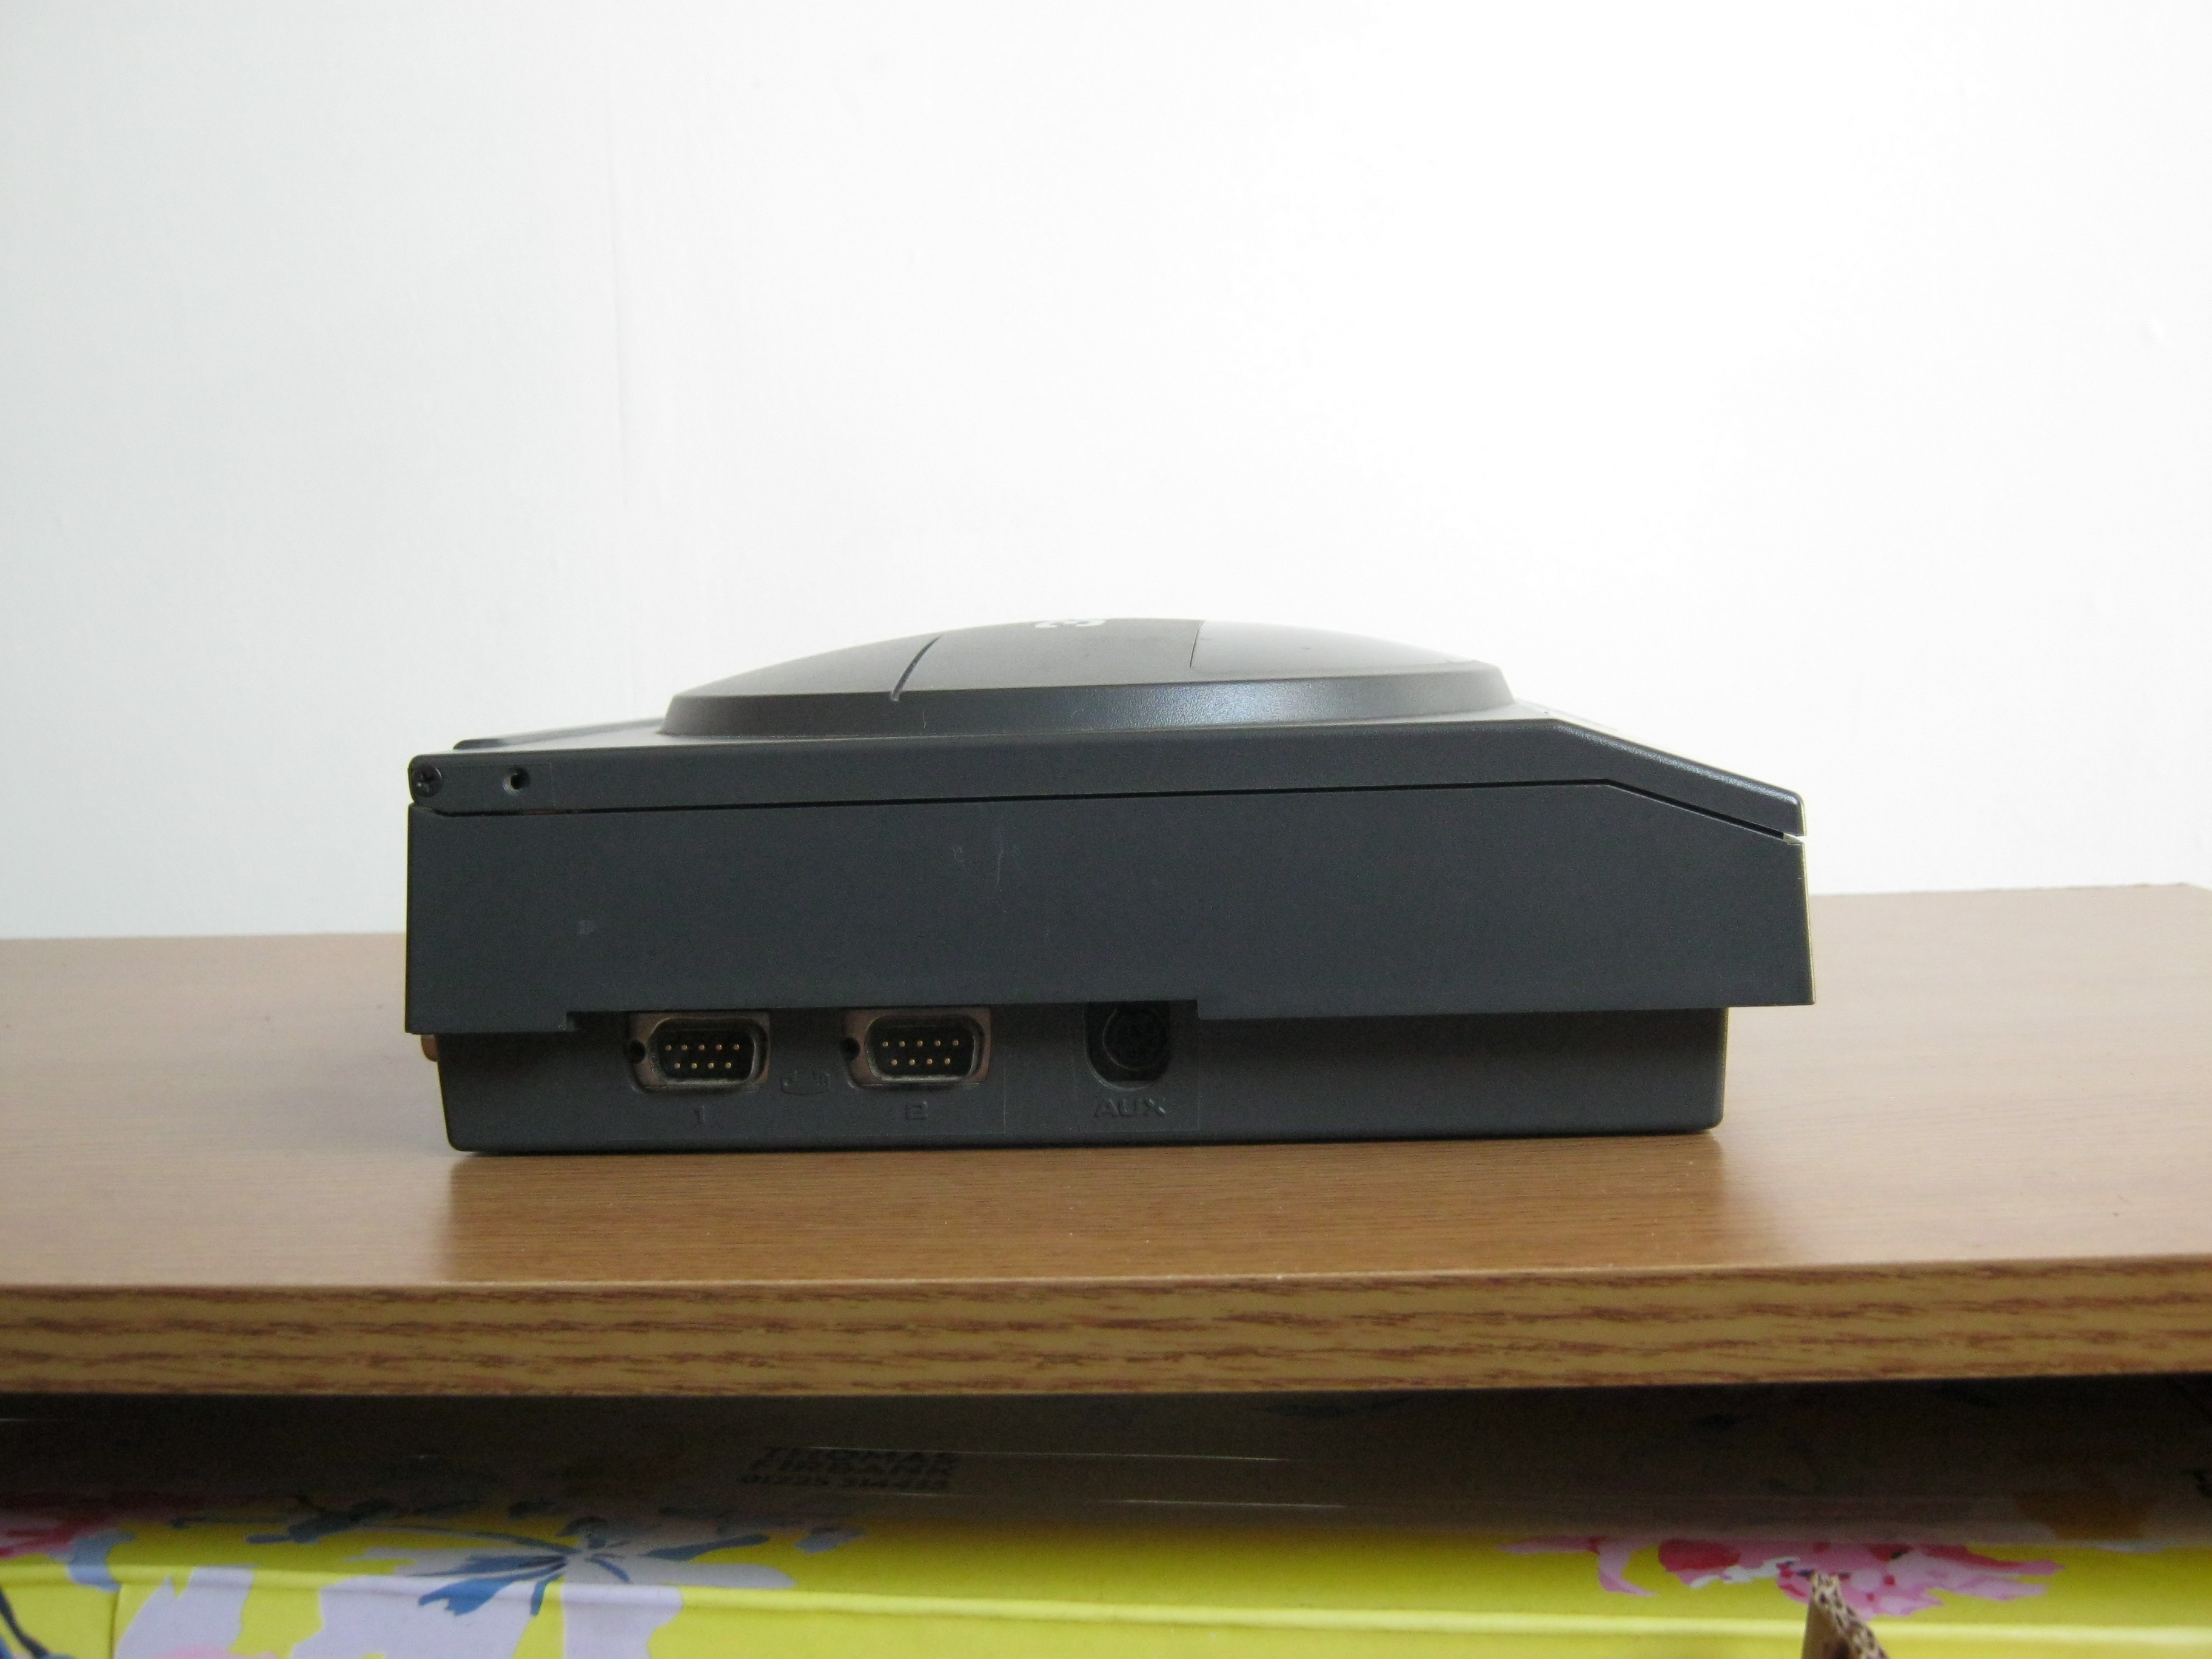
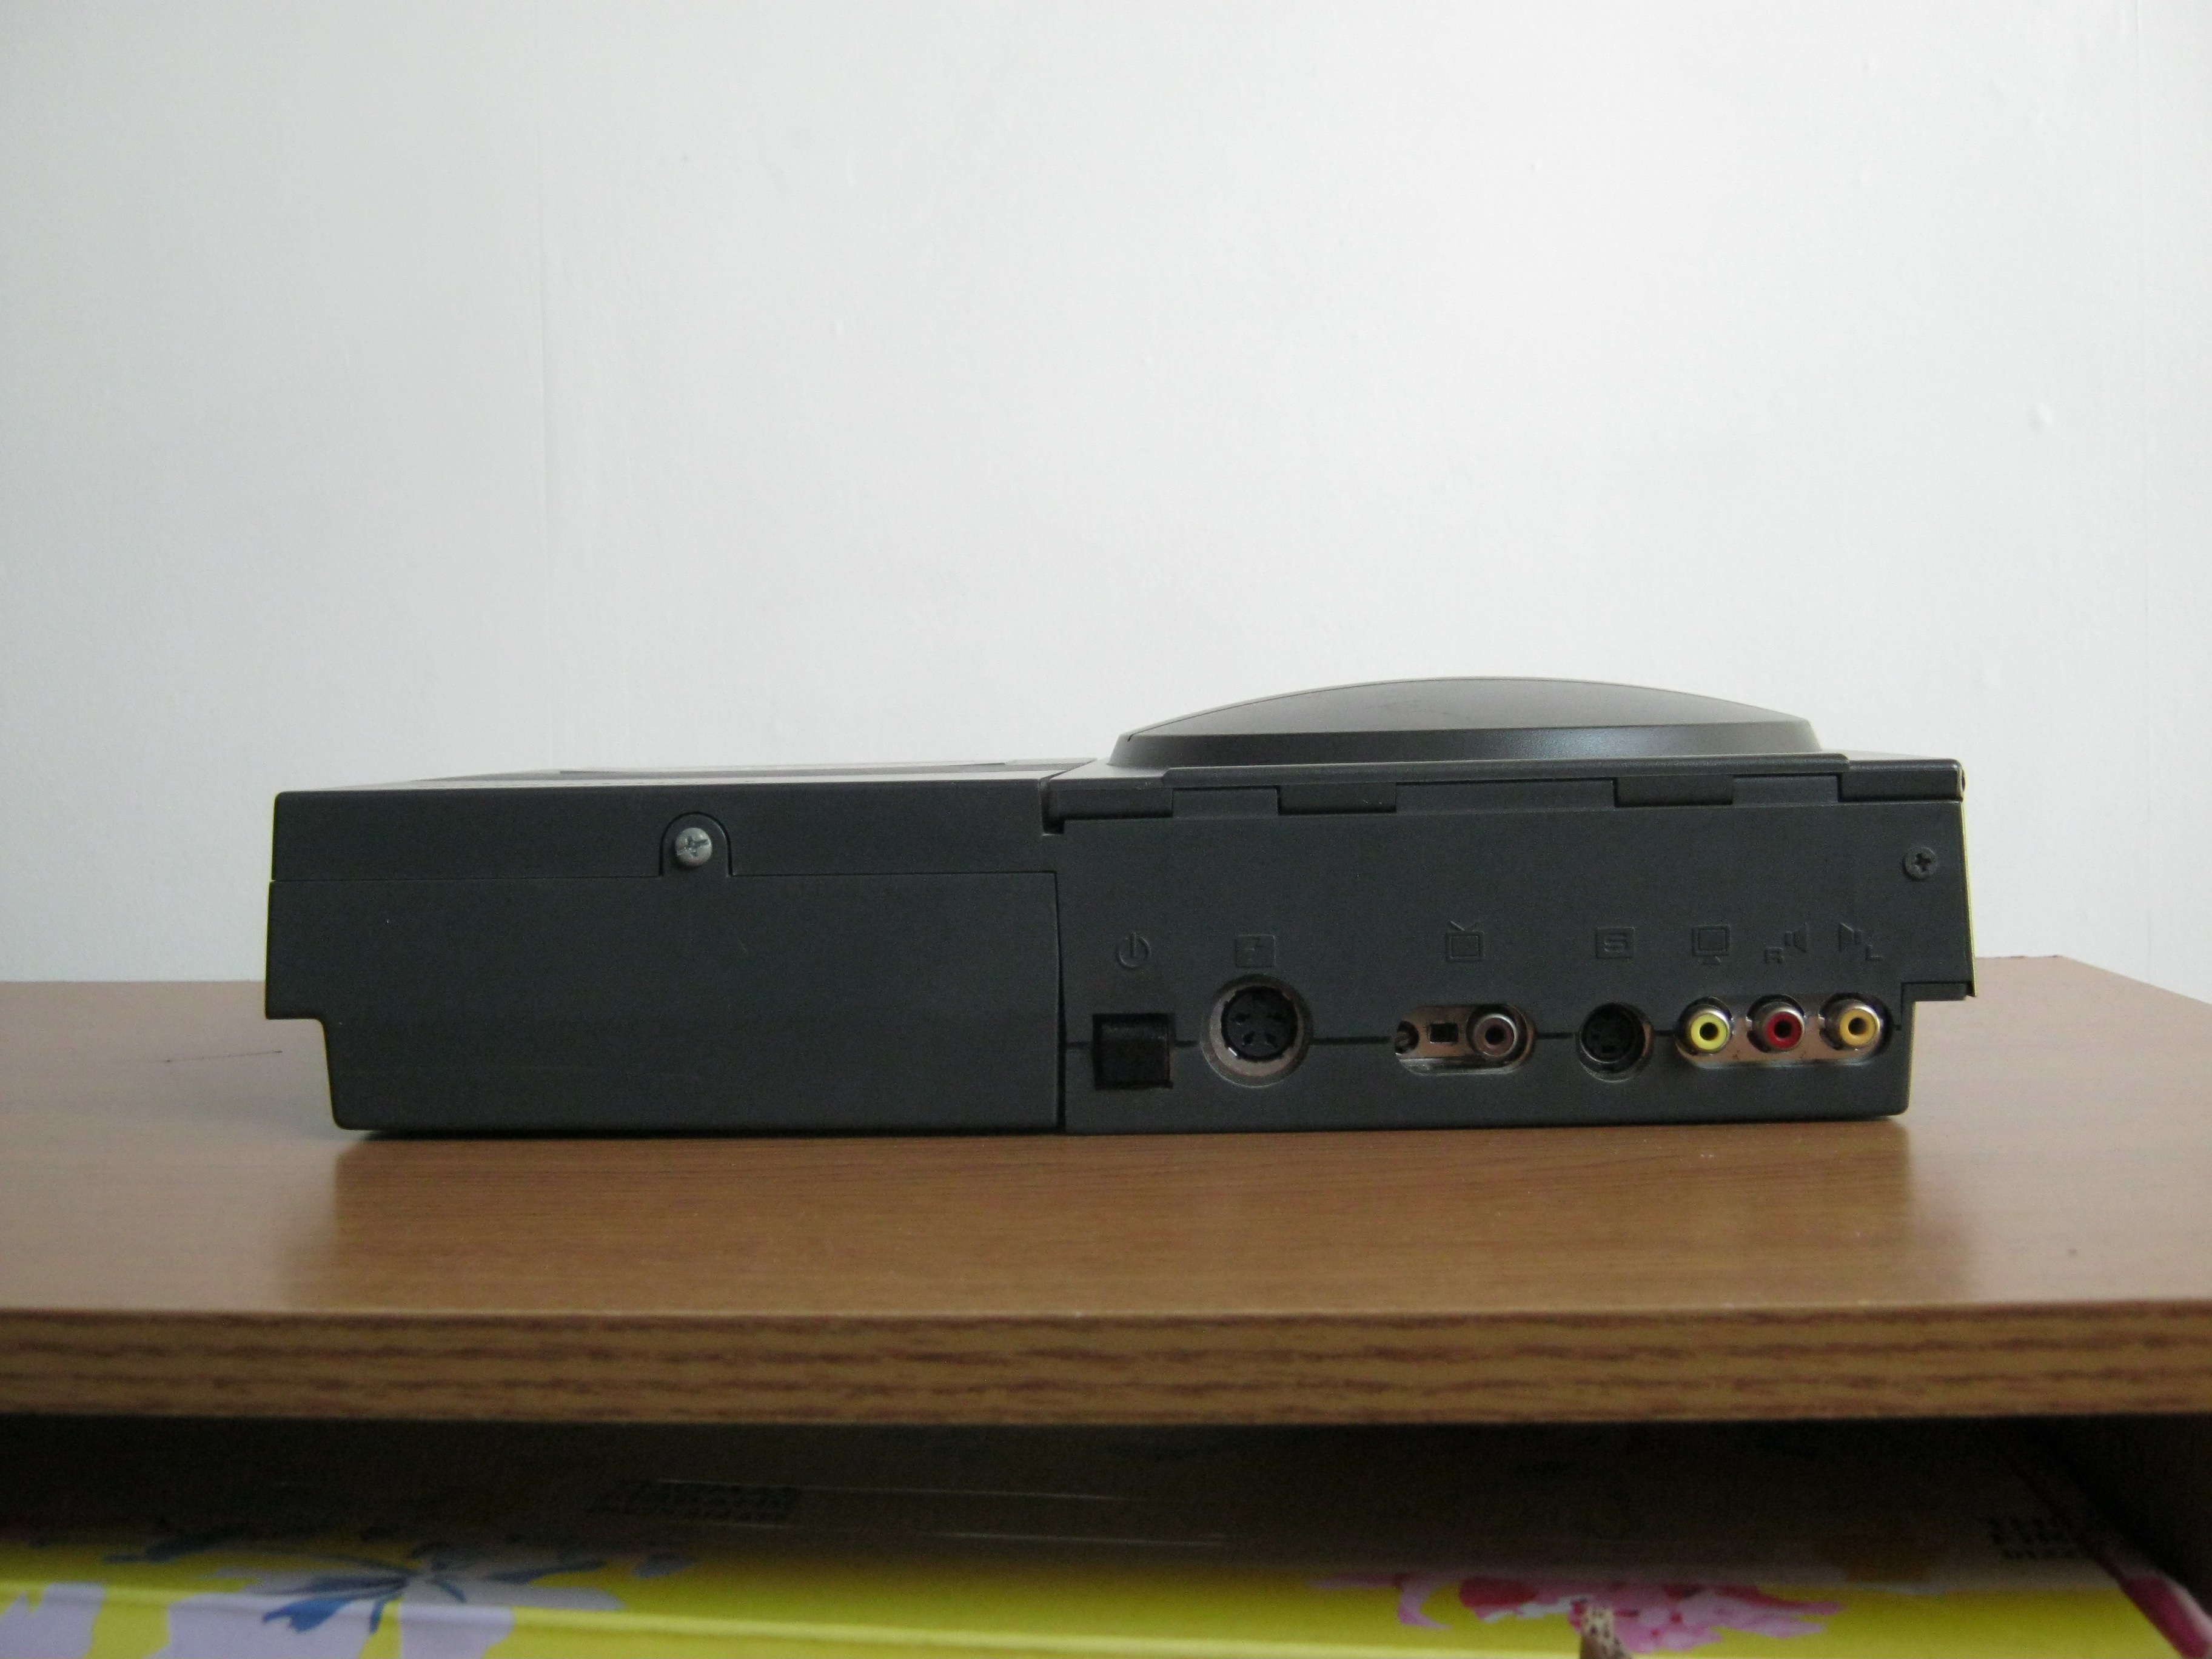
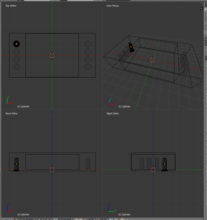
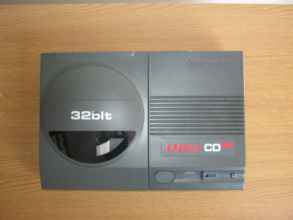
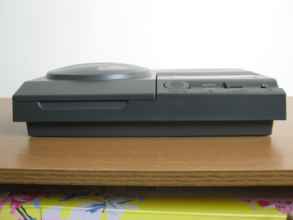
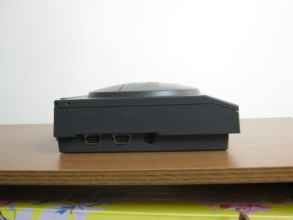
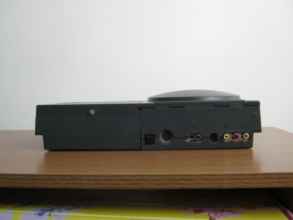
Here's some (near-)orthographic photographs of a CD32.
An industrial designer is me. Just need to expand the box beyond these minimal volumes (these represent the vacant cavities, rather than the outer edges).
Here's some (near-)orthographic photographs of a CD32.
 I could make my enclosure look like a little CD32, or one of the halves (the ridges or the CD dome), but that would be FUSS. I'm just going to make it a box.
Blender crashed. Yeehaw.
Definitions:
• Dimensions are in millimetres.
Can't tell which window is focused because of Windows 7's visual design.
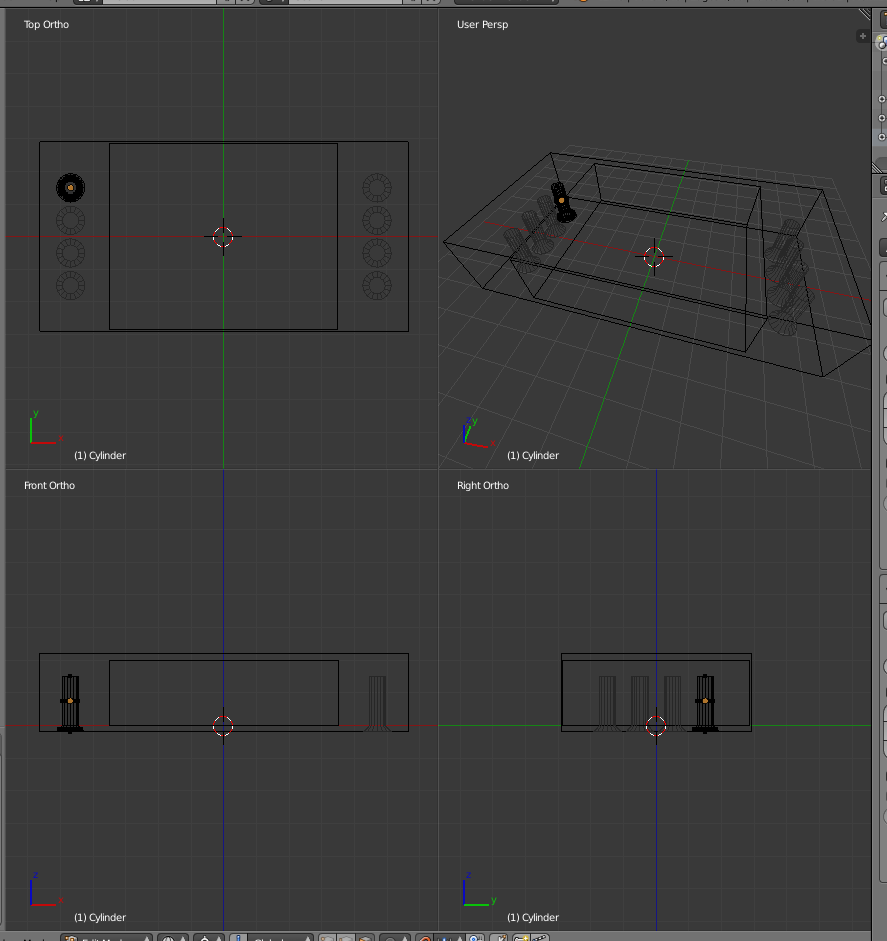
I'm going to construct this using a lot of Boolean operations to try to keep things manifold (stop laughing at the back, there). I'm going to work first with cavities: meshes in the shape of the volume where I know I don't want anything to be placed. Then I can work around those, defining a full volume of the outside extent of the enclosure and subtracting the interior to create a shaped hollow. Knowing how to grab, move, shear, shrink/fatten, bevel, copy, paste and use modifiers to mirror and repeat elements is a must.
I could make my enclosure look like a little CD32, or one of the halves (the ridges or the CD dome), but that would be FUSS. I'm just going to make it a box.
Blender crashed. Yeehaw.
Definitions:
• Dimensions are in millimetres.
Can't tell which window is focused because of Windows 7's visual design.
I'm going to construct this using a lot of Boolean operations to try to keep things manifold (stop laughing at the back, there). I'm going to work first with cavities: meshes in the shape of the volume where I know I don't want anything to be placed. Then I can work around those, defining a full volume of the outside extent of the enclosure and subtracting the interior to create a shaped hollow. Knowing how to grab, move, shear, shrink/fatten, bevel, copy, paste and use modifiers to mirror and repeat elements is a must.
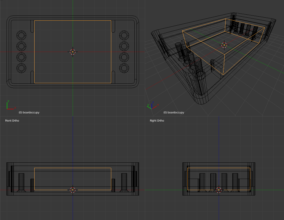
 Putting all the different pieces as different objects is a good idea.
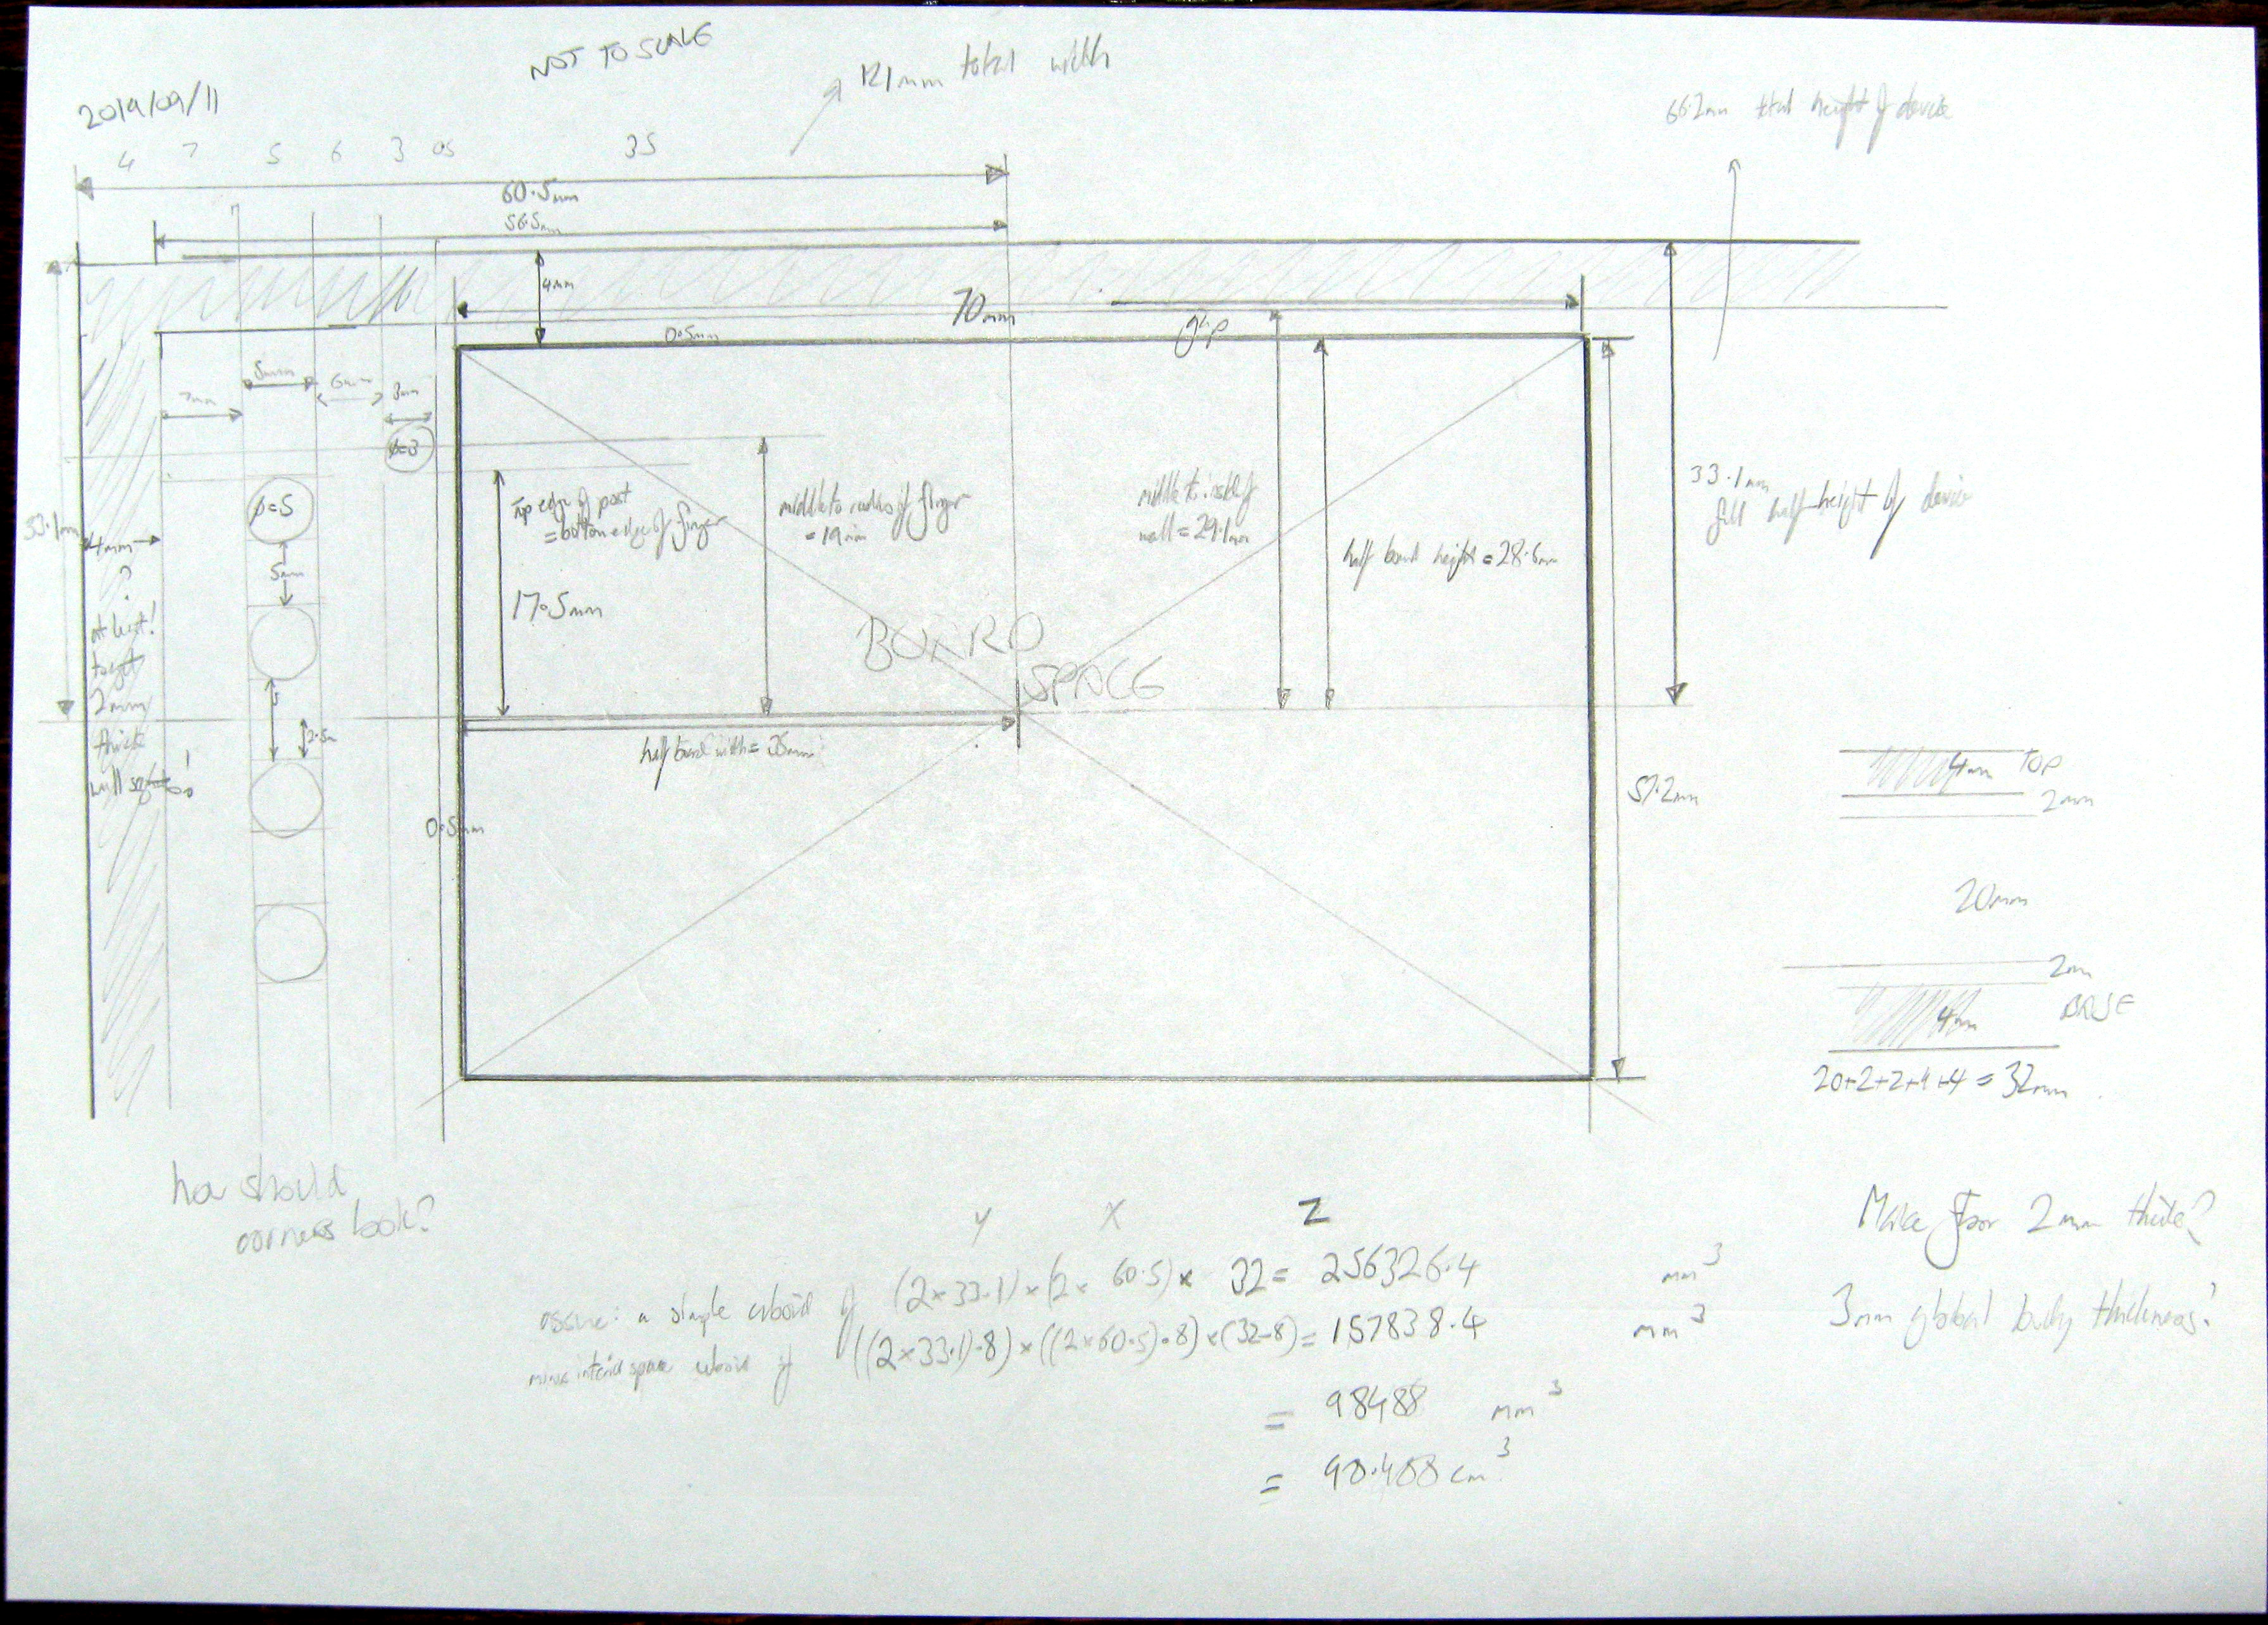
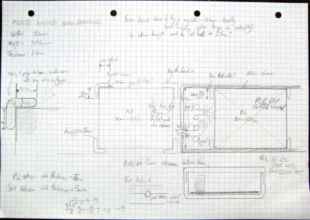
I'm working all this out on paper...
Putting all the different pieces as different objects is a good idea.
I'm working all this out on paper...
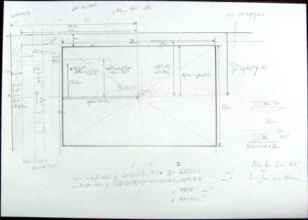
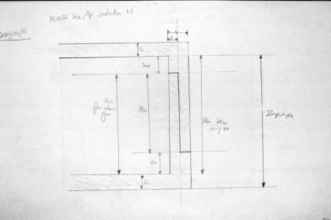 Working backwards and forwards and determining the relationship between all the distances repeatedly makes errors stand out quickly, which keeps things consistent.
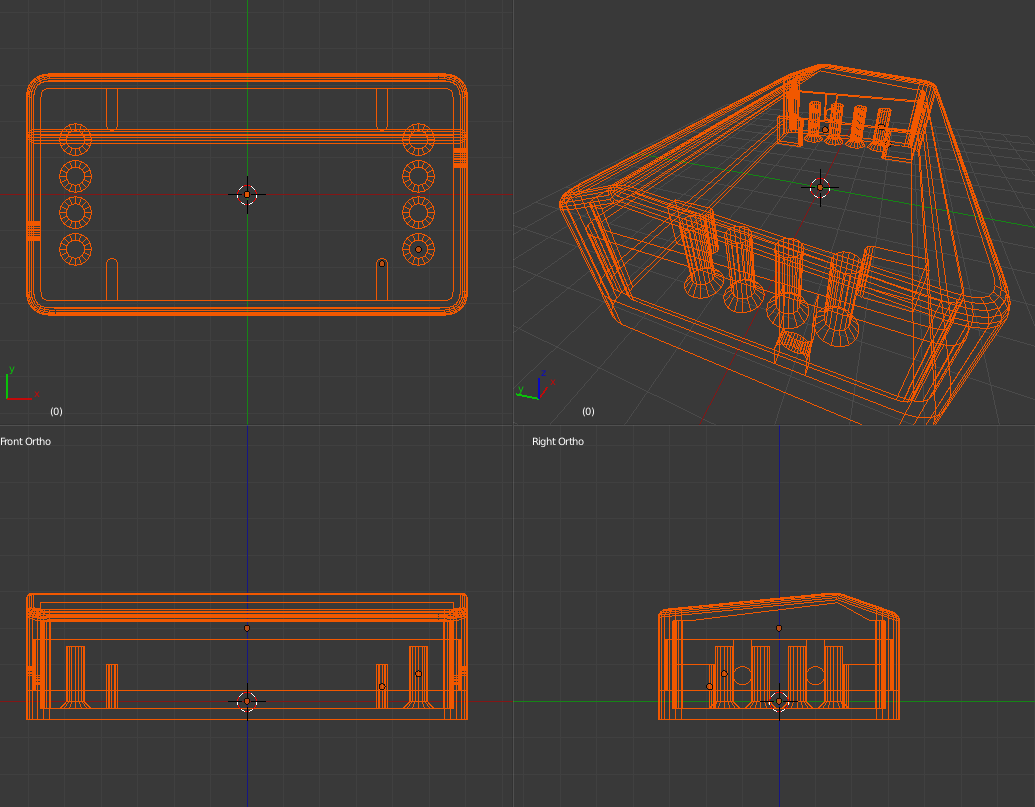
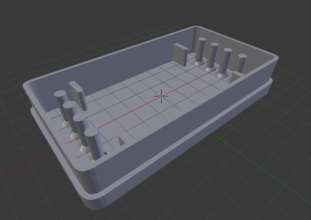
 Man, it's an ugly thing. I don't know whether I ought to leave the corners angular or what!
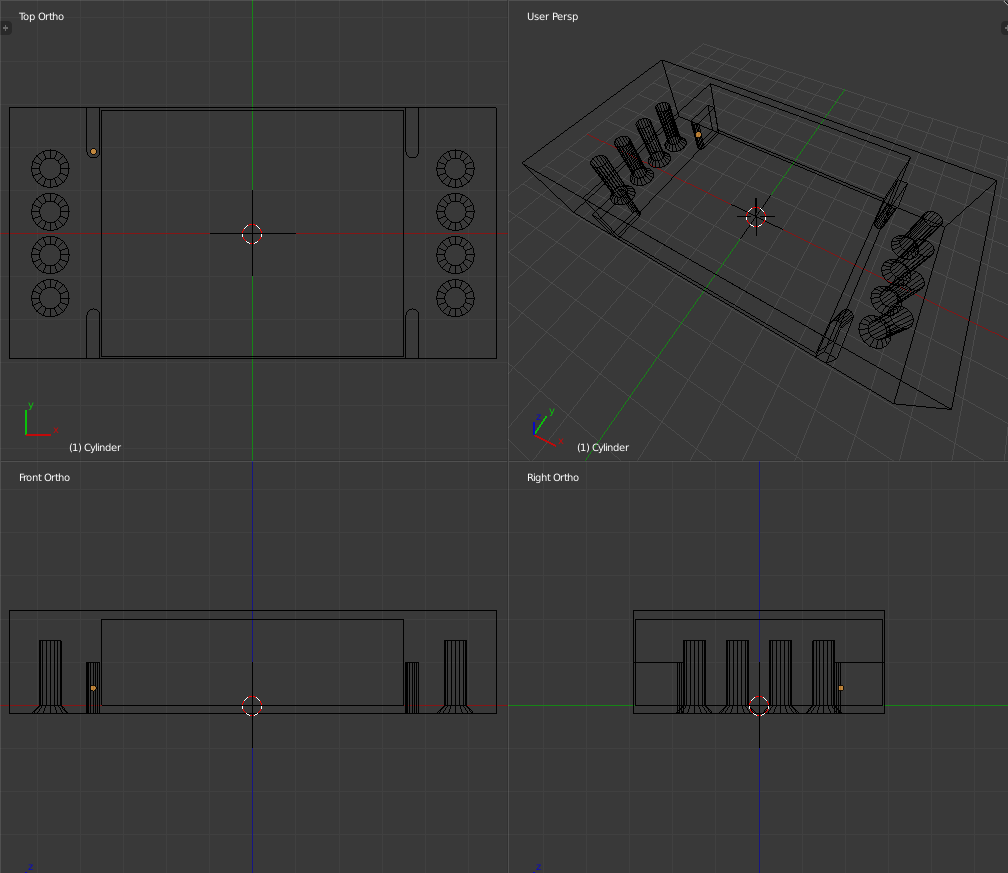
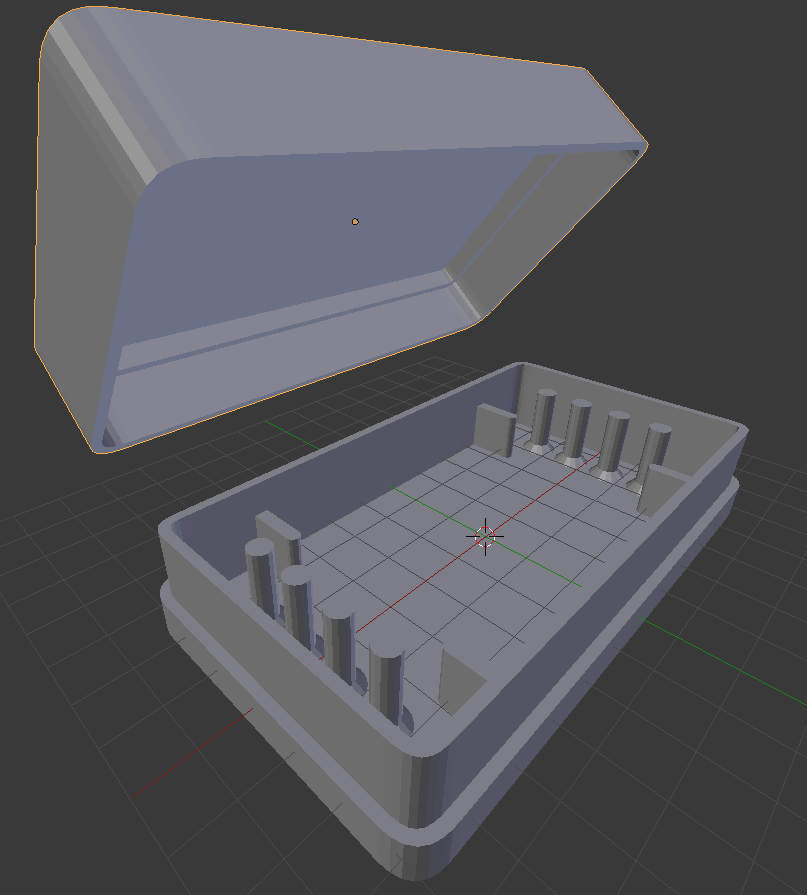
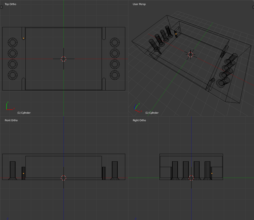
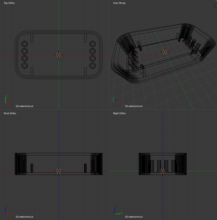
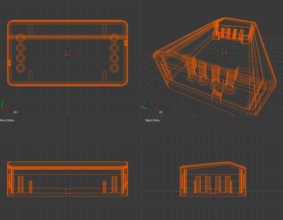
 Okay! Got the top and bottom pieces modelled very basically. The yellow cuboid is the volume dedicated to the circuit board part.

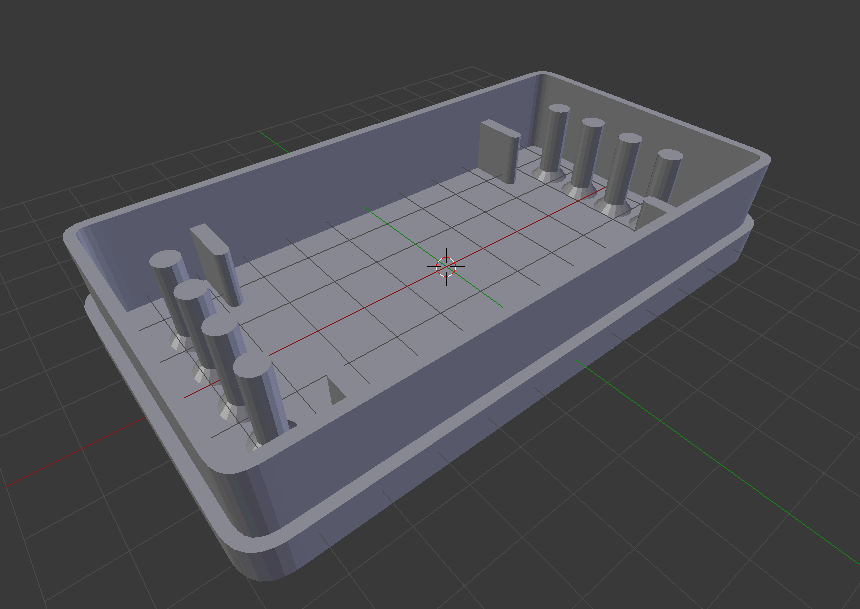
 A temple/warehouse of circuitude.
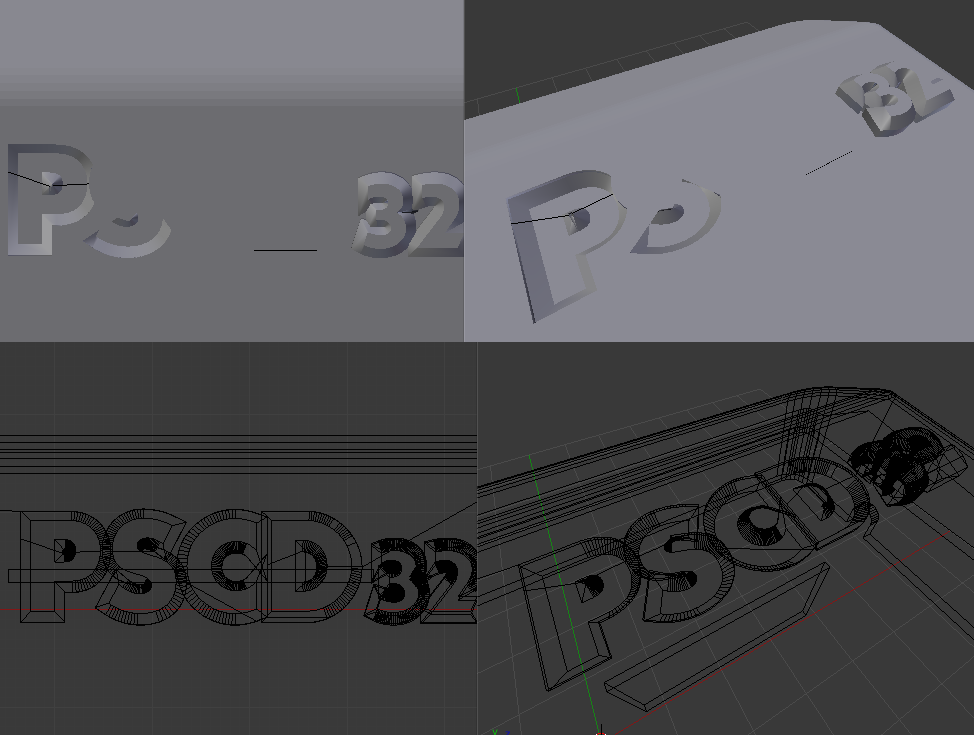
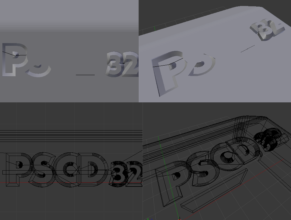 Me: Emboss the letters, Blender
Blender: One catastrophe, coming right up!
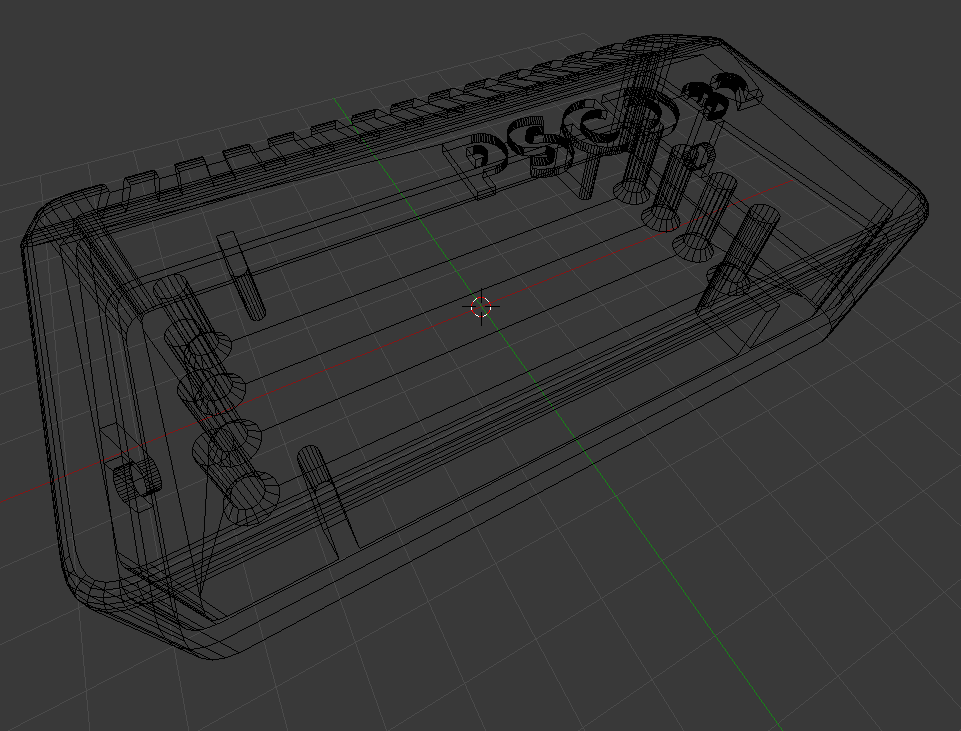
This is what happens when you ask Blender to perform a Boolean operation with non-manifold meshes, or self intersecting meshes. And it doesn't tell you. So you have to be very careful with what you're asking Blender to do.
Me: Emboss the letters, Blender
Blender: One catastrophe, coming right up!
This is what happens when you ask Blender to perform a Boolean operation with non-manifold meshes, or self intersecting meshes. And it doesn't tell you. So you have to be very careful with what you're asking Blender to do.
 C'mon, Blender. That's supposed to be recessed vents. But instead it's holes. And I can't print holes. It'll end the universe.
I'm using Array on a distorted cuboid mesh to create a series of boxes that I can subtract from the top of the case to make indented faux-vents, similar to the back of the Amiga. But it's coming out like this.
I think this is because when I distorted the cuboid meshes, I had some completely silent mode activated that introduced a whole load of new vertices. Keep an eye on the info bar at the top of the screen when you work. If the numbers of vertices, edges and faces change when you don't intend them to, something mysterious is happening.
C'mon, Blender. That's supposed to be recessed vents. But instead it's holes. And I can't print holes. It'll end the universe.
I'm using Array on a distorted cuboid mesh to create a series of boxes that I can subtract from the top of the case to make indented faux-vents, similar to the back of the Amiga. But it's coming out like this.
I think this is because when I distorted the cuboid meshes, I had some completely silent mode activated that introduced a whole load of new vertices. Keep an eye on the info bar at the top of the screen when you work. If the numbers of vertices, edges and faces change when you don't intend them to, something mysterious is happening.
 I did the thing that usually works when blender starts being unpredictable: load a few saves back and repeat whatever I tried. Just making a simple oblong slice shape again and subtracting it, and it worked this time.
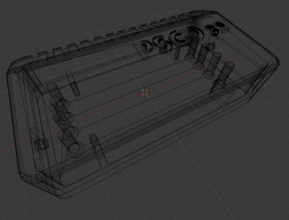
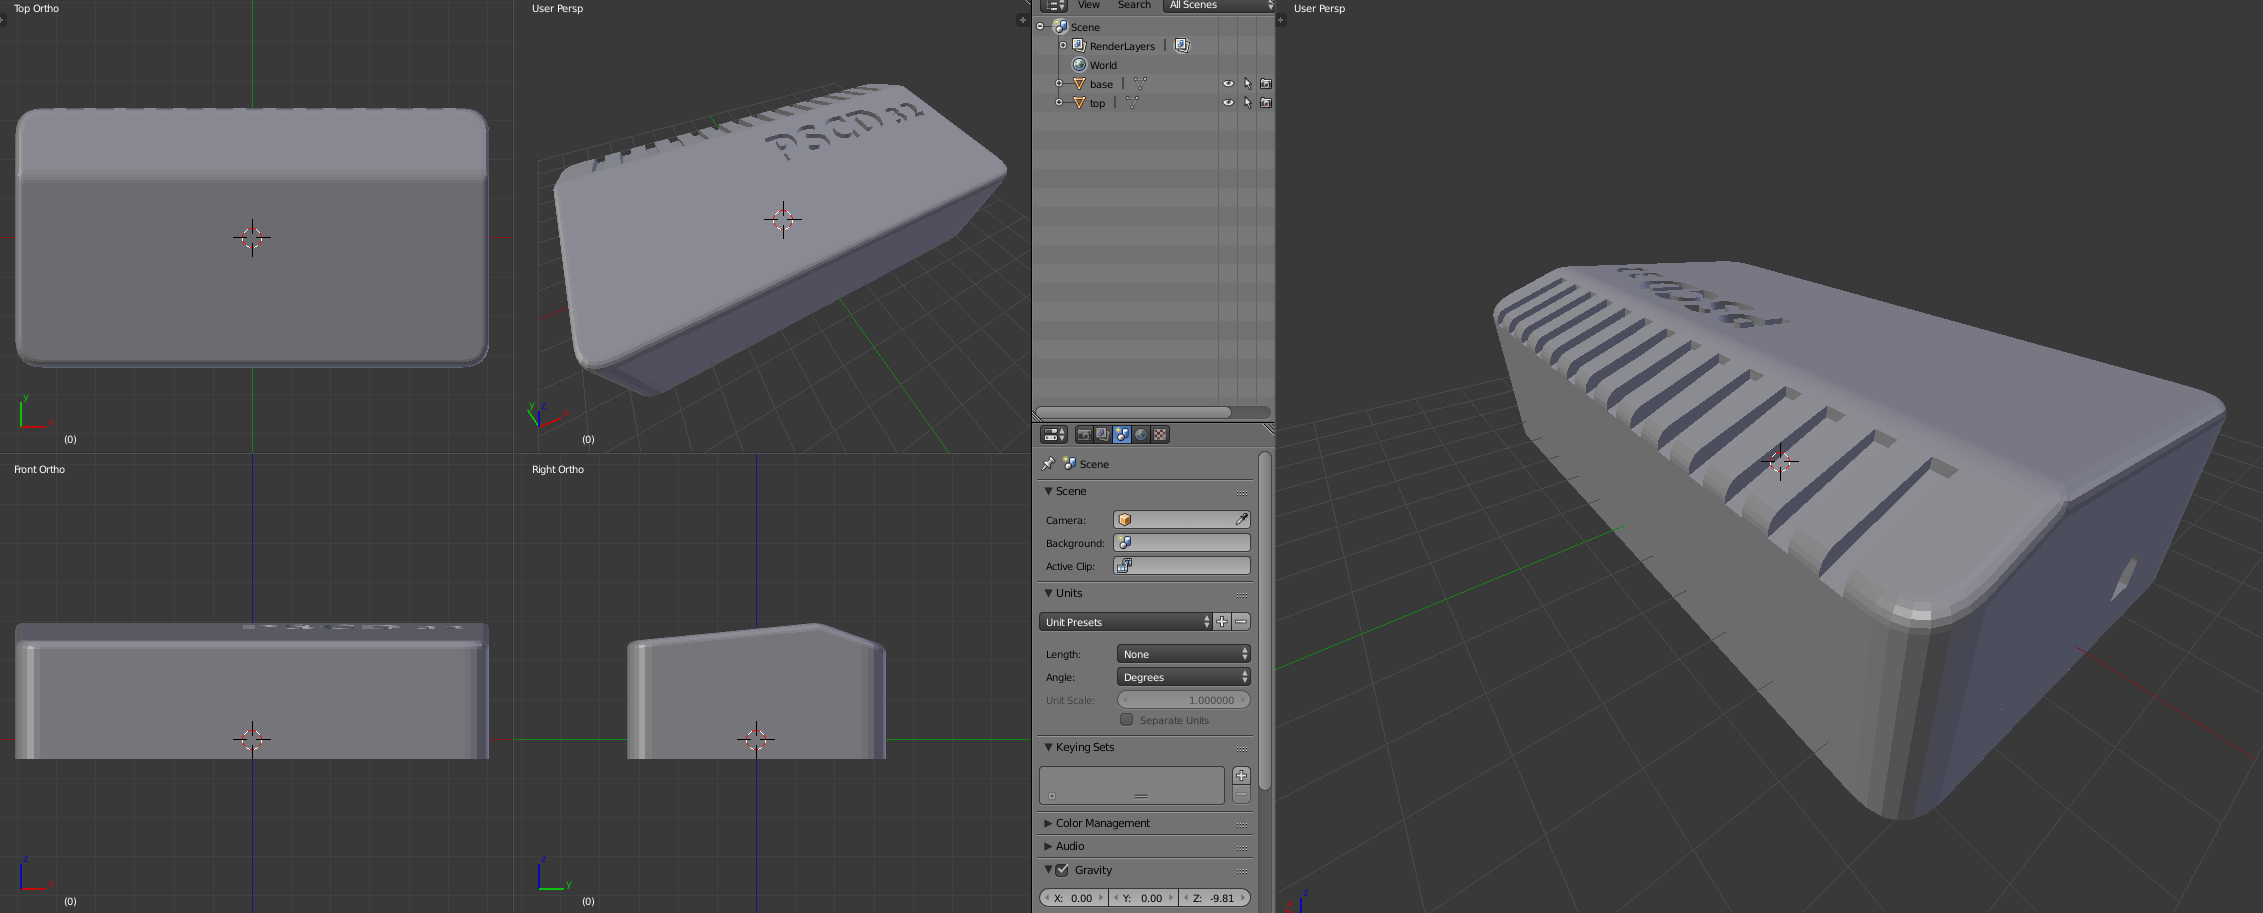
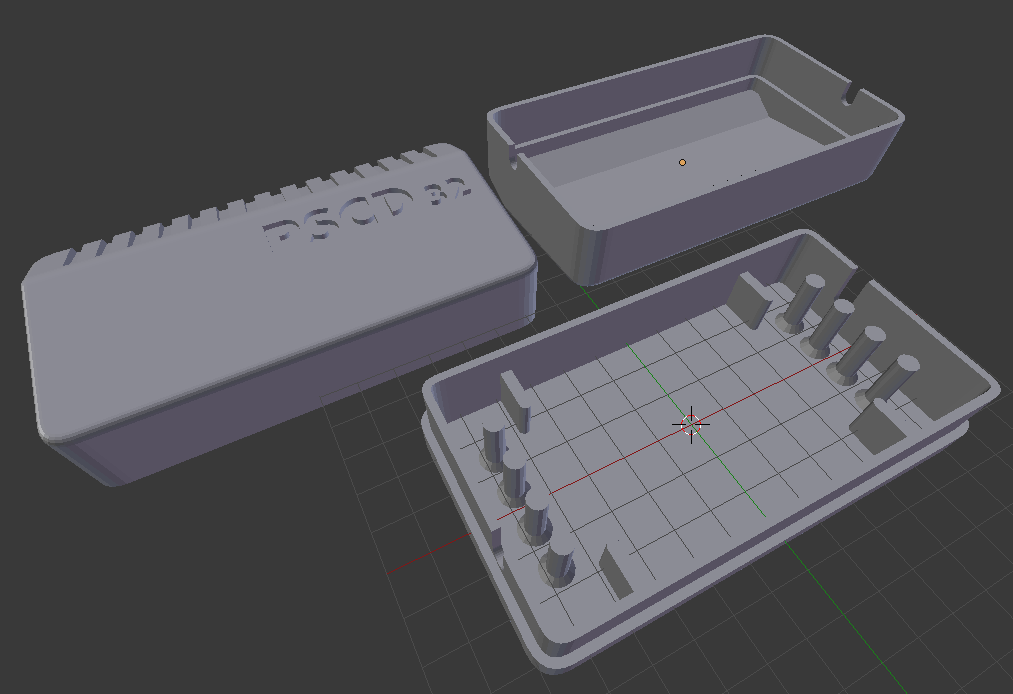
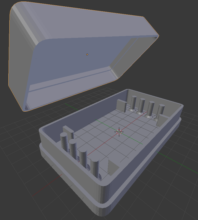
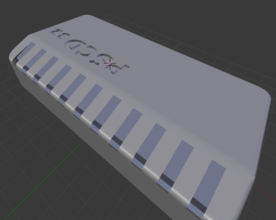
 I think it's done.
Unless I want to stick my name on it... and there's always room for 3D cats.
I think it's done.
Unless I want to stick my name on it... and there's always room for 3D cats.
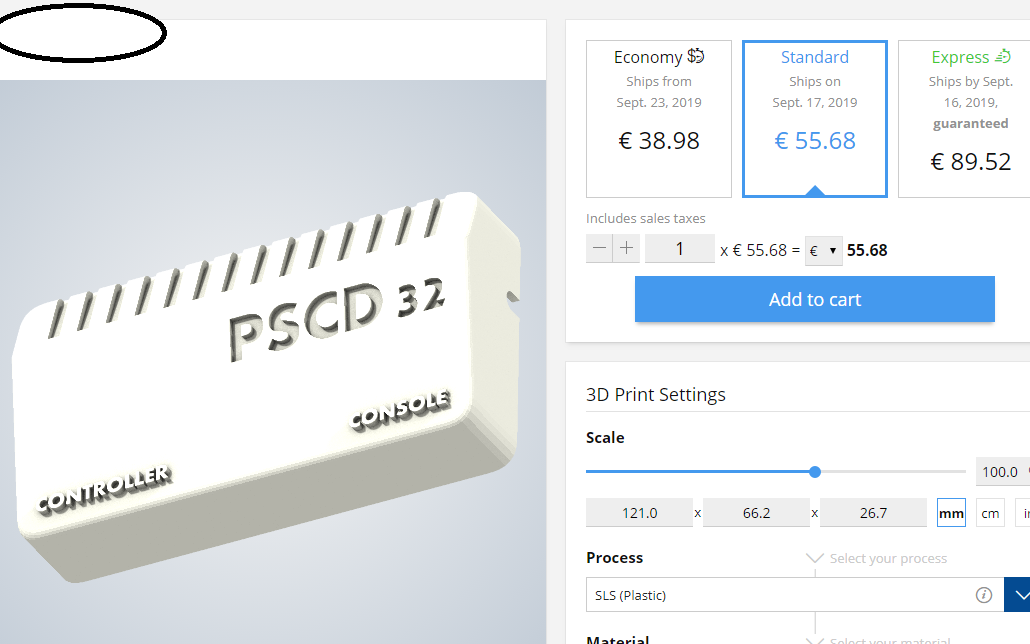
 On the right, there, prices I don't think I'll be paying! (for just ONE HALF of it, yikes!)
But the file uploaded to the online service and its displaying a preview which means it's 3D printer compatible!
On the right, there, prices I don't think I'll be paying! (for just ONE HALF of it, yikes!)
But the file uploaded to the online service and its displaying a preview which means it's 3D printer compatible!